ARF files contain recordings that have been made of online sessions and were downloaded from WebEx and recorded using Network-Based Recording which is often referred to as NBR.
This kind of file can be exported into a Windows media player and converted into a more widely used format.
Usually, ARF files contain any of the following types of content: audio, video, Q&A results, pools, file transfer, annotation, desktop shares, chat conversations, and more.
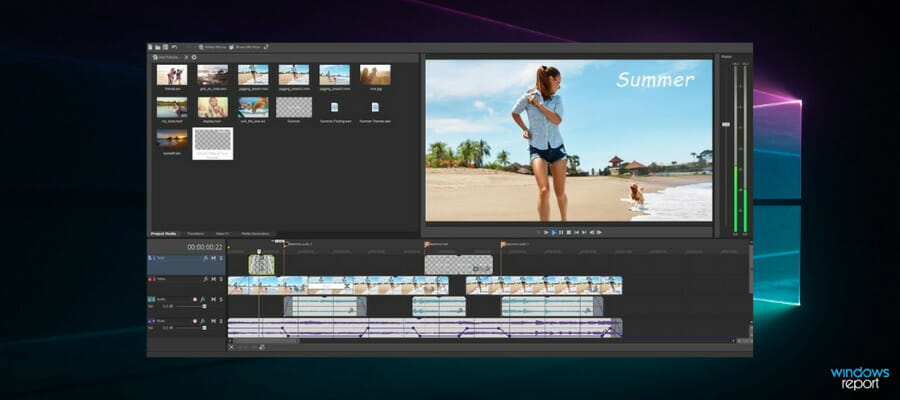
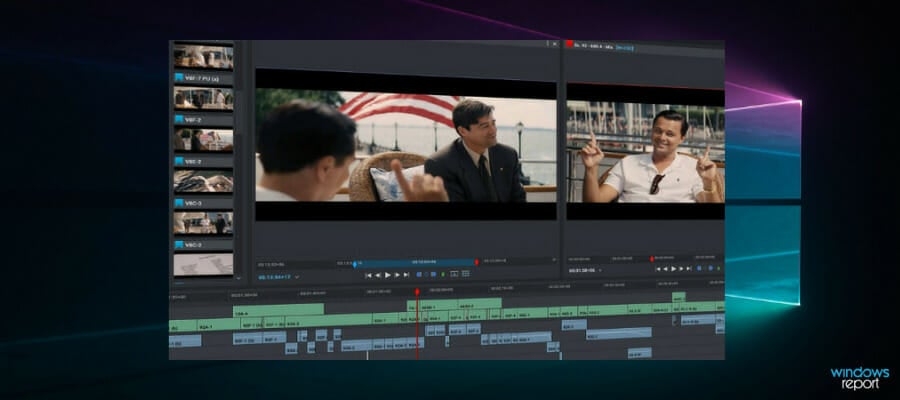
If you are trying to open an ARF file, you’re in the right spot because we gathered four of the best tools that will enable you to view, open and edit ARF files.
Make sure to check out these tools’ sets of features in order to be able to make the best decision.
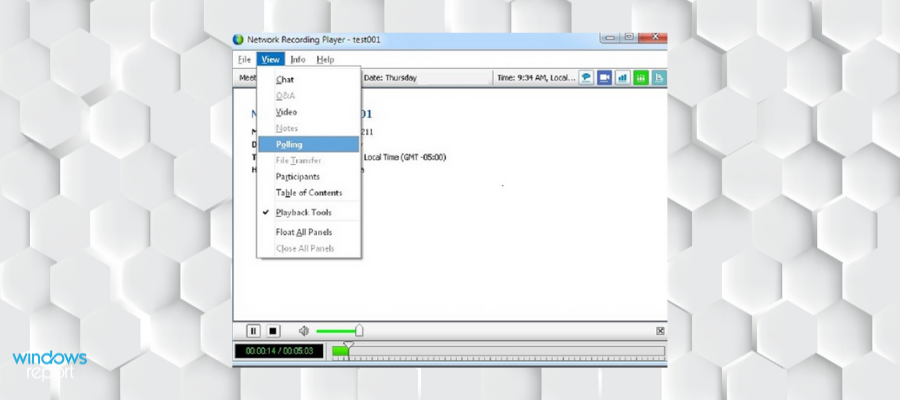
Usually, you can use WebEx Network Recording Player in order to be able to open AFR files on Windows. But there are certain times when you may want to edit ARF contents with Adobe Premiere for instance or open AFR files on mobile devices.
This is where the screen recorder comes as one of the best available solutions. This tool is able to capture the screen to help you directly record ARF to MP4 for playing WebEx network recording.
Take a look at the most exciting features that are included in this tool and the easy steps that need to be taken in order to use it:
After you download the ARF Player, you have to install it, and this is really easy even for beginners.
Select Screen Recorder in order to enter Record Video and Audio window.
You have to select the recording area and choose Full Screen or Customize recording area to capture the WebEx network meeting.
After setting the recording options, you have to turn on System Audio and Microphone Audio in order to better save the web conferencing audio.
Now, you can easily record WebEx meeting to MP4.
You can download this Screen Recorder tool for free and see how it works on your machine running Windows.
Aiseesoft Screen Recorder
Record your screen, video games, skype calls, and youtube videos in the easiest and most professional way with Aiseesoft Screen Recorder.
With HD Video Converter Factory Pro you can convert the downloaded WebEx online meeting recording from the ARF file format to other types to be able to play it on your devices. For instance, you can convert the ARF file to AVI, MP3, or MP4 formats.
The best solution to achieve this is to use HD Video Converter Factory Pro. This is an efficient ARF converter that offers users more than 300 formats and codes to choose from.
Check out the best features that are included in HD Video Converter Factory Pro:
This tool is famous for its really fast conversion speed and extremely high compression ratio that will help to significantly reduce the video file size without losing any quality during the process of conversion.
This is one of the best choices that you have available these days to convert ARF files to be able to play them on your system.
HD Video Converter Factory Pro provides a great visual experience in an efficient and safe method.
Using this tool, you will be able to download various videos from mainstream websites.
The powerful inner video editor will enable you to trim your videos and add various effects and subtitles as well.
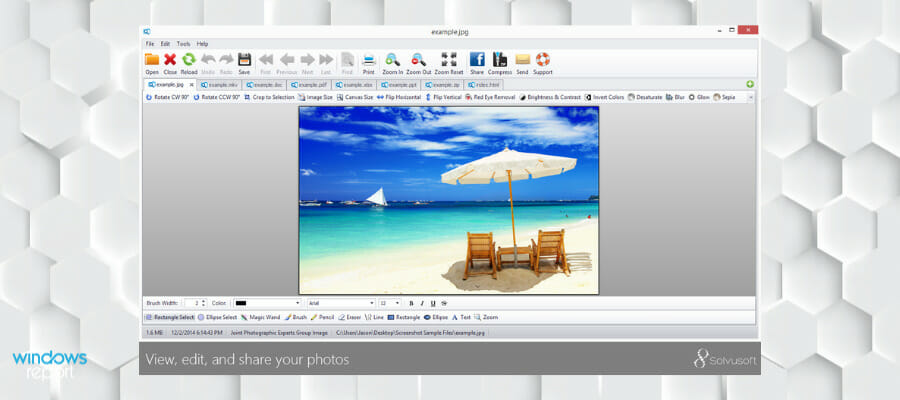
File View Pro is a software that can open plenty of file types, including .arf files. It is created as an overall go-to solution that users can apply for all their files without having to download particular software for each file type.
The user interface is simple, uncluttered. Anyone can get adjusted to it really fast since it does not have any particularities that need much learning. To open your files, you can easily place them on the main page with drag-and-drop.
The types of files the software can open are generous. You get to enjoy audio and music files of over 700 formats, so there is a very high chance that you will be able to open virtually anything audio-related.
The software can also open hundreds of formats of compressed files, database files, developer files, documents, image files, video and movies, and many more.
Depending on the file type, the file opener comes with specific options. For example, if you want to open a movie file, you get a built-in media player with audio settings, video quality adjustments, and of course play/ pause buttons.
Similarly, if you want to open a text document, you get some text editing features like font adjustments, font color, page number, or alignment options.
File View Pro also has a file compressing feature. You can use this to create .zip files or other formats of compressed files to save up disk space and you can always use this exact same software to open your compressed files in seconds.
Other key features include:
Email support for fast file sharing
Available in multiple languages
Minimal editing options for image files
File View Pro is a licensed software. You can download the unregistered, free version if you want to get accustomed to the user interface and see the toolset.
Cisco’s WebEx Player is one of the most popular tools that you can use for playing ARF files. With the help of this tool, you will be able to watch, share and edit WebEx recordings and all you have to do is just download the player.
Take a look at the best features that are included in this software:
You will be able to watch a recording effortlessly
If you receive an email that includes a link to a WebEx recording, all you have to do is click on the link in order to watch it
You can also enjoy easy sharing, and you will be able to post a link anywhere, and your visitors will get the chance to view the WebEx
If you want to edit something, you just have to download the file and convert it to WMV and edit it just like you would do with any other video
You have to be careful because there are two types of WebEx recording files, ARF and WRF and you have to choose the right player for your recording WebEx Player/ Recording Editor
These are our top choices for the best solutions that you have available for playing ARF files. Check them all out and make the best decision for your needs and according to your skills.
Make sure to leave us any feedback regarding the subject in the comment section below.
Getting a payment error in Fortnite that reads “Looks like something went wrong. For your protection, this transaction has been declined. Please try another card or other payment methods”?
If you’re sure the transaction should have passed—your card is valid, has enough funds, and isn’t blocked, then the issue is likely on Epic’s end or with how your bank flags digital purchases.
Find below tested ways to get rid of this bug.
What to do if I can’t buy V-Bucks in Fortnite?
1. Close the game and relaunch it
Something went wrong payment error can appear in Fortnite due to the server problem or game lag, but you can fix the error by quitting the game. After quitting, relaunch Fortnite, try to make the purchase again, and check if the issue is still there.
2. Change the matchmaking region
Fortnite, an online multiplayer game, allows you to change your settings for the Matchmaking region. This mostly helps with combating high ping, but it can also fix Something went wrong Fornite payment error.
You can try changing the matchmaking region setting to fix this issue.
Launch Fortnite and click on Menu.
Select Settings from the options.
Open the Game tab.
Scroll down and look for matchmaking region. Use the Right-Left arrow button to change the region to the lowest possible ping.
Some users have reported that they can make purchases when the payment is made through Fortnitemobileversion.
To avoid Something went wrong payment error, launch Fortnite on your mobile and try to make the purchase.
4. Check your account access
If you consistently spend on in-app purchases using a single credit card or account, Epic games may block some payments for security reasons.
In such a situation, you have no option but to wait a few days or a week before making more purchases on Fortnite.
5. Update the Launcher
Sometimes Something went wrong Fornite payment error can appear if the Launcher is out of date. If the problem is on the developer side, Epic will release an update soon and fix the issue.
Ensure you download the launcher’s latest version and check if that solves the problem.
6. Disable antivirus or adblocker
If you have installed Adblocker on your PC to prevent annoying ads from appearing, you should know that Adblocker can interfere with Fortnite as well.
Adblockers may block suspicious actions to protect the user, but they can also block genuine requests and cause a Something went wrong Fornite payment error. If you have an ad blocker installed on your PC, disable it.
Do the same for antivirus and firewall. To disable the antivirus, right-click on the Antivirus icon on the taskbar and select Quit. If your antivirus is the problem, you can choose another one with strong game modes from the best antivirus programs for gaming PCs.
Quit Fortnite if running, and relaunch it. Try to make a purchase and see if the payment goes through.
7. Change your payment option
If Fortnite is blocking your payment due to the consistent use of a single credit card to make the payment, try to change the payment methods.
Fortnite supports other payment methods like PayPal, prepaid cards, etc. Try to make a payment through alternate methods and see if that resolves the error.
8. Uninstall and reinstall Fortnite
If you’re still getting Something went wrong Fornite payment error, you can try to uninstall Fortnite and reinstall it. Uninstalling and reinstalling the game should fix any problems with installation files in the system.
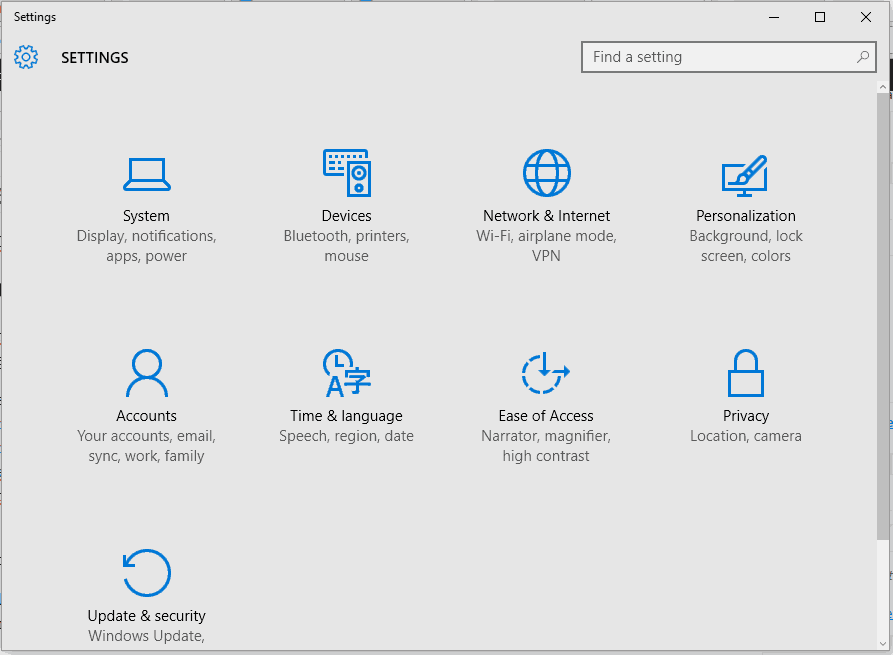
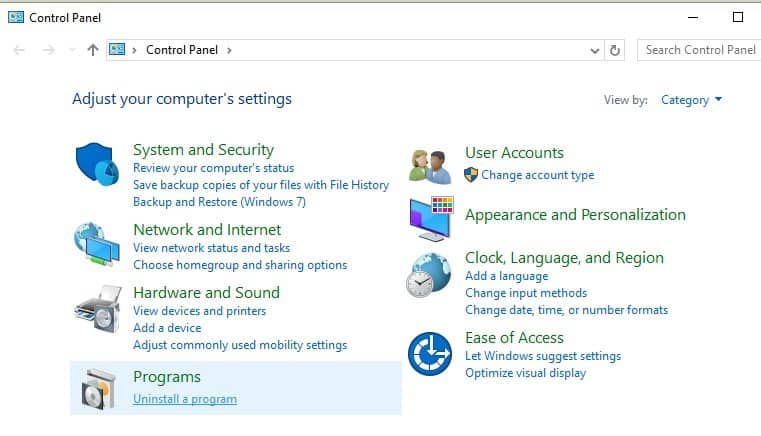
Open Control Panel.
Go to Programs and Features > Uninstall.
Select Fortnite and click on Uninstall.
Reinstall the game from the official website and see if that resolves the error.
If you want to completely remove Fornite, including all its files and registry entries, we suggest you try using IOBit Uninstaller.
Something went wrong Fornite payment error usually occurs if the payment processing company blocks the card from making any more purchases to safeguard the user from overspending or to prevent misuse of stolen or lost credit cards.
We also have a guide on how to quickly fix OR-RWE-03 error in Google Pay, so you might want to visit it before you leave.
And if it’s not just no sound but a range of game audio issues, there are specific fixes for that too.
However, we have listed some handy solutions that you can apply to fix this payment issue. Let us know if any solutions helped you fix the error in the comments below.
Sometimes your printer might ask you to input a password when you want to print a file or try to view the properties of the network printer. If you don’t have permission to do that, the error message Access Denied might appear on your desktop.
Don’t worry, we will guide you through each step and make this process faster, efficient and simple for you.
What to do if your printer keeps asking for password
1. Identify and fix any printing problems
Before removing and reinstalling the printer, let’s make sure there are no other existing errors.
From the Start Menu, select Devices and Printers under Control Panel.
Identify the available printers, select the problematic one, right-click on it and then select Troubleshoot (as in the image below).
Run the Troubleshoot Tool which will automatically identify and fix any printing problems your Network might encounter.
Does the issue persist? Then further proceed by removing and reinstalling the printer.
2. Remove and reinstall the printer
Remove and Reinstall Printer Steps:
Click on Windows Start Button
From Devices and Printers Menu, select a device or the printer, right click on it, and select Remove Device.
When the Yes/No question pop’s up, click on Yes.
Now that we removed the Device/Printer, the next step is to reinstall a new Printer and link it to an existing network. (You will see further in this article).
From Device and Printers Menu, click on Add a Printer. When asked what type of printer do you want to install, chose A Network, Wireless or Bluethoot Printer as in the image below.
Once you click on that, the PC will automatically search for available printers within your Network.
If this is the case, select the desired printer name.
After successfully adding the printer, the PC will ask you to do a Printing Test Page. Click on Finish.
Now, within the Devices and Printers Menu a new printer device will appear. It can be also found with the Network and Connections Tab. Once added, the printer will appear in both locations.
Select it, and after, right click it and select “Connect”.
We have just shown you how to add a new printer to an existing network without being mandatory to enter any password. Just by linking the new printer to the existing network credentials.
If the steps above are not working in your case, or just seem like too much work for you, there is a suitable option of reinstalling the printer driver automatically using dedicated software as Outbyte Driver Updater.
3. Solution for Wi-Fi printers
In case you have a Wi-Fi printer, connected to your PC through Wifi, we have a very quick and innovative solution.
Just make sure your computer is connected to the wireless network from where you need to retrieve the printing password.
First switch on the printer. Make sure it is on.
Then check if the Wi-Fi light/button is on as well.
If the button is checked, leave it like that. If it’s not, check it. A blue light should blink.
The next step is to find the Wi-Fi password.
Press the Wi-Fi button once.
Press the ! button, right under the Wi-Fi button.
Now, wait for the printer to print a document. It can take some time, so you may need to wait for a few minutes. The Printer Information Page should now be printed.
Right in the page middle, below the blue icon you can see the name of the printer and the printer password written under The Wifi Direct Password.
We hope our suggestions helped you. If you have any questions, let us know in the comments below.
The IIS Manager in Windows is the graphic user interface of IIS, Microsoft’s web server. The Windows 10 users can access the IIS manager using a short inetmgr command in the Run box. However, some users have reported that Windows is not responding to inetmgr command resulting in Windows 10 inetmgr not found problem. Other users have reported similar issues in the Microsoft Community Forums.
Usually I open a command box and type inetmgr … so what is the new way to start IIS? It is installed. I just need to know how to start it. Yes, just that. Weird I know.
Follow the troubleshooting tips in this article to fix “Windows 10 inetmgr not found” issue in your computer.
How to fix Windows 10 inetmgr not found
1. Install IIS Manager
In case the inetmgr command does not start IIS Manager, it could be because the app is still not installed or enabled on your Windows computer.
You can enable IIS Manager from the Windows Features option.
Press Windows Key + R to open Run.
Type control and press OK.
Go to Programs > Programs and Features.
From the left pane, click on “Turn Windows features on or off“.
In the Windows Features window, locate the “Internet Information Services” option.
Check the “Internet Information Services” option.
Click OK.
Wait for the Windows to install IIS Manager and then restart the system.
After the restart, press Windows Key + R and type inetmgr. Click OK and this should open IIS Manager.
2. Install IIS Manager using PowerShell
If the Windows Features option did not work, you can try to install IIS Manager using PowerShell. Here is how to do it.
First, make sure you download and install RSAT (Remote Server Administration Tools) for Windows. Note that this feature is only available for Windows 10 Pro and above editions.
Download and install RSAT on your Windows computer.
Next, right-click on Start and select Windows PowerShell (admin).
In the PowerShell window type, the following command and press Enter. Get-WindowsFeature *Web*
The above command should tell you if the IIS Manager is installed on your system. If it is missing, use the following command to install IIS Manager. Add–WindowsFeatureWeb–Mgmt–Console
Restart the system after IIS Manager is installed.
After the restart, press Windows Key + R, type inetmgr and click OK.
3. Check for Alternate IIS Installation
If you have alternate versions of IIS Manager such as IIS Express installed, it may have taken the IIS service name resulting in error with inetmgr command.
Uninstall the IIS Lite or IIS Express if installed on your system.
Reboot the system and run the Inetmgr command again and check for any improvements.
If you have installed internet and system security programs like Antivirus from Avast, it may create issues with IIS Manager installation.
Try to pause or temporarily disable Antivirus in your system and try to install IIS Manager from “Turn Windows Features On/Off” option.
If the issue is fixed when you pause your antivirus, we suggest you switch to a different security tool. You can find many Windows 10 compatible antivirus software that will not interfere with the IIS Manager installation, or any other processes or apps.
Get antivirus software with a good firewall, a large threat database, transparent privacy policy, and low error rates. You don’t have to compromise on system functionality to have a fully protected PC.
If you love to sing, you’ve definitely had moments when you wished you could do away with the vocals so you could sing in your heart out in your own voice.
But removing vocals from music tracks isn’t as easy to do, though it is doable. Especially with proper vocal remover software.
While it may not be possible to completely remove vocals from songs due to elements such as frequency spectrum, stereo image separation, compression, and other issues, with some little experimentation, plus audio of good quality, you can actually achieve good results.
It’s not easy to find instrumental or karaoke versions of the song you like or want, so you’re usually stuck with the full version plus all its vocals. So how do you convert it to a karaoke version?
There’s no way to remove vocals from a song 100 percent, and the best vocal remover software that actually does this very well can cost you some money.
However, we’ve checked out some free and some premium software you can use with your digital audio library.
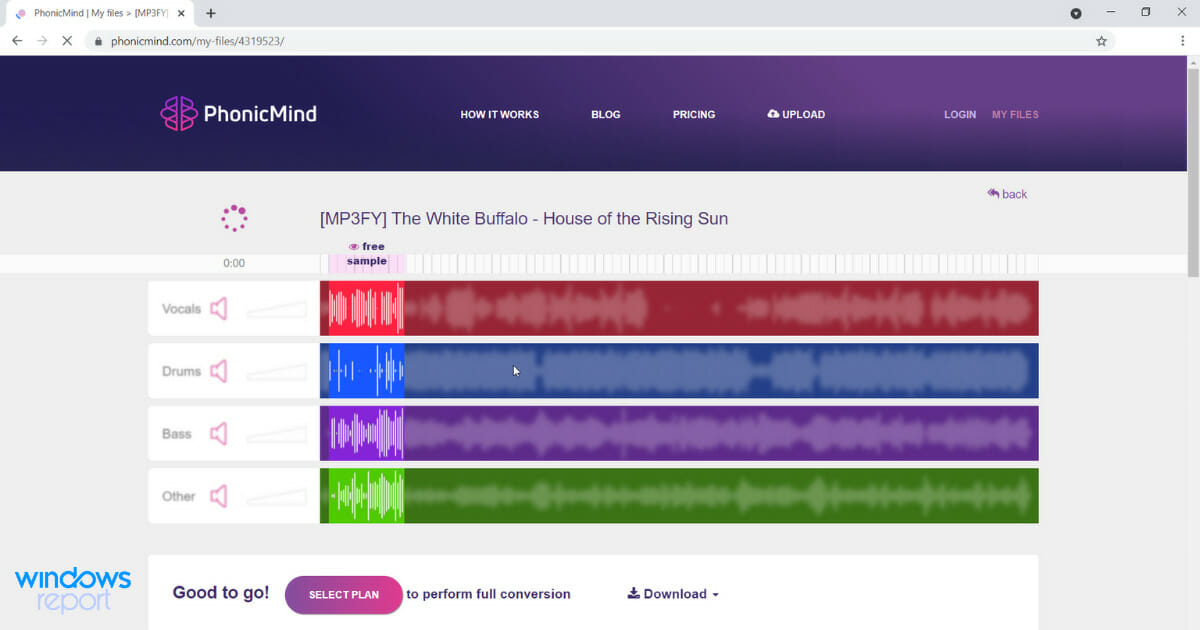
This tool lets you create Cappella tracks by removing instrumentals, or creates a karaoke track by removing vocals with its Center Channel Extractor effect.
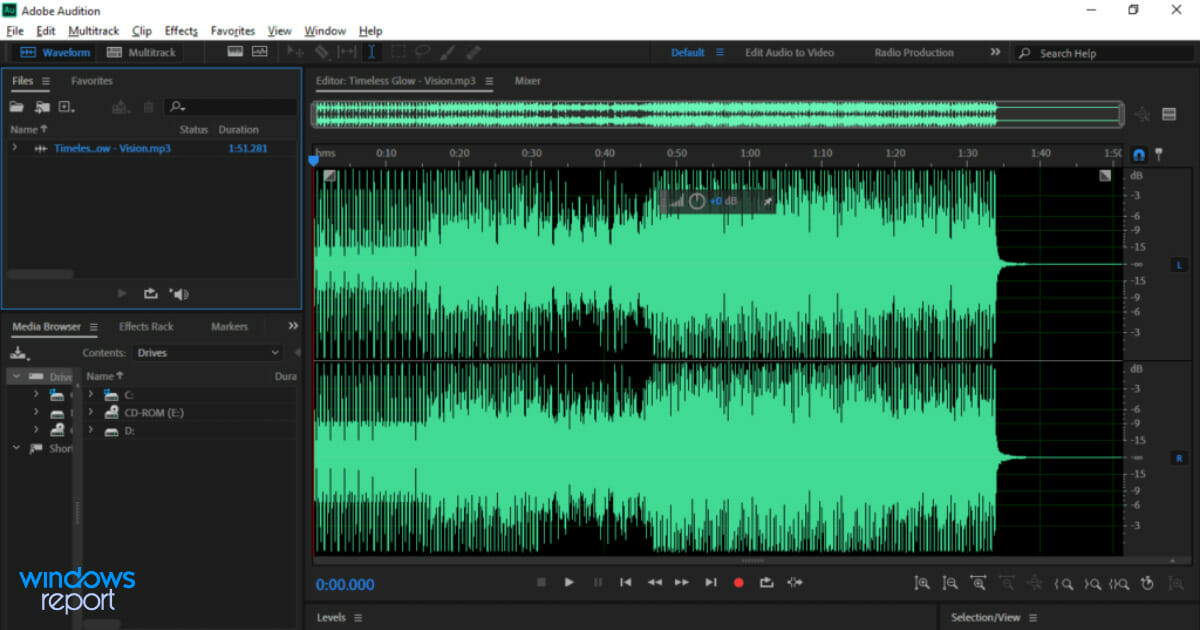
It is part of the Adobe Audition Creative Cloud (CC) that’s incredibly powerful, with audio editing features plus multitrack recording and editing capabilities associated with DAW.
The layout is intuitive, with a clean and customizable interface, plus the tool is impressive to handle any audio editing job type.
Adobe Audition lets you switch between different interface layouts, and if you have used its previous versions before, then you may have liked the classic layout but this can be returned via window preferences.
What you can’t do is add or remove tools from your toolbar. It also lets you record more than one audio source at once, tackle your multitrack recording project and record multiple audio sources simultaneously.
It has a full digital mixer to adjust levels, panning, and other parameters at once.
There are many effects this tool has that you can add to the audio as well, including delays, reverbs and distortion, or chain effects together.
Additionally, there’s the batch processing tab for applying processes to multiple files in one sitting.
When it comes to the best software for removing vocals from a song, Adobe Audion is our number one pick, so be sure to consider it.
Adobe Audition
If you’re looking for professional audio editing software that can remove vocals, Adobe Audition is the right choice.
If you need a professional music service for precise vocal extraction, look no further since you’ve found a top choice already.
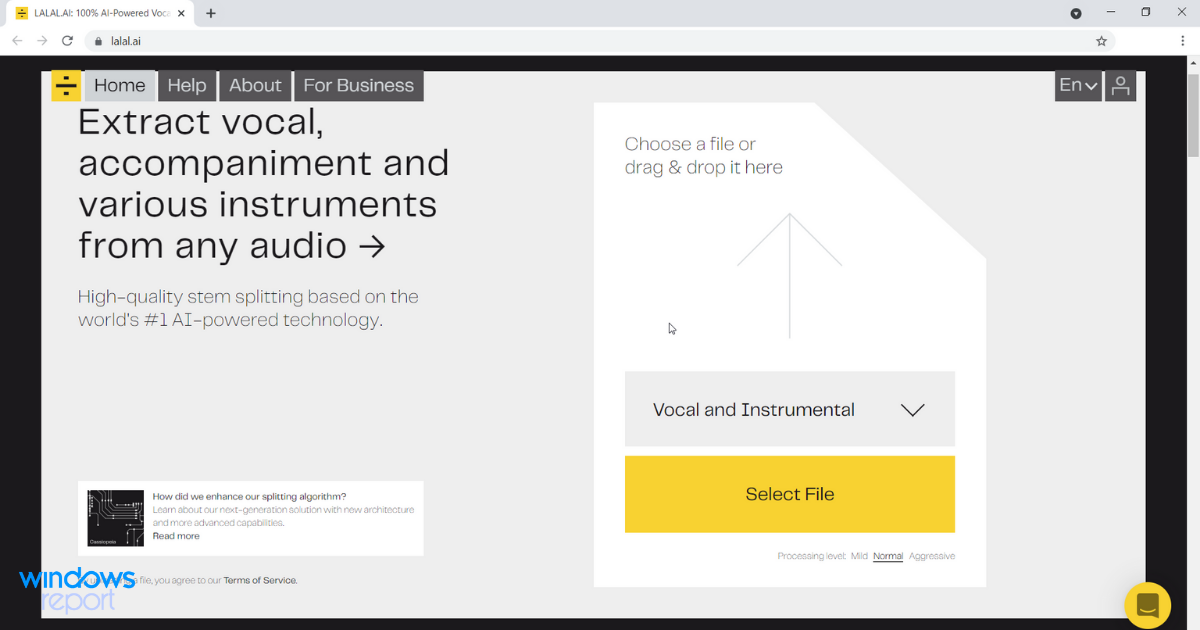
For those who are unfamiliar with this next-generation music separation service, let us tell you from the start that it offers high-quality audio splitting based on the world’s first AI-powered technology that works.
You just need to select a file or drag and drop it, then go for one of the three available processing levels: Mild, Normal, and Aggressive.
You’ll be surprised by the quick result and that’s not all! Besides vocal, you can also use it to extract instrumental tracks.
Useful key features that Lalal.ai brings to the table:
Unique neural network based on 20TB of training data
Ease of use
Accurate vocal extraction
Removal of instrumental tracks with no quality loss
Three packages to choose from – Lite, Professional, Custom
Lalal.ai
Without compromising quality, you can remove voice, instrumental, percussion, bass guitar, and keyboard sounds.
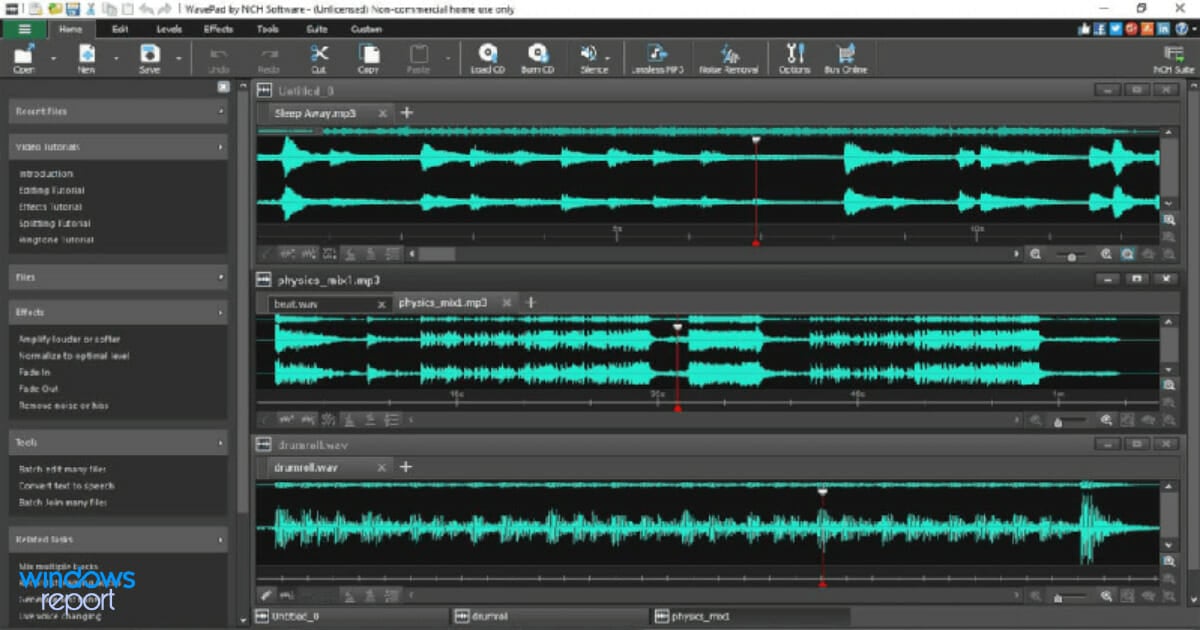
WavePad from NCH is probably one of the best well-rounded audio editing software you’ll ever find.
The sheer number of features and mix of professional complexity and intuitive user-friendly design deserves all the praises.
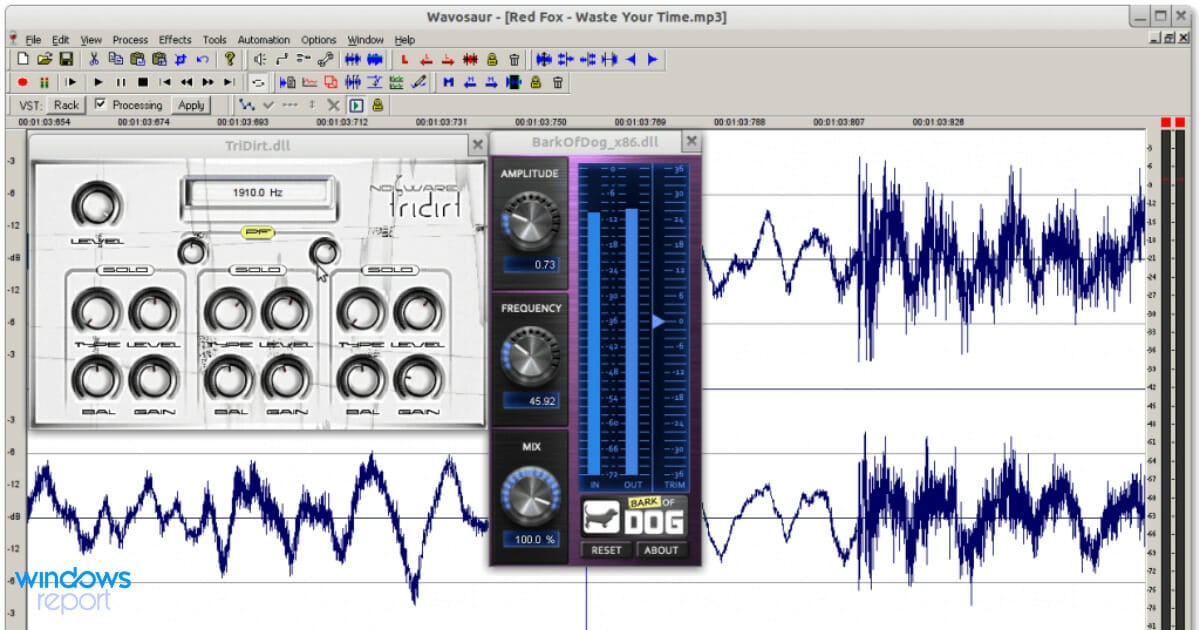
In this particular case, when it comes to voice (vocals) removal from a certain audio track, it does what you need. Although WavePad can’t remove vocals completely, it can lower their volume to the point where they are inaudible.
The precision of the task is also important because what we don’t want is for the vocals remover software to remove the instruments near the voice in a similar stereo spectrum.
WavePad will indeed remove some background instruments, but it wouldn’t be anything noticeable.
With the batch option, you can remove vocals from numerous tracks with a single click, which is rather amazing. Especially if you have a large library.
Overall, this is a great audio editor and acapella extractor software, so you might want to try it.
WavePad
Edit your audio like a professional and remove vocals with NCH WavePad software.
The unique Kanto Karaoke Player and Recorder for PC Windows and Mac OS aims to improve the performance of professional and novice singers alike.
You may easily create and adjust your own playlist with the drag and drop function from your PC, thanks to real-time control of the musical lineup and mixing and crossfading between tracks.
Midi files may be converted to MP3 by integrating various sound fonts, which produces a fairly awesome high-quality sound and pitch, and gives you top-notch performance.
The application has various settings and functions, such as voice recording on the song, midi channel control, and a WEB Browser for playing online music from YouTube.
Multiplex karaoke files in CDG/MP3+G/MP4 formats can be played, and the vocals can be disabled or enabled with a single click at any moment during singing.
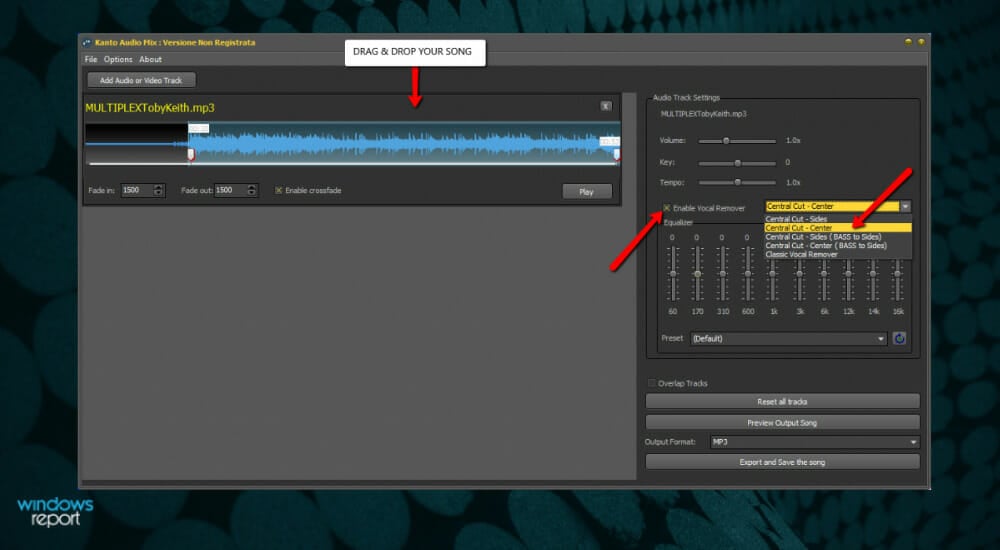
The Equalizer panel has the Vocal Remover Multiplex Song option. You only need to enable the Equilizer and modify the voice parameters at any time.
A multiplex file has a stereo channel with the vocals on the left side. This being said, Kanto Karaoke Player and Recorder may shut off the left channel and remove the vocals in real-time.
Kanto Karaoke
When you play multiplex karaoke files in CDG/MP3+G/MP4 format, you will be able to disable/enable the voice track with a single click.
Kanto Audio Mix is a cool and innovative Windows software created for music enthusiasts and people who seek control over their audio files (mp3, midi, KAR).
You may use this toolkit to mix, trim, and overlay audio recordings, as well as adjust the key, volume, and speed of the audio track and make ringtones for your smartphone.
You can adjust the fade time and activate crossfade for each audio file, as well as change the tone, tempo, and volume, and eliminate vocals using the equalizer.
This application is appropriate for you if you want to venture into audio editing and learn more about the creative part of the karaoke experience.
You may merge midi or mp3 files to create a high-quality musical medley with crossfade effects using the audio joiner, and you can overlay two or more audio tracks to create your own original song with audio overlapping.
This great vocal remover software is available and downloadable for free for Windows OS, and it gives you an easy way to reduce vocals on a digital audio track via audio canceling.
This method scrubs away most vocals by splitting the music track into two, inverting one half, and switching the audio to mono.
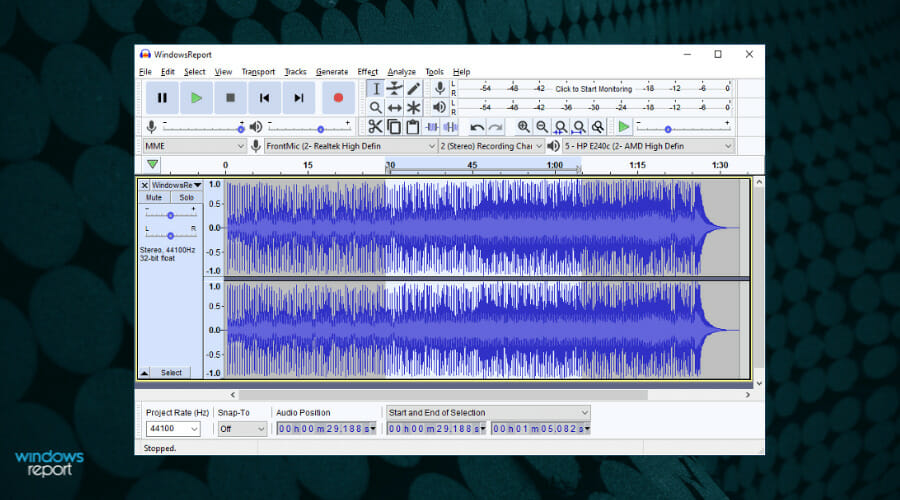
Audacity is a popular editor with built-in support for vocal removal, which comes in handy if say the vocals are in the middle with instruments spread around, or if they’re in one channel and all else is in a different channel.
The option for vocal removal in this software is found in the Effect Menu, where you’ll find Vocal Remover, and the other option is called Vocal Reduction and Isolation.
Audacity is completely free, and it’s one of the best software for removing vocals from a song if you’re on a budget, so you might want to consider it.
Note: Audacity released a new version of the tool replacing all previous versions. This one brings new features that are very useful for removing vocals.
This is a vocal remover for music songs that lets you make karaoke out of any song using artificial intelligence. All you do is upload your music and voila.
You can extract vocals from any song and use it for your performance, or practice until perfection.
If you have an instrument, you can remove the music and practice playing it, or even compose your own remixes.
This state-of-the-art AI software understands music on a deep level and can outperform any human in source separation tasks.
With deep learning, the AI is trained by listening to music daily at a speed of 20 minutes per second.
The software takes one minute to perform vocal removal after you upload your song, which is why this is the ultimate invention with no equal when it comes to vocal removal quality.
Once the process is complete, you get the karaoke version with vocals removed, and the vocals-only version with the music removed.
This is a powerful voice cancellation software, and if you already haven’t, we suggest that you try it out.
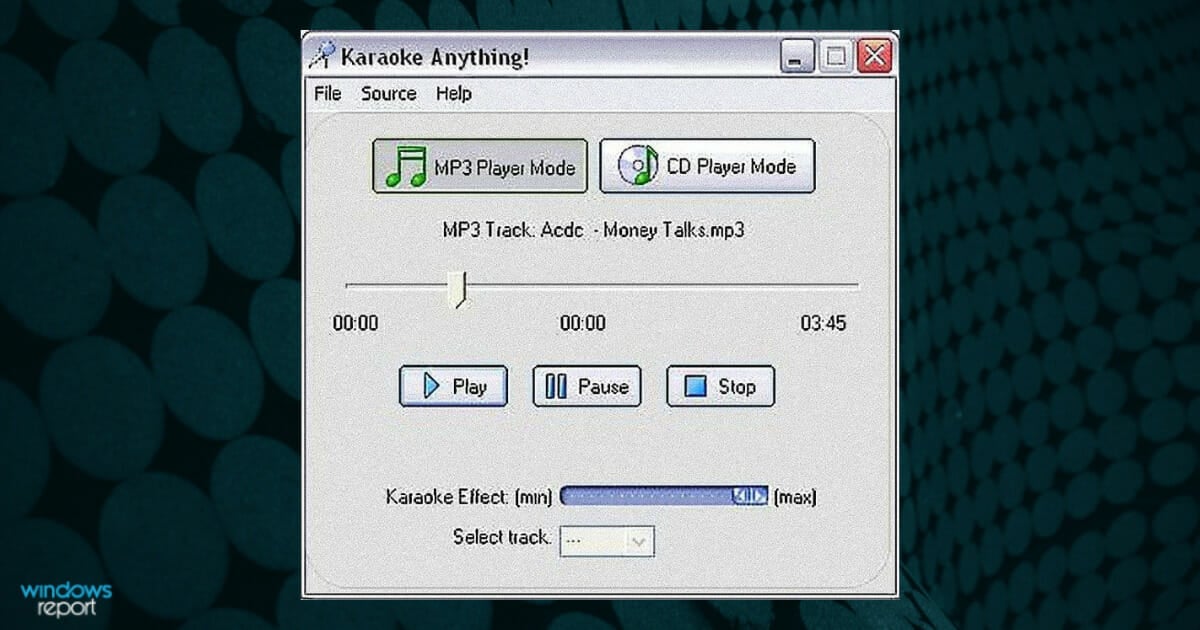
This is a simple acapella extractor software, which works with almost any type of song.
You can create karaoke (instrumental) tracks with MP3 files, but, this effect cannot be applied to stereo or mono recordings.
It is a free program that lets you remove any lyrics from any song you choose so you can sing your heart out wherever you choose.
It has a special equalizer that can minimize the vocals so that they’re not heard when music is played. It is very easy to do and people who use CDs can also extract music from the discs and extract the vocals.
Karaoke fans will find this software ideal, but not all songs work with this tool so some people may be disappointed and have to remove vocals on a different platform.
It has a user-friendly interface, and you can preview music before you work on it, plus it has a play, pause, and stop button.
This best vocal remover software helps you create karaoke tracks online from your browser for free.
It is suitable for users who cannot use its Vocal Remover Pro software or those looking for instant karaoke tracks.
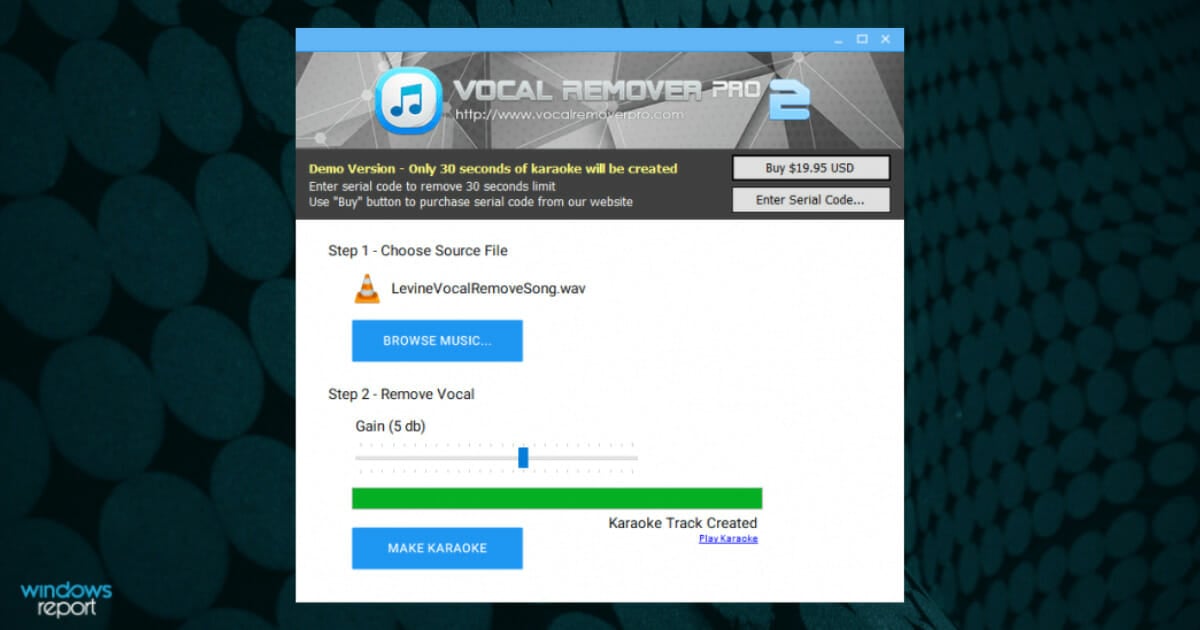
The Vocal Remover Pro tool has superior sound quality than the online vocal remover and can convert any music video on YouTube to MP3 Karaoke without the singing.
It uses advanced sound processing technology to remove vocals from music, and automatically create a brand new instrumental karaoke track from the original music file.
It also ensures sound clarity with high precision vocal removal algorithm, and where the vocals cannot be completely removed, it will be substantially reduced, but you can create unlimited tracks at lightning speeds of 5 seconds on average per track.
If you cannot use these best vocal remover software for one reason or another, you can always use the Voice Cancellation setting in Windows, which cancels the voice before you hear it via the computer’s speakers.
Simply enable the option to reduce vocals’ sound in real-time by clicking on the sound icon on the taskbar and selecting Playback devices.
Then, double-click Speakers/Headphones, then in the Properties window, click the Enhancements tab and check the Voice Cancellation box.
Have you used any of these best vocal remover software before? Or is there one you’d like to give a try? Let us know in the comments section below.
Once you’ve removed vocals from your audio tracks, you can use the new audio files for your karaoke sessions.
To do this, download one of these great karaoke tools on your computer, upload your new audio files and sing your heart out.
Malicious software can cause many problems, and this is why many users rely on antivirus tools to protect their PC.
However, in some rare cases, your antivirus tool isn’t enough to contain the virus from spreading.
If you’re concerned that a certain application or file is malicious, you should be able to run it safely by using sandbox software.
Sandboxing is a security feature that can isolate potentially dangerous applications in order to prevent them from causing damage to your PC.
Many applications, such as web browsers, already run in a sandbox mode with limited privileges thus keeping you protected from malicious websites and users.
As you can see, sandboxing isn’t a new feature, and if you use Google Chrome, you’re already running an application in a sandbox environment.
The best sandboxing applications practically are virtual machines that can run whole operating systems along with the main OS.
How to choose the best sandbox software
There are many great third-party sandbox applications, and you can use them to create your own sandbox environment and run potentially malicious applications without risk.
If you know exactly what you’re looking for, the information table below will provide answers to some of the most important questions regarding the products on our list:
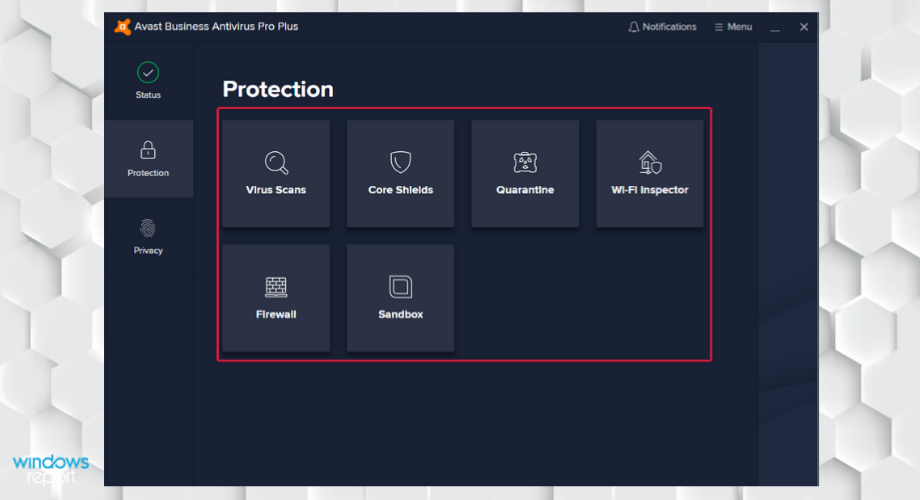
Another antivirus software with built-in sandbox support is Avast Internet Security. The sandbox feature allows you to run suspicious files in a safe environment without affecting your PC.
In addition to sandboxing, this tool will encrypt your data and protect you from fake websites.
The application can scan spam emails, but it also offers a built-in antivirus software that can recognize and remove security threats.
Avast Internet Security has a Behavior Shield feature that will analyze app behavior in real-time. This feature will alert you if an application tries to perform anything suspicious.
The antivirus also comes with a Wi-Fi Inspector feature that will detect any possible vulnerabilities in the local network and your router.
Actually, Avast comes with a SafeZone dedicated browser that will ensure perfect protection during online transactions.
Let’s quickly look at its key features:
Built-in firewall so you can easily restrict applications from accessing the Internet
Wi-Fi Inspector feature that can check your router and see if your network is vulnerable
Browser Cleanup feature to remove sneaky toolbars, add-ons, and extensions
Built-in password manager that will keep your login information safe from malicious users
Real Site feature that can recognize fake websites
SafeZone Browser to provide you with extra security while browsing
You will always be protected when browsing because you will even be warned if you’re visiting a fake website that is disguised as the real one, preventing you to disclose your credentials.
Avast
Enjoy real-time protection with a leading digital security pack powered by Avast.
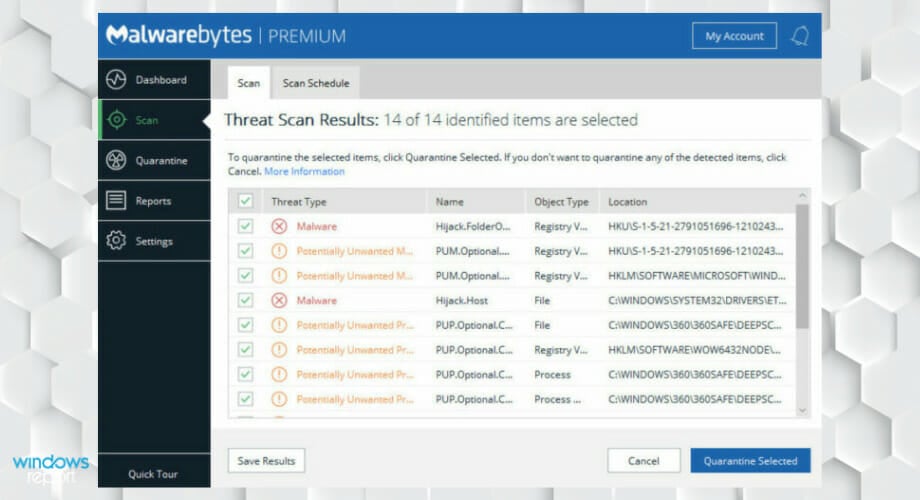
Malwarebytes needs no introduction as its reputation precedes its name simply because it reaches (and effectively eradicates) malware where traditional antiviruses stumble.
This is what sandboxing is all about – creating a safe environment for unsafe apps to be executed, which is something that a regular antivirus simply cannot perform.
Malwarebytes gives you the peace of mind you are seeking by actively using a triple-layered next-generation anti-malware protection solution to keep anything from trojans, rootkits, spyware, and worms to bots and rogues at bay.
With the latest version, the antivirus will use 50 percent fewer CPU resources during a scan, and with a feature called Play Mode, you won’t be interrupted by any notification or update.
Apart from the sandboxing and defense features, it can also remove the potentially unwanted programs that are slowing down your system.
Moreover, the software has a very simple interface that is easy to understand and use by anyone, regardless of their technical skills.
Let’s quickly look at its key features:
Protection against advanced ransomware infections
Removes all traces of malware on your device
Minimal impact on performance (removing potentially unwanted programs or PUPs)
Easy to use and highly customizable interface
Uses simple controls that make it easy to customize your security
Multiple layers of security, including real-time protection
Quick, comprehensive scans of your device (scans viruses faster and cleans malware infections)
Not even the most sophisticated emerging threats stand a chance when facing this tool’s powerful AI-powered detection technology that quickly identifies, isolates, and eliminates malware.
Malwarebytes
There is no room for compromise when it comes to your security. Go for the best sandboxing software!
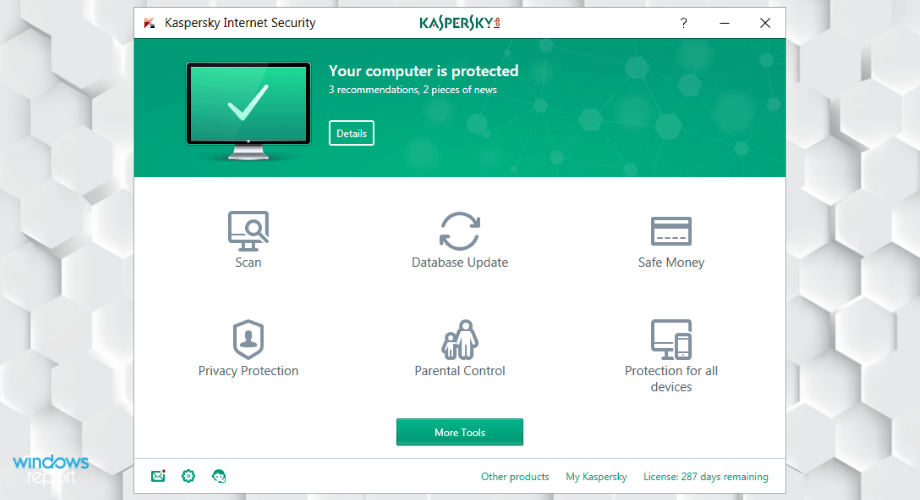
An alternative software that can isolate any security issues is Kaspersky Internet Security. Giving the name, the internet connection and security are greatly managed by this tool.
First of all, this offer guarantees qualitative services like free VPN, secure chats, online purchase protection, or even webcam protection from risky surveillance. So browsing the web won’t be vulnerable anymore.
Such a solution gives full-scale protection from malware or dangerous viruses like botnet or rogue. Thus you can improve the sandbox environment exponentially when you choose this tool.
Moreover, anyone can benefit from protection against hackers’ tactics to steal your data, like keylogging. So it’s very recommended to get network security using dedicated software.
For instance, Kaspersky provides two-way firewall protection, multi-devices payment protection, or high-security app lock. All that to prevent any threats away from you.
In addition, other high-tech protection tools offer security from malicious links or software that contains risky malware
Let’s quickly look at its key features:
Instant Neutralization of any dangers
Real-time security for cyberthreaths
VPN online privacy
Protection for banking or purchasing actions
Home protection for Wi-fi network
Anti-phising and network privacy tools
Security dashboard on the go
In conclusion, this program can represent a vital choice for your PC system protection against numerous threats online. It’s also available on multiple devices with full-rounded solutions to security issues.
Kaspersky Internet Security
Protect yourself and your family in any circumstances using highly potent software like Kaspersky.
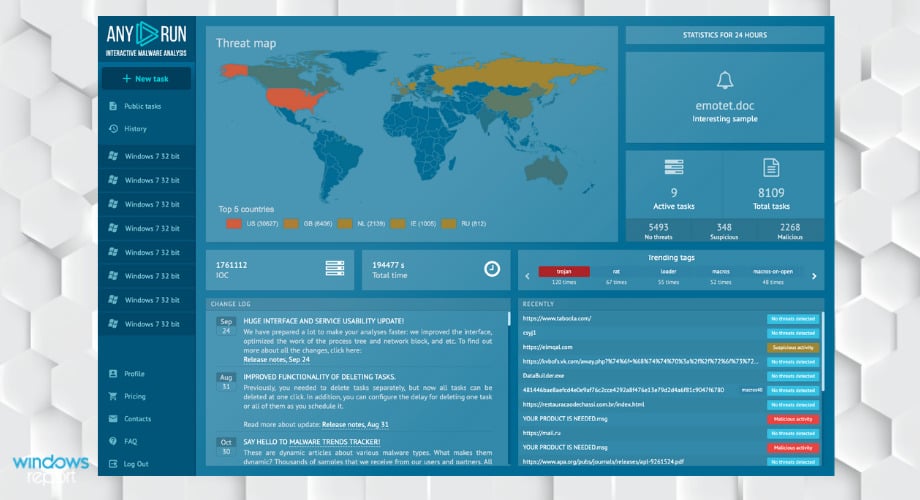
Any.run is a great online service that provides detailed analysis about malware to protect anybody online, offering cloud-based sandboxing.
This tool is actually a malware hunter that can show you real-time online threats and gives interactive access to secure your computer instantly.
So using it you can analyze your files or software and benefit from process monitoring. Other features entail network tracking, threat intelligence platform, or real-time interactions.
Moreover, the value of Any.run consists of a comprehensive analysis of risky files, and besides giving the user possibility to see it and modify if it’s needed.
It can also track behavior activities and observe new processes creation, malicious files, or URLs that can harm your PC. All that in real-time to help you make conclusions during task execution.
Let’s quickly look at its key features:
Cloud-based interactive access
Effective detecting of new malware
Easy to share reports with video or screeshots
Faster service compared to automated sandboxes
Large number community of researchers
Another incredible service is the threat intelligence platform created by various researchers. So these researchers from more countries contribute to provide insights about new malware at early stages, thus protect millions of users.
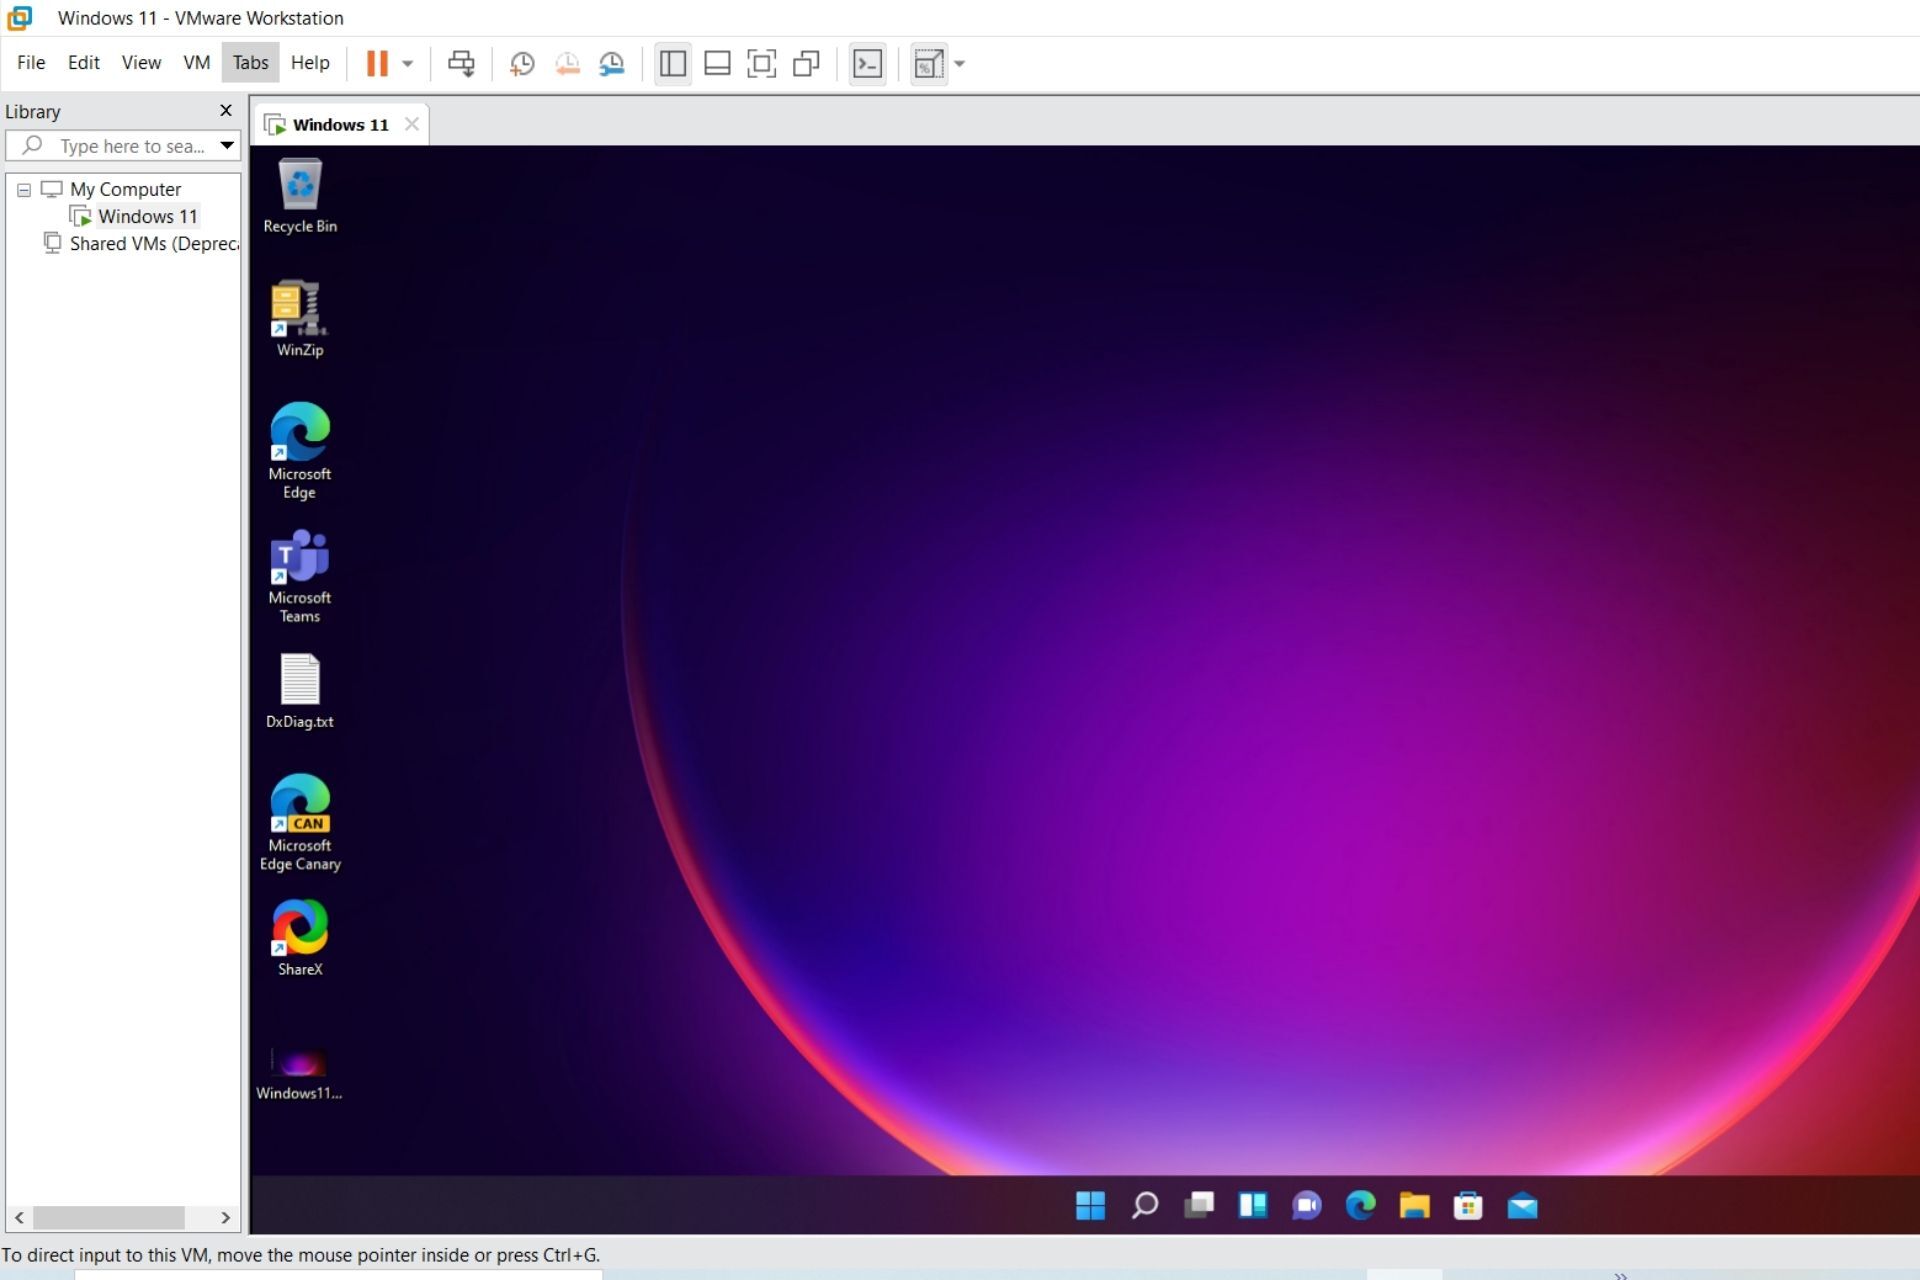
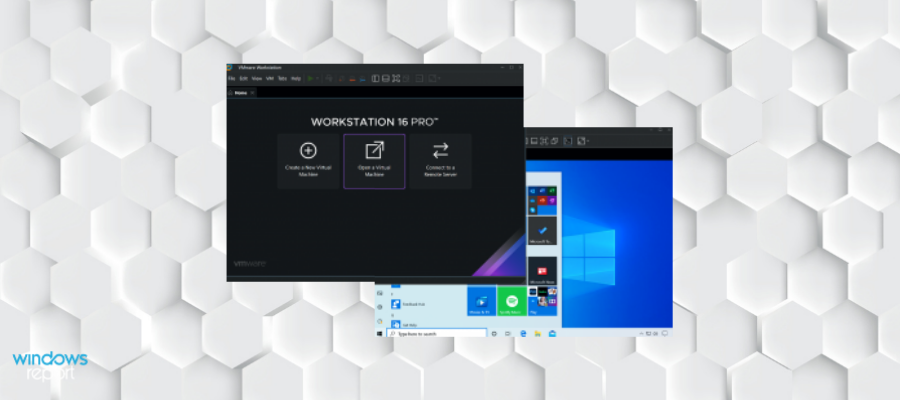
If you’re looking for sandbox software, you should also consider VMware Workstation 16. This application allows you to run another operating system alongside your current operating system.
As a result, changes in the virtual environment won’t affect your PC in any way. This makes these applications perfect for testing potentially harmful software.
It also supports snapshots, thus allowing you to restore your virtual environment to the previous state with ease.
Although this tool is extremely useful, it requires a bit of setup and hardware power in order to work properly, so if you don’t have enough hardware power you might want to skip it.
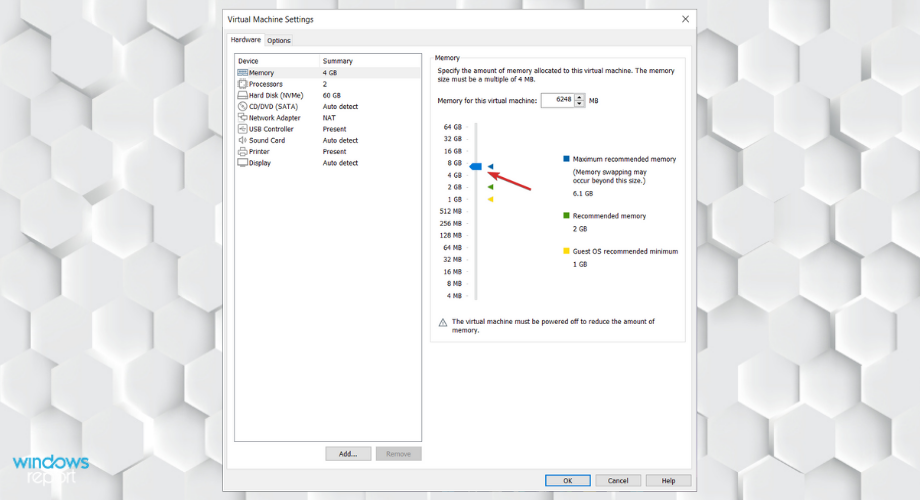
When you start a virtual machine, you can’t set the same amount of RAM as the available physical memory available or your system will likely crash.
So, not only that you can sandbox any apps and browsing, but you can do the same for a complete system and test it safely.
Let’s see what are this tool’s best features:
Run Windows DirectX 11 games and apps
Deploy Kubernetes Environments on the desktop
Supports the Windows Hyper-V mode
Dark mode interface
Easy to use, friendly interface
Increased VM scale – 32 vCPU, 128GB RAM, 8GB VRAM
VMware Workstation 16 is especially helpful to use if you want to install Windows 11 and test it without any possible harmful implications.
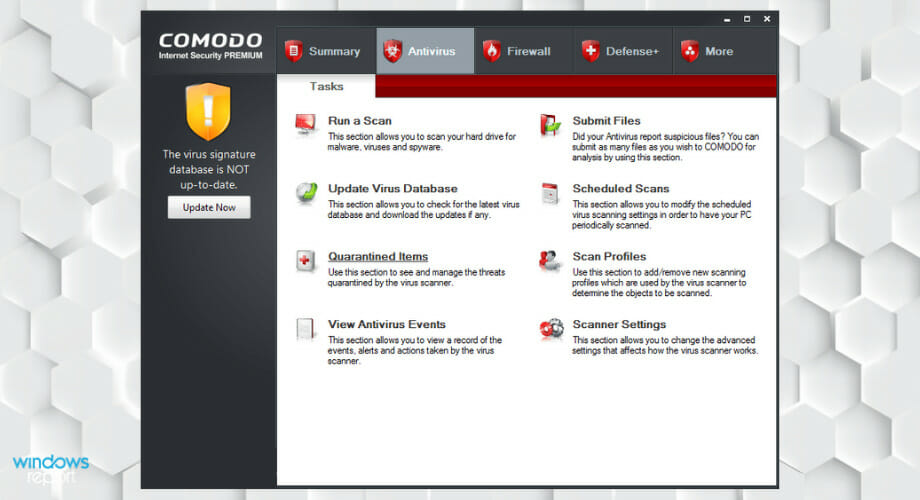
Comodo Internet Security is an antivirus software tool, but it also offers sandbox features to its users. Thanks to them, your system will remain protected from unknown and new threats.
The application will isolate unknown files into a sandbox environment thus preventing any damage to your PC.
Isolated files won’t affect other processes, applications, or data on your PC. In addition to suspicious files, you can also run specific programs always in sandbox mode thus increasing your PC’s security.
This application also offers an integrated firewall that will prevent certain applications from accessing the Internet. In order to achieve maximum security, there are antivirus, anti-spyware and anti-rootkit features.
Comodo Internet Security can also prevent bot attacks and thanks to the Defense+ feature it will keep your critical system files safe from malware.
The application also offers a Memory Firewall feature that will protect you from buffer overflow attacks. In addition, there’s a powerful anti-malware feature that will terminate malicious processes.
Moreover, note that it comes in three versions. The Free version offers all the aforementioned features along with the sandbox.
If you don’t have antivirus software, Comodo Internet Security might be perfect for you. With a built-in sandbox feature, it should keep your PC protected at all times.
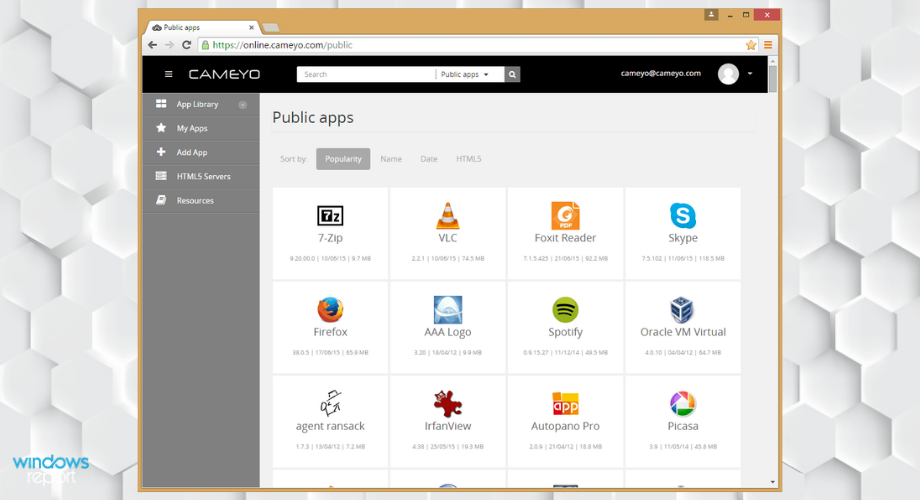
Cameyo is another application that allows you to run software in a safe environment without installation.
All your virtual programs will run in a virtual environment separated from your system. As a result, your computer won’t be affected in any way by them.
This application will create an entire application virtualized as a standalone .exe file. This allows you to run the application on your computer without installation.
In addition, you can also publish your application to Cameyo cloud servers and run it from any HTML5 browser.
This is perfect if you want to showcase your software to other users. If needed, you can also run your applications from a USB flash drive.
It’s worth mentioning that this tool also allows you to run Windows applications on any other platform with ease.
Cameyo is a decent sandbox software, and you can use the basic Personal version for free. If you want to get access to more advanced features, you might want to consider signing up for the Enterprise or Developer package.
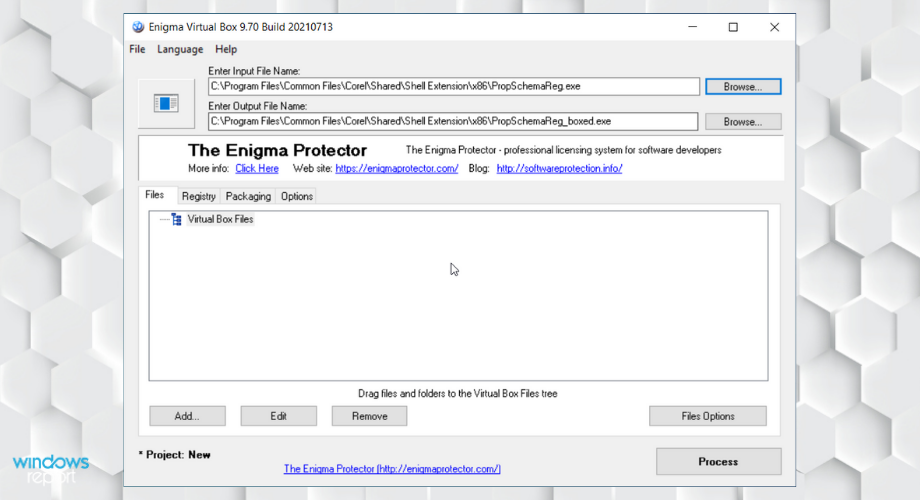
Another application that can create virtualized applications and run them in a sandbox environment is Enigma Virtual Box.
This tool allows you to move all files related to a certain application to a single file. The application supports a wide range of file types, and you can easily virtualize any file.
All your virtualized files and apps will run in a sandbox environment without affecting your current system. The application doesn’t extract any files to your hard drive, so the emulation is performed in the process memory.
It also supports the virtualization of any files and allows their compression. This will significantly reduce the total size of an application.
Another interesting benefit is that with this tool, you can register ActiveX/COM components without administrator privileges.
Enigma Virtual Box might not be the best sandbox software on our list, but it’s completely free, so you should try it out.
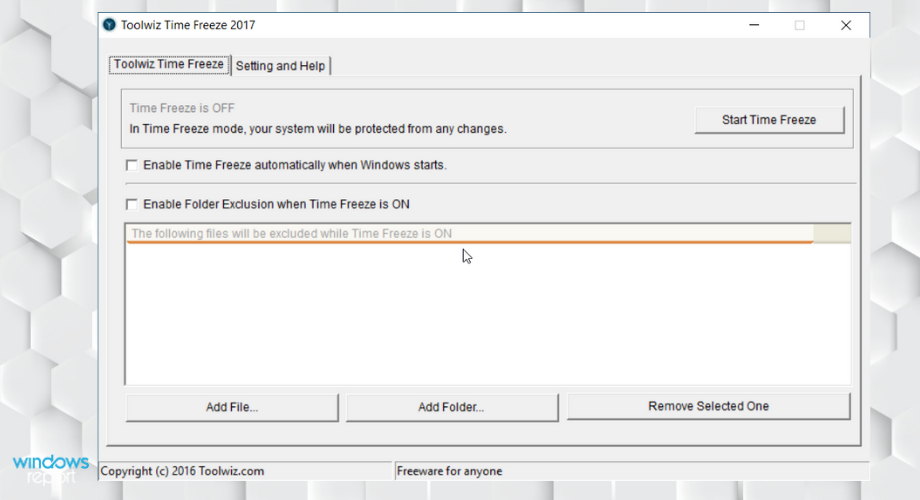
If you want to protect your PC from malicious applications, you might want to consider the Time Freeze tool from ToolWiz. The application has a Time Freeze mode that will run your entire system in sandbox mode.
This means that any changes you perform to your system won’t be saved. However, you can add files to the exclusion list in order to make permanent changes.
Thanks to this feature, you don’t have to create an isolated space since your entire system can work as a sandbox.
Using this tool, you can create a virtual environment from your system. This means that you can run all your installed applications in a virtual environment while keeping your system frozen and protected from malicious software.
As a result, your system will be completely malware-free while Time Freeze is running. Using this tool, you can run multiple operating systems at the same time.
The list of supported systems includes both real and virtual ones, and you can easily switch between them without restarting your PC.
Time Freeze allows you to easily restore your system and revert any changes by simply restarting your PC. Any downloaded files can be removed, so you don’t have to worry about any damage to your PC.
It is a solid sandbox software, as you most likely expected it to be, but before you can use it it’s required that you disable scheduled defrag and Windows backup.
Regarding the availability, this tool should run on all versions of Windows and it’s completely free, so if you want a simple sandbox software option, we recommend that you check out Time Freeze.
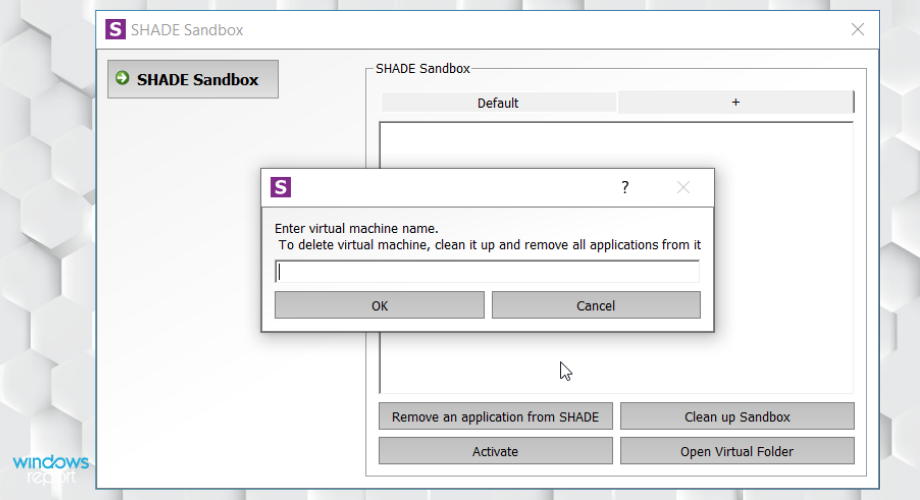
Another sandbox software that you might find useful is Shade Sandbox. Since this tool creates a sandbox environment, it’s perfect against new and unknown threats.
Using this tool, you can open suspicious websites without any fear of malicious users and applications. The application has a simple interface, so even the basic users should be able to handle it.
It’s worth mentioning that this application is fully compatible with other security tools, so you won’t have any issues.
Shade Sandbox will isolate malware or any other harmful application inside the sandbox environment thus keeping your operating system malware-free.
You can also add a certain application to the sandbox environment simply by dragging and dropping the application to the dedicated Shade Sandbox.
All your files such as history, cookies, and temporary files are stored in a sandbox environment so they can’t affect your operating system in any way.
This means that your registry and system files are secure from viruses and malicious applications at all times.
Shade Sandbox is a great sandbox software, and with its simple user interface, it will be perfect for basic users who want to enhance their security.
We have to mention that this application is completely free for personal use, so if you like the sound of it, we recommend that you download and install Shade Sandbox.
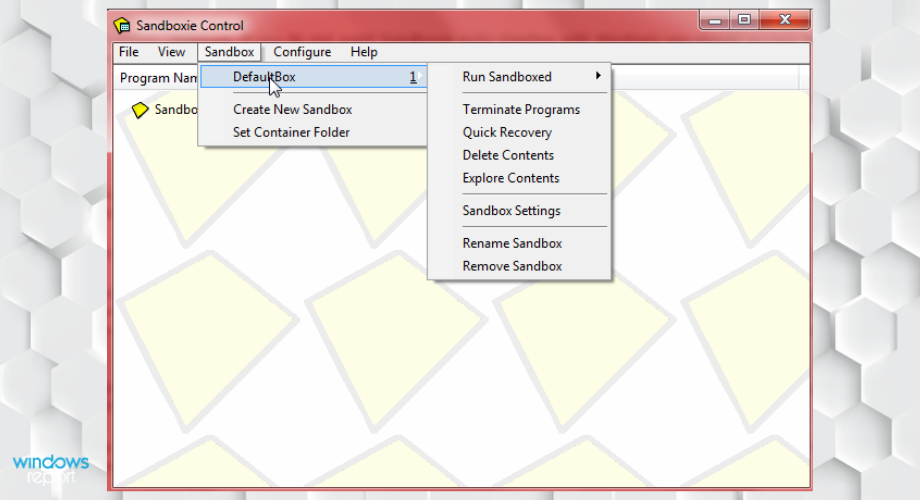
One of the best-known sandbox software is Sandboxie. This application will create an isolated space on the hard drive that you can use as a sandbox.
This space is separated from your other files, so even if you use a malicious application inside the isolated environment it won’t spread to your PC and make any changes to it.
This application allows you to secure your web browser and block any malicious software from affecting your computer.
In addition to your web browser, you can run your email client in sandbox mode and protect your device from malicious attachments.
This application also blocks websites and applications from accessing your data thus keeping your PC secure at all times.
Sandboxie is also great if you want to test new applications. If you’re concerned that a certain application can cause system-wide changes, you can always run it in Sandboxie to prevent that.
The application supports legacy Windows operating systems as well as Windows 10. There’s also support for all major browsers and support for both 32-bit and 64-bit systems.
Plus, it is rather lightweight so it should work on any PC without issues. Sandboxie is a great sandbox software that will protect you from malicious applications and other threats.
We have to mention that this application isn’t free, but you can download the trial version free of charge.
Users who want step by step guidance can follow our dedicated guide on how to use Sandboxie safely on Windows.
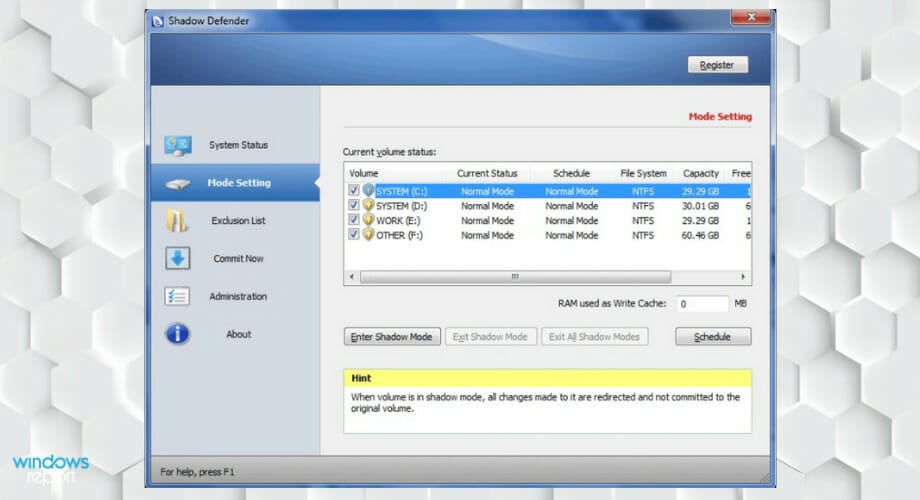
A great sandbox software that you might want to consider is Shadow Defender. This is a simple application that can protect your PC from malicious applications and unwanted changes.
This tool can run your PC in a Shadow Mode that applies system changes only in a virtual environment. As a result, your operating system will remain unaffected by these changes.
It is simply perfect if you encounter any malicious applications or unwanted changes on your PC. To fix the problem, simply restart your PC and you’ll restore your system to an earlier state.
If you want, you can set which files and folders will be saved permanently. These files won’t be affected by the restoration process, and they will preserve all changes.
Shadow Defender can protect you from various malicious applications, but it also allows you to surf the Internet without any risks.
In addition, you can test any application in a safe environment thus preventing any damage to your PC.
Shadow Defender is a solid sandbox application, but unfortunately, it’s not free. If you want to try out this tool, just download the free trial version.
The main goal of sandboxing is to protect your system from any dangers associated with all types of threats.
At the same time, you can use sandboxing platforms to test experimental features or apps without the fear of crushing your main system.
Here are some tips that you can use all the time to improve your sandbox usage:
➡ Allocate as many resources as possible
The virtual machines are the most complex sandboxes because they can emulate entire operating systems along with yours, but they can also drain the most resources from your physical system.
The key to having the best performance from the virtual machine is to allocate as many resources as possible but you can’t set it to use all your resources.
For instance, if you have 8 GB of physical memory on your system, you can only grant 7 GB for your virtual machine. That is why you have to have a powerful configuration to run a virtual machine.
For instance, in our screenshot above, VMware recommends using 6.1 GB of memory out of 8 GB to run the virtual machine.
➡ Always sandbox before trying something new
If you want to run an app or a process that you don’t know what consequences will have on your system, always back up your data and use a sandboxing application.
You will see that some of the apps recommended in our list also create instances of your systems that you can go back to in the most convenient way, so everything you do after that point can be reverted.
➡ Quarantine any suspicious files
Did you receive a file in an e-mail from an unknown recipient? We would always recommend not to open or execute the file before making sure it’s safe to do so.
At the same time, if you have an antivirus with sandboxing capabilities, you can still open it using that feature and know exactly what is all about without any possible safety issues.
You will find a few antiviruses with sandboxing features just like the one from Avast (shown in the screenshot above) in our list so take them into consideration if you get easily distracted and tend to open such files.
We hope that our list of the best sandboxing application gave you enough options to find yourself the ideal one for your needs.
If you have any other options that you prefer and you’ve tested, do mention them in the comments section below.
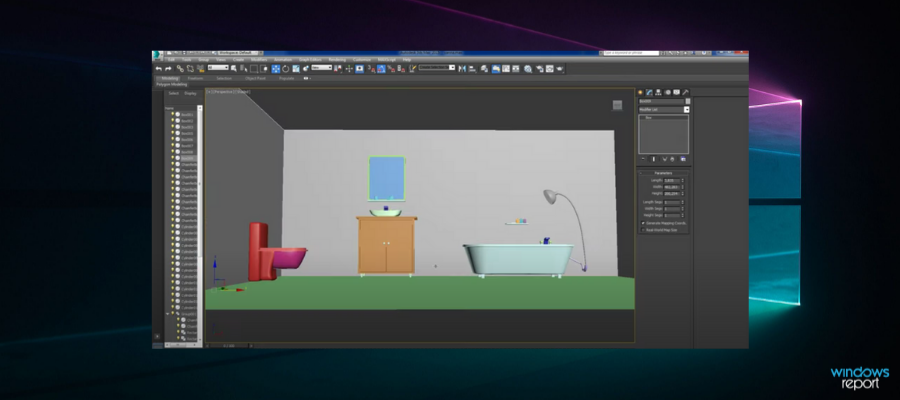
When we talk about hard surface modeling software, we are referring to modeling technique tools that can design unanimated objects in a realistic manner. In fact, this tool will model static objects and enables you to create highly detailed and precise 3D models in one place.
Interestingly, artists have been engaged in a heated debate about which is truly the best software for hard surface modeling over the last couple of years.
Names like Maya, 3DS Max, and even the up-and-coming Blender have been bandied about as the very best.
And there are dozens of other options, both subscription-based and freeware each with its own strengths and faults.
So, what’s the very best software for hard surfaces? Here is what our editors and in-house designers think.
What is the best software for hard surface modeling?
Maya’s impressive collection of powerful modeling tools puts it ahead of the competition by miles.
Even better, the interface has recently been overhauled and now comes with a revolutionary UV toolkit with enhanced tools and functionality.
You will thus love how it makes everything flow easily starting with the easier symmetrical modeling as a result of the improved symmetry tool.
Likewise, its famed sculpting toolset helps sculpt and reshape models more intuitively and artistically.
In the same way, Maya’s efficient library improves consistency in Boolean operations making it awesome for polygon modeling.
The interactive workflows, look, and feel are all designed to help hard surface artists work faster and to deliver jaw-dropping hard surface creations.
Sure, the software is a bit pricey but its brilliance fully compensates for the hole it burns in your pocket.
You can download Maya Free Trial and enjoy its goodness for 30 days.
Autodesk Maya
Create complex characters and amazing effects with Autodesk Maya.
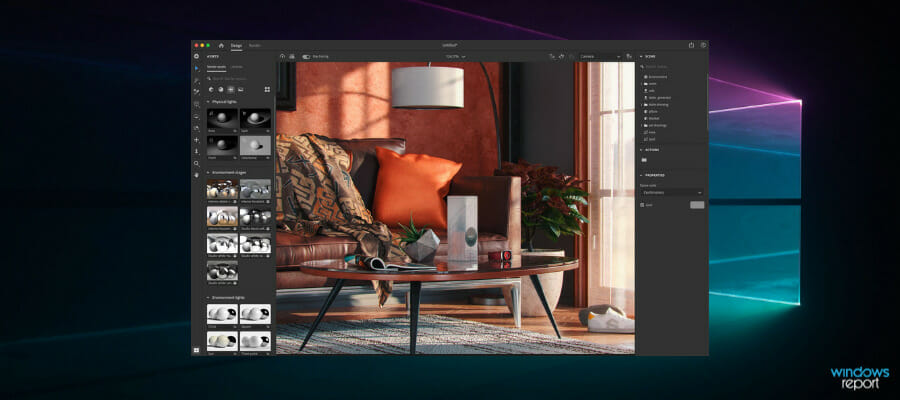
Adobe Substance 3D Collection includes a selection of assets for designers looking to advance their hard-surface modeling skills: Stager, Painter, Sampler, and Designer. Substance 3D Painter is an industry-standard software for texturing 3D models in real-time.
Smart creative applications and high-quality content in the Substance 3D family provide everything you need to create amazing art, and the best part is that it covers levels for both beginners and experts that want some extra touch to their projects.
The library has thousands of 3D models and materials, the magazine explains how artists create 3D art, and for extra knowledge, there are tutorials to help you all the way.
You may work with real-life pictures, create sophisticated parametric materials with complete editing control, or just paint in 3D with a brush.
Adobe Substance 3D Collection components are digital leather workshop selection, packaging, fashion, sportswear, products design, and retail.
Adobe Substance 3D
Give life to your 3D art with real-life photos and complex parametric materials or draw artistically with a brush!
Daz 3D includes a variety of hard surface models that you can import in Daz Studio, and edit them however you want. Its vast library of models can be used in videos, different projects, and designs.
The geometry editor allows you to pick and alter an object’s mesh. You may conceal sections of anything, assign parts of a surface to a different material or surface group, and even remove mesh elements.
Once you’ve picked an item in the scene panel, you may manipulate its stuff.
What’s particularly wonderful about Daz is the useful info/command windows that appear when you right-click. So, if you right-click in the viewer, you’ll get a variety of selection style possibilities (Drag: select individual polygons, Marquee: drag a box). It also contains data about Face Groups, Surfaces, and Regions.
Daz 3D
With Daz 3D you can separate objects from a surface, and place them wherever you want to enhance your project.
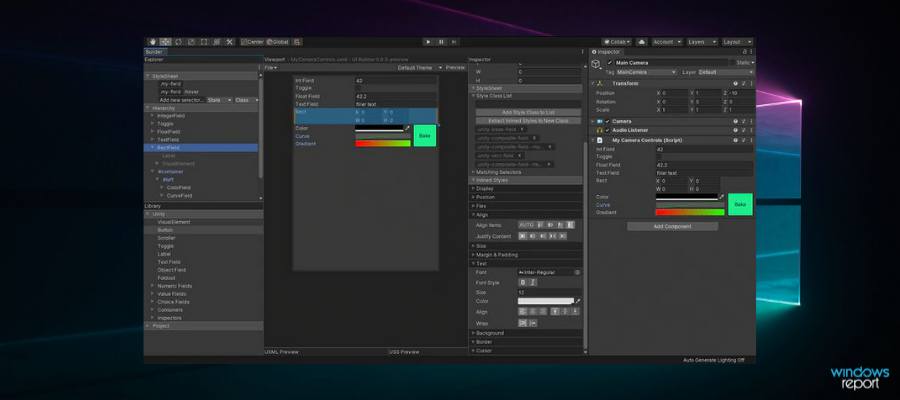
Unity‘s material authoring tool for hard surface modeling is ArtEngine. The technology, which makes use of the capabilities of Assisted Creation, helps artists in accelerating production processes.
AI-assisted artwork automates and speeds photoconversion to physically-based rendered (PBR) materials, such as up-resing, deblur, seam removal, unwarping, color matching, and other tasks.
AI-powered tools allow you to concentrate on the most valuable aspects of the creative process.
You have the chance to bring fresh vitality to outdated or low-quality materials. Enhance the look of your items while increasing their value and longevity.
Unity has so many valuable functions, that you will love it from the start. You can remove any problematic pictures, artifacts, or fuzzy regions from scans across all texture maps.
It automatically identifies and unwarps a pattern to align any regular texture pattern in picture space, as well as automatically decreases the discomfort of warping textures such as wrinkles and stretching.
To swiftly clean up materials and remove unnecessary parts, erase seams from materials across all PBR maps at once.
Unity
Through creative and quality-of-life advancements, Unity offers a robust 3D material-creation workflow.
3 DS Max is considered faster for demanding hard surface modeling projects. As a matter of fact, some of our editors felt that its UV projection tools and smoothing groups are immensely better than almost every other tool from Autodesk.
Consequently, there’s a widespread impression that 3DS Max is the benchmark as far as hard surfaces are concerned.
Well, when we scanned its abilities, it’s hard to disagree.
First, you can create models in numerous intuitive ways. You can also easily extract information for your model to help inform planned modifications.
You can as well blend and mix up to six materials to create realistic hard surface models.
The software’s spline-based modeling features have also been earning rave reviews as they are super-efficient when creating/ editing poly formats in surface modeling.
Bottom-line? The 3DS Max software offers 3D hard surface models of the highest possible quality in much less time.
Autodesk 3DS Max
Make the best design visualization, games, and animation with AutoDesk 3ds Max.
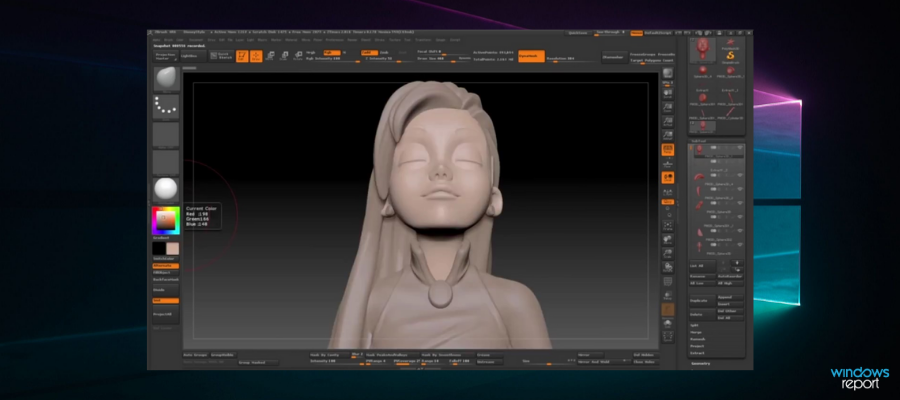
While a lot of artists know Zbrush as an organic modeling tool, the software also comes with infinite powers for hard-surface modeling.
From typical hard surface modeling tasks like extrusions to finding edge hardness to using dynamesh for creating sophisticated hard surfaces, this has it all.
And it makes some of the tougher designs look like child’s play…
For example, its features allow you to use the customizable toolset to dynamically add/reduce polygons as desired.
Then, the software also offers a refreshing way to blend multiple pieces of essential geometry together.
Still there, applying live Booleans has never been easier while the panel loops make creating elevated/lowered panels a breeze.
Like the rest of the top 5 tools, Zbrush’s hard surface workflow is superb and it, in general, makes hard surface modeling fun.
These powers and precision have, unsurprisingly, endeared Zbrush to film studios, game developers, illustrators, and countless designers globally.
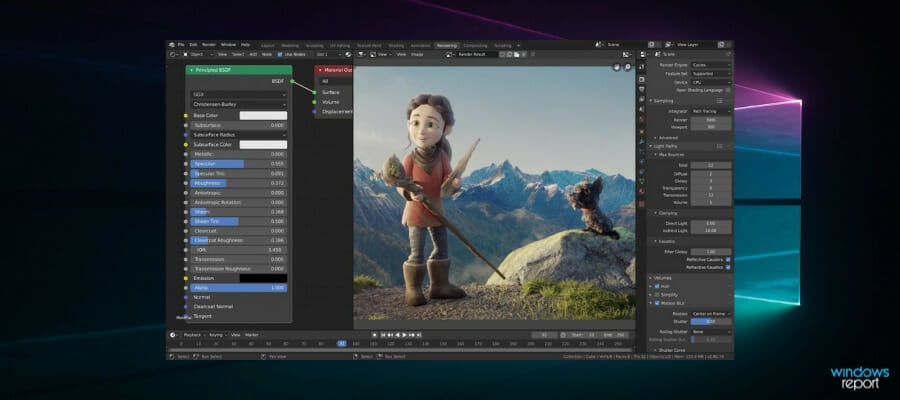
Experts contend that Blender might go on to become the best software for hard surface modeling in the not-too-distant future.
Already, the program is making its mark in the games industry in a big way with several gaming giants known to be admirers.
Now, if you don’t have the budget for Maya and her similarly pricey rival 3DS Max, or if you are a fan of open source, then you will appreciate the free Blender’s huge potential in hard surfaces.
Among the highlights is its exceptional performance in manipulating various surfaces at a polygonal level together with the availability of all the popular modeling tools.
It’s as elegant as its competitors and one certainly feels that this is primed to produce top-class realistic models.
The program is optimized for pure hard surface objects and will give you incredible Sci-Fi movies, real-world robotic designs, environment props, and more.
Okay, its support is still sluggish but it’s understandable considering its freeware.
Again, blender’s growing community is very helpful and ready to come to your aid when in trouble.
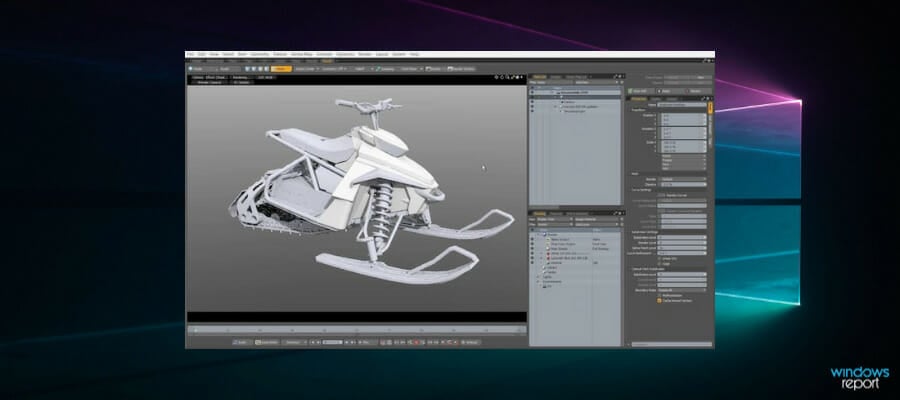
Despite increased options for artists, Modo’s modeling tools have remained a huge attraction to designers.
Most appealing is the program’s versatility which makes it a premier choice for all types of projects related to hard surface modeling.
Whatever the project, Modo’s intuitiveness, iterative design workflows, and flexible tool assembly lets you create without bumping through typical technical hoops.
And because of its many add-ons, Modo can be adapted to match the needs of any modeling project from conceptualization to the final product.
Further, Modo’s highly robust procedural modeling system lets you add several levels of fine details with speed.
The drag-and-drop presets are also a godsend and allow artists to quickly fashion the look they want.
If not, one has the option of simply selecting from the software’s huge library of tremendously realistic physically-based materials.
In short, whether you are a veteran or a beginner, Modo’s finesse gives you the immense creative freedom to showcase your natural artistic talent.
Pricing varies and there are hefty discounts for enterprises.
As you can see, there are many accomplished programs all ranked among the best software for hard surface modeling.
To avoid disappointments, remember to consider each software’s workflow, capabilities, and flexibility.
As usual, always start with the trial version and see from there how things evolve.
We recommend you bookmark our design software section for more articles and guides. Check our Graphic Design Hub to see new ways in which you can bring your ideas to life.
Nothing beats lighting a fire and worming the space around us in the winter. But what if you don’t have a real one? Well, the next best thing is to add one to your PC desktop! There are a few software and apps that add animated fireplace wallpapers and screensavers to Windows which regenerate the natural radiance of a real fire on the desktop. This is some of the software you can add virtual fireplace wallpapers and screensavers to Windows with.
Add Fireplace Animated Wallpaper to the Windows Desktop
First, you can add the Fireplace Animated Wallpaper to your desktop from this web page. The animated wallpaper there is retailing at about $7.95 per background. You can press Download under the Fireplace wallpaper to save a demo of the portable software to Windows. It adds an animated fireplace wallpaper to your desktop for about five minutes when you click fireplace_demo.
The demo time period isn’t especially generous, but it’s still quality desktop wallpaper. You can click an Animated Wallpaper icon in the system tray and select Settings to open further configuration settings shown directly below. There you can select an Autorun on Windows start-up option. Click the Icons tab and deselect the Show desktop icons check box to remove icons.
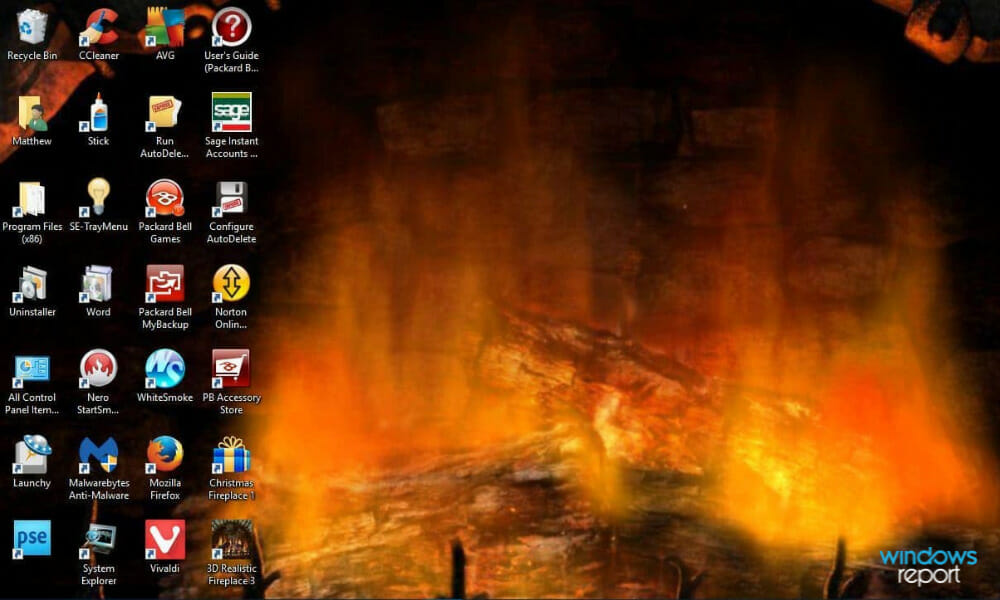
Wall of Fire is an alternative wallpaper for the desktop you can purchase from exactly the same animated wallpapers site. It has the same configuration settings as Fireplace, but the animated wallpaper adds a golden glow of fire across the desktop as shown directly below. OK, it’s not exactly a fireplace; but it’s pretty similar.
With the Fireplace 3D screensaver, you can transform your computer into a genuine fireplace. It’s meant to look as natural as possible since the visual effects and background warm your body and soothe your feelings. You could even feel the heat of a genuine fire and hear the crackling of a blazing fire.
Geliosoft has two programs with which you can add customizable virtual fireplace screensavers to the desktop. This software, which is also compatible with Windows 10/8/7/XP, can create a realistic 3D fireplace decoration for your desktop within a few steps.
Press the Click Here button on this page to save 3D Realistic Fireplace Screen Saver’s installer to Windows.
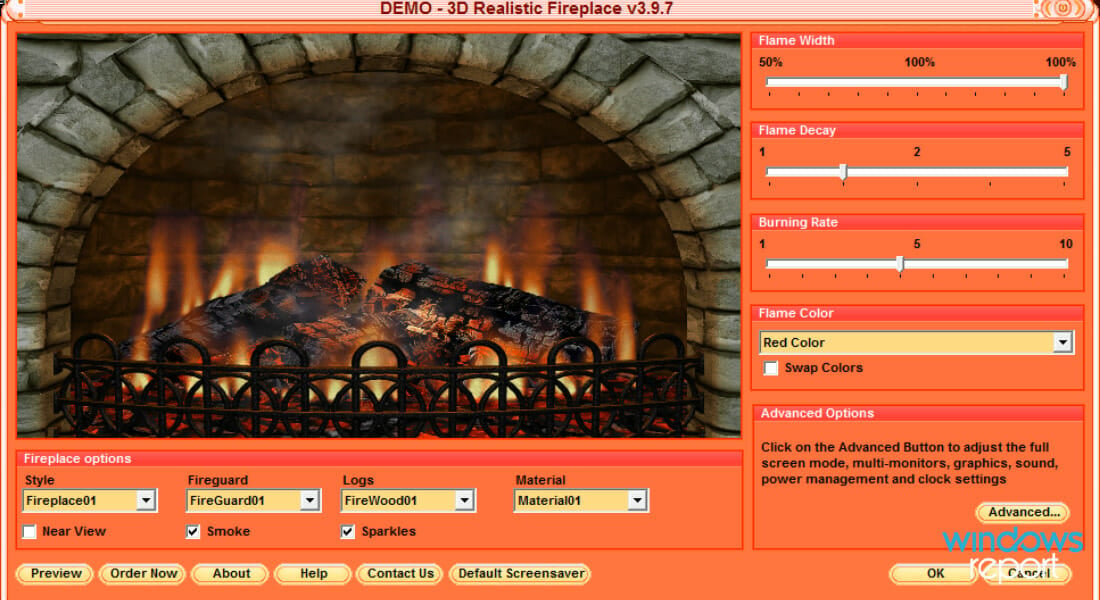
Open the 3D Realistic Fireplace Screen Saver installer to add the software to Windows and open its window in the snapshot below.
This window shows you a preview of the screensaver and includes numerous customization options for it. Under Fireplace options you can customize the fireplace style, logs and material by selecting pertinent settings from the drop-down menus.
In addition, you can select a Near View check box that removes the bricks from the fireplace as below.
The screensaver’s customization window includes three bars on the right with which you can configure the width, decay and burning rate of the flames. For example, dragging the Burning Rate bar further to the right effectively speeds up the flames and dragging it left slows them down.
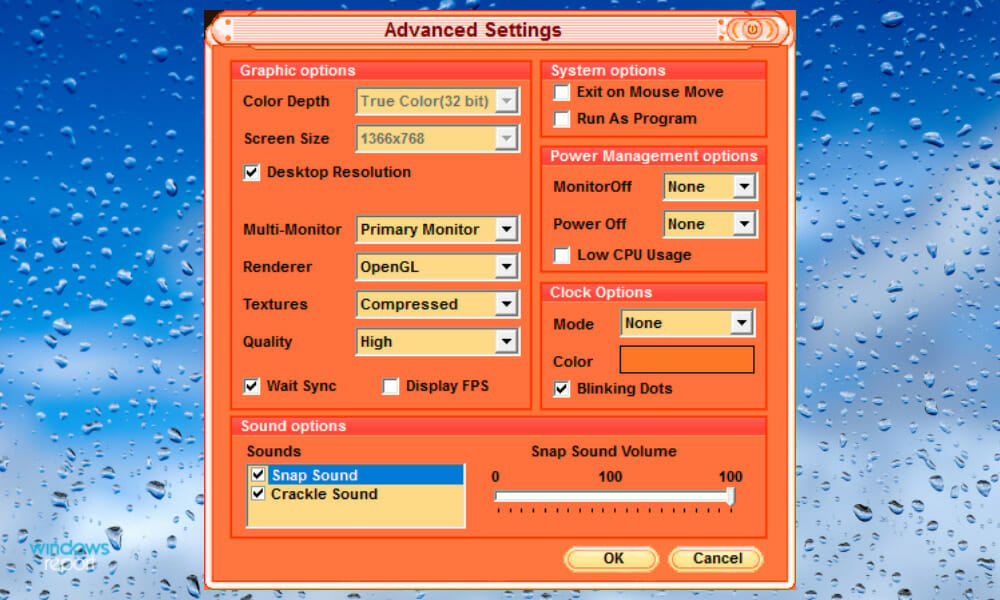
Press the Advanced button to open the window below that includes further options.
There you can configure the screensaver’s graphical settings. By default, the screensaver matches your desktop resolution; but you can deselect the Desktop Resolution option to configure color depth and screen size options.
The Advanced Settings window also includes a couple of audio options. You can switch the snap and crackle effects off by selecting the pertinent check boxes.
You can add a clock to the screensaver by clicking the Mode drop-down menu. Then select 24 or 12-Hour options from there to add a clock to the virtual fireplace.
Click the Preview button to open a full preview of the screensaver. Then click the Default Screen saver button to apply the virtual fireplace as your screensaver.
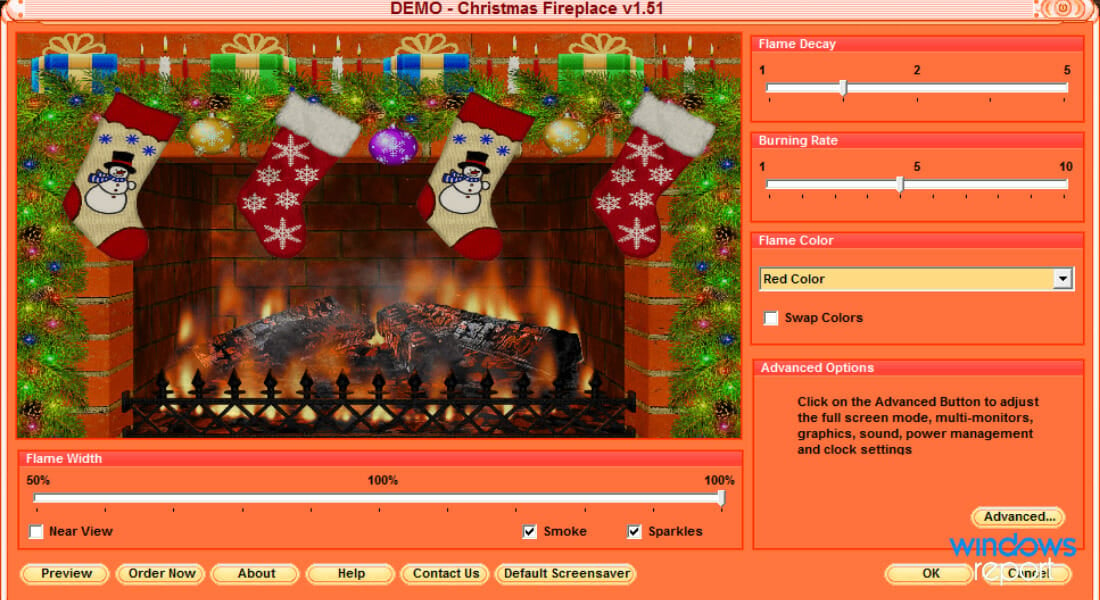
Christmas Fireplace Screen Saver is an alternative customizable screensaver for Windows that has a Xmas theme with a wreath and snowman stockings hung around the fireplace. So this is a great screensaver to add some Xmas decor to Windows when the holiday season comes around. Press the orange Click Here button on this web page to download the program’s demo. Then run through the installer to add the software to Windows and open its window below.
The customization options on that window are much the same as those for the 3D Realistic Fireplace Screen Saver. There you can drag the bars left and right to adjust the flame width, decay, and burning rate. Click the Flame Color drop-down menu to select orange, red or yellow fire colors. Then, when you’re done configuring the screensaver, press Default Screen saver to add it to Windows.
There are also a few virtual fireplace apps freely available for Windows 10 and 8. Firstly, you can add Burning Fireplace to Windows 10 or 8.1 by pressing the Get the app button on this page. That app regenerates a realistic fireplace with crackling sound effects in Windows.
Alternatively, check out the Virtual Fireplace app for Windows 10, Win 10 Mobile, and 8.1. The fire opens full-screen like a screensaver, but you can switch it to window mode by moving the cursor to the top right corner and pressing the arrow button. This app includes nine full-screen fireplaces to select from, which also have classical music accompaniments. Users can select log burning effects and adjust the fire-burning speed. Note that only one of the app’s nine fireplaces is freely available with in-app purchases required for the others.
So now you can add enchanting virtual fireplaces to Windows 10, 8.1, and 8 with 3D Realistic Fireplace, Fireplace wallpaper, Virtual Fireplace, Christmas Fireplace Screen Saver, and Burning Fireplace. They’re great Windows software and apps to customize the desktop with during Xmas.
If you enjoy customizing your desktop as much as we do, make sure to check our wallpapers section.
Make sure not to miss our dedicated desktop enhancements section if you’re crazy about customizing your virtual workspace!
These videos are further remixed to create funny or annoying content for the viewers using the best software for YTP. I’D SAY HE’S HOT ON OUR TAIL is widely known as the first YTP. Chain poop, Poopers Unite, or Spiderman are among other popular poops. But, to create a quality YTP, users need reliable video editing software.
We have handpicked a mix of free and paid video editing software for YTP that helps users create that perfect poop.
What are the best tools to create YouTube poop videos?
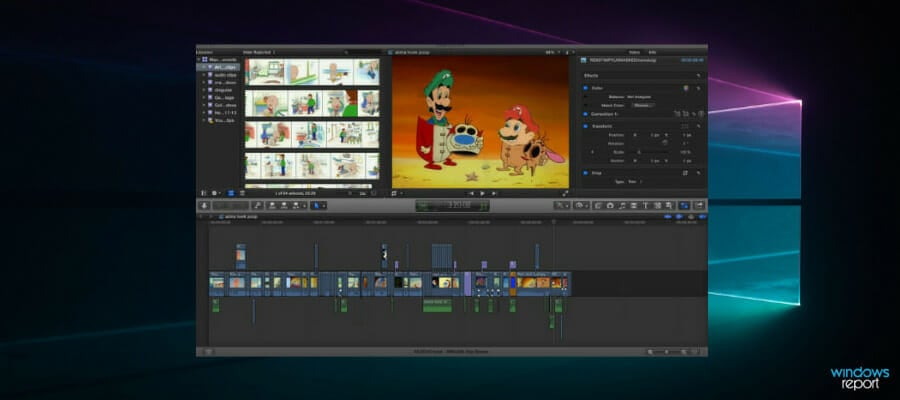
The first software to make it on our list can be no other than the industry-leading video editing software, Adobe Premiere Pro.
We might have gone a bit overboard, as this tool is clearly not your average YTP maker but a professional video editing suite that helps you craft and polish footage for professional purposes.
Nevertheless, if you are a perfectionist, you will appreciate its impressive features and put it to good use as a grown-up Youtube poop maker.
The Premiere Pro is a feature-rich tool that benefits from seamless integration with other Creative Cloud Suite apps but is also capable of perfectly blending with third-party plug-ins to expand your creative horizons even more.
With native file support and lightweight workflows, you can edit footage in any format, from 8K to VR.
Most importantly, there is no need to get overwhelmed by this tool’s numerous functionalities. There is also great support available and step-by-step tutorials to cover everything from the basics to advanced techniques.
Let’s quickly look at its key features:
Automatically reformat and reframe your videos to speed up workflows and optimize formats
Selective color grading, animation, and video effects
Essential Sound panel to edit or sync audio, add sound effects and automatically duck music
Import footage from any file format
Trim footage with precision
Seamless integration with both other Adobe products and third-party extensions
Adobe Premiere Pro
Take your YTP projects to the next level with industry-leading video editing software.
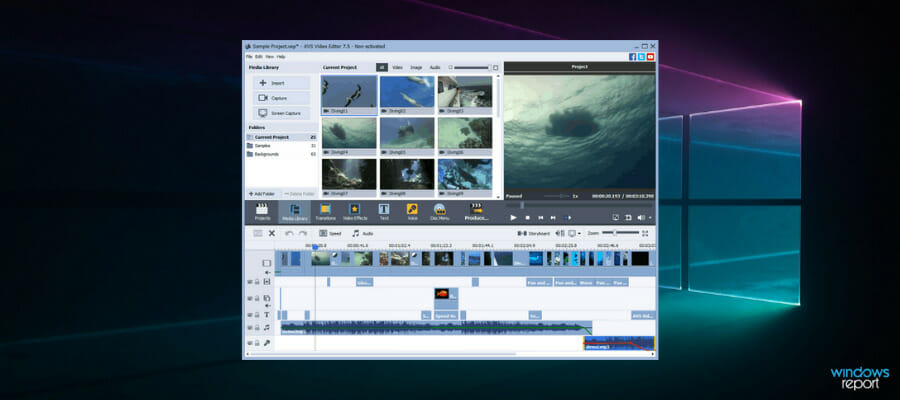
For those looking for free and reliable video editing software for YTP, AVS Video Editor can be the answer.
It offers powerful video software features, such as trim, cut, split, merge, rotate, and mix videos. Users can select from 300 creative effects and transitions for videos.
It also allows users to apply audio, texts, menus, and subtitles. Option to burn DVD/Blu-ray discs and balancing the video camera for shaky recordings are some of the other great features.
Let’s quickly look at its key features:
Speed up HD-videos editing using the built-in video cache technology
Record media files from the computer display and create video guides
Capture moments and convert it to stunning slideshows, make Blu-ray videos, or share the videos to social networks
It supports various video formats like AVI, VOB, MP4, DVD, WMV, etc.
AVS Video Editor
Trim, cut, split, add effects and transitions and mix to create a YTP video with pazzazz.
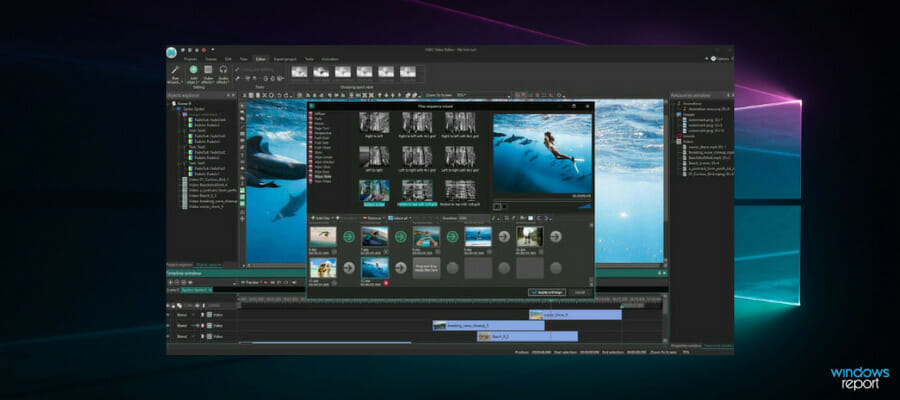
YouTube poop video editing needs special skills, and VSDC Video Editor is one of the best software for YTP one can find. Although it’s completely free, it can do a lot compared to many paid programs.
It comes packed with features, and one of its major features is that it allows frame-by-frame control. While it’s great for mixing audio and video files, it also lets users add filters to videos and many other visual effects.
Let’s quickly look at its key features:
Access to repositories of filters (color correction, object transformation, transition, and much more)
Timeline swapping and altering scene functions
Option to insert single-click filters to save time
Smooth editing experience
Supports wide format and capturing videos
VSDC Video Editor
The free multimedia suite takes your YTP as far as your imagination can reach.
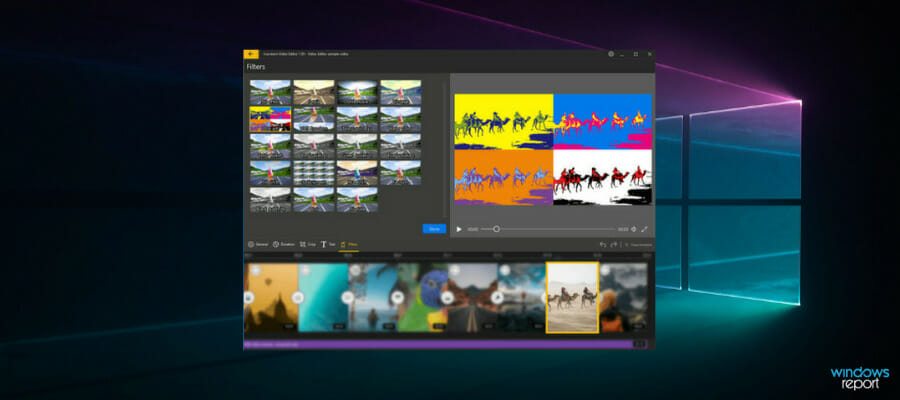
IceCream Video Editor is a simple software for Windows 10 to use and includes tools for editing videos before they are captured into a YouTube Poop Video. Add transitions, cut flicks, title and background noises, and visual effects to films and pictures. Among other things, you may rotate, speed up, and blur videos.
IceCream Video Editor provides comprehensive lessons on how to apply all of the effects to your video in a few simple steps. Don’t miss out on one of the most intuitive GUI out in the field!
Let’s dive into IceCream Video Editor’s key features:
On a single screen, you may combine videos and images.
15 scene transitions or randomly applied for more fun.
Video speed may be adjusted.
Customize audio by adjusting the volume, adding effects, and fading in and out.
Upload movies to YouTube, Dropbox, and Google Drive with ease.
Blur the video, apply an old movie effect, and adjust the brightness, contrast, saturation, and color.
IceCream Video Editor
Add transitions, cut movies, add titles and background sounds, and apply graphic effects to videos and images.
Video editing sees a new high with the VEGAS Movie Studio. The software comes with a wide range of dynamic video editing tools in a responsive and neat interface.
The interface is not just attractive, but it also allows users to quickly access the most important tools.
Multicamera interface, strong editing tools, amazing special effects, and pro color correction tools are some of its other great functions to look out for.
Supports real-time, multi-cam editing for up to 4 cameras
Color processing, raw cut during viewing, support for OpenFX
Video editing on up to 200 video and 200 audio tracks
Direct upload to social and video platforms like Vimeo, YouTube, and Facebook, and much more
Vegas Movie Studio
With a powerful video engine, innovative effects, and an easy-to-use interface, Movie Studio provides a smooth editing experience – professional video production for everyone.
Lightworks is one of the leading software for YTP that’s been known for its film editing capabilities for the past 25 years. It has been used in some of the finest movies to date.
It’s a complete video development package that helps everyone easily create exclusive videos. While it can be used to create videos for social media or 4K film projects, it’s also highly used to create YouTube videos.
Let’s quickly look at its key features:
Simple and responsive interface
Access to incredible audio and video content, royalty-free
Timeline feature that helps with easy editing and trimming
Resolution proxy system for 4K, real-time complete audio, and video FX
Export video for YouTube/Vimeo, SD/HD, up to 4K
Supports wide file format that includes variable frame rate media
So, to create that perfect YouTube poop for a magical effect on the viewers, select from the list, and get going.
Video editing is an art that needs skilled minds and equally skilled software. This list of the best software for YTP contains the names that are best in the business. We also have the perfect YouTube video editing apps on your PC.
Do you want more followers for your Youtube channel with visual content? Check out these Best Channel Art Maker Tools, and explore our Video Software Hub for more creative solutions to polish your projects.
For some of us, keeping up with our favorite sites is of paramount importance especially since our livelihood demands it.
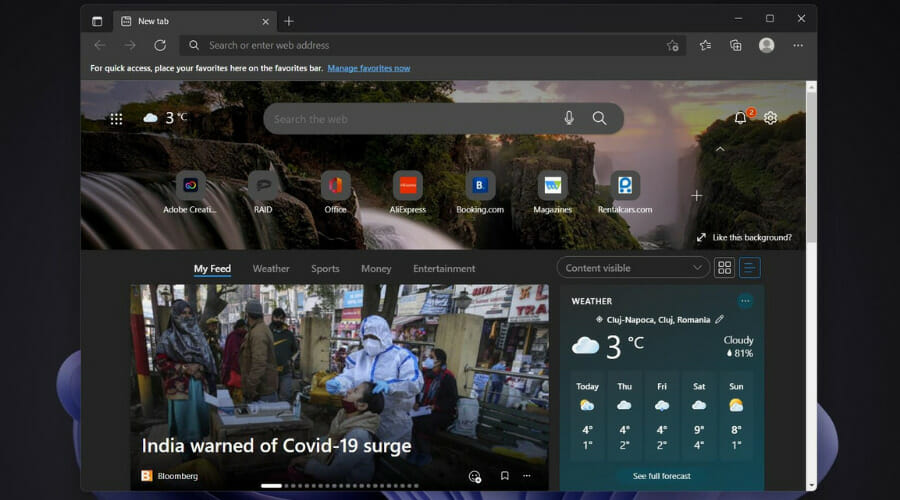
In order to lend an extra hand in this matter, the Redmond-based tech company is introducing a brand new feature to its browser, called Followable Web.
You’re probably wondering what this new feature does, and, as the name suggests, Followable Web allows you to follow different websites and stay up to date with their newest content.
The online actions you take will be stored in the browser’s memory and you’ll be able to see most of your followed sites on the new panel.
That being said, if you want to see all of the sites, you will have to quickly access the collections menu.
Followable Web is still in testing and not generally available
But, before you get all excited, we also have to inform you that this new feature is currently available only to members of the Edge Canary early access channel.
And even for them, the rollout process is gradual, so don’t be alarmed if you’re not seeing the feature in your app for the time being.
Pretty soon, we’re going to be looking at a single unified means of keeping up with sites, one that might also eliminate the need for going through other sources like social media or Google News.
It’s most likely going to take a while before this feature is ready for a worldwide rollout process, but we’re probably looking at a mid-2022 release.
And, if you’re an Edge user, there’s plenty of other reasons to get excited about nowadays, considering that Microsoft is adding a ton of new features.
The tech giant has seriously stepped up its efforts to keep people invested in Edge, instead of going for other alternatives such as Chrome, Brave, Opera, or Firefox.
Two other interesting and helpful functionalities are also currently in their testing phase. The first one is going to actually allow us to use Edge’s Web Capture tool for PDF files as well.
Another awesome new addition that is being prepared for release is the brand new Game panel. We have no exact release dates for these features, but we’re pretty sure we’ll see them go live in 2022.
What are your thoughts about Microsoft’s Edge browser lately? Share your opinion with us in the comments section below.
Having two monitors is a great way to expand the Windows desktop. A dual-monitor setup enables you to drag the cursor and software windows across two monitors.
A dual-monitor setup is almost like having two VDUs (Visual Display Units) attached to each other for an expanded display.
However, Windows 10 doesn’t provide a huge amount of configuration settings for multiple monitor setups; and Windows 7 doesn’t even include a taskbar on the secondary VDU.
To make the most of multiple VDUs attached to a single desktop, you can add dual-monitor software to Windows.
There are numerous third-party dual-monitor programs that more fully extend the taskbar to the additional VDUs, provide new customization options and add extra title bar buttons to software windows.
These are a few of the best dual monitor programs for Windows.
What are the best software that can manage multiple monitors?
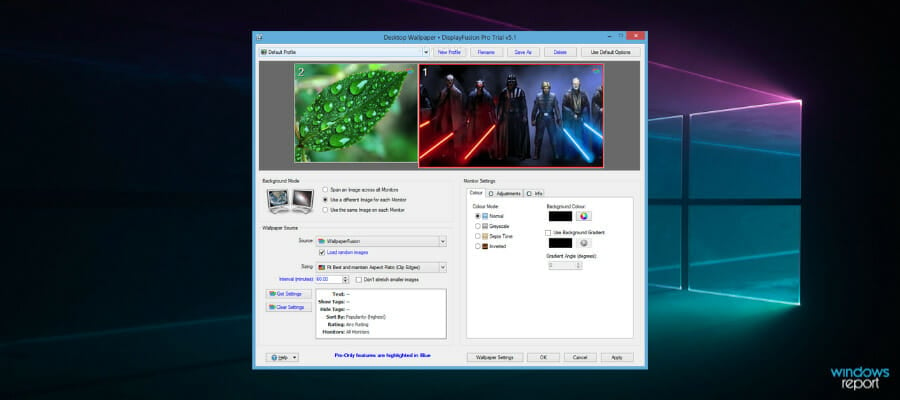
DisplayFusion is a highly rated software that has a plethora of options and tools for multi-monitor setups.
The big difference between the versions is that the freeware DisplayFusion doesn’t include multi-monitor taskbars or screensavers, Windows lock screen customization settings, and the Alt + Tab Handler.
DisplayFusion Pro includes more extensive customization options for dual-monitor setups than most alternative software.
It enables you to add separate wallpapers to VDUs, expand a desktop wallpaper across two monitors, customize the lock screen, span screensavers across all your monitors, save desktop icon layouts, and even set up scripted macros.
Of course, the Pro version provides a multi-monitor taskbar that retains the Start and Show Desktop buttons and window thumbnail previews on the second VDU.
On top of all that, DisplayFusion Pro has a handy Alt + Tab Handler, additional Windows 10 customization settings, and remote control apps for Android and iOS devices.
Display Fusion Pro
Make the best of your multitasking using software that can split and organize your PC monitors, so try Display Fusion Pro.
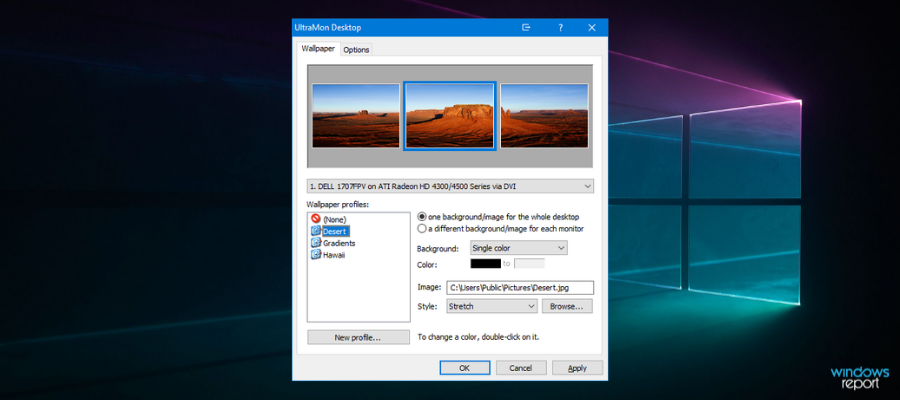
UltraMon provides an extensive suite of tools for dual-monitor setups and is compatible with both 32 and 64-bit Windows platforms from XP to 10.
If multitasking is your second nature or your work requires running multiple devices and apps, this software comes in handy. With the smart taskbar, you can manage lots of programs easier than ever.
UltraMon provides a taskbar extension that extends the taskbar to the second monitor. You can configure each taskbar to include only programs open within its VDU or all open software on every monitor.
The software enables its users to select alternative wallpapers and screensavers for each VDU.
Furthermore, UltraMon adds a handy Maximize desktop button to window title bars so that you can expand the windows across both monitors; and you can clone displays on both VDUs with its mirroring tool.
So you can try out a full 30-day trial of UltraMon by downloading your Windows versionon their official website.
Actual Multiple Monitors has had some rave reviews. This dual-monitor software provides a taskbar, Start menu, system tray, and Alt+Tab switcher for the extra VDUs.
The software is compatible with 32 and 64-bit Windows platforms from Win 2000-10. Actual Multiple Monitors fully replicates the Windows taskbar on the secondary VDU.
Thus, the taskbar on the second monitor includes a Start menu, notification area, Show Desktop button and clock; plus you can configure it with the software’s mirror, mixed and individual mode settings.
Furthermore, the secondary taskbar has a context menu with which you can select to gather windows to it or move them to the primary taskbar.
Aside from the extra taskbar, Actual Multiple Monitor users can select to have alternative wallpapers on the monitors or expand a single background across both desktops; and it includes similar options for screensavers.
The Desktop Divider is a novel addition to Actual Multiple Monitor that enables you to divide the desktop into smaller tiles for maximized windows.
Desktop mirroring is another of AMM’s great tools with which you can clone the primary monitor in the secondary VDU.
You can also try out a full 30-day trial of AMM to see the rich-featured capacity of this software, plus increasing your productivity exponentially at work.
Few other dual-monitor programs can match the tools and options included in Actual Multiple Monitors, DMT, MultiMon TaskBar Pro 3.5, DisplayFusion Pro, and UltraMon.
MultiMon is a lightweight alternative to DisplayFusion that supports triple monitor setups. You can add either MultiMon TaskBar 2.1 or TaskBar Pro 3.5 to 32 or 64-bit Windows platforms.
The freeware Taskbar 2.1 adds a second and third taskbar to the additional VDUs, but it lacks the system themes in the pro version.
Taskbar 2.1 doesn’t give you much more than the extra VDU taskbar. It’s worth mentioning that you can manage your programs or files from the primary monitor, even though you open them on other monitors.
However, both versions do include a handy Clipboard Extender tool that saves all text copied to the clipboard so that you can select multiple items from the combo box on the secondary taskbar.
TaskBar Pro 3.5 users can also expand windows across two VDUs, move windows to another monitor with arrow buttons and select alternative taskbar themes.
Hence you can check out the official website to save the TaskBar 2.1 freeware version for your Windows PC.
Dual Monitor Tools is freeware software for dual-monitor setups. This is a lightweight program that requires less than one MB storage space, and it includes some awesome multi-monitor tools.
The software runs in most Windows platforms from XP to 10, and you can download it from their official page.
Dual Monitor Tools consists of five primary modules: DMT Launcher, Cursor, Snap, Swap Screen, and Wallpaper Changer.
DMT Launcher is the software’s primary novelty with which you can launch any program by entering custom magic words in its text box.
You can configure the software to periodically change the wallpaper on both monitors with the DMT Wallpaper Changer.
Dual Monitor Tool users can set up customized hotkeys to move windows between VDUs, minimize, maximize and supersize them so they expand across both monitors.
Therefore, DMT Snap is also a handy software module with which you can capture a snapshot on one monitor and display it on the other.
Kids love to draw, doodle and dive into imaginary worlds that only they can understand. If your children’s imagination knows no bounds and they want to translate it into something real, give them animation software to play with.
Animation tools for kids are very intuitive and easy to use. They create a fun and interactive environment for your kids to unleash their creativity and express themselves in a healthy way. At the same time, your child can explore technology and learn how to use a keyboard and mouse.
Windows Report has compiled a list of the best animation software that you kids can use on their Windows PCs. We’re sure your kids will have a great time playing around with these tools.
Depending on the age of your kid(s), we recommend you to first show your kid(s) how to use the tool so that he/she can learn how to use it properly.
DP Animation Maker is an easy-to-use program to create beautiful animation for stories and games. It doesn’t require technical skills or design experience, though it contributes to gaining them and unleashing your child’s creativity.
This is a multimedia program with prebuilt animations and plenty of features that allow you to bring images to life! You can make natural scenes burst with vibrancy, and give motion to people and objects with just a few clicks.
Here’s what you can create with this animation software tool for kids:
Animated Backgrounds
Animated introductions for games
Animated videos
Digital greeting cards
Animated pictures for multimedia products
Music videos/YouTube videos
Give images the illusion of being underwater, reflected in water, or even on fire. After you’ve chosen an effect, you may edit the adjustment parameters to perfect the height of your flames or the speed of your waves.
With DP Animation Maker you can create seamless 2D animations automatically, that allow you to transform still photos into moving sceneries.
With little effort, kids can turn a still image into a vibrant, breathing universe. With DP Animation Maker, you can make natural sceneries pop with color and give action to people and things.
DP Animation Maker
In a simple user interface, both beginners and pros can create vibrant, meaningful, and colorful animations in only a few steps and clicks.
VideoScribe from Sparkol has a user-friendly, fun interface and various tools to create peculiar animated narrations, that make it fun for kids to try.
Video Scribe began as a practice in which an artist sketched on a whiteboard and afterward captured the activity on video.
Following the recording of all of the drawings, the video footage is sped up to include an accompanying voiceover to supplement the story that the artist is attempting to tell.
Produce amazing educational motion pictures, whiteboard animations, promo videos, education videos, marketing videos, and more by using drag and drop elements.
VideoScribe free features include:
Large library for videos, images, music
Diversity with paint editor
Download and share videos to PowerPoint and Vimeo
Create MOV and WMV unlimited videos
Unlimited support and product updates
Educational tutorials for kids to understand how to use it
Although it may not be suitable for kids, it is an asset for teens and beginners who want to have a deeper understanding of video creations.
VideoScribe
Import your own media files into the cloud-based animation generator for quick editing, or pick from a vast library, and then publish it wherever you like!
Animatron is an animation software that allows anyone, including kids to turn their ideas into cartoons. It’s free to try.
You can use this app to draw, animate, and narrate different stories. It’s very easy to work with, and kids can use the Lite Mode where they can simply drag and drop various elements to create animated stories.
At the same time, parents can use Animatron as well since this tool is powerful enough to create complex animations. You can generate whiteboard-style animations with it.
Because of its “back to school” feel, whiteboard animation attracts kids. They are eager to listen and learn everything you want to communicate with them when they see a whiteboard.
You get access to hundreds of premium pictures, backdrops, and audio. From the office to the amusement park, our animated characters will captivate kids and teens right away.
You can use the tool online. There is no download required, but the only downside is the watermark.
Animatron is suitable for children over 8 years old.
PowToon is an interesting online animation tool and one of the best animation software for kids. It’s free to try.
Although it was not initially developed as an animation tool for kids, it’s easy to use, making it perfect for kids and beginners.
First, you need to sign up in order to be able to use the tool. You can then select the type of animation that you want to insert and the project that you want to work on.
You can choose between Modern Age, Whiteboard animation, Cartoon, Infographic, or Corporate animation.
Then you need to select the storyboard structure that best suits your or your child’s preferences. A series of pre-built scenes are available and you can also customize them.
PowToon is perfect for various school assignments allowing your kids to create unique presentations.
The software is suitable for kids over 10 years old.
ToonBoom’s Harmony is a powerful animation software for kids that’s free to try. It’s also suitable for intermediate users, teens, and even graphic artists.
If your kid has some experience using animation tools, then maybe it’s time to step up the game and learn how to use Harmony.
There are a lot of free videos, webinars, and other great learning resources that your kid(s) can use to learn how to master this software.
Courses on Harmony are available for free and your kid can learn at his/her own pace, test their skills, and earn badges.
Harmony key features include:
Ink, paint, rig and animate
Sketch, draw, and paint
Bitmap and vector tools are available for creating complex projects
You can create hybrid animations by combining 3D imported models with 2D
Muvizu: Play is fun animation software for kids. It’s free to try. Anyone can create 3D scenes with this tool.
Muvizu: Play has a unique character animation system that lets users choose from a series of predefined characteristics and forms and customize their animated characters.
The tool’s developers proudly stated that Muvizu: Play is for everyone, from educators and students to animators and business people.
As you might have already guessed, the software is suitable for older kids and teens.
Muvizu: Play key features include:
Virtual lights, cameras and lots of special effects
This brings us to the end of our list. All the animation software listed above is perfect for kids, older kids, and teenagers. We’re sure that they’ll have a great time creating animation with these programs.
You should also check our the explainerd website where you will find a smart tool that will help you create awesome explanation videos and animations easily.
Check out this awesome compilation ofvideo animationssoftware that will make it more fun and awesome with these new tools!
Looking for the best 3D animation software for Windows 10? Here are other great options with endless possibilities for animation design.
Let us know in the comments area below, which of these fantastic tools best suits the youngsters on the block!
Yes, we know what a nuisance constantly typing passwords can be for some of us, and modern-day browsers offer a way around having to always do that.
Sure, the fact that your browser saves your login information can be very helpful most of the time, but have you ever thought that your credentials could become exposed this way?
Well, you should know that the RedLine information-stealing malware targets some of the most popular browsers such as Chrome, Edge, and Opera.
A quick interaction with this virtual bad boy and you’ll soon find out why storing your passwords that way is actually a bad idea.
This malicious software is a commodity information-stealer that can be purchased for roughly $200 on cyber-crime forums and be deployed without requiring much knowledge or effort.
A recent case of serious RedLine infection is a website contact form spamming campaign that uses Excel XLL files that download and install the password-stealing malware.
RedLine helps steal your browser-stored credentials
A new recent report from security experts at AhnLab ASEC warns us that the convenience of using the auto-login feature on web browsers is becoming a substantial security problem.
Based on a demonstration shared by the analysts, a remote employee lost VPN account credentials to RedLine Stealer cybercriminals who used the information to hack the company’s network three months later.
Although the infected computer had an anti-malware solution installed, it failed to detect and remove RedLine Stealer, so make sure you keep this in mind next time you want to save your credentials on your browser.
RedLine will actually target the Login Data file found on all Chromium-based web browsers and is an SQLite database where usernames and passwords are saved.
The worst part is that, even when users refuse to store their credentials on the browser, the password management system will still add an entry to indicate that the particular website is blacklisted.
And while the hackers may not have the passwords for this blacklisted account, they can still find out that the account exists, actually allowing them to engage in credential stuffing or phishing attacks.
Again, we understand that using the web browser to store your login credentials is tempting and convenient, but it also exposes you to major malware infections that can lead to disaster.
Your best alternative, in this case, would be to use a dedicated password manager that stores everything in an encrypted vault and requests the master password to unlock it.
Activating multi-factor authentication, wherever this is available, is an additional step that we encourage you to take, in order to better secure your precious data.
Have you also grown accustomed to storing your login credentials in your browser? Share your experience with us in the comments section below.
As 2021 is coming to a close, it’s a good time to look back at the good and not the good things that happened in the Microsoft universe this year. The ongoing COVID-19 pandemic has affected the Redmond giant and many other companies in a lot of ways, but as of this writing, Microsoft remains the rare tech giant with a mindblowing $2 trillion market capitalization, alongside Apple.
Six years after Satya Nadella became the new CEO of Microsoft, it seems that the company is doing better than ever. Microsoft’s cloud services including Azure and Microsoft 365 continue to experience solid growth, while LinkedIn, the most expensive acquisition in Microsoft’s history saw its revenue surpass $10 billion for the first time this fiscal year.
On the consumer front, there have been some exciting events this year with the launch of Windows 11, as well as new Surface devices such as the Surface Laptop Studio on the Surface Duo 2. Xbox fans also got to play a strong lineup of new exclusive games including Microsoft Flight Simulator, Forza Horizon 5, and Halo Infinite.
Of course, there were also a couple of missteps along the way: The launch of Windows 11 hasn’t exactly been a smooth affair with lots of FUD around its minimum system requirements. In recent weeks, there’s also been a growing sentiment that Microsoft is starting to ruin its new Chromium-based Edge browser with bloat, with an excessive focus on shopping features no one asked for.
It’s impossible to be completely exhaustive about everything Microsoft did in 2021, but it’s been an interesting year overall and the company has set the stage for what could be an even more exciting 2022. Without further ado, let’s start with the few things that Microsoft did really well this year.
The good
Windows is back
If many believed Windows 10 to be “the last version of Windows,” the company surprised many enthusiasts with the announcement of Windows 11 in June. This new version of Windows is the first to be released under the leadership of Panos Panay, the Surface inventor who’s now become Executive Vice President and Chief Product Officer at Microsoft.
Following the departure of Terry Myerson and people like Joe Belfiore taking the back seat at Microsoft, Windows was desperately in need of a public face. Panay isn’t exactly the most charismatic public speaker in the tech industry, but he’s a decent storyteller and there’s no doubt that he has a vision for the future of Windows.
Earlier this year, Microsoft announced that it had stopped working on Windows 10X, a new lightweight version of Windows 10 for Chromebook-like devices to focus on what PC users actually use. Windows 11 marks the beginning of a new era for the desktop OS which will now receive major updates once a year, just like the most popular software platforms these days.
Windows 11 brought a fresh coat of paint as well as useful new features for power users, but the OS still looks like it’s a work in progress. The UI inconsistencies that plagued Windows 10 haven’t completely disappeared, and exciting new features like the integration of the Amazon Android App store were not ready for launch. Still, Windows 11 marks a step in the right direction for Microsoft, and it’s good to see that the desktop OS now has the company’s full attention.
Exciting new Surface devices
We’re now getting used to seeing Microsoft update most of its new Surface devices in the fall, but this year has been pretty special. Just like Apple, Microsoft is a company that slowly iterates, but we finally got a redesigned Intel-based Surface Pro tablet this year with the Surface Pro 8, which leverages the same slimmer design previously seen in the Surface Pro X line.
Instead of releasing a new Surface Book 4, the company also surprised us with the Surface Laptop Studio, a new 2-in-1 workstation that drops the detachable screen for a more convenient flippy form factor. The Surface Laptop Studio is the most powerful Surface device the company ever released with up to 32GB of RAM and optional Nvidia GeForce RTX 3050Ti GPU, and our own Arif Bacchus loves it.
The Surface Laptop Studio shows that Microsoft is finally paying attention to professionals looking for a powerful mobile workstation. Now, we just hope that Microsoft will iterate on this new form factor more frequently than the neglected Surface Studio line, which hasn’t seen a new model since the Surface Studio 2 was released three years ago.
Xbox has more momentum than ever
If Microsoft’s Xbox Series X and Series S launched without big exclusive games last year, the company finally delivered in the second half of 2021. With Microsoft Flight Simulator, Forza Horizon 5, and Halo Infinite, Xbox gamers finally have exclusive games that make good use of the Xbox Series X’s 12 teraflops of computing power.
Following its acquisition of ZeniMax/Bethesda earlier this, Microsoft’s Xbox Game Studios division now includes 23 talented studios which will allow the company to release a minimum of one exclusive first-party game every quarter. Bethesda’s Starfield is already one of the most anticipated games of 2022, but Microsoft’s Xbox Game Pass service will also have several third-party high-profile games available on day one including A Plague Tale: Requiem, S.T.A.L.K.E.R. 2: Heart of Chernobyl, and Scorn.
If Microsoft doesn’t share any data about hardware sales anymore, VGChartz estimated Xbox Series X|S sales at 11M units since launch in December, which isn’t so far from lifetime PS5 sales at 16.6M units. If the Xbox Series X and the PS5 both remain hard to find due to the ongoing chip shortages, the Series S seems to be more broadly available and it has reportedly outsold the Series X in several key markets.
The bad
Microsoft still sucks at communication
Year after year, communication seems to remain one of Microsoft’s true Achilles’ heel, and the Windows 11 announcement was another great example of that. Truth be told, Microsoft deserves credit for creating a more secure OS that leverages new features such as Secure Boot and TPM 2.0 chips, but the company did a pretty job at explaining which Windows 10 PCs would be eligible for a free upgrade.
It certainly didn’t help that the company’s PC Health Check app, which was supposed to tell Windows 10 users if their PC could upgrade to Windows 11 or not was pretty barebones at launch. The first version of the app couldn’t tell users why their Windows 10 PCs didn’t meet the system requirements for running Windows 11, and Microsoft employees were forced to do damage control on Twitter. When you have to reach out to Microsoft employees on social media to get more information about a brand new OS, this is clearly not a good sign.
Because many Windows 10 PCs come with Secure Boot and TPM 2.0 disabled, it’s possible that Windows 11 adoption will be much slower compared to Windows 10. Last month, the IT asset management firm Lansweeper published an analysis of over 10M Windows PCs that showed that only 0.21% of them were running Windows 11 in November, which is really low. Additionally, Lansweeper analyzed over 30M Windows devices across 60K organizations and saw that only 52.55% of them met the TPM system requirements for Windows 11, and only 44.4% of them met the CPU requirements for the new OS.
The Windows Insider Program is in a weird place
Microsoft’s Windows Insider Program is still very active, but it’s sometimes hard to follow what’s really happening when there are 3 different rings and some features that are only available for a subset of Insiders. Unfortunately, joining the Dev Channel (previously Fast Ring) isn’t a guarantee to get early access to all new features, as the Windows Insider team usually prefers to test them first with a subset of Insiders.
In some cases, Dev Channel Insiders don’t even get priority access to new features, as was recently the case for the Windows Subsystem for Android. One of the most anticipated new Windows 11 features shipped first to Insiders in the Beta channel in October, and Dev Channel Insiders only had access to the Windows Subsystem for Android and the Amazon Android App Store in November.
If Windows 11 will only get one major update once a year, non-Insiders may not need to wait until the fall to get new features. The Windows Insider team now says that that new features on OS improvements that are being tested with Dev Channel Insiders could “show up in future Windows releases when they’re ready, and we may deliver them as full OS updates or servicing releases.” This could well be the case for the Windows Subsystem for Android, which may ship to non-insiders via a “servicing release” instead of a major OS update. There’s no way to know, though, and we wish the Windows team was a bit more transparent with ETAs for new Windows 11 features.
Microsoft Teams for consumers
It’s clear that Microsoft Teams has slowly but surely cemented its place as a leading communication app in the enterprise world, but Microsoft’s attempt to make Teams a popular messaging app for consumers seems ill-fated. On Windows 11, Teams for Consumers replaced Skype as the pre-installed messaging app, but it’s not clear why anyone would use a brand new app to chat with friends and family when WhatsApp or Facebook Messenger already do that just fine.
Obviously, Microsoft doesn’t really “get” social and Teams for Consumers can’t compete with established competitors with billions of users. Teams is also competing with Skype, which already lost this battle years ago. On mobile, using the same Teams app for enterprise and personal messaging is also not convenient at all, and WhatsApp gets it by having a separate mobile app for business users.
The ugly
Microsoft Edge has a bloat problem
Microsoft’s new Edge browser launched as a fast and bloat-free alternative to Google Chrome, and it has since gained useful new features such as Collections, Vertical Tabs, or Sleeping Tabs. In recent months, though, the Edge team seems to have switched its focus on adding new shopping features, and Edge users seem to disagree with this new direction.
“One area we’ve been focused on is making your shopping experience fast and seamless,” explained Microsoft CVP Liat Ben-Zur in a post highlighting why Edge was “the best browser for shopping.” Between the autofill coupons feature, built-in price comparisons, price history, and easy access to customer ratings, Microsoft wants to make Edge “the personal shopping assistant you’ve always needed,” but is this what Edge users really want.
Recently, the Edge team seemed to have crossed a line with a new “buy now, pay later” that is currently being tested with Edge Insiders. Microsoft has teamed up with the Fintech company Zip to make this BNPL feature built-in in the browser, and there’s an argument to be made that such services can be predatory. Kevin Beaumont, an ex-Microsoft employee publicly asked the company to kill the feature, while also pointing out many other controversial moves done to discourage Edge users to switch to Google services.
Google, Facebook, Apple, Microsoft and Amazon are basically in a race to the bottom about who can make the most money while pointing at each other for being shittier.
That situation just means everybody involved is covered in shit, while smugly thinking they’re the best.
Microsoft Edge remains a solid browser, but maybe it’s time for the Edge team to set its priorities straight. There’s a lot of competition in this space right now, and no one wants Edge to become a personal shopping assistant or a casual games platform. A good web browser should be fast and reliable while respecting your privacy, and we hope the Edge team will focus more on the fundamentals in 2022.
Windows on ARM PCs are still boring
While Apple has just released some impressive new MacBook Pros using the company’s new M1 Pro and M1 Max chips, the PC ecosystem is still waiting for the ARM SoC that will finally shake things up. Windows on ARM PCs have been around for many years now, but even Qualcomm’s latest Snapdragon 8cx Gen 2 that powers Microsoft’s Surface Pro X didn’t really move the needle in terms of performance.
If Apple expects to transition its whole Mac line to Apple Silicon in just two years, x86 chips from Intel and AMD will continue to power the majority of PCs in the market. Earlier this fall, Intel revealed its first 12th gen “Alder Lake” desktop CPUs using a hybrid architecture combining performance cores and efficiency cores, and the advantages of low-powered ARM chips aren’t so obvious anymore.
The Surface Duo 2 is more of the same
Microsoft’s original Surface Duo had many issues including a lackluster camera, outdated specs, and unpolished software, and many Surface fans expected Microsoft to fix that with the Surface Duo 2. While the core specs are much better on paper, the $1,500 device once again disappointed on the hardware and software front and it’s not clear if Microsoft should really carry on with dual-screen devices.
To be fair, dual-screen devices are a new form factor and Microsoft is using an OS that hasn’t been designed from the ground up for dual-screen use. However, the Surface Duo 2 having no external screen makes it less easy to use than other dual-screen devices like the Samsung Z Fold 3 or the Motorola Razr, and many users have also been complaining about the touch screens sometimes being unresponsive.
The original Surface Duo saw its price drop pretty quickly, and it remains to be seen if the same thing will happen with the Duo 2. Anyway, longtime Surface fans know that it usually takes Microsoft 3 or more iterations to get a product right: That was true for the Surface Pro line, but the Surface Book line didn’t get that chance as the Surface Laptop Studio just replaced the Surface Book 4 many were expecting. We’re not sure if Microsoft will release a Surface Duo 3 next year, but in the meantime, Surface Duo owners are still waiting to receive the latest version of Android that may help to make things slightly better.
Looking Ahead
We expect Microsoft to continue to play on its strengths next year, and we’ve heard the company talk a lot about the new “hybrid work” era in 2021. The software giant explicitly said that Windows 11 had been designed with hybrid workers in mind, and the company is also making a bet on cloud PCs with Windows 365, a new subscription service providing enterprise users seamless access to Windows 10 and Windows 11 PCs from a web browser.
Microsoft may not have flashy new consumer devices and products like Apple and other competitors, but it’s still a pretty fascinating company to observe, especially when it’s making mistakes. This year, we’ve seen the company open its Microsoft Store on Windows PCs to all types of apps with much more developer-friendly terms, but the same company would also very much like Windows users to stick with Edge and Bing as their default web browser and search engine.
What do you think are the most important things Microsoft did in 2021, and where do you see the company going next year? Let us know in the comments below.
Affinity’s apps are genuinely solid alternatives to Adobe’s Photoshop, Illustrator, and InDesign with professional-grade features and completely free updates several times a year that don’t require any type of subscription or upgrade fee.
With the 30% discount, each Affinity app now just costs $38.49, a pretty good drop from their usual $54.99 price.
With all three Affinity apps being sold via the Microsoft Store, you can also use any Microsoft Store or Xbox account credit or gift cards that you have to pay for them.
This is one of the errors that are caused by Windows 11. To be more precise, the 0x800f0830 error is commonly seen when people try to install the latest OS on their PCs or laptops.
There are many similar errors that you might encounter on Windows 11: error code 0x800f0835, error code 0x800f0805, error code 0x800f0900, error code 0x800f0930, error code 0x800f0902, error code 0x800f0A04, to name a few.
As such, there are several methods for fixing them and the error code 0x800f0830 is no exception.
Is the Windows 11 0x800f0830 error serious?
If you have recently downloaded and installed Windows 11 on your computer, then you might have come across a few problems.
Therefore, if you are one of those users who have just installed the previous version of Windows, you might have received the Windows 11 CBS_E_IMAGE_UNSERVICEABLE error.
Furthermore, this is one of the most common errors that occur during the process of installing Windows 11. The users who have come across this error message say that it is a minor problem and can be easily fixed by performing some troubleshooting steps.
However, many people ignore this error message and continue with the installation process hoping that it will eventually be complete. But this does not happen as the installation process never completes.
The error could be referring to anything from a challenge with the service, an update, or even the process of installing software on your computer.
Why does the error code 0x800f0830-0x20003 occur?
This is a very common Windows 11 error code and is usually caused by misconfiguration of the system settings or incorrect hardware/software.
In fact, there are several reasons behind it. One of the main causes is a problem with your computer’s memory. If you have installed more than 4 GB of RAM into your computer, you will most likely experience an error message pointing to 0x800f0830 as your source of concern.
This is due to the fact that Windows 11 cannot recognize more than 4 GB of RAM, which is why it will not be able to load any programs or even display your desktop correctly. In order to fix this issue, you must remove some of the RAM from your computer and try to reboot your system again.
Another possible cause for this error is a malicious Trojan virus that has infected your operating system. This virus can take over control of your computer and essentially disable all processes on your PC at will.
Show antivirus
This includes the one responsible for running Windows 11. As long as the virus is active, there is no way to repair it other than to reform it. That’s why you should use one of the best antivirus solutions for Windows 11 to protect your computer.
How can I fix the Windows 11 error code 0x800f0830?
1. Run SFC and DISM scans
Press Windows key + X key and select Run.
Then, key in the following command and press Enter: cmd.exe
Press Ctrl+Shift+Enter simultaneously.
When the User Account Control pops up, click Yes.
Key in the following command and press Enter key: sfc /scannow
Once the scan is complete, check if error 0x800f0830 persists while installing updates.
In case it is persistent, you will then have to key in the following command in Command Prompt: dism /online /cleanup-image /restorehealth
In case that did not fix the error, we recommend using a third-party repair software as the best option that scans your PC for corrupted or outdated files and replaces them.
2. Use the Windows Update troubleshooter
Press Windows key + I key to open the Settings app, then select Troubleshoot on the leftside panel.
Scroll down the subsequent window and click on Other troubleshooters.
Select Windows Update and then click on Run.
3. Clean Boot your system
Press the Windows key + R key to open the Run dialog box.
Key in the folllowing command in the dialog box and press Enter key: msconfig
Select the Services tab, then uncheck the box marked Hide all Microsoft services, and click on Disable all.
Shift to the Boot tab next and check the box left of Safe boot.
Then, select Apply then OK.
Restart your PC and the system will boot into the Safe Mode.
Click the search bar and write the patch ID you are having problems with, then hit Enter.
Download the package matching with your system BIT and then Install it.
Usually, Microsoft automatically provides cumulative updates when you’re connected to the Internet via an Ethernet or Wi-Fi connection.
However, if your computer is on a metered connection and has slow Internet speeds, these files can be corrupted or broken. This can lead to unexpected error messages popping up.
The Command Prompt will apper, click Run as administrator.
Click the Yes button for the User Account Control.
Key in the following one at a time and press Enter after each one:
net stop wuauserv
net stop bits
net stop appidsvc
net stop cryptsvc
Then, key in the following code:ren C:\Windows\SoftwareDistribution SoftwareDistribution.old
Key in the following code:ren C:\Windows\System32\catroot2 Catroot2.old
Lastly, you need to run the below commands subsequently:
net start bits
net start appidsvc
net start wuauserv
net start cryptsvc
Once the scan is complete open the SettingsApp, check for Windows Update, and install the recent patch in the usual way.
6. Turn off Developer Mode
Press the Windows key + I key to launch the Settings App.
Then, click on Privacy & Security.
Scroll down the window and turn the Developer ModeOFF.
Finally, restart your computer and check if it the issue has been resolved.
As you know by now, there are several other Windows Update issues that can arise for some users. For example, our guide on how to solve error 0x80070002 will help you resolve this problem in no time since the solutions may be applied in Windows 11 as well.
Were you able to resolve the issue with either one of the fixes listed above? Let us know which one worked for you in the comments section below.
A Wi-Fi adapter, also known as a wireless adapter, is attached to a computer to enable connection to a wireless network, before devices with built-in connectivity were created.
They come in form of USB sticks plugged into a port on your computer, or PCI network cards plugged into a PCI slot on the motherboard.
However, Wi-Fi adapters are almost being phased out as the new-gen computers have built-in wireless connectivity.
If your Wi-Fi adapter won’t connect to the router, and you’ve tried restarting your machine or installing the latest Windows Updates, here are some more solutions that can help you going forward.
How to fix Wi-Fi adapter when it won’t connect to your router
This helps fix the network connection and creates a new connection to your ISP.
Click Start
Select Power
Click Shut Down
Unplug the power cord from your wireless router/gateway or wireless modem/router
Unplug the power cord from your broadband modem
Wait five seconds and then plug the power cord back to the wireless router and wait for the lights to come on and reflect the normal internet and computer activity.
Turn on your computer and perform a hard set once Windows loads. If it doesn’t connect automatically, click the Network Connection icon on the notification area and select your network.
Click Connect
2. Run the network troubleshooter
This helps diagnose and fix common connection problems.
Right click Start
Select Control Panel
Select Network and Internet
Select Network and Sharing
Go to the search box and type Identify and repair network problems
Select Identify and repair network problems to run it following the instructions carefully
3. Update the network adapter driver
An outdated or incompatible network adapter driver is one of the causes when your Wi-Fi adapter won’t connect to the router. If you recently had a Windows 10 upgrade, most likely the current driver was for a previous version.
Right click Start
Select Device Manager
Select Network Adapters and click to expand the list then check for the adapter name
Right click on the network adapter and select Update Driver
Select Search automatically for updated driver software
Restart your computer see if it fixes the USB Wi-Fi adapter is not connecting to the internet issue
If Windows can’t find a new driver for your network adapter, visit your computer manufacturer’s website to download the latest network adapter driver.
3.1 Update drivers using a third-party tool
Downloading and updating drivers manually from the manufacturer’s website can damage your system by choosing and installing the wrong versions. In order to prevent that, we strongly suggest doing it automatically by using specialized software.
This kind of tool will automatically find the right driver versions, thus protecting you from downloading and installing mismatched drivers.
We recommend Outbyte Driver Updater because it is lightweight, very easy to use and you can set it up to do frequent drivers scans and automatically update and repair your drivers.
4. Roll back the network adapter driver
If you recently installed a new network adapter driver, rolling back your driver to a previous version may help by doing the following:
Right click Start
Select Device Manager
Select Network adapters and click to expand the list then choose the network adapter name
Right click the network adapter, and then select Properties.
In Properties, select the Driver tab
Select Roll Back Driver, then follow the prompts
If the button is unavailable, that means there’s no driver to roll back to.
5. Uninstall the network adapter driver and restart
You can do this if your network connection stopped working after a recent update. Ensure you have drivers available as a backup, and visit the PC manufacturer’s website and download the latest network adapter driver from there.
Right click Start
Select Device Manager
Select Network adapters and click to expand the list then choose the network adapter name.
Right click the network adapter, and then select Uninstall
Select Delete the driver software for this device checkbox
Click Uninstall.
Restart your computer
If Windows doesn’t automatically install a driver, try to install the backup driver you saved before uninstalling.
6. Check Device Manager for valid wireless card entry
If there’s no valid entry in your computer’s device manager, delete any bogus entries and re-install the wireless adapter’s drivers. Check your Network connections to ensure you have a wireless network connection icon and the Properties of the icon are correctly configured with TCP/IPv4 protocol in the Network connections properties.
7. Ensure a vendor’s Wireless Utility is not running together with Windows’ native wireless utility
Ensure that no firewall prevents or blocks the wireless components to get to the network.
If all is well, and the Wi-Fi adapter won’t connect to the router, log in from a computer that is connected or can be connected to the wireless router with a wire, the disable the wireless security. Ensure the wireless broadcast is on and then try connecting with No Wireless security. When it is working, turn on the wireless security.
NOTE
Sometimes you may make a mistake in writing and retyping the security passphrase. You can circumvent this by copying it from the router’s menu, and then paste when asked by the wireless adapter.
8. Set up a new wireless connection
If you’ve tried all the other nine solutions and none of them work, document the required settings and confirm they’re correct, then completely delete your wireless connection or connections from your computer.
Set up a brand new wireless connection and see if it resolves the problem. This may resolve any settings that changed without any reason or any corruption in original connection files.
9. Use network reset to reinstall network devices
This should be the last step you try if the other solutions don’t help when your Wi-Fi adapter won’t connect to the router. It can also help solve connection problems you might have after upgrading from a previous version of Windows to Windows 10, as well as fix problems where you can connect to the Internet but not to shared network drives. It removes any network adapters you have installed and the settings for them.
Once your computer restarts, network adapters are reinstalled, with default settings.
Note: to use network reset, you must run Windows 10 version 1607 or later.
Click Start
Select Settings
Select Network & Internet
Select Status> Network reset.
On the Network reset screen
Select Reset now
Click Yesto confirm.
Wait for your PC to restart and see if that fixes the problem.
Note: Network reset might set each one of your known network connections to a public network profile where your computer is not discoverable to other PCs and devices on the network, which can help make your PC more secure. If your PC is part of a homegroup or used for file or printer sharing, you need to make it discoverable again by setting it to use a private network profile.
After using network reset, you may need to reinstall and set up other networking software you might be using, such as VPN client software or virtual switches from Hyper‑V.
Has any of these solutions fixed the problem? Let us know by leaving a comment in the section below.
The WLAN AutoConfig error 1068 occurs when your laptop or desktop can’t detect WiFi. Error 1068 returns the following error message: Windows could not start the WLAN AutoConfig service on the local computer. Error 1068: The dependency service or group failed to start.
Consequently, you can’t connect to the internet. So, how can we fix error 1068?
How do I fix WLAN AutoConfig error 1068 in Windows?
1. Restart Your Router
First, try restarting your router. This doesn’t always fix connection issues, but sometimes it can do the trick. Switch off the wireless router and wait for a minute.
If the router has a Wireless Button, press it to turn the signal off. Switch the router back on and wait for it to fully initialize. Now, your browser might open websites.
2. Run the Network Troubleshooter
Windows has a built-in network troubleshooter that you can use to repair connection errors. You can open and run that troubleshooter as follows.
Press the Win + X hotkey to open the Win X menu.
Select Control Panel to open an All Control Panel Items tab.
Select Troubleshooting to open the tab shown directly below.
Then select Network and Internet to open a list of troubleshooters as below.
Select Internet Connections to open the troubleshooter in the shot directly below.
Click Advanced > Run as administrator to run the troubleshooter with admin permissions.
Press the Next button to run the troubleshooter. Follow the troubleshooting instructions to fix detected issues.
In addition, you can also select to run a Network Adapter troubleshooter much the same. That troubleshooter detects and fixes wireless adaptererrors.
The wireless adapter driver might need repairing. If that’s the case, reinstalling the driver could fix error 1068. If you can do that, reinstall the wireless adapter driver as follows.
First, open your wireless card’s manufacturer’s website.
Go to the support section of the site.
The website will list drivers for the wireless adapter. Download the driver that’s compatible with your Windows platform to a USB stick.
When you have an updated adapter driver saved to a USB stick, open Device Manager in Windows by clicking the Cortana taskbar button and entering ‘Device Manager’ in the search box.
Select Device Manager to open the window below.
Expand Network Adapters so that you can right-click the wireless adapter. Select the Uninstall option from the context menu.
Select the Delete the driversoftwarefor this device option on the Confirm Device Uninstall window. Press the OK button to confirm.
Then restart your Windows desktop or laptop.
Now you can install the new driver from the USB stick. Insert the USB stick into the desktop or laptop, and open the driver setup from the flash drive.
If you want a quicker method, we recommend you try a dedicated driver updater such as Fortect Driver Updater. It will repair and update your drivers regularly, allowing you to take care of other tasks.
4. Check the Adapter Settings
You should check that your adapter is enabled. To do that, open the Network and Sharing Center tab by pressing the Cortana taskbar button and entering ‘network and sharing’ in the search box.
Select Network and Sharing Center to open the tab shown directly below.
Click Change adapter settings to open the tab directly below.
Now you can right-click your wireless adapter to check if it’s enabled. If not, select Enable from the context menu.
If your adapter is enabled, select Disable on the context menu to reset it. Then select the Enable option on the context menu.
5. Restart WLAN AutoConfig
Error messages sometimes contain clues about how fix them. Error 1068 mentions the WLAN AutoConfig service. As such, the WLAN AutoConfig might not be correctly configured or even enabled. This is how you can adjust the WLAN AutoConfig service settings.
First, press the Win key + R hotkey to open Run.
Enter ‘services.msc’ in the Open text box, and press the OK button.
Now scroll to the WLAN AutoConfig service listed on the window directly above.
Double-click WLAN AutoConfig to open the window shown below.
The service should be running with an Automatic startup type. If not, select Automatic from the Startup type drop-down menu.
Press the Start button if the service isn’t running.
Press the Apply and OK buttons.
Now restart the Windows platform.
6. Edit the Registry
Editing the DependOnService multi-string with the Registry Editor can also fix error 1068. To do that, open Run and enter ‘regedit’ to open Registry Editor.
Then navigate to HKEY_LOCAL_MACHINESYSTEMCurrentControlSetServicesDhcp in the Registry Editor. That includes the DependOnService multi-string highlighted in the snapshot directly below.
Double-click DependOnService to open the Edit Multi-String window. Delete everything in the Value data text box except Afd.
Press OK to close the Edit Multi-String window, and exit the Registry Editor.
Then, you should also restart Windows.
7. Repair Files With the System File Checker Tool
Corrupted system files can also be behind WiFi connection errors. So, running the System File Checker can repair those files and fix error 1068. This is how you can run an SFC scan in Windows.
Windows 10 and 8 users can open the Command Prompt by pressing the Win key + X keyboard shortcut. Select the Command Prompt (Admin) from the power user menu.
Alternatively, press the Start button and select All Programs > Accessories in Windows 7. Then, you can right-click the Command Prompt and select Run as administrator from the context menu.
Next, enter ‘sfc /scannow’ in the Command Prompt window, and press the Return key.
The scan might repair system files. If it does, restart Windows after the SFC scan.
Microsoft Teams is a popular cloud-based team collaboration software that is part of the Office 365 suite of applications. Irrespective of whether you have the Office 365 license, you can install Microsoft Teams to participate in the meeting if a user with the Microsoft Teams setup invites you via email.
However, some users have reported a Microsoft Teams error code 503 while trying to sign in to their Microsoft Team desktop client. Similar issues can be seen on the Microsoft Community forum discussion page.
So I have installed the Free version of Microsoft Teams in my desktop and created a account. Then, when I tried to log in to MS Teams I got the message “D’oh something went wrong” Error 503. I have tried multiple times (at least 10) and still haveing the same error.
In this article, we have listed all the possible solutions to fix Microsoft Teams error code 503 in Windows computers.
How to fix Microsoft Teams error code 503?
1. Login to Microsoft Team web client
If you can’t wait to resolve the issue with your desktop client, you can use Microsoft Team’s web client which offers all the functionalities.
If you are unable to access Microsoft Teams web client, try to download the app on your smartphone. Login using your mobile app and check if it works.
If the issue persists everywhere, it could be an issue with the Microsoft Teams’ service.
In this case, contact Microsoft Teams support or open a ticket for a clear understanding of the issue.
3. Clear Credential Manager
If you have signed in using your personal account into Microsoft Teams instead of your work account, you may get this error.
To resolve this, try to clear the Credential Manager for any credentials related to Microsoft Teams and try again.
Press Windows Key + R.
Type control and click OK.
In the Control Panel, go to User Accounts > Credential Manager.
Click on Windows Credentials tab.
Go through all the saved credentials list and click on Remove for everything that is related to Microsoft Teams.
Close the Credential Manager and open the Microsoft Teams app.
Try to sign in with your work account and check for any improvements.
If the issue persists, try to uninstall and reinstall Microsoft Teams. This can resolve any issues with the app.
However, when talking about troubleshooting the app, this should be the absolute last resort solution.
How do I fix Microsoft Teams login issues?
We compiled a list of tested troubleshooting solutions that you can use to fix login problems in Teams. Follow the instructions listed in our guides to fix the issue.
If you are using an HP laptop or HP all-in-one Desktop, you may encounter an error occurred flow will now shut down after rebooting your system or installing updates. This error is specifically known to have affected the HP devices running Windows.
The full error reads An error occurred; flow will now shut down. The error seems to be with the Conexant Audio Flow Audio Driver. Also, the Audio Drive comes pre-installed with the HP laptops or comes with updates.
So in this guide, we explore triggers and solutions an error occurred Flow will now shut down.
Why does Flow will now shutdown message appear?
The Flow will now shutdown message typically appears on HP computers when the HP Flow CM Professional or Conexant Flow software encounters an error or stops working correctly.
There are various reasons why the message may appear, especially on an HP computer, including the following:
Software conflicts – This occurs when the HP Flow CM Professional software clashes with other software or applications installed on the computer.
Outdated software or drivers – If the software or its associated drivers are outdated, it can cause the software to stop working correctly.
Corrupted installation files – Sometimes, the HP Flow CM Professional software installation files may become corrupted, leading to errors during installation or use.
Insufficient system resources – To function correctly, your software requires a certain amount of system resources, including RAM, processing power, and storage space.
What is Conexant Flow?
Conexant Flow is a comprehensive document and content management solution that provides a range of features and capabilities to help businesses manage their digital documents more efficiently and effectively.
Conexant Flow is available in different editions, including a desktop version for individual users and a server-based version for organizations that require more advanced features and scalability. Also, the software can be deployed on-premise or in the cloud, depending on the customer’s requirements and preferences.
It will sometimes also trigger the Flow will shutdown error message.
How can I fix the Error occurred Flow will now shutdown issue
Expand the Sound, video and game Controllers section.
Right-click on Conexant High Definition Audio driver and Properties.
Now, click on the Driver tab and note down the Driver Version.
You must find and download the Audio Drive older than the installed version. You can find it on the official website most of the time.
Once the driver is downloaded, right-click on Audio Drive in the Device Manager and select Update Driver.
Click on Browse my computer for drivers. Locate the downloaded driver and install it.
Finally, reboot the computer and check for any improvements.
3. Uninstall the Driver and Device
3.1 Uninstall the Device
Press Windows Key + R.
Type control and hit Enter to open the Control Panel.
Click on Program and open Programs and Features.
Lastly, find Conexant High Definition Audio and uninstall it.
Now you need to uninstall the device from the device manager.
3.2 Uninstall the driver
Press Windows Key + R to open the Run Dialog box.
Type devmgmt.msc and hit Enter.
Expand the Sound, video and game Controllers section.
Right-click on Conexant High Definition Audio driver and select Uninstall device.
Finally, restart the system, and Windows will automatically install audio drivers if required.
4. Update Windows
Press Windows + I to open Settings.
Open Update & Security.
Click Windows Update and check if there are pending updates. If not, click Check for Updates.
Lastly, download and install the updates and reboot the system to complete the update.
5. Perform a System Restore using Restore Point
Type Create Restore in the search and open Create a Restore Point.
Click on the System Restore button.
Select the Choose a different restore point option and click Next.
If you don’t have the Choose a different Restore Point option, click Next.
Select a restore point and hit Next.
Click on Finish to initiate the restore process.
Finally, Windows will restart the system after the system has been restored to an earlier state.
That is as much as we will cover in this guide.
As you must have noticed, most triggers are related to drivers. So, if you have your drivers up to date, it is easy to avoid an error occurred Flow will now shutdown.
Finally, tell us in the comments section below what solution worked for you.
It’s true that public reaction to Microsoft’s Surface Duo series of devices hasn’t exactly been what the company was expecting.
Now, however, it seems that the Redmond tech giant may be considering a new form factor, one that actually has three displays instead of two.
The patent for this futuristic design was discovered in U.S. Patent and Trademark Office (USPTO) documentation, which means that we get an early look at the above-mentioned hardware.
A Surface device with three displays in in the works
The patent that Microsoft filed actually dates back to June 23, 2020, and was originally discovered by Patently Apple.
And even though the document is a heavy read, too technical for some the image included in it is worth more than a thousand words.
Basically, this upcoming device is essentially very similar to the Surface Duo, the only difference being that it will come with three displays, instead of the traditional two.
Looking at these plans, you might notice that the hinges are designed and positioned for one purpose. When the gadget is folded, it will only expose a single display at all times.
If you ever owned a Duo or seen one, you know that the Duo is reverse-folded, which means that it exposes both displays, or fold it towards yourself, hiding both displays.
But the words Surface Trio aren’t even mentioned in this patent, creators choosing to refer to it as a multi-panel display device.
By reading the patent, you can also find out that multi-panel display devices may be useful in a variety of different scenarios, as the creators so eloquently put it:
For example, multiple software application windows may be visually presented on separate display panels at the same time. Multi-panel display devices may use a hinge to allow for the display panels to fold in different directions (e.g., inward/outwards). Such foldability allows multi-panel display devices to have a larger total display area relative to a similarly-portable single display device, while also allowing for smaller folded dimensions relative to a non-folding display device offering the same display area.
Before you already make plans and add this future product to your wishlist, you have to remember that this is still just a patent for the time being.
As you can imagine, very few details about these new gadgets are currently available. We know little about tech specs or what software it’s going to run on.
All that’s left to do now is to wait for Microsoft to finish this product and make it generally available for the public. But considering that we’re talking about the Redmond company, who knows how long that will take?
We’ll definitely keep an eye open for any development in this story and report back as soon as we have some new details.
What’s your take on this new device patented by Microsoft? Share your thoughts with us in the comments section below.
It’s already a well-known fact that Microsoft sort of previously hinted at some future design changes for Windows 11, and the world might have just gotten the first glimpse at it, without actually realizing it.
In the SDK in Windows 11 Build 22523, there’s apparently is a new tabbed design public API. The first shred of information about this matter first surfaced on Twitter.
We’re about to take a look at the different style choices, and you can judge for yourself and pick your favorite.
New DWMWA_SYSTEMBACKDROP_TYPE in 22523 SDK, public Win32 API for Mica, Acrylic and their strange new 'tabbed' blend: pic.twitter.com/dbsu7ZFiIi
Windows 11 might have more style choices in the near future
If the pictures shared in the Tweet did not really seem that different to you require some more visual aid to determine which one is the best looking, we got you covered.
There is a way in which you can get a more in-depth view, showing how these APIs might impact a real app. To make it easier for you, we’ll also display these screenshots throughout the article.
This first one is the acrylic version, which we all have to admit looks pretty darn good. The second choice is the popular Mica, followed by the Tabbed version.
As you can see, the differences are pretty notable, which means that choices will impact the way your OS looks and feels even more.
This is excellent for the users that always look for a way to stand out or break the routine, giving their setup a much more personal feel.
Microsoft might be willing to bring Mica effects to modern and legacy apps as well. This apparently can be seen with a MicaBackdropInApplicationFrameHostTitlebar flag in the latest Windows Insider builds.
And since the Redmond-based tech company Microsoft committed to once-a-year updates for Windows 11, you can expect any design changes to launch next year.
Out of the three visual styles presented in this article, which one is your favorite? Share your opinion with us in the comments section below.
Whether you just upgraded to Windows 11, or you’ve already had it installed for months, problems can always occur that might cause data loss or corruption.
Either way, it’s important to know that you can retrieve your files by using data recovery software that can get them back and repair them very fast.
That’s why in this article, we will talk about Tenorshare 4DDiG Data Recovery software, a great tool that can help you retrieve your content extremely fast with no effort.
What is Tenorshare 4DDiG and how can it help you?
As its name clearly points out, Tenorshare 4DDiG Data Recovery is a software that offers one-click recovery for lost or deleted data from Windows, Mac, USB, SD cards, external devices, digital cameras, and more.
To be more precise, it can recover over 1000 file types including photos, videos, documents, and audio so it will get you back all your precious data.
Even if you’re the victim of accidental deletion, formatting, lost partition, corruption, crashed system, virus attack, and so on, Tenorshare 4DDiG Data Recovery will get back your files.
Of course, there are some other such tools out there but this software is extremely easy to use so its friendly menus are accessible even if you have absolutely no knowledge about data recovery.
It’s also important to know that the software was optimized perfectly for Windows 11 and as you will see from our tests, it performs flawlessly on the new OS.
What are the best Tenorshare 4DDiG Data Recovery features?
1. Deleted files recovery
We’ve all been there! Deleting some files accidentally is a common mistake and usually, but retrieving the files from the Recycle Bin should be a piece of cake, right?
Well, not if you set the bin to empty itself automatically or if you did that yourself in a zealous effort to get more space on your drive.
No need to panic because you can still get them back with Tenorshare 4DDiG with just a few clicks by using the Recycle Bin data recovery feature even if you’ve emptied the bin.
And the best part is that you will be able to preview the files before recovery so you retrieve only the useful data and not all the other junk you really want to part with.
2. Formatted drive and lost partition recovery
You need to know that Tenorshare 4DDiG can retrieve all the data from a drive even if it was formatted. The only condition here is that you didn’t overwrite a lot of data on the drive.
Formatting a drive doesn’t really delete all the data on it, but it marks the space as free to use so the system can fill it with data.
However, you can’t recover the data unless you have a specialized tool like 4DDiG Data Recovery from Tenorshare.
This dedicated software doesn’t care if you formatted the drive or if it has some bad blocks, it will pull out the data regardless.
Moreover, it can even detect and recover data from lost or deleted partitions in case you’ve performed some experiments that went wrong at some point.
It also does a great job on RAW drives like the one in our screenshot above. This drive has a RAW file system and the data on it is accessible only with the help of data recovery software like 4DDiG.
3. Crashed computer recovery
After a computer crash, all data can be compromised and you can sum up the situation as catastrophic, right?
Not if you use the Recover from Crash Computer feature from Tenorshare 4DDiG Data Recovery that will help you create a bootable USB or DVD to restore your PC.
After this problem is dealt with, you may still easily recover all your data if some were lost when the crash occurred.
4. External device recovery
Unfortunately, we all have that external drive, USB stick, or SD card that we relied on to back up our files only to discover that the data from it disappeared mysteriously.
Well, it’s not that much of a mystery that external storage devices can be fragile and are easily damaged, becoming inaccessible or unusable.
No matter what kind of device you have, 4DDiG makes it possible to get back the lost data with the highest recovery rate.
Retrieving the data is as easy as selecting the drive from the menu in the main window and hitting the Start button.
The software will scan the device and will show you a list of all the files that are available for a restore so you can choose only the ones you really need.
However, you should know that 4DDiG doesn’t perform miracles. It cannot help if your drive is physically damaged and cannot be accessed at all.
5. Photo and video repair
Sometimes, you can retrieve the photos and videos from a crash, a formatted drive, or who knows what calamity only to find out that they are not displayed properly.
Tenorshare 4DDiG Data Recovery comes again to the rescue with the Photo Repair and Video Repair features.
Just select the one you need to use, drag-and-drop the files in the program’s window, and hit the Repair button. It’s that easy and your media files will be restored to the original.
This will also fix them if you can’t open them in the first place and that’s the most frustrating case when handling your photos or videos.
How to use 4DDiG to recover lost files after updating Windows 11?
Starting 4DDiG will get to the main window which actually invites you to choose a recovery option. If you lost files after a Windows 11 update, you should choose the system drive, in our case the C: drive and hit the Start button.
Next, you will be prompted to select the file types the software to look for or just click on the Scan All File Types button to look for all of them. If you select only one or two categories, the scan process will be faster, of course.
In the upper part of the window, the software will display the time needed for scanning and there you also have the controls to pause or stop the scanning. You will also notice that this is a Fast Scan. In the full version you will also have the Deep Scan option to retrieve even more files.
On the left pane you will find the tree of folders that you can recover and on the right window, you will see their contents.
When the scanning process ends, you can check the boses for the files or folders to retrieve and hit the Recover button from the bottom right corner of the window.
With this version, you can’t retrieve the files so you will either click on the Buy Now button to make the purchase, or if you allready did that, select the Register button to enter your e-mail address and registration code.
After you register, by clicking on the Recover button will open a dialog box to choose the location where you wish to restore the lost files, then click on the OK option.
That’s it! Now you will find the files you thought you lost forever in the folder you indicated at the end of the process.
Now, click on the Free Download button to get the free trial version or go for Buy Now if you’re ready to make the purchase. We chose the first option to test it for you.
You will get an installer file and if you run it after it finishes downloading, you will need to click on the Install button to move on.
The installation will last a couple of seconds. Select Start after it is finished.
We have to specify that with the free version, you will only be able to use some of the features of the product and scan for lost files but to recover them, you will have to buy and register the product.
However, the prices are decent compared to other similar solutions. You will only have to pay $45.95 for a one-month license.
You will get a better deal for a one-year license which will cost only $55.95 and if you want to opt for a lifetime license, that will be $59.95.
Quick data recovery from any internal or external drive
Compatible with Windows and Mac OS
Retrieves your data even from a formatted drive
Highest data recovery success rates in the industry
Cons
You need to buy a license to retrieve your files
Final notes
First of all, we were impressed by the simple and comprehensive interface. Anybody can use this tool although you can also find some great tutorials on the developer’s website if you still need them.
Another important aspect was the high-speed detection of the lost files and also the fact that it found files that we even forgot we deleted.
We also enjoyed the availability of the photo and video repair features that are missing in other similar products.
It’s also a great thing that you are able to preview all the files before restoring them so you can pick only the ones that you really need.
Have you already tried this software? If so, share your experience in the comments section below.
Bored at work or school and really itching to play Solitaire or another game to pass your time? Microsoft might have the solution for you. The company is now beta testing a new panel in the Canary version of Microsoft Edge with quick access to a variety of MSN games titles (via Neowin.)
Available for some people in version Edge Canary 99.0.1117.0, the new Games panel can be accessed by a toggle switch in Edge://settings/appearance. From there, users can toggle a new Games button (off by default) to add a new controller icon in the area of the address bar box. Clicking the icon then summons the pop-up panel which links out to various games on MSN.
Redditor u/Leopeva64-2 reveals that in this panel, the games can be sorted by categories. These include Microsoft Classics, Arcade, Board & Card, Puzzle, Sports, and more. Clicking a game will open it up in a new tab, or window, depending on your setting, right in Microsoft Edge itself.
At the moment, we’re not seeing this Games panel on our end, so Microsoft might be A/B testing it to get some feedback. That’s nothing new, as this type of testing has been done in the past, but it’s an interesting move, to say the least. It seems as though Microsoft really wants to make Edge the browser that can do it all, as the company has been working on tons of features since the browser launched. Price trackers, an grammar and spelling editor, and math solvers are just a few examples of things Microsoft has added to Edge.
Adding external displays has long been a common practice amongst users, and it does help to a great extent. But for some users, 4k resolution is not showing in Windows 10.
Using your 4K TV as a monitor for your Windows 10 PC allows you to view more items simultaneously if you’re working or to watch your favorite TV shows and movies online.
Getting this setup to work shouldn’t be too hard, but sometimes, a small glitch can make it seem like a never-ending problem. So, let’s find out why Windows 10 will not recognize 4k screen resolution.
Why is my monitor not displaying 4K?
Here are a few reasons your PC is not showing 4k resolution:
Improper connection: An improper connection is the most common reason the 4K monitor is not showing 4K on your PC, be it a loose connection or using an improper port.
Damaged HDMI cable: When it comes to connections, the cable plays a vital role, and a damaged one can trigger several problems.
Misconfigured settings: Several settings must be for the 4K resolution to appear on the Windows 10 PC.
Issues with the driver: An incompatible or outdated driver has often been found to be the underlying cause when 4K resolution is not showing in Windows 10.
What can I do if 4K resolution is not showing on Windows 10?
Before we head to the slightly complex solutions, try these quick ones first:
Ensure your graphics card and the monitor/TV support 4K resolution.
Use a different port on the PC to connect the HDMI cable.
If you use an HDMI to DP connector, make sure it works fine. Some users reported that replacing it with a DP-to-DP connector got things working.
Disconnect the other displays and only use the one that supports 4K resolution and that you want to project to.
Make sure any in-app settings are not changing or conflicting with the resolution.
Check for any pending Windows updates and install them.
If none work, move to the fixes listed next.
1. Use the dedicated utility to set the resolution
NOTE
The steps listed here are Intel Graphics. If you have Nvidia or AMD, there is a dedicated control panel for both, with an option to set the display resolution.
Launch the dedicated utility the graphics card manufacturer provides and head to the Display tab.
Now, choose the desired setting from the Resolution dropdown menu.
If 4K resolution is not showing in Windows 10, your primary approach should be to use the dedicated utility provided by the GPU manufacturer to set the desired resolution. If the option is also missing here, head to the next method.
2. Update the graphics driver
Press Windows + X to open the Power User menu, and select Device Manager.
Expand the Display adapters entry, right-click on the graphics card, and choose Update driver.
Now, select Search automatically for drivers from the context menu.
Press Windows + R to open Run, type devmgmt.msc, and hit Enter.
Double-click on Display adapters, right-click on the graphics card, and select Properties.
Navigate to the Driver tab, and then click on Roll Back Driver.
Choose a reason for the roll back, and click Yes to confirm.
Once done, restart the computer for the changes to come into effect.
That’s it! If updating the driver didn’t work and everything else, ranging from connections to cable and compatibility, seems to be in order, rolling back the driver should do the trick when 4K resolution is not showing in Windows 10.
A big number of Windows 10 users have reported that maximized windows leave a blank space on top of the screen. This error causes the top of the screen to be unusable, and if you right-click on it, it reacts the same way it would if you would right-click on the desktop. This can be a big problem, so let’s see how to fix it.
How can I fix Windows 10 maximize window bug?
1. Update your Windows 10 operating system
Click on Start button -> Settings (cog wheel).
Inside the Settings window, scroll down and select Update and Security.
Click the Check for updates button and wait for the process to complete.
2. Update video card drivers using Device Manager
Press Win + X keys on your keyboard -> select Device Manager.
Inside theDevice Manager-> select Display Adapters -> select your video card.
Right-click on your video card, and select Update Driver.
In the newly opened window, select ‘Search automatically for updated driver software’.
You can also use automated utilities such as Outbyte Driver Updater that will scan your PC for missing or damaged drivers and then download and install the corresponding versions. This can save you some time and you can also set up the app to do regular scans and updates.
3. Activate ‘Scale full screen’ option inside Intel HD Graphics
Right-click on your Desktop -> Graphics Properties.
Inside the Intel application, click on ‘Display’.
Select the option ‘Scale full screen’, and tick the box next to ‘Override Applications Settings.
Select Apply.
4. Reload Graphics driver with this keyboard shortcut
Press ‘Ctrl + Shift + Win Key + B’ on your keyboard to reload graphics driver.
The screen will flicker, and you will hear a sound that confirms the reload is completed. After this process is done, please try and see if the issue persists.
In this article, we explored some of the best proven troubleshooting methods for having an issue with a blank area at the top of your screen. This issue is caused by an incompatibility between the display settings found in your Windows 10 device, and the way your dual-display reacts.
Please make sure to follow the steps we provided in this guide in the order that they were written, to avoid any other issues. Also, don’t forget to let us know if this guide helped you solve your issue, by using the comment section below.
The AdobeGCClient.exe (Genuine Copy) is a process that runs as part of the Adobe Software Integrity Service validation testing, which checks for any tampering with Adobe Software program files, or improper or invalid license.
The AdobeGCClient comes with several Adobe programs. But then, the Adobe GC Invoker Utility will run in the background as one of the programs that automatically start when you boot your computer.
Does AdobeGC invoker utility need to run at startup?
Presumably yes, the Adobe GC Invoker Utility needs to run at startup to perform the functions it’s designed for.
However, users have reported many instances of the AdobeGCClient.exe process that eat up a lot of CPU memory even when not running any Adobe program.
The entire process causes massive computer slowdown, sometimes also when the device is not connected to the Internet.
Moreover, the process appears to behave like spyware, causing the installed antivirus program to keep warning about suspicious activity and blocking the launch of other safe programs.
Given these circumstances, is it safe to disable the process from startup or from the running programs?
Although not recommended, you can disable the process by opening the Task Manager and right-clicking on each process to end it. Alternatively, you can also go to the Startup tab and disable the Adobe GC Invoker Utility.
Note that by doing this, some Adobe programs might fail to launch or run properly.
Can I remove Adobe GC Invoker Utility?
Yes, you can, but it will keep reappearing since it’s a process inherent to almost any Adobe program. And if you remove it, whatever Adobe program you have might become unusable.
You can find the file in C:/Program Files (x86)/Common Files/Adobe AdobeGCClient. Many users simply deleted the file, but it reappeared.
Also, uninstalling and reinstalling an Adobe program will lead to the same result. What’s more, sometimes when removing an Adobe program, the Adobe GC Invoker Utility will still run at startup.
In this case, if you want the process completely out of your computer, use dedicated software because they are proven to completely remove any leftover files related to the app you want to uninstall.
Dedicated uninstaller software are completely safe and can find all lingering files that only take up space and cause errors.
Once again, if you use Adobe software on a daily basis or if you want to keep using it, it’s inevitable to stumble upon this issue as the Invoker Utility will cause you trouble.
In case you want to contact Adobe for support, you won’t get much help since they do have an interest in protecting their software.
Luckily for you, today we have a special guide that will help you fix that, so let’s get started.
Why is my computer not detecting my Canon camera?
There are several reasons for this problem, and we’re going to show you the most common ones:
USB cable – For your camera to be recognized, you need to use a compatible USB cable.
USB port issues – Sometimes, your USB port can cause this issue. Try changing the port or using a USB hub. This is also sometimes the reason Canon EOS Utility is not working.
Camera settings – In some instances, power saving or Wi-Fi settings on your camera can prevent it from being recognized. Disabling these features usually fixes the issue.
Drivers – Camera or USB drivers can cause this issue. To fix it, you need to reinstall and update your drivers.
What can I do if the Canon camera is not recognized by Windows 10?
Before we start fixing this issue, there are a couple of general solutions that you should try:
Restart or turn off your PC – Fixing this issue is simple, and sometimes all that you have to do is to turn your PC off and then turn it back on again.
Try a different USB cable – Canon cameras usually use IFC-400PCU or IFC-600PCU cables for Mini-B and Micro-B terminals. If you’re using a non-default cable, ensure it’s fully compatible with your camera.
Connect a camera to a different USB port – Sometimes, it might be possible that your USB port isn’t working properly, so connecting the camera to a different port can solve the problem.
Use a USB hub – A few users reported that connecting the camera to the USB hub and then connecting the hub to the PC worked for them, so be sure to try that.
Use a card reader– With it, you can remove the card from your camera and connect it directly to the PC to transfer the photos.
1. Switch Off the Canon Camera’s Auto Power Off and Wi-Fi/NFC Settings
Press the Menu button.
Go to the Settings tab and select Power saving.
Now set the Auto Power Down to Off.
To disable Wi-Fi/NFC, do the following:
Press the Menu button and navigate to the Setup menu.
Next, go to the Wireless communication settings.
Locate Wi-Fi/NFC and set it to Disable.
For instance, the EOS Rebel T65 camera can’t be connected if its Wi-Fi/NFC setting is enabled. So switch those settings off via your camera’s menu if they are currently enabled.
2. Update the Generic USB Hub Driver
Right-click the Start menu and choose Device Manager.
Double-click Universal Serial Bus controllers to expand a list of USB controllers as below.
Right-click Generic USB Hub and select Update driver from the context menu to open the window in the shot directly below.
Select the Browse my computer for driver software option on that window.
Next, select the Let me pick from a list of device drivers on my computer option to open a list of compatible drivers as below.
Select the Generic USB Hub listed, and click Next to install it.
You can also update your drivers automatically with utilities like Outbyte Driver Updater. These scan your PC, find the outdated and damaged drivers, and download and install the latest versions.
It is the easiest solution to opt for because the process is automatic and you don’t have to worry about finding the correct driver versions.
After updating your drivers, check if the Canon camera is still not recognized by Windows 10.
3. Uninstall the camera via Device Manager
Plug your Canon camera into a USB port of a laptop or desktop.
Right-click the Start button and choose Device Manager from the list.
Double-click Portable Devices to expand a list of connected devices, including your camera.
Right-click the Canon camera and select Uninstall device.
A dialog box opens requesting further confirmation. Press the Uninstall button on that window to confirm.
Then press the Scan for hardware changes button at the top of the Device Manager window.
After doing that, you should be able to connect the Canon camera to Windows 10 without any issues.
As you can see, this can be an annoying issue, but hopefully, you managed to fix it with one of our solutions.
This isn’t the only issue with a camera you’ve encountered, and many reported that camera is not recognized in Device Manager, but we covered that in one of our other guides.
Did you find a different solution? If so, let us know in the comments below.
For instant camera users, here’s a helpful guide on how to fix Instax Mini 9 not working with step by step instructions.
Printer not activated, error code -30 message can sometimes appear and prevent you from printing documents. This can be a big problem, and in today’s article we’ll show you how to fix this issue.
This error message can prevent you from printing, and speaking of this error, here are some similar issues that users reported:
Printer not activated error code -30 PDF, 20 PDF – This error message can sometimes appear while trying to print PDF files. If this happens, perhaps you can fix the issue by using Print to PDF feature.
Printer not activated error code 41 –This is another common problem that can occur, and it can occur if you don’t have the necessary security permissions.
Printer not activated error code 30 HP, Epson – This error can affect any printer brand, and if the issue appears, the cause is most likely an outdated printer driver.
Printer not activated error code 30 Windows 10, 8.1, 7 – This error message can appear on almost any version of Windows, but you should be able to fix it by using one of our solutions.
How can I fix the Printer not activated, error code -30 message?
1. Make sure that your printer drivers are up to date
Sometimes Printer not activated, error code -30 can appear if your printer drivers are out of date.
Outdated drivers will prevent you from printing documents, but you can fix this problem simply by updating your drivers.
There are several ways to do that, but the best method would be to visit your printer’s manufacturer’s website and download the latest drivers for your model.
Although updating drivers is usually simple, some users might have issues downloading the appropriate driver for their printer manually.
If you don’t want to search for drivers on your own, you might want to try using Outbyte Driver Updater software.
This application is designed to automatically search and download the necessary drivers for you, so you might want to try it out.
It scans your system and lists all existing and possibly missing drivers. The tool also detects if there is already a new version for current records. If necessary, these can be updated directly via Outbyte Driver Updater.
To do this, load the corresponding file on your PC and copy the new version to your computer with one click. A wide range of hardware is supported, including drives, printers, and scanners.
According to users, Printer not activated, error code -30 appears when trying to use a quick print option to print documents.
Sometimes your applications might try to use Print to PDF feature automatically, and that can cause the error message to appear.
To fix this problem, it’s advised to always manually select the printer that you want to use when printing.
This is just a workaround, but it should help you out with this problem until you find a permanent solution.
3. Use Print to PDF feature
Open the document you want to print to a PDF file.
Find and open the Print dialog box in the application (may vary depending on the app used).
Usually go to File and select Print.
Choose Microsoft Print to PDF in the Select Printer section.
Click Print or OK.
If this problem occurs when trying to use Print to PDF, the issue might be a third-party solution.
Previous versions of Windows didn’t have native Print to PDF support, and this is the main reason why users had to use all sorts of third-party solutions.
With Windows 10, there’s finally a built-in Print to PDF feature, so there’s no need to use third-party applications.
If you’re having Printer not activated, error code -30 error, try using the built-in Print to PDF feature and check if that solves your problem.
4. Reinstall printer drivers and modify your registry
Press Windows Key + R and enter regedit.
Now navigate to HKEY_LOCAL_MACHINESYSTEMCurrentControlSetHardware ProfilesCurrentSoftwareTS PDF Generator
Right-click the TS PDF Generator key and select Permissions.
Choose Usersgroup and check Full Control option.
Click Apply and OK.
To fix the Printer not activated, error code -30 error on your PC, sometimes you might have to reinstall your printer drivers.
In addition to doing that, you might also have to make a couple of changes in your registry.
According to users, the lack of certain privileges in your registry can cause this issue to occur, but you can fix the problem by reinstalling the printer driver and modifying your registry.
5. Remove printer software
If you’re getting Printer not activated, error code -30 message, the problem might be your printer software.
Sometimes this software can interfere with your system and cause this and other errors to appear.
However, you can fix the problem simply by removing or reinstalling your printer software. To do that, you can just use the Settings app and remove the printer software from the Apps section.
This isn’t the most effective solution usually, and sometimes it can leave certain files or registry entries in the background that can cause this issue to reappear.
To be certain that the printer software is completely removed, we recommend you use CCleaner to get rid of any leftover files.
Many use CCleaner to take care of cookies, cached files, and problems with their registry. It’s a great PC optimization tool that analyzes your whole system and lets you know what you can do to improve it.
Not only that, the tool also has a built-in uninstaller utility so you will not have to go through the hassle of reinstalling the app from Windows Settings. You can remove the app and its corresponding files from one central UI.
If uninstalling the printer software solves the problem, you might want to try using your printer without it. Alternatively, you can also download the latest printer software and check if it solves your problem.
Locate the application that is giving you this error message. Right-click it and choose Properties.
Go to the Security tab. Select your user account from the list and click Edit.
Select your user account and check the Full control option in the Allow column. Click Apply and OK.
After doing that, you’ll have full control over the application and the problem with your printer should be resolved.
7. Install the latest updates
Press Windows Key + I to open the Settings app.
Go to the Update & Security section.
Click the Check for updates button.
If any updates are available, they will be downloaded automatically in the background. Once the updates are installed, check if the problem is still there.
8. Run the printer troubleshooter
Press Windows Key + I to open the Settings app.
Go to the Update & Security section.
Select Troubleshoot from the left pane.
Choose Printer and click the Run the troubleshooter button.
Follow the on-screen instructions to complete the troubleshooting process.
According to users, Printer not activated, error code -30 can appear due to various bugs on your system, and if you’re having this error, you might be able to fix it simply by running the printer troubleshooter.
Windows has a number of troubleshooters available, and you can use these troubleshooters to fix common printer problems.
9. Make sure that your printer is set as default
Press Windows Key + I to open the Settings app.
Go to the Devices section.
Select Printers & scanners.
Choose your printer and click the Manage button.
Click Set as default button.
Hopefully, all these solutions managed to help you with your Printer not activated, error code -30 troubles.
In case you have subject-related questions or suggestions, we’ll be glad to be hearing from you. You can post them in the comments section below.
Take a look at our Windows 10 section for news, updates, and other helpful guides.
Be sure to bookmark our Fix Hub and find great solutions to other similar issues.
Whether you’re working from home or the office, a printer is a must-have, especially if paperwork is involved. But what happens if your printer is connected but not printing in Windows 10?
It must be a frustrating experience. Fortunately, it is an issue that has numerous working solutions, and we will show you how to fix it in this guide.
What is the possible cause when your printer is on but not responding?
Listed below are some of the potential causes of this issue, as reported by users:
Faulty app or process: If Windows 10 can’t print after installing an app on your PC. You need to perform a clean boot and probably remove the faulty app.
Printer incompatibility: In some cases, this issue might occur if your printer is incompatible with Windows 10. You can check this in the Control Panel to be sure.
Outdated driver: Sometimes, Windows 10 will not print to the network printer because of an outdated driver. The solution to this is to update your drivers.
What can I do if the printer is connected but not printing on Windows 10?
Below are some basic troubleshooting steps to try before proceeding to the more detailed solutions in this section:
Restart your PC.
Check printer power and connection.
Check if the printer is compatible with Windows 10.
If you still can’t solve the problem, you can now explore the solutions below:
1. Reinstall your printer
Press the Windows key, type control, and click OK.
Select View devices and printers under Hardware and Sound.
Now, right-click your printer, select Removedevice and follow the onscreen instructions to complete the process.
Next, go back to the Control Panel page and click Uninstall a program under Programs.
Right-click your printer software and select Uninstall.
Finally, follow the onscreen instructions to complete the process and reinstall your printer from scratch.
If your printer is connected but not printing on Windows 10, you can fix it by reinstalling it. This should clear any glitch that might be causing the problem.
2. Update drivers
Press the Windows key + X and select Device Manager.
Double-click the Print queues option to expand it, and right-click your device.
Now, select Update driver.
Finally, select Search automatically for drivers and install all available updates.
An outdated driver is one of the major causes of the printer being connected but not printing issues on Windows 10. The solution to this is to update your driver to the latest version.
While you can use the Windows driver updater above, you can also go to the manufacturer’s to download the driver.
Alternatively, you can repair and update your drivers using dedicated software. Once you have the app, open the main window and press the scan button.
3. Run the printing troubleshooter
Press the Windows key + I and select Update & Security.
Select Troubleshoot in the left pane and click Additional troubleshooters.
Finally, select Printers and click Run the troubleshooter.
In some cases, this issue might be due to minor glitches. The easiest way to clear this is to run the printer troubleshooter.
4. Clear spooler files and restart the spooler service
Press the Windows key + R, type services.msc, and click OK.
Double-click the Print Spooler option to open its properties.
Now, click the Stop button.
Click the OK button.
Next, press the Windows key + R, type %WINDIR%\system32\spool\printers, and click OK.
Now, delete the contents of the Printers folder.
Repeat steps 1 and 2 and click the Start button.
Finally, click the Apply button, followed by OK.
In some cases, the printer connected but not printing issue on Windows 10 can be due to corrupt printing files. You can fix this by clearing the Spool files and restarting the Print Spooler service.
Now, click Advanced and uncheck the Print in background option to disable it.
Finally, try printing again.
Sometimes, the printer is connected, but not printing issue on Windows 10 might be due to your in-app settings. So, if you are facing this issue on any Microsoft app, try to disable background printing, as shown above.
6. Print in clean boot mode
Press the Windows key + R, type msconfig, and click OK.
Select the Services tab at the top, check the Hide all Microsoft services box, and click Disable all.
Now, go to the Startup tab and click Open Task Manager.
Next, right-click each of the apps there and select Disable.
Finally, go back to the System Configuration window and click Apply, followed by OK.
You will have a clean boot environment after all these steps are carefully followed, after which you can try and check if the printer won’t print in Windows 10 problem is gone.
7. Boot in Safe Mode, then test printing
Press the Windows key + I and select Update & Security.
Select Recovery in the left pane and click Restart now under Advanced startup.
After your PC restarts, choose Troubleshoot > Advanced options.
Now, select Startup Settings.
Click the Restart button.
When your PC restarts, press the corresponding key to Enable Safe Mode or Safe Mode with Networking.
Finally, try printing again after your PC boots up.
The printer is connected, but not printing issue on Windows 10 can sometimes be due to a problematic driver or process. Booting your PC in Safe Mode should do the trick here.
With this, we can conclude this guide on the printer is connected but not printing on Windows 10 issue. Hopefully, you solved the problem before exhausting the solutions therein.
You were probably expecting the new year to start off with a bang when it comes to the games that Xbox adds each month to the Gold subscription.
You might be a bit disappointed if you were expecting some of the newer titles, but the ones that are coming are still fun and worth taking for a spin.
Microsoft has just announced the Xbox Games with Gold lineup for January 2022, which contains 4 new free games worth $54 in value for Xbox Live Gold and Xbox Game Pass Ultimate subscribers.
Neurovoider and Aground are coming to Games with Gold
We know you’re excited so we’re going to start with the first two games that will be free to claim starting the 1st of January, 2022.
So, on the first day of the new year, you can enjoy the twin-stick shooter RPG Neurovoider, as well as the Xbox 360 vertical shooter Radiant Silvergun.
The two other games added to the service starting January 16 are the mining RPG Aground, and the classic Xbox 360 title Space Invaders Infinity Gene.
It seems that Microsoft decided to start the new year with more of a throwback atmosphere, reminding gamers that its not all Cyberpunk 2077 and Battlefield 2042.
You might like to know that overall, these four free games actually represent 2400 in Gamerscore, which is right in line with the Games with Gold for December.
If you haven’t gotten around to grabbing last month’s titles yet, we remind you that you have until the end of December to claim The Escapists 2 and Insanely Twisted Shadow Planet.
Out of the four coming in January, which is your favorite title? Share your opinion with us in the comments section below.
Privacy and security are two important things when it comes to web browsing these days. While having your browser remember settings and sessions can be convenient, you obviously don’t want to be overly tracked online, you might not want your data to be associated with your online accounts, nor do you want intrusive ads or your data to be leaked online.
Luckily, Microsoft Edge is a browser that can help with that. The latest versions of the Microsoft web browser have built-in controls that help you take control of your privacy. Plus, there are also additional steps you can take to put you in control of your data. Here’s how to make Microsoft Edge as private as possible.
Turn off Edge’s shopping features
Microsoft Edge has some features that might help you when shopping. The browser is designed to track the prices items you’ve been looking at and eventually help you save money, This, though. might come off as intrusive to your privacy. So, while in Edge’s Privacy, Search, and Services settings (edge://settings/privacy), scroll all the way down to the Services section. From there, toggle all the switches to the Off position. This includes things like suggestions from Pinterest in Collections, too.
Oh, and remember the controversial Buy Now Pay later option in Microsoft Edge? Along with other factors, it had a lot of people upset, as they felt it was an invasion of privacy, so you might want to turn it off. You can do this by typing edge://settings/payments into the Microsoft Edge address bar. You can then select to turn off the Shop Buy now, pay later option on sites when you shop.
Second up is a setting that’s most obvious: changing Edge’s tracking prevention. Once you visit Edge’s settings menu, click to Privacy, Search, and Services in the right-hand bar. Then, from there, look for Tracking Prevention. It’s one of the most up-front options up top.
You’ll want to turn the switch for Tracking Prevention to On if it’s not already turned on, and then change it to Strict. This Edge setting will block trackers on all websites, reduce personalization, and block other harmful trackers. It’s a good first step to making Edge as private as possible. And, you can always check to see which trackers Edge has blocked under Blocked trackers. You might end up surprised as to how many Facebook trackers Edge blocked!
Note: Though Edge has a Do Not Track setting, it’s a voluntary signal. Just because you have it enabled, it doesn’t mean that sites will respect your choice. The folks at Spread Privacy have a more in-depth explanation as to why Do Not Track doesn’t always work.
Send Do Not Track Requests
Next up, you’ll want to scroll down in Edge’s Privacy, Search, and Services settings to the Privacy section. From there, look for Do Not Track requests and turn the switch to On. While you’re at it, also turn off the switch for Allow sites to check if you have payment methods saved. This means the browser and websites won’t store your sensitive credit card information.
As another part of Privacy, we also suggest turning off the toggles for sending results from searches on the web. Microsoft says this data from Edge is not associated with you, but if you really want to be secure, disable the feature. Of course, it’s also best to toggle the switch for personalization to off, too. This ensures that if you’ve signed in with a Microsoft account, your data won’t be sent to Microsoft to personalize other Microsoft services.
We also want to end this section with some tips on Microsoft Edge’s newest features. Edge now has built-in malware protection. You can look for it under the Enhance your security on the web section of Privacy. From there, choose Balanced or Strict. A balanced option will not break websites, and only add security mitigations for sites you don’t visit often. Strict, meanwhile, adds security mitigations for all sites but could break certain parts of websites. This feature is known as Super Duper Secure Mode.
Be careful with your extensions
Extensions are meant as a way to boost your experience in Microsoft Edge, but they also could collect data about you, too. Usually, this isn’t the case, and most extensions do no harm to your data. However, it’s always best to check the company, group, or developer that’s making the extension you’re downloading.
In the Chrome Web Store, you can do so by looking for Offered by at the top of the page. And in the Microsoft Edge Add-ons website, look for the developer name under the name of the extension. Don’t pick or download extensions from unknown sources. Microsoft actually removed 18 malicious extensions for Edge back in 2020.
Also of note are ad-blocking extensions. Edge has ad-blocking built-in, but it might be best practice to use one, so more harmful ads don’t intrude on your web browsing experience. We suggest using uBlock Origin. It’s one of our favorites as it’s light on CPU usage and memory. There are many other alternatives, though, including Adblock Plus.
Other tips & the caveats
Signing in with a Microsoft Account on Edge results in the best possible experience for most people. However, if you’re truly concerned about privacy, it might be best to not use a Microsoft Account when browsing in Microsoft Edge. This, though, comes with an important caveat. You’ll end up losing out on the convenience of the web browser, especially when tweaking the settings we mentioned above. Without a Microsoft Account, you’ll end up not being able to sync your password, settings, and more across different devices. You’ll have to do a lot of “hard work” when it comes to remembering passwords, managing bookmarks, etc.
But if that’s something you’re willing to give up, you might want to skip the sign-in process when you boot up Edge for the first time and create a profile without a Microsoft Account.
Though extreme, we also suggest clearing your cookies and history every so often. Cookies are sometimes abused by websites to track you. For the utmost privacy, you should set up Edge to clear your history and cookies each time you close the browser. Of course, this impacts the end experience, as you’ll lose track of websites you visit, but it is a good step for privacy. Just go to edge://settings/privacy, and then look for Clear browsing data. Under Choose what to clear every time you close the browser pick the browsing history, cookies, and other site data options. Now, each time you close Edge, you’ll have a clean slate!
The Windows 11 bugs keep on coming. Over on the Windows 11 known issues page, Microsoft now mentions that HDR displays might not render some content properly.
The issue was first confirmed by Microsoft on December 24, and has since been marked as “investigating.” It apparently happens after updating to Windows 11 and impacts some image editing programs. Microsoft says the issue is observed with white colors, which could display in bright yellow or other colors. Officially, the issue appears to be linked to color-rendering Win32 APIs. According to Microsoft:
This issue occurs when certain color-rendering Win32 APIs return unexpected information or errors under specific conditions. Not all color profile management programs are affected, and color profile options available in the Windows 11 Settings page, including Microsoft Color Control Panel, are expected to function correctly.
Microsoft has yet to issue a fix and says that it is working on a resolution for late January. The issue only impacts Windows 11, version 21H2 at the moment. Seeing as though Microsoft is on vacation for the holidays like the rest of us, it could be well until the first Patch Tuesday on January 11 at the earliest that a potential fix could be released.
Depending on how you look at it, it has been a bit of a rough patch for Windows 11. Even though the operating system is now rolling out to more devices, there have been several notable bugs. Recently, these include issues with MSI apps, Intel SST drivers. Usually, Microsoft is quick to release fixes, first through the Windows Insider program, and then for everyone else on the public and retail versions of the operating system.
Do you receive the Accelerometer error on start-up on your HP device? If you are, don’t worry as this is a minor problem related to some drivers and which can be easily addressed.
There are a few ways in which you can try to fix the Accelerometer error in Windows 10 and everything is being detailed and discussed in the following guidelines and steps.
Usually, this warning message is displayed after your Windows received a new update, especially if that was a Windows 10 update. As already outlined, the error is talking about a driver who is not running properly.
It can be a file corruption or an outdated driver, thus the troubleshooting solutions will focus on resolving these particular aspects, as described below:
With a dedicated driver update, you will efficiently manage all your drivers from your PC and resolve this type of trouble.
Therefore, using this software means you can benefit from up-to-date drivers for each one and optimize your driver devices at peak capacity.
3. Remove corrupted drivers and reinstall them manually
If updating the driver isn’t fixing the Accelerometer error, try to uninstall and reinstall it manually afterward:
You can remove the driver from Device Manager – access Device Manager as already explained, then right-click on the HP 3D DriveGuard driver and choose ‘uninstall’.
Alternatively: go to Control Panel, switch to Category and under Programs click on Uninstall. Find the HP 3D DriveGuard software and remove it from your Windows 10 device.
Hint: for accessing Control Panel just right-click on the Windows start icon and select ‘Control Panel’.
Restart your device and then access this link. From there you can download the latest HP 3D DriveGuard driver.
Afterwards, install the driver by running the executable file that was just downloaded and follow on-screen prompts.
The methods explained above should help you fix the HP Accelerometer error in Windows 10.
You can share your own experience with us and with the other users who are planning to use this step-by-step guide. The easiest way in which you can get in touch with us will be through the comments area that’s available below.
Adobe Premiere Pro is one of the best video editing tools on the market, but some users reported Adobe Premiere Pro couldn’t find any valid editing modes message on their PC.
According to users, this message prevents them from running Adobe Premiere Pro, and in today’s article, we’re going to show you how to fix this error.
There are many error messages that can occur while using Adobe Premiere Pro, and here are some common problems that users reported:
Adobe Premiere Pro could not load any audio drivers, find any video modules Windows 10 – These are some common problems that can appear with Adobe Premiere Pro, but you should be able to fix them using our solutions.
Adobe Premiere Pro CC not responding, startup error – Sometimes Adobe Premiere Pro won’t start at all. This can be due to your antivirus or due to the lack of administrative privileges. To fix the issue, try running the application as an administrator and check if that helps.
Adobe Premiere Pro won’t open – If this problem occurs, the issue might be related to your graphics card drivers. If your drivers are up to date, make sure that Adobe Premiere Pro is using dedicated graphics as the default graphics processor.
How do I fix the Premiere Pro editing modes error?
1. Make sure that the application is completely installed
According to users, if you’re getting Adobe Premiere Pro couldn’t find any valid editing modes message, the problem might be related to the incomplete installation.
Several users reported that this error occurred because the Settings directory was missing from the installation directory.
If that’s the case, try installing Premiere Pro on a different PC and check if it works. If it does, locate the Settings directory and copy it to the first PC. After that, Premiere Pro will start working on your PC.
This is a bit crude solution, but it works according to users, so feel free to try it out.
2. Make sure that Adobe Premiere Pro is using your dedicated graphics
Premiere Pro is a hardware-intensive application, and in order to use it, you need to have a powerful graphics card. Many laptops and some PCs come with both dedicated and integrated graphics.
According to users, Adobe Premiere Pro couldn’t find any valid editing modes message appeared because Adobe Premiere Pro was set to use integrated graphics.
Integrated graphics usually don’t have enough hardware power to smoothly run Adobe Premiere Pro, and that can lead to this error.
To fix the problem, you’ll need to set your dedicated graphics as the default processor.
To do that, open your graphics card control panel such as the Nvidia Control Panel or Catalyst Control Center and set your dedicated GPU as the default graphics processor for Adobe Premiere Pro.
3. Update your graphics card drivers
According to users, this issue can sometimes occur if your graphics card drivers are out of date. To fix the problem, it’s advised to update your drivers to the latest version and check if that helps.
To do that, you should visit your graphics card manufacturer’s website and locate the latest drivers for your model. Once you download and install the latest drivers, check if the problem is still there.
You can also update all your drivers automatically with just a few clicks using third-party tools as recommended below.
With such a specialized tool, the process of managing drivers will run easily to find the latest driver versions for the needed devices.
In addition, you can rely on this automated support due to its smart technology, and rich database that contains millions of drivers from the official manufacturers.
Right-click the Adobe Premiere Pro shortcut and choose Properties from the menu.
When the Properties window opens, navigate to the Compatibility
Now check Run this program as administrator option and click Apply and OK.
After doing that, the application will always start with administrative privileges whenever you use this shortcut, and the problem will be permanently resolved.
According to users, Adobe Premiere Pro couldn’t find any valid editing modes message can appear if you don’t have the necessary privileges to run Adobe Premiere Pro.
5. Install the latest Premiere Pro updates
You’d be surprised to learn just how many problems outdated software can trigger. From compatibility issues with files created in a newer version to not working at all.
Before diving into complex and time-consuming troubleshooting steps, let us start with the basics. Make sure you’re running the latest Adobe Premiere Pro version.
Adobe regularly rolls out updates to all of its programs, adding new features and fixing existing bugs. Maybe the latest update patches a known issue preventing users from using the tool.
6. Check your antivirus
Having a good antivirus is important if you want to keep your PC protected from online threats. However, sometimes your antivirus can interfere with your system and cause issues with certain apps.
If you’re getting Adobe Premiere Pro couldn’t find any valid editing modes message on your PC, that’s because your antivirus is interfering with it.
To check if your antivirus is the problem, open it and try disabling certain features. After that, check if the problem persists. If that doesn’t help, your next step would be to completely disable your antivirus.
This may leave your PC vulnerable, but if you’re using Windows 10, you’ll remain protected by Windows Defender, so there’s no need to worry.
If disabling the antivirus doesn’t help, you might want to try removing your third-party antivirus. Many users reported this issue while using AVG Antivirus or Constant Guard.
If removing your antivirus solves the problem, this might be a perfect time to consider switching to a different antivirus solution.
7. Change Switchable Graphics in BIOS
This is fairly simple to do, and you can do it by following these steps:
Restart your PC and boot to BIOS.
Once you enter BIOS, locate the Switchable Graphics option and change it from Dynamic to Fixed.
Now save changes and restart.
According to users, sometimes Adobe Premiere Pro couldn’t find any valid editing modes message can appear due to your BIOS settings.
As we already mentioned in one of our previous solutions, this issue can be caused by your integrated graphics, and in order to permanently fix the problem, you need to disable it from BIOS.
Once your PC restarts, the problem should be permanently resolved and Adobe Premiere Pro will start working again.
To see how to properly disable the graphics card in BIOS, we suggest that you check your laptop’s manual for detailed instructions.
8. Reinstall Adobe Premiere Pro
If you are keep getting Adobe Premiere Pro couldn’t find any valid editing modes message while trying to run Adobe Premiere Pro, the issue is most likely related to a corrupted installation.
To fix the problem, it’s advised that you completely remove Adobe Premiere Pro from your PC and then install it again.
There are several ways to do that, but the most effective one is to use professional uninstaller software.
By using such software you’ll completely remove the selected application along with all of its files and registry entries. Once the application is removed, install it and check if the problem is still there.
Adobe Premiere Pro couldn’t find any valid editing modes message can be problematic, and in most cases, this issue is caused by your drivers or by your graphics card.
However, you should be able to fix the problem using one of our solutions. Feel free to write us a comment if you have any suggestions.
We’re familiar with Oculus, the head-mounted-display tech company that produces the newest virtual reality headsets. It redefines digital entertainment, bringing better immersion, whether you’re watching a movie or playing games, the future never felt so close to our fingertips, or eyes.
However, issues with Oculus can occur, and one of the common problems reported by users is Sorry we’re having trouble updating Oculus error. Numerous users reported this issue on Reddit threads.
I’ve been having this message show up once in a while over the past week.
There’s plenty of free space on all library disks, disks where %TEMP% is, as well as the disk where the Oculus software is installed.
The reasons behind this issue may vary, and sometimes you might encounter this error due to improper antivirus of firewall configuration. We’ve created a list of fixes that can solve this issue. So let’s get started, shall we?
Sometimes the simplest of things bare the best results. If you’re getting Sorry we’re having trouble updating Oculus error, you might be able to fix it simply by logging out. Log out from your Oculus home software, wait a few moments, and log back in.
To do that, navigate to the Friends section, click the three dots, then select Sign Out.
2. Perform a firmware update
Maybe the problem could be related to firmware. Firmware is the software that provides low-level control for the device’s specific hardware. So maybe this could be causing issues with your Oculus software updates attempts.
Firstly, connect your headset device, and ensure that it shows up as connected in the Oculus Configuration Utility.
Select Tools, click on Advanced, and select Update Firmware.
When prompted to select a file, select the one you have prepared for your headset.
The firmware will begin updating.
After the update finishes, shut down your machine and restart the Oculus Configuration Utility.
3. Move your large files
This isn’t the ideal scenario, but the minimum required space is to update Oculus Rift is 9 GB. If you don’t have enough storage space, you might encounter Sorry we’re having trouble updating Oculus error.
In order to free up some space, just delete any large files you don’t want anymore, or move them to a different partition. You can also try to uninstall any programs or content you don’t have a use for anymore. Try moving your large files to an external or alternate hard drive. Lastly, you can use Disk Cleanup to free up extra space.
4. Repair your software
In order to fix this problem, follow these steps:
Go to Oculus setup official page.
Click on the Download Oculus Rift Software button, and then run the downloaded file with Administrator rights.
Click on Repair.
After the process is finished, check if the issue is still there.
5. Check your antivirus and firewall
Try whitelisting your Oculus software on both your firewall and antivirus of choice. Sometimes your antivirus or firewall can block your connection causing the Sorry we’re having trouble updating Oculus error to appear. If your antivirus is preventing you from updating Oculus software, perhaps you should disable it temporarily or switch to a different antivirus.
TotalAV is the right choice to make for lightweight antivirus services, plus robust anti-malware or protection against phishing or ransomware attacks.