Aside from the refreshed Surface Pro 7 Plus released in January of this year, Microsoft has been relatively quiet about its plans for future hardware in 2021. Despite a healthy release of products during a global pandemic that included the Surface Go 2, Surface Pro X (2), and Surface Laptop Go, fans and journalists are still mounting rumors and speculations about Microsoft’s updates to its flagship devices in 2021.
To that end, another set of Surface rumors have found their way to the internet via Windows Central journalist Zac Bowden. According to Bowden’s latest reporting, Microsoft is still planning a Spring-time Surface event and that said event could be host to updated accessories and color options such as Cobalt Blue for laptops, new Teams specific Bluetooth headphones, and the Surface Classroom Pen options as well as minor refreshes of “existing product lines,”
Regarding the refreshed Surface lineup, rumors in 2021 remain constant with those of last year speculating that Microsoft’s Surface Laptops will come in both 11th Gen Intel and AMD Ryzen variants. While the specific Ryzen chipset option speculation has ping-ponged back and forth between the latest cutting-edge offerings or the more seasoned 4000 processors, it’s clear Microsoft and AMD are continuing their chipset relationship with the Surface lineup after mixed reviews in 2019.
In addition to Intel and AMD processors, Microsoft is rumored to be enabling configurations of up to 32GB of RAM for the laptops, which breaks the 16GB ceiling that was previously in place for years. A new base model configuration of the Surface Laptop 4 is talked about as 8GB with 256GB of storage with either an entry-level 11th Gen or AMD Ryzen 4000 processor starting at $999 for the 13.5-inch variant. Microsoft could also be readying a new color option for the Surface Laptop 4 in Cobalt Blue.
Alongside its laptop, Microsoft is rumored to be prepping a pair of Surface Headphones targeted at commercial users with a specific emphasis on Teams enabled functionality. The new headphones could come with the same Plus moniker as the Surface Pro 7 Plus of this year, further solidifying a naming convention that delineates its consumer products from its commercial. Brad Sams of Petri and Thurrott.com fame identifies the commercial use of the Surface Headphones Plus as part of a Teams certification that’s specific to a dongle that supports headset connectivity to PCs without Bluetooth.
In a move similar to Apple and other headphone makers, Microsoft will also extend the longevity of its devices by selling replacement earmuffs/cup replacements. Unfortunately, Cobalt Blue will not be a color option for these rumored headphones at release with most speculating that the standard matte black with being the only option initially. Lastly, there is talk of a new Microsoft webcam in tow for the rumored Spring event. The dedicated external webcam is expected to support 4K resolution recording, high-dynamic-range (HDR), and privacy cover functionality.
In other Spring gadget news, Microsoft is also said to be bringing an update to the Surface Classroom Pen. The Surface Classroom Pen, which resembles the same bulky-looking pen used for Surface Hubs is said to be in its second generation but no specifics on added functionality have been listed. It could be, just an update to the connectivity features to include the latest Bluetooth protocol support for reduced latency as well as an update to the software to smooth out jitters.
Again, everything listed above is being filed under the speculations column as Microsoft has made no public statements or even any indication that it plans to host a Spring, Summer, or Fall event yet. However, Sams and Bowden are pretty confident in their sources and reporting and that has typically boded well for fans.
In recent months, many Xbox fans have been asking the company to sell the same Xbox Series X fridges it sent to various influencers to promote the console. Well, this is finally going to happen after Twitter used chose the Xbox brand as the first-ever #BestOfTweets Brand Bracket champion.
For those unfamiliar with the competition, Twitter’s #BestOfTweets Brand Bracket gives Twitter users the chance to crown the best brand on Twitter. The competition included many popular food companies such as Doritos, Oreo, or Pizza Hut, as well as entertainment brands including MTV, Bravo TV, Spotify, and Xbox.
In the final Brand Bracket, the Xbox brand beat Skittles by a very thin margin, with 50.5% of a total of 341,731 votes. Before the final result, Xbox Marketing Aaron Greenberg had promised that Microsoft would put into production this year real Xbox Series X Mini Fridges if it won the final brand bracket, and this certainly helped to swing the votes.
We first saw these Xbox Series X Mini fridges in a promotional campaign for ZOA, a new brand of energy drinks created by Hollywood and WWE superstar Dwayne “The Rock” Johnson. In an elegant move, Greenberg said that the first Xbox Series X Mini Fridge will be “filled with games & headed to our friends at Skittles of course.”
Thanks to everyone who voted, this was down to the wire and thrilling to follow. Now that @Xbox won, we will move forward on our promise to make those Xbox Series X Mini Fridges. First one off the line will be filled with games & headed to our friends @Skittles of course! ???????? https://t.co/xeeN8yLGV8
— Aaron Greenberg ????????♂️????U (@aarongreenberg) April 2, 2021
With 15.9 million Twitter followers as of this writing, the Xbox brand actually has fewer fans than the PlayStation brand (21.6M). In recent months, though, the Xbox social media team has made an excellent use of Twitter to promote Xbox Series X|S consoles and Microsoft’s Xbox Game Pass subscription service.
If you’re not following the Xbox Game Pass Twitter account yet, you really should. The team behind the account doesn’t take itself too seriously, and the perfect mix of smart teases, funny gaming references, and apologetic messages towards gamers with ever-increasing backlogs.
Can you guys help us think of ways to say we added more games? we're running out of ideas pic.twitter.com/kmUYQghMCA
One of the best tweets the Xbox team published this year was probably the one posted to react to the leaks about the Xbox Series S, which made excellent use of the popular “Awkward Look Monkey” meme. Microsoft was reportedly planning to officially announce its second-next-gen console just a couple of days later, but the leaks forced the Xbox team to change its plans at the last minute.
Anyway, this tweet was a pretty great way make to make fun of a not-so-fun situation for all the teams that have been working very hard on the Xbox Series S official reveal.
We’re looking forward to seeing the Xbox team share more price and availability details for these Xbox Series X Mini fridges. They may definitely become a great companion accessory for Xbox Series X owners, and a cool collector item to remember this console generation in many years. Let us know in the comments if you’re planning to treat yourself with an Xbox Series X Mini Fridge later this year.
Installing the latest Windows Defender updates helps you to keep your computer safe. Usually, Windows 10 will automatically download and install updates once a day for you.
You can also download the latest updates manually. However, there are instances when users can’t install the latest Windows Defender updates due to various error messages.
Error 0x8050800c is one of the most frequent Windows Defender issues. Users are complaining on Microsoft Community forum about it.
I am getting this error whenever I want to update the virus definition in Windows Defender. Sometimes the defender itself automatically turns off. […] The error code I am getting is: 0*8050800c. What should I do? I am using Windows 10.
If you’re experiencing the annoying error 0x8050800c on your computer, follow the instructions listed below in order to fix it for good.
How do I fix Windows Defender update error 0x8050800c?
1. Restart your computer
First of all, you should try to restart your PC, then download and install the latest Windows Defender updates.
Users report that a simple action such as rebooting your computer eliminates error 0x8050800c and allows you to update your antivirus.
Restarting is one of the most used troubleshooting steps and usually, the first one taken when users are dealing with software or other computer issues.
2. Install the latest Windows 10 Updates
If there are any pending Windows 10 updates, install them first and then try to update Windows Defender. Many users confirm that this simple action solves the majority of Defender’s errors.
Once you have installed the latest Operating System updates, restart your computer and try to update your antivirus.
If you can’t install Windows Updated due to errors, we recommend you to check our dedicated guide and easily fix this problem.
3. Make sure you’re not running a third-party antivirus
It is possible that you’ve installed another antivirus program on your computer. If such is the case, this may explain why you can’t update Windows Defender.
Uninstall the third-party antivirus solution from Control Panel, as you usually do with any program. In case this doesn’t completely remove it, use a software removal tool.
If you’re a Norton user, we’ve got a detailed guide on how to completely remove it from your personal computer.
4. Clean your registry
If your system files are corrupted, Windows Defender may not be able to download and install the latest updates.
In order to quickly scan and repair your registry, install a registry cleaner on your computer and let it do its job.
“Both MLB The Show 21 Xbox One and Xbox Series X|S Standard Editions will be included with Xbox Game Pass so members will be able to play the best version of the game regardless of which console they’re on. And with cross-platform play and progress, you can play against others online, and earn and use content across the platform and generation you choose,” said Jamie Leece, MLB Senior Vice President, Games & VR today.
MLB The Show used to be a PlayStation exclusive franchise, and MLB The Show 21 will be the first game in the series to ship on Xbox consoles. It will also support cross-platform play with players on PlayStation 4 and PlayStation 5 consoles, which is a pretty big turnaround considering Sony’s initial reluctance to enable crossplay with Xbox players in games like Minecraft or Fortnite.
It’s nice to see Sony’s MLB The Show video game series getting on board with Xbox Game Pass and Xbox Cloud Gaming, though it’s worth noting that the cross-gen game won’t support Smart Delivery on Xbox consoles. There are separate versions of the game for Xbox One and Xbox Series X|S consoles, and the next-gen version is $10 more expensive than the Xbox One version. Both the Xbox One and Series X|S versions of MLB The Show 21 will be available on Xbox Game Pass on launch day, and you can also get both of them by pre-ordering one of the two cross-gen bundles starting at $84.99.
Microsoft has announced the release of version 0.35 of its PowerToys suite of tools. The latest update brings some new features, such as shortcuts for swapping FancyZones layouts, plenty of notable improvements to various tools, and bug fixes.
First off, PowerToys FancyZones now has new keyboard shortcuts to swap between different layouts quickly. PowerToys Run also is receiving some new options, and users will now be able to specify the location of the tool on the screen. There are some general localization improvements with this release, too.
Unfortunately, the Video Conferencing Mute utility is not being added yet. “Yes we know we’ve stated this before, but we’re hyper focused on doing a 0.36 experimental release week of April 5th. We feel we are near ready to add in Video Conference mute into the stable release pending feedback from the pending 0.36 experimental release,” said Clint Rutkas, Program manager lead on PowerToys.
Here’s the full list of improvements and fixes in regards to PowerToys Run and FancyZones:
FancyZones
Added hotkeys and quick swap functionality for custom layouts! Users can now assign a hotkey in the editor and use it to quickly set a desktop’s zones with Ctrl + Win + Alt + NUMBER key binding, or by pressing the hotkey while dragging a window.
Fixed zone placement algorithm for when the Taskbar is vertical
Bug fixes
PowerToys Run
Users can specify where to show the launcher window. Thanks @addrum!
New plugin added to support opening previously used Visual Studio Code workspaces, remote machines (SSH or Codespaces), and containers! When enabled, use { to query for available workspaces. Thanks @ricardosantos9521! Please note, this plugin is off by default.
Shell history now saves the raw command instead of the resolved command. A command like %appdata% would now save in the Shell history as is instead of C:\Users\YourUserName\AppData\Roaming. Thanks @mayitbeegh!
Better logging to try to track down some bugs
Bug fixes
Finally, the general improvements section mentions an upcoming system requirements change for the PowerToys suite of tools. The software giant plans to remove the specific settings in PowerToys version 0.37, which currently supports older versions of Windows. Microsoft may revert this change with migration to WinUI3, but in the meantime, users will need to run Windows 10 version 1903 or higher to install the next major stable release.
We invite you to head to the GitHub releases page to download the latest update or check out the complete list of fixes for this version on this page.
Do you keep getting the OneDrive Script error? We let you know how to resolve it.
OneDrive is a cloud solution that works just like Google Drive, or Dropbox, for you to store your personal files securely, and access them anytime, anywhere, and from any device or browser.
Like every innovation, there are bound to be a few troubleshooting issues.
Users of OneDrive have expressed concerns about the OneDrive Script Error on Windows. This also happened with their personal accounts as well as OneDrive for Business. This may occur for the following reasons:
Active scripting, meaning that ActiveX controls or Java programs on your network or computer are blocked. Programs such as antivirus, firewalls, or Internet Explorer can also be configured to block active scripting, ActiveX controls or Java programs.
Corrupted or outdated scripting engine
Incompatibility with older versions of Internet Explorer
NOTE
Note: it is important to understand the make and model of your computer, where you downloaded the OneDrive application from, as well as the browser you are using. If Internet Explorer is your default browser, know which version is installed on your computer.
If you’re getting the OneDrive Script error on Windows, here are solutions to help you resolve the issue.
How do I fix the OneDrive script error?
1. Check your browser
If you’re on Internet Explorer and the OneDrive Script error issue arises, check these two things first:
That script errors are on multiple web pages because if they do, then the problem may be the pages themselves. You can also disable script debugging if you choose to ignore the errors. Don’t disable this function if the issue is on multiple sites.
That the problem is due to files or settings on your computer. You can use another user profile or browser, or even a different computer to view the pages that caused the OneDrive script error. If it doesn’t occur, then the issue is in files and settings on your computer.
There are three ways to resolve the problem with regards to Internet Explorer.
1. Verify that the Active Scripting, ActiveX controls, and Java programs are not blocked by your browser
Launch Internet Explorer.
Go to Tools
Click Internet Options.
Then, click on the Security tab.
Click the Default Level, then click Ok.
If these are blocked, it can disrupt web page displays. With the steps below, you can reset your browser’s security settings to unblock the three.
2. Remove temporary Internet files
Launch Internet Explorer.
Go to Tools.
Click Internet Options.
Click the General tab.
Go to Browsing History and click on Delete.
In the Delete Browsing History dialog box, select Temporary Internet Files, Cookies, and the History boxes, then click Delete.
Click Close then Ok.
Each time you open Internet Explorer, a local copy of your browsing history is stored in a temporary file. If these stored files folder becomes too big, you may have display issues. You can resolve this by clearing such files.
3. Install the latest Internet Explorer service packs and software updates
Download and install the latest service packs and software updates if you already don’t have them as they contain updates that can fix the OneDrive Script Error issue. You can do this via Windows Update.
You can also try downloading the OneDrive desktop app using Internet Explorer to check whether the OneDrive Script error issue persists.
4. Switch to a better browser
Internet Explorer is a really old browser. Even it’s newest counterpart, Microsoft Edge, even if it holds up really well to modern times, doesn’t compare to other browsers on the market.
Therefore, we recommend changing your browser to a better one that is constantly updated and optimized, and benefits from a multitude of features.
Opera
Opera is the fastest, most optimized, and feature-rich browser available at the moment!
You can create this using the Windows Media Creation Tool.
Boot Windows Technical Preview from the installation media.
Under Windows setup page, select Language to install.
Select Time and currency format.
Select Keyboard or input method.
Click Next.
Click Repair your computer.
Select Troubleshoot.
Select Automatic Repair, then choose the operating system.
A blue screen will appear with an option to choose from. Choose Troubleshoot.
Select Advanced options.
Choose Automatic Repair from the Advanced boot option.
Follow the prompt’s instructions.
Using Windows 10 installation media, you can use Automatic Repair to detect and fix any problems that prevent your computer from starting.
Such problems include drivers, program conflicts, malware, and memory.
However, if you do not have installation media, you can download and create Windows 10 installation media, then follow the steps below to perform the Automatic Repair.
Does the issue persist? If it does, try the next solution.
3. Enable Active Scripting
Right-click Start button and select Run.
Type inetcpl.cpl and press Ok.
Under Internet Options, select the Security tab.
Click the Custom Level button.
A Security Settings – Internet Zone dialog window will open.
Locate Scripting.
Go to Active Scripting.
Select Enable.
A warning window will pop up asking you Are you sure you want to change settings for this zone.
Click Yes.
Under Internet Options, click Ok to close.
Check whether you’re still having the OneDrive Script error issue.
4. Optimize OneDrive syncing with office files
To do this, verify that Use Office to work on files with other people at the same time option is unselected under the OneDrive app settings.
If you still get the OneDrive Script error issue, then the OneDrive sync is being interfered with possibly by the Office Upload cache. In this case, clear the cache for the Microsoft Office Upload Center files then check if this fixes the issue.
You can clear the cache by clicking Delete cached files or enabling Delete files from the Office Document Cache when they are closed. However, a listing of open files remains in the cache and is stored on your computer.
Any luck after this? No worries, there are more solutions ahead.
5. Install critical Windows Updates
Press the Windows Key + S and search for Settings.
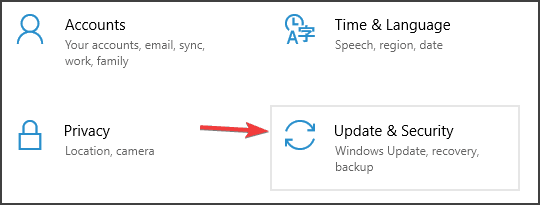
Open Settings and select Update and Security.
Go to Windows Update and select Check for updates.
Let Windows download and install any updates.
This will in turn update Internet Explorer, security definitions, and all the required drivers.
6. Check OneDrive system requirements for your computer
This helps you know if your computer meets the standard requirements for downloading and installing OneDrive.
For starters, OneDrive requires an active Microsoft account, so if you don’t have one, get signed up.
The desktop app requires the following:
An operating system of 32-64 bit version for Windows 10
A processor of 1.6 GHz or higher,
Memory of 1GB of RAM or more,
1024 x 576 resolution (minimum)
High speed internet access, and
NTFS or HFS+ file systems.
Users with the built-in OneDrive need to be aware that the OneDrive Script error occurs whenever JavaScript of VBScript code on an app affected by internet connection settings has a problem.
Since the program uses JavaScript, you need to make sure you installed Java on your devices.
The built-in OneDrive application uses Internet connection settings via Internet Explorer, so incorrect settings may affect the app, possibly leading to the OneDrive Script error.
We trust you’ve been assisted, but let us know if you have any further questions, issues, or additions to this article.
In today’s Internet world, it is very dangerous to run your computer without any protection. So, people install antivirus programs to keep their computer as safe as possible.
But the new operating system always brings some problems with itself, and this time Windows 10 caused problems with installing antivirus software to some users.
Your antivirus software should work just fine on the new Windows operating system, but if you’re unable to install it for some reason, follow the instructions below, and hopefully, you’ll solve the problem.
Several users reported that they are unable to install antivirus on their Windows 10 PC. Regarding antivirus problems, users reported the following issues:
Not able to install antivirus on Windows 10 – According to users, some of them are unable to install antivirus on their Windows 10 PC. This can occur if your antivirus isn’t compatible with Windows 10.
Virus blocking antivirus installation – Sometimes malware can prevent you from installing your antivirus. To fix that, you need to create a rescue disk on a different PC and use it remove the malware.
Antivirus program won’t install – In some cases, your antivirus won’t install due to file corruption. However, you can fix the problem by running DISM and SFC scans.
Computer won’t let me install antivirus – In certain cases, you can’t install an antivirus on Windows 10. This can happen due to certain third-party applications, so be sure to remove them.
What do I do if Windows 10 prevents installing an antivirus?
1. Turn off Windows Defender
Go to the Settings app, and then to Update and security.
Go to Windows Defender tab and click on Open Windows Defender Security Center.
Navigate to Virus & threat protection.
Select Virus & threat protection settings.
Uncheck Real-time protection.
Windows Defender is Microsoft’s built-in security tool, which protects your Windows 10 if you don’t have any other antivirus installed.
It shouldn’t make any problems with the third-party antivirus, but maybe some features of the antivirus conflict with Windows Defender, and that’s why you can’t install it.
So, try to turn off Windows Defender, and then install the third-party antivirus.
Now your Windows Defender is disabled, and you can try to install your antivirus program again.
2. Check if your antivirus is compatible with Windows 10
If you’re using some less famous antivirus, there’s a chance that it’s not compatible with Windows 10.
If you’re looking for antivirus that works with Windows 10, we have already given you a couple of recommendations in Solution 3.
3. Make sure you don’t have any other antivirus installed
You should know that two antivirus programs don’t function well together, so if you already have some other antivirus installed, you should uninstall it before you try to install the new one.
There’s a chance that you didn’t even know that you have another antivirus on your computer, as it maybe came as a bloatware, along with another software you installed on purpose.
So, head to Control Panel, then click on Programs and features, and if you have any other antivirus installed, just uninstall it and try to install your desired antivirus again.
Then again, you could choose an alternative antivirus altogether, one that doesn’t any compatibility issues at all, such as the one recommended below.
This solution is rated as being one of the top antivirus tools in the world in terms of sheer protection, and that is thanks to the constant live scanning features that do not slow your PC down in any way.
TotalAV
Try an antivirus that is really protecting your data but doesn’t interfere with your programs.
Sometimes third-party applications on your PC can interfere with your system and cause this problem to appear.
To fix the issue, you need to find and remove that application from your PC. Users reported that applications such as System Mechanic can cause this issue to appear, so be sure to remove them from your PC.
In order to completely remove an application, you need to use uninstaller software. These tools are designed to remove all files and registry entries associated with the problematic application, so be sure to use one for your applications.
Dedicated uninstaller software not only will remove any apps that are preventing you from installing an antivirus, but it will get rid of residual files as well since this too can contribute to such issue.
5. Run a SFC and DISM scans
5.1 Run a SFC scan
Press Windows Key + S, type cmd, and click on Run as administrator to open Command Prompt as administrator.
If Command Prompt isn’t available, you can also use PowerShell (Admin).
When Command Prompt starts, enter the following command and press Enter to run it: sfc /scannow
SFC scan will now start. This scan can take about 15 minutes, so be sure not to interrupt it.
Once the SFC scan is finished, check if the problem still persists. If the issue is still present, or if you were unable to run SFC scan, you’ll have to run DISM scan as well.
5.2 Run a DISM scan
Start Command Prompt as administrator as shown in the previous solution.
When Command Prompt starts, enter the following line, and press Enter: DISM /Online /Cleanup-Image /RestoreHealth
DISM scan will now start. This scan can take up to 20 minutes or more, so don’t interrupt it.
When the DISM scan is finished, check if the problem still persists. If the problem is still present, or if you were unable to run SFC scan before, try to run it again. After running SFC scan again, the issue should be resolved.
If your Windows 10 prevents antivirus install, the issue might be file corruption. Your system files can become corrupted and that can lead to this and many other problems.
Fortunately, there are several ways to fix file corruption on your PC. One of the easiest ways is to run an SFC scan.
SFC scan is designed to repair a corrupted Windows 10 installation.
6. Clean your PC with a dedicated tool
According to users, sometimes this issue can be caused by temporary files on your PC. To fix this problem, you need to remove temporary files.
There are several ways to do it, and the simplest one might be to use a dedicated tool. You already have the Disk Cleanup tool embedded in Windows but that doesn’t have too many features.
If you want to use a more complex tool, you might want to try using Ashampoo WinOptimizer.
This tool comes with advanced features and it will clean your temporary files as well as your registry, so feel free to try it out.
7. Perform a Clean boot
Press Windows Key + R and enter msconfig.
Press Enter or click OK.
System Configuration window will now open. Navigate to Services window and check Hide all Microsoft services.
Click the Disable all button.
Navigate to Startup tab and click on Open Task Manager.
A list of startup applications will appear. Right-click the first item on the list and choose Disable from the menu.
Repeat this step for all startup applications on the list.
After disabling all startup applications, close Task Manager and go back to System Configuration window.
Now click on Apply and OK to save the changes.
After doing that, restart your PC and check if the problem is resolved.
Third-party applications can interfere with your antivirus, and prevent you from installing it. If your Windows 10 prevents antivirus install, you might be able to fix the problem by performing a Clean boot.
This is rather simple and you can do it by following the steps above.
After you install your antivirus, enable all startup applications and services once again.
8. Restart the Windows Audio service
Press Windows Key + R and enter services.msc. Press Enter or click OK.
When Services window opens, locate Windows Audio service.
Right-click the service and choose Stop from the menu.
Wait for a few moments, right-click the service again and choose Start from the menu.
After restarting the service, try to install your antivirus again.
If your Windows 10 prevents antivirus install on your PC, the issue might be your services. Speaking of services, users reported that Windows Audio service is a common cause for this problem.
To fix the issue, you need to find this service and restart it.
9. Disable Fast Startup
Press Windows Key + S and enter power settings.
Choose Power & sleep settings from the list of results.
Now select Additional power settings.
From the menu on the left, select Choose what the power button does.
Now click Change settings that are currently unavailable.
Uncheck Turn on fast startup (recommended) option and click on Save changes.
Windows 10 comes with an interesting feature called Fast Startup. This feature combines shutdown and hibernation into one allowing your system to boot faster.
Although this is a useful feature, it can lead to certain issues. Speaking of issues, few users reported that this feature can prevent you from installing certain applications, such as your antivirus.
After doing that, the Fast Startup feature should be disabled. Keep in mind that your PC might boot a bit slower after disabling this feature.
That’s it! We hope that our solutions helped you fix the problem with the antivirus not installing in Windows 10 and you were able to do that. If you have any other suggestions, leave them in the comments section below.
Low memory could be one of the most annoying issues on your computer, especially if you just bought a new Windows 10 8GB laptop, and you know that everything should work smoothly.
The message is clear: Your computer is low on memory Windows 10! But luckily, there’s a solution for this annoying problem, and we hope it will be helpful to you like it was helpful to other users.
What to do if you have a low memory problem in Windows 10?
1. Close unnecessary processes from Task Manager
Right-click on a free spot on the taskbar and select Task Manager from the list.
Once the new window opens, you will see the list of processes and programs that are running in that moment.
Identify the program or process that is using excessive memory and end them but be careful not to close any system processes because you will cause other problems.
Closing any background programs and processes can free up memory and get rid of the low memory error in Windows 10.
2. Increase virtual memory in Windows 10
Press Windows logo and X at the same time.
Click on System and then on Advanced system settings.
Then click Settings from Advanced pane under Performance.
Click on the Advanced tab.
Click on the Change button below.
Uncheck Automatically Manage Paging File Size for all Drives.
Check the Custom Size and set Initial Size and Maximum Size properly.
Click Set and then click OK.
This procedure will set the right amount for the programs you’re using and block Windows from allocating too much memory for certain programs.
3. Perform a SFC scan to fix the registry
Press the Windows key + S, type cmd, then click on Run as administrator to start Command Prompt with full privileges.
Now type the following command and press Enter: sfc /scannow
Wait for the scanning process to complete and then restart your computer.
After this System File Checker scan, all the corrupted files will be replaced but the action will take effect after restarting your system.
According to reports, the main reason for overused memory in Windows is a memory leak, caused by some driver. So, to bring your memory usage to normal, you’ll have to either re-install or update that driver.
But first thing first, you’ll have to identify which driver is causing low memory issues. Here’s how to analyze your memory usage, and determine which driver needs to be updated or reinstalled.
Once you determine which driver is the problem, it’s easy to deal with it. You can head to Device Manager, and look for updates, or maybe you can try reinstalling that driver, it depends on your case.
All your drivers need to be updated, but doing it manually is very annoying, so we recommend you download a dedicated Driver updater tool.
We recommend Outbyte Driver Updater because it is able to update drivers in bulk, find the exact driver version you need for you hardware, and check your drivers on a regular basis.
All these while being light and easy-to use. The tool can scan your whole PC and update or repair any driver that requires it, or you can select the specific driver you want to fix.
Our solution should solve this problem but in case you’re still getting the Low memory or Out of memory error in Windows 10, you can check out our previous article about low memory in Windows, to find a solution
If you have any suggestions or you know about any possible solutions, don’t hesitate to leave us a comment in the dedicated section below.
Go to the following folder: C:\Documents\Sports Interactive\Football Manager 2016
Locate the graphics folder and delete it.
Football Manager 2016 players have experienced crashing issues, and according to them, these issues are caused by installed graphics such as kits, logos, etc.
If you are using any skins, it’s recommended to delete them by following the steps above.
2. Delete your preference files
Press Windows Key + R to open Run dialog. Enter %localappdata% and press Enter or click OK.
Go to the Sports Interactive\Football Manager 2016 folder.
Delete the Preferences folder and start the game again.
Sometimes crashes can be caused by corrupted preference files, and if that’s the case, we advise you to delete corrupted preference files. To do that follow the steps above.
We have to point out this folder isn’t related to your save game, and your saved games will remain intact even if you delete this folder.
3. Verify game cache
Start Steam and go to your game library.
Locate Football Manager, right-click it and choose Properties.
Go to Local Files tab and click Verify integrity of game cache button.
Wait for the process to complete.
If certain core files are missing, that can cause Football Manager 2016 to crash, so it’s advised you verify integrity of game cache. To do that, follow the steps above.
4. Change GPU Rendering to Software
Start Football Manager 2016, go to Preferences, and select Interface.
Go to General panel and change Rendering mode to Software.
Save the changes.
If Football Manager 2016 is crashing on your computer, be sure to set the GPU Rendering to Software. To do that, follow the steps above.
5. Make sure that your graphics drivers are up to date
Sometimes Football Manager 2016 crashes are caused by outdated graphics card driver, so be sure to update it. You can find all the necessary updates on your graphics card manufacturer’s website.
6. Turn off your antivirus
In some cases, your antivirus software can interfere with Football Manager 2016 and cause the game to crash. If that’s the case, you might have to temporarily disable your antivirus before you start the game.
7. Disable your audio devices
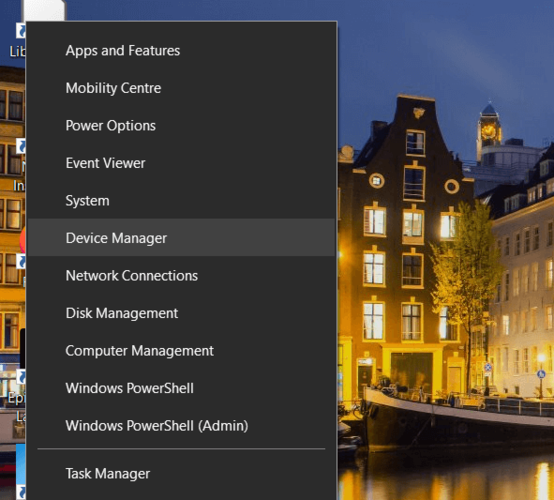
Press Windows Key + X and choose Device Manager from the list.
When Device Manager opens, go to Sound, video and game controllers section.
Right-click the audio device and choose Disable. Repeat this process for all audio devices.
Close Device Managerand start the game.
This is peculiar solution, but it can be helpful with Football Manager 2016 crashes.
Sometimes crashes can be caused by your audio device, and some users are suggesting that you disable it before starting Football Manager 2016. To do that, follow the steps above.
Your game will run without sound, but that’s normal because you’ve disabled audio devices. If crashing has been fixed, it means the problem is most likely related to your audio driver, so you should update it.
After you’ve done with Football Manager 2016, make sure to go back to Device Manager and enable your audio devices.
These are some of the ways to fix the FM 2016 crash dump in Windows 10 so make sure you try them.
Fix – Football Manager 2016 black screen
1. Run the game in borderless window mode
Open Steam and go to your game library.
Find Football Manager 2016 and right-click it. Choose Properties from the menu.
Go to General tab and click Set Launch Options.
Enter the following: -small_screen -windowed
Click OK and start Football Manager 2016 again.
Users have reported issues with black screen in Football Manager 2016, and in order to fix this issue, it recommended to run the game in windowed or borderless window mode.
To run Football Manager 2016 in windowed mode, follow the steps above.
Fix – Football Manager 2016 no sound
1. Disconnect USB peripherals and update audio drivers
If you have any problems with sound in Football Manager 2016, it’s recommended you unplug any USB peripherals, such as your printer or external hard drive, before starting the game.
In addition, you might want to upgrade your audio drivers.
Updating drivers manually is OK, but it can also be tricky and time-consuming. The easiest way is to use a dedicated software that will do that automatically.
The software recommended below will update and repair all the problematic drivers in just a single action with only a few clicks.
Fix – Football Manager 2016 won’t install
1. Disable your antivirus
If you have issues with installing Football Manager 2016, you try disabling your antivirus. After you’ve disabled your security software, try to install Football Manager 2016 again.
These are some of the most predominant Football Manager 2016 issues on Windows 10, and we hope that our solutions have helped you fix these issues.
The FM 2016 crash dump error is the worst in our list but our solutions will help you fix it in no time. Leave us a comment in the section below if you have more ideas.
Today’s world is so technologically advanced that we are slowly but steadily digitizing everything, from social security to digital signatures and crucial data. Living in such a world makes you prone to cyber-attacks.
Therefore, cybersecurity and data protection are mandatory if you wish to keep your data intact and your devices safe. This is where Acronis True Image comes into play. This software was made to protect your PC from both malware, and the occasional system crashes.
The product combines both data backups and antimalware systems to bring you a powerful tool that will protect your data at all costs, from accidents, threats, invasive or unwanted programs, and spyware.
Both a backup and a cybersecurity tool in one simple package
Acronis True Image 2021 is a personal solution that combines backup and anti-malware in one so it can guard your digital life from today’s threats – from hard disk failures to cybercriminal attacks. It’s powerful cyber protection that’s intuitive and easy-to-use.
Acronis True Image keeps your data authentic, ensuring safe data recovery in case of any breach or loss. In addition, it keeps all of it unaltered, defending it from corrupting malware.
It benefits from AI and behavioral algorithms that cannot be easily bypassed by new types of malware, detecting and stopping threats in real-time. Thanks to the backup integration, you can restore any affected file.
All of these are combined into one easily manageable, comprehensive, and really easy-to-use UI that can be used and understood by everyone.
What features does Acronis True Image bring?
Acronis True Image includes features that will ensure your safety at all times, and many options for you to customize. Let’s have a look at them, shall we?
Backup
Acronis True Image allows you to make backups of all your data. You can create backups on your own computer, your external drive, or you can upload them to the Acronis cloud.
Acronis doesn’t just have a backup system. It comes with a plethora of options such as scheduling, which allow you to decide when the backups are made, and under what conditions.
How do you make a backup?
Open Acronis True Image.
Click on Select Destination.
Choose where you would like to make the backup.
For our demonstration, we chose to make one on the local drive.
Select your folder then click Ok.
Click Backup Now to create a backup.
Let the program run its course.
If you wish to customize your backup or create a schedule, click Options.
There are lots of customization options for you there.
Protection
The next big component of Acronis True Image is its cybersecurity. Acronis True Image has all the settings and information regarding your system’s scans, vulnerability, and status under the Protection tab.
The first thing you will notice when selecting the Protection tab is a section containing the following:
Turn protection on/off: This will obviously turn the antimalware on or off. You can turn it off temporarily or indefinitely.
Detected Issues: this includes a list of all the issues that were found after scans.
Quarantine: A list of isolated potential threats found running real-time and scheduled anti-malware scans.
Protection exclusions: You control exclusion lists that allow approved programs to run uninterrupted.
The tab has two main sub-tabs, mainly Overview and Activity. The Overview tab contains information about the scanned files, the last time your PC was scanned, and how protected it is.
Now, to add a brief summary of the scanning system. You can perform Full scans, which are thorough and take longer or you can run Quick scans which will be faster as scans only scans critical areas and anti-malware most common locations.
Actually, the program will constantly perform Full scans by itself, and it does inform you when it will do so. In the Overview tab you there will be a section telling you when the next full scan will take place.
One last thing that you can find in the Overview tab is the Vulnerability assessment. This feature will give you a list of the vulnerable files and data in your computer.
In the Activity tab, you will see information about all the actions performed by the antivirus on your PC, with a date and a time attached to each and every one of them.
This is great when trying to keep track of changes in your computer, which will help you pin-point the exact moment when something harmful happened to your device.
Archive
Another nifty feature you will find is Archive, which allows you to free up some of your internal storage space by moving your files to an external storage or even the Acronis cloud.
These archives can be encrypted with 256-bit AES encryption which will ensure their safety and protection. The cloud has a multitude of data centers, so you can choose the one closest to you for faster upload speeds.
You can freely access your files easily with the Acronis Drive Folder from your computer, or directly from your browser.
How do you archive files?
Open Acronis True Image.
Select the Archive tab.
Click Analyze Home Folder.
Select the file you wish to archive.
Select a destination.
We chose the Acronis Cloud for this demonstration.
If you wish, click on Options and select the nearest data center.
Here you can also encrypt it with a password.
Press Ok, then Archive.
You will be prompted with a message giving you some information.
Select Yes, then wait for the program to finish moving the files.
Sync
The Sync feature is pretty self-explaining. Acronis True Image will sync your data across all of the devices which are signed-in with the same account. The feature works cross-platform with tablets, phones and PCs.
Tools
The Tools section includes many tools to save you time and optimize your data protection. That being said, let’s talk about each one of them.
Disk cloning
This feature allows you to clone your entire Operating System, applications, and data to a brand new disk. You will be able fully to utilize the disk since it will be bootable and completely identical.
Rescue Media Builder
This feature allows you to create bootable media which you can use to recover your computer in case something happens and you won’t be able to buy it anymore.
This is how you set up Rescue Media Builder
Open Acronis True Image.
On the Tools section, select Rescue Media Builder.
Select the Simple method.
Select which type of file you wish to make.
For this demonstration, we selected an ISO file.
Select the folder where you wish to save it and click Save.
Wait for the program to run its course and you’re set.
Acronis Universal Restore
This is Acronis’ own media creation tool. You can use this software to create a Universal Restoration media builder. This allows you to boot old systems on newer hardware, which is great when you replace old PC components.
How do you use Acronis Universal Restore
Open Acronis True Image.
Go to Tools, then select Acronis Universal Restore.
Follow the instructions in the new window.
The instructions require you to access their site and download another program.
Parallels Access
This feature allows you to remotely control your PC or laptop through your mobile device. You will need to download Parallels Access on your mobile.
Thanks to this app, you will have access to your computer at all times in case anything dangerous happens and needs to be solved immediately while you’re away.
Try&Decide
This small tool allows you to perform any potentially dangerous operations without worrying that you might damage your operating system, programs, or data.
This way, you can try out the software, see if it is harmful to your system, and when you’re done, you can revert everything back to how it was before you made any changes or installed the respective software.
System Cleanup
The System Cleanup tool will erase your saved computer passwords, other personal information, and activities saved in your device, thus protecting your privacy by eliminating the possibility of data theft.
Acronis Security Zone
Just as its name suggests, this is a specially allocated zone that is highly secured, and where all of your system’s backups will be stored and protected from any external harm.
Acronis Drive Cleaner
This tool will completely wipe off all the information on your partitions in case you wish to completely clean them.
Third-party Tools
Here you will find a collection of extra add-ons and tools that are really useful to have on your computer alongside Acronis True Image.
All Tools
This is just a collection of all the existing tools you can find in the software, all grouped in the same folder.
What about the price plans?
We will be honest with you, when it comes to pricing, Acronis True Image does not play around. The software runs on a yearly subscription, coming in the form of three price plans, for one computer, three, or five.
However, the program includes a whooping 30-day trial period for you to try out and explore it. Here are all the different price plans:
The Essential plan:
$49.99 billed yearly for one computer.
$79.99 billed yearly for three computers
$99.99 billed yearly for five computers.
Includes flexible backups
Active disk cloning
Quick recovery/Universal restore
Ransomware protection
30-day antimalware protection trial for device and data backup.
Tech support including mail, online chat, and phone
The Advanced Plan:
$89.99 billed yearly for one computer.
$129.99 billed yearly for three computers
$189.99 billed yearly for five computers.
Includes flexible backups
Active disk cloning
Quick recovery/Universal restore
Ransomware protection
Antimalware protection for device and data backup.
Tech support including mail, online chat, and phone
500 GB of extra cloud backup and features
Automatic data application in the cloud
Backups for Microsoft 365
The Premium plan:
$124.99 billed yearly for one computer.
$189.99 billed yearly for three computers
$209.99 billed yearly for five computers.
1TB of free cloud storage
Ability to add up to 5TB of extra cloud storage
Includes flexible backups
Active disk cloning
Quick recovery/Universal restore
Ransomware protection
Blockchain file certification
Electronic signatures
Antimalware protection for device and data backup.
Tech support priority including mail, online chat, and phone
Cloud backup and features
Automatic data application in the cloud
Backups for Microsoft 365
Acronis True Image
Keep your computer safe with the wide variety of awesome features included with Acronis True Image!
No cloud storage included in the cheaper price plans
Acronis True Image is software that offers more than just anti-malware protection since it includes a multitude of other useful tools. However, not everyone will make use of all those features.
We think that the program and its price are great for those who will actually utilize it to its full extent. In regards to those who are just looking for antivirus software, the price tag is a little bit too high.
Many users use Windows Server, even the older versions, so in today’s guide, we’re going to show you the best antivirus software for Windows Server 2003 and 2008.
If you’re running a Windows Server, it’s crucial that you protect it properly and make sure to install the latest updates and get reliable antivirus software as well.
Different antivirus solutions still support the latest release of Windows Server 2008, and some even work with Windows Server 2003. So let’s see what are the best options to choose from.
What is the best antivirus software for Windows Server 2003 & 2008?
ESET PROTECT Advanced offers reliable protection against zero-day threats with cloud-based sandboxing technology. It is the ideal solution for securing crucial business data.
An encryption feature is also available and it allows you to easily encrypt an entire disk. The software offers a cloud-based console allowing you to remotely manage your configuration.
Plus, this server antivirus offers endpoint protection for computers, smartphones, and virtual machines, so you can rest assured that your entire network is completely secure.
As for the file server support, the software works with Microsoft Windows Server 2019, 2016, 2012, and 2008. So if you’re using a Windows Server, feel free to install it on your PC.
ESET PROTECT Advanced
Protect your Windows Server against all threats with this cutting-edge antivirus.
This Bitdefender antivirus is the getaway for preventing malware and fishy activity on multiple server networks or business databases.
First, this solution works on various versions of Windows, including Windows Server 2008 R2. It also offers an advanced level of protection against brute force attacks, password stealers, and network exploits.
For maximum security, there’s layered protection for all security endpoints. Thanks to a single console, you can monitor the security of your workstations and servers with ease.
Bitdefender GravityZone Security also has advanced application behaviour monitoring. With its machine learning technology, you will be able to detect any suspicious activity in a few moments.
It’s worth mentioning that you benefit from layered ransomware prevention and mitigation strategies. So, you’re assured of web-based endpoint security and cyberattack monitoring for any device.
Bitdefender GravityZone Business Security
This tool offers the best protection for your business while offering Windows Server 2008 compatibility.
Vipre antivirus is incredibly straightforward, and you can get it up and running in a matter of minutes.
First of all, the application offers award-winning defence against all types of malware as well as ransomware.
With this solution, you can block malicious websites and keep all your computers in the network secured thanks to the integrated Patch Management feature. Moreover, you have trustworthy security against malware, ransomware and other risky threats.
The VIPRE antivirus also offers file encryption and advanced control for removable devices. As for the supported systems, the software works on Windows Server 2008 R2 and newer.
VIPRE
Try this anti-phishing antivirus for the best Windows Server 2008 protection.
Avast Business Antivirus Pro offers support for all versions of Windows Server, starting from Windows Server 2008.
The software offers advanced threat protection that analyzes the behaviour of malware and prevents it to infiltrate your server network.
At the same time, the application has a centralized management system, allowing you to easily manage all devices that are using Windows server protection software.
In conclusion, if you need dependable security for Windows Server, then Avast Business Antivirus Pro is exactly what you need.
Avast Business Antivirus Pro
Looking for an antivirus that works with various Windows Servers? You can count on Avast Business.
ClamWin is free antivirus software that works on all versions of Windows, including Windows Server 2003 and 2008. It is an open-source tool, so you can easily check its code if needed.
The application offers you a high detection rate against viruses and spyware. Plus, due to the scheduled scanning, you’ll be sure that your server is perfectly safe at all times.
Moreover, this software automatically updates your virus database, and it can scan files individually as well.
A worth-noting useful feature is an add-on for Microsoft Outlook that lets you scan attachments automatically.
Although Windows Server 2003 has reached its end of life, you can still find a couple of antivirus applications that work with it. However, we recommend updating to Windows Server 2008 or newer for improved security.
Concluding here, these are our top antivirus applications for Windows Server 2003 and 2008, so be sure to check them all. What is your antivirus of choice? Let us know in the comments below.
Blue Screen of Death errors such as CRITICAL_OBJECT_TERMINATION, can be caused by both hardware and software, and this is why these errors are sometimes so hard to fix.
Since BSoD errors can cause so many problems, today we’re going to show you how to fix this error on Windows 10.
How can I fix CRITICAL_OBJECT_TERMINATION BSoD error?
1. Repair your PC with a dedicated tool
A great idea for solving BSoD errors on Windows 10 is to restore your system to a healthier state, with specialized software that can also repair damaged files as well as keep you safe from dangerous websites.
These tools can automatically analyze your device for corrupted or damaged files and then repair them to restore normal operation.
2. Run the Hardware Troubleshooter
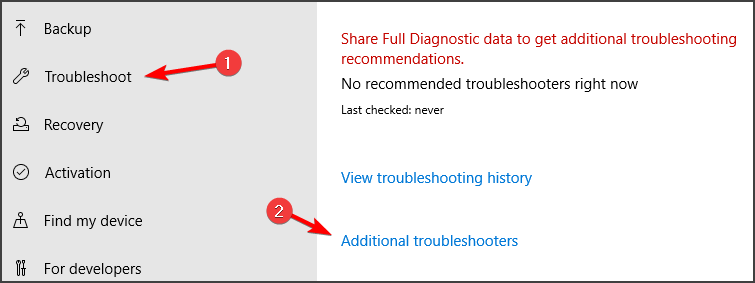
Open the Settings app and go to Update & Security section.
Select Troubleshoot from the menu on the left.
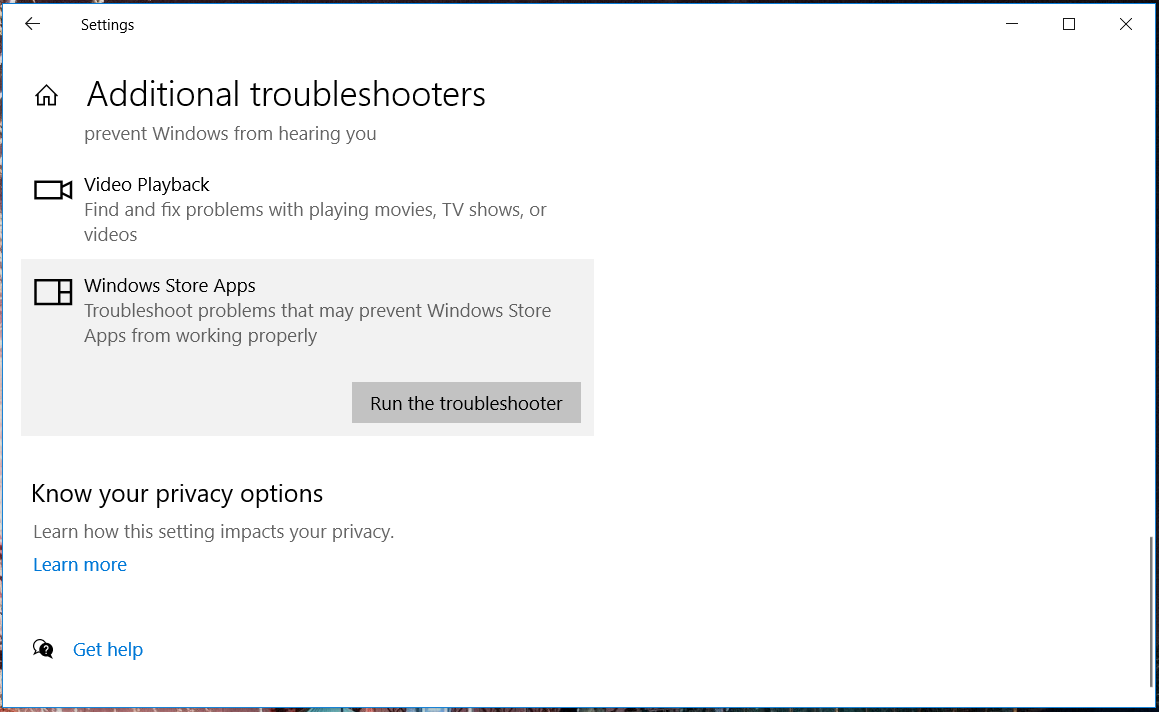
Select BSOD from the right pane and click Run the troubleshooter.
Follow the instructions on the screen to complete the troubleshooter.
If updating your drivers didn’t resolve the problem, we’re going to use Windows 10’s troubleshooting tools.
The first tool we’re going to use is the built-in troubleshooter that can be found in the Settings app. You can use this tool to resolve all sorts of issues within the system, including BSODs.
3. Run the SFC scan
Right-click on the Start Menu button, and open Command Prompt (Admin).
Enter the following line and press Enter:sfc/scannow
Wait until the process is done (it may take a while).
If the solution is found, it will automatically be applied.
Close the Command Prompt and restart your computer.
The next troubleshooter we’re going to try is the SFC scan. This is a command-line tool that goes through your system searching for potential issues.
Of course, if resolving these issues is possible, the SFC scan will do it automatically.
4. Update your drivers
4.1. Update drivers manually
Press the Windows key + R together at the same time on your keyboard.
This should open the Device Manager menu list.
From Device Manager click on the specific driver you need to update.
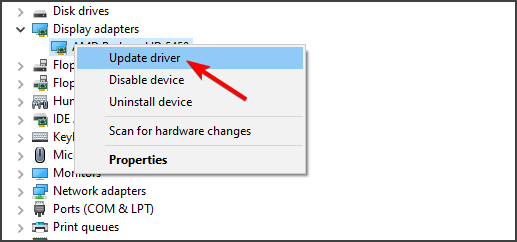
Right-click on the icon and choose Update.
If an update for this driver is available, follow on-screen prompts and install it.
Restart Windows 10.
Many BSoD errors are caused by outdated or incompatible drivers, therefore it’s important that update them in order to fix this error.
Updating drivers is fairly simple, and you can easily do it by visiting your hardware manufacturer’s website and downloading the latest drivers for your device.
4.2. Update drivers automatically
Searching for drivers on your own can be time-consuming. So, we advise you to use a tool that will do this for you automatically.
Using this automatic driver updater will scan your device right from the installation and provide you with an accurate report of all the elements that need to be updated, then download the missing patches in seconds.
Right-click Start and open Command Prompt (Admin).
Paste the following command and press Enter:
DISM /Online /Cleanup-Image /RestoreHealth
Wait until the scan is finished.
Restart your computer and try updating again.
And the third troubleshooter we’re going to use is DISM. Deployment Image Servicing and Management (DISM) is a powerful tool that reloads the system image. So, it can also resolve potential BSOD errors.
We’ll walk you through both standard and the procedure that utilizes the installation media below:
5.2. With the Windows installation media
Insert your Windows installation media.
Right-click the Start menu and, from the menu, choose the Command Prompt (Admin).
In the command line, type the following commands and press Enter after each:
Make sure to change an X value with the letter of the mounted drive with Windows 10 installation.
After the procedure is finished, restart your computer.
6. Remove problematic applications from your PC
Third-party applications can often cause Blue Screen of Death errors, and users reported that Comodo Optimizer was the cause for the CRITICAL_OBJECT_TERMINATION error.
According to users, after removing the Comodo Optimizer the issue was resolved, so be sure to remove this software if you have it installed.
Another common cause for this error can be your antivirus or firewall, so we advise you to temporarily uninstall any third-party antivirus programs that you have installed.
Windows 10 comes with Windows Defender that works as a default antivirus, so even if you remove your third-party antivirus, your PC won’t be completely defenseless.
We have to mention that uninstalling the antivirus software might not fix the problem, so be sure to use a dedicated removal tool and remove all files associated with your antivirus.
If removing the antivirus fixed the problem, you can now reinstall your antivirus or you can switch to a different antivirus program.
You can also access the BSoD file log location in order to find out the main reason why your PC crashed and what actual program is causing this annoying error.
7. Update your SSD firmware
Many users reported that the CRITICAL_OBJECT_TERMINATION error was caused by outdated SSD firmware, and in order to fix this error, it’s recommended that you update the firmware on your SSD.
Updating your firmware is an advanced procedure, and it can cause damage to your SSD if you’re not careful, therefore be extra careful if you decide to update SSD firmware.
8. Disable TRIM on your SSD
Press Windows Key + X on your keyboard to open Power User Menu and choose Command Prompt (Admin) from the list.
When Command Prompt opens, insert the line below and press Enter to see if TRIM is enabled or disabled. If you get 0 as a result, it means that TRIM is enabled and you need to disable it. fsutil behavior query DisableDeleteNotify
If TRIM is enabled, insert the line below and press Enter: fsutil behavior set DisableDeleteNotify 1
Close Command Prompt.
According to users, disabling TRIM can sometimes help you with CRITICAL_OBJECT_TERMINATION error. Bear in mind that this is just a workaround, but it might be helpful to you.
9. Turn off Hotplug for SATA devices
Few users reported that theCRITICAL_OBJECT_TERMINATION BSoD this issue can be fixed by turning off Hotplug for SATA devices in BIOS.
To see how to enter BIOS and how to turn off Hotplug for SATA devices, we strongly advise you to check your motherboard manual for detailed instructions.
We also recommend you stay informed on the factors that usually are at the root of this problem. Check out this ultimate guide on all the causes that generate the BSoD error.
10. Check your swappable SATA board
Many SSD drives come with swappable boards that you install on your PC and use to connect your SSD.
Sometimes these boards might stop working, and you’ll have to replace the faulty SATA board with a new one. Alternatively, you can just connect your SSD directly to the SATA port on your motherboard.
11. Set the Drive mode to ATA in BIOS
Sometimes CRITICAL_OBJECT_TERMINATION error can be caused by certain BIOS settings, most commonly Drive mode.
According to users, you need to change the Drive mode in BIOS to ATA in order to fix this error. For detailed instructions, we strongly suggest that you check your motherboard manual.
As an alternative solution you can also try some high-quality specialized software that can get you out of the predicament, so you should take a look at this article on the best BSoD repair tools.
12. Replace your SATA cables
Few users reported that this error was caused by SATA cables, and according to them, replacing the SATA cables fixed the Blue Screen of Death error, therefore we strongly advise you to check and replace your SATA cables.
CRITICAL_OBJECT_TERMINATION BSoD error is often caused by your hard drive or SSD, and if you’re having this problem, we strongly suggest that you try some of our solutions.
Since Windows 10 is available as a free upgrade, users can rollback to the previous version in the first month after the upgrade.
Unfortunately, many users reported blue screen after reverting to the previous version of Windows. This can be a big problem, therefore today we’re going to show you how to fix it.
How can I fix the blue screen after Windows 10 rollback?
1. Use third-party solution
The blue screen after Windows 10 rollback is a Blue Screen of Death error that upsets many users. However, there is a fast and efficient manner to solve it: use third-party software.
We recommend powerful technology that will safely repair and secure your computer. This kind of repair software is ideal for any PC user as it offers you important benefits.
2. Deactivate Turbo memory driver
Start Intel Turbo Memory console.
Uncheck Enable Windows ReadyBoot and Enable Windows ReadyDrive.
According to users, Intel Turbo Memory can cause blue screen after Windows 10 rollback to appear. Therefore, it’s advised that you disable it.
In addition to disabling Intel Turbo Memory, some users are also advising to remove the Intel Turbo Memory module from the system as well.
3. Change your hard drive mode in BIOS
Some users claim that this problem is caused by your hard drive mode, and in order to fix this problem you need to change it. To do that press Del or F2 while your computer boots to enter BIOS.
Once you enter BIOS locate hard drive mode setting and switch between available modes.
These are UEFI, Legacy, Raid On, and AHCI, and you must try them until you find the one that works for you.
For detailed instructions on how to enter BIOS and how to change your hard drive mode we strongly suggest that you check your motherboard manual.
4. Uninstall the problematic drivers
Press Windows Key + X to open Power User Menu and select Device Manager from the list.
Find the driver that you want to uninstall, right-click it and choose Uninstall device from the menu.
If available, check Delete the driver software for this device and click OK.
After you remove the driver restart your PC. When your PC restarts Windows will install the default driver instead of the deleted driver.
According to users, this issue can sometimes occur due to your drivers, and in order to fix this issue you need to find and remove the problematic driver.
Users reported that touchpad or display driver can cause this problem to occur, therefore you might want to remove them. To do that follow these steps:
If the default driver works well you can continue using it, but if there are any problems you might have to update it.
5. Install the latest drivers
According to users, sometimes this issue can occur if your drivers are out of date. To fix this problem, it’s advised that you update all your drivers.
To do this manually, you need to find the model for each hardware device on your PC and download the latest drivers from the manufacturer.
As an alternative, you can use a performant driver management software to help you with this task. Download and install it, then let it perform a full scan of your operating system.
Once the scan has ended, this solution will provide you with a detailed report of missing, damaged and outdated drivers. From there, it is up to you to choose to download and install one or all drivers found.
In some instances, your USB devices can lead to blue screen, and in order to fix this problem, it’s advised to disconnect the unnecessary USB devices. This includes USB hard drives, flash drives, printers, wireless adapters, etc.
As a rule of thumb, you should only keep your keyboard and mouse connected to your PC in order to troubleshoot the issue.
If the issue doesn’t appear after disconnecting certain devices, try connecting them again and wait for the problem to reappear.
If the issue reappears, it’s probably caused by your drivers. Alternatively, it’s possible that a certain USB device is faulty, so you might have to replace it.
7. Remove the problematic applications
It’s possible that a certain application is causing the blue screen to appear after Windows 10 rollback. Sometimes the application might be damaged, and that can lead to a blue screen and many other issues.
However, you can fix the problem simply by finding and removing the problematic applications.
You can usually uninstall the problematic application right from the Settings app.
Although this method is the simplest, it’s not always effective. Even if you remove an application, it can still leave certain files and registry entries that will interfere with your system.
To completely remove an application, along with all of its files and registry entries, you can use uninstaller software. It is a special application that can remove any software from your PC.
In addition, this application will remove all files and registry entries associated with the application you want to remove, thus completely removing the application from your PC.
We suggest you should try reliable uninstaller software. With Powerful Scan and File Shredder features, this tool will completely remove leftovers or stubborn plug-ins without any hassle.
Restart your computer a few times during the boot to start Automatic Repair.
Choose Troubleshoot > Advanced options > System Startup and click the Restart button.
When your computer restarts again, press 5 or F5 to choose Safe Mode with Networking.
When Safe Mode starts you need to find and remove your antivirus software. If you cannot access Windows at all due to blue screen error, you can remove the antivirus programs from Safe Mode.
Blue screens are often caused by certain software, most commonly your antivirus.
So, if you’re having this problem after rolling back from Windows 10 we suggest that you remove all third-party antivirus programs from your PC.
Users reported that Avira and Kaspersky antivirus caused this problem to appear, but bear in mind that almost any third-party antivirus can cause this error.
9. Perform a Clean boot
Press Windows Key + R and enter msconfig. Now click OK or press Enter.
From System Configuration, navigate to the Services tab, check Hide all Microsoft services, and click Disable all.
Navigate to the Startup tab and click Open Task Manager.
Right-click the first entry on the list, choose Disable from the menu. Do this for all entries on the list.
Return to System Configuration, click Apply and OK to save changes and restart your PC.
After your PC restarts, check if the problem is still there. If the issue doesn’t appear, it means that one of the disabled applications was causing the problem.
To find the problematic application you need to enable services and applications one by one until you manage to recreate the problem.
Once you find the problematic application, you need to remove it using the uninstaller software or keep it disabled.
If you’re having blue screen errors after Windows 10 rollback, the problem might be third-party applications or services. It’s advised to perform a Clean boot like in these above-mentioned steps.
Blue screen after Windows 10 rollback can be a big problem, but we hope that you managed to fix this issue by using one of our solutions.
If you’re having issues accessing Microsoft 365 services right now, you’re not alone. The software giant has acknowledged that several Microsoft services including Microsoft Teams, Azure, Dynamics, and Xbox Live may be inaccessible for some users due to a DNS issue, and the company is currently working to mitigate impact.
We're investigating a potential DNS issue and are evaluating our mitigation options.
— Microsoft 365 Status (@MSFT365Status) April 1, 2021
Microsoft will provide live updates about these intermittent issues on the Microsoft 365 Status Twitter account, the Microsoft 365 Health Status page, and the Azure Status website. If you’re an Xbox gamer, you can also get live updates on the Xbox Status site. As of this writing, the Xbox team has acknowledged various issues affecting Xbox Live sign-in, multiplayer gaming, Cloud Gaming, and Store and subscriptions.
In the latest update posted on Twitter a couple of minutes ago, the company said that it has “rerouted traffic to our resilient DNS capabilities and are seeing improvement in service availability. We are continuing to investigate the cause of the DNS issue.” The company plans to publish another update in an hour or earlier as events warrant.
Update 5PM PT: Microsoft says that the issue should now be resolved. “We have confirmed that the underlying DNS outage has been mitigated. Currently we’re validating the recovery of the downstream Microsoft 365 services,” the company said on Twitter.
Blue Screen of Death errors is one of the most serious errors that you can encounter on your Windows 10 PC. They shut down your device and all of the unsaved progress of your projects or work will possibly be lost.
These errors can be sometimes hard to fix, since it is hard to pin-point exactly the root of the problem. Therefore, today we’re going to show you how to fix PAGE_NOT_ZERO error.
Since fixing a Blue Screen of Death manually is pretty hard to do on your own, especially when you don’t have a lot of background knowledge, you should look for something else to help you with the problem.
Downloading a third-party system restoration tool will be really helpful because the software will automatically scan your system for any possible data corruption and fix it on its own.
PC repair tools are able to accurately detect the underlying issue that causes the BSoD in the first place. They use their own system file database to replace or repair any damaged system files.
Moreover, you can use them as optimization tools for all sorts of PC issues. They can help you clean your PC, fix high CPU usage, repair virus damage, and more.
2. Download the latest Windows 10 updates
Press Windows Key + S then type in Settings.
Go to Update & Security.
Select Windows Update, then Check for updates.
Allow Windows scan for newer versions and install all of them.
Blue Screen of Death errors can be caused by both hardware and software issues, and if your operating system has problems with certain hardware or software, you can fix those problems by downloading the latest patches.
Microsoft is constantly working on Windows 10, and new patches are released frequently. Many of these patches bring improved security, new features, and various bug fixes related to both hardware and software.
If you’re experiencing any Blue Screen of Death errors on your Windows 10 PC, we strongly advise that you use Windows Update and download the latest patches.
3. Run the BSOD Troubleshooter
Open the Settings app and go to Update & Security section.
Select Troubleshoot from the menu on the left.
Select BSOD from the right pane and click Run the troubleshooter.
Follow the instructions on the screen to complete the troubleshooter.
In case updating your drivers didn’t get the job done, let’s try Windows 10’s built-in troubleshooting tool.
This tool is designed to deal with various system issues, including the BSOD problems. So, it might be helpful when resolving the PAGE_NOT_ZERO error, as well.
4. Install the latest drivers
Blue Screen of Death errors, such as PAGE_NOT_ZERO, can be caused by outdated or buggy drivers. Drivers are especially important because they allow your operating system to work with your hardware.
If a certain driver is outdated or not compatible with Windows 10, you might experience a BSoD error. To fix BSoD errors, it’s important that your drivers are up to date.
You can update the necessary drivers simply by visiting your hardware manufacturer’s website and downloading the latest drivers for your device.
Bear in mind that you might have to update all drivers on your PC in order to fix this error.
4.1 Update drivers automatically
Searching for drivers on your own can be time-consuming. So, we advise you to use a tool that will do this for you automatically. Using an automatic driver updater will certainly save you from the hassle of searching.
The program will always keep your system up to date with the latest drivers, so you won’t have to worry about updating them or any compatibility issues.
Go to Search, type cmd, and open the Command Prompt (Admin).
Enter the following line and press Enter: sfc/scannow
Wait for the scan to complete (it will take a while)
The tool will automatically resolve the problem, if possible.
Now, close the Command Prompt and restart your computer.
Another troubleshooter that could be helpful here is the SFCscan. This is a command-line tool that scans your system for potential flaws, and resolves them, if possible. So, it could also resolve the PAGE_NOT_ZERO error.
6. Run DISM
Right-click Start and open Command Prompt (Admin).
Paste the following command and press Enter: DISM/Online/Cleanup-Image/RestoreHealth
Wait until the scan is finished.
Restart your computer and try updating again.
And the final troubleshooting tool we’re going to try is DISM. This is perhaps the most powerful troubleshooter, as it deploys the system image all over again.
We’ll walk you through both standard that utilizes the procedure above and the procedure that utilizes the installation media below:
With the Windows installation media
Insert your Windows installation media.
Right-click the Start menu and, from the menu, choose the Command Prompt (Admin).
In the command line, type the following commands and press Enter after each: dism/online/cleanup-image/scanhealthdism/online/cleanup-image/restorehealth
Now, type the following command and press Enter: DISM/Online/Cleanup-Image/RestoreHealth/source:WIM:X:SourcesInstall.wim:1/LimitAccess
Make sure to change an X value with the letter of the mounted drive with Windows 10 installation.
After the procedure is finished, restart your computer.
7. Check the hard drive
Enter the Advanced Startup (Restart your computer while holding the Shift key).
Choose Troubleshoot > Advanced Options.
Select Command Prompt from the list of options.
When Command Prompt appears, enter the following lines and press Enter after each line in order to run it: bootrec.exe/rebuildbcdbootrec.exe /fixmbrbootrec.exe /fixboot
Some users are also suggesting that you need to run additional chkdsk commands as well.
To perform these commands, you need to know drive letters for all your hard drive partitions.
In Command Prompt you should enter the following (but remember to use the letters that match your hard drive partitions on your PC): chkdsk/r C:chkdsk/r D:
Restart your computer and check if the issue is solved.
This is just our example, so keep in mind that you have to perform chkdsk command for every hard drive partition that you have.
If there’s a problem with your hard drive, BSOD issues are quite possible. To check if that’s the case, run the chkdsk command.
This command will scan all your partitions for potential problems. If the solution is available, this tool will also apply it.
8. Temporarily remove your antivirus program
It’s not uncommon for Blue Screen of Death errors to be caused by third-party software such as your antivirus. According to users, Both Avast and Bitdefender can cause these types of errors to appear.
Therefore be sure to remove that software from your PC. Uninstalling the software might not be enough since antivirus programs are prone to leaving certain files and registry entries behind after you uninstall them.
To completely remove an antivirus program from your PC, we strongly suggest that you use a dedicated removal tool.
Almost all antivirus companies have a dedicated removal tool for their software available for download, so be sure that you download it and use it.
Even though users reported Avast and Bitdefender as the main causes for PAGE_NOT_ZERO Blue Screen of Death error, you should know that almost any antivirus program can cause this error to appear.
It’s advised to remove all third-party antivirus programs from your PC. If removing the antivirus fixes the error, you can now reinstall it, or you can switch to different antivirus software.
Make sure that all files related to your antivirus software are completely removed from your system before you try to install a new one.
We encourage you to check our detailed list of the best antivirus software on the market and choose one of the products that fit your needs.
9. Update BIOS
Few users reported that they fixed PAGE_NOT_ZERO Blue Screen of Death error by performing BIOS update. By updating BIOS you’ll unlock new features of your motherboard thus allowing it to work with new hardware.
Bear in mind that updating BIOS is a potentially dangerous procedure, so be extra careful if you don’t want to cause any damage to your motherboard.
To make sure that you update your BIOS properly, we strongly advise you to check your motherboard manual for instructions.
10. Reset Windows 10
Restart your computer a few times during the boot sequence to start Automatic Repair.
Choose Troubleshoot > Reset this PC > Remove everything.
You might get asked to insert Windows 10 installation media, so be prepared to do so.
Select Only the drive where Windows is installed > Just remove my files and click the Reset button.
Follow the instructions to complete the reset.
If this error is caused by certain software, you can easily fix it by resetting Windows 10. This procedure is similar to clean install, so we advise you to back up all your important files before you start it. In addition, you might also need a bootable USB flash drive with Windows 10 on it, so be sure to create one. To reset Windows 10, do the following:
After you complete the reset don’t install any software. Instead, test your PC for a while and check if the error appears again. If the error appears again, it’s probably caused by your hardware.
11. Check for faulty hardware
If you’re having PAGE_NOT_ZERO Blue Screen of Death error, we strongly advise that you check your RAM first. Several users reported that faulty RAM can cause this error to appear.
We strongly advise you to test if your RAM is working properly. Sometimes you just have to place your RAM into a different slot in order to fix this error.
If your RAM is working properly, check other hardware components. Users reported that a faulty CPU caused this error, so be sure to check your processor first, and then move on to other components.
PAGE_NOT_ZERO Blue Screen of Death error is usually caused by software or faulty RAM, but you can easily fix it by using one of our solutions.
It would really help us if you left any feedback or suggestions regarding the subject in the comment section below, so don’t hesitate to do it.
If you are already using PowerToys, you may already know of all of the helpful utilities available to make your life easier, including Keyboard Manager. Another bonus of PowerToys is the Image Resizer utility, which allows you to ability to resize images in bulk without the need to open an image editor.
Once the Image Resizer utility is set up, you can resize images directly from File Explorer or the desktop on Windows 10. In just a few short steps you will have Image Resizer set up and running. Here’s what you need to do.
If you don’t already have it installed, you need to download and install PowerToys from GitHub. After the installation process is complete, launch PowerToys from your desktop or Start menu and toggle on “Enable Image Resizer.”
Close the PowerToys window and try resizing images in File Explorer or desktop on Windows 10 using right-click.
Resize images in File Explorer or desktop
Once Image Resizer is enabled, locate the images you want to resize in File Explorer or on your desktop. Select the images individually or in bulk (as shown) with your mouse and right-click them. In the menu that pops up, select Resize pictures.
The Image Resizer menu will appear, requiring you to choose a size from the list (or enter a custom size), select the options you want and then click Resize to resize your pictures.
Once completed, your resized images will save in the same folder as the source images. Image Resizer will definitely save you a lot of time if you need to resize images in bulk.
Additional Image Resizer Settings in PowerToys
If you want to change the default small, medium, and large sizes, you can adjust the dimensions of the default sizes in the Image Resizer settings in PowerToys. Here’s what you need to do.
Open PowerToys and on the Image Resizer options page, there are three sections available; Images sizes, Encoding, and File.
Image sizes
In Image Resizer options, Image sizes defines the small, medium, large, and Phone (as seen on mobile devices) default sizes available. You can rename and change any of the sizes to your own preferences and add an infinite or finite number of custom sizes. Each image size can also be configured as Fill, Fit or Stretch. The dimensions that you use for resizing can also be changed as Centimeters, Inches, Percent and Pixels. Keep in mind, the width and height of the specified size may be swapped to match the portrait or landscape orientation of the resized image. In order to always use the width and height as specified, be sure to un-check Ignore the orientation of pictures.
Encoding
There is also an Encoding section to provide even more customization settings for your images. By default, Image Resizer will save the resized image in the source image file format. However, in the instances that Image Resizer is unable to resize the image in the source image format, Image Resizer will use the Fallback encoder option available here. You can also configure the JPEG percentage quality level, PNG interfacing, or TIFF compression.
File
The File section is allows you to indicate the resized images’ file name format. The default file format includes the original file name with the size you select. You also have several other options that you can add to the File section to change how your resized images are saved. Here are the file parameters available as provided by Microsoft.
%1: Original filename
%2: Size name (as configured in the PowerToys Image Resizer settings)
%3: Selected width
%4: Selected height
%5: Actual height
%6: Actual width
Bear in mind, you don’t need to use any of these additional Image Resizer Settings in PowerToys, but it is helpful to know what these settings do just in case you find a need to use them later.
What program do you use to resize your images in Windows 10? Let us know in the comments!
For podcasting and video conferences on Microsoft Teams or Slack, it’s often great to use an external desktop microphone. Using one in favor of the built-in microphone from your PC, headset, or webcam helps boost your voice, and makes you sound a little bit more professional — and less like you’re sitting inside of a tin can.
Movo, a company which is known for its audio, video, photography, and smartphone equipment, recently reached out via email and sent over one of their best-selling microphones for me to sample. Here’s a look at how I used the Movo UM700 Desktop Studio Microphone in my life and why it’s great for podcasting, and Microsoft Teams calls.
Premium design for a desktop studio microphone
First off, I want to get into the design of the microphone. Naturally, the Movo UM700 desktop microphone looks a lot like a Blue Yeti. It features a solid metal base, and design, which is important for the $125 price point on Movo.com. The only bit of plastic on the mic comes on the swivel stand. This is on the sides where you can adjust the tightness of the screws on the mount. The mic is also cool to the touch and feels premium no matter where you touch it.
Yet despite being made of metal, the UM700 is quite compact. I was able to move it between my podcasting setup and my work from home desk without worrying about the weight. Movo says it weighs around 2.3 pounds, which is quite manageable.
Thanks to the included base (there’s a felt material on the bottom which grips your desk) you can point the microphone in any direction you want. However, it is best practice to keep the mic facing upwards to get the best audio quality. The base helps you adjust the mic to your own settings.
I felt that having the UM700 in the camera frame during OnPodcast made me feel quite professional. The design is quite simplistic, and it looks great in the camera frame. It isn’t bulky, it doesn’t require screws or mounts to set up, and it sits cozily on a desk to fit with any aesthetics.
Features that you want in a desktop studio microphone
In terms of features, the UM700 doesn’t disappoint. The most important one is the plug-and-play compatibility. You just need to plug your microphone into your PC or Mac to get started. The connection happens via Micro USB, with the cable being included in the box.
The cable is quite long, too, which means the mic can be far away from your PC if need be. I liked this because the USB port on my laptop is on the left side, and I keep the mic on the right. The extra cable length gives me room to play.
Other big features onboard the UM700 include its adjustable polar patterns, headphone jack, dial controls, and a mute switch. There’s even room for a 5/8″ thread for mounting, too.
All of these are features you want on a premium microphone. But interestingly, the dials on the UM700 are bigger than what you’d find on a Blue Yeti. I liked this, as it makes it easier to grab onto the dial and change settings on the fly.
On the polar patterns, there are four to choose from. These patterns help adjust the microphone to different scenarios. It’s great to see these different patterns as it gives you more bang for your buck. You won’t be stuck to using the microphone for just one thing. It can be your do-it-all microphone should you decide to move on from podcasting to something else later on.
Anyway, the stereo pattern uses the left and right channels on the mic for a wider sound image, say for playing guitar, or acoustics. The Omnidirectional pattern picks up sound equally from all sides of the microphone, for natural voice and for conference calls. The Cardioid pattern is recommended for podcasting gaming, or Twitch, as it records sound directly in front, and rejects sounds from the sides and the rear of the microphone. And finally, there’s the Bi-directional pattern. This one records from the front and rear and is suggested for interviews.
As I used my UM700 for podcasting, I depended a lot on the Cardioid pattern. I’ll talk about that more in the next section, but this mode definitely helped elevate and clear up my voice. When I hopped on Skype or Teams calls, meanwhile, I switched over to the Omnidirectional pattern.
The final thing of note is the headphone jack, gain control, and mic gain switch. With these, you’re in total control of your sound and experiences. I plugged my headphones into the UM700, and I was able to control the volume coming out of Teams independently from my PC.
It’s great to be able to do this, as when you’re podcasting, you don’t want to awkwardly put your hands on your PC while on camera to get to a volume slider. I was able to make slight hand movements and adjust the gain and the volume quite subtly. The mute mic button is nice, too. I use this when Kareem is speaking on OnPodcast, to avoid the feed picking up noises in the room around me and give Kareem the spotlight.
I do have a note on the patterns. It’s best to pick a pattern and stick with it before you record. Switching pattern mid-recording doesn’t always switch over while you record, so be a bit careful here.
The audio quality is great
Design and features are one thing for a mic, but the audio quality is the most important. I’ll say that in my use, here is where the Movo UM700 really does exceed expectations. It captures 48kHz/16-bit broadcast quality sound and runs on the frequency response of 20Hz to 20kHz.
Now, I’m not an audiophile, and I’m not the technical type when it comes to audio. However, you can see a sample above in OnPodcast Episode 27 where I switched to the Movo UM700 microphone and judge for yourself by watching and listening.
Previously, I was using a generic microphone, and you could tell so by going back to previous podcast episodes. That mic picked up the echo in the room, as well as ambient noises around me. The UM700 does a better job of canceling out those ambient noises, as well as echoes, too. It puts emphasis on my voice, and my voice only, largely thanks to the Cardioid pattern.
Other than the Cardioid pattern, I also used the Omnidirectional pattern. I set up the microphone to pair up with a Dell monitor that I am reviewing and gave my family a voice call using the UM700.
Set in the Omnidirectional mode, the mic picked up both my voice, as well as my father’s voice, who happened to be sitting quite a ways away. I already podcast through Teams, but for this reason, I can see the mic being useful for personal Teams calls, or Skype calls, too.
An all-around excellent desktop microphone
After using the Movo UM700 for two weeks, I think it’s a great microphone. The design is quite premium, and fits well with my podcasting needs. Granted, I am not an audiophile, I also think the audio quality shapes up well, too. The Movo UM700 is definitely a microphone to consider if you’re new to podcasting, or just looking to boost your set up at home.
Robinhood is among the leading trading apps for stock, options, and exchange-traded funds (ETFs).
This app is appealing to investors as it offers commission-free investing with no account minimums.
Robinhood is also an intuitive app that’s straightforward to utilize, so this gives it even more of an edge when it comes to competing applications.
What countries is Robinhood available in?
Lots of investors might be interested in adding Robinhood to their Android or iOS mobiles. However, the app is restricted to a small number of countries.
Robinhood is not currently available in all but two countries. You can only register a Robinhood account and download the app in the USA and Britain.
There are also a few more requirements for users in those countries to set up a Robinhood account.
Users in the United States must be 18 years or over, be U.S. nationals, and have valid social security numbers. If you don’t meet those requirements, you can’t register a Robinhood account in the USA.
Alas, there aren’t really any tricks that will enable users outside Britain and the U.S. to utilize Robinhood.
To download the app, users can change their Apple App Store and Google Play account settings to the USA. However, users still won’t be able to register a Robinhood account to utilize the app.
Can I utilize Robinhood in Windows 10?
The app itself is not available for Windows 10. However, users can utilize Robinhood’s browser web app.
Alternatively, you can install an Android emulator to utilize the Robinhood mobile app within Windows.
Can I utilize Robinhood on vacation?
Some registered Robinhood users might wonder if they can still utilize the mobile app outside of their countries when on vacation.
Yes, you can still utilize your Robinhood account and app in the vast majority of countries when on holiday.
However, the U.S. Office of Foreign Assets Control restricts U.S. financial services in a few (currently five) sanctioned countries. So, you won’t be able to access your Robinhood account within a sanctioned country.
What can I use instead of Robinhood?
There are plenty of trading apps, but we stick with eToro, which is available in 140 countries all over the world. eToro brings an easy-to-use, intuitive interface, plus innovative trading features.
The tool includes 2000+ financial instruments such as stock, crypto suited for novices and experienced Forex and CFD traders alike, and ready-made copy portfolios and strong data protection policies. The platform is considered a safe, low-risk broker to trade Forex and CFDs.
Beginners, but not exclusively, will find the CopyTrader technology a gold gem since they can borrow the same trading techniques used by more successful traders to learn from.
eToro USA LLC does not offer CFDs, only real Crypto assets are available for US users.
eToro
Dive into the secrets of cryptocurrency trading with this app which is available in over 140 countries all over the world.
74% of retail investor accounts lose money when trading CFDs with this provider. You should consider whether you can afford to take the high risk of losing your money.
Disclaimer: This ad promotes virtual cryptocurrency investing within the EU (by eToro Europe Ltd. and eToro UK Ltd.) & USA (by eToro USA LLC); which is highly volatile, unregulated in most EU countries, with no EU protections & not supervised by the EU regulatory framework. Investments are subject to market risk, including the loss of principal.
That being said, some might be surprised Robinhood is restricted to two countries after about five years since its launch. However, financial markets in countries are closely regulated.
Robinhood Markets Inc. needs to gain the required permissions to expand its trading service to other nations.
So, for now, most of the world must wait for Robinhood to expand more. Australia and Canada are two countries that Robinhood Markets Inc. has hinted it might extend its trading app to in the future.
We hope that the information from this article managed to answer your questions. If you have any other curiosities, don’t hesitate to leave a comment.
If you’re a casual consumer of third-party applications (especially free ones), you’ve probably seen various offers during the installation, with a variety of different applications.
When it comes to Yahoo! Powered program, things are not as transparent. This tool installs in the background and then completely overtakes your browsers.
And, seemingly, it’s rather hard to remove once it’s installed in your Windows 10 OS.
We decided to shed some light on this and provide you with the recommended solutions on how to uninstall Search Powered by Yahoo.
How can I remove Yahoo! Powered from Windows 10?
1. What’s Yahoo! Powered and what does it do?
Yahoo! Powered is the PUP (Potentially Unwanted Program) which tends to install in the background while you’re installing some other third-party application.
We already wrote about the adware search bars and browser hijackers and their tendency to hide in plain sight.
Say, if you choose the Standard installation (which most users do) instead of the Custom, chances are that the Yahoo PUP will install without you even knowing.
So, be careful with freeware applications – they can infect your PC with something you obviously don’t want. And you won’t be aware until it’s too late.
Once you accidentally get this tool on your PC, it’ll disrupt your browsing experience by changing the home address and default search engine on one or multiple browsers and plague you with ads.
However, in comparison to some other similar malicious tools, this application is quite resilient when it comes to uninstalling.
And due to its non-virus nature, there’s a chance that antivirus solutions won’t recognize it as a threat.
Some users reported that it, even after they remove it from the Control Panel, it was still present in their respective browsers. Luckily, there are a few ways to remove it for good.
2. Use a malware removal tool
Download the antivirus using the link below.
Run the tool and click Scan.
Wait until the tool scans your system and then select what to do with the detected programs.
Restart your PC.
One way to do so is to use a dedicated malware and adware remover like the one recommended below.
Not only does it function like a standard antivirus tool that removes all unwanted malware from your PC and prevents them from getting there in the first place, but it can also handle programs that are installed, but are PUPs.
TotalAV
Any time you have a PUP in your PC that needs removing, TotalAV will get rid of it quickly.
Removing this application from your system requires a 3-stage procedure. Firstly, you’ll need to uninstall the carrying program from your PC.
One efficient way to remove programs and all associated sub-programs from your PC is by using a dedicated uninstaller.
We recommend picking one of the best uninstaller software on the market, that will wipe your PC clean of any program that you deem unnecessary.
They are generally very straightforward. Simply open the software, select the program that needs removal, and then select to delete all leftover files as well.
This will ensure that no PUPS will be left behind, that your storage has been freed up, and that you can perform a clean reinstall as if for the first time.
That’s it. After these steps, you will completely remove Search Powered by Yahoo from Windows 10.
If you still have problems with the Yahoo! Powered uninstall, check our list with the best PUP removal tools. For any other questions or suggestions, feel free to leave them in the comments section below.
If your antivirus is blocking EXE files in Windows, it can prevent you from installing, running, or even accessing certain apps. This can happen with third-party antivirus tools or Windows Defender blocking EXE files by mistake. Here’s how to fix it.
How can I unblock the EXE files blocked by my antivirus?
Disable real-time protection and install the program.
Open Avast user interface from the notification area.
Open Settings.
Choose General.
Open Exclusions.
Click on the File Paths and then on Browse.
Navigate to the folder where the EXE file is stored.
Here you can choose to exclude the entirety of the folder or just an individual EXE file.
Confirm changes and enable real-time protection.
Avast is a great antivirus software with one of the highest detection rates for malware or other computer viruses. However, sometimes it can block harmless files.
If you want to learn more about Avast antivirus, its requirements, and its benefits, don’t hesitate to visit our dedicated guide.
2. How to stop ESET from blocking a file
Kill the real-time protection and install the program.
Open ESET from the notification area and press F5 to open the Advanced Setup.
Open Web Access Protection.
Select Exclusions.
Click on Add… in the right pane.
Follow the path to the EXE file and exclude it. You can exclude the containing folder, as well.
Confirm changes and turn on real-time protection again.
ESET is a modern security solution, suitable for all your devices, that is AI-powered in order to keep you protected from old and new threats. But, false positives can still appear.
If you are also using a VPN client and find that is blocked by ESET antivirus, we recommend you take a look at our step-by-step guide to fix the problem.
3. How to stop Avira from blocking a file
Right-click on the Avira icon in the notification area and disable the real-time protection.
Install the program.
Now, expend the Avira from the notification area.
Click on Extras.
Select Configuration from the contextual menu.
Open PC protection and then Scan.
Select Exceptions and then Add.
Exclude an individual file or the whole folder.
Now, get back to PC protection and expand Real-time protection.
Click Exceptions and then Add.
Exclude the same file/folder as above.
Confirm changes and enable Real-time protection.
Avira has won multiple awards over time, due to its high detection rate and very few false positives during testing. Use the above steps if an EXE is detected as malware.
Keep in mind that your antivirus can affect system files as well, and that can cause uihost.exe error and many other issues.
4. How to stop Bitdefender from blocking a file
Disable the real-time protection and install the troubling program.
Click on Protection.
Choose View features.
Select Settings.
Open the Exclusions tab.
Click on the List of files and folders excluded from scanning and then Add.
Add the file or folder you want to exclude.
Confirm the selection and re-establish Real-time protection.
Bitdefender is another well-known antivirus with high detection rates. It can protect your computer from almost any cyber threat.
If you want to know more details about this great antivirus software, don’t hesitate to check our dedicated guide.
5. How to stop Malwarebytes from blocking a file
Open Malwarebytes.
Select Settings.
Choose Malware Exclusions.
Click Add file if you want to exclude the EXE file or Add folder if you want to exclude the whole folder.
Follow the path and select the file/folder you want to make invincible for further scans.
Confirm the selection and run the program.
Malwarebytes protects you against malware, ransomware, malicious websites, and other advanced online threats. But, if he detects your EXE files as malware, just follow the above steps.
6. How to stop Windows Defender from blocking a file
Open Windows Defender from the notification area.
Select Virus & threat protection.
Open Virus & threat protection settings.
Scroll down and select Add or remove exclusions under the Exclusions section.
Click on Add an exclusion and select file or folder you want to exclude.
Confirm selection.
Windows Defender is a great built-in security tool that is integrated into your OS. However, this is basic protection and sometimes harmless files can be detected as viruses.
That should do it. Again, we must stress your computer is at risk if you decide to whitelist an EXE file that’s actually malware.
You can also try to use another antivirus with no false positives or almost none. If you don’t know exactly what to choose, spare your search time and head to our dedicated guide.
Steps from this guide can also be used if you ever encounter the Couldn’t download virus detected error, so don’t hesitate to try them.
So, do act with caution. Feel free to share your thoughts on the subject in the comments section below.
Drivers, or better said, problematic drivers are one of the top reasons for issues with updates and even BSoDs.
Microsoft changed the way how they validate drivers and with Windows 10 version 2004, they made it easier and safer to download and install new drivers.
All driver updates are now listed under the View optional updates option. That means that you don’t need to check for drivers in the Device Manager anymore.
According to a recent document issued by Microsoft, they will evaluate better the quality and reliability of a Windows 10 driver update by analyzing the data coming from cohorts.
The cohorts refer to a set of systems and devices that share the same targeting attributes including HWID, CHID, and OS version.
Another idea behind this move was that hardware manufacturers would able to block updates when you try to install incompatible drivers.
How can I check for drivers using View optional updates?
Click on the Windows button and hit the Settings button (the cogwheel above the Power button).
Next, click on Updates & Security.
In the Windows Update window, click on the View optional updates option.
In the next window, you will see the Driver updates category but no updates.
Click on Driver updates in order to expand with possible updates.
Check the boxes of the drivers you want to install and click on the Download and install button.
How can I find out which drivers I installed?
If you installed the drivers and have some issues with it, you can always go to the manufacturer’s website and download a previous version. But how do you know which one had a problem?
It’s simple, you just need to check the history of updates:
In the Windows Update window, click on the View update history option.
Click on the Driver updates option and you will see the list with all the previous drivers you installed complete with their versions.
Use a driver updater
Dedicated driver updater software pulls off several driver-related tasks with just a couple of clicks.
Once installed, if you run the tool it will scan your device and return a full list with all the installed drivers, their status and recommended actions.
This would be the easiest way to find out the latest drivers you installed, or if any driver is missing or needs updating, plus get recommendations of matching software.
For many Windows 10 and 8 users, the brightness option is no longer available in Windows 10, Windows 8, or Windows 8.1 and this is causing a lot of frustration among users. Read below how you could fix this.
If you are a new Windows 10, 8, or Windows 8.1 user, then everything probably seems totally different and new for you. But everything is just as simple as before, so don’t fret.
The brightness option, of course, is available in Windows 10, 8, or Windows 8.1 and is actually very simple to find.
To find the brightness option, just press windows logo+w to open the Search Charm and just type brightness and select the settings.
But if your problem is related to pressing a key on your keyboard or laptop, like the user below suggests on the Microsoft forums, then you need to try some other fixes.
for some time the brightness button after you press settings in the sidebar is unavailable before I installed windows 8.1, with the shortcut keys on the wireless keyboard accompanying my all-in-one Toshiba not working. the brightness work first when I originally got the computer but does not now. is it because of an update?
How do I enable the brightness option in Windows 10?
1. Change your power plan settings
From the Start Screen, type Control Panel and select it.
Set the View by: dropdown to Category.
Select Hardware and Sound.
Select Power Options.
Select the Change plan settings link on your current power plan.
Select Change advanced power settings.
Expand Display.
Expand Enable adaptive brightness.
Change the setting to On and select OK.
If your Windows Defender is giving you warnings about setting the brightness to maximum, you can disable it by following this quick guide.
2. Update your display drivers
Press the Win Key + S and type Device Manager.
Open Device Manager.
Expand the Display adapter section and select your GPU.
Right-click on your GPU and select Update driver.
Users should also try updating their display drivers to fix the brightness unavailable Windows 8.1 error. They can do that by using the Device Manager method which we explained in detail above.
If you are using an Nvidia or AMD GPU you might try to download the latest drivers from your manufacturer’s website, which could solve your problem.
2.1 Update drivers automatically
Updating your drivers manually requires you to check your hardware model and search for the latest compatible driver version available.
Such a process is tedious, requires a lot of time, and is not safe if you have no background knowledge. Thankfully, there are other ways to automatically download and update your drivers.
You can get the latest driver versions for your PC hardware components using automated support from specialized software such as Outbyte Driver Updater.
This resourceful tool will help you manage every aspect of your drivers, starting from installing missing drivers or fixing damaged ones that might lead to risky BSoD issues.
The main problem that a Windows user can have is upgrading to the latest version and not finding the brightness option.
For those of you who struggle with that, here’s the right fix for you. You will find all the possible solutions in order to fix this issue.
If you have a Windows 10 OS, you may have the brightness set to maximum. Many users reported this malfunction from different laptop models and PC configurations.
The term antivirus has become so ingrained in tech culture, that almost everyone is familiar with its meaning. Chances are you have a PC running Windows 10, and you’re wondering if you still need one.
After all, Windows 10 is the most advanced and secure desktop operating system to date. The short and simple answer is yes, and we’re going to explore five reasons why an antivirus is still a necessity.
Do you need antivirus for Windows 10?
1. Microsoft itself ships Windows 10 with a built-in antivirus
The most obvious reason why antivirus software is still a necessity for most users is Windows Defender.
Yes, even Microsoft – the company behind the Windows operating system that currently runs on over 1.5 billion PC – began integrating a basic antivirus solution with the release of Windows Vista in 2006.
Years later, things haven’t changed all that much, except for the explosion of security threats.
Today we have hundreds of millions of new PCs shipping every year with Windows Defender as an integral part of Windows 10, which comes pre-installed on many of these devices.
It provides a basic layer of security until you install your own choice of antivirus.
For this reason, you should choose a professional antivirus that will keep your operating system virus-free.
Use a third-party antivirus
To be sure your computer’s operating system is free of errors, viruses and that your sensitive data will not be obtained by unauthorized sources, you must take a little bit further. Windows Defender cannot handle all of these issues alone,, which means you have to use a professional software.
If you need a fast and light software to keep your computer healthy, safe and optimized, then TotalAV is just what you need.
This performant antivirus is the perfect tool for gamers as well as average users wishing to have uninterrupted sessions of work or gaming at their computers. It is compatible with Windows, Mac, and Linux operating systems.
TotalAV has created TotalAV to run without requiring a lot from your computer resources. This means you can play, watch movies or work at your computer while this antivirus is active without experiencing any slowdowns.
Once TotalAV has been downloaded and installed, let it scan and he will do what he knows best: to clean your computer of viruses, worms, ransomware, spyware, and all types of malware.
TotalAV
TotalAV is your computer’s best ally as it will detect and remove any virus, malware, worms, ransomware and spyware.
2. An antivirus can be used for easy setup of security rules
If you’re running the latest version of Windows 10, you can use the new Windows Defender Security Center to do more than just scanning for viruses.
Additional features include Device performance & health, Firewall and network protection, App and browser control, and Family options.
The Windows Defender Security Center can provide you with additional tools, which is pretty good for a free tool, but still not enough when it comes to traditional, paid third-party solutions.
There are free versions available from third parties, but they’re just as limited, and some will even nag you with pop-up ads.
There’s a good reason why some antivirus vendors have changed the branding of their products to reflect how paid tiers of their products provide you with more than a simple virus scanner tool.
Some even offer mail spam protection, web browsing privacy protection, or use your mobile device as a strengthening tool for your PC’s security.
3. Antiviruses have evolved to match new security threats
Most of you have probably heard or read news about classic types of malware, such as Trojans, worms, keyloggers, and backdoors. These would typically infect users through things like email attachments or downloads from suspicious websites.
After that, they would spread to all devices in a local network, causing even more damage. All of them are different methods used to take advantage of your sensitive information.
Microsoft has been improving the security of Windows with each new release, rendering many of the classic viruses obsolete. In turn, the bad guys have devised new ways to attack and take over control of your PC.
One notable example is ransomware, which steals your data and makes it technically impossible to access unless you pay the thieves in a way that makes it very unlikely to ever identify them.
In the meantime, antivirussoftware has evolved to deal with such threats. It can now provide special protection for your important folders, prevent malware from starting with Windows, and set up a trusted application whitelist.
Some antiviruses even prevent an attacker from modifying their settings or uninstalling by locking things under a user password.
4. Your web browser is not as secure as you think
Chances are you spend the most time using a web browser, and this is also one of the main targets for the bad guys. As much as Google, Microsoft, and others like to tout how safe their browser is, the reality is that all of them have flaws.
That leaves you vulnerable until you get an update, which can take some time depending on the complexity of fixing the flaw.
On top of these, the classic phishing attacks still work. Attackers can hide malicious code in ads, auto-playing video, or social media campaigns masquerading as legitimate competitions or giveaways.
Once you click on these, you’re infected. And since there’s no visual clue of what has happened, you may not even know it.
Some attacks involve redirects that take you from a legitimate service to an infected or masquerading web page.
As you’re trying to log in, you basically give away your credentials to the bad guys. Good antiviruses typically analyze the web page code and will warn you if it’s malicious.
5. The antivirus as an additional layer of security
But I’m careful what I do with my PC and on the web is what some users may say. But you can never be too careful about security, and good practices are not enough to keep your PC safe. Thinking proactively about security will lower the risk of data and financial theft, or identity fraud.
As medics say: prevention is better than the cure. Here are some of the situations where an antivirus can provide some precious additional security:
online shopping, banking, and trading;
using public Wi-Fi;
sharing links, files, or even your PC with others;
clicking on ads, giveaway links;
watching adult content;
when using social media or exploring the web;
when downloading files, media, and software from the web
Some of you may even think that antiviruses can catch malware only after the fact. In reality, the best security solutions today analyze the behavior of any app you run.
This increases the chances of discovering a security threat before it even has a chance to do any harm.
What about Windows 10 S?
Microsoft says that Windows 10 S is more secure because it only runs sandboxed apps from the Microsoft Store. That’s true to some extent, but it’s not the whole story.
You’re only less likely to get spyware and adware from the Store – which is curated by Microsoft.
You’ll only be able to use Microsoft’s Edge browser in Windows 10 S, which is still vulnerable to attacks. Your important files still need protection from ransomware.
Even sandboxed apps from the Store are not the holy grail of security. On top of that, the default account on Windows 10 S is still is vulnerable to attacks.
The takeaway is this: an antivirus is still as important as being careful and keeping your software up to date. Also, there’s no need to spend a fortune on an antivirus.
Companies like Bullguard or Bitdefender offer more affordable tiers that fit your specific needs. What do you use as a security solution?
Feel free to share your experience with us via the comments section below.
Twitter released their latest set of release notes earlier today detailing all of the major and minor changes that have been made to the Twitter web app that powers the official Windows 10 Twitter app and, naturally, the web app that’s accessible via web browsers on PCs, tablets, and Xbox One and Xbox Series X consoles.
The two biggest changes made include the addition of a new Topics menu option for users to follow, unfollow, and manage topics from and the first sign of support for Fleets, Twitter’s Instagram Story-like feature.
While the Windows/web version of Twitter doesn’t have full support for Fleets just yet, such as a full menu along the top of the screen that displays new Fleets to view, users are now able to watch Fleets in full from within a Message (DM) once someone replies or reacts to one they’ve made.
For example, if you make a Fleet on the iOS or Android Twitter app and someone responds to it, you’ll be able to read their response and watch the Fleet in question via the Messages tab.
Fleets: We’ve enabled DM Fleet previews and the Fleet viewer screen for all.
Nudges: When Retweeting a Tweet that contains a link to an article, you’ll now be shown a nudge prompting you to think about reading the article before you share.
Topics: There’s a new page for browsing and picking Topics. You can find it by going to the Topics screen via the More menu, and clicking “More Topics”. You can also navigate there directly via twitter.com/i/topics/picker.
Topics: We’re experimenting with showing Topics to follow in the sidebar on widescreen views to give you more examples of Topics you may be interested in.
Updated
Accessibility: Voiceover will now read out labels for government and state-affiliated media when focusing a Tweet that includes these labels.
Accessibility: Improved focus navigation and voiceover when navigating into a Tweet within a conversation.
Accessibility: Corrected accessibility markup on Buttons that act as links to other pages, or reposition you on the current page.
Account: Improved readability of error messages on the account login page.
DM: Improved dynamic display for larger numbers of avatars in the DM conversation information section for group conversations.
Emoji: Updated emoji to Twemoji 13.0.2. Visual coverage of the changes can be found at Emojipedia, and more specific information can be found at GitHub.
Lists: Added screen name to the add/remove from Lists menu action for additional context.
Notifications: Increased the number of avatars that are shown for condensed notifications on the notification screen.
Nudges: Improved the look and feel of article nudges shown at various screen sizes when Retweeting a Tweet with a link to an article.
Fixed
Bookmarks: The floating compose button will now show properly on the Bookmarks screen on mobile clients.
Composer: The cursor will now start at the beginning when auto populating the composer with a hashtag from an Event or other source.
Composer: Opening scheduled or drafted Tweets from the inline composer will no longer display an empty composer modal.
DM Drawer: The popover menus that are displayed for DM messages will no longer scroll with the body of the page when using the DM Drawer.
DMs: Fixed an issue where the DM muted accounts timeline would show as empty after navigating away and back.
DMs: When sending media through DMs, the composer will no longer incorrectly clear, and will become disabled until the media has actually sent.
Events: Fixed issues with cropping on Event header images.
Lists: The Lists menu item will no longer disappear at smaller screen heights.
Lists: Corrected an issue where clicking on Followers on the List screen was showing an error screen.
Lists: Fixed an issue where rapid presses of the next button when creating a List would create duplicates.
Profile: We will no longer show the location icon if the location is empty.
Scrollbars: Updated a number of places where scrollbars were being shown when they shouldn’t have been.
Topics: Fixed an issue where clicking on Topics in the carousel was not requesting new items as needed.
Topics: Unfollowing a Topic from within the home timeline will now correctly show a confirmation prompt.
Tweets: You will no longer be able to trigger the modal for blocking via keyboard shortcut on your own Tweets.
Tweets: We will now show the properly localized timezone on the Schedule Tweet page.
Looking for the best antivirus software for Windows XP SP2? Even though XP is old, many still use it, and since Microsoft stopped support, having a reliable antivirus is a must.
We picked the top free options that protect your PC without slowing it down. Let’s find the right one for you.
Another great antivirus for Windows XP SP2 is Malwarebytes. Keep in mind that newer versions of Malwarebytes aren’t supported by Windows XP, however, the company is still releasing security updates for older versions.
Regarding the software, it will remove all types of malware and viruses with ease, and thanks to real-time protection, it will stop any infection before it causes any damage.
Malwarebytes is light on your resources, so you won’t even notice that it’s running, which makes it perfect for older computers.
It comes with advanced shields that will keep all vulnerable software and system safe from any type of exploits.
Malwarebytes also creates the first line of defense in real-time by blocking malicious website before you can access them, keeping you protected in advance.
Malwarebytes
Protect yourself from attacks that threaten your personal information, files and financial well-being.
AVG is a trusted solution that combines artificial intelligence with crowdsourced data from millions of users to stay ahead of hackers.
The tool tells you about unsafe web pages and links, blocks dangerous attachments and possible malware, and updates its definitions in real-time to keep your PC safe.
Also, note that AVG is very quiet and runs in the background without slowing down your Windows XP computer.
AVG continues to protect Windows XP customers by releasing updated virus definitions and software updates for AVG Internet Security.
Windows XP users continue to benefit from up-to-date protection against viruses, malware, and other threats, but they should be aware that the risks of using an unsupported operating system increase over time.
AVG Internet Security
Windows XP is no longer supported, so you need to consider enjoying third-party protection.
Just like Malwarebytes, Webroot also has a legacy version that is still compatible with Windows XP SP2. The software is incredibly fast, and up to 60 times faster than other antivirus software, according to the developers.
The software is lightweight, and it doesn’t store antivirus definitions on your PC, instead, it will store them in the cloud, so they won’t take any of your storage space.
The software offers real-time protection against all types of malware, but it will block phishing websites, malicious websites, and all types of ransomware with ease.
Webroot Internet Security Plus provides cloud-based online threat protection for all your devices, protecting you no matter how you connect or where you are.
It scans faster, uses less system resources, and protects you in real time by identifying and blocking new threats as soon as they emerge.
Webroot Internet Security
All the protection you need for safely browsing the web.
This security software is designed to work on all versions of Windows, and according to the developers, Windows XP is still supported. In terms of security, this antivirus will protect you from all types of malware and ransomware.
360 Total Security uses 360 Cloud Scan Engine, 360 QVMII AI Engine, QEX, and Kunpeng engine to protect you from all types of malware.
360 Total Security also has privacy protection in terms of webcam protection and keylogger blocking, as well as online shopping protection that will keep your online transactions secure.
With multiple engine protection, you are sure that no threat will touch any of your sensitive and private data.
You are safe all around, from internet and privacy protection to WiFi checkups and additional security to even tune-up tools to speed up your computer.
Although Windows XP SP2 isn’t officially supported by Microsoft, there are still a handful of antivirus applications that work with it.
Are you still using Windows XP? Let us know in the comments section what is your antivirus software of choice.
Wrapping up
While Windows XP SP2 is no longer supported by Microsoft, protecting your PC remains crucial. The antivirus tools listed here offer reliable security without slowing down your system, making them ideal for older machines.
Don’t forget to keep your PC running smoothly with trusted optimization tools and additional antimalware software for layered protection. Stay safe and share your favorite antivirus in the comments below!
Bitdefender recently launched a Bitdefender BOX version, upgrading the previous release.
This new cybersecurity hub for the smart home brings more power, more storage as well as a bevy of new features and options.
Bitdefender BOX 2 adds support for dual gigabit Ethernet, enhances Wi-Fi power, and uses advanced machine learning algorithms combined with intrusion and prevention systems to quickly detect threats and nip attacks in the bud.
This Wi-Fi security solution combines hardware, cloud, and software to protect all IoT devices, including those that have absolutely no built-in security features.
Bitdefender BOX 2 – secure all your IoT devices
This tool monitors and secures all the devices connected to your Wi-Fi network. There is no need to use multiple Wi-Fi protection tools on each and every device – Bitdefender BOX 2 has got your back.
Moreover, Bitdefender confirmed that BOX 2 protects your mobile devices even when you are away from home.
Smart devices and intelligent gadgets are becoming more and more popular, and hackers are aware of that. IoT security is a very hot topic, as many reports already confirmed that smart devices are extremely vulnerable to threats.
Therefore, purchasing the Bitdefender BOX 2 is a must if you want to stay one step ahead of cyber attackers. In our opinion, along with the Cujo, it is one of the best IoT home firewall devices to have.
Bitdefender BOX 2 key features include:
Management for all the devices in your Home Network from a single mobile app.
Parental controls to monitor your kids’ online activities and manage screen time.
Fully compatible with your Home Network
Maximum Internet Speed – rest assured, this tool won’t affect your Internet speed in any way.
Includes a 1-year subscription to Bitdefender Total Security. For more information, this antivirus solution, check out our review.
Destiny 2 is an awesome free-to-play online game enjoyed by millions of players in the whole world.
If you’ve played any online game before, you probably know already about lagging, packet loss, and geo-restrictions and how using a VPN can help you overcome them.
On the other hand, a worrying amount of users talk about how using a VPN can get you banned from Destiny 2.
In our guide we’ll help you learn more about this topic and how to avoid getting banned in Destiny 2.
Does using a VPN get you banned in Destiny 2?
Long story short, using a VPN doesn’t and shouldn’t get you banned if you’re using it to play Destiny 2.
Bungie’s Terms of Service forbid you from using any third-party tool that may help you get the upper edge in a game.
These tools include, but are not limited to trainers, mods, autofire, aimbots, and anything else that modifies the game to give you an unfair advantage.
Therefore, if you’re not doing anything shady with your VPN, there’s no reason for you to receive a Destiny 2 ban.
However, it’s worth mentioning that a lot of players complain about VPN users in-game.
Apparently, during PVP, where latency is best kept at a minimum, VPN players can inadvertently make other players lag.
This, in turn, could give them an advantage as well as an opportunity to increase their frags at the expense of other players’ loss.
The detection rate of an antivirus product is only one aspect of its entire security suite offering.
An antivirus detection rate helps you block, delete, and/or warn you about the possibility of malware and other suspicious activity in your computer.
There are security software tools that deliver various scans to successfully find and eliminate threats that can damage your device, including viruses, malware, ransomware, and other types of cyber threats.
Thus, most of these best antivirus with the highest detection rates listed here have passed the test with amazing results.
What’s the best antivirus software with a high detection rate?
TotalAV is an antivirus software with a top-notch detection rate that successfully protects your device against damaging threats and viruses.
It has a WebShield feature that defends your PC against phishing and scam websites that are created to harm your device, compromise security, and steal your personal data.
TotalAV helps you block annoying ads, pop-ups, and notifications that fill up the screen when you’re browsing your favorite sites.
You can schedule smart scans to run at your preferred time and guarantee that your system remains safe all the time.
TotalAV
Monitor your device with TotalAV and eliminate any harmful threats that can compromise your security.
This antivirus has scored one award after another earning top marks when it comes to tests on antivirus with the highest detection rate in comparison to the industry average, which is about 99.7 percent.
While some independent tests may reveal different scores, the Bitdefender detection rate offers 100 percent accuracy.
A spot check across some of the top independent antivirus software reviews shows that Bitdefender scores anywhere between 98 percent to a near-perfect 99.9 percent.
Bitdefender’s Antivirus is one of the best antimalware for Windows 10, with unbeatable cyber-threat detection, optimized performance for speed, and battery life preservation.
Its GravityZone feature – adaptive, layered endpoint security designed for cloud and virtualization – protects from advanced attacks, through its monitoring and hypervisor introspection architecture.
It effectively blocks attacks that most traditional endpoint and next-gen antivirus defenses don’t.
Bitdefender Total Security
Bitdefender remains a big name in the antivirus business, so claim the best deal with no hesitation!
ESET HOME Security Essential is indeed an integrated computer security. It uses AI and in-house developed new technologies to protect you from old and new threats.
We can definitely say about ESET HOME Security Essential that it is an intelligent system, constantly on alert for attacks and malicious software that might endanger your computer.
ESET HOME Security Essential is a complete security solution that combines maximum protection and a minimal system footprint.
Use this antivirus to prevent any infiltration of viruses, spyware, trojan horses, worms, adware, rootkits, and other online threats that can seriously affect your computer safety.
ESET HOME Security Essential
Use one of the best and most modern antivirus solutions from ESET and be sure your PC is well-protected
Avira is another great free security solution that won multiple awards over time, due to its high detection rate and very few false positives during testing.
Avira Antivirus will make your browsing experience faster because it will block annoying ads. It can also analyze your privacy status and inform you of any privacy threats.
In addition, the software will analyze your home network and let you know if there are any security vulnerabilities that you need to address.
Emsisoft Anti-Malware does not only recognize all possible threats, but it is also highly rated by almost all test institutes.
Its awesome features and technologies allow detecting even the unknown yet threats. Its price keeps it at the top, so you have the best quality-price ratio.
In the ratings, Emsisoft Anti-Malware is always below Bitdefender which we have written about above. That means that this tool is not behind the biggest security providers.
Even if some giants like Kaspersky and Avast keep users’ opinions focused on them, this tool is constantly improving.
Permanent 4-layer security and Behaviour Blocking allow it to counter basically everything that can attack your system from outside, but also from the inside.
We also have to mention that this tool runs on almost every PC hardware configuration as it is well-optimized, and its price right now is great.
Panda has been recognized by independent reviewing labs, recently by Virus Bulletin, a global leader in testing security for the prevention, detection, and elimination of malware and spam.
To this end, it is one of the best antiviruses with the highest detection rate, as ranked at 100 percent, earning a VB100 certificate in their most comparative test.
It is the first and only antivirus for enterprises that combines advanced protection technologies, and detection and remediation features, to classify 100 percent of running processes on all endpoints.
A unique feature is its contextual intelligence, which the platform uses to reveal patterns of malicious behavior and generate defensive strategies to counter both known and unknown threats.
Panda has been receiving high grades, not just from such a demanding approving agency as VB, but it has also been recognized in the Real World Protection Test for proper functioning and efficiency.
If you as much as getting a 3 percent difference in your antivirus detection rate, it may open doors to possible security breaches of about more than 10,000 infections on a monthly basis.
This is why F-Secure, the best antivirus with the highest detection rate that currently stands at 99.9 percent, gives you the best possible protection against threats.
F-Secure continually builds up the best protection, daily, weekly, monthly, and annually, to offer the best endpoint protection in the world.
It has been proven unarguably, by AV-Test, a leading international and independent service provider in IT security and AV research, who gave F-Secure the Best Protection award for four years in a row.
Features include Protection Service for Business that delivers comprehensive endpoint security for all your devices.
Cloud Protection and Rapid Detection Service monitor your security status 24/7, alerting you of breaches within minutes with a clear action plan.
It is secure, innovative, and straightforward, with seamless cooperation, even as the online threat landscape continuously evolves and changes with threats getting more complex by the day.
Avast Free Antivirus is one of the world’s leading antivirus with the highest detection rate. It has also scored between 99.9 and 100 percent in independent real-world tests.
Avast Free Antivirus has even received top marks in detecting all threats with a 100 percent detection rate.
It is powered by Artificial Intelligence (AI), with more than 400 million sensors feeding it with big data, and machine learning technology to stay on top of the most evolved malware.
The results of these independent tests show that Avast delivers top security with its free products, so you can enjoy peace of mind and rest assured you will have minimal interference on your PC activities.
It is tested and approved by the most prestigious anti-malware institute and is an award-winning antivirus security tool, with 100 percent certified protection against zero-day threats.
It is the ultimate security for your business as it protects your IP, customer data, business strategy, and everything else including your server, email, and VPN.
Most paid solutions cannot currently provide the protection you need, so this powerful cybersecurity, yet free, antivirus is just what you need for your system.
The Intel Graphics Control Panel enables users to change graphics settings for Intel GPUs. However, some users have reported that Intel Graphics Control Panel is not opening.
This issue can lead to other problems, such as Intel display audio not working therefore it’s crucial that you fix this problem as soon as possible.
Luckily for you, there’s a way to fix this problem, and in this article, we’re going to show you a couple of simple methods that you can use.
How can I fix the Intel Graphics Control Panel not opening?
1. Update your Intel GPU’s driver
First, try updating your Intel GPU’s driver after uninstalling the Intel Graphics Driver package and Graphics Control Panel app via Apps & features.
You can update your Intel driver with driver updater software, which will include options for downloading and automatically installing the latest drivers.
Plus, the whole process works smoothly while updating any driver with almost no input from the user. Hence, manage GPU drivers effortlessly or any other driver on your PC using this software.
2. Manually install the Intel(R) Graphics Control Panel driver on your PC
First, open the Win + X menu in Windows 10 with the Windows key + X hotkey.
Click Device Manager to open that window.
Double-click Software components to open that category.
Next, right-click Intel(R) Graphics Control Panel (or Intel Graphics Command Center) and select Update driver to open the window shown directly below.
Then click the Browse my computer for drivers option.
Click the Let me pick from a list of available drivers on my computer option.
Select the Intel(R) Graphics Control Panel, and click the Next button.
Thereafter, restart Windows after reinstalling the driver.
NOTE
The above fix is for users who still can’t open the Intel Graphics app after they’ve installed the required DCH drivers on their PC. First, make sure your PC has a suitable Intel DCH driver installed on it.
Some users might only see Generic software listed in Software Components. If so, try right-clicking Generic software and installing the Intel(R) Graphics Control Panel driver as outlined above.
3. Try opening the Intel Graphics Control Panel with alternative methods
Click the Type here to search taskbar button, and then enter Intel in the search box.
Click the Intel Graphics Command Center (Control Panel) search result to launch that app.
If you can’t open the Intel Graphics Control Panel one way, try an alternative method. For example, you can open the Intel Graphics Control Panel with the Ctrl + Alt + F12 hotkey for it.
These are simple workarounds, but they might work if Intel Graphics Control Panel is not opening.
4. Repair and reset the UWP Intel Graphics app
First, press the Windows and I keys at the same time to launch Settings.
Click Apps to open that Settings tab.
Then scroll down to and select your Intel Graphics app.
Click Advanced options to open the buttons in the shot directly below.
Then click the Repair option.
If the Repair option doesn’t do the trick, try pressing the Reset button as well to clear the app’s data.
5. Reinstall your Intel Graphics app
To reinstall an Intel Graphics app, open Apps & features in Settings as outlined for steps one and two of the previous resolution.
Then select your Intel Graphics app in Apps & features.
If a dialog box window pops up asking to open the MS Store, select the Open option.
Then click the Get button within the MS Store app to reinstall Intel Graphics Command Center.
NOTE
The Intel® Graphics Control Panel is no longer available for download at MS Store. Users who need to reinstall the GCP app will have to replace it with the Intel Graphics Command Center.
If Intel Graphics Control panel is not opening, you can also remove it completely using specialized software with a built-in uninstaller. We recommend CCleaner because it will also clean junk files and registry entries.
Then click Additional troubleshooters to open the list shown directly below.
Select Windows Store Apps to click its Run the troubleshooter button.
Thereafter, go through the instructions provided by the troubleshooter to fix detected issues.
Those are some of the potential resolutions for fixing an Intel Graphics Control Panel (Command Center) app that doesn’t open. If the fixes above aren’t enough, however, you can contact support via Intel’s Customer Support page.
Did you manage to find the solution to this issue on your own? If you did, feel free to share it with us in the comments section.
Cyberattacks on corporate firmware have intensified over the past two years, according to a study commissioned by Microsoft.
More than 80% of enterprises have experienced at least one firmware attack in the past two years, but only 29% of security budgets are allocated to protect firmware.
Firms do invest in monitoring network vulnerabilities and scanning techniques; but one of the reasons for the alarming mentioned numbers would be that firmware is more difficult to monitor, Microsoft says.
Why are firmware attacks more appealing for hackers?
In terms of effort, attacks on software are easier to finalize. However, hackers prefer targeting firmware because, if successful, they guarantee access to a company’s credentials and encryption keys. And the damage is considerably more substantial.
Given the increased security measures taken by companies recently, attackers have also invested more time in perfecting their strategies.
As a result, many companies don’t even know they have been exposed to such a security breach so they don’t particularly take appropriate measures.
How to prevent attacks on firmware?
To prevent these types of attacks, enterprises should focus on using Kernel data protection (KDP) and memory encryption solutions. These techniques work by blocking malware from accessing kernel memory.
However, only 36% of businesses invest in hardware-based memory encryption and less than half (46%) are investing in hardware-based kernel protections, the study says.
So companies spend more time and resources on post-attack measures than on designing prevention strategies, which the source rates as outdated methods
The main reason for these trends would be the lack of automation. Consequently, Microsoft proposes a new class of devices called Secured-core PCs, with a zero-trust build core that prevents attacks on firmware from the very beginning.
Secured-core PCs have already been delivered to some companies with positive results. Microsoft has partnered with AMD and Intel to include this technology on their devices.
As a result, more than 100 secured-core devices from brands such as Acer, Dell, HP, Lenovo, or Panasonic are available on the market today. The number will surely go higher in the near future.
A number of Windows 10 users have reported that their Taskbar has turned white all of a sudden. This isn’t a major issue unless your taskbar icons are gone as well.
There are many issues you can encounter, such as Taskbar not working, but today we’re going to focus on the Taskbar and its color change.
Why is my taskbar suddenly white?
Temporary system glitches can cause this issue to occur.
Your color configuration isn’t correct, so it’s making the taskbar white.
In some rare cases, your regional settings can cause this issue.
Problems in the registry can also affect Taskbar and make it change color.
How do I get rid of the white taskbar?
1. Tweak modes in Personalization settings
Open the Windows settings.
Choose Personalization, then open Colors.
Under Choose your colors, pick Custom.
Toggle both the default Windows mode and default app mode color options until you get the desired result.
2. Check Taskbar color settings
Right-click an empty space on your desktop and select Personalize.
Select the Colors tab in the right-side list.
Toggle On the option Show color on Start, taskbar, and action center.
If you want to choose a specific color, disable the option Automatically pick an accent color from my background. (Having this option disabled will allow Windows to choose a color for your taskbar based on your desktop background)
From the Choose your accent color section, select your preferred color option.
Inside the Settings window, select the Time & Language option.
Click on Region and select a location in which Cortana is not available (examples include Gabon, Senegal, Samoa, Taiwan, etc.)
Click the Start button, next click on your profile picture and select Sign out.
Log back into your account.
Follow steps 1,2, and 3 of this method to re-set your Region settings to the default setting.
4. Registry tweak
Press Windows + R keys on your keyboard, type regedit in the Run box and pressEnter.
Inside the Registry Editor, open this path: HKEY_CURRENT_USER\Software\Microsoft\Windows\CurrentVersion\Search\Flighting\0\WhiteSearchBox
Double-click on the Value key inside the right panel and set the value to 0.
Press Ok.
Restart your PC.
Note: Please make sure that you create a restore point before changing any values inside the Registry Editor. Changing the values in the Registry without proper guidance can render your system unusable.
In this article, we explored a quick fix for issues caused by your taskbar turning white in Windows 10. Please make sure to follow the steps in the order that they were written to avoid causing any issues.
This isn’t the only issue you can encounter, and many reported that Windows 10 Taskbar icons are missing, however, we covered that in a separate guide.
We would love to know if this guide helped you. Please let us know by using the comment section below.
Have you ever wanted to change keyboard shortcuts on Windows 10 to something else? In the past the process of remapping keys or keyboard shortcuts usually involved downloading a difficult-to-use third-party application. Now, the process is a a whole lot easier with PowerToys, a Microsoft application that you can use to make any key on your keyboard act like any other key—and even remap keyboard shortcuts.
Remap any key
With PowerToys, it’s easy to remap any key to another key or even change a keyboard shortcut combination. If you don’t already have PowerToys installed, you can download it for free directly from its GitHub page. Once installed, follow these steps.
1. Open PowerToys
2. Toggle on the Keyboard Manager
3. Choose Remap a key
4. Choose the plus button (+) as shown to add a new key mapping
At this point, you will need to choose a key that you want to remap in the “Key” field and what you want the key remapped to in the “Mapped To” field. For this example, I am going to use Scroll Lock as a replacement for Paste on Windows 10. Keep in mind you can choose the key that you want to remap by choosing it from the drop down menu or by choosing Type and simply typing out the key you want to use.
In the “Mapped To” field, I will enter the Paste keyboard shortcut (Ctrl + V) as I want to remap Scroll Lock to act as the Paste command any time I press the key.
Once you are finished making your selections for the key remapping, Choose OK to confirm. At this point you will see a pop-up message confirming your key remapping selection. Choose Continue Anyway to confirm the key remapping.
That’s it! You’re finished. Now as long as PowerToys is running, any time I press Scroll Lock, the key will act as the Paste shortcut on my Windows 10 PC. Now in Keyboard Manager in PowerToys, you will see the key remap that you created.
Delete a key remap
Deleting a key remap is easy. All you need to do is go to Keyboard Manager in PowerToys and click the “Remap a key” button to take you to the list key remaps.
Once there, click the trash icon and press OK to confirm.
The key you remapped will be removed. Now, you can create a new key remap using the guide above or exit PowerToys completely.
Do you use any other PowerToys utilities on Windows 10? Let us know in the comments!
Microsoft’s Xbox Cloud Gaming (Project xCloud) technology has reached an important new milestone with the new support for original Xbox and Xbox 360 games. Until now, only select Xbox One games were playable on Android devices via Microsoft’s cloud gaming technology, but that’s changing starting today with a selection of 16 original Xbox and Xbox 360 games.
“We’ve listened to the feedback, going all the way back to our earliest cloud gaming preview, and making games from previous generations available on mobile devices has been one of the most requested features by the community,” the Xbox team explained. Fable II, Fallout: New Vegas, and The Elder Scrolls IV: Oblivion are among the new Backward Compatible games playable with Xbox Cloud Gaming starting today, and you can find the full list below:
Banjo-Kazooie
Banjo-Tooie
Double Dragon Neon
Fable II
Fallout: New Vegas
Gears of War 2
Gears of War 3
Gears of War: Judgment
Jetpac Refuelled (touch controls enabled)
Kameo
Perfect Dark
Perfect Dark Zero
The Elder Scrolls III: Morrowind
The Elder Scrolls IV: Oblivion
Viva Piñata (touch controls enabled)
Viva Piñata: TIP (touch controls enabled)
The Xbox team said today that more OG Xbox and Xbox 360 games will be cloud-enabled soon. Xbox Cloud Gaming is currently only available with an Xbox Game Pass Ultimate subscription, which also includes Xbox Game Pass for Console, Xbox Game Pass for PC, and Xbox Live Gold. Over 100 Xbox games are currently cloud-enabled, with many of them supporting touch controls on Android phones and tablets.
When Command Prompt appears, enter the following lines and press Enter after each line in order to run it: bootrec.exe/rebuildbcdbootrec.exe/fixmbrbootrec.exe/fixboot
Some users are also suggesting that you need to run additional chkdsk commands as well.
To perform these commands, you need to know drive letters for all your hard drive partitions.
In Command Prompt you should enter the following (but remember to use the letters that match your hard drive partitions on your PC): chkdsk /r c:chkdsk/r d:
This is just our example, so keep in mind that you have to perform chkdsk command for every hard drive partition that you have.
Restart your computer and check if the issue is resolved.
Corrupt disk sectors or some other hard drive-related problems can easily cause various BSOD issues. Including the SYSTEM_LICENSE_VIOLATION error for Windows 10 and Windows 8.
While the steps described above are perfectly capable of solving the issue under discussion, you might find the elevated Command Prompt a bit daunting.
2. Use a third-party BSoD fixer
BSoD errors aren’t that easy to solve manually. You need to find the cause of the problem and then find ways to solve it. There is another way to fix these errors faster and more effectively.
Namely, using a full system repair tool that will resolve Blue Screen issues as we speak. Not only will the software pinpoint exactly what’s wrong with your PC, but it will also fix it for you.
3. Run the BSOD Troubleshooter
Open the Settings app and go to the Update & Security section.
Select Troubleshoot from the menu on the left.
Pick BSOD from the right pane and click Run the troubleshooter.
Follow the instructions on the screen to complete the troubleshooter.
If updating your drivers didn’t get the job done, we can try Microsoft’s built-in troubleshooter for BSOD errors. This is probably the easiest solution for almost any BSOD issue because it basically solves the problem for you.
4. Update Windows 10 and all your drivers
Blue Screen of Death errors are often caused by hardware and software issues, and in order to avoid them, it’s highly recommended that you update Windows 10 as often as you can.
Microsoft is constantly releasing updates for Windows 10 via Windows Update, so be sure to download them.
Many of these updates fix certain hardware and software glitches, therefore if you wish to avoid BSoDs, we strongly suggest that you keep Windows 10 up to date.
In addition to downloading Windows 10 updates, it’s just as important to update your drivers. Windows 10 utilizes your drivers in order to communicate with your hardware.
If a certain driver is out of date, or just not compatible with Windows 10, you’ll probably get a BSoD error such as SYSTEM_LICENSE_VIOLATION. To fix these types of errors you have to update all your drivers.
Updating drivers is relatively simple, and you can do it simply by visiting your hardware manufacturer’s website and downloading the latest drivers for your device.
While downloading drivers, be sure to download drivers for all major hardware components.
4.1 Update drivers automatically
Searching for drivers on your own can be time-consuming. So, we advise you to use a tool that will do this for you automatically.
Using an automatic driver updater will certainly save you from the hassle of searching for drivers manually, and it will always keep your system up to date with the latest drivers.
5. Run the SFC scan
Right-click on the Start Menu button, and open Command Prompt (Admin).
Enter the following line and press Enter:sfc/scannow
Wait until the process is done (it may take a while).
If the solution is found, it will automatically be applied.
Now, close the Command Prompt and restart your computer.
The next thing we’re going to try is the SFC scan. This is a command-line tool that scans your computer for potential issues and resolves them.
So, it might be helpful when dealing with the SYSTEM_LICENSE_VIOLATION error, as well.
6. Run DISM
Right-click Start and open Command Prompt (Admin).
Paste the following command and press Enter: DISM/Online/Cleanup-Image/RestoreHealth
Wait until the scan is finished.
Restart your computer and try updating again.
Standard way
The third troubleshooting tool we’re going to try is DISM. As its name says, Deployment Image Servicing and Management (DISM) reloads the system image, resolving some potential problems on the way.
We’ll walk you through both standard and the procedure that utilizes the installation media below:
With the Windows installation media
Insert your Windows installation media.
Right-click the Start menu and, from the menu, choose the Command Prompt (Admin).
In the command line, type the following commands and press Enter after each: dism/online/cleanup-image/scanhealthdism/online/cleanup-image/restorehealth
Now, type the following command and press Enter: DISM/Online/Cleanup-Image/RestoreHealth/source:WIM:X:SourcesInstall.wim:1/LimitAccess
Make sure to change an X value with the letter of the mounted drive with the Windows 10 installation.
After the procedure is finished, restart your computer.
7. Install a Windows optimizer
You could simply use a third-party tool to check your hard drives and detect and repair any issues on the spot without the hassle.
Windows optimizer software will free up precious space thus provide with more available memory and allowing you to enjoy faster startup and loading times.
These tools are generally complete tuneups, cleaning, repair, and optimization suites. They can also detect and replace corrupted Windows files, create backups, and more.
Remove junk data, useless temp files, web browsing traces, fix superfluous Registry entries, broken shortcuts, and disable unnecessary services to boost jour PC’s performances.
8. Find and uninstall problematic applications
Sometimes certain applications can cause this error to appear, therefore it’s crucial to find and remove those applications.
It’s worth mentioning that almost any application can cause the Windows 10 system license violation error, so you might have to do some research before you find the problematic one.
You should also know that recently installed or recently updated applications can cause this error too, therefore if you updated or installed any new app before the BSoD error started appearing, uninstall it.
One common cause for Blue Screen of Death errors is your antivirus software. Almost any antivirus software can cause a BSoD error, so be sure to remove any third-party antivirus programs that you have installed.
To completely remove an antivirus program you should use a dedicated removal tool. Many security companies offer these tools for their software, so be sure to download one for your antivirus program.
9. Enter Safe Mode
Start Automatic Repair while restarting your computer during the boot.
Alternatively, you can hold the Shift key and click the Restart button.
When your computer boots, select Safe Mode with Networking or any other version of Safe Mode.
If the problem is caused by certain software, you’ll be able to tell that by entering Safe Mode.
Safe Mode starts only with basic drivers and software, therefore, if your issue is caused by a certain application or a problematic driver, your system should work without any problems in Safe Mode.
10. Perform System Restore / Windows 10 reset
Start Automatic Repair by restarting your computer a few times during the boot.
Choose Troubleshoot > Advanced options > System Restore.
Select your username and enter your password and click Continue.
Pick Choose a different restore point, and select a restore point you wish to return to.
Click Next and wait for the process to finish.
According to the users, they managed to fix SYSTEM_LICENSE_VIOLATION error by performing System Restore.
If System Restore didn’t fix the issue, you should try performing a Windows 10 reset. This procedure is similar to clean install, therefore be sure to back up all important files from your C partition.
Note: It’s also worth mentioning that you might need a Windows 10 installation media to complete this step, therefore you should use the Media Creation Tool to create a bootable USB flash drive.
To perform Windows 10 reset, do the following:
Start Automatic Repair.
Choose Troubleshoot > Reset this PC > Remove everything.
If you are asked to insert Windows 10 installation media, be sure to do so.
Select Only the drive where Windows is installed > Just remove my files and click Reset.
Follow the instructions and wait for the reset process to complete.
After the reset, all your installed applications and files will be removed, including any software cause for the BSoD. If the error appears again, it’s most likely that you have faulty hardware.
11. Check for faulty hardware
Your RAM can be the common cause for BSoD errors such as SYSTEM_LICENSE_VIOLATION, therefore be sure to test your RAM first.
There are plenty of specialized tools you can use to perform detailed tests of your RAM, so make sure that you download one. If RAM is not the problem, check if other major hardware components are working properly.
Any recently installed hardware can cause these types of issues, especially if it’s not fully compatible with your PC. If you installed any new hardware recently, be sure to remove it or replace it and check if that fixes the error.
SYSTEM_LICENSE_VIOLATION BSoD error can be troublesome, but we hope that you managed to fix it by using one of our solutions.
Do share your troubleshooting experience with us via the comments section below.
As more people across the world hurtle towards mobile computing, it is becoming increasingly important for most software products to be loaded with remote control features.
The remote control features enable team collaboration anywhere, and at any time, therefore they are being sought by an increasing number of companies all around the world.
The same goes for security software where antiviruswith remote control management exists to troubleshoot workplace and client issues quickly and securely without moving from your desk.
Remote control also allows for quick and safe connections to machines so as to resolve issues in real-time, which in turn saves you time, money, and stress.
IT admins are able to receive real-time alerts and report on threats, while taking control of their networks’ security from any location, at any time, especially with the many remote workforces across the globe.
Here are our top picks for the best antivirus with remote control management.
What is the best antivirus with remote control management?
With Bitdefender’s tools, you get full visibility into your overall security posture, security threats on a global scale, and control over security services that protect virtual or physical desktops, servers, and mobile devices.
All these are managed through a single console, Control Center, for control, reporting, and alerting services (in companies this is for various roles in the organization).
Through the Device Control module, you can perform remote or manual installs by going to My Bitdefender window, where you can update, start a scan, and register the product, all from the cloud.
Once you open My Bitdefender page, you can find all devices installed with Bitdefender and control it from there.
Notable Bitdefender features:
Great price plan
VPN included
Best Windows compatibility
Awesome customer support
Bitdefender Total Security
Now you can have the remote control management, and you can provide total protection for your PC against malware threats only with Bitdefender!
Panda Remote Control is a tool developed by Panda Security to let you access your computer(s) on your network remotely from a web console.
With this tool, you can troubleshoot issues without being physically present, or, if you’re an agency, you can resolve your clients’ security problems without them having to intervene, and with little if any impact on their activity.
It is available in Panda’s Endpoint Protection, Endpoint Protection Plus, and Adaptive Defense 360 consoles when you buy it, then automatically installs the first time you enable Remote Control option in the settings of the configuration profile for the group that hosts remote computers.
Only users with Total Control or Security Administrator permissions can use it – not users with Monitoring Administrator’s Guide 7 permissions.
You get three options when defining the privacy level to apply when accessing remote computers: Always ask for permission, Just notify, and Allow access without notification.
Notable Panda Dome features:
Real-time monitoring
Personal firewall
Device management
USB Protection
Panda Dome Essential
You can have full protection for your PC against viruses and remote control management with Panda Dome.
AVG’s Managed Workplace 10 comes with integrated advanced security features including expanded remote control functions.
The Premium Remote Control has been enhanced to include ad hoc and on-demand sessions to offer remote support to anyone on the internet without deploying Managed Workplace.
It also has end-user consent feature that respects the privacy of your clients by requesting access to initiate remote control to their devices.
This remote control feature saves clients the cost of purchasing and maintaining a separate remote control solution.
Notable AVG features:
Computer Protection
Web & Email protection
Hacker attacks protection
Privacy protection
AVG Ultimate
Take advantage of remote control feature and secure your PC against all malware threats.
Avast is a leading antivirus with remote control management for smooth running and troubleshooting issues without leaving the comfort of your desk.
The software will keep your PC safe, using a combination of self-improving AI and advanced system protocols to stop any new threats from entering your system and possibly stealing data.
The remote control feature allows the Avast customer support team to access your PC, troubleshoot, and potentially fix problems that proved too difficult for you.
The Premium remote control features include:
Remote administration to remotely connect to any computer and install new software, troubleshoot, switch users, among other tasks
System information to see vital info about the hardware and software
File transfer to send log files and receive software updates to troubleshoot and resolve issues fast and effectively
Session recording, a one-click recording to capture sessions for follow-up and/or training
Maximum security for complete end-to-end encryption to keep your connection safe
Full-featured chat client to stay in touch with customers as you troubleshoot their problems
Avast Premium Security
Get Avast with remote control management for pleasant running and great PC protection from spyware.
All BullGuard products in its comprehensive security suite are designed with your business in mind.
One of the most striking things is its effective and pleasing design, with a simple to navigate and use dashboard interface, and clearly marked features and actions.
It comes with a remote control so you can manage your personal or business information, whether your device is not close by, or even if it gets lost or stolen.
You can choose from BullGuard Premium Protection, BullGuard Internet Security or BullGuard antivirus.
Have you used any of these antivirus with remote control management? Or do you have one that you currently use that’s not listed here? Share with us your experience in the comments section below.
While most modern web browsers require you to install a third-party extension to block ads, the UC Browser comes with a built-in ad blocker. However, several users have reported the UC Browser adblock is not working.
To fix the problem, we have listed a few workarounds to help you resolve this issue once and for all.
How do I fix UC Browser adblock if it’s not working?
1. Use an alternate browser with a built-in adblocker
UC Browser is blocked in a few countries to comply with the region’s local laws. Fortunately, there are alternative browsers like Opera One browser that offer built-in adblocker.
Similar to the UC browser, Opera One blocks all kinds of intrusive ads, loads pages faster, and comes with a filter option to unblock ads from any site you want.
Additionally, Opera One browser offers a free VPN for enhanced privacy and security, built-in messenger apps and snapshot features, video pop-out, battery saver, and even an AI.
Launch UC Browser browser and click the Menu icon from the top menu.
Choose Settings from the options.
From the left pane, click on the Ad Block tab.
Under Block settings, check the Block pop-up window box. You can also change your filter page ads preference.
Close the settings page and relaunch the browser app.
Once the app restarts, check if the ad-block issue is resolved. If the ad-block setting is enabled and UC Browser adblock still is not working, try clearing the browser cache to see if that helps resolve the issue.
Clear browser cache
Click the menu icon and choose Clear browsing data. You can also access it by pressing the Ctrl + Shift + Del key on your keyboard.
Choose the data you want to clear and click the Clear data button.
Don’t clear the saved password and other data, as you will have to enter these details when accessing the website again.
Tap the Menu icon represented by three horizontal lines.
Now tap on the Ad Block feature to turn it on.
Optional: Tap on Powerful Ad Blocker for even better ad protection.
Clearing the browser cache will help you resolve any issues that occur due to corrupted data.
3. Reinstall UC Browser
On Android:
Open the Settings menu on your Android device.
Navigate to Apps or Application Manager.
Now select UC Browser and choose Uninstall.
Download the application again.
On Windows:
Open the Settings app. You can do that with Windows Key + I shortcut.
Navigate to the Apps section.
Select UC Browser from the list of installed apps and click on Uninstall.
Once uninstalled, reboot the computer.
After the restart, go to the UC browser download page and download the browser’s latest version.
Install the browser and check if the UC Browser adblock not working issue is resolved.
To completely remove certain applications, it’s better to use a dedicated uninstaller software.
The UC Browser Adblock not working issue may occur due to file corruption. If enabling the adblock option in the setting does not help, consider using an alternative web browser like Opera.

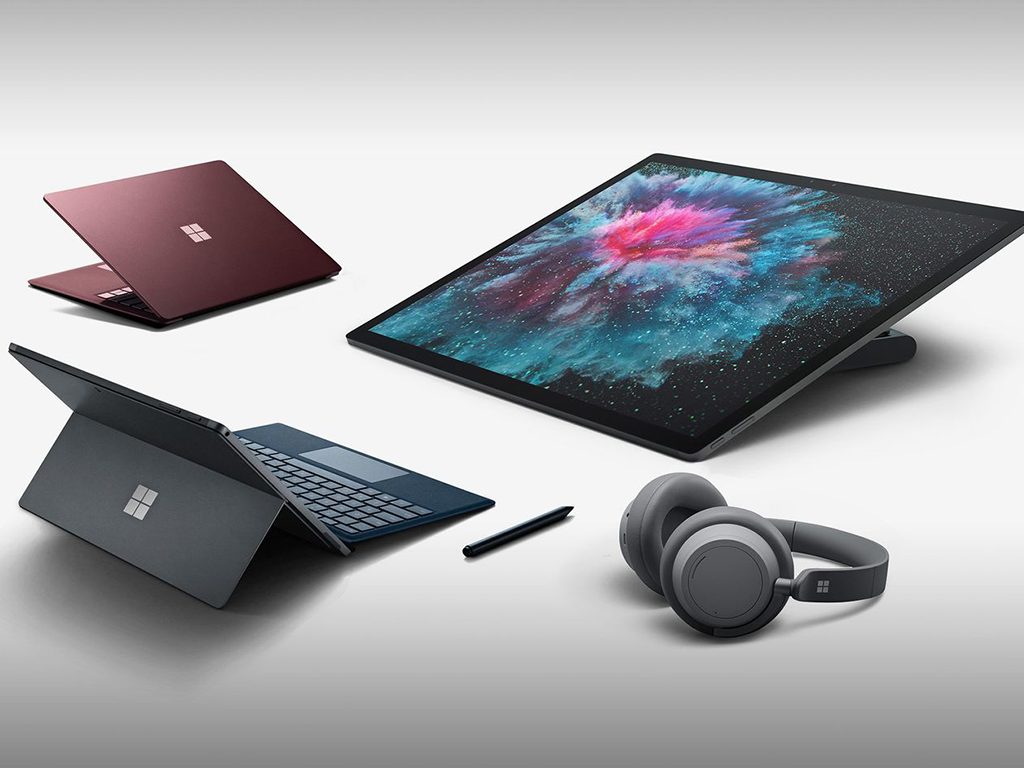
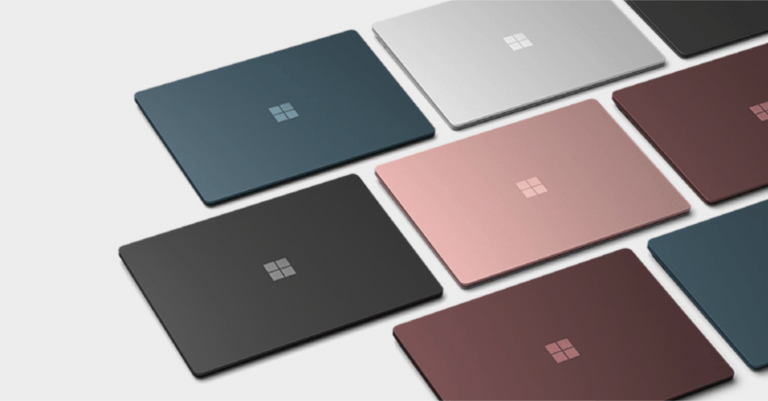
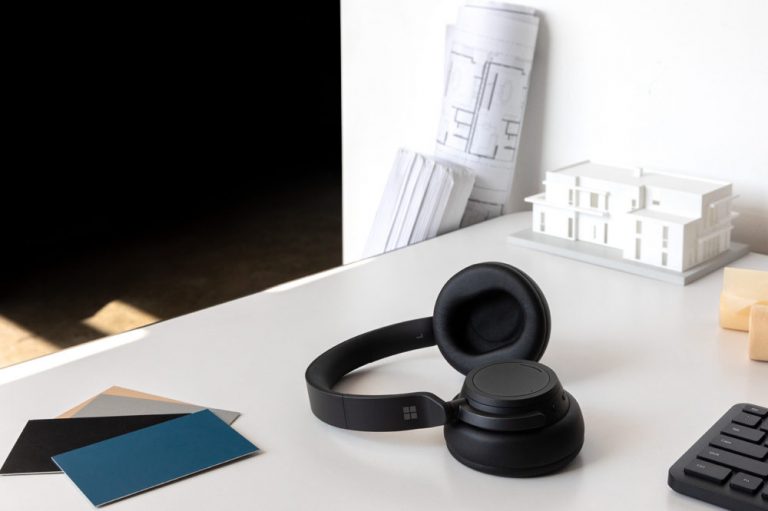






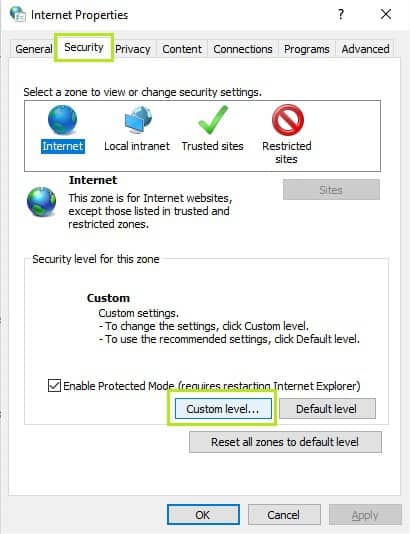
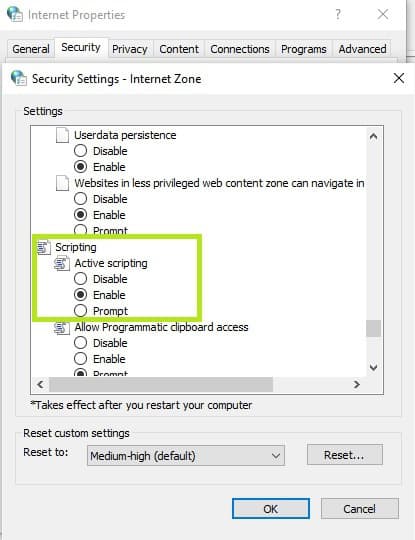
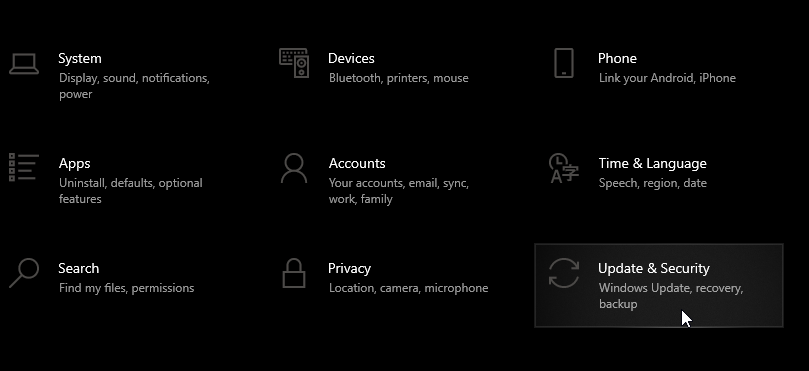
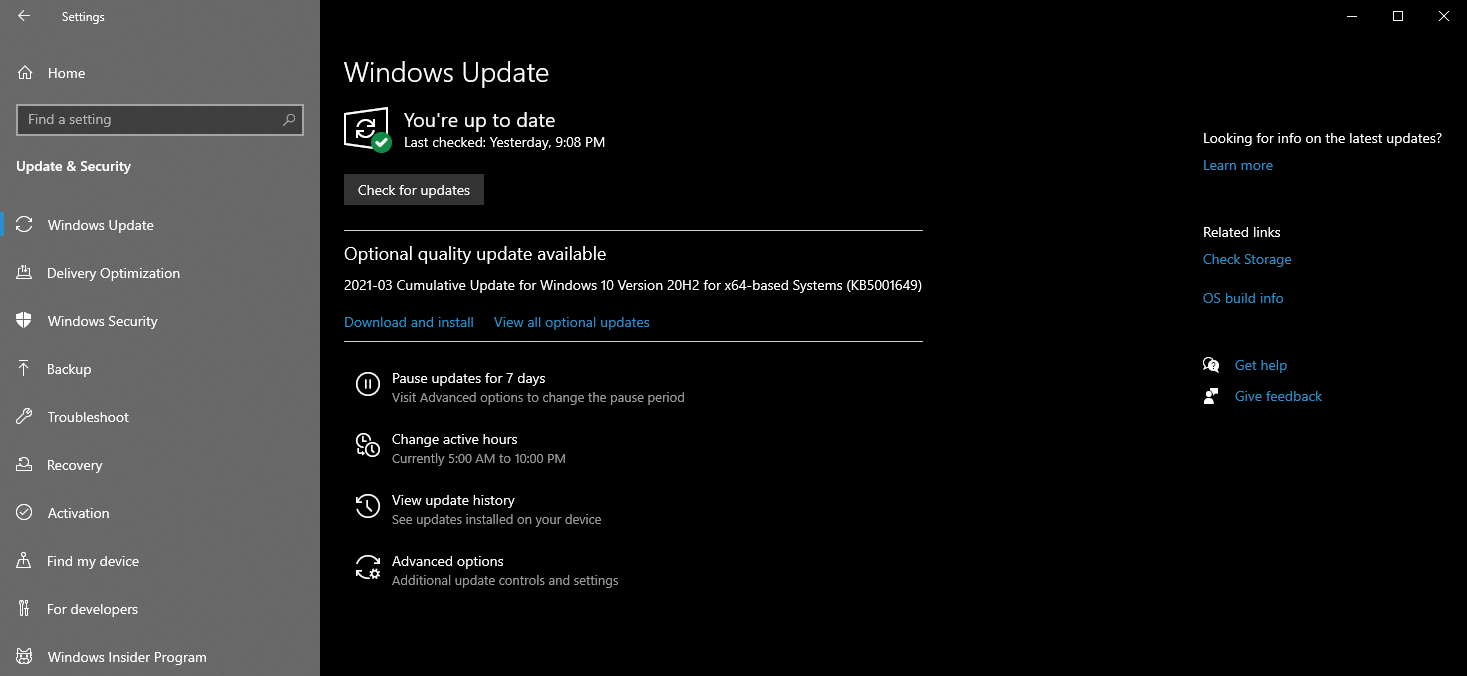




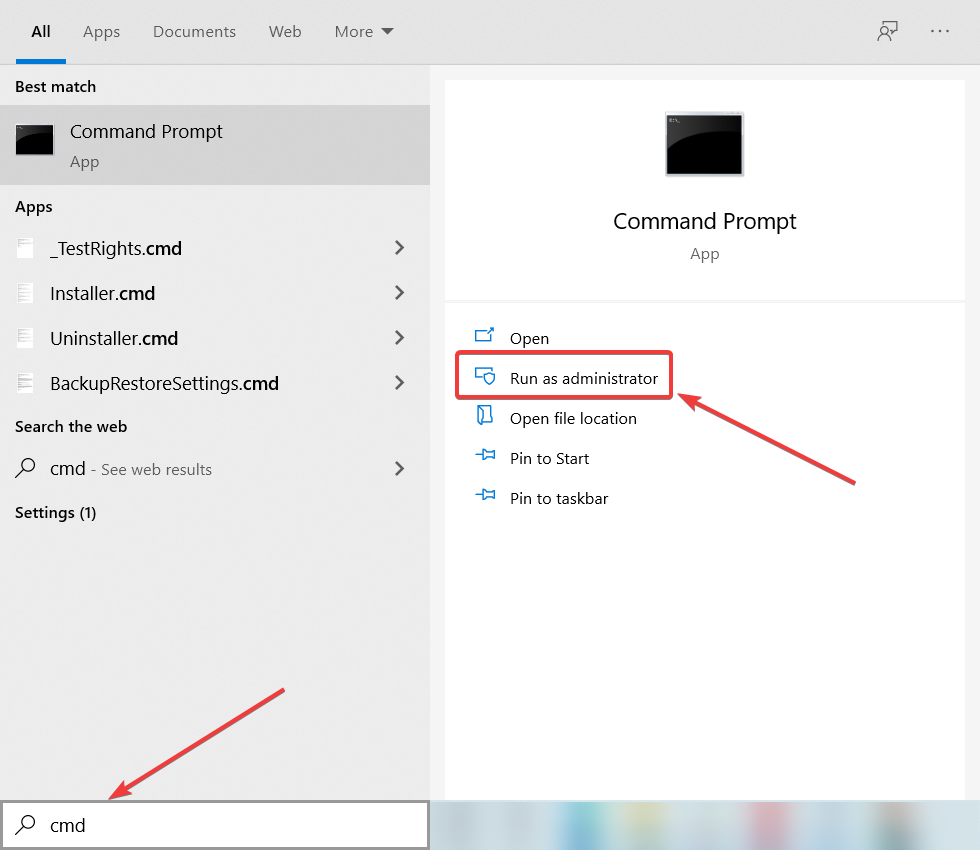


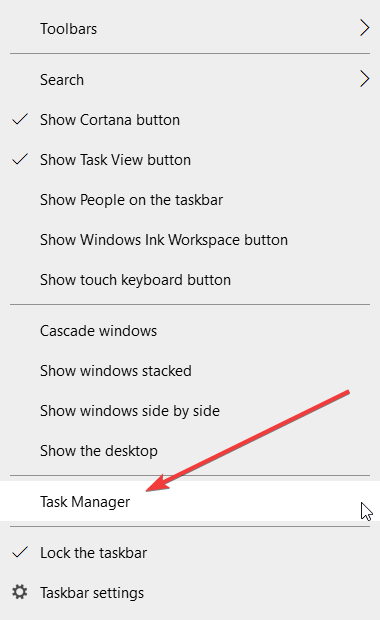
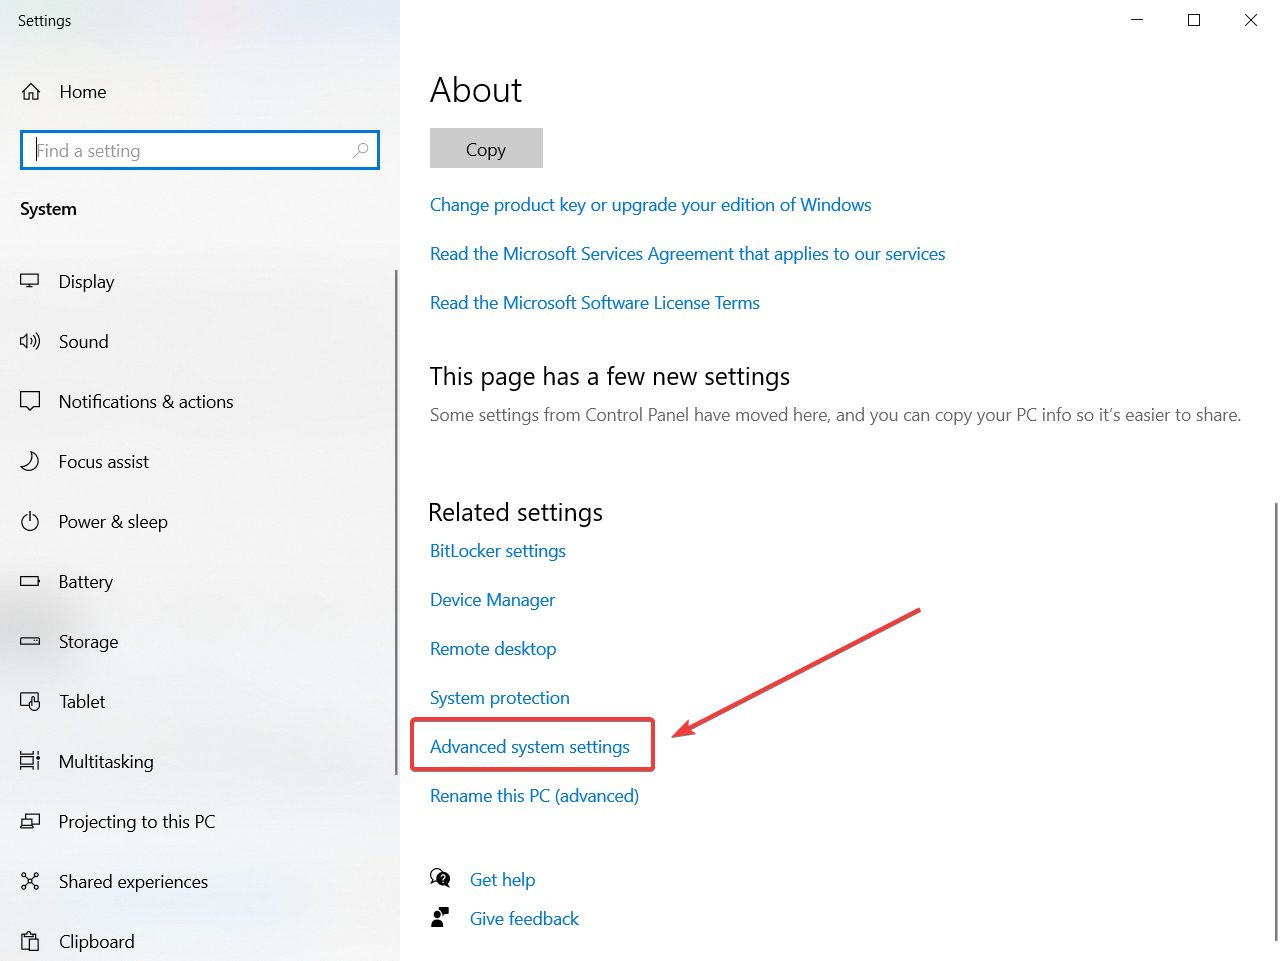
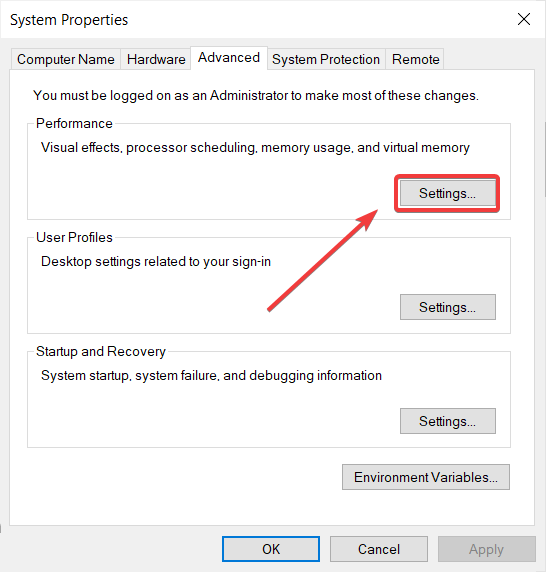
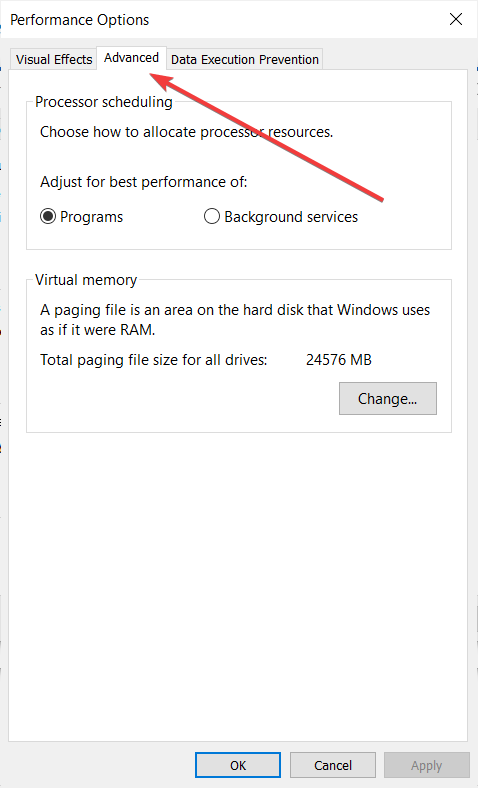
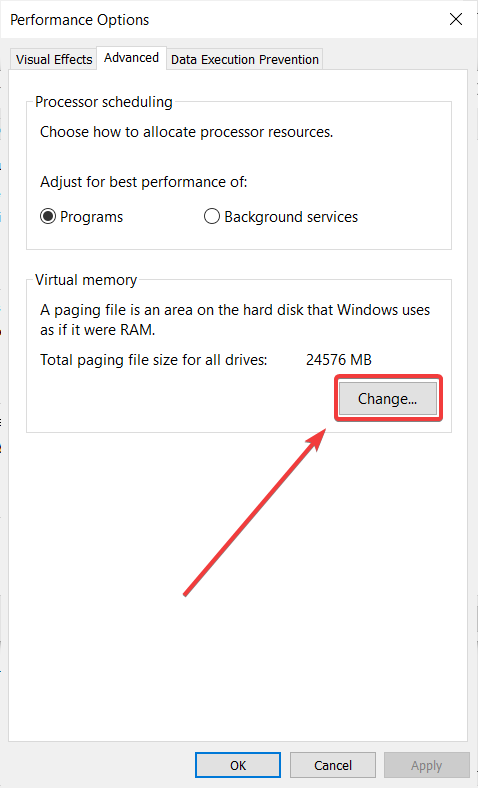
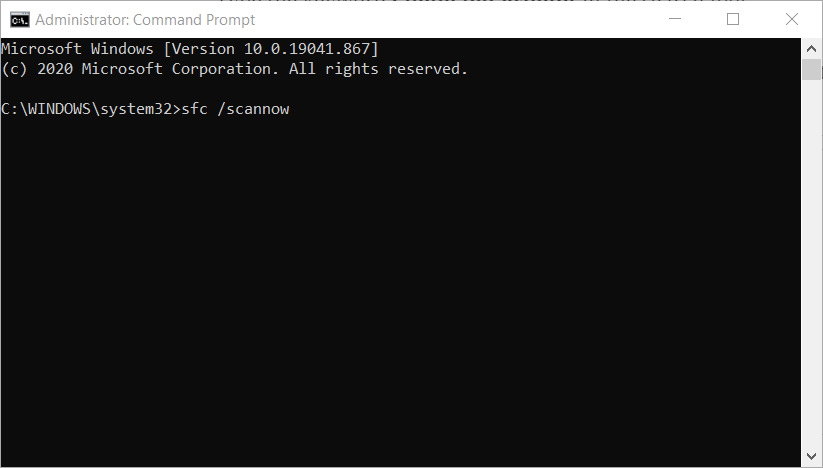
![Football Manager 2016 problems and solutions [Windows 10/11]](https://windowsreport.com/wp-content/uploads/2016/03/football-manager-1.jpg)
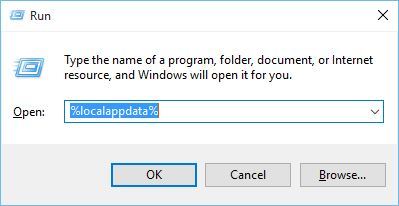


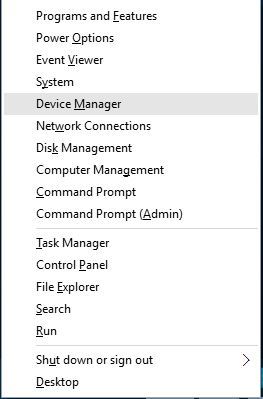
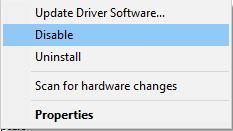


![What is Acronis True Image & how to use it [Review]](https://windowsreport.com/wp-content/uploads/2021/03/acronis-true-image-2021.jpg)




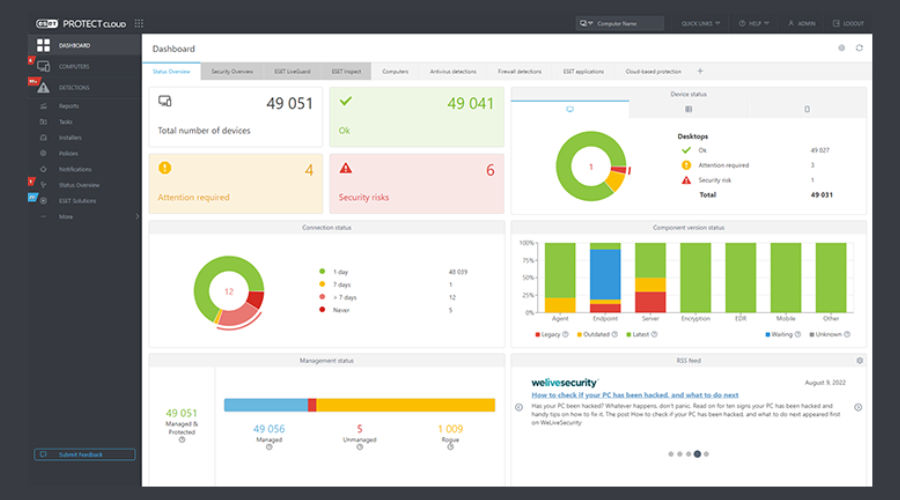

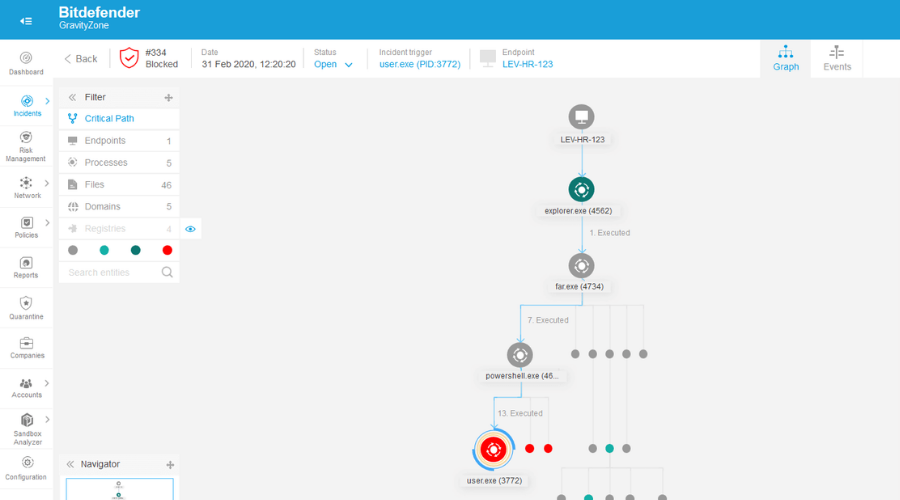

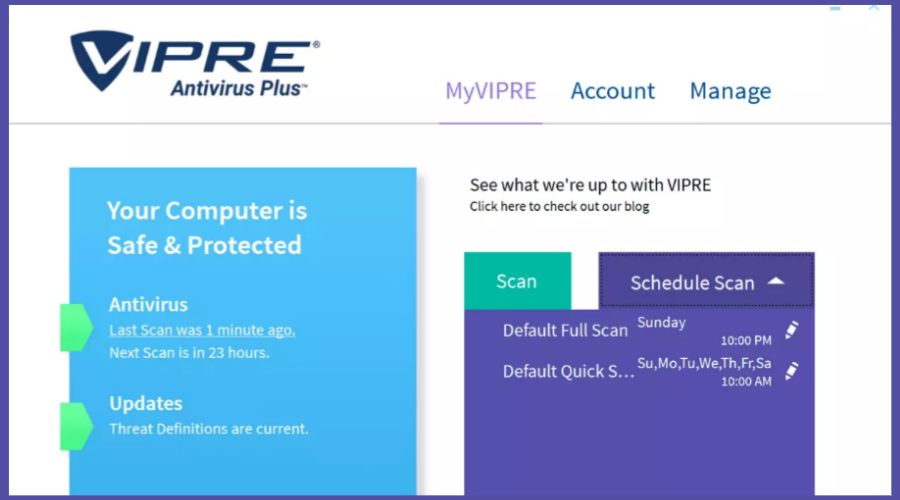
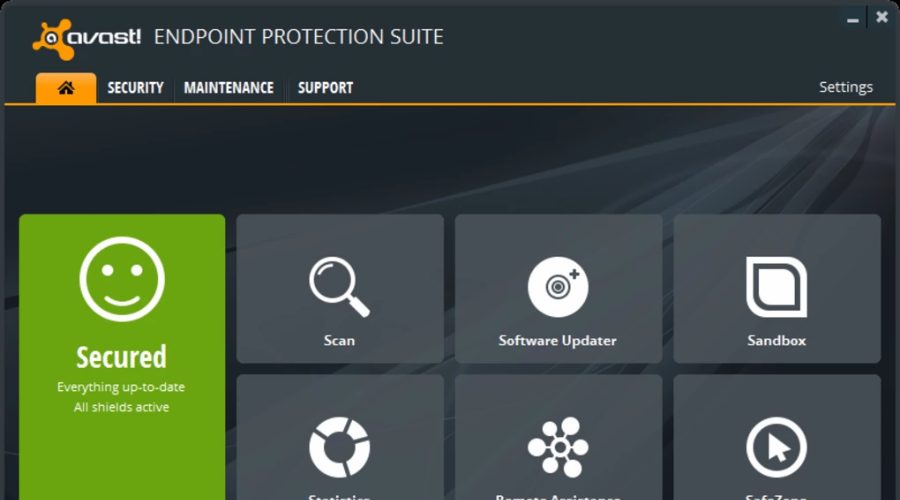

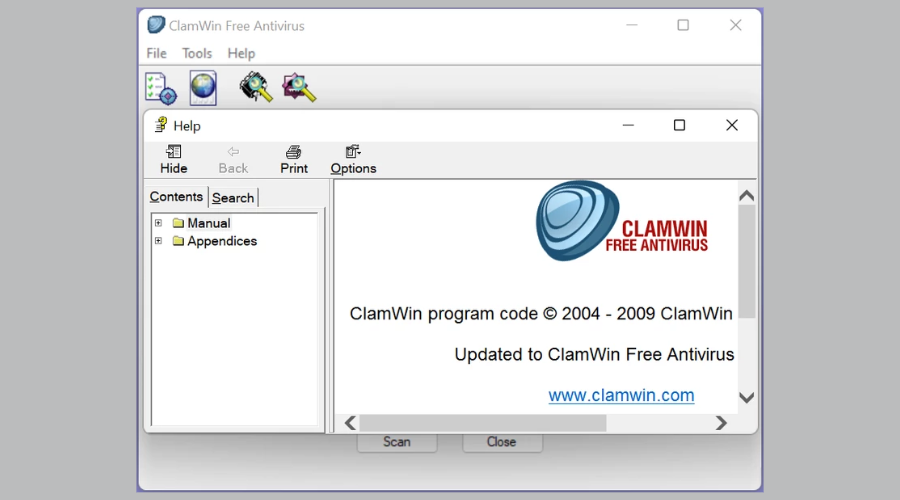


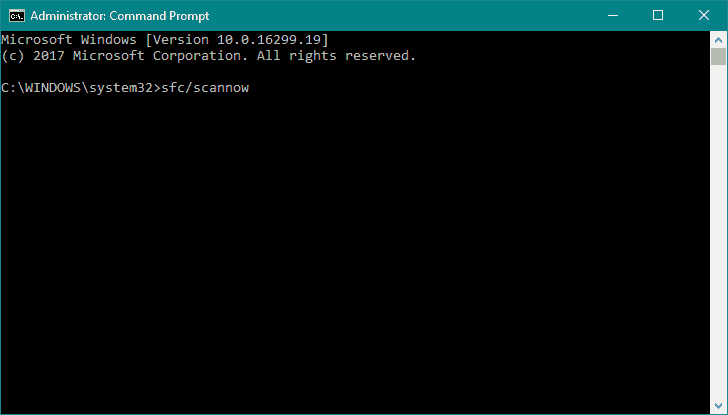




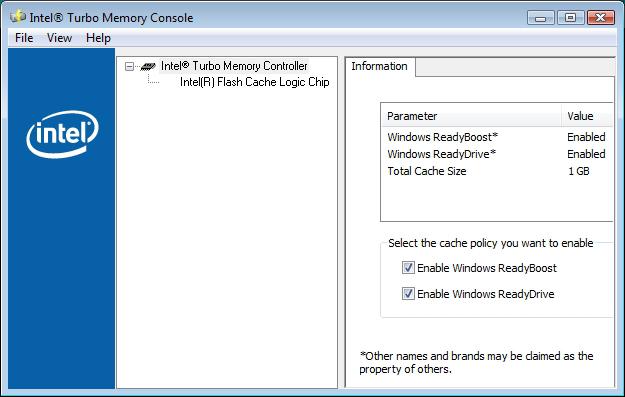
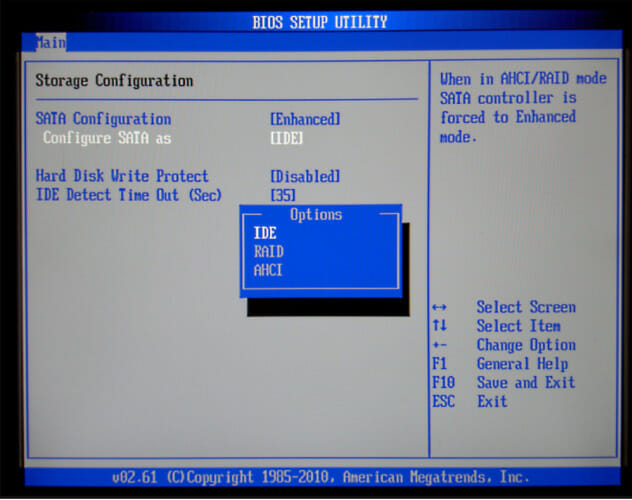
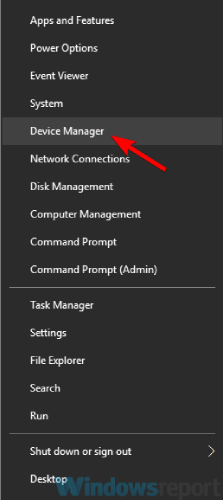
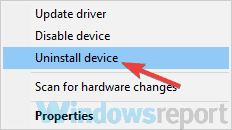
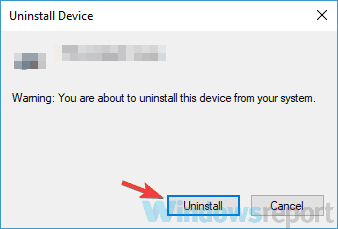
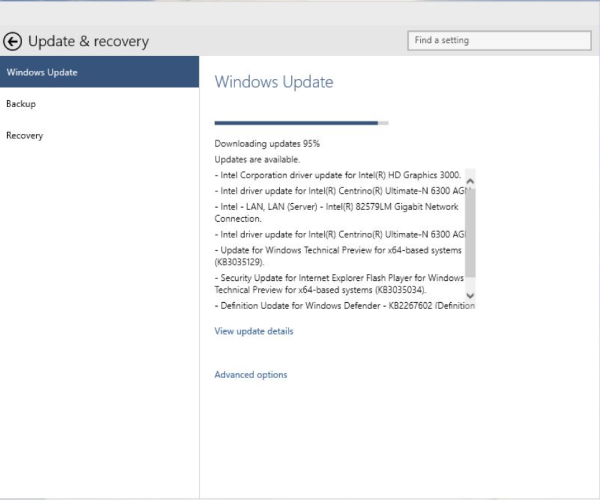
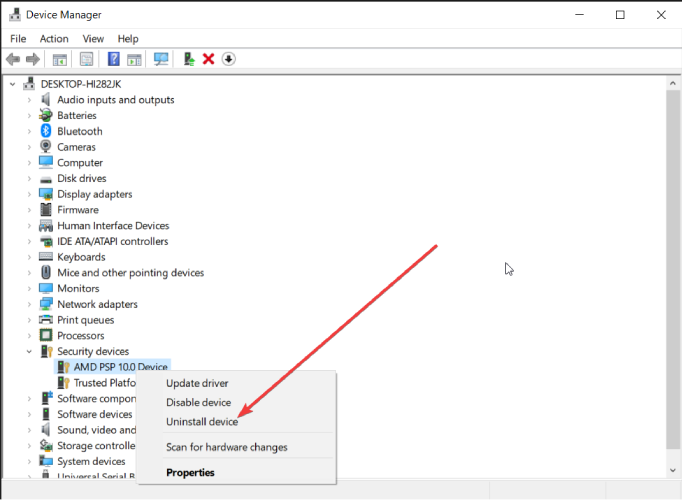
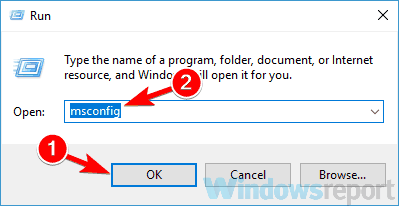
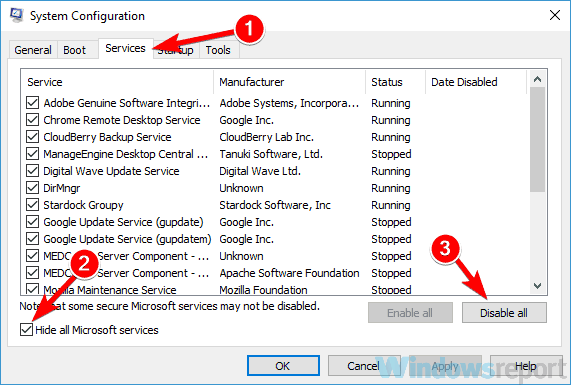
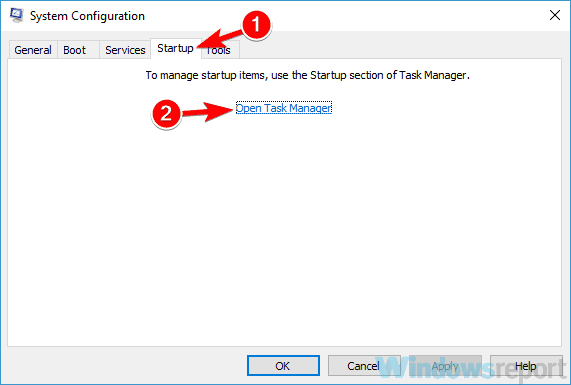
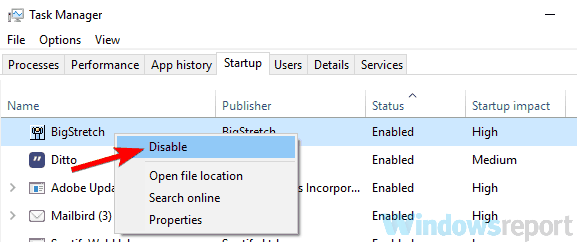
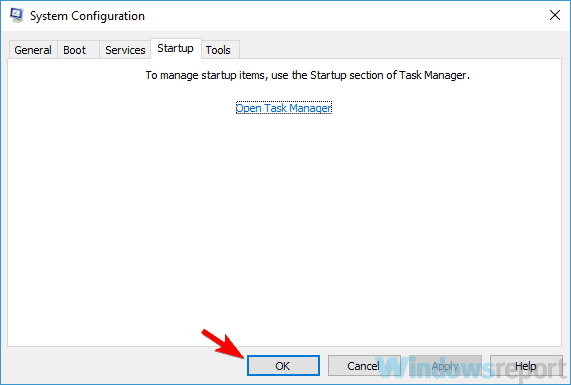

![FIX: PAGE NOT ZERO error in Windows 10/11 [Full Guide]](https://windowsreport.com/wp-content/uploads/2018/10/PAGE-NOT-ZERO-error.jpg)
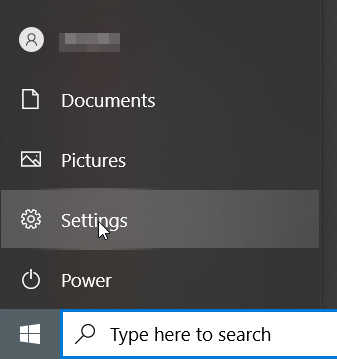
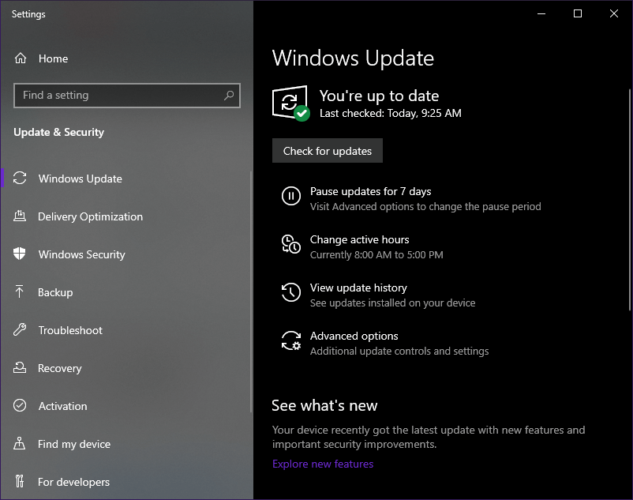
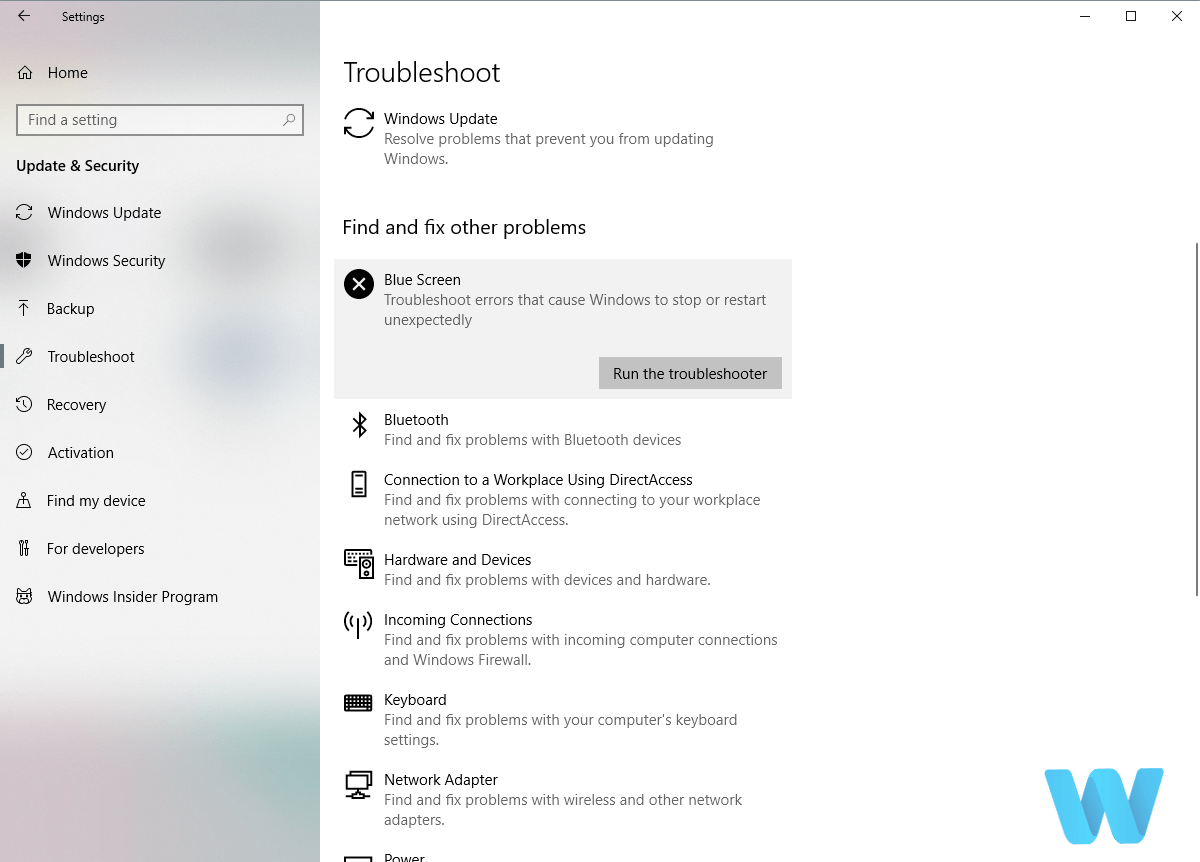
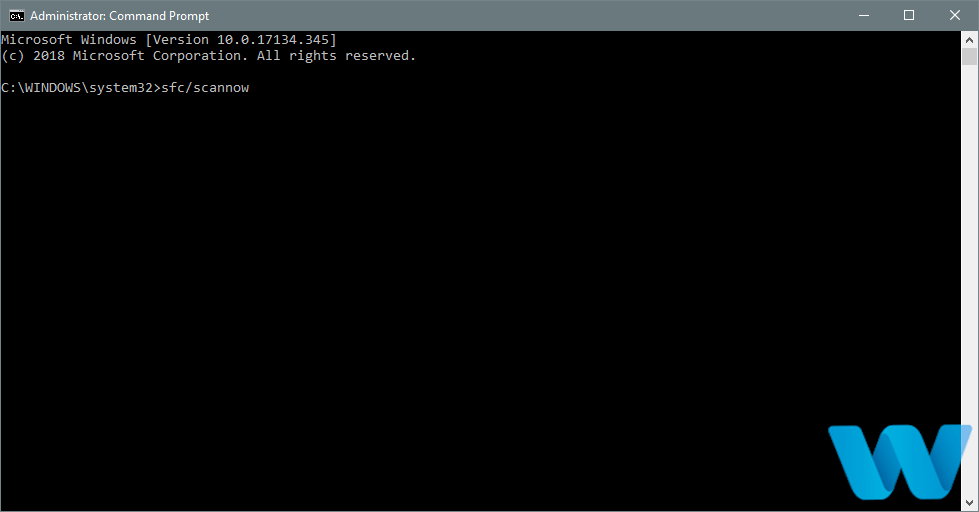
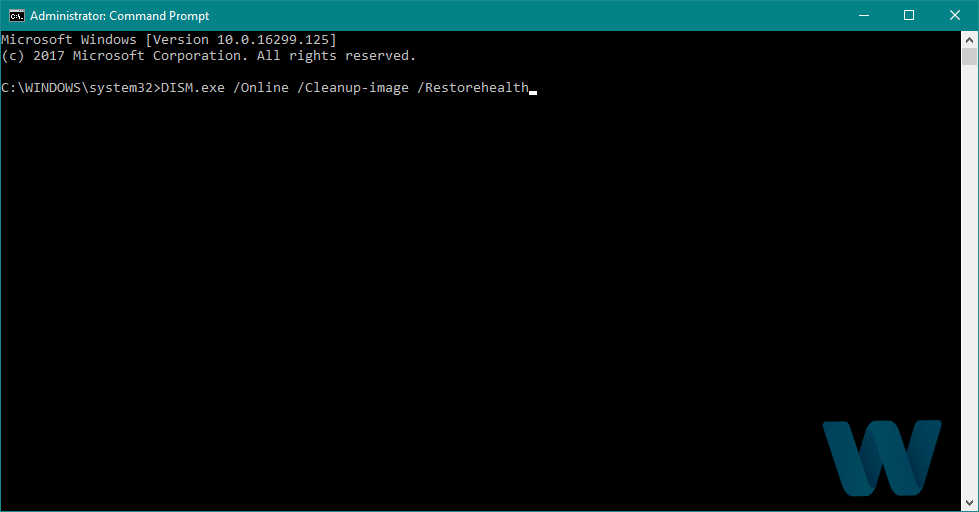
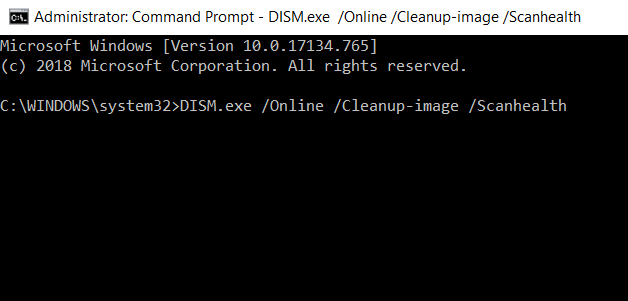
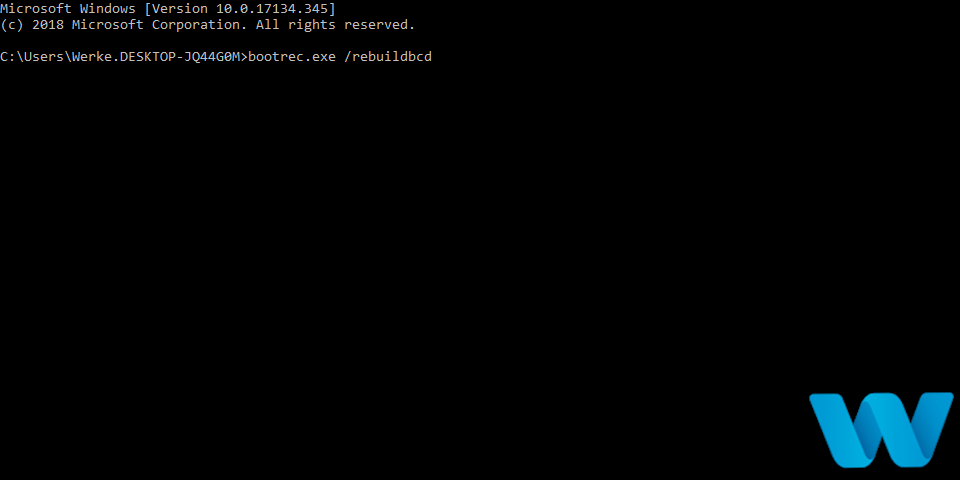
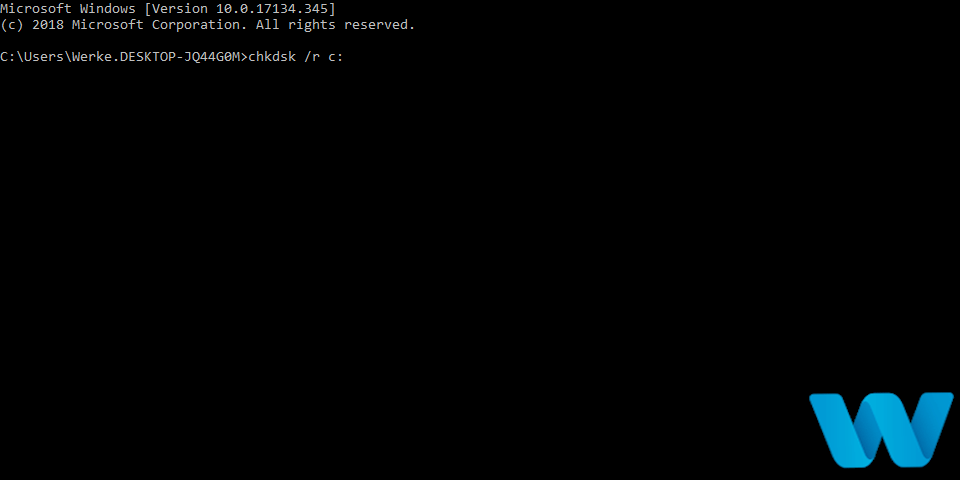
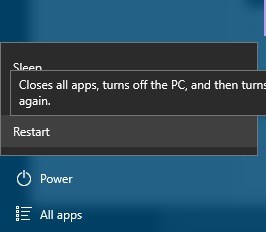
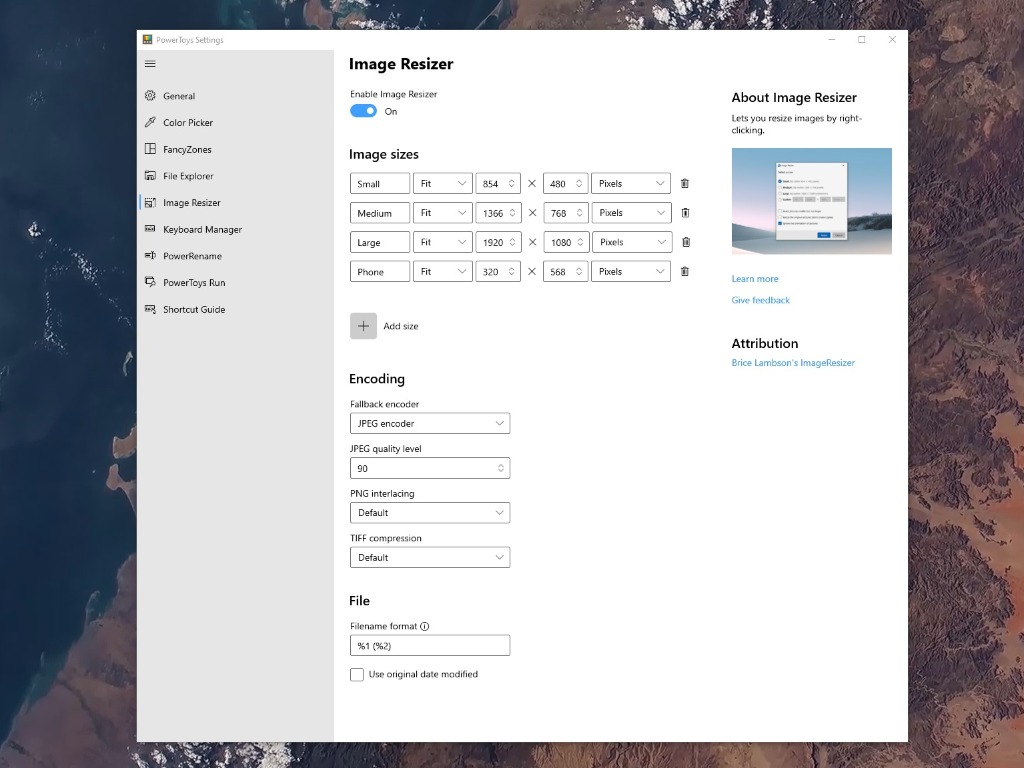
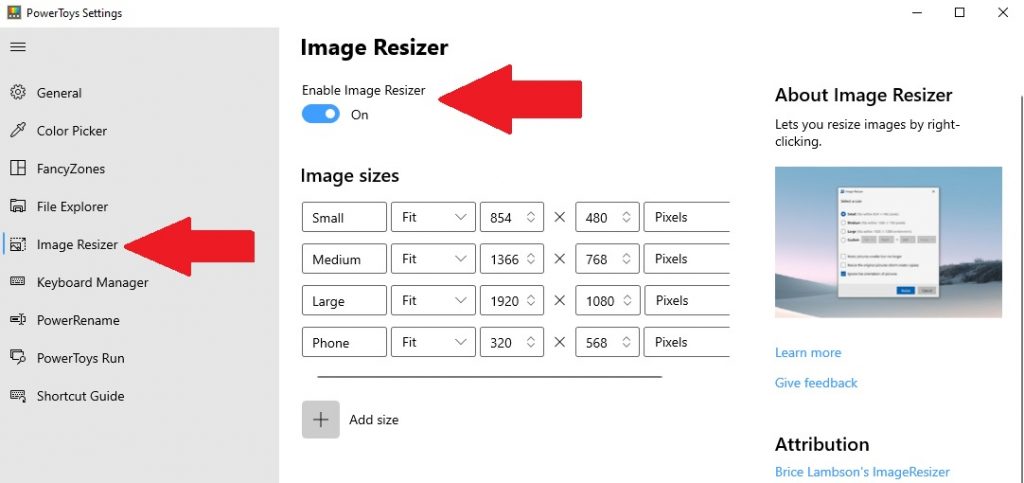
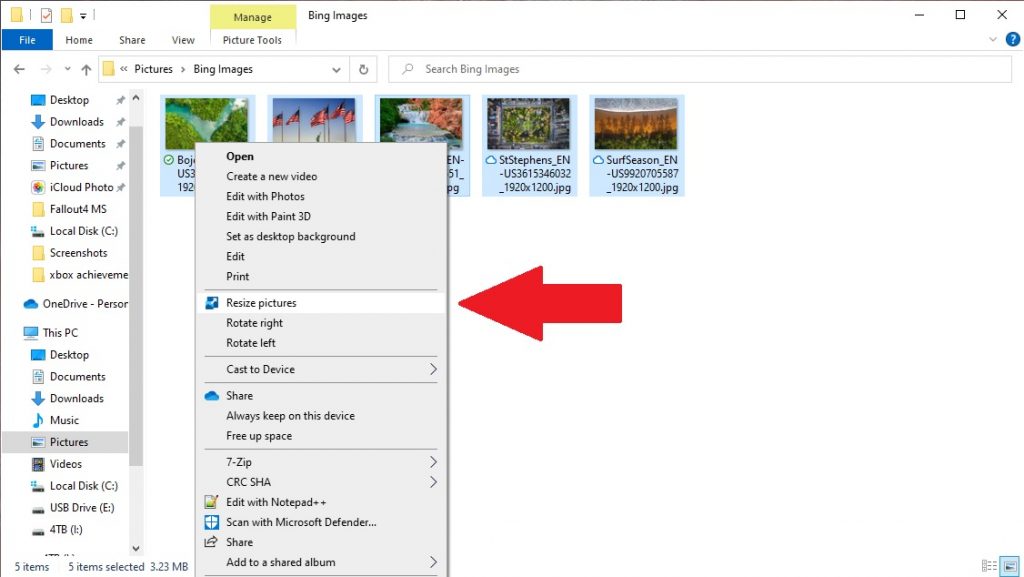
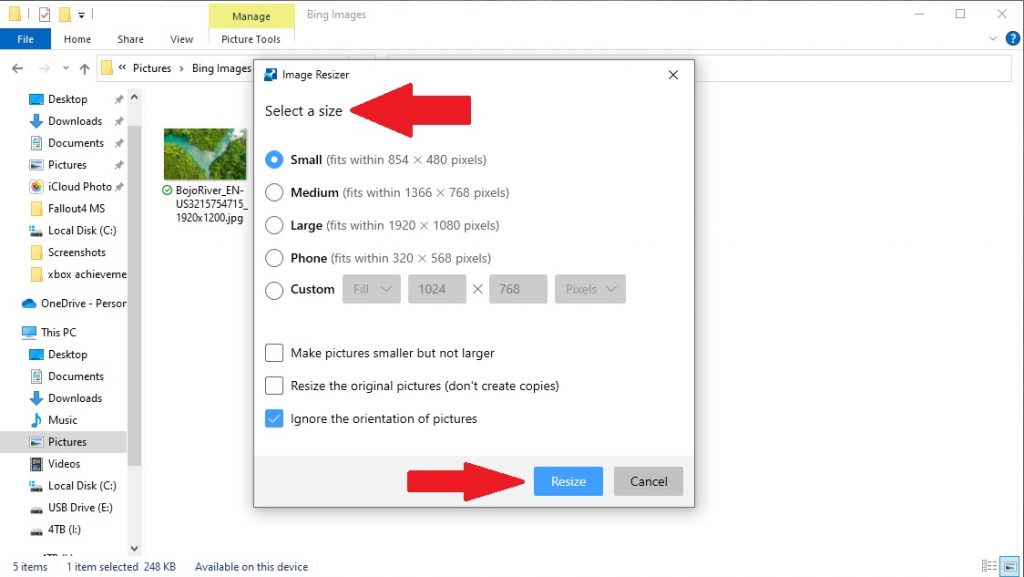
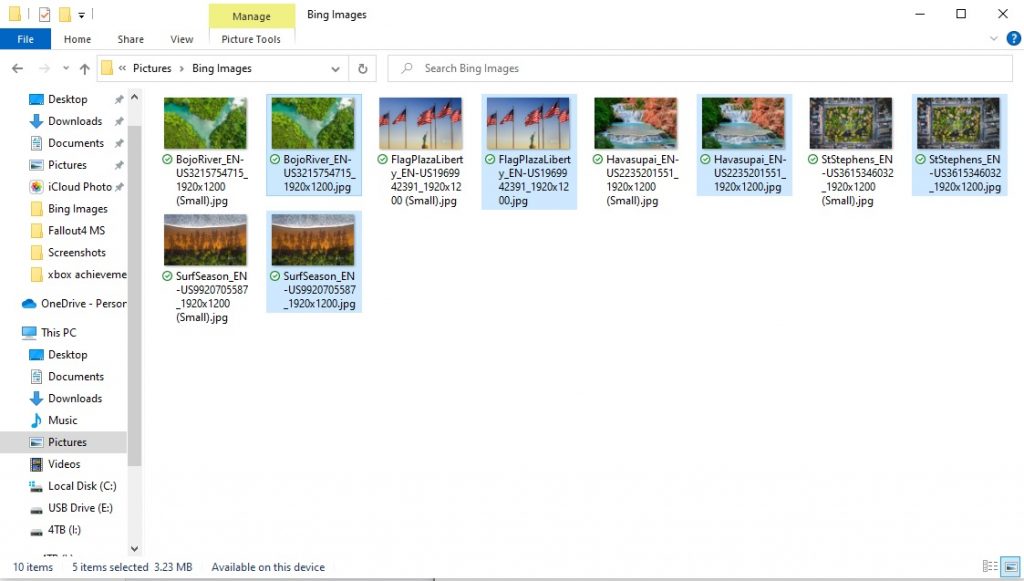
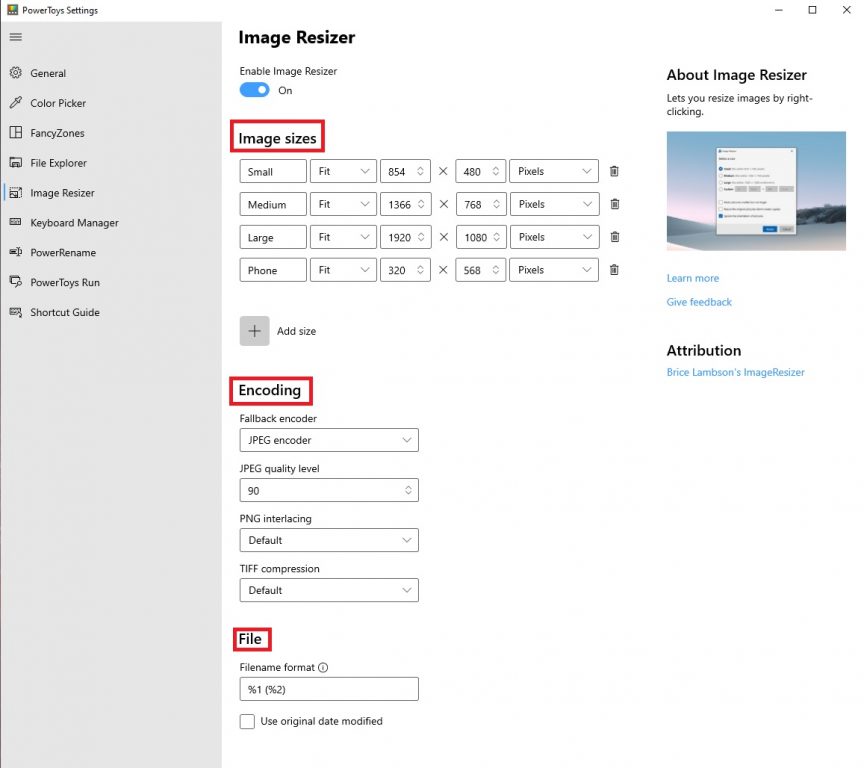
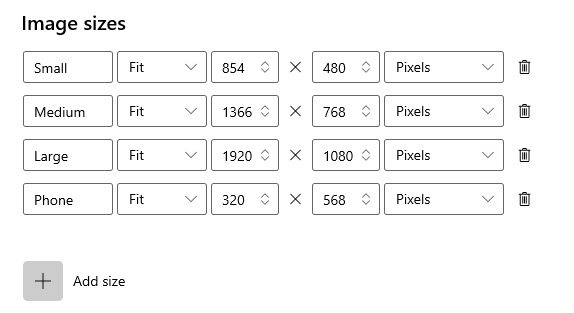




![Robinhood Not Available in Your Country? [Full Guide]](https://windowsreport.com/wp-content/uploads/2021/04/Robinhood-featured-image.jpg)

![How to remove Yahoo! Powered tool on Windows 10 [Quick Fix]](https://windowsreport.com/wp-content/uploads/2018/05/Yahoo.jpg)

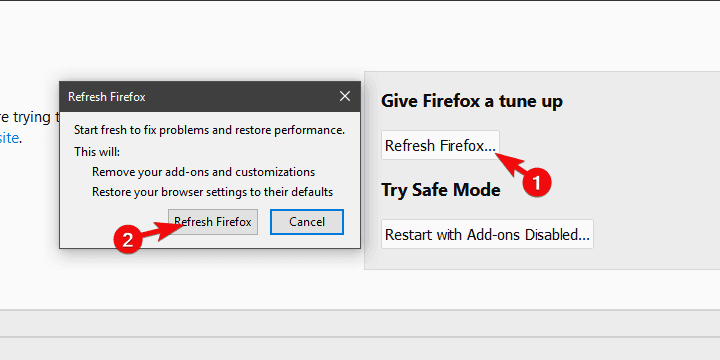
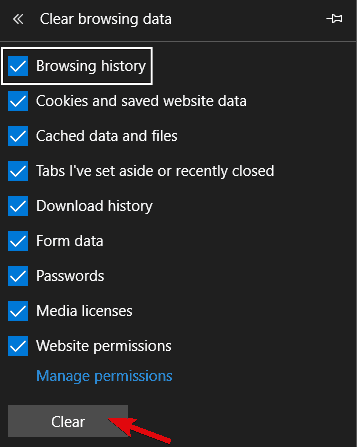


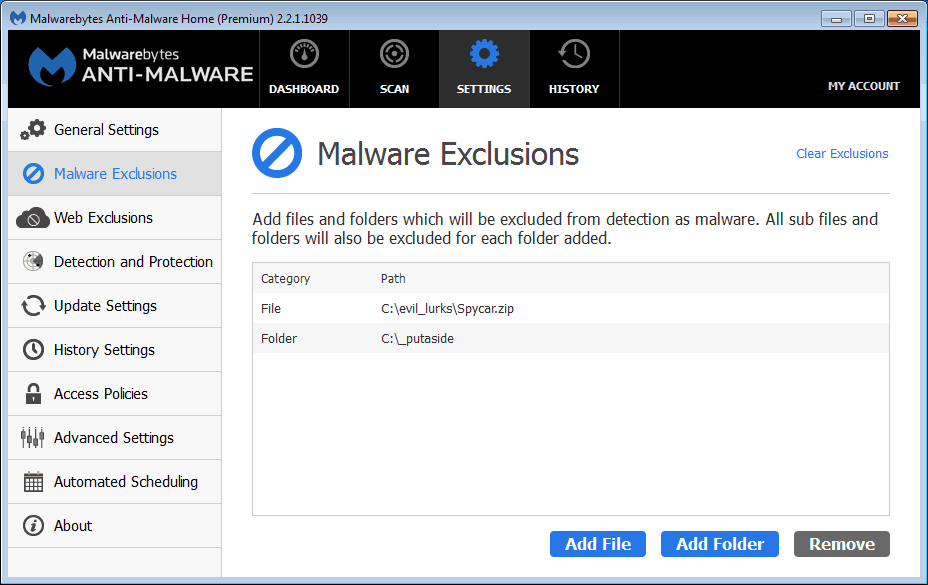


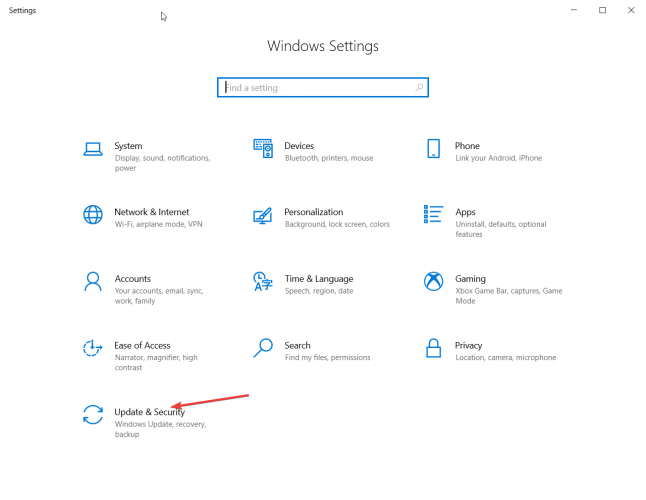


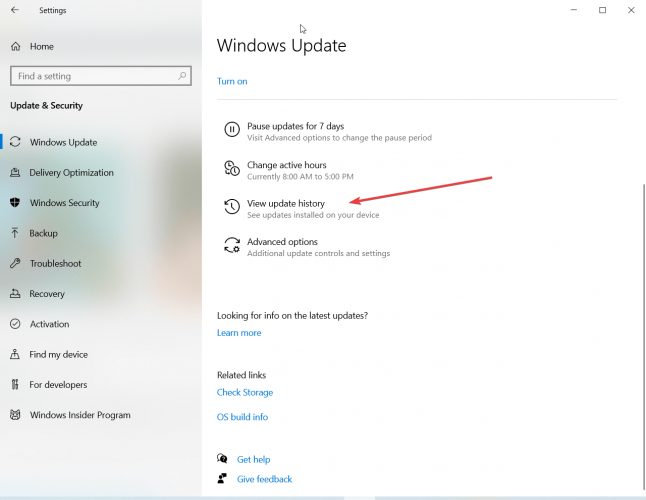


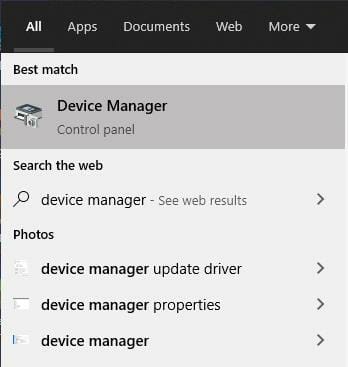
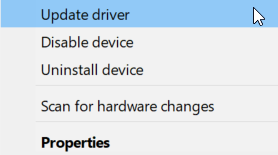
![Do you need an antivirus for Windows 10/11? [We Answer]](https://windowsreport.com/wp-content/uploads/2021/04/Featured-image-123-resized.jpg)
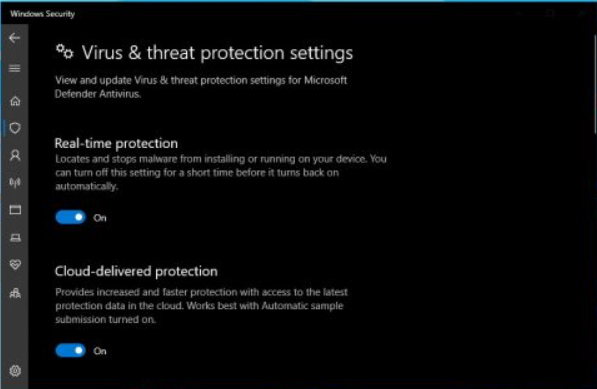
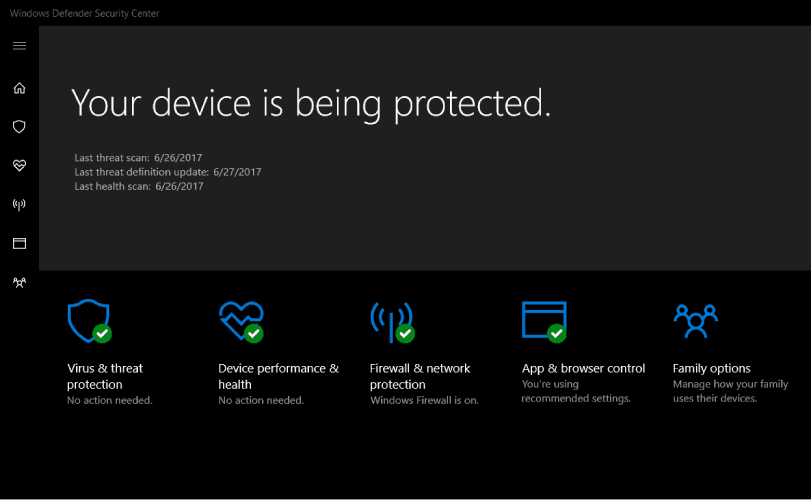









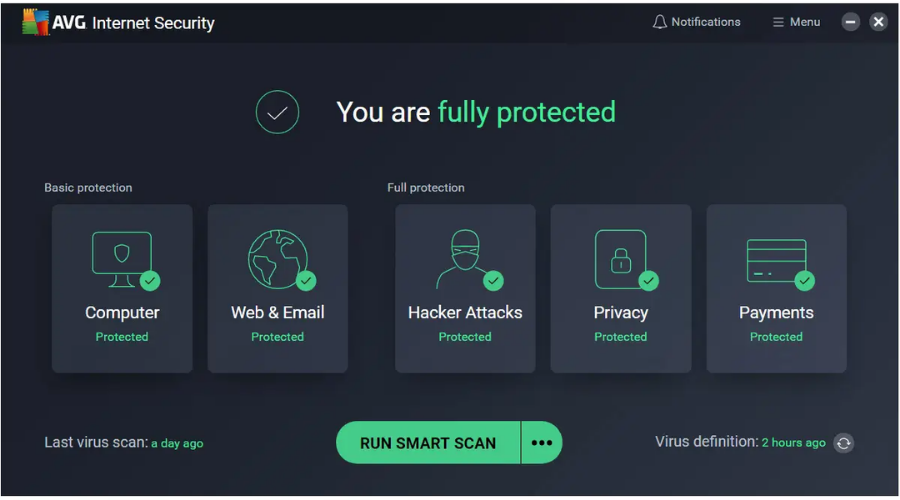

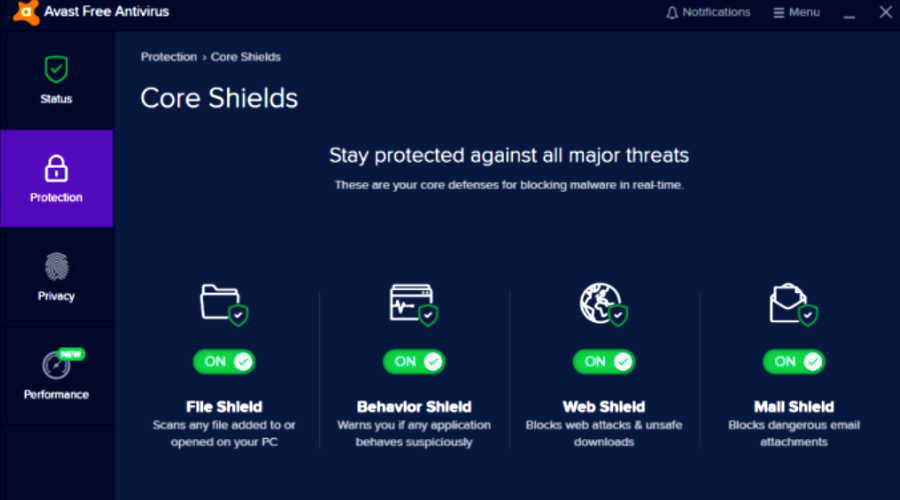




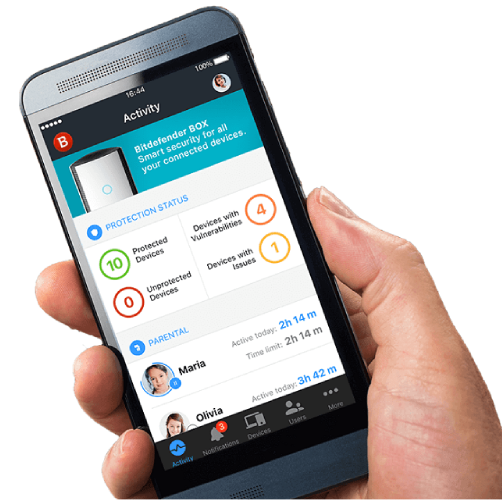


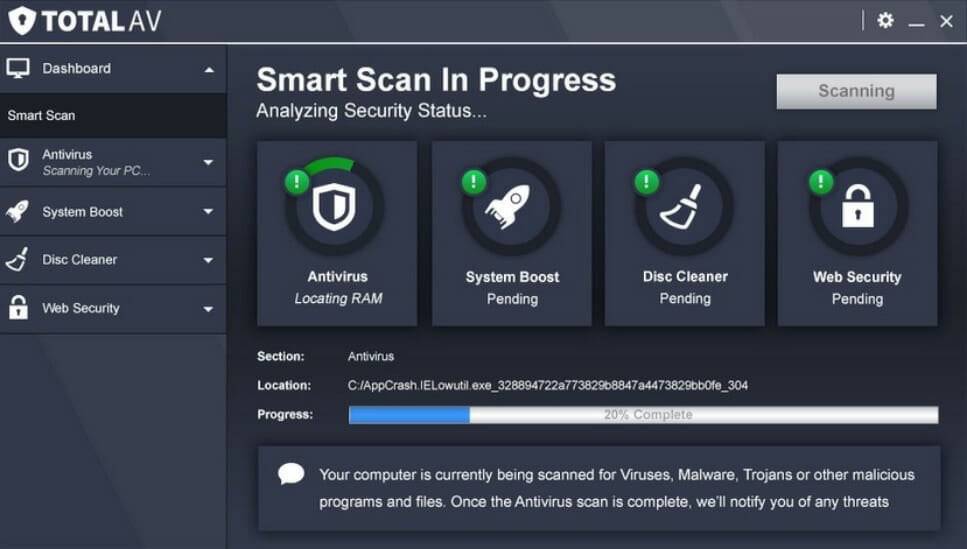


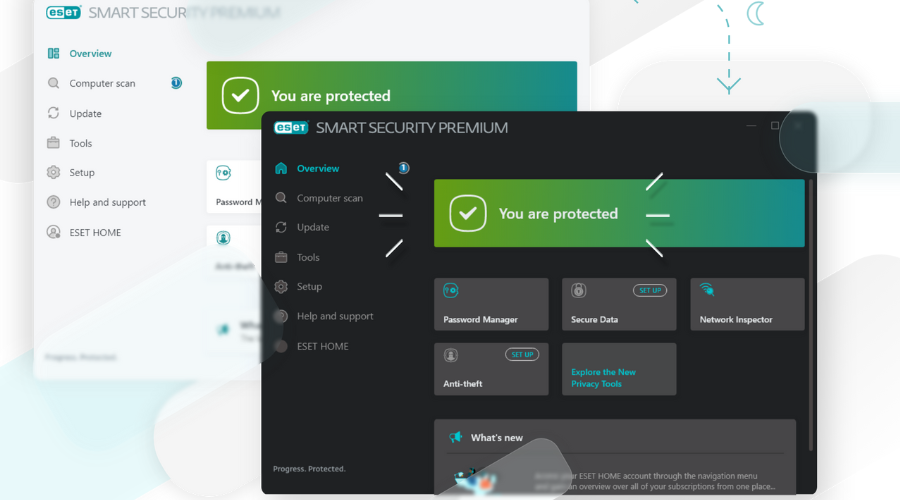

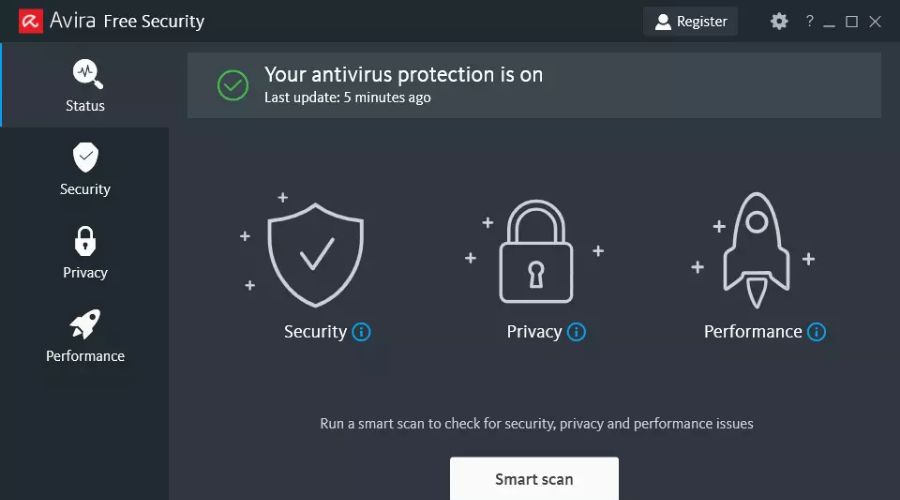
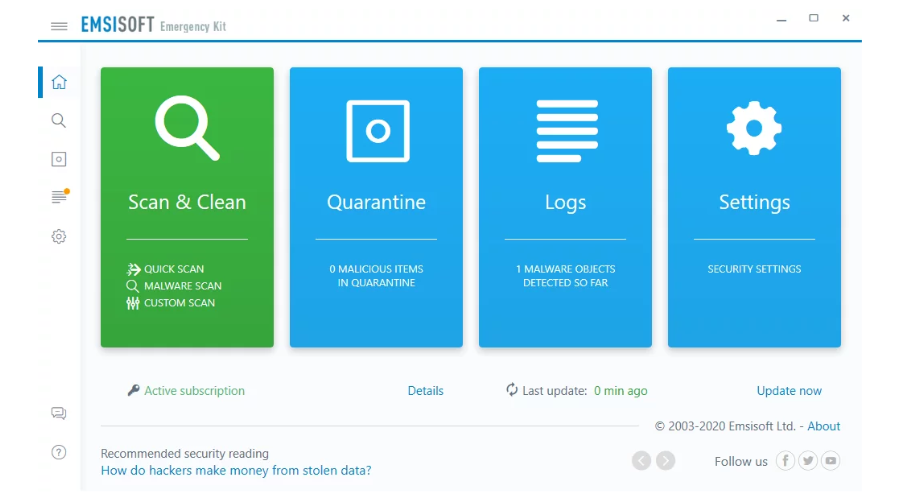
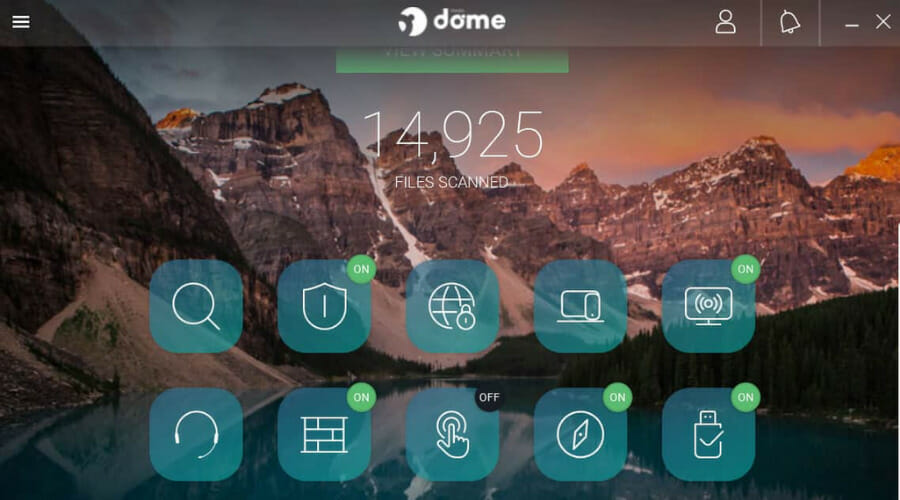
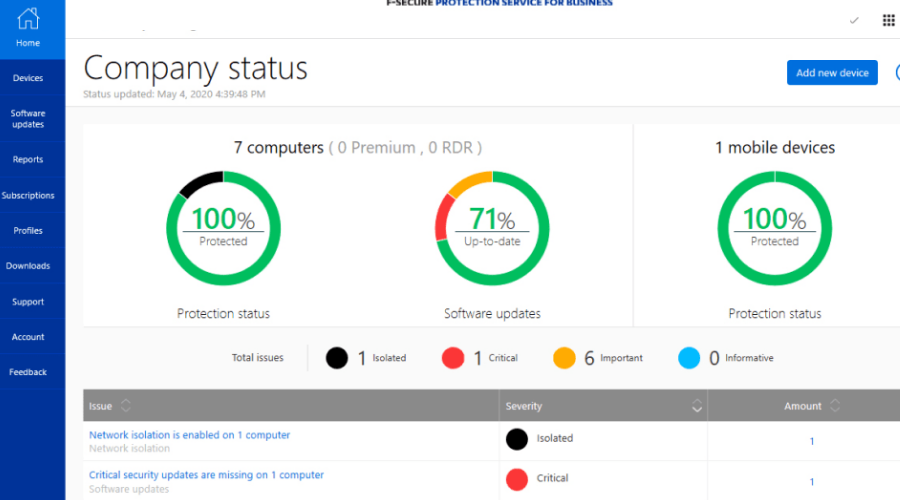
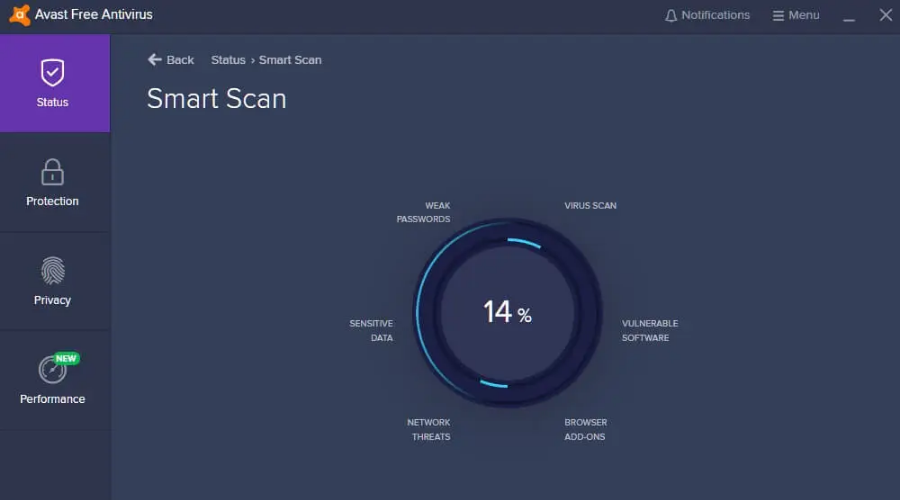
![FIX: Intel Graphics Control Panel not opening [Full Guide]](https://windowsreport.com/wp-content/uploads/2021/03/intel-graphics-control-panel-not-opening.jpg)