The cookies are blocked or not supported by your browser error when you want to log in to your WordPress site. It prevents you from accessing your website until it is resolved.
It is usually not because your browser does not support WordPress cookies. Instead, it occurs due to switching hosting providers and installing caching and security plugins on your website.
Irrespective of the cause, we will show you how to fix this problem just like we did with the common WordPress hosting issues.
How do I ensure cookies are enabled?
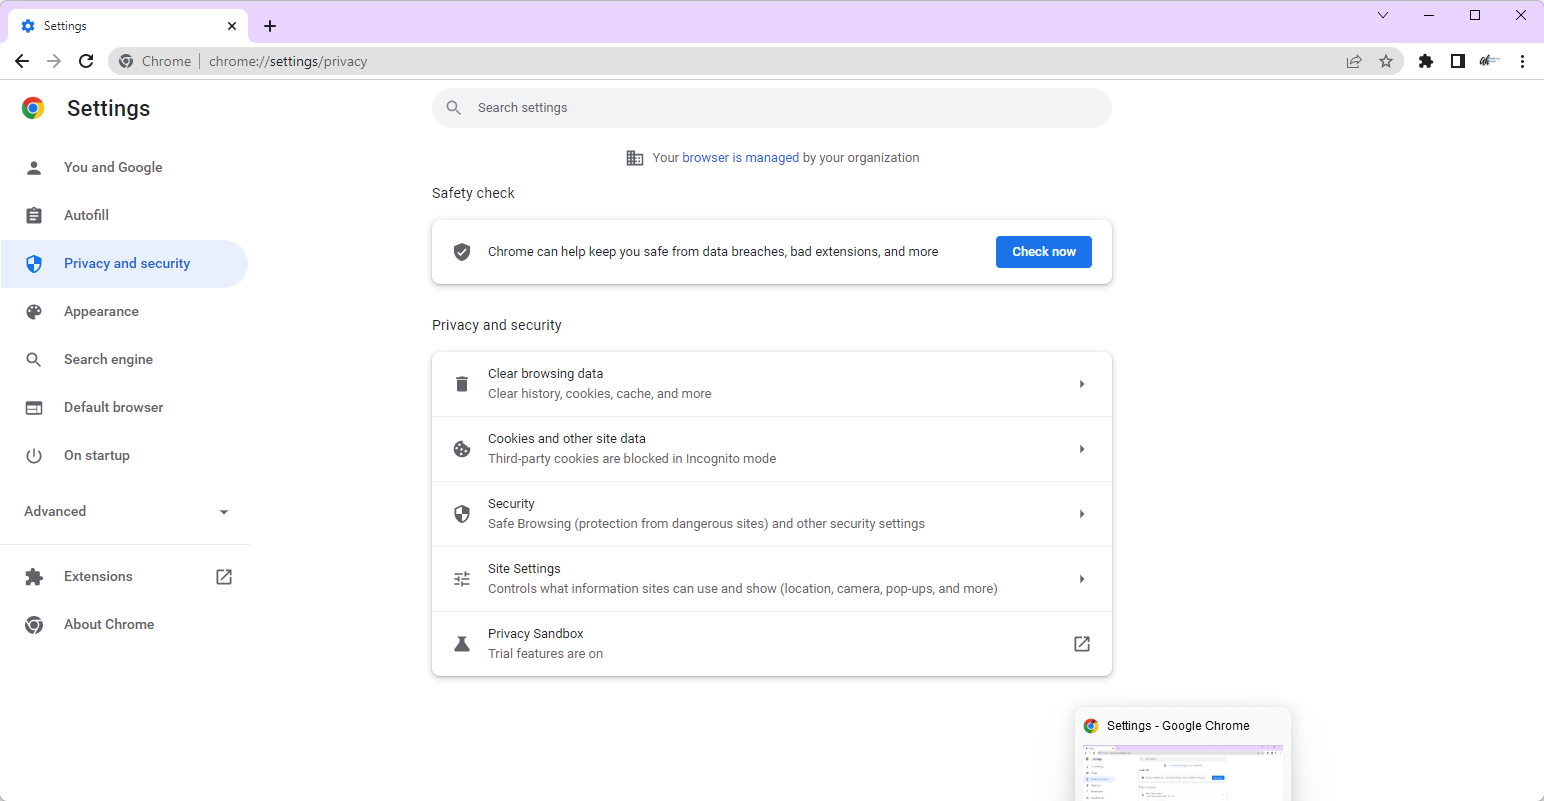
Launch your browser and click the menubutton (three vertical dots) at the top right corner.
Select the Settings option.
Choose the Privacy and security option on the left pane.
Select Cookies and other site data.
Finally, tick the radio button for Allow all cookies.
With this enabled, cookies will always work on your browser. And you can be sure the cookies are blocked or not supported by your browser issue is not from your end.
?️Quick Tip:
The Advanced settings in the Opera One browser allow you to manage favorite sites and cookies with a few mouse clicks. The Allow sites to save and read cookies setting determines whether websites can set cookies.
In general, you should probably keep this enabled, but this is easily manageable in Opera One and you may allow whatever cookies you want or trust to be favorable.
Opera One
Easy manage third-party cookies, set preferred websites you mostly visit, and avoid blocked access.
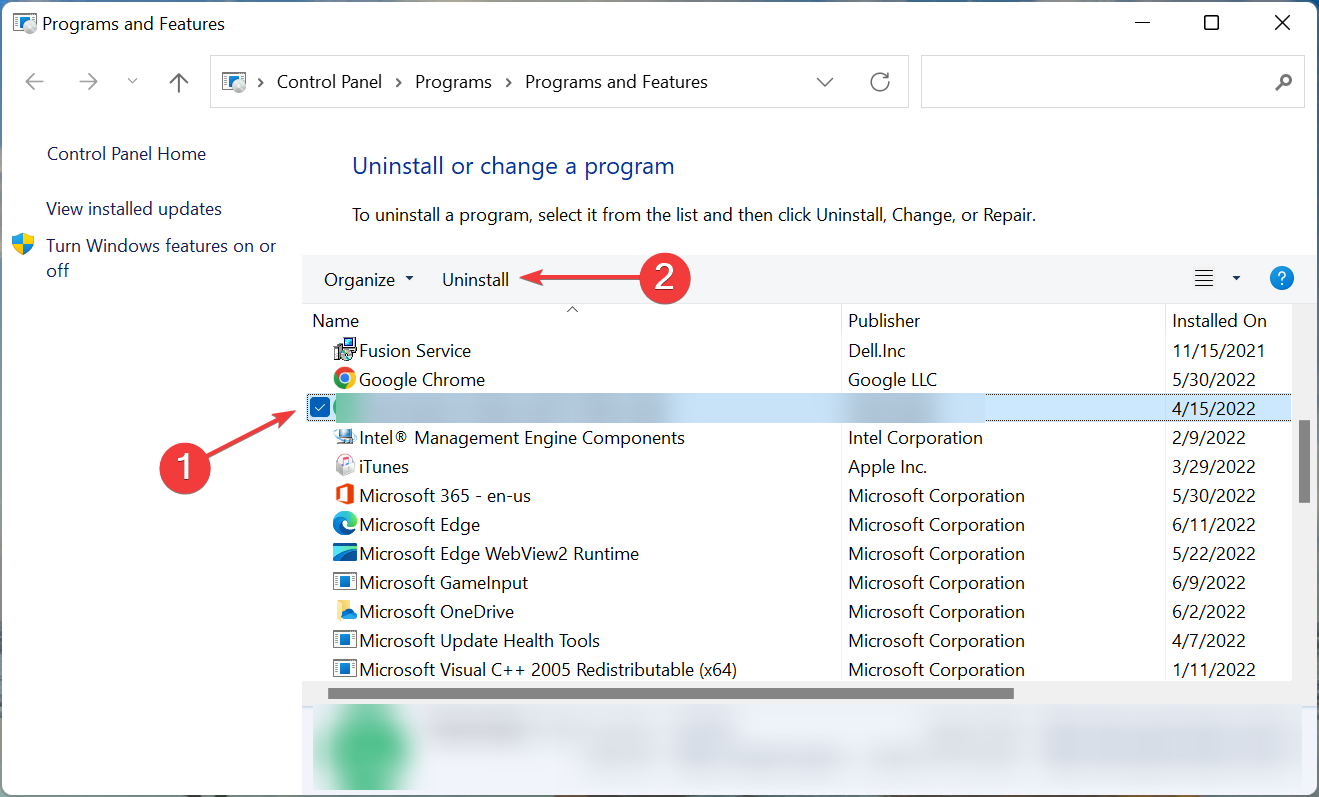
If the cookies are blocked or not supported by your browser error started showing up after installing a caching or security plugin on your site, you might have to disable it to restore normalcy.
This is because these plugins cache and minify your site, leading to cookies not being generated or not working. Hence, you need to disable the plugin to log in to your browser.
2. Clear browser cookies
Open your browser and click the menubutton.
Choose the Settings option.
Select the Privacy and security option.
Choose Cookies and other site data.
Select the See all cookies and site data option.
Finally, click the Remove All button.
The cookies are blocked or not supported by your browser error might be because you changed your hosting provider. Changing your provider while keeping your domain the same might cause existing cookies not to work on your website.
So, if your WordPress cookies are blocked after migration, clearing the cookies and allowing another to be generated should do the trick.
Copy and paste the code below into it: setcookie (TEST_COOKIE, 'WP Cookie check', 0, COOKIEPATH, COOKIE_DOMAIN); if ( SITECOOKIEPATH != COOKIEPATH ) setcookie (TEST_COOKIE, 'WP Cookie check', 0, SITECOOKIEPATH, COOKIE_DOMAIN);
Lastly, Save/upload the functions.php file.
This technical fix should only be used as a last resort if the two fixes above fail. You will require a bit of coding/technological know-how to do this.
This code will check if your browser has cookies by setting the WordPress test cookie. It has proved to work for other users, so you should give it a try too if all options fail.
The cookies are blocked or not supported by your browser error, and preventing you from logging into your WordPress site can be annoying. However, as shown, it can be fixed with the correct info.
Gone are the days of reading a series of complex papers in the library while doing academic research. Nowadays, academic research browsers or search engines have taken the role and simplified the process.
Some of these tools provide citations, references, and links to text that would usually be unavailable to you. And thankfully, these tools are free, unlike some of the best survey software for academic research.
However, there are too many of them. So, choosing the best one might be a real headache.
This article simplifies that process by selecting the five best academic browsers you can use.
Can Google Scholar be used for academic research?
Google Scholar is one of the leading, if not the best academic research browsers available. It has excellent coverage and a lot of resources for just about any literary work.
Its primary purpose is to function as an academic research engine. So, it will always do the job well.
Is Google Scholar credible?
Being the academic research wing of a tech giant, it’s safe to say that Google Scholar is credible. Moreover, it has a lot of reliable sources, with citations to boot.
Also, with its excellent coverage and reach, you can lay your hands on the best academic papers in your field.
What can I use other than Google Scholar?
The academic research browser industry is not a monopolized one. There are other trusted research search engines aside from Google you can use.
There are also many websites where you can find the best research papers needed. Hence, you are not short options, as we will show in subsequent sections of this guide.
This tool carries the power of the Google search engine to find the best research papers. It has a coverage of over 200 million articles.
The good thing about this academic research browser is that the papers are free for all fields. Also, it mainly provides links to the full text in PDF format for you to download.
Thanks to its dynamism and coverage, Microsoft Academic is an excellent research browser. It covers over 210 million articles.
One of the significant differences between this search engine and Google Scholar is the overview page for each indexed paper. This allows you to easily see the top citing articles without reading the entire document.
BASE (Bielefeld Academic Search Engine) is a research browser hosted by the Bielefeld University in Germany. It provides resources from the combination of entries from many institutional repositories.
What’s more, it is free and open-source. BASE allows you to search for everything for free, whether images, journals, abstracts, or articles.
Semantic Scholar is one of the newest browsers for academic research. It is driven by Artificial intelligence algorithms to provide results with more relevance and impact.
This is done by finding hidden links between topics. Also, you can stay updated on the latest articles in your field with the Semantic Scholar email alert.
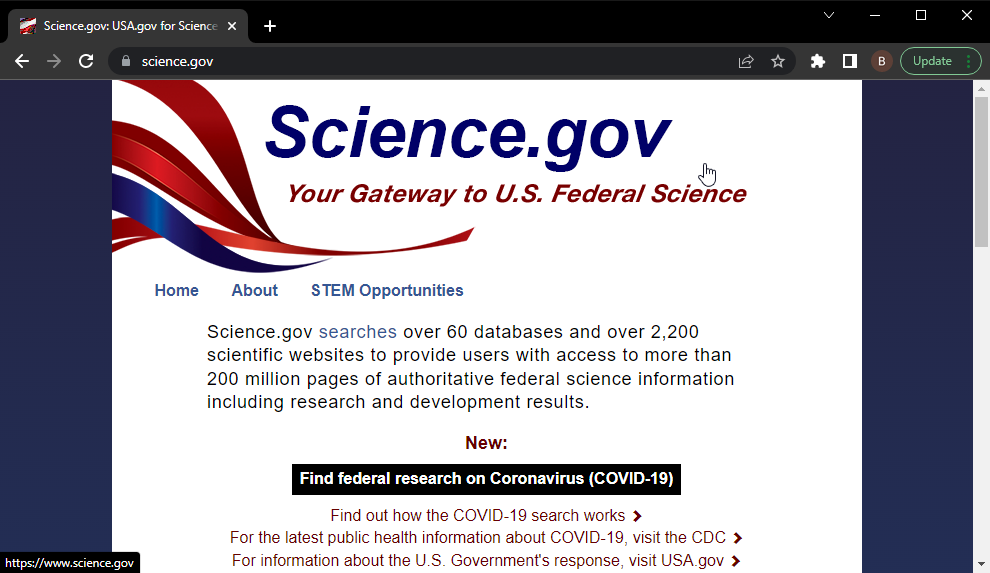
Science.gov is an excellent tool that provides users with reliable scientific research results. In addition, it allows you to access the best websites for research papers available online.
The articles provided by Science.gov are entirely free. Moreover, it covers over 200 million reports from more than 15 US agencies.
Hence, you are not short of credible materials to use for your research.
The best academic research browser should give you access to reliable resources. This is what the search engines in this guide provide, and you should find them helpful.
No doubt, many of you are waiting for the Patch Tuesday monthly batch of security updates and we’re here to make it a bit easier for you to find what you’re looking for.
It goes without saying that Microsoft isn’t the only company that has such a rollout on a monthly basis. So, in this article, we’re going to talk about Adobe and some of the patches for their products.
As we’re pretty sure you know by now, we will also include links to the download source, so you don’t have to scour the internet to find them.
Adobe releases a batch of fixes for 46 CVEs
May 2022 was a pretty light month for Adobe, with five updates addressing 18 CVEs in Adobe CloudFusion, InCopy, Framemaker, InDesign, and Adobe Character Animator.
Out of all the updates in last month’s rollout, the largest one is the fix for Framemaker, with 10 CVEs in total, out of which nine are Critical-rated bugs that could lead to code execution.
However, for June 2022, This month, the company released six patches addressing 46 CVEs in Adobe Illustrator, InDesign, InCopy, Bridge, Robohelp, and Animate.
By far the largest update belongs to Illustrator, which addresses 17 total CVEs, with the most severe of these bugs allowing code execution if an affected system opens a specially crafted file.
You should also know that the big majority of these bugs fall into the Out-Of-Bounds (OOB) Write category.
If you are a Bridge user, then you should definitely acknowledge the fact that the update for Adobe Bridge fixes 12 bugs, 11 of which are rated Critical.
Next, we get to talk about the InCopy update, one that brings fixes eight Critical-rated bugs, all of which could lead to arbitrary code execution.
Moving on to the InDesign app, the patch fixes seven Critical-rated arbitrary code execution bugs, just in case you were wondering.
That being said, for both InDesign and InCopy, the bugs are a mix of OOB Read, OOB Write, heap overflow, and Use-After-Free (UAF) vulnerabilities.
There is only one bug fixed by the Animate patch, and it is also a Critical-rated OOB Write that could lead to arbitrary code execution.
We haven’t forgotten about Robohelp, where Adobe released a patch that fixes a Moderate-rated privilege escalation bug caused by improper authorization.
This is what you are looking at in terms of Patch Tuesday releases for Adobe for the month of July 2022, so hurry up and get the software.
What’s your take on this month’s release? Share your thoughts with us in the comments section below.
Sitting in front of a computer with bright light all day can be tiring and cause eye pains. One remedy to this problem is enabling the dark mode setting on your computer.
The dark mode setting turns the bright screen of your computer darker. The result is white text over a dark background, although some applications allow accent colors that change the text color over the dark background.
Studies show that setting your screen to dark mode increases focus and reduces tiredness. So it’s no surprise that many users put their computers in Dark Mode. If you’re looking for ways to optimize the dark mode feature on your computer, here’s how to go about it.
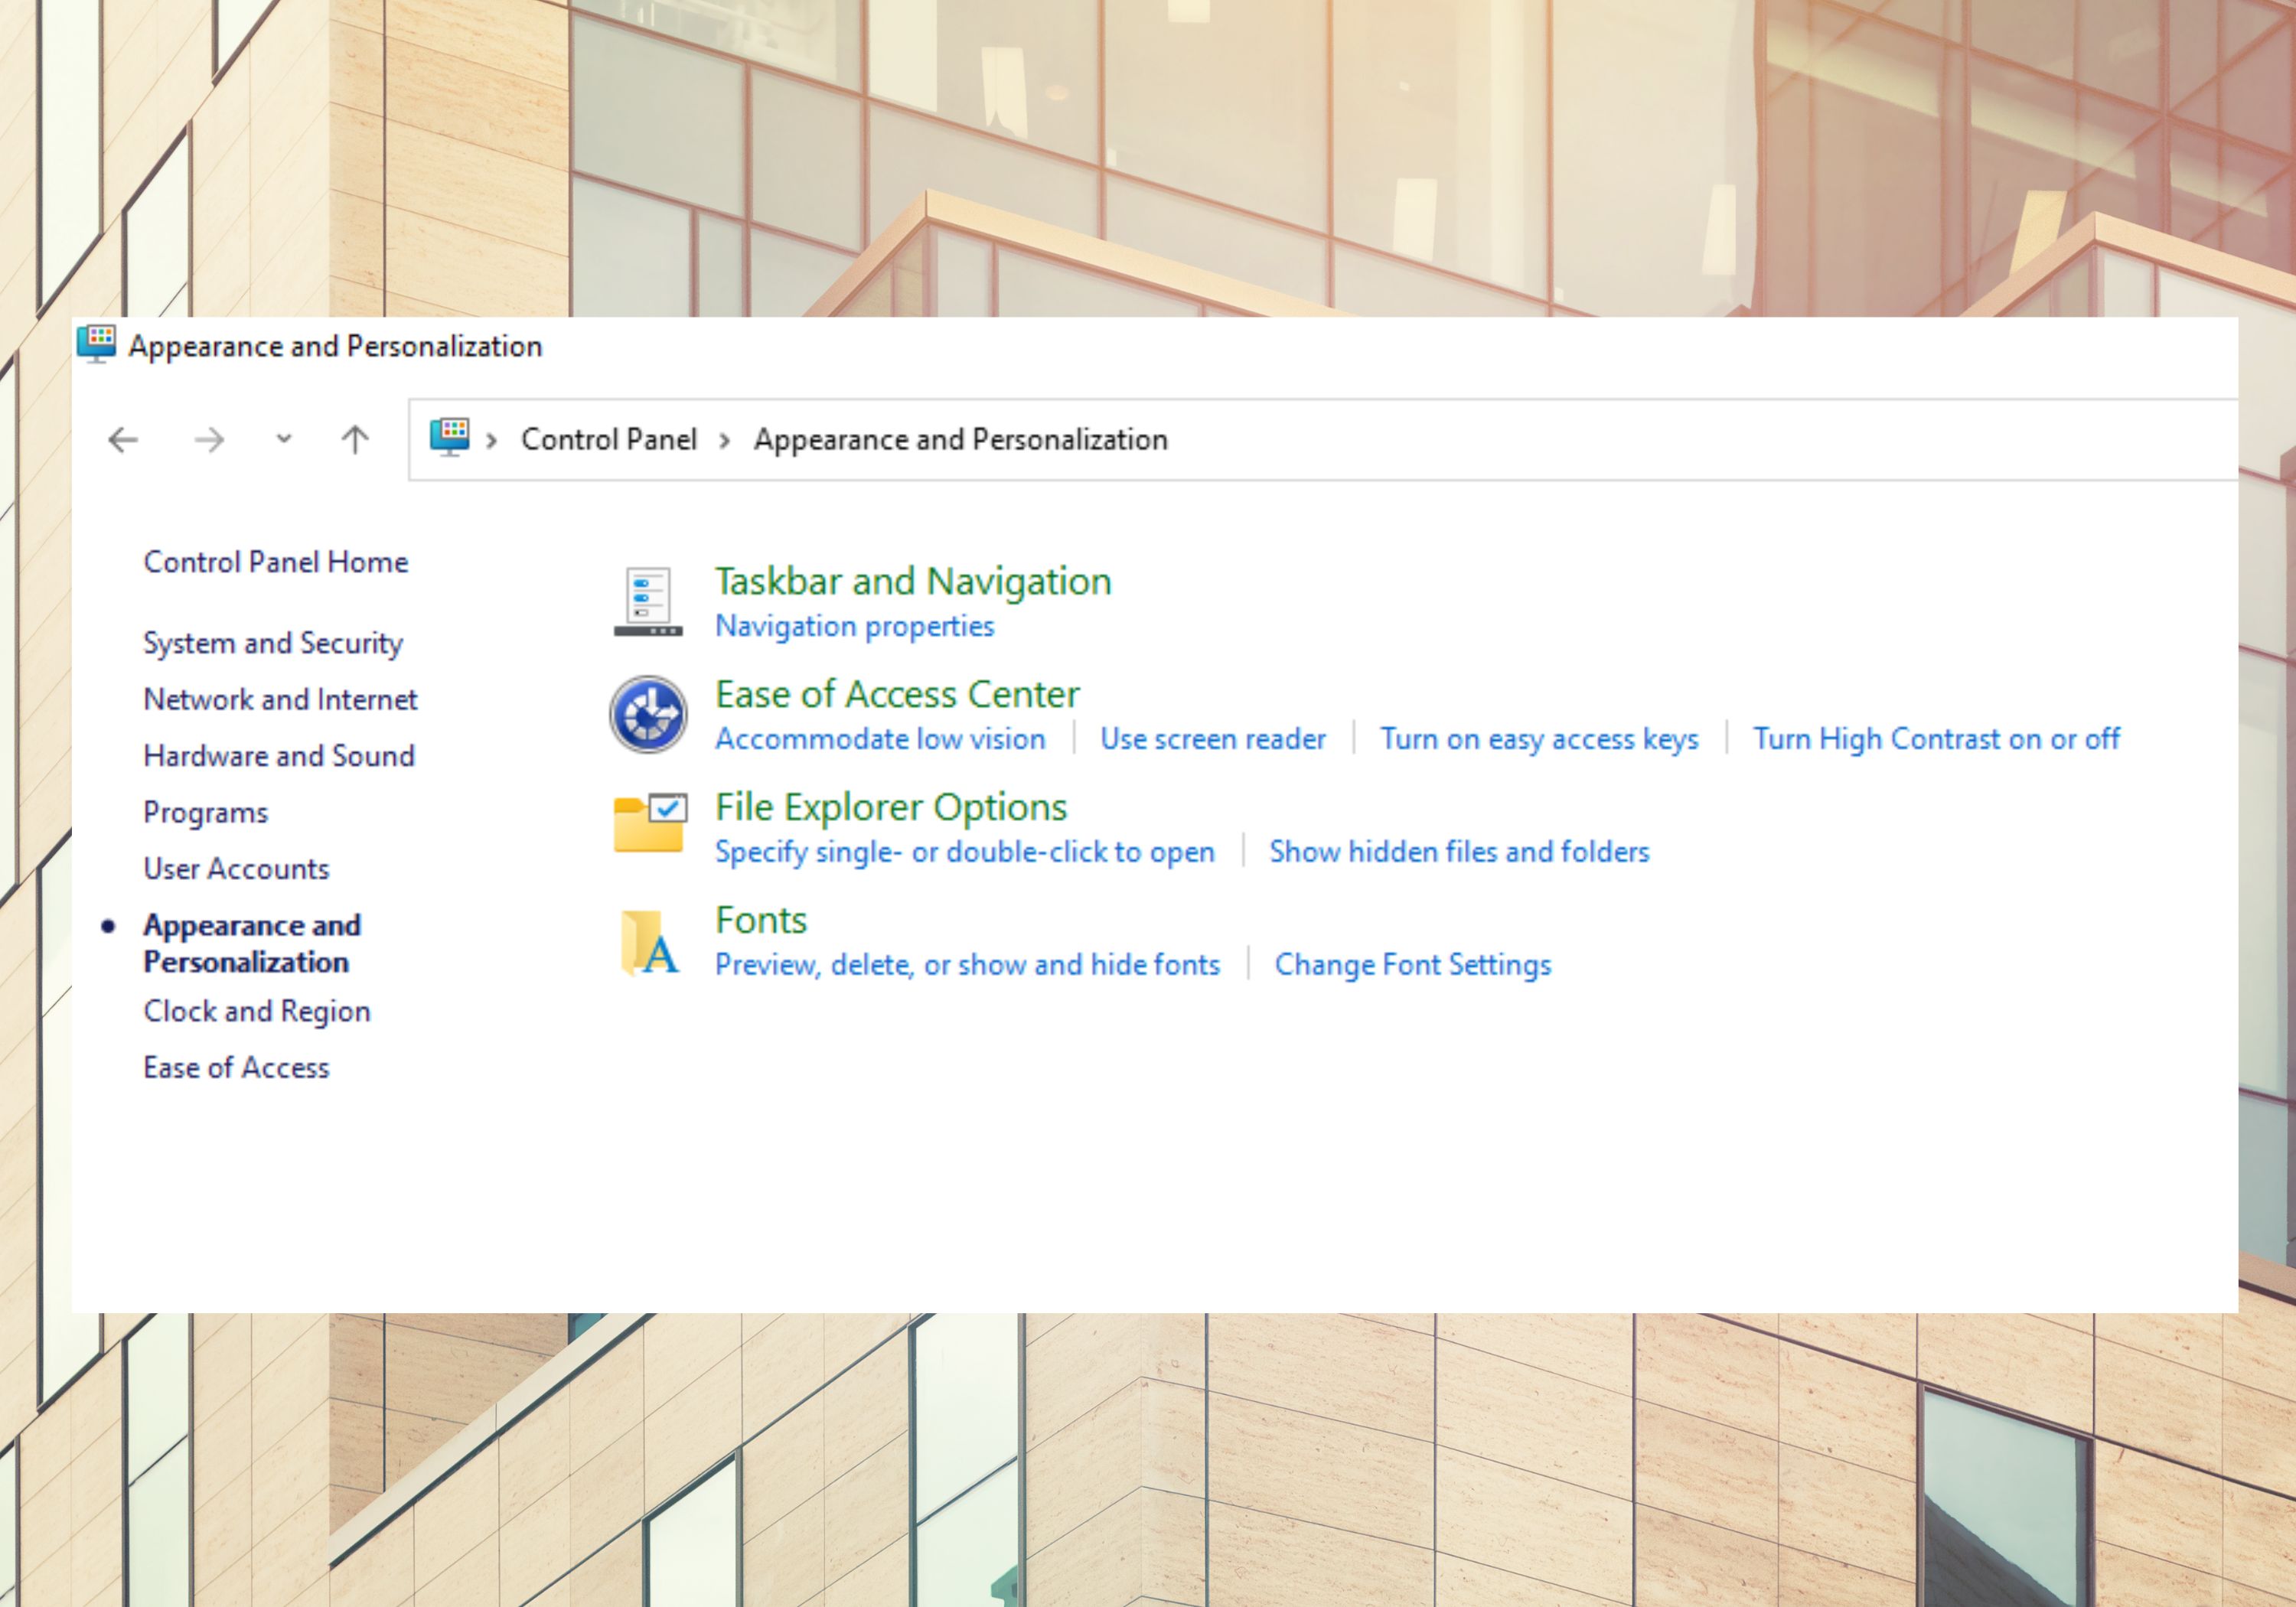
Why is the Control Panel not dark?
It is normal to set your computer to dark mode and notice that the control panel is not dark. However, changing your display settings to dark mode will affect the public display of your computer, including applications.
However, this setting does not affect the control panel. To change the control panel display settings to dark mode, you must manually change the specific settings.
Is there a Dark Mode for Task Manager?
The Windows 11 Task Manager has the system accent color and dark mode feature. You can select accent colors to match the background of your task manager.
Is there a Dark Mode for File Explorer?
The dark mode is becoming very popular for several devices and applications, including the built-in PC File Explorer. You can also change the accent colors to match the background of your file explorer.
How do I turn on Dark Mode in the Control Panel?
1. From Settings
Press CTRL + ALT + S to open settings.
Click personalization.
Select colors.
Go to the choose your default app mode and click the dark button.
2. Using Windows Search
Click on the Search icon in the taskbar.
Enter color settings.
Click on open.
Click on Colors.
Go to the choose your default app mode and click the dark button.
Anyone can easily add PS5 emojis to communication platforms like Discord. Discord provides members with a safe space to mingle verbally and textually.
Emojis are a big part of visual language on the internet and media such as Discord. Just like other applications, Discord permits the use of emojis through text chat channels. In addition, the platform supports, allowing far more flexibility than regular emojis.
To enhance your Discord experience, download gaming emojis to your Discord server with these simple steps.
Keep reading!
Does the PS5 keyboard have emojis?
Emojis are a core part of virtual texting today and are supported across several platforms, including Sony’s renowned line of sleek gaming consoles, the PlayStation.
The PS5 gaming console has numerous emojis, and the keyboard supports this through its customized emoji font.
Also, the PS5 supports all 3,521 emojis approved by Unicode, including those from September 2020’s Emoji 13.1. Also, the PS5 has better emoji support than what is obtainable on popular smartphones.
How can I get emojis on PS5?
The PS5 has custom Sony emoji designs, one of the most updated emoji platforms. In addition, players can send messages via the PlayStation home button while using the Messages function.
Access the emoji keyboard by pressing the L3 button when sending a direct message to another user.
How to add PS5 emojis to Discord?
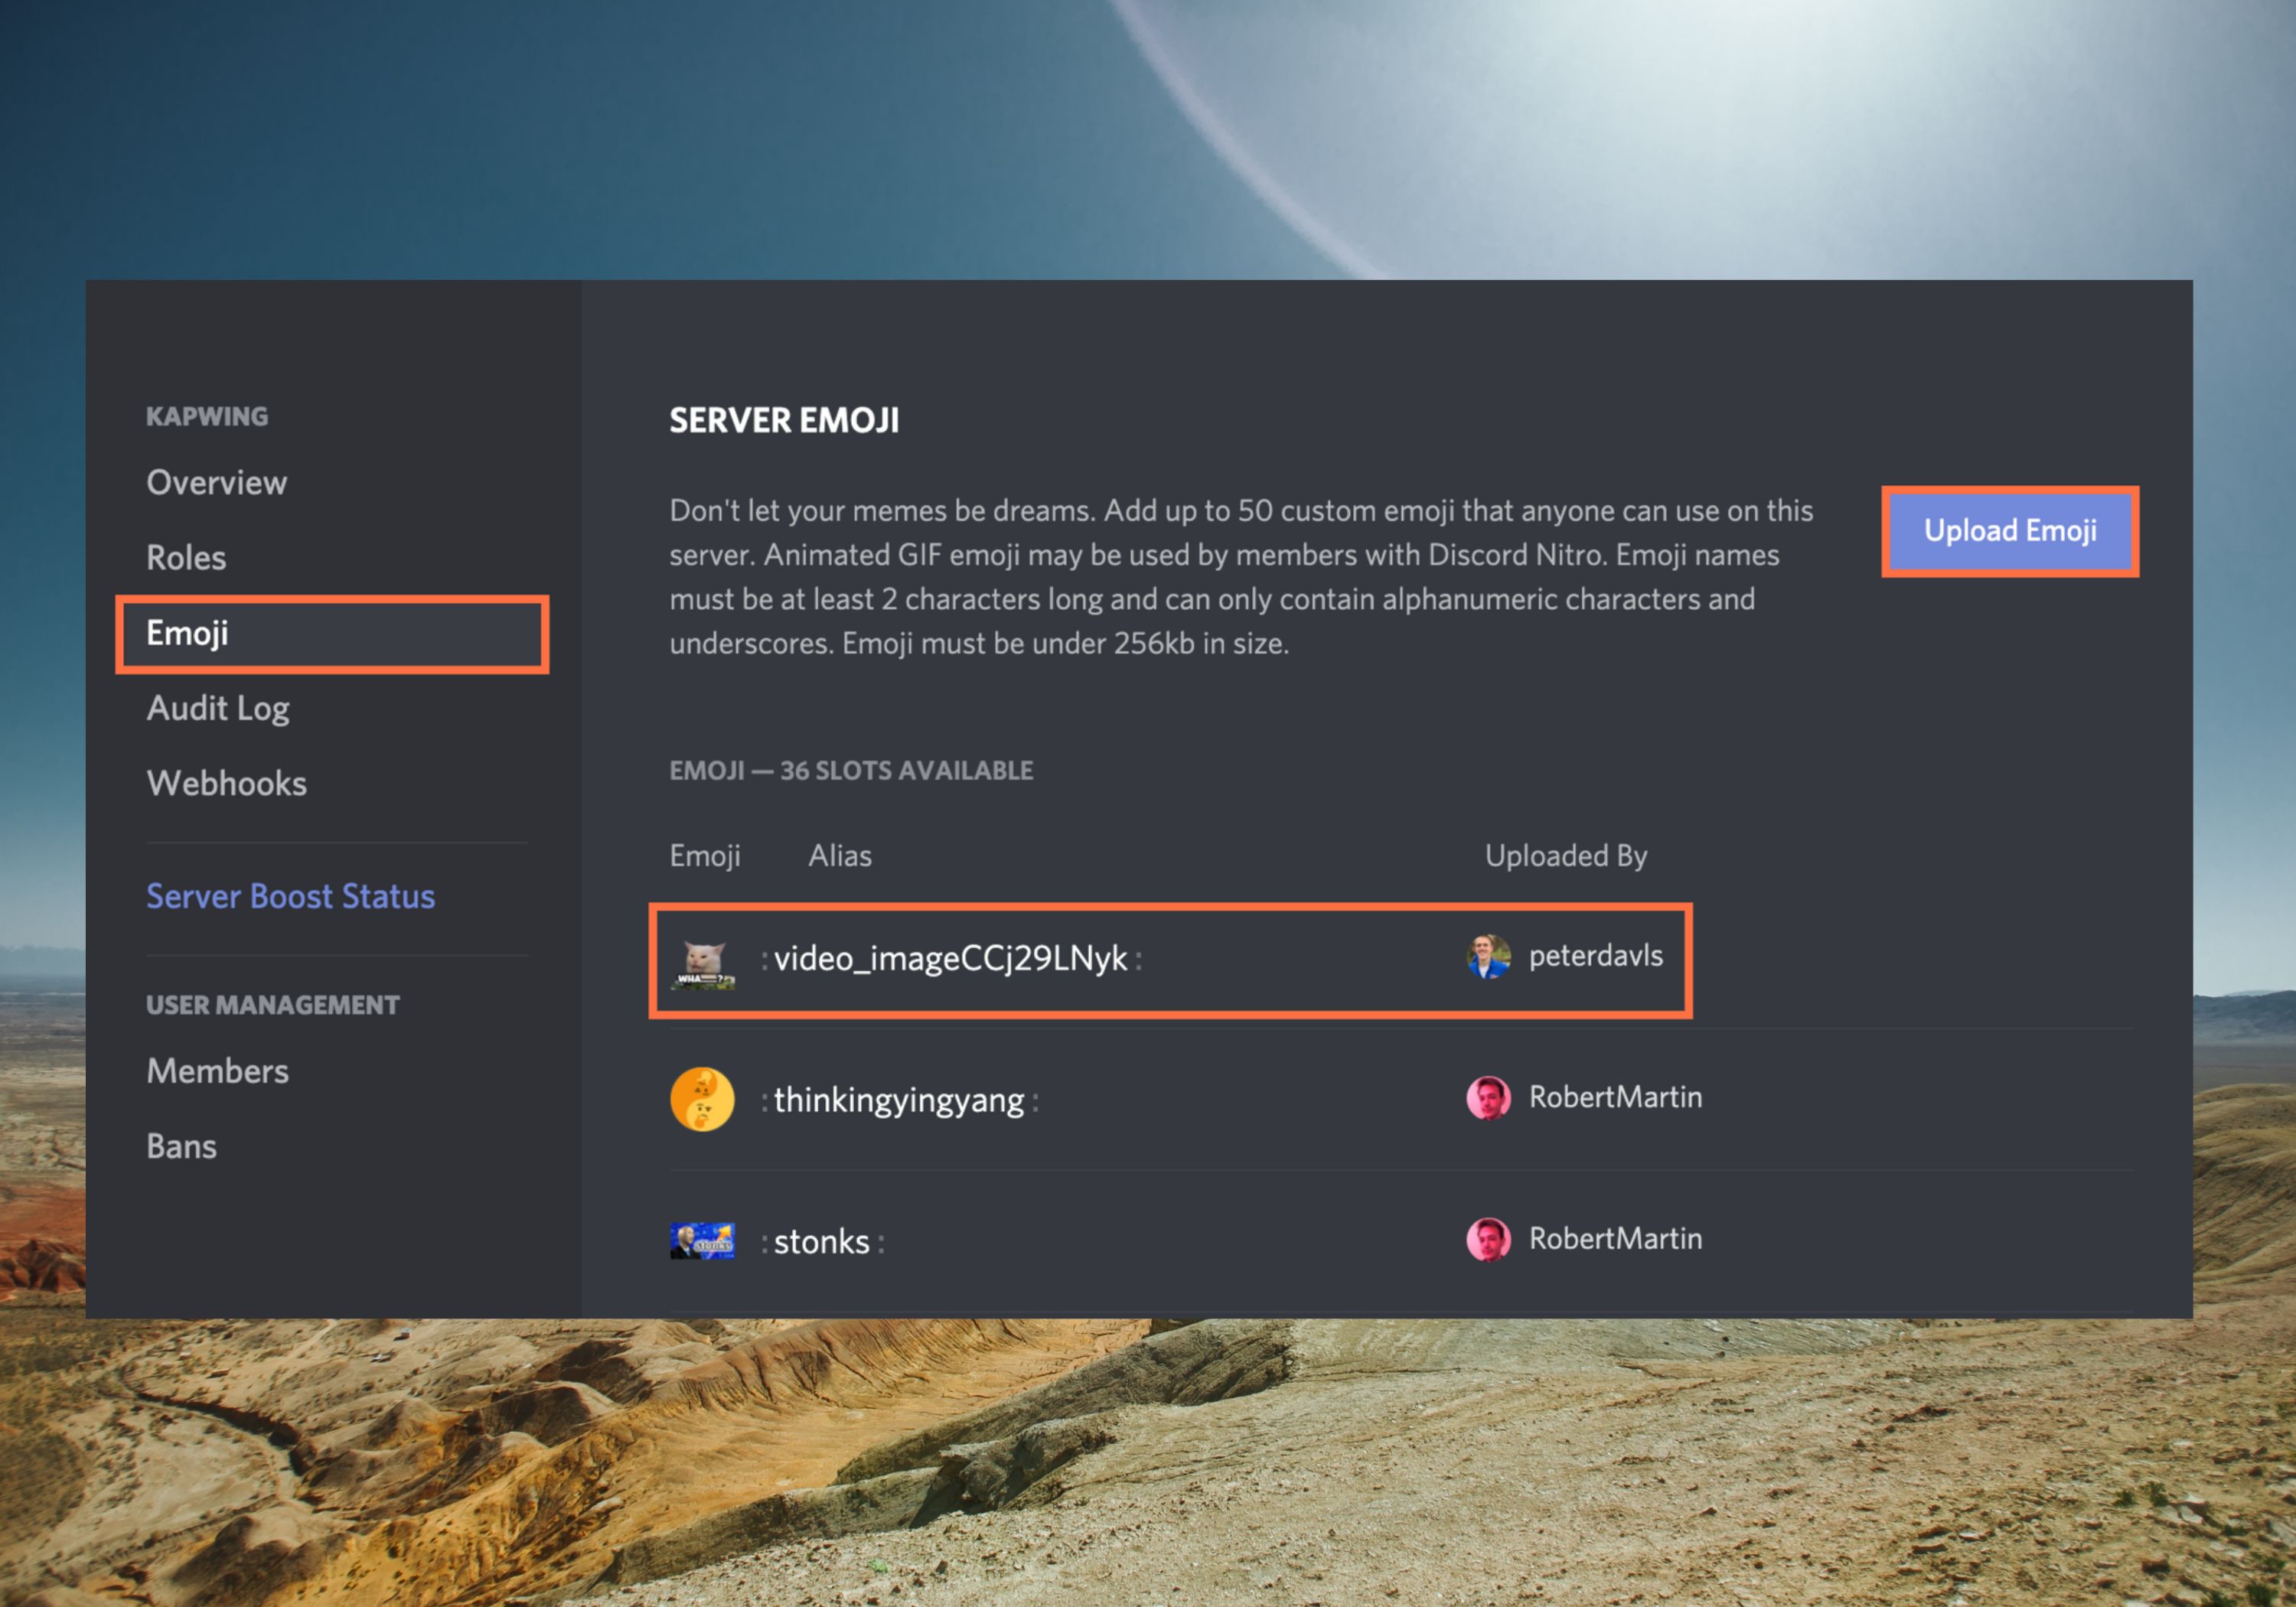
Open the server you want to upload an emoji to, and then click the dropdown arrow next to the server’s name in the top-left corner of the screen.
One option to get emojis would be to type the name of the emoji you want. Every emoji comes with associated names like Playstation, Nintendo_Switch, Joystick, Television, Swords_DPS, and so on, which you can find via the emoji menu.
You may also consider uploading your custom emojis gaming to your Discord account. An alternative is copying and pasting PS5 gaming symbols and emojis to your keyboard.
Get your custom and gaming emojis with the steps listed above. If you have additional questions, let us know in the comments box.
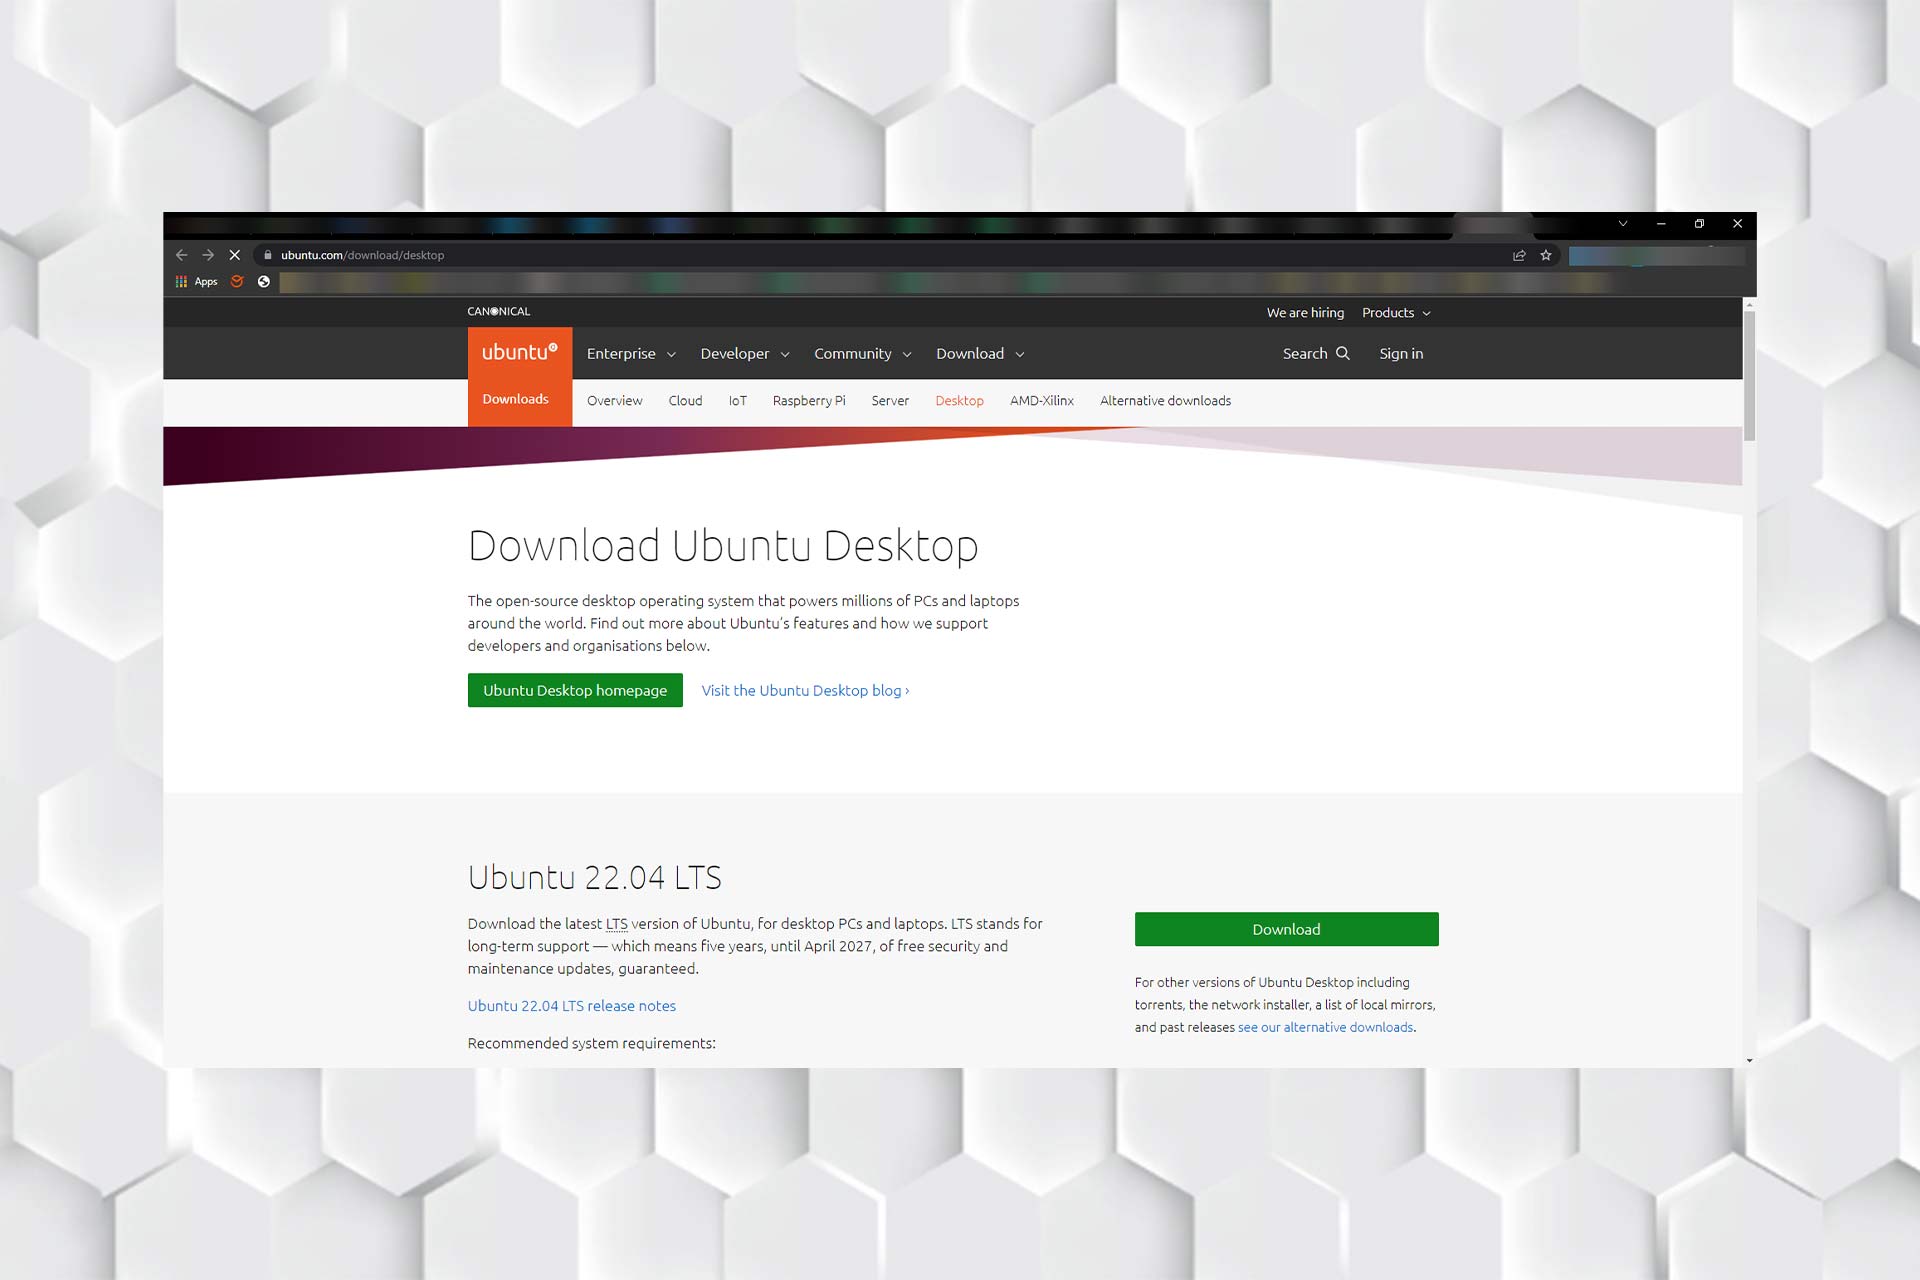
Looking to use Safari on your Chromebook? While Safari isn’t officially available for Chrome OS, there are some workarounds that let you download and install the Safari web browser on your Chromebook.
Whether you want to test websites on Safari or simply prefer its browsing experience, this guide will show you how to get Safari up and running on your Chromebook quickly and safely.
How can I download and install Safari for Chromebook?
Can I run Safari on my Chromebook?
Unfortunately, Safari is a macOS and iOS exclusive and it’s not available on other platforms. This means that you can’t download Safari on Chromebook.
Can you get a different browser on Chromebook?
Yes, it’s possible to get a different browser on Chromebook, but only on models that have Play Store or Linux available.
How do I install a new browser on a Chromebook?
If your Chromebook has access to PlayStore, you can download third-party browsers and use them. Alternatively, if you’re using Linux on Chromebook, you can install other browsers with Terminal.
Chrome is integrated into Chromebook, and it’s the fastest browser you can use. In case you’re having any performance issues with it, using a lightweight browser might help.
Can you install Edge on a Chromebook?
Yes, it’s possible to install Edge on Chromebook, and we have an entire guide dedicated to this, so don’t miss it.
If you’re on a different platform, we also have a great guide on how to install Safari on Windows 11, so don’t miss it.
What would you do if there’s an unknown entry in the Device Manager and you can’t recognize it? An unknown device doesn’t work unless you install a driver, and you can’t find the driver until the device is identified. This is where the Vendor ID in Device Manager comes into the picture.
Device Manager is an app that lists out all the devices, components, and peripherals connected to the computer, both internal and external. It also allows you the option to perform a bunch of functions, and find information about the device.
So, let’s understand what the Vendor ID is and how you can find it in the Device Manager.
What is the vendor ID?
Vendor ID is an identifier allotted to the device manufacturer to help track them down for various reasons, including finding the relevant driver.
Though, using the Device ID is a quicker and more straightforward approach. If you plan to lookup the Device ID in Windows, the process is pretty much the same as for Vendor ID.
How do I find the vendor ID of a device?
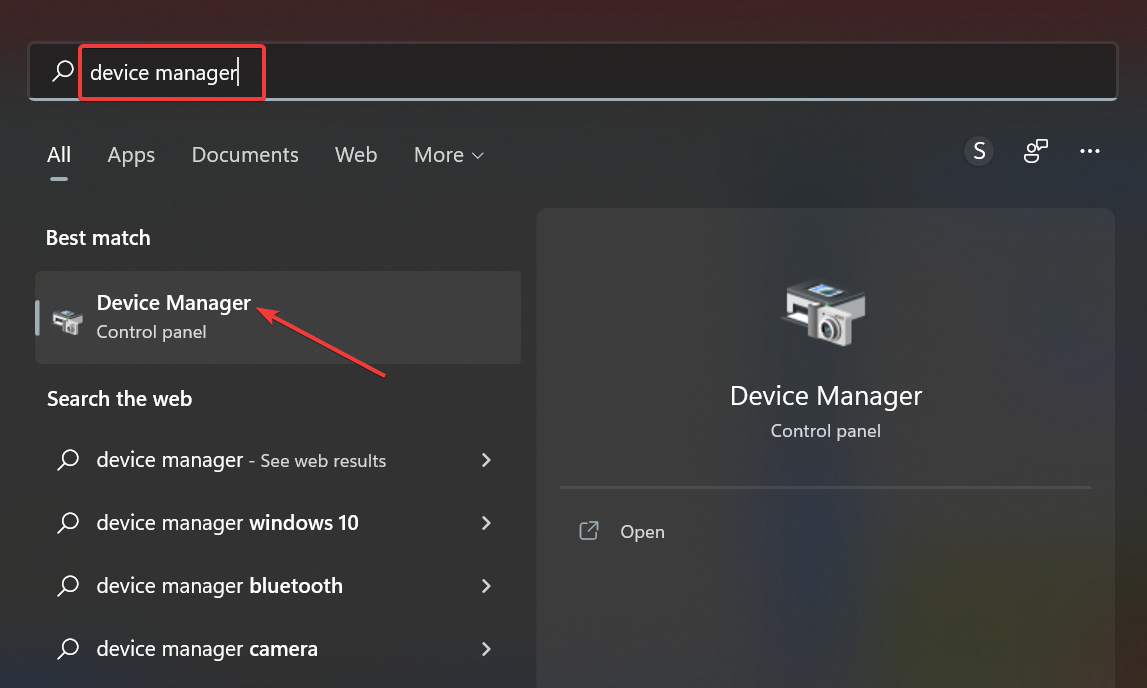
Press Windows + S to launch the Search menu, enter Device Manager in the text field, and click on the relevant search result.
Locate the unknown device, right-click on it, and select Properties.
Navigate to the Details tab.
Click on the Property dropdown menu, and select Hardware Ids from the list of options.
Now, the number next to VID or VEN is the Vendor ID.
You can also right-click on it, select Copy, and directly search for the Vendor.
How do I locate a Vendor using the Vendor ID?
Once you have the Vendor ID or the whole Identification Number (the string of characters from which we extracted the Vendor ID), locating the Vendor won’t be a difficult task. Simply search for the Vendor ID using a reliable search engine.
Just look through the search result and you will find a reliable website with a list of Device IDs Vendor ID. Look through it to identify the unknown device, and then install the drivers for it.
That’s how you can find the Vendor ID in Device Manager, and use it to identify both the Vendor and the Device, even if the computer does not recognize it.
The mouse is one the most vital devices connected to the computer, and problems with it, or even minor disruptions, can drastically impact your workflow. Several users encountered a similar issue when their Bluetooth mouse started to lag in Windows 11.
Bluetooth mice are generally more prone to issues due to wireless connectivity but offer several benefits over their wired counterparts. And the problems encountered with the former are easily fixable.
So, let’s find out what’s causing your Bluetooth mouse to lag in Windows 11, and the best solutions for the problem.
Why is my mouse lagging in Windows 11?
Connectivity issues are generally found to be behind lag on a Bluetooth mouse. It’s also likely that the mouse is kept far apart or its adapter is not plugged in properly.
Other than that, it could have to do with mouse or Bluetooth drivers. The driver is a critical piece of software that help relay commands between the device and the OS, and issues with it can cause the associated device to malfunction.
Besides, misconfigured settings or conflicting applications too have been found to lead to Bluetooth mouse lag in Windows 11.
How do I fix Bluetooth mouse lag in Windows 11?
1. Some basic checks
When using a Bluetooth mouse, make sure that it is in range. You can try turning off the mouse using the switch, waiting for a few moments, and then turning it back on. Also, restart the computer in case it’s a trivial bug that causes your Bluetooth mouse to lag in Windows 11.
In case you haven’t replaced the mouse batteries in a while, do that, and see if the lag problem is gone. If none of these work, try using a mouse pad as smooth surfaces affect the cursor movement.
2. Change the mouse pointer speed
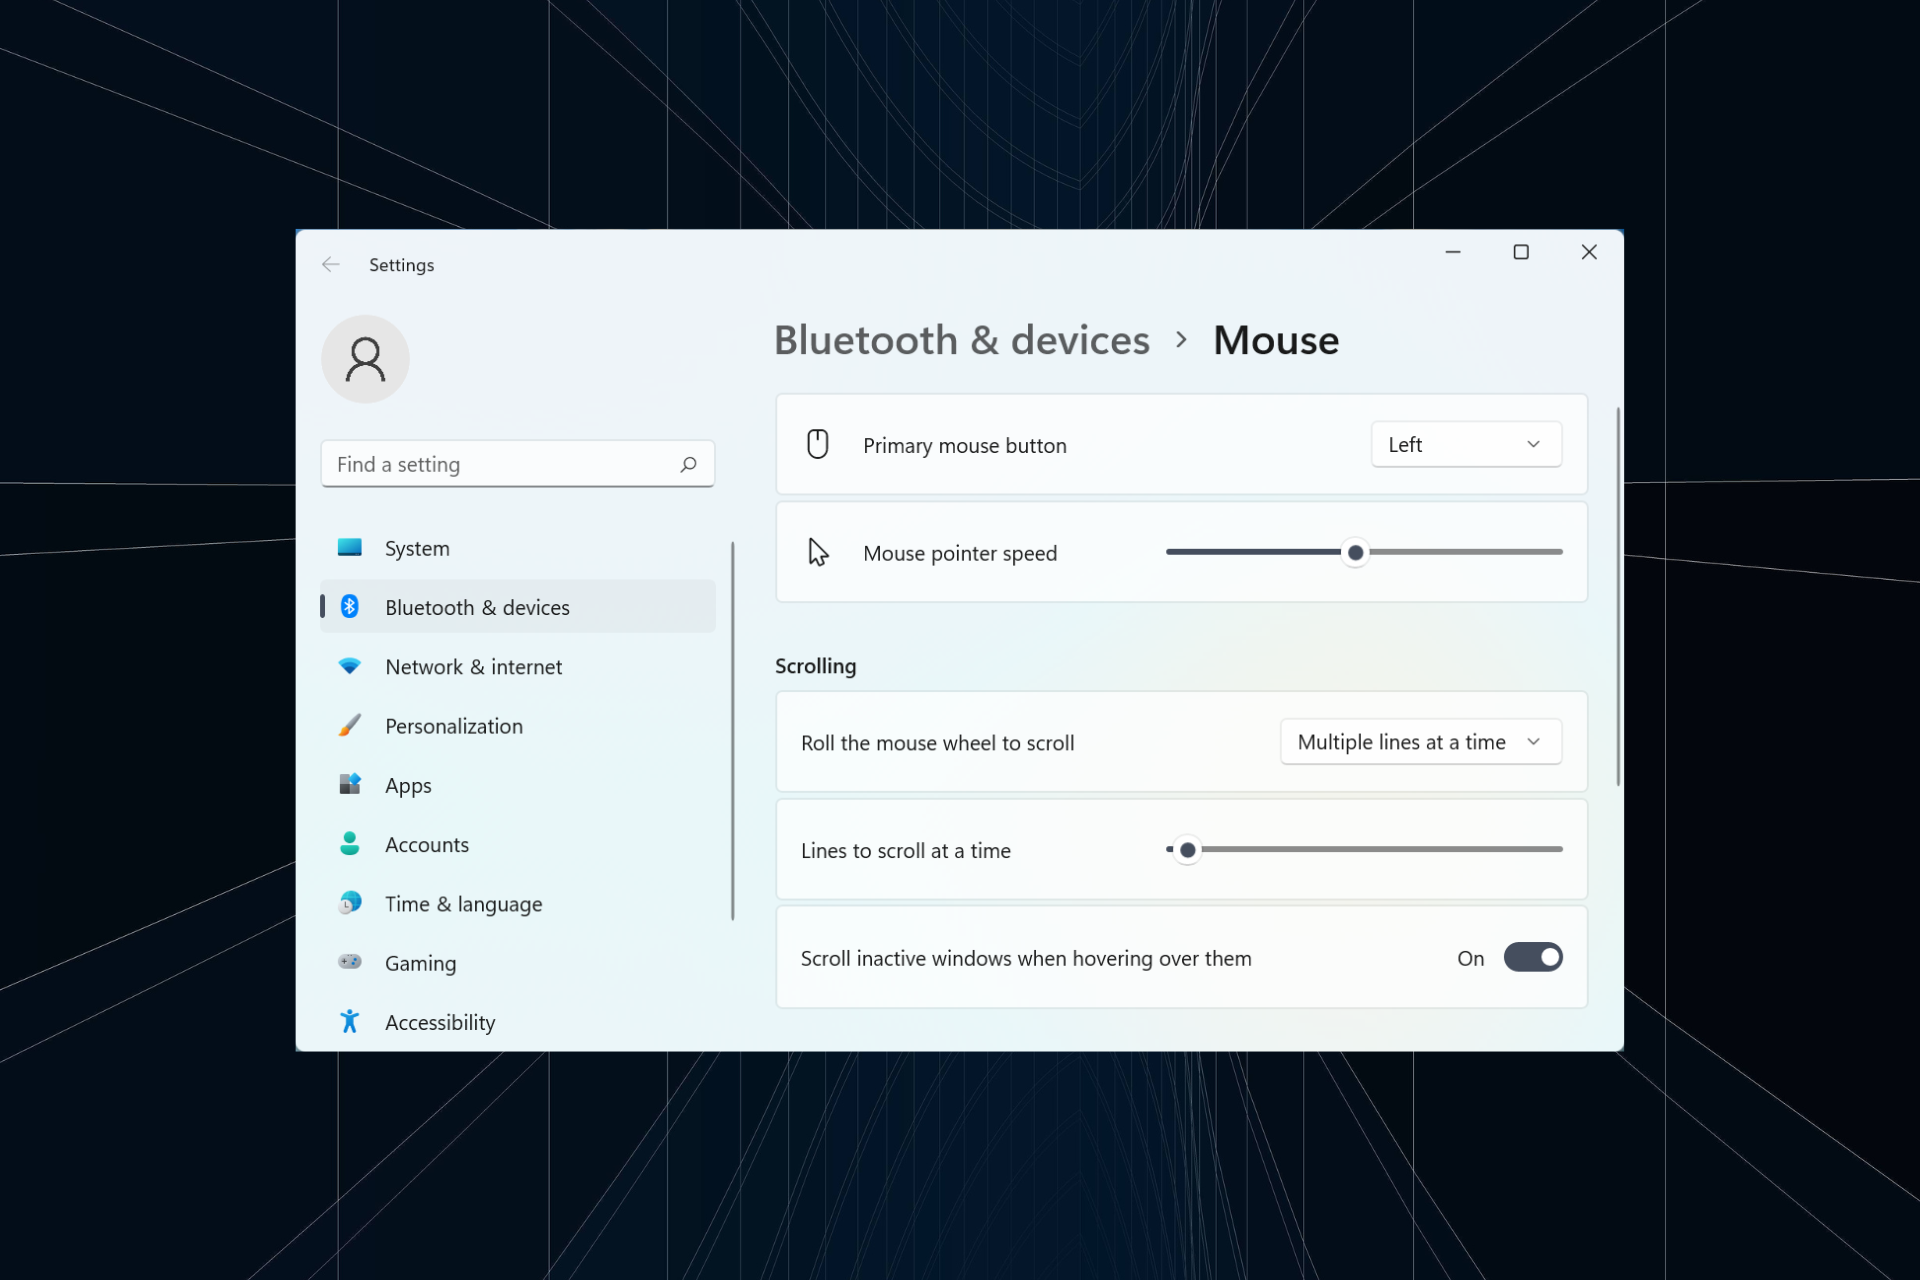
Press Windows + I to launch the Settings app, and select Bluetooth & devices from the pane on the left.
Click on Mouse on the right.
Now drag the Mouse pointer speed slider to the right to increase the cursor speed and set it at the desired level.
If the Bluetooth mouse lag in Windows 11 started after you made some changes to the settings, do check the pointer speed. Also, increasing the pointer speed can act as a temporary solution for mouse lag.
3. Run the Bluetooth troubleshooter
Press Windows + I to launch Settings, and click on Troubleshoot on the right in the System tab.
Click on Other troubleshooters.
Now, locate the Bluetooth entry, and click on the Run button next to it.
Follow the on-screen instructions and choose the appropriate response, when prompted, to complete the process.
4. Update the drivers
Press Windows + S to launch the Search menu, enter Device Manager in the text field, and click on the relevant search result.
Now, double-click on the Mice and other pointing devices entry here.
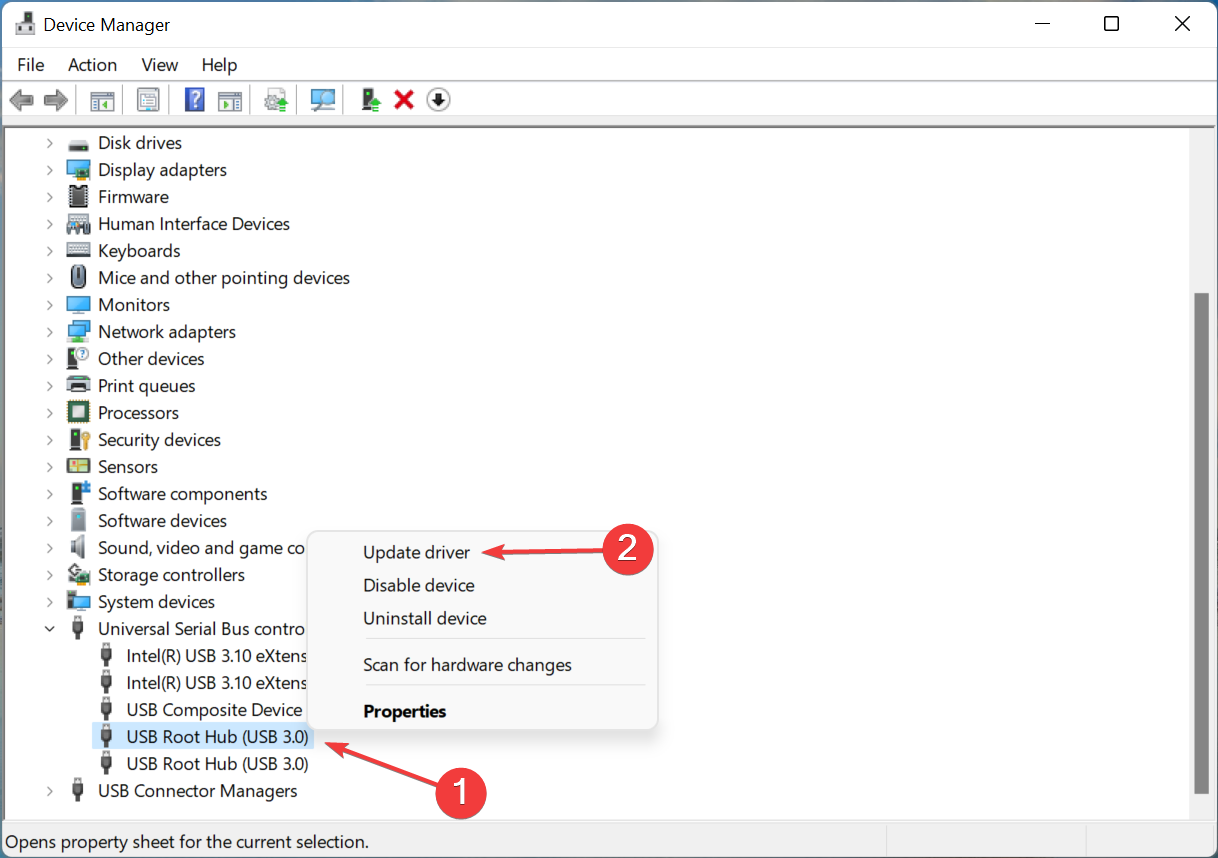
Right-click on the mouse that lags, and select Update driver from the context menu.
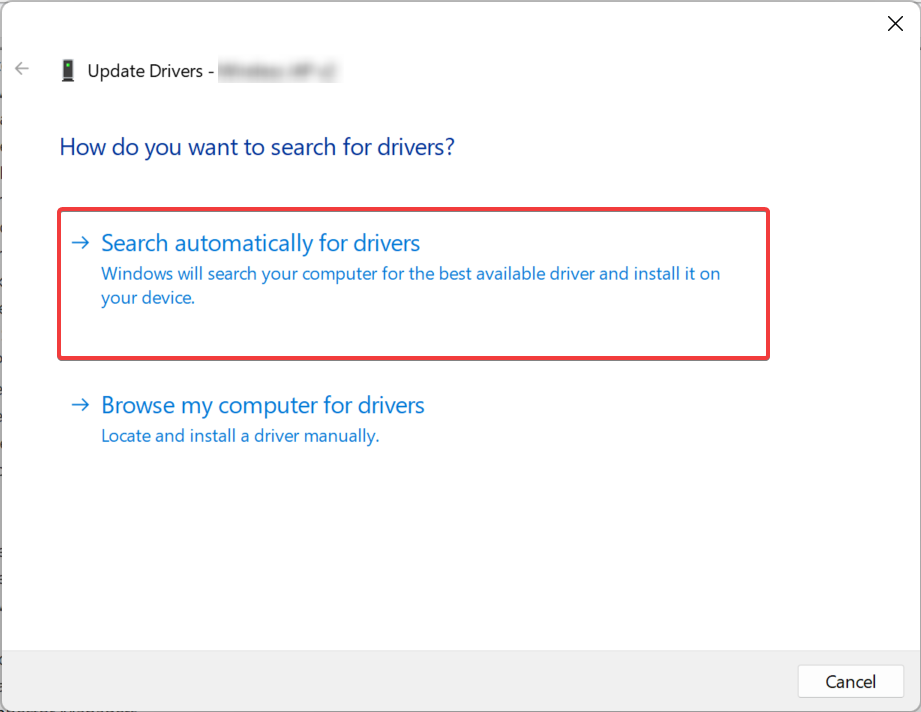
Next, select Search automatically for drivers from the two options.
Wait for Windows to search for the best available driver and automatically install it.
If the above methods have not helped resolve Bluetooth mouse lag in Windows 11, updating the drivers might do the trick. In case the automatic method didn’t work, you may try manually installing the driver.
If updating drivers is not your personal favorite task, there is an automatic solution. A driver updater tool such as Outbyte Driver Updater will scan your system for any problems or missing drivers and it will provide a report in just a few seconds.
This is actually more efficient and faster than looking for drivers every time you have a problem with your Bluetooth devices. What if you have multiple Bluetooth devices installed?
When your Windows PC fails to find the proper driver, you may have to search for them yourself, which takes time and understanding of missing or outdated drivers. Save time and call in for an automatic, tested solution.
Press Windows + I to launch Settings, and select Bluetooth & devices from the left.
Next, click on Mouse on the right.
Click on Additonal mouse settings at the bottom.
Navigate to the Pointer Options tab.
Untick the checkbox for Display pointer trails, and click on OK at the bottom to save the changes.
Pointer trails, as the name suggests, is a feature in Windows where you can track the movement of the pointer/cursor, as it moves across the screen. But, given the way this feature works, it might look like the cursor is lagging.
After disabling the pointer trail, check if the Bluetooth mouse lag problem in Windows 11 is fixed.
6. Uninstall conflicting applications
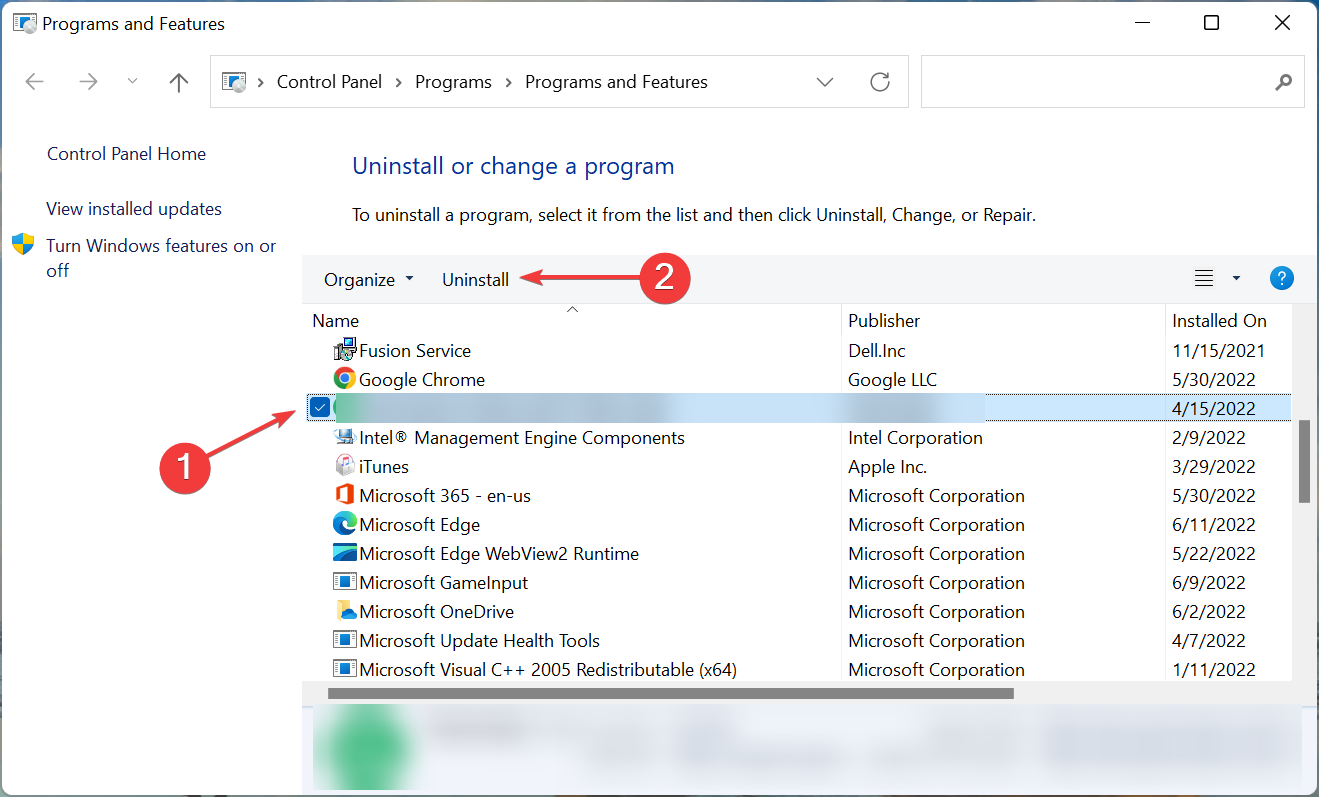
Press Windows + S to launch the Search menu, enter Control Panel in the text field, and click on the relevant search result.
Click on Uninstall a program under Programs.
Locate the conflicting application, select it, and click on Uninstall.
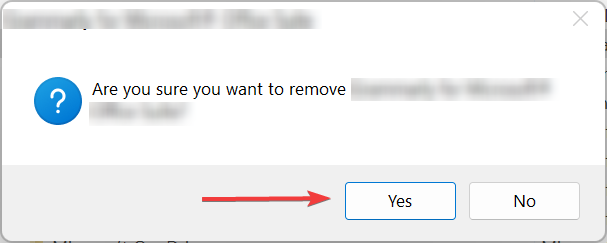
Click Yes in case a confirmation prompt pops up.
If a dedicated uninstaller appears, follow the on-screen instructions to complete the process.
Many users started encountering Bluetooth mouse lag in Windows 11 after installing a performance booster software or a tool that modifies/amplifies the cursor movement. If that’s the case, uninstall the app, and the mouse stuttering in Windows 11 would be fixed.
7. Run a malware scan
NOTE
We will be listing the steps to run a scan using the built-in Windows Defender. You can use an effective third-party antivirus as well to scan for malware and virus.
Press Windows + S to launch the Search menu, enter Windows Security in the text field, and click on the relevant search result.
Click on Virus & threat protection.
Now, click on Scan options to view all the available types of scans.
Select the Full scan option and click on Scan now at the bottom.
The scan will take a few minutes to half an hour, or in some cases even more, depending on the number of files to be scanned. And, if it’s a malware or virus that was causing Bluetooth mouse lag in Windows 11, things should work fine now.
Should I disable Enhance Pointer Precision in Windows 11?
First, you need to understand what the Enhance Pointer Precision feature basically does. In simple words, it detects how fast you move the mouse and accordingly moves the cursor/pointer on the screen. So, the cursor would cover a different linear distance if the pace of mouse movement is altered.
For most, this feature actually brings more trouble than enhances precision because there is no clarity as to how far the cursor would go every time you move the mouse. This is particularly a problem for gamers where precision is critical.
By disabling the Enhance Pointer Precision feature, you would be able to assess the cursor activity beforehand since it does not depend on how fast or slow the mouse is moved.
Though the feature is enabled by default, users who are into gaming should disable Enhance Pointer Precision. Others who have never had a problem with the pointer can keep it enabled.
That’s all there is to the Bluetooth mouse lag issue in Windows 11 and the most effective solutions for it. Many also reported encountering lag when dragging windows in Windows 11, and the methods here should work for that as well.
By the time you reach this part, the problem should be long gone. In case it persists, the issue lies with the hardware, and you should consider buying a new and handy mice with long life.
Tell us which fix worked and the mouse you were having trouble with, in the comments section below.
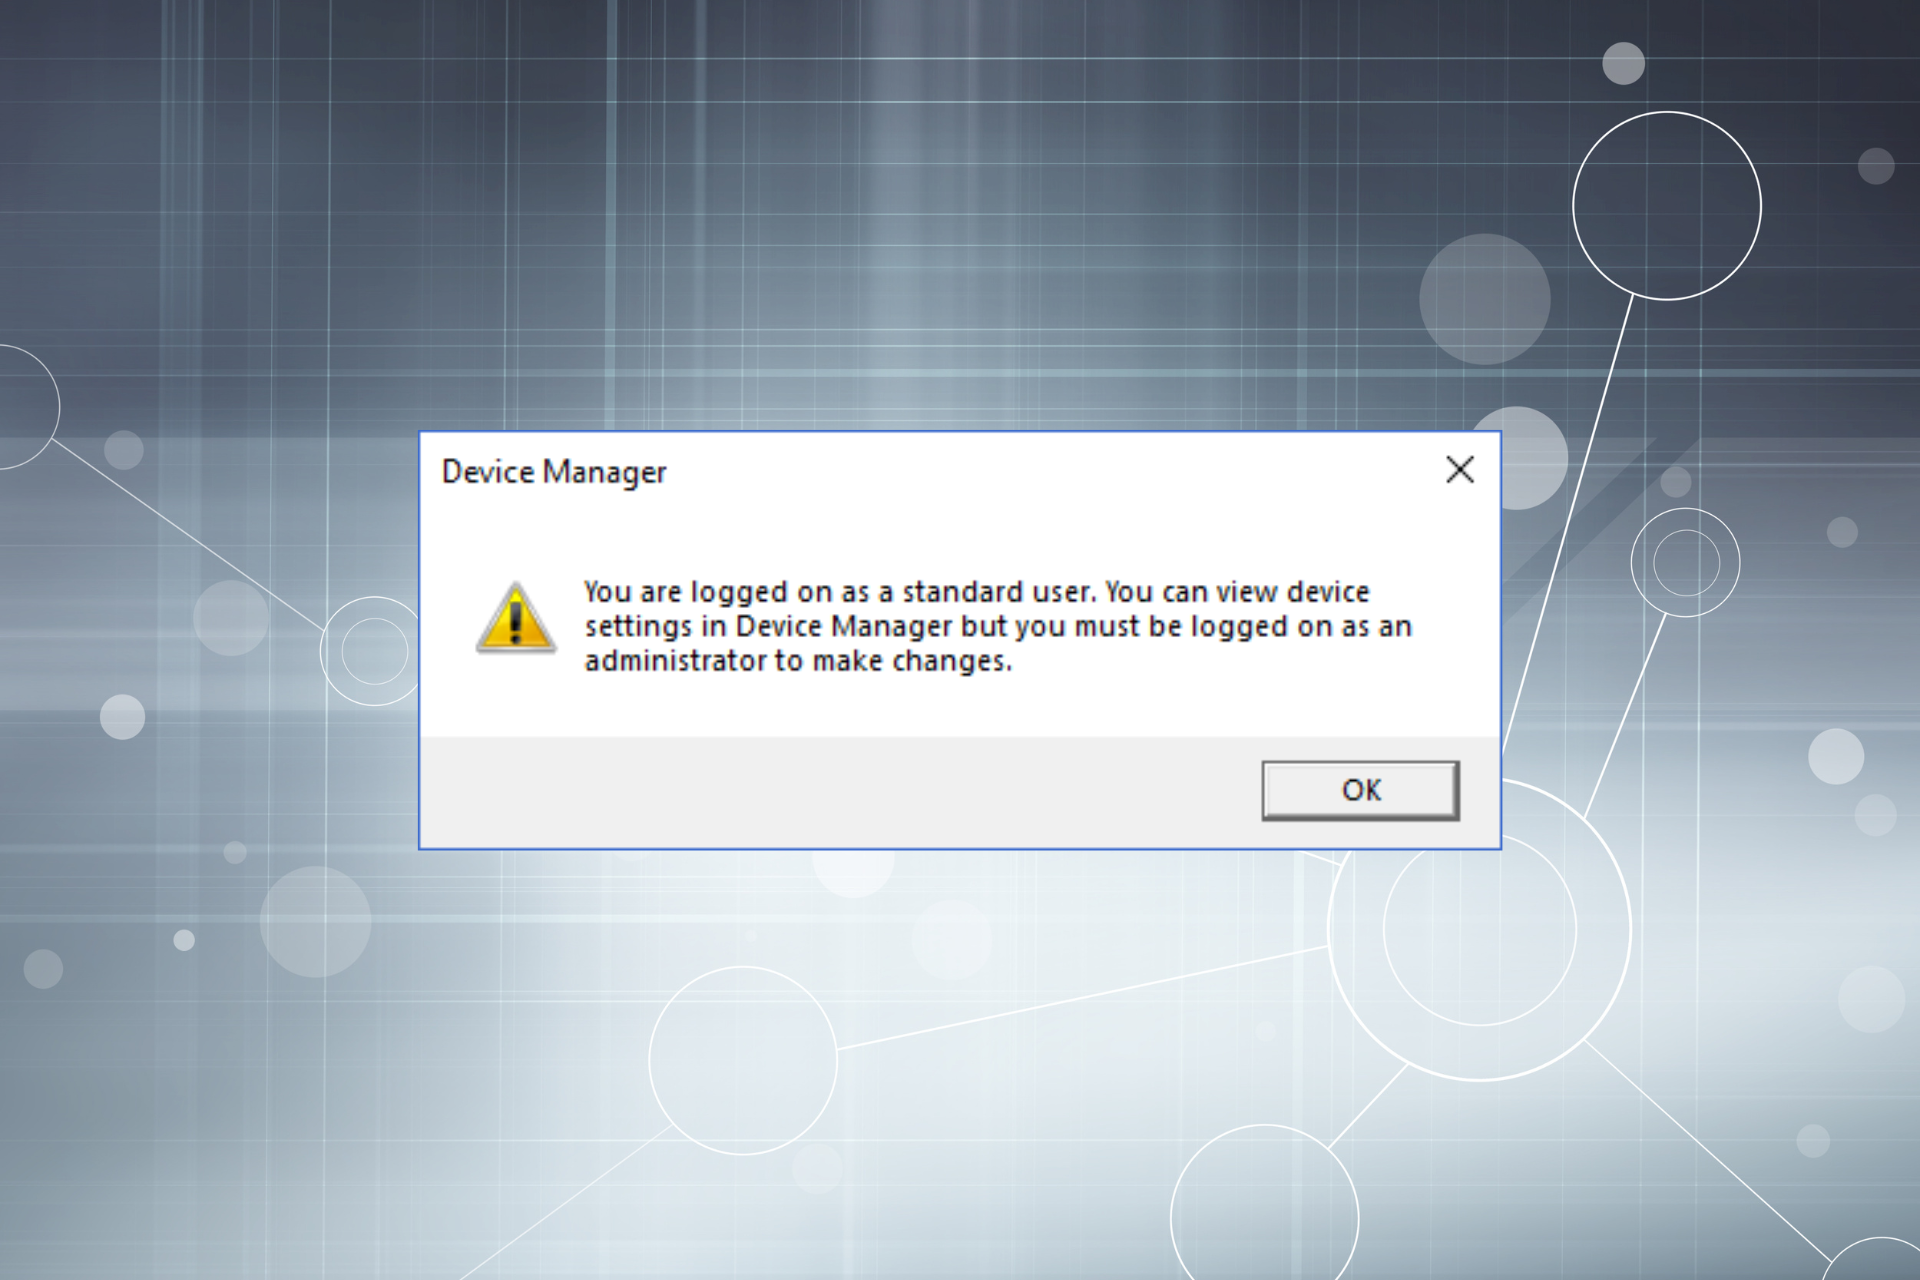
A Windows computer has two types of user accounts, Standard and Administrator. If you using a Standard account, the You are logged as a standard user. You can view device settings in Device Manager popup will appear when launching the Device Manager.
However, this does not mean that users cannot make any changes in the Device Manager. All they need is the password for the Administrator account on the computer.
Let’s see what you can do if you receive the You are logged as a standard user popup in Windows 10/11 on opening the Device Manager.
What does standard user mean on Windows 10 and 11?
Standard User accounts are basic and you can’t make any major (administrative) changes without authentication, though you can run applications and perform other tasks.
This account works fine for most users but has certain restrictions for Device Manager in Windows 11, and other administrative apps.
What can a standard user do?
A standard user can make changes pertaining to that particular account only. This includes changing the account password or picture, applying a new desktop wallpaper, viewing files, running applications, and accessing the Internet.
How do you fix You are logged on as a standard user?
1. Enter the password for the Administrator account
NOTE
We have listed the steps to access the various functions in the Driver tab. This should provide a basic understanding of the concept and help you perform other tasks as well.
Click OK on the error box.
Right-click on the device that you want to modify, and then select Properties from the context menu.
Click on the Change settings button.
Enter the Pin/Password or use the biometrics to authenticate.
None of the options will now be greyed out, as was the case earlier, but you will still receive the You are logged as a standard user popup on successive attempts.
2. Run SFC scan
Press Windows + X and select Windows Terminal (Admin).
Authenticate using any of the listed options.
Now, press Ctrl + Shift + 2 to open Command Prompt.
Paste the following command and hit Enter to run the SFC (System File Checker) scan: sfc/scannow
Check if the You are logged as a standard user popup stops appearing on opening Device Manager.
3. Switch to an Administrator account
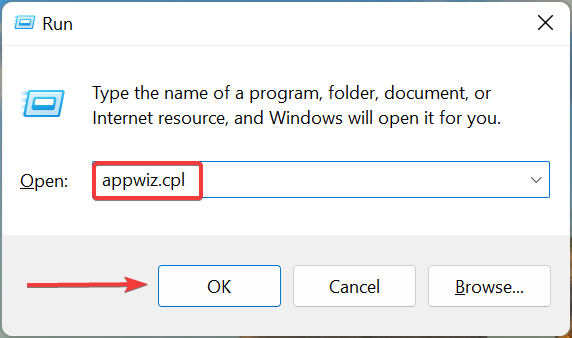
Press Windows + R to open Run, type netplwiz, and click OK to open User Accounts.
Authenticate using the method set by the Administrator.
Now, select the Standard user account, and then click on Properties.
Go to the Group Membership tab, select Administrator, and then click on OK at the bottom to save the changes.
If you want to access the Device Manager without encountering the You are logged as a standard user popup, switching to an Administrator account would do the trick.
Guild Wars 2 is a popular, free-to-play MMORPG developed by ArenaNet; however, players have reported receiving an error in Guild Wars 2 that they are not authorized to create an account.
This can be a particularly frustrating issue as the game is becoming more and more popular, especially after the Guild Wars 2: End of Dragons graphics update, which enhances gameplay.
With over 16 million players, users can play for free, although there are upgrades that users can purchase. The game offers several expansions to buy; however, if you want to download Guild Wars 2: End of Dragons, we have a guide.
If you are receiving the error: Account creation failed, or There was an unspecifiederror, keep reading to find the solution.
Are Guild Wars and Guild Wars 2 accounts the same?
An ArenaNet account allows users to have all of their accounts and games in one place and under one login.
An account on Guild Wars is not the same as Guild Wars 2, even if they are linked in ArenaNet, and thus players cannot continue using a Guild Wars character in Guild Wars 2.
Is Guild Wars 2 region-locked?
Yes and no; users can play on both EU and NA servers without creating a new account. However, if players with an EU account are in the US, they will not be able to use their EU account and need an NA copy.
When faced with geolocation restrictions, a reliable VPN service may provide you with the quickest access to unblocked content. It not only unblocks multiple types of content, but it also grants access to a large number of servers, allowing you to avoid network congestion.
When it comes to gaming, Private Internet Access is our most trusted VPN, so give it a shot and let us know how it goes.
What to do when you can’t create an account on Guild Wars 2
1. Try a different email
Users have reported that they get an unspecified error when trying to create an account on Guild Wars 2. This is likely because the email is already associated with another account, including a Guild Wars 1 account.
Try using an email that is not a .edu or Gmail account.
Click on the menu button in your browser, usually located in the top left- or right-hand corner.
Click on Extensions or Manage extensions.
Locate any ad blocker or script blocker addons and disable them.
Restart your browser.
If you have ad/script blocker addons installed on your default browser, try disabling them.
3. Disconnect from WiFi on a mobile device
If you’re having issues, try disconnecting from Wi-Fi. This can be done by disconnecting from Wi-Fi and using mobile data. You can also try using a VPN.
This issue is likely the result of too many people in your area creating multiple accounts from an IP address.
After creating your account, you can download Guild Wars 2 and begin playing for free!
Hopefully, you no longer receive errors in Guild Wars 2 telling you that you are not authorized to create an account. However, if you’re having issues with Guild Wars 2 crashing in Windows 10/11, we offer some solutions.
Let us know which solution worked for you in the comments below if there is a solution that worked for you that is not on our list, comment!
Xbox controllers are an essential component of every console, and in today’s guide we’re going to show you the most expensive Xbox controllers that you can get.
Microsoft has largely been a computer software developer and vendor. However, this changed in 2001 when they released their first gaming console. At this time, companies such as Sega, Sony, and Nintendo dominated the market.
Several things define the gaming experience with Xbox, key among them the Xbox controllers. Over the years, the industry has seen an evolution in the controllers used with the Xbox console.
Brief history of Xbox controllers
The first Xbox controller, also known as the Duke, came with two analog triggers, six face buttons, a d-pad with eight directional pointers, two analog sticks, and two slots used for add-ons such as memory cards.
The controller had a bulky design, and the following year Microsoft introduced The Xbox Controller S which came with a slimmer form and rearranged face buttons.
Next came the Xbox 360 controller in 2005, with some major design changes. This controller was the first one to feature shoulder buttons and the guide button, which became stable for all future controllers.
This model is also the first one that had a wireless variant, which is something that all future models would follow.
The Xbox One Controller was similar to its predecessor, but it brought better haptic feedback for shoulder buttons along with more responsive controls.
After it came the Xbox Elite Controller which was an improvement of the previous model. It featured rubberized grip, customizable d-pad, interchangeable analog sticks, and programmable paddles.
Xbox One S Controller was similar to the original version, but it brought Bluetooth support. This allowed users to sync with PCs without having to use additional adapters.
Xbox Elite Wireless Controller Series 2 was an improvement over the previous Elite controller. It came with added Bluetooth support and the ability to adjust tension and pressure for each analog stick.
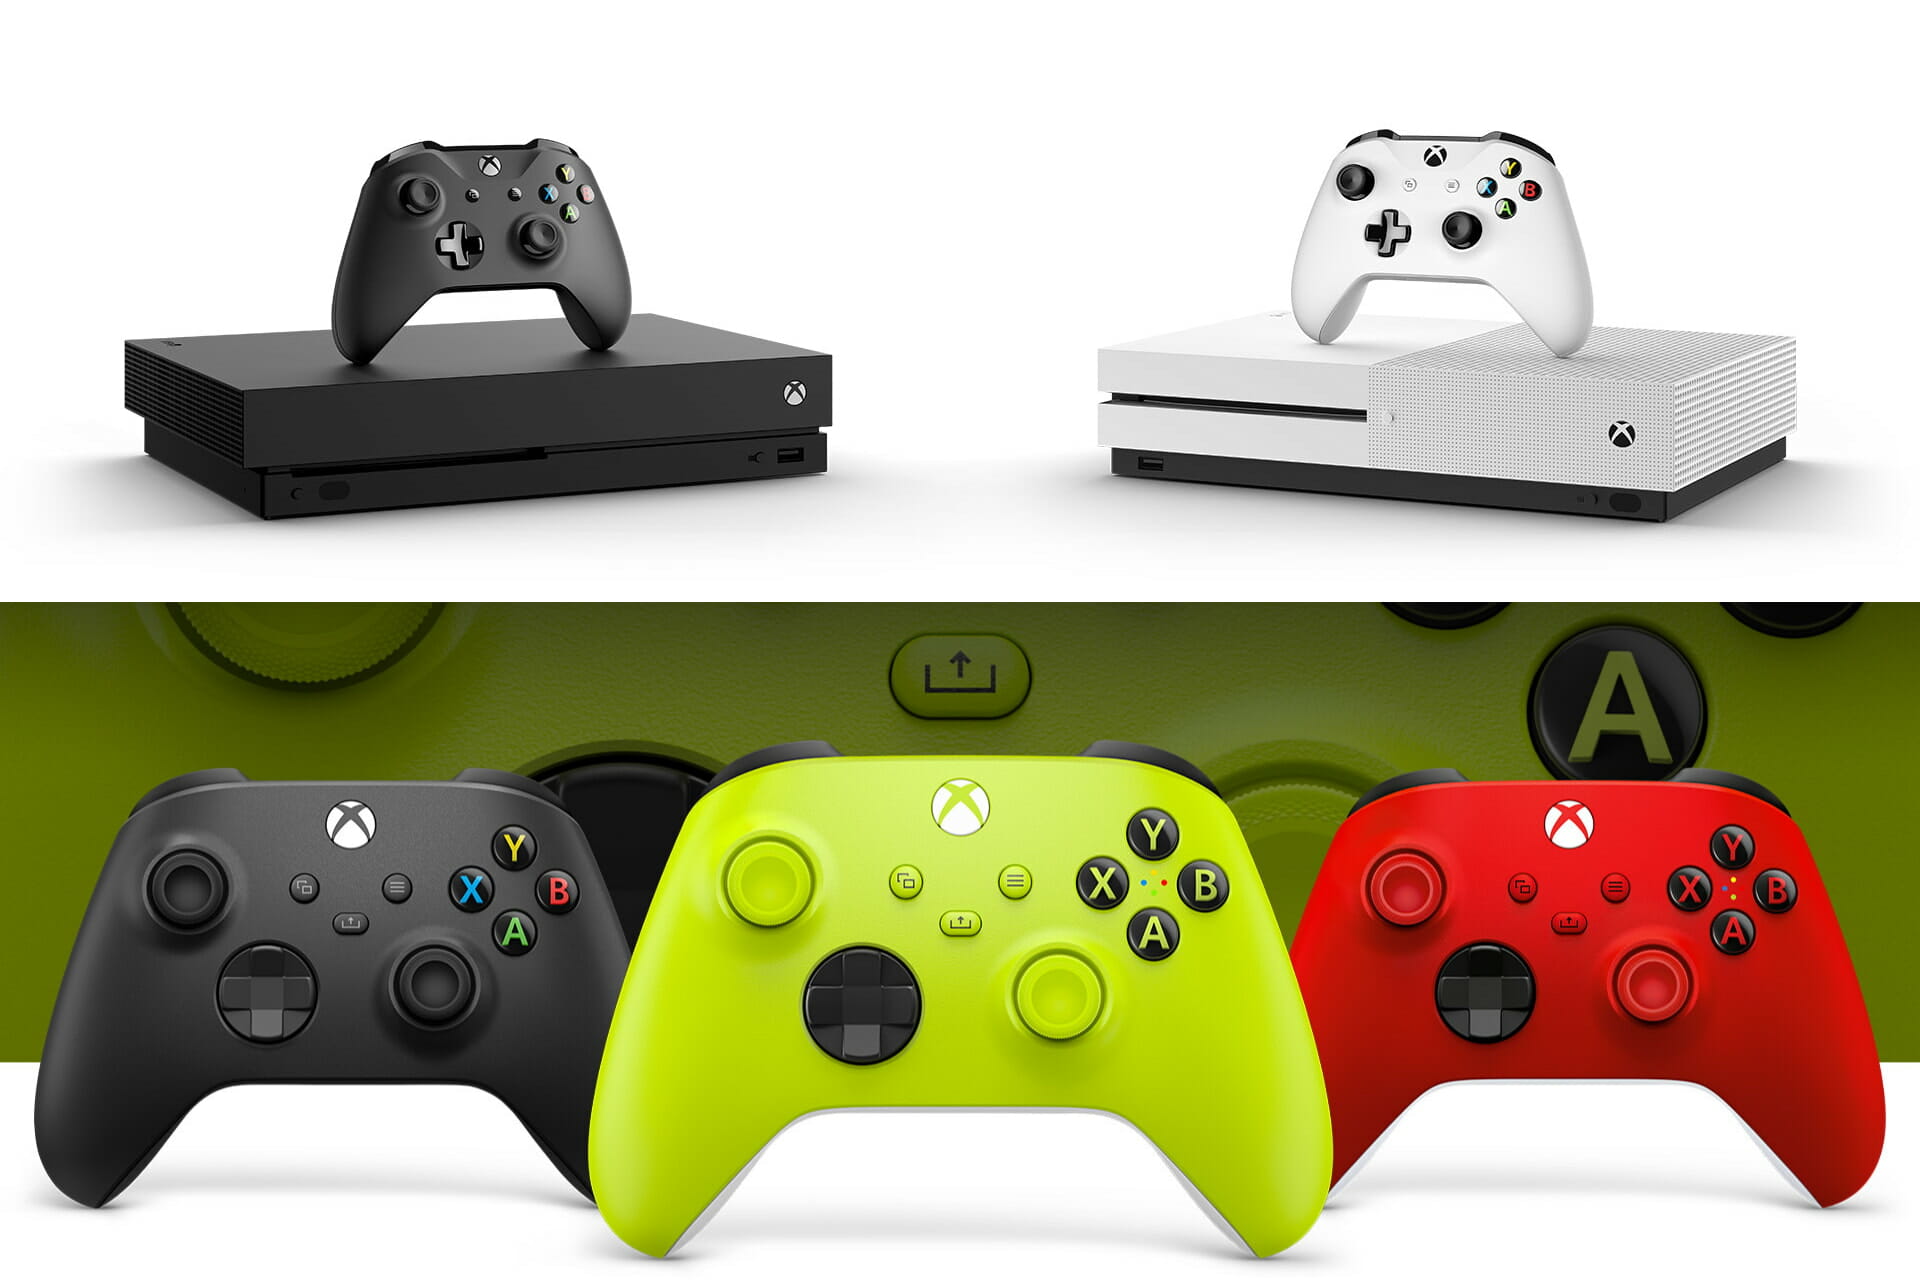
The latest entry is the Xbox Series X Wireless Controller. It comes with a dedicated screenshot button, and it also has a hybrid d-pad, textured triggers, and bumpers, as well as button mapping.
It’s worth mentioning that there are many limited versions of controllers, and they are usually game-specific. It’s also worth noting that you can also customize your own controller through Xbox Design Lab.
However, this service isn’t available at the moment, but there are many third-party services available that you can use to design your controller.
What is the most expensive Xbox One controller?
Some Xbox controllers have been quite expensive over the years especially due to the evolution witnessed in the same period.
Do you know the most expensive Xbox One controller ever? If you’re looking for one, you might want to consider getting the golden controller.
This has happened with the previous versions of the Xbox console and controllers. Linus Sebastian, an influencer, has made the most expensive Xbox controller ever from solid gold.
It cost about $87,500 to make the controller, which makes it the most expensive Xbox controller.
So, how much is the most expensive controller in the world? It will cost you about $87,500 to get a controller similar to the one discussed above.
You can also opt for the Thrustmaster TS-XW Servo Base controller which costs about $372.
What is the rarest Xbox controller?
The rarest Xbox controller is the Xbox Series X Launch Team controller. It was issued to Xbox employees who were involved in the development of the Xbox Series S and X.
These controllers are the rarest Xbox controllers we have today because they were never sold.
This controller comes with a design that looks like the one employed in the Robot White Xbox Wireless controller. It also comes with a white D-Pad, menu, view, and thumbsticks. The A, B, X, and Y buttons are fully green.
It also features a black line pattern covering the faceplate and launch dates for all Xbox consoles scripted within the line pattern. This controller has the words Project Scarlett and Launch Team written on the controller.
Other rare Xbox controllers include the Halo 5: Guardians Master Chief and Spartan Locke of 2015.
There’s also Deep Blue, Military Green, and Storm Gray of 2016, X018 Sugar Skull of 2018. For Start Wars fans there’s Razer Boba Fett wireless controller and The Mandalorian Giveaway of 2020.
How we chose the most expensive Xbox controllers?
Our team of expert testers has made sure to try out all the devices that were worthy of mention to create the results presented in this guide.
The team, with an added experience of more than 15 years in the field of testing hardware, has meticulously chosen the finalists for this list after rigorous testing on a variety of levels.
Tip
Editor’s tip:
To pick the best Xbox controller, you need to consider the following elements: ➡ Programmable buttons ➡ Changeable thumbsticks and D-pad ➡ Design ➡ Wireless capability
The following guide takes all these factors into consideration in order to provide you with the most accurate results.
What do consider when choosing the most expensive Xbox controllers?
Programmable buttons
Many high-end controllers have programmable buttons at the bottom that you can remap any way you like.
By doing so, you can use them to perform certain actions in games that you wouldn’t be able to otherwise.
Replaceable components
Being able to replace thumbsticks and D-pad is important because you can customize the controller, and ensure that your user experience is completely optimized.
Some models allow you to completely replace analog sticks and D-pad, which is great especially if you start having issues with either of them.
Design
When it comes to design, users should pay attention to the ergonomics and the over design. Controllers with rubberized grip will always fit better in your hand, so they are usually a better choice.
Visual design is also important to some users, and you’ll be pleased to hear that there are amazing design choices available so you’ll surely find what suits you.
Wireless
Wireless capability is important since it will allow you to enjoy in gaming sessions from any distance, so you won’t have to worry about your cables.
Of course, some controllers don’t have this feature, but they make up for it with other features.
Tip
Buyer’s tips:
➡ If you’re looking for the most expensive controller, then Thrustmaster TS-XW Servo Base is the perfect choice for you. ➡ As such, it’s a perfect choice for racing games with its precise force feedback. ➡ On the other hand, if you need something that is closer to a regular controller Microsoft Elite Series 2 Controller is a must-have. ➡ With its customizable D-pad and analog sticks, you can customize your controller any way you want.
What are the most expensive Xbox controllers in the world?
The Thrustmaster TS-XW Servo Base controller is a powerhouse composed of different technologies with a bid to provide users with cutting-edge performance.
It comes with a host of features, among them a brushless servomotor that provides users with dynamic torque and powerful force feedback effects.
It also features an axle that is mounted on its metal ball bearings. This is important for linear and balanced performance, something enhanced by its T-LIN technology.
Its responsive and smooth action remains silent when playing games, making sure users have an amazing experience when playing games.
It also comes with a built-in cooling system whose purpose is to maintain the dynamic performance of the controller’s motor while remaining silent and without overheating.
If you’re looking for the most expensive Xbox One steering/racing wheel, then this model is the perfect choice for you.
The Elite Wireless controller is among the most comfortable Xbox controllers we have today. It beats most of its competitors when it comes to its features as well as customization.
This controller allows users to customize its triggers, the D-pad and sticks to match their gaming needs. It also comes with back paddles for the ultimate gaming experience. Gamers also get an Xbox Elite app for advanced customization. This app allows them to remap all the buttons on the controller.
If you are a gamer who enjoys eSports, then this is the Xbox controller for you. This is because of the ability of gamers to customize the controller in a bid to get the best performance when gaming. It comes with a host of features such as custom triggers. Users can also choose from different color options, analog sticks, and buttons, among others.
The Scuf Instinct Pro comes with regular triggers that are placed around the rear grips. This ensures that gamers do not struggle to press the buttons, especially in the heat of the moment when competing with other online gamers.
This might not be the most expensive SCUF controller, but it’s certainly one of the best.
Even though the Nacon Revolution X Pro is a wired Xbox controller, it is one of the best controllers for gamers who want to experience full control over their style of play. It takes its inspiration from the original Xbox controller but features extra customizations such as an RGB ring on the right thumbstick and backlighting features.
It comes with large buttons at the back and an extra button whose purpose is to allow gamers to switch from one profile to another. You can have a maximum of four profiles. Using the Revolution X Software on Windows OS or Xbox, you can customize these profiles to match your requirements.
The Razer Wolverine Tournament Edition is known for its advanced customization capabilities. This controller comes with four remappable buttons with two of them acting as back paddles that gamers can easily access even when in the heat of the moment during a game.
It also comes with hair-trigger locks whose sole purpose is to reduce the stress gamers experience when looking for the right button during a game, especially in shooting games. It features a non-slip rubber grip for enhanced handling so it will remain in your hands even during intense gaming sessions.
Players with physical disabilities might find it difficult to use traditional controllers when playing games. The Xbox Adaptive Controller is the best for these people. It comes with a fully customizable hub that enhances its accessibility.
For instance, it features input ports on its side that represent every button on the traditional Xbox controller. Using a USB device, users can control its functions to ensure that the controller meets their requirements.
In addition, it comes with the capability to customize different profiles that can be switched easily depending on the requirements of the players.
Microsoft launches special controller editions designed for Xbox users who want something extra from the normal controller. The Night Ops Camo Special Edition was released in 2021 and its design features a black and gray camo pattern.
It comes with the latest controller features such as a hybrid D-pad, textured grips on bumpers and triggers, a share button, and others. It works well with Xbox One and can also be used as an Xbox Series X controller as well.
Playing with a fight stick is one of the best ways of enjoying fight games. The best fight stick controller available is the MAYFLASH Arcade Stick F500 Elite. It features an amazing build quality with high-end components. Its buttons are quite responsive and come with a precise joystick.
Gamers can add many customizations to the fight stick to match their requirements, giving them control over their style of play. This controller works well with Xbox One but is also compatible with Xbox Series X.
If you are a fan of flight games such as Star Wars Squadrons or Ace Combat, then the Thrustmaster T-Flight Hotas One is the best controller for you. This is because it comes with a flight stick that will leave you feeling like you are on an actual flight.
It provides gamers with a hands-on throttle and sticky feel. These elements come together in an affordable package, compared to what they do. This controller connects the joystick and throttle with a sturdy base. Gamers can also pull them apart if they want to. This ensures that they can place the elements the way they would like to.
This is a modular gamepad, and it lets you change and replace the analog sticks easily, without having to use any additional tools.
The controller comes with near-zero latency, so you can enjoy high-intensive games without skipping a beat. It’s important to mention that the mechanical D-pad is ergonomical, and it offers enhanced precision.
Lastly, the 2 additional rear buttons can be remapped, allowing you to assign different functions or disable them completely.
This is an Xbox Elite Series 2 Controller, so it shares the same functionality such as programmable buttons, adjustable tension thumb sticks, short trigger locks, and a rubberized grip.
Of course, paddles and the D-pad can be easily replaced for optimal performance. However, this controller comes with front and back prints, and it has tens of different designs available.
Using the hydro-dip painting, the colors won’t ever fade, so your controller will look great even after months of heavy gaming.
This controller is highly customizable and it comes with interchangeable thumbsticks, and you can choose between 3 heights and 4 grip designs.
Remapping is available allowing you to assign a maximum of 14 buttons to the rear buttons for easier access. Hair triggers are also available, so you’ll experience a lightning-fast response time.
Lastly, we have to mention the design, and the controller has artwork on both sides, thus spicing up its appearance. Of course, you can choose between many different designs and find the one that works best for you.
In case you’re looking for a modular controller, then this model might be just what you need since it comes with replicable analog sticks and D-pad, and you can even swap their position for optimal performance.
Speaking of customization, you can easily adjust the travel range of the triggers, so you can achieve the best performance.
Programmable buttons are available at the bottom, and you can remap them any way you want. Speaking of customization, you can get different color modules and achieve some impressive results.
If you want to make your gaming session more immersive, you can do that with this controller since it comes with 16.8 million colors and various lighting effects.
The controller has four additional triggers and two remappable buttons that you can configure any way you want.
The controller is ergonomic with its modified L-shaped handgrips and non-slip rubber. It’s worth mentioning that thumbstick caps are interchangeable, so you can between short and extended ones.
Custom controllers offer unique designs, and this is why some users might be interested in Wordene Series X|S controller.
The controller comes with a mod chip installed, and it supports various features including rapid fire, quick scope, sniper breath, drop shots, sniper breath, and many others.
Regarding the design, it has a vibrant look, so if you need a controller that will stand out from the others, this one might be what you need.
Bottom runners
There are many controllers that didn’t make it to our list, so we’ll cover them briefly in this section.
If you’re a fan of racing games, then this controller might be perfect for you. It comes with analog pedals with anti-slip pads and a 23cm diameter wheel.
The controller is compatible with the latest version of Xbox, but keep in mind that headphones and headsets aren’t supported, so this is why we didn’t include it on our list.
This controller comes with a textured trigger grip and bottom and side dimple grip patterns, so it will remain steady in your hands during gaming sessions.
Regarding the design, it comes with a vibrant design that looks great, but some users might not like it, so we decided to include this model in this section.
For retro gamers, we have a special retro controller inspired by the original Xbox Duke controller. The button layout is the same as on the original model, so it’s almost the same as playing on an original controller.
Regarding the design, it comes with Cortana on the front, so it looks visually appealing, and it’s perfect for retro gamers and Halo fans.
With the programmable buttons, you can take your game to the next level and enjoy haptic feedback with dual rumble motors.
There are four programmable paddles that you can map to any button, and there are also three-way trigger locks, so you can adjust the depth of the triggers as you like.
How much is the most expensive Xbox?
Now that we have seen some of the most expensive controllers, some gamers might want to get an expensive Xbox as well. If you’re interested, you might want to acquire one of the hundred Xboxes launched by Gucci in 2021.
The fashion company released a limited version of the Xbox Series X console, with each one of them numbered. This is the most expensive Xbox Series X and comes with a lot of extras at $10,000. They come with two controllers with red and blue strips to show the colors of the fashion company.
Imagine the gaming experience you would have if you acquired this Xbox Series X as well as one of the most expensive Xbox controllers such as the Thrustmaster TS-XW Servo Base controller!
Now that you know what are the most expensive Xbox controllers, why not consider some Xbox NFT games to play?
What is the best Xbox controller in your opinion? Let us know in the comments section below.
Since Elden Ring is all that everyone can talk about these days, we’re here to tell you that the game justgot a new update this week for two of the three platforms the game’s available on.
The new update is relatively small in size, but effective, as it takes care of a couple of issues that players on PlayStation, Xbox, and PC have been experiencing.
Let’s dive in together and find out all of the latest changes and fixes that are coming to your new favorite game, written by George R.R. Martin.
What changes does patch 1.05 bring to Elden Ring?
This time around we are looking at a pretty hefty rollout for Elden Ring, as From Software had a lot of ideas on how to improve its latest masterpiece in patch 1.08.
Most of the tweaks and fixes are addressed to all the platforms that support the game, but there are some that only target PC players, as follows:
Added keyboard/mouse operations that can be input in PRESS ANY BUTTON on the title screen.
Added Return to Desktop to the system item on the main menu for exiting the game.
Changed so that mouse click input is not reflected when switching windows to active.
Fixed a bug that slowed performance when changing Screen Mode and Resolution in a special procedure.
Now, as far as the changes that will impact Elden Ring for Xbox, PlayStation, and PC, while transactioning with the Twin Maide Husk NPC, the following Bell Bearing items have been changed so that their liberated status will be carried over to the NG+ play:
Bone Peddler’s Bell Bearing
Meat Peddler’s Bell Bearing
Medicine Peddler’s Bell Bearing
Gravity Stone Peddler’s Bell Bearing
Smithing-Stone Miner’s Bell Bearing
Somberstone Miner’s Bell Bearing
Glovewort Picker’s Bell Bearing
Ghost-Glovewort Picker’s Bell Bearing
From Software also added emphasis to the choice of the Sacred Flask and several other options that can be strengthened in the grace menu.
You will also be pleased to know that developers have also added sound effects when other players’ summon signs appear, making the experience even more entertaining.
Fixes
Fixed a bug where equipment could be changed from the equipment menu during the use of a skill under certain circumstances.
Fixed a bug in the “War Cry” skill where the effect was applied to a weapon that was not the target of the skill.
Fixed a bug where some actions of the “Barbaric Roar”, “War Cry”, and “Troll’s Roar” recovery time was longer than expected.
Fixed a bug where the effects of the “Determination” and “Royal Knight’s Resolve” skill does not always wear off with certain weapons.
Fixed a bug in which some attacks of the “Ice Spear” skill are unguardable.
Fixed a bug that caused the attack power of some skills to be reduced when using the “Golden Vow” skill.
Fixed a bug that the light wave of the “Moonlight Greatsword” skill sometimes does not aim at the locked-on target.
Fixed a bug that caused damage to allies when using the “Seppuku” skill under certain circumstances.
Fixed a bug that caused the increase in attack power of the “Seppuku” skill to be higher than expected for some attack motions.
Fixed a bug in which a status effect was applied when using the “Hoarah Loux’s Earthshaker” skill.
Fixed a bug where the “Waves of Darkness” skill would not hit the enemy with a spinning cleave.
Fixed a bug that caused unintended motions to be played when switching to a different sorceries or incantations while using a sorcery or incantation.
Fixed a bug that the FP consumption increased when using the sorceries “Magma Shot” and “Roiling Magma” while riding a horse.
Fixed a bug where the “Claw Talisman” effect was not applied when jumping with the “Starscourge Greatsword” in both hands.
Fixed a bug that the power of two-handed attacks except jump attack of the weapon “Golem’s Halberd ” is different from expected.
Fixed a bug that when using the weapon “Pulley Crossbow” with the left hand while the right hand weapon was given an attribute by magic or item, the effect was given to the “Pulley Crossbow” as well.
Fixed a bug in which arrows and bolts that did not match the type of long-range weapon could be released in certain procedures.
Fixed a bug in which guard boost was reduced when some weapons were strengthened to the maximum.
Fixed a bug in which the attributes of weapons could be changed while the inventory had reached its maximum capacity and the ashes of war could not be changed.
Fixed a bug that caused the boss “Malenia, Goddess of Rot” to have low HP under certain circumstances.
Fixed a bug that allowed enemies to be attacked from outside the fog in certain areas.
Fixed a bug in online multiplayer where, when a boss is defeated in the host’s world as a cooperative player, the same boss may not appear in your world.
Fixed a bug that prevented the battle with the boss “God-Devouring Serpent” from progressing under certain circumstances.
Fixed a bug that prevented hostile NPCs from appearing under certain circumstances.
Fixed a bug that prevented the event of the NPC “Alexander, Warrior Jar” from progressing under certain circumstances.
Fixed an issue where the item “Sacred Flask” is not restored after destroying a group of enemies under certain circumstances.
Fixed a bug that under certain circumstances, after defeating the boss “Starscourge Radahn”, the user could not move from the map to the grace.
NOTE
If you cannot move from the map to the grace, you can move to the grace by touching the grace “Starscourge Radahn”
Fixed a bug that prevented found sites of grace from registering on the map under certain circumstances.
Fixed a bug that prevented some graces from being able to be touched when approached under certain circumstances.
Fixed a bug that allowed hostile guests to enter boss areas under certain circumstances.
Fixed a bug that prevented a critical hit from behind from hitting in hostile multiplayer.
Fixed a bug that caused performance to slow down when the “Sentry’s Torch” weapon was equipped under certain circumstances.
Improved stability of online multiplayer between PS4 and PS5
Improved loading times for the Xbox Series X|S version
Fixed a bug that the master volume setting was not reflected in some cutscenes
Improved stability of online multiplayer.
Fixed a bug that caused sounds to play differently than expected in some situations.
Fixed a bug that caused the player to become inoperable and die in certain locations.
Fixed a bug in which the drawing and hit detection were different than expected in some maps.
Fixed a bug in some maps that allowed players to reach unexpected locations with certain procedures.
Fixed some texts.
Several other performance improvements and bug fixes
Have you noticed any other problems that need a quick fix in Elden Ring? Share your experience with us in the comments section below.
Microsoft continues to beef up its cyber threat analysis and response solutions portfolio with the acquisition of Milburo, a company specializing in foreign threat and research detection.
Today Microsoft announced via its Official Microsoft Blog that it has entered into an agreement to acquire Milburo, to specifically roll the company and its resources into the Microsoft’s Customer Security and Trust organization.
According to Microsoft’s corporate vice president of Customer Security and Trust, Tom Burt, the company is looking for Milburo to step in and help mesh its current threat detection platforms while also expanding its abilities to counter new cyber threats and state sanctioned information operations.
Working in close collaboration with the Microsoft Threat Intelligence Center, our Threat Context Analysis team, our data scientists and others, the new analysts from Miburo will enable Microsoft to expand its threat detection and analysis capabilities to address new cyber-attacks and shed light on the ways in which foreign actors use information operations in conjunction with other cyber-attacks to achieve their objectives. Miburo has become a leading expert in identification of foreign information operations.
As part of Milburo’s mission statement, the company has set out to help “protect democracies and the free information environment from malign influence and extremism.”
Microsoft may be looking to leverage Miburo’s robust language portfolio as well as its expansive foreign information operations knowledge to help bolster Redmond’s solutions for private, public, military, research, and law enforcement sectors in international markets.
The announcement comes about a month after Microsoft publicly acknowledged its role in combating state-sanctioned cyber-attacks and disinformation campaigns aimed at Ukraine by Russia.
According to Tom Warren from The Verge, Microsoft is currently working on getting casual games to Microsoft Teams. Microsoft aims to leverage this inclusion as a way of enhancing Teams’ user experience, where the meeting’s attendees will get to play these games against each other.
Based on The Verge’s source, users can expect entries such as Solitaire, Connect 4, and Wordament making their way to Microsoft Teams. As we speak, Microsoft is currently testing this out internally, and there is a chance that these games might actually not make it to Microsoft Teams as they refused to comment on the matter when the Verge reached out for clarification.
Alongside testing casual games in Teams, Microsoft also envisions virtual spaces inside Teams where colleagues can network and socialize with games. These virtual spaces are part of Microsoft’s broader metaverse plans, and the company has previously detailed its ambitions for 3D avatars and immersive meetings that are expected to arrive in Microsoft Teams this year.
Microsoft has been updating and making improvements on the platform to help users embrace the remote and hybrid work arrangement more. While it is not yet clear, if and when Microsoft will be rolling out these casual games to Teams, it would be quite interesting to see the effect it has on its user experience.
You might have not heard anything about Teams for a while, but that doesn’t mean that Microsoft has given up on one of its most successful applications.
In fact, the Redmond-based tech giant just released a long list of new features for Teams to improve audio and video on the service.
The Teams app now uses artificial intelligence to make meetings and calls feel more natural, which will be a significant improvement.
What’s coming to Microsoft’s Teams?
We know you want specifics, so we’re actually talking about echo cancellation, de-reverberation, background noise suppression, and real-time optimization for content sharing.
The Vice President for Microsoft Teams, Nicole Herskowitz, has actually outlined the new features, mentioning that disruptive echo effects, poor room acoustics, and choppy videos are some common issues that hinder the effectiveness of online calls and meetings.
Thus, through AI and machine learning, Microsoft has identified and is now delivering innovative enhancements in Microsoft Teams that improve such audio and video challenges.
This means that, even if you’re using one of the best webcams, a room with poor acoustics can drastically reduce audio quality.
Microsoft’s above-mentioned AI features for the Teams software should alleviate this to some extent by canceling echoing, reducing reverberation, and allowing two people to speak at once.
That last feature should also make it less awkward when trying to hold a normal conversation that involves back-and-forth communication.
If you want to check the complete list of improvements, this is what’s coming:
Echo cancellation
De-reverberation adjusts for poor room acoustics
Interruptibility for more natural conversations
Background noise suppression
Real-time screen optimization adjusts for the content you’re sharing
AI-based optimization ensures your video looks great, even under bandwidth constraints
Brightness and focus filters that put you in the best light
So, if you are a Teams user, you will surely be delighted to know that all of these changes are being implemented to your favorite app.
What other features do you feel Teams is missing? Share your opinions with us in the comments section below.
To make the most of every day, you need to be organized. In this way, you will have almost everything under control. Using a schedule makes it easier to find free time to dedicate to your favorite activities.
Organizing each task within the week is crucial if you want to make sure that nothing is neglected, and you reach your goals.
You definitely need a user-friendly and efficient calendar if you want to stay organized all week long. Well, you’ve come to the right place. This article highlights the best software that you can use to plan your week.
This article aims to give you a valuable guide to pick the best software that suits your needs.
What is the best weekly planner software to use?
Monday.com – Ideal to run multiple workflows on a single platform
Monday.com is a cloud-based Work OS designed to help users organize and track their projects. You can use it for free or purchase the most convenient package in case your team has more than three members.
What differentiates Monday.com from other planner software is the possibility to run multiple workflows on a single platform.
There are 200+ options, including Task Management, and you can build custom applications for all of them. Alternatively, if you want to start planning right away, access the template center.
The interface is clean, aesthetically pleasing, and compact. All the important data you want to track is stored on boards.
To add one, click the Add button next to the + symbol in a circle, located on your left panel, or use a ready-made board template.
You can use charts, insert files, links, or interactive elements. Monday.com has a great interactive calendar that allows you to track deadlines and have a clear timeline of your weekly responsibilities.
You may activate it by integrating your Google Calendar or by adding it to your dashboard from the widgets tab.
Monday.com uses OneLogin’s secure single sign-on (SSO) integration, saving you time and keeping your data safe.
Check out other important features of this advanced planner software:
Real-time data insights
Fast and customizable automation
Various integration options, including Zoom, Google, Excel, Outlook, and more
Simple and secure file sharing solutions
Kanban boards and Gantt charts
24/7 Customer Support
Multiple budgeting and collaboration features
Monday.com
Organize your tasks and track your progress with Monday.com, a fully customizable and versatile Work OS!
Efficient Calendar features an easy-to-use interface that allows you to organize your week to every detail.
The calendar is packed with the most important functions such as calendar, reminder, holidays, events, and tasks. You can prioritize your tasks, and easily add attachments to them.
Graphically speaking, you can think of the Efficient Calendar as a minimal version of Microsoft Outlook, which has fewer features but it’s more minimalist.
The most important con related to this software is the impossibility to integrate it with your email. Because of that, you cannot invite people to attend a meeting or understand if they will participate in your meeting.
The software is compatible with all Windows versions up to Windows 10, Android, and iOS. More so, it comes with a wide variety of language options.
Here are some of the app’s main features:
Sync all of your devices
Multiple calendar views
Powerful document editor
Reminders
Encrypted information
Efficient Calendar
Monitor and set up your schedule in an effective and efficient way!
If you just have an assignment you need to track, the Assignment Calculator web app from StudyBounty can be an excellent choice.
The tool has a very simple mechanism for keeping things on track following seven steps of achieving your goal.
All you need to do is to enter the starting and ending date of your assignment, then outline it.
Then, Assignment Calculator tracks your progress as you perform each task, one by one until the end.
The app is created especially for writing essays and papers and at the bottom of the page, you will find other tools to help you get through.
You will see a title page generator, a conclusion generator, a words-to-page converter, and more.
The tool is free to try and follow on the website but if you want to receive notifications of your progress, you will have to create an account on the website.
Check out its key features below:
Free to use
Very simple and intuitive usage
Go through seven steps to achieve your goal
Notifications for your progress
Guidance throughout the whole process
Assignment Calculator
Track your assignment all through your designated time by following seven major steps to get to your goal.
This online task planner offered the needed help for millions of people to fulfill their daily tasks and complete 150+ million projects.
First of all, in case you want to take out the stress and put everything on your list carefully, step by step, and resolve it accordingly, this platform is made for you.
You’ll be able to organize your day-to-day tasks easily by adding them to your inbox and setting up time and priorities.
More so, you can separate it all into sections and organize it between your personal and business life.
Plus, the platform offers great functionalities to stay on top of a multitude of tasks with a quick add button, subtasks, or project management tools.
Let’s say you already are overwhelmed with your busy work and tasks keep coming, becoming harder to prioritize what really matters.
Summarize time management tactics in one button that can set up priority levels.
With that being said, this popular and very useful platform it’s the most suited solution for every employee or human being with too much to do.
Here are some of its key features:
Organize your day-to-day tasks
Set duration and priority for tasks
Great organizing tools
Friendly user interface
Create sections and color-code your projects and assignments
Todoist
Manage your duties day by day, month by month with this professional online tool and stay on top of your work.
AnyTime Organizer Deluxe is user-friendly and well-structured software. Contrary to the software listed above, you can integrate AnyTime Organizer Deluxe with Google Calendar.
This software represents a good option for very organized professionals.
The concept at the base of AnyTime is that a nice calendar is not enough for busy people. It includes to-do lists, notebooks, budget templates, address books, maps, due dates, and reminders.
Additionally, you can upload photos of your contacts, alert for overlapping events and, security options with the possibility to keep all your passwords.
AnyTime Organizer has a clean interface with a useful guide that can help you in case of trouble. Moreover, the company’s website has well-rated customer service and useful FAQs to respond to your needs.
You can move the undone tasks directly to the next day. To remember your task, there is a built-in schedule ticker at the top of the program which recaps them. You can also schedule all your future events, holidays, and birthday.
The software will even pop up reminders if you organize a birthday party so that you know when your guests are coming to your house. Are you passionate about a specific sport?
The software allows you to download the season calendar of several sports (e.g. NBA, Nascar).
AnyTime Organizer Deluxe lets you create a personal letter template to print and send via traditional mail.
It is quite easy to take notes via the software and to organize them as you wish. As far as numbers are concerned, if you need to remember and organize your expenses, AnyTime Organizer Deluxe is a good tool.
Nevertheless, do not expect the tool to calculate any total or import your bank account expenses — the software does not allow that.
You can import and manage data from other software, but it is not always easy. It depends on what software you’re using.
If you are importing from AnyTime previous versions, Sidekick or you synchronize your Google data, the process will be fast.
Vice versa, if you want to import from Microsoft Outlook, you might have some limitations, especially in the file format.
Despite its pros, AnyTime Organizer Deluxe has no dedicated app and the software is not cloud compatible. Those disadvantages narrow its potential.
Let’s see the software’s main features:
Organize and switch between different calendars
Schedule events, calls, and tasks
Add reoccurring and repeating events
Drag-and-drop to reschedule
Print or e-mail PDFs
Anytime Organizer Deluxe
A powerful tool for organizing your daily timetable with more than 3,000 different calendar layouts.
C-Organizer is a planner software to take into consideration if you are a professional or a very organized person. C-Organizer is a strong organizational tool that provides many options to organize your week.
Contrarily to the previous tools described, it supports access to cloud services and devices (e.g. Google Drive, Dropbox, Windows Smartphones).
The software provides a clear interface and a powerful and customizable built-in notification system. The latter can alert you anytime via email or screen alerts.
You can also move an event easily within the application, which, by the way, has a high level of protection.
As AnyTime Organizer Deluxe, the software gives the possibility to manage all your IDs and passwords. Unlike AnyTime Organizer Deluxe, C-Organizer Pro can also help you to generate strong and quality passwords.
You can write notes, address books (adding a lot of information such as email, photo, job), create to-do lists, generate contact lists, and organize your calendar.
Nevertheless, you cannot make any calculation for your expenses. It is possible to categorize tasks and subtasks, prioritizing them.
C-Organizer Pro has well-structured data storage. You can back up your database both manually or automatically to do not lose any important information.
The simplicity of this application is its main characteristic. Its motto is Do not leave for tomorrow what you can do today. Therefore, it only allows the organization of the day and the next day.
Basically, it is an app created for all those who prefer the old-school agenda. Its interface is indeed based on that: a page for today and another for tomorrow.
You can pass to the next day all the tasks that you could not carry out within the day. Comparing it with a common agenda, with this software you will always have the list of activities updated.
The completed activities are deleted with a single touch and you can also access the software from multiple devices.
There is a mobile app available and it is free only for the Android operating system, but it is also available on iOS.
When it comes to aesthetics, this app is over the top. The user interface is nice to look at, and intuitive as well! If you want some eye candy, this app is for you.
Any.do is a daily work organizer software for anyone who must track their day-to-day tasks.
If your day gets busier as it goes you probably need a good tool to stay productive and resolve your tasks stress-free.
With this solution, you have included an efficient to-do list, conversational reminders, or complex calendars to sustain your daily workflow.
Using this weekly planner will improve your organizational skills by keeping you updated with your busy day. For example, if you can’t keep the rhythm by yourself try to include to-do lists or smart reminders.
The smart features offered by this planner are quite simplistic and can be useful for anyone who needs to keep track of their work.
Meaning, regardless of your intent or status you can use plain functions like smart calendars or lists to better stay in touch with your duties.
Also, any technique you may choose to be in the loop based on your style, this tool sure can provide practical benefits. With that being said, do not hesitate regarding your improving workflow and choose to be settled.
If you want to organize your week, and that of your collaborators, check their agenda or share yours with them, Trello is the software you are looking for.
With Trello, you can manage any type of project, and it is probably the most customizable application on our list.
You can set deadlines for work delivery, organize them by color and monitor the tasks belonging to any team member.
In Trello, each member can add the tasks in which they are involved. The project leader can mark the work to do.
The other participants can choose which activity they prefer to carry out. The interface will show who is carrying out what task.
The application has a free version, very efficient for a person or a small team, and a premium version, BusinessClass. The app has user-friendly and free mobile apps available on iOS and Android.
The latter can provide a greater storage capacity than the free version. However, the free version has all the necessary functionalities, and you will not miss any kind of tool.
This article provides a view on the best software able to organize your week, which comes from third-party companies.
We have purposely avoided describing the main organizers provided by Google (Google Calendar), Microsoft (Microsoft Outlook), and Mozilla (Mozilla Thunderbird).
In fact, those are already highlighted when you open a Google or Microsoft account or when you use Mozilla’s browser.
The aim of the article is to provide fresh and interesting options for users who want a classical agenda, professionals who want to plan well their week, or people who are working in a small team.
Increase productivity
There are many ways to increase productivity in your life, or at work. The main thing you need to do is to stay on track with your activities.
Hence why we created this awesome list of software. We’re busy people, we have lots of things that we need to remember, so why shouldn’t we use a tool to help us.
Since you will always be prepared for the scheduled events, you will have plenty of time to think about speeches, presentations, and ideas.
Benefits of weekly planner apps
The greatest perk of having a weekly planner is the amount of stress you lose from constantly having to remind yourself of events.
You would be surprised how much time we waste thinking about stuff we’re going to do and trying to create a mind map of our schedule.
Once you start using these apps, and the weight gets removed off your shoulders, you will also notice that you can focus on other activities and hobbies.
Let us know if the article has been useful to you. More so, feel free to give us any feedback or suggestions regarding the subject in the comment section below.
Last week we discussed the new File Explorer tabs feature that was made available for the Windows Insiders that conduct their testing on the Dev Channel, through Build 25136.
Well, don’t feel bad if you’re on the Beta Channel instead, because Microsoft has just released Build 22621.160 to the Windows 11 Insiders on the Beta Channel.
And you would be pleased to know that this new Build brings improvements to the File Explorer in the form of Tabs, as well as some navigation updates.
File Explorer tabs are available on the Beta Channel
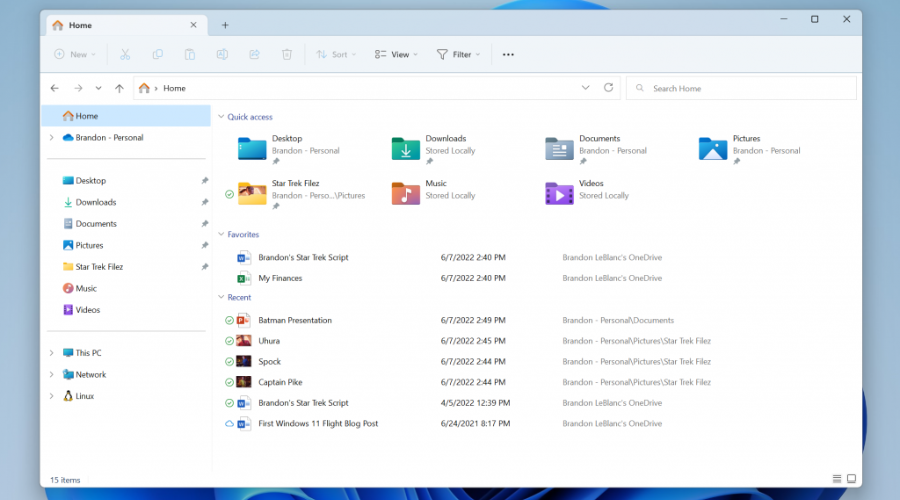
As far as File Explorer is concerned, the tech giant introduced a refreshed layout of the left navigation pane which makes it easy for you to switch between folders.
This update actually provides easy access to your pinned and frequently used folders (Quick access) and your OneDrive cloud profiles added to Windows.
Windows folders that are available by default in the navigation pane are no longer displayed under This PC to keep that view focused on your PC’s drives.
In addition to seeing live content from the weather widget, you’ll also start to see live updates from the sports and finance widgets, along with breaking news alerts.
However, you should know that you might not get to test this feature right away, as the Redmond tech company has stated in the official blog post.
We are beginning to roll this feature out, so it isn’t available to all Insiders in the Beta Channel just yet as we plan to monitor feedback and see how it lands before pushing it out to everyone.
That’s pretty much all that can be said about the new Beta Channel Build, with the exception of the one known issue that has been also listed in the same post.
And by that, we mean that the up arrow is misaligned in File Explorer tabs, and it will be fixed in a future update, according to Microsoft.
Have you installed this latest Windows 11 Beta Channel update? Share your experience with us in the comments section below.
Firstly, HTTP security header not detected is an alarming issue that leaves your site vulnerable to hackers. Security headers determine whether a set of security precautions should be blocked or activated on the web browser.
Security headers direct and instruct web applications on how to handle your request and rely on responses from HTTP headers.
It depends on the responses obtained from the metadata in the HTTP request to determine if the HTTP security header is not detected.
Also, new browsers have a built-in protection system known as the XSS filter. However, it could be turned off by default, which leads to this problem.
This isn’t the only error that you can encounter, and many reported HTTP 401 unauthorized error on their PC, but that can be easily fixed.
What causes the HTTP security header not to be detected?
Cross-site scripting (XXS) occurs when malicious and dangerous code is sent by the attacker to a different end-user. Hence, if your header lacks any of these during the attack, it could cause HTTP security header not detected.
X-frame options (Strict transport security): X-frame options help with improving the security of web applications against the threats and attacks from clickjacking. Clickjacking happens when an attacker uses different tricks to lure users into clicking on an unintended link.
X-content type options: This reads or rather, allows the web application to sniff the MIMEtype to stop the browser from loading the styles and scripts from an incorrect MIMEtype.
HTTP Strict Transport Security: This header deals with the browser’s built-in Cross-Site Scripting (XSS) filter, and prevents communication with illegitimate web servers. It instructs your browser direct traffic to secure and legitimate HTTPS sites.
X-XSS-Protection HTTP: This allows you to whitelist content sources. It can prevent all the XSS attacks and reduces the damage from those that get through.
Many reported HTTP security header not detected on port 80, and we’re going to show you how to fix that issue on several different platforms.
How can I fix the HTTP security header not detected?
1. Implement X-Frame-Options in the server
1.1 Apache
Open your virtual host configuration file. Next, input the following:$ sudo nano /etc/apache2/sites-available/example.com.conf
Add the following to the configuration file. Afterwards, restart the server: Header always append X-Frame-Options DENY
1.2 Nginx
Open your Nginx virtual host configuration file and place this in the directory: /usr/local/nginx/conf
Add this to the configuration file: add_header X-Frame-Options DENY
1.3 IIS
Open IIS server host Manager.
Go to HTTP Response Headers.
Click Add and enter X-Frame-Options in the name entry, and DENY in the value.
Select OK to effect change.
2. Implement X-XSS-Protection
2.1 Apache
Open virtual host configuration file and input $ sudo nano /etc/apache2/sites-available/example.com.conf
Add this to the configuration file: Header set X-XSS-Protection "1; mode=block
As you can see, it’s pretty simple to fix HTTP Security header not Detected vulnerability in Apache.
2.2. Nginx
Open your Nginx virtual host configuration file and place this in the directory: /usr/local/nginx/conf
Input the following in the conf file and restart the server: add_header X-XSS-Protection1; mode=block
2.3 IIS
Open IIS server host Manager.
Go to HTTP Response Headers.
Click Add and enter X-XSS-Protection in the name entry, and nosniff in the value.
Open your virtual host configuration file using this directory: $ sudo nano /etc/apache2/sites-available/example.com.conf
Add the following to the configuration file, then restart the server: Header set X-Content-Type-Options nosniff
3.2 Nginx
Open your Nginx virtual host configuration file and place this in the directory: /usr/local/etc/nginx
Add the following in the nginx.conf file, then restart the server: add_header X-Content-Type-Options nosniff;
As you can see, it’s pretty simple to fix HTTP Security header not Detected vulnerability in Nginx with this method.
3.3 IIS
Open IIS server host Manager.
Go to HTTP Response Headers.
Click Add and enter X-Content-Type-Options in the name entry, and nosniff in the value.
Select OK to effect change.
4. HTTP Strict Transport Security
4.1 Apach
Open your virtual host configuration file using this directory: $ sudo nano /etc/apache2/sites-available/example.com.conf
Add the following to the configuration file, and restart the server: Header set Strict-Transport-Security "max-age=31536000; includeSubDomains; preload
4.2 Nginx
Open your Nginx virtual host configuration file and place this in the directory: /usr/local/etc/nginx
Add the following in the nginx.conf file, and restart the server: add_headerStrict-Transport-Security 'max-age=31536000; includeSubDomains; preload';
4.3 IIS
Open IIS server host Manager
Go to HTTP Response Headers.
Click Add and enter HTTP Strict Transport Security in the name entry, and max-age=31536000; includeSubDomains; preload in the value.
Select OK to effect change.
This is one way to fix HTTP Security header not detected vulnerability in IIS, so be sure to try it out.
HTTP strict transport security header (HSTS) is supported across all browsers. As such, the issue should be fixed after this.
These are the best solutions for the HTTP security header not detected issue. Also, it is advisable that you follow these fixes carefully to input the right information into the configuration file.
HTTP Security header not detected issue has been reported on SonicWall, Windows 2012 R2 and, Fortigate, but the solutions for these platforms are similar to the ones from this guide.
In addition, using these HTTP security headers will improve your server security and enable them on your sites.
Check out our guide to solve HTTP error 400 that users have complained about aside from security.
One of the hottest reveals to come out of the Xbox & Bethesda Game Showcase broadcast on Sunday was the announcement of a new partnership between Xbox and Kojima Productions to create “a brand new experience like we’ve never seen before.” The clip featured legendary game creator Hideo Kojima himself, who went on to describe the project – which at this point has no official title – as a “never-before-seen concept.” He also made mentioned of “Microsoft’s cutting-edge cloud technology.”
What this exciting new proposition could entail is anyone’s guess at this point, but suffice it to say that the project sounds somewhat experimental in nature, and promises to deliver something groundbreaking in terms of play mechanics. Nonetheless, this announcement has drawn the ire of some longtime fans of Kojima’s work, who have taken to Change.org in an effort to cancel the project.
The petition reads as follows:
“Kojima is betraying his loyal fans. He has been blinded by greed. We must help him come back to the winning side. PLEASE SHARE THIS PETITION EVERYWHERE.
Not everyone has good enough internet to stream games. Not everyone has enough money to buy a new console or build a new pc. Please Kojima, dont (sic) leave us.”
The petition, which at the time of this writing has nearly 1,700 signatures and counting, was apparently started last year in response to then-rumors that Kojima’s next game would be an Xbox exclusive. Kojima has been largely associated with PlayStation consoles throughout his storied career, most notably as the mastermind behind the Metal Gear Solid franchise during his long tenure at Konami – a franchise which was for a time a PlayStation exclusive. Not to mention Kojima Production’s first game, the Sony-published, award-winning Death Stranding. Clearly there are many PlayStation fans who are unhappy with Kojima’s partnership with Xbox.
The petition is unlikely to have any real impact on how Xbox and Kojima decide to move forward with the project, and it has largely been the subject of ridicule. However, there may be a valid point about the game’s accessibility, as the hinted-at cloud features would require a fast internet connection, which unfortunately is something not everyone has access to.
While there are no doubt many PlayStation fans who are angered and disappointed by the news, Kojima Productions took to Twitter following the announcement to remind everyone that the company still maintains a good relationship with Sony.
As an independent creative studio, #KojimaProductions will continue pursuing work on creations for our fans. We will explore various possibilities with games, movies, and music through platforms that evolve with time and technology. We look forward to your continued support! pic.twitter.com/Q2Ww6exwGA
— KOJIMA PRODUCTIONS (Eng) (@KojiPro2015_EN) June 13, 2022
And while Sony fans may be irked by this partnership, it certainly does not spell the end of Kojima games on PlayStation consoles.
You are indeed right, another month has passed since we received the last batch of security updates from Microsoft. And the time is upon us again, so buckle up for another security software rollout.
Today marks the Patch Tuesday release for the month of June, which means that the major vulnerabilities and flaws will finally be fixed. Well, most of them at least.
While we wait for this rollout to begin. let’s take a look at last month’s patches and see what can expect from this release.
What were the highlights of the May Patch Tuesday release?
Microsoft has been hard at work on security improvements in pretty much everything that has to do with software security for the Windows operating system suite.
Last month, for example, the 74 new updates that were deployed during the Patch Tuesday rollout addressed CVEs in:
Microsoft Windows and Windows Components
.NET and Visual Studio
Microsoft Edge (Chromium-based)
Microsoft Exchange Server
Office and Office Components
Windows Hyper-V
Windows Authentication Methods
BitLocker
Windows Cluster Shared Volume (CSV)
Remote Desktop Client
Windows Network File System
NTFS
Windows Point-to-Point Tunneling Protocol
What can we expect this month?
There’s no denying that the great majority of users are surely hoping to see a fix for CVE-2022-30190 in this month’s operating systems updates.
As you would have imagined already, the rollout should include updates for Office and Sharepoint Server as well.
Furthermore, Exchange Server and .NET framework were updated last month so probably won’t see anything new here.
However, it has been quite a while since Microsoft delivered a SQL Server update on Patch Tuesday, so we should also be open to this possibility.
Although the untrained eye might have a look and think that everything works as it should, experts actually anticipate another large set of CVEs addressed in the OS updates.
Only a few hours separate us from this software rollout, so we might as well just wait and see with our own eyes. Hopefully it’s only standard stuff.
What do you think will get patched this month? Share your predictions with us in the comments section below.
Microsoft Teams has emerged out as one of the most popular team collaboration app in the global communication tools market. Effective video meetings, quality collaborations, user chat options, Teams offers it all.
If you’re a regular Teams user, sooner or later, you’re going to have to invite people to your Teams meetings. In what follows, we’ll discuss how exactly you can do that. So let’s get started.
How to invite someone to a Teams meetings
On the Microsoft Teams app, there are two ways you can invite someone to a Teams meeting. First, when you’re inside a meeting, and second, when you’re yet to start a meeting but would like to add people beforehand. Here’s how you can get started.
Invite someone during a meeting
When you’re in a meeting, click on the Show participants to see the people who were sent an invitation but who haven’t joined in yet. Then, to invite them in to join, click on Request to join. That’s it. Do this, and you’ll be able to add new folks while your meeting is going on.
In contrast, to invite new people to your meeting—people that you hadn’t added earlier—you can look them up by their names or email addresses, and then send an invite.
Invite someone before a meeting
But if you’re looking to add someone to your meeting beforehand, then you’ll be taking a different approach. Here’s how.
To add someone to your Teams meeting beforehand, click on the Add required attendees or Add optional attendees option. This will let you search and invite people to your meeting.
So that’s about it, folks. Inviting someone to a Teams meeting doesn’t have to be complicated. And thanks to the Teams developers, it isn’t. We hope this article helps in your goals.
Gaming on Windows has long been a favorite amongst the community, particularly because users don’t have to purchase a new device and because of the ease of access. However, several users have reported that their Windows 11 controller is not working.
This could happen both with the Xbox and PS4 controllers, and we will take up both separately to help you identify and eliminate the underlying cause.
So, let’s find out why the controller is not working in Windows 11 and how you can fix things.
Why is the controller not working in Windows 11?
There are various reasons why the controller is not working. If the problem started right after you upgraded to Windows 11, chances are it’s either a connection issue (with the Bluetooth controllers), an outdated Xbox accessories app, or problems with the installed driver.
Several users also reported that their antivirus blocked the controller, which doesn’t happen often. Make sure to verify this by disabling/uninstalling the antivirus. Some PS controller users reported that it was the AMD chipset driver that led to it not working in Windows 11.
If you are using a wired controller, it could be the USB port malfunctioning, or the port might be disabled from the BIOS.
Now that you have a basic understanding of the concept let’s head to the solutions. We have Xbox and PS4 fixes under different sections, so head over to the one relevant in your case.
What do I do if the controller is not working in Windows 11?
1. Xbox
1.1 Restart the system and controller
Press Alt + F4 to launch the Shut Down Windows box, click on the dropdown menu, and select Restart.
Now, click on OK to restart the computer.
The first thing you should do when the Xbox controller is not working in Windows 11 is to restart the computer and the controller itself. This will eliminate any trivial issues and get things up and running in no time.
1.2 Update the USB driver (for wired Xbox controllers)
Press Windows + S to launch the Search menu, enter Device Manager in the text field, and click on the relevant search result.
Now, double-click on the Universal Serial Bus controllers entry to view the USB ports.
Right-click on the port here, and select Update driver from the context menu.
Next, select Search automatically for drivers.
Wait for Windows to find and install the best available driver for the controller.
Problems with the driver are another common reason behind your Xbox controllers not working in Windows 11. No matter what the issue is, installing the latest version should fix things.
To speed things up, use a dedicated utility to take care of both your USB drivers and Bluetooth drivers. It can identify and fix any corrupt drivers and update outdated ones.
Press Windows + R to launch the Run command, enter appwiz.cpl in the text field, and click on OK to launch the Programs and Features window.
Now, locate the third-party antivirus, select it, and click on Uninstall.
Click Yes in the confirmation prompt.
In case a dedicated uninstaller appears, follow the on-screen instructions to complete the process.
If you don’t want to install the antivirus right away, try disabling it first. But, remember that the built-in Windows Security is more than capable of keeping your computer secure.
1.4 Update the Xbox Accessories app
Press Windows + S to launch the Search menu, enter Microsoft Store in the text field, and click on the relevant search result.
Click the Library option at the bottom-left corner.
Now, click on the Get updates button.
If a newer version of the Xbox Accessories app is available, it will be downloaded and installed automatically.
1.5 Install the latest controller firmware
NOTE
Before you proceed, make sure to connect your Xbox controller to the Windows 11 PC using a cable and not Bluetooth. Also, read the instructions provided on each page to not run into any errors.
Press Windows + S to launch the Search menu, enter Xbox Accessories, and click on the relevant search result.
The Update required button will be visible in case there’s a newer version of the firmware available, click on it.
Click on Continue.
Wait for the firmware update to complete.
Using outdated firmware can also lead to problems and your Xbox controller might not work in Windows 11. The Xbox Accessories app can help quickly update the firmware, and by this time, the problem would be eliminated. Besides, it will also help when the controller only works in Steam.
You can now start using the Xbox controller on Windows 11 without encountering any further problems.
Once the tool is downloaded, go to the folder where it is located, right-click on the DS4 Windows file, and select Extract All.
If you want to change the location of the extracted files, click on Browse and select another path, or go with the path selected by default. Then tick the checkbox forShow extracted files when complete, and click on Extract at the bottom.
Now, open the extracted files and double-click on DSWindows.exe to launch the tool.
You may then receive a prompt saying that .NET is required to run DS4Windows, in case it’s not preinstalled on the computer. Click on Yes to download it.
Now, click on the Download x64 version, or as the case may be on your computer.
Once downloaded, double-click on the file to launch the installer.
Next, click on Install in the setup window.
Click Yes in the UAC prompt.
After the installation is complete, again launch the DS4Windows tool.
Select the desired location to save the profiles and settings.
Once DS4Windows is launched, follow the on-screen instructions to complete the basic app setup.
DS4Windows is a critical tool that allows users to connect their Play Station controllers to their Windows PC since there’s no native support with many. So, install the software and check if the Windows 11 controller has now started working.
2.2 Uninstall AMD chipset software
Press Windows + R to launch the Run command, type appwiz.cpl, and click OK.
Now, locate any entry that goes by the name AMD software, select it, and click on Uninstall.
Follow the on-screen instructions to complete the process.
Restart the computer once the uninstall is complete.
Many reported that the AMD chipset driver caused the problem in their case, and simply reinstalling it did the trick and fixed things when the Windows 11 controller was not working.
If you encounter any issues after the uninstall, head to the AMD Drivers and Support page, search for the package you removed earlier, and install it.
2.3 Install the latest version of Windows 11
Press Windows + I to launch the Settings app, and select the Windows Update tab from the left.
Click on Check for updates on the right.
If an update is listed after the scan, click on the Download & install button.
2.4 Disable Driver Signature Reinforcement
Driver Signature Enforcement is a feature in Windows that allows only the drivers that have been verified and signed by Microsoft to be installed on the computer. But often, manufacturers don’t submit the driver to Microsoft and upload it directly on their official website.
If you or a third-party tool has installed any such drivers for the controller, the feature will block it. Disabling the Driver Signature Enforcement has worked for many users and fixed things if the Windows 11 PS4 controller was not working.
2.5 Run DS4Windows as administrator
Locate the DS4Windows launcher, right-click on it, and select Properties from the context menu.
Go to the Compatibility tab.
Now, tick the checkbox for Run this program as an administrator, and click on OK at the bottom to save the changes.
Many times, if the DS4Windows app does not have the necessary permissions, it might run into trouble and lead to your PS4 controller not working in Windows 11. Configure the program to launch with administrative privileges in this case, and things should be working again.
These are all ways to fix issues when the controller is not working in Windows 11 for Xbox or PlayStation.
Given the absence of E3 in 2022, Sunday’s Xbox & Bethesda Game Showcase was one of the most anticipated gaming events of the year. And with more than 30 games shown throughout the stream (and not just “fillers,” but mostly games that are truly representative of next-gen gaming), it is safe to say that the event did not disappoint, at least for most, and the event’s reception has been generally positive.
The event focused on games coming to Xbox in roughly the next 12 months. We got a look at some upcoming AAA titles like Redfall, the new Forza Motorsport, and of course the star of the show (pun not intended), Starfield, which was showcased with an extended gameplay reveal to the delight of Xbox and Bethesda fans everywhere.
And there was also the big announcement from Riot Games unveiling the League of Legends creator’s new partnership with Xbox that will bring these five games (with noted perks) to Game Pass:
League of Legends (PC): All Champions Unlocked
League of Legends: Wild Rift (Mobile): All Champions Unlocked
Legends of Runeterra (PC & Mobile): Foundations Set Unlocked
Teamfight Tactics (PC & Mobile): Select Little Legends Unlocked
VALORANT (PC): All Agents Unlocked
And really, that was the overarching theme of the showcase – “coming to Game Pass.” Almost all of the games featured in the event were titles that were coming to Microsoft’s gaming service in the next year, and a great many of them were day one Game Pass additions. Just judging from everything that was announced during Sunday’s event – and bear in mind that that isn’t even close to everything – it is clear that Game Pass Subscribers will have their hands full throughout the next 12 months.
While the Xbox & Bethesda Game Showcase for 2022 left us with plenty to be excited about, now that we’ve had a few days to take it all in it’s obvious that the real winner from the event was Game Pass, and by extension Xbox and Windows gamers. It’s pretty impressive to see how the best service in gaming continues to fortify itself, and one really can’t help but be excited for the coming year in Xbox.
Internet Explorer has a feature called InPrivate Browsing. It allows you to browse the Web without leaving a trail of cookies and other information behind.
You may be wondering why anyone would want to wipe off their history and delete cookies when they come in handy especially when you have forgotten an important site.
Well, when using shared computers, it is important to clear your browsing history as your personal information could land in the hands of unauthorized parties.
Granted, there may be times you want to turn off InPrivate browsing on Internet Explorer. When monitoring kids or employees, you may want to keep tabs on their online activities for safety purposes.
InPrivate is a feature of Internet Explorer that allows you to browse the web without leaving any records on your computer or in your history. Incognito mode provides a similar experience in Chrome, Firefox, and Safari.
In essence, they all have different names but serve a similar purpose of providing privacy modes that prevent your browsing history from being recorded.
How do I turn off InPrivate browsing?
1. How do I turn off InPrivate browsing in Windows 10?
Use the Registry
Hit the Windows + R keys simultaneously to open the Run command.
Type Regedit in the dialog box to open the Registry.
Navigate to the following location: HKEY_LOCAL_MACIHNE\Software\Policies\Microsoft/Internet Explorer/Privacy
Right-click on Privacy and select New DWORD (32-bit) Value.
Set the value to 0.
2. How do I turn off InPrivate browsing in Windows 11?
Use Group Policy Editor
Press the Windows + R keys to open the Run command.
Type in gpedit.msc in the dialog box and press Enter.
Navigate to the following location: Computer Configuration/User Configuration/ Administrative Templates/Windows Components/Internet Explorer
Select Privacy, right-click on Turn off InPrivate browsing, and select Edit.
Toggle on the Disabled button in the next window that pops up.
We hope you have been able to turn off InPrivate browsing on your Internet Explorer browser. In case switching on and off is a hustle for you, perhaps you may want to consider installing private browsers without tracking.
Do you use InPrivate browsing or incognito mode? Let us know your top reasons in the comments section below.
The S3 Browser can be an essential tool for managing your Amazon S3 account. But, it can also be a bit sluggish at times.
It is a very useful tool if you want to access your data from any location. However, sometimes this application may stop responding and not work properly.
If you find that your S3 Browser is not working, there are a few things you can do to troubleshoot and resolve the issue.
What is the use of the S3 Browser?
S3 Browser enables you to quickly set up an Amazon S3 account, create buckets, upload data, and configure permissions.
It is a free tool that helps you browse, search, and manage your data in Amazon S3. You can use it to perform basic file transfer operations, such as uploading, downloading, and deleting files.
The easy-to-use interface allows you to view information about your buckets and objects, such as the number of bytes stored in each object and the date each object was last accessed.
But, one question that every user always asks is the following one: Is the S3 Browser secure? The S3 Browser is very secure. It uses a variety of security mechanisms to protect your data.
S3 Browser uses end-to-end encryption (E2EE) to ensure that only you can read the data stored in your bucket. This makes it impossible for anyone else to access your data by accident or on purpose.
So, how do you access the S3 browser? First, you need to have signed up for Amazon S3 and then download the S3 Browser. You will be prompted for your S3 credentials and then you will be able to access your files.
Quick Tip:
When everything else fails, there are always other options. Browser errors can happen for a variety of reasons, but if you need a better way to manage Amazon S3 from your browser, you should try the Opera browser.
Amazon Assistant is Amazon’s official product that assists you in discovering products available on Amazon and comparing prices as you shop online. You can find personalized product recommendations for you by clicking on the extension icon in your browser.
First, check to see if the browser is responding. If you are using a desktop computer, open up another browser and see if you can access your account with no problems.
The cookies and cache on your computer may be causing issues with the S3 Browser. Simply clear and delete them then check if the problem persists.
2. Send a diagnostic report
Launch your S3 Browser, click on Tools, and select Diagnostics.
Once the Diagnostic Report dialog opens, enter the error and click Send.
3. Restart your PC
If your browser is not responding and you have tried everything, then you should simply restart your PC. This is the most common solution to any problem, especially when it comes to software.
Your computer could be running slow and taking too long to open files. This means that your computer needs to be restarted.
We hope that with this article, you have been able to resolve issues with your S3 Browser not responding. While you are still here, check out our list of the best S3 Browser applications for Mac.
Let us know of any other solutions that worked for you if you were faced with this issue in the comments section below.
Microsoft has gained yet another set of allies in its long road of approvals for its Activision Blizzard $68 billion buyout as it wins over the Communications Workers of America (CWA) with a new Labor Neutrality Agreement.
While Microsoft and Activision Blizzard are legally barred from certain levels of communication with one another as their potential merger remains under investigation, the two have followed similar paths on unionization efforts over the past two weeks.
Microsoft first announced it would adopt more pro-union policies at the beginning of the month as it looks to steer conversations around potential unionization efforts from partners, vendors and certain employee classes; roughly a week later Activision Blizzard settled its long public battle with developer studio Raven’s Quality Assurance department’s call for a union by starting collective bargaining negotiations, as well.
Starting this week, efforts from both Microsoft and Activision Blizzard will coincide with the announcement that Microsoft and the CWA have entered into “a ground-breaking” labor neutrality pact.
Specifically, Microsoft and the CWA’s agreement will apply at Activision Blizzard starting roughly 60 days after the acquisition is made official and what it does is provide a pathway for Activision Blizzard employees to organize and democratically start the process for collective bargaining if they chose so.
Based on the following five provisions, Activision Blizzard employees, who soon become Microsoft employees, will be able take a seat at the negotiation table for fairer employee labor practices, wages and communications.
Microsoft will take a neutral approach when employees covered by the agreement express interest in joining a union.
Covered employees will be able to easily exercise their right to communicate with other employees and union representatives about union membership in a way that encourages information sharing and avoids business disruptions.
Employees will have access to an innovative technology-supported and streamlined process for choosing whether to join a union.
Employees can maintain confidentiality and privacy of that choice if they wish.
If a disagreement arises between the CWA and Microsoft under the agreement, the two organizations will work together promptly to reach an agreement and will turn to an expedited arbitration process if they cannot.
As noted in the announcement, this agreement doesn’t take hold for former, current or even future employees of Activision Blizzard pre-Microsoft-acquisition. The agreement should also not be confused with the recent collective bargaining agreement struck by Activision and its gaming studio Raven, as that applies to a specific department within the studio, and not all Activision employees.
However, it does appear the new commitment between Microsoft and CWA will apply to all Activision Blizzard employees and goes a long way to assuage fears the CWA had about Microsoft’s bid for the publisher.
“The agreement addresses CWA’s previous concerns regarding the acquisition, and, as a result, we support its approval and look forward to working collaboratively with Microsoft after this deal closes,” according to CWA president Chris Shelton.
Microsoft still has over a year to get the other regulatory approvals from state, government and international boards to conclude its acquisition of Activision Blizzard, but winning over the CWA early is probably a very smart move.
There are many ways you can be productive at work or school, and one of them involves general multitasking. Sure, you can stack your windows side by side on your laptop or monitor screen or even use tools like PowerToys, but that only does so much. To truly unlock your potential, you need a large and expansive screen.
That’s where a product like the Dell 34 Curved USB-C Monitor (S3423DWC) comes into play. This curved monitor sports ultra-wide WQHD (3440 x 1440) resolution, USB-C connectivity, built-in speakers, and a USB port under the chin. There’s even AMD Adaptive-Sync technology on board too. The combination of those features on this monitor can help you truly stay productive, and immerse yourself in work, school, or whatever you may be using it for.
Specs & Price
The Dell 34 Curved USB-C Monitor (S3423DWC) can be purchased at Dell.com for $770, or when on sale, for around $575. That sale price makes it an affordable option if you’re looking to buy a curved monitor for the first time.
The screen size is 34 inches, with a resolution of 3440 x 1440, tuned at 100 Hz. The aspect ratio comes in at 21:9. The display supports AMD Freesync. According to our colorimeter, the display hits a contrast ratio of 3000:1, and 99% of the sRGB spectrum. The response time is 4ms gray to gray on extreme. Curvature on the display comes in with an 1800 radius. Brightness is around 300 cd/m2, and the panel type is VA.
Since this is a curved display, you can’t fully rotate it vertically. Tilt angle is rated at -5 to +21 degrees, and height adjustment goes up to 3.9 inches. With the stand at the lowest position as I reviewed, the measurements come in at a 31.8-inch width, 8.5-inch depth, and 15.3-inch height. This monitor also has a KVM switch, as well as picture-in-picture support, or picture-by-picture support. All of this means you can fit the monitor in with almost any setup, and there’s a lot of room for adjustment.
Design
In the past, I’ve reviewed similar curved monitors from Dell. Dell’s new 2022 curved monitors keep the same minimalist design as 2021’s. That means you’ll get a textural white-colored back panel, that’s designed to fit in with your office. Oh, and the stand has a place for routing your cables for better management. The monitor can even be attached to the wall with a VESA-compatible mount. And as always, setup is quick and easy, just requiring you to screw a stand into the base, and then hook the monitor in. No tools are required!
You’ll also find Dell’s signature three-sided narrow bezels on this monitor, with a tiny bottom chin where the Dell Logo is. Dell mentions in a product listing that these bezels have been shrunk down a bit between generations for an improved viewing screen-to-body ratio. As far as the curve comes to the design, it’s rated at the 1800 radius. This hits the sweet spot, as it’s not too extreme of a curve, and won’t be too hard on your eyes since there’s less distortion. It feels natural to use when sitting on your desk.
Finally, there are the speakers. Like past curved monitors from Dell, there are two 9-watt speakers at the bottom of this monitor. They’re downwards firing, so don’t expect the best quality. I thought the sound emitted was decent enough for Teams calls, but definitely not for watching movies. I hooked up my external speakers since there’s an audio line out port (which is appreciated, not all curved displays have one.)
Ports & Buttons
The mix of ports on this monitor is pleasing. No matter what I wanted to connect to this monitor, it worked. From left to right, there’s the power connector, HDMI 2.0 port, another HDMI 2.0 port, then USB-C upstream (with up to 65 watts of power delivery.) There’s also an audio line out power, a Super Speed USB-A 3.2 Gen 1 Type B upstream port, and a Super Speed USB 3.2 Gen 1 downstream port. Then, under the chin, you get a USB-A port with up to 10 watts of power charging.
The real highlight of this monitor, though, is USB-C. That means you have a single cable for everything, which is great for productivity. One cable for data and charging meant that using my Surface Pro 8 with the monitor was a charm. No need to use my Surface Connect charger, as the monitor provided enough power for charging. I was even able to plug in my Logitech Bolt adapter into the monitor and use my keyboard and mouse, without taking up a port on my Surface. It’s truly a space saver and time saver, as I spent less time worrying about dongles and more time on my actual PC. A second or third USB-A port or another USB-C port on the chin would have been appreciated, though. But I see why it could have been omitted to help keep the price down.
As far as buttons go, you won’t find joystick controls here. Instead, there are four buttons that are used for navigation of the menus, switching inputs and color profiles, or changing settings. This means you’ll have to be super careful and be attentive to what button you’re pressing as you go between menus to switch inputs. I wish Dell would make joystick controls standard on all of its displays as joystick controls are so much simpler. The menus, though, are in-depth as always, with lots of image controls
Display Performance
As usual, to test the performance of this monitor I put it through my usual workflow. That includes gaming on it using my Xbox Series X, and usual productivity on my Surface and Mac Mini.
For console gaming, I would not depend too much on this display. HDMI 2.1 is not supported here, and neither is 4K. Next-gen gaming consoles won’t make the most out of it, not to forget how the image will be stretched, too.
I did, however, do some light PC gaming on the display with Fortnite. I’d say that performance is decent, there wasn’t much lag. I still think that 100Hz and the 4ms response time aren’t ideal for a monitor of this size for games. If you’re looking for something for gaming, the recently reviewed Dell 32 4K UHD Gaming Monitor is better.
This is a monitor for casual gaming, at best. But at least the image quality is there. The colorful outfits of Fortnite characters looked very vibrant and lively. Even the scenery when I peeked through a scope in one of my guns looked great, too. This monitor does a good job with color replication and shading.
As for productivity, this is where the monitor is best. I already mentioned the benefits of USB-C, but thanks to this resolution and size, I was able to fit four full-sized Edge windows side by side by side on this display. There even was room left for my Teams chat and WhatsApp. Combined with the really good contrast ratio, web pages looked very crisp and lively on this display. Unfortunately, though, videos on this monitor will play in lettered box mode, so movie watching can’t be that immersive. The colors, though, are still accurate and sharp, which is surprising considering this is a VA panel that usually has slow black to gray pixel transition speeds on lower refresh rates. I guess that’s where the 100Hz kicks in to make Windows 11 and other content come to life.
PIP Mode & more
As someone who owns both a Mac Mini and multiple Windows PCs, there’s sometimes I wish I could have them both on the same screen at the same time. This is one thing that the Dell 34 Curved USB-C Monitor (S3423DWC) helped me do. The monitor has a picture-in-picture or picture-by-picture functionality, and a KVM switch.
You typically don’t find that in other competing curved monitors, so to see it here is a huge plus. With one monitor, you can control multiple inputs at the same time. Just go to the menu to activate it, and then select which inputs you want to see on the screen. I used USB-C with my Surface and HDMI with my Mac Mini. It was really cool seeing the two operating systems side by side.
Note that this monitor also supports Dell’s Easy Arrange technology. This can give you ways to tile your open windows, similar to PowerToys. It is basically all about snapping windows into templates of your choice, though Windows 11 now does a good job with this thanks to Snap Layouts.
Immersive & Productive
There are plenty of alternative curved monitors that you can buy right now, but the Dell 34 Curved USB-C Monitor (S3423DWC) is one of the best. With USB-C connectivity, a USB-A port on the chin, KVM and PIP modes, as well as in-built speakers, this is a monitor that you must buy if you want to be productive at work or school.
The business-focused professional networking platform LinkedIn has proved itself vital for working professionals. Whether working as an employee, employer, recruiter, sales professional or business owner, the social networking platform can help you extend your reach and connect with the correct people who can help you advance your career.
Since its launch in May 2003, the business networking platform has evolved into a powerhouse of networked connections where over 810 million professionals interact to share business and related career information. But with all the major brands on the platform, how can LinkedIn benefit the small business owner? Here are some of the top reasons why you should seriously consider creating a personal LinkedIn profile, a company page, or adding some of the new features and changes released in 2022 to your existing profile to take advantage of some of its new features available for free.
What are the top reasons why LinkedIn is important for your business?
Extending your personal brand online. You can manage the professional image you want to display to your customers. A carefully crafted profile showcasing your skills, experience, testimonials and work history can bring you business. Your profile will also appear when people are searching for a particular skill or experience. Having your business value proposition displayed on your profile can bring inbound clients to you with minimal effort on your part. Having a great profile will bring your credibility and allow you to tell your story to bring your work to life.
Showcasing your professional brand with Company Pages. Having a company page, which shows your business expertise in your industry, the products you produce and news about the company can really enhance your brand. You can advertise jobs available at the company and post white papers. In short, if used correctly and updated frequently, a LinkedIn Company Page can eliminate the need for small businesses to actually have a paid-for website.
Finding work on LinkedIn. Contractors or teams of ad-hoc workers can use LinkedIn to find suitable employment in their area of the country or find work online. LinkedIn’s search and tagging features can showcase roles which are tailored to your skills. If you are open to finding a new job, your profile will show up when recruiters search for your specific skill set, location, or even if you want to work remotely. You can show whether you want to work as a part-time contractor, a full-time employee and when you want to work. You can even specify the audience for the profile setting so that recruiters are the only group of people who will see this new information
Generate Leads. You can collect leads from LinkedIn members who visit your Company page by creating a lead generation form to capture member information so you can close the deal. LinkedIn’s data shows that using LinkedIn to generate leads can increase conversions by two to three times compared to standard campaigns using sponsored content. These forms can not only be used to connect LinkedIn members to your brand, but also enable you to promote your whitepapers or encourage signups to a webinar.
Showcase your skills. You can add specific skills gained to each work placement you have done. Any recruiter who is performing a skills search will see your name listed under that specific skill. You can also add your skills and ask for and receive recommendations about your work. These endorsements will be visible to others who view your profile and will further validate your expertise on your profile
Update your job-specific skills. You can search LinkedIn’s online courses to enhance your knowledge about any topic you want. LinkedIn Learning courses vary in length and complexity and cover a plethora of topics. Many are free courses and are offered in six languages. You can follow structured learning paths, or browse the videos on offer. The courses range from beginner to advanced levels and several courses lead to certifications.
LinkedIn is a fabulous networking tool that, when used properly, can really enhance your ability to grow your connections and advertise yourself or your business to gather new business opportunities and advance your career. Over the next few weeks, I will be drilling down into many of the free features of the platform that you can adopt to create a LinkedIn presence to be proud of. So What are you waiting for?
Everyone in the gaming world is pretty much familiar with Elden Ring by now. The Dark Souls-like action role-playing game was developed by FromSoftware and published by Bandai Namco Entertainment.
It’s available for different platforms such as Microsoft Windows, PlayStation, and Xbox. Since the title was first released, we’ve seen a lot of things go wrong with it, some of which aren’t fixed yet.
Another problem that drives gamers crazy is Elden Ring not updating, thus rendering them unable to enjoy their new favorite game.
What can you do when faced with such a predicament? Fixing this problem is easier than you think and we are about to guide you through the troubleshooting process.
What can I do if Elden Ring won’t update?
It’s important to know that this can happen for quite a several reasons. A glitch in the Steam client could be the main one, but there are other scenarios as well.
The game’s auto-update feature might not be set, there might be corrupt files inside it, or the internet could also play its part in this story.
Here’s what you need to do to restore game functionality and keep on building your legend and your legacy in Elden Ring.
1. Force close Steam
Right-click on the Start menu and select Task Manager.
Find the Steam process, select it and press the End Task button.
2. Enable the Elden Ring auto-updates
In Steam, right-click Elden Ring and select Properties.
Select the Updates tab.
Under Automatic updates choose Always keep this game updates.
3. Verify game file integrity
Find Elden Ring and right-click it, then select Properties.
Click on Local Files.
Press the Verify integrity of game files… button.
4. Allow Elden Ring through your Firewall
It is well known that the operating system’s security measures can sometimes interfere with our games, especially online ones.
Thankfully, we can add exceptions in our Firewall, which will stop Windows from preventing games from going online or receiving updates. Here’s how you too can do that:
Search for Firewall and open the app.
Click on Allow an app or feature through the Windows Defender Firewall.
If Elden Ring isn’t on the list, click Change settings and then Allow another app.
Click on Browse and look for Elden Ring on your device.
Select the game’s folder and press Open.
Click the Add button.
5. Update graphics drivers
When we talk about gaming, the main thing we should always consider when encountering any sort of issue is updating the GPU drivers.
Doing this will spare you a lot of problems in the long run and contribute to the smooth, uninterrupted gameplay you long for.
Search for Device Manager and open the app.
Open Display adapters, right-click your GPU and select Update Driver.
It’s also worth checking your internet connection, just to be sure that the problem doesn’t originate from there. No internet or an extremely slow connection speed can prevent updates from being installed.
If none of the above-mentioned steps work for you, another solution to consider is reinstalling Elden Ring entirely, as this solved the issue for some players.
In the lack of official fix patches, we will have to rely on these temporary workarounds for now. Hopefully, From Software will hurry in eliminating these annoying problems once and for all.
SpaceX does this by having thousands of low orbiting satellites as a constellation above the Earth. The internet provided via Starlink is a low-latency and high bandwidth service. It’s pretty impressive what the company managed to do in a few short years.
Companies are trying to do the same thing, such as Viasat and HughesNet, launching many low-hanging satellites. But Starlink has a decent headstart above them.
Expect to see Starlink pop everyone in the coming years. The company is hard at rolling the service out worldwide, starting with more rural areas first.
Right now, you can purchase a connection for a residential house, a business, or an RV. However, be aware that the service is relatively expensive because you’ll have to buy the dish and pay a monthly subscription.
Be prepared to pay several hundred dollars upfront. But once you do, you’ll get access to some pretty fast internet.
Where can I get Starlink internet?
Starlink rolls out first to rural areas and countries with either poor connections or that are small. Large portions of the European Union have access to Starlink internet and large areas of the United States.
But in the United States, a large portion of it still doesn’t have access to Starlink. For example, the Appalachian mountains don’t have Starlink or some of the biggest cities.
For example, Los Angeles and New York, the two largest American cities, won’t get Starlink internet until 2023. You can check out Starlink’s global map to see which countries do or eventually will get Starlink internet.
You even see countries that will probably never get Starlink internet. So those countries are greyed out, while the countries with Starlink are light blue.
The reason why those countries will never get Starlink internet is probably due to global politics. Unfortunately, Russia is one of those countries, and they’re currently involved in an unpopular conflict.
China and North Korea are on that list due to other political problems. However, Cuba and Venezuela are on there, although they’re not currently involved in any wars or closed off as others.
Regardless of political standing, below is a brief list of the countries and regions slated to get Starlink over the coming year.
Q2 2022
Q3 2022
Q4 2022
2023
Countries
Columbia
Ecuador
Panama
The entire continent of Africa
Dominican Republic
Peru
Paraguay
Central America
Albania
Bahamas
Argentina
Brazil
Jamaica
Bolivia
Peru
Uruguay
Serbia
Greenland
Japan
Scandinavia
Southeast Asia
South Korea
Saudi Arabia
Kazakhstan
Turkey
As you can see, most of the world is slated to get Starlink connectivity sometime in 2023. This list doesn’t list every country out there, but it gives you a pretty good general idea of where things are going.
Some notable countries that weren’t listed include Australia, Chile, and Canada. They don’t have 100 percent Starlink coverage but will see expansion during 2023.
Starlink speed test: device vs. router
Testing the speed between your device and a Starlink router is tricky because you need to access Starlink’s internet and purchase the equipment. One, the equipment is costly.
It’s almost $1000 for the whole thing. This guide is being written in a place where there is no Starlink access. The company hasn’t brought its service everywhere across the United States.
Fortunately, the YouTube channel All Media Services has provided a sample of what people can expect from Starlink and its internet speeds. However, don’t look at this data as definitive and the standard for Starlink.
It’s only a sample of what Starlink can do. All Media Service has a video and a post on the Starlink Community Forums detailing their experience with the service. It’s recommended that you check out both to get the complete picture.
The speeds are discovered by using the Starlink app, and there are three tests it conducts. Test one checks the connection speed between a device and router, which obstacles can influence.
Test two checks the speed from the router to the satellites in orbit, providing you with the internet. Finally, test three shows you the bandwidth limit of your connection; think of it as the possible full potential of your relationship.
Don’t think this is how fast your internet is because that’s not what the test tells you. Just how fast you can go. Before showing the results, it’s important to point out that All Media Services did two types of tests.
One was done with a 2.4 GHz Wi-Fi connection and the one with a 5 GHz. The 2.4 GHz is slower than the 5 GHz but has a farther reach. 5Ghz has a strong signal up close but can be quickly interrupted.
This first graph is done under the 2.GHz Wi-Fi and ignores the third test; it’s irrelevant. As you can see, the connection between the device and router has an average of 90 Mbps. From the dish to the satellite, it’s 139 Mbps.
According to All Media Service, this is a little slower than expected, but they mention seeing results over 100 Mbps. They also remind people that Starlink satellites are constantly moving and switching.
This can result in varying levels of connectivity. Under the 5 GHz network, things got a little bit better for the device to router test.
The test shows that the device to router connection got a bit better with a faster Wi-Fi connection. On the other hand, the router to the satellite connection got worse than before. But, again, these satellites are moving and quickly interrupted.
Don’t obsess over these numbers too much. These are simply examples of what Starlink is capable of using two different Wi-Fi connections.
The main thing to take from this example is that your connections may be slower than expected, but that’s normal and to be expected. Starlink is still a new service and working through the problems right now.
Starlink speed and latency
Now let’s take a look at how Starlink stacks up with other satellite internet providers and a personal connection. It would be unfair to compare Starlink directly to broadband internet service providers.
These companies have been in the business of providing internet for much longer than Starlink and have been established for much longer.
But even then, Starlink still offers a pretty good service comparable to broadband which is why a personal connection will be included in the graphs. Full disclosure: the personal connection will be through Spectrum, and it’s the base plan.
The other satellite internet providers will be Viasat and HughesNet, which are the biggest rivals to Starlink. And as you will see in the graph, Starlink has the fastest speeds.
The information comes from Ookla, an online service that provides a free internet performance analysis looking at download speeds, upload speeds, and latency. They’re also the owners of Speed Check.
As you can see from the download and uploads alone, Starlink is compatible with a base plan from Spectrum. However, this information comes from a report published in February 2022, so the speeds may have improved.
Currently, Starlink is in beta as it’s still rolling out and fixing any bugs that may appear in its service. After all, it’s not a perfect service, but it’s still doing a pretty good job. A 104.97 Mbps download speed is on average with other ISPs.
It wouldn’t be surprising to see Starlink become even better in 2023. However, one more critical speed stat hasn’t been mentioned, and that is latency. This is where Starlink truly shines.
Don’t let the bars fool you. The higher the bar is, the worse the latency. HughesNet and Viasat do terribly when it comes to latency. High latency can cause your connection to lag and move at a snail’s pace.
One of the most annoying aspects of having lousy internet. Starlink’s fantastic performance with latency alone makes it worth the subscription. Imagine going out to a rural area and having fast internet.
It’s even faster than the personal connection. Starlink’s latency is on par with premium connections. Also, be aware that this information is based on the average according to all the data Ookla had.
This information comes from the United States, with a pretty uneven internet infrastructure. For example, if you look at that Ookla report, the fastest speeds in the US are in the state of Maine and the western portion of the country, namely the southwest.
States like Colorado, Minnesota, Washington, and Michigan have zones where Starlink speeds are fast, whereas other states are slower. And what’s more, is that Starlink is continuously getting better.
Starlink’s latency comes from Speed Check, which conducted multiple tests to keep track of Starlink’s performance during 2021. And as you can see, Starlink’s connection has been steadily getting better.
The same thing happens to the download and upload speeds: steadily getting better over time. Again, Speed Check’s results come from an averaging of the rates. These numbers are consistent throughout all of Starlink’s networks.
We are as curious as you are about whether Starlink can be used for gaming. Fortunately, we were able to undertake some tests on gaming platforms in order to answer this question, and the results were quite promising.
Things are always subject to change. Hopefully, Starlink will become even faster and provide lightning-fast internet throughout.
Feel free to leave a comment below if you have any questions on other Windows 11 apps or if you have some that you recommend. Also, feel free to leave comments about guides that you’d like to see or information on other Windows 11 features.
Safari is one of the cleanest and fastest browsers out there. It boasts superb performance and has many endearing features.
The browser was enjoyed on the earlier versions of Windows before Apple stopped releasing updates for it on the Operating System. While it is still possible to install Safari on Windows 10, users have found it difficult to update it.
However, this guide will show how to update Safari on Windows 10 and 11 to the latest version available. You only need to follow the instructions, and you will be fine.
Can the Safari browser be updated?
There is no way to update the Safari browser on Windows 10 and 11. This is because Apple stopped providing updates for the browser on Windows in 2012 due to a lack of interest from users.
The browser update is no longer supported and can’t be downloaded. However, if you have a version later than the last one released, there is a way to update it.
This will be discussed in the subsequent sections of this article.
What is the latest version of Safari?
The latest version of Safari generally is 15.4, released in March 2022. However, it is only available on macOS and iOS devices.
For Windows 10 and 11, the latest version is available in Safari 5.1.7. This is not available on any official platform. You can get it on third-party sites for installation.
?️Quick Tip! Alternatively, you can use a browser with up-to-date Windows apps. Just like Safari, Opera One offers top-notch web security, including anti-tracking, adblockers, and built-in VPN.
Opera One also brings features like workspaces, tab islands and native AI to help you better organize your browsing sessions . The browser also has a modular AI-ready design for integration with the current AI options but also future ones.
Opera One
Browse privately with this Windows-supported browser, enable VPN, and create your customized workspace with tons of add-ons.
Please scroll down to the Safari browser and click on it.
Select the Uninstall option.
To install the updated version of Safari for Windows 10 and 11, you need to uninstall the previous one on your PC. This is especially useful if you installed the browser with an installer from a later Windows version like XP.
Safari is one of the most coveted browsers on Windows due to its impressive speed and performance. It also boasts a simple yet stunning design that is easy on the eyes.
However, Apple stopped supporting it on Windows a long time ago due to a lack of interest from users. Thankfully, just as you can install Safari on Windows XP, there are ways to do it on other versions.
This guide will show you how to download the latest version of Safari, whether 32 or 64-bit, for Windows 7.
Can I download Safari on Windows 7?
Despite Apple discontinuing Safari on Windows, you can still download Safari on all operating system versions. For example, the browser installs and runs fine on Windows 7 without hiccups.
The only caveat is that you can only get on a third-party website. We usually advise against this due to the security risks involved.
But if you need Safari on your Windows PC for one reason or another, this is the only option available.
Is Safari for Windows free?
Since its inception, Safari has always been a free browser, which has not changed on Windows. It is also accessible on third-party websites where you can download the installer.
So, it is free whether you download the latest version of Safari in 32 or 64-bit on Windows 7.
?️Quick Tip:
Opera One is another free lightweight browser that works great on Windows 7. Because of its advanced ad blocker, encrypted security, and built-in VPN, this browser is ideal for Windows 7.
You can open a large number of tabs, which works flawlessly thanks to the turbo mode, and loads only the important parts of web pages. Furthermore, you may import everything from your current browser with just one click.
Opera One
Advanced built-in features to help you browse faster and in a secure environment on Windows 7.
Select the radio option next to I to accept the terms in the license agreement and click the following button.
Check the Automatically update Safari checkbox and click the Next button.
Lastly, click Install and wait for the process to complete.
You have it: a complete guide on downloading Safari for Windows 7. This article also contains valuable information on the availability of the browser and some of its other endearing features.
Safari vs. Firefox vs. Chrome: Which works faster?
One of the strongholds of Safari is its incredible speed and performance. Where other browsers pack in numerous features that users might never use, Apple has designed this browser with little but powerful features.
This, plus its Javascript engine, makes it compare favorably with some of the leading browsers in Chrome and Firefox in terms of performance.
Safari extensions are a great way to help you get more out of the browser. They work on both Macs and Windows PCs. But there are some differences in how you get them on each platform.
Extensions let you add new features to Safari without having to download any software or learn how to code. They’re super easy to install, and they come in thousands of different varieties.
The question is why would you want to download Safari for Windows 10 or 11 and install extensions when there are so many other browsers available? Safari has some amazing features that are just not available in other browsers.
What does the Safari accounts extension do?
The Safari accounts extension adds an icon to the menu bar that allows you to sign in to your accounts. You can use this extension to sign in without having to enter your credentials every time you want to use a service that requires authentication.
When the user signs in to Safari on Windows, they will be asked if they want to allow your app to use their account. If they agree, the extension takes care of all the details and handles signing them in automatically when necessary.
At this point, you may be wondering how to get Safari extensions on Windows 10/11. Safari extensions are also available for Windows users, but installing them isn’t as easy as it is on macOS.
The extensions are not available on the App store or web store say for Chrome. You will have to get them from third-party sites. While you are downloading files from untrusted sites, always check to ensure that the file extension ends in .safariextz.
Any other type may be malware or a virus that has been morphed to look like the legitimate extension you are trying to download and infect your computer.
How can I install the Safari accounts extension on Windows 10 and 11?
What can I do if the Safari extension is not showing up on Windows?
If you’re using Windows and the Safari extension isn’t showing up, there are a few things you can try. You can restart the browser and see if the extension will appear. If not, you may need to clear the browser cache and cookies.
To clear Safari cache and cookies, follow the steps below:
Launch Safari and click on the gear icon.
Select Preferences.
Click on Privacy.
Select Remove All Website Data next to Cookies and other website data.
Click on Remove Now.
Refresh the browser and see if you can locate the extension.
We hope you have been able to install the Safari accounts Extension on Windows 10/11 without any issues.
If you encounter any other related errors such as Safari not working on Windows 10, we have plenty of fixes you can try to resolve the issue.
Several users have reported that they are facing Warzone update not enough free space error and aren’t able to install the latest COD Warzone update on their consoles.
This has irked many Call of Duty Warzone fans, and they are constantly looking up to the internet for solutions. If you are among such users, you have landed in the right place.
Because here in this guide, we will give you 5 clear solutions that can help you fix the Warzone update not enough free space error. Let us get right into it.
Why can’t I update COD Warzone when I have enough space?
This error doesn’t apply to just COD Warzone alone; other COD games have suffered from the same problem.
Some users have mentioned that the PS4 console requires double the amount of space as the actual size of the game. But that doesn’t hold for other games, except for COD Warzone.
So, the best bet that you are facing Warzone update not enough free space error could be because of a bug. Unfortunately, there is no clarity on what is causing this problem, but by following the below-mentioned solutions, you will hopefully be able to fix the problem.
How can I fix the Warzone update not enough free space error?
1. Delete and install only required add-ons
Open the PlayStation Library.
Select All.
Select COD Warzone and hit the Options button.
Choose Delete.
Press OK to confirm.
Deleting the entire COD Warzone game will help you free up a significant amount of space on your console, but it also facilitates one more thing.
The next time we will be downloading COD Warzone, we will only download the required components of the game. If you wish only to play multiplayer, you would only have the multiplayer part of the game.
Follow the steps to download the specific add-on of the game.
Head to the Library.
Scroll down and select the Purchased option from the left pane.
Search for COD Warzone.
Select the PlayStation Store button.
Choose Your Add-Ons.
Download the specific add-ons you wish to play the game with. For example, only download the multiplayer mode for COD Warzone.
Now, download the game from the PlayStation Stor.
2. Delete games and applications
Head to Settings.
Scroll down and select Storage.
Press X on your controller to open System Storage.
Go to Application.
Start deleting unwanted applications and games from your console.
3. Delete game data from Gallery
Head to Settings.
Scroll down and select Storage.
Press X on your controller to open System Storage.
Select Capture Gallery.
Now delete all the game data, such as screenshots, screen recording, etc., files that might be filling unnecessary space on your console.
Choose COD: Warzone game to access the game’s saved data.
Select Options and hit Delete.
Choose the saved data files to delete, then select Delete.
5. Clear cache on your console
Turn off your PlayStation 4 or 5.
Wait till the lights of the PlayStation 4 or 5 turns off completely.
Unplug the power cord from the socket.
Wait for about a minute or two.
Plug the power cord back into your console.
Turn on your console.
Why do I need so much storage to update COD Warzone?
The answer to this question comes in two folds. The first is that PS4 always downloads the entire game and any new updates that you install on your console.
If you already have COD Warzone installed on your PS4 and want to install the update, you should have free space totaling the game size + the size of the update.
That is, unfortunately, how the PS4 stores’ games. It creates a second copy of the game, installs the update and the new version of the game, and later deletes the older version.
What can you do to prevent this issue? Sadly, all you can do is follow the above steps to clear up space on your PS4 console. Alternatively, you can attach bigger hard drives and SSDs, or plug in a USB external hard drive to expand the storage.
To avoid facing a Warzone update not enough free space error, we recommend you clear up space on your console before you proceed to download an update.
Once upon a time, browsers were nothing more than access to the internet. While this still holds, they have evolved through the decades and do much more than connect you to the internet.
They have become very robust engines and can carry out complex functions such as gaming, streaming, etc. Modern browsers pack a lot of features and functionality and have become a one-stop shop for all internet activities.
With the expansion in the use case of browsers, there has been a need for more interaction with this user. However, this comes with the downside of exposing the user to privacy violations. Hence many modern browsers incorporate many privacy and security features to ensure you stay safe while browsing.
Unless your PC is only for typing, using a browser is as routine as drinking your morning coffee. Identifying the features that stand out the most and the benefits different browsers offer is vital to choosing the right browser.
The following are critical elements to consider:
Compatibility – Selecting an optimized web browser for your OS or computer is critical. So, for example, Edge may be ideal for Windows PCs, Safari may be suitable for Macs, Chrome may be the most HTML5-compatible, and so on.
Load Time – The speed with which a web browser retrieves, shows, and traverses information resources is called the load time. When your material takes a long time to load, you spend more time waiting for it to load than reading or using the content.
Security – Regarding a safe and enjoyable Internet experience, protecting and maintaining your identity and data integrity are significant priorities. It would help if you leaned more towards a browser that offers the most online protection.
Design – The design determines how easy it is for you to get around. How accessible are your favorite features? A great design will significantly increase your browsing experience.
?️Quick Tip:
Even though we’re here to discuss Chrome, Firefox, and Brave browsers, it’s worth noting that Opera One is another excellent option.
You can use all of the browser extensions discussed today and still have something additional advantages, like a built-in VPN and Ad Blocker. Another unique feature of Opera One is its built-in AI and modular AI-ready design, for other AI technologies integration.
Let’s go to the Brave Browser vs. Chrome vs. Firefox comparison without further ado.
Brave Browser vs. Chrome vs. Firefox
➡ Design
Brave
You can check statistics on the effectiveness of the browser at blocking trackers and adverts and saving time and bandwidth in the top-left corner. Also, you can view news that populates as you scroll down the dashboard.
You can switch between what you show in the larger space beneath. For example, if you choose binance.com, that info will appear where the Brave Rewards information appears.
Cards by Brave are the names of the connections, and you can conceal them individually by editing cards.
The browser has a pretty dashboard overall, and you can customize it more by navigating to the Settings button in the bottom-right corner of the page. For example, stats, background graphics, headlines, top sites, and the clock may be customized.
Chrome is unremarkable in its appearance. But then again, it’s a tool made to show websites, and the sites should take precedence over the browser.
That said, Chrome does a fantastic job blending into the backdrop — it’s stunningly simple.
Daily, you’ll only need to worry about a few settings, but hiding or showing the bookmarks toolbar, altering your default search engine, and managing cookie and browser history storage is simple.
With its support for parental control and multiple users, the Chrome browser is suitable for the whole family and remains a great option to download today.
Firefox has a clean white background with larger-than-normal, easy-to-read black lettering for most of its font.
You will see a top article list from Pocket on newly launched tabs. You are allowed to customize the page by clicking the Settings button in the top-right corner.
Additionally, it’s possible to turn off or on sponsored content, and Pocket Recommended stories, add extra rows of shortcuts, and turn off or on recent snippets and activities.
The remainder of the browser options is as simple to navigate. There are many of these so that you can experiment.
Brave’s servers are reported not to see or keep your surfing data and invariably will not be able to sell your information to any third parties. Your information is confidential and will remain on your local device till you erase it.
You can also change the privacy settings for individual sites or across your entire browser.
Do Not Track, Cookie Control, Script Blocking, Password Manager, Fingerprinting Prevention, and Tracker Blocking are some other privacy and security tools available.
Chrome
Regarding security, Chrome has set the bar high. Internally, its program architecture is sandboxed to prevent site code from infecting the remainder of your system.
Safe Browsing from Google offers the same anti-phishing and anti-malware capabilities as Firefox. In addition, if you visit a bad site, you’ll get a red warning screen identical to Firefox.
On the other hand, Chrome no longer issues warnings regarding sites with mixed content, which means some elements on a website are protected by HTTPS, and some are not. Firefox continues to flag this.
Chrome was the most recent major browser to offer a Do Not Track privacy setting, but it’s still hidden under the Advanced Settings.
Firefox
According to its website, the browser captures very minimal information about you. True, but your email address is used to set up your account after downloading Firefox.
The tracking protection blocks websites and ads that attach hidden trackers to capture your browsing data. Trackers will not see your online fingerprints if you use the ad blocker.
Its DOH (DNS over HTTPS) feature prevents ISPs from revealing your information. You can also manage the password keeper with a primary password. In addition, you’ll need to create separate main passwords for each device.
Firefox also features breached website alerts, automatic updates, fingerprint blocking, a built-in password manager, individual protection reports, encrypted data, and third-party cookie blocking.
➡ Performance
Brave
Brave’s browser performance results from its unique method of approaching Internet privacy. Brave speeds up the loading of websites by blocking third-party advertisements and trackers.
With reduced connection speed or older machines, this enhanced speed is undeniable.
Removing third-party advertisements from the page eliminates the need to load extra content because less bandwidth is needed, or less data is taken from the connection when fewer items are packed. Lower bandwidth also implies a speedier experience on each page.
While browsing a website, Javascript automatically runs as the base that most pages work with. Brave does not delete Javascript, but it executes less of the javascript.
Many people may be astonished to learn that Google Chrome no longer ranks #1 in many performance tests. This is because Chrome swept the browser industry when it first launched, thanks to its lightning-fast JavaScript speed.
That benefit was a big part of why it was so popular initially. It’s still quick, although rival browsers like Brave have since caught up to it, if not surpassing it, in terms of speed.
Firefox
Firefox is the slowest of the three browsers on desktop, coming in just below Brave and Chrome but outperforms Microsoft Edge. However, it beats Chrome in speed on mobile devices, but not by much.
Firefox has a significant initial footprint regarding system resources because it uses a lot of RAM even when a few tabs are open. However, it is more efficient than its competitors with more available tabs, utilizing substantially less RAM than the Google Chrome browser.
➡ Unique features
Brave
Unique features are the last metric we will consider in this Brave browser vs. Chrome vs. Firefox comparison, and here is what you must know.
You can begin by importing your favorites, bookmarks, autofill data, and history into Brave from Firefox or Chrome. Additionally, you may import an HTML file from the Settings menu.
You can decide what search engine to use from seven options: Google, Qwant, Bing, Startpage, DuckDuckGo, Brave, and Ecosia.
One of Brave’s notable features is the Playlist feature. You may import video and audio from various sources into your Playlist and listen to them offline or online.
You can earn tokens by seeing Private Ads on the browser. These can be used to assist content creators.
Chrome
Given exciting new entrants like Brave and notable upgrades in Firefox, Chrome has not been very innovative in terms of features of late.
However, it has recently been updated to address security flaws, increase coding functionality, and improve reliability. Unfortunately, it has also removed some features like the Notification Center. Unfortunately, these aren’t particularly eye-catching improvements, but they are nonetheless significant.
Chrome has integrated bookmark syncing for a while. Passwords, tabs, themes, preferences, extensions, auto-fill entries, web apps, and Omnibox history are synced in Chrome.
Firefox
Regarding security features, Firefox thrives but does not offer much that stands out in terms of standard functionality. While you generally won’t choose Firefox based on standard features, all of them are nice.
Users will also enjoy blocking auto-play of video and audio and seeing picture-in-picture pop-outs, among other features. Custom themes and dark mode are also available, as are pinned tabs, a built-in screenshot tool, form autofill, extensions, reader mode, and word check.
➡ Conclusion
Brave may be the way to go if you are interested in unique features, as it has innovated the most in recent years in this metric. However, we generally will stick to Google Chrome because while its design seems minimalist, it is the most robust and boasts the most extensive extensions library.
This implies that you will be able to carry out much more functions by using rich plugins specific to tasks you need to accomplish.
A UR Browser Review may open your eyes to more privacy features to look out for in a browser.
Microsoft’s Windows 10 is the most recent version of the operating system. This operating system includes a slew of features and apps, such as dark mode, Cortana integration, and a default browser, Microsoft Edge.
Windows 10 has a completely refined user interface that users enjoy. One of the most significant differences between Windows 10 and previous versions of Windows is the addition of a Settings App.
This Settings App is also known as the new Control Panel in Windows 10 because it contains the majority of the options and settings found in the native Control Panel.
There are lots of ways to access the Settings app in Windows 10:
Click on the Settings icon in the Start menu.
Clicking on the Settings tile in the action center.
Use Windows Icon + I Shortcut key.
Search the Settings app in the Start menu search bar.
However, most users prefer to open the Settings app from the Start menu. The issue now is that many users are reporting that the Settings app is missing from the Start menu in Windows 10.
It’s possible that this is happening because you accidentally set the Windows 10 operating system to hide the Settings app icon from the Start menu.
Is the Settings icon missing from your Windows 10 Start Menu? No worries, in this article you will learn how to restore it to the Start menu.
What to do when the Settings Icon is missing in Start Menu in Windows 10?
1. Restore the Missing Settings
As the Settings app is missing in the Start menu, you can directly search the Settings app in the Start menu search bar.
In the Settings app windows, you will see different settings, click on the Personalization settings.
Under Personalization, on the left pane, click on the Start tab.
Now on the right pane, scroll down and click on the link labeled Choose which folders appear on Screen.
Here you need to Turn on the Settings option to restore the missing Settings to Windows Start Menu.
By using the above method you can also add documents, file explorer, downloads, music, pictures, network, and homegroup to Windows 10 Start Menu.
2. Use the Windows troubleshooter
If the method discussed above does not work for you, you can utilize Microsoft’s troubleshooter to detect and resolve the Settings not appearing in the Start Menu issue.
Type in Troubleshooter in the Start Menu.
Click on the Other troubleshooter option.
Find the needed troubleshooter in the menu.
Simply launch the troubleshooter by pressing the Run button and allowing it to scan for and resolve the problem.
Follow the instructions from the wizard menu to finish the process.
We hope you find the above-mentioned method useful and that you are successful in restoring the missing Settings icon to the Windows 10 Start Menu.
If you have any difficulties doing this or have any questions about it, please leave them in the comments section. We would be delighted to assist you.