Order FIFA 18 from Amazon UK to receive Xbox Live Gold for 6 months at £14.99

With many Xbox One players getting their hands on FIFA 18 today, Amazon in the United Kingdom is offering up a promotion for those who purchase the game for Xbox One.

If you order FIFA 18 through Amazon UK, Amazon will provide 6 months of Xbox Live Gold at £14.99. Even better, for those who purchase FUT points, Amazon is offering 15% off 4,600 FUT points.

FIFA 18 Amazon

You can grab the promotion here by ordering FIFA 18 on Amazon UK.

How to fix DIFxDriverPackageInstall Error = 10 when installing your printer

DIFXDriverPackageInstall Error 10 is an error which occurs while installing one of the Brother printers. This error occurs when you want to install the drivers or printer software of the Brother products and it halts the installation process of the printer.

Brother Inc is a USA based company which has a wide range of products that include printers among others. The error DIFXDriverPackageInstall Error = 10 prevent the installation of the printer causing problems for their customers while installing their printers product.

However, it has been noted that this error is caused by corrupt system files or if all the files for the printer’s driver are not in a specific path. In order to solve the error DIFXDriverPackageInstall Error = 10, we have come up with these solutions.

How to fix DIFxDriverPackageInstall Error = 10

  • Run System File Check Scan
  • Use third-party software for damaged system files
  • Install the printer using Administrator privileges
  • Use Microsoft’s Printer Troubleshooter
  • Download the printer installer from the official website

Solution 1: Run System File Check Scan

First of all, the DIFxDriverPackageInstall Error = 10 error can be fixed by running a system file check process. This process can fix any corrupt system file hindering the installation of the Brother printer. System File Check (SFC) scans, checks, and fixes any corrupted files. To run a SFC scan on your Windows PC, follow these steps:

  1. Press Windows key and type “Command Prompt”
  2. Right-click on the Command Prompt and select “Run as administrator”DIFXDriverPackageInstall Error = 10
  3. Now, in the cmd prompt, type “sfc” and hit the “Enter” key.DIFXDriverPackageInstall Error = 10
  4. Here, Type “/scannow” without quotes and hit the “Enter” key.
  5. Finally, restart your Windows PC and try to install the Brother printer again.

This method will run a system file check and repair all corrupt system files most especially related to the DIFxDriverPackageInstall Error = 10 error which halts the installation process of the Brother printer.

Solution 2: Use third-party software for damaged system files

Another way to fix the DIFxDriverPackageInstall Error = 10 error would be to use a reliable third-party repair tool that focuses on repairing corrupt system files.

Without harming your user data, this type of program performs a complex scan and fixes your OS automatically, helping your device and all drivers to function properly.

Solution 3: Install the printer using Administrator privileges

Also, another method of fixing the DIFxDriverPackageInstall Error = 10 error problem is by using “Administrator privileges” to install the Brother printer. The installer can be acquired from the software CD that comes with the printer or can be downloaded from the Brother website. The steps for running the installer using admin privileges are given below:

  1. First of all, locate the setup file of the Brother printer.DIFXDriverPackageInstall Error = 10
  2. Then, right-click on the setup file.DIFXDriverPackageInstall Error = 10
  3. Select Run as Administrator and follow the prompts to complete installation.

Running the installer package with the admin privilege fixes the DIFxDriverPackageInstall Error = 10 problems. Ensure you enter the necessary details during installation and answer the prompts accordingly.

Solution 4: Use Microsoft’s Printer Troubleshooter

Furthermore, Windows users can use the Microsoft troubleshooting tool to fix the DIFxDriverPackageInstall Error = 10 problems during installation. Download and use the troubleshooter by using these steps below:

  1. Go to the link here.DIFXDriverPackageInstall Error = 10
  2. Download and install the troubleshooterDIFXDriverPackageInstall Error = 10
  3. Follow the prompts and install the printer again

After downloading the troubleshooter, launch the printer troubleshooter program and it will fix the DIFxDriverPackageInstall Error = 10 problem.

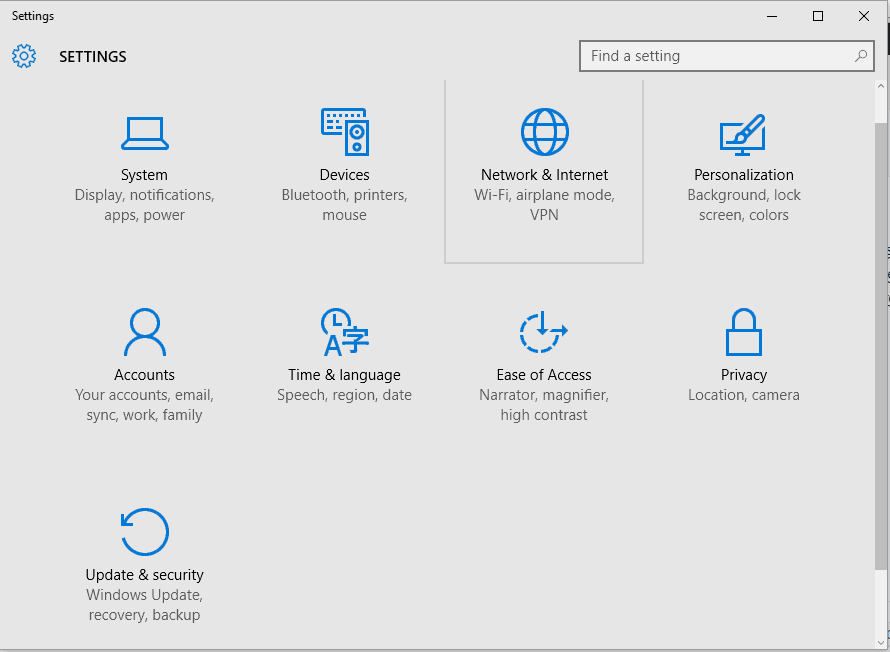
On Windows 10 Creators Update, you can use the built-in troubleshooter. Here are the steps to follow:

  • Go to Settings > Update > Troubleshoot
  • Go to the ‘Get up and running’ section and select ‘Printer’ > run the troubleshooter.
fix printer

Solution 5: Use Installer from the official website

In addition, DIFxDriverPackageInstall Error = 10 problem can be caused due to a corrupt installer file from the CD that came with the printer. Downloading installer files from the official can fix the installation problem. Follow these steps to download the installer from the official Brother website:

  1. First of all, go to this link here.DIFXDriverPackageInstall Error = 10
  2. Select your printer from the products menu.DIFXDriverPackageInstall Error = 10
  3. Locate the “Support” menu at the right panel and click on “Learn more”.DIFXDriverPackageInstall Error = 10
  4. Click on “Downloads on our online solution center”.DIFXDriverPackageInstall Error = 10
  5. Select your Operating System version and click on “Search”.DIFXDriverPackageInstall Error = 10
  6. Here, select your printer and download the installer under “Full Driver & Software Package” section.DIFXDriverPackageInstall Error = 10
  7. Install the printer using the downloaded installer.

In conclusion, these method can fix the DIFxDriverPackageInstall Error = 10 problem. Try any of the fixes mentioned above and comment below if you have any questions.

The extended attribute file on the mounted file system is corrupt [Fix]

ERROR_EA_FILE_CORRUPT is a system error and it usually appears when there’s a file corruption on your PC. This error usually comes with The extended attribute file on the mounted file system is corrupt message, and today we’re going to show you how to fix this error on Windows 10.

How to fix ERROR_EA_FILE_CORRUPT error?

Fix – ERROR_EA_FILE_CORRUPT

Solution 1 – Install the latest updates

Before we start fixing this problem, we highly recommend you to install the latest Windows updates. Windows 10 is a great operating system, but it has a few bugs. Microsoft is working hard to fix these bugs, and the best way to keep your PC bug-free is to keep Windows 10 up to date. By default, Windows 10 automatically installs the necessary updates, but sometimes it can happen that you miss an important update. To fix this problem it’s advised to check for updates manually. This is rather simple and you can do it by following these steps:

  1. Press Windows Key + I to open the Settings app.
  2. Go to Update & security section and click on Check for updates button.
  3. Windows 10 will check for updates. If updates are available, it will download and install them in the background.

After you install the necessary updates, check if the problem still persists. If the error still appears, proceed to the next solution.

Solution 2 – Temporarily disable your antivirus

In some cases your antivirus software can interfere with your system and cause this and other errors to appear. To check if your antivirus is causing the problem, you can try disabling it and check if that helps. If you don’t want to disable your antivirus software completely, you might want to try changing its configuration. Sometimes certain features of your antivirus can interfere with your operating system and cause this and other errors to appear. To fix the issue, you need to check your antivirus settings and disable the problematic features. This isn’t the simplest task, and you might have some problems finding and disabling the problematic feature on your own.

Alternatively, you can uninstall your antivirus and check if that solves the problem. Keep in mind that antivirus applications can leave certain files behind after you remove them. To ensure that all files are removed, you need to use a dedicated removal tool. Antivirus companies offer these tools for free, so be sure to download the one for your antivirus.

If uninstalling the antivirus fixes the problem, you might want to consider switching to a different antivirus software or updating your antivirus to the latest version.

Solution 3 – Copy your files from a backup

According to users, this problem can appear due to corrupted files. However, you might be able to fix it by restoring your system from a backup. This is relatively simple in Widows 10, but in order to use this solution you need to have a system backup ready.

Windows 10 comes with Backup and Restore feature that allows you to create your system image and use it as a backup. Using this feature you might be able to restore the corrupted files and fix the problem. Keep in mind that this solution requires you to have a backup ready, but if you don’t you can skip this solution since it doesn’t apply to you.

Solution 4 – Enter Safe Mode

Safe Mode is a special segment of Windows, and it’s perfect for troubleshooting. Safe Mode uses only the default drivers and applications, so if this problem is caused by a third-party app you’ll be able to tell that from Safe Mode. To enter Safe Mode, do the following:

  1. Open Start Menu and click on Power button. Press and hold the Shift key on your keyboard and choose Restart from the menu.
  2. Choose Troubleshoot > Advanced options > Startup Settings from the menu. Now click on the Restart button.
  3. List of options will now appear. Select any version of Safe Mode by pressing the appropriate keyboard key.

Once you enter Safe Mode check if the problem still appears. If not, it’s possible that the cause of the error is a third-party application.

  • READ ALSO: Read Apple and Linux file systems on Windows with this tool

Solution 5 – Perform a Clean Boot

As we already mentioned, sometimes third-party applications can cause this problem to appear. Third-party apps can sometimes start automatically with Windows, so you’ll encounter this problem as soon as you start your PC. To find which application is causing the problem, you need to perform a Clean boot. This is relatively simple and you can do it by following these steps:

  1. Press Windows Key + R and enter msconfig. Press Enter or click OK.
  2. Navigate to the Services tab. Check Hide all Microsoft services option and click on Disable all.
  3. Navigate to the Startup tab and click on Open Task Manager.
  4. When Task Manager opens, you’ll see a list of all startup applications. Select each application on the list and click on Disable button.
  5. After disabling all startup applications go back to System Configuration window and click on Apply and OK to save changes.
  6. After doing that, restart your PC to apply the changes.

Once your PC restarts check if everything is in order. If the error message doesn’t appear, it’s most likely that one of the disabled applications or services is causing the problem. To find out which application is the cause, repeat the same steps but enable applications one by one or in groups. After enabling a group of applications, restart your PC and check if the problem appears again.

Keep enabling applications and services until you find the problematic application. After you find it, you can keep it disabled, uninstall it or update it to the latest version and check if that solves the problem.

Solution 6 – Create a new user account

If this error keeps appearing on your PC, you might be able to fix it by creating a new user account. Sometimes your user account can be corrupted or not properly configured and that can lead to this error. To create a new user account, you need to do the following:

  1. Open the Settings app.
  2. Go to Accounts section. Select Family & other people from the left pane and click on Add someone else to this PC.
  3. Click on I don’t have this person’s sign-in information.
  4. Select Add a user without a Microsoft account.
  5. Enter the desired user name and click on Next.

After you create a new user account, switch to it and check if the problem appears. If the issue doesn’t appear on a newly created account, you need to move your personal files to it and start using it as your main account.

Solution 7 – Perform an SFC scan

If you’re getting The extended attribute file on the mounted file system is corrupt message, you might be able to fix it by performing an SFC scan. By doing that you’ll scan your system and repair the corrupted files. This is rather simple, and you can do it by following these steps:

  1. Press Windows Key + X to open Win + X menu and select Command Prompt(Admin).
  2. When Command Prompt opens, enter sfc /scannow and press Enter to run the command.
  3. The scanning process will now start. This process can take a while, so don’t interrupt it.

After the scanning is completed, check if the problem still appears. If SFC scan can’t fix the problem, you might want to run DISM scan instead. To do that, follow these steps:

  1. Start Command Prompt as an administrator.
  2. Enter the following commands:
    • DISM /Online /Cleanup-Image /CheckHealth
    • DISM /Online /Cleanup-Image /ScanHealth

    Keep in mind that these scans can take a while, so don’t interrupt them.

  3. If any of these scans finds corrupted files, you need to enter DISM /Online /Cleanup-Image /RestoreHealth command and wait for it to fix the problem. This process can take about 20 minutes or more, so don’t interrupt it.

After the scanning is finished check if the error is resolved.

Solution 8 – Perform System Restore

System Restore is a useful feature of Windows that allows you to restore your PC and fix many problems. If this problem started appearing recently, you might be able to fix it by using this method. To restore your PC, do the following:

  1. Press Windows Key + S and enter system restore. Choose Create a restore point from the menu.
  2. System Properties window will appear. Click on System Restore button.
  3. Once System Restore starts, click on Next. If available, check Show more restore points option. Select the desired restore point and click on Next.
  4. Follow instructions on the screen to restore your PC.

Solution 9 – Reset Windows 10

If the error still appears, you might want to consider resetting Windows 10 as a final solution. Windows 10 reset is similar to clean install since it will remove all your files from your system drive. To avoid any file loss, we strongly advise you to create a backup before resetting Windows.

We also have to mention that this method might require a Windows 10 installation media so be sure to create one using Media Creation Tool. After creating your backup and installation media you can reset Windows 10 by doing the following:

  1. Open the Start Menu, press and hold the Shift key, click the Power button, and choose Restart from the menu.
  2. Choose Troubleshoot > Reset this PC > Remove everything. If you’re asked to insert Windows 10 installation media be sure to do so.
  3. Select your version of Windows and choose Only the drive where Windows is installed > Just remove my files.
  4. You’ll see a list of changes the reset will perform. Once you’re ready to start, click on Reset.
  5. Follow the instructions on the screen to complete the process.

After you finish the process you’ll have a clean installation of Windows 10. Now you just have to install all your apps and move the personal files from the backup. This is a drastic solution since it will delete all files from your system drive, so use it as a last resort.

The extended attribute file on the mounted file system is corrupt message and ERROR_EA_FILE_CORRUPT error can cause some problems on your PC. These aren’t serious errors, and you should be able to fix them by using one of our solutions.

READ ALSO:

Skype officially releases their preview for Linux computers

Last month, the Skype team quietly released its preview desktop app on Linux. This is the same app that is also available in preview on Windows and macOS, but until now it wasn’t available as an update for the previous Skype for Linux beta app, which is based on Skype for web.

Starting today, Skype Preview is now officially available on Linux, and you can install it from the Skype Insider page. The preview app brings a redesigned UI with a black theme option, screen sharing support, the new message reactions and more.

Skype Preview supports screen sharing on Linux.

“The next generation of Skype for Linux is part of our broader strategy to rebuild Skype from the ground up with cloud technology—a more reliable platform that can scale to a much bigger audience,” explained the Skype team. “We’re making great improvements in the ways you like to connect with people and bringing your world closer together than ever before.”

The Skype Preview app is still a work in progress, but Microsoft is iterating faster than before with an app that is now truly cross-platform. The Skype team is still listening to user feedback, and you can share you ideas by clicking the heart button on the menu or by visiting the Skype for Linux online community.

Microsoft buys 65 acres in heart of Silicon Valley, eyes cloud and internet expansion

Microsoft has purchased 65 acres of land in the heart of Silicon Vally, and according to Mercury News, is eyeing a cloud and internet expansion. The company reportedly paid $73.2 million for the space running along State Route 237 between Alviso and Milpitas, soon joining other tech giants like SanDisk, and Polycom in the area.

Judging from proposals submitted to the local government, Microsoft could be opening up a 437,000 square feet facility. Based on local zoning laws, this means that about 2,200 people could be working in the new building. This is great news for the citizens in the area looking for work, since according to the original report, amenities in the area have also recently been constructed, including new stores and hotels.

Microsoft has not yet announced any official plans, but Christian Belady, general manager of Microsoft Cloud Infrastructure and Operations issued the following statement:

“We continuously explore opportunities to meet the needs of a future based on cloud computing and internet services, so we’re thrilled to find a great one in the heart of Silicon Valley.”

San Jose Mayor Sam Liccardo, meanwhile, welcomed Microsoft to the area:

“We welcome Microsoft’s substantial investment in San Jose, as it seeks to meet the world’s burgeoning demand for cloud capacity… I especially appreciate Microsoft’s sensitivity to the surrounding environment and its continued commitment to sustainable construction and operations.”

Although Microsoft is based out of Washington, the company still has a campus in Silicon Calley, nearby to Google’s headquarters. It’s great to see Microsoft expanding, as its Azure cloud services are becoming ever so popular.

Cuphead is now available on Xbox One, Windows 10 and Steam

Three years after it made a strong impression at E3 2014, Cuphead, the retro-looking run and gun platform game from indie developer Studio MDHR is now available on Xbox One, Windows 10 and Steam. Cuphead was clearly one of the most anticipated games to launch this Fall, and early reviews have been praising the 1930’s cartoon style as well as the challenging but rewarding gameplay.

The game is just a $19.99 purchase and it’s eligible for Xbox Play Anywhere if you buy it from the Windows Store. Cuphead also supports local multiplayer, and you should definitely try it with your friends who enjoy old school classics shoot-’em-ups such as the Contra or Metal Slug series. You can read Cuphead’s official description below:

Cuphead is a classic run and gun action game heavily focused on boss battles. Inspired by cartoons of the 1930s, the visuals and audio are painstakingly created with the same techniques of the era, i.e. traditional hand drawn cel animation, watercolor backgrounds, and original jazz recordings.

Play as Cuphead or Mugman (in single player or local co-op) as you traverse strange worlds, acquire new weapons, learn powerful super moves, and discover hidden secrets while you try to pay your debt back to the devil!

Do you expect Cuphead to become an instant classic, or do you think its challenging gameplay could make casual gamers unsure to try it? Let us know below.

Cuphead
Cuphead
Developer:
Studio MDHR
Price:
$19.99

Achievement Unlocked! Check out this epic Xbox One controller cake

A truly amazing individual by the name of Chelsey took her love of Xbox to the next level this week by creating a birthday cake in the shape of a white Xbox One controller. She posted some photos of it on her Twitter account and, as you can see, the end result is pretty impressive.

While the Xbox One Controller cake looks quite big, it’s actually on the small size as can be seen from a photo she tweeted comparing it to her fist.

The cake proved to be such a hit on Twitter that it garnered the attention of Microsoft’s own Phil Spencer who complimented the cook on her skills.

The cake also inspired others to share their own video game cakes such as this Xbox One cake…

and this PS4 one (which isn’t as powerful as the Xbox cake).

You can see more of Chelsey’s amazing cakes on her official Facebook page here.

Have you ever made a video game-themed cake? Let us know in the comments.

Jackbox Party Pack 4 announced for Xbox One

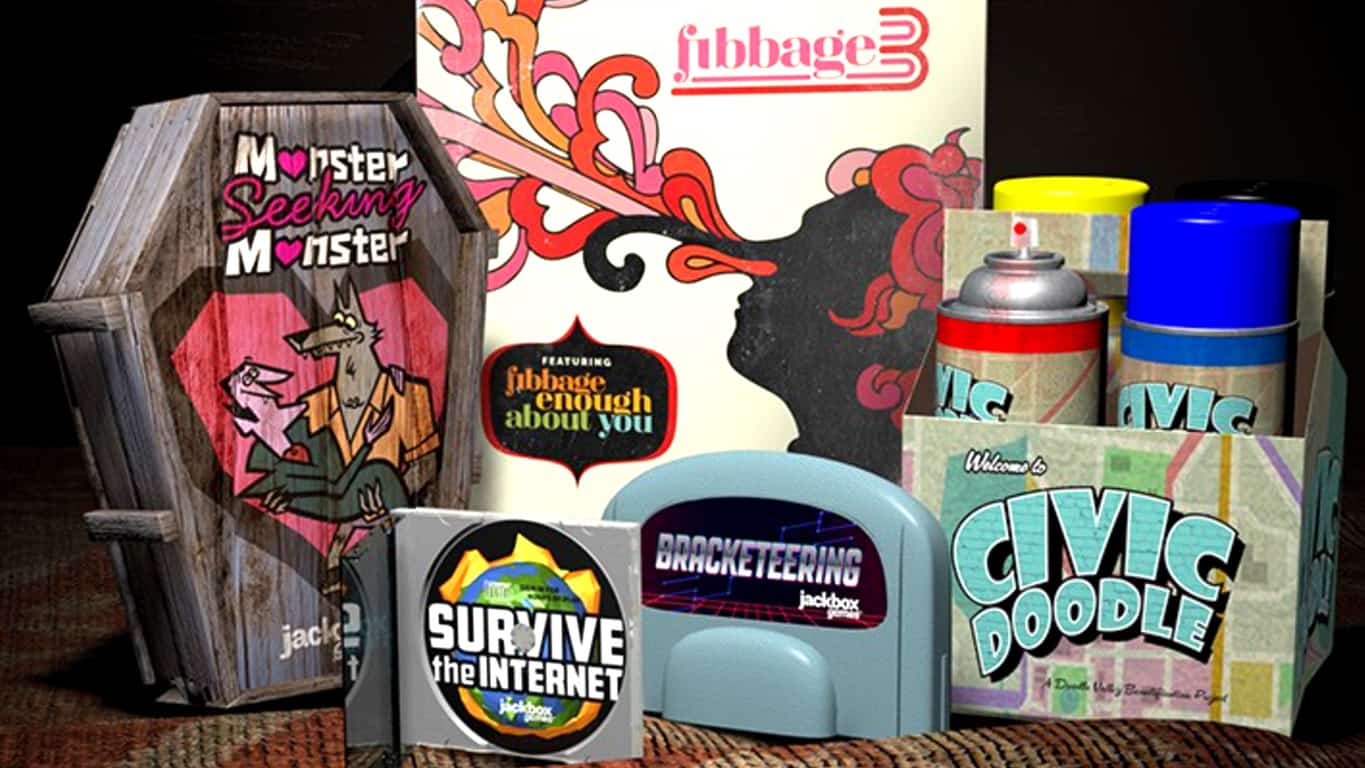
Jackbox Party Pack 4 has just been formally announced and is due for arrival on Microsoft’s Xbox One family of consoles on October 20th, just a few weeks away.

This latest entry in the Jackbox Party Pack series will come with five party games; Fibbage 3, Survive the Internet, Monster Seeking Monster, Bracketeering, and Civic Doodle. Here’s the full game description:

It’s the fourth collection of go-to party games from Jackbox Games! The biggest and fourthiest addition to this storied party game franchise features not five but FIVE AND A HALF crowd-slaying games!

Fibbage 3 (2-8 players)

The blanking fun sequel with all-new question types and the game mode Fibbage: Enough About You where you guess the weird facts about your friends.

Survive the Internet (3-8 players)

The web-based frame game where you twist your friends’ “online” comments in hilarious ways.

Monster Seeking Monster (3-7 players)

The spooky date-a-thon where you message and date fellow monsters with special powers.

Bracketeering (3-16 players)

The deranged debate match where you place smart bets on stupid arguments.

Civic Doodle (3-8 players)

The one-up art game where you compete to improve the town murals.

Play using your phones, tablets or computers. No extra controllers needed!

Plus EVEN MORE features just for streamers!

Are you excited for more Jackbox games to play with your friends, family, or viewers? Let us know in the comments below.

The mounted file system does not support extended attributes [Fix]

System errors such as ERROR_EAS_NOT_SUPPORTED can occur almost on any PC and they can cause certain problems. You’ll recognize this error by The mounted file system does not support extended attributes message, and today we’re going to show you how to fix it on Windows 10.

How to fix ERROR EAS NOT SUPPORTED error?

Solution 1 – Use Allwaysync

Few users reported this error message while trying to copy files and folders using the robocopy command. According to them, they are getting The mounted file system does not support extended attributes message every time they tried to use this command.

If you’re having this problem, you might be able to circumvent it by using tools such as Allwaysync. This is a file-synchronization tool and will allow you to sync files between desktop PCs, laptops, USB drives, and web servers. Several users reported that this tool worked for them, so be sure to try it out.

Solution 2 – Use MVFS drive

According to users, you might be able to circumvent this error by using MVFS drive or mapped view drive and run dir. Several users claim that this solution works, so you might want to try it out.

Solution 3 – Make changes to your registry

If you’re getting this error on your PC, you might be able to fix it by making few changes in your registry. This is rather simple and you can do it by following these steps:

  1. Press Windows Key + R and enter regedit. Press Enter or click OK.
  2. Optional: Before making any changes to the registry, it’s always a good idea to make a backup. Your registry stores important system settings, and if you make any wrong changes you can cause stability issues with your PC. To create a registry backup, you need to click on File > Export.
    Now you need to select a safe location for your backup. Set Export range to All, enter the desired file name and click the Save button.
  3. Navigate to HKEY_LOCAL_MACHINE\System\CurrentControlSet\Services\Mup key in the left pane.
  4. In the right pane, right-click the empty space and choose New > DWORD (32-bit) Value. Enter DisableDfs as the name of the new DWORD. Double click the DisableDfs DWORD to open its properties.
    The mounted file system does not support extended attributes
  5. Set the Value data to 1 and click OK to save changes.
  6. After doing that, close Registry Editor and restart your PC to apply changes.

Keep in mind that modifying the registry can lead to certain issues, and if you experience any problems after performing this solution you need to restore your registry. You can do that by running the file that you created in Step 2. Alternatively, you can go back to Registry Editor and manually undo the changes.

Solution 4 – Convert your external hard drive to NTFS file system

According to users, The mounted file system does not support extended attributes message usually appears when trying to create a backup via local network. Users claim that they are unable to create a backup on their external hard drive due to this error.

To fix the problem, some users are suggesting to convert your external hard drive to NTFS file system. There are several ways to do it, and if you already have your files on the external hard drive, you can convert it without losing your files. To do that, follow these steps:

  1. Press Windows Key + X to open Win + X menu and choose Command Prompt(Admin).
    The mounted file system does not support extended attributes
  2. Once Command Prompt opens, enter convert X: /FS:NTFS and press Enter to run the command. Be sure to replace X with the correct letter that represents your external hard drive. It’s crucial to use the correct letter or else you might accidentally convert the wrong hard drive, so be sure to double-check everything before starting.

Keep in mind that this process can take a while, so be patient and don’t interrupt it. Depending on the size of your external hard drive the process can take about an hour or sometimes more.

Another way to convert your external hard drive to NTFS is to format it. Formatting the drive will delete all your files from it, so use this method if you don’t have any important files on your external hard drive. If you have important files, you might want to back them up before formatting the drive. To format your external hard drive, do the following:

  1. Open This PC.
  2. Locate your external hard drive, right click it and choose Format.
  3. Set the File system to NTFS and enter the desired Volume label. Now click Start to format your drive.
    The mounted file system does not support extended attributes
  4. Wait for the process to finish.

After the process is finished, all files from your external hard drive will be removed, but your hard drive will use NTFS file system instead. After converting to the NTFS file system, the error should be resolved.

Solution 5 – Use Daemon Tools to mount the .wim file

Several users reported this error message while trying to work with .wim files. To fix this problem you need to mount the file with Daemon Tools and then read the files from it. This is a simple workaround, so be sure to try it.

Solution 6 – Remove the /B parameter

Users reported The mounted file system does not support extended attributes message while using robocopy command to copy files. According to them, this error occurs due to /B parameter. This parameter will copy files in Backup mode, and that can sometimes cause this problem. To avoid this problem in the future, be sure to exclude /B parameter from the robocopy command.

Solution 7 – Create a virtual hard drive

According to users, the The mounted file system does not support extended attributes message appears while trying to save certain files. This error appears with Paint.net, but it can also affect other applications.

According to users, the application tries to save files to the drive that doesn’t exist causing this error to occur. According to users, you can avoid this problem by creating a virtual drive and saving the file to it. To do that, follow these steps:

  1. Press Windows Key + X and choose Disk Management.
    The mounted file system does not support extended attributes
  2. When Disk Management opens, go to Action > Create VHD.
  3. Set the save location for your virtual hard drive and its size. Now choose VHD as the format and choose Fixed size. Click OK to save changes.
  4. The virtual hard drive will appear on the list of drives. Right-click it and choose Initialize Disk.
    The mounted file system does not support extended attributes
  5. Select MBR (Master Boot Record) and click OK.
  6. Now right click on Unallocated space and choose New Simple Volume.
  7. When new window appears, click on Next.
  8. Set the desired size of the drive and click Next. In most cases, it’s best to use the maximum size available.
    The mounted file system does not support extended attributes
  9. Select the desired letter and click on Next. Be sure to use the drive letter that the application is forcing you to save to.
  10. Select the formatting options and click on Next. In most cases you can leave these options unchanged.
    The mounted file system does not support extended attributes
  11. Now click on Finish to complete the process.

After creating a new virtual drive you’ll be able to save files on it without any issues. However, you’ll have to move the files from the virtual hard drive to the desired location. This is just a workaround, but it might be helpful to some users, so be sure to try it out.

Solution 8 – Check your antivirus software

In some cases, this error can be caused by your antivirus software. Even though antivirus software is a necessity, certain problems with it can occur. Antivirus tools can sometimes cause this and other errors to occur, and in order to fix it it’s advised to check your antivirus configuration.

Certain security features can interfere with your operating system, and if you’re having this problem you need to find and disable the problematic feature. This might not be an easy task, especially if you’re not familiar with system security so it might take you a while to find the problematic feature.

If you can’t find the problematic feature, you might want to try disabling your antivirus entirely. Keep in mind that your computer won’t be completely vulnerable even if you disable your third-party antivirus software.

If disabling the antivirus doesn’t fix the problem, you might want to try removing your antivirus software. Antivirus tools often leave certain files and registry entries behind even after you uninstall them.

These files can also cause problems and to remove them you need to use a dedicated removal tool. Antivirus companies usually have these tools available for download, so be sure to download one for your antivirus software.

After removing all files related to your antivirus, check if the problem is resolved. If so, you might want to install the latest version of your antivirus or switch to a different antivirus software.

Solution 9 – Install the latest updates

According to users, this problem can appear due to certain bugs and glitches in Windows 10. To keep your system bug-free, we strongly advise you to download and install the latest Windows updates.

In most cases, Windows 10 will automatically download and install the missing updates. However, sometimes you might skip an important update due to certain errors. To check if your Windows 10 is up to date, do the following:

  1. Press Windows Key + I to open the Settings app.
  2. Go to the Update & security section. Now click on Check for updates button. Windows will check for updates and if any updates are available they’ll be installed automatically.
    The mounted file system does not support extended attributes

After updating Windows to the latest version, check if this error still persists.

Solution 10 – Enter Safe Mode

Safe Mode is a special segment of Windows that runs with default drivers and applications. As a result, this mode is perfect if you want to troubleshoot your PC. To enter Safe Mode, you need to do the following:

  1. Open the Start Menu and click on Power. Press and hold the Shift key on your keyboard and choose Restart from the menu.
  2. Choose Troubleshoot > Advanced options > Startup Settings. Click the Restart button.
  3. Once your PC restarts, you’ll see a list of options. Select any version of Safe Mode by pressing the appropriate key.

After you enter Safe Mode, check if the problem still appears. If not, it means that certain application is causing this problem. To fix the issue, we advise you to remove any recently installed or updated applications and check if that solves the problem.

Solution 11 – Restore your PC

If you still have this problem on your PC, you might be able to fix it by performing System Restore. This feature is rather useful and it allows you to restore your PC and fix various problems. To perform System Restore, do the following:

  1. Press Windows Key + S and enter system restore. Choose Create a restore point from the menu.
    The mounted file system does not support extended attributes
  2. System Properties window will appear. Click on the System Restore button.
  3. When System Restore window opens, click on Next. If Show more restore points option is available, check it. Select the desired restore point and click on Next.
    The mounted file system does not support extended attributes
  4. Follow the instructions on the screen to complete the process.

After restoring your PC, be sure to check if the problem still persists.

Solution 12 – Reset Windows 10

If you’re still having this problem, you might want to try resetting Windows 10. This process is similar to clean install, so be sure to back up your important files before you reset Windows 10.

In addition, this procedure might require Windows 10 installation media, so be sure to create it using Media Creation Tool. After you create installation media and your backup, you can reset Windows 10 by doing the following:

  1. Open the Start Menu, click the Power button, press and hold the Shift key and click on Restart.
  2. Choose Troubleshoot > Reset this PC > Remove everything.
  3. If you’re asked to insert Windows 10 installation media, be sure to do so.
  4. Select your version of Windows and choose Only the drive where Windows is installed > Just remove my files.
  5. You’ll now see the list of changes the reset will perform. Once you’re ready to start, click on Reset.
  6. Follow the instructions on the screen to complete the reset process.

After the resetting process is done, you’ll have a clean installation of Windows 10. Keep in mind that all your files and applications will be removed from the system drive so you’ll have to install them again. This is a drastic solution so use it only if other solutions can’t fix this problem.

The mounted file system does not support extended attributes message and ERROR_EAS_NOT_SUPPORTED error can prevent you from copying certain files and cause problems on your PC. This isn’t a serious error, and you’ll be able to solve it by using one of our solutions.

READ ALSO:

Why should I download JavaScript code for Windows 10/11?

JavaScript is already integrated into your browser so that you do not have to download the actually language. Similar to CSS, JavaScript is  built in. The majority of browsers also offer a developer section, which allows users to configure how JavaScript works on their computer.

Therefore, you do not need to download the scripting language, but rather you need to download the written code you need to run a webpage. This is ideal for individuals who are not willing to spend countless hours on learning how to write JavaScript themselves.

On the other hand, if you do decide to start writing, you will need a text editor that both has syntax highlighting as well as code recognition. Fortunately, there are numerous text editors that can be used for JavaScript. However, if you are looking for an easy-to-use app, then we recommend Notepad ++. This is application is not only free, but fast and small in program size. It uses minimal CPU power, and is user friendly to top it off.

Nevertheless, the majority of beginners will look for already written code. If you are wondering how to download JavaScript code for Windows 10, then the information below will help you out.

What do I need to know if I want to download JavaScript code for Windows 10?

Fortunately, it is fairly easy to find written scripts that are free of charge on the internet. You will also find a wide variety of script built for just about anything. However, the first thing you should look out for when you are looking for code to download, is script that are copyright protected. In fact, most code that perform important tasks will most likely be copyrighted. Therefore, when you are looking for script to download, you will want to look for free downloads, instead of just copying JavaScript directly from a website.

Coders who know how to read and write JavaScript are however, allowed to read an existing code and write a script similar to it. As long as it is your own version, then you won’t get into trouble. Yet, it will always be safer if you downloaded free code from a website. Thankfully, the internet is full of such websites that offer all types of JavaScript coding. You only need to use a search engine to find what you are looking for.

Advantages of downloading JavaScript code for Windows 10

So, besides avoiding copyright infringement, downloading JavaScript can benefit you in several other ways. Downloading JavaScript code is convenient and can save you a good deal of time. Also, some websites offer detailed instructions on how to apply the coding you download from them.

While you may not be able to find free prewritten JavaScript that does everything for you. You can always use downloaded JavaScript as a foundation to build up from. Therefore, both experienced and amatuer coders can make use of JavaScript. Downloading JavaScript code for Windows 10 will simply make building a website a much easier process.

Of course, the best thing about it all is that it is all for free. This all means you can download script to experiment on, risk free. So naturally, this will be ideal for beginners who want to step into the world of coding.

Regardless of whether you are a beginner or expert at using JavaScript, you can make use of downloading JavaScript for Windows 10. There are simply too many benefits to it.

READ ALSO:

Microsoft unveils affordable Windows 10 S devices for Firstline workers

At the Ignite event held in Orlondo, California Microsoft pulled the wraps from a new range of Windows 10 S devices. The laptops from HP, Dell, Lenovo and Acer promise to offer a bang for the bucks with an affordable price tag. The Windows 10 S is Microsoft’s solution to slow Windows on low-end hardware. The operating system promises a better boot time and it doesn’t let users install any apps outside that of Windows Store.


The Windows 10 S is Microsoft’s take on Google Chrome which has slowly eaten up its share in the education market. Microsoft is rolling out the Windows 10 S globally and it only a matter of time before everyone has access to the same. The prices for the devices from the Microsoft OEM partners start from $275 and will be available from the next month.

At the event, Microsoft said that the Windows 10 S is best suited for Firstline workers who evidently “serve as the point of contact between an organisation and its customers or products.” Furthermore, the company has also launched a new plan called Microsoft 365 F1.This plan is specifically designed for Firstline Worker and can be used to train and upskill employees.

As per Microsoft the new Windows 10 S devices will minimize the total cost of ownership for Firstline Workers and will help them in the following ways,

  • Simple to use: Windows 10 S delivers a familiar Windows 10 experience so Firstline Workers can get productive right away. It is designed for performance, start-ups are quick and built to stay that way so that productivity never slows down, even on entry-level devices. It offers more seamless integration with hosted VMs for remote desktop and apps for firstline worker scenarios. And it is fully integrated with OneDrive, empowering Firstline Workers to work from anywhere.


  • Streamlined for security: Designed with Firstline Workers in mind, Windows 10 S has the goal of preventing the most common cyber attacks like ransomware and exploits. Applications built on the Universal Windows Platform or Centennial are delivered via the Windows Store ensuring they have been verified for security and integrity. And with Microsoft Edge, Firstline Workers are protected against phishing attacks and malicious software.


  • Easy to manage: Windows 10 S was designed with Modern IT in mind, including cloud-based identity and management with Azure Active Directory and Microsoft Intune. Together with Windows Update for Business, organisations can manage and update Windows 10 S devices using the power and convenience of the cloud.

This is what Bernado Caldas, GM, Commercial Marketing in Windows had to say, “Another important scenario for many businesses is the ability to customize and lock down devices to specific tasks or experiences for Firstline Workers and kiosks. In the Windows 10 Fall Creators Update, organizations can quickly set up and maintain locked down single purpose devices with improved tools in Windows Assigned Access. In future updates, we are also building additional lockdown, customization, and anti-theft capabilities.”

RELATED STORIES TO CHECK OUT:

0xc00d11d1 (0xc00d4e86) Audio Error: 3 Ways to Fix it

Audio errors are not as common as they were back in the day, but they still can pose an annoyance in Windows 10. And 0xc00d11d1 (0xc00d4e86) are a frequent issue for most.

The error code appears when users try to play audio files on native Windows applications, like Windows Media Player or Groove Music. The problem isn’t as grave as it sounds (no pun intended), and you should be able to resolve it in no time.

What is the 0xc00d11d1 (0xc00d4e86) audio error?

The error code basically indicates that the device is having trouble playing audio, and it’s generally a problem at the user’s end that triggers the error. Here are a few reasons for it:

  • Incompatible or outdated drivers: A common reason behind the error is when you are running outdated drivers or the ones installed are incompatible.
  • Misconfigured device settings: Often, when the device settings are not configured correctly, it will fail to function, and Windows will display the 0xc00d4e86 code instead.
  • Connection issues: Improper or loose connections, or even a damaged cable, can cause an audio error.

How do I fix audio error 0xc00d11d1 (0xc00d4e86)?

Before we proceed, try these quick tricks first:

  • Ensure the connections are in order and the cable is not damaged. Or you could unplug the cable and firmly place it back in.
  • Install the latest Windows updates if any are pending.
  • Connect the device to another computer to verify whether it’s a hardware problem to blame.

If none work, head to the solutions listed next.

1. Update sound drivers

  1. Right-click the Start button, and from the Power User menu, choose Device Manager.
  2. Expand Sound, video and game controllers.
  3. Right-click on the affected device and select Update driver.update driver to fix 0xc00d4e86
  4. Choose Search automatically for drivers and wait for the installation to complete.
  5. Restart your PC and check for changes while playing audio files.

The first action you should take when 0xc00d4e86 or similar errors emerge is to update the drivers.

Drivers are an essential part of any system. They are the common ground, the mutual language, the link that connects hardware and software. Even the most expensive playback device won’t comply without the proper sound drivers.

If Windows is unable to find one, it’s often wise to check the manufacturer’s website and manually install the driver.

2. Run the troubleshooter

  1. Press Windows + I to open the Settings app, and click on Update & security.
  2. Choose Troubleshoot from the left pane, and click on Other troubleshooters.
  3. Select Playing Audio and click on the Run button.run troubleshooter
  4. Choose the appropriate response when prompted and make the recommended changes to get things running.

The built-in troubleshooters often help fix a range of errors with minimal effort and should be one of the primary approaches you take when fixing the 0xc00d4e86 audio error in Windows 10.

3. Restore playback devices to default values

  1. Right-click on the Sound icon in the notification area, and select Playback devices.
  2. Right-click on your default playback device and choose Properties.
  3. Navigate to the Advanced tab.
  4. Click on Restore Defaults and confirm changes.Windows 10 audio error 0xc00d11d1 (0xc00d4e86)

Finally, if none of the solutions above were helpful, maybe this will serve you justice. Namely, certain users reported that the audio errors appeared after the recent Windows updates. Or you could also uninstall Windows updates, the problematic ones, to get things running.

That should resolve the 0xc00d4e86 audio error and other sound-related issues on your Windows 10 PC.

Before you leave, do check some quick tricks to improve the audio quality in Windows.

Finally, don’t forget to share your experience with audio errors in Windows 10 with us and other readers. You can do it in the comments section below.

Java 9: New features and download link

Java is one of the most well known programming languages in the world. On September 21st, 2017 the newest update has been released as Java 9. The recently released Java Development kit (JDK) 9 is filled with new, innovative features such as new modular files, new optional link time phases, more tool options, JMOD format, compilation improvements, and much more.

In this article, you will learn both how to download Java 9 and learn about its important developer features.

Java Developer Kit 9 Features

It is well known that the key feature in the JDK 9 is the Java platform’s Module System. This modular system will significantly help make Java more scalable. This means that it will function better on smaller devices. There are seven other important major features, and we will talk about them below.

1. Reactive Streans

The reactive programming feature in Java 9 is a highly popular tool to develop applications. It has been improved greatly, as Akka, Play, and Scala frameworks have been included into the Reactive Streams.

Furthermore, the Reactive Streams in Java 9 are implementing parallel and scalable applications which makes the platform run easier on smaller computing devices.

2. API Improvements

The stream interface has been improved with four new methods that allows users to create stream sources from data collections. Users will have far greater versatility when they are configuring stream elements.

3. Private methods

Since Oracle, the brand behind Java, wants to avoid users generating redundant code, they have added the private methods feature which will create more re-usability.

4. Micro benchmarks

Java 9 has been utilizing the Java Benchmarking Harness to increase its development process. Therefore, optimizations and warm up times will be largely improved.

5. New HTTP Client

The new HTTP client in Java 9 will offer increased performance and support in both WebSocket handshake and HTTP/2.

6. JShell

Read-eval-print functionality will be available in Java 9, thanks to Jshell. This feature allows users to evaluate both expressions and statements with an API. This also means that other apps have access to these capabilities. 

7. Increased Security

Java 9 not only has stronger security, but it has implemented a new string scheme that will optimize security updates.

Conclusion

All in all, JDK will be easier to navigate, especially on smaller computing devices. There will be improved security features and increased overall performance. Users will find it a good deal easier to develop and build codes. Here is where you can download Java 9.

READ ALSO:

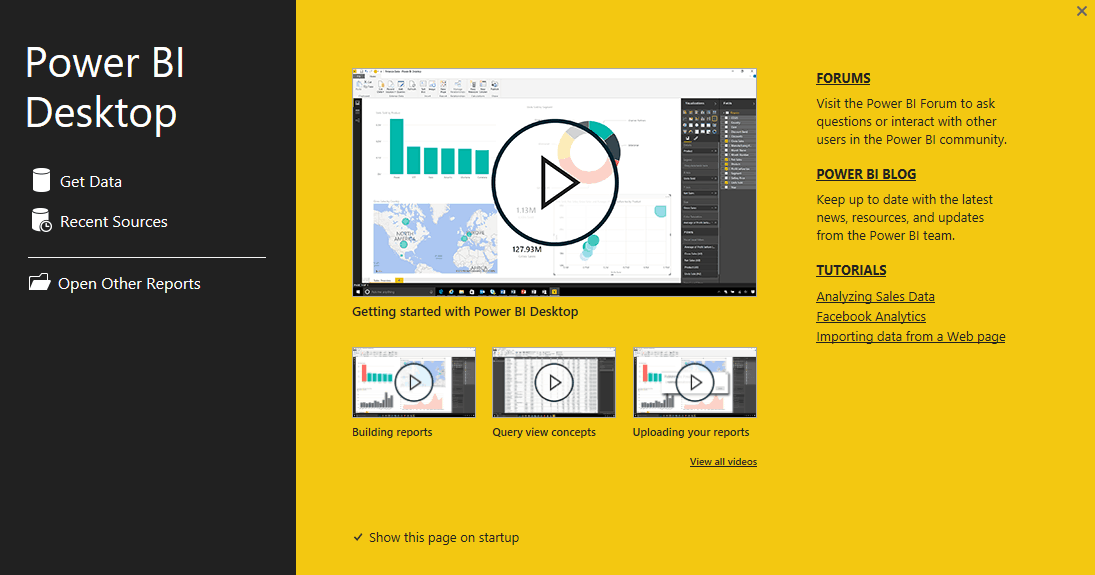
Download Power BI Desktop to create interactive reports

The Power BI Desktop app promises to be the most powerful authoring tool on the market, putting analytics at users’ fingerprints. Using it, you’ll be able to create interactive data visualizations and reports as well.

Power BI Desktop lands in Windows Store

Now, enterprise organizations can push the latest version of this app via the Windows Store. This way, their users will be able to enjoy the latest features and improvements. Because the app is included in the Windows Store, existing installations of the Power BI Desktop will automatically be updated without the need for any end user Windows administrator rights.

Power BI Desktop features

Check out the app’s features and functionalities below:

  • Using the app, you will be able to connect to hundreds of data sources both in the cloud and on premises.
  • You will get the opportunity to transform and mix data from multiple sources with the help of just a few clicks.
  • You can extend your data models with DAX formulas.
  • You have the chance to choose from over 100 cutting-edge data visuals. You can even create your own.
  • The app will allow you to dig as deep as possible into data to find patterns and discover all kinds of insights.
  • You can build your very own design with intuitive formatting tools and themes as well.
  • You will be able to create mobile reports for users who are on-the-go.
  • You will be able to share visual analytics with everyone in your business.
  • You can publish securely to the web or an on-premises report server.
  • You can also embed visuals in your app or website.

As you can see, this app is filled with great features and opportunities, so hurry up and download it right away from the Windows Store.

RELATED STORIES TO CHECK OUT:

Windows 10 taskbar search box receives an intelligent search experience

Enterprise customers got some great news with Microsoft’s addition of some new goodies. Check them all out below:

Intelligent search capabilities for Office 365 apps, services and the Windows 10 taskbar

Microsoft brings smart search features and experiences powered by Microsoft Graph. The company not only integrated highly improved search experiences with Office 365 apps and services but it also brought them to Windows 10 taskbar search box as well. Users are now able to search for applications, documents, email messages, people, and company resources across local devices and Office 365.

Microsoft 365, a bundle of products including Office 365, Windows 10 and management tools

Microsoft will also adding anti-phishing techniques and enhanced integration between cloud and on-premises identity threat detection features.

Windows 10, Office 365 and other management tools will be sold as a bundled product called Microsoft 365 and will sport editions aimed at schools and workers who spend most of their days dealing with customers.

New intelligent experiences will be available to enterprise customers in the following months

Enterprise customers will have the opportunity to search for documents are stored in OneDrive or in a group in SharePoint together with the documents being stored locally.

Enterprise users will be able to find their colleagues directly from Windows by searching them by their first name. This way, they will be able to find the people who they most work with and connect with them in an instant.

Microsoft will also support natural language queries in email search. For instance, you’ll be able to search for emails from a particular user with attachments with this search query.

RELATED STORIES TO CHECK OUT:

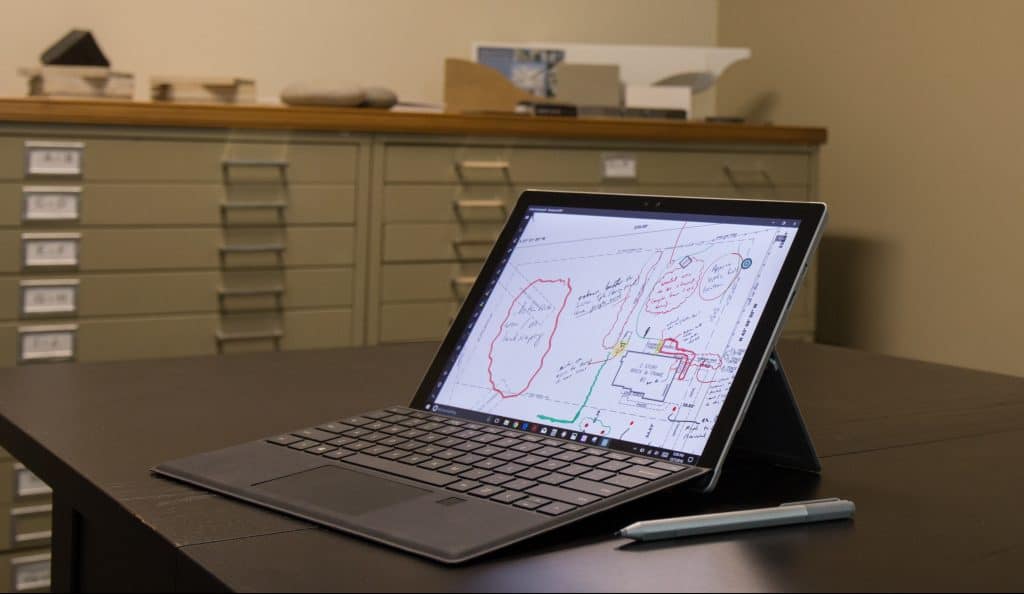
What to do when your Surface Pro 4 screen vibrates

Microsoft’s Surface Pro 4 is touted as one of the thinnest, lightest, fastest and most powerful devices to use, among its rivals, including the MacBook.

This device features not just an ergonomic cover and fingerprint reader, but also a 12.3 inch PixelSense display that is 30 percent more powerful than previous Surface Pro devices in the series.

Despite its fantastic features, beautiful build and amazing display, the Surface Pro 4 has been known to have a few issues in usage including screen flickering and vibration, as we reported in a previous article.

This article outlines some of the solutions you can use to get your Surface Pro 4 device up and running in as far as resolving the screen vibration issue goes.

In order to understand where the screen vibration problem stems from, here are a two main known symptoms:

  • Intermittent ‘phantom’ touch input on the screen, which may disrupt any applications running on the machine, or affect and/or interfere with usability of the device
  • Few random screen touches then some correct functioning, then the process recurs

If your Surface Pro 4 device experiences the two symptoms described above, there are a few ways of going about managing the situation, if not fixing it altogether.

However, sometimes, this issue may be brought about by three causes such as physical damage to the machine, type of software installed, or electromagnetic interference from nearby sources.

Therefore, in the event that some of these solutions do not work, there’s need to check on these and other possible external factors that may bring about the problem.

Vibration of the screen on your Surface Pro 4 laptop is largely caused due to problems affecting the calibration of your device’s touch screen. Here’s how to resolve the issue.

How to fix Surface Pro 4 screen vibration

  1. Request for an exchange if still under warranty
  2. Perform a two-button reset
  3. Download Microsoft’s hotfix

Solution 1: Check your Surface Pro 4 device warranty

If you recently got a Surface Pro 4 device, and you’re still under warranty (in the US), visit a physical Microsoft retail Store and request for an exchange. You can also request for an examination and replacement set up while you are at the Microsoft Store.

Solution 2: Two-button reset

Here’s how to resolve the screen vibration issue on your Surface Pro 4 device using this solution:

  • Swipe from the right
  • Tap or click Settings
  • Click Power
  • Click Shut down to switch off your device (you can also press the power button down for 30 seconds to do this)
  • Once the device is off, press and hold the increase volume button and power button simultaneously for 15 seconds, then release both at the same time. This may flash the Surface device logo on your screen, but keep holding it down for a minimum of 15 seconds
  • Upon release of the two buttons, give the device about 10 seconds
  • Press and release the power button to turn on your device

If this doesn’t help, go to solution 3.

Solution 3: Hotfix for your Surface Pro 4 device

Microsoft has availed a supported hotfix intended to correct the issue of screen vibration, so this solution is to be applied to your Surface Pro 4 device that is experiencing the same.

To determine whether the hotfix is available, check the ‘Hotfix Download Available’ section. If it doesn’t appear, get in touch with Microsoft’s Customer Service and Support by submitting a request to get the hotfix, and they’ll get back to you.

Note: you will find that the product name on the download page is listed as Surface Pro 3, which is incorrectly inputted owing to database limitation. However, the products that are applicable for the specific hotfix are both the Surface Pro 4 and Surface Book.

A touch calibration tool is provided, which saves calibration information to the touch firmware in the device, allowing you to reimage your device, or reinstall Windows after running the tool.

To use this tool, ensure the following is in place:

  • The device has at least 25 percent battery power on which the device is running on
  • The device’s screen is away from any fluorescent lighting and/or other bright lighting
  • Power supply is disconnected to the device
  • The device has the latest firmware and Windows drivers updates
  • There are no devices plugged into the USB ports

Once you have these requirements in place, then you can install and run the tool.

Follow these steps to install and run the touch calibration tool, but do not touch the screen while this process is underway:

  • Download hotfix 3165497
  • Run the hotfix once download is complete
  • Extract the files to a folder of your choice
  • From the folder, find CalibG4.exe file
  • Run the CalibG4.exe file

Upon completion, the tool will display a ‘PASS’ status, then take two minutes to complete calibration.

Note: in the event your device freezes, or crashes while the touch calibration tool is running, or the tool doesn’t complete calibration, do the following:

  • Press down the power button for about 30 seconds to switch off your device
  • Turn on the device
  • Run CalibG4.exe again

If none of the above solutions worked, then contact Microsoft Support for further options.

Use the comment section below to let us know which solution worked for you.

RELATED STORIES TO CHECK OUT:

The specified extended attribute name was invalid [Fix]

Computer errors can occur on almost any PC, and several users reported The specified extended attribute name was invalid error message while trying to copy certain files. This error is also known as ERROR_INVALID_EA_NAME, and today we’re going to show you how to fix it on Windows 10.

How to fix ERROR_INVALID_EA_NAME error?

Fix – ERROR_INVALID_EA_NAME

Solution 1 – Check your antivirus

Antivirus tool is a necessity since there are many threats online. However, certain antivirus tools can interfere with Windows and cause this error to occur on your PC. Some antivirus tools have certain features that can interfere with Windows and prevent you from copying files. To fix the issue, you need to check your antivirus configuration and disable the problematic feature. This isn’t a simple task, especially if you’re not familiar with computer security.

Another solution that you can try is to disable your antivirus temporarily. If disabling the antivirus doesn’t help, you might want to try removing your antivirus software. To completely remove your antivirus software, many users are recommending to use a dedicated removal tool. Antivirus tools tend to leave certain files and registry entries even after you remove them, and sometimes these files can also cause this problem to occur.

Many antivirus companies have dedicated removal tools available for download, so be sure to download and use the removal tool for your antivirus software. After you remove your antivirus, check if the problem still appears. If not, you might want to switch to a different antivirus tool or try installing the latest version of your antivirus software.

Solution 2 – Enter Safe Mode

Safe Mode is a special segment of Windows that runs with default applications and drivers, so it’s perfect for troubleshooting. Since these errors can occur due to third-party software, it’s always a good idea to check if the problem appears in Safe Mode. To do that, you need to follow these steps:

  1. Open the Start Menu, click the Power button, press and hold the Shift key on your keyboard and click on Restart.
  2. Choose Troubleshoot > Advanced options > Startup Settings. Now click on Restart button.
  3. After your PC restarts you’ll see a list of options. Select any version of Safe Mode by pressing the corresponding key.

Once you enter Safe Mode check if the problem still appears. If not, it means that the most likely cause for your problem is a third-party application.

Solution 3 – Perform the Clean boot

To find out which application is causing this problem, many users are recommending to perform Clean boot. Many applications and services tend to start automatically with Windows, and sometimes these services and apps can interfere with it and cause this and other errors to occur. To perform Clean boot, you need to follow these simple steps:

  1. Press Windows Key + R and enter msconfig. Press Enter or click OK.
  2. System Configuration window will now appear. Go to Services tab and check Hide all Microsoft services option. Now click on Disable all button.
  3. Now go to Startup tab and click on Open Task Manager.
  4. List of all startup applications will appear. Select any application on the list and click on Disable button. Now repeat the same steps for all entries on the list.
  5. After disabling all startup items you need to go back to the System Configuration window and click on Apply and OK to save changes.

After disabling all startup items you need to restart your PC to apply the changes. Alternatively, you can log out and log back in to your Windows account and check if that solves the problem. If disabling the startup applications fixes the problem, you should repeat the same steps and enable applications one by one until you find the one that is causing this problem. Keep in mind that you need to restart your PC or log out and log back in to apply the changes. After finding the problematic application, you can keep it disabled, remove it from your PC or update it to the latest version and check if that solves the problem.

Solution 4 – Remove the problematic applications

As previously mentioned, sometimes third-party applications can cause this problem to appear. To fix the problem, you need to find and remove the problematic application from your PC. To do that, you need to follow these steps:

  1. Press Windows Key + I to open the Settings app.
  2. Go to Apps section, locate the problematic application on the list and click Uninstall.
  3. Follow the instructions on the screen to remove the application.

If you don’t want to use the Settings app, you can remove the applications by doing the following:

  1. Press Windows Key + S and enter control panel. Choose Control Panel from the list of results.
  2. Select Programs and Features from the list.
  3. List of applications will now appear. Find the problematic application on the list and double click it to remove it.

Keep in mind that almost any application can cause this problem to appear, so be sure to remove any recently installed applications and check if that solves the problem.

Solution 5 – Copy the files to a DVD disc

Several users reported The specified extended attribute name was invalid error message while trying to copy files from Mac to PC. According to users, they were unable to transfer files from Mac to PC via network. If you have this problem, you can try copying your files to an optical disc and then transferring them to another computer. In addition, you can try copying the files to a USB flash drive, but some users reported that this method didn’t work for them.

It seems that this error occurs while trying to copy iTunes library from Mac to PC, but it can also appear with other types of files. If you’re having this error on your PC, be sure to try this workaround.

Solution 6 – Update your NAS firmware

According to users, this error occurs when trying to copy files from Netgear NAS to your PC. This can be a problematic error, but according to users you can fix it by updating the firmware on your NAS. Updating the firmware is advanced and potentially dangerous task and you can cause irreversible damage to your NAS if you’re not careful. To ensure that update process goes smoothly, we advise you to check the instructions manual and follow the instructions carefully.

Solution 7 – Perform System Restore

If this error started appearing recently, you might be able to fix it by performing System Restore. This is a relatively simple procedure and you can do it by following these steps:

  1. Press Windows Key + S and enter system restore. Choose Create a restore point from the menu.
  2. System Properties window will now appear. Click on System Restore button.
  3. Once System Restore window opens, click on Next. Check Show more restore points option, select the desired restore point and click on Next.
  4. Follow the instructions on the screen to complete the restoration process.

After you restore your PC, check if the problem still appears.

Solution 8 – Create a new user account

Sometimes The specified extended attribute name was invalid error can appear if your user account is corrupted. Issues with user accounts can occur once in a while, and if you’re having this problem, we suggest that you create a new user account. This is rather simple and you can do it by following these steps:

  1. Press Windows Key + I to open the Settings app.
  2. Go to Accounts section and choose Family & other people from the left pane. Now click on Add someone else to this PC.
  3. Click on I don’t have this person’s sign-in information.
  4. Now click on Add a user without a Microsoft account.
  5. Enter the desired user name and click on Next.

After creating a new user account, you need to switch to it and check if the problem appears on a new account. If not, transfer your personal files to the new account and use it as your main account.

Solution 9 – Reset Windows 10

If this error still persists, you might be able to fix it by resetting Windows 10. Resetting Windows 10 is similar to clean install, so the process will remove all your files and applications from your system drive. To avoid file loss we strongly advise you to create a backup before performing the reset. In addition, you might need to use a Windows 10 installation media, so be sure to create one using Media Creation Tool. After creating an installation media and your backup, you can reset Windows 10 by following these steps:

  1. Open the Start Menu, click the Power button, press and hold the Shift key and click Restart.
  2. Choose Troubleshoot > Reset this PC > Remove everything.
  3. If you’re asked to insert installation media be sure to do that.
  4. Select your version of Windows and choose Only the drive where Windows is installed > Just remove my files.
  5. You’ll see a list of changes the reset will perform. Click on Reset button to start the process.
  6. Follow the instructions to complete the process.

After resetting is finished, you’ll have a new installation of Windows 10. Now you just have to transfer your backup and install the necessary applications. After doing that, the error message should be fixed completely. This is a drastic solution, so use it only if other solutions can’t fix the problem.

The specified extended attribute name was invalid and ERROR_INVALID_EA_NAME errors can be problematic, but you should be able to fix them easily by using one of our solutions.

READ ALSO:

How to prepare your old PC for sale

When I got my 2017 Surface Pro, I didn’t have much use for my old Surface Pro 4, so I had to get it ready to sell online. My Surface Pro 4 (SP4) had the latest Windows 10 Insider build on it and in order to sell it online, I would need to factory reset the SP4 back to the Windows 10 Creators Update. While I enjoy having the latest Windows Insider builds on my device, a prospective buyer might not. Here’s how I went about factory resetting my SP4 in order to sell it.

Microsoft gives you two easy options when you want to delete everything off your PC:

  1. Keep my files – Removes apps and settings, but keeps your personal files.
  2. Remove everything – Removes all of your personal files, apps, and settings.

The “Keep my files” option is best if you want to refresh your Windows 10 PC if it is running slowly and you want to refresh your computer or go back to a previous version of Windows 10. This option will keep all of your personal files, but you will need to re-install any programs you installed that are not a part of the stock Windows 10 apps that came with your PC.

Microsoft, Windows 10, Clean, Erase

Once you pick “Remove everything,” you’ll have two different options:

  1. Just remove my files
  2. Remove files and clean the drive

The “Remove everything and clean the drive” option is more suited for when you are looking to recycle your Windows PC and sell it online through eBay or another venue. “Just remove my files” will remove all your files that are not backed up through OneDrive or another cloud storage option.

“Remove files and clean the drive” will do exactly what it says it does; remove all traces of your Microsoft account, remove all your files, and fully clean the drive. As you can tell, this option is for those that are looking to sell or recycle their old PC. Any files that you have backed up via OneDrive will not be affected and will remain accessible online via OneDrive.

Microsoft goes into great detail on what each Windows 10 recovery option does to your PC. It is important to keep in mind that if you have a large hard drive (wink!), it may take several hours to completely clean your drive. In case you decided to wanted to know how secure Microsoft’s option is of cleaning your drive when compared to a third party option, there is extensive information available

If you choose “just remove my files,” Microsoft will do a quick format. Whereas “fully clean my drive” does something completely different, as Microsoft notes:

“The behavior of this option will vary depending on if the drive is encrypted with BitLocker. If the volume is not encrypted, then this option performs a full format of the disk and writes zeroes to every sector. This will take quite a long time. This is similar to running the command below [in Command Prompt]:

format.exe c:\ /P:0

If the volume is encrypted with BitLocker, only a quick format is performed, as that wipes all of the information necessary to decrypt the disk. With no way to decrypt the disk, the data is effectively lost.”

Once your Windows 10 PC finishes the process of removing all your files, and restarting. Your PC should enter back into the Windows 10 setup process as if you just bought the device. Now, you can post your old PC on eBay, give it to someone as a gift, or donate your old PC to a worthwhile organization.

You can rest assured that your Windows 10 device is wiped clean of your files and is ready for someone else to use. Personally, I sometimes complete this process twice to make sure that there are no issues or old content remaining on the my old Windows 10 PC.

Quick, tune in to this special Ignite edition Windows Insider webcast on Mixer

The Windows Insider team is hosting a special webcast, and you won’t want to miss it! It’s set to kick off in just a few minutes, so be sure to watch on Mixer, as there likely will a lot of Ignite news discussed!

Previous webcasts covered topics such as a deep dive on Microsoft’s engineering systems, and the company’s flighting systems for Windows 10. So, be sure to watch this special edition webcast, as you never know what surprises the Windows Insider team will have in store for you! Plus, the webcast is also a great way to connect with the Windows Insider team and have them answer your burning questions!

Digital pre-orders open for Dungeons 3 on Xbox One

Dungeons 3 is now available to digitally pre-order on the Xbox One. All pre-orders made before the game’s October 13th release date will receive the Undead Throne Room downloadable content (DLC) for free. This DLC adds a unique skin that changes the appearance of an in-game location.

Here’s the official game description and link.

At last, the Dungeon Lord has successfully united the forces of evil and established his dark empire. Time for the next step in his most diabolical quest: expansion!

Through enticing the dark elf priestess Thalya from the fluffy clutches of the surface world to become his chief lieutenant, the Dungeon Lord has found a way to direct his campaign of conquest from the confines of his underground lair. With Thalya on the front line, and the united forces of evil to support her, players will have to use every trick in the book to best those do-gooders of the overworld, once and for all!

Pre-order Dungeon 3 on Xbox One

Are you a Dungeon fan and will you pre-order this title? Let us know in the comments.

Game of Thrones Season 7 is now available in the Windows Store

The latest season of Game of Thrones, Season 7, is now available in full in the Windows Store on Windows 10 PC and Mobile and Microsoft’s Xbox One family of consoles.

All seven episode of Season 7 are available in both High and Standard Definition and can be downloaded on PC and Mobile and streamed on console. Here’s the official season synopsis.

The long winter is here. Throughout seven thrilling episodes, the penultimate Season 7 focuses on a convergence of armies and attitudes that have been brewing for years. As the season begins, Daenerys Targaryen–accompanied by her Unsullied army and emboldened by Dothraki/Ironborn allies and her lethal trio of dragons–has finally set sail for Westeros with Tyrion Lannister, her newly appointed Hand. Jon Snow has apparently consolidated power in the North after his spectacular conquest of Ramsay Bolton and the return of Winterfell to Stark control. In King’s Landing, Cersei Lannister, bereft of any surviving heirs, has successfully seized the Iron Throne. But as these and other factions drive towards new alliances or (more likely) violent conflicts, the cold specter of another, apocalyptic threat–in the form of an army of undead White Walker–threatens to undermine the status quo and obliterate the outcome of these smaller, all-too-human rivalries.

Do you buy TV seasons in the Windows Store or do you prefer to watch media another way? Share your thoughts with us in the comments below.

Game of Thrones
Game of Thrones
Developer:
HBO
Price:
Free

Windows Experience Index freezes your PC? We have the solution for you

The Windows Experience Index is a popular Windows feature available on Windows PCs from Windows Vista to Windows 7. It rates and improves computer performance by generating a performance rating score.

However, the Windows Experience Index was removed from Windows 8.1 and cannot be found in subsequent Windows versions as well. The good news is that there is dedicated software that helps you bring the WEI back.

Many NVIDIA graphics cards users experience constant freezing while running the Windows Experience Index feature.

If you have been experiencing computer freezing issues while running the Windows Experience Index feature, this post will help you fix the problem.

How to fix Windows Experience Index freezes

Method 1: Update Graphics Drivers

Obsolete or old graphics drivers could probably be responsible for the Windows Experience Index freezing problem. You can update your PC’s graphics driver by following these steps:

  1. First of all, press the “Windows” and “R” key to launch the “Run” program.
  2. In the Run windows, type devmgmt.msc and click “OK” to open “Device Manager”.windows experience index freezing
  3. From the Device Manager left panel, expand the Display adapters category and right-click on the video card.windows experience index freezing
  4. Select “Update Driver software” and follow the prompts to apply the update.
  5. Finally, after video driver on your PC has been updated, restart your PC.

Note: After updating your graphics driver, test Windows Experience Index again to make sure it runs smoothly. Another way by which you can update your PC’s graphics driver is by visiting your PC’s manufacturer website so as to download and install the video card driver for your PC’s model.

Otherwise, it’s very easy to update all your drivers with automated support offered by software like Fortect Driver Updater. The tool can identify missing or outdated drivers and install them correctly without any issues.

Method 2: Disable DirectX Video Acceleration (DXVA)

DirectX Video Acceleration (DXVA) is a Microsoft API used for video decoding to be hardware accelerated. Disable DXVA to fix Windows Experience Index freezing problem. If DirectX Video Acceleration is disabling, Windows Experience Index will be able to run flawlessly. Follow these steps in order to disable DXVA:

  1. Download DXVA from here, install, and run it. (DXVA requires .NET Framework and Microsoft Visual C++ 2008 Runtime to run).
  2. Proceed to the DSF/MFT tab and click the DSF/MFT Viewer
  3. Go to the “DirectShow and Media Foundation” menu, locate the entries that are shown in red (these red entries are DXVA-accelerated).
  4. Here, click Microsoft DTV-DVD Video Decoder, or on any of the red entries, and at the lower-right corner, click on GPU Acceleration and Disable DXVA.
  5. Launch Windows Experience Index

Note: Run Windows Experience Index program to test the solution.

Method 3: Update your PC BIOS

Another reason for the Windows Experience Index freezing problem could probably be due to problems arising from your graphics hardware. Upgrading your BIOS can fix your graphics hardware problem. Basic Input-Output System (BIOS) is embedded software on a motherboard.

windows experience index freezing

BIOS is the first software which the PC loads enabling PC components like CD drives, keyboards, speakers, and mice to work from the moment you turn it on. Follow these steps to update your PC BIOS:
1. Press the “Windows” key and “R” key to open the Run box.
2. In the Run box, type msinfo32 and hit “Enter” to display System Summary.
3. Write down your BIOS version number and date before you proceed, backup your BIOS using Universal BIOS backup Toolkit available for download here.
4. Therefore, visit your PC manufacturer’s website before you download the BIOS update for further instructions.
5. Download and install the BIOS update and follow the prompts
6. Your PC will automatically restart.
7. Hence, Watch the monitor to see if the computer displays the BIOS Utility keys and enter them to initiate BIOS utility.
8. Also, look for an option to “Restore Defaults” or “Load Fail-Safe Defaults”. This may be on any page of the tabbed menu. Use the arrow keys to navigate, and follow the on-screen instructions.
9. Finally, after done configuring the BIOS, save the settings, and exit the BIOS utility.

NOTE: Power loss on your PC while updating your BIOS is dangerous and may destroy your motherboard. Ensure you have power backup in place before you update your BIOS.

You may consider using a UPS or charging your laptop fully and plug into wall power. In addition, check your PC manufacturer’s website before updating your BIOS.

We hope that the solutions listed above helped you fix your Windows Experience Index freezing problem. Do you know of any method that we did not mention? Feel free to drop a comment below.

Fix: Error 0xc00000f while booting Windows 10/11

If we were to to categorize Windows boot error 0xc00000f in Windows 10, that’s somewhat analogous to the Blue Screen of Death.

This is a severe error and may be triggered by various factors. However, we made sure to enlist all of them below in order to help you. If you’re having a hard time with this error, make sure to check for the possible solutions below.

How to fix critical boot error 0xc00000f in Windows 10

  1. Update Windows and your software with the latest drivers
  2. Rebuild BCD and MBR
  3. Check HDD
  4. Perform a clean reinstall

fix 0xc000000f: Error attempting to read the boot configuration data
This is the screen you’re getting with the 0xc000000f error. Read below on how to fix it.

Solution 1 – Rebuild BCD and MBR

This might come as a disappointment, but most of the time, faulty HDD is the main cause. On the other hand, if someone tampered with MBR (Master Boot Record) or BCD (Boot Configuration Data), there’s a chance that their respective configurations are either corrupted or completely gone.

In order to repair them, you’ll need the bootable media drive, DVD or USB, with the Windows 10 installation. If you’re unable to create it on the troubled PC, you can do it on any other – regardless of the system. Just download the Media Creation Tool and configure a USB flash stick or burn the setup to DVD.

Finally, once you’ve obtained the installation drive, follow the instructions below closely in order to repair the Master Boot Record:

  1. Insert the Windows 10 bootable media (USB stick or DVD) and restart your PC.
  2. Set the bootable media with the Windows 10 installation as the primary boot device. Change the boot order by either entering the Boot menu or within BIOS settings.
  3. Press any key to boot.
  4. The loading process of the installation file should commence.
  5. Select preferred language, time/format, and keyboard input. Hit the ”Next” button.
  6. In the following dialog box, select ”Repair your computer” from the bottom left corner.
  7. Open Troubleshoot from the selection menu.
  8. Choose Advanced Options.
  9. Open Command Prompt. If prompted, select your account and enter the password.
  10. In the command line, type the following commands and press Enter after each:
    • bootrec /FixMbr
    • bootrec /FixBoot
    • bootrec /ScanOs
    • bootrec /RebuildBcd
  11. Exit, remove the installation drive and try starting the system in a normal manner.

On the other hand, if you’re still unable to fix the problem, make sure to check the steps below.

Solution 2 – Check HDD

As we already stated above, this and similar critical system errors that incorporate the bootloader, are most of the time related to HDD. The only question is concerning the degree of damage. If the damage is complete and your HDD is out for good, you’ll need to replace it, obviously.

However, if only certain sectors are affected, there’s a chance to repair it with the bootable third-party tool. Either way, you’ll need a tool like this to check the HDD state, so it’ll cost you nothing to try and go for a repair.

In order to scan for errors, you’ll need the third-party HDD tool. Below, we used Hiron, but you can use any tool of your choice if you reckon it’s better suited for the job. This tool is free and you can use it for a variety of boot-related diagnostics and repairs. In addition, you’ll need the third-party ISO application to create a bootable DVD or USB flash stick.

Follow the instructions below to check the HDD for errors:

  1. Download Hiren BootCD, here.
  2. Burn the Hiren’s BootCD ISO file to DVD or stack it on USB.
  3. Insert the USB or DVD and reboot your PC.
  4. Make sure to change the boot order in order to boot from the USB or DVD.
  5. Now, once the Hiren BootCD loads, choose Dos programs.
  6. Select Hard Disk Tools. To do so, enter number 6 and press Enter.
  7. Select HDAT2 4.53. This time enter number 1 and press Enter.
  8. Highlight your partition on the list and press Enter.
  9. From the next screen, select Device Tests Menu.
  10. Select Check and Repair bad sectors.
  11. After the scanning procedure finishes, remove the USB/DVD and restart your PC.

Solution 3 – Perform a clean reinstall

At the end, if you’re unable to boot but you’re positive that both HDD and bootloader are in the top condition, you’ll need to go for the reinstall. Of course, there’s a chance that the additional hardware is causing this error, like peripheral devices or RAM, but that’s only the case on rare occasions.

You can find the detailed explanation on how to create an installation drive with Media Creation Tool and reinstall your Windows 10 in this article. Starting from a scratch can indeed be a time-consuming work, but it should help you resolve this or similar issues.

We hope this proved helpful. In addition, we’ll like to hear your questions or suggestions in the comments section below.

RELATED STORIES YOU NEED TO CHECK OUT:

Fix: Xbox App Server Blocked Connectivity on Windows 10

Microsoft’s Xbox is well known as one of the top gaming consoles on the market. Numerous games, including Xbox exclusives, can be used on the Xbox consoles. That combined with affordable prices and high end hardware has made the Microsoft gaming console rivaled only by a few.

Because of its popularity, Microsoft has added an application on Windows 10 that allows PC users to access all of Xbox’s features. However, users may face an issue where the Xbox app server blocked connectivity on Windows 10. If you are facing this same problem, then the instructions in this article will help you resolve the issue. Below you will find information on not only how to resolve the connectivity problem, but also info on major causes of this error. 

Causes of the Xbox app server blocked connectivity on Windows 10

There are multiple reasons why your Xbox application is blocked on your Windows OS. Identifying the issue is the first step in the process of fixing the error. Here are the major causes of the connectivity issue:

1.Incorrect network adapter

You could be having connection issues because your Xbox application is connecting to the incorrect network. Perhaps, your computer is connected to the internet through Wi-Fi as well as Ethernet. If this is the case, then the application may constantly switch from network to network, causing complications.

Furthermore, Wi-Fi connections are generally less stable than Ethernet connections. Therefore, you will want to ensure that you are connected through an Ethernet cable before you start your Xbox app. Also, you may want to turn off your Wi-Fi when you are playing online Xbox games.

2. Antivirus blocking Xbox app’s connection

If you are using an antivirus program other than Windows Defender, then you will want to ensure that its settings are properly configured. Typically, antivirus programs will block applications for security reasons, even if the application is completely trustworthy. Thus, you will want to check out the app settings of your firewall program to see whether or not the Xbox application is blocked.

3. Unable to establish a Teredo IPsec connection

This is the primary cause of Xbox app server blocked connectivity on Windows 10. There is information in the next section that will show you how to fix this issue.

Speaking of which, if you’re getting the ‘Teredo is unavailable to qualify‘ error, check out our dedicated troubleshooting article to fix it.

How to fix Xbox app server blocked connectivity on Windows 10

Fix 1: Internet connection

This is a simple solution to the problem. Open your Xbox application and go to its Settings. Next go to the Network section. Look and see if it says Connected under internet connection. 

Fix 2:  Make sure Windows and your firewall software is up to date

Out of date software can cause connectivity and compatibility issues. So, first see if your Windows 10 is using the latest update. You may even have to use the Windows 10 Creators Update.

If you are using antivirus programs that are not from Microsoft, then you will also want to ensure that they are completely updated. Configuring your firewall programs to enable Teredo Ipsec connectivity is also essential. If you are not sure how to properly configure your firewall’s settings, then you should look for the program’s ‘help’ feature. Alternatively, you can try temporarily disabling your firewall program in order to test whether or not it is interfering with Xbox live.

Fix 3: Enable Windows Firewall

While it may seem contradictory to the advice mentioned in the section above, it is important to know that Windows Firewall is built to help Teredo Ipsec connection work. In fact, it is essential for Windows Firewall to be enabled in order for Teredo Ipsec to function. So, you will want to check whether or not your Windows Firewall is enabled.

If it is disabled for some reason, then this is how you enable Windows Firewall:

  1. Double click on the Windows Firewall icon located in your task bar. Alternatively, you can search for it in the Windows menu by pressing the Windows Key and typing in Windows Firewall.
  2. In the dialog you should see an option that allows you to turn Windows Firewall On and Off. You will find it on the left side of the Windows.fix xbox app server connectivity blocked
  3. Restart your computer.

Fix 4: Enable the default policy of Windows Firewall

  1. Open the Command Prompt dialog in admin mode. You can do this by right clicking on the Windows icon located in your task bar and locate it on the list that shows up. Alternatively, you can open Windows menu and type in cmd. Remember to open the dialog in admin mode.
  2. Next, type this in: netsh advfirewall show currentprofile. This command is to see whether or not your default policy is active or not.
  3. If you are presented with this information, then your profile is disabled : Firewall Policy     BlockInbound,Allowinbound
  4. Type this command to enable the default policy: netsh advfirewall set currentprofile firewallpolicy blockinbound,allowoutbound

Unfortunately, since there are multiple possible factors that can cause Xbox App Server Blocked Connectivity on Windows 10, you may have to try out several fixes before you resolve the issue. Nevertheless, the solutions presented in this article will work for the majority of users.

Ivanka Trump joins Microsoft President Brad Smith at Virginia school for a morning of Coding for Kids

Microsoft may not necessarily agree with the Trump administration’s political policies, but it looks as though the company has put politics to the side to help better the future of humanity. Indeed, Microsoft President Brad Smith and senior advisor to the President and first daughter Ivanka Trump were spotted together at a Virginia school for a morning of Coding for Kids.

The event at the Virgina School is part of Donald Trump’s presidential memorandum, directing the Education Department to invest $200 million in grant funding each year to expand STEM and computer science education in schools. According to CNN, Microsoft, and many other tech giants are expanding on this memorandum, with each of the companies committing $50 million to the efforts.

In a tweet, Microsoft President Brad Smith remarked that the memorandum is “an important step towards advancing STEM and Computer Science in American schools– and a big win for our nation’s young people.”

Microsoft already has many efforts to help young folks become interested in STEM and computer sciences. The company previously held STEM Saturday events at certain Microsoft retail stores, giving youth and other participants hands-on experiences with the most up to date technologies.

Next Xbox Live Sessions will feature Forza 7, professional drivers Tanner Foust and Josef Newgarden

Microsoft has announced that the next Xbox Live Sessions will feature professional drivers Tanner Foust and Josef Newgarden. The two drivers will be playing Forza 7 and will be going head to head in the game, putting their racing talent to the test.

As usual, the session will be hosted on the Mixer Xbox Channel, and fans who tune-in will be able to submit questions and have the chance to win some prizes. Xbox’s Major Nelson will be hosting the session, and Forza Community Manager, Brian Ekberg will also make appearances.

For those unfamiliar, Josef Newgarden was just crowned Verizon INDYCAR champion, and Tanner Foust is a former Global Rallycross and Formula Drift champion. The two drivers both reflected excitement for being a part of Xbox Live Sessions.

“Forza has always been one of my favorite games on Xbox, so I can’t wait to play Forza Motorsport 7 against Tanner on Xbox Live Sessions…“This should be a ton of fun, but I’m definitely going to bring my A-game and play to win.”- Josef Newgarden

“I’m looking forward to getting behind the wheel in Forza Motorsport 7 for some friendly competition against Josef. I can’t say I will be going easy on him when it comes to speeding towards a victory!” – Tanner Foust

DJ Khaled, Marlon Wayans, and James Corden were other famous figures who were a part of past Xbox Live Sessions. The Session is sure to be fun, so be sure to tune in! And remember to pre-order Forza 7 to have your own chance at enjoying the Xbox exclusive racing title when it launches!

Free Spider-man Homecoming items now available for your Xbox Avatar

Even as the Xbox team barrels forward with a ground-up redesign of the user Avatars for the platform, they continue to push out content for the current system.

Today, fans of Marvel’s Spiderman Homecoming movie can now snag a free costume for their Xbox Avatar.

I haven’t been able to test out the whether or not the new costume is accompanied by any new animations but it’s still neat to see Xbox Avatars getting love while the company works on a new promising platform.

New Xbox Avatars

It will be interesting to see how the Xbox team incorporates sponsored content such as movie tie-ins, TV show partnerships and pop culture lexicon with its new platform.

Pinball FX3 launches on Windows 10 & Xbox One, supports all old tables

Pinball FX 3, the latest pinball simulator video game from Zen Studios, is now available on Windows 10 and Xbox One, and the free-to-play game supports Xbox Play Anywhere. Even better, the game lets you unlock all previous Pinball FX2 / Zen Pinball 2 purchases for free: to do so, you’ll have to select the “Import Tables” button on the main Pinball FX3 dashboard (the process works on both the Windows 10 and Xbox One versions, and you can get more details on this FAQ).

For those unfamiliar with the series, here is the game’s official description and launch trailer:

Pinball FX3 is home to the most exciting pinball library, with tables based on the biggest brands in entertainment including Star Wars, Marvel, Aliens, Bethesda, Family Guy, TellTale’s The Walking Dead, Portal and more! All tables feature challenging new game modes, table upgrades and power-ups, unlockable bonus items and more.

Pinball FX 3 looks to be a cool casual game and a nice addition to the Xbox Play Anywhere catalog. If you’re interested, you can get it for free from the download link below.

Pinball FX3
Pinball FX3
Developer:
Zen Studios
Price:
Free

Attempt to release mutex not owned by caller [Fix]

Attempt to release mutex not owned by caller is a system error and it can occur on almost any PC. This error comes with ERROR_NOT_OWNER code, and today we’re going to show you how to fix this problem on your Windows 10 PC.

How to fix ERROR_NOT_OWNER error?

Fix – ERROR_NOT_OWNER

Solution 1 – Install the latest updates

The simplest way to fix this problem is to install the latest Windows updates. Windows 10 usually installs important updates automatically, but sometimes you can miss an important update due to certain bugs. If that’s the case, it’s highly advised to check for updates manually. To do that, follow these steps:

  1. Press Windows Key + I to open the Settings app.
  2. Once you do that, navigate to Update & security section. Now click on Check for updates button. Windows 10 will now automatically search for updates and download them in the background.

After downloading and installing the latest updates, check if the problem is resolved. Windows 10 might have couple of bugs and compatibility issues, but Microsoft is working hard to fix them through Windows updates. To ensure that your PC is bug-free, we strongly recommend to keep your PC up to date.

Solution 2 – Use the correct IP address

Several users reported Attempt to release mutex not owned by caller message while trying to use a printer. According to users, they were unable to access the printer over the web. As a potential solution users are suggesting to use the printer’s IP address to access it instead of its name. After doing that, you should be able to access your printer without any problems.

Solution 3 – Install the latest drivers

This error can occur with various devices, and if you’re having this problem you might want to try updating your drivers. To do that, simply visit the manufacturer’s website and locate your model on the list. Download the latest drivers for your device and install them. After installing the latest drivers check if the problem still persists.

If you’re using an USB device, it’s also a good idea to update your motherboard drivers. Simply go to your motherboard manufacturer’s website and download the latest drivers. After installing the latest drivers, check if the problem still appears.

Solution 4 – Reinstall your drivers

As previously mentioned, sometimes drivers can cause this problem to appear. If that’s the case, you need to find and reinstall the problematic drivers. To do that, follow these steps:

  1. Press Windows Key + X to open Win + X menu. Choose Device Manager from the list.
  2. Locate the problematic device on the list, right click it and choose Uninstall device.
  3. Confirmation dialog will now appear. Click on Uninstall.
  4. After doing that, you need to install your drivers again. You can follow the instructions from previous solution and install the latest drivers from the manufacturer. Alternatively, you can click Scan for hardware changes button and let Windows install the missing drivers automatically.

After reinstalling the drivers, check if the issue still appears.

Solution 5 – Check your antivirus software

Even though antivirus software is necessary, sometimes it can cause this and other errors to appear. Many antivirus tools tend to enforce certain security policies, and that can prevent devices and applications from running properly. To fix this problem, you need to check your antivirus configuration and try disabling certain features. If you’re not familiar with antivirus and computer security you might have issues finding the problematic feature.

Alternatively, you can try disabling your antivirus entirely. Even if you choose to disable your antivirus your PC won’t be completely vulnerable. Windows 10 comes with Windows Defender that works as a default antivirus software, so even if you disable your antivirus you’ll remain protected. After disabling the antivirus check if the problem still persists. In most cases you can disable your antivirus as a temporary workaround.

Lastly, you can also try to uninstall your antivirus software. Keep in mind that antivirus tools can leave certain files and registry entries behind even after you uninstall them. Those files can also cause this problem, so we advise you to use a dedicated removal tool for your antivirus to remove it. Many antivirus companies offer these tools for their software, so be sure to download and use one for your antivirus.

After removing the antivirus software entirely, check if the problem still appears. If removing the antivirus fixes the issue, you need to switch to a different antivirus software or update your antivirus to the latest version.

Solution 6 – Enter Safe Mode

If this problem appears frequently, it might be caused by third-party applications. To check if that’s the problem, you can navigate to Safe Mode. Safe Mode is a special segment of Windows that runs with default drivers and apps, so it’s perfect for troubleshooting. To enter Safe Mode, do the following:

  1. Open the Start Menu and click on Power button. Press and hold the Shift key and choose Restart from the menu.
  2. Choose Troubleshoot > Advanced options > Startup Settings and click the Restart button.
  3. Once your PC restarts you’ll see a list of options. Select any version of Safe Mode by pressing the appropriate keyboard key.
  4. Once you enter Safe Mode, check if the problem appears.

If the problem doesn’t appear in Safe Mode it’s possible that one of your applications is causing this issue. In order to fix the problem you need to remove any recently installed or updated applications.

Solution 7 – Perform a Clean boot

Third-party applications can sometimes cause this error to appear, and in order to prevent it you need to find and disable the problematic application. Many applications and services start automatically with Windows causing this problem to appear. To find the problematic application, you need to disable all startup applications and services. This is relatively simple and you can do it by following these steps:

  1. Press Windows Key + R and enter msconfig. Click OK or press Enter.
  2. Go to Services tab and check Hide all Microsoft services. Now click on Disable all button.
  3. Go to Startup tab and click on Open Task Manager.
  4. Once Task Manager opens, you’ll see a list of all startup applications. Select any application on the list and choose Disable from the menu. Repeat this step for all entries on the list.
  5. After disabling all startup applications, close Task Manager and go to System Configuration window. Click Apply and OK to save changes.

After disabling all startup applications and services you need to restart your PC to apply changes. Once your PC restarts check if the problem still appears. If not, it means that one of the disabled applications or services was causing the problem. To find the problematic application you need to repeat the same steps and enable services and applications one by one or in groups. Keep in mind that you need to restart your PC for every set of services or applications that you enable.

After finding the problematic application, you can keep it disabled, uninstall it or update it to the latest version in order to fix the problem.

Solution 8 – Restore Windows

If this error started appearing recently, you might be able to fix it by restoring your system. To do that, you need to use System Restore feature. This is a useful tool and it allows you to restore your system to the previous state. To use this tool, you need to do the following:

  1. Press Windows Key + S and enter system restore. Choose Create a restore point from the menu.
  2. System Properties window will now appear. Click on System Restore button.
  3. When System Restore window opens, select Choose a different restore point and click on Next.
  4. Check Show more restore points option and select the desired restore point. Click Next to proceed.
  5. Follow the instructions on the screen to complete the restoration process.

Once the restore process is finished, the error should be resolved completely. Keep in mind that this method can cause you to lose any recently saved files, so you might want to back them up before restoring your system.

Solution 9 – Reset Windows 10

If the problem still appears, you might want to consider resetting Windows 10. We have to warn you that this process is similar to clean install, so it will remove all applications and files from your system drive. To avoid file loss we strongly advise you to create a backup before resetting Windows 10. In addition to backup, you might also have to create a Windows 10 installation media. You can do that with ease using Media Creation Tool. After backing up your files, you can reset Windows 10 by following these steps:

  1. Open Start Menu, click the Power button, press and hold the Shift key and choose Restart from the menu.
  2. Choose Troubleshoot > Reset this PC > Remove everything.
  3. If prompted to insert installation media, be sure to do so.
  4. Select your version of Windows and choose Only the drive where Windows is installed > Just remove my files.
  5. Review the changes that reset will make. Click on Reset button to start.
  6. Follow the instructions on the screen to complete the reset.

After resetting your PC, check if the problem still appears. If not, install all your applications again and move your files from the backup. This is a drastic solution since it will remove all your files from the system drive, so use it only if other solutions can’t fix the problem.

Attempt to release mutex not owned by caller message and ERROR_NOT_OWNER error are system errors and they can cause certain problems on your PC. Fortunately for you, these errors are relatively simple to fix and you should be able to fix them by using one of our solutions.

READ ALSO:

FIX: Windows 10/11 ESRV.EXE application error (0xc0000142)
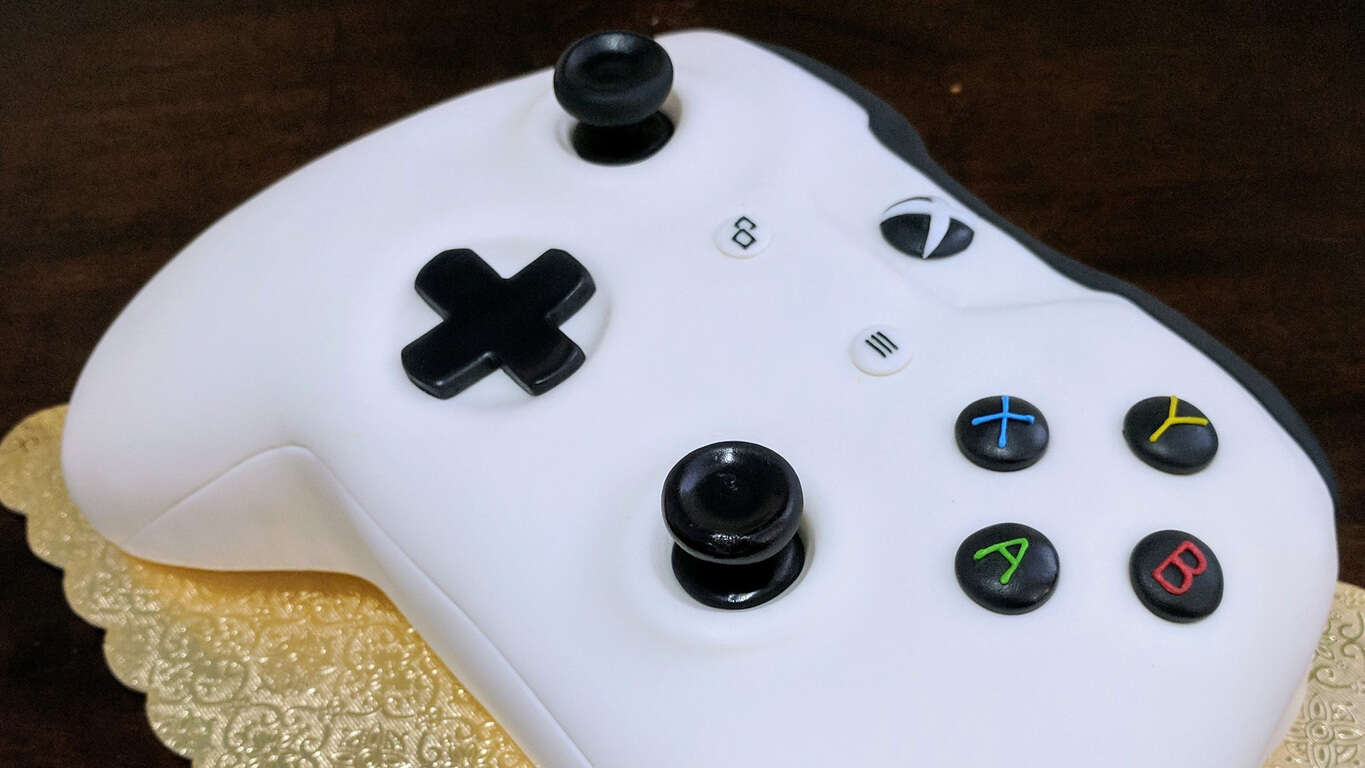
Windows 10 updates are there to improve your overall Windows experience. These updates address recently reported bugs, add new security patches and bring new features and apps that can optimize and customize the way you are using your desktop or notebook. But, along with the regular bug fixes, the same updates can also bring issue of their own, which will eventually cause system malfunctions. Well, that’s the same case when discussing about the esrv.exe application error (0xc0000142).

This Windows 10 error code is related with the latest Windows 10 update – the Windows Creators Update. It seems that when the system was updated, the Creators firmware messed up the Intel Driver Update Utility. So, chances are, after installing the mentioned software you start receiving the esrv.exe application error (0xc0000142) issue.

While it’s not a major problem, it’s still quite annoying, so let’s see how we can fix this new Windows 10 Creators Update error code.

How to solve Windows 10 esrv.exe application error (0xc0000142)

Because the Windows 10 esrv.exe application error (0xc0000142) is associated with the Intel Driver Update Utility, we need to find a fix for this particular software. So, the first thing you should try to apply is an update for this program:

  1. Go to your system settings: press the Win+I keyboard hotkeys.
  2. Then, click on Devices (Bluetooth, printers, mouse).devices from windows settings 10
  3. From the page that opens, scroll down and look for Device Manager.device manager windows 10
  4. Click on that entry and then look for the Intel Driver Update Utility program.
  5. Try to update this software, if that’s possible.

If updating Intel Driver Update Utility isn’t fixing the esrv.exe application error (0xc0000142) Windows 10 bug just uninstall the same feature. You can uninstall Intel Driver Update Utility easily by following:

  1. Go to Control Panel – press Win+R hotkeys and in the RUN box enter control panel; in the end press Enter.
  2. In Control Panel switch to Category.
  3. Next, under Programs click on Uninstall.control panel remove Intel Driver Update Utility
  4. Find the Intel Driver Update Utility software within the programs that are currently installed on your Windows 10 system.
  5. Select that entry and then choose ‘uninstall’.
  6. Follow on-screen prompts and complete the uninstall process.
  7. Restart your Windows 10 device when you are done.

There you have it; that’s how you can fix the esrv.exe application error (0xc0000142) bug that’s associated with the Windows 10 Creators Update.

If you are still getting “The application was unable to start correctly (0xc0000142) error after applying the steps from this tutorial, click OK to close the application” message error.

Use the comments field from down below and give us more details about the error log page. Of course, based on the details you offer, we will try to find the best fix for you.

RELATED STORIES TO CHECK OUT:

Error 0x80070456 – 0xa001b in Media Creation Tool [Fix]

Error 0x80070456 – 0xa001b can appear while using Media Creation Tool on your PC. If this happens, you won’t be able to create Windows installation media.

This can be a big problem in case of emergency, but there are ways to fix this problem, and in today’s guide, we’re going to show you have to do it.

Why does Media Creation Tool keep failing?

  • Your USB drive doesn’t meet the requirements.
  • Cache files are interfering with the processes.

In case you have further problems, our Media Creation Tool not working guide should be able to help you fix them.

How can I fix error 0x80070456 – 0xa001b?

1. Make sure you are using the right USB device

  1. Make sure the flash drive has at least 8 GB of free space.
  2. Properly format the drive before using it.
  3. It suggested using FAT32 or exFAT.

2. Reset the Media Creation Tool

  1. Make sure you are logged in with administrative privileges.
  2. Open Control Panel on your computer: press Win+R hotkeys and type Control Panel in the Run box.
  3. Switch to Large Icons and click on File Explorer Options.file explorer options
  4. Then, choose View.
  5. Under Hidden files and folders check the Show hidden files, folders and drives field.show hidden files and folders
  6. Close this window.
  7. Access This PC from My Computer.
  8. Go to the root drive of your Windows system (it’s usually the C partition).
  9. From there delete the $windows.~WS and $windows.~BT folders.
  10. Close this window.
  11. Click on the Search icon located near the Windows start button.
  12. Type Disc Cleanup and run this process.
  13. When done, go ahead and reinstall the Windows 10 Media Creation Tool from Microsoft and repeat the Windows 10 creation process.

As you can see, it’s pretty simple to fix this error message, since it’s usually caused by your cache.

This isn’t the only problem you can encounter, and many reported This tool can’t update your PC while using Media Creation Tool.

Did you find a solution to this problem on your own? If so, share your findings with us in the comments below.

How to cast your entire laptop to Chromecast using Chrome Browser

Exactly after a year of purchasing a Google Chromecast, I have now realised that I can’t live without it. While buying the Chromecast I intended to use it along with my TV (bought a unsmart TV for this purpose), however, later I came to stumble upon the other benefits of having a Chromecast.

The best part, however, was that I could get a respite from my small laptop display and instead cast the Chrome browser to my TV, which needless to say is much larger.

How to Cast the Chrome Browser?

Casting the Chrome browser to a TV or a much larger display is pretty straightforward, however, there are a few things that one should take care of. In this segment, we will walk you through the steps to configure and use the Cast function on Chrome browser.Ensure that your Chrome browser is updated to the latest version,


  • Ensure that your Chrome browser is updated to the latest version, it’s always better to check the same by heading over to Chrome>Hamburger Menu>Update.
  • Make sure that both your laptop and the Chromecast device is connected to the same Wi-Fi network.

The content from the Chrome browser can be cast to the Chromecast through several ways. I prefer pinning the Cast button to the toolbar and then choose the device I would like to cast to.

However, if you have not pinned the Cast Button simply go to Chrome Settings>Cast. If you want to cast the videos from Chrome enabled sites like YouTube simply click on the Cast Button as shown below.

Want to stop the cast? Easy just click on the Cast Button and now press the “X” mark against the device. Now the above steps mention how to cast a single web page from a Chrome Browser, this is ideal if you want to Cast a video from say Amazon Prime or YouTube but if you want to cast your entire laptop there are other ways to do so.

How to cast your Entire Laptop/Desktop using Chrome Browser

Well, I have been using this very feature to cast my work laptop on a much larger screen. The Cast option is compatible with Windows, Mac and also Chrome OS. However, the Windows has an advantage as one could also cast the audio channel. With this feature, your entire laptop screen will be mirrored. In order to Cast your laptop follow the steps below,

  • If you have pinned the Cast Button simply click on it, if not head over to the Settings menu and click on Cast. The Cast button will glow blue when your Chrome is ready for Casting.
  • In the next step, you will see a small drop-down that lets you choose the source. Select “Cast Desktop” in this option.
  • Now choose the Chromecast device you want to Cast your laptop on.

I have been able to Cast a major chunk of websites however plugins like Quicktime and VLC are not yet supported. In some cases its quite possible that the image will be displayed on the TV, however, the sound will continue playing on the laptop, this is mostly due to an incompatible website.

If you want to switch to a single tab mode just select “Cast this Tab.” One will be able to use their laptop to control the content and navigate through the websites. However, it’s always advisable to use at least a mid-range laptop since I have noticed a discernable lag in the low-end basic Windows Notebooks.

For more information on how to display content from your PC to another device, the articles below may interest you:

Microsoft Store is set to reach Windows 10 Mobile

On September 22, Microsoft rebranded the Windows Store to the Microsoft Store. The rebrand comes with a revamped logo which replaced the original. Microsoft is currently rolling out the new Store update to Windows 10 testers on the Release Preview Ring, even if the new store will not significantly change apart from its name and logo. Still, Windows 10 users might notice that the taskbar icon for the store now also has a shopping bag and a company logo.

Microsoft Store is available on all devices running Windows 10

The update was already released for Windows 10 Mobile but only a few users received it. Then, Microsoft terminated the rollout process. On the other hand, almost all Windows 10 PCs from the Release Preview Ring have received this update. For now, it looks like you can’t update the Windows Store on Windows 10 Mobile because you cannot update some first-party apps on PCs.

But don’t worry, because Microsoft is aware of the issue and is currently working on finding a fix for the bug.

The issue turned out to be a backend bug that caused a problem for the Release Preview Ring Insiders, preventing them from updating the apps on the Windows Store. As Microsoft is working intensively on this matter, the bug will probably get fixed pretty soon and the company will be able to go on as planned with the rebranding of Windows Store on Windows Phones as well.

Ss soon as the update becomes public, all of our Windows 10 smartphones will receive it and we’ll be able to check it out!

RELATED STORIES TO CHECK OUT:

Surface Phone and other third-party Windows phones to arrive next year

Brace yourselves: next year will be a productive one for Microsoft as it looks towards its next mobile device, the Surface Phone. What’s even more exciting are the many rumored third-party Windows phones that may also arrive in 2018 as well.

The Surface Phone will be the ultimate mobile device

Rumors surrounding the Surface Phone originated in 2012 and various features were reported even back then. Even the Executive Vice President and Chief Marketing Officer at Microsoft confirmed plans of a new premium Windows phones for both consumers and businesses.

Past rumors said the Surface Phone would be unveiled by the end of the year, but it turns out that Microsoft has delayed its launch until 2018 or 2019.

The latest rumors detail a Surface Phone running an Andromeda operating system will be revealed in the second half on 2018. We already know the company has been working on developing the new operating system.

OEMs will launch their Windows Phones as well

According to sources, Microsoft partners including HP, Lenovo, and Dell will launch their own Windows Mobile devices running Andromeda, so all this will be very interesting. Both the Surface Phone and third-party Windows Phones running Andromeda will probably arrive if everything goes as planned.

We still don’t know anything about Andromeda but despite that, it really looks like 2018 will be an exciting year for both Microsoft and the company’s fans — and we’re looking forward to all these releases.

RELATED STORIES TO CHECK OUT:

Preview Alpha Xbox Insiders can now transfer games and apps across their networks

A big change has finally arrived for Xbox Insiders, as announced by Brad Rossetti on Twitter. Users are now be able to transfer their games and apps across networks, cutting out the middle man and making it so that you don’t need to re-download items from the Store. It’s a nice feature that’s meant to make things convenient for people who have multiple Xbox’s in their home.

As explained by Brad, this feature is meant to “Save on bandwidth” by letting you transfer games between consoles. The idea here is that you won’t need to spend 30 or more gigs trying to download something that you already have on another console. While not every home has more than one Xbox, this still helps out a selection of people quite a bit.

Preview Alpha members should now be seeing this feature on their consoles as it went live last night at 6PM PST. Let us know if you’re finding this feature useful by dropping us a comment below.

Halo Wars 2: Awakening the Nightmare expansion now available on Xbox One, Windows 10

Halo Wars 2 came out months ago to a decent amount of praise, becoming a well-liked entry into a cult classic series, and helping to keep Halo fans interested while we wait for the next entry in the main series. For those of you who wanted to head back into the world of Halo Wars 2, there’s a brand new expansion out that can help you satisfy that need. Halo Wars 2: Awakening the Nightmare, is now available on Xbox One and Windows 10.

The new expansion will feature the introduction of The Flood back into Halo Wars, alongside of some new games modes. Beyond this, you’ll get the opportunity to get into some new campaign missions from the perspective of the Banished. If this sounds like the kind of thing you’d be interested in, you can pick it up right now for $19.99.