Fix corrupted OneDrive files and shortcuts after Anniversary Update

Upgrading to Windows 10 Anniversary Update is a simple affair, though, some people have come across problems. We’ve been hearing about a certain issue where Windows 10 users, after upgrading to the Anniversary Update, are finding out that some frequently opened items are no longer valid.

Apparently, the update caused several shortcuts to point to OneDrive. Now, we know it’s possible to set OneDrive to be the default sport for certain folders. For example, the Document and Pictures folder within OneDrive can be set to be the default, leading the operating system to pass over the system’s own Document and Pictures folder when saving files.

Here’s what unlucky Windows 10 users had to say:

After upgrading Windows 10 to anniversary edition today (8/2/16) I noticed that some items on my frequently opened Word, Excel, Powerpoint are no longer valid. Somehow after the update some of the item shortcuts are pointing to OneDrive (which I don’t use and I reconfirmed has no documents) instead of my local drive. The bigger annoyance is I can’t right click and delete these items from the jump list by using Remove from this list.

OK, so, this is indeed a problem, one that is not particularly easy to fix. Sometimes a single work around can make it right, but at other times, the user will have to perform a clean install. No one wants to do that right, so let’s hope the following idea can sort things out for those who might be going through similar problems.

What we recommend, is to run both SFC scan and DISM scan. For those not aware, SFC scan is used to scan for corruptions within Windows. This utility can be found in the operating system, so no need to download anything. As for DISM scan, it should help with fixing corruptions also, and can be found in Windows 10.

Step 1: Open an Administrator command prompt window by:

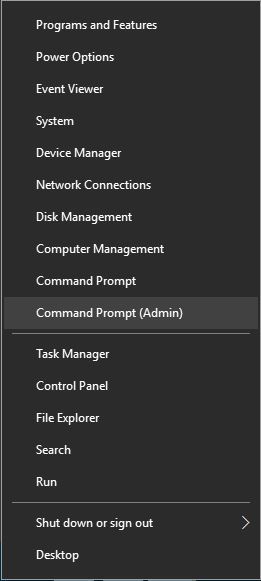
  1. Press Windows logo + X keys on the keyboard and select Command Prompt (Admin) option.
  2. Click on Yes and continue. Provide administrator password if prompted.
  3. Check if it says Administrator: Command Prompt at the top of the command prompt window.

Step 2: Type the following commands in the CMD Prompt:

Dism.exe /online /cleanup-image /scanhealth

                Dism.exe /online /cleanup-image /restorehealth

sfc /scannow

Step 3: Close the command window and check if the issue is resolved.

If that doesn’t work, attempt to clean %AppData%\Microsoft\Windows\Recent\AutomaticDestinations\*.

RELATED STORIES YOU NEED TO CHECK OUT:

Windows 10 Anniversary Update deletes restore points

The Anniversary Update changed a lot of things in Windows 10, therefore some users are a little confused about it. While the second major update for Windows 10 indeed caused a lot of problems to users, there are some ‘issues,’ that actually aren’t flaws at all. It’s just some people not understanding how the update works, so we’re going to explain one of these examples in this article.

Recently, once user reported on Microsoft’s forums that all his system restore checkpoints were gone after installing the Anniversary Update. At first look, it looks like an issue, but it’s actually just how major updates for Windows 10 work. Microsoft considers major updates, like the Anniversary Update, as fresh installs, therefore it deletes all system restore checkpoints created in the previous version.

So, if you also noticed that the Anniversary Update deleted your restore points, you should know that it’s completely normal, and it’s not any kind of an issue.

So, why major updates delete system restore points? That’s because you created all your previous system restore points in the previous Windows 10 version, and by performing system restore, you basically aim to roll back to that version, which is not possible. The only way to remove the Anniversary Update from your computer is by rolling back, or performing a clean install.

Now that you know why your restore points are deleted, it is highly recommended to create a new one, as soon as you install the Anniversary Update. We assume you already know how to create a restore point in Windows 10, since you noticed that your restore points are gone, in first place. However, if you’re not sure how to do that, check out this article.

We hope we eliminated any confusion about restore points in Windows 10 Anniversary Update with this article. If you don’t understand something else about the update, feel free to ask us in the comments, and we’ll gladly explain everything, or you can use the Get Started app for Windows 10 Anniversary Update, and find everything you need to know on your own.

RELATED STORIES YOU NEED TO CHECK OUT:

Microsoft natural language processing researchers heading to ACL 2016

Microsoft has sent more than twenty of their researchers to the annual meeting of the Association for Computational Linguistics (ACL). Among them is Bill Dolan, the Principal Researcher at Microsoft Research. In his blog post today, he described a bit about what Microsoft was willing to share during the ACL conference and how it could affect technology moving forward.

As Dolan states, a major focus of Microsoft’s work has been to break down the language barriers between people and machines alike. Machine learning is a growing market where a massive shift of developer interest has swayed. Microsoft Research intends to find a way to turn natural language into a means of communicating and collaborating with their devices in a seamless manner. Some examples of this project is generating questions based on an image or photograph and a  publication exploring the translation between natural language to code.

Natural language is the translation of human to human interaction whereas machines speak in a completely different way with their coding. In natural language, the tone, mood, and inflections of words and syllables can change the entire meaning of a conversation that machine learning hasn’t quite grasped as of yet. Dolan stated that their most recent publication will also be presented during ACL that touches on this very subject.

“A Persona-Based Neural Conversation Model” will explain the research of mimicking human interaction with that of artificial intelligence. The idea is to respond to the linguistic behavior of the person to create a subtle characteristic of natural human conversation. The research, in particular, is aimed towards creating immersive virtual reality characters and agents. The full publication is already available to download as a PDF.

This year, the conference is being held at Humboldt University in Berlin, Germany. While it’s already started for the week, it will be continuing until August 12th.

Microsoft still hasn’t got emojis right, users take to Reddit to voice their complaints

Last week, when the Windows 10 Anniversary dropped, it introduced a new style of emojis to the Windows 10 experience. As great as the new emojis to be, and as hard as Microsoft worked to bring the new emojis to Windows 10, a group of Windows 10 users on Reddit are still not pleased with the new experience.

Of issue to the Redditors is the fact that Microsoft’s own emojis still show up as black and white in the Microsoft Edge browser.  According to the Redditors, other issues include the fact that Edge or the mail apps do not support Microsoft’s NinjaCat emoji, while Google Chrome’s browser does. Redditor Etegy, however, has a theory as to why it does not work and commented in the thread that the way emojis display depend on the fact if a page specifies utf-8 in the header.

So, what do you think of the emojis in Windows 10? Have you noticed any issues where an app would not display the new style of emojis? Let us know your thoughts by dropping us a comment below!

Fix: Not Enough Disk Space for Anniversary Update

Thousands of users who have tried to install the Anniversary Update on their computers are blocked by an annoying error message informing them they don’t meet the necessary hard disk space requirements. Microsoft recommends users should have at least 16 GB of free space on their disk in order to download and install the Anniversary Update.

However, there are still many users who can’t get the Anniversary Update although they meet the system requirements necessary for this operation. It appears that this issue is prevalent for low storage devices, although they have enough free space to successfully complete the upgrade. High storage devices with hundreds of gygabites of free space are also affected by this error.

 “Not Enough Disk Space for Anniversary Update”

“Machine = Surface Pro 3 with no third party AV installed. Available space on C drive = 21.2gb

When I run Windows 10 Update Assistant get message CPU=OK, Memory=OK, Disk Space=OK. After pressing “NEXT”, get message: Something went wrong. Not enough disk space, please run Disk Cleanup and try again.”

“The update fails with a 0x80070070 error, stating that I do not have enough free space on my hard drive, however, the drive has over 300GB of free space available even after downloading the update. “

Users have also run the Windows Update Troubleshooter, but the tool couldn’t detect any issues.

Fix: “Not Enough Disk Space for Anniversary Update”

Solution 1 – Delete the Anniversary Update files

“deleting the downloaded update files and starting over appears to have resolved this, although I have no idea why.”

Solution 2 – Use the Media Creation tool

You can download the tool straight from Microsoft’s website. Most users have confirmed this method allowed them to finally install the Anniversary Update on their machines, after the Upgrade Assistant informed them there was not enough space on their disk.

RELATED STORIES YOU NEED TO CHECK OUT:
Anniversary Update doesn’t detect the second monitor

The list of issues caused by the Anniversary Update gets longer with each passing day, confirming that Microsoft still has a lot of work to do to make Windows 10 version 1607 perfect.

According to user reports, many computers don’t detect the second monitor after upgrading to the Anniversary Update. Users have tried various general workarounds to fix this issue, such as restarting the devices, unplugging the monitors several times, but nothing worked.

Computers running the Anniversary Update don’t detect the second monitor

Anniversary update automatically updated on my computer.  My Dell computer no longer can detect my second monitor which is a Samsung.  I have pushed detect and it only detects the main monitor.  I have restarted many times – nothing.  I have plugged and uplugged several times.  Do I just need to go back to the Windows prior to the update? Or is there a solution?

What to do if the second monitor is not detected

Actually, this is a common problem after installing updates on computers, because the drivers need a bit more time to install and work.  In this case, you should try to force the system to install and use the latest display drivers. Go to your graphics card manufacturer’s website, and download the latest driver for your graphics card, preferably the one for the Anniversary Update.

In case this solution doesn’t help you, you can also uninstall the current display driver and use the default one.

  1. Open the Device Manager > select your display driver.
  2. Right click the driver > select Uninstall.

delete display driver anniversary update

  1. Check Delete the driver > click OK.
  2. Restart your computer and you’ll have your default driver installed.

RELATED STORIES YOU NEED TO CHECK OUT:
Fix slow boot up in Windows 10 Anniversary Update

If your computer is booting up slower after you installed the Anniversary Update, rest assured there is nothing wrong with your device. It’s the OS that ‘s causing this issue, as many users who are running Windows 10 version 1607 confirmed.

This issue is affecting quite a large number of users, forcing them to wait minutes on end for their computers to start. Judging by their comments, it appears that the boot up time has increased by ten times after the update was installed.

Users are complaining about slow boot up issues in Windows 10 Anniversary Update

“After I installed Windows 10 Anniversary Update, boot up speed is totally decreased.
Before upgrade, it is taking only 4-5 seconds, but after upgrade It is taking around 50-60 seconds to boot up.”

“Right before this update it would only take 30 seconds, now after this update it takes between 1 minute 30 seconds and 3 minutes.
I DID NOT INSTALL ANYTHING ELSE, THIS UPDATE SIGNIFICANTLY SLOWED MY COMPUTER.”

Microsoft’s Support engineers have listed a series of fixes to solve this issue, but users confirmed none of them really worked.

How to make your computer boot up faster

Solution 1 – scan you computer

Run a full-system scan to remove possible infections, if you didn’t scan your machine before upgrading.

Solution 2 – Disable unnecessary startup apps

high startup impact apps windows 10

  1. Launch the Task Manager > select the Startup tab
  2. Filter the apps according to their Startup impact rating > disable the apps with a high impact on startup, but keep security software.

Solution 3 – turn on Fast Startup

  1. Type power options in the search box > select the first result
  2. Select What the power buttons do

customize power buttons anniversary update

3. Scroll down to Shutdown settings > tick the Turn on fast startup checkbox > Save changes.

turn on fast startup windows 10

If none of the solutions listed above help you, you can either re-install the Anniversary Update, or simply roll-back to your previous Windows version.

RELATED STORIES YOU NEED TO CHECK OUT:

Fix: Apps crash after Windows 10 Anniversary Update install

The Windows 10 Anniversary Update is not a bug-free OS, although Microsoft hoped it would. Every day, new reports emerge about the issues users have encountered after installing Windows 10 version 1607.

The latest reports reveal that apps immediately crash after the Anniversary Update is installed. Users simply click on the apps to launch them, the app logo is visible for one second and then the apps crash. It appears that all the Windows apps are affected by this issue, and the problem is not limited to a particular app.

Users are complaining about app crashes in Anniversary Update

“UWP apps immediately closes, Anniversary Update.”

“Having exact same problem, Facebook, Messenger, Fresh Paint, and a host of other apps crash upon opening.”

“Same here on 2 PCs – some apps like Baconit and Readit work on my Surface Pro 4 but not on my desktop.”

Apps immediately crash upon opening – how to fix this

Solution 1 – Clear & Reset the Windows Store Cache

  1. Type cmd in the search box > select Command Prompt
  2. Type WSReset.exe
  3. Allow the process to complete > restart your computer.

Solution 2 – Reset the app settings

  1. Go to Settings > System > Apps & features
  2. Select the app which won’t start -> Click on Reset.  Reset is under Advanced Options after clicking on the app.

Solution 3 – Take ownership of all the WindowsApps files

  1. Go to C:\Program files using the File Explorer
  2. Change the File Explorer settings temporarily to show hidden files and folders.

show hide file explorer files

3. Select the WindowsApps directory > right-click on it > select Properties

WindowsApps folder Windows 10

4. Go to the Security tab > click on Advanced

advanced security options

5. The window “Advanced Security Settings for WindowsApps” is now visible

6. Click on the Change link next to the Owner label.

7. The window “Select user or group” is now available

take ownership of windows directory windows 10


  1. Type your user account in the area “Enter the object name to select” >  click OK.
  2. Set full access to the app folder for your account. Right-click on the WindowsApps folder > Properties > Security > Add.
  3. The window “Permission entry for data” is now visible.
  4. Click on “Select a principal” > add your account.
  5. Set permissions to “Full control”.
  6. Run PowerShell as an admin and re-register all of the packages by typing the command Get-AppXPackage | Foreach {Add-AppxPackage -DisableDevelopmentMode -Register “$($_.InstallLocation)\AppXManifest.xml”} 

If you’ve found other workarounds for this issue, list them in the comment section below.

RELATED STORIES YOU NEED TO CHECK OUT:

How to opt out of Insider Preview Program after Anniversary Update

Hey there, friend. We heard that you decided to join the Insider Program many moons ago, but now since the Anniversary Update has become available, you’d like to return things to normal. However, you have no idea how to do this. Such a shame. Worry not, we do, and we’re about to share how.

Here’s the thing, if you remove your device from the Insider Program, you will be able to jump right back in whenever the need arises, and it will again, we’re sure. Now , unlike times before, removing yourself from the Insider Program is painless and only requires a few clicks of the mouse, so that’s great.

How to remove yourself from the Insider Preview Program:

Open the Settings menu, right, then click on the Update & security option at the bottom. After doing all that, switch directly to the Windows Insider Program section then click on the option that says, Stop Insider Preview builds. Windows 10 will then give an option to option out of the Insider Preview temporarily, but that’s not what you want.

What you want is the option that says, “Need to stop getting Insider builds completely?”. That option sits at the bottom, so just click on it, then click Confirm at the next stop. Finally, restart your computer and from there, you should be out of the Insider Preview Program completely.

Enrolling again is just as easy. Seriously, it is fool proof, so anyone should be able to do it.

It shouldn’t take long for Microsoft to begin releasing new updates to Insiders, so whenever the interesting bit begins to rollout in the coming months, you’ll be enrolling again, no problem.

RELATED STORIES YOU NEED TO CHECK OUT:

Create a bootable USB Stick with Windows 10 Anniversary Update

The much awaited Windows 10 Anniversary Update is here, and with it comes a ton of new features and bug fixes. Look at that, we’re using Microsoft Edge with the LastPass extension installed, who would have thought? Windows 10 is more refined now and feels like a complete experience, so as expected, many would want to perform a clean install using a USB stick.

Now, creating a bootable USB stick for Windows 10 is quite easy. You’ll need a USB stick with at least 6GB of space, the Windows 10 Anniversary ISO, and a supported computer. You’ll also need some patience because getting everything up and running will take a few minutes, but faster than using a DVD, or even a Blu-Ray for that matter.

Before downloading the ISO, determine which version of Windows 10 you’ll need. Do you have less than 4GB of RAM? Then we recommend the 32-bit version of Windows 10. If not, go for the 64-bit version like the boss you are.

Now that everything is place, it’s time open the Command Prompt widows and take the following steps:

  1. Use the “diskpart” command to open the partitioning software. You may need to accept a UAC prompt to continue.
  2. Use the “listdisk” command to view the list of all the storage devices attached to your device.
  3. Identify the disk number of the USB drive that you are using. To make it easy, just look at the size column to identify it by its capacity. Also, it is typically the last one listed.
  4. Use the “select disk X” command to select the USB drive. Replace X with the disk number you found earlier.
  5. Use the “clean” command to erase the USB drive.
  6. Use the “create partition primary” command to create a primary partition on it.
  7. Use the “select partition 1” command to select it.
  8. Use the “active” command to make the primary partition active.
  9. Use the “format fs=fat32 quick” command to quickly format the primary partition as a FAT32 drive.
  10. Use the “assign” command to assign a letter to USB drive’s primary partition.

Finally, just copy the contents from the ISO file onto your USB stick and you’re good to go. Now, when we say copy, we do not mean copy the ISO file itself. Mount the ISO file, copy everything inside, and paste them inside the USB stick.

We should point out that you should know how to allow your computer to boot from a USB drive. The way to this is differs from manufacturer to manufacturer.

RELATED STORIES YOU NEED TO CHECK OUT:

Fix Windows 10 Anniversary Update stuck in reboot

The Anniversary Update plays it hard to get for some users: although quite a few days have passed since Microsoft rolled out the update, there are users who are still struggling to install Windows 10 version 1607 on their machines.

Microsoft’s Forum has been flooded by complaints regarding reboot issues. Users are reporting that their computers remain stuck in reboot for hours on end, without any trace of progress. First, they thought that if they waited long enough for their computers to install the Anniversary Update, they would be able to use their devices after a few hours.

Unfortunately, this strategy has proven to be quite wrong since their computers remain stuck in reboot even after 24 hours. What is worse, it that the same problems occurs even when users try to install the update using the Anniversary Update ISO file. In other words, the best solution for Anniversary Update install issue no longer applies.

Anniversary Update remains stuck in reboot

Found the Windows 10 upgrade assistant and let it download over night. This morning the assistant was “stuck” at 97% in the download. I rebooted the laptop and no changes were made, so I started the update assistant again. This time I couldn’t get past 0%. [..]

Then I downloaded the “Media creation tool” and started that and it went right to “Downloading Windows 10” Progress 97% and it is stuck again for hours.

If your computer is still stuck in reboot, try the workarounds listed below and see if they help you.

What to do if the Anniversary Update installation process gets stuck in reboot

  1. Disconnect all peripherals: external hard drive, mouse, USB storage devices, all of them.
  2. Make sure you’re installing the right Windows version: the 32-bit or 64-bit OS.
  3. Re-install your original Windows OS to repair it because your system might be riddled with system and Windows Update errors. Install the Anniversary Update only after you’ve re-installed your original OS. Then:
    1. Perform a clean boot
    2. Disable .NET 3.5 Framework in System Features
    3. Disable NVIDIA Graphics adapter, LAN, Bluetooth, USB Ports and Wi-fi. You should disable the Internet connection after Windows 10 downloads, just before restart during installation.
    4. Disconnect all peripherals.
    5. Use the Media Creation tool to download and install the Anniversary Update.

RELATED STORIES YOU NEED TO CHECK OUT:

Windows 10 Anniversary Update deleting Linux partitions?

Many folks who are running Windows 10 on their computers, usually have a Linux partition installed as well. Regular folks do it, developers do it, and then the few who prefer to use Linux but are forced to use Windows. But here’s the thing, it would appear as if the Windows 10 Anniversary Update is removing Linux partition.

Alan Pope, Ubuntu Community manager at Canonical, took to Twitter recently to complain that he has seen several reports of folks claiming the Windows 10 Anniversary Update has been deleting partitions containing Linux operating systems.

https://twitter.com/popey/status/760813314851086336

This should not be taken as any confirmation that Microsoft’s operating system is indeed working against Linux partitions after the Anniversary Update. However, we do believe Linux users should hold off a while from upgrading Windows 10 until more information is released. Furthermore, we also recommend backing up your Linux install, you know, just to be on the safe side of things.

There is no reason for Alan Pope to make up such a story, so chances are, something is going on. If true, then this might be a bug within the Anniversary Update, something Microsoft has missed.

Personally, I haven’t installed Linux in 5-years, which means, I’m unable to give this a test run to see if something is really down. However, we’ll investigate the matter to see if folks are truly having problems, or if it is just an isolated incident happening but only to a few.

While you’re waiting for some answers, go ahead and download the Windows 10 media pack. It’s a free download, so no commitment. It should also be noted that Windows 10 Anniversary Update, resets pen settings. It means if you have a Surface Pro or any other system that uses pen, you’ll have to customize your settings all over again.

RELATED STORIES YOU NEED TO CHECK OUT:

Take a look at the weapons coming to Battlefield 1, first on Xbox One

EA always takes considerable measures to research and develop their video games. Particularly with the Battlefield franchise, criticism of the action-packed war games  have always come down to the weapons. Do they feel realistic, immersive, and powerful? For Battlefield 1, bearing arms is one of their proudest features. Enough so to take the spotlight in the first of their Gameplay Series videos counting down towards the inevitable release in October.

In the World War 1 setting, the Battlefield 1 team has focused on bringing the best and most common weapons for the time period. This addition to the franchise is much different than the usual urban settings and fast vehicles. According to Creative Director Lars Gustavsson, “It is a different experience. It’s much more up close and personal.”

This is the first video we’ve seen since the E3 official gameplay trailer and live multiplayer stream hosted over a month ago. From what we know, players will be able to experience the full World War 1 with epic battles in key locations. Take the fight straight to the besieged cities throughout France, break your way through the fortified mountains of the Italian Alps, and experience head to head combat under the blazing sun of the Arabian desert. Battlefield 1 has large scale battles that can be approached by sea, air, or land with a heavy multiplayer campaign for up to 62 soldiers.

Battlefield 1 will release worldwide on October 21, 2016. If that’s not soon enough for you, it will be available for EA Access on Xbox One before any other platform on October 18. Pre-order are already available on the Xbox Store including plenty of bundles with the game. The Battlefield 1 Early Enlister Deluxe Edition lets you play earlier with a code for one month of EA Access. That’s not the only thing that you’ll get to play earlier, though. With the bundle, you’ll also be able to have a week of early access to an unannounced map that will be releasing later in the year.

Fix Windows 10 v1607 installation stuck

Long-awaited Anniversary Update, also known as version 1607, for Windows 10 is finally here, and while some users managed to install Windows 10 v1607 without any issues, others reported various problems with this update. Users reported that they can’t even install version 1607 because the installation is stuck.

You’re probably excited about the Anniversary Update just as we are, and you can’t wait to try many of the new features that Anniversary Upgrade has to offer. Despite the intensive testing in the Insiders Program, it seems that many users have problems with this update.

Users reported that Anniversary Update install hangs on older laptops, and this doesn’t come as a surprise, especially if your device doesn’t meet the hardware requirements. Certain users reported that Anniversary Update download is stuck and that there’s no way to download it. To make things even worse, certain users managed to successfully download the Windows 10 v1607, but the installation process gets stuck despite meeting the hardware requirements. This is an unusual problem, and if your Windows 10 v1607 installation is stuck, there are few potential solutions that you can try.

Solution 1 – Wait patiently for installation to finish

We understand that you’re excited about the Anniversary Update and that you can’t wait to try it and test the new features, but sometimes the installation process might take a while to complete. To see if the installation process is truly stuck, we advise to check the hard drive LED on your computer case. If the LED is blinking, it means that your hard drive is active and that Windows 10 v1607 is installing. Unfortunately, installation process can take more than a few hours to complete, and users reported that installation finished successfully after waiting for an hour or two. There’s no way to speed up the installation, therefore your only solution is to wait patiently for the installation to finish.

Solution 2 – Delete Windows Update Cache

In case your installation is actually stuck, you might be able to fix it by removing Windows Update Cache. Sometimes issues with cache can cause installation problems for various updates and version 1607 is no exception. To Delete Windows Update Cache, do the following:

  1. Start Command Prompt as an administrator. To do that, simply press Windows Key + X to open Power User Menu and select Command Prompt (Admin) from the list.
    anniversaray-update-installation-stuck-admin
  2. When Command Prompt opens enter net stop bits and press Enter.
    anniversaray-update-installation-stuck-cmd-stop
  3. Now enter net stop wuauserv and press Enter.
    anniversaray-update-installation-stuck-cmd-stop-2
  4. Close Command Prompt.
  5. Navigate to C:\Windows.
  6. Locate SoftwareDistribution folder. Create a copy of this folder and save it on your Desktop or any other safe location.
    anniversaray-update-installation-stuck-software
  7. Open SoftwareDistribution folder and delete all files and folders from it.
  8. Restart your PC.

After your PC restarts, Windows Update cache will be cleared, and you can try to download and install version 1607 using Windows Update once again.

Solution 3 – Update using Windows 10 Anniversary Update ISO file

If the Windows 10 v1607 installation is stuck, you might want to upgrade using the Windows 10 Anniversary Update ISO file. ISO file is a digital copy of a DVD media, and it works as a virtual DVD, which means that you can use it to install Anniversary Update. Microsoft released official Windows 10 Anniversary Update ISO files for download, and you can download them for free. After downloading the necessary ISO file, double click it to mount it and start the installation process. Users reported that this workaround worked for them, so be sure that you give it a try.

Solution 4 – Create a bootable media and perform a clean install

Using this solution you’ll remove all files from your C partition, therefore be sure to back up all important files. This is a drastic solution, therefore use it only if all other solutions don’t work. To create a Windows 10 installation media, be sure to use Media Creation Tool and download the latest ISO file that contains Anniversary Update. Use Media Creation Tool to create a bootable USB flash drive or DVD and boot your PC from that drive. Follow the instructions on the screen to complete the installation. After completing the installation you should have working version of Windows 10 v1607.

Anniversary Update brought all sorts of problems, and if Windows 10 v1607 installation is stuck, be sure to try all solutions from this article. If you can’t get Anniversary Update to install, or if you have any major problems with it, you might have to stick with the older build until Microsoft fixes all these issues.

READ ALSO:

Windows 10 Anniversary Update resets pen settings

The Windows 10 Anniversary Update is known to reset users’ settings to default. For some users, the OS resets all the settings, while other users are luckier and only the app font size or the pen settings are changed.

Microsoft has officially acknowledged this issue, adding that its team is working hard to fix this problem as soon as possible so that future updates won’t cause these settings to revert to the defaults.

Not all my settings migrated when I updated from Windows 10 version 1511 to the Windows 10 Anniversary Update (version 1607).  For example, my pen settings were reset after installing the update.  Which settings didn’t migrate and how do I get them back?

If your pen settings have been changed after you installed the Anniversary Update, the only solution available is to simply personalize your settings again. Go to  Settings > Devices > Pen & Windows Ink and set the parameters you want.

Unfortunately, for the time being some click settings cannot be personalized, but the tech giant is trying to find a fix for this issue as well.

It is currently not possible to modify some OEM-specific Pen click setting customizations.  We’re working to create a fix for you and we’ll update this post as soon as a fix is available.

Some users are quite disappointed in Microsoft, and even accuse the company of imposing its will upon users. They feel that Microsoft is trying to do everything it can to prevent them from customizing their computers, and are complaining the company shows no respect for the individual user anymore.

RELATED STORIES YOU NEED TO CHECK OUT:

Remove Action Center & Windows Ink icons in Windows 10 v1607

Windows 10 Anniversary Update is here, and it brought a lot of system improvements and user interface changes. The update also brought a lot of customization options, so you can basically turn almost every element of the system on or off.

In this article, we’re going to show you how to turn off the Action Center and the Windows Inking workspace. However, we’re not sure why would you like to remove the Action Center from the taskbar, because its a hub for all your notifications, but we believe you have your own reasons. Maybe you don’t like the new design, maybe you feel functionality should be better, it’s up to you.

Same thing goes for Windows Inking workspace, if you don’t have a touchscreen device that doesn’t support pens, you simply don’t need this feature turned on. It is usually turned off on all touchscreen-less devices, but in case the update turned it on for some reason, you’ll now find out how to disable it.

So, without any further ado, let’s see how to remove the Action Center and the Windows Inking Workspace from the taskbar:

  1. Go to the Windows 10 Settings app
  2. Go to  Personalization > Taskbar
  3. Now, click on Turn system icons on or off
  4. Find the Windows Inking Workspace and the Action Center, and simply toggle them offturn off action center windows ink

Once you did this, you won’t see these two icons in the taskbar. If you want to bring them back, just repeat the process from above, but logically, turn these tow features on.

If you have any questions, or comments, just let us know below.

RELATED STORIES YOU NEED TO CHECK OUT:

Windows 10 Anniversary Update restores settings to default for some users

It looks like the Anniversary Update is causing more problems for the users who’ve installed it than anyone expected. The latest confirmed issue seems to be the update resetting all Windows settings to default.

As soon as users reported this issue on Microsoft’s forums, the company replied saying that the Anniversary Update will indeed reset settings on some computers without any particular reason as to why. Microsoft said that its development team is working on a solution, and that a forthcoming update that addresses it should be pushed through Windows Update soon.

“We are aware of an issue that could reset a few of your personalized settings choices to their defaults. The team is working hard to fix this as soon as possible so that future updates will not cause these settings to revert to the defaults. If you’ve already updated to version 1607, here are some of the settings that may have been reset. Please go to the Settings app to re-personalize any of these settings if any have changed,” said Microsoft.

Based on user feedback, the Anniversary Update is working fine for most. However, despite having caused some problems here and there, we still can say that the update is pretty stable. We’re going to hunt for more issues caused by the Anniversary Update and we’ll let you know about them as soon as possible.

In case you’ve encountered some issues upon installing the Anniversary Update, let us know in the comments and we’ll try to find a solution for your problem. You can also feel free to tell us about your experience with the Anniversary Update so far!

RELATED STORIES YOU NEED TO CHECK OUT:

Fix: FPS rate drops after installing the Anniversary Update

More and more gamers are complaining about issues caused by the Anniversary Update. The latest Windows version blocks the Exclusive Mode in game controllers, preventing gamers from properly using their devices.

Other gamers have recently noticed the FPS rate drops significantly after installing the Anniversary Update. In some cases, the FPS rate is reduced by as much as 50%, which heavily impacts the gaming experience.

So far, it appears that the only users who are complaining about the FPS rate are the ones using NVIDIA graphics cards. The possibility that this issue could be caused by outdated drivers can easily be dismissed, as gamers confirmed their drivers are updated.

Gamers report FPS rate drops after installing the Anniversary Update

I just updated my windows 10 to the latest version 1607 this morning. Before the update all my games used to run on a range from 90fps to 120fps, but since the update all my games fps have dropped to 60 and seem to be locked there. The weird thing is that when I open the game it starts running on the normal range of 90-120 but it instantly drops to 60 and stays there. I’m using a NVIDIA GEOFORCE GTX 960M that is up to date (checked this morning) and the V-SYNC option on the NVIDIA control panel is turned off as well as the in-game v-sync option.

It appears that the FPS rate drops because of the Xbox app in Windows 10, which records game clips all the time. Fortunately, a quick fix is available, and you’ll soon restore your normal FPS rate.

How to fix FPS drop in the Anniversary Update

  1. Go to the Xbox app > Settings
  2. Select Game DVR > Record Games  > turn off this option.

RELATED STORIES YOU NEED TO CHECK OUT:

Fix: Media Creation Tool for the Major Update doesn’t work

In case you still haven’t receive the Anniversary Update via Windows Update, perhaps the best way to install it is with Microsoft’s Media Creation Tool. But, it looks like even using this tool to create a bootable media with the Anniversary Update isn’t the best solution sometimes, because the Media Creation Tool could crash sometimes.

So, if you receive an error message like “There was a problem running this tool,” or “Something Happened” while trying to create a bootable media, or clean install the Anniversary Update on your computer, you basically won’t have any upgrade options. But don’t worry, if you’re not able to clean install the Anniversary Update using the Media Creation Tool, we prepared a couple of solutions that might help.

What to do if the Media Creation Tool for Anniversary Update doesn’t work

Solution 1 – Run as administrator

In some rare cases the Media Creation Tool won’t work if you don’t run it as administrator. So, right-click on the Media Creation Tool icon, and choose ‘Run as administrator’ from the context menu. If running the tool as administrator didn’t help, try some of the solutions listed below.

Solution 2 – Enable needed processes

Some Windows 10 services are required to be running in order to make the Media Creation Tool work properly. Make sure all these services are running, and try to install the Anniversary Update once again. Here’s what you need to do:

  1. Go to Search, type services.msc, and open Services
  2. Make sure following services are running properly, and are set to Automatic:
    • Automatic Updates OR Windows Update
    • Background Intelligent Transfer Servicemedia creation tool error1
    • Server
    • Workstation
    • TCP/IP NetBIOS Helper
    • IKE and AuthIP IPsec Keying Modules
  3. If any of these services is not running properly, right-click on it, choose Start, and set Startup type to “Automatic”

Solution 3 – Try another computer

While we wandered around various forums to see what people are saying about the Media Creation Tool, we noticed that the tool simply doesn’t work well for everyone. So, to save yourself some time and effort, try to run the Media Creation Tool, and create a bootable media, which you can later use on the first machine.

Since the Media Creation Tool allows you to create a bootable media, and use it on another computer, you shouldn’t have any problems. If you’re not sure how to create a bootable media with the Media Creation Tool, check out this article. However, if the tool also doesn’t work on another computer, try some of the following solutions.

Solution 4 – Change language settings to English

If your system locale is different than the language of the downloaded Windows 10 setup files, the Media Creation Tool probably won’t work properly. So, make sure your system language and locale are same as the language of the Media Creation Tool, and change it, if opposite. The best option is to change your system language to English.

If you’re not sure how to change your computer’s language, do the following:

  1. Open Control Panel, and go to Region
  2. Go to Administrative tab, and choose Change system locale
  3. Set Locale to English, and click OKmedia creation tool anniversray update problem
  4. Now, return to Administrative tab, and go to Copy settings
  5. Make sure both “Welcome screen and system accounts” and “New user accounts” checkboxes are checkedmedia creation tool anniversray update problem2
  6. Confirm changes
  7. Restart your computer

If system locale was indeed the problem, you should be able to use the Media Creation Tool without any issues.

Solution 5 – Fix Using Registry Editor

If none of the solutions above solved the problem with the Media Creation Tool, you should also try fixing it yourself, by applying one registry tweak. Here’s what you need to do:

  1. Go to Search, type regedit, and open Registry Editor
  2. Go to the following path:
    • DDHKEY_LOCAL_MACHINE\SOFTWARE\Microsoft\Windows\Current Version\Windows\Update\OSUpgrade
  3. Create a new DWORD, name it AllowOSUpgrade, and set its value to 1
  4. Restart your computer

Solution 6 – Disable Antivirus

There’s also a chance that your current antivirus software actually prevents the Media Creation Tool. This could be due to conflict with Windows Defender, or some other reason. All in all, try disabling your third-party antivirus program, and run the Media Creation Tool once again.

If you tried each of these solutions, and none worked, try changing your strategy and make it possible for your computer to receive the Anniversary Update via Windows Update. To find more details about that, check out article about what to do if the Anniversary Update doesn’t show up.

That should be all, we hope this article helped you to solve your problem with the Media Creation Tool. If you have any comments, questions, or maybe some other solution for this issue, just let us know in the comments.

RELATED STORIES YOU NEED TO CHECK OUT:

PCs freezing after Anniversary Update install

For some users, downloading and installing the Anniversary Update is quite a challenge: for some, Windows 10 version 1607 isn’t appearing on their update list, others are stuck in endless boot loops, while still others are receiving various error codes.

Even the lucky ones who’ve managed to install the Windows 10 Anniversary Update are encountering many annoying issues: Cortana is missing or remains unresponsive, partitions disappear, and files and folders are nowhere to be found.

There are also very unfortunate users who cannot user their computers at all after installing the Anniversary Update. Soon after they start their computer, Windows freezes and displays the message “Microsoft Windows is not responding”.

Users report PCs freeze after installing Window 10 version 1607

Just updated my primary desktop. Everything went fine, no problems, but my whole system freezes after startup. After logging in everything works for like 20secs. After that if I only mouse over the Start area, taskbar, the black part simply, it freezes and I get a message that Microsoft Windows is not responding. After a couple of ninja startups and restarts I disabled every 3rd party program starting with windows. So it’s not that.

For the time being, Microsoft has yet to officially acknowledge the bug hence there is no official solution available. Users have already contacted Microsoft’s Chat Support, and judging by Support engineer feedback, it appears the tech giant wasn’t at all aware of these Windows freezes.

The Windows community suggested a series of workarounds, but no definite solution is available yet.

To all affected people, we haven’t yet found a definite solution, so the only option to get a working PC at the moment is to roll back to a previous build in case you updated.

We’ll keep on searching for a solution as well because one of our computers is also plagued by random Windows freezes. We are a bit luckier as the freezes occur only four or five times a day, which means we can still use the computer unlike other, more unfortunate users.

RELATED STORIES YOU NEED TO CHECK OUT:

.RDP files won’t open after Anniversary Update

Quite a large number of users are reporting they can’t open .RDP files after installing the Windows 10 Anniversary Update. More specifically, the files remain unresponsive irrespective of the actions performed by users.

It appears that the update breaks some features related to remote desktop connections, as users have confirmed the problem doesn’t occur on VMs with a fresh install of the Anniversary Update ISO file. It seems that this issue is affecting only Microsoft’s Remote Desktop Connection Manager app, as all the users plagued by this problem don’t have other RDP software installed.

Users complain RDP files won’t open after Anniversary Update

After the Windows 10 Anniversary Update was installed on my Windows 10 Pro, .RDP files won’t open. Remote Desktop still works if you open it manually and enter in the server info. But my saved .RDP files won’t open. Also, right clicking on them and selecting edit also does not work. Nothing happens. I even opened Remote Desktop connection, entered in the server info manually and clicked Save As. That shortcut also won’t work.

The fact that RDP.files won’t open on systems running the Anniversary Update is extremely frustrating for businesses, because users depend on this feature to open their own computers from home.

Fortunately, there is a workaround available to fix this issue, but it’s not a permanent solution.

How to open RDP.files on systems running the Anniversary Update

1. Type display in the search box
2. Select Display Settings
3. You’ll see a text in red “A custom scale factor is set“.
4. Click on the text underneath “Turn off custom scaling and sign out“.
5. Sign back in.
6. MSTSC should now work with an RDP file passed as a parameter.

RELATED STORIES YOU NEED TO CHECK OUT:
New DLC for Doom, Unto the Evil, released

Just a week after the popular shooter Doom received a “Free Update 2” featuring new multiplayer modes and updates to the SnapMap level creation tool, iD Software and Bethesda Softworks have released today the game’s first premium DLC, called “Unto the Evil.” The $14.99 add-on is introducing new maps and weapons, a new playable demon, new hack modules and more. Here is the list of the goodies below:

  • Dominate Three New Multiplayer Maps:
    • Ritual – Go to the frozen wasteland of the Martian polar core where the UAC has recreated cultish experiments around a demonic artifact. Activate the artifact when enemies are nearby to engulf them in hellfire.
    • Cataclysm – Visit an off-world space station where the UAC has opened a permanent portal to Hell in this map with split environments and player teleporters.
    • Offering – Discover an ancient temple fortress built on a pool of Argent energy in this map featuring ancient hell environments, lava pools, and deadly voids.
  • Unleash the “Harvester” Playable Demon: Play as the Harvester, a terrifying demon that consumes souls using lightning energy before unleashing a devastating ranged attack.
  • Equip the UAC EMG Pistol
  • Master the fast-firing sidearm and its secondary fire to charge a powerful energy shot that deals significant damage.
  • Surprise Your Enemies with the Kinetic Mine: Deploy this explosive, proximity-activated mine that when triggered, launches toward its target, doing area-effect damage on impact.
  • Customize Your Experience with Robotic-Themed Armor: Leave your flesh behind and customize your character with the ruthless style of these cold machines.

Additionally, id Software is also introducing the “PartyPlay system”, which will allows anyone who is in your party to play any of the new maps as part of the map rotation. To celebrate launch of the game’s first multiplayer DLC, there us also a double XP weekend which will last until August 8, at 12pm ET. The $14.99 DLC is available today on Xbox One, PS4 and PC and you can get it on your Xbox One from the link below.

Get the Unto the Evil DLC for your Xbox One ($14.99)

Get the full Season Pass with 3 Multiplayer DLC Packs ($39.99)

GameStop extends trade-in program for the Xbox One S through August

Gamestop’s trade-in system lets gamers sell used consoles and video games in return for newer ones. Widely known for being convenient when new generation consoles come knocking, Gamestop retailers didn’t leave fans disappointed once the Xbox One S hit the shelves.

According to Gaming Bolt, the trade-in offer for the Xbox One S was originally only going to last until July 31st. Now it has been extended towards the rest of this month as well. Put credit towards your Xbox One S purchase by trading in any of the following consoles:

  • 3DS XL or Wii U can be traded in for up to $100 off.
  • Xbox One can be traded in for up to $150 off.
  • Playstation 4 can be traded in for up to $200 off.

This also includes trading towards any of the new console and game bundles. Learn more about how to build up trade credit with Gamestop and find more offers on the official web page.

Many gamers would find the trade in as a worthy upgrade from the Xbox One, especially with the $150 discount. The new generation’s slim design removed nearly 40% of the consoles body mass. Under the hood, the 2 TB console makes it possible to stream 4K resolution video and  features a built-in power brick. IFixIt even tore the new console apart, giving it an 8 out of 10 rating for repairability. Add on the sleek Bluetooth controller for easy gaming and you’ve got a $400 purchase worth sinking your teeth into.

Of course, others might be holding out to learn more about the highly anticipated Project Scorpio teased to us at E3 earlier this year.

If you’re ready to give up your old and get your hands on the new, then this is the opportunity for you. We can’t be certain that the offer will last past the end of August so be certain to check it out while you still can.

Anniversary Update blocks Exclusive Mode in DualShock 4 and other game controllers

Overall, Windows 10 PC users are satisfied with the many new features introduced by the Anniversary Update. However, if you ask a gamer — especially one who uses Sony’s DualShock 4 controller — you won’t get the same answer.

The Windows 10 Anniversary Update broke the drivers of many game controllers, disabling Exclusive Mode. Windows 10 version 1607 breaks InputMapper’s ability to connect to the controller exclusively which is required by certain games.

Gamers complain the Anniversary Update breaks Dualshock 4 drivers

As of update 1607, kernel32.dll CreateFile() using only the flags GENERIC_READ and GENERIC_WRITE and 0 for dwShareMode no longer allow exclusive (non shared) access to devices needed in some circumstances.
An example of a device that is not allowing exclusive access any more is the Sony Dualshock 4 Game controller.

The root-cause for this issue is an undetermined Windows process that connects to all HID devices. This connection should only apply to certain GUID or device classes such as keyboards and mice, not to all devices.

Fortunately, there is a workaround available that requires users to disable and then re-enable the HID device in the device manager. Once this action is completed, other programs will then be able to access it exclusively.

How to fix Exclusive Mode issues on game controllers

  1. Close the DS4 tools
  2. Go to Device Manager > HID devices > Game Controller > Disable
  3. Wait for the command to be completed
  4. Enable the feature again
  5. Open the DS4 tools.

The fact that the Anniversary Update breaks game controllers made many gamers angry, with many joking that this is how Microsoft eliminates competition. However, we tend to think this is only a mistake as Microsoft has broken its own controllers before as well.

However, the steps listed above constitute only a workaround. For the time being, there is no permanent fix for this issue.

RELATED STORIES YOU NEED TO CHECK OUT:

  • You’ll soon be able to use the new Xbox One controller on Windows 10 Mobile

Windows Update Keeps Crashing my PC: How to Fix it

The Anniversary Update is a major update for Windows 10, and many users were quite excited about it. Unfortunately, it seems that these have their own share of issues, with many reporting that Windows Update keeps crashing the PC.

As this is a major update with an array of new features, it’s not surprising to experience certain issues. Some found the PC’s speed reduced, others had an increase in boot time, and for a few, it led to BSOD errors.

If a Windows update freezes the computer or triggers issues, the following solutions will help you out!

How do I fix Windows 10 update crash?

Before we move to the complex solutions, here are some quick ones to try:

  • Boot the PC into Safe Mode to get it working and then execute the solutions.
  • Check for any other pending updates and install them. When a Windows update keeps crashing the PC, Microsoft usually releases a patch in the subsequent versions.
  • Head to the Secure Boot settings and disable it when Windows 10 crashes on startup after an update.

If none work, head to the fixes listed next.

1. Install .NET Framework 3.5 and C++ Redistributable Package

Users report that both freezing and crashing issues can be fixed by installing the C++ Redistributable Packages and .NET Framework 3.5. The OS and many third-party applications rely on these components, therefore be sure to download them from the links below:

Keep in mind you might have to download all available versions of C++ Redistributables and .NET Framework to fix these issues.

2. Run the SFC scan

  1. Press Windows + X to open the Power User menu, and select Command Prompt (Admin) from the list.
    anniversary-update-crashes-freezes-cmd-admin
  2. Type the following command and hit Enter: sfc /scannow anniversary-update-crashes-freezes-scannow
  3. Wait until the scan is completed.

If you’re experiencing crashes or freezes on the PC after installing the Anniversary Update, you might want to perform an SFC scan. This scan is designed to check your Windows 10 installation and repair any corrupted system files.

3. Set the default save location to C:

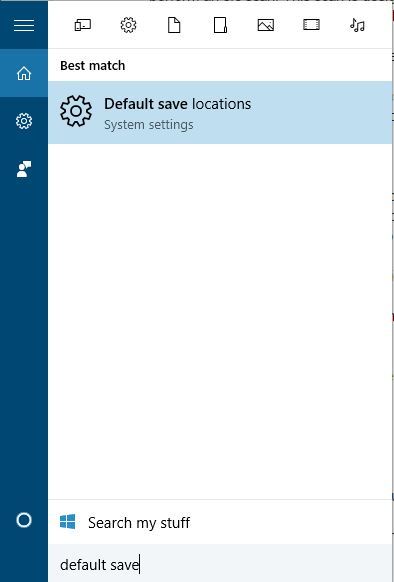
  1. Press Windows + S, type default save, and select Default save locations from the menu.
    anniversary-update-crashes-freezes-default-save
  2. Go to the Save locations section and set all options to This PC (C:). Basically, you have to set the system drive as the primary save location.
    anniversary-update-crashes-freezes-save-location

Users reported that you can fix things when a Windows update keeps crashing the PC after an Anniversary Update by setting the Default save location to the C: drive, or whichever is the system drive in your case.

4. Disable AppXsvc using Registry Editor

Tip icon Tip
Although some reported that this solution fixed crashing issues for them, others reported BSOD errors after applying it. So, make sure to create a restore point before you proceed.
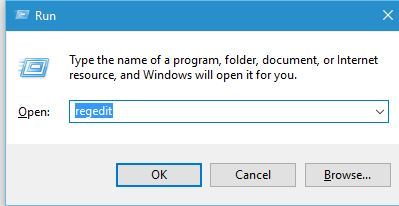
  1. Press Windows + R, enter regedit and click OK.
    anniversary-update-crashes-freezes-regedit
  2. When Registry Editor starts, navigate the following path:HKEY_LOCAL_MACHINE\SYSTEM\ControlSet001\Services\AppXSvc
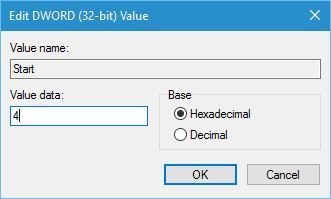
  3. Locate the Start DWORD in the right pane and double-click on it.
    anniversary-update-crashes-freezes-registry-editor
  4. Set Value data to 4 and click OK.
    anniversary-update-crashes-freezes-value
  5. Close Registry Editor and restart your PC.

According to some users, disabling AppXsvc in Registry Editor fixes both freezing and crashing issues after installing updates in Windows 10.

5. Rollback to the previous build

If the problematic Windows update keeps crashing the PC, you may want to uninstall the update. Once done, wait for another version to be released, and only then, update the OS.

Uninstalling the problematic update should fix things when the PC freezes, crashes, or fails to boot altogether.

That’s it! You now know how to fix things when the Windows 10 PC keeps crashing after installing an update, and should have it up and running.

Before you leave, find out how to boost the PC’s performance and make it run faster than ever.

For any queries or to share what worked for you, drop a comment below.

Windows 10 Anniversary Update changes font size in menus and apps

Many users are reporting the Windows 10 Anniversary Update changes the font size of their apps and menus, making the text smaller. This is an old issue that even Insiders have complained about, but it appears Microsoft hasn’t done anything to prevent Windows 10 updates from changing the font size.

On the other hand, Microsoft’s Support engineers confirmed the company was aware of an issue that could reset some of users’ personalized settings to their defaults. They also added the engineer team was working hard to fix this bug as soon as possible so that future updates wouldn’t cause these settings to revert to the defaults.

Anniversary Update users complain about font size changes

Just received the Anniversary update and my screen and browser fonts have changed.  They are smaller and obviously different.  Is this supposed to have happened?  I can’t see how to change them back.

If you want to change the font size of apps and menus, follow the steps listed below to personalize the sizing of text.

How to personalize the font size on the desktop and other places in Windows 10

  1. Go to Settings > System > Advanced display settings
  2. Select Advanced sizing of text and other items
  3. Select Set a custom scaling level 

Set-a-custom-scaling-level


4. Click on Custom sizing option > Scale to this percentage of normal size

custom-sizing-options-windows-10


5. Click OK > restart computer

6. Go back to Settings > System > Advanced display settings > Advanced sizing of text and other items

7. Select Change only the text size > personalize the settings

change-the-text-size-windows-10-icons


8. Restart your computer.

In case you also want to resize desktop icons on Windows 10, use the step-by-step guide below.

How to resize desktop icons on Windows 10

Change the view settings

desktop-icon-size-windows-10


  1. Right click on your desktop.
  2. Select View.
  3. Choose the icon size you want.

RELATED STORIES YOU NEED TO CHECK OUT:

Microsoft is a leader in 18 Gartner Magic Quadrants, including Cloud Infrastructure as a Service

Microsoft has been scoring some real victories lately in terms of how analysts have been rating their “cloud-first, mobile-first” productivity solutions. Gartner, in particular, has been rating Microsoft as a Leader in a number of their Magic Quadrants, from cloud storage to Disaster Recovery as a Service (DRaaS).

Today, the Azure blog spent some going highlighting all of the areas where Microsoft is a cloud computing leader:

Today, Gartner has named Microsoft Azure as a leader in its Magic Quadrant for Cloud Infrastructure as a Service for the third year in a row based on completeness of our vision and ability to execute. We are honored by this continued recognition as we are relentless about our commitment and rapid pace of innovation for infrastructure services. With the G series, Azure led with the largest VMs in the cloud and we continue to deliver market leading performance with our recent announcement supporting SAP HANA workloads up to 32 TB. And while Azure is a world class cloud platform for Windows, it’s also recognized for industry-leading support for Linux and other open source technologies. Today, nearly one in three VMs deployed on Azure are Linux. Strong momentum for Linux and open source is driven by customers using Azure for business applications and modern application architectures, including containers and big data solutions. With over sixty percent of the 3,800 solutions in Azure Marketplace built on Linux, including popular open source images by Ubuntu, CoreOS, Bitnami, Oracle, DataStax, Red Hat and others, it’s exciting that many open source vendors considered Microsoft one of the best cloud partners.

In fact, Microsoft is the only cloud computing vendor that is a Magic Quadrant Leader in all of the major cloud services categories, including IaaS, Platform as a Service (PaaS), and Software as a Service (SaaS). These ratings place Microsoft in an enviable position above Amazon AWS, Salesforce, and Google. Looking at the following chart, we can see that Microsoft is a Leader in fully 18 different Magic Quadrants.

Microsoft Magic Quadrant Leader positions
Microsoft Magic Quadrant Leader positions.

Microsoft highlights two specific customers who are using the Redmond company’s cloud solutions:

  • Fruit of the Loom: Office 365 was their “runway” to Azure. Success with Office 365 deployment has led to use of Azure infrastructure and its platform services as they moved their consumer-facing website fruit.com to Azure. To gain insight into how they should market and package their products, Fruit of the Loom is also leveraging platform services such as Azure Machine Learning.
  • Boomerang: An Office 365 ISV takes advantage of Azure to create productivity solutions within Outlook. A key feature for Boomerang is its ability to generate real-time calendar images that are shareable with people outside of the user’s organization. Boomerang relies on Azure’s enterprise-proven infrastructure to support this computationally demanding workload. Their experience with Office 365 led them to look more closely at Azure, and they have started to migrate services from AWS to Azure to leverage Azure’s platform services and Machine Learning capabilities.

Clearly, Microsoft’s investments in their cloud computing strategy is paying off in terms of industry recognition to go along with the company’s significant gains in cloud revenues. Going forward, this recognition should continue to help Microsoft enlist more companies into their cloud computing platforms and continue their success in shifting from the Windows company to a leader in a “cloud-first, mobile-first” market.

The definitive history of the Microsoft ninjacat

The beloved Ninja Cat and its trusty fire breathing unicorn steed have spread to every corner of Microsoft, from animated Skype emojis, to Xbox Avatars, to being the mascot of the Windows Insider program. Ninja Cat has become its own cultural meme for Microsoft, signifying that things aren’t business as usual in Redmond and that Microsoft is cool again.

But not much has been known about where the Ninja Cat came from since Ninja Cat stickers first started appearing on employee’s computers back in early 2015. That is until now. One of the creators of the Ninja Cat took to the Microsoft Developer blog to chronicle the history of the famed unicorn riding feline and all of the permutations since.

Ninja Cat and his trusty T-Rex
Ninja Cat and his trusty T-Rex as an Xbox Avatar

It all started with a team Microsoft employee KC Lemson was working with in 2014. They were working on a presentation about what would be later known as Windows 10. In the presentation, they included a joke that showed the infamous satirical Microsoft org chart transform into a slide full of “kittens and puppies and rainbows and unicorns.” And Lemson adds that the design was indeed inspired by Jack Heuser’s Welcome to the Internet meme.

Lemson then says after the presentation that other Microsoft employees started asking “how they could get that powerpoint slide on a T-shirt.” And so, she started making shirts, but also stickers since they’re significantly cheaper. It just organically spread throughout Redmond from there as employees started putting stickers on their work laptops. Eventually, non-Microsoft employees spotted the sticker and The Verge wrote about it not long after the reveal of Windows 10, and the rest is history.

Ninja Cat even made an appearance last fall at the #Windows10Devices event

Lemson’s blog post goes on in further detail describing the chain of events that led to the Skype emoji, the Xbox avatars, and the versions with a T-Rex and a shark. If you are curious about the entire history and to see a great collection of different versions of ninja cat, you can read more here.

But KC Lemson also importantly notes the greater significance of Ninja Cat. Sure it started as a fun joke in a PowerPoint slide, but it also visually captures what she describes as “a sort of zeitgeist about how people felt about the product and where we were headed.” Ninja Cat has also served to put a more personal touch on Windows 10 and Microsoft’s cultural transformation.

KC Lemson writes:

In the hallways there is so much energy and passion for our products and our customers, but due to the immense scale at which our products operate, it’s easy sometimes to come across as “Corporate with a capital ‘C’.”

Memes come and go. But Ninjacat has definitely left its mark and captures the essence of an important turning point for Microsoft.

Hue’s Xbox One release date announced

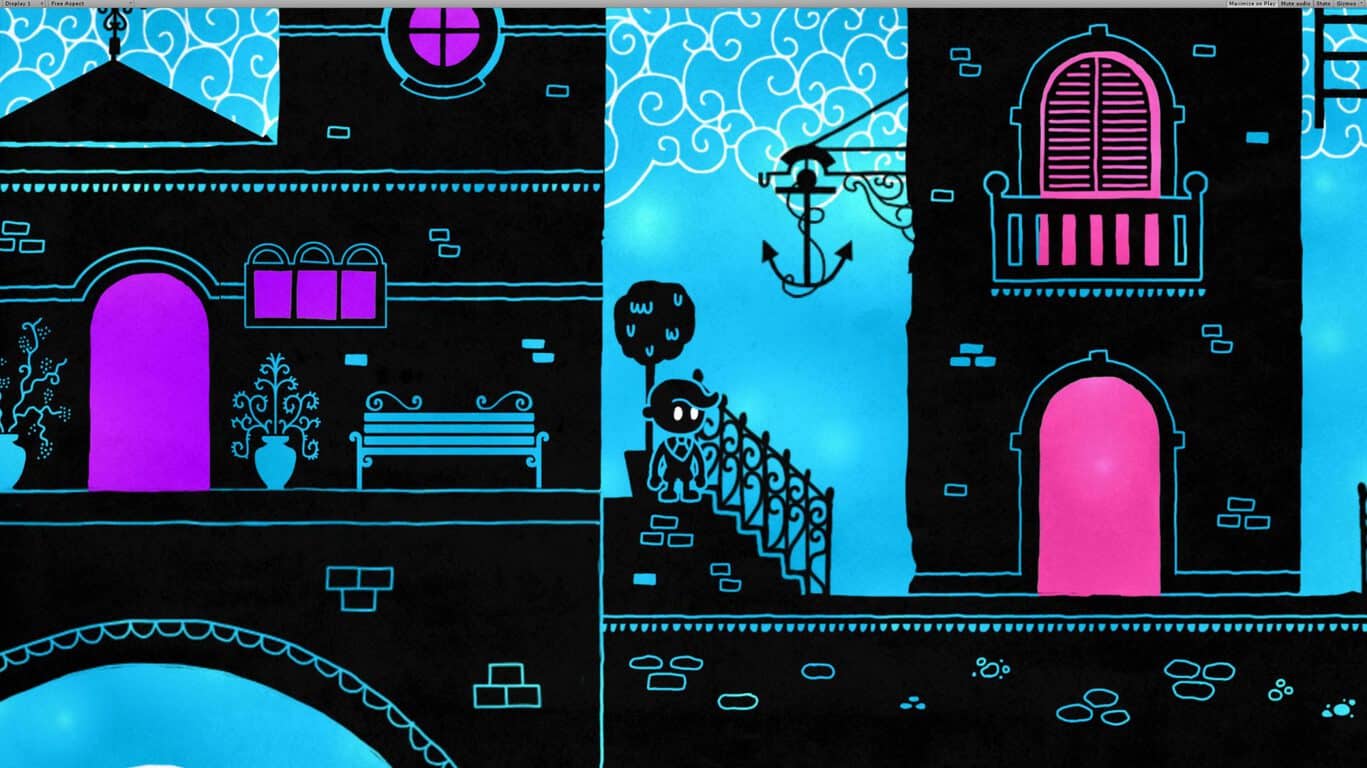
Curve Digital and Fiddlesticks, the developers of upcoming puzzle-platformer game Hue, have announced that the game will head to the Xbox One on August 23rd.  The announcement was made in a trailer, which can be seen below (via NextOnGaming.)

As seen in the above trailer, Hue is a Puzzle Platformer where you can alter the world and your surroundings by changing it’s background color.  The world of the game features a dangerous gray land, and you are tasked with unearthing colored fragments on a journey to find your missing mother.  Hue will also be available on other platformers including PC via Steam, PS4, and PS Vita.

Hue is an award winning title, picking up many prizes in 2015 such as Best Game of the Show, and Best Kids & Family Game at Casual Connect USA Indie 2015.  Available on August 23rd on Xbox One, the title come to other platformers including PC (via Steam,) PS4, and PS Vita.

Cortana missing or not working after a Windows 10 major update

It appears that the Windows 10 Anniversary Update and Cortana don’t get along very well. Many users complained Cortana was missing after they installed the update on their machines. Other users were a bit luckier, they could find Cortana, but they couldn’t get her to work.

The fact that Cortana is not working on the latest Windows 10 version is surprising, taking into account all the publicity Microsoft created around its personal assistant.

After the Anniversary Update Cortana has gone

Cortana missing or not working Anniversary update

“[…] now Cortana is missing. When I click on the Search icon, there is no notebook, no light bulb, and if I try Settings, I just get “Change what Cortana knows about me in the cloud.” No sound commands in Cortana are working, from “Hey Cortana” to anything in Search. I can’t search by voice.”

Users can no longer use Cortana after updating to Windows 10 version 1607

“So as soon as the update to Anniversary update finished, I hit up Cortana and after a second it changed back to the regular “search” and doesn’t let me turn on Cortana back again.”

Other users managed to get Cortana to work to a certain extent. However, it appears that not all the options are available: the info cards, the notification mirroring and other features are unresponsive, or they are missing altogether.

How to fix Cortana issues in Windows 10 Anniversary Update

The only solution we found to fix Cortana-related issues in the Anniversary Update involves modifying the registry. If you managed to find other workarounds, list them in the comment section below.

cortana not working anniversary update registry

  1. Type regedit in the search box > hit Enter
  2. Go to HKEY_CURRENT_USER\SOFTWARE\Microsoft\Windows\CurrentVersion\Search
  3. Change BingSearchEnabled from 0 to 1.
  4. Make sure all the Cortana flags are set to 1.
  5. Try to use Cortana again.

RELATED STORIES YOU NEED TO CHECK OUT:
Partition disappears in Windows 10 Anniversary Update

Microsoft hoped the Windows 10 Anniversary Update would literally be a revelation for all users, but shortly after installing the update, users encountered various issues. Despite Microsoft’s efforts to anticipate all the possible bugs, the list of complaints is getting longer every day.

Many users are reporting that some of their partitions simply disappeared after installing the Anniversary Update. Usually it’s the smallest partition that disappears, although we couldn’t say for sure whether the partition is deleted or if Windows simply doesn’t detect it. Some users are informed that the partition is not allocated, while others can detect it once they install partition management apps.

Users complain their partition is gone after Anniversary Update

I  began installting the update yesterday evening before going to bed. Now I see that my D: partition is gone. In the disk manager it says “149,05GB Unallocated”. It is a 160GB Intel SSD. I had most applications installed and all my personal files on this partition.

Users report partition won’t mount after Windows 10 Anniversary Update

partition gone anniversary update

Since updating to the Anniversary update earlier one of my partitions won’t mount. It’s on a 3TB Seagate ST300DM001 HDD which I have split into 1 2TB partition and 1 1TB partition. The 1TB partition mounts fine however the 2TB doesn’t, this was working fine before the update in Windows 10 and the drive is using GPT.

One program that helps in such situations is the MiniTool Partition Wizard. The program successfully detects the partition, allows users to assign a drive letter and access the partition in File Explorer.

Other users suggesting installing Acronis Virtual Disk Drive for 2 TB+ drives, and confirmed that in their case the partition magically re-appeared with all the files intact. You can try this workaround as well, download Acronis Virtual Disk Drive, and see if it works for you.

RELATED STORIES YOU NEED TO CHECK OUT:

Third party Pokémon GO app for Windows 10 is now available

Pokémon GO is an augmented reality game was only released for Android and iOS. However, a few weeks ago, we found out about a company named ST-Apps that’s working on a third party Pokémon GO app for Windows 10 Mobile.

We are pretty sure that not many thought this game would be available for Windows 10 Mobile so soon, but it seems the Windows Phone community inspired the developer company to make an effort and release it as soon as possible. ST-Apps seems to have figured out a way to sideload Pokémon GO using its source code from GitHub.

However, gamers will still need to make an account on an Android or iOS device, something that can be done via Bluestacks). Keep in mind that side-loading will need to be enabled in order to install the app as it can’t be found on the Windows Store. The downside of Pokémon GO for Windows 10 Mobile is that it lacks the augmented reality features the game comes with. The third party Pokémon Go app can be installed on devices that run on Windows 10 Mobile, but there are developers who could bring it to Windows 8.1 OS by using the source code.

How to install third party Pokémon Go Game On Windows 10 Mobile:

– You will need to create a Pokémon Trainer Club account by heading to this page
– Log into Pokémon GO from an Android/iOS device to select your starter (You can do this via Bluestacks)
– Logout from the official Pokémon GO application
– Enable sideloading on your Windows 10 Mobile device
– Download the certificate from here and the app file from here
– Copy the two files on your mobile device, open the file manager, launch and install the .cer file. After that, launch and install the .appx file.
– Launch the game and log into your Pokémon GO account to start playing!

RELATED STORIES TO CHECK OUT:

Windows 10 Anniversary Update brings a whole new set of emojis

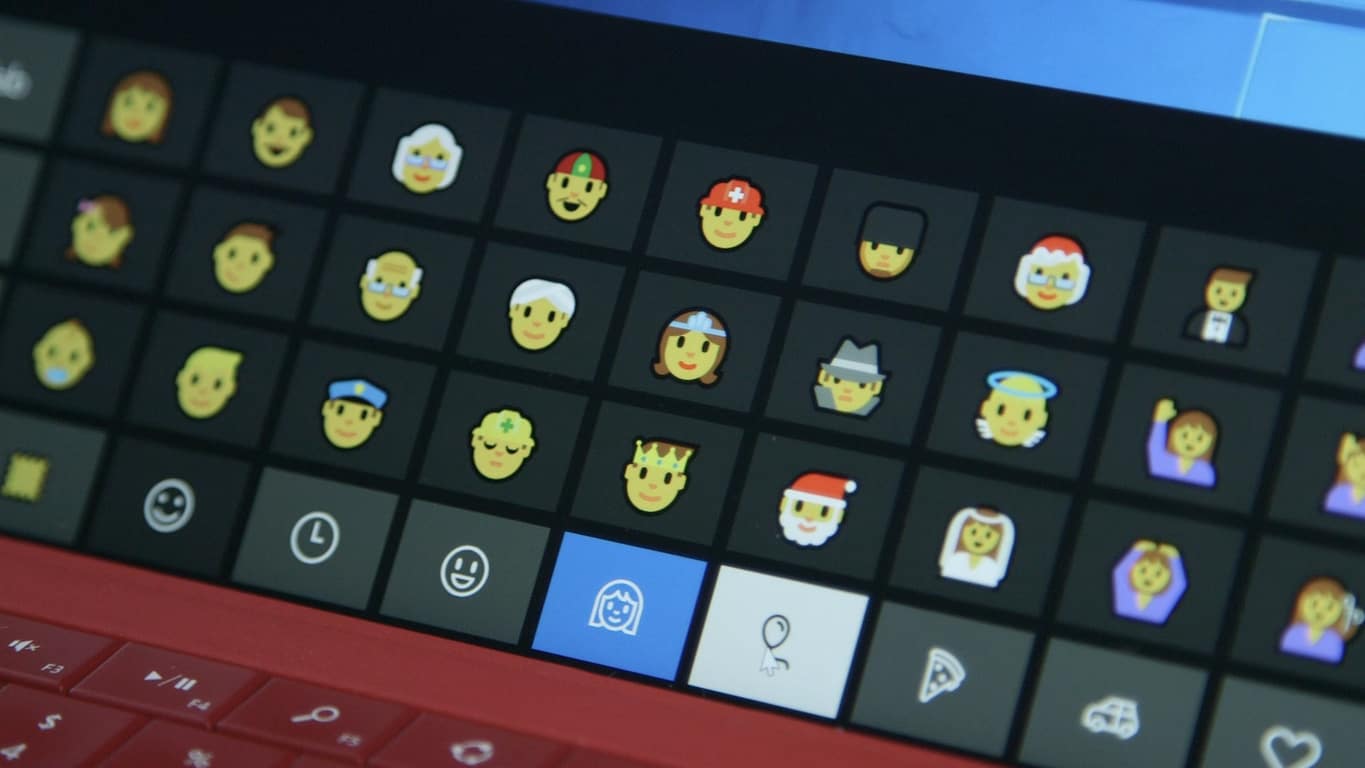
Anniversary Update for Windows 10 is now released, and it brought a lot of interesting additions. One of the additions that you might not notice at first look, but will definitely love once you find it is a whole army of new emoji for Windows 10, just like we told you before.

The update completely changed Windows 10 emoji set, by redesigning some of existing emoji, but also by introducing brand new ones. According to Emojipedia, the new list of Windows 10 emoji now counts 52 thousand emoji! This sound unbelievable, but is completely true, there are infinite combinations of little guys you can use while chatting with your friends.

windows 10 anniversary emoji

“Microsoft today released Windows 10 Anniversary Update which includes a completely new emoji design, full Unicode 9 emoji support, as well as interracial and single parent families — a first for any operating system. This version of Windows includes over 52,000 new emojis when all family combinations are taken into account. You read that right, fifty two thousand.”

Emoji on each Microsoft’s platform, including Windows 10 PCs and Tablets, and Windows 10 Mobile devices, were updated with the Anniversary Update. However, only users who already managed to install the Anniversary Update on their PCs are currently able to use all these emojis, as the update still has to arrive to Windows 10 Mobile.

windows 10 anniversary update emoji

You can take a look at all emoji on Emojipedia, but be aware, it might take a while until you manage to check each one. Also, don’t forget to tell us in the comments, what’s your favorite Windows 10 Anniversary Update emoji?

RELATED STORIES YOU NEED TO CHECK OUT:

85 changes introduced with Windows 10 Anniversary Update

The Windows 10 Anniversary Update promises to take the Windows user experience to the next level with a plethora of interesting features. These improvements were added following user feedback, so many users will be happy to see that Microsoft took their opinion into consideration and updated Windows 10 accordingly.

The changes made to Windows 10 improve many areas of the OS: The Start Menu displays more apps, Cortana is more reliable, the Notification Center is more user-friendly, while the Edge browser now supports a series of new features. However, it’s hard to notice all these improvements unless you use them, which is why we’re presenting you with the 85 new features the Anniversary Update includes.

85 Windows 10 Anniversary Update Improvements

  1.  The default e-mail address is no longer displayed on the lock screen.
  2. You can control Music playback from the lock screen itself.
  3. The Login screen now uses a background image same as the lock screen.
  4. New Windows activation troubleshooter to resolve issues with windows activation.
  5. Microsoft account is now linked with your digital license which activates Windows.
  6. The Start menu UI has been updated.
  7. Lists of the most used applications and all applications have been combined together.
  8. Vertical bar added to the left side of the menu which contains settings, Explorer and file options.
  9. The Start menu now displays up to three newly added applications instead of one.
  10. Applications that start with numbers are now listed under the symbol “#” instead of “0-9”.
  11. Cortana is available on the lock screen (you must first activate in the settings).
  12. Improved synchronization of Cortana and Action center.
  13. Cortana has been integrated with Maps.
  14. Reminders are shown as a list and can use images and application data also.
  15. Music search-Cortana can search for music and supports playback from Groove music pass(US only)
  16. You can set a timer using Cortana.
  17. Sync your notifications on the PC to phone and vice versa is enabled through Cortana. You can get information about battery, calls on other devices, etc.
  18. Cortana can read your  Office 365 emails, reminders, etc.
  19. Cortana shows sound wave instead of random characters when it is listening to you.
  20. Search shows Onedrive results too.
  21. Added ability to show a specific window on all virtual desktops.
  22. Switch between desktops is now possible with the new four-finger gestures on the Touchpad.
  23. Indicators on the taskbar for Universal modern apps.
  24. The system clock is integrated with events from the calendar application.
  25. The system clock will be displayed on each monitor when using a multi-monitor configuration.
  26. The Flyout UI of volume is improved-now you can change the source of the Audio and control volume accordingly.
  27. Explorer Icon would be removed by default.
  28. is moved to the right of the system clock.

  29. Notification Center icon now shows the number of notifications.
  30. Notifications between mobile and desktop versions of Windows are now synchronized.
  31. The Wi-Fi icon now has an additional interface instead of the on/off network.
  32. The options are available to the new setting priority and the allowable number of notifications from the same application and configuration buttons at the bottom of the center.
  33. You can reject any notification by clicking the middle mouse button.
  34. Now you can remove/add individual items from the quick actions.
  35. Extensions support has been added. The notable extensions available now are Adblock Plus, Translator, Last Pass and Web Clipper.
  36. Tabs can be pinned so that accidentally closing the browser doesn’t remove them.
  37. Switch back and forth from web pages using swiping left or right.
  38. Right clicking the back button would result in the list of web pages history.
  39. Added an option to clean-up the data when the browser is exited.
  40. The favorite bar can now show icons only,allows renaming and creating folders.
  41. Paste/search and paste and go options up in the address bar depending on the information present on the clipboard.
  42. A warning displays when you close Edge wh a download is in progress.
  43. The default download location of the items can be changed.
  44. Added importing favorites support from Firefox.
  45. Favorites are shown in a tree structure in hub.
  46. When the display window is narrow,the share and make a note button get converted into an icon.
  47. What’s new and tips page added to the main menu of the browser that leads to a page of Edge change-log.
  48. Hub can be pinned so that it would open when we start Edge.
  49. New download prompt that would ask you for either save/run.
  50. Duplicate favorites are allowed but they should not be in the same folder.
  51. New Skype Universal app replaces phone and video app.
  52. Added connect app which brings continuum experience to a PC.
  53. Added Sticky notes as a modern app.
  54. Feedback hub has been introduced replacing Insider hub and windows feedback.
  55. New shortcut for feedback hub-Windows key+F.
  56. New updated versions of Sports, News, Music Films and TV etc.
  57. Sway is merged with photos app.
  58. Windows Defender can be used even if another 3rd party antivirus is installed.
  59. Microsoft WiFi has been discontinued.
  60. A new tool to clean install Windows.
  61. Now applications can be run in light or dark mode.
  62. Taskbar properties have been merged in the Settings app.
  63. The apps can now be reset in the factory state. The option is present in System>Apps. This is quite handy when an app doesn’t open.
  64. A network test button has been added to test the network.
  65. Each subcategory of a category has its own icon.
  66. Location improvements-now approximate locations can be used.
  67. Screen reader and magnifier improvements.
  68. Added a separate option for Windows Insider program in Update and security.
  69. Active hours in Windows update. The computer doesn’t restart in the time interval of active hours.
  70. The latest information on windows update link has been moved to advanced options.
  71. Developer subcategory in update and security has been improved.
  72. The search bar in the Settings app has been moved to center and is enabled by default. Earlier to search you had to click on the text box first.
  73. Improvements to the subcategory bar-the colored text would tell the active section.
  74. New icons of update and security and Windows update.
  75. The taskbar can now be hidden when in Tablet mode.
  76. List of all applications is now shown in full screen rather than a list.
  77. Optimization of Onecore, the shared code of windows used to develop windows on all platforms.
  78. New Windows Ink feature: Windows Ink is enabled by default
  79. New interface for installation progress of Windows updates
  80. Improved battery life of a device in standby mode.
  81. Native Ubuntu Bash support.
  82. The User interface of User account control has been changed.
  83. Added a new group policy to remove 260 character limit on paths of files and folders on NTFS.
  84. New emoticons.
  85. Command Prompt display has been improved on High DPI displays.

What are your favorite Windows 10 features? What other features should Microsoft add to Windows 10?

RELATED STORIES YOU NEED TO CHECK OUT:

Fix: Can’t install Edge extensions in Windows 10 Anniversary Update

The Windows 10 Anniversary Update arrived on the scene on August 2nd, and soon after installing it many users hit the forums, searching for a solution for the issues they encountered.

The Redmond giant has long been boasting about Edge’s new features, particularly about the plethora of extensions users would be able to install. However, quite a significant number of users reported they couldn’t install extensions for Microsoft Edge after downloading the Anniversary Update.

Here is the problem: This app encountered a problem. Please reinstall it to repair. Same circle. Reinstall and same message pop up. Cannot get out. […]

This problem only applied for extension in Window Store. Any other app installed and worked fine. This problem is driving me crazy. 4 months waiting and nothing but pain. What should I do? I don’t want to do a clean install.

The Anniversary Update keeps on informing users that extensions need repair and asks them to reinstall Edge extensions over and over again. Users confirmed that this issue occurs with every Edge extension.

It appears that the bug is not with extensions or Edge, it seems that the Windows Store itself is the issue. It can update apps, but it cannot install them properly. Once apps are downloaded, they simply crash or won’t launch at all.

Fix: Can’t install Edge extensions in Windows 10 Anniversary Update

Solution 1 – use PowerShell

1. Launch Powershell as admin.

fix install edge extensions powershell anniversary update

2. Type Get-AppxPackage *pocket* | Remove-AppxPackage to uninstall pocket.

powershell remove package anniversary update

3. Type Get-AppxPackage -AllUsers| Foreach {Add-AppxPackage -DisableDevelopmentMode -Register “$($_.InstallLocation)AppXManifest.xml”} to reinstall all stock apps including the Windows Store.

fix install edge extensions

4. Install Pocket through the Windows Store.

Solution 2 – Use the CCCleaner

  1. Launch CCleaner > go to Tools and Remove Programs
  2. Select the Edge extension and removed it.
  3. Go to the Store through Edge > install the extensions you want.

RELATED STORIES YOU NEED TO CHECK OUT:

Windows 10 Anniversary Update improves the Windows Store

Microsoft improved every important aspect of Windows 10 with the Anniversary Update. One of the features drawing the most attention from users is definitely the Windows Store. The Anniversary Update introduced some visible changes to the Store that users will see once the update is released.

Besides all the changes Microsoft introduced to the Store, it also paved the way bigger updates in the future. And by bigger updates, we mean  Xbox Play Anywhere, which is set to be released this fall. In case you’re not familiar with Xbox Play Anywhere, this feature allows you to play a single game on multiple Microsoft platforms, including Windows 10 PCs, Windows 10 tablets, and Xbox One.

While this feature has yet to be released, the Windows Store already allows you to purchase a game that will eventually work on both platforms. The list of games compatible with Xbox Play Anywhere is still short with just a few newer titles like Minecraft, Quantum Break, Forza Motorsport, and more. This will also affect media purchases, as well.

windows 10 store anniversary update game description

Preparation for Xbox Play Anywhere is definitely the biggest highlight of the post-Anniversary Update Windows Store, but it also contains some refreshing features that we mustn’t forget about: The Store was drastically redesigned and now has a more distinct Windows 10 feel.

Apps and games descriptions are now richer and sport improved user ratings, system requirements, and more. The Store will even tell you if a certain game is compatible with your computer so you don’t end up buying a game that you can’t play.

windows 10 store anniversary update sys requirements

Of course, perhaps the biggest problem of the Windows Store and the UWP platform itself remains. Windows 10 won’t receive many new apps from third-party developers even after the Anniversary Update, but that’s not something Microsoft could fix with the Anniversary Update.

All in all, the Windows Store is now much better and more appealing — and the best is yet to come.

What do you think about the revitalized Windows Store in the Anniversary Update? Is there something you want to see in the Store that Microsoft still hasn’t bring? Tell us in the comments below!

RELATED STORIES YOU NEED TO CHECK OUT: