5 Best Drum Backing Track Software for Music Producers

Drumming is a passion that many music lovers nurture, and physical drum machines have been sufficing the needs till now. But with the advancement of technology, people now use the best software to create drum tracks.

Drum machine programs are now a part of most of the mixers and input/output devices.

While online drum machines or audio editing software help create tracks, the best drum tracks software offers much more. Online drum machines are known to generate short drumming samples, but only MIDI files.

A software solution, on the other hand, helps create amazing music at a much lower cost compared to physical drum machines.

We have handpicked some of the best software to create drum tracks that make drum tracks sound amazing.

What’s the best drum track software to get?

Adobe Audition – Strong audio restoration tools
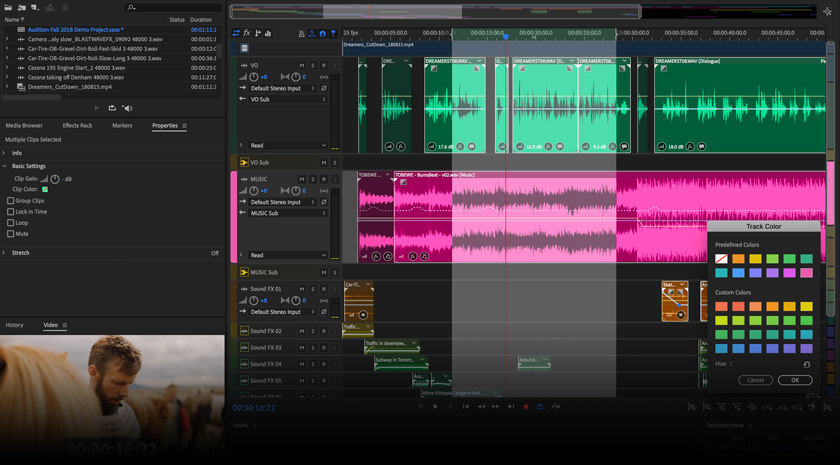
Interface of Adobe Audition

Adobe Audition is a recommended choice for people who have basic knowledge of music creation and want to produce content at a professional level.

To decide if this should be your option as well, take Adobe Audition as more than the greatest drum track software.

It’s actually a multitrack recording studio that offers all the refined tools you expect to get from Adobe products.

Adobe Audition has an abundance of effects that you can add to your audio if you want to make drum tracks sound real. Moreover, it can detect beat patterns and rhythms and set in and out points accordingly.

Additionally, its ability to switch between different interface layouts is refreshing. If you are no stranger to the classic layout, nothing stops you from making the switch to the desired layout in the window preferences.

No less important, if you usually rely on other Adobe products like Adobe Stock or After Effects, a smoother workflow is guaranteed.

After all, Adobe Audition integrates with the most popular apps and services of the moment.

Incredible key features provided by this professional audio editor and post-production suite:

  • Multitrack recording capabilities
  • Strong audio restoration tools
  • Noise-canceling features to make sure that all of the noise from your recordings can be easily removed
  • Spectral Frequency Display for a professional display of the frequency range with colors
  • Spectral Pan Display and Spectral Phase Display for a perfect stereo sound sync
  • Countless video tutorials in the Help section of the company’s website

Adobe Audition

Record and edit your drum sessions to track and improve your progress with Adobe Audition.
Free trial Visit Website

FL Studio – Professional-level app

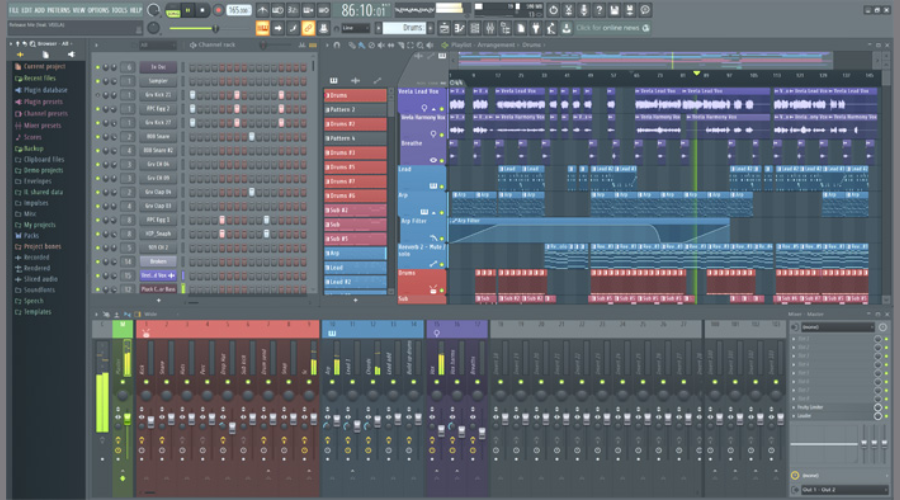
FL Studio is one of the best drum track software that offers a complete package with the option to record, edit, mix, arrange, and compose professional-level music.

Based on DAW (Digital Audio Workstation), it offers an exhaustive music production atmosphere. It features a built-in plug-and-play function, and a 4 x 16GB pad matrix.

Users can add patterns on the Step Sequencer quickly, or they can also change to Performance Mode to play live and record notes.

It also allows users to launch patterns based on their requirements. While the Mixer allows users to mix and achieve perfection to the top professional level, the Piano Roll sends note and automation data to the plugin tools, efficiently.

It comes equipped with one of the most flexible Playlists, and with over 80 plugins with instruments and effects to choose from.

As a bonus, it also offers VST standards 1, 2, and 3 apart from a wide range of built-in instruments.

From the vector interface, the option to record live control movements and edit, or live DJ control to touch control access, it offers a lot.

FL Studio

Launch patterns based on your equipment with the most flexible program.
Free Trial Visit Website

Reaper – Customizable software

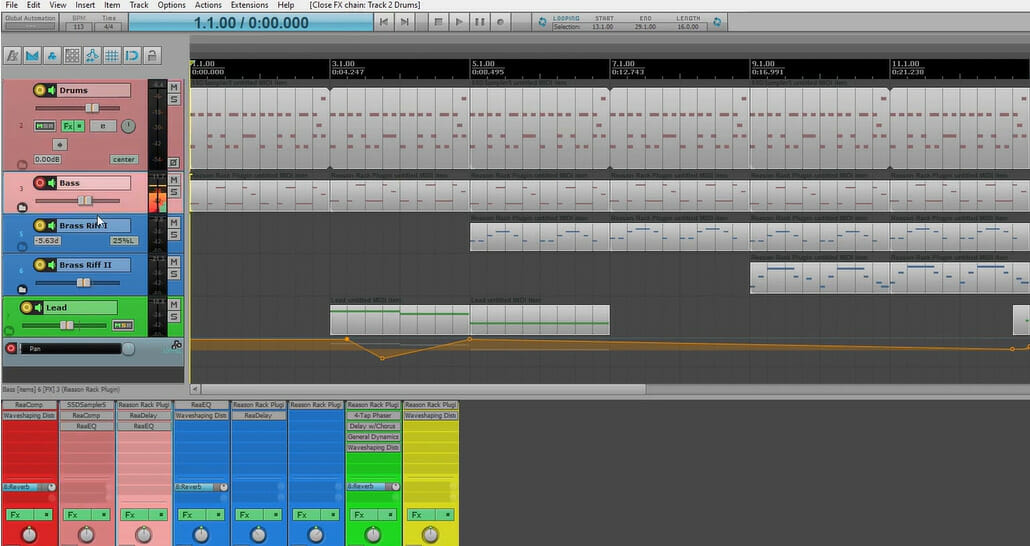
Reaper is a super customizable drum track software that allows users to apply different themes. It provides support for a host of free extensions while offering many options for rendering.

Moreover, it offers endless tracks with endless effects. One of the most significant aspects of the software is that it rarely crashes, unlike other DAWs.

It’s an efficient and professional-grade software that loads quickly and is firmly coded. Being portable it can be installed and operated from a removable or a network drive.

Among its other major features are, robust audio and MIDI channeling, 64-bit internal audio processing, multiple studio-level effects, and more.

⇒ Get Reaper

Audacity – Easy-to-use platform

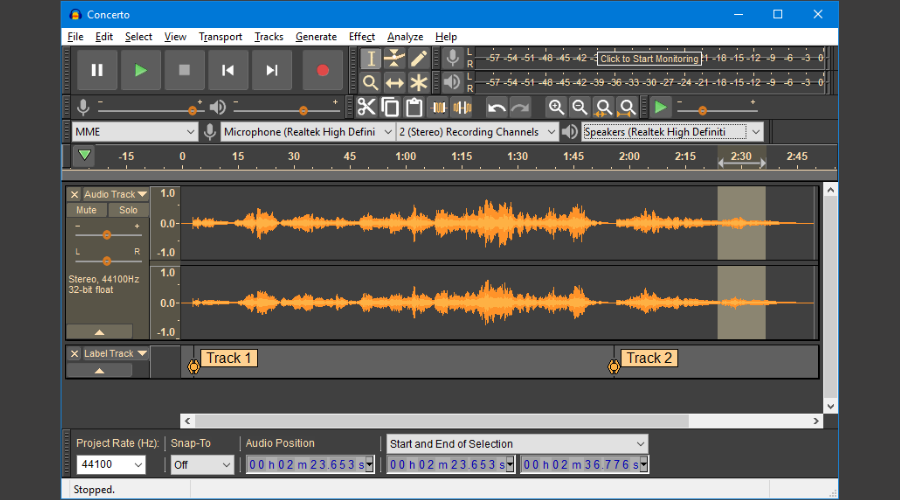
Audacity is undoubtedly one of the most popular digital audio editors around that’s free and open source. This is among the best software to create drum tracks due to its super-efficient multi-track audio editor.

It’s an easy-to-use platform that’s compatible with all the major operating systems (Windows, Mac OS X, GNU/Linux, and more).

While it can record live using a mixer or microphone, it can even import, edit, and blend the music. It allows users to further export their recordings in multiple types of file formats, which include several files at one go.

The software provides support for 16-bit, 24-bit, and 32-bit in terms of sound quality. Moreover, it converts the sample rates and formats using superior-quality dithering and re-sampling.

It also supports different types of plugins, viz., LADSPA, LV2, Nyquist, VST, and Audio Unit effect. Users can even modify Nyquist effects in the text editor, or create their own plugin.

Furthermore, users can edit with cut, copy, paste, and delete functions easily, along with endless use of Undo and Redo.

Manipulation of tracks and selections with the keyboard, an option to view and select frequencies in the spectrogram, and an option to preview LADSPA, LV2, VST, and Audio Unit (macOS) effects in real-time, are some of its other major features.

⇒ Get Audacity

Cakewalk – Natural pro-studio audio

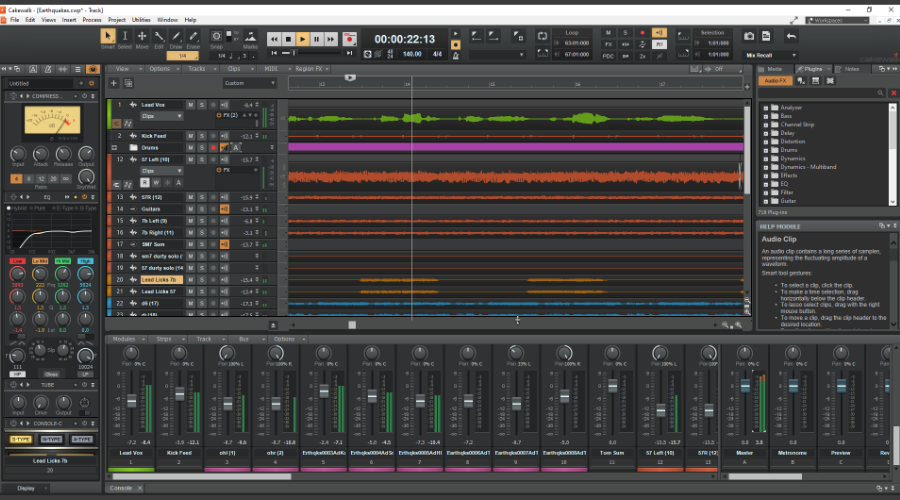
Sonar Home Studio by Cakewalk is another free and among the best drum track software that’s known for its innovation. It’s one of the most well-rounded packages for music production.

It comes with a blend of advanced technology, easy workflow, and an inspiring interface. The software allows users to make complete songs and performances using some creative songwriting tools.

It also allows users to record performances with clear quality and endless audio and MIDI tracks.

Moreover, users can also edit the tracks, fix, and tweak the pitch, organize sections, and much more. It offers natural pro-studio audio through the mix feature that helps to compose huge, clear, and powerful mixes.

The integrated mastering tools, on the other hand, lets users complete the mixes in a polished manner.

Users can further export their creations and even publish them straight to social media platforms like Facebook, YouTube, etc.

⇒ Get Cakewalk

A musician knows well about his requirements while composing tracks. His topmost requirement is professional quality sounds and tracks.

So, if you are looking for software that can help enhance and create high-quality drum racks, you may want to try the above list of some of the best software to create drum tracks.

6 best vocal harmonizer software for PC & Mac

Harmonizers are devices that sample incoming audio material, and that will automatically create a few time-stretched versions at different pitches, combining them all to an audio output.

This happens in real time, and you can hear the devices all the time on the radio. Vocal harmonizer software is an excellent alternative to physical harmonizers.

A good harmony engine alternative comes with amazing sets of features that make them fully-fledged harmonizers.

We picked out five of the best vocal harmonizer tools for PC and Mac, and we’re giving you a glimpse of their amazing sets of features.

What is the best vocal harmonizer?

Adobe Audition

Adobe Audition is a world-leading audio workstation used to design, mix, and create crystal clear sound effects. Why should it be your next vocal harmonizer software choice?

Well, let us start with some of its core functionalities. Audition comes as an expansive toolset that includes multitrack, spectral, and waveform display to restore, edit, and mix audio content with precision.

Its interface may look intimidating at first, yet give yourself the needed time and you’ll feel right at home.

We may as well add that it’s easy to master from the start if you have experience with any other editing software.

With dozens of shortcuts available right out of the box, the most common tools are already at your disposal.

Moreover, you’ll find useful its noise reduction tools that can remove background noise like tape hiss or power-line. The wide versatility of how you can remove noise is appreciated by users all over the world.

Expect to get zero crashes while working with it and a pristine sound with a polished mix. Don’t you just like the sound of it?

Some of the most important key features that you’ll enjoy using:

  • Multitrack features to produce content with multiple audio layers
  • Unmatched audio restoration tools
  • Visual of audio waves to keep the audience entertained
  • Can easily import and export multiple formats
  • Integration with other Adobe apps for a smoother workflow
Adobe Audition

Adobe Audition

Perfect for all things related to music-making, the ultimate DAW will also prove to be the best vocal harmonizer!
Free trialVisit website

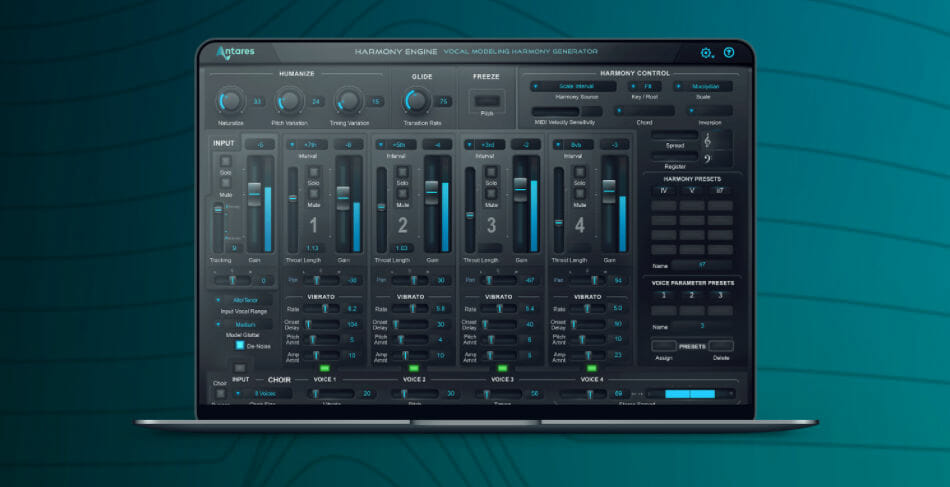
Harmony Engine

The maker of Auto-Tune Evo created a software solution that is a full-fledged harmonizer called Harmony Engine Evo.

Whether you are an experienced vocal arranger or a songwriter who is looking for a perfect backup vocal, this tool offers you new ways to create the harmony parts that you hear in your mind.

Harmony Engine uses a few innovative Harmony Control modes from fully automatic to individual control of each one of the notes.

Take a look at the most exciting features that are included in this software below:

  • Harmony Engine packs four high-quality, formant-corrected harmony voices that come with vibrato, independent vocal character, and pan settings
  • There are also five channels of the CHOIR Vocal Multiplier that will let you turn each harmony voice into more unison voices
  • The Throat Modelling technology used by this tool allows you to process each harmony voice via a physical model of the human vocal tract
  • The individual humanizing functions offer selectable amounts of variation to each voice for realistic and natural-sounding results
  • With the help of Harmony Engine Evo, you will be able to use all the necessary tools to produce great convincing harmonies

This tool provides four independent harmony voices, a vast variety of robust harmony generating modes, and humanization features for the most natural-sounding performance.

With this tool, you will be able to explore harmonic alternatives that you may have never considered before.

⇒ Check out Harmony Engine


Mu Voice

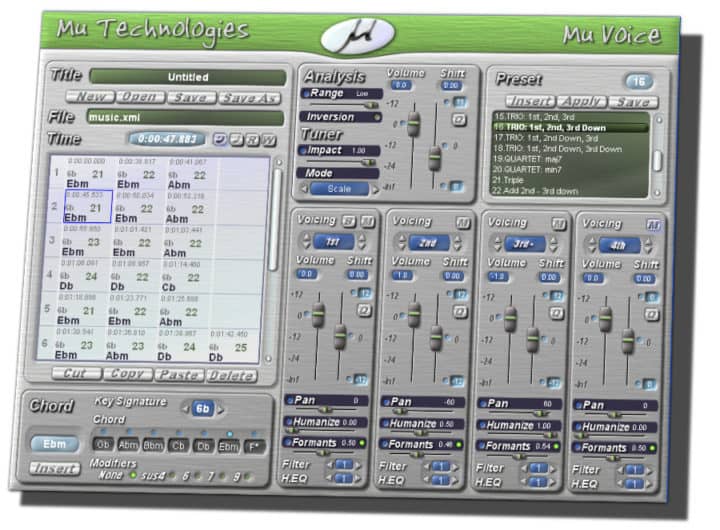
Mu Voice is a plug-in that allows you to tune the vocal recordings, apply various special effects, and add amazingly sounding harmonies when you are mixing your tracks.
This tool uses an innovative technique for vocal processing, and it provides a unique set of features for your recording studio.

Check out some of its best features:

  • There is an intelligent harmonizer that takes into account the musical context of a certain tune, and you will be able to configure each track by setting the octave and voicing
  • The chord panel included in this tool offers an effortless to use interface in order to select scales and chords
  • After you select a scale, you will also get the diatonic series of chords
  • You can also add scales and chords to a chord scheme
  • There is also a mixer included in this tool that lets you mute and bypass some of the channels to control the gain and apply pitch shifts
  • Mu Voice also includes a built-in tuner, and for every track, there is an additional set of special effects
  • In order to keep the massive number of control parameters manageable, all the settings can be saved in the presets, and you will get the chance to add them to the chord scheme.
  • The progression of the chords and presets can be automated easily

⇒ Check out Mu Technologies


MHarmonizerMB

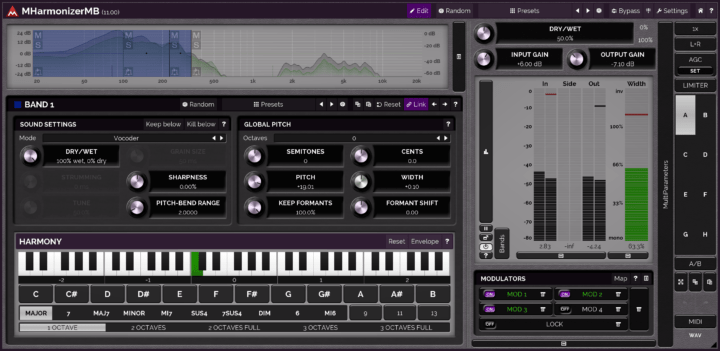
MHarmonizerMB from Melda allows you to make one instrument sound like various musicians at once.

You will also be able to create harmonies, enhance or widen recordings, add bass drum sub-harmonics, and more.

Take a look at the best features and functionalities that are packed into this amazing software:

  • The tool includes multiple harmonizing algorithms, formant adjustments, up to 120 voices, and more
  • You will be able to enjoy six distinct frequency bands
  • Using MHarmonizerMB, you will be able to modulate any parameter, and each modulator will work as an LFO, enveloper, audio level follower, randomizer, and also pitch detector
  • The tool comes with a straightforward interface that will turn out easy enough for beginners as well
  • You will be able to enjoy a unique visualization engine with time graphs and classic meters
  • MHarmonizerMB uses the adjustable oscillator shape technology
  • More handy features include a safety limiter, automatic gain compensation, smart randomization, and many more
  • MHarmonizerMB is optimized for the newest AVX capable processors

⇒ Check out MHarmonizerMB


Style Enhancer

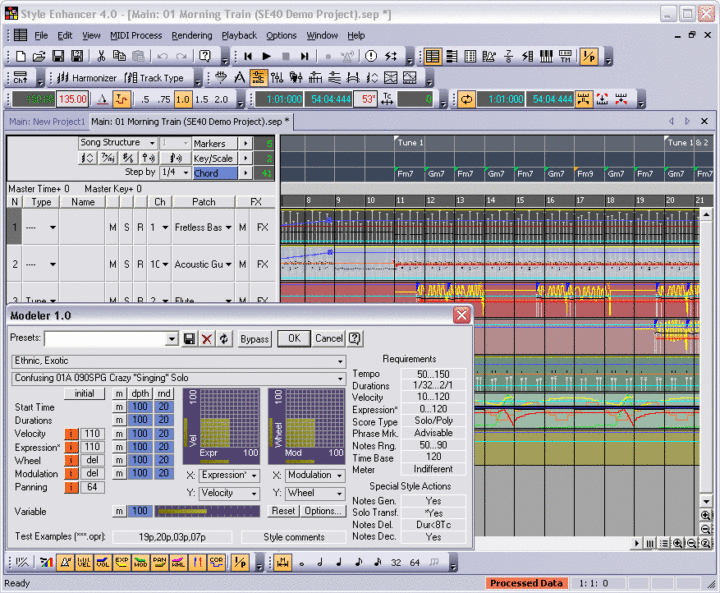
Style Enhancer is a sequencer that is based on Performance Modelling technology. It comes with intelligent and powerful MIDI-data generation and transformation.

This tool includes an advanced system of online MIDI FX, and powerful processing tools that are serving at automating data conversion.

Take a look at some of this tool’s key features and functionalities:

  • You will be able to enjoy playback through multiple MIDI outputs
  • The tool allows excellent melody harmonizing and data generation according to the chord progression
  • You can use various MIDI FX, and these include Modeler; the MIDI FX chains can then be saved for future use
  • The tool comes with great multi-object visualization and straightforward editing of all the events that are implemented in the Piano-Roll view
  • You will also have the possibility to create and save your own SE project
  • Style Enhancer is basically a complete MIDI tool for arranging and composing music in any genre that you want
  • The newest MIDI FX includes the following: AutoPhraser, Chord Generator, Drum Generator, Line Generator, Quantizer, Shaper, Time Morpher, Time-Pitch Adjuster
  • This software is packed with powerful processing tools that are great for automating data conversion

Overall, Style Enhancer is able to ensure excellent and flexible real-time control and generation of MIDI data.

This allows increasing the efficiency of managing your hardware and software synthesizers as well in order to obtain the best sounds that would be impossible to achieve with other tools.

⇒ Check out Style Enhancer


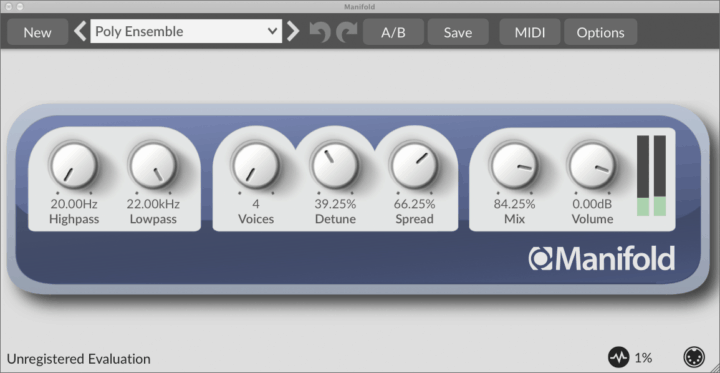
Loomer Manifold

Manifold is a software audio effect processor that is able to increase an audio signal. It can produce a fuller, more prominent, and livelier sound.

The input signals are split into 20 individual voices, and each one of these is detuned and placed around the stereo panorama. The voices are then recombined with surprising results.

Just take a look at the most important features packed in this tool:

  • Manifold can produce a vast range of effects starting with subtle modulations and finishing with the most extreme detuning that makes the weakest of input sources powerful
  • The tool will process only a specific frequency range by using the lowpass and highpass filters
  • The flexible panning allows the effect to produce sounds that can be focused in the center of the stereo image
  • The MIDI Learn mode is useful for integration with any MIDI hardware controller
  • This tool comes with optimized audio algorithms that will not overload your processor
  • Manifold also boasts rock-solid stability and this tool is basically ideal for live work
  • The software has a simple and intuitive interface, and this makes it suitable for beginners as well
  • With its total parameter automation, Manifold is perfect for a studio environment.

⇒ Check out Manifold’s official website


Here is where our list of top picks for the best vocal harmonizer plugin tools comes to an end.

All the tools that we have discussed above come with robust sets of unique features and every one of them has to offer its original functionalities and advantages.

4 best software to record online FM radio

Due to the large popularity of music streaming services like Spotify or YouTube, online FM radios lost their initial value.

However, that doesn’t mean that FM radios are not listened to. There are so many various radio stations streaming music for every taste.

What’s a better way to hear something fresh than on your favorite FM radio, and once you hear it, to record it and save it for the purpose of an offline pleasure.

Since that randomizing factory radio can’t be replaced easily and there are so many songs you want to keep, we prepared a list of tools that will enable you to record any given track that’s currently playing.

That way, you should be ready to capture any contagious tune without a problem. So, if you’re into radio but still willing to record a song or two, make sure to check the software we presented below.


What are the best tools to record online Internet radio?

Adobe Audition (recommended)

adobe audition audio recording tool

Adobe Audition is a versatile audio recording and editing software that packs a plethora of features. Record clear and pristine vocals or audio from your favorite online radio stations, with this awesome tool.

But in order for Audition to record audio streamed from the Internet, make sure your soundcard supports the What You Hear recording feature. This is because the tool can only record the sound signals sent by your soundcard.

Speaking of Internet radio, it is worth mentioning that you can also use Audition to record, clean up, and mix sound for recorded tracks, or radio through your computer microphone.

So, whether you are an online Internet radio fan, you run your own online radio station or you run your own podcast show, Adobe Audition can help you to record high-quality audio.

Other key features of Adobe Audition include:

  • Multitrack recording and editing
  • A flexible and intuitive user interface
  • Built-in audio recorder troubleshooter
Adobe Audition

Adobe Audition

Create your own online FM radio easily with the best software on the market, Adobe Audition
Free trialVisit website

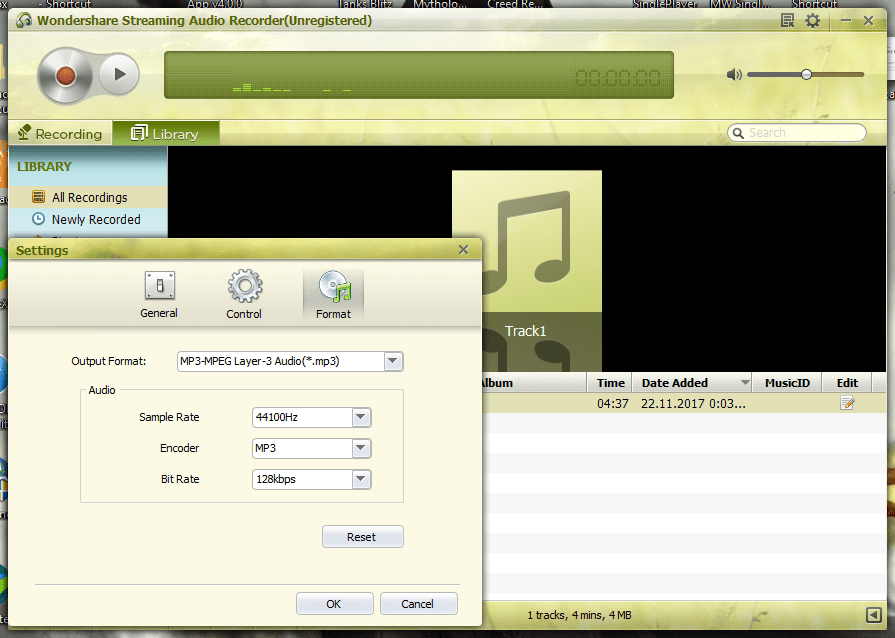
Wondershare Streaming Audio Recorder

Wondershare has its share in various multimedia categories with a large variety of premium tools. They are indeed pricey, but, in return, you get everything you need with premium support and remarkable design.

One Wondershare’s tool that fits nicely on our list is called Streaming Audio Recorder. As the name itself says, this nifty application is used for recording any streaming audio, including FM radio streaming.

These are the main features of Wondershare Streaming Audio Recorder:

  • Audio recording from any audio streaming source, including videos
  • Tracks tagger that automatically updates metadata
  • Intuitive and simple-to-use interface design
  • Advisement removal
  • Ringtone maker
  • Various output formats and bitrate options

When it comes to recording, just open the program and click on the Record button. Wondershare Streaming Audio Recorder will work its magic, and voila, you got yourself a new song in the dedicated library.

Too bad that the Trial period is quite limited and you’ll need a $29 in order to use the full potential of Streaming Audio Recorder.

Wondershare Streaming Audio Recorder

Wondershare Streaming Audio Recorder

Wondershare Streaming Audio Recorder lets you record and stream high-quality audio with a simple and intuitive interface
Free trialVisit website

RadioSure

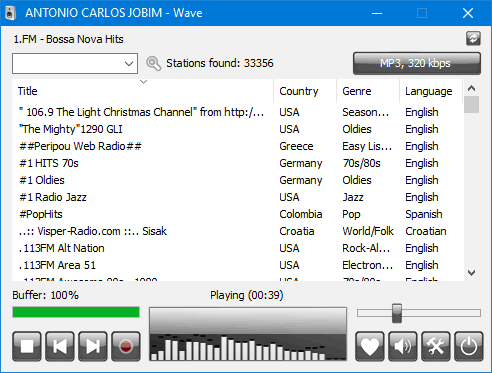
RadioSure is a quite simple tool on the first glimpse, but there’s hardly any other similar application that matches its feature-rich demeanor hidden behind the simplified interface.

It looks like a simplistic extension of any given multimedia player that enables you to listen to an FM radio.

But, besides the immensely large base of radio stations, RadioSure will let you record anything that’s currently playing so you can save it to your storage.

Here’s what you’ll be getting, feature-wise if you decide to try it out:

  • Can be installed as a portable app, so it won’t meddle with your registry
  • More than 33.000 international radio stations covering basically every genre out there
  • You can sort an abundance of radio stations alphabetically, by country, genre, or language
  • You can choose between various streaming sources for a certain radio station
  • Names of currently playing songs
  • Recording with choices of bitrate, fade – in and fade-out after each track, and automatical split between the tracks
  • A large variety of applicable skins you can download from the official site
  • Global hotkeys support

Now, we’ll focus on the recording. It’s as simple as they come. You run the program, navigate to Settings and configure recording options to your liking.

Then just look up for the station of choice and click the Record button in the bottom-left corner. Simple as that. RadioSure is a freemium program, so there’s also the Pro version up for grabs with even more features.

⇒ Download RadioSure


Nexus Radio

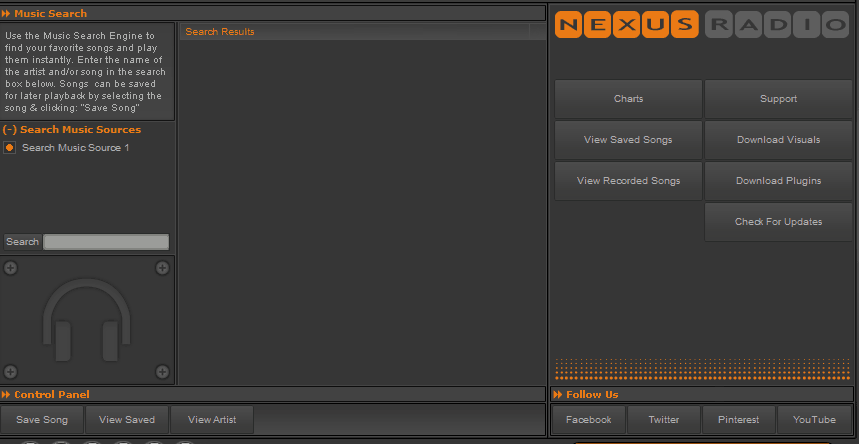
Now we finally come to a sweet spot on this list. And that spot is reserved for none other than widely-known Nexus Radio. One of the best, if not the best FM radio application available for free.

Imagine an FM radio player that can do it all, with more than 30.000 stations divided into 38 music genres at your disposal.

Add more features to that sheer presence of stations, and of course, the recording option, too, and we found ourselves the right tool for the job.

Here’s the list of the key features Nexus Radio offers:

  • Full-featured Winamp-like media player
  • Dynamic stream recorder with auto file naming features and recording schedule
  • Downloadable visualizations
  • Audio editor
  • Audio streaming recording with a single click
  • Support for various plugins
  • 30.000+ radios stations covering 38 music genres
  • Frequent updates that address bugs and add more features

And all of that packed in a modern UI gives the impression of a well-produced freeware application.

Recording-wise, you should easily configure everything you need in no more than 2 minutes. After that, the only thing left is to select the station of choice and click on that Record button.

⇒ Download Nexus Radio


With that, we can conclude our list. There are plenty of other similar programs, but we decided to pick the ones we tried and can recommend objectively. You can try them out and find out which suits you the best.

Finally, don’t forget to share with us your experience regarding the tools we presented. You can do so in the comments section below.


FIX: There was an error opening your printer on Photoshop

Photoshop allows you to print your work directly from the application. Sometimes, the print function in Photoshop may not work properly.

The full Photoshop error reads There was an error opening your printer. Printing functions will not be available until you have selected a printer and reopened any documents.

Is there a problem with Photoshop opening your printer? Solve it today by resetting Printer Preferences.

By resetting the printer preferences to default values, Photoshop should be able to access the printer again. Alternatively, you can change the default printer or apply the Registry fix.

Finally, make sure that the printer driver is up-to-date as well as your Photoshop copy.

Follow the detailed instructions below to fix the error at hand.

  1. Reset printer preferences
  2. Update the printer driver
  3. Change the default printer
  4. Update Photoshop
  5. Registry fix

What can I do if Photoshop won’t print?

1. Reset printer preferences

  1. Quit Photoshop if running.
  2. Relaunch Photoshop and open the file that you want to print.
  3. Click on the File menu and go to Print. Don’t click on Print, simply hover the mouse over the Print option.
  4. Now press and hold the Spacebar key for a few seconds.
  5. This should reset the Printer Preferences for Photoshop. Upon a successful reset, you will see a print settings dialogue box.
  6. Proceed with printing the document and check if the error is resolved.

If you’re getting Error opening printer in Photoshop, the problem might be corrupted configuration settings for Photoshop‘s print function.

You can resolve this issue by resetting the print preferences for Photoshop by following the instructions from above.

2. Update the printer driver

  1. Type Device Manager in the search bar and click on Device Manager.
  2. In the Device Manager, scroll down to Print Queues and expand it.
  3. Right-click on the problematic printer and select Update Driver.
    Printer Queues Device Manager - Update Driver
  4. Choose  Search automatically for updated driver software option.
  5. Windows will now look for any new updates and install them automatically.
  6. Restart the PC, launch Photoshop , and set the printer as the default in Printer options.

Try to update the driver from the Device Manager and check if that resolves the error.

If the issue persists, try to download and install the driver manually. You can download the latest driver from your printer manufacturer’s website. That should fix the Photoshop error opening printer for good.

If you’re getting Error opening printer message in Photoshop, you can try to update drivers automatically with Outbyte Driver Updater.

This is a third-party software that will scan your system for outdated drivers and update all your drivers automatically.

⇒ Get Outbyte Driver Updater

3. Change the default printer to fix the Photoshop error opening printer

  1. Launch Photoshop and open the document you want to print.
  2. Press Ctrl + P to open the Print dialogue box.
  3. In the Print settings, click on the Printer option and select a different printer from the list. Click on Done / OK to save the changes.
    Printer Options - Adobe There was an error opening your printer on Photoshop
  4.  Quit and relaunch Photoshop.
  5. Open Print settings and change your work printer as default printer. Click OK/Done to save the changes.

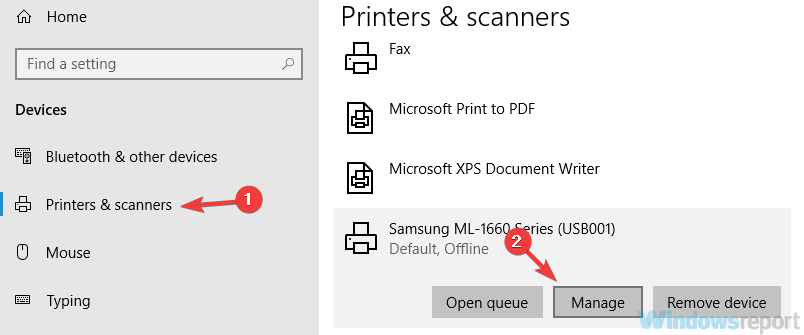
If that does not work, in Windows, go to Start > Settings > Devices > Printer and Scanner

manage printer printers & scanners settings an error opening printer in Photoshop

Change the default printer to something else. Make sure to set your work printer as default again in Photoshop Print option and check for any improvements.

Users have reported that changing their default printer in the printer settings to something else and changing back it to the default printer has fixed the issue.

Therefore, we advise you to try this workaround if Photoshop is not printing.

4. Update Adobe Photoshop to latest version

Keep your Adobe Photoshop copy updated. The Adobe team releases an update for Photoshop almost every month.

Each new release contains performance improvements and bug fixes. Some of them even come with new features.

There’s little reason to run an older version. Your printing issues might be eliminated through one of the updates released.

Verify what version you have installed by opening Photoshop, and in the top menu select Help -> About Photoshop. Below the Logo, you will see the version you have installed.

This is the simplest solution, and it should help you if Photoshop is not printing.

⇒ Get Adobe Photoshop

5. Registry fix for the Photoshop error opening printer

  1. Press Windows + R to open Run
  2. Type Regedit and hit enter.
  3. In the Registry Editor, go to the following location: ComputerHKEY_CURRENT_USERSoftwareAdobePhotoshop Elements16.0
  4. Right-click on 16.0 folder and select New > DWORD (32-bit) Value.
  5. Rename the new value as OverridePhysicalMemoryMB.
  6. Double-click on OverridePhysicalMemoryMB. 
  7. In the new dialogue box, select Decimal under the Base section.
    Photoshop - Printer Opening Error - Registry Edit- Memory
  8. For Value Data, enter a numeric megabyte value according to your system’s physical memory (RAM). If you have 4GB memory, enter 4000 and for 8GB enter 8000.
  9. Click OK to save the changes.

There was an error opening your printer error in Photoshop can be problematic, but hopefully you have managed to fix it using our solutions.

Interior Design Software: 8 Best We Tested in 2026

Redecorating your home comes with a few risks because what you thought looked great in the store might not seem that amazing in your room.

Rather than spend money while redoing all your work, you can simply use interior design software that can help you envision your project in the highest detail, in your home eliminating potential mistakes.

Whether you’re a professional interior designer or just want to see how the new couch would fit in your home, these apps will provide a clear picture.

What should I look for in an interior design software?

There are a lot of interior design programs on the market, and every one of them comes with its own unique features.

First off, you should adapt the software to your skills. If you don’t know much about architecture or design, you should settle on a more friendly app, with simple features.

Some of the solutions below also help you with automatic dimension calculation so you will know immediately know if the couch will fit right in or not.

Also, if you need a more detailed picture of your home, find a software with a high library of objects to match them easily with what you’re planning.

That being said, we have gathered the best tools out there to ease the process of redecorating your home.

What are the best interior design software for Windows 10?

Adobe Dimension

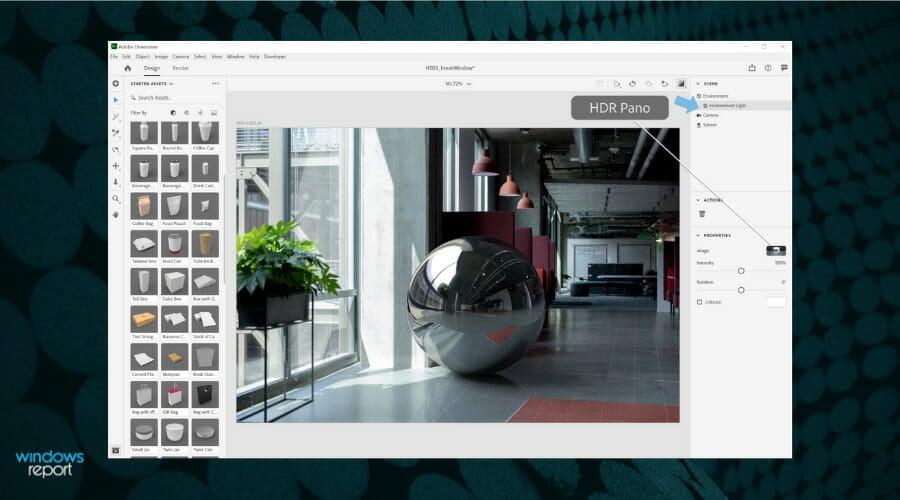
Adobe Dimension comes with fantastic tools for designing 2D and 3D interior spaces.

The software is packed with features and an interactive interface, and it’s one of the most straightforward programs to use once you have taken the time to learn it.

It comes with plenty of options and tools that will help you get a realistic depiction of what your new home will look like.

The tool has great integration with Adobe Stock, but the images may be watermarked if you don’t have a license for Adobe Stock.

It allows you to pick and edit objects from its extremely vast library from Adobe Stock that includes moldings, furniture, window coverings, flooring, materials, paint, and so on.

Even if you are a beginner in designing, you can learn how the software works. It comes with fantastic learning materials and online lessons, and plenty of creative options to help you build the home of your dreams.

Take a look at some of the most exciting features that are included in the program:

  • For interior work, you will get designs for doors, windows, cabinets, and fireplaces
  • The program can help you customize the surface, texture, shapes, light, and colors of your design elements
  • It does an excellent job especially if you are remodeling your kitchen and bathroom
  • Adobe Dimension also comes with landscaping features to design your patio, deck, yard, and garden
  • As well, interior designs can be created in 360 or augmented reality as Adobe Dimension is part of Creative Suite, where you can find apps like Adobe Aero, Indesign or XD that can help you in creating interactive content

Adobe Dimension

Adobe Dimension is one of the greatest software for 2D and 3D interior design software.
Free trial Visit website

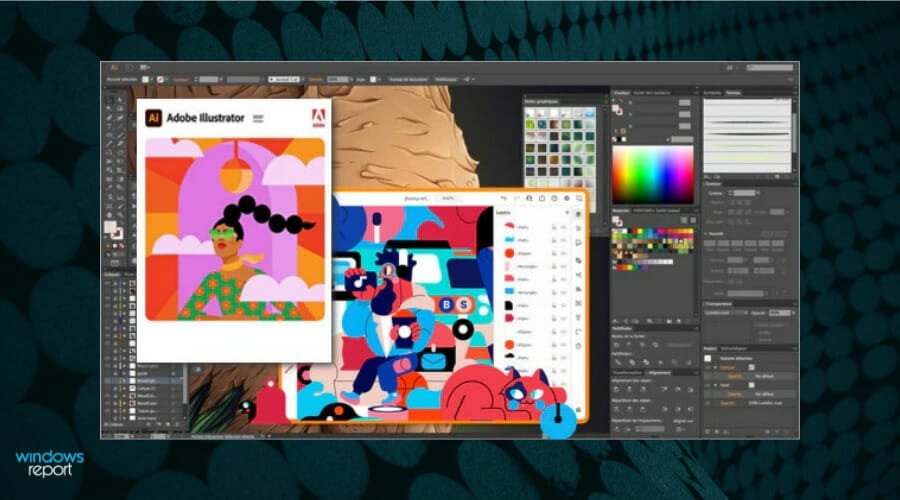
Adobe Illustrator

This is the best software that allows you to create 2D and 3D design concepts.

The program is designed to help you visualize the way decorating elements, furniture, and basic aspects will look in the way you imagine. Take a look at the essential features that are included in the software:

Moreover, for a better experience in 3D rendering, Adobe is including Live Effects, so you can visualize in real-time all the changes you make without changing the layer.

You will be able to unlock your creativity with features like Pen Tool to create technical illustrations, like shapes, paths, and vector-based graphics.

Due to an intuitive interface workspace, the tool will allow you to manage layers, draw plans, and elevations in order to have a clear perspective of your work.

For artistic architectures who prefer to draw, Illustrator is coming with the innovation of drawing on iPad Pro with a Pencil or touch.

Take a look at its most important features:

  • Mix and match the walls, ceilings to find the perfect combination
  • With just a few clicks, you can give your home a digital makeover
  • This tool allows you to digitally paint the rooms with any color that is included in the Adobe Illustrator paint collection
  • For a precise position and arrangement in the interior space, Adobe Illustrator comes with transforming features like aligning, scaling, and rotating features
  • Great set of advanced designing tools

Adobe Illustrator

Adobe Illustrator will help you visualize all the elements that you will imagine in the home decor.
Free trial Visit website

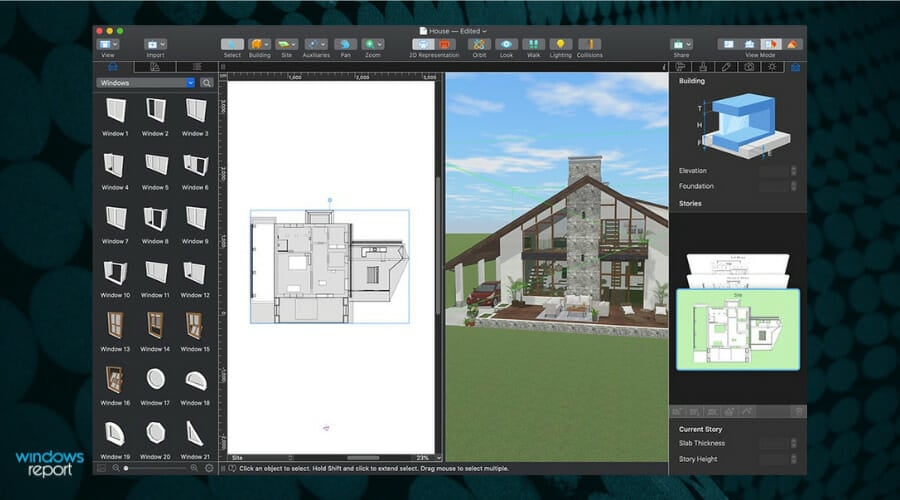
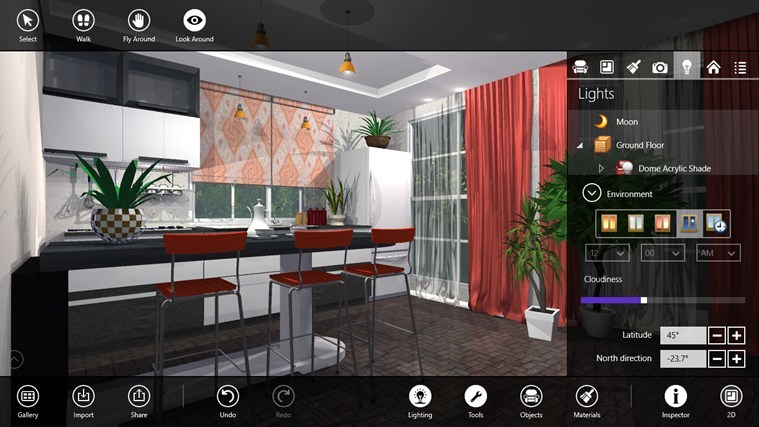
Live Home 3D

Live Home 3D Pro is an excellent home design app that will help you design and build the house of your dreams.

Whether you’re a homeowner who wants to completely revamp his/her home or a professional designer, this app is for both of you.

Live Home 3D Pro offers advanced design tools and a rich Object Library with thousands of 3D models of pieces of furniture, fireplaces, and much more.

In-app purchases are also available. For example, you can purchase over 150 additional plans and more than 600 additional materials to make sure that the end results look exactly like the digital design.

Users absolutely love this app, and this review sums it all up:

This program is extremely effective for visualizing ideas before you plan build them. FIRST, this product is great for trying out ideas for your own before going to the expense of building.

SECOND Anyone with CAD intuition of any level or just an interest in acquiring some CAD experience will love this product.

Here are some key features of the app:

  • 2D floor plans and real-time 3D rendering are supported
  • There is no limit as to the number of stories that you can design
  • You can use photos to create custom materials so that you can fully personalize the design
  • You can automatically adjust natural light by setting the time and geographic location
  • You can export the design of your house to 3DS, FBX, OBJ, Collada, VRML, and X3D formats

Live Home 3D

Use one of the best 3D rendering design software to personalize your future home.
Check price Get it now

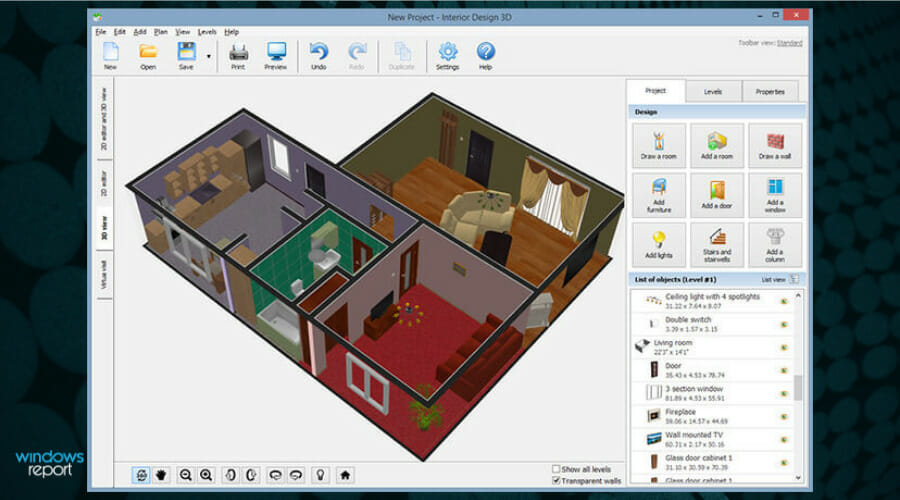
Interior Design 3D

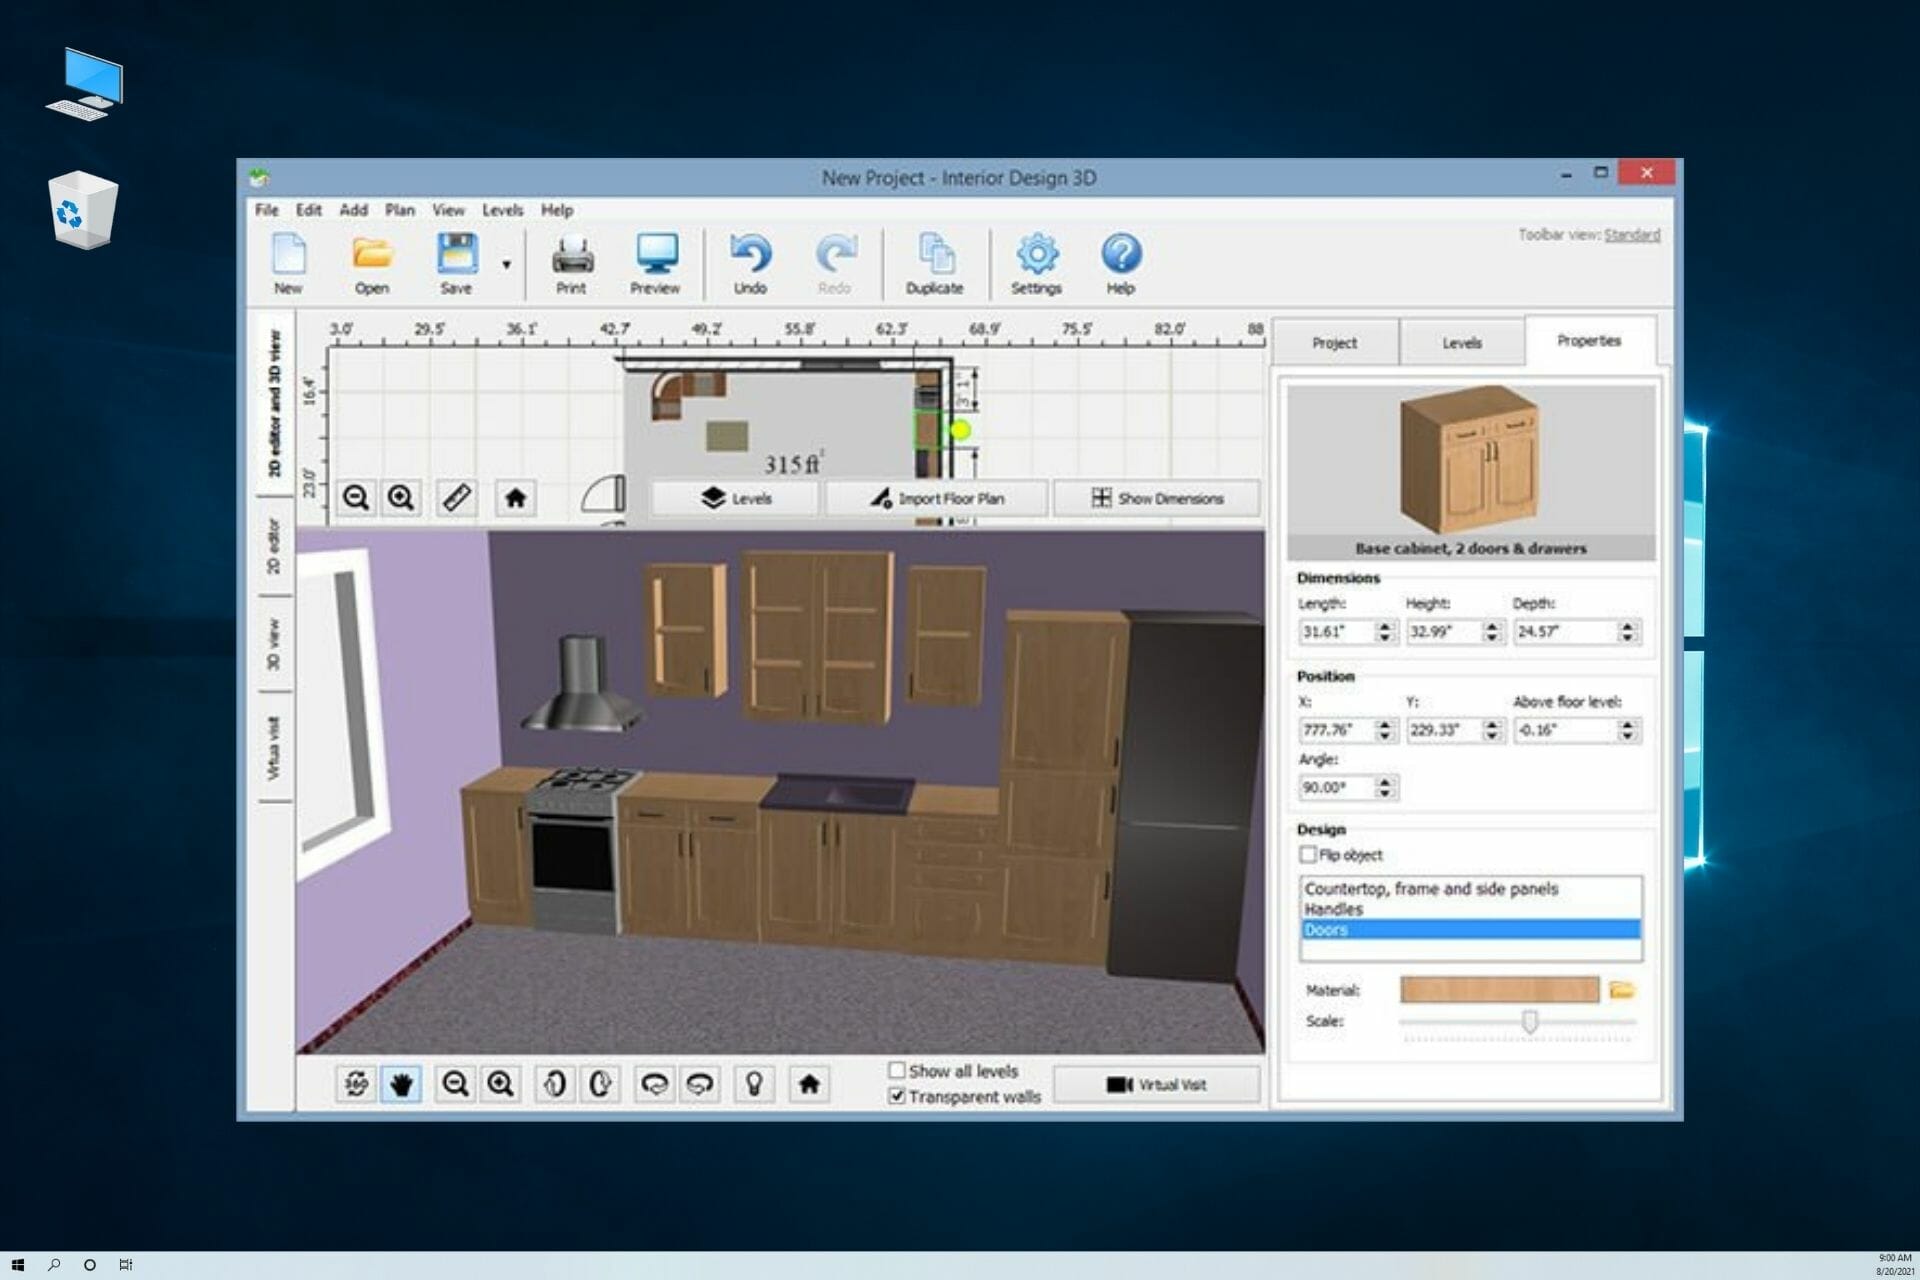
Interior Design 3D is convenient software for creating floor plans and home interiors. It is highly intuitive and requires no professional skills to master. 

The program allows you to draw plans from scratch or customize pre-made samples. There is a library of over 600 decorative materials at your disposal, so you can try a new look for the walls, floor, ceiling, etc.

A built-in collection of furniture items will help you plan the furnishing of your dream house. After all is done, you can take a virtual tour of your new or remodeled place. 

Here’s what a customer had to say about working with Interior Design 3D: 

Tried a few other floor plan creators before, but they were all too technical for me. This one is totally easy to use. I’d recommend Interior Design 3D to everyone who wants to start designing their property.

Here are Interior Design 3D’s key features:

  • Create floor plans for apartments and houses
  • Import existing floor plan drawings to use as a base
  • Experiment with 600+ materials: wood, tiles, parquet, etc.
  • Find furniture and accessories for any room in the built-in library
  • Use the smart Stairs Constructor to design safe and stylish stairs
  • View the 3D model from different angles or take a virtual tour
  • Print floor plans and 3D scenes or save as JPEG or PDF

Interior Design 3D

Create your floor plan and dream interior design with this great professional tool!
Check price Get it now

DreamPlan Home Design Software (NCH)

Designing your future house is no easy task, and everything needs to be planned ahead if you want things to turn out perfectly.

That is precisely why you need a program that can cover pretty much every aspect of your house planning.

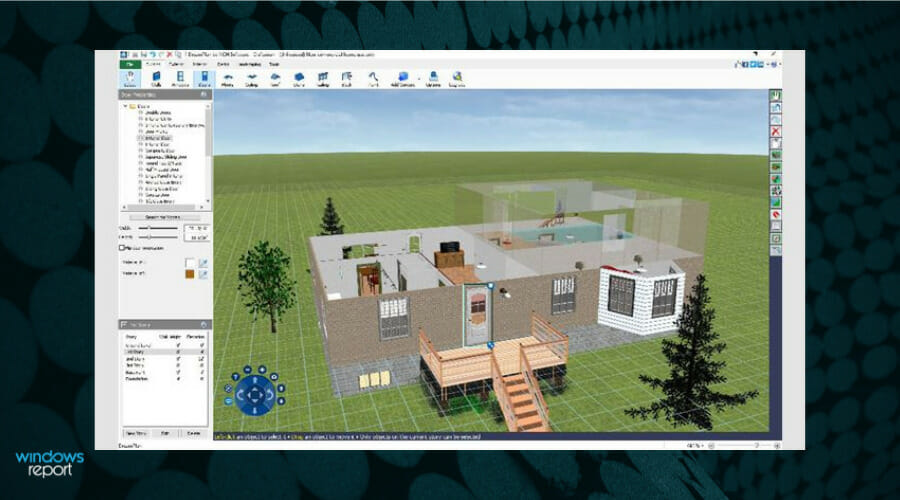
Everything from the walls, colors, room placement, and even the furniture can be set, edited, and managed within DreamPlan Home Design Software (NCH).

The best thing about this tool is that you don’t need to be an architect or an interior designer to do a good job since the interface is so easy all you need to do is click, hold, drag, and move objects around however you see fit.

The presets included are amazing, and you can even load your own resources for elements such as wall designs or carpet colors.

Let’s see what are its best features:

  • Wide range of environments and objects to choose from (indoor objects, garden, etc)
  • Terrain editor
  • Not demanding of your system’s resources
  • Incredibly simple UI

⇒ Get DreamPlan Home Design Software (NCH)

Total 3D Home Design Deluxe 11

Total 3D Home Design Deluxe 11 comes with plenty of tools that will help you reimagine your home’s interior.

The software comes with thousands of brand-name products and materials in its library.

It comes at an affordable price, and after you learn a bit about its features, you won’t find designing with this program a challenge as it may seem in the beginning.

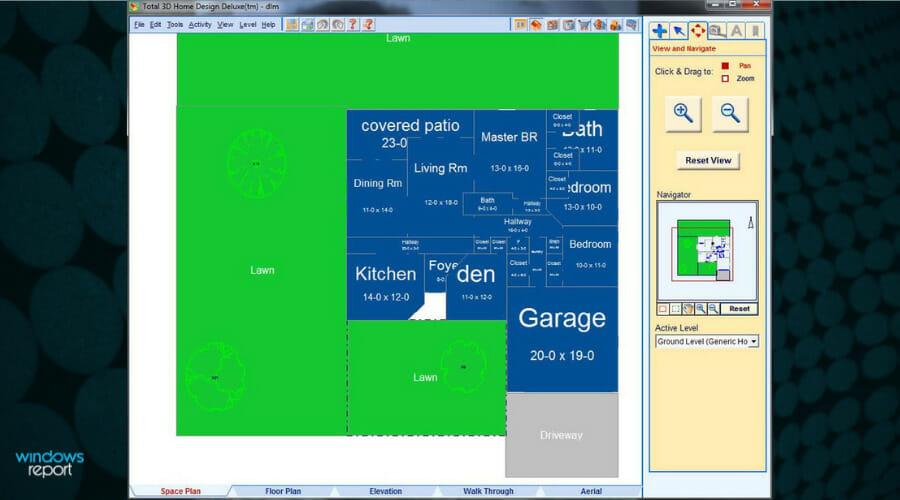
The software comes with color-coded floor plans that will make it easy to distinguish between doors, windows, appliances, and furnishings.

It also includes lots of sample plans and objects, and you will be able to create rooms quickly and effortlessly.

Here are the most useful features that are included in this software:

  • It provides you the opportunity to redecorate your rooms, add another room or design an entire house virtually
  • The software is best suited for beginners
  • It is a great way to brainstorm ideas for your new home
  • The SmartRoom Blocks feature allows you to create complete rooms automatically
  • You can design in both 2D and 3D
  • You can also import images to use in the design
  • You will also get the ability to simulate interior lighting and shadows as well

⇒ Get Total 3D Home Design Deluxe 11

Punch Home & Landscape Design Premium 19

Punch Home & Landscape Design Premium 19 is excellent software for most remodeling and redecorating projects. It provides the bonus of outdoor planning features as well.

This tool comes with a beautiful set of features to help you create your new home in virtual reality, and it can also help you keep tabs on the price of materials.

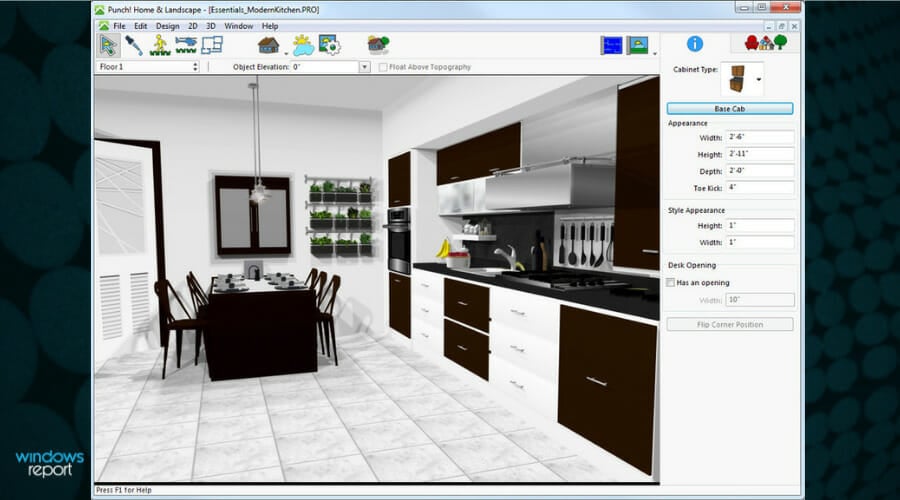
For instance, while you draw and resize rooms, the automatic dimensioning tool will provide the exact measurements.

The program is compatible with CAD software. This means that after you finished designing a room, you will be able to export it in DXE or DWG formats.

The software comes with lots of sophisticated tools that might take some time to learn, but it won’t be difficult, and the effort is worth it.

Here are its most important features below:

  • It comes with a generous object library filled with over 4,700 objects
  • It includes bathroom fixtures, doors, appliances, windows, light fixtures, and furniture
  • The actual rebuilding in an easy process
  • You have the ability to create a Quick Palette with all the colors and materials that you want to use
  • It includes landscaping tools, and you can also design your porch or deck as an extension of your home
  • The QuickStart option will help you create a floor plan first
  • You can also incorporate electric elements into your plans
  • Once you recreate a room, you can view it in both 2D and 3D, and you’ll be able to walk through it

⇒ Get Punch Home & Landscape Design Premium 19

Home Designer Interiors

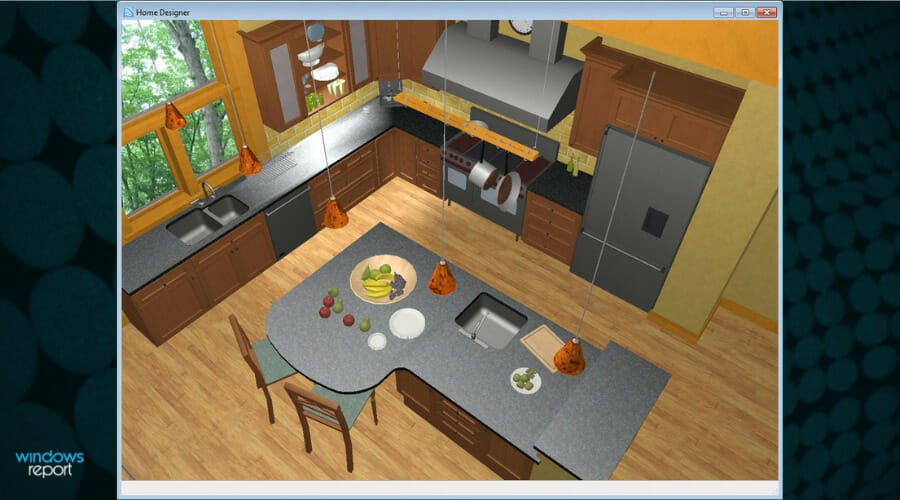
Home Design Interiors is a very efficient home design app that allows you to renovate any living space. This interior design program will make sure that you will see how everything looks before you decide to buy anything.

It is a comprehensive software packed with a lot of features and an extensive object library.

In fact, it includes over 6,500 objects in its object library, and the materials library includes more than 30,000 items.

You can choose between lots of bathroom fixtures, appliances, doors, cabinets, fireplaces, and so on, to complete that dream home exactly as you imagined it.

After you finish the design process, Home Design Interiors provides accurate digital mock-ups in 2D or 3D. You will be able to virtually walk around your new home as well.

Take a look at the most interesting features of the program below:

  • The program provides lots of flooring options, windows, furniture, and houseplants
  • It includes handicap-accessible objects and materials
  • The drag-and-drop feature works in 2D
  • You can update things and alter colors and materials in 3D
  • The program is ideal especially if you plan to remodel your home
  • The pre-arranges furniture groupings will help you plan the space

⇒ Get Home Design Interiors

These are our picks for the top interior design programs for Windows that you can use right now to create that dream home.

Interior design software is a really helpful tool when you want to try out new designs, decor, and layouts before investing the money and labor required to do the job in real-life.

Such tools can definitely help you plan designs or renovations and complete the projects of your dreams. Pick the best software for your needs and start designing!

And after finishing the interior, how about checking our selection with the best garden design software for PC and Mac. It might get you a few landscaping ideas.

Have you chosen the right tool? Tell us all about how you made the selection in the comments section below.

Full fix: Windows 10/11 Photo Enhancer not working

Windows (Microsoft) Photos would be a great photo-editing app if there weren’t so many bugs.

There are many things going for it, but it seems that, when it comes to stability, this app falls short for many users.

One of the commonly-used features is the Photo Enhancer which, as the name says, fixes your photos for you in a single click.

But, it seems that this nifty retouching tool stopped working recently.

If you’re dealing with a severe case of enhance your photo not working, worry not as we prepared a list of available solutions.

At least one of those should help you address the matter at hand, so don’t hesitate to try our fixes to solve the Windows photos enhance not working.

How can I fix Enhance your photo mode issues in Windows 10?

  1. Download Adobe Photoshop
  2. Run the built-in troubleshooter
  3. Update Windows 10
  4. Reset the app
  5. Reinstall Windows Photos
  6. Try sticking to local photos only

1. Download Adobe Photoshop

Photoshop CC 2020 best editing tool

If your Photo Enhance is not working in Windows 10, the easiest solution is to use an alternative. The best photo enhancement and editing tool available on the market right now is Adobe Photoshop.

This software tool has a wide range of features and options.

It can be downloaded and installed in just a couple of steps, without the hassle of a complex process with confusing steps.

Photoshop is the first choice of beginners and professionals, mainly because of its plethora of editing tools and ease of use.

A large number of brushes, filters, and photo effects add to the complete experience that Photoshop offers.

Besides that, the customizable workspace with lots of easy-to-use options is another big plus.

Frame tools, slicing tools, magic wand, symmetry mode, white balance, color gamma, and color correction are just some of the many features in Photoshop that can help you enhance your photos.

Adobe Photoshop

Adobe Photoshop

If the Photos app is failing, the most cherished photo editing software will definitely enhance your artwork!
Free trialVisit website

2. Run the built-in troubleshooter

Here’s how to run the dedicated troubleshooter and try fixing the Photos app and the Enhance your photo mode:

  1. Right-click Start and open Settings.
  2. Open Update & Security.windows photo enhancer not working
  3. Select Troubleshoot from the left pane.
  4. Highlight the Windows Store apps troubleshooter from the end of the list.
  5. Click on the Run the troubleshooter.windows photo enhancer not working

The first troubleshooting step is the built-in part of Windows 10. Since the Photos app is an integral part of the Windows 10 workflow, there’s the dedicated troubleshooter which deals with app issues.

The idea was for UWP apps to take over, but even the built-in ones, like Photos and Mail & Calendar, fall short. This is where the Store Apps troubleshooter comes into play.


3. Update Windows 10

Here’s the whole route:

  1. Open Settings and navigate to Update & Security > Windows Update and Check for updates.windows photo enhancer not working
  2. Wait until the available updates are applied.
  3. Navigate to Microsoft Store and click on the 3-dot menu.
  4. Choose Downloads and updates.windows photo enhancer not working
  5. Update Windows Photos.

The number of times Microsoft changed the Photos app since its inception on Windows 8 can barely count.

In concerns to the issue we’re addressing today, they removed the automatic enhancement options a few releases back.

Now you’ll need to apply this to every individual photo. And even that, obviously, won’t function as initially intended. If this was a minor problem, Microsoft might’ve put it under the rug.

However, since there were (and still are) lots of complaints, they had to do something. And, seemingly, they did.

That’s why we encourage you to check for the latest updates. In addition, make your way to Microsoft Store and check for updates there, as well.


4. Reset the app

Here’s how to reset the Photos app in Windows 10:

  1. Open Settings.
  2. Choose Apps.
  3. Under the Apps & features, search for Photos.
  4. Highlight the Photos app and open Advanced options.windows photo enhancer not working
  5. Scroll down and click Reset.windows photo enhancer not working

As you’re probably aware, one can’t uninstall the Photos app. It’s a successor to Windows Photo Viewer and the main competition to Google Photos.

You can, on the other hand, reset the app to factory values. This won’t meddle with your photos, so don’t worry about it.

It’ll just clear all pilled-up cache and, basically, refresh everything as it’s the first time you’re starting the app.


5. Reinstall Windows Photos

Follow these steps to reinstall Windows Photos in Windows 10:

  1. Right-click Start and open PowerShell (Admin).
  2. In the command-line, type the following command and press Enter: get-appxpackage *Microsoft.Windows.Photos* | remove-appxpackagewindows photo enhancer not working
  3. Wait until the app package is reinstalled and restart your PC.
  4. Open Photos and check the Enhancing feature again.

Yes, we said you can’t remove Windows Photos. But that doesn’t exclusively mean the app can’t be reinstalled. Of course, this requires a more complex approach than the previously suggested solution.

In order to reinstall the Windows Photos app (or any built-in app, for that matter), you’ll need to use PowerShell as shown above.


6. Try sticking to local photos only

Here’s how to disable OneDrive for Windows Photos:

  1. Open Photos.
  2. Click on the 3-dot menu and open Settings.windows photo enhancer not working
  3. Under the Microsoft OneDrive, disable Show my cloud-only content from OneDrive.windows photo enhancer not working
  4. Close Photos and restart PC.
  5. Open Photos again and check whether the Enhance feature works.

If we have to name one distinctive advantage the Photos app brings is direct access to cloud storage. Of course, here we refer to Microsoft’s-own OneDrive.

You can, without downloading, access all photos stored in OneDrive. However, there are some reports that this causes the slowdowns and additional issues with Windows Photos.

Especially if you’ve changed the default OneDrive locale on your PC or the photos are only online-stored.

Because of that, we recommend unlinking the OneDrive and Windows Photos (if this link isn’t a dire need). You could still access all photos on your local storage.


In case you’re aware of an additional tool, make sure to tell us in the comments section below.

Also, leave there any other questions or suggestions that you may have.

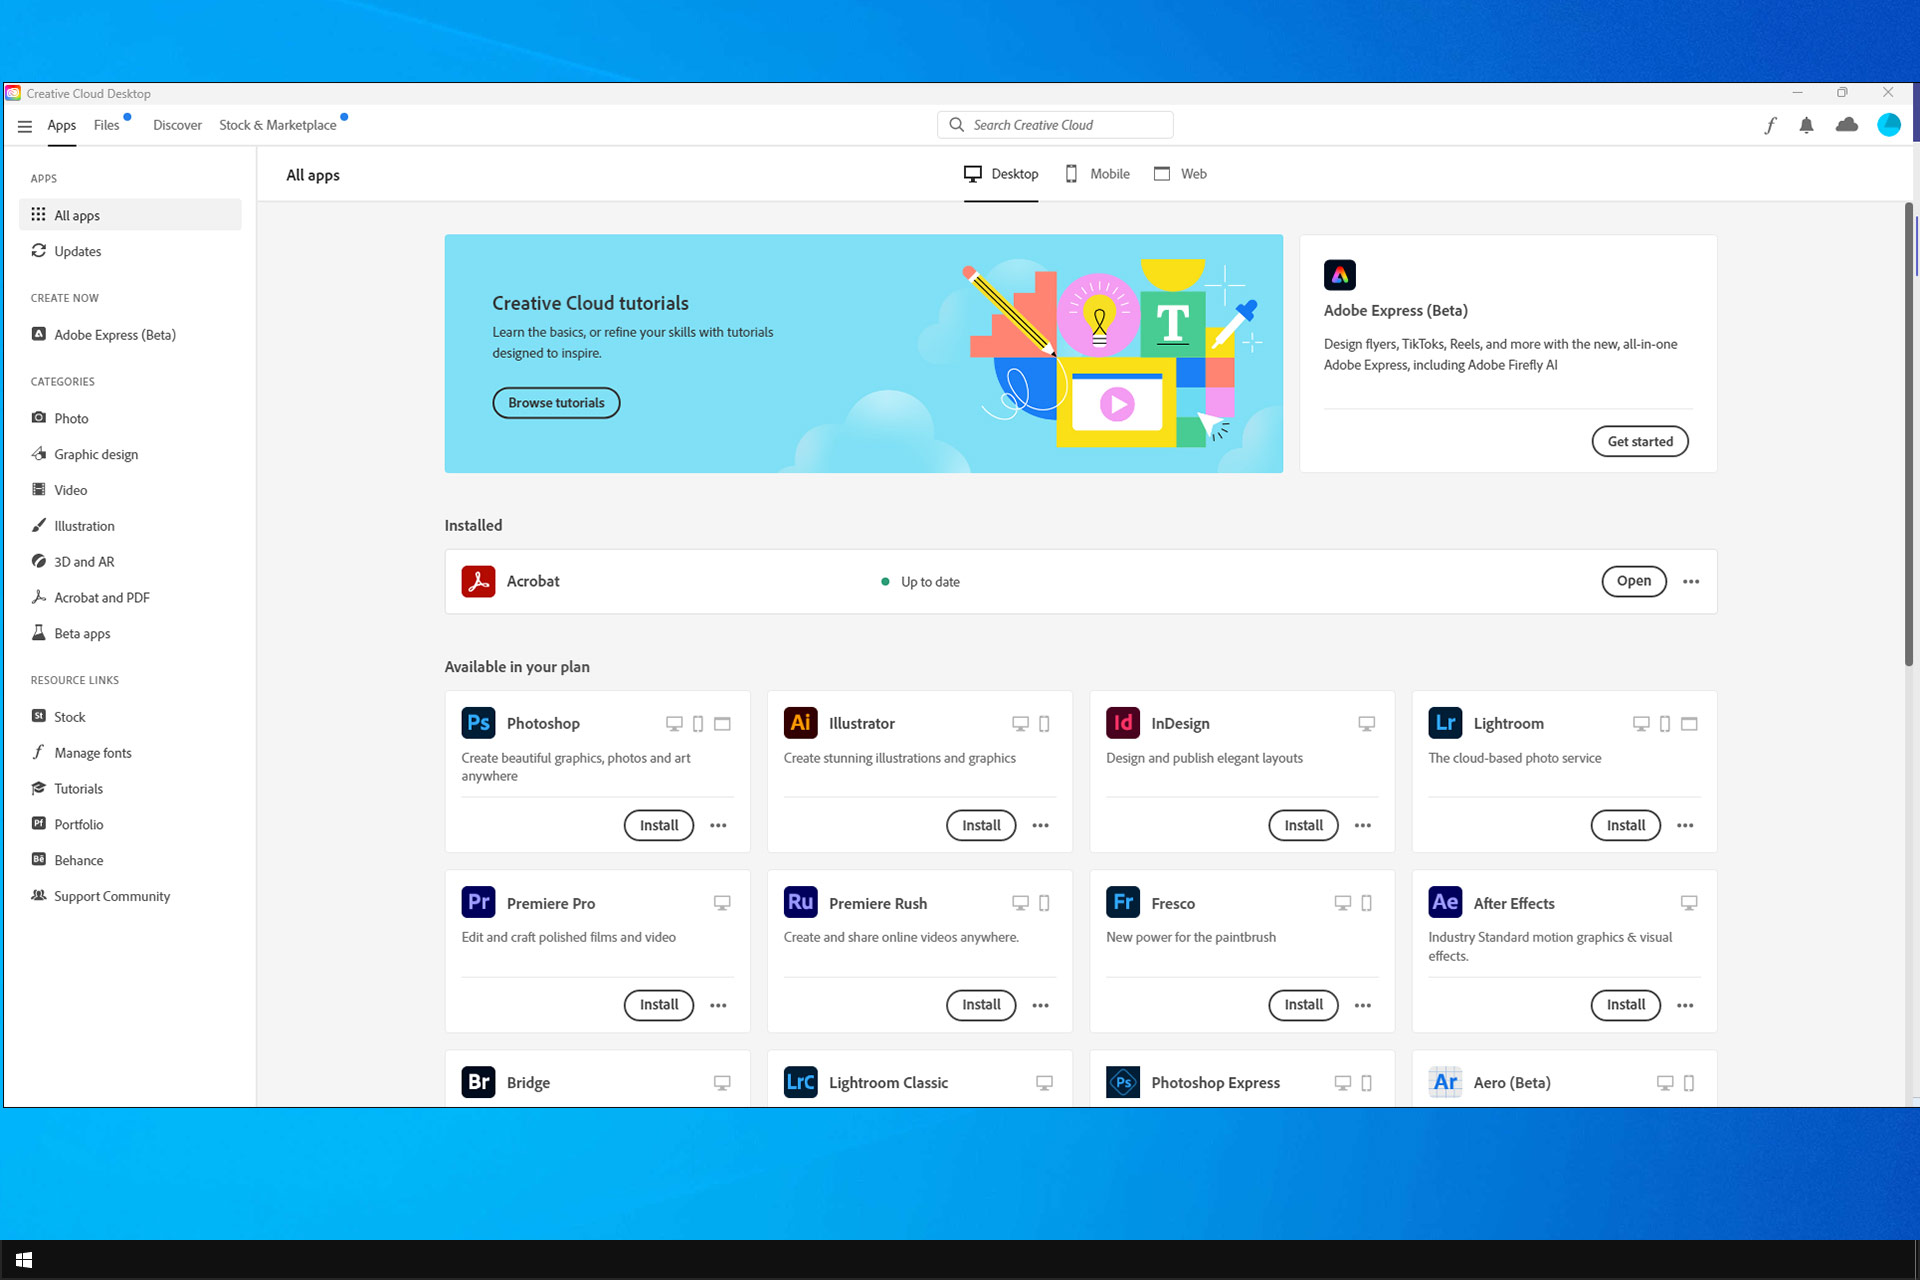
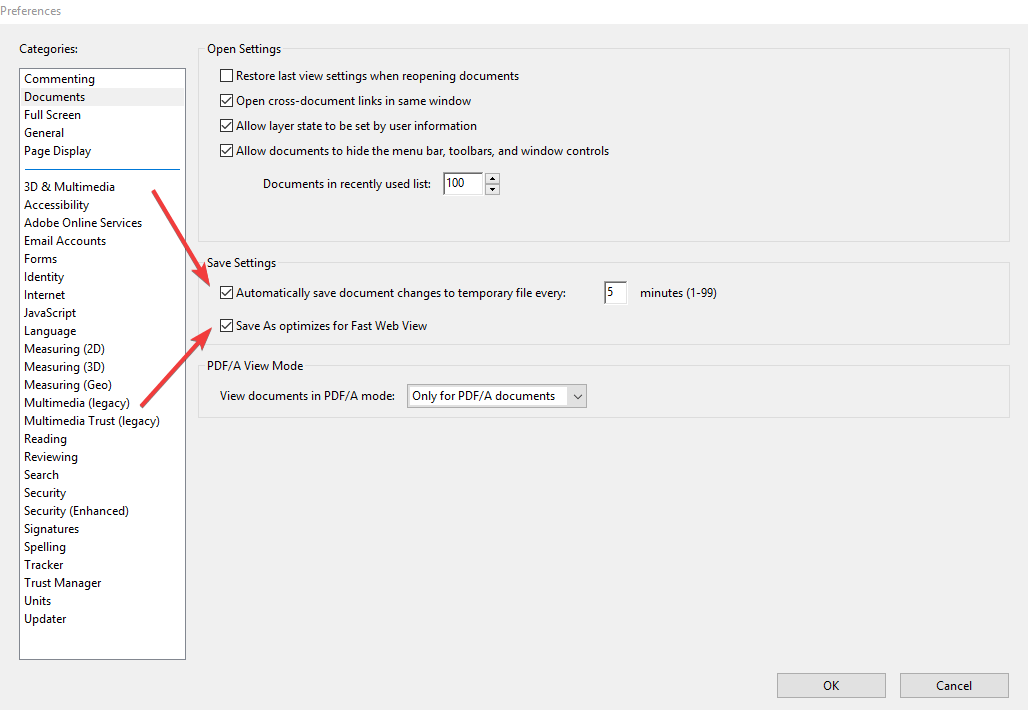
How to change the language in Adobe Creative Cloud

Adobe by default sets the language preference for its CC apps depending on the default language settings of your computer.

However, some users may prefer their native language over English or vice-versa,  depending on the requirements.

The fact that Adobe still doesn’t allow custom installation makes it difficult to select user preferred language during installation.

In this article, we show you how to change the language of Adobe Creative Cloud apps for Windows PCs.

How do I change the language on Adobe Creative Cloud?

1. Change language from Creative Cloud interface

  1. Launch Adobe Creative Cloud app from the taskbar.
  2. Click the Gear icon/three dots (top right corner).
  3. Click on the Preferences option.
    change language Adobe Creative Cloud
  4. From the sidebar select Apps.
  5. Under Installing, click the drop-down menu for Default install language.
  6. Select your preferred language from the list.
  7. Click Done to apply the changes.

You can change the default language for your Adobe CC app from its interface. However, the changes will only affect future installations.

This means you need to reinstall any Adobe app to use it in your preferred language after changing it.

As noted earlier, this change cannot be applied to the already existing apps, but will only affect future installations. So, if you already have some Adobe apps installed, you need to uninstall and reinstall the apps.

2. Change the system language

  1. Click on Start and select Settings.
  2. Click on Time &Language.
  3. Select the Language tab.
    change language Adobe Creative Cloud
  4. Click on Add a preferred language option.
  5. Find and install the language you want to use Adobe CC with.
  6. Set the new language as the default display language.
  7. Launch the Adobe app and check if the language preference is changed.

If you don’t want to reinstall the Adobe apps to benefit from the language change, try changing the system language. Adobe by default uses the system language, thus allowing you to use the app in your preferred language.

While this is a quick solution, there are a couple of issues here. First, you need to have a multi-language Windows license ( Windows 10 Pro or above) to add another language to the system.

Second, you need to change the system language completely to change the Adobe app language.

This makes the first solution more practical for those who don’t mind reinstalling the software to change language preference.

Adobe Creative Cloud supports 25+ languages for its apps. However, before uninstalling any app, make sure that the Adobe app supports your preferred language in the preference screen.

3. Run the latest Adobe Creative Cloud version

There is no secret that we’re always encouraging you to use the most recent Adobe Creative Cloud version. Besides dreaming of new features and fixes of all kinds, it’s time to think outside the box this time.

Visit Adobe’s official distribution page and don’t hesitate to choose the current OS system. Also, choose to install Adobe Creative Cloud directly in your language.

Eventually, click on the Download Now button and you’ll be good to go.

If you have any other questions or suggestions, don’t hesitate to leave them in the comments section below.

Fix corrupted After Effects files: The only guide you need

Imagine working on a project in Adobe After Effects and the file you were working on suddenly won’t open. A thing of nightmares, certainly. But not as uncommon as one would imagine.

If the saving procedure is interrupted, the file might get damaged or unsupported.

This is where incremental backups and autosaves come in handy, but if you (for some reason) have only one version of the file, here’s how to try and fix After Effects file. Don’t hold your hopes high, though.

Table of contents:

  1. Check the autosaves
  2. Start a new project and import the file
  3. Upgrade to the latest Adobe After Effects version
  4. Try with QuickTime
  5. Use File History or a third-party recovery tool

How can I fix corrupt Adobe After Effects files?

1. Check the autosaves

If you have the Auto-save feature enabled, there should be at least a dozen backups stored locally. Sadly, this feature isn’t enabled by default so, if you haven’t enabled it by hand, this won’t be of any help.

The backup folder is found in the standard save location. In addition, make sure to clear the cached data to prevent render functions from kicking in in the later steps.

This might not be the most reliable solution, but restoring from a backup can be useful if the After Effects file is damaged.

If you don’t have any auto-saves, continue with the steps below.

2. Start a new project and import the file

Many affected users managed to address the issue at hand with a simple workaround. By starting a new project and importing the corrupted file, they were able to access it.

This is a common solution for corrupt After Effects files which saved a lot of users from the hardship of progress loss.

It’s worth giving it a try, especially if After Effects is saying that jpg file is damaged or unsupported.

3. Upgrade to the latest Adobe After Effects version

Maybe the best thing to do in your case is to start from scratch. Installing the latest version of After Effects is a no-brainer, yet it definitely helps you fix the corrupted files that are giving you a hard time.

This automatically uninstalls previous versions of After Effects, while preferences and settings from all of them are migrated to the current one.

Moreover, you get the chance to enjoy all significant upgrades and new features packed in this amazing digital visual effects application.

⇒ Get Adobe After Effects

4. Try with QuickTime

Another viable option to open corrupt, unsupported, or incomplete After Effects files are to install the QuickTime and Avid Meridian Codec.

This fixed it for some users, as they were able to access the corrupted files afterward. The procedure is rather simple and it doesn’t require any additional configuration or troubleshooting.

You can find the QuickTime installer, here. And the Avid Codec set is located here.

5. Use File History or a third-party recovery tool

Finally, the only suggestions which cross our minds are recovery tools. If you’ve configured it, you can use the built-in File History to retrieve the older version of the file.

On the other hand, you can just stop making any changes to the hard drive and use any third-party recovery tool to restore older versions of the file that way.

This isn’t the most reliable solution, but it might work if the AfterEffects file is damaged.

We encourage you to share alternative solutions if you’re aware of any in the comments section below. And please back up your future projects as frequently as possible.

What’s the Best Music Software for Rap Beats in 2026

Having the best music software for rappers is a must to produce an excellent song. For any type of music genre, particularly rap and hip-hop, the lyrics beat and rhythm playx a pivotal role.

No audience-grabbing opportunity or top being at the music chart without the best music making software ever.

Now, the lists of music software mentioned in this review are suitable for beginners, intermediate, and expert beat makers.

But note that the music production software listed in this guide, however, covers only those that are Windows 10 compatible.

Whether is the rap recording software or just for creating some mean beats, here’s our selection with the best music software for rappers.


What is the best music software for rap beats?

Adobe Audition

The word Rap is supposedly an acronym for Rhythm and Poetry, and you can’t maintain a good rhythm and tempo without an ear for music and some good software.

And that is precisely why Adobe Audition is at the top of our list.

This digital audio workstation has all the tools that a singer, songwriter, or music producer will ever need, and not just for rap, but for pretty much every musical genre.

Study the sound quality of your recordings, remove all imperfections, clear the music of any background noises, all of this can be accomplished from this great program.

Admittedly, this isn’t a program that could be considered entry-level, but those with minimal experience editing and mixing audio will get the hang of it quickly.

Normally, such a professional tool would only be available behind a hefty price tag, but Adobe Audition can now be downloaded and tested for free.

Here are some of the pros of using Adobe Audition:

  • Multitrack support
  • Handles pretty much every kind of audio file format
  • Professional-level audio editing tools
  • Makes it easy to go back and edit already-completed projects
  • Projects made with older versions of Audition are compatible with each other

Adobe Audition

Whether you’re a well-established rapper or a newbie, Adobe’s professional audio editing software will help you give a personal touch to your music.
Free trial Visit website

FL Studio

When looking for an excellent digital audio workstation (DAW), FL Studio 12 presents the best out there in the market.

Particular for those trying to get a grip or hone their beat-making skill, FL Studio sure is the way to go.

FL Studio is a popular brand with over a decade of electronic dance music (EDM) making experience. It’s most suitable for rap sessions due to its excellent features with standard protocols for even beginners.

With a little practice, reading through manuals and videos getting started mixing music beat shouldn’t take any longer.

The most recent versions offer over 30 synth software from its robust loop library to make a professional track making possible.

A beginner can start learning with the free version of the music software before upgrading to the full version. The FL Studio 12 has slight limitations with editing features and little perks with effect plugins.

It, however, still qualifies as the overall best buy for the best music software for rappers. Available FL studio video tutorials make learning easier.

Key FL Studio features:

  • Easy to navigate and user-friendly DAW for cut and paste (editing), time-stretch, pitch shifting, correction, etc.
  • It includes Producer edition for recording vocals and instruments. Use the MIDI keyboard and microphone to record, edit, and mix.
  • Offers free lifetime updates, meaning no more purchase of upgrade license and additional value for money.
  • One of the best and innovative DAW – customizable, multi-touch support, easy to resize, etc.

FL Studio

The virtual music studio with all the features the rapper in you might desire to create, record and customize audio effects.
Free trial Visit website

Samplitude Pro X5

Music has reached the digital age a long time ago, and this trend doesn’t seem to show any signs of stopping anytime soon.

Thus, if you want to be part of the new wave of musicians that are reaching out to people’s hearts and ears, then you need some really good software.

Samplitude Pro X5 is a great software tool that will bring your music mixing and recording game to a whole new level.

With professional effects, efficient editing functions, as well as a powerful audio engine, this software continues to set new standards in the professional audio sector.

What makes it so great is the fact that it covers all aspects of music production, from recording and editing to music production, all the way to mixing and mastering to give your songs the finishing touches.

Key features:

  • Recording, production, mixing, and mastering in a single DAW Highest audio quality for recording studio tasks
  • Automation Lanes for optimal control and overview of track automation data
  • Plug-in browser for quick searches for effects and instruments
  • Improved performance: Samplitude now supports CPUs with up to 32 cores
  • New MIDI editing functions and improved MIDI workflow
  • 17 virtual instruments and Independence Pro Plus sampler full version

Samplitude Pro X5

After you’ve tried this high-end audio editing software, you’ll never go back to regular audio software.
Check price Visit website

ACID Pro 10

Acid Pro 10 offers beat makers a professional platform for expressing their musical creativity. Magix Software GmbH brings over 20 years’ experience in music software production to play in the Acid Pro 8.

The free trial version helps even beginners to try out using one of the best music software for rappers. Acid Pro 8 is the most recent music software released by the company.

It allows for easy multi-track recording, looping with exceptional MIDI features using the all-new Graphics User Interface.

The Acid Pro 365 is for more experienced beat makers. With regular practice, an intermediate player should be good to go pro!

Key ACID Pro features:

  • Excellent version 10 easy to navigate GUI to an awesome music-making experience.
  • Processes at least 16 new instruments using the world-class audio-MIDI function.
  • Customizable and responsive channels for the record, play, edit, and mix.
  • Introduction of additional 13 music effect plugins.
  • Introduction of VST3 support to boost beat making.
  • Up to 9 GB available loop library.
ACID Pro 10

ACID Pro 10

Use ACID Pro’s game-changing technology to edit and remix your rap music and enter in line with some of the world’s best DJs.
Check priceVisit website

Steinberg Cubase

Cubase is a respectable brand popular amongst renowned music makers and arguably one of the best music software for rappers.

Cubase offers a digital audio workstation with versatility, great sound quality, a range of top-notch tools for music production.

Steinberg includes its signature key in the Cubase for a touch of professional sound mixing.

The Cubase signature key comes with an advanced drum editor and score functions for manual editing of MIDI tracks. Cubase is more suitable for advanced players and will take some handling to master.
Key features include:

  • Unlimited audio-MIDI tracks
  • A robust sound library (about the biggest).
  • Advanced plugins and reverb effects.
  • Easy to edit (drag and drop), correct.
  • Can record as much as 24 extra instruments
  • 30 drum kit Groove Agent SE4
  • Construction kit for EMD and LoopMash FX

⇒ Download Steinberg Cubase


Ableton Live

Ableton Live has been around for close to two decades providing a great platform for music producers and rappers to explore their creativity.

Several unique features make Ableton Live one of the best music software for rappers.

And intermediate and professional rap music producers and beat-makers should find the Ableton Live seamless to work with.

However, because of the simple design and easy-to-use tools, even a beginner can grow on Ableton Live.

It has advanced drum rack plugins in the Introversion that makes laying multiple samples on the 16-pad grid great.

You can record samples, adjust tempo, and more at a very low cost while learning the ropes. But it’s also an exceptional tool for live performance with little or no glitches.

Key features include:

  • Unlimited audio-MIDI track.
  • Excellent user interface with easy software navigation.
  • A stress-free connection between MIDI, software, and hardware music instruments.
  • Seamless editing, cut, and paste functions with workflow improvements.
  • Advanced synth plug-ins and electronic drums for intuitive sound handling.
  • Different versions are suitable for each experience level plus budget considerations.
  • A rich 23 sound library and 50 GB of sound.

⇒ Download Ableton Live


Presonus Studio

Presonus Studio offers nothing less than studio-grade music sounds like the best music software for rappers.

Some of the exceptional tools inclusive for the Studio One DAW experience include the AudioBox iTwo audio interface.

AudioBox iTwo is an add-on that makes the workstation an exciting experience. It allows for easy navigation, drag-and-drop functions, and more to create smooth seamless sound and reverb effects.

It has a little perk though when it concerns aesthetics and overall outlook but an intriguing workflow experience.

Key features:

  • Comprehensive Audio Box iTwo audio interface for easy manipulation.
  • Unlimited track making capabilities
  • Multiple functionalities – VST, buses, FX channels, MIDI, Melodyne, etc.
  • Studio-standard sound quality from a 64-bit sound engine.
  • Mastering integration tool for beginners

⇒ Download Presonus Studio


When searching for the best music software for rappers it’s always best to work with tools that make learning easier.

As one advances with using the music software then it would be okay to move to more advanced recording software.

Using the best music beginner software guide can be quite helpful in making purchase decisions too. Intermediate or advanced music producers shouldn’t find these music making software so difficult to learn.

One to two years of mastery could be enough before making the decision for a Pro music maker.

Twitter updates on Windows 10 and web with support for Birdwatch, carousel ads, and more

A new batch of release notes have been published, revealing everything that’s been added or changed over the past few months within the Twitter Progressive Web App (PWA) that powers both the Windows 10 Twitter app and the Twitter web experience.

The most noteworthy change is added support for the new Birdwatch feature which was announced earlier today. Birdwatch is Twitter’s attempt at empowering users to identify and fact-check misleading tweets via a new note functionality which is launching today in the US and is expected to roll out to other regions soon.

Other major changes include the addition of image and video carousel ads, hover labels, the ability to dismiss topic suggestions, and more information on verified accounts.

Here’s the full release notes:

New

  • Birdwatch: We’ve added Birdwatch, a pilot program in the US of a community-driven approach to addressing misleading information on Twitter. Learn more here.
  • Carousels: We’ve rolled out Image/Video Carousel ad formats for Promoted Tweets on Twitter.com.
  • DMs: We’ve added social context information to message requests in your inbox. This should give you a better idea of who has sent the DM, and whether they’re someone you might know.
  • Hover Labels: We’ve been working to improve and expand our hover labels! To start, we’ve added hover labels to the side navigation when it’s collapsed to help give you more context. We’ve also added them to the composer, media viewer sidebar, and the home timeline switch.
  • Pre-Roll Ad Redesign: We’ve made a number of updates to Pre-roll video ads on Twitter.com to improve ad attribution and the overall user experience.
  • Retweets: The Retweets button will once again display the Retweet and Quote Tweet menu instead of directly opening the Quote Tweet composer.
  • Topics: Topic pills in the Suggested Topics module now have an “X” button which allows you to indicate when you’re not interested in a Topic.
  • Verified Accounts: We’ve added an educational sheet for the verified badge, and a new flow for verified accounts to remediate issues and violations.

Updated

  • DMs: The tombstone for sensitive media in DMs will now show more informative text in the button to display media, letting you know whether it’s a photo, video, or GIF.
  • Emoji Picker: The recently used section in the emoji picker will now update when closing the picker, instead of in realtime. This will make it easier to select emojis from the recently used section without them reordering while you’re making selections.
  • Misinformation Prompt: When you’ve selected Like or Retweet on an embedded Tweet that has been flagged as misinformation, you’re brought to the Web client and shown a confirmation prompt. This prompt now has a link for more information about the Tweet.
  • Topics: Increased the size of the Topic pills in the Suggested Topics carousel on mobile devices.
  • Topics: For recommended Topic Tweets, we’ve increased the size of the context header on the Tweet detail screen.

Fixed

  • Accessibility: Improved focusing of entries which are lists for screen reader users.
  • Accessibility: Corrected some issues with navigating timelines using the “j” and “k” keys. More updates are in progress.
  • Accessibility: Improved labeling of the account switcher.
  • Carousels: Fixed issues with keyboard navigation when viewing carousel content fullscreen.
  • Composer: The composer will no longer show a flash of a loading spinner when loading the home timeline.
  • Conversation Controls: Education for conversation controls will no longer display “you can reply” prompts when viewed while logged out.
  • DMs: Fixed an issue where list items were missing borders in the Message requests inbox.
  • DMs: You should no longer see the sensitive media interstitial for messages you’ve sent.
  • DMs: The filter graphic media setting will now correctly show as enabled by default.
  • Education Prompts: We’ve made changes to prevent users from seeing educational prompts after they’ve already been shown.
  • Explore: Improved link readability on Explore header content.
  • Lists: Private Lists will now display a proper error message instead of a blank screen in cases where the List was not found.
  • Lists: Fixed an issue where navigating into Lists from a notification was showing an error.
  • Lists: Reordering your pinned lists will now properly save the updated ordering. Also resolved issues with deleting pinned lists.
  • Photo Editor: Improved spacing and presentation in the GIF editor.
  • Profile: Fixed visibility of the error message on the edit profile screen letting you know name is a required field.
  • Text: Fixed an issue where you were unable to highlight certain blocks of text.
  • Toasts: Muting an account through the reporting flow will now show the correct screen name in the toast that’s displayed.
  • Tweets: Fixed an issue where selecting Like on a Tweet with limited engagements would show a prompt on top of the information modal.
  • Tweets: Non-compliant Tweets without a tombstone will now correctly disable Tweet actions.
  • Tweets: While editing photos in a Tweet, zooming on iOS should no longer cause broken images.
  • Tweets: The “x” key will now correctly trigger the block action when focusing a specific Tweet.

Have you had a chance to check out the new Birdwatch feature yet? Do you think it’ll be effective? Share your thoughts with the community in the comments below and then follow us on Twitter for more tech news.

Raster Graphics Editor Software: 6 Best in 2026

Are you a digital artist or a graphics designer? Do you need a reliable raster graphics editor to make your work easier? Look no further – this article brings you some of the best raster graphics editors in the market.

A raster graphics editor is an application that facilitates the creation and edition of photos or graphical illustrations and saves them in one of the standard raster images formats like JPEG, GIF, PNG, and others.

It is a creative tool commonly used by graphics designers and creative artists in their day-to-day endeavors, to create, edit and retouch images as they see fit.

There is a myriad of software that uses raster graphics in the market, most of which are substandard or average at best. Hence, if you want a reliable raster graphics editor, follow this article.

What’s the best raster graphics editor for PCs?

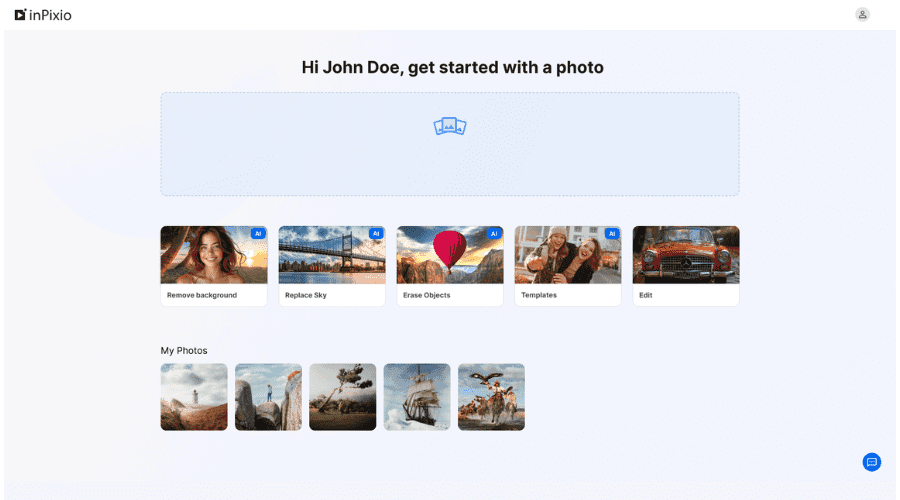
InPixio Photo Studio 12 Pro – Simplified photo editing

The solution offered by inPixio is probably the most accurate and beneficial for raster graphics and easy photo editing.

First, you may consider this tool if you’re a complete beginner. So, the reason why is that you can easily create designs or edit your shots with a few clicks.

As the Internet is dominated by AI nowadays, this tool is fully optimized and offers AI-powered tools for professional-looking photos.

Hence, you can use raster graphics elements and create wonderful portrait or landscape images.

It’s worth noting that InPixio has a simplified UI to fit everything in one place. Meaning that it’s possible to work on different projects and not switch between them.

Concluding here, invest in a professional photo editing tool with an intuitive but full-featured design to deliver your vision.

inPixio Photo Studio 12 Pro

inPixio Photo Studio 12 Pro

Have a go with AI editing tools and high-class technology to speak through your photos.
Check Price Visit Website

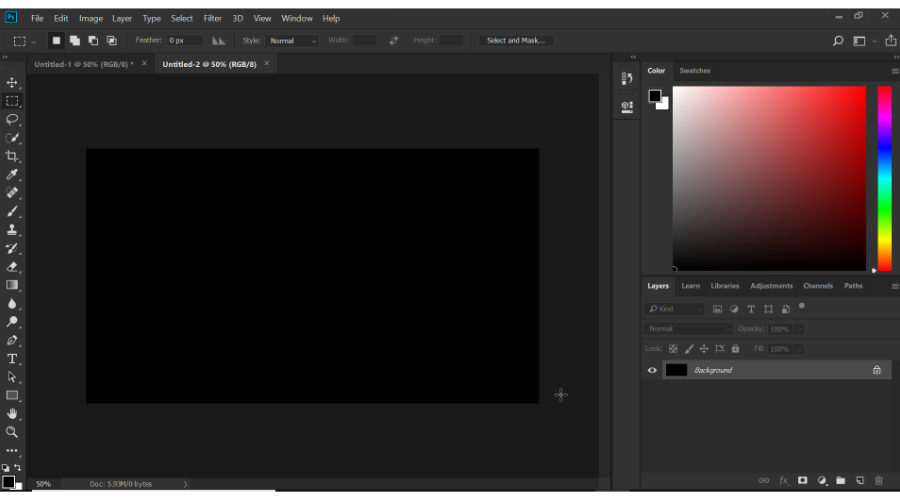
Adobe Photoshop – Ultimate detailed graphics

Adobe Photoshop is probably the most popular raster graphics editor out there, with a huge global client base. It is a product of Adobe Corporation, and it is supported on both Windows and Mac computer systems.

Adobe Photoshop, to many people, is the established standard in the world of photoshopping and raster image editing.

The software is equipped to edit raster image layers and color patterns, for all the major raster image formats including BMP, JPEG, PICT, PNG, PSD, and TIFF.

It hosts a highly customizable and extensible platform, which is made possible by plug-ins like Camera-Raw, filter plug-ins, color correction plug-ins, 3D effects, special effects, and so on.

Adobe Photoshop hosts a myriad of powerful features, some of which include: Paintbrush, 3D extrusion, Video editing, slicing and cropping tools, frame and shape tools, Symmetry mode, Clone Stamp, etc.

Corel Painter – Raster graphics art on canvas

corel painter best raster graphics editor

Corel Painter, from Corel Corporation, is one of the most widely used raster graphics editor applications. Painter is the ultimate photoshop tool of millions of graphic designers and creative artists across the globe.

This program is cross-compatible with both Windows and Mac computers, with support for all modern Windows versions. Corel Painter hosts a set of powerful tools allowing you to create impressive photos.

The software is like the digital version of a traditional paint toolbox, as it hosts features like felt pens, pattern pens, image hose, airbrush, pastel sticks, watercolor, floaters, thick paint, a media library, and so on.

Essentially, it is designed to simplify the work of a creative artist, as all physical paintings can easily be created and edited with a computer system and a graphics tablet (or mouse) via Corel Painter.

Other noteworthy features of Painter include a comprehensive user guide, intuitive UI, color workflow, Wacom tablet support, multi-format file support (PNG, JPEG, and so on), reliable client support, and much more.

Corel Painter is offered in two models: Business and Education. The pricing of both models is available by quote (custom pricing). There is also a free trial version for both versions.

Corel PaintShop Pro – Engaging photo designs

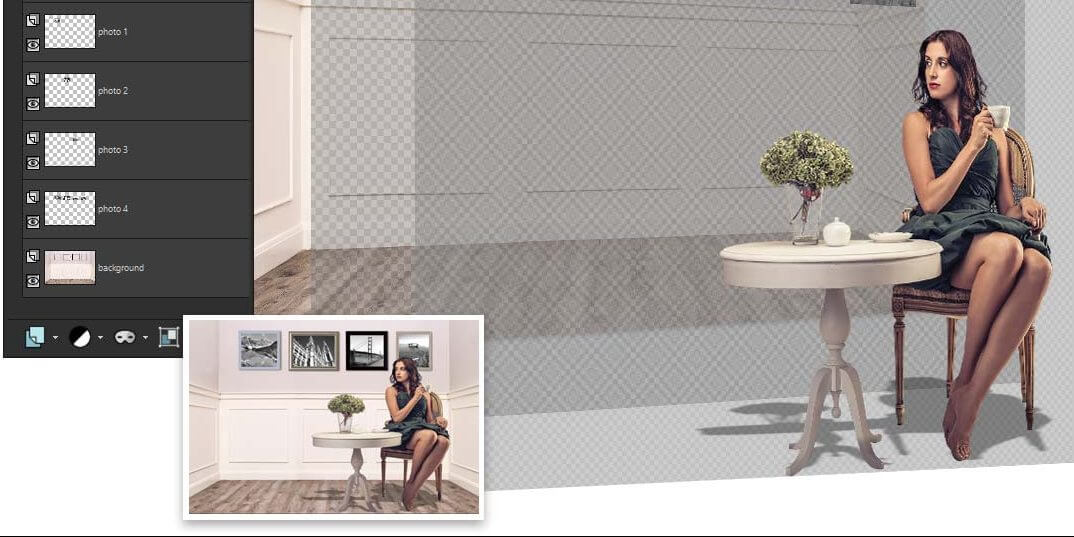
PaintShop Pro Corel_best photo correction tool

Corel PaintShop Pro, fondly tagged PSP, is a top-rated raster graphics editor, which is specially designed for Windows computers.

However, PaintShop Pro is not just a raster graphics editor, it is also a vector graphics editor. As such, it is an all-rounder, which makes it one of the leading options for millions of digital artists across the globe.

PaintShop Pro’s original build was not designed by Corel; it was instead acquired from a middle-class tech firm in 2004.

The software has gone through a series of development since then, and today, it is comfortably one of the best graphic design and photo editing tools in the market.

PaintShop Pro hosts the latest in AI (Artificial Intelligence) technology, 360o editing, and much more like 4K support Customer support, and a free trial.

It also includes Paintbrush, Auto-save, Swift image cropping, Vintage tools, Pic-to-Painting presets, Photo restoration, Layers, Masks, Image filters, Media sharing (via Social media integration), and more.

GIMP – Veteran object manipulation tool

gimp

GIMP – GNU Image Manipulation Program – is one the oldest raster graphics editor in the market, having been around for over 20 years now. It is supported on all major computer operating systems.

GIMP is specially built to simplify the art of photo/image editing. It can be employed to retouch any type (format) of photos, and also change images from one format to another.

This makes it ideal for quick editing since virtually all image formats are supported.

GIMP includes a Watercolors selector, HSV color selector, Paintbrush, Airbrush, Bucket fill, Blend tool, Clone tool, Smudge tool, Dodge & burn tool, Multilayer support, 150+ image filters, and more.

More advanced features include an Animation package (plug-in), Resynthesizer (plug-in), Unsharp mask tool, Multi-format support, Color management extensions (Inkscape & Scribus), and more.

GIMP is an open-source application, developed under GNU’s General Public License (GPL). As such, it is available to all at absolutely no cost.

⇒ Get GIMP

Artweaver – Safe and creative art

Artweaver

Artweaver rounds up our list of best raster graphics editors. It is similar to Adobe Photoshop and Corel Painter in terms of functionality.

It also offers exclusive support for only Microsoft Windows computer systems, although it can also be used on Linux PC.

Artweaver, just like Corel Painter, is capable of simulating traditional paint works, with a set of color management and photo editing tools like airbrushes, paint brushes, oil paint effects, photo filters (mosaic, emboss & blur), and so on.

Furthermore, Artweaver houses support for virtually all image file formats, albeit with limited layer support.

This software includes lasso, magic wand, multilingual support, pen tablet/eraser support, custom pallets, color themes, multiple CPU core support, user-friendly UI, a dedicated helpline, and more.

Artweaver is a freemium program, with a free version for personal use and an optimized commercial edition for business owners and professionals.

⇒ Get Artweaver

This article has outlined five of the best raster graphics editors in the market, that are easy to use, have Windows compatibility, client base, and affordability.

So, if you are a digital artist, graphics designer, or just an art lover, you can employ one of the above-listed raster graphics editors to simplify your workflow and improve productivity.

Microsoft tests its service pipeline with cumulative update build 21296.1010 in the Dev Channel

Late this afternoon Microsoft announced the release of cumulative update build 21296.1010 to the Dev Channel. Showing in Windows Update as KB4602812, this just a small release and doesn’t come with anything major. Rather, it is designed to test Microsoft’s servicing pipeline.

You should be seeing this update if you’ve installed build 21296 last week. As a reminder, that build rolls out an update to the converged clipboard history design (WIN + V) to support pinning, unpinning, deleting, and syncing individual entries. It also delivers the ability to manage and create Storage Spaces from within Settings for more Windows Insiders.

Now that Microsoft is testing its pipeline, we hope that it means that we’ll see another major build this week. These releases have been small, with the exception of build 21286 which brought the new news and interests section in the taskbar. We’re still awaiting the rumored Design overhauls said to be coming later this year with the “Sunvalley” update.

Best Motion Tracking Software: Top 3 of 2026

Motion tracking can bring videos to life and a free video editing software with motion tracking feature allows you to do the same without having to spend a fortune on a premium video editing software.

There are quite a few uses of motion tracking that are obvious, and then some are less obvious.

You can use motion tracking to play a superhero who shoots a laser from his eyes or track an athlete’s movement to improve his performance.

The technology can also be used to remove or blur unwanted objects from a picture or stabilize a video by consistently tracking the object on the editing table.

While there are a good number of free video editing software, only a few offer motion tracking for free.

In this article, we take a look at the best free video editing software with motion tracking to bring your videos to life.


What is the best motion tracking video editing app?

Adobe Premiere Pro (recommended)

premiere pro best subtitle editing software
  • Price – Free trial for 7 days

Pros

  • High-grade professional video editing software
  • Motion Tracking support
  • Excellent collection of online learning and training resources

Cons

  • Not for beginners

Adobe Premiere Pro is the best leading software in video editing and VR reality software equipped with all the powerful tools you need to create something cool.

It is available for both Windows and Mac users, the two platforms used by most of the content creators and video editors.

Adobe Premiere Pro is not your regular trim, cut, paste and produce kind of software. It is a full edit suite with all the features for moviemakers.

Advanced digital specialists can create some cool stuff by referring to the training mode materials on the official website that consists of masterclass tutorials to create their own interactive digital effects.

The user interface is not similar to other video editing tools, as it is a software for professionals in cinematography, but the easy-to-use timelines make it easier to create your video storytelling with the help of an intuitive workflow.

You also have interactive reframing of the video with optimized footage for Facebook, YouTube, Instagram and other social media as well as color grading features on offer.

For video editing, Adobe Premiere Pro offers animation tools that include transitions of series, motion graphics, or you can create your customized template form Essential Graphics tab.

You can further extend the functionality of the software using official apps that will allow you to share videos on social media, to create broadcasts, to create unique characters or to animate in real-time.

You will be able to have unlimited powers if you are a member of Creative Cloud, so you can benefit from the entire package of editing video app for free.

On the flip side, Adobe expresses being an advanced photo editing suite involving a steep learning curve. You can reach out to the online Adobe Community for any help, though.

Adobe Premiere Pro is an excellent video editor that can deliver some great results to the users who are willing to spend a considerable amount of time learning to use the software.

Adobe Premiere Pro

Adobe Premiere Pro

Adobe Premiere Pro lets you edit your videos like a pro thanks to its motion tracking feature, so don’t waste time and give it a try!
Free trialVisit website

DaVinci Resolve 15

davinci resolve 15
  • Price – Free

Pros

  • Advanced editing features
  • Support for RAW formats
  • Motion Tracking Support
  • Free to use

Cons

  • Steep Learning Curve

DaVinci Resolve currently in its 15th edition from Black Magic design is second to none when it comes to video editing capabilities.

It is a free video editing software with a complete set of basic and advanced editing features to cut your next blockbuster film or commercial.

DaVinci Resolve has a Studio version of the tool that offers everything in the free version plus some additional features including multi-user support and 3D tools.

The latest version of DaVinci Resolve has full visual effects, and motion graphic features built-in.

The workspace gives you access to a complete 3D workspace with over 250 tools for different tasks including text animation, tracking, stabilization, rotoscoping, vector painting and more.

Using the Blackmagic RAW codec, you can create stunning images by extracting maximum details from any RAW footage.

The Fusion Effects consist of advanced tools to assist visual effects artist and motion graphic animators with vector paint, rotoscoping, chroma keying, 3D particle system and tracking, and stabilization.

The motion tracking feature allows you to match camera movement with the camera tracker.

Other notable features in DaVinci Resolve include the professional grade color grading and correction tools with advanced curve editor, noise reduction and grain tools.

There is also Fairlight Audio support that offers a built-in DAW (Digital audio workstation) for professional mixing and sample-level editing.

DaVinci Resolve is an excellent piece of software and step above Hitfilm Express with all its advanced editing features.

However, the learning curve in DaVinci Resolve is also one notch higher than Hitfilm Express which is better suited for the novice users in comparison.

⇒ Get DaVinci Resolve 15 


Blender

Blender
  • Price – Free  /  Open Source

Pros

  • Motion Tracking Support
  • 3D modeling and animation support
  • Essential video editing tools
  • Free to use

Cons

  • Steep learning curve

Blender is a completely free, award-winning, open source video editing software that offers a basic yet very efficient set of tools for advanced users.

The software is primarily used for 3D modeling and animation, but the video editor offers enough punch to edit and render the video using the tool.

Blender is admittedly not the best video editing program for the beginners. The advanced users, however, can extend the functionality using third-party add-ons.

Features offered by Blender include live preview, chrome vectorscope, luma waveform, 32 to tracks to add audio, images and visual effects and the audio mixing and syncing capabilities.

Blender allows you to perform the basic video editing tasks but where it shines the most is its ability to carry out complex tasks such as video masking etc.

Blender is an excellent software for anyone looking for a multipurpose tool to edit videos with motion tracking support and also create 3D models and animations.

Or if you are looking for a video editor to use on multiple platforms including Windows, Linux, and macOS.

⇒ Get Blender 


Looking for the best slow motion video editing software? Here are the best options for you.


All the software listed in this article offers basic to advanced video editing tools along with motion tracking support.

While there are many free video editing programs available, these are the best programs you can download if motion tracking support is one of the priorities.

What’s your pick? Is it an advanced video editing software like Hitfilm Express and DaVinci Resolve or a multi-purpose and more 3D/animation focused Blender for you? Let us know in the comments.


FIX: Photoshop CC installation failed

Adobe Photoshop is one of the world’s most well-known raster-based image editors in existence, having basically coined the term for doctoring an image with special effects.

The program has been on the market for quite some time, and each year Adobe launches a new version of the program, further expanding its toolset with new and exciting features.

That being said, the latest version of Adobe Photoshop is Photoshop CC.

Unfortunately, some users have reported having issues with the new program, especially during the installation phase:

I am trying to download Photoshop on a Windows 7 computer. Every time I click to download the app on Creative Cloud, it says waiting, then “Installation Failed”.

Click on this and it says “Installation failed

Download error. Press retry to try again or contact Customer Support.(55)”

I have retried multiple times, restarted computer, turned computer on and off, emptied temp files.

Not working. Please help.

Since not being to install the program at all can be quite troublesome, we’ve decided to look over some steps that you can take in order to troubleshoot the problem.

What can I do if Photoshop installation failed?

1. Get the latest version of Photoshop

Before proceeding with any of the troubleshooting steps mentioned below, make sure that you have Adobe Photoshop downloaded from the official website.

Adobe does not officially support downloads from any third-party sources, so do this at your own risk.

In case you desire the official version of Photoshop, you can acquire it from the official website only, having qualitative photo editing services you can use exclusively from the provider.

Hence, it’s recommended to avoid pirated versions from unknown sources, considering the functionality and security matters. So be sure you install this popular editing tool carefully, plus you can get the free trial anytime you need.

Adobe Photoshop

Adobe Photoshop is perfectly capable of filling in all the tool requirements of any graphic designer, so try it out!
Free trial Visit website

2. Check if you have any browser security extensions installed

More often than naught, a lot of users have an issue with downloading the installation kit for Photoshop CC, and not actually installing it.

That being said, it is a well-known fact that some security extensions can interfere with the download process.

These include Adblockers, Mcafee site/web adviser, internet security toolbar, and more of the kind.

Thus, if you have any of these installed, either uninstall them or temporarily disable them before trying to download Photoshop CC again.

Note: You can also try opening incognito/private tabs in your browser and try downloading Photoshop CC since these tabs open without extension interference.

3. Disable your PC’s Firewall

  1. Press Start, and open the Control Panel.
  2. In the search box, type firewall, and then click Windows Firewall.
  3. In the left pane, click Turn Windows Firewall on or off.
  4. Click Turn off Windows Firewall under each network location that you want to help protect, and then click OK.

4. Uninstall the Creative Cloud Desktop Manager

  1. Download the ZIP file containing the executable uninstaller.
  2. Extract Creative Cloud Uninstaller.zip.
  3. Run the executable installer file, Creative Cloud Uninstaller.exe.
  4. The installer prompts you to confirm that you want to uninstall the Creative Cloud desktop app.
  5. Review the message and click Uninstall.

Once the Creative Cloud Desktop Manager is uninstalled, delete the following folders:

  • C:>Program Files (x86>Common Files>AdobeOOBE
  • C:>Program Files (x86)>Common Files>AdobeAdobe >Application Manager
  • C:>Program Files (x86)>AdobeCreative >Cloud Folders
  • C:>Users><user_name>>AppData>Local>Adobe >AAM UPDATER and OOBE

Go to C:>Program >DATA >Adobe, and rename the file SL-STORE as SL-STORE_OLD

Note: You will need to set your Windows Explorer to view hidden folders in order to access some of these folders.

Once the folders have been deleted and renamed, reboot your PC and perform a clean Creative Cloud Desktop Manager install as well as a clean Photoshop CC install.

By following these steps, you should be able to easily solve and Photoshop CC installation issues.

If you know of any other solution that we may have missed out on, check out this detailed article.

FIX: Microsoft Photos app has disappeared

Did Microsoft Photos app disappear on your Windows 10 computer? Don’t panic, we can help you fix this problem.

The famous Windows Photos application is a multipurpose image viewer available as a built-in program on Windows 8, Windows 10, and Xbox One.

This program allows you to view, organize, and edit your videos and images.

However, some Windows users reported that things go unusual and Microsoft Photos app disappeared on their PC.

Also, they get the error message Element not found whenever they try to open images on their PC.

What should I do if Microsoft Photos app has disappeared?

First off, try running the Windows Store Apps troubleshooter. Photos app is a Windows Store app and running the troubleshooter might help.

Alternatively, you can try downloading the Photos app by using PowerShell and Windows Store.

What can I do if the Windows 10 Photos app is missing?

  1. Run the app troubleshooter
  2. Download an alternative photo viewer
  3. Clear the Windows Store cache
  4. Download and Install Microsoft Photos
  5. Use PowerShell

1. Run the app troubleshooter

  1. Open the Start Menu, type in troubleshooting, and hit Enter.
  2. In the troubleshooting window, scroll down to locate Windows Store Apps.
  3. Click on it and then click on Run the troubleshooter.
  4. Follow the prompts to finish up the process.
  5. Restart PC.

If Microsoft Photos app has disappeared, you can fix the problem by using the application troubleshooter.

With the app troubleshooter, you can check for errors related to Microsoft Photos and then resolve them automatically.

Check to see if Microsoft Photos appears on your Windows PC after the restart. If not, you may proceed to the next step.

2. Download an alternative photo viewer

  1. Download Lightroom free.
  2. Make sure you register for a free 7-day trial.
  3. Install Adobe Lightroom on your PC.
  4. Press Start.
  5. Go to Settings.
  6. Choose Apps.
  7. Go to Default Apps.
  8. In the Photo viewer section choose Adobe Lightroom.

If Photo Viewer doesn’t work, then maybe it’s time you try out an alternative photo viewing tool, one good example being Adobe Lightroom.

Not only is this Adobe product an excellent photo viewer, but it comes with all the editing tools you will ever need to enhance and doctor photos.

In fact, this program can be considered a lightweight version of Adobe Photoshop, but without the complicated UI.

3. Clear the Windows Store cache

  1. Press the Windows + R keys to launch the Run program.
  2. In the Run dialog box, type wsreset.exe and hit the Enter key.wsreset microsoft photos app disappeared
  3. Restart your PC.

Clearing the Windows Store can effectively resolve the missing Microsoft Photos problem.

Check to see if the issue is resolved after restarting your computer. If not, you should try the next solution.

4. Download and Install Microsoft Photos

Microsoft Photos may have been accidentally or manually uninstalled on your Windows PC.

However, you can manually install Microsoft Photos on your Windows PC from the official Microsoft Photos website or from the Microsoft Store.

5. Use PowerShell

  1. Go to Start, and type PowerShell.
  2. Right-click it, and select Run as an administrator.
  3. Type the following commands in the PowerShell window and then hit the Enter key:

PowerShell –ExecutionPolicy Unrestricted $manifest = (Get-AppxPackage Microsoft.WindowsStore).InstallLocation + ‘AppxManifest.xml’ Add-AppxPackage –DisableDevelopmentMode –Register $manifestpowershell microsoft photos app disappeared

  1. Restart your PC, and launch the Microsoft Store.
  2. Search for Microsoft Photos to download and install it on your system.download microsoft photos microsoft photos app disappeared

PowerShell can also help if Microsoft Photos app has disappeared. 

There you go, these are just a couple of solutions that can help you if the Microsoft photos app has disappeared on your PC. Let us know in the comments section if you found our solutions helpful.

Lookbook Software: 6 Best to Use in 2026

We live in a world that is in a constant process of technological development, and that means new technologies are created every day across the globe.

Because of that, people generally prefer to read on their mobile devices and computers than using real physical papers, because it’s more convenient not to carry a stack of heavy papers around constantly.

For the reasons mentioned above, it is very important that publishers use the latest tech available. This is where software that can create professional PDF lookbooks come in.

PDF lookbooks are a useful and professional way of presenting your products to marketers and designers, in order to achieve greater market exposure and to attract the target clients.

The way you present your products, no matter if the product is related to fashion or hardware, makes a big difference in the way you are perceived by your customers, and also competitors.

You can create lookbooks for a variety of reasons. You can use them to present the latest line of clothing you created to the public,  modeling, product presentation for customers, artist portfolios, etc.

Lookbook software allows you to create digital magazines, books, coupons, brochures, etc. Doing this allows you to present your business more clearly, giving the reader the option to use the digital magazine.

In this article, we will explore some of the best lookbook software options available on the market that allow you to easily create professional-looking lookbooks and flipbooks.


What is the best lookbook software?

Adobe InDesign

InDesign - Best film lookbook software

The InDesign app from Adobe is our top pick for the best film lookbook software.  It offers you an incredibly useful set of features, and everything is packed in a beautiful and user-friendly interface.

InDesign not only has the capability to automatically adjust pages to the format that you’re using, but the way the new properties work gives you a more clear understanding of how your document is structured.

The smart automatic page adjustment feature simplifies the process very much, as it is done to pixel-level accuracy with just one click of your mouse.

The PDF context menu has also been revamped to allow more options and to be easier to use, even for inexperienced users.

Here are some other useful features found in InDesign:

  • Very large selections of fonts and formats
  • Automatic layout adjustment so you can focus on creating
  • Smart properties panels simplify the creation process considerably
  • Content-Aware Fit option that automatically adjusts the selection  size to contain the most important parts
  • Great PDF export and import options
Adobe InDesign

Adobe InDesign

Create professional and engaging digital lookbooks with the industry-leading software,
Check priceVisit website

FlipHTML5 Pro

FlipHTML5 - How to create lookbooks

FlipHTML5 is a great PDF lookbook creator that gives you the ability to apply different multimedia elements to your project.

This software allows you to transform a PDF file into a great-looking page-flipping lookbook that can be saved either digitally or printed out.

This software gives you all the tools you need in order to apply different multimedia content to your project, and then publish your lookbook either to a local storage, online, or as a plugin for your website.

FlipHTML5 Pro gives you access to 50GB of storage, allows you to upload an unlimited amount of projects, and also removes the pestering watermark, in order for you to represent your company entirely.

One of the best features of FlipHTML5 Pro is that no ads will ever pop up on your screen, this allows you to focus entirely on the job at hand.

You can export up to 5 lookbooks every month with the option of choosing from 10 great looking bookcases, of a maximum of 1000 pages/book.

In order to keep your files safe at all times, you can also upload files to and from Google Drive and Dropbox.

Here are some key features that are worth mentioning:

  • Slide mode – Can create slides or flipping effects for either a single page or a double plage slide effect
  • Google Analytics tracking – useful information relating to your content, conversion rate, social and advertising
  • Text version for SEO – allows users to search inside the PDF text as well, increasing your exposure
  • Custom logo/branding
  • Password protection
  • Custom templates – a great set of built-in templates and themes to help you customize your project easily
  • Can import table of contents from PDF
  • Customize the lookbook and its functionality
  • Keyword searching -you can search for specific pages by using keywords

 ⇒ Download FlipHTML5 Pro


Yumpu

Yumpu is a great software option that allows you to create professional-looking lookbooks from your PDF files, and allows you to publish projects directly from the dashboard.

One of the best features of this software, besides the fact that it can create digital flipbooks from PDFs, is that Yumpu has great integration with social media platforms, and also a powerful optimization engine.

This software operates as a tool that can be remotely accessed and allows you to modify every aspect of your project, no matter where you are on the planet.

It’s extremely simple to get started using Yumpu. All you need to do is create a free account, and then you can upload a pre-made PDF file to be converted into a digital lookbook, or start from scratch and build your own.

After you’ve finished your project and you published it, you will receive a short piece of code that allows you to embed your flipbook on your webpage, in a blog post, or on Facebook.

You can use this software for free, but if you want to get a bigger number of features and options, you can opt for one of the paid versions.

The paid versions offer a no-ad service, an unlimited number of magazine exports, SEO optimization, Google Analytics, drag, and drop features, etc.

⇒ Try Yumpu


AnyFlip

AnyFlip - lookbook creation

AnyFlip is another great software that allows you to create professional looking lookbooks. This software can be used both online, and as a downloadable software for Windows 10.

You can start using AnyFlip by working with an already existing PDF file from which you can extract the data and transfer it into an HTML5 lookbook document.

With the AnyFlip Free account, you can publish an unlimited number of projects, and host the completed project on their servers.

If you feel like you need a bit of inspiration to get started, you can check out the AnyFlip templates and themes library.

AnyFlip Free allows your clients to open a magazine up to 30.000 times every day, gives you 500 uploads/month, and 100GB storage. The downside of using the free version is that it has limited features.

With the paid versions of AnyFlip you can get up to half of a million daily opens for your clients, unlimited numbers of uploads/month, unlimited storage, and many other great features.

⇒ Try AnyFlip


LucidPress

LucidPress is another great software option that allows you to easily create lookbooks/flipbooks by using drag and drop features for ease of access.

By using this software you also get access to a large amount of pre-designed templates, layouts, and customization tools, that can help you choose the best look for your project.

You can create a wide range of items with this app, including but not limited to letterheads, brochures, business cards, flipbooks, etc.

If you’re not sure how to start designing your lookbook or just need a bit of guidance, you can use one or more templates from la 350 options available, or, you can design everything starting from a white page.

One of the best features of this software is the fact that you can share the work on different projects with your team of designers.

Everybody that is added to this multi-people workspace gets access based on the administrator’s rules, and they can contribute to the design by changing the colors and fonts.

Because communication in this type of project is extremely important, LucidPress offers you the possibility to use chat and comment features. This way everybody that’s part of the team will understand what’s going on.

All the projects created in LucidPress are stored securely in an encrypted cloud environment. This feature allows you to access your projects from anywhere in the world, and not worry about ever losing your files.

⇒ Try LucidPress


PubHTML5

pubhtml5

PubHTML5, much like FlipHTML5, allows you to create professional looking lookbooks, and offer a great set of customization options.

You can access this software from anywhere in the world, and produce incredible digital publications of any printed files, or PDFs.

Customizing the way your lookbook looks is easy with the wide range of customization options and the possibility to simply drag and drop images, sounds, and video to your presentation.

PubHTML5 allows you to customize the book titles, keywords and descriptions about your products in order to increase your SEO score, get more visitors, and eventually more sales as well.

All the SEO customization you perform in this software allows you to make your project easy to search through and can be added easily to your website or blog to increase online visibility.

Another great feature of this software is the PubHTML5 Metrics option. This feature offers you real-time reports relating to the engagement of your clients, zoom patterns and the time they spend on each page.

With the free version of PubHTML5, you can create great looking lookbooks, administer the project, use the text version of SEO, and also publish your work on social media directly from the soft.

The Premium version of PubHTML5 has a few extra and very useful benefits. You can use MS Office files to create your lookbook, have access to animation editorial features, and insert audio files to digital catalogue.

⇒ Try PubHTML5


It is extremely useful to use professional lookbook creator software to achieve great looking results. Creating the perfect lookbook has never been easier with the tools we presented in this top 5 list.

You get an incredible amount of pre-designed templates on which you can build your project, or you can start from scratch and use all the customization options available to create your perfect flipbook.

We would love to know what option you chose from this list and how it performed for you. Please feel free to let us know what your experience was, in the comment section below.


Use Visio Online Preview to open Visio diagrams in browsers

If you don’t possess a Visio license, and you don’t feel like purchasing one, rest assured there are ways to view and even edit your diagrams.

Find out how to open Visio diagrams in browsers in the following article. We’ve found some quick solutions for you, so read on.

How can I use Visio Online Preview to open Visio diagrams?

Visio Online is a tool that lets users view and share Visio drawings on the web even if they don’t have Visio installed in their machines.

Microsoft already rolled out Visio Online Preview to Office 365 commercial customers in First Release.

All you need to do is upload a .vsdx file to the cloud, OneDrive for Business, or SharePoint Online. Then all users can access the file on their browsers without installing Visio on their computers.

If you’re curious to see what this tool can do, test it, and get an idea of what it’s like.

Other features include:

  • Navigate to other pages in the file by clicking the tabs in the lower left.
  • Zoom in and out of the drawing using the slider located in the lower-right corner.
  • You can share your drawing by sending a link instead of an email attachment. Click Share in the upper right and other users can then view it in a web browser.
  • You can also view shape data: click on a shape and then select Shape Info to see its data.
  • Hyperlink support is available.

Here’s what you need to know about the Visio:

  • The tool doesn’t allow users to edit drawings, but this feature will be supported in the future.
  • Visio Online Preview works with the current versions of Edge, Chrome, and Microsoft Internet Explorer.
  • The tool is expected to be generally available by the end of this year to all Office 365 subscription plans that include Office Online.

⇒ Get Visio

By opting for web access rather than purchasing the Vision software, you may quickly preview files. What was your experience with Visio, and did you run into any problems? Please use the dedicated area below to comment.

Abstract Art Software: 5 Best to Use in 2026

If you’re looking for a powerful software for abstract art, this article may help you. There are quite a lot of tools for creating abstract art on the market, and it’s difficult to pick the right one.

In this article, we’re going to list the best software for abstract art that you can use to unleash your creative genius. They are compatible with Mac and Windows 10 as well, so make a choice.

We used a series of criteria in the selection process, including user reviews, versatility, ease of use, PC compatibility, and more.


What are the best abstract art software?

Adobe Illustrator – Highly customizable professional tool

Adobe Illustrator comes as a highly-polished application for creating vector graphics for print or the web. If you happen to lack photography skills, and you’re more into abstract art, you can’t go wrong with Illustrator.

Firstly, if you’re familiar with other Adobe apps, keep in mind that the interface looks quite similar.

The tool panel is located to the left of the screen. Each time you select a tool, different options available for that tool appear at the top.

Use the Pen Tool to draw lines, then open the Gradient Panel to set your color markers and adjust the parameters to your liking.

To really get the most out of Adobe Illustrator, you’ll need to get accustomed to its drawing tools and all those presets that modify the workspace to better meet your needs.

Be sure that you’ll master creating logos, icons, or abstract art in no time.

Take a look at some of the most important key features included in the program:

  • The Pen tool is one of the most used tools to create all kinds of designs
  • A clean and fully customizable interface that enables you to capture the essence of abstract art
  • Intuitive troubleshooting when opening or saving files
  • Countless effects help you perfectly express your messages
  • Learning Illustrator is very easy as there are lots of tutorials to take a peek at

Adobe Illustrator

With Adobe Illustrator creating abstract line art should come as no challenge, so try it on.
Free trial Visit Website

Corel Painter 2023 – Optimized painting experience

Corel Painter 2023 is an impressive digital art software that will help you create stunning masterpieces. The tool is highly addictive, we spent more than 3 hours playing on the canvas after installing it.

Every stroke leads to the next as if the tool were able to push a magic button and let your inspiration run wild.

Corel Painter 2023 is a complete software and can satisfy even the most demanding artists. There are dozens of additional brushes that you can buy, each dedicated to particular drawing styles.

Long story short, Corel Painter lets you create fine abstract digital art that will make 18th-century painters envy you.

Some of the Main features of Corel Painter 2023:

  • Build and Sculpt brushes
  • Color Selection control for Selection brushes
  • Feather Selection up to 2000px
  • Overlay mode for selections

Corel Painter 2023

Create abstract art with brushstrokes worthy of great painters.
Check Price Visit Website

Synthetic Studio Artist – Powerful Creative AI Assistance

With Synthetic’s Studio Artist software, anyone can create great art. This is the place where art and science collide, allowing you to generate stunning pieces of visual art.

The tool relies on artificial intelligence to automatically paint and draw.

Here’s how to use the Synthetic Studio Artist software:

  1. Pick a source photo and then select the canvas type that you want to use.
  2. Select a preset (there are more than 1,000 presets available) and hit the Action button.
  3. The tool will start painting an impressive piece of art using the source image as a model.
  4. You can then add the finishing touches using a mouse or pen.

Most importantly, you can use Studio Artist to apply the same process to videos as well. You can try out Synthetic’s Studio Artist 5.0 software for free.

You can also buy Studio Artist 5.0 as is worth every cent.

Some of the key features of Synthetic’s Studio Artist:

  • Automatic, Assisted and Manual Paint and Drawing Mode
  • Dual Paint Mode
  • Paint Action Sequence
  • Extensive Photo and Video effects Suite

⇒ Get Synthetic Studio Artist

Abstract Curves Software – Standalone or plugin


Abstract Curves opens the gate to the world of digital abstract art. This software will help you generate beautiful abstract images with just a few mouse clicks.

The tool offers a bevy of interesting design features and presets that you can use to generate original, intricate images.

You can superimpose the images you generate on your own photos using the Transparent Background option.

You can then use your creations as backgrounds, wallpapers, icons, or simply add them to your artist portfolio.

Abstract Curves works both as a stand-alone tool, as well as a plug-in for PhotoShop.

Main features of Abstract Curves Software:

  • Works as a standalone application and as a plugin
  • Adding generated images to your photos
  • 30+ built-in color palettes with 7000+ colors
  • 130+ built-in presets in 10+ galleries

⇒ Get Abstract Curves 

Art Rage – Realistic painting tools

As its name suggests, Art Rage is not your regular art software. Abstract art has often been misunderstood as a manifestation of angry, sometimes crazy artists.

This tool seems to actually embrace this idea, allowing you to create unusual pieces of art.

Art Rage is a very versatile tool, being used for traditional style art, graphic design, picture book illustrations caricatures, abstracts, photo editing, special effects, and more.

The software comes with a very simple and user-intuitive interface, making it suitable both for beginners and advanced users.

As a matter of fact, if you haven’t used Art Rage before, there are plenty of tutorials that you can watch to get familiar with the tool.

Art Rage 5 is the latest version of the tool and comes equipped with basically all the features you need to create true masterpieces:

  • Customizable digital brushes, including custom brush blenders, stickers and sticker spray
  • Real color blending and an adjustable metallic level
  • BMP, GIF, JPG, PNG and TIFF support, and much, much more

⇒ Get Art Rage


The software tools listed above are all excellent tools for creating abstract images. Select the one that best suits your needs.

For example, if you’re a professional abstract art creator, we recommend Synthetic’s Studio Artist 5.0 or Corel Painter. If abstract painting is only a hobby for you, then download Art Rage or Abstract Curves.

How to highlight unselectable text

You can copy and paste selectable text in word processor documents and on website pages with the Ctrl + C and Ctrl + V hotkeys.

When the text is selectable, you can hold the left mouse button and drag cursor to highlight and then copy it.

However, there’s also lots of text within the Windows UI and other software packages that you can’t highlight and copy.

If you ever need to copy text that you can’t highlight by holding the left mouse button, check out the Capture2Text and Textify programs for Windows 10.

Capture2Text and Textify are two software packages that enable you to copy text which you can’t usually highlight.

They are both fairly tiny utilities with which you can highlight more specific software text by pressing their hotkeys.

However, we’ve got another option that may be far more tempting than these two ones. All three are handy programs, and this is how you can highlight text with them.


How do I highlight text that cannot be highlighted?

1. Highlighting text with Adobe Acrobat

try out Adobe Acrobat
  1. Open the official homepage, then click on the Download Now button.
  2. With the program installed, open up Acrobat’s Preferences.
  3. Go to the General category next.
  4. Here you can check the Make Hand tool select text&images.
  5. Up to this point, selecting text is possible without activating the selection tool in advance. Therefore, feel free to use the cursor to select the text you want to highlight.
  6. Finally, simply right-click within the selected area and choose Highlight Text.

Highlighting unselectable text is no challenge when using a reliable PDF solution like Adobe Acrobat. More than five million organizations worldwide rely on it and for a good reason.

Besides helping you get this job done, get ready for a smooth interface, the incredible ability to compare two documents in different formats, along with cloud-based commenting and sharing features.


2. Highlighting text with Capture2Text

  1. First, open this page and click Capture2Text_v3.9 to save its Zip file.
  2. Open the Capture2Text_v3.9 Zip in File Explorer, and then press the Extract all button to decompress it. Select a path to extract it to, and you can open the program from there.
  3. When the software’s running, you’ll find a Capture2Text icon in the system tray. Right-click that and select Preferences to open the window shown in the snapshot directly below.capture2text
  4. Click Save to Clipboard on the Capture2Text context menu if it isn’t already selected.
  5. Next, open a window with some text you need to copy. Alternatively, as an example, you can open the Display settings window as below.capture2text2
  6. Place the cursor near the text you need to copy. Then press the Windows key + Q and drag the cursor. You should see a blue box that you can now highlight the text by dragging the cursor.
  7. Drag the blue box around the text you need to copy. Then the copied text should appear at the top left of the window as in the snapshot directly below.capture2text4
  8. Now open Notepad and press Ctrl + V to paste the copied text. 

3. Highlighting text with Textify

  1. Save the Textify Zip by clicking the Download Now button on this Softpedia page.
  2. Open the program’s compressed folder, and click Textify to run it from the Zip.capture2text5
  3. When you’ve opened the Textify window above, find some text to copy in Windows 10. 
  4. Move the cursor over some text to copy and press the Shift key + middle mouse button, which is the default hotkey. That will open the box below which includes the text you selected to copy.capture2text6
  5. The text in the box is highlighted so that you can press the Ctrl + C and Ctrl + V hotkeys to copy and paste.
  6. You can copy Start menu text such as app and software shortcuts with Textify much the same. Note that the Textify text box opens behind the Start menu.

You can highlight a lot of software text with Capture2Text that you usually wouldn’t be able to copy. However, you still can’t copy the Start menu text with that utility.

Textify is an alternative program that enables you to highlight and copy a little more text on the Start menu and any other software window.


Textify and Capture2Text are both great utilities for highlighting and copying text.

Although you can copy the Start menu text with Textify, one advantage of Capture2Text is that you can highlight and copy image text on website pages.

It also has more extensive hotkey and output customization options. So, it’s worth adding any of these programs to your desktop or laptop.

Even better, you could go for Adobe Acrobat and enjoy a complete PDF solution with all the features you may have in mind.


Go to Home, select the arrow next to Text Highlight Color, then finally choose No Color.

  • How can I copy text from an image?

In order to copy text from an image, simply right-click it and choose Copy Text from Picture. Then, just click where you’d like to paste the text and press Ctrl+V.

FIX: Adobe Application Manager missing or damaged

It can be very annoying to run your Adobe applications on your PC and see an error message saying that the Adobe Application Manager is missing or damaged.

Here is what one user had to say about this issue on the Adobe help forums:

When I open any Adobe applications I get the message: Adobe Application Manager, required to verify your license, is missing or damaged. Please download a new copy of Adobe Application Manager. How can I get any of the applications running again? Any help is highly appreciated.

Because the message can include a wide range of possible issues, this error can cause a lot of frustration amongst users who encounter it.

In today’s guide, we will try to cover all the possible reasons for this error appearing, and we will give you step-by-step information about how to apply the specific methods one by one.

Please keep trying to run the Adobe Application Manager after trying out each of the methods presented in this list.

This will ensure that you won’t waste any time, and at the same time protect your system from any unneeded changes in its settings.

How do I fix the Adobe App Manager missing or damaged?

1. Uninstall and reinstall the Adobe Creative Cloud application

  • To uninstall:
  1. Press the keyboard shortcut Win+X.
  2. Choose Apps and features.
  3. Search for the Adobe Creative Cloud app in the application list, select it, then click Uninstall.
  4. Follow the on-screen instructions to complete the uninstallation process.

In order to completely remove the Adobe Creative Cloud application from your PC, you need to follow the steps above.

  • To reinstall:
  1. Visit the official Adobe website to download Adobe Creative Cloud.
  2. Sign in with your credentials.
  3. Click the Download button and follow the on-screen instruction to complete the setup.

Due to the latest security measures to protect your account from any third parties, installing the Creative Cloud without having administrator privileges can cause some files not to be installed properly.

In order to avoid encountering this issue, it is recommended that you reinstall the application after either logging into or creating a new administrator account.

2. Repair the Creative Cloud application

Even though it might seem like an obvious solution, some users have had great results by simply clicking the repair button inside the error message.

After trying out this option, please try to see if the issue is resolved, and if not, continue reading this list.

3.  Use the Creative Cloud Cleaner Tool from Adobe

  1. Download the Creative Cloud Cleaner Tool.
  2. Open the tool and choose the option Creative Cloud 2017, 2015, 2014, Creative Cloud & CS6 Products.
  3. Select Adobe Creative Cloud Desktop.
  4. Rename the following OOBE folders to OOBE.old:
    Program Files (x86)Common FilesAdobeOOBE UsersAppDataLocalAdobeOOBE
  5. Download and reinstall the Creative Cloud app by following the steps mentioned in solution number two.

In today’s fix article we explored some of the best troubleshooting methods to apply if you see the error about your Adobe application manager either missing or being damaged.

We would love to know if this guide has proven useful in your situation and if you managed to easily access your Adobe app manager.

Please feel free to share your thoughts with us on this matter by using the comments section found below this article.

Creative Cloud Page is Not Available: 5 Ways to Restore it

If the Creative Cloud page is unavailable, you won’t be able to use any of Adobe’s services, which can be a significant issue.

However, this can be fixed, and today, we will show you a couple of solutions that can help you with this issue.

Why is Creative Cloud blank?

  • The software might be out of date.
  • Its cache files or installation is corrupted.
  • You’re not using the correct GPU with the software.

How do I fix blank Creative Cloud desktop apps?

1. Check compatibility

  1. Now, all Windows platforms are compatible with Creative Cloud.
  2. Users can only utilize CC on 64-bit Windows 10 platform or macOS v10.12 and higher.
  3. Thus, users who don’t have compatible platforms will need to upgrade to 64-bit Windows 10 or newer.

2. Update the Creative Cloud app

  1. Check the current version of Adobe Creative Cloud app.
  2. If it’s not up to date, update it.
    Creative Cloud sign in creative cloud desktop app is blank
  3. After doing that, check if the problem is resolved.

With every update, Adobe adds new features and security patches and increases compatibility. As with every piece of software, ensure you are using an up-to-date version for the best experience.

⇒ Get the latest version of Adobe Creative Cloud

3. Clear the OOBE folder

  1. Press the Windows key + E hotkey, which opens File Explorer.
  2. Click the View tab.
  3. Select the Hidden items checkbox.
  4. Enter this path in File Explorer’s folder path bar: C:\Users\WindowsReport\AppData\Local\Adobe\OOBE
  5. Change the user folder in that path to the actual title of your user folder.
  6. Select all the contents of the OOBE folder by pressing the Ctrl key + A.
  7. Press the Delete button to erase selected files.

4. Reinstall the Creative Cloud app

  1. Download the Creative Cloud Uninstaller from this page.
  2. Open the Creative Cloud Uninstaller ZIP in File Explorer.
  3. Click the Extract all button.Extract Compressed Folders window creative cloud desktop app is blank
  4. Press the Extract button.
  5. Then open the Creative Cloud Uninstaller from the extracted folder.
  6. Click the Uninstall button on the window that opens.

5. Select Power Saving Graphics for Creative Cloud

  1. Right-click the desktop and select AMD Radeon Settings.
  2. If you can’t find it there, type AMD Radeon Settings in the Windows search bar. 
  3. Click the System tab on the Radeon Settings window.
  4. Then select the Switchable Graphics tab shown directly below.Switchable Graphics tab creative cloud desktop app is blank
  5. Enter Creative Cloud in the Search box.
  6. Click the Creative Cloud profile application to select the Power Saving option.

Some users with hybrid Intel/AMD graphics systems have said they’ve fixed the issue by switching Creative Cloud to Intel (power-saving) graphics. 

The above resolutions will probably fix the Creative Cloud app for most users. However, this isn’t the only issue; many reported high CPU usage in Creative Cloud Desktop. If that happens, you might have to stop Creative cloud from running in the background.

Many reported Adobe Creative Cloud download error, but we have a unique guide that addresses that. What method did you use to fix this issue? Let us know in the comments below!

Microsoft, Google, and more announce support for new Open Web Docs initiative

Microsoft has just announced its support for Open Web Docs, a new initiative aiming to support community-driven platforms for high-quality developer documentation. Instead of creating a brand new docs platform, Open Web docs will work closely with existing documentations platforms including Mozilla’s popular MDN Web Docs.

“The collective’s initial goals are focused on supporting MDN’s recent infrastructure transition and contributing to core web technology documentation, browser compatibility data, and JavaScript documentation on MDN Web Docs,” Microsoft said today. The Redmond giant will support Open Web Docs as a founding sponsor along with Google and Coil, with additional support and participation from W3C, Samsung, and Mozilla.

In the short term, Open Web Docs will employ a full staff of independent technical writers who will work with existing platforms and make contributions to MDN Web Docs. In the long term, Open Web Docs will work on “developing a community of contributors around core web technology documentation, browser compatibility data, and improving JavaScript documentation,” the announcement post reads.

While Open Web Docs already has some big backers, the collective is welcoming anyone who wants to contribute to the project and support long-term maintenance of web platform technology documentation. You can follow @OpenWebDocs on Twitter to get news about the project, which also has a GitHub page.

Microsoft Teams will soon queue your sent messages when you’re offline

Microsoft Teams is gaining a new feature that should help users be productive even without an active internet connection. The new Offline experience will be rolling out worldwide on the Teams desktop and web clients later this month (via Petri).

Currently, when a user tries to send or edit chat messages in offline mode, the app returns those messages with a failure message. In this scenario, Microsoft Teams prompts users to retry or delete the messages when the network connection is re-established. The Offline experience should automatically address this issue by automatically sending all unsent messages in a queued state for up to 24 hours.

“In phase one of this update, Teams messages that are sent while a user is offline will be queued on the local device. Teams will automatically send the messages when the device resolves connectivity issues within 24 hours. However, if the message remains in an unsent state for more than 24 hours, the message will fail and Teams will prompt the user to resend or delete the message,” the company explained in the Microsoft 365 Admin Center.

However, in phase two of this update, Microsoft Teams will add the ability to edit the messages lined up in the messaging queue. The company noted that the second phase will begin at the end of this month and should be complete mid-February.

The upcoming support for Offline mode is a welcome addition, and it should help ensure that your colleagues will receive important messages as soon as the device connects back to the internet.

Kurt DelBene is the latest Microsoft veteran to leave the company

As in all organizations, changes occur as executives move on to better opportunities (as in the cases of Brad Anderson and Julia White), or to retirement, as in the case of Executive Vice President Kurt DelBene, who will be leaving Microsoft at the end of the fiscal year in June.

DelBene is a long time Microsoft veteran, joining the company in 1992, where he rose to eventually lead engineering and marketing for Office. As Mary Jo Foley notes, he left the company in 2013, first to help fix the Affordable Care Act website as a Senior Advisor to the Secretary of Health and Human Services, and then spent some time with Madrona Ventures Group, a venture capital firm based in Seattle.

DelBene then came back to the company in 2015 in a new role leading Corporate Strategy and Core Services Engineering. Most recently, he’s been leading work Microsoft’s COVID-19 response, where he will stay until his retirement at the end of June.

In an email to employees today, CEO Satya Nadella explained that DelBene’s position will not be replaced, according to Foley:

According to Nadella, Core Services Engineering and Digital Security and Risk Engineering will transition to Executive Vice President Scott Guthrie’s Cloud and AI organization. Microsoft Business Operations is moving to Finance under Chief Financial Officer Amy Hood. And Corporate Strategy will become part of new Business Development Chief Chris Young’s organization.

Although changes are to be expected, it will be interesting to see how Microsoft Senior Leadership team evolves heading into the new fiscal year.

How to create a Flow in Microsoft Teams and why you might want to help you stay productive

Have you ever wanted to get a notification on activities happening inside Teams relating to documents being uploaded, forms being signed, or even tasks being completed in Planner? Usually, you might have to check each of these Microsoft 365 apps individually to get up to speed on things. However, with Power Automate and Microsoft Flow, you can create certain “Flows” to help you keep track of your business, and help boost your productivity. Today, we’ll be showing you how you can do that.

Adding Power Automate to Teams

First things first, you’ll need to add Power Automate to Microsoft Teams to proceed. To do this, click the Apps section in the Teams sidebar. From there, search for Power Automate. Then, choose the Power Automate app that opens up and choose the purple add button. If you want flows in a specific channel or an entire team for all users, you also can choose the down arrow, and pick Add to team, if you have the privileges to add an Automation for everyone. Once done, you should see the Power Automate app open up in the sidebar in Teams.

Creating a premade, “popular” Flow in Teams

Power Automate Teams

Next up, you should be taken to a filtered option showing you only Microsoft Teams Flows and Templates. You can filter to other Flows if you want to by clicking the filter button next to the Search Flows button (but more on that later.) Anyway, you also should notice some popular templates for Flows in Teams. These are pre-made templates by Microsoft, that you can enable with just a few clicks, no coding required!

We’ll focus on these first, as these are the most popular and help address some of the most common needs for notifications in Teams. Here’s a list below, but keep in mind you can see a list of all the Teams flows by choosing to See all Teams templates at the bottom of the Power Automate app. Generally speaking, any of the Flows in the Teams list will be straight forward to set up, needing just a few simple steps.

  • Notify a team when a new Forms response is submitted
  • When the status of a task in Planner changes to complete, notify a channel
  • Notify a team when a new item is created in a SharePoint List
  • Save a message to OneNote
  • Create a work item from a message
  • Notify a team when a new task is added to a Trello board
  • Notify a team when the status of a work item changes in Azure DevOps
  • Notify a team when an alert is triggered in PowerBI.

If the Flow you want is in this list, then click it. You’ll get a popup message, allowing you to configure it. We’re using the Flow for task changes in Planner, as an example. Usually, you should see a box letting you name the flow. Then, under that, will be a list of sign-ins (or connectors) that you’ll need. Make sure you sign in, to each one, and then click continue and follow the on-screen instructions. In our case, we’ll need to configure and choose the Planner group ID, the Plan ID, the Teams Team, and then the Channel to continue.

When done, you can choose Create Flow. And you should then see a popup message saying Your workflow has been created. It now appears in the list of Flows on the main Power Automate page! And it will run automatically from now on.

Creating other, and custom Flow in Teams

Custom Flow Teams

Thanks to Power Automate, you’re not just limited to Flows themed towards Teams. If you want, you also can create other Flows, too. You can toggle to these by clicking the Filter button at the top of the screen, next to the search box, and choosing All Templates.  Then, look to the left to choose a category. The steps will be the same, requiring you to sign in and connect accounts, as we did above.

If you’re a more advanced user, you also can create a blank Flow, on your own, not following a template. Click the Create tab in Power Automate, and then choose to Create from blank. From there, you’ll see a list of triggers and actions. You’ll also see some themes, under All. Pick your theme, to filter the trigger and actions.

Then, choose a trigger, following the instructions on the screen. After the trigger is finished, set up the action by following the instructions and the wizard on the screen. Each Flow has a different set of instructions, but it’s pretty straight forward to understand. You can then Test the flow by clicking the Test button on the top. You also can check the flow for errors by choosing Flow Checker too. When ready, click Save and your Flow will be put into action.

Checking and deleting Flows

Editing Flow Teams

Now that you’ve created your Flows, you can easily delete them, or edit them, too. Simply open up the Power Automate app in Teams by clicking the ( . . .) in the Sidebar, and then clicking the Home tab. From there, you should see a list of your Flows. You can move your mouse to the far right, and click the three dots in the list and then choose Edit or Delete to delete the Flow. More importantly, you also can check the Run History to see how it’s running, of it has gone rogue.

Just the start of endless possibilities!

Creating Flow in Teams with power Automate is just the start of the possibilities. Microsoft has a platform known as PowerApps, which lets you create your own custom apps for your business using similar templates. You can learn more about that here. And remember, check our Microsoft 365 hub for more news and information.

5 Best Drawing Software For Mouse Users

Digital advancement has made many designers leave their pen and paper and use digital tools to create visual images.

While many creative professionals embrace the drawing tablet trend, there are plenty of professionals still using their mice to create stunning artwork.

Whether you are just starting with your digital art journey or a professional looking for advanced drawing software to create your next masterpiece, there is drawing software for everyone.

That said, when looking for drawing software, it is important to understand your requirements as drawing programs are quite expensive. This is why we have compiled a list of the best drawing software for mouse users.

What are the best drawing software for mouse users?

Adobe Photoshop – Leading detailed designs

Adobe Photoshop - Best Painting Software

From photo editing and compositing to digital painting, animation, and graphic design, Adobe’s Photoshop can do it all and more. It is part of Adobe’s Creative Cloud suite; thus, it can be accessed across desktops and iPad.

The latest Photoshop version comes with improved performance while making it easier to use the tool for beginners.

With the enhanced object selection tool, you can swap out skies with a click and remove objects, and recolor with powerful editing tools.

Use Neural filters to colorize scenes with AI technology, remove scratches, or change expression, pose or age in seconds. Adobe has also improved the learn and help menu to find tools and see feature demos.

Key features of Adobe Photoshop:

  • Plenty of editing tools
  • Easy to use and loads of help and tutorials
  • Excellent cloud and multi-device support
  • 3D design capabilities

Adobe Photoshop

Use your mouse to create astonishing drawings on your PC with the capabilities of this amazing software.
Free trial Visit website

Adobe Illustrator – AI-powered drawing

Popularly known for its vector graphics features, Adobe Illustrator, helps you create stunning graphics anywhere. Like Photoshop, Illustrator is also part of the Adobe Creative Cloud subscription model.

Illustrator is the industry standard for creating web and mobile graphics for logos, icons, product packing, and billboards.

The new Adobe Sensei AI automatically extracts colors from a photo, adds them to your design, auto-trace a hand-drawn sketch, and turns it into vector graphics.

Other new additions to the popular vector graphics program are cloud document management with offline access, type enhancement tools, and smart glyph snapping, making it easier to position text and other objects precisely.

Key features of Adobe Illustrator:

  • Excellent vector graphics design capabilities
  • Improved user interface and performance
  • Simplified Free Transform tool
  • Adobe Sensei AI automatically extracts colors from designs

Adobe Illustrator

Adobe Illustrator is going to make using your mouse to create amazing digital art a breeze, with access to thousands of features.
Free trial Visit website

Clip Studio Paint – Mouse artist’s drawing app

With its highly customizable paint brushes for drawing and painting, Clip Studio Paint is an excellent tool for creative professionals to try drawing software without breaking the bank.

Clip Studio Paint is compatible with Wacom drawing tablets and offers up to 8192 levels of pen pressure to create a design exactly as you imagine with the powerful brush engine.

Whether you want to create concept Art & painting, character art, illustration, comic and manga, or animation, Clip Studio Paint offers unlimited style for various paintings.

Key features of Clip Studio Paint:

  • Great value for money
  • Powerful software to support a variety of creative styles
  • Accurate and responsive workflow
  • Compatible with Photoshop

Clip Studio Paint

Clip Studio Paint offers you a variety of brushes and tools that can be easily used with your mouse to create great art.
Free trial Visit website

Krita– Freehand inking

Krita is an excellent alternative to commercial drawing software like PhotoShop and Illustrator. This multi-platform-supported app has focused its efforts on digital drawing and painting.

With a modern-looking user interface and a good layout, Krita feels much like Photoshop. It also supports different brushes with different brush presets to choose from. It is also fully compatible with Wacom tablets.

Other notable features offered by the app include stabilizers for freehand inking, assistants for constructing a complex scene, a distraction-free canvas-only mode for painting, and the usual layers, filters, and transform tools.

Key features of Krita:

  • Clean and responsive user interface
  • Resources manage to handle brushes and pattern collection
  • Supports PSD file to work with Photoshop files
  • Good set of editing tools for creative professionals

Krita

Krita can be easily used with your mouse to create amazing art on your PC.
Check price Visit website

Autodesk SketchBook – Paper drawing feel

Autodesk SketchBook may not have the bells and whistles of other popular image manipulation tools like Photoshop and Illustrator, but it excels as pure drawing software for serious artists and technical illustrators.

The Pro version of the app offers over 100 highly customizable brushes that offer special effects such as synthetic, smudge, and glow. You can also create canvas up to 100 Mpx while maintaining the zoomed-in feeling of traditional drawing.

Other notable features of Autodesk SketchBook include paper to digital to scan sketch imports, multi-platform support, drawing tablets compatibility, and multiple media format support.

Key features of Autodesk SketchBook:

  • Pure drawing software for artists and illustrators
  • Greater compatibility
  • Easy to learn with plenty of tutorials
  • Clean distracting free user interface

Autodesk SketchBook

You can easily draw incredible pictures by simply using your mouse in Autodesk SketchBook.
Free trial Visit website

While drawing tablets are the go-to tools for digital artists, not having a tablet does not mean you cannot create stunning art.

All it takes is a good understanding of the drawing tools like Adobe Photoshop or Illustrator and some imagination.

All the software listed in this article supports mouse inputs and offers unlimited possibilities to creative professionals who are otherwise limited by resources.

FIX: Do You Want to Save Changes to PDF Before Closing?

On some occasions, Adobe Reader is asking to save before closing repeatedly, yet without visible changes.

Well, there are two main reasons why Adobe Reader and Adobe Acrobat may prompt you to save changes to a PDF file after you’ve opened it:

  • The PDF file is corrupted and Adobe Reader or Acrobat automatically repaired it without displaying a warning message over the same, which explains why the Save button is enabled (an automatic repair was performed).
  • The PDF has form fields and the NeedAppearances entry in the interactive form dictionary is set to TRUE. What this means is the conforming PDF reader generates an appearance stream for form fields in the PDF where necessary, so this enables the Save button. If the entry is set to FALSE, the conforming PDF reader won’t generate new appearance streams.

If you want to stop getting the message error, try the solutions below right away.

How do I stop Adobe Acrobat from asking me to save changes?

1. Download the latest Adobe Acrobat software version

Getting the same annoying message every time you try to close your PDF document is clearly frustrating. Even so, you can disable the Adobe Save file prompt in a simple way.

The issue you’re experiencing is often related to an outdated Adobe Acrobat, so don’t postpone grabbing the latest version.

All you have to do is download the product from the manufacturer’s site. This simple action will save you a lot of time when going through countless troubleshooting steps.

Acrobat Pro DC

Use Adobe’s complete PDF solution for any device and manage your documents like a pro.
Free trial Visit Website

2. General troubleshooting

Generally, Adobe Acrobat won’t prompt you to save a PDF file if you just opened and closed it without making any modifications.

If this happens, then it means the file has been modified, either due to corrupt files, or automatic repair. To resolve this, open the document, close and save it, then open it again and close it.

If it doesn’t prompt you to save again, then Acrobat did an automatic repair on the PDF file in the first save operation.

If your PDF file is not bad or corrupted, then something within the PDF file is modifying it as we mentioned earlier.

You can check if this is causing the do you want to save the changes to pdf before closing issue by disabling Acrobat’s JavaScript in Preferences > JavaScript, then uncheck the Enable Acrobat JavaScript box.

Then, open and close the document.

3. Disable protected mode at startup

  1. Open Adobe Reader.
  2. Go to Edit.
  3. Select Preferences.Do you want to save changes to PDF before closing
  4. Select Security (Enhanced).Do you want to save changes to PDF before closing
  5. Uncheck Enable protected mode at startup and press OK.Do you want to save changes to PDF before closing
  6. Open the PDF file again and save it as you do normally.

You can also respond to the Do you want to save the changes to PDF before closing dialog by selecting Yes, then save the PDF file on top of itself.

This should make the Save changes dialog box go away when closing the file.

4. Change saving settings

  1. Open Adobe Acrobat.
  2. Go to Edit.
  3. Select Preferences.
  4. Select Documents.Do you want to save changes to PDF before closing
  5. Go to Save settings and uncheck both options.Do you want to save changes to PDF before closing

Have you managed to resolve the do you want to save the changes to pdf before closing the message prompt on your computer with our solutions? Let us know by dropping a comment in the section below.

Interior Design Apps for Windows: Best to Use in 2026

If you are an architect, a Feng-Shui lover or you just care about your interior design, then you need to try some of these Windows 8, Windows 10 apps.

We all experienced phases in our existence when we wanted to do something different with our living spaces.

That might have involved moving some furniture around and painting the walls in different colors, and sometimes that was really enough. But what happens when you want to reinvent your living space completely?

After all studies have shown that the environment you live in has a neurochemical impact on your overall well-being.

Thankfully, if you have a device that features Windows 8, Windows 10, and Windows RT you can get right to planning your dream bedroom.

Thankfully, you can find in the Windows App store some very useful little programs that can help you create the living space you always dreamt of.

All this without actually leaving the house and going to consult a home decorating expert or driving up to Ikea to use their interior design application. Here’s a list of the apps we found to be most of the help:


What are the best interior design apps for Windows 10?

Adobe Illustrator (recommended)

Adobe Illustrator official

Adobe Illustrator features interesting and atypical design ideas for all the spaces in your house like the living room, bedroom, or kitchen.

Illustrator can be a great inspiration for architectures who want to visualize their idea in order to improve the way elements from the interior are arranged.

The interactive and easy-to-use software interface will do things for you, so all you have to do is to put your creativity into your imagination.

You can easily illustrate all interior details and add more color and style to your creation for more of a Feng-Shui vibe.

In addition, you can create rendering 3D interior design by managing layers, using brushes, and pen, and building shapes and vectors.

In order to eliminate or improve features like eliminating unwanted background elements or improving the light, you can use Adobe Photoshop as well.

Moreover, Adobe Illustrator is included in the Creative Suite, so you can benefit from more drawing and designing applications that will help your work.

Adobe Illustrator

Adobe Illustrator

Design the interior of your house just the way you like by using the feature-rich Adobe Illustrator
Free trialVisit website

Adobe Dimension

Adobe Dimension interior design

Assuming that you have an idea of how you are going to renovate your living quarters. In order to get right to it, you will need to acquire a tool for creating spatial designs and design elements from the interior environment.

That’s when Adobe Dimension app comes in. This is a fully-fledged design portal that allows you to create the best 3D visualizations that allow you to personalize the space with customized texture, light, and material.

This powerful interior designing tool can rotate, scale, resize, move the interior elements in order to fit properly in the environment.

You can add your element using the drag-and-drop feature in order to ease your workflow. Moreover, with Adobe Dimension you can select the substance material in order to craft customized objects.

Adobe Dimension is part of Creative Suite, so you can use tools like Adobe XD, InDesign, or Adobe Aero to push the boundaries of your imagination to other vision and 3D perspective or augmented reality.

Adobe Dimension

Adobe Dimension

Renovate your living quarters and your house in the most creative ways with Adobe Dimension
Free trialVisit website

Live Interior 3D

windows 8 interior design app

This is a fresh app that has made its way into our top and it’s definitely a welcome entrance. With almost 400 megabytes, this app comes with so many objects and materials that can be used.

In other words, it’s a helpful tool not only for those looking to design their own house but even for professional interior design pundits.

Live Interior 3D

Live Interior 3D

Design the best rooms and rearrange your furniture the way you like digitally using Live Interior 3D

Architectural Digest

architectural digest windows 8 design app

Architectural Digest is one of the most famous publications covering Interior Design in our list, being very popular around the world.

Windows users have the opportunity to browse through issues and discover tips about home/office decoration, furniture shopping and even suitable travel destination for design apasionados.

The digital edition brings a little more than the old fashion magazine, as it features some videos and interactive sections.

Architectural Digest

Architectural Digest

Discover tips about home and office decoration, and try out different furniture with Architectural Digest
Check priceVisit website

Color Wheel: A Color Scheme Generator

Choosing the right colors for your living spaces might not be such an easy task for everybody. The Color Wheel app can help you decide which colors are best fitted together.

You can enter a specific color, for example, the color you want to paint your walls, and the app will automatically display Complementary, Split Complementary, Monochrome, Triadic and Analogous colors.

The program is great for those looking to get the right combination of colors into their lives and bring it to life through their home decorations.

Color Wheel: A Color Scheme Generator

Color Wheel: A Color Scheme Generator

Color Wheel allows you to choose from a plethora of colors such as cpmplementary, monochrome, and triadic colors.

Planner 5D

Planner 5D is one of the most popular home design apps in the Microsoft Store. This tool is perfect for a wide variety of tasks, including renovating and re-designing your home.

The app offers a catalog of over 3000 items that you can use to create detailed 2D and 3D plans easily with a simple and interactive interface.

If you haven’t used any interior design apps before, then Planner 5D is one of the best tools to use. It supports an unlimited number of projects and you can also use it without an Internet connection.

Planner 5D

Planner 5D

Get Planner 5D, one of the most popular and attractive home and interior designer software on the market
Check priceVisit website

Live Home 3D

Live Home 3D is an intuitive home design app built upon the Live Interior 3D app. Using this app is very simple, all you need to do is draft detailed 2D floor plans and then the tool will automatically built-in 3D.

You can use this app to complete many design tasks, including interior design, furniture arrangement, color matching, and so on.

Once you’re happy with the end result, you can share your design ideas with your friends or co-workers.

Live Home 3D

Live Home 3D

Live Home 3D is one of the most intuitive, self-explainatory and easy to use home designer software on the market

This list consisted of awesome articles that are useful for home and interior decorations.

If you feel like we missed any important app or if you have any information regarding the subject please let us know in the comment section below.


5 Best Sunglass Design Software to Use in 2026

In order to create beautiful sunglasses design, you will need to use specialized CAD (computer-aided design) software that gives you all the tools you need in order to achieve this task.

You get access to a lot of specialized tools that enable you to perform exact measurements and design your frame in an unlimited number of ways.

You can also use different colors, change the way the hinges work, design the glasses arms in beautiful shapes, etc.

Using a design software before sending the project to be made either by 3D printing or normal manufacturing allows you to maintain full control over the specifications of your design.

It also helps you see a preview of the final product before finalizing the project. Let’s explore some of the best software tools for PC running Windows.


What are the best sunglass design software to get?

Adobe Illustrator

If you’re ready to find the best sunglass design software, there’s no better fit for the job. The development of Adobe Illustrator began in 1985.

However, it has turned into the most powerful vector graphics editor of the moment.

You need to know from the start that it enables rapid sunglass prototyping and creative collaboration if you want to focus on design exclusively.

This doesn’t mean that the process itself cannot be fun, especially with all the drawing tools that you may use.

One nice thing about working with Illustrator is that the Properties Panel gives context-sensitive info and options about the selected objects.

Feel free to use the software to browse Dropbox files without even downloading them and don’t forget the Creative Suite software integration across Illustrator, Photoshop, and other Adobe apps you enjoy using.

Adobe Illustrator tries to be different from the other tools found below and works on mathematical formulas instead of pixels. Therefore, you may change the size of all your projects according to the need.

These are some of the most interesting Adobe Illustrator key features that you may enjoy:

  • Intuitive Pen Tool that lets you match any curves
  • Multiple format options to never sacrifice quality in resolution
  • Useful keyboard shortcuts to undo, zoom in, zoom out, cut, and paste
  • Support for CSV and XML in the Variables Panel
  • Countless tutorials and help resources are found in the Home and Learn tab
Adobe Illustrator

Adobe Illustrator

Adobe Illustrator is the best vector graphics editor so it perform perfectly on sunglasses design.
Free trialVisit website

Autodesk 3DS Max

3DS Max is great design software that can be used in a variety of industries, covering everything from automotive designs, to custom 3D art, to designing custom apparel and accessories.

The features of 3DS Max allow you to create, customize, and also edit your sunglasses design in an unlimited number of ways. With this software, your imagination is truly the limit.

It needs to be mentioned that even though the capabilities of 3DS Max are very close to the other software options we presented above, it is a lot harder to learn if you’re a beginner when it comes to using design software.

Here are some of the best features of 3DS Max:

  • Can create a real-life rendering of your virtual model
  • Fully compatible with software like Inventor, Revit, Unity, etc.
  • MAXtoA integrated plug-in
  • Can create OSL maps from simple nodes with Open Shading Language (OSL)
  • Wide range of plug-ins and add-ons available in Autodesk store

⇒ Get Autodesk 3DS Max


Rhino 7

This software is one of the most used on the market in the field of designing apparel and accessories, and because it offers an incredibly wide range of tools.

Even though Rhino has a bit of a learning curve, especially for those of you who don’t have any experience in working with CAD software, the incredible performance this software has makes it one of the best design software options on the market.

This software allows you to customize the way your sunglasses look with unlimited customization power and also gives you exact measurements for every part of your design.

This simplifies the process of transforming your project into real sunglasses and gives you the power to avoid any measuring mistakes.

This process is done by using the revolutionary double-precision meshes.

After you’ve built your sunglasses design, you can render it in 3D and customize the way it is presented by changing lighting, shadows, and many other factors.

Testing your sunglasses design before sending it to be made reduces overall costs and allows you to have peace of mind knowing that the hinges and lenses will work as designed.

Here are some other useful Rhino features:

  • Compatible with all other CAD, CAM, and rendering software
  • Able to design complicated 3D shapes without needing too much computer power or skills
  • User-friendly interface that helps with the learning curve

⇒ Get Rhino 7


Autodesk Alias

Autodesk Alias is a close contender of the previous software we presented, Rhino. This software was created by Autodesk, and it is a very powerful design tool.

Even though it’s intended purpose is the automotive industry, the wide range of features found in this software allows you to create almost anything you can imagine.

Beyond this, Alias’s capabilities can be extended even more by accessing the Autodesk library. As in the case of Rhino, Alias allows you to create models both in 3D and in 2D panels.

Using the 3D design tools need for you to have some experience with using CAD software, but the user-friendly user interface helps you get through the process of learning fast.

You can access the wide range of tutorials Autodesk has available by clicking here.

Here are some of the best features found in Autodesk Alias:

  • Can use VR (virtual reality) to simulate the model you created in the real world
  • Unlimited editing capabilities – you can draw, edit, design shapes, add textured details, choose materials, etc.
  • Customizable keyboard controls – snapping, marking menus, etc.

⇒ Get Autodesk Alias


SolidWorks

SolidWorks is another great software that can help you a lot when designing a pair of sunglasses.

This software contains a wide range of features that allows you to customize every shape, color, and texture to fit your vision.

Because testing if your designed product is essential, SolidWorks allows you to create amazing real-life renderings of your models and also test it in real life conditions.

The Solidworks database contains an incredible amount of design elements that can be downloaded and easily customized, and it can also estimate the production costs of your product.

You can set up custom polygon geometry that allows you to cover every millimeter of your design perfectly, allows exact measurements of parts and elements.

You can also choose from a good range of material textures and colors.

In order for the rendering to be as exact as possible, you can also set custom material properties, and also custom relations between different elements of your design.

⇒ Get SolidWorks

In this article, we explored some of the best software options that give you all the tools you need in order to create a beautiful sunglasses design on your Windows PC.

We would love to know what software option you chose and how did it work for you. Please feel free to let us know in the comments section below.


How to Draw on Photos and Videos in Windows 10

If you are eager to draw on the Photos app in Windows 10, this seems to be your lucky day. Microsoft has released plenty of exciting new features for the very same app you intend to use.

This means that you have more options to spice up your creativity. You can quickly doodle over photos and videos using a touchscreen, stylus, or a computer mouse.

In addition, the Photos app lets you create an animation of your drawing process on images and allows you to share it as a video.

Over the years, new pen types and colors have been added to let you customize and share your best photos with others.

On top of that, Microsoft also streamlined everyday tasks and editing tools, including the cropping and rotation tools, through a constantly refreshed user interface. Besides, Windows offers an option to edit the EXIF data.

You will also find a horizontal navigation bar to help you sift through photos categorized by albums or folders, so what are you waiting for?

You should better act quickly when inspiration strikes.

How can I draw on photos and videos in Windows 10?

1. Effortlessly draw on photos and videos by using the Photos app

use Photos app
  1. Start by opening a video or a photo from your gallery.
  2. Then, select the Edit and Create option.
  3. Click on Draw next.
  4. Choose your preferred pen from the Windows Ink Toolbar that shows up next.
  5. Select the size and color of the fonts you’d like to use from various palettes.
  6. Start drawing on the images and videos. No one is hurrying you up!

If you ever wondered how to draw on videos on your PC, this is the simplest method that you can use.

2. Download Adobe Photoshop

If you want to have more options to edit photos and videos in Windows 10, what do you think about giving a try to Adobe Photoshop instead?

This is the go-to software for rendering an image in high resolution, altering the skin tone, playing with color options, and making everyday edits.

As for those of you looking to easily transform ordinary images into professional ones, Photoshop offers a plethora of tools in that regard, too.

Incredible brushes that may be easily controlled with a stylus or touch on an iPad and countless graphic design filters are within reach of anyone trying to make a statement regarding creativity.

No less important, it doesn’t matter if your schedule seems crazy. Start on your iPad while commuting, then finish on your desktop, as your work is always saved to the cloud.

Without a doubt, Adobe Photoshop is the best tool if you want to draw pictures on a laptop or any other device, so be sure to check it out.

Adobe Photoshop

Try this powerful image editing software to edit your photos or create professional photos from scratch.
Free Trial Visit Website

If you’ve got the above tools, what features do you like using? Share your thoughts in the comments section below.

Badge Making Software: 5 Best to Use in 2026

Badges are similar to identity cards, but with advanced security features. It’s like another emblem for the organization, worn by the employees.

As implied, the designing of security badges involves an intricate process keeping the company security in mind.

Moreover, they give access to different premises of the company and are hence, designed by security badge software programs.

Having said that, these badges are also useful for new hires and members for quick access.

Unlike a usual card printing tool, an id card design software is capable of adding security features like holography, etching, MicroText, and more.

Therefore, it’s important to choose the right ID card software that guides users step by step to design the desired security badge.

Here’s a list of some of the best security badge software programs that can do justice to security needs.


What are the best ID card design software to use?

Adobe Photoshop

Adobe Photoshop is an excellent tool that companies can use to design the security badges of their employees.

A security badge is not only a means to identify the holder and restrict employee access to the areas they are not allowed to enter. It’s also an emblem for the organization itself.

Photoshop puts a large collection of badge templates at users’ disposal. Of course, if you don’t like the design of the ready-made templates, you can create your own.

A security badge or identification card with a nice design will make employees feel proud when wearing it.

In other words, Photoshop will help companies foster belonging at the workplace through unique badge designs. Interested in seeing what Photoshop can do?

Adobe Photoshop

Adobe Photoshop

It’s a piece of cake to create ID badges with Adobe Photoshop, the best photo editing software on the market.
Free trialVisit website

AlphaCard

Badge making has witnessed a major upheaval in the past few years with the modern security badge software by AlphaCard.

The software is the brainpower behind the card-printing process that enables users to design their own badges.

It also helps them handle and save any details of the cardholder, make contact with databases, and insert features.

The software comes equipped with pre-set templates that can be used to design the badges. It includes features like text editing, and also conditional layers and objects to help design badges in layers.

The software allows users to import images in various formats. Moreover, users can add encoding in form of barcodes, proximity encoding, magnetic strips, etc. using the tool.

Among its major advantages is its security feature with password protection, accounts for individuals and groups, and more.

These features help prevent any unauthorized access to the design documents.

The attendance and time tracking feature of the software help smoothen the process of controlling employee data in a centralized spot.

⇒ Download AlphaCard


Asure ID Software by HID Global

HID Global comes with a complete range of Asure ID card design software. From plain, preliminary type software to enterprise-level software it has a lot to offer.

HID Assure ID Exchange is a product that focuses on more secure password-based applications with avant-garde smart card features. It also includes laser engraving for added security.

It includes robust integration along with modules for encoding and enrollment. This feature makes sure of fast and smooth access to other database sources.

Users can also personalize the badge both graphically and electronically in a single consistent method using iDirector management module.

Besides, it also features the laser configuration module for easy setup and upkeep of the engraver.

Best of all, it boasts an advanced user interface that’s perfect even for the beginners. Moreover, it allows users to sort, filter, and assemble data to create custom reports.

Compatibility with Fargo laser engraver and firm integration with more than 25 top id card systems, are some of its other major features.

⇒ Download Asure ID Software by HID Global


IDSecurityOnline

IDSecurityOnline prints professional security badges just like the other applications. It also helps manage employee data and syncing with the current database while inserting encoding features to the badges.

The range of software offered by the brand makes the entire ID designing process much easier with a professional outcome.

These are not just easy to upgrade but are also easy on the pocket with availability in different prices based on needs.

Pre-defined templates, edit view for text data, magnetic encoding option, creating and editing facility for the database table, or signature acquisition are some of the other significant features of the basic software.

Advanced features like Guru Peedy that provides a chance to communicate with the software, or signature capturing are available in pro versions.

Easy four click interfaces or Twain image acquiring are among the other notable features of the advanced versions.

⇒ Use IDSecurityOnline


Jolly ID Badge Software

Jolly ID Badge Software brings the ID creation solution for users that helps them track their employees, easily. It can create even the most intricate or simple layouts, based on the needs.

Whether users make templates using the designs or implement them to any preferred profile, it gets easy to print the desired number of cards with company emblem.

Users can also consider the advanced versions for employee tracking and visitor management. Moreover, the pro versions help integrate the new badges with the access control system.

This ID card printing software helps make photo IDs that are fully featured. Using this software, users can allocate security badges to employees, visitors, and even members, easily.

What’s more? It also blends with the existing software to print Badges straight from the current personal records of the user. In addition, it helps reprint replacement badges fast and effortlessly.

Best of all, it makes the ID cards more secure by adding barcodes, magnetic strips, and RFID encoding.

⇒ Get Jolly ID Badge Software


A company badge or an identity card is critical for the organization’s security and also for its employees.

Therefore, it’s important to get it printed using professional security badge software that ensures the complete security of the credentials.

So, choose from the best software programs from the above list and secure your employee’s data.


6 best vocoder software for Windows & Mac [really good]

Musicians are always looking for innovative ways to explore musical possibilities.

These include new techniques to improve the flexibility and fidelity of the music and add new effects. Among these new effects that one can use is a vocoder.

This is often confused with a talkbox, but it’s actually a device where you sing into the microphone and can translate the tone of your voice to an instrument which is usually a keyboard.

The primary options that you have available with vocoders are the keyboard, plug-ins used with midi controllers.

We picked up five of the best free standalone vocoder software on the market so make sure to check out their sets of features in order to make the best decision.


What are the best vocoder tools for Windows 10 and Mac?

Adobe Audition

Editing and playback tools, special effects like vocoder and many others, countless multitrack options, waveform, and spectral display – everything you could ask from a digital audio workstation is seamlessly incorporated in Adobe Audition.

Adobe Audition concentrates the best audio features into a single cross-platform package designed for creating, mixing, editing, and restoring audio content.

Its complex toolset is designed to accelerate video production workflows and audio finishing.

Let’s quickly go through its key features and latest enhancements as fresh as February 2020:

  • Export video clip range (set the export range to video clip while exporting using AME)
  • Improved effects support (custom layout of your effects which may be stored in a preset and used subsequently)
  • Overlapped clips support
  • Punch and roll recording (pre-roll, visual countdown, and Punch Again functionality to correct mistakes and continue recording without interruption)
  • Zoom to selected clip (in the Multitrack Editor, choose Zoom and Zoom To Selected Clips)
  • Auto-ducking ambience sound (in the Essential Sound panel, automatically generate a volume envelope to duck ambience sound behind dialogue and sound effects)
  • Nudge clip up and down
  • Manual keyframe entry (edit time and parameter values for a particular keyframe)
Adobe Audition

Adobe Audition

Adobe Audition is a very complex audio tool that also has a great vocoder tool to play with.
Free trialVisit website

Morphoder

Vocoders have gotten lots of attention lately, and even if most people talk about using autotune, vocoders have been doing similar effects.

With Morphoder from Waves, you can take the original Vocoder synthesizer to a new level.

Morphoder allows you to combine various audio signals in order to create unique wild sounds that have never been heard before. You will be able to obtain some really unmatched definition and clarity.

Let’s quickly go through its key features:

  • This is an eight-voice stereo synthesizer.
  • It comes with format control.
  • The Morphoder is a modulator with Linear Phase EQ.
  • You will also get to use MIDI controls.
  • This is an excellent vocoder that is easy to use even for musicians who are not extremely advanced.
  • Morphoder is the ideal tool for those who are interested in getting an in-depth vocoder plug-in.
  • It comes with lots of parameters that make sure that you will have complete control over your sound.
  • With Morphoder, it will be easy to get the pitches that you want.

You can check out more features and functionalities of this tool be heading over to Morphoder’s official website.

⇒ Download Morphocoder


Robotronic By Sugar Bytes

Robotronic By Sugar Bytes is an excellent sounding and effortless to use vocoder that is able to process both mono and stereo input signals.

It includes a sampler and a synthesizer, and it comes with a lot of useful features.

Let’s quickly go through its key features:

  • Among its features, there are two amazing ones called Frequency Focusing and Formant Shifting.
  • You will also be able to enjoy mono signals that can be vocoded with each other.
  • Robotronic By Sugar Bytes includes an integrated sampler that can be used as a modulator.
  • There is also an internal synthesizer that can be used as a mono carrier for mono and stereo inputs and sample player.
  • Both audio inputs come with a complete channel strip with Compressor, Gate, and gain stage.
  • It’s also important to note that on the outputs, you will be able to enjoy three-band EQ, Compressor, and a multi-effects unit with four signal-pimpers.

⇒ Download Robotronic By Sugar Bytes


Matrix 2 By Virsyn

This is a follow-up version to a previous variant of the tool that has been created by Virsyn. The new tool comes with a redesigned interface, and it’s now available for Windows as well.

Let’s quickly go through its key features:

  • In a unique filter bank, there is a spectral analysis that is performed, and signals are developed.
  • The output section of the vocoder consists of a stereophonic synthesis filter bank that assembles the brand new synthetic speech.
  • The Matrix 2 By Virsyn features a second Tone generator for enhanced speech intelligibility.
  • You will also be able to enjoy an LFO for vibrato generation with an optional mod wheel control.
  • There is an improved pitch follower from version 1 of this tool.
  • There are also two new filters included and additional presets.
  • The Matrix 2 By Virsyn comes with an internal noise generator for whisper effects.
  • Some present examples include the following: synth voice, ensemble, drums, stereo, gender, krass, and more.

⇒ Download Matrix 2 By Virsyn


Vocalizer By Sonivox

Vocalizer By Sonivox is both a processor and an instrument. It includes four spectral synthesis modules that can be routed into each other in various ways.

Let’s quickly go through its key features:

  • Vocalizer By Sonivox offers a revolutionary MIDI-controlled audio effect.
  • Using this tool, you will be able to enjoy unparalleled vocoding, signal processing, and re-synthesis.
  • The expanded controls include FFT audio processing suite.
  • Other exciting features include the following: formant, pitch shift, improved frequency control, and spreading.
  • There are two rows of performance pads that extend live performance control and playability.
  • Vocalizer By Sonivox also includes VST, AU, AAX Support, and RTAS.
  • This is a unique MIDI-controlled effect processor that is able to transform any audio track, audio source, or the output from any VI in your DAW host into a great musical instrument.
  • The advanced formant shifting will make things pop.
  • There are also over 16 filter configurations and 16 spectral synthesis types included in this tool.

Vocalizer By Sonivox is the ultimate instrument expansion tool that offers endless sound-sculpting possibilities. This tool is ready to harmonize, modify, enhance, fortify, and re-synthesize any instrument or sound.

⇒ Download Vocalizer By Sonivox


Vocodex by Image-Line

Vocodex by Image-Line is one of the most potent plug-ins in terms of features, and it also has an excellent reputation for the fantastic quality of sound that you can get out of it.

Let’s quickly go through its key features:

  • There is a speech enhancement contouring of noise or modulator pass-through.
  • The modulator noise reduction will reduce ambient noise bleeding through the carrier.
  • Vocodex by Image-Line also includes reverb and voice doubling capabilities.
  • The built-in soundgoodizer is excellent for limiting and warm output.
  • There are up to 100 bands that are individually locatable anywhere in the spectrum.
  • The built-in carrier synthesizer is powered by Sytrus.
  • The ban unison will create a fat sound.

This tool is also compatible with Windows, and you will need a DirectSound or ASIO compatible soundcard in order for it to work flawlessly.

You can check out more features and functionalities that are packed into this tool to see if it is suitable for your needs.

⇒ Download Vocodex by Image-Line


These are our five picks for the best vocoder software that you can currently find on the market. They all include unique sets of features and functionalities.

We recommend that you check out most of them before making the final decision just to be entirely sure that you pick the perfect tool for your needs and skills.

Ever thought of changing your voice on Skype? Here are 5 tools that can do just that.

Let us know which one convinced you in the comments section below.


FIX: Microsoft Publisher won’t save files as PDF

Microsoft Publisher is a desktop publishing application created by Microsoft. Given the nature of the program, it’s frequently used to make documents.

Because documents are usually meant to be read, it goes without saying that you’d usually want to save them in one format or another.

Users have been complaining for some time now that Microsoft Publisher has issues when trying to save their documents in PDF format.

When trying to save a Publisher file as a PDF or XPS, users may get this error: Microsoft Publisher cannot save the file.

It would seem that the issue can happen with different Publisher versions, but most commonly with Publisher 2016 under Windows 10.


Quick Tip:

If Microsoft Publisher gives you a hard time these days, let us assure you that there are a few great alternatives to choose from.

Downloading Adobe Illustrator is a matter of seconds, yet it definitely gives you the desired outcome. Saving files as PDF will no longer be an issue, not to mention the features of this professional vector graphics editor.

Adobe Illustrator provides a generous suite of drawing tools, countless effects, and unique fonts, so feel free to experiment away!

⇒ Download Adobe Illustrator


How can I save PDF files in Microsoft Publisher?

1. Make sure you have the latest Adobe Reader version installed

If Publisher not saving PDF files correctly, maybe it’s time to see things from a different perspective.

Instead of taking Microsoft Publisher as the culprit from the very beginning, grab the latest Adobe Reader version and install it into your PC.

Chances are you won’t even have to follow the troubleshooting steps below. Besides that, note that this tool is ideal to view and annotate PDF files, convert them to Word, or to enjoy online collaboration.

Adobe Acrobat Reader

Adobe Acrobat Reader

Adobe Acrobat Reader is a perfect choice for PDF viewing and management, so be sure to try it out.
Check priceVisit website

2. Save PDF files in Microsoft Publisher 2016 or newer

  1. Close Publisher.
  2. Click the Start button.
  3. Go to Settings.
  4. Go to Devices.
  5. Select Printers & Scanners.
  6. Deselect the Let Windows manage my default printer option if it’s selected.
  7. Choose a device under Printers & scanners other than your default printer. As an example, select either Fax or Microsoft Print to PDF.
  8. Click the Manage button.
  9. Click Set as default in the next page.
  10. Select your printer under Printers & scanners.
  11. Click Manage.
  12. Click Set as default.
  13. Start Publisher and try saving your file as a PDF or XPS.

This is a simple solution, but it can help you if you’re having Publisher to PDF converting problems.


3. Save PDF files in older versions of Microsoft Publisher

older publisher publisher won't save as pdf
  1. Compress the images in your document.
  2. Get rid of any page backgrounds or large images from your document.
  3. Remove transparent images from your document.
  4. Remove picture effects, such as recolors, brightness, or corrections from your document.
  5. Try installing the 64-bit version of Publisher as it’s not affected by the issue.

4. Update, repair or re-install your Microsoft Office installation

1. Update Microsoft Office

  1. Open any Office app, in this case, Publisher, and create a new document.
  2. Go to File.
  3. Navigate to Account ( Office Account in case you’ve opened Outlook).
  4. Choose Update Options.
  5. Click Update Now.
  6. For this to work, you have to click Enable Updates.

2. Repair Microsoft Office

  1. Open Control Panel > Go to Programs.
  2. Select Programs and Features.
  3. Locate Microsoft Office and click on Change.
  4. Select Quick Repair > and click the Repair button.
    Repair Office

3. Re-install Microsoft Office

  1. Press Windows Key + R.
  2. Type Control and press Enter to open Control Panel.
  3. Go to Programs.
  4. Select Programs and Features.
  5. Locate Microsoft Office and click on Uninstall.

  6. Get a fresh copy of Microsoft Office from the official website and install it again.

How was the procedure for you? Let us know by using the comments area below.

  • Why won’t my Publisher file save as a PDF?

In this case, consider that you are running an outdated Adobe Reader version. For more tips, take a look at this quick guide on how to fix Microsoft Publisher saving PDF issues.

  • How do I open a Microsoft Publisher document?

You basically need to click File > Open, and browse to the file in cause. This guide dedicated to solving Microsoft Publisher not opening issues can help you if you happen to experience such problems too.

Icon Maker Software for PC: 6 Best to Use in 2026

Adding new shortcut icons to the desktop is a great way to customize Windows. You can download myriad icon packs from various websites.

However, some prefer to design their own icons for Windows with third-party software. You can make use of infinite icon styles and templates from professional tools included in the list.

Although you can utilize some image editors to set up your own icons, there are also specialized icon creators for Windows 10.

We encourage you to test and compare a few tools and then choose the ideal one that meets all your design needs.

These are the best programs to design icons with on your Windows 10 computer.

What are the best icon maker software for PC?

Adobe Illustrator – Variety of icon designs

Adobe Illustrator is the go-to icon maker software for PC when planning to design your own Windows desktop icons easily and intuitively.

With Adobe Illustrator, you may start with a simple graphic and turn it into a memorable icon for your digital business or holiday projects.

The best thing about this icon maker tool is that it comes as vector-based design software.

This means that you can bring your designs into reality as it easily scales down for mobile screens and lets you go as far as billboard sizes.

The icons finally look crisp and beautiful, yet various effects, styles, and individual characters may be further selected when you plan to give the finishing touches to your icons.

Despite all these countless different options you may choose from, Adobe Illustrator is still incredibly easy to use and has a very intuitive interface.

Therefore, this tool is designed for professionals and newbies alike who need all the bells and whistles to level up their game.

Don’t hesitate to be one of them. You just need to let your imagination run wild and trust your design skills.

Adobe Illustrator

Adobe Illustrator is an excellent publishing tool but you can use it for a world of purposes, including icon making.
Free trial Visit website

Softorbits Icon Maker – PNG icon creator

Interface SoftOrbits Icon Maker

When talking about creating icons or other UI elements that are smaller in size, few programs come close to Softorbits Icon Maker.

As far as the toolset goes, it has everything you may ever need in order to create a new icon, a new cursor, and generate an icon from pictures in batch.

In fact, If you want to create multiple icons that follow the same style, you can make great use of the program’s bulk mode.

Additionally, Softorbits Icon Maker oversimplifies the icon creation process by introducing a tool that efficiently transforms pictures into icons by simply reducing their size.

The icons that you create will seem all the more original thanks to the variety of editing tools that you can use.

They include blurring, brightness, contrast, adding perspective, sharpening, adjusting colors, transparency, and much more.

However, the best part about this tool is not what it offers, but how it offers it. The UI is incredibly intuitive, and you don’t need experience with similar programs in order to get around it.

Softorbits Icon Maker

Design the most creative icons for your projects with this useful tool.
Check price Visit website

IcoFX – Import & export options

IcoFX is among the best all-in-one icon maker software for Windows platforms from XP to 10. This is an icon maker package that includes many of the tools and options you would expect to find in full image editors.

The software enables its users to extract and edit icons for both Windows and Macintosh OS X. IcoFX is not free but you can benefit from a 30-day trial of the software you can try out.

IcoFX has all the options you’ll probably need to design great icons from scratch.

It includes more than 30 tools to edit icons with, which include various brushes and pencil, selection, text, gradient, eraser, shape, and retouching options.

The software provides more than 40 effects, color correction tools, and layer-based editing for image processing.

IcoFX users can also apply icon customizations to Windows folders. In addition, you can convert various image formats directly to ICO files with resolutions up to 1024 x 1024 and extract icons with this software.

So this is a great program for designing icons, and you can also utilize it for more general photo editing.

IcoFX

Take advantage of this comprehensive icon creator and editing solution.
Check price Visit website

Junior Icon Editor – Free tool for Windows icons

Junior Icon Editor 4.37 enables users to create icons from scratch or existing images.

This might not have as many tools and options as IcoFX, but it’s a lightweight freeware alternative you can run on most Windows platforms.

Junior Icon Editor includes a brush, pen, airbrush, shape, line, flood fill, arc, text, color picker, and eraser drawing tools with which to set up new icons.

The software doesn’t come with much in the way of image-processing tools but does include options for flipping, rotating, zooming, and shifting images.

Junior Icon Editor enables you to set up 16 x 16, 32 x 32,, and 48 x 48 icons with a 32-bit color depth. You can also create icons for Windows Mobile, iOS, Linux, and Android platforms with this software.

⇒ Get Junior Icon Editor

Axialis IconWorkshop – A development industry standard

You can design and convert icons for the Windows, Android, iPhone OS, and Mac platforms with Axialis IconWorkshop.

This is also one of the few icon-maker programs with which developers can set up image strips for software toolbar icons.

Axialis IconWorkshop is compatible with 64-bit Windows 10, 8.1, 8, and 7 platforms.

Axialis IconWorkshop has an intuitive drag-and-drop UI design. The UI includes a Librarian file manager on the left, and a built-in folder browser at the bottom.

It also has the drawing and editing tools on the right of the software’s window and a multi-image UI that enables you to open and edit multiple icons within the same window.

For editing icons, Axialis IconWorkshop includes a range of brushes, pencils, color pickers, shapes, lines, flip and rotate, color fill, and text tools. This isn’t entirely a full-blown image editor, but it does include 13 effects.

It also provides color correction options for adjusting contrast, hue, saturation, etc.

Another good thing about Axialis IconWorkshop is its Adobe Photoshop and Illustrator compatibility.

Axialis IconWorkshop users can import PSD files directly from Photoshop and quickly transfer files between the applications with the IconWorkshop plug-ins.

This software also has 15 Photoshop templates that you can quickly set up icons with.

⇒ Get Axialis IconWorkshop

Greenfish Icon Editor Pro – Freeware image edits

Greenfish Icon Editor Pro is a highly rated open-source icon maker package for 32 and 64-bit Windows platforms.

You can utilize this software for designing 256 x 256 icons, editing animated cursors, extracting icons, and converting images to ICO formats. There’s also a portable version of the software for USB drives.

Greenfish Icon Editor Pro includes a drawing toolkit from which you can select pencil, line, shape, text editing, and advanced selection options.

There’s a Color Picker tool on the right of Icon Editor Pro’s window with which you can adjust colors. Greenfish Pro users can select a range of effects on the software’s Filters menu.

The software supports layer editing, and you can also select Create Windows icon from image and Create Mac icon from image options on its Icon menu.

So this program has most of the tools and options you’ll need for editing icons.

⇒ Get Greenfish Icon Editor Pro

Those are six noteworthy icon makers for Windows that include a wide selection of editing options and tools to design innovative shortcut icons and modify existing icon sets.

They are also graphics editors that you can utilize for designing custom cursors and other graphic content. Also, note that you can set up custom icons with web apps such as X-Icon Editor and Free Icon Maker.

30 Best USB Control Software For PC [2026 Guide]

We all use all sorts of USB devices on our PCs, but sometimes USB devices can be a security risk. USB flash drives and other storage devices can be infected with viruses, but you can easily protect your PC from USB threats.

There are tools that can help you manage your USB devices, and today we’re going to show you the best USB control software for Windows 10.

What is the best USB device control software?

Device Control Plus

Gaining control over what goes in and out of your attachable media and applying safeguards are the main way through which malware infections and other similar damage can be avoided.

That being said, a fully-equipped tool such as Driver Control Plus will prove to be everything you need to do just that, and more, offering better control and improved security over all your removable media.

More so, thanks to the zero-trust approach, even devices that were once considered safe will still be scanned and monitored each and every time so as to prevent any hijacking and unexpected infections.

  • Here’s what Device Control Plus provides you with:
  • Discovers and identifies the entry of all new devices
  • Authorizes the access of each device
  • Assign’s role-based access for each device
  • Protects from malware attacks
  • Monitors device and user behavior

Device Control Plus

Limit the access and get better control over the USB devices attached to your PC with the help of Device Control Plus!
Check price Visit website

Bitdefender

The next entry on our list is an antivirus tool that most of you are probably very familiar with.

Not only is Bitdefender the world’s best antivirus tool, but it also comes with some additional tools that indirectly increase protection as well.

These include the ability to scan USB flash drives so that no matter what you connect to your PC,  your risk of being infected is reduced to a minimum.

Couple that with the fact that Bitdefender is extremely low-maintenance when it comes to system resources and how it interferes with other functions, and you have a perfect alternative USB control tool.

Bitdefender Antivirus

Bitdefender Antivirus

Protect your PC from Internet threats and from malware that can come via USB ports with this amazing antivirus.
Check price Visit website

Panda Antivirus

Panda Antivirus is the last antivirus entry on our list, but that doesn’t mean that it is inferior to the previous two entries.

Panda Antivirus specializes in detecting potentially harmful executable files from USB devices, and once it scans them and deems them dangerous, it immediately blocks their ability to launch by themselves.

Of course, this is just one of the many tools included by Panda Antivirus, along with the typical ones you would expect, such as permanent Internet monitoring and protection, background system scans, and more.

More so, Panda Antivirus can be tried for free, so you know when you will be making the full purchase exactly what to expect afterward.

Panda Antivirus

Panda Antivirus

Panda offers reliable USB protection without slowing down your system. Ready to try it out?
Check price Visit website

Malwarebytes

Malwarebytes is a good antivirus tool for those that have a much more restrictive budget since a lot of its features are also available in the free version of the program.

Besides the file scanner, system scanner, Internet monitor, and malware blockers, Malwarebytes also comes with the ability to scan any external USB devices and hard drives that you connect to the PC.

This ensures that safety is put first before any type of data transfer so that you can rest assured that your data is safe from corruption and spyware.

More so, all of those protective features come with an almost unnoticeable resource footprint, as your PC will never slow down because of it, not even during scans.

Malwarebytes

Malwarebytes

An excellent antivirus tool that will keep your PC safe from all forms of malware that may be hidden in external USB devices.
Free trial Visit website

BullGuard Antivirus

Yet another antivirus tool makes it on our list, also because it has USB protective features.

BullGuard is just as known in the antivirus world for its incredible performance, but more users know it for being very resource-friendly, especially when running on older PCs.

Scan all USB devices that you connect to your PC easily, and get a briefing on whether the device is safe or not.

Only after you give your permission will BullGuard unlock the USB device and allow it to transfer data to and from the PC.

⇒ Get BullGuard

Gilisoft USB Lock

If you’re a home user and you’re looking for an application that can help you prevent data theft, you should consider this app. Using this tool you can prevent storage devices from running on your PC and prevent any chance of malware infection via USB.

In addition, you can prevent writing to removable storage and prevent file copying without your permission. It’s worth mentioning that this tool also works with multimedia devices such as Android and iOS devices.

Besides removable storage, you can also prevent the reading and burning of optical media right from this app.

The software allows you to create a list of trusted devices meaning you’ll be able to use the devices you trust without any restrictions. In addition to USB devices, the application also has a website lock feature.

If needed, you can also stop users from changing IP addresses or disable the network adapter completely. The tool also has a program lock feature and you can use it to prevent users from running certain applications.

You can block any third-party application or system applications such as Registry Editor and Task Manager.

The application can also block other devices such as printers, modems, COM & LPT devices, infrared and Bluetooth devices. USB Lock has password protection so users won’t be able to tamper with your security policies.

There’s also an email notification available, so you’ll know if someone tries to access the application with the wrong password.

This tool has a solid reporting feature so you can keep a close eye on all file operations. In addition, you can also see all removable storage that was connected to your PC along with the list of allowed and denied access attempts.

Gilisoft USB Lock has a simple-to-use interface but it offers advanced features. The application allows you to set a list of trusted devices, so you won’t have to worry about data loss or malware infection ever again.

The software is available for a trial, but you’ll need to get a license to continue using it.

Gilisoft USB Lock

Take better control of your USB ports and make sure no one gains unauthorized access to them with this amazing tool.
Check price Visit website

Note: If you find Gilisoft USB Encryptor, do not confuse it with a USB Lock. USB Encryptor is another powerful protection tool against any threats, but it uses different algorithms. However, it is up to you to choose the right tool in order to increase your USB protection.

Desktop Central

If you’re a computer administrator and you manage multiple PCs in your network, you might be interested in this application. Using this tool you can automatically install patches on all computers in your network.

This feature works with Adobe Acrobat, Firefox, Java and other third-party apps. If needed, you can also choose which applications you want to update. In case there’s a problematic patch available, you can choose not to install it.

In addition to patches, this application is perfect if you need to install certain software on all computers in your network. The installation doesn’t require any user interaction, and you can schedule the installation time, set the parameters and completely automate the process.

As for supported formats, you can easily install MSI and EXE applications using this feature.

Desktop Central also supports remote control allowing you to take control over any PC in your network. Remote control is web-based so you can use it from any PC. If needed, you can lock user’s keyboard and mouse in order to stop them from interfering.

If you’re working with sensitive information, you can also turn off the user’s screen so he can’t see the changes you’re performing. During the remote session, you can use Ctrl + Alt + Delete and Alt + Tab commands and transfer files remotely.

Of course, 128-bit Advanced Encryption Standard (AES) is available, so your remote sessions will be completely private.

The tool also supports power management so you can easily keep track of power consumption. The tool supports predefined power templates, but you can also remotely turn off screen savers, monitors, hard drives or completely turn off the computer.

Using this tool you can also control the USB devices connected to the computers in your network. The application offers granular control, but it also allows you to enable or disable specific devices.

You can also restrict USB usage for all users or all computers in the network to enhance your security. The application works with nine different types of USB devices, so you can easily control them remotely.

The application also has predefined configurations that you can apply to specific computers in your network. If you want to enhance computer performance in your network, you can use many built-in tools such as Disk Defragmenter, Check Disk and Clean Disk.

If needed, you can schedule these tools to run automatically ensuring maximum performance from all PCs in your network.

Desktop Central is a solid application if you need to configure all PCs in your network. In addition to computer configuration, you can also control USB devices and protect all network computers.

This is a great application, but it’s aimed towards network administrators and advanced users. If you’re just a basic user who wants to control USB devices, you might want to skip this software.

Desktop Central

Manage multiple computers and automate task with Desktop Central from ManageEngine.
Free Trial Visit Website

Endpoint Protector Device Control

Another application that can help you control USB devices and protect your PC from data theft or malware is Device Control. If you have sensitive information on your PC, you might want to protect them from unauthorized access with this application.

With this tool you can easily monitor, control or completely block USB storage devices. If needed, you can also block the actual USB port so it won’t work with any USB device.

After you define your device policy, you can easily monitor all ports and devices on your remote computers. If needed, you can block devices or enforce encryption in order to protect your files. In case any security policy is violated, you’ll get an instant report via email.

The application allows USB port monitoring and lockdown for all major desktop platforms. It’s important to mention that this service has a web-based interface so you can easily monitor USB ports from any device.

In addition, the service is simple to setup, and you can have it up and running in a matter of minutes.

The application offers precise control and you can specify which devices can or can’t be used. In addition, you can create device whitelist or define user rights for each user or group on the PC.

If needed, you can grant USB access remotely even if the computers are offline. Of course, you’ll get a detailed report about USB usage once you connect back to the network.

Device Control is a solid USB control application, and it’s perfect for network administrators. If you want to try this application out, feel free to request a demo from the developer’s website.

⇒ Get Endpoint Protector Device Control

Lumension Device Control

Another great tool for network administrators that can protect your PC from data theft is Lumension Device Control. Using this application you can set security policies for removable storage and optical discs.

The application allows you to see which user is using removable storage so you can easily monitor all endpoints in your network. In addition, you can easily see which endpoints have removable storage connected to them.

There’s also a detailed log so you can see all allowed or blocked events, policies by devices, machine or user, and all file metadata. Thanks to this feature you’ll be sure that nobody is installing any malicious applications or copying files without permission.

If needed, you can also change permissions for USB devices and allow users temporary access. Speaking of access control, you can also completely block all USB storage devices from running on endpoint computers.

To enhance security, you can prevent reading or writing from USB devices and set enforced encryption. Speaking of encryption, the application uses FIPS 140-2 technology to protect your data.

This is a rather useful feature because you can force all users to encrypt their data before transferring it to removable storage. As a result, all transferred data will remain protected even if the removable storage is lost or stolen.

If needed, you can set data limit for file transfer ensuring that users can’t copy large files to removable storage. As a result, you can minimize the damage caused by data theft.

Of course, you can see the list of all files that are written or read from the removable storage or optical drives. Thanks to this feature you’ll always know what type of files are your users copying or running from removable storage.

To protect your network from malware, you can also set a list of trusted devices in order to minimize the chance of malware infection. If needed, you can also set the type of files that can be transferred from and to the removable storage.

Lumension Device Control is a great application that allows you to have full control over all USB ports and devices in your network. This is a powerful tool for network and system administrators, and if you want to try it out you can download the free trial version.

⇒ Get Lumension Device Control

USB Lock RP

The next entry on our list is a software tool specifically designed to control USB devices’ access to computers in a network, and it is called USB Lock RP.

This tool is essentially a centralized USB management system, but the highlight of the product given our list is its ability to whitelist targeted USB devices by hardware ID and block the rest.

Besides Data loss prevention, this solution allows you to block malware from accessing your network via common USB media.

USB Lock RP operates on-premises and includes USB monitoring and encryption. That being said, if you think installing a specialized USB security tool to manage USB access is required then go ahead and use USB Lock RP without issues.

⇒ Get USB Lock RP

McAfee Device Control

USB storage devices are useful, but they can be a security risk in your network. If you own a business, it’s important to protect your data and prevent any chance for data theft. Using this tool you can easily monitor and control data transfers on all PCs in your network.

The application offers an enhanced control management system that allows you to prevent copying of classified data. You can control all USB devices based on their product and vendor ID, serial number, device class, and device name.

Using these parameters you can allow data transfer only for specific USB devices that you trust.

McAfee Device Control can completely block removable storage devices or force them to work in read-only mode. By doing so, you’ll eliminate the chance of data theft in your network.

The application also offers content-aware protection for removable devices, and there’s full integration with McAfee Endpoint Encryption available. In order to protect your files, the application offers file access protection for removable storage.

Thanks to this feature, your files will remain protected even if the removable storage is lost or stolen. If needed, you can also block the copying of specific files and eliminate the chance of data theft.

There’s also a Citrix device rule that can block access to local drives, removable storage, printers, optical drives, clipboard, etc. The application can also block read-only files and provide you with detailed information regarding user activity.

Speaking of user monitoring, the application works with McAfee ePolicy Orchestrator allowing you to keep track of events in real-time. With this tool, you can see information such as user data, sender, recipient, timestamp and data evidence.

Thanks to this feature you’ll be sure to find out about data theft as soon as it occurs.

McAfee Device Control is a great application and it will help you control all USB devices in your network. The application is designed for system and network administrators, so if you want to enhance the security in your network, you might want to consider using this tool.

⇒ Get McAfee Device Control

PA File Sight

Another great application that can help you monitor your files and control USB devices is PA File Sight. Using this tool you can keep a close eye on all your files and see who’s using them.

In addition, you can see when a specific file was created, renamed, moved or deleted. In fact, you can also find which user deleted a file and from which device.

Using this tool you can monitor all files or specific files and see even the slightest file changes. In fact, you can also see permission changes as well as both successful and failed actions.

To keep absolute control over the files in your network there’s a real-time monitoring feature that allows you to see changes as soon as they occur.

The application also supports different types of notifications, so you can receive an email or SMS message when a security violation occurs. In addition, there’s support for an SNPP pager, but you can also run any application once the security violation occurs.

Of course, all security violations will be recorded in a log file, so you can see detailed information about any infractions.

The application supports remote monitoring so you can easily monitor remote servers with ease. Speaking of which, there’s also a Remote Desktop feature available so you can take control over the remote server and fix any potential issues.

It’s worth mentioning that PA File Sight supports USB control so you can prevent USB devices such as flash drives from running on your PC. The application also works with optical drives, and you can automatically eject them once they are inserted.

Of course, you can also automatically disconnect storage devices as soon as they are added or disable AutoRun for drives and optical discs. There’s also support for trusted devices, and to register a trusted device you just have to add its serial number to the list of exceptions.

We also have to mention that this tool supports action URLs, so you can open a specific URL with desired parameters once an infraction occurs. There’s also a Desktop Notifier feature that will show you alerts in the system tray.

The application also offers additional types of actions so you’ll never miss an important alert.

PA File Sight is a great file monitoring tool, and it’s perfect for network and system administrators. There are two versions available, Lite and Ultra, and both of them offer different features. Both versions are available for a 30-day trial, so feel free to try them out.

⇒ Get PA File Sight

MyUSBOnly

If you’re looking for USB control software, you might be interested in MyUSBOnly. The application allows you to create a list of trusted USB storage devices so you can rest assured that nobody will be able to copy files from your PC.

MyUSBOnly logs all USB activity so you can easily see when removable storage was connected or disconnected from your PC. In addition, you can also see all copied, modified and deleted files.

You can also set up email notifications and receive an email if an unauthorized storage device is connected to your PC. The application is lightweight and almost invisible so users won’t even know that it’s running in the background.

MyUSBOnly is perfect for home users that want to protect their data, but it’s also suitable for business users. The application can keep track of your network PCs and workstations, so it’s perfect for network administrators.

It’s worth mentioning that this application requires a password, so users without the password can’t disable it or uninstall it. MyUSBOnly is rather simple to use, and with its friendly user interface, even the basic users will be able to protect their PC from data theft.

It’s worth mentioning that this device can block removable storage devices, but it can also disable optical drives and various smart devices. It can also prevent USB Wi-Fi adapters or Bluetooth devices from working.

As a result, the chance for data theft using USB devices is almost nonexistent. There’s also a cloud version that allows you to monitor all your computers remotely. In addition, you can also remotely authorize devices for all your computers.

MyUSBOnly is a decent application, and unlike previous entries on our list, it’s simple enough so even the home users can use it without any problems. If you need to protect multiple computers, there’s also a special version optimized for businesses.

The application is available for a free trial, but if you want to continue using it, you need to purchase a license or pay a yearly subscription.

⇒ Get MyUSBOnly

USB Manager

If you’re looking for a simple application to control USB devices on your home PC, you might want to check USB Manager. The application has a humble user interface and it allows you to block different types of USB devices.

For example, you can easily block storage devices, printers, audio devices or scanners. To do that, simply select the device you want to block and you’re good to go.

As you can see, the application is incredibly simple to use, and even the most basic users will be able to use it. Unfortunately, there’s no support for trusted devices, so you can’t configure which devices can be used on your PC.

As a result, if you choose to block removable storage, all removable storage devices will be blocked from running on your PC. This can be a problem especially if you want to block all storage devices except your own.

The application supports password protection so you can easily secure it with a password. By doing so you’ll prevent unauthorized users from changing your settings and unblocking USB devices.

USB Manager also supports hotkeys and you can start the application by using the predefined keyboard shortcut.

It’s worth mentioning that you can set this application to start automatically with Windows, but you can also hide it from other users. By doing so other users won’t even know that this tool is running in the background.

USB Manager is incredibly simple to use which makes it perfect for basic home users. As for flaws, some users might not like the humble user interface and the lack of support for trusted devices.

Despite some flaws, this is still a decent USB control software, and if you’re looking for a free and simple application you might want to try USB Manager.

⇒ Get USB Manager

Windows USB Blocker

Another USB control software for home users is Windows USB Blocker. This is a freeware and portable application, so you can run it on any PC without an installation. The application is incredibly simple to use, and it will block all removable storage on your PC.

To block all USB flash drives you just need to click a single button. After doing that, you won’t be able to access any removable storage from your PC. The application has a simple user interface so even the most basic users will be able to use it. Unfortunately, the application doesn’t offer any advanced options so you can’t set a list of trusted devices. As a result, you can only block or unblock all removable storage devices from running on your PC.

We also have to mention that this tool doesn’t support other types of USB devices, so printers, Bluetooth dongles and other USB devices won’t be blocked. The latest version also has support for command-line interface which can be useful for advanced users that want to automatically block USB devices.

Windows USB Blocker is incredibly simple to use, but it doesn’t offer any advanced features. If you’re a home user and you need a free and portable application to block USB devices, you might want to consider Windows USB Blocker.

⇒ Get Windows USB Blocker

USB Disabler

If you want to protect your home PC from data theft and malicious files, you might want to consider USB Disabler. This is a lightweight application that can prevent USB flash drives from running on your PC.

Using this tool you can set all USB flash drives to work in read-only mode. In this mode, users can run applications and files from the USB flash drives but they can’t copy any files to them.

Using this feature you can easily prevent data theft and be sure that nobody isn’t copying your files without your permission.

If you want more protection, you can completely disable USB drives from running on your PC. By doing so, users won’t be able to open any files or copy them to the removable storage.

In fact, they won’t be able to access removable storage at all. This option is perfect if you’re concerned that someone might infect your PC by connecting a malicious USB flash drive to it.

If you want to connect a trusted USB flash drive, you can do so by turning on the normal mode. This will allow you to access and copy files to your flash drive without any restrictions.

The application is incredibly simple to use and it can block and unblock USB flash drives simply by choosing the desired option from the dropdown menu.

We have to mention that this application requires administrator privileges in order to work, so be sure to run it as an administrator.

USB Disabler is simple to use, but it doesn’t offer any advanced features. Our only complaint is the lack of ability to set trusted devices, meaning that you can disable or enable all USB storage devices using this app.

On the other hand, the application is completely free and portable, so it’s perfect for any home user that wants to protect its PC.

⇒ Get Windows USB Blocker

USB Block

If you’re concerned that someone can steal your data or infect your PC by using a removable storage device, you should definitely consider using USB Block.

The application has a simple to use interface that allows you to easily block USB devices. Using this tool you can block removable storage as well as optical discs and floppy drives. In addition, you can also block network access and non-system drives with this tool.

The application allows you to set the list of authorized devices so you can block all devices except your own USB flash drive. To protect your data from unauthorized access, the application will ask you to set a password.

After doing that, if an unknown device is detected you’ll be asked to enter your password in order to authorize it. If you want, you can add the device to list of exceptions so you can connect it without any prompts. Since the application is protected by a password, unauthorized users won’t be able to open it and change their settings.

It’s worth mentioning that the application has a built-in log so you can see if anyone tries to access the application or authorize an unknown device. Another useful feature is the ability to run this tool in Stealth mode.

By doing so, the application will be hidden from Start Menu, Desktop and Control Panel. If needed, you can also set a keyboard shortcut to activate the Stealth mode with ease.

Another great feature is the ability to run this application in Safe Mode, so even the most persistent users won’t be able to bypass it.

USB Block is simple to use, so it’s perfect for home users that want extra security. The application allows you to set the list of trusted devices, which is also a major plus.

USB Block is available for a free trial, but if you want to continue using it you’ll need to purchase a license.

⇒ Get USB Block

USB Pratirodh

Another application that will allow you to protect your PC from data theft and malware is USB Pratirodh. Using this tool you can easily prevent removable storage from being used on your PC.

The application will block all USB storage devices, and if you want to use a specific device you need to register it beforehand.

You can configure each registered device and allow the removable storage to run only in read-only mode. By doing that, users won’t be able to copy any data to the USB drive.

If needed, you can also enable full access to the USB drive. This is useful if you want to connect your own flash drive and freely copy your files. According to the developer, the application also supports encryption and malware detection.

USB Pratirodh has a humble interface that some users might not like. The application is relatively simple to use, but not as simple as other entries on our list.

To add a trusted device, first you need to create your username, protect it with a password and assign a new device to it. This method offers extra protection, but the entire process might be a bit confusing to new users.

We also have to mention that the application has a master password that will prevent other users from changing your security settings.

Overall, USB Pratirodh is a decent tool that offers some advanced features. The application is completely free, and if you don’t mind the slightly outdated interface feel free to try it out.

⇒ Get USB Pratirodh

USB Flash Drives Control

Another lightweight application that can stop data theft and protect you from malware is USB Flash Drives Control. This is a freeware application and it will run from the system tray. Using this tool you can see the connected USB flash drives, and you can even explore them right from the application.

USB Flash Drives Control allows you to control all USB flash drives by unchecking certain privileges. There are three options available and by turning off the read mode you won’t be able to write any files on the USB flash drive as long as it’s connected to your PC.

In fact, you won’t be able to see or access your flash drive at all. This option is useful if you’re worried that someone might use an infected USB flash drive on your PC without your knowledge.

There’s also a write mode available, and by turning it off you won’t be able to write any files to your USB flash drive. Thanks to this feature, you’ll successfully prevent any chance for data theft.

Another option is Execute Mode, and by turning this option off users won’t be able to run executable files from USB flash drive. This feature is rather useful if you don’t want users to run unknown and potentially malicious applications from the flash drive.

Keep in mind that these options don’t apply to already connected devices.

USB Flash Drives Control is a lightweight and simplistic application and with minimalistic user interface even the basic users will be able to protect their PC.

As for the flaws, the application doesn’t allow you to set a list of trusted devices, and that’s our only complaint. Despite this flaw, this is still a solid application so feel free to try it out.

⇒ Get USB Flash Drives Control

AccessPatrol

If you want to protect your PC or multiple PCs in your network, you might want to consider using AccessPatrol. The application allows you to control various USB storage devices such as flash drives, multimedia devices, Bluetooth and WiFi adapters.

Using this tool you can set three different security levels, including full access, read-only access and no access at all. Thanks to these options, you can easily limit access or completely block certain devices from running on your PCs.

The application has a centralized web console, so you can enforce your security policies on all PCs in your network. Using this tool you can have detailed device reports, and you can also set the list of trusted devices.

By doing so you can set the list of authorized devices and give them the full access to PCs in your network. In fact, you can also authorize specific devices only for certain users and enhance your security even further.

Since this tool is designed for network administrators, you can remotely install it and secure your entire network in a matter of minutes.

AccessPatrol supports email reports so you can easily get a detailed report about device usage in your network. Thanks to this feature, you can easily find any security violation with ease.

Another useful feature is the ability to protect your devices and sensitive information even outside your network. There’s also a scheduling feature so you can allow unrestricted access to USB devices only during specific time of the day.

AccessPatrol is a great tool that can help you control USB devices in your network. The application offers a wide array of features, and with support for remote monitoring, it’s perfect for system administrators.

You can download the application for a 14-day trial, but if you want to continue using it you’ll need to purchase a license.

⇒ Get AccessPatrol

Wenovo USB Disks Access Manager

Another freeware application that can help you protect your PC from file theft and malware is Wenovo USB Disks Access Manager. This is an incredibly simple application, so even the most basic users will be able to use it.

The application has only three options and it allows you to enable all USB storage devices, run them in read-only mode, or completely block the detection of USB devices.

By using read-only mode you’ll prevent users from copying files to their removable storage and successfully prevent data theft.

If you’re worried that someone can connect an infected USB flash drive to your PC, you might want to consider disabling USB disk detection completely.

By doing so, your PC won’t recognize removable storage and it won’t be able to use it at all.

As previously mentioned, this application is incredibly simple to use, but it doesn’t allow you to set a list of trusted devices. With the lack of this feature, you can only block or unblock all USB storage devices from running on your PC.

Wenovo USB Disks Access Manager is a freeware and completely portable application, so it can run on almost any PC without issues.

The application is perfect for home users, so if you want to protect your personal PC, be sure to download and try this application.

⇒ Get AccessPatrol

DriveLock

Another application that can help you secure your data from data theft is DriveLock. This application allows you to take full control over all removable storage and prevent data theft. Using this tool you can control the data flow and monitor your files at all times.

There’s support for remote access, and it addition to removable storage you can also prevent optical discs from running or burning.

The tool also allows you to choose which applications are allowed to install. By doing so, you can prevent the installation of unwanted applications and be sure that your personal network is safe from malware.

You can set a list of trusted applications and prevent all other untrusted apps from running.

DriveLock offers a powerful reporting system that allows you to keep a close eye on all used storage devices. Thanks to this feature you can see all transferred data and be sure that no data theft occurs.

If needed, you can print your reports or export them to Excel, PDF, and HTML format. You can also get scheduled reports via email and be sure that no infractions occur.

There’s also support for encryption which means that you can protect all files that are stored on the removable storage. Thanks to this feature, all your files will remain protected even if the removable storage is lost.

DriveLock is a great application for USB control, and it’s perfect for system administrators that need to control multiple PCs in the network. The application is available for a free trial, but if you want to continue using it, you’ll need to obtain a license.

⇒ Get DriveLock

Ratool

Another free and portable application that can help you control USB devices is Ratool. The application has a simple user interface that allows you to block all removable storage from running. In addition, you can also force removable storage to run in read-only mode and prevent any chance of data loss.

The application also allows you to set a password and prevent unauthorized users from changing your security settings. In addition to USB removable storage, you can also block optical drives, floppy drives, tape devices and WPD devices from running.

Many infected USB devices will automatically run malware once you connect them to your PC, but this tool allows you to disable Autorun feature for removable devices.

By doing so, you can prevent most malware from infecting your PC. You can also force hidden files to be displayed on the flash drives. Thanks to this feature, you can easily detect any suspicious and potentially dangerous files.

The tool can also prevent the installation of new USB devices which is useful if you want to disable all unknown storage devices from working on your PC. Overall, Ratool is a solid application, and it offers all the basic features that a home user needs.

In addition, you can also prevent all unknown USB devices from running on your PC. The application is completely free and portable, so feel free to try it out.

⇒ Get Ratool

DeviceLock

Another great tool for system administrators that allows you to control USB devices is DeviceLock. The application comes with device access control feature so you can control which users have access to USB devices.

For example, you can control which users can access removable storage, FireWire, Infrared, COM, and LPT ports. In addition, you can restrict access to WiFi and Bluetooth adapters.

The application can also control MTP devices such as smartphones, tablets, and all sorts of media players. Lastly, you can restrict access to optical media and floppy drives as well. It’s worth mentioning that you can set devices to run in read-only mode so users in your network won’t be able to copy any files to them.

The application also offers network communications control, so you can easily monitor network protocols, web applications, and instant messaging apps.

The application can easily monitor network activity in your network, but you can set a list of trusted services, websites, and email addresses that you can access.

DeviceLock also has a Content Filtering feature so you can see all data that is copied to removable storage, clipboard or sent to the printer. Speaking of which, the application has character recognition feature available so you can easily inspect textual data from pictures and graphical files.

It’s worth mentioning that this tool has a Tamper Protection that prevents users from changing security policies. Even users that have system administrator privileges won’t be able to configure DeviceLock.

To make any changes to the security policies, users have to access DeviceLock console with a proper password.

The application supports centralized configuration and deployment meaning that you can deploy security policies to computers in your network with ease. There’s a file type control feature that supports over 5300 different file types.

The application will analyze the file’s binary content and determine its true type before enforcing the security policy. It’s worth mentioning that you can set up different file policies for users and groups in your network.

By doing so, you’ll be sure that users can’t copy or access specific file types in your network.

Another great feature is clipboard control, and thanks to it you’ll be sure that users in your network can’t transfer sensitive information. The application lets you have control over the type of files that users can access from clipboard.

In addition, you can easily monitor the content of the textual data copied to the clipboard at any time. The application can prevent users from creating screenshots, but it also allows you to see the list of created screenshots with ease.

There’s support for trusted devices, and you can easily add a specific device to the list of trusted devices. As for white listing, you can add the device to the list by using its serial number.

White list feature also works with optical media, so you can easily allow certain optical discs to run in your network.

There’s also support for temporary access by using access codes. In addition, the software also allows you to add specific protocols to the white list.

The application offers detailed reports, so you can easily view any security violations that occurred in your network. There’s also SNMP, SYSLOG and SMTP alerting so you’ll get a notification as soon as a security violation occurs.

There’s also support for file shadowing as well as forced encryption for all removable storage devices.

DeviceLock offers a wide array of features, so it’s perfect for network and system administrators. As for availability, you can download the trial version for free, but in order to continue using this tool you need to obtain a license.

⇒ Get DeviceLock

GFI EndPointSecurity

Another application for network and system administrators that can protect all PCs in your network is GFI EndPointSecurity. This application is perfect if you’re concerned about data theft in your network.

The software can force file encryption for all removable storage meaning that your files will remain protected at all times.

The application has automatic computer discovery feature that allows you to easily detect any new PCs in the network. Thanks to this feature, the administrator can see any new PC that is connected to the network and automatically apply security policies to it.

The application supports scheduling and you can set auto detection to run at predefined intervals ensuring that all new PCs are discovered as soon as possible.

GFI EndPointSecurity also has device reporting feature so you can see graphical reports about all devices in your network. In addition, you can also view information regarding user activity, copied files, etc.

There are multiple types of reports available, so you can easily see all the necessary information.

Application supports grouped protection so you can easily group computers and apply security policies to them. Each group can have different policies and different portable device access assigned to them.

The application supports real-time monitoring so you can easily see user statistics in real-time. In addition, you can receive alerts as email, SMS or network messages as soon as a specific device connects to your network.

The software also offers device-related user activity logs allowing you to see the list of files accessed on any device.

GFI EndPointSecurity also supports blacklists so you can allow or deny access to specific devices. In addition, you can set different access policies for different users and groups.

By doing so, you can grant specific users different access rights to certain devices and allow only company-approved devices to be used in your network.

GFI EndPointSecurity is a great tool that can protect your network from data loss or malware. This is an advanced application, so it’s perfect for system administrators and other advanced users.

The application is available for a free trial, but if you want to continue using it, you’ll need to purchase a license.

⇒ Get GFI EndPointSecurity

DigitalGuardian

Another application that can help you protect your data from data theft is DigitalGuardian. As for protection, the application protects your files by assigning certain tags to them.

If a user tries to send a tagged file, the file transmission process will be stopped. In addition to blocking, the application can also create detailed logs so you can see information about every policy violation in your network.

The application also supports file encryption and you can automatically block, justify or encrypt sensitive data. This feature works for email attachments, files moved to a removable drive or cloud storage.

In addition to encryption, you can also set the type of files that can be transferred to removable devices. If needed, you can also set a fixed amount of data that each user can transfer in a specified time period.

By doing so, users will be able to transfer only a limited amount of data. If you need extra security, you can easily create a blacklist of devices based on their serial number.

DigitalGuardian is a professional tool, so it’s perfect for system administrators and business environments. The tool is available for a free trial, but you need a license if you plan to continue using it.

⇒ Get DigitalGuardian

Solarwinds USB Analyzer

Data theft can be a big problem, but if you want to protect all computers in your network, you might want to consider using this tool. By using this tool you’ll prevent data leaks in your network along with malware infections. In addition, you can completely restrict access to USB ports and ensure that data doesn’t leave your network without your knowledge.

The application uses endpoint USB security technology that allows you to monitor usage of USB devices. This feature supports removable storage, phones, cameras and wireless network devices. The application allows you to set response rules so you can disable USB devices once a security breach occurs.

In addition, you can set a list of trusted devices and apply a specific set of rules if an unknown device is connected to your network. For example, you can automatically detach USB devices, terminate processes, block IP addresses or turn off your PC. The application also supports detailed reports, so you’ll be able to keep a close eye on all computers in your network.

Solarwinds USB Analyzer is a great tool and it offers an abundance of features. This application is designed for advanced users and system administrators, so it might be perfect for your business network. Free trial version is available, but in order to continue using this tool you need to purchase a license.

⇒ Get Solarwinds USB Analyzer

Safend

If you’re a system administrator and you’re looking for a USB control software, you might want to consider this tool. Safend Protector can protect you from data theft by monitoring all endpoint devices and data flow in your network.

The tool can restrict file access, but it can also encrypt media devices. The application offers detailed analysis and reporting features and it complies with the latest standards.

In addition to data theft, the tool can also protect you from malware. The application will automatically scan each USB device for viruses. If the device is clean, you can allow it to access your network.

If you want to enhance your security, you’ll be pleased to hear that this software offers device detection and restriction so you can easily block certain devices from accessing your network.

You can block devices by type, model or by their serial number. This tool also supports encryption so you can easily encrypt files on removable storage and optical discs. By doing so, your files will remain protected even if the removable storage is lost.

In addition to USB control, the application offers granular Wi-Fi control according to MAC address, SSID or network security level. If needed, you can also block hybrid network connections and enhance your security even further.

There’s support for 3rd party antivirus tools allowing you to use them to scan removable storage with ease.

The application also offers extensive reporting so you can easily find out every data leak. Speaking of which, you can receive periodic reports and keep up with user’s activity in your network.

The application will report all intentional and unintentional security events as well as suspicious activities. In addition, you can also see detailed reports about device usage in your network.

There’s also an auditing feature that allows you to keep a constant track of your endpoints. The tool will show you all information regarding USB, FireWire, PCMCIA, PCI, internal storage and Wi-Fi connections.

Safend suite is a powerful tool that will help you control USB devices and prevent any chance for data theft. The application is perfect for network and system administrators, and it’s available for a free trial.

⇒ Get Safend

Check Point Endpoint Media Encryption

Data leak can be a big problem, but you can easily protect all devices in your network by using this tool. The software allows you to encrypt data stored on removable devices, but you can also track and manage removable devices individually.

In addition to USB devices, the application offers encryption for optical discs as well.

The tool also has removable media enforcement that maximizes data security by assigning a digital signature on each encrypted device. By doing so, the user will be informed if any change to stored data occurs.

The tool also has device access control settings so you can easily control removable media, FireWire, Bluetooth, Wi-Fi and other devices.

The application offers advanced control and you can set different policies for devices by brand, type, size or ID for maximum security.

The tool also supports logging and alerts allowing administrators to keep a close eye on users. If needed, you can also receive email alerts as administrator as soon as a security violation occurs.

Check Point Endpoint Media Encryption is a great application that offers an abundance of features. This is an advanced tool so it will be perfect for system administrators in smaller or larger companies.

⇒ Check Point Endpoint Media Encryption

USB Security

Another tool that can help you protect your home PC from data loss or malware is USB Security. The application allows you to create a list of trusted devices and easily block all unauthorized devices.

Thanks to this feature, other users won’t be able to steal your files or install malware via USB.

According to developer, the application also offers centralized deployment and management so it can be used for smaller networks. In addition to blocking USB devices, this tool can also assign passwords to them, so you can access removable storage only with a correct password.

Thanks to this feature, you can increase the security even further. It’s also worth mentioning that this tool runs quietly in the background, so users won’t even know that it’s running.

USB Security has a built-in event log that will list all connected USB devices. The application offers password protection so nobody can make changes to its settings.

USB Security is a simple tool, so it’s perfect for home users. The application is available for a free 15-day trial, but it requires a license for continued use.

We have to mention that we got a warning while downloading USB Security, but after the antivirus scan it was determined that the file wasn’t malicious.

⇒ USB Security

Protecting your computer from data theft and malware is rather important, and we covered some of the best USB control software that can help you with that.

Many tools on our list are designed for business environments and professional users, but there are also couple of free tools that will be perfect for home users.

FIX: Windows Media Player won’t play AVI files

Windows Media Player supports most of the mainstream video formats, but it doesn’t play all media files.

AVI is one file format that Windows Media Player should play without any errors, but some WMP users still can’t play AVI videos with it. When WMP doesn’t play AVI videos, it will return an error message stating, Windows Media Player cannot play the file.

 This is how you can play AVI videos in WMP if it’s returning that playback error message.

What can I do if Windows 10 won’t play AVI files?

  1. Install the K-Lite Codec Pack
  2. Fix AVI files with DivFix++
  3. Convert the AVI file to another media format
  4. Use Adobe Premiere Pro
  5. Open the AVI with VLC
  6. Restore Windows to a restore point

1. Install the K-Lite Codec Pack

  1. First, open this website page and click Download Standard to save the K-Lite installer to your hard drive.
  2. Then open the K-Lite installer, and press the Next button.
  3. Select the Normal mode radio button, and then press the Next button.
  4. Select the default profile 1 from the drop-down menu and click Next.
  5. A customization board then opens from which you can select additional options for configuring components. Press the Next button to go to the next setup page.
  6. Select the Windows Media Player checkbox for file associations, and then click the Next button.
  7. Then you can select supported video and audio file formats. Press the Select All button to select them all.
  8. Press the Next button to finish the setup wizard.
  9. Thereafter, press the Finish button to close the K-Lite setup window.

K-Lite is one of the most comprehensive codec packs, and it will surely help if you can’t play AVI files on Windows 10.

2. Fix AVI Files With DivFix++

  1. First, press the Download button on this webpage to save DivFix’s Zip to a folder.
  2. Then extract the DivFix Zip by pressing the Extract All button in File Explorer and selecting a path to extract it to.
  3. Open DivFix’s window from the extracted folder.
  4. Click the Add Files button to select an AVI video.
  5. Press the Strip Index button.
  6. Next, select the folder icon to choose a path for the fixed AVI file.
  7. Press the Fix button to repair the AVI.
  8. Thereafter, open WMP to play the AVI.

If you still cannot play AVI files in Windows 10 with the K-Lite codec pack, it might be the case that the AVI file is corrupted.

Try playing numerous AVI video files in Windows Media Player. If it’s the case that one is corrupted, you can fix it with the DivFix++ software. This is how you can fix AVI videos with DivFix++.

3. Convert the AVI File to another media format

Alternatively, you could also convert the AVI file to another supported WMP format such as WMV.

This isn’t exactly a fix, but it’s a workaround that will probably help you if AVI files are not playing.

You can convert AVIs to WMV by opening this page, clicking the Choose file button to select AVI, and then pressing Convert file.

4. Open AVI files with Adobe Premiere Pro

Premiere Pro is an industry-leading video editor used by professionals from YouTube to Hollywood.

It is capable of handling any type of video format you thought at it with ease, and it gives you complete control over editing clips and creating your own quality content.

Take your work to the next level, by using the accompanying app, Premiere Rush, which allows you to continue your work uninterrupted on your mobile device.

Additionally, it perfectly integrates with the rest of the Creative Cloud apps to make life easier and your videos better. Moreover, you can try Adobe Premiere Pro completely free for 7 days.

With its array of powerful features, Adobe Premiere Pro is a great choice if AVI files are not playing on your PC.

Here are just some of the powerful features that Adobe Premiere Pro boasts:

  • Automated tools powered by Adobe Sensei
  • 8K support with ProRes HDR
  • VR editing
  • Work on-the-go with Adobe Rush
  • Audio mixing

⇒ Get Adobe Premiere Pro

5. Open the AVI with VLC

  1. First, press the Download VLC button on this page; and then open the software‘s installer to add it Windows.
  2. Open the VLC media software.
  3. Open an AVI video in VLC. If it’s an AVI with a broken index, a Broken or missing AVI dialog box window opens.
  4. Now select the Build index and then play option on the Broken or missing AVI dialog box window.
  5. You can also configure VLC to automatically fix the AVI files without any dialog box opening. To do so, click Tools > Preferences in VLC.
  6. Select the Input/Codecs tab and scroll to the Files section.
  7. Select Always Fix from the Damaged or incomplete AVI drop-down menu.

You can also fix broken AVI files with the VLC media software. If it’s more of a compatibility issue, VLC will certainly play the AVI as it’s almost a universal media player.

However, note that VLC only temporarily fixes the video, but it’s a decent workaround if you can’t play AVI files on Windows 10.

6. Restore Windows to a restore point

  1. Press the Win key + X hotkey to open the Win + X menu.
  2. Click Run to open its window as shown directly below.
  3. Enter rstrui in Run’s text box and click OK to open the window directly below.
  4. Press the Next button, and then select a restore point from those listed.
  5. Click Next and Finish to confirm your chosen restore point and restore Windows.

If Windows Media Player was playing AVI videos without any issues a few months back, restoring Windows to an earlier restore can be helpful if you cannot play AVI files in Windows 10.

As long as you’ve had System Restore enabled, you can utilize that tool to revert Windows to a time when AVI files were playing in WMP.

Those are a few resolutions that will fix AVI videos that aren’t playing in Windows 10’s Windows Media Player and other media software.

If you’re utilizing older versions of WMP in Vista or XP, update the software and check that the AVI format is selected on WMP‘s File Types tab. For further details on how to add an AVI codec to Windows Media Player, check out this post.