For a very long time, Windows Live Mail has been the go-to email client for Microsoft Windows users. However, no application is entirely stable, as you’ve seen in the past few years. At times, Windows Live Mail’s spam filter might be the one not working.
You’ve probably faced certain problems while using the Windows Live Mail application and there’s nothing out of the ordinary in this error. However, you do know your filtering options and they used to work great.
When receiving unsolicited junk emails in your Inbox that’s clearly not the case any longer. So, to help you out, we are going to discuss some reliable ways to deal with this Windows Live Mail error.
What can I do when Live Mail’s Spam filter is not working?
1. Remember the basics
As a quick recap, carefully read the lines below:
Don’t hesitate to remove your email address from mailing lists that aren’t on your safe senders list.
Clicking Unsubscribe is time-consuming but beneficial per long term.
When an email appears to come from a company, it never hurts to contact customer service via phone or web browser to confirm it’s indeed legitimate.
Scammers often use a technique called spoofing to disguise their real email address.
When dealing with this case, right-click on the email, and select the Junk email submenu, then click Mark as junk.
Give a try to one of those latest email scanning software programs to further filter your emails.
If you added your email account as IMAP or Microsoft Exchange ActiveSync, you may have another spam folder in addition to Windows Live Mail’s own junk email folder.
Try finding it in the folder tree (left pane) and see if it’s active or not.
3. Try to repair the installation
The quickest remedy now is the Repair option that waits to be used. With all programs closed, just type wlarp into the start search box and press Enter.
Select Repair on the next page. When it’s finished, reboot the computer for the changes to take place and launch Windows Live Mail.
4. Customize your spam filters
Click on the dropdown arrow of the Junk / Not junk button, then choose Safety options from the menu. The general Options tab keeps tabs on your junk filter.
By default, Windows Live Mail has it set to:
Low
This lets you move the most obvious junk email to the Junk Email folder
For a much higher level of protection, you could go for:
Safe List Only
Only mail from people or domains on your Safe Senders List will be delivered to your inbox.
Receiving countless junk emails every day is no joy, but you know how to stop that now. Windows Live Mail has these adaptive spam filters built right in.
This means that your junk filter gets better with time at recognizing what you see as junk emails.
If you have any other suggestions that can help with Windows Live Mail’s spam filter issue, share them with the other users in the comment section below.
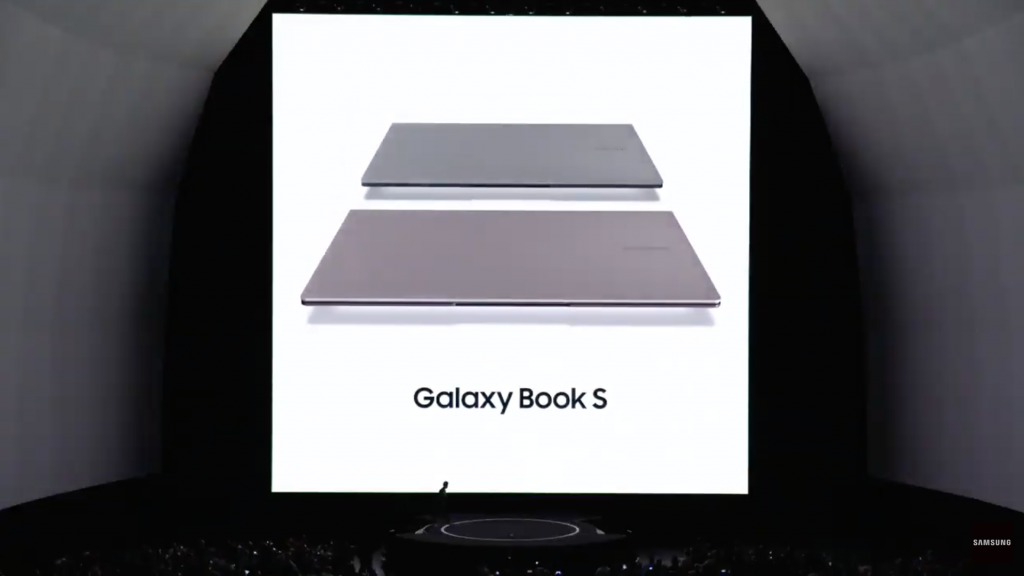
Samsung’s Windows 10 Galaxy Book S, powered by Qualcomm’s Snapdragon 8cx processor, is set to launch on February 13, 2020. For those that pre-order the Galaxy Book S before then, Samsung will give out $100 gift cards for purchase towards Samsung PCs, tablets, and accessories. As noted in a post by The Verge, the Windows 10 ARM-based Galaxy Book S was “unveiled at Samsung’s Galaxy Note 10 event last summer, but missed its original September [2019] launch window.”
Samsung Galaxy Book S
The Samsung Galaxy Book S starts at $999.99 for the base model and is similar to the Surface Pro X, another Windows 10 on ARM-based PC. The Samsung Galaxy Book S has a supposed 23-hour battery life, and Samsung claims that the battery is based on the device’s onboard LTE being switched on the whole time. It is unlikely that the Galaxy Book S will be able to provide as much battery life as compared to what the Surface Pro X offers.
The Samsung Galaxy Book S will also be available for purchase through the Microsoft Store starting on February 13, but pre-orders of the device are being handled through Samsung directly.
The Printer leaving black lines or streaks on paper is a fairly common problem. It’s something that you are likely to come across even the best printers, be it any make or type, including laser or inkjet printers.
That said, resolving the issue is quite easy and can be done in just a few minutes. Keep reading to find out all about the problem and the solutions that worked for others!
What causes black lines on paper when printing?
Here are the primary reasons you find the printer printing black lines:
Dirt accumulation: Dirt or dust accumulation on the rollers or the transfer belt is a common aspect that triggers the issue.
Excess toner powder: When there’s excess toner powder, there’s a chance that you will find black lines on printer paper.
Using improper printing material: Experts recommend using only official printing material and components (when repairing printers) since their cheaper counterparts aren’t as effective.
What can I do when the printer leaves black streaks?
1. Clean the rollers
Tip
You need to be extremely gentle with the rollers and transfer belt, as any damage to either will only aggravate the problem. Preferably, wear gloves so as not to end up damaging either.
Made of soft rubber material, rollers act to move the paper inside the printer for the print to take place. However, any dust particles here can be enough for black lines to appear on the prints. So, the thing to do here is to clean the rollers gently using a lint-free cloth.
You can also use a soft brush moistened with some isopropyl alcohol for the cleaning act, especially if it’s hard to reach with your hands. Also, clean the transfer belt as well if your printer has one. You might also have to replace the roller if cleaning the same does not solve the issue.
2. Clean cartridge nozzles
Launch the printer app and select Maintenance.
Under Maintenance, look for anything like Device Servicing that allows you to deal with the ink cartridges.
Once you are through the same, select Clean Ink Cartridges.
Follow the on-screen instruction to complete the process.
If needed, you might have to opt for a more thorough cleaning (if such an option is available) or perform the cleaning act several times to fix things when the printer is leaving black streaks.
3. Replace the drum
This is more applicable to laser printers, where the drum is used to sort the print onto the paper. However, even a speck of dust on the drum can be enough to cause black lines as the print misses out on the portion where the dust is.
Replace the drum if you are able to, or replace the toner if the drum is part of it, as is sometimes the case. Unfortunately, this isn’t quite a simple job, and you should seek expert help if you can’t manage it on your own.
4. Clean or replace the fuser
A damaged fuser is also another reason for lines to appear on prints. So, the best option here is to go for a complete replacement of the fuser.
Again, seek professional help if needed. Both the drum and fuser or replaceable units are replaced during maintenance operations.
Microsoft’s line of Surface laptops is trendy among users. Not only are they powerful and boast great functionality and design, but they are also optimized for the Windows OS. But for some users, Surface Pro was making a weird noise.
Surface laptops aren’t exactly cheap to buy or have spare parts replaced, so a buzzing sound means that maybe something is straining it too much. The problem seems to appear on all models. Keep reading to find the solutions!
What can I do if Surface Pro is making a weird noise?
Before we proceed, here are a few quick tricks to try:
Make sure they are no loose components inside the laptop’s body. Gently shaking it will make this evident.
If the fan makes a noise, clear any dust accumulation using a can of compressed air.
Ensure all the connections are in order and verify whether Surface Pro still makes a buzzing sound.
If none work, head to the fixes listed next.
1. Change your laptops performance mode
Tip
This solution is more of a workaround since it will lead to your laptop discharging faster, so make sure you weigh in the pros and cons.
Click on the battery icon on your Taskbar
Move the slider to the far right, at Best performance
Strangely enough, fan sounds are usually heard when the CPU is under strain, so the fan has to rotate faster to compensate for the heat. However, this buzzing sound that has been reported is more persistent when the laptop is idle or using little resources.
Microsoft’s return policy is very flexible, and you can always ask for a replacement, especially if the device is under warranty. All you have to do is contact Microsoft Support and share the problem.
However, if this is a general hardware flaw, the new item will most likely have the same issue as the old one.
A common error with VMware workstations is when you try to power on the virtual machine on a Windows 10 device though you are greeted with the dreaded Blue Screen of Death when Credential Guard or Device Guard is enabled.
This no doubt makes for a frustrating scenario though the good thing here is that the issue can be remedied easily and effectively. And the easiest and most obvious solution here is to disable Windows Defender Credential Guard.
What to do if VMware is not compatible with Credential Guard
1. Turn of Windows Defender Credential Guard using Group Policy
Launch Group Policy Management Console. Just type Group Policy in the Cortana search box and select Group Policy editor from the search result.
In the Group Policy Editor window, select Computer Configuration > Administrative Templates > System > Device Guard from the options on the left.
You will get to see the Turn On Virtualization Based Security option on the right panel. Double click on it.
This will launch the Turn On Virtualization Based Security
Click on the Disable option to disable the setting.
Click on Apply > OK.
Close the Group Policy window as well.
2. Delete Registry setting
Open Registry Editor. (Type regedit in the Cortana search box.)
The usual precautions to be adopted when tinkering with Registry settings are applicable here. It is strongly recommended to back up the Registry before making any changes to it.
3. Delete the Windows Defender Credential Guard EFI variables using bcdedit
It is an easy process where you just have to type the following commands from an elevated command prompt and press Enter.
Those of you that work in an office environment most probably have access to an entire host of products that ease your work.
For example, having a subscription to the Microsoft Office suite can be very beneficial, since it comes with pretty much all the tools you may ever need.
This includes access to a personal information manager and email client named Microsoft Outlook.
However, keep in mind that managing work environments is made easier when using Group Policies, since these are policies applied from a singular administrator account, and applies to all PCs in a workspace.
However, one thing you must know about using Outlook is that its Security Mode must be configured to use Group Policy settings. Additionally, security settings need to be configured anyway for the general health and safety of your PC.
How do I configure Outlook security settings?
1. Make Outlook security settings compliant with Group Policies
Log in to Windows using an account with administrator permissions
Only administrators can change this setting
Open Outlook
ClickFile
Go to Options
In the Outlook Options window, click Trust Center
ClickTrust Center Settings
In the Trust Center window, click Programmatic Access
Select the optionNever warn me about suspicious activity (not recommended)
This will disable the warning messages
ClickOKtwice
By following this step, you can disable the displaying of warnings stating that a program is trying to access email address information or send messages on your behalf.
These are the most common security settings and scenarios you may ever meet when using Outlook. By following these steps, you should no longer encounter any of these issues.
If you’re aware of any other Outlook security settings that may need solving, share it in the comments section below and we will discuss it in the future.
Microsoft releaser a new cumulative update called KB4534321 that is aimed specifically towards Windows 10 version 1809.
It stands out because it was released outside of the normal release schedule, and it brings plenty of fixes and improvements to the Windows 10 October Update.
What stands out most are the fixes and improvements to Microsoft’s Mixed Reality, the fixes to a long-standing issue where the Windows Out Of Box Experience (OOBE) would go in a restart loop, and more.
Most important changes in KB4534321
Updates an issue with Windows Mixed Reality that occurs after upgrading to a new version of Microsoft Edge
Updates an issue that causes a device to repeatedly go into the Windows Out Of Box Experience (OOBE) restart loop in certain situations.
Fixes an issue that causes the touch keyboard to close when you select any key
Updates an issue that prevents users from reducing the size of a window in some cases.
Updates an issue that changes the user-customized order of tiles in the Start menu even though the layout is locked or partially locked.
Fixes an issue that causes the Settings page to close unexpectedly
Updates an issue that might prevent a user’s settings from syncing across devices
For the full list of improvements and fixes, check out this link.
As far as issues go, there are only two noticeable issues identified by Microsoft:
Renaming files or folders that are on a Cluster Shared Volume can cause errors
After installing KB4493509, devices with some Asian language packs installed may get error messages
Get KB4534321 now
Unless Microsoft plans on releasing more updates that are out of the normal release schedule, this will most likely be the last update users will be receiving until February.
As such, if you want to get the latest fixes and test out the latest features, get the update now.
The updates are available via all known sources, which include:
External hard drives are great if you need extra space or a reliable backup solution, but many users reported that their MacBook is not connecting to an external hard drive. This can be a big problem for some, so today we’re going to show you how to fix this issue.
What to do if the MacBook isn’t connecting to an external hard drive
1. Try using a USB hub or a power adapter
If your MacBook can’t connect to an external hard drive, it might not have sufficient power. To fix this, try connecting your hard drives to a powered USB or Thunderbolt 3 (USB-C) hub. Alternatively, try connecting your external device to its power adapter.
2. Check the cables and the connection
Sometimes these types of problems can occur if you have issues with your cables. To fix this, be sure to inspect both power and data cables and ensure that they aren’t damaged. If this is the case, you may need to buy a new one.
In addition, you can try connecting your external hard drive directly to your Mac instead of a hub.
3. Make sure your device is formatted properly
If you’re using your external hard drive with both Windows and Mac, it’s rather likely that it’s not formatted properly. Mac doesn’t work with the NTFS file system, so be sure to check your external drive on another system.
If it’s formatted using an NTFS file system, you’ll have to format it again, but this time use exFAT, FAT or Mac OS Extended file system. For the best compatibility with Windows, using exFAT is recommended.
4. Make sure that the external hard drive is mounted
If your external hard drive isn’t recognized, try mounting it manually. To do that, follow these steps:
Go to System Preferences > Disk Utility.
Check if the external hard drive is listed in the sidebar.
Highlight your hard drive and select Mount.
Your drive should now become available in Finder.
5. Reset NVRAM and SMC
One method that can help you is resetting NVRAM and SMC. To reset NVRAM do the following:
While your MacBook is on, press and hold the following keys:
Option, Command, P, and R.
Hold these four keys pressed for at least 20 seconds.
Your MacBook should play startup chime. Once you hear it again, release the keys.
To reset SMC do on models with the T2 chip, do the following:
Shut down your MacBook.
Press and hold left Control, left Option (Alt) and right Shift.
Hold these three buttons for 7 seconds.
While keeping three buttons pressed, press and hold the Power button as well.
Hold all four buttons pressed for 7 seconds.
Release the buttons and press the Power button to boot your MacBook.
If you don’t have T2 chip do the following:
Turn off your MacBook.
Press and hold left Shift, left Control and left Option (Alt).
While holding these keys, press and hold the Power button as well.
Keep all four keys pressed for 10 seconds.
Now release the keys and boot your MacBook.
There you go, several quick and easy solutions that should help you if your MacBook won’t connect to an external hard drive.
Microsoft released the second round of updates of the year 2020 just two weeks after Patch Tuesday.
This cumulative update is called KB4532695 is available for Windows 10 version 1903 and Windows 10 version 1909.
This cumulative update is mostly composed of fixes, the most noticeable one being the File Explorer issue that has been plaguing users for almost 4 months now.
KB4532695 affects the use of Outlook’s mailboxes
Unfortunately, this cumulative update is not without its flaws. Just a day after hitting live, users have been reporting on official forums that the cumulative update makes their Outlook mailboxes disappear from Mail:
After applying the “January 28, 2020-KB4534132 Cumulative Update for .NET Framework 3.5 and 4.8 for Windows 10 Version 1903 and Windows Server 1903 RTM and Windows 10, version 1909 and Windows Server, version 1909″ update, all four of the outlook.com mailboxes have disappeared from Mail, and only the gmail mailboxes remain. This is grossly unacceptable behavior. Running the “January 28, 2020—KB4532695 (OS Builds 18362.628 and 18363.628)” update leaves the mailboxes still missing.
Curiously enough, nothing in the KB4532695’s changelog seems to indicate any change, improvement or bugfix related to Outlook, Mail, or mailboxes in general.
What makes this issue all the more confusing is that if users within Mail‘s settings, they will see that all of the mailboxes are still registered there.
Admittedly, since the mailboxes still show up as registered, it might be simply a visual bug.
Whichever the case, Microsoft will not release any new updates until the February Patch Tuesday updates. This means that if you too encounter this issue, might as well uninstall the cumulative update.
What’s your take on Microsoft’s latest cumulative update issue? Share your thoughts in the comments section below.
Microsoft just released the second set of cumulative updates for January, and they include many new fixes, including the long-awaited fix for the File Explorer search issue.
This update fixes a problem that has been persisting for almost 4 months, which many users have been expecting to arrive with the first set of Patch Tuesday updates for the year 2020.
Another noticeable fix will thrill gamers since it fixes an issue that caused multiplayer PC games to drop the invitation to play the game in multiplayer mode
KB4532695 is available for Windows 10 version 1903 and Windows 10 version 1909. Builds increase to version 18362.628 and 18363.628 respectively.
KB4532695 Changelog
These are the key changes that come with KB4532695 :
Updates for Windows 10 version 1903
Improves the accuracy of Windows Hello face authentication
Updates an issue that changes the user-customized order of tiles in the Start menu even though the layout is locked or partially locked
Updates an issue that causes a grey box to appear when you search within Control Panel and File Explorer
Fixes an issue that causes the touch keyboard to close when you select any key
Updates an issue that, in certain cases, causes multiplayer PC games to drop the invitation to play the game in multiplayer mode
Updates an issue that sometimes causes an error when you unplug a USB type C hub flash drive
Fixes an issue that displays incorrect indicators for offline and online files
Updates for Windows 10 version 1909
Due to the nature of Windows 10 version 1909, it comes with all of the above-mentioned fixes, plus the following:
Updates an issue that prevents File Explorer’s Search Bar from pasting clipboard content using the right mouse button (right-click)
Updates an issue that prevents File Explorer’s Search Bar from receiving user input
As you may have noticed, this is just a small generic update that deals with bugfixes more than anything else.
Whichever the case, this will probably be the last set of updates that Windows 10 users will be receiving until the 11th of February, during the next round of Patch Tuesday updates.
The updates are available via all known sources, which include:
Microsoft just posted its FY20 Q2 earnings and the company, by most accounts, exceeded expectations on a myriad of fronts.
We mentioned earlier today, that the street expectations had the company posting an ESP of $1.32, but Microsoft managed to rouse a $1.51 for the quarter as well beating expected revenue gains of $35.6 billion, hauling in $36.9 billion for its Q1.
According to Microsoft’s press release for its earnings, the company “returned $7.9 billion to shareholders in the form of dividends and share repurchases in the first quarter of the fiscal year 2020, an increase of 28% compared to the first quarter of the fiscal year 2019.”
Office Commercial Products
Revenue in Productivity and Business Processes was $11.8 billion and increased 17% (up 19% in constant currency), with the following business highlights:
Office Commercial products and cloud services revenue increased 16% (up 18% in constant currency) driven by Office 365 Commercial revenue growth of 27% (up 30% in constant currency)
Office Consumer products and cloud services revenue increased 19% (up 20% in constant currency) with continued growth in Office 365 Consumer subscribers to 37.2 million
LinkedIn revenue increased 24% (up 26% in constant currency)
Dynamics products and cloud services revenue increased 12% (up 15% in constant currency) driven by Dynamics 365 revenue growth of 42% (up 45% in constant currency)
Intelligent Cloud
Revenue in Intelligent Cloud was $11.9 billion and increased 27% (up 28% in constant currency), with the following business highlights:
Server products and cloud services revenue increased 30% (up 32% in constant currency) driven by Azure revenue growth of 62% (up 64% in constant currency)
Enterprise Services revenue increased 6% (up 7% in constant currency)
More Personal Computing
Revenue in More Personal Computing was $13.2 billion and increased 2% (up 3% in constant currency), with the following business highlights:
Windows OEM revenue increased 18% (up 18% in constant currency)
Windows Commercial products and cloud services revenue increased 25% (up 27% in constant currency)
Surface revenue increased 6% (up 8% in constant currency)
Xbox content and services revenue decreased 11% (down 9% in constant currency)
Breaking down the numbers we see that of the $36.9 billion revenue total, Microsoft’s Windows division was able to contribute a bit more significantly this quarter than in prior, thanks to a strong PC market and its self-imposed end-of-life cycle for Windows 7.
The numbers coming out of the Surface division were also very strong and are cresting at a $2 billion business, marking an almost first for the flagship hardware line.
As expected, Microsoft’s Xbox gaming business slumped for the quarter with no new exclusives or accessories to drive console purchases.
The market for additional Game Pass subscriptions is meeting saturation levels. However, Microsoft credits the game Fortnite with its lackluster performance in the three month period.
The famed battle royale shooter performed exceptionally well the prior year and artificially raised Microsoft’s content and services numbers due to the amount of loot purchased through its marketplace for the game.
On the whole, Microsoft had one of its best quarters to date and the company is poised to make similar gains in the coming ones.
It’ll be interesting to see how Microsoft’s 2020 investments in xCloud, the untested market of dual-screen hardware in the Neo and Duo, as well as its cloud initiatives such as partnerships with Salesforce and the Department of Defense, effect its YoY.
We understand that sometimes you are encountering issues with Windows Live Mail. That’s a pretty neat email client, but it is not without its faults – one of them is precisely the fact that messages are prone to stay longer than you’d want them to.
Long story short, you can’t delete messages from Deleted, Sent, Junk or any other folder. You can’t delete a single email message, nor a group of highlighted messages. You simply can’t delete anything.
Here are a few easy steps that you can perform to fix this glitch.
What can I do if Windows Live Mail is not deleting messages?
1. Confirm and delete superfluous folders
In case of having more than one email account in Windows Live Mail, first, sign in to each account. Then, expand all your folders in the folder pane.
In case of also seeing superfluous folders called Sent items, Junk email or Deleted items in addition to the regular ones called Sent, Junk and Deleted, things are about to get a lot easier for you.
Remember that you need to be signed on to Windows Live Mail with IMAP and simply delete those extra files. Everything should start working normally again.
Click Control Panel. You’ll find this option on the right side of the Start window.
From the Category view, select the Uninstall a program option.
Locate the Windows Live Essentialsprogram. It is normally placed in the list of programs, in the middle of this window.
The Uninstall or repair Windows Essentials programs pop-up will give you two choices. Select Repair all Windows essentials programs this time.
Wait for the procedure to end, then restart your computer for the changes to take place.
If you are still getting this error, then don’t hesitate to use the Repair utility for Windows Live Mail. Follow the instructions above to the letter if using a Windows 10 PC.
In the Windows Search bar, type Control and open Control Panel.
Click Uninstall a program found below the Programs icon.
Up next, locate Windows Essentials.
Click Windows Live Essentials. Doing so will select it.
Click Uninstall/Change.
This will invoke a pop-up window.
Click Remove one or more Windows Live programs.
Then, click the Mail checkbox.
Click Uninstall and it will begin removing the Windows Live Mail program from your computer.
Don’t forget the important part of reinstalling it.
If you need additional info on how to uninstall programs and apps in Windows 10, take a look at this detailed guide.
The messages error you are dealing with can also be fixed by completely uninstalling Windows Live Mail, then installing it back.
Some users have reported success by also removing and then reinstalling all their email accounts one by one. What about you? Share your experience with tackling this issue in the comments section below.
Some HP printer users have posted on the HP forum about a 0xb39ff018 error. When that error arises, the printer stops printing and a 0xb39ff018 error code pops up. There isn’t an error message alongside the code to provide any clues for potential resolutions.
Despite that, here are a few solutions for fixing HP printer error 0xb39ff018.
How can I fix HP printer error 0xb39ff018?
1. Run the Printer troubleshooter
The Printer troubleshooter might come in handy for fixing the 0xb39ff018 error. To open that troubleshooter in Windows 10, click the Type here to search button.
Enter troubleshoot in the search utility.
Click Troubleshoot settings to open the window shown directly below.
Click Printer and its Run the troubleshooter button.
Then select the printer error 0xb39ff018 arises for.
Click the Next button to go through the troubleshooter.
If the Troubleshooter stops before completing the process, fix it with the help of this complete guide.
2. Remove ink cartridges and reset printer
Removing the cartridges and resetting the printer might resolve error 0xb39ff018 as the issue can be due to cartridges. Remove the cartridges from your HP printer.
Remove the USB power cable from the printer (with the printer turned on).
Then unplug the USB power cable.
After a few minutes, plug the USB cable back into printer and wall outlet
Turn your HP printer back on.
Open the ink cartridge access door to reinsert your ink cartridges.
Then close the access door for ink cartridges.
If any alignment page or print calibration prompt appears, do as instructed.
3. Check out HP Print and Scan Doctor
The HP Print and Scan Doctor can also be an invaluable troubleshooting tool for HP printer error codes.
Click HPPSdr to open the installer for HP Print and Scan Doctor.
Make sure your HP printer is on. Then open the HP Print and Scan Doctor window.
Click the Start button on the HP Print and Scan Doctor window.
Select the printer that you need to fix error 0xb39ff018 for.
Press the Next button.
Click the Fix Printing button.
Thereafter, go through any troubleshooting guidelines for issues detected.
There aren’t many confirmed fixes for error 0xb39ff018. However, the resolutions above are worth a shot. If the error persists, consider returning the printer to HP for repairs, which will be a freely available service if the printer is still within its warranty period.
If you have any other questions or suggestions, leave them in the comments section below and we’ll be sure to check them out.
Windows Live Mail was one of the most widely used desktop email clients, but some users have forgotten about it. The ones that haven’t are struggling, more often than not, with different errors and bugs. One of the most common issues is that Live Mail isn’t displaying properly.
The error could be encountered in various forms. Windows Live Mail sometimes shows that you have new emails and clicking on any of them should normally reveal the message in the preview window. Instead, it shows nothing.
Other users describe how the Windows Live Mail message body is not showing any text either. Does any of these ring any bells?
After rigorous investigations, we managed to identify a collection of methods that have helped Windows Live Mail users in a similar situation to solve this particular problem. Let’s take a closer look.
What can I do when Live Mail is not displaying properly?
1. Empty the temporary files folder
One really easy way to make Windows Live Mail display properly again is to empty the temporary files folder. These files are stored in what’s called the Windows Temp folder.
As a general rule, try finding it at %userprofile%AppDataLocalTemp. Delete all files in it via the Delete button from the Home menu, then restart Windows Live Mail.
2. Switch antivirus protection to Off in Windows Security
Your error could also be caused by the antivirus program installed on the system. Therefore, disabling it might help you isolate the issue. Follow this path Start > Settings > Update & Security > Windows Security > Virus & threat protection > Manage settings.
Switch Real-time protection to Off. Scheduled scans will continue to run and don’t worry. It’s only a temporary action.
If you’re having trouble opening the Setting app, take a look atthis article to solve the issue.
3. Make changes into Program Directory to fix Live Mail display anomalies
If the middle window has a bunch of strange sideways markings which go along the bottom of the very same window, then you could try this instead.
Copy d3d10level9.dll from Windows 10 Version 1709 into the Program Directory of Windows Live Mail on your current Windows 10 version. Follow this path C:Program FilesWindows LiveMail to get there.
4. Enable HTML content when Windows Live Mail is not displaying images
When emails that contain images or photographs only show text and no images, you’re advised to open Windows Live Mail. Then, follow this path Options > Safety Options > Security.
Under the Download Images heading, untick the checkbox next to Block images and other external content in HTML email. Don’t do anything about the checkmark from the box below Show images and external content sent from email addresses in my safe sender’s list.
You could also go to Tools > Options> Read to make sure Read all messages in plain text are not checked either.
Your last resort is to Uninstall and reinstall Windows Live Mail. For that, find your way into Control Panel > Programs and Features > right-click on Windows Live Mail. Select Uninstall > Remove one or more Windows Live programs.
Once it is uninstalled, now install the same. Then, restart the computer and check if Windows Live Mail is displaying properly again.
After following all the steps described in this guide, your Windows Live Mail should start working as expected again.
Don’t forget to leave any other questions or suggestions that you may have in the comments section below.
Ever since the European Union passed the General Data Protection Regulation, or GDPR for short, Microsoft has not only worked to improve data transparency for itself, but is also helping its business customers to better comply with data privacy laws. Among those was the company’s Compliance Score tool, which allows Microsoft 365 customers to see and overview of their overall compliance to privacy laws and helps them to determine which actions to take to help them comply.
Microsoft has just announced new assessment options to help keep users up to date on the various privacy laws, including the new California Consumer Privacy Act (CCPA) as well as Brazil’s upcoming Lei Geral de Proteção de Datos (LGPD) in August. The company has also added other assessment options including those from the International Organization for Standardization to help businesses maintain a Privacy Information Management System (PIMS), as well as those from the American Institute of Certified Public Accountants (AICPA) to help users follow standards to safeguard their confidential data with SOC 1 Type 2 and SOC 2 Type 2.
Microsoft has also extended the public preview of its Compliance Score to all business users on Microsoft 365 and Office 365, and those just getting started can check out its technical documentation to help them get started.
What do you think of these new assessment options in the Compliance Score tool? Feel free to leave your comments below.
Just barely over two weeks ago, Microsoft discontinued support for the Windows 7 operating system. For those still using devices running the ten-year-old operating system (time flies, doesn’t it?), this means Microsoft will no longer provide security updates, critical patches to vulnerabilities, or fixes for potential bugs.
For some businesses, this isn’t as much of a problem. That’s because the company is offering Extended Security Updates for enterprises that can’t feasibly upgrade their large-scale computer networks to a newer operating system without critical risks. Consumers and some smaller-sized businesses, on the other hand, will need to fend for themselves.
Luckily, many anti-malware companies have committed to providing continued support for customers still running Windows 7 (via ZDNet). Companies such as BitDefender, NortonLifeLock, and many other have committed to providing updates for the next two years at the very least, according to German antivirus testing lab AV-TEST. Even McAfee will continue providing support until at least December 2021.
The continued support from anti-malware companies is important given Windows 7’s continued strong marketshare, which still greatly surpasses that of the still-supported Windows 8.1 operating system according to StatCounter.
Of course, even with continued anti-malware support from big-name companies, that still doesn’t make the older machines nearly as secure if they were running a newer version of desktop OS, such as Windows 10. Those vulnerabilities will remain there going forward, and new exploits are discovered all the time. That’s why Microsoft still advices users to switch to a newer OS with more modern features and continued security patches.
Still, for those who find that upgrading is much easier said than done, using anti-malware applications is still far better than leaving a machine completely exposed.
Stuck with patchy public internet, or no Wi-Fi at all? If your mobile plan supports tethering, there’s no reason why you can’t still work while on the go. In this guide, we’ll show you how to connect your PC to your phone, giving you 4G/5G internet on a Windows 10 device without its own SIM. If instead, you need to share your PC’s internet connection with other devices by using it as a mobile hotspot, check out this guide.
The steps you’ll need to follow depend on which phone platform you use. We’ll cover iOS in the section immediately below. If you use Android, skip down the page to find the relevant steps.
Enabling tethering on iOS
On iPhone, open the Settings app and tap “Personal Hotspot” to start configuring your Wi-Fi access point. Tap the “Personal Hotspot” toggle button to turn on your hotspot.
You can change your hotspot’s password by tapping the “Wi-Fi Password” field. iOS defaults to using a strong password so you won’t necessarily need to change this. Tap the blue “Save” button at the top of the password settings screen to save your changes.
Enabling tethering on Android
On an Android device, open the Settings app and head to the “Network & internet” category. The screens you see may look slightly different depending on your Android version and device manufacturer. If you don’t see the same screens at all, you should refer to your manufacturer’s documentation.
From the “Network & internet” page, tap the “Hotspot & tethering” button to view the mobile hotspot settings. Next, press the “Wi-Fi hotspot” button to customise the hotspot’s settings.
Tap the toggle button at the top of the page to turn your hotspot on. Use the settings on the page to rename your Wi-Fi hotspot (its SSID) or change the password.
Connecting to your hotspot
Now you’re ready to switch back to your Windows 10 PC. Make sure your Wi-Fi is turned on (you can check by opening Action Centre with Win+A and looking for the “Wi-Fi” settings tile).
Next, open the Wi-Fi networks list by clicking the Wi-Fi icon in the system tray. After a few moments, you should see your phone’s hotspot appear in the list. Android devices will appear as the name you set on the hotspot settings page; iOS devices show up as their device name.
Tap the Wi-Fi hotspot to connect to it like any other. You’ll need to supply the password you set on your phone. You should now be able to browse the web on your PC, using your phone’s 4G. Just remember to stay within your data plan and turn your hotspot off (on your phone) once you’re done browsing.
Seems Google is tooling around with its communications paradigm and looking to consolidate various online properties with a unifying messaging app or service.
The Information is reporting that Google is already in production with an internal beta app that’s serving as a sort of mesh service that enables its enterprise users the ability to surface functions and data from some of its stand-alone services such as Google Drive, Gmail, Google Calendar, and Google Hangouts.
The details of the app are sparse for the moment, but it seems there is already a dedicated mobile app in use, however, a web-based component has yet to surface.
From the sounds of it, Google is looking to wedge itself in between Microsoft and Slack in an ongoing enterprise messaging showdown with its new makeshift offering. The Information reports a similar assessment that concludes, “the move could help it compete more effectively with application suites from Microsoft and others, according to two people who have used the application and three people briefed about it.”
While there is little known about Google’s new messaging application, the company has telegraphed some of its intentions towards a move such as this, dating as far back as January of 2019.
In late 2019, it was rumored that Google might have been considering a purchase of Salesforce to boosts its position among Cloud service providers in a coordinated effort to more thoroughly compete in the enterprise space. However, Google’s new messaging efforts could put a wrinkle in the theorized acquisition talks as Salesforce recently partnered with Microsoft on the use of Slack in certain parts of its marketing cloud already.
Even if Google manages to not bungle this app as it has with its other previous messaging services the company is still light on integrated workplace tools as well as support for 3rd party data integration and a more robust productivity suite when compared to competitors Microsoft or Slack.
If you have any type of AMD Radeon hardware, and you use Microsoft Windows 10, you’ll now be glad that AMD Radeon Software is now available through the Microsoft Store.
This doesn’t mean that the software is no longer available through AMD’s website. Instead, the goal was to make the program far more accessible.
What does the AMD Radeon Software do?
The Microsoft Store version of the AMD Radeon Software is in no way any different from the version you could download from AMD’s website.
As such, it can be used to fine-tune your GPU settings and to perform driver updates. This comes as a welcome surprise, especially since the app support a wide variety of AMD PC GPUs.
These include the RX 5700, which was one of the company’s first GPUs based on the 7nm Navi architecture. If you are the proud owner of a Surface Laptop 3, then you should know that it is also powered by an AMD chip.
Having the AMD Radeon Software while using an AMD GPU means that you can now adjust the video settings of your games just the way you want them to.
How do I get the AMD Radeon Software?
As mentioned above, the AMD Radeon Software is now also available in the Microsoft Store. This means that it can be installed just like any other Microsoft Store app.
All you need to do is visit the Microsoft Store website and press the Get button. Afterward, all you have to do is access it from the Start menu, and use it as you please.
We live in a time when there is always something to do, meetings to plan, and people to meet. That is why having some sort of calendar or assistant is necessary, even for the most mundane tasks.
One good program to start off with is Microsoft Outlook, one of the world’s most popular personal information managers.
Of course, many users may know it for its ability to act as an email client. However, its toolset shows that it is mainly there to help you organize better.
The problem is that organizing means order, and some users are having issues with how Outlook orders things.
It seems that for some users, whenever they create a new folder in Outlook, it will not be arranged in alphabetical order among the others. Instead, it will be simply added at the bottom of the list.
Before Outlook.com was upgraded earlier this year to allow special characters in the names of custom folders, all such folders were automatically sorted alphabetically in the Folders pane. now, however, whenever I create a new customer folder, regardless of which other folder I create it in, it is simply added – and permanently remains – below all the other (already existing) folders where it is created.
While this bug does not break folder functionality, it can be a bit bothersome.
Whichever the case, we’ve created this step-by-step article that will show you how to get your Outlook folders arranged alphabetically again.
How do I arrange Outlook folders alphabetically again?
1. The desktop client
Launch Microsoft Outlook
Go to the Folder tab
Click on Show All folders A-Z to turn this on
This will lock your folders in alphabetical order
If you prefer to arrange them in a certain order, do the following:
If you are experiencing this issue on the Outlook web client that you access via a browser, simply log out and log back in again. Your folders should now be arranged alphabetically by default.
By following these steps, your folders on both the desktop and web client version of Outlook should now be arranged alphabetically.
If you’re looking to edit images or create digital art from scratch, then Adobe’s family of products may be among the first things that may come to mind. One of the components of this software family is Adobe Lightroom and millions of subscribers use it around the world.
Unfortunately, Adobe Lightroom is still software and, as we all know, software can still be prone to bugs and issues.
One good example is an issue users have been reporting on official forums, where newly-created files and folders don’t appear in Lightroom CC.
Clean install of L CC onto win 10 PC. Not all the folders in my files show up in the folders area on the left hand side. If I try to import them LR says they have been imported. Result is that I can’t work on many of my images in LR CC. Any suggestions?
Since the program cannot show users newly-created or imported files and folders, it limits much of the functionality. That is why we’ve created this step-by-step guide that will show you precisely what you need to do to see the folders again.
How can I make new folders appear in Lightroom CC again?
1. Turn off filters
Launch Lightroom CC
Look on the left hand side of the Library Module under Catalog
Click on All Photographs
Turn off filters
Press Ctrl–L once or twice
Select Photo
Go to Stacking
Select Expand All Stacks
Search for one of the missing folder’s name using the Lightroom Filter Bar
Lightroom has a history of having issues moving files. That is why the best thing to do is to move files outside of Lightroom, using the traditional Copy and Paste combination.
Additionally, whether the newly created folders are on a removable hard drive or not. If they are, make sure the external hard drive is properly connected to the PC.
3. Make sure the folders are accessible
Folders that don’t have read and write permissions granted to them will not appear in Lightroom. You can change this by right-clicking the folder and disabling the box labeled Read-only.
Additionally, make sure that the folders are not hidden since these too are inaccessible by Lightroom.
By following the above-mentioned steps, you should be able to view any folder in Lightroom CC, regardless of whether it is new, old, native or imported.
If you’re aware of another way to solve this problem, share it in the comments section below so that other users can try it, as well.
Microsoft’s Outlook is probably one of the world’s most popular personal information managers. It features calendars, event organizers and more. However, most users probably know it as a great email client.
Whichever the case, Outlook is a program that can be found on almost any computer running the Windows OS. However, it is still a piece of software and, as we all know, the software can have bugs.
One perfect example is a bug that users are reporting on official forums, where new folders are not showing up in the Outlook desktop client.
I created a folder three days ago (work email) but it did not appear on the desktop. It did appear on the online outlook.office365, however this is not convenient to work from. I’ve previously solved a similar issue by turning off cached mode (when it is on about 1/3 folders disappear), but this has happened in spite of this.
Since this problem is one that hinders the functionality of Outlook, we’ve decided to create a step-by-step guide that will show you what you need to do to fix this problem.
How do I make new folders to appear in Outlook?
1. Use Exchange Cache Mode
Launch Outlook
Go to File
Go to Account Settings
Navigate to the E-mail tab
Select your Exchange account and click on Change
Go to the Exchange Server Settings window
Check Use Cached Exchange Mode
Click onNext
You should be back at the Email Accounts window
Click on Finish
Restart Outlook
Press Ctrl + 6 and see if the newly created folders do appear
2. Update Outlook
Launch Outlook
Go to File
Go to Office Account
Select Office Updates
Select Update Now
Wait for the updates to finish, and restart Outlook
How do I make new shared mailbox folders visible in Outlook?
This issue applies to folders shared via Outlook folder permissions. Thus, simply make sure you have been granted Full Access permissions to the mailbox on the Exchange server and you will not experience the issue mentioned above.
By following these steps you should be able to see new folders on your Outlook desktop clients, be it your own or ones that are on shared mailbox folders.
If you’re aware of another way to solve this Outlook problem, share it in the comments section below so that other users can try it, as well.
Being able to print documents is important, but many MacBook users reported that their MacBooks are not connecting to their printers. This can be an issue, and in today’s article, we’ll show you how to fix it.
What to do if MacBook isn’t connecting to a printer
1. Remove the printer and install it again
One way to fix the problem with Epson printers and MacBook is to simply reinstall the printer. To do that, follow these steps:
Go to System Preferences > Printer.
Now delete the Epson printer and other printers from the list.
Connect your Epson printer to your MacBook using a USB cable.
Now add the printer from the Printer section in System Preferences.
Keep the printer connected via USB and set up the printer’s Wi-Fi.
Disconnect the printer and restart your MacBook.
After doing that, it should connect and start working again.
2. Add the printer in both wireless and wired mode
According to users, they fixed the problem by adding their printer twice, once in wired and once in wireless mode. For wireless mode to work, be sure to use the IP address that is printed on your printer in order to configure it properly.
3. Use reset the printing option
One way to fix this issue is to reset the printing system. This is fairly simple and you can do it by following these steps:
Open the Apple menu and choose System Preferences.
Click on Printers & Scanners.
Right-click anywhere in the Printers window and choose Reset printing system
Click on Reset or OK.
The printing system will now reset.
Turn off the printer, wait for 10 seconds and turn it back on.
Now go back to the Printers window and add the printer again.
4. Check your cables and network connection
If MacBook is not connecting to a printer, it’s advised to check your cables and ensure that your printer is properly connected. If you’re using a wireless printer, try restarting your wireless router and check if that helps.
MacBook Pro not connecting to Epson printer
If you’re having issues with your Epson printer, the solutions above should be able to help you with them as well.
There you go, several quick and easy solutions that should help you if your printer is not connecting to MacBook.
Windows Server provides quite a reliable platform for hosting programs or sites. But that does not mean it does not encounter errors, with the one that has been reported by many being the Server not operational message.
Of course, that’s not a pretty sight to be faced by any server operator. Nevertheless, it is also quite easy to set things right here. So, dig right in for the solution to the server, not the operational in the active directory issue.
How can I fix the server is not operational error?
1. Setting the right IP configuration
Check the IP configuration to ensure the gateway is configured to serve as the DNS server on the Domain Controller.
You are also recommended to change the IP configuration to either 168.1.33 or 127.0.0.1.
2. Turn off the guest account in the trusted domain
Click on Start, then Programs.
Select Administrative Tools, followed by Active Directory Users and Computers.
In the console tree, right-click on the Users.
Right-click on Guest in the details pane.
Select Disable Account.
3. Create a similar trusting domain user account in the trusted domain
Click on Start, then Programs.
Select Administrative Tools, followed by Active Directory Users and Computers.
In the console tree, right-click on the Users.
Point to New and select User.
Type details of the user already present in the trusting domain and then select Next.
Type in the existing user account password and then select Next.
Click on Finish.
Check if this solves the issue.
4. Resolving configuration error
Join the server to the domain, followed by configuring the server to be a domain controller.
This makes the Active Directory Domain Services (AD DS) Wizard in Server Manager use Kerberos authentication and not NTLM authentication for browsing the AD DS forest.
The above steps should be all you need to do to get rid of the encountered error contacting the domain the server is not operational error.
The performance of a drive while plugged into a router is guaranteed nowadays. It makes no sense to keep on checking the Linksys SmartWiFi settings. All it says is: There is no drive in the external port.
Additionally, this seems to be the case no matter how many times you try to refresh the setting.
If your Linksys router does not recognize the external hard drive, also known as a portable hard drive, there’s no better time than the present to take advantage of the solutions here presented.
Refer to the below lines instead to have a quick glance at potential fixes.
Steps to fix Linksys router doesn’t recognize the external drive
1. Do an upgrade to the router’s firmware
At one point, all routers reach what the manufacturer considers their end-of-life phase. Those models are downgraded to either having only critical security updates or they simply stop being upgraded at all.
Is that your router’s case? Assuming that it isn’t, upgrade it right away.
When the upgrade is finished, you can proceed with the reset procedure. This is one of the most common troubleshooting operations, but don’t forget to do it with the drive connected to the router this time.
To reset your Linksys device, locate the Reset button first. Its exact location will vary between devices, yet it is usually found on the back of the router.
Press and hold the Reset button for 10 seconds. This will initiate the factory reset on your Linksys router. The flashing Power LED means the reset is working.
If you don’t see it, press and hold down the Reset button for about 30 seconds while the router is powered on. Then, unplug the power cable from the router while still keeping the Reset button pressed for another 30 seconds.
Reconnect the power cable to the router and hold the same button pressed for another round of 30 seconds. Lastly, you can let go of the Reset button.
3. Connect the external hard drive to a computer
The hard drive can be connected to the outside of a computer through a USB connection that is often used to serve as a portable storage solution. Just test that it works to make sure it is not the culprit of this situation.
If you know of any other workaround to make an external hard drive work with the Linksys router, share it in the section below so that other users can try it as well. Also, don’t forget to leave there any other questions or suggestions that you may have.
Those who utilize the Microsoft SQL Server database management system (typically within Windows Server) might sometimes need to change sa user passwords. Users can do that with the SQL Server Management Studio.
However, a Cannot alter the login `sa` error might arise when users try to change a sa password. As a result, users can’t change the passwords when that issue arises.
How can I fix the Cannot alter the login ‘sa’ error?
1. Log in as administrator
Users usually can’t change the sa password because they don’t have sufficient admin permissions to do so. First, you’ll need to log out of Windows.
Then log back into Windows with an admin account added to SQL Server.
Launch the Microsoft SQL Server Management Studio software.
Select Windows Authentication on the Authentication drop-down menu.
Press the Connect button.
Click Security > Logins > sa on the left of the Server Management Studio window.
Click Status on the Login Properties – sa window.
Deselect the Login is locked out checkbox if selected.
Then click the General tab on the window to reset the password.
2. Modify the password with OSQL
If you still can’t change a sa password, try changing the password with the OSQL SQL server tool. First, log in to your Windows virtual private server.
Open the SQL Server Configuration Manager, which will usually be on the Start menu. However, you can also open it from its default WindowsSysWOW64 folder.
Select SQL Server Services on the left of the window.
Right-click SQL Server to select its Properties option.
Select the Startup Parameters tab on the SQL Server window that opens.
Then enter the following in startup parameter text box: -m;.
Press the Add button, and select the OK option.
A dialog box will then open. Click OK on that dialog box.
Click OK on the SQL Server Properties window.
Next, right-click SQL Server to select the Restart option.
Enter ‘cmd’ in Run’s text box, and press the Ctrl + Shift + Enter hotkey.
Then enter the query below in the Command Prompt. Replace the <SQL SERVER INSTANCE> with your SQL server name and <password> with your own password:
osql -E -S .<SQL SERVER INSTANCE>
exec sp_password @new='<password>’, @loginame=’sa’
go
alter login sa enable
go
exit
Return to the SQL Server Configuration Manager window.
Right-click SQL Server to select Properties again.
Select –m; in the Existing parameters box on the Startup parameters tab.
Press the Remove button.
Click the Apply option, and press the OK button on the dialog box.
Click OK to exit the properties window.
Thereafter, you’ll need to restart the SQL server again. Right-click SQL Server on the Server Configuration Manager window to select Restart.
Log in to SQL Server Management Studio with the new password you entered within the OSQL Command Prompt query.
Those are two ways you can fix the Cannot alter the login ‘sa’ error. First, try changing password with the Microsoft SQL Server Management Studio (as admin) and then OSQL.
If you have any other questions or suggestions, leave them in the comments section below and we’ll surely check them out.
One of the best and most accessible email clients that ever existed was offered as freeware by Microsoft, and it was called Windows Live Mail. While its glory days are well gone, some still prefer the simplicity and the features of Live Mail.
Unfortunately, some users have reported that they are receiving a pop-up window which states that:
Windows Live Mail could not be started. Closing Windows Live Mail
Your calendar contains corrupt data that is forcing Windows Live Mail to close. (0x8E5E0247).
What can I do if Windows Live Mail could not be started?
1. Remove the entire Windows Live Mail
On Windows Explorer navigate to: <User name>AppDataLocalMicrosoft
Remove Windows Live Mail
After applying these steps, start Windows Live Mail and re-enter all your email settings. As a precaution, you could make a copy of the original Windows Live Mail.
You could also try to perform a system restore for the day before. Plenty of users confirmed that this solved their problem.
The popup error will most likely not appear anymore for you either. If it does, just move to the next solution.
If System Restore isn’t working, don’t panic. Check this useful guide and set things right once again.
4. Choose Repair instead of Uninstall
Trying to uninstall seems to have cleared up the issue for many Windows Live Mail users, but others are still encountering it. Don’t go all the way this time, but choose Repair when presented the options to Uninstall or Repair.
Now, just rename the folder of the account you sign in to Windows Live Mail
Restart your computer for all these changes to take effect
Lastly, launch Windows Live Mail again
You may try to give a different name to your account’s folder used to sign in to Windows Live Mail. Further syncing your calendar does the trick, so just apply the above steps.
If all else failed, cloning the hard drive to get a bigger and faster one also does wonders.
Do you want more information regarding any of the previously mentioned solutions? Let us know in the comments section below.
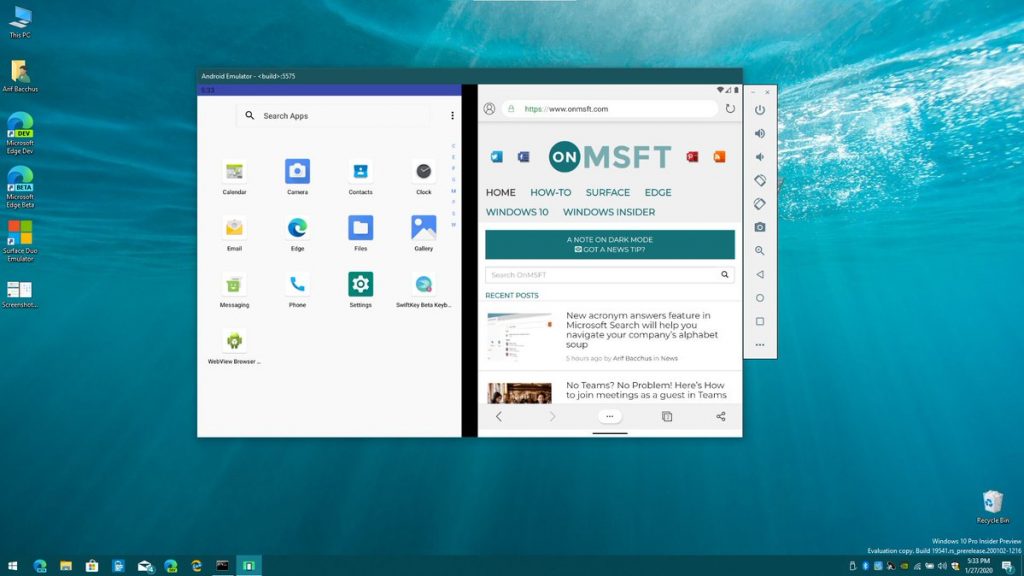
Microsoft’s dual-screen smartphone, the Surface Duo, won’t be coming out for at least another 11 months, but if you’re excited about it, you can simulate the Surface Duo experience right on your own PC. This can be accomplished with the Surface Duo SDK recently released by Microsoft (and now for Mac).
This SDK is meant for developers to code and demo their apps on a simulated Surface Duo, but anyone with a good knowledge of Windows is free to try it on their own as well — regardless if they’re a developer or not.
In this guide, we’ll show you how you can try out the Surface Duo SDK and get a Surface Duo emulator on your Windows 10 PC to get a taste of that dual-screen Microsoft Android experience. But, be warned, this is a very technical process.
Some Prerequisites
Before getting started, there are some prerequisites you need to take note of. You’ll need to download a few developer programs to your Windows 10 PC, and you need to make sure that a few settings options are enabled.
Also, before installing, you’ll need roughly 15-20GB of free space on your PC, just to be safe. Additionally, please be aware that the Surface Duo emulator is very buggy, and doesn’t support the Google Play Store, so your experience will be very limited to the few stock apps, and trying out the user interface. Here’s a checklist for you.
Make sure that Hyper V, Hyper V Management Tools, Hyper V Platform, Virtual Machine Platform, and Windows Hypervisor Platform are checked under Turned Windows Features on or off section. You can find this by searching for Turn Windows Features on or off from the Start Menu.
Make sure your PC has 4GB of RAM at the least, though 8GB is recommended.
Make sure that hardware virtualization is enabled in your system BIOS.
Install the latest version of Android Studio, available from Google here. You’ll also need to use the SDK manager in Android Studio to make sure all of the Android emulation tools are installed.
Download install Visual Studio Community 2019 and make sure that all the Android developers tools are installed.
If you’ve already enabled the Windows Features above, and have support for Hardware Virtualization on your PC, you’re set to go. You can head to Google’s website an download Android Studio. It’s a 719MB file, so you’ll need to be patient. Once done, double click to run it, and be patient while it installs. You’ll need around 2.3GB of free space on your PC for the files as things are extracted during install. This step is very important, as Android Studio has the underlying Android files for the Surface Duo emulator. If you skip this step the emulator will NOT work.
After install, you’ll be prompted to import Android Studio Settings. Skip this, and choose to Do not Import Settings. You can then choose Standard and continue on. You’ll get to pick a theme, and then you’ll see a list of SDK components. Keep clicking the blue Next button, and then Finish. You’ll have to wait while the required SDK tools install. It’ll be roughly 500MB extra worths of files that need to be download and installed. Once done, click Finish.
Once that is done, you’ll be able to open Android Studio. Click Start a new Android Studio Project. Pick Add no Activity. Once the project loads, head up to the File menu and choose Settings. You’ll then want to click System Settings in the side bar and click Android SDK. Make sure Android 10 is checked on the list and that it says Installed. And check to see that Intel x86 Emulator Accelerator is installed under SDK Tools. You’ll also want to make sure that everything is enabled under SDK Update Sites. If not, click the respected boxes and click OK to install. Once verified, you can close Android Studio.
Step 2: Install Visual Studio 2019
Now that you’ve installed Android Studio, the second step is to install Visual Studio 2019. This is yet another free download if you choose the Community 2019 edition from the download page. Once the .exe is downloaded, double click to launch it. The Installer will then fetch files, it’s roughly a 71MB initial download.
When that initial download completes, the installer will launch Visual Studio 2019. Scroll down the list of Workloads and choose Mobile Development with .NET. You’ll then want to choose Install while downloading and then click the Install button. This will be a 7.26 GB download, and install will take roughly 10 or so minutes. Be patient.
Once everything is installed, you’ll get a prompt to sign in. Click Not now, maybe later. You can then choose your theme and click Start Visual Studio. Another window will then pop-up, and click Continue without code. This will open Visual Studio.
To continue, you’ll again want to make sure that all the relevant Android SDK tools are installed on your PC. You can do this by clicking the Tools menu, choose Android and then choose Android SDK Manager. Once selected, check to see that Android 9 or Android 10 are installed. If not, click the box, and Apply Changes to have VIsual Studio install it. You’ll also want to click on the Tools menu and expand the boxes for Android SDK Tools, Android SDK Build Tools, and Android Emulator.
Make sure you see that it says Installed under each of these. If not, you’ll want to click the box to have Visual Studio download and install. When finished, click Apply Changes. You can then close Visual Studio.
Step 3: Download the Surface Duo SDK
Now that you’ve got Android Studio, and Visual Studio 2019 installed, you’re free to install the Surface Duo SDK. This is the easiest step of them all. All you need to do is download the file from Microsoft’s website here. It’s roughly a 620MB download, so be patient.
Once downloaded, extract the ZIP to your PC somewhere, preferably in your documents folder. Once extracted, head to where the file was extracted to if you weren’t already taken there. You’ll notice a file with the Microsoft Logo labeled SurfaceDuoEmulator_2020.117.2. Click it, to run the installer. You’ll need an additional 3.6GB of free space for the emulator to install.
Once finished, a shortcut to Surface Duo Emulator will be installed on your PC. You’re now free to explore a simulated Surface Duo!
Have fun with the emulator!
Once you launch the Surface Duo Emulator, it will need some time to load. Depending on your PC’s hardware, it might take a few minutes. There’s not too much to the emulator at the moment, though, as it’s mainly meant for developers.
You can preview the Surface Duo dual-screen UI and open some of the stock apps like mail, weather, and Edge. You also can stack apps side by side, or hold an app to the middle to have it open up like a book on the large screen. Edge works fine and will allow you to open webpages. It’s a pretty cool experience if you’re using it on a Surface or touch screen PC. So be sure to check it out, and let us know your thoughts in the comments below!
When Microsoft initially made the plans to replace its EdgeHTML rendering engine with Chromium in the built-in browser for Windows 10, it also explained that it will also make contributions to the Chromium project. In other words, any changes made to the engine that now powers the new Edge could make its way to both browsers.
Well, it seems Microsoft isn’t only focused in improving the Chromium engine, as one of the developers has committed to bringing one of Edge’s most useful features over to Chrome and its open-source variant, Chromium. As anyone who juggles multiple browser windows at any given time may already know, both browsers allow a tab to be moved from to new windows or merged with others by it dragging out of the present window.
But Edge makes it easier by not just allowing the user to right-click any tab or multiple tabs and choosing a new window, but also allowing them to be moved into an existing one, as well. In an exchange between a Microsoft and a Google engineer on the Chromium bugs tracker, Google’s Leonard Gray asks Microsoft’s Justin Gallagher:
If you’re still interested in upstreaming this from Edge, we’d be happy to take it ?
To which Gallagher responded:
Sounds great! I’ll take ownership of this issue then.
Only weeks after the exchange, a commit was created by Gallagher and passed to the Chromium Gerrit. It’s especially interesting, given the bittersweet relationship between the two companies in the past, that developers from both sides are now working together to bring new features to both competing web browsers.
Microsoft’s “move tab to window” feature was one of the exclusive features of the classic Edge, and has since made its way to the new Chromium-powered version. Thanks to Microsoft, those who don’t see themselves ever leaving Google’s popular browser will also get the feature soon, as well.
Do you think Microsoft’s Edge has the potential to some day overtake Google Chrome? Share your thoughts below.
With most players having unlocked the majority of Fortnite’s Chapter 2 Season 1 content, many have been wondering when this current season will finally end and the next season will begin.
Epic Games has finally released some information on future content and it seems like Season 2 of Chapter 2 will need to wait for a rather significant update to go live in early-February which will transition the game to the Unreal Engine’s Chaos physics system.
The Unreal Engine update will bring the popular video game to Version 11.50 and Chapter 2 Season 2 content is expected to go live on February 20th.
No concreate info on Season 2 content has been announced but an official blog entry does tease that it “will feature — with multiple –.”
To keep players engaged until then, additional Overtime Challenges will be added and a new two-week event will also be held.
Are you excited for Fortnite Chapter 2 Season 2? What would you like to see in it or the new two-week event? Share your thoughts with the community in the comments below and then follow us on Pinterest and Facebook for more video game content.
Microsoft will provide a free Windows 7 software patch to solve a problem in the KB4534310 update it issued on January 14, 2020, the day it ended non-premium support for the operating system. The fix will be available to Windows 7 users, including those that haven’t signed up for paid extended security updates (ESU).
The bug may cause a wallpaper to appear black in the “Stretch” configuration. It doesn’t seem to have OS security implications, though, as it only affects desktop personalization.
The software giant has every reason to want to deliver a solution very soon, considering that some Windows 7 users are actually paying for such updates. The German government will be paying about €800,000 for ESUs this year alone. Likewise, many organizations and governments around the world are still counting on premium ESUs to keep their Windows 7 PCs secure.
While a fix isn’t available yet, Microsoft has said it will provide it in an upcoming release.
We are working on a resolution and will provide an update in an upcoming release, which will be released to all customers running Windows 7 and Windows Server 2008 R2 SP1.
It appears that setting the desktop wallpaper to options other than “Stretch” doesn’t cause any problems. So, before an update becomes available, Windows 7 users may have to make do with the fit, fill, tile, and center wallpaper settings.
The issue is also affecting custom wallpapers that don’t match the PC’s screen resolution.
Windows updates not always perfect
Windows updates, including security patches, don’t always work out as expected. For example, errors in the recently released Windows 10 Cumulative Update KB4528760 included the failure to install.
Since Microsoft has already turned its back on free Windows 7 support, it’s highly unlikely there will be another free update for the OS after the upcoming KB4534310 fix.
In the meantime, Windows 7 users not receiving ESUs can only turn to the latest antivirus solutions to secure their PCs. Although Microsoft is advising users to move to Windows 10, there are still millions of unsecured Windows 7 computers around the globe.
Laser printers are known to have the best quality prints though, as with every other gadget, there are times when the printer might malfunction. And one common issue to be faced with laser printers is that of double prints, or in other words, the printer is printing shadows.
Then again, there are ways to tackle the issue effectively and easily.
Fix laser printer if it’s printing shadows
1. Check imaging drum
A drum that is not discharging properly after each print job is a prime culprit for printing shadow prints.
This usually happens if the drum is nearing the end of its life cycle or is defective.
In that case, replacing the drum is the easiest option to get rid of the issue.
If the drum happens to be a part of the toner cartridge, you have no option but to replace the toner as a whole.
An easy way to know if the drum is the culprit is by looking at the prints. If the actual print and the shadow prints are quite close (about 2 – 3 cms), or the same as the drum’s circumference then the drum is at fault and needs to be replaced.
2. Check Fuser unit
A faulty Fuser unit can also lead to the printer printing shadows.
This usually happens if the Fuser is not able to heat the toner powder well enough for the prints to be sharp and precise.
Again, the best way to know if the fuser is malfunctioning is by looking at the prints.
If the actual print and the shadows are a bit further apart, about 4 – 5 cm, then the fuser has gone wrong and its best to replace the same.
3. Use the right paper
Make sure you are using paper of the right quality, one that is recommended to be used with the particular printer you are using.
Papers that are too glossy or thick are known to cause shadow prints.
4. Clean the Fuser roller of dust and other debris
Clean the printer as dust accumulation on the inside can also cause shadow prints.
You can use a lint free cloth to clean the fuser roller and adjoining areas to ensure there is no dust or other debris anywhere on the inside.
5. Humidity
All laser printers are designed to operate within a specific heat and humidity range, usually below 80 percent.
Make sure the place where you are operating the printer is within the safe range.
If the place is too hot and humid, this may cause the toner powder to clump.
This, in turn, will tend to cause the printer to print shadows.
6. Toner powder
The easiest way to find out if the toner power is causing the shadow prints is by visual inspection of the drum.
If the drum is seen to be covered by the toner, then the toner power is at fault.
This is due to the toner power not getting charged properly.
In that case, you might have to remove the old toner powder or replace the toner cartridge
This is all you need to do if your laser printer is printing shadow prints.
Technology is evolving more and more, and the general direction is to no longer have a hands-on approach in any of our activities. For example, a lot of users are replacing old-fashioned typing with voice-recognition software.
All you have to do is install the software, and everything that you speak will be turned into writing automatically. One of the best speech recognition software is Dragon NaturallySpeaking, as it has millions of users all over the world.
However, some have reported encountering issues with the program. After starting Dragon NaturallySpeaking, the following message appears when the user profile is loading:
User profile is not ready for dictation.
Since this essentially means that users can no longer use the program at all, it is indeed a serious issue. As such, we’ve decided to create a step-by-step guide that will show you how to bypass this problem.
How do I make my user profile ready for dictation?
1. Check the microphone connectivity
Make sure the Microphone is connected to the right socket as well
If it is a Bluetooth Microphone, make sure the Bluetooth detection is activated on both mic and PC
Use the Windows Sound Recorder to test if the microphone is working properly
2. Make sure the microphone is added as a sound source for that profile
Open Dragon NaturallySpeaking
Load the current user profile
This will occur automatically if there is only a single user profile
On the DragonBar, select Profile
Select Add dictation source to current User Profile
Click New if necessary and follow the steps to add an additional source
Clicking New is only necessary if this is your first sound source added
When prompted, select the dictation source from the drop-down menu
You should find your microphone listed here
Follow the instructions in the Audio Setup Wizard to configure the new source
By following these steps, your user profile should now be able to use Dragon NaturallySpeaking without any further issues.
If the problems persist, make sure you also try some of the following:
Check for conflicting sound devices
Try a different sound card or USB microphone
Test the microphone on another PC
Reinstall the sound card drivers
Update the sound drivers
Note: For more information on how to update drivers on Windows 10, check out this in-depth article.
If you’re aware of another way to solve this Dragon NaturallySpeaking , tell us about it in the comments section below so that other users can try it, as well.
Those of you that love mobile games but hate the concept of playing on your phone are probably well aware of what BlueStacks is.
For those of you that don’t know, the BlueStacks App Player is designed to enable Android applications to run on PCs running Microsoft Windows and Apple’s macOS.
This means that you can enjoy all of your favorite games on a machine that will never run out of battery, and that has much better performance than an average phone.
However, even BlueStacks has occasional bugs in the system. For example, users have reported that sometimes they cannot load files into BlueStacks because the folder containing them is not visible to the app.
So i’m trying to install an obb with which to install an apk, but i can’t figure out how to do so. i’ve installed es file explorer and fx file explorer to search for the windows shared folder, but on both applications the folder is inaccessible and greyed out. i don’t know why that is, or what i can do to fix it or bypass it. please help me, i’m at my wit’s end.
Since this bug prevents program functionality entirely, it has been deemed as a serious issue. As such, we’ve decided to create this step-by-step guide that will tell you exactly what you need to do to fix it.
How can I open folders in BlueStacks again?
1. Transfer the files to your phone
Open the File Explorer.
In the top toolbar, check to enable Hidden items and File extensions.
Go to the following folder: C:\ProgramData\BlueStacks\Engine\UserData\SharedFolder
Copy or drag the file you need to open into that folder.
Launch BlueStacks.
Access the Menu.
Go to Storage.
Select Explore.
Select the Windows folder.
Go to the BstSharedFolder. The file should be located there.
Copy it and paste it on the phone’s storage in the Android OBB folder.
By following these steps, you should be able to transfer files from your PC to your Android phone via BlueStacks. The method may seem a bit complicated at first, but unfortunately, it is the only fix to the issue.
2. Reinstall BlueStacks
2.1 Uninstall Bluestacks
Click the Windows Start button and select Settings.
Now select the Apps option.
Scroll down to find the Bluestacks app, click on it, then select the Uninstall button.
Follow the on-screen instructions to uninstall the app completely.
After the file has been downloaded, launch the executable file and install the app.
If you can’t manage to make BlueStacks work, it probably has some corrupt files or a broken component so it’s best to reinstall the app fresh.
This is a two-step process but if you follow the steps above you should be done with it in just a few minutes.
There is no information as to why this error occurs, but now at least you know of a good workaround.
If you’re having problems because some game is not playable in your region our list of the best VPNs for BlueStacks should come in handy to solve the problem.
If you want to read about more tips, tricks, and fixes about BlueStacks, leave us a message in the comments section below.
Microsoft decided to start off 2020 by ceasing support for Windows 7. This means that the OS will no longer be receiving any kind of updates neither in the form of new features, or security patches.
This leaves Windows 7 users with very few choices, including the following:
Of course, migrating to an entirely new OS is difficult at a large scale, such as within a company. that is why steps need to taken in order to ensure that everything goes smoothly.
How ever, this takes time, during which their computer systems are vulnerable to outside cyberattacks. Such would be the case with QuickBooks and TurboTax users that are still using Windows 7.
Windows 7, QuickBooks and TurboTax
Since Windows 7 is no longer receiving security updates, this means that all of your data is in a vulnerable state. If you are using any type of accounting software, or are performing banking transactions or online shopping, you are exposing yourself even more.
Such would be the case with QuickBooks and TurboTax. While their respective developers do continue to make clients that are still compatible with Windows 7, it is not clear how much longer this will last.
Even the developers of QuickBooks and TurboTax recommend that users migrate to Windows 10:
TurboTax for tax year 2019 and QuickBooks 2020 will install on Windows 7 (Service Pack 1 or later) PCs. However, we strongly recommend upgrading your operating system before installing these products.
While you can use TurboTax and QuickBooks Desktop on any operating system listed in the products system requirements (Windows 8/Windows 8.1/Windows 10), Microsoft recommends that Windows 7 users upgrade to Windows 10.
They went on and added that once you’ve upgraded to Windows 10, you can continue to use the software without repurchasing it.
Once you’ve upgraded your Windows operating system, your current version of TurboTax or QuickBooks Desktop will work on your PC. You don’t have to buy them again.
As such, sooner or later you will still need to upgrade to another OS, and do something to keep your data safe.
Keep your QuickBooks and TurboTax data safe
Since QuickBooks and TurboTax work with sensitive information such as addresses, bank account numbers, passwords, it is necessary to take all the measures needed to keep the data safe.
If migration is not yet an option, and you do not have the budget to go for the WIndows 7 Extended Support, you could always opt for a third-party antivirus tool that will keep you safe.
For the best antivirus programs that work on Windows 7 for banking programs, check out this in-depth article. Additionally, changing your Internet browsing habits can take you a long way.
If you want to learn more about how the end support of Windows 7 affects various software, leave us a message in the comments section below.
Netgear routers, like all other routers, have settings pages you can open in your browser. However, some Netgear router users have said in forum posts that they can’t log in to the settings pages for their routers with their admin passwords.
Some users have said a 192.168.1.1 refused to connect error arises when they try to open their router settings pages. Below are some of the resolutions that might fix the Netgear passwords not working.
How to fix Netgear router admin password is not working
1. Double-check the login details for the router
First, make sure that you’re really entering the right default password for your Netgear router. The Netgear Router Password page includes a full list of default login passwords for the various router models.
Open that page in a browser to check the login details for your router model. You might also find the settings page’s login details on a sticker at the bottom of your router.
2. Don’t rely on saved passwords
Make sure your browser isn’t trying to log in to the router’s settings page automatically. Your browser might automatically input a saved password for the router settings page. If so, erase that password. Then enter the default password for the router yourself.
3. Turn off third-party antivirus software
Third-party antivirus utilities also block access to routers’ settings pages. So, try turning off third-party antivirus software by right-clicking their system tray icons and selecting a turn off or disable option.
If you can’t find a disable setting on the context menu, open the antivirus utility’s primary window and have a look through its settings tab. After that, log in to your router’s settings page with the antivirus software disabled.
4. Disable all browser extensions
Some users have confirmed they’ve fixed router settings page login errors by disabling browser extensions. To do that in Google Chrome, click the Customize and Control Google Chrome button.
Select the More tools > Extensions options to open the tab shown directly below.
Click the toggle switches on the extensions there to turn them off.
5. Reset the browser
If you have lots of extensions, resetting the browser to its factory settings can be a quicker way to turn them all off. You can reset Chrome by entering ‘chrome://settings/’ in the browser’s URL bar and pressing Return.
Scroll down and click the Advanced button.
Click Restore settings to their original defaults at the bottom of the Settings page.
Then click Reset settings to restore the browser to its original settings.
6. Reset the Netgear router
It might be the case that the Netgear router’s password has been changed from the original default one. However, you can restore the original login password by pressing the small reset button at the back of the router with a paperclip.
Press that button for about 20-30 seconds until the router’s lights start blinking. In addition, turn the router off and back on after resetting.
Those are some of the most probable resolutions for fixing admin password login issues for Netgear routers. For further potential fixes, users with MyNETGEAR accounts can submit support issues at the Netgear website.
If you have any other questions or suggestions, see the comments section below.