The Logitech unifying receiver’s new technology provides a unified receiver for six wireless devices, but some customers have reported poor range.
Unfortunately, its limited range has led some users to doubt the benefits of this sophisticated, yet basic receiver from a world-renowned firm.
As the word wireless indicates, users should be able to use the products while standing far away from their primary PC or laptop, however, the limited range precludes this.
What is Logitech Unifying?
Unify is a gadget that allows you to connect compatible keyboards and mice to a single computer without the need for numerous USB receivers.
This device may be kept in the laptop and does not need to be unplugged when not in use due to its compact size.
How can I fix Logitech unifying receiver poor range issues?
1. Find somewhere less crowded
If you are using the receiver in a populated location, find somewhere less crowded and with fewer electronic devices around.
Other 2.4GHz transmissions might be filling up the area. Even when using a microwave oven, wireless devices may face some interference and cause Logitech unifying receiver’s poor range.
2. Switch the wireless routers channel
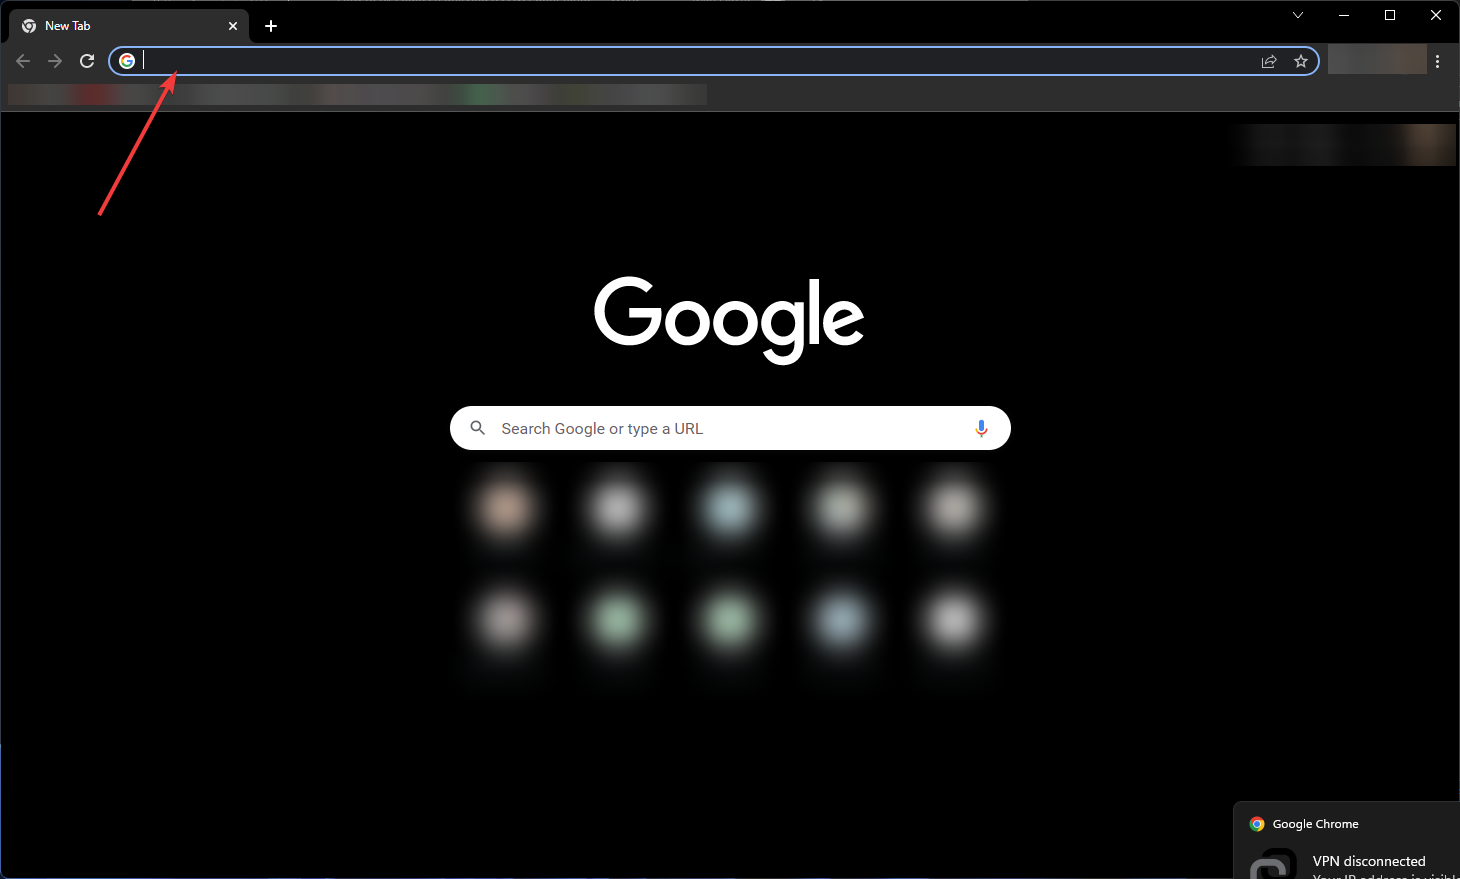
First, open your browser and type the manufacturer’s default IP address, which is usually found on the underside of your router or in the user manual.
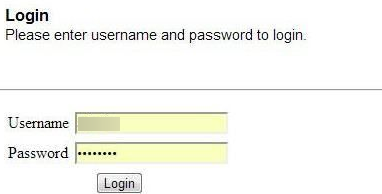
Following that, log in to your router’s settings page with your username and password.
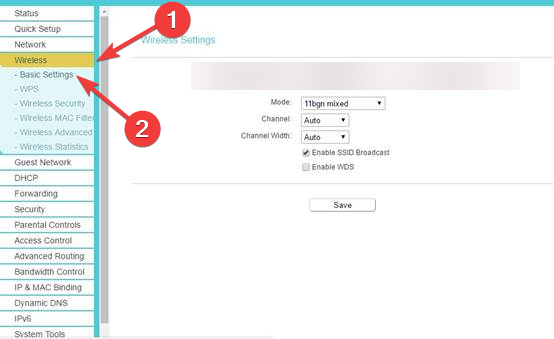
To change your Wi-Fi settings, go to the Wireless tab. If you aren’t currently on the relevant page, go to the Basic (or equivalent) tab.
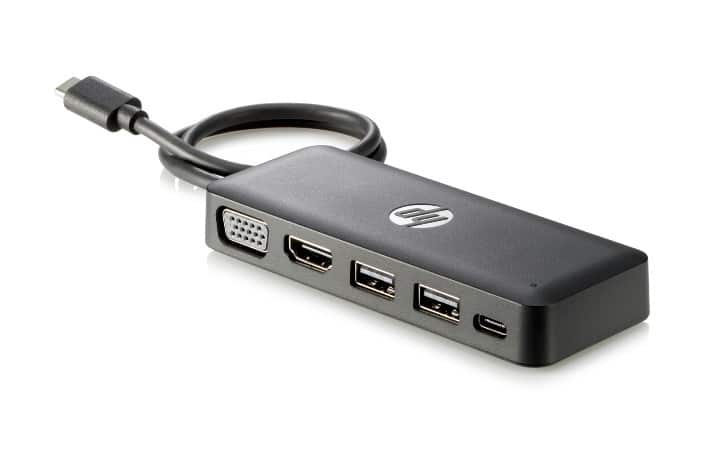
Visit one of the many online markets. Choose and purchase a USB Extender based on your needs.
After you’ve purchased your extender, insert the USB connector end into a USB port on your computer or laptop.
Then, plug your dongle into the USBport on the opposite end of the extension.
Simply bring the end of the extender attached to the dongle closer to where you wish to use your wireless device after this is done.
The radio waves from your wireless device will only have to go to the dongle with the USB extender installed.
As a result, you may avoid interference or signal loss over greater distances with this strategy and possibly fix Logitech unifying receiver’s poor range.
4. Provide an adequate power supply
First, make sure that your laptop is plugged in.
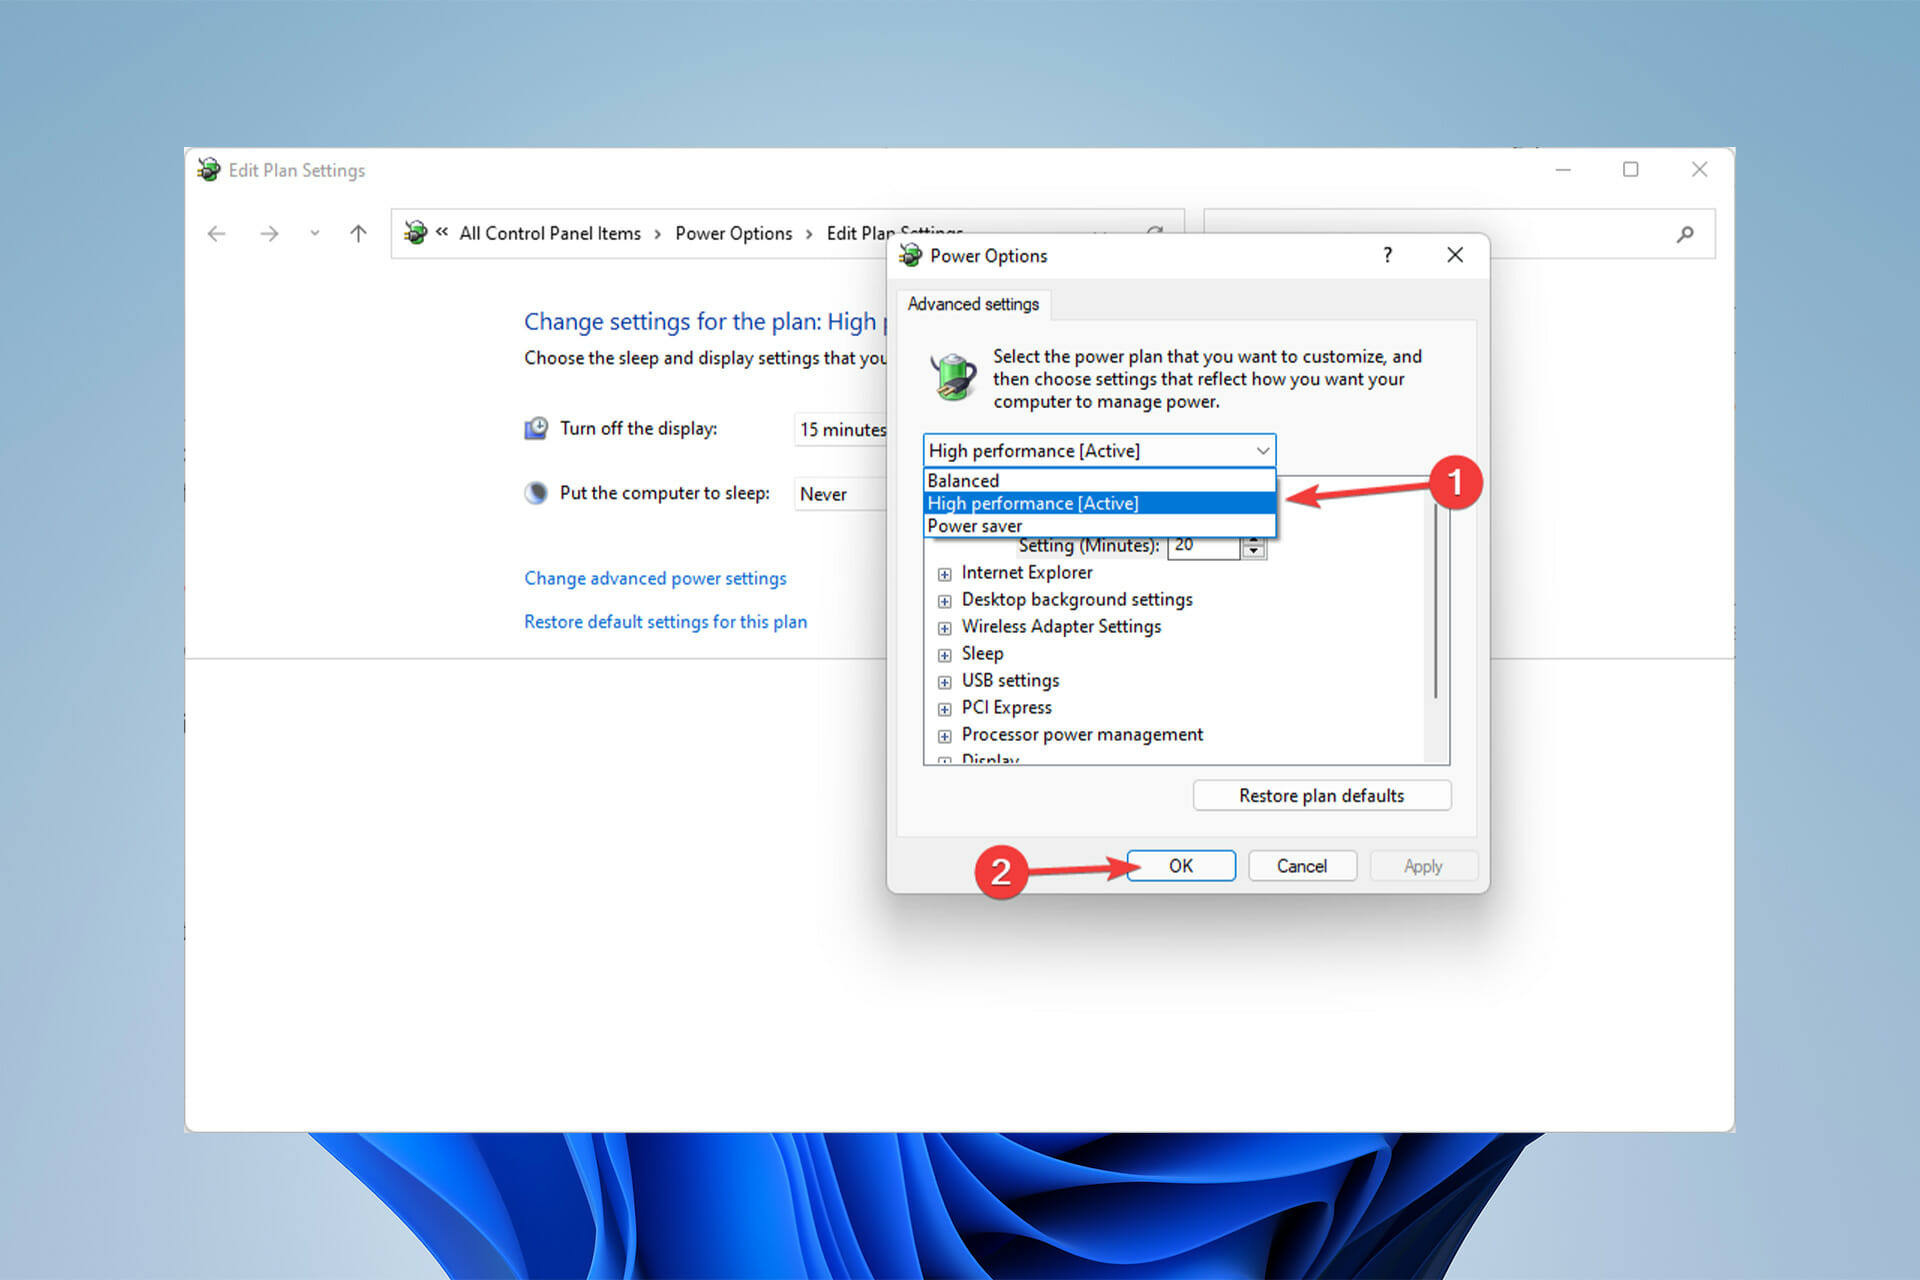
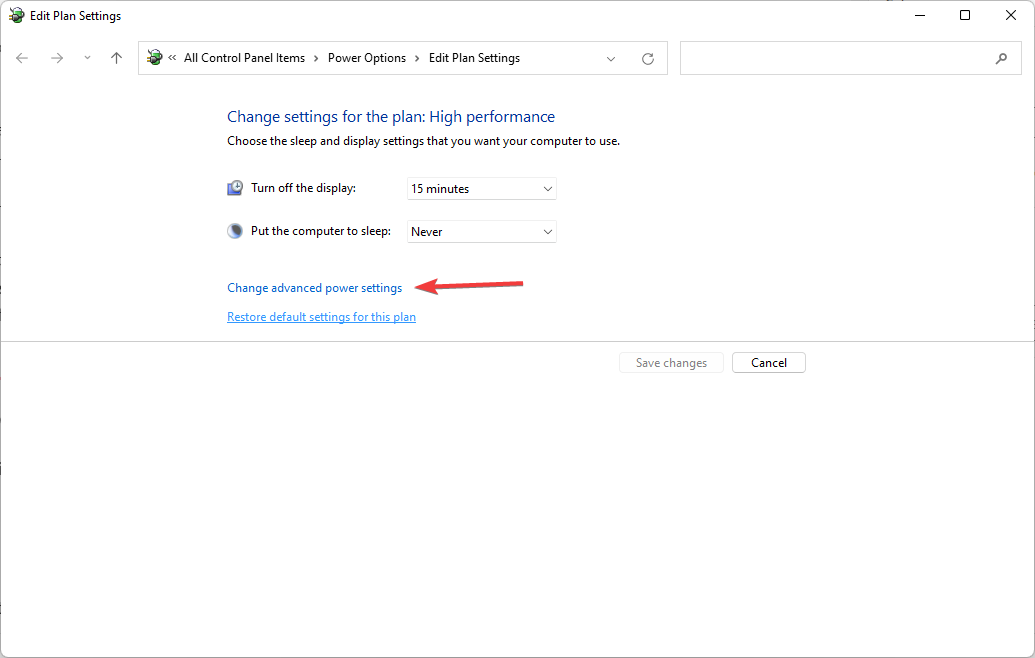
After that, click on the Start menu, type Edit Power Plan, and hit Enter.
Click on Change advanced power settings.
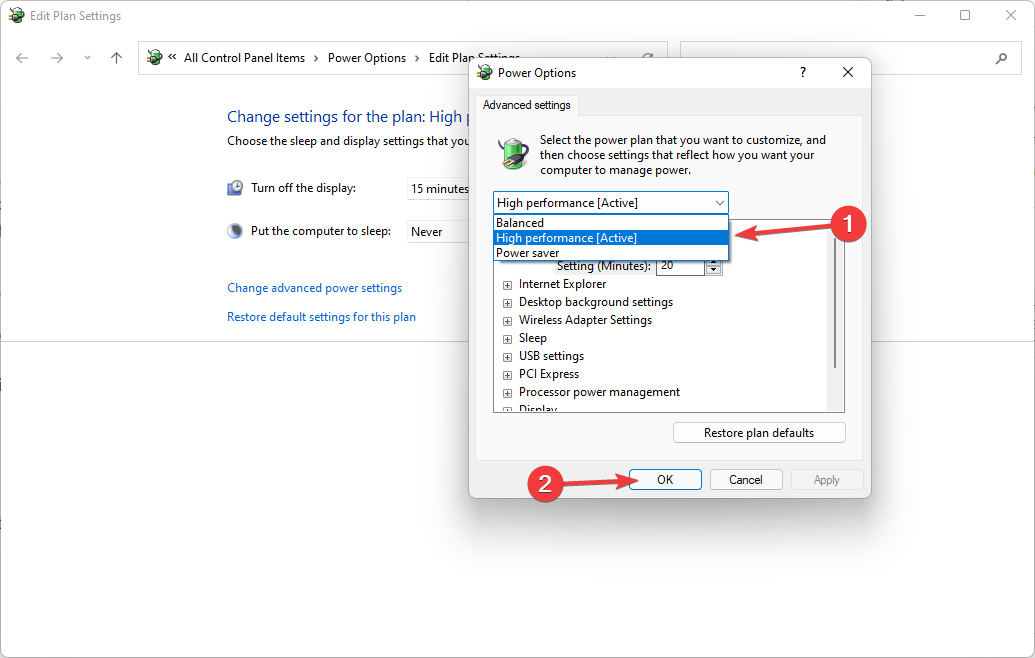
Then change it to the High performance option and click OK.
Are there any alternatives to the Logitech Unifying receiver?
You may find product alternatives from many brands by conducting a simple search.
There are over a million Logitech Unifying receiver alternatives available, some of which may not have the same faults as the Logitech receiver.
Signals are frequently interrupted owing to distance or obstructions between your mouse and keyboard and the receiver.
As a result, the first thing to look for when you have a poor receiver range is the presence of any comparable devices on the signal path or router channel.
Moreover, it is also a good idea to examine the specifications before acquiring such items to ensure that your laptop or computer can fully support the device.
Because such devices require certain operating systems to work properly, failure may occur if the proper system is not installed.
In an update from 2021, Microsoft limited certain backup features on Windows 11. File History was one of those options and it has been a part of Windows systems since Windows 8.
Microsoft did this because it wanted to push people more towards using its OneDrive cloud storage and possibly purchase a subscription to the service. Unsurprisingly, people were not happy with this move and demanded that Microsoft reinstates File History.
What’s so good about File History?
Fortunately, since then, Microsoft has reinstated File History. To be fair, the feature isn’t all that much better than OneDrive cloud storage, but people like to have options and make their own choices on where to save their files.
File History isn’t the default on Windows 11 despite Microsoft bringing it back. You still have to turn it on and set it up to back up your files.
This guide will show you how to turn the backup options on Windows 11, how to back up the system, and configure the feature.
How do I use File History to back up my Windows 11 computer?
1. Turn on File History
Start by clicking on the magnifying glass icon in the taskbar to bring up the search bar.
Search for the Control Panel and click the top result that appears to open it.
When the Control Panel opens, click on System and Security.
In System and Security, click File History.
Conversely, you can click on Category next to View by and change the panel’s layout.
In the drop-down menu, select Large icons.
In this new window, select File History.
The Filter History will take some time to search for other drives.
Once it finds one, click the Turn on button.
Upon turning on Filter History, click Run now to begin saving your computer’s file to the hard drive.
2. Configure File History
Staying in the File History portion of the Control Panel, select Advanced Settings on the left-hand side.
Here you can decide how often copies of your computers should be saved. Click the menu next to Save copies of files to change this frequency from every 10 minutes to once a day.
You can change how long the copies stay on your computer by clicking the file next to Keep saved versions and making a selection. You can keep them forever, for a set amount of months, or until space is needed.
Underneath the Versions section is Clean up versions. Clicking this will open the File History Cleanup window which allows you to delete saved versions from your computer.
You can decide to delete versions older than two years or everything but the most recent.
Once you’ve decided how far back you want to delete the files, click the Cleanup button.
Click the link under Events logs to see recent events, errors, and copies you made.
Once you’ve made your changes, click the Save changes button at the bottom.
Back in the main File History page, you can change the drive by clicking Select drive on the left-hand corner.
On this new page, you can select another drive to back up, although, in this guide, there’s only one.
Below that you can select an existing backup.
If there’s another drive on the local network that you want to add, click Add network location and locate the drive. But make sure file sharing is on.
On the main page, you can choose which parts of your computer should not be saved by first clicking Exclude folders.
In this window, click the Add button to choose what should be excluded.
Make your selection. In this guide, the Music library will be excluded.
Click the Select Folder button.
Exclude as many folders as you want. When you’re done, click the Save changes button.
3. Create System Image Backup
In the File History, click System Image Backup in the bottom left corner.
Click Set up backup.
Select the drive where the backup will go. Then click Next.
You can choose what you want to back up, but this guide will let Windows 11 choose.
Review your backup settings in the next window. You can change often Windows 11 is saved by clicking Change schedule.
Choose how often the backup is saved by making your selection in the menus. Click OK.
Click Save settings and run the backup.
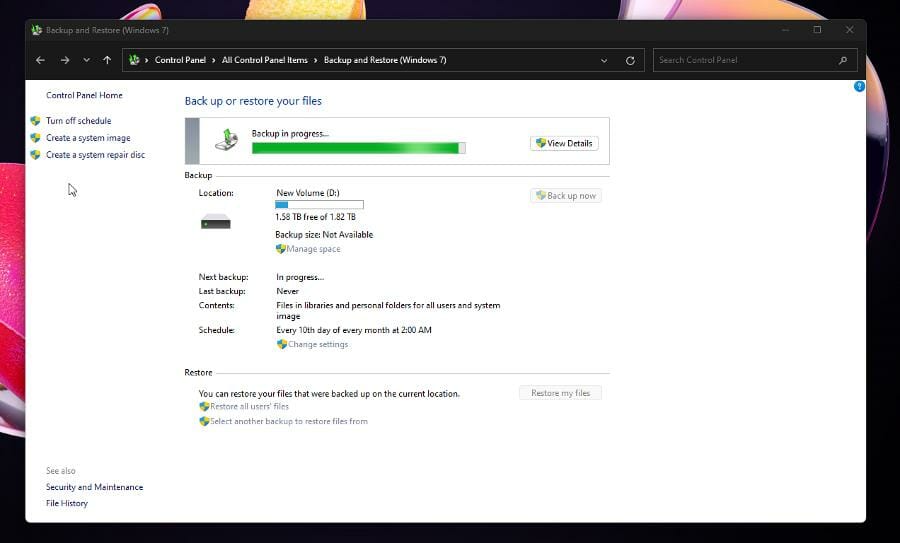
File History will proceed to backup your Windows 11 files. It may take a while before it finishes.
If you have to back up more than 100GB worth of data, the first backup may take a full 24 hours to complete.
After it finishes, File History will let you know how big the backup is.
4. Restore personal files
When it comes time to restore your files, return to the System Image Backup of the File History.
Under Restore, click the Restore my files button.
In the Restore Files window, you have a variety of choices from which you can select how to restore the files.
This guide will select Browse for folders to do an all-around restore, but you select certain files by clicking on either Browse for files or Search.
Select the backup folder and click Add folder.
Click Next.
Then select where you want to restore the files. This guide will select In the original location to make it easy.
Click the Restore button.
Give your computer enough time to complete the process. How large the file size is will determine how long it will take.
Back in the Restore Files window, you can select to restore the files from a particular date by clicking Choose a different date.
You can choose which backups to restore by clicking on the drop-down menu and making a selection. You can go as far as a year or show every single backup.
Select the backup from a certain point in time and select the OK button.
Next, follow the same instructions to restore the backup.
Are there other ways to backup files on Windows 11?
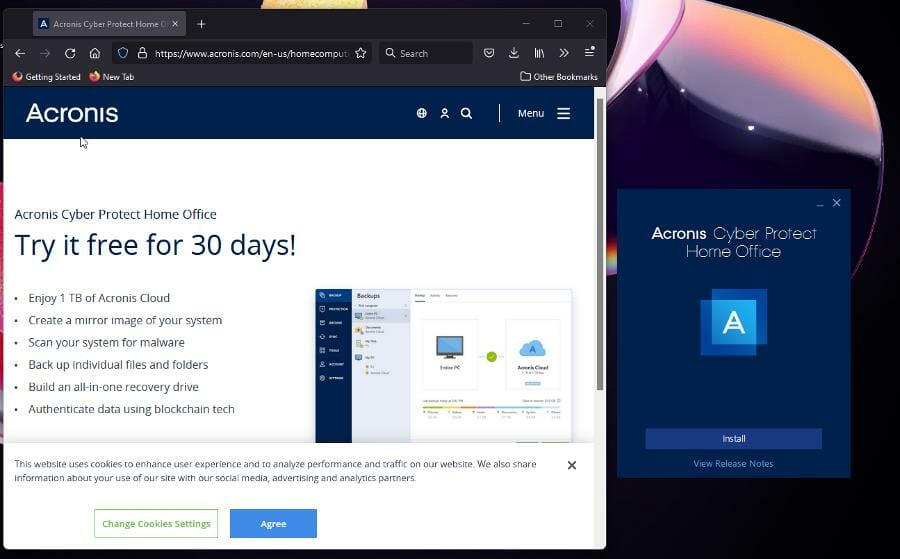
Many people prefer using third-party software over the native apps on Windows 11 and this is no different when it comes to backing up files. There are tons of backup software for the operating system.
And it’s also possible to back up Android device software on your PC as well. The process was originally a tedious one, but so long as you get the right app, backing up those files is a breeze.
Feel free to leave a comment below if you have any questions on other Windows 11 apps. Also, leave comments about reviews that you’d like to see or information on other Windows 11 features.
Digital design might be difficult if you don’t have the necessary apps and tools, but Silhouette Studio is just what every designer needs, even if you occasionally experience Silhouette Studio stuck on initializing.
Typically, design programs are built to be simple to use and understand so that the process is not made any more complex.
This application has a number of difficulties that users have reported, including being stuck during the setup process, which may be resolved by following a few easy steps.
What are the different versions of Silhouette Studio?
The four different versions of this application are the basic edition, designer edition, designer plus edition, and business edition, which range in price and features.
Additionally, the basic edition is free and available to anybody, while the business edition costs $99 and includes all of the advanced features.
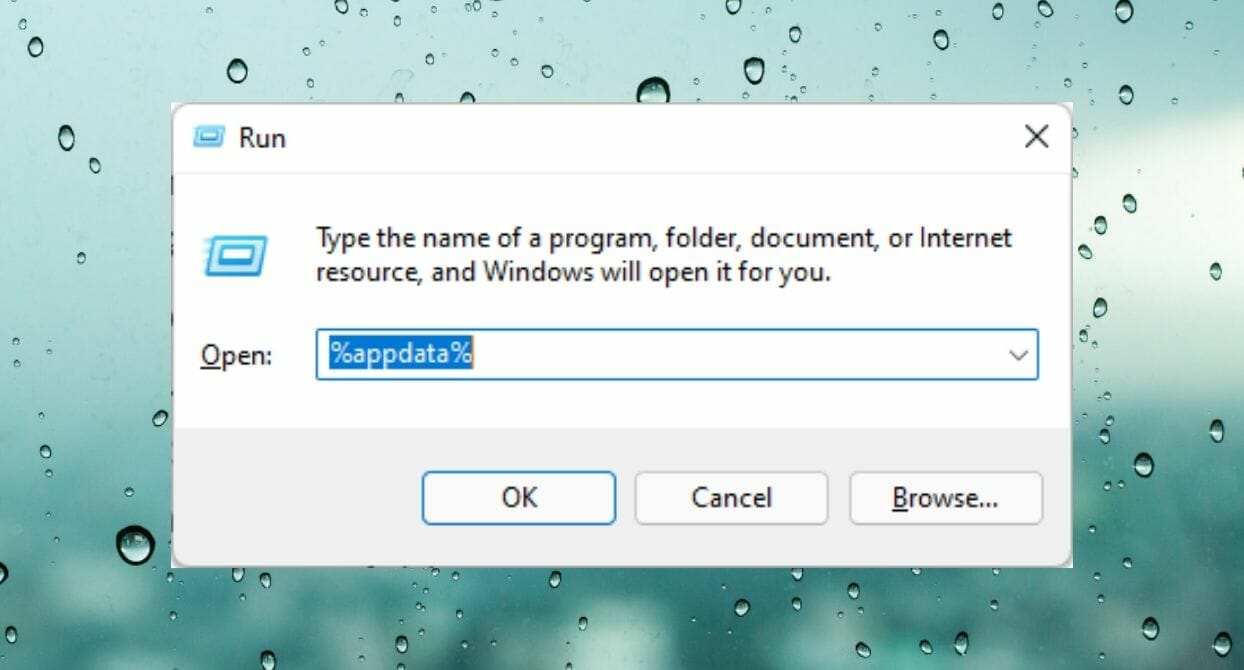
In the Run window, type %appdata% and press Enter.
Delete the com.aspexsoftware.Silhouette_Studio folder.
Empty the Recycle Bin.
Re-open Silhouette Studio.
User-generated cut settings, as well as any preference choices you may have selected in the Preferences settings, will be removed as a result of this operation.
If possible, make a note of any custom settings or preferences so you can recreate or re-select them after the operation is finished.
Select the Mac or Windows link according to your computer operating system.
Click on the Download Silhouette Studio button.
Once downloaded, run the installation program and follow the on-screen prompts to install the software program.
First, make sure that your PC or laptop meets the software’s minimal requirements.
Unfortunately, if your computer does not satisfy the minimal requirements, you will have to use a different computer to utilize the Silhouette Studio software application.
Scroll down to the Legacy Version section to download and install the previous older version.
If your software started crashing right after you updated it, although it was functioning before, you may need to remove the current version and roll back to the prior version.
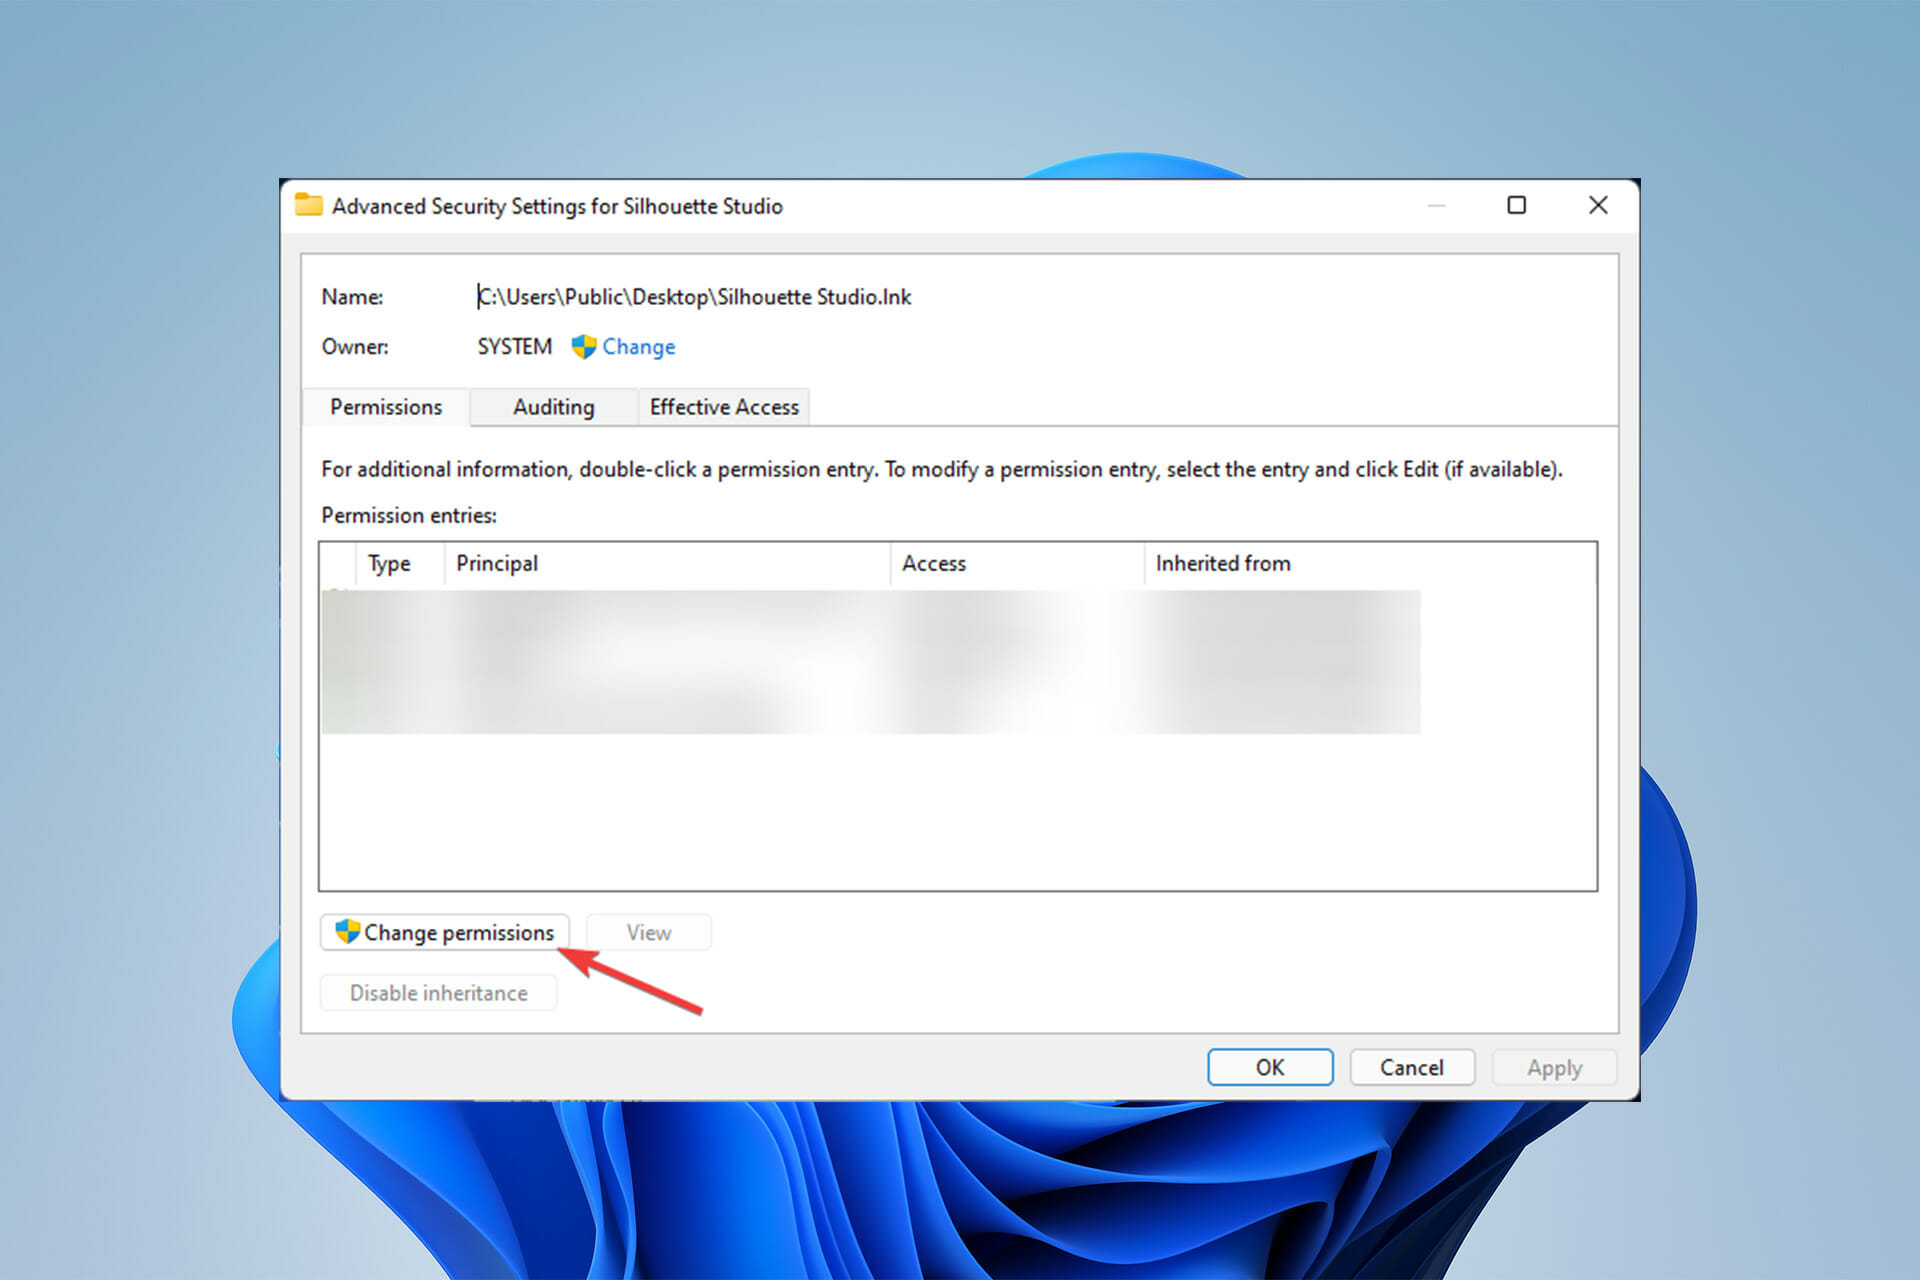
4. Check permissions
First, right-click on the Silhouette Studio program shortcut and select the Properties option.
Then, select the Security tab then click the Advanced button.
Select the Change Permissions button and provide authorization.
Next, check the box entitled Remove all inherited permissions for this subject.
Select Apply and then select OK.
When you first launch Silhouette Studio, it goes through a process of initializing all of your settings before completely opening and presenting the working area.
If the correct permissions are not granted, the software may experience difficulties during the startup process, preventing the software from being successfully launched.
Inkscape, a tool for designers and producers that offers flexibility and power, is another free alternative.
Inkscape is utilized in a wide range of businesses like marketing/branding, engineering/CAD, online graphics, cartooning as well as personal usage.
Similar to this software is Adobe Illustrator, an industry standard for web graphics and visionary designs that works for most creative industries out there.
Furthermore, these solutions, which were provided to you are the official solutions from the official website of the software, thus have a high chance of fixing your problem.
The intriguing aspect is that many users have encountered this difficulty, which is why it is listed as one of the probable issues on the software’s main site.
Because the graphics card is one of the most important pieces of hardware for executing this program, poor GPUs or overall hardware might create issues.
That is why before installing any application users must check the requirements section to avoid any unnecessary problems and errors.
Not receiving emails from Amazon Gmail, whether you’re a customer or a seller, can be frustrating and cause you to miss out on important news.
Amazon focuses on advertising products and developing a platform to sell them, its express services are also used to deliver these items.
When users complete a purchase or pay for it, Amazon normally sends them an email with the transaction details and a receipt.
This makes it much easier for users to keep track of their purchases or to save receipts in their email history for later use.
However, some users appear to be having issues receiving these emails on their Gmail accounts, causing extra stress and confusion.
What does Amazon sell?
Amazon.com is an online retailer, e-book reader manufacturer, and Web services provider that has become synonymous with electronic commerce.
Amazon.com sells books, music, movies, housewares, electronics, toys, and a variety of other items directly or as an intermediary between other shops.
What can I do if I’m not receiving emails from Amazon on Gmail?
1. Check spam folders
By clicking or touching Spam in Gmail’s left sidebar, you may access your spam folder.
If you find the email you’re looking for, open it and mark Report not spam or move it to your inbox.
Gmail features a built-in system for automatically sorting emails into separate folders. This implies that it is possible that Gmail will designate new emails as spam.
Click the gear button in the top-right corner of the Gmail desktop page, then click See all settings.
Select the Filters and Blocked Addresses tab to see all your Gmail filters. Review the filters and select Delete for any you want to remove.
It’s likely that Amazon has been added to your account’s list of blacklisted addresses for numerous security reasons.
It is strongly advised that you just delete Amazon from the aforementioned list, as other websites may jeopardize the security of your account.
3. Clean Email storage
In the search bar of Gmail, type has:attachment larger:10M. This will display all emails with attachments larger than 10MB. You can change 10 with a greater number if you want to delete larger files.
Because Gmail storage is counted toward the free 15GB of storage that comes with every Google account, it’s critical to clean up Gmail and erase thousands of unread emails.
Other Google services also are eligible for the 15GB of free storage. As a result, cleaning out your Gmail storage will free up space for these services as well.
4. Use a third-party email client
Gmail requires desktop users to access it from their web browsers as it does not yet provide a dedicated app. Some users report experiencing serious delays when opening Gmail which can be caused by network congestion or simply a cluttered browser.
For this reason, we recommend you install a dedicated email app on your PC. Mailbird is our top recommendation because it’s fully compatible with Gmail and lets you connect multiple accounts and access them from one central UI.
The transition should be smooth as this email client is very intuitive. Easily set up Amazon as one of your trusted contacts and it won’t show up in the spam folder. The app is light so the risk of a laggy inbox will certainly decrease.
What are the other websites to use instead of Amazon?
Even though eBay doesn’t have its own products and only third-party vendors are allowed to sell on eBay, it is one of the biggest competitors of Amazon.
eBay boasts over 180 million active buyers, offers a wider range of products than Amazon, and is easier to interact with and shop from.
With social media platforms like Instagram, Youtube, Tiktok, etc., and the need for smart marketing, videos are becoming more relevant and in demand. This has also triggered a need for great editing tools.
To keep up with the times, your video editing skills, must be top-notch, but these skills are often just as good as the tools you use.
These editors can accomplish a lot, trimming, cutting, and changing video backgrounds are the very basics.
We will discuss our favorite video editing tools, emphasizing the most appropriate for removing video background even without the need for a greenscreen.
How can I change the background of a video without a green screen?
While this article focuses on downloadable apps to remove background from videos, there are a few ways to accomplish this, including:
Using free or paid online services: These are services like Kapwing, Cutout.pro, Unscreen, and Veed. You simply navigate to the websites on your browser, upload the videos, and within a few clicks, you can get rid of backgrounds.
Using desktop applications: These require a downloaded file to be installed on your computer. The process is very similar for most of these apps, but the interface is usually the differentiating factor.
Using mobile applications: These also require an installation but will only work on mobile devices. They are lighter than the desktop versions but may not have as many features.
What is the best free software to change video backgrounds?
EaseUS video editor is a PC video editing software with an incredible choice of effects for your videos. It provides easy access to all transitions, visual effects, and drag-and-drop functionality.
It has an extensive range of overlay effects and video filters that can improve your movies. The tool lets you produce music videos as slideshows and includes the functionality to crop and edit a video as a magnificent Hollywood blockbuster movie using effects like zoom out, sketch, and old film.
You will be able to use it swiftly to convert AVI, MP4, MKV, WMV, MOV, and images to various formats. Every important video and audio format is supported. As a result, you may import media files from a drive and films taken with camcorders, cellphones, GoPro cameras, DV cameras, and other devices.
This free editor lets you export your customized video in any format on iOS and Android devices. You may also burn videos on DVDs or upload them directly to social media sites like Facebook, YouTube, and Twitter.
VSDC Free Video Editor is a suite capable of competing with the more pricey video editing tools.
It allows you to build video projects with a max frame rate of 30fps and full HD resolution using a combination of video clips, photos, and audio files.
Its screen recording tool allows you to record video and capture desktop images. Video and audio filters, as well as elegant transitions, are all featured.
Finished works can be exported in several formats, with preset profiles for common devices. In addition, VSDC allows you to burn projects to DVD.
Objects, which comprise photos, video clips, sprites, audio files, animations, and more, are featured in VSDC Free. Overlaying, mixing, and masking are all options for layering options. If you want to add watermarking effects to your photos, they make it easy.
You will enjoy exploring its suite of audio and video effects that allow various Instagram-style filters and fully programmable special effects like smoke, fire, and water.
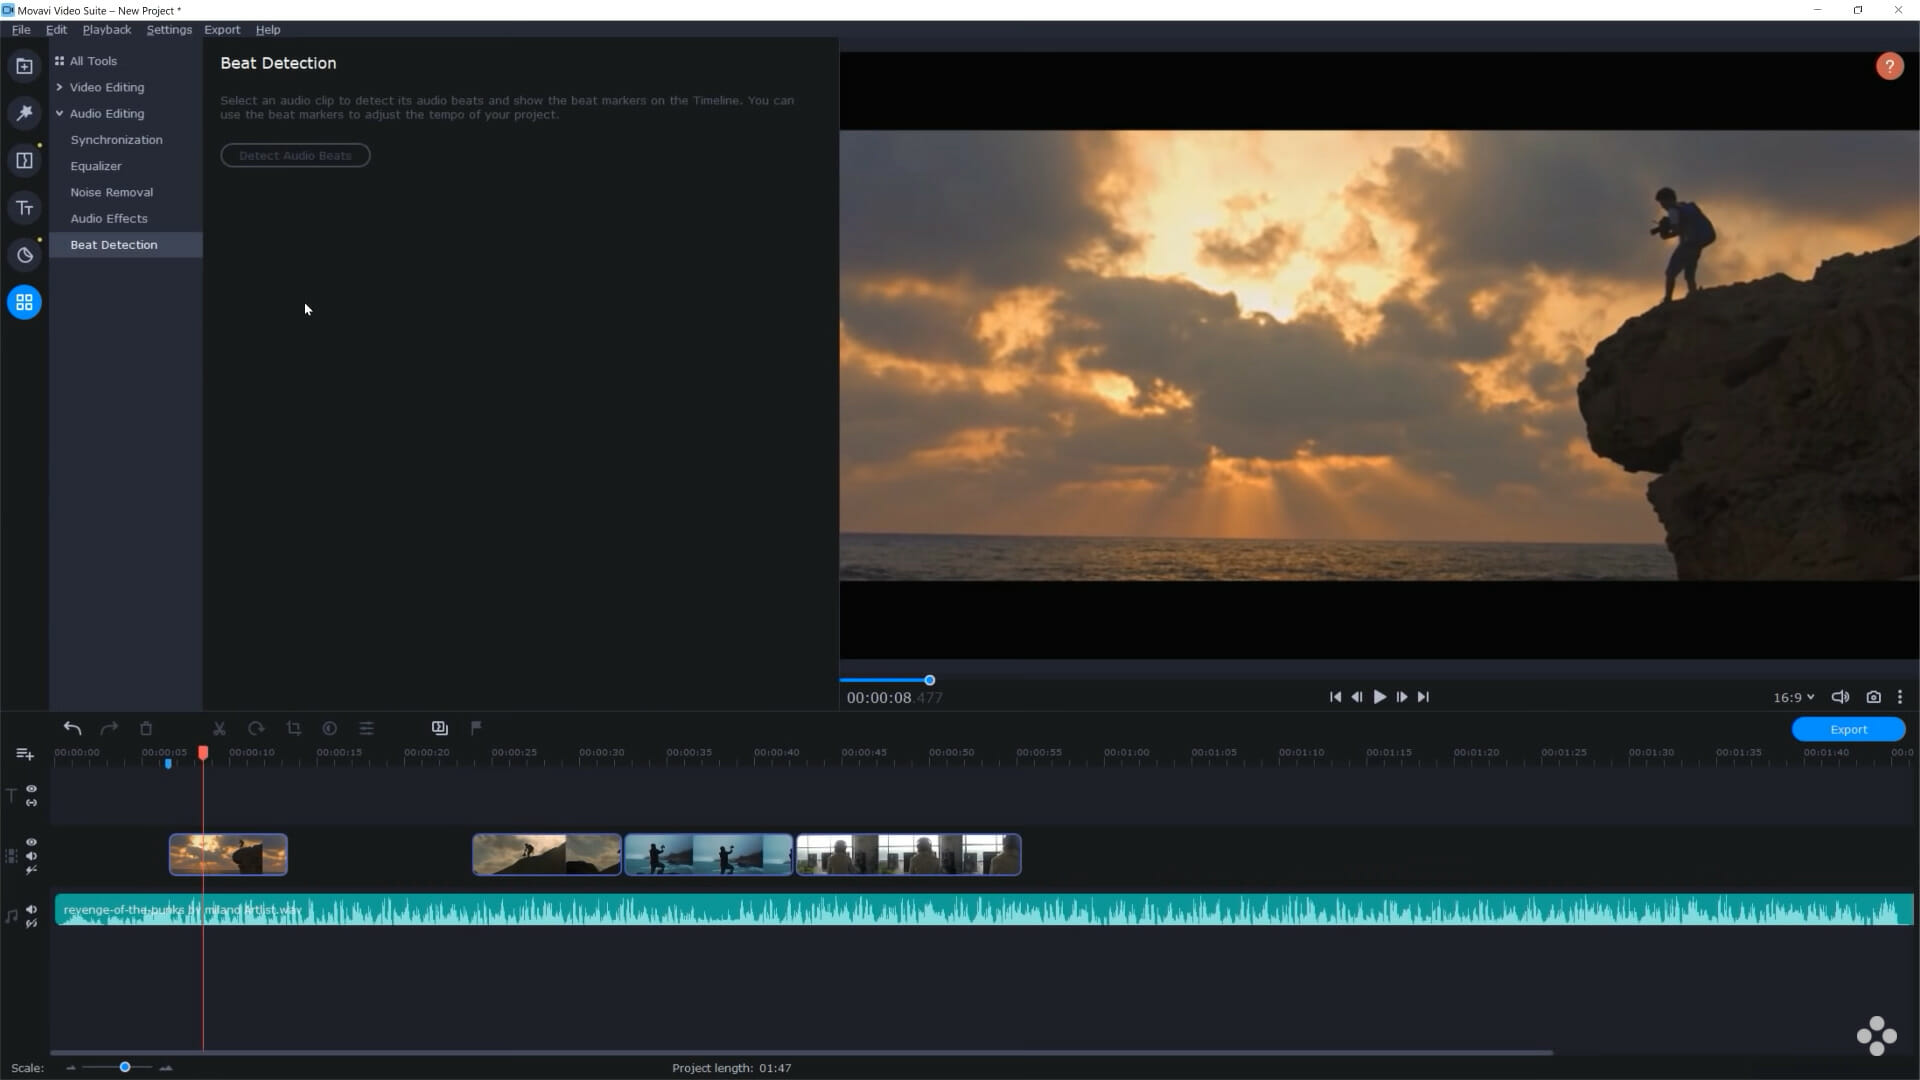
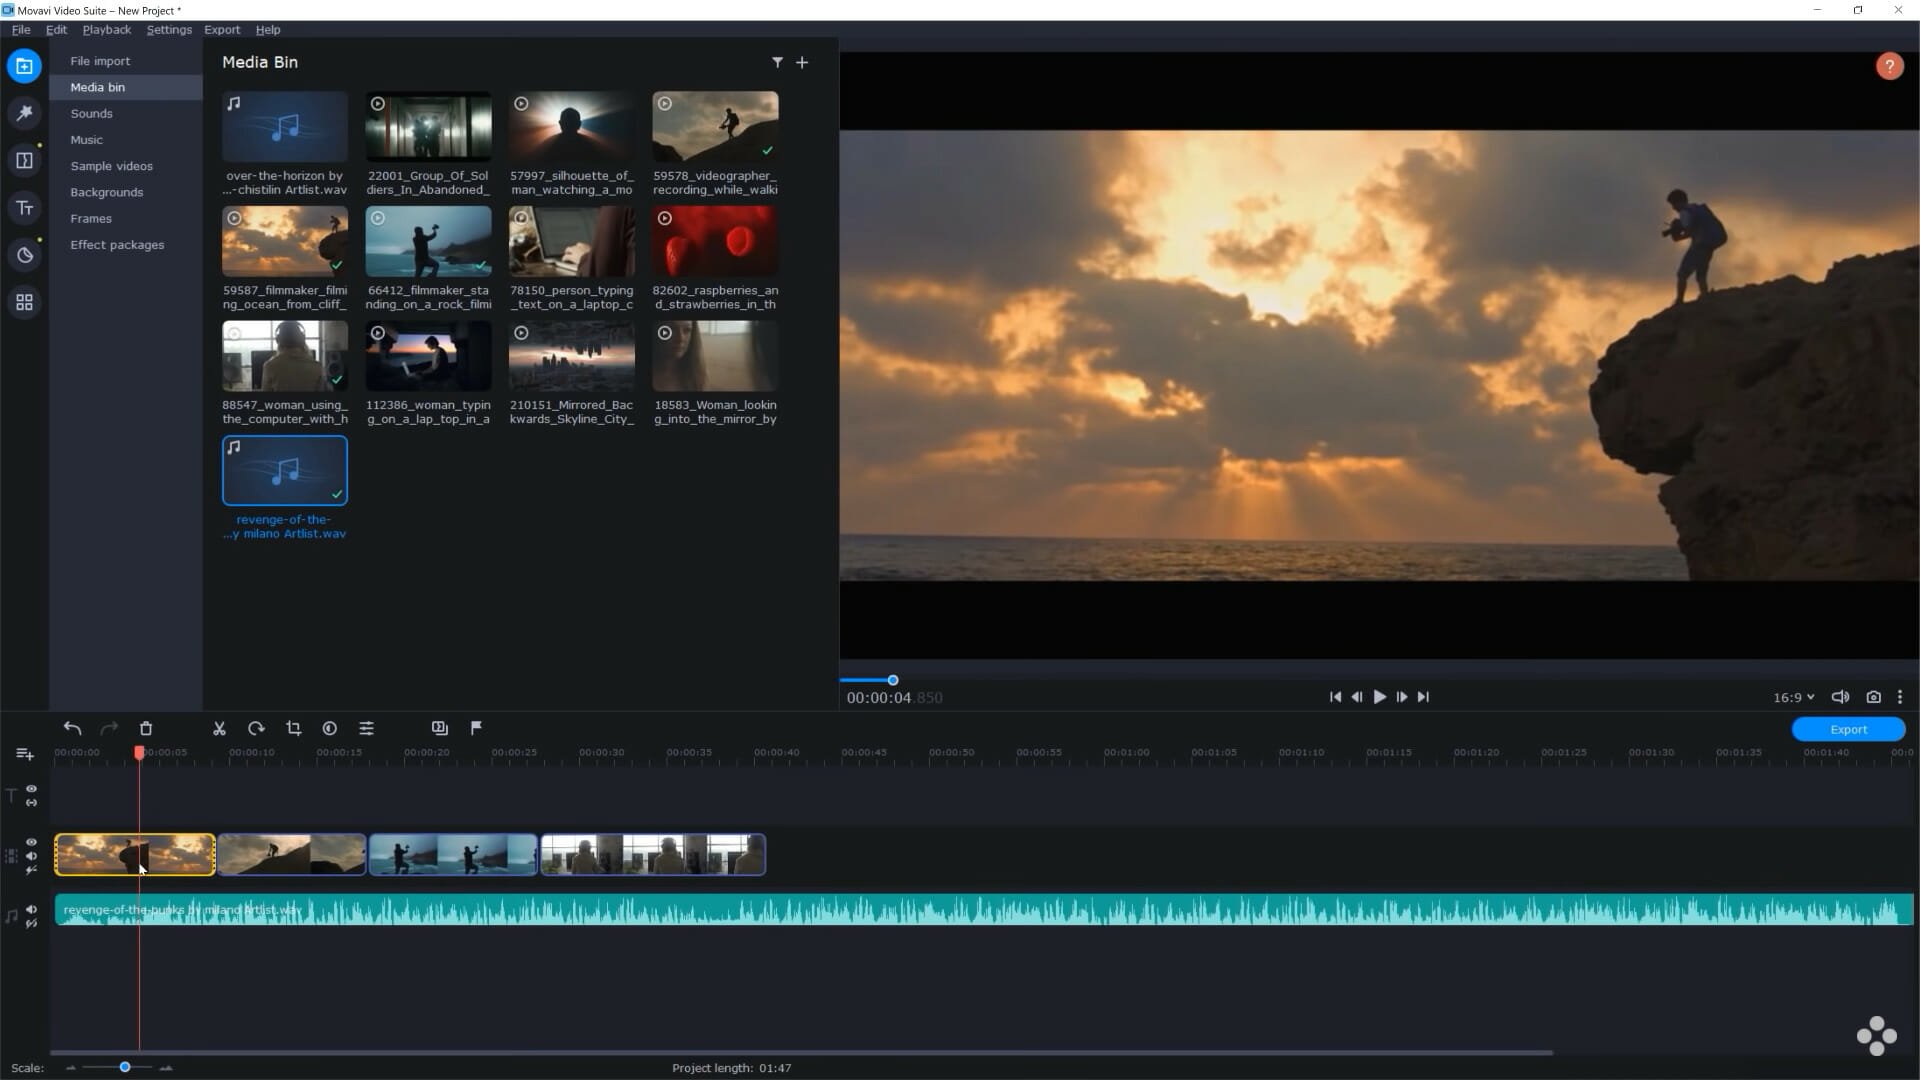
Movavi Video Editor is the ideal tool for bringing your imaginative thoughts to life and sharing them across the world. It features ready-made intros, keyframe animation, and special effects to make your videos stand out.
If you’ve used similar products before, you will notice that it has a streamlined user interface with no learning curve. You may enjoy fast processing and rendering with this video editor for computers. The Chroma Key will effortlessly modify or remove the backgrounds of clips to whatever you choose.
Its tools are located exactly where you would expect them to be, and you’ll be able to learn its features in under 30 minutes and start editing like a pro.
You may come up with simple concepts and then use the built-in capabilities to turn them into a complete multimedia experience.
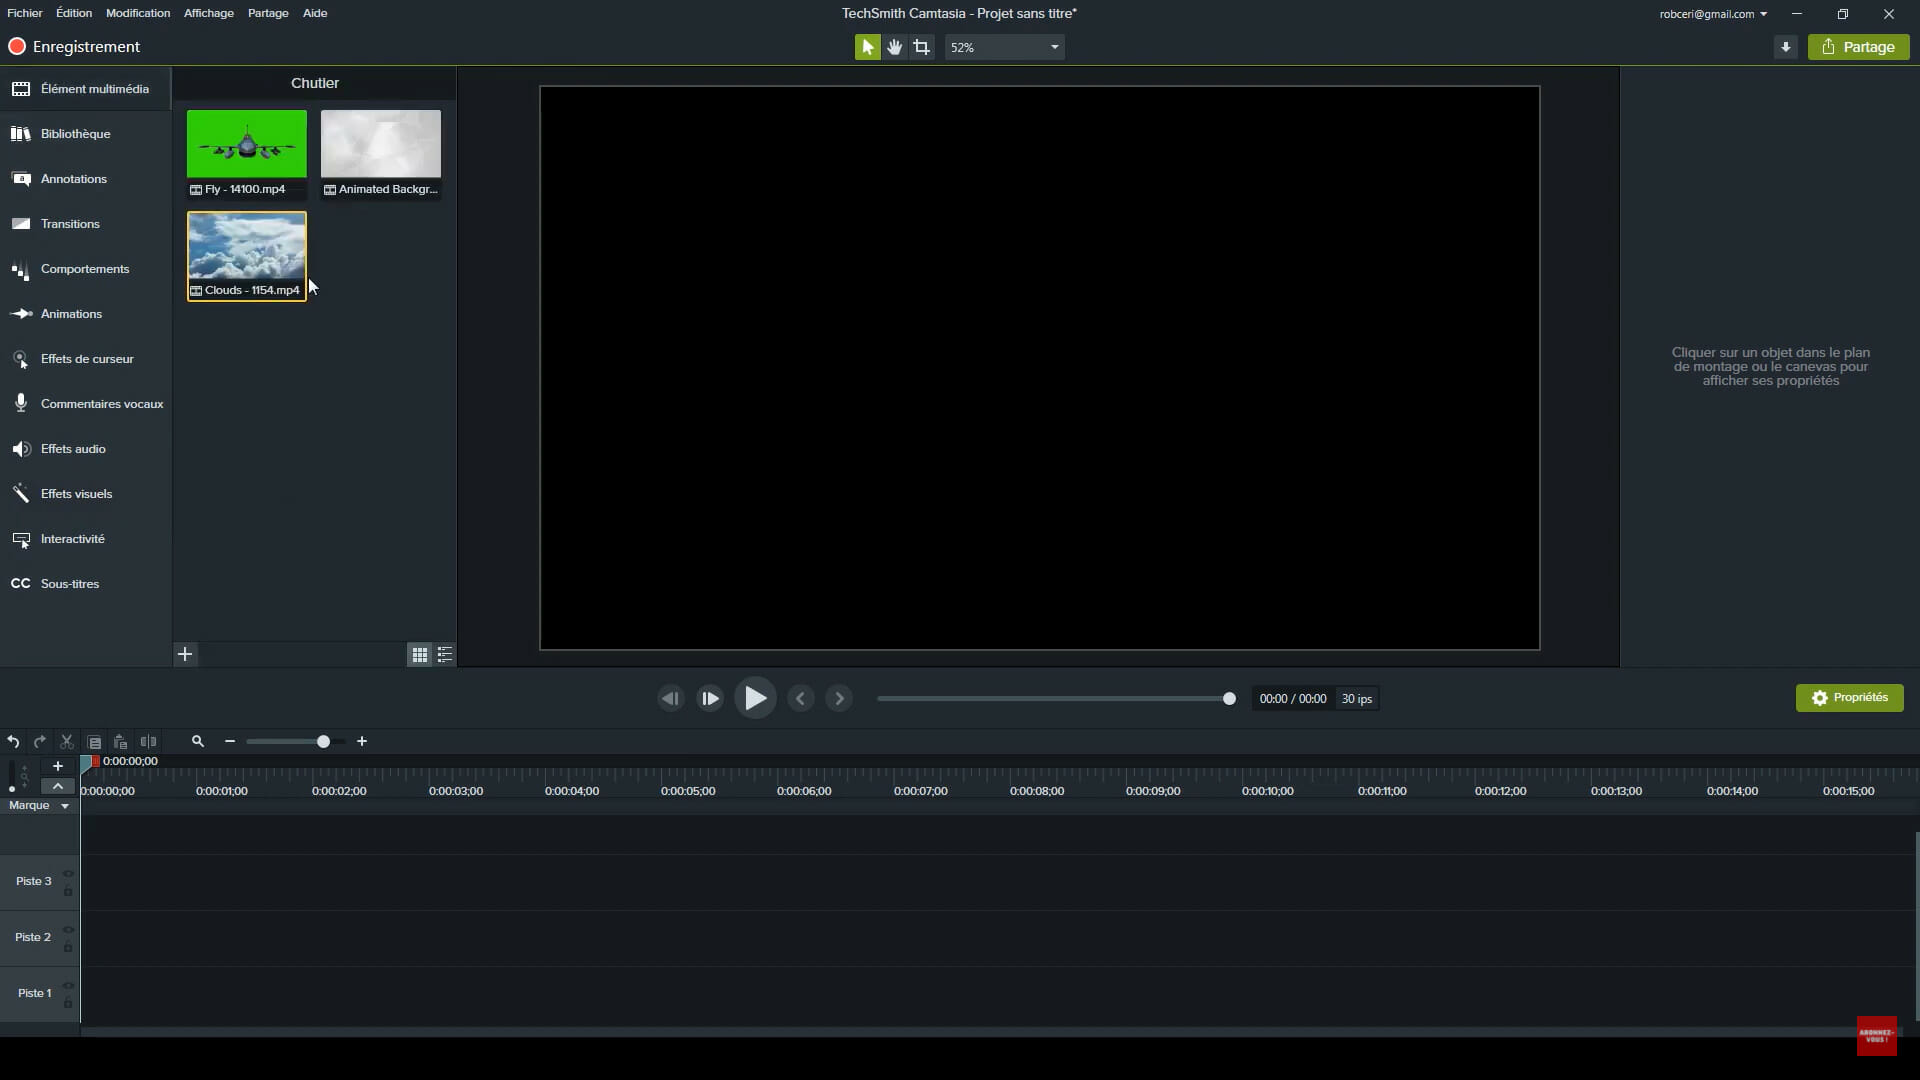
Camtasia is a video recording and editing tool that is easy to learn. You will not need a massive budget or advanced video editing abilities. Simply begin with a template, record or capture your PC screen and add some effects.
It captures the whole screen, a region, particular dimensions, an app, or a window, among other things. Any of the royalty-free materials in the Camtasia catalog can be customized and added to your video for a professional finish.
You’ll be able to use your frequently used tools and effects at the click of a button and save unique styles and setups for future use. The intuitive drag-and-drop feature makes removing, adding, trimming, and moving audio or video chunks a breeze.
In addition to its many features, you will be able to remove video backgrounds just like the other apps on this list.
It has a convenient import tool that allows you to drag and drop audio, video, or image assets from your mobile device, PC, or the cloud into your recording.
You’ll appreciate the transitions, including over 100 to utilize between scenes and slides to help your videos flow better.
The tools in this article are all free. Of course, there are paid options for added functionality, but if you aim to remove backgrounds from videos without greenscreen, they should suffice.
We always recommend you start with a free version and only purchase a subscription or an upgrade if you find it to be a perfect fit for you.
Even though this list has been made in no particular order, you should consider user-friendliness and the tool’s learning curve before deciding to stick to any video editor.
We will like to know which editor you are using. Drop us a comment below.
The Basic Input/Output System, which is also known as BIOS, has its primary function to control the early stages of the computer’s startup process and make sure the operating system is loaded correctly into memory.
The BIOS should be updated only when new features become available or if a problem arises.
However, if something goes wrong during the BIOS update, it can break your PC and make it inoperable. In this guide, we’ll explain step-by-step how to update the BIOS of the Acer Swift 3.
How to update the BIOS of Acer Swift 3
1. Download and install BIOS from the Acer website
Check the model of your PC and the BIOS version. To check them, open Acer Care Center, which is a built-in program for Acer computers.
Now select your Windows operating system version and language.
Locate the BIOS/firmware and expand it.
Download the latest available BIOS update.
Extract the .zip file.
Connect the AC adapter to your Acer computer, and make sure it isn’t removed when updating the BIOS. If your PC shuts down during the update, the BIOS can get damaged, making your PC inoperable.
Double-click on the BIOS file to update your computer with the latest available BIOS.
Click Ok on the pop-up screenafter you have read the message.
Run the BIOS file in the new OS to update the BIOS.
Is it a bad idea to update your BIOS?
BIOS updates don’t enhance the performance of your computer, nor do they come with new features every time.
Installing a new BIOS is riskier than updating a Windows program, as your computer can get bricked if something goes wrong.
You should only update your BIOS when:
If you are experiencing bugs, and the latest version of BIOS addresses these bug fixes.
If you are upgrading your computer with the latest hardware, such as a new CPU or RAM, that was just recently launched. Manufacturers release new BIOS to help your PC support the new hardware.
Can BIOS update automatically?
The simple answer is No. The BIOS doesn’t and can’t update automatically.
The BIOS update is riskier and should be done carefully, otherwise, you can break your PC and make it inoperable. And fixing a PC with a damaged BIOS can be infuriating and costly.
You can update the BIOS by flashing it (by following the steps mentioned above).
BIOS is one of the key components that need to be installed in your computer to run it smoothly. But when updating the BIOS, you should be careful or you may damage your BIOS.
If you own a Windows computer, you know the importance of having updated device drivers, but have you ever thought of updating the motherboard’s resources?
The motherboard, unlike most other devices, is sometimes not easily identifiable in the Device Manager, and sometimes it is hidden, and to view it you have to unhide them.
Keep reading this article to learn how to update your motherboard resources in the Device Manager and also unhide it if it is hidden.
Do Windows updates install drivers automatically?
Windows generally have a large catalog of drivers, and they do update the drivers with every Windows update, but the problem is that they are not the latest version, and they lack drivers for most of the devices.
Windows 11 also installs default drivers that help your PC work without any issues.
But, if you are facing any issue or a component has completely stopped working, you might have to update the device with updated drivers.
Where do I find the motherboard resources in the Device Manager?
1. Unhide system resources
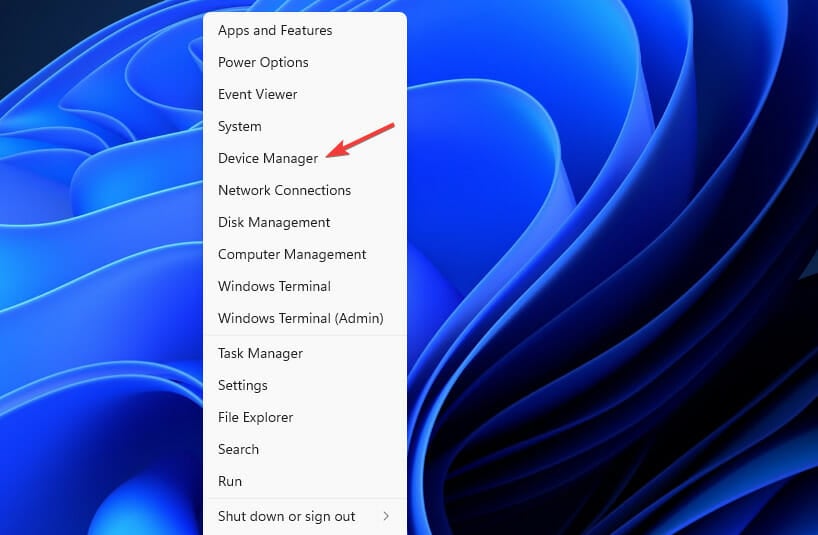
Click on the Start button and search for Device Manager
In the Device Manager window, click on View.
Then click on Show hidden devices.
Now you should see the motherboard resources under the System devices tab.
2. Manually updating the drivers
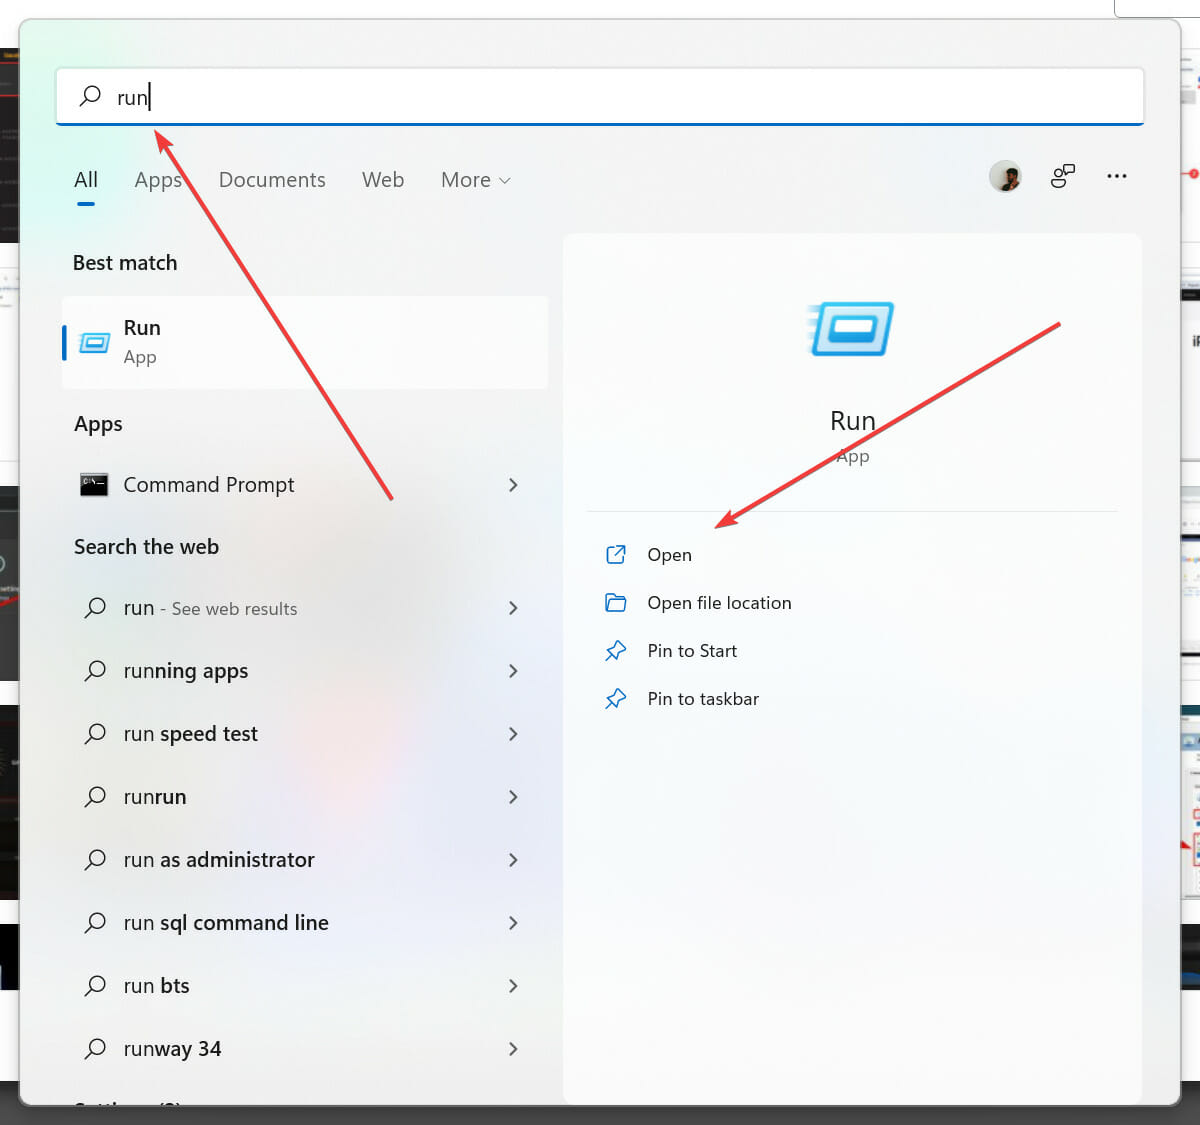
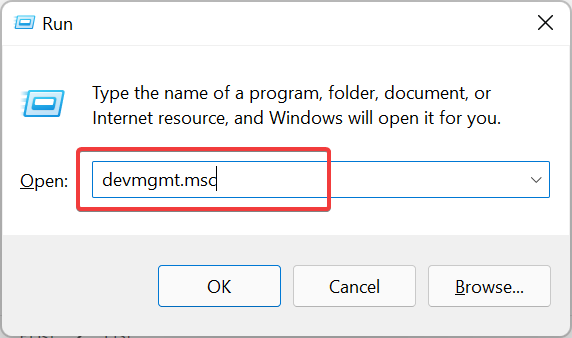
Press Win + R to open the run dialog box.
Type devmgmt.msc and click on Ok.
Locate System devices and expand them.
Update the device’s driver by right-clicking and selecting Update driver.
Then click on Search automatically for updated driver software.
Allow a few minutes for Windows to locate the drivers.
Once located, Windows will download and install the drivers.
Once the installation process is complete, click on Close.
Reboot your PC.
Repeat this process for every driver under System devices to keep your motherboard’s resources updated with the latest drivers.
Open Outbyte Driver Updater and scan to see if any new drivers are available.
Once found, click on Update/Update all.
Allow a few minutes for the drivers to be downloaded and installed.
Once the installation is complete, reboot your PC.
Why should you update the motherboard resources?
When you update motherboard resources, you are not updating the drivers for the motherboard itself. Instead, you are updating drivers for all the components that are attached to the motherboard, such as the CPU, RAM, peripheral devices, etc.
The motherboard itself doesn’t require drivers, but you do require drivers for the hardware components and peripherals that are connected to the motherboard.
Drivers act as a bridge between software and hardware, and they help the hardware components of your PC communicate with the software.
Without the drivers, your PC cannot communicate properly and your PC will show performance issues. And if you are running outdated drivers or drivers that have been corrupted, your PC can malfunction and stop working.
By updating the drivers regularly, you can have your PC run efficiently and at maximum performance. You will also avoid running into problems such as network issues, audio issues, and whatnot, which are the result of having outdated or corrupted drivers on your PC.
The motherboard hosts all the components, and to connect the hardware with the software, manufacturers release drivers that help these two communicate with each other.
It is always recommended to update every device driver with the latest one so that your computer runs error-free.
We hope this article has helped you learn how to update your device’s drivers properly.
If your computer stops working due to a compromised operating system or if it is a new computer that you are just setting up, you can use the bootable flash drive to install the operating system.
And if your Acer Swift 3 for some reason fails to boot, you can boot it using a bootable flash drive. What if your Acer Swift 3 fails to boot using USB? What do you do in this case?
You’ve reached the right place to know how to boot your Acer Swift 3 using USB.
What can I do if my Acer Swift 3 cannot boot from a USB flash drive?
1. Unplug all USB devices
Your Acer Swift 3 cannot boot from USB due to some interference, so unplug all USB devices, including the USB keyboard and mouse.
Now plug them in one by one and make sure all the USB devices don’t cause interference. Also, make sure your Acer Swift 3 works normally.
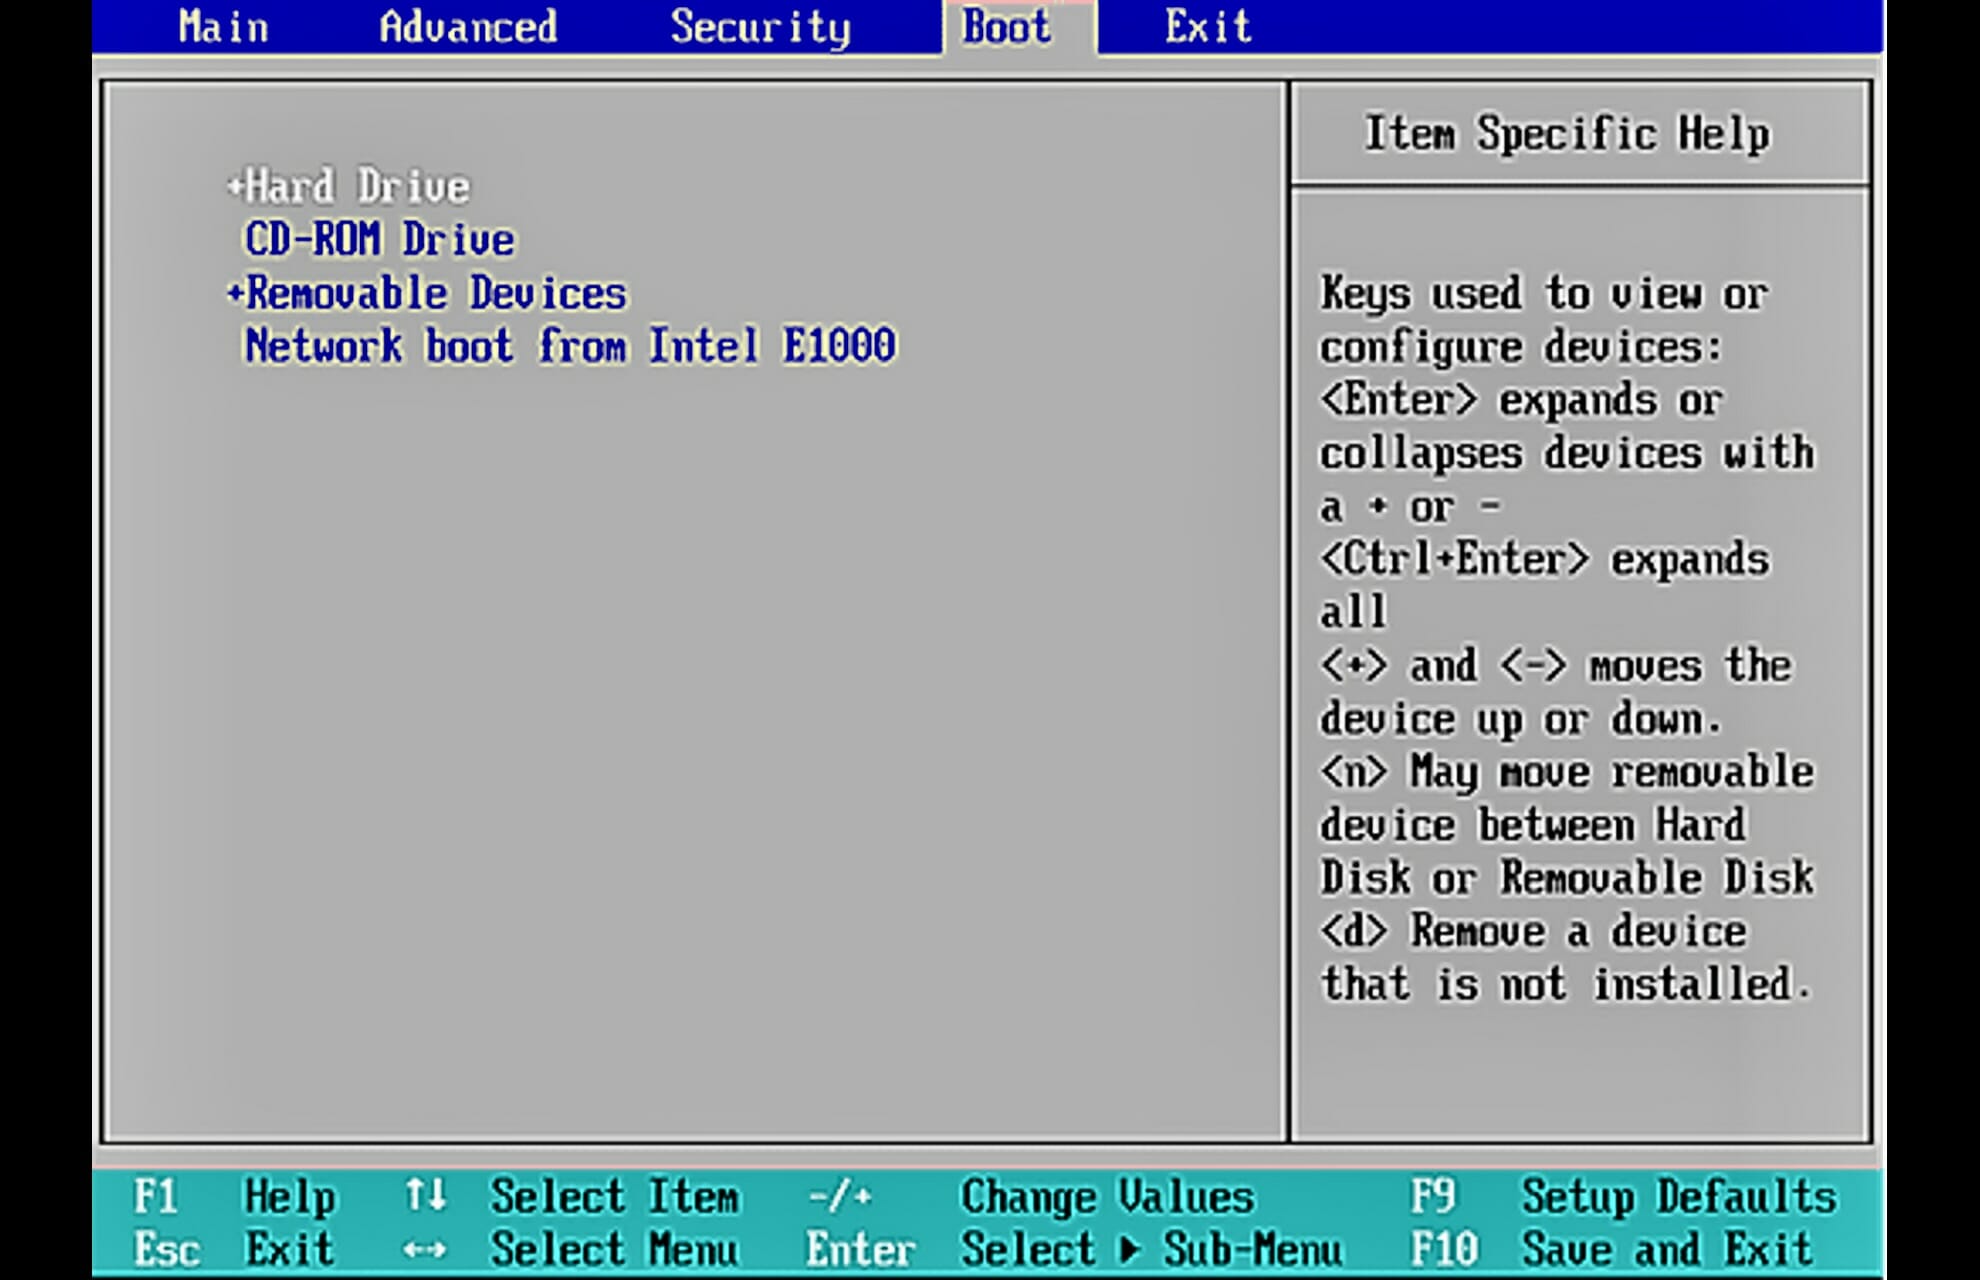
2. Change the boot order
Restart your computer and press F2 to open the BIOS screen.
Using the arrow keys, go to the Boot tab.
Change the boot order and make the USB the first boot device, then exit from that tab.
Close the BIOS settings page by selecting Exit saving changes or Save Changes and exit.
Restart your computer.
3. Turn on Legacy Boot
Power on your PC.
Press F2 to open the BIOS settings or press the Del key, as some Acer computers use the Del key to enter the BIOS settings page.
Go to the Main tab.
If the F12 Boot Menu setting is disabled, enable it.
Now, navigate to the Boot tab.
Select Legacy from the Boot Mode drop-down menu.
Press Enter.
Save the changes and exit the BIOS settings page.
4. Make the primary partition active
Insert the Windows 11 installation disk into your computer.
Select your language and region, then click Repair your computer to enter Advanced Startup Options.
In the Command Prompt window, enter these commands:
diskpart
select disk 0 The number 0 represents the system disk number.
list partition 1 The number 1 represents the system partition number.
active
If the primary partition was not set as active initially, then the Acer computers may show no bootable device. After following the above steps, the system partition will be set to active. Now restart your computer and check if the error persists.
The above commands will scan your hard drive for file corruption and repair any corrupted files that are preventing Windows from booting up properly.
Acer, Dell, and other computers from other manufacturers sometimes fail to boot. By updating the BIOS you can generally fix the issue.
But, if you are trying to update the BIOS using the USB flash drive and even if it fails then you can try other alternatives such as using the Windows installation media or you can create the installation media for yourself by downloading it from Microsoft Windows download page.
It may be difficult to track down a high-quality LG Gram 17 screen protector, but this article will help you.
Because of the lighting conditions, it is inconvenient to change positions while working.
So it’s preferable to come up with a solution and ensure that the lighting conditions do not impact the laptop screen, allowing you to work productively at any time and in any location.
Screen protectors, which come in a variety of types, are one of the most effective solutions.
We have selected some of the best laptop screen protectors because the laptop screen is the most delicate component of a laptop, and it needs more care and attention.
Puccy privacy screen protector film protects laptop screen from scratches, damages, strikes, dropping, and collision.
This product uses silicone glue that is easy to remove. Airless processing removes air bubbles under the screen protector, and adsorption happens naturally.
When you use this screen protector, the brightness of the screen will be decreased. Adjust the brightness to meet your demands.
This product has Anti Blue Light which makes this product a perfect choice for students, office staff, game lovers, fashion beauty bloggers, pregnant women, and the elderly who spend a lot of time using a laptop.
If you’re looking for an LG Gram 17 screen protector capable of filtering out Blue Light, relieving eye fatigue, and helping you sleep better, MUBUY-GOL will be a perfect choice.
The matte layer of our screen protector helps you work better in a bright environment since it captures light reflections and the surroundings.
This laptop screen protector saves users’ eyes from harmful Blue Light and reduces eye fatigue, and helps you keep your eyes healthy.
This product is 0.01-inch thick and offers a high level of functionality and transparency. You can enjoy a high-definition and realistic view experience.
Additionally, the screen protector performs well, shielding the screen from scratches and dust in everyday use.
This screen protector blocks your laptop screen’s Blue Light and reflection due to lights, and it helps you relieve your eyes fatigue and nearsightedness (myopia).
One of the best LG Gram 17 screen protectors, the oleophobic and hydrophobic coating protects your screen from fingerprints, dust, scratches, and cracks.
This screen protector use Really Touch Sensitivity that gives you a natural feel while keeping touch accuracy.
If you spend long hours working with your laptop, your eyes may suffer from Blue Light and fatigue.
This screen protector helps you work with your computer during working hours without any eye strain or insomnia at night.
The anti-glare coating reduces the visual and reflection interference in high light conditions.
If you want to take care of your laptop and extend its life, you have to use the best screen protector. Besides, your eyes health is the most important thing.
You need the best LG Gram 17 anti-glare screen protector if you work in high light conditions.
If you work in a crowded environment and need some privacy, buy an LG Gram 17 privacy shield that protects your screen contents from others around you.
Device Manager is the utility in Windows where all the connected devices are listed. Also, here you can identify and troubleshoot problematic hardware, and even change the power settings. But, for some users, the Power Management tab is missing in Device Manager.
This could happen due to a bunch of reasons and is likely to affect your experience due to the inability to make changes. In this case, you wouldn’t be able to configure how the system controls the device’s power and whether the device can wake up the PC.
So, read the following section to find out what to do if the Power Management tab is missing in Device Manager in Windows 11.
What do I do if the Power Management tab is missing in Device Manager?
1. Update Windows
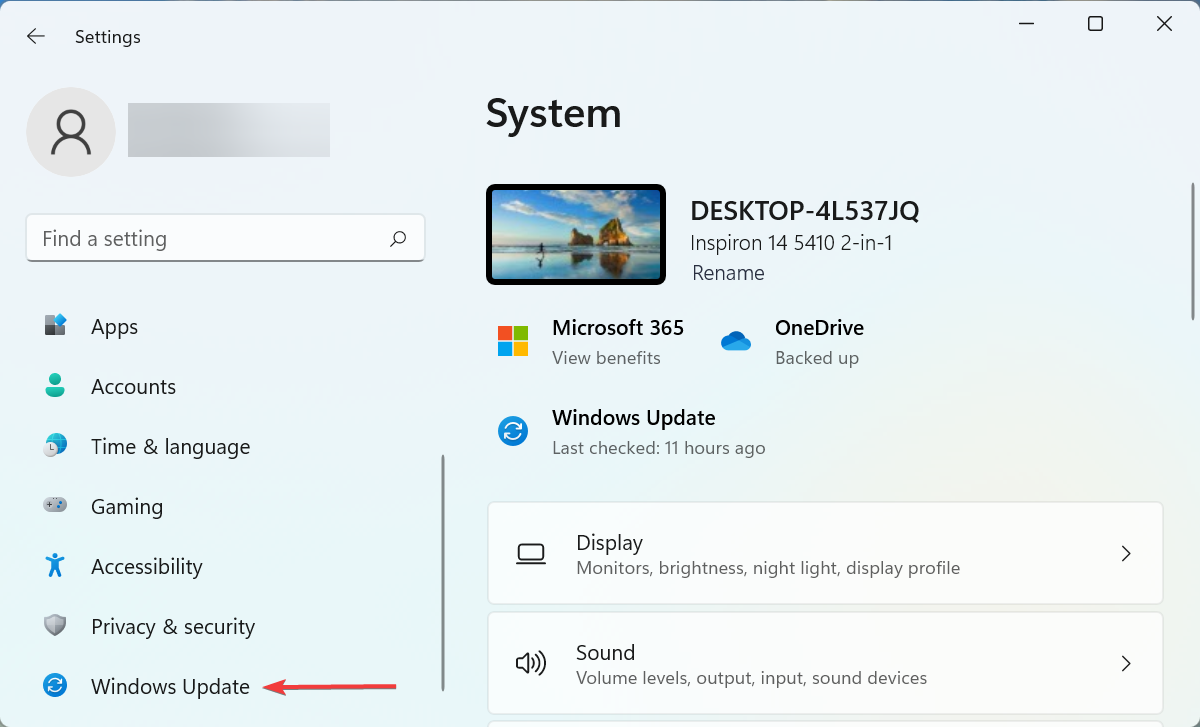
Press Windows + I to launch the Settings app, and select Windows Update from the tabs in the navigation pane on the left.
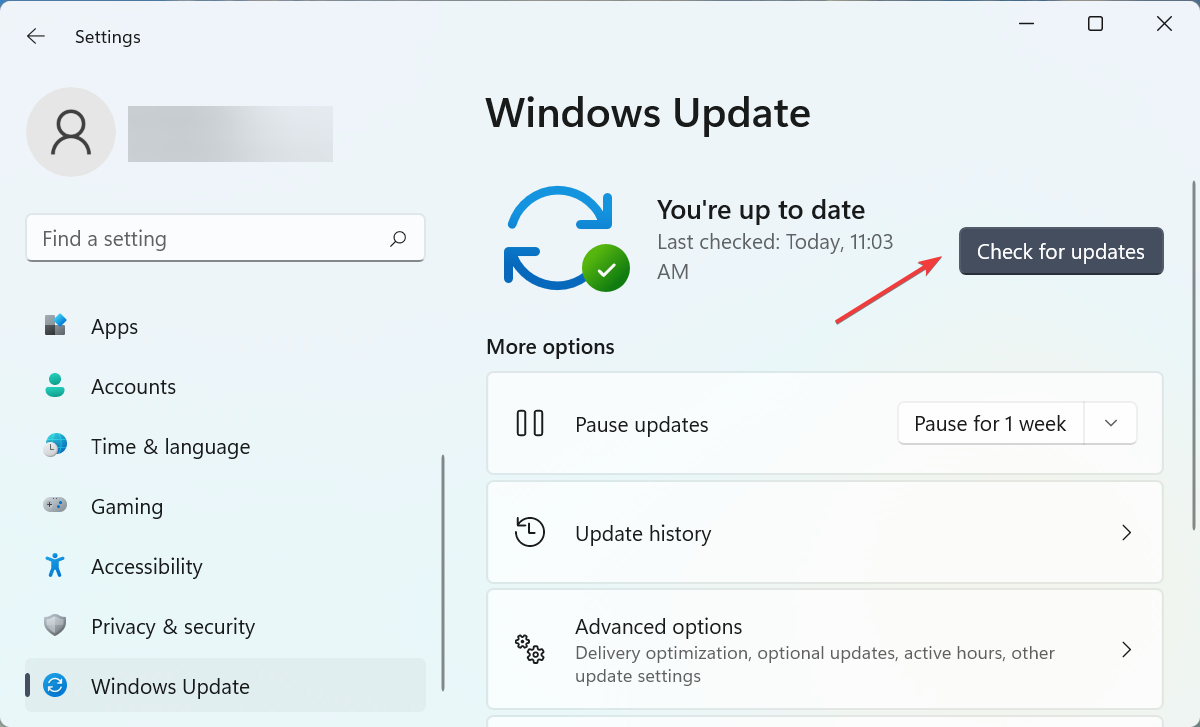
Next, click on the Check for updates button on the right to scan for any new available versions of the OS.
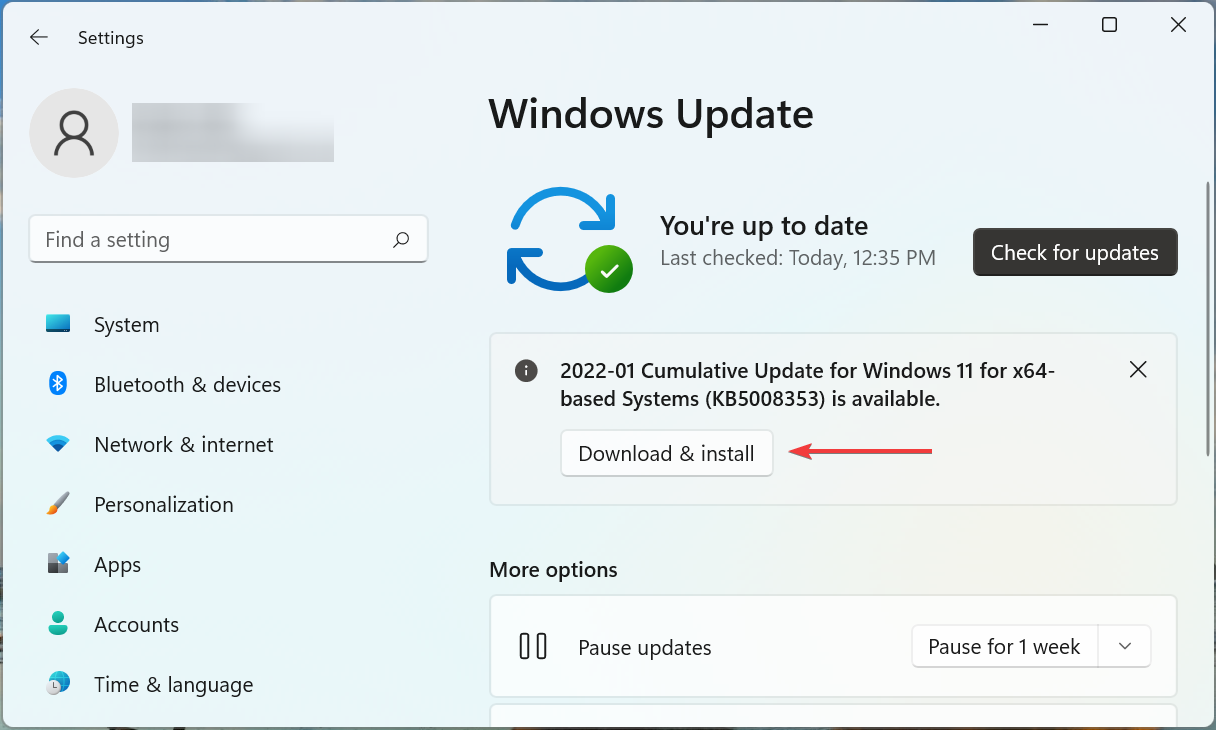
If an update is listed, click on Download & install.
One of the first things you should do when the Power Management tab is missing in Device Manager is to update the OS. Oftentimes, a bug with the current version of Windows could be behind the problem.
If the problem persists after making the changes, head to the next method.
2. Change BIOS settings
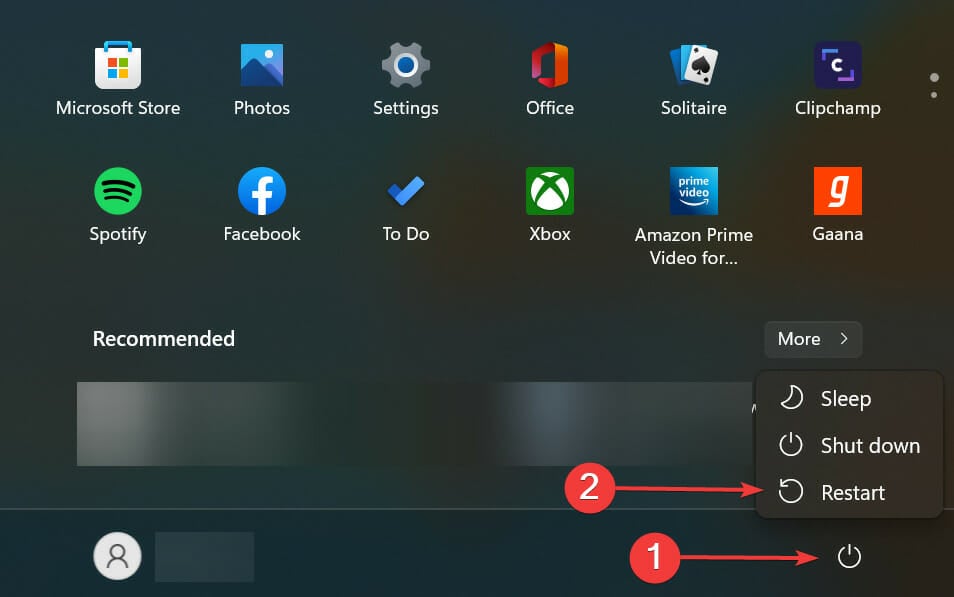
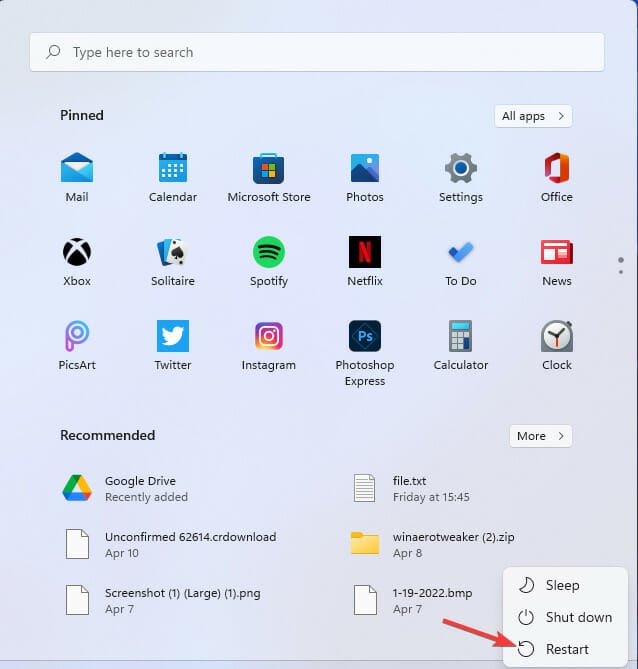
Press the Windows key to launch the Start menu, click on the Power button, hold Shift, and then click on Restart.
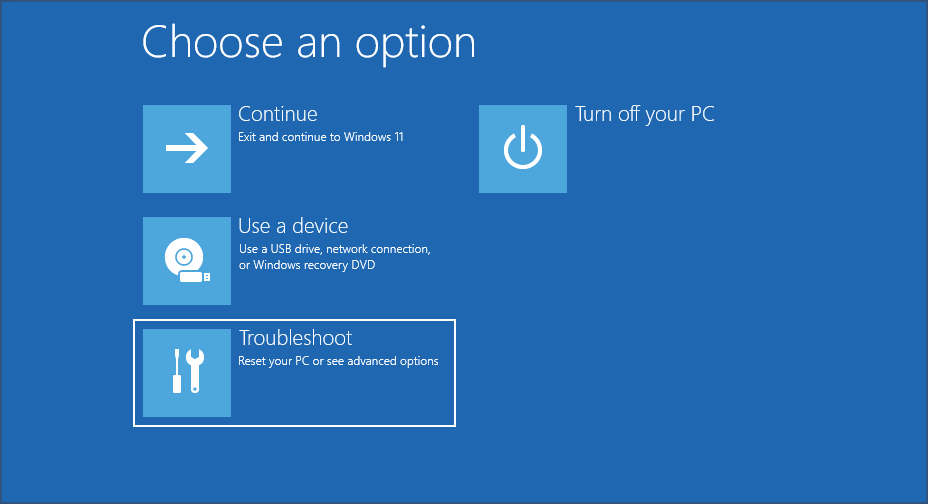
Wait for your PC to enter the Recovery Environment (RE), and then select Troubleshoot.
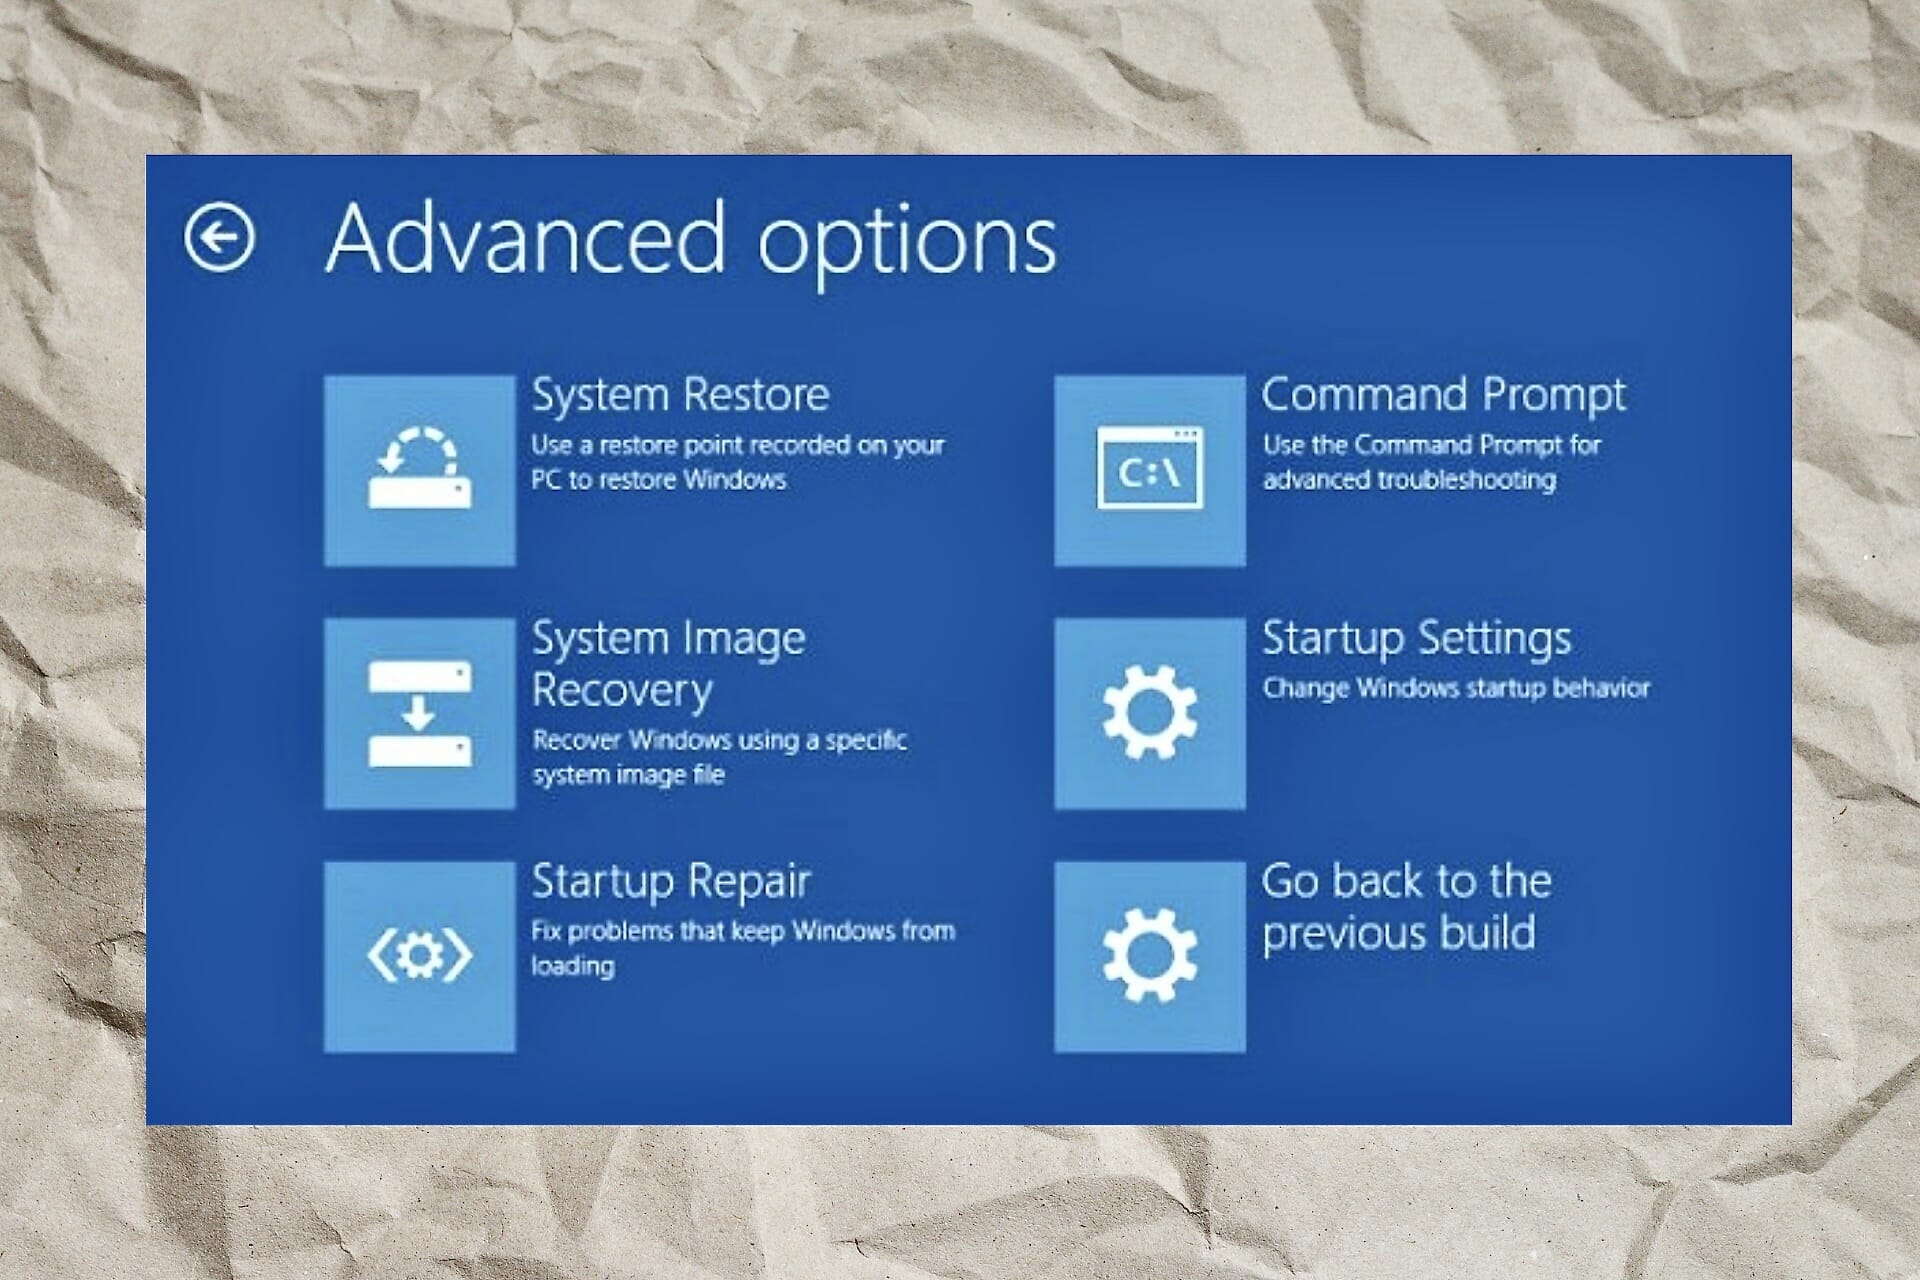
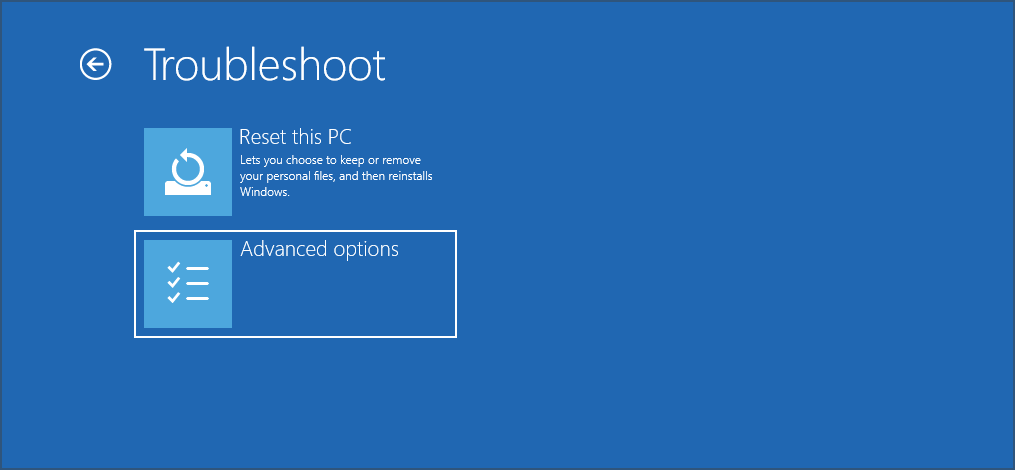
Next, click on Advanced options.
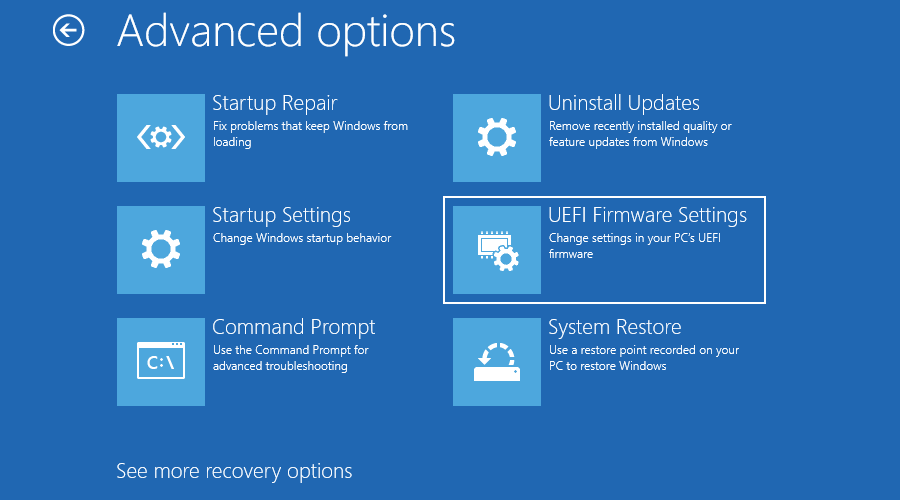
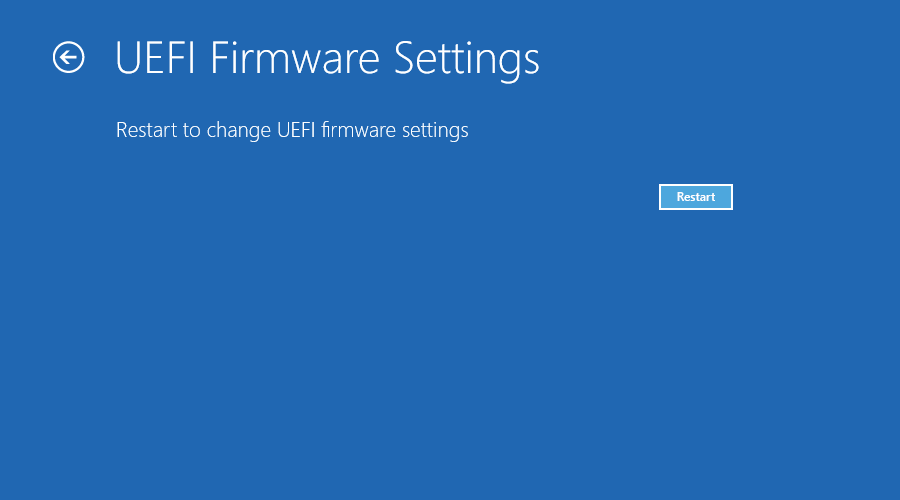
Click on UEFI Firmware Settings from the six options that appear here.
Now, click on Restart to enter the system BIOS.
Click on the Power Management tab.
Now, enable the USB Wake Support feature, save the changes, and exit the BIOS.
The USB Wake Fit feature in Windows helps wake the computer from sleep using USB devices, such as the mouse and the keyboard. If the feature is disabled, the Power Management tab may be missing in Device Manager in Windows 11, so try enabling it.
3. Reinstall the driver
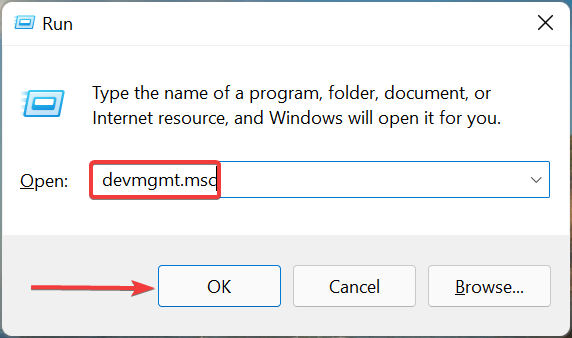
Press Windows + R to launch the Run command, enter devmgmt.msc in the text field, and either click on OK or hit Enter to launch the Device Manager.
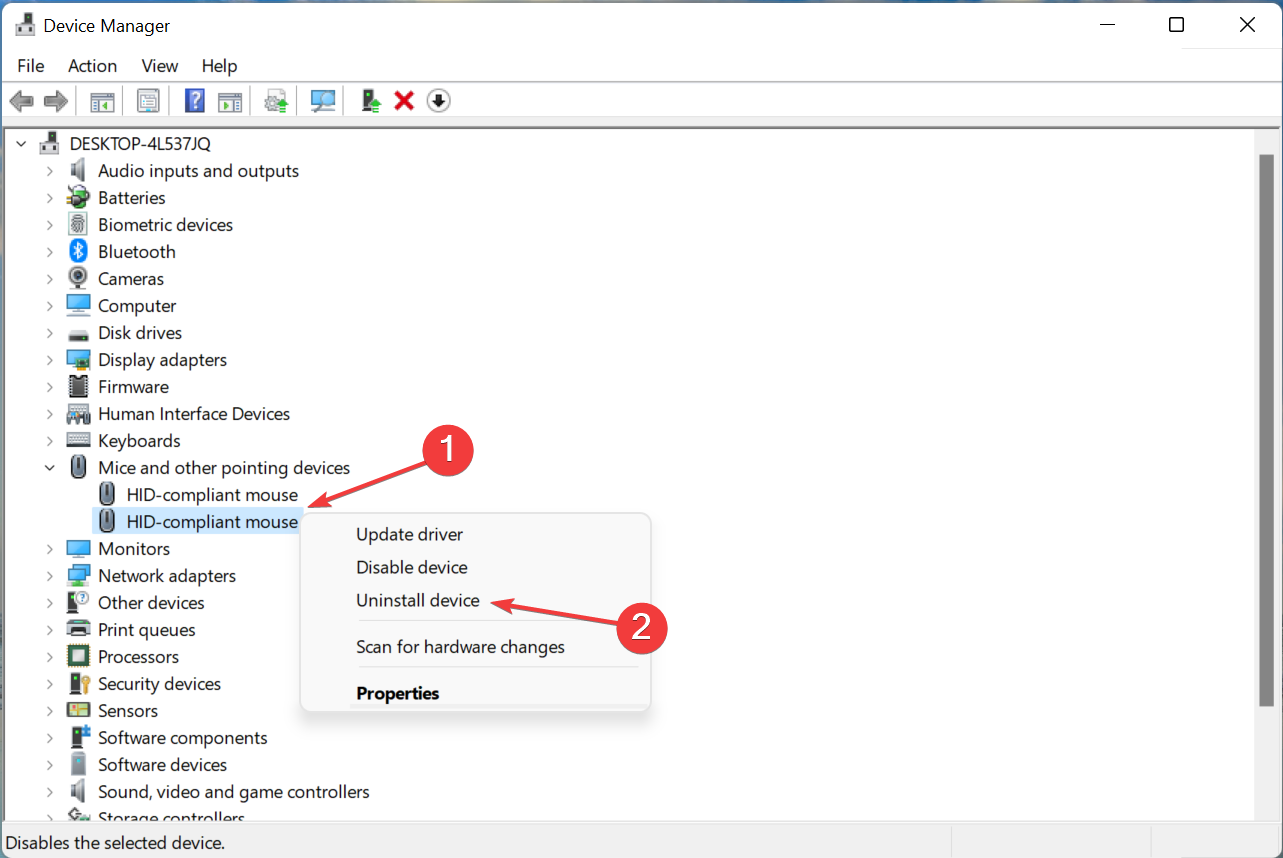
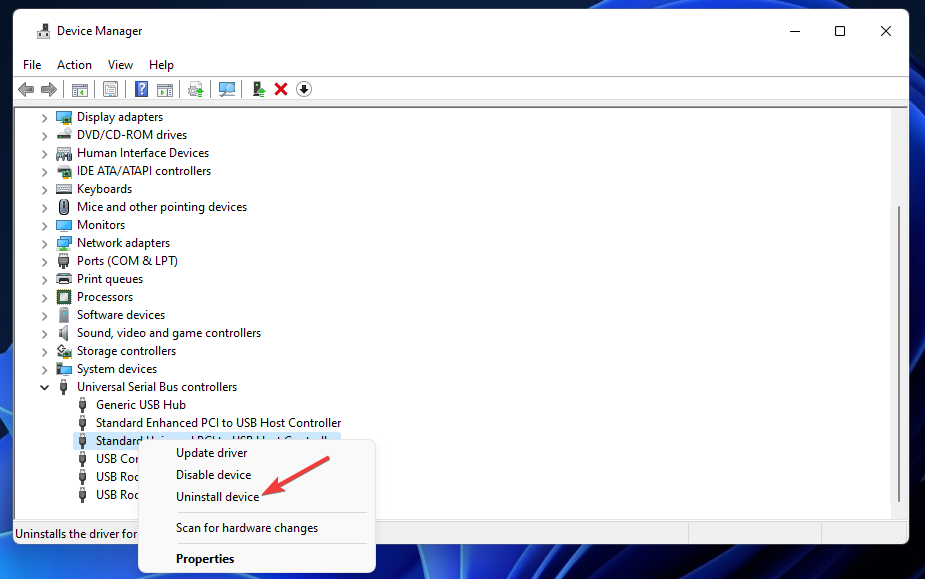
Locate the problematic device here, right-click on it, and select Uninstall device from the context menu.
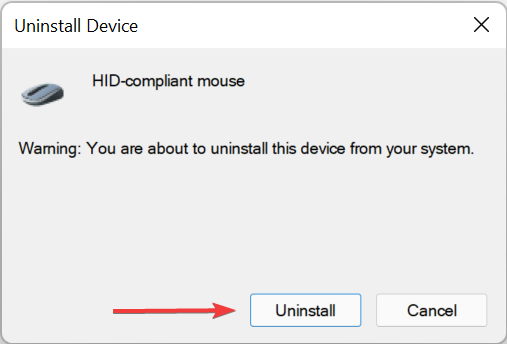
Click Uninstall in the confirmation prompt that appears.
If the currently installed driver is corrupt, reinstalling it should do the trick. A corrupt driver can easily be identified by the warning sign right at the corner of the device icon.
Once done, check if the Power Management tab reappears in Device Manager.
4. Update the device’s driver
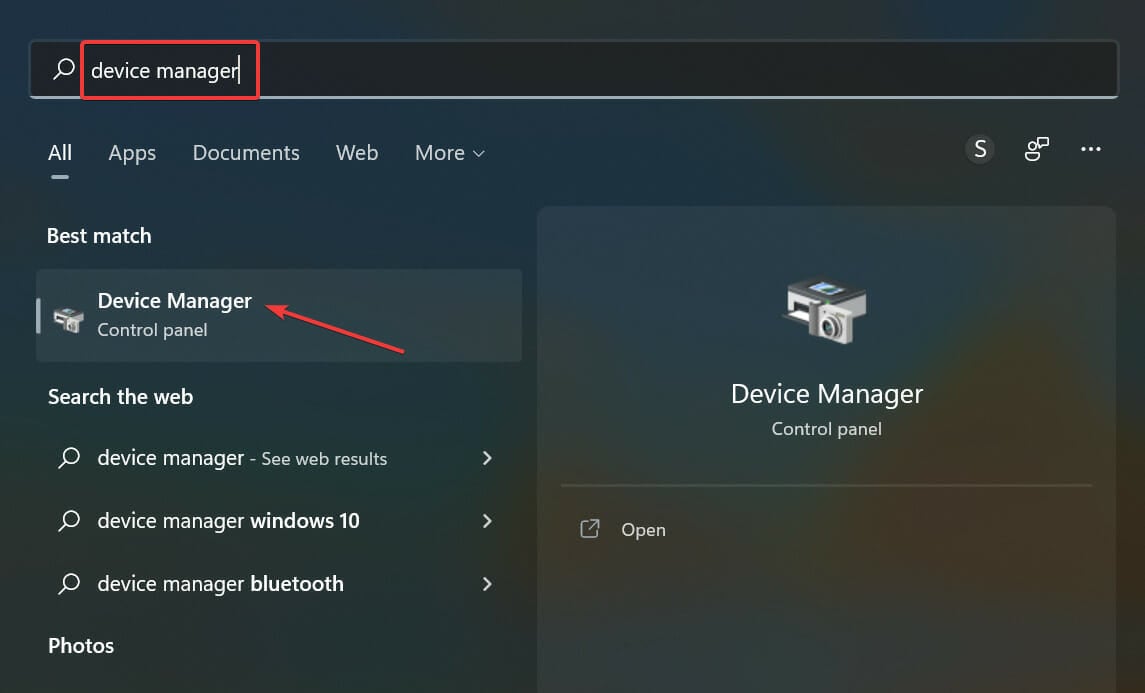
Press Windows + S to launch the Search menu, enter Device Manager in the text field at the top, and click on the relevant search result.
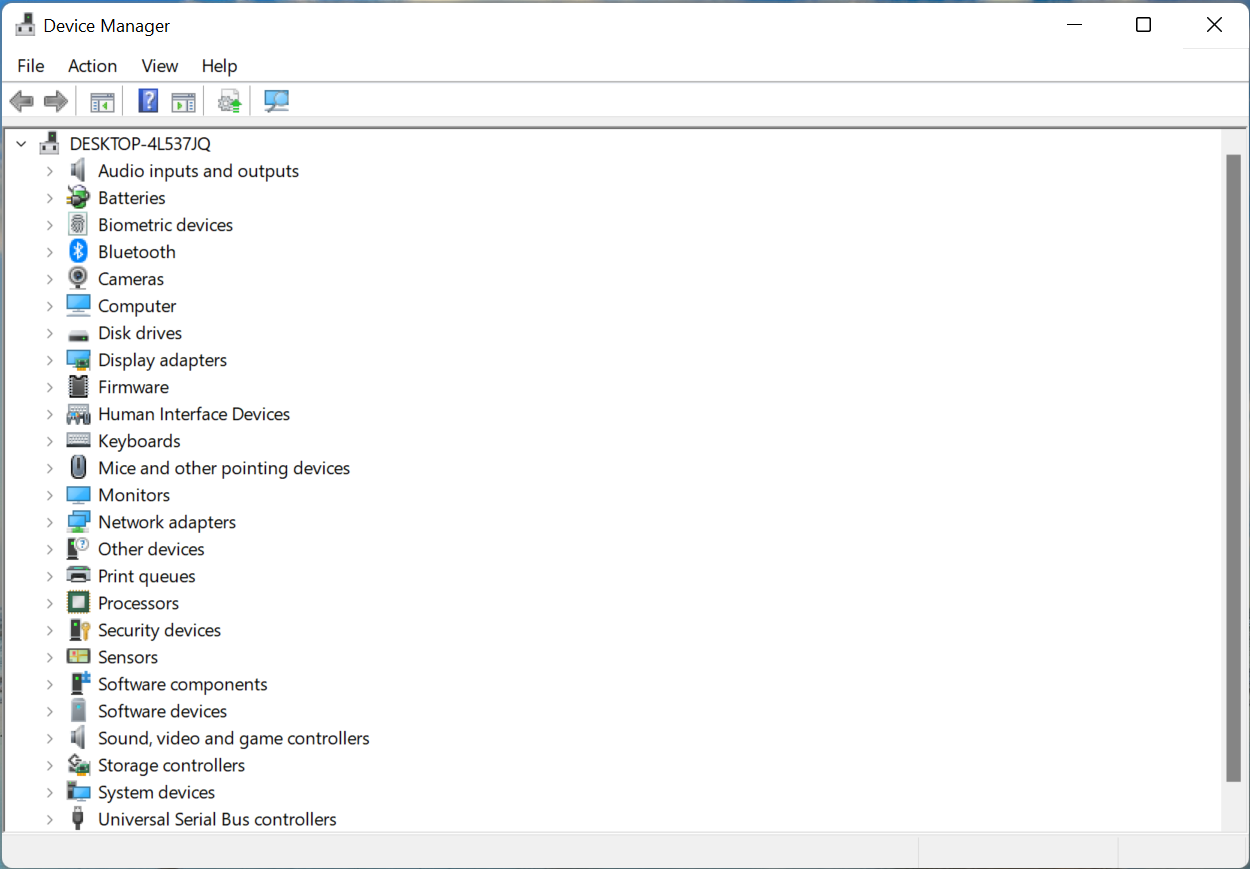
Next, double-click on the entry under which the problematic device is located.
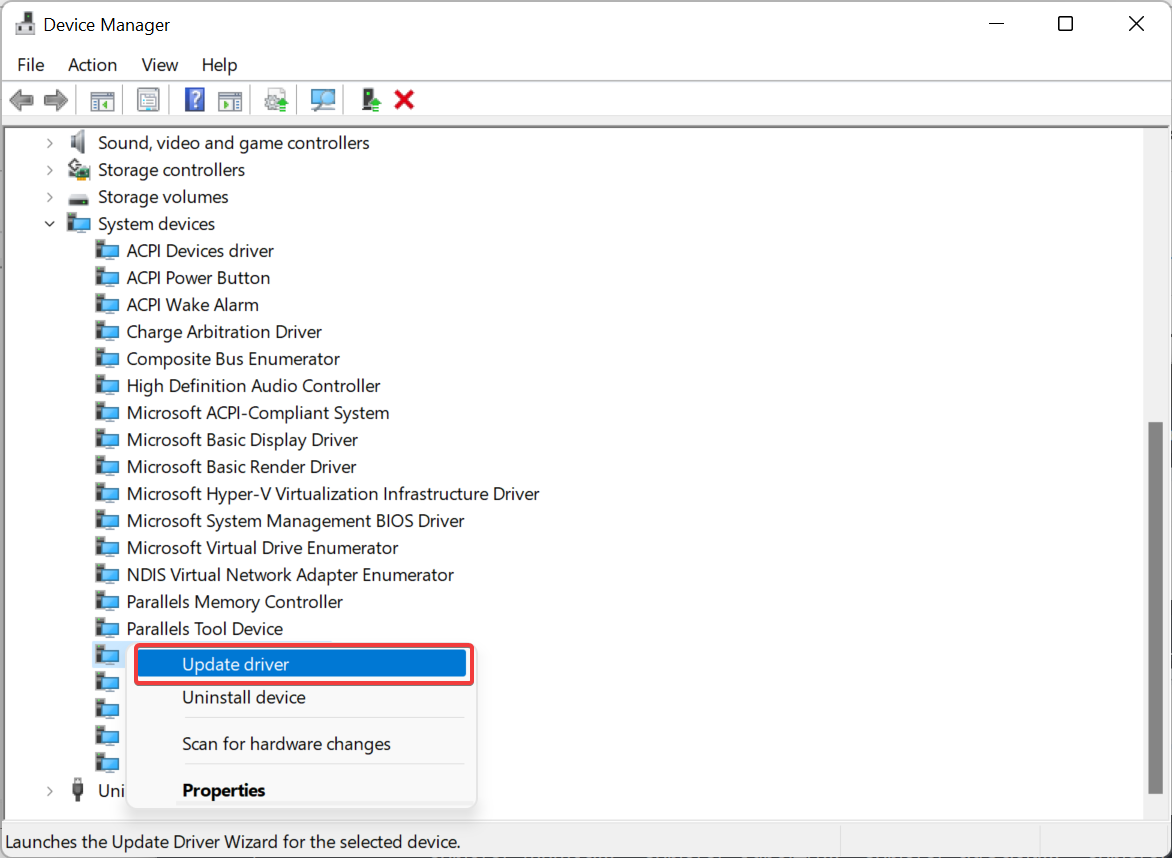
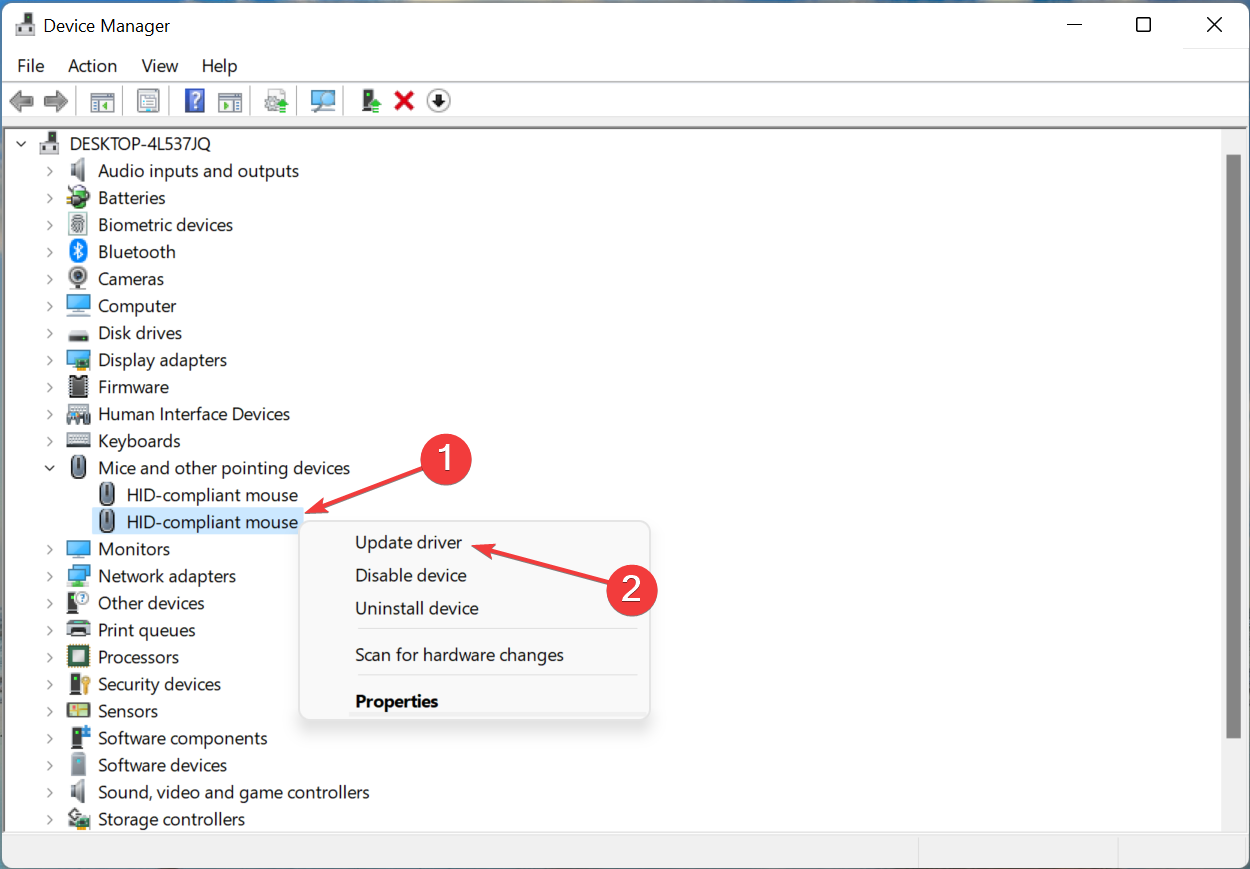
Right-click on the problematic device, and then select Update driver from the context menu.
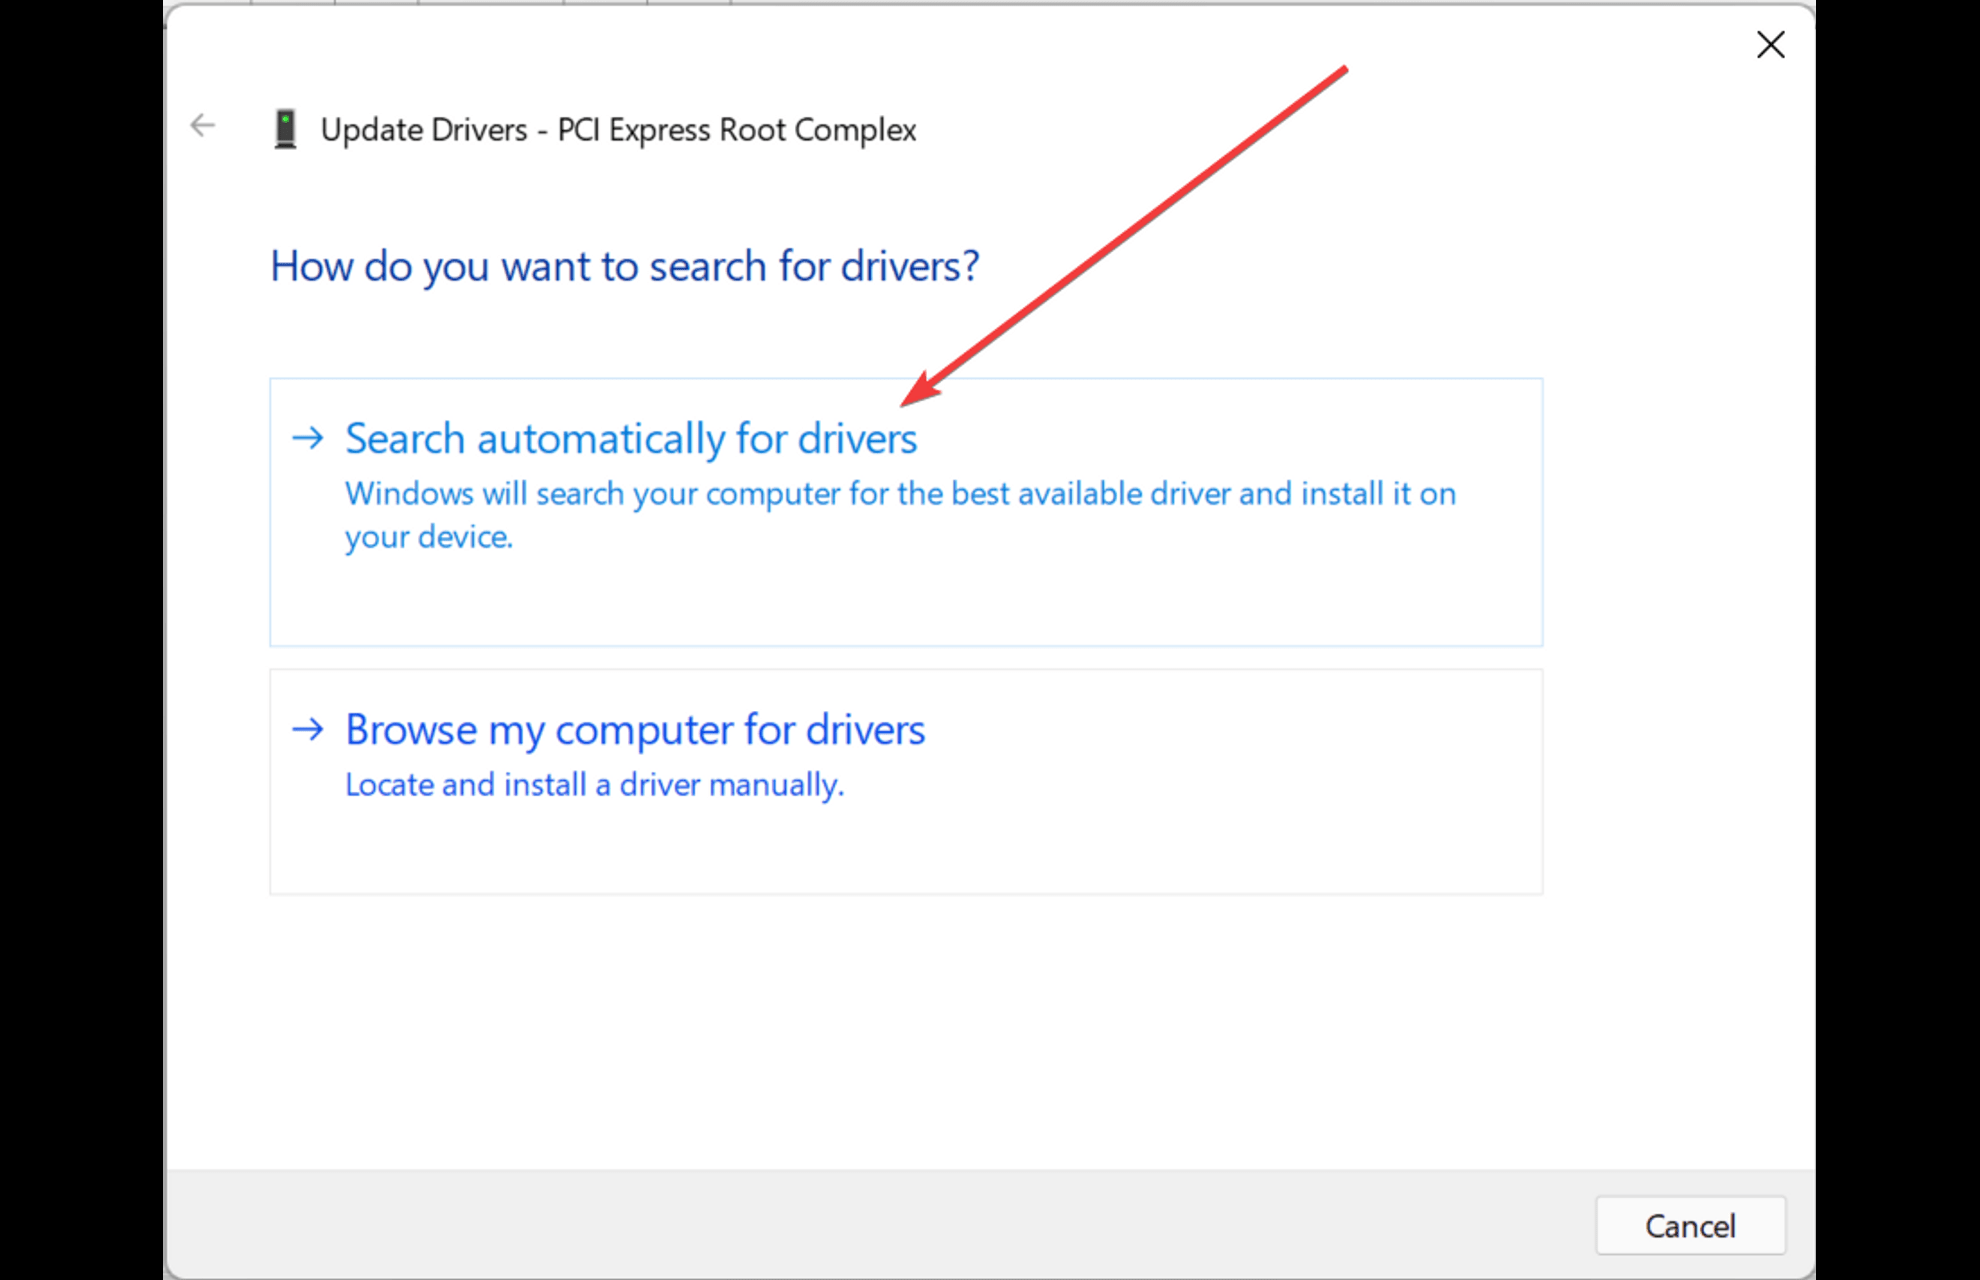
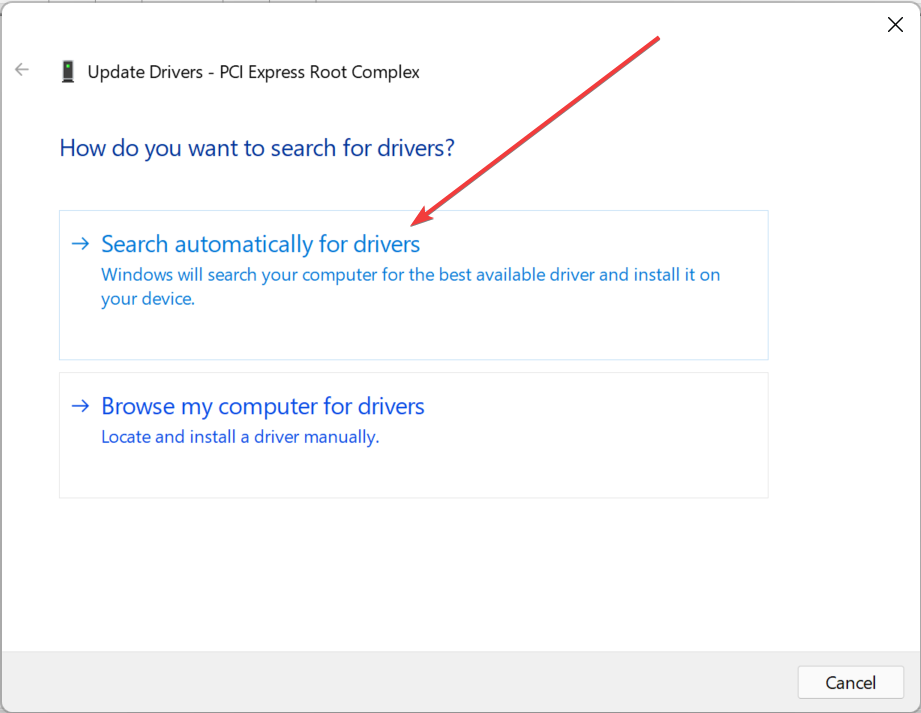
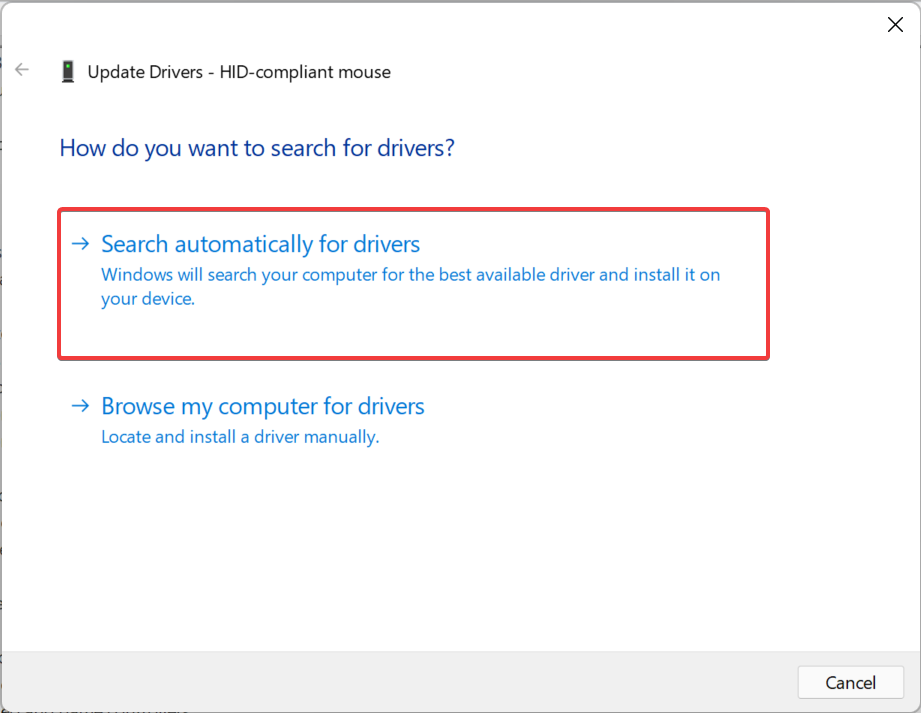
Now, select Search automatically for drivers from the two options that appear in the Update Drivers window.
Wait for Windows to find the best available driver on the system.
Drivers play a critical role in the way the OS interacts with the device and the relay of commands between the two. However, if the installed driver doesn’t support the option, the Power Management tab may be missing in Device Manager.
Do this for all such devices where the Power Management tab is missing and once done, restart the computer for the changes to come into effect.
You can perform this time-consuming operation manually, yet there is an automated driver software capable to install or update any device drivers on your PC.
5. Access the Power Management tab via Control Panel
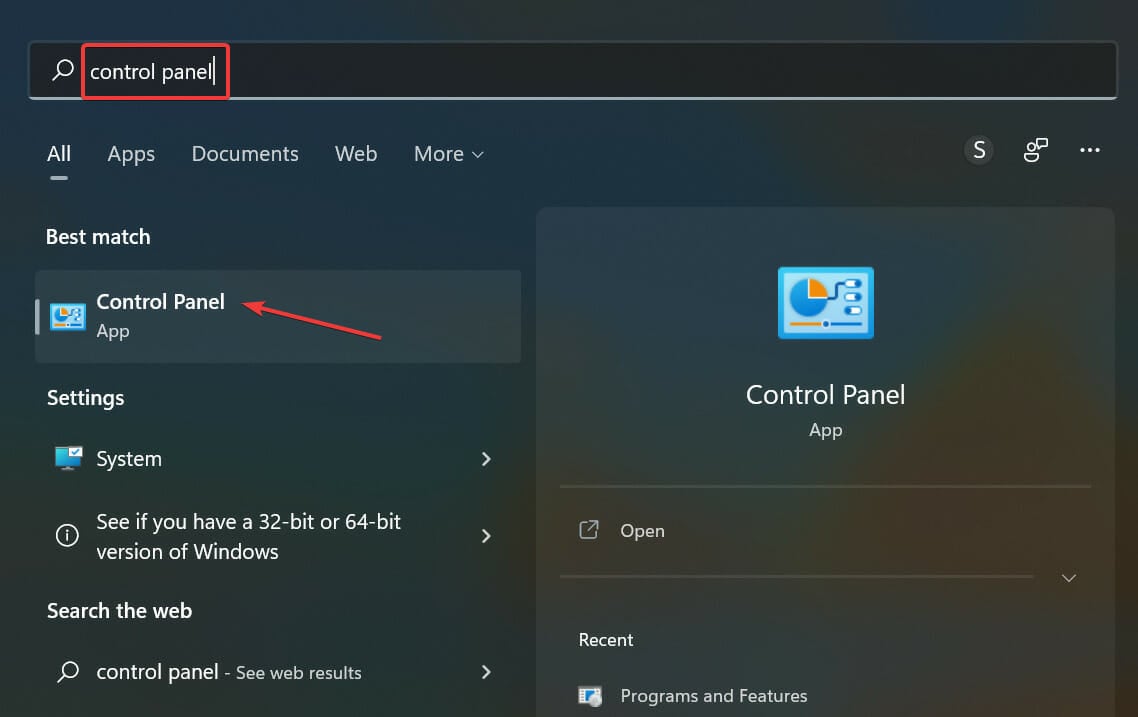
Press Windows + S to launch the Search menu, enter Control Panel in the text field at the top, and click on the relevant search result that appears.
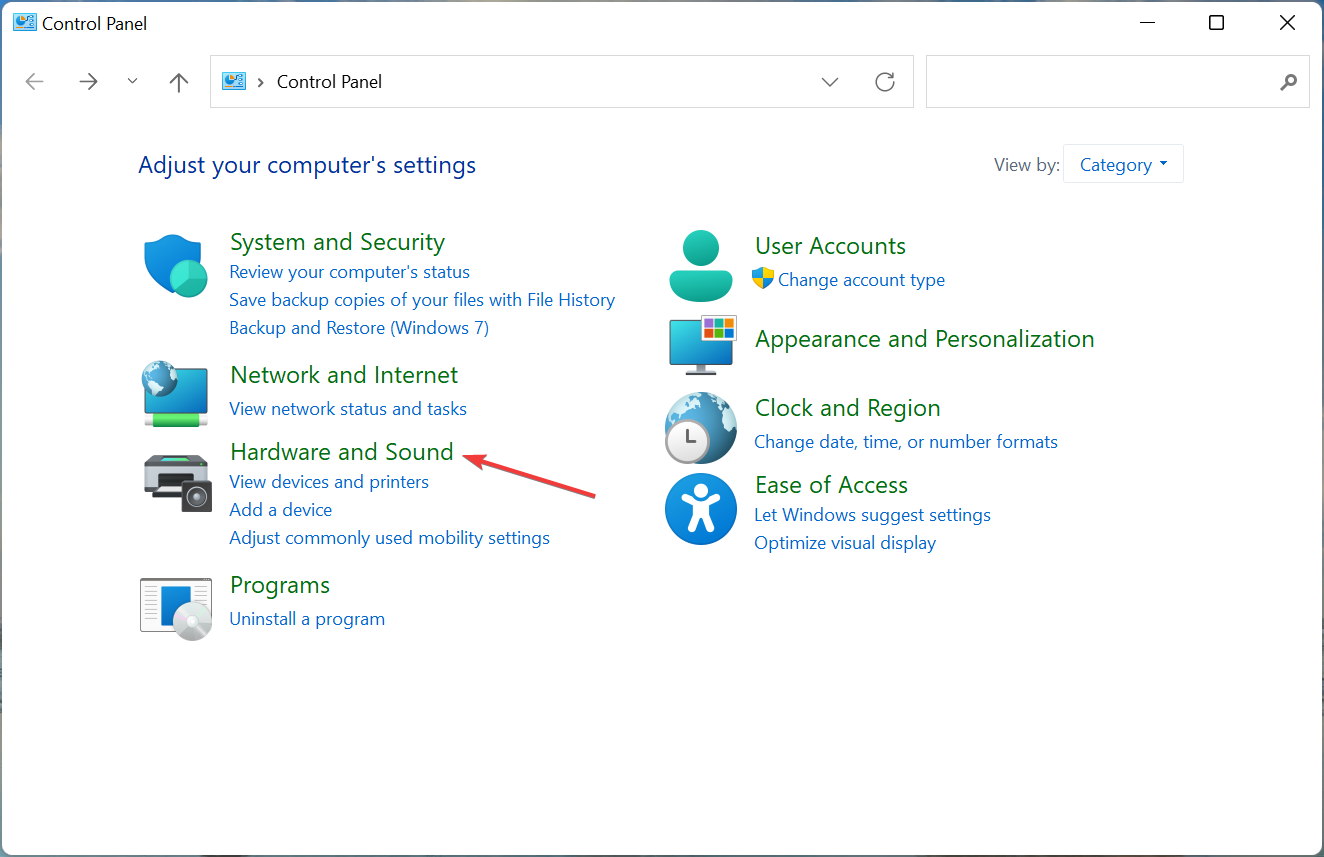
Click Hardware and Sound from the various options listed here.
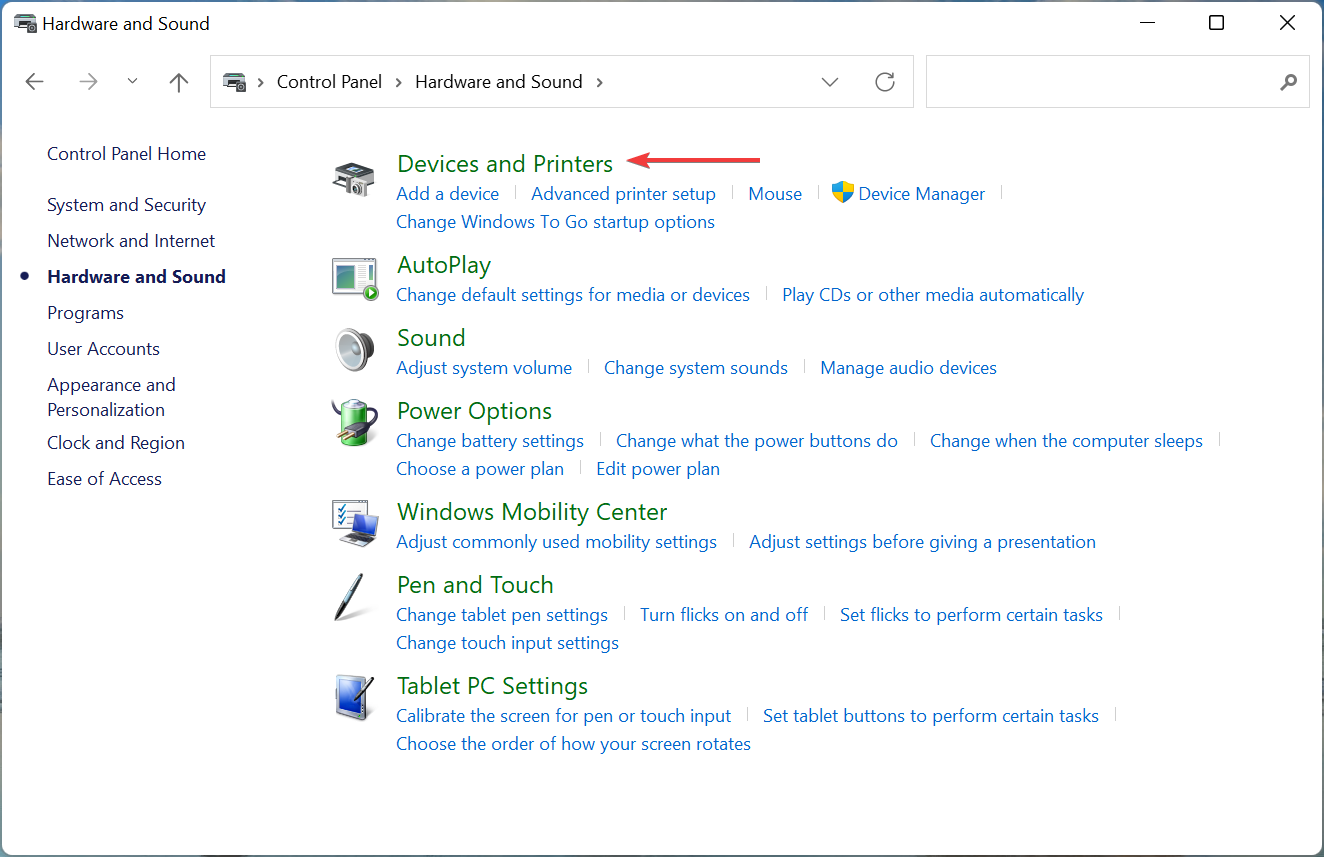
Next, click on Devices and Printers.
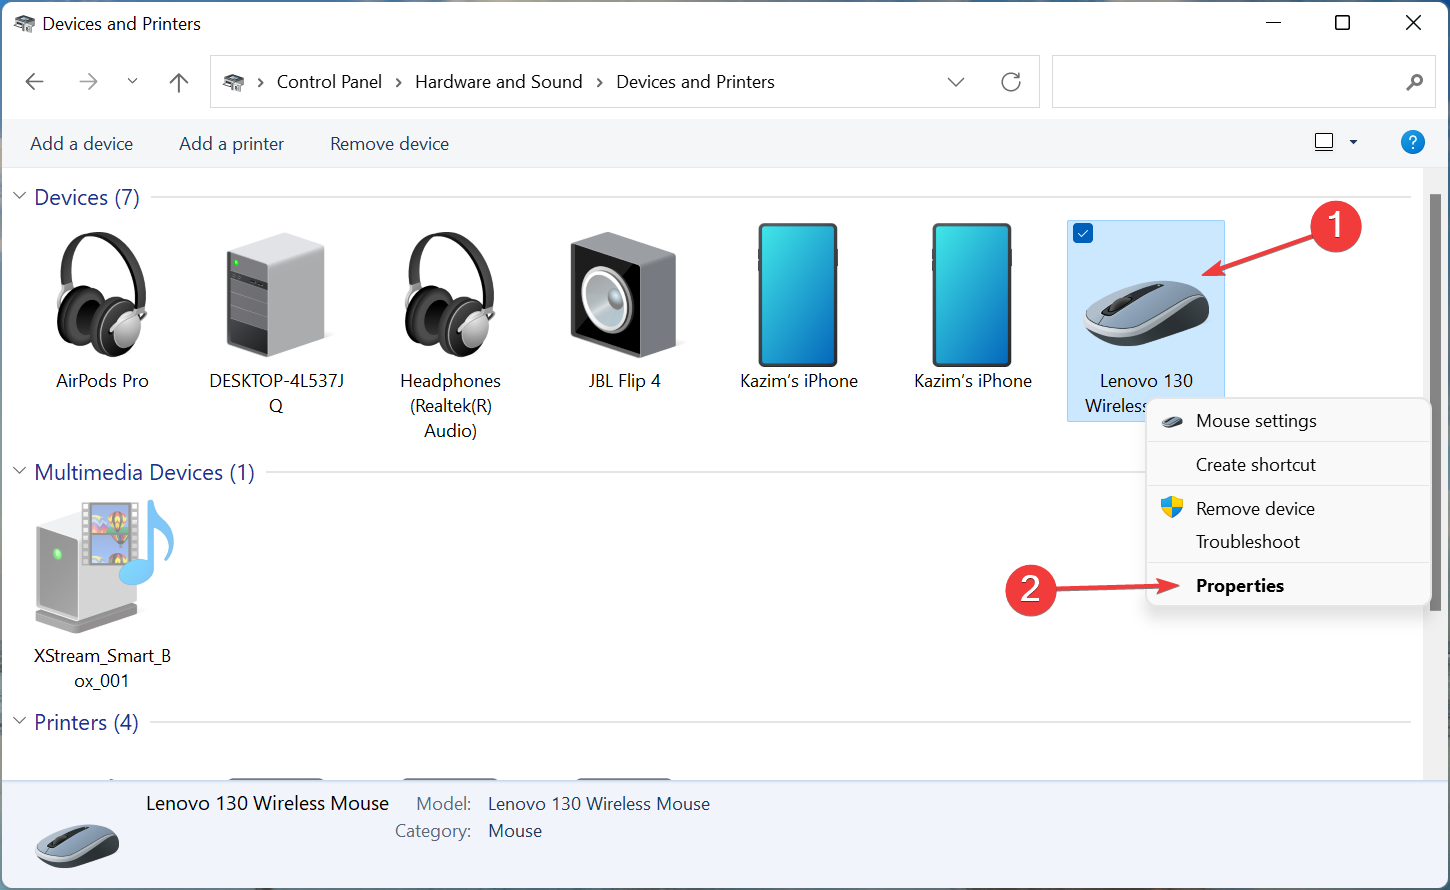
Right-click on the devices for which you want to change the power settings, and select Properties from the context menu.
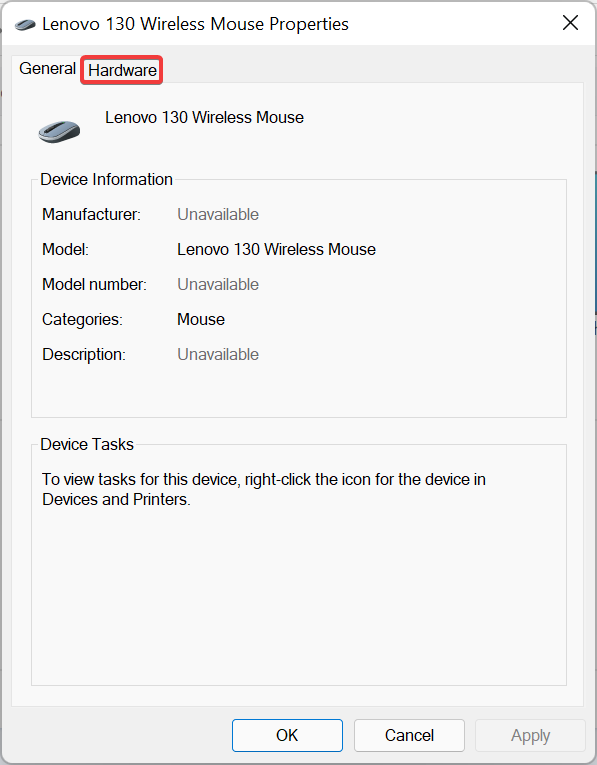
Go to the Hardware tab.
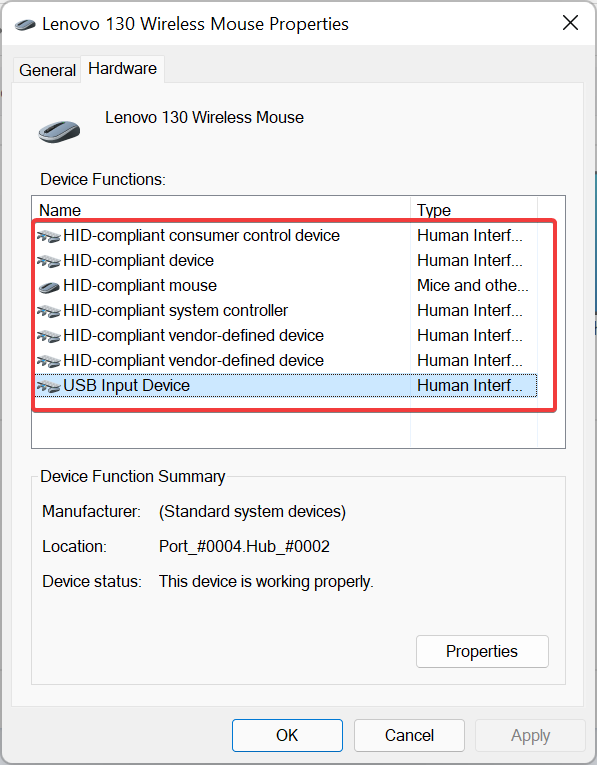
Now, double-click on each of the entries here one a time to launch the Properties.
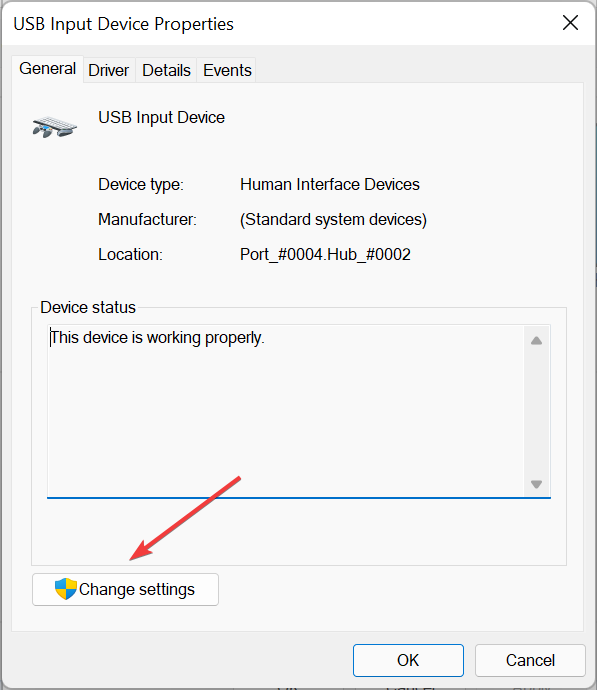
Click on the Change settings button in the Properties window.
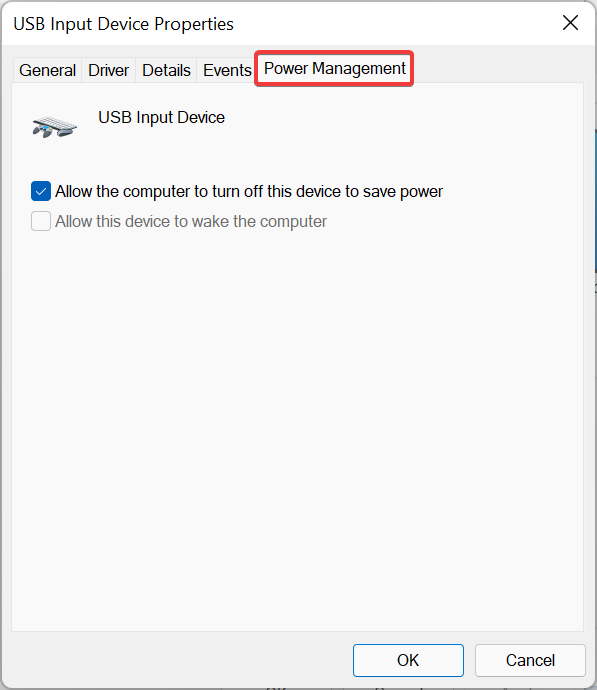
In one of the entries, you should find the Power Management tab and can make the desired changes.
6. Modify the Registry
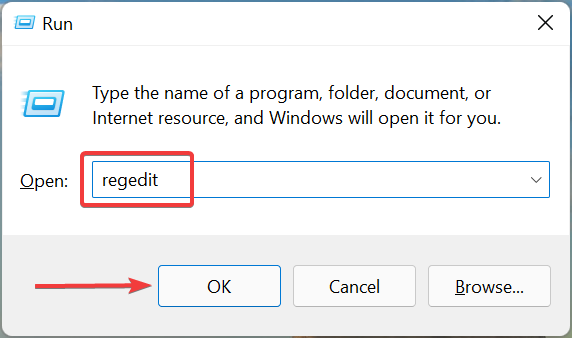
Press Windows + R to launch the Run command dialog box, enter regedit in the text field, and either click on OK or hit Enter to launch the Registry Editor.
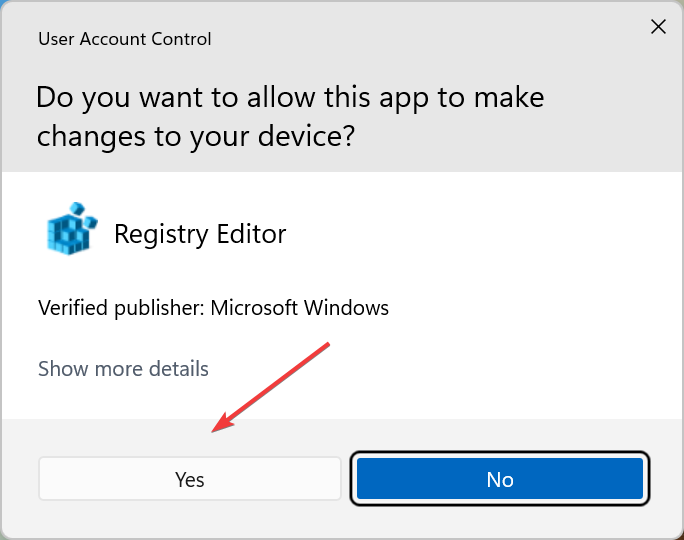
Click Yes in the UAC (User Account Control) prompt that pops up.
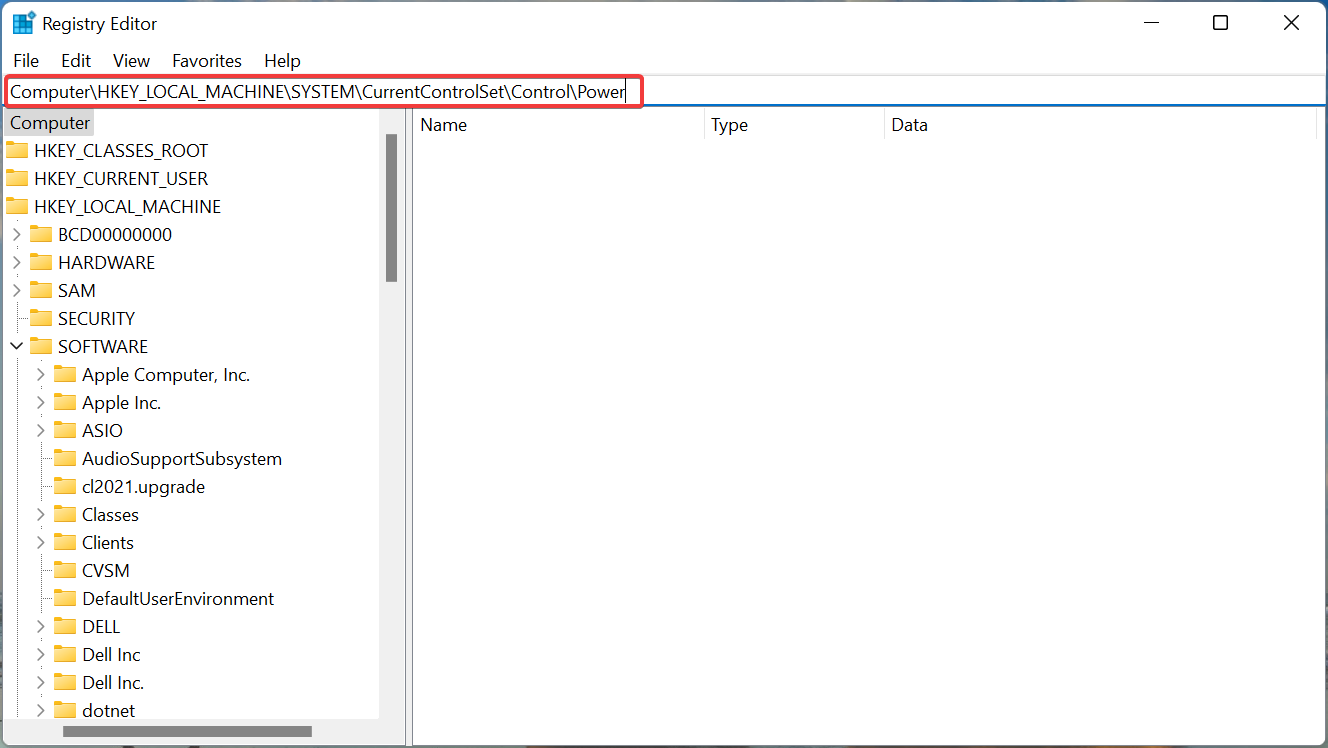
Now, paste the following path into the address bar at the top, and then hit Enter:Computer\HKEY_LOCAL_MACHINE\SYSTEM\CurrentControlSet\Control\Power
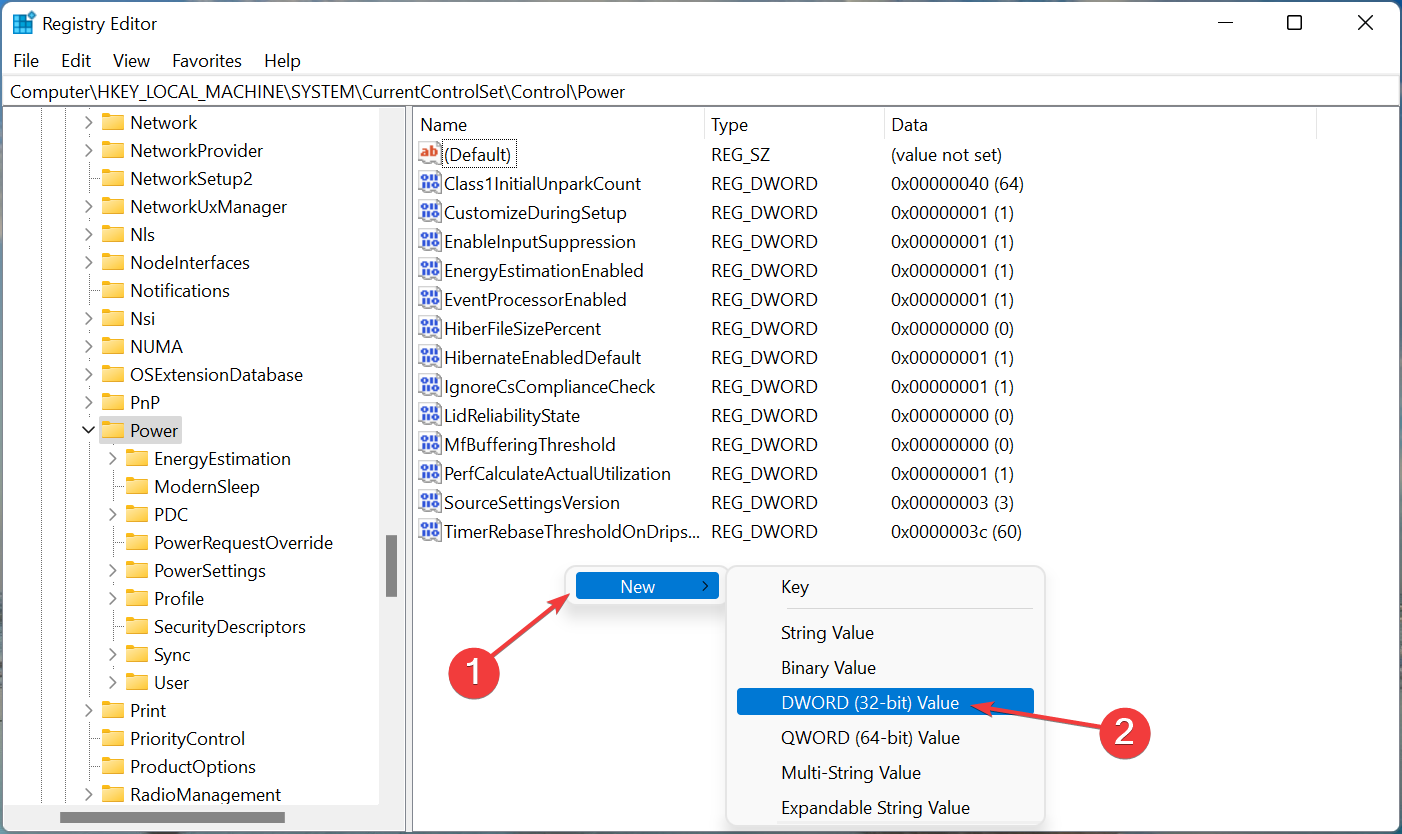
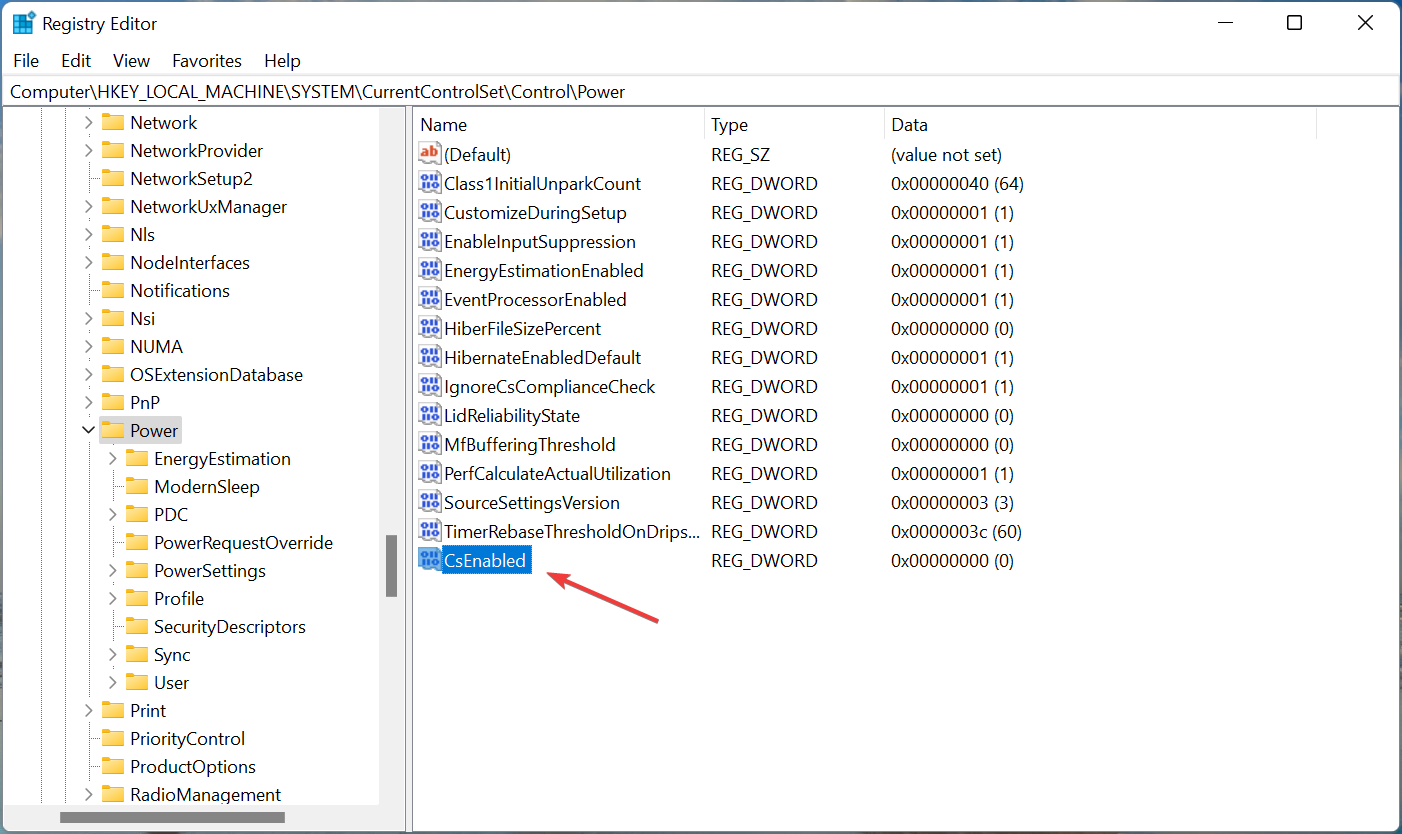
If there’s no CsEnabled key here, create one by right-clicking on the empty portion on the right, hovering the cursor over New, and then selecting DWORD (32-bit) Value from the context menu.
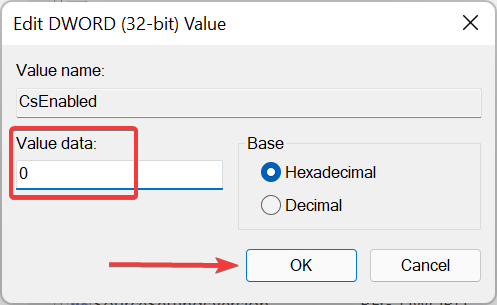
Double-click on the key to modify it.
Enter 0 under Value Data, if it’s not already the value, and then click on OK to save the changes.
Now, restart the computer for the changes to fully come into effect.
Since the method involves making changes to the Registry, we recommend you to stick to the steps listed here and remain careful while executing these since a minor lapse on your end could considerably damage the PC.
If none of the methods listed here have worked, you are left with no option but to perform a system restore.
System Restore
When you perform a restore, the system is basically taken back in time to a state where the error did not exist. This is achieved by reconfiguring the settings and removing applications, among other changes, but the process does not affect the stored files.
Also, you can undo a system restore if the process does not yield the desired results.
These are all the ways you fix issues that lead to the Power Management tab missing in the Device Manager issue in Windows.
It’s safe to say that every self-respecting gamer has learned the lesson about paid games, free games, and microtransactions, making the area less tabu in these last few years.
In fact, there are free-to-play games that generated a lot more revenue from microtransactions than many expensive triple-A titles put together.
Thus, making a free game doesn’t mean you aren’t going to make any money from it, it just means that you are making it through other means.
Microsoft also plans to profit from people that are willing to play and pay for these free games, which is why ads are soon coming to them.
Free-to-play games will soon display ads on Xbox
It should come as no surprise that the Redmond tech giant already has already created an ad system for the Xbox dashboard, via Yahoo and Anzu.
Work on this new idea started in 2018-2019, and will allegedly create more opportunities and also attract a lot more advertisers.
As presented by Business Insider, the new system could go live by the 3rd quarter of this year, and the Redmond tech giant will not take a cut from the ad income.
According to the quoted sources, the ads could appear as digitally rendered billboards in a racing game or open-world adventure.
For the time being, it’s currently unknown what other forms these free-to-play ads could manifest as, or if they will include videos or audio.
We don’t know yet if Microsoft and Xbox have started pitching advertisers and brands on the new ad system.
We’re pretty sure that many will be concerned for their privacy, with this new ad idea. Microsoft collects a lot of data with telemetry, but it doesn’t want advertisers to do the same.
The main goal here would be to provide a system that prevents targeted ads by protecting user data.
It’s plain to see why Microsoft didn’t try this on PCs and decided to deploy it on Xbox consoles. Users can easily bypass it by editing the host file or by using a system-wide ad-blocking program like AdGuard for Windows.
Even though the ads will only be apparently introduced for free-to-play games, many are now concerned that they will soon start to see ads everywhere.
Hopefully, that won’t be the case and the situation will be closely monitored and contained by Microsoft. What is your opinion on this whole ad situation? Let us know in the comments section below.
Three things are crucial when it comes to using modern-day technology for business: speed, accessibility, and multitasking.
Modern-day businessmen want to do most of their work on the move, combining all their devices and using their full potential.
Home PCs, office computers, notebooks, phones – they may all be connected for better usage. And it isn’t at all complicated to do so.
There are plenty of Windows software solutions to take into consideration. And business use is only the tip of the iceberg. Using it to help friends manage their PC is one option that can come in handy.
How can remote connection software help me?
While connecting your handheld devices is a good way to play a movie from the couch, the two-PC connection is the advanced way to enable all features – just like you were sitting in front of it.
To do this, simply install host and client software on specified PCs and it is done. In a few steps, you can take full control of the given PC and do whatever you want.
We’ll list a few of the best Windows 10 & 11 compatible remote desktop software tools to introduce you to the dazzling potential they have.
Some of them are easy to install and are mainly for everyday use, others are advanced tools and offer better performance in professional environments.
What are the best tools to control one PC from another?
If your organization needs a remote support solution, SetMe leads the way on Windows.
The easy-to-use software facilitates tech support via an Expert Console for the technician and Client-side app for the end user. The technician simply enters a 6-digit code, provided by the user, and an encrypted connection to control the computer remotely is made.
Once connected, technicians can also set up unattended access, so the end user does not have to be present when the technician works in the future.
Connections are maintained over the cloud, and even if the user or technician is experiencing network issues, you can reconnect automatically. Likewise, to make troubleshooting more efficient, technicians can auto-reconnect after rebooting or shutting down the remote computer, including Safe Mode.
SetMe’s fast and easy file transfer supports drag-and-drop, as well as clipboard syncing.
Other top features:
View detailed system information and connection details for all remote computers.
No admin rights needed on the end user’s computer.
Even when idle, session will remain active for up to 3 days.
Feature-rich desktop toolbar allows for easier remote screenshots, screen recording, and chatting between user and technician.
Fast to connect and minimal lag when controlling a computer remotely.
Remote Access Plus by ManageEngine is an excellent choice if you’re looking for a powerful tool that gives your team full control over remote endpoints.
This tool is designed with support teams in mind, it allows you to access, troubleshoot, and manage computers from anywhere, quickly and securely.
Remote Access Plus is great for both unattended and real-time sessions, making it great for managing workstations anywhere.
Whether it’s resolving user issues, pushing updates, or running maintenance tasks silently in the background, Remote Access Plus helps you do it all with ease.
The setup is simple, and the interface is clean enough for anyone in IT to pick up quickly. Plus, it works across platforms—Windows, Mac, and Linux.
Let’s quickly look at its key features:
Remote desktop access with low latency and high responsiveness
Unattended access support for 24/7 troubleshooting
Voice, video, and text chat built into the session window
Built-in tools like Command Prompt, Task Manager, and Registry access
File transfer and remote file manager
Wake-on-LAN and remote shutdown/restart
Secure with AES 256-bit encryption and two-factor authentication
Detailed session recording and audit logs for compliance
Whether you’re working in a small business or an enterprise IT department, Remote Access Plus helps you keep everything running smoothly—even when users are miles away.
Remote Access Plus
Use Remote Access Plus and simplify IT support from anywhere.
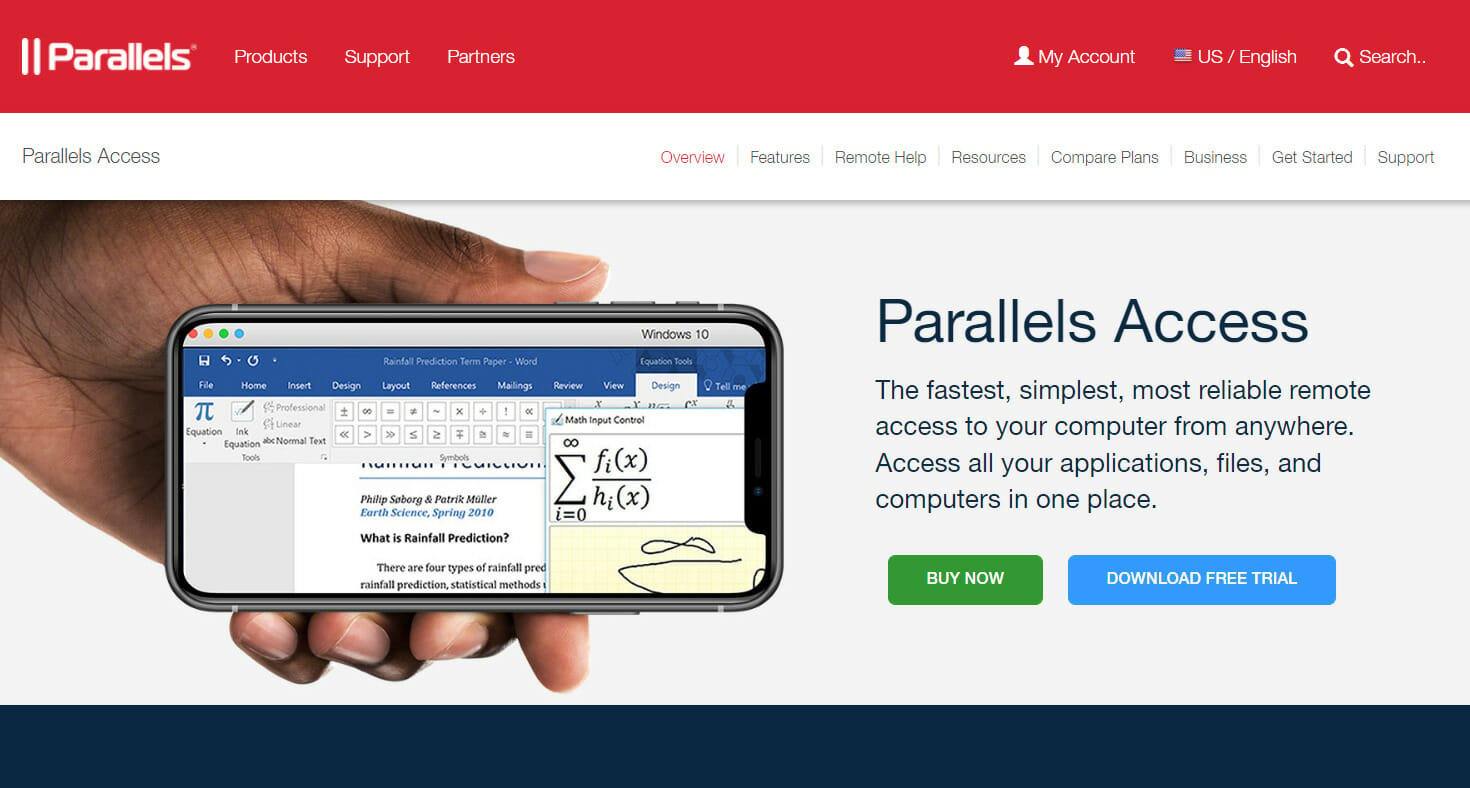
Parallels Access is the go-to solution if you want a straightforward program that can allow you full access to your computer from anywhere, at any time.
This feature-rich software is virtually unparalleled when it comes to remote control systems, and it was conceived with one thing in mind: you.
Quick launch, easy navigation, and intuitive control with just one tap or directly through your browser – rest assured that you’ll enjoy all these and more.
It’s also very convenient to use on a mobile device where you tap to start any desktop application, Mac, or PC as with any other iOS or Android app.
For short, Parallels Access allows you to search, view, and even open your files on a remote machine, no matter if it’s a PC or a Mac. whether it’s a Mac or PC.
Let’s quickly look at its key features:
Select, copy, and paste text with precision thanks to the Lock’n’Go Magnifying Glass technology
Simple one-tap access via your mobile phone or directly through the browser from another PC
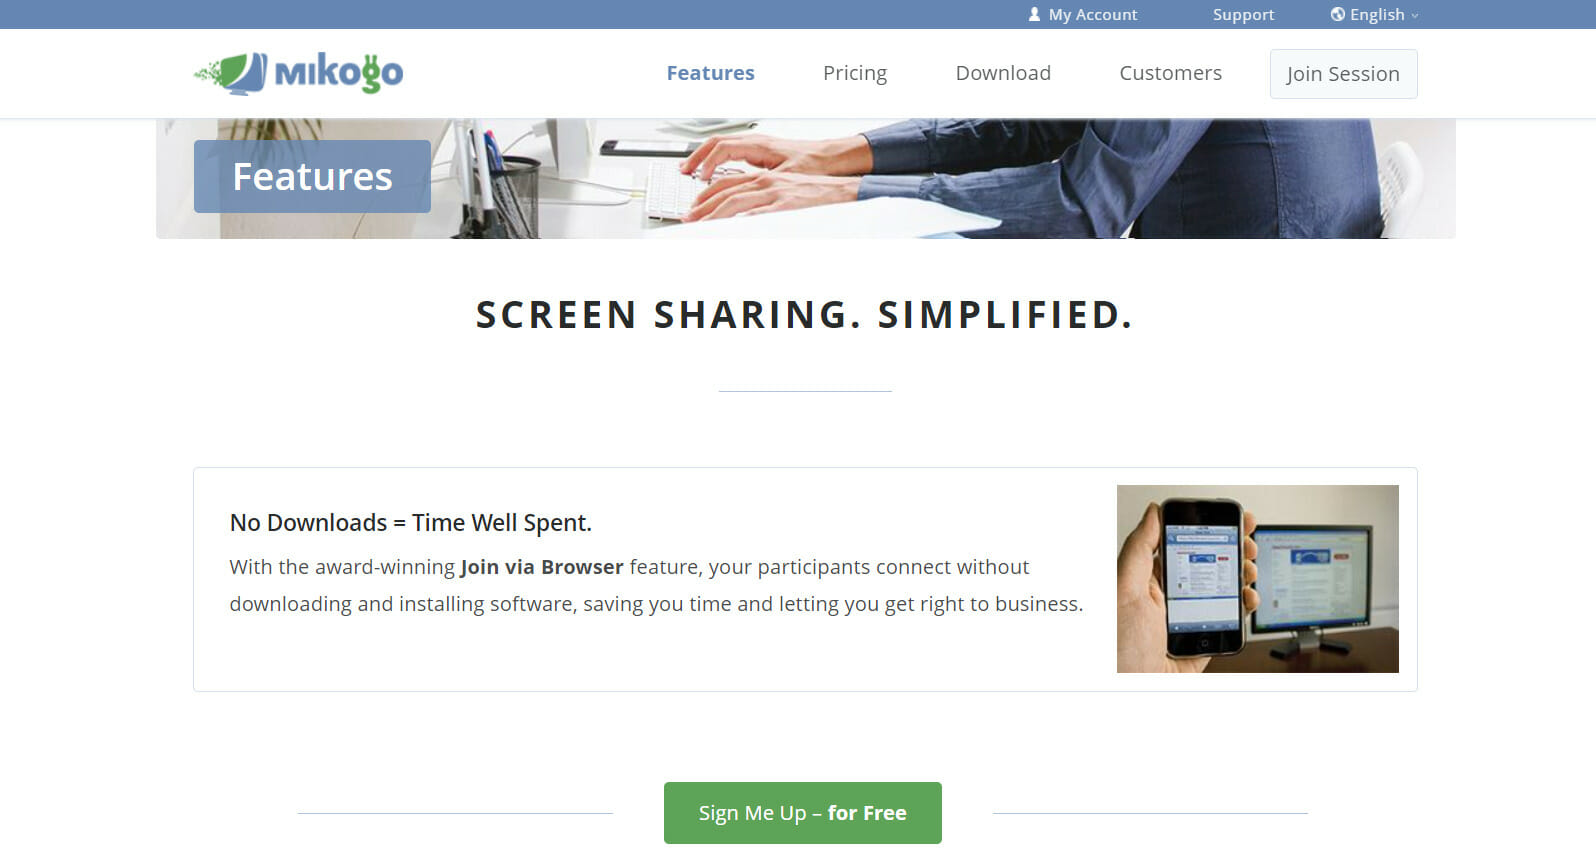
This cross-platform software Mikogo allows you to assist your audience with remote mouse and keyboard control or get assistance in the same way by handing over control, be it on a PC or Mac.
This tool is great for conferences because anyone in the meeting can take the stage and make a presentation by sharing their screen.
And it’s not only the visual experience. The app offers high-quality VoIP and teleconferencing numbers for multiple countries so you will have sharp, non-interrupted communication.
To top it all, you will be able to record the screen and VoIP call, to watch the meeting later by using the dedicated Session Player.
Indeed, more flexibility means fewer boundaries and why not take advantage of this versatile tool to enhance your business?
Let’s quickly look at its key features:
Switch Presenter to allow any meeting participant to take the word and share their screen
Remote keyboard and mouse control
VoIP conferences with session scheduler
Screen and VoIP recording
Multiple monitors and app filtering to display up to 4 screens and only the programs you want
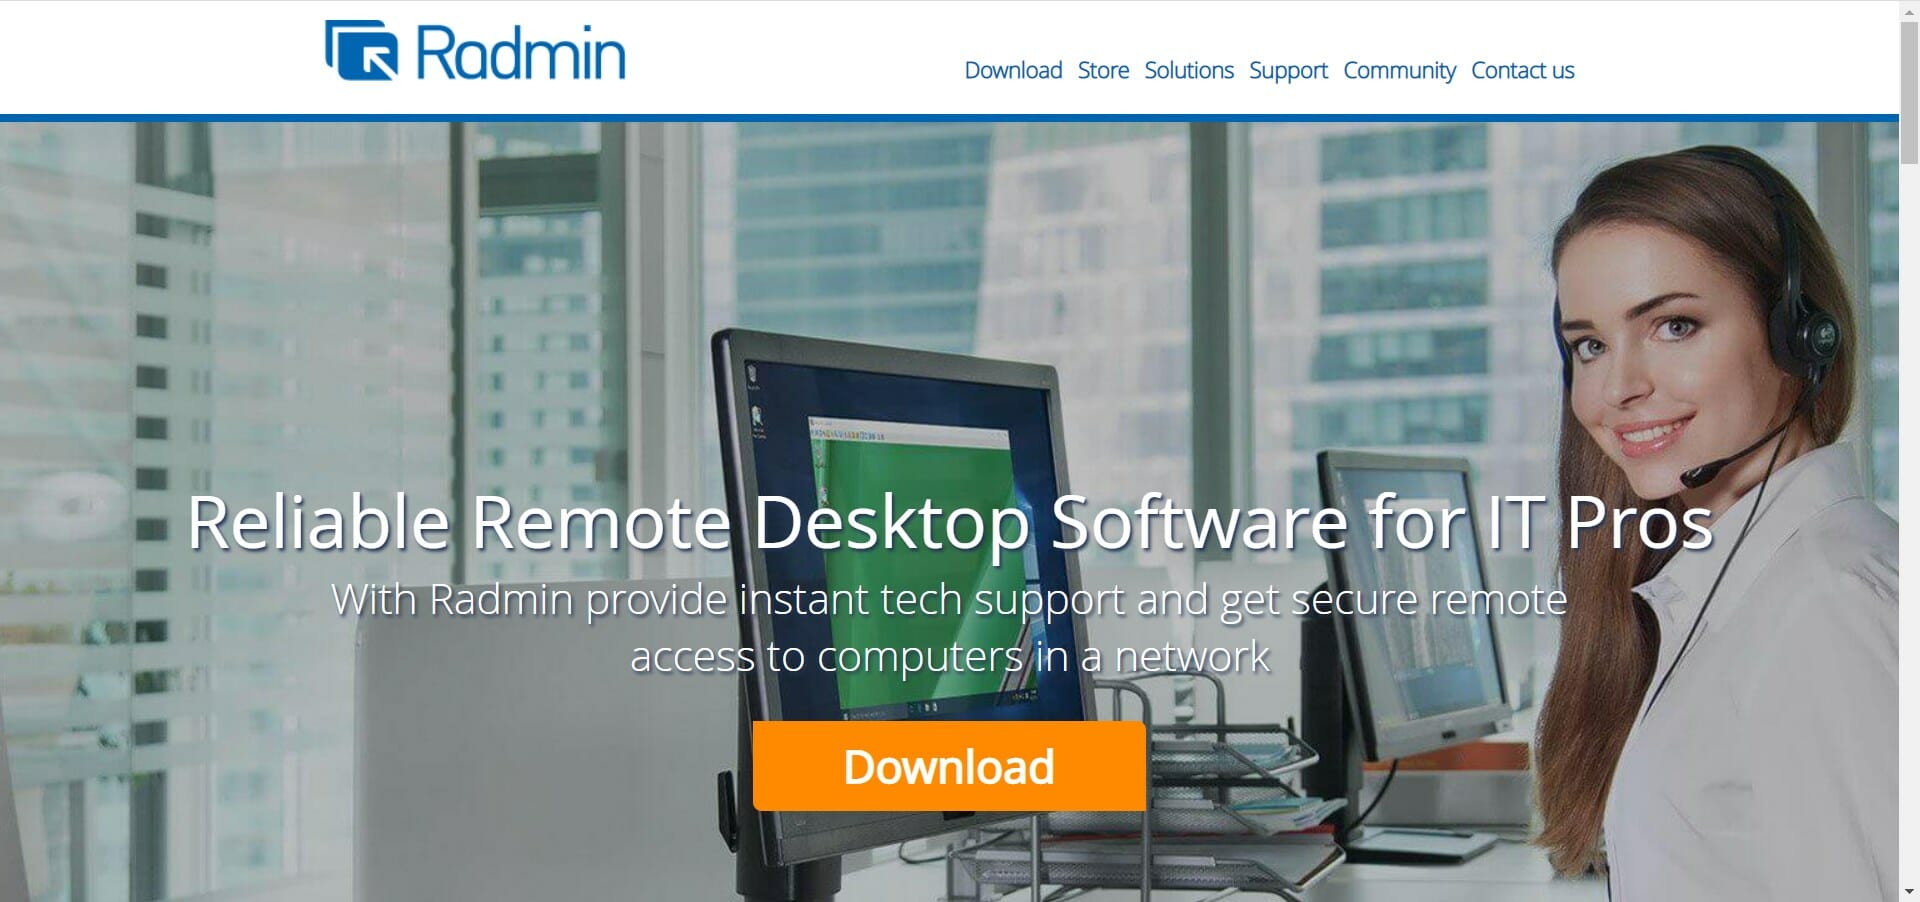
With Radmin Remote you enter a different zone. This is the app reserved mainly for IT professionals and it is known on a global scale as the go-to solution for remote tech support.
In fact, the developers say that it’s used by over 100,000 businesses around the world to provide remote tech support to employees.
Of course, we are talking about more than just remote mouse control – with this app you can perform end-to-end server maintenance and more complex operations at infrastructure or network levels.
The IT administrator can even access unattended workstations and servers to deal with any maintenance and settings remotely.
Nevertheless, its complexity should not put you off – you can keep things as big or small as you like and the app itself is easy to install, use, and update.
Let’s quickly look at its key features:
Secure and reliable remote access to PCs across the globe
Access all assets and perform central system administration with ease
Low bandwidth optimized to allow remote controlling even over 3G networks
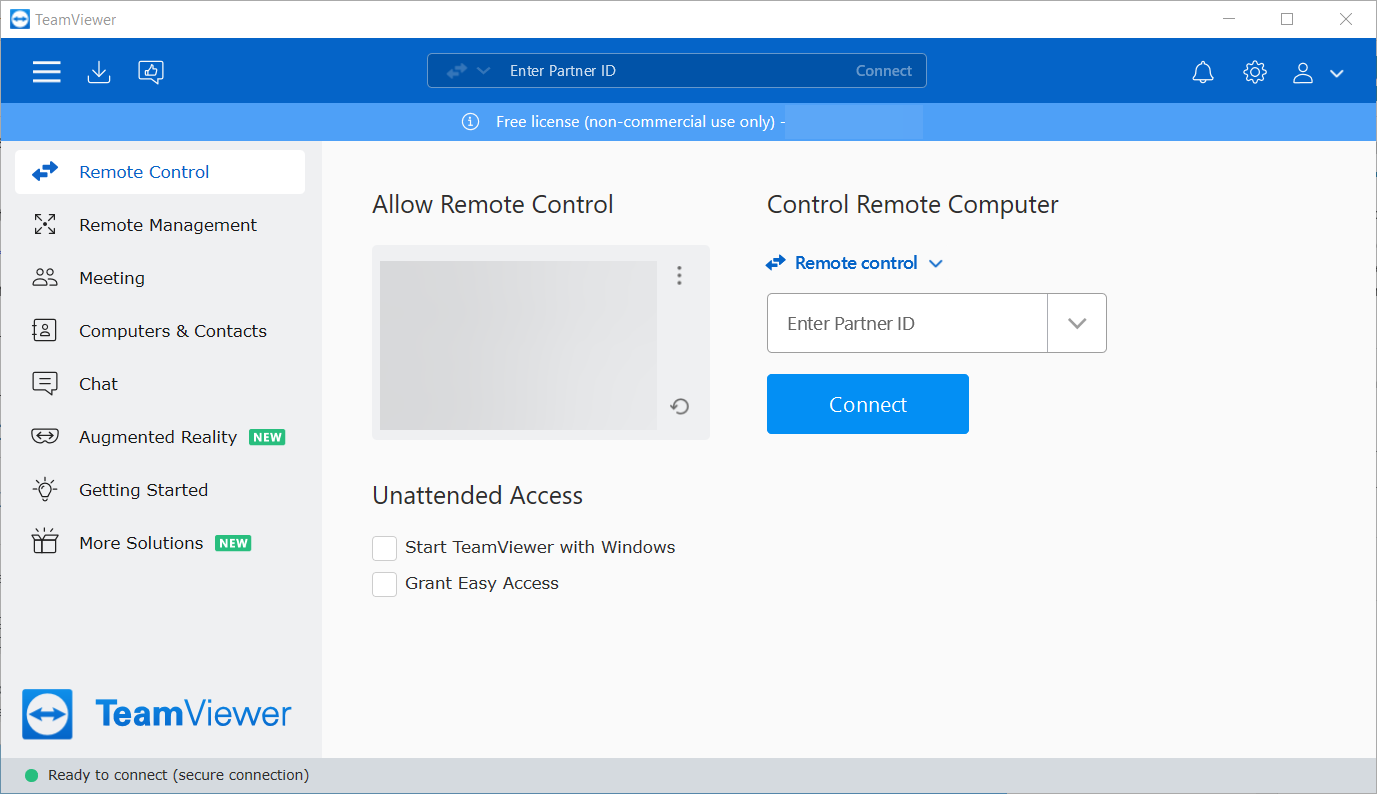
TeamViewer is probably the most popular remote access tool available. It’s freeware so you can obtain it with a simple download.
The best thing about TeamViewer is its multiplatform presence so you can use it on almost every device in your possession. Installation is easy and setting it up is no hustle at all.
Host and client sides can easily connect by installing TeamViewer and inserting a 9-digit ID. After that, you can reboot the client PC in Safe Mode.
Just transfer files even from cloud storage, start and join meetings, have text and voice chats, and much more. There is also support for multiple monitors.
One great alternative for TeamViewer is the cost-effective and reliable SupRemo. This software is perfect for controlling other devices remotely from anywhere in the world.
Compatibility is not an issue when we talk about SupRemo, because it works with all platforms and devices, including iOS, Windows, macOS, Android, and more.
Moreover, the software is free for non-professional and/or non-continuous use. The software is great for companies as well, since it includes flexible and affordable paid plans for business use.
Keep in mind that all the licenses allow unlimited installations to an infinite number of PCs.
This means that you can use your license on multiple devices since what really matters is the number of simultaneous connections, and there’s actually no limit of endpoint or seats where to install the license.
You can also try SupRemo freely for a whopping 21 days. Enjoy the full experience without having to set a subscription up, or even having to register.
The program has many great features that promote productivity and teamwork, such as:
File transfer that allows you to easily copy data from the remote device to the local one
Remote printing of documents stored in the remote device
UI customization to make the software look just the way you want
Automatic update to always take advantage of the latest features
Unattended access feature that lets you access computers remotely without needing permission
Secure encrypted connection keeps your data safe during the sessions
Online address book for storing and transferring contacts
Chat with coworkers or customers through instant messaging
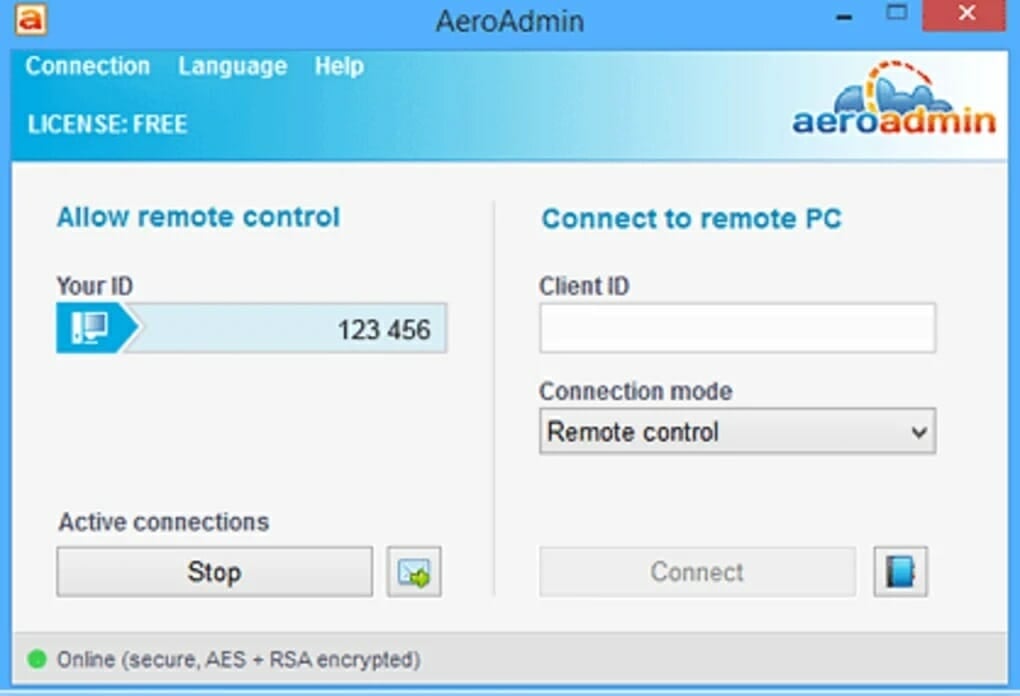
AeroAdmin is, compared to many other remote access tools, the easiest one to use. Although there is no chat option, this program is one of the best for instant access to other PC.
With an interface similar to the Team Viewer, AeroAdmin can easily connect to another device by sharing an IP or entering an ID.
All you have to do is to choose from the two different connection modes: View Only or Remote Control to take over someone else’s computer.
The best thing about AeroAdmin is that it’s portable so it can be launched from USB and get to work swiftly. Both personal and commercial uses are free of charge.
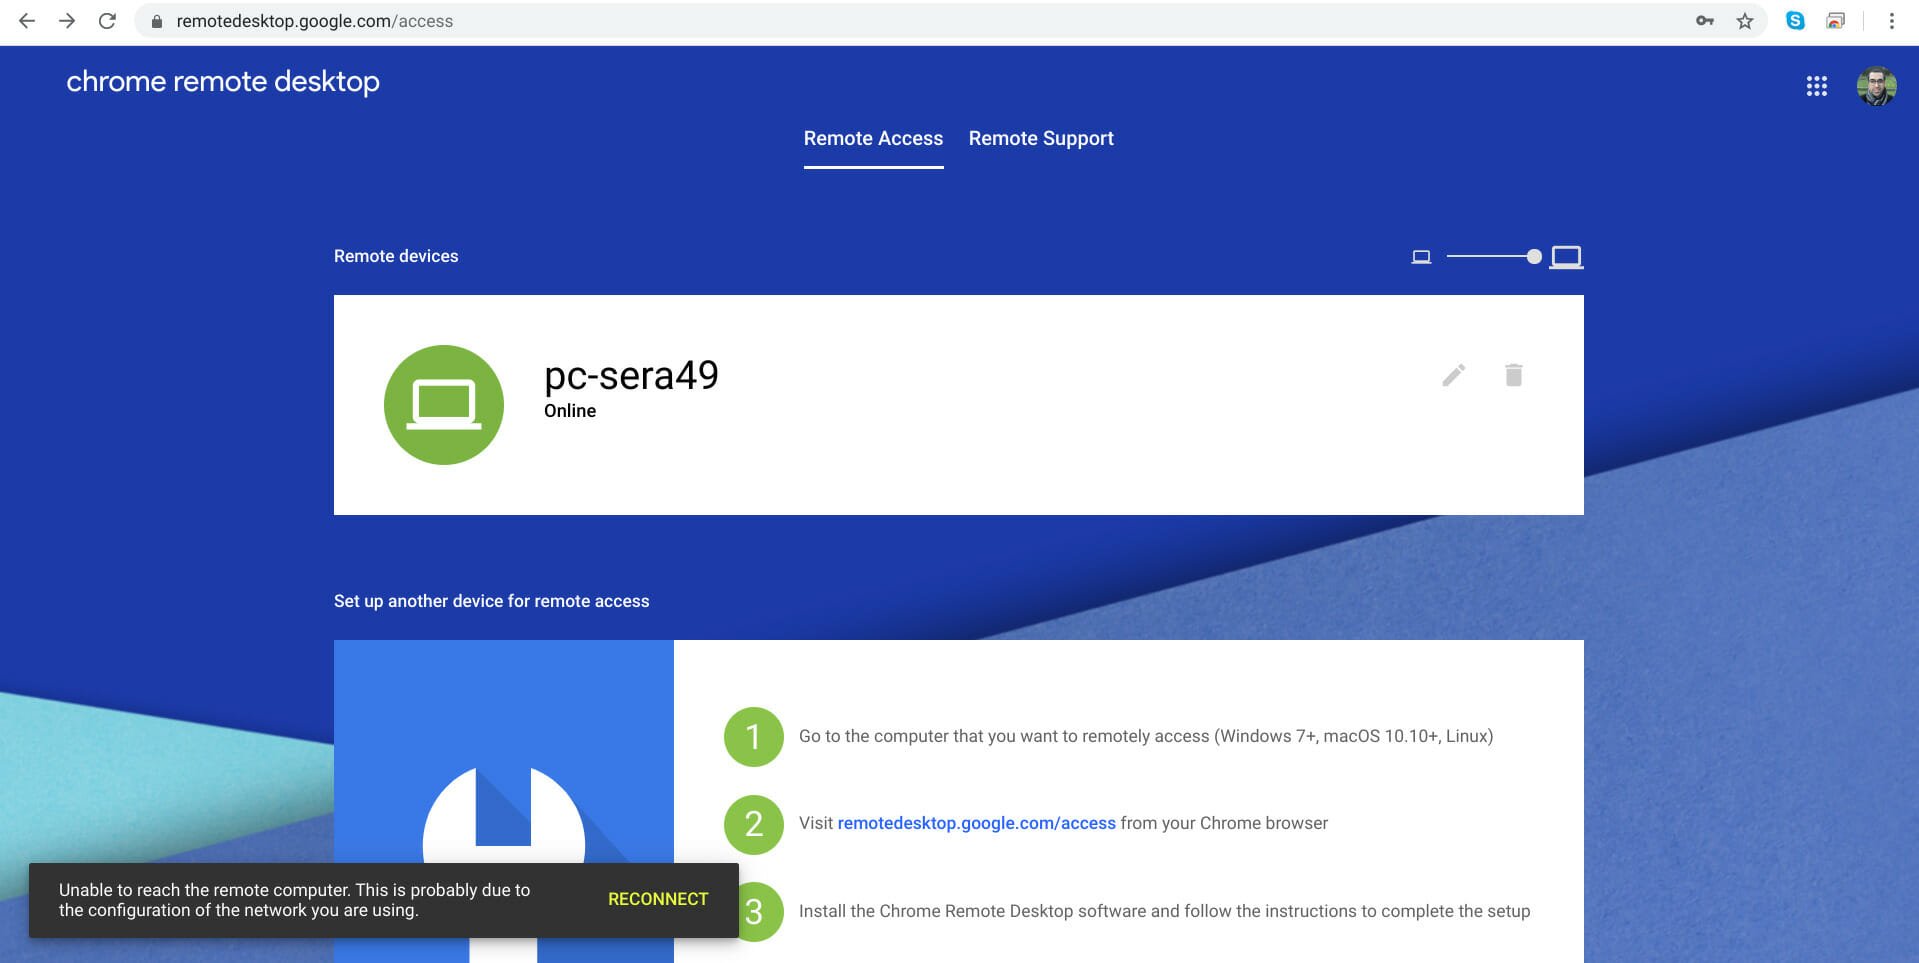
Chrome Remote Desktop is the browser extension that lets you remotely control any other computer with the same extension.
You won’t find an abundance of options but it’s easy to install and you can use it with any system that supports the Chrome browser.
Just log in to both host and client sides and enter the PIN. After that, you’ll have insight into the host PC with limited but useful options. Data transfer and PC control are the most used ones.
While other programs on the list have more options, Chrome Remote Desktop is a viable choice for basic use and easy setup.
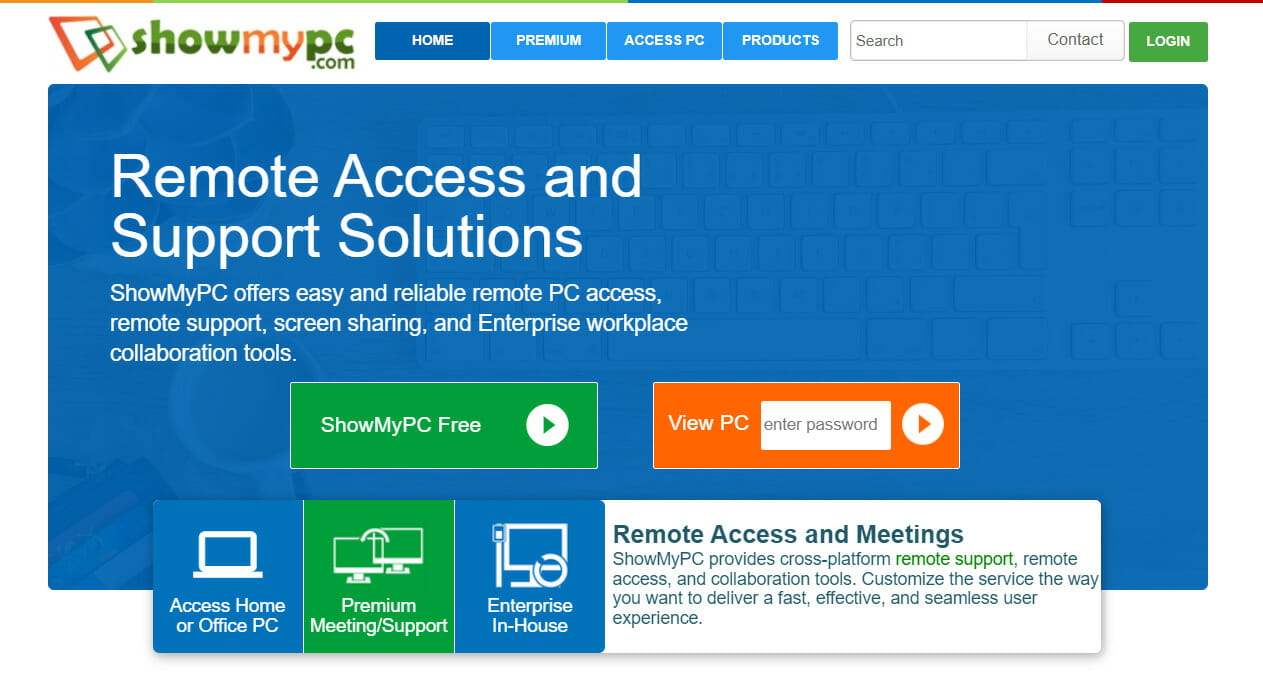
Comparing it to the previous programs, this one, even with its free edition, is quite a capable tool with many options.
The connection between two PCs is done with the Shared Password, a generateddigital ID. ShowMyPC is a portable program so you can run it from the USB.
It can be used for remote access, meetings, and even supports webcam sharing over a web browser. This program is related to Java so you have to acquire it also.
Because of the Java platform, you can also use the program via the web browser. ShowMyPC premium solutions are amazing and can be of great use if you are keen to pay for them.
You will benefit from the following key features:
Connect from home, the office, or from a mobile device
Access multiple unattended PCs with P2P and RDP support
Easy-to-use no-install application
Screen sharing, remote access, and video conference
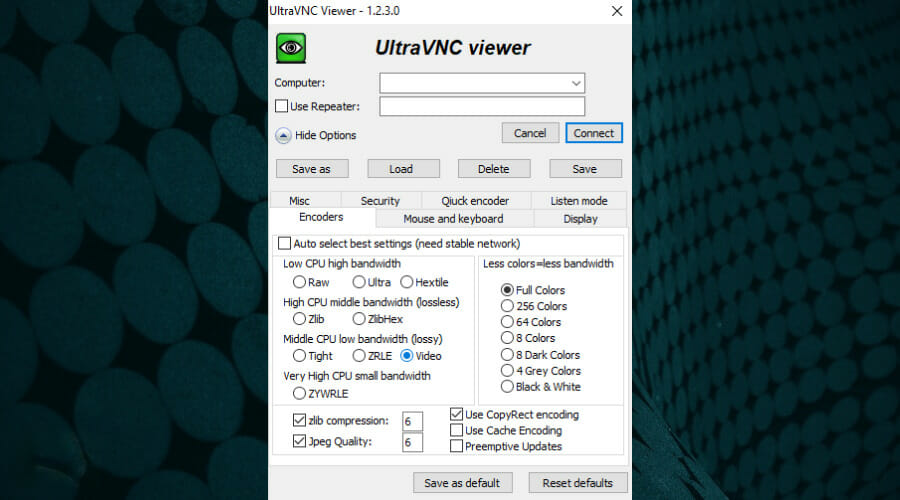
UltraVNC is an advanced tool for remote access. While most of the other listed tools do not need router forwarding or IP address tweaking to work properly, those are mandatory for UltraVNC.
This won’t be a problem for advanced users, but the users with basic needs and knowledge are going to spend some time tuning it up.
Although it needs configuration, UltraVNC has a good set of options, and it’s worth trying. The interface is sometimes hard to use, at least until you understand the given options.
To set up UltraVNC from the host PC, you’ll need to choose the Server option. On the client PC, first, install the Viewer option and then get to the port forwarding configuration.
Once the connection is acquired, you can use text chat, copy clipboard data, or send keyboard shortcuts.
Let’s review a few of its best features below:
Use your mouse and keyboard to control the other PC remotely
Uses the Remote Frame Buffer protocol (RFB)
Supports older versions of Windows, including Windows 95
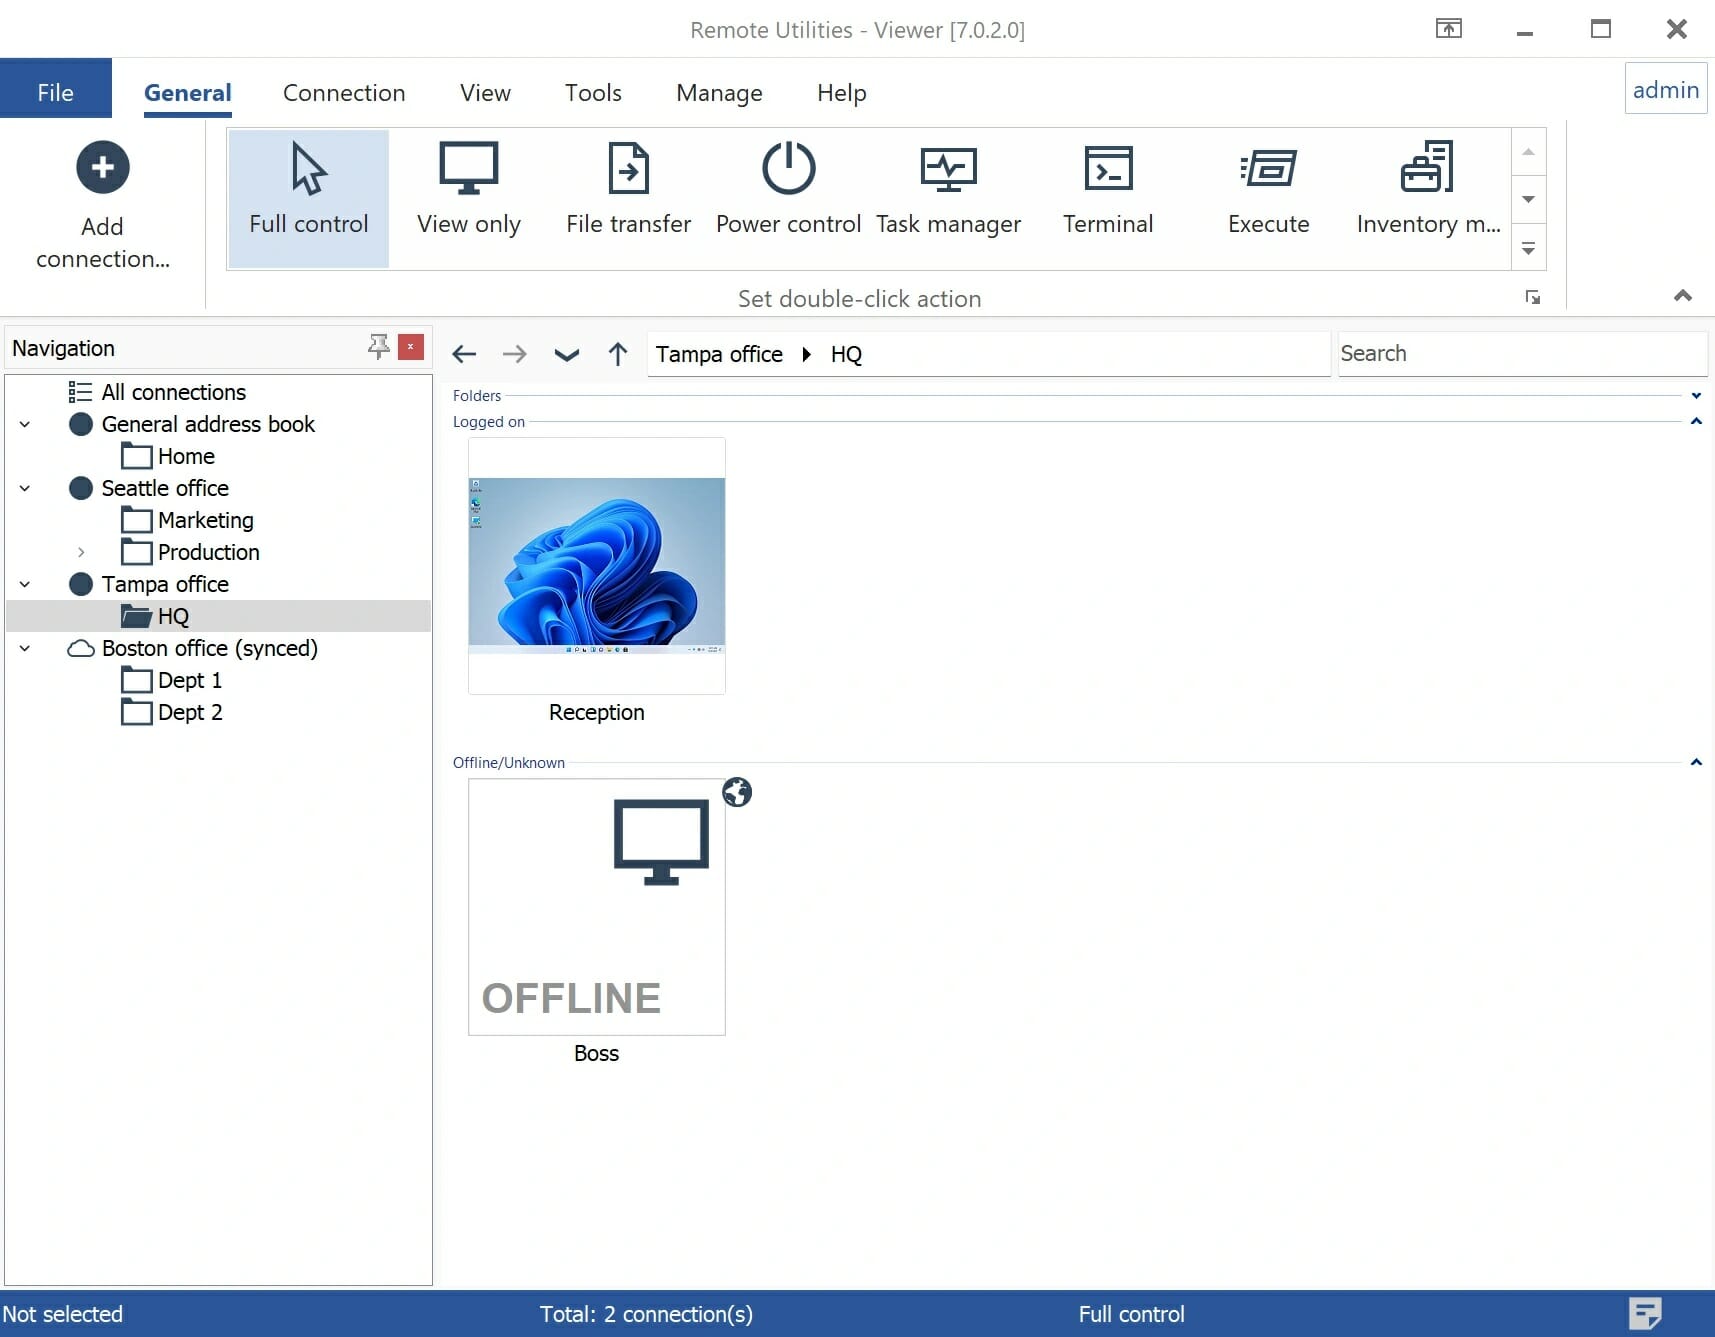
Remote Utilities offers multiple tools integrated into one program that will assist you with all your remote access needs.
The number goes up to 15 remote access solutions and modules. The connection is established with the ID and with installation-separated versions of the program on both client and host respectively.
There’s no need for router forwarding or making a static IP address. By entering your ID and password, you are ready to go.
And if you configure it for the Power Mode, you will also be able to restart and shut down the remote PC.
Check out its key features below:
Fast and direct connection
No relay server needed
Control the desktop, mouse pointer, and keyboard of a remote computer
Restart and Shutdown commands of the remote PCs available in the Power Mode
When it comes to remote control tools, AnyDesk is clearly on top of the game. And we don’t just say that – its amazing features can back up this bold statement.
It comes with a surprisingly user-friendly UI and just like the programs listed below, it can be started portably or installed.
According to your selection, you will either get random ID numbers or passwords based on your PC name. The connection is easily obtainable in a few steps, so you won’t lose too much time.
There are plenty of available options that can come in handy, but support for unattended access is probably the best. It allows you to access a host PC without anyone present on the other end.
You are probably considering adopting version 21H2 as well, so here are a few things you should know before you engage in this process.
If you use Windows 10 2004 or newer, installing version 21H2 will not take long because, with all previous feature upgrades, Windows 10 21H2 is actually also a small enablement package.
This means that getting version 21H2 will feel like installing a regular cumulative update, so there’s really nothing entirely new about it.
The latest Windows 10 release contains no changes in hardware requirements, which means all compatible computers should get the update without issues.
Microsoft also stated that Windows 10 21H2 has no known issues so far, but that does not mean the operating system is flawless.
The Redmond tech company managed to fix some bugs previously preventing Windows 10 users from installing version 21H2.
According to the schedule, Microsoft is planning to end Windows 10 20H2 support on May 10, 2022.
Yet another reason to upgrade to Windows 10 21H2 in order to keep your system up to date and with all the necessary security patches.
Remember that Windows 10, as an operating system, will reach the end of support 3 years from now, on October 14, 2025.
As we are sure that you are aware by now, Windows 11 has been available for testing for some weeks now, through Microsoft’s Windows Insider program.
Before it was available directly from the Redmond tech company, some leaked ISO versions were downloaded and installed by Windows 10 users but, as you can imagine, they weren’t at all stable.
The bad part is that these so-called Windows 11 versions are still available on the internet and installing one of them could have serious consequences.
Windows 11 installers found online contain dangerous malware
All you can see across the internet these days is people testing and reporting problems with Microsoft’s latest operating system.
And, of course, other people wanting to partake in the testing phase for the upcoming OS but unsure where to get it from, tried to download the Windows 11 ISO from unorthodox sources.
It comes as no surprise that, every time something even remotely popular becomes available on the web, there are always certain individuals looking to make new victims by piggybacking off a product’s popularity, with malware.
As you can imagine, installing a bootleg version of Windows 11 that you found in God knows what website, can have serious ramifications.
It could mean that all your personal info is now up for grabs and all the time you’ve spent on ways to protect your content just went down the drain.
Big companies that specialize in security software, such as Kaspersky, are now warning users about the potential repercussions of using such installers on a personal device.
It’s wild to have to say this, but if you’re planning to install Windows 11, you should get it from official sources. As it turns out, people who are using alternative methods to get Windows 11 are also getting some malware along with it!
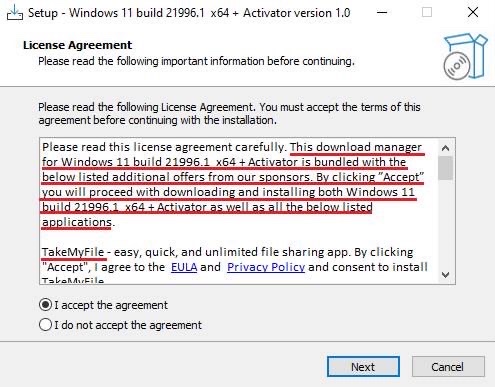
The untrained eye is easy to fool, as some malicious third parties have proven, by adding the nefarious software into an apparently harmless installer, called 86307_windows 11 build 21996.1 x64 + activator.exe.
By simply reading the description, some users might think that all it does is install Windows 11 build 21996.1.
However, the truth is far from that and all you would do by running this executable and agreeing to its terms would be opening the door for intruders.
This file’s size is only 1.75GB, and it certainly seems plausible to some. The actual truth is that the bulk of that space consists of one DLL file that contains a lot of useless information.
What happens if I run this fake Windows 11 installer?
Before we describe what happens if you do, you might want to refrain from doing it, for your own safety.
We say that because opening the executable will start the installer, which looks like an ordinary Windows installation wizard. Its main task is to download and run another executable.
This second executable is actually an installer as well, and it even comes with a license agreement, which of course few people take the time to read.
It is generically called a download manager for 86307_windows 11 build 21996.1 x64 + activator and mentions absolutely nothing about the fact that it would also install some sponsored software.
And of course, if you accept the agreement, a number of malicious programs will be installed on your device.
Note that this is just one example, and there are many more such ingeniously disguised malware packs on the internet.
The main lesson here is that if you want to try Windows 11, download and install it from a certified source. In this case, the only certified and safe source is Microsoft itself.
Windows 11 is not available for purchase at any retailers, online or offline, at this time. This software is still in development and you can only test its preview builds via the Insider program.
The best advice that we or anybody else could give you is to steer clear of such fake products and make a habit of getting your software from reliable sources.
This will save you a lot of headaches along the way. Especially if you have valuable or sensitive information stored on your device.
Have you ever downloaded an unofficial Windows 11 version on your machine? Share with us, in the comments section below, any consequences that came with this installation.
Right on schedule, Microsoft has shared the second wave of Xbox Game Pass titles coming to the service this month. The list includes games like Bugsnax, Unsouled, 7 Days to Die, but more importantly, Microsoft also confirmed that more Ubisoft titles will be coming to the service soon, as well.
If you’re not familiar, Bugsnax used to be a PlayStation exclusive adventure game, but it now will come to Xbox Game Pass on Cloud, Console, and PC on April 28. As for Unsouled, it’s a stylish, fast-paced 2D action-RPG coming to Console and PC on April 28. 7 Days to Die, meanwhile, is a post-apocalyptic open-world game. It too will come to Cloud, Console, and PC on April 26. See below for the other titles covered in this wave.
F1 2021 (Cloud) EA Play – Now available
Need for Speed Hot Pursuit Remastered (Cloud) EA Play – Now available
Turnip Boy Commits Tax Evasion (Cloud, Console, and PC) ID@Xbox – Now available
Research and Destroy (Console and PC) – April 26
As for the news about Ubisoft tiles, Microsoft mentioned that it is working with Ubisoft to “bring more incredible games to the Game Pass library.” It has been confirmed that Assassin’s Creed Origins will join the library for cloud, console, and PC via the Ubisoft Connect app. Microsoft will also bring For Honor: Marching Fire Edition to PC via Ubisoft Connect app and upgrade to the Marching Fire Edition for cloud and console.
Finally, if you’re an Xbox Game Pass Ultimate member, you’re going to enjoy touch controls in 12 more games. Zero Escape: The Nonary Games and Danganronpa: Trigger Happy Havoc Anniversary Edition! are two of the titles. Ben 10, Besiege, Danganronpa: Trigger Happy Havoc Anniversary Edition, Edge of Eternity, Hitman Trilogy, Lawn Mowing Simulator, Need For Speed: Hot Pursuit Remastered, Paw Patrol, Race with Ryan, Transformers Battlegrounds, Windjammers 2, and Zero Escape: The Nonary Games wrap up the list.
Based on a news report by The Hacker News, there are three high-impact Unified Extensible Firmware Interface (UEFI) security vulnerabilities, CVE-2021-3970, CVE-2021-3971, and CVE-2021-3972 that have been identified to be affecting various Lenovo devices such as the Lenovo Flex, IdeaPads and Yoga laptops.
Originally, CVE-2021-3971, and CVE-2021-3972 were meant to be used during the manufacturing process of Lenovo consumer notebooks. However, they were mistakenly left in during the production of BIOS images without being deactivated first.
Attacks could gain access to these devices where they would be able to disable SPI flash protection or the UEFI Secure Boot feature from a privileged user-mode process during OS runtime.
However, on October 11 in 2021, the complaints were lodged to Lenovo, and yesterday they released patches for the security vulnerabilities as highlighted below.
CVE-2021-3970– A potential vulnerability in LenovoVariable SMI Handler due to insufficient validation in some Lenovo Notebook models may allow an attacker with local access and elevated privileges to execute arbitrary code.
CVE-2021-3971 – A potential vulnerability by a driver used during older manufacturing processes on some consumer Lenovo Notebook devices that was mistakenly included in the BIOS image could allow an attacker with elevated privileges to modify the firmware protection region by modifying an NVRAM variable.
CVE-2021-3972 – A potential vulnerability by a driver used during manufacturing process on some consumer Lenovo Notebook devices that was mistakenly not deactivated may allow an attacker with elevated privileges to modify secure boot setting by modifying an NVRAM variable.
It is important to make use of these security patches to avoid being compromised in the future. The threats are initiated early during the boot process before the OS gains control. Therefore, the attackers will able to counter any security measures put in place.
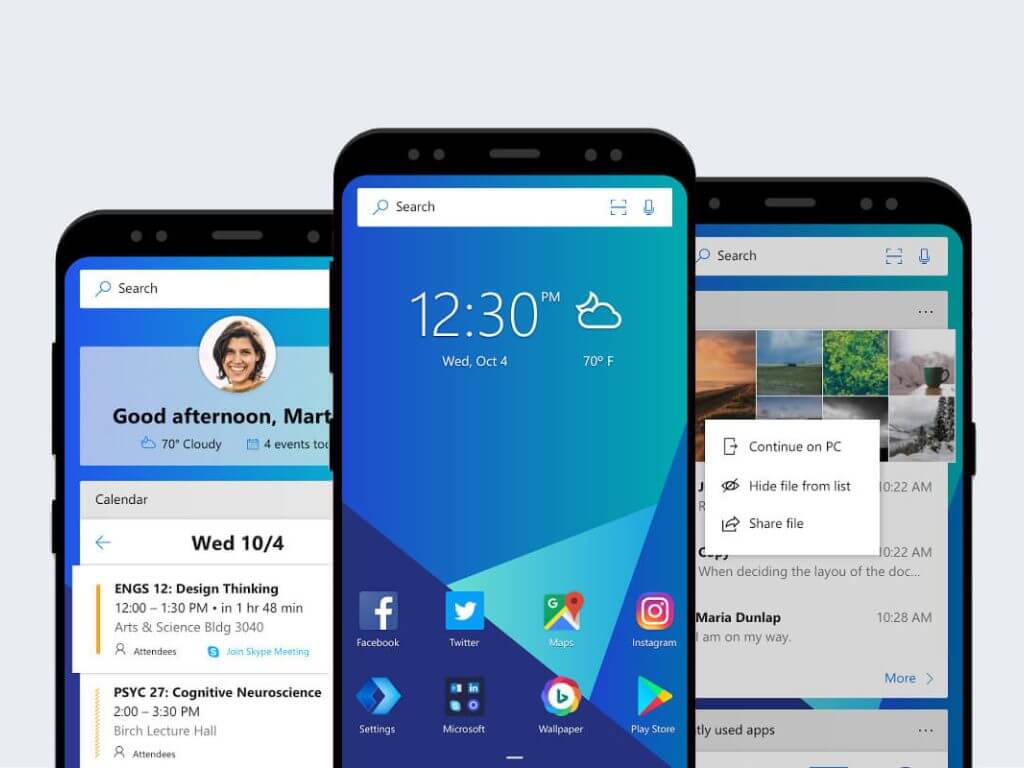
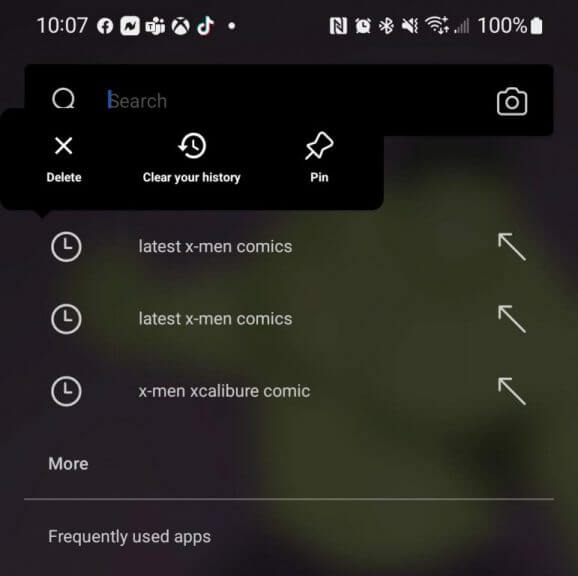
The Microsoft Launcher for Android smartphones just received an update that brings a new feature that enables a search history section in the footer.
According to the changelog, users will now be able to utilize a click to pin function to store the historical search query of the device to the top of the launcher search.
In addition, users will also be able to show “More” or “Less” of the search history section to their liking.
Lastly, the Microsoft Launcher team squashed some more bugs resulting in some additional performance improvements across the experience. The team doesn’t get into the nitty gritty of specifically what’s been adjusted or addressed, so we’ll be reliant on the comment and review section in the Play Store for user generated updates.
Enable long click to pin a historical search query to top.
Enable More/Less footer for search history section.
Known bugs were fixed and performance improvements were made.
The new version of the Microsoft Launcher comes in at 6.220203.0.1035995, takes up about 39M requires Android 5.0 and up and was published April 13, 2022.
Accessing content on the Internet should be a simple thing. However, with government surveillance and hackers lurking in the shadows, the Internet isn’t as safe as it used to be. If you want to protect your personal information, you’re going to need to invest in a VPN.
WatchGuard, a leader in the VPN software industry with a strong focus on network security and data protection, offers a wide range of products and services that are easy to use and cost-effective.
The revolutionary VPN software provides an extremely versatile and powerful way to connect to your company’s network from remote locations.
Whether you’re out of office or just out of town at a convention, its VPN software allows for lightning-fast access to all the files, applications, and resources available inside your corporate network.
When you use a VPN, your traffic is encrypted before it goes out to the Internet. This means that everyone between you and the VPN server sees gibberish, they can’t see what sites you’re visiting, or to who you’re sending data.
Most importantly, no one between you and the VPN server can see your IP address. Your IP address is your digital fingerprint, and it can be used by law enforcement to determine your location.
Some of the key features of WatchGuard VPN
1. Allows you to use Domain name
If you use a dynamic IP address for your VPN, then the WatchGuard client will allow you to use the domain name directly and save you from typing the IP address each time.
However, there are conditions like the need to register the dynamic IP address you wish to connect through with the dynamic DNS service provider.
2. Allows multiple authentication types
The main issue with most SSL VPN providers is that they have a limit on the authentication types they support.
WatchGuard also has a limit, but this limit includes all authentication types supported by the Firebox. Thus, if an authentication type isn’t supported by the VPN, it wouldn’t work with the hardware anyway.
3. Multi-factor authentication
We know cloud-based VPN services are pretty secure these days, but hackers always find a way. Thus, multi-factor authentication is a must for cyber-security. WatchGuard VPN uses AuthPoint encryption to offer multi-factor authentication to users.
What are the pros of using WatchGuard VPN?
WatchGuard VPN has more pros than cons. It is a pretty good VPN for budget users.
WatchGuard VPN is fairly secure. While users might say that they have better options in the market, the basic security protocols are the same and the protection level is the same too. It will make sure your data is well encrypted.
WatchGuard VPN is relatively cheaper. This is a major advantage considering that other security features are similar. Why pay more for the same thing?
The VPN is easy to use. All you need is to enter the details and you are ready.
Network fluctuations with the WatchGuard VPN are rare. Thus, you can expect a stable connection with the software.
What are the cons of WatchGuard VPN?
The main and only con is that the speed is slightly slower than its counterparts. However, it still does the job well.
How to download and install Watchguard VPN on Windows 11?
Doing a little research before you start to use a VPN will help you get started on the right foot. There are many safe VPNs you can choose from, but it’s important to keep in mind how you interact with your data over any given network.
Most people think of virtual private networks as a way to keep their browsing data safe. You can also use VPNs to cloak your data, remain anonymous online, or bypass geo-blocking. Thus, take your time before choosing the best VPN service.
We hope this article helped you know more about WatchGuard VPN. If you have any questions, please leave us a comment below.
When your PC doesn’t boot, it’s nearly hard to fix anything, so flashing the BIOS may be your only option.
A computer’s basic input-output system is one of its most important components and extremely sensitive to alteration or adjustment.
Flashing the BIOS means upgrading it or restoring it to its default settings, which will undo any changes.
Even if your computer won’t boot up, you can flash the BIOS with the help of this article. So, without further ado, let’s get started.
How can I flash BIOS when the computer won’t boot?
1. Flash or update BIOS from a bootable USB
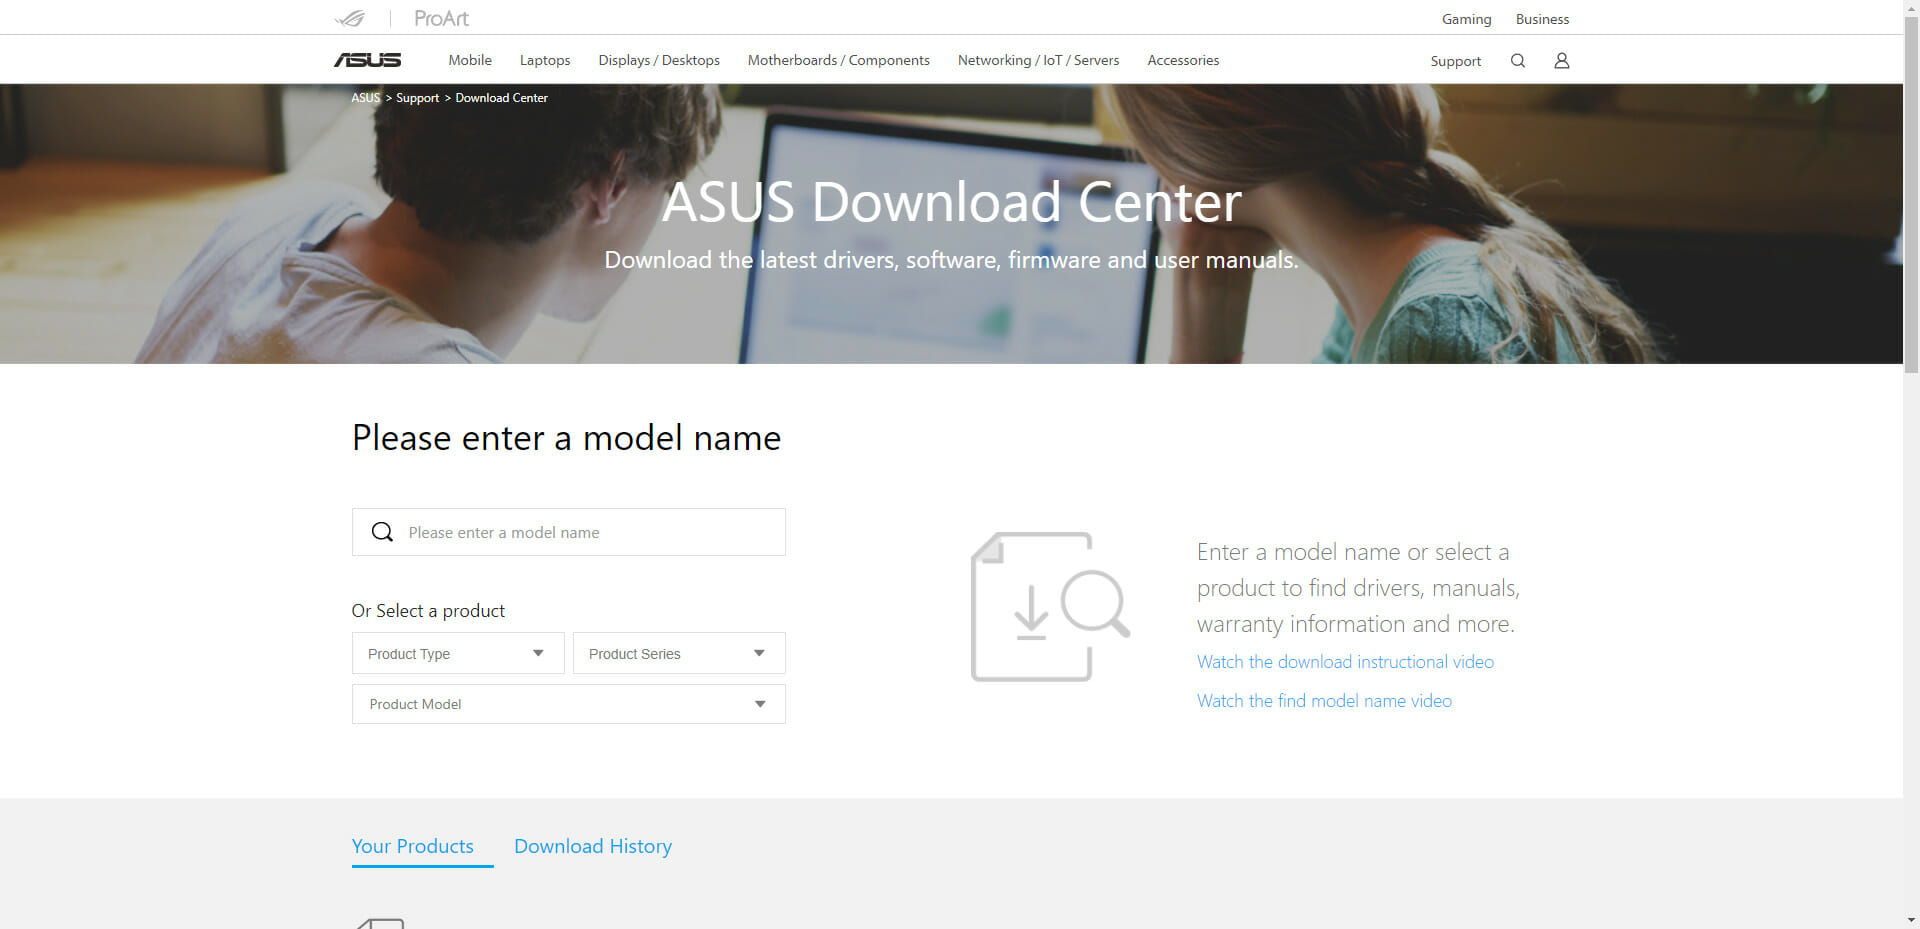
Using another computer or laptop, visit your motherboard’s or computer’s manufacturer’s website and look for a support page.
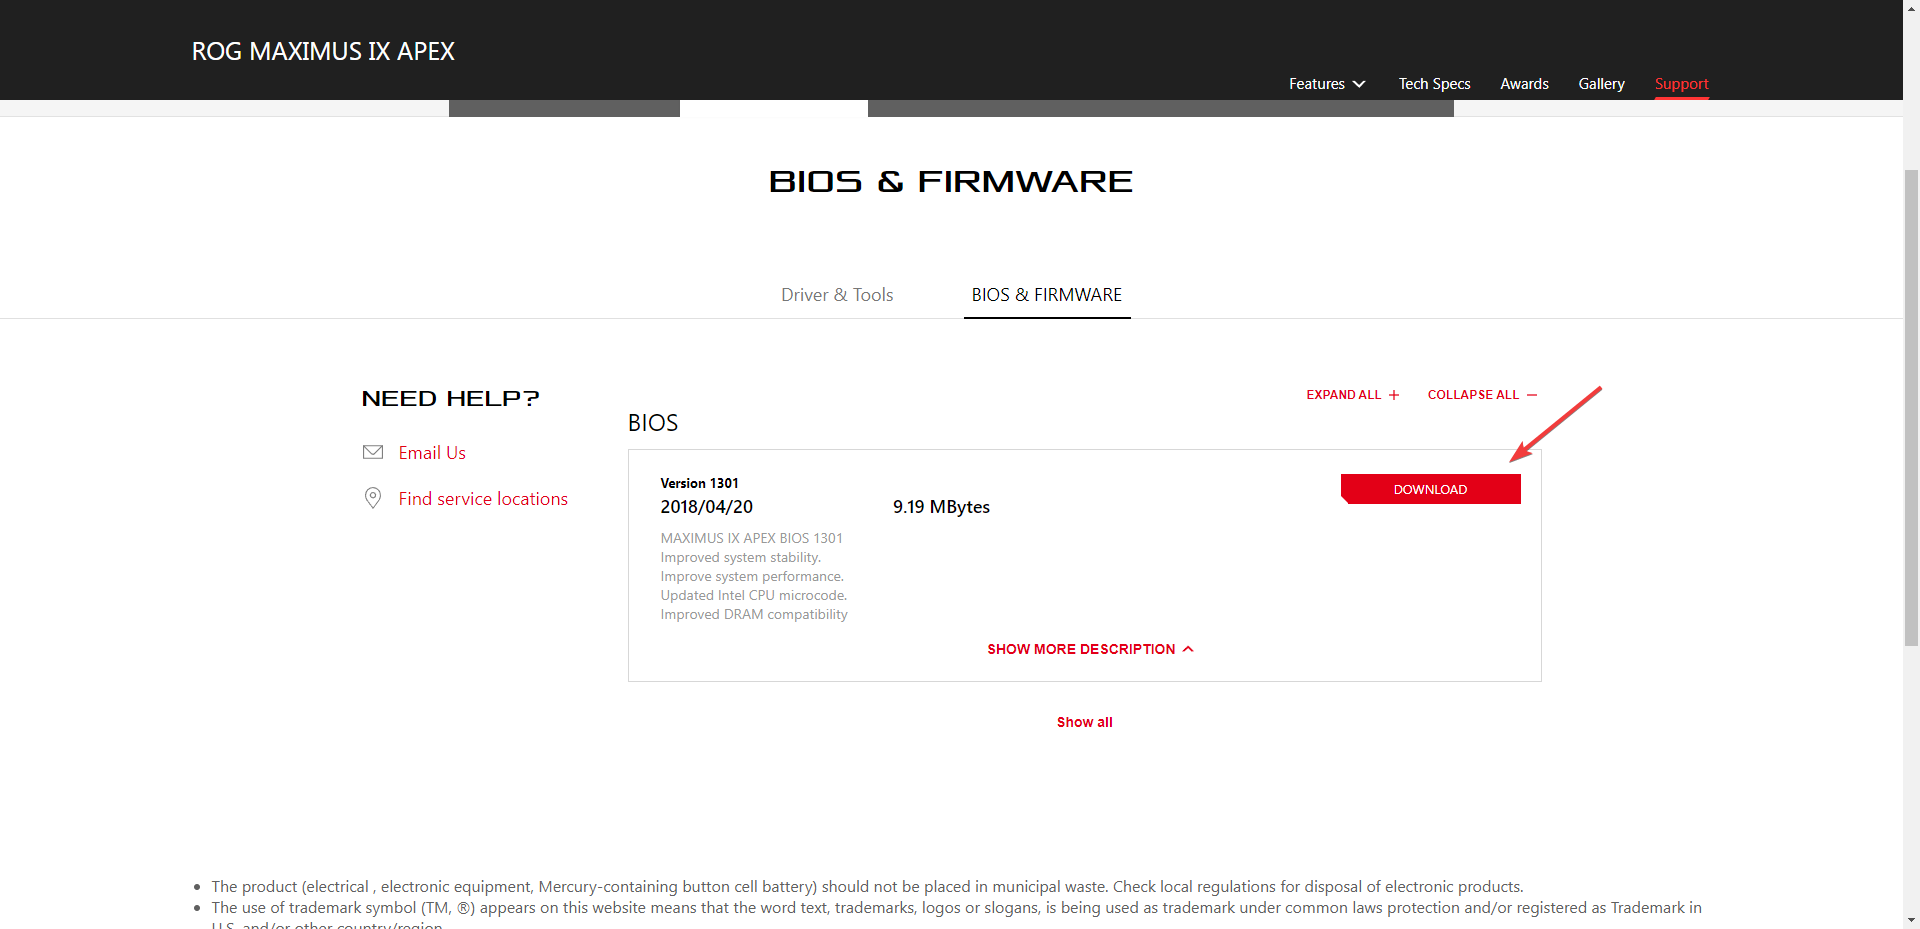
They should have your motherboard or laptop model listed. In our example, we go to the ASUS help center and type our motherboard model.
Then download the BIOS file.
If the downloaded file is a ZIP file, extract the contents.
Look for the BIOS file in the contents of the unzipped file and make a note of where this BIOS file is located.
Before beginning the BIOS flash process, save the BIOS file to an external device like a USB drive.
Boot your faulty computer after ensuring that it is plugged in or that your laptop is completely charged and plugged in.
Enter the BIOS screen by pressing the key specified by the manufacturer’s instructions for a BIOS update as soon as the computer starts. F1, F2, Delete, F8, Esc, or another key could be used.
Start the update process based on your computer’s model once you’re on the BIOS panel. (To complete the upgrade, you may need to look at different tutorials on the manufacturer’s website.)
The BIOS flash can take anywhere from a few minutes to several hours, and your system will restart after the BIOS update is completed.
It is critical not to interrupt the computer’s power supply; thus, any interruption can cause the BIOS to become corrupted, rendering your computer unusable.
For a detailed guide on how to update BIOS in Windows 11, check out this article on updating BIOS in Windows 11.
2. Reset BIOS by removing the motherboard battery
Unplug your computer from the power outlet and turn it off. Make sure to discharge any residual electricity in the machine by pressing and holding the Power button.
Remove the case side door.
Look for the CMOS battery on the motherboard. Most of today’s motherboards use flatcircular batteries that are a little less than an inch in diameter.
Slide your finger under one of the battery’s edges and pry it up gently. The battery may feature some locking mechanism that you will need to open.
Even though this may seem like a complicated process, following the steps will make it easy to update or flash your BIOS to get your PC working again.
If none of the other options have worked, flashing the BIOS may be the answer, and don’t worry, it won’t damage your motherboard if done without interruption.
Reading manufacturer manuals can also help to lessen the chances of the BIOS flashing procedure failing, so it’s a good idea to go to the manufacturer’s website and read relevant information.
Antivirus software is one of the most crucial tools at your disposal for protecting your device but sometimes it causes the computer shuts down during a virus scan.
With more sophisticated assaults on your devices, it’s critical to have antivirus apps on your desktop and scan your system frequently.
However, you may encounter some difficulties at some point during the process.
For example, your computer shuts down during a virus scan! Don’t worry though because we are here to help you fix this problem.
How do I know if the problem is caused by software or hardware?
To start, press the Windows + I keys on your keyboard to open Settings.
Click on System then select Recovery.
Under Recovery options, next to Advanced startup, select Restart now.
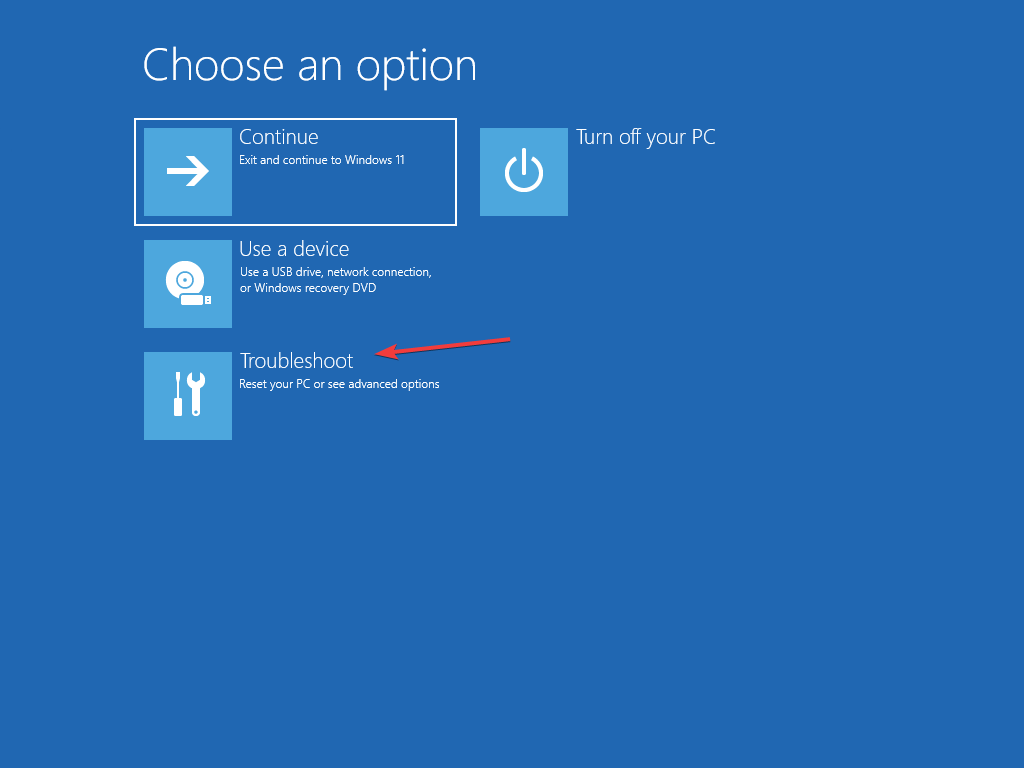
After your PC restarts to the Choose an option screen, select Troubleshoot.
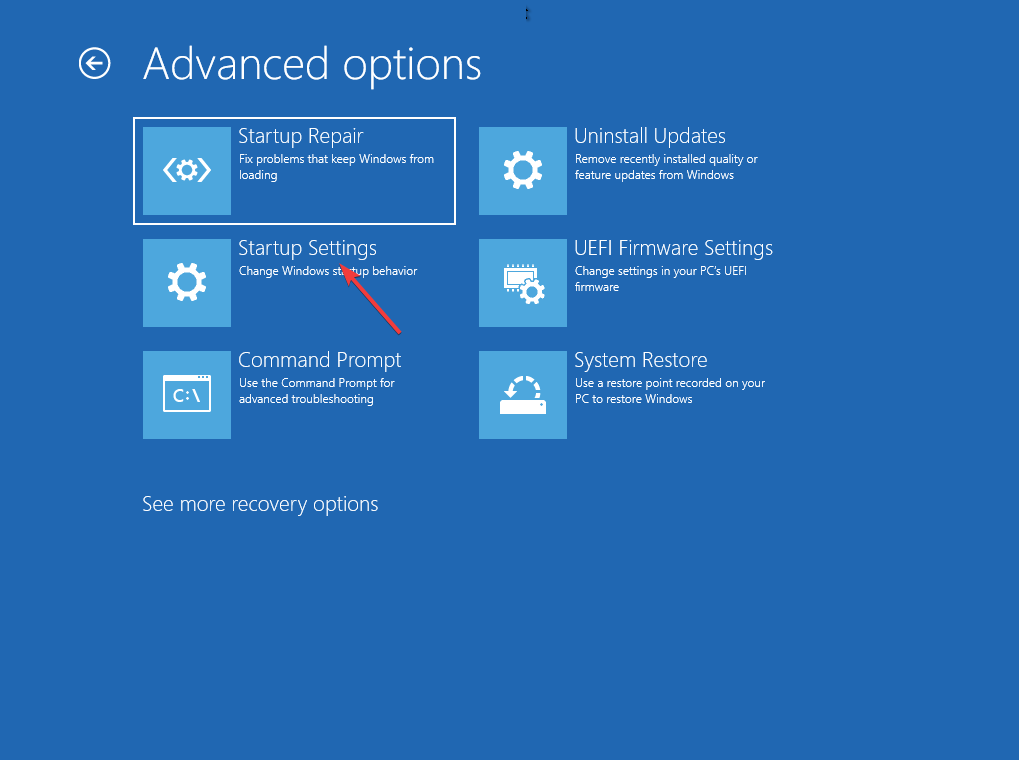
Select Advanced options.
After that, click on Startup Settings.
Select Restart (You may be asked to enter your BitLocker recovery key if you have one).
After your PC restarts, you’ll see a list of options. Select 4 or press F4 to start your PC in Safe Mode without internet and select 5 or press F5 for Safe Mode with Networking.
Now that we know what caused our problem, we can focus on solutions, which are, of course, dependent on the main cause.
What can I do if the computer shuts down during a virus scan?
1. Check fans
Even in Safe Mode, if your computer crashes while running a virus check, it’s likely that the problem is hardware-related, most likely a heat problem.
So, if you have access to your pc/laptop fan clean it and if you are not familiar with the procedure try getting help from an expert.
2. Install a PC repair tool
The most common symptom of a problem with your computer’s operating system is a restart.
So, it’s possible that your computer’s operating system is also malfunctioning. In this case, a PC repair tool is required.
3. Install another antivirus
As we mentioned before, Safe Mode can make everything clear. If the antivirus scan went smoothly on windows Safe Mode, then the problem is caused by software issues or incompatibility.
To solve the problem, you can try another reliable antivirus app and test if it works. Before installing another antivirus don’t forget to uninstall the old one.
Now check to see if your computer shuts down during a virus scan again. If yes, proceed to the next solution.
If everything is okay on Safe Mode and installing a new antivirus didn’t work, you might need to defrag your hard drive. To do so, follow the steps below.
Click the Start menu, type defrag and select Defragment Optimize Drives.
When the window opens, you’ll see a list of all your drives and their current defragmentation status. Select the drive that you want to analyze, and click the Analyze button. Remember! this procedure works only on HDDs.
Wait for the process to finish then choose the analyzed drive and click on Optimize.
Wait for the process to finish.
Keep in mind that depending on the extent of fragmentation, the process may take some time, and there is a higher chance of resolving the computer shuts down during a virus scan issue.
Antivirus protection is critical for anyone who cares about their data and computer systems and wants to prevent any further damage.
Antivirus software acts as a security guard at the entrance, keeping intruders from entering.
However, sometimes, the antivirus is the source of the problem and it shuts down the computer during a virus scan.
Because prevention is far more effective than cure, having a system in place intended to identify and prevent viral assaults is preferable to having to spend time and money patching infected equipment.
That’s why you have to install an antivirus and use full scan frequently.
Resource and memory conservation is essential, especially in older Android devices. One way to make sure that you do not run out of memory is by using low-resource-consuming applications.
These are often light versions of some of the apps you are used to and other times, they are just well-thought-out and developed applications.
In this article, we will like to explore a few low-RAM Android browsers, that will be perfect for your device that is running low on memory.
Opera Mini is one of the quickest and lightest browsers available. You get reduced power consumption, faster browsing, valuable features, and more.
It’s also known for data compression and adblocking. These capabilities are ingrained in our daily lives, and we often use them across our devices’ browsers, either as add-ons or as built-in functions.
The drawback is its downloading. When compared to other light browsers, this functionality is a bit slower.
Opera Mini is an excellent RAM-conserving browser that can be made even quicker by disabling some functions.
We suggest this browser if you need a light browser, but you don’t want to lose out on entertainment and news.
Nothing beats Google Go if you’re looking for a nice lightweight mobile browser for your Android.
As you input in the search field, it immediately displays search results. It is also well-customized to provide the greatest possible user experience. All of the most popular websites are featured on the main page and may be accessed easily by tapping on them.
You may save even more data by simply activating a feature named use lite web pages in the Google Go settings. Some browser components, such as the wallpaper and app background, may also be customized.
If you have a device with limited memory, we strongly advise you to use this browser.
Pure Browser is a freshly released lightweight browser with a slew of essential features in high demand these days.
It has taken care of everything from privacy to speed without sacrificing file size. It also has the advantage of a well-designed UI that provides a fantastic experience for browsing and downloading.
With Pure Browser’s night mode enabled, viewing films online becomes more enjoyable.
The browser is strict when it comes to ad blocking and privacy, it does not keep any user data and safeguards your data and privacy on the internet.
Via browser is a basic and minimalist browser that you may use to save RAM on your Android device.
Most online browsers populate their home pages with information that doesn’t always make sense to users. But with Via browser, you only see your search bar on the main page; no other irrelevant information will be shown.
There are several choices in Via Browser to improve the user experience. It has features such as a desktop site, downloads, incognito mode, tools, night mode, etc.
The most significant feature of this browser is that it supports add-ons. It contains two built-in add-ons, the first of which is a QR Code scanner, and the second is a download manager.
There you have it; our complete list of RAM-conserving browsers for your Android devices.
All the light browsers we have discussed are good choices. You may be drawn to one for various reasons, minimalistic design, optimized download, etc. In the end, you should make your choice of a low RAM-consuming browser based on your personal preferences.
In the comments, let us know which of the browsers you would rather try.
You may have already encountered and are familiar with Discord’s error message; Your Files are Too Powerful.
We know how annoying it is since it may have appeared every time you attempted to upload one of your cherished video files.
This error message is accompanied by a short statement that says, Max file size is 8.00 MB please, implying that your movie is too large to be submitted, or at least larger than 8MB.
However, there is a straightforward remedy. You may submit your videos without worrying about this problem if you compress them beforehand.
This article will explore the best video compressors to use for Discord.
Can I upload larger videos on Discord without compressing them?
Discord has been one of the most interesting instant messaging services since its introduction in 2015 and has grown to over 300 million registered members.
Despite its enormous user base and popularity, the corporation has set a limit of 8MB for the file size that may be shared on the platform.
This is easily a major issue for everyone since even a short HD film may use up to 300MB of storage.
If you have a Discord Nitro membership, you will be able to upload up to 50MB of video. This membership includes benefits that a regular user does not have access to, such as an increased maximum size of submitted videos.
Movavi is a very capable video compressor for Discord.
The service contains professional video editing tools such as special effects, keyframe animation, and pre-made intros.
It also has a tool called Apply Chroma Key, which allows you to modify the backdrop of your films to anything you choose.
The service recently redesigned its layout, which we feel is really user-friendly and has straightforward controls, so you won’t need to learn anything to get the most out of it.
One of the nicest things about this Discord video compressor is its speed. You will compress videos quickly within Discord’s limit file size of 8MB, process files, and display them all in one place.
Movavi
Get Movavi, an all-round video maker, with a screen recorder, timeline markers, and converter.
Veed.io is an all-inclusive video editing tool that lets you transcribe audio, add subtitles, record podcasts, and compress video with just a few clicks.
Veed.io now provides a free online video compressor tool in addition to its other video-editing capabilities. Its compressor supports AVI, MP4, MOV, and other video formats.
Using the compression service is quite easy; all you have to do is choose and upload your video file, choose the compression options, and download the compressed video. Once you are done, you can share on Discord or any other platform.
It is a great option that does not visibly compromise video quality, and since this is an online service, no downloads and installations are required.
From the name, you can guess that it is a Discord video compressor that will compress your files to at least 8MB.
This interface is very basic. Once you navigate to the website, it is mainly a white screen with an option to upload your video.
When you click the upload option, you’ll be prompted to choose the video you wish to compress, after which the program will begin processing it.
It offers a variety of file sizes ranging from 8MB to 100MB. Sound editing options, such as eliminating sounds from videos, are also available on the platform.
You can easily and rapidly decrease the file size of any movie, whether it’s 50MB or 200MB. Furthermore, the video quality is not noticeably impacted and remains excellent.
FreeConvert is an online file conversion application that may help you convert your files between different formats.
You may use it to compress any content into manageable file sizes, whether a document, an image, music, or video. You can effortlessly post your cherished videos to Discord, Instagram, WhatsApp, and other platforms with FreeConvert.
It is simple to use, similar to many of the services on our list since there is no program or application to download and install. All you have to do is submit files to the platform’s servers and wait for the compression process to complete.
It’s also one of the safest and most dependable tools since all your videos are uploaded securely using the HTTPS protocol, and after they’re done, they’re promptly erased from the servers.
As a result, you don’t have to be concerned about your privacy and safety while using FreeConvert. Additionally, you may utilize the platform to convert files between formats, such as MP4 to MP3, PDF to JPG, PNG to JPG, and more.
Media.io is an online audio and video editing application that allows you to perform any tasks of file converting or compressing.
It comprises many powerful tools in one location, including a video compressor, video converters, audio converters, thumbnail creators, GIF creators, audio cutters, picture resizers, etc.
First, you must select and upload any video file from your PC to compress it. After that, you will tweak video parameters like size, resolution, bitrate, etc., to meet your needs.
When you’ve completed making changes, click the Compress button and the Download option to save the compressed file. The greatest feature is that you won’t lose quality when compressing the file size.
You may join the platform for free and utilize the video compressor to compress your video files up to 500 MB. A paid subscription lets you work on larger files.
Most of the services in this article will achieve the same goal. However, it would help if you took note of the quality of the final product, as this is the main separating factor among all these Discord video compressors. But, of course, other factors like speed should be a consideration.
In the end, we expect that this guide has educated you on what good choices exist, and you should be able to make a choice based on your personal preferences.
The Razer Book 13 is by default a good quality laptop with an impressively sturdy CNC anodized aluminum-made chassis that against all odds, manages to remain light, portable, and compact.
But just like you’d benefit from a Razer Book 13 screen protector neatly applied on top of the built-in Gorilla 6 glass, a protective sleeve would not hurt.
You probably already have a laptop bag, stacked in a dark corner of your desk. While there are also heavy-duty laptop cases that are worth paying for, we reckon a Razer Book 13 sleeve is more adapted for traveling.
What is the difference between a laptop case and a laptop sleeve? Sleeves are usually handleless and conceived to perfectly fit your laptop without any loose ends in order to prevent sliding.
Is it worth getting a laptop sleeve?
Owning a piece of robust equipment is a good start, but its in-built protective mechanisms are by no means exhaustive and do not cover unexpected events such as drops or other intense shocks.
This is where a good laptop sleeve comes in to protect not just against dust or minor debris but against spills and all kinds of accidents that are likely to occur especially when you’re on the move.
While there is no shortage of protective gear on the market, we know that finding the right Razer Book 13 sleeve can be a daunting task.
So, we made things simple for you with a useful checkpoint to keep close when searching for the best laptop sleeve out there.
How do I choose a laptop sleeve?
Tip
➡ High-quality durable materials such as neoprene or polyester ➡ Protective mechanisms against knocks, bumps, drops, falls scratches, scuffs, dust, and debris ➡ Water-resistant capacities to repel spills ➡ Perfect fit (Remember that your Razer Book 13 is equipped with a 13.4-inch display with bezels on 4 sides, so your sleeve should be wider than that, but without too much spare space to prevent it from sliding. You will need to consider the laptop’s width for this, so don’t go any lower than 13.8 inches when it comes to the sleeve’s dimension.) ➡ Lightweight and flexible materials that are highly adaptable but hold their form well in time and easy to use accessories (such as zippers or velcro) that allow you to easily slip your laptop in and out
Which laptop sleeve is the best for Razer Book 13?
This Alapmk case is all about craftsmanship and high quality. Everything is hand-sewed and punctiliousness can be seen (and admired) in the slightest details from the handle, to the zipper and pocket.
Since it’s not produced on an industrial scale, this fashionable sleeve is by no means universal and only caters to a chosen few (laptop models) among which the Razer Book 13.
First things first. Let’s talk materials. On the exterior, we have a high-quality synthetic leather, while the interior boasts a soft cashmere microfiber, making this Razer Book 13 sleeve not just a sight for sore eyes thanks to its appealing esthetics, but also a joy to touch with your hands.
Of course, looks are not everything. On the contrary, this premium PU leather has tons of functional advantages.
The liner has proved to be a cooling enhancer and its unique design improves the airflow and helps dissipate heat better.
What’s more, it also acts as a protective layer against scratches and dust, while the durable interior coating helps to protect your laptop against mild collision and impact.
Now, we all know that loose ends can be a problem when using the laptop and Alapmk tried to anticipate this by adding two elastic rubbers.
Unfortunately, it’s not a flawless solution as the bottom straps covered a bit of the screen for us.
Furthermore, there seems to be a bit of an issue with Dell XPS 9300 laptops even though they are listed as supported models. It turns out that this sleeve partially covers the camera. However, we had no such problem with the Razer Book 13.
Just like our previous recommendation, this Razer Book 13 sleeve is part of a limited series and the attention to detail is easy to notice.
To begin with, it’s portable and super convenient to carry thanks to its attached handle and buttons. This 2-in-1 design makes it even more practical and you can easily use it as a comfortable carrying bag.
And speaking of comfort, we all know that accessories are just as important as the main equipment itself. That’s one of the reasons why cable management accessories are so useful for office space organization, for instance.
MAMA MOUTH’s sleeve includes a pocket as well as an additional front storage space to help you keep your items organized.
The sleeve is made of high-quality waterproof leather that protects your laptop against spills but also against dust, scratches, and collisions.
While the external coating is durable and resistant, the inner layer is made of soft microfiber to further protect your laptop.
To top it all, the entire design is built around the idea of improving air circulation to avoid overheating. This unique cooling feature will make sure your laptop’s temperature is always under control even under intense usage conditions.
The Razer Protective Sleeve V2 is custom-fit for 13.3 notebooks and it has Razer written all over it.
We mean that both in the literal sense (see the company’s staple holographic and chromatic wordmark) and figuratively due to the high-quality finishes that elevate the product and distinguish it from everything else on the market.
The exterior material is a combination of highly durable and robust PVC and polyester that seals your laptop against accidental spills, abrasions, and other potential damages.
Meanwhile, the padded interior lining is as smooth as they come and provides a slim layer of protection for your laptop.
Needless to say that there is a great advantage in owning a sleeve and laptop manufactured by the same company. From the very beginning, you can rule out potential incompatibility issues as this case is custom-fit for your Razer Book 13.
Its slim and sleek design guarantees flawless portability and you can easily slot this breezy laptop into your backpack or suitcase.
The snag-free velcro further contributes to the ease of use, making it easy to take the laptop out or to put back in and hold it securely in place.
While we salute the Razer Protective Sleeve V2’s superb features, it would not be fair to skip its flaws. The flip-out mousemat – advertised as a huge selling point – turned out to be a bit disappointing.
The flap is simply not big enough and the mousepad itself is causing the laptop to overheat.
There you have it, now you know which Razer Book 13 sleeve to pick in order to make the most of your productivity-focused workstation.
Unleash its true potential by pairing it with the sleeve that does it justice and enjoy it for years to come in pristine condition!
Windows 11 IPsec VPN has become popular worldwide in the last few decades. These services have become a necessity for anyone who wants to keep their online activities safe and secure.
IPsec is a suite of protocols that are used to secure Internet communications. It’s also used for other things like controlling access to webpages, eliminating spam, and safeguarding your data. It is an abbreviation for Internet Protocol Security.
The widespread use of the internet has raised many concerns, one of which is that Internet traffic should be secured. This idea culminated in the 90s with IPsec, which is still widely used to this day.
IPsec is one of the core protocols for securing Internet connections. It also enables secure connections between a host and an internet gateway. Though not as common as it once was, it still plays an important role in securing internet communications.
What is Windows 11 IPsec VPN?
A virtual private network (VPN) is a service that masks your online identity and assigns you a new one. The best VPN services allow you to bypass internal firewalls and circumvent ISP throttling techniques. They also help you stay secure on public Wi-Fi, protect your data from hackers, and more.
IPsec is usually used in a Virtual Private Network context to create secure connections over the public internet. It creates a network connection between two devices that resembles a connection within a private internal network.
Its most common use case is when remote employees need access to secured files stored behind a corporate firewall.
The protocols that are a part of the IPsec suite are technologies that secure one of the major kinds of VPNs, we prefer to call them IPsec VPNs.
How can I set up IPsec VPN on Windows 11?
1. Sign up for a VPN service
To get started, you need to subscribe to a VPN service to obtain their VPN server address. We recommend Private Internet Access VPN. It is a highly secure VPN service that allows you to protect your personal data from hackers and internet snoopers.
It works by providing you with an anonymous IP address and hiding your original ISP location. PIA is considered one of the most cost-effective VPN services on the market.
Go to the Windows Search bar and type Settings. Hit Enter.
Next, go to Network and Internet.
In the left pane, click VPN.
Then, click Add VPN.
Set VPN to Windows (built-in).
Type in the VPN server from your VPN Service Provider.
Set VPN type to L2TP/IPsec with certificate.
For the type of sign-in info selection, select Username and password.
Enter your VPN credentials.
Finally, click Save.
In today’s high-tech world, it’s important to protect your online privacy by using a VPN. Windows 11 users should make sure their VPN is up to date with the latest protocols such as IPsec, to take advantage of the best security feature.
How does IPsec VPN work?
One of the most important functions in IPsec is key generation. What does this mean? Well, it starts with the SA (Security Association) – a cryptographic key that’s exchanged between hosts.
These keys work by allowing the communicating parties to decrypt and encrypt their communication.
The type of encryption used depends on the goal of the two hosts, and this is negotiated automatically. For example, you might want to use message integrity to ensure data hasn’t been tampered with.
However, it’s generally more important to make sure messages are confidential than it is to just ensure they’re not altered.
The SA information is passed to the IPsec module, which then modifies every packet in both directions.
What these modifications do is change the packet’s header, which includes metadata, information about the packet at the beginning of the data sent, and its payload (which is the actual data being sent).
Today, the Internet has become a new phenomenon that helps people to connect with each other. However, it has also created a great risk of information leakage and hacker attacks.
Using a VPN is one of the best ways to ensure your online security and privacy. There are many reasons why you should use a VPN, but the benefits can be summed up in one word: security.
We certainly hope you are enjoying your new VPN and the many benefits that come along with it. Do let us know your views on this in the comments section below.
Conserving computing resources is very important, especially when working on older systems. The number of applications you run directly impacts how much RAM you have to spare for other apps.
Many browsers are resource-intensive, and by opening multiple tabs, you may just be reducing your available storage. As a developer, you may not be able to compromise on many of your core development software, but you can save resources by using a lightweight browser.
This article will discuss some of our best recommendations for lightweight browsers for developers.
What are the best lightweight browsers for developers?
LambdaTest’s LT browser is a web browser that you may use to create and test websites. It is designed to give developers an advantage, and it comes with practically all of the development tools you’ll ever need.
It has numerous screen sizes, allowing you to test websites on various devices. You may also design custom screen resolutions.
It includes the ability to adjust your network speed, allowing you to test the website’s performance in terms of speed. A side-by-side mobile view capability in the browser will enable you to sample many devices at once.
Then there are features like one-click metrics, hot reloads, and bug recording that comes with the LT browser.
This browser makes it simple to analyze web page accessibility, SEO, and a variety of other website performance indicators. To share the bugged data, you may use the browser to connect channels like Jira, Asana, Trello, and Github.
Additional features:
Mobile website test
Lighthouse reports
Hot reloading
LT Browser
In need of a browser built for developers? This solution can test or debug mobile websites in minutes for multiple systems.
Mozilla keeps surprising us with new products. Firefox Developer Edition is one of these new products. It is the edition that is just for devs.
This browser isn’t the lightest, but it fits into this category.
It provides more capabilities centered on development than the standard Firefox and improved speed. Most of its tools are centered on open-source projects.
Regarding performance, this Mozilla Firefox Edition delivers impressive results, ensuring that pages load as quickly as possible. The browser performs better than its competitors in several tests, such as Asm.je and WebGL.
For geeks and website developers, it is now the most used browser, at the very least, it comes out on top in numerous developer polls.
Additionally, it can show the CSS grid of your resource, which is an unusual, if not unique, feature.
This browser, created by the former CEO of Opera, has only been around for six years. Although it is aimed at a public audience, it has several developer-friendly features.
It offers a very basic and clean design with complete customization options such as changing themes and colors to suit your requirements.
Because Vivaldi is built using React.JS, Node.JS, and HTML 5, you can expect it to run well and deliver high performance. It allows you to utilize any extensions, even those built for Firefox and Chrome, without problems.
It features an ad blocker. The split-screen, feed reader, built-in mail client, and calendar help the user experience.
Vivaldi also provides excellent privacy protection, ensuring that no one can monitor your online activity.
With developer-centered browsers, balancing lightweight and developer tools is not an easy find. While these are not particularly the most lightweight browsers, they are the best you will need if development and resource conservation is the priority.
The Razer Thunderbolt 4 Dock comes in second as a choice pick for your Surface Pro 8.
It is considered one of the best third-party products that will go well with your Surface Pro 8.
This dock has a built-in USB-C charge charger that will keep your device charged at all times.
Other features include dual monitor support for 2 4K @ 60Hz displays, 10 ports for added connectivity and RGB lighting if you want to create some atmospheric lights.
The Kensington SD2500T is another ideal third-party product for your Surface Pro 8.
This product allows you to expand functionality with Intel’s Thunderbolt 3 technology which is compatible with devices such as your Surface pro 8.
If you wish to connect your Surface Pro 8 to external monitors, you have the option of 2 4K UHD @ 60HZ and 1 8K UHD @ 30HZ using the Thunderbolt 3 port.
Other ports such as the USB-C offers great support for extra monitors to keep your workflow at an optimum level.
The 120-watt power supply delivers 60Watts which is enough to deliver power to peripherals like your mouse, keyboards and hard drives as well as charge your phone or tablet.
A proper docking system is more than enough to cover some of the issues that have been experienced by Surface Pro users.
If your wish is to increase functionality such as the Surface Pro 8 docking station dual monitor connection, then any of these products will work just fine.
Finally, don’t forget to let us know which docking station you picked for your device in the comment section.
Windows 11 got rid of News and Interests segment and replaced it with the Widgets, which you can turn on or off through the settings.
Widgets come with the Weather app, which shows all the details and information you want about the weather. For this, you have to click and open the app for viewing.
Some users struggle when they try to show the weather in the Taskbar. Some end up giving up on the feature as they have no way to fix that.
Many reported that Taskbar icons are missing on Windows 11, but that can be easily fixed. For more information about the weather widget, be sure to keep on reading.
What are the causes of Windows 11 weather not showing on the Taskbar?
There are several reasons why the taskbar doesn’t display the weather features. Some of the leading causes include:
Having pending updates from a specific build or previous updates during migration from Windows 10 to 11
Corrupt registry and system files
Improper settings and configurations
Conflicting user accounts
Having issues with TLS and SSL
How can I fix Windows 11 Weather widget if it’s not showing in Taskbar?
1. Check the widget settings
Go to the Search button, type Settings, and hit Enter.
Click on the Personalization tab.
On the Taskbar items list, locate the Widgets option.
Toggle the Widget button to turn it on.
2. Clean up the PC files
Open the Start Search box, type Command Prompt and choose the Run as administrator option.
Type the following commands in the order below and hit Enter for each: DISM.exe /Online /Cleanup-image /Scanhealth DISM.exe /Online /Cleanup-image /Restorehealth DISM.exe /Online /Cleanup-image /startcomponentcleanup sfc /scannow
Restart your PC
All these commands make sure your PC has the finds and repairs corrupt files that may affect the normal functioning of Windows 11 programs.
An alternative and easy method of repairing your PC is to use a PC Repair Tool. This software will effectively scan, identify, and fix all PC issues affecting your computer thus optimizing its performance.
3. Enable the SSL and TLS
Press Windows key + I on the keyboard to open the Settings app.
Choose the Network and internet tab. Click on Advanced network settings.
Select the type of network you use.
Click on View all properties.
Choose the Edit button on the DNS Server Assignment tab.
Change the DNS settings from Automatic(DHCP) to Manual.
Toggle the IPv4 and IPv6 buttons and turn them on.
Change the Preferred DNS details to 4.2.2.1 and Alternate DNS to 4.2.2.2.
Click OK to save the changes.
Go back to the start button, Search Internet Options, and hit Enter to open the Internet Properties.
Click on the Advanced tab.
Scroll to the Security category and Check these options: SSL 3.0, TLS 1.0, TLS 1.1, TLS 1.2, TLS 1.3.
Copy all the contents of the Vivetool to the following directory: Windows\System 32
Go to the search, type Command Prompt, and select the Run as administrator option.
Type each of these commands as you hit Enter: vivetool addconfig 34301415 2 vivetool addconfig 36226456 2 vivetool addconfig 36553793 2 vivetool addconfig 36226054 2
Restart your PC.
After the restart, an icon appears on the left side of the PC, click on it, and it automatically changes to the weather widget.
Press Windows key + R on your keyboard to open an empty Run dialog.
Type gpedit.msc and click OK.
Navigate to the Computer Configuration directory.
Select Administrative Templates, then Windows components.
Locate the Widgets folder and double click to open it.
Click on the Allow widgets option to open the expanded Window.
Choose the Not configured option and click Apply and then OK to save the changes.
6. Create a new User Account
Click on the Start search button, type Settings, and hit Enter.
Click on the Accounts option.
Choose the Family and other users option.
On the Other users tab, select Add account to add another user.
Choose Idon’t have this person’s sign-in information when prompted to enter your Microsoft account.
Choose the Add a user without a Microsoft account option. Input your username, password, password hint, click Next, and follow prompts to finalize the procedure.
After creating your account, log out from the old account and login into the new one. Repeat the same process and login into your previous account. The problem gets fixed.
7. Check your Windows Update
Press Windows key + I on the keyboard to open the Settings app.
Click on the Windows Update tab.
Click on the Update history. Try if you have the KB5010414 update. If the update doesn’t exist, install it and try again.
This option works mainly for people who upgraded directly from Windows 10 to 11 using an update. The weather feature got released through the KB5010414 update making it compulsory to enjoy the weather feature.
Why is the Windows 11 weather widget not updating?
If the weather widget isn’t updating, it’s possible that you have a network issue that is preventing it from working properly, so be sure to check that.
Damage to your Windows installation can also cause this problem, so you might have to repair your installation or recreate your user profile.
Windows 11 has a lot of widgets that are for different purposes. Some of the other widgets that come with the new operating system include a calendar, photos, tips, Entertainment, traffic etc.
If the problem is still there, you might want to visit our Windows 11 widgets not working guide for more in-depth solutions.
With today’s internet polarized by privacy-threatening tools and programs, your web browser should be a haven. This is why a privacy-first browser like the Bit Browser is paramount.
A secure browser with ease of use to boot, the Bit Browser allows you to traverse the internet without leaving traces. It is a free browser that also boasts lightning-fast browsing speed, among other features.
Getting accustomed to this browser, you would be forgiven to think it’s either the Bit Browser for privacy or burst.
However, in this guide, we will show you four secured alternatives that boast the features that made the Bit Browser popular and even more.
Opera One is the undisputed number one on this list, and for a good reason. It is hard to beat when it comes to privacy, anonymity, and browsing speed.
A privacy-focused and high-performance browser, Opera One has a built-in VPN feature that allows you to remain anonymous on the internet for as long as you want.
The VPN also allows you to access region-restricted info without getting caught. There is also the ad-blocker that eliminates even the most stubborn ads and banners.
Add its incognito mode that lets you browse without any traces, and you just know your security is guaranteed.
Lastly, being a Chromium-browsed browser, Opera One is one of the fastest browsers. It just ticks more boxes to be considered as just an alternative to the Bit Browser.
Other features:
Opera flow for effortless syncing between devices.
Built-in QR and Barcode scanner.
Night mode.
Native AI
Opera One
Secure your mobile browsing with this fully integrated browser that has smart features and 100% private navigation.
Brave is well-known for privacy and security. Hence, its popularity, despite still being relatively new in the industry.
Released in 2019, this browser does more than block trackers and clear cookies. It comes with a built-in VPN that replaces your IP address with a virtual one. With Brave, you have assured a blazing-fast browsing experience.
Brave is free, easy to install, and compatible with nearly all devices and operating systems. It is indeed a worthy Bit Browser alternative.
This is another web browser that ranks high in the privacy and security department. A Chromium-based browser, Vivaldi is a blazingly-fast app capable of loading complex web pages in seconds.
It comes packed with tracking protection and a built-in ad blocker. Its ad and pop-up blocker effectively eliminates ads, banners, and even phishing links designed as ads.
Finally, Vivaldi allows you to customize your browsing experience with its wide array of features such as page capture, theme selector, layer options, speed dials, etc.
As the name implies, DuckDuckGo is a secured browser that lets you escape website tracking and prying eyes looking to steal your data.
It has amazing security features such as zero private data collection, an effective web tracker blocker, and enforced HTTPS connections. This is why it is one of the most sought-after online privacy tools.
DuckDuckGo just about puts you in charge of your privacy without sacrificing any of the features expected in a web browser. This browser has it all, whether it is browsing speed, friendly interface, bookmarks, and tabs management.
There you have it. The four best alternatives to Bit browser.
The web browsers discussed are great options if you want to browse the internet with privacy and security assurance. Aside from being secured, these browsers also make your browsing experience enjoyable.
If you prefer browsers with low memory usage while also secure, you can check out our guide for the top picks.
Let us know the option you find fascinating on our list in the comments section below.
Address Bar autocomplete is a must-have feature in any serious modern-day browser like Chrome. It gives a sort of semi-automatic typing by offering suggestions to automatically complete any URL or keyword you are typing in the Address Bar.
This is done with the aid of browser data like history and common keywords searched by other users on the search engine at the time. However, this amazing feature sometimes stops working, thereby depriving users of the ease it brings.
Be at ease if the Chrome Address Bar autocomplete is not working for you, as this guide contains effective fixes for the problem.
Difference between autocomplete and autofill
It is easy to confuse Chrome autofill and autocomplete features for each other due to their names and apparent meaning.
The autofill feature allows you to save information like login details and other info filled on a form. It helps you fill this info automatically the next time you need it.
On the other hand, autocomplete uses browser data to provide suggestions to complete a URL or keyword you are typing automatically.
It relies majorly on data like cache, history, and the common keywords currently being searched around the words you are typing. So, they are distinctively different.
How can I fix the Autocomplete feature inside Google Chrome?
1. Enable autocomplete
Click the menu button (three vertical dots) at the top right corner.
Select the Settings option.
Click the You and Google option on the left pane.
Now, select Sync and Google services.
Go to the Other Google services section and toggle the Autocomplete searches and URLs switch to the right to activate it.
2. Clear cache and cookies
Click the menu button.
Select the Settings option.
Click Privacy and security on the left pane.
Choose the Clear browsing data option.
Mark the Cookies and other site data and Cached images and files boxes.
Finally, click the Clear data button.
3. Disable extensions
Type the address below in the Chrome Address bar and press the Enter key: chrome://extensions
Toggle the switch in front of each extension backward to disable them.
Now, restart Chrome.
If autocomplete starts working after disabling all the extensions, you can start enabling them one after the other to know the one causing the problem.
Click the menu button and select the Settings option.
Click the Advanced option on the left pane.
Choose the Reset and clean up option.
Choose the Restore settings to their original defaults option.
Click the Reset settings option when prompted to confirm the action.
5. Switch to an alternative browser
If the autocomplete feature still does not work after applying the fixes above, you can opt for Opera One to enjoy the ease of use you crave.
The Opera One browser focuses on making life easier for you on the web with its numerous user-friendly features. It comes with built-in VPN, Ad blocker and AI.
Also, aside from its extensive extensions, it is compatible with chrome extensions. This allows you to enjoy most features you get on Chrome plus extras.
Opera One just about ticks all the right boxes as a Chrome alternative.
Chrome Address Bar autocomplete is a handy feature, especially for users who seldom memorize URLs.
It also aids basic keyword search when you need to know the trending keywords around a particular phrase or word. Its uses are just too enormous to miss out on.
We have shown how to get the Chrome Address Bar autocomplete feature back working perfectly in this fully packed guide. However, if you are facing a more serious issue like Chrome not working, you can check out our guide to fix it.
Let us know which fixes helped you solve the problem in the comments section below.
A computer uses various components, both hardware, and software, to function efficiently and perform properly. If it is missing a component, if it is using an outdated component, or if it is using a corrupted component, the start-up can fail.
Windows computers come with the flexibility of upgrading or downgrading various components, such as the CPU, RAM, SSD, and more. For all these hardware components to communicate with the software, you need to install drivers, which are the software components.
If any component is missing or Windows is not detecting it, you can scan for hardware changes using the Device Manager which will help troubleshoot and make the device respond and work again.
To learn how to do this, keep reading to find out!
How do I use the Device Manager to scan for hardware changes?
1. Scan for hardware changes
Plug the device into your computer.
Click on the start button and search for Run.
Open Run and type devmgmt.mscto open the Device Manager.
Now, right-click on the device that is not working and has a caution icon and select Scan for hardware changes.
Your device should be able to work now.
2. Update the drivers manually
Open the Device Manager by following the steps above.
Click on the device that is not responding and expand it.
Now right-click on devices and click on Update driver.
Select Search automatically for updated driver software.
Allow some time for Windows to check if there are any new drivers available to be updated with.
Once located, Windows will automatically install the drivers.
3. How can you install missing devices in the Device Manager?
Click on the start button and search for Computer management.
In the Computer management window, click on Device Manager on the left side of the window.
Now, on the right side of the pane, click anywhere on the list of devices.
Click on Action and then select Add Legacy Hardware.
An Add Hardware Wizard window will pop up. Click next to add hardware.
Now, select Install the hardware that I manually select from a list (Advanced) and click the Next button.
A new window will open that has the list of all the hardware. Select the hardware that is missing from the Device Manager to add it and then click Next.
Select the manufacturer and the model and click on Next.
Now a new window will confirm if you would like to add the hardware (such as Bluetooth, wifi, etc.). Click on Next.
Click on Finish after the installation is complete.
A scan for hardware changes helps broken devices work again. If you don’t want your devices to get corrupted or outdated, it is recommended that you always update the device drivers with the latest drivers available by the manufacturer.
Although Windows updates the drivers with every update, they are often not the latest. You can update your device’s drivers both manually and automatically, or you could also use a third-party application that will update the drivers as soon as they are available.
Dying Light 2 was just released and tons of users are exciting about all of its post-apocalyptic survival scenarios set, in a world full of zombies and dangers.
Even if it brings up some of the most impressive stories and features, it seems like in some cases, the user’s experience has not been the best.
One of the most annoying related reported problems is the Dying Light 2 Black Window quest bug. This is how players describe it on some of the most popular gaming forums:
I think I’m stuck… (Help pls)!
So I’m doing the Black Widow side quest and I got to the point where I need to protect Josh, and he died. I turned the power back on and now I can’t talk to Josh, fast travel or open the door to leave. How do I get out?
Need help with Black Widow quest from PKs (PS5)!
Currently bugged in the quest step where you talk to Josh after protecting him but Josh died and never respawned. Tried everything from restarting the app to reinstalling to no avail, my last hope is to complete the quest with someone else and maybe it’ll update mine or something but it’s my only hope other than waiting for a patch.
When it occurs, players are encountering a glitch that gets them stuck or unable to progress this quest.
How can I fix the Dying Light 2 Black Window quest bug?
1. Complete the quest in someone else’s world
Even if developers didn’t come up with certain fixes, in this case, there are some solutions that could help you prevent/get rid of this annoying bug.
The first is a more a precautionary workaround and requires doing the quest in someone else’s world. This will keep your save file safely in case the bug occurs.
2. Check the video below
https://www.youtube.com/watch?v=3JJ1P5XQyDk
As, for now, there is no official acknowledgment of the issue from Techland, we hope that the above workarounds managed to solve today’s annoying Dying Light 2 Black Windows quest bug.
In case you face any additional related questions, make sure you leave a comment in the dedicated section below.
The USB controller resources error is one some users have reported arises when plugging devices into USB 3.0 ports on their PCs. A notification pops up with a Not enough USB controller resources message when that error arises. One user described that issue in a forum post as follows:
Hi, I’ve been trying to solve this problem for a while now but I can’t solve it. I cannot connect more than 2 XBox 360 PC joypads at the same time. The third is not detected and the operating system returns the alert Not enough USB controller resources.
This error can arise in Windows 11 and earlier platforms of Microsoft’s flagship OS series. As a consequence, users can’t connect further USB devices. You might be able to fix that error with the potential fixes outlined below.
How come the USB controller resources error occurs in Windows 11?
The USB controller error message says the controller doesn’t have sufficient resources for the connected device. Thus, this issue can often occur when plugging a device in eclipses the XHCI USB 3.0 controller’s resource limit. The XHCI USB 3.0 controller has an endpoint usage limit.
However, this issue can also pertain to USB 3.0 controller drivers. One or more of the USB host controller drivers on your PC might be faulty. Some users have said they’ve fixed the Not enough USB controller resources error by reinstalling USB controller drivers.
How can I fix the not enough USB controller resources in Windows 11?
1. Connect devices with USB 2.0 ports on your PC instead
As this error occurs for USB 3.0 ports, connecting devices with available USB 2.0 ports on your PC could be a simple workaround. That might not exactly be a fix, but at least you’ll be able to connect more USB devices to your PC without any issues.
2. Run the Hardware and Devices troubleshooter
Press the Windows + S hotkey that opens the Type here to search tool.
Search for the Command Prompt by entering cmd in the text box.
Click Command Prompt in your search results.
Type in this command from opening the Hardware and Devices troubleshooter: msdt.exe -id DeviceDiagnostic
Press the Enter keyboard key.
Click Next to start the Hardware and Devices troubleshooter’s scanning.
Find the Universal Serial Bus controllers section and double-click on it.
Right-click on the USB 3.0 device and select Update Driver.
Select the Search automatically for drivers option.
Wait to find the best driver version for your device.
Restart your PC after the installation is complete.
Alternatively, you can choose a more practical and time-saving solution that will update any old drivers from your system automatically.
Outbyte Driver Updater is a freely available driver updater tool that will tell you if any of the USB controller drivers on your PC are faulty or outdated. You can also install new drivers for the USB controllers using this reliable tool.
Moreover, it’s possible to create a driver backup for additional protection regarding updating drivers and be relaxed about other system malfunctions.
Double-click Universal Serial Bus controllers to view that USB category.
Right-click a USB host controller listed there to select Uninstalldevice.
Then press the Uninstall device button on the Uninstall Device window.
Repeat the above steps for all host controllers listed within the Universal Serial Bus controllers category.
Click Power on the Start menu, and select Restart from there. Windows should then automatically reinstall drivers for USB controllers.
5. Try using a USB dock
The Not enough USB controller resources error can also arise because too much power is being drawn from USB ports. That error might not occur if you plug devices into a USB dock with its power source. If you happen to have a USB hub handy, try connecting your devices to the PC with it.
There aren’t that many potential fixes for the Not enough USB controller resources error. However, those resolutions will likely be enough to fix the Not enough USB controller resources error in Windows 11 in most cases.
As always, you’re welcome to discuss the error covered in this guide below. If you’ve discovered any other way to resolve the Not enough USB controller resources error, feel free to share it in the comment section.
If you want to protect your online accounts, using a strong password is best. A strong password consists of both lowercase and uppercase letters, numbers, and symbols.
Creating a strong password isn’t always easy, but fortunately, some tools can help you with that.
The best way to create a strong password is to use a password manager, but if you’re not a fan of those, you might want to consider using password generator software.
Anyone eventually forgets their online accounts’ passwords, so the answer for this issue is Roboform password manager.
This useful tool comes to support you and every user who needs to encrypt and generate online passwords cleverly and quickly.
To get started, simply log into the app with your email and a password you should remember, and start surfing the web to store all the passwords you need.
RoboForm allows you to also sync your account on multiple devices, so you keep track of the passwords on the desktop and on the go too.
You can add all your passwords in the vault automatically while accessing the websites or add them manually to save them for good.
This tool has other excellent features: free usage, recurrent software updates & improvements, top encryption tools, and easy login and saving technology.
As a last note, we suggest you advance to different plans that include premium features such as data backup or access for multiple devices.
RoboForm
If you’re still noting down your passwords, do not. This password manager will create them in seconds.
NordPass – Most secure password generation and storage
If you want a tool that uses state-of-the-art technologies in order to provide the best passwords for a secure digital life, NordPass is certainly worth trying.
NordPass is a password management software that incorporates a powerful password generator feature.
It delivers random, unique passcodes that follow the latest security guidelines, incorporating hard-to-guess elements.
Not only that, but you can set up your own preferences and generate a password accordingly.
For instance, you can opt for a character-based password that combines random characters, but you can also get a word-based password that gives you randomized word combinations.
You can pre-select how you want to separate your words (with a hyphen, space, underscore, etc.) and you can also select whether you want to use capital letters or digits.
You also can pre-select the length of your password. NordPass can give you a secure passcode from anywhere between 8 and 60 characters.
Along with this extensive set of options, NordPass will also be able to store all your passwords and their corresponding accounts so you can connect easier.
It has an autofill feature that finds your account and its password as you start typing it.
Other key features of NordPass include:
Syncs across multiple devices
Stores credit card information
Data Breach Scanner
Includes a password health scanner
NordPass is one of the most advanced password managers on the market and it provides a pleasant user experience, encompassing its comprehensive set of features within a simple and intuitive interface.
It has a free version as well as some subscription-based plans. You can also get it as a browser extension.
NordPass
Set up your own requirements and generate unbreakable passwords.
Keeper is a great tool to generate and make your passwords more secure.
Able to generate strong passwords for each of your accounts, Keeper makes it a breeze to quickly log in on websites and applications without having to remember or enter passwords.
Keeper does not place any limitations on the number of passwords it can keep track of.
You can rest assured that all your accounts will be secured with strong passcodes without worrying about running out of storage space.
The tool can protect you against hackers and data theft with its strong password generator technology.
It’s also very convenient as it offers an autofill feature under the name of KeeperFill. It detects your account and corresponding password as soon as you start filling in your login credentials.
Other key features of Keeper include:
Save private files, photos, and videos in your vault
Sync instantly between devices, computers, and browsers
Two-step verification via SMS, Google Authenticator, Duo Security, or RSA SecurID
Support for Windows Hello
The free version of the program comes with limited possibilities. If you want to use it fully, check out the pricing offer now.
If you’re looking for a tool that can create cryptographically secure passwords, you might want to consider PWGen.
The application can also generate classical passwords, pronounceable passwords, and pattern-based passwords. In fact, you can even create passphrases that will use words from word lists.
As a result, you can generate passwords that are easier to remember.
The application uses a random pool technique based on your input and system parameters in order to generate passwords.
There’s also support for text encryption and the creation of random data files that can be used for encryption.
Application offers full Unicode support, and it doesn’t write any files to the registry. In addition, you can also use this tool to generate multiple passwords and save them to a single file.
PWGen also has the ability to encrypt and decrypt your clipboard thus allowing you to securely copy your passwords. The application has a simple user interface, and it’s compatible with all versions of Windows.
PWGen is a great password generator software. It’s relatively simple to use, portable and free.
Other key features of PWGen include:
Free and fast downloader
Lightweight
Completely free
Clipboard text encryption
We must mention that you need to add parameters to the Character set field if you want to configure your password, which might be confusing to new users.
Despite this minor flaw, PWGen is still a great application, so download it.
Next on our list is a free password generator software that also works as a password maanger.
Random Pssword Generator lets you easily keep track of all your passwords by storing them in its secure vault.
The application uses a master passwords, and you can’t access your passwords without it.
As a result, all your passwords will remain safe from unauthorize d access.
The application has a simple user interface, and it will be perfect for first-time users.
When creating a new password you just need to check what type of characters you want to use and choose password length. If needed, you can also generate up to 100 passwords instantly. All generated passwords will have a color assigned to them that represents the password’s strength.
If you want to add a specific password to the password manager, click it and enter its label and comment.
Random Password Generator is quite simple to use, but unlike our previous entry, it doesn’t offer many advanced options. The application has a simple interface, and you can create strong passwords in seconds.
Other key features of Random Password Generator include:
Generate passwords in batch
Customized rules to meet specific user needs
Quick search feature
Overall, Random Password Generator is a great application for every first-time user.
If you’re looking for a simple password generator software, you might want to check SecureSafe Pro Password Generator.
The application has a simple user interface, and even the most basic users should be able to use it. SecureSafe Pro Password Generator can generate passwords that are up to 100 characters long. In addition, you can generate up to 100 000 passwords with a single click of a button.
The application allows you to save all your generated passwords to a single text file which can be rather useful. In addition, you can also copy individual passwords to the clipboard.
As for password generation, you can check certain parameters to create the desired passwords. You can choose the length of the password as well as the number of passwords that you want to generate.
If needed, you can exclude dubious symbols, but you can also use special symbols. In addition, you can even use your own symbols if you want.
The application can also generate pronouncing passwords by adding vowels to them. After generating the passwords, you can see them along with the strength indicator in the right pane.
Other key features of SecureSafe Password Generator include:
Military-grade encryption
Can be installed on a USB drive
Cloud sync via Dropbox, One Drive, Google Drive, or another cloud service of your choice
SecureSafe Pro Password Generator is a simple password generator that will be perfect for every user. The application is completely free, and a portable version is available so you can run this tool without installation.
Unlike previous entries on our list, Advanced Password Generator is a Universal app. This is a rather simple password generator software, so it’s perfect for first-time users.
The application has a simple and clean user interface, and you can adjust the length of your password simply by moving a slider.
In addition to password length, you can also choose what type of characters you want to use. The supported characters are lowercase and uppercase letters, numbers, and special characters.
You can also use custom character sets if you want. The application also allows you to easily copy your password to the clipboard and paste it anywhere you want.
Advanced Password Generator offers the most basic options when it comes to password generation. It doesn’t allow you to create multiple passwords, and it can’t export your passwords to a text file or save them.
Other key features of Advanced Password Generator include:
Available on PC and mobile devices
Can be installed for free for up to 10 devices (from the same Microsoft accounts)
If you need to create a secure password, Advanced Password Generator is a decent tool. It’s simple to use and free, so it will be perfect for the most basic users.
Another free and portable password generator software is ZSoft Password Generator. This application is rather simple and lightweight, and it doesn’t offer any advanced options.
There’s a simple user interface that allows you to configure your passwords. You can choose the password length, but you can also choose what type of characters you want to include in your password.
The application will always generate five passwords, and you can’t change that. We have to mention that you can export your passwords to a text file which can be useful.
The application doesn’t have a strength indicator, so you won’t know how strong and secure your passwords are.
ZSoft Password Generator is a solid password generator, but it offers limited functionality. The inability to create more than five passwords is a flaw, especially when you have the option to export your passwords to a text file.
In addition, the lack of strength indicator might be a problem for some users. This isn’t a mandatory feature, but it can be rather useful.
Other key features of ZSoft Password Generator include:
Available in English and Danish
Save passwords to your preferred location
Overall, ZSoft Password Generator is a decent tool with a simple user interface and basic features. The application is completely free and portable, so feel free to try it out.
If you’re looking for a free and portable password generator, you might want to consider PassworG. The application has a simple interface that allows you to generate passwords with ease.
You can choose the password length and the number of passwords you want to generate.
Thanks to the simple interface, you can quickly enter which characters you want to use in your password. In addition, you can add sets of characters from the menu.
The application will generate passwords quickly, and it also has a strength indicator that shows you how secure your passwords are. In addition, this tool can also make readable passwords that are easier to pronounce and remember.
Unlike previous entries on our list, PassworG allows you to check the strength of your password. The application will scan the selected password and inform you about potential vulnerabilities. If necessary, you can also export all your passwords to a text file and save them on your PC.
Other key features of PassworG include:
Detailed security check that helps you improve your password
Simple user interface
Easy to use
PassworG is a simple application that can create secure passwords with ease. In addition, the application provides you with detailed security check. Thanks to this feature, you can see how to improve your password in order to make it less vulnerable.
Another free password generator software that you might want to consider is Strong Password Generator.
This application is completely free and portable, so it should run on any PC without an installation.
The software offers the basic features, and you can choose the character set that you want to use in your passwords.
In addition, you can set the desired password length. The application doesn’t offer a strength indicator, and that’s the only flaw of this application.
In addition to generating a single password, you can also create an array of passwords. The maximum number of passwords you can generate is 1000, which should be more than enough for most users.
Of course, the application allows you to export generated passwords to a text file. In addition, you can also copy your passwords to clipboard.
Another feature we didn’t expect to see is the ability to generate serial number keys. This feature will be extremely useful to all developers who want to protect their products with a serial number.
Other key features of Strong Password Generator include:
Works on all Windows platforms starting from Windows XP
Installable and portable version
Intuitive UI
As we already mentioned, our only complaint is the lack of strength indicator, which isn’t a major flaw. We have to mention that this application requires administrative privileges in order to run, so be sure to run it as an administrator. The application is free and portable, so there’s no reason not to try it.
If you’re looking for a powerful password generator software, you might want to consider this application. This application can generate numbers, passwords, coupon codes, and series of numbers with ease.
According to the developer, the application can generate millions of unique passwords in a matter of seconds.
The application supports four password types, and you can choose between Normal, Masked, Pronounceable, and Dictionary passwords.
Of course, you can choose which type of characters you want to use for your passwords. In addition, you can make your passwords pronounceable or phonetic, which is rather useful.
After choosing the desired options, you can see the password strength, preview, and the number of available combinations. In addition, Password Generator Professional is fully compatible with VBScript scripts.
Just like many other password generators, this one also supports password export. However, the application offers multiple export options. This means that you can export passwords to text, HTML, CSV or Excel documents.
You can even print passwords directly to paper or copy them to a clipboard. If needed, you can also save long password lists into separate files.
Other key features of Password Generator Professional:
Choose the minimum and maximum number of characters
Command-line support
Generate usernames
Password Generator Professional is an amazing application, and it offers a wide range of features, so it’s perfect for advanced users. The application offers both basic and advanced options, and it’s one of the best entries on our list.
This is another free and portable password generator software. The application has a simple interface, and it allows you to generate a single password. Regarding the customization, you can set the password length with ease.
As for additional customization, you can choose which character sets you want to include in your password.
If you want, you can exclude similar characters to avoid confusion. It’s worth mentioning that you can customize each set of characters.
This means that you can use only specific letters, numbers or symbols if you want. In addition, the application allows you to hide your password, or to copy it to the clipboard. You can also export your password to XML, HTML, or RTF document.
We have to mention that this is just a free version, so it offers the most basic features. If you need more advanced features, you might want to consider using Std version.
In addition, this version also allows you to generate hexadecimal and syllable passwords. You can add custom or special characters to your password if you want.
The Std version will also remove similar characters from your passwords automatically. We also have to mention that this version uses user-generated masks to create unique passwords.
You can also generate password hashes and create lists of passwords with the Std version. If you need even more advanced features, you might want to consider purchasing the Pro version.
SoftFuse Password Generator is a decent password generator software. The free version offers the most basic features, and it doesn’t have the ability to create multiple passwords.
Other key features of SoftFuse Password Generator include:
Generate ID numbers and PIN codes
Store, edit, search, or delete your passwords
Print passwords and usernames directly from the application
If you’re looking for a primary and portable password generator, you might want to try SoftFuse Password Generator. If you need more advanced features, consider purchasing Std or Pro version.
If you need advanced password generator software, you might want to consider Strong Passwords Need Entropy. This is a freeware and portable application, so it can run on any PC without installation.
If needed, you can create passwords that are pronounceable and easier to remember. There are 12 different generators available, so you can generate unique passwords easily.
You can also use this tool to create a unique MAC address or serial number. Although some generators have additional options, the random password generator only allows you to change the length of the password.
The application will automatically generate a strong password, and you can even check how strong your password is. Strong Passwords Need Entropy offers detailed information about your password, such as the number of special characters, letters and numbers.
The application can’t generate a list of passwords but allows you to create a list manually. In addition, you can export your passwords to a text file if you wish.
Strong Passwords Need Entropy is a powerful tool that allows you to create unique and powerful passwords. In addition, the tool will also test the strength of your passwords and show you the necessary information.
Other key features of Strong Passwords Need Entropy include:
Verify your password in the top 10 000 easy to guess passwords
Password strength assessment
Customizable rules
Strong Passwords Need Entropy offers a wide range of features, but it might be a bit complicated to use. If you’re an advanced user looking for a free and portable password generator, be sure to try this application.
Another free password generator software that you can try is Awesome Password Generator. This application allows you to generate passwords or WPA keys.
As for password generating, you can choose which characters you want to use as well as password length. Awesome Password Generator will also show you the strength of your password, so you’ll know if its safe to use.
As for additional options, you can create easy-to-type passwords or exclude confusing characters. To make the password creation process easier, you can copy them directly to the clipboard as soon as you generate them.
Of course, you can also create multiple passwords and save them directly to a text file. We have to mention that you can also add more passwords to the text file without removing your previous entries.
Thanks to this feature, you can easily generate passwords or export them by using any command-line tool.
Other key features of Awesome password generator include:
Create easy-to-type passwords
Clipboard support
Command-line tools
Awesome Password Generator is a great application, and it offers a wide range of features. If you need a simple tool to create passwords or WPA keys, be sure to consider Awesome Password Generator. The application is completely free and portable, so you can use it without any restrictions.
If you’re looking for a free and portable password generator, you might be interested in Password Generator.
The application allows you to create readable or simple-to-remember passwords. In addition, you can set the length of a password or choose if the password will use numbers.
The application also supports advanced configuration that allows you to choose the type of characters that you’ll use.
You can choose uppercase or lowercase characters, hexadecimal numbers, or special characters.
Password Generator also allows you to exclude certain characters that can be confusing to read. You can choose not to repeat characters or convert letters to special characters if needed.
Extended options require you to use a password template. It’s worth mentioning that you can easily modify or create new templates.
We must admit that password templates are confusing, especially for first-time users. Extended options don’t allow you to set password length, so you’ll have to rely on a password template.
However, if you choose to use a simple interface, you won’t be able to customize your passwords like in other applications.
If you want to customize your password, you need to use the Extended options, but since they require password templates, you’ll need to learn how to use them properly.
Password Generator is a great tool for both basic and advanced users. If you need to quickly generate a password this tool is a perfect choice.
Other key features of Password Generator include:
Password templates
Include/exclude certain characters
Test if your passwords match security standards
Export passwords to encrypted documents
However, if you need to create custom passwords, you’ll need to invest some time and learn how password templates work. The application is free and portable and will run on any PC without installation.
Chaos Generator – Basic and easy settings for generating passwords
Another simple and free password generator software is Chaos Generator. This is a free application, and it allows you to easily generate passwords.
The application has a humble interface, and it allows you to set password length and number of passwords that you want to create. In addition, you can also save your passwords to a text file.
It’s worth mentioning that you can also open text files using this application.
Regarding the configuration, you can choose which characters you want to use. You can choose uppercase, lowercase, numbers, and special symbols.
In addition, you can also specify which symbols you want to use. The application doesn’t allow you to generate pronounceable or simple passwords, and there’s no strength indicator available.
Other key features of Chaos Generator include:
Lightweight
Compatible with all Windows versions
Simple user experience
Chaos Generator is a simple password generator, and it offers basic options to its users. The application is simple to use and completely free, so it’s perfect for novice users.
Simple password generators are usually the best, and today we have a simple password generator that we want to show you.
The application allows you to generate list of passwords, and you can easily copy them to a text file. As for configuration, the application allows you to enter which characters you want to use.
You can also choose to use handwriting-friendly characters or tablet-friendly characters. Of course, you can set the length of your passwords with ease.
The application also allows you to test your passwords and see their strength. This is a very basic feature, but it requires you to enter your password manually.
We also have to mention that Password Renew supports password scrambling. Thanks to this feature you can modify your password by using 30 different methods.
This is rather useful if you want to change your current password or make it stronger.
Other key features of Password Renew include:
Suitable for low-end PCs
Easy configuration
Compatible with all Windows versions
Can be used from a thumb drive
Password Renew is a free and portable application, and it offers decent password-generating options. This might not be the best password generator software, but its simple interface will be perfect for basic users.
Another password generator that you might want to try is StrongPasswords Ultimate. The application has a simple interface, so you can generate passwords with ease.
The application allows you to create a list of passwords, and you can also choose the length and number of generated passwords.
In addition, you can choose the type of characters that you want to use.
The application has eight different templates that allow you to create passwords, serial numbers, memorable passwords, etc.
StrongPasswords Ultimate also has a strength indicator, thus allowing you to see how secure your passwords are.
Other key features of Strong Password Ultimate include:
Store passwords in their database
Set up a master password
Encrypt your passwords
StrongPasswords Ultimate is a great password generator, and with its simple interface, it will be perfect for basic users. The application is completely free and portable, so you can download it and use it on any PC.
If you need a simple and portable password generator, you might want to consider this tool. WinTinker Password Generator is a lightweight application that allows you to generate random passwords.
The application allows you to generate a single password, and you can choose the number of characters and character type.
WinTinkker Password Generator doesn’t support multiple passwords, and there’s no strength indicator, which is a minor flaw in our opinion.
In addition, we have to mention that this tool offers limited configuration regarding password generation.
Other key features of WinTinker Password Generator include:
Generates secure and easy-to-remember passwords
Simple set-up and configuration
It’s also worth mentioning that this tool supports encrypted passwords. Overall, WinTinker Password Generator is a basic tool and it offers simple features. The tool is free, portable, and suitable for basic users.
One of the simplest password generators on our list is Password Inventor. This is a small, portable and free application that will allow you to generate passwords.
Just like many other tools on our list, this one allows you to create simple passwords. You can choose the type of characters that you want to use as well as password length.
The application allows you to create passwords based on patterns. In addition, there’s also an ability to create simple and pronounceable passwords.
Other key features of Password Inventor include:
Include/exclude certain characters
Save your passwords to a text file
Password Inventor offers a simple interface, so it’s perfect for novice users. The application is free and portable, so there’s no reason not to try it.
Another password generator software that we need to mention is Advanced Password Generator. This is a freeware and portable application that allows you to create secure passwords easily.
The application has rather a simple user interface, and it allows you to create a single password.
Regarding password creation, you can set the minimum and maximum size of your password. In addition, you can choose which type of characters will appear in your password.
If you want, you can include numbers, letters, special, unique, and even your own characters.
The application doesn’t allow you to create multiple passwords, which is its biggest flaw. In addition, there’s also no strength indicator, which can be a flaw for some users.
Other key features of Advanced Password Generator include:
Lightweight
The graphical interface and command line
Compatible with Windows and Linux
Despite those minor flaws, Advanced Password Generator is still a decent tool. The application is completely free and portable, and thanks to a user-friendly interface, it will be perfect for first-time users.
Using a strong password is the best way to protect your online accounts from malicious users. There are many great password generators, and we hope you found a suitable tool on our list.
If you want to fix the Among us servers that could not authenticate your error, this article has the necessary steps, including some essential information that can help you.
Among Us is an online multiplayer social game developed by Innersloth. For being available on major platforms, it has gained a lot of popularity. However, the problem begins when gamers encounter unexpected errors like server authentication issues.
This article has come up with a very effective solution to get rid of this Among Us error. Before that, let’s know about this problem a bit more.
Why may Among US servers not authenticate you?
After doing some research and tests, we have found these significant reasons that can cause this problem:
The Among Us server may be going through some technical issues
Network related problems from your end
Choosing the wrong server region in the game
Corrupted local data
Else, there may be a few more minor things that can create this problem. Fortunately, you can always get rid of the issue if you follow these methods.
What can I do if the Among Us servers could not authenticate you?
1. Change region
Open the game and sign in.
Click on Online.
Look at the bottom right corner and click on the region name.
Choose a different or correct region.
Now, find the public game and see if it has fixed the problem or not.
2. Fix local data
Close the game if already opened.
Press Win + R on the keyboard to open Run.
Type the following command and press enter. %appdata%
Click on the Up icon on the newly opened window.
Go to the LocalLow folder.
Then go to the Innersloth folder.
Next, go to Among Us folder.
Right-click on the token and then click on the delete icon.
If you still face the same error with Among Us, it may be because of the network connectivity issue between your ISP and the game server. In this case, Using a gaming VPN is the best idea.
Private Internet Access is a great option for Among us and many other games. With access to over 35,000 speedy servers in the entire world, it will most definitely grant a lag-free connection.
This VPN helps bypass ISP throttling and lets you play any games without restrictions. You can easily change the game region and connect to one of the PIA servers located in a relevant location to get an excellent experience.
We must also mention that PIA has thousands of servers in the US only, and if you want to unlock certain Among US features that are only available on the Among Us US servers, this VPN is your best option.
What type of VPNs should you consider for Among Us game?
When you want a VPN for gaming, always choose the one that provides the best quality bandwidth and helps to bypass ISP throttling. Else, you can look for the number of gaming optimized servers and some other features.
You also should consider the app availability of any VPN service before making the final decision.
Private Internet Access is indeed the best choice for gaming, particularly for the games like Among Us, Minecraft, Fortnite, League of Legends, Fifa, etc. Else, ExpressVPNis another great choice as it has many gaming features, including port-forwarding.
These are the methods and information you need to fix the Among Us servers could not authenticate you. Feel free to let us know in the comment box if you know any other better methods that can help others.
Popular game franchise Call of Duty developed by Treyarch and Raven Software released the COD: Black Ops Cold War game in 2020. Just like other Call of Duty games, COD Cold War is also a first-person shooting game.
Notably, it is the direct sequel to COD: Black Ops. While the game is all fun and good, there are some issues that players have been experiencing on different devices, including the Xbox.
If you are having issues with COD Cold War not updating issues on Xbox, we have a dedicated guide with a list of effective solutions that will help you fix the problem.
Then several people reported that the game isn’t working on their Xbox console. Do not worry, because we have got you covered here as well. You can check out our guide on how to fix COD Cold War not working on Xbox.
But if you are here, then you might be facing textures not loading in the COD Cold War issue. This issue basically means some in-game content, such as textures for trees, bushes, roads, bricks, clouds, and even buildings, does not load properly.
If there is a texture issue with the game, then you will see low-resolution or pixelated trees, bushes, roads, etc. In fact, sometimes the buildings, etc won’t load at all.
This is a serious issue since it prevents you from playing the game optimally. If you are also experiencing COD Cold War texture issues, and are looking for solutions, then you are in the right place.
Because this guide lists some of the best solutions that have reportedly helped players fix the textures not loading in COD Cold War. Let us check them out.
What causes textures not loading in COD Cold War problem?
Call of Duty: Cold War textures not loading is a graphics-related problem. That is, there may be a lack of memory resources or they are missing, preventing the in-game graphics from properly loading the content.
However, that is just one of the reasons you will experience this problem. Below are some of the other common reasons that trigger the textures not loading in the COD Cold War problem.
PC has outdated graphics drivers.
NVIDIA ShadowPlay is interfering with the game’s performance.
The game files are corrupt.
Correct graphics settings aren’t selected.
Game cache files are conflicting with the game’s optimal performance.
The dedicated GPU isn’t selected.
The GPU is overclocked.
Restart shaders installation.
Background running apps conflict with the game.
Activision and Blizzard accounts aren’t connected.
Now that you know some of the most common reasons you may come across textures not loading in COD Cold War, let us look at how to solve them, one by one.
How can I fix COD Cold War missing textures or COD Cold War textures not loading on PC issue?
1. Update graphics drivers
Right-click on the Start menu.
Select Device Manager.
Expand the Display adapters section.
Right-click on your GPU and select Update driver.
Select Search automatically for drivers.
Install the update if it is available.
Restart your PC.
A broken or outdated graphics driver can be the main reason for all errors related to textures or graphics.
It is very important to keep all the drivers, especially the graphics drivers, up to date if you play games on your PC. Because new updates resolve compatibility issues and also bring performance improvements.
While you can perform the graphics card update following the above method, there is a tool that helps you update all your PC drivers in one go, with a simple click.
The software is called Outbyte Driver Updater. The software user interface is clean and easy to understand. There is no learning curve per se.
All you need to do is open the software and scan your PC for outdated and missing drivers. Outbyte Driver Updater will show you the result, and prompt you to install or update the faulty drivers.
Some notable features also include fixing errors related to faulty or broken driver files, updating old device drivers, locating missing drivers, etc.
This trick is for those who have an NVIDIA graphics card installed on their PC. NVIDIA ShadowPlay is a feature in the NVIDIA GeForce Experience software that allows the user to capture or share gameplay recordings, screenshots, or live streams.
Some users have reported that disabling the NVIDIA ShadowPlay feature has helped them fix the textures not loading in COD Cold War. So, we would suggest you disable the feature and check if this helps.
3. Repair corrupt game files
Open the Battle.net client on your PC.
Open the COD: Black Ops Cold War game page.
Click on Options.
Select the Scan and Repair option.
The tool will start scanning and repairing the game files.
Restart your PC.
Launch the game and see if this fixes the textures issue or not.
If game files are corrupt, not only will you experience textures not loading in the COD Cold War issue, but other problems as well.
In such a case, we would recommend that you use the scan and repair option in the Battle.net tool. This will help locate the faulty game files and fix them so that certain issues can be resolved.
4. Change graphics settings
Open the game.
Click on Settings.
Select Graphics.
Under Graphics settings, below are the recommended settings that helped users fix the textures issue on COD Cold War.
Texture Quality: Medium
Model Quality: Medium
Special Effects Quality: Medium
Screen Space Reflection (SSR): Low
Shadow Quality: High
Dynamic Shadows: Disabled
Special Effect Shadows: Disabled
Weapon Shadows: Disabled
Ray Tracing: Disabled
Anti-Aliasing Quality: High
Subsurface Scattering: Disabled
Motion Blur: Disabled
Of course, it’s up to you and your PC’s processing quality if you wish to tune all the graphics settings to the maximum. But the above settings have helped several users fix the texture quality issues.
You can give it a try if you are facing the problem, because it is better to have smooth gameplay that suffers from texture rendering issues than vice versa. Besides, you can also tweak other settings and see if that helps you fix the problem.
5. Delete game cache files
Press Ctrl + Alt + Del buttons to open the Task Manager.
Close Blizzard Battle.net, and any other related processes.
Press the Win + R keys to open the Run dialogue.
Type the below command and press Enter. %ProgramData%
Delete the Battle.net and Blizzard Entertainment folders. Do not worry, this won’t affect any of your game-related data.
Game cache files are the files that save certain game settings that help open the game faster. If some game files get corrupt then it can cause multiple issues with the associated game.
Try following the above process and deleting the mentioned folders. Once you play the game again, it will create these folders again.
6. Select dedicated GPU
Select NVIDIA GPU
Right-click on the empty space on your homescreen and select NVIDIA Control Panel.
Expand 3D Settings.
Select Manage 3D Settings.
Switch to the Program Settings tab and select the COD Black Ops Cold War game from Set a program to customize drop-down menu.
In Select the preferred graphics processor for this program option, select the NVIDIA graphics card.
Click Apply to save changes.
Restart your PC.
Select AMD GPU
Right-click on the empty space in your homescreen and select Radeon Settings.
Select Preferences > Additional Settings.
Choose Power.
Click on Switchable Graphics Application Settings.
From the applications drop-down list, select COD Cold War.
Under the Graphics Settings section, select High Performance profile.
If your PC comes with a dedicated graphics card or GPU then you need to select it for the game in order for it to use the dedicated GPU.
Because the GPU isn’t selected, the game will run with the internal graphics card, which, in most cases, isn’t powerful enough to render the game as optimally as the dedicated GPU.
7. Stop GPU overclocking
If you selected GPU overclocking from the graphics card menu, then you may want to disable it. Often, when overclocking is selected, the game texture sometimes fails to load and you may also experience graphics issues.
In such a case, we would suggest you disable the overclocking and check if this fixes the issue or not.
Scroll to the bottom and click on Restart Shaders Compilation.
The game will re-install the shaders.
Several users have reported that restarting the shaders compilation has helped them fix the texture issue with the COD Black Ops Cold War game.
9. Close background apps
Press Ctrl + Alt + Del to open the Task Manager.
Under the Apps section, close all the apps except the game.
Under the Background Processes, you can one by one, end processes that aren’t essential. However, you should be careful that you shouldn’t close the app that is required by your system for its functioning.
Click on Profilelocated on the top-right corner and select Linked Account.
Under the ACCOUNT LINKING section, find your profile and hit the Link With Battle.net Account button.
Follow the onscreen instructions to complete the linking process.
Restart your game and see if this fixes the textures not loading in COD Cold War problem.
If your Acitvision account isn’t linked with your Blizzard account, then you might come across multiple issues. For some, due to this, the game takes time to load, and for others, the game gets stuck with Shaders compilation.
So, make sure that you have connected your Acitivision and Blizzard accounts by following the above steps and check if this fixes the problem or not.
What else can I do to fix textures not loading in COD Cold War?
There are a few other tricks up our sleeve that you can try and possibly fix the textures not loading in the Call of Duty: Black Ops Cold War game.
➡ Optimize Windows 11 for gaming
Open the Start menu.
Search for Game mode settings and open it.
Toggle off the Game Mode option. Turning off the game mode ensures other things do not run in the background while gaming.
Restart your PC.
➡ Disable Ray Tracing
Open the game.
Select Settings.
Click on Graphics.
Disable all the Ray Tracing options.
Ray tracing does make the game feel beautiful, taking all the in-game content’s graphics to the next level. However, ray tracing has often been associated with multiple texture-related issues. It is advised that you turn off the Ray Tracing and check if this fixes the issue or not.
Let us know in the comments down below which method helped you fix the textures not loading in the COD Cold War game. Feel free to share any other method that did the job for you.
Screen mirroring your Acer laptop to a TV lets you enjoy videos, presentations, and games on a bigger display without complicated setups. You can connect wirelessly using built-in Windows features or through a wired HDMI connection for better stability.
Screen mirroring allows you to duplicate or extend your laptop display onto your TV, making it ideal for entertainment, work presentations, or educational use. Acer laptops running Windows make this process straightforward with multiple connection options.
On your TV, select the correct HDMI input screen to start remote viewing.
A wired connection as already mentioned gives you the best screen mirroring experience as it provides better picture quality and shorter lag time.
To get the optimal result, we would recommend you use the latest HDMI cable version. Using an HDMI cable also makes sure that there is no audio sync issue.
If you are facing issues while connecting your Acer laptop to a TV via HDMI cable, then we would suggest you reconnect the cable, restart both devices, or configure your display settings.
To configure the display settings, follow the steps below:
Press the Win + P keys to open the Project menu.
Select one of the below-mentioned modes as per your requirement.
PC screen/Computer only: Use only the first monitor.
Duplicate: Mirror the same content on both laptop and TV.
Extend: Use both monitors to extend your display.
Second screen/Projector only: Use only the second monitor.
Once you select the option, you will see the appropriate selection on your TV. There are other options to tweak such as adjusting the resolution to match your television.
2. Use a VGA cable
Connect your laptop and TV using a VGA cable.
For audio, you need to connect two devices with a 3.5mm cable.
Select the Source or AV option on your TV.
The connection should be established automatically. However, in case that doesn’t happen you can head to Settings > System > Display. Here, ensure that TV is selected.
Using a VGA cable could be an option to screen mirror your Acer laptop to a TV if your laptop or TV is an older one. Besides, it is also important that both devices should have a VGA cable port on both of them.
VGA cable isn’t as competent as an HDMI cable. You will see a lower resolution of screen mirroring. Since VGA cables only deal with video, you will have to buy or attach a separate 3.5mm audio jack cable to handle audio.
3. Use a Type-C cable
Connect both devices using a USB-C cable. You can also make use of a USB-C to HDMI adapter if one of your devices doesn’t have a USB-C port.
Switch on the TV and laptop.
Select the proper input source on the TV.
If your PC has a Type-C port, then there are a couple of options to connect it to a TV and start screen mirroring.
You can either use a Type-C to Type-C cable to connect both devices. However, do note that not every Type-C cable can transmit video and audio signals. You need to purchase the one that supports it. Alternatively, you can use a Type-C to HDMI adapter.
Connect both your laptop and TV to the same Wi-Fi network.
Open the Google Chrome browser.
Click the 3-dot icon.
Select Cast.
The browser will search for compatible devices.
You can choose among the different casting options.
Cast this tab: This will cast the currently open tab to your TV.
Cast this PC or entire screen: This will begin casting your entire screen, meaning you can open file explorer, view images and videos, and play games mirrored on your TV.
To use this method, your TV should have an in-built Chromecast or an external Google Chromecast device attached to it.
Google Chromecast is an inexpensive way of screen mirroring from your Acer laptop to a big screen TV. For this device to work optimally, you need to have a strong Wi-Fi connection, because everything, including the video and audio, will be transferred via Wi-Fi.
If you are facing issues connecting your Acer laptop to a TV for screen mirroring, then the first thing that you should check is which connection you are opting for, i.e., Wired or Wireless.
If you opt for a wireless connection, then you should check if the internet connection is working fine or not, because a wireless screen mirroring connection depends on the internet connection. Besides, you should also check if both your laptop and TV are connected to the same Wi-Fi network or not.
Next, if you have opted for a wired connection, then check if all cables are connected securely in place or not. Moreover, you can also check for cable damage.
The above four methods are the only ways via which you can screen mirror your Acer laptop to a TV and enjoy content consumption on a big screen.
Let us know in the comments section below which method you opt for screen mirroring your Acer laptop to a TV.