Fix: Computer Keeps Restarting Before Windows Loads

The boot time in computers has significantly reduced in the past few years, owing to recent technological advancements. Yet users continue to face boot errors. One such is when the computer keeps restarting before Windows loads.

While Windows not booting altogether usually indicates a hardware problem or corrupt OS, continuous restarts could have to do both with the software and hardware issues, making troubleshooting a tad more tricky. So let’s find out why the computer keeps restarting on boot.

Why does my computer keep restarting before Windows?

Here are a few reasons the computer or laptop keeps restarting before Windows loads:

  • Incompatible or malfunctioning hardware: Issues with the RAM, HDD, motherboard, graphics card, CPU fan, and other similar vital components can cause the PC to restart.
  • Corrupt Windows installation: Oftentimes, the OS installation goes corrupt due to recent software changes, and reinstalling Windows is the best way to go.
  • Problems with the BIOS: BIOS is the first thing that comes into play when the computer is turned on, and problems with it can be the reason your computer keeps restarting with no display.

What can I do if computer keeps restarting before Windows loads?

Before we start with the major changes, here are a few quick things to try:

  • Disconnect all non-critical peripherals from the PC, especially any older USB sticks, gaming controllers, and joysticks.
  • Make sure the power supply to the computer is optimal. If you are using a surge protector or a hub, plug the PC directly into the wall port, and verify whether the computer still keeps restarting before Windows loads.
  • Check for overheating, though it’s unlikely to be the case since it takes the computer at least a few minutes to generate that heat level. But you could still ensure that the flow of air is not restricted.
  • Ensure all the connections are in order, even the internal ones.
  • If it’s a laptop, unplug the battery and power it using the cable only. This helps when the battery is malfunctioning or is simply dead.

If none work, head to the solutions listed next.

1. Reset the BIOS

  1. Turn on the computer, and as soon as the display lights up, hit F2, F10, F12, Esc, or Del, depending on the manufacturer, to enter the BIOS.
  2. Now, click on the Default option. In some cases, it would be available in the settings, so you will have to look for it.default to fix computer keeps restarting before windows loads
  3. Click OK to confirm the change.ok

In most cases, the BIOS is responsible when the computer keeps restarting before Windows loads, and a simple reset should work.

If you cannot load the BIOS, it means that either the BIOS is corrupt or there’s a major hardware issue to blame. And in both cases, we recommend you take your PC to a repair shop. However, if the BIOS is accessible, but the reset didn’t yield the desired results, head to the next solution.

2. Run tests on the RAM

Tip icon Tip
Before you start with the test, try turning on the computer with only one module connected and verify whether the OS boots. Similarly, do this for all the RAM modules.

When you can’t turn on the computer, the best way to test the RAM modules is to connect them to another PC individually and use Memtest86+, an open-source memory testing tool that has helped a lot of users when the computer keeps restarting before Windows loads.

MemTest86+

The tool will run a range of tests and even fix trivial issues. But in most cases, it’s best to replace the faulty RAM module to get rid of the problem once and forever.

3. Check for corrupt system files

  1. Turn on the computer, and soon as the display lights up, press the power button to turn it off. Repeat the process twice and on the third-party attempt, Automatic Repair will kick in.
  2. Click Advanced options to proceed.
  3. Click on Troubleshoot.troubleshoot
  4. Again, click on Advanced options.advanced options
  5. Now, choose Command Prompt.command prompt to fix computer keeps restarting before windows loads
  6. Run the following three commands individually:DISM /Online /Cleanup-Image /CheckHealth DISM /Online /Cleanup-Image /ScanHealth DISM /Online /Cleanup-Image /RestoreHealth
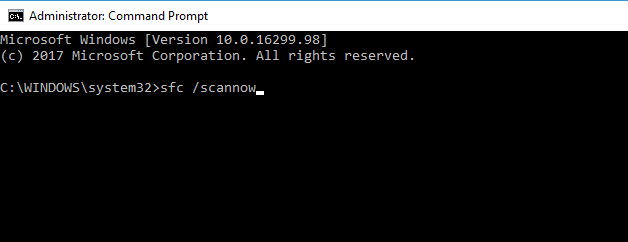
  7. Once done, paste the following command and hit Enter:sfc /scannowsfc scan to fix computer keeps restarting before windows loads
  8. Once done, restart the computer and check whether it now boots properly.

Another effective solution would be to use a professional third-party repair tool that focuses on cleaning the clutter in your system and repairing corrupted system files.

With built-in performance tools, this kind of software can fix your HDD problems within a few moments, restoring your OS to its peak performance.

You should know that it is recommended to use automated assistance to repair more complex Windows problems and thus avoid unsafe actions.

4. Perform a system restore

  1. Access the Recovery Mode on the PC as we did earlier, and choose System Restore.system restore to fix computer keeps restarting before windows loads
  2. Now, choose your account from the list.account
  3. Enter the password for the selected account and click Continue.password
  4. Click Next to proceed.next
  5. Choose a restore point from the list and click Next.restore point to fix computer keeps restarting before windows loads
  6. Verify the restore details and click Finish.finish
  7. Click Yes in the confirmation prompt.confirm
  8. Wait for the restore to complete.restore to fix computer keeps restarting before windows loads

In case the computer keeps restarting before Windows loads after the checks and changes listed previously, a system restore may help. It only helps with the software side of things but is great at eliminating issues arising from recent driver updates.

5. Reinstall Windows

If a system restore didn’t do the trick, there’s always the option to reinstall Windows. This will do it when it’s a corrupt Windows installation to blame for the problem.

All you have to do is create a bootable USB drive, plug it into the PC, boot it via it, and then follow the on-screen instructions to reinstall the OS.

Tip icon Tip
If nothing so far has worked, it’s certainly a hardware problem, and we recommend you contact the manufacturer or a professional to get the PC inspected.

Besides, after you have fixed the problem, check the best PC repair tool that will automatically identify and eliminate problems, thereby preventing such issues from reappearing.

Tell us which fix worked for you in the comments section below.

Fix: No sound after Bluetooth connection in Windows 10/11

Bluetooth enables you to connect devices without any cables. However, Bluetooth doesn’t always work perfectly as some Windows users have stated on forums that there is no sound coming from their wireless speakers even though the devices are seemingly connected.

This is how you can fix Bluetooth speakers that aren’t pumping out any audio in Windows 10.

How do I fix a Bluetooth device without sound?

  1. Update your Bluetooth device driver
  2. Does your Windows PC Support Bluetooth?
  3. Check that the Bluetooth Support Service is enabled
  4. Select the Bluetooth device as the Default Playback device
  5. Check the Bluetooth Device’s audio level
  6. Re-pair your Bluetooth speakers
  7. Open the Playing Audio Troubleshooter
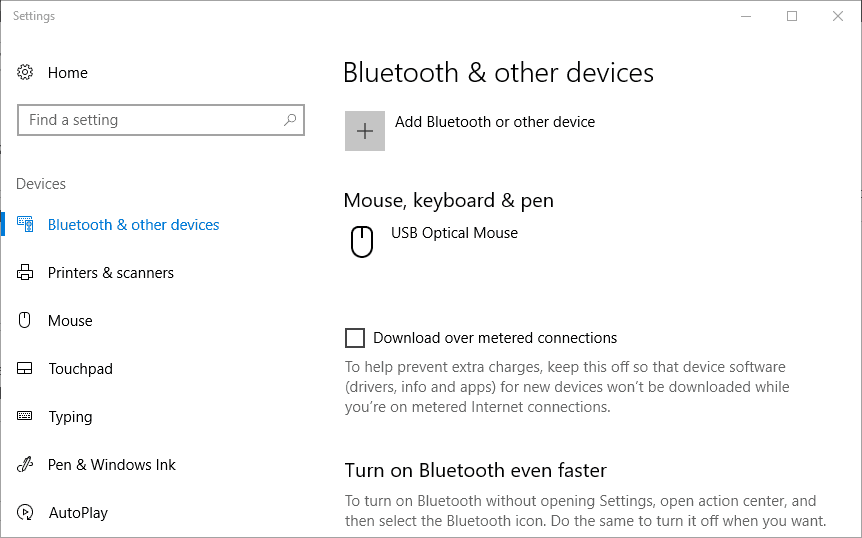
  8. Open the Bluetooth Troubleshooter
  9. Check the Bluetooth Speaker set is enabled

1. Update your Bluetooth device driver

  1. Note down the speaker set’s product title and serial number. You’ll probably find those details in the manual for the speakers.
  2. You’ll also need Windows platform details. To check if you have 32 or 64-bit Windows, enter ‘system’ in the Cortana’s search box and select System.
  3. Open the speaker manufacturer’s website, and open the driver download section on the website.
  4. Enter or select your wireless speaker details in the search box or from the drop-down menus on the site.
  5. Download the most update driver for your speakers that’s compatible with your 32 or 64-bit Windows platform.
  6. After downloading the driver, you can probably select to run an installer for the driver.

For further details on updating drivers, check out this driver update guide.

Bluetooth device issues can be due to antiquated or corrupted drivers. If the driver is outdated, the speakers might not work with updated platforms or the latest Bluetooth 5 version. So updating a driver might restore the speaker sound.

We strongly recommend automatically updating your drivers with Outbyte Driver Updater. This tool is backed up by a library of all the most used drivers in the world, allowing it to identify and quickly fix all outdated, broken, or missing drivers altogether.

All you need to do is install it, let it scan your PC, and then choose which drivers should be fixed.

The rest of the process is all automated by Outbyte Driver Updater, and the speed with which it does its job is entirely dependent on your Internet connection.

Once your drivers have been dealt with, simply restart your PC, and you’re all set.

⇒ Get Outbyte Driver Updater

2. Does your Windows PC support Bluetooth?

If you have a more antiquated laptop or desktop upgraded to Windows 10, it might not support Bluetooth. As such, double-check that your system is Bluetooth compatible.

This post provides further details for checking Bluetooth compatibility with Device Manager in Windows 10.

If your PC doesn’t support Bluetooth, you can still connect wireless speakers with a USB dongle. You can insert a Bluetooth dongle into a USB slot and then connect the speakers.

For example, this Amazon page includes a USB dongle for various Windows platforms that you can connect up to several wireless devices with. Even if your desktop or laptop supports Bluetooth, a USB dongle might still resolve the issue.

3. Check that the Bluetooth Support Service is enabled

  • Open Run by pressing the Windows key + R keyboard shortcut.
  • Enter ‘services.msc’ in Run’s text box.
  • Press the OK button to open the window in the snapshot directly below.
  • Double-click Bluetooth Support Service to open its window below.
  • Select Automatic from the Startup type drop-down menu if the startup is currently disabled.
  • Press the Start button (on the properties window) to kick-start Bluetooth Support Service.
  • Press Apply > OK to confirm the newly selected settings.

It might be the case that the Bluetooth Support Service is disabled. If so, your Bluetooth speakers aren’t going to work.

4. Select the Bluetooth device as the default playback device

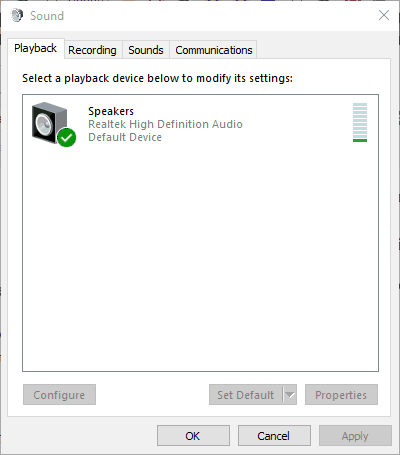
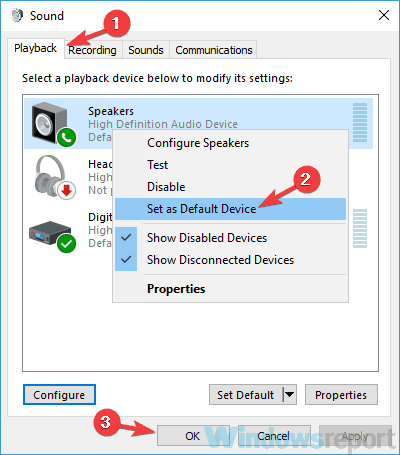
  • Right-click the system tray icon and select Playback devices to open the window directly below.
  • Now select the paired Bluetooth speakers listed on the Playback tab.
  • Next, press the Set Default button to select the Bluetooth speakers as your default playback device.
  • Click Apply and OK to confirm the new settings.

Some users have got their wireless speakers working by adjusting the default playback device settings. This requires that you select the Bluetooth-connected device as the default speaker.

5. Check the Bluetooth Device’s Audio Level

In addition, check the Bluetooth speakers’ audio level via its properties window. You can do that by right-clicking the speakers on the Playback tab and selecting Properties.

Then select the Levels tab, and drag the audio output bar to the far right. Click Apply and OK to close the window.

6. Re-pair Your Bluetooth Speakers

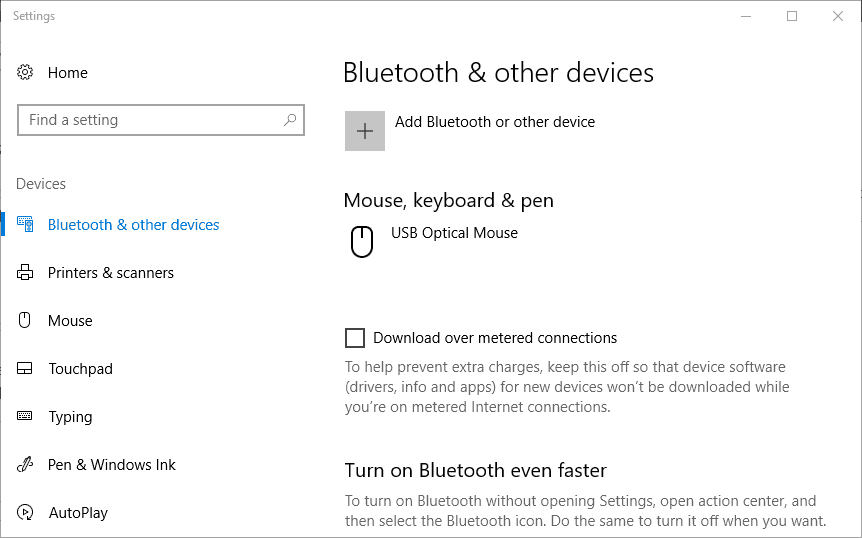
  • Re-pairing Bluetooth speakers might also be a potential resolution. To re-pair (reconnect) the speakers, enter the keyword ‘Bluetooth’ in Cortana’s search box.
  • Select Bluetooth and other device settings to open the window shown directly below.
  • Select the listed wireless speakers, and press the Remove device button.
  • Press the Yes button to confirm.
  • Select the listed Bluetooth speakers and press the Pair button to connect them again.

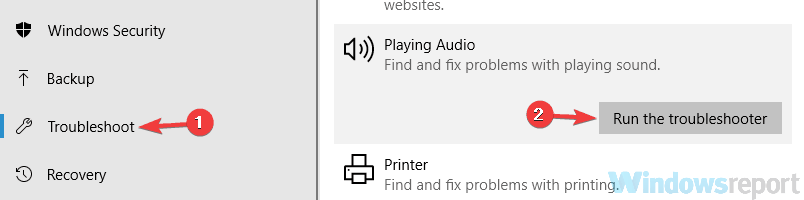
7. Open the Playing Audio Troubleshooter

Windows 10 includes a Playing Audio troubleshooter that can fix sound playback. So this troubleshooter might also come in handy for fixing your wireless speaker audio playback.

You can open that troubleshooter by pressing the Cortana button and entering the keyword ‘audio playback’ in the search box.

Select Find and fix audio playback to open the troubleshooter window in the snapshot directly below.

8. Open the Bluetooth Troubleshooter

  • Open the Cortana app.
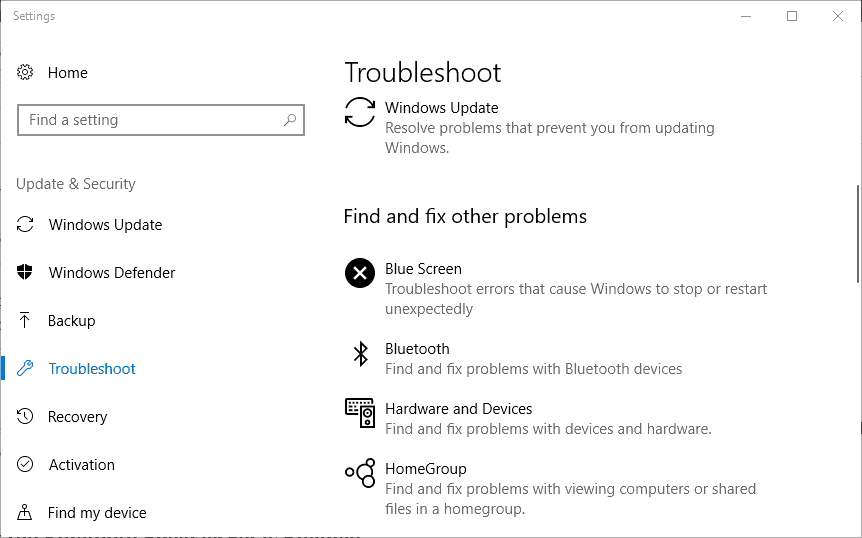
  • Enter ‘troubleshoot’ in Cortana’s search box.
  • Select Troubleshoot to open a list of Windows troubleshooters as shown below.
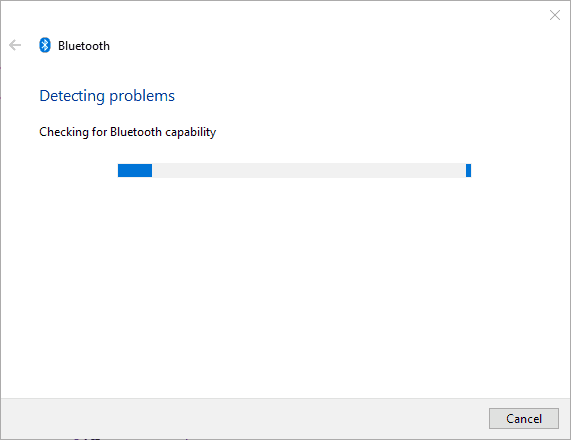
  • Select Bluetooth and press the Run the troubleshooter button to open the window directly below.
  • The troubleshooter might then provide potential fixes that will restore Bluetooth speaker audio.

Windows 10 also includes a Bluetooth troubleshooter that might be worth noting. You can utilize that troubleshooter to fix your wireless speakers.

First, it will tell you if your laptop or desktop supports Bluetooth. This is how you can open that troubleshooter.

9. Check the Bluetooth Speaker Set is Enabled

  • The Bluetooth speakers might not be enabled.
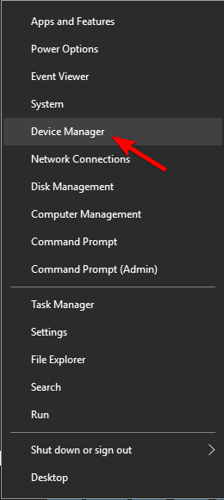
  • To check the speaker set is enabled, press the Win key + X hotkey and select Device Manager to open the window directly below.
device manager
  • Double-click the Bluetooth Radios category to expand a list of wireless devices.
  • A down arrow sign highlights that a device is not enabled. If your wireless device has a down arrow sign, right-click it and select Enable on the context menu.

There’s a good chance that some of those resolutions will fix your Bluetooth speakers so that they pump out audio once more.

If not, then there might be a hardware issue with the speakers; so check that they work with an alternative device such as a tablet or TV.

You can get the speakers fixed, or perhaps a replacement set, so long as they are still within the manufacturer’s warranty period.

For more information on how to use such devices, go to our dedicated Bluetooth Hub. Need more help fixing various PC components? Go to our Peripherals Fix page.

FIX: 5.1 channel surround sound not working on Windows 10/11

If you like to enjoy multimedia content then you probably have a 5.1 surround speaker system.

These speakers are perfect for all fans of multimedia and it’s a big problem when 5.1 channel sound isn’t working on Windows 10, so let’s see if we can fix this.

Users report that they can only get 2.1 audio, although 5.1 audio worked fine with previous versions of their Windows.

In addition, users are getting Failed to play test tone errors when trying to test their audio device. So what can we do to fix this issue?

How do I fix the 5.1 channel surround sound on Windows 10?

1. Change the sound bit rate and frequency

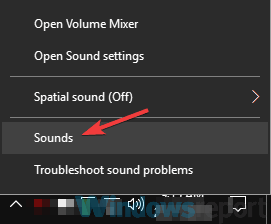
  1. Right-click on the speaker icon on the right of your Windows taskbar.
  2. Select Sound, then go to Playback.
  3. Right-click on your speaker and select Properties.
  4. Click the Advanced tab.
  5. Expand the format list and change the bitrate to 24bits and frequency to 96000Hz.
  6. Click Ok. Now your 5.1 audio should work properly.

This applies if you’re using Realtek Sound. To fix this, you need to open Realtek Sound manager and set the sound bitrate to 24bits and frequency to 96000Hz for 5.1 audio to work properly.

If this option doesn’t work, you might want to try changing the bitrate and frequency until you find the one that works for your computer.

2. Update your audio driver

  1. Press the Win Key + S and search for Device Manager.
  2. In the Device Manager, go to your Audio inputs and outputs.
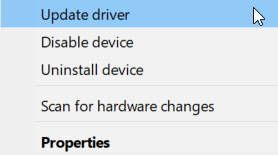
  3. Right-click on your speaker and select Update driver.

  4. Now, expand Sound, video and game controllers.
  5. Repeat the process for the devices you find there.

If you’re using Realtek audio, you might want to download the latest drivers or any version of drivers higher than 6.0.1.7487.

Some users report that this was helpful to them. If you’re not using Realtek audio, it won’t hurt that you try updating your audio driver as well.

Update drivers automatically

The process of manually updating your drivers is tedious and requires a bit of background knowledge. Installing the wrong driver or an incompatible one will make the situation worse.

Therefore, we recommend checking out a specialized tool that updates drivers automatically, so you won’t have to go through the trouble of doing it yourself.

One noteworthy tool that helps you keep your drivers in check is Outbyte Driver Updater. It is very straightforward and lightweight.

You just have to let it scan your drivers. Upon your approval, it will fix any damaged or missing drivers and install new versions for the outdated ones.

Another thing that may be of real help is that you can set it up to regularly scan and update your drivers.

It doesn’t use too many resources, so you can let it run in the background while you take care of other tasks.

⇒ Get Outbyte Driver Updater

3. Update your Windows 10

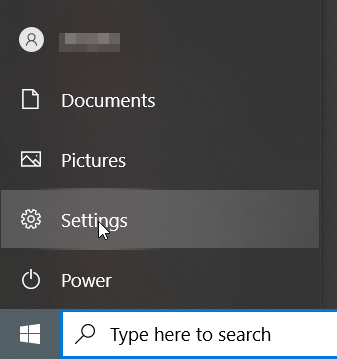
  1. Press the Win Key + S and type Settings.
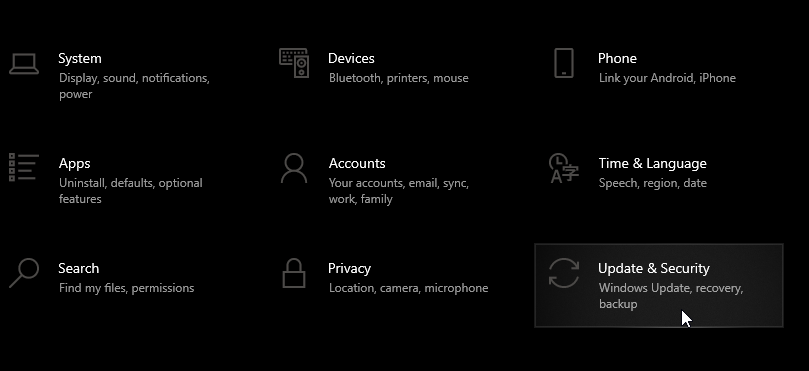
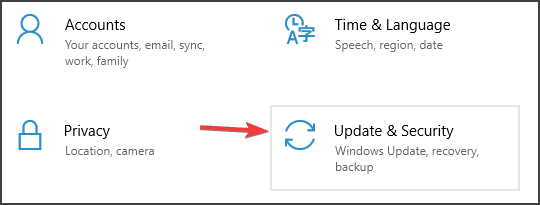
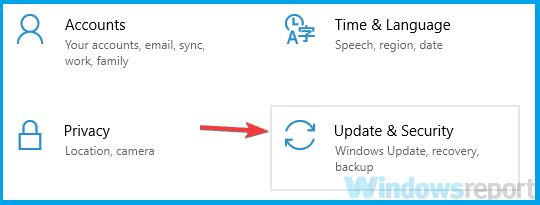
  2. Go to the Update & Security.
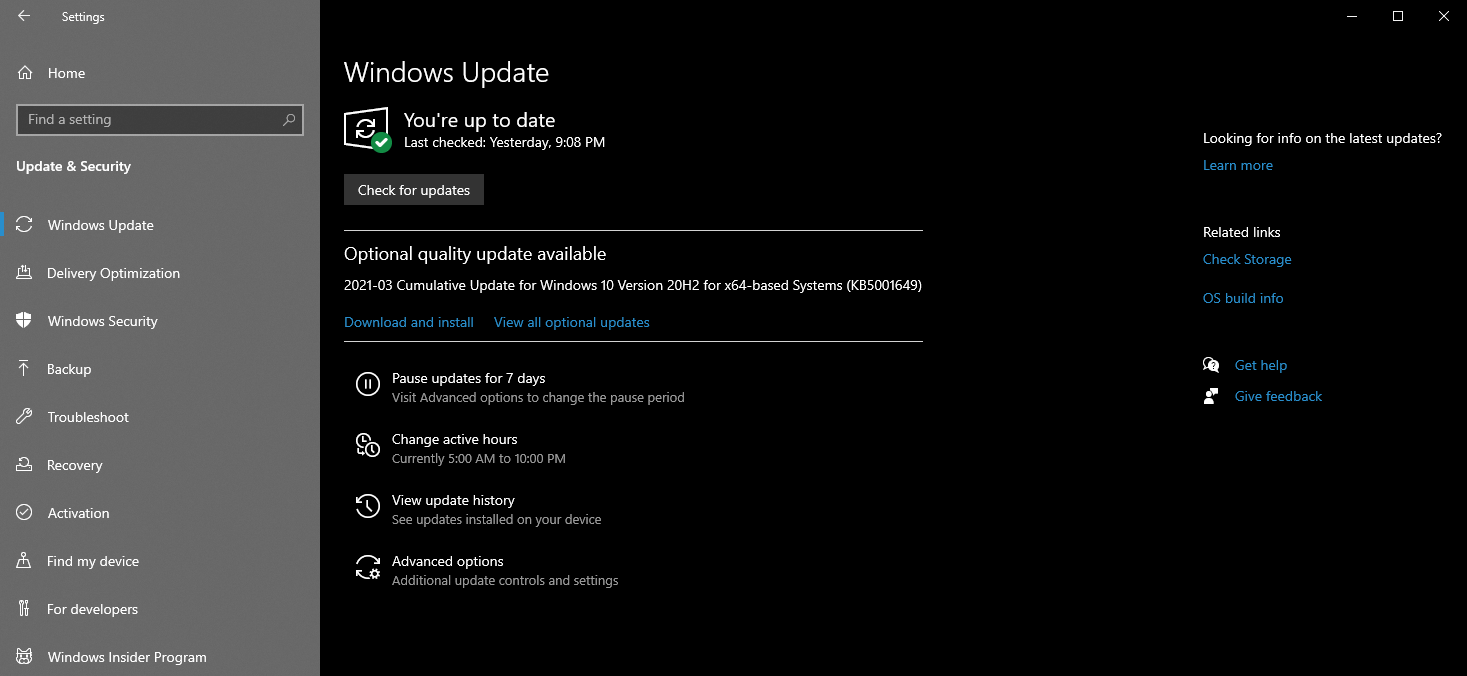
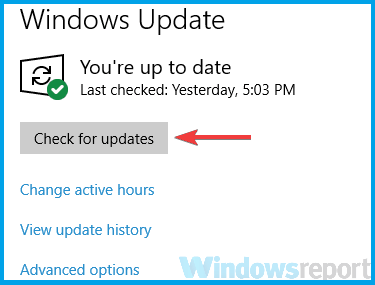
  3. Select Windows Update, then Check for updates.
  4. Let Windows search and install the latest updates.

Microsoft constantly works at improving their Windows OS and fixing all bugs they find. If your surround sound isn’t working, it might be a problem from their end, unrelated to you.

In this case, you just have to wait for a Windows update that will automatically solve the problem, so be patient.

We hope these solutions worked for you. If none of these solutions were helpful to you, make sure that you keep your Windows 10 up to date and wait for the official solution from Microsoft.

Please leave us feedback regarding the subject or any other helpful solutions that know of in the comment section below.

Fix: OneDrive keeps crashing in Windows 10/11

Have you experienced problems with OneDrive in Windows 10 Technical Preview? Some users of the Microsoft forum reported that their OneDrive is constantly crashing when they want to perform certain operations.

Well, we have a couple of solutions for you and we hope they will be helpful.

What can I do if One Drive keeps crashing?

1. Install the latest Windows updates

  1. Click the Start button
  2. Choose All Programs
  3. Click Windows Update
  4. Check for updates
  5. If any updates are found, click Install updates
  6. Restart your computer

Since new Windows 10 builds are coming out fast, there’s a chance you missed some Windows updates that are crucial for the proper functioning of your OneDrive app. To make sure all your updates are in place, do the following:

2. Check if there are any conflict processes

  1. Right-click on the Windows status bar
  2. Choose Start Task Manager
  3. Under the Processes tab, make sure that none of these processes are running, if any of these processes are running, End them and try your OneDrive again:
    • groove.exe
    • msosync.exe
    • msouc.exe
    • winword.exe
    • excel.exe|
    • powerpnt.exe

It is possible that some processes running on your computer are preventing OneDrive from working correctly. To check if you run some of these processes, follow the above guide.

3. Fix Unrealistic Dates

  1. Open Windows Explorer
  2. Click on OneDrive on the left-hand side
  3. Right-click on the Date field in the header and check Date Taken. Date Taken will be added all the way to the right.
  4. Type Pictures in the search box, on the top right and press Enter (Make sure your View is  Details)
  5. Sort by date taken
  6. Look for any date that has an unusual time stamp such as one done in the future. If there is one, edit to a more realistic date

4. Use an alternative storage app

There are many options when it comes to storage, and a bit of help from a third-party tool might be just what you need.

Keeping all of your assets synchronized has never been easier thanks to Sync, the tool that allows you to store, share, and access all of your files from any location.

The best part is that you get up to 5 GB to store all those important files in the cloud absolutely free of charge.

But Sync delivers more than storage, it also protects your data with end-to-end encryption, making sure your confidential documents are completely safeguarded from unauthorized access.

Raising the stakes even further, Sync also acts as a powerful backup solution to keep your files synced across all of your devices with no risk of data loss or leakage.

The platform has a generous storage space of 2TB to 4TB, depending on the plan you decide to get.  It supports unlimited share transfer, as well as real-time backup and sync.

Sync is also reliable when it comes to security. It has end-to-end data encryption and you can password protect your files. Along with that, it allows you to set up two-factor authentication.

It is very versatile and has both desktop and mobile apps, so you can access your data regardless of where you are.

We hope you managed to solve those pesky OneDrive crashes with one of the solutions above.

Speaking about great features, 15GB of free storage space is a valuable asset, but you can have more. Make sure you get the most of your OneDrive Quota.

To properly utilize this cloud-based solution, do keep our OneDrive Guides close.

As always feel free to share your troubleshooting experience or any other questions/suggestions you might have via the comments section below.

FIX: ASUS ACPI Driver is missing in Windows 10/11

Many of us use laptops on a daily basis. But it seems that some laptops are having some minor problems with Windows 10. Some users reported that they are getting Asus ACPI driver missing errors on their Windows 10 devices. So let’s see if we can fix this issue somehow.

Asus ACPI driver errors usually appear when Windows 10 starts, and it’s not a serious issue. It’s certainly an annoying one because it will appear every time you start Windows 10. This issue is reported to affect Asus laptops. If you’re having this problem on your laptop you should check out one of our solutions below.

What to do if your Asus ACPI Driver is missing

1. Uninstall Asus Hotkey Service

The Asus Hotkey Service is a simple software that allows you to use Fn keys to adjust brightness, sound volume, etc. on your laptop. It’s a useful tool, but it’s not necessary for your laptop.

According to users Asus Hotkey Service is the main cause for Asus ACPI driver missing error. So in order to fix the error, it’s advised to uninstall it. In order to uninstall this software follow these instructions:

  1. Click the notification icon in the lower right corner of your screen.
  2. Next click Settings and go to All Settings.
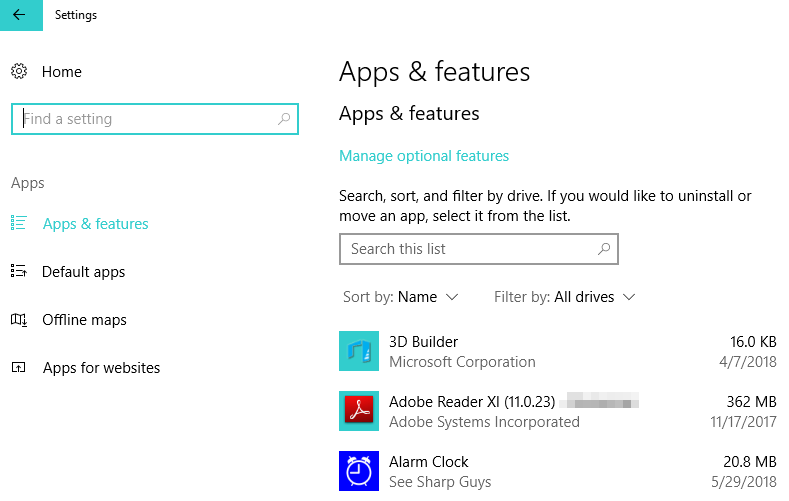
  3. Click System and go to Apps & Features.
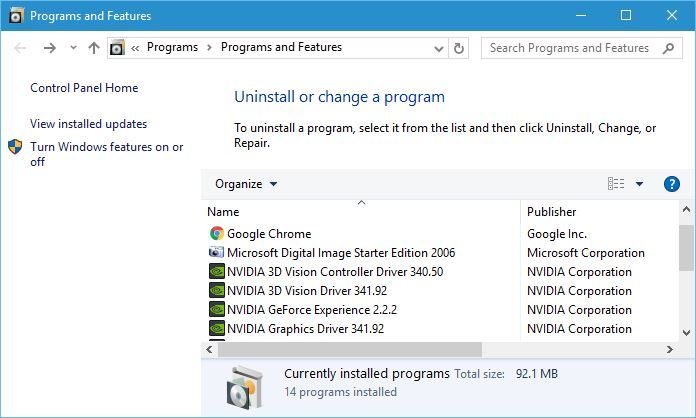
  4. When you open Apps & Features you might have to wait for the list to load.apps & features windows 10
  5. Locate Asus Hotkey Service on the list and click to uninstall it.
  6. As soon as Asus Hotkey Service is uninstalled restart your computer.

This error should be resolved now, and you won’t get the Asus ACPI driver’s missing message again. Of course, this means that you won’t be able to use Asus Hotkey Service and its hotkeys anymore.

If you want to continue using this software and get rid of the error we suggest that you download the Asus Hotkey Service version for Windows 8 from here. Just remove the current version as we showed you and install Version V1.48 from the link above.

2. Update your drivers

Update drivers manually

If you don’t want to remove the Asus Hotkey Service, then you can try to update your drivers. Outdated driver versions may trigger this alert as Windows 10 fails to detect the driver.

To fix this problem, you can simply download the latest ACPI Driver version. Use Windows 10’s Device Manager, right-click the ACPI Driver and select the update option.

Update drivers automatically with dedicated software

You can also use a dedicated driver updater software to do the job. We recommend Outbyte Driver Updater because it is especially easy to use and efficient. You will achieve maximum results with little or no effort on your part.

After you have selected the right driver version for your device, the application will update them individually or in groups at a glance.

Outbyte Driver Updater is very lightweight and you can set it up to automatically scan and update your drivers. It uses a very small number of system resources.

Allowing it to run in the background will save you some time and you won’t have to worry about this issue again.

Along with the updates, Outbyte Driver Updater is also able to detect whether you have any missing or damaged drivers and fix these issues as well.

⇒ Get Outbyte Driver Updater

We hope this guide helped you remediate the missing driver issue. If you have any suggestions or want to tell us more about your experience, feel free to use the comment section below.

If you want to learn more, we have a great guide on how to download the ACPI ATK0110 driver, so you might want to check it out.

Unable to edit Word 2016 documents [SIMPLE GUIDE]

Some users complained on Microsoft forums that they’re unable to edit an existing Word document. Fortunately, this issue is not caused by Microsoft’s developing team, and it isn’t some kind of bug in Word 2016, so we have a workaround that could help you.

Office 2016 was released a couple of years ago, and a lot of people are still using it. But the Office version brought some problems with itself, as a lot of users were complaining about various issues upon the release of the software pack.

Luckily, most of the problems have been solved, and using Office 2016 apps isn’t frustrating anymore.

What to do if I cannot edit Word 2016 documents?

Table of contents:

  1. Disable Document Protection
  2. Repair the Word document
  3. Make sure Office 2016 is activated
  4. Delete Registry keys
  5. Disable Add-ins
  6. Reinstall Office
  7. Disable Hardware Acceleration
  8. Install Windows updates
  9. Uninstall Office updates

1. Disable Document Protection

To do that, follow these steps:

  1. Open Word 2016 document you have problems with
  2. Go to Developer tab (if you don’t have Developer tab, go to File>Options>Customize Ribbon> and select Developer)
  3. In the Protection group, go to Document Protection
  4. Navigate to the bottom of the panel, and click Stop Protection
  5. Enter the password for the document, and click OK

If you cannot edit your Word document, it’s probably protected with a password. In case you don’t want to enter the password every time you access the document, you’ll need to disable document protection, and delete the password.

After performing this, you should be able to edit your Word 2016 document normally, without any interruptions.

2. Repair the Word document

One of the reasons you are unable to edit Word 2016 documents might be because the actual file is damaged.

Fortunately, there are still ways to deal with this. Use Stellar Repair for Word – a third-party utility.

It will safely repair Word files. It will preserve any text, headers or footers, and images. You can feed it either a .doc file or a .docx.

Fully compatible with Microsoft Word 2016, we highly recommend this tool if you have any issues with your documents.

Once the file is recovered, you can open it again in Word and be able to edit and save the new changes.

⇒ Get Stellar Repair for Word

3. Make sure Office 2016 is activated

There’s one more thing that could prevent you from editing your Word 2016 document, and that is the expired Office 2016 trial.

Microsoft offered Office 2016 in a month-long trial, which attracted a lot of users who don’t have an Office 365, and they downloaded the package, without thinking that it might expire.

And indeed, for some reason, you’ll be still able to use Office 2016 even after that one month of the free trial, but it will eventually expire after some time, leaving your Office 2016 apps useless.

So, if you downloaded the free trial, make sure you bought Office 365 subscription, or you won’t be able to use Office 2016.

If you don’t want to pay for using Word, you can always download the ‘lite’ version of the software from Microsoft Store, called Word Mobile.

4. Delete Registry keys

If you’re still unable to edit Word 2016 documents, we’re going to try one registry hack. Here’s what you need to do:

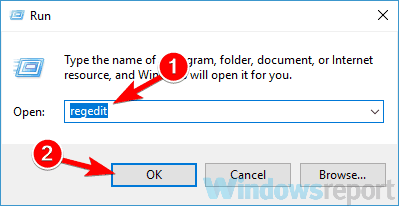
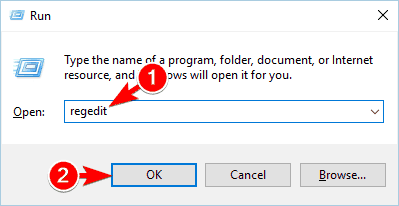
  1. Go to Search, type regedit, and open Registry Editor.
  2. Navigate to the following path:
    • HKEY_CURRENT_USER\Software\Microsoft\Office\16.0\Word
  3. Now, just click on the Data key, and delete it
  4. Restart your computer.

This action will reset Word 2016, along with the bug that prevents you from editing documents.

5. Disable Add-ins

As much as add-ins are useful in Office apps, a corrupt add-in can cause big problems. So, we’re going to disable that troublesome add-in to see if Word functions well without it.

But since we can’t surely know which add-in causes problems, we’ll have to disable them all at once. Here’s how to do that:

  1. Open Word 2016.
  2. Go to File > Options.
  3. Click Add-Ins, and then disable all add-ins.
  4. Restart the program, and run it without any add-ins enabled.

Now, start installing add-ins one by one to determine which one causes problems. However, if you’re still unable to edit documents after uninstalling add-ins, install them once again, and move to another solution.

6. Reinstall Office

Reinstalling programs has been one of the most popular troubleshooting methods for years. And we’re going to seek its help here, as well.

However, since Word is part of the Office Suite, you’ll have to reinstall the whole bundle. Reinstalling everything can be painful, but it might be worth it in the end.

You can uninstall Office just like you would uninstall any other program. The fastest and easiest way is by going to Control Panel > Programs and Features. Now just uninstall the whole suite, install it once again, and see if the problem is resolved.

If you want to completely remove Office from your Windows 10 PC, follow the simple steps in this article.

7. Disable Hardware Acceleration

  1. Open any Office app.
  2. Go to File > Options > Advanced.
  3. Locate Hardware Acceleration and disable it.
  4. After doing that, try to start Word 2016 again.

Word 2016 uses Hardware Acceleration to optimize its performance. However, this very setting can also cripple Word in some cases. So, if none of the solutions from above got the job done, we’re going to disable Hardware Acceleration in Word 2016.

If you can’t disable Hardware Acceleration this way, we’re going to turn to the Registry Editor once again:

  1. Open Registry Editor.
  2. In the left pane navigate to this key:
    • HKEY_CURRENT_USER\Software\Microsoft\Office\16.0\Common
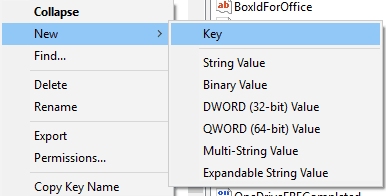
  3. Right-click the Common key and choose New > Key from the menu.
  4. Enter Graphics as the name of the new key.
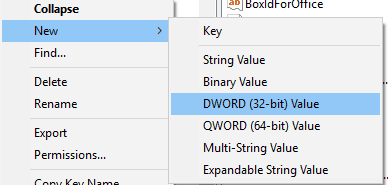
  5. Now right click Graphics key and select New > DWORD (32-bit) Value. Name the new value DisableHardwareAcceleration.
  6. Double click DisableHardwareAcceleration value and set its Value data to 1. Click OK to save changes.
  7. Close Registry Editor and check if the problem is resolved.

Note: We advise you to play with Registry only if you know what you’re doing. If you mess up something in Registry, you can have big problems. So, if you’re not sure about this, ask someone else for help.

8. Install Windows updates

Microsoft often releases Office updates through Windows Update as regular updates for Windows. So, maybe you’re dealing with a known problem acknowledged by Microsoft. If that’s the case Microsoft will release a fix or patch through Windows Update.

To check for updates, simply go to Settings > Updates & Security, and check for updates.

9. Uninstall Office updates

On the contrary to the previous workaround, a new update can actually be the problem that caused it in the first place. In that case, the best thing you can do is to uninstall the troublesome update. And here’s how to do that:

  1. Go to the Settings app.
  2. Head over to Updates & Security > Windows Update.
  3. Go to Update history > Uninstall updates.
  4. Now, find the latest Office update installed on your computer (you can sort updates by date), right-click it, and click Uninstall.
  5. Restart your computer.

Did you know that Windows 10 uninstalls problematic updates to avoid certain startup failures? Check out this article to find out more.


That’s about it. We hope at least one of these solutions helped you in case you were unable to edit Word 2016 documents. If you have any comments, questions or suggestions, just let us know in the comments below.

[wl_navigator]

Sims 4 Not Responding: How to Fix it Easily

Windows 10 offers all sorts of improvements to its users, but despite the improvements, it isn’t a perfect operating system, and there are some issues from time to time.

One of these issues is related to a video game called Sims 4, and users report the Sims 4 not responding issue. Read on to find out how to fix it.

There’s nothing more frustrating than buying a video game and not being able to play it. Users reported that Sims 4 stops working all of the sudden, and this can be quite frustrating, but there are a few solutions to this issue.

How do I fix Sims 4 not responding?

1. Update your graphics card drivers

If you can’t play Sims 4 on your PC, the issue might be related to your graphics card drivers. Outdated drivers can cause your game to crash and experience various issues.

To fix this issue, be sure that you update your graphics card drivers. And the easiest way of doing that is by using a specialized software solution like Outbyte Driver Updater.

It’s a lot easier to use and a lot safer because if you’re trying to find the drivers on the manufacturer’s site there is always the possibility of installing the wrong driver.

Begin by downloading and installing the Outbyte Driver Updater tool. It will be over in just a few seconds and then it starts automatically looking for driver problems on your system.

When the process is over (also just a few seconds), you get a report with all the drivers and recommended ones for installation.

The only thing left to do after that is to click on Update All if you want to install all of them or just select the ones you are interested in by checking their corresponding boxes and hitting the Update button for each.

Outbyte Driver Updater

Outbyte Driver Updater

The graphics card should be fixed up after you install the drivers using Outbyte Driver Updater. It's all automatic!
Free trial Visit website

2. Exclude the game folder from your Antivirus

This is sometimes an issue with antivirus software, so the best solution is to add your Sims 4 installation directory to the exclusion list.

This is different for each antivirus software, so you’ll have to find out how to do it for your antivirus.

In addition, you can turn off your antivirus software temporarily. This might not be the best solution for some users, especially if you’re heavily concerned about your safety.

In some cases, you might have to switch to a different antivirus solution in order to fix the problem.

A Windows 10 compatible antivirus won’t interfere with your installed software and it only uses minimal resources from your PC.

So an excellent tool not only does not interfere with your gaming but actually detects when you start playing and stops any pop-ups, enhances the visual settings, and blocks unimportant apps.

3. Delete the .txt files from your Sims 4 folder

  1. Go to the following folder: C:UsersYOUDocumentsElectronic ArtsThe Sims 4
  2. Find lastCrash.txt and lastException.txt files and delete them.
  3. After you’ve deleted those files try running Sims 4 again.

4. Move the Sims 4 folder

  1. Navigate to the following path: C:UsersYOUDocumentsElectronic ArtsThe Sims 4
  2. Right-click the folder and choose Cut.
  3. Go to your desktop, right-click it, and press Paste.

Note: This folder contains all your saved games, and after you’ve moved it, the game will recreate after you start it again.

Unfortunately, by doing this, you’ll delete all your saved games and game progress, but the problem will be solved.

However, if the problem still exists, the Sims 4 saves folder is not an issue, so you can replace the newly created Sims 4 folder with the one from your desktop, to get your game progress back.

5. Turn off the Proxy servers

  1. Search for inetcpl.cpl and select it from the list of results.
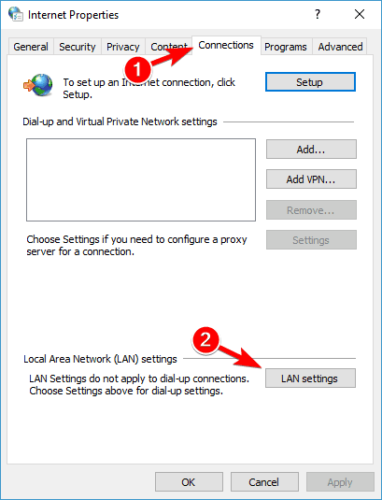
  2. Go to the Connections tab and press the LAN Settings button in the Local Area Network (LAN) settings section.
    Sims 4 not responding
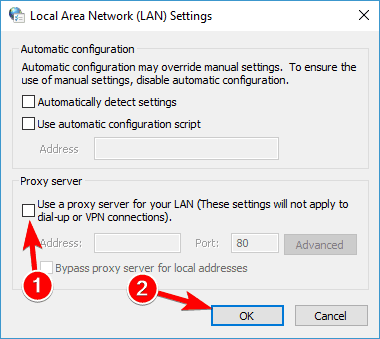
  3. Uncheck Use a proxy server for your LAN. Click Apply and OK to save the changes.
    Sims 4 crashing

6. Exclude game files from Data Execution Prevention

  1. Press Windows Key + S and enter system settings. Select View advanced system settings from the results.
  2. Click on the Settings button in the Performance section.
    Sims 4 play button greyed out
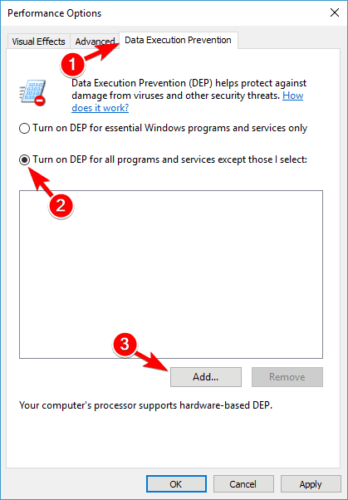
  3. Click the Data Execution Prevention tab, select the Turn on DEP for all programs and services except those I select option, and then click the Add button.
    Sims 4 won't open in Origin
  4. Add all .exe files from the following path: C:Program Files (x86)Electronic ArtsThe Sims 4GameBin
  5. Click OK to save the changes.

7. Change the Process Affinity

  1. Make sure that the Sims 4 is running. You can press Alt-Tab to switch from the game back to your desktop.
  2. Press Ctrl + Shift + Esc to start Task Manager.
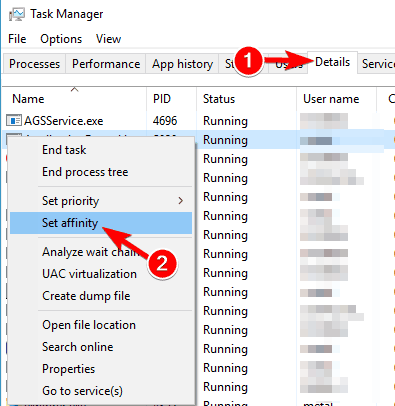
  3. Go to the Details tab. Find the Sims 4 process, right-click it, and select Set affinity.
    Sims 4 play button greyed out
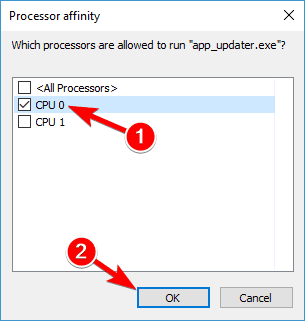
  4. Select just one CPU. Click OK and close the Task Manager.
    Sims 4 won't open in Origin

Note: If this solution works, you’ll need to repeat it every time you start Sims 4.

8. Change the command-line arguments

  1. Start Origin.
  2. Go to My Games section and right-click Sims 4.
  3. Choose Properties.
  4. Find the Command-Line Arguments textbox and enter -w und.
  5. Click Apply to save your changes.

9. Modify the graphic settings

  1. In the Search bar type control panel and select Control Panel from the list.
  2. Type Control PanelAll Control Panel Items and press Enter.
    Sims 4 won't open in Origin
  3. All Control Panel items should be displayed. Find Intel Graphics and Media and click it.
  4. Click Advanced settings and then 3D.
  5. Change the 3D Quality settings.
  6. Click on Power, and change the Power Setting to Maximum Performance.
  7. Click Apply to save the changes.

10. Launch the game in compatibility mode

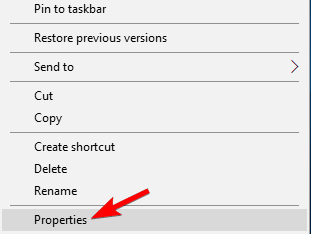
  1. Right-click the Sims 4 shortcut and select Properties from the menu.
    Sims 4 not working
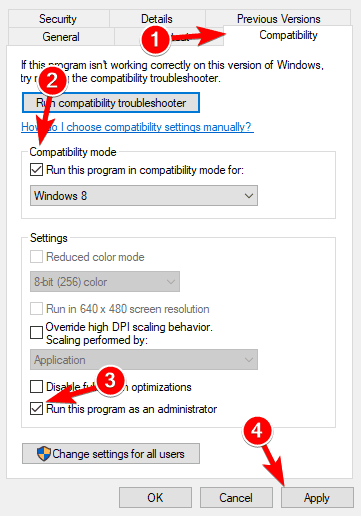
  2. Go to the Compatibility tab, check Run this program in compatibility mode for and select Run this program as administrator.
    Sims 4 freezing
  3. Click Apply and then OK.

11. Clear the Origin cache

  1. Open File Explorer.
  2. Click the View tab in File Explorer and check Hidden items.
  3. Navigate to the following path and delete all files and directories except for LocalContent: C:ProgramDataOrigin
  4. Navigate to the following directory, locate Origin folder and delete all files from it: C:Users<username>AppDataLocal
  5. Lastly, navigate to the following directory, locate the Origin folder and remove all files and directories from it: C:Users <username> AppDataRoaming

12. Move your mods to a different directory

  1. Create a new mods folder for Sims 4.
  2. Move mods one by one or in groups from your Desktop to the new mods directory.
  3. You should be able to find the problematic mod that is preventing you from running the game.

What are some common Sims 4 issues on Windows 10?

The Sims 4 is a great game, but many users reported that they can’t play the game on their PC. Speaking of, users reported the following issues:

  • Sims 4 play button greyed out – Many users reported that they can’t play Sims because the play button is grayed out. This can be an annoying problem, but you should be able to fix it with one of our solutions.
  • Sims 4 won’t open in Origin – If Sims 4 can’t start in Origin, the problem might be your game cache or corrupt DLL files. Simply clear the Origin cache and check if that solves the issue. We have a dedicated guide on the Sims 4 won’t open in Windows 10 issue that you can check out for more info.
  • Can’t play Sims 4 because of video card – If you can’t play Sims 4 due to your video card, make sure that you have the latest drivers installed. In addition, be sure that you’re using the only dedicated graphics card to run Sims 4.
  • Sims 4 not responding, working, opening, loading – If Sims 4 won’t run on your PC, you need to be sure that you have the necessary DirectX and C++ Redistributables installed. You can install these components from the Sims 4 installation directory.
  • Sims 4 keeps crashing, freezing – Another common problem with The Sims 4 is frequent crashing and freezing. This is most likely caused by your settings, but after changing them the issue should be resolved.

That would be all, as you can see, we offered you a big list of solutions, as we hope that at least one of them will be helpful when it comes to fixing the Sims 4 not responding or crashing issue. If you have any comments or questions, just reach to the comment section below.

No Sound on Netflix? 6 Best Solutions to Fix it Now

If you’re streaming a television show, your favorite series, or movie, and you’re getting video but no sound with Netflix, the issue is usually with the content or your speakers’ connection.

It is important to note that sometimes Netflix streaming performance is also influenced by the number of browser tabs, apps, and programs that take up your computer’s memory and processing resources.

Some quick troubleshooting options you can check include whether your speakers are properly hooked up to your receiver and whether HDMI/optical connectors are properly plugged in.

However, if your volume is okay or turned up on your Netflix player and computer/device, and you’ve tried playing a different show or movie but still get no sound with Netflix, that’s a problem.

Here we have listed more quick fixes and solutions in this article you can try.

Quick Tip:

Streaming Netflix in a browser with sound optimization is the quickest workaround and an opportunity to try Opera GX.

You can use Opera GX Control, optimized for multiple tab management, to reduce the load from other tabs while focusing on Netflix streaming sessions. The sound booster in Opera GX can be toggled based on preferences and the image quality is streamlined for gaming, thus ultra HD if you want.

Opera GX

Faster access and greater sound optimization directly in your browser.

How do I get sound back on Netflix?

  1. Set sound to Studio Quality
  2. Change your audio settings
  3. Reinstall audio drivers
  4. Switch to Stereo
  5. Update Microsoft Silverlight
  6. Switch audio output to HDMI

1. Set the sound to Studio Quality

  1. On the lower right end of your taskbar, find the speaker icon and right-click on it.
  2. Click Playback Devices.
  3. Click the speaker.No sound with Netflix
  4. Click Properties.No sound with Netflix
  5. Click the Advanced tab.No sound with Netflix
  6. From the drop-down menu, select 24-bit, 192000 hz (Studio Quality).No sound with Netflix
  7. Select OK to save your settings.
  8. Try playing Netflix again and see if the sound is restored.

2. Change your audio settings

  1. Open Netflix.
  2. Select the TV show or movie you want to watch.
  3. While you’re the show or movie is playing, move your mouse over the computer/device screen.
  4. Click the Dialog icon.
  5. If surround sound (5.1) is selected, change to a non-5.1 option.
  6. Try playing Netflix again and see if the sound is restored.

If changing audio settings to a non-5.1 option resolves the problem, do the following to resume playing in 5.1:

Check your device’s audio settings

If audio output settings are set to stereo or Linear PCM, select a 5.1 compatible option instead, but check with your computer or device manufacturer for help in adjusting these settings.

If 5.1 audio is enabled

If 5.1 audio is enabled when watching a show or movie, select the option within the Audio & Subtitles menu during playback.

Not every episode or season of a 5.1 supported TV show or series may have 5.1 available. Test for 5.1 availability of later seasons of a TV show by using the season drop-down option on the title description page.

If you’re using a device that supports 5.1 audio

5.1 Digital Dolby surround sound is not currently supported while streaming Netflix on a computer using Microsoft Silverlight or HTML5. It is, however, supported in the Netflix app for Windows 10.

To check if your device supports 5.1 audio, go to any Netflix original to check for a 5.1 audio option. If it isn’t there, then your device may not support this feature, or it may need to be turned on.

5.1 channel surround sound not working in Windows 10? Check out this quick guide to fix the issue in no time.

3. Reinstall audio drivers

  1. Right-click the Start button.
  2. Select Device Manager.No sound with Netflix
  3. Go to Sound, Video, and Game controllers.No sound with Netflix
  4. Right-click and select Uninstall on any item listed under sound/audio.
  5. Check the delete device driver option.
  6. Right-click Start and select Programs and features.No sound with Netflix
  7. Find your audio software and uninstall it then restart your computer. Once it restarts, the device driver will install automatically, then you can install the latest audio software.

Update drivers automatically

Updating drivers is a risky process because you can download and install the wrong driver version. That could lead to permanent damage to your system.

In order to prevent that, we recommend using the most suitable solution. This tool is tested and approved by our team.

⇒ Get Outbyte Driver Updater

4. Switch to Stereo

If you are still experiencing issues with 5.1 audio, your current setup may not be supported. To get back to streaming, try switching to stereo as an alternative to 5.1.

5. Update Microsoft Silverlight

Microsoft Silverlight

Netflix uses Microsoft Silverlight which can be updated via Windows Update or through Microsoft’s website.

Upgrading is a good troubleshooting step to make sure the audio and video playback is working as best as possible.

6. Switch audio output to HDMI

  1. Right-click Start.
  2. Select Control Panel.No sound with Netflix
  3. Select Hardware and Sound.No sound with Netflix
  4. Go to Sound.No sound with Netflix
  5. Click Manage audio devices.No sound with Netflix
  6. In the window that opens, select the device described with HDMI or Digital Audio, and click Set Default. A green tick mark should show that this device is now the selected output device.
  7. Click OK to confirm and exit.

HDMI lets you transmit audio and video signals with one cable. If the audio output doesn’t change to HDMI output automatically, you’ll have to switch it manually, by doing the following:

Let us know whether any of the solutions helped when you get no sound with Netflix by leaving a comment in the section below. No online bugs or unexpected errors should stay there for too long using the latest tips in the Netflix problems hub.

Also, leave there any other suggestions or questions that you may have and we’ll be sure to check them out.

When you’re in one of the below-described situations, don’t worry. It’s often quite easy to fix these issues with the help of our previously detailed tips:

  • Netflix no sound on TV / Smart TV / HDMI – If you get no sound while streaming a Netflix TV show or movie, setting the sound to Studio Quality should correct the problem.
  • Netflix sound not working / Netflix audio not working – If you are experiencing sound audio issues when you try to watch Netflix, don’t hesitate to follow the above steps for your device.
  • Netflix Chromecast no sound – Users also describe not getting any sound on their Chromecast devices. If you’re one of them, change sound settings or try casting with different devices.

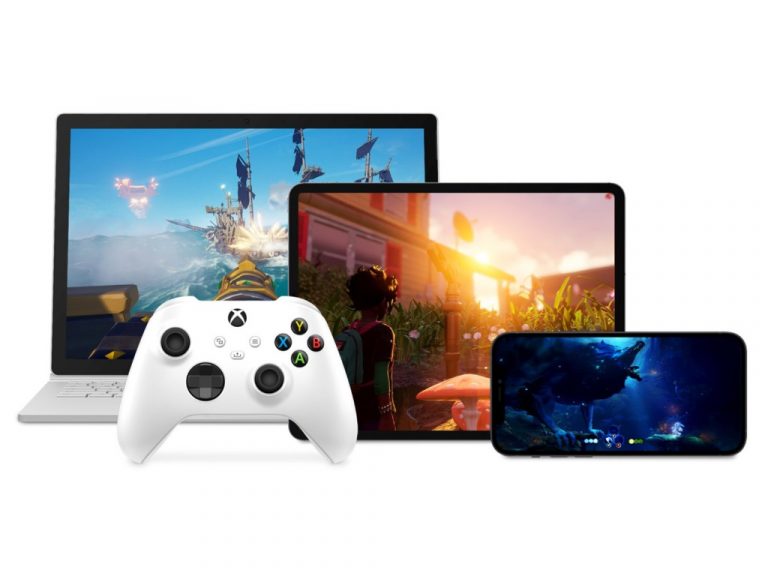
Microsoft was reportedly close to bringing Xbox Cloud Gaming to Apple’s iOS App Store

If Microsoft’s Xbox Cloud Gaming service is currently available on iPhones and iPads via the web, a new report from The Verge reveals that Microsoft was in advanced talks with Apple to bring Xbox cloud-enabled games, including high-profile exclusives to the iOS App Store. The revelations come from a series of private emails between the two companies that surfaced following the Epic vs. Apple trial.

Last year, Apple updated its App Store terms of services to allow game streaming apps, though with two important caveats: Each cloud-enabled game must be submitted to the App Store as an individual app to allow Apple to review it before publication, and all these games must also use Apple’s in-app purchases system to that the company can take its standard 30% cut.

At the time, a Microsoft spokesperson that this would be “a bad experience for customers,” as the company wanted to have its Xbox Game Pass app provide a single entry point to all cloud-enabled games, just like things work on Windows PCs and Android. iOS users can currently access the full Xbox Cloud Gaming catalog via the web, but the private emails between Apple and Microsoft reveal that the Redmond giant was working on a solution on bringing Xbox cloud-enabled games to the iOS App Store in a way that would satisfy both companies.

If Microsoft was initially not so hot about having one app on the App Store for every cloud-enabled game, the company discussed with Apple a more user-friendly way to do this. Lori Wright, Xbox head of business development explained in an email that Microsoft could make cloud-enabled games on iOS use less storage by having all the streaming tech in a single app, instead of including it in every game.

Xbox Cloud Gaming

“If we put the streaming tech in each game individually, the average size of each game would be roughly 150MB and each game will need to be updated every time there’s a streaming tech update. If we have a single streaming tech app, it will be around 150 MB, but the other apps will only be roughly 30 MB and will not need to be updated when the streaming tech is updated. This will be a better experience for users, explained Wright in an email with members of several key members of Apple’s App Store team.

To make the argument more convincing to Apple, Wright also proposed to bring exclusive AAA Xbox games to the iOS App Store. “This would be an incredibly exciting opportunity for iOS users to get access to these exclusive AAA titles in addition to the Game Pass games,” the exec wrote. However, this plan never saw the light of day as Microsoft ultimately rejected Apple’s new App Store policies back in September 2020, and the company announced a web version of Xbox Cloud Gaming compatible with iOS devices the following month.

In a statement to The Verge, Apple spokesperson Adam Dema explained that the blocking point was Microsoft’s refusal to comply with Apple’s requirements regarding in-app purchases. “Unfortunately, Microsoft proposed a version of xCloud that was not compliant with our App Store Review Guidelines, specifically the requirement to use in-app purchase to unlock additional features or functionality within an app,” the statement says.

In a separate statement to The Verge, Xbox Cloud Gaming CVP Kareem Choudhry had quite a different story and said and denied that IAPs were the blocking point. “The reasons for rejection were unrelated to in-app purchase capabilities; we currently provide Xbox Cloud Gaming through a singular Xbox Game Pass app in the Google Play Store without IAP enabled, for example, and we would do the same through the App Store if allowed,” the exec explained. “In addition to Xbox Game Pass, we were also open to bringing select individual games to iOS as we do today with titles like Minecraft,” he added.

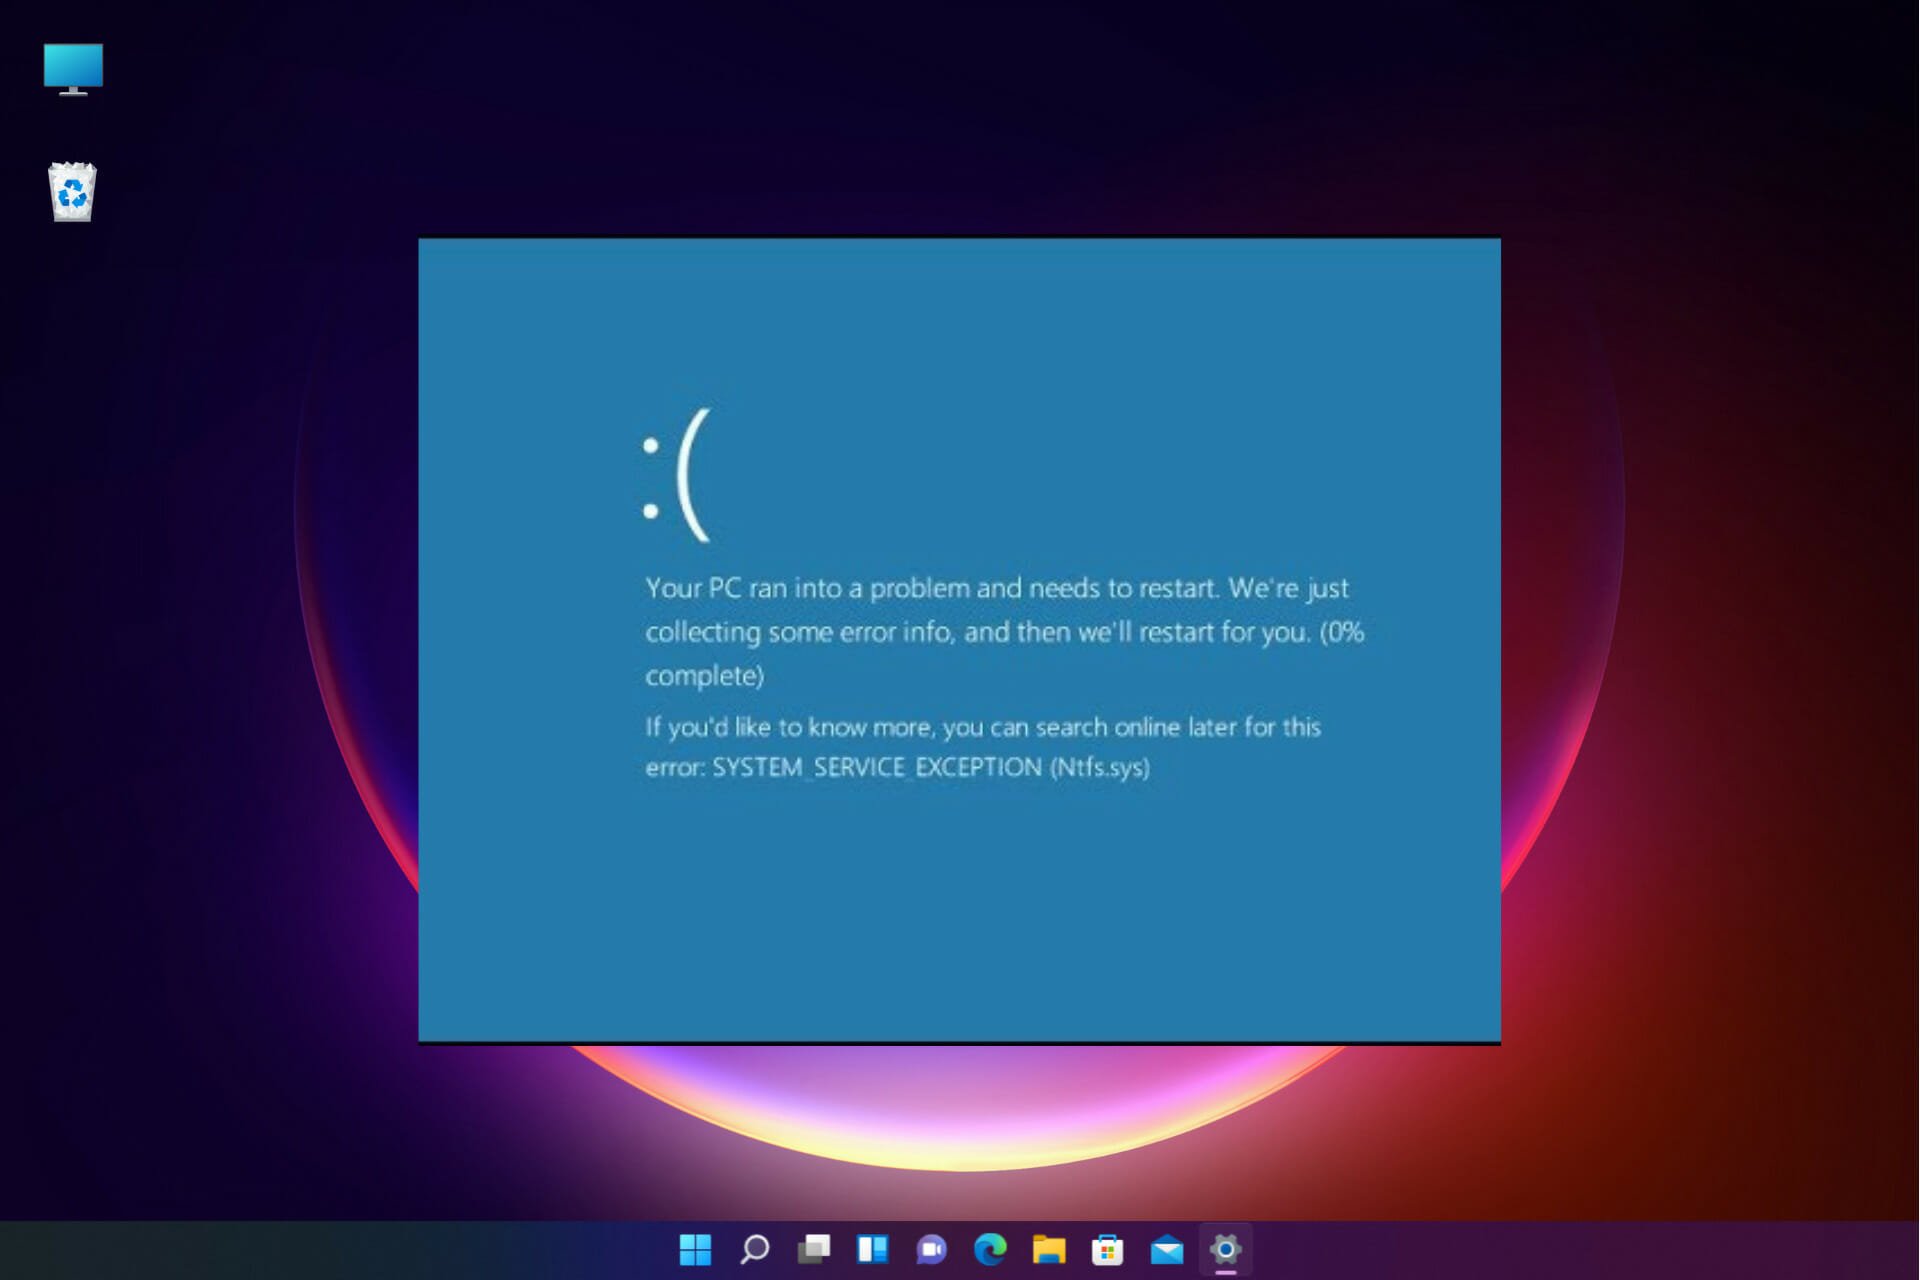
Fix System Service Exception Blue Screen in Windows 11

The System Service Exception in Windows 11 is a BSOD error and it will cause your system to crash suddenly. Luckily, you can fix this issue with these solutions.

What causes System Service Exception BSOD error?

Usually, the system_service_exception issue can occur because of faulty drivers, and while the solutions from this guide are specific for Windows 11 users, they might apply to fix SYSTEM_SERVICE_EXCEPTION Blue Screen of Death on Windows 10, 8, and 7 as well. Corrupted system files or buggy updates can also cause this issue.

How do I fix system_service_exception in Windows 11?

1. Run CHKDSK

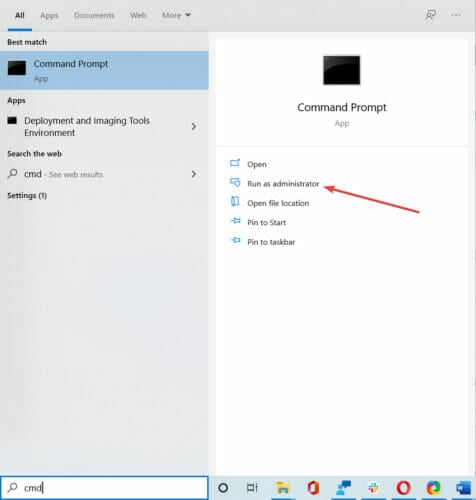
  1. Type Command Prompt in your Start menu search bar, then right-click the best match and select Run as administrator.
  2. Then, key in the following code and press Enter. The command will scan your system for errors and fix any issues along the way:chkdsk /r
  3. Restart your device and check whether the issue has been resolved

2. Disable Google update services 

  1. Open the Run dialog box by pressing the Windows + R keyboard shortcut.
  2. In the Run box, key in the following command and press Enter: msconfig
  3. Click on Services. Then, uncheck Google Update Service, click on the Apply, then OK.
  4. Reboot your system and check for the error, it should be fixed.

3. Remove corrupted files

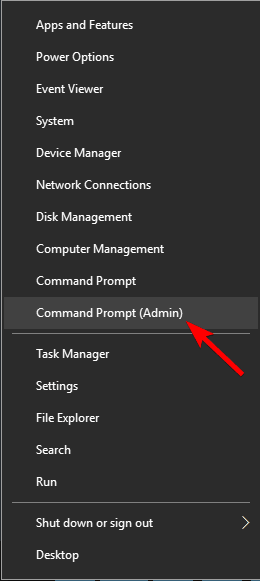
  1. Right-click on the Start button and choose Command Prompt (Admin).
  2. After opening the Command Prompt, key in the following command and press Enter:

sfc /scannow

  1. This will scan the system files and all the errors get fixed automatically.

You will need to run the SFC scan to fix the corrupted and missing system files. It is a built-in tool that helps scan your device and fix the system files. 

Besides the built-in tool, there are also automated repair solutions that can take care of your Windows system files automatically. This kind of software can repair issues like BSoD error 0x00000154, and fileinfo.sys BSoD.

4. Update your system drivers

    1. Go to the Settings app and click on Windows Update. Then select Check for updates.
    system-service-exception-windows-11
  1. 2. Now, type Device Manager in the Start menu search bar and select the option that pops up.

    system-service-exception-windows-11
  2. 3. Scroll down the list and check for an error symbol. If there is nothing, your driver status is likely not the source of the issue.

    system-service-exception-windows-11
  3. 4. If there is a yellow alert symbol, open the section using the dropdown arrow, then right-click the problem-driver and select Update driver.

    system-service-exception-windows-11
  4. 5. Select Search automatically for updated driver software to let Windows automate the update process for you.

  5. 6. Choose Update driver for GPU.

    system-service-exception-windows-11
  6. 7. Then, reboot your device and check if the problem has been resolved.

If your graphics card driver is out of date, there’s a chance you’ll encounter this issue. So, the obvious solution, in this case, is to update your GPU drivers.

Nevertheless, there are times when it is impossible to make the update. Windows might end up using the wrong driver version. You can also use Outbyte Driver Updater to help remedy this situation.

5. Uninstall recently downloaded applications

  1. Press the Windows key + X and choose Apps & features.
  2. Locate any recently installed app and click on the three dots next to it. Now choose Uninstall.
    uninstall-program-windows-11
  3. Follow the instructions on the screen to remove it.

You can use our guide on how to uninstall apps on Windows 11 PC in that regard. You must use the Start Menu, Settings, or other methods to achieve your goal.

6. Run the DISM tool

  1. Type Command Prompt in the Start menu search bar, then right-click and select Run as administrator to open an elevated Command Prompt.
  2. Type the following commands individually and press Enter after each:DISM /Online /Cleanup-Image /CheckHealth DISM /Online /Cleanup-Image /ScanHealth DISM /Online /Cleanup-Image /RestoreHealth
  3. Wait for the command to complete. The process can take up to 20 minutes, depending on your system’s health.
  4. When the process completes, type the following command and press Enter:
  5. Then, restart your device and check whether this fix has resolved the error. 

7. Reset Windows 11

  1. Go to Settings. then click on Recovery, then select Reset this PC. Your system restarts as soon as you hit the button, so make sure you back up any important files beforehand.
  2. Your system will restart, then you may select Keep my files or Remove everything.

As a last resort, if none of the above methods worked for you, you will need to reset Windows 11. This will allow you to refresh your system files and fix the Windows 11 BSOD System Service Exception.

Before you leave, check some quick tips to boost performance in Windows 11 and make your PC run faster than ever.

This error affects all versions, and you can use methods from this guide to fix System Service Exception in Windows 10 as well.

This isn’t the only BSOD on Windows 11, and we also wrote about Irql gt Zero at System Service Error in one of our earlier guides.

We hope that the methods that we have highlighted above were able to get you over the hump. Which of our methods helped you solve the problem? Share your thoughts with us in the comments section below.

Microsoft announces new partnerships and capabilities for Azure Space

Microsoft has announced new capabilities and partnerships for Azure Space, the company’s cloud computing platform that connects satellites and services across industries. The company has also unveiled a new set of tools that should help to enhance satellite images.

First up, the Redmond giant has launched a new service called “Azure Orbital” in public preview, allowing customers to communicate and control satellites from ground stations. With this cloud-based ground station service, organizations can now securely and efficiently store, process, and analyze data in the cloud with reduced costs.

SpaceEye using AI to predict what image looks like underneath clouds.

Microsoft also unveiled SpaceEye, an AI-powered tool that fetches cloud-free optical and multispectral satellite images of the Earth. “SpaceEye uses the Synthetic Aperture Radar (SAR) instrument from the Sentinel-1 mission as a baseline data source—as radar data is not affected by cloud cover. Space Eye then combines this radar data with historical optical imagery to generate an AI image prediction of what it looks under the clouds. This can unlock significant use cases in agriculture, land-use monitoring and disaster response among others,” explained Tom Keane CVP for Microsoft Azure.

Furthermore, Project Turing, which is built on Microsoft Azure, uses artificial intelligence to analyze and enhance the resolution of satellite images. The company highlights that the technology is already running on Azure to improve Bing Maps worldwide, which covers more than 50 percent of all user requests.

Project Turing using satellite imagery to enhance resolution and aid human perception.

Microsoft also announced new partnerships with Airbus, Blackshark.ai, iDirect, Esri, as well as Orbital Insight. These partnerships will bring high-resolution satellite imagery, new data insights, and more flexible solutions to Microsoft’s Azure Space ecosystem. “The power of extracting and leveraging data collected from space can transform entire industries and create new paradigms,” Keane said yesterday.

The free Matrix Awakens open-world experience is now live on Xbox consoles

The very impressive The Matrix Awakens: An Unreal Engine 5 Experience is now live on Microsoft’s Xbox Series X and Xbox Series S consoles.

This new title, which is kind of a blend of a video game and cinematic experience, is completely free to download and play and provides a rather exciting look at the future of video game graphics and gameplay with its incredibly realistic visuals and detailed virtual world powered by Unreal Engine 5.

“An original concept written and cinematically directed by Lana Wachowski and James McTeigue, this boundary-pushing technical demo features Keanu Reeves and Carrie-Anne Moss reprising their roles as Neo and Trinity while also—in a blending of the real and unreal—playing themselves,” reads the official Microsoft Store description for The Matrix Awakens. “Many of the VFX crew from the original film came back together for the digital execution of the experience, including John Gaeta, Kim Libreri, Jerome Platteaux, George Borshukov, and Michael Gay, in collaboration with teams across both Epic Games and partners such as SideFX, Evil Eye Pictures, Weta FX (formerly Weta Digital), and many others.

“The demo morphs from breathtakingly realistic cinematic to fast-paced third-person shooter experience, complete with action-packed car chase sequence, and also provides a rich, vastly detailed open world to explore, set within the universe of ‘The Matrix’.”

Unreal Engine 5 is the latest iteration of the Unreal Engine game engine that’s used to create a number of major video games from Star Wars Jedi: Fallen Order to Gears of War 4. The Matrix Awakens is very much a showcase for Unreal Engine 5’s capabilities with its virtual city that measures up to 16 square kilometres and boast 38,146 drivable cars, realistic lighting and sound, and thousands of humans and vehicles running on complex AI systems.

Many future titles are expected to be made using Unreal Engine 5 while several existing ones, such as Fortnite, are planning to upgrade to the new engine sometime in 2022.

Have you tried The Matrix Awakens yet? Let us know what you thought in the comments below and then follow us on Twitter and Facebook for more tech and gaming news.

How to Fix the Xlive.dll Error in Windows 10/11

When using Windows 10 as your default OS you will probably experience various system problems. The most common are incompatibility issues that can be easily resolved with the proper solutions.

In that matter, we can now discuss the xlive.dll Windows 10 problems, which can be addressed with ease if you choose to follow and apply the guidelines below.

The xlive.dll system error is quite common on Windows 10. You can encounter it when trying to install a new program, run a new game, or even when trying to shut down your device.

So, if you get error messages stating that xlive.dll was not found, xlive.dll is missing, and the code execution cannot proceed because xlive.dll was not found, reinstalling the application may fix this problem.

Now, this issue might occur because you have accidentally removed the xlive DLL file from your Windows 10 system, due to hardware problems or because of compatibility mismatches.

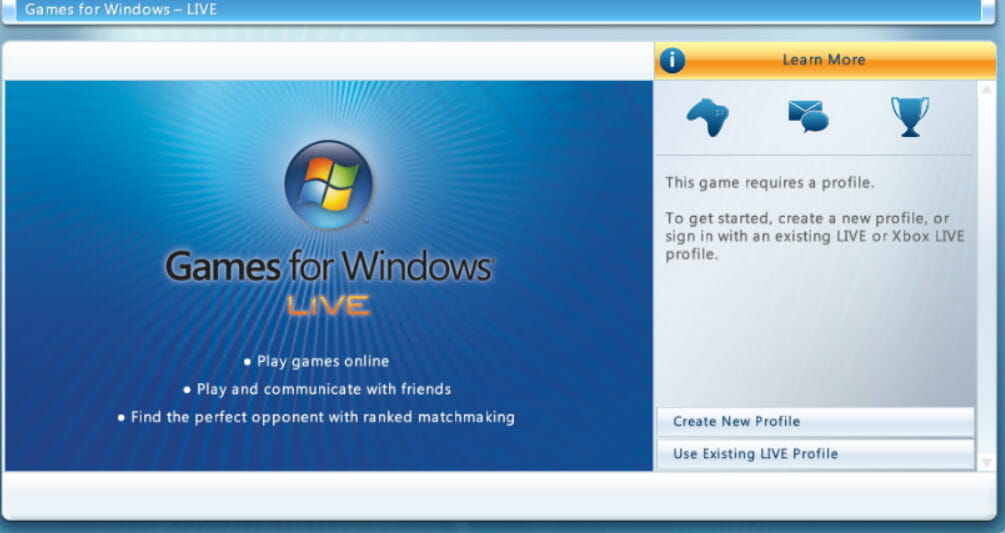
Xlive.dll is an important component of Games for Live, and if this file is missing you won’t be able to run certain games.

Since this can be a big problem, in this article we’re going to cover the following issues:

  • Xlive.dll GTA 4, Dirt 3, Fallout 3, Virtua Tennis 4, Batman Arkham City, Resident Evil 5, Tekken x Street Fighter, Operation Flashpoint Red River, Operation Raccoon City, Street Fighter 4, Dark Souls, Halo 2, Kane and Lynch, Lost Planet 2, Bulletstorm, Gears of War – This file is associated with many games, and if Xlive.dll is missing, you might not be able to play your favorite games. This error affects dozens of games, but you should be able to fix it using one of our solutions.
  • Xlive.dll download – If you have problems with Xlive.dll, the best course of action is to download the file again. Downloading the file from third-party websites isn’t the safest solution, however, you can download it right from Microsoft’s website.
  • Xlive.dll was not found, is missing, cannot be found – If this file is missing from your PC, you might not be able to run certain games. This can be a big problem, however, you should be able to fix the issue by reinstalling Games for Live and the affected games.

How can I fix xlive.dll Windows 10 issues?

  1. Download Games for Live
  2. Check your PC for malware
  3. Perform an SFC scan
  4. Install the latest updates
  5. Update your drivers
  6. Perform a system repair
  7. Reinstall Games for Xbox Live

1. Perform an SFC scan

  1. Open Command Prompt as administrator. To do that, right-click the Start Button and choose Command Prompt (Admin). If Command Prompt isn’t available, feel free to use PowerShell (Admin) instead.
    Xlive.dll GTA 4 command prompt admin
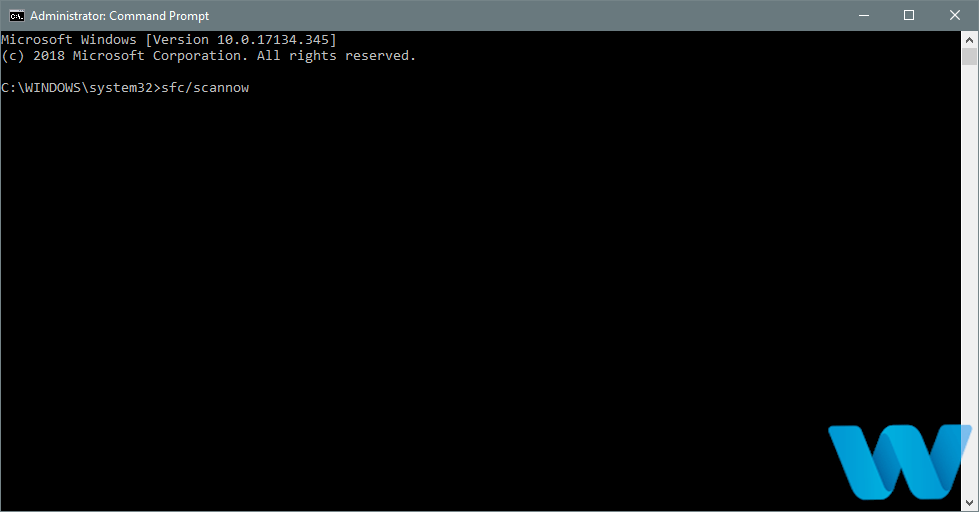
  2. Once the Command Prompt starts, enter sfc /scannow and press Enter to run it.
    Xlive.dll download sfc scannow cmd
  3. The SFC scan will now start. This process can take 15 minutes or more, so don’t interrupt it.

Sometimes xlive.dll can become missing due to file corruption. File corruption is a relatively common problem, but you can easily fix the corrupted files by performing an SFC scan.

Speaking about corruption, you might find that a third-party DLL fixer can be just what you need to solve xlive.dll issues.

2. Download Games for Live

  1. Download Games for Live right from Microsoft’s website.
  2. Right-click the installation file and choose Run as Administrator from the menu.
    Xlive.dll is missing run as admin
  3. Follow the instructions on the screen to install the application.

Once the application is installed, the issue should be resolved and your game will start working again without any issues.

Keep in mind that many third-party websites offer you to download Xlive.dll, but they aren’t always reliable and safe to use.

Instead, you just need to download Games for Live right from Microsoft’s website.

A few users reported that they had to copy the xlive.dll from C:WindowsSysWOW64 to C:WindowsSystem32 directory in order to fix the problem, so be sure to try that as well.

3. Check your PC for malware

Missing DLL files are usually a sign of malware infection, and if xlive.dll is missing from your PC, it’s possible that your PC is infected.

To fix the problem, be sure to scan your PC with antivirus software and check if that fixes the problem.

We recommend you to use a tool that can perform a thorough scan on your whole system such as TotalAV. It is amongst the antiviruses with the highest detection rates.

The software has a strong anti-malware engine and offers multi-layered protection. It is very easy to use and set up and includes parental controls.

It also has a powerful firewall that secures your connection, plus additional web protection tools such as a secure online payment feature.

After scanning your PC and removing the malware, check if the problem still persists.

4. Install the latest updates

  1. Open the Settings app by pressing Windows Key + I.
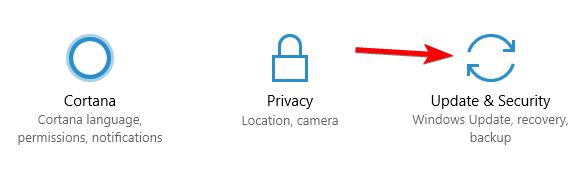
  2. When Settings app opens, go to the Updates & security section.
    Xlive.dll was not found update & security settings
  3. Click on Check for updates button.
    Xlive.dll Dirt 3 check for updates

If xlive.dll is missing, you might be able to fix this problem by installing the latest updates.

Windows 10 usually installs the latest updates automatically, but you can check for updates manually by performing the steps above.

If any updates are available, Windows will download and install them in the background. Once the updates are installed, check if the problem is resolved.

5. Update your drivers

Update your drivers for hardware devices in order to address the incompatibility issues and reinstall the programs or the games that reported the xlive.dll problem.

To update your drivers, you need to download the drivers for the desired device from the manufacturer’s website.

As an alternative, you can try an automated tool that will perform the task for you. Dedicated driver updaters are a quicker and safer option.

There are major risks that come with installing a bad driver version, but an automated updater removes them completely. They either have their own driver database or automatically find online drivers and match them with your hardware.

Most driver updater software on the market also includes driver repair tools that detect damaged and missing drivers on your PC. Some may also include minimal optimization features.

6. Perform a system repair

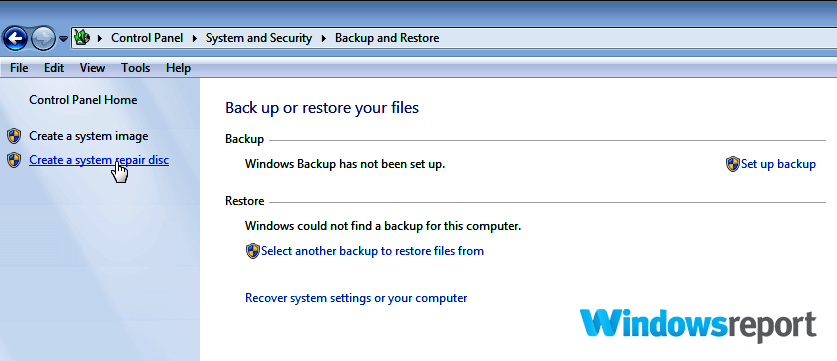
If you have problems with xlive.dll, you might be able to fix them by performing a system repair. To do that, insert your Windows 10 installation disk and run the System repair option.

this version of system recovery options is not compatible usb

The system repair disc should help you troubleshoot the issue. It includes System Restore, System Image Recovery, Startup Repair, and Command Prompt tools.

If you have a system restore point or system image recovery, you can try and use them to restore the PC configuration you had before this issue appeared.

Keep in mind that this is a drastic solution and you should use it only if other solutions can’t fix the problem.

7. Reinstall Games for Live

A few users reported that they fixed the issue simply by uninstalling Games for Live and all games associated with it.

After you uninstall both Games for Live and related games, you need to install Games for Live again. Now install the problematic games again and check if that solves the problem.

This is a simple solution, but sometimes a reinstall can fix this and many other problems, so make sure to try it out.

One of these methods should resolve your xlive.dll Windows 10 issues. If you happen to know of more workarounds, feel free to share them with us via the comments section below.

Fix igdkmd32.sys Blue Screen Failure in Windows 10/11

Blue Screen of Death is usually an indicator of a hardware problem, but in some cases, BSOD can be caused by certain software.

If you get BSOD on Windows 10 telling you there was a problem with igdkmd32.sys, you should know that this problem is usually caused by software applications.

The igdkmd32.sys issue on Windows 10 can also be caused by hardware problems, outdated firmware, corrupt drivers, and others,  but it can be easily fixed by following one of our solutions.

How do I fix the igdkmd32.sys error on Windows 10?

1. Use a third-party tool for BSoD

Troubleshooting the exact cause of a BSoD error is a time-consuming and sometimes a very difficult task for those who are not particularly computer savvy. 

Luckily, there are dedicated tools that can help you diagnose your personal computer and brings up solutions for them. Such a tool can even solve BSoD errors like those related to igdkmd32.

2. Uninstall your current display driver

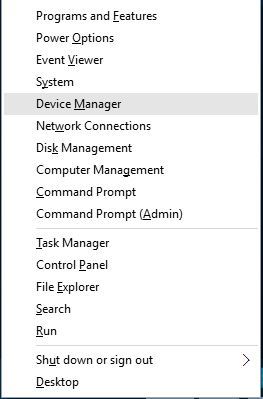
  1. Press Windows Key + X and choose Device Manager from the list.
    device-manager
  2. Once Device Manager opens, navigate to the Display adapters section and expand it.
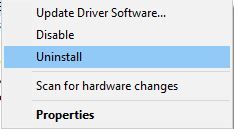
  3. Locate your display driver, right-click it and choose Uninstall from the menu.
    uninstall-driver
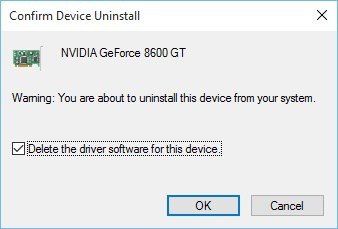
  4. Check Delete the driver software for this device and click OK.
    confirm-uninstall-driver
  5. After you’ve uninstalled your display adapter, restart your computer.

Problems with igdkmd32.sys on Windows 10 can be caused by a problematic display driver, and if that’s the case, we strongly advise you to uninstall your currently installed display driver. 

If the issue still persists, we strongly advise you to visit your graphic card manufacturer’s website and download the latest drivers for your graphic card.

3. Update your drivers

BSOD errors are usually caused by bad, faulty or outdated drivers. So, it’s always a good idea to keep your computer drivers up to date.

If you don’t want the hassle of searching for drivers on your own, you can use a tool that will do this automatically. it will help you to keep all your drivers up to date.

Besides the time you lose while searching for drivers, sometimes it can happen that you installed the wrong version or incompatible ones. With this tool, it will never happen.

⇒ Get Outbyte Driver Updater

4. Uninstall TeamViewer

According to the users, sometimes software such as TeamViewer, VMWare, DisplayFusion, or LogMeIn Hamachi can cause these kinds of problems.

In order to fix these issues, you’ll have to uninstall the problematic software. Users reported that uninstalling TeamViewer fixed their problems.

If you don’t use TeamViewer, try removing the software and check again if the issue persists. If not look to another software installed right before the problems appeared.

5. Disable hybrid graphics

  1. Restart your computer and keep pressing F2 or Del key on your keyboard while your computer boots.
  2. On certain motherboards, it might be a different key, so it’s always a good idea to check your motherboard manual.
  3. Once you enter BIOS, you need to find the Hybrid Graphics option and disable it. To locate this option, please check your motherboard manual.
  4. Save changes and restart your computer.

Users reported that disabling hybrid graphics in BIOS can stop the problems with igdkmd32.sys on Windows 10. To disable hybrid graphics, follow the above steps.

6. Use an older version of display drivers

In some rare cases, the latest display drivers might not be the best for your computer since they can cause problems with igdkmd32.sys on Windows 10.

If you’re having issues with igdkmd32.sys, we advise you to uninstall your display driver and install the older version instead.

You can find all the driver versions on the website’s manufacturer of your computer or of the graphic card, depending on if it is an integrated or a dedicated one.

7. Check the hardware

If a piece of hardware inside your computer is damaged, you’re very likely to get all sorts of BSOD issues. So, make sure your hardware is functional. Additionally, it won’t hurt if you clean it from dust from time to time.

Furthermore, many computers and laptops have built-in solutions to check for hardware errors. Each manufacturer has a different solution, thus check your system manual.

Any recently installed hardware can cause these types of errors, therefore if you installed any new hardware we urge you to remove it or replace it.

8. Run the troubleshooter

  1. Go to Settings.
  2. Head over to Updates & Security > Troubleshoot.
  3. Select Blue Screen, and go to Run the Troubleshooter. 
  4. Follow further on-screen instructions and let the process finish.
  5. Restart your computer.

If none of the previous solutions managed to resolve the issue, we’ll try with a few troubleshooting tools. The first one is Windows 10’s built-in troubleshooter.

9. Run the SFC scan

  1. Open the Windows search bar and type cmd.
  2. Run Command Prompt as administrator.
  3. Enter the following line and press Enter: sfc/scannowKernel Mode Exception Not Handled M Windows 10 error
  4. Wait until the process is done (it may take a while).
  5. If the solution is found, it will automatically be applied.
  6. Now, close the Command Prompt and restart your computer.

The next troubleshooting tool we can try is the SFC scan. The System File Checker is a command-line tool that scans your system for potential corrupt system files.

If you encounter issues with SFC, it stops or does not work at all on Windows 10, use our dedicated guide in order to fix the problem.

10. Update your Windows 10

Microsoft is continuously improving Windows 10 through updates. So, if the issue you’re facing is already acknowledged by Microsoft, they’re probably working on a fixing patch.

So, always make sure your system is up to date. Windows 10 usually installs the updates automatically, you can check for yourself by going to Settings > Updates & Security > Windows Update.

If the Windows 10 update is not working on your computer, use our comprehensive guide to troubleshoot and solve the issue. 

11. Uninstall the Windows updates

  1. Go to Settings > Updates & Security > Windows Update.
  2. Go to Update history > Uninstall.
  3. Now, find the troublesome update (you can sort updates by date), right-click it, and go to Uninstall. 
  4. Restart your computer.

Contrary to the previous solution, it can be a certain Windows update that actually disrupts the system. If you suspect that might be the case, your best bet is to simply delete that update. 

Problems with igdkmd32.sys on Windows 10 are usually caused by drivers, and most of these problems can be fixed simply by reinstalling or updating your graphics card drivers.

Furthermore, you should know that we talked about a somewhat similar error, the igdkmd64.sys bug which caused VIDEO_TDR_FAILURE error in Windows 10, so check that one out as well.

Razer Synapse won’t change lighting? Fix it in 3 steps

Razer Synapse is software that lets you assign shortcuts to complex tasks (macros) and change lighting profiles. The software/hardware tandem is coveted by veteran gamers because of its functionality and aesthetic.

However, it seems that the Razer Synapse sometimes becomes unresponsive to changes in lighting.

Fret not, for we have compiled our favorite picks on how to avoid this problem. So rest assured and follow these instructions to change the lighting with Razer Synapse.

How can I fix the Razer Synapse lighting profile issue?

1. Check your port

In some cases, the reason razer synapse won’t change lighting is because of a faulty USB port. If this is the case, detach your device from its port and plug it into another one.

It also makes no difference if you plug your device into a USB 2.0 port instead of a USB 3.0 port or vice versa.

If changing the ports makes no difference, try plugging your Razer hardware into another port on another PC.

If the lighting profile changes, the issue lies within the device itself. Try getting in touch with Razer tech support to solve this issue.

2. Uninstall and then reinstall Razer Synapse

  1. Detach all Razer devices from your PC. If you are using a desktop, replace Razer devices with a standard keyboard/mouse.
  2. Uninstall Razer Synapse by navigating to Programs and Features in Control Panel and then click on Uninstall a program. Find Razer Synapse in the list, and uninstall.uninstall razer synapse
  3. Your PC may prompt you to restart. Restart after the next step. Navigate to the location of all Razer Synapse files and delete (usually C:/ ProgramFiles(x86)/Razer).
  4. Restart your device.
  5. Download the Razer Synapse Software again.
  6. Click the Install button.installing razer synapse
  7. After finishing the installation, plug in the Razer devices and check the lighting response.

3. Upgrade or reinstall drivers for Razer Synapse

  1. Navigate to Control Panel and locate the Device Manager.control panel device manager
  2. Open the Device Manager and navigate to the view section of the toolbar. Then click on Show hidden devicesdevice manager hidden razer
  3. After that, locate your unresponsive Razer hardware and left-click. You will see an option to update your driver.
  4. Upon clicking, you will be given the option of an automatic or manual search for the drivers. Click on the first option.razer synapse driver update
  5. In case the problem isn’t fixed, download drivers directly from the Razer website and then chose the second option. Navigate to the driver download folder and open it.

A computer cannot manage video cards, sound cards, or other hardware, they must be managed by a driver. You can manually update drivers if you have a thorough understanding of the drivers your PC requires.

With the help of a driver updater tool like Outbyte Driver Updater, you can repair outdated and obsolete drivers. With a few clicks, the software will scan your PC’s hardware and peripherals for potential driver updates or installations.

When time is of the essence, this solution will allow you to install only what you need in a matter of seconds. You can configure Outbyte Driver Updater to perform driver upgrades and installations in bulk or on a per-driver basis.

⇒ Get Outbyte Driver Updater

In this guide, we explored some of the best solutions for fixing the Razer Synapse not changing lighting issues.

To explore more useful information on this topic, don’t hesitate to visit our extensive Razer Hub.

If you found this guide helpful, contact us by leaving a comment in the section found below this article.

How to fix error 0x80041003 on Windows 10, 8, 7

Windows 10 is a solid operating system, but it’s not error-free. Speaking of Windows errors, users reported error 0x80041003 in Event Viewer.

This can be an annoying error, and in this article, we’re going to show you how to fix it. The solution below applies to Windows 10 but will work on Windows 8 or 7 as well.

How do I fix error 0x80041003 on a Windows device?

1. Disable User Account Control

  1. Press Windows Key + S and type user account. Choose User Account Control from the menu. Alternatively, you can just open the Start Menu and search for user control.
  2. The User Account Control Settings window will appear. Move the slider all the way down to Never notify and click OK to save changes.

User Account Control is a security feature in Windows that prevents users from changing settings that require administrative privileges.

Even though this feature can be useful, many users tend to disable it because it can become rather annoying over time. This feature can sometimes interfere with Windows and cause this and other errors to appear.

After you disable User Account Control, the problem should be completely resolved. Disabling this option might slightly reduce your security, but you shouldn’t worry about it too much.

2. Create a vbs script and run it

  1. Open Notepad.
  2. Now copy/paste the following code lines:
    • strComputer = "."Set objWMIService = GetObject("winmgmts:" _
    • & "{impersonationLevel=impersonate}!\\" _
    • & strComputer & "\root\subscription")
    • Set obj1 = objWMIService.ExecQuery("select * from __eventfilter where name='BVTFilter' and query='SELECT * FROM __InstanceModificationEvent WITHIN 60 WHERE TargetInstance ISA ""Win32_Processor"" AND TargetInstance.LoadPercentage > 99'")
    • For Each obj1elem in obj1
    • set obj2set = obj1elem.Associators_("__FilterToConsumerBinding")
    • set obj3set = obj1elem.References_("__FilterToConsumerBinding")
    • For each obj2 in obj2set
    • WScript.echo "Deleting the object"
    • WScript.echo obj2.GetObjectText_
    • obj2.Delete_
    • next
    • For each obj3 in obj3set
    • WScript.echo "Deleting the object"
    • WScript.echo obj3.GetObjectText_
    • obj3.Delete_
    • next
    • WScript.echo "Deleting the object"
    • WScript.echo obj1elem.GetObjectText_
    • obj1elem.Delete_
    • Next
  3. Now choose File > Save as.
  4. Set Save as type to All Files and enter myscript.vbs as File name. Choose your desktop as a save location and click the Save button.
  5. After doing that, close Notepad.

Now that you have your script ready, you need to run it using Command Prompt. To do that, follow these steps:

  1. Press Windows Key + X to open Win + X menu and choose Command Prompt (Admin) from the menu. If Command Prompt isn’t available, choose PowerShell (Admin) instead.
  2. When Command Prompt starts enter cd %userprofile%\Desktop and press Enter to run it.
  3. Now enter cscript myscript.vbs and press Enter to run it.

After running this script, the problem should disappear completely. Keep in mind that older warnings related to this error will still remain in Event Viewer, so you’ll have to delete them manually.

3. Create a bat file and run it

  1. Open Notepad.
  2. Now copy/paste the following code:
    • @echo on
    • cd /d c:\temp
    • if not exist %windir%\system32\wbem goto TryInstall
    • cd /d %windir%\system32\wbem
    • net stop winmgmt
    • winmgmt /kill
    • if exist Rep_bak rd Rep_bak /s /q
    • rename Repository Rep_bak
    • for %%i in (*.dll) do RegSvr32 -s %%i
    • for %%i in (*.exe) do call :FixSrv %%i
    • for %%i in (*.mof,*.mfl) do Mofcomp %%i
    • net start winmgmt
    • goto End
    • :FixSrv
    • if /I (%1) == (wbemcntl.exe) goto SkipSrv
    • if /I (%1) == (wbemtest.exe) goto SkipSrv
    • if /I (%1) == (mofcomp.exe) goto SkipSrv
    • %1 /Regserver
    • :SkipSrv
    • goto End
    • :TryInstall
    • if not exist wmicore.exe goto End
    • wmicore /s
    • net start winmgmt
    • :End
  3. Now go to File > Save as.
  4. Set Save as type to All Files and enter script.bat as the File name. Set your Desktop as a save location and click the Save button.
  5. Close Notepad. Locate script.bat on the Desktop, right click it and choose Run as administrator from the menu.

After running the script, the problem should be completely resolved. According to users, this issue appears because the current user doesn’t have the necessary privileges to perform the operation in WMI.

To fix the problem, you might have to change your security permissions. Changing the permissions could be potentially dangerous, so keep that in mind. To change the permissions, follow these steps:

  1. Press Windows Key + X and choose Computer Management from the menu.
  2. When Computer Management opens, in the left pane navigate to Services and Applications > WMI Control. Right-click WMI Control and choose Properties from the menu.
  3. When Properties window appears, navigate to Security tab. Now select Root from the menu and click on Security.
  4. If you’re a member of Administrators group, check if Administrators have full control option checked. If you aren’t a member, you might have to add your account and give it full control. To do that, click on Add button.
  5. In Enter the object names to select field enter your user name and click on Check Names. If everything is in order click on OK.
  6. Now select your user name from the list and check all options in the Allow column. Click on Apply and OK to save changes.

After you change your security permissions, you just have to restart your PC in order to apply the changes.

4. Delete the Repository folder

  1. Press Windows Key + R and enter services.msc. Press Enter or click OK.
  2. When Services window opens, locate Windows Management Instrumentation service and double click it.
  3. Once the Properties window opens, click on Stop button and click on Apply and OK. If you get a warning message, just click on Yes or OK.
  4. After you stop the service, close the Services window.

Now you need to delete the Repository directory. To do that, follow these steps:

  1. Go to this directory C:\Windows\System32\WBEM
  2. Locate the Repository directory and copy it to a safe location on your PC. If anything goes wrong, you can copy this directory back to the original location and fix the problem.
  3. Now delete the Repository directory from WBEM folder.
  4. After doing that, close all applications and shut down your PC.
  5. Turn on your PC again. After the PC turns on, leave it idle for about 10-15 minutes. During this time your PC will recreate Repository directory.
  6. Turn off and back on your PC and the problem should be resolved.

Few users reported that this solution worked for them, so feel free to try it out.

5. Check your RAM

Sometimes you can get a BSOD error followed by error code 0x80041003. This type of error might be related to your RAM, so it’s advised to check it.

The simplest way to do that is to leave only one memory module connected and test it for errors with Memtest86+. Keep in mind that you need to scan your RAM for a couple of hours in order to test it thoroughly.

If you have more than one RAM module, you’ll have to repeat this solution with every RAM module individually.

This solution requires you to remove your RAM from the PC case, so if your PC is under warranty or if you don’t know how to do it properly, you might want to skip this solution.

This only applies if you’re getting a Blue Screen of Death followed by a 0x80041003 error code. If your PC doesn’t restart due to this error, you should skip this step.

6. Check your BIOS

check bios

If you’re experiencing high CPU usage due to this error, you might want to check your BIOS. According to users, the cause for this problem is the Turbo Mode option in your BIOS.

To fix the issue, you need to navigate to BIOS and turn Turbo Mode off. For detailed instructions on how to do that, we advise you to check your motherboard manual.

7. Run a dedicated troubleshooting tool

You can resolve this system error by getting help from a specialized third-party tool that can sure repair Windows errors.

These tools provide professional automated support for this type of system error, thus you can run exhaustive scans to detect complex malfunctions.

8. Reset Windows 10

  1. In Windows, open the Start Menu, click the Power button, press and hold the Shift key and click on Restart.
  2. Choose Troubleshoot > Reset this PC > Remove everything.
  3. To proceed to the next step, you might be asked to insert a Windows 10 installation media, so be sure to have it ready.
  4. Select your version of Windows. Now click on Only the drive where Windows is installed > Just remove my files.
  5. You’ll see a list of changes that reset will perform. If you’re ready to start click the Reset button.
  6. Follow the instructions on the screen to complete the reset.

Resetting Windows will remove all your files from your system drive, therefore we advise you to back up important files beforehand.

After the reset is completed you’ll have a fresh installation of Windows 10. Now you just have to move your files from the backup and install the applications again. This is a drastic solution, so you should use it only if other solutions can’t fix the problem.

Error code 0x80041003 usually isn’t dangerous, but if your PC starts restarting or freezing due to this error, feel free to try any of our solutions.

FIX: There might be a problem with your audio device

There might be a problem with your audio device message can sometimes appear, and it can cause various issues with your audio. However, there’s a way to deal with this message on your PC.

This error message can lead to various problems, and speaking of which, here are some similar issues that users reported:

  • No audio output device is installed Windows 10 Dell – This problem can appear on almost any device, and the issue is usually caused by your drivers. Simply update them to the latest version and check if that helps.
  • There might be a problem with your audio device Windows 10, 8, 7, your sound device – Windows 10 is not the only system that can be affected by these problems. Even if you don’t use Windows 10, you should be able to use most of our solutions.

How can I fix the audio device problem?

1. Make sure that your audio driver is up to date

Sometimes There might be a problem with your audio device message can appear due to your outdated drivers.

In order to prevent this message from appearing, it’s advised to update them to the latest version.

To do that, you just need to find the model of your sound card and download the latest drivers for it.

Most users have an integrated sound card, so you just have to visit your motherboard manufacturer’s website, check the model, and download the audio driver.

If this process seems a bit complicated to you, you can also use third-party tools such as Outbyte Driver Updater to update your drivers automatically.

This tool will automatically find outdated drivers and update them. If you want your PC to run smoothly, be sure to try Outbyte Driver Updater.

It will also keep your system safe from permanent damage caused by manually downloading and installing the wrong driver versions.

More so, you can rest assured regarding the process as the tool provides automated support to update any drivers from your computer.

This software includes powerful features that help to find missing drivers, fix the broken ones, and sure update old drivers to be ready for new software changes.

⇒ Get Outbyte Driver Updater

2. Install the latest updates

  1. Press the Windows Key + I to open the Settings app.
  2. Navigate to Update & Security.
  3. Click on Check for updates.

If any updates are available, they will be downloaded automatically in the background and installed once you restart your PC.

3. Make sure that the correct device as the default playback device

  1. Right-click the volume control icon in the bottom right corner and choose Sounds.
    There might be a problem with your audio device Windows 8
  2. Go to the Playback tab, and locate your audio devices (Speakers or Headphones).
  3. Right-click it and select Set as Default Device.
  4. Click Apply and OK.
    No audio output device is installed Windows 10 Dell

After making these changes, check if the problem is still there.

4. Reinstall the audio driver

  1. Press Windows Key + X, and select Device Manager.
  2. Locate your audio device, right-click it and choose Uninstall device.
  3. Check the Remove driver software for this device option.
  4. Select Uninstall.
  5. Click the Scan for hardware changes icon.
  6. Windows will now try to install the default driver.

5. Modify the registry

No audio output device is installed Windows 10 Dell
  1. Press Windows Key + R, type regedit, and  press Enter.
  2. Go to: HKEY_LOCAL_MACHINESYSTEMCurrentControlSetControlClass
  3. Locate LowerFilter with a value of LVUSBSta.sys.
  4. Remove LVUSBSta.sys as the value data and check if the problem is resolved.

We have to warn you that modifying the registry can be potentially dangerous if you’re not careful, so you should create a backup before you make any changes.

6. Run the troubleshooter

There might be a problem with your audio device Windows 10
  1. Open the Settings app and go to Update & Security.
  2. Select Troubleshoot.
  3. Choose Playing Audio and click Run the troubleshooter
  4. Follow the on-screen instructions to complete the process.

7. Try a different audio format and turn off audio enhancements

No audio output device is installed Windows 10 Dell
  1. Right-click the volume control icon in the bottom right corner and choose Sounds.
  2. Go to the Playback tab and double-click your default audio device (in our example, that’s Speakers).
  3. Navigate to the Enhancements tab and make sure that all options are disabled.
  4. You can even check Disable all enhancement option.
  5. Save changes and check if that solves the problem. If not, proceed to the next step.
  6. Go to the Advanced tab and try changing the Default Format value.
  7. Experiment with different values and check if that solves your problem.

8. Perform an in-place upgrade

  1. Download and run the Media Creation Tool.
  2. Choose to Upgrade this PC now option and click Next.
  3. Select Download and install updates (recommended) and click Next.
  4. Follow the on-screen instructions until you reach the Ready to install screen.
  5. Select Change what to keep.
  6. Be sure to choose Keep personal files and apps and click Next.
  7. Follow the-on screen instructions to complete the upgrade process.

If the problem keeps appearing, the only way to fix it might be an in-place upgrade.

If you’re not familiar, this process is quite similar to a clean install, but unlike the clean install, the in-place upgrade won’t delete any of your files.

After you’re done, you’ll have a fresh and updated version of Windows installed, with all your applications and files exactly where you left them, and the audio problem should be resolved.

There might be a problem with your audio device message can be quite annoying, but if you encounter this issue, be sure to try some of our solutions.

Let us know which one worked best for you by leaving a message in the comments section below.

Take a look at our Fix section for complete guides on troubleshooting PC problems. Check out our Peripherals Hub for helpful troubleshooting guides created and recommended by our experts.

How to troubleshoot Windows Movie Maker has stopped working

Movie Maker is video-editing software that was formerly bundled with older Windows platforms as part of the Live Essentials suite. Some users have stated on forums that Movie Maker stops working for them.

Windows Movie Maker has stopped working and Windows Movie Maker does not start are two of the more regular WMM error messages that pop up on some users’ desktops.

The stopped working error message can pop up when uses try to open files within the video editor. Consequently, the software crashes and closes or freezes during playback.

Below are a few resolutions that might fix Windows Movie Maker’s stopped working error messages and occasional freezes.

What do I do if Movie Maker stopped working?

1. Close other software when running Movie Maker

  1. Right-click the taskbar and select Task Manager to open that utility’s window.fix audio buzzing
  2. Then close all software listed under apps on the Processes tab by right-clicking them and selecting End task.
  3. In addition, you can close some third-party software listed under background processes to free up more RAM for WMM.
  4. To remove startup programs, such as antivirus utilities, select the Startup tab. Then select software there and click the Disable button.

Movie Maker might stop working and display a crash error message when there is a lack of RAM on your laptop or desktop.

There might be insufficient RAM for Movie Maker when you’re running lots of other software alongside it. That’s more likely if your desktop or laptop has a small amount of RAM to start with.

So make sure there are no other software windows open on your taskbar when you’re running Movie Maker. In addition, close third-party software in your system tray.

2. Update the graphics card driver

2.1. Update drivers manually

  1. Press the Windows key + R together at the same time on your keyboard.
  2. This should open the Device Manager, which will look like the picture
  3. From Device Manager find the driver you need to update.device manager windows 10
  4. Right-click on this field and choose Update.
  5. If an update for this driver is available, follow on-screen prompts and install it.
  6. When done, restart your Windows 10 system.

You can also troubleshoot the issue by manually updating your system which is not hard to do, just access the Device Manager and follow the instructions above.

On the other hand, updating drivers automatically is more reliable and safe for your PC, plus you only have to select the drivers you need to update and the rest will be done by specialized software.

⇒ Get Outbyte Driver Updater

3. Disable third-party video file filters

  1. First, open Run by pressing the Windows key + R hotkey.
  2. In the Run dialogue box, insert the line below and press the Return key: cmd
  3. Open the folder that includes Movie Maker by entering cd followed by its path in the Command Prompt.
  4. Then enter the following line to open Movie Maker in its safe mode: moviemk.exe /safemod
  5. Click the Tools menu.
  6. Select Options on the Tools menu.
  7. Then select the Compatibility tab on the Options window.
  8. The Compatibility tab includes a list of third-party filters. First, deselect filters that end with an .ax extension.
  9. If Movie Maker still crashes, deselect all the third-party filters on the Compatibility tab window.

The Windows Movie Maker has stopped working error message can often be due to incompatible video filters.

So deselecting third-party video file filters listed on Movie Maker’s Compatibility tab (in the classic version) might fix the software.

4. Use a third-party alternative to Windows Movie Maker

When it comes to editing videos at a professional level, Adobe Premiere Pro is known as an industry standard. This is an advanced tool that comes with a myriad of special effects and professional features.

If you want to transform your footage into a high-quality video then Adobe Premiere Pro encompasses all the functions you need, such as editing videos in any format from 8K to virtual reality.

Cut it, bind it, add soundtracks and special effects, pretty much anything you want is achievable through this timeline-based video editor.

More so, you can now test it out for free for a full 7 days along with all other Adobe products, so go ahead and give it a try.

⇒ Get Adobe Premiere Pro

5. Run Windows Movie Maker in Compatibility Mode

  1. Some Movie Maker users have confirmed that running the software in compatibility mode can fix the stopped working error.
  2. To do that, right-click a Movie Maker shortcut icon and select Properties.
  3. Click the Compatibility tab shown in the snapshot directly below.
  4. Select the Run this program in Compatibility Mode for check box.
  5. Select the latest Windows platform that predates your current OS from the drop-down menu.
  6. Press the Apply button.
  7. Click OK to close the window.

Some users confirmed that running Movie Maker in Compatibility mode solved the issue they had regarding the Windows Movie Maker troubleshooting process.

Follow the steps we mentioned above and see if it helps you with fixing the issue. If you still experience problems, see the following solutions.

6. Repair the Windows Live Essentials Suite

  1. To open the Run dialog box, press the Windows key + R hotkey.
  2. In the Open text box insert the line below and click OK to open the uninstaller window: appwiz.cpl
  3. Enter Windows Live Essentials in the search box.
  4. Select Windows Live Essentials, and press its Uninstall/Change button.
  5. Then select the Repair radio button shown directly below to fix Live Essentials applications.
  6. Click the Continue button.

The Windows Live uninstaller window includes a Repair option that can fix the suite’s applications. So that’s an option worth noting when you notice that Windows Movie Maker is not working on Windows.

7. Reinstall Codecs

If video playback freezes in WMM, there might be a corrupted video codec on your desktop or laptop. If so, reinstalling a codec might fix Move Maker’s playback freezing and other issues.

The freeware program Codec-Sniper provides an overview of the codecs and filters on your PC and their status. The program tells you if a codec is correctly installed or not with its Status column.

Codec-Sniper also includes a Delete button with which you can erase codes.

So you can remove video codes with Codec-Sniper. Alternatively, you can uninstall codec packs, such as K-Lite, via the Programs and Features Control Panel applet.

8. Reinstall Windows Movie Maker

  1. Open the Run accessory in Windows.
  2. In Run’s text box, insert the line below and press the Enter key: appwiz.cpl
  3. Next, select Windows Live Essentials and click Uninstall/Change to open the window below.
  4. Then select the Uninstall option and click Continue to remove the suite.
  5. Restart Windows before you reinstall Movie Maker.
  6. Reinstall Windows Live Essentials 2012 by clicking Download Now.
  7. To add the classic Movie Maker 10 version to Windows, go to the official Microsoft page and click the Get button.

Reinstalling Windows Movie Maker is another potential resolution when Windows Movie Maker is not working. You can download Windows Movie Maker 10 from Microsoft’s website.

Those are some of the best resolutions for fixing Movie Maker stopped working or does not start error messages.

Whether you decide on running a different video tool like Adobe Premiere or choose to troubleshoot the Windows video editor we trust that our option will help you solve the problem.

We’d like to hear more from you on this issue so please drop us a comment in the dedicated section below.

Fix: Only secure content is displayed on Windows 10/11

Microsoft is constantly improving the Microsoft Edge browser and surely their users’ online safety is a priority. However, on some occasions, when surfing the Internet, certain unexpected content-related messages might appear.

One such message is Only secure content is displayed that users got in Internet Explorer or in Microsoft Edge. This happens when trying to access a website that has both secure and non-secure content on its page.

Why do I get the Only secure content is displayed pop-up?

This doesn’t mean that the website you’re trying to access is insecure. In fact, this type of notification appears mostly while trying to access financial websites, such as your bank’s website for example.

Websites usually display mixed content, which includes both secure and nonsecure content. For example, the login form that you use to access your bank website is secure content because it users HTTPS protocol to communicate to a web server.

On the other hand, elements such as images or banners use the unsafe HTTP protocol. Though more of the web traffic has been redirected through the HTTPS protocol lately, or web browsers have started to use it by default, but certain details still use the HTTP protocol.

And the above-mentioned error appears because some insecure content or web page might get access to secure content.

So this is unlikely to happen on regular websites, but some malicious websites might use this to get access to your personal information, and this is why Microsoft decided to include this notification and display only secure content.

Blocking insecure content is the default behavior on Microsoft Edge and newer versions of Internet Explorer, and turning it off comes with a slight security risk.

1. Try an alternative browser

Edge is overall a good and reliable browser, but if you keep getting error messages, the quickest fix is to switch to a different browser.

There are many good alternatives that use up a small number of system resources while having good loading rates.

We recommend you give Opera a try because it provides the best balance when it comes to stability, security, and performance.

The user interface is simple and easy to navigate. You can customize it to your liking and make it suit your workspace.

It has easy-to-use bookmarking options, you can create multiple folders and subfolders to keep track of your most important web pages.

On top of that, Opera integrates multiple social media platforms so you can access them easier, directly from its sidebar. Just log in and easily keep in touch with your peers.

The browser also has a large library of free, downloadable add-ons. You can integrate mini-games, productivity apps, translators, spellcheckers, and many more.

Another important thing to mention is that opera has a free built-in VPN. It secures your connection and helps you surpass geo-restricted content.

Opera

Avoid frequent browser errors by switching to a more stable and reliable tool such as Opera and customize it as you wish.
Free download Visit website

2. Remove the secure website error using Internet Settings

  1. Press Windows Key + S and type Internet Options. Select Internet Options from the list.
    internet-options
  2. When Internet Options window opens, navigate to Security tab and select Internet.
  3. Next, click on Custom level button.
    custom-level
  4. Scroll down to the Miscellaneous section and locate Display mixed content.
  5. You’ll be presented with three options. If you wish to always display mixed content, choose Enable. By choosing this option you won’t get “Only secure content is displayed” notification anymore.
    mixed-content-enabled
  6. Click OK button to save changes.
  7. Click Apply and OK in the Internet Properties window to apply changes.

Microsoft is trying to protect its users from potential dangers, but sometimes that extra layer of protection might be a nuisance, and people tend to turn it off.

Now when you know how secure and insecure content works, you can allow mixed content to be displayed and remove the Only secure content is displayed notification.

Tell us if this solution worked for you. Use the comments section below.

Microsoft Surface Go Not Charging – Troubleshooting Guide [2026]

Despite its good reputation of lasting up to 9 hours, Surface Go‘s battery won’t charge at all for some users. This leaves users fully reliant on a power source, which kind of defeats the purpose of a laptop.

The good news is, there are a few tricks you can try to fix this once and for all.

Solutions to fix Surface Go charging problems

First, make sure your charger or charging port isn’t damaged. Ruling those out, let’s troubleshoot software issues that lead to Surface Go not charging:

1. Shut Down the Surface Go and Charge it

If the Surface Go doesn’t charge up when it’s on, try shutting down the laptop instead of restarting. Select the Shutdown option on the Start menu. Then charge the laptop for more than half an hour.

This will also help when faced with a black screen on Surface Go 3.

2. Open the Power Troubleshooter

Window 10 includes a Power troubleshooter that can come in handy for fixing laptop battery issues. To open that troubleshooter, press the Type here to search button on the taskbar.

  • Input the keyword ‘troubleshoot’ in the search box.
  • Click Troubleshoot to open the window shown directly below.
  • Select Power and press the Run the troubleshooter button.
  • Thereafter, the Power troubleshooter window will open and might apply fixes automatically. The troubleshooter might also provide some guidelines for users to follow.

Smart charging can pause Surface Go charging at 50 or 80 percent, so consider turning off smart charging on Microsoft Surface before trying deeper fixes.

3. Reinstall the Battery’s Driver

  1. Open the Win + X menu by pressing the Windows key + X hotkey.
  2. Select Device Manager to open the window in the snapshot directly below.
  1. Double-click the Batteries category.
  2. Then right-click Microsoft Surface ACPI-Compliant Control Method Battery and select Uninstall device.
  3. Press the Uninstall button to confirm.
  4. Press the Scan for hardware changes button in Device Manager to reinstall the battery driver.
  5. Alternatively, users can also restart Windows 10 to reinstall the battery driver.

Reinstalling the battery’s driver forces your operating system to verify and recognize your battery, allowing it to charge.

4. Check for Windows Updates

  1. Press the Windows key + i to open Settings.
  2. Go to Update & Security/ Windows Update.windows update in settings
  3. Check if any updates are pending. If they are, schedule a restart time or select Restart now.windows update options

5. Use Surface Diagnostic Toolkit

  1. Download and install the Surface Diagnostic Toolkit from the Microsoft Store.surface diagnostic toolkit download page
  2. Run the Diagnostic and wait for the results. The tool will tell you all the identified issues with your laptop.microsoft surface diagnostic toolkit result
  3. Follow the on-screen prompts to fix all found issues.
  4. When the process is done, check if you can now charge your Surface Go.

These are the tricks that you can try to fix Surface Go when it won’t charge. If the problem persists, it may be well beyond your expertise as a user and require professional help.

In that case, you can return your Surface Go laptop to Microsoft for repairs within that warranty period. If

Microsoft can’t fix the battery charging either, users should be able to get a replacement for a Surface Go that’s still within warranty. Alternatively, you can also contact Microsoft support.

FIX: Dropbox failed to uninstall

The Dropbox failed to uninstall error is common, but the good news is that you can troubleshoot it quickly. Most times, you can’t get Dropbox to uninstall because of a broken uninstaller.

Many Dropbox users have solved this problem by fixing their account linking. On this page is a detailed step-by-step guide on how to uninstall Dropbox when it fails.

How do I get Dropbox to uninstall when it fails?

1. Re-install the Dropbox app

  1. On an internet browser, visit this install page to download the Dropbox offline installer.
    download-dropbox-offline-installer-dropbox-uninstall-failed
  2. On downloading the Dropbox offline installer, double-click it and follow the installation steps
  3. After installing Dropbox, find its icon from your system tray, right-click on it, and hit Quit Dropbox.
  4. When you close all instances of the Dropbox app, attempt to uninstall Dropbox again and check if your Dropbox fails to uninstall still.

We recommend using a specialized tool for this process, to ensure unwanted software and all residuals will be removed seamlessly. With a single click, you can free up more storage space by removing leftover app junk files like cache data and application logs.

An uninstaller tool is designed to facilitate the uninstalling process of any service and product, so it’s a quick and secure solution if you didn’t manage to remove Dropbox via the standard method.

2. Uninstall Dropbox manually

  1. Open File Explorer by pressing the Windows key + E.
  2. In the address bar of File Explorer, enter the following string:
    • %PROGRAMFILES(x86)%.
  3. You will be taken to the Program Files folder.
    • Here, double-click on the Dropbox folder.
      open-dropbox-folder-dropbox-uninstall-failed
  4. Next, open the Client folder.
  5. Here, find Dropboxuninstaller.exe and double-click on it.
    run-dropboxuninstaller-exe-dropbox-uninstall-failed
  6. This launches the Dropbox manual installer.
    • Here, click on the Uninstall button.
      dropbox-uninstalled-manually-dropbox-uninstall-failed

3. Remove your computer from Dropbox web

  1. Close the Dropbox application on your computer and every other instance of Dropbox.
  2. Visit the Dropbox login page on any internet browser.
  3. Sign in to Dropbox using the credentials of the account logged in on the app on which you get the Dropbox failed to install error.
  4. In Dropbox, click on your account name at the top right-hand corner of the screen and select Settings from the dropdown menu.
    open-dropbox-settings-dropbox-uninstall-failed
  5. Next, navigate to the Security tab.
  6. Find the Devices area and look for the machines that are linked with your Dropbox account.
  7. Here, click the X beside the computer where Dropbox fails to uninstall to unlink it.
    unlink-dropbox-dropbox-failed-to-uninstall
  8. Select Unlink to confirm your action.
  9. Next, press the Windows key + E to open File Explorer.
  10. On the address bar, search for
    C:Program Files (x86)DropboxClient
  11. You will land in the Client folder of Dropbox. Next, find and delete Dropbox.exe.
  12. Return to your desktop and right-click on the Recycle Bin icon.
    • Select Empty Recycle Bin to clean it up.
  13. Finally, restart your machine.

Fix Dropbox failed to uninstall  on  Mac

  1. First, you unlink your Dropbox account.
    • Click on the Dropbox icon from the menu bar and select Preference.
  2. Next, click on Account and now hit Unlink Dropbox.
  3. After unlinking Dropbox, launch Activity Monitor and Force quite Dropbox.
  4. Now open Finder.
    • From the sidebar, select Applications, and then drag-and-drop Dropbox to Trash.
  5. Next, locate the Dropbox folder and also move that to Trash.
  6. Press the following key combination:
    • Shift + G + Command.
  7. Open the Go to the folder window and enter /Library to go to the Library folder.
  8. Here, look for the folder called Dropbox Helper Tools and also remove this folder.
  9. Finally, clean the logs and caches.
    • On the Go to the Folder window, enter /.dropbox and hit Return.
  10. Delete all the files in this folder also.
    • You may want to empty the Trash.

That’s what to do when Dropbox fails to uninstall. Attempt the solutions in the order in which they are here, and one will fix the issue.

If you have any questions or encounter challenges using any of these methods, do leave a comment here.

For more articles on this amazing service, check out our dedicated Dropbox Hub.

We have even more guides like this one on our Web Apps Fix page too.

  • What is a Dropbox and how does it work?
Dropbox is a cloud storage service, meaning that you can upload and store your files on an online server, and download them whenever you feel like it as well. For more services like this, check this list of the best cloud storage services out there.

How to fix Windows 10/11 video player problems

If you are running the Windows 10 operating system, you might experience some issues regarding the video player.

If you are trying to view a movie after a long day at work or run a music video in your free time, having this issue is annoying.

This will either prevent you from opening the video file or even if you open it the video might not be playing in the quality you would want it to play.

Running an encoded video in a different format than the one you have in the system or supported hardware will try to use a software decoder to play your video in Windows Microsoft systems.

Using this software decoder without having the necessary free CPU memory required, it will most likely not play as it should or it will not start at all.

How do I fix video playback problems on Windows 10?

1. Fix the issue from the Control Panel

  1. Press and hold the buttons Windows and X.
  2. This will bring you to the Control Panel of the system.
  3. Let’s type in the search box presented in the window Power.
  4. Click (left click) on the Edit Power Plan icon that appeared after the search completed.
  5. Click (left click) on Change advanced power settings.
  6. Next, you need to click on Processor power management.
  7. From this window, we can go to Maximum processor state and select from there the maximum percentage CPU you want your PC to be at when it is plugged into the power outlet.
  8. Put in the maximum processor state to run at 100%.
  9. Click on OK and close the window.
  10. Reboot the PC.
  11. Try to run again the video and see if it will work this time.

Normally, your CPU will operate at a maximum of 60 % of its full strength if it is plugged into the power outlet.

We will increase the maximum capabilities of the CPU percentage in this tutorial so that if the system uses a software decoder to play a video you won’t have any issues with it.

You need to be logged in as an Administrator to execute the steps above.

2. Try a different video player

There are not so many fixes for video players out there, thus not so many solutions to consider applying.

The guide above is viable but might be hard to complete for some of you, especially when the problem is more specific.

In that case, you cannot fix this problem without a more radical solution that involves changing the player. Getting used to Cyberlink PowerDVD 21 requires no special abilities.

With a user-friendly design and a list of simple features such as organized content in one place or seamless playback, this multimedia app turns into a must-have.

⇒ Get Cyberlink PowerDVD

Was that so hard? Let us know your opinion on how this article can be improved in any way and enjoy your videos on Windows 10.

We have written extensively about this topic, for additional information, check our Windows Media Player section.

In our Windows 10 Troubleshooting Hub, you will find several solutions to fix all issues you may encounter with this OS.

Users may also find out tips useful when looking for answers to the following questions:

  • How to fix choppy video playback Windows 10 media player – When encountering this issue, updating the video driver software and reducing video hardware acceleration should be your first actions.
  • What causes stuttering and glitching in video playback? – Users in search of answers to this question should keep in mind that corrupt video software and slow Internet connections can both cause these issues.

Fix: Windows 10 won’t wake up from sleep after the Anniversary Update

Windows 10 Anniversary Update is finally released! And while it brought a lot of refreshing new features to Windows 10 users, it also caused some problems of its own. One of the first reported problems we stumbled up is the issue with waking up from sleep.

So in this article, we’re going to explore the issue a little bit and try to solve it for everyone who’s bothered with sleep mode issues in Windows 10, after installing the Anniversary Update.

How to solve wake up issues in Windows 10 Anniversary Update

Solution 1 – Run Power troubleshooter

Perhaps the simplest solution is to just run Windows 10’s Power Troubleshooter, and check if this tool can solve the problem for you. To run the Power Troubleshooter in Windows 10, do the following:

  1. Go to Search, type troubleshoot, and open Troubleshooting
  2. Under System & security, go to Improve power usage
  3. The troubleshooting wizard will start automatically, and if any issues are detected, it will try to solve them for youwindows 10 power troubleshooter

In case the troubleshooter didn’t find any issues, you’ll have to perform some more complicated actions to make your computer wake up from sleep normally, so try some of the solutions listed below.

Solution 2 – Verify drivers

Just like it’s the case with any major update for Windows 10, some drivers simply might get incompatible with the system, once the Anniversary Update is installed. So, head over to the Device Manager, and make sure all your drivers are installed properly and are compatible with Windows 10 even after the Anniversary Update.

In case you have a bad driver installed on your computer, it could cause various issues, including problems with waking up from sleep. If you’re  not sure how to access the Device Manager and make sure all your drivers are okay, do the following:

  1. Go to Search, type devmg, and open Device Manager
  2. Go through the whole list of installed hardware, and see if none of them has a small yellow exclamation mark besides its icondevice manager update drivers
  3. If some piece of hardware has the exclamation mark, right click on it, and go to Update driver software
  4. Restart your computer, if needed

Some bigger hardware manufacturers have partnerships with Microsoft, and they often offer drivers through Windows Update. So, once you install the Anniversary Update, run Windows Update once again, just to make sure you don’t miss anything.

We highly suggest using specialized software to automate this process. This type of tool will assist you in not compromising your PC by uploading and installing the wrong driver versions; it will provide you with a list of drivers to update, from which you will choose the one that best fits your needs.

In addition, this software is highly capable to manage drivers by installing or updating them automatically, with just a few clicks. The only action you have to do is to select the needed drivers and let the process find them quickly.

There are no security risks and you will actually optimize your PC performance by getting the newest driver devices available for your system.

⇒ Get Outbyte Driver Updater

Solution 3 – Turn off hibernation

One of the most common solutions for problems with waking up from sleep, or turning the computer on normally is disabling hibernation. Once you disable hibernation, your computer will only be able to sleep or shut down, without being caught in some other state. Here’s how to turn off hibernation in Windows 10:

    1. Right click on the Start Menu button, and choose Command Prompt (Admin)
    2. Enter the following line, and press Enter:
      • powercfg /h offturn off hibernation windows 10
    3. Restart your computer

Now your computer is only able to sleep or to be completely turned off, so potential wake up problems could be resolved. But, if even turning off hibernation didn’t solve the problem, try to change how updates are beign delivered to your system. Find instructions for that action below.

 Solution 4 – Change what power buttons do

If your power buttons configuration is wrong, or if the Anniversary Update somehow changed it, there’s a chance that your computer (or laptop) will crash when waking up from sleep. To change the power buttons configuration, you first need to turn hibernation back on (you should do it anyway if turning it off didn’t solve the waking up problem).

To turn hibernation on in Windows 10, follow steps from the previous solution, but instead use the command: powercfg /h on. 

Now that you turned hibernation back on, you can go and change your power buttons configuration. Here’s how to do that:

    1. Open the Settings app
    2. Go to System > Power and Sleep > Additional Power settings
    3. Now, click on ‘Choose what the power buttons do’ from the left pane
    4. Set power configuration to following:
      • When I press the power button: Hibernate
      • When I press the sleep button: Turn Off the Display
      • When I close the Lid: Sleepanniversary update sleep problem power buttons
    5. Now, go back to Additional Power settings (from step 2)
    6. Make sure Balanced is selected under “Plans shown under battery meter,” and click on Change Plans
    7. Now, go to Change advanced power settings
    8. Move down, and expand Power Button & Lid
    9. Make these changes:
      • Lid close: Sleep for both options.
      • Power Button: Hibernate for both options
      • Sleep Button: Turn Off the displayanniversary update sleep problem power buttons
    10. Save all changes, and restart your computer

That should be all for our sleep problem caused by the Anniversary Update for Windows 10. We hope at least some of these solutions helped you to solve this problem, and that you’re now able to use the full potential of Windows 10’s second major update.

In case you have any comments, questions, or suggestions, feel free to let us know in the comments, below.

Full fix: Critical_process_died csrss.exe [BSoD]

Computer errors are a common occurrence, and while certain errors are relatively harmless, others can cause you a lot of problems.

Critical_process_died csrss.exe is a Blue Screen of Death error, and since this error will crash your system every time it appears it’s important to know how to fix it on Windows 10.

The Critical_process_died csrss.exe error can be problematic, and speaking of this error, here are some similar issues reported by the users:

  • Critical_process_died Windows 10 won’t boot, won’t boot in Safe Mode – If your system can’t boot due to this problem, it’s possible that there’s an issue with your hardware. But before you replace your hardware, you might want to try reinstalling your system.
  • Critical_process_died 0x000000ef – Sometimes this error can be followed by an error code. However, you should be able to fix the problem using one of our solutions.
  • Critical_process_died ntoskrnl.exe – Sometimes you might get an error message saying which file caused the problem. If that’s the case, simply do a bit of research and remove the application associated with that file.
  • Critical process died overclock, overheat – Overclocking and overheating can also cause this problem, and in order to fix it, be sure to remove all overclock settings.
  • Critical process died Avast, Kaspersky – Your antivirus can also cause this issue to occur, and to fix the problem, you’ll need to remove or disable your antivirus.

How can I fix the critical_process_died csrss.exe error?

1. Uninstall the problematic software/driver

  1. Press the Windows Key + X, and select Device Manager from the list.
    Critical process died overclock
  2. Locate the driver that you want to remove, right-click it and choose Uninstall.
    Critical process died overheat
  3. If available, check Delete the driver software for this device and click OK.
    Critical process died Kaspersky
  4. After you delete the driver, restart your PC.

Sometimes the critical_process_died csrss.exe error can be caused by certain software or a driver that you have installed.

To fix this issue, users are suggesting to find and remove the problematic software from your PC. Your antivirus is the common cause for these types of errors, therefore be sure to remove it.

In addition to software, certain drivers can cause this issue to appear. Users reported that Intel Rapid Storage Technology is the common cause for this error, therefore be sure to remove it.

2. Use a repair tool

Sometimes, when we don’t know what errors fall on our PC and overwhelm us, we need a powerful repair solution to fix everything effortlessly.


3. Turn off the Sleep mode

  1. Write power settings in the Search bar, and choose the Power & sleep app.
  2. Navigate to Additional power settings in the Related settings category.
  3. Locate your current power plan, and click Change plan settings next to it.
  4. Click Change advanced power settings.
  5. Go to the Sleep section, and disable all the options.
    Critical_process_died Windows 10 won't boot
  6. After you’re done click Apply and OK to save changes.

Few users reported that they fixed the critical_process_died csrss.exe error by disabling the Sleep mode. You only have to follow the above steps to get it fixed in no time.


4. Install the latest updates and drivers

4.1 Install the latest updates

  1. Press Windows Key + I to open the Settings app.
  2. Navigate to the Update & Security section.
  3. Click Check for updates button.

Windows will now download the missing updates and install them as soon as you restart your PC.

The simplest way to fix critical_process_died csrss.exe and other Blue Screen of Death errors is to download and install the latest updates through Windows Update.

Many of these updates fix both hardware and software issues, therefore it’s recommended that you install them.

Windows 10 usually downloads the missing updates automatically, but you can always check for updates manually on your own.

4.2 Install the latest drivers

  1. Press Windows key + X and select Device Manager from the list.
  2. In Device Manager, expand the proper category for the problematic component.
  3. Right-click on the driver you want to update and select Update driver.
  4. Select Search automatically for drivers.
  5. In a short while, Device Manager will download and install the compatible drivers for the hardware component.

In addition to the latest updates, it’s also recommended to install the latest drivers. Outdated drivers are the common cause for these errors, therefore be sure that you update them.

With little research, you can find which driver is causing this error and update it, but if you can’t find the problematic driver we advise you to update all your drivers.

You can also visit your hardware manufacturer’s website and download the latest drivers for your hardware.

We also recommend a professional tool to automatically download all the outdated drivers on your PC. Outbyte Driver Updater is one of the best options available. It can detect and fix damaged drivers, out-of-date drivers, and missing files on your drivers.

5. Update your BIOS

Your BIOS is in charge of most of your hardware components, and if your BIOS is outdated you might get critical_process_died csrss.exe error. To fix this error users suggest updating your BIOS.

To update BIOS you need to visit your motherboard manufacturer’s website and download the latest version of BIOS.

We have to mention that BIOS update is somewhat an advanced and dangerous procedure, therefore use extra caution if you want to avoid causing permanent damage to your PC.

For detailed instructions on how to update your BIOS, be sure to check your motherboard manual.


6. Remove SATA adapter cradle for your SSD

Some users tend to use SATA adapter cradle for their SSD, but few users reported that SATA adapter cradle can cause this error to appear.

According to users, after removing the SATA adapter cradle and connecting the SSD directly to the motherboard the issue was completely resolved.


7. Perform a System Restore

  1. Press the Windows Key + S, and type system restore.
  2. Select Create a restore point from the list of results.
    Critical_process_died 0x000000ef
  3. Click on the System Restore button.
    Critical_process_died ntoskrnl.exe
  4. When System Restore window opens, click Next.
    Critical process died overclock
  5. If available, check Show more restore points option.
  6. Select the restore point you want to revert, and click Next.
    Critical_process_died Windows 10 won't boot
  7. Follow the instructions on the screen to complete the restoration process.

According to users, you might be able to fix this problem by performing System Restore. After the restoration process is finished, check if the problem is still there.


8. Remove problematic applications

In some cases, third-party applications can cause this issue to appear, so you’ll have to remove them.

If this problem started appearing recently, it’s rather likely that a third-party application caused it, so it’s advised to remove any recently installed applications and check if that helps.

Many applications tend to leave leftover files after you remove them, so it might be best that you use uninstaller software.

Third-party uninstallers can detect and remove any lingering files related to your selected app, thus removing it completely from your system.

Most uninstallers can also forcefully remove stubborn software that can’t be removed with Windows settings. This includes malicious or broken apps.

Uninstaller software includes additional optimization features that help you clean your PC. They can detect and remove useless files, broken files, registry entries, temp files, and more.


9. Reinstall Windows 10

  1. Open the Start Menu, click the Power button.
  2. Press and hold the Shift key and choose Restart.
  3. Choose Troubleshoot, select Reset this PC, and Remove everything.
  4. If you’re asked to insert Windows 10 installation media, be sure to do so.
  5. Select Only the drive where Windows is installed, and select Just remove my files.
  6. Click the Reset button to start.
  7. Follow the on-screen instructions to complete the reset.

Once the process is finished, your system will be reinstalled and the problem should be fixed.

According to users, sometimes in order to fix this problem, you need to reset your PC to the default. This process is similar to clean install, so before you perform it, be sure to back up all important files from your system drive.

To perform a reset, you might have to create an installation media, so be sure to do so using Media Creation Tool software.

In case the problem appears after you reset your PC, it’s rather likely that a hardware component is causing this issue.

The most common causes are your RAM and graphics card, so be sure to check them first. If your hardware is the problem, you’ll have to perform a detailed hardware inspection to pinpoint the problem.


Critical_process_died csrss.exe error can cause many problems, but in most cases, you can fix this error by removing the problematic software or by updating your BIOS.

If these solutions don’t work, feel free to try any other fix from this article. Also, leave us your suggestions in the comments section below.


Windows Backup Server Execution Failed (0x80080005) [Fixed]

The Windows Backup Server execution failed (0x80080005) error is one that can pop up for some users attempting to back up data or set up restore points.

The full error message states: The backup application could not start due to an internal error. Server execution failed (0x80080005).

As a consequence, users can’t back up the required data or set up a restore point. When the Windows Backup service isn’t starting, there must be a problem with the Volume Shadow Copy.

Error 0x80080005 can often occur due to a PC not having full control of the System Information Volume folder. So, in this article, we’ll show you how to check and tweak that information.

How can I fix a Server Execution Failed (0x80080005) error?

1. Restart the Volume Shadow Copy service

  1. Input Command Prompt in the home screen search box.
  2. Right-click the program and select Run as administrator.
  3. Then enter this command and press Enter: net stop sdrsvc net stop sdrsvc cmd
  4. To restart the Volume Shadow Copy service, input net start sdrsvc

2. Use an alternative backup tool

If you think working with Command Prompt is too complicated or in case you need a backup solution on the spot, try using a dedicated backup tool.

For example, Acronis Cyber Backup is a backupper software specifically created to simplify and automate the process.

It lets you pick where you want to save your data while keeping it secure and providing powerful encryption.

Moreover, it includes additional features such as antivirus protection and system restore function to similar hardware or even dissimilar hardware and virtual environments.

Acronis Cyber Backup

Back up your files with ease and increased safety with the Acronis software.
Free Trial Visit Website

3. Take ownership of the System Volume Information folder

  1. First, you need to log in to an admin account.
  2. If you have a built-in admin account, type this in Command Prompt and press Enter: net user administrator /active:yes
  3. Alternatively, convert a standard current account into an admin one from Control Panel > Change account type.
  4. Then, press Win key + R to open the Run accessory.
  5. Enter cmd in Run’s text box.
  6. Press the Ctrl + Shift + Enter hotkey to open an elevated Command Prompt.
  7. Input the following and press Enter to stop the Volume Shadow Copy service: net stop sdrsvc
  8. Then type the following in the Prompt, and press Enter: takeown /F "C:\System Volume Information" /A
  9. The Prompt window should then say, System Volume Information now owned by the administrator’s group.takeown /F "C:System Volume Information cmd
  10. Optional: Delete the contents of the folder after taking ownership with this line + Enter: del "C:\System Volume Information\Windows\ImageBackupCatalog
  11. Restart the System Volume Information service with this command: net start sdrsvcnet start SDRSVC cmd
  12. Exit the Command Prompt, and then restart the desktop or laptop.
  13. Thereafter, try to start Windows Backup within an admin account.

4. Manually set all permissions in System Volume Information to SYSTEM

  1. Open File Explorer and navigate to the root directory of the drive where the System Volume Information folder is located (usually C:).
  2. Right-click on the System Volume Information folder and select Properties.
  3. Go to the Security tab and click on Advanced.
  4. Click on Change Permissions.
  5. Select SYSTEM and click Edit.
  6. Check the box for Full Control under the Allow column.
  7. Click Apply and then OK to save the changes.
  8. Repeat these steps for each item inside the System Volume Information folder.

5. Delete specific registry keys related to Windows Backup

  1. Press Win + R to open the Run dialog box.
  2. Type regedit and press Enter to open the Registry Editor.
  3. Navigate to HKEY_LOCAL_MACHINE\SOFTWARE\Microsoft\Windows\CurrentVersion\WindowsBackup
  4. Right-click on the subkeys named ScheduleParams and select Delete.
  5. Confirm the deletion if prompted.
  6. Close the Registry Editor and restart your computer.

6. Grant Full Control Over the System Volume Information Folder:

  1. Open the Start Menu, search for cmd, and click on Run as administrator.
  2. Type the following command, replacing X with the letter corresponding to the partition or your computer’s hard drive that Windows is installed on (for most people, this is C:), and press Enter: takeown /f X:\System Volume Information /A /R
  3. Next, type the following command to grant full control over the folder: icacls "X:\System Volume Information" /grant:r "SYSTEM:(OI)(CI)F" /T
  4. Wait for the command to be fully executed, and once it’s been executed, close the elevated Command Prompt.
  5. Restart your computer and try creating a backup and/or a system restore point to see whether the problem has been fixed.

Those are some of the more probable resolutions for the Server execution failed (0x80080005) error.

Taking ownership of the System Volume Information folder is the most widely confirmed resolution for kick-starting the Windows Backup service. However, the other resolutions might also fix the issue for some users.

Let us know in the comments which one worked for you.

5 ways to fix Forza Horizon 5 not downloading

We’re pretty sure that, by now, everyone has heard about Playground Games’ latest title, which is the awesome Forza Horizon 5.

Although a pretty stable game, considering not many major problems affected it, besides the save issue, new information surfaces on forums and social media platforms about the game not downloading.

And even though this is not such a widespread problem, some PC gamers are reporting issues that render them unable to download and install Forza Horizon.

However, if you did manage to install the game and it keeps crashing for you, our article will help you get to the bottom of it.

What can I do to fix Forza Horizon 5 not downloading?

Many of the players that did report their Forza Horizon 5 not downloading, or simply redownloading for no reason, say that they encountered the 0x80073CF9 error code.

But, as annoying as this issue can be, we have some tips for you that will help you move past this nuisance and enjoy your time racing with your friends.

There are quite a few ways to go about solving this problem, but we are about to show you five methods that you can easily do yourself and save you a major headache.

1. Check your internet connection

Before we try other methods, we’re going to advise you to run a thorough check on your internet connection and test out the speed.

This is actually not that strange if we are talking about intermittent internet connections, but the problem is fixable.

If you are in the same situation, you can fix Network and Internet connection problems on your Windows device by using the Complete Internet Repair Tool or the Network Reset feature.

Another way to go about it is flushing the DNS, because if the DNS settings are corrupted, it can prevent certain applications and your system from making contact with the internet.

2. Check the Date and Time on your PC

Keep in mind that, if your PC’s clock is out of sync you may encounter this issue of Forza Horizon not downloading or keeps redownloading on your Windows PC.

  1. Press Windows Key + I to bring up the Settings menu.
  2. Select the Time & language tab.time and date 1
  3. Click on Date & time.time and date 2
  4. Make sure that Set time automatically is turned on.date and time 3
  5. Press the Sync now button.date and time 4

3. Relog in Microsoft Store

  1. Open the Microsoft Store.
  2. Click on the Account button.relog store 1
  3. Click the Sign out button.relog store 2
  4. Click on the Sign in button.relog store 3
  5. Select the desired acount and press the Continue button.relog store 4

4. Change download location

Have you checked your disk space lately? The issue could be happening because the game doesn’t have enough space to download in the location where it’s supposed to go.

However, you can easily change this location by accessing the Settings menu and modifying where new content goes when downloaded,

  1. Press Windows Key+ I to bring up the Settings menu.
  2. Select the System tab.change storage 1
  3. Click on the Storage button.change storage 2
  4. Click on Advanced storage settings.change storage 3
  5. Select Where new content is saved.change storage 4
  6. Change the location where new content goes when downloaded.change storage 5

5. Create a new user account

The last step in today’s list is actually trying to download the game from a different account than the one you are signed in with on your PC.

We’re about to show you how to create a different account if you don’t already have one set up. However, keep in mind that the new user must be created using another Microsoft account.

  1. Press Windows Key+ I to bring up the Settings menu.
  2. Select the Accounts tab.change account 1
  3. Click on the Family & other users button.change account 2
  4. Click the Add account button and go through the sign in process.change account 3

These are the solutions that we’ve prepared for you, in hopes that you will resolve this issue and manage to install Forza Horizon 5 on your PC.

Was this article helpful to you? Let us know in the comments section below.

Posted in Fix

How to get your PC performing like new with CCleaner

You have probably noticed that in time, after installing a lot of apps, your PC starts to run slower, and your frustration grows bigger when even the simplest tasks take seconds to perform.

Don’t worry, you’re not alone and there are plenty of solutions to get rid of this problem. However, it takes time to clean all the junk and uninstall all the unwanted apps.

That’s why in this article we will explain how to get your computer performing like new by using an automatic solution called CCleaner.

How can CCleaner help you make your PC run faster?

First of all, CCleaner is a free PC optimizer app that comes with a lot of tools that will clean your PC and help it run faster.

You can use the free version forever but after you install it, you will be able to trial all the features from the paid Pro version for 14 days.

And you will probably get used to them because you will benefit from tools to update all your apps and drivers with a single click and a lot more.

For instance, a Pro feature of CCleaner is to monitor any junk files in real-time and clean your browser automatically after you close it, so it protects your privacy by deleting the tracking files and browsing data.

And by clearing your junk files from all the places that no other software can reach, you will start noticing that your PC runs again like new.

How can I use CCleaner to get my PC performing like new?

  1. Go to the CCleaner dedicated website and hit the Download Free Version button.
  2. Then, click on the Free Download button. You can also opt for the Free Trial button if you want to test the full features of the Pro version for 14 days (no credit card required) but you can also do that from the app.
  3. You will get an executable file. Once the app has downloaded, open it and follow the installation instructions.
  4. When installation has finished, hit the Start CCleaner button.
  5. It’s important to mention that you can switch to the Professional Free Trial version by clicking on Options, then selecting the Start Free Trial button.
  6. Let’s stay with the Free version. Click the Health Check option from the left and then choose the Start button from the main window.
  7. The tool will need to close some apps in order to analyze them too so you can click the Close & Analyze button or to close them yourself to make sure you saved any work you were performing. If you uncheck their boxes, CCleaner won’t be able to analyze them at this moment.
  8. After a short while, you will receive a report with the problems that need to be fixed. You’ll need the Pro version (or trial) for two features: speeding up your PC by disabling startup apps, and keeping it secure by automatically updating your applications.
  9. After clicking on the Make it better button, CCleaner will start performing the automatic tasks to clean your PC and the finished report looks a lot better. For us, it deleted more than 5000 trackers and more than 1 GB of junk that was taking so much needed space on our drive.

After this procedure, you may already notice that your PC is running smoother, but you can do a lot more with CCleaner so keep reading.

Other CCleaner important features and tools

The automatic cleaning feature from Health Check will do a perfect and fast job on making your PC run faster but if you click on the Custom Clean tab from the left, you will discover plenty of other options.

With this option, you can manually set up the cleaning scheme for most of your Windows or third-party apps, and even delete system unused files like Event logs and others.

And after you’ve made your selection, click on the Analyze button. You will get a report, and you will be able to get rid of the unwanted files by hitting the Run Cleaner button.

You can set custom cleaning rules for Windows and third-party apps

Another great tool is the Driver Updater. Just click on it from the left side menu, hit the Scan button to let CCleaner identify them.

Now, if you want to update all of them automatically, you will need a Pro license. Otherwise, you can only see what are the drivers that you need to update.

Update your drivers automatically with only 3 clicks

But that’s not all! You can also fix Registry problems by clicking on the feature from the menu. Then, you just click the Scan for Issues button and the Review selected Issues button.

As this is a more delicate procedure, when you hit the Review selected Issues button you will be prompted to create a Registry backup just in case.

CCleaner helps you easily fix registry issues

After you create the backup, CCleaner will go through all the modifications with you one by one, so you can decide whether to perform them or not.

You also have a Fix All Selected Issues button if you don’t want to spend more time on this than you should.

That’s it! Now you know how to get your PC performing like new by using CCleaner and we hope that it now runs a lot faster.

Remember, this is an optimizer app, not a security solution so it won’t replace your antivirus but as you’ve seen, it helps you protect your privacy by removing trackers and browsing history.

CCleaner is also on our list including the best DLL repair software tools so if you have that problem, you know how to solve it.

Have you tried CCleaner yet? Tell us all about your experience in the comments section below.

How to fix corrupted Kaspersky databases

Does Kaspersky Antivirus give you an error message saying Databases are corrupted whenever you open up this software? You are not alone. 

A wide number of users have reported having the same issue on their PCs, and it seems that this will prevent the application from working properly.

In this article, we will explore some of the best methods to fix this issue, so let’s get started.

Why does the corrupted Kaspersky databases error appears?

In almost all cases, this issue will occur if your Kaspersky installation is damaged. This can happen for several reasons, but the most likely is a bad update.

After removing the update that caused the issue, the problem should be resolved.

How corrupted Kaspersky databases error affects my PC?

If this error appears, Kaspersky Antivirus can’t update its antivirus definitions. This can be a problem since newer threats could be to infect your PC and cause damage.

In the worst-case scenario, your antivirus won’t work at all, thus leaving your PC completely vulnerable to all malware.

How can I fix corrupted databases errors in Kaspersky?

1. Update your Kaspersky databases

  1. Open Kaspersky.
  2. Click on Database Update.
  3. Now click the Run update button.
  4. Wait while the updates are being downloaded.
  5. If the process is completed successfully, then the Kaspersky window will turn green. That means that the error is resolved.

2. Restart Kaspersky

  1. Right-click on the Kaspersky icon in your Taskbar and select Exit.

  2. Run Kaspersky by double-clicking the icon on the desktop.
  3. Check to see if the problem persists.

3. Rollback the update

  1. Start Kaspersky.
  2. Navigate to Protection and Control and select Tasks.
  3. Right-click the Update task on the list and choose Roll back update.

4. Re-install Kaspersky

  1. Press Windows key + X keys on your keyboard and select Apps and features.
  2. Search the list for Kaspersky Antivirus and Kaspersky Secure Connection.
  3. Select each of them, and then click on Uninstall.
  4. Follow the on-screen instructions to completely remove Kaspersky Antivirus from your PC.
  5. Visit the Official Kaspersky website, and download your favorite version.
  6. Install Kaspersky again, and check to see if the problem persists.

To ensure that this methods works, you’re advised to remove software leftovers as well since they can cause problems once you install the application again.

For this, it is recommended to use dedicated uninstaller software. These utilities can detect all Kaspersky files, such as registry entries, and delete them in just a few minutes.

They are safe to use and proven to save you a lot of time, as you will not have to manually look through each and every folder on your PC.

Is Kaspersky a good antivirus?

Yes, Kaspersky is a great antivirus solution that will provide users with high-grade protection against all types of malware.

The antivirus works great, but few users reported that Kaspersky is blocking VPN, however, that can be easily fixed.

Is is safe to disable Kaspersky?

If you’re on Windows 10 or newer, you already have a built-in antivirus in form of Windows Defender. Although it’s not as advanced as Kaspersky or any other antivirus, it still does a great job of keeping you safe.

So even if you disable or remove third-party antivirus, you’ll still remain protected thanks to the built-in security software.

In this article, we explored some of the best troubleshooting methods for the Corrupted databases error in Kaspersky. We hope these methods solved your issue.

If you’re still having this issue, we advise you to check our guide on how to fix fatal errors in Kaspersky for more information.

Please feel free to let us know how well these solutions worked for you, by using the comments section below.

Microsoft Released The Pantone Color Of The Year 2023 Theme Pack

If you were looking to add a bit more color and flavor to your Windows 11 powered device, this is your chance to do so.

Microsoft has just released a new theme pack that you will surely enjoy, called Pantone Color of the Year 2022, for both Windows 10 and Windows 11 users.

This new and flavorful Windows wallpaper/theme pack contains four high-quality wallpapers, and they are all free.

Four new Windows 10/11 themes are available for free

It’s safe to say that we’ve come a long way since the first Windows 11 wallpaper ever created, back when the new operating system was no more than a rumor.

And we’ve already seen a lot of variations for the ones that the OS already has, designed and modified by some of the more tech-savvy and talented users out there

However, now, you can now download another new theme pack for free from the Microsoft Store, if you wanted to switch things up a bit and have more options.

It’s not much, but the colors chosen for this specific pack will surely be to everyone’s liking. And, once you’ve downloaded the pack, experiencing these new themes will be really easy.

You just have to switch between them as you regularly do, by right-clicking on the desktop and selecting Personalize.

You can access the same section by opening the Settings menu and clicking on the Personalization tab.

What are your feelings about these four new themes given away for free by Microsoft? Share your thoughts with us in the comments section below.

Native DirectX 12 video encoding API is coming to Windows 11

It’s safe to say that we can all agree on the fact that, as a set of multimedia solutions for the Windows OS, DirectX 12 is quite successful in the field of games and video.

Before this even existed, the Redmond-based tech giant used to provide an API for GPU-accelerated video decoding processing and motion estimation.

However, through a DirectX developer blog post created yesterday, Microsoft detailed the newly introduced DirectX 12 video encoding API for Windows 11.

Windows 11 is getting native DirectX 12 video encoding API

Basically, the Video Encode API actually allows video engines to make use of the GPU in order to perform video encoding in line with the standards set by DirectX 12.

Thus, third-party developers can now use this feature in their applications as well. Also, keep in mind that Vulkan already includes APIs for video encoding and decoding for H264 and H265 codecs.

Even though the current DX12 video encoder API on the Windows 11 platform only supports the H264/HEVC format, Microsoft has some recommendations.

To be more specific, the tech giant stated that developers should understand the corresponding codecs and driver tool support in advance.

In addition to the video encoding API included in Windows 11 by default, interested developers can also obtain it through the DX12 Agility Software Development Kit (SDK version number 1.70.10-preview or higher).

The detailed API interfaces and structures definition can be found here. For finding more design details and detailed documentation for the API, please refer to this document.

Video Encode API supported platforms 

The Video Encode API is included as part of Windows 11 and can also be found in the DirectX 12 Agility SDK (version 1.700.10-preview or newer).

The list below contains the hardware platforms that currently have support for Video Encode for both H264 and HEVC codecs and their minimum driver version requirements. 

VendorSupported platformsMinimum video driver version
AMDRadeon RX 5000 series or greater than Ryzen 2xxxx series or greaterIn development – ETA Q2 ‘2022
IntelTiger LakeIce LakeAlder Lake (from early 2022)v30.0.100.9955
NVIDIAGeForce GTX 10xx and above GeForce RTX 20xx and above Quadro RTXNVIDIA RTXv471.41

Excited about the new addition coming to Windows 11? Share your thoughts with us in the comments section below.

Zorin OS vs Windows 11: Which is Better?

Ever since Windows 11 came out, at the beginning of October, a lot of us have been contemplating upgrading to the new operating system.

Whether we’re just too used to Windows 10, afraid of the new, or just don’t have compatible hardware to run it, many haven’t taken this leap yet.

However, if you find yourself in the third category, which means that your device is incompatible with Microsoft’s new OS, but are looking for a new experience, then we have something neat to show you.

Can’t run Windows 11? Take Zorin OS 16 Lite out for a spin

So, if you want something new and feel like switching to Linux but don’t know which operating system to choose for your old PC, we might be able to help you with that.

Zorin OS 16 Lite, which was actually released today, should be an excellent Linux-based Windows 11 alternative for aging devices.

Although its distribution is based on Ubuntu 20.04.3 LTS and uses Xfce 4.16 as its desktop environment, Zorin is actually going to feel rather familiar to Windows users.

It comes with pre-installed software, which makes it great for beginners, who can start using it right after installation, and, it even offers a simple way to install and run Windows programs.

And it even looks almost exactly like Windows 11, making this transition even smoother than you might actually expect.

Developers stated that Zorin OS 16 has been refreshed with a revamped and refined appearance out of the box.

They’ve also introduced a new, more polished default theme that’s easier on the eyes. You’ll find detailed touches and delightful animations throughout the system that elevate your computing experience.

The new OS comes with new artwork and desktop wallpapers, greeting you with a dynamic wallpaper that changes based on the time of the day.

Zorin OS now comes with a built-in database that detects popular Windows installer files, so that the system can guide you through the installation process. If the system recognizes the .exe or .msi file you double-clicked on, it will automatically suggest you to install the app or game (or its closest alternative) from the recommended source, whether it’s a native package in the Software store or a Linux-optimized installer for a PC game in Lutris or Steam. It also provides you with a simple and informed option to install Windows App Support if you wish to run the Windows version of the app or game.

The Zorin OS 16 desktop is a lot more customizable than the Windows 11 one, thanks to new settings for the taskbar and panel. If you simply right-click on the taskbar to access the Taskbar Settings, you can:

  • Move the panel to the left or right side of the screen, in addition to the top and bottom
  • Set the panel’s transparency and size
  • Display the panel on multiple monitors
  • Show/hide and move the panel’s buttons and indicators
  • Choose to only display taskbar icons for apps running on the current workspace or monitor
  • Change the behavior when clicking or scrolling on app icons in the taskbar
  • Show/hide window previews and tooltips when hovering over taskbar app icons
  • Automatically show/hide the panel intelligently

Some of the other improvements that developers thought about when designing the Zorin OS 16 are as follows:

  • Fractional scaling for high-resolution displays
  • Star files for easy access in the Files app
  • Better fingerprint reader support with simpler setup
  • Unread message badges and progress bars in taskbar icons
  • Display a QR code to easily connect your devices to your computer’s Wi-Fi hotspot
  • The Settings app now has a refreshed category layout that’s easier to navigate
  • Easily create app folders in the app grid by dragging apps onto each other (Touch, macOS-like, and Ubuntu-like desktop layouts only)
  • Switched to the new Photos app for simpler photo management
  • Disabled built-in tracking and telemetry in Firefox for more privacy-respecting web browsing
  • Flicker-free boot experience (on supported hardware)
  • Improved support for newer hardware
  • Based on Ubuntu 20.04 LTS

So, if you already gave up on the idea of trying Windows 11 for the moment, you can go ahead and give Zorin OS 16 a try, see if you can get used to it.

If you want to download Zorin OS 16 Lite, you can do so on their official website, which is pretty user-friendly so you shouldn’t have any trouble finding what you are after.

A lot of people have already embraced the new experienced, as the new operating system already celebrated one million downloads recently.

We’re thrilled to say that [Zorin OS 16] it’s been downloaded over 1 million times. We’ve been overwhelmed by the terrific feedback we’ve heard from users around the world and the press. Thank you all for helping to make this the biggest release of Zorin OS ever,” said the devs.

Would you be willing to try this OS instead of Windows 11? Let us know in the comments section below.

The 4 best 4K webcams for your Windows 10/11 laptop or PC

Webcams are miniature (sometimes hidden) cameras attached to computer systems. These cameras are designed to provide optimized audio-visual during remote conversations or gaming.

Although recently developed computer systems are equipped with built-in HD webcams, you can get a better resolution in 4K webcams. Hence, we’ve compiled a list of the best 4K webcams currently available.

While no computer system can boast of a built-in 4K webcam, any standard PC (Windows, Linux, Mac, and so on) can enjoy the 4K experience simply by connecting an external 4K webcam to their computer.

With this, you get the best live streaming experience, as well as well-detailed pictures/videos during live chats/streaming.

One obvious stumbling block, however, is identifying which of the available 4K webcams is suitable for you, and after this topic is covered, you can move on to how you can edit your 4k videos optimally.

To address this issue, we bring you reviews on five of the best 4K webcams. Take a closer look and make a choice as soon as possible.

How we chose the best 4K USB camera

To create this useful list, our panel of expert testers with combined experience for 15 years in this domain have worked around the clock and compare products on a variety of levels.

The devices were tested to ensure that the requirements are being met, especially considering the quality of the image and overall clarity.

The devices were tested from a large batch of possible choices and were then compared with each other to provide you with this simplified and efficient list.

Tip icon Tip
Editor’s tip:

To further clarify the elements that were considered by our panel of expert testers, and also allow you to make an informed decision, here is a small list of elements that need to be analyzed:

➡ Output/input resolution
➡ Frames-per-second rate
➡ Operating system compatibility
➡ Type of cable connection
➡ Microphone quality

If you take into consideration all the elements presented above, then you will surely make the right decision when choosing a good 4K webcam.

What to consider when choosing the best 4K webcam?

Output/input resolution

The values of this element will dictate the quality of the streaming experience, or how crisp the image will look while communicating with your co-workers, family, or friends through applications like Skype, Zoom, Google Meet, etc.

To qualify in the 4K range, the resolution of your camera will need to be above the value of 3840 x 2160 px. Anything lower than that, and it would classify as being Full HD only.

Frames-per-second rate

No matter what the resolution of your output/input is, if the rate of the number of frames that it can process in one second is not high enough, then the images will either be blurred, or the smoothness of the video stream will be lagging.

This of course influences your online interaction considerably, and it is an important factor when choosing a good 4K-quality camera.

OS compatibility

As there is no use for you to invest in a 4K camera that doesn’t work with your system, it is also extremely important to consider this element.

While most cameras should work with the most common devices that run Windows or macOS, there might be some exceptions, so keep an eye out for this detail.

Type of cable connection

The way you will be able to connect your newly-bought camera to your PC is also another important factor, and missing out on this idea can cause you a lot of problems.

Because we don’t want for you to be required to send your device back to the seller and replace it with a compatible one, this guide includes information about the type of connection available.

Microphone quality

Even though having a built-in microphone is not necessarily important, it does simplify the entire process considerably, as you won’t need to set different input and output settings when preparing for an online meeting.

Even though some cameras come with a built-in microphone or even multiple microphones, the quality of these elements is of great importance when it comes to how you’re going to be able to use your device.

Tip icon Tip
Buyer’s tips:

➡ If you want to be sure that you have the best 4K webcam from this list, without compromising at any level, then the WyreStorm Focus 210 is the top recommendation.

➡ To ensure that you get the best video quality, and at the same time do it in style, both the MOKOSE 4K and the Logitech Brio Ultra HD webcams are some good choices.

These two options offer a full 4K experience, while also ensuring that the setup is quick and efficient, and you won’t have any problems with compatibility either.

➡ As the resolution is the most important factor when choosing a good webcam, and considering all the examples in this guide cover that area, no matter which one you choose, you will be happy with the result.

➡ If you are very interested in how good the microphone is on your newly-acquired camera, the first two options from this list will surely keep you satisfied.

➡ If you want to also have noise-canceling features built into your 4K camera, then going for the DEPSTECH 4K Webcam option is recommended.

➡ In the case that you want to ensure that nobody will be able to snoop around and activate your camera remotely, the NexiGo N950 Pro is the product to choose.

This device includes a privacy feature that will block the view of the webcam when not in use.

Now that we understand which options fit with which needs, let’s dive into the actual list and explore each of the products further.

MOKOSE 4K

  • Large 1/1.8 inches CMOS sensor
  • 3840 x 2160 @30fps output
  • 3 meters long USB cable
  • Support for Windows, OS X, Linux
  • Can be used in combination with other webcams on the same system
  • Design might not fit everybody's concept of a webcam

The MOKOSE 4K USB camera is a powerful and versatile little device that has a 6-12mm manual lens with various focal settings.

This device uses a 1/1.8 inches CMOS image sensor to capture truly clear and crisp images that covers the entire spectrum of color without any issues.

The large sensor also ensures that no matter where you use it, whether it is outside or inside, the sensor will be able to capture enough light to optimize the image and offer you crystal-clear quality.

To add to the versatility of this camera, the new firmware update also offers you custom settings like brightness, contrast, hue, exposure, etc. This takes the powerful and beautifully designed MOKOSE 4K webcam closer to having a professional camera with a variety of calibration settings for your image.

Depending on the requirements you have you can choose from a variety of resolutions: 3840 x 2160@30fps , 2560 x 1440@30fps, 2048 x 1536@30fps, 1920 x 1080@30fps, 1280 x 720@30fps, 640 x 480@30fps.

The USB cable that powers and connects your PC or laptop to the webcam is 3 meters long and supports USB 3.0 and 2.0 interfaces.

This device has a wide range of compatibility, working without issues on a variety of OSs, like Linux, OS X, Windows, etc.

The camera can also work in tandem with other webcams to improve the versatility, thus offering almost unlimited recording capability from the same device.


Logitech Brio Ultra HD webcam

  • IR facial recognition
  • Background noise filter
  • RightLight 3 technology
  • 5x HD Zoom
  • No software support

Logitech is arguably the most prominent webcam manufacturer in the world. And it comfortably sits at the top of our list, with its superb Brio 4K webcam, which is widely regarded as one of the most advanced webcams on the market.

Logitech Brio Ultra HD Webcam incorporates some of the best obtainable specs/features of any webcam.

It has a 5x HD Zoom capacity, multiple resolutions (2160 pixel, 1080p, and 720p), Windows Hello (for Windows computers), and more.

The multiple resolution support allows you to change the webcam’s resolution as you see fit. For instance, the 2160p (4K) resolution provides a detailed image of your face during a live chat. It is up to you to decide if you want to use this resolution or simply change it to a smaller one (1080p or 720p).   You have the option to choose from 30/60fps, which makes this an incredibly useful device.

Another noteworthy feature of Logitech Brio 4K is the RightLight 3 technology, which uses an advanced AI system to automatically modify videos/pictures to suit every lighting condition (gloomy or flashy).

Therefore, even in a low-light condition, you can still get a near-perfect video recording or streaming experience.

To add to the previously mentioned features, the Brio allows you to view videos/pictures in three viewing angles – 90 0, 78 0, and 65 0. This provides you with a wide diagonal, horizontal, and vertical view.


NexiGo N950 Pro

  • Sony 8.5MP sensor
  • 3840 x 2160 resolution
  • 5X digital zoom with adjustable field of view
  • Built-in stereo mics
  • Privacy cover included
  • The microphone is not very high quality

The NexiGo N950 Pro is another very powerful and versatile webcam that offers 4K quality video streaming, making it another important contender in this list.

This slick-looking device can easily be clipped on the edge of your monitor or laptop screen, and the slim design ensures that it won’t bother you while working. while also offering you crisp image quality in any Zoom, Skype, or Google Meet session.

To make your video conference experience even better, the N950 Pro also offers adaptive lighting technology, which automatically optimizes the image in your call to make it bright and clear.

At the same time, the handy webcam cover ensures that no third party would be able to remotely activate the webcam while you’re not using it. This enables you peace of mind, and in return, gives you the capability to focus on other elements of your day other than ensuring your privacy is protected.

The Sony 8.5MP sensor used in the building of this handy webcam offers a 3840 x 2160 resolution at 30 Fps, thus you will never need to worry about image quality either.

Another handy feature is the 5X digital zoom option, which not only zooms in while maintaining the same resolution but also enables you to modify the field of view, to choose if you want a narrow or a wide focus.

Being compatible with both USB-A and USB-C input ports, enables you to use the webcam with a variety of compatible devices, and the built-in stereo microphones ensure that, besides your conference call members seeing you in crystal clear quality, they will also hear you accordingly.


DEPSTECH 4K Webcam

  • 1/3 inches Sony optical sensor
  • 3840 x 2160 resolution with 30 fps
  • Dual built-in mic with noise-cancelling
  • Compatible with both macOS and Windows devices
  • Tripod included
  • Narrow width coverage but perfect for one person

The 4K webcam from DEPSTECH is another viable option to consider when trying to choose a reliable and good device of this type.

Even though this is not as flashy as the models previously discussed in this list, this doesn’t mean that it is not capable of some great feats.

The 4K webcam has an 8MP  1/3 inches Sony optical sensor with CMOS that renders images at 3840 x 2160 resolution with 30 frames per second.

To ensure that you can use it in a variety of ways, the device comes packed with a tripod, and also the capability to be attached to your monitor or laptop screen with a clip.

This device from DEPSTECH has a built-in dual microphone with noise-canceling technology, ensuring that every sound captured will be crystal clear, and at the same time will considerably reduce ambient noise.

All you need to do to start using this device is to connect the cable to your PC and start your conferencing or recording software. There are no drivers to be installed, and the easy clip-on system ensures you won’t waste any time to set it up either.

Works out of the box with a variety of OSs, including Windows and macOS, and perfectly compatible with applications like Skype, Zoom, OBS, FaceTime, YouTube, etc.


Bottom runners

Besides the 4K webcam options presented above, there are a few other products that caught our eye but haven’t proven to be real contenders to the options that made the list.

Nonetheless, these options are worth noting as well, so here is a small list containing them:

➡ Looca 4K HD webcam

Offering a 3840×2160 resolution with automatic low light correction features, this device makes a good choice in case you don’t want the best of the best options.

Another bonus is the Play and Pause function which allows you to stop the camera while working with just a click of a button.

➡ IPEVO V4K UHD

A great UHD webcam with a CMOS image sensor, great noise reduction features, and comes with a good presentation tool, the IPEVO V4K camera can do the trick for some users.

Added to this, it comes with a multi-jointed stand which allows you to set it in a variety of ways.

➡ XPCAM 4K

The XPCAM 4K comes bundled with a tripod, and also allows you to use the handy privacy cover to block any unwanted attempts for people to remotely connect to your device.

Also including a Pause and Play button, this device offers a compact folding design for you to easily carry it anywhere you go.


In this article, we have outlined four of the best 4K webcams for you that offer a variety of useful features. Choosing the one that fits your needs will be a lot easier while considering all the elements described in this guide.

Let us know which one is your final pick in the comments area below.

Microsoft and Adobe partner to more deeply integrate PDFs, e-signatures into Microsoft 365

Adobe has announced the next step in its partnership with Microsoft. The two technology giants are now exploring new ways to meet their customer’s needs during the new shift to hybrid work.

Under the next steps of this partnership, Adobe hopes to find unique ways to integrate both its and Microsoft’s core productivity tools. This involves the use of embedding Adobe’s software like PDF, e-Signature, and document automation capabilities in Microsoft 365.

“We’re expanding our partnership with Adobe to solve the productivity paradox and make digital work and life as creative, collaborative, and efficient as possible. Millions of joint Adobe and Microsoft customers will have easy access to the best digital document experiences wherever they are, changing the game for modern productivity and the future of work.,” said Jared Spataro, corporate vice president, Microsoft.

More information on the partnership and a look at existing Microsoft and Adobe solutions are available on Adobe’s website. Note that Adobe Sign is Microsoft’s preferred e-signature solution, and already integrates with Microsoft applications like Teams, Dynamics, and more.

Microsoft will overhaul hiring processes after DOJ investigates discrimination cases

After Microsoft faced charges that it was discriminating against job applicants who were not U.S. citizens, a settlement has finally been reached in the U.S. Justice Department. Microsoft will now overhaul some of its hiring processes, ensuring that it properly follows all American laws (via NBC.)

At the center of the issue is the fact that Microsoft asked six lawful permanent residents to show their permanent resident cards to show permission to work without employer sponsorship. This apparently violates U.S. law, as Microsoft asked these applicants for unnecessary immigration documents when not required.  Microsoft issued the following statement on the matter.

We hire and confirm employment eligibility for tens of thousands of people, and a handful were mistakenly asked for extra information or documentation. We appreciate we need to prevent these mistakes and have worked to address these issues and improve our internal processes as part of our commitment to compliance.

Even with this situation, Microsoft has been a champion for diversity in the workplace. It has a website dedicated to global diversity and inclusion, and a report is available to track the company’s progress in increasing diversity and fostering inclusion. When former U.S. President Donald J Trump attempted to end DACA, an Obama-era United States government program known for protecting hundreds of thousands of young undocumented immigrants known as DREAMERS, Microsoft was highly against the move.

Spotify’s free Halo Infinite audio series adds to the Xbox game’s lore

An official Halo Infinite audio drama series went live just a few hours before the launch of the video game’s single-player Campaign/story content on Xbox consoles and Windows PCs.

The audio series, Halo Infinite: Memory Agent, is exclusive to the Spotify audio platform and can be listened to for free via any of the official Spotify apps or via the Spotify website in a web browser. The series’ story is a companion to the one that unfolds in the Halo Infinite video game and follows a secret agent as she attempts to track down the game’s protagonist, Master Chief.

Here’s the official series description for Halo Infinite: Memory Agent:

A lone secret agent from the Office of Naval Intelligence is sent on a mission to relay critical intel to the Master Chief. There’s just one catch—every seven hours, her memory resets. Now she must make a perilous journey through closely monitored space, desperate to learn whatever she can about her own past as well as that of the Master Chief. Through the help of an AI companion and battlefield reports of others who have encountered the legendary hero, she pieces together just how important her task may be.

Each episode of Halo Infinite: Memory Agent runs for around 10 minutes. The whole series can be listened to in full in around an hour.

The Halo Infinite video game has garnered a lot of positive reactions from players and media though its Multiplayer and Campaign haven’t been without criticism. Our Laurent Giret recently reviewed the game and, while he had a lot of good things to say about it, also criticised it for launching without some much-needed content.

Want more Halo news? Make sure to follow us on Facebook and Twitter.

Fix: Class Not Registered Chrome Error on Windows 10/11

Google Chrome is the most popular web browser on the market with millions of active users. Despite its popularity, Google Chrome still has some issues, and many users reported Class not registered error message while using Chrome.

This error can prevent you from starting Chrome, and today we’re going to show you how to solve this problem on Windows 10.

Class not registered Chrome.exe error, how to fix it on Windows 10?

1. Completely remove Google Chrome and reinstall it

If you’re having this problem, you might want to try reinstalling Google Chrome. In most cases, you need to completely remove Chrome, and the best way to do that is to use Revo Uninstaller or any other similar tool.

Using this tool you’ll remove Chrome along with its registry entries and associated files. After removing Chrome completely, reinstall it and check if the problem still appears.

2. Delete Chrome registry values

To remove the problematic values, do the following:

  1. Press Windows Key + R and enter regedit. Click OK or press Enter.
  2. Optional: Before making any changes to the registry it’s always a good idea to create a backup. To do that, click on File > Export.

    Set All as Export range, choose a safe location and save name and click on Save button. If any problems occur after modifying the registry, you can always run this file to restore it to its previous state.
  3. Now you need to delete the following keys from your registry:
    • HKEY_CLASSES_ROOTChrome
    • HKEY_LOCAL_MACHINESoftwareClassesChrome
    • HKEY_CURRENT_USERSoftwareClassesChrome
    • HKEY_LOCAL_MACHINESoftwareClassesChromeHTMLshellopencommandDelegateExecute
    • HKEY_CURRENT_USERSoftwareClassesChromeHTMLshellopencommandDelegateExecute

    To do that, simply select the desired key from the left pane, right-click it and choose Delete from the menu. When the confirmation message appears, click on Yes.

After deleting these keys Chrome should start working again without any problems.

If you’re looking for a faster way to delete these keys, you might want to try using Command Prompt. Using Command Prompt you can delete these keys by running few commands. To do that, follow these steps:

  1. Press Windows Key + X to open the Win + X menu and choose Command Prompt (Admin).
  2. If the Command Prompt isn’t available, you can also use PowerShell.
  3. When Command Prompt opens, enter the following commands one by one:
    • HKEY_CLASSES_ROOTChrome
    • HKEY_LOCAL_MACHINESoftwareClassesChrome
    • HKEY_CURRENT_USERSoftwareClassesChrome
    • HKEY_LOCAL_MACHINESoftwareClassesChromeHTMLshellopencommandDelegateExecute
    • HKEY_CURRENT_USERSoftwareClassesChromeHTMLshellopencommandDelegateExecute

Several users reported that other values can also cause this problem to appear. To fix the issue, you need to locate and remove the following keys from your registry:

  • HKEY_CURRENT_USERSoftwareClassesWow6432NodeCLSID{5C65F4B0-3651-4514-B207-D10CB699B14B}
  • HKLMSoftwareClassesChrome
  • HKLMSoftwareClassesChromeHTMLshellopencommandDelegateExecute

After removing those keys, the problem should be fixed.

Sometimes certain registry values can interfere with your system and cause this error to appear. To fix this problem, you need to remove those values from your registry.

Keep in mind that modifying the registry can cause certain problems, so be aware that you’re modifying it at your own risk.

3. Repin Chrome shortcut to the Start Menu

This is relatively simple and you can do it by following these steps:

  1. Unpin Chrome if it is pinned to your Taskbar. To do that, simply right click it and choose Unpin from Taskbar option.
  2. If Chrome is pinned in Start Menu, be sure to unpin it by following the same steps.
  3. Press Windows Key + R and enter appdata. Press Enter or click OK.

    Now navigate to the LocalGoogleChromeApplication directory. If this directory isn’t available, go to the Chrome installation directory.
  4. By default, it should be C:Program Files (x86)GoogleChromeApplication..
  5. If you’re using the 64-bit version of Chrome, you might want to go to the Program Files directory instead.
  6. Right-click chrome.exe and choose Pin to Start option from the menu.
  7. Alternatively, you can simply drag and drop chrome.exe to the Taskbar to pin in there.

If you’re having this problem on your PC, you might be able to solve it simply by repinning Chrome shortcut to the Start Menu or your Taskbar.

After repinning Chrome, you just need to use the pinned shortcut and your browser should start without any errors.

4. Launch Chrome using a .bat file

You can easily run several commands at once on your PC by using a .bat file. These types of files allow you to create your own scripts and run different applications. According to users, you can also use a .bat file to circumvent this error. To create a .bat file, do the following:

  1. Open Notepad.
  2. Enter start /d “C:Program Files (x86)GoogleChromeApplication” chrome.exe exit in your document. Keep in mind that you must use the correct installation directory for Chrome if you want this script to work.
  3. Now click on File > Save as.
  4. Set Save as type to All files and enter chrome.bat. Choose a save location you can quickly access and click on Save.
  5. After saving the file, you just need to run chrome.bat to start Chrome.

Keep in mind that this is a workaround, and if you want to avoid this problem, you need to start Chrome always by using the chrome.bat file.

5. Reregister DLL files

Sometimes Class not registered error message can appear in Chrome because your DLLs aren’t properly registered. To fix the problem, you need to reregister your DLLs and check if that solves the problem. To do that, follow these steps:

  1. Start Command Prompt as an administrator.
  2. When Command Prompt opens, enter FOR /R C: %G IN (*.dll) DO "%systemroot%system32regsvr32.exe" /s "%G" command and press Enter.

Keep in mind that you might get several error messages while this command is running. After the command is executed, restart your PC and check if the problem is resolved.

6. Change the prefix of Chrome’s shortcut

According to users, you might be able to fix this error message simply by adding a prefix to Chrome’s shortcut. To do that, follow these steps:

  1. Be sure to remove all Google Chrome shortcuts that are pinned on your Taskbar.
  2. Now go to Chrome’s installation directory, locate chrome.exe and create a shortcut of it.
  3. Move the shortcut to your Desktop, right-click it and choose Properties.
  4. Go to Shortcut tab and in the Target section add C:Windowsexplorer.exe. Be sure to add this line before the quotes and don’t change anything else in the Target field. Now click on Apply and OK to save changes.

After making these changes, you need to start Chrome using this shortcut. Keep in mind that this is just a workaround, and if you want to avoid this problem, you need to use this shortcut every time you want to start Chrome.

7. Remove the problematic keys and set Chrome as a default app for PDF files

Few users claim that this problem occurs when trying to view PDF files in Chrome. According to them, the problem might be a certain key in your registry. To fix the issue, first you need to remove this key by following these steps:

  1. Open Registry Editor.
  2. Navigate to HKEY_CURRENT_USERSoftwareClasses key in the left pane. Locate the pdf_auto_file key in the left pane and delete it.

If you can’t find this key in your registry simply proceed to the next segment. Now you just have to set Chrome as default application for PDF files. To do that, follow these steps:

  1. Press Windows Key + I to open the Settings app. Navigate to the Apps section.
  2. Go to Default apps section and select Choose default apps by file type option from the right pane.
  3. List of file types will now appear. Locate .pdf file extension and click the application next to it.
  4. Choose Google Chrome from the list.

There’s another way to set Chrome as a default application for PDF files. To do that, follow these steps:

  1. Press Windows Key + S and enter control panel. Choose Control Panel from the list of results.
  2. List of options will appear. Select Default Programs from the list.
  3. Go to Set your default programs.
  4. List of all applications will appear. Select Google Chrome in the left pane and select Choose defaults for this program.
  5. Check .pdf from the list of extensions and click on Save.

You can also use Associate a file type with a program option to set defaults. You can do that by following these steps:

  1. Go to Default Programs section and click on Associate a file type or protocol with a program.
  2. Locate .pdf on the list and double click it.
  3. Choose Google Chrome from the list and click on OK to save changes.

After doing that, Google Chrome will be a default application for PDF files, and that will hopefully fix this error on your PC.

8. Set a different browser as default

Few users claim that you can fix Class not registered error message in Chrome simply by setting a different browser as default. To do that, follow these steps:

  1. Open the Settings app and go to Apps section.
  2. Go to Default apps section and click on Google Chrome in Web browser section.
  3. Select any other browser from the list to set it as default.

You can also set a different default browser by doing the following:

  1. Navigate to Control Panel > Default Programs and click on Set your default programs.
  2. Select any web browser from the list on the left and choose Set this program as a default. After you’re done, click OK to save changes.

After setting a different web browser as default, start Google Chrome again. Now you should see a message asking you to set Chrome as a default browser. Set Chrome as default and check if the problem is resolved.

9. Update the Chrome to the latest version

If you’re having this problem in Google Chrome, you might be able to fix it simply by updating Chrome to the latest version. To check for updates, you need to do the following:

  1. Start Chrome.
  2. Go to the Menu icon in the top right corner and choose Help > About Google Chrome from the menu.
  3. Chrome will now check for updates. If updates are available, they will be installed automatically.

If you can’t open Chrome at all, you need to remove it and download the latest version from the official website.

This error message might be fixed in the upcoming version of Chrome, but if you can’t wait for the new version you can always download the Canary or Beta version of Chrome and use it instead.

Keep in mind that this version might not be as stable, so you can experience other issues while using it.

You also have the option to use a different browser that may not cause this issue at all. Opera One is one of the most reliable browsers out there with great security and up-to-date features that allow you seamlessly navigate the Internet and it also comes with free native AI.

Opera One

Get a seamless, error-free connection and stay secure with great privacy, a built-in VPN, and tons of add-ons.
Free Download Visit website

Keep in mind that this issue can affect other browsers. To learn more, visit our Microsoft Edge WebDriver error: Solutions and fixes article.

If you need to know more about browsers, check out our website’s Browser page. For more guides covering this amazing tool, check out our dedicated Chrome Hub.