CSV file, also known as Comma Separated Value file, is a spreadsheet file format which contains data sets which are separated by commas. Each new line is separated by a comma to represent a new database row. CSV files are important as they help exchange data and are used in many scientific and business programs.
However, CSV files are opened by spreadsheet programs – this enables you to modify the files into cells which transfer data between various databases. Here are the best software that you can use to open CSV files on your Windows 10 computer.
Corel Quattro Pro is developed by Corel and is a spreadsheet application for managing your accounts and finances.
In addition, Quattro Pro has a nice interface similar to Microsoft Excel this means it would be easier for users to adjust and use the application effectively. Quattro pro also supports CSV format and users can view, and modify formatting options such as the font, cell colour, border, and size.
Meanwhile, this software is easy to use and is now part of the Corel Word Perfect office package. Quattro is an excellent alternative to Microsoft Excel as it has similar features.
Note: Corel Quattro Pro is now part of WordPerfect
File Viewer Plus is a simple tool used to view file formats. The application is a handy application to have on your system as it supports over 1000 different file formats.
However, CSV files can be easily viewed using this software. Although, the application is limited and you cannot manipulate the file easily like other applications mentioned above.
Furthermore, File Viewer is a good handy application to have on your system as it enables you to view a large number of system file formats.
With Quicken Deluxe you can easily import data from other financial management programs and set up your preferred settings easily. The program also supports CSV format and you can view, modify and format the information contained in the CSV format.
In addition, Quicken Deluxe also offers users a reporting tool which allows you to create custom financial reports. The financial tool is a great application for users that want to have more control over their finances and this makes it a handy tool for users that want to access CSV file format.
One other great choice would be Microsoft Excel, the industry-standard spreadsheet program for organizing and manipulating data. The application enables users to sort data and allows tools for analyzing and gathering data easily.
In addition, Excel has many mathematical functions that let you manipulate data and compute results, users can also download preloaded templates that are set to their preferences for organizing data.
Excel supports a large number of formats including CSV system format. With excel you have more functions when accessing your CSV file; hence, you can edit, manipulate, and visualize the data contained in the file. You can also change the font size and pattern of the information contained in the CSV file format.
Moreover, MS Excel is the best software to open CSV files and is recommended for all fields, as you can easily keep statistical checks and analysis. However, MS Excel is packaged under Microsoft office suite but can be downloaded as a stand-alone application.
Microsoft Notepad is a popular text editor used for basic programming and editing text format files. It has limited options since it is a text editor unlike a full Word processor although you can modify text, font, size, and script.
The tool supports many file formats including HTML, CFG, and CSV system files. Notepad can view and modify contents stored in CSV file format.
The text editor is a useful editor for coding as it supports HTML and other coding formats. Meanwhile, Notepad is a lightweight but powerful built-in tool on your Windows system.
Note: All Windows versions come with Notepad preinstalled, so you don’t have to worry about downloading it.
LibreOffice is an open suite which has several applications which allow users to create and modify different types of documents. The suite is free to download and offers similar features to the polar Microsoft Office suite.
Meanwhile, this office suite has a word processor, spreadsheet application, and database management application as part of its suite.
The spreadsheet application called Calc supports CSV file format and you can use this application to view edit, modify and save CSV file format. Calc has many tools that have been organized in an easy to use interface.
LibreOffice can also be used to create presentations and manage a database. It is an excellent alternative to Microsoft Office suite, as it is cheaper and similar in functions to its more expensive rival.
Apache Open Office is an open office suite similar to LibreOffice and is used to create and modify documents the program has many applications that mirror Libre office with a word processor called writer spreadsheet called Calc which is a spreadsheet application.
In addition, this software supports CSV file format; hence, users can open, view, and modify contents contained in the file. It has tools which can be used to organize CSV files and supports may industry standard formats such as DocX and PDF.
Apache open office is free to use and good software to open CSV files.
In conclusion, the programs we mentioned above are the best software to open CSV files. Before you leave, you might want to check our guide on how to convert Excel to CSV file.
However, some of the applications are limited in functionality. Hence, Microsoft Excel is the highly recommended software to open CSV files on Windows 10 computers.
Users work frequently with text files, and on Windows 10 the most used text editor is Notepad. This is a simple tool, but it has its limitations and users reported File too large for Notepad error while trying to open certain files.
The Notepad text editor, just like many others, has a file size limit and it can’t be used to open large text files. For most basic users Notepad will be enough, but advanced users might encounter File too largefor Notepad error on their PC.
For example, if you have server logs or any other large files, you might get this error while trying to open those files with Notepad. Unfortunately, you can’t make Notepad open those large files, and the only solution is to use third-party text editors to open those files.
There are different applications that you can use, and today we’re going to show you a couple of them in order to fix the File too large for Notepad error.
How do I fix File too large for Notepad error on Windows 10?
As soon as the installation is complete click on Activate or opt for Start Trial.
The File Viewer menu will open, click on Open a File tab.
File Viewer is the essential text editing tool you need that will dramatically improve your work-flow. With this intelligent software you can open over 400 file types such as Office doc, PDFs and even image files.
Those uncommon file formats won’t be giving you any headaches because File Viewer can open Microsoft Project, Visio documents and source code files with syntax highlighting.
Thanks to its versatility you’ll benefit from a built in media-player that will allow you to play any type of audio or video file. This editor gives you the possibility to crop a raw image from a digital camera and convert it into a JPEG file.
With File Viewer you can also organize your PC folders more efficiently and have the important documents just one click away thanks to the file browser feature.
File Viewer Plus
Manage over 400 types of documents including multimedia files with this incredibly versatile tool!
Large Text File Reader is a third-party text viewer that allows you to view files that are up to 10GB in size. This application will show you a number of lines at the time and not the entire file.
Even though you’re not able to edit the file, you should be able to view it and copy the necessary information.
Bare Tail is another software that allows you to view large text files. This software comes in both paid and free version.
The only difference between the two is that the paid version doesn’t have the splash screen when you start the program. This isn’t a major problem, and it doesn’t interfere with the application in any way.
This application supports real-time viewing and it can scroll down to any line in the entire file instantly. In addition, you can use this application to view files over the network and it also has a support for line wrapping.
In addition, you can change the font, spacing, and other font-related settings. If you plan to use real-time viewing, you can easily follow the end of the file no matter how fast it changes.
In addition, you can also view several files at the same time by using tabs, which have visual indicator so you can see the status of the file without actually having to open the tabs.
Of course, you can rearrange tabs both horizontally and vertically. You can also highlight any string you want in order to better notice it throughout the file. This application has a lot of great features, and if you need to view a large text file, this application will be perfect for it.
Another application that can be used to view large text files is EditPad Lite. In addition to viewing large files, this application will store your clipboard, so you can easily access any data that you pasted in the text editor.
There’s a search feature available that allows you to easily search and replace any string. In addition, this application supports extensive configuration and you can even create a portable installation and run it from a USB flash drive.
Another useful application for viewing large files is LogExpert. This is a simple application that will allow you to view large files with ease.
It allows you to place bookmarks and navigate through them at any time. There’s also text highlighting, so you can easily find any string that you need.
This smart tool gives you the possibility to monitor files in real-time and use the tail feature to always see the end of a log file.
Universal Viewer Free is another application that allows you to view large text files. This is a simple application that allows you to switch between several modes such as Text, Binary, Hex, Unicode, etc. It’s a simple application, but it should be perfect for for viewing large text files.
Another application that can be used to view large text files is TopGun. This application allows you to easily view large text files and search for a specific string. TopGun is a lightweight application, and it can work without any problems on almost any PC, but you might encounter some issues with certain larger files.
The File too large for Notepad error can be a big problem especially if you work with large files frequently. You can easily solve this problem by using any of the free tools that we mentioned, so be sure to give them a try.
We’d like to hear more from you on this subject so feel free to drop us a comment in the section bellow.
Microsoft invested much time and effort into creating Cortana for Windows 10. It is a personal assistant for Windows users capable of doing many things like searching the web, finding things on your PC, keeping track of your calendar, receiving the weather forecast, and many more.
However, some Windows 10 users disliked Cortana to the point where they disabled it. If you are in this situation but have changed your mind and want Cortana back, follow the below steps.
How do I restore Cortana on Windows 10?
You may have the service enabled but not working or disabled Cortana and need it reenabled. Regardless of the situation, it would be best if you restored it, and any of the following may yield results.
Restart your computer – While on its own, this may seem generic; if you have the service enabled but not working, a restart may be a helpful first solution in reenabling it.
Contact Microsoft Support – Unlike a restart, this may be your last option if nothing else works to restore Cortana.
Check the Regions & Language settings – You may need to modify this setting to restore Cortana since the service is unavailable everywhere.
Reinstallation – This is an obvious call. A reinstallation would restore a perfectly working Cortanan in most cases.
Enable the service – While trying to restore the Cortana service, you will have no success if it is not enabled.
Is Cortana still on Windows 10?
Yes, the service is on Windows 10; however, it has evolved, and its functionality is a bit different from what it was in previous Windows versions.
The service used to be your digital personal assistance, but in Windows 10, it has become more of a productivity Windows feature, helping users manage emails and tasks.
It also is not automatically integrated with the search bar and would need to be enabled.
How do I enable Cortana after disabling it?
1. Re-enable Cortana using Group Policy
Press the Windows + R keys to open Run.
Type gpedit.msc and press Enter to launch the Local Group Policy Editor.
Navigate to Local Computer Policy and go to Computer Configuration.
Go to Administrative Templates and click onWindows Components.
Navigate to Search.
Locate the policy named Allow Cortana and double-click on it.
Enable the Allow Cortana local policy by selecting the Enabled radio button.
Click on Apply and then on OK.
Close the Local Group Policy Editor.
Restart your computer.
2. Re-enable Cortana using the Windows Registry
Press the Windows key +R to open a Run dialog.
Type regedit and hit Enter to launch the Registry Editor.
Navigate to the path below: Computer\HKEY_LOCAL_MACHINE\SOFTWARE\Policies\Microsoft\Windows\Windows Search
Double-click on Allow Cortana, and set the value to 1.
Close the Registry Editor and restart your computer.
In the Task Manager, right-click on Cortana from the Processes tab, and select Open File Location.
This should take you to the following location: C:\Windows\SystemApps
Locate the folder that is named Microsoft.Windows.Cortana.bak.
Right-click on it, select Rename and remove the .bak from the end of it.
Restart your computer.
We hope that the solutions described above will help you enable Cortana.
There you go; we believe all the methods discussed in this article are straightforward. There is not one that works better than the others; you should try any that seems most convenient for you.
Meanwhile, if you have other ideas or suggestions, share them with us using the comments below.
Having a VPN on your computer can be a great thing for your privacy and connection security.
But did you know that you can share your VPN connection with other PCs on the same network?
You probably had a hunch, since you landed on our guide.
We’re here not only to confirm that VPN connections are shareable but also to teach you how to do it with minimum effort on your Windows 10 laptop, desktop or tablet.
Configure your hotspot by entering an SSID (Wi-Fi display name) and password)
Connect to a secure VPN server
Turn on the Secure Hotspot feature
That’s about it. You can now connect to Windscribe’s secure hotspot using additional devices.
So technically, you’re sharing your VPN connection with other devices, and this is as easy as it gets.
However, you must keep in mind that most VPNs have a limited amount of supported devices.
On the other hand, certain VPNs such as Windscribe, allow you to connect an unlimited number of devices.
How to share a VPN connection from iPhone to PC
Sharing your iPhone’s VPN connection to your PC is an excellent way to provide your computer with secured internet access.
That way, you’ll share the VPN connection from your iPhone to your Windows PC without having to purchase a separate VPN account on your computer.
Just connect to a VPN server on your iPhone and follow the guide below:
Find and open the Settings app on your device.
Tap Personal Hotspot to enter it.
Turn on the toggle next to Allow Others to Join.
Select USB Only or Turn on WLAN and Bluetooth, depending on how you want to connect your iPhone to the PC.
If you chose Turn on WLAN and Bluetooth, go to the network icon at the bottom right corner of your PC and select your iPhone’s hotspot. However, if you selected USB only, connect your iPhone to the PC with a USB cable.
Your PC should now have access to the web through your iPhone’s VPN connection.
Conclusion
All things considered, if you’ve ever considered sharing your VPN connection, there are several ways you can go about it.
However, as you could see from our guide above, some methods are more time-consuming than others.
We’ve found that using a VPN with hotspot support is the easiest method, followed closely by installing a VPN on your router.
By far, configuring your Windows 10 to share your VPN connection (both wired and wireless) might be a bit difficult to achieve, especially for novices.
A number of users have reported encountering the following error message on Citrix Workspace on Windows 10: A fatal error occurred. Would you like to restart Citrix Receiver?
The reasons for this issue are varied, but the most common reasons are either faulty receiver settings inside the user’s profile or .NET requirements not being met. The latter option also makes the self-service window crash and shows this error message.
In this article, we will explore some of the best troubleshooting methods to try and solve this issue.
What can I do if a fatal error occurred in Citrix Workspace?
1. Download and install .NET Framework .NET 3.5 Service Pack 1
Type Turn Windows features on and off in your home screen search bar.
Select the first option from the top.
Inside the Windows Features window, deselect the box next to .NET Framework 4.8 Advanced Services.
Wait for the process to complete, then click Close.
Right-click on it and select Run as administrator.
Follow the on-screen instruction to finish installing.
Hopefully, using one of these solutions will eliminate the fatal error during the Citrix installation error message. Similarly, if your Citrix Workspace is not launching at all, check our detailed guide to fix it.
In case you’ve used another method, feel free to use the comment section below and share it with us.
Outlook Express was a popular email client bundled with older Windows versions via Internet Explorer. Microsoft discontinued it starting with Windows Vista, replacing it with Windows Mail and later Windows Live Mail. If you miss its simplicity, there are a few ways in which you can still emulate it in Windows 11.
How can I still run Outlook Express in Windows 11?
NOTE
Disclaimer: Outlook Express is a discontinued email client and is no longer supported on modern Windows versions. Attempting to run it on current systems poses security and compatibility risks. For a reliable, modern alternative, we recommend Mailbird, a lightweight, user-friendly email client that integrates multiple accounts, contacts, and productivity tools in one place.
Indeed, this isn’t the original program, however keep in mind that it’s impossible to run on Windows 10 and use the discontinued email client.
The main perks of installing OE Classic are ease of use, minimal resources, and total security.
The user interface is very much like that of Outlook Express, it comes with a built-in address book where you can import your contacts, plus security updates, comprehensive sets of rules, and no-fuss migration of your old messages and data to the new program.
And, extremely important for many, there’s no size limit to attachments (whereas with Outlook Express there was a 2GB size restriction).
For any trouble with the program, the developers offer direct and fully relevant advice.
While Microsoft pushed Windows 8 to computers, those who didn’t necessarily have to migrate or buy a new device with the new OS were strongly advised on forums and comments to stick to Windows XP or Windows 7, to still use Outlook Express.
Which is somewhat difficult considering the upgrading pressure.
But with the help of a virtual machine, you install the above-mentioned older systems and use your preferred email client.
3. Migrate your old environment
This solution was inspired by a couple of user comments, who recommended a third-party program called Zinstall to migrate any old operating system to your newly installed Windows 10.
The interesting part about using Zinstall is that it allows you to use incompatible apps on your latest OS, without compromising system settings or program performance.
The only mandatory condition here is that you still have the old system running on another device – so basically to have two PCs or laptops.
With Zinstall, you can transfer programs, documents, music, pictures, favorites, emails, accounts, settings, and other locally stored files.
The program supports transfers from Windows XP, Windows Vista, Windows 7, Windows 8/8.1 to Windows 10. Similarly, you can also move files between 32-bit to 64-bit OS or vice-versa.
The whole process is intuitive and should take 20-25 minutes, depending on the size of your transferred files/programs.
As you can see, it’s not impossible to still use Outlook Express. If you have any additional suggestions on this topic, don’t hesitate to leave them in the comments section below and we’ll be sure to check them out.
Following a year of public preview, Microsoft’s Cloud Gaming (Project xCloud) finally launched in September as part of Xbox Game Pass Ultimate. As of today, subscribers can access over 100 Xbox Game Pass games on Android devices via Microsoft’s Cloud Gaming technology, and the company keeps adding more compatible games every month.
Integrating the Cloud Gaming service with Xbox Game Pass Ultimate is a great way to add value to the service and make it more compelling next to Google Stadia Pro, though Microsoft’s Cloud Gaming strategy still leaves a lot to be desired. As of today, you can’t use it to play any game you want via the cloud, as only select Xbox Game Pass games are currently available on Android devices.
As of today, the new Remote Play feature on the Xbox apps for iOS and Android allows owners of Xbox consoles to stream any of their installed games to their mobile devices, but Cloud Gaming could eventually make that unnecessary. In the latest episode of Major Nelson’s podcast, Xbox head Phil Spencer said that he was open to idea of letting customers buy Xbox games, and follow what Google has been doing with its Stadia Store.
Our long-term aspiration is to make xCloud a great way for new gamers to come into the ecosystem. (…) Now, we want to give people the ability to buy. We’ve talked about that. We don’t want to make it just about the subscription because we know certain people want to be able to buy their games and still play them via the cloud. So they get that convenience feature of being connected to their library. There’s so much opportunity as we’re looking at new screens that we can bring xCloud to. It opens up massive device categories that we don’t even really think about today in terms of where these games can show up.
Spencer didn’t go as far as suggesting a “buy once, pay anywhere” scenario where all Xbox games you buy on the Microsoft Store, though that would be the ideal scenario. This is pretty much what Microsoft tried to do with its “Xbox Play Anywhere” initiative, a system that lets customers buy a game once on the Microsoft Store and play it on both Xbox consoles and PC at no additional cost. Adding Cloud Gaming to the mix would really push Xbox Play Anywhere to the next level, though Microsoft will likely need publishers to agree to make their Xbox games available for streaming in the first place.
Google’s Stadia may not be getting a lot of mindshare since launch, though the cloud gaming service remains an easy way to buy and play some of the latest blockbuster games such as Cyberpunk 2077 or Assassin’s Creed Valhalla on almost any device. Microsoft went a different route by restricting to Android devices and select Xbox Game Pass at launch, but things could change soon.
“We’re going to get to iOS. We’re going to get to PC. We’re going to get to different devices in 2021, continue to expand the regions that we’re in. We’re getting so much learning from just people using the products, using the games, and telling us what they like, areas that we need to improve”, Spencer also said in the interview with Major Nelson. It’s still early days for Cloud Gaming, but Microsoft has the opportunity to become an early leader in that space thanks to its established Xbox ecosystem and cloud expertise with Azure.
Cortana, Microsoft’s virtual assistant, and once known by many as Microsoft’s take on Apple’s own Siri, has gone through a bit of a rebrand recently. While you can still find Cortana in Windows 10, the assistant is now much more centered on being part of your work life. This means it’s all about helping you stay productive, rather than delivering quirky facts as it used to.
As a result, Cortana can now be found in Microsoft Teams on iOS and Android, and rumor has it that it will even be coming to the desktop apps too. So, how can you use Cortana in Teams as part of your productivity? Today, we’ll be looking at just that.
What can Cortana do?
Current Windows 10 Insider Rings
Rings
Version
Name
build
Stable
1903
May 2019 Update
18362
Slow
1903
May 2019 Update
18362.10024
Release Preview
1909
November 2019 Update
18363.448
Fast
20H1
??
19002.1002
Skip Ahead
currently unused
Before jumping into anything, we want to explain what Cortana can do for you in Microsoft Teams. Well, on both the Teams mobile app and dedicated Microsoft Teams displays, you can use Cortana for a variety of things. Some of the most common include calling, joining meetings, checking calendars, chats, files, and more. We’ve included some of the most common ways to use Cortana in Teams on the list above for you, but you can check Microsoft’s full list here.
How to find Cortana in Teams
So, where can you find Cortana in Microsoft Teams? It’s pretty easy. On Teams on iOS and Android, you can find Cortana by clicking either the Activity or the Chats section of the app. Then, look for the microphone icon at the top of the screen.
When you press the microphone, you’ll summon Cortana. Sometimes, though, the feature might not be turned on. You can check to see if Cortana is turned on in Teams mobile by clicking the hamburger menu on the left of the screen, choosing settings, and then looking for Cortana.
If you’re on an iPhone or iPad running iOS 14, you also can visit this section to add a Cortana shortcut to Siri, too. This will allow you to ask Siri to Open Cortana in Teams, without having to click the microphone icon. Simply follow the instructions on the screen to proceed. You can configure your own “wake word” to summon Cortana in Teams if need be. even if the app is closed.
Tweaking Cortana in Teams
Keep in mind that right now, Cortana is only supported in the Teams mobile app and on Teams Displays in the United States. If you’re from outside the United States, you won’t see this feature. You can enjoy using the phrases we mentioned above for common things like calling, but Cortana can also be used for presenting, too. When a slide is open. you can say things like “Go to the appendix slide” in the Teams mobile app, or “Cortana, go to the appendix slide” when on a Teams Display.
Currently, Cortana also supports two voices. There’s a feminine voice, as well as a masculine voice. You can tweak these from the settings, as we showed above.
Rumor has it that Microsoft is still playing with the idea of bringing Cortana to the desktop. For now, though, Cortana has a new home on Teams on mobile, and it’s a great way to save time during your meetings, and accomplish common tasks.
Microsoft Edge has enjoyed some renewed momentum since its release on iOS and Android, before a switch to Chromium made it possible to bring it to older versions of Windows as well as macOS and Linux. If Google Chrome remains the obvious market leader, a recent Microsoft job listing (via Windows Central) mentioned that Edge has now crossed 600 million users.
“With the general availability Edge has already reached 600 million customers and is taking a fresh approach to browsing by putting the end user at the center and meeting the user where they are, shipping on Windows 10, down level Windows, Mac and Android,” Microsoft said in the job listing for a Principal Software Engineer that will join the Edge team. It’s not exactly clear what this 600 million customers number includes, though keep in mind that Microsoft Edge remains the default browser on Windows 10 PCs and that the OS crossed 1 billion monthly active users last year.
Beyond the Windows ecosystem, Edge now being available macOS, Linux, as well as iOS and Android likely really helped to make the browser more popular, especially with the ability to sync favorites and passwords across platforms. The initial Windows 10 exclusivity made Edge a non-starter for many, as did the fact that new features only came to the web browser every six months with new Windows 10 updates. Fortunately, the new Chromium-based Edge now gets updated just as often as Google Chrome, and Edge Insiders can also test new features before the general public.
Do you think Microsoft Edge could be the next Microsoft product with 1 billion users this year? Let us know in the comments below.
WPS file is a document created using Microsoft Works word processing software. The file format is similar to .DOC of Microsoft Word but lacks some advanced formatting options that a Word document usually contains.
The default software used to open WPS files was Microsoft Works 9 but the software was discontinued in 2010. However, there are many software programs like MS Word and MS Publisher that can open WPS files but you would need to select an older file format which can be tasking.
Here are some of the best software that you can use to open WPS files today.
File Viewer Plus is one of the best file viewers available. You can use the software to convert documents, images, and files to other file formats. In addition, you can also modify and save images using the built-in image editor. For every file, you open you can access hidden features as the tool allows access to secured file paths.
Meanwhile, File Viewer supports over 300 file format types and supports WPS file type. With File Viewer Plus you can open, edit, and modify the information contained in your WPS file format. Hence, you can use this software to open WPS files on Windows 10 computer.
Lastly, this tool comes with a user manual that gives you clear tutorials on how to use the software effectively. File viewer supports all Windows operating systems most especially Windows 10.
File Viewer Plus
Convert and edit a plethora of file formats, such as WPS-type files with File Viewer Plus, one of the best software for Windows 10.
LibreOffice is an excellent open-source office suite usually used as an alternative to Microsoft office. The suite contains applications similar to Microsoft Office such as Writer which is the word processor, Calc which is similar to Excel, and Impress which is a presentation application.
This software has an easy-to-use graphical user interface and you’ll find it easy to adjust from MS Office as their applications have similar settings to Microsoft Office. The writer application is a good substitute for MS word and can open many file formats including WPS formats.
With the writer application, you can edit, modify, and open WPS files in Windows 10 PC. This makes it ideal software for your WPS file formats as other formatting options such as fonts, table insertion are similar to Microsoft works.
Although the software is limited in overall functions when compared to office, it is still a nice alternative to have as you can open WPS files and it’s free to download as well.
Although Microsoft Works is no longer maintained by Microsoft, it is still available for download on various third-party websites. Microsoft Works is a smaller version of Microsoft Office suite as it is a productivity suite developed for personal use at home.
This office suite contains a word processor for creating resumes, letters, and other documents, a worksspreadsheet which is for recording and analyzing data such as inventories, and a works database that is used to store information such as emails and contacts.
In addition, the Works word processor default file format is WPS and users can open, edit and modify WPS files with tools available to customize contents contained in the file. Other format such as Microsoft Word DOCX format is also supported.
However, Works is a great alternative to Microsoft Office suite for your personal use; hence, it combines all the qualities of the office suite in a smaller package. Meanwhile, you can use Microsoft Works to open WPS files on Windows 10 computers.
This software is a free document converter that converts file formats from one format to another. The software enables you to access files before converting them and is a handy software to have on your Windows 10 PC.
NCH Doxillion supports many file formats from DOC, PDF, RTF, HTML, XML, WPD, ODT, and most especially WPS file format. You can open your WPS file formats and view contents in them, although editing tools are limited in this tool. Also, minor adjustments to the WPS documents such as changes of fonts can be made.
Since NCH Doxillion is mainly a file converter, you can convert batches of WPS files into whatever format you want for further use. However, the software uses a simple drag and drop mechanism to convert file formats and is available for Windows 10 operating system.
Have you used any of the software we mentioned above to open WPS files on a Windows 10 PC? Share your experience with us. Feel free to comment in the section below.
Those who have downloaded movies from torrent sites might have spotted Video_TS (video transport stream) folders in File Explorer. Video_TS is a folder that includes DVD data for the downloaded movie.
The folder includes three Video_TS data files within one of its subfolders. Thus, some users might wonder how they can play the DVDTS data after downloading movies.
Users who encountered this issue have also asked the following questions:
what is video_ts
how do i play video_ts files on my computer
playing video_ts files on pc
Here are some easy ways users can play DVD Video_TS folder files in Windows.
How do I play DVD Video_TS Folder Files?
1. Use Adobe Premiere Pro
Adobe Premiere Pro let’s you do so many things with a video file. First, it can easily playback the video and you can actually see it.
Then, you can use it to simply convert it to a different format that is natively compatible with Windows or other media players and let others enjoy the content.
You can go a bit further actually and edit the video. For example, you can add or edit subtitles and captions. Or you can cut the video and remove unnecessary parts.
Of course, advanced options are available such as making color changes, add slight effects or filters or put together 2 or more video files and combine them into one.
It’s also free to try for 7 full days so that gets you plenty of time to test it out.
Adobe Premiere Pro
Adobe Premiere Pro lets you edit, play and access a wide variety of video file formats!
Click theDownload Now button on the WinX DVD page.
Click on the setup and install the software.
Open WinX DVD.
Click on +Folder, then select the Video_TS folder you’d like to convert.
Choose To MP4 as the output profile.
Click Browse and select the destination of the converted folder.
Afterward, click Run.
Not all media software supports the Video_TS format. Those users who need to play Video_TS files in media players that don’t support the format can convert the TS folder to MP4 format.
WinX DVD is freeware Windows software with which users can convert Video_TS folders to MP4s. Due to the unique title check mechanism, it supports any types of old and new DVDs, incl. 99-title and damaged DVDs.
In addition, the software is one of the best free ones on the market at the moment, claiming to surpass 95% of its rivals in speed, while also balancing quality at a low CPU usage.
Thus, users can play Video_TS files in VLC, convert them to MP4s, and burn them to DVD for playback in Windows.
This software guide provides further details for some of the best DVD-burning software that you can add video content to DVDs with.
Click the Download button on the Free DVD Video Burner page to save the software’s installer to a folder.
Then open the software’s setup file to install it.
Insert a blank DVD-RW in the DVD drive.
Click the Browse button to select the Video_TS folder to burn to DVD.
Select the DVD drive from the Drive drop-down menu.
Then press the Burn button.
Users can burn the DVD Video_TS folder to a blank disc. Users will need a blank DVD-RW disc to burn to and DVD burner software.
Free DVD Video Burner is straightforward, if somewhat basic, Windows software to burn a TS folder to disc with. Follow the aforementioned guidelines to burn a Video_TS to DVD with Free DVD Video Burner.
Open the VLC setup wizard to add the software to Windows.
Next, launch the VLC software.
Click Media at the top left of the VLC window to open that menu.
Select the Open Folder option.
Then select the Video_TS folder to import into VLC.
Press the Select Folder button.
Then click the Play button to playback the video.
VLC users can play Video_TS files without burning them to DVD. The VLC media player supports the Video_TS format so that its users can play TS files without DVD.
The computer did not resyncerror arises for some users when they try to sync a Windows Server PC’s time with NTP server. The full error message states:
The computer did not resync because no time data was available.
The Command Prompt displays that error message for some users when they try to sync time with the w32tm /resync command. Check out these resolutions if you need to fix that issue and also the w32tm /resync access denied problem.
How can I fix The computer did not resync error?
1. Reconfigure Windows Time Service Group Policy objects
To do that, launch Run with the Windows key + R keyboard shortcut.
Double-click the Type string to open the window in the snapshot below.
If the Type string isn’t there, right-click an empty space on the right of the window and select New, then select String Value. Enter Type in the text box for the new string.
Clear the Value data box. Then enter NT5DS in the Value data box.
Click the OK button.
Thereafter, restart Windows.
3. Run an extended Windows Time (w32tm) command
An extended w32tm command might fix The computer did not resyncerror. Open the search tool with the Windows key + S hotkey.
Enter the keyword cmd to search for Command Prompt.
Right-click Command Prompt and select Run as administrator to open an elevated Prompt.
Type this lengthy command into the Prompt’s window:
So, that’s how you can fix The computer did not resyncerror so Windows syncs with time server. Those remedies will probably be enough to fix the issue for the majority of users.
However, there might be other resolutions; and users who have fixed the same issue with other methods are welcome to share them below.
Nowadays, with the help of powerful PCs and vivid imagination, pretty much anyone can start editing photos and videos as if they were an expert.
However, the difference between a good editor and a great one is the tool they use to create. For those who want to be great, the obvious choice is CyberLink’s PowerDirector 365.
Those unfamiliar with Cyberlink’s PowerDirector 365 think of it as the consumer-friendly versions of professional market software titles Premiere Pro and Avid Media Composer.
PowerDirector is loaded with all of the same essential editing tools as peers, and it supports all of the latest formats and technologies.
In addition to being a fraction of the cost, it also includes unlimited access to a royalty-free stock video, image, and music catalog that is powered by the industry-leading Shutterstock.
PowerDirector 365 Features
The latest version of PowerDirector comes packed with exciting new features. With an updated mask designer, dynamic keyframe controls, customizable motion graphic titles, green screen editing, and the ability to add customized shape objects to create text bubbles and callouts within your videos, to name a few.
Whether you’re new to editing or a seasoned pro, there are also instant creation tools to allow you to select templates from a vast library that are pre-designed with titles, transitions, and effects that you can then customize with a few clicks.
PowerDirector 365 is available as a subscription plan for $70/yr – significantly cheaper than its closest competitor Adobe’s Premiere Pro, which costs more than $240/yr.
With PowerDirector 365, you’ll also get much more with its subscription plan.
Here’s a list of the features that you will get with a PowerDirector 365 subscription:
Unlimited access to hundreds of thousands of premium and royalty-free stock photos, video footage, and background music from Shutterstock
Unlimited access to CyberLink premium plug-ins, templates, cinematic effects, motion graphic titles, LUTs, and pro-level effects for video editing
Expansive audio library with a growing collection of sound effects and background music tracks
Always up-to-date with the latest features and updates
Priority customer support
PowerDirector 365 System Requirements
OS: Windows 10, 8.1, 8, 7 (64-bit only)
Processor: Intel Core i-series or AMD Phenom II and above
Graphics:
Standard Video: 128 MB VGA VRAM or higher
360-video: DirectX 11 compatible
AI Plugin: 2GB VGA VRAM or higher
Memory:4GB required (6 GB or above recommended)
Hard Disk Space:7 GB
Burning Device:Burning drive is required for disc burning purpose
Sound Card: Windows compatible sound card is required
Internet Connection: Required for initial software and file format activation, downloading software updates (patches), and accessing to DirectorZone services
Screen Resolution:1024 x 768, 16-bit color or above
Installing PowerDirector 365
Once you’ve subscribed to PowerDirector 365, you will be able to access the program through the CyberLink Application Manager.
The application manager will also manage the software’s updates, as well as manage the additional plug-ins and effects that the PowerDirector 365 subscription provides.
Note: You will need an Internet connection to access your PowerDirector 365 license.
How do I get CyberLink PowerDirector 365?
Downloading and installing PowerDirector 365 is easy, and it all starts with creating a CyberLink account. Proceed with the following:
Open the CyberLink Application manager and download PowerDirector 365
How do I use PowerDirector 365?
The best part of PowerDirector 365 is the powerful core editing software that is not only feature-rich but it’s also easy to handle, even if you’re completely new to the video editing process.
All of the additional content that you can download besides the base program can also be downloaded, updated, and removed with the App Manager, and these include:
Effect packs
Video packs
Audio packs
Font packs
Is PowerDirector 365? for professionals?
The great thing about PowerDirector 365 is that it caters to both novice and expert editors alike.
What makes PowerDirector standout is that it packs all of the amazing features of its competitors and more into a substantially more affordable package.
PowerDirector caters to every level of the editor. Advanced editors can go straight into full mode, and the interface will feel familiar with every editing tool that is standard to professional-grade platforms.
If you are new to editing, there are also options for a more approachable introduction to your first project. Additionally, you’ll have full access to their Learning Center, with many video tutorials to guide you at any step in your editing journey.
There’s a wide variety of design packs that the PowerDirector 365 subscription includes that will allow you to expand the horizons of what you can create.
Go from stitching together clips to creating professional-grade cinema just by upgrading to the PowerDirector platform.
Even if you’re unsure about committing to an entire year’s subscription, you can go month-to-month while you explore the platform.
There’s even a free version with limited features that you can try before subscribing.
Professional video editing with an incredible pricing
PowerDirector 365 subscription:
Annually – $54.99
Monthly – $19.99
PowerDirector 365
Enjoy one of the world’s leading video editing tools, now available as a subscription service with additional benefits!
Announced during the Star Wars: The High Republic livestream earlier this morning, the recently released Star Wars: Squadrons video game will be getting a new cosmetic item inspired by a lightsaber from Lucasfilm’s new publishing initiative.
The lightsaber item will unfortunately just be a cockpit flair with which players can decorate their ship with though this does make sense given that the Squadrons game is purely a dogfighting title and has no lightsaber-wielding characters.
Star Wars: The High Republic is a new set of Star Wars stories set hundreds of years before the events of Star Wars Episode I: The Phantom Menace. Unlike The Mandalorian which is a live action TV series, all of the High Republic stories will be restricted to novels, children’s books, and comic books. The first books in the High Republic line, Light of the Jedi and A Test of Courage, launched today. The first issue of the Star Wars: The High Republic comic book series launches tomorrow.
Are you interested in the Star Wars: The High Republic? Would you like to see more content from it added to Star Wars video games? Let us know why or why not in the comments and then follow us on Pinterest and Twitter for more Xbox gaming news.
However, as you’d expect, there are a few catches. One of the most important ones is that discovery+ isn’t exactly available everywhere.
Furthermore, it seems that, as with many other streaming services, US residents have it best. A question from the FAQ section reads as follows:
Can I access your shows while outside of the US?
Unfortunately, this app is only available in the U.S. and supported territories. However, most of our networks are global and we have apps and sites for each region, depending on your location.
*Get started by connecting to a VPN server inside the US. For example, we managed to connect with the Texas server. However, don’t be afraid to explore more server options.
Using a VPN is currently the most popular solution to unblock various geo-restricted content.
Given that discovery+ receives the geoblocking treatment much like many other streaming platforms, turning to VPNs makes sense.
Furthermore, you’ll also benefit from increased privacy and security if you choose a VPN.
We recommend Private Internet Access because it has an impressive range of security and privacy features, in addition to an outstanding network of servers (over 22,000 and counting).
Private Internet Access
Want to watch discovery+ from outside the US? PIA can help you with that.
It may sound weird, but apparently some countries can watch discovery+ for free, at least for now.
India, for instance, lets you access the page and watch discovery+ content without even asking you for an account.
If you try the same for the US or the UK, you’ll most likely face a login prompt, which will stop you in your tracks.
There may be other countries where you could watch discovery+ for free, we just haven’t figured them out yet.
So you may want to experiment with a VPN, try connecting to different countries, and access discovery+. Maybe you’ll hit the jackpot.
In this case, you could also try using a free VPN. However, you shouldn’t expect it to work 100%, as free VPNs are generally easier to detect.
Conclusion
To wrap it up, a VPN is your best course of action if you’re trying to access discovery+ from outside the US.
Furthermore, there are some countries where the service is (still) free, such as India.
Keep in mind that the service has its share of issues, and many have reported Discovery Plus error 400, but we have a guide dedicated to fixing this issue.
You could try and access discovery+ from various countries using a free VPN, just don’t expect it to work 100% of the time.
Your ISP sees everything that you do online, including all the websites you visit. Using this information, they can personalize ads based on your location and product preferences.
In a lot of cases, Internet service providers are required by law to collect and store customer data for a limited period of time, so that legal investigation agencies can counteract cybercrime.
An ISP may also throttle network bandwidth if you’re engaged in streaming or torrenting activities.
Throttling can also be used to force you into upgrading to more expensive subscription plans with superior Internet speed.
So it shouldn’t come as a surprise that most privacy-concerned users are constantly looking for solutions to hide their browsing history from their ISP.
For instance, if you ever tried to use a web browser in incognito or browsing mode, know that it won’t prevent your ISP from monitoring your data.
Google Chrome clear explains this:
But we’re here to guide you on the right path and show you how to improve your online privacy by concealing your browsing activity from your Internet service provider.
How can I hide my browsing history from my ISP?
Use a VPN
A VPN service offers the easiest way to stop ISP tracking on Windows 10, Mac, Android, iOS, and any other platform.
You can use a virtual private network solution to hide the fact that you’re browsing, torrenting, gaming, or streaming, thanks to encryption.
But we advise against using free VPNs because they usually leak your IP address and compromise your integrity.
Instead, consider investing in a premium VPN service since it will tremendously help you on the long haul.
And we can’t think of a better candidate than Private Internet Access. It provides 256-bit military-grade encryption through OpenVPN.
You can also check out WireGuard, a newer, faster and just as secure protocol if you’re looking to block ISP spying on your computer.
When using a VPN, it’s essential to understand that you’re basically trusting the VPN provider with your data, instead of your ISP. That’s why you must opt for a VPN service that offers a zero-logging privacy policy.
Private Internet Access is a prime example in this case. It’s one of the few VPN services that proved its no-logging claims in court (twice).
More about PIA:
Exclusive DNS servers
VPN kill switch
Shadowsocks and SOCKS5 proxy
24/7 live chat support
30-day money-back guarantee (no free trial)
Pay with a credit card, PayPal, or crypto
Private Internet Access
Use a reliable VPN like PIA with a zero-logging privacy policy (proved!) to hide your browsing activity from your ISP.
You DNS servers are responsible for translating the domain names you enter in your browser address bar into IP addresses. It’s the way in which computers communicate with each other over the web.
By default, your ISP assigns your DNS servers. So, if your DNS resolver is poisoned, you risk exposing your web navigation details, downloads, torrenting and streaming activity to your ISP.
Right-click the Start button and go to Network Connections
Click Change adapter options
Right-click your Internet connection and select Properties (you need admin rights)
Double-click Internet Protocol Version 4 (TCP/IPv4)
Select Use the following DNS server addresses
Set Preferred DNS server to 8.8.8.8
Set Alternate DNS server to 8.8.4.4
Click OK
In our example above, we used the Google Public DNS servers because they’re free, fast, and secure. You can also try CloudFlare or OpenDNS.
If you have IPv6 connectivity, make sure to also modify your IPv6 DNS server addresses.
However, if you’re the owner of a trustworthy VPN service like Private Internet Access (buy here), you don’t have to do anything.
That’s because PIA runs its private DNS servers as soon as you connect to a VPN server. It enhances your online privacy since you’re already encrypting your data traffic with a VPN.
Use Tor (The Onion Router)
The Tor anonymity network amplifies your online privacy and stops your ISP from seeing what you browse or download. It’s particularly great for users looking to defeat government censorship.
Tor encrypts and reroutes your data traffic through multiple nodes all over the world before it reaches its destination. It makes sure that no one can understand who you are or what you’re doing on the Internet.
All you have to do is download the Tor Browser, fire it up, and surf the web as if you’re using a regular browser.
If you’re worried that your VPN provider may not be truthful about its no-logs claim, you can install the Tails operating system, which is based on Tor.
Tails redirects all computer traffic through Tor. So, after installing your VPN service and connecting to a VPN server on Tails, your ISP or VPN provider will not be able to track you down.
Visit only HTTPS websites
HTTPS websites use SSL certificates to provide end-to-end encryption. It’s one of the best ways to protect your computer from eavesdroppers.
Using HTTPS instead of HTTP is also a great way to prevent your ISP from monitoring your data usage. And the simplest way to enforce HTTPS pages is by installing a web browser extension.
For example, Private Internet Access (buy here) has a browser addon with an integrated HTTPS feature. Otherwise, you can set up HTTPS Everywhere.
Keep in mind that an HTTPS browser extension won’t work outside of the web browser, such as torrent clients. A VPN is better in that case.
Use a secure search engine
In 2019 alone, Google made almost 135 billion US dollars in ad revenue. It made it happening by collecting your data and creating attractive ad opportunities for third-party marketing agencies.
Your ISP also has a big role in this. But you can block IPS and Big Data companies from monitoring you by turning to a secure search engine as an alternative to Google, Yahoo!, and others.
DuckDuckGo is an excellent privacy advocate that ensures private search, tracker blocking, and site encryption. You can also try Startpage or other private search engines.
Conclusion
To recap, you can prevent your ISP from monitoring your downloads, browsing, and other online activities by getting equipped with a dependable VPN service like Private Internet Access (buy here).
You can also change your DNS settings, join the Tor anonymous network, access only HTTPS websites, and resort to a secure search engine like DuckDuckGo.
Microsoft OneNote is a great app for taking notes, compiling data, and organizing information. The best part is, it syncs with the cloud, meaning you can access your notes everywhere.
It is multi-platform, meaning it is available on Android, iOS, macOS, and the Web, besides being available on Windows 10 devices. But this cross-platform design comes with a problem.
Desktop users may frequently face problems when trying to sync data to and from the cloud. This is quite a common problem with the desktop version of OneNote on Windows 10.
In this guide, we look into some of the most common sync errors (notebook/particular section won’t sync, sync conflicts arise, storage issues show up, etc.) and how they can be resolved.
How do I fix OneNote that won’t sync
1. Install the latest updates
Firstly, it is worth noting that whatever problem you may be facing could be a result of an issue with the OneNote application itself. This is why you need to make sure that you have the latest updates installed. Updates will often contain fixes for bugs that may be causing your problems. To check for updates go to File > Account. Click on Office Options then click on Update Now.
2. Check your Internet connection
Also, a no-brainer, make sure you are actually connected to the Internet before you attempt to troubleshoot OneNote. More often than not, sync issues are a result of bad Internet connections.
You can check your internet connection by looking on the right-down corner, where you should see a Wi-Fi icon or the Ethernet icon. You can also just open an internet page and see if it loads.
If there are any issues, troubleshoot the problem with the help of your Internet Provider.
3. Manually sync the particular section
Go to File then click on Info.
Click View Sync Status, or right-click on the Notebook you want to sync and click on Notebook Sync Status.
Under Shared Notebook Synchronization, you will find the Sync now button, click on it.
Note: This is a OneNote built-in solution to the problem of a particular section not syncing.
4. Copy the pages to a new section
Select the + tab or Right-click on the navigation bar, and select New Section.
Name the new section.
Go to section with the sync problem, right-click on each of its pages and click on Move or Copy.
Select the new section as the destination, and click Copy.
Note: Once you’ve followed through these steps, you can now use the manual sync method described above to sync the new section. Once you’ve synced the section, right-click on the old section and select Delete.
5. Empty the OneNote Recycle Bin
Select the History tab.
Select the Notebook Recycle Bin button.
Right-click on the old section and click on Delete.
You can also select Empty Recycle Bin and delete everything.
Note: The section you’re about the delete may contain important pages. Make sure you copy them before you permanently remove the section from the recycle bin.
Sometimes, when you remove a particular section that isn’t working or that you don’t need anymore, it may end up causing sync problems. For this reason, you need to remove them from the OneNote Recycle Bin.
6. Fix misplaced sections on OneNote
A section of your notebook could get misplaced when you’re trying to share it with other users. This happens when OneNote tries to sync the changes made to the section but cannot find the section file.
When this happens the notebook gets marked with an icon in the Notebooks list. There are two solutions to this problem, move the misplaced section to another notebook, or delete that section.
Move the misplaced section
OneNote lets you manually resolve the problem of a misplaced section by letting you move the particular section.
Right-click on the tab for the misplaced section.
Select Move or Copy.
Select the target notebook as the destination.
Click on Move or Copy depending on what you would like to do.
Delete the misplaced section
If you’re sure that you do not need the section that has been misplaced, you could simply delete it to resolve the issue. Follow these steps:
Under the Notebooks list, select Misplaced Sections.
Right-click on the misplaced section you would like to remove and click on Delete.
7. Check if the notebook is accessible on the web
Go to File then Info.
You should find the link right below the notebook. Select the link then right-click on it and click Copy.
On the web browser of your choice, enter the link you just copied and hit enter to open the notebook.
Note: If your notebook is accessible via the web browser then this confirms that there is a problem with the desktop app. If not, it could be a service error.
If the problem is with your desktop app, one of the simplest solutions to get your notebook to start syncing again is to close and reopen it. This should reset the connection, and get your notebook to start syncing again.
8. Check the sync status
If you were able to access the notebook online, but the changes you recently made weren’t added to it, you should check the sync status of the notebook to confirm whether or not it was synced.
To check the status, go to File then Info, and from the right side select View Sync Status. In the new windows, you will see an error message below the notebook with the issue.
If possible, click on the Get Help button in order to access more troubleshooting steps. If that’s not available, note the error message and do a quick online research.
10. Check the service status
If you were not able to access the notebook online via a web browser, there could be a problem with the OneDrive service itself. To confirm this, open a web browser of your choice and proceed to the Office portal.
If the services are up and running, you should see a green screen with a tick mark, and the message In case there is nothing wrong with the services, you should contact Microsoft for further assistance on your issue.
Make sure that you keep OneNote open and signed in during the troubleshooting process. You could potentially lose your data otherwise.
11. Fix content sync conflict on OneNote
When two or more people try and edit the same piece of text simultaneously, this will result in synchronization conflicts. These conflicts are automatically detected by OneNote which then proceeds to create multiple copies of the same page. This will be indicated via a yellow message that appears on the top of the page.
To prevent this issue from showing up in the future, make sure only one user is editing a page at a time. Or you could coordinate who edits which section.
To resolve this issue, you will need to copy the edited content to the main page and then proceed to delete the other page. To do this, click on the yellow message, copy the content from the temporary page, and paste it onto the primary page.
12. Fix storage sync conflicts on OneNote
You may occasionally run across error code 0xE00015E0. What this means is, either your file is too big to sync, or that your local device is low on space. Usually, it’s because OneNote has a lot of backups stored.
Here’s how you can resolve these issues.
Remove unnecessary backups
Press the Windows key + R to open the Run dialogue.
Paste the following and hit enter: %localappdata%.
Double click on the Microsoft folder, then OneNote.
Here click on the folder with a name corresponding to the version of your application (16.0 for OneNote 2016, for instance),
Open the Backup folder.
Delete all the backup files that you no longer need.
Optimize files and reduce automatic backups
Go to File then Options.
Select Save & Backup.
Under Optimizing files, select Optimize All Files Now.
Under Backup, reduce the number of backup copies to keep.
All of the above steps should help you out when OneNote is giving you trouble with synchronization.
If you are looking for a great alternative solution to OneNote, we recommend you Evernote. It will help you to store everything from personal moments to business projects, safe, always secure, and ready whenever you need them.
You can use it on multiple devices so your important notes are with you wherever you go. Read more about this excellent software in our Evernote guide.
MS Office 2013 users can utilize templates for preformatted documents. However, some Office users have said that a Something went wrong while downloading your template error message pops when they try to download templates.
Consequently, users can’t get new templates from within Word, Excel, or PowerPoint. These are some of the resolutions that have fixed the Something went wrong while downloading your templateerror for MS Office users.
How do I fix the downloading template error?
1. Get a template from the Office templates and themes page
Note that you don’t need to download templates from within Office applications. You can manually download templates from Office templates & themes on Microsoft’s website.
Select a theme there, and click its Download button. That won’t fix the Something went wrong while downloading your templateerror within Office applications, but you can still get themes nonetheless.
2. Uninstall Visio Viewer
Press the Windows key + R keyboard shortcut to launch Run.
Enter appwiz.cpl in Run and click OK to open the uninstaller Control Panel applet.
Select the Microsoft Visio Viewer, and press the Uninstall button.
Click Yes on any dialog box window that opens.
Restart Windows after uninstalling Visio Viewer.
Alternatively, users can uninstall Viso with its uninstaller. To do that, press the Windows key + Q hotkey and enter Visio Viewer in Cortana’s search box.
Then right-click Visio Viewer and select Open file location.
Click the Uninstall.exe in Visio Viewer’s folder to remove the software.
Note: Lots of Office users have stated that uninstalling Visio Viewer fixes the error. That’s the software that enables users to preview their Visio pictures within Internet Explorer.
If you need to keep Visio Viewer, you can try reinstalling it. Click Download on this VV page. Then select either visioviewer64bit.exe or visioviewer32bit.exe and click Next to download the 64 or 32-bit version that matches MS Office’s bit version.
In addition, if you experience problems uninstalling Visio Viewers or other problematic applications on your PC, you can rely on other best uninstaller software that completely removes certain programs.
3. Repair MS Office
Open the Run accessory.
Input appwiz.cpl in the Open text box, and click the OK button.
Next, select the MS Office suite listed within the Programs and Features Control Panel applet.
Then press the Change button.
Select the Repair option.
Users can then select a Quick or Online Repair option.
Press the Repair button.
Note: A better alternative Is to use Stellar File Repair, a tool designed to repair office files. It can fix several corrupt files such as PowerPoint presentations, Excel spreadsheets, ZIP archives, and Word documents.
4. Deselect the Allow Office to connect to the internet option
Click File and Options in an Office application.
Then click Trust Center on the left of the window.
Press the Trust Center Settings button.
Click Privacy Options on the left of the Trust Center window.
Deselect the Allow Office to connect to the internet setting.
Click the OK button on the window.
The above solutions are all confirmed resolutions and will fix the Something went wrong while downloading your templateerror for most MS Office users.
Then you can download the templates you need within Microsoft Office applications again.
Back in November 2020, Microsoft Edge Canary and Dev channels gained the ability to sync browsing history and open tabs across devices. While the new feature was only available to Edge Insiders until now, it appears that some non-Insiders are also starting to see this in the stable version of the browser.
According to Thurrott.com, the feature was spotted by a Twitter user that had Edge Stable with version 87, though we believe that it has yet to reach all users. The change appears to be a part of the controlled rollout strategy, so you may have to wait for a bit to see it on your machine. Unfortunately, we are not seeing it yet on a couple of Windows 10 PCs we checked.
To use this feature, you need to enable these sync options in Edge manually. To do this, head over to the Settings Settings and more ( … ) > Profiles > Sync. On this page, you should use the toggle buttons to enable Open tabs and History sync options and finally restart the browser.
Needless to say, this is definitely a welcomed change, as makes it easier to access browsing history and web pages across different devices. In case you missed it, the company has listed new Microsoft Edge features that will roll out to users in the stable channel with version 88 later this month. The list includes Vertical tabs, Password Monitor, Sleeping tabs, the ability to reset your sync data, and more. If you’re interested, feel free to check out the Microsoft Edge Roadmap for details.
Over the holidays, Microsoft Launcher on the Surface Duo was updated to version 6.2.201102.92686. This quality update brings some small changes to the experience for those who own the Microsoft dual-screen Android device (via Windows Central.)
According to the Google Play Store listing, one of the changes includes Improvements for spacing and icon consistency in the app drawer. Other changes include support for keyboard search in the Office apps. Some of the other things that the changelog mentions don’t appear to be new, however, and have been seen in prior releases. The rest of the changelog is below.
Improvements on opening feed page in landscape and concurrent with another app on Surface Duo
Support overview on single screen of Surface Duo
Support screen time on Surface Duo
Improvement on app group creation flow via context menu
Multi-touch of app icon repositioning supported on home screen
Fixed known bugs on app drawer, app icon size, folder swipe up gesture
If you missed your chance to get Surface Duo, and want to experience Microsoft Launcher on the device, the wholesale retailer CDW is currently selling the base-model version of the Surface Duo at almost half the price. It’s selling for the all-time low price of just $740.
One of the most common things you might find yourself doing in Windows 10 every day is copying and pasting text. Most often, it’s from a webpage, an email, or a document. But what if you want to copy text from a photo or a video (without selectable text) and paste it on your clipboard?
Usually, doing so would entail using the “search with screenshot” feature of the Windows 10 search box, and going into Bing on the web, and copying the text. Developer Joe Finney, though, has a new app that helps make the process a lot easier, without the use of the internet.
I wrote about the app the day he introduced it, but I’ve also been spending my time with it over the past few days, too. Here’s a hands-on look at the experience.
Using the Text Grab app
Using Text Grab is just as simple as using a screenshot tool. Once it’s downloaded from the Microsoft Store, all you need to do is launch it from the Start Menu, or pin it to your taskbar. Your screen will then change over to a lighter color, and you’ll see a pencil appear in place of your mouse. You can drag the pencil anywhere you want, and it will turn into a green box and will “grab” the text it sees on your screen. That could be text in a video, an excerpt from a PDF, or anything else you want.
Once you select from the part of the image you want, Text Grab will then paste the text to your clipboard. You can paste it anywhere you want, just as if it were always text. Most times, the end result will be pretty accurate. I’ve been using it to copy specs off supplied specs sheets, videos, and PDFs for CES related posts, and it’s been quite a time-saver, compared to having to manually drag my mouse around to copy things into my posts.
Do note that there’s also a functionality built into Text Grab where if you single-click, the app will attempt to copy the word which was clicked on. This is a function of the Windows 10 OCR, as we’ll get into next. It draws a box around each of the words it recognizes.
How Text Grab works
So, how does this app work? While it sounds pretty basic, it actually functions using the Windows OCR API. For those unfamiliar, the Windows OCR is Optical Character Recognition. It’s part of the Universal Windows Platform (UWP.) The developer feature lets you extract text and text layout information from images. Unlike most apps that extract text and layout information from images, the OCR doesn’t require an internet connection. It’s also been used in Word, OneNote, OneDrive, and Office Lens. Since Office Lens has been removed from the Microsoft Store on Windows 10, this helps you fill that gap a bit.
Do note that Text Grab is also meant to be simplistic, too. It doesn’t have to run in the background all the time, and it can easily be launched with a keyboard shortcut if you pin the app to your taskbar. There’s also no clunky user interfaces with things such as a history page, or even popups asking for feedback.
Text Grab is open sourced!
The best part of Text Grab is that the app is open sourced. While Joe Finney says that his app is still a work in progress, the code for the app is available on GitHub. This means that it can change over time, with help from the community. You can check the app out here on GitHub if you’re the kind of person that likes to tinker or develop Windows 10 apps. Of course, we also invite you to check out the app via the link below, too. We’ll be having Joe on the OnPodcast this weekend, so be sure to drop us some questions that you might have for him, as well!
If you’re a close follower of Windows and Microsoft, you might remember the rumors of an operating system known as Polaris. It was believed to be a streamlined flavor of Windows Core OS for new PCs, cutting out legacy features in favor of better battery life, and performance on lower-end hardware. It was eventually canceled in favor of Windows 10X, but an early build of Polaris recently leaked online, confirming the project was actually once a thing at Microsoft (via Windows Central.)
Interestingly enough, this early Polaris build is designed for ARM32 PCs, like the Surface RT. However, it’s not really something to install, as there’s no Windows Shell, and there are no apps in the release. Zac Bowden reports that the leak is an RS3 RTM build, confirming that Microsoft has been working on the project since at least 2017. Again, though, there isn’t anything new or anything most people can play with in this leaked build. It’s rather designed for professionals who are interested in tweaking and exploring an unreleased version of Windows.
While there isn’t much to this leaked build, it’s still something you might want to check out. We don’t endorse or recommend installing it, but it’s available dow download on the Internet Archive.
Microsoft has removed Office Lens, the company’s free document scanning tool app for Windows 10, from the Microsoft Store. The app no longer supports certain cloud-based features, and users won’t be able to save their pictures to cloud services including OneDrive, and OneNote (via Aggiornamenti Lumia).
“Certain cloud-based services in Office Lens for Windows, such as saving your pictures to OneDrive, OneNote, Word, PowerPoint, or PDF, will become unavailable after December 31, 2020. You can continue to use other features of the app as installed on your device. In addition, Office Lens for Windows 10 will no longer be available for download from the Microsoft Store as of January 1, 2021,” the company explained.
As a recall, Microsoft launched the Office Lens app for the Windows Phone platform back in 2014. The handy tool allows users to convert their smartphones into a portable scanner for converting physical documents to Word, PowerPoint, or PDF format. The scanned documents can be uploaded to Microsoft’s OneDrive cloud storage and OneNote.
The company announced in October that Office Lens for Windows 10 is losing support by the end of 2020, and the change was detailed in a support document. While the Microsoft Store Office Lens version is no longer available, the app should continue to work on Android and iOS devices. For the best experience, you’ll need to download the latest version of Office Lens from Google Play or the App Store, though.
According to a report from Windows Central journalist Zac Bowden, sources familiar within Microsoft are talking about a tangible timeline for the final consolidation of Outlook across platforms.
A few years ago, Microsoft spearheaded a project to redesign Outlook on the Web to bring it more in line with its own flagship enterprise email client. The result was a nicer looking web email client that still lacked most of the built-in functionality achieved by the native commercial offering of Outlook for the desktop. On top of its efforts on the web, Microsoft also divided up engineering resources to work on a more consumer-friendly in-box email client for its Windows 10 operating system that split the functionality of Outlook up between two apps simply titled Mail and Calendar. Once again, people were offered a sleeker-looking mail client that still lacked many of the features more flushed out mail services still offered.
It now seems that Microsoft is underway with a project called Monarch that intends to replace the Windows 10 desktop client with a new web app that will function identically across Mac, PCs, and the web. Other details include the web app hosting a much smaller install footprint as well as greater accessibility to users on both free and paid Office accounts while also gaining some native OS integration in the processes. Among some of the native features coming to Project Monarch are offline storage, share targets, and system notifications to start.
Microsoft watcher Tero Alhonen added to the intrigue with a screenshot of what looks to be an early look at Project Monarch:
Unfortunately, Project Monarch is a way off with Bowden reporting that testing of the new client may not happen until the end of 2021 and possible full replacement of the Mail & Calendar app in Windows happening sometime in 2022. Microsoft also wants to tackle its flagship commercial Outlook app through Project Monarch but that undertaking is even further down the road.
In the meantime, the Mail & Calendar app for Windows 10 will receive one more visual update as part of its maintenance upkeep that will showcase some early visions of the next design elements of Windows 10 via the company’s Sun Valley UI overhaul.
Again, it should be noted that Microsoft has not confirmed any of the above information, but Bowden tends to have reliable sources.
Let us know in the comments below what you make of Microsoft’s umpteenth attempt at consolidating its mail efforts.
Microsoft PowerPoint presentations usually contain important, sometimes classified, documents. Hence, most people tend to password-protect such documents against unauthorized access.
However, what happens if you forgot your password? To ensure your files are not lost forever, this article will provide you with the necessary solutions, to recover PowerPointpassword.
Password protection is the most convenient way of preventing unsolicited/unauthorized access to digital files, accounts, and so on. On average, a typical individual finds it very difficult to keep track of all his passwords, and in such cases, he becomes a victim of his own trap.
At times, forgetting a PowerPointpassword could mean nothing. Most times, however, it could be very damaging, especially if such a presentation contains important documents (for business or academic purpose). In this case, recovering the forgotten password becomes imperative, to enable you to regain access to the PowerPoint document.
This post will show you how to recover PowerPointpassword and regain control of your PowerPoint presentation(s).
The easiest and quickest way to recover PowerPointpassword is with the use of a reliable password recovery software. A typical password recovery software uses some set of decryption algorithms, to decrypt password-protected PowerPoint files, thereby providing you with a free pass to access the inherent documents.
Some programs are able to recover forgotten passwords, while others simply reset the passwords to simple, less complex, ones. Either way, you are able to recover PowerPointpassword and access your .ppt documents.
What are the best programs to recover PowerPoint passwords?
Stellar Password Recovery is a software that can recover your lost passwords. The program searches your other installed software for different passwords and gives you a list with all of them.
This way, you can remember the password you forgot, or you can try using a different one if you are the type of person who uses the same password for different accounts.
The app can also reset your system password on reboot, in case you forgot it and you think you will be locked out of using the pc. The password finder feature includes, among others, Microsoft Office products such as PowerPoint, which is great for recovering ur important work or college projects.
In addition, the software has a feature that finds the license keys of the activatet products on your device, in case you need to use them again.
Stellar Password Recovery
Recover all your data easily, find forgotten license keys and lost passwords with Stellar Password Recovery.
Purchase the program here and install it on your computer.
Ensure you have a Windows Setup disk (CD) or ISO image (to create a bootable password reset CD or Flash drive)
In case you have neither of the aforementioned hardware, you can request for an ISO image (for Windows Key) here.
Burn the downloaded ISO image on an empty CD or Flash drive.
Slot in the CD or Flash drive and allow it to take over the boot process of your system.
Follow the on-screen instruction to recover/reset the forgotten PowerPointpassword(s) and other security settings on your system.
Recoverpassword and retrieve your PowerPoint document(s).
Windows Key from Passware, also known as Passware Windowskey, is one of the most popular recovery programs used to recoverPowerPointpassword (and other system passwords) on Windows computers. It is compatible with all Windows OS between Windows 10 and Windows XP, as well as all Windows servers between 2013 to 2003.
The software works in tandem with a CD or Flash drive, to reset the security settings (including passwords) of a computer. With this, you can easily adapt the program to recover passworded PowerPoint documents.
Windows Key is optimized to perform virtually all security-related functions, including secure boots resetting, Admin password resetting, local policy resetting, designated password resetting, and more. Essentially, it can be employed to swiftly recover any system password on your system, at a 100% recovery rate.
Passware Windows Key is offered at a starting price of $39, and there are three major editions on offer: Basic, Standard Plus, and Business. There is also a free trial version, as well as a 30-day refund policy on all purchases.
Windows Key from Passware is quite easy to use, irrespective of the type (and complexity) of the password you seek to recover; be it PowerPoint, system admin password, or any other. Just follow the aforementioned steps and you are good to go.
Windows Key
Windows Key from Passware is a software that will reset your security settings of your system, including passwords.
PassFab has an unique password detection algorithm that is designed to find everything easy and fast. It can analyse each password’s length and its difficulty.
Moreover, PassFab allows its users to recover passwords from multiple computers at once, using three so-called Attack modes. The software allows you to restore or change your passwords after it has found them, and it also ensures that all your data is protected.
Lastly, in order to search and find your passwords faster, the program makes use of both GPU and CPU power for faster speeds and acceleration. Thanks to its amazing optimization, the software runs at full power on any combination of hardware.
Note:To ensure you don’t forget your password in the future, simply reset your password to a simpler combination or you can remove the password completely.
To recover and access the restricted documents, the ultimate solution is to recover the protecting-password. And we have outlined, in this article, reliable recovery tools, any of which can be employed to recover a forgotten password and retrieve protected documents.
If you would like to add any information regarding password recovery, feel free to do so in the comment section below.
Windows 10 has some issues with the software, especially if it’s older software, so some incompatibility issues are going to happen. One of these issues is related to Microsoft Money Plus for Windows 10.
If you’re not familiar, Microsoft Money Plus it’s a personal finance management software created by Microsoft that allows you to monitor your bank accounts and expenses.
But this software was discontinued in 2008, and Microsoft isn’t working on it anymore.
Some users prefer using Microsoft Money Plus over other solutions, and since this is an older software, some issues are going to happen.
The common problem with Microsoft Money Plus on Windows 10 is that it requires Internet Explorer 6 to run.
Don’t worry, you won’t need to install Internet Explorer 6, this is just an error that occurs because Money Plus relies on Internet Explorer, and it checks the registry for it.
Fortunately for you, you can fix this problem simply by modifying your registry.
The process is simpler than it seems, and you should be able to do it by following our instructions closely. So without further ado, let’s get started.
How can I solve the issues with Microsoft Money in Windows 10?
Change the registry values for Internet Explorer
Search for regedit, right-click it, and choose Run as administrator.
On the left side you need to navigate to:HKEY_LOCAL_MACHINE\SOFTWARE\Wow6432Node\Microsoft\Internet Explorer if you’re on 64-bit version of Windows. (If you’re using 32-bit version go to:HKEY_LOCAL_MACHINE\SOFTWARE\Microsoft\Internet Explorer)
In the right pane you need to find Version registry value Modify its value from 9.11.10240.16384 to 9.11.10240.1638.
After doing that, close the Registry Editor.
That’s it, just save the changes and you’re good to go. As you can see this is just a minor registry error, and by changing it Microsoft Money Plus should be working without any problems on Windows 10 now.
If you have any other Windows 10-related issues you can check for the solution in our Windows 10 Fix section. If you found our solution helpful, feel free to let us know in the comments section below.
You will receive different system notifications when your PC is connected to a specific network. Among these notifications, we have the alert that says: could not reconnect all network drives.
While this default notification lets you know that some devices from your network cannot be currently used, it can also be a false positive. In this guide, we will show you how to disable the notification.
Why does Could not reconnect all network drives message appear?
Below are some of the reasons you get could not reconnect all network drives error message:
Outdated PC: If your PC is outdated, you will likely get this error message when you connect your network drives. The solution to this is to update your operating system.
Wrong settings: Sometimes, some settings in GPO or Regedit can be the cause of could not reconnect to all network drives. You need to make the necessary changes to eliminate the error message.
How can I fix Could not reconnect all network drives error?
Here’s what to do first:
If this notification concerns a driver currently disconnected from your computer, you only have to re-establish the actual connection. For example, if we’re talking about an external hard drive that’s currently not recognized by your PC, and if this specific external hardware causes the actual alert, we should unplug and re-plug the USB cord.
1. Update your PC
Press the Windows key + I and select Update & Security.
Click the Check for updates button.
Finally, download and install all available updates.
At times, could not reconnect all network drives issue might be due to an outdated operating system. Downloading and installing the latest patches should do the trick here.
2. Use a batch file from Microsoft
2.1. Create a startup file
Press the Windows key, type note, and select Notepad.
Copy and paste the script below on Notepad: PowerShell -Command "Set-ExecutionPolicy -Scope CurrentUser Unrestricted" >> "%TEMP%\StartupLog.txt" 2>&1 PowerShell -File "%SystemDrive%\Scripts\MapDrives.ps1" >> "%TEMP%\StartupLog.txt" 2>&1
Press the Ctrl key + S to save the file.
Now, change the File name to MapDrives.cmd and choose All Files as the Save as type.
Click the Save button.
Next, copy the MapDrives.cmd file and navigate to the path below: C:\ProgramData\Microsoft\Windows\Start Menu\Programs\Startup
Paste the file into the StartUp folder.
Next, open a new Notepad window and copy and paste the script below: $i=3 while($True){ $error.clear() $MappedDrives = Get-SmbMapping |where -property Status -Value Unavailable -EQ | select LocalPath,RemotePath foreach( $MappedDrive in $MappedDrives) { try { New-SmbMapping -LocalPath $MappedDrive.LocalPath -RemotePath $MappedDrive.RemotePath -Persistent $True } catch { Write-Host "There was an error mapping $MappedDrive.RemotePath to $MappedDrive.LocalPath" } } $i = $i - 1 if($error.Count -eq 0 -Or $i -eq 0) {break} Start-Sleep -Seconds 30 }
Now, press the Windows key + S, set the File name to MapDrives.ps1, and Save as type as All files.
Click the Save button.
Copy the MapDrives.ps1 file and click your C: drive in the left pane.
Next, click the New folder icon at the top and name the folder Scripts.
Finally, paste the MapDrives.ps1 file into the Scripts folder and restart your PC.
If you keep getting could not reconnect all network drives error message, you can fix it using the batch file from Microsoft. If this method does not work for you, you can try running the batch file following the second method.
2.2. Use the Task Scheduler
Leave the MapDrives.ps1 file in the Scripts folder, as shown in the solution above.
Press the Windows key, type task, and select the Task Scheduler option.
Now, choose Action > Create Task.
Type the name (something like Map Network Drives) and description of the task in the Create Task dialog box under the General tab.
Click the Change User or Group option, select a local user or group, and then click the OK button.
Next, choose New on the Triggers tab.
Choose At log on under the Begin the task section.
Now, choose New on the Actions tab.
For the Action field, choose Start a program.
Enter Powershell.exe in the Program/script field.
Next, type the command below in the Add arguments (optional) field: -windowstyle hidden -command .\MapDrives.ps1 >> %TEMP%\StartupLog.txt 2>&1
Type the location (%SystemDrive%\Scripts\) of the script file In the Start in (optional) field.
Now, select Start only if the following network connection is available in the Conditions tab.
Select Any connection and click OK.
Finally, sign out and sign in to your PC to run the scheduled task.
If creating a startup file does not eliminate could not reconnect all network drives option, you can use the Task Scheduler.
3. Make Window wait for the connection before mapping network drivers
Press the Windows key + R, type gpedit.msc, and click OK.
Navigate to the path below in the left pane: Computer Configuration > Administrative Templates > System > Logon.
Now, double-click Always wait for the network at computer startup and logon to open.
Tick the Enabled radio button.
Finally, click the Apply button, followed by OK, and restart your PC.
In some cases, could not reconnect all network drives message shows up because the policy that tries to map your drive is initiated at startup. However, there might be no drive connected at this point.
Hence, you must change the settings to wait until the drive is ready.
Press the Windows key + E to open Windows Explorer and click This PC in the left pane.
Find the driver that’s not connected and right-click on its icon.
From the list of options that are displayed click on the Disconnect network drive entry.
Or, from the main window status bar, click on the Map network drive and choose Disconnect network drive.
5. Disable the Windows cannot connect to all network drivers message at start-up
Press the Windows key + R, type regedit, and click OK.
Navigate to the path below in the pane: HKEY_LOCAL_MACHINESYSTEMCurrentControlSetControlNetworkProvider
Now, double-click on RestoreConnection in the right pane. If the option is not available, do the following:
Right-click the NetworkProvider option and choose New > DWORD (32-bit)Value.
Now, type RestoreConnection as the DWORD name and double-click it.
Set the Value data to 0 and click the OK button.
Finally, restart your PC.
How to disable Could not reconnect all network drives on Windows 10 notification?
To disable could not reconnect all network drivers on Windows notification, you need to go through the Group Policy Editor. We have shown how to do this in solution four above.
The troubleshooting solutions we listed in our article should help you fix or disable could not reconnect all network drives message displayed on your Windows 10 computer.
Some users have said that they can’t uninstall programs with the MSI Windows Installer as it gets stuck while gathering the required information.
That error can arise for one specific program or numerous software. These are a few of the potential resolutions that might fix the Gathering required information error for some users.
Some users have confirmed that they’ve fixed the gathering required information error by updating Windows 10 to the latest build version.
Users have also said that they uninstalled software that the gathering required information error arises for with SafeMSI, which enables users to utilize the Windows Installer service within Safe Mode.
How can I fix Windows installer if it gets stuck?
1. Update the Windows 10 build version
Click on the Windows button, then select Settings and click on Update & Security.
Repair MSI is a utility that can fix numerous Windows Installer (MSI) errors. So, that software might come in handy for resolving the gathering required informationerror. Click Download Now on its Softpedia page to save the Repair MSI archive to a folder.
Users can click the RepairMSIWindowsInstaller.exe file to open the window in the snapshot directly below. Then press the Start button to fix MSI.
4. Reregister the Windows Installer Service
Enter cmd in the search box and select Run as administrator under the Command Prompt app from the results.
Input the following separate commands and press Enter after entering each one: %windir%\system32\msiexec.exe /unregister
%windir%\system32\msiexec.exe /regserver
%windir%\syswow64\msiexec.exe /unregister
%windir%\syswow64\msiexec.exe /regserver
Thereafter, close the Command Prompt; and restart the desktop or laptop.
We hope that our solutions solved the gathering required information error with the Windows Installer. If you have any further suggestions don’t hesitate to write them in our comments section below.
While Apple’s consumer and commercial base only make up a fraction of Intel’s chip business, AMD’s recent gain in server chip provisions has elevated Third Point CEO Daniel Loeb’s argument that Intel needs to take some “immediate action to boost the company’s position as a major provider of processor chips for PCs and data centers.”
Over the course of a couple of years, Third Point has become a significant voice in Intel’s investors’ meetings as it has accumulated close to a $1B stake in the company which is why Loeb sent out an emergency flare in the form of a letter to Intel.
Loeb points out some key identifiers that should have most Intel investors worried, such as the loss of talent within the company due to “human capital management issues”, the erosion of Intel’s industry-leading position as a micro processing manufacturer to TSM and Samsung, and its market share loss in its core PC industry to ARM as of recent. Even when it comes to championing computational modeling for AI, Intel has been surpassed by NVIDIA.
Perhaps, not simply satisfied with sounding the alarm, Loeb also goes on to mention more strategic things Intel can do to stem the company’s bleeding of mind and market share beginning with an evaluation of its business as an integrated device manufacturer.
Among Loeb’s notes for Intel include a call for advisors to reexamine whether the company should remain an integrated device manufacturer and or divest failed acquisitions.
Third Point believes that Intel should consider separating its chip design from its semiconductor fabrication plant manufacturing operations, according to the sources. This could include a joint venture in manufacturing, according to sources.
Aside from its suggestions, Third Point is also ready to play aggressively if sees Intel brushing off its concerns. Loeb and company have reserved the option to submit potential nominees to Intel’s board to help facilitate the changes Third Point believes are a necessity for the company to ward off the continued dabbling its partners are doing with their own custom silicon as of late.
In a response to Loeb’s attentive letter, Intel offered the following, “Intel welcomes input from all investors regarding enhanced shareholder value. In that spirit, we look forward to engaging with Third Point LLC on their ideas towards that goal.”
Despite Third Point’s lack of subtly and nuance, the ideas that Loeb brings forth are worth examining for Intel as its once-dominant position is being quickly undermined by companies working faster and producing better alternatives for its partners.
Netflix is one of the most popular online video streaming services. However, its popularity doesn’t keep it clear of technical issues.
One of those is error code M7111-1331-2206, which arises for some users who access Netflix from web browsers.
Instead of streaming the movie, a Netflix tab opens and displays the error code M7111-1331.
If you’ve been in this situation, here are a few ways you can fix error code M7111-1331-2206.
How to fix Netflix streaming error This title is not available to watch instantly?
1. Check if Netflix is down
There might be something wrong with Netflix‘s servers if you encounter the error M7111-1331-2206.
In this case, there’s not much you can do to fix it other than waiting for a while. More often than not, the issue takes care of itself.
You can check if Netflix is down at DownDetector.com. Just type Netflix in DownDetector’s search box and wait for the results.
2. Clear browsing data
Error M7111-1331-2206 can often be due to corrupted or outdated browser data.
Therefore, one of the best solutions is usually to clear all browser data.
The browser’s cache is perhaps the most essential thing to clear, but users can also erase other website-related information.
This is how you can clear Google Chrome’s browser data:
Click the Customize Google Chrome button at the top right of the browser’s window
Select More tools
Click the Clear browsing data button
Head to the Advanced tab
Select the All time option from the Time range drop-down menu
Cached images and files are the essential check box to select
Thereafter, press the Clear Data button
3. Reset the Browser
Resetting the browser is another resolution that can help you clear browsing data.
However, that will also disable extensions that might have an impact on Netflix’s streaming.
Netflix 1080p is one extension that can potentially generate the M7111-1331-2206 error. Follow the guidelines below to reset Google Chrome.
Go to Chrome’s Settings section
Click the Advanced button to expand the tab
Select the Restore settingsto their original defaults option
Press the Reset settings button
4. Try using Netflix in an alternative browser
As the M7111-1331-2206 error often pertains to corrupted browser data and extensions, users might find that Netflix works fine in alternative browsers they seldom use.
So, try streaming a Netflix show or movie in another (preferably newly-installed) browser.
Edge is probably the best browser for Netflix as it can stream movies at 4K resolution.
However, Opera One and Google Chrome are also Netflix compatible browsers and work great.
We recommend trying a browser that conveniently uses the processing capacity and has integrated techniques that focus on loading content-rich pages faster.
5. Open Netflix From the URL Bar Instead of Bookmarks
Some Netflix users might need to refresh their bookmarks to fix error M7111-1331-2206.
If you open Netflix with a bookmark, try opening the website by typing www.netflix.com in the URL bar instead.
If that resolves the issue, delete the current Netflix bookmark and add a new one.
6. Turn off your VPN
Netflix Inc has clamped down on VPN software. Consequently, streaming errors can arise when Netflix detects a VPN.
So, try not to use a VPN to access Netflix, or temporarily disable your VPN and check if the error still occurs.
Alternatively, you could try to use a Netflix-friendly VPN. If you’re considering switching to a VPN that works great with online video streaming services, check out our best Netflix VPNs.
Conclusion
Those are a few resolutions that might fix the M7111-1331-2206 error for Netflix movie streaming in browsers.
Remember, however, that users can also watch movies with the Netflix app, which might be more reliable than utilizing the movie-streaming service within browsers.
With the evolution of the internet and the services people and companies provide online, there is an increased risk of exposure to scammers, money launderers, and other third parties that don’t have the best interest of your company at heart.
Because of these risks, being able to store information about your clients and verifying their validity, is very important. Activities that include market manipulation, trade of illegal goods, corruption of public funds, tax evasion, etc. are covered by AML regulations.
In the past, the process of finding possible money launderers was a painstakingly slow process that included manually searching through tons of papers and folders. Even after the searching process would be done, you would still have issues when it comes to gathering objective and exact information.
Fortunately, you can now use specialized software that allows you to easily streamline the research process of possible money launderers. Read on to find out more details.
Shufti Pro is a top software in the financial industry that offers Identity Verification services with the help of KYC & AML Screening solutions.
It is a great tool for worldwide medium to large businesses because it scans over 3,000 documents written in more than 150 languages from around 230 countries and territories. Thus, Shufti Pro can guarantee up to 98.67% accurate identification results.
The platform offers access to 1700+ datasets acquired from international sources including OFAC, EU, HMT, UN, DFAT, and others. Furthermore, the AML data bank is updated every 15 minutes.
Unfortunately, fraud is very common, thus, to avoid being a victim, performing regular AML checks will help to don’t lose money and your company’s reputation. Also, it is a simple way to verify and validate your customer’s transactions.
Shufti Pro’s AML engine works intelligently to reduce false positives. Global AML verifications are done in real-time to enable organizations to mitigate the financial risk associated with high-risk customers.
Most important features of Shufti Pro:
Quick and Accurate Verification Processing
Seamless API integration for service automation and higher flexibility
Comprehensive Global Coverage
Two-Fold Technology, AI (Artificial Intelligence) and HI (Human Intelligence)
It can be used as web-based, desktop software, Android or iOS application
PCI DSS and GDPR compliant
Shufti Pro
One of the best AML software, Shufti Pro identify high-risk entities with robust AML screening solutions.
Encompass is a great AML software that allows you to fully manage your company by storing data in an accessible and safe location and can also automate different aspects of the monotonous-type tasks of your practice.
The automation process is done using CDD (Customer Due Diligence) and EDD (Enhanced Due Diligence) processes.
Stream-lining these aspects of your practice is extremely useful, as it allows you to focus on more sensitive topics while also taking the time to analyze your data results. This type of software offers detailed information by connecting to various clients databases focused on the task at hand.
Encompass has a very intuitive user interface that offers you quick access to all the automation features, data sources, searches, and can even monitor ongoing data streams in real time.
This software offers optimal protection from risks posed by regulations, including the ability to simultaneously verify customer information, discover the previous beneficial owners, screen for issues, and can even perform media checks.
You can use Encompass to see an all stored data regarding specific customers in one simple file. This allows you to assess the risk involved with each customer, apply risk ratings,and also compare the risks to AML/CTF compliance. The Encompass API can be easily integrated with your AML system and it allows you to easily automate any process.
Notable features of Encompass include:
Access to global corporate registries
Electronic identity verification
Automated discovery of UBOs
Automated screening of individuals compared to your PEP sanctions data
Can automatically store negative results checks and uses AI to show you results quickly
Continuous monitoring of your customer’s profiles
Ability to build a complete audit trail for every action performed
Taxcalc is another great software options that was designed to help your accountant prevent, and deal with any AML issues encountered.
This software was launched in 2009, and since then, Taxcalc has become a partner with the global leader in identity and credit information, called Equifax. This feature allows you to rest assured that all the information you get regarding your customers is true and objective.
All you need to do in order to acquire customer information is to simply enter the name and address of your possible client. This will show you all known data regarding your client’s purchase history, outstanding payments, etc., so you can make a better informed decision.
Because of it’s powerful yet simple to use features, Taxcalc AML can be used in accountancy practices, by auditors, bookkeepers, and tax and payroll advisors as well.
Key features of Taxcalc AML include:
Pass and Refer results – after the identity check is completed, the system allows you to choose if the candidate was accepted on not and add notes relating to your decision
Built in Anti-Money Laundering Identity Checking Service
You can get Taxcalc AML with a basic licence that allows you to perform searches and verify registration for 15 people. As your business evolves, you have the possibility to buy more ‘personal searches’ packs, depending on the number of customers you need to verify.
AMLCC is a powerful AML software designed for use in different industries, but it is greatly optimized for use in accountant practices. This easy-to-use tool will help you deal with all the responsibilities dictated by law.
This software can guide you through all the steps needed in order to successfully train your staff and offers you the possibility to create a full range of reports, both automated and manual.
Your data is always securely stored in the cloud, eliminating the risk of possible issues with data corruption or the loss of files and data folders. You can easily access all AMLCC data from anywhere in the world.
The AMLCC Recording System makes it easier than ever to create, manage, and store records, and also offer other features such as:
Risk assessments
Can verify client identities
Database with clients reported to the NCA
Residency checks
Ability to analyze ‘risk’ factors – politically exposed persons
One of the best features of AMLCC is the fact that it offers a comprehensive Training Module that contains two parts :
MLRO training – Money Laundering Reporting Officer
Training for all client-facing staff – receptionists, sales people, etc.
Both parts of the training module include a multiple-choice questions test that allow you to evaluate yourself.
This AML software from Iris is a very powerful tool for accountants, solicitors, etc., that allows you to manage every aspect of your company’s compliance recording.
You can use this app to produce a risk-based assessment of your customer’s database, that can give you an all-encompassing overview of your practice. The compliance features found in Iris ensures you are up to date with the latest legislation and also has regular updates.
Key features found in Iris AML:
KYC information – client risk and documentation
Ability to track staff training
Automatically identifies non-compliant clients
Unlimited electronic ID verification system
Download and search treasury sanctions list
Can import customer records from any existing database
AML compliance technical reference manual by SWAT UK Limited
Oracle Financial Services Anti Money Laundering is a great AML software that has a good range of features. You can use this AML software to easily identify, examine, and directly report any people that might be interested to engage in money laundering.
This offers you the possibility to streamline processes and focus your energy on other aspects of your practice.
This AML software from Oracle has a wide range of pre-configured AML scenarios, stored in libraries. These scenarios can simplify the process of data processing and collection and also keep up with rules imposed by laws.
Main features include:
Can monitor, investigate and report on any incredulous activities
Library of comprehensive behavior detection
Can customize your risk scoring and thresholds
Robust case management
Full compliance with national & international regulations
In this article, we explored some of the best software options on the market that allow you to easily collect, manage and create a wide range of reports, and also protect your company against hidden money-laundering practices.
The features included in the above list cover a wide range of accounting and data collection tools that will surely help run your practice even more efficiently than before.
Please let us know in the comment section below what software did you choose from the list, and why.
2020 was undoubtedly a very special year for all of us, with a worldwide pandemic that impacted everyone and profoundly changed the way we work. This year has been pretty brutal for many sectors including transport, restaurants and food services, or the events industry, though the biggest tech companies including Microsoft, Apple, Google, or Amazon are still thriving.
Like many of its competitors, Microsoft quickly enforced a work from home policy for its employees and cancelled all in-person events until July 2021. This global switch to remote work had a big impact on the growth of Microsoft Teams and Zoom, and the software giant also didn’t fail to launch various new hardware and services since the beginning of the COVID-19 pandemic.
While Microsoft has continued to perform very well quarter after quarter this year, there have been some notable misses on the consumer side of things, with the closure of the company’s Mixer game streaming service coming first to mind. As 2020 is coming to a close, this is my personal and non exhaustive list of Microsoft’s hits and misses for this year.
Microsoft Teams became a juggernaut
Microsoft Teams has been one of the fastest new Office 365 services since launch, and the app has experienced a meteoric growth this year due to the ongoing pandemic. Microsoft announced 115 million daily active users for Teams back in October, adding 40 million new users in just six months.
Overall, Microsoft seems to have doubled down on Teams since the beginning of the pandemic, adding several new features to make the video conferencing experience better than Zoom’s. It’s sometimes hard to keep up with all the updates coming to Teams every month, but my colleague Rabia penned yesterday a good recap of what Teams added in 2020.
Your Phone is becoming an essential Windows 10 app
If the selection of Microsoft UWP apps that ship with Windows 10 still leaves a lot to be desired, Your Phone is starting to really stand out. If you own an Android phone, Your Phone will allow you sync recent pictures, send and receive text messages, and even make phone calls right from your PC.
Apple has created similar synergies between iPhones and Macs many years ago, and it’s nice to see Windows 10 finally catching up. Microsoft has been testing some exclusive Your Phone features on select Samsung Galaxy devices, including the ability to run multiple Android apps on your PC, and the company can probably do more to make Android devices integrate even more seamlessly with Windows 10.
In recent years, Microsoft introduced several new Windows 10 features that didn’t really get momentum, and the list includes Timeline and the now deprecated My People shortcut in the Taskbar. Your Phone isn’t as deeply integrated to the system and remains an app that can be updated regularly through the Microsoft Store, and that’s probably best for users. Do you remember having to wait six months to get new features for the legacy Microsoft Edge? Yeah, Microsoft should probably avoid doing that again.
Xbox Game Pass remains one of the best deals in gaming
Xbox Game Pass crossed 15 million subscribers this year, and the service remains one of the best deals in gaming these days. This fall, Microsoft added EA Play games and Xbox Cloud Gaming to the Ultimate tier at no additional cost, and we’re continuing to see high-profile games join the service such as Control or Doom Eternal.
All new Xbox Games Studios titles continue to launch on Xbox Game Pass for Console and PC on day one, and this has really helped niche games like Microsoft Flight Simulator to reach over 2 million PC players since its launch in August. Microsoft’s upcoming acquisition of Bethesda/ZeniMax Media will guarantee a regular stream of new first-party games coming to the service, and Microsoft is likely not done with studio acquisitions and business deals with big publishers.
Following the addition of EA Play to Xbox Game Pass Ultimate, a recent rumour suggests the Ubisoft+ catalog could also join Xbox Game Pass next year. We’ll see what happens, but Microsoft is certainly ready to make Xbox Game Pass even more attractive than it is today.
Microsoft didn’t screw up the launch of its Xbox Series X|S consoles
We all remember the disastrous launch of the Xbox One seven years ago, when Microsoft had a console that was less powerful than the competition, but still cost $100 more due to the inclusion of Kinect. The Xbox One also really suffered from all the FUD about the console requiring to be always connected to the Internet, and Microsoft wasted years to rebuild the trust it had lost in the Don Mattrick era.
Fast forward to 2020, the recent launch of the Xbox Series X|S is a completely different story. Even though Microsoft didn’t share any sales numbers, both consoles have been selling out very quickly in all their launch markets, and many enthusiasts haven’t been able to get their hands on the new Xbox or PS5 consoles during the holidays.
The Xbox Series X and Series S unfortunately launched without the flagship game that should have been Halo: Infinite, but delaying the game to Fall 2021 was definitely the right thing to do even though we’re still a bit worried about it. We hope that Microsoft will have a stronger lineup of exclusive games next year, and the company also has yet to convince us that the Xbox Series X is the most powerful new console on the market. So far, many cross-platform games such as Assassin’s Creed Valhalla, Dirt 5, or the much-criticized Cyberpunk 2077 run just as well, if not better, on Sony’s PlayStation 5 console.
Microsoft once again shipped two Windows 10 updates this year, with the latter being a pretty minor update with just a couple of UI changes. Panos Panay, Microsoft’s Chief Product Office Officer and new head of both Windows client and hardware said earlier this year that the company was going “to accelerate innovation in Windows 10” to meet customers where they are now. As a result, Windows 10X, Microsoft’s new OS originally designed for dual-screen devices has been delayed to next year, and it will now ship first on single-screen devices aimed at customers using cloud-powered apps first and foremost.
For now, we haven’t really seen the results of this “accelerated innovation in Windows 10,” though a significant design update codenamed Sun Valley could make its debut in the second half of 2021 with the Windows 10 21H2 update. As for Windows 10X, the first devices running the new OS are expected to be released next year, but Microsoft’s dual-screen Surface Neo, which was expected to be a launch device for Windows 10X this fall has been delayed to an unknown date.
Between the bi-annual Windows 10 release cycle, the company’s internal work on Windows 10X, and the slow progress on Windows 10 on ARM, it may look like the Windows division may have a bit too much on its plate right now. In many ways, it’s probably Apple that made PCs exciting again this year with the launch of the first Apple Silicon Macs, which don’t suffer from the same performance and compatibility issues that have been plaguing Windows 10 on ARM PCs for years.
If Apple expects to transition its whole Mac line to its own Apple Silicon over the next two years, Windows 10 on ARM still looks like a little side-project instead of the future of Windows 10 it should be. As you may know, the first Windows 10X devices will apparently keep using Intel chips that no longer offer the best battery life on mobile devices. It remains to be seen if Windows 10X can avoid ending up like another Windows RT or Windows Phone, but Apple’s being all-in on ARM chips seems to be the right thing to do right now.
The Surface family continues its slow growth
Just like Apple, Microsoft is a company that slowly iterates, and that’s why we keep seeing the same designs in the latest Surface Pro, Surface Book, and Surface Laptop devices. The Surface Pro X was an interesting change, but it looks like the refreshed design isn’t coming to the Surface Pro 8 expected to be announced in January.
Following the launch of its first Surface Go tablet in 2018, Microsoft followed up with more low-cost Surface devices this year with the Surface Go 2 and the Surface Laptop Go. While it’s certainly a good thing to make Surface devices more affordable, I also think that many Surface fans are still waiting for a true Surface workstation. I’m imagining this device as the “Surface Laptop Pro,” which would have a powerful dedicated GPU that’s still missing on the regular Surface Laptop models, and no gimmicks like the detachable (and somewhat unreliable) hinge from the Surface Book line.
I also believe there’s a market for a boring “Surface phone” with a single screen unlike the Surface Duo, but with the same premium design and top of the line specs. My colleague Arif, who is quite the Surface fan, reviewed the Surface Duo and initially liked it, but he eventually returned it because of the disappointing camera as well as an issue with USB-C port. He got an iPhone 12 Pro instead, and I don’t blame him.
Truth be told, the 1st-gen Surface Duo is overpriced for a device that shipped with a subpar camera and an unpolished OS. Even after a couple of software updates, the Android OS and its apps like the Microsoft Launcher apparently still requires some work, but that has to be expected from a new Android manufacturer. Actually, Microsoft acquired the operations team from a Finnish company working on the Surface Duo’s Android software this year.
After the Duo launched, I was optimistic for aggressive updates to improve the overall expereince…but it has been slow, at best :/ https://t.co/neKB2jpmqV
Microsoft is obviously serious about its Surface Duo line, and we hope the Surface Duo 2 will fix the shortcomings from the first-gen devices. In the meantime, the company still has a deep partnership with Samsung and the company’s latest Galaxy devices have unique synergies with Windows 10 that could really make Surface Duo customers jealous.
Microsoft still doesn’t get social
This year saw the closure of Mixer, the game streaming service that Microsoft acquired four years earlier. The Redmond giant spent a lot of money to get big streamers like Ninja to stream exclusively on Mixer, but this didn’t really help to move the needle and Mixer continued to lag behind Twitch, YouTube, and Facebook Gaming this year when all these services experienced meteoric growth during the pandemic.
If Mixer’s Faster-than-light protocol will live on in other Microsoft products including Teams, this failed acquisition shows that Microsoft still doesn’t get social. While Zoom pretty much became the default app for video meetings this year, English comedian James Corden wondered “what the hell happened to Skype” in a funny video that went viral a couple of months ago.
Microsoft’s struggles with social apps continue with the new Xbox apps available on Windows 10, iOS and Android, which dropped all Xbox Live social features such as Looking for Groups or Xbox Live Clubs. More and more Xbox gamers are now ignoring Xbox Live’s social features in favor of Discord servers, and Microsoft itself is a heavy Discord user with many official servers for Xbox games or their studios.
I could see a Discord acquisition making a lot of sense for the company, but unfortunately, the company chased another rabbit this year with TikTok in what ended up as a quite embarrassing episode for the company. While the US Government pushed the Chinese social network to sell its US operations to a US-based company, Microsoft stepped it but ultimately dodged the bullet as despite an announced deal with Walmart and Oracle, the fate of the company’s US operations is still in limbo.
Again, I think Discord would be the perfect acquisition for Microsoft as it’s currently growing fast and tries to distant itself from its initial gaming focus. Discord also has a live streaming community that Microsoft could be interested in following the sunsetting of Mixer, and I also believe Discord is a much better social app than Microsoft Teams, which Microsoft is now trying to position as a Skype/Zoom alternative for consumers.
Looking forward to 2021
2020 was a good year for Microsoft overall, but 2021 should be much more exciting. Windows 10 users should see a big design update in Fall 2021, and the first Windows 10X devices should also make Windows interesting again. On the Xbox side of things, we should finally get Halo Infinite 2021 and see more games that really take advantage of the power of the Xbox Series X. Microsoft should also continue to surprise us with Xbox Game Pass announcements and maybe some new studios acquisitions.
I’m a bit less excited about Microsoft’s Surface division, which really needs to shake things up after Apple really impressed with its first Apple Silicon Macs. Microsoft is reportedly working on its own ARM chips for Surface devices and servers, but we likely won’t see the results of this work next year. Anyway, the “Wintel” alliance had a good run and it’s now time for Microsoft to really double down on Windows 10 on ARM in case PC manufacturers and consumers end up ignoring Windows 10X devices.
Lastly, 2021 should be another big year for Microsoft Teams, which has become one of the company’s most successful new apps since its launch in 2016. If companies have been embracing Microsoft Teams in a pretty big way this year, it remains to be seen if the addition of personal features can make the app appeal more to consumers. Microsoft had Skype and Mixer, but the latter is now dead while the former is now pretty much irrelevant. I’m not sure a TikTok acquisition would have made Microsoft cool again, but I doubt consumers will abandon Zoom and WhatsApp in favor of Microsoft Teams anytime soon.
If you’re looking to customize the look of your PC, but you aren’t thinking just about the windows tint color, but a complete overhaul, then you’ll need a complete third-party tool like Stardock’s Object Desktop.
This software suit comes with pretty much anything you need to make your PC look and feel different, from themes, to live wallpapers, UI rearrangements, customized sounds, and more.
Object Desktop
If you’re looking to give your Windows 10 PC a fresh new look, give it a complete makeover with Object Desktop!
A Rainbow of Birds is a theme designed for bird lovers that comes with 12 wallpapers with all sorts of birds on them such as flamingos, kingfishers, swans, peacocks and hummingbirds.
This theme is designed for fans of science fiction and space exploration. GTGraphics comes with user created pictures of space and even though it doesn’t feature any real pictures of our galaxy it still looks amazing.
Frozen Formations theme features beautiful pictures of ice, so if you like icicles, sunrays over the ice and icebergs, this theme is for you. As for the number of wallpapers, this theme comes with 12 different wallpapers.
If you’re not a fan of winter and ice maybe you would like a warmer theme and this one might be just what you need. This theme comes with 15 wallpapers of beautiful beaches during the sunset.
There is more than one picture of each beach and in this theme you’ll see pictures from Dillon Beach, Bodega Head, Kihei, LaHaina and Sonoma Coast.
If you’re looking for a them full of radiant, beautiful warm colors, then AN HSIN PU TZU is the right choice for you. This colorful Windows 10 theme will definitely put a smile on your face.
It comes with six wallpapers and adds a light blue-purple color to your Windows 10 tiles.
Calligraphy is a beautiful Windows 10 theme that brings soothing hues of blue, light pink, green and more to your PC. As its name suggests, this theme brings your 6 images that confirm calligraphy is an art.
If you’re a fan of abstract art, this Windows 10 theme is perfect for you. It brings ten abstract art images where lines, curves and dots artfully blend together to create amazing wallpapers.
The theme adds a grey color to your Windows tiles, while blue is the dominant color in most wallpapers.
If you need a bit of color in your life, this joyful Windows 10 theme will definitely put a smile on your face. Color Splash brings you 13 wallpapers full of vibrant colors.
Chocolate is a guilty pleasure for many. But why should you hide your passion for chocolate? Let the whole world know who much you love chocolate by installing this chocolate-inspired Windows 10 theme on your PC.
The 10 wallpapers that this theme brings will definitely make you want to go and buy some chocolate even if you’re on a diet. Yummy!
If you’re looking for an elegant and classy looking theme, Everyday Art 4 is the right choice for you. This theme confirms once again that photography is an art that allows people to freeze time.
The wallpapers included in this theme are mainly close-ups that will help you see things from a different perspective.
Add a car-themed wallpaper on your desktop and you’ll fuel your productivity. This impressive Windows 10 theme brings you 14 images depicting the most beautiful and powerful cars in the world.
Just hit the download button and check out the wallpapers.
If you love motorcycles, you’ll also love this Windows 10 theme. It brings you 7 wallpapers depicting the world’s most powerful motorbikes. This theme add a beautiful light red color to your Windows tiles.
If you sometimes want to escape and run away from everything, this beautiful Windows 10 theme will help you do just that. It brings you 10 breath-taking images depicting beautiful places where mountains meet the sky or fields of wheat embrace the blue sky.
This theme packs 20 breath-taking images shot in the beautiful land of New Zealand. The wallpapers depict amazing images where the sea meets the mountains.
Of course, the dominant color in these pictures in green. The themes add a pleasant blue color to your tiles.
If you like relatively dark colors such as brown, grey and light black, then this theme is for you.
As the title of this theme suggests, the images depict beautiful rock formations that confirm once again how nature can sculpt beautiful works of art over thousands or millions of year.
The themes add a complementary brown color to your tiles.
Animal themes are very relaxing and often induce a feeling of general comfort. So, if you love animal wallpapers and you own a dual monitor system, then this theme is for you.
It brings 13 images that will definitely add a friendlier touch to your monitors. The themes add a complementary brown color to your tiles.
As you probably know, Netflix is a major streaming platform with millions of users, and it seems that some users are having Netflix problems on Windows 10.
Therefore, today we’re going to explore those problems and see if there are any viable solutions.
How can I repair Netflix problems on Windows 10?
Update your display drivers
Netflix functionality issues could be caused by faulty device drivers. For example, many users reported problems with AMD display drivers.
Instead of immediately blaming your graphics card, thinking that it’s too old to handle online streaming, check your GPU and other drivers. Updating them is often enough.
However, besides the fact that it takes a long time, you risk installing the wrong drivers for your devices, which could result in serious computer malfunctions.
A safer and quicker way is to use an automatic tool such as Outbyte Driver Updater. It detects your current drivers and finds newer versions on the web, with minimum assistance from your side.
If you normally watch Netflix in your web browser but doesn’t work anymore, try using the dedicated app instead.
You can download the official Netflix app from the Microsoft Store for free, log in with your Netflix credentials, and start watching your favorite movies and TV series.
If you’re already using the Netflix app but encountering various errors on the Windows 10 app, try reinstalling it. Any missing DLL files should be automatically installed by Microsoft Store.
Disable your free VPN or proxy
The online streaming platform doesn’t like VPN and proxy servers. That’s because free VPNs and proxy tools use free and public IP addresses that get immediately detected by blocked by Netflix.
Unfortunately, there are few free VPNs that work with Netflix. But they come with various restrictions, such as few VPN servers or restricted time on Netflix.
The trick is to resort to a paid VPN service whose IP addresses don’t get identified and rejected by Netflix. And one of the best tools for the job is Private Internet Access.
You can install PIA not only on Windows but also on Mac, Android, iOS, Linux, and even routers. It’s excellent for unblocking Netflix US anywhere in the world.
Besides Netflix, PIA can unblock other media streaming services like HBO Max or Peacock.
It allows up to 10 simultaneous connections, so your entire family can simultaneously enjoy different Netflix shows on their own devices.
And, if you wish to return to the original Netflix library available to your country but keep using the VPN for secure browsing and torrenting, it’s possible to split the VPN tunnel.
More about PIA:
Access VPN servers in over 12 US cities to watch Netflix
A zero-logging privacy policy
24/7 live chat support
30-day money-back guarantee (no free trial)
Pay with a credit card, PayPal, or crypto
Check for Windows Updates
Click the Start button and type Windows Update
Open the app and click Check for Updates
If an update is available, make sure that you download it
Netflix relies on Silverlight. So, if you notice a pending update for Silverlight, make sure to get it.
Clear browsing data
If you’re trying and failing to watch Netflix on your browser, make sure to clear browsing data. Here’s exactly what you need to do:
Google Chrome
Go to Settings
Click Clear browsing data
Select Cookies and other site data and Cached images and files
Set the Time range to All time
Click Clear data
These steps also apply to Opera, Brave, and other Chromium-based web browsers.
Mozilla Firefox
Visit Options
Select Privacy & Security
Find Cookies and Site Data
Click Clear Data
Select Cookies and Site Data and Cached Web Content
To recap, if you’re experiencing problems watching Netflix on your Windows 10 computer, make sure to update your drivers to the latest version.
It’s also a good idea to disable your free VPN or proxy. Instead, use a reliable VPN service that won’t get blocked by the streaming service, like Private Internet Access.
You can also clear browsing data, switch to the Netflix app if you normally use the web browser, and check for Windows Updates.
Unblock Netflix US and other libraries anywhere in the world with a VPN. Visit our VPN section or explore our Netflix Troubleshooting Hub for detailed guides on various Netflix problems.
Did these solutions work for you? What else can you suggest to Netflix viewers? Leave us a comment in the section below.
Ever wanted to copy text from a photo or a video that you see, and then paste it into your clipboard in Windows 10? Joe Finney, the same developer behind Ink Calendar in Windows 10, is back with another app to help you do just that.
Named “Text Grab” this latest app works similarly to a screenshot tool. However, instead of saving an image, it captures the text from the selected region and passes it to the Windows OCR API and then to the clipboard, so you can paste the text from the image anywhere. According to Finney, each word has its own bound box, so with a single click, you can select a word. See it in the demo below.
The app is still a work in progress, but Finney says on Twitter that he wanted to get the word out right away so people could play around with the app. It’s even open-sourced on GitHub, too, so you can contribute to the project, as well. Try the app now via the link below, and let us know how you’ll be using it, too.
Cyberpunk 2077 is one of the biggest RPG games in recent years, and one key aspect of any RPG games is your ability to control your character within a certain environment.
Unfortunately, things aren’t that easy with Cyberpunk 2077, since by default it doesn’t let players change the key binding setup it comes with.
Whenever they try changing the key bindings, or try mapping out different keys on Windows 10, they are met with an error message that states:
Key Binding Failed
This issue is present on the PC and Stadia versions of the game, and it also affects those that attempt left-handed keybindings..
Because of the game’s popularity and the severity of the issue, we’ve decided to approach it with a solution. That being said, continue reading the guide below, and you’ll be well on your way to customizing your Cyberpunk 2077 key bindings to cater to your needs.
Note: The method below involves modifying game files, so make sure you create a backup of them in case things don’t work out as they are supposed to.
How do I fix the Cyberpunk 2077 Key Binding Failed error?
1. Modify the game’s Key files
Open Steam
Go to your Library
Right-click on Cyberpunk 2077 and select Properties
Go to the Local Files tab, and select Browse Local Files
Navigate to Cyberpunk 2077
Select r6
Choose Config
Open inputUserMappings.xml using Notepad
Look for the IK_F key, and replace it with whatever letter you want
If you want to replace F with M, it should be changed to IK_M
Edit the following values to whatever keys you prefer, similarly to the previous solution:
IK_W to IK_Up
IK_A to IK_Left
IK_D to IK_Right
IK_S to IK_Down
Save the file, and relaunch the game
By following these steps, you should be able to successfully replace Cyberpunk 2077’s default key bindings without having to see any more error messages.



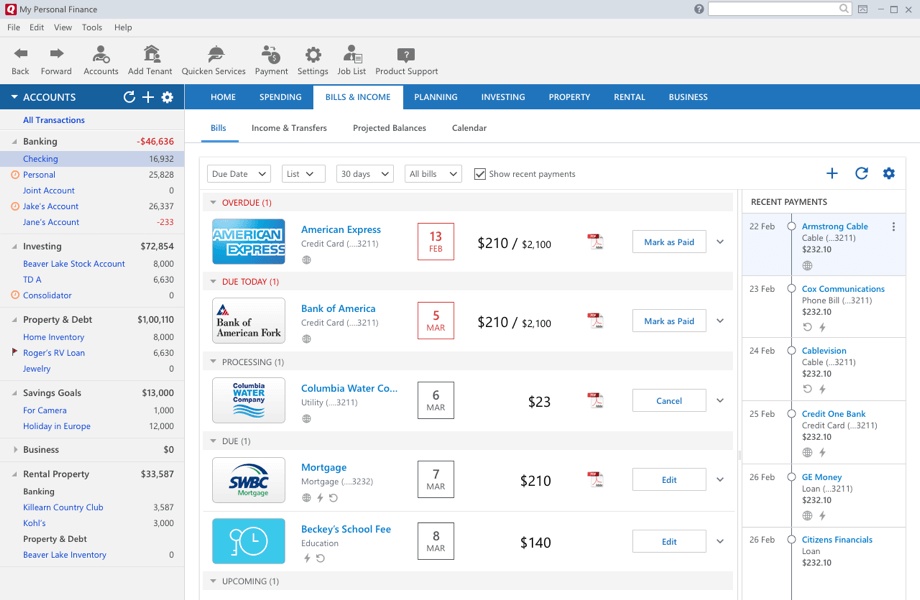





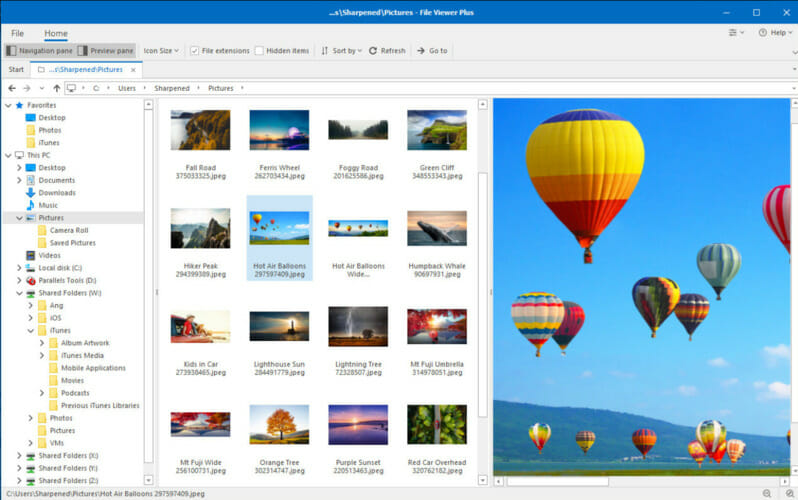



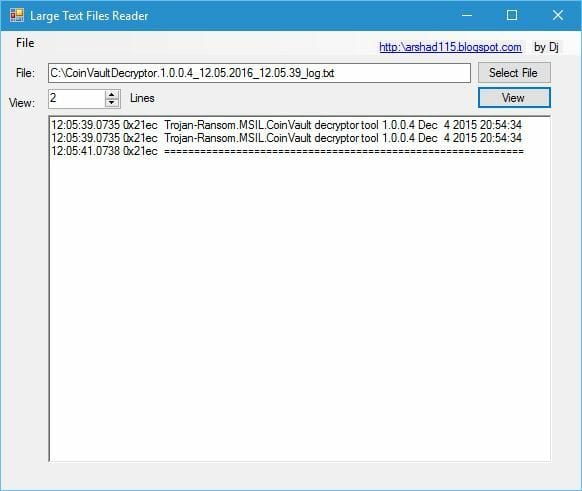
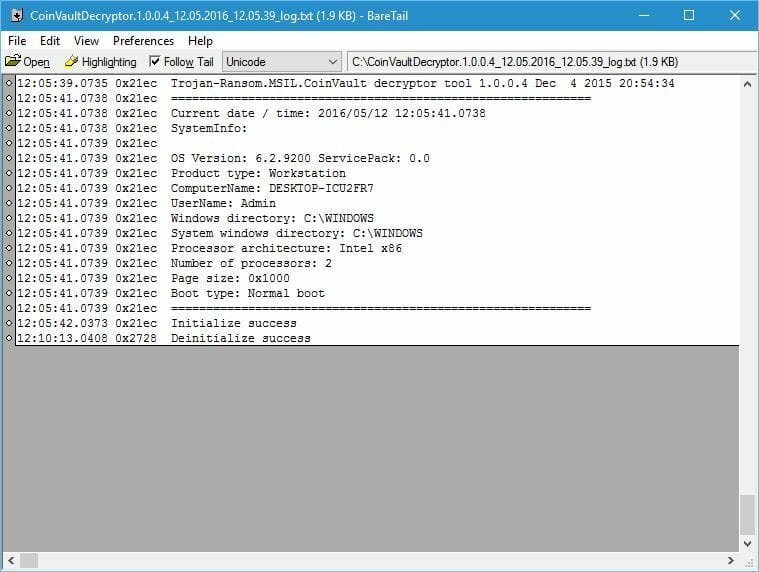
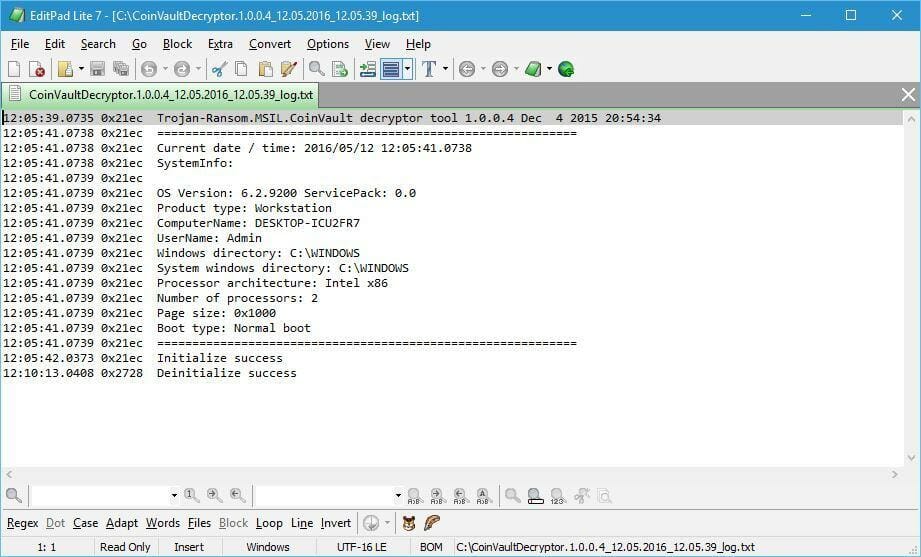

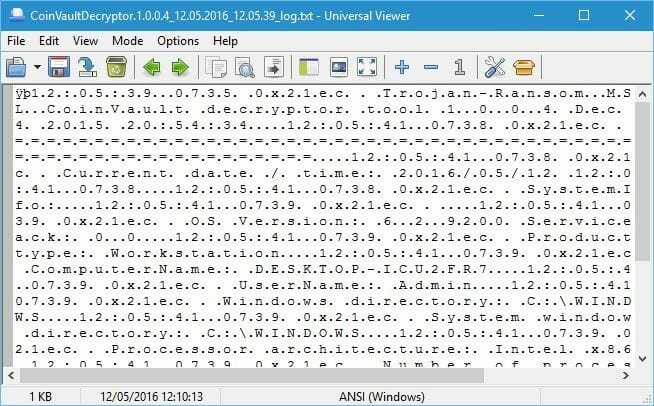
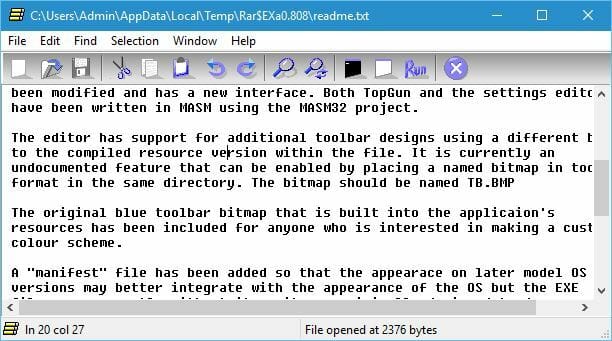



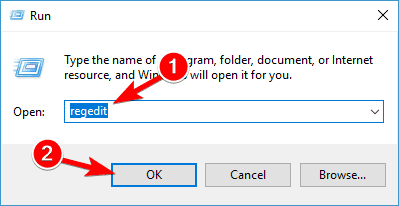
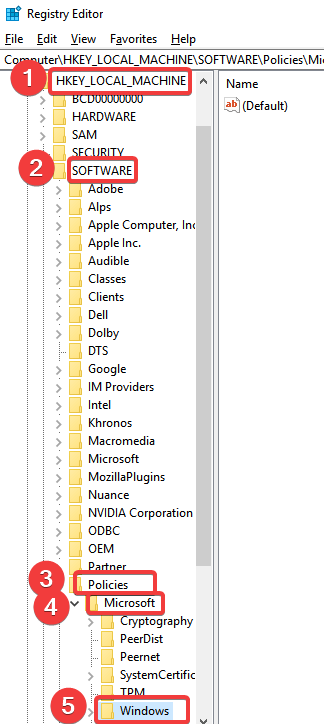


![How to Share a VPN Connection on Windows 10 [4 Methods]](https://windowsreport.com/wp-content/uploads/2021/01/Share-VPN-connection-Windows-10.jpg)

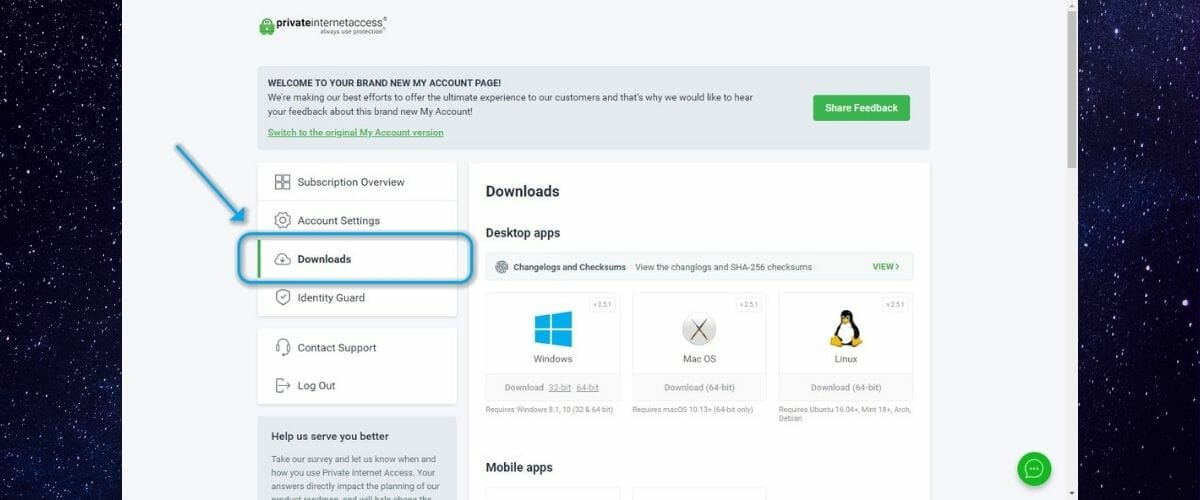




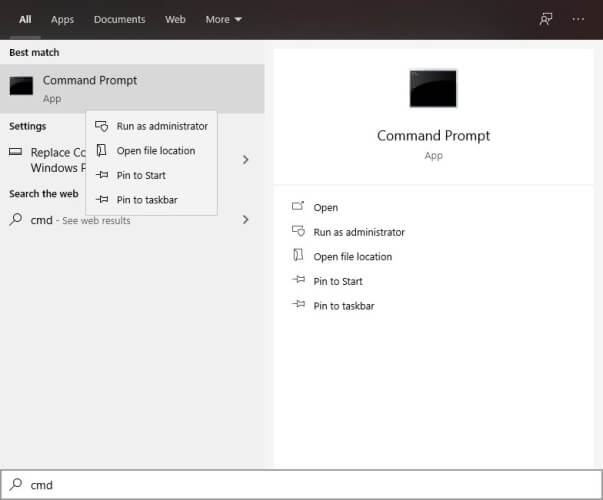
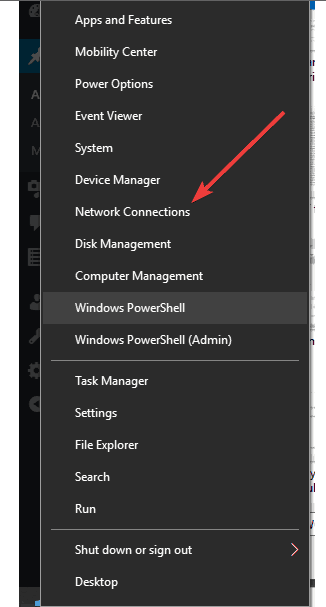
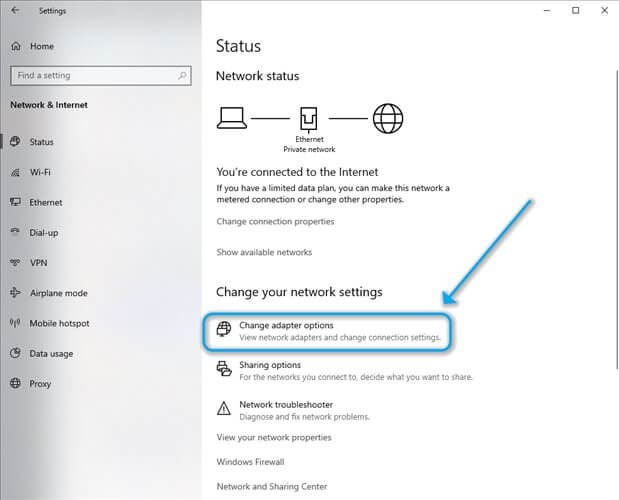
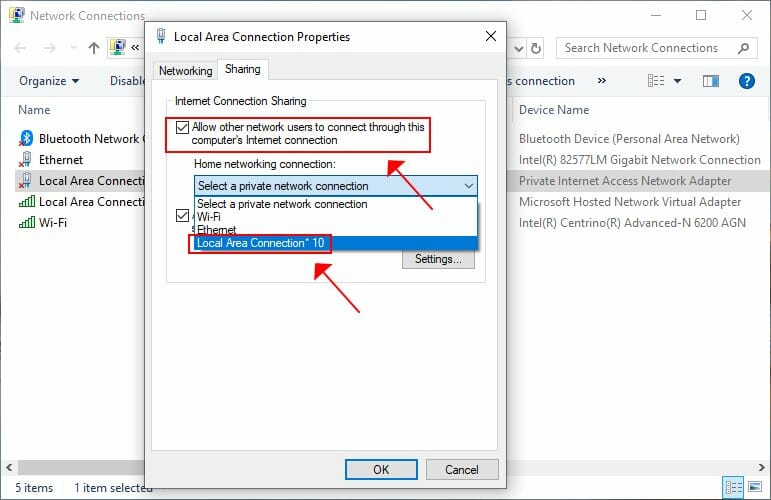











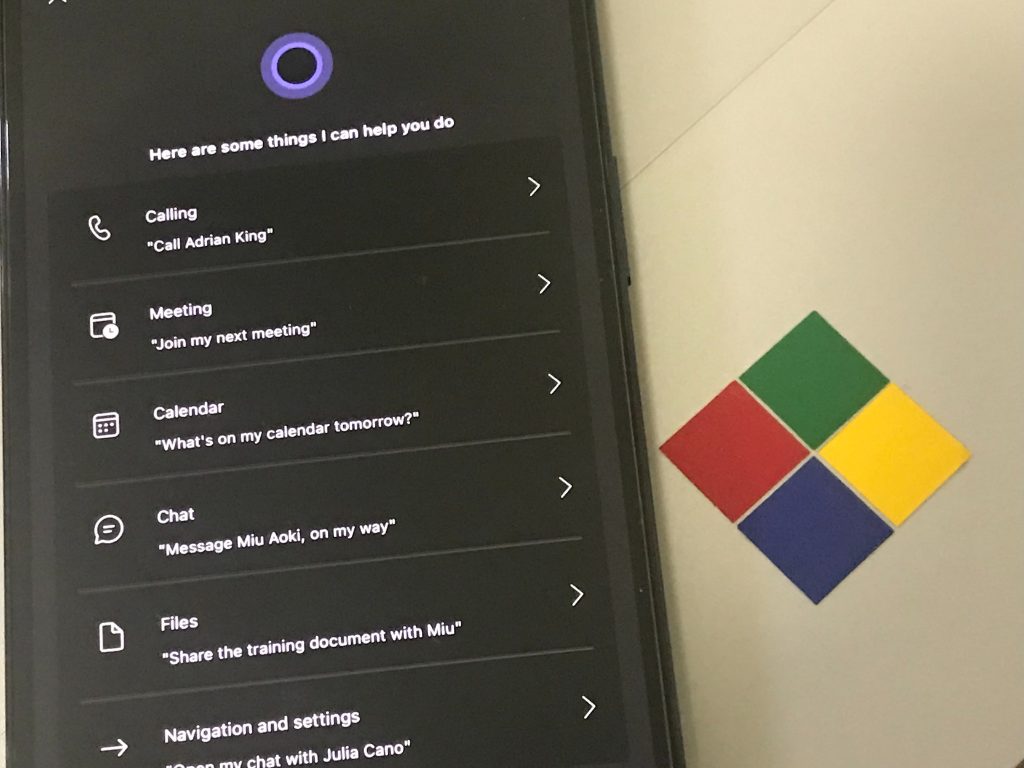
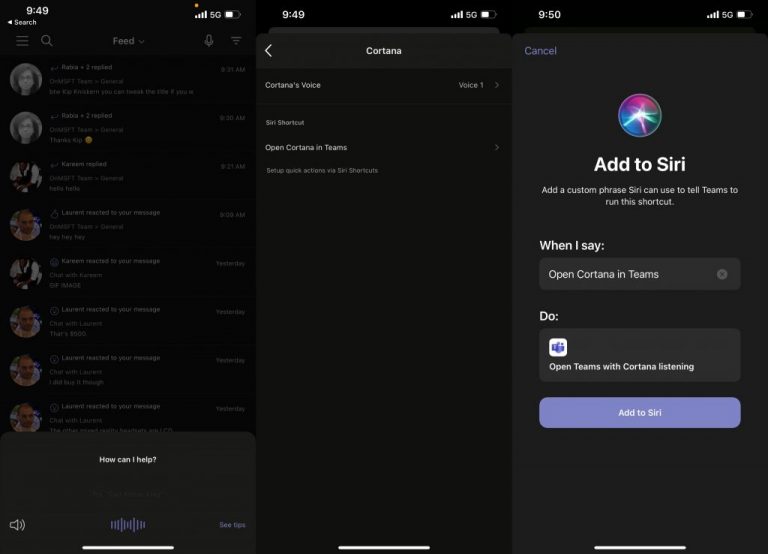
![How do I open a WPS file in Windows 10/11 [Best Tools]](https://windowsreport.com/wp-content/uploads/2018/05/files.jpg)
 File Viewer Plus is one of the best file viewers available. You can use the software to

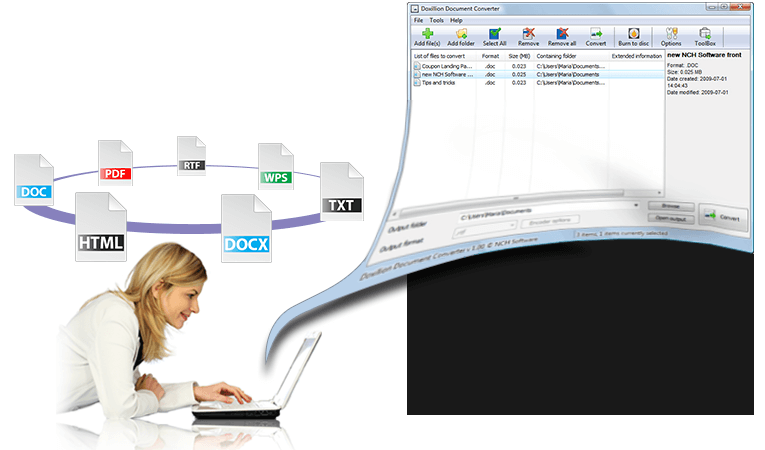








![PowerDirector 365: Features, Price & Value [Full Review]](https://windowsreport.com/wp-content/uploads/2020/12/pdr-win-report-1.jpg)
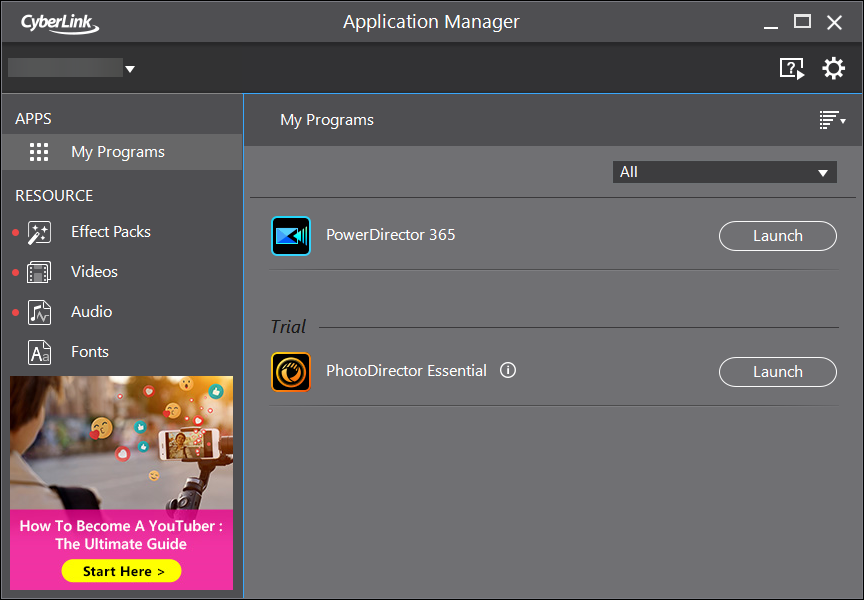
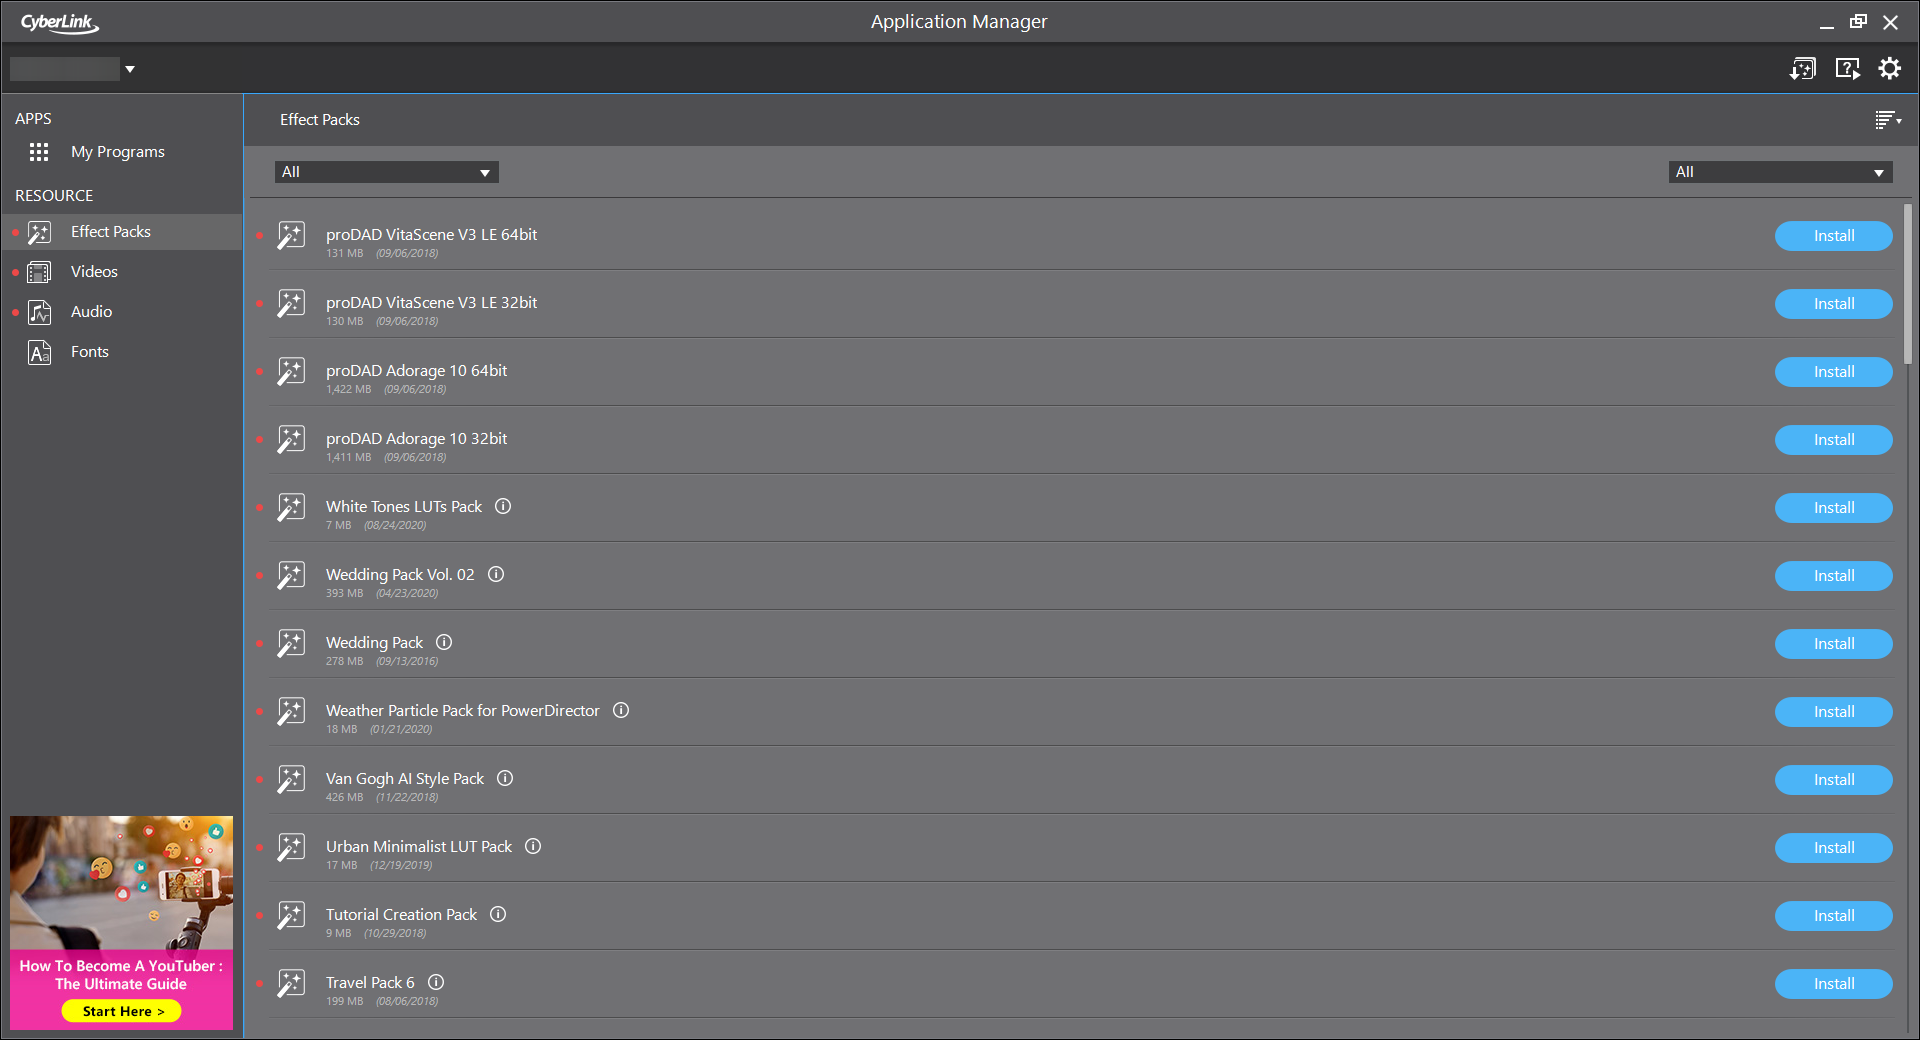










![How to hide browsing history from your ISP [Privacy Guide]](https://windowsreport.com/wp-content/uploads/2021/01/Hide-browsing-activity-from-ISP.jpg)







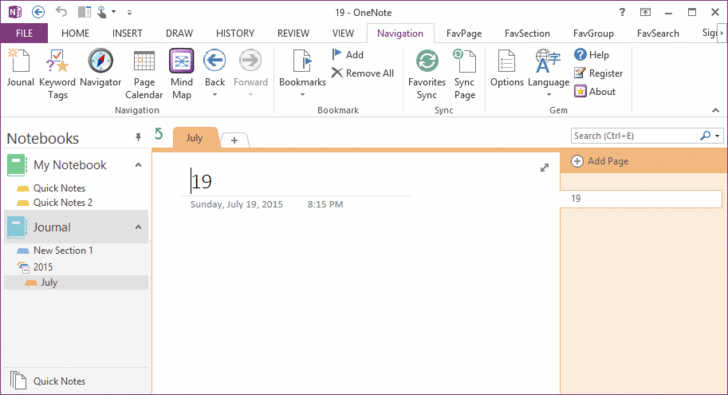


![Something went wrong while downloading your template [Fix]](https://windowsreport.com/wp-content/uploads/2020/08/Save-graphical-elements-in-Microsoft-Office-as-pictures.jpg)
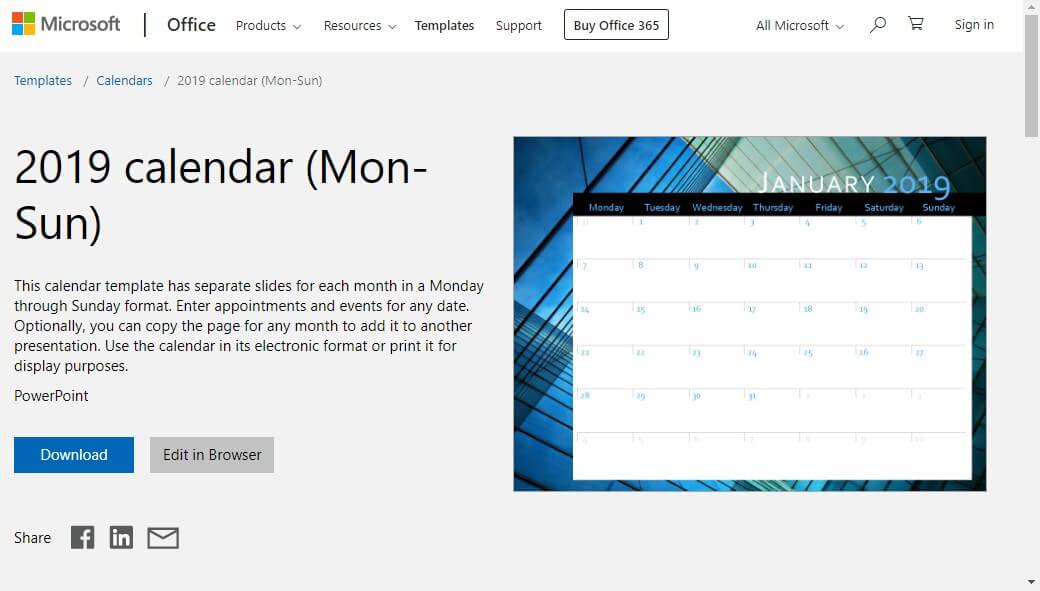
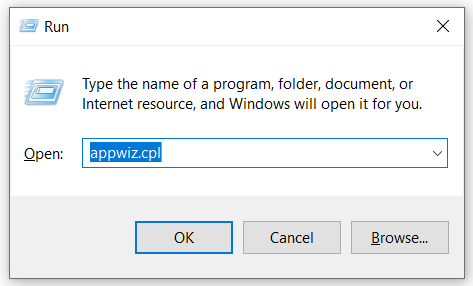
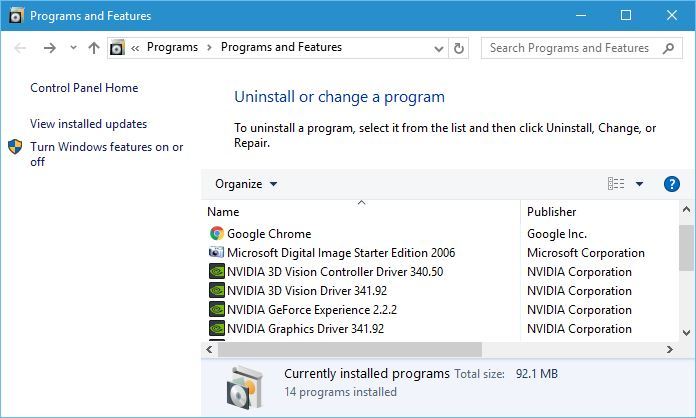
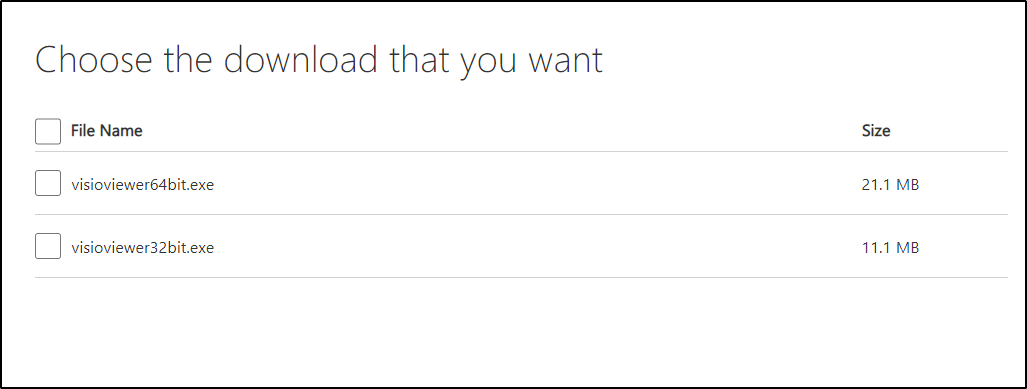
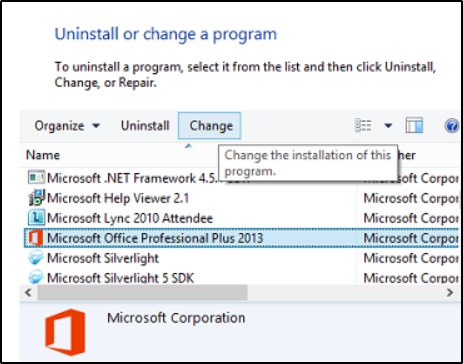
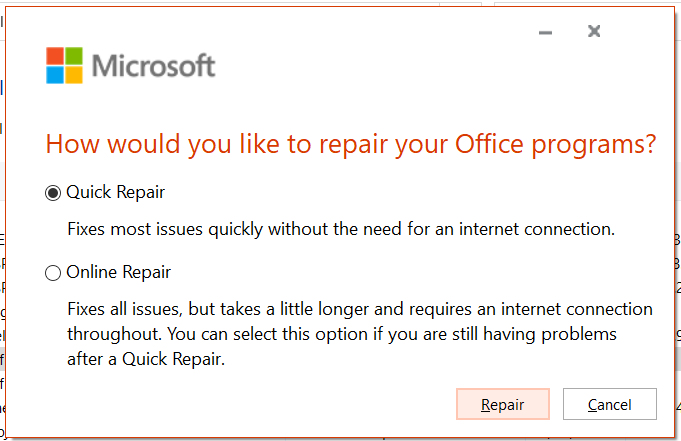
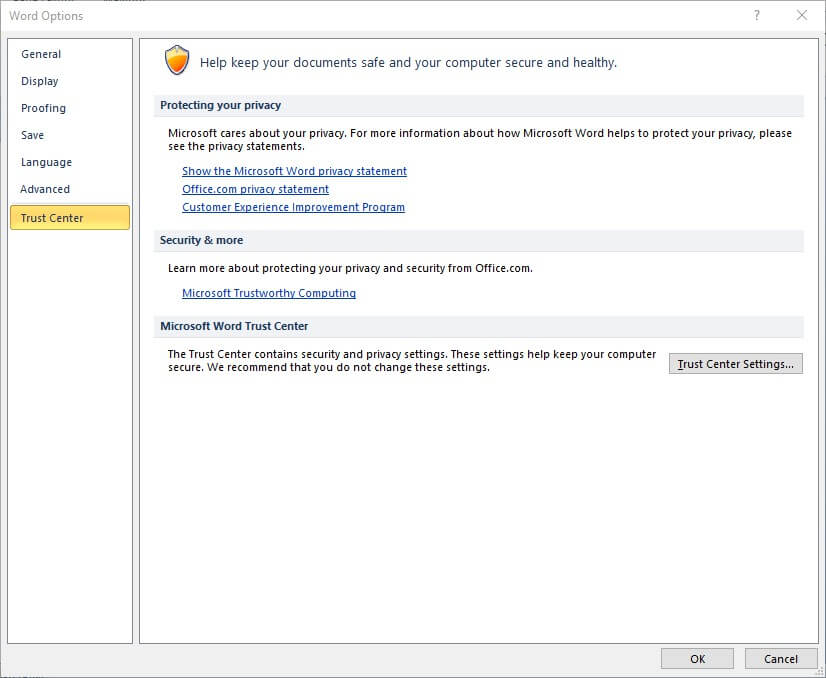
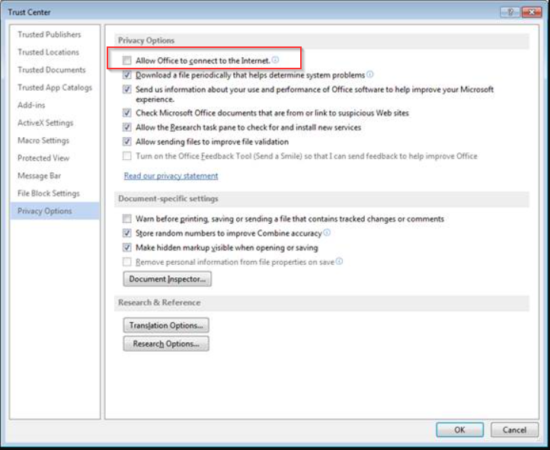

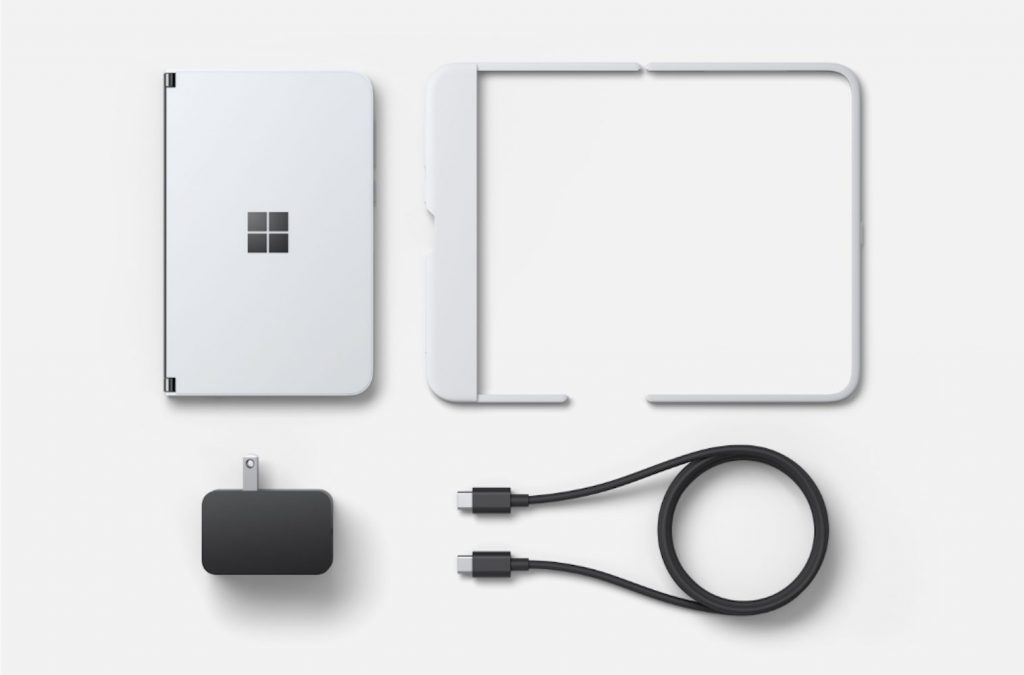
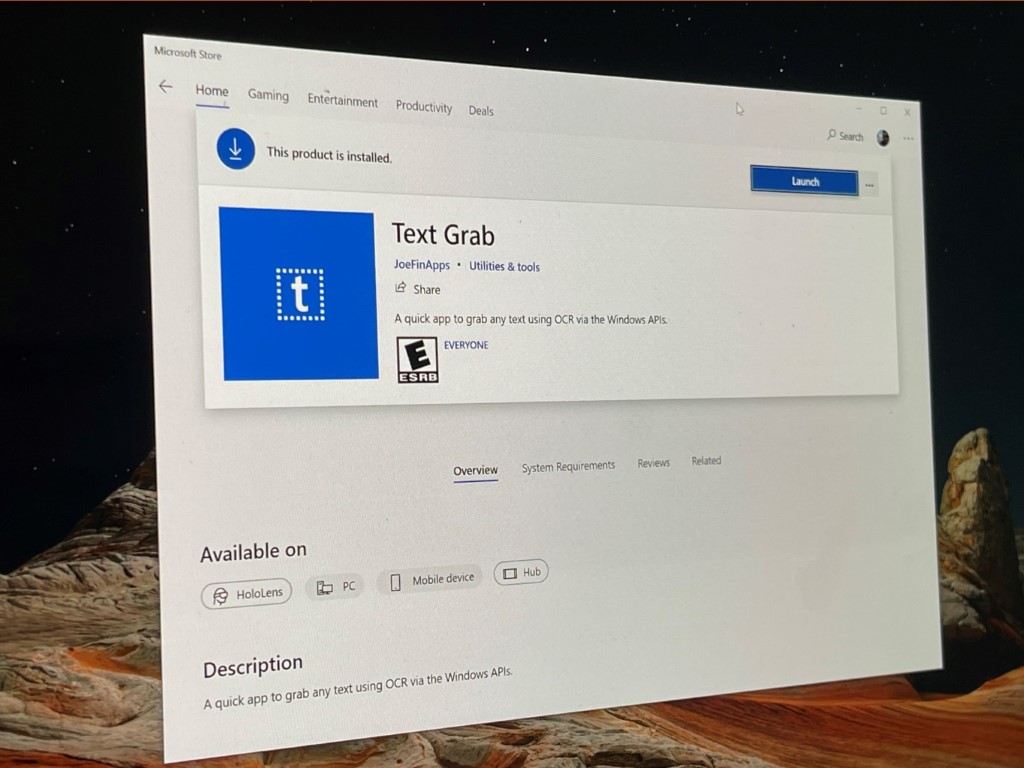





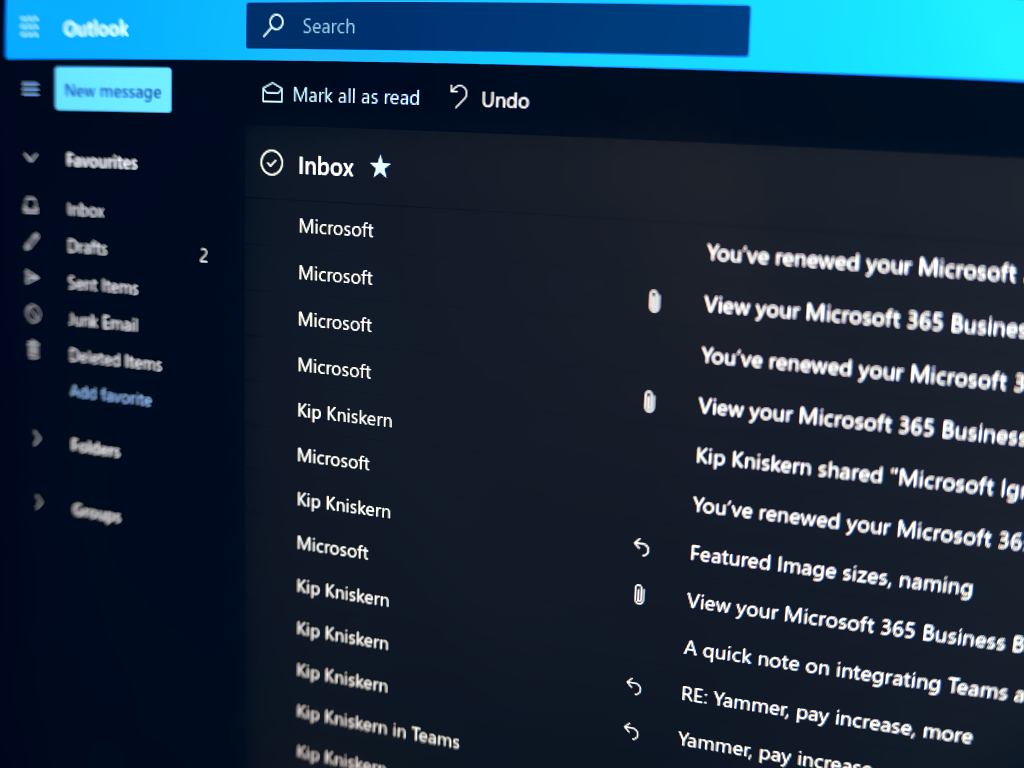






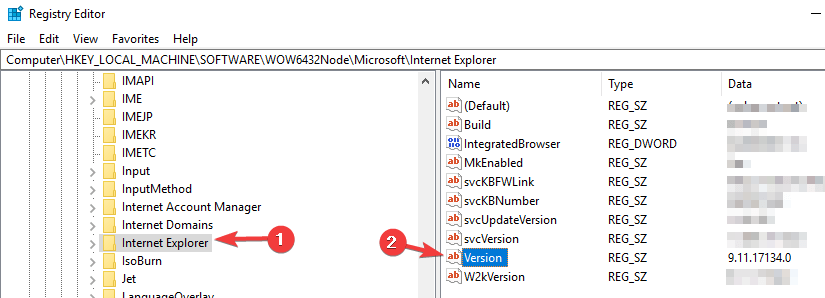

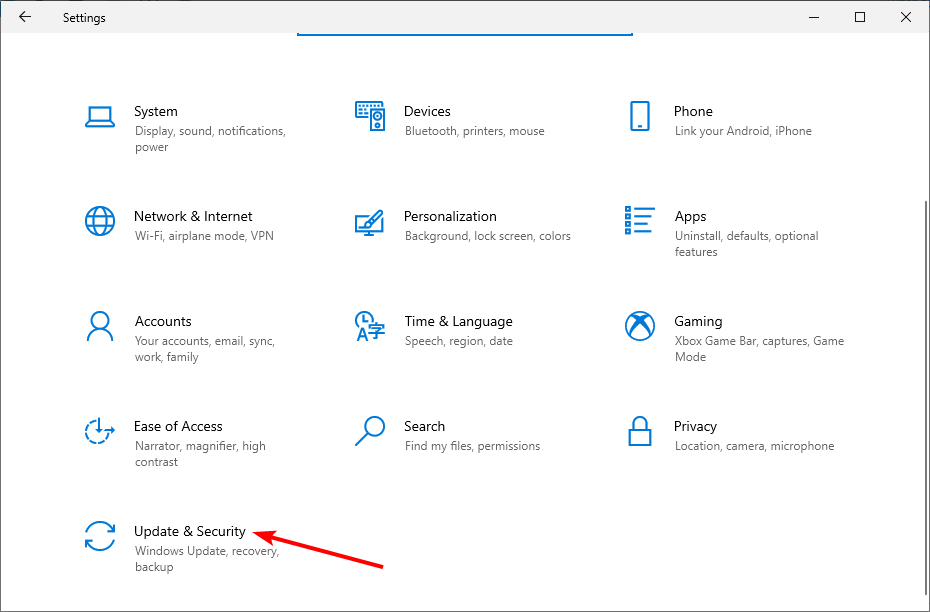
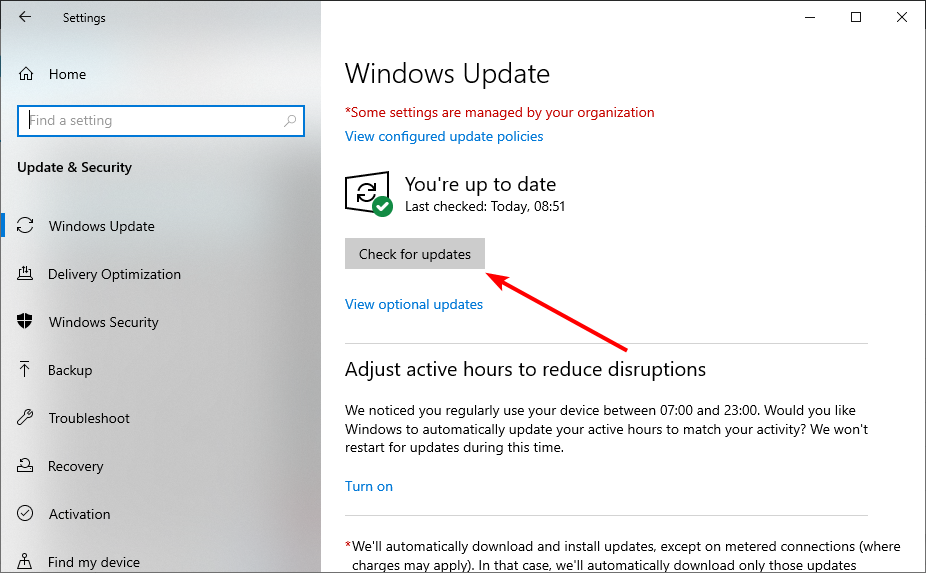
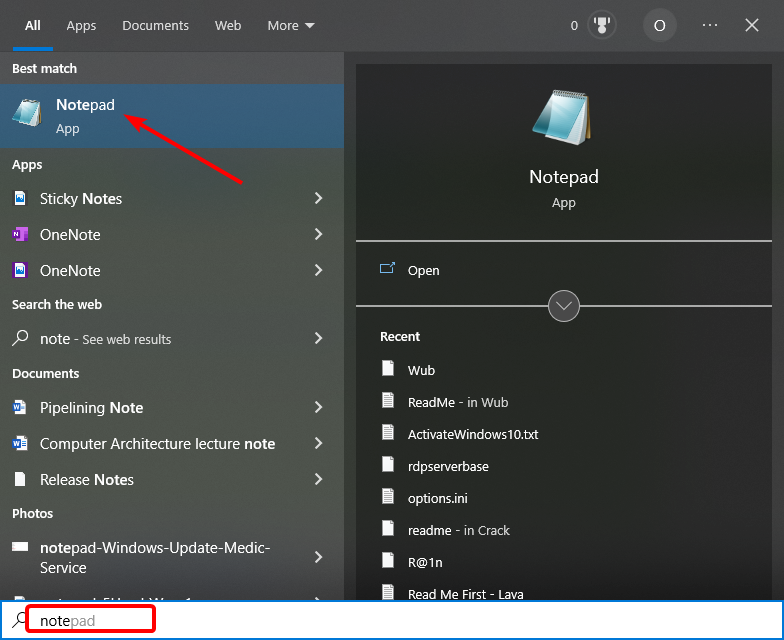
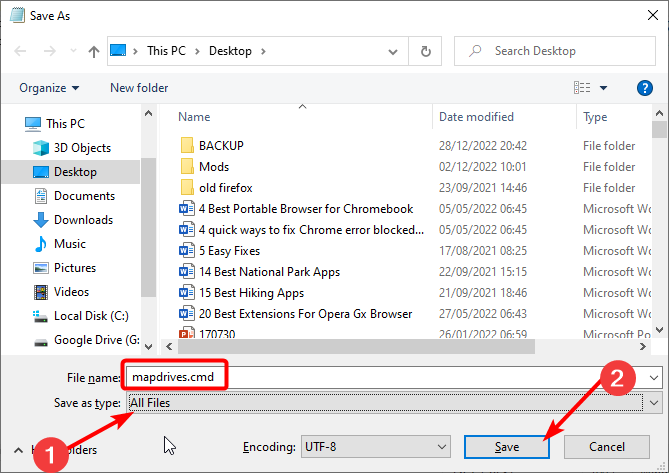
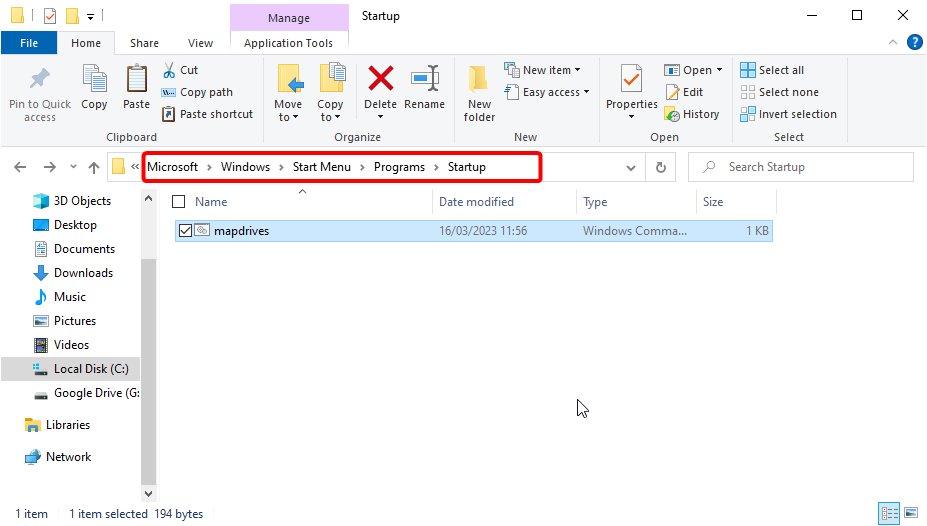
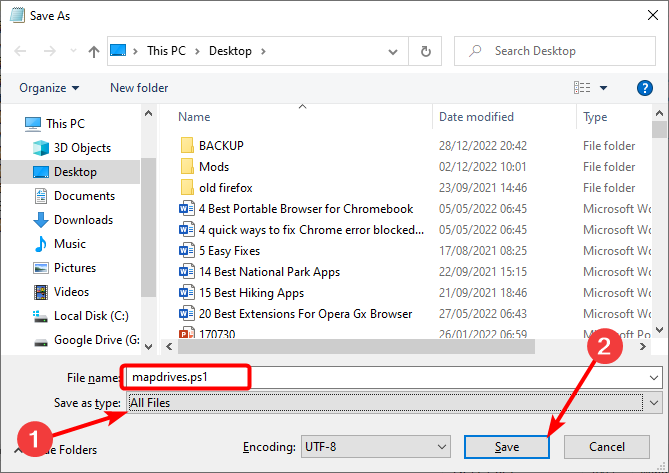
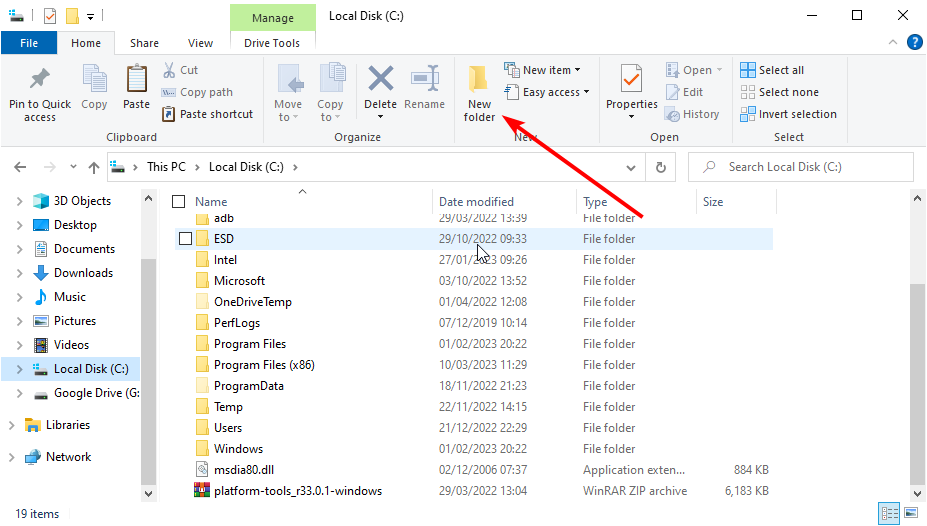
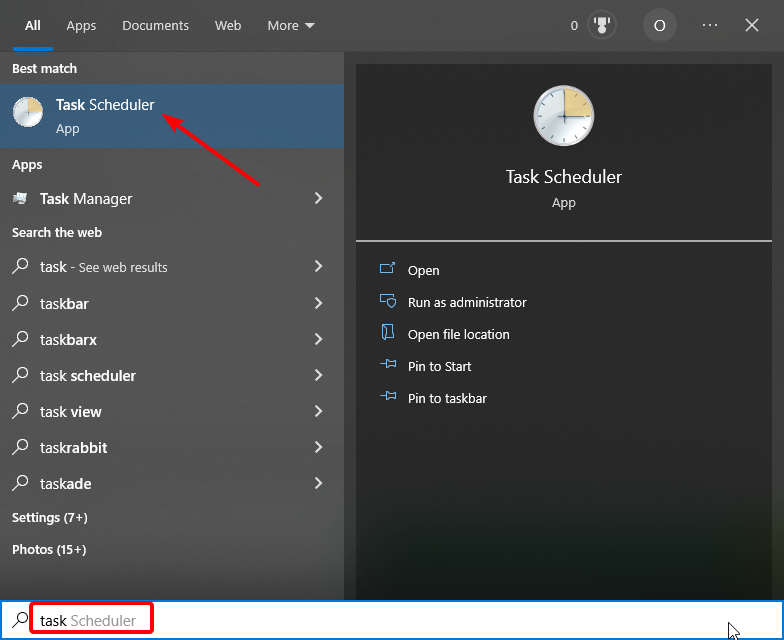
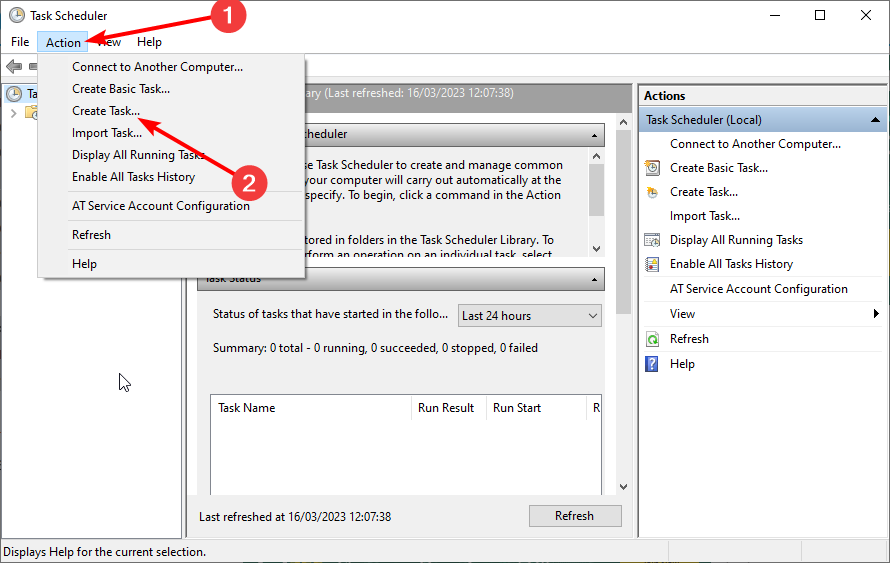
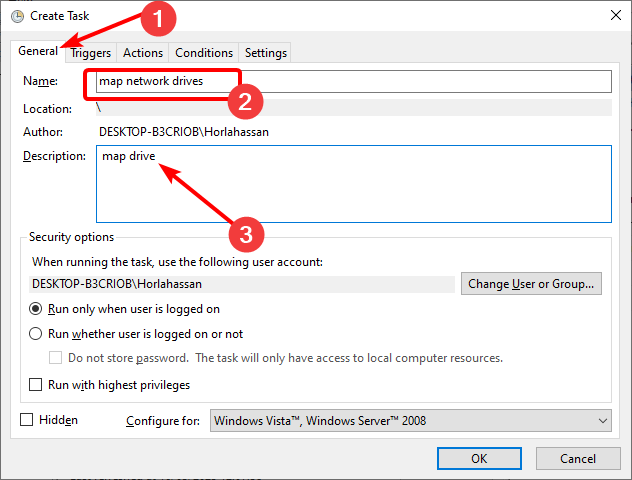
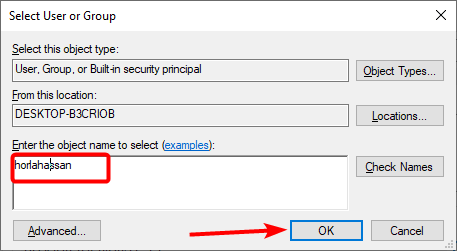
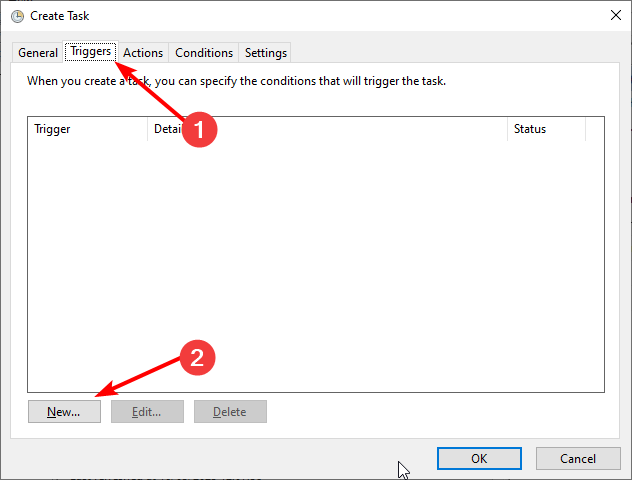
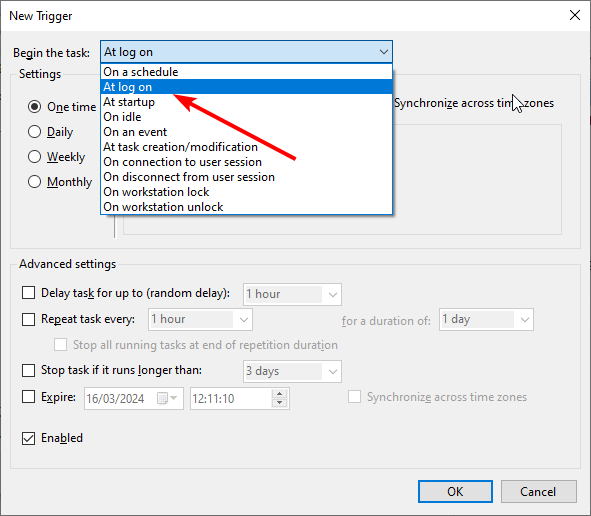
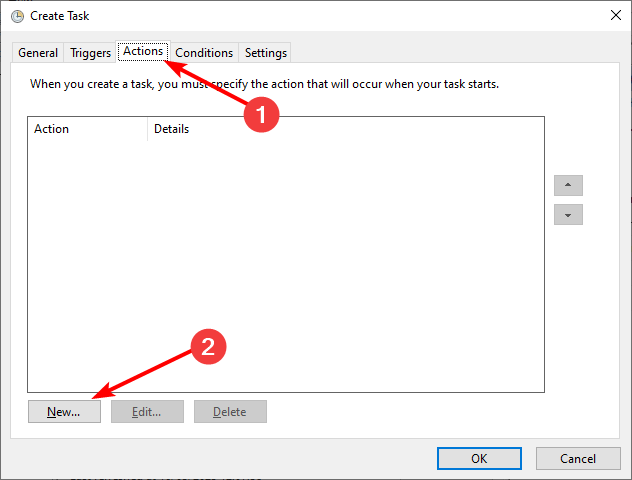
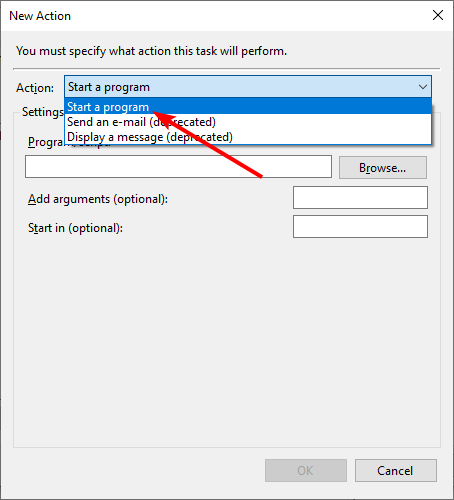
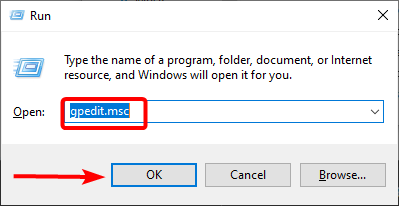
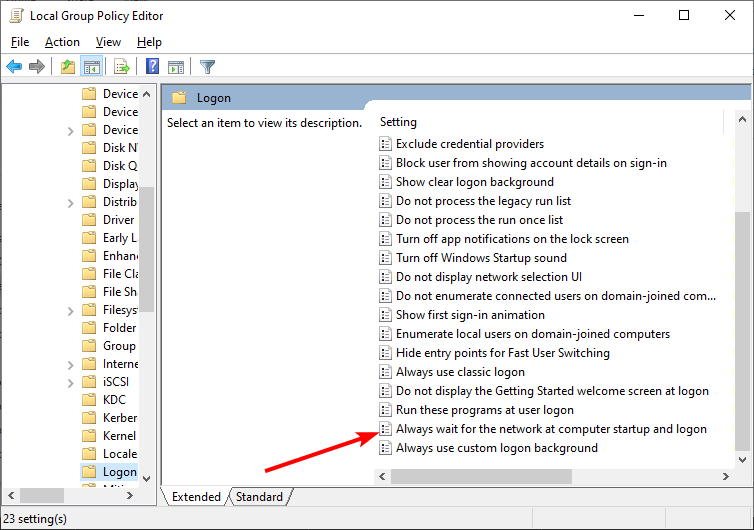
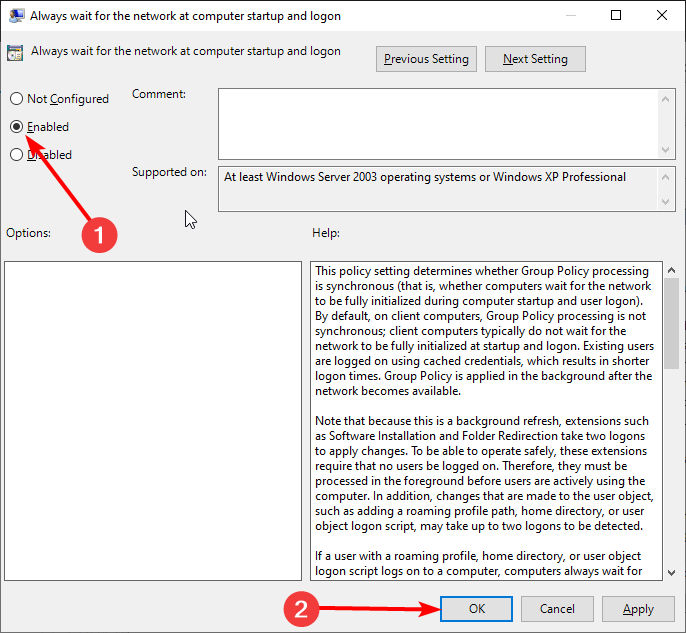
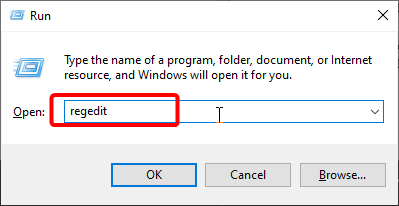
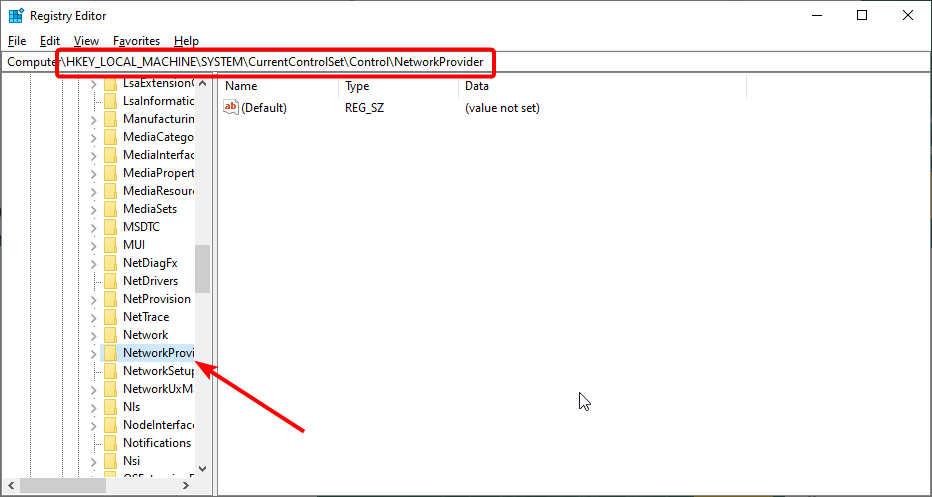
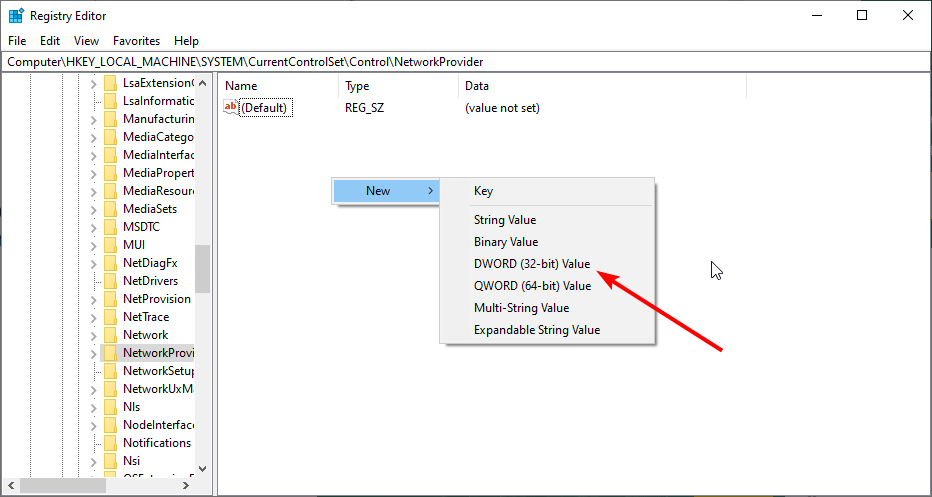
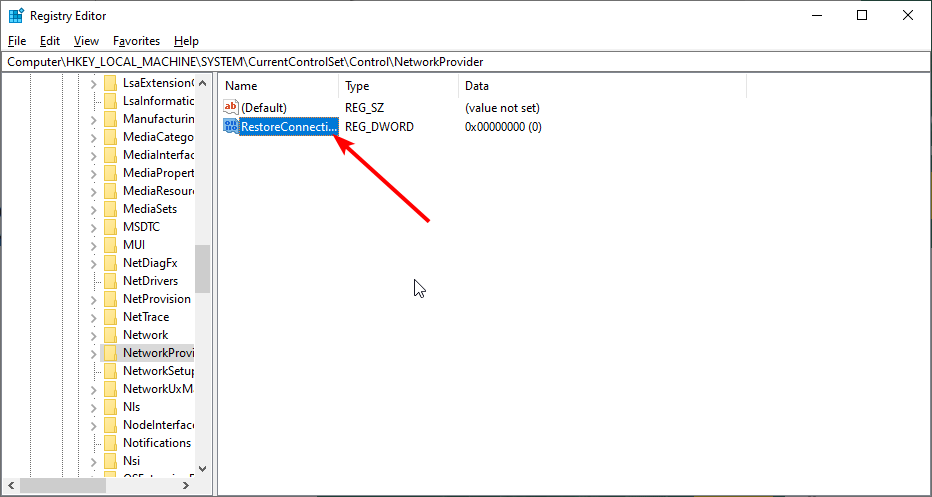
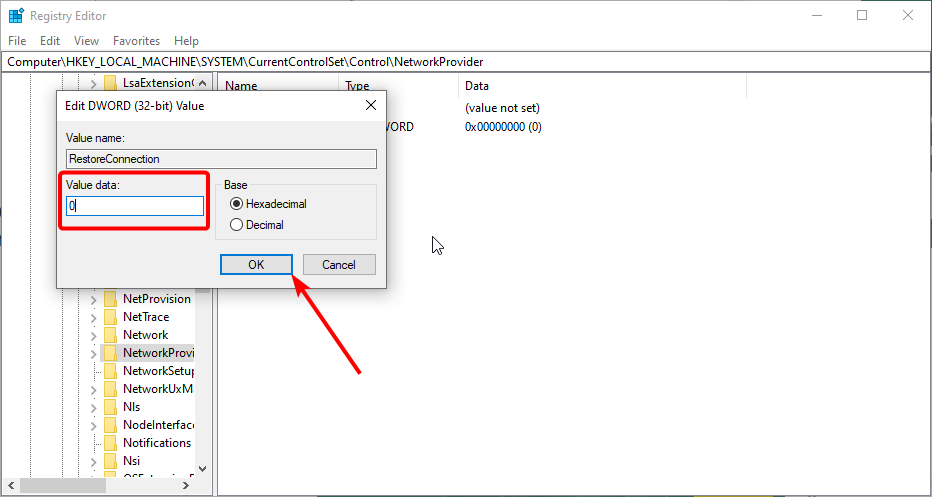




![FIX: Netflix streaming error M7111-1331 [6 tested methods]](https://windowsreport.com/wp-content/uploads/2019/04/Netflix-Streaming-error-M7111-1331.jpg)
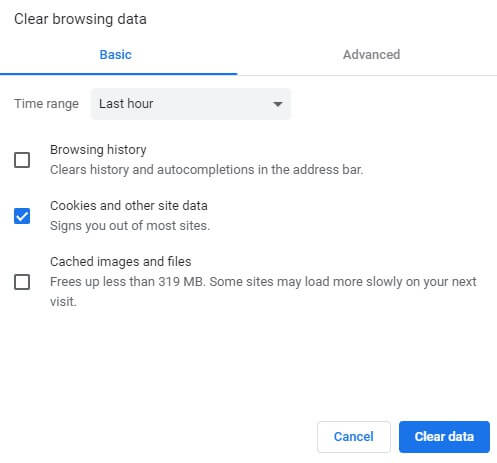
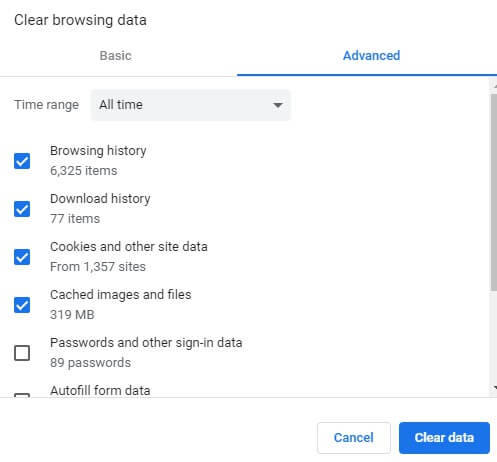
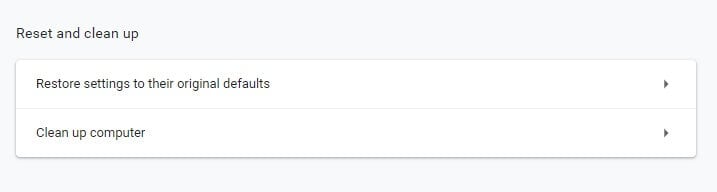




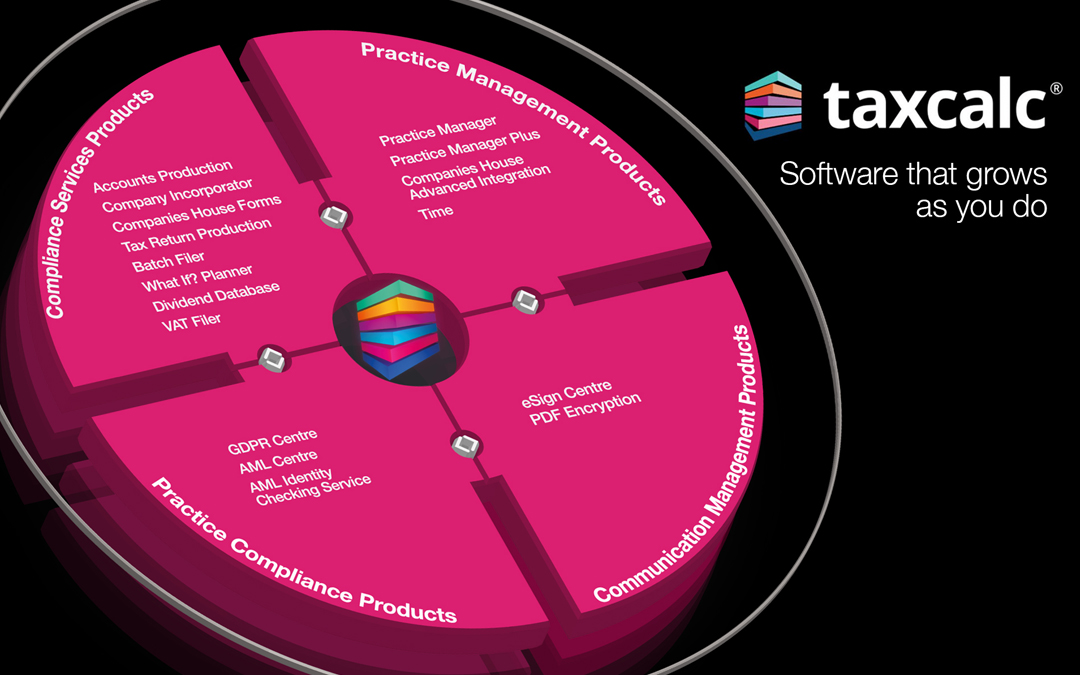






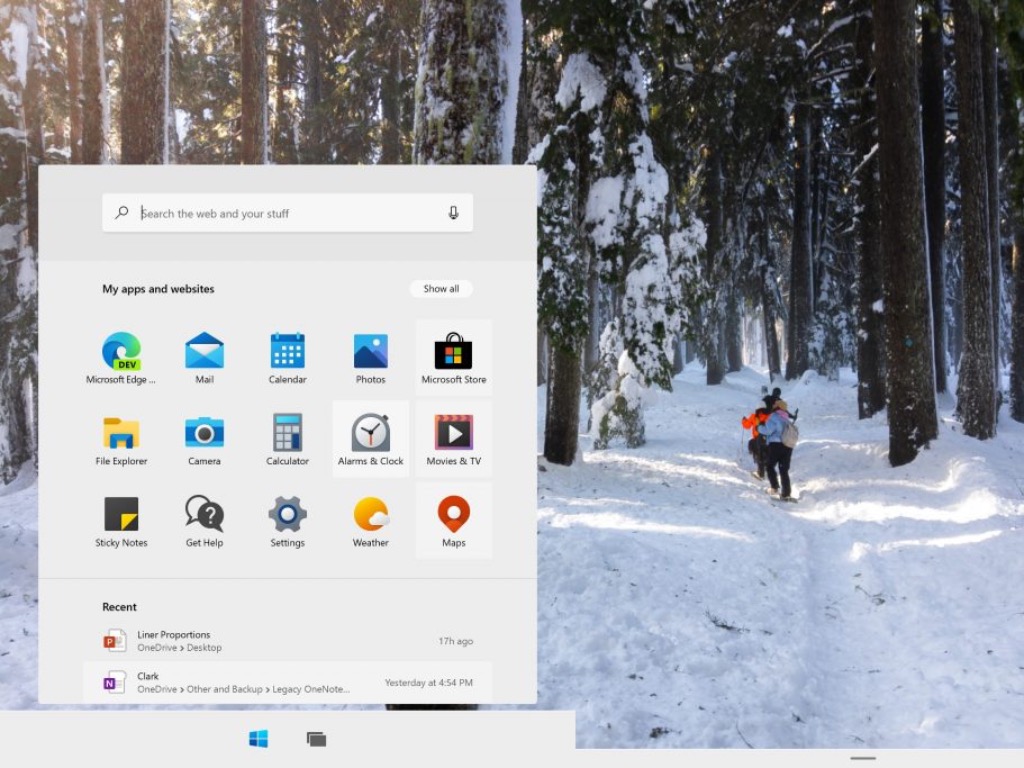

![22 Best New Windows Themes for Dual Monitors Setup [2026]](https://windowsreport.com/wp-content/uploads/2017/10/Windows-10-theme.jpg)






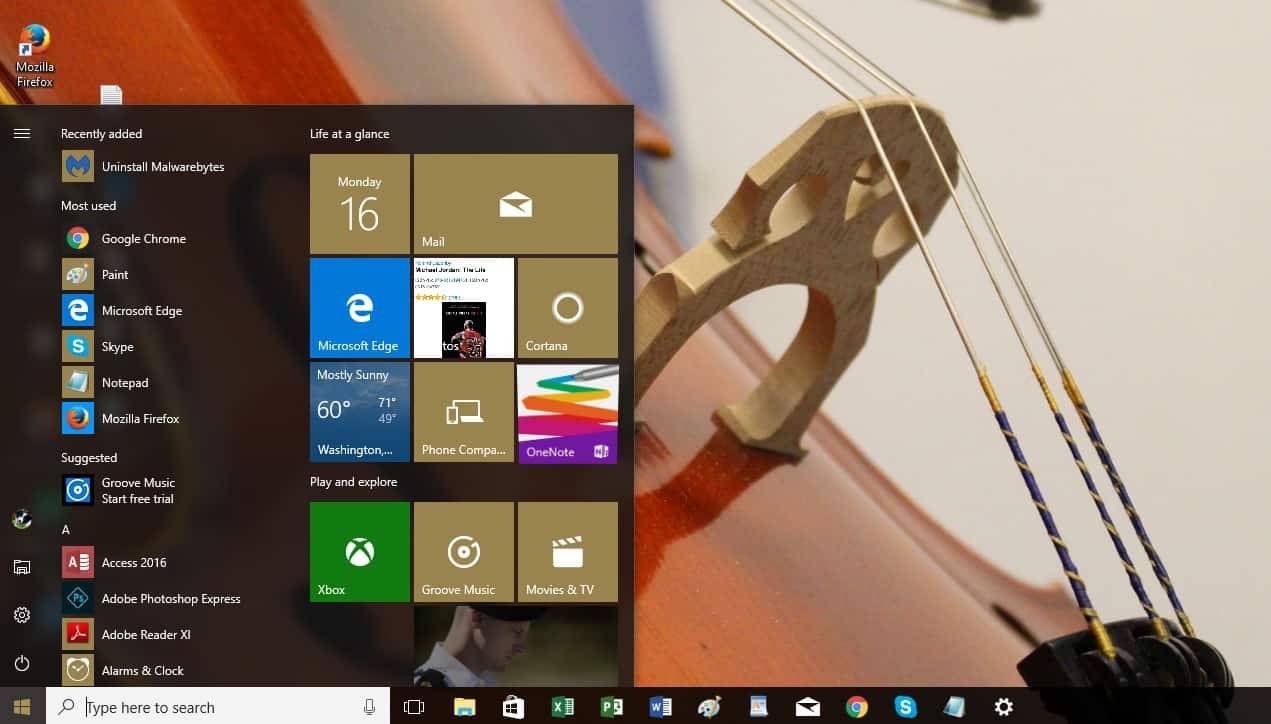


![How to Fix Netflix Issues in Windows 10/11 [Easy Guide]](https://windowsreport.com/wp-content/uploads/2018/01/Fix-Netflix-issues.jpg)

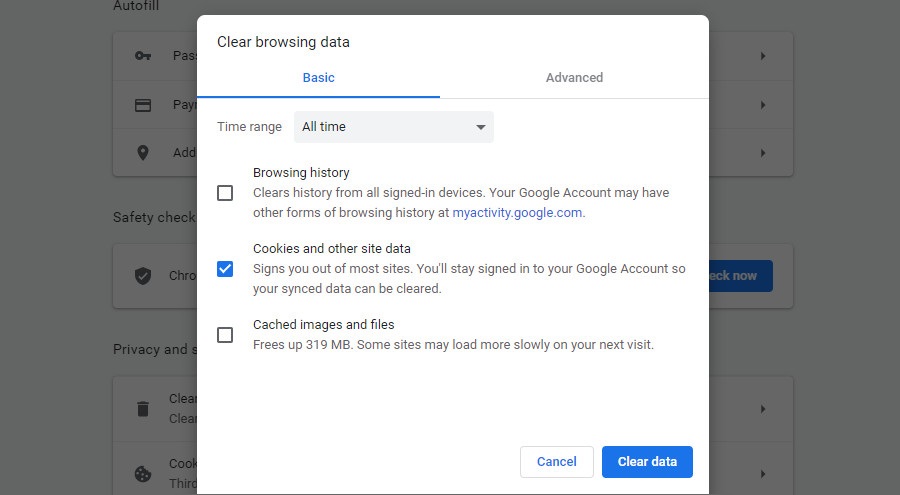
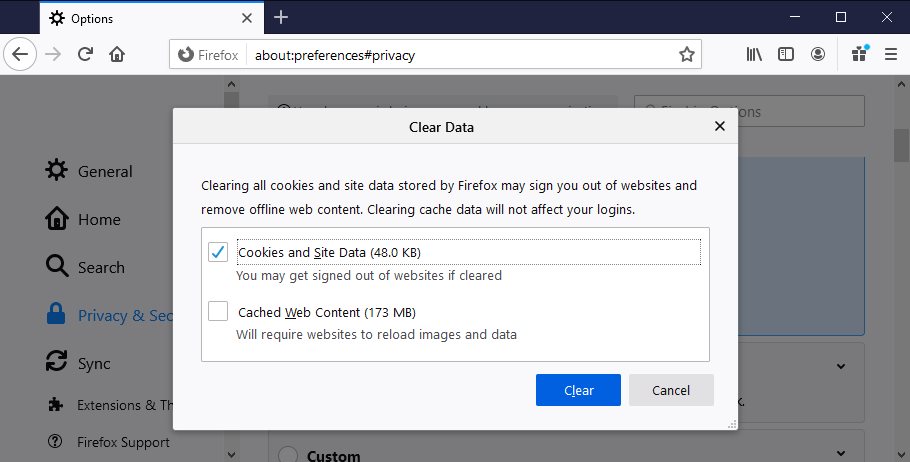
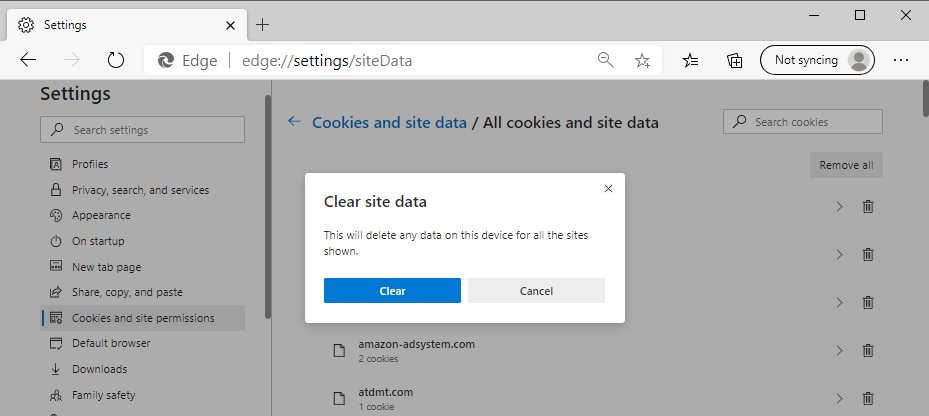
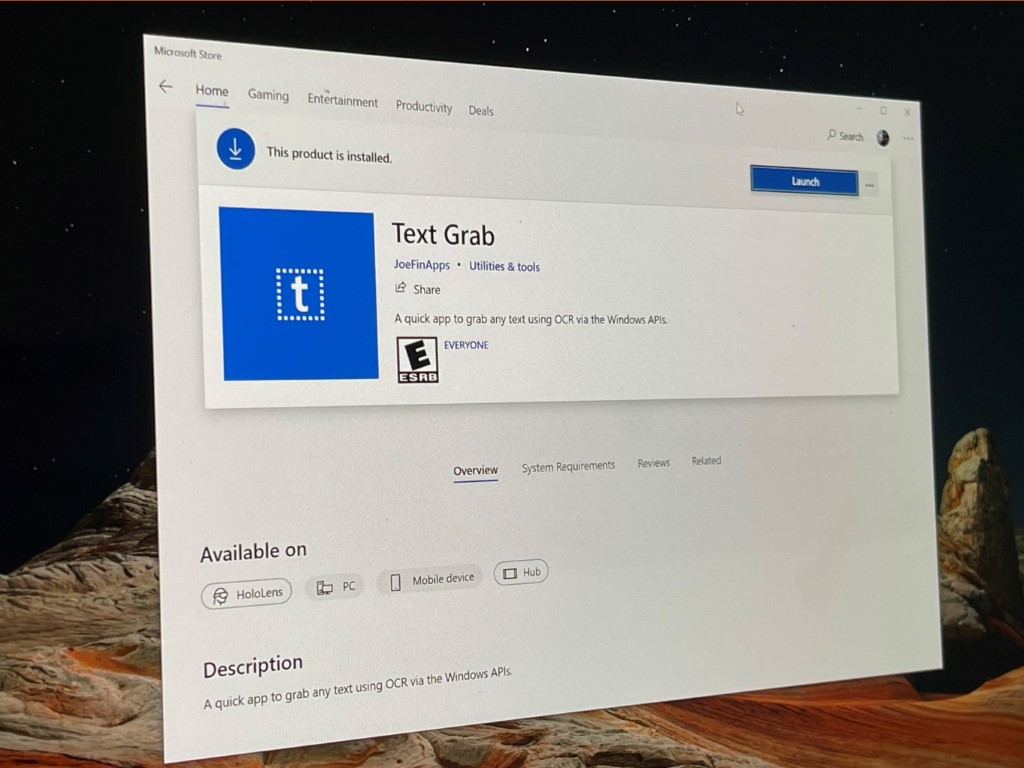
![[SOLVED] Cyberpunk 2077 Key Binding Failed Error](https://windowsreport.com/wp-content/uploads/2020/12/Cyberpunk-2077-7.jpg)

