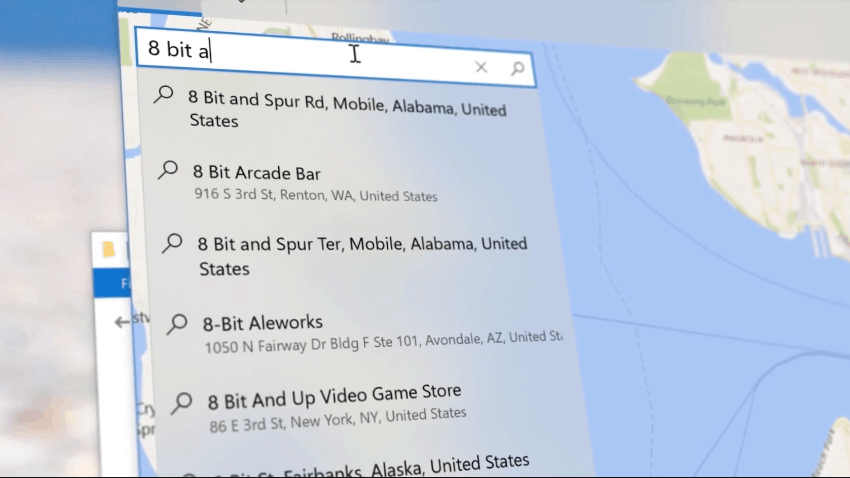
Microsoft highlights several Fluent Design System components in new video

Last week, Microsoft held its second Windows Developer Day where the company highlighted everything that’s new for developers in the Fall Creators Update. One of the big theme of the event was Fluent Design, Microsoft’s new design language for Windows 10 which is already visible in the Windows Shell as well as several stock Windows 10 apps.

Yesterday, the company published the following video on its Windows Developer channel to showcase several Fluent Design System components (via Neowin): beyond the “acrylic” transparency effects, you can see the “Reveal” lighting effects when the mouse is over the desired areas, and there are also some cool parallax scrolling effects in some apps such as Photos and MSN News.

Microsoft previously explained at Build 2017 that Fluent Design will evolve and become more complex (and hopefully prettier) in future major Windows 10 updates. It’s now up to developers to embrace Fluent Design in their Windows 10 apps, and you can learn more technical details about the new design language by checking all videos from last week’s Windows Developer Day.

What is $Windows.~WS folder in Windows 10/11

Just like all previous Windows iterations, Windows 10 has some unique features and unique folders. One of those is the $Windows~WS folder, which stores upgrade-related files.

Today, we’ll try to explain what this folder stands for, why it is important, and why you can or can’t delete it without a second thought. You can find everything you need regarding this folder just below.

What’s $Windows~WS folder and can you safely delete it?

What’s the Windows~WS folder?

$Windows~WS is a hidden folder in which you can find essential files of the previous system version. Basically, it stores the most important data and provides you with backup in case you want to downgrade your system back to Windows 7 or Windows 8.

what is $windows.~ws folder

Thus, this folder is only visible to users that upgraded to Windows 10 on Windows 7 or 8 foundation, rather than performing the clean installation.

what is $windows.~ws folder

It can be found in the system partition, once you enable the Hidden items. You can do so by checking the Hidden items box under the View section.

Even though ‘WS’ stands for Windows Setup, it stores mostly configuration files and not the setup files. Still, if you’re rethinking switching back to Windows 7 or 8 respectively, it’s quite important to keep this file and not delete it.

Another similar folder is $Windows~BT, which, on the other hand, stores major updates and installation files, so it’s also worth keeping.

Can I delete $Windows.~WS?

On the other hand, these folders combined can take dozens of gigabytes of storage space. And if you’re satisfied with what Windows 10 offers, you can delete their content immediately. You can do it manually — by deleting the folder, or with the bit of help of the built-in Disk Cleanup tool. Details about Disk Cleanup can be found in this article, so make sure to check it out.

Follow the instructions below to clean them and free some storage space on your system partition:

  1. In the Windows Search bar, type Disk and open Disk Cleanup.
  2. Select the system partition (C: most of the time).
  3. Click on the ”Clean Up System Files” button.
  4. Check all the boxes.what is $windows.~ws folder
  5. Click OK to confirm the start of the cleanup procedure.what is $windows.~ws folder

After that, you can navigate to C:$Windows~WS and delete its content completely. And, don’t worry, you can delete this folder without consequences.

This isn’t the only issue you can encounter, and a few users reported 2 Windows folders on the C drive, but we covered that issue in a separate guide.

That should do it. If you have related questions regarding this or other folders, post them in the comments section below. We look forward to hearing from you.

Fix: ‘No .natvis files found’ error on Windows 10

The ‘No .natvis files found‘ error on Windows 10 occurs when users try to run DX commands in the Windows 10 kits debugging tools. Alternatively, when users click DML links generated by other commands such as X or DV, this error appears.

The error message looks something like this:

  • “No .natvis files found at C:Program Files (x86)/Windows Kits/10/Debuggers/x64/Visualizers”

As the error message suggests, the reason behind this error are some missing files (the .natvis files). These files typically help the debugger understand how a particular data types should be visualized.

With the files missing, the error is thrown. In this article, we look into how you can resolve the ‘No .natvis files found’ error on Windows 10.

How to fix the ‘No .natvis files found’ error on Windows 10

.Natvis files are typically included with the debuggers of Windows 10 kits, Visual Studio 2013 comes with a slightly modified version of these files. Hence, doing a clean installation of Visual Studio 2013 (not 2015, as its Natvis files are not supported by the debuggers of the Windows 10 kits).

Once the installation is complete, follow these steps:

1. Find the Visual Studio 2013 Natvis files. Press Windows + R, and in the Run dialogue enter the following address:

  • “%programfiles(x86)%Microsoft Visual Studio 12.0/Common7/Packages/Debugger/Visualizers”

2. Locate the address of the Windows 10 debugger. Usually, it is the following location. (Press Windows + R, and in the Run dialogue enter the following address:)

3. Locate location where debugger of Windows 10 is installed. Usually this location is:

  • “%programfiles(x86)%Windows Kits/10/Debuggers/[x86 or x64 or arm]”

4. Now create a folder named “Visualizers” in the addresses of all available debugger packages (x86 or x64 or arm). You will need administrative privileges.
5. Copy the .natvis file from the installation folder of Visual Studio 2013 to these newly created folders.
6. Restart all Windows 10 kits debuggers.

Microsoft has said that a future version of Windows 10 kits will include updated versions of .Natvis files that are compatible with Visual Studio 2015. So make sure you keep an eye for updates.

RELATED STORIES YOU NEED TO CHECK OUT:

How to remove the ‘SLU_Updater.exe’ pop-up message

Any sort of pop-up that asks you to download something shouldn’t be trusted. Usually, you are dealing with deceptive messages that scam websites use to access data on your Windows 10 system or trick you into paying for third-party software.

Either way, you should be extremely careful as most likely you are experiencing a malware attack.

One such particular case is the SLU_Updater.exe pop-up message.

Therefore, if you just received the SLU_Updater.exe pop-up, you should quickly decide what to do next. Of course, you shouldn’t download anything on your computer. What you need to do is initiate a full scan and remove the malware which is playing with your nerves.

And here is how you can achieve that.

How to remove the SLU_Updater.exe malware

Apparently, the update pop-up is associated with the program Stagelight by Openlabs. So, erasing the SLU_Updater.exe file should be possible if you uninstall the already mentioned software from your computer.

In order to do so, follow these steps:

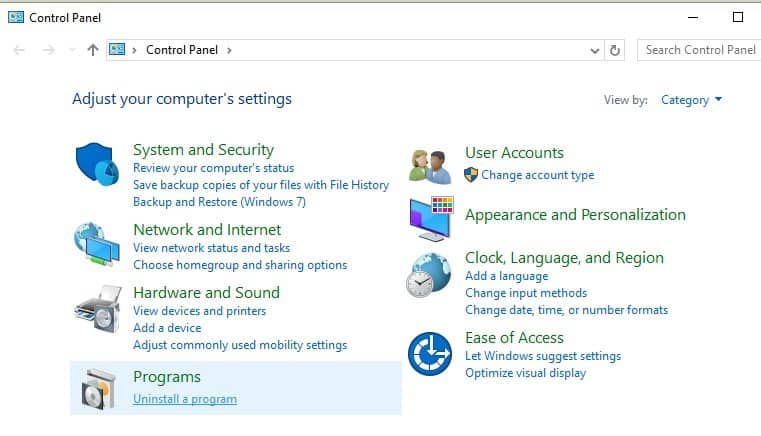
  1. Press the Win+X hotkeys and select Control Panel.
  2. In Control Panel, switch to Categories and click on Uninstall (under Programs).The exclusive semaphore is owned by another process
  3. Find the Stagelight program and remove it.
  4. If you cannot remove the program, try to stop its processes first – access Task manager and under Processes tab end any process that might be related with this program.
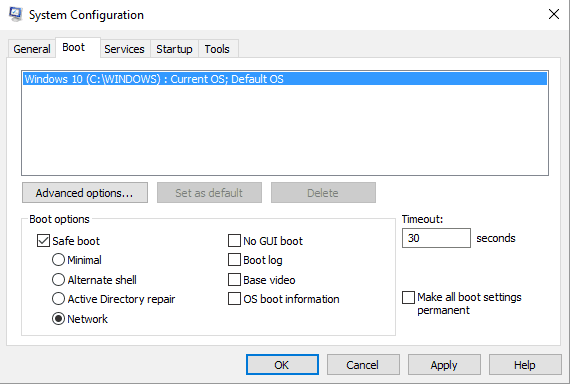
safe mode with networking

Hint: If you just cannot remove the program, try to complete the steps from above through Safe Mode – press Win+R hotkeys and type msconfig and then press Enter; from the next windows switch to Boot tab and check the Safe Mode check box; save your changes and restart your Windows 10 system.

If you are still receiving the SLU_Updater.exe pop-up, after uninstalling the Stagelight by Openlabs program, initiate a scan. You can use default antivirus software from Microsoft, or you can choose to run a more automated software that will eliminate the issue.

For this purpose, we advise any user to approach the best antivirus software for Windows PCs you can find now.

Either way, make sure you complete a full scan – just wait for as long as it takes (the scan will run depending on how many files are stored on your device). In the end, choose to remove all the infected files and restart your computer.

Afterward, perform one last scan for making sure that everything is safe and secured now.

That should do the trick and you should now remove the SLU_Updater.exe pop-up message from your Windows 10 system. Make sure that your computer is always protected by antivirus or antimalware programs to avoid similar problems.

Also, Windows Firewall must be enabled and you should use web browsing protection too. And, of course, be careful when downloading and installing third-party apps on your device, especially when you navigate towards web pages that cannot be fully trusted.

Windows 10 bloatware: check what the release includes & what it removes

Everyone was waiting for Microsoft to release the Windows 10 Fall Creators Update on October 17. But, in case you didn’t know, you also have the ability to install it right now without even having to join the Windows Insider Program. Read below to find out how.

Windows 10 Fall Creators Update Bloatware Free Edition is not an official release from Microsoft

The Windows 10 Fall Creators Update Bloatware Free Edition is not an official release from Microsoft. Instead, it’s a special edition built using the MSMG Toolkit v7.7 and the latest Windows 10 Fall Creators Update RTM Build 16299.15.

The Bloatware Free Edition will remove a lot of unwanted extras from the operating system. Speaking of which, if you want to completely remove bloatware from your Windows 10 PC, check out this step-by-step guide.

Check out what the release includes & what it removes:

This release includes an integrated DirectX 9 and applied Metro skin to the Windows Photo Viewer.

Regarding what it excludes, the following features have been eliminated:

  • All the Metro apps except the Store, Xbox, and Sticky Notes
  • Third-party app links
  • Telemetry
  • Maps
  • Skype video app
  • Contact support
  • Windows Embedded Features (removes packages related to Custom Shell, Device Lockdown, Keyboard/Registry Filter)
  • Cortana
  • Home group
  • Geo location
  • Quick Assist app
  • Mixed reality
  • Windows Defender
  • Take a Test

Once you installed the Windows 10 Fall Creators Update Bloatware Free Edition, you will have to enter your Windows product key in PC Settings – Updates & Security – Activation – Change Product Key to activate the release. You can use the operating system also without activating it.

The ISO also comes with the stable RAID Driver v15.2.0.1020, so it will be on your USB Flash disk once you burn the ISO to it for easier access.

This is useful for users who want to install Windows 10 on a RAID setup, and you can simply point to the USB Flash disk/RAID folder in order to load the IRST driver. This way, you will get the chance to see your RAID array.

You can now download the Windows 10 Fall Creators Update Bloatware Free Edition ISO.

RELATED STORIES TO CHECK OUT:

The Thread is Already in Background Processing Mode [Fix]

System errors, such as ERROR_THREAD_MODE_ALREADY_BACKGROUND can appear on almost any computer. This problem is related to the Windows platform, and you can easily recognize it by its The thread is already in background processing mode error message.

This isn’t a major error, and today, we will show you how to fix it properly.

How can I fix ERROR_THREAD_MODE_ALREADY_BACKGROUND?

1. Check your dsm.opt file

According to users, this error occurs after restarting the TSM Client Acceptor service. It seems that the cause of the problem is dsm.opt file. This file doesn’t support certain characters, and if you made any changes to it you might’ve caused the problem.

To fix the issue, you need to open dsm.opt file and remove the problematic entries. After doing that, you have to save changes and restart the TSM Client Acceptor and check if that solves the problem.

Several users reported that their dsm.opt file had several invalid TCPCADAddress entries. After removing them from the dsm.opt file, the issue was resolved entirely.

Several users reported that the option file was the problem in their case, and after commenting out VMSKIPMAXVMDKS=yes entry and saving the changes, the issue was resolved.

2. Check your file name

According to users, this error occurs with InfoPath and SharePoint Library. Apparently, the issue can appear if your file name contains any illegal characters. If you’re having this problem, you should check your file name for any illegal characters and remove them.

Many errors can occur with illegal characters in file names, so be sure your file name contains only alphanumeric characters. If there are any special characters, remove them and check if that solves the problem.

3. Clear the InfoPath cache manually

By default, InfoPath saves its cache automatically on your PC. However, sometimes certain issues can occur; the only solution is manually removing the cache. To do that, follow these simple steps:

  1. Press Windows Key + R to open the Run dialog and enter %appdata%. Press Enter or click OK.
  2. Navigate to the MicrosoftInfoPathFormCache2 directory and delete all files from the directory.

After doing that, the cache will be successfully cleared and the problem should be resolved.

If you don’t want to delete the cache manually, you can do it using a single command. Simply open the Run dialog like we showed you in the previous steps and enter Infopath /cache clearall. Now press OK or Enter, and the cache will be removed automatically.

4. Recreate ThinApp packages

This error also appears while using VMware and ThinApp for Horizon. Users reported that recreating the ThinApp packages and choosing the Manage with Horizonfixed the issue for them, so be sure to try it.

Keep in mind that this solution applies only to the users that are using VMware. You can skip this solution entirely if you’re not using this tool.

5. Check your antivirus software

Antivirus tools are necessary, but sometimes third-party antivirus software can interfere with your system and cause this and other errors to occur. You need to check your antivirus configuration and disable all problematic features to fix the problem.

Finding the problematic feature isn’t always simple, especially if you’re unfamiliar with antivirus software and computer security, so you’ll have to use trial and error.

Alternatively, you can disable your antivirus software entirely and check if that solves the issue. In some cases disabling the antivirus doesn’t work, so you might have to remove your antivirus.

We must mention that antivirus tools often leave certain files and registry entries behind that can still interfere with your system. To completely remove your antivirus, we advise you to download and use a dedicated removal tool. Many antivirus companies offer these tools for their software, so be sure to download one for your antivirus.

After removing your antivirus entirely, check if the problem still persists. If not, you might want to install the latest version of your antivirus or switch to a different antivirus tool.

6. Enter Safe Mode

Safe Mode is a special segment of Windows that runs with default drivers and applications, so it’s perfect for error troubleshooting. To enter Safe Mode, you need to do the following:

  1. Open the Start Menu and click the Power button. Press and hold the Shift key and choose Restart from the menu.
  2. Choose Troubleshoot > Advanced options > Startup Settings. Click the Restart button.
  3. Once your PC restarts, a list of options will appear. Select any version of Safe Mode by pressing the appropriate key.

Once you enter Safe Mode, check if the problem still appears. If not, it’s most likely that one of the third-party applications is interfering with your system and causing this error. To fix the problem, you must remove any recently installed or updated applications and check if that solves the issue.

7. Keep your system up to date

Windows 10 is a solid operating system, but just like any other one, it also has a few bugs. Microsoft is frequently releasing new updates and addressing these bugs, so if you want to keep your PC bug-free and stable, it’s advised to keep your system up to date.

In most cases, updates are downloaded automatically in the background, but sometimes, you can skip an update due to certain errors. To fix this issue, you can check for updates manually by doing the following:

  1. Press Windows Key + I to open the Settings app.
  2. Once the Settings app opens, navigate to the Update & security section.
  3. Click on Check for updates button.

If any updates are available, Windows will download them in the background and install them once you restart your PC. After updating your operating system, check if the problem still appears.

The thread is already in background processing mode error message can cause problems on your PC, but we hope you managed to solve it by using one of our solutions.

Windows Media Player disappeared after update? Here’s how to get it back

It is already known that the upcoming Windows 10 Fall Creators Update will get rid of some of the oldest programs in the Windows ecosystem, such as Paint. However, it appears that list might be longer than we expected. Windows Insiders are already testing the Fall Creators Update and, after receiving the KB4046355 update, discovered that Windows Media Player is no longer available.

After the update the WMP is completely gone, the C:Program Files (x86)Windows Media Player” folder only has a “wmp.dll” file. Currently on build 16299.0.

Right now, we do not have any official information from Microsoft but we are waiting for an announcement. However, it is not hard to understand why they decided to remove it, since there are many other alternatives including third-party players.

How to reinstall Windows Media Player

Windows Media Player users might have been scared by the news, but it appears that Windows Media Player is not gone forever. While it is true that it will not come installed by default in the upcoming Windows 10 Fall Creators Update, there is a way to get it on your computer once again.

Here is what you have to do:

  1. Go to the Settings app.
  2. Open Apps > Apps & features and then select “manage optional features”
  3. Once you are there, select the “Add a feature” option.
  4. Scroll down all the way to the bottom of the screen and you should find Windows Media Player.
  5. The program will be listed as an optional feature. Select it and click the install button.
  6. In less than a minute, the installation should be complete and you will be able to use Windows Media Player once again on your computer.

RELATED STORIES TO CHECK OUT:

KB4041689 marks the end of support for Windows 10 version 1511

If you’re still running Windows 10 version 1511 on your computer, perhaps it’s time to upgrade your OS. Microsoft recently pushed the last Windows 10 version 1511 update to the public, marking the end of support for the OS.

Update KB4041689 brings a series of bug fixes to Universal CRT that blocked executable files from running, patches memory corruption issues, and adds many security improvements to various Windows components.

KB4041689 changelog

  • Addressed issue where the Universal CRT _splitpath was not handling multibyte strings correctly, which caused apps to fail when accessing multibyte filenames.


Addressed issue where the Universal CRT caused the linker (link.exe) to stop working for large projects.


Addressed issue where the MSMQ performance counter (MSMQ Queue) may not populate queue instances when the server hosts a clustered MSMQ role.


Addressed issue with the Lock Workstation policy for smart cards where, in some cases, the system doesn’t lock when you remove the smart card.


Addressed issue where, when using Conditional Access with Azure Active Directory, authentication fails.


Addressed issue with form submissions in Internet Explorer.


Addressed issue where messages that should be in a non-English language display in English in Internet Explorer.


Addressed issue where USBHUB.SYS randomly causes memory corruption that results in random system crashes that are extremely difficult to diagnose.


Security updates to Microsoft Windows Search Component, Windows kernel-mode drivers, Microsoft Graphics Component, Internet Explorer, Windows kernel, Microsoft Edge, Windows Authentication, Windows TPM, Microsoft PowerShell, Windows Wireless Networking, Windows Storage and Filesystems, Microsoft Windows DNS, Microsoft Scripting Engine, Windows Server, Device Guard, and the Windows SMB Server.

Windows 10 version 1511 end of service

As we already stated at the beginning of this article, KB4041689 is the last update that Microsoft released to Windows 10 version 1511. In other words, devices running this OS version will no longer receive monthly security and quality updates.  If you continue using Windows 10 version 1511, your computer will no longer be protected against the latest security threats.

Upgrading your PC to the latest OS version available is extremely important. In this manner, you can stay one step ahead of hackers and avoid malware and ransomware attacks.

To continue receiving security and quality updates, we recommend upgrading to Windows 10 Creators Update as soon as possible. For more information on how to install the Creators Update and fix possible download issues, check out the articles below:

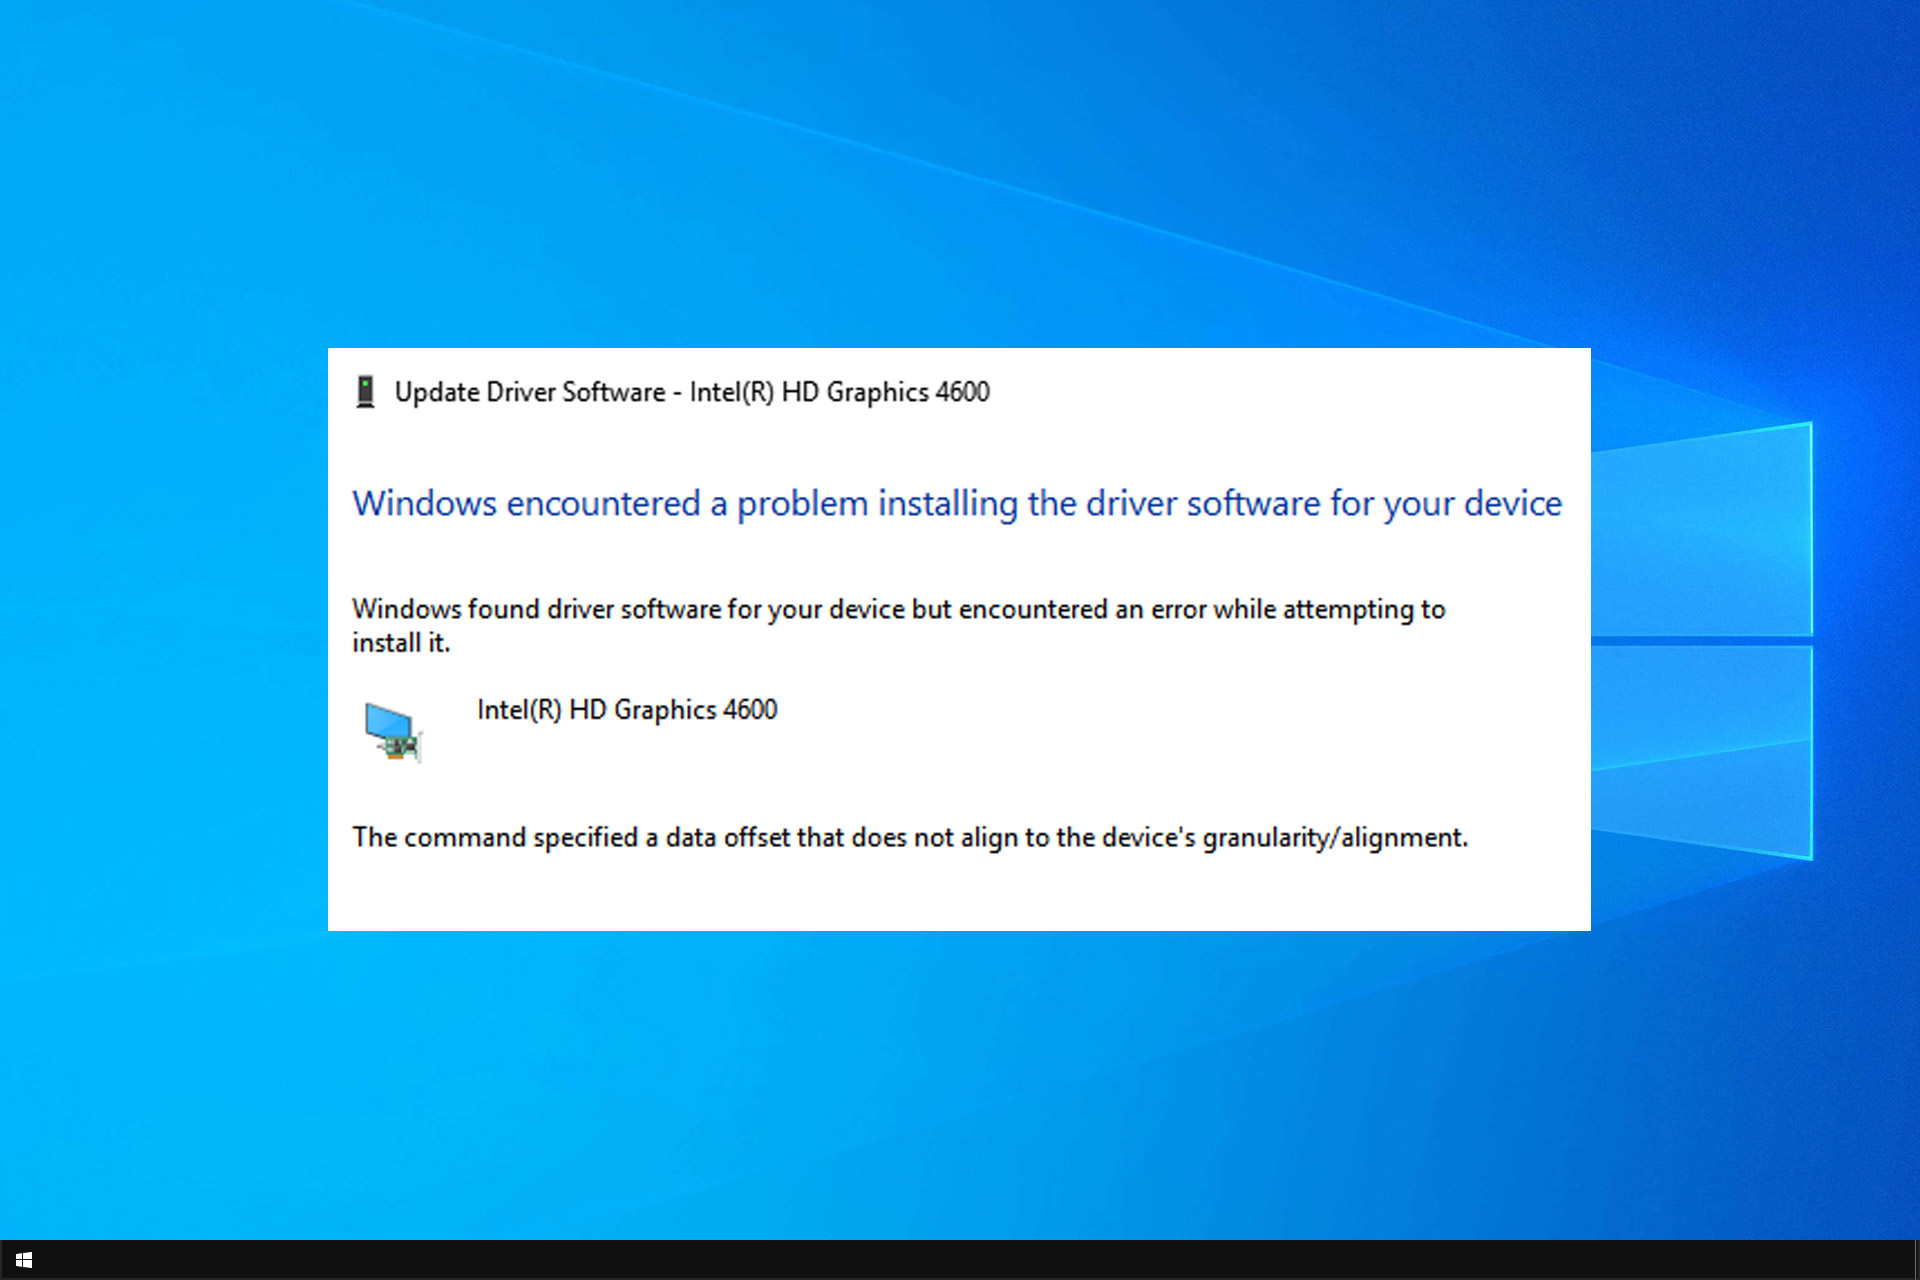
Command Specified Offset Data Error: 5 Ways to Fix it

System errors, such as ERROR_OFFSET_ALIGNMENT_VIOLATION, can cause Command specified offset data message to appear.

This message can be problematic, and it cause  BSOD errors and crashes. Speaking of Blue screen errors, we have a great guide on BSOD causes that you should check out.

Today we’re going to focus on the offset data message, so without further ado, let’s get started.

What causes The command specified a data offset that does not align to the device’s granularity/alignment?

  • In some instances, your antivirus can interfere with your PC and lead to this error message.
  • Missing updates will sometimes cause this issue.
  • Problems with Windows Update components can cause this problem.
  • Sometimes third-party startup application can result in this error message.

How can I fix Command specified offset data error?

1. Check your antivirus

  1. Open your antivirus settings.
  2. Next, locate Core Shields and disable them all.
  3. After doing that, check if the problem is gone.

Keep in mind that these are just a general guidelines, and the steps will different depending on the antivirus software that you’re using.

2. Make sure that Windows is up to date

  1. Press Windows Key + I to open the Settings app.
  2. Once Settings app opens, navigate to the Update & security section.
  3. Now click on Check for updates button.

If any updates are available, Windows will automatically download them in the background and install them once you restart your PC. After updating your system, check if the error message still appears.

3. Reset Windows Update components.

  1. Press Windows key + X and choose Windows Powershell (Admin).
  2. Enter the following commands one by one:
    net stop wuauserv
    net stop bits
    net stop cryptsvc
    cd %SystemRoot%\System32
    ren catroot2 catroot2_BackUp
    cd..
    ren SoftwareDistribution SoftwareDistribution_BackUp
    net start wuauserv
    net start bits
    net start cryptsvc
  3. After all commands are executed, close Command Prompt.

4. Perform a Clean boot

  1. Press Windows Key + R and enter msconfig. Press OK.
  2. System Configuration window will appear. Navigate to the Services tab and check Hide all Microsoft services option. Now click on Disable all.
  3. Navigate to Startup tab and click on Open Task Manager.
  4. When Task Manager opens you’ll see a list of all startup applications. Select the first entry on the list and click on Disable button. Repeat this step for all applications on the list.
  5. After disabling all startup apps, close Task Manager and go back to System Configuration window. Click Apply and OK to save changes.
  6. Restart your PC to apply changes.

After doing that, check if the problem still appears. If not, you need to repeat the same steps and enable applications and services one by one or in groups.

Keep in mind that you need to restart your PC after enabling a group of apps or services. After you find the problematic application you can keep it disabled, remove it and Command specified offset data error will be gone.

4. Perform a System Restore

  1. Press Windows Key + S and enter system restore. Choose Create a restore point from the menu.
  2. System Properties window will now open. Click on System Restore button.
  3. When System Restore window appears, click on Next. Check Show more restore points and select the desired restore point. Click on Next to continue.
  4. Follow the instructions on the screen to complete the reset.

After completing the reset, check if the issue still persists. In most cases System Restore should be able to revert any recent changes and problems, so be sure to try it out.

5. Reset Windows 10

  1. Open the Start Menu and click the Power button. Press and hold the Shift key and click on Reset.
  2. List of options will appear. Click on Troubleshoot > Reset this PC > Remove everything. You might need to insert an installation media during this step, so be sure to have it ready.
  3. Choose your version of Windows and select Only the drive where Windows is installed > Just remove my files.
  4. You’ll see a list of files that reset will remove. Once you’re ready to start click on Reset button.
  5. Follow the instructions on the screen to complete the reset.

After resetting Windows 10 check if the issue still persists. If not, install all your applications and move files from the backup.

Command specified offset data is a system error and it can prevent you from installing certain applications. This isn’t a serious error, and you should be able to resolve it by using one of our solutions.

In case the problem is still there, we suggest using BSOD Viewer to diagnose crashes and further analyze the problem.

What solution did you use to fix this issue? Let us know in the comments below.

Sony’s reluctance to bring Minecraft cross-play to Playstation “not going away,” says Xbox chief

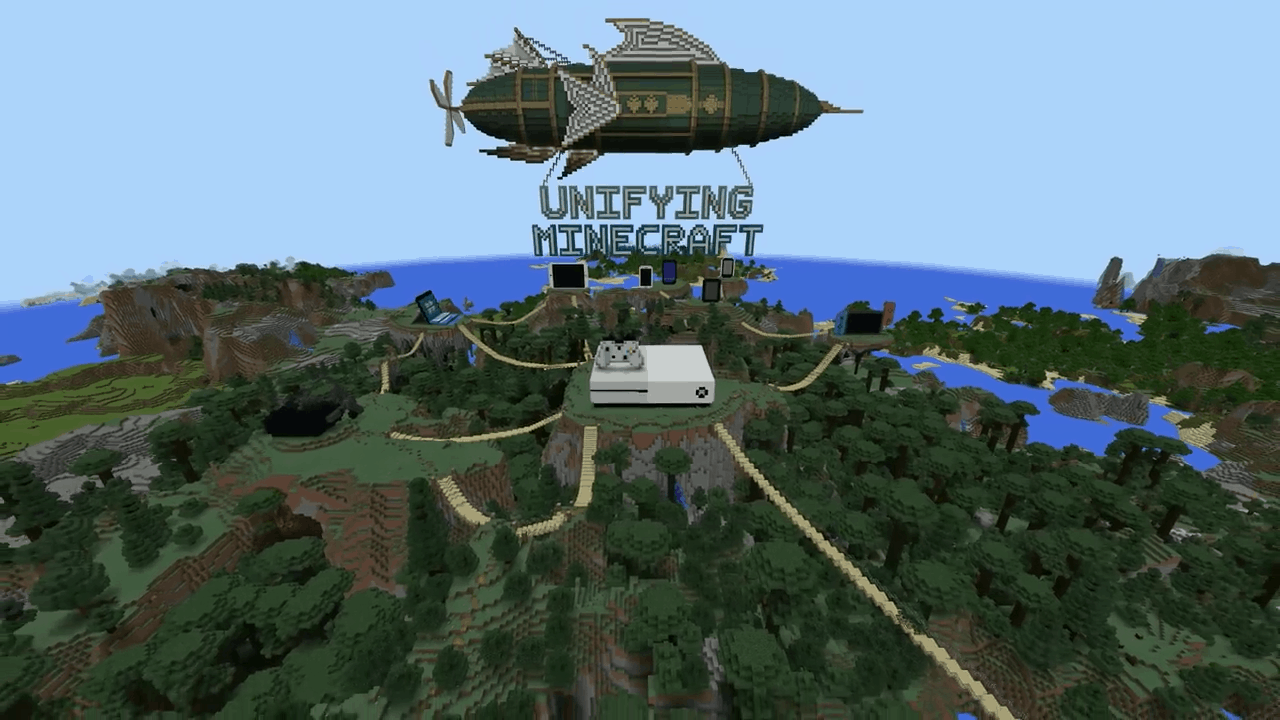
Back at E3 2017, Microsoft made headlines when they announced that Minecraft’s Better Together update would enable cross-play multiplayer between Xbox One, Windows 10, Nintendo Switch as well as mobile platforms. But unfortunately for PlayStation gamers, Sony declined to play ball, defending their refusal to open up cross-network play by the necessity to protect younger gamers.

In the following months, Microsoft said that it has been in discussions with Sony to enable cross-play on the Playstation 4 version of Minecraft, but things aren’t looking good so far. In a recent interview with GameSpot, Xbox Chief Phil Spencer shared that he’s unsure if Sony will ever have a change of mind about it. He explained:

“I have a real struggle making comments about their motivation or timelines. I know there is a certain view that says if my friends have this console, they can’t play with people who buy another console. That’s a reason they go buy my console,” he said. “That reason is not going to go away. So we’re putting Minecraft out there as one of the biggest games on any platform and allowing people to play together regardless of what device they bought. I don’t think everybody is taking that same approach to the ecosystem. So I’m never going to call anything a lost cause but I think some of the fundamental reasons and certain scenarios, they’re not really going away. So I don’t know what would change.”

For Spencer, crossplay multiplayer is positive for gamers, game developers as well as the video games industry as a whole. “If it’s better for gamers, I have a hard time thinking why we shouldn’t go do this, especially when you’re trying to make the gaming business a bigger business; grow it, get more games, create more opportunity,” he explained. But Sony, which has the best-selling console of this generation may have no interest to play nice with other platforms, for now at least.

In the meantime, if cross-platform multiplayer does matter to you, then the Xbox One remains the better choice. In addition to Minecraft, several Microsoft Studios titles such as Gears of War 4 or Forza Horizon 3 already support cross-play between Xbox One and Windows 10, and the fighting game Killer Instinct even supports it between Steam, Windows 10 and Xbox One. Do you think Sony will have to change its stance at some point, or do you think the company is more interested in keeping PS4 players in a walled garden? Let us know below.

The target device has insufficient resources to complete the operation [Fix]

ERROR_DEVICE_NO_RESOURCES is a system error and it can appear on almost any PC. You can easily recognize this error thanks to its The target device has insufficient resources to complete the operation message, and today we’re going to show you how to fix it.

How to fix ERROR_DEVICE_NO_RESOURCES?

Fix – ERROR_DEVICE_NO_RESOURCES

Solution 1 – Check for updates

Windows 10 is a great operating system, but it’s not bug-free. Some compatibility issues and bugs can occur once in a while, and in order to prevent them from appearing it’s advised to keep your Windows up to date. Updating Windows is rather simple, and in most cases Windows 10 will automatically download and install the necessary updates. However, due to certain problems you might skip an update. To ensure your PC is up to date, we strongly advise you to check for updates manually. This is rather simple and you can do it by following these steps:

  1. Press Windows Key + I to open the Settings app.
  2. When Settings app opens, go to Update & security section.
  3. Click for Check for updates button.

Windows will now check for updates. If any updates are available, they will be downloaded in the background and installed once you restart your PC. Once your PC is updated, the error should be resolved.

Solution 2 – Check your antivirus

Even though antivirus software is a necessity, it can sometimes interfere with your system and cause this and other errors to occur. If you’re using a third-party antivirus software, you might want to check its settings. Sometimes certain features can prevent specific operations from running, and to fix the problem you need to find and disable the problematic features. This isn’t as easy as it sounds, especially if you’re not familiar with your antivirus or computer security.

If disabling the problematic feature is too complicated for you, you can try disabling your antivirus software entirely. Even if you disable your antivirus, your PC will remain protected thanks to the Windows Defender.

If disabling the antivirus doesn’t fix the problem, your last option is to remove it. Keep in mind that antivirus tools tend to leave certain files and registry entries behind even after you remove them. These files can also interfere with your system, so it’s important that you remove them. The best way to do that is to use a dedicated removal tool. Almost all antivirus companies have dedicated removal tools for their software, so be sure to download one for your antivirus and use it to remove all leftover files.

If removing the antivirus fixes the problem, you can try switching to a different antivirus application or install the latest version of your antivirus software.

Solution 3 – Run Windows Update troubleshooter

According to users, you might be able to fix this problem simply by running Windows Update troubleshooter. Improperly installed update can cause this error to appear, but you can fix that by running Windows Update troubleshooter. This is relatively simple and you can do it by following these steps:

  1. Open the Settings app and navigate to Update & security section.
  2. Navigate to the Troubleshoot tab and choose Windows Update from the right pane. Click on Run the troubleshooter button.
  3. Follow the instructions on the screen to complete the troubleshooting process.

You can also troubleshoot Windows updates by doing the following:

  1. Press Windows Key + S and enter control panel. Choose Control Panel from the list.
  2. Once Control Panel opens, click on Troubleshooting.
  3. Click on View all.
  4. Scroll all the way down and click on Windows Update.
  5. Click on Next to start the troubleshooter.
  6. Follow the instructions on the screen to complete the process.

Several users reported that running the troubleshooter fixed the problem for them, so be sure to try this solution.

Solution 4 – Remove a problematic update

Even though it’s important to keep your PC up to date, sometimes certain updates can cause this and other problems to appear. To fix the problem you might want to try removing any recently installed updates. This is rather simple and you can do it by following these steps:

  1. Open the Settings app.
  2. Navigate to Update & security section and click on Update history.
  3. Click on Uninstall updates option.
  4. Installed Updates window will appear. Look for any recent update and double click it to remove it.

After removing the problematic update, check if the problem still appears.

Solution 5 – Enter Safe Mode

Safe Mode is a special segment of Windows that runs with default drivers and applications, so it’s perfect for troubleshooting. To enter Safe Mode, do the following:

  1. Open the Start Menu and click on Power button. Now press and hold the Shift key on your keyboard and choose Restart from the menu.
  2. Choose Troubleshoot > Advanced options > Startup Settings. Click the Restart button.
  3. Once your PC restarts a list of options will appear. Select any version of Safe Mode by pressing the appropriate key.

Once you enter Safe Mode check if the problem still appears. If not, it means that one of disabled applications is probably causing this error. To fix it, you need to find and remove the problematic application from the PC. In most cases the cause is usually a recently installed application, so be sure to remove those applications first.

Solution 6 – Perform System Restore

If this error started appearing recently, you might be able to solve it by restoring your PC using System Restore. This is a useful feature that will restore your PC to the previous state and fix any recent problems. We have to warn you that this feature might remove any recently saved files as well, so we recommend to back up your files just in case. To perform System Restore, do the following:

  • READ ALSO: Windows Update issues after installing Windows 10 Creators Update [Fix]
  1. Press Windows Key + S and enter system restore. Choose Create a restore point from the menu.
  2. System Properties window will appear. Click on System Restore button.
  3. Once System Restore window opens, click on Next.
  4. Check Show more restore points option and select the desired restore point. Click on Next to proceed.
  5. Follow the instructions on the screen to restore your system.

System Restore is a quick and simple way to fix computer errors, so if you’re having this problem, be sure to try this solution.

Solution 7 – Reset Windows 10

If other solutions can’t fix this problem, you might want to consider resetting Windows 10. We have to warn you that this process will remove all installed applications and files from your system drive, so be sure to back them up. You might need a Windows 10 installation media to perform the reset, so be sure to create it with Windows Media Creation Tool. To reset Windows 10, you need to do the following:

  1. Open the Start Menu, click the Power button, press and hold the Shift key and choose Restart from the menu.
  2. List of options will now appear. Choose Troubleshoot > Reset this PC > Remove everything. During this step you might need to insert Windows 10 installation media, so be sure to have it ready.
  3. Select your version of Windows and choose Only the drive where Windows is installed > Just remove my files.
  4. Now you’ll see a list of changes that reset will perform. Click the Reset button to start.
  5. Follow instructions on the screen to complete the reset.

After resetting Windows 10, all your files and apps will be removed from the system drive. Now you just have to restore your backup and check if the error appears again. This is a drastic solution, so you should use it only if other solutions can’t fix the problem.

ERROR_DEVICE_NO_RESOURCES and The target device has insufficient resources to complete the operation error message can cause some problems, but they aren’t serious errors. These errors are relatively simple to fix, and you should be able to fix them by using one of our solutions.

READ ALSO:

Mozilla Firefox ends support for Windows XP and Windows Vista in 2018

Yes, it’s finally come to this. Windows XP is arguably the most popular Windows operating system that had a run for nearly two decades. Even today, I see small enterprises and educational institutions use Windows XP. In the meanwhile, the Windows Vista had its fair share of trouble and was dismissed for good. The news here is that Mozilla has decided to end support for Windows XP and Vista starting from June 2018.

firefox-independent-mozilla

Next year Firefox will reach the ‘end of life’ (EOL) on the Windows XP and the Windows Vista. On an interesting note, both the operating systems themselves are nearing the end of life. However, earlier the older operating systems were put into Extended Support Release last year and the expiry, in this case, was September 2017. This time around the company has confirmed that the ESR will be the last and Mozilla will finally pull the plugs on its browser for both the operating systems.

“As one of the few browsers that continue to support Windows XP and Vista, Firefox users on these platforms can expect security updates until [June 2018]. Users do not need to take additional action to receive those updates.”- Mozilla announced.

We think that the nine-month warning is fair enough and this should ideally compel the users to upgrade to a latest Windows version. Unsupported operating systems are vulnerable to all kind of threats be it from the malware or other exploits. The worst part, however, is that Microsoft will not be issuing patches and security fixes. That being said Mozilla has also pulled the plug on other operating systems as well, so Windows is no exception.

In the meanwhile, Mozilla is arming itself with the Firefox Quantum which uses a new CSS which according to the company makes the new browser twice as fast as its predecessor. The Firefox Quantum has also garnered rave reviews and perhaps will help people switch back to Firefox.

RELATED STORIES TO CHECK OUT:

RAM is Not Detected? 4 Ways to Recognize it

Many users reported that new RAM is not detected on their PC, which can be problematic. RAM is a basic component of any computer, and your PC can’t work without it.

To fix this issue, first, you need to check your RAM type and make sure that you’re using compatible modules.

Fixing this issue isn’t as hard as you think, and today we’re going to show you how to fix it properly.

Why is my RAM not detected?

  • You have exceeded your operating system’s RAM limit.
  • Your motherboard can’t handle more RAM memory.
  • The memory isn’t compatible with your motherboard.
  • The maximum RAM limit isn’t properly set on your PC.

What can I do if my RAM is not detected?

1. Check Windows OS RAM limits

  1. Press the Cortana button on the taskbar.
  2. Enter the keyword system in the search box.
  3. Select to open the System tab shown in the snapshot directly below.
    PC won't accept RAM
  4. Windows 10 users can also select About your PC to open further OS details as below.
    PC won't accept RAM
  5. The listed system type specification tells you whether your platform is 32 or 64-bit. Also, note the Installed RAM spec that highlights the usable RAM amount.

You’ll need to upgrade a 32-bit platform to a 64-bit OS to ensure that all your system’s RAM is accepted. A 64-bit Windows 10 or 8 upgrade will ensure at least 128 GB RAM is accepted.

The Pro edition of Win 10 supports up to 2 TB (terabytes) of RAM. Note that your desktop or laptop will also need to 64-bit CPU to upgrade to a 64-bit OS.

The 64-bit Windows 7 platforms have lower RAM limits. The 64-bit Windows 7 Basic accepts 8 GB RAM only. You can add up to 16 GB RAM to Win 7 Premium.

2. Check Motherboard RAM restrictions

  1. Check your motherboard manual.
  2. Alternatively, enter the motherboard’s model number in a search engine to find a manufacturer support page for it.
  3. Then you can open a page on the manufacturer’s website that might provide further details pertaining to how much RAM your motherboard supports.

This is always a good rule to follow, with any hardware, so always make sure that everything is fully compatible.

3. Check RAM compatibility

  1. Check out this web tool with which you can find compatible upgrades.
  2. Enter your model and check the compatibility list.
  3. If it’s not compatible, remove the module and return it to the vendor for a replacement.

4. Adjust the maximum RAM setting

  1. Press the Windows key + R hotkey and enter msconfig in Run’s text box.
  2. Press the OK button to open the MSConfig window in the snapshot below.
    PC won't accept RAM
  3. Select the Boot tab on the System Configuration window.
    PC won't accept RAM
  4. Press the Advanced options button to open BOOT Advanced Options as shown below.
    PC won't accept RAM
  5. Deselect the Maximum memory option there if it’s selected.
  6. Click OK to close the BOOT Advanced Options window.
  7. Press the Apply button, and restart the Windows OS.

We hope these steps helped you with the RAM not detected issue on your PC. Maybe now Windows will recognize all your laptop’s or desktop’s RAM.

Just make sure you check your Windows and motherboard system specifications before adding another RAM module to a desktop.

If the problem is still there, we have a great guide on what to do if the PC is not using all RAM, so be sure to check it out.

Mail App Error 0x8500201d: How to Fix it

If you’ve recently encountered error code 0x8500201d with the Mail app on Windows 10, this article is for you. This error occurs when the Outlook mail account fails to sync your emails with the mail app.

The error usually shows up when you click on Sync. The error message reads as, Something Went Wrong; We can’t sync right now. Error Code: 0x8500201d. Keep reading to find out how to fix things.

How do I fix sync error 0x8500201d?

1. Re-enable Mail syncing.

  1. Open the Mail app. Go to Accounts, and select the account that’s giving you the problem.
  2. On the Account settings window, click on Change mailbox sync settings.syncing
  3. Change the Syncing option to OFF.
  4. Close and restart the Mail app.
  5. Go to Accounts, select the same account, and click on Change mailbox sync settings on the Account settings window.
  6. Change the Syncing options to ON and then restart the Mail app.

The first troubleshooting solution you need to try to resolve mail app synchronization error 0x8500201d on Windows 10 is disabling and then re-enabling the mail syncing process.

2. Perform a clean boot

  1. Click on Start, and in the search bar, type msconfig.
  2. From the search results, select System Configuration.
  3. Open the Services tab.
  4. Check the Hide all Microsoft services checkbox, and click the Disable all button.hide all microsoft service
  5. Next, go to the Startup tab, and click the Open Task Manager button.
  6. Right-click on all start-up items and click on Disable to disable them.
  7. Close Task Manager.
  8. Click the OK button on the Startup tab of the System Configuration window to save the changes.

Performing a clean boot can be useful in identifying the cause behind error code 0x8500201d. Usually, the problem stems from some third-party application or startup processes. Disabling all start-up processes and then re-enabling them one at a time can help pinpoint the source of the error.

Once the process is complete, restart the computer. See if the error persists. If not, start each application/service one at a time. As soon as the problem reappears, you will have identified the culprit.

If this doesn’t work for you, you can try the next solution.

3. Remove & re-add your account

  1. Open the Mail app. Go to Accounts, and select the account that’s giving you the problem.
  2. On the Account settings window, click on Delete accountdelete account to fix Mail app error 0x8500201d.
  3. Close & restart the mail app.
  4. Click on Settings from the bottom left corner of the screen.
  5. Choose Accounts, and then Add account.add account
  6. Enter your email account credentials and add the account.
  7. Close and restart the Mail app again. Go to Accounts, and select the new account.
  8. On the Account settings window, click on Change mailbox sync settings.
  9. Disable contacts sync.

Hopefully, this will resolve Mail error 0x8500201d. If not, try the next step.

4. Remove your account

  1. Open the Mail app. Go to Accounts, and select the account that’s giving you the problem.
  2. On the Account settings window, click on Delete account.
  3. Now, add a new account.
  4. Close and restart the Mail app again.

If the previous solutions didn’t work, you can remove the current account and add a new one to fix Mail app error 0x8500201d in Windows. Or, you could try contacting Microsoft Support.

Besides, do check the best email clients to use in Windows.

Tell us which fix worked for you in the comments section below.

Fast Ring Insiders may receive first RS4 build as soon as this week

We’re now just a week away from the release of the Windows 10 Fall Creators Update, and Microsoft is warning Windows Insiders on the Fast Ring Insiders to check their Windows Insider settings today. According to a recent post on the Windows Mixed Reality Developer Forum, the company is asking Mixed Reality developers to switch to the Release Preview Ring as the Fast Ring may get its first Restone 4 build as soon as this week.

From the forum post:

For those of you developing VR experiences for the new Windows Mixed Reality immersive headsets, we have an important message: if you stay in the Windows Insider Fast ring, beginning October 10, 2017 you may begin to receive RS4 builds, which will not be the most stable builds for mixed reality development. To continue mixed reality development uninterrupted, please switch your Insider settings to receive “just fixes, apps, and drivers” without getting a new Windows build from the “Windows Insider Release Preview” ring.

It’s not clear why the message is only addressed to Mixed Reality devs, as this is probably something all Windows Insiders should know about. The first RS4 builds, currently only available to Skip Ahead Insiders, can be more buggy especially since we’re quite early in this new development cycle. Additionally, once you move to this new development branch, you won’t be able to go back to the production branch (RS3) without reinstalling Windows. In other words, if you’re not ready yet for RS4, you should probably switch to the Release Preview ring as soon as possible. Here is how to do it:

  1. Open Windows Settings
  2. Select “Update & Security”
  3. Select “Windows Insider Program”
  4. In the “What kind of content would you like to receive?” drop-down menu, select “Just fixes, apps, and drivers”
  5. In the “What pace do you want to get new builds?” drop-down menu, select “Windows Insider Release Preview”

As of today, the Windows 10 build 16299.15 is available to download for both Fast Ring and Slow Ring Insiders, and we expect it to the Release Preview Ring pretty soon. If you’re already running this build and don’t want to test new builds from the development branch, you now know what to do.

The system cannot find message text for message number [Fix]

ERROR_MR_MID_NOT_FOUND is a system error that can appear on any PC. This error usually comes with The system cannot find message text for message number message, and today we’re going to show you how to fix it.

How to fix ERROR_MR_MID_NOT_FOUND error?

Fix – ERROR_MR_MID_NOT_FOUND

Solution 1 – Check your Command Prompt shortcut

According to users, this error usually appears when trying to run certain commands from Command Prompt. Users reported creating a shortcut of Command Prompt on their desktop, but it seems that they can’t run any commands from it.

This error usually occurs if you don’t create a Command Prompt shortcut properly. If you copy Command Prompt to your desktop by mistake and try to run commands from it, you might experience certain problems. To fix this problem, we strongly advise you to check your Command Prompt shortcut and recreate it.

To create a Command Prompt shortcut, you can do the following:

  1. Right click on your desktop and choose New > Shortcut.
  2. Create Shortcut wizard will appear. Enter cmd in the input field and click on Next.
  3. Now enter the name for your shortcut and click on Finish.

You can also create Command Prompt shortcut by going to the Windows directory and creating a shortcut from there. To do that, follow these steps:

  1. Open File Explorer and go to C:WindowsSystem32.
  2. Locate cmd.exe, right click it and choose Create shortcut option.
  3. You’ll now get a warning message asking you to create a shortcut on your desktop. Click on Yes.

If you want, you can also use Pin to Start option to pin Command Prompt to the Start Menu. Alternatively, you can also start Command Prompt directly by doing the following:

  1. Press Windows Key + S.
  2. Enter command prompt and select Command Prompt from the list of results.

Another way to start Command Prompt is to use Win + X menu. This is a useful feature that allows you to quickly access certain system applications on Windows. To access Command Prompt, do the following:

  1. Press Windows Key + X.
  2. A list of options will appear. Select Command Prompt from the list.

If Command Prompt isn’t available, you can also use PowerShell to run your commands.

You can also start Command Prompt using the Run dialog. To do that, follow these steps:

  1. Press Windows Key + R to open the Run dialog.
  2. Enter cmd and press Enter or click OK.

As you can see, this problem is usually caused by a bad shortcut, but you should be able to solve it by creating a new Command Prompt shortcut or by running it directly.

Solution 2 – Use third-party software for registry issues

We recommend installing professional third-party software designed to fix registry and hardware issues, as well as common Windows errors. This type of tool can provide you with a thorough diagnosis and deliver system optimization within minutes.

Defective OS files and registry affect your PC’s performance and response time too. Repairing or replacing them is necessary if you want them to perform advanced administrative functions.

These tools will perform complex scans and detect damaged files in real time. Using online databases, will replace all the files in critical condition with healthy ones and restore your Windows registry values to their default settings.

Solution 3 – Check if the command syntax is correct

If you’re using command line applications often, you can sometimes get this error if you don’t enter your commands properly. If you make a typo or enter an invalid parameter or command, you can cause this error to appear. To avoid it, we strongly advise you to double check your commands before you run them in Command Prompt.

Solution 4 – Reinstall IIS service

According to users, this error can sometimes occur while using IIS service. To fix this problem, users are suggesting to uninstall and reinstall the IIS service. After doing that, the problem should be resolved completely.

Solution 5 – Use Command Prompt

The system cannot find message text for message number error can sometimes appear while trying to start Event Viewer. To fix this problem, users are recommending to use Command Prompt to disable certain services. This is relatively simple and you can do it by following these steps:

  1. Press Windows Key + X and choose Command Prompt (Admin). If Command Prompt isn’t available, you can use PowerShell instead.
  2. When Command Prompt opens, you need to enter these commands one by one:
    • net stop winmgmt
    • cd C:WindowsSystem32LogFilesWMI
    • rename RtBackup RtBackup2
    • exit

After running these commands restart your PC and check if the problem still persists.

Solution 5 – Use PowerShell ISE

PowerShell is a command line tool similar to Command Prompt, but it offers more advanced features. However, users reported this error message while trying to run certain scripts in PowerShell. To fix this problem, users are recommending to use PowerShell ISE. To do that, follow these steps:

  1. Press Windows Key + S and enter powershell.
  2. Choose PowerShell ISE from the list of results.
  3. After PowerShell ISE starts, try to run your script again.

In addition to running PowerShell ISE, you can also try running it with administrative privileges. To do that, simply repeat the same steps and right click PowerShell ISE and choose Run as administrator from the menu.

Solution 6 – Run SFC scan

According to users, this error can sometimes occur due to corrupted system files. Fortunately for you, you might be able to fix it by running an SFC scan. To use this feature, do the following:

  1. Press Windows Key + X and choose Command Prompt (Admin) from the menu.
  2. Once Command Prompt starts, enter the sfc /scannow command and press Enter to run it.
  3. The scanning process will now start. Keep in mind that the scanning can take more than 15 minutes, so be sure not to interrupt it.

After the scanning is completed, check if the problem still appears.

If SFC scan can’t fix the problem, or if you can’t run SFC scan at all, you might want to try using DISM scan instead. To do that, follow these steps:

  1. Open Command Prompt as administrator and enter the following:
    • DISM /Online /Cleanup-Image /CheckHealth
    • DISM /Online /Cleanup-Image /ScanHealth
  2. These two commands will scan your system separately, so be sure not to interrupt them. If the scans report any problems, you need to use DISM /Online /Cleanup-Image /RestoreHealth command to repair your installation. The repair process can take more than 20 minutes, so be sure not to interrupt it.

After repairing your system with DISM command the problem should be resolved.

Solution 7 – Make sure to properly open Command Prompt

According to users, they are getting this error while trying to start Command Prompt. It seems that this error occurs when users try to copy Command Prompt to a different folder and run it from there. In order to use Command Prompt you need to run it from its default folder.

Sometimes users need to open a specific directory with Command Prompt, but copying the Command Prompt to that directory isn’t a solution. To properly open any directory with Command Prompt you need to do the following:

  1. Navigate to the directory you wish to open.
  2. Press and hold the Shift key and right click anywhere in the directory. Choose Open Command Prompt window here. Some users might have Open PowerShell window here option instead. Both options work the same and it will open the command line tool in that directory.

Alternatively, you can start the Command Prompt and use the CD command to navigate to the desired directory.

The system cannot find message text for message number error usually appears when using Command Prompt. This isn’t a serious error and in most cases you can fix it by checking your Command Prompt shortcut.

Acquiring Network Address Message: How to Fix it

Is your PC stuck while acquiring a network address? This can be a problem since your PC won’t get an IP address assigned to it.

This will prevent users from accessing the Internet, so it’s crucial to fix this issue, and in today’s guide, we will show you how to do it.

How do I fix acquiring network address in Windows 10?

1. Update the LAN (Network Adapter) Driver

  1. Press the Windows key + X and choose Device Manager from the list.
  2. Double-click Network adapters and right-click the listed wireless LAN device to open its context menu.
  3. Select Update driver to open the Update Drivers window.
  4. Click the Search automatically for updated driver software option to obtain and install the latest device driver.
  5. Some prefer to download and install drivers manually. You can do that by entering a hardware device listed on the Device Manager window in a search box on the network adapter’s manufacturer website.
  6. If you’re not sure which manufacturer website to download a driver from, right-click the wireless LAN device listed on the Device Manager window and select Properties. The General tab includes manufacturer details.
    computer wont acquire network address
  7. Download a driver that’s compatible with your Windows platform from the manufacturer’s website. Select the Browse my computer for driver software manually option on the Update Driver window.
  8. Press the Browse button to select the new driver, and click Next to install it.

On the other hand, it’s recommended to have a driver update manager to ensure your PC driver software works properly and the OS benefits from the latest updates.

Performed regularly, this action can lead to significant speed gains and protect your device from security breaches and malware. So, you should consider a dedicated application that can update the desired driver with a few clicks in a secure way.

2. Open the Internet Connections Troubleshooter

  1. The Internet Connections troubleshooter might shed some light on and perhaps even fix the issue. To open that troubleshooter, press the Cortana button on Windows 10’s taskbar.
  2. Input troubleshoot in the search box. Select Troubleshoot to open the window shown directly below.
    computer wont acquire network address
  3. Select Internet Connections and press its Run the troubleshooter button.
  4. Click the Troubleshoot my connection to the internet option in the troubleshooter’s windows. The troubleshooter might then provide some potential resolutions.computer wont acquire network address

3. Switch off firewalls

  1. First, enter the keyword firewall in the Cortana or Start menu search box.
  2. Select Windows Firewall to open its Control Panel tab shown below.
    computer wont acquire network address
  3. Click Turn Windows Firewall on or off to open the Customize Settings tab in the snapshot directly below.
    pc wont acquire network address
  4. Select both the Turn off Windows Firewall options.
  5. Click OK at the bottom of the Customize Settings tab.
  6. You can switch third-party anti-virus software firewalls off via their system tray icons. Right-click your anti-virus utility’s system tray icon to open its context menu.
  7. Select a disable option on the context menu to switch the anti-virus software off.
    computer wont acquire network address
  8. If switching firewalls off resolves the acquire network address error, restore them to their default configurations. You can restore the Windows Firewall to its default settings by clicking Restore Defaults on the Firewall tab and pressing the Restore defaults button.
    computer wont acquire network address

The Windows or third-party firewalls might be blocking the DHCP (Dynamic Host Configuration Protocol) ports 67 and 68. The DHCP protocol enables automatic IP address and network parameter requests. Switching firewalls off will ensure they aren’t blocking the DHCP.

4. Check the DHCP client

  1. Press the Win key + R hotkey to open Run.
  2. Enter services.msc in Run, and press the OK button.
    computer wont acquire network address
  3. Double-click the DHCP Client to open its properties window shown directly below.
    computer wont acquire network address
  4. Select Automatic from the Startup type drop-down menu if that’s not already selected.
  5. Click Apply and OK to confirm the new setting.

5. Clear the DNS Cache and Renew the IP Address

  1. Open Command Prompt as administrator.
  2. Run the following commands:
    ipconfig /flushdns
    ipconfig /release
    ipconfig /renew

    computer wont acquire network address
  3. Close Command Prompt and check if the problem is gone.

6. Reset the TCP/IP Protocol

  1. Open the Command Prompt as an administrator by entering cmd in the Windows search box and right-clicking Command Prompt. Then you can select a Run as administrator option.
    fix computer network address
  2. Run the following command: netsh int ip reset
    fix computer network address
  3. Thereafter, restart the desktop or laptop.

How can I roll Windows back to a restore point?

  1. To open System Restore, press the Win key + R keyboard shortcut to open Run.
  2. Enter rstrui in Run’s text box, and click the OK button.
    fix computer network address
  3. Press the Next button, and select the Show more restore points option.
  4. Select a listed restore point that predates the acquire network address error.
    fix computer network address
  5. System Restore might also remove some software. Click Scan for affected programs to open a list of software that will be deleted.
  6. Press the Next > Finish buttons to confirm your restore point and restart Windows.

How do I find the IP address of my computer?

  1. Press Windows key + X and choose PowerShell (Admin).
  2. Next, run the following command: ipconfig
  3. Look for IPv4 value for your network connection and you’ll find your local IP address.

Some of the resolutions above will probably fix the Acquiring network address error and re-establish the internet connection.

This can be a serious error since it can lead to a lost Internet connection and many other problems, but we hope you managed to fix it.

In case you’ve found a different solution that worked for you, please share it with us in the comments section.

Facebook Windows 10 app gets Jump Lists support with latest update

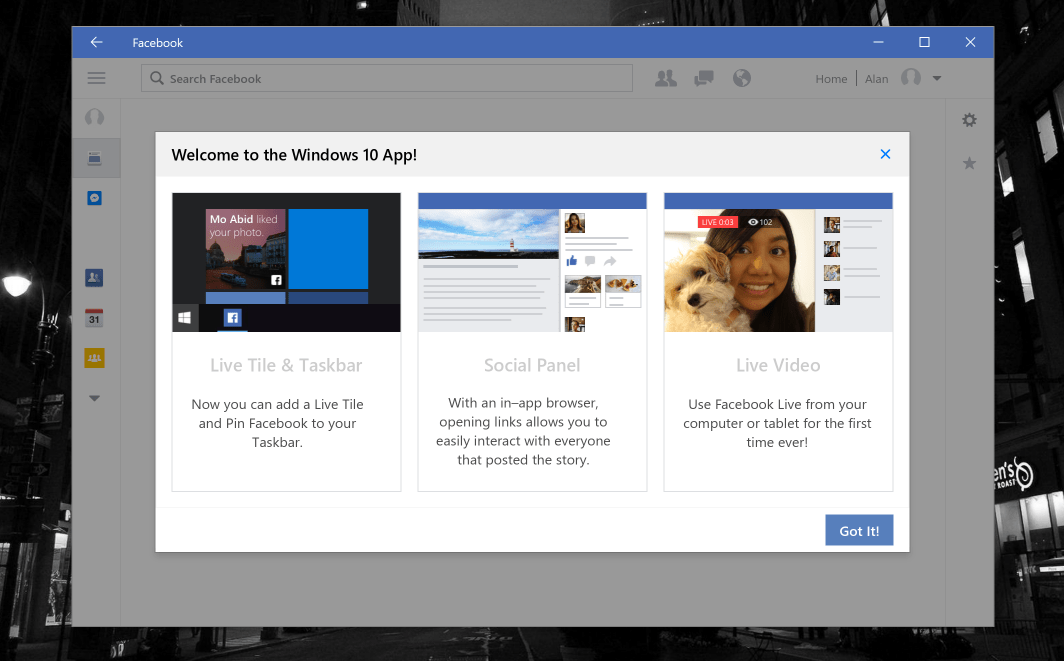
If there are not a lot of great social media apps on the Windows Store as of today, Facebook is probably one of the few exceptions. So far, the social network has been supporting its Windows 10 apps (including Messenger and Instagram) with frequent updates, and the latest version of the Facebook app introduces jump lists support, something that you don’t often see on UWP apps (via Windows Blog Italia).

For those unfamiliar, Jump List support means that if you have pinned the Facebook app on your taskbar, you can right-click the app icon to get instant access to select features such as writing a new post, upload a photo or video or start a Live video.

Jump lists on the Facebook app

Although the list of tasks is quite limited for now, it’s still a handy feature for Facebook addicts and it may well convince others to install the app instead of just using Facebook on a web browser. Do you think the Facebook app for Windows 10 is a good example of a well-done UWP app? Let us know below.

Facebook
Facebook
Developer:
Meta
Price:
Free

Microsoft to purchase wind energy from GE in Ireland thanks to new 15-year agreement

Microsoft today announced the signing of a new 15-year agreement to purchase wind energy from General Electric (GE) in Ireland. All a part of the company’s commitment to building a “responsible cloud for global good” in Europe, under the new agreement, 37 megawatts of clean energy will be added to the Irish electric grid.

Technically known as a power purchase agreement, Microsoft is set to buy 100 percent of the wind energy from the Tullahennel wind farm in County Kerry, Ireland. This makes Microsoft one of the first multinational tech giants to support the construction of a wind energy project in the area.

Also under the agreement, Microsoft is hoping that valuable new insights will be created about “how renewable energy can be stored.” A first in the region, Microsoft and GE will specifically be testing how batteries can be used to capture and store leftover wind energy before sending it back to the rest of the electric grid.

Christian Belady, General Manager, Datacenter Strategy at Microsoft, remarked on this new agreement:

“Microsoft is proud to be deepening our long history of investment and partnership in Ireland with this agreement…Our investment will help bring new, clean energy to the Irish grid, and contains innovative elements that have the potential to grow the capacity, reliability and capability of the grid to incorporate new clean power sources like wind energy. And that is good for the environment, for Ireland and for our company.”

Microsoft already has supported many sustainability projects in Ireland, such as a new foresty initiative, as well as investments in energy efficiency measures and technologies. Today, the tech giant is also acquiring an Irish energy supply license from GE, with the energy trading company ElectroRoute acting as a trading service provider for the supply company. This will all bring more flexibility and allow for the growth and investment in renewable energy in Ireland over the next few years.

What to do when your computer won’t download anything

Are you having trouble because your computer won’t download anything? Worry not.

Billions of downloads happen almost down to the minute on a global scale. When you get to the point where your computer won’t download anything, even after you’ve tried all you know how to, frustration takes over, and you feel like replacing it with a new one.

Fortunately, there are solutions to fix this problem, and we share them in this article.

My PC won’t download anything: How do I fix that?

  • Create a new account
  • Reset Internet Explorer
  • Use Windows Defender
  • Check for malware

Solution 1: Create a new account

Here are the steps you can take to execute this:

  • Click Start
  • Select Settings
  • Select Accounts

computer won't download anything

  • Click Add someone else to this PC

computer won't download anything

  • Fill in the form with the user name and password. Your new user account will be created.
  • Click on Change account type

computer won't download anything

  • Click the drop down arrow and choose Administrator to set the account to administrator level

computer won't download anything

  • Restart your computer
  • Login to the new account you just created

Try downloading using the new account.

If this doesn’t work, try doing the following:

  • On your new account, use it to downgrade your usual account
  • Click Apply or Ok
  • Raise back your old account to its default admin level
  • Rinse and repeat a few times as this will help to remove any corruption
  • Leave your account on as Administrator

Check whether you can download from the newly created account. If they work, then there’s two things to do at this point:

Solution 2: Reset Internet Explorer

If you have any antivirus, antispyware and security products on your computer, sometimes these cause issues whenever they’re uninstalled (or installed) as they leave traces or their file elements behind.

One thing to do when your computer won’t download anything is to reset Internet Explorer.

Here’s how to go about it:

  • Start Internet Explorer
  • Open Reset Internet Explorer Settings dialog box
  • Go to Tools menu
  • Click Internet options
  • Click Advanced tab
  • Click Reset or Restore Default
  • Under Reset Internet Explorer Settings dialog box, click Reset
  • Click Close once Internet Explorer completes application of default settings
  • Exit then restart Internet Explorer

READ ALSO: Fix Slow Xbox One game downloads

Solution 3: Use Windows Defender

To use Windows Defender, follow these steps:

  • Go to the Search box
  • Type Windows Defender
  • Select Windows Defender from the list of search results
  • Click Scan now

computer won't download anything

The scanner will check or look for any issues within your computer on programs that may not look legit.

Solution 4: Check for malware

Here you can use a malware scanner to check for any malware infection. Update your malware remover, then use it only to scan for any such suspect files.

Sometimes it could be a BHO or Browse Helper Object, a plugin for Internet Explorer that enhances its capabilities. BHOs are usually abused by spyware programs to monitor and sometimes steal user identity and browsing habits silently, but also slow down your system.

To deal with this issue, get a BHO remover that will identify and remove any spy BHOs present in your computer’s system.

Let us know whether which solutions worked for you.

RELATED STORIES TO CHECK OUT:

Download RansomSaver to detect and block ransomware on Outlook

Many ransomware attacks target emails because they are an excellent opportunity for hackers to use in a short amount of time. RansomSaver is an add-on for Microsoft’s Outlook messaging program. It detects and removes emails that include ransomware.

RansomSaver essential features

RansomSaver is an add-on for Microsoft Outlook that is compatible with all 32-bit and 64-bit versions of Microsoft Outlook from Outlook 2007 to the newest versions. It runs on all versions of Windows released after Windows XP. Speaking of Windows XP, if you’re still running this OS, don’t forget to install a reliable antivirus tool. For more information on the best antivirus software to use, check out this list.

RansomSaver integrates into Outlook automatically after installation. It features lots of options, but the essential function is scanning for ransomware.

RansomSaver checks the emails that you choose to select for ransomware attachments, and it can delete the whole message or just the infected attachment. The add-in then will move the emails to a dedicated folder called RansomSaver.

RansomSaver features

The options that are supported by the program are very simple, and they include the following:

  • You may enable or disable the removing of attachments/emails
  • You may disable the functionality until your next Outlook start
  • You may disable the scanning of the deleted items folder in Outlook

These options can be found in the add-in’s toolbar. There you will also see options to scan the existing folders for ransomware and a link that will lead you to the incident log as well.

All in all, RansomSaver targets two goals: detecting potential threats when you’re opening your emails and scanning all existing ones for possible issues. It’s likely that more experienced user won’t find this tool extremely useful for their own systems, but the program will definitely turn out to be great for protecting more inexperienced users and preventing them from executing malicious files attached to their emails.

For more information about other similar tools that scan your emails for malware, check out this article.

Download RansomSaver from Synergy.

RELATED STORIES TO CHECK OUT:

Short Names are Not Enabled on This Volume [Fix]

There are many system errors that can occur on your PC, and one of them is ERROR_SHORT_NAMES_NOT_ENABLED_ON_VOLUME.

This error comes with Short names are not enabled on this volume message, and today we’re going to show you how to fix it on Windows 10.

How to fix ERROR_SHORT_NAMES_NOT_ENABLED_ON_VOLUME error?

1. Install the latest updates

According to users, this error occurs when trying to access certain files. Bugs in your operating system can cause this; to fix them, we advise you to install the latest updates.

Microsoft addresses bugs and other issues via Windows updates, so if you want to keep your PC up-to-date and bug-free, be sure to install the latest updates.

Updating Windows is straightforward, and it will occur automatically in the background, meaning there’s no need for user interaction. However, sometimes due to certain problems, you might skip an important update. To be sure that your system is up to date, we strongly advise you to check for updates manually by following these steps:

  1. Press Windows Key + I to open the Settings app.
  2. When Settings app opens, navigate to the Update & security section.
  3. Now click on Check for updates button.

Windows will now check for updates and download them in the background. After updates are installed, check if the problem still appears.

2. Check your antivirus software

Antivirus software is necessary, but some antivirus tools can enforce certain policies that prevent you from copying or accessing files. If you’re using a third-party antivirus tool, you might want to check its security policies.

To do that, you need to check your antivirus configuration and disable features that might interfere with your system. This method might require a bit of trial and error, especially if you’re unfamiliar with your antivirus or computer security.

3. Disable or remove your antivirus

If you can’t find the problematic policy in your antivirus configuration, you might want to try disabling it entirely. Windows 10 comes with Windows Defender that works as a default antivirus, so you can disable other antivirus tools without any fear of malware. After disabling the antivirus, check if the problem still persists.

If disabling the antivirus software doesn’t solve the issue, you can also try removing your antivirus. Keep in mind that antivirus tools often leave files and registry entries that can still interfere with your system.

We suggest using a dedicated removal tool to remove all files related to your antivirus completely. Almost all antivirus companies offer these tools for their software, so be sure to download and use one for your antivirus.

If removing the antivirus solves the problem, you can try to install the latest version of your antivirus and check if the problem appears again. Alternatively, you can switch to a different antivirus software entirely.

4. Use Command Prompt

According to users, Short names are not enabled on this volume message that appears on their PC when they are trying to access files from their backup. To fix the problem, you must run a single command from Command Prompt. To do that, follow these steps:

  1. Press Windows Key + X to open Win + X menu. Select Command Prompt (Admin) from the menu. If Command Prompt isn’t available, you can also use PowerShell.
  2. When Command Prompt opens, enter fsutil behavior set disable8dot3 0 and press Enter to run it.

Some users are suggesting to use a slightly different command. To fix the problem, start Command Prompt and enter fsutil 8dot3name set X: 0 command. Remember that you need to replace X with the letter of the problematic drive.

If you want, you can check which drives have 8dot3 name creation feature enabled. To do that, enter fsutil behavior query disable8dot3 X: in Command Prompt. If the drive has this feature disabled, you can enable it by using the command above.

5. Perform Clean boot

Sometimes third-party applications can interfere with your system and cause this and other system errors. To fix this problem, you need to disable all startup applications and services and check if that helps. To do that on Windows 10, do the following:

  1. Press Windows Key + R and enter msconfig. Press Enter or click on OK.
  2. System Configuration window will appear. Go to Services tab and check Hide all Microsoft services option. Now click on Disable all button to disable them.
  3. Navigate to the Startup tab and click on Open Task Manager.
  4. When Task Manager starts you’ll see a list of all startup applications. Select the first entry on the list and click on Disable button. Repeat this step for all entries on the list.
  5. After disabling all startup items, close Task Manager and go back to System Configuration window. Click on Apply and OK to save changes.

After doing that you need to restart your PC to apply the changes. If the problem doesn’t appear after restarting your PC, one of the startup applications is certainly causing the problem. To find the problematic application you need to repeat the same steps and enable apps and services individually or in groups.

Keep in mind that you’ll need to restart your PC every time after enabling a group of apps or services. After you find the problematic application, you can keep it disabled, remove it or update it to the latest version and check if that solves the issue.

6. Reset Windows 10

Before we start, we have to mention that this solution will delete all files and applications from your system drive, so be sure to back them up. This process also requires Windows 10 installation media, and you can create it easily with Media Creation Tool. To reset Windows 10, do the following:

  1. Open the Start Menu and click on Power button. Press and hold the Shift key and click on Restart.
  2. Select Troubleshoot > Reset this PC > Remove everything. This step might require installation media, so be sure to have it ready.
  3. Select your version of Windows and choose Only the drive where Windows is installed > Just remove my files.
  4. Now you’ll see a list of changes that reset will perform. Once you’re ready, click Reset to start.
  5. Follow the instructions on the screen to complete the reset.

This is a drastic solution since it will remove all your files and apps from the system drive, so use it only if other solutions can’t fix this problem.

Short names are not enabled on this volume message can cause some problems, but in most cases, you can fix it by using Command Prompt and running certain commands from it.

Xbox news recap: Halo Easter egg found inside the Xbox One X, the return of the Xbox Onesie and more

Welcome to our weekly Xbox news recap series, where we go over the top stories of the past week in the world of Xbox. Let’s get started.

Halo Easter Egg found inside the Xbox One X

While most people aren’t going to be opening up their Xbox One X to take a peek at its hardware, there’s a special surprise in there for anyone who does. Some Spanish fan YouTubers recently discovered that, engraved into every Xbox One X, there’s a picture of Halo’s Master Chief riding a Scorpion. It’s a nice love letter to the franchise that put Xbox on the map, and is just generally cute.

Halo's Master Chief riding a scorpion in the Xbox One X console

The Xbox Onesie is returning to Australia

Xbox One fans will remember the Xbox Onesie – a product that came and went very quickly, as part of a special event. The onesie looks extraordinarily comfortable, and people were very upset when they were pulled away from shelves. If you live in Australia, however, the onesie has made a triumphant return. These ones are coming in celebration of Forza Motorsport 7, and are a bit more form fitting – in the interest of looking like racing uniforms.

Xbox Onesie 2

Free Xbox One X adapters probably won’t come with the Xbox One X

According to a tweet from Aaron Greenburg, the Xbox One X won’t be getting free Kinect adapters like the Xbox One S did. When asked about a potential free adapter promotion, Greenburg said that “that program has ended,” without much hope for a similar program regarding the Xbox One X.

Scuf announces new Elite controllers for Forza

Scuf, the leading third party manufacturer for high quality controllers, has announced a partnership with Forza on their latest project. The Xbox One Elite controller has real leather on it, as well as all of the special switches and buttons that you’ve come to expect from an Elite controller. The final product is absolutely gorgeous – but you’re going to have to be willing to drop $300 bucks on it, in its extremely limited run of 2,500 units.

Thanks for joining us. To keep up to date with all the latest Xbox news, keep a close eye on our Xbox One tag.

1073545193 File System Error: 4 Ways to Fix it

Many users who upgraded from Windows 8.1 to Windows 10 may face a File System Error (1073545193) when trying to open Windows Store applications. This error may also pop up when users try to open image files in these newly upgraded systems.

Even though the error is a File System Error, a simple File System scan in the command prompt (SFC scan) may not be able to fix the problem.

To resolve the File System Error (1073545193) on Windows 10, try the following troubleshooting steps.

How do I fix file system error 107354519?

1. Reset the store cache

  1. Open the Run dialogue by pressing Windows + R.
  2. Type in the command and hit Enter:wsreset.exewsreset

Hopefully, this simple trick should solve your issue. If it doesn’t, move on to the second solution.

2. Run the Windows Store app troubleshooter

  1. Press Windows + I to open Settings, and click on Update & Security.update & security
  2. Select Troubleshoot from the navigation pane, and click on Additional troubleshooters.troubleshoot to fix file system error 1073545193
  3. Click on Run under the Windows Store Apps troubleshooter.
  4. Follow all the on-screen instructions. Once the process is complete, restart your computer.

This is another simple solution that will almost always resolve the error. Run the Windows Store app troubleshooter to fix File System error 107354519.

3. Try disk cleanup

  1. On Start, type Command Prompt, right-click on the relevant search result, and select Run as administrator.
  2. In command prompt, enter the following commands in succession:DISM.exe /Online /Cleanup-image /Scanhealth DISM.exe /Online /Cleanup-image /Restorehealthdism to fix file system error 1073545193
  3. Once done, restart the computer.

4. Reinstall apps

  1. Open PowerShell in administrative mode.
  2. Type in the following commands in succession:Get-AppXPackage | Remove-AppxPackage Get-AppxPackage -AllUsers | Remove-AppxPackage
  3. Restart your computer and again open PowerShell in administrative mode.
  4. Type in the following command:Get-AppXPackage | Foreach {Add-AppxPackage -DisableDevelopmentMode -Register "$($_.InstallLocation)AppXManifest.xml"}powershell

This will restore Windows Store and the apps. If it didn’t help, try contacting Microsoft Support for a resolution.

Before you leave, find do check our comprehensive guide on File System Errors to find out more solutions.

Tell us which fix worked for you in the comments section below.

FIX: Age of Mythology Extended Edition bugs on Windows 10/11

Age of Mythology Extended Edition is a revamped and enhanced edition of the popular RTS classic, which finally enables Windows 10 users to enjoy this amazing title, too. Despite this, the game edition is quite well optimized but not completely without issues. Users have reported various bugs and errors on Steam‘s official forum and offered ways to fix the Age of Mythology Extended Edition.

For that purpose, we conducted extensive research to provide you with solutions for all the most commonly known Age of Mythology Extended Edition issues on Windows 10.

How to fix Age of Mythology Extended Edition common issues and bugs on Windows 10

1. Game won’t start/crashes

  1. Restart Steam. This is an essential but nonetheless helpful workaround that comes in handy once the game fails to start.
    1. Close the game and kill its process in the Task Manager.
    2. Close Steam and terminate its processes.
    3. Start the Steam desktop client and look for changes.
  2. Check game integrity. Many errors are caused by corruption or incomplete installation files. Check them out with Steam and repair affected files.
    1. Open Steam.
    2. Choose Library.
    3. Right-click on the Age of Mythology Extended Edition and open Properties.
    4. Select the Local files tab.fix age of mythology extended edition windows 10
    5. Click on the ”Verify Integrity of Game Files” button.
  3. Start the game in windowed mode. Some users managed to resolve the problem by starting the game in the windowed mode and switching to the full screen within in-game settings.
    1. Close the game.
    2. Navigate to C:Program Files (x86)SteamsteamappscommonAge of MythologyUsers
    3. Open your profile (file with .prf extension) with Notepad.
    4. Search for  <windowmode>0</windowmode> and change the 0 with 1 (<windowmode>1</windowmode>).
    5. Confirm changes and restart the game.
  4. Check GPU drivers. Lack of proper graphics drivers can cause a bag of issues. Make sure to check them out and download from the OEM’s official site.Full screen game keeps minimizing
  5. Update Windows. Make sure that your Windows 10 is up to date. You’ll need to acquire certain cumulative updates in order to install game-related files.
  6. Uninstall mods. Mods can cause a lot of trouble. Make sure to remove them one by one in order to find out which one is preventing the game from starting.
  7. Install DirectX and redistributables. Make sure to install the latest version of DirectX and Visual Studio C++. For the latter, you might need both x64 and x86 versions.
  8. Run the game in the compatibility mode as an admin.
    1. Right-click on the Age of Mythology Extended Edition desktop shortcut and open Properties.
    2. Choose the Compatibility tab.
    3. Change the Compatibility mode to Windows 7 and choose to Run the program as administrator.fix age of mythology extended edition windows 10
    4. Confirm changes and start the game.
  9. Reinstall the game. Reinstallation is the last resort.

2. Users can’t play online/update the game

  1. Check the connection. Firstly, we’ll need to make sure that the internet connection is up and running. If that’s not the case, make sure to:
    • Switch to a LAN connection.
    • Restart your modem or router.
    • Disable router’s Firewall and third-party antivirus temporary.
    • Update router’s firmware.
  2. Verify the game cache. We already explained this step above, and it’s viable for connectivity-related issues, too.
  3. Install Microsoft Visual C++ 2015. Microsoft Visual C++ 2015 is an important piece of the puzzle. Install all Windows Updates and then download Microsoft Visual by following this link.
  4. Use Voobly to play online. This third-party site offers a multi-version multiplayer, which can be great for some players that want to play online.
  5. Reinstall the game. Reinstallation can take some time, but it’s always advised when there’s nothing else to do.

3. Game sound missing

  • Update sound card. As same as with GPU drivers. Make sure that proper sound drivers are installed.
    1. Right-click Start and, from the Power Users menu, open Device Manager.
    2. Navigate to Sound, video, and game controllers and expand it.
    3. Right-click on the main sound device and choose ”Update driver”.
  • Update Windows. Certain users resolved sound issues in Age of Mythology Extended Edition by updating system.
    1. Press Windows key  + I to open Settings.
    2. Choose Update & security.
    3. Click on the Check for updates button.fix age of mythology extended edition windows 10
  • Disable mods. Third-party mods are great, don’t get us wrong. Some of them just tend to affect the game in a bad way including, the in-game sound.
  • Disable surround sound. Other users regained normal in-game sound by disabling Dolby Surround sound and switching to Stereo.
  • Check the default Playback device. Make sure that your primary playback device is up and running.
    1. Right-click on the Sound icon in the notification area and open Playback devices.
    2. Right-click on the preferred playback device and Set it as default.fix age of mythology extended edition windows 10
    3. Look for changes.
  • Check in-game Sound settings. Confirm that everything is properly set within in-game sound settings. fix age of mythology extended edition windows 10

4. Low FPS

  • Lower your settings. Even though this game is remastered, it’s not demanding by any stretch of the imagination. However, if you’re stuck with a quite old PC, take these steps into consideration:
    • Disable all graphical enhancements.
    • Lower screen size
    • Set shadow quality to Off.
  • Restart the game. A fresh start is always good. Many in-game problems can be resolved this way.
  • Disable background processes. Some background processes might take a toll on your PC’s performance and affect Age of Mythology. Make sure to prevent resource-hogging programs from working in the background.
  • Disable Game Mode. It seems that the Game Mode feature isn’t providing the results we hoped for.
    1. Press Windows key + I to summon the Settings app.
    2. Open Gaming.
    3. Select Game mode from the left pane.
    4. Toggle Game Mode off.Full screen game keeps minimizing

READ ALSO: How to boost Windows 10 low FPS for AMD PCs

5. DLC Tale of the Dragon issues

  • Disable mods. Another obvious step. Older mods might lack compatibility with the lately introduced DLC and vice versa. Disable one mod at a time until you confirm the issue. That way you can keep other mods.
  • Install redistributables. With the latest DLC packages, you need to update your DirectX and redistributables, too. Download Virtual Studio C++ and DirectX in order to resolve the DLC issue at hand. Pay a close attention to architecture (64-bit or 32-bit).
  • Confirm the integrity of the game files with Steam. Follow the steps we provided above to do so.
  • Reinstall the DLC. Finally, you should reinstall DLC if none of the previous steps resolved the issue.

In order to boost your game performance and get rid of slowdowns, lags, low FPS and other annoying issues, we recommend downloading GameFire (free).

6. Text not showing on the in-game Main menu

  • Perform a registry tweak. This is a bit risky procedure, so make sure to backup your registry and follow the below-presented steps closely:
    1. Firstly, type Fonts in the Search bar and open Fonts.
    2. Delete the GiovanniITCTT if it’s there.
    3. Secondly, you’ll need to download the GiovanniITCTT and install it again. You can download this font from this website.
    4. Next, in the Windows Search bar, type regedit, right-click on Registry Editor and run it as an administrator.
    5. Follow this path:
      • ComputerHKEY_LOCAL_MACHINESOFTWAREMicrosoftWindows NTCurrentVersionGRE_Initialize
    6. Right-click on the right section and create a new DWORD (32-bit) registy entry.
    7. Name it DisableFontBootCache and set its value to 1.
    8. Restart your PC and look for changes.
  • Verify game integrity. For various reasons, the installation files tend to get corrupted or incomplete. Run Steam‘s tool and verify game‘s integrity.
  • Reinstall Windows 10. Some users managed to resolve the issue with in-game fonts by completely reinstalling Windows 10. If you’re ready to go that far, make sure to check this article for the thorough explanation on how to reinstall Windows 10.

With that, we can finally conclude this list. Hopefully, these steps helped you fix Age of Mythology Extended Edition issues for good. If you have additional issues or alternative solutions, feel free to tell us in the comments section below.

RELATED STORIES YOU NEED TO CHECK OUT:

File Type Being Saved or Retrieved Has Been Blocked [Fix]

System errors such as ERROR_BAD_FILE_TYPE can appear sooner or later on any PC. This error often comes with The file type being saved or retrieved has been blocked message.

The error will prevent you from opening specific files in the browser, so in today’s guide, we’ll take a closer look at it and show you how to fix it.

What can I do if The file type being saved or retrieved has been blocked?

1. Check the file name

  1. Right-click the file and choose Rename. Make the name as short as possible.
  2. Alternatively, try moving the file to a different location.
  3. Lastly, check for any special characters in the path and file name and try to remove them.

2. Try using a different web browser

Many users reported that this issue occurs while trying to download files from the Internet. According to users, they can download the files without any problems, but once they try to run them they encounter The file type being saved or retrieved has been blocked message.

As a potential workaround users are suggesting to switch to a different web browser and try to download the file again. Several users reported that this workaround works for them, so try using a different browser to download the problematic file.

We recommend trying a modern and intuitive browser with less processing capacity than its counterparts. Its advanced capabilities and customizable features will provide an error-free and secure online experience.

Opera

Download any file with an additional protective layer and built-in VPN!
Try it now Visit website

3. Change the file extension

  1. Open File Explorer.
  2. Click on View tab and then check File name extensions.
  3. After doing that you’ll be able to see file extension for each file on your PC. Now locate the problematic image file, right click it and choose Rename.
  4. Change the file extension from .mdf to .iso.
  5. Confirmation message will appear. Click on Yes to change the file extension.

After changing the extensions, check if the issue is gone.

4. Check blocked file types

  1. Navigate to Central Administration.
  2. Click on Security and navigate to General Security and choose Define blocked file types.
  3. Navigate to Web Application menu and choose Change Web Application. Now go to Select Web Application page.
  4. If you see that a certain file type is blocked, you can unblock it simply by selecting it from the list and pressing the Delete key. After doing that, click OK to save the changes.

This is a relatively simple solution, and if you’re using SharePoint, feel free to try it out.

Why is my file being blocked?

  • Long path name or special characters in file name can cause this problem.
  • Sometimes, your web browser can lead to this issue.
  • In some instances, a specific file extension will cause this error.
  • Your SharePoint settings can interfere with certain files.

ERROR_BAD_FILE_TYPE and The file type being saved or retrieved has been blocked message can cause a lot of problems on your PC. The issue is similar to Download cannot be saved because an unknown error occurred message that we covered earlier, so be sure to check that guide for more solutions.

However, you should be able to fix this problem using one of our article’s solutions.

Microsoft’s digital assitant Cortana adds Connected Home integration with Nest, Hue and SmartThings

While Microsoft may not be the flashiest during keynotes as it presents the perks of using its digital assistant, the company has been toiling away at making it more interconnected with a growing list of products users already own.

Recently, a tipster over at Windows Central stumbled upon additions to the Cortana Notebook that now include Connected Home integrations which finally support Hue Lights and the Nest thermostat among many others.

With this new addition, users can now assign management of services such as Wink, Insteon, Nest, SmartThings, and Hueto be done through Cortana voice commands.

Perhaps, this new Connect Home leak is paving the way for the official release of the Harman Kardon Cortana powered smart speaker, which would ideal an ideal setup for any home or business office.

As Google, Apple and Amazon introduced new and updated hardware initiatives that look to leverage their own digital assistants, it’s becoming imperative that Microsoft seek as many partner integrations it can to keep pace.

Xbox One’s Cuphead is getting official Funko Pop figures

The indie retro-style video game Cuphead is stirring up some dust, introducing its own Funko Pop Figurines following up on its release a week ago. The title by Studio MDHR is a cartoony run and gun platformer that is now available on Xbox One, Windows 10, and Steam for $19.99.

The vinyl series from Funko features Cuphead, Mugman, and the Devil, highlighting the story of the pair racing to repay their debts. While Cuphead and Mugman are standing at nearly 4″ tall, The Devil is slightly more ominous with its 6″ tall height. Still, the figurines are cute additions to your gaming collection.

The bundle is being shown on Amazon as coming soon, January 17, 2018. Buyers can go ahead and pre-purchase the trio for $55.95 (not including shipping).

Do you collect Funko Pop Figures? Let us know what games you collect from or want to see figurines made for in the comments below.

Xbox Live Multiplayer is free for everyone this weekend

Starting today through Monday, October 9, you can play online with your friends on Xbox for free. As the video announcement below suggests, this is also the perfect opportunity to go hands-on with the open multiplayer beta of Star Wars Battlefront II, which will also close on Monday. In case you missed our previous coverage, the Xbox One beta includes four different game modes featuring all three cinematic eras of Star Wars, and it looks to be a lot of fun.

Of course, you’re also free to play any multiplayer game you already own this weekend, and this includes Xbox 360 backward compatible games. Microsoft regularly offers free multiplayer days for Xbox Live Silver members (the last event was three months ago during the Destiny 2 open beta), which is a good way to give all Xbox owners a taste of Xbox Live Gold. Let us know in the comments which multiplayer games you’re planning to play this weekend.

Access Denied Before Opening Files in This Location [Fix]

ERROR_FORMS_AUTH_REQUIRED error usually comes with Before opening files in this location, you must first add the website to your trusted sites list, browse to the website, and select the option to login automatically message.

It can cause problems with SharePoint. This is a system error, and today we’re going to show you how to fix it on Windows 10.

How do I fix SharePoint Access Denied?

1. Authenticate to Office 365

  1. Use Internet Explorer to sign into SharePoint online. Be sure to use your Office 365 login details.
  2. Once you enter your login information, check the Keep me signed in option and click on the Sign in button.
Tip icon Tip
It’s crucial to check Keep me signed in option in order to fix this error. If you didn’t select this option, you need to sign out and sign back in again.

According to users, this problem occurs when using SharePoint Online with Office 365. Once you map a network drive to SharePoint, you have to occasionally connect to the SharePoint Online website.

After signing in with your Office account, open a document library in Explorer View and try to access the mapped network drive.

2. Add your SharePoint Online sites to Trusted sites

  1. Press Windows + S, enter Internet Options, and click on the relevant result.
  2. Navigate to the Security tab, click on Trusted sites, and then click the Sites button.
  3. Enter the URL of your SharePoint websites in the Add this website to the zone section and click the Add button. Once you’re done, click Close and OK to save changes.
  4. Some users recommend unchecking Enable Protected Mode for Internet Zone, so you might want to try that as well.
  5. Several users suggest adding the following entries to the Trusted zone:
    • https://*.outlook.com
    • https://*.sharepoint.com
    • https://*.microsoftonline.com
    • https://*.lync.com
    • *.microsoftonline.com
    • *.sharepoint.com
    • *.outlook.com
    • *.lync.com

After adding all your SharePoint websites to the trusted zone the Access denied. Before opening files in this location, you must first add the website to your trusted sites list, browse to the website, and select the option to login automatically error should be completely fixed.

3. Check the status of WebClient service

  1. Press Windows + R, enter services.msc, and click OK.
  2. Locate the WebClient service. Check the Status of this service. If the Status isn’t set to Running, right-click WebClient and choose Start from the menu.
  3. After starting this service, close the Services window.

According to users, in order to prevent this error from appearing, you need to keep the connection after you restart the computer. To do that, you need to make sure that the WebClient service is running.

4. Install the latest updates

  1. Press Windows + I to open the Settings app.
  2. Navigate to the Update & Security section.
  3. Select Windows Update from the left pane and click on the Check for updates button.
  4. Windows will now check for any new updates. If updates are available, Windows will download and install them in the background.

Sometimes Access denied. Before opening files in this location, you must first add the web site to your trusted sites list, browse to the web site, and select the option to login automatically message can appear if your system is out of date.

Windows 10 has a few bugs and glitches, but Microsoft is working hard to fix them through Windows updates. In most cases, these updates are installed automatically in the background, but if you think that a certain update is missing, check for updates manually.

5. Use the correct path for the network drive

  1. Open Office 365 and your project. Click on Open with Explorer icon. The icon is hidden in the ribbon, so you might have to search for it.
  2. Click the address bar, and the location should change to example.sharepoint.com@SSLDavWWWRoot or something similar. Copy this path.
  3. Now try to map a network drive again, but be sure to use the same path from the previous step. In our example, it was example.sharepoint.com@SSLDavWWWRoot, but it will be different on your PC.

Several users reported this error while trying to map a network drive using File Explorer. According to them, they used the URL to the SharePoint website, and that caused this error to appear.

If you have the same problem, you need to use the correct path to the network drive.

After using the correct path, the problem should be fixed. This isn’t the best solution, and you’ll have to log in every time you restart your PC in order to access the network drive.

6. Allow users to run custom scripts

  1. Go to SharePoint Admin Center, and select Settings.
  2. Scroll down to the Custom Script area.
  3. Check Allow users to run custom script on personal sites and Allow users to run custom script on self-service created sites options.

After making these changes, the problem should be resolved. Keep in mind that it might take 24 hours for these changes to apply.

7. Delete Internet Explorer cache

  1. Press Windows + S, enter Internet Explorer, and click on the relevant search result.
  2. Once Internet Explorer starts, click the gear icon in the top right corner and navigate to Safety, and click on Delete browsing history.
  3. Select Temporary Internet files, Cookies and website data, and History from the menu. Then, click the Delete button to delete the cache.
  4. After deleting the cache, restart your browser and check if the problem still persists.

Several users reported you can fix Access denied. Before opening files in this location, you must first add the website to your trusted sites list, browse to the website, and select the option to login automatically problem by clearing the Internet Explorer cache.

And once the error is fixed, do not forget to check some quick tips to increase the Internet speed.

Tell us which fix worked for you in the comments section.

Every Xbox One X console has a hidden Halo image inside

Some eagle-eyed Spanish YouTubers have found a pretty cool Easter egg in literally within Microsoft’s upcoming Xbox One X console; a small image of Master Chief riding a scorpion. You can see an image of the discovery below.

Halo's Master Chief riding a scorpion in the Xbox One X console

Master Chief is the main protagonist in the popular Halo video game franchise which has been a staple on all three Xbox console generations. The scorpion on the other hand is a not so subtle link to the initial codename for the Xbox One X, Project Scorpio. IGN reached out to Microsoft’s Mike Ybarra who confirmed that this small image will be included in every shipped version of the Xbox One X console. Pretty cool!

Do you like Easter eggs such as this? Let us know why or why not in the comments below.

Xbox’s Halo franchise voted best video game music in new Twitch poll

Twitch, the large video game streaming service, recently conducted a poll with users asking them which game franchise had the best soundtrack and Microsoft’s Halo won with over 155,000 votes!

Halo has long been one of the Xbox brand’s largest series with several games launching on the Xbox, Xbox 360, and Xbox One in addition to Windows Phone and Windows PC over the years. There’s even a mixed reality Halo experience planned.

The music of Halo has always been something that’s praised by fans but it’s still impressive that the majority of gamers on Twitch found it to have the best music out of any game ever released.

What do you think? Does Halo have the best music? Let us know in the comments below.

Gwent: The Witcher Card Game finally launches on Windows 10

Gwent: The Witcher Card Game is now available to play on Windows 10 PCs and tablets. The game is an Xbox Play Anywhere title which means that it supports cross-play and save between the Xbox One console version and all purchased digital content carries over between versions.

Like the Xbox One version of Gwent, the Windows 10 version is also in Game Preview which means that it’s still being tested and isn’t fully featured yet. The Windows 10 version also seems to be missing the ability to play online matches against friends, something that was added to the Xbox One version recently, and currently lacks touch support (a surprise considering how touch-focused Windows 10 devices are now) and also shows significant lag when using the mouse.

Gwent: The Witcher Card Game is free-to-play and is one of the most user-friendly digital card games out right now. Have you played the Windows 10 version yet or will you be sticking to the Xbox One version? Let us know in the comments below.

GWENT: The Witcher Card Game

How to fix pidc.txt error on Windows 10 startup

The pidc.txt error on startup on Windows 10 PC  is an annoying error message for any Windows user. The error textbox usually displays the following message: “The file C:Windowstemppidc.txt could not be opened. The system could not find the file specified.”

The pidc.txt error is related to COMODO CIS version 10.x free internet security. Product ID (PID.txt) is an optional configuration file used during COMODO’s Windows installation to indicate the Windows edition and the Windows product key. The COMODO software attempts to acquire the COMODO Product ID key during startup resulting in the error message on Windows 10 PC.pidc.txt error on startup on Windows 10

However, the pidc.txt error message is common most especially during startup on Windows 10 users. We have compiled some methods that can be used pidc.txt error on startup on Windows 10 PC.

How to fix pidc.txt error on Windows 10 PC

  • Update COMODO CIS version
  • Disable COMODO CIS from startup
  • Complete uninstall of COMODO CIS
  • Use IObit Uninstaller program

Method 1: Update COMODO CIS version

The pidc.txt error can be fixed by updating your current COMODO CIS version to the latest one. The newest version should definitely contain patches which could fix the error message on startup. Follow these steps listed below to update your COMODO CIS version:

  1. Launch COMODO CIS application on your PC.
  2. Locate the “Update” menu and click on it.pidc.txt error on startup on Windows 10
  3. Follow the prompts to complete update of the application.

Consequently, connect to the Internet before you proceed with the update. The pidc.txt error will be fixed if you try out this method.

Method 2: Disable COMODO CIS from startup

Another method of fixing the pidc.txt error on startup on Windows 10 is by disabling COMODO CIS from startup menus. Disable COMODO CIS from startup by following these steps:

  1. Press “Windows” key and “R” key to launch the Run program.pidc.txt error on startup on Windows 10
  2. Type “msconfig” without quotes and hit the “Enter” key.pidc.txt error on startup on Windows 10
  3. In the System Configuration window, click on the “Startup” tab.pidc.txt error on startup on Windows 10
  4. Uncheck all tick boxes where the manufacturer is COMODO, click on “Apply” and then “OK”.pidc.txt error on startup on Windows 10
  5. Select the “Restart” option.pidc.txt error on startup on Windows 10

Read Also: Impactor.exe Bad Image: How to fix this error and launch your apps

Furthermore, you can use another alternative utility tool to disable COMODO CIS because of the pidc.txt error on startup on Windows 10. However, you can try other fixes below to permanently get rid of the pidc.txt error.

Method 3: Complete uninstall of COMODO CIS

In addition, you can completely uninstall the COMODO CIS to prevent pidc.txt error on startup. However, COMODO CIS is an antivirus that infuses its registry keys into the Windows registry; a normal uninstall process is not applicable to the application. In order to uninstall COMODO CIS, follow these steps:

  1. Press the “Windows” key, type “task manager” without quotes, and then hit “Enter”.
  2. Locate COMODO Internet Security, click on it and select “End Task” option.pidc.txt error on startup on Windows 10
  3. From the Start menu, go to System settings and select Apps & Features to open the full list of installed programs.
  4. Locate COMODO CIS, right-click on it, and then click on the “Uninstall” button.pidc.txt error on startup on Windows 10
  5. Follow the prompts to uninstall COMODO CIS. However, repeat steps 3 & 4 for other COMODO applications such as Comodo Dragon web browser, Comodo Secure Shopping, and Internet Security Essentials.
  6. Press Windows key + R to launch Run program, type “regedit” without quotes, and the hit “Enter”.pidc.txt error on startup on Windows 10
  7. Navigate to the HKEY_CURRENT_USERSoftwareCOMODOGroup right-click and delete the folder.pidc.txt error on startup on Windows 10
  8. Also, navigate to the HKEY_LOCAL_MACHINESOFTWARECOMODO folder as well and delete the folder.pidc.txt error on startup on Windows 10
  9. Press Edit at the top of the window and select Find.pidc.txt error on startup on Windows 10
  10. Type COMODO in the search menu, delete all findings, and then reboot your PC.pidc.txt error on startup on Windows 10

Note: this method can be utilized to fix the pidc.txt error on startup on Windows 10 PC as it completely removes all traces of the COMODO CIS application and other applications in its bundle.

Read Also: How to fix LogonUI.exe Application Error on Windows 10, 8, 7

Method 4: Use IObit Uninstaller program

Another method of fixing the pidc.txt error is by using the IObit uninstaller program. This utility program is ideal for removing stubborn software applications such as COMODO CIS and cleaning up all its traces. Download, install and use IObit Uninstaller on your Windows 10 PC to solve the pidc.txt error on startup problem. Use these steps below:

  1. Download IObit Uninstaller program here, and install afterwards.pidc.txt error on startup on Windows 10
  2. Launch the IObit Uninstaller application.pidc.txt error on startup on Windows 10
  3. Select the COMODO CIS program and other applications in the bundle, and then select automatically remove residual files.pidc.txt error on startup on Windows 10
  4. Click on the “Uninstall” option to proceed with the uninstall process.

Also, you can use any of the ten best alternative uninstaller programs. Follow these steps above to uninstall the COMODO CIS program with its application bundles in order to clear the pidc.txt error on startup on Windows 10. You can install other alternative antivirus on your Windows PC after you uninstall COMODO CIS.

In conclusion, these methods above are fixes which are applicable in solving the pidc.txt error on startup on Windows 10. Try any of the fixes mentioned and use it to solve the pidc.txt error problem. Feel free to comment below.

RELATED STORIES TO CHECK OUT:

Printer won’t work after upgrading to Windows 10/11? Try this

If you’re at work or run a home office, one of the most important equipment you need is a printer. Of course, there are many reliable printers that you can choose from to get the job done.

Depending on the nature of your work, or business, once in a while you may need to print individual or bulk documents, so it is necessary to find out updates related to your printer either from the manufacturer, or the operating system you’re using.

Printer problems are not new. But when these have to do with software or an operating system, then it can be frustrating and detrimental to the user.

One of the concerns that have come up, with regards to printing after updating or upgrading to Windows 10, is that either the device is not working at all, or there are some challenges in how the printer operates after performing the upgrade.

Here are some quick fix solutions to bail you out when your printing device is acting up after a Windows 10 upgrade/update.

Printer won’t print after Windows update

Solution 1: Reboot your computer

This is the first line of action whenever such an issue comes up (or any other issues with your computer and any other hardware you may be using along with it). However, if you restart your computer and nothing happens on your printing device, you can go to the next solution.

Solution 2: Check if your printer is compatible with Windows 10

Some printers may not necessarily work with Windows 10, or may have limited functionality altogether, so you need to check if yours is in this category before using the solutions below.

Follow these steps to check if your device is compatible:

  • Right click Start button
  • Select Control Panel
  • Click on Hardware and Sound
  • Select Devices and Printers. You will see a list of devices, and another for printers
  • Check under Unspecified section to see if your printer is listed there

Once you establish whether it is unspecified or not, go to the next solutions to fix the issue.

Solution 3: Check power supply and connection

Ensure your printing device is correctly plugged into a power outlet and switched on, including the surge protector. Check also that the USB cable that connects your printer to your computer is securely plugged in.

If you’re using a wireless connection for your device, make sure the following is in place:

  • Turn on the wireless option and ensure it is available for your printing device
  • Run a wireless connectivity test for your printer, check also that your computer is connected to a wireless network (this should be the same for your printer and computer).

Should this not work, go to the next solution.

Solution 4: Uninstall your printer, then reinstall again

This is one of the quick fixes to resolve the issue.

Follow these steps to uninstall and reinstall your printer:

  • Right click Start button
  • Select Control Panel
  • Click on Hardware and Sound
  • Select Devices and Printers. You will see a list of devices, and another for printers
  • Find your printer
  • Right click on your printer
  • Select Remove device

How to reinstall your printer after uninstalling it:

  • Right click Start button
  • Select Control Panel
  • Click on Hardware and Sound
  • Select Devices and Printers. You will see a list of devices, and another for printers
  • Click Add a printer

add printer

  • A pop up will appear that scans for new devices. If your particular printer is on, Windows will automatically scan and find it.

Printer

  • Perform a test page print to see if it is working

To install or add a local printing device, connect your device to your computer then turn it on.

Solution 5: Update drivers

Like most printers, yours may also require software so as to perform better. If you performed an upgrade or update to Windows 10, there is a possibility that your printer’s current driver will not work with the operating system.

Other issues that cause your printer drivers not to work including power surges, viruses, and other computer issues that may arise to damage your printer’s drivers.

To update the drivers, you can use either of these three methods:

  • Windows Update
  • Device software installs
  • Download and install driver manually

Method 1: Update printer drivers using Windows Update

  • Right click Start button
  • Choose Device Manager
  • Click on Printers to expand the list
  • Locate your device then right click on it
  • Choose Update Driver
  • Choose Search automatically for updated driver software

Method 2: Update printer drivers by installing printer software from your manufacturer

Check your printer’s hardware for a disc that came with it so as to install any software for your printer.

Method 3: Download and install driver manually

  • Go to your device’s manufacturer website
  • Check for driver updates under the support section
  • Identify your printing device and download the newest version of drivers for your printer
  • Follow the installation instructions to update your drivers

Sometimes after downloading drivers, you can double click on them to automatically set off the installation process by following these steps:

  • Right click Start button
  • Choose Device Manager
  • Click on Printers to expand the list
  • Locate your device then right click on it
  • Choose Update Driver
  • Choose Search automatically for updated driver software

In the event none of these methods work, you can reinstall the driver, but remove the old drivers first using these steps:

  • Unplug the USB cable connecting your printing device to your computer
  • Right click Start button
  • Select Control Panel
  • Click on Hardware and Sound
  • Select Devices and Printers. You will see a list of devices, and another for printers
  • Select your printer
  • Right click and choose Remove device
  • Type Print management in the search box

printer

  • Select Print Management

printer

  • Choose All Printers
  • Check for your printer under the list
  • Right click and choose Delete
  • Reboot your computer
  • Plug back your USB cable to connect your printer and computer
  • Reinstall the printer’s driver and software


Solution 6: Check with your manufacturer

If the other solutions didn’t work, contact your device’s manufacturer for more troubleshooting and support based on your specific issue.

Did any of these solutions work for you? Share with us your experiences in the comments section below.

RELATED STORIES TO CHECK OUT:

The exclusive semaphore is owned by another process [FIX]

If you’re getting the ‘ERROR_EXCL_SEM_ALREADY_OWNED‘ error code 101 with ‘The exclusive semaphore is owned by another process‘ description, follow the troubleshooting steps below to resolve it.

A system error that bears code 101 can occur in various scenarios. Sometimes just after a startup, but it’s mostly occurring in the midst of installation of programs in Windows and just after or during the system reinstallation. After the error prompt, the program will crash. It mostly occurs due to:

  • Missing DLL, EXE, or SYS files that are essential for programs.
  • Faulty device drivers related to a troubled program.
  • Outdated BIOS version
  • Malware infection.
  • Deleted registry values.

This error can impact all Windows versions and Windows 10 isn’t an exception.

Because of the multiple possible causes, we advise you to try the various troubleshooting steps we presented below, in order to resolve the issue at hand. Of course, the approach you should take depends on the appearance of the error.

How to fix ‘The exclusive semaphore is owned by another process’ system error

  1. Scan for malware
  2. Repair or reinstall the troubled program
  3. Update drivers
  4. Scan system with SFC
  5. Repair the registry
  6. Reinstall Windows

1. Scan for malware

Malware is the first obvious suspect when it comes to system errors. It’s paramount to keep your system clean and protected in order to avoid this and similar problems.

Moreover, even if you’ve enabled real-time active protection, there’s still a chance that the creeping malware comes from the data partition onto the system partition. That should be enough to show you how resilient those can be.

However, luckily, you can perform a deep scan and clean up your PC in a few easy steps. You can either use a 3rd-party antimalware solution or just turn to Windows Defender, the built-in system security tool.

Follow the instructions below to perform a deep scan with Windows Defender:

  1. Open the Windows Defender icon from the Notification area.
  2. Open Settings.
  3. Save everything before you start, to prevent the data loss.
  4. Locate Windows Defender Offline and click Scan Offline.windows defender offline scan
  5. Your PC will restart and the scanning procedure will last for approximately 15-20 minutes.

If your Defender definition base is up to date, you should easily locate and remove all possible viruses.

2. Repair or reinstall the troubled program

If the damage to a certain program is already grave enough to cause the system error 101, you should take a reinstall into consideration. Some applications have a restore option, so that’s the first thing you should look for.

However, if there’s no restore option available, reinstallation is the only solution. In addition, it’s highly advised to use some 3rd-party tool to remove remaining registry values, after uninstall. It’s the safest way to evade future system errors after the program is freshly installed.

If you’re uncertain how to reinstall the program follow the instructions below, and hopefully, the error will be avoided in future use:

  1. Right-click Start and open Control Panel.
  2. In the Category view, choose to Uninstall a program.The exclusive semaphore is owned by another process
  3. Navigate to troubled, Windows-related program that caused the error prompt.
  4. Right-click and Uninstall it.
  5. Delete remaining folders and clean the registry (make sure to back it up before you run the cleanup tool).
  6. Restart your PC.
  7. Install the program and look for changes.

3. Update drivers

Outdated drivers can also cause this or similar system errors. For this exact error, it’s essential to have a proper driver that responds to a program you run. For example, if the program you run is somehow related to a GPU or sound card drivers that are faulty, there’s a chance that the program will crash.

Because of that, we advise you to follow the below steps and confirm that all drivers are properly installed:

  1.  Right-click Start and open Device Manager.
  2. If you locate any driver with the yellow exclamation sign, right-click and click Update Driver Software.
  3. In addition, you can navigate to the OEM’s site and download the drivers for various devices.

Have in mind that some manufacturers offer a driver bundle, which should speed the procedure substantially.

On the other hand, you might handle your PC drivers automatically with the right driver software. Plus, install or update all your drivers using specialized support from a driver expert like Fortect Driver Updater.

4. Scan system with SFC

However, if the ‘ERROR_EXCL_SEM_ALREADY_OWNED ‘, also known as system error 101, appears just after the startup, you can be sure that the system files are affected. Is it because of malware, badly installed updates, or misuse of certain system resources, we can’t be sure. Luckily, even though it sounds complex, there’s a simple solution for this problem.

You just need to run the SFC command-line tool. This tool will check the files’ integrity and fix possible errors and corruption. If you’re not sure how to do it, check these instructions:

  1. Right-click the Start menu and open Command Prompt (Admin).
  2. In the command line, type or copy-paste the following command and press Enter:
    • sfc/scannow
The exclusive semaphore is owned by another process

3. After the procedure is finished, restart your PC.

If there’s any corrupted system file, SFC should fix it and restore its original state. Have in mind that the procedure may be lengthy, so it may take you some time.

5. Repair the registry

Now, we’ve come to a bit of dangerous ground. Even though it’s not easy to cope with system errors, the unknowledgeable use of the registry can cause you much more problems. However, if you’re used to registry tweaks, you’re probably backing up your registry frequently. If that’s the case, you should be able to resolve the problem. If it’s registry-related, of course.

And it often is, since the registry controls and configures all system processes. If the registry values are not appropriately set, there’s a great chance that something will go wrong, and eventually, the system errors will appear.

We’ll just try to inform you how to import pre-saved registry save and, hopefully, resolve the problem. For additional tweaks, you should check other sources, but we strongly advise you to act with caution.

  1. In the Windows Search bar, type regedit and press Enter.
  2. Open File and choose Import.
  3. Import saved registry configuration and apply changes.

With that, the problem should be resolved and the programs and system features should work just like intended.

6. Reinstall Windows

In the end, if the problem is persistent and the error reappears often, you might take the system reinstallation into consideration.

We’re aware that that’s not a preferred solution, but the appearance of system errors is a sign that something is wrong with your system. For that purpose, depending on the system you run, you should inform adequately and perform a reinstallation or take your computer to a service.

We hope this article will help you resolve your problems. In case you have any questions or suggestions, make sure to share them with us in the comments section below.