In the rapidly digitizing world, it’s easy to be overwhelmed by the relentless influx of information and tasks. However, rest assured, Microsoft has come up with an ideal solution: Microsoft 365 Copilot.
This personal assistant capitalizes on large language models (LLMs) combined with your data in the Microsoft Graph to catalyze your productivity and help you stay afloat in the digital tide. It mediates your tasks within your everyday Microsoft 365 Apps — Word, Excel, PowerPoint, Outlook, Teams, and more.
1. Microsoft 365 Copilot: Your Word Editor & Co-Writer
Imagine having a second brain to assist you with writing and editing. That’s what Microsoft 365 Copilot delivers. With a simple command, Copilot in Word can create a first draft, pulling information from across your organization. Whether you need more content for a document or want to shorten a verbose paragraph, Copilot is at your fingertips to assist.
What sets it apart is its capacity to understand and work with a catalog of tones – professional, passionate, casual, and thankful – enabling you to find the perfect pitch. This also makes it a proficient writing mentor, ready to help you enhance your arguments and iron out inconsistencies in your text.
You can use commands such as:
Draft a two-page project proposal using data from [document] and [spreadsheet]
Make the third paragraph more concise
Change the tone of the document to casual
Create a one-page draft based on this outline
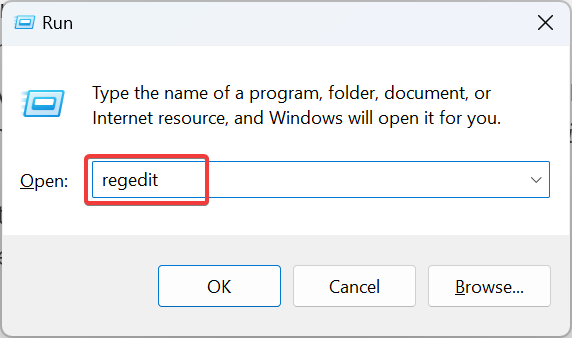
Adding CoPilot to Microsoft Word via Registry Editor: Press the Windows key + R to access the Run dialog box. Type ‘regedit’ and confirm with Enter. Navigate the path: HKEY_CURRENT_USER\Software\Microsoft\Office\16.0\Common\ExperimentConfigs\ExternalFeatureOverrides\word.
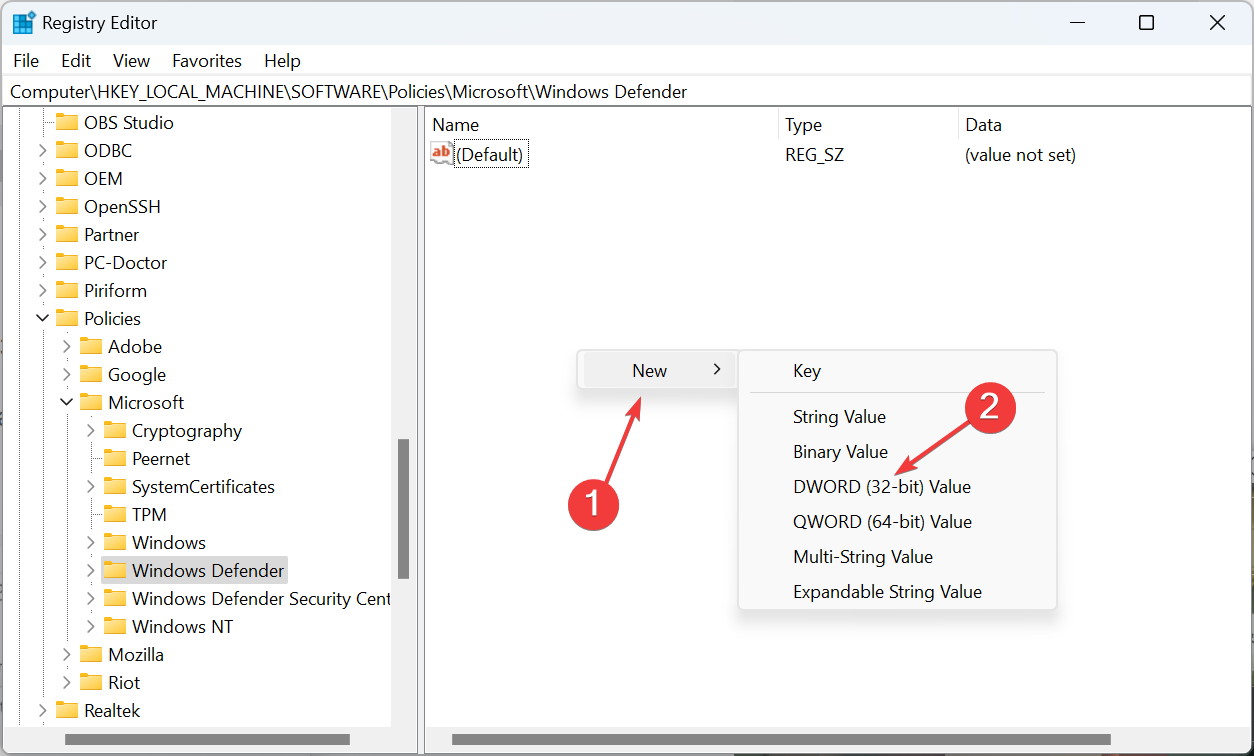
You’ll need to make a new entry here: right-click on Word, select ‘New’ followed by ‘String Value’.
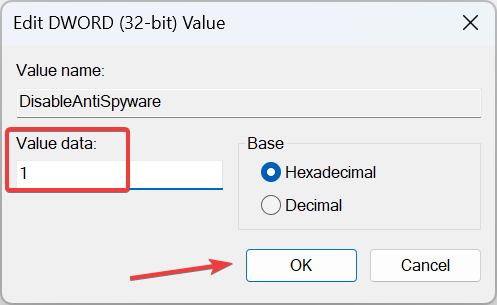
Name your new key as ‘Microsoft.Office.Word.CoPilotExperiment’ and confirm. Double-click on this key will allow you to set its value as true.
(Kindly note that a valid subscription to Microsoft 365 is needed to move with these instructions.)
2. Microsoft 365 Copilot: Your In-house Data Analyst in Excel
Navigating data analysis can be challenging, but not with Copilot in Excel. This tool helps you explore your data by answering your queries, not only in the language of formulas but also in everyday jargon. It can draw correlations, set up hypothetical scenarios, and suggest new formulas based on your queries.
Whether it is identifying trends or creating compelling visualizations, Copilot simplifies the complex and helps you make sense of your data.
Activating CoPilot in Excel: For utilizing the feature in Excel, establish a new workbook or continue with a pre-existing one. Visit the Home tab in the toolbar and press the Copilot option.
A sidebar featuring various insights and suggestions related to your data will appear. Interestingly, the feature empowers users to form natural language queries, carry out financial modeling, analyze different scenarios, generate visuals, and streamline financial processes. For instance, you can ask the tool to generate a financial model using a specific variable or request it to visualize the impacts of certain changes using charts.
3. Microsoft 365 Copilot: Your Slide Deck Designer in PowerPoint
When it comes to presentations, everybody wishes for a touch of professionalism. Copilot extends its benefits to PowerPoint, assisting you in creating slick, comprehensive presentations.
Incorporating CoPilot in PowerPoint: On a newly initiated PowerPoint presentation, head towards the Home tab located in the Ribbon. Within the ‘Design’ section, you’ll notice the Copilot option adjacent to the ‘Design Ideas’ button.
Click on the Copilot feature for a fresh panel to populate on your screen’s right side. As a first-time user, the next task will be to select the kind of content you wish to present. Following this, a wealth of design ideas and potential talking points will be showcased to you by Copilot.
In Summary
Microsoft 365 Copilot is a novel tool designed to enhance productivity by serving as your assistant in Word, Excel, and PowerPoint. Unchain your creativity, supercharge your productivity, and improve your skills by leveraging these handy tips and reaping the benefits Copilot has to offer.
Compared to other automated assistants, Copilot stands out with its low-key creativity and high efficiency, making it a valuable companion in your digital journey.
Recent KB5028244 update issue affecting Windows 10 users and their ClickOnce deployed apps. Unfortunately, users have been experiencing problems, but it’s good that Microsoft has addressed the issue through a Known Issue Rollback (KIR). Last month, the same update faced video playback and recording issues, which were later resolved.
What’s KIR?
Windows’s Known Issue Rollback (KIR) feature enables Microsoft to swiftly revert a non-security update that has triggered a significant setback. This help maintains the operational status of devices and ensures user productivity while Microsoft implements a lasting solution.
What’s the issue?
After installing the KB5028244 update, users face problems with ClickOnce deployed apps. Even if the ClickOnce apps are installed and marked as “trusted,” they prompt reinstallation.
Microsoft has updated the release notes, now it says:
This issue is resolved using Known Issue Rollback (KIR). Please note that it might take up to 24 hours for the resolution to propagate automatically to consumer devices and non-managed business devices. Restarting your Windows device might help the resolution apply to your device faster. For enterprise-managed devices that have installed an affected update and encountered this issue can be resolved by installing and configuring a special Group Policy. The special Group Policy can be found in Computer Configuration ->Administrative Templates -> <Group Policy name listed below>.
Resolution Time: The KIR resolution might take up to 24 hours to propagate automatically to consumer and non-managed business devices. Restarting the affected Windows device could potentially help the resolution apply more quickly.
Enterprise Solution: For enterprise-managed devices that have encountered the ClickOnce app issue after installing the affected update, Microsoft recommends resolving the problem by installing and configuring a special Group Policy. The specific steps for deploying and configuring this special Group Policy are detailed in the release notes.
This shows us that software updates are complicated and need thorough testing and communication to prevent unexpected issues for users.
There is an upcoming improvement to the “Find on Page” feature in Microsoft Edge. This enhancement aims to make it easier for users to search for specific words on a webpage by moving the feature from the three dots menu to a more accessible sidebar. As seen on Twitter, the new sidebar will display sentences containing the search term, enhancing the feature’s usability. Canary had another trial last week with a button that enables the export of browsing data in Edge to a CSV file.
A button will appear to open the feature in the sidebar
Filter the search results to display only those from the web, the visited site, or the specific page
Collapse the sidebar if you want to revert to the original page view
This change is currently available in the Canary channel of Microsoft Edge, an experimental browser version. It might take some time before the new feature makes its way to the stable release of Edge.
This improvement appears to enhance the user experience of searching for content within a webpage in Microsoft Edge.
Outlook has a built-in calendar that allows you to manage and share events, and speaking of event sharing, you can easily import ICS files in Outlook.
By using ICS files, users can get access to different calendar events made in another app. This can be extremely useful, so in today’s guide, we’ll show you how to properly import these files.
Does Outlook accept ICS files?
Outlook fully supports ICS files out of the box.
One benefit of ICS files is their compatibility with various calendar apps, services, and computer platforms.
By having support for ICS files, you can import events to Outlook regardless of the platform, calendar service, or app that the event organizer uses.
This allows seamless organization of events, despite using different platforms or apps.
How do I import an ICS file to Outlook calendar?
1. Use the import feature in the Outlook app
In Outlook, go to File, and then select Open & Export. Next, choose Import/Export.
Select Import an iCal (.ics) or vCalendar (.vcs) option and click on Next.
Locate the ICS file on your PC and select it.
When the new dialog box appears, click on Import.
2. Import it in Outlook for Web
Open Outlook for Web.
Navigate to the Calendar and click on Add calendar.
ICS files are great since they allow you to easily share events and appointments regardless of the calendar app that you’re using. To learn more about appointments, we have a guide on how to copy Outlook Calendar appointment to another day, so don’t miss it.
A VPN makes it possible to unlock region-restricted content on your Firestick. It makes TV apps believe you’re in their access boundary while in a different place, most likely an unsupported region.
It’s like having a virtual teleporter to entertainment from around the globe. But what happens when your VPN suddenly decides to take a break?
Don’t fret! We’ve got you covered with our expert guide on fixing VPN issues with your Firestick. Let’s embark on a journey to troubleshoot and get your streaming game back on track!
Is Firestick not working with VPN? Here’s how to fix it!
Upon testing several methods, we found that the ones below actually work. So go ahead and try them.
1. Check your Firestick software and VPN compatibility
One of the primary reasons why Firestick might not work with a VPN is software incompatibility.
The Firestick’s generation and the VPN app must be compatible to work seamlessly together.
Here’s how to check it on the device:
Go to Settings on the homepage.
Select My Fire TV.
Click on About.
And then Fire TV Stick.
It should display your device name, type, and other information.
Unfortunately, if you have a first-generation Fire TV Stick, it may not be compatible with VPN apps.
So, you need to install the VPN on your router or upgrade your Fire TV stick to a newer model compatible with VPN apps.
Also, constantly check for updates on the Firestick software and the VPN app to ensure they run the latest versions.
However, if your internet connection is unreliable or experiencing issues, it can cause disruptions while using the VPN. Perform a speed test on your Firestick and ensure it has a strong WiFi connection.
If you want to test your internet speed directly on the device, follow this simple guide:
Open Settings from Fire TV home.
Select Network from the grid of options.
Select your WiFi network and click the option key on your remote to find more details.
Make sure it says: Connected to the internet. Then click on the Run Speed Test button at the bottom of the screen.
Alternatively, you can test your VPN speed using a site like Speedtest.net or Fast.com on a web browser app.
After that, you can compare the results with and without the VPN connection to see how much your speed is affected.
While the exact speed requirements may vary depending on the type of content you intend to stream, a minimum download speed of 10 Mbps is generally recommended for a satisfactory VPN experience on Fire TV Stick.
If your speed falls below this threshold, you might encounter performance issues when using a VPN.
One easy solution is to avoid router overload.
When your router is overloaded with multiple devices, it can lead to congestion and impact your internet performance.
So, ensure that your router can handle the number of connected devices and the bandwidth requirements of VPN usage.
Also, you can disconnect any unnecessary devices or consider upgrading to a more capable router.
3. Clear app cache
When you download and install a streaming app on Firestick, the app creates a cache saved on your Firestick device.
The cache stores some data and settings that help the app run faster and smoother.
However, sometimes the cache can become corrupted or outdated, storing old locations that prevent your installed apps from catching on to your VPN’s location.
To clear the app cache on your Firestick, simply follow these steps; I used Netflix as an example.
Go to Settings on your Firestick home screen.
Select Applications.
Select Manage Installed Applications.
Choose the streaming app that you want to clear the cache for. For instance, we are about to clear the Netflix app cache.
Select Clear cache.
You can also clear the app cache for the streaming app you wish to access and the VPN you use.
This will help you create more space and faster runtime for your apps.
However, For every app, you must clear the cache individually, as there is currently no option to select multiple apps and clear them simultaneously.
4. Change your VPN server
Two things are involved; you may be connected to a VPN server location where the streaming service you are trying to access is not available. Or the one you’re working on is having issues.
So, If Firestick isn’t working with your current server, try switching to a different one. Here’s how:
Open the VPN app on your Firestick.
Select All countries from the main menu.
Choose a different country from the list.
Confirm your connection request.
Wait for the connection to establish.
Try accessing your desired streaming app again.
You can also choose Specialty servers from the main menu, such as Obfuscated, Dedicated IP, Double VPN, or Onion Over VPN servers.
These servers have different features and purposes that may be more suitable for what you need.
You might have to experiment with multiple servers in various locations where the streaming service is accessible.
5. Reinstall VPN on your Firestick
Firestick occasionally undergoes software updates that may result in compatibility issues with certain apps, including VPNs.
So, reinstalling ensures compatibility with the latest Firestick software
In case there were any misconfigurations or settings conflicts with your previous VPN installation, reinstalling the app allows you to start with a clean configuration and potentially resolve those errors.
Here’s how to do that:
Select the Settings option on the Firestick home screen.
Locate and click on the Applications tab.
Choose Manage Installed Applications.
Look for the VPN app in the list of installed applications and select it.
On the VPN app page, click the Uninstall button to remove the application from your Firestick.
Confirm the uninstallation when prompted.
Once the VPN has been successfully uninstalled, return to the Firestick home screen.
Access the Amazon Appstore.
Use the search function to find the VPN app on the Amazon Appstore.
Select it to open the app page and Download. Once the installation is complete, return to the Firestick home screen.
Locate the VPN app among your installed applications and click on it to open it.
Launch the VPN app and log in with your account credentials.
You should now be able to use your VPN on your Firestick without issues.
6. Change your VPN provider
Due to IP leaks, sluggish connections, and internet speeds, some VPNs might not function appropriately with Firestick.
Therefore, if none of the abovementioned fixes work, you should change your VPN as a last resort.
We will recommend CyberGhost. It is a fast, reliable, secure VPN that works flawlessly with Firestick and other streaming devices.
Plus, it can unblock all the major streaming services, including Netflix, Hulu, BBC iPlayer, and more.
To use CyberGhost on your Firestick, follow these steps:
Open the Amazon Appstore from the home screen and search for your CyberGhost.
Select the CyberGhost VPN option.
Click on Get to download the app.
Wait for the installation process to complete.
Open the app after installation.
Click on Agree & continue from the window that pops up to accept the VPNs privacy goal.
Select Allow VPN Access.
Click OK to accept the connection request.
Login with the credentials you used when subscribing in step 1.
Connect to a server of your choice. In this case, we connect to a Canadian server to unblock Crave TV’s content.
You’re all set to stream your favorite content!
By switching to a different VPN provider, you might be confident you’re using the most excellent VPN possible, complete with security precautions, IP protection, robust server connections, and other features.
Does Firestick block VPNs?
Firestick does not inherently block VPNs. It allows the installation of a VPN app you can use to protect your internet connection and access content from different places.
But hold on: there’s a catch! Some streaming services, like Amazon Prime Video, Netflix, and Hulu, might be a bit tricky
They can sometimes spot VPN IP addresses and block them to stick to regional restrictions.
No worries, though! Some VPN providers are pretty crafty. They often update their server IPs or have special servers just for streaming services. Sneaky, right?
Before you pick a VPN, double-check if it’s suitable for streaming and has the correct servers for Firestick. That way, you can chillax and binge-watch your favorite shows without any trouble.
Keep in mind things might change over time. So, staying updated on the latest info about VPNs and Firestick is an intelligent way to stay on board. Happy streaming!
Does Firestick detect VPNs?
No, Firestick does not detect VPNs, but some streaming platforms you may have installed on it do.
If your router isn’t hiding your location, Firestick apps will interfere with the server you’re using, making your VPN useless.
Bad VPNs take ages to replace blacklisted servers, which means you cannot access region-locked content.
You might want to know how streaming services and platforms detect your VPN, right?
They use various methods for detection, including:
IP Address Blacklisting: They maintain lists of known VPN server IP addresses and block access from these addresses.
Deep Packet Inspection (DPI): They analyze the data packets sent over the network to identify and block VPN traffic patterns.
DNS Leaks: Some VPNs might have DNS leaks that reveal their actual IP address, which can be detected and blocked by the service.
Behavioral Analysis: If they detect multiple users accessing content from the same VPN server simultaneously, they can flag it as suspicious activity and potentially block it.
However, the best VPNs compatible with Firestick do a great job of replacing a blacklisted server.
That means that, even if a particular service has disabled a VPN server, a replacement will be up sooner rather than later.
Does Firestick work with a VPN?
Absolutely! We use CyberGhost to stream Aladdin and the Death Lamp on Netflix UK in Nigeria.
You must have a compatible VPN service to ensure a seamless streaming experience on Firestick.
That’s where Cyberghost ($ per month) and ExpressVPN ($ per month) come into play.
These VPN providers have a clever approach to outsmart any potential detection systems, granting you uninterrupted access to your favorite streaming services.
Whenever a streaming platform identifies and blocks an IP address, they act swiftly, replacing it with a new, unblacklisted one.
Thanks to their extensive network of servers, you’ll always have plenty of unblocked options.
With ExpressVPN and CyberGhost on your side, you can confidently enjoy your Firestick’s streaming capabilities without worrying about regional restrictions.
So go ahead and binge-watch your favorite shows with ease.
Best VPNs for Firestick
Finding the perfect VPN for your Firestick is crucial for enjoying smooth streaming and robust security.
To enhance your streaming experience, we tested several VPNs to check which seamlessly works with Firestick.
We came up with the top four based on provision for unlimited bandwidth, high-quality streaming, strong encryption, user-friendly apps, customer support, and a money-back guarantee.
So, let’s unveil them.
CyberGhost – best VPN with streaming-optimized servers for Firestick
CyberGhost is an excellent Firestick VPN for streaming. It boasts over 9,000 servers in 91 countries, rivaling others in global access.
Its filters help narrow down servers for optimal streaming.
It’s also a great torrenting VPN with a filter for P2P traffic, although that might not be a priority on your TV.
With CyberGhost, your online activities are kept private, thanks to standard protocols like OpenVPN and 256-AES encryption, and its no-logs policy is audited by Deloitte.
While it performs well with US Netflix, iPlayer, and Prime Video, there was a dip in streaming performance for UK Netflix and Disney Plus during testing.
CyberGhost offers exceptional value, especially with extended plans like the three-year option.
Its industry-leading 45-day money-back guarantee sets it apart from others, which typically have a 30-day guarantee.
You can also try CyberGhost for free with varying trial periods on Windows, Android, macOS, or iOS devices.
✅ Pros:
Top-notch streaming capabilities for Firestick
Live Support in various languages
Encrypted not just once but twice
Easy-to-use Fire TV app
❌ Cons:
The free trial is one day
CyberGhost
Enjoy unrestricted access to all your favorite Firestick TV content with this reliable VPN
ExpressVPN has a user-friendly app you can easily install and use on your Firestick.
With over 3000 high-speed servers in 94 countries, you have enough options to pick from anywhere in major countries worldwide.
We’ve tested all its server locations, and they work well on Firestick, which means you can stream your favorite shows from different platforms without geo-restrictions.
In addition, their bandwidth allows for infinite server switching in addition to their SSL-secured network.
Furthermore, it offers various streaming protocol options, such as Lightway or OpenVPN, that allows you to optimize your streaming and browsing experience.
The service also offers 256-bit encryption. Such a robust encryption protocol will keep you under the radar while streaming movies and online content.
Also, your privacy is protected with a strict no-logs policy and the TrustedServer feature, which deletes server data after each session.
Plus, it has a 24/7 live chat and emails to assist you through instant setting up or troubleshooting.
✅ Pros:
Excellent privacy and customer support
Split tunneling
Zero activity log
30-day money-back guarantee
❌ Cons
Pricier than most VPNs
ExpressVPN
Embrace limitless Firestick TV enjoyment with this tested VPN for streaming!
An exclusive NordVPN FireStick app is available for download from the Amazon App Store.
It is simple to use because of the user-friendly server list.
You may access geo-restricted material from Netflix, Amazon Prime, Disney+, and other services using the 5700+ fast servers spread over 60 countries, including 60+ in Spain.
Specialty servers that increase security and anonymity include Double VPN, Obfuscated Servers, and Onion Over VPN.
NordVPN’s AES-256 encryption protects your privacy and data from hackers, ISPs, and marketers.
No tracking or marketing of your internet activities or personal information is allowed under a rigorous no-logs policy.
The kill switch disconnects you from the internet if the VPN connection drops, preventing data leaks.
NordVPN uses the NordLynx protocol, based on WireGuard, ensuring blazing-fast speeds and low latency, ideal for HD video streaming.
The Trusted app option lets you choose which apps or websites use the VPN, optimizing your usage. With a 30-day money-back guarantee, you can try NordVPN risk-free.
✅ Pros:
In-built antivirus and ad blocker
Money back guarantee
Six device connectivity
Allows crypto payment option
❌ Cons:
Slightly slower speeds
NordVPN
Get seamless access to shows around the world. Power up your Firestick with NordVPN!
IPVanish is one of the best VPNs for Firestick, providing a seamless and secure online experience.
With 2,200+ lightning-quick servers across 75+ locations worldwide, it ensures top-notch performance in Spain.
Your online activities and traffic data are kept completely anonymous and secure with their strict no-logs policy and are independently audited for verification.
IPVanish prioritizes speed with WireGuard® protocol, OpenVPN, and IKEv2, ensuring smooth streaming.
With one account, you can protect all your internet-connected devices, not just your Firestick, and establish multiple VPN connections for your household.
The split tunneling feature allows you to customize and enhance your online experience by choosing specific apps to use with the VPN.
A kill switch is in place to automatically protect your information if the connection drops.
IPVanish offers dedicated customer support daily and night to address issues and maximize your VPN experience.
✅ Pros:
Fast and stable speeds for streaming
Compatible with every Fire Stick TV
Unblocks Netflix, Disney Plus, BBC iPlayer, Hulu, and more
Good privacy and security features
❌ Cons:
No dedicated streaming servers for Fire Stick
No built-in antivirus or ad blocker
IPVanish
Watch content worldwide & enjoy seamless connections on your Firestick with IPVanish VPN!
If your Firestick is not working with a VPN, don’t worry.
By following the solutions provided in this article, you can troubleshoot and resolve the problem effectively.
Whether by changing servers, clearing cache and cookies, or trying a different VPN provider, you can enjoy a seamless streaming experience and enhanced privacy with your Firestick and VPN combination.
So, go ahead and fix the issue to make the most of your entertainment options securely.
Outlook fully supports events and invites, but by default, it’s not possible to send an Outlook invite with multiple times.
This can be a problem and make scheduling events even more complicated. We decided to address this limitation and show you how to circumvent it.
Can I send one Outlook invite for multiple dates?
By default, Outlook doesn’t support sending a meeting invitation with multiple time slots. This is a major flaw, but there are ways to work around this limitation by doing the following:
You can send multiple individual invites.
Alternatively, you can use third-party tools to bypass this limitation.
How do I send an Outlook invite with multiple times?
1. Create an appointment in Outlook
Open Outlook and click the Calendar icon in the bottom left corner.
Click the New Appointment icon.
Go to the Scheduling Assistant in Outlook.
You’ll now see all your available time slots. Drag and drop available time slots to the invitation.
Click the Attendees tab and invite the desired attendees.
Lastly, click on Send to send the invite.
2. Create individual invites for each slot
Open Outlook, and go to your Calendar.
Select New Appointment and add the attendees.
Set the desired time and click on Send.
Repeat the steps from above for every time slot.
This is a quick and helpful workaround, but it can be impractical since you’ll have to send multiple meeting requests in Outlook. In addition, your recipients might have difficulty managing multiple event invite emails. But one can always mark meetings as tentative when not sure of participation.
Enter the desired name for the file and make sure to select iCalendar format in Save as type field.
Repeat the steps from above to create multiple ICS files each with a different time slot.
Create a new email message and add all your ICS files as attachments.
Now send the email to all your attendees.
For this method to work, you need to explain to your attendees to open a single ICS file that meets their desired time slot and add it to their Outlook Calendar to select it.
This method is great since it allows you to create an Outlook calendar invite with multiple dates without using third-party tools. If needed you can also add BCC to meeting invite, in just a couple of steps.
After adding FindTime, go and set up the new meeting.
Click on New Meeting Poll and select the available time slots.
After you send a meeting invite, the attendees will have the option to choose a meeting time on their own.
By using this add-in, you’ll be able to easily create an Outlook invite with multiple time slots, so we encourage you to try it.
Outlook is one of the most versatile email clients that lets you manage events and see when a calendar event was created, so it comes as a surprise that it doesn’t allow you to send an invite with multiple times.
Speaking of Outlook features, we have a great guide on how to open multiple Outlook windows, so be sure not to miss it.
If you’ve found another way to do that, please share it with us in the comments section below.
Microsoft has unveiled a set of updated policies for its AI services, set to take effect on September 30th. The policies address emerging challenges in generative AI, particularly data usage and responsible development practices. However, Microsoft has stated that it does not retain conversations or utilize that data to train its AI models for the Bing Enterprise Chat mode. This service will be available to Microsoft 365 subscribers from next month.
The five key policy points cover a range of areas. Users are prohibited from attempting to reverse engineer AI models, preventing the discovery of underlying components. Data extraction via methods like web scraping is disallowed unless explicitly permitted. A significant clause restricts users from employing AI data to create or enhance other AI services.
Emphasizing the fourth point, which mentions
iv. Use of Your Content. As part of providing the AI services, Microsoft will process and store your inputs to the service as well as output from the service, for purposes of monitoring for and preventing abusive or harmful uses or outputs of the service.
The tech giant highlights its commitment to safeguarding user inputs and generated outputs. Microsoft will now process and store user inputs and outputs generated by the AI models to prevent abusive or harmful uses of its AI services. This data management approach aligns with the growing concerns regarding data privacy and responsible AI development.
Here is the list of all the points:
Reverse Engineering: Do not try to discover or remove the components of Microsoft’s AI models, algorithms, and systems.
Extracting Data: Web scraping, harvesting, and data extraction cannot retrieve data from Microsoft’s AI services without permission.
Limits on Data Usage: Microsoft’s AI services cannot be used to create or improve other AI services.
Use of User Content: Microsoft stores and processes user inputs and AI-generated outputs to prevent abusive or harmful use.
Third-Party Claims: Users are responsible for handling third-party claims related to using Microsoft’s AI services, such as copyright infringement claims from generated content.
These policies follow similar moves by other tech giants, including Meta, Google, and OpenAI. The alterations reflect the increasing importance of ethical data handling and AI development, particularly with the surge in AI-generated content across the web.
Microsoft’s data management strategy addresses user concerns in a landscape where AI is becoming increasingly integrated into daily life. It sets a precedent for responsible AI service usage across the industry.
Microsoft Loop will be a new addition to the project management and collaboration space, offering tools like Jira and Trello, as announced via Twitter (X). Users can update their Jira and Trello boards without leaving Loop. Earlier this month, it was announced that Microsoft had launched the official Microsoft Loop app for Windows PCs.
Exciting news! ???? Introducing integrations with @Jira and @Trello! Now, managing projects in Loop is easier than ever as you can update your Jira and Trello boards without leaving Loop. This is just the first step towards more exciting integrations coming your way. #NewInLooppic.twitter.com/esjrLpXMzV
While this integration is on its way, one of the users showed their desire for Figma and Miro implementation, to which Microsoft Loop replied
✍️✍️✍️
supposedly depicting that they have noted it down.
What are Microsoft Loop, Jira, and Trello?
Microsoft Loop is a collaborative workspace platform that combines notes, tasks, and code for efficient teamwork.
Jira is a tool for managing projects used by software development, IT, and customer service teams. Jira has a more extended history and was initially focused on bug tracking. Still, it has since evolved into a comprehensive project management tool widely used by software development teams.
Trello is a Kanban board tool that helps teams visualize their work and track their progress.
Dell is rolling out its new 24 Touch USB-C Hub Monitor which should have fans of the Surface Studio display a bit excited to finally get a touch-friendly dedicated screen for their current setups.
The Dell 24 Touch USB-C Hub Monitor (P2424HT) is a 1920 x 1080 FHD 23.8-inch touch monitor that can be flexed from a standard upright position to a tilted 60-degree designer/architect mode similar to the Surface Studio, but also doubles as a minimalist connectivity hub.
The Dell 24 Touch houses a single USB-C dedicated power connector that delivers up to 90 watts of power as well as an Ethernet port, two 5Gbps USB ports located on either side of the display, a full HDMI slot and display port.
Made from 85% Post Consumer Recyclable (PCR) plastics, the Dell 24 Touch also comes Energy STAR, TCO Certified Edge and EPEAT Gold certified for sustainability and energy efficiency.
Most importantly, the Dell Touch 24 supports 99% sRGB color calibration and IPS technology for accurate color displays as well as Dell’s own ComfortView Plus software that dampens blue light emissions while maintaining “true-to-life” colors.
While the Dell 24 Touch isn’t as sleek looking like the Surface Studio display and its hinge mechanism appears a bit clunkier, it achieves the same outcome for anyone who’s been waiting for a dedicated touch monitor with the ability to tilt, swivel, slant and adjust like Microsoft’s offering for $519.00.
Our heavy investment in pushing our new graphical features and our complete overhaul of the rendering engine unfortunately made splitscreen really difficult to implement.”
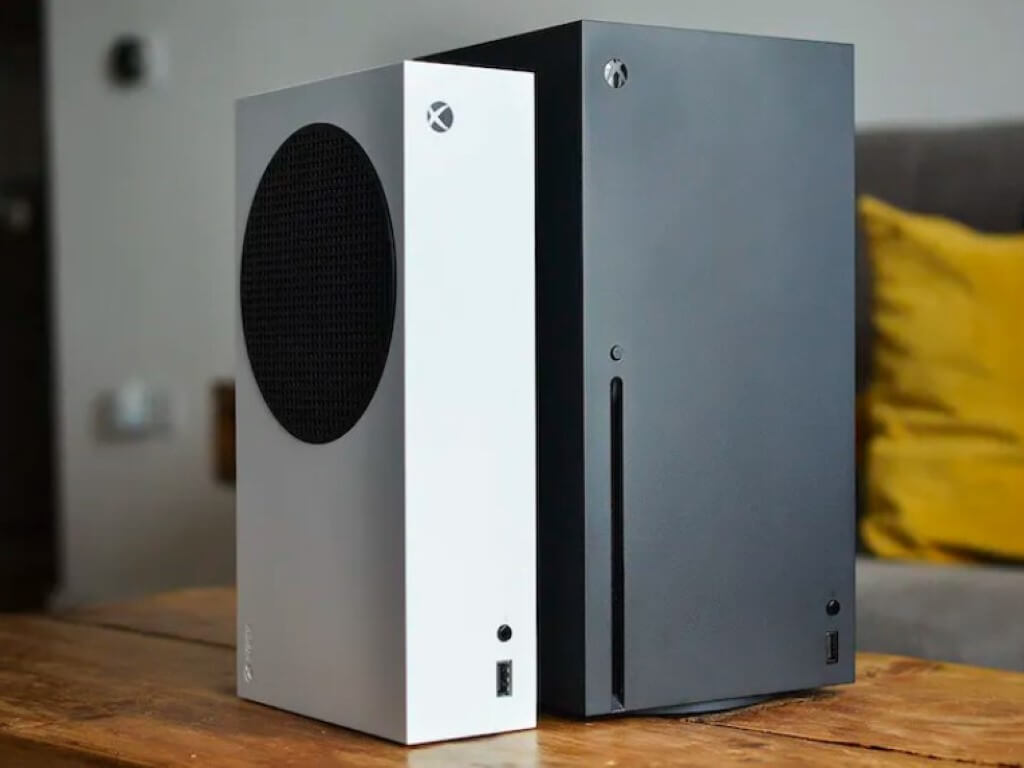
Many have interpreted this as meaning “really difficult to implement on Series S.” Running split screen multiplayer is a resource-intensive feature, and has proved much more difficult for developers to implement on Microsoft’s more affordable albeit less powerful ninth-gen console. (Series S dev kits got a slight memory boost a year ago, but this has proved only marginally helpful).
And this isn’t the first time the issue of the Series S’ performance capabilities has come up. Microsoft had to forgo a split-screen campaign co-op mode in Halo Infinite, though its inclusion had been initially planned from the start. Many have speculated that this was because 343 couldn’t get it running at 100% on Series S.
All of this has led many to ask (and not for the first time): is the Series S holding back the Xbox brand this console generation? With headlines like “Microsoft’s Xbox Series S Parity Demands Are Now Handing Sony Free Wins” (Via Forbes), it’s easy to see how some might buy into this notion.
If you want to see when a calendar event was created in Outlook, this guide can help! We will explore two methods with step-by-step instructions in tracking event creation date.
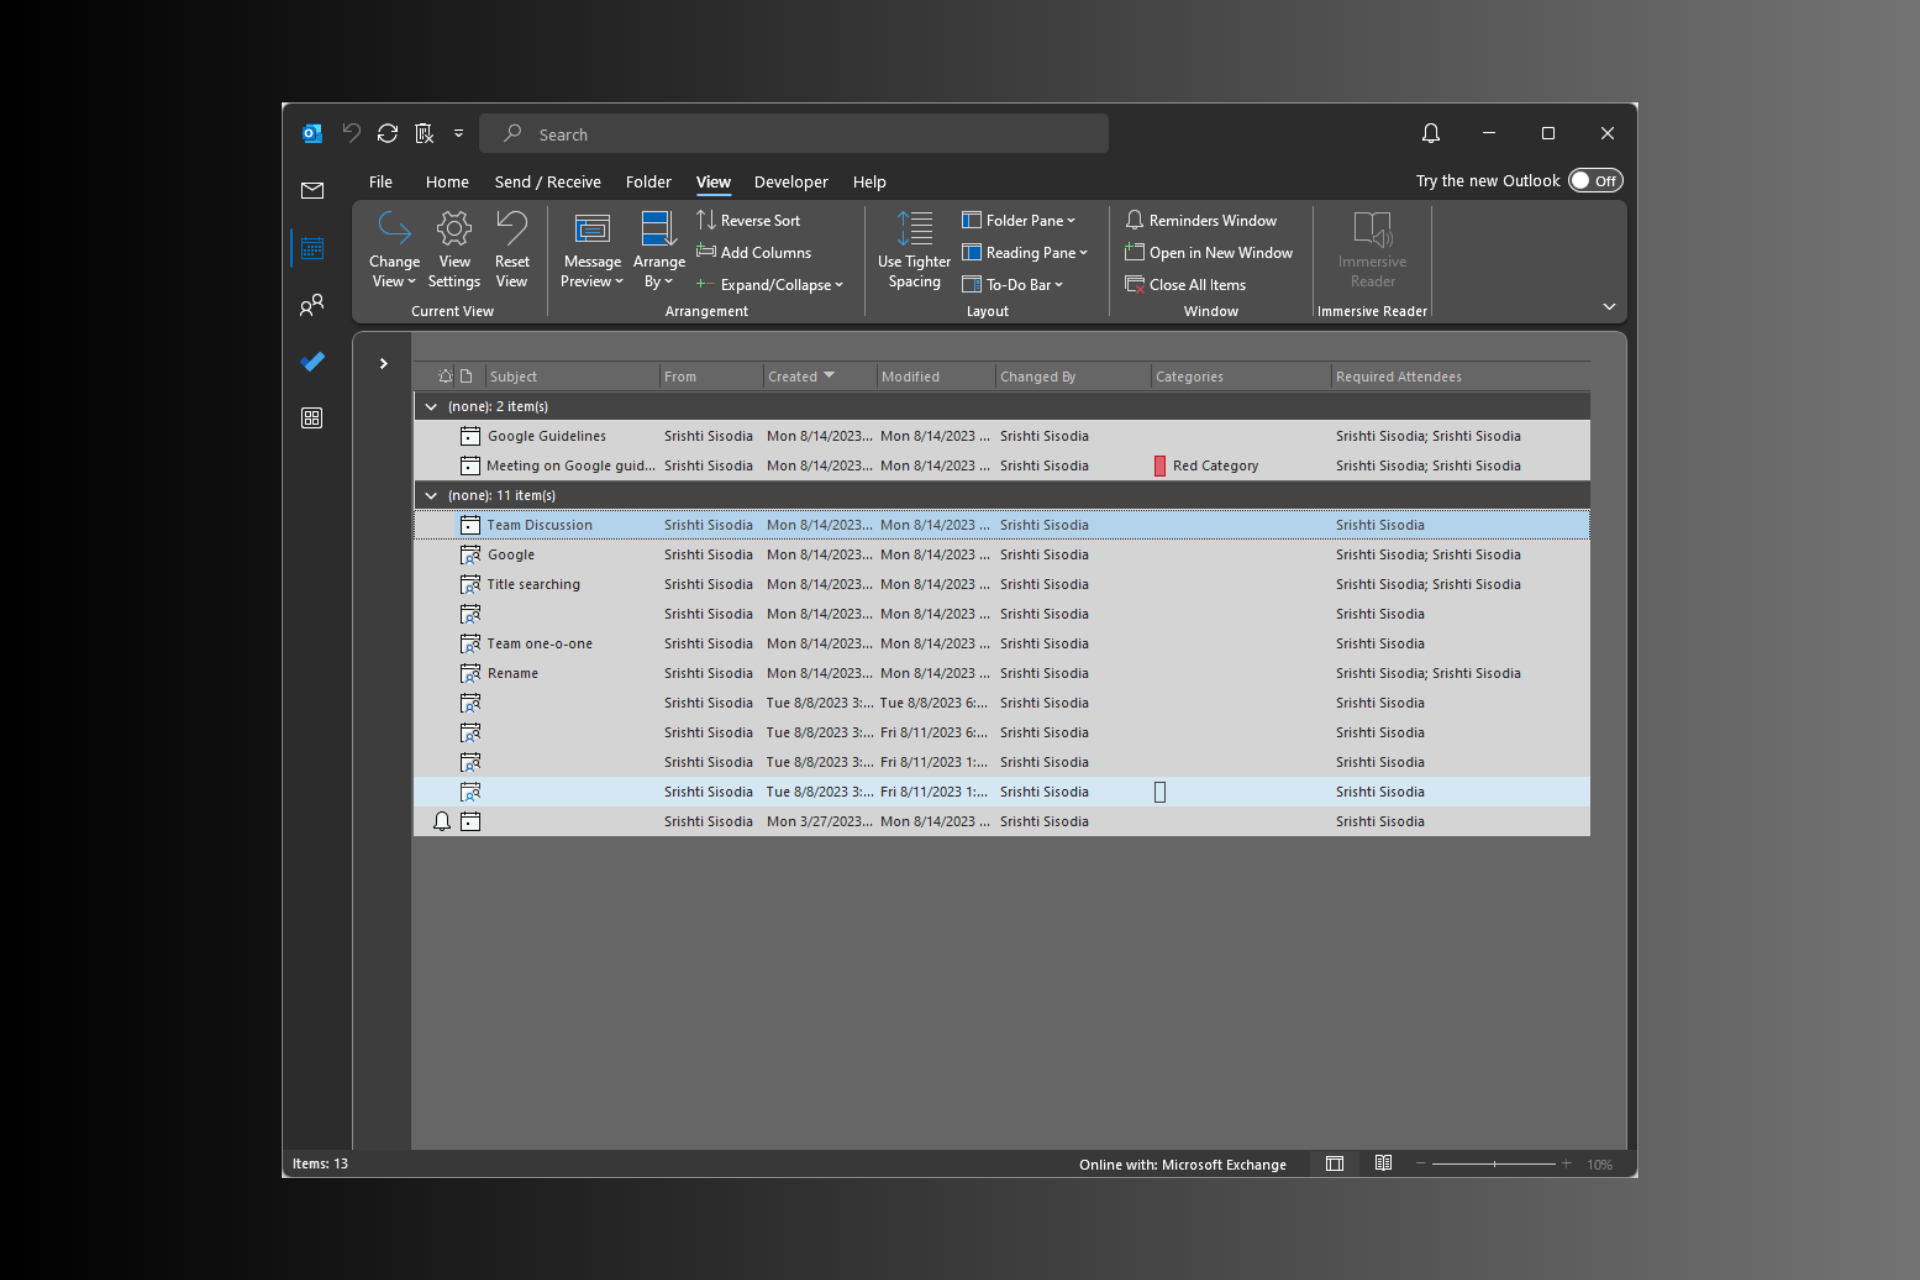
Also, we will discuss steps to add a column named Created, which will help you see creation dates for all the calendar items on Outlook.
How can I tell when an Outlook invite was sent?
To know the date and time when an Outlook invite was sent, you can check the Sent Items folder; however, if the sent items are deleted, you can add a column named Created to the event list to get the details.
To do so, follow these steps:
On the Outlook main window, click the Calendar icon. Go to View, then Change View, and select List.
Right-click on the toolbar, and select Field Chooser.
On the Field Chooser window, select All Appointment fields from the drop-down list.
Select Created and drag and drop it to the toolbar to add it.
Select Customize Ribbon from the left pane, and click the check box next to Developer to select the option under the Main tabs.
Click OK.
You can skip this step if you already have the Developer tab in the Ribbon.
1.2 Design a form
On the Outlook main window, click the Calendar icon from the navigation pane. Go to the appointment or event, double-click it to open.
On the appointment window, go to the Developer tab and select Design This Form.
The window will get refreshed and will open with more options. Locate and click All Fields.
Next, for Select from, choose the Date/Time fields option from the drop-down list.
You will get all the information about the event, including Date Created, Duration, End, Modified, Recurrence Range End, Recurrence Range Start, Remind Beforehand and Start.
This way, you can access the hidden fields in Outlook and see when a calendar event was created in Outlook, along with other details.
On the Outlook main window, click the Calendar icon from the navigation pane.
Go to View, then Change View, and select List.
Select the appointment or event whose creation date you want to know and click the Developer tab.
Click the Visual Basic option to launch the Microsoft Visual Basic for Applications.
Go to Insert, and click Module.
A new module window will open, copy & paste the following code mentioned below and press F5 to run it. Once it’s run successfully, you will receive a dialog box saying the event’s creation date.
Public Sub ShowCreatedDate()

Dim oItem As Object
Set oItem = GetCurrentItem()
MsgBox "This item was created on " & oItem.CreationTime

End Sub

' ----- Function --------
Function GetCurrentItem() As Object
    Dim objApp As Outlook.Application

    Set objApp = Application
    On Error Resume Next
    Select Case TypeName(objApp.ActiveWindow)
        Case "Explorer"
            Set GetCurrentItem = objApp.ActiveExplorer.Selection.Item(1)
        Case "Inspector"
            Set GetCurrentItem = objApp.ActiveInspector.CurrentItem
    End Select

    Set objApp = Nothing
End Function
Select any events listed and use this Outlook VBA trick to know the creation date.
3. Add a Created column to all Calendar items
On the Outlook main window, click the Calendar icon from the navigation pane.
Go to the View tab, click Change View, and from the drop-down list, select Manage Views.
On the Manage All Views window, select List, then click Modify.
From the Advanced View Settings List window, click the Columns button.
For Select available columns from, select All Appointment fields from the drop-down list.
Under Available Columns, choose Created and click Add.
The newly created column will appear in the box right to Add; you can click Move Up or Move Down to decide its position on the toolbar.
Click OK to confirm.
Go to the Calendar folder, click View, then Change View, and select List.
You can now see the column indicating the creation date of all the events.
If you think the list has a lot of events and appointments that are of no use but can’t delete calendar events, then we recommend you check out this informative guide to find the solution.
How do I view calendar edit history in Outlook?
Outlook doesn’t come with an inbuilt to show the complete history of an appointment or event. However, you can add the Modified & Changed By column in the List view of your Calendar to track the changes. To do that, follow these steps:
On the Outlook main window, click the Calendar icon from the navigation pane.
Go to the View tab, click Change View, and from the drop-down list, select Manage Views.
On the Manage All Views dialog box, select List, then click Modify.
From the Advanced View Settings List window, click the Columns button.
For Select available columns from drop-down list, choose All Appointment fields.
Now go to Available Columns, select Modified and click Add.
You will see Modified will appear under Show these columns in this order list.
Next, choose All Mail fields from the drop-down menu for Select available columns from.
Select Changed By and click Add.
Click OK on all the open windows to confirm.
Go to the Calendar folder, click View, then Change View, and select List.
Now, you can check the names of users who created the event and the modified date for all the Outlook events and appointments on the list.
You can add columns like All-Day Event, Subject field, and Recurrence Pattern to get other information.
So, these are methods you can use to see when a calendar event was created in Outlook when you open Calendar events in list view.
You can also use Outlook calendar insights to get relevant information based on the calendar data, which can help you manage work.
Microsoft reported new capabilities and updates related to Microsoft Azure Firewall. Azure Firewall is a cloud-native firewall as a service offering from the Microsoft Azure platform. The updates focus on enhancing the monitoring, management, and innovation aspects of Microsoft Azure Firewall. Here are the key points:
Keeping an Eye on Firewall Health (Preview):
Microsoft Azure Firewall will now allow users to monitor the health status of their Azure Firewall resources.
It will let users know if there might be a problem.
Users will know if it’s working fine (“Available”) or had a little issue (“Unavailable”).
Better Reports with Embedded Workbooks (Preview):
There’s a new way to look at Azure Firewall data that’s easier to understand, i.e., more visually engaging reports.
You can integrate info from different Firewalls to see the big picture.
It helps users discover why something went wrong in their logs by showing specific details.
Faster Service with Latency Probe (General Availability):
Users can now measure how quickly Azure Firewall responds, i.e., The Latency Probe metric measures the overall latency of Azure Firewall.
If there’s a delay, users will know it’s from the Firewall.
This helps users catch problems with traffic or services sooner.
Uses Ping Mesh tech to measure ping packet latency.
Overall, these updates aim to enhance the monitoring and management capabilities of Azure Firewall.
Keeping your Windows up to date is one of the most important things you can do, as a Windows user. The operating system might be excellent for gaming, and business matters, but it still is prone to a lot of malware attacks.
Plus, the updates are necessary for your machine to work as intended. Drivers, especially the peripherals, are getting updated with automatic Windows updates. Patch Tuesday updates focus on a lot of security, so make sure to not skip them when they’re out.
And then there are the other features, such as Windows Copilot that will come with future Windows 11 updates, most likely this fall. Either way, the AI tool is already in the Windows Insider Program, so it will be out before you know.
And then, there are games that require you to update your Windows in order for you to play them. One of them is the popular Minecraft, and the knowledge of it left some users baffled.
Do you need to update your Windows to play Minecraft?
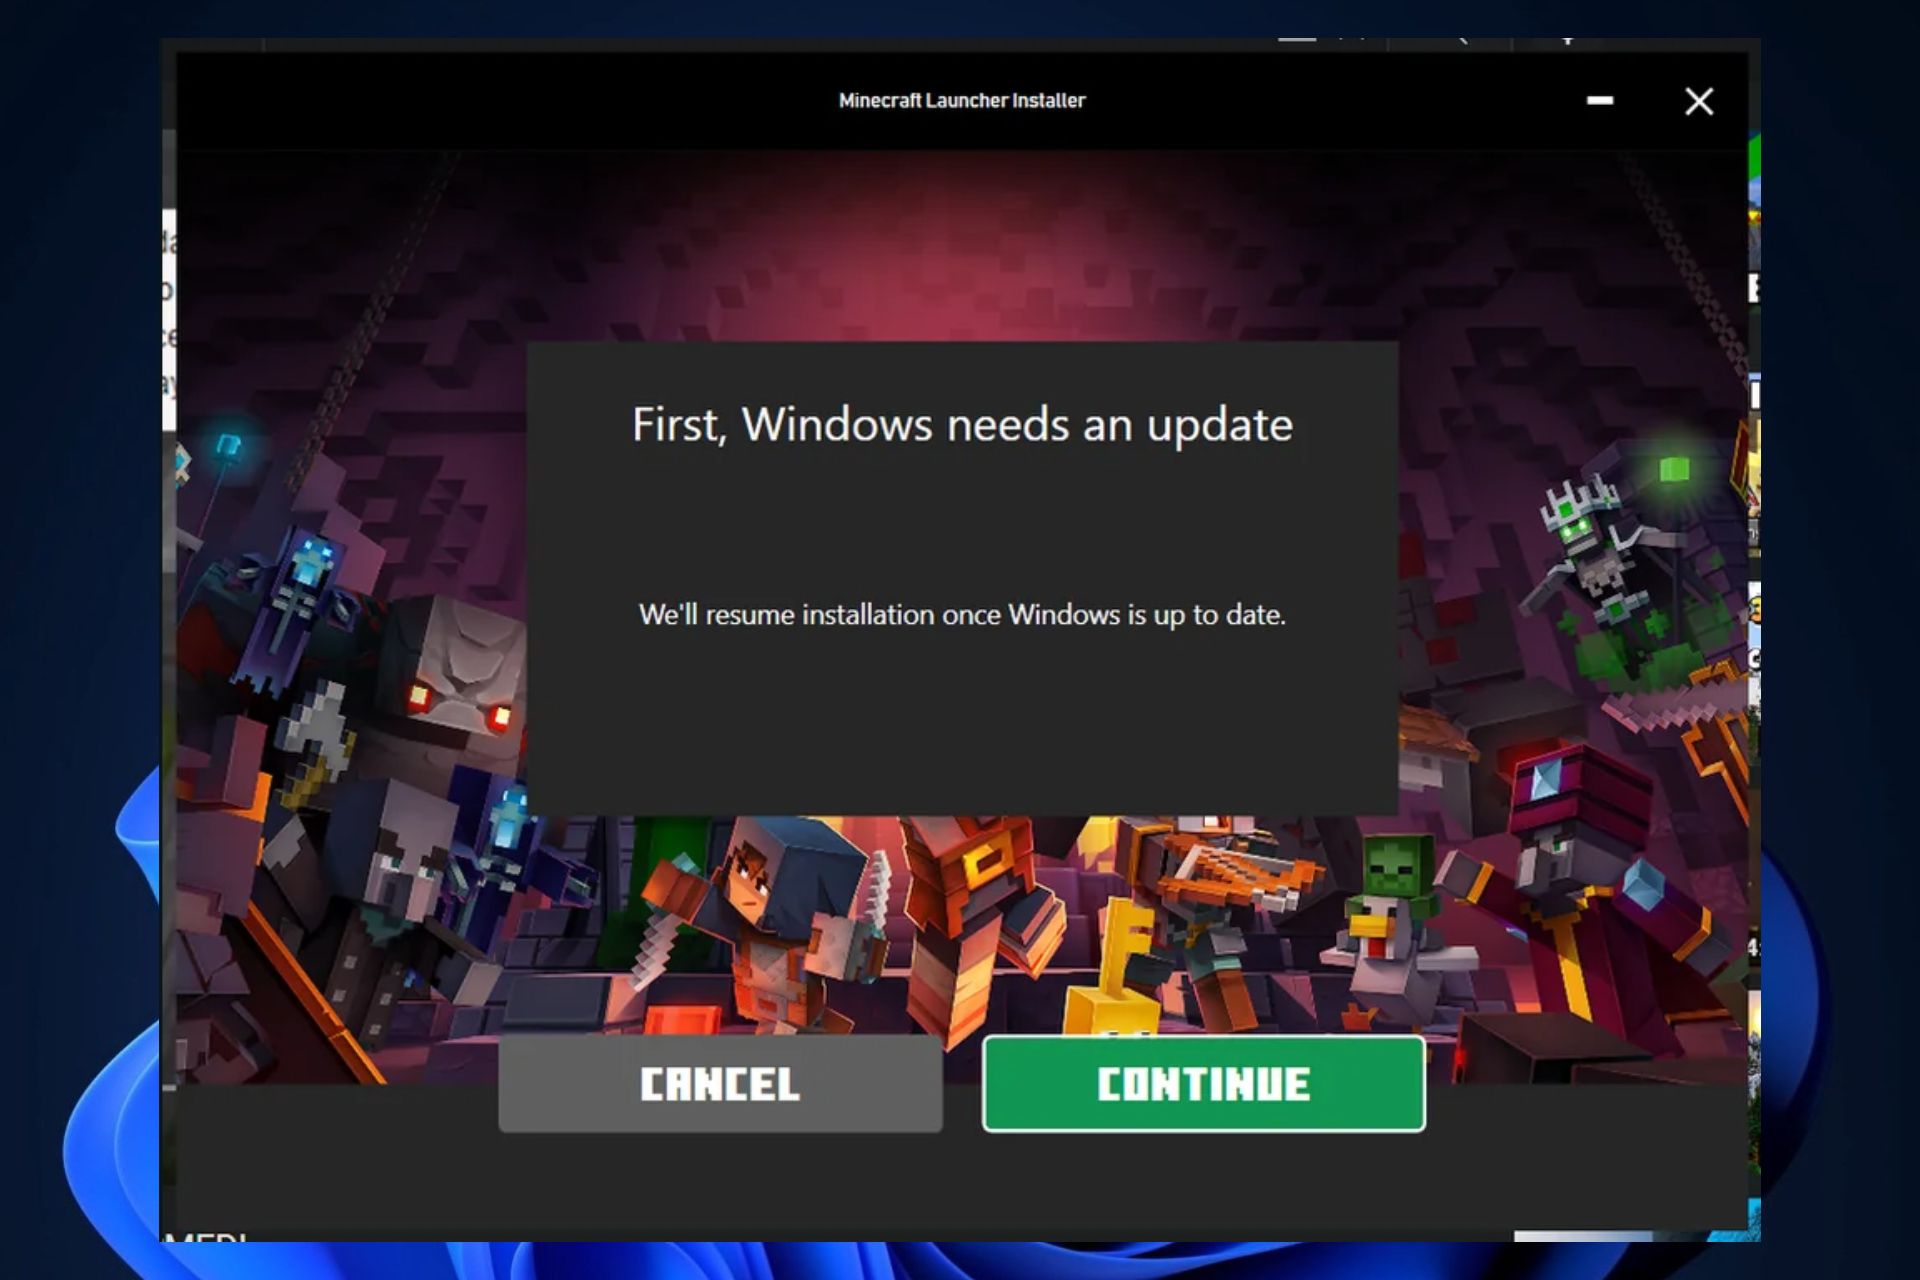
The short answer is that, yes, you need to update your Windows to play Minecraft. However, as some users spotted it some years ago, you only need to update your Windows 10/11, if you launch Minecraft through the Windows 10/11 Minecraft launcher.
There is always the possibility of downloading and installing the legacy Minecraft launcher. This legacy launcher will not prompt you to update your Windows, and you can run it on newer Windows versions as well, such as Windows 10 and Windows 11.
You also have to take into account which Minecraft you play. It seems that Microsoft Bedrock does require Windows to be up to date in order for you to play it. While the Minecraft Java edition does not require you to update your Windows.
The difference between Minecraft Bedrock and Minecraft Java is that they allow the players to use different technologies to render all kinds of in-game elements, such as particles or fog. So they might require a stable Windows version to do so.
The best solution to avoid Windows updates, although it is not recommended to do it, is to just download the legacy launcher and run Minecraft from there. But if that’s not an option, then you should just update your Windows.
Have you experienced this sort of issue while trying to play Minecraft? Let us know in the comments section below.
PDF is one of the popular file formats that helps present a document, image, and form neatly. It is a reliable & secure way of exchanging electronic documents used by businesses, schools & colleges worldwide.
If you deal with PDF documents very often, then this is for you. Here we will discuss one such PDF editor tool, PDF Extra, which makes creating, editing, and converting PDF documents simpler than ever.
PDF Extra is an advanced PDF editor tool available on all popular platforms like Windows, Android, and iOS. Let’s learn more about the software to understand what it has to offer.
What are the best features of PDF Extra?
1. Edit text & images in PDFs
PDF Extra makes editing text and images in PDFs as simple as doing it in a Word document; all you need to do is open the document, select the Edit Text & Images option, click Edit & start the work.
Convert your text to any popular font style, alter the font size, change the color, and adjust the spacing between words.
Furthermore, you can add text, rotate objects & letters, take a snapshot of the document, and add images from your computer or the web & resize, arrange, or rotate them as you like.
This PDF editor gives options to create new PDF documents from scratch From Images, From Office Documents, From Scanner, Combine Files, and Blank Document or allows you to extract pages from the existing PDF document.
2. Convert PDFs to other formats
PDF Extra can convert your PDF document into different file formats. Just upload the document, click Convert, and choose the desired file format to initiate the conversion.
You can create, edit & scan PDFs and save them to Docx, PPTx, Xls, HTML, JPEG, PNG, RTF, ePUB, and more using the tool or from the official website.
This powerful PDE converter lets you turn OCR on or off if converting the file to Docx or Xls, preserving the content as it is.
Compress the PDF files online right from your browser by just uploading the file and choosing the compression level, Basic, Medium, or Strong, to get desired results
3. OCR scanning
Another advanced feature of PDF Extra is OCR, or Optical Character Recognition, a technology that recognizes text within an image.
This is a valuable feature for those who want to scan and convert paper documents, handwritten notes, and images taken by a digital camera into searchable PDFs.
This makes editing scanned documents easy & less time-consuming as you can search for text and specific phrases within the images and make corrections.
Reading an ebook, reviewing job applications, or skimming through a report, a PDF reader like PDF Extra always comes in handy.
With access to MobiDrive, you can open and read your PDF documents on any device, including Windows, Android, or iOS phones and tablets.
If you are into ebooks, this feature is just for you as you can view the PDF in different modes, Single Page, Continuous, Two Pages, Separate Cover, and Two Pages Continuous.
You can highlight, add footnotes & comments to the paragraph or phrase you like and bookmark a page to continue where you left off.
With the new Read Mode, you will get a true full-screen view, so that you can focus on what’s important. Also, with a floating toolbar, you would get access to tools like Highlight, Page View, Free Draw, Page Selection & Navigation, Zoom, Find, etc.
5. Organize, share, and protect PDF documents
PDF Extra lets you reorder the PDF document by changing the order, inserting new pages, labeling the pages, deleting them, or extracting them to create an individual file.
Once you finish editing and sequencing the document, click the Share icon to send the final copy using a link, attachment in an email, or a Zip file.
With advanced page settings, like orientation, page sizing, collation, and the option to shrink the oversize page, you can print your document in a certain manner or even as an image.
Sharing a legal document, employee contract, or bank document, don’t forget to protect it with a password.
With PDF Extra, you can secure your document with a password of your choice, control the printing quality, and add encryption, a time stamp, & a digital signature with ease.
6. Best mobile features
Apart from Windows, PDF Extra is available on your Android & iOS devices, and the access to MobiDrive, handling PDF documents between devices is easier than ever.
You can view, scan, edit, reorder, compress, convert, extract, combine, print, or share PDF files from your mobile app, just as your Windows app does.
You can quickly scan any image or a PDF document and click Recognize to extract text. Further, you can share, copy the text or export it to a TXT file.
PDF Extra has an exciting feature, Wi-Fi Transfer, available only on the iOS version, which is a simple way to move files to other iOS, Android, Windows, or macOS devices via a browser-based client. The feature will soon be available for Android users as well.
PDF Extra
Edit, annotate, organize, convert, & protect your PDF documents on Windows, iOS & Android devices.
Using an advanced PDF editor tool like PDF Extra to manage your PDF documents that has an intuitive interface, & offers multi-platform support has its perks; some of them are:
Controlled PDF structure – Allows to change the font color, style, & size, adjust the spacing between text & add, resize, arrange, or rotate images on the document.
Share ideas – Enables you to highlight important details, add comments, insert bookmarks, markups, & shapes to display your creativity and personalize the document.
Convert in different formats – Converts a PDF document to Docx, PPTx, Xls, HTML, JPEG, PNG, RTF, ePUB, and more from the official website or app.
Combine multiple PDFs – Drag and drop functionality makes it easier to combine multiple PDF files into one. You can reorder, add passwords and make other changes before saving the final version.
Fill & sign forms – Allows you to fill forms, edit & sign invoices, contracts, or other legal documents, digitally to save time, & relieving you from the stress of dealing with paper.
Secure document – Gives the option to edit permissions and add passwords, encryption, & time stamps to ensure the document stays authentic.
So, this is how the tool can help you manage your PDF documents seamlessly across devices, whether for personal or professional use.
PDF Extra comes with a freemium version, but it is restricted to limited features, which can help you test the tool before making a decision.
The software has three pricing plans: PDF Extra Premium, PDF Extra Ultimate, and PDF Extra 2023.
PDF Extra Premium is a subscription service for a single device (Windows/Android/iOS), can be purchased for $4.16 / month, and comes with 50 GB MobiDrive storage.
PDF Extra Ultimate is a subscription-based plan for $6.66 / month. It can be used on Windows, Android, and iOS devices and offers 100 GB MobiDrive storage & the Convert feature.
PDF Extra 2023 is a lifetime subscription for $99.99 for a single device with one year of maintenance upgrades and 5 GB MobiDrive storage.
Upon testing, we found the app to be true to all its claims and works wonders in creating & editing PDF documents.
Investing in PDF Extra can be a wise decision as it makes handling PDF documents easier so that you can focus on what’s important to you!
If you have any questions or suggestions about the tool, feel free to mention them in the comments section below.
Roobet is a popular cryptocurrency-supported betting platform, but is subject to geo-restrictions.
When attempting to access Roobet, users often encounter a pop-up window stating, “Sorry, Roobet isn’t available in your region.”
And this might happen even when trying to access it through a VPN.
One of the leading reasons why Roobet is not working with a VPN is using an ill-fitting service that can’t deal with the platform’s monitoring systems.
Luckily, this guide will help you play your favorite casino games without interruptions.
Let’s get started!
Is Roobet not working with VPN? Here’s how to fix it!
There could be various culprits behind your VPN-related issues on Roobet.
That’s why you can test each of the methods below to get back on the platform in no time:
1. Change the VPN Server
If you’re having trouble using Roobet with your VPN, it could be because the platform has blocked your current virtual IP address.
Websites with IP blocking measures constantly look for a large number of visitors with the same IP. This confirms that the IP address is shared and the visitor is using a VPN; thus, they block it.
Changing to a different server will assign you a new address, and if Roobet hasn’t blocked this one, you can use the platform once again.
Here’s how to do it on ExpressVPN:
Open your Start Menu, type ExpressVPN, and press Enter.
Select the Ellipsis icon and choose a server you haven’t used before.
Hit Connect.
Enjoy gambling on Roobet!
In some cases, you may need to try several different servers before the issue is resolved.
2. Clear cookies and cache
Cookies and cache data stored on your browser can help websites identify your location.
If you’ve previously visited Roobet without a VPN, your browser might still have data about your actual whereabouts and cause conflict with the VPN’s virtual location.
We recommend clearing browser cookies to ensure your security and avoid getting blocked on services like Roobet.
Here are the steps on how to clear cookies in Google Chrome:
Open your Start Menu, type Chrome, and press Enter.
Expand the Kebab menu from the top right corner, hover over More Tools, and choose Clear browsing data.
Choose the desired Time range, check the box next to Cookies and other site data, and click Clear data.
Finally, Restart your computer.
Revisit Roobet and enjoy the platform!
3. Change Your VPN Provider
Now, if the methods above have failed the issue may be with your VPN provider.
That’s because some services lack the necessary tools to bypass heavy restrictions – either due to being easily detectable, or by accidentally leaking data about your real IP and location.
Accordingly, we highly recommend usingExpressVPN, a dependable and high-speed VPN, which also proved to work seamlessly with Roobet during our tests.
Here’s how to get it up and running:
Visit ExpressVPN’s website, and choose a subscription period that matches your requirements.
Pick the preferred payment method from the choices and click Join Now to purchase the license.
After receiving the activation email, go to the ExpressVPN download page and get the relevant app for your device.
Follow the on-screen guideline to Install the software.
Open it and pick the server you wish to connect to.
Click the Power icon to connect and enjoy Roobet.
7. Enjoy unrestricted access to Roobet!
Why is Roobet Displaying a VPN Detected Error?
Roobet has recently implemented an update that makes it incompatible with most VPNs, especially free ones. But what is the reason behind this change?
Each country has specific online gambling laws and regulations determining whether Roobet is allowed.
In a country where online gambling is prohibited, you’ll encounter the Roobet error message, blocking you from accessing the platform.
To prevent users from bypassing regional restrictions using VPNs, Roobet has implemented measures.
The platform constantly scans for VPN IP addresses and takes action to block or blacklist them.
These measures are in place to ensure compliance with legal requirements and to avoid potential financial penalties.
How does Roobet detect my VPN?
Roobet employs common strategies to identify the use of virtual private networks.
These can include:
Tracking IP addresses: Websites can determine if an IP address belongs to a VPN server when used by many people. To prevent abuse, Roobet blocks such IP addresses.
Checking GeoIP databases: Some databases maintain lists of known VPN server IP addresses, which services like Roobet can utilize. By blocking these IP ranges, Roobet aims to prevent attempts to bypass geographic restrictions.
Checking browser fingerprint: Your browser can stand out if you customize it in specific ways. Additionally, characteristics such as browser cache and cookies can make your browser identifiable.
Does Roobet work with a VPN?
Yes,Roobet works with a VPN. The best VPNs for the platform, such as ExpressVPN, offer many IP addresses to minimize the possibility of sharing your IP with other customers.
VPNs will redirect your traffic through regions where the Roobet service is available, allowing you to access it without any worries.
Moreover, the robust encryption these VPNs provide ensures that your online activities remain completely secure and private.
But with so many options on the market, which one should you choose?
Best VPNs for Roobet
After testing the leading providers, we boiled it down to the three best VPN services for Roobet:
ExpressVPN is the top choice for Roobet because it effortlessly unblocks the platform and other online casinos from anywhere.
With servers in Reboot-friendly countries like Argentina, Chile, and Costa Rica,ExpressVPN ensures seamless access.
It offers obfuscated servers to bypass VPN detection and a Network Lock kill switch for data protection, with military-grade encryption, fast speeds, and lets you simultaneously connect up to 5 devices.
In addition, it guarantees a secure and lag-free gambling experience. It has a 30-day money-back guarantee and 24/7 customer support for added peace of mind.
Pros:
Fast speeds
Servers located in Chile, Canada, and Romania
High-level security and privacy
Excellent browser extension
Cons:
Relatively high price
No dedicated IP addresses
Lacks an ad blocker
ExpressVPN
Bypass Roobet’s geo-restrictions like they’re nothing with this leading VPN provider.
Roobet offers various casino games that have the potential to earn you significant winnings in a short time.
However, individuals in restricted countries often encounter limitations when trying to access Roobet due to betting license restrictions.
To ensure uninterrupted access, we provided solutions to overcome the Roobet not working with VPN error messages ASAP. Just follow the steps, and you’ll be good to go in no time!
Most Outlook users don’t realize that each email account they add creates a separate calendar. So, the more accounts you use, the more calendars clutter your view.
Instead of switching between them, you can streamline everything by connecting your default Outlook calendar to your primary account, or even merging all calendars into a unified view. In this guide, we’ll show you exactly how to do that.
How can I restore my Outlook calendar to its default view?
Launch your Outlook app.
Click on the Calendar icon at the bottom left corner.
Navigate to the View tab on the top taskbar pane, then select Reset View.
As you keep adding events to your calendar, it can become messy or disorganized. That’s why you may need to reset your calendar settings to the default view.
However, this is not the only reason. You may find that your calendar items are not syncing or saving when you populate it. This can cause you to miss out on important calendar events. Deleting every single appointment can be a hassle, so resetting it is the way to go.
Aside from resetting Outlook to default view, you can also change your default calendar to reflect the one you use the most, and below is how to go about it.
How can I set and change the default calendar in Outlook?
Launch your Outlook app.
Click on the Calendar icon at the bottom left corner.
Navigate to the File tab at the top left pane, click on Options, and select Account settings.
Navigate to the Data Files tab in the Account Settings dialog box, click on your chosen mail profile, and hit Set as Default.
Hit Yes on the confirmation prompt, then click the Close button.
Restart your Outlook app for the changes to take effect.
The above steps apply to all email protocols, including Exchange, IMAP, and POP3.
Having a long list of calendars can be confusing. You may be getting meeting requests, but if you’ve not set the default calendar in Outlook to your work or school email, you may fail to check on these emails.
That’s why we recommend merging calendars to increase your productivity. This will provide more insight into your free and busy time so you can avoid booking more than one meeting at the same time, and below, we show you how to go about it.
How do I merge calendars in Outlook?
1. Use the Overlay feature
Launch your Outlook app.
Click on the Calendar icon at the bottom left corner.
Right-click on the calendar you wish to merge and select Overlay.
Repeat this step until you’ve successfully added all calendars.
Your calendar screen will now display all your calendars in one place, side-by-side, but they will not be combined. To view them in one place, you’ll have to export your calendar items from separate mail profiles to merge them.
It’s important to note that the Overlay feature is only available in newer versions of Outlook from 2007 upwards. Users may have to export their data files manually for the older versions.
2. Export the calendar folders
Launch your Outlook app.
Click on the File tab at the top left pane, select Open & Export, and in the drop-down menu, select Import/Export.
Hit Exportto a file and click Next.
Click on Outlook Data File and hit Next.
Select a calendar folder associated with the mail profile you want to merge and hit Next.
Fill in the folder location and name, respectively, then click on Finish.
Repeat steps 1-2, then click Import.
Click on Outlook data file and hit Next.
Select Browse and select the file you created in step 6 above.
Click on Import items into the current folder checkbox and hit Finish.
When you need to jump from one calendar to the other, it can become annoying trying to select the correct one every time you want to sign an appointment or send an invitation.
It’s generally a good idea to follow this process to avoid losing or switching over calendar events. It takes just seconds, so it’s worth doing if you use multiple calendars in Outlook frequently.
You may also be interested in hiding calendar details from your colleagues or keeping your calendar events private, so check out our article on how to go about it.
Hopefully, this article has helped you to keep Outlook’s calendars selected and merge them. If you have any additional questions or recommendations, please comment below.
There are ways to bring back the old Windows icons on Windows 11, and you can do so very quickly, actually. They might be more familiar to work with, since Windows 8, or Windows 10 have been around for more than Windows 11.
And we all know that Windows 11 also brought a major design overhaul, which is still happening, by the way. So, while Windows 11’s design is far from complete, old Windows icons might bring some familiarity back. Not to mention nostalgia.
But it seems this is actually normal. As one user put it, Windows 11 is just a re-skin of Windows 10, which in turn is a re-skin of Windows 7, which was just an improved version of Windows Vista. So you’re able to find a lot of parts, including icons from older Windows versions if you’re looking close enough.
You can also find a Windows XP leftover icon on “Please wait until the current program is finished uninstalling or being changed.” message.
For example, this user connected their phone to Windows 11 to import their videos and photos, and the app appeared of all a sudden.
I connected my phone to import vids and photos and this popped up all of a sudden
So, while there is no clear way why they appear, it seems that Windows Vista and Windows 7 do keep existing on Windows 11, after all.
Have you experienced this on your Windows 11? Let us know about it in the comments section below.
Do you know how the CTRL + F combo makes the perfect search feature in documents? Now imagine the same in Outlook. Searching in folders is quite useful in Outlook, but not many people recognize it exists or how to set it up.
We know how important it is and how it can improve your email productivity, so here’s how to go about it.
Why can’t I search my Outlook folders?
If you received an important email and have since moved things around in your email, it can be hard to crack which folder it resides in.
You’ll have to perform a search in your folders to locate it. But what happens when your search function is not working in your Outlook folders?
What could be the reason? Below, we explore some possible causes:
Incorrect/disabled indexing – Indexing assigns your Outlook folders some order to allow the search query to return results quickly. If not enabled, the search results cannot be generated.
Corrupt search index – The search index contains a database of your Outlook folders and becomes bulkier with more emails. With time, it may become corrupt and stop working altogether.
Wrong configuration – If you’ve not configured your Outlook mail to search for folders or set up any search filters, there’s no way your search results will be conclusive.
Corrupt application – It is also possible for your Outlook application to become corrupt. This can be due to corrupt registry entries or a malware invasion.
Now that you know why searching in your mail folders may sometimes fail, here’s how to organize your emails into folders with these quick steps.
How can I search a folder by name in Outlook?
1. Standard search folder
Launch your Outlook app.
Click on the File menu, then select Options.
In the Outlook Options dialog box, click on Search.
Under Results, select your current folder or all mailboxes if you have multiple email profiles, then click OK.
Outlook has a built-in search folder that comes pre-configured for you. The only problem with these pre-defined options is that they may force you to search in folders you’re not interested in, taking a lot of your time.
A more structured way of searching emails is by creating a custom folder. You can create a separate folder for each search query and as many folders as you want, each with different search options.
2. Create a custom search folder
Launch your Outlook app.
Click on the Mail icon at the bottom left corner.
Navigate to the Folder tab at the top menu, select New Search Folder.
In the New Search Folder dialog box that opens, select Create a custom search folder, create a name for your Search folder, and click OK.
Click on Choose under Customize Search Folder to specify the search criteria.
In the Search Folder Criteria dialog box, navigate to each tab, select the relevant items you wish to set conditions for, then press OK.
To search, return to your Outlook search folders and select the one you created.
Sometimes, you might be looking for a specific type of email or individual message. And while the preset search folder can still bring up these search queries, they can be time-consuming.
That’s why you need custom search folders in Outlook to narrow your search results to a specific email folder. For example, if you want to find all the emails from a specific person, you will create a search folder for them and filter your messages by that mail folder.
You’ll be able to collect messages that match certain search folder criteria in a single place. Moreover, once you’re done, you can always delete the virtual folders by right-clicking search folders and getting rid of them.
So that’s how to use search folders in Outlook. Hopefully, they’ll help you organize your time and unread mail in a way that works best for you.
From our own research, these types of folders can be more efficient than the search bar in Outlook. Whether using the built-in or custom search folder, you can save time searching for emails. It makes the perfect tool for staying on top of your inbox.
Did you know that RSS feeds is also another folder in Outlook, and you can remove RSS feeds from Outlook in just a couple of clicks.
Done with your to-do list? No need to have them lingering around. In this article, you will learn how to hide completed tasks in Outlook.
This will allow you to be more productive and move on to other active tasks that need your attention. So, here’s how you go about it.
What happens to completed tasks in Outlook?
When you complete a task in Outlook, it is moved from your Tasks folder to the Completed Items folder. The only problem is that it only moves from one folder to another. The completed folder does not remain hidden.
This is why you may need to hide these tasks from the main task view. The main benefits of decluttering your task view include:
You’ll organize your tasks in Outlook and make your task list more manageable. In turn, your workload will also shrink because you can clearly see tasks in your Outlook calendar that are pending.
You won’t have to second-guess yourself by trying to redo completed tasks every time you see them.
You’ll be able to prioritize your tasks and meet deadlines when you only have pending tasks in your tasks screen.
Now that you know the pros of hiding tasks in Outlook, here are some Outlook task management tips.
How do I automatically hide completed tasks in Outlook?
Launch your Outlook application.
Navigate to the View tab, click the To-DoBar option, then select Tasks in the pop-out menu.
In the Advanced View Settings dialog box, click on the Filter button, then hit OK.
Navigate to the Advanced tab, and under Define more criteria, select Completed in the Field drop-down menu.
Set the Conditions entry to equals, and the Value entry to no, then click OK.
Go back to your Task list, and you’ll find all the completed tasks hidden.
How do I archive completed tasks in Outlook?
Launch your Outlook app.
Navigate to the View tab, click the To-Do Bar option, then select Tasks in the pop-out menu.
Find your Completed tasks folder, right-click on it, and select Properties.
Navigate to the AutoArchive tab, then check the Archive items in this folder using the default settings box.
To get rid of these tasks after a certain period, check the Archive this folder using these settings: and edit the time field to clean out this task folder automatically.
Hopefully, as you auto-hide completed tasks, this will help you eliminate clutter from your tasks list and make the daily tasks easier to track.
All of the changes will be taking place behind the scenes, and it will be seamless for you without worrying about completed tasks.
With that out of the way, we’d like to direct your attention to another related issue. You may find that your Outlook app is not opening in Windows 11 at times. If this is the case, check out our detailed article on how to address this problem.
Having shown you two different methods for hiding completed tasks in Outlook, you should have a pretty good idea of which will work best for you. Which method do you prefer? Let us know in the comments section below.
If you have several folders on Outlook, chances are you might someday accidentally misplace a folder by dragging and dropping it into another folder. However, this may not be the only reason for the missing folder, there could be other factors as well.
In this guide, we will cover all the reasons behind it and discuss some quick ways to find a folder in Outlook.
Why can’t I find my folder in Outlook?
There could be several reasons why you can’t locate the folder; some of the common ones are mentioned here:
Accidentally moved, renamed, or deleted the folder – If you mistakenly moved/renamed or deleted the folder, you won’t find it in its original location.
PST file corrupted – The Outlook PST file, if corrupted, could make the folder disappear from the Folder Pane.
Folder is hidden – If the folder you are finding is hidden, you will not access it from the Folder Pane. Try unhiding all of them and check.
Server or network issue – A weak internet might prevent you from connecting with the server causing the issue. To fix it, check your internet connection.
Now that you know the causes, let us check out the ways to find the folder in Outlook.
How to find a folder you accidentally moved in Outlook?
Before proceeding with any detailed steps for finding the folder, go through the following preliminary checks:
Relaunch Outlook.
Verify your internet connection is working fine.
Scan the .PST file using the Inbox Repair tool to restore its contents.
Ensure there is no pending update for the Outlook app.
If you can’t see the lost folder, move to the troubleshooting steps mentioned below.
1. Check the Nearby folders
On Outlook, click View from the menu bar, then locate Folder Pane, and click on the drop-down next to it to ensure Off is not selected.
Once confirmed, click the Greater than (>) symbol from the left side of the window to expand the Folder Pane.
Now expand the folders above and below where you last saw the missing one.
2. Use the Folder Size option
On the Outlook window, click the Greater than (>) symbol to expand the Folder Pane.
Right-click the email address which contained the folder and select Data File Properties from the context menu.
In the Outlook Today dialog box, switch to General, locate, and click the Folder Size button.
Next, on the Folder Size window, scroll through the list of folders with subfolders to find the lost folder.
Once located, note down the folder path, go to the Outlook main window, locate it, and move it to its original location.
If you are facing a similar problem with emails, we recommend you check out the guide to find the folder location of the email.
3. Use the Instant Search & Advanced Find options
On the Outlook main window, click Search from the menu bar, choose All Outlook Items from the dropdown menu next to it, then mention the email subject line or anything related to the folder and press Enter.
Once you see the email from the missing folder, double-click it to open.
While on the email window, press Ctrl + Shift + F to open the Advanced Find dialog box.
Next, click Browse.
From the Select Folder(s) window, note down the path to the folder, click OK, then close the Advanced Find window.
On the Outlook main window, click the Greater than (>) symbol to expand the Folder Pane.
Locate Deleted Items folder, and check if the folder is present there.
If you can’t find it there, go to the Actions menu, and select Recover Deleted Items from Server.
A Recover Deleted Items window will pop up; select the folder if available, and choose Restore Selected Items, then click OK to confirm the action.
5. Use Windows Search
NOTE
This method will only work for older versions of Outlook (before 2013) and Windows (7 and older).
Go to the Start menu, and type the item’s name stored in the lost folder in the search bar.
Once you get the results, you can see the item’s full path.
Having too many folders on Outlook could cause this issue more than once, so if you don’t want to invest your time finding them, save the Outlook folders to desktop.
6. Use a VBA code
On the Outlook window, press Alt + F11 to launch Microsoft Visual Basic for Applications (VBA).
On the VBA window, go to Insert, then select Module.
Copy & paste the code mentioned below to run a custom search program, and press F5 to run it.
Once the code runs, you will get the Macros window; select the code; if not selected, click Run.
On the Search folder window, input the name of the folder and click OK.
You will get the path of the folder in the next window; note that down and click Yes.
Private m_Folder As Outlook.MAPIFolder
Private m_Find As String
Private m_Wildcard As Boolean

Private Const SpeedUp As Boolean = True
Private Const StopAtFirstMatch As Boolean = True

Public Sub FindFolder()
  Dim Name$
  Dim Folders As Outlook.Folders

  Set m_Folder = Nothing
  m_Find = ""
  m_Wildcard = False

  Name = InputBox("Find name:", "Search folder")
  If Len(Trim$(Name)) = 0 Then Exit Sub
  m_Find = Name

  m_Find = LCase$(m_Find)
  m_Find = Replace(m_Find, "%", "*")
  m_Wildcard = (InStr(m_Find, "*"))

  Set Folders = Application.Session.Folders
  LoopFolders Folders

  If Not m_Folder Is Nothing Then
    If MsgBox("Activate folder: " & vbCrLf & m_Folder.FolderPath, vbQuestion Or vbYesNo) = vbYes Then
      Set Application.ActiveExplorer.CurrentFolder = m_Folder
    End If
  Else
    MsgBox "Not found", vbInformation
  End If
End Sub

Private Sub LoopFolders(Folders As Outlook.Folders)
  Dim F As Outlook.MAPIFolder
  Dim Found As Boolean

  If SpeedUp = False Then DoEvents

  For Each F In Folders
    If m_Wildcard Then
      Found = (LCase$(F.Name) Like m_Find)
    Else
      Found = (LCase$(F.Name) = m_Find)
    End If

    If Found Then
      If StopAtFirstMatch = False Then
        If MsgBox("Found: " & vbCrLf & F.FolderPath & vbCRLF & vbCrLf & "Continue?", vbQuestion Or vbYesNo) = vbYes Then
          Found = False
        End If
      End If
    End If
    If Found Then
      Set m_Folder = F
      Exit For
    Else
      LoopFolders F.Folders
      If Not m_Folder Is Nothing Then Exit For
    End If
  Next
End Sub
So, these are methods you can use for finding folders in Outlook. If nothing worked for you, you need to look through every folder to locate it manually.
Still can’t find the folder; chances are you might have deleted it accidentally and need to use email recovery software for Outlook to recover it.
Microsoft is continuing efforts to improve the user experience of PowerToys through a redesigned homepage and the platform’s “incubation system” approach that tests and refines features before their official inclusion.
Microsoft PowerToys is a collection of system utilities designed specifically for power users on the Windows operating system. These tools are geared towards enhancing productivity and providing more customization options for users.
Earlier this month, PowerToys version 0.72 was introduced, including reduced storage consumption, new plugins for the Run utility, and enhancements to Mouse Highlighter and PowerRename.
Focusing on better visibility of enabled/disabled utilities, quick access to shortcuts, remapping a key using Keyboard Manager or launching Hosts File Editor, and links to in-depth settings should enhance user understanding and utilization of PowerToys’ functionalities.
PowerToys is an incubation system for testing new work. Some features are on be default, others off. Most of the time, we will default them to on. This, from time to time, leads to unexpected results when someone quickly invokes find my mouse or other utilities.
PowerToys remains freely available for Windows 10 and 11 users, with multiple sources for installation, such as the Microsoft Store, GitHub, and the “winget install” command.
DHCP plays a vital role for devices on a network. Besides allowing effective communication, it also assigns critical parameters. But many found that DHCP is not enabled for Wi-Fi in Windows.
The error message appears after you run the built-in Windows Network Diagnostics troubleshooter when the Wi-Fi icon in the system tray reads, No Internet. However, other devices on the network have proper connectivity.
Keep reading to find out how to fix things and enable DHCP for Wi-Fi!
What is DHCP?
As the name suggests, DHCP (Dynamic Host Configuration Protocol) dynamically assigns IP addresses and other critical parameters to the devices when connected to a network. This is essential for the device to interact and have a stable Internet connection.
In addition, DHCP also provides devices with a DNS server address, which is responsible for locating websites on the Internet. This is done by turning the domain name we enter into the IP address used by the website.
All the functions of DCH are automatic in nature and require minimal to no human intervention as long as things are configured correctly. But when you can’t access the Internet and find that DHCP is not enabled for Wi-Fi, issues are bound to appear.
What is the DHCP problem with Wi-Fi?
Here are a few reasons you find that DHCP is not enabled for Wireless Network Connection:
Misconfigured network settings: Often, it’s the incorrect network settings to blame when DHCP is not enabled or working for Wi-Fi.
The dedicated service is not running: Windows devices have a dedicated DHCP client service installed, which, when not running or if the startup type is set to Disabled, can trigger issues.
Outdated or incompatible driver software: The driver software play a critical role when it comes to network & Internet, and if you have corrupt, incompatible, or outdated drivers, chances are DHCP will fail to work.
Software conflicts: Several third-party applications are known to conflict with DHCP and affect the IP address allocation.
Issues with the router: When you find that DHCP is not enabled for Wi-Fi, there’s also the possibility of a hardware issue, usually one with the router.
How do I fix DHCP is not enabled for Wi-Fi?
Before we move to the slightly complex solutions, try these quick ones:
Restart the computer and the router. For the latter, ensure it’s kept in the powered-off state for at least 60 seconds.
Scan the PC for malware using the built-in Windows Security.
Disable any third-party antivirus installed on the PC.
If none work, move to the fixes listed next.
1. Run the network troubleshooter
Press Windows + I to open Settings, and click Troubleshoot on the right in the System tab.
Click on Other troubleshooters.
Now, click the Run button next to the Network & Internet troubleshooter.
Follow the on-screen instructions to complete the process and make the recommended changes.
Often the quickest way to fix things when DHCP is not enabled for Wi-Fi is to run the dedicated troubleshooter. The built-in Windows tool will automatically identify the underlying cause, recommend the changes, and enforce them for you, all within a matter of minutes.
2. Run the DHCP Client service
Press Windows + S to open the Search bar, type Services in the text field, and click on the relevant search result.
Right-click on the DHCP Client entry from the list of services, and then select Properties.
Select Automatic from the Startup type dropdown menu, click the Start button if the service is not running, and then on OK to save the changes.
The DHCP client service is vital for the network protocol to function. So you must set it to run automatically when Windows boots. Also, this will help when Windows is unable to get DHCP address.
3. Update network drivers
Press Windows + X to open the Power User menu, and select Device Manager.
Expand the Network adapters entry, right-click on the Wi-Fi adapter, and select Update driver.
Now, select Search automatically for drivers and wait for Windows to install the best available stored locally.
When you have a faulty network adapter driver, it’s best that you update the network drivers. When Windows can’t find an update, head to the device manufacturer’s official website, find the latest version, download it, and then manually install the driver.
Anyhow, you have a greater alternative to update the network drivers or any other devices with dedicated support given by a driver manager application. All you have to do is press one button to proceed and fix all your drivers.
Press Windows + R to open Run, type ncpa.cpl in the text field, and hit Enter.
Right-click on the active network adapter, and select Properties from the context menu.
Select the Internet Protocol Version 4 (TCP/IPv4) entry, and click on Properties.
Now, check the radio buttons for Obtain an IP address automatically and Obtain the DNS server address automatically, then click OK to save the changes.
Make similar changes to Internet Protocol Version 6 (TCP/IPv6) if your network connection relies on the protocol.
Once done, restart the computer and check for improvements.
If DHCP is not enabled for Wi-Fi, the Wi-Fi network adapter settings could be set such that users must manually enter the DNS server and IP address. And in the absence of these two parameters of the Wireless Network Connection, you wouldn’t be able to access the Internet.
Press Windows + R to open Run, type ncpa.cpl, and then click OK.
Right-click on the active network adapter, and select Disable.
Now, open the Services window, right-click on DHCP Client, and select Restart.
Head back to Network Connections, right-click on the same network adapter, and this time, select Enable.
For some users, when the wireless adapter didn’t have access to DHCP, the underlying cause turned out to be a temporary glitch, and simply restarting the service and re-enabling the adapter did the trick!
6. Disable proxy
Press Windows + I to open Settings, go to Network & Internet from the navigation pane, and click on Proxy.
Now, disable the toggle for Automatically detect settings, and make sure there are no entries under Manual proxy setup.
7. Disable Windows Firewall
Press Windows + S, type Control Panel in the search bar, and click on the relevant search result.
Click on System and Security.
Click on Windows Defender Firewall.
Now, select Turn Windows Defender Firewall on or off from the left.
Choose Turn off Windows Defender Firewall (Not recommended) under both Private network settings and Public network settings, then click OK to save the changes.
Once done, verify whether the DHCP is not enabled for Wi-Fi error disappears. If yes, your firewall was conflicting with the active network connection, and that triggered the error.
8. Reset the network settings
Press Windows + R to open Run, type cmd, and hit Ctrl + Shift + Enter.
Click Yes in the UAC prompt.
Now, paste the following commands individually and hit Enter after each:netsh winsock reset catalognetsh int ip reset resetlog.txtipconfig /releaseipconfig /renew
Once done, restart the computer.
When everything else fails to work, the last option is to reset the network settings, i.e., reset Winsock and release the IP address. A network reset also helps when you find DHCP not working.
You should have fixed the DHCP is not enabled for Wi-Fi error by now. Remember, the solutions here work on all iterations of the OS, including Windows 10 and Windows 11.
Does Wi-Fi need DHCP?
While this wasn’t the case a decade ago, Wi-Fi now needs the DHCP running. You don’t just need the protocol running on devices, but DHCP must be enabled in the router settings.
DHCP is, more or less, a norm now, and you will end up facing issues when it’s disabled or not working.
In the last week of May, Microsoft unveiled its new Windows Backup app through Windows 11 Insider Build 23466. This app was initially accessible only to Windows 11 users enrolled as Insiders on the Dev channel.
Now, this utility is being introduced to Windows 10 as well. Presently, it has been integrated into the build released to the Release Preview Channel, indicating that Windows 10 users will soon have access to an official backup tool from Microsoft.
What sets the Windows Backup app apart is its comprehensive approach to data protection. Beyond merely safeguarding files, the app takes on the task of backing up system settings, along with the contents of the Start menu and the taskbar.
The app’s scope is extensive, and it serves a dual purpose, as highlighted by Microsoft. Not only does it provide an easy means to backup and restore one’s computer, but it also streamlines the transition to a new PC, especially one running the upgraded Windows 11.
The Windows 10 version of the app closely resembles the iteration released for Windows 11 users, with the exception of the absence of the Out Of Box Experience. This has led to speculation within the tech community about the potential intentions behind this difference. Some speculate that Microsoft might leverage the Windows Backup app to simplify the migration process from Windows 10 to Windows 11. However, Microsoft has not provided any official statements regarding this matter.
Xbox’s backward compatibility feature brought older Call of Duty games back into the top five best-selling video games in the UK, as their servers were restored last month. This feature allows players to play select Xbox 360 and even some original Xbox games on the newer Xbox One, Xbox Series X, and Xbox Series S consoles.
In this case, “Call of Duty: Modern Warfare 2” and “Call of Duty: Black Ops 2,” both originally released on the Xbox 360, saw a resurgence in popularity due to their compatibility with newer Xbox platforms. These games benefited from fixing matchmaking issues, making the multiplayer experience smoother. The games were also included in the Xbox Ultimate Game Sale, which was offered at discounted prices.
This combination of improved gameplay experience, discounted pricing, and the availability of backward compatibility likely contributed to these older Call of Duty titles climbing back into the top five best-selling games in the UK during the mentioned month.
It highlights how backward compatibility can extend the lifespan of older games and give players a chance to relive or experience classic titles on modern hardware.
That’s right, this new offering is especially for those who take their portable gaming that seriously. To my knowledge, this may be the first 4K portable monitor designed specifically for Xbox. Of course, it’s compatible with a range of devices too including PC/laptop, Switch, and PS5. Of course, that 4K resolution comes at a few extra dollars. Is it worth it? Read on to find out.
Monitor specs and features
Ports
HDMI x2
3.5mm audio jack x2
DC in x1
Compatibility
Desktop PC
Laptop
Xbox
PlayStation 5
Nintendo Switch
Game modes
FTG
FPS
RTS
Package contents
Portable monitor x1
User manual x1
Power adapter/cable x1
HDMI cable x1
Remote control
Screwdriver + 2x screws for installation
Display
14” 4K UHD IPS
Display features
HDR
FreeSync
60Hz refresh rate
8ms response time
OD (Overdrive anti-ghosting)
On screen display (OSD) menu
3840 x 2160 (4K) resolution
Speakers
3.0W dual stereo
Product dimensions
12.6 x 8.77 x 3.11 in.
Product weight
2.64 lbs
Summary
Obviously, DEPGI’s DE140SK monitor is designed for Xbox Series S, and affords a semi-portable option for taking your Series S on the go. The monitor attaches easily onto the Series S and should be no problem for most. Check out this helpful video from DEPGI’s YouTube channel for reference (the model is different, but the assembly process is exactly the same for the DE140SK).
Once the monitor is attached, it’s plug and play: no driver software or setup needed here. As you can see, the monitor compliments the Series S aesthetic nicely. When closed, the unit absolutely looks like a console that Microsoft might have produced!
The monitor comes with a remote control, and also has a set of face buttons at the base of the monitor for power and volume controls, a menu button and so on. An On screen display (OSD) feature allows for customization of audio and picture settings, and more.
As portable monitors go, picture quality here is great. Of course, the real draw with the DE140SK is 4K. Native UHD 3840 x 2160p @60Hz looks crisp and clear on this 14” display, and the aforementioned OSD lets you tune settings like contrast, black level, color saturation and more to get the best viewing experience possible out of this monitor.
Audio isn’t too shabby either; the 3.0W dual stereo speakers will give you plenty of volume to spare. Obviously you are not going to get the same quality you would out of your main entertainment setup, but for a portable monitor the sound quality here is quite respectable.
The verdict
DISCLAIMER: A sample unit was provided for an honest review
As with DEPGI’s other portable Xbox Series S monitors, this offers a fantastic way to take your favorite console on the go. Although it does inevitably bulkify the Series S, the DE140SK is still compact enough to easily fit inside a backpack—in fact, a carry case of some kind is absolutely essential if you plan to be on the move with this.
Also, while you can power the monitor from the Series S, this really only works for short gaming sessions. In most cases you’ll want to make use of a separate power source for the monitor. All this means that this Xbox monitor solution is only semi portable. Who knows?: maybe someday DEPGI will offer a model with a rechargeable battery.
That aside, this is perfect for those summer trips. Or even just catching some sun while getting your game on out on the patio, especially when you just have to have 4K.
Cons:
Only semi portable
Pros:
On the go 4K gaming!
Responsive display with great picture quality
Easy to take with you provided you have a carry case or backpack
The DE140SK 4K Xbox Series S portable monitor from DEPGI is available on Amazon, and currently retails for $329.99. However from now until August 19th, you can redeem a $30 coupon on Amazon and also use this code 7ZPLOCS1 for a 15% total discount, dropping the price to 283.49.
An .EML file is not your ordinary PDF or DOC file format. However, since Outlook has native EML support, you should be able to open EML files with ease.
Still, older versions may struggle so if you have problems doing so, this guide will help you.
Can Outlook open the EML format?
Yes. EML, or Electronic Mail Format, is a file extension for sending attachments and can store emails in archive format. This is useful when you want to return to such messages later.
Although EML files are primarily associated with Outlook and Outlook Express, the EML file format is open source. This means that they can also be opened using third-party apps or other email clients.
Newer versions of Outlook, starting from 2010 upwards, can open the EML file automatically within the app. However, earlier versions will require you to tweak your registry settings.
Why can’t I open an .EML file in Outlook?
Below are some reasons why your EML file type may not open in Outlook:
Corrupt EML file – If the file content is corrupted, you may have trouble opening it. In such a case, you can ask the sender to resend the file or try repairing the file using third-party programs.
Malware infection – If your system is infected by a virus, any files you download may become inaccessible. You’ll have to perform a system scan and ensure your antivirus is up-to-date.
Outdated version – If your EML files are not opening within the app, you may be having compatibility issues, and the easiest workaround is to update your Outlook app.
Encrypted file – If the information on the file is sensitive, some users can encrypt the files. If this is true, the sender usually has the decryption code.
Default program – Clicking on the EML file and opening it using another mail client or third-party program can render it unopenable. Setting Outlook as the default application will resolve this issue.
Now that we know what we’re dealing with, let’s see how you can properly open EML files in Outlook.
How can I open an EML file in Outlook?
1. Open the file within Outlook or Windows Live Mail
You can Import EML files to Outlook using the drag-and-drop method, but if this doesn’t work, proceed to the next steps.
Launch your Outlook and Windows Live Mail apps from your desktop.
In Windows Live Mail, navigate to the File menu, click on the Export Mail tab, then select Email messages.
Select Microsoft Exchange as the email export option and click Next.
Click on OK in the next pop-up window to confirm export, select the file folder containing the EML files, and then hit Next.
Once the export is a success, click on the Finish button.
Go back to your Outlook mail, and your files will be displayed.
2. Edit the file extension
Open your Outlook mail and download the EML file. If you can’t find it right away, you can do an Outlook search for attachments.
Go to the EML file location on your PC, right-click on it, and select Rename. Change the .EML format to .MHT.
You’ll get a warning that the file may become unreadable but proceed by confirming.
Right-click again on the renamed file, and this time, select Open with. From the list of apps, choose Microsoft Edge. Click on Choose another app if not among the list or download the browser if you haven’t already.
Other browsers can also open the EML file, but using Microsoft Edge is the simplest method because it natively supports the EML file extension.
Go to the EML file location on your PC, right-click on it, and select Open with. From the list of apps, select Notepad.
The content will be all over the place but with close examination, you may be able to sift through the important parts, especially if it is a small document.
4. Use an EML viewer
If you’re not into manual methods, you can opt for an EML converter. Furthermore, manual file conversion can take a significant amount of time, and you risk losing data or ending up with corrupted EML files.
A third-party tool will convert your EML to PST or another format of your choice. Such tools come in handy when you have bulk files of this kind and need to convert all of them in a timely manner. To that effect, we have an expert list of the best EML file viewer for Outlook mail.
We’ve tackled various ways to open Outlook EML files, so we encourage you to try out one of these methods. Keep in mind that if you’re using an older version of Outlook or Outlook Express, there’s a good chance you will not be able to open EML files natively.
Overall, it should be a fairly easy process. Should you encounter any other issues, such as the data file cannot be accessed, we have covered the fixes in our comprehensive guide.
That brings us to a close on this article, but keep the conversation going in the comment section with any additional thoughts or queries, and we’ll do our best to get back to you.
Windows Defender is the built-in antivirus shipped alongside the OS and is a part of the default installation. While the antivirus delivers optimal performance and triggers minimal conflicts, you may often need to disable Windows Defender temporarily.
This is usually the case if you want a reliable third-party antivirus solution to take over or when Windows Security stops an application from running. So, let’s find out how you can temporarily disable Windows Security and the subsequent effects!
What happens if I disable Windows Defender?
When you disable Windows Defender temporarily or permanently, the PC is left unprotected unless another antivirus is installed and running. So, it’s not recommended that you turn off Windows Defender.
If you have to disable Windows Defender, here are a few tips and tricks that will keep the PC safe:
Keep Internet activity to a minimum: We often become victims of phishing through emails, and the same medium is used to infect the PC with malware. So, it’s recommended that you don’t click on links in emails or even those on unreliable websites.
Don’t download files or apps: Another preventive measure you can undertake to ensure security after disabling Windows Defender is not to download any files or apps. The ones on the Microsoft Store are safe, but be wary of others.
Get another antivirus: When Windows Security conflicts with a program or process, installing another antivirus is best instead of disabling the former altogether.
Press Windows + S to open Search, type Windows Security in the text field, and click on the relevant result.
Click on Virus & threat protection.
Now, click on Manage settings under Virus & threat protection settings.
Disable the toggle under Real-time protection.
Click Yes in the prompt to confirm the change.
That’s it! You can temporarily disable Windows Defender in all iterations of the OS via the built-in settings. And when you want to enable it, simply turn on the toggle for Real-time protection.
2. Through Command Prompt
Press Windows + R to open Run, type powershell, and hit Ctrl + Shift + Enter.
Click Yes in the UAC prompt.
Now, paste the following command and hit Enter to disable Windows Defender:Set-MpPreference -DisableRealtimeMonitoring $true
To re-enable Windows Defender, run the following command:Set-MpPreference -DisableRealtimeMonitoring $false
Another easy way to temporarily disable Windows Defender is using a PowerShell command. Remember, it doesn’t disable the antivirus altogether, but just Real-time monitoring.
3. Using the Registry Editor
Press Windows + R to open Run, type regedit in the text field, and hit Enter.
Click Yes in the prompt that appears.
Now, paste the following path in the address bar and hit Enter: Computer\HKEY_LOCAL_MACHINE\SOFTWARE\Policies\Microsoft\Microsoft Defender
Right-click on the empty portion, hover the cursor over New, select DWORD (32-bit) value, and name it DisableAntiSpyware.
Next, double-click the DWORD, set its Value data to 1, and click OK to save the changes.
Finally, restart the computer for the changes to apply.
To re-enable Windows Defender, change the Value data to 0 or delete the DisableAntiSpyware DWORD.
For those who want to disable Windows Defender using the Registry temporarily, there’s an easy method out there. Add and enable the DisableAntiSpyware DWORD, and you are good to go!
The Local Group Policy Editor doesn’t come preinstalled on the Home edition of Windows. So, if you can’t find it, verify the Windows edition. Though, you can manually install gpedit.msc in no time.
Press Windows + R to open Run, type gpedit.msc in the text field, and click OK.
Under Computer Configuration, expand Administrative Templates, select Windows Components, and then choose Windows Defender Antivirus.
Now, double-click the Turn off Microsoft Defender Antivirus policy on the right.
Select Enabled and then click on Apply and OK to save the changes.
Restart the computer for the changes to come into effect.
To turn on Windows Defender, set the Turn off Microsoft Defender Antivirus policy as Not configured or Disabled.
That’s it! If you prefer changing the Local Group Policy Editor, temporarily disable Windows Defender.
Outlook is well-known for its calendar support, but many wonder if adding a public folder calendar to Outlook is possible.
Having a public calendar can be helpful since you can see events from others or groups, and in today’s guide, we will show you how to add one to Outlook.
How do I show public folders in Outlook?
Navigate to More Apps and select Folders.
Now right-click the desired folder and select Add public folder to Favorites.
Next, click on All Public Folders.
Select the public folders that you want to add to your favorites and click on Add Public Folder.
After doing that, you should be able to access public folders in Outlook quickly.
Now that these folders are visible, let’s see how we can add a public folder calendar in Outlook.
Microsoft news recap is a weekly feature highlighting the top Microsoft news stories of the past week. Sit back, grab some coffee, and enjoy the read!
Microsoft may be preparing to launch an all-digital Xbox Series X model.
Microsoft is reportedly gearing up to launch an all-digital Xbox Series X model. This new console would do away with the disc drive, enabling Microsoft to sell it at a lower price point. The all-digital Xbox Series X would be a good option for gamers who only purchase digital games, and it would also be a more affordable choice for families.
Multiple vulnerabilities found in Microsoft products, including Teams
Microsoft has issued a high-risk security alert warning of multiple vulnerabilities in its products, including Teams. These vulnerabilities could allow attackers to take control of a user’s account or device, steal data, or disrupt services. Microsoft has released patches for these vulnerabilities, and users are advised to update their software as soon as possible.
Microsoft Authenticator to trial WhatsApp code delivery for enhanced security
Microsoft Authenticator is getting a new feature that will allow users to receive verification codes for two-factor authentication (2FA) via WhatsApp. This is seen as a security-enhancing feature, as SMS messages and some other forms of receiving verification codes have inherent security weaknesses. The WhatsApp code delivery feature is currently in trial, and it is not yet clear when it will be rolled out to all users.
New Zealand regulator gives nod to Microsoft’s acquisition of Activision Blizzard
Isn’t it cool how we’re able to stay up-to-date with all that’s happening in the world straight from our taskbars? It’s a quick method to keep you in the loop while you’re working if you don’t have time to catch the news.
Well, some users are in the dark as their news and interests are not showing in their taskbars. It could probably be an internet problem, but let’s explore all avenues to get this important widget back.
Why are news and interests not updating?
If you’re wondering why your news and interests widget is not updating or showing up on your taskbar, below are some possible reasons:
The widget is hidden – While the news and interest widget may be an important piece of information, some find it disturbing. They may hide it from the taskbar to prevent it from popping up whenever you hover your mouse around that area.
Disabled widgets – In some cases, the widgets are disabled, and you may have to enable them to regain your news and interests widget.
Conflicting widgets – If you’ve downloaded third-party widgets similar to the news and interests widget, they may not show up because the other program has disabled apps that perform the same tasks.
Outdated OS – If you’ve not checked for system updates in a while or disabled them permanently, this could be why your news and interests widget is not showing.
Poor connection – If you’re having issues with your connection, the news and interests widget may not show up because data cannot be fetched.
Virus infection – If a virus has sneaked into your system, some features may not work as they usually do, which may be why your news and interests widget is not showing.
How do I get the News and interests back on my taskbar?
Check off the following conditions before moving to the slightly technical solutions:
Ensure your Taskbar is not hidden and docked at the bottom.
Check and ensure you have a stable internet connection.
Try restarting your PC.
1. Check for updates
Hit the Windows key and click on Settings.
Click on Windows Update then select Check for updates.
Wait for the scan to complete and if available, click on Download & install.
2. Run a virus scan
Press the Windows key, search Windows Security, and click Open.
Select Virus & threat protection.
Next, press Quick scan under Current threats.
If you don’t find any threats, proceed to perform a full scan by clicking on Scan options just below Quick scan.
Click on Full scan, then Scan now to perform a deep scan of your PC.
Wait for the process to finish and restart your system.
Even though you’re using Windows Defender to protect your PC, it’s not completely secure against more advanced malware attacks. In order to get powerful virus defence, you would need an upgrade.
Fortunately, you can find plenty of useful antivirus tools and rely on their improved security and high detection rate for all kinds of threats.
3. Enable via Group Policy
Hit the Windows + R keys to open the Run command.
Type gpedit.msc in the dialog box and hit Enter.
Navigate to the following location: Computer Configuration/Administrative Templates/ Windows Components/News and interests
Double-click on Enable news and interests on the taskbar.
Check the Enabled box, then click Apply and OK to save changes.
We highly encourage you to avoid editing the registry, but if necessary, before you make any changes, ensure you create a backup or a restore point. This will ensure you have a safe point of return in case anything goes wrong.
Hit the Windows + R keys to open the Run command.
Type regedit in the dialog box and hit Enter.
Navigate to the following location: HKEY_CURRENT_USER\Software\Microsoft\Windows\CurrentVersion\Feeds
Right-click on ShellFeedsTaskbarViewMode, but if unavailable, right-click on a blank space on the right the select New DWORD (32-bit) Value. Rename it as ShellFeedsTaskbarViewMode.
Double-click on it and enter 1 in the Value data entry.
Close the registry editor and restart your PC.
You’ll find that most of the time, you had just not enabled the feature, and all it takes is to tweak these settings.
With that out of the way, we’d like to direct your attention to another interesting guide. If you’d like to change your widget language, we have all the details on how to go about it.
Do let us know of any additional thoughts you may have on this topic in the comment section below.
Are you experiencing problems with Yahoo and VPN? This isn’t uncommon, and if you encounter this issue, you won’t be able to access Yahoo at all.
This is a difficult issue to tackle, but we’ll try to provide you with several potential solutions that you can try.
Which VPN is good for Yahoo?
It seems that Yahoo is having issues with various VPNs, and one of the most common causes for login issues is your VPN, so using one with Yahoo is discouraged.
What can I do if Yahoo isn’t working with VPN?
Before you try any other steps, you might want to try using a different browser and check if that helps. You can also try temporarily disabling our VPN as a workaround.
1. Use the Forgot username option
Visit the Yahoo Mail page.
Click on the Forgot username link.
Next, enter your email, recovery email, or phone number and click Continue.
Follow the instructions on the screen to complete the process.
While Yahoo doesn’t necessarily block VPNs, your choice of providers can still determine your experience with its service. You may also get the temporary error 15 if you’re in a different location, so try switching it off.
Don’t you just hate it when you immediately hit send on an email and suddenly remember you forgot to add someone’s email address? Well, this can be a thing of the past with Outlook’s delay email feature.
Mistakes are not the only reason email users choose to delay emails. Most email clients have an automatic sending button, but sending email messages at the right time is considered proper email etiquette.
Using this simple scheduling feature, you may score a few points with your boss for observing time.
How can I delay sending an individual email in Outlook?
1. Use the Outlook desktop version
Launch your Outlook mail from your desktop or search for it from your app list.
Click on the New mail tab, and in the email composition window, fill in all the necessary details to compose a new email or reply to an already existing email from your inbox.
Navigate to the Options tab and select Delay Delivery.
Go to Delivery options section, tick the Do not deliver before check box, select the time frame, then click Close.
Once you exit this window, you can go about typing your message and hit send. It will then be in your Outgoing mail until its scheduled delivery time.
If you wish to edit the delivery time, you can follow the above steps and adjust the time. To disable it, clear the Do not deliver before check box.
2. Use Outlook browser version
Open your browser and login to your Outlook mail and click on the New mail option on the taskbar at the top.
Fill in the necessary entries for the receiver, subject and compose the message in the email window.
Click on the drop-down arrow next to the Send option and select Schedule send.
A new window will pop up where you can set a custom date and time, you’d like your message to be delivered.
In case emails are not sending in your Outlook email, check out our detailed article on what to do.
Unfortunately, the delay or email scheduling option in Outlook mobile versions is unavailable. The only workaround is to use your mobile browser and switch to the desktop version to enable this feature.
How can I delay sending all emails in Outlook?
Launch your Outlook desktop app and click on the File tab.
Select Rules, and click on Manage Rules & Alerts in the drop-down menu.
A Rules & Alerts window will open. Click on the Email Rules tab and select New Rule.
Go to the Start from a blank rule section, click on the Apply rule on messages I send option, and hit Next.
A new dialog box will pop up with scheduling options for the emails you wish to delay.
Once you click any of these options, the standard delay for all messages will not apply. Therefore, ignore all these rules and simply click on Next.
In the next Rules Wizard pop-up window, tick the defer delivery by a number of minutes check box to set the Outlook delay send rule.
Next, move to Step 2: toEdit the rule description(click an underlined value) at the bottom. Here’s where you’ll define the number of minutes as specified in 7 above. Click on the hyperlinked text, which will open a small dialog box where you can specify the period of time you wish to defer the email by then hit OK then Next.
Finish the rule setup by filling in the Specify a name for this rule section in case you want to create more rules in the future to avoid confusion.
Ensure you check the Turn on this rule box and then click on Finish.
If you have multiple Outlook accounts and wish to apply the same email delay rule, also check the Create this rule on all accounts box.
Click the Finish button and confirmation dialog box that appears to finish setting up. Now all your messages will remain in your Outbox folder until their scheduled time.
If you’d like to reschedule email delivery in Outlook, simply go to your Outgoing emails. Here you can edit the minutes check box again.
In case the email scheduling is not working, and emails are stuck in your outbox after the delivery time has elapsed, we have an article on what to do.
How can I disable or schedule automatic send/receive in Outlook?
Launch your Outlook app, select File, and under the Options menu, click on Advanced.
Go to the Send and receive section and uncheck the Send immediately when connected box.
Click on the Send/receive option and in the pop-up window that appears, uncheck the Schedule an automatic send/receive every … minutes and Perform an automatic send/receive when exiting boxes.
Now click on Close to save these settings.
From here, you will only have to press the F9 button when you’re ready to send these messages.
To schedule the automatic send/receive option, follow the above steps, but in step 3, ensure to check the Schedule an automatic send/receive every … minutes, then adjust the email send time to an interval you’re comfortable with.
The only downside to this email delivery option is that you might miss out on important messages, especially when your inbox is not updating due to connection issues.
The next time you have a really important email or message that you don’t want to hit the inbox too soon, add an extra delay to the send time using the steps outlined above.
Hopefully, this brings you a step closer to better email productivity. Instead of keeping your emails in your drafts folder for long periods of time, try scheduling them.
You may also want to check out other modern email clients with email schedulers and see what they have to offer. Not only will you benefit from a cleaner interface but also out-of-office auto-reply, and email templates, among other features.
That’s it for this article, but we’d love to hear more from you. Which email scheduling option do you prefer and why? Drop us a comment down below.
Emojis are part of everyday online communication, and many wonder how to add emoji to Outlook email. This is simpler than you think; this guide will show you how to do it.
How do I insert emojis in Outlook?
1. Use the Windows Emoji Picker
Press the Windows key, type outlook, and click Open.
On the Outlook window, click New Email to start composing an email.
Go to the email body or Subject field, click it, and press Windows + . to open Windows Emojis Picker.
Select any emoji you want to add to your email message, and it will appear in your message window.
Press the Windows key, type outlook, and click Open to launch the email client.
On the Outlook window, click New Email to start composing an email.
On the New Email window, go to the Insert tab.
Locate and click Symbols, then click More Symbols.
In the Symbol dialog box, for Font, select Wingdings or Segoe UI Emoji from the drop-down list.
If you don’t see the smileys right away for the Segoe UI Emoji font, scroll down to find the one you want. You can also select Extended Characters- Plane 1 from the Subset drop-down.
Click Insert to add the smiley face to the body of your email.
Outlook groups are helpful because they allow you access to a shared mailbox and calendar, but have you ever wondered how to delete an Outlook group?
If you don’t need to manage a group anymore, you can quickly delete it, but remember that doing so will delete all the data associated with that group.
However, a deleted group can be recovered for up to 30 days, but that requires help from the IT administrator. In today’s guide, we will look at removing a group properly, so let’s start.
Why can’t I delete group emails in Outlook?
To delete group emails in Outlook, you need to be a group owner or have permission to delete emails.
Sometimes, technical glitches can interfere with this process, and users report waiting a bit before their changes are applied.
This isn’t unexpected since there’s a difference between deleting a single email and the entire group thread.
The group thread contains multiple emails that might be connected to two or more group members. Deleting it will remove an entire conversation for multiple users, which is why this requires additional permissions.
In case you’re not familiar with this feature, we have a great guide on how to create group email in Outlook.
How do I delete a group in Outlook?
1. Use the Outlook app
Open Outlook and locate your group in the left pane under Groups.
Now select Edit Group from the ribbon menu. This will open the Outlook group management window.
Click the Delete group button.
Check I understand that all group content will be deleted and click on Delete.
After doing that, your group will be deleted along with all of its data. This also includes your shared mailbox in Outlook.
2. Use the Outlook Web app
In the left pane, locate Groups and select your group from there.
Click on the More icon and choose Settings.
Now click on Edit group.
Locate the Delete group option and click it.
Check I understand that all group content will be deleted and choose Delete.
Keep in mind that the steps might be slightly different if you’re using the older version of Outlook for the Web.
Event logs are reports that detail major and minor changes and even errors. A log is generated if a service or startup app fails to run on the first attempt. But when the number of logs becomes significant, users may want to disable Windows event logs.
Individual logs take up a minuscule amount of space on the disk, but if thousands of such reports are generated daily and stored on an SSD, you are looking at a diminished performance down the line.
Keep reading to find out how to turn off event logging in Windows!
Is it OK to disable Windows event log?
Yes, there’s no harm in disabling event logs. Remember, these logs are just reports that help troubleshoot issues. They don’t perform any actions or automatically fix the problem at hand.
For many users, they, surprisingly, are the source of the problem. Their corrupt state can trigger errors or lead to dwindling system performance.
So, if you are sure that the event logs won’t be needed, disabling them won’t cause any issues. However, if storage space is not a concern, we recommend allowing Windows to generate and record event logs. And you can clear them by running Disk Cleanup every month or so.
How can I disable the Windows event logs?
1. Disable the dedicated services
Press Windows + S to open Search, type Services in the text field, and click on the relevant search result.
Now, scroll down, locate Windows Event Log, right-click on the service, and select Properties.
Select Disabled from the Startup type dropdown menu, click the Stop button, and then on OK to save the changes.
Similarly, disable the following two services as well:
Windows Error Reporting Service
Windows Event Collector
Finally, restart the computer for the changes to come into effect.
If you want to disable event logs in Windows 10 or the latest iteration, a quick option is to disable all the related services. The PC won’t be able to register any more logs in their absence.
2. Via Command Prompt (CMD)
2.1 Disable the Event Log service
Press Windows + R to open Run, type cmd, and hit Ctrl + Shift + Enter.
Click Yes in the UAC prompt.
Now, paste the following two commands individually and hit Enter after each:sc config eventlog start= disablednet start eventlog
Restart the computer for the changes to apply.
The two commands we executed terminated the Windows Event Log service right away and disabled it from running at startup on subsequent reboots.
Press Windows + S to open Search, type Command Prompt in the text field, and click on Run as administrator.
Click Yes in the prompt that pops up.
Now, execute the following command: auditpol /set /subcategory:"Filtering Platform Connection" /success:disable /failure:enable
The command will stop Windows from logging Audit Success in Windows Filtering Platform, and it will only register the Audit Failure logs. Remember, this won’t altogether disable Windows event logs, but it will certainly reduce the number.
3. Disable specific logs with the Registry Editor
Press Windows + R to open Run, type eventvwr in the text field, and click OK.
Locate the type of log you want to disable and double-click on it.
Now, go to the Details tab, and copy the Guid Iisted here.
Press Windows + R to open Run, type regedit in the text field, and hit Enter.
Click Yes in the prompt that appears.
Next, paste one of the following paths in the address bar depending on the log type and hit Enter: HKEY_LOCAL_MACHINE\SYSTEM\CurrentControlSet\Control\WMI\Autologger\EventLog-SystemHKEY_LOCAL_MACHINE\SYSTEM\CurrentControlSet\Control\WMI\Autologger\EventLog-SecurityComputer\HKEY_LOCAL_MACHINE\SYSTEM\CurrentControlSet\Control\WMI\Autologger\EventLog-Application
Locate and select the GUID you copied earlier in the navigation pane under the related key.
Double-click the Enabled DWORD on the right.
Enter 0 under Value data and click OK to save the changes.
Finally, restart the computer for the changes to apply.
That’s it! Using the registry, you can disable specific Windows event logs, be it for System, Security, or Application. Though the process is slightly complex and time-consuming, the changes made here apply throughout.
Did you know aside from updating Windows via the built-in update tool, you can also do so via the command line? It’s a common workaround when one fails, but what do you do when both fail?
This is the latest headache for Windows users as they try to update Windows Subsystem for Linux. You’ll get the error 0x80070661 via Windows Update and an error message that says 0x80070661, this processor type does not support this installation packagevia the command line.
The WSL software is a critical update, especially for those who like to test other OSes on Windows, so here’s a breakdown of how to resolve this error.
What is error 0x80070661 this processor type does not support this installation package?
The error 0x80070661 is related to the Windows Subsystem for Linux application, which allows you to run other operating systems in Windows without the need for a virtual machine. While you can download it from the Microsoft Store, it needs other components to run.
For instance, once you’ve downloaded it from the Microsoft Store, you’ll need to run Windows Update to install necessary bug fixes and updates. In short, the two go hand-in-hand, so you may get the error 0x80070661.
Now, onto the this installation package is not supported by this processor type message. This indicates that the WSL system and your processor are incompatible. The program may have been working well, but suddenly, it is no longer supported.
This should not be a cause for alarm. As certain programs are updated, they become incompatible with older software.
For instance, your WSL may have been upgraded to a newer version, but if your Windows is outdated, there may be a miscommunication between the two software.
How can I fix error 0x80070661?
A few preliminary checks to perform before any technical troubleshooting include:
Inside the search box type Ubuntu then click on the three ellipses and choose Uninstall.
Now type Linux and click on the three ellipses next to Windows Subsystem for Linux WSLg Preview followed by Uninstall.
Repeat the step for Windows Subsystem for Linux Update.
Now go back and access Optional features inside the Apps section.
Click on More Windows features under the Related settings section.
Now, uncheck the Virtual Machine Platform as well as Windows Subsystem for Linux. That’s it! Restart your computer to apply the changes made.
Install WSL from the Microsoft Store again and see if the issue persists.
You can also download the update manually from the Microsoft Update Catalog. Some users reported a success story after going this route, so if all the steps above fail, this might be it for you.
We also advise you to get one of the Windows Update repair tools, which can fix errors such as 0x80070661 slightly faster.
That brings us to the end of this guide but do share with us any observations you may have made regarding this error in the comment section below.