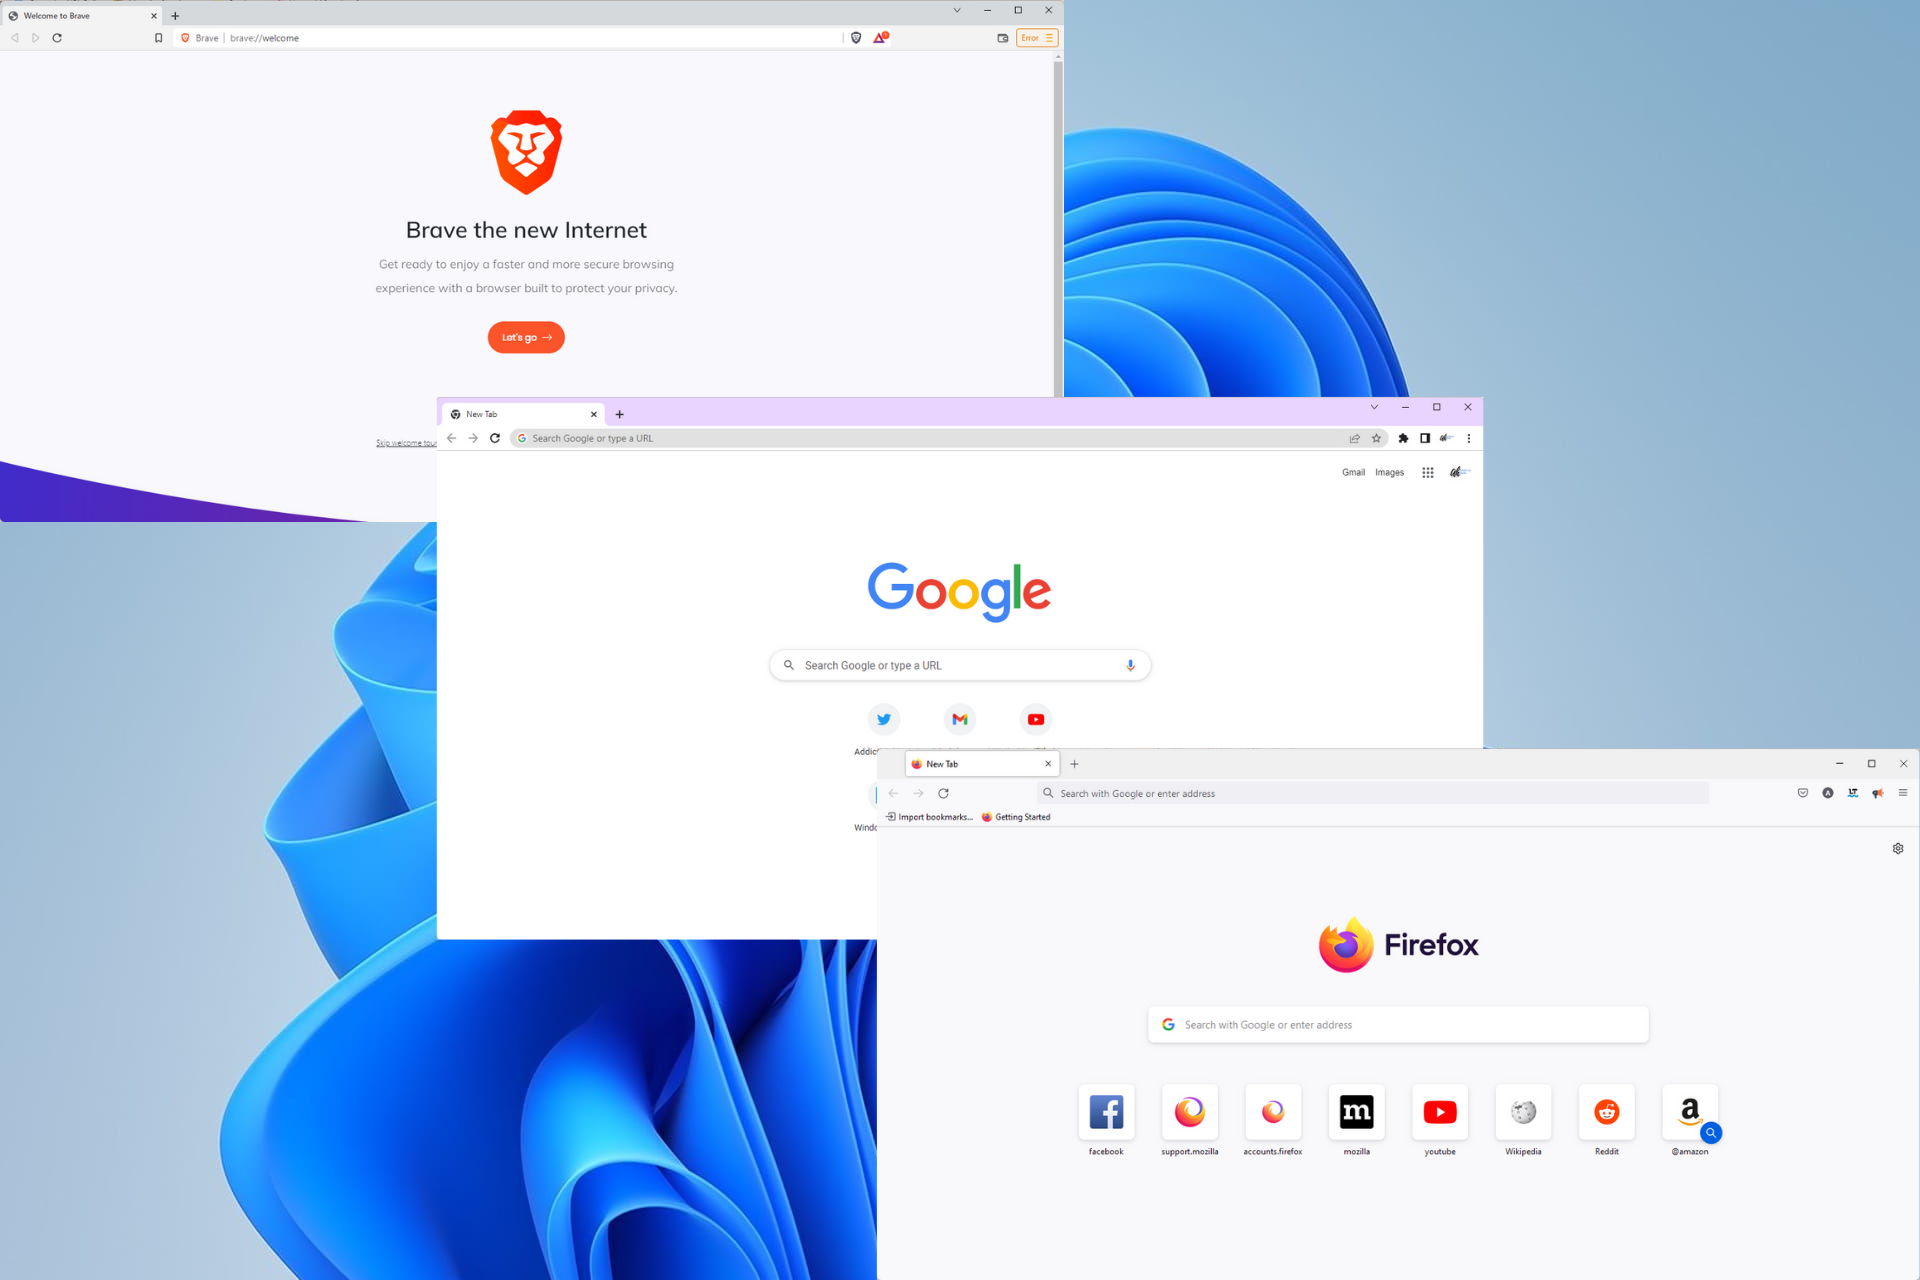
Brave vs Chrome vs Firefox: Which is Better for You?

Once upon a time, browsers were nothing more than access to the internet. While this still holds, they have evolved through the decades and do much more than connect you to the internet.

They have become very robust engines and can carry out complex functions such as gaming, streaming, etc. Modern browsers pack a lot of features and functionality and have become a one-stop shop for all internet activities.

With the expansion in the use case of browsers, there has been a need for more interaction with this user. However, this comes with the downside of exposing the user to privacy violations. Hence many modern browsers incorporate many privacy and security features to ensure you stay safe while browsing.

Considering other browser options, an incredibly lightweight and secure Pale Moon browser may be worth a try.

How to choose the best browser for you

Unless your PC is only for typing, using a browser is as routine as drinking your morning coffee. Identifying the features that stand out the most and the benefits different browsers offer is vital to choosing the right browser.

The following are critical elements to consider:

  • Compatibility – Selecting an optimized web browser for your OS or computer is critical. So, for example, Edge may be ideal for Windows PCs, Safari may be suitable for Macs, Chrome may be the most HTML5-compatible, and so on.
  • Load Time – The speed with which a web browser retrieves, shows, and traverses information resources is called the load time. When your material takes a long time to load, you spend more time waiting for it to load than reading or using the content.
  • Security – Regarding a safe and enjoyable Internet experience, protecting and maintaining your identity and data integrity are significant priorities. It would help if you leaned more towards a browser that offers the most online protection. 
  • Design – The design determines how easy it is for you to get around. How accessible are your favorite features? A great design will significantly increase your browsing experience.

?️Quick Tip:

Even though we’re here to discuss Chrome, Firefox, and Brave browsers, it’s worth noting that Opera One is another excellent option.

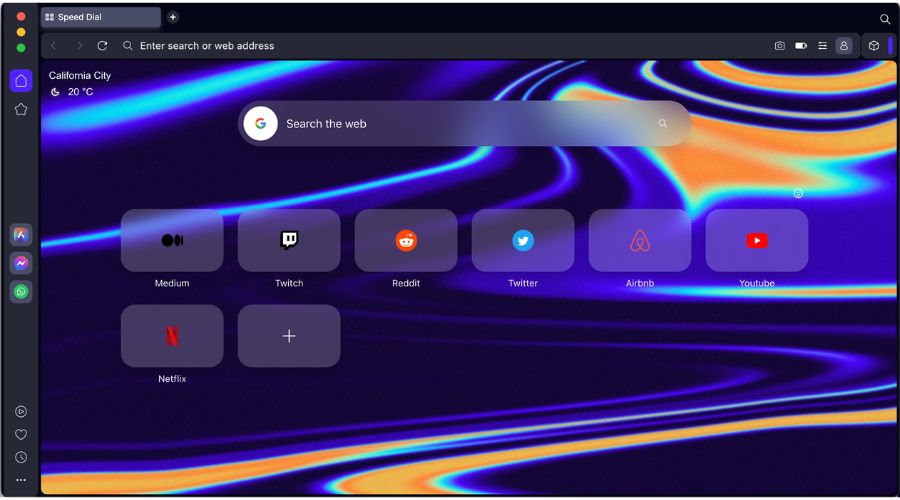
You can use all of the browser extensions discussed today and still have something additional advantages, like a built-in VPN and Ad Blocker. Another unique feature of Opera One is its built-in AI and modular AI-ready design, for other AI technologies integration.

⇒ Get Opera One

Let’s go to the Brave Browser vs. Chrome vs. Firefox comparison without further ado.

Brave Browser vs. Chrome vs. Firefox

➡ Design

Brave
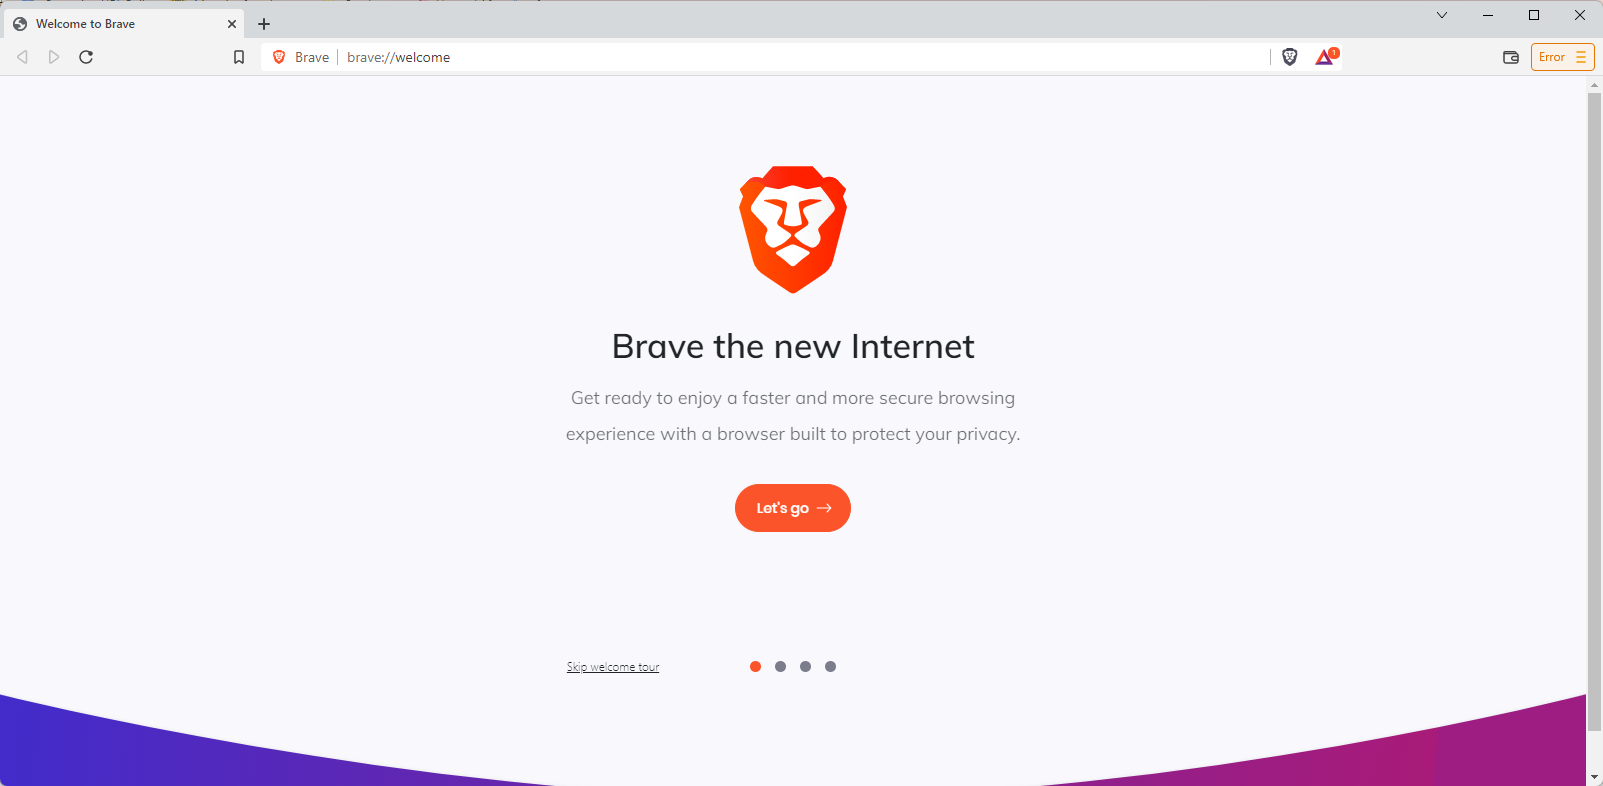
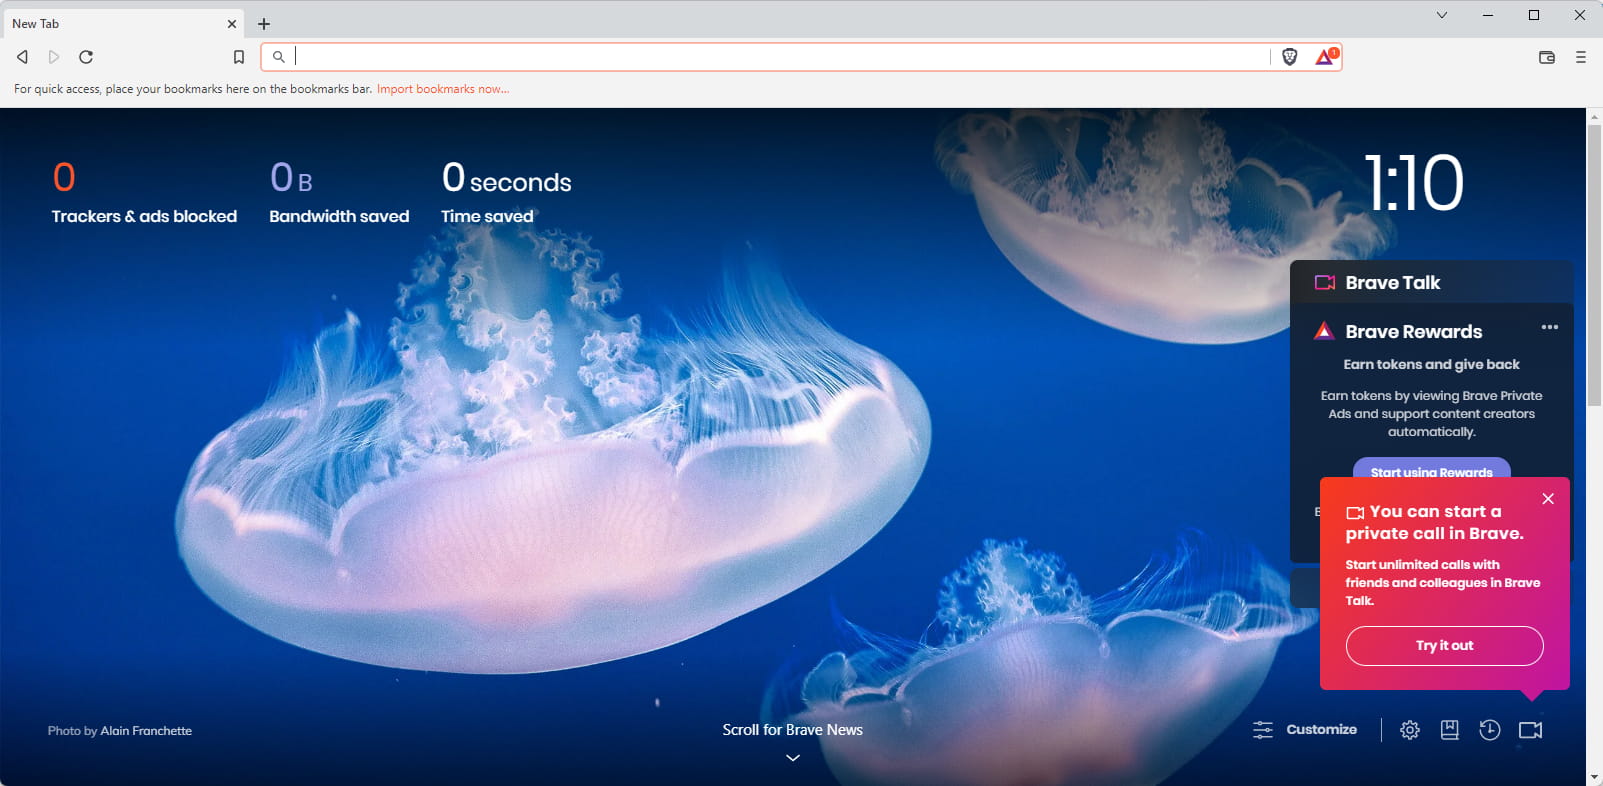
You can check statistics on the effectiveness of the browser at blocking trackers and adverts and saving time and bandwidth in the top-left corner. Also, you can view news that populates as you scroll down the dashboard.

You can switch between what you show in the larger space beneath. For example, if you choose binance.com, that info will appear where the Brave Rewards information appears.

Cards by Brave are the names of the connections, and you can conceal them individually by editing cards.

The browser has a pretty dashboard overall, and you can customize it more by navigating to the Settings button in the bottom-right corner of the page. For example, stats, background graphics, headlines, top sites, and the clock may be customized.

⇒ Get Brave

Chrome

brave browser vs chrome vs firefox

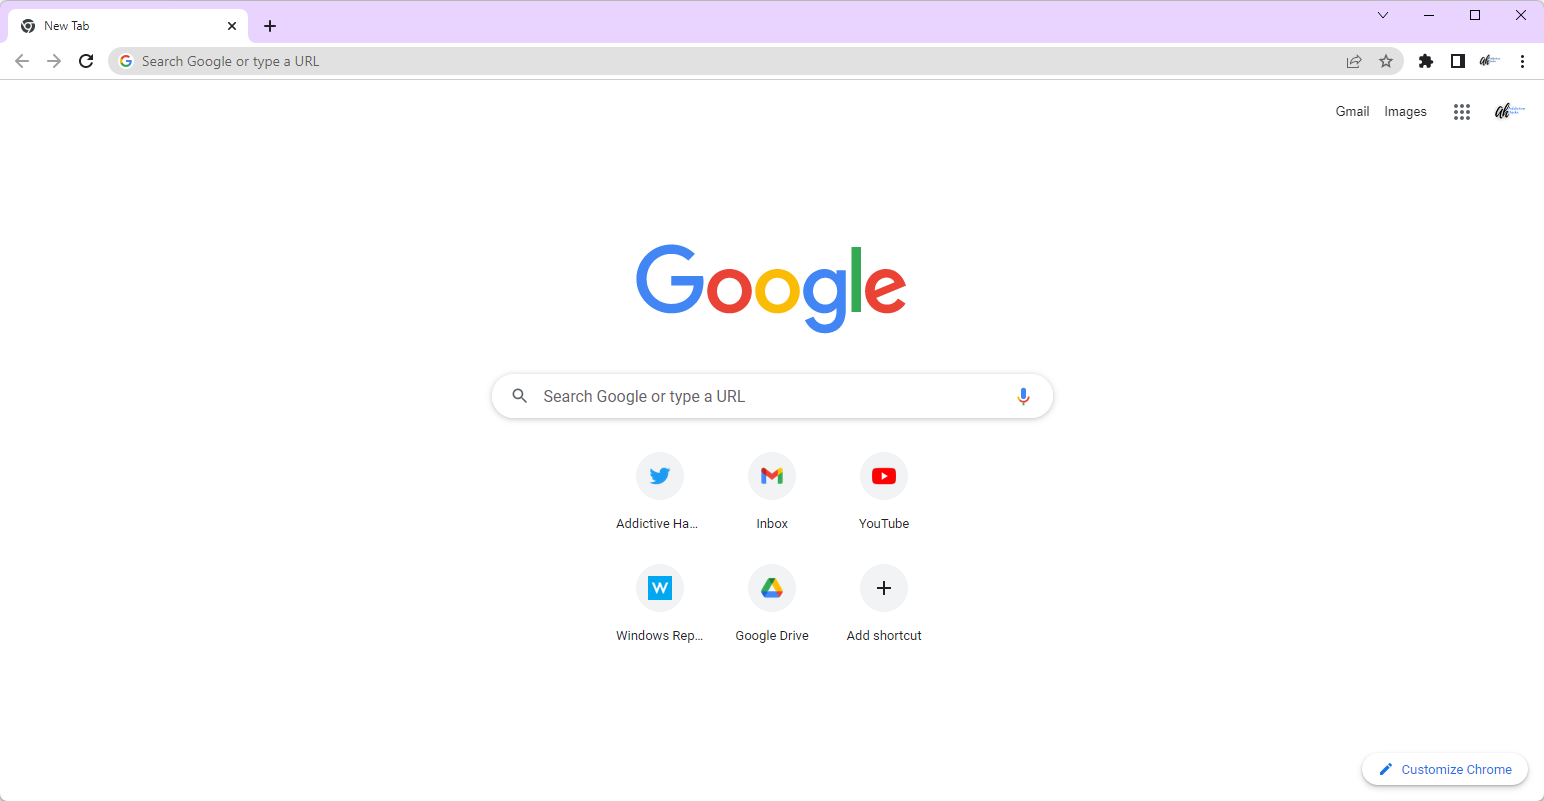
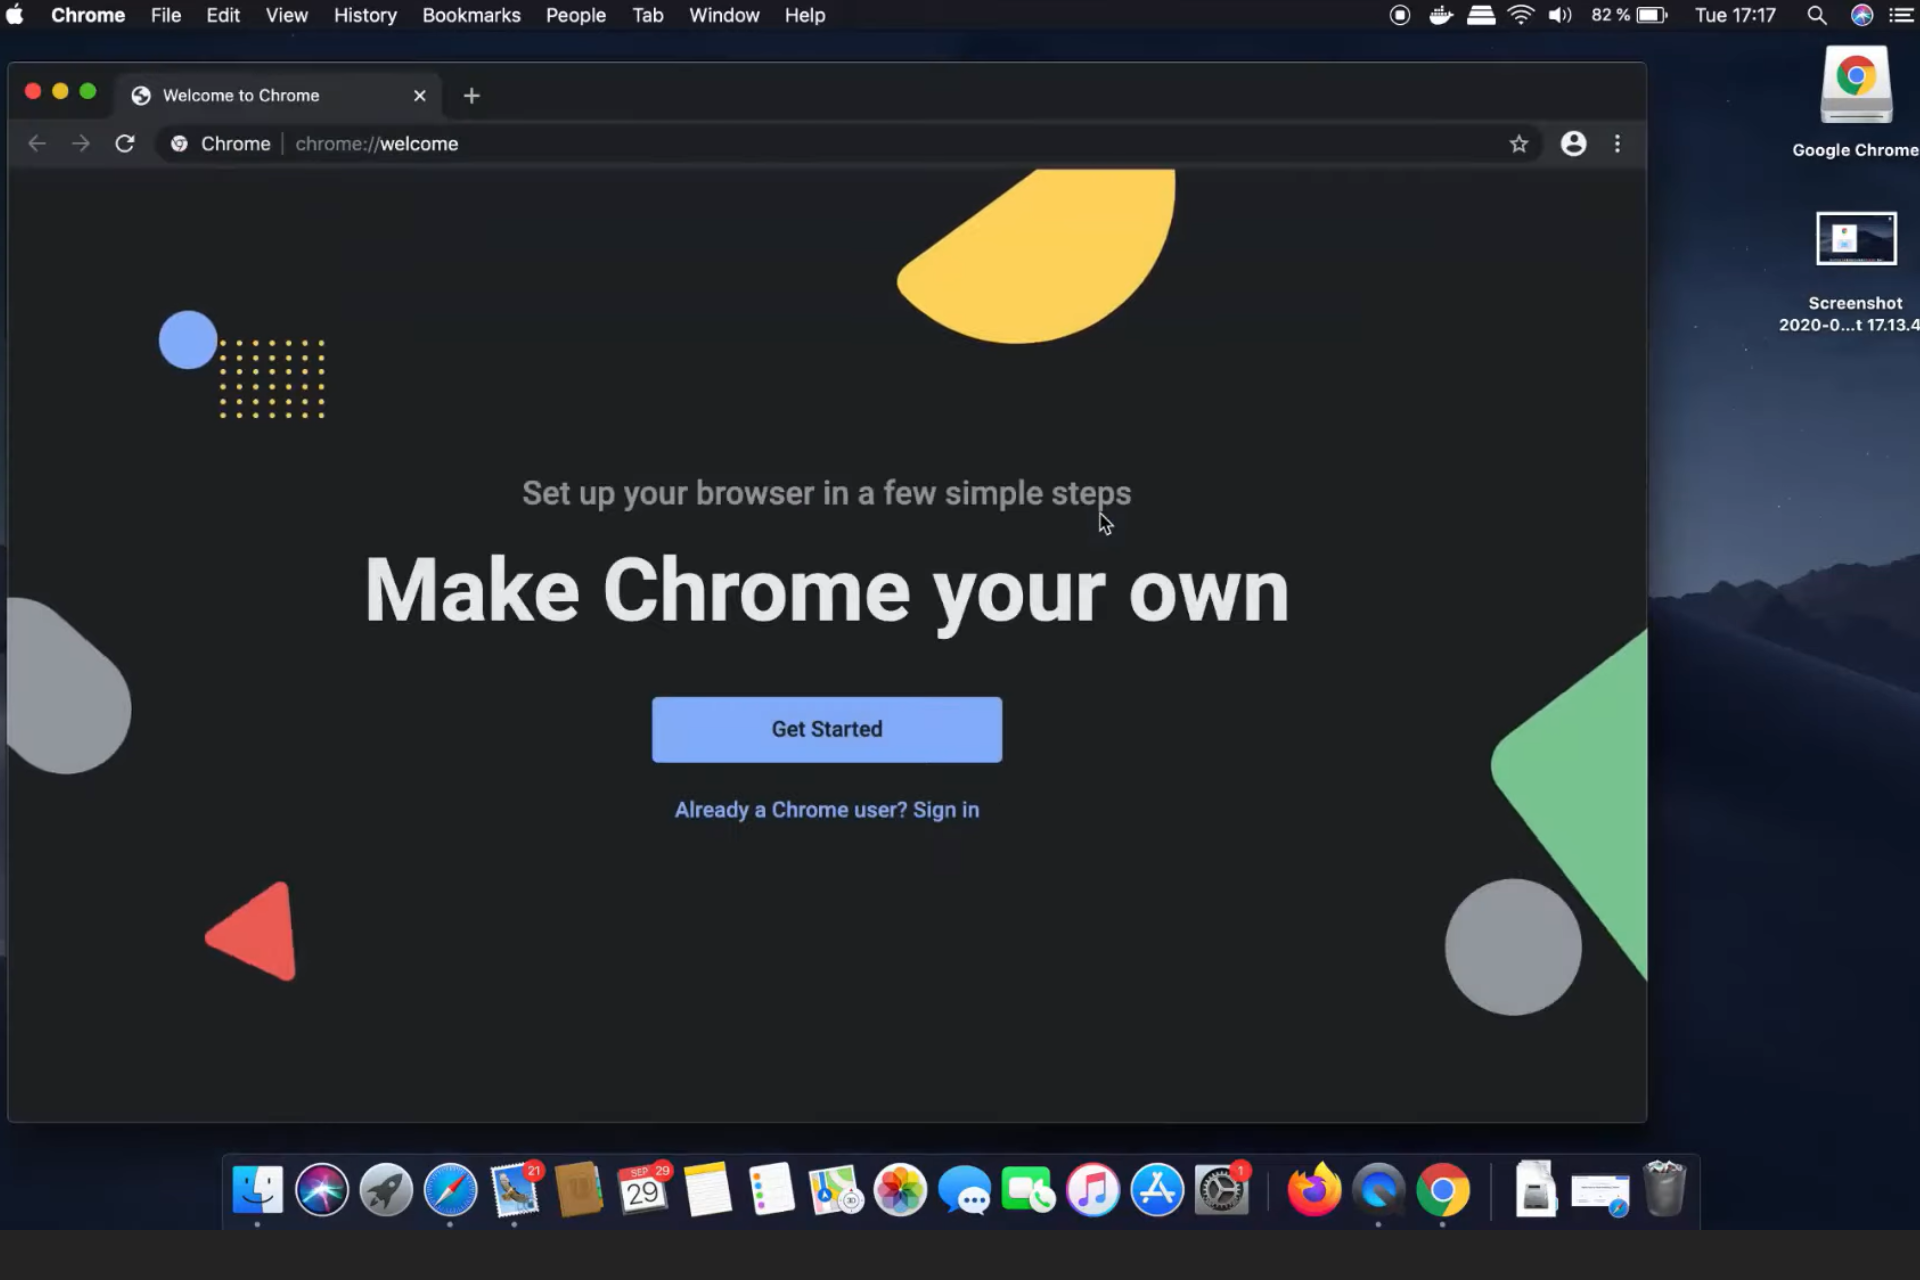
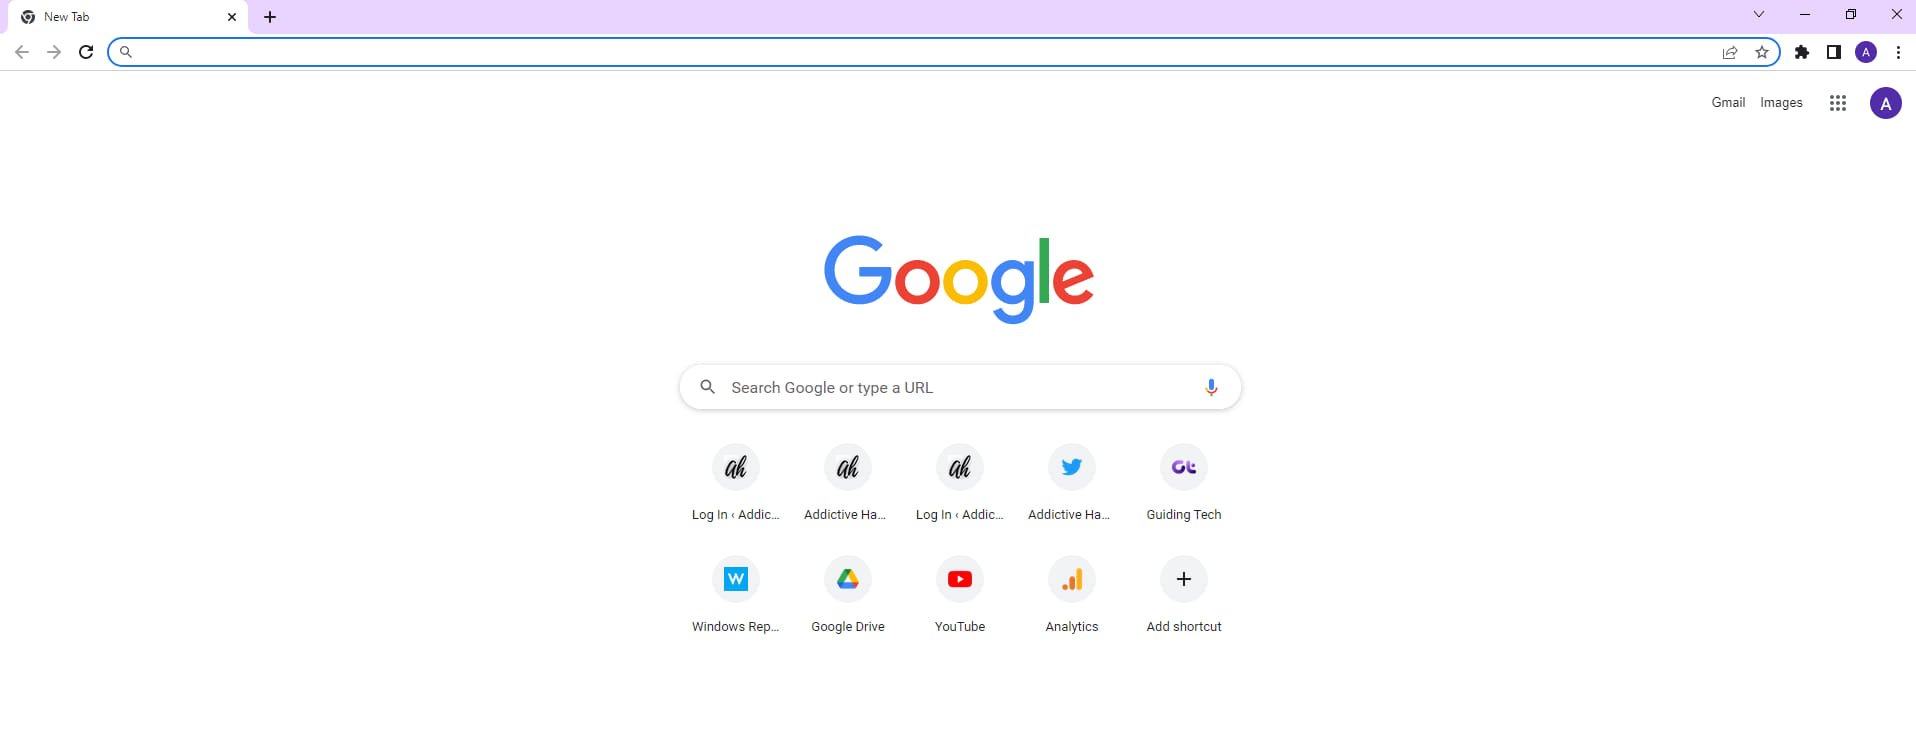
Chrome is unremarkable in its appearance. But then again, it’s a tool made to show websites, and the sites should take precedence over the browser.

That said, Chrome does a fantastic job blending into the backdrop — it’s stunningly simple.

Daily, you’ll only need to worry about a few settings, but hiding or showing the bookmarks toolbar, altering your default search engine, and managing cookie and browser history storage is simple.

With its support for parental control and multiple users, the Chrome browser is suitable for the whole family and remains a great option to download today.

⇒ Get Chrome

Firefox

brave browser vs chrome vs firefox

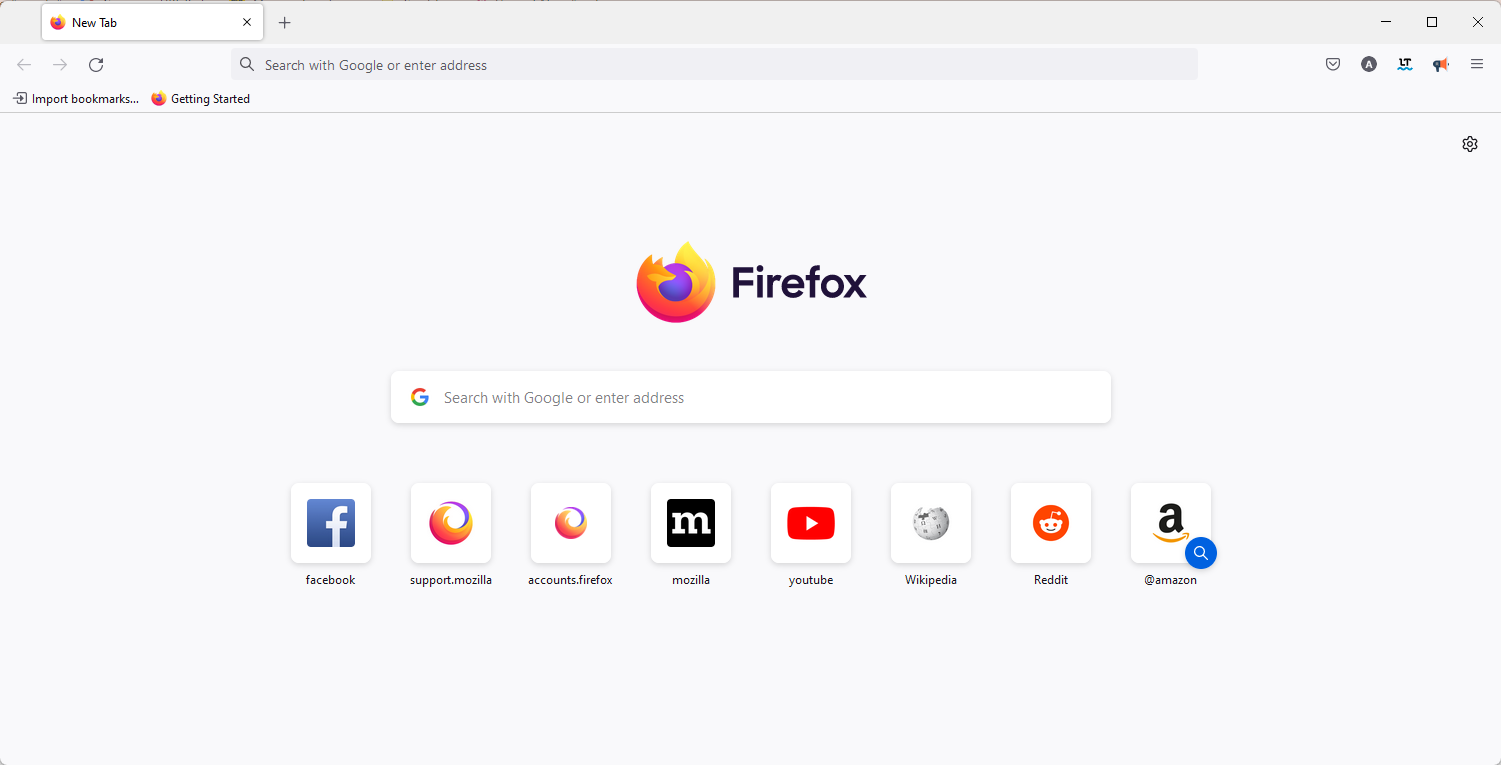
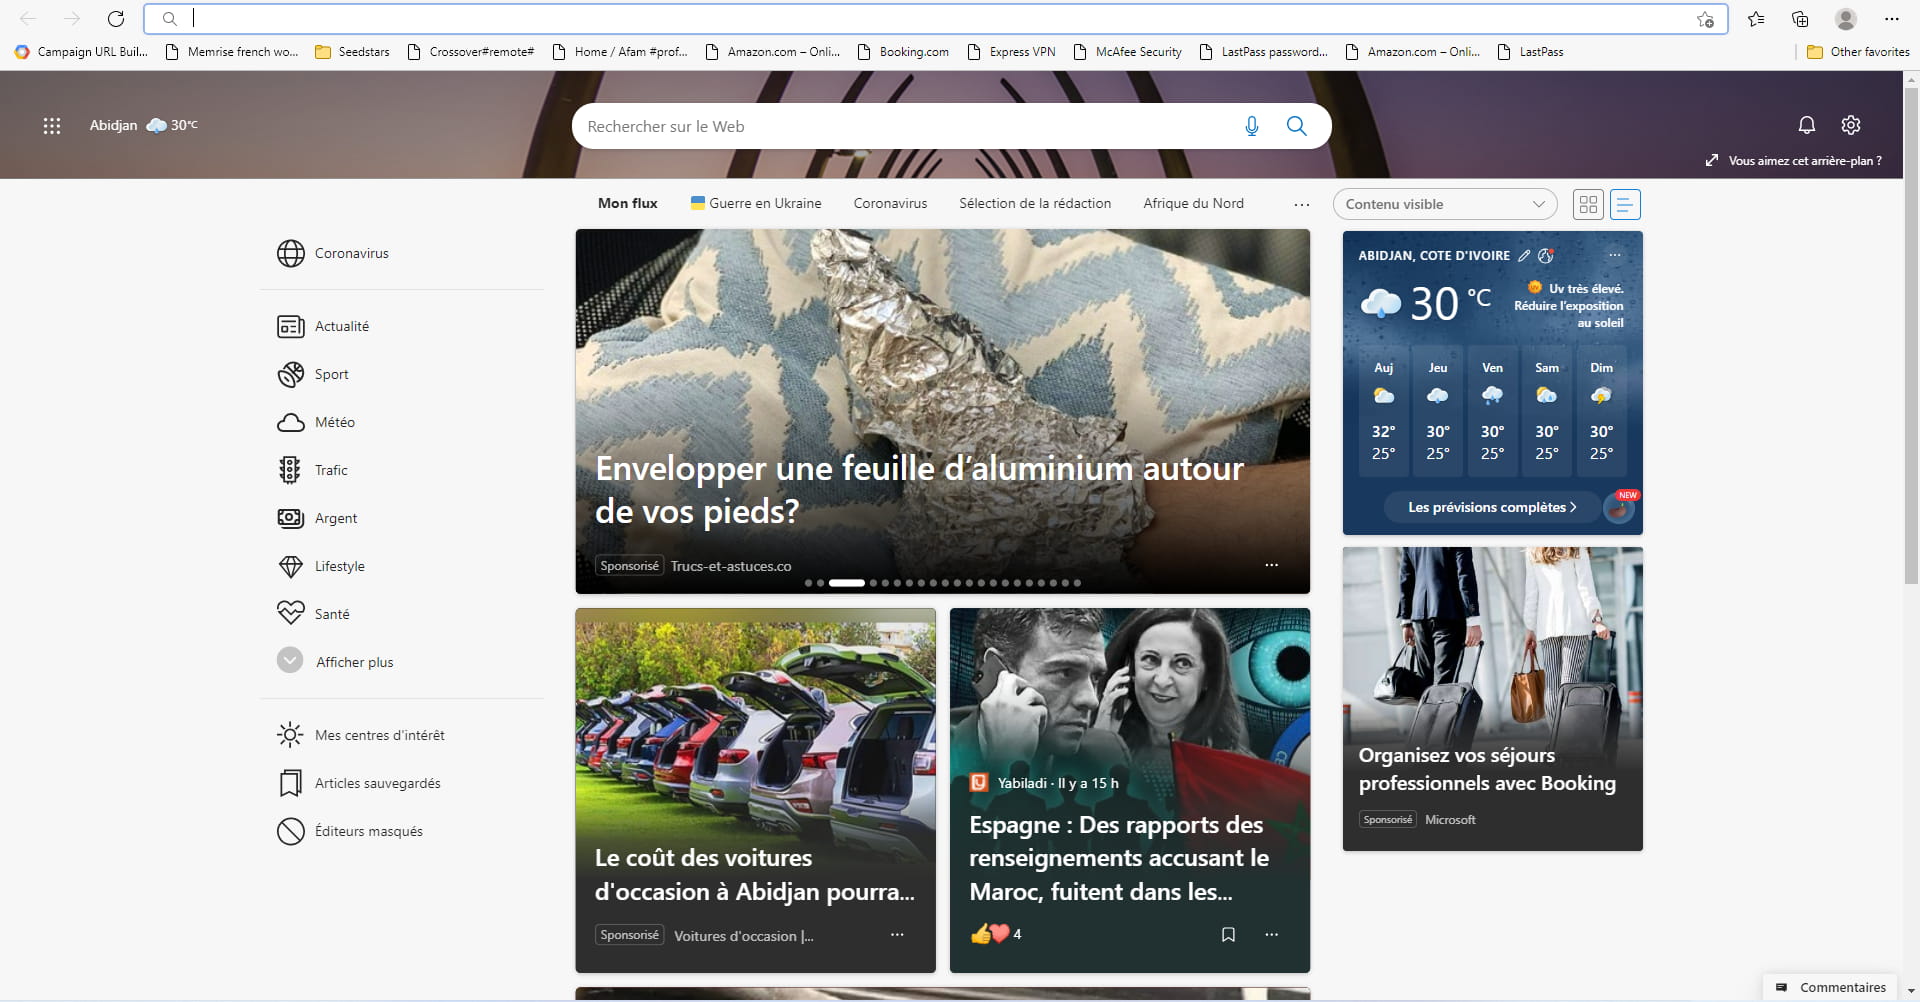
Firefox has a clean white background with larger-than-normal, easy-to-read black lettering for most of its font.

You will see a top article list from Pocket on newly launched tabs. You are allowed to customize the page by clicking the Settings button in the top-right corner.

Additionally, it’s possible to turn off or on sponsored content, and Pocket Recommended stories, add extra rows of shortcuts, and turn off or on recent snippets and activities.

The remainder of the browser options is as simple to navigate. There are many of these so that you can experiment.

⇒ Get Firefox

➡ Privacy & Security

Brave

Brave’s servers are reported not to see or keep your surfing data and invariably will not be able to sell your information to any third parties. Your information is confidential and will remain on your local device till you erase it.

You can also change the privacy settings for individual sites or across your entire browser.

Do Not Track, Cookie Control, Script Blocking, Password Manager, Fingerprinting Prevention, and Tracker Blocking are some other privacy and security tools available.

Chrome

Regarding security, Chrome has set the bar high. Internally, its program architecture is sandboxed to prevent site code from infecting the remainder of your system.

Safe Browsing from Google offers the same anti-phishing and anti-malware capabilities as Firefox. In addition, if you visit a bad site, you’ll get a red warning screen identical to Firefox.
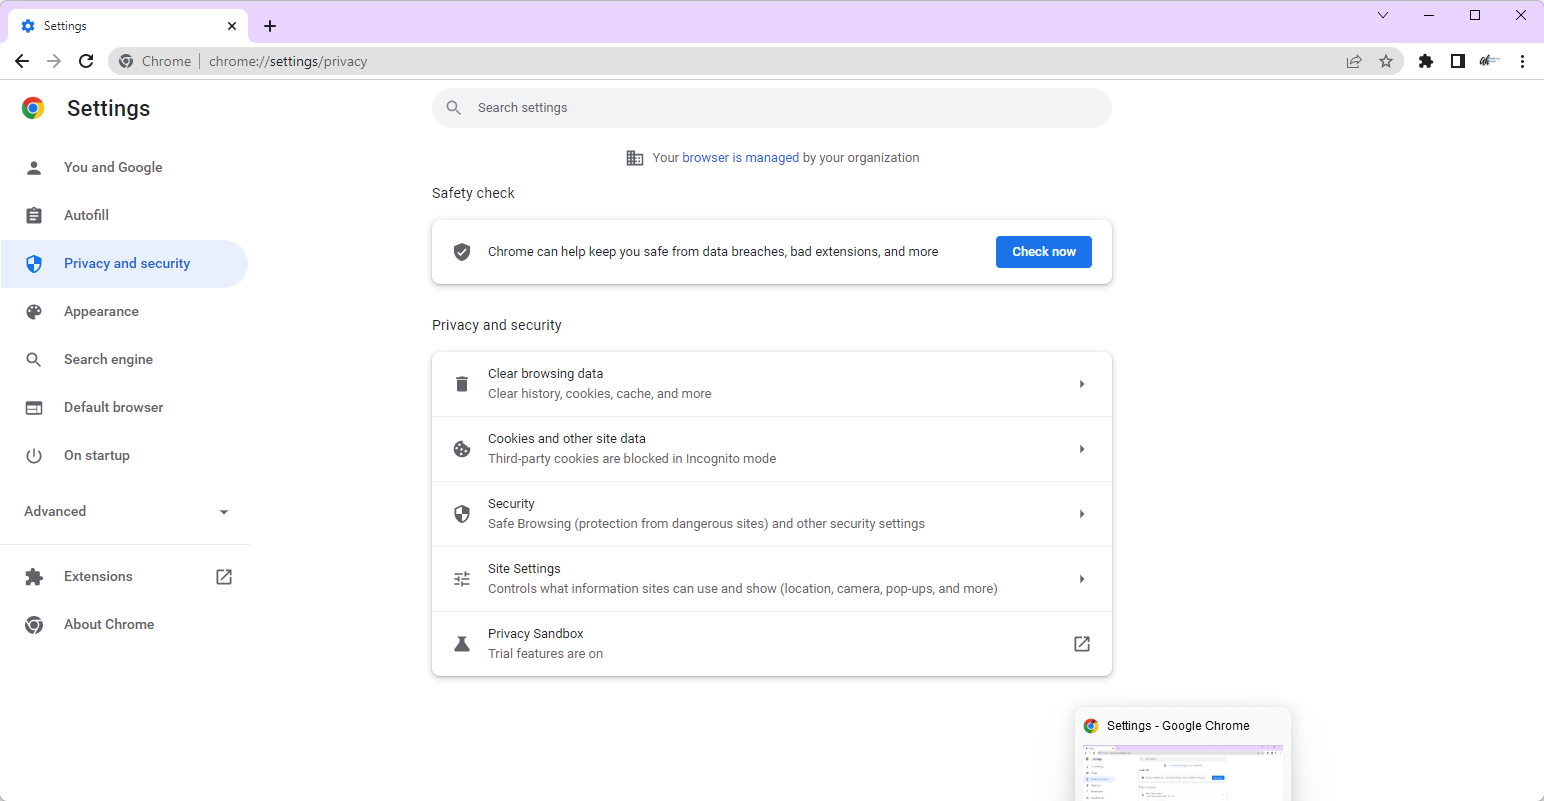
On the other hand, Chrome no longer issues warnings regarding sites with mixed content, which means some elements on a website are protected by HTTPS, and some are not. Firefox continues to flag this.

Chrome was the most recent major browser to offer a Do Not Track privacy setting, but it’s still hidden under the Advanced Settings.

Firefox

According to its website, the browser captures very minimal information about you. True, but your email address is used to set up your account after downloading Firefox.

The tracking protection blocks websites and ads that attach hidden trackers to capture your browsing data. Trackers will not see your online fingerprints if you use the ad blocker.

Its DOH (DNS over HTTPS) feature prevents ISPs from revealing your information. You can also manage the password keeper with a primary password. In addition, you’ll need to create separate main passwords for each device.

Firefox also features breached website alerts, automatic updates, fingerprint blocking, a built-in password manager, individual protection reports, encrypted data, and third-party cookie blocking.

➡ Performance

Brave

Brave’s browser performance results from its unique method of approaching Internet privacy. Brave speeds up the loading of websites by blocking third-party advertisements and trackers.
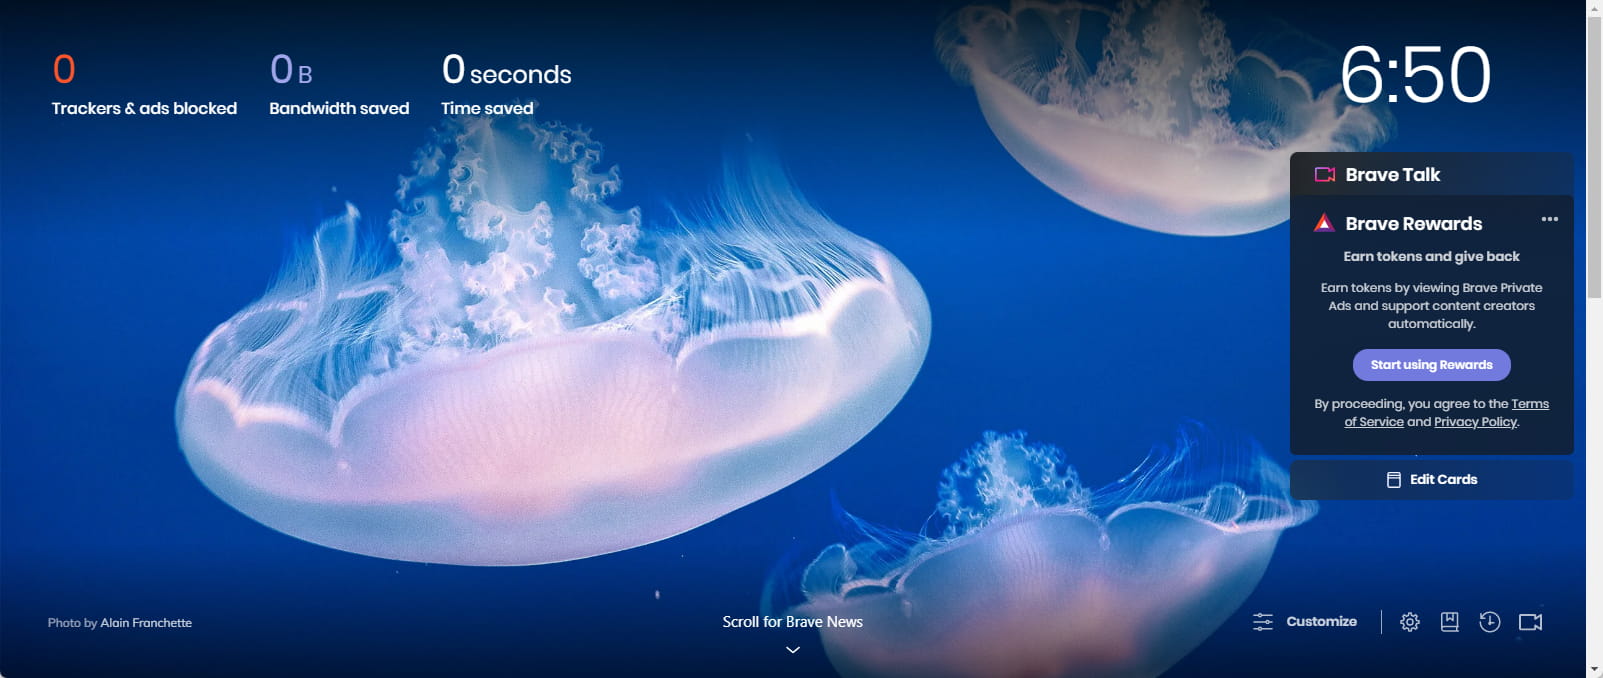
With reduced connection speed or older machines, this enhanced speed is undeniable.

Removing third-party advertisements from the page eliminates the need to load extra content because less bandwidth is needed, or less data is taken from the connection when fewer items are packed. Lower bandwidth also implies a speedier experience on each page.

While browsing a website, Javascript automatically runs as the base that most pages work with. Brave does not delete Javascript, but it executes less of the javascript.

Chrome

Many people may be astonished to learn that Google Chrome no longer ranks #1 in many performance tests. This is because Chrome swept the browser industry when it first launched, thanks to its lightning-fast JavaScript speed.

That benefit was a big part of why it was so popular initially. It’s still quick, although rival browsers like Brave have since caught up to it, if not surpassing it, in terms of speed.

Firefox

Firefox is the slowest of the three browsers on desktop, coming in just below Brave and Chrome but outperforms Microsoft Edge. However, it beats Chrome in speed on mobile devices, but not by much.
Firefox has a significant initial footprint regarding system resources because it uses a lot of RAM even when a few tabs are open. However, it is more efficient than its competitors with more available tabs, utilizing substantially less RAM than the Google Chrome browser.

➡ Unique features

Brave

Unique features are the last metric we will consider in this Brave browser vs. Chrome vs. Firefox comparison, and here is what you must know.

You can begin by importing your favorites, bookmarks, autofill data, and history into Brave from Firefox or Chrome. Additionally, you may import an HTML file from the Settings menu.

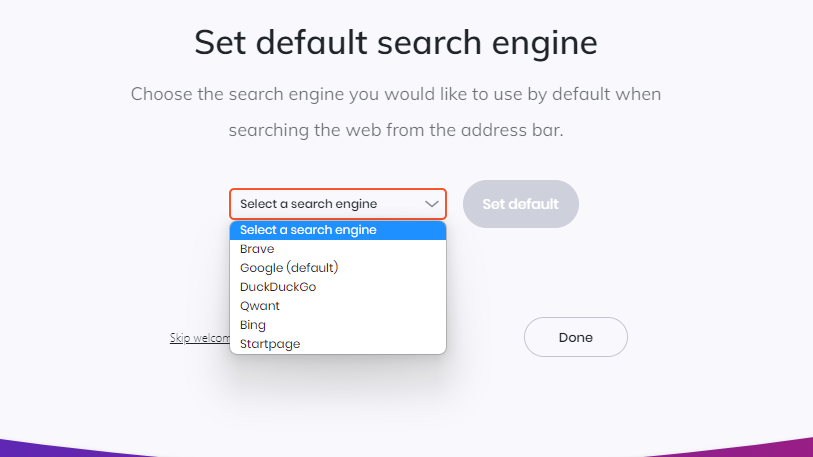
You can decide what search engine to use from seven options: Google, Qwant, Bing, Startpage, DuckDuckGo, Brave, and Ecosia.
brave browser vs chrome vs firefox

One of Brave’s notable features is the Playlist feature. You may import video and audio from various sources into your Playlist and listen to them offline or online.

You can earn tokens by seeing Private Ads on the browser. These can be used to assist content creators.

Chrome

Given exciting new entrants like Brave and notable upgrades in Firefox, Chrome has not been very innovative in terms of features of late. 

However, it has recently been updated to address security flaws, increase coding functionality, and improve reliability. Unfortunately, it has also removed some features like the Notification Center. Unfortunately, these aren’t particularly eye-catching improvements, but they are nonetheless significant.
brave browser vs chrome vs firefox

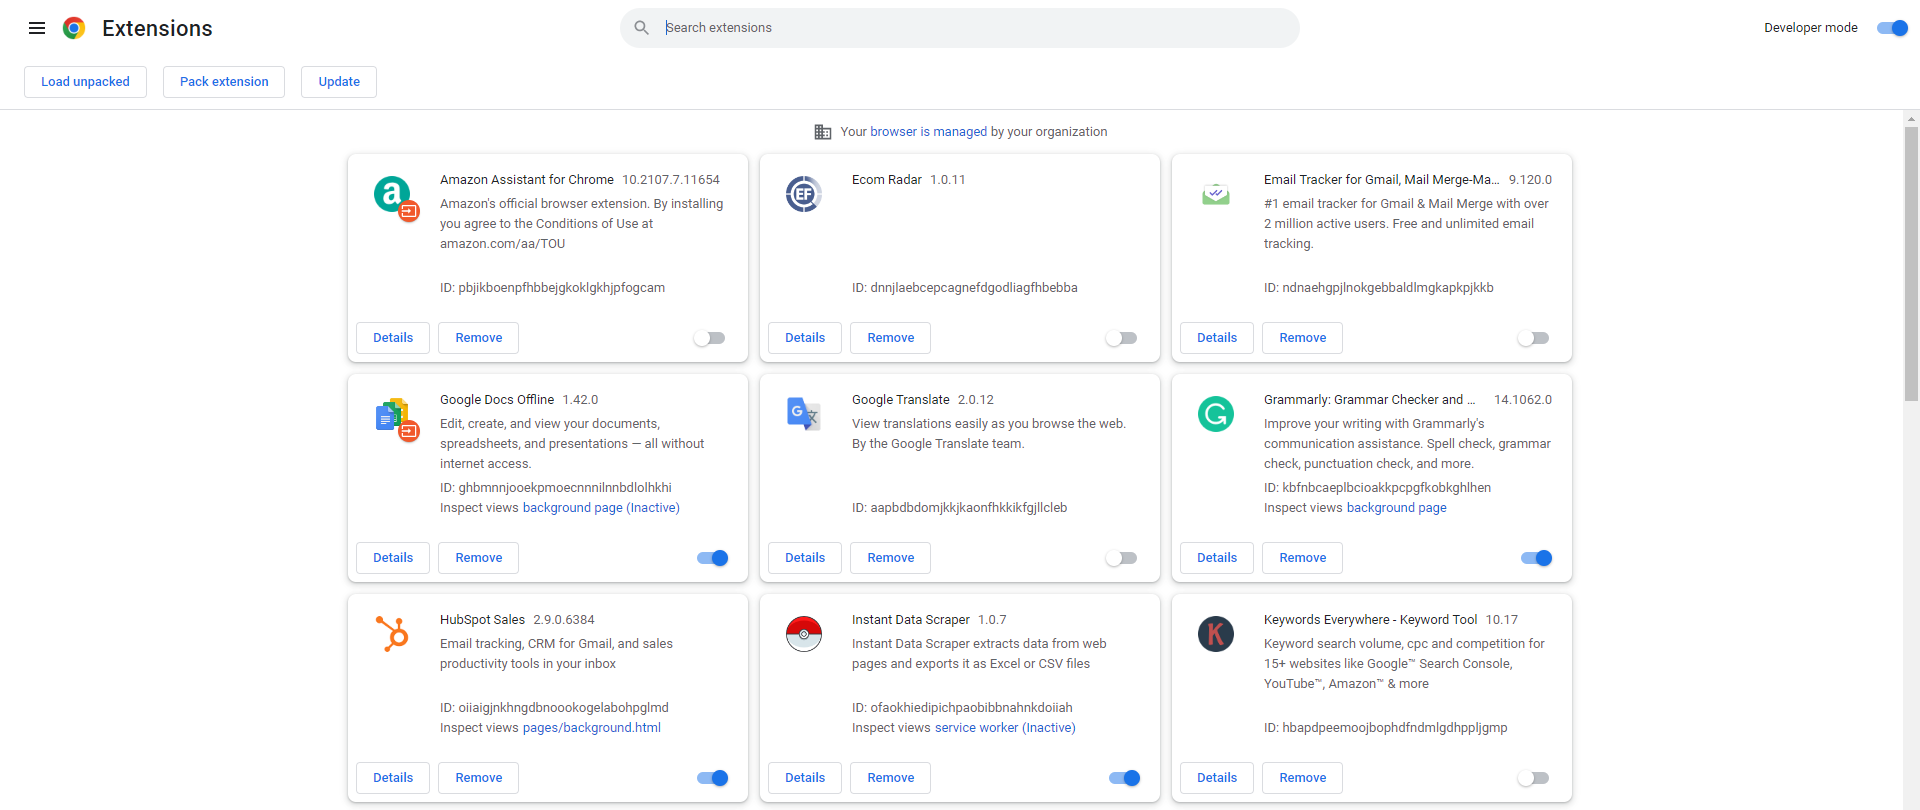
Chrome has integrated bookmark syncing for a while. Passwords, tabs, themes, preferences, extensions, auto-fill entries, web apps, and Omnibox history are synced in Chrome.

Firefox

Regarding security features, Firefox thrives but does not offer much that stands out in terms of standard functionality. While you generally won’t choose Firefox based on standard features, all of them are nice.

Users will also enjoy blocking auto-play of video and audio and seeing picture-in-picture pop-outs, among other features. Custom themes and dark mode are also available, as are pinned tabs, a built-in screenshot tool, form autofill, extensions, reader mode, and word check.

➡ Conclusion

Brave may be the way to go if you are interested in unique features, as it has innovated the most in recent years in this metric. However, we generally will stick to Google Chrome because while its design seems minimalist, it is the most robust and boasts the most extensive extensions library.

This implies that you will be able to carry out much more functions by using rich plugins specific to tasks you need to accomplish.

A UR Browser Review may open your eyes to more privacy features to look out for in a browser.

Easy Fix: Settings Icon is missing in Start Menu Windows 10

Microsoft’s Windows 10 is the most recent version of the operating system. This operating system includes a slew of features and apps, such as dark mode, Cortana integration, and a default browser, Microsoft Edge.

Windows 10 has a completely refined user interface that users enjoy. One of the most significant differences between Windows 10 and previous versions of Windows is the addition of a Settings App.

This Settings App is also known as the new Control Panel in Windows 10 because it contains the majority of the options and settings found in the native Control Panel.

There are lots of ways to access the Settings app in Windows 10:

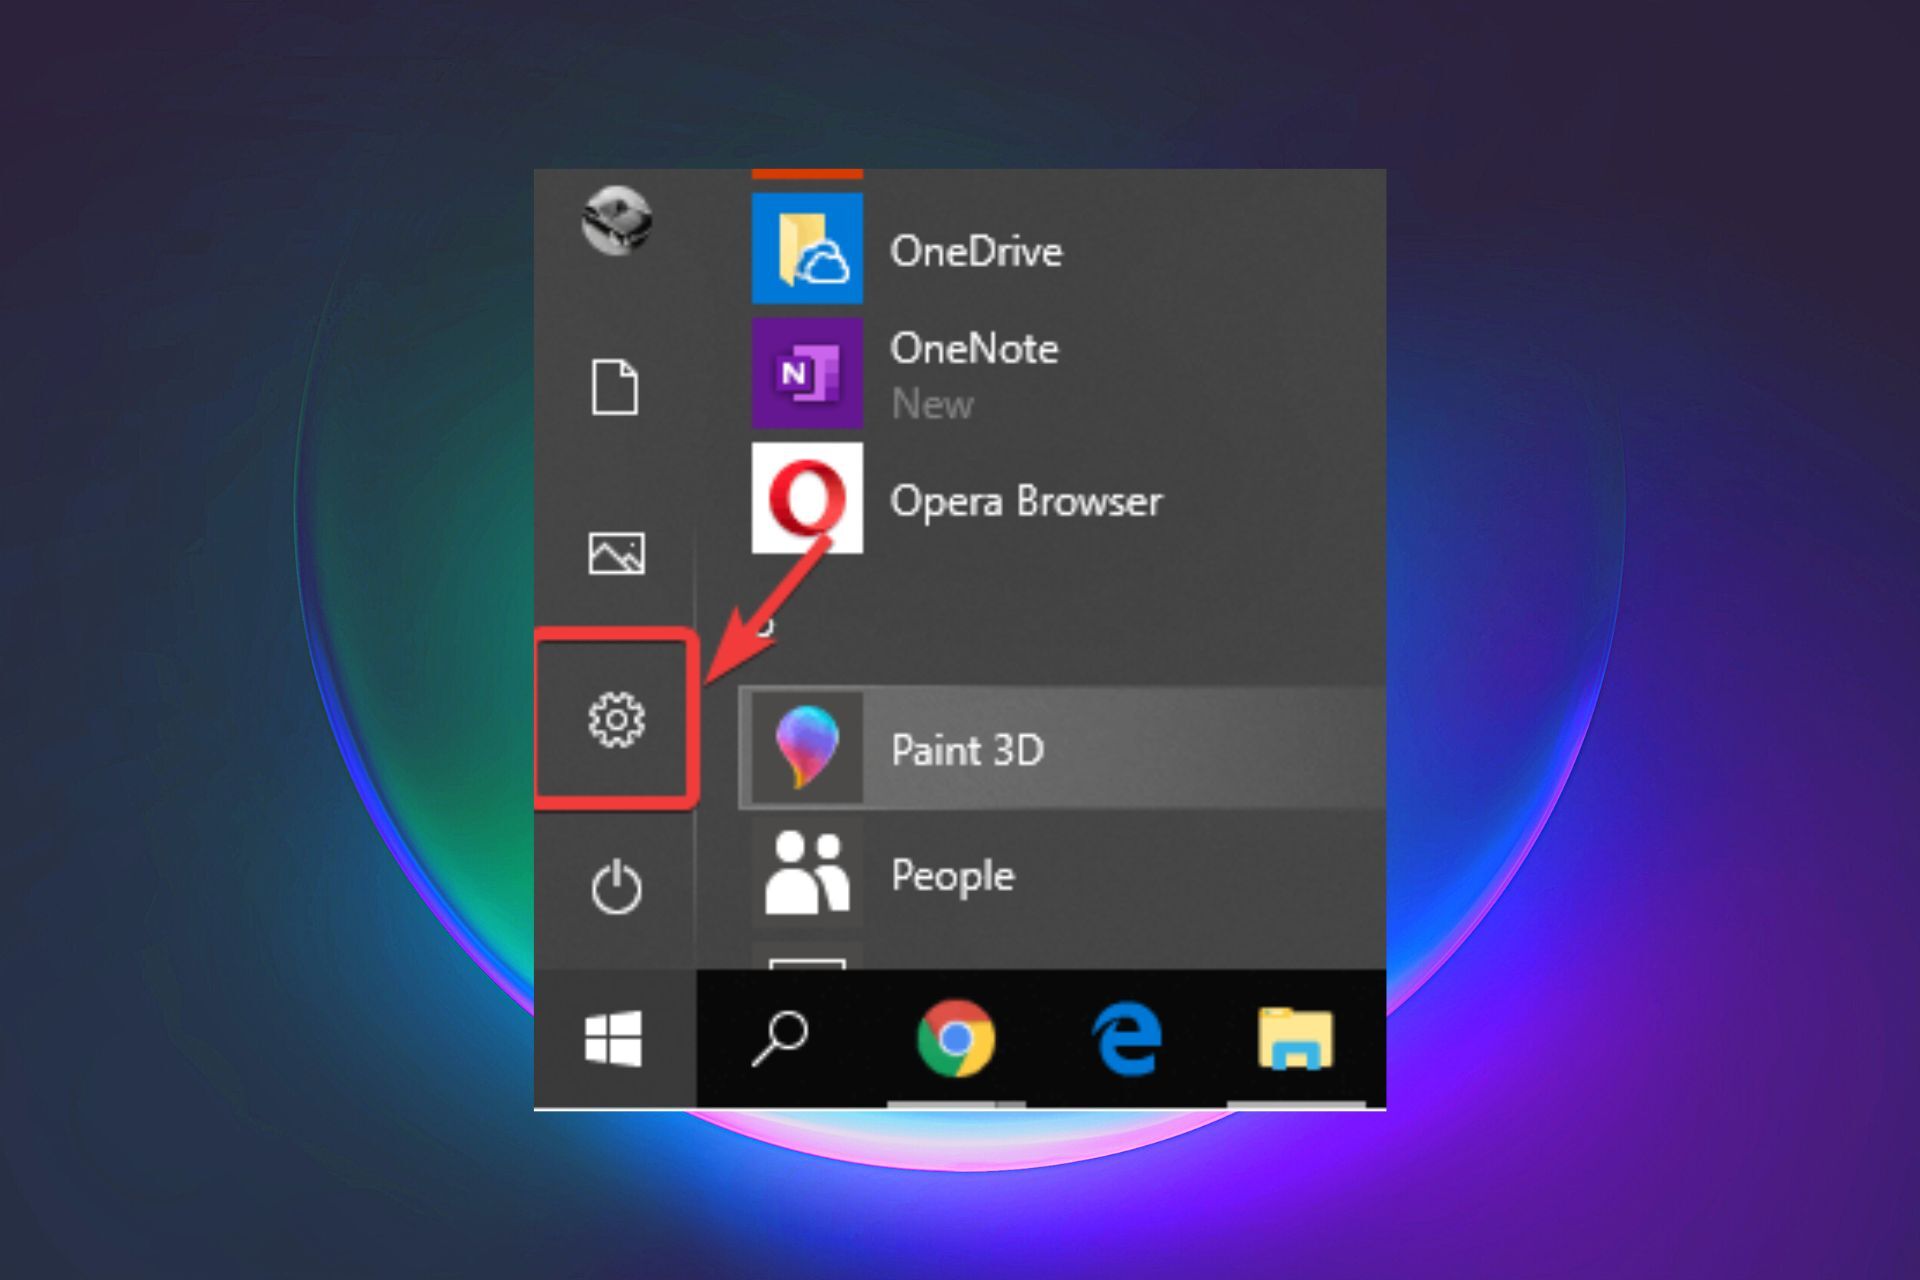
  1. Click on the Settings icon in the Start menu.
  2. Clicking on the Settings tile in the action center.
  3. Use Windows Icon + I Shortcut key.
  4. Search the Settings app in the Start menu search bar.

However, most users prefer to open the Settings app from the Start menu. The issue now is that many users are reporting that the Settings app is missing from the Start menu in Windows 10.

It’s possible that this is happening because you accidentally set the Windows 10 operating system to hide the Settings app icon from the Start menu.

Is the Settings icon missing from your Windows 10 Start Menu? No worries, in this article you will learn how to restore it to the Start menu.

What to do when the Settings Icon is missing in Start Menu in Windows 10?

1. Restore the Missing Settings

  1. As the Settings app is missing in the Start menu, you can directly search the Settings app in the Start menu search bar.
  2. In the Settings app windows, you will see different settings, click on the Personalization settings.
  3. Under Personalization, on the left pane, click on the Start tab.
  4. Now on the right pane, scroll down and click on the link labeled Choose which folders appear on Screen.
  5. Here you need to Turn on the Settings option to restore the missing Settings to Windows Start Menu.

By using the above method you can also add documents, file explorer, downloads, music, pictures, network, and homegroup to Windows 10 Start Menu.

2. Use the Windows troubleshooter

If the method discussed above does not work for you, you can utilize Microsoft’s troubleshooter to detect and resolve the Settings not appearing in the Start Menu issue.

  1. Type in Troubleshooter in the Start Menu.
  2. Click on the Other troubleshooter option.
  3. Find the needed troubleshooter in the menu.
  4. Simply launch the troubleshooter by pressing the Run button and allowing it to scan for and resolve the problem.
  5. Follow the instructions from the wizard menu to finish the process.

We hope you find the above-mentioned method useful and that you are successful in restoring the missing Settings icon to the Windows 10 Start Menu.

If you have any difficulties doing this or have any questions about it, please leave them in the comments section. We would be delighted to assist you.

7 Ways To Fix Silverlight When It’s Not Working

Browsers have come a long way from what they used to be in the 90s. Then, most web resources were made out of minimal graphics, static text, a few graphics, and the odd looping MIDI music clip.

However, the Internet has become more sophisticated over time. For example, websites today can incorporate sound, animation,  video, and other interactive elements. 

Developers needed to design new programs to examine, build, and engage with these new functionalities, and Microsoft’s Silverlight is one of these programs.

It is comparable to Adobe Flash in several aspects, and a client must be downloaded because browsers cannot handle Silverlight content without it.

This client allows Web designers to include streaming videos, music, and animation on their sites. Silverlight will enable programmers to develop sophisticated, user-interactive Web applications.

These programs are referred to as RIAs or Rich Internet Applications.

If you do not have the app, you can download Silverlight on Windows 10 using a few steps.

Can I still download Silverlight?

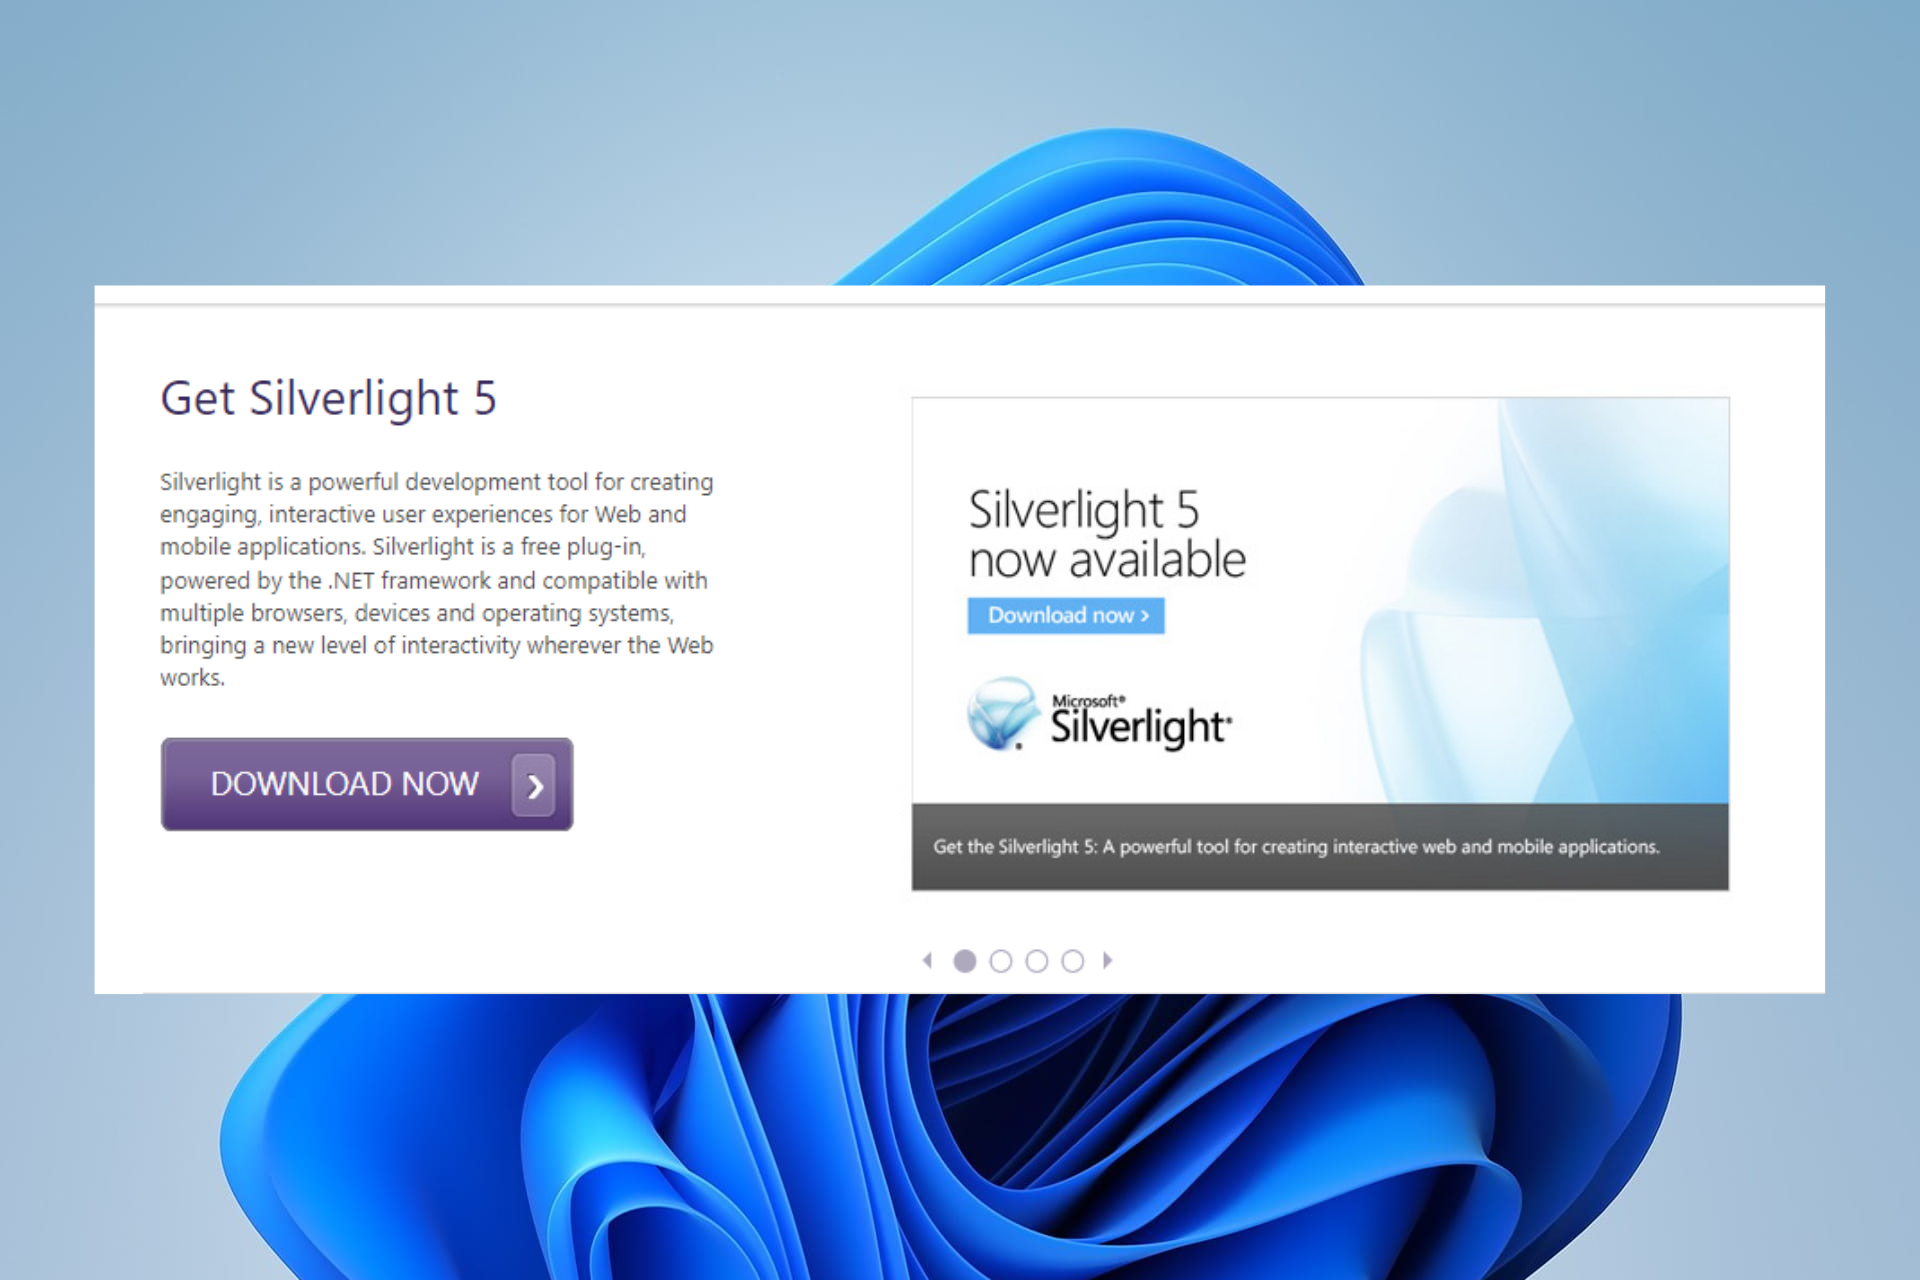
The image below shows techs that support Silverlight.

Officially you can not. But even though the official Silverlight download page is no longer functional, certain websites still need it.

This will make it hard to access Silverlight-enabled material now that it’s been removed from the internet? You will only be able to get access to it if you download it via an unofficial 3rd party.

Since October 12, 2021, Microsoft no longer offers support for Silverlight. Internet Explorer (IE) 11 is the only browser that supports the Silverlight programming framework since support for Internet Explorer 10 expired on January 31, 2020.

Also, Firefox,  Chrome, and other browsers that run on the Mac OS are no longer supported.

However, if you have it already installed and have problems, let’s talk about some of the best fixes.

Quick Tip:

Since Silverlight can no longer be officially downloaded and installed on Microsoft, your best bet is to use a modern browser that allows for all Silverlight’s functionality.

We recommend installing and browsing with Opera One on Windows 10 and 11. This browser offers support for multimedia content. It is an excellent option for streaming videos on Twitch, YouTube, and other platforms.

Opera One

Browse the web securely with this up-to-date browser with integrated multimedia apps.

How do I fix Silverlight on Windows 10&11?

➡ Silverlight not working in Chrome

In recent Chrome editions, you will not need Microsoft Silverlight. But unfortunately, it can no longer be officially downloaded is a sign that it has outlived its usefulness.

Enrich your multimedia experience on Chrome by updating the browser and using extensions from Chrome’s vast extension library.

➡ Silverlight not working in Edge

Edge is an upgrade and a replacement on Internet Explorer 11. It is the favorite browser for Windows 10 and 11 and does not need Silverlight technology.

On Microsoft Edge, you will be able to access almost any kind of multimedia content without the need for extensions. However, in rare cases, you will find helpful add-ons in the extension library.

➡ Silverlight not working in Firefox

Just like many modern browsers, Firefox also has disabled support for Silverlight. Unfortunately, this means you will not be able to run the plugin anymore.

You will not be missing much as current versions of Firefox have features that make Silverlight obsolete. The browser also has a large community, and you will find different add-ons to improve the multimedia content experience.

➡ Silverlight not working in Internet Explorer 11

  1. Launch Internet Explorer.
  2. Click on the gear icon at the top right corner of the browser.
    silverlight not working
  3. Select the option to Manage Icons.
    silverlight not working
  4. Click the Currently loaded add-ons dropdown menu and select All add-ons.
  5. Under the Microsoft Corporation menu, click on Microsoft Silverlight, then at the bottom of the windows, click the Enable button.
    silverlight not working

Go ahead and close the Windows, which should have resolved the problem. If not, try the next solution.

Reset Internet Explorer

  1. Launch Internet Explorer.
  2. Click on the gear icon at the top right corner of the browser.
    silverlight not working
  3. Select Internet Options.
  4. Click on the Advanced tab.
    silverlight not working
  5. At the bottom of the windows, click the Reset button.
  6. Tick the Delete personal settings checkbox, then click on the Reset button.
    silverlight not working
  7. Restart the browser, and Silverlight should be back working.

There you have it.

If you have not installed Silverlight, you will probably not have any need for it. And any solutions that resolve issues on silver light in outdated browsers may no longer work on recent updates of your browser.

If you still use an old Windows OS, it will be wise to learn all you need to know about the Silverlight tech on Windows 8.

Please let us know if you found this helpful guide.

5 Best HD Avengers Endgame Wallpapers for Windows 10

It looks like you are someone who is a fan of Avengers Endgame. Well, there is no denying the fact that Marvel never lets its fans down.

They do an excellent job of teasing people with their new episodes and series. Well, Avengers Endgame is one of the hottest and the most popular topic at the moment around the world.

People are going crazy to watch the Avengers Endgame and see what will it bring.

Anyways, a lot of Marvel fans like to personalize their devices with Marvel fan art. It looks like you are someone who is looking for the Marvel Avengers Endgame wallpapers for Windows 10 PC.

All of the wallpapers you see below are handpicked from a pool of Avengers Endgame Wallpapers. Also, all these wallpapers are in Full High Definition resolution.

These wallpapers will look good on almost every Windows 10 PC. With that being clear, that being said, let us now take a look at our first wallpaper on the list.

Well, that’s exactly what we will be covering today in this post. If that sounds interesting, let us top it.

What are the best HD Avengers Endgame wallpapers for Windows 10?

AFTER ‘THAT’ PAGE

Do you remember the scene of Avengers Infinity War when Nick Fury urgently sends a page to Captain Marvel?

Well, this wallpaper, which we should say looks beautiful features almost every character of the Avengers Endgame. The background of the wallpaper is sick, the colors look good too.

At the office, when we set this as wallpaper on our machine, it just gave our rig a completely new and sick look which was liked by many.

Anyways, we will highly recommend you download this wallpaper and set it. See if it goes well with your theme and setup.

You can download this wallpaper completely free on your Windows 10 PC from here. Didn’t look too good? Well, don’t worry, try our next wallpaper.

WILL HE WIN?

Continuing with the list of 5 Best HD Avengers Endgame wallpapers for Windows 10, we have another great-looking Avengers Endgame Wallpaper.

Do you remember the Thanos from the Avengers Infinity War? Well, he is one of the most powerful villains from Marvel. He wants to collect all the infinity stones for his good.

This wallpaper has a galaxy theme which might be liked by many. It does look like some setup. Anyways, you can download this wallpaper in Full High Definition for free from here.

THE COMEBACK

With the previous Avengers, we have seen a lot of characters from the Avengers being snapped. Right? Well, guess what, some of these characters are making it back to the Avengers in the Endgame.

The most hyped one is the comeback of Hawkeye aka Clint Barton as Ronin.

Well, the character is coming back with a brand new look which is quite amazing. Looking at the preview of the wallpaper above, you must have already got an idea about how good the character looks now.

In case, the wallpaper looks pretty good on almost every desktop. You can download it for free on your Windows 10 PC from here.

WHERE ARE THE OTHERS?

Moving on with the list of 5 Best HD Avengers Endgame wallpapers for Windows 10, we have the fourth wallpaper.

This wallpaper has a pretty great background which features sky and a lot of lightning. We can find the most powerful characters of the Avengers in the wallpaper upfront.

There are some really vivid colors on the wallpaper. The facial expressions of the characters on the wallpaper also look pretty good too.

We will highly recommend you download and try out this amazing wallpaper for Windows 10 PC. You can download it for free on your PC from here.

THE SNAP

THE SNAP! Yes, as you might already know, Thanos is the most powerful villain of the Avengers Infinity war. He is on the earth to wipe all the humans on the earth and get the Infinity Stones.

This wallpaper features Thanos with his gems. If you are someone who likes the Villains more than the Heroes, then the chances are that you will like this wallpaper.

Anyways, this wallpaper too like every other wallpaper on the list is in Full High Definition and can be downloaded completely free on your Windows 10 PC.

So that’s it guys, this was our take on 5 Best HD Avengers Endgame Wallpapers for Windows 10. We hope that you found this post useful.

Let us know your pick for the best Avengers Endgame Wallpaper in the comments section down below.

10 Best Plagiarism Checker Software for PC

Plagiarism checker software helps you verify the quality of your writing to make sure it’s original content. These tools are indispensable to SEO marketing, journalism, research, and academics.

For example, you need professional software to detect plagiarism if you’re a freelance writer. Otherwise, copied materials can become your downfall.

In this article, we selected what we think is the best plagiarism checker software for PCs. Here it is:

What is the best plagiarism checker software?

QuillBot Plagiarism Checker – Great for multiple file formats

best plagiarism checker software for PC

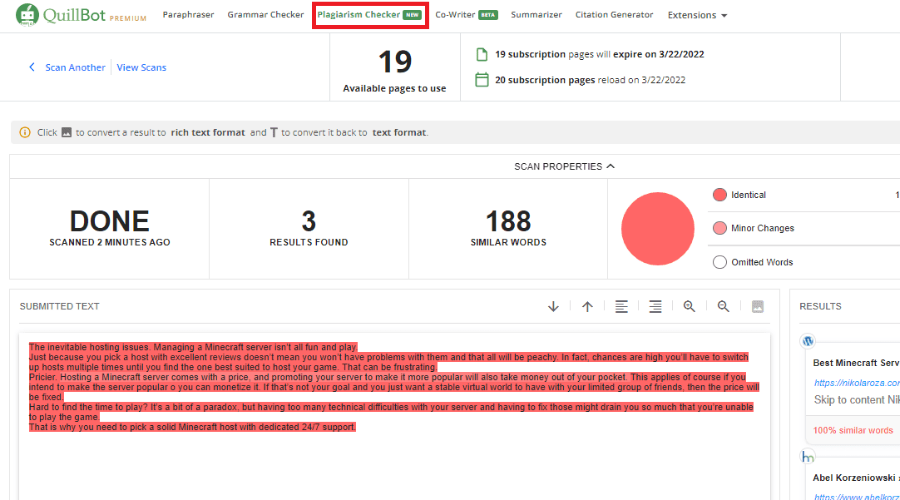
QuillBot is known for its spellchecker and paraphrasing tools and it’s no surprise that it also offers a worth-trying plagiarism checker.

To check your documents for plagiarism, you have to upload them to Quillbot. It supports multiple types of formats including txt, docx, pdf, and HTML.

The tool will then use its algorithm to check whether your document is similar to other documents in its database. 

It will then offer easy-to-follow feedback, letting you know where you lack proper citations or whether your text has been copied/paraphrased from somewhere else.

The report gives you an accurate plagiarism score, letting you know how much of your data corresponds with data found in other sources at which point it is time to take action and change it up.

Another tool worth mentioning for our international readers is Quillbot, which can check for plagiarism in over 100+ languages, including Spanish, French, Japanese, Chinese, and Arabic.

For those of you worried about uploading the documents, Quillbot has a transparent privacy policy that can be read on its website.

It states that they only store your data up until the algorithm checks it. Once you are done adjusting your document, it will be permanently deleted from their database.

One setback if you plan to check large-sized documents is that the app only lets you scan 20 pages per month. If you need more, you will have to pay an extra fee.

The plagiarism checker is a premium tool of Quillbot, so you must purchase a subscription plan to use it.

However, the monthly fee is not much, and premium users get additional benefits that include faster processing speeds, compare modes, and advanced grammar rewrites.

Other key features of QuillBot Plagiarism Checker include:

  • Cross-checks with web pages, books, research publications, and academic papers
  • Fix the issues found with the Quillbot Citation generator
  • High-accuracy detects paraphrased plagiarism
  • User-friendly and cross-platform app

QuillBot Plagiarism Checker

Use QuillBot’s powerful algorithm to check your documents against thousands of resources thoroughly.
Check price Visit Website

Plagiarism Checker X – Great graphics representation

Plagiarism Checker X is one of the best plagiarism software options. It has an intuitive interface and straightforward options, and it uses a large database to check for text similarity and original content.

This is another great choice, regardless of your field. It provides assistance to students, teachers, writers and journalists, and digital marketers.

Plagiarism Checker X supports multiple formats, including MS Word Documents (.docx, .doc), .rtf, .pdf, and plain text. You can easily upload your files and get a plagiarism report right away.

If you suspect a document is similar to another specific document, you can use the Side by Side Comparison feature. This analyzes and finds similar and duplicate content within two particular files.

This can save you a lot of time as you won’t have to go through the whole document again and only check the report provided by the software.

Another feature that is especially useful for teachers is the Bulk Comparison. You can import multiple documents and run a plagiarism scan across all of them in just a few minutes.

Plagiarism Checker X also has options for digital creators. If you blog, you can use this software to scan across the web for content that is similar to your text. This can save you from getting banned from search engines as you can quickly adjust your text for better originality rates.

Plagiarism Checker X has a free fully functional edition with limited features. It also has premium options that come with a lifetime license. 

Other key features include:

  • Offline side-by-side comparisons
  • Copy/paste option for text insertion
  • Keyword analyzer
  • Percentage reports of similarities

Plagiarism Checker X

Take your writing to the next level and always stay authentic with Plagiarism Checker X!
Free Trial Visit Website

ProWritingAid – Ideal for writers

ProWritingAid is more than a grammar checker – it’s an all-in-one writing mentor designed to enhance your writing through unique suggestions presented in a fun and interactive manner.

Just as writing is more than grammar, ProWritingAid stretches its focus beyond basic punctuation and conjugations. It covers your style, tone, and approach to help you deliver an original, unique, and consistent piece of content.

This tool gives in-depth reports beyond grammar, spelling, and syntax. It can analyze your style, check for overused words and phrases, identify alterations, and more.

Regarding plagiarism, this tool performs advanced scans across the web. It looks for similarities in over a billion web pages and articles to ensure your text is original and well-cited.

Another smart and helpful feature of Pro Writing Aid is the Cliches and Redundancies Report. Good information often gets lost in too many phrases.

Redundant pieces of text can drive away even readers who are genuinely interested in the topic of your text. This feature ensures the creation of quality, engaging content.

Pro Writing Aid can also detect the writing style of your text and make sure that you follow it across the whole piece.

It detects any tense inconsistencies, bad wording, overuse of the passive voice, and more. It helps you create an easier-to-read text, whether you are an academic, blogger, or student.

This software integrates many popular tools such as Google Docs, Microsoft Office, Scrivener, and Essay Checker.

Pro Writing Aid is a paid service. You can either get a subscription with monthly or annual charges, or a lifetime license with all updates included. It does provide a free trial upon an email request. 

Let’s quickly look at its key features:

  • Automatic suggestions on style improvements to accelerate your editing
  • Eliminate style inconsistencies (vague expressions, passive voice, repetitiveness, and more)
  • Check and address spelling and grammar errors instantly
  • Contextual adaptation through the word explorer and thesaurus
  • Intelligent pattern detection to eliminate common mistakes
  • Highest privacy standards and fully GDPR compliant

ProWritingAid

Become a better writer while still staying true to your style with ProWritingAid!
Free Trial Visit Website

Grammarly plagiarism – Best spelling and grammar checker

Grammarly needs no introduction. It’s the most famous grammar checker tool to this date, ideal for work, personal projects, and academic writing.

However, few know that Grammarly includes powerful plagiarism checker software that verifies over 16 billion web pages. The only issue is that it’s only available for Grammarly Premium users.

Grammarly’s plagiarism checker uses ProQuest databases to detect major similarities between your text and thousands of published works from various academic fields. 

It also scans the internet for plagiarized content, verifying over 16 billion websites to ensure that the work you want to submit is as original as possible.

Grammarly can be your go-to software solution for writing, regardless of the type of text. Besides the spellchecker and plagiarism checker, it offers plenty of useful features that help you improve your work. It detects text style and suggests adjustments based on your specific goals.

The software has an extensive dictionary database to detect spelling mistakes and syntax problems. Grammarly can suggest style improvements to avoid repetition, cluttered phrases, and other similar issues.  

Regarding minor errors such as typos, the tool detects them within seconds and automatically suggests in-text improvements. This way, you can focus on your work’s content without stressing too much about easily detectable and fixable problems.

Grammarly Premium provides a comprehensive toolset that writers of all types can use. The software also has a free version with some limitations.

You can install it as a browser plugin, use it directly on the website, or download the app to your computer.

Other key features include:

  • Gives suggestions based on the target audience
  • Clarity suggestions
  • Readability and vocabulary feedback
  • Create a custom dictionary associated with your account
  • Native app for PC and MAC

⇒ Get Grammarly Plagiarism

Copyleaks – Ideal for academic usage

Copyleaks prides itself on being plagiarism checker software powered by AI and machine-learning technology. It can detect paraphrased and similar text.

The tool reaches out to academic and educational environments as well as the business and enterprise industry.

Copyleaks can compare two different specific websites. You can get full reports of all individual pages on these two websites and quickly find possible copyright infringement.

On that note, the software also allows you to compare different types of documents. You can upload and compare files in different formats, such as .docsx, .pdf, .xls, or .ppt. 

With advanced optical character recognition technology, Copyleaks can also detect plagiarism in image files. The software can understand the written content in an image and report when it finds risks of plagiarism.

Another really useful feature provided by Copyleaks is the multiple language support. The software can scan for plagiarism across different languages.

Copyleaks is a paid product offering two plans: Academia & Education and Business & Enterprise. 

Let’s quickly look at its key features:

  • Compare any two files for text similarity
  • Offline mode to find duplicate files
  • Stores your data in the cloud but doesn’t expose it
  • Download reports with plagiarism detection results
  • Integrates with Microsoft Word and Google Docs

⇒ Get Copyleaks

Free Plagiarism Checker – Fast plagiarism checker

If you’re looking for a fast way to check your text for duplicate content, use the Free Plagiarism Checker app from Study Crumb.

It is so easy and quick to use that you will be amazed because the results will come in just a few seconds.

Just type a title of at least two words, paste your text of between 100 and 500 words, and hit the Check for Plagiarism button.

The web tool detects accidental plagiarism and exact-match content but ignores commonly used phrases and citations.

And the best part is that you can check as many texts as you like for free and unrestricted.

It confronts your writing with billions of online resources, including academic periodicals, so you will be sure that you won’t have any trouble submitting it.

Moreover, your document will not be stored anywhere and it will be deleted as soon as you leave the page.

Check out its key features:

  • Fast and easy to use
  • Complete confidentiality
  • A huge database of online resources
  • Free to use, without any restriction
  • 100 to 500 words check at a time

Free Plagiarism Checker

This amazing web tool will confront your text with billions of resources to ensure no duplicates.

Turnitin – Great for students

Turnitin is one software that focuses on integrity which is one of the reasons it’s so amazingly popular in academic environments.

The tool quickly identifies plagiarism by comparing content sets against the largest collection of digitalized academic materials and highlighting similarities.

The Similarity tool provided by Turnitin checks offers comprehensive plagiarism reports. It compares your text against active and archived web pages, works included in the Turnitin repository, periodicals, journals, and other publications.

The reports generated by this tool give in-depth information about the plagiarism scan results. The similarity score is the percentage of the plagiarized content in your paper. 

Turnitin Similarity categorizes plagiarized content into two categories: matches and sources. Matches are texts that are not entirely identical but very similar. Sources are identical pieces of text that come from other papers.

These can greatly help because you need different solutions to fix your paper. For example, a source can be fixed with the right citation, while a match requires further reading and more original content.

Turnitin Similarity is an excellent choice for students because it is compatible with multiple learning tools, such as Blackboard Learn, Brightspace, MS Teams, and Moodle.

Turnitin is a licensed-based software that targets academic institutions. You can’t get it as an individual user if your school doesn’t use it.

If you represent an institution and want to use it, you can request it by filling out a request form.

Let’s quickly look at its key features:

  • Effective plagiarism detection solution
  • Implement authorship based on data-driven insights
  • Feedback and grading features to facilitate instructional dialog
  • Educational, creative resources to enhance academic skills (blogs, guides, white papers, and more)

⇒ Get Turnitin

Scribbr – Fast and accurate

Scribbr is an education-oriented tool that compares your document to an impressive database. It scans across over 91 billion active and archived web pages and millions of other publications.

Besides that, users can also add their own sources to the checker. If you used small independent publications or unpublished papers as your source materials, you can upload them into the checker and compare them with your paper.

It has up-to-date technology that fights fake plagiarism alerts. AI-generated scans are never foolproof, and there is always a risk of a false positive. The software scan ignores commonly used words and phrases and reference lists.

Moreover, you can tweak the settings to exclude specific papers or databases, change the threshold for small matches, or ignore certain similarities.

The report provided by Scribbr offers an overall percentage of similarity and a list of all the sources found in your text. The plagiarized paragraphs are highlighted; you can click them to compare them side-by-side with the source text.

This software is also a great option because it has clear confidentiality policies. Some plagiarism software automatically enrolls any text within their database to improve their scores. Scribbr does not do that and lets you delete your document after receiving your report.

Scribbr is a paid service that charges based on document size. It has three different options and also custom plans for institutions. 

Other key features include:

  • Agent support from plagiarism experts
  • Detects plagiarism across 20 different languages
  • Support for institutions and individual users

⇒ Get Scribbr

Plagramme – Designed for students

Plagramme is a similarity checker with an ever-growing customer base. It is greatly appreciated for features such as paraphrase detection, quote correction, and the extensive source database.

This tool is mainly targeted toward students and teachers. Still, it can be used with no issues by other professional writers because it has the tools to check for similarities across all fields and types of sources, including web-based content.

Plagramme offers to users detailed reviews of their texts. Its up-to-date detection technology gives you separate scores for similarity, plagiarism risk, paraphrase score, improper citations, and matches. The similarity score is the overall percentage, while the others are more specific.

Users can easily identify these issues within their text because the tool highlights them in different colors. You can also get links and side-by-side comparisons with the sources found during detection.

Palagramme has a very large multi-language database that covers over 129 languages. It can easily detect translated text, paraphrases of the translated text, and other similar issues. It is reportedly recognized as the national anti-plagiarism tool in multiple countries.

Improper citations can also create problems with your paper. Palagramme takes care of these as well. It detects all citations and uses highlights for feedback.

Green highlights mean that your citations are correct, and purple means that you need to adjust them. 

Plagramme is a paid service. It charges based on the size of your text. You get to try it for free for a limited-sized text.

Other key features include:

  • Sharing options between students and teachers
  • Free plan  for teachers
  • Multiple language interface

⇒ Get Plagramme

Dupli Checker – Great file format support

Dupli Checker is web-based anti-plagiarism software. It is intuitive and easy to use and offers multiple options for inserting text.

You can either paste text from your original document and insert it in the textbox on the main page, upload a text file (supports .tex, .txt, .doc, .docx, .odt, .pdf, .rtf), or insert a webpage URL.

Dupli Checker works similarly to the other software in this list. It searches its database for similarities between your text and previously published content. It can be used for all text types, including academic papers, blog posts, or essays. It provides percentage-based results.

This software also vows to protect your privacy. It does not save the documents you upload and deletes any trace of them once you check the results.

This tool also has a grammar checker feature highlighting misspellings or errors.

It can detect text similarities across seven different languages. It can detect translations and risky paraphrases on the web and across multiple publications.

Dupli Checker has an automated feature that can help you improve your text. The Make it Unique feature can rewrite your text in a plagiarism-free manner. This can be a really good time-saving option.

Dupli Checker is a free tool that can be used immediately without registration. You only need a good Internet connection. 

Other key features include:

  • Super fast detection
  • Highlights plagiarized paragraphs with color-coding 
  • Identifies duplicate sentences and phrases

⇒ Get Dupli Checker

Why do I need a plagiarism checker?

Copyright laws are very strict in most places, and if you don’t focus on the originality of your content, you risk harsh consequences, such as being discredited as an academic or being banned from search engines if you work online.

Even though you try your best to cite your sources and produce original content, the smallest errors, such as a bad citation, can recognize your text as plagiarism.

Since your career depends on writing genuine content and search engine rankings, you will definitely enjoy the perks of using such tools to facilitate your work.

Anti-plagiarism software is a great time saver and can often provide better reviews than human proofreaders, as their AI-based technologies don’t miss as many important details as we do.

In the tech age, a plagiarism checker software tool is necessary for copyright protection. Plagiarism can result in lawsuits, criminal charges, and sometimes even imprisonment.

Even if you commit unintentional plagiarism, it will still be viewed as plagiarism in the eyes of the law, and this is very important to remember.

Use one of these trusted tools according to your needs to eliminate the risk of being penalized for plagiarism.

By using plagiarism software, you will be able to make sure that your content is 100 percent original.

You might also be interested in our selection of the best automated proofreading software because it will help you with your academic work.

We hope that our recommendations were helpful to you. For more suggestions, please access the comments section below.

5 Best HD Marvel Wallpapers for Windows 10 [Free Download]

Looking for the best HD Marvel Wallpapers for your Windows 10 PC? Alright, so it looks like you are someone who likes Marvel. Well, Marvel does have some great superheroes.

Now, there are really a lot of fans of Marvel out there who like to set the Marvel Wallpapers on their devices. Well, that’s great! It’s good to follow something which you really like.

Anyways, you might be looking for some good Marvel Wallpapers for Windows 10 in HD.

If you go out on the Internet looking for the Marvel HD Wallpapers the chances are that you will not be able to make a choice.

The reason is there are quite a lot of options out there to choose from. Anyways, you might not want to waste time going through a lot of wallpapers.

All of the wallpapers you see below are handpicked from a pool of Marvel Wallpapers. Also, all these wallpapers are in Full High Definition.

Today, in this post, we would be covering the 5 Best Marvel wallpapers for Windows 10.

What are the best HD Marvel Wallpapers for Windows 10?

Avengers Wallpaper

There is no denying the fact that the Avengers is one of the best series by Marvel. Now, speaking of the Avengers, we cannot forget the Avengers Infinity War. Right?

Well, this is a wallpaper which features all the characters together on a big screen. In the movie, they have faced all the villains along with the Thanos who is here to get the Infinity stones and destroy the universe.

This wallpaper looks pretty good on the big screen. You should definitely download and set this as your PC’s wallpaper and see if it looks good on your Setup. You can download this wallpaper for free by clicking here.

Thanos Wallpaper

Are you someone who likes Villains more than Heroes? Well, if that’s you, then the chances are that you already know about and like Thanos.

Well, there is no denying the fact that the Thanos is a supervillain in Marvel’s Cinematic Universe. Thanos is appeared to be one of the most powerful villains of the Avengers so far.

Anyways, if you love villains or Thanos, then you should consider checking out this amazing wallpaper. You can download this amazing Thanos wallpaper for free on your Windows 10 PC by clicking here.

Captain America Wallpaper

Captain America is another great character from the Marvel courtesy. He is one of those characters who symbolize dedication, hope, and power. He loves justice and is a really powerful character.

Just in case you don’t already know or just can’t really remember, Captain America was born through a scientific program that Marvel called the “Rebirth” and holds an iconic shield to fight against the enemies.

The Wallpaper features Captain America holding the shield with a really nice background effect. You should definitely try out this amazing wallpaper on your Windows PC. Download it for free from here.

Iron Man Wallpaper

Iron Man is one of those Superheroes of the Marvel courtesy who is a techie. If you are here looking for Marvel Wallpapers for Windows 10 PC, then the chances are that you are also tech-savvy.

Anyways, the Iron Man acquires most of his powers from the Iron suit which is heavily loaded with the gadgets and benefits from a true AI assistant, Jarvis.

This wallpaper has some really good colors which can turn out pretty sick with a nice Windows 10 PC setup. That being said, you can download the Iron Man Wallpaper on your Windows 10 PC from here.

Thor Wallpaper

And finally, last but not the least, we have the Thor Wallpaper coming in at number 5 on our list of 5 Best Marvel Wallpapers for Android Device. Thor is someone who is the Asgard and the God of Thunder in Marvel. He has a lot of abilities.

For instance, he can bench press mountains, fly through the cosmos, and can compete with any villain with this hammer.

The wallpaper has a dark side on the left where the icons go. You can download this wallpaper on your Windows PC for free from here.

So that’s it guys, this was our take on 5 Best HD Marvel Wallpapers for Windows 10. We hope that you found this post useful, let us know your pick for the best Marvel Wallpaper in the comments section down below.

Easy Fix: Err_Connection_Closed in Chrome

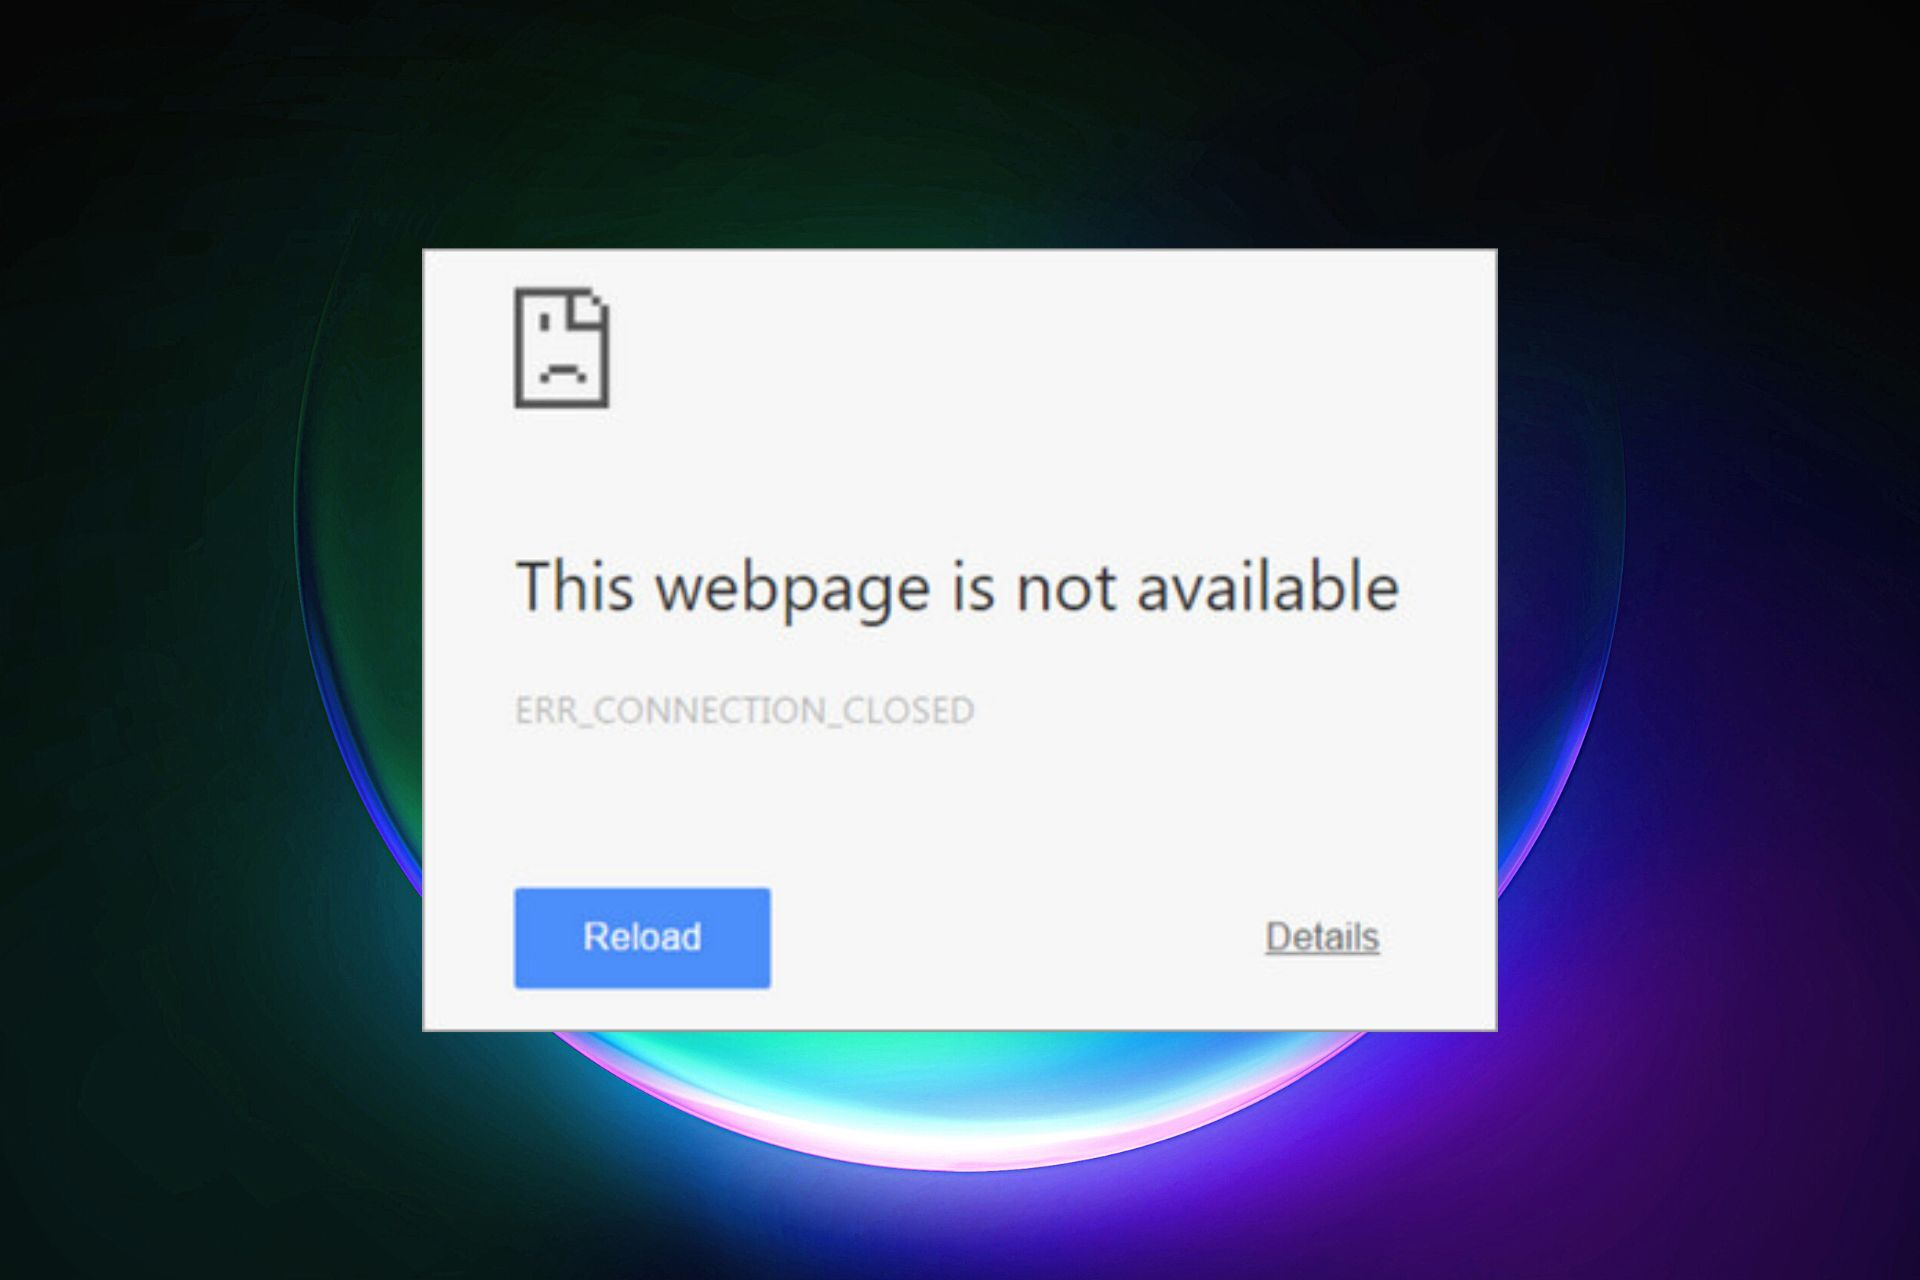
We frequently experience issues with Chrome, particularly with Internet connectivity. Chrome frequently displays errors on the screen, and today we’ll discuss how to fix the Err_Connection_Closed error in Chrome, so let’s get started.

How do I fix Err_Connection_Closed in Chrome?

1. Clear DNS cache

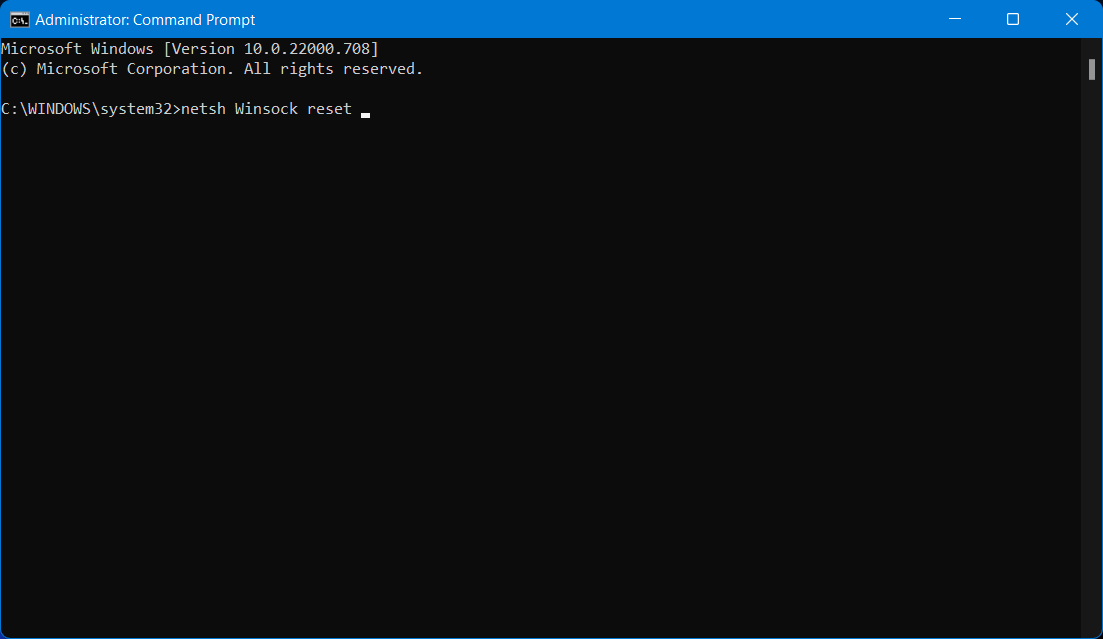
  1. Open the command prompt window by typing on the Start Menu and clicking on the Run as Administrator option.
  2. Type in the following command and hit enter afterward: netsh Winsock reset

Try using Chrome after this. If the error pertains, type in the following lines of the command followed by a press of the enter button after each line:

ipconfig /release
ipconfig /renew
ipconfig /flushdns
ipconfig /registerdns

After executing the above commands make sure to restart your system. These commands clear the DNS cache for the system and renew the connection with the ISP. If it does not fix the Err_Connection_Closed error then follow the next solution.

2. Clear Chrome cache

Another viable option would be to clear your Chrome browser cache and cookies to fix Err_Connection_Closed.

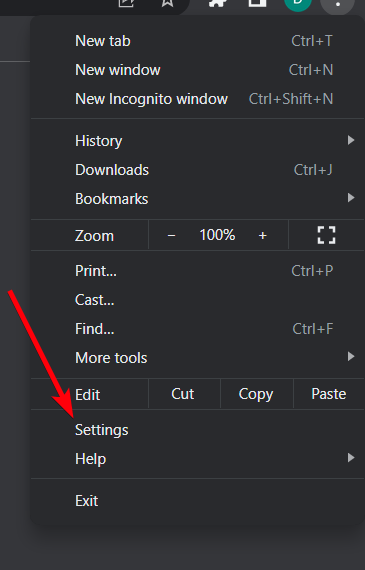
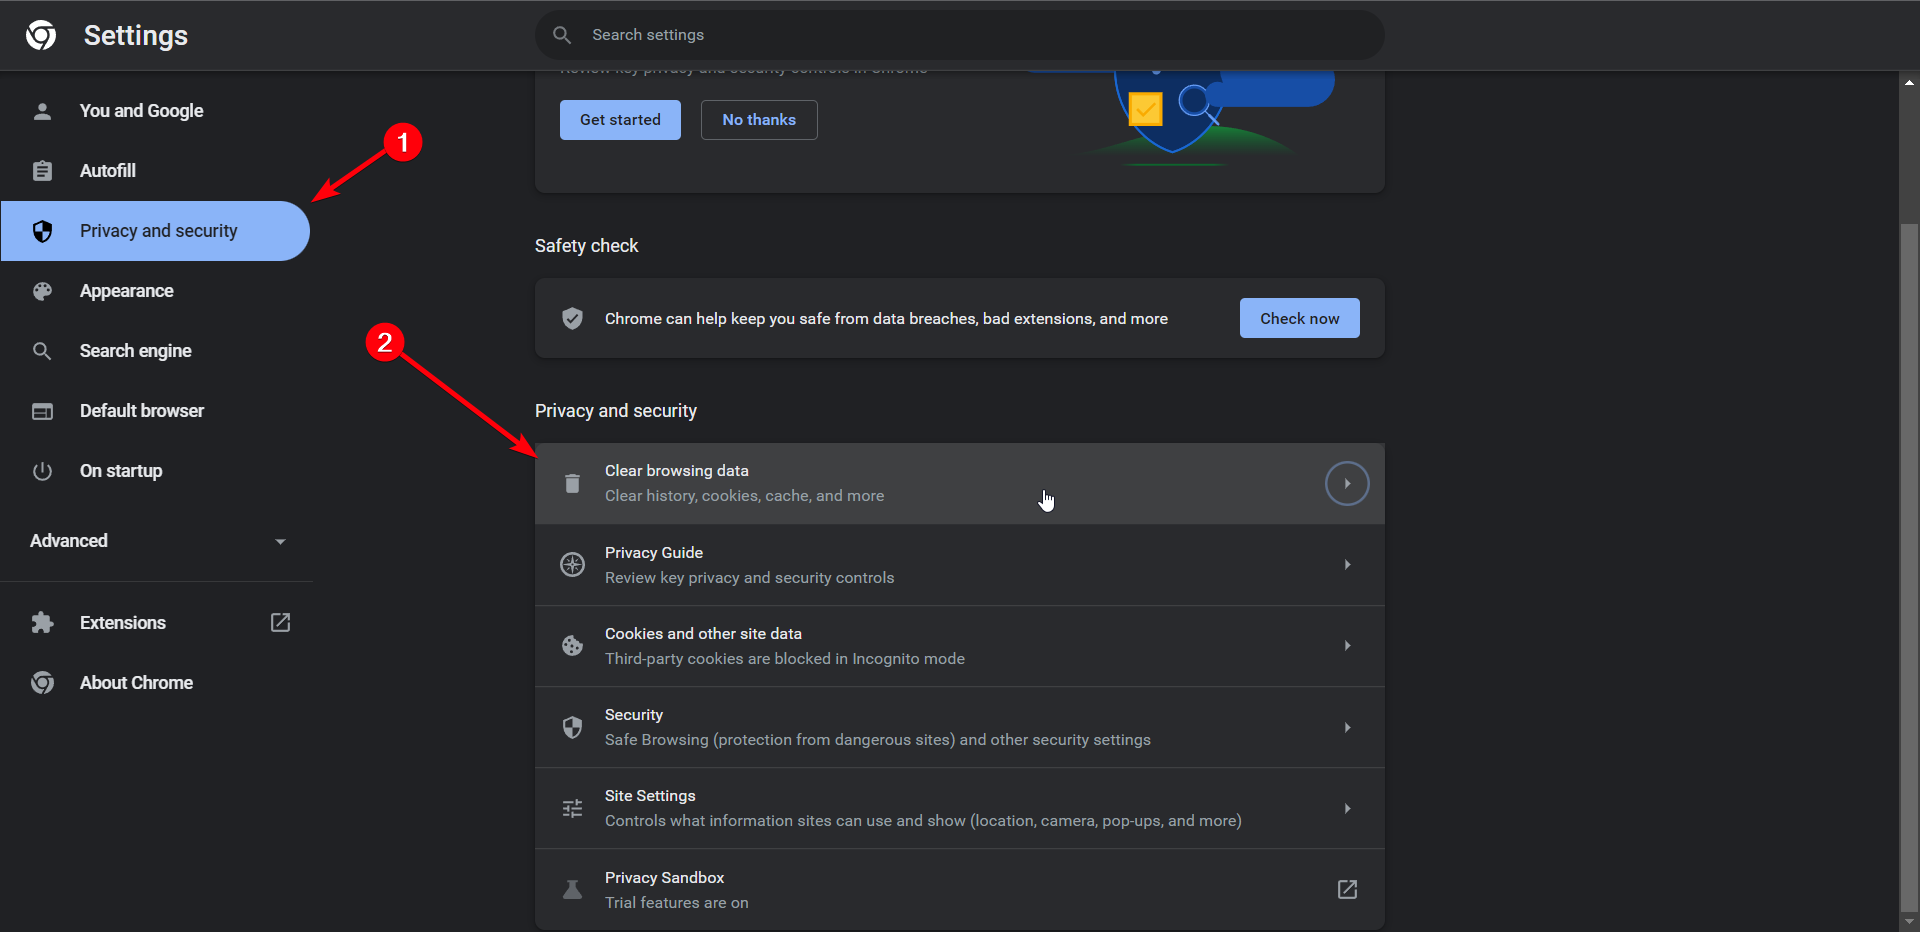
  1. Open Chrome and click on the three dots in the upper right corner.
  2. Go to Settings.
  3. Click on the Advanced Settings option. You will find it after scrolling to the bottom.
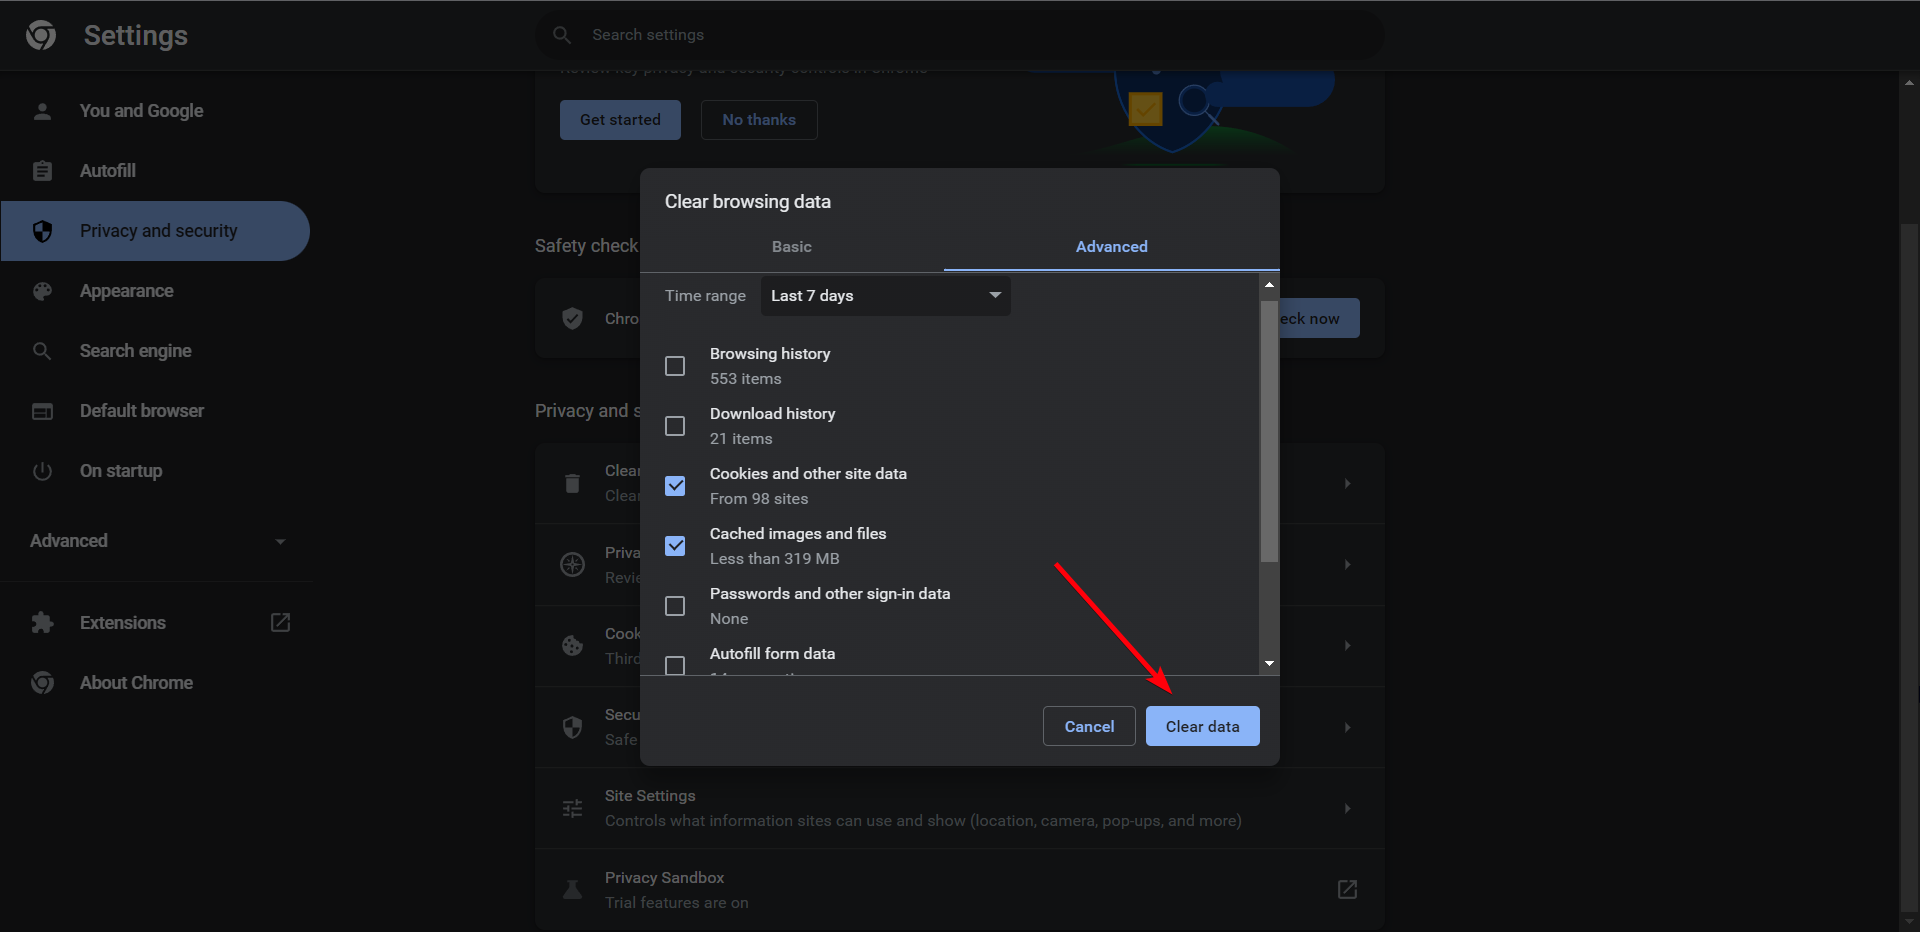
  4. Go to Privacy and security, and click on the Clear browsing data option. A pop-up window will appear.
  5. Select the Cookies and Plugin Data and Cached Images and Files checkboxes and click on Clear Browsing Data to proceed.

After deleting the cache files the Err_Connection_Closed in Chrome error should be resolved. In case you are still facing the error, follow the method given below.

If you’re not sure about erasing browsing data manually from your browser, there is automated software that can unclutter your system in a few moments.

That said, CCleaner will find useless browsing data on your PC and erase any cookies or cache data in any browser you may use.

3. Assign DNS Address Manually

If both the above methods fail, there’s this method that you can fall back on that requires you to manually reassign the DNS address. Here’s how it is done.

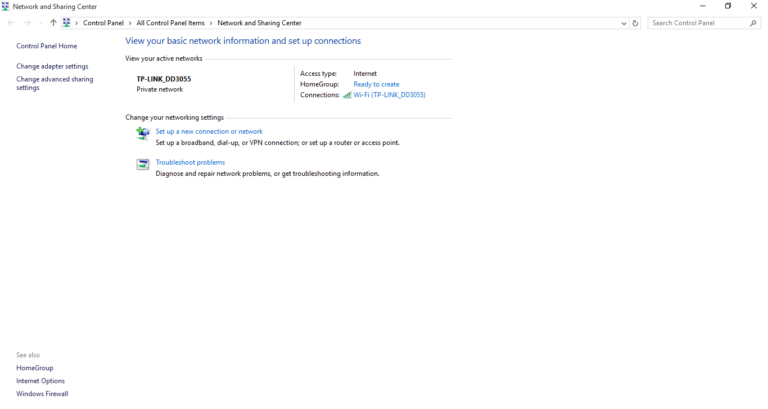
  1. Right-click on the network icon from the notification tray on your computer. This could be the Wi-Fi icon or the LAN icon.
  2. Click on the Open Network and Sharing Center.
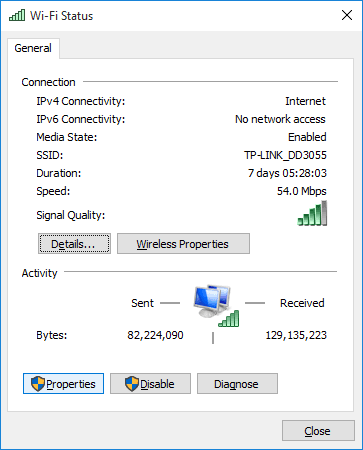
  3. Click on your connection.
  4. A pop-up window will appear. Proceed to click on Properties.
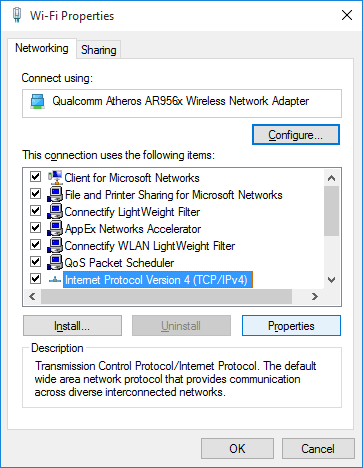
  5. Select the Internet Protocol Version 4 (TCP/IPv4) option and again click on Properties.
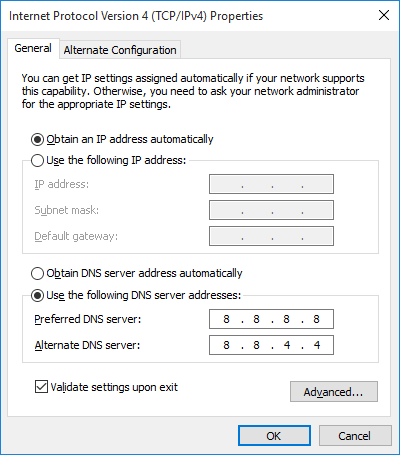
  6. Select the radio box next to Use the following DNS server addresses.
  7. Proceed to enter the values 8.8.8.8 and 8.8.4.4 in the Preferred DNS Server and Alternate DNS Server fields respectively.
  8. Select the Validate Settings Upon Exit checkbox, then click OK.

4. Consider an alternative browser

To avoid all the connection and server errors on your Chrome browser, it’s easy to change this browser and import all your data as well.

Opera One browser is the go-to browser that offers very useful features to use in your day-to-day online activities.

You can browse your websites way faster without interruptions, benefit from VPN privacy and ad blocker tools, or make use of the native AI or of other AI’s dues to it’s modular AI ready design.

Opera One

Forget about connectivity problems on Chrome and enjoy the browsing experience and features in this skilled browser.
Free Download Visit website

FAQs

What causes the ERR_CONNECTION_CLOSED error?

This error appears when your browser can’t connect to a website because the connection was unexpectedly closed, often due to network settings, VPNs, or firewall interference.

How do I fix the ERR_CONNECTION_CLOSED error on Chrome?

Clear your browser cache, disable extensions, reset your network settings, and ensure no proxy or VPN is blocking access.

Can antivirus software trigger ERR_CONNECTION_CLOSED?

Yes, some antivirus programs may block SSL connections or secure websites, leading to this error. Temporarily disable or adjust settings to test.

Does using a VPN help with ERR_CONNECTION_CLOSED?

Sometimes. If your ISP blocks a site, a VPN can help bypass restrictions, but if the VPN itself fails to connect, it might cause the error too.

Seeing related issues in Chrome? Try our step by step guide to fix the ERR_CONNECTION_RESET error on Windows 10 and restore your connection fast.

So this was our tutorial on how to fix the Err_Connection_Closed error in Chrome. We hope the guide proved helpful to you. Have any queries? Get back to us in the comments section below and stay tuned for more useful articles.

3 Easy Steps to Fix Internet Explorer Missing in Windows 10

There are lots of users complaining that when they try to search for Internet Explorer in the Start menu search bar of Windows 10, Internet Explorer is missing in Windows 10.

Even the worst part is that it’s also not available in the Windows Accessories folder. Strange right?

Is Microsoft hiding Internet Explorer (IE) so that users can use the Microsoft Edge, the new default browser for Windows 10? The answer to this question is a mystery.

So for whatever reason, if you’re not able to launch Internet Explorer with Windows 10 Start menu search bar or by any other method, then you can follow the instruction to launch the missing Internet Explorer in Windows 10.

Note icon NOTE
Starting with June 15, 2022, the Internet Explorer browser has officially gone out of service. Thus, IE 11 will be retired for Windows 10 client SKUs, version 20H2 and later, and Windows 10 IoT, version 20H2 and later.

Please note that the products not affected by this retirement are:

– IE Mode in Edge
– IE 11 desktop on Windows 8.1
– Windows 7 (with Extended Security Updates)
– Windows Server LTSC (all versions)
– Windows Server 2022
– Windows 10 client LTSC (all versions)
– Windows 10 IoT LTSC (all versions)

How can I fix Internet Explorer Missing in Windows 10?

1. Search it on your PC

If Internet Explorer does not appear in the Start menu search result, then you can find it under the Windows Accessories folder:

  1. For that, click on the Start button, Scroll down until you see the Windows Accessories folder. 
  2. Click on the down arrow and here in the list, you will definitely see the Internet Explorer.

If the Internet Explorer icon is appearing in the list of Windows Accessories, then this confirms that there is an issue with the Search feature.

You can fix Internet Explorer not appearing in Windows 10 search by rebuilding the search index in Windows 10. For that, you can check the tutorial on how to rebuild the search index in Windows 10.

2. Find the new Internet Explorer location

In case Internet Explorer is not appearing in the Windows Accessories folder keep following the next steps:

  1. You need to navigate to the following location:
    C:\Program Files (x86)\Internet Explorer
    If you’re using a 64-bit version of Windows 10, then you need to navigate to the location below:
    C:\Program Files\Internet Explorer
  2. In the Internet Explorer folder, you will see different files and folders. Here you need to look for the “iexplore” (it is a .exe file)
  3. Make a right-click on iexplore file -> Send to -> Desktop (create shortcut) and this will create a shortcut of Internet Explorer on your desktop.
  4. To launch the browser, you can use this shortcut of Internet Explorer.
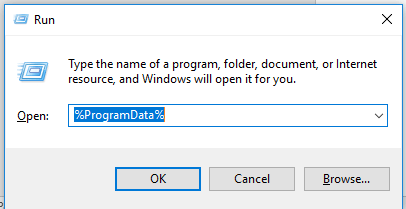
  5. To add Internet Explorer back into the Windows Accessories, launch the Run dialog box by pressing Window + R keyboard shortcut.
  6. Paste the path mentioned in the upcoming line and press Enter key to launch Windows Accessories.
    %ProgramData%\Microsoft\Windows\Start Menu\Programs\Accessories
  7. In the folder, you need to paste the Internet Explorer (iexplore icon). When you see the confirmation dialog, click Continue to complete the process.
  8. From now, you will see the Internet Explorer in the Windows Accessories folder.

3. Try an alternative browser

There is another method you can use to save all your time from fixing Internet Explorer issues, namely to change your browser to a more efficient one.

You have the opportunity to switch to Opera One and benefit from future-proof improvements like sidebar app integrations, reliable VPN protection, and sharing files easily using the Flow tool.

In addition, this browser includes more current features like built-in VPN, Ad Blocker and even a native AI.

⇒ Get Opera One

Ultimately, this is how you need to add Internet Explorer back in the Windows 10 Start Menu.

Windows 10 Start menu search feature will not show you the Internet Explorer in the results as you have just added a new shortcut of Internet Explorer in the Windows Accessories folder and it takes time to automatically index the shortcut in the same search results.

If you want the Internet Explorer icon to appear in the Search result immediately, then you can manually rebuild the search index in Windows 10.

Let us know if you found this guide useful. Also, were you able to find the missing Internet Explorer (IE) in Windows 10?

6 Best Browsers For Macbook Air & Air M1 To Use

You have probably just gotten a new MacBook Air, and you are wondering if to go ahead using Safari or what is the best browser for MacBook Air. So, we will give you the best education on this topic.

Browsers have become an essential tool in fulfilling our daily tasks. It does not matter if you are working or playing; they serve the all-important role of connecting you to the internet.

They were very limited in the early browser days, but now, their use remains invaluable, from gaming to more essential tasks like financial transactions.

However, you want to be sure what browser will serve you the best on your MacBook Air & M1 chips.

The best browser combines and finds the best blend between speed, power consumption, security, etc.

Also, note that if you use an older laptop, any of these browsers for slower computers should be better options for you.

What browser can I use on MacBook Air?

The browser market is highly competitive, and many browser manufacturers will not thrive if their products can not function properly across different platforms.

Hence, the modern browser will almost always have support for Windows, Mac, and Linux OS, meaning that most of them would work well on MacBook Air.

The best browser for MacBook Air in 2023 may be subjective to the criteria you feel is most important, but here are a few that will work seamlessly on this computer:

  • Safari
  • Google Chrome
  • Opera One
  • Edge
  • Brave
  • Firefox

The list goes on, but we will be showing you why some of these are the best browsers for MacBook Air running the M1 chip.

Is Chrome or Safari better for MacBook Air?

First, these are the biggest giants in the browser industry, and both are great fits for the MacBook Air. After that, however, the favor tilts slightly in favor of Safari. For the apparent reason that it is the only browser made specifically for Mac OS.

This makes it highly flexible and adaptable to the browser.

What is the best browser to use on MacBook Air?

Opera One – Best for social integration

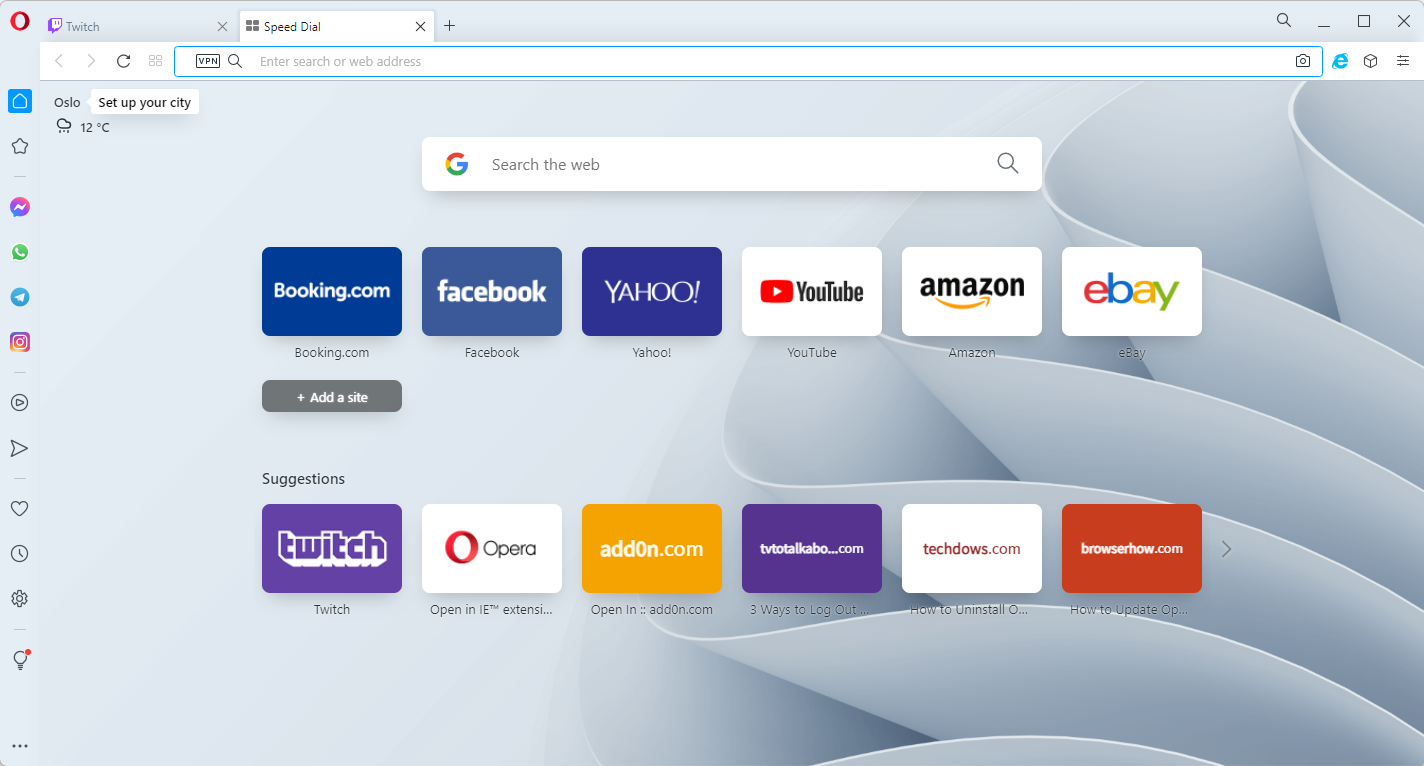
Opera’s splash screen allows you to switch on the Crypto Wallet, utilize the built-in VPN, switch on its ad blocker, and activate in-browser chatting from the side panel before you launch it.

For gamers, though, we recommend Opera GX, which is intended exclusively for gamers and includes Razer Chroma support and Twitch integration.

Since 2013, the Opera One browser has used the Chromium engine, giving it access to an extensive and comprehensive extensions repository.

One of the browser’s most significant and enticing features is the ability to integrate social apps without the need for plugins. In addition, most key platforms are instantly available and may be used as needed.

These features make it one of the best for MacAir and any Mac OS device.

Additional features:

  • Sidebar extensions
  • Animated themes
  • Integrated ad blocker

Opera One

End-to-end encrypted browsing and suitable to send notes, images, links, and other important data.

Safari – Best overall

Including the Safari browser in this list is a no-brainer, and Mac OS users will almost always pick it as their favorite browser, and with good reason.

Firstly, it is a browser made specifically for the OS and works seamlessly on every MacBook Air device. You probably will find it hard to switch to any other browser after getting used to Safari.

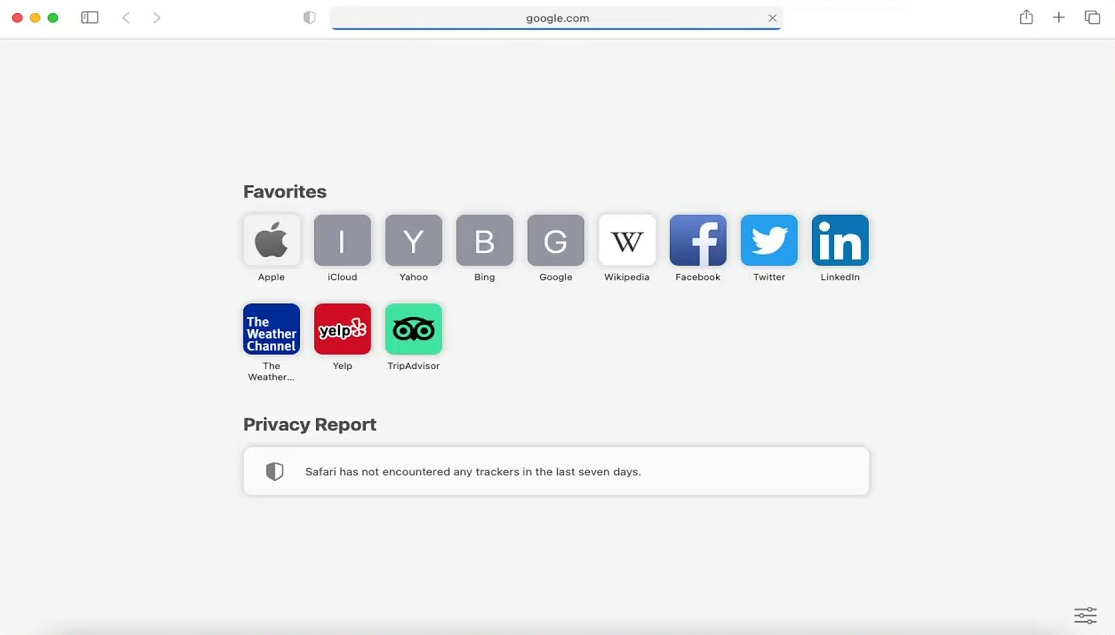
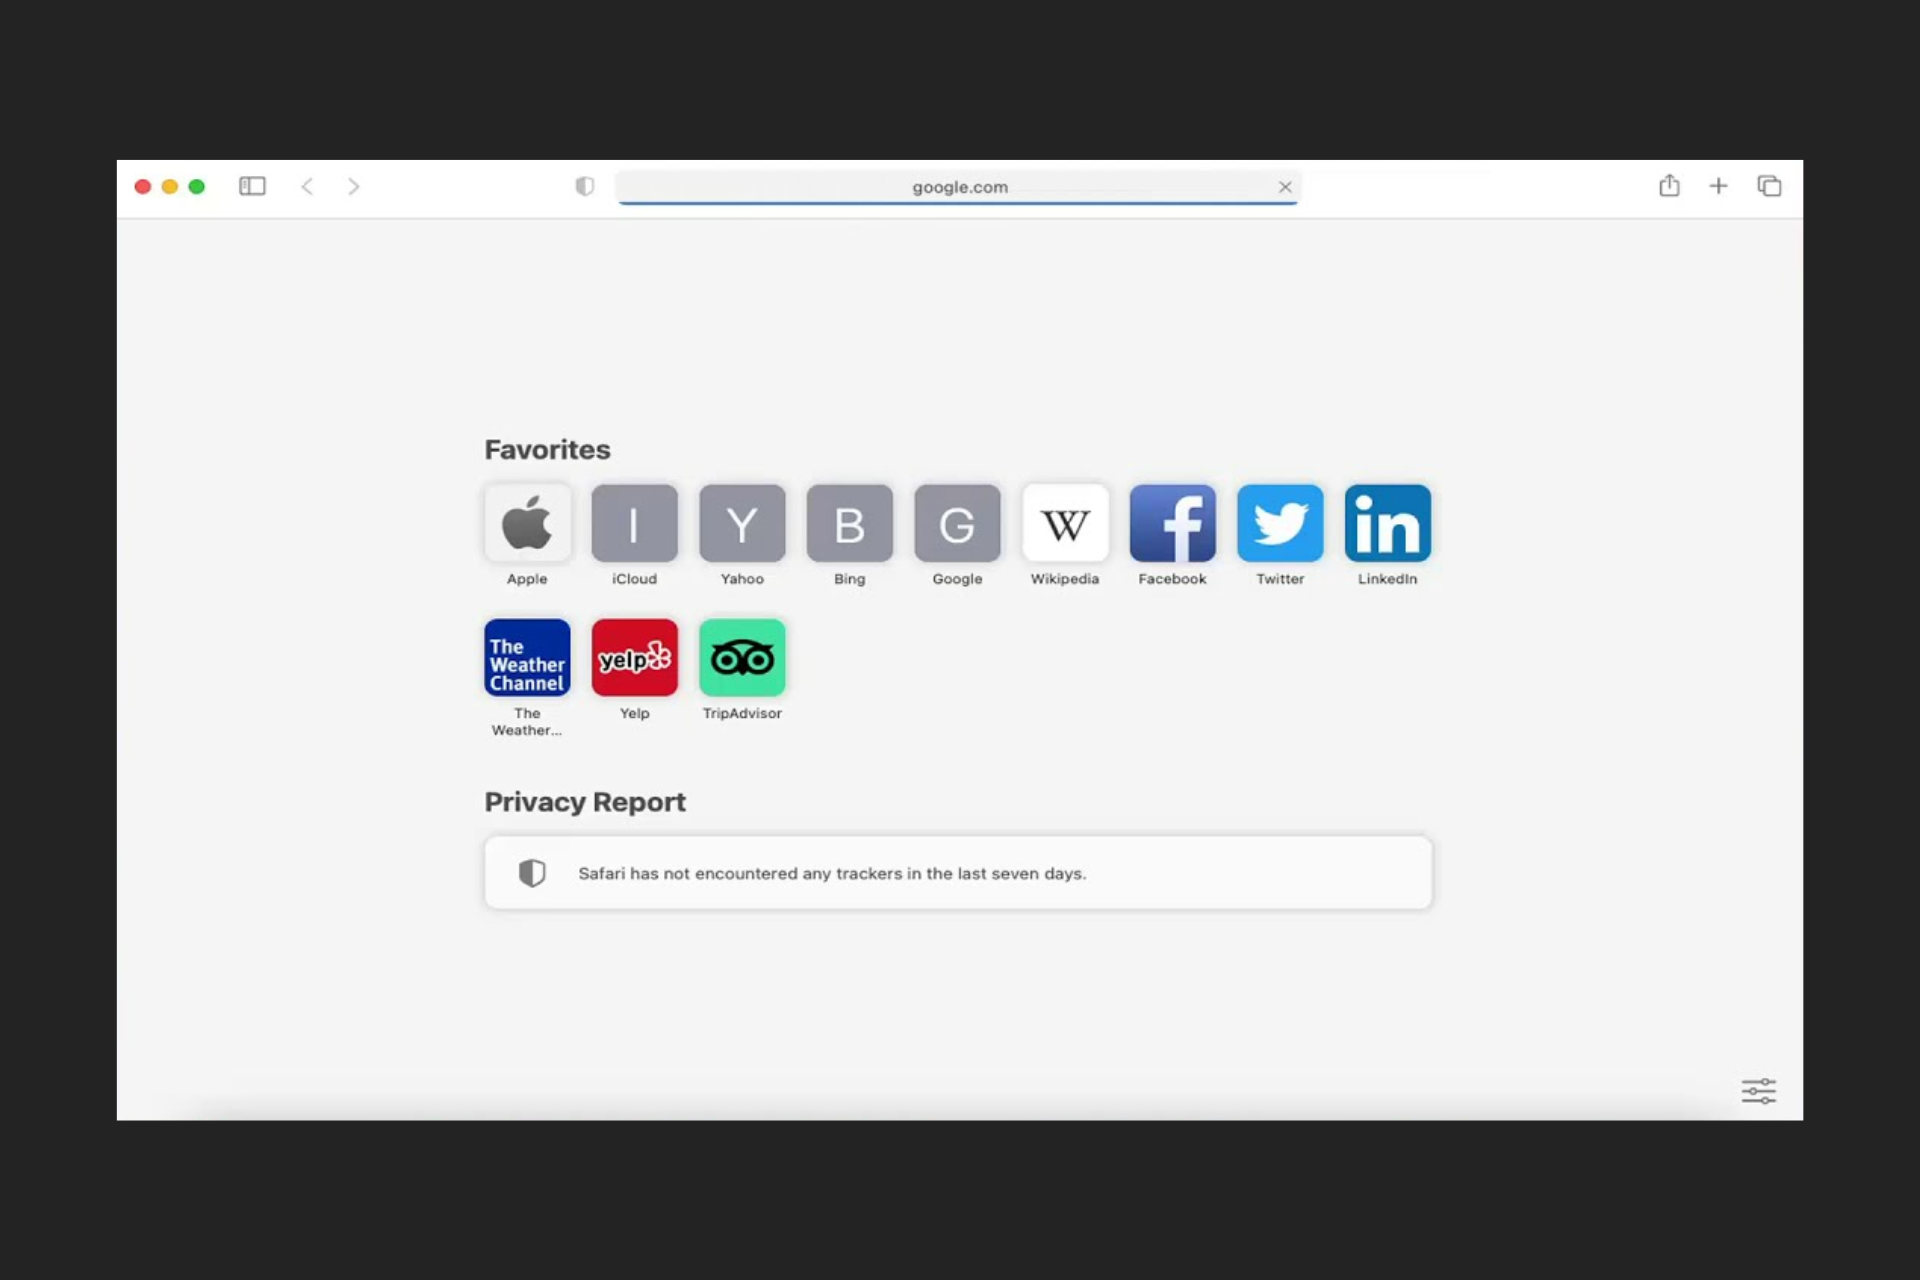
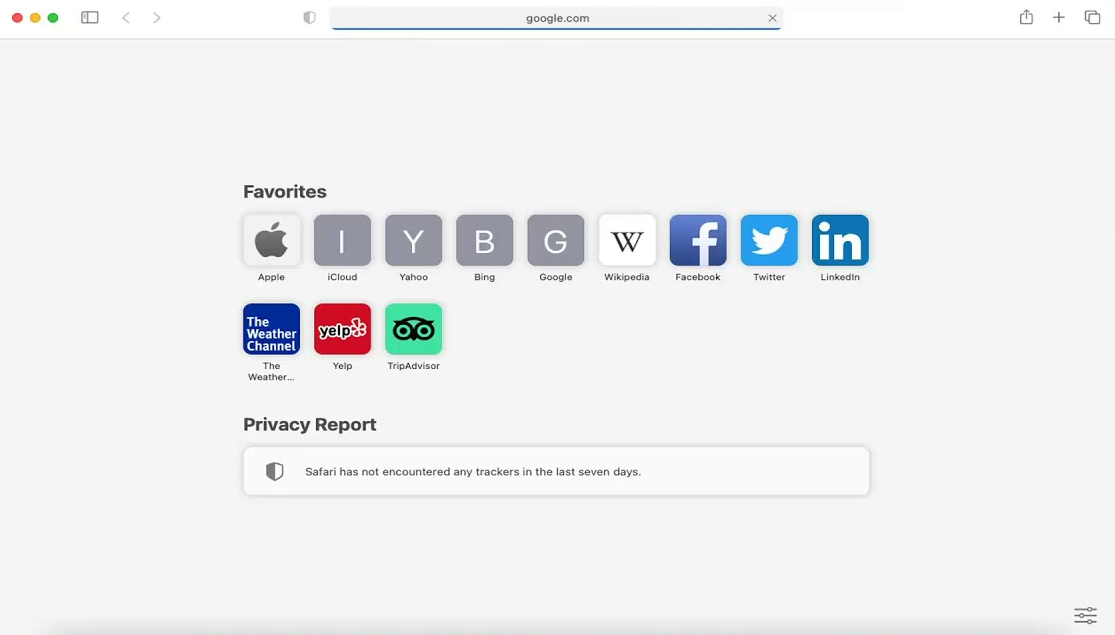
Secondly, it is a leader in online privacy thanks to critical features like intelligent tracking avoidance and its privacy report.

Additionally, the Privacy Report displays information detailing how your online privacy is protected. Hence, you’ll notice a list of site trackers that the browser won’t let profile you.

Lastly, if you have missing credentials, you can benefit from its password manager, which helps you store and manage your data.

Additional features:

  • Tab Management
  • Text Copying and Quick Sharing.
  • Bookmark Management.

⇒ Get Safari

AVG Secure Browser – Nicely suited for Mac OS

AVG Secure Browser Mac OS

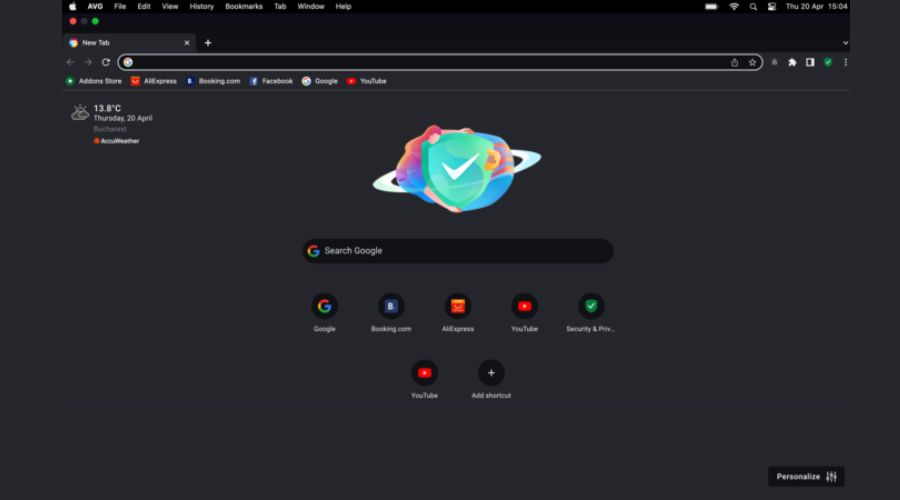
Using the AVG browser, you will get speedy and secure navigation on all your Mac devices due to encrypted engines.

This browser is built cross-platform and can be easily used on Mac devices, providing you with a confidential mode to surf the web.

You can also enjoy lightning-fast browsing without slow times and privacy tools like the Privacy Cleaner to erase browsing history or tracking cookies.

Plus, AVG is quite light on resources and it doesn’t drain your battery life. Not only that, there is an automatic ad-blocker to remove ads instantly.

More exactly, it can block third-party trackers from collecting personal data about you, ensuring completely intimate browsing without cyber threats.

Additional features:

  • Stealth mode for tracking issues
  • HTTPS encryption rule
  • Digital fingerprint masking
  • No tracking scripts

AVG Secure Browser

Look no further and try the AVG browser for stress-free digital life.

Firefox – Best for power users

best browser for macbook air

The Firefox browser remains the internet’s Swiss Army Knife and one of our favorite browsers.

Its version 90 is explicitly great for Macbook Air users since it can notify you of data breaches involving your email address.

Additionally, it prevents browser attacks caused by fingerprinting, it stops those awful notifications pop-ups, and for Mac OS, it adds picture-in-picture video mode.

It remains one of the most customizable browsers and offers flexibility with extension and appearance.

Notably, its recent update significantly augmented its efficiency and performance, lagging behind competitors like Opera One and Chrome.

Additionally, Firefox had a significant add-on problem in 2019, but assuming nothing else goes wrong, it will remain the best browser for Macbook Airs with the M1 processor.

Additional features:

  • Credential syncing
  • Enhanced tracking protection
  • Page Actions menu

⇒ Get Firefox

Chrome – Most comprehensive extensions library

best browser for macbook air

Chrome is a powerful Google browser that rivals Firefox and Safari as a top Mac browser.

It’s one of our favorites since it’s easy to use, has a robust security feature, and follows industry standards.

It may hug on your computer resources, but its Tab Freezing feature aims to solve this by dynamically freezing your background tabs so they don’t use resources needlessly. However, Chrome still consumes a lot of help. On a MacBook Air, this may not be so obvious.

Chrome 91 has strong autofill capabilities, cross-platform compatibility and sync, a great add-on library, and terrific web development tools.

Lastly, the browser includes a safe DNS lookup on Mac OS; it can report if your email has been hacked and prevent much harmful mixed material.

Additional features:

  • Data syncing
  • Visual Browser History
  • Tabs manager

⇒ Get Chrome

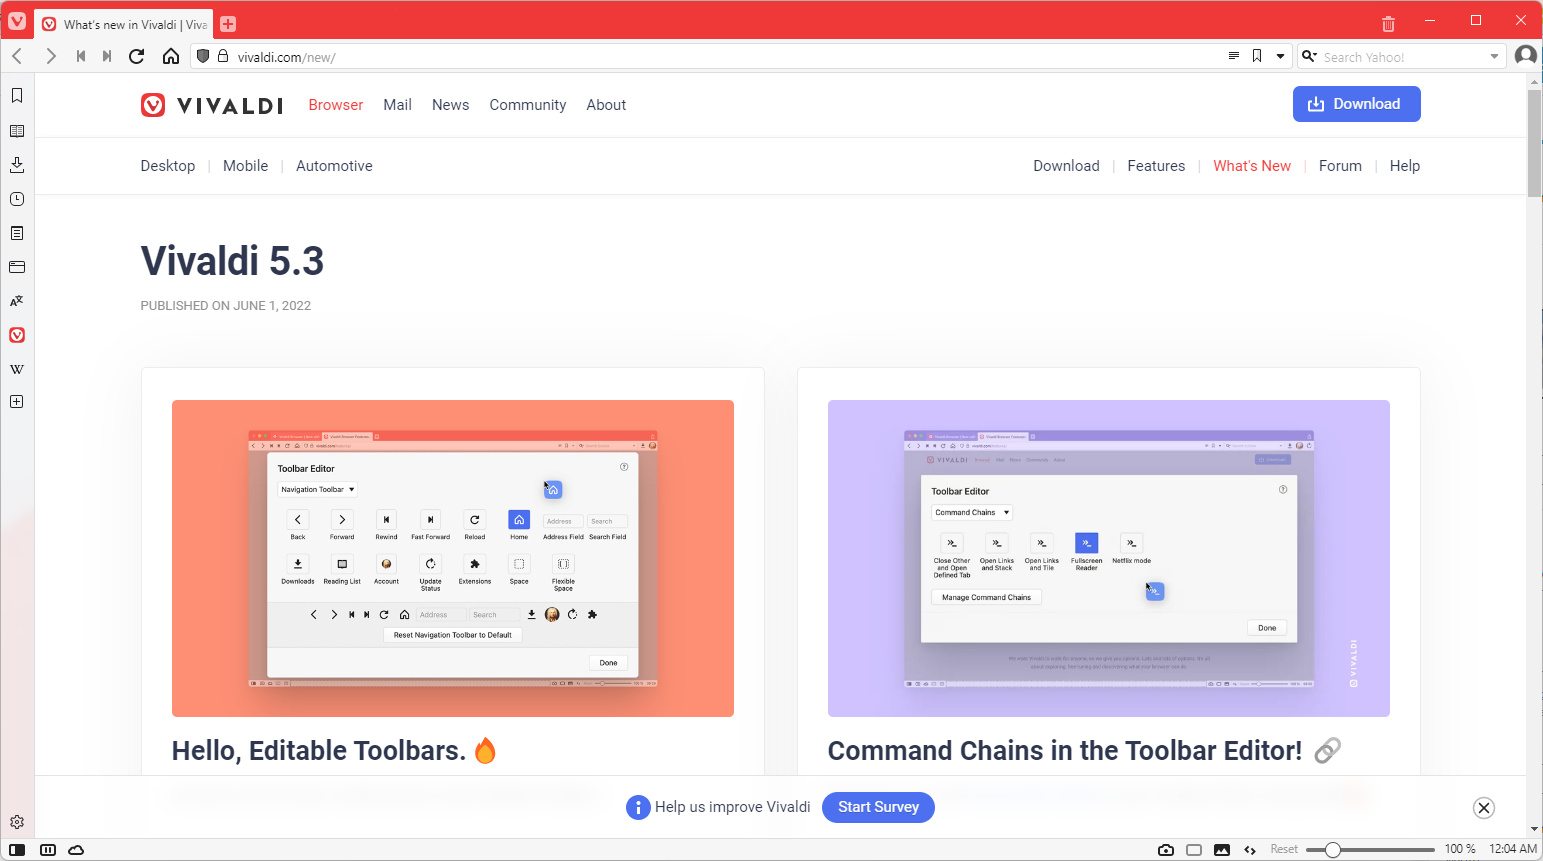
Vivaldi – Most customizable

best browser for macbook air

This browser is former Opera One engineers’ brainchild, and it, like Opera, deviates from most mainstream browsers.

It’s the browser for personalization and customization, and you can change almost everything from how navigation functions to the appearance of the UI.

Toolbars may be placed anywhere you choose, sites can be pinned to the sidebar, and page typefaces and color palettes can be changed; whatever customization you need, you should be able to do.

You may even look at your history in a graphical format to improve how you see and understand elements like time spent on websites.

Finally, it’s ideal for Mac OS users who like tinkering with interfaces. However, it would help if you were cautious not to spend the whole day tinkering instead of working.

Additional features:

  • Fast forward and rewind
  • Web Panels
  • Visual Tabs

⇒ Get Vivaldi

There you have it. Our complete list details the best browser for MacBook Air. We believe all the browsers will make a great fit, and you should choose based on personal preferences.

Lastly, note that you will have to make a separate download to be able to use all the browsers on the list on a Mac OS device except for Safari.

Please let us know if you have found this helpful article; we would love to hear from you in the comments.

If you use an OS other than Mac OS, you can choose from any of the best browsers that use the least battery.

6 Best Browsers That Won’t Drain Your Mac’s Battery

Here we will discuss the best browser options for Mac battery life, but before we go into details it is important to note the evolutions of browsers.

In the early 90s, most browsers were only capable of displaying static content. That meant that today’s rich data types would have been wasted on the early browsers.

However over the years, a lot has changed, and there has been great progress in the browser industry. Browsers are real powerhouses now, capable of performing incredible tasks such as video streaming and gaming.

The downside to this evolution is that they have become very resource-intensive. They now take up much more memory space and require more processing power than ever. These downsides also take a toll on the battery of your machines.

Hence to stay longer while running on battery, you must use the most battery-efficient option.

If you use an OS other than Mac OS you will be able to choose from any of the best browsers that use the least battery.

Which browser is the most battery efficient?

You must note that to a wide extent, battery efficiency depends on what tasks you are running. For example, reading text on the web will consume far more battery power than streaming.

This is because while streaming in itself is memory-consuming, it also makes use of other computer hardware, ie, your speakers.

That said, Microsofts Edge has been a great option for battery efficiency, and the good news is that you can install and use it on your Mac computers. Hence, it is about the best browser for battery life.

Does Chrome use a lot of battery on Mac?

Of course, anyone that has had to surf the internet has used Chrome at some point. At initial deployment, battery conservation may not have been its fundamental goal, but with recent updates, it is easily becoming a fast contender for the most efficient battery use.

It gives options to stop Chrome from running in the background which goes a long way to economize on battery use.

Does Firefox use more battery than Safari?

If you are using a Mac, your go-to browser should be Safari. Because it is built specifically for Apple devices, you can expect that it offers the best options for customization and efficiency. This is true even for battery use, as it offers more efficiency on Mac computers.

That said there is not much to tear the two apart and Firefox is always still an energy-efficient option on most computers.

Which browser is best for battery life on Mac?

Opera – Best overall

best browser for mac battery life

Opera has been running on the Chromium engine since 2013, which gives the advantage of a very expansive and complete web extension library.

Social and messaging app integration that doesn’t need extensions is among the browser’s most valuable and appealing features. Most major platforms are immediately accessible and may be accessed as required.

Compared to competing browsers like Microsoft Edge and Chrome, it claims to operate up to 35 percent longer on battery saver. This may offer you an additional hour of browsing on your Mac.

We prefer the Opera browser since it has an inbuilt VPN, allowing you to mask IP addresses when necessary.

Additional Features:

  • Snapshot tools
  • Workspaces
  • Ad blocker

Opera

Using Opera’s power-saving mode, you can extend battery life and still get the most of performance and fast browsing.

Safari – Extensive content-blocking capabilities

best browser for mac battery life

If you have not used another browser before, you’ll probably find other browsers too tricky to master after the Safari browser use becomes second nature. This is because it is significantly different from most browsers in design. 

But we love it because it is built with power conservation in mind, especially with its more recent upgrades. It is central to the Mac experience, and on an M1 MacBook, you may get as much as 17 hours of browsing.

Thanks to features like its intelligent tracking prevention and privacy report, it is a pacesetter for privacy on the internet.

You probably will be doing more in this browser than ever before and will fulfill all kinds of tasks, ranging from work and school to entertainment. Its tabs are very compact, lightweight, and modern, and it offers Tab Groups; a whole new way to use tabs.

Additional features:

  • Private browsing
  • Content blocking
  • Password manager

⇒ Get Safari

AVG Secure Browser – Encrypted browsing on MacOS

AVG Secure Browser Mac OS

AVG is the most private browser with great compatibility for Mac devices and enhanced security features.

You can primarily use this straightforward UI browse to navigate faster online and preserve your Mac battery life.

The main features of the AVG browser contain privacy guard functionality to block ads or trackers while you navigate on any page.

Another benefit you should know about is the Privacy Cleaner which can erase browsing history and cookies data. Plus, the Hack check will always warn you about phishing threats while you’re online.

Additional features:

  • One-click integration with AVG Antivirus and VPN
  • Stops tracking scripts
  • Mask browser traces
  • HTTPS web encryption

AVG Secure Browser

Browsing on this secured engine ensure the Mac battery life optimization.

Chrome – Most extensive library

best browser for mac battery life

Chrome is a robust Google browser that competes for battery efficiency with Internet Explorer, Safari, and other modern browsers.

To ensure the browser does not hug the battery, you should keep it updated. It also comes with power-saving options, and you will be able to stop it from running in the background if you need more battery time.

Chrome is our favorite browser because it has a simple interface, has robust security features, is fast, and adheres to industry standards. However, it isn’t the fastest browser and may not have some features that some competition provides.

Additional features:

  • Visual Browser History
  • Browser memory use
  • Website tabs manager

⇒ Get Chrome

Microsoft Edge – Most efficient 3rd party browser

Yes, you are right to think that this is a for Windows browser. It, however, offers seamless compatibility across platforms, including the Mac. 

It’s the default Microsoft browser but also one of the most efficient with battery usage. We love it because its efficiency does not come at the cost of speed, as it also is one of the fastest available browsers. 

It is a secure and safe browser and will allow you to perform sensitive tasks like financial transactions confidently. 

Additionally, you will be able to get the best out of it even when you run into bugs because the browser is regularly updated. This is also a plus for dev teams who will be able to test the most recent browser features. 

Additional features:

  • Browser sync
  • Sleeping tabs
  • Tracking prevention

⇒ Get Microsoft Edge

Brave – Most secure

best browser for mac battery life

This is a very new browser that takes a different philosophy to the Internet. The browser automatically disables all trackers, allowing you to surf at lightning speed.

Its’ Shields eliminate trackers and every unsolicited advert while giving you a choice to see certain ads via an opt-in method that keeps your data safe.

Compared to Chrome and many other browsers,  it outperforms and may extend use on your Mac by an hour on battery in terms of energy usage.

Additional features:

  • Custom backgrounds
  • Sync/password sync
  • Speed reader

⇒ Get Brave

There you have it, our list of the best browsers for Mac battery life. Please note that this list has not been made in any particular order, and we expect that your final choice will come down to personal preferences.

That said, Safari is the go-to Mac browser. Still, if you want to experiment with different browsers on its OS, our recommendation will be Opera because of its flexibility and easy integrations.

We hope you find this helpful article. Please drop us your comments and let us know your preferred browser option. Also, most of these are among the best browser choices for Mac M1.

Note that Windows users may also use the Safari browser, and in a few easy steps, they will get solutions if Safari is not working on Windows.

How to Check Update Size in Windows 11 & 10

Since the day Microsoft released Windows 11 and 10 the Windows update section has been consistently populated with timely updates. However, unlike previous versions of Windows, there is no setting in Windows 11 and 10 OS that allows you to check the size of the update.

As a result, users never know how long it will take the system to complete the update process. This can be enraging at times because you never know when the update installation will begin and end.

If you want to know the size of a Windows 11,10 update, the Windows Powershell is the utility you can use.

Do you want to check the size of Windows 11 and 11 updates before downloading them? Actually, it is possible, and you will learn how to do so in this article.

How do I check the size of the Windows 11/10 Update before download?

Utilize Powershell service on the PC

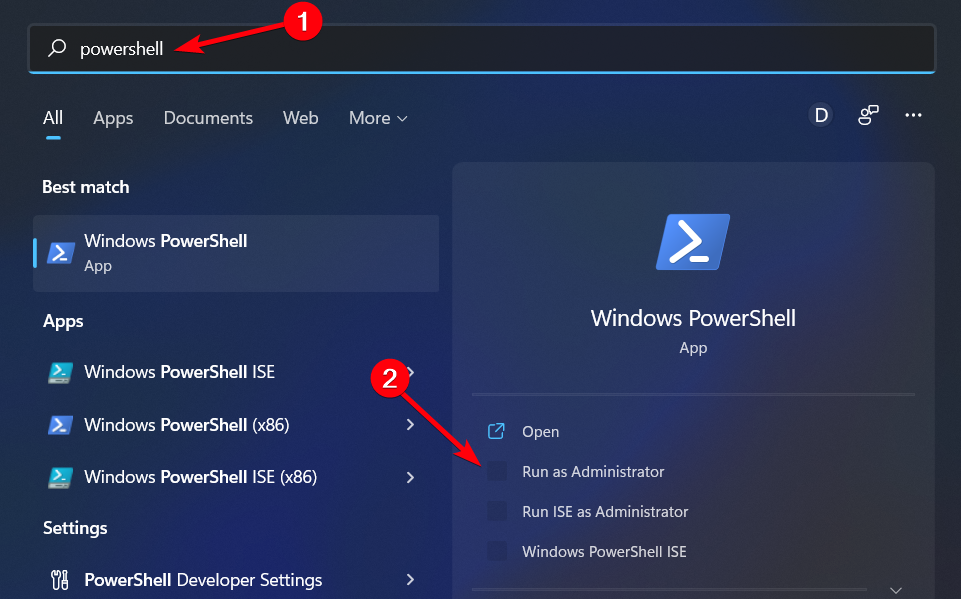
  1. Click on Start Menu and type PowerShell, and choose Run as Administrator.
  2. Execute the next command in the admin Powershell tab:
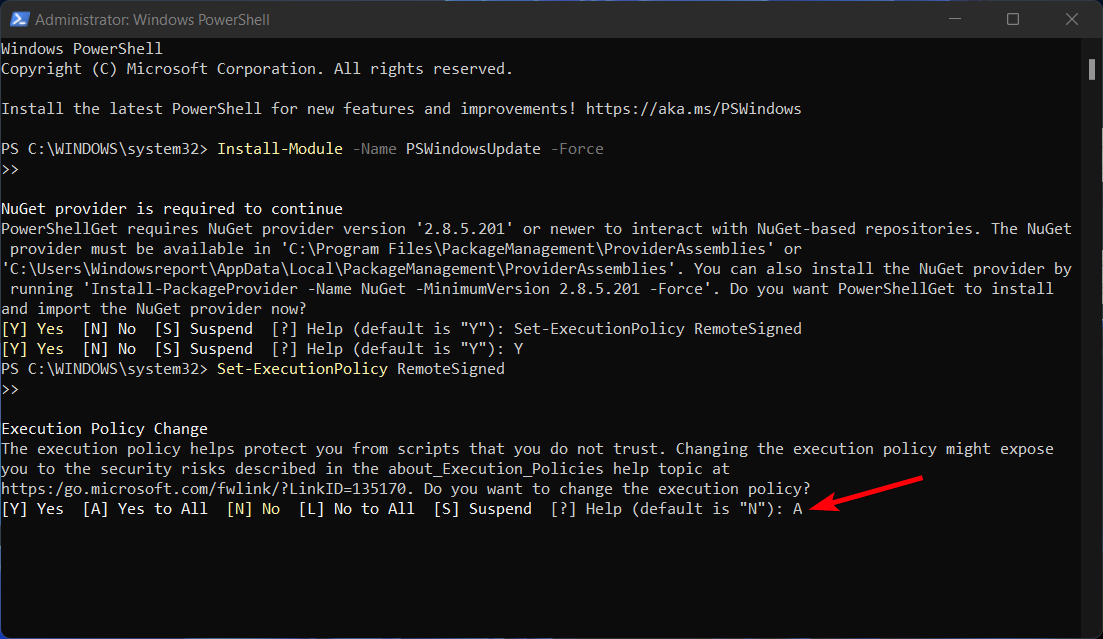
    Install-Module -Name PSWindowsUpdate -Force
    Using the -Force flag will help you install any requiring modules without additional warnings.
  3. Use this command to change the execution policy from Restricted to Remotesigned.
    Set-ExecutionPolicy RemoteSigned
  4. Type the letter A and Enter to confirm the execution policy change.
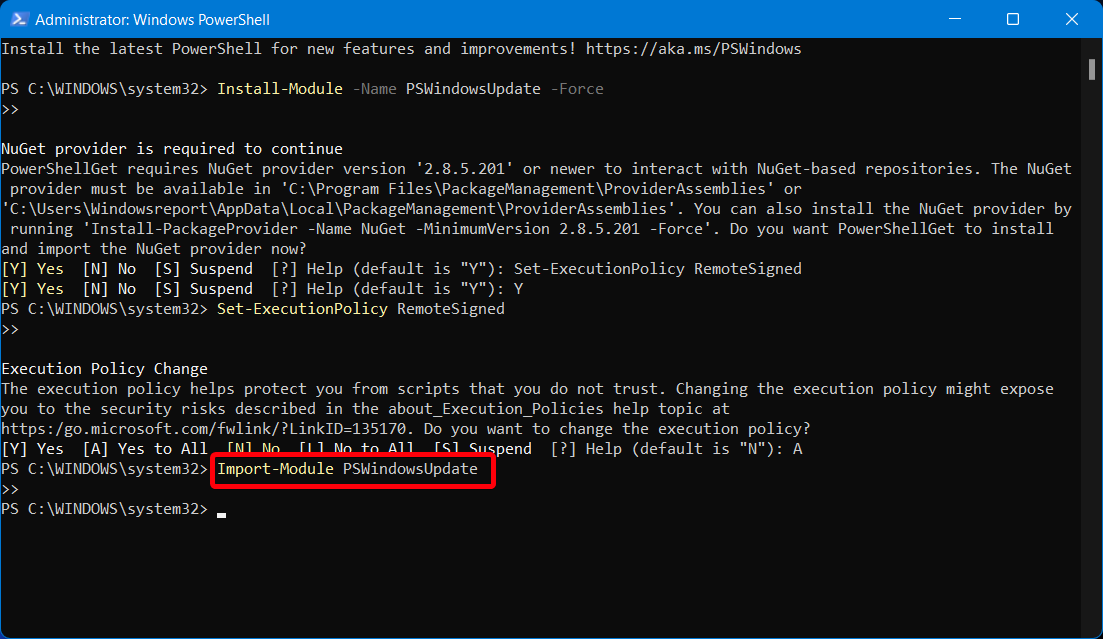
  5. When the execution change is finished, type the next command to import the PSWindowsUpdate module.
    Import-Module PSWindowsUpdate
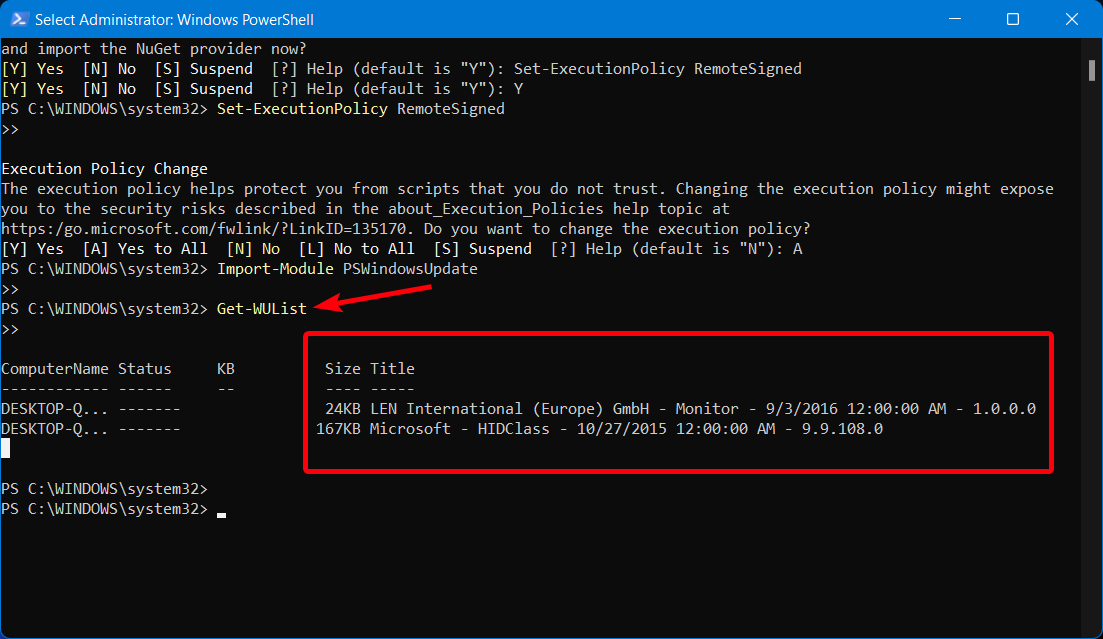
  6. As a final step, add the next command to see the list with all the Windows updates size on your PC.
    Get-WUList

Keep in mind that this useful application only aids in the resolution of issues with the Windows Update feature in Windows 11 and 10.

Because there is no official way to check the size of Windows 11,10, you can use third-party software to determine the size of the update before downloading and installing it.

Why don’t you give this guide a shot and let us know how it works for you in the comment area below?

How to Create an Application Whitelist Policy in Windows 10

If you really want to protect your Windows 10 PC from malware and unknown executive files, then the best solution is to create an Application Whitelist Policy. In this guide, you will check out a detailed article on how to do it.

Application whitelisting is one of the best practices which is used by IT administrators to prevent their systems from running unapproved executable programs or files on their system.

Even the home users can also take advantage of the whitelisting feature to ensure full protection from malware or ransomware.

The whitelisting feature was first introduced in Windows XP and following the tradition, this feature is also available in Windows 10, a recently launched operating system by Microsoft.

If you’re the one running Windows 10 on your computer or laptop, then you must check the following options which you must consider employing on your PCs.

How do I create an Application Whitelist Policy in Windows 10?

1. Manually create an application whitelist policy

  1.  Type secpol.msc in Windows 10 Start Menu search bar.
  2. Under Security Settings, navigate to Software Restriction Policies and click on it.
  3. Right-click on Software Restriction Policies and click on New Software Restriction Policies to create a new policy.
  4. You can double click on Enforcement, Designated File Type, and Trusted Publishers.

With the help of Software Restriction Policies. You can do the following things:

  • Whitelist Applications or Programs
  • Fight Malware
  • Regulate which ActiveX controls can be downloaded
  • Run only digitally signed scripts
  • Enforce that only approved software is installed on system computers
  • Lockdown a machine

Once done with all these steps, you need to head over to the Security Level folder under Software Restriction Policies.

Under the Security Level folder, you will see the following three options:

  1. Disallowed
  2. Basic User
  3. Unrestricted

Our requirement is to whitelist the applications or programs and for that, make double-click on the Disallowed option and click on the Set as default button on the new window.

2. Use Windows AppLocker for whitelisting application

  1. Go to Local Security Policy,
  2. Under Security Settings click on Application Control Policies.
  3. Choose AppLocker.

Suppose you want to create a rule for the Packaged app, then Packaged app Rules and make right-click on the “Create New Rule” and fill the preferences according to your requirement.

Windows AppLocker, allow or block particular users from installing or using a particular program. You can accomplish this result by using whitelisting rules.

It provides administrators to have full control over which programs and files users can run. These include scripts, executable files, DLLs, Windows Installer files, Packaged app installers, and Packaged App

With the help of Windows AppLocker, you can block Windows Store apps and block legacy. But this feature only exists in the Pro and Enterprise editions of Windows 10.

3. Create Whitelist Application using third-party software

Third-Party software is also available to whitelist the application. Some of the popular names are CryptoPrevent and VoodooShield.

If you’re a home user, then you must install Enhanced Mitigation Experience Toolkit, it is a freeware tool that helps administrators to have full control over third-party plugins or apps.

Why don’t you give a try to this guide and let us know if you have any queries related to it by leaving a comment below.

What is Microsoft Dev Box and How Can You Use It

Microsoft recently introduced the Dev Box service, which offers a cloud workstation to create development environments in Windows virtual machines.

In the usual situations, a developer needs to be fast and flexible. However, that is possible only if he has access to the latest hardware with all the additional features.

But, irrespective of how fast the PC is, installing and configuring a project toolchain is time-consuming.

Therefore, Microsoft introduced a cloud-powered developer workstation to improve the overall turnaround time and productivity.

Also, if you want to know how to enable the developer mode in Windows 11, we have a detailed post.

Here’s a quick brief on the Dev Box and how it works.

What is the Microsoft Dev Box?

The Dev Box provides developers with ready-to-code developer workstations in a secured environment and for hybrid teams of any size.

Microsoft Dev Box will virtualize your development PC (Windows) in a browser.
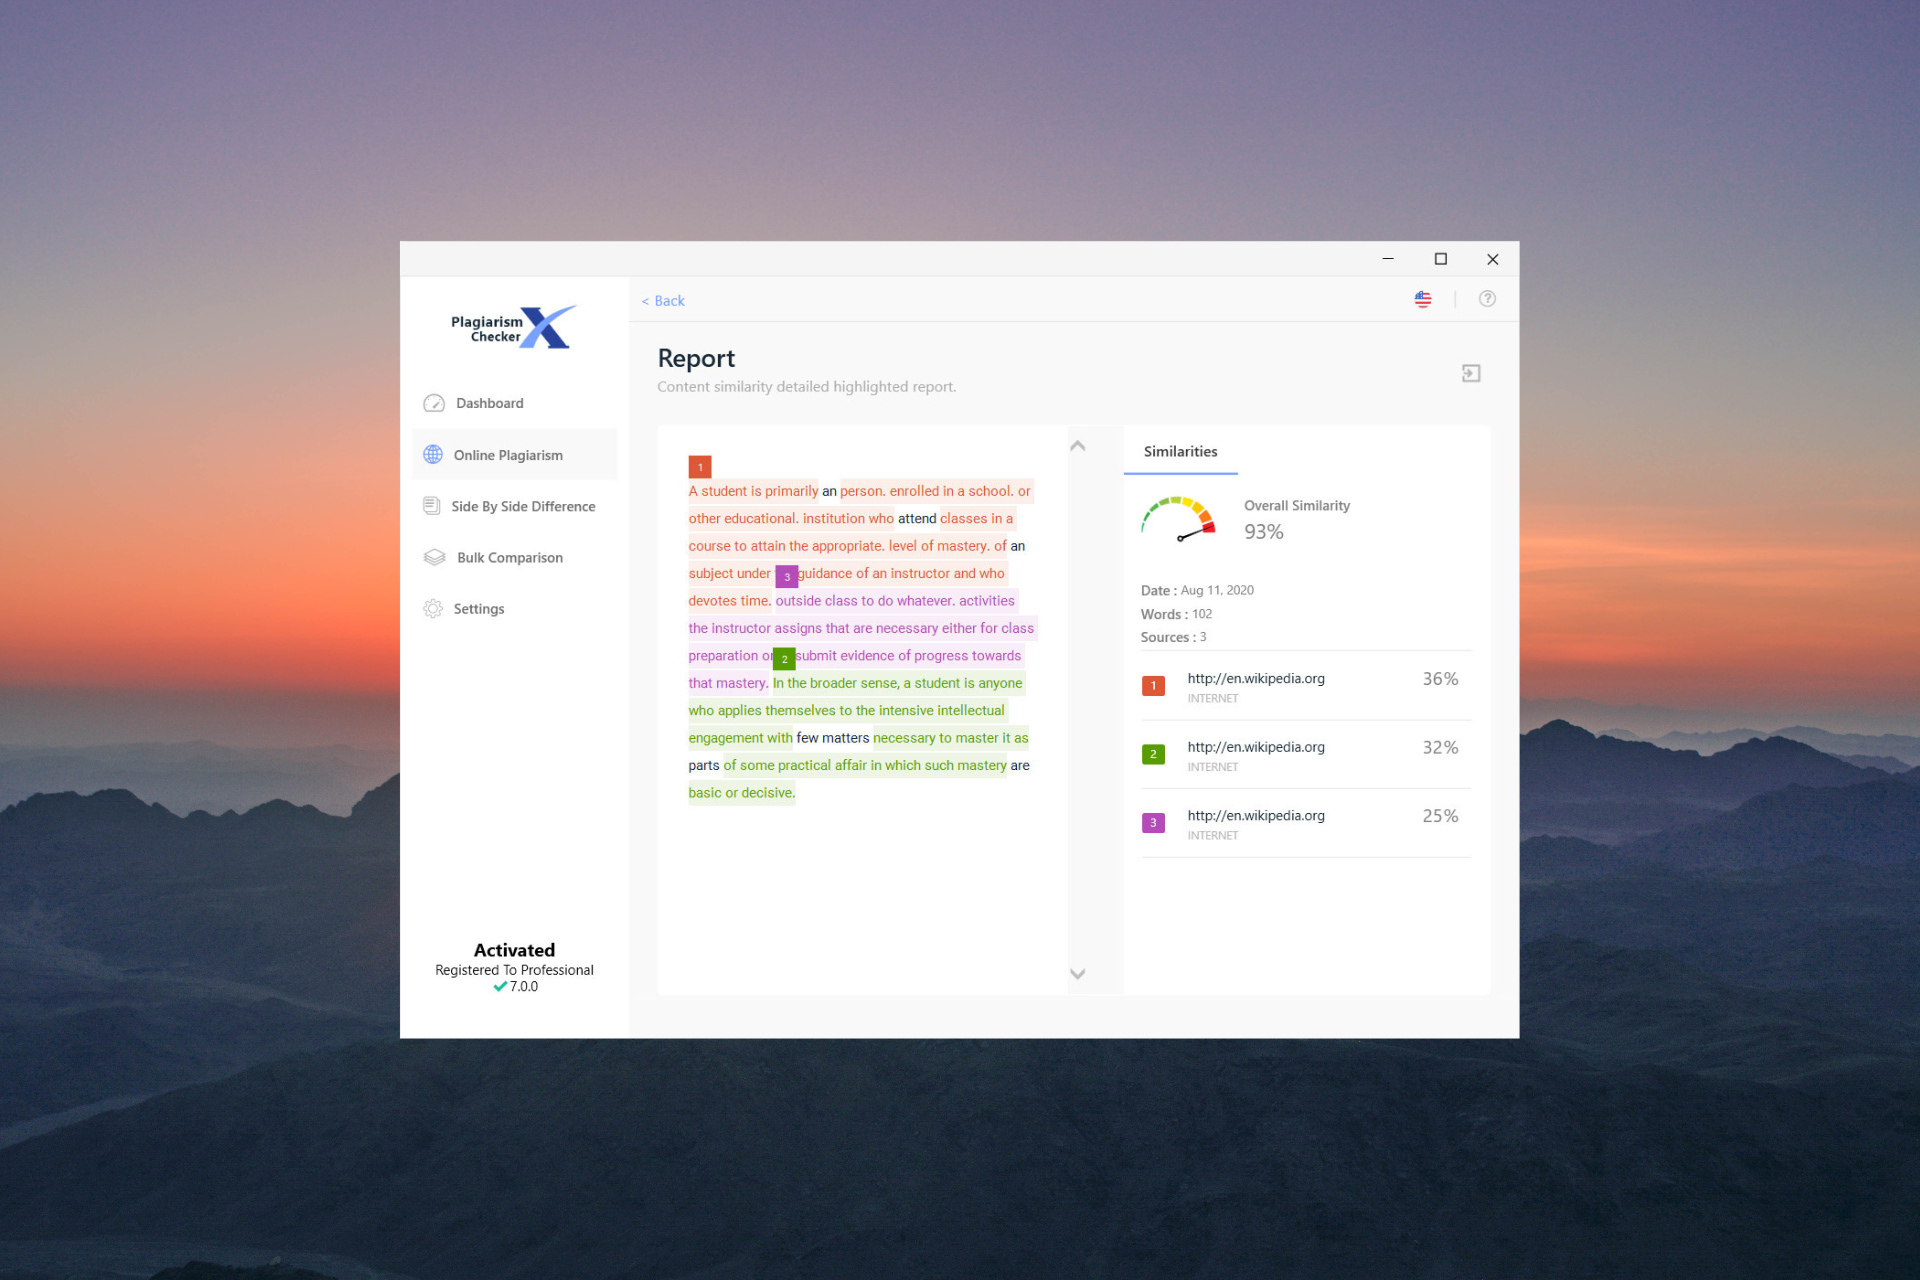
These cloud workstations come preconfigured (by Dev teams) out-of-the-box for specific projects and tasks.

This helps the devs to stay in control of their Dev Boxes through a developer portal. Here, they can create and delete their Dev Boxes for any tasks.

Moreover, with the help of Windows 365, the cloud-based developer workstation integrates with Intune and Microsoft Endpoint Manager.

Besides, Microsoft Dev Box is your development workstation on Azure. This is because it comes with the Azure Active Directory integration.

Additionally, the Microsoft 365 integration helps the IT administrators to manage Dev Boxes in association with the Cloud PCs in Microsoft Intune and Microsoft Endpoint Manager.

While the Dev Box is a useful proposition for developers, dev teams, and IT administrators, here’s how it works.

How does Microsoft Dev Box work?

As a user, you can access the Dev Box through a simple web link. You need to click on the link to open it on a Remote Desktop.

This will spin a virtual machine running a preconfigured image that offers all the required tools for the project.

The Dev Box provides you more rights over your images than what a regular user gets with Windows 365. This allows you to install tools as per your need.

However, the device’s capabilities connected to a Dev Box are unrelated to the virtual environment.

So, even if you use an old device to evaluate some code from another location, you would experience the same performance in your office.

But how do you register for the Microsoft Dev Box private preview?

How to sign up for the Microsoft Dev Box?

At the moment, the Dev Box is in private preview and will be available for public preview in the next few months.

To learn more about Microsoft Dev Box and watch demos of the service, you can visit the Microsoft Build website.

You can also sign up for the Microsoft Dev Box using this sign-up form, and you will be on the waitlist to analyze the Microsoft Dev Box.

Microsoft has been planning to give developers more freedom for a long time, and the new cloud-based workstation seems to be the answer. Besides, users getting into app development for Windows should read more about the Windows Software Development Kit.

In the meantime, here’s a detailed guide on the best virtual machines for Windows 10/11 for developers to get the best virtualization tools.

If you have any other queries related to the Dev Box, you can leave your comments below in the comments box.

6 Best Windows 11 Optional Features to Enable on Your PC

Every time Microsoft releases a new version of the Windows operating system, it comes with new features to improve the user’s experience. Windows 11 options are excellent with a lot of new things.

Windows 11 has optional features that users or businesses can choose to turn on and install if they need them.

These features give users more functionalities and control of their PC. Most of the features are for businesses, IT firms, and server administrators who may need extra features to achieve what they want.

You can control most of the features through the Control Panel or Settings because most of them are off. Some of these features include the appearance of the taskbar, auto HDR, snap layouts, etc.

One can opt in and out of these optional features and functionalities to the extent allowed by the service description.

Additional benefits and functions come with these features on Windows 11, making the user experience even better. The benefits are for online and offline uses, depending on users’ wants.

A person’s niche determines what to install and what not to. Business features are different from educational ones; some need general ones.

Those categorized as optional include some from Windows legacy tools like Internet Explorer, Windows Media Player, and WordPad.

In this guide, we will look at some of the best Windows 11 optional features and how to turn them on.

What features should be turned on in Windows 11?

This version of Windows comes with many of these optional features that you can turn on and off. The components work well for servers and businesses, although some are general.

For optimal performance, you should take caution not to enable every feature so as not to slow down the system’s performance. It also helps for security reasons.

Since there are many optional features available, they take a lot of space, and so the hard drive fills whether they are enabled or not.

The process of enabling and disabling can be done offline because the features are stored on the computer already. There are other notable features like Windows 11 themes.

Optional features give you more power and control of your machine so if you like to tweak the system, they will come in handy.

The majority of the features like RAS Connection Manager Administration Kit (CMAK), Microsoft Message Queue (MSMO) Server, Internet Information Services (IIS), Data Center Bridging enable you to manage servers and networks using your PC.

They help in improving productivity. You can multitask by enabling features that support your work, e.g., turning on multiple Windows.

It also gives you the chance to improve the user experience of your PC. You can turn on several features like the change taskbar and desktop interfaces to improve the user experience.

How do I enable optional features in Windows 11?

  1. Click the Search icon on your taskbar, type windows features, and click on Turn Windows features on or off.
  2. Now, select the features you want to enable and click the OK button.

Some of our readers experienced a problem where the list of Windows 11 optional features is empty or not loading.

In this case, you will need to set the Windows Modules Installer service to start automatically.

What are the best Windows 11 optional features?

1. The classic File Explorer: How to restore it

  1. Press Windows + R to open the Run window, type regedit, and hit Enter or click OK to open the Registry Editor.
  2. Navigate to the following path: HKEY_LOCAL_MACHINE\SOFTWARE\Microsoft\Windows\CurrentVersion\Shell Extensions
  3. Now if you see a subkey called Blocked, click on it to open. In our case, and if it’s the same for you, right-click anywhere on the right pane, select New, then Key to create a new subkey and name it Blocked.
  4. Now click on the Blocked subkey, right-click on a free space on the right pane, then select New and choose String Value.
  5. Name the value {e2bf9676-5f8f-435c-97eb-11607a5bedf7} and leave it just like that, without modifying its value.
  6. Now go to the following path in Registry Editor: HKEY_LOCAL_MACHINE\SOFTWARE\WOW6432Node\Microsoft\Windows\CurrentVersion\Shell Extensions
  7. Again, if you don’t have a Blocked subkey, create it just like in the previous steps, then add the same string value {e2bf9676-5f8f-435c-97eb-11607a5bedf7} exactly the same.
  8. Close the Registry Editor and restart your PC.
  9. If all works fine, when you open File Explorer again, you should see it with the Classic ribbon.

In Windows 11, most of the options are behind dropdown menus. To get rid of that and display all the commands as a ribbon, we use the steps stated above to achieve that.

However, we need to mention that this method removes the Share command from File Explorer so if you want to use it, think twice about using the solution.

It’s not really a problem because you can always perform the steps again and remove the string value and back to how it was before.

You have to be careful when editing your Registry Editor, and it can cause you to lose data and force you to install Windows afresh.

2. Auto HDR to improve the gaming experience

  1. Press Windows + G on the keyboard and select the Settings icon to access the gaming features.
  2. Click on the Edit more preferences in the Windows Settings. It will direct you to the settings.
  3. Choose the System settings.
  4. Navigate to the Display settings and choose the HDR option.
  5. Toggle the Bar to turn it on.
  6. Click on the HDR page to bring up more settings. Select the AutoHDR option and turn it on.

Auto HDR improves the gaming experience when you configure it well. It will help users benefit from over the 800 games enhancement, each looking vibrant and detailed.

However, you should know that not all devices support the HDR feature so if your device doesn’t show this option, you will not be able to turn it on.

3. Use Snap Layouts to split the screen into multiple areas

  1. Click on the Start Search box, type settings, and hit Enter to open the Settings app.
  2. Select System and choose the Multitasking option.
  3. Turn the Snap windows button ON.
  4. Check the Show snap layouts when I hover over a window’s maximize button option.
  5. For the maximize option to show, hover over the window’s Maximize button.

You can choose from several options when arranging the pages with other apps. The layout also depends on the PC’s display, i.e., some are 16:9, 3:2, etc.

If your display has 1920 pixels or below, you won’t be able to enjoy these features due to the Windows 11 requirements.

4. Different backgrounds for virtual desktops

  1. Hover your cursor on the Taskbar button.
  2. Click on the Plus sign to add a new desktop.
  3. Right-click on the new desktop and select Choose background.
  4. It will direct you to the Personalization settings. Select a new background, and the new desktop will look different.

5. New keyboard shortcuts

Although Windows 11 inherited all the Windows 10 shortcuts, the new OS has some additional keyboard shortcuts that give you access to some of its features:

  • Press Windows key+ Alt + Up arrow – To snap active Windows to the top half of the screen.
  • Hit the Windows key+ Alt + Down arrow – To snap active Windows to the bottom half of the screen.
  • Press Windows key + W – to open the widgets.
  • Hit Windows key + Z – to open snap layouts.
  • Press Windows key + H – to initiate voice typing.

6. Taskbar size – How to change it

  1. Head over to the Start Search box, type regedit, and hit Enter.
  2. Navigate to the following path: HKEY_CURRENT_USER\Software\Microsoft\Windows\CurrentVersion\Explorer\Advanced
  3. Right-click on the Advanced folder. Select New, and then DWORD (32-bit) Value to create a new key.
  4. Name the DWORDS value as TaskbarSi.
  5. Double click on the value created to open the key properties.
  6. Enter numbers 2 or 0 in the Value data box – 2 increases the size while 0 reduces the size. Select the base to Hexadecimal and click OK to save the changes.
  7. Close the Registry Editor and restart your PC to apply all the changes.

When the PC restarts, it applies all the changes according to your choice. You can play around with the values and maintain the size you like.

Is it safe to work with Windows 11’s optional features?

There is no problem with turning Windows 11’s optional features on. As they help you improve and maximize your results to meet the set goals.

But you have to ensure that the features you turn on, you can control and limit them. We have a detailed article on how to better manage your optional features.

You might also be interested in our article on the best Windows 11 tips & tricks to customize your OS.

For some users, turning a lot of the features on can affect your PC’s storage and memory, leading to slow performance that can affect your daily duties. It can also make your PC vulnerable. If you turned an optional feature on and aren’t using it, it’s good to turn it off.

If you plan to install Windows 11 on your PC, make sure that it meets the system requirements and if you face any issues, try to troubleshoot the problem and how you can overcome them.

Which optional features of Windows 11 do you use? Let us know in the comments section.

3 Ways To Fix Google Fi VPN When It’s Not Working

The VPN you use should be from a trusted provider. For example, Google runs its VPN service through some products, including the Fi cellular network.

With Google Fi VPN, you can get this security across your devices, iPhones, and Androids.

This article explores your best options when Google Fi VPN is not working.

While Google Fi is a great option, some of the best VPNs for mobile data may also be great options.

Why is Google Fi VPN not working?

The Fi VPN is a service that works for devices in the United States. However, with a few tweaks, you can use it across borders. Here are a few reasons why Fi VPN may not work:

  • Service outside the US and calls are disabled.
  • Out of date Google apps.
  • Out-of-date device OS.

Is Google Fi VPN always on?

The Project Fi cellular service is a VPN that is constantly on. Therefore, users will have no downtime unless there are issues with their devices or new software upgrades and releases.

Quick Tip:

As a practical workaround, we suggest switching to another VPN software that offers effective digital privacy and faster internet speed.

You can have a try with PIA (Private Internet Access) and obtain an incredibly fast connection and advanced protection compared with the free VPN security by other VPNs.

Private Internet Access

Have comprehensive privacy with this VPN and eliminate functionality issues from other unstable tools out there.
Check price Visit website

What can I do if Google Fi VPN is not working?

1. Turn off the data saver

  1. Open the Settings app of your phone (Android).
    google fi vpn not working
  2. Tap on the Connections option.
    google fi vpn not working
  3. Select the Data usage option.
  4. Tap data saver and toggle off the switch.
    google fi vpn not working

2. Update your OS

  1. Open the Settings app on your device.
    google fi vpn not working
  2. Scroll down to Software update.
  3. Select the Download and install option.

New versions of the Google Fi VPN may no longer be compatible with outdated software. By updating your OS, you can use the latest features of the VPN and avoid bugs caused by older software.

3. Restart the device

Restarting helps in clearing the RAM and enhances the phone’s efficiency well. However, apps typically run in the background, which can result in slowness, battery depletion, heat, and other issues.

Rebooting a device is a general fix you will apply to a different computer. However, it forces many troublesome processes to shut down.

After a restart, you should check to see if Google Fi VPN works.

How can you turn on or off your Google Fi VPN?

  1. Launch the Google Fi application.
  2. Select Phone Settings.
  3. Tap the Privacy & Security option.
  4. Toggle on Protect your online activity.
    google fi vpn not working

It would help if you now had your Google Fi VPN up and running. Note that you follow the same process to turn off Google Fi VPN. The only difference is that you toggle off the Privacy & Security option.

We believe you should have your Google Fi VPN up and running. In some extreme cases when none of these solutions work, users have remarked that a reset of their devices helped in resolving any problems with the VPN.

Let us know your thoughts and send us your questions if you have any via the comment section.

7 Ways to Fix Security Issues on WordPress Websites [SSL, HTTPS]

Security forms a vital part of the trust that visitors place on a website. This is even more relevant when dealing with confidential information, such as health records or payment method data. Those who have a WordPress site that is not secure will benefit a lot from reading this article.

The more measures website owners can take to keep their websites secure, the better. While there are ways to bypass security-related warnings faced when visiting a website, the annoyance spoils the user experience. Fortunately, there are many steps that one can take to make amends, free of charge.

Search engines, too, have begun to emphasize secure websites more while deciding the latter’s ranks. Security issues often create a feeling of panic among website owners. However, keep reading to find out how to fix such issues on a WordPress website.

Why is my WordPress site not secure?

Being a flexible and feature-filled CMS makes WordPress a lucrative target for hackers because there are many vulnerabilities and endpoints.

Visitors may see a warning about a WordPress site not being secure for various reasons. One of them is a missing SSL certificate. Sometimes, a misconfigured or expired certificate, also results in warnings issued by the browser.

Not all such certificates renew automatically. So, if one forgets to renew them manually, they will expire and will lead to warning.

How do I make my WordPress site secure?

A WordPress website often involves third-party code used in the form of themes, language packs, and plugins. These are in addition to the core files of the CMS. Website owners need to keep all of these up-to-date. Newer versions of plugins and themes often include patches that fix security loopholes.

There are also many tools available that can scan the website for security-related issues and suggest remedial measures.

Why is my WordPress site HTTP, not HTTPS?

It is not sufficient just to have an SSL certificate installed. One needs to force HTTP traffic to use HTTPS instead. The steps to do so will vary depending on the underlying software.

However, there are also plugins available that can help to set up the necessary redirection quickly. Using plain HTTP will make the website traffic more prone to eavesdropping by hackers.

How do I fix the WordPress site not secure?

1. Install an SSL certificate

If the website hasn’t installed an SSL certificate, one can obtain it by applying for fresh registration. Many domain name providers and web hosting agencies supply digital certificates as well.

Free SSL certificates are also available from sources such as Let’s Encrypt, GoGetSSL, ZeroSSL, Sectigo, etc. Hosting providers usually have better support for paid certificates.

2. Renew the installed SSL certificate

WordPress site not secure certificate expired

Free SSL certificates usually expire after 90 days, and paid ones after about a year, depending on the validity chosen while purchasing. Not all hosting providers support the automatic renewal of the certificates.

3. Force all traffic via HTTPS

If the browser is expected to use HTTPS automatically but instead uses plain HTTP only, the browser will consider the WordPress site not secure.

In this case, it is very likely that the traffic is not being forced through HTTPS, leaving visitors free to use plain HTTP if they wish to. This can be corrected by redirecting all HTTP traffic through HTTPS.

4. Make sure that the certificate is installed for the correct address

WordPress site not secure address mismatch

If there is a mismatch between the address mentioned in the certificate and the website where it is installed, the browser will take that as a warning.

Multi-domain and wildcard certificates can be used to cover more than one address in one go.

5. Get a certificate from a trusted provider

If the website had a Symantec digital certificate, Chrome will not trust it anymore. Consider getting an SSL certificate from another vendor.

Even Mozilla Firefox won’t consider such certificates as trustworthy, including Symantec’s other brands like Thawte, GeoTrust, and RapidSSL.

6. Adjust the clock of the system

Adjust clock

If the system clock is not accurate, the browser will likely consider a valid SSL certificate invalid. Set the correct date and time in the system clock to correct this.

This will apply even to portable devices. If the clock in the phone/tablet is not set accurately, the browser in the OS too, might fail to recognize a valid SSL certificate.

7. Update the operating system and/or browser

Windows Update

Newer versions of operating systems and browsers contain code that can recognize trustworthy SSL certificates more reliably.

Even if visitors use a browser that has a slow update cycle, such as Firefox ESR, it is better to make sure that it is the latest version available.

Is the WordPress site not secure even with SSL?

Even if SSL is active on the website, visitors may still get a Not secure warning in the browser. One of the leading causes for this is content on the page that the server fetches from external sources. If that data is fetched without encryption, the browser will consider it insecure.

Visitors tend to get annoyed when they see an error on the website. Security-related errors may even create a feeling of panic.

When choosing to go for an SSL certificate, it helps to check what verification level it involves. Some certificates check who owns the domain, whereas others will require documents about the business.

If you are sure that the website has a valid and properly configured SSL certificate but are still facing issues, check out this article on how to secure your certificate when Chrome says it’s not valid.

Another annoying WordPress issue is cURL error 28. To learn the probable causes and solutions to fix it; read this guide.

Let us know which solution worked for you in the comments area below.

Xbox Insiders on Windows PC can preview Wolfenstein: Enemy Territory for free

From now until June 23, participants in the Xbox Insiders Program on Windows PC can take part in a preview of Wolfenstein: Enemy Territory. By joining in the preview, Xbox Insiders can play an integral part in bringing the game to Windows PC.

Wolfenstein: Enemy Territory was first released way back in 2003. It is objective-based multiplayer first-person shooter featuring a WWII setting. Up to 32 players can choose to play as either Axis Powers or Allies, across 6 maps based on real-world battlefields.

How to join:

  • Sign in on your Windows PC and launch the Xbox Insider Hub application.
  • Go to Previews > Wolfenstein: Enemy Territory.
  • Select Join.
  • Once registration is complete you’ll be directed to the Store. From there install the game.
  • Note that the preview is only available on Windows PC, and you must be a participant in the Xbox Insider Program.

If you aren’t already part of the Xbox Insider Program but would like to join, you can do so here. Or you can learn more about it by visiting the Xbox Insider Program FAQ. Members looking to provide feedback can do so by visiting this page.

The Xbox Insider Program is a great way for passionate Xbox fans to get in early access to new features and even games, while providing vital feedback. And the best part is that it is free to join.

Featured image courtesy of imdb.com. 

Play Dead by Daylight, Unturned and Diablo III: Eternal Collection this week with Xbox Free Play Days

The weekend is looking pretty grim with this week’s Xbox Free Play Days lineup. Three great games will be available to play from Thursday, June 9 through Sunday, June 12 for Xbox Live Gold and Xbox Game Pass subscribers.

Dead by Daylight

If you haven’t had a chance to try out this critically acclaimed horror game, now is the perfect time to partake in the many thrills Dead by Daylight has to offer. The game’s 6th anniversary is coming up, and it will be celebrated with a special in-game event titled “Twisted Masquerade” from June 16-20. The game is also part of the Deals Unlocked sale that is currently ongoing, and offers big discounts on the game and DLCs.

Diablo III: Eternal Collection

Join the more than 65 million gamers that have delved into the world of the now-legendary Diablo III since it first launched just over a decade ago. With the Reaper of Souls and Rise of the Necromancer expansions included, this is the definitive Diablo III experience.

Unturned

The weekend takes a slightly lighter turn with this block-style survival game, set in an zombie-ravaged open-world sandbox. Join up to 24 friends online (or play split-screen co-op) as you scavenge for food, weapons and supplies while fending off the zombie hordes in the ruins of modern society.

This week’s Xbox Free Play Days offering definitely delivers for fans of the dark and macabre. Note that you can purchase the games at a discount during the event, while keeping your progress and earned achievements. You can learn more about the Xbox Free Play Days here.

How To Easily Fix Blink’s Unknown Tulsa Error

Blink by Amazon offers inexpensive and compact security systems. The security cameras by Blink come with customizable motion detection alerts, two-way audio, 1080p full HD video recording, temperature monitoring, etc.

They also work with Amazon’s Alexa, allowing users to view video feeds and motion announcements on any Alexa device. Also, these cameras allow users to access their security camera footage from anywhere in the world.

But recently, many users have complained about the Blink unknown Tulsa error. This mainly occurs due to some server errors. However, other factors may be responsible for this issue.

If this error is troubling you, keep reading to learn how you can fix it.

Why is the Blink app not working?

The Blink app allows users to check what is happening in their homes from anywhere. This application enables accessing your Blink security camera directly from your smartphone.

You need to connect the Blink security camera and your smartphone to the internet to use this feature. But this could arise several issues like live view failure or the Blink unknown Tulsa error.

These Blink error messages appear if the sync module isn’t able to communicate with the camera. However, sometimes an unstable internet connection can be blamed, so here’s what to do if your Internet access is blocked.

How can I fix the unknown Tulsa error on Blink?

1. Move your camera closer to the sync module

If your sync module or Wi-Fi is placed far away from the camera, consider relocating it somewhere nearby.

You need to have three bars of signal strength for the camera to work with the Wi-Fi or sync module.

2. Power cycle your router and camera

  1. Turn off and/or unplug the router and camera.
  2. Now, wait for at least 30 seconds.
    blink unknown tulsa error
  3. Plug in the device and/or turn it back on.

You’ve now successfully power cycled both your devices; make sure that it’ll take a few minutes to start functioning. Check if the Blink camera unknown Tulsa error is fixed once the router and the camera start.

3. Try another power source

If none of the above-mentioned steps were able to fix the Blink system not working, try a different power source.

Remove the batteries and connect a micro USB cable and USB power adapter to your camera. Doing so will allow your camera to run without any batteries.

How do I refresh the Blink app?

If you are not receiving motion alerts or video doorbell notifications on your Blink app, refreshing the application might help resolve Blink error codes. The Blink app provides notifications on your smartphone to know what is happening with your Blink account and systems.

Below mentioned are the steps to refresh the Blink app.

On Android

  1. Close the Blink App and open Settings.
  2. Click on Apps followed by Manage Apps.
    Settings apps
  3. Scroll down and click on Blink.
    blink unknown tulsa error
  4. Now select Clear data at the bottom.
    Blink Clear data

On iOS

  1. Close the Blink app.
  2. Double click the Home button and all the apps you’ve been using should pop up.
  3. Flick the Blink app upwards until it disappears from the screen.
    iOS refresh
  4. Restart your device and reopen the app.

Well, that’s all from our side on how to fix Blink’s unknown Tulsa error, and we hope that our solutions helped you solve this issue.

If the troubleshooting methods didn’t solve this error, try reinstalling the Blink app. But this should be only a last resort. And if you still have any issues, feel free to drop a comment below. We’re eager to hear from you.

Lost Ark Statistics: Find Out How Many Bots Are On Your Server

Die-hard fans of the MMOARPG video game genre will forever remember February 11 2022 as the day their new favorite game was released.

That is, users in Europe, North America, and South America, as fans in South Korea started playing Lost Ark back in December 2019, when the title was initially released.

Hype for this awesome game has been building for quite a while, and a lot of people have downloaded and played Lost Ark since.

This reflects in the numbers that the title has been stacking up since its second release, but you shouldn’t always trust what the naked eye can’t entirely see.

Gamers have started slowly realizing that many of the players they run into while playing are not really what they seem at first.

And we’re not talking about dealing with shady individuals or shapeshifting wizards, but about the large number of AI (bots).

Not everybody you encounter in Arkesia is a human player

You didn’t think that everybody you met while adventuring throughout Arkesia was a real player, did you? In fact, you would be shocked to find out how many actually aren’t.

Yes, the bots have been a real handful for both Tripod Studio and Smilegate, the two companies that put their heads together and created Lost Ark.

Bot accounts, as you would imagine, can be used for a multitude of things, including farming, camping, or trading, or maybe even simply to overcrowd servers.

Yesterday I was playing at 4 AM and I have encountered several bots in the game leveling up. I decided to follow them and make a research. It turns out that in almost every channel, every zone of the map, in every continent, there are massive ammounts of bots that are chain questing.

Forums dedicated to the ultra-popular game are buzzing with fans complaining about the massive bot community in Lost Ark and what it does to the game.

Note that Lost Ark players have been quitting the game since shortly after launch due to the proportions of this botting problem.

Furthermore, those that decided to keep playing have been begging the developers for a solution to this entire situation.

As a consequence, it can prove hard for a game to sustain itself when the number of new players that stick around is small.

Not to mention that the players that leave will be less likely to express any type of game-related opinion or feedback, thus decreasing the feedback pool that developers have at their disposal.

We’re about to take a look at some numbers which will make you better understand the magnitude of the above-mentioned situation.

How many bots are there in Lost Ark?

Players that noticed this abnormality have started tracking the numbers since early release, back in February, and have compiled pretty interesting statistics.

Sure, maybe you thought that 20% of characters in the game are bots, but it goes much higher than that. as you are about to see.

If we take a look at the above-mentioned period, you will get a general understanding of how massive the bot population really is.

As you can observe from the screenshot above, which was taken from the Lost Ark forum, the number of bots is staggering, compared to the actual human players.

Apparently, bot classes are mostly Berserker and Sorceress according to the people that took the time to study this, and it was discovered that bot routines currently use these two classes.

We’ll remind you that Lost Ark features five playable classes, and each splits into Advanced Classes. As such, we have:

  • Warrior: Berserker, Paladin, Gunlancer, Destroyer.
  • Martial Artist: Striker, Wardancer, Scrapper, Soulfist, Glaivier.
  • Gunner: Gunslinger, Artillerist, Deadeye, Sharpshooter.
  • Mage: Bard, Sorceress
  • Assassin: Shadowhunter, Deathblade

The disproportionate increase in percentage in the charts regarding classes such as Berserker and Sorceress is from the actual bots.

It wasn’t hard to read the differences, considering the Warrior subclass made an initial jump from 38.5% to 41.9%. The mages, on the other hand, had a more steady growth from 23.2% to 25.4%.

Now, we know you might ask why, and we’re more than happy to provide the answer for you. It is simply because of a little thing we like to call reliability.

You see, bot accounts made for farming or trading need to first level up, and then provide reliable services in a relatively low amount of time, constantly.

And what other classes are better fit to carry out these important tasks, if not Berserkers and Sorcereses? If you take a look at our guide to pick the best starting class in Lost Ark, we told you the same thing.

Which thing? That the Mage, a subclass of the Sorceress, and the Warrior, a subclass of the Berserkers, are the best for players starting Lost Ark for the first time.

That means that they are perfectly suited for this line of work, due to their resilience and ease to achieve high damage in whatever farm scenario they might be in.

Don’t get us wrong, all of the other classes can do just fine on their own, but they are not suited for botting because of the complexity required to be efficient.

So, back in February 2022, when the game was released in Europe, as well as in North and South America, only half the total population were in fact human players.

Needless to say, the information that 49.05% of Lost Ark players are bots did not sit well with the remaining fans and the situation got worse.

Later reports, recorded in May 2022, point out that what fans were appalled by was only the tip of the iceberg. As the months went by, bot numbers increased dramatically.

Posts on the same Lost Ark forum were already depicting a reality that many refused to believe at first, showing that the bot population had actually increased to a head-spinning 73%.

You don’t have to be a math genius to figure out that 27% is a ridiculously low number for such a popular MMOARPG title.

That being said, this number will also probably grow smaller and smaller due to the players that are still leaving on a daily basis.

What’s the solution?

Well, Smilegate did acknowledge the situation and provided a reply for its gaming community on the 13th of May 2022, also detailing measures being taken as a consequence.

We know that bots have been causing frustration within the community, and we share in that frustration. Over the past few months we’ve made a number of changes to Lost Ark in order to combat bots.

The company responsible for what is considered a gaming masterpiece confirmed it has been fighting a war against the bots infiltrating Arkesia.

Developers explained that combating bots can be especially challenging in free-to-play games because it’s so easy to create an account and enter the game.

As a result, Smilegate confirmed taking the following actions against bot accounts:

  • Permanently banned several million accounts that participated in botting, hacking, or gold selling.
  • Level-gated area chat to keep brand-new accounts from spamming gold-selling advertisements.
  • Actively updated the game’s automatic chat moderation with lines and phrases that we know are commonly used by gold sellers.
  • Changed the reward structures of quests and events to add a stronger deterrent against using bots to farm gold.
  • Updated and improved Easy Anti Cheat detection capabilities to better identify and act against bots.
  • Enabled a native detection system to help quickly identify bad actors and take action against them.
  • Improved reporting tools in-game to help our players report bots and our support staff act more quickly on reports.
  • Blocked IP from regions where we do not have publishing rights that have shown large amounts of bot activity.
  • Blocked VPNs to stop bad actors from working around IP bans.

But don’t go thinking that this battle has been won just yet. In reality, developers are still working out clever ways to try and keep this from happening.

Each of the above tactics has shown some measure of success in removing bots from the game but you can still run into them around every corner.

Smilegate confirmed working closely with Easy Anti Cheat to improve their support of Lost Ark and with Smilegate RPG to improve the native bot detection system.

Furthermore, creators will also be tuning events and rewards to prevent or remove paths for further future bot abuse.

The community has been adamant with requests for tools such as Captcha or two-factor authentication in order to thin out the bot population.

However, all of these changes would require a sizeable platform and architectural changes that developers are not yet ready to make.

Note that real-world account owner identification is another method used in some regions, however, certain important factors make this a less realistic solution for the time being.

What’s the all-time situation of Lost Ark?

Seeing how Lost Ark is played through Steam, it’s not hard to find out what’s left of the Lost Ark community by looking at the numbers.

According to the Steam Charts, the peak of players engaged in Arkesian adventures reached 1,324,761, and this was back in February 2022.

Since then, the numbers started slowly declining each passing week, with only a peak of 907,696 players, which is 36.47% less, recorded just the following month (March 2022).

April was Lost Ark’s worst month to this date, with a further decrease of 20.09%, bringing the remaining players down to 569,729.

A lot of players, many of them bots, returned to the game in May 2022, when Steam reported a 37.79% increase in the population.

Another 7.17% increase has been reported for June 2022 as well, as Steam experts presented a statistic of 828,728 active accounts.

And, as you now know, the number of real players in those 828,728 is less than half. We’ll just have to keep an eye on the meters and see what happens with Lost Ark in the future.

Lost Ark Twitch streams have also dropped dramatically throughout the months, with people less and less interested in spending their time watching clips of the popular game.

This is reflected in numbers monitored by websites such as Twitch Tracker, where we can see just how bad the game is doing stream-wise.

Whatever the situation may be, Lost Ark still remains a really well-made game, with diverse classes and combat system, and it’s also very pleasant on the eye.

The intricate PvE scenarios and the entertaining PvP you can engage in while playing Lost Ark have fascinated many and continue to do so to this day.

And, you would also be pretty enticed by it, especially if you are a fan of games series such as Diablo, Torchlight, or Sacred.

We can also help if you’re having problems with the game, such as Lost Ark not installing on Steam, not starting due to authentication errors, or the dreaded EasyAntiCheat errors.

Encountered the G0X9-SPELPWP1P2NT error while playing Lost Ark? That too can be solved with just a few easy steps, and we’ll show you how.

Also, if you can’t play Lost Ark because there’s not enough disk space, you need some help adding cross-server friends, or learning how to inspect other players, we’re here for you.

We’ll leave it up to you to decide whether to remain a resident of Arkesia or not. All that really matters, in the end, is that you have a good time and enjoy what you do.

Lost Ark is still a fun game, it’s just harder to do things now that almost three-quarters of the entire population is made up of AI.

Sad, but now tragic, considering that Smilegate is still putting in the effort to eradicate bot accounts. Pretty soon, hopefully, Arkesia will only be populated by real users.

Are you still playing Lost Ark on Steam? Share your experience with us in the comments section below.

21 Best Ways to Limit the CPU Usage of a Process

Allocating your computer resources is necessary; sometimes, certain applications can use more resources than you would like.

As a result, your performance will be negatively impacted, and you’ll experience slowdowns, stuttering, freezes, and other issues.

To prevent this, you need to set limits or resource usage, and in today’s guide, we will show you how to limit CPU usage on your Windows PC.

How do I check my CPU usage?

Windows 10

  1. Press Ctrl + Shift + Esc.
  2. In the Processes tab, look for the CPU column and you’ll see CPU usage for each process.
  3. To see overall CPU usage on a graph, go to the Performance tab.

Windows 11

  1. Start Task Manager by pressing Ctrl + Shift + Esc.
  2. The Processes tab should automatically open. Look for the CPU column to see the CPU usage for each application.
  3. Navigate to the Performance tab to see overall CPU usage on a graph.

How can I improve my CPU performance?

Use faster RAM

To get the maximum performance out of your CPU, it’s essential to use RAM with a higher clock rate. Using a faster RAM, your PC and memory will exchange data faster.

This might not be a noticeable change while performing everyday tasks, but there will be a performance boost when performing more intensive hardware tasks, such as gaming.

To find out the maximum RAM speed your CPU can handle, be sure to check your processor’s hardware specs page.

It’s also advised to check your motherboard manual and see what are the maximum RAM speeds that it can handle, so ensure that it can handle it at maximum frequency.

For more information regarding this subject, read our guide on what happens if your RAM is faster than a CPU.

Overclock your CPU

You might have to overclock it if you want to get the maximum performance out of your CPU. By doing so, you’ll be raising its speed and improving your performance.

Do keep in mind that overclocking is not without its risks, and by overclocking you’ll increase the temperature output which can reduce the life expectancy if you’re not careful and you don’t have sufficient cooling.

In the worst-case scenario, you can overheat and damage your hardware, so be cautious. For more information, visit our best software for Intel and AMD CPU overclocking article.

Check your temperature

You need to check your PC’s temperature to ensure it’s running smoothly. We wrote a helpful guide on how to check CPU temperature on Windows 11, so you can check it out for more information.

Alternatively, you can use one of many CPU monitoring software to check the temperature of your processor.

If the temperature exceeds normal, you might have to change the fan speed or invest in additional cooling.

How to limit the CPU usage of a program?

1. Use Task Manager

  1. Press Ctrl + Shift + Esc. The Task Manager window will now appear.
  2. Navigate to the Details tab.
  3. Locate the application whose resource usage you want to limit and right-click it.
  4. Navigate to Set priority and set it to Below normal or Low.

Keep in mind that these settings apply only until you turn off your PC. Once you turn it off, the settings will revert to the default values.

You can also adjust the processor affinity to limit the CPU usage by doing the following:

  1. Start Task Manager and go to the Details tab.
  2. Locate the desired application, right-click and choose Set affinity.
  3. Uncheck processors threads that you don’t want to use with that software and click on OK.

Keep in mind that the fewer processor cores the application uses, the less CPU power it will require, but by disabling available cores, you might affect the performance and the stability of that software.

2. Use BES

  1. Visit the BES download page.
  2. Download the software.
  3. Once the application is downloaded, run it.
  4. Click on Target.
  5. Now select the application that you would want to limit and click on Limit This.
  6. When the confirmation dialog appears, click on Yes.
  7. Move the slider to select how much would you like to limit CPU usage for that process.
  8. Repeat this for all programs that you want to limit.

3. Use Process Tamer

  1. Visit the Process Tamer website and download it.
  2. Run the application.
  3. The software will run in your system tray and automatically limit the CPU usage of any application that exceeds a certain threshold.
  4. To configure the software, right-click the system tray icon and choose Configure.
  5. Now you can set the threshold, affinity, and other settings.

4. Use ProcessLasso

  1. Navigate to the ProcessLasso page and download the latest version.
  2. Install the software and run it.
  3. Right-click the application you want to limit.
  4. From there you can adjust both CPU affinity and priority with a few clicks.
  5. You can also use the CPU limiter feature to reduce the number of available cores to an app if the CPU usage exceeds certain values.

How to limit CPU usage in Windows 11?

Disable background apps

  1. Press Windows key + I to open the Settings app.
  2. Navigate to Apps and select Installed apps.
  3. Click three dots next to the app’s name and choose Advanced options.
  4. Set Background app permissions to Never.

Keep in mind that this method only works for Windows Store apps, and it will prevent them from running silently in the background.

By managing the background app power usage, you can also enable Power throttling, thereby limiting power usage.

Disable Superfetch

  1. Press Windows key + R and enter services.msc. Press Enter.
  2. Locate SysMain on the list and double-click it.
  3. Click on Stop to stop the service.
  4. Set the Startup type to Disabled and click Apply and OK.

The methods mentioned in this guide will affect all apps on your PC and lower the CPU usage in general.

If you want to limit CPU usage for individual apps, the process is almost identical on Windows 11, and you can use all the solutions from the previous section, and they should work without any problems.

Regarding CPU usage problems, here are a few common ones that these solutions should address:

How to limit CPU usage in games?

  • How to limit Minecraft CPU usage?

1. Change the render distance

  1. Navigate to Settings.
  2. Now go to Video and locate Render distance.
  3. Lower the value and save changes.

2. Use mods to optimize the game

According to users, you can reduce the CPU usage in Minecraft by using mods that will optimize the game or replace the rendering engine.

The two most popular mods for this purpose are Lithium (Fabric) and Sodium, so feel free to download and try them both.

  • How to limit Apex Legends CPU usage?

1. Change the client affinity

  1. Start the game on Steam or Origin.
  2. Minimize the game.
  3. Press Ctrl + Shift + Esc to open the Task Manager.
  4. Now go to the Details tab. Right-click Steam or Origin client and choose Set affinity.
  5. Make sure that only the first and the last CPUs are selected. Click OK.

If this method doesn’t work, do the same for the Apex game client and check if that works.

2. Change V-Sync settings

  1. Navigate to Settings.
  2. Now go to Video.
  3. Set the V-Sync to Disabled or Dynamic.
  4. Save changes.
  • How to limit Battlefield CPU usage?

1. Make sure the game is up to date

If the game is having any CPU usage problems, it’s rather likely that bad optimization is the cause. You can fix this by installing the latest updates.

Once the game is up to date, check if the CPU utilization is still high.

2. Update your graphics card drivers

  1. Navigate to your graphic card manufacturer’s website.
  2. Select your model on the list.
  3. Download the latest driver and install it.

After your GPU drivers are updated, check if the issue is still there.

3. Adjust your power settings

  1. Press Windows key + S and enter power plan. Select Choose a power plan from the list of results.
  2. Locate your select power plan and choose Change plan settings.
  3. Now navigate to Change advanced power settings.
  4. Go to Processor power management and locate the Minimum processor state. Set it to around 20% and save changes.
  • How to limit Dota CPU usage?

1. Change affinity

  1. Start the game.
  2. Once the game starts, minimize it.
  3. Now press Ctrl + Shift + Esc to open Task Manager.
  4. Navigate to the Details tab. Right-click dota process and choose Set affinity.
  5. Try disabling one or more CPU cores and check if that solves the problem.

Users reported that disabling CPU 0 fixed the issue for them, but you might have to experiment with different settings to fix the problem.

2. Remove MSI drivers and software

  1. Press Windows key + X and select Device Manager.
  2. Now locate any MSI drivers that you have, right-click, and choose Uninstall device.
  3. Check Delete the driver software for this device and click on Uninstall.
  4. Do this for MSI drivers that you have installed.

Now you need to remove the MSI software by doing the following:

  1. Press Windows key + X and select Apps and Features.
  2. Locate the MSI software that you have installed.
  3. Select it and click on Uninstall.
  4. Follow the instructions on the screen.

After you’re done, restart your PC. Once your PC restarts, the default drivers will be installed for your motherboard. Do not update them and check if that solves the problem.

Keep in mind that this solution can be applied to other motherboard brands and not just MSI.

  • How to limit Fortnite CPU usage?

1. Change the video settings

  1. Navigate to the menu in the top right corner and select Settings.
  2. Go to the Video.
  3. Set Window mode to Fullscreen and set the resolution so it matches your screen resolution. Lastly, set the Frame rate limit above your monitor’s refresh rate.

2. Add Fortnite to your antivirus whitelist

  1. Press Windows key + S and type windows security. Select Windows Security from the list.
  2. Navigate to the Virus & threat protection and select Manage settings.
  3. Select Add or remove exclusions.
  4. Select Add an exclusion and then choose Folder.
  5. Add Epic Games, BattlEye, and EasyAntiCheat directories to the list of exclusions.
  • How to limit New World CPU usage?

1. Adjust graphics settings

  1. Start the game and open Settings.
  2. Navigate to Visuals and set Max FPS to 60 or even 30.
  3. Now locate Video Quality and set it to a lower value.
  4. Save changes.

2. Use high-performance mode

  1. Open Nvidia Control Panel.
  2. Navigate to Manage 3D settings and then choose Global Settings.
  3. Now make sure that the Preferred graphics processor is set to a High-performance NVIDIA processor.
  4. Save changes.
  • How to limit Rainbow 6 Siege CPU usage?

1. Modify the game files

  1. Navigate to the following directory: C:\Users\Documents\My Games\Rainbow Six - Siege\
  2. Open GameSettings.ini with Notepad.
  3. Locate FPSLimit and set it to FPSLimit=60. You can also use any value higher than 30.
  4. Save changes.

2. Change the game priority

  1. Start the game.
  2. Once the game is running, minimize it by pressing Alt + Tab.
  3. Now press Ctrl + Shift + Esc.
  4. Go to the Details tab.
  5. Locate Rainbow Six Siege on the list, right-click it and expand Set priority. Set it to Low.

Now, check if the problem is resolved.

What are the best tools to monitor CPU usage?

By closely monitoring CPU usage, you can easily detect if any process is using more resources than it should and stop it to ensure there aren’t any slowdowns on your PC.

Using such software, you can ensure that your PC is working at peak performance by finding and stopping any apps with high CPU utilization.

Speaking of which, here are some of the best applications you can use for CPU monitoring.

PRTG Network Monitor

If you’re a system administrator and want to manage your server or a PC, PRTG Network Monitor is one of the best tools you can use.

The software can monitor all your available applications and files, and thanks to advanced logging, you can see problems on your PC or server as soon as they appear.

This software is for professional users, but you can also use it on your home PC to have a full overview of your system’s performance.

ManageEngine OpManager

Another professional tool for resource monitoring is ManageEngine OpManager, and this software can be used for real-time network monitoring, allowing you to easily measure packet loss, latency, speed, and more.

The ability to monitor CPU, memory, and disk usage is also there, and you can use this software to monitor both Windows and Linux servers or even virtual machines.

It’s also important to mention that this software can monitor processes locally and remotely, so you can rest assured that no apps are using more resources than they should.

SysGauge

If you need dedicated CPU monitoring software, SYSGauge might just be what you need. The software can provide you with information such as CPU usage and kernel CPU usage.

You can also view additional information, including CPU interrupt time, interrupt rate, frequency, and C1-C3 power states.

The software is incredibly simple to use in its GUI version, but there’s also a command-line version available for more advanced users.

HWiNFO

This software is designed to give you in-depth hardware information, and at the same time, it allows you to monitor all your components.

Using this software, you can see your CPU information, including its speed, utilization, voltage and other information.

Thanks to the real-time monitoring, you can also keep a close eye on your system temperature, so you can easily detect any overheating and performance issues.

Wise System Monitor

If you need software to monitor CPU usage, then Wise System Monitor might be the perfect choice for you. Using this application, you can view the list of all active processes, as well as their CPU and memory usage.

To ensure that your PC is running smoothly, you can quickly close any applications that are using more resources than they should with a single click.

The app also has a floating window that shows you all the important information, such as your network speed, memory, and CPU usage, as well as your PC temperature.

What is the most power-efficient CPU?

When it comes to power efficiency, the Ryzen 5000 and 4000 mobile series has an incredible performance at 15W TDP.

CPUs with the best power performance (Source: CPUBenchmark)

If you’re looking for a desktop CPU, then you should consider models from the Ryzen series since their TDP ranges from 65W to 95W.

Regarding the APUs, the power consumption is even less, and you can get 35W-65W consumption depending on your model.

If you’re looking for a new power-efficient CPU, check our CPU guides for more information.

As you can see, limiting the CPU usage on your Windows PC is pretty simple. It comes in handy for processes like WbemCons.exe, and it can be done with the Task Manager or with specialized software.

If you’re still having issues with high CPU usage, you might want to check our list of software to fix high CPU usage for more ways to deal with this problem.

How do you limit CPU usage on your PC? Let us know in the comments section below.

Windows 7 vs Windows 11: It is Worth the Upgrade Now?

If you are curious about the facts that we have found after comparing Windows 11 vs. Windows 7 and want to know if you should upgrade or not, go through this article.

Microsoft released Windows 11 on October 5, 2021. Since then, this OS has given mixed experiences to many users. However, despite having a strict hardware requirement, it has achieved a significant market share in the past few months.

When Windows 11 is gaining its userbase, many people are still using Windows 7 and are not sure whether they should upgrade or not.

If you want, you can see this guide on using Windows 7 forever.

Windows 7 was indeed an excellent operative system and a massive success for Microsoft, especially after getting so much criticism for Windows Vista; it was overdue.

This company also got massive success for Windows 11’s immediate predecessor. So even though the new OS is considered a replacement for Windows 10, we want to focus on the other side for a specific group of people.

We have used Windows 11 and 7 to find out the differences and some other precious answers. The article is based on our research and the feedback from different users worldwide.

Windows 11 vs. Windows 7 – Key differences

➡ System requirements

Compared to other Windows operating systems, Microsoft maintains strict system requirements for Windows 11. They even have a PC Health Check tool to check the compatibility of your PC with this new system.

Though this new OS is compatible with most recent PCs, there may be a slight incompatibility for some specific systems because of the TPM requirements.

Unlike previous Windows versions, the new one requires TPM 2.0 enabled or the Microsoft Pluton as a security processor.

Here are the critical hardware requirements for Windows 11:

  • Processor: 1 GHz or faster with two or more cores 64-bit processor
  • RAM: 4 GB or better
  • Storage: 64 GB
  • Security Processor: TPM 2.0 or Microsoft Pluton
  • Graphics Card: DirectX 12 compatible or later with WDDM 2.0 driver
  • Display: 720p with 8 bits color support or better

The PCs built within the last four years should be capable of running this new operating system. But, many users have not been able to install it due to the strict security processor requirements.

If you are interested, read the differences between Microsoft Pluton and TPM.

Even if you don’t have these security modules, you can still install Windows 11 without TPM 2.0.

On the other hand, the Windows 7 system requirements were very straightforward. Therefore, anyone could run this OS if they have a PC with the same or better configurations as the following specs.

  • Processor: 1 GHz or faster 32 or 64-bit processor.
  • RAM: 1 GB for 32 bit and 2 GB for 64 bit.
  • Storage: 16 GB for 32 bit and 20 GB for 64 bit
  • Graphics Card: DirectX 9 compatible GPU with WDDM 1.0 or higher driver

When Windows 7 came out, people did not have to face difficulties running this OS like now when people are facing problems running the current Windows OS.

➡ Features comparison

  • Design and UI

When you compare these two different Windows operating systems, the first difference is the design and UI.

Windows 11 Start menu

On Windows 11, Microsoft has eliminated many legacy designs and introduced new UI types with a different appearances. For example, even though Windows 7 also had the rounded corner, for its successors Windows 8, 8.1, and 10, MS did not follow this design pattern.

After a long time, Microsoft brought back the rounded corner in UI elements. But, it is very different than the past operating systems.

Windows 7 used a frosted glass effect for transparency on some parts of the UI. In contrast, Windows 11 transparency effect is very different. It uses a blurry effect in the UI using the colors of your desktop background.

This is called Mica material which is a part of Microsoft’s fluent design language.

When you move a Window that uses this modern UI element, it changes the color based on the position compared to the desktop background using the blur technique.

This is primarily to make it look fresh and modern without reducing performance and battery life.

This new fluent design is visible in most built-in Windows 11 apps, settings, file explorers, context menu, etc. Though some of the apps are still using legacy designs, these will get a new look over time, like the Notepad got its fluent design a few weeks ago.

  • Built-in apps, start menu, and settings.

Windows 11 has a very new and different Start Menu than Windows 7. Microsoft has moved the start menu to the middle instead of the left side for the first time. However, you can quickly move it to the left.

Windows 11 built-in apps

The new start menu may cause inconvenience to the legacy Windows users. However, Microsoft has made it this way to make Windows more comfortable for the latest Windows users familiar with the smartphone UI.

Windows 7 start menu had the traditional XP/VISTA-like layout where the app list was visible. Though, you could disable it from the settings. On Windows 11, it’s like a smartphone UI where the app list becomes visible after an additional click.

In the new OS, you also can pin and unpin apps in the start menu, while it was not possible in this way in the old Windows versions.

The Control panel is the center of Windows 7, where users can tweak certain things on the operating systems. But, Windows 11 has a dedicated Settings app which is very different than the control panel.

Windows 11 Settings app

Users can do most things from this new settings app. Nevertheless, this modern Windows OS still has that control panel as some features are not available in the Settings yet. Once it is sorted out, MS will eliminate the Control Panel.

Most Windows 11’s built-in apps are not significantly different from Windows 7’s ones. The main difference you will notice is in the UI. Also, there are some additional and completely built-in apps you will find like Mail and Calendar, Photos, etc.

  • Widgets

Both operating systems have Widgets as a built-in feature. But, there are many differences. Windows 11 has a dedicated panel for widgets that appear when you click on the specific icon on the taskbar. These widgets are like Windows 10’s live tiles with more details.

Windows 11 Widget Panel

On the other hand, Windows 7 widgets are constantly visible on the desktop. Unfortunately, these also look very different and have some limitations in terms of functionalities and performance.

If you miss the live tiles of Windows 10’s start menu, you should look into the Windows 11’s widgets, as this new feature replaces these live tiles. If you need, you can easily disable the devices by tweaking a simple function.

  • Multi-Tasking

Windows is traditionally very compatible with multi-tasking. However, the latest version of this OS has brought some significant changes that can take your experience to the next level.

To work on multiple windows simultaneously, you had to organize each of them manually on Windows 7.

Windows 11 snap layout

However, on Windows 11, 6 predefined layouts automatically organize each opened app and window. This feature is called snap layout. It has more to offer than this automatic window management.

One of the best things is that it remembers which apps were opened last time, particularly layouts that make it easier to do your work more conveniently.

Windows 11 multi-tasking

Dual or multiple monitor setup, switching between desktops, everything has got much more improvements on the latest OS. But, remarkably, when you connect the second monitor, Windows will restore the layout style you used last time with that display.

Windows 11 File Explorer tab

The new File Explorer on the latest OS has the long waited tabs feature. Now, it is more convenient to interact with multiple folders.

  • Touch Support

In the early days, Windows was not that touch-friendly. Windows 7 had pen & touch support. It was not as convenient to use as the modern versions of Windows.

Since Windows 8, Microsoft has focused on touch screen devices aggressively. In Windows 11, it has received significant improvements.

On both touch-supported laptops and tablets, the new os can give an excellent experience as there are new gestures aimed to navigate between apps and interact more conveniently.

Windows 11 on screen keyboard

The new touch keyboard is also very much tablet friendly. Now, you can type without facing difficulties due to the large size of your screen.

  • App support

Windows 7 supports only legacy Windows apps, including the Win32 ones. But, Windows 11 has a dedicated app store, and it supports different types of apps, including the modern UWP apps.

Windows 11 Microsoft Store

The new app store, known as Microsoft Store, has got a new design. Now, it is easier to find out your desired apps.

Various software makers are releasing their apps on this store. So, the new OS has been rich in in-app support and availability.

  • Windows Subsystem for Android

One of the best features of Windows 11 is the Windows Subsystem for Android. It allows you to run an Android app on your PC or laptop without requiring a third-party emulator.

You can only install apps using the Amazon app store though it is also possible to sideload Android apps using an unofficial medium like ADB tools.

Windows 11 Android apps

The Android app support is yet to be available as an entire release. However, according to the various sources, it will be within the next few weeks.

One of the things is that not all PCs are compatible with this feature. So, if you think the third-party emulators will be irrelevant, that’s not correct.

There are some differences between Windows 11 vs. Android emulators. However, many users will still use these tools to run Android apps on PCs.

  • Windows Subsystem for Linux

Unlike legacy operating systems, Windows 11 is very advanced and flexible. If you want to use some parts of Linux, mainly Ubuntu, Windows 11 has its support. You will not need to install a separate operating system for this. The Linux Sub-system will do the job perfectly.

Windows 11 ubuntu subsystem microsoft store

On Windows 7, there are no such features. As a result, it has no way to use anything of Linux within this Windows OS except the virtual machines.

This feature was first introduced in Windows 10 that has been carried out for Windows 11.

  • Collaboration features

When MS started building Windows 11, it considered the needs of business users with high priority. That’s why the latest OS gets many collaboration features.

Microsoft teams windows 11

Microsoft Teams has come as a built-in feature for this OS. Else, many features help users share and discuss things quickly with the team members.

  • Windows Sandbox

If you know about the virtual machine, you will like the Windows Sandbox feature of Windows 11. It was first released on Windows 10. The Windows Sandbox allows you to open a virtual Windows system isolated from the main OS.

Windows 11 Sandbox

It helps test various software and do some critical tasks where security matters. Unfortunately, there are no such features for Windows 7. You will need to rely on third-party tools that may not be as good as the built-in one for that OS.

➡ Windows 11 vs. Windows 7 – Performance

Both Windows 11 and Windows 7 are excellent operating systems from Microsoft. Though these are from two completely different eras, they are still comparable in many ways.

When we talk about performance, it is tricky to compare these two versions of Windows. Windows 7 was one of the best-performing operating systems of its time. Anyway, it is the best performing Windows OS for the old systems till now too.

However, due to various reasons, the Windows 11 performs better on modern computers with decent specifications. 

This latest variant has many performance-boosting features that utilize modern hardware more robustly. So, users see noticeable performance differences compared to the ancient Windows 7.

  • Compatibility

One of the critical things about the performance of both operating systems is their compatibility. You can use Windows 7 on old and modern devices. But, some drivers of the most current devices may not be available for this OS.

So, this operating system works best on old PCs. Windows 11 performs excellently on the latest hardware. If your computer doesn’t have TPM 2.0 or the Microsoft Pluton, this version will not work. Though, when TPM or Pluton is there, it will work best.

➡ Windows 11 vs. Windows 7 – Gaming

The old Windows 7 was a prime choice for gamers a decade ago because of its performance, latest DirectX support, etc. Microsoft always focused on gaming with high priority.

Windows 11 gaming tab

With Windows 11, this company has shown its willingness to provide an outstanding experience to gamers. It has got several gaming features that make gaming even better on PCs. We have found that Windows 11 can provide more FPS while gaming in many cases.

The most significant gaming features this OS has brought are the following ones:

  • DirectStorage

This new technology makes NVMe SSDs transfer game data directly to the GPU rather than to the CPU. As a result, it reduces the rendering time significantly faster.

You may notice a little difference in the actual gameplay for this feature if you already have a decent system. But, when your system loads a game or specific game levels, you will notice a significant improvement.

To utilize this feature, a user must use PCIe 3.0 or 4.0 SSDs. Microsoft also has planned to bring this feature to Windows 10.

  • Auto HDR

Auto HDR is another excellent feature that is very appealing to gamers. It makes the older game titles look better on Windows 11 PCs. However, it requires the developer to create an HDR-compatible release.

When you launch a compatible game and have a compatible device, it will automatically prompt you to enable Auto HDR.

  • Game bar and Gaming tab

Windows 11 has a dedicated gaming tab in the Settings app where you can tweak various settings related to games. For example, you can enable game mode from there, configure screen capture settings, and tweak options for the Game bar.

The game bar was first introduced in Windows 10. In the latest OS, it has received significant improvements.

  • Xbox Game Pass

This latest Windows also has a dedicated Xbox app to access specific titles if you have an Xbox Game Pass subscription.

➡ Windows 11 vs. Windows 7 – User experience

When we talk about the user experience, Windows 11 will always do better than Windows 7, except in some situations.

In low-end devices, Windows 7 may perform better. But, in the actual usage, you will face many issues. Most of the flagship software makers have already stopped supporting this ancient operating system. Web browsers do not work well on this OS as well.

Though Google Chrome will support this old Windows OS for a few more weeks, it will stop working. We have personally tested Chrome and other compatible browsers on this OS and found that many websites show security warnings.

So, even if you notice slightly better performance in some specific cases, Windows 7 is not very good in terms of user experience in 2022.

Windows 11 Taskbar item preview

On the other hand, Windows 11 is the latest OS from Microsoft. The industry is focusing on this OS more than previous MS operating systems. In modern compatible devices, Windows 11 works very smoothly.

There are many built-in features, including some for gamers; always put this OS on the top.

Windows 11 will always be a better choice for security and compatibility with modern software, at least for the next few years.

However, Users still complain about a few things. For example, the new start menu looks better. But, it is missing some features that we saw in Windows 10. For example, the taskbar doesn’t support drag and drop yet.

Else, by default, the start menu and the start button are in the taskbar’s middle. So when you pin a lot of apps in the taskbar, it will look weird and does not give an enjoyable experience to the power users.

Fortunately, you can always put the start menu and pinned apps on the left, like Windows 7.

Microsoft has been taking users’ feedback seriously. As a result, we see that the preview builds are getting some changes. The missing features, mainly the start menu tweaks and drag and drop, will be landed on the full release of Windows 11 within a few months.

In terms of user experience, Windows 11 will always do better and get regular improvements. On the contrary, it will not happen with the old Windows 7 as it has already passed its lifecycle.

➡ Dual boot Windows 11 and Windows 7

You may need to use both operating systems for some reason. For example, some older software did not get an update for a long time and may not work on the latest Windows OS.

In this case, you may want to use Windows 7 and your preferred modern OS. Then, it is possible to do the dual boot easily.

We already have a dedicated guide to dual boot Windows 11 and 7. You can see the instructions from there and do it at your convenience.

➡ Should the Windows 7 users finally upgrade to the latest OS?

The answer is primarily positive. Windows 7 is obsolete in this era. So, it is not a good idea to stay with this legacy OS anymore. However, if you do not have a plan to build or buy a new computer, you can stay with this OS a few more times.

However, if you plan to upgrade your hardware, it’s the right time to choose the latest Windows 11. After being released, it was a bit less performing. But, over time, this OS has gained significant performance improvements.

➡ Can you make Windows 7 look like Windows 11 and vice versa?

Yes. You can. Several themes and tools are available to make your older Windows OS look like the latest Windows 11. For this, you can use Windows 11 Skinpack.

Windows 7 UI

There is also Windows 7 Skinpack that will make any modern Windows look like the Windows 7.

However, installing such themes and tools may come with a minor performance penalty depending on the system you have been using. Nevertheless, if you want, you can get the vibe of the different operating systems by using such tools.

If you are on the latest OS and want to change its look, look at these best Windows 11 themes and skins.


Windows 11 has solved many limitations that we saw in its predecessors. Microsoft is also improving this OS with each new update.

For some fantastic features, better capability to utilize modern hardware, and game-changing features in terms of both performance and security, Windows 11 is the ultimate choice for PC lovers.

Not only the Windows 7 users but also any other Windows users should consider upgrading to Windows 11. It is worth it.

After going through this Windows 11 vs. Windows 7 comparison, what’s your thought? We want to hear from you if you have any opinions or ideas on this topic and have decided to upgrade. Write down in the comment box to let us know.

What is RdrCEF.exe Application Error & How to Fix it

Application errors are the ones that either crash an app while it’s running or prevent it from opening. Several users reported encountering the RdrCEF.exe application error accompanied by the message, The application was unable to start correctly (0xc0000001), on Adobe Acrobat Reader.

But, even when the app runs just fine for you, there could be several errors in the background, just not as severe.

Though that’s not the case with the RdrCEF.exe application error because it prevents Adobe Acrobat Reader from working.

What is RdrCEF.exe?

The RdrCEF.exe is a vital process for Adobe Reader, and is responsible for several critical functions, including but not limited to, cloud services and network interaction.

There are a bunch of errors that you might encounter with this process and some of these are listed below:

  • RdrCEF.exe application error 0xc0000142
  • RdrCEF.exe application error 0xc06d007e
  • RdrCEF.exe application error 0xc00000001

How do I disable Adobe RdrCEF?

Since RdrCEF.exe is an inseparable process, users can’t disable it without affecting the functioning of Adobe Reader DC. But, if you are willing to let go of some of the functionalities, renaming the RdrCEF.exe file to RdrCEF_old.exe, stored at the following address might help.C:\Program Files (x86)\Adobe\AcrobatReaderDC\Reader\AcroCEF

In case the program is consuming high system resources, as reported by many, there’s always the option to uninstall it, and switch to a low-resource consuming PDF viewer.

Let’s now find out what to do if you encounter the RdrCEF.exe application error when opening Reader.

How do I fix AdobeARM.exe application error?

1. Run as administrator

  1. Right-click on the Adobe Acrobat launcher, and select Properties from the context menu.Properties
  2. Head to the Compatibility tab.Compatibility tab
  3. Tick the checkbox for Run this program as an administrator, and click OK to save the changes.Run as administrator to fix rdrcef.exe application error

Once done, check if the RdrCEF.exe application error is fixed. In case it persists, head to the next method.

2. Check the permissions

  1. Right-click on the Adobe Acrobat Reader launcher, and select Properties.Properties
  2. Go to the Security tab.Security to fix rdrcef.exe application error
  3. Click on the Edit button.Edit
  4. Select your user account, tick the checkboxes to provide all the relevant permissions, and click OK to save the changes.Provide permissions to fix rdrcef.exe application error

3. Update Adobe Acrobat Reader

  1. Open Adobe Acrobat Reader, and then click on the Help menu at the top.Help
  2. Select Check for Updates, and if one is available, wait for it to install.Check for updates to fix rdrcef.exe application error

Since the RdrCEF.exe application error has been encountered by many, it should be addressed in one of the updates. So make sure to update the app.

4. Repair installation and restart

  1. Launch Adobe Acrobat Reader, and then click on the Help menu.Help
  2. Select Repair installation from the list of options.Repair Installation to fix rdrcef.exe application error
  3. Click Yes in the confirmation prompt.Yes

Now, wait for the repair process to complete and restart the application. Once done, the RdrCEF.exe application error would be eliminated. This would work if there was a problem with the app installation itself, or another intricate issue, that basic troubleshooting couldn’t identify.

These are all the ways you can fix the RdrCEF.exe application error and get things up and running in no time. Also, the methods listed here might work for other Adobe Acrobat Reader errors as well.

Also, find out what to do if Adobe Reader is not printing PDF documents. Users also reported an AcroCEF.exe application error, but we have a dedicated guide that addresses it.

If you have any other queries or know of a method that’s not listed here, drop a comment below.

3 Tips on What to Do When Safari Cannot Download a File

Safari can be a great browser, but it can also be very annoying. One of the most common errors you might encounter is that Safari cannot download a file. This is usually caused by a corrupt or damaged data file being downloaded.

The problem with this error is that it doesn’t give you much information on how to fix it. You might have to try different methods to uncover the underlying problem.

Sometimes, when a browser doesn’t work properly, there’s no choice but to switch to another one temporarily until you get things working again. You can download Safari for Windows 10 and try whether it works out.

Aside from Mac, users have also reported that they experienced similar problems with:

  • Safari cannot download this file on iPhone – This happens mostly to phone users who are trying to download from the Safari mobile version.
  • Safari cannot download this file on iPad – This happens to users who use are on their iPads while using the Safari browser.
  • Safari cannot download this file wallet on ticketmaster – This normally happens when you try to save a file to an Apple wallet but can’t because the ticketmaster merchant does not support passes.
  • Safari cannot download this file on pkpass – This normally happens when you don’t use the correct version of your certificates. When the passes don’t match, the file fails to download.

You can try accessing the same website in another browser and see if it works. If it does, the problem is with Safari not downloading and not the file itself.

Why can’t Safari download a file? 

Some of the common causes why Safari can’t download a file include:

  • Slow Internet connection – If there’s no Internet connection or too slow, your downloads will be pending or get canceled before completion.
  • The website does not allow downloads – Many websites have security settings that prevent people from downloading files, so you will keep getting a download error. If you are wondering: Why can’t Safari download a file to Apple wallet? You must save it on your phone for your antivirus to scan for any malware first.
  • Corrupt download file – If the file you’re trying to download is not a standard web page, and instead, it’s an application or other type of file, then it may be a corrupt download.
  • The file is too large for your device – If you get a message that says Safari cannot download this file because there is not enough disk space, consider deleting some files that aren’t important to you until there’s enough space for downloads to complete successfully again. 
  • A browser extension is blocking the download – Some browser extensions can interfere with downloading files in Safari. Check which extensions are enabled in Safari’s preferences and disable any that don’t need to be activated while downloading files.
  • You are using an unsupported app or browser version – You may not be able to download files if your web browser is older than the latest release. Your device may also have an unsupported version of the Safari app installed. Check your device’s Settings app and see if there are any updates available.

You may also ask: Why can’t Safari download a file on my iPad? Well, the OS only supports specific file formats, so you need to verify that the file you want to download meets the requirements.

How can I allow Safari to download files?

1. Disable extensions 

  1. Navigate to Safari on the menu bar and select Safari Extensions.
  2. Under the Extensions tab, select the extensions you want to uninstall and click Uninstall.Extensions Safari

2. Clear cache 

  1. Navigate to Safari on the menu bar and select Preferences.
  2. Click on the Advanced tab and check the Show Develop menu in menu bar box.Advanced tab Safari
  3. Select Develop on the menu bar and click Empty Caches.Developer tab Safari

As a practical option for cleaning your browser cache, you can rely on cleanup software such as CCleaner to delete cookies or browsing data in seconds.

3. Allow downloads from other sources

  1. Navigate to Safari on the menu bar and select Preferences.
  2. Select Security & Privacy then check the App Store and identified developers box under Allow apps downloaded from.

Remember, if you allow apps from unidentified developers, you’ll be allowing any app to access your entire device when installed. This includes applications that could potentially steal data or take over your phone.

At the same time, this also helps with the Core Services UI Agent error.

Ensure you trust the site where you are downloading files to prevent exposing your system to vulnerabilities. As a safety tip, we recommend you install a VPN to secure your identity as an extra layer of protection.

If you face any related issues such as Windows not recognizing your iPad, refer to our comprehensive guide on how to go about it.

We’d love to hear your feedback on what tip came through for you. Leave us a comment down below.

Arc Browser vs Retrox: Which One’s the Better Gaming Hub?

In the world of PC gaming, there are many advantages of using a frontend emulator over a traditional gaming console. Frontend emulators aren’t the most popular choice. However, they can still be useful and worth using.

The program acts as a middleman between the game and the console, allowing you to play your favorite game on your PC. The software emulates the console’s controller and allows you to play with a controller or keyboard and mouse.

There are many frontend emulators hence it can be a daunting task to settle on one that accurately meets your needs. The good news is that most of them are free to download and use.

We have an in-depth comparison of Windows 11 vs Android emulators. You can try a couple of them and compare their features such as compatibility with other systems, speed and storage before you settle on one.

?️Quick Tip:

You can also try Opera GX, another desktop web browser for Windows PCs.

This browser is primarily designed for gamers. A gaming-inspired theme with Razer Chroma integration, gaming news and deals built-in, a Twitch panel, and sound effects by a game soundtrack designer.

⇒ Get Opera

What is an emulator frontend? 

An emulator frontend is a piece of software that simplifies the use of emulators. It offers the possibility to control your retro gaming console from one place, without having to switch between different systems.

They can often be used to add features that aren’t included in the original emulator, such as better video filters or improved compatibility with different input devices.

It is easy to confuse them with emulators but there is a difference. Emulators are programs that replicate the hardware of another system. This makes it possible to run software made for that system on your computer.

Frontends on the other hand are programs that allow you to easily launch multiple emulators at once and switch between them easily. 

Although there are many frontend emulators out there, we settled on Arc Browser and Retrox. So, which one has the better gaming hub?

What is the best emulator frontend? 

1. Arc browser

Arc Browser is one of those simple frontend emulators gamers opt for because of its simplicity. You will not be bombarded by complicated features but it does its job pretty well.

  • Simple UI – Arc browser has a very simple UI, with just a few options on its home screen.  Its minimalist design lets you focus on what matters most.
  • Cloud storage – Another fan-favorite feature is its cloud storage system. You can upload files to your cloud account and access them anywhere, even when you’re offline. Storage is a key feature for most gamers given the number of games being updated on a daily basis.
  • Speed – Its speed and performance are also unmatched. You can have a long list of games and the speed remains impeccable. You can scroll over a thousand games in seconds with no lag. This feature is definitely a winner for people who get easily annoyed when stuck in the same position for a while.

2. Retrox

Retrox is one of those easy to set up frontend emulators. You only need to install it and it will do the rest of the work for you.

  • Automated – Retrox will automatically download and install the corresponding emulator required to play your selected game.
  • Cloud storage – This feature saves your gameplay and allows you to pick up exactly where you left off. What’s even better is that you can play from anywhere.
  • Supports cheats – Gamers will tell you that having unique cheats for certain games makes it worth playing. With Retrox supporting cheats, it puts it among the top contenders for the best frontend emulators.
  • Themes – If you are the kind of person who likes to change up the look of your UI, Retrox has support for themes to make your games more interesting.
Arc BrowserRetrox
No cheat support yetSupports cheats
Simple UICustom themes
Offers cloud storageOffers cloud storage
Saves gameplaySaves gameplay

How do I add games to my frontend?

It all depends on the emulator you are using. Each has its own set of instructions but the general rule is that you will import or upload your game to a given menu and the emulator will do the rest for you.

Aside from the two frontend emulators discussed here today, you can also check out our other list of lag-free Android emulators if you were not satisfied with the selection.

If you are looking for something more inclusive, you can opt for all-in-one emulators to play both retro and arcade games.

Feel free to share some of your favorite frontend emulators and what features make them stand out in the comment section below.

Windows 7 Gadgets for Windows 11: 7 Best to Download

Here’s an interesting idea: Windows 7 Gadgets for Windows 11. Many of us loved Windows 7’s gadgets.

They were a great way to extend the power of your desktop and get quick access to information and tools that might otherwise take several steps to find.

But is it even possible to get that retro look and feel of the good old Win 7 into the brand new Windows 11? Do gadgets work in Windows 11?

Fortunately, most of the Windows 7 gadgets and tools can be used as Windows 11 widgets – small cards that display relevant, dynamic, and personalized content based on your account history, interests, and usage.

Tip icon Tip
Previously known as gadgets in Windows 7 and Vista, they were deemed insecure and banned from Win 8 and 10 only to make a strong comeback in Windows 11.

But do you really have to be signed in to your Microsoft or local account to get everything neatly organized at a glance? As always, we have a nifty workaround to help you use Windows 11 widgets without signing in.

Now, Windows 11 is a true game-changer and an amazing OS in many ways. But for nostalgics, there can only be one true master of all operating systems.

That is no other than the much-beloved pioneer, Windows 7 which is still going strong after all this time.

Can I make Windows 11 look like 7? That’s the question we get too often and yes, we’re pleased to confirm that you can resuscitate pretty much anything from installing the Classic Shell on Windows 11 to getting Aero themes, enabling the old taskbar in Windows 11, and so on.

On this note, you can also get genuine Windows 7 gadgets for Windows 11 with no more than a couple of clicks.

Where are the gadgets in Windows 11?

The Windows 7 gadgets were displayed in a sidebar, but now they have their own dedicated menu on the Windows 11 taskbar.

Thus, the new widgets bring together everything you need to stay on top of your daily routine without losing focus. From productivity apps to weather, traffic, and news – everything is available in a unified location, the widgets board.

How do I install widgets on Windows 11?

  1. First of all, you need to open the Widgets board. You can do that either by pressing the live weather icon in the left corner of your taskbar or by hovering over the widgets’ icon.
  2. Next, Click the Add widgets button in the top right corner of the board.
  3. Add your chosen widget by clicking on the + button next to the widget’s name.
Tip icon Tip
➡ If the widget button is not visible, simply right-click your taskbar to open the Taskbar Settings. Turn on the Widgets option under the Taskbar items section.

➡ Alternatively, you can use this path Settings => Personalization => Taskbar and toggle Widgets to On.

You can easily port these beloved gadgets from Windows 7 as widgets to Windows 11 and use them exactly as they were. However, some other gadgets might take a little maneuvering to work in Windows 11.

What are the best Windows 7 gadgets to use on Windows 11?

Weather – Track the weather of your location

The new and improved weather gadget or widget in Windows 11 will help you keep track of the weather at home, work, or on vacation.

No matter where you are in the world, with the Weather Gadget you can get an updated forecast for your current location. It also lets you know more detailed information like humidity, visibility, and wind.

To Do – Arrange your daily tasks

The To-Do gadget or widget in Windows 11 is a handy gadget that allows you to quickly and easily create a personal To-Do list.

You can get a total summary of your day at a glance by checking out the To-Do gadget. It helps you organize your tasks and check them off one by one.

You can also rearrange your tasks according to priority, and upgrade your daily efficiency.

Calendar – Keep track of the date 

A calendar provides a way for you to keep track of dates more visually. The widget offers countless options to customize the calendar in an esthetic and functional manner that best suits your needs.

Thus, you can easily adjust the date format, colors, font size and style, calendar day title, month title display order, and more.

You can launch and use this gadget using the Widget Launcher in Windows 11.

Calculator – Calculate away

If you need to do calculations at the drop of a hat, you might miss the calculator the most out of all the Windows 7 gadgets. It’s pretty much just a calculator and looks like one, just as the name suggests. 

You can install the Widget Launcher from the Microsoft Store and use it to get this gadget. It features a standard calculator layout with an optional scientific mode, memory functions, and more.

Currency Converter – Calculate foreign currencies

If you’re trying to convert one unit into another, you have to go through several steps and then wait for the conversion process to finish.

The Unit Converter gadget allows you to convert any unit into any other in just a few clicks. 

This gadget is perfect for anyone who works with different types of measurements daily.

Unit converter – Measure in multiple units

If you’re trying to convert one unit into another, you have to go through several steps and then wait for the conversion process to finish.

The Unit Converter gadget allows you to convert any unit into any other in just a few clicks. 

This gadget is perfect for anyone who works with different types of measurements daily.

CPU meter – Monitor CPU performance

A CPU meter gadget might not be for everyone, but it is highly useful as it shows how much your processor is being used.

It also allows you to see if any programs are using up your CPU power, which can help you pinpoint the problem in performance.

Can you add widgets to the desktop on Windows 11?

As you can see, your widgets board is highly customizable – you can pin or unpin widgets to the board, rearrange and resize, add or remove them as you go, and set them to reflect your personal interests.

What you cannot do, however, is to add the widgets directly to your desktop as you would with Windows 7 gadgets. In order to do that, there is an additional (yet quick and easy step) required.

  1. Simply download and install a third-party app called the Widget Launcher from the Microsoft Store.
  2. Launch this third-party app on your Windows 11 PC and select a widget from the middle panel.
  3. Next, click on Launch Widget in the right panel and you’re all set!

Since Windows 7 gadgets still have plenty of fans it’s only natural to seek the best ways to get them back into your life.

Another interesting (third-party that is ) alternative app to help you install Windows 7 gadgets for Windows 11 is Desktop Gadgets/Gadgets Revived.

Widgets and gadgets are small applications that run on your desktop or laptop screen. They are easy to access and use, allowing you to quickly find the information you need while you work. 

They are highly convenient, but they put a strain on the computer and affect its performance. But you can easily customize and fix widgets’ high CPU usage in Windows 11. So why not give it a go?

Device Manager is Flickering? 3 Quick Ways to Fix it

Device Manager is a useful component in Windows that not just allows us to view the connected devices, but also perform several functions. Though many reported that Device Manager keeps flickering on their PC.

In this case, the Device Manager becomes pretty much inaccessible and you can’t update drivers, perform basic troubleshooting, or modify the device properties anymore.

Read the following sections to find out what you can do if Device Manager keeps refreshing in Windows 11.

Why is my Device Manager flickering?

Here’s a list of reasons why the Device Manager is flickering on your computer:

  • Issues with the connection or malfunctioning device
  • Problematic driver
  • Conflicting applications or processes
  • Corrupt system files

How do I find Device Manager errors?

  1. Launch the Device Manager, right-click on the relevant device, and select Properties.Properties
  2. Navigate to the Events tab and click on View All Events to have a look at all the errors.view all events

How do I stop Device Manager from flickering?

1. Update the problematic driver

  1. Launch the Device Manager, right-click on the device that keeps disappearing and reappearing, and then select Update driver.Update driver to fix device manager flickering
  2. Next, select Search automatically for drivers in the Update Drivers window.Search automatically for drivers

If this doesn’t work, you can try to manually install the latest driver version in order to fix the flickering on Device Manager.

In any case, there is a more suitable method you can utilize in order to update the display driver on your PC without using Device Manager at all.

With the specialized tool named Outbyte Driver Updater, you’ll get a complete scan of your system to detect outdated device drivers automatically. In this way, the Device Manager flickering problem will be easily resolved.

⇒ Get Outbyte Driver Updater

2. Uninstall conflicting applications

  1. Press Windows + R to launch Run, enter appwiz.cpl, and then click on OK.appwiz.cpl to fix device manager flickering
  2. Next, select the conflicting application, and then click on Uninstall.Uninstall app to fix device manager flickering
  3. Click Yes in the confirmation prompt.Yes
  4. Now, follow the on-screen instructions to complete the process.

Once done, restart the computer and check if Device Manager flickering in Windows 10/11 is fixed. If not, head to the last method.

3. Perform a System Restore

In case you are wondering why the device manager is blinking, there are a lot of things that could have gone wrong, and instead of identifying that through some extensive troubleshooting, you could simply perform a system restore.

System Restore basically takes your system back in time by reverting recent changes and removing apps. Just, make sure to select a restore point that was created before the Device Manager flickering issue was first encountered.

Also, find out what to do if biometric devices are not showing up in Device Manager.

Tell us which fix worked for you in the comments section below.

Fix: Device Manager this Operation has Been Cancelled:

Many users have reported encountering This operation has been cancelled due to restrictions in effect on this computer. Please contact your system administrator error while opening Device Manager in Windows 11 and 10.

The error is primarily seen on computers that are controlled by organizations and not the end user, with several restrictions in place.

So, let’s find out how you can fix the This operation has been cancelled error in Device Manager.

What happens when your operation is cancelled in Device Manager?

When you encounter the error while launching the Device Manager, it points to the fact that you have not been provided permission to access it. If an organization or your employer owns the computer, contact them.

In case it’s your personal computer, it could be misconfigured settings or some inadvertent changes to the Registry. Try the methods below to fix the This operation has been cancelled error in Device Manager.

How do you fix This Operation has Been Cancelled?

1. Modify the Registry

  1. Press Windows + R to launch Run, type regedit, and click OK.registry to fix device manager this operation has been cancelled
  2. Click Yes in the prompt.Yes
  3. Paste the following path in the address bar and then hit Enter: Computer\HKEY_CURRENT_USER\Software\Microsoft\Windows\CurrentVersion\Policies\ExplorerPaste address
  4. Locate the DisallowRun key, right-click on it and then select Delete.Delete key to fix device manager this operation has been cancelled
  5. Click Yes in the confirmation box.Yes

Check if the This operation has been cancelled error in Device Manager is resolved.

2. Make changes to the Group Policy Editor

  1. Press Windows + R, type gpedit.msc, and then click OK.gpedit.msc to fix device manager this operation has been cancelled
  2. Expand Administrative Templates under User Configuration and then double-click on System.system
  3. Double-click on the Don’t run specified Windows applications on the right.Don’t run specified Windows applications
  4. Select Not Configured and then click on OK to save the changes.disable to fix Don’t run specified Windows applications

Restart the computer and check if the This operation has been cancelled error in Device Manager is fixed. If not, head to the last method.

3. Reset Windows

In case none of the methods listed here have worked, you are left with no option but to reset the PC. Make sure to wipe everything while resetting.

When you reset the computer, all the installed applications and configured settings are lost, and if any of these were behind This operation has been cancelled error in the Device Manager, things should work fine now.

How do I take restrictions off my computer?

  1. Press Windows + S, and search for View advanced system settings.view advanced system settins to fix device manager this operation has been cancelled
  2. Go to Computer Name tab and then click Change.Change
  3. Select Workgroup, and then click OK to save the changes.Workgroup

That’s it! By now, you should have the This operation has been cancelled error fixed in the Device Manager.

Also, find out the best alternative tools for Device Manager.

Tell us which fix worked for you in the comments section below.

How to Fix Failed to Connect to Multiplayer Services in AoE2

Age of Empires 2 is a real-time strategy video game set in the middle ages with playable civilizations.

All the players get the resources to build towns and create different enemies. There are five historically-based campaigns and three additional single-player modes and multiplayer support.

But recently, many users have complained about Sorry, failed to connect to multiplayer services in AoE2. Errors like these mainly occur if the server certificate authentication fails.

If you are also among the people facing this error, keep reading this post to learn how you can fix it.

How do you enable multiplayer in Age of Empires 2?

It’s very easy to enable the multiplayer mode in Age of Empires 2. Follow the steps mentioned below to do so:

  1. Open Age of Empires 2 and click on Multiplayer icon on the left of the home screen.
  2. Select Host game to create your own match with the options available.
  3. Click on Create lobby to finish the process.
    Create Lobby
  4. You can now set additional settings for your match while you wait for other players to join.
  5. Once all the players have joined the game and all slots are filled click on Start game to begin the match.
    Start Game

What can you do if you can’t connect to online multiplayer services in AoE2?

1. Verify the integrity of game files

  1. Open Steam and click on Library.
  2. Right-click on Age of Empires 2 from the list.
  3. Click on Properties and then on Local Files.
    sorry failed to connect to multiplayer services aoe2
  4. Then click on Verify Integrity of Game Files.
    Verify (1)
  5. Restart Steam and check if it fixes the failed to connect to multiplayer services AoE2 error.

Several users complain about the fact that they are unable to verify the integrity of game files on Steam. Rest assured that our guide shows you what to do in case that happens.

2. Check your Internet connection

As Age of Empires 2 is an online multiplayer, it needs a stable Internet connection to run efficiently. Check your Internet connection by performing a speed test.

Try switching to mobile data if using a Wi-Fi connection and check if the game runs on your device. Also, disable VPN if you’re using one.

3. Flush DNS Cache

  1. Click on Start, search for Command Prompt, and select Run as Administrator.
    sorry failed to connect to multiplayer services aoe2
  2. Type the following commands one by one and hit Enter:
    ipconfig/flushdns
    ipconfig/renew

    flushdns
  3. Restart your device once done and check if the unable to connect to online services platform token authentication failed error is fixed.

4. Check Network Card settings

  1. Open the Control Panel and click on Network and Internet.
  2. Navigate to Network and Sharing Center.
  3. Select Change Adapter Settings, then right-click on the adapter connected to the Internet, and select Properties.
    sorry failed to connect to multiplayer services aoe2
  4. Select Internet Protocol version 4 (TCP / IPv4) and click OK to save the changes.
    Select TCP IP and OK

Well, that’s all on how to fix sorry failed to connect to multiplayer services AoE2 error on your device. We hope the methods mentioned above were able to help you.

If this guide was helpful, do let us know in the comments below.

Xbox set to launch five first-party games in the coming year

Ahead of the Xbox and Bethesda Game Showcase which is set to take place in June 12, Xbox confirmed that Xbox Cloud Gaming is going to receive its first TV apps, starting with  Samsung 2022 smart TVs. Microsoft has had quite a busy year where they got to launch Halo Infinite, Forza Horizon 5, Psychonauts 2, Age of Empires IV, and Flight Simulator across all Xbox gaming platforms.

Also, users should also soon expect to have the capability of streaming games not featured in the Xbox Game Pass library. Moreover, Microsoft also plans to add exclusive game demos to the library as they continue to expand their reach to new countries.

With that said, through a press statement as spotted by the folks at Windows Central. Microsoft intends to “meet or exceed” the number of games that it launched this fiscal year. However, it is yet unclear what entries will make it to Xbox. But remember, both Redfall and Starfield were delayed and set to be released probably sometime this summer, therefore, it is quite likely that they will be part of the entries making their debut.

On top of these two entries Windows Central speculates that “highly likely candidates for other games launching between now and next summer include RPG Avowed, from the developers of Pillars of Eternity. We could also see sim racer Forza Motorsport 8 emerge too. There are other potential candidates, such as leaked Project Belfry from Stoic, or Obsidian’s Pentiment.”

But in the meantime, we will have to wait for Microsoft to disclose the titles that they plan to release during this period. Keep it OnMSFT.com for this and more gaming updates.

Dell follows up its XPS 13 Plus with a remodeled 5th Gen XPS and new Surface Pro competitor

Dell is following the announcement of its polarizing XPS Plus laptop by bringing Intel’s 12th Gen Intel Core processors to its redesigned XPS 13 and its new Surface Pro competitor the XPS 13 2-in-1.

Dell XPS 13 (5th Generation)

Starting at $999 US $1,249 CAD

Starting today, June 9, 2022, customers in the US and Canada can snag the all new and redesigned XPS 13 that combines a thinner and lighter chassis with improved battery performance claims as well as tweaks to the audio profile while maintaining all of the productivity standards of previous models.

Specifically, Dell has tweaked its 4-side InfinityEdge display for a fifth generation by upping the level of brightness to 500 nits and adding an anti-reflective, anti-smudge layer. The 13.4-inch XPS 13 display can be ordered at FHD, FHD+ and 4K UHD configurations.

Surrounding the impressive screen is a new chassis that comes in more vivid tinted aluminum options such as Sky (steel blue) and Umber (metallic brown) inspired colors, which all sit atop a refined CNC machining process. The interior of the laptop also crafts a tone-on-tone aesthetic by offering Platinum or Graphite color schemes.

xs9315nt-xnb-04-bl-pu

Things remain sparse but streamlined when looking at the port selection on the Flanking either side of the XPS 13 are 2x Thunderbolt 4 Type) ports, 1 USB-C to USB-A v.30 ports, 1 USB-C to 3.5mm headset jack converter.

As for what goes under the hood, Dell managed to shrink the motherboard on the XPS 13 by 1.8x smaller which led to an enlarged area for bigger speakers and a lighter design overall.

For anyone banning the use of Windows on their PC purchases, Dell will be offering an Unbutu configuration with the new XPS 13 for the open-source community as well.

Dell XPS 13 2-in-1

Starting at TBD

Moving on to the more exciting news from the company, is the all-new Dell XPS 12 which is now better reserved as the Surface Pro lineup competitor.

The XPS 13 2x 1 represents yet another push for OEMs to join the efforts to expand tablet-computer productivity with fresh new Surface-like design.

XPS 13 2-in-1 (3)

Dell repeats its use of a new CNC machining when crafting the tablet computer that weighs a little over 1.8 lbs. or 1.23 lbs. with the new Folio cover and keyboard?

However, unlike Microsoft and its Surface Pro device, Dell will be including a stylus in-the-box We also killed some time at a stylus’s well as 12th Gen Intel Core processors for configurations. Other notes for the 2-in-1 include 5G connectivity, 3K resolution, 16GB of LPDD4x Dual channel memory, up to 1TB of PCIe 4 storage.  Iris Xe GPUs, 49.5 WHr battery among other features.

XPS 13 2-in-1 (2)

As with most Pro competitors, Dell is selling its proprietary keyboard to make use of more granular and precise workflow, thus validating earlier mockery

The XPS 13 2-in-1 will be available in select markets the that include the US and Canada, later this summer.

New in Gaming: Xbox Design Lab adds new countries, new colors

Customization is an integral part of the console or PC gaming ecosystem, which is why Xbox Design Lab is ever-evolving. Microsoft first introduced the capability of tailoring your controller to meet your expectations back in 2016. The main objective that they hope to achieve with this is to have the players express their personalities with the wide array of combinations that are available.

Today, Microsoft is launching Xbox Design Lab in 11 new countries which include New Zealand, Australia, Japan, Korea, Singapore, Norway, Hungary, Greece, Czech Republic, Switzerland, and Slovakia. They have further added that Taiwan will also be included later on in the summer.

As far as the range of customization and colors is concerned, Microsoft is unpacking Soft Pink, Soft Orange, and Soft Purple. On top of that gamers will also get new camo Top cases with matching side caps, that is, Mineral Camo, Arctic Camo, Blaze Camo, Sandglow Camo, and Forest Camo.

Microsoft is continuously effecting these changes and improvements to the Xbox experience with the aim of enhancing joy across the globe to the entire gaming community. With that said be sure to catch the Xbox and Bethesda Games Showcase on June 12, to get more updates

New in Gaming: Xbox app coming to 2022 Samsung Smart TVs

The Xbox mission has always been simple: to bring the joy of gaming to as many people as possible. And to achieve that goal the team at Xbox has endeavored to allow gamers to play precisely what they want, when and how they want, and with whom they want.

Enter the Xbox app, which at present is available not only on Xbox consoles but also on Windows 8, 10, and 11 PCs as well as on Android and iOS. This covers a whole gamut of devices: consoles, desktop and laptop PCs, mobile smartphones and tablets. Now it looks like we can add smart TVs to the mix courtesy of a new partnership with Samsung that will bring the Xbox app to new Samsung smart TVs.

The new smart TV app will join the mobile Xbox app to bring Xbox to a wide range of devices.

If this news sounds familiar, it should – Xbox and Samsung have partnered before to bring Xbox Game Pass to millions of Samsung Galaxy smart phones. Also, it was stated a year ago in an Xbox Wire post that Xbox was working to bring the app and Game Pass to more screens. This latest announcement is, in part, the fruition of that promise, with the Xbox team also working on a streaming device that will utilize cloud gaming to bring Xbox to even more devices and users.

The Xbox app will be coming to new Samsung 2022 smart TVs, and for those who are new to gaming it will present an excellent entry point without needing to buy a gaming PC or Xbox console. Xbox has said that they intend to expand to other TV partnerships in the future.

Apparently using the Xbox smart TV app will be as simple as launching the app, logging into your Microsoft account, connecting your controller, and launching your digital game of choice to play from the cloud. With Game Pass Ultimate gamers have over 100 great titles to choose from, and those who aren’t already a member can join right inside the app. This new way to play offers an exciting choice for new gamers and those looking to declutter their living room without giving up their Xbox gaming.

Chrome Bookmarks Disappeared: 5 Ways To Get Them Back [2026 Guide]

Chrome bookmarks help to improve your browsing experience. They store essential sites and allow you to access them easily.

However, users are starting to complain that the Chrome bookmarks disappeared on PC. This can be caused by a series of factors, from user mistakes to browser faults.

Thankfully, you can quickly solve this problem, just like other Chrome bookmarks issues.

This guide contains five simple yet effective fixes to help you restore your favorite missing links. Irrespective of the cause, we have a solution for you.

Where are Google Chrome bookmarks stored?

bookmarks file location chrome disappeared

Chrome bookmarks are stored on a folder created for your browser. To locate this folder on Windows, Open File Explorer and follow the path below: C:UsersusernameAppDataLocalGoogleChromeUser DataDefault

Note that the username in the path is the name of your profile on your PC. 

mac bookmarks location

On Mac, open the Finder app and follow the path below: MacintoshUsers/usernameLibraryApplication SupportGoogle ChromeDefault

The username in the path should be replaced with your profile name. 

?️ Quick Tip!
If you don’t want to deal with such problems in the future, use a more stable browser like Opera One. You can even import all your Chrome bookmarks and settings.

It’s often updated and has a modern interface, with quick access to social media platforms. Opera One also includes an adblocker, a VPN, and more.

⇒ Get Opera One

Where did my Chrome bookmarks go?

If your Chrome bookmarks disappear, chances are they are somewhere on your PC. Below is are some of the reasons you can’t find them on your browser:

  • Accidental deletion: You might mistakenly delete your Chrome bookmarks yourself. In this case, you should quickly press the Ctrl + Z keys to undo the action.
  • Chrome bookmarks bar disappeared: Sometimes,  Chrome bookmarks bar that is missing and not your favorites disappearing. You can restore the bar by pressing Ctrl + Shift + B keys on Windows and Command + Shift + B on Mac to restore it.
  • Browser update.
  • Turn off sync while the profile is in use.

How do I recover my bookmarks on Google Chrome?

1. Use the Chrome folder

  1. Open File Explorer and follow the path below: C:UsersusernameAppDataLocalGoogleChromeUser DataDefault
  2. Locate the files name Bookmarks and Bookmarks.bak. The Bookmarks option is the default file currently used by chrome while bookmarks.bak is the latest backup.
    bookmarks file chrome disappeared
  3. Close all Chrome windows.
  4. Rename the bookmarks file to a different name like bookmarks.out.
    rename bookmarks
  5. Rename the bookmarks.bak to Bookmarks. The goal is to set it as the default for Chrome.
    rename second bookmarks disappeared
  6. Now, relaunch Chrome.

This generic fix is effective for the Chrome bookmarks that disappeared after sync, update, or reboot issues on Windows and Mac.  
You can also use a Chrome bookmarks recovery tool for this fix on Windows. Again, the instructions have been detailed on the website.

2. Recover from previously backed up file

  1. Open Chrome and click the menu button (three vertical dots) at the top right corner.
  2. Click the Bookmarks option.
  3. Select Import bookmarks and settings.
    import bookmarks option
  4. Check the checkbox for Favorites/Bookmarks.
    favorite bookmarks chrome disappeared
  5. Click the dropdown at the top and select Bookmarks HTML File.
  6. Click the Choose File button.
    choose file button
  7. Select the bookmarks file you backed up in HTML format in the past and click the Open button.
    select saved bookmarks chrome disappeared
  8. Click the Done button when prompted that Your bookmarks and settings are ready.
    bookmarks success

This fix only works if you have backed up your favorites in a folder in the past. It is especially effective if your Chrome bookmarks disappear after an update or sync.

3. Import bookmarks from other browsers

  1. Open Chrome and click the menu button.
  2. Select the Bookmarks option followed by Import bookmarks and settings.
    import settings option
  3. Click the dropdown at the top and select the browser to import from. We will use Mozilla Firefox as an example here.
    choose firefox chrome disappeared bookmarks
  4. Check the box for Favorites/Bookmarks.
  5. Click the Import button.
    import  firefox bookmarks chrome disappeared
  6. Click the Done button when prompted.
    importation success chrome bookmarks disappeared

This fix works for all Chrome bookmarks disappeared scenarios like after update, reboot, or sync. The only caveat is that you must have exported the bookmarks to another browser before they went missing.

4. Restore from browsing history

  1. Launch Chrome and click the menu button.
  2. Select the History option.
    history option
  3. Click the History option at the top to open the entire browsing history.
    full history chrome bookmarks disappeared
  4. Now, select the links you have bookmarked to open them. 
  5. Click the star icon in the Address bar to add it to bookmarks again.
    bookmark link

5. Recover bookmarks with Google Activity

  1. Open Chrome and type my Google activity in the address bar. 
    my activity search chrome bookmarks disappeared
  2. Click the Welcome to My Activity option.
    welcome to my activity
  3. Scroll down the page to locate the link to the sites you bookmarked. Then, click on them to open them again.
    the activity page bookmarks chrome activated

In a case where you have cleared your browser history, you can recover your missing Chrome bookmarks via Google. But you need to have signed in to your Google account, Chrome and enabled the history sync settings before the links disappeared.

We have come to the end of this detailed guide on how to recover your Chrome bookmarks after they disappeared. The fixes provided are primarily general and work for Mac and Windows alike.

If Chrome is not syncing bookmarks, passwords, and other info on your PC, you can check our guide on how to fix it.

Let us know the solution that helped you restore your Chrome bookmarks in the comments section below.

4 Most Expensive Xbox Headsets that are Worth the Money

You get what you pay for; isn’t that how it goes? More often than not, a hefty price tag acts as a quality benchmark. Hence, it’s only natural for gaming fans with a thing for Microsoft consoles to want to put their hands on the most expensive Xbox headsets.

Price plays a vital role in determining the quality of features in a gaming headset. Nevertheless, there are many factors to consider apart from the price, and the ultimate goal is to achieve an improved gaming experience. 

So, why are gaming headsets so expensive in the first place? These elements increase the cost of a gaming headset, from durability to comfort, noise-canceling, multi-connectivity, clear microphone, and broader frequency. 

Furthermore, the most expensive gaming headset for Xbox that delivers high quality must be fully equipped to accommodate all versions of the famous console.

With compatibility being such a big deal, you need to ensure that the most expensive Xbox One headset you pick will also be the best premium Xbox Series X or S headset that your money can buy.

Our selection includes not only the most expensive Xbox headsets but, overall, the best headset in the world for Xbox with excellent both extended compatibility and great features.

What is the world’s most expensive gaming headset?

When writing this article, the most expensive and best gaming headset in the world is the Bang & Olufsen Beoplay Portal, currently selling for $499.

It is crafted to improve the immersive gaming experience on consoles and is ideally suited for PC and even mobile gamers, with tailored modes for each device. 

Its most appealing features include crystal clear sound and advanced noise-canceling with lower latency. Using the Dolby Atmosphere technology, the audio quality it boasts is unmatched. 

Furthermore, its dual-mode compatibility enables smooth wireless connectivity and a USB-C dongle. If you’re looking for the most expensive wireless headset for Xbox, PlayStation, or PC, the Beoplay Portal is a worthy investment that will level up your gameplay thanks to its fine-tuned features.

What are the most expensive headsets for Xbox?

K712 PRO Over-Ear

  • Ergonomic design for enhanced comfort
  • High-quality materials (soft velour pads)
  • Sophisticated Open Technology for precise sound
  • Flat-wire voice coils for improved performance
  • Powerful sound imaging and spacious soundstage
  • The ear cups' straps are a bit flimpsy.

The AKG Pro Audio K712 Pro offers the most comfort for a fatigue-free gaming session with maximum wearing.

If you were wondering what is the best headset in the world for Xbox, you just struck gold as this product crafted from genuine soft leather will guarantee a comfortable and lightweight fit.

Its compatibility with all Xbox consoles and more makes it a fan favorite. What’s more, its sophisticated open technology ensures an improved and powerful sound quality with excellent performance.

The flat wire voice recall coupled with the 3 DB guarantees bass reproduction and impulsive response. This helps perfect the immersive gaming experience.


QuietComfort 35 Series 2 Gaming Headset

  • Fully compatible with all Xbox generations
  • Acoustic noise-canceling technology
  • Advanced controls for mic volumes
  • Comes with a Discord-certified mic
  • Detachable gaming module
  • Sound-cancelling does not apply when the battery is drained (wired mode).

What headset do pro Xbox gamers use? You wanted to know; we’re here to deliver – it’s this 2-in-1 Xbox headset with options for wireless gaming or wired experiences and excellent battery life.

You can game freely and go unplugged for up to 40 hours in wired gaming and 20 hours for wireless connection gaming sessions. What more can you ask for?

Also, this headset’s noise-canceling feature is second to none. The headset and the built-in mic have a noise-canceling feature that ensures a clear and crisp gaming experience.

It eliminates all external noise that may disrupt your gaming session, and that’s just one of the reasons why pro gamers appreciate this headset so much.

Last but not least, the lightweight materials used and the soft-padded earpads ensure enjoyable and comfortable long hours of gaming.


Kraken Tournament Edition THX 7.1

  • Adjustable mic volume, noise sensitivity, and more
  • Accurate THX Spatial Audio for the ultimate surround sound realism
  • Custom-tuned drivers for immersive gaming
  • Comfortable oval design with heat dissipation and anti-pressure cushions
  • No Razer staple lighting effects

If you’re after the best surround-sound experience, the Kraken THX Tournament Edition cannot go unnoticed.

This is head and shoulders above other headsets in terms of audio quality. It delivers an enhanced ultra-realistic gaming sound beyond imagination that immerses you completely in the gaming world.

The Kraken THX 7.1 is universally compatible with all devices. From the latest Xbox series S and Ps5 to the old gens. All gamers can use it. Although, the new gens are guaranteed much-improved quality in use.

Its soft padding makes it suitable for medium to long hours of comfortable gaming without wear out or pain.

Extra tip: which is the no one gaming headset? While it does not provide the most expensive Xbox headset, Razer is one of the most potent manufacturers out there with a focus on gamers’ needs.

If the THX 7.1 Tournament Edition is not you’re cup of tea, the Razer Blackshark V2 – arguably the best headset Razer has yet produced – will catch your eye (or should we say your ear?)


Cloud Flight S - Wireless Gaming Headset

  • Sturdy build + breathable leather material
  • Best battery life (30 hours wireless gaming) + wireless Qi-charging
  • Custom-tuned virtual 7.1 surround sound
  • HyperX Ngenuity software with ear cup controls
  • The app does not allow much sound editing and mostly serves for ear cup adjusting.

This could easily be the most expensive Xbox headset based on battery life and backup. It back sets a 30 hours battery life when used for wireless connections.

HyperX Cloud Flight S’ surround sound feature is powered with a custom-tuned 7.1 sound for a surreal gaming experience. It’s compatible with all Xbox series and PlayStation consoles.

The mic features crystal clear sounds with noise cancellation and a LED mute indicator, and the Qi wireless charger provides a comfortable charging option.

Speaking about comfort, you will enjoy its large ear cups made of plush memory foam.


These are the most expensive Xbox headsets that you can get your hands on for an equally immersive gaming experience. Each has particular features that make it stand out from the rest, so don’t be shy to take a closer look.

How about the most expensive Turtle Beach Xbox One/S headsets? You can always expand your area of interest and dig deeper into what the market has to offer.

As always, we’re more than glad to help out, so don’t miss out on our best Turtle Beach headset selection. On this note, we wish you a happy gaming and crystal-clear sound!

3 Ways to Fix COD Warzone Update Requires Restart Error

Call of Duty Warzone, when released in 2020, was arguably one of the most bugged games to be released that year.

One of the most common and reported errors that Call of Duty Warzone players have come across is the never-ending Warzone update that requires restart error.

Notably, the error has not only afflicted COD Warzone players on the PlayStation console but Xbox users as well.

Activision came up with a solution for this, which we will be discussing in this guide. But along with Activision’s answer, we will give you a couple of more solutions that you can apply and possibly fix the Warzone update requires restart error and get back to gaming. So let us get right into it.

Why does COD: Warzone keeps saying update requires restart?

As already mentioned, COD: Warzone players coming across a glitch or bug isn’t something surprising, but this Warzone update requires restart error is accompanied by a bug that prevents players from playing the game.

Restarting the game doesn’t fix the problem, and resetting the internet connection hasn’t worked for players, which hints that this is not an ordinary bug or related to the server.

The actual reason you might come across this Warzone update requires restart error loop is unknown. Thankfully, we have the solutions for you in this guide that will surely help you fix the problem at hand.

How do I fix the COD: Warzone update requires restart error?

1. Clear cache on your console

➡ PlayStation 5/PlayStation 4

  1. Turn off your PlayStation 4 or 5.
  2. Wait till the lights of the PlayStation 4 or 5 turns off completely.
  3. Unplug the power cord from the socket.
  4. Wait for about a minute or two.
  5. Plug the power cord back into your console.
  6. Turn on your console.

➡ Xbox Series X

  1. Press the Xbox button on your controller.
  2. Scroll to the right and select Profile & System.
  3. Select Settings.
  4. Choose Devices & Connections.
  5. Select Blu-Ray.
  6. Select Persistent Storage.
  7. Tap on Clear Persistent Storage.

➡ Battle.net

  1. Close all Blizzard programs.
  2. Press Ctrl + Shift+ Esc on the keyboard to open the Task Manager.
  3. Click on the Processes tab.
  4. End process for agent.exe or Blizzard Update Agent.
  5. Press Win + R to open the Run dialogue.
  6. Type the below command and press Enter. %ProgramData%Origin error code 9:0
  7. Right-click on the Blizzard Entertainment folder and select Delete.
  8. Restart the Battle.net desktop app.
  9. Relaunch the game.

The above method has been shared by Activision themselves after carefully examining the COD: Warzone update requires restart loop error.

2. Delete save game data

➡ PlayStation

  1. Open the Settings.
  2. Select Storage.
  3. Choose System Storage.
  4. Select Saved Data.
  5. Choose COD: Warzone game to access the game’s saved data.
  6. Press the Options button and select Delete.
  7. Choose the saved data files to delete, then select Delete.

➡ Xbox One

  1. Press the Xbox button.
  2. Select My games & apps.
  3. Choose See all.
  4. Highlight the game and press the Menu button on your controller.
  5. Choose Manage game & add ons.
  6. Select Saved data on the left-hand side of the screen.
  7. Choose the game to access the game’s saved data.
  8. Use the Options menu and select Delete saved data.

3. Install all of the COD Warzone game content

  1. Load the game.
  2. Go to the DLC Management screen from the main menu.
  3. Install all game content, including the Campaign and Special Ops packages.

How can I fix the Warzone update requires to restart black screen issue?

The Warzone restart Black screen issue has mainly affected the COD: Warzone players on PC. For them, we have a list of some handy solutions below:

  • Install the latest Windows updates
  • Disable GPU overclocking
  • Update graphics driver
  • Check your internet connection

Let us know in the comments below which one of the above-mentioned methods helped you fix the COD: Warzone update requires a restart loop error.