6 Best Browsers That Let you Customize Your Address Bar

The Web browser is an application with programs that allows it to surf the internet across the World Wide Web. Several browsers are available for you to use on your devices to interact with the internet.

However, an important aspect to consider when choosing is the best browser address bar. Furthermore, being able to customize your browser to your taste is interesting. It will make the browser more efficient and productive for your use.

How do I show my address bar in the browser?

➡ Exit the Full-screen mode in your browser

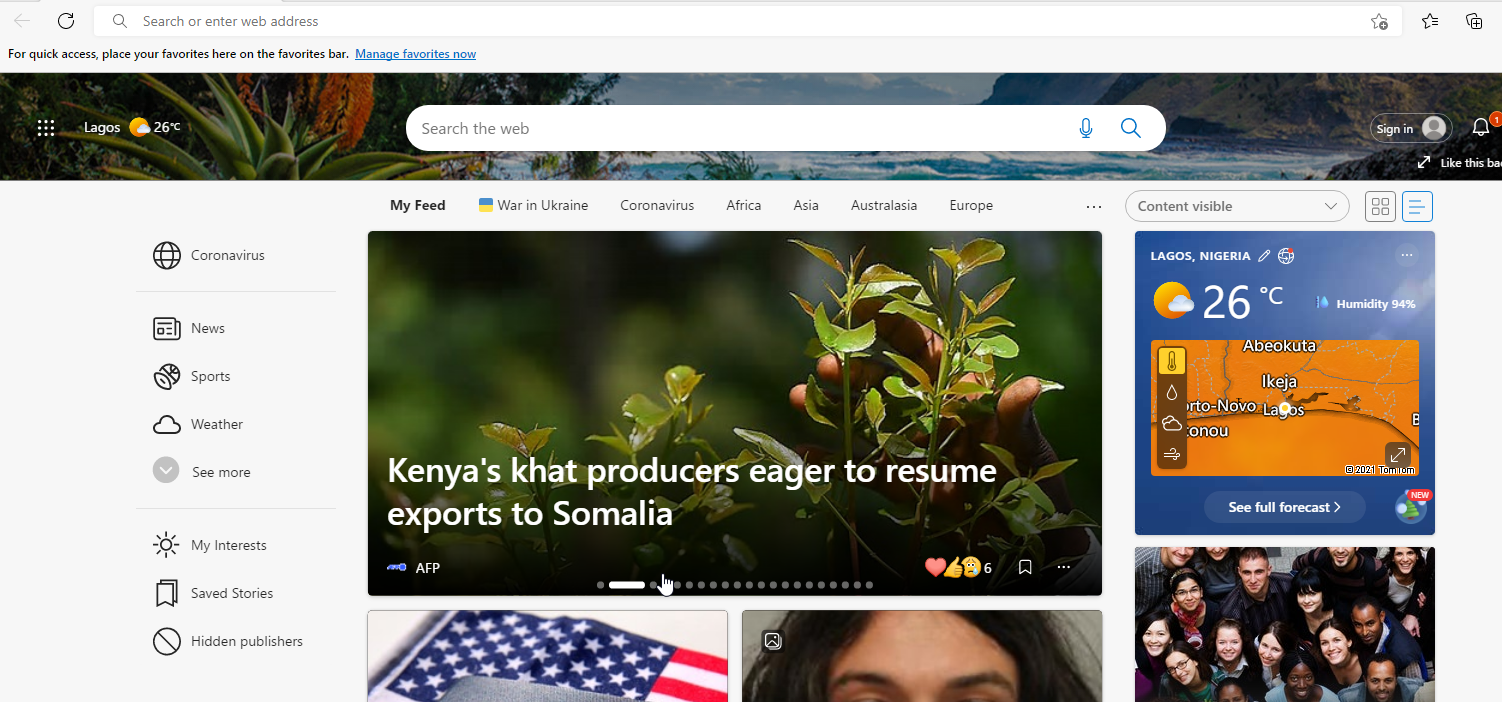
To make the address bar in your browser reappear, press the F11 key on your keyboard to exit the full-screen. Also, you can show it by moving your mouse pointer to the top of the screen to prompt the part.

➡ Run a Virus scan

However, a virus scan will detect and remove any virus infecting your device and restore your address bar.

➡ Reinstall your browser

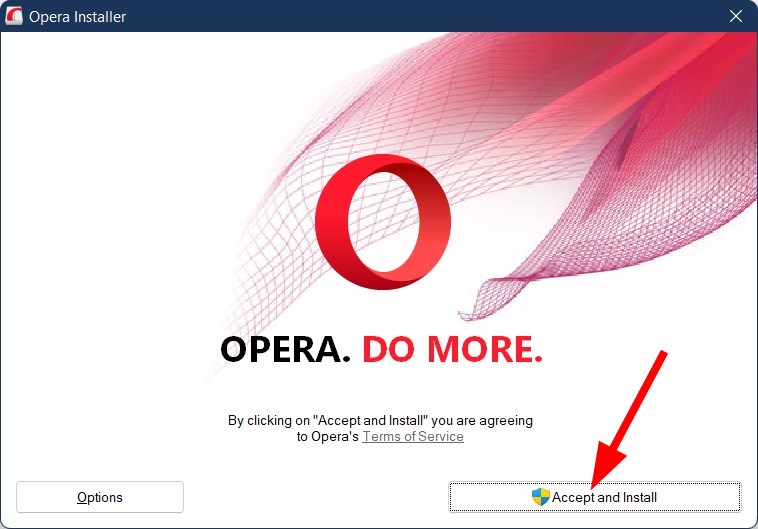
The solution you can employ if the three above don’t work is to uninstall and reinstall your browser. Though it is a harsh option that’ll clear your browser data, it will fix your address bar disappearing issue.

What are the best browsers with a highly customizable address bar?

Opera One – In-depth personalization

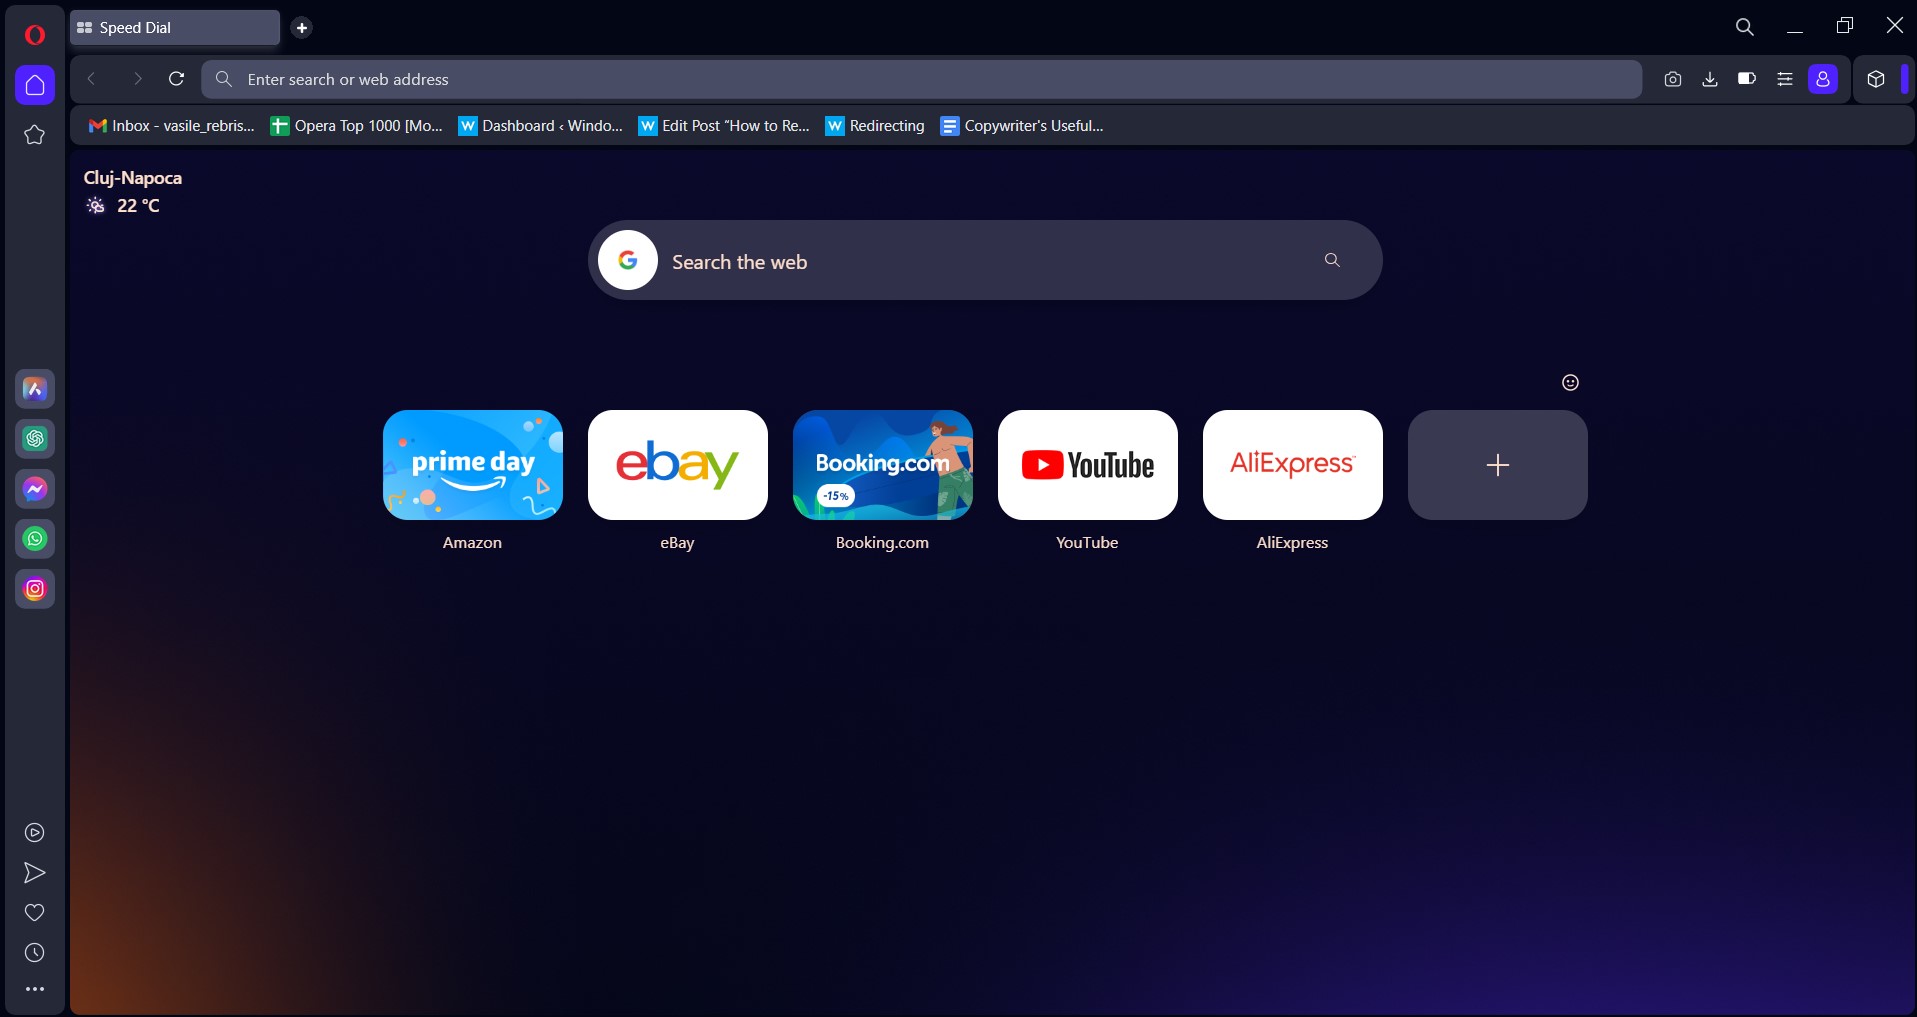
Opera One is a groundbreaking browser that has taken UI customization to another level. Compared to other browsers like Chrome and IE, Opera One is built with settings that allow users to take charge of the display.

It has one of the best browser address bar customization settings that consists of UI appearance, address bar settings, themes, and wallpaper papers. Also, users can change the entire browser’s font or customize fonts for specific items.

It allows you to add extensions from the Opera One add-ons, import from other browsers, and even include emojis in the address bar. Furthermore, this browser comes with built-in AI, VPN and Ad Blocker.

Opera One

Shortcuts make Opera One the fastest browser in customization by replacing much of your pointing and mouse clicking.
Free Download Visit website

Mozilla Firefox – Multitude of graphic settings

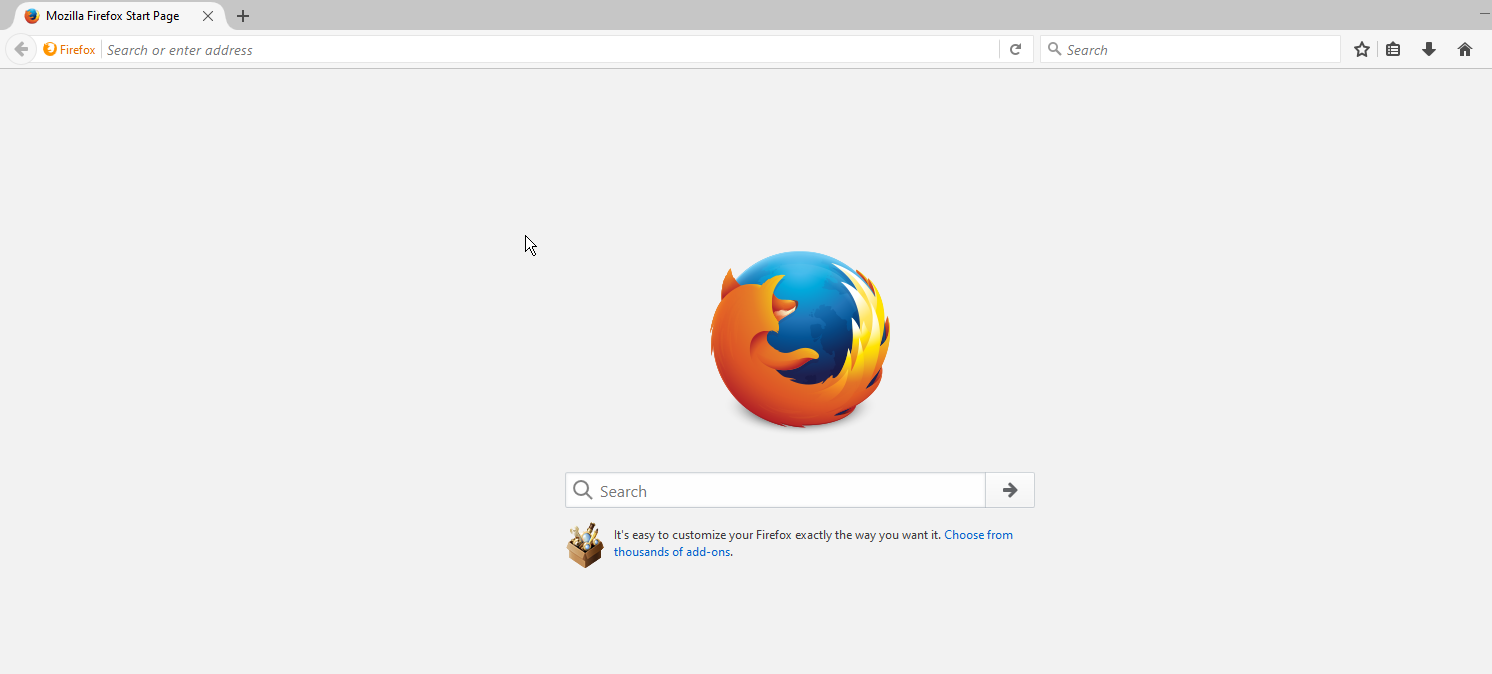
Mozilla Firefox is one of the oldest browsers in the market. It is the most customizable, with a fast and protective web engine.

Firefox has an Options tab where you can access more customizable settings for your browser. For example, it allows you to modify your search bar and use different themes and graphics for your browser.

Also, Mozilla has an inbuilt screenshot feature that you can use to screen grab pages on your tabs. These configuration options make it customizable, relatively beautiful, and ease your experience.

⇒ Get Mozilla Firefox

Vivaldi – Endless Theme designs

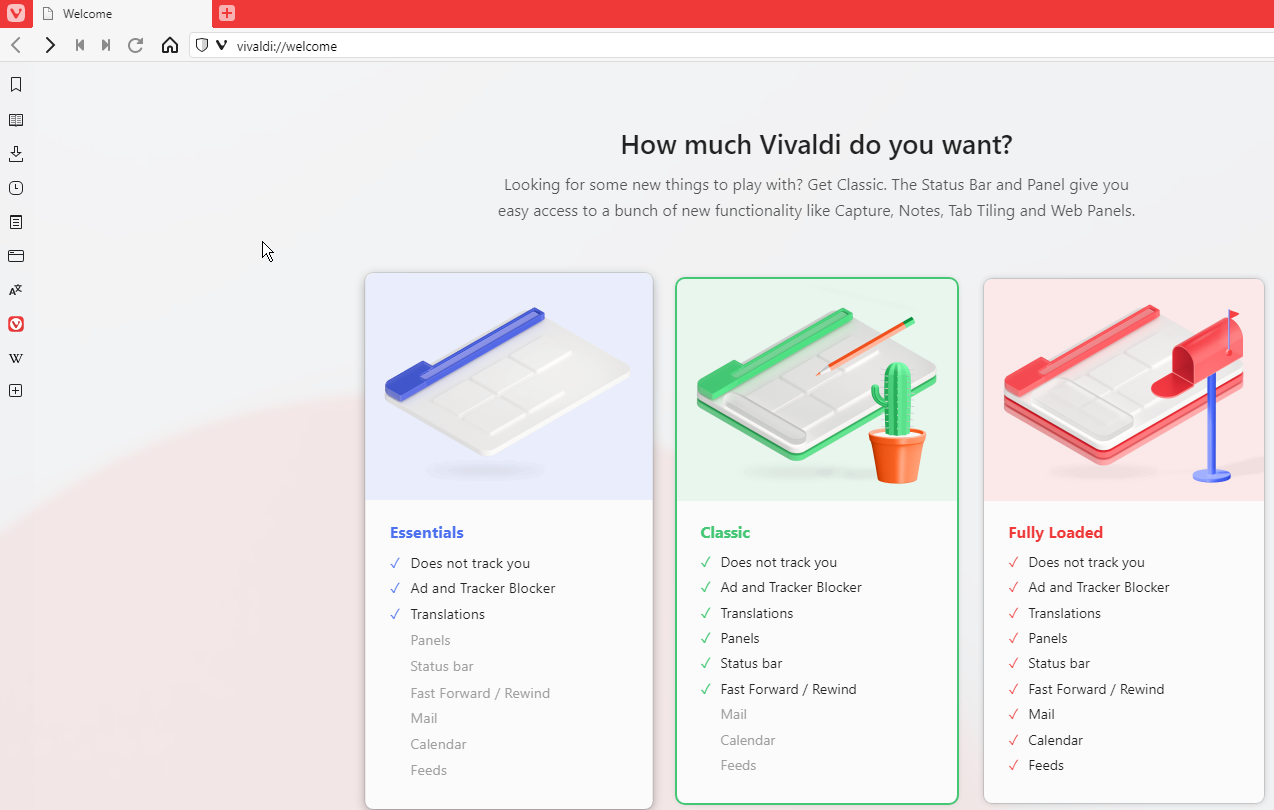
Regarding customization like the address bar and tabs, Vivaldi is top-notch. However, it is more like Opera Mini because they share the same UI (user interface).

Vivaldi’s settings contain options that allow you to adjust your display in any way you like. The Settings Tab house features themes, tabs, appearance, tab display, and lots more.

It allows you to add browser extensions for a better browsing experience. For example, you can toggle hide/show your address bar in settings or set a keyboard shortcut for it.

⇒ Get Vivaldi

AVG Secure Browser – Smooth navigation experience

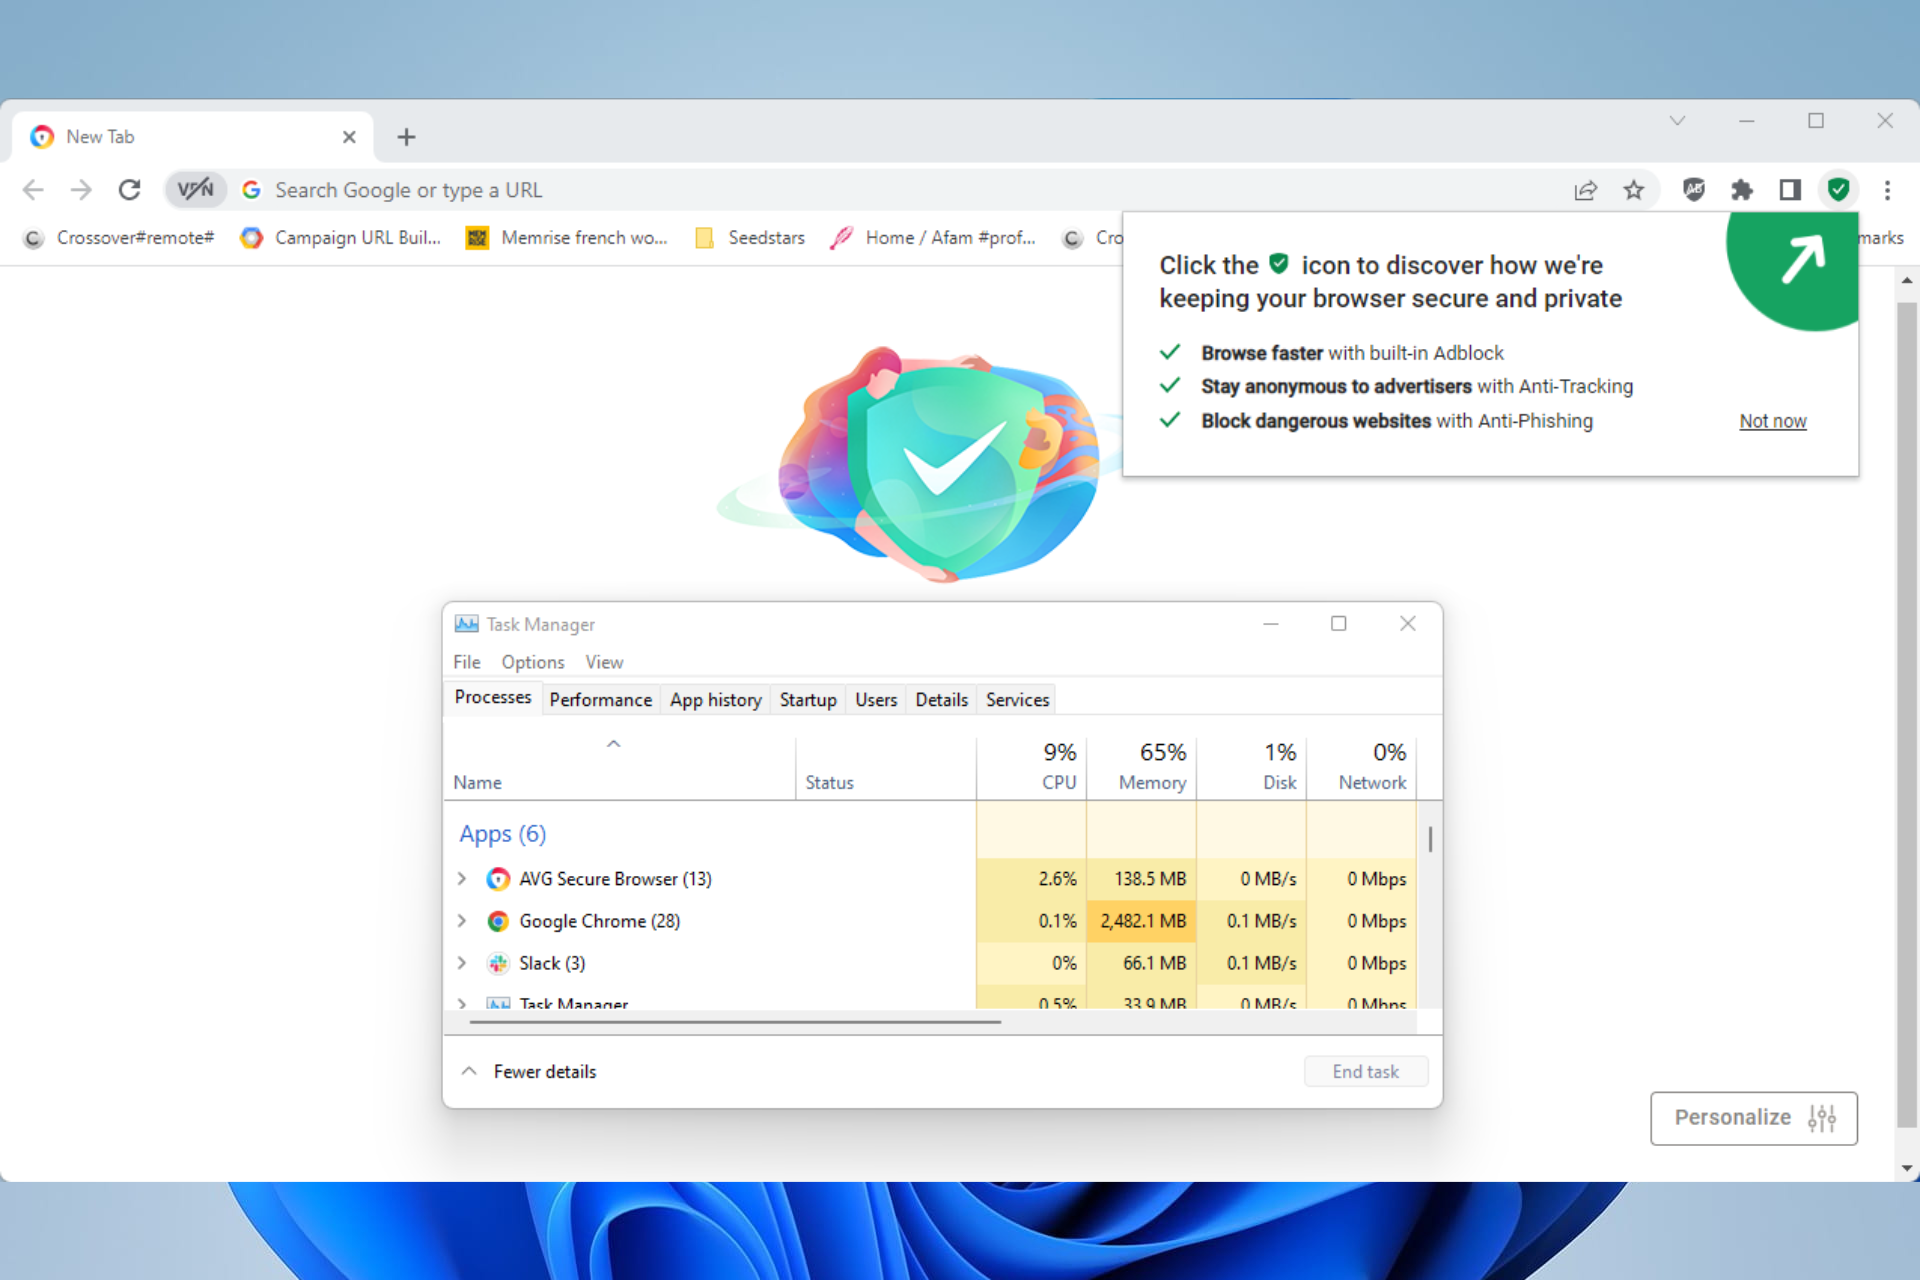
AVG is a great private browser that has clever customization options for your address bar and UI looks.

With this highly secured browser, your online activity is always covered. The technology focuses on web tracking prevention, malware detection capability, and practical workflow tools.

The features you will get can help you enhance web safety and navigation with tools like Stealth mode, HTTPS encryption, or improved speed on essential tasks.

In addition, you also have streamlined browsing without ads due to automatic adblocking functionality.

⇒ Get AVG Secure Browser

Microsoft Edge – Simplicity at its best

The old Edge browser was poor and underdeveloped. However, since the conversion of the browser to chromium codes, it’s been a different story.

The Chromium Edge has a full arsenal of tools and extensions that allows users to explore online. Customization options are one of the best parts of Edge.

Themes, extensions, tabs settings, and other features make Edge different from other browsers. For example, Edge’s address bar and tab pages are more customizable than other browsers like Chrome.

⇒ Get Microsoft Edge

Google Chrome – Timeless classic

Chrome is one of the best browsers, with mind-blowing features and settings such as modifying the browser address bar. In addition, it is filled with downloadable themes and wallpapers for its UI.

It allows you to set shortcuts, use GIFs as background, and customize the address bar. You can explore many settings to give you the best display on Chrome.

⇒ Get Google Chrome

How do I keep my address bar visible at all times?

  1. Launch the Internet Explorer.
  2. Move your cursor to the top right corner to prompt the Settings bar.
  3. Click Options and tap on Appearance.
  4. Toggle on the Always show address bar and tabs option.

To learn more about the best customizable browsers, click this link. Also, there are some portable browsers you can use without installation.

Chrome is Crashing on Windows 11? How to Stop it

Google Chrome might be the world’s major browser, but that doesn’t mean it always works as expected. Many users reported that Chrome is crashing on Windows 11.

When Chrome isn’t working, it crashes when users try to launch it. Consequently, users can’t open and utilize that browser. Sometimes it will show an error message like Google Chrome has stopped working and closed.

This isn’t the only problem, and many reported that Chrome isn’t responding. However, we tackled this issue in a separate guide.

Try applying the potential resolutions below to get Chrome up and running in Windows 11.

Is Chrome compatible with Windows 11?

After experiencing many issues, some users wonder whether Chrome even works on Windows 11. The short answer is yes; it works well with the latest operating system developed and released by Microsoft last year.

It works more efficiently than Windows 10, but the difference is not gigantic. The first difference you will surely notice is the design, which looks much better.

Yes, one could argue that since the OS was released, users constantly had to deal with Windows 11 browsers not working or web pages not loading correctly, but that’s mainly in the past.

Of course, the software will always surprise us with silly little glitches, such as the Internet being connected, but the browser isn’t working, but there is a fix for everything, so don’t worry.

That being said, you will still encounter the occasional errors and glitches, which is why we are here to lend a helping hand and transform them into a thing of the past.

Quick Tip:

If you can’t resolve this issue with Chrome, there is always another better option, like the Opera One browser.

By choosing this browser, you have a faster and more secure service when navigating online. Not only that, Opera One includes an integrated ad-blocker, free VPN support, sidebar messengers, and a crypto wallet.

Opera One

Have the best compatibility and navigation on Windows 11 with Opera One.

How do I fix Chrome crashing on Windows 11?

1. Run Google Chrome as an administrator

  1. Right-click the Chrome icon on your desktop.
  2. Choose Run as administrator.

If this method has worked for you, follow these steps to ensure that it will always run with this option activated.

  1. Right-click the Chrome icon.
  2. Choose Properties.
  3. Click the Compatibility tab.
  4. Tick the box next to the Run this program as an administrator.
  5. Click OK.

2. Run the compatibility troubleshooter

  1. First, press the Windows and I keys simultaneously.
  2. Select Troubleshoot > Other troubleshooters in Settings.
    Troubleshoot navigation option windows 11 chrome not working
  3. Press the Run button for the Program Compatibility Troubleshooter.
    Run button windows 11 chrome not working
  4. Select Google Chrome in the troubleshooter’s software list. Then, click Not Listed to select it if you can find it.
    Program Compatibility Troubleshooter windows 11 chrome not working
  5. Press the Next button to troubleshoot Chrome.

3. Open Chrome in incognito mode

  1. Right-click the Start taskbar button and select Run from the shortcuts menu.
    The Run shortcut windows 11 chrome not working
  2. Input this launch command within the Open box: chrome.exe -incognito
  3. Then click the OK button. After that, Chrome might open in incognito mode.

4. Open Chrome without any extensions

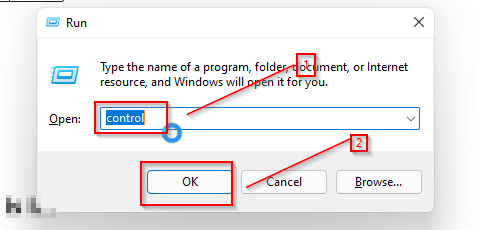
  1. Press both the Windows and R keys at the same time.
  2. Type this command for launching Chrome in the Open box: chrome.exe --disable-extensions
    Run accessory windows 11 chrome not working
  3. Then press the Return key, hopefully opening Chrome in a safe mode with extensions disabled.
Note icon NOTE
If this method launches Chrome, reset that browser by typing chrome://settings/reset in its URL bar and pressing Enter. Next, click the Restore settings to their original defaults option, and press the Reset settings button.

5. Disable antivirus utilities

  1. Double-click the Windows Security system tray icon shown directly below.
    Windows Security icon windows 11 chrome not working
  2. Click the Virus and threat protection tab’s shield icon.
  3. Then click the Manage settings option on that tab.
    Manage settings option windows 11 chrome not working
  4. Please turn off the Real-time protection option by clicking its toggle button.
    Real-time protection option windows 11 chrome not working

Disable that utility from its context menu if you’ve got third-party antivirus software installed—Right-click the antivirus tool’s system tray icon to bring up its context menu. Then select a disable setting for its antivirus shield there. Turn off the antivirus utility’s shield for a few hours.

6. Delete your Chrome user profile

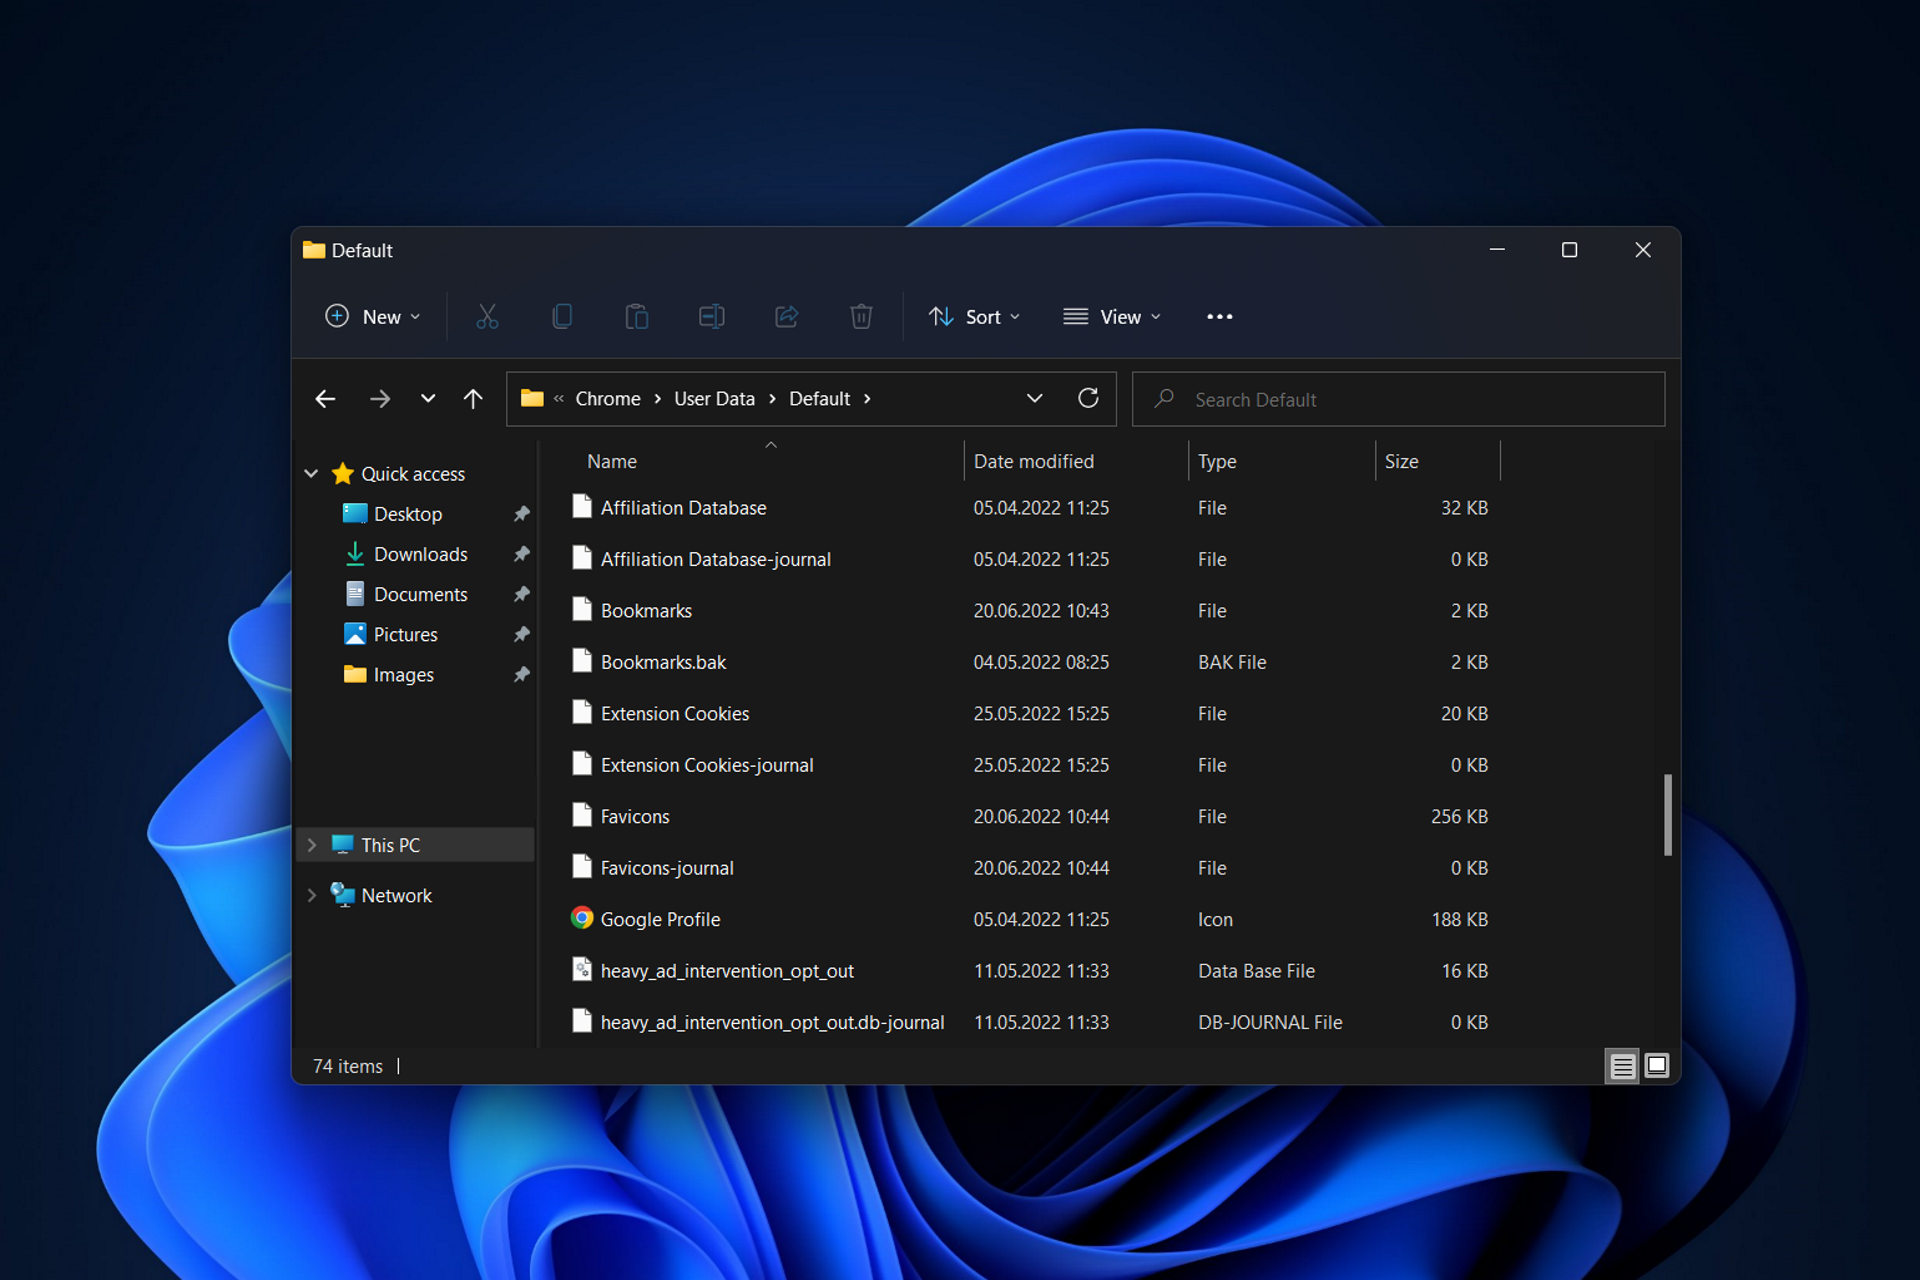
  1. Open Run by pressing the Windows key + X and selecting its shortcut on the menu.
  2. Type this command in Run’s text box and press Enter: %USERPROFILE%\AppData\Local\Google\Chrome\User Data
  3. Next, right-click the Default folder and select Copy. Finally, paste that folder into an alternative directory with the Ctrl + V hotkey for backup purposes.
    The Default folder windows 11 chrome not working
  4. Then right-click the Default folder to select Delete.
  5. Try launching Chrome after deleting that folder. If it opens, reset the browser as specified for the fourth resolution.

Deleting the cache is a great way to stop Chrome crashing on windows 11.

7. Delete the chrome.dll file and flush the DNS

  1. First, click the search utility’s taskbar shown directly below.
    The magnifying glass icon windows 11 chrome not working
  2. Type Google Chrome in the search text box.
  3. Right-click Google Chrome to select its Open file location option.
  4. Then right-click the Google Chrome shortcut in File Explorer and select its Open file location option.
  5. In the Application folder, double-click the subfolder with the Chrome version number.
  6. Right-click the chrome.dll file and select Delete.
    Chrome.dll file windows 11 chrome not working
  7. Close File Explorer’s window and click the search taskbar button again.
  8. Next, enter cmd within the search box.
  9. Click Run as administrator for the Command Prompt search result.
    Run as administrator option windows 11 chrome not working
  10. Input the following command and hit Enter: ipconfig /flushdns
  11. Then type this text in the Command Prompt’s window and press Return: netsh winsock reset
    netsch winsock reset windows 11 chrome not working
  12. After that, close the Command Prompt’s window.
  13. Click the Start button, and select Power on the menu.
  14. Then click Restart.

After doing that, check if Chrome is still crashing on Windows 11.

8. Reinstall Google Chrome

  1. Bring up Run with its Windows key + R hotkey.
  2. Type this command into the Open text box: appwiz.cpl
  3. Click OK to open Programs and Features.
    Programs and Features windows 11 chrome not working
  4. Select Google Chrome there, and click on Uninstall option for it.
  5. Click Yes on confirmation prompts.
  6. Open the Start menu to select its Power and Restart options.
    Restart option windows 11 chrome not working
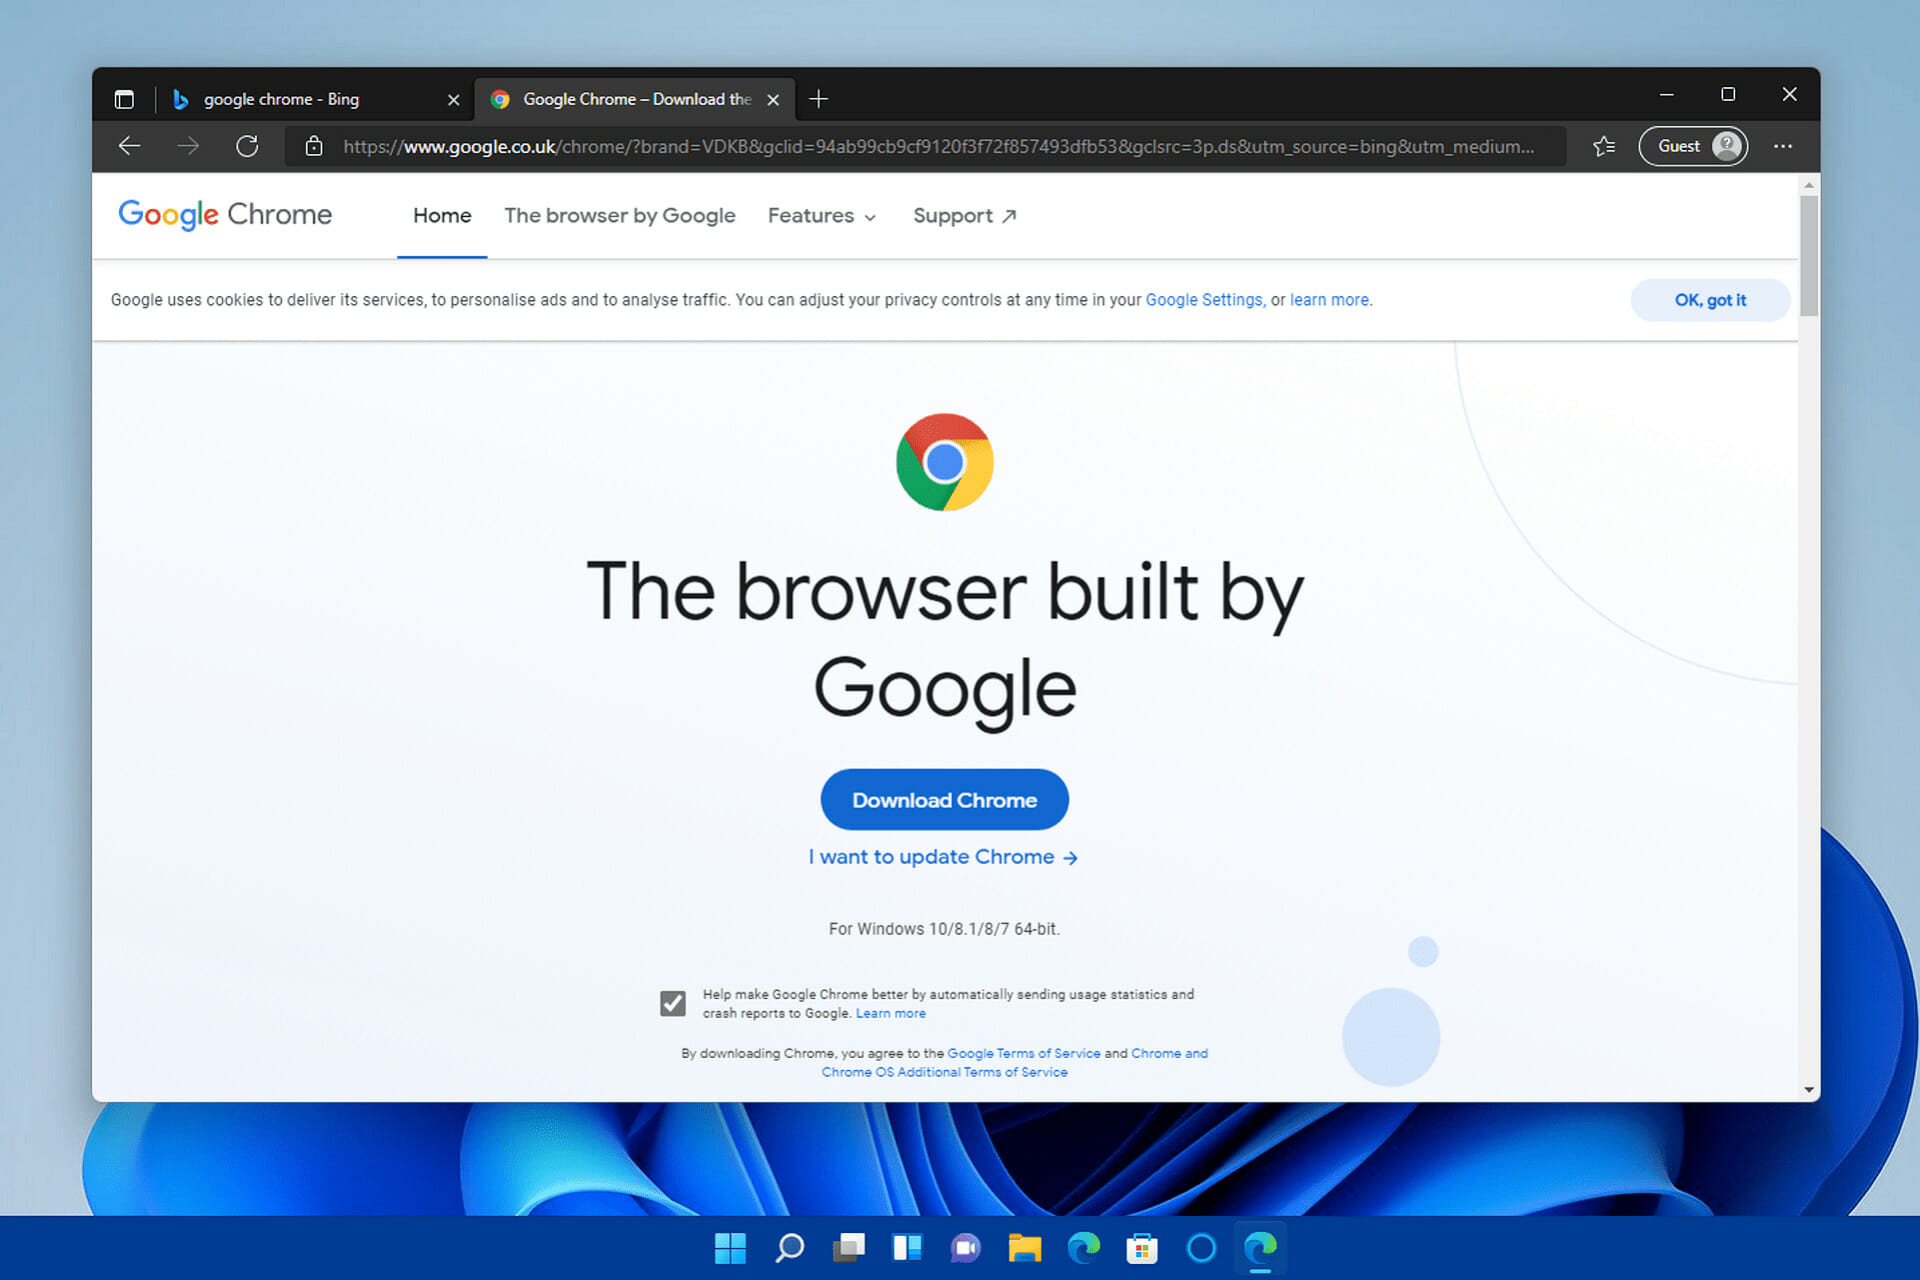
  7. After restarting, open Google Chrome’s download page in Edge.
  8. Click the Download Chrome button there.
  9. Open File Explorer’s window by clicking the folder taskbar icon in the snapshot below.
    The File Explorer button windows 11 chrome not working
  10. Then open the folder you downloaded Chrome’s setup wizard to.
  11. Double-click Chrome’s setup wizard to install the software.

Uninstalling Chrome with third-party uninstaller software, such as IObit Uninstaller, will ensure no leftover files from the software are left behind. IObit Uninstaller thoroughly erases all leftover residual files and registry keys from uninstalled software.

If Google Chrome opens and closes immediately on Windows 11, then reinstalling the software is the way to go.

How to bypass Microsoft’s restrictions and replace Edge as the default browser

The Redmont giant’s move to make it more complicated for users to change the default browser from Edge to any other option has made many people react on forums and blogs.

Fortunately, some easy ways exist to perform this action without spending too much time stressing about the decision itself.

This is how you can make Google Chrome your default browser on Microsoft’s latest desktop platform.

  1. Click Start to bring up the menu, and select the pinned Settings app from there.
  2. Next, click Apps on the left side of Settings.
  3. Select the Default apps option.
    Default apps navigation option windows 11 chrome not working
  4. Then click the listed browser that’s currently your default one, which is probably Edge.
  5. Click the HTML category, and select the Switch anyway option.
    Default browser file formats windows 11 chrome not working
  6. After that, choose an alternative default browser.
    App selection window
  7. Press the OK button.
  8. In addition, change the default browser for the HTTP, HTTPS, HTM, and SHTML categories to Google.

You can also check out some other excellent browsers for Windows 11 if you’re not sure which one will fit your needs best.

We don’t promise the above resolutions are guaranteed to fix Google Chrome not working in Windows 11 for everybody. However, those potential fixes will probably kick-start Chrome for most users.

We can also assist with issues like Chrome Remote Desktop not working or the browser not installing on Windows 10 and 11.

If Google Chrome not opening on Windows 11 even after applying these solutions, remember that there are some great alternatives to Google’s browser.

For example, Opera One and Vivaldi have more extensive customization settings and better features than Chrome. You can also utilize Chrome’s extensions with those browsers.

In case the problem is still there, be sure to read our Google Chrome not opening guide for additional solutions.

Also, if you’ve found any other way to fix Chrome’s browser not working, you’re most welcome to share your alternative resolution below.

What is VPN Agent Service & How to Fix its High CPU Usage

Are you encountering the VPN agent service with high CPU usage on your computer? This has been a rampant theme among PC users who are conflicted on the cause of this issue.

This issue is often associated with malware or virus, which would force the VPN agent to constantly be active even when the computer is in sleep mode. Hence, it leads to high CPU usage and disrupts your PC’s performance.

This article will provide actionable solutions for quick fixes to troubleshoot this VPN agent’s high service usage.

What is vpnagent.exe?

Firstly, the vpnagent.exe is an executable file that accompanies the Cisco AnyConnect VPN client software. So, it is meant to be a safe executable app on the PC.

However, the VPN Agent is also known for its vulnerabilities to malware and viruses. So, it might be worth checking your Task Manager often for discrepancies.

Where is vpnagent.exe located?

The vpnagent.exe file is located inside the installer folder of the Cisco AnyConnect VPN.
It can be accessed by following this path: C:Program Files/(x86)Cisco/CiscoAnyConnect/Secure Mobility Client

How can I fix VPN Agent’s high CPU usage?

1. Uninstall the VPN Agent

  1. Press the Windows key, input the command prompt, and launch it.
  2. Click Programs and select Uninstall a program option from the list.
  3. Search for either Cisco AnyConnect VPN client or vpnagent.exe, or Cisco Systems.
  4. Locate it, click on it and choose the Uninstall tab to remove it from the PC.

You should fix the high CPU usage by uninstalling the file directly from the Windows installer if you really want to do it yourself. However, if it isn’t here, try this other option.

Tip icon Tip
Why uninstall VPN Agent Service manually when a reliable third-party tool can assist you in doing it correctly? IOBit Uninstaller is well-known for deleting existing applications from your Windows PC.

The VPN Agent Service might be difficult to delete because it leaves traces and causes conflicts with other new installations. What’s cool about IOBit Uninstaller is that it also searches and removes residual traces of uninstalled programs, as well as deleting registry entries.

  1. Press the Windows key + E to open the file explorer.
  2. Navigate using this path: C:Program Files>Cisco Systems>Cisco AnyConnect VPN Client >VPN Agent Service> vpnagent.exe_uninstall.exe
  3. Then run the uninstaller file to remove it.

2. End the Task in Task Manager

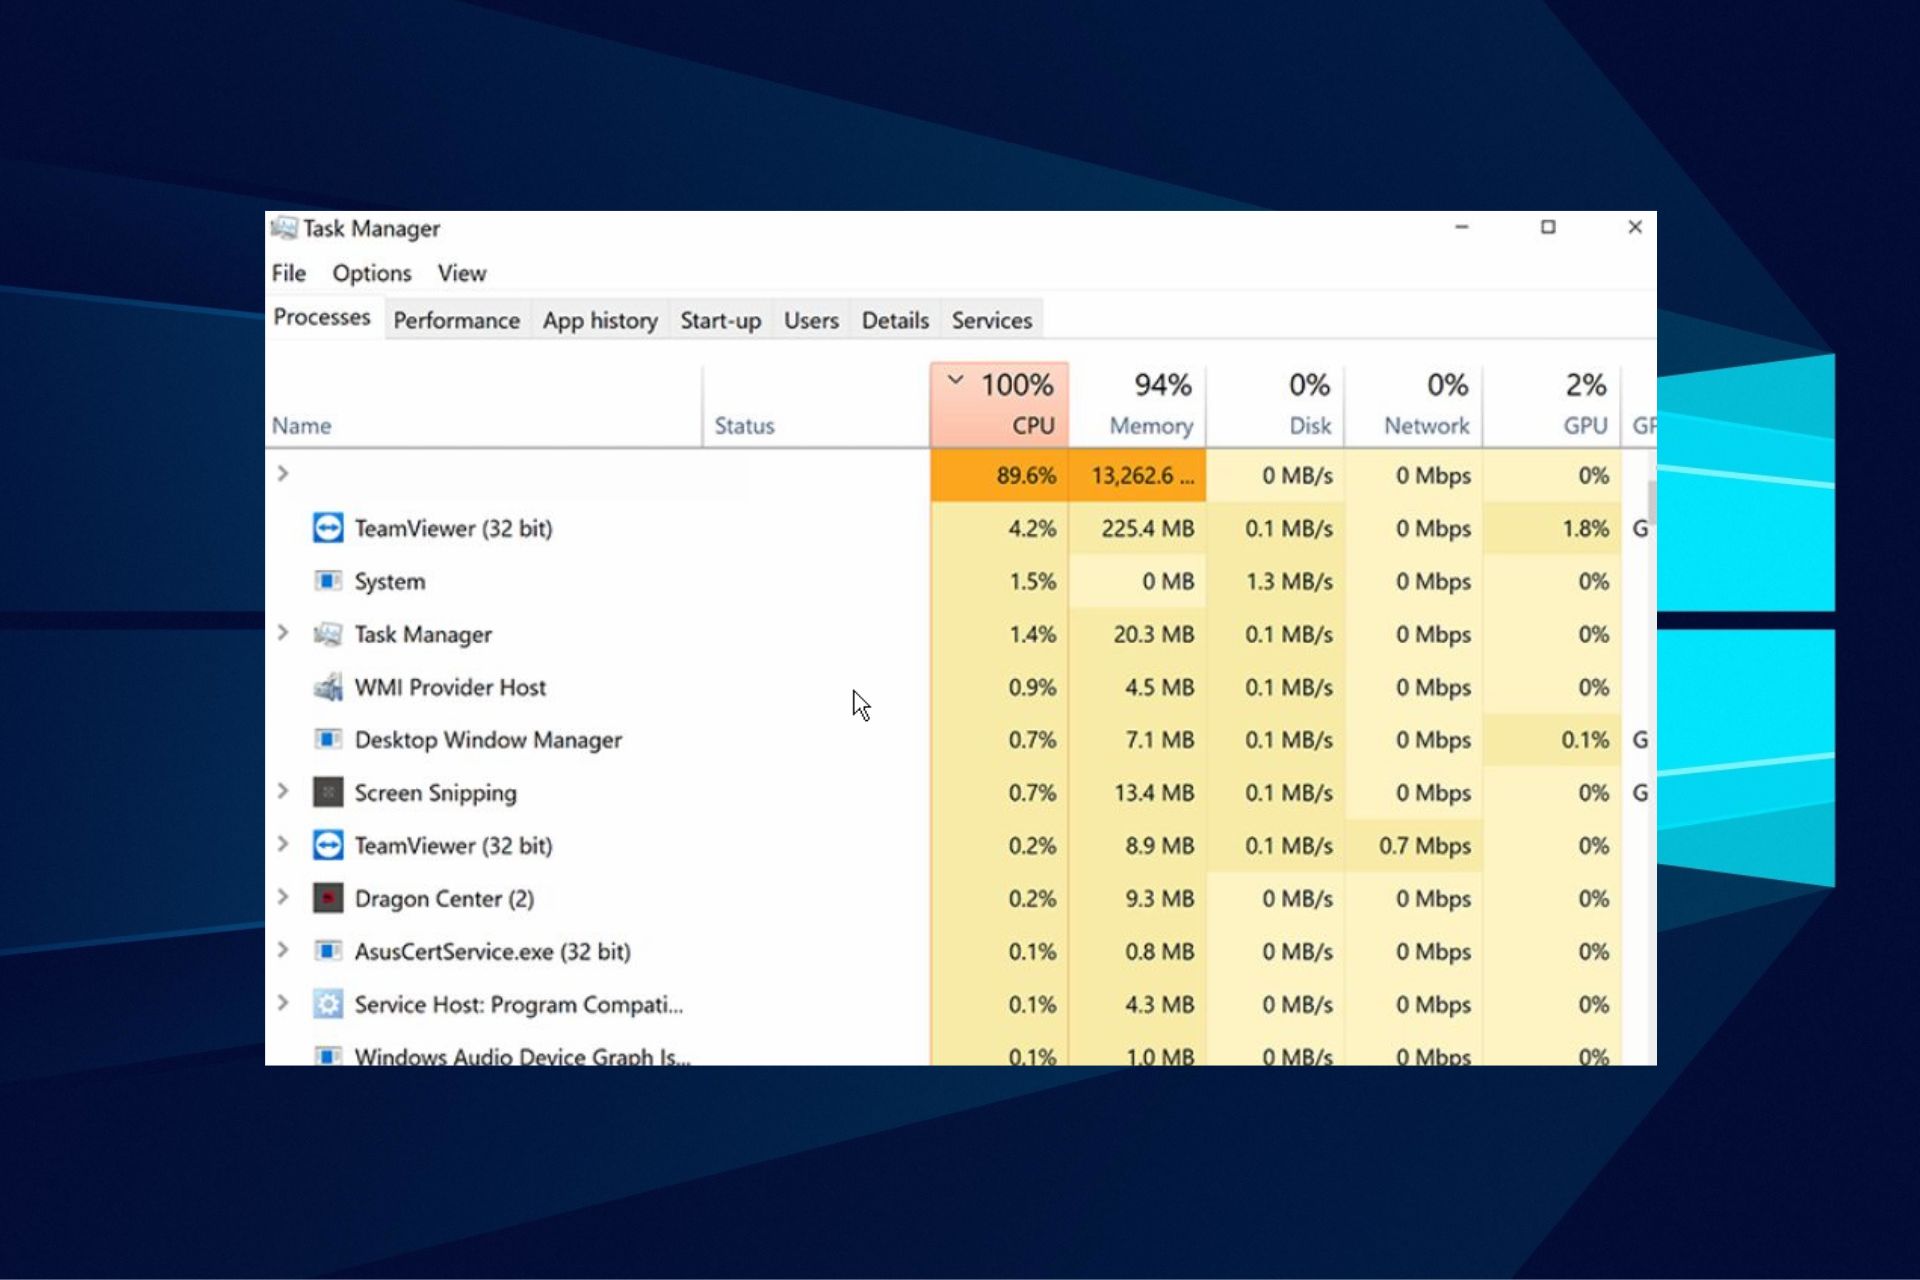
  1. Press the Windows key, input Task Manager, and launch it.
  2. Locate the vpnagent.exe file and right-click on it.
  3. Then click End Task from the drop-down options.

This option is also effective since it force stops the file from being active on your device. Try these fixes for a quick solution to the problem of high CPU usage service from the VPN agent.

However, should the issue persists, you may need external software to troubleshoot it. So, check out our guide on the best software to fix high CPU usage.

Also, we have an article to fix CPU at 100% when nothing is running. And you can also try our guide on fixing high CPU usage in Windows 11.

Leave a question or suggestion below in the comments section. We’d like to hear from you.

What does SoundCloud’s Loading Error Mean & How to fix it?

Platforms like SoundCloud are available so that users can upload and share their music with other people. It has over 150 million listeners, but this doesn’t mean it’s not with shortcomings. An error like the SoundCloud loading error can be quite frustrating to encounter.

Users complain about this error because they were not able to access the music platform. SoundCloud is like other music platforms, it is with shortcomings that they fix during updates.

Furthermore, this article will provide solutions for the SoundCloud loading error and explain its causes.

What does the SoundCloud loading error mean?

This error means that SoundCloud is having sole issues loading your data or its data. However, this error can occur due to network issues.

SoundCloud can experience outages whenever they are doing maintenance or patches, resulting in SoundCloud app loading errors. Also, this error can pop up when you don’t follow SoundCloud’s requirements.

Why is SoundCloud not working?

  • Poor internet connection: SoundCloud is an online music-sharing platform, so you need to access it with a stable network. For SoundCloud, it requires a strong and fast internet connection to load its data from the server. Hence, you can encounter the loading error message when you don’t have a good internet connection.
  • SoundCloud server issue: Users can encounter this error if the servers are down. SoundCloud is vulnerable in some ways, resulting in users getting error messages sometimes. When the server is unable to process your request, it breaks down.
  • The browser version is old: Sometimes, SoundCloud can encounter errors because your browser is old and needs an update. Updating your browser helps it run faster and smoother.
  • Lack of RAM: The more activities you have on your device, the more RAM they consume. An instance is opening many tabs on your browser. So, SoundCloud can display the error message when it doesn’t have enough space to load its data.

Quick Tip:

In case you’re having this issue on your current browser, you might need a new browsing partner to fix loading issues. Opera One is great for that.

Opera One will help you escape the loading problem on your device with more stability due to instant search or tracking ad-blocker, plus security improvements with free VPN support and built-in AI.

Opera One

Access your loved music platform using this browser with high privacy and speedy navigation.
Free Download Visit website

How to bypass the loading error on SoundCloud?

1. Update your browser

  1. Launch the play store app on your mobile device and click the profile icon.
  2. Select the Manage apps and devices option.
  3. Scroll down to Updates available and check if there is an update for your browser.
  4. Click the Update button and it will install automatically.

2. Troubleshoot your internet connection

An easy way for this is by restarting your router. Unplug it from power for a few minutes and plug it in.

3. Clear some RAM space

  1. Go to Settings on your mobile device.
  2. Select the Apps option and click Manage apps.
  3. Check the app consuming more space, click on it and tap the force stop button.

4. Restart your device

Another easy solution is restarting your device, allowing it to rest and sync information faster.

Execute the solutions above, and we hope you can fix the SoundCloud loading error. For more information about common SoundCloud problems and how to fix them, you can go to our page.

Play Dead Island: Riptide Definitive Edition and two other games this weekend with Xbox Free Play Days

Three more games are available to play free this weekend for subscribers of Xbox Live Gold and Xbox Game Pass Ultimate, with Xbox Free Play Days. Let’s check them out.

Dead Island: Riptide Definitive Edition

“Welcome to the Zombie Apocalypse experience of a lifetime!” Dead Island: Riptide Definitive Edition is currently on sale at a staggering 85% off at the time of this writing, as part of the current Deals with Gold sale.

TheHunter: Call of the Wild

This open-world hunting sim offers one of the most immersive virtual hunting experiences yet. Take to the 50-square mile game world alone or with up to 8 players.

Tom Clancy’s Rainbow Six Siege

As with theHunter: Call of the Wild, this game is included in the Game Pass library, and is yet another thrilling installment in the acclaimed Rainbow Six series.

These games are available from Thursday, June 23 to Sunday, June 26 for Game Pass Ultimate (which includes Xbox Live Gold) and Xbox Live Gold members. The Xbox Free Play Days perk allows members to install and play a different selection of games each week. It is a great way to try something new and maybe even find a new favorite. If you would like to find out more about Xbox Free Play Days you can check out the FAQ page. Happy gaming!

Microsoft tests spotlight-like launcher for quick commands in Edge browser

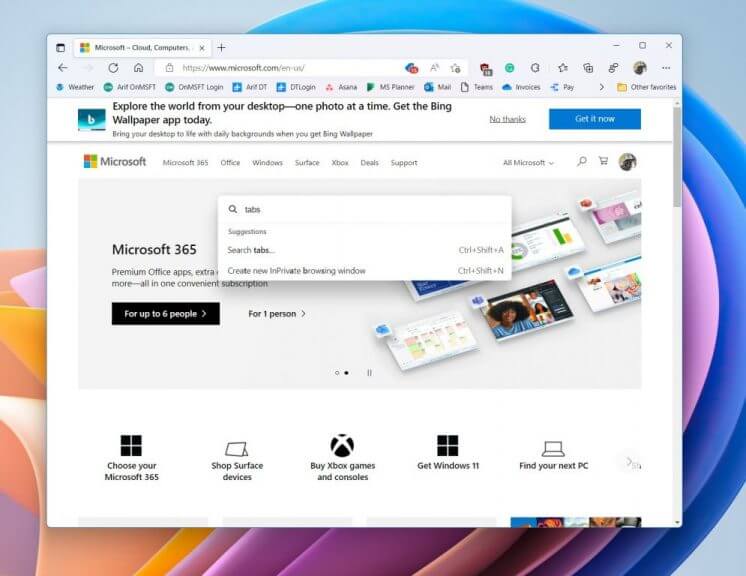
There are many ways you can be efficient in Microsoft Edge with keyboard shortcuts, but Microsoft is now working on a new one. As spotted by Leopeva64-2 on Reddit and Neowin, Microsoft is testing a launcher for Edge, that’ll let you use quick commands for common tasks.

Right now, this launcher is being tested in the Edge Insider channels with Edge Canary and Edge Dev. Once enabled with edge://flags/#edge-devtools-toaster, and setting DevTools Toaster to enabled, you can summon it by hitting the Ctrl, Shift, and Space buttons on your keyboard. When you do that, you’ll see a floating box pop up in the middle of your webpage in Edge, prompting you to enter a keyboard. This box is very clean looking, almost like Spotlight on macOS, which floats on top of what you’re working on in the middle of the screen. Check it out below.

You can then enter a keyword like tabs, windows, or clear to get suggestions on a common task like closing tabs, or clearing browsing history. You can even see your history, too! Do note, though, that not every task is supported by the command bar, so you might still have to manually go to Edge’s settings menu for come tasks.

Overall, this does seem like a nifty feature, but since it is in testing in the Edge Insider channel, there’s a chance that not everyone will get this in the stable version of Edge. What do you think of this launcher? Let us know in the comments below.

Rainbow Six Siege Error Code 2-0x0000d00c: 4 Ways to Fix it

There’s a lot of competition in the gaming industry, and different companies are trying to thrive. The Rainbow six siege error code 2-0x0000d00c is familiar error users complain about. Rainbow Six Siege is sophisticated with advanced gaming features.

A common thing about game platforms is that they release updates from time to time. Therefore, it helps to fix the bugs from previous updates.

Going into this article, we shall explore some causes for Rainbow Six Siege errors and how to fix them.

Why am I having network problems in Rainbow Six Siege?

  • Interference with other apps: Antivirus can prevent the game from accessing the internet.
  • Firewall protection is on: Sometimes, when the firewall protection is on for your Windows, it can affect the way rainbow six siege works. It is not good to disable the Firewall, but it can still be a problem.
  • Poor internet connection: Problems with your network provider can lead to errors. Also, any restrictions on your network can affect the game connecting to its server.
  • Background applications can be the cause of some Rainbow Six Siege errors. It is because some apps might not be compatible with how the game functions. So this results in conflicts between the two parties.

How do I fix error code 2-0x0000d00c on Rainbow Six Siege?

1. Use a VPN

To ensure that the task is performed flawlessly and without any security loss, choose a VPN that works excellently for Rainbox Six: Siege.

Some VPNs help increase and stabilize your internet connection speed. It will help you connect to the rainbow six siege network faster. VPN like Speedify is reliable and can solve error problems.

In addition to that, there are more compelling VPN tools that offer thousands of servers in many regions so you can improve your speed.

It is recommended to pick professional VPN support like PIA and resolve network issues on any of your games.

Private Internet Access

Have an increased game performance on RainboxSix Siege without connection issues with this all-rounded VPN.
Check price Visit website

2. Check Background Apps

  1. Press the Windows Key + R to prompt the Run page.
  2. Type MSConfig and click OK.
  3. On the System configuration page, go to Services, click Hide all Microsoft services, and click Disable all.
  4. Click Startup beside the Services tab and open the Task Manager.
  5. Disable the items running in the Task Manager.
  6. Return to the System configuration page, and click Apply at the right bottom, then press OK.

3. Disable Firewall In Windows

  1. Press the Windows key, search for Windows defender firewall and launch it.
  2. Click on Turn Windows Defender Firewall on or off on the left pane.
  3. Select the Turn off Windows Defender Firewall (not recommended) options on the page, then click OK.

4. Check your internet connection

Performing a power cycle on your router should fix the error. Turning it off and then back on will refresh your network connection. It will aid the Rainbow six siege network.

However, the above solutions are practical and easy to go through. Rainbow Six Siege error code 2-0x0000d00c won’t update another problem users encounter.

If you want to know about other Rainbow six siege errors apart from the rainbow six siege error code 2-0x0000d00c and their solutions, visit our website.

Windows Insiders in Russia reportedly unable to download new builds

As the domestic fallout from the Russian invasion of Ukraine continues for Russian citizens, it looks as though Windows Insiders might now be unable to download new builds in the country through Windows Update. This new and separate issue comes right after it was discovered that Russians were also blocked from downloading Windows 10 & Windows 11.

This was first reported by Neowin, which cites a Twitter thread of someone discussing not being able to upgrade to the latest Insider build in Russia. In that thread, one Windows Insider seems to confirm that it is in fact no longer possible because there’s a country code parameter for Windows Update. However, the Twitter user also says that using a VPN would still allow for updates.

Interestingly enough, another Twitter user seems to add to this speculation. This second user mentions that while they can’t download ISO files, usual Windows updates like defender intelligence or cumulative updates work fine. In a follow-up, this Twitter user also added that they can’t join any of the Windows Insider channels, though it might be because of their PC not meeting Windows 11 requirements.

Microsoft has yet to announce anything through the Windows Insider channels or official blogs about shutting down the Windows Insider program in Russia. There’s also a chance that these Twitter users are just having technical issues. We reached out to Microsoft for clarification on what’s happening and will update this story accordingly.

Microsoft last updated the world on how it is responding to the Russian invasion of Ukraine on June 8 by saying that it will “significantly scale down operations” in Russia. This involves about 400 employees, which Microsoft said would be treated with respect while it also works to still fulfill contracts with existing Russian customers.

7 Best Image-to-dot Matrix Converter Apps [Easy to Use]

You should read on if you are searching for an Image dot-matrix converter.

Images and pictures have been communicating emotions and feelings for ages. With modern computing, the extent to which we can manipulate images is limitless.

From aging images to adding filters, from changing backgrounds to adding textures, there is no saying what can be done with an image.

However, the goal sometimes may be to pixelate a photo. Therefore, there is always a use for the dot matrix image, and while it is not the most common way to edit pictures, you would want a dot matrix image from time to time.

In this article, we explore the options for the best image-to-dot matrix converter. While we focus on apps, a few HTML5 online photo editors are worth the try.

How do I convert an image to a dot matrix?

You can convert an image to dot matric using web services or any image-to-dot-matrix converters mentioned in this article.

While the converting apps are very effective, an online service may be the more straightforward solution. Follow these steps:

  1. Navigate to Image Online.
  2. Scroll down and select an image in jpg format by clicking the Choose File button.
  3. Scroll down to the bottom and click the OK button.

What are the best apps to convert an image to a dot matrix?

Adobe Photoshop – Most Robust

Adobe Photoshop is the go-to photo editing app, arguably the biggest and most established in this genre globally.

While new users may experience a stiff learning curve, there are no limits to what can be achieved with the tool.

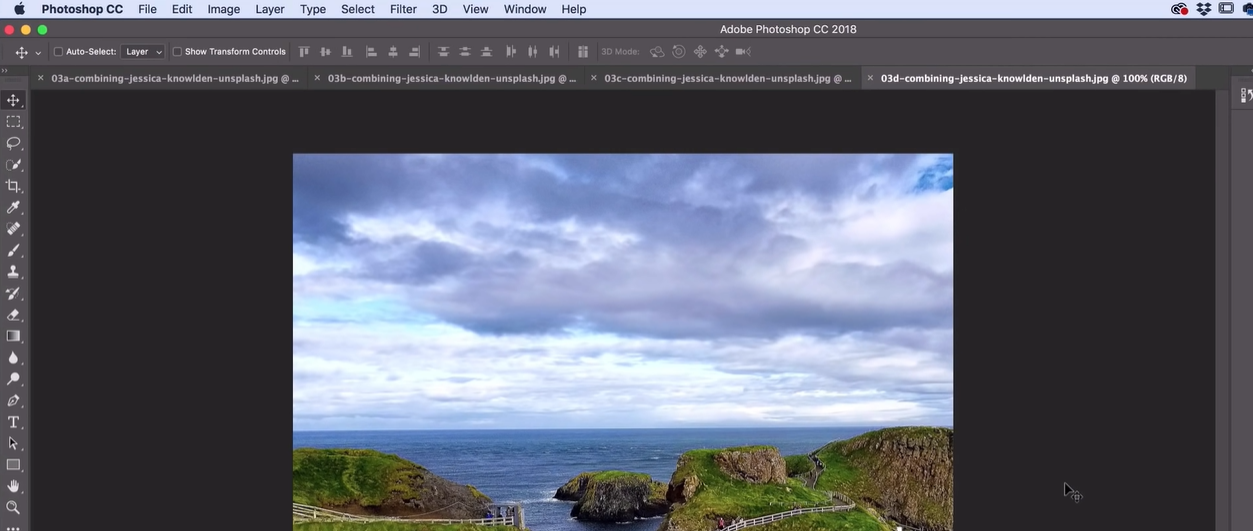
Many users have asked how I make an image into a dot in Photoshop? Note that among the great features is the dot matrix image conversion. When you navigate the Image menu, the Adjustments option, and the Invert option, you can convert the image to a dot matrix.

Unlike HalftonePix and most other apps we will be discussing, Adobe Photoshop is a premium tool, and you will have to buy a license to enjoy its full capabilities.

The main features include:

  • Layers
  • Selection Tools
  • Vector Mask
  • Retouching Tools

Adobe Photoshop

Create the Matrix dots effect is one of Photoshop’s filters, a dot pattern, and a layer mask.
Free trial Visit website

Canva – Best free PC option

image to dot matrix converter

The Canva app aspires to be the one-stop shop for all creative visual needs.

It aims to obtain the best outcomes for the effort and time people put in; consequently, it’s appropriate for individuals who find the pricier options intimidating.

Whether you need to entirely rework the style of an image or incorporate stickers and text, the software covers a remarkable amount of use situations.

The flexible design tool is available in browsers and an application for iOS, Android, and Windows.

The main features include:

  • Add text to videos
  • Video sound effects
  • Image enhancer

Canva

Duotone and Style Transfer picture effects are fun and creative, while Frames and Shadows are cool and charming.

Adobe Photoshop Express – Best mobile and PC option

image to dot matrix converter

We have mentioned Adobe Photoshop in our list, and we believe the express version also deserves to be said. It’s a fantastic free picture editor for both mobile and desktop computers. It also allows you to access all of its functions from the comfort of your computer browser.

Even for newbies, it’s appropriately designed, and everything is readily available.

You do not need an extension on the browser version; upload an image and start editing.

The editor supports only JPG files with a resolution of not more than 16MP and width of fewer than 8,191 pixels. 

The main features include:

  • Exposure adjusts
  • Social media crop presets
  • Perspective distortions

Adobe Photoshop Express

You may change the exposure, and color, and add other photography effects.
Free trial Visit website

HalftonePix – Best for Android

HalftonePix is an Android mobile app that allows you to create sophisticated artistic image effects. It has a wide range of shapes, patterns, halftone styles, and colors in its filters. Everything will be customizable, allowing you to create an authentic, one-of-a-kind look.

It has several dot matrix effects and lets you add a halftone effect to a photo from your library or selfie. This one-of-a-kind and spectacular photo filter are not to be missed!

The main features include:

  • Circle effects
  • Line/Stripe effects
  • Wave effects

⇒ Get HalftonePix

B-l-a-c-k-o-p DotMatrix FREE – Best free Mac option

image to dot matrix converter

This app can be used with digital photographs or your Mac’s camera. All you have to do now is position and click. Then, choose from dozens of designs that may be easily modified to your desired color once you’ve taken your photo.

It functions with Lion and Snow Leopard on your Mac. The tool works well with iSight, although it’s not required. Additionally, you can use pictures from your iPhoto library, your cell phone, or random photos from the internet.

One of its most valuable characteristics, as the name says, is the ability to create dot matrix images.

The main features include:

  • Multiple design options
  • Easy learning curve
  • Cinema Display

⇒ Get B-l-a-c-k-o-p DotMatrix FREE

GIMP – Most sophisticated free image editor

image to dot matrix converter

GIMP, also known as the GNU Image Manipulation Program, is a powerful photo editor with a wide range of sophisticated features for fine-tuning photos and producing original artwork.

It has filters, automatic picture enhancing capabilities, customizable brushes, layers, and plugin compatibility.

Its robust contributors ensure that it is always in development, and all defects are quickly squashed. This adds to an outstanding free photo editor that outperforms many paid products.

You may convert an image to a dot matrix with a few clicks.

The main features include:

  • Customizable interface
  • Graphic design elements
  • Digital retouching

⇒ Get GIMP

Piskel – Most suited for web users

image to dot matrix converter

A PC or laptop makes a lot of sense for creating and editing images, and since we have seen some mobile apps, let us take you to an excellent PC option. 

Piskel is a web-based expert pixel art editor. With this editor, you may make animations and still images and switch between them rapidly using keyboard shortcuts.

With the onion choices, you may animate frames with a teaser of the final sprite on the side.

Transforming is simple, with separate controls for rotating, flipping, cloning, and aligning frames. You can save the work in a specific format locally or export it in conventional formats like GIF, Zip, and PNG.

The main features include:

  • Live preview
  • Offline versions
  • Open Source

⇒ Get Piskel

This list represents the best image for dot-matrix converters in the market. Most of these are free tools; you may activate a trial for the paid options.

Also, note that this list has not been made in any particular order, and we recommend that your final dot-matrix converter should reflect your personal preferences.

We hope you find this article helpful; let us know in the comments.

7 Ways to Fix CoinBase Alerts Not Working

Coinbase is a trusted app for cryptocurrency for purchasing, trading, transferring, and storing digital currency. In addition, it offers a feature known as Price Alerts. You can set up automatic alerts through the mobile app to inform you about price movements for a specific cryptocurrency.

Once a user sets up a Price Alert on the Coinbase app, they are notified about the live prices of their selected cryptocurrencies. Even more, all users receive an alert informing the percentage change in the price.

But recently, many users have complained about Coinbase alerts not working on desktop, Android, and iOS.

As it’s an issue of concern, it’s essential to fix it. In this post, we have compiled a list of some workarounds that may help you if Coinbase notifications are not working.

Quick Tip:

As an efficient method to get notified about cryptocurrencies, you have an exhaustive market scanning tool that is basically your account manager.

This complete solution comes with all you need and offers customized crypto alerts based on market price, volume, exchange listings, or wallet tracking. Plus, get notified about gas fees for any coins.

More, the alerts can be sent to you via SMS, phone call, email, push alerts, and others. You can monitor cryptocurrency markets for 46 exchanges and get notified of multiple crypto services like Binance or Gemini.

Cryptocurrency Alerting

Be aware of all your crypto coins’ prices and exchange on Coinbase and more.
Check price Visit website

How do I set up alerts on Coinbase?

Setting up automatic price alerts through the Coinbase mobile app is pretty simple. It will notify you of price changes for selected cryptocurrencies.

  1. Open the Coinbase app on your Android or iOS device.
  2. Search for the crypto you want to turn on price alerts for.
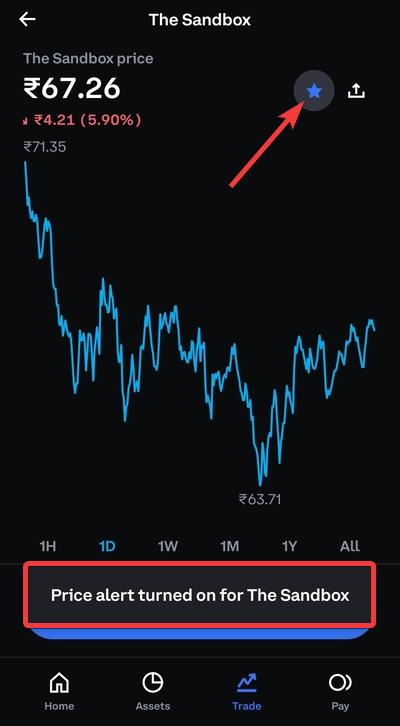
  3. Click on the Star icon to add the cryptocurrency to your watchlist; doing so will also turn on price alerts for that specific cryptocurrency.
    coinbase alerts not working
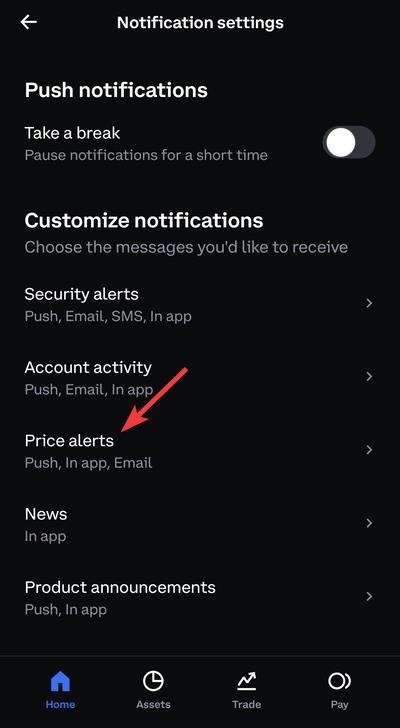
  4. Navigate back to Home, click on the Notifications icon, and then click on the Settings icon.
    Open settings
  5. Now tap on Price alerts.
    coinbase alerts not working
  6. Here, you can select if you want the alerts pushed to your phone and receive alerts within the app or via your registered email.
    coinbase alerts not working

What can I do if Coinbase Alerts not working?

On your smartphone

1. Clear the mobile app’s cache data

On Android

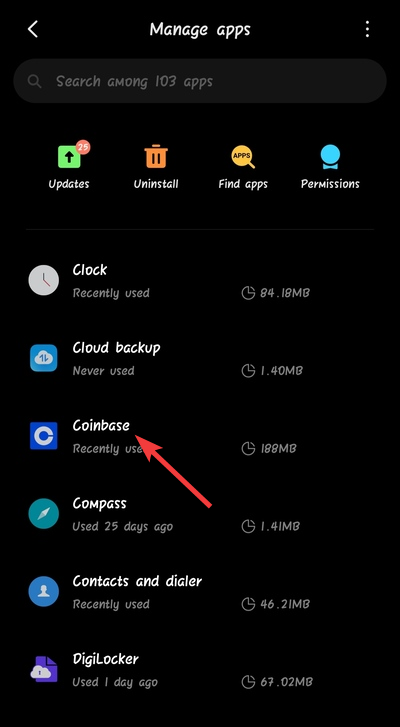
  1. Open Settings, click on Apps, then select Manage apps.
  2. Scroll down and click on Coinbase.
    Click on coinbase
  3. Click on Clear Data.
    coinbase alerts not working

On iOS

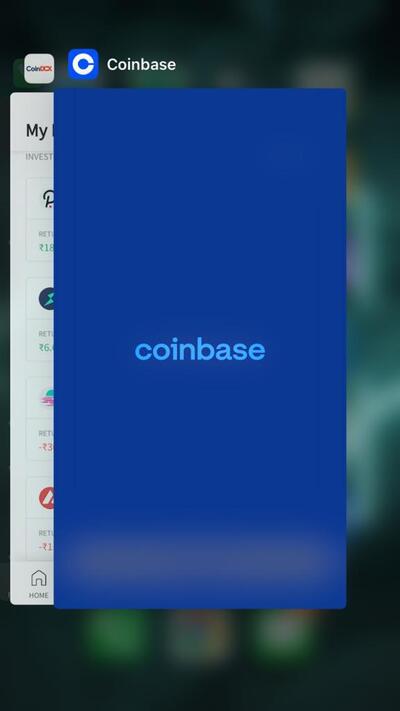
  1. Close the Coinbase app.
  2. Double click the Home button, and all the apps you’ve been using should pop up.
  3. Flick the Coinbase app upwards until it disappears from the screen.
    Coinbase iOS

This is a simple solution, so be sure to try it if Coinbase is not sending price alerts on your device.

2. Update the Coinbase app

This issue can also occur if you use an older app version. If that is the case, update the Coinbase app to its latest version.

You can download the latest Android version from the Google Play Store and the iOS version from the Apple App Store.

3. Reinstall the app

Android

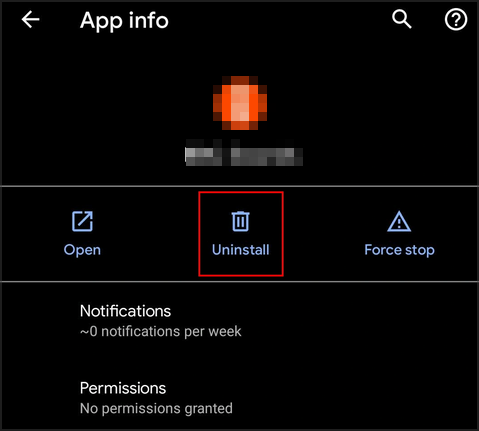
  1. Open Settings.
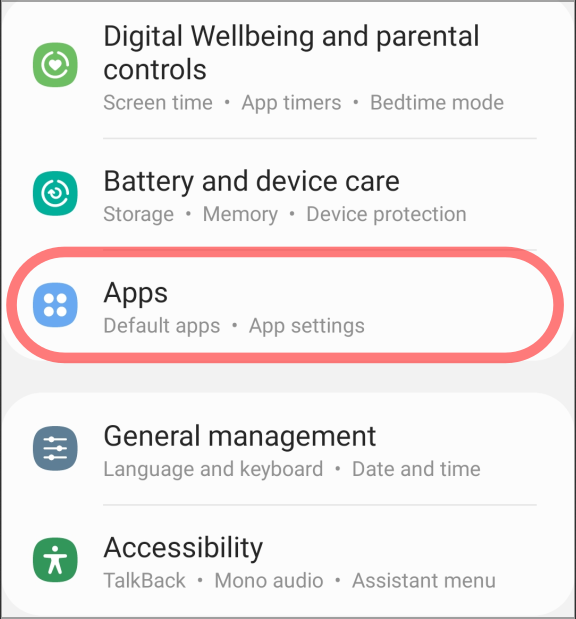
  2. Navigate to Apps.
  3. Select Coinbase.
  4. Tap Uninstall.
  5. Now download the app again from the Play Store.

iOS

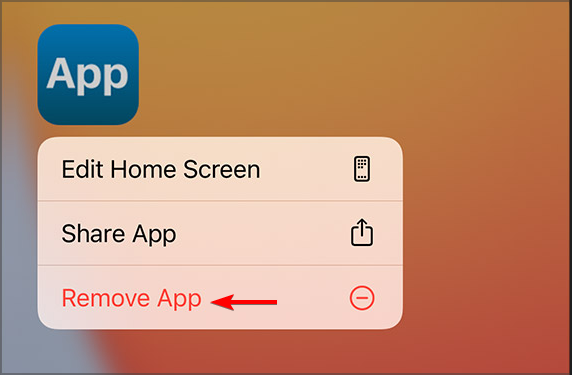
  1. Tap and hold the Coinbase app.
  2. Now select Remove App.
  3. Once the app is removed, download it again from the Apple Store.

On Desktop

1. Clear Browser cookies and cache

On Chrome
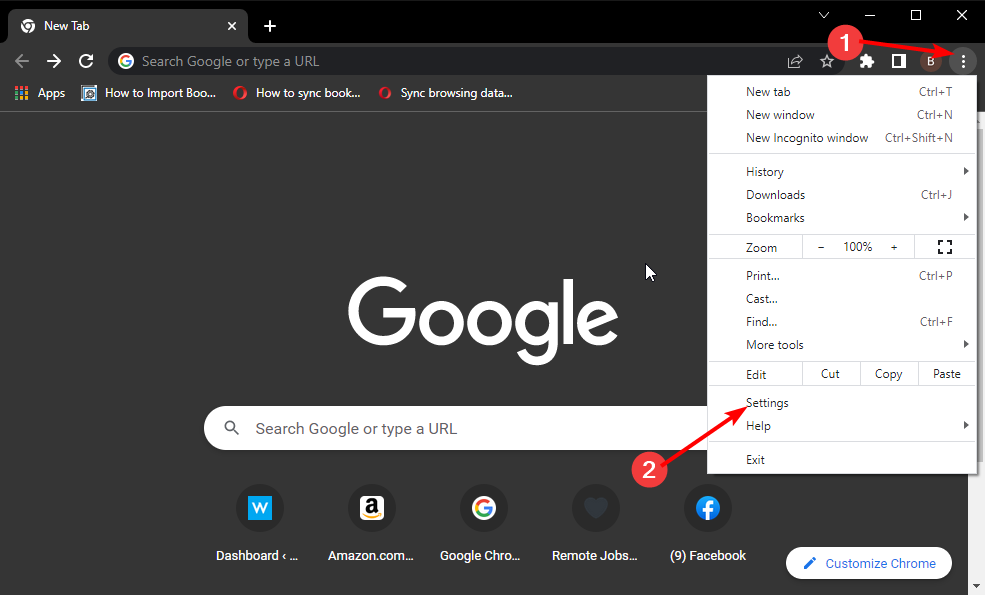
  1. Open Google Chrome and click on the three vertical dots at the top right corner.
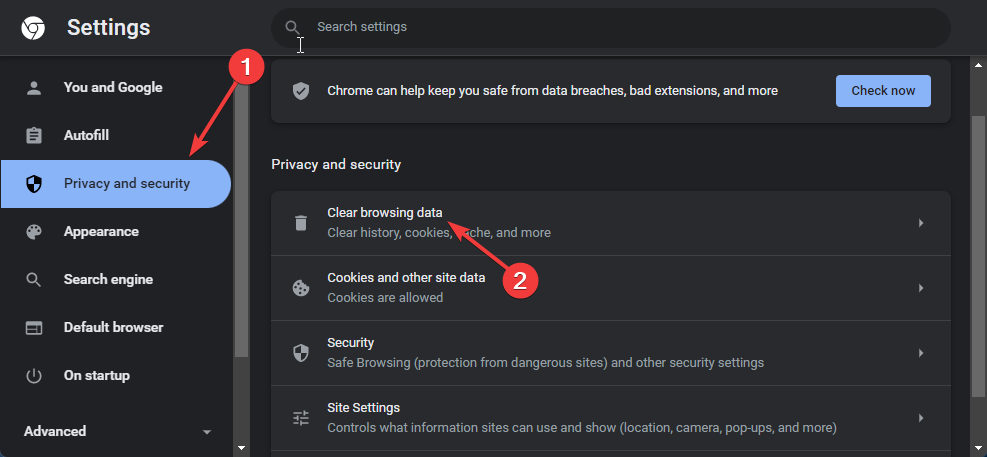
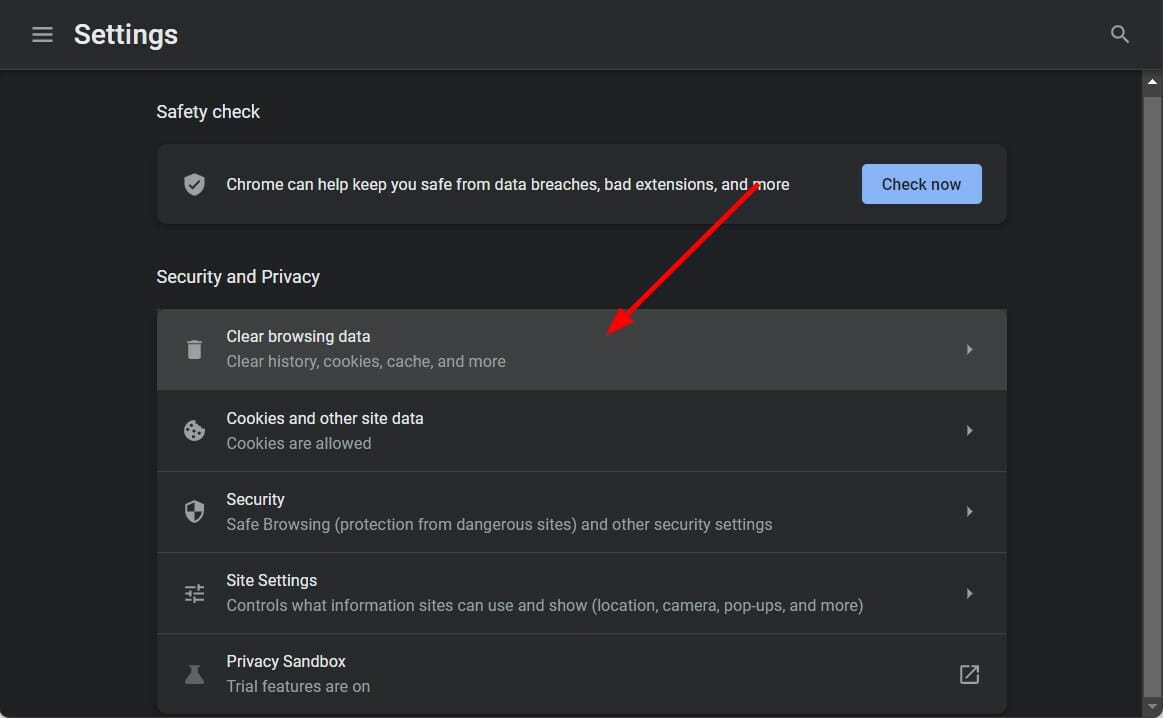
  2. Click on Settings and navigate to Privacy and Security.
  3. Click on Clear Browsing Data.
    Chrome-privacy-and-security
  4. Check the options Cookies and other site data and Cached images and files.
  5. Once done, click on Clear Data.
    coinbase alerts not working
On Firefox
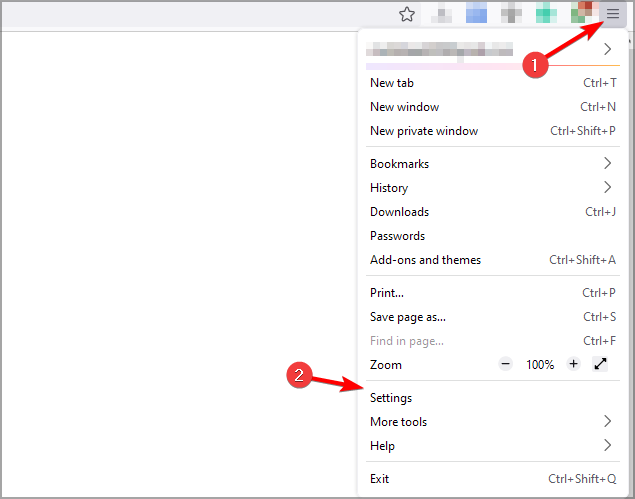
  1. Open Firefox and click on the hamburger icon at the top right corner.
  2. Click on Settings.
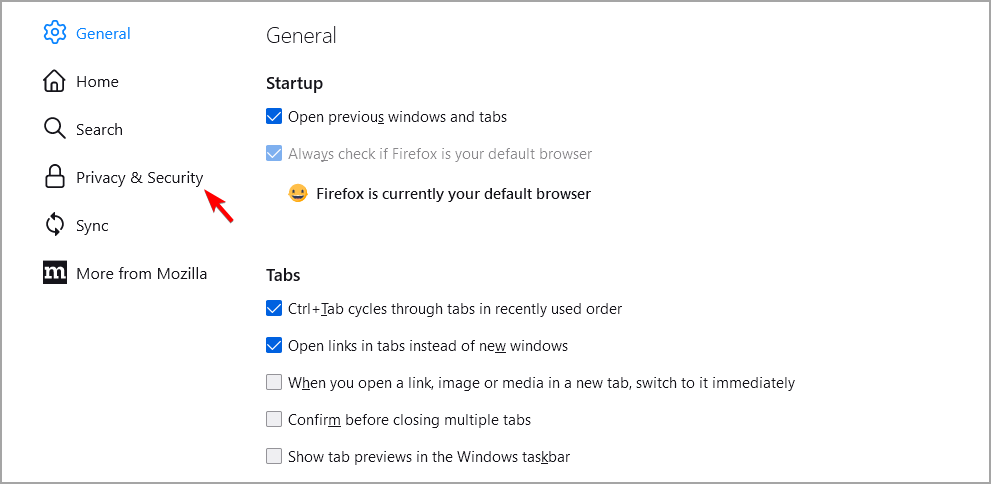
  3. Navigate to Privacy & Security.
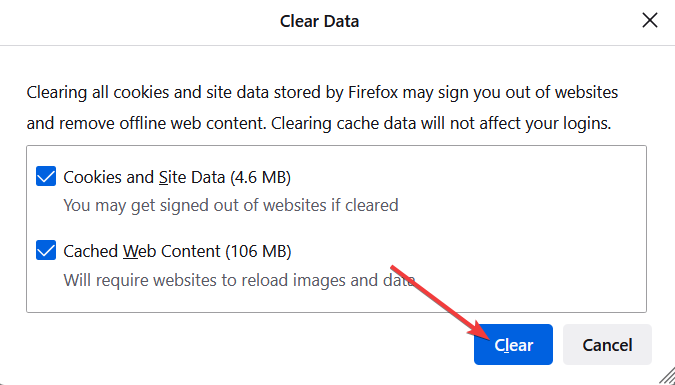
  4. In the Cookies and Site Data section, click on Clear Data.
    Firefox-Clear-Data
  5. Now click on Clear to confirm the process and check if Coinbase alerts not working issue is fixed.

2. Disable your VPN

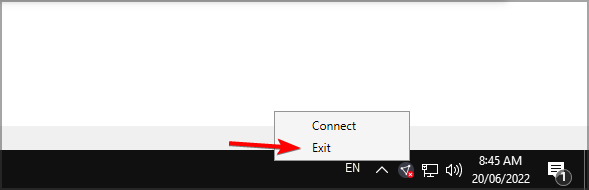
  1. Locate the VPN icon in your system tray.
  2. Right-click it and click on Exit.
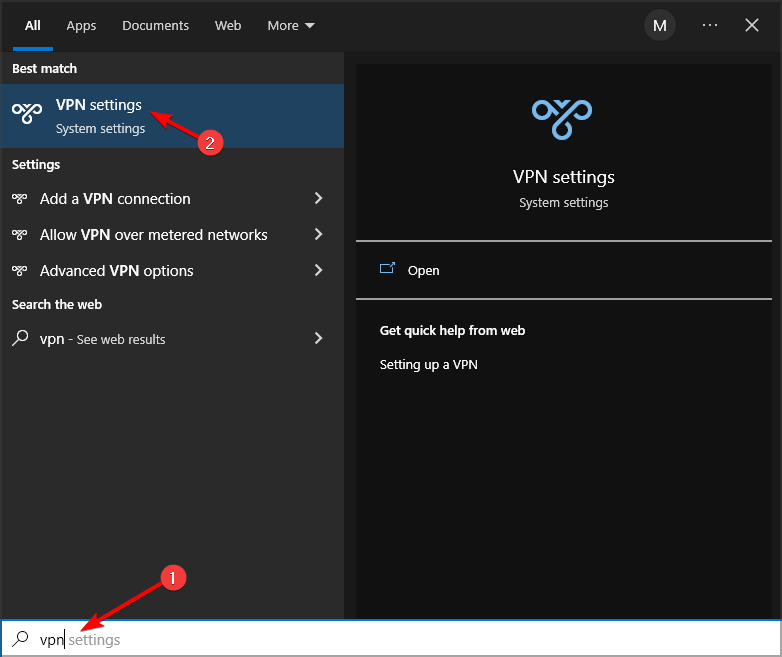
  3. Press the Windows key + S and enter VPN. Select VPN settings.
  4. Select your VPN connection and click on Remove.

3. Update your browser

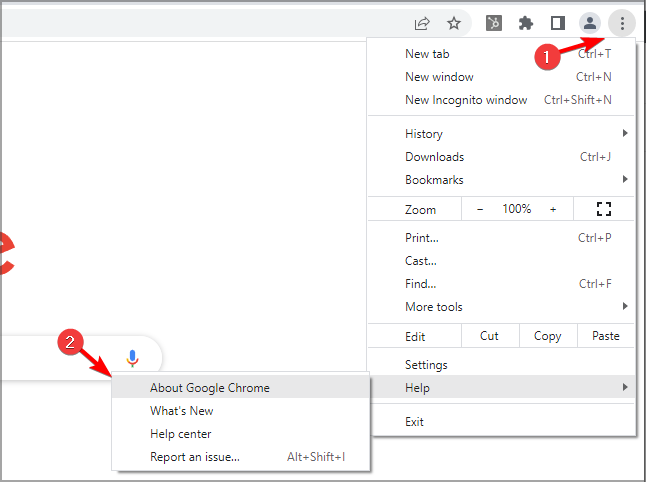
  1. Click the menu icon in the top right corner and go to Help. Now select About Google Chrome.
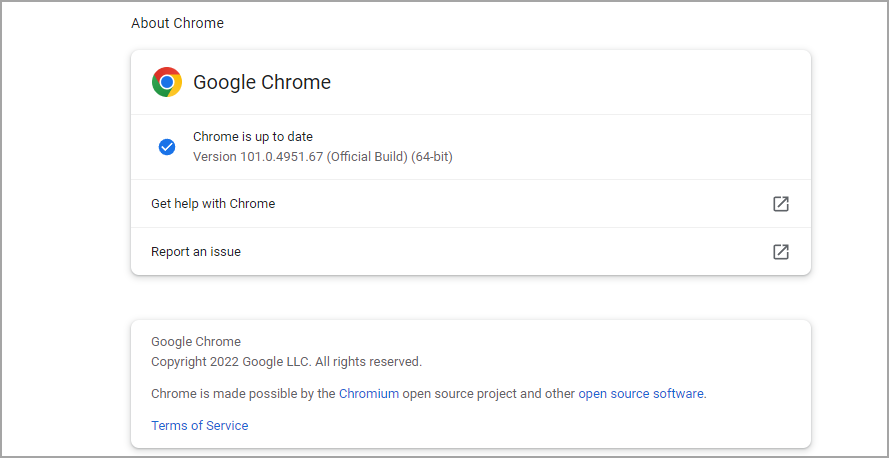
  2. A new tab will appear and check for available updates.
  3. If updates are available, they’ll be automatically downloaded.

The process is more or less similar for other browsers, so feel free to try it.

4. Use a third-party alerting service

If none of those mentioned above workarounds were able to fix Coinbase not sending price alerts, try using another Crypto price alerts app like Cryptocurrency alerting.

This website creates customizable Crypto Alerts based on market price, volume, volatility, etc.
cryptocurrencyalerting-1

Suppose you don’t prefer cryptocurrency alerting as a free crypto price alerts software, please take a look at our article on the best cryptocurrency price alert apps and services.

That’s how simple it really is to fix Coinbase alerts not working. Follow the steps mentioned above to solve this error in no time. If the troubleshooting methods mentioned above cannot help you, contact Coinbase Support.

If you still have any issues, feel free to comment below. We’re eager to hear from you.

MetaMask not Found on Thetan Arena on PC and Mobile: 9 Fixes

Are you encountering MetaMask not found in the Thetan Arena while trying to connect the wallet or make a transaction? This article has featured the solutions for both desktops and smartphones.

The Thetan Arena is an e-sport game platform powered by blockchain technology. It has gained significant popularity in recent years.

You can buy or rent a lot of items from its marketplace using Coinbase and MetaMask. If you are interested, learn how to fix Coinbase not updating balance.

MetaMask not Found Thetan Arena Screenshot

However, in the Thetan Arena marketplace, users may face problems with crypto wallets. One of the most common ones is the MetaMask not found error. Fortunately, you can easily fix this issue.

What causes MetaMask is not found on Thetan Arena?

There are some critical situations when you may encounter problems with MetaMask and third-party e-commerce-like platforms. If the Thetan Arena marketplace doesn’t find the MetaMask, it may be because of the following reasons:

  • MetaMask extension or app is corrupted or outdated.
  • MetaMask wallet extension has no proper permissions.
  • Your web browser is incompatible or outdated.
  • There is a network issue that is causing a problem for Thetan Arena to communicate with your device properly.
  • Either of MetaMask or Thetan Arena is having a problem in their backend.
  • Improper Network on MetaMask.
  • Interference by third-party extensions.

Though these are the major reasons, you may encounter the problem due to a very different condition. But, you can easily solve MetaMask not found on Thetan Arena error by following the methods we have featured in our article.

Quick Tip:

Before digging into solutions you may want to try on a different browser. In this case, we recommend you to try Opera One as it is considered one of the best web browsers for cryptocurrency and NFT.

Else, Opera One comes with many other benefits, including a built-in ad blocker, a VPN and a native AI for a smarter web browsing. The Crypto Wallet in Opera One is surely something you have to try.

Opera One

The Crypto Wallet is fully optimized for secure trading online.
Free Download Visit website

How can I fix MetaMask not Found on Thetan Arena on a PC or Mac?

1. Update MetaMask extensions

1.1 Update chrome extensions

  1. Open the Google Chrome.
  2. Type the following address in the address bar and press enter: chrome://extensions/
  3. Turn on the developer mode by toggling the switch and then click on the Update.updating chrome extensions

1.2 Update Firefox add-ons

  1. Open Mozilla Firefox.
  2. Type the following address in the address bar and hit enter: about: add-ons
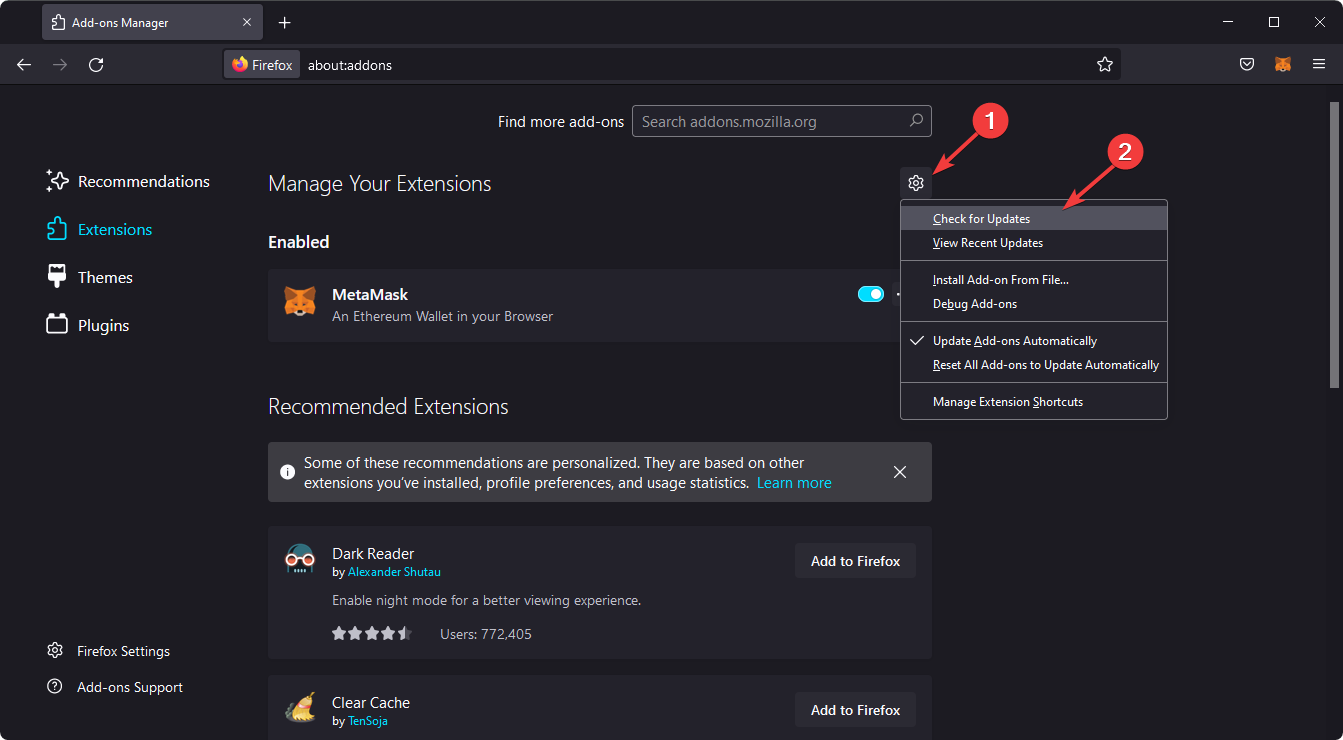
  3. Click on the gear icon and then choose to Check for updates.update firefox extensions

Updating the extensions should fix MetaMask not found Thetan Arena error. If not, follow the next methods.

2. Verify permission for MetaMask

  1. Right-click on the MetaMask icon on your browser.
  2. Put your cursor on This can read and change site data to and choose On all sites as shown in the screenshot.allow metamask on all sites

3. Check service status

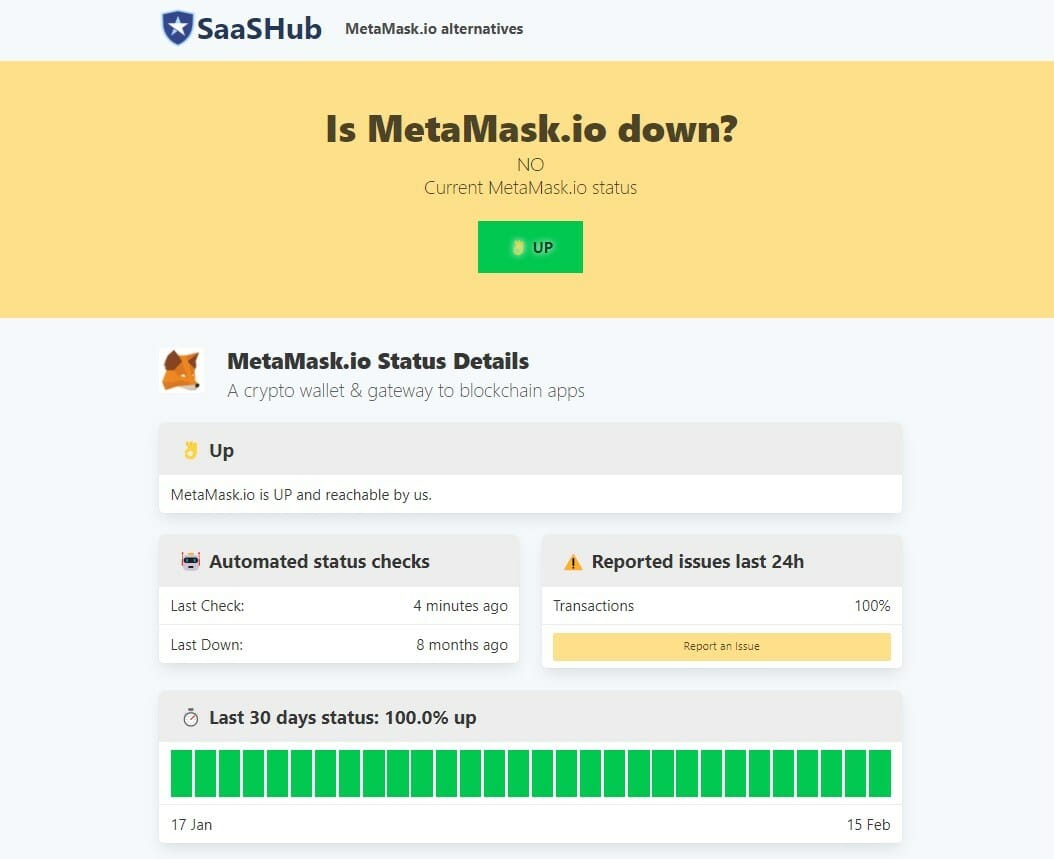
  • Visit this MetaMask service status page to check their service status.metamask status page
  • If it’s down, wait until the service becomes available, and then try again.

4. Update browser

4.1 Update Chrome

  1. Open the Google Chrome.
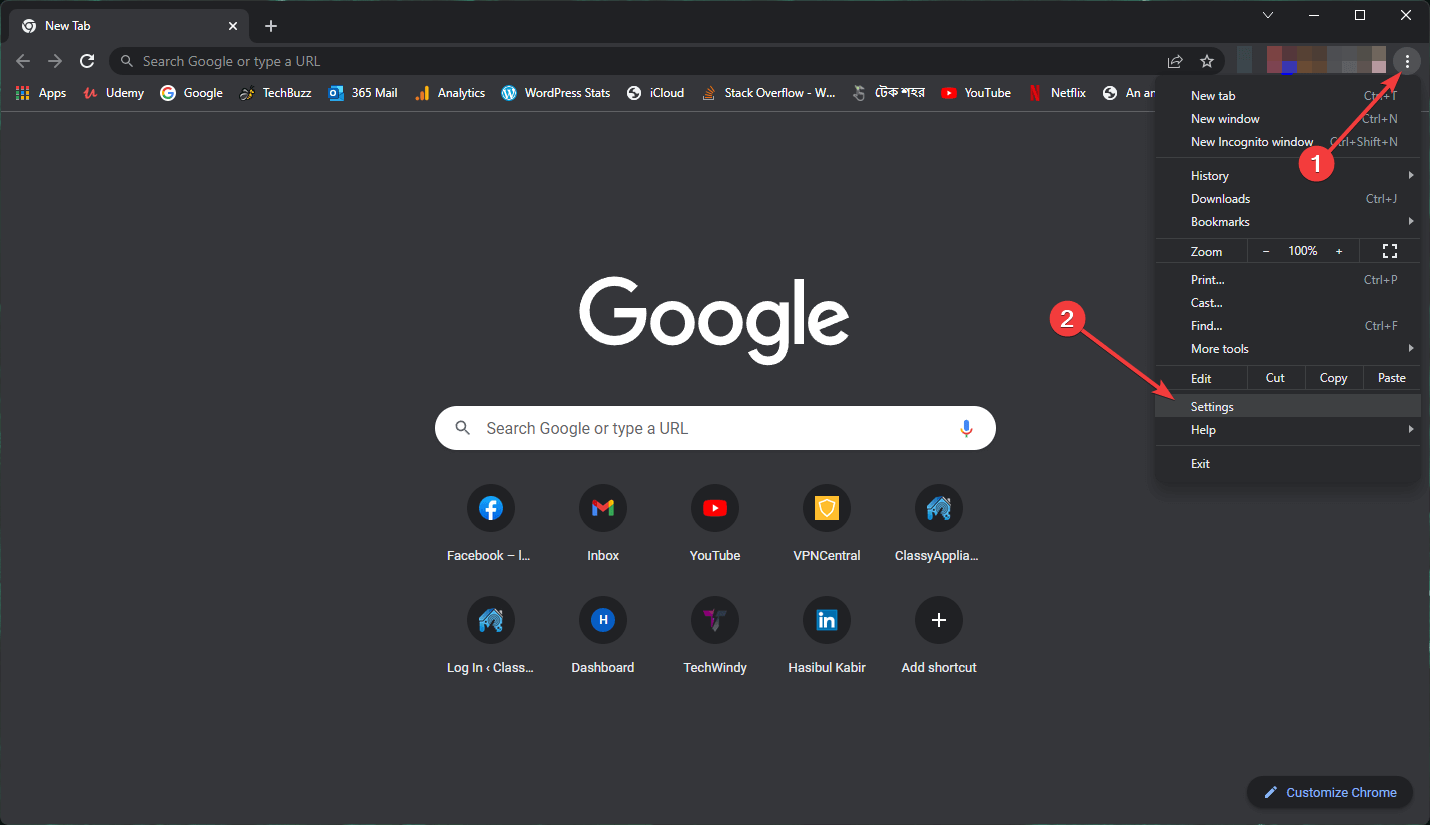
  2. Click on three vertical dots on the top right corner and Settings.going settings chrome
  3. Go to About Chrome.
  4. Chrome will check for the update and install any available one automatically.
  5. Relaunch Chrome.

4.2 Update Firefox

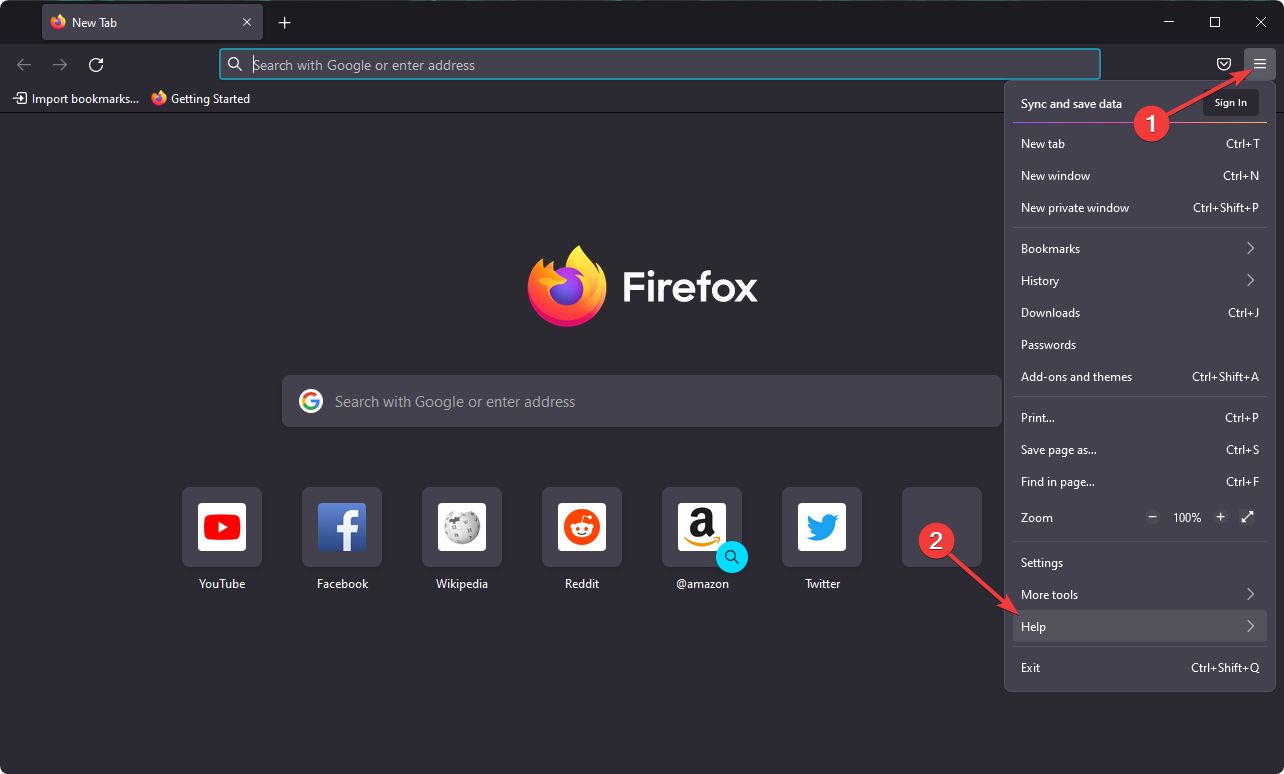
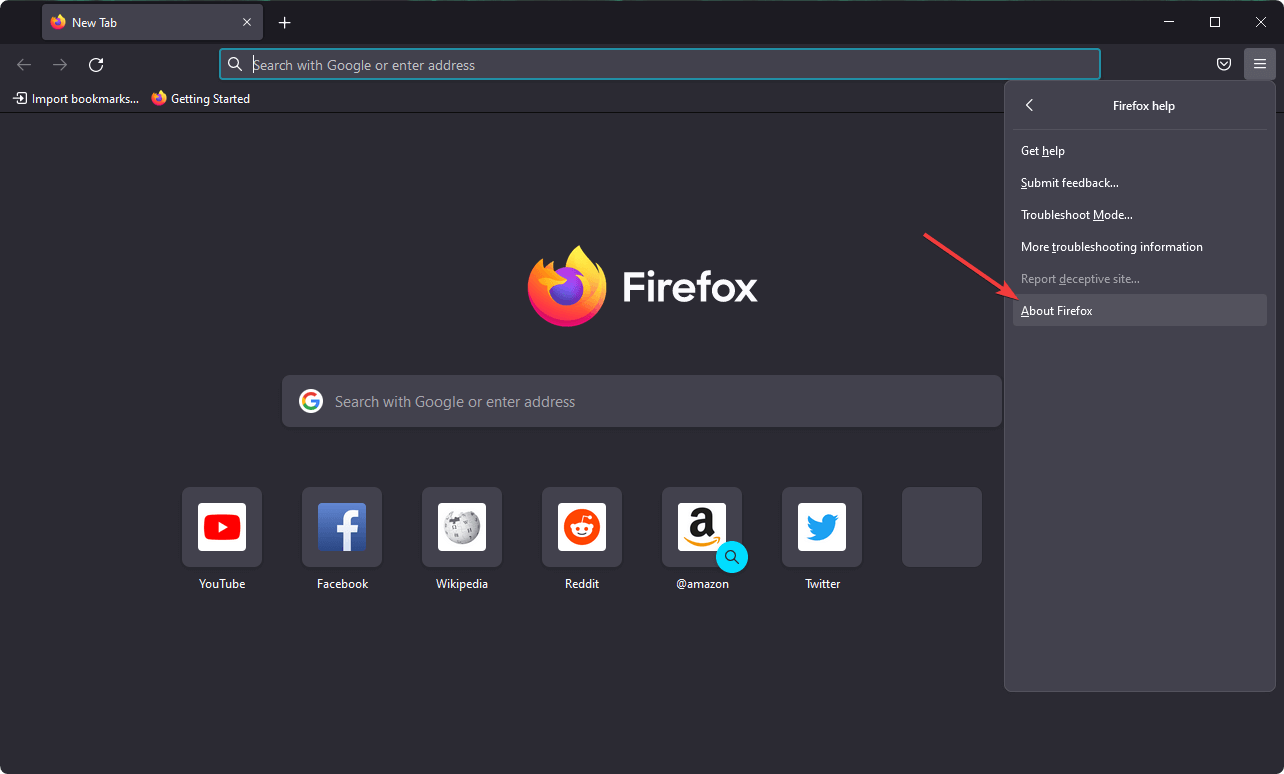
  1. Click on three vertical lines and go to Help.going to help of Firefox
  2. Click on About Firefox.clicking about firefox
  3. It will update the browser automatically.

5. Use the correct network on MetaMask

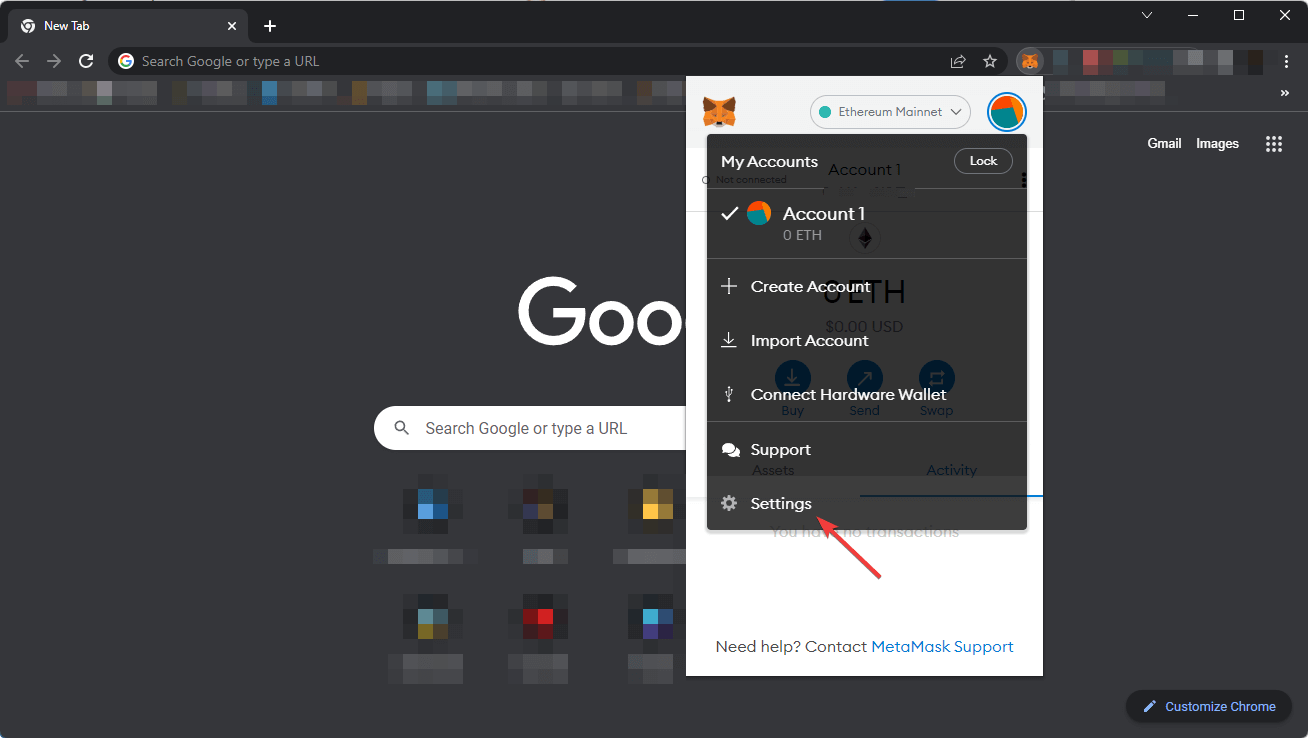
  1. Click on the profile icon of MetaMask and go to its Settings.going metamask settings
  2. Go to Networks.going networks metamasks
  3. Click on Binance Smart Chain.
  4. Make sure the network has the following entries:
    Network Name: Binance Smart Chain
    New RPC URL: https://bsc-dataseed.binance.org
    Chain ID: 56
    Currency Symbol: BNB
    smart chain network configuration metamask

If you don’t see the Binance Smart Chain, add a new network with the above entries. If everything is correct, you should no longer encounter the MetaMask not found error on the Thetan Arena.

6. Disable third-party extensions

6.1 Disable in Chrome

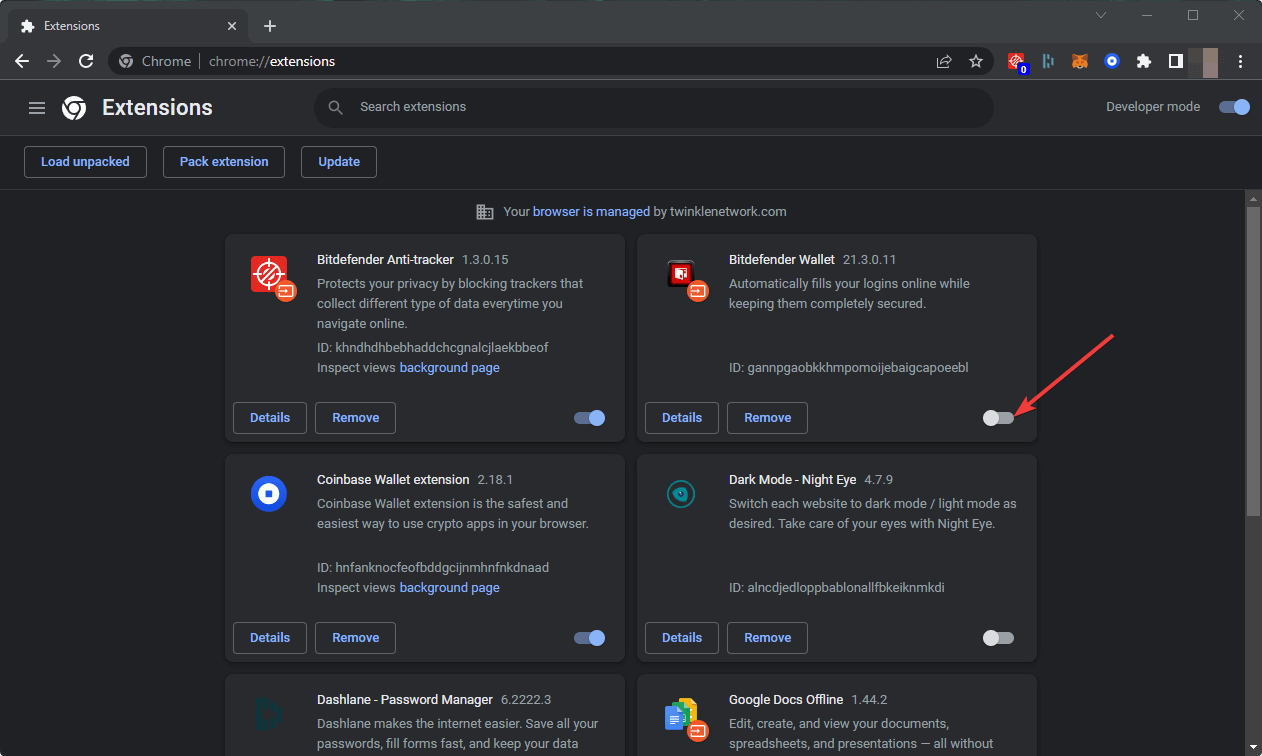
  1. Go to the extensions page as shown in method 1.1.
  2. Toggle the switch off next to the extensions you want to disable.disabling chrome extensions

6.2 Disable in Firefox

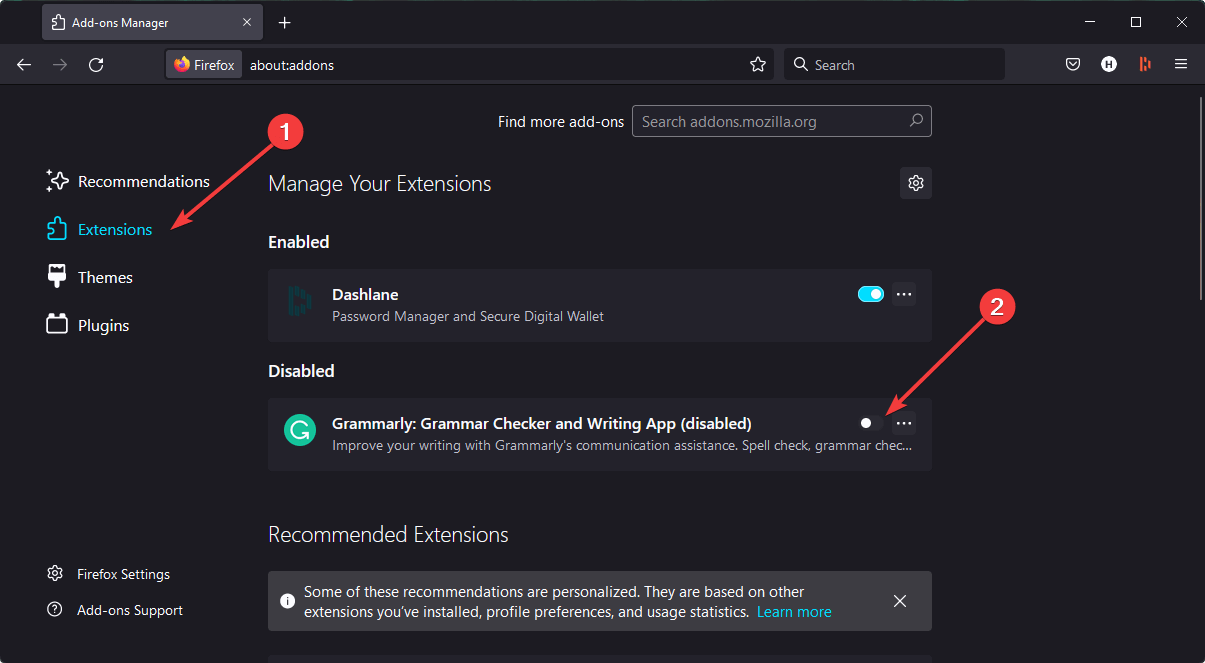
  1. Go to the Firefox add-ons page as shown in the method 1.2.
  2. Click on Extensions and then toggle the switch off for the items you want to disable.disabling firefox extensions add-ons

While disabling, you should focus on the ad-blocking extensions more. Because, in our experience, these types of add-ons or extensions cause a lot of trouble for crypto wallets and other services. After disabling, try to connect the MetaMask wallet with Thetan Arena again.

7. Use a VPN

When there is something wrong with the internet traffic, you will get this type of problem. So, we suggest you try a different network to solve the problem you are facing. A VPN is the best choice in this type of situation.

Private Internet Access (PIA) is the most recommended VPN for blockchain-based services as it provides a lot of security with very stable performance.

⇒ Get Private Internet Access

8. Re-install the MetaMask extension

  1. Go to the extensions page as shown in method 1.1.
  2. Click on remove for MetaMask.removing metamask extension chrome
  3. Then, Install the MetaMask extension again.

9. Clear browsing data

  1. Open your browser.
  2. Press CTRL + Shift+ Del on your keyboard.
  3. Choose All time as the time range.choose clear browsing data time range
  4. Check Cache images and files and then click on Clear data.clearing temp data chrome

After clearing data, you will need to login into all online services, including MetaMask, and Thetan Arena, again. Do it and try to connect your crypto wallet. This time, you will not get any more problems.

How can I solve MetaMask not Found on Thetan Arena on a smartphone?

1. Continue from the built-in browser of MetaMask

  1. Open the MetaMask app on smartphone.
  2. Click on three vertical lines and then on the browser.going browser metamask app
  3. Now, visit Thetan Arena and try to connect the wallet again.

2. Update the app

  1. Open the App Store/Play Store.
  2. Click on the profile icon and go to Manage apps & devices.going manage apps and devices playstore
  3. Tap on Update all.update apps android play store

3. Re-install the app

Re-installing the MetaMask wallet app can fix a lot of other problems along with this MetaMask not found error. If none other methods work, you can try it as the last option.

These are the best ways to solve MetaMask not found error with Thetan Arena. If you know any other useful steps, feel free to share them in the comment box.

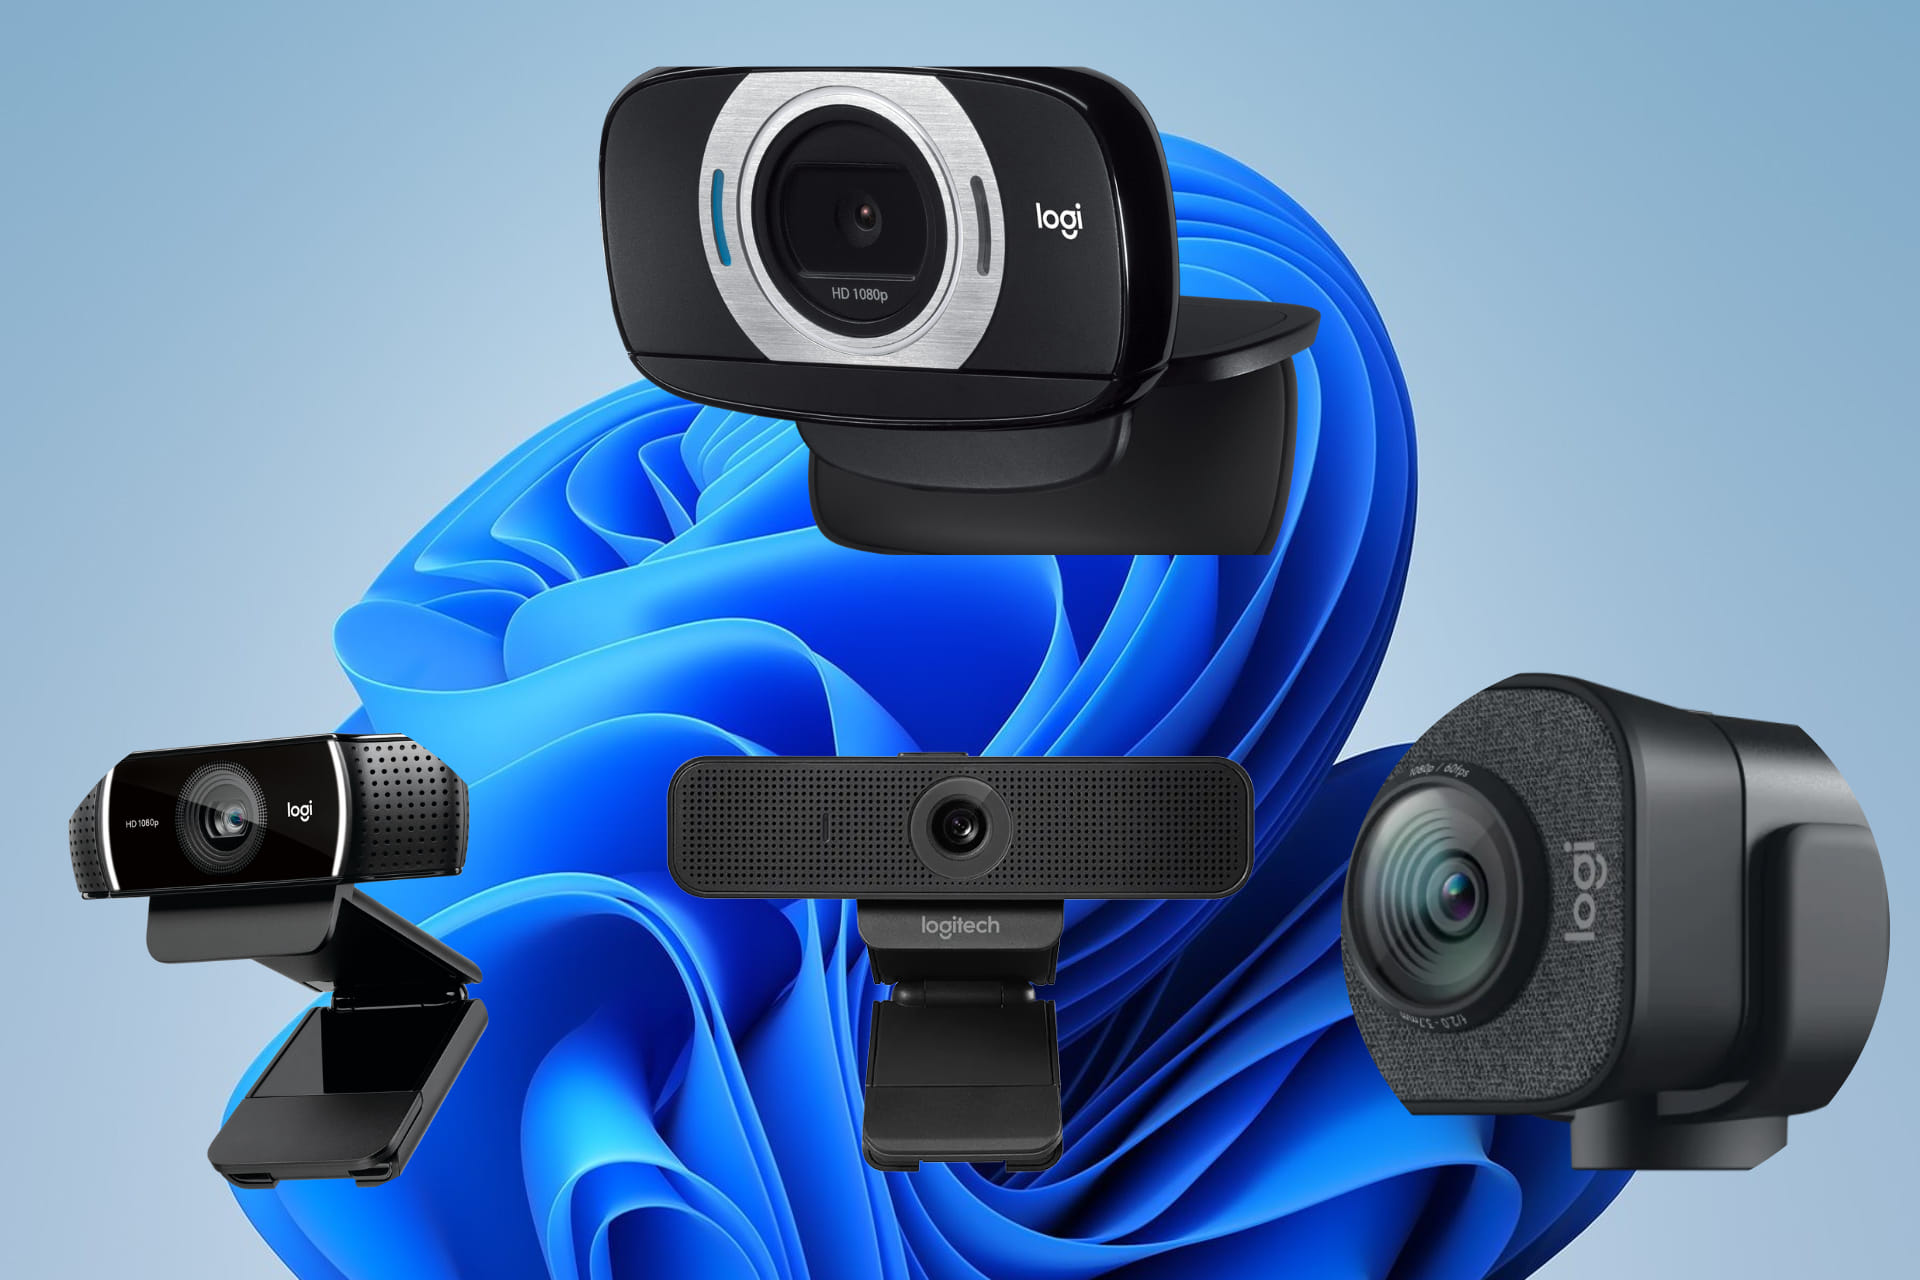
5 Best Webcams for Windows 11

In the modern world, many laptops will come with built-in webcams; however, these may lack the quality you desire, and others may be below-par representations of webcams.

Videos have become an integral part of our communication. From Zoom meetings to social media, its use cases are limitless. Hence, you will not want to compromise on the video quality of your device.

With an operating system like Windows 11, or any other modern OS, you should not expect magic if the hardware is not right.

There are indeed many excellent Webcam software made for Windows 11, but you will need the best kind of hardware to tap into the full strength of the operating system’s capacity.

To this end, we would like to explore with you in this guide the very best Windows 11 webcams you can find in the market.

How did we choose the best Windows 11 webcams?

Our team of experienced testers, who have a combined 15 years of expertise in this field, worked diligently to compile this informative list, comparing items on several levels.

The webcams were put through their paces to verify that they matched the standards advertised, notably in terms of overall clarity and picture quality.

They were chosen from a large pool and then evaluated against one another to give you this concise list.

Tip icon Tip
Editor’s tip:
Here is a list of factors to evaluate to understand better the elements reviewed by our panel of professional testers and also to assist you in making an educated decision:
➡ Video compression
➡ Field of view
➡ Autofocus and low-light correction
➡ Resolution and frame rate
➡ Microphone quality
➡ Mounting and privacy

If you examine all of the factors listed above, you will undoubtedly make the best selection when purchasing a camera for your Windows 11 PC.

What to consider when choosing your Windows 11 webcam?

1. Video compression

Streams use massive volumes of data, and video compression is essential for real-time HD quality across ordinary Internet bandwidths.

That said, H.264 AVC (Advanced Video Coding) standard is used in most professional cameras to produce high-grade video at reduced bit rates than prior codecs.

Also, H.264 reduces the time a device’s CPU uses for decoding and encoding. This guarantees that resolution and frame rates seen by users are consistent with what is promised.

2. Field of view

The FOV (Field of View) of a webcam is the breadth of the region it can record. A camera with a wide-angle lens covers a larger FOV; generally, the product specs will include the Field of View in degrees.

And here is what you should expect:

  • One individual in front of a device requires a FOV of 60 degrees
  • Two persons viewing a camera set on a computer display may be captured at 78 degrees
  • Presenting a whiteboard or a body of people sitting at a conference table requires a FOV of about 90 degrees
  • Standard cameras capture a diagonal 16:9 landscape frame. But specific products may be turned into a 9:16 panorama format to record material for Facebook and Instagram stories

3. Autofocus and low-light correction

Almost every webcam on the market has focusing capabilities. When contrasted against inexpensive webcams, higher-end ones feature quicker and more exact focusing.

When recording in an open space workplace or the home office with different glare and light sources, obtaining a clear, genuine image may be difficult, and subjects may seem gloomy or merge into the background.

Professional webcams contain unique technologies that can identify individuals from windows and walls and apply the appropriate improvements for a more bright and genuine appearance.

Lastly, some Windows 11 webcams include an in-built light located around their lens that can be adjusted for brightness.

4. Resolution and frame rate

The sharpness of the video captured by a webcam is its most crucial characteristic. This attribute is expressed in terms of frame rate and resolution in digital video.

Crispier visuals have a better resolution and a faster frame rate, implying that motion on the screen will be smoother. However, the price of a webcam is directly proportional to its frame rate and resolution.

In addition, the resolution is determined by the number of pixels projected on a screen, which are expressed length by breadth, and mainly in a 16:9 aspect ratio. The following are the three most popular resolutions:

  • Standard high definition, often known as HD Ready or 720p, is a resolution of 1280 x 720 pixels
  • Full high definition, or 1080p, refers to a 1920 x 1080 pixels resolution
  • 4K which refers to a 3,840 X 2160 pixels resolution in UHD (ultra-high definition)

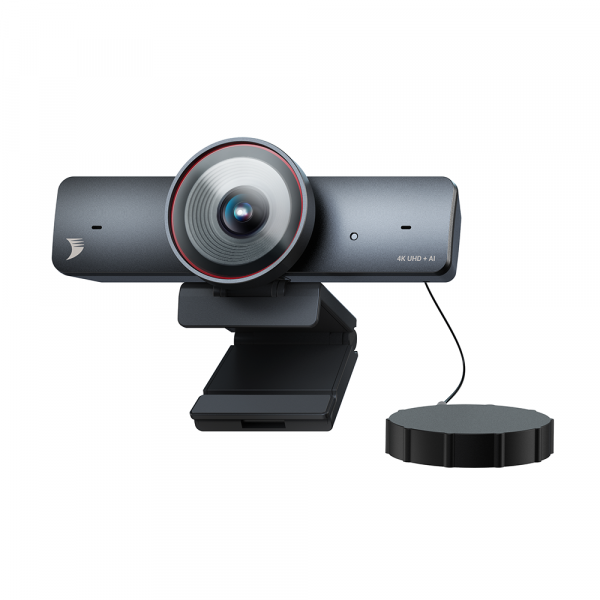
The WyreStorm FOCUS 210 Webcam is an example of a 4K Windows 11 webcam with a steep price tag.

These kinds of webcams can capture sharp-looking video pictures comparable to those captured by a DSLR camera.

Note that 4K video creates files that are too huge for your regular live streaming; however, they are ideal for capturing material that you can edit and output afterward in any of the top video editing tools.

5. Microphone quality

One built-in mic is the standard for most webcams. Webcams having two mics flanking the lens give the listener a more lifelike audio stream.

For high-quality video conversations and live streaming, a dual-mic arrangement is excellent. However, an external desktop mic may be helpful for more professional content development.

6. Mounting and privacy

Webcams are meant to be mounted on top of a PC screen, and most of them will also fit over your laptop screen.

A flex-neck clamp or webcam tripod may enable you to capture still photographs or movies from other angles than straight on.

These give you greater control over your photos and better alignment, resulting in sharper, clearer photographs and lesser editing.

When not in use, a webcam’s privacy measures include a plastic covering the lens.

Tip icon Tip
Buyer’s tips:
➡ The WyreStorm Focus 210 is our top choice if you need to have the most incredible 4K camera from our list without sacrificing any other elements
➡ The Elgato Facecam is a good option for gamers and streamers, but you will also be able to use the Logitech HD C922 to get similar streaming results
➡ To get a good balance of all the elements you may want from a webcam, you should go for the Dell UltraSharp webcam
➡ The Anker PowerConf C200 webcam is our budget option, but it stacks well against Logitech HD C922 for video conferencing features

Now that we know which solutions are best for particular demands, let’s look at the list and learn more about each product.

WyreStorm FOCUS 210 - Best 4k webcam

  • Wide Dynamic Range
  • Auto Framing feature with 90FPS
  • Dual AI noise-canceling mics
  • Works with all video calling apps
  • AI-tech optimization
  • 120 degrees field of view
  • A 30 degrees swivel angle

The picture quality of the FOCUS 210 webcam may be improved in high-contrast lighting conditions thanks to its WDR (wide dynamic range) technology. It features a 120° ultra-wide field of vision and will catch crisp details in softly and brilliantly light environments.

FOCUS 210 web camera can broadcast 4K super high definition video with superb class video whether you work remotely or in your company’s conference room. Additionally, the web camera supports AI  Backlight adjustment and low light correction.

The FOCUS 210 4K web camera can also intelligently frame visitors for an excellent view as they approach or exit its field of vision, thanks to its powerful auto framing feature.

This functionality does not need any manual configuration. Furthermore, it can quickly and painlessly place everyone in your group into a frame, resulting in more informed conference experiences.

Finally, to have a superb online conference experience, we recommend that you engage the unique presenter monitoring option in WyreStorm FOCUS software.


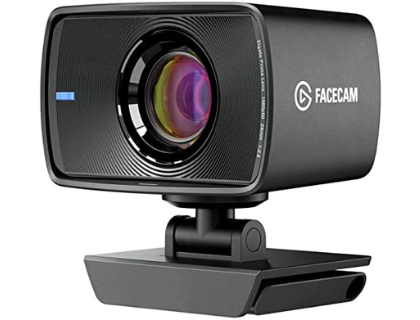
Elgato Facecam - Best webcam for streaming

  • Fixed focus
  • Camera Hub software
  • Easy manual control
  • Uncompressed 1080p 60 fps video
  • Overexposed shots
  • Elgato Tax

Elgato’s enormous streaming environment, which included green screens, capture cards, stream decks, microphones, ring lights, and even acoustic paneling, is now complete with the Facecam webcam.

This Elgato new web camera is positioned as a professional camera for online video streamers who do not want to invest in more costly solutions, such as a DSLR camera but still want the most satisfactory image possible.

The Facecam delivers uncompressed footage at 1080p/60fps, which is a significant deal for streamers and may be the main reason you will want to buy it.

Without going into a lengthy discussion of compression and encoding, the short version is that the webcam produces a final video with less artifacting than most other cameras.

It’s worth noting that you can obtain all of this without lowering your resolution or frame rate with tools like OBS.

Lastly, Facecam’s ISP is tuned to boost highlights and adjust shadows automatically, and colors are vivid while being realistic. Darks and whites are consistently balanced to optimize detail while reducing noise to a minimum. As a result, your visual quality is incredible at any time of day or night.


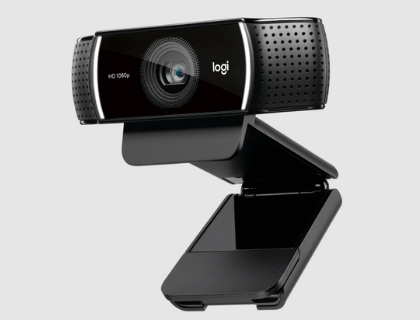
Logitech HD C922 - Best webcam for conference

  • 78 degrees diagonal FOV
  • Autofocus
  • Auto light correction
  • Noise cancelling mic
  • Not the greatest for M1 Macs

You may customize your video looks for meetings with this webcam. Just use the Logi Tune webcam program to portray oneself in the best light to alter parameters such as zoom and FOV (field of vision). With only one click, you may join meetings.

The C922 has a 78° diagonal field of vision and an autofocus glass lens. Its full HD capacity in streaming preserves all the details and natural colors and delivers a smooth video. We suggest you utilize the capture function to zoom, edit, and pan.

It’s also a terrific choice for streaming, with 60 frames per second at 720p for very smooth video. So, with no latency or distortion, you’ll be able to stream live.

Furthermore, its light correction and HD autofocus fine-tune lighting circumstances, resulting in high-definition, razor-sharp video in any setting, ensuring that you appear beautiful in your stream at all times.

Finally, the C922 Pro Webcam’s two omnidirectional mics record more natural sound from diverse angles.


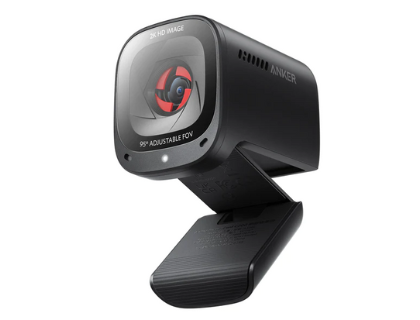
Anker PowerConf C200 webcam - Budget webcam

  • AI noise cancellation
  • Directional voice pick-up
  • Tripod mountable
  • Excellent low-light performance
  • Good build quality
  • Noise cancellation might result in jerky digital audio

This USB webcam’s 2K ultra-clear resolution ensures crisp clarity in every meeting. With a high-quality video conference, you will be noticed by your colleagues or amaze your employer.

Also, since the bigger aperture size collects more illumination, you may seem bright with this web camera even if you don’t use additional lights in low-light situations.

It has specialized twin microphones that employ artificial intelligence to pick up your speech while suppressing ambient noise for perfect audio. As a result, you won’t have to be concerned about being heard.

We also like it since the angle of the lens’s aperture allows you to customize how much the webcam can view. For example, you may choose from 65 degrees, 78 degrees, or 95 degrees to display only your face or show what’s behind you without sacrificing picture quality.

Finally, since privacy is vital, you may use the built-in cam cover to protect yourself from the webcam’s view while not in use.


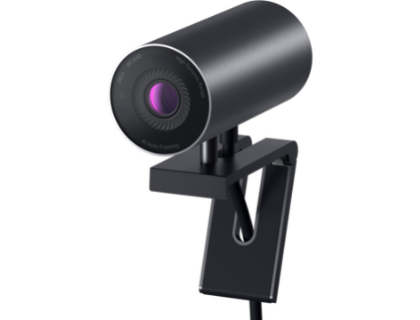
Dell UltraSharp webcam - Best Windows Hello webcam in 2022

  • Auto-light correction
  • Auto Framing/Zooming
  • External Privacy Cover
  • Optimized for Skype for Business and Google Hangouts
  • No in-built microphone

When you’re near enough, Dell ExpressSign-in identifies and logs you in using Windows Hello. Also, when you walk off, the system locks for additional security.

When the webcam is not in use, a privacy shutter lid lets you quickly clamp the camera’s cap and keep it safe. You may also set your field of vision to 65 degrees, 78 degrees, or 90 degrees to personalize how much of your surroundings are in frame.

Its Peripheral Manager software allows you to use innovative and intelligent functions like AI Auto Framing, HDR, various presets, and Fields of View, enabling you to change settings effortlessly depending on your preferences.

Finally, the robust AI auto framing ensures that the world’s most smart 4K webcam always focuses on you.


Bottom runners

Besides the webcams that made our list of the best Windows 11 webcams, there are other options you may want to try.

We have included a few that may not be our first choices; however, they have proved solid buys for many users. Below are some webcams for Windows 11 to consider.

➡ IPEVO V4K UHD

Here is a good webcam that has a CMOS image sensor. It has strong noise reduction capabilities and is a solid option that may do the job for certain customers.

We like the multi-jointed stand that enables you to position it in several ways.

➡ Razer Kiyo

It’s a superb streaming choice as well as a multi-purpose webcam.

Razer has taken away many of the frills that more expensive cameras have, concentrating solely on what counts most to YouTube vloggers and streamers with the Razer Kiyo.

➡ Logitech C930e

This is an excellent alternative if you run a home office. While we have already discussed another Logitech webcam, if you have a smaller space, you should try Logitech.

It does not rely on your PC for all its heavy lifting and can do the encoding itself.

And this is our list of the best Windows 11 webcams but please note that all the webcams reviewed are backward compatible and will be great options even if you run Windows 10.

Lastly, note that if your webcam is not working in Windows 11, you will usually be able to fix it in a few steps.

If you’ve tested any of these products or if you have other suggestions, don’t hesitate to tell us all about them in the comments section below.

How to Fix the AOL Service Error [4 easy solutions]

Popular email service provider AOL is considered one of the best and most secure email services, providing high-end security to its users.

Well, this is the reason why many make use of AOL email services. With time, AOL has received multiple features.

However, thanks to heavy outgoing and incoming email via its servers, AOL often irks its users with problems, one of which is the AOL service error.

AOL users have reported that they come across this service error when trying to use one of the AOL features.

Thankfully, in this guide, we will explain to you how you can fix the AOL service error. Let us check it out.

What triggers the AOL service error?

This AOL service error can pop up for multiple reasons. For instance, it could be triggered because of a poor internet connection.

Since internet connection is the most crucial thing for AOL to function, you should have a fast and stable internet connection to avoid such issues.

It could also be triggered by entering the wrong credentials, i.e., email ID or password. Server issues have also been one of the main reasons why users have reported experiencing this issue.

Other reasons that might cause AOL service error is using an incompatible browser, etc.

Quick Tip:

If you feel like struggling too much trying to repair AOL service, you can confidently choose another effective email software.

For example, Mailbird is a user-friendly email platform that will manage multiple email accounts and simplify your work with integrated apps.

⇒ Get Mailbird

How can I fix the AOL service error?

1. Check AOL servers

Using websites such as IsItDownRightNow or Downdetector, you can easily have a look at the status of the official AOL servers.

If the official servers are down, then there is nothing much you can do apart from waiting for the servers to get fixed. However, till that time, you can make use of other services.

2. Update your browser

  1. Open the browser.
  2. Click on the 3-dot icon.
  3. Select Settings.
  4. From the right pane, select About Chrome.
  5. Chrome will automatically search for a new update and, if found one, will prompt you to restart your browser to install the update.

3. Fix problems when receiving mail

Here are some troubleshooting tips that can help you fix the problems when receiving emails on AOL and ultimately eliminate the AOL service error.

  • You may have created a filter for a specific sender, causing you to receive emails from that sender. Try disabling the filter.
  • Check your blocklist and unblock the sender you wish to receive the message from.
  • Due to heavy traffic, you may experience delays in receiving emails. Wait for a bit for the issue to get resolved.

4. Clear browser cache

  1. Open your web browser.
  2. Click on the 3-dot menu.
  3. Select Settings.chrome settings
  4. Click on Privacy and Security from the left pane.
  5. Select Clear browsing data on the right side.clear-browsing-data-metamask-not-working
  6. Tick the box next to Cached images and files.
  7. Hit the Clear data button.

What are the other AOL issues and their solutions?

Like every other email service, AOL also has its fair share of errors and issues you will encounter from time to time.

Below are some of the most common AOL issues and their guides to help you resolve them.

  • AOL mailbox not available error could happen because of server issues. You can check out our dedicated guide to fix it.
  • If you are having issues with your AOL account not responding, we have a guide to help you quickly fix it.
  • Facing AOL certificate trust issues? We have a dedicated guide to help you fix the problem.
  • If AOL Mail is not syncing with your Windows 10/11 Mail app, then you can follow the steps in this guide to fix the issue.
  • You can fix the AOL mail not displaying images problem following the tips mentioned in our dedicated guide.

Let us know, down in the comments below, which one of the solutions helped you resolve the AOL service error. Also, feel free to share any other method that allowed you to fix the problem.

50 All-Time Best Browser Games You Need To Play In 2026

You have probably played a few browser games if you are a gaming fan. We want to explore the best browser games of all time.

Browser games have evolved over the last two decades, but this has been a testament to the numerous improvements in browser technology, from displaying only static pages to dynamic, media-rich content.

Technology like HTML5 and Javascript have been key players in this innovation. Today, gamers rip the benefits as our most choice games can now be played on a browser.

All you need is a computer and a connection to the internet, and you can play some of the best online PC games of all time, no matter what type of gaming you prefer.

That said, it isn’t easy to choose the best online games that survived over time, simply because of the sheer number of options available and the variety of user preferences.

You may also want to try out any free online games to play without downloading.

What games can I play on a web browser?

There is no restriction on browser games, and you have choices of FSP, RPG, adventure, etc.

A good number of them even support playing with controllers. So, even though you are connected via the computer, you can enjoy gameplay the old-fashioned way, just as if you were playing from a console.

Lastly, many games you originally played on the console now have browser versions. Some examples are:

  • Pac-Man
  • Doom
  • Wolfenstein 3D
  • Sid Meier’s Civilization 1 & 2
  • Counter-Strike 1.6
  • Super Mario Bros.

No matter what kind of games you prefer, our list includes a variety of genres that will surely provide you with hours of fun, so make sure to read through the entirety of this article and try the games you want.

What is the number 1 browser game?

We can not give you a definite answer, especially since it is subjective and open to your preferences. Also, there are too many games to choose from and many genres to consider, but we will make a recommendation nonetheless.

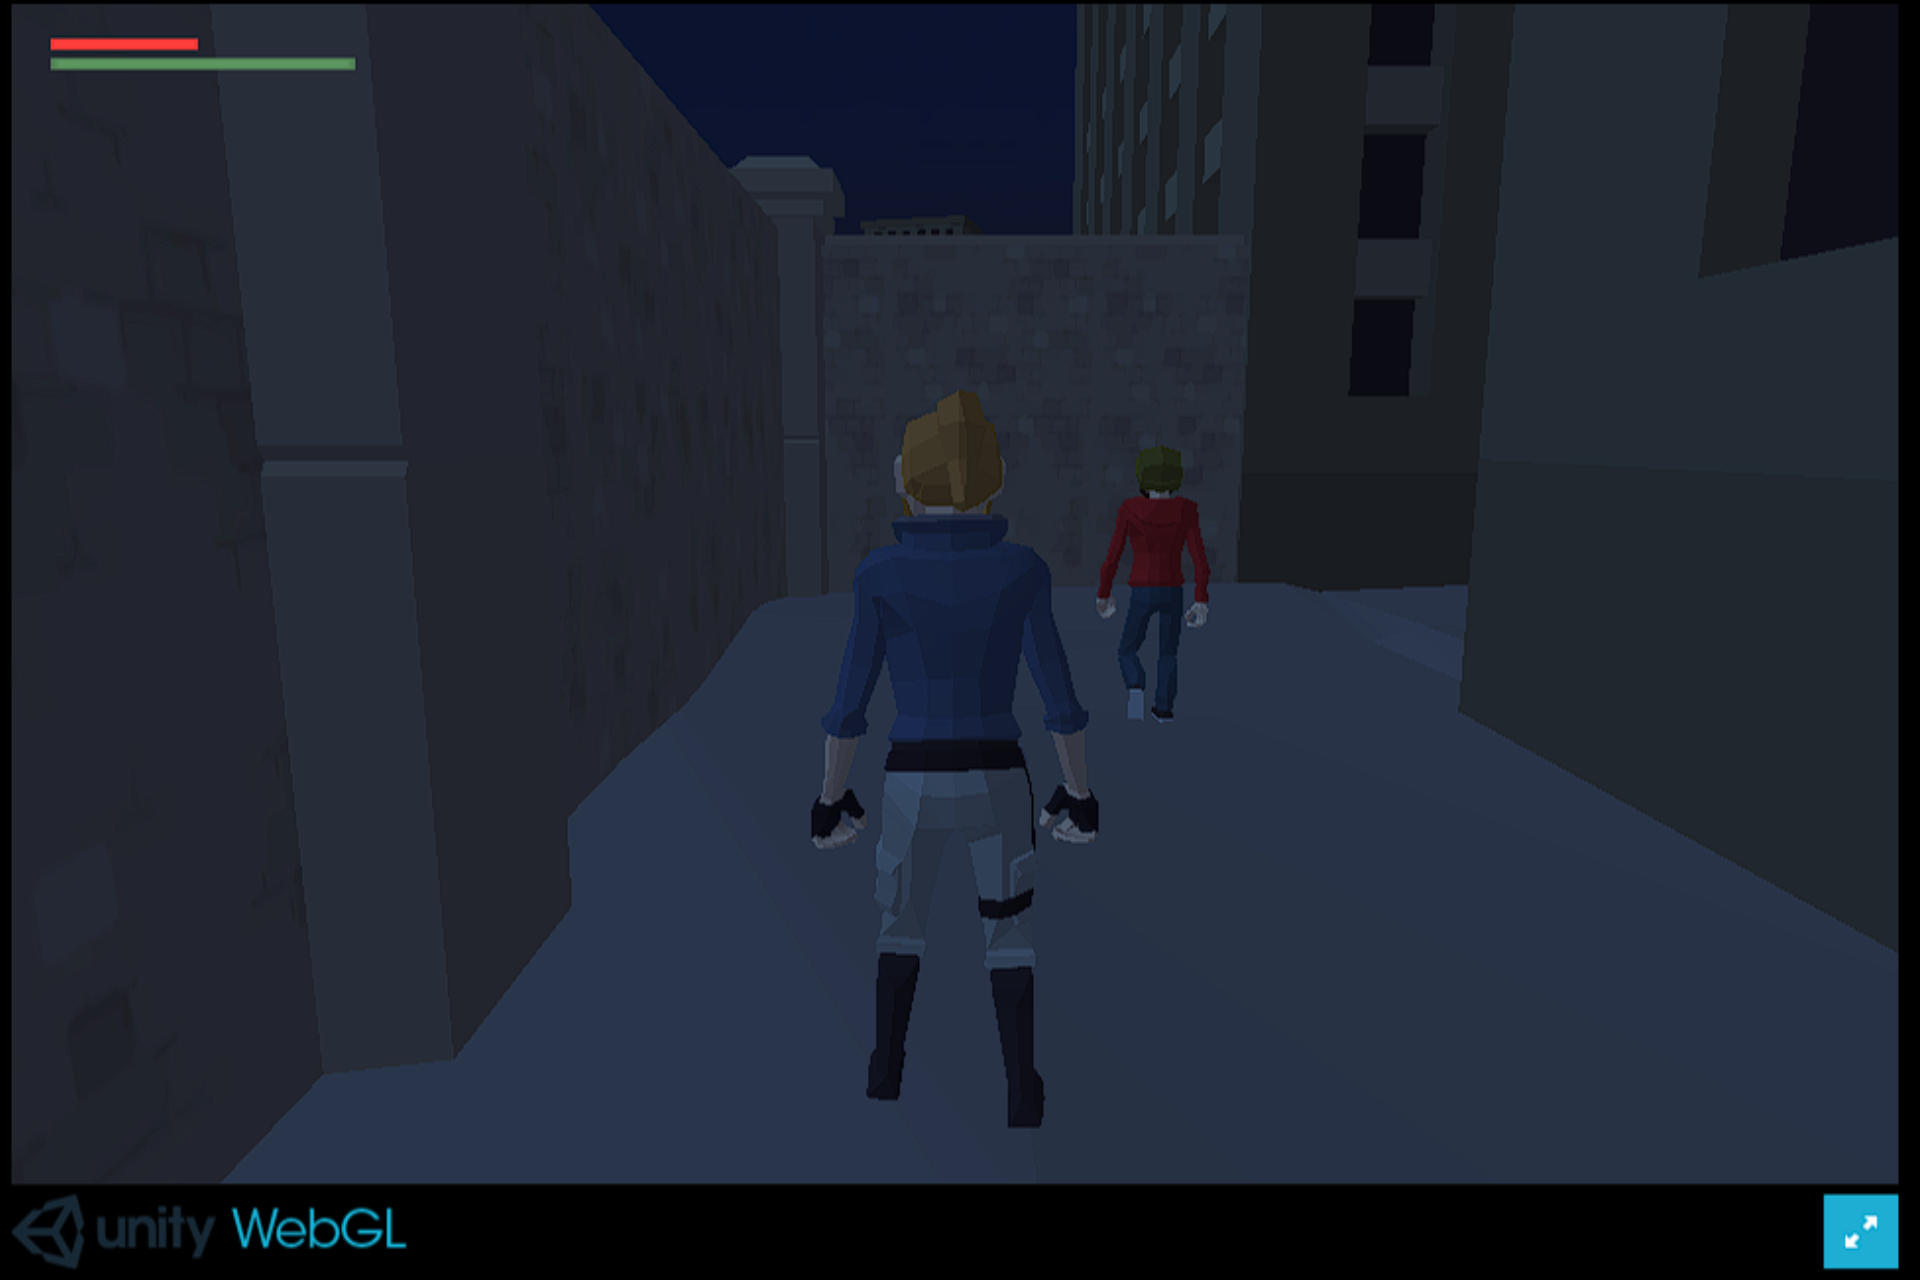
Leftovers is our browser game pick, as the graphics and storyline take us back to simpler gaming times but do not compromise on the overall story and character development.

As you can see from the screenshot above, the world is exciting and set in post-apocalyptic scenery in which you have to fight to survive. Make sure to explore all corners of the maps for hidden gems.

This game offers an immersive world to explore and an engaging story that will keep you glued to your screen for at least a few hours.

Are browser games safe?

Browsers connect you to the internet, and the internet, with its many advantages, exposes people to a world of data and privacy breaches. Unfortunately, this could be true even if you only play browser games.

We recommend you connect to the internet using a VPN and only play games from trusted websites and vendors, or choose a browser that already has a built-in VPN like Opera GX.

Now, let’s dig into the list of the best browser games ever.

What are the best browser-based games to play now?

➡ Best free browser games

1. Chrome Dino – Best offline browser game

This game is fun and unique because it belongs to the rare niche that does not require an internet connection. As a result, it’s one of our top free browser games.

⇒ Play Chrome Dino

2. Doom – The best free FPS old browser game

Here is a top-rated, classic FPS game where you enter the role of the Doom Slayer and gun down innumerable terrifying monsters.

⇒ Play Doom

3. Line Rider – Simple yet engaging sled simulator

Line Rider will suit you if you’ve ever been interested in loops and sled riding. 

In this game, you are the conductor, and the rider’s fate is yours. Therefore, you should draw lines and determine where he goes. 

⇒ Play Line Rider

4. QWOP – Best track and field browser game

The QWOP game is relatively easy and involves sprinting down a 100-meter racetrack as quickly as possible.

It’s also been on Angry New Party multiple times, a  Japanese TV series, and The Office in the United States.

⇒ Play QWOP

5. A Dark Room – Most minimalistic adventure browser game

You start by attending to a fire in a freezing, dark room. More possibilities become accessible as you fuel the fire, and the plot gradually unravels.

This game is based on vintage text-based video games that were popular in the 70s.

⇒ Play A Dark Room

6. Threes – Best number puzzle-free io game

Threes is a highly addicting arithmetic puzzle game that is simple to learn yet challenging to perfect.

The objective is to stack identically numbered and adjacent cards on each other, and you can move right, left, right, down, or up.

⇒ Play Threes

7. Slither.io – Best free snake browser game

In your mission of becoming the tallest worm, you gather colored dots, but adding players makes the traditional concept more challenging and multiplayer.

If you crash with another player, you’ll forfeit your worm and be forced to begin devouring dots afresh.

⇒ Play Slither.io

8. Spelunky – Best vintage free adventure browser game

On a web browser, Spelunky, widely recognized as one of the greatest games, is still as absorbing as ever.

As you navigate countless dangers, encounter scary monsters, and amass valuable goods, you’ll uncover the hidden treasures beneath the surface.

⇒ Play Spelunky

9. Catan Universe – Cross-platform free IO browser game

Since its introduction in 1995, Catan Universe has distinguished itself as a legendary board game. But, like other vintage board games, it’s also found its way to the digital domain.

Catan Universe is cross-platform, so you may play on various devices and compete with other gamers.

⇒ Play Catan Universe

10. Salvagette – Best free adventure browser game

Your mission is to annihilate the enemy. Blue orbs indicate when each attacker will fire a missile at you, and you should calculate a course that will not cost you any of your four lives.

A shop and several outcomes add to the game’s complexity, and you can even go back and play the first game, Salvage, to see how it all started.

⇒ Play Salvagette


➡ Best paid browser games

1. A Dance of Fire and Ice – Most simplistic rhythm exploration browser game

A Dance of Fire and Ice is a rhythm game with only one button. You are in charge of two planets orbiting each other as they move down a meandering course.

You must direct the orbs while maintaining their ideal balance! To advance in the line, press the button that corresponds to the beat.

⇒ Play A Dance of Fire and Ice

2. Tinyfolks – Most minimalistic browser RPG game

In this basic retro-looking strategic RPG, you’ll be required to train your people, build your settlement, and fight monsters!

You’ll have roughly 15 weaponry at your disposal and have to enhance the buildings to unlock additional activities.

⇒ Play Tinyfolks

3. 10mg: Cover Me In Leaves – Best interactive horror fiction browser game

Cover Me In Leaves is an interactive horror fiction work about brilliant brains and the world’s final destruction.

You’ve stayed in your little town since graduating high school, with no chances or ambitions. Every other person you know and care about has gone on to more extraordinary things.

⇒ Play 10mg: Cover Me In Leaves

4. Downstream Dream – Most addictive browser game

This developer has taken real-life events and built them into an all-time water game. The game brings scenes and gameplay that show a lot of regrets and so much love. If you get hooked on this one, you will probably get emotional.

⇒ Play Downstream Dream

5. Peckin’ Pixels – Best paid resource management browser game

This game is a fun administration game in which you manage a chicken farm and earn money by selling the colorful eggs laid by your hens.

Peckin’ Pixels is made entirely of HTML canvas and Javascript, with zero game libraries or engines. Electron was used to create the downloadable version.

⇒ Play Peckin’ Pixels

6. Pullfrog – Tetris-styled animal browser game

Cactus bricks are dropping. You, a tiny frog dubbed frog, must leap and escape to avoid them. To eradicate them from your land, arrange them in Tetris-style lines.

While they’re still falling and green, retrieve them. When they’re dried and yellow, turn them to ashes.

⇒ Play Pullfrog

7. Second Puberty – Best paid suite of browser games

This Second puberty game is a compilation and album of 7 short games produced over two years. The creator’s goal was to express his experiences about surgically transforming in his thirties and living in solitude during an epidemic.

⇒ Play Second Puberty

8. The Lost Night – Most captivating horrors paid IO browser game

You’ve awoken in the heart of a creepy town, attempting to discover your way home. Here, you assist the residents of this strange hamlet, and they’ll lead you along the right path.

With your secret abilities, you can take them out and earn sweets.

⇒ Play The Lost Night

9. Havendock – Best ocean survival browser game

You’ve landed in the open sea. Here, you’ll be able to learn how to distill water, gather resources, and discover bricks to construct a little settlement here.

People will begin to arrive soon, and it will be your responsibility to welcome them aboard and help them survive.

⇒ Play Havendock

10. Forget the brakes – Best train control browser game

Two railway engineers are constructing their locomotives! However, the brakes were overlooked. These locomotives will be meandering on multiple tracks, and you will ensure they do not collide with obstructions.

⇒ Play Forget the brakes


➡ Best browser RPG (role-playing games)

1. Hordes.io – Best graphics and characters browser game

Hordes provide new players with various options, including two factions, three classes, and three enormous landscapes. In addition, over 50 spells allow you to tailor your strategy to every PvP or PvE encounter.

⇒ Play Hordes.io

2. Aberoth – Classic RPG browser game

You start playing as a prisoner in Aberoth, supervised by a napping orc who has lost the key to your prison on the floor nearby. Get the key and steal out of the basement.

⇒ Play Aberoth

3. Torn – Best GTA-like text-based online RPG browser game

As a destitute man sleeping on the streets, your goal is to ascend to fame and power and never go hungry again. But, sadly, everyone else you pass is doing the same thing – even when it implies putting you down.

⇒ Play Torn

4. Utopia – Best strategy RPG browser game

Taking and keeping cities and territory throughout the ages is central to Utopia. Each era can last several months, so ensure you have the time.

This is the best browser game of all time for RPG lovers.

⇒ Play Utopia

5. Granblue Fantasy – Best fantasy exploration browser game

Consider a universe in which islands glide across the sky. You’ve lived in this one forever, but finally, you decide to live in search of your missing dad. But, unfortunately, the elements are against you, and your island starts disintegrating around you.

⇒ Play Granblue Fantasy

6. Undergarf – Best browser exploration game with low graphics

The personalities of Undertale and Garfield collide in Undergarf. It’s a pleasant environment devoid of violence and strife. You participate in the game as Nermal, who wanders into this universe and faces Sansfield.

⇒ Play Undergarf

7. Prison Struggle – Best prison simulation browser game

You’ll have to build your character in prison while trying to keep things moving on the outside, which is essential if you want to rebuild your life following your release.

⇒ Play Prison Struggle

8. Neighbor – Best horror RPG browser game

Neighbor is about the costs associated with locating your ideal dwelling. As the building’s pasts begin to plague our hero, mysteries emerge.

You can join our protagonist on the quest for enlightenment, divided into three chapters.

⇒ Play Neighbor

9. Zork – Text-based RPG browser game

This is a popular text adventure game. Thanks to its high-quality narrative and excellent text recognition, it has stood through time. It was first released in the late 1970s.

⇒ Play Zork

10. Nevergrind – Most engaging RPG browser game with great customization

Nevergrind is for you if you enjoy customizing your characters. It has 12 different skills, 14 different classes, and 12 different races to pick from, making each playing unique.

⇒ Play Nevergrind


➡ Best browser single-player games

1. Fear the Spotlight Demo – The best storyline browser game

An accident 25 years ago resulted in the partial burning of a school. Go with Amy to the abandoned location, but be cautious: something appears to be following you there.

⇒ Play Fear the Spotlight Demo

2. Leftovers – Best single-player adventure browser game

Your mother is preparing dinner. She gave you the responsibility of giving away to the neighbors since she was concerned about the number of leftovers and didn’t want them to waste.

Even though it might not be for everybody, this game is one of the best browser games to play in 2022. The story is immersive and interesting.

⇒ Play Leftovers

3. Assessment Examination – Best interactive fiction single-player browser game

Assessment Examination is a browser-based game that is also downloadable. The game is based on the Mandela Catalogue. This interactive fiction game is a fantastic way to sharpen your mind.

⇒ Play Assessment Examination

4. Farmers Stealing Tanks – Best action single-player browser game

best browser games all time

Grab a tanker out of petrol and return it to your garage. The WASD or Arrow keys control the Tractors in this game.

Lastly, you can obtain a free life by crashing other tanks with your stolen tank.

⇒ Play Farmers Stealing Tanks

5. Burger & Frights – Best survival single-player browser game

best browser games all time

In this short horror game, you navigate a dark woodland on a bike. The gameplay was influenced by games like a John Carpenter horror film and Rides with Strangers.

⇒ Play Burger & Frights

6. Quick Draw – Best art single-player browser game

best browser games all time

You have just 20 seconds. Will you be able to draw something recognizable by the computer? In this game, you are racing against time, and moving your mouse ideally to make the shapes is your only savior.

⇒ Play Quick Draw

7. Wounded Winter – Best American-Indian-themed single-player RPG browser game

best browser games all time

The story’s protagonist is a Native American named Akecheta. While hunting, his tribe is attacked, and all its members are killed. The assailants take his wife, and he sets out to free her and avenge his people.

For us, this game is one of the best browser games of 2022, but what counts is what do you think about it?

⇒ Play Wounded Winter

8. The Letter – Best browser game with stealth gameplay

best browser games all time

The game follows a reporter on a mission to learn the truth about the origins of conflict and terrorism in the modern world. Here, you take on the role of this female character and assist in discovering various secrets.

The Letter fits as one of the best browser games of all time including 2022 for single-player game lovers.

⇒ Play The Letter

9. Time is Solid Here – Best puzzle single-player RPG browser game

best browser games all time

Time is Solid Here is a horror puzzle game just chosen for the Goethe-Stillstand/Standstill Institut’s Project Exhibition.

Don’t be surprised if you see a giant head talking about huge trucks and everything.

⇒ Play Time is Solid Here

10. Filled with Freedom – Best horror storyline browser game

best browser games all time

If you are looking for intense horror, get ready for ghost chases, darkness, and everything horror in this exciting tale of a boy visiting home.

⇒ Play Filled with Freedom


➡ Best browser multiplayer games

1. Agar.io – Best arcade multiplayer IO browser game

best browser games all time

You begin as a cell that must drift about the game board to stay alive and become more extensive. Then, as you gather more partitions, you become more significant and better.

This is one of our favorite multiplayer browser games.

⇒ Play Agar.io

2. Tanki Online – Best multiplayer browser tank game

best browser games all time

In 3D battlefields, you may battle with elements such as buildings, walls, arches, and shrubs. Because the game’s physics is based on reality, your tank may become trapped in deep holes or tumble off cliffs.

⇒ Play Tanki Online

3. Skribbl.io – Best multiplayer browser drawing game

best browser games all time

In this game, you get to pick a word and draw it. The aim is to create a drawing good enough that other players can successfully guess what you are trying to draw.

⇒ Play Skribbl.io

4. Clashed Metal Drifting Wars – Best racing multiplayer browser game

best browser games all time

Think of racing and shooting. This game is the perfect blend of the two and will give you an adrenaline rush from start to finish.

⇒ Play Clashed Metal Drifting Wars

5. UNO With Friends – Best multiplayer browser card game

best browser games all time

This is an entry-level card game that you can pick up in no time. To start, every player is given seven cards, and you must match the number or color of the card on the pile.

⇒ Play UNO With Friends

6. Isleward – Best role-playing city browser game

best browser games all time

Here is a role-playing game with a poor resolution. The game begins by asking you to pick a persona and then abandoning you in Stratford. However, you will have a lot to discover here.

If you need a multiplayer game that ranks as one of the best browser games ever, Isleward is a great pick.

⇒ Play Isleward

7. Treasure Arena – Best treasure hunt adventure browser game

best browser games all time

If you fancy the idea of being stuck in an arena or battling your way to getting some treasure, then this adventure game is for you.

⇒ Play Treasure Arena

8. Town of Salem – Best multiplayer RPG browser game

best browser games all time

This is a game that tests your ability to be a devious liar. A player can pick from three different characters. Mafia, townspeople, and neutrals are the three factions in this game.

⇒ Play Town of Salem

9. Kingdom of Loathing – Best pun-based browser game

best browser games all time

This is most likely the earliest browser game available. Even though you can not make much out of it, it’s popular among adults and teens. The rationale is that it’s a witty and fun-filled game.

⇒ Play Kingdom of Loathing

10. Prodigy – Fantasy-inspired role-playing browser game

best browser games all time

This game is a multiplayer internet role-playing game with over 50 million players. The competition aims to boost your awareness and mathematical proficiency in a fun way, and it’s one of the best online games of all time.

⇒ Play Prodigy

How can I play PC games in a browser?

All you need is an internet browser. We recommend Opera GX because it is built just for gamers and has all the cool features that enhance the gaming experience.

Next, navigate to the browser game site and play away. And even though some games are better off played on your Android phone, some users prefer the PC experience, but some Eversoul may throw error 4010.

There you have it, our roundup of the best browser games ever. Let us know your thoughts and which of these are your favorites.

Now, you can launch your browsers and play away. Note that to get the best of these games, you must use any of the best browsers for gaming.

Valorant Error Codes: How to Fix 20 Most Common Ones

There are various Valorant error codes that you can encounter, and in this guide, we’re going to tackle some of the most common ones, so let’s get started.

How can I fix common Valorant error codes?

1. How do I fix error 4 in Valorant?

  1. Head over to account.riotgames.com and enter your account credentials to sign in.
  2. On the Riot account management page, click edit RIOT ID and TAGLINE and save the changes.
  3. Relaunch the game and log in.

This code means your Riot display ID is invalid. It doesn’t allow you access to the game because something is wrong with your login identity.

2. What is the meaning of error code VAL 5?

  1. Log out your Riot account from every device logged in.
  2. Log in to your Riot Games Account.
  3. Click Riot Account Sign-In.
  4. Hit the Change Password button, input the current and new password, and confirm it.
  5. Click Save Changes.

Whenever you get a Valorant error code 5, your account is active elsewhere. Usually, this error causes the game to crash when another device logs in with the same credentials as yours.

3. Error code VAL 1

  1. Press Windows, and search for Valorant.
  2. Select the app, then click Run as an administrator.

This error code signifies two things. First, it could be a connection error, or Valorant can’t access your entire PC. In this case, it might be impossible to connect to the server.

4. How to fix Valorant error code 7?

  1. Go to the Riot Games support site banner.
  2. Click on Service status at the right top corner.
  3. Next, select your region and click Current Messages to display the server situation in your area.

This error code means that Valorant cannot connect to the session service. However, you can get this kind of error if you have a suspension on your Riot account. Also, an update may be going on, which could cause the server to be down.

Also, you can check Valorant ping and ensure that there’s no issue with the servers.

5. How to fix the error code VAL 19?

  1. Press the Windows key, input Task Manager, and launch it.
  2. Locate all the processes with the Riot Games or Valorant logo.
  3. Right-click on each of them and select End Task.
  4. Restart PC to take effect.

Error code VAL 19 is a connection error on Valorant. This occurs when the Riot Client fails to initiate the connection correctly.

This problem directly stems from the Riot client and not the game itself. Also, the error has been more predominant after the patch 3.12 update.

6. What does Error code VAL 29 mean?

  1. Press the Windows key, input the control panel, and launch it.how to setup vpn on widnows 10
  2. Click the Windows Defender Firewall option.windows defender firewall
  3. Go to the left pane of the screen, then click Allow an app or feature through Windows Defender Firewall.
  4. Then, press Change settings to add Valorant to the authorized apps in your firewall.change settings firewall windows 11
  5. Browse for Valorant and click open.
  6. Click add, tick the boxes next to the button, and select OK to save the changes.
  7. Restart the PC to take effect.

Whenever you have a network issue, you get the error code 29. In other words, it signifies something wrong with your network. Mainly, firewalls cause this issue, blocking the game from accessing the internet.

7. What does the VAL 31 error mean?

To fix this, restart the Riot client just like the error code VAL 19 above.

Error code 31 is another network communication issue. It means that Valorant failed to get player name information. This can occur when there is a malfunction with the game, which is usually not serious.

The major causes of this error are unstable network connection, server issues, and maybe minor bugs from the Riot game client.

8. How do I fix Valorant error code 33?

This error code means the Riot Client process was closed. Unfortunately, this is one of the most common errors among Valorant gamers. It usually occurs mid-game and causes the game to crash.

Since the issue stems from the Riot Client, you can fix this error by closing and restarting Riot Client following the guide in error code VAL 19.

9. What does VAL error 39 mean?

  1. First, restart the game as suggested in the error code.
  2. If there is a server issue, wait patiently until they restore the server.

This means the Riot game’s servers are offline in your location or generally. However, this occurs when there is a significant update, and it requires shutting down the whole Riot server.

Players get this error code mostly when there’s maintenance going on. The pop-up message displays, There was an error connecting to the platform. Please restart your game, client.

    10. What is the error code Val 43 in Valorant?

    Whenever you get the error code 43, the system times out, which means a connection problem preventing your game client from reaching the Riot server.

    Typically, this error occurs during maintenance and updates. So, to fix it, you should restart your game client and wait a bit before launching Valorant. This should automatically solve the problem.

    11. What is the error code VAL 44?

    1. Proper click Riot Vanguard from the System Tray icon, then click Exit Vanguard.
    2. Press Windows key + I to launch the Settings app.
    3. Click Apps and expand Apps & Features from the left pane.
    4. Locate Riot Vanguard, click on it, and select Uninstall.
    5. Confirm the process and restart your PC.

    This error displays Vanguard not initialized. This is a typical error players come across when playing Valorant.

    It occurs when the Valorant game client and the Vanguard anti-cheat system disagree. Also, when the Riot Vanguard anti-cheat file is corrupt, error code 44 can appear.

    12. What is Valorant error 45?

    1. Press Windows key + R to launch the Run dialogue box.
    2. Input %AppData% and click OK to open the Appdata.
    3. Then, navigate with this path: C:\Users\USERNAME\AppData\Local\Riot Games\Riot Client\Data
    4. Delete the RiotClientPrivateSettings.yaml file.
    5. Close the File Explorer and run Valorant as an administrator.

    Valorant error code 45 indicates that Vanguard needs a reboot. However, it usually happens when there is an issue with the Riot Vanguard.

    Since Valorant depends on the Riot Vanguard to function effectively, the game automatically crashes when this error pops up.

    13. What does Error code 46 mean?

    This error code means that the platform is experiencing some downtime. Besides, it gives engineers time to work on the forum. It will be impossible to initiate maintenance on the game when it is active. Hence, the Riot client won’t be available.

    However, the only thing players can do when faced with Error code 46 here is sit back and wait patiently for the game to be restored.

    14. What does Error code VAL 49 mean?

    1. Restart the Riot client: This is the first thing you should do whenever you encounter error code 49. It will help the Riot vanguard program sync better.
    2. Check if your system specifications meet Valorant’s standards: So, visit Valorant’s official website for details, and compare them with your system properties.
    3. Also, you can contact Riot support for assistance. They will put you through what to do to get it fixed.

    This error code indicates that Chat did not initialize. Thus, it notifies the player that the chats are not loading correctly. However, this error can be fixed quickly, and sometimes, it may require deep troubleshooting.

    15. How do I fix error code 128 on Valorant?

    1. Press the Windows key, input Command Prompt and launch it.how to see wifi password windows 10
    2. Input the following commands: bcdedit -set TESTSIGNING OFF bcdedit -set NOINTEGRITYCHECKS OFF
    3. Reboot your computer and launch Valorant.

    Valorant error code 128 occurs when the Riot Vanguard cannot initialize. Mostly, players encounter this error when a program on their computer conflicts with the Vanguard anti-cheat program.

    16. What is Van code 68?

    1. Press the Windows key, input Command Prompt and launch it.how to see wifi password windows 10
    2. Input the following commands one-by-one: netsh winsock reset netsh int ip reset ipconfig /release ipconfig /renew ipconfig /flushdns
    3. Then restart your computer to sync the configuration into the system.

    Valorant error code 68 represents Incorrect network configuration. However, it can be caused by incorrect network settings and firewall blockage. Consequently, the Valorant client won’t be able to connect to Valorant servers.

    17. How do I fix error code VAL 81?

    1. Press the Windows key, input Task Manager, and launch it.
    2. Locate the Valorant app, right-click on it, and select End task.
    3. Then relaunch Valorant.

    Error code Val 81 indicates a connection error. Either internet connection issues or Valorant server issues can cause this connection error. Also, if you launch the Riot client badly, it can result in the matter.

    18. How do I fix Val 51 code?

    This is a content service failure, according to Valorant’s developers. It occurs when you launch the Valorant client badly, and it cannot retrieve content from the game’s servers.

    A simple game restart should fix this error.

    19. What does Error code VAL 52 mean?

    1. First, restart the Riot client and relaunch the game.
    2. Restart your Router and PC to fix internet connection issues.
    3. Submit an error ticket to the Support team.

    This means that Valorant has a Problem fetching skill information for players. However, a lousy startup for the Valorant client can cause this error if the servers are down.

    20. What does Error code Van 1067 mean?

    Enable TPM 2.0 and Secure Boot for a quick fix:

    1. Press the Shift key + Restart to reboot your PC to Windows Recovery Environment (WinRE).
    2. Navigate to Troubleshoot.
    3. Select Advanced options.
    4. Click on UEFI Firmware Settings.
    5. Go to the Security tab, locate the Trusted Platform Module (TPM) and enable it.
    6. Also, find Secure Boot and enable it. Based on different PCs, the UEFI settings are usually different.

    This error occurs when you upgrade your Pc to Windows 11. However, it occurs due to the absence of either Secure Boot or TPM 2.0.

    These are the 20 familiar Valorant error codes players complain about. Follow the fixes provided to solve them effectively.

    Another error that seems to trouble many is Valorant’s Error code: 59, but a quick network reset or changing the IP address and DNS server should fix things.

    How do I talk to Valorant support?

    1. Click this link to visit the official Valorant website
    2. Then click Can’t find what you’re looking for? Submit A Ticket.
    3. Choose a request type and sign in.
    4. Input the subject and choose your inquiry.
    5. You’ll then input the necessary information in the description box
    6. Attach the required documents and click submit.

    You’ll receive an email that confirms that your ticket is processed immediately. Although, it takes 5 to 24 hours for Valorant support to respond to tickets. Because of the increase in complaints and support requests, responses can be delayed a bit.

    Check out our guide for further reading on how to fix Valorant not working on Windows 11. Also, we have an article that troubleshoots mouse stuttering in Valorant error.

    You can leave your questions and suggestions below, and we’d like to hear from you.

    Parsing Error: Unexpected Token [3 Steps to Fix it]

    The Parsing error unexpected token usually occurs when there is an incompatibility between the parser option and the code. However, in writing JavaScript, developers do come across this error.

    This error happens when the development environment is incompatible with the parser’s capabilities. First, we’ll go through the causes of this error and how it often occurs.

    As we go further into this article, we’ll guide you through some fixes for the parsing error unexpected token.

    What causes the parsing error unexpected token?

    When writing a JavaScript application, you can get the error because a specific syntax is missing or added to your code. However, the unexpected token mistake notifies you that JavaScript expects a kind of arrangement in the code you’re writing. An example of what the parsing error unexpected token looks like is:

    Nonetheless, you must understand that this error can occur because of different things. JavaScript has expectations.

    So, you must know what JavaScript rules and expectations are. Then, it will help you decipher where the issue is.

    How can I fix the parsing error unexpected token?

    1. Specify the parser you’re using

    For ESLint users, you have to specify the parser for ESLint. It is essential because the parser will be able to generate compatible JavaScript syntax that ESLint can read.

    A Parser like babel-eslint will be suitable for ESLint. It is because ESLint is not compatible with modern JavaScript syntax. So, you need to specify the parser to use for your configuration.

    In the example above, the parser is specific, so ESLint will be able to know what to use. Furthermore, by doing this, you won’t get the parsing error unexpected token ESLint typescript again.

    2. Check if your punctuation is incorrect

    JavaScript has its syntax, and you must follow the rules that guide it. For example, omitting necessary or adding unknown punctuation marks in your coding will prompt the error.

    So, to fix the unexpected token problem, go through your codes for punctuation errors. Punctuation marks like parenthesis and commas must be proper in your coding. If not, JavaScript won’t recognize it and won’t be able to parse it.

    In the code above, JavaScript can’t parse it because it expects the parenthesis { to be closed.

    3. Check for typos

    As said earlier, JavaScript has its syntax. So, its parsers expect every token and symbol to be in a specific order before they can read them.

    However, trace your coding to know where the error is from and correct it. Code editors can help you edit your syntax, even before the parser detects it.

    In some cases, the underlying issue may be related to malformed JSON rather than JavaScript syntax. A JSON parse error occurs when the data structure is invalid, and fixing it often resolves token-related problems.

    It is essential to know the rules of JavaScript syntax and their uses in detail. Then, following the guidelines above, you can fix the parsing error and unexpected token problem.

    There are other JavaScript errors that you can come across; visit our page to learn more.

    Steam Link no Sound: 7 Ways to Get Your Audio Back

    Have you encountered the Steam Link no sound issue? If yes, you can go through this article to get the most effective solutions and some vital information.

    Steam Link is a fantastic solution to enjoy Steam games on any supported devices in your home using the local network.

    It is almost like a cloud gaming solution. The difference is one of your devices is the server, and you play it on the home network, which gives you the smoothest possible experience due to superfast connection speed.

    However, the smoothest experience often gets worse for unwanted errors. It can be that Steam Link is not working or not recognizing the controller. But, this article is about the no sound issue. This problem affects almost every device that supports Steam Link. It includes the following:

    • Android phones, tablets
    • Android TVs, Apple TVs, and any supported TVs
    • iPhones, iPads
    • Windows PCs, Laptops, Tablets,
    • Any macOS devices like Macbook, iMac, etc.

    The no sound issue on Steam Link may occur in different ways. Some users may experience no sound problem only with the menu. Some may get it only during the actual gameplay.

    You also may notice no sound at all when you are using the Steam Link.

    No matter what is the type of the problem, you can always fix it by yourself. However, we would like you to go through a few more things to help you with the best solution and information about the troubleshooting steps.

    How do I install the Steam Link on a PC?

    1. Go to the Steam Link app download page.
    2. Download the app for your computer by using the appropriate link.download steam link for windows
    3. Install the app.
    4. Open the app.
    5. Pair your PC with a supported controller, or skip this step.pair controller page steam link
    6. Now, Steam Link will scan for computers or other devices where Steam is installed and opened.selecting computer steam link app
    7. When it finds any, click on it and authorize.
    8. To authorize, you must input a code in the Steam app on the host computer.steam link authorization code input
    9. Steam Link will do the connection speed test and configure anything that is required.
    10. At last, you are ready to start enjoying your Steam library on the remote PC.

    We also have a guide on connecting Steam Link to a PC. That may help you to learn the process better.

    How can I fix Steam Link no sound issue?

    1. Restart

    If there is no sound on Steam Link, you should restart both the host and remote devices. In many cases, it fixes the problem and saves the time you would spend trying other methods.

    2. Check if the audio device is enabled on the host computer

    1. Open the Start Menu on the host device.
    2. Type control panel and hit enter to open it.opening control panel win11
    3. Go to Hardware and Sound.going hardware sound control panel
    4. Click on Sound.clicking on sound control panel
    5. Now, right-click on the Speakers with the description Steam Streaming Speakers and click on Enable.enabling speaker control panel steam streaming

    Now, try to play games again using the Steam Link on the remote device and see if it has fixed the no sound issue or not.

    3. Verify Streaming settings

    1. Open the Steam Link app on the remote device.
    2. Click on the gear icon to open Settings.going steam link settings
    3. Go to Streaming.going streaming settings steam link remote device
    4. Enable Audio if it is disabled. tweaking audio streaming steam link remote device app
    5. Disable the Microphone to see if it helps.

    4. Check Host audio settings

    1. Open any of the connected PC using Steam Link.
    2. Click on Back if the game library is opened by default.clicking back steam link library
    3. Then, click on the gear icon to open the Settings.going steam link host settings
    4. Go to Interface under Audio.going audio settings interface steam link host
    5. Verify all the volumes are at maximum or at your convenient level.
    6. Go to the Music under Audio.
    7. Verify the volume is set to maximum level.

    It will solve Steam Link’s no sound issue for both the game and menu.

    5. Advanced host option

    1. Click on Remote Play under the features section in the same Settings window as the previous method.going remote play settings steam link host
    2. Click on Advanced Host Options.
    3. Check Prioritize network traffic.
    4. You can check and uncheck Play audio on host to see if it helps.play audio host steam link check uncheck

    6. Make sure the connection is stable

    Although the Steam Link will test the network speed during setup, you may still face many types of issues with a slow network problem. Of course, it should not happen, but if it happens, check if all the cables are correctly connected.

    Also, make sure you have a stable WiFi signal. If possible, use Ethernet instead of wireless communication.

    You may also be interested in reducing input lag on Steam Link.

    7. Reconnect the device

    7.1 Unpair the remote device

    1. Open the Steam app on the host device.
    2. Click on Steam from the menu and go to Settings.going steam settings
    3. Go to Remote Play.going remote play settings steam app
    4. Select the device you want to unpair and click on Unpair Devices.unpairing steam link device steam app

    7.2 Pair the remote device again

    1. Open the Steam Link app on the remote device.
    2. Click on Start Playing.clicking start playing steam link
    3. Input the authorization code that appeared in the remote device to the Steam app of the host device when prompt.

    Can I use the Steam Link on my TV?

    You can use the Steam Link on your TV if it is a supported model. Many supported smart TVs let you enjoy your Steam library via your home network.

    If you want to know about the list of Steam Link-supported televisions, look at the list given below.

    • Sony smart TVs
    • Samsung smart TVs
    • Hisense smart TVs
    • Philip TVs
    • Xiaomi smart TVs
    • TCL smart TVs
    • Any TVs with the Android operating system.

    If you have an unsupported TV brand like LG, Sharp, etc., you should not worry. Because you can easily use Steam Link using Apple TV, Android TV box, etc. There are even dedicated TV boxes for Steam Link.

    Chromecast users can enjoy the Steam library using some technical steps. However, if you have Roku, unfortunately, it doesn’t have a Steam Link app yet.

    How do I connect my steam link to my smart tv?

    1. Go to the app store of your smart TV.
    2. Download the Steam Link app.searching steam link app smart tv
    3. Open the app and pair your controller.
    4. Select the host device when it finds after scanning.selecting computer steam link smart tv
    5. Pair it using the authorization code that appears on the screen.
    6. Let it finish the speed test process.

    Now, it should be all OK. You can start streaming your Steam games on your smart TV.

    This article has shown you the most working methods to resolve Steam Link with no sound problem. Feel free to share in the comment box if you know any other way.

    15 Best Chat Messaging Apps That you can use in Your Browser

    Gone are the days when we used to make use of SMS to connect with friends or family. Instead, instant messaging apps have taken over and can be accessed on your phone or from your PC’s browser.

    Instant messaging apps have also evolved and are no longer just a way to send or receive text messages. You can now share media files and documents, place a video or voice call, join a group, have a meeting, and so on using such apps.

    This guide will give you a list of the 15 best chat messaging apps you can use in your browser. These free chat platforms work perfectly well on a browser similar to the app.

    So, if you are confused about which in-browser chat messaging client you can go for, this list will help you. Let us check it out.

    How can I chat online without an app?

    Just like you would install an app on your Android or iOS phone to use the messaging platform, several platforms also offer their installation files for PCs.

    However, that isn’t suitable for people who rarely use these services and only want to access them for important tasks or when they are not near their phones.

    In such a case, using an in-browser chat client or a browser-based chat app can be helpful. Such apps do not require installing an app for the service or anything on your PC.

    You can visit the website of the in-browser chat client and enter your credentials to start messaging your friends.

    We have listed some options in this guide that don’t even require you to sign up or enter your phone number to use the platform.

    If you are wondering which in-browser chat clients are, you can check out the list in the next section.

    Quick Tip:

    Do you want to hear some exciting news? In the Opera One browser sidebar, you may access the most popular messengers such as Facebook Messenger, WhatsApp, Telegram, and VKontakte.

    What could be better than having integrations with your favorite chat system in the same browser? You may receive messenger alerts directly on your sidebar, ensuring that you never miss a message.

    Opera One

    Pin your messenger chats to explore and talk side by side with your browsing routine.

    What are the best web-based chat clients?

    Here are the 15 best in-browser chat clients you can use on your browser without needing to install a separate app.

    Chat appsFeaturesLink
    WhatsApp– Offers video and voice calls
    – Login by scanning the QR code
    Visit
    Telegram– Log in using a QR code
    – Self-destructing messages
    Visit
    Facebook Messenger– Connect with Facebook friends
    – Live video/voice chat
    Visit
    WeChat– Video messaging
    – Real-time location sharing
    Visit
    Threema– Share photos/videos
    – Log in using a QR code
    Visit
    Skype– Offers call recording feature
    – Voice and video calls
    Visit
    Steam– Send files and voice notes
    – Chat with your gamer friends
    Visit
    Discord– Call or text your friends
    – Use the push-to-talk feature
    Visit
    Tandem– Send files to your friends
    – Offers video call option
    Visit
    JumpChat– No registration is required
    – Offers video/text chat, screen sharing
    Visit
    WebRoom– Place HD audio/video calls
    – Share files and links
    Visit
    Slack– Send voice or text.
    – Place video calls
    Visit
    Google Chat– Share documents
    – Deliver presentations
    Visit
    Zoom– Connect via video call/ chat
    – Share your screen
    Visit

    What are the differences between an in-browser chat client and a desktop client?

    Different messaging platforms have already made their platforms available for use as an in-browser chat client.

    However, the most common question that pops up is whether there is a difference between using the platform on a browser and using it on a desktop app.

    Well, browser chat apps have also received multiple features over the years, and there are only a few downsides to using the service on a browser rather than a desktop or mobile app.

    But the limitations of the browser or web app compared to the desktop app are unlikely to be a deal-breaker for many—especially those who just want to temporarily access the chat platforms and be done with their work.

    Also, that does not mean that the web apps or browser-based chat platforms aren’t good enough to use regularly.

    The list we have provided contains apps such as WhatsApp and Telegram, which constantly update and replicate most of the features of their mobile apps onto their desktop and browser apps. Here is a guide that will let you understand the steps to use WhatsApp on a web browser.

    Let us know in the comments below which one of the apps you use on your browser. Also, let us know if there are other in-browser chat clients you use and would like to share with others.

    What Is LinkedIn Unknown Host Error & How to Fix It

    When you visit LinkedIn, you may encounter many LinkedIn error codes. One of the most common error messages is Unknown Host.

    Two things usually cause this error: your computer’s DNS settings are not configured correctly or a problem with LinkedIn’s servers. Here’s a brief look at what this error is all about and how to fix it.

    Why is LinkedIn not working?

    A few primary reasons could be causing LinkedIn’s Unknown Host error.

    • The first reason is that the LinkedIn server may be down or experiencing technical difficulties.
    • Another possibility is that your internet connection is not working correctly.
    • Finally, it is also possible that your computer’s DNS settings are not configured correctly.

    Why can’t I log into LinkedIn?

    There are a few reasons you may not be able to log into LinkedIn. One reason could be that you are trying to access the site from an unrecognized or unknown host.

    If this is the case, you will see an error message that reads Unknown Host Error.

    How can I fix an unknown host error on LinkedIn?

    1. Check your internet connection

    1. Open Settings, then go to System and tap on Troubleshoot.
    2. In the next window, choose Other troubleshooters.
    3. You’ll see an option for Internet Connections. Tap on Run.
    4. This will open another box where you can begin the troubleshooting process. If there are any problems, you’ll be notified at the end.

    To check if your browsers are updated:

    ➡ Google Chrome

    1. Tap on the three dots near the top right and choose Settings.
    2. Scroll down to the bottom and tap on About Chrome. You’ll find information on whether it’s updated or not.

    ➡ Mozilla Firefox

    1. Tap on the three stripes in the top right corner and choose Settings.
    2. Click General and scroll down to Firefox Updates. Then, tap on Check for updates and wait for the feedback.

    ➡ Opera One

    1. Launch Opera One and type settings/help into the search bar. This will automatically open a page that shows you the latest version you’re using.

    2. Clear your cookies and cache

    ➡ Google Chrome

    1. Open Settings.linkedin unknown host error
    2. Go to Privacy and security, then tap on Cookies and other site data.
    3. Then click on See all cookies and site data.linkedin unknown host error
    4. Then tap on Remove All.
    5. A pop labeled. Clear site data will appear. Click on Clear all to finish the process.linkedin unknown host error

    ➡ Mozilla Firefox

    1. Open Settings.
    2. Tap Privacy & Security on the left panel, then choose Cookies and Site Data. Click Clear Data.
    3. In the following pop-up, ensure the boxes next to Cookies and Site Data and Cached Web Content are checked. Finally, tap on Clear to complete the process.

    ➡ Opera

    1. Click the Settings icon from the sidebar and tap on Clear browsing data.
    2. This will open a small window with options to choose the time range. Ensure the boxes next to Browsing history, Cookies, and other site data and Cached images and files are marked.
    3. Click on Clear data to complete the process.

    That’s how you deal with LinkedIn unknown host error. Once you’ve tried the above recommendations, you should be able to access your account without any issues.

    For similar LinkedIn errors like cp_error_generic_server_error, check our website for possible fixes.

    30 Best Windows 11 Books That Explain The OS Inside Out

    In October 2021, Microsoft launched its latest operating system, Windows 11. This was a surprising event for some since one of Microsoft’s officials said that Windows 10 would be the last operating system of the company.

    Whatever changed Microsoft’s minds, Windows 11 is indeed a good refreshment over Windows 10. You get a bunch of new features and a new overall design.

    There are a few features that many do not know, or did not have the time to explore. In such a scenario, you could go over the help section of Windows 11 and learn more about the OS.

    But that is pretty overwhelming for some, and many prefer a guide or a book that could help them better understand all the features of the Windows 11 OS.

    This is where this guide comes into the picture, because, here we will give you a list of some of the best Windows 11 books that will help you learn everything about the new OS.

    We will include books that would cater to every type of reader, be it a beginner or an advanced user. Let us check the list out.

    Is there a book for Windows 11?

    If you have recently installed or have been using Windows 11 for quite some time, you might have thought, what else the OS can do apart from the daily tasks?

    For this, you would go online and search for either a written article or some books that can help you feed information about the OS.

    Well, you will find tons of books about Windows 11 available online, which you can purchase from popular shopping sites such as Amazon.

    But the question comes, which one to go for? To put it in simple words, there are books for every level of user. You can get yourself a guide for dummy, if you are a beginner, or get an advanced level book if you already know what are you doing.

    This guide will give you a list, that will list down a collection of books suitable for everyone.

    What are the best books to learn everything about Windows 11?

    Here is the list of the best Windows 11 books that you can read in 2022 to know inside and out about the latest operating system.

    Book NameAuthorLink
    Windows 11 For DummiesAndy RathboneGet this book
    Windows 11: Complete New OS User GuideAllan FaringtonGet this book
    Windows 11 Made EasyJames BernsteinGet this book
    Teach Yourself VISUALLY Windows 11Paul McFedriesGet this book
    Windows 11 All-in-One For DummiesCiprian Adrian RusenGet this book
    Windows 11 File Management Made EasyJames BernsteinGet this book
    Windows 11 for SeniorsAnthony PythonGet this book
    Seniors Guide to Windows 11Richard ReedGet this book
    Windows 11: 2022 Complete User GuideVickie HillGet this book
    Windows 11 for SeniorsCharlie RogersGet this book
    WINDOWS 11 FOR BEGINNERS 2022Richard SteveGet this book
    Windows 11: Discover From Beginner to ExpertMike WangGet this book
    WINDOW 11 DUMMIES, BEGINNERS, SENIORS, AND PRONicholas AndersonGet this book
    Windows 11 USER GUIDEBrian A. DavisGet this book
    Windows 11: A Complete User GuideKenneth W. BrianGet this book
    Windows 11 For Seniors For DummiesCurt SimmonsGet this book
    Windows 11 For Seniors Made EasyJames BernsteinGet this book
    Windows 11 User Guide For Beginners and SeniorsNoble PowellGet this book
    Windows 11 for SeniorsBetty StoneGet this book
    Computer Basics Absolute Beginner’s GuideMike MillerGet this book
    WINDOWS 11 TIPS AND TRICKSPeter JohnGet this book
    Windows 11 For BeginnersDonald SmithGet this book
    WINDOWS 11 FOR BEGINNERS 2022Joe WebinarGet this book
    Windows 11 for Beginners: An Illustrated ManualJames D. CooneyGet this book
    Windows 11 User Guide for SeniorsMatt VicGet this book
    Windows for Seniors (Windows 11 Edition)Kevin WilsonGet this book
    Laptops for Seniors in easy stepsNick VandomeGet this book
    WINDOWS 11 FOR BEGINNERS & ADVANCED USERSWisdom ScholarsGet this book
    Windows 11 User’s ManualPaul SpurgeonGet this book

    Should I upgrade to Windows 11 right away?

    One of the most common questions that have been floating around the internet is to whether an upgrade to Windows 11 right away if you are using Windows 10?

    The best answer for this would be, depends on what you want from your PC. Confused? Let us explain.

    If you are setting up your workstation with all the high-end gadgets, speakers, and whatnot, and want everything to be top-notch with the updated system, then definitely, Windows 11 deserves a place in that setup.

    Not only, your PC will be running the latest and most modern operating system that Microsoft has to offer, but it also goes in line with the high-end setup that you are creating for your space.

    On the other hand, if you are a work-a-holic, or a person who spends his day in and out on his PC, and are finding no issues whatsoever with Windows 10, then you can continue using Windows 10 on your PC or laptop.

    According to Microsoft, the company will continue to support Windows 10 until October 14, 2025. So, that is 3 years from now, and Windows 10 accustomed users can continue using the OS till the expiry date.

    This also means that you will receive the latest security patches, access to Windows 11 features such as Auto HDR, virtual desktops, and critical updates throughout 2025 on Windows 10.

    How can I upgrade my Windows 10 PC to Windows 11?

    If you don’t have time to go through the books mentioned above, and want a simple explanation of how you can upgrade your Windows 10 PC to Windows 11, we have got you covered.

    For users looking for a simple and easy-to-understand guide on how they can download Windows 11 ISO or update from Windows 10, simply check out our detailed guide.

    We have all the information there, right from how you can download a Windows 11 ISO, what are the minimum requirements that you need to fulfill to upgrade to Windows 11, and all other common doubts that you might have regarding Windows 11.

    That’s it from this guide. Let us know in the comments below which one of the above-mentioned 30 books you opted for and liked.

    Opera for Windows XP: 32/64 bit Download [SP2, SP3, SP4]

    Microsoft ended its official support for Windows XP on April 8, 2014. However, there are several systems still running Windows XP across the globe.

    People use it for everyday tasks such as printing, regular work-related tasks, etc. If you are among such users and are wondering if you can install the Opera browser in it, then you are in the right place.

    Because we will cover everything, you need to know about downloading and installing the Opera browser on Windows XP 32/64 bit. So let us check it out.

    Is Opera compatible with Windows XP?

    You can still download and install the Opera browser on your Windows XP 32/64 bit PC, provided that you have installed the appropriate version.

    To clarify, Opera 36 is the last version that supports Windows XP. But you need to be at peace knowing that you won’t be getting any future updates.

    And also, you will be missing out on features that the new version of the Opera browser offers to people using Windows 10 or Windows 11.

    Moreover, there will be security and privacy concerns since you will be using an old version of an internet browser on an ancient operating system. For a fact, two ancients don’t sound good, especially when using the internet.

    How do I download Opera on Windows XP?

    1. Visit the official Opera browser website.
    2. Switch over to the Downloads section.
    3. Scroll down and under Download Beta and Archived browsers section, locate Opera 36 for Windows XP/Vista.
    4. Expand the Opera 36 section by clicking on the Plus (+) button.
    5. Hit the Download the offline package button.

    Following the above steps, you can download the supported version of the Opera browser on your Windows XP 32-bit or 64-bit PC.

    After downloading the package, you need to install it on your PC before you can start using it. For that, check out the next section.

    How do I install Opera on Windows XP?

    1. Open the location where you have downloaded Opera 36 on your Windows XP PC.
    2. Launch the program.
    3. Click on the Accept and Install button.
    4. Before that, you can click on the Options button. Under the Options page, you will find the following settings to tweak:
      • Change the language you wish to install
      • Select for whom you want to install the browser
      • Change the installation path
      • Import bookmarks from the default browser
      • Share usage data to help improve Opera
    5. The installation will begin.

    After the installation is complete, you will be presented with the browser’s home page. Now, you can start surfing the internet on the Opera browser on your Windows XP PC.

    What are some of the key features of Opera 36 for Windows XP?

    Here are some key features you can use once you download Opera for Windows XP 32-bit, Windows XP 64-bit, or Windows XP SP3.

    • Offers an in-built free VPN.
    • There is a Turbo function to optimize the traffic and increase browsing speed.
    • Adblocker lets you block all the ads and trackers.
    • There is a built-in unit converter.
    • Advanced bookmarking tool.
    • In-built email and chat clients.
    • The Snapshot allows you to capture and edit snapshots of pages.
    • Customizable search bar.

    Let us know in the comments below if the guide helped you download and install Opera 36 on your Windows XP 32-bit or 64-bit PC.

    New Windows 11 Insider build 25145 brings Braille driver solution, OneDrive storage alerts to the Dev Channel

    Microsoft just released the latest Dev Channel build, version 25145, for Windows 11, and along with a number of changes, fixes, and improvements, it includes three new features:

    Narrator Braille Driver Solution

    This change allows Braille devices using Windows 11 to continue to work when switching between Windows’ Narrator and third party screen readers, with Narrator now gaining the ability to automatically change Braille drivers. You’ll need to make some configuration changes, see the Windows Insider blog post for more.

    OneDrive storage alert and subscription management comes to Settings

    Similar to Microsoft 365 subscription management options available in Settings, with this new build you’ll be able to view billing, payment method, and OneDrive storage usage within Settings for OneDrive Standalone 100GB subscriptions. The page will also notify you if you are close to or above your OneDrive storage limit. This feature begins rolling out today, but as usual Microsoft will “monitor feedback and see how it lands” before pushing it out to everyone on the Dev Channel.

    Local Administrator Password Solution

    Microsoft is bringing the legacy “Local Administrator Password Solution” (or LAPS) to Windows natively with this new build. A number of new features have been added to LAPS, although “feature documentation is not yet available.” Check the blog post for more.

    If you’re on the Windows 11 Dev Channel, be sure to download and install this latest build and let us know what you think in the comments below.

    WSL 2 distros are now supported on Windows Server

    Yesterday we informed you about some nasty VPN and RDP connectivity problems on Windows Servers with Routing and Remote Access Service (RRAS) enabled.

    These problems started happening after the latest updates from the Patch Tuesday rollout were installed by users.

    Today, however, we come back with some Windows Server-related news, but more on the bright side this time, so you should be pleased.

    Windows Server 2022 now works with WSL 2 distros

    To be more exact, Microsoft has announced that Windows Subsystem for Linux (WSL) 2 distros now work on Windows Server 2022.

    The Redmond tech giant allowed earlier testers to try the feature via GitHub almost a month ago, so people already knew about it.

    That being said, since the KB5014678 update rolled out, all Windows Server 2022 users have received this most recent feature as well.

    On the off chance you still need to update your system to get WSL 2 support on your Windows Server, just make sure that you installed KB5014678.

    Thus, once this cumulative update has been applied to your Windows Server, you are ready to kick things off and use WSL.

    Don’t worry, this is a simple process, but if you need more help getting it installed, Microsoft has prepared a special docs page that will also give you more links to get started with.

    Also note that, if you have any technical issues, Microsoft asks that you report them on the WSL GitHub repository.

    Have you already used WSL 2 distros on your Windows Server 2022? Share your experience with us in the comments section below.
    How to Add a Digital Signature Identity & Field in Adobe Acrobat

    Most companies widely accept digital signatures as the preferred document approval option. This is because of their high-security level, which eliminates the risk of tampering.

    Hence, they are employed in contracts, invoices, and proposals. You can use Adobe Acrobat to create digital signatures just like they are used to create fillable PDFs with an electronic signature.

    This guide will show you how to create this vital document, sign a PDF file, and create a signature field with Adobe Acrobat.

    What is a digital signature identity?

    A digital signature is a unique signature supported by a digital certificate. This signature provides lasting proof of your identity.

    Digital signatures are probably the most secure type of e-signature, thanks to being bound by cryptography to the signed document. 

    How do I enable signature in PDF?

    1. Open a PDF file and click the Sign document icon at the top of the page.
      sign document this signature field requires a digital siganture
    2. Select the Add Signature option.
      add
    3. Select whether to Type, Draw, or use an Image as your signature.
      apply
    4. Click the Apply button and position the signature well in your PDF file.

    How do I create a digital signature identity in Adobe?

    1. Open Adobe Acrobat and click the Edit menu.
    2. Select the Preferences option followed by signature.
      edit this signature field requires a digital signature identity
    3. Click on More in the Identities and Trusted Certificates section.
      more
    4. Choose Digital IDs followed by the Add ID icon.
      add icon
    5. Tick the radio for A new digital ID I want to create now and click Next.
      new digital identity this signature field requires
    6. Select a file location to store your digital ID. Note that you can use the New PKCS #12 Digital ID file interchangeably on Windows and Mac, while the second option is for Windows alone.
    7. Click the Next button. 
      new pks
    8. Fill in the identity information to create your digital signature ID and click Next.
      data field
    9. Choose a location to store the digital ID file and create a password.
      finish this signature field requires digital identity
    10. Finally, click the Finish button to complete the process.

    How do I add a digital signature field to a PDF?

    1. Open a PDF and select More Tools from the side menu.
      more tools this signature field requires digital identity
    2. Choose the Prepare Form option under the Forms & Signatures segment.
      prepare form
    3. Click Start when asked to select a document to begin.
      start
    4. Click the Pen icon at the top to add a digital signature field.
      pen icon this signature field requires digital identity
    5. You will see a blue signature field when you move your mouse back into your document.
    6. Click on the space where you want to add the field. This will display a yellow box asking you to enter a field name.
      field name
    7. Enter the name of the person you want to sign and click on any space to the side of the signature field.
      save
    8. Finally, press Ctrl + S keys to save your document.

    The digital signature identity is a secure and efficient way to verify and keep documents safe online. And we have proved that they are easy to create and implement with the right tools.

    If your Adobe Acrobat Reader DC is not responding on your PC, check our detailed guide on how to fix it quickly. You can also sign PDF and send them directly from Outlook.

    Keep in mind that Windows Cryptographic Service Provider reported an error message can prevent you from adding signatures, but we have a guide that addresses it.

    Feel free to let us know if you encountered any problem signing or creating a digital signature in the comments section below.
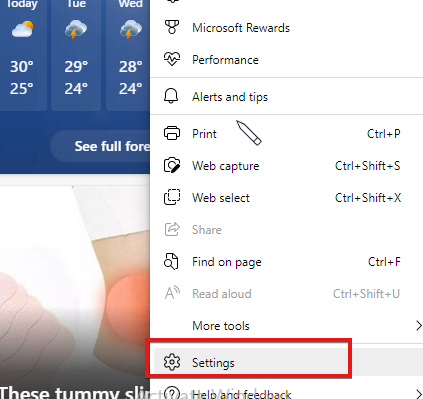
    This guy made a giant Xbox Series X the size of an actual fridge because, why not?

    A YouTuber has apparently created a giant Xbox Series X console that is roughly the size of a refrigerator.

    Michael Pick apparently believes in the credo “go big or go home.” He is known for his larger than life creations, which also include a massive 12.5 foot long, 200 lbs. NERF gun that shoots 50 mph darts, as well as a giant Nintendo Switch console.

    His latest project is a 6.5-feet-tall, 3.4-feet-wide, 250 lbs. Xbox Series X console, which is 600% bigger than the retail Series X and fully functional. It is officially the largest Xbox of an kind ever made, according to the Guinness Book of World Records. Pick teamed up with fellow YouTuber ZHC to further customize the giant Xbox Series X.

    You may recall that Microsoft itself made a Xbox Series X fridge, which was later given away as part of its Xbox Series X|S promotion. A retail Xbox mini-fridge was also produced, which you can still buy today if you simply must have one. Apparently Pick was inspired by the original Series X refrigerator, but instead of building his own functional Xbox fridge, Pick built a functional fridge-sized Xbox.

    Pick will be donating the giant Xbox Series X to the YMCA Youth and Teen Development Center in Atlanta, GA.

    Fix: Allow Sites to be Reloaded in Internet Explorer Mode Missing

    Microsoft Edge is one of the modern browsers for Windows 11 that are fast and secure. It is a different proponent from the old Internet Explorer (IE), representing most good things in the latest browsers.

    However, it has a feature that allows you to reload websites in its old browser mode. This feature helps you load ancient sites yet to catch up with some of the latest browser’s properties. 

    Unfortunately, some users have complained that allowing sites to be reloaded in Internet Explorer mode is missing on Edge. 

    This guide will take you through surefire ways of restoring and enabling the feature for different versions of Edge.

    How do I enable sites to be reloaded to Internet Explorer mode?

    1. Enable from Edge settings

    1. Open Microsoft Edge and click the menu button (three horizontal dots) at the top right corner.
    2. Select the Settings option.
      settings allow sites to be reloaded in internet explorer mode missing
    3. Choose Default Browser on the left pane.
      default browser
    4. Click the dropdown in front of Allow sites to be reloaded in Internet Explorer mode.
    5. Select the Allow option.
      allow
    6. Now, click the Restart button to effect the change.
      restart allow sites to be reloaded in internet explorer mode missing

    Sometimes it is not that allowing sites to be reloaded in Internet Explorer mode is missing on Edge. Instead, the feature is not working because you have not enabled it.

    Ensure to restart your browser immediately after enabling it to make it work.

    2. Enable from Group Policy Editor

    1. Press the Windows key + R to open the Run utility. 
    2. Type gpedit.msc and press the Enter key.
      gpedit
    3. Click the User Configuration option on the left plane.
    4. Select the Administrative Template file.
      user admin task
    5. Now, select the Windows Components file.
      windows allow sites to be reloaded in internet explorer mode is missing
    6. Choose the Microsoft Edge option.
      microsoft edge
    7. Double-click the Configure Internet Explorer integration option. 
    8. Tick the radio for Enabled.
    9. Click the dropdown under Options and choose Internet Explorer mode.
    10. Finally, click Apply, followed by settings.

    Note that enabling sites to be reloaded in Internet Explorer mode from the GPO settings only works if you have Microsoft Edge Policy Template on your PC.

    How do I reload tabs in Internet Explorer mode?

    1. Launch Microsoft Edge and visit any site of your choice.
    2. Click the menu button.
    3. Choose the Reload in Internet Explorer mode option.
      reload site

    This will reload the site on the tab in Internet Explorer mode. To verify that the change is effective, check the IE icon showing to the left of the Address bar.

    The ability to allow sites to be reloaded in Internet Explorer mode comes in handy on Edge, which is too good to be missing. We have shown ways to restore the feature on different versions of Edge.

    Do you need the best Microsoft Edge extensions to install to improve your browsing experience? Check our list for some juice options you can get now.

    Feel free to let us know if you experience any hiccups using the IE mode on Edge in the comments section below.
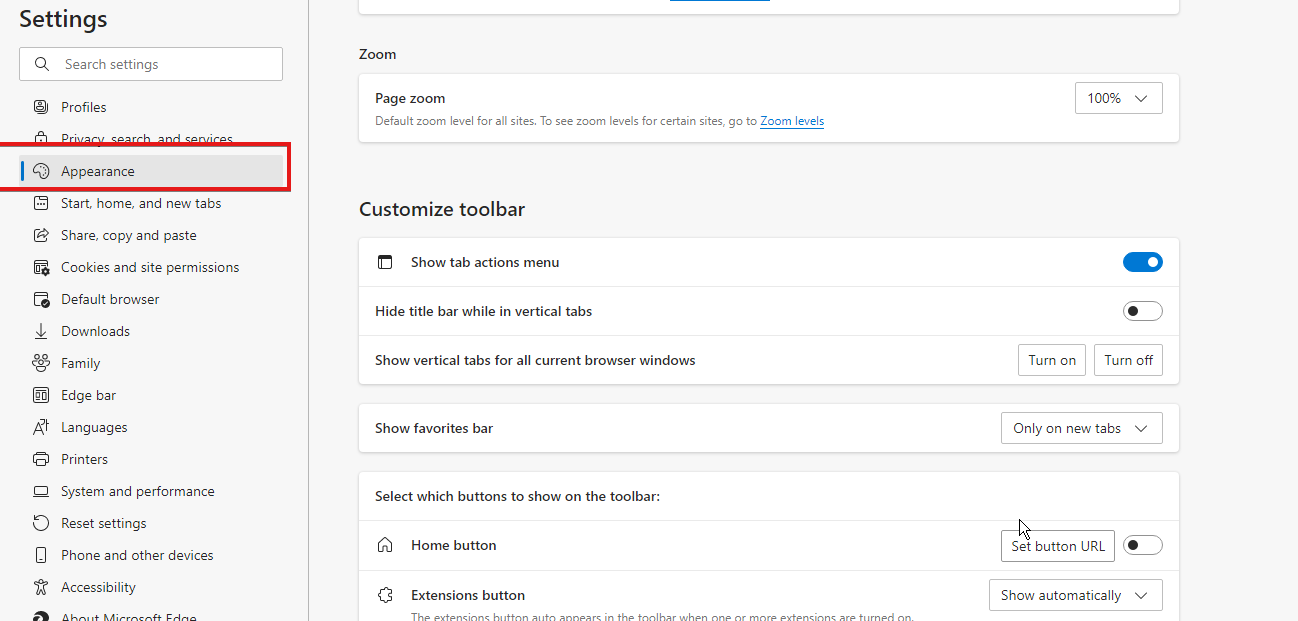
    Can’t Change Core Voltage in MSI Afterburner: 3 Ways to Fix it

    After installing the MSI Afterburner, you may notice that MSI Afterburner core voltage is locked. Some unsupported desktop GPU models require a temporary fix to have voltage control and work in the MSI Afterburner.

    Unlocking the voltage control on MSI Afterburner is limited to +100 modified boosts allowable. Try using modified BIOS with a high base voltage to allow the voltage control to use the remaining 100mV of excess voltage in MSI Afterburner, permitting it to be the primary OC utility. Also, if you don’t want to do extreme overclocking, it should be limited to +100mV.

    How do I unlock voltage control on MSI Afterburner? 

    1. First, go to the MSI Afterburner Profiles folder.
    2. Right-click on the named file VEN_10DE&DEV… (it’s a .cfg file).
    3. Select Properties.
    4. Click on Security.
    5. Select Edit and click on Users.
    6. Check the Allow permission boxes.
    7. Click OK and OK again to save the file after editing it.
    8. You can now open the file named VEN_10DE&DEV… in WordPad and replace what you see with the following lines:
      [Startup]
      Format=2
      CoreVoltageBoost=
      PowerLimit=
      ThermalLimit=
      ThermalPrioritize=
      CoreClkBoost=
      MemClkBoost=
      [Settings]
      VDDC_Generic_Detection=1
    9. Go to MSI Afterburner Settings, check the Unlock voltage control and Unlock voltage monitoring, and click OK.
    10. After this, you can restart the app.

    The GPU voltage control unlocks and can be used up to +100mV, including GPU voltage in the OSD. Unclocking voltage control will also help when you get Failed to start scanning in MSI Afterburner OC scanner.

    Can I increase the core voltage of the MSI Afterburner?

    Increasing core voltage comes with more risks than benefits. It increases the heat output of the GPU and draws current. In addition, you can permanently damage it if you exceed limits.

    There’s a little chance of 5% for the MSI afterburner when trying to force constant voltage.

    This is because the MSI has a self-overclock feature to regulate core voltage. So it either works or crashes at a certain point.

    How do I lower my core voltage MSI Afterburner?

    You can use the MSI Afterburner with the benchmark if you can’t adjust the core voltage.

    Download and install a benchmarking app, for instance, Heaven Benchmark, and remember to deselect the fullscreen option from the Settings menu.

    It’s easier to tweak GPU settings simultaneously in Windows mode.

    How can I change the core voltage in MSI Afterburner?

    1. Modify vBIOS Core Voltage to 100mV below the suggested max voltage for your GPU.
    2. You can flash the bios; some GPUs must be flashed to be unlocked.
    3. Go to check boxes in the settings for Voltage control and Voltage monitoring to change core voltage.

    You should also note that increasing your boost clock and voltage will lead to higher load temperature because you’ve switched from the default voltages and clocks.

    How do you use core voltage?

    You can use the core voltage of devices to increase the clock speed, balance power draw, and reduce heat to operate in higher frequencies.

    If things still don’t work out, you may want to look at our list, including the best overclocking utilities, and use a better alternative.

    If you don’t want to fine-tune your settings, you can constantly adjust the power limit in Afterburner to overclock your GPU.

    Thank you for reading this article, and don’t forget to spare a few seconds to comment below.

    Get ready for Xbox Cloud Gaming mouse and keyboard support (along with some latency enhancements)

    Microsoft is preparing to launch mouse and keyboard support for its xCloud game steaming service. It was reported back in March that mouse and keyboard support was at last going to be implemented, when head of the Microsoft Flight Simulator Project Jorg Neumann stated during a developer Q&A:

    The next step for us is mouse [and] keyboard…This is platform-level support, so it has nothing to do with us. Obviously, mouse and keyboard works for our sim. So the platform team is working on this. I know I can’t give a date because it’s the platform team. I don’t know their dates, but it’s coming.

    Once implemented, the feature will allow PC gamers using Xbox Cloud Gaming to play cloud streamed games with mouse and keyboard, or at least for those Xbox games which support it (Xbox is set to expand its xCloud game library sometime later this year).

    Additionally, Microsoft is working on ways to help game developers improve latency, such as improvements to its Direct Capture tool. Morgan Brown, a software engineer on Xbox’s game streaming team, went into further detail in the video below explaining the latency improvements in store for Xbox Cloud Gaming.

    He also confirmed what Neumann hinted at earlier this year, saying “Xbox has been supporting keyboard and mouse for a few years now, and we’re working on adding it to streaming for PC users. He added “But you can start adding it to your game right now and your console keyboard and mouse users will appreciate it. It will light up in streaming once we’ve finished adding it.”

    These latency improvements along with the upcoming Xbox Cloud Gaming mouse and keyboard support, will help to make xCloud a much more viable gaming option for many PC gamers.


    3 Ways to fix a Network Error While Uploading File to Amazon S3

    Amazon Simple Storage Service, popular as Amazon S3, is a storage service that uses a web interface to provide a storage object. 

    The Amazon S3 storage object can store different types and sizes of data ranging from applications to data archives, backups, cloud storage, disaster recovery, and much more. 

    The service is scalable, and users only pay for the storage space. 

    The Amazon S3 has four storage classes based on availability, performance rates, and durability. The classes include the Amazon S3 Standard, Amazon S3 Standard Infrequent Access, Amazon S3 One Zone-infrequent Access, and the Amazon Glacier. 

    Can Amazon S3 upload a resume on failure? 

    The Amazon S3 can resume a failed upload. Also, if your system goes off in the middle of an upload, the Amazon S3 can continue the upload once your system is back on without a restart. 

    What is the max file size that we can upload to S3? 

    The Amazon S3 can store files or data of different sizes between 0 bytes and 5 gigabytes. However, the maximum file size that can be uploaded to the S3 at once is 5 gigabytes. 

    You can upload files larger than 5 gigabytes using the multipart upload API, with which you can upload files as large as five terabytes to the S3. 

    How can I upload large files to S3 from the browser?

    1. Split the file into different parts using the dd, Linux, or split method.
    2. Launch the multipart upload and get an upload ID once it is launched.
    3. Upload each part of the file, followed by the upload ID and the part number.
    4. Conclude the upload by submitting the ETag pairs, including the upload ID and let number for each part of the file.

    You might experience a network error while uploading files to the S3. Some common S3 network errors you could come across are: 

    • Unable to connect to the endpoint.
    • Missing credentials.
    • S3 API returned an error.

    Here’s how you can fix these errors once and for all: 

    What can I do if the S3 upload fails due to a network error?

    1. Fix unable to connect to endpoint 

    1. First, check to ensure you’re using the correct AWS region and Amazon endpoint.
    2. Ensure that your network can connect to the Amazon endpoints.
    3. Confirm that your DNS can resolve to the S3 endpoints.
    4. Check the VPC configuration if you’re using an Amazon EC2 instance and set the correct AWS region.

    2. Fix missing credentials 

    You can get the missing credentials error if the DB cluster is missing the IAM role attachment or the role ARN is not given, and only the role name is provided in the parameter group.

    The best way to fix this is to load data from the S3 command. 

    3. Fix S3 API returned error 

    This error could appear either because you have an encrypted file in your S3 bucket or encryption on your S3 bucket.

    Either way, this can be fixed by adding kms* to the IAM role you used to perform the LOAD operation if the ServerSideEncryptionConfigurationExists is true. 

    You can also click here to learn more about S3 uploading. I hope this guide has helped to solve the issue! Please remember to share your thoughts in the section below.

    Discover Apple Music’s Web Browser Player [Lossless Audio & More]

    Apple Music is a streaming music service that has been around for a few years. It was initially only limited to the iTunes app and iOS users, but a web player has since been introduced.

    The service allows you to listen to all sorts of music from different artists and genres. You can also create playlists and save songs to listen to offline.

    The web player looks very similar to the mobile app and lets you browse tracks by album or artist, search for songs or artists, and create playlists. It also has its social features so that you can follow friends and see what they’re listening to.

    Is there a web player for Apple Music? 

    Apple Music is a subscription-based music streaming service that gives you access to millions of songs. However, there are times when it may be more convenient to use the web player instead of the mobile app.

    It’s also helpful if you don’t have access to your computer (for example, at work) or want to listen to some tunes while surfing the web on your phone or tablet.

    Apple Music subscribers can access their libraries from any web browser. The web player is designed to work on desktop and mobile devices. In addition, we have a dedicated guide on using Apple Music on your browser.

    Quick Tip:

    Apple Music is built-in into the Opera browser and can be found on the browser’s sidebar, just below the messengers’ area.

    The playback may be managed using the conventional playback buttons on the computer keyboard or by hovering over the Player icon in the sidebar, without having to open different tabs or players.

    ⇒ Get Opera

    When it comes to selecting the best music streaming application, you may find yourself asking: Is Apple Music better than Spotify? 

    Like Spotify, Apple Music has both free and paid tiers that allow subscribers to listen to any song they want without ads, but there are some key differences between the two services.

    The most significant difference between Apple Music and Spotify is how each service approaches playlists. Both services curate their own playlists based on genre or mood and offer suggestions based on your listening history. 

    Apple Music may be better for most users because of Lossless audio, which ensures you play your music on the highest audio quality available.

    Ultimately, your personal preferences will help you decide which one is superior to the other, but they equally have their strengths and weaknesses. 

    What are the main features of Apple Music’s web browser-based player? 

    1. Playlists

    You can create new playlists or edit existing ones by adding tracks from the music library or by dragging and dropping them on top of each other in a playlist. 

    When you create playlists on the web player, you curate your favorite tracks when you’re away from your computer. In addition, playlists are synced across devices, so they appear on your iPhone or iPad too. 

    2. Radio

    One of the biggest advantages of this service is the Radio feature. It allows you to listen to all your favorite genres and discover new ones with little effort on your part. You can create custom radio stations based on artists, albums, or songs you like most. 

    The Radio feature allows you to discover new music based on loved artists. You can also create stations based on genres or other parameters such as moods or activities like working out.

    3. Song sharing

    If you find a song or album you like, sharing it with others is easy, thanks to Apple Music’s social networking aspect. 

    All you need to do is click on the Share button next to any song title and select who you want to share it with from your contacts list or Facebook friends list.

    4. Customizable sidebar

    The sidebar in the web player lets you view different categories at a glance, so it’s easy to find what you’re looking for — whether it’s new releases or top charts.

    You can add songs from the sidebar or search for specific artists or albums. Apple Music web player also lets you choose to show or hide the sidebar, its columns and rows, and even its contents.

    Can Apple Music play on Chrome? 

    Yes, you can. Users have asked this very common question since most Apple services tend to be confined to their products.

    Whereas many browsers are compatible with the service, you may be wondering what the best way to listen to Apple Music on your PC is.

    You can use the web player in your browser, but it’s not very convenient if you want to use other apps while listening. 

    Alternatively, you can install iTunes for Windows 10 on your computer and sign up for an Apple ID. Apple Music is also available for Windows 11 and Mac computers.

    We also have a rich library of other music players you can install to enjoy your playlists, so be sure to check that out too.

    In the comments section below, let us know what other Apple Music features you enjoy.

    Microsoft says the Microsoft Editor extension is cross-platform with Outlook

    If you are constantly sending out emails rife with spelling and grammatical errors while using Outlook applications and can’t seem to get over it, then Microsoft has something in store for you. The Microsoft Editor extension is now widely available across all Outlook apps, that is, Outlook for Windows, Mac, Web, iOS, and Android with a supported account type.

    However, the tool is not available for users using Outlook in a mobile browser or the Mail App for Windows. You can use the tool and all the features it encompasses for all accounts with a consumer, education, business, or enterprise Microsoft 365 subscription.

    According to the Techcommunity post by Microsoft:

    Microsoft Editor spell checking, and basic grammar checking are available for Outlook.com accounts. Microsoft Editor is not supported for all other account types.

    microsoft editor

    For all the Outlook for Microsoft 365 subscribers, the tool is enabled automatically for those using a default system language that is already supported by Microsoft Editor. This will in return help you to avoid making any grammatical errors while sending emails out using Outlook. Microsoft has also indicated they will be unpacking more Editor enhancements in Outlook in the future.


    Best Nvidia driver to Download & Install [Top 5 Picks]

    NVIDIA produces many of the best graphics cards the industry has seen. For years, it has continuously provided GPUs to PC gamers, animators, graphic designers, video editors, and other GPU-intensive professions.

    However, you must use a compatible NVIDIA driver on your operating system.

    While Windows 11 is adaptable, not all drivers you may have used on other operating systems will work.

    Here, we will share the best NVIDIA graphics driver compatible with Windows 11 PCs.

    Finally, you can follow a few simple steps to correct the problem of the NVIDIA Control Panel not opening.

    Does Windows 11 have NVIDIA drivers?

    Throughout the history of NVIDIA, they’ve released dedicated drivers for every new Windows OS. The release guarantees that users get the best performance and access to the most recent features on Windows.

    Windows 11 is no exception; drivers like NVIDIA Studio and Game Ready continue the trend and provide support for the OS.

    What graphics card supports Windows 11?

    There is an extensive range of graphic cards that support Windows 11. We love to recommend GeForce RTX 3090 and GeForce RT 3080 Ti.

    How do I download NVIDIA drivers?

    1. Navigate to NVIDIA’s website.
    2. Fill out the download form according to your preferences, then click the Search button.
      best windows 11 nvidia driver
    3. Click on the Download button.
      https://i.imgur.com/yZnsPFU.png
    4. After downloading, open and install the file.

    What is the best NVIDIA driver for Windows 11?

    GeForce Game Ready Driver – Optimizes PC gaming

    For Fall Guy: Free for All, GeForce Game Ready gives the best day-zero gameplay experience.

    Additionally, it supports the most recent upgrades and releases, such as the inclusion of NVIDIA Reflex to ICARUS and the addition of beam tracking to JW Evolution 2, Resident Evil 2, 3, and 7.

    Even though the OEM (original equipment manufacturer) provides approved drivers for individual notebooks, NVIDIA Studio Drivers and Game Ready Drivers can be loaded on compatible notebook GPUs.

    Finally, NVIDIA suggests that you verify with your laptop manufacturer for needed software upgrades.

    ⇒ Download GeForce Game Ready

    NVIDIA Studio Driver 512.96 – Enhances the PC’s photo editing capabilities

    While operating using creative applications, NVIDIA Studio Drivers give creators, artists, and 3D developers the highest dependability and performance.

    Studio Drivers are rigorously tested against multi-application creator processes and numerous industry-leading creative programs. So, from Autodesk to Adobe and beyond, you get the most significant degree of reliability.

    Also, NVIDIA Studio Driver supports Topaz Labs Gigapixel AI v6.1, Adobe Substance Modeler Beta, Marmoset Toolbag 4.04, DaVinci Resolve 18, and Reallusion iClone 8.

    Lastly, the Omniverse Machinima, Omniverse Audio2Face, Omniverse spanning Omniverse Cloud, and the Omniverse XR App beta are all supported by this NVIDIA Studio Driver.

    ⇒ Download Get NVIDIA Studio Driver

    NVIDIA RTX Release 515 – Improves your PC’s video editing features

    The NVIDIA RTX Driver’s newest Production Branch release is 515. This new driver outperforms the prior branch in API interoperability, application performance, and power management.

    Production Branch drivers are built and trusted to offer protracted availability and stability. As a result, they are perfect for enterprise clients and users who require ISV and OEM hardware and application certification.

    Additionally, driver component changes and Bug fixes have been included in this release to boost performance, and it also works with the Windows 11 22H2 OS.

    ⇒ Download NVIDIA RTX Release 515

    GeForce Game Ready 368.81 WHQL – Improves your VR experience

    Obduction, NVIDIA VR Funhouse, Raw Data, Everest VR, and The Assembly, the five new Virtual Reality titles debuting for the HTC Vive and Oculus Rift, are optimized for the latest Game Ready 368.81 WHQL VR drivers.

    Patches for Oculus Rift GPU Boost problems and HTC Vive DisplayPort incompatible that have been reported by some customers are also included. Next, open GeForce Experience and select the Drivers option to install.

    This driver is evaluated in the cited Game Ready titles, and the findings are disclosed to developers so that they can improve their games and send client-side updates to address any issues discovered.

    ⇒ Download GeForce Game Ready 368.81 WHQL

    NVIDIA Studio Driver 512.59 – Enhances 3D-rendering work

    April’s NVIDIA Studio Driver offers the best compatibility for the most recent creative apps, such as Chaos Vantage, Cinema4D, and Unreal Engine 5.

    Also, the new Omniverse Connectors for Redshift and Blender are supported by this Studio Driver.

    The GeForce RTX 30 Series (Notebooks), GeForce 10 Series (Notebooks), GeForce GTX 16 Series (Notebooks), and GeForce RTX 20 Series (Notebooks) are all supported by this driver as well.

    This set of drivers will give you and other creators the highest level of VR application dependability and performance. And finally, it has been tried and tested in various multi-app creation workflows.

    ⇒ Download NVIDIA Studio Driver 512.59

    How do I update my NVIDIA graphics driver Windows 11?

    1. Visit the NVIDIA website.
    2. Click on the DOWNLOAD NOW button.
    3. Once the download completes, install the executable file, and it will check for and make the updates.

    How do I install old NVIDIA drivers on Windows 11?

    1. Navigate to the Windows 11 NVIDIA drivers download page in your browser.
    2. Click on the DRIVERS menu and select ALL NVIDIA DRIVERS.
    3. Scroll down to the Beta, Older Drivers, and More section and select the Beta and Older Drivers option.
    4. Fill out the form to select the driver you want and click the Search button.
      best windows 11 nvidia driver
    5. Click on any of the drivers from the search result.
    6. Next, click the download button to get the driver and install it on your computer.

    In all circumstances, keep in mind that downloading and installing NVIDIA drivers may cause the computer monitor to flash erratically or go dark. This is common because the graphics card is trying out new drivers, which might occasionally produce visual problems.

    There you have it; our list of the best Windows 11 NVIDIA drivers.

    With the latest graphics driver, you will get patches that increase your graphic card’s functionality and critical updates to previously reported malfunctions.

    Note that some users have complained that NVIDIA keeps crashing on Windows 11, but you will be able to fix it and continue to have a great experience in a few clicks.

    Lastly, do not forget that if you are downloading or installing older drivers, they may not work on Windows 11. In this case, you will have to use them with an earlier Windows edition.

    Where’s the Location of Chrome Bookmarks in Windows 10, 11 & Mac?

    Bookmarks in Google Chrome are simple to organize and quick to retrieve from inside the browser. Whenever necessary, you may quickly add, remove, and rename bookmarks with only a few mouse clicks. You can also find them inside the chrome bookmarks’ location folder.

    On the other hand, if you want to move your bookmarks to a different browser without losing them, you will need to locate the file that contains your bookmarks and copy them by hand unless you use the export option to generate a new file.

    Follow along as we will show you how to find the location where Chrome saves your bookmarks on Windows 10, 11, and Mac. Keep on reading!

    Are my bookmarks saved in Google Chrome?

    Chrome maintains each user’s bookmarks in a single location. Therefore, if you are unable to locate the bookmark file, it is possible that you have the incorrect folder open or that you are in the wrong user path.

    You may find it in the same folder every time on every machine. However, depending on the operating system (OS) that is being used, such as Windows 10, 11, or macOS, the folder can be located in a different place.

    Quick Tip:

    The Opera One browser allows you to mark a link as a favorite and add it to your bookmark list to return to later. The page URL is added to the bookmarks with a single click on the heart icon in the URL bar.

    On the Opera One browser, you can manage bookmarks in many ways. Beside bookmarks, the browser, comes with a lot of organizational features, such as workspaces, tab islands and a native AI.

    Opera One

    It’s so easy to manage bookmarks here since it’s one of the best functions in Opera.
    Free Download Visit website

    Where do I find my Google Chrome bookmarks folder?

    1. In Windows 10

    1. Open a new File Explorer window by typing file explorer inside the Windows search function.file-w10 chrome bookmarks location
    2. Enter the following path inside the top search bar to find Chrome bookmarks’ location on PC: C:Users\AppData\Local\Google\Chrome\UserData\Default\Bookmarkslocal-google chrome bookmarks location

    There you will find all the bookmarks that you have saved on your Chrome browser. If you delete them, the bookmarks will also disappear inside Chrome.

    If you wish to change your browser, look at the five best browsers for Windows 10 [Fastest & Safest].

    2. In Windows 11

    1. For Windows 11, start by opening the Windows Search function and typing File Explorer.file-exp chrome bookmarks
    2. Once you open a new File Explorer tab, go to the following location by copy-pasting it inside the search bar: C:Users\AppData\Local\Google\Chrome\UserData\Default\Bookmarksbookmarks chrome bookmarks location

    That’s it! Here, you will find all the bookmarks that you have previously saved. You will lose your data inside the browser by deleting the Bookmarks file or the Bookmarks.bak file.

    3. On Mac

    1. Open Finder and navigate to the following location: ~/Library/Application Support/Google/Chrome/Default/Bookmarksfinder chrome bookmarks location
    2. There you will find the bookmarks saved on your current user folder. If you wish to discover different bookmarks for different profiles, change the username after the Users folder and before the Library ones.

    We recommend you check out our article on the five best lightweight browsers for Mac in case you want to export your bookmarks to another browser.

    How can I change Chrome bookmarks’ location?

    Your time spent perusing the web is simplified tremendously when you have a collection of bookmarks that has been meticulously organized.

    As of now, you can’t change your Chrome bookmarks’ location since it would throw off the entire system and result in an error. However, you may opt to export them to other browses by following the steps below.

    When you export your bookmarks, an HTML file is generated. This HTML file may then be imported into various browsers, and all of your bookmarks will be carried across.

    You can move them from one Chrome browser to another or even to an entirely new browser if Chrome Sync is not to your liking.

    We will walk you through the process of exporting your bookmarks from Google Chrome so that you may import them into another browser of your choice and immediately feel more at home.

    1. Begin by opening Google Chrome on your Windows or Mac and click on the three-dot menu icon in the top-right corner.three-dot chrome bookmarks location
    2. Hover over the Bookmarks option and choose Bookmark Manager.bookmark-manager chrome bookmarks location
    3. Next, click on the three-dot menu icon in the top bar and choose Export Bookmarks.export chrome bookmarks location
    4. Performing this action will result in the creation of an HTML file that stores all of your bookmarks. You now have the option to select the location in which the file will be saved. After choosing a location, you will have the option to rename the file before clicking the Save button.

    If you wish to import Chrome bookmarks into Firefox, check out the article linked to learn how to do so.

    Alternatively, take a look at how to import Internet Explorer bookmarks into Google Chrome.

    And lastly, don’t miss out on our comprehensive guide on how to fix Chrome bookmarks issues on your PC.

    Don’t hesitate to leave a comment in the section below and share your thoughts with us. Thanks for reading!

    3 Easy Ways to Access a Shared Folder With Different Credentials

    Windows includes networking features that enable users to share folders between their PCs via local networks. As a result, sharing a folder on one Windows PC with another can be very convenient.

    You can set up shared folders, which can be accessed with different credentials, with Map Network Drive.

    What is a mapped network drive?

    A mapped network drive points to a shared folder on a user’s local network. Those are drives you can assign letters to that include shared network resources.

    You can share a folder between two PCs on a mapped network drive with File Explorer’s Map Network Drive wizard.

    Why can’t I access a shared folder with different credentials?

    The default Map Network Drive wizard settings configure Windows to connect with shared folders using the PC’s local user account and password.

    You can’t access a shared folder with different credentials unless you select Map Network Drive’s Connect using different settings option.

    Even with that setting enabled, Windows saves entered credentials for users who select the Remember my credentials option.

    Credential Manager saves the shared folder’s login credentials in a vault. Users need to erase saved credentials to access shared folders with different credentials.

    How can I access a shared folder with different credentials?

    1. Use the Map Network Drive option

    1. Right-click Windows 10’s Start menu button to select File Explorer.
    2. Click This PC on the left side of File Explorer.
      Map network drive button access shared folder with different credentials
    3. Press the Map Network Drive button on the Computer tab to open the window in the snapshot directly below.
      Map Network Drive window access shared folder with different credentials
    4. Click the Browse button.
    5. Choose a folder you want to share on the Browse for Folder window, and press the OK button.
    6. Then select the Connect using different credentials checkbox.
    7. Press the Finish button. After that, the Windows Security window directly below will open.
      The Remember my credentials option access shared folder with different credentials
    8. Enter the required credentials in the login text boxes. Don’t select the Remember my credentials checkbox if you’ll need to access the shared folder with different credentials at other times.
    9. Press the OK button.

    2. Remove saved credentials for the shared folder

    1. To remove saved credentials for a shared folder, bring up the search tool by pressing the Windows and S keys simultaneously.
    2. Type Control Panel within the search box.
    3. Click Control Panel to open that window.
    4. Select the Small icons option on the Control Panel’s View by menu.
    5. Click Credential Manager to open the applet shown directly below.
      Credential Manager access shared folder with different credentials
    6. Then select Windows Credentials to view the saved, shared folder credentials.
    7. Click the Remove from vault option for the saved credentials you need to delete.
    8. You can now enter different shared folder credentials in the Windows Security window.

    3. Clear temporarily cached credentials

    1. Click the search button or box on Windows 10’s taskbar.
    2. Type cmd within the search tool to locate the Command Prompt.
    3. Select Command Prompt to open its window.
    4. Input this command within the Prompt’s window: net use * /delete /yes
      net use command access shared folder with different credentials
    5. Press the Enter key to clear the credential’s cache, and wait a few minutes.
    6. Note: This method is for clearing temporarily cached credentials for shared folders. It will save you from restarting Windows to access a shared folder with alternative credentials.

    Why can’t I set up a shared folder with Map Network Drive?

    If you can’t select a folder to share with Map Network Drive, network discovery is probably disabled. So first, make sure network discovery is enabled in Windows 10. You can enable that feature as follows.

    1. Press the Windows key + I key combination.
    2. Click Network & Internet to open the Status tab.
    3. Then select the Network and Sharing Center shortcut to open the Control Panel applet shown directly below.
      Network and Sharing Center access shared folder with different credentials
    4. Click Change advanced sharing settings on the left side of the applet.
      The Turn on network discovery option access shared folder with different credentials
    5. Select both the private and guest Turn on network discovery options.
    6. Press the Save changes button.

    So, just make sure you select the Connect using different credentials option when mapping a drive if you need to access a shared drive with different user credentials.

    Then you can access the shared folder with different credentials so long as you don’t select the Remember my credentials option.

    Users can access a shared folder with different credentials without restarting by clearing temporarily cached user credentials via the Command Prompt.

    Router Lost Contact With NTP Time Server: 3 Ways to Fix it

    Issues with connectivity and WiFi can be very frustrating and significantly reduce productivity.

    Computers use the Network Time Protocol (NTP) for clock synchronization. In most cases, if not all, your laptop uses NTP to track the time.

    If you get a server lost contact with an NTP time server error message, read this article to the end to find out how to fix it. 

    What happens when a router has been set to an incorrect time?

    A router’s performance is usually not affected by incorrect time settings, so your connection may not be affected. 

    However, some issues can occur. These include:

    • Incorrect time for all gadgets that use the router as a local time server. 
    • The timestamps in the router’s log data will be wrong.
    • If features are disabled at certain times of the day because of restriction times, these settings will be out of sync with real-time.

    How do I change the date and time on my router?

    Each router has a web-based interface that you can access on a browser. After logging in with the correct details, you can input the IP address or domain name of your preferred NTP server to obtain the current internet time and effect the time change.

    You may also choose to set the time and date manually.

    Quick Tip:

    In case you’re not exactly that person who’s tech-savvy or you just need a faster method, there are virtual router tools that may help.

    A good choice is Connectify Hotspot software because it can transform your PC into a router that shares Hotspot Wi-fi with all the devices in your house.

    ⇒ Get Connectify Hotspot

    How can I fix the NTP time server loss?

    1. Check the configuration of your router

    Ensure that your NTP server is connected to the network and that your router or firewall configurations are correctly done.

    2. Restart the Windows Time Service

    1. Click on WIN + R.
    2. Enter cmd and click OK.
    3. Enter the following command to force stop the NTP service: net stop w32time, then press Enter.
    4. Then, restart it by entering this command: net start w32time.

    3. Ping the NTP server from your PC/source IP

    1. Click on WIN + R.
    2. Enter cmd and click OK.
    3. Type in the following command: ping time.windows.com. Then press enter.

    You will get the request timed out message if the time server is down. In this case, you’ll have to switch the server. A recommended alternative custom server is the time.nist.gov time server. For more detailed steps on this, check out this article.

    Thanks for reading! Please let us know what you think in the section below.

    Regional Settings on Windows 11: How to Quickly Change Them

    Windows 11 regional settings are features that permit users to customize the apps and operating systems of their computer-based on their geo-location. 

    When correctly updated, you can get accurate real-time weather forecasts and other geo-location-synchronized apps running smoothly on your PC.
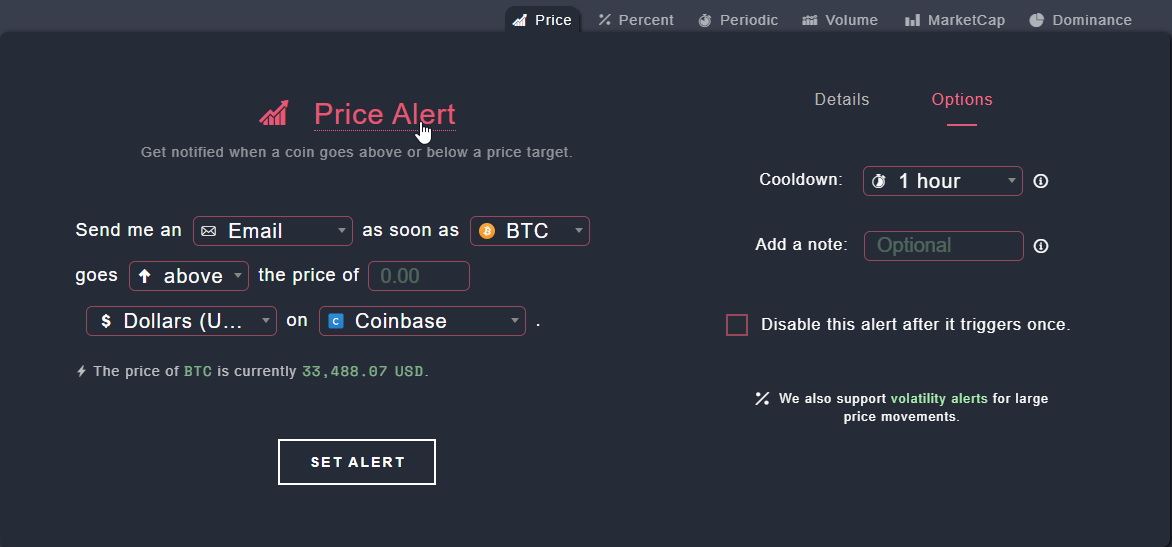
    Does region matter in Windows 11? 

    Windows 11 regional settings do not significantly affect how the operating system functions. However, features and services that depend on cultural relevance or location awareness will benefit from correctly using the right Windows 11 regional settings.  

    Where can I find regional settings? 

    1. Click on WIN + R.
    2. Type control into the dialog box and select ok.
    3. Click on clock and region.
    4. In the new window, select region.

    How do I know what region my computer is in?

    After you have accessed the regional settings on your computer by following the above steps, click on a region to see what region your computer is currently set to.

    How do I change regional settings in Windows 11? 

    1. From Settings

    1. Go to settings by pressing WIN + I.
    2. Click on time and language.
    3. On the left side of the screen, select region.
    4. When the region settings open, select the new location from the region or country list.

    To ensure your apps and services display accurate data based on your location, follow this guide on how to change location in Windows 11.

    2. From the control panel

    1. Open the start menu and search for the control panel.
    2. Open Clock and Region.
    3. Click on region to open regional settings.

    3. Changing the default date

    1. Go to the region settings page.
    2. Select formats.
    3. Choose a format from the options, click on apply and OK to save changes. 

    4. Changing default time

    1. Open the region settings and select format.
    2. Choose your preferred time format from the options.
    3. Click on Apply and OK to save changes. 

    5. Changing administrative language settings

    1. Go to settings by pressing WIN + I.
    2. Click on time and language.
    3. Select language.
    4. Select administrative language settings.
    5. Click on change system language.

    How do I change decimal separators in Windows 11? 

    Other than the regional settings, there are also some optional settings that you might wish to enable on Windows.

    1. Click on WIN + R.
    2. Type control into the dialog box and select ok.
    3. Select clock and region.
    4. Click on region.
    5. Select additional settings.
    6. Change the decimal symbol column and the list separator columns as required.
    7. Click Apply to save the changes.

    We hope this article has provided helpful information in helping you change your Windows 11 regional settings and correct any errors you have been experiencing. Please share your comments and thoughts in the section below.