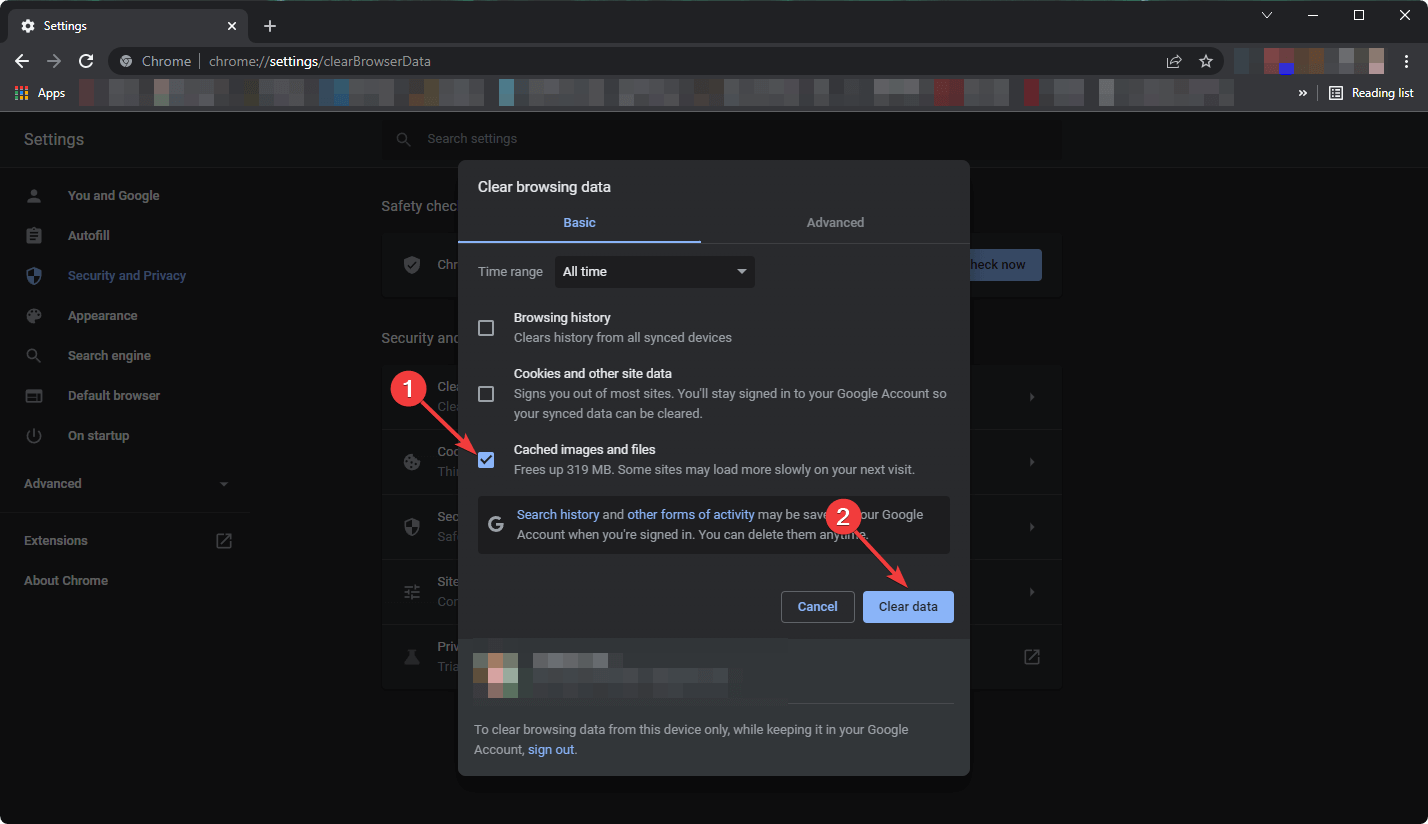
Microsoft Excel made it as an eSport on ESPN’s “The Ocho”

You might be using Microsoft Excel every day for common things like invoices, but did you know that Microsoft Excel is an esport title just like CS:Go and Rocket League are? Well, spotted by Windows Central, ESPN recently broadcasted a Microsoft Excel competition dubbed “All-Star Battle,” as part of their “The Ocho” programming, which highlights a series of niche sports.

ESPN aired the Excel competition on August 5, but it originally took place in May and you can watch it above. Apparently backed by Microsoft, this Excel competition is actually quite unique. It saw players create slot machines using emojis and points, a six-level platformer in Excel, and other tasks based on pre-set data tables.

Prize money was also involved, and there’s even an organization, Financial Modeling World Cup, that oversees it. If you’re up for it you even can download the data that were used in the competition and try to solve it yourself. Just be aware, that the file won’t have the solution, but just the right answers, and there could be many ways to solve it.

Packet Loss in Battlefield 2042: 3 Quick Ways to Fix it

Battlefield 2042 is a very popular first-person shooting game from the house of Electronics Arts. However, some of our readers have reported facing the Battlefield 2042 packet loss issue.

Do note that Battlefield 2042 is available only as a multiplayer game, and there is no single-player campaign mode. It does come with cross-platform play.

If you are a fan of Battlefield 2042 but are facing a packet loss issue, then we have solutions for you that will help you resolve the error. Let us take a look at the solutions that will help you resolve the Battlefield 2042 packet loss problem.

Why is my connection so bad in Battlefield 2042?

Because of lag, the game will stutter, and you won’t be able to enjoy the game as much as you would have liked.

After some research, we found out that there are multiple reasons that could make the Battlefield 2042 game feel laggy:

  • Your system does not meet the minimum requirements
  • The drivers on your PC are outdated
  • The in-game settings aren’t optimal as per your hardware
  • There are too many background applications running in the background
  • Network issues can also cause the game to perform poorly
  • V-Sync also induces unnecessary input lag

The above are some of the common reasons why the Battlefield 2042 game may feel laggy. You can tweak them to resolve the issue. Now let us take a look at how you can fix the Battlefield 2042 packet loss issue.

How do I fix packet loss in Battlefield 2042?

1. Use a trustworthy VPN provider

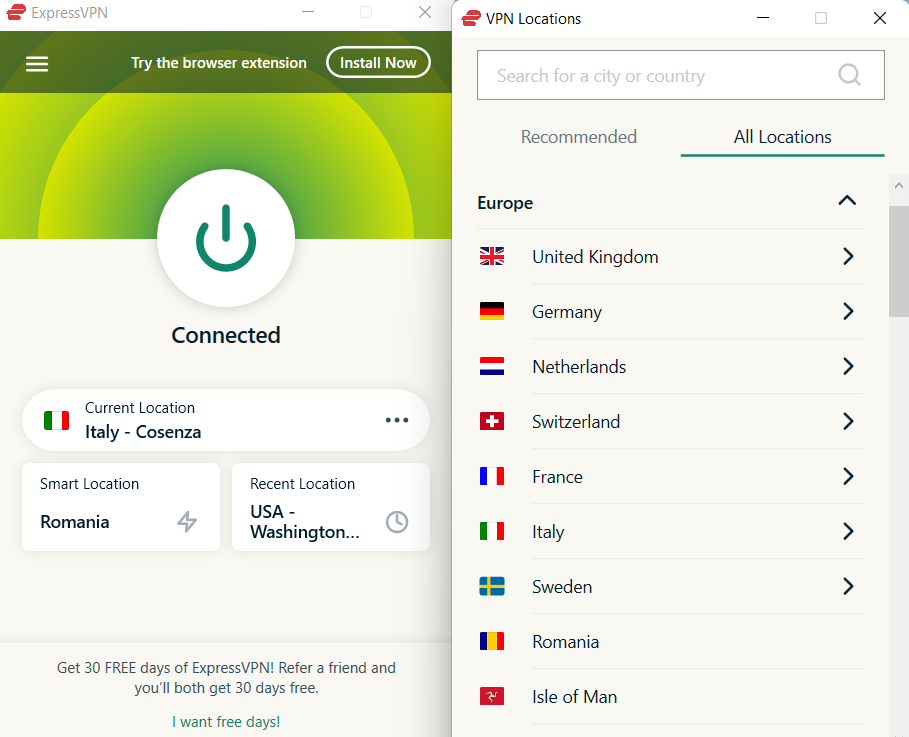
  1. Select the right ExpressVPN subscription plan for you.
  2. Download and install the VPN.
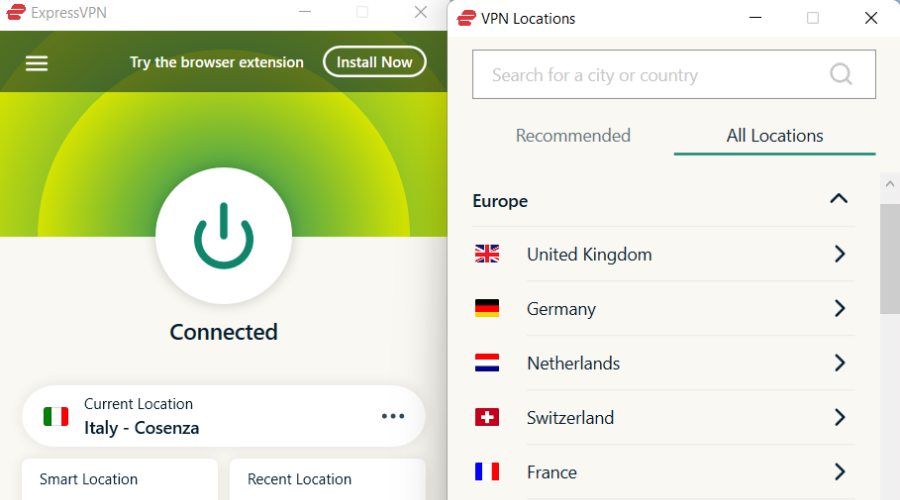
  3. Open ExpressVPN, then chose a server close to your location (faster connection speed).
  4. Open Battlefield 2042 one more time.
  5. Check if the packet loss issue is resolved.

Changing the server location is not the only feature that ExpressVPN brings for gaming. Choosing the right server might even boost your ping, gain access to country-restricted content and ever provide a backup in case the servers are down, you can try connecting to another region’s server.

Gaming is not the only use for ExpressVPN, as you can use it online. While browsing, you can enjoy protection from any threats as well as maintaining your anonymity.

ExpressVPN

A trusted VPN to provide you with the best features.
Check Prices Visit Website

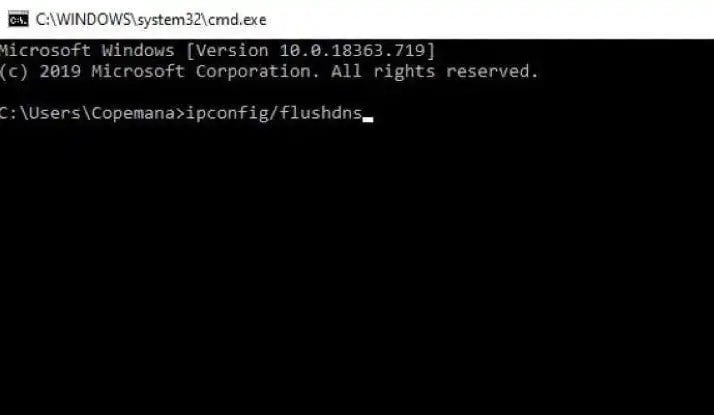
2. Flush the DNS

  1. Open the Start menu.
  2. Search for the command prompt and click on Run as an administrator.
    how to see wifi password windows 10
  3. Type the below command and press Enter: ipconfig /flushdns
  4. Restart your computer and check if it resolves your problem.

Often, cached data can hamper the gameplay experience and can trigger all sorts of connectivity issues. By flushing the DNS, you are basically deleting the cached data.

After you have flushed the DNS, you can now launch the Battlefield 2042 game and check if this fixed the Battlefield 2042 packet loss issue or not.

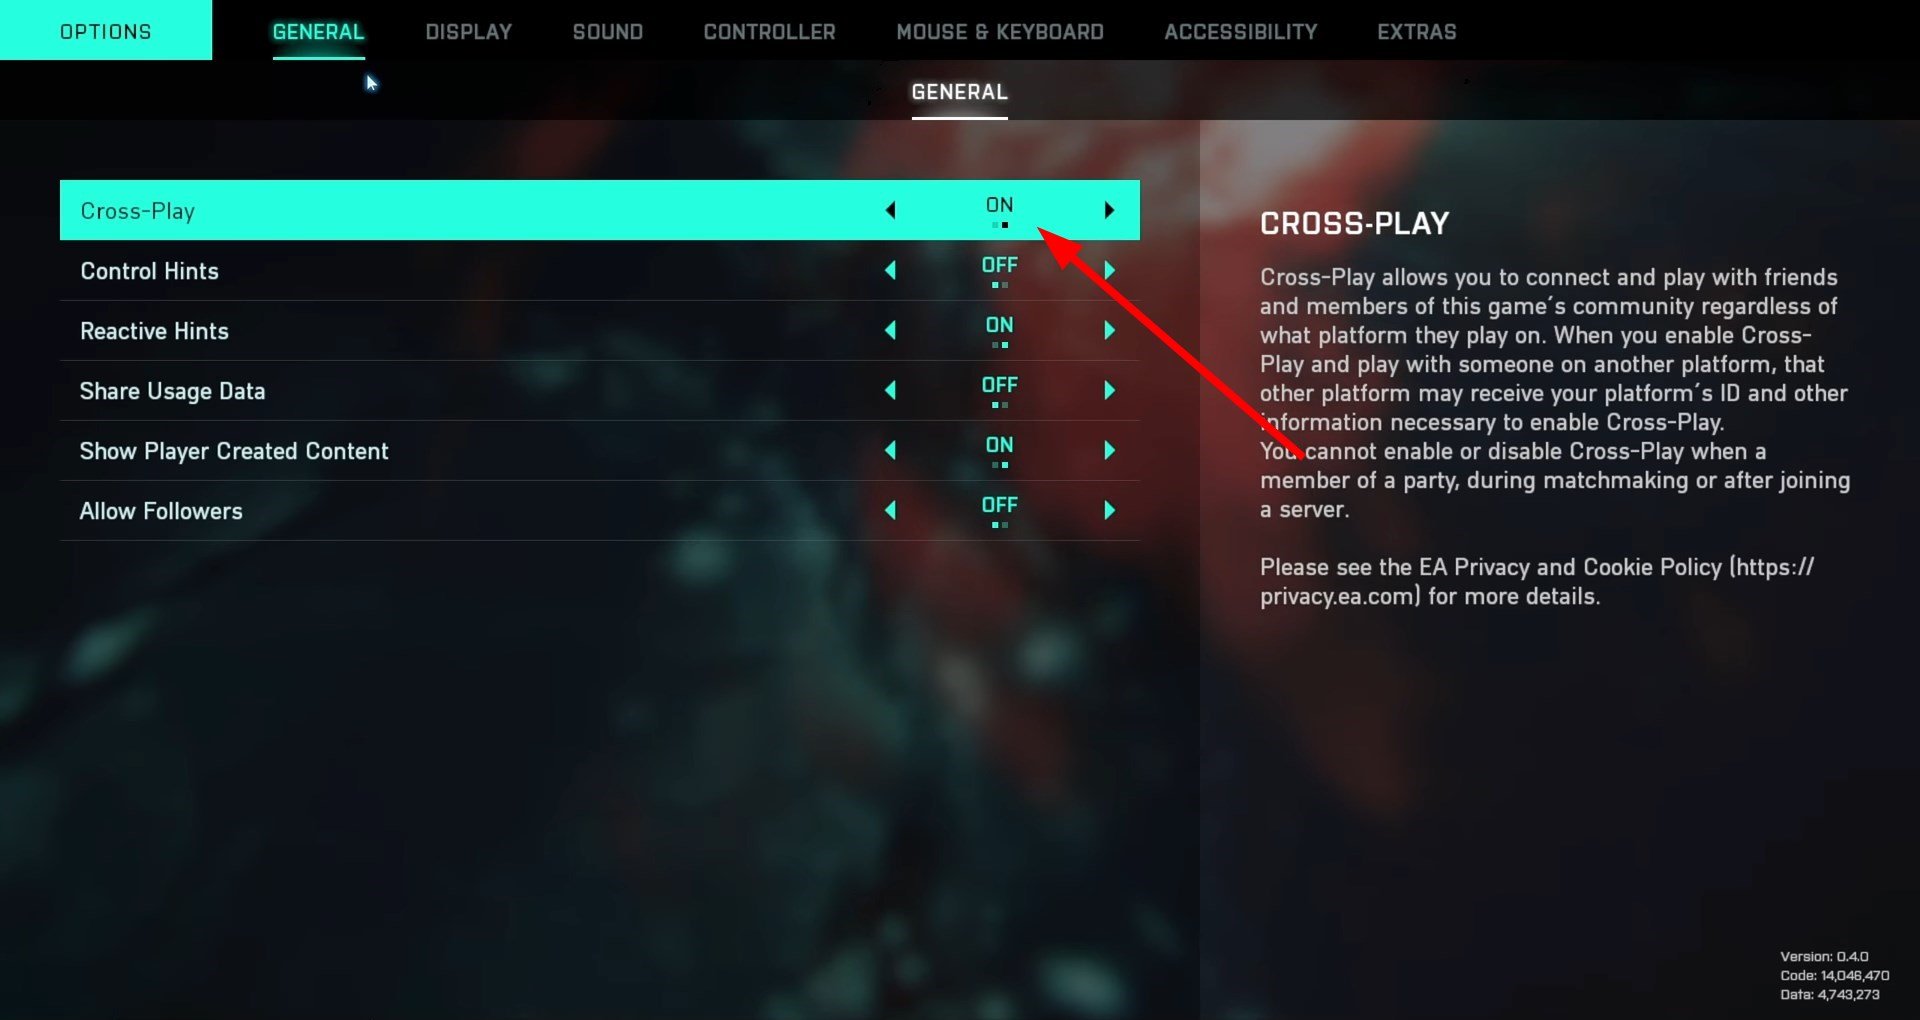
2. Turn off Crossplay in Battlefield 2042

  1. Launch the game.
  2. Head to the in-game options.
  3. Go to the General tab.
  4. Locate the Crossplay button.
  5. Set it to off.
  6. Restart the game, and check if this fixes the issue or not.

A lot of users have reportedly fixed the Battlefield 2042 packet loss problem by turning off the crossplay option.

When you turn off the crossplay option within the Battlefield 2042 game, you are restricting yourself to playing against players on different consoles.

3. Check your internet and the game server

In order to play Battlefield 2042 with your friends, you need to connect with them over the internet. If your internet connection is experiencing some issues, then you will face network-related issues.

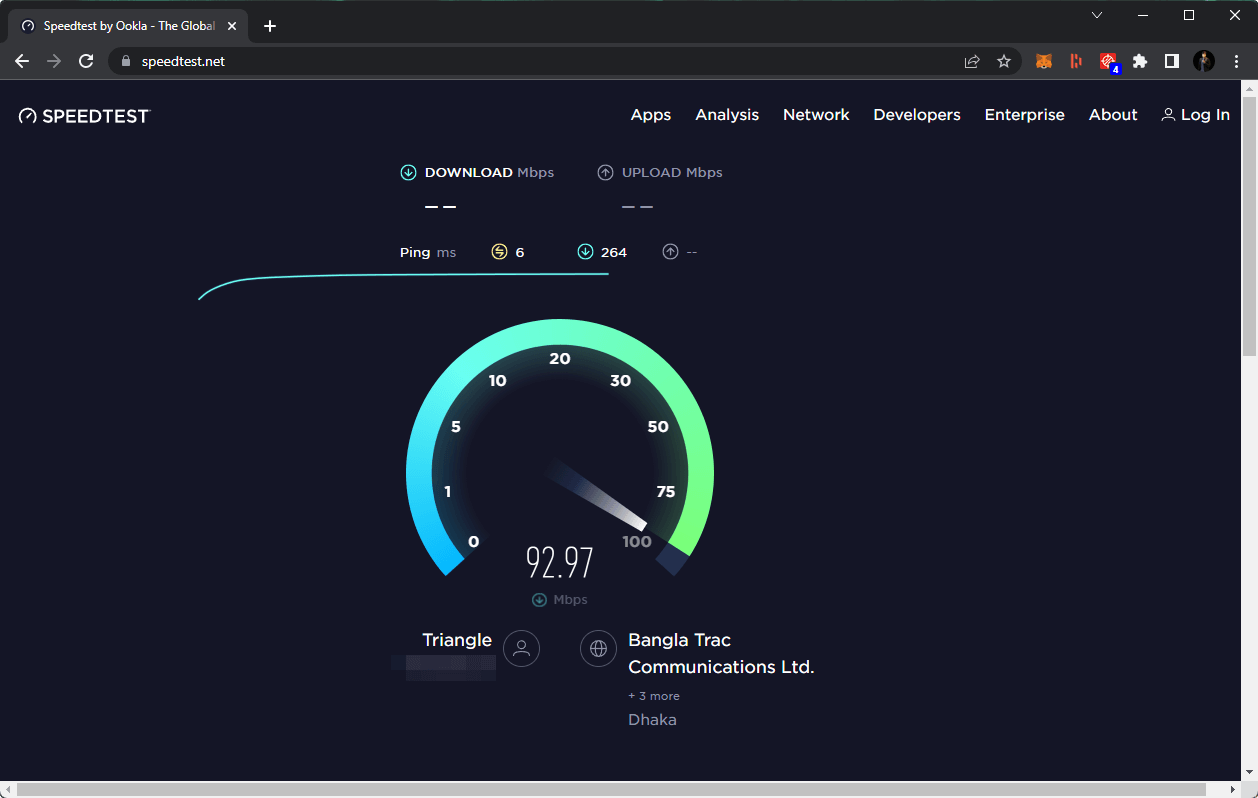
You can make use of websites such as Fast.com or Speedtest.com and check if you are getting the optimal internet speeds as per your data plan or not. If not, then you can contact your ISP and get the problem fixed.

Also, the error could be because the official servers of the game are down or facing some issues. You can use websites such as Downdetector to check if the official servers of Battlefield 2042 are facing any problems or not.

You can also check in with the official Twitter handle or support forums to know more about server-related issues.

If the problem is because of the official server, then there is nothing much that you can do apart from waiting till the issues are resolved.

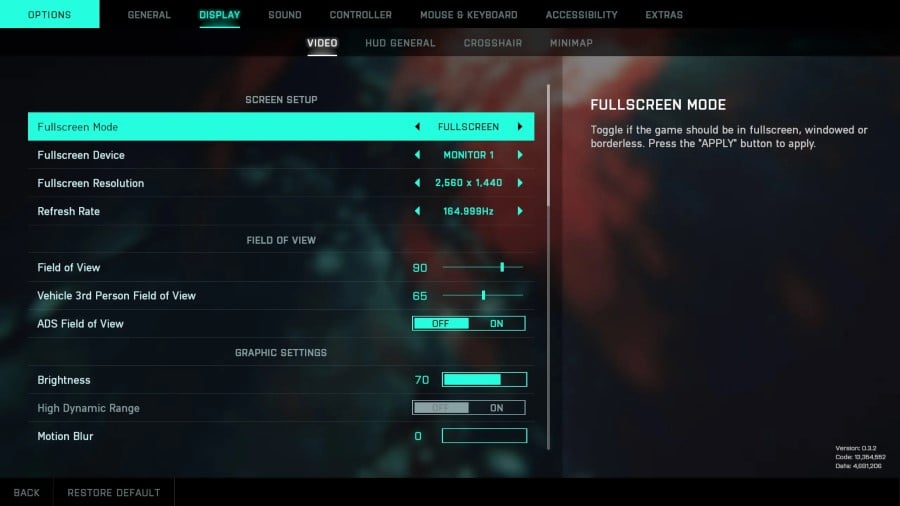
How can I make my Battlefield 2042 run better?

Here are some tips that would help you to make Battlefield 2042 run better:

  • Lightning Quality: Low
  • Anti-aliasing Quality: High
  • Terrain Quality: Medium
  • Effects Quality: Low
  • Undergrowth Quality: Low
  • Ray tracing: Off
  • DLSS: On
  • Dynamic Resolution Scaling: On
  • GstRender.ShadowQuality: Set to zero
  • Fullscreen mode: Fullscreen
  • Fullscreen Resolution: Native resolution
  • Refresh rate: High
  • Field of view: 90
  • ADS Field of View: 70
  • HDR: Off
  • Motion Blur: Off
  • Chromatic Aberration: Off
  • Film Grain: Off
  • Vignette: Off
  • Ambient Occlusion: Off

What graphics card do you need for Battlefield 2042?

MINIMUM PC REQUIREMENTS:

  • OS: 64-bit Windows 10
  • Processor (AMD): AMD Ryzen 5 1600
  • Processor (Intel): Core i5 6600K
  • Memory: 8GB
  • Video Memory: 4GB
  • Graphics card (NVIDIA): Nvidia GeForce GTX 1050 Ti
  • Graphics card (AMD): AMD Radeon RX 560
  • DirectX: 12
  • Online Connection Requirements: 512 KBPS or faster Internet connection
  • Hard-drive space: 100GB

RECOMMENDED PC REQUIREMENTS:

  • OS: 64-bit Windows 10
  • Processor (AMD): AMD Ryzen 7 2700X
  • Processor (Intel): Intel Core i7 4790
  • Memory: 16GB
  • Video Memory: 8GB
  • Graphics card (NVIDIA): Nvidia GeForce RTX 3060
  • Graphics card (AMD): AMD Radeon RX 6600 XT
  • DirectX: 12
  • Online Connection Requirements: 512 KBPS or faster Internet connection
  • Hard-drive space: 100GB SSD

As you can see, the minimum graphics card requirement to play Battlefield 2042 is Nvidia GeForce GTX 1050 Ti or AMD Radeon RX 560.

But to play the game to its full potential, you need to match up the recommended graphics card requirement of Nvidia GeForce RTX 3060 or AMD Radeon RX 6600 XT.

The same packet loss issue was also experienced by Battlefield 5 players. Thankfully, we have some effective solutions that you can check out that will help you resolve the problem.

We also have a new guide on Battlefield 2042 error code 1 8600 1S, so don’t hesitate to check it out.

How to Download & Install MSN Explorer Repair Tool in Windows

If you use a Windows operating system, chances are that you have run into problems once in a while. When that happens, you usually try to find a solution to fix the issues you are facing. Doing this might have forced you to look at repair tools, depending on the kind of problem that you are facing. 

There are multiple repair tools that you can use, with one of the most common ones being the MSN Explorer Repair Tool. This has led to most people asking questions about the MSN Explorer Repair Tool download.

Before discussing how to download this tool, you need to note that there are many repair tools on the internet.

However, you have to be careful when using other repair tools to make sure that you are not installing corrupt software on your computer. Always download your software applications from legitimate websites.

What is MSN Explorer Repair Tool?

The MSN Explorer Repair Tool is a software program developed by Microsoft for the users of the Windows operating system. There have been several releases of this software, but reports indicate that over 98% of its users use the 1.0.0049.0 release.

When using the program, a scheduled task is usually added to the Windows Task Scheduler to launch MSN Explorer Repair Tool at different scheduled times. The scheduling is different depending on the version of the program that you use.

When running the MSN Explorer Repair Tool, you will have three files installed on your computer. These include clearcookies.exe, cleariecache.exe, and msnrt.exe. Most users of this tool are running either Windows 7 or 10.

What is the latest version of the MSN Explorer Repair Tool?

There are different versions of the MSN Explorer Repair Tool, with some of the most common versions including 11.7, 11.6, 11.5, and 1.0. The latest version to look for when downloading the MSN Explorer Repair tool is version 11.7 released in late 2020.

Quick Tip:

Issues show up when we don’t expect them and they affect our computer performance. Many tools will help you clear all of them.

Repair multi-tools that specialize in solving more errors, also optimize registries, restore any DLL files that are missing, and many other features.

How do I download & install the MSN Explorer Repair Tool?

  1. Visit the official MSN Explorer website and download the version of MSN Explorer you would like to install.MSN Download Site - msn explorer repair tool download
  2. Navigate to your downloads folder and run the MSN Explorer installation file.
  3. Follow the on-screen instructions to install the application.MSN Installation
  4. You will also set up how you want to connect MSN Explorer to the internet.MSN Internet - msn explorer repair tool download
  5. Go ahead and add a user to MSN Explorer. You can sign in as a guest or add a new user.Add User MSN

How do I run MSN Explorer Repair Tool?

Running the MSN Explorer repair tool requires you to first launch the MSN Explorer. On the homepage of the MSN Explorer application, you will see Help and Settings.

Choosing Help and Settings takes you to a new window with Status and Support. You will be able to run MSN Explorer Repair Tool from here.

What is MSN Premium?

MSN Premium is built for users with a high-speed internet connection that can support the benefits of this application.

Some of these benefits include increased storage space of 10GB, a higher daily sending limit, the ability to send larger attachments, and a higher number of recipients on mail, among others.

MSN Explorer is a good tool for those who are looking for an application that combines a web browser – the Internet Explorer – with other services that as instant messaging and email services. It also comes with a repair tool, the MSN Explorer Repair Tool, that you can use in case of any problems.

If MSN Explorer is not responding in Windows 10, our guide can help you. Also, let us know your opinion in the comments area below.

5 Best Browsers that Support JPEG 2000 [Ranked by Compatibilty]

JPEG 2000, also known as JP2, is the successor to the regular JPEG which gives higher quality images and improved compression performance. Here are our picks for the best browsers that support JPEG 2000 ranked by compatibility.

Do all browsers support JPEG 2000?

No, most browsers do not support JPEG 2000. The image format debuted in the year 2000, hence the name, and was solely supported by Safari. Today not much has changed and most browsers still do not support JPEG 2000.

While JPEG 2000 offers a more flexible code stream, it requires a more complex and demanding code and thus needs more resources. This is the main reason why it is not adopted across other browsers.

JPEG 2000.

Major browsers like Google Chrome and Mozilla Firefox do not support JPEG 2000, but a comparable alternative is the WebP format. WebKit supports JPEG 2000, so Webkit-based browsers might be compatible with the format.

How do I open a JPEG 2000?

JPEG 2000 files are compatible with most image editing programs, such as Adobe Photoshop. To open a JPEG 2000 file, simply open up your image editing program and select your file to view.

To open JPEG 2000 files in a browser other than Safari, you’ll first need to convert it to another format like PNG or regular JPEG.

What are the best browsers that support JPEG 2000?

Safari – Ideal for iOS and macOS

Safari offers total support for JPEG 2000.

It may come as a surprise to some, but Safari provides the most support and compatibility for JPEG 2000. Safari provides support for the high-quality image format since Version 5 and has maintained compatibility up to the latest version of the browser.

Because JPEG 2000 is natively supported on mac OS, it is also compatible with Safari for iOS mobile devices. However, if you have Safari installed on your Windows, you may not be able to use JPEG 2000 files.

Safari claims to be the fastest browser on the market and offers top-notch security with advanced tracking protection and sandboxing.

Key features of Safari:

  • The most compatible for JPEG 2000
  • Cross-device syncing
  • Tracking protection

⇒ Get Safari

GNOME Web – Popular WebKit browser

GNOME Web browser support JPEG 2000.

GNOME Web browser (also known as Epiphany) is a popular WebKit browser for Elementary OS and Linux devices. The browser has a built-in ad blocker and offers tracking protection so users can browse securely. Because it’s based on Apple’s WebKit engine, it has a clean and simple interface, similar to Safari.

GNOME Web browser performs well with its lightweight design and simplicity. There are no widgets or extensions to bog down the browser. For more information on how to download GNOME Web (Epiphany) Browser to your PC, we have a guide for that.

Key features of GNOME Web:

  • Built-in ad blocker
  • Sleek and simple interface
  • lightweight

⇒ Get GNOME Web

Dolphin Browser – Great for iOS users

Dolphin browser for iOS may be compatible with JPEG 2000.

Dolphin Browser is a web available for Android and iOS devices. This mobile browser offers tab management and the ability to install add-ons for a more customized browsing experience. Dolphin has unique features like social app integration and Sonar, a smart voice search function.

Dolphin is a WebKit-based browser and may be compatible with JPEG 2000 files. However, it’s unclear if the image format will work on Dolphin installed on Android devices and may only be supported on Dolphin on iOS.

Key features of Dolphin Browser:

  • Tab management
  • Social integration
  • Smart voice search

⇒ Get Dolphin Browser

Konqueror – Supports tabbed browsing

Konqueror may support JPEG 2000.

Konqueror is another well-known browser for Linux devices that is based on the WebKit engine. The browser was developed by KDE and includes a file manager.

Konqueror uses KHTML rendering and is compatible with the latest version of CSS and JavaScript. It also supports tabbed browsing and web shortcuts. If you want to know how to download and install Konqueror on Windows 10 or 11, we have a guide for that.

Key features of Konqueror:

  • Open-source
  • File manager
  • Web shortcuts

⇒ Get Konqueror

Falkon – Light on PC resources

Falkon browser.

Falkon (formerly QupZilla) is another KDE web browser based on QT WebEngine. Although Falkon uses QT WebEngine rendering, it supports WebKit and thus may be compatible with JPEG 2000 files.

The alternative browser is known to be light on PC resources and includes a speed dial homepage and the ability to take screenshots from within the browser. Falkon has a sleek and simple interface making it user-friendly.

Key features of Falkon:

  • Supports WebKit
  • Uses fewer PC resources
  • User-friendly interface

⇒ Get Falkon

What is better PNG or JPEG 2000?

While JPEG 2000 provides and maintains high-quality images and real-time video footage, it’s not as compatible as PNG. PNG files are compatible with most if not all browsers and are far more efficient to transfer files online.

JPEG 2000 offers both lossy and lossless compression which is why it’s able to maintain a higher quality, whereas PNG only offers lossless compression. However, JPEG 2000 requires a complex codec and probably won’t be compatible across browsers anytime soon.

We hope you enjoyed our picks for the best browsers for JPEG 2000 support. Overall, Safari is by far the best choice when it comes to JPEG 2000 files. Let us know in the comments if you use JPEG 2000.

3 Ways to Clear Cache, Cookies & History in the AOL Browser

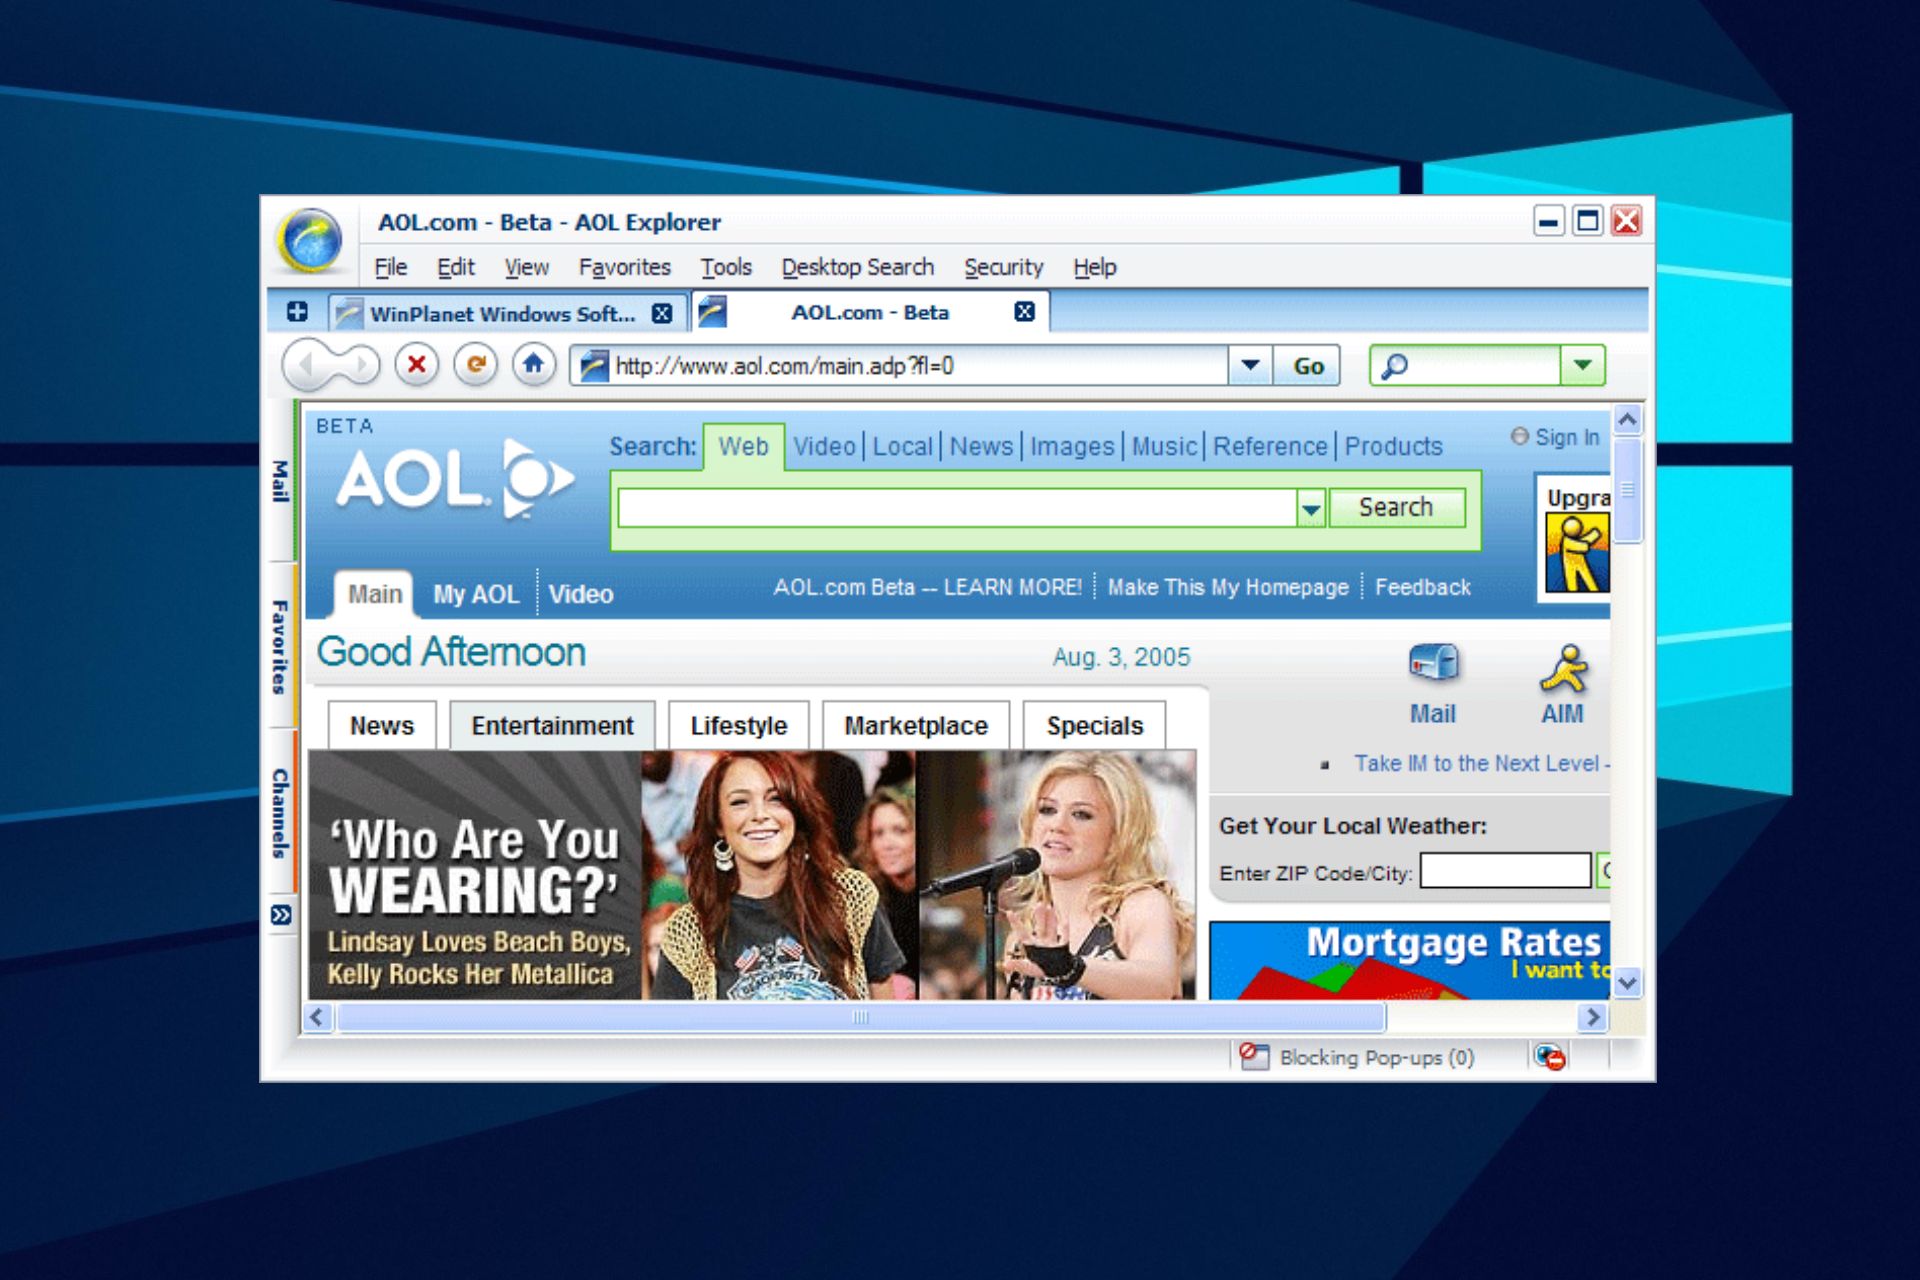
There are Several new-age browsers with many features. AOL browser was released in 2005 and has been through numerous updates. Its features include a customizable tab manager and fast browsing speed. However, there are various issues that you can encounter with the AOL browser.

One of these issues is the cookies and caches problem. Hence, you should know how to go about the AOL browser and clear cache.

It helps you to load websites quickly and smoothly. However, this data can become corrupt and old, and it can cause difficulties with the browser’s performance.

For instance, it can slow down the browser’s speed and cause browser security difficulties. Also, the cache storage can become filled and cause difficulties with some browser components.

Is it good to clear the browser cache?

Yes, it is good to clear your browser cache. It will help you flush out corrupt caches and cookies and prevent the old ones from causing browser difficulties. Likewise, it frees more space for the browser to save new browsing information to help it load sites faster and smoothly.

Moreover, keeping caches on your browser for a long time can cause severe harm to the browser and can prevent it from functioning properly.

Quick Tip:

If manually clearing cache isn’t your thing, we recommend using an automated safe tool. The CCleaner tool’s default cleaning state identifies the caches that need cleaning in the AOL browser.

Simply choose the data types you wish to erase, press the Analyze button, and review the data CCleaner will erase. CCleaner will remember your preferences for the next time you open it.

CCleaner

Erase cache from AOL browser automatically, with premade settings to ease the process.

How do I delete recent activity on AOL?

  1. Launch the AOL browser.
  2. Click on the Keyword option, then select Go to keyword.
  3. Type in Browser Settings and click Go.
  4. Click on Clear My Footprints and click the Select Footprints to Clear option.
  5. Tick the boxes for Browsing History, Cookies, and Browser Cache.
  6. Then, select the Clear Selected Footprints option.
  7. Click OK to complete the process.

Restart your computer and check if your browser’s recent activity is cleared.

How do I clear the AOL cache?

  1. Launch the AOL browser on your computer.
  2. Click on the Settings button on your screen.
  3. Select the Essentials option from the drop-down, then select Internet Options.
  4. On the AOL Internet Properties windows, select General.
  5. Go to the Temporary Internet Files option and Settings.
  6. On the new page, select Every visit to the page and click OK.
  7. Go back to the General tab.
  8. Click on Delete files, then OK.

It will clear the Cache files in your browser. After the process is complete, restart your browser.

How do I clear cookies on the AOL browser?

  1. Launch the AOL browser on your computer.
  2. Select the Settings button and go to Essential Dialogue.
  3. Select the Internet Options.
  4. Click on the General tab and select the Delete Temporary files option.
  5. Ensure that you tick the Delete Cookies box, then click on OK.

Restart your device and your browser after the process is complete. This is one of the most effective ways to clear the cache on the AOL browser.

Nonetheless, we recommend that users don’t keep their browser cookies for a long time as it can cause some problems. However, you can learn several other things about the AOL browser. Hence, you can read through our article about AOL explorer and why you should use it.

Furthermore, there are many other browsers you can download and install on your device for better and more reliable internet experiences. Hence, check our page for recommendations on the best 20 browsers with high support for HTML.

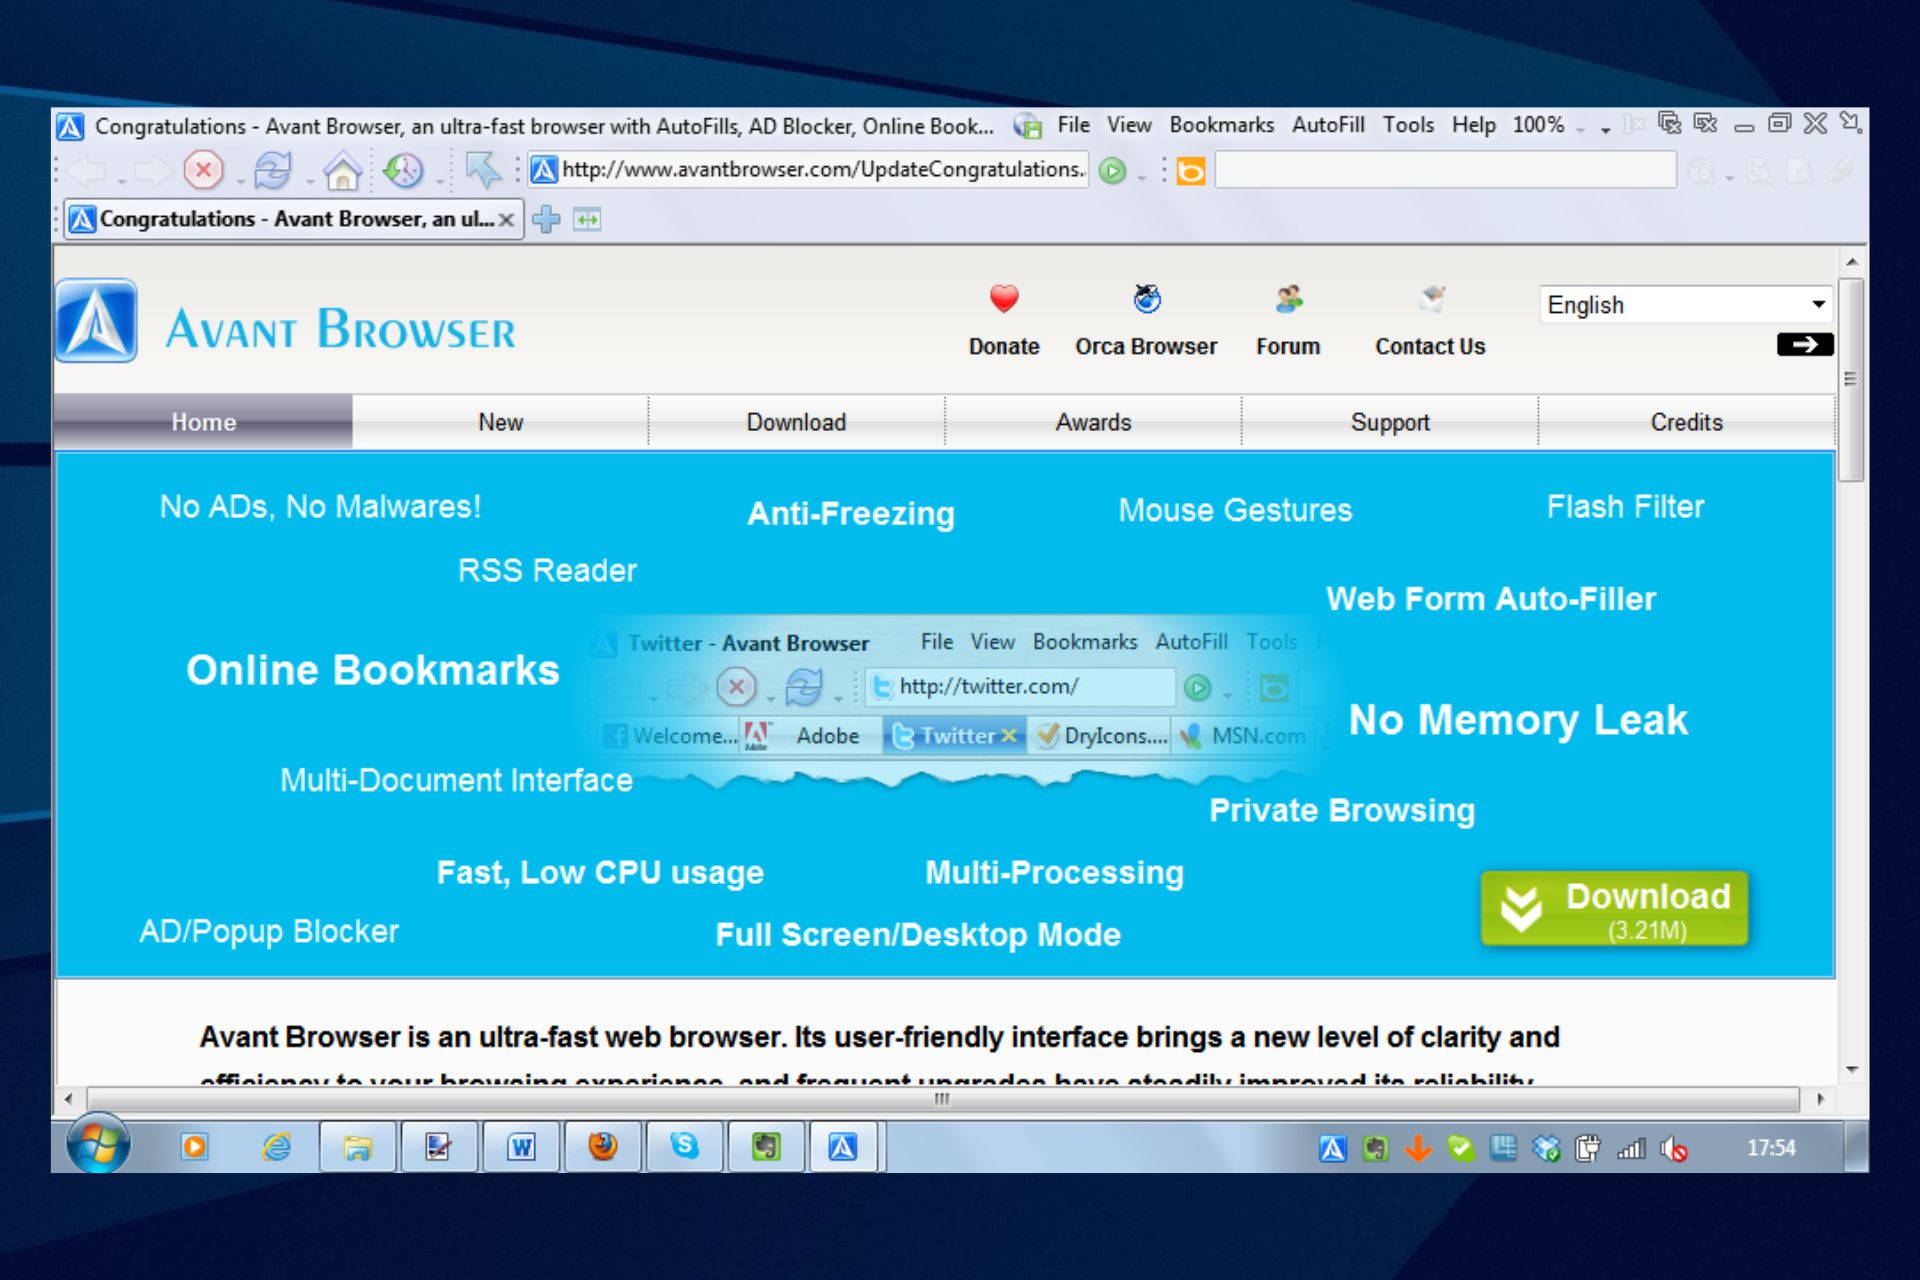
Download Avant Browser for Windows 10 & 11 [32/64 bit]

The Avant browser was initially developed by a Chinese programmer called Anderson Che in 2004. This browser is an open-source project. This was developed using two engines, called the Gecko layout engine and the Trident layout engine.

They released two versions of the browsers. The Lite version was developed using only the Trident layout engine, and the Ultimate version was developed using the Trident and Gecko layout engines.

The Gecko layout engine is also used by Mozilla Firefox for their browsers. Avant browsers typically run on all the windows operating systems that are above Windows 2000 version.

The latest version of the Avant browser is build 3, 3.17.2020, which is a stable version. There have been no releases for this browser since then.

This version also includes the WebKit layout engine and Chrome rendering engine, along with the other two engines (Trident and Gecko). This makes the Avant browser still more powerful.

If you are looking forward to having the Avant browser on your Windows system, this article will guide you on how to download and install it.

Is Avant compatible with Windows 11?

The Avant browser is undoubtedly a great browser choice, which is not only the fastest but the most powerful one. It is compatible with Windows 11, the latest version of Windows. It is also compatible with versions above Windows 2000.

Quick Tip:

Stability is a key aspect of the Opera One browser, and we did a comparison test between Avant and Opera One. The key distinctions were in terms of security, HTML5 and CSS3 compliance, and customization.

Avant was able to keep up with Opera One’s performance, but at an average level. This browser also offers features such as built in VPN, Ad Blocker and AI.

Opera One

Stable, always up to date, and highly customizable, making it a great pair for Windows 10 & 11.
Free Download Visit website

How do I download and install the Avant browser on Windows 10 and 11?

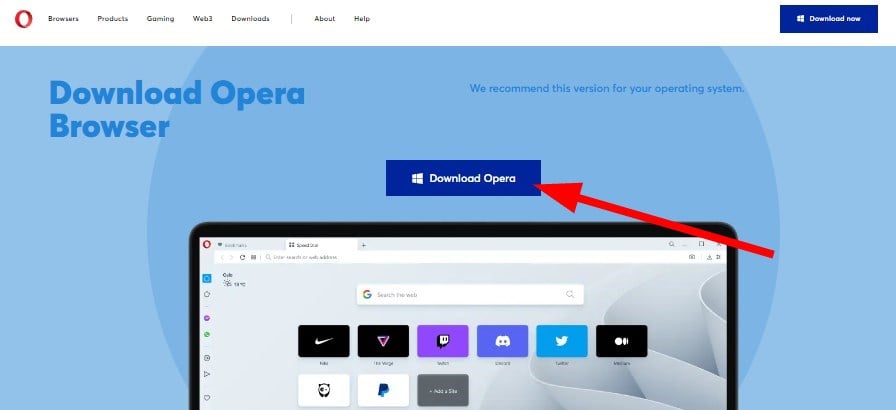
  1. Open the Downloads page in the web browser on your system.
  2. Select the version that should be downloaded, whether it is Lite or Ultimate (recommended).
  3. On clicking the Download Avant browser, it starts downloading its setup file.


  4. After the downloading is finished, the setup file will be stored in the Downloads folder on the system.
  5. Go to the Downloads folder by typing the below line in the Run box (Win + R) and then pressing Enter key:

    C:\Users\%username%\Downloads\


  6. In the Downloads folder, double-click on the asetup.exe file.


  7. This throws a UAC prompt on the screen. The user needs to accept it by clicking Yes to continue.


  8. Now choose the installation type by clicking on the Standard radio button and clicking Install.


  9. This starts the installation process on the system and please wait till it finishes.


  10. Once it finishes installing the Avant browser on the system, just click Finish.


  11. This closes the installation window and launches the Avant browser app on the system.

Is Avant still supported?

Yes, the Avant browser is still supported and runs on the Windows system. The latest version of this browser was released in 2020.

Avant browsers are very widely used by users across the world and this has some system requirements to be met by the users in order to run them smoothly. The system should have at least 300 MHz or higher processor, as well as 128MB RAM or more.

If you found this article to be informative, please leave us a comment below. We’d love to hear from you!

Download Pale Moon Browser for Windows XP 32/64 bit

Mozilla Firefox is a name in the browser market that is well known and is used mostly by power users who want more from their browsers.

However, in the last few years, even though Google Chrome does not offer many out-of-the-box features, it has been the go-to browser for millions across the globe, making it the most used web browser.

But the base of Firefox is secure and based on it, you will find multiple new browsers. One of which is the Pale Moon browser.

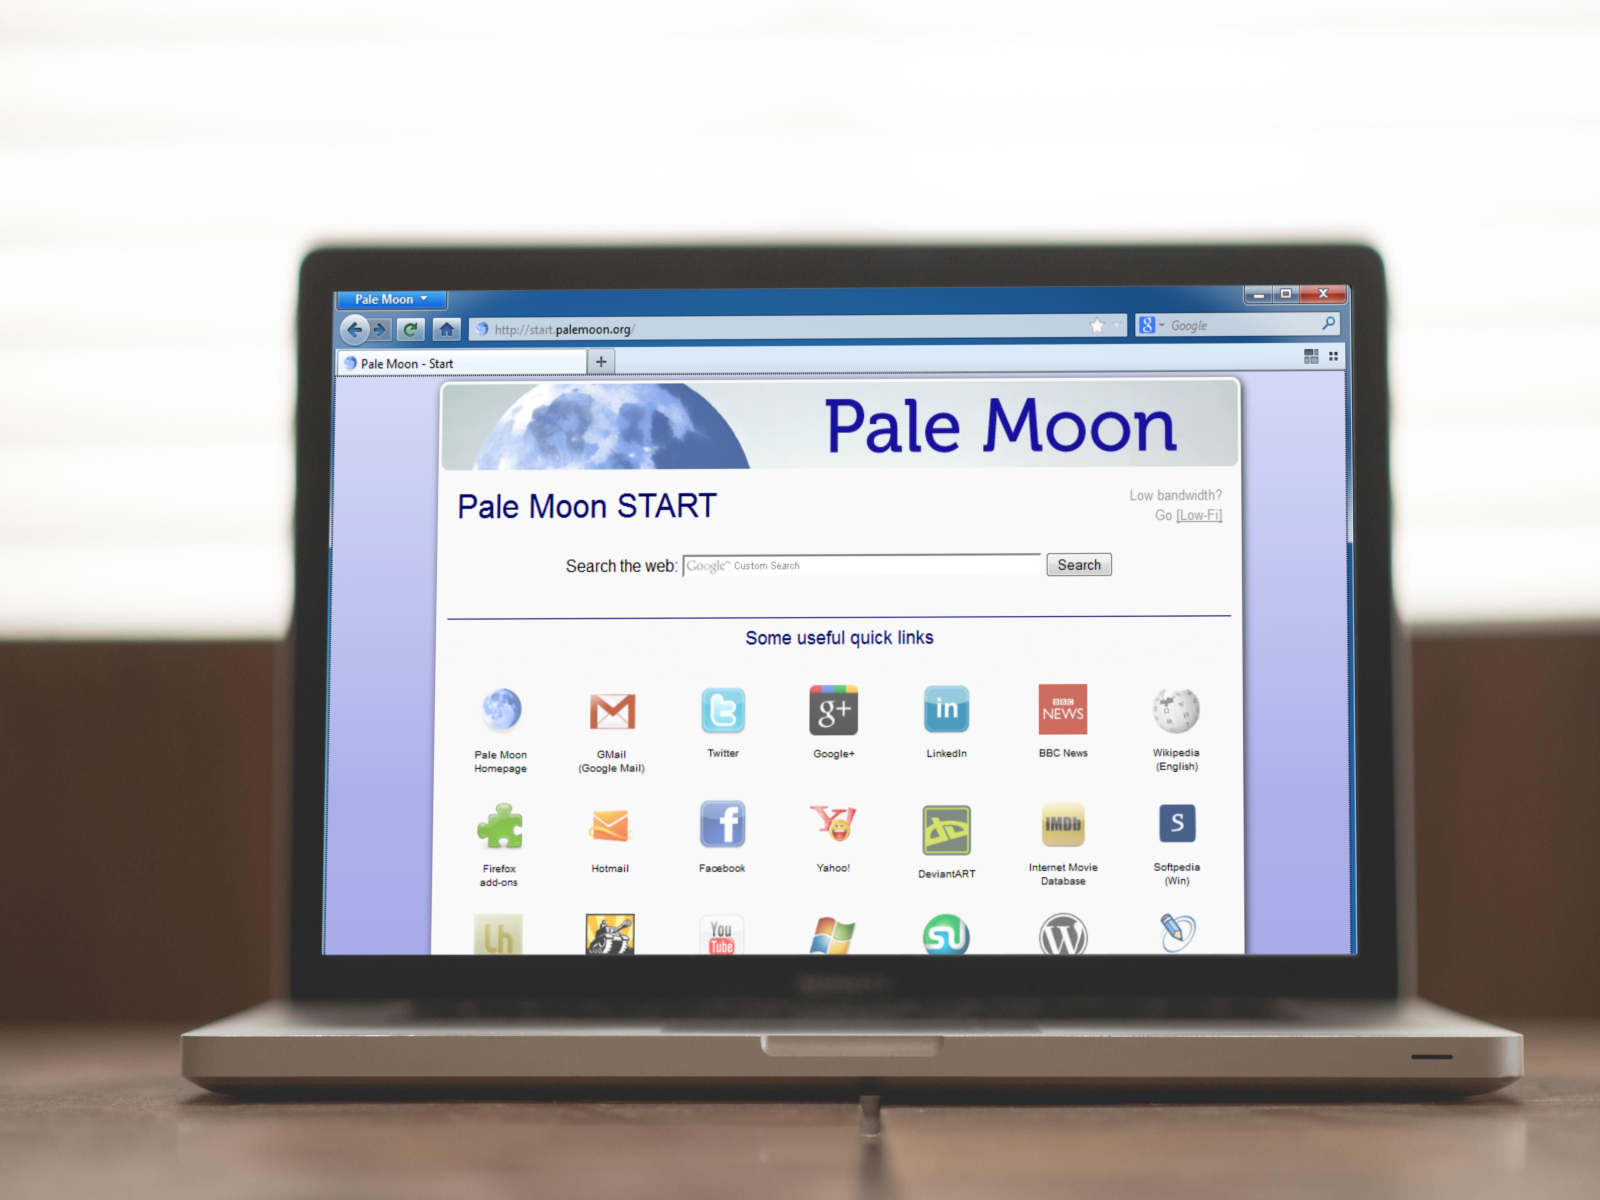
The Pale Moon browser is meant for Microsoft and Linux, and it is an open-source browser. It focuses on providing an efficient browsing experience without hogging the resources.

It also emphasizes privacy and notes that it never tracks or sells your data. The Pale Moon browser has an active community that helps bring new features to the browser.

While the Pale Moon browser has ended support for Windows XP 32/64 bit, if you are still running an old PC with Windows XP and want to know how you can install the Pale Moon browser on it, then this guide is for you.

Here, we will show you the steps and the links that will let you download the most appropriate version of the Pale Moon browser for Windows XP. Let us get right into it.

Does Pale Moon work on Windows XP?

Yes. The Pale Moon browser works on Windows XP, but not the latest version. Pale Moon stopped supporting Windows XP and you won’t be able to install the latest version of the browser.

The last supported version of the Pale Moon browser for Windows XP is Pale Moon 26. Notably, Pale Moon version 26 was released back in 2016, and it misses out on multiple new features that it has to offer in the latest version.

Some of the features that you will find in the latest available versions are:

  • Supports Microsoft Silverlight, Unity Web Player, Adobe Flash, etc. plugins
  • Comes with an add-on store
  • Encrypted sync service
  • Offers permissions manager
  • Receives regular security updates
  • Speedy script processing

The Pale Moon 26 version misses out on the above and more features but is still capable and good enough for a Windows XP PC.

Let us take a look at how you can download the Pale Moon browser on your Windows XP machine.

Quick Tip:

In case you need a more efficient browser compatible with Windows XP, the most suitable one is Opera One. The version for Windows XP is at the bottom of the download page because it’s an older version.

This alternative browser delivers practical integrations with social media apps, enhanced security with a free VPN, and plenty of navigation tools.

Opera One

Switch to this modern browser that has customizable tools and flexible navigation.

How do I download & install Pale Moon on Windows XP?

1. Download Pale Moon browser

  1. Head to this website.
  2. Download the Pale Moon 26 version.
  3. Save the installer in your desired location.

Do note that this is not the official website from where you can download the Pale Moon 26 version. The official archived version only lets you download the language pack, which in our case is not apt.

Make sure that you have the necessary antivirus tools turned on before visiting a third-party website, and scan the downloaded file before installing it on your PC.

For a list of the best antivirus tools, you can check out our guide on the best antiviruses for Windows 10 and 11.

2. Install Pale Moon browser

  1. Launch the Pale Moon 26 installer.
  2. On the initial setup page, select Next.
  3. You will be asked to select between Standard and Custom installation.
    • Standard: It will install the Pale Moon browser will common and default options.
    • Custom: It will let you select individual options such as installation directory, etc.
  4. Once your selection is done, click Next,
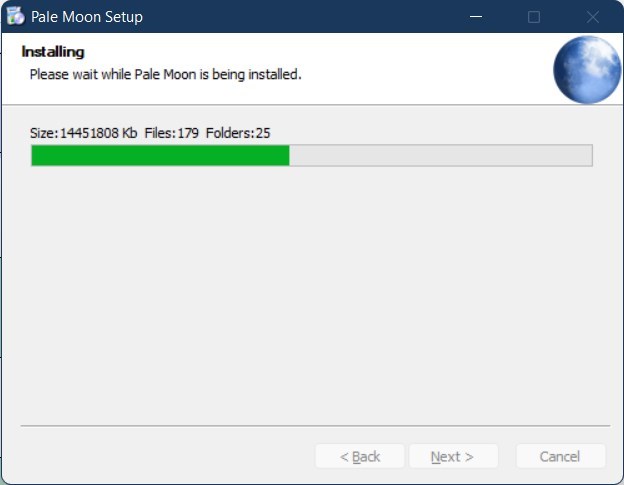
  5. Follow the on-screen prompts and the installation will begin.
  6. After the installation is complete, you can now enjoy the Pale Moon browser on your Windows XP PC.

What are the features of the Pale Moon 26 browser for Windows XP?

Here are some of the key highlights of this old Pale Moon v26 browser which is the last version that is supported for Windows XP:

  • Optimized for modern processors
  • Optimized layout and rendering engine (Goanna)
  • Regularly updated with the latest security patches
  • Additional security features and security-aware development
  • Privacy-aware: zero ads; no telemetry, spyware, or data gathering
  • Fully customizable interface
  • Support for full themes
  • Speedy page and script processing
  • Support for plugins like Silverlight, Flash, and Java
  • Support for a growing number of Pale Moon exclusive extensions

Is Pale Moon better than Firefox?

While the Pale Moon browser is similar to Firefox in many ways. Some of which are mentioned below:

  • Both are open-source browsers
  • Available across multiple platforms
  • Both browsers are privacy focussed
  • Support extensions

Now comes the million-dollar question is the Pale Moon browser better than Firefox? The short answer to this is no.

While both have their own merits and demerits, Firefox is actively updated and comes with a plethora of features that Pale Moon has a long way to catch up to.

Moreover, Firefox is more modern and offers plenty of user-oriented features, whereas, Pale Moon looks dated and offers more privacy-centered features.

If you are looking for other options, then you should definitely check out our list of the best browsers that will provide you with the best possible browsing experience.

Let us know in the comments below if you were successful in installing the Pale Moon 26 browser on your Windows XP PC or not by following the above-mentioned methods.

LHR vs non-LHR GPU: Which Cards are Better for Gaming?

Lite Hash Rate (LHR) are graphics cards developed by NVIDIA that detect and reduce cryptocurrency mining while gaming. This is one of NVIDIA’s methods of deterring cryptocurrency mining. Keep reading to learn about the main differences between LHR and non-LHR GPU.

Powerful gaming graphics cards are most appealing to crypto miners because they work faster and thus earn more coins. However, if you’re looking to get started in crypto mining, check out our recommendations for the best PCs for cryptocurrency mining for beginners.

What does LHR mean for GPU?

Because LHRs detect any cryptocurrency mining and halve the hash rate, GPUs are less desirable for mining. Hackers are less likely to target users with LHR GPUs because of this significant reduction in crypto mining.

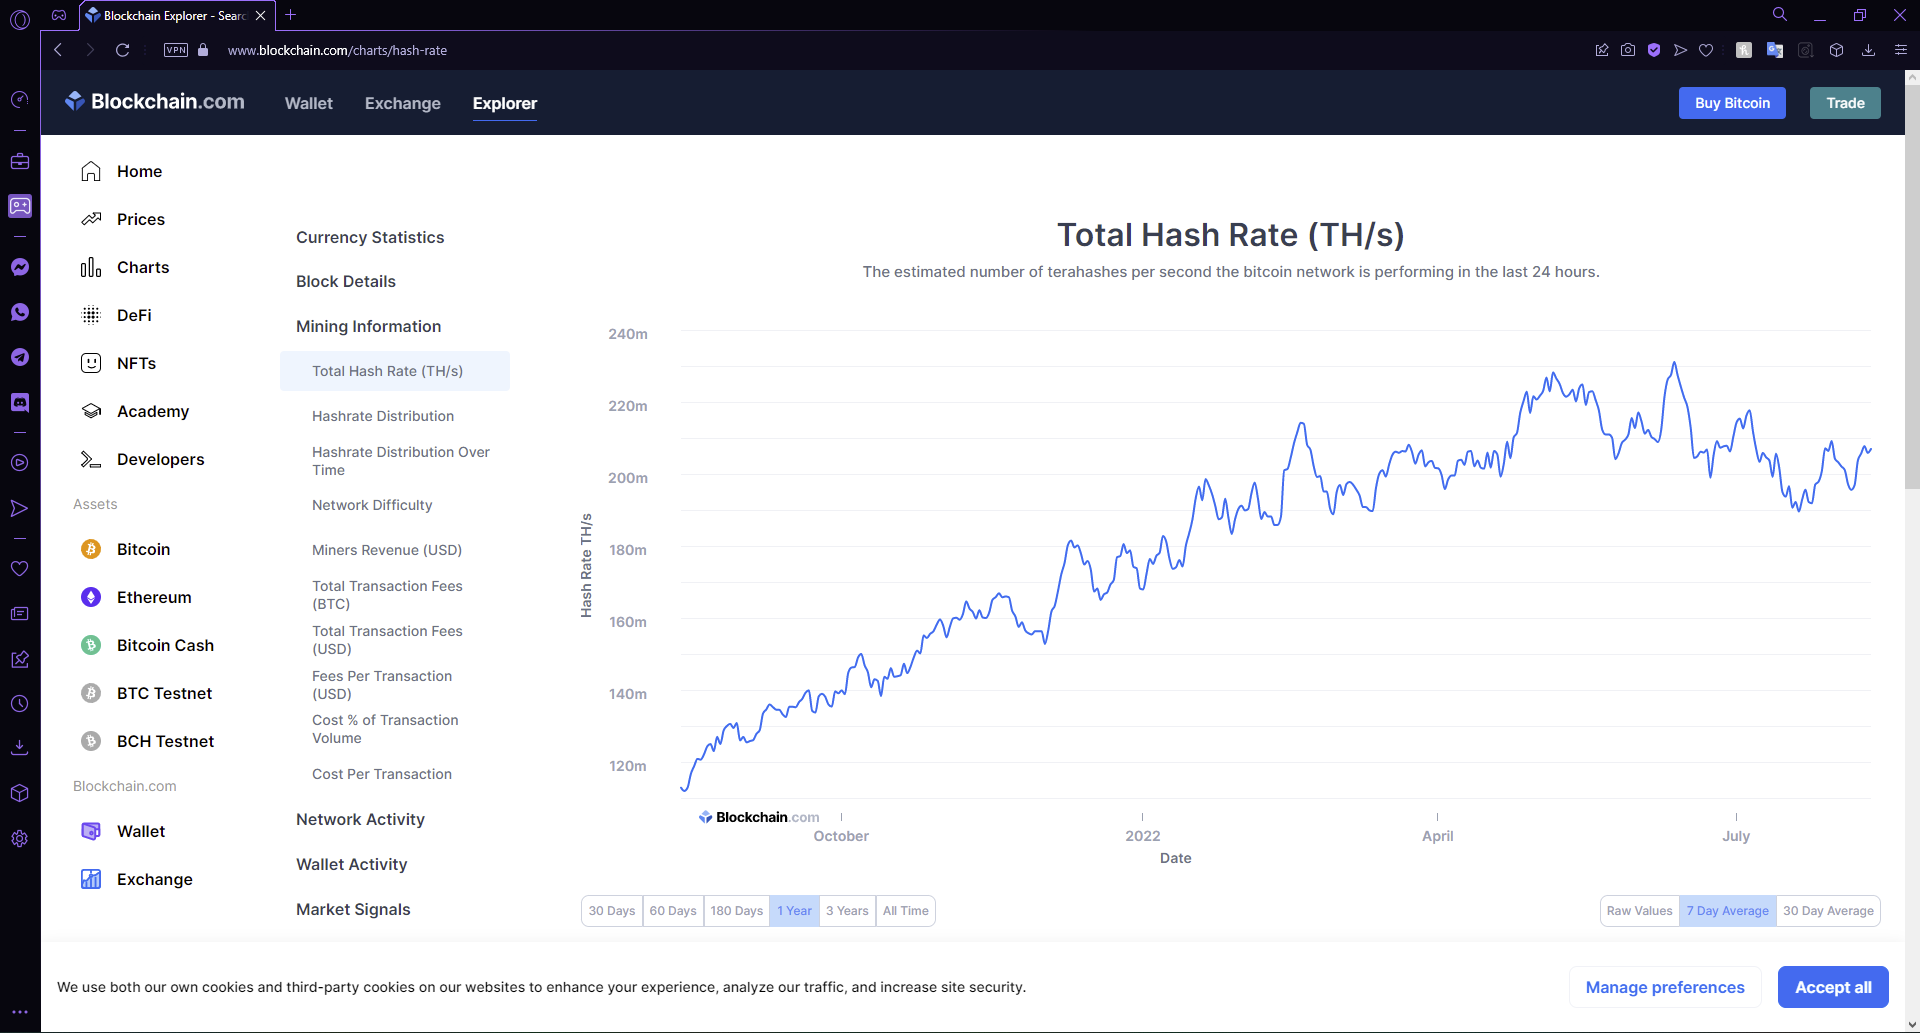
In cryptocurrency, the hash rate determines mining speed, meaning the higher the hash rate, the higher the profit for miners. LHR cards lower the hash rate making the GPU unappealing to miners.

Crypto hash rate.

Quick Tip:

While mining crypto sure takes up a lot of video memory, gamers need to make sure that the RAM and CPU are in order. They all know how high demanding some games can be.

Opera GX is a browser that comes with a RAM and CPU limiter, also an integrated Discord and WhatsApp app to maintain you connected throughout the gaming session.

Opera GX

Don’t lose any performance and set new limits for your gameplays.

Does LHR matter for GPU?

LHR does matter for GPU. It makes the graphics card less appealing for crypto mining and thus helps prevent the cost of graphics cards from going up.

Because of the crypto mining gold rush, miners needed GPUs and thus the demand for them went up, leading to sky-high prices and stock shortages. Having an LHR card makes GPU less desirable for miners and may regulate the market.

What are the differences between LHR and non-LHR GPU?

1. Performance

There are tons of side-by-side comparisons of LHR vs. non-LHR GPU that can be found online. The LHR is strictly designed to limit hash rates and thus has no impact on gaming speed or performance. So if you’re a gamer, there is no difference performance-wise between LHR and non-LHR cards.

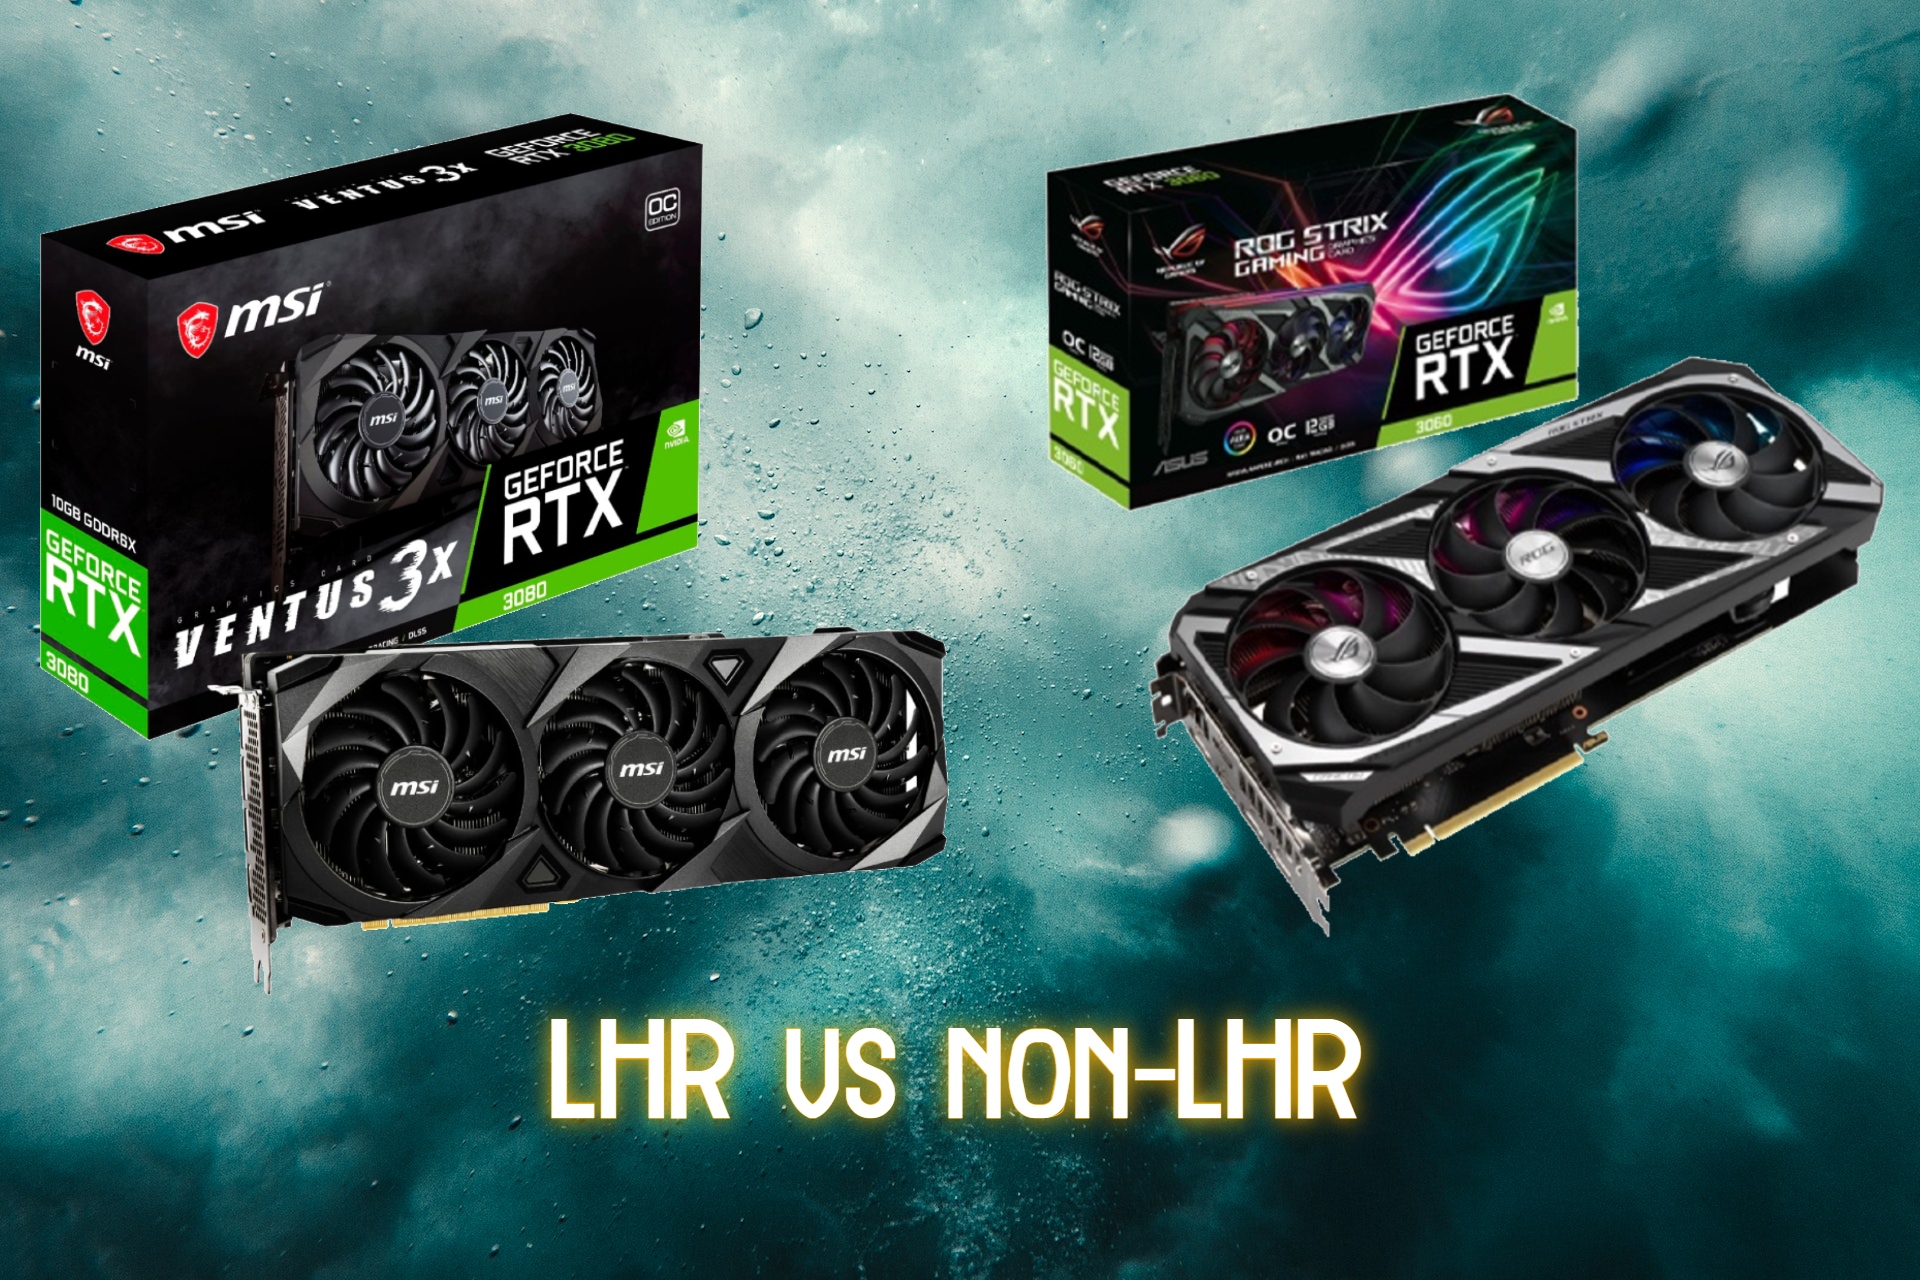
LHR vs non-LHR GPU.

However, if you’re a crypto miner, then the LHR is far more likely to limit mining speeds and performance as intended. There is speculation that miners may eventually be able to bypass the restrictions, but until then it’s best for miners to avoid LHR GPUs.

2. Price

As far as price goes, NVIDIA wanted to make LHR cards more accessible and affordable for gamers by reducing their appeal to crypto miners. However, for crypto miners, NVIDIA released Cmp HX, a dedicated crypto mining GPU.

The main reason for the LHR card is to prevent crypto miners from inflating prices by making it less desirable for them, resulting in lowering the prices for gamers.

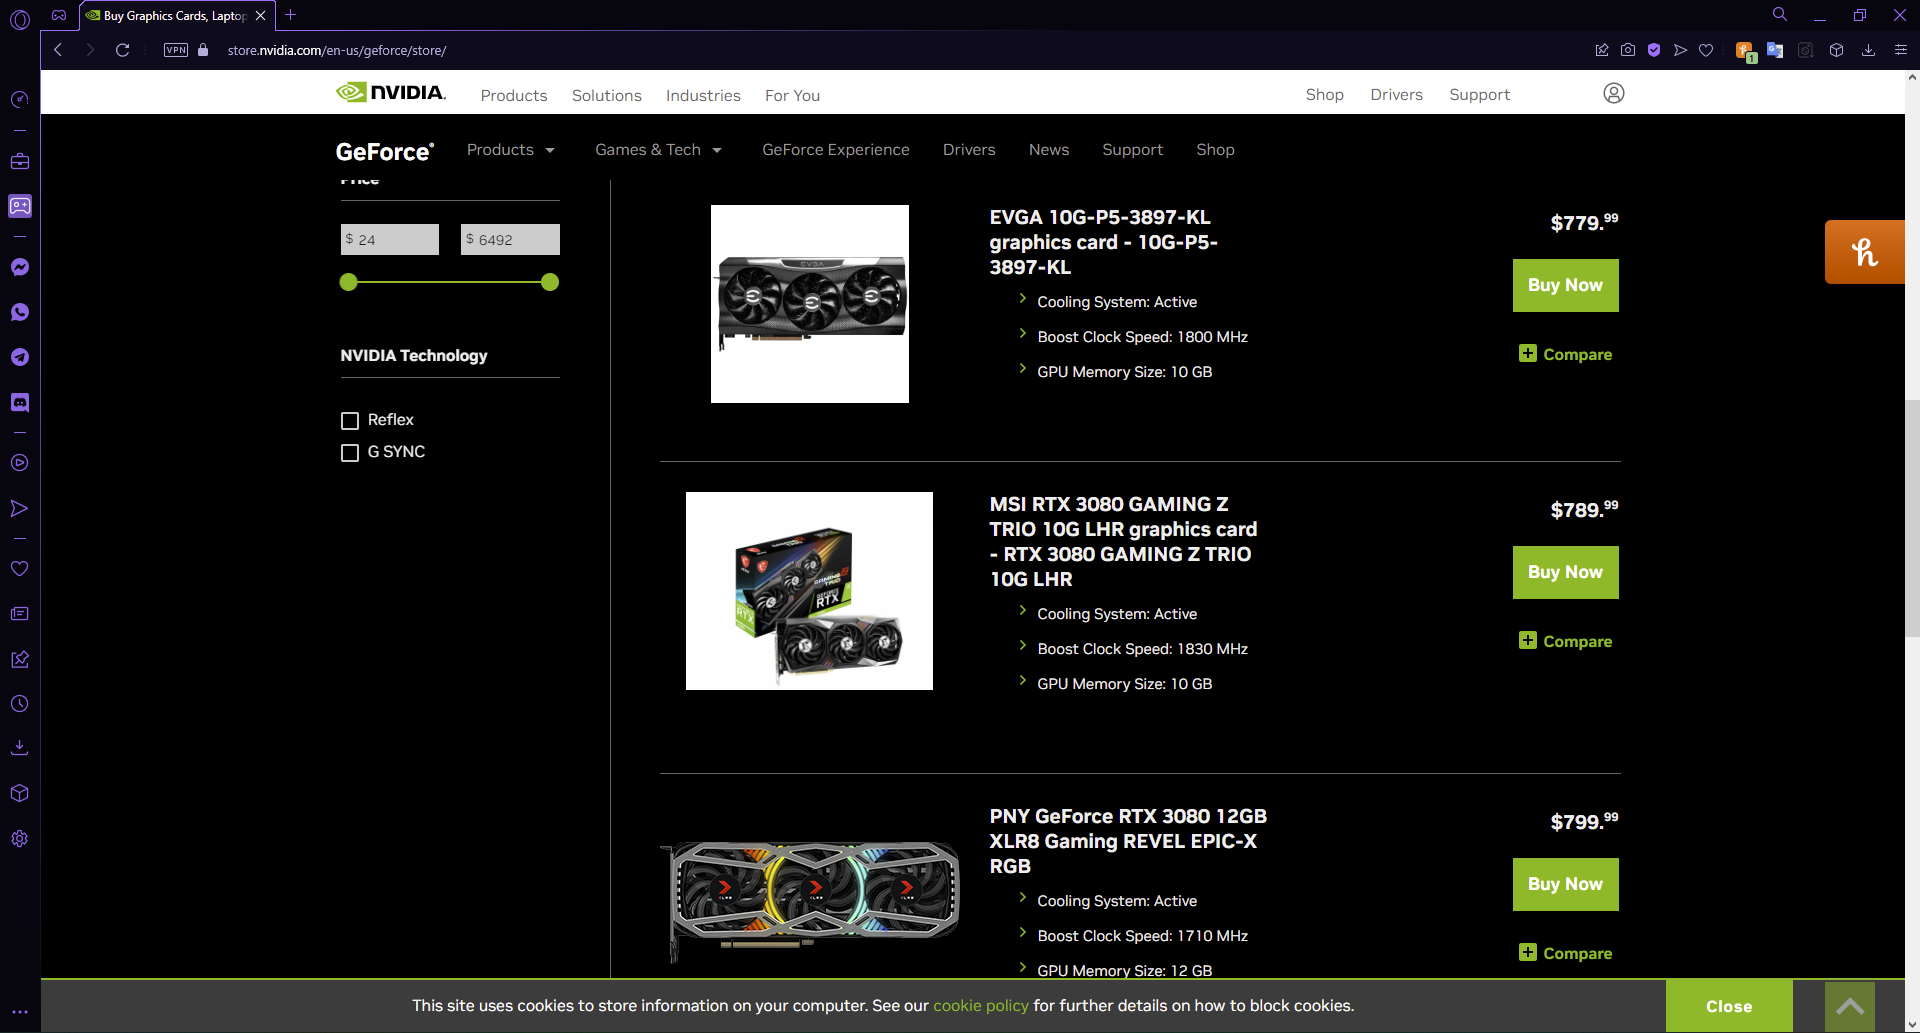
NVIDIA LHR vs non-LHR GPU pricing.

Are non-LHR cards better for gaming?

LHR cards do not affect gaming and GPU performance and only impact crypto mining. Users have run many independent tests on both LHR and non-LHR GPU and the performance is not affected.

For a list of our suggestions for the best NVIDIA GPUs for gaming, we have recommendations for that.

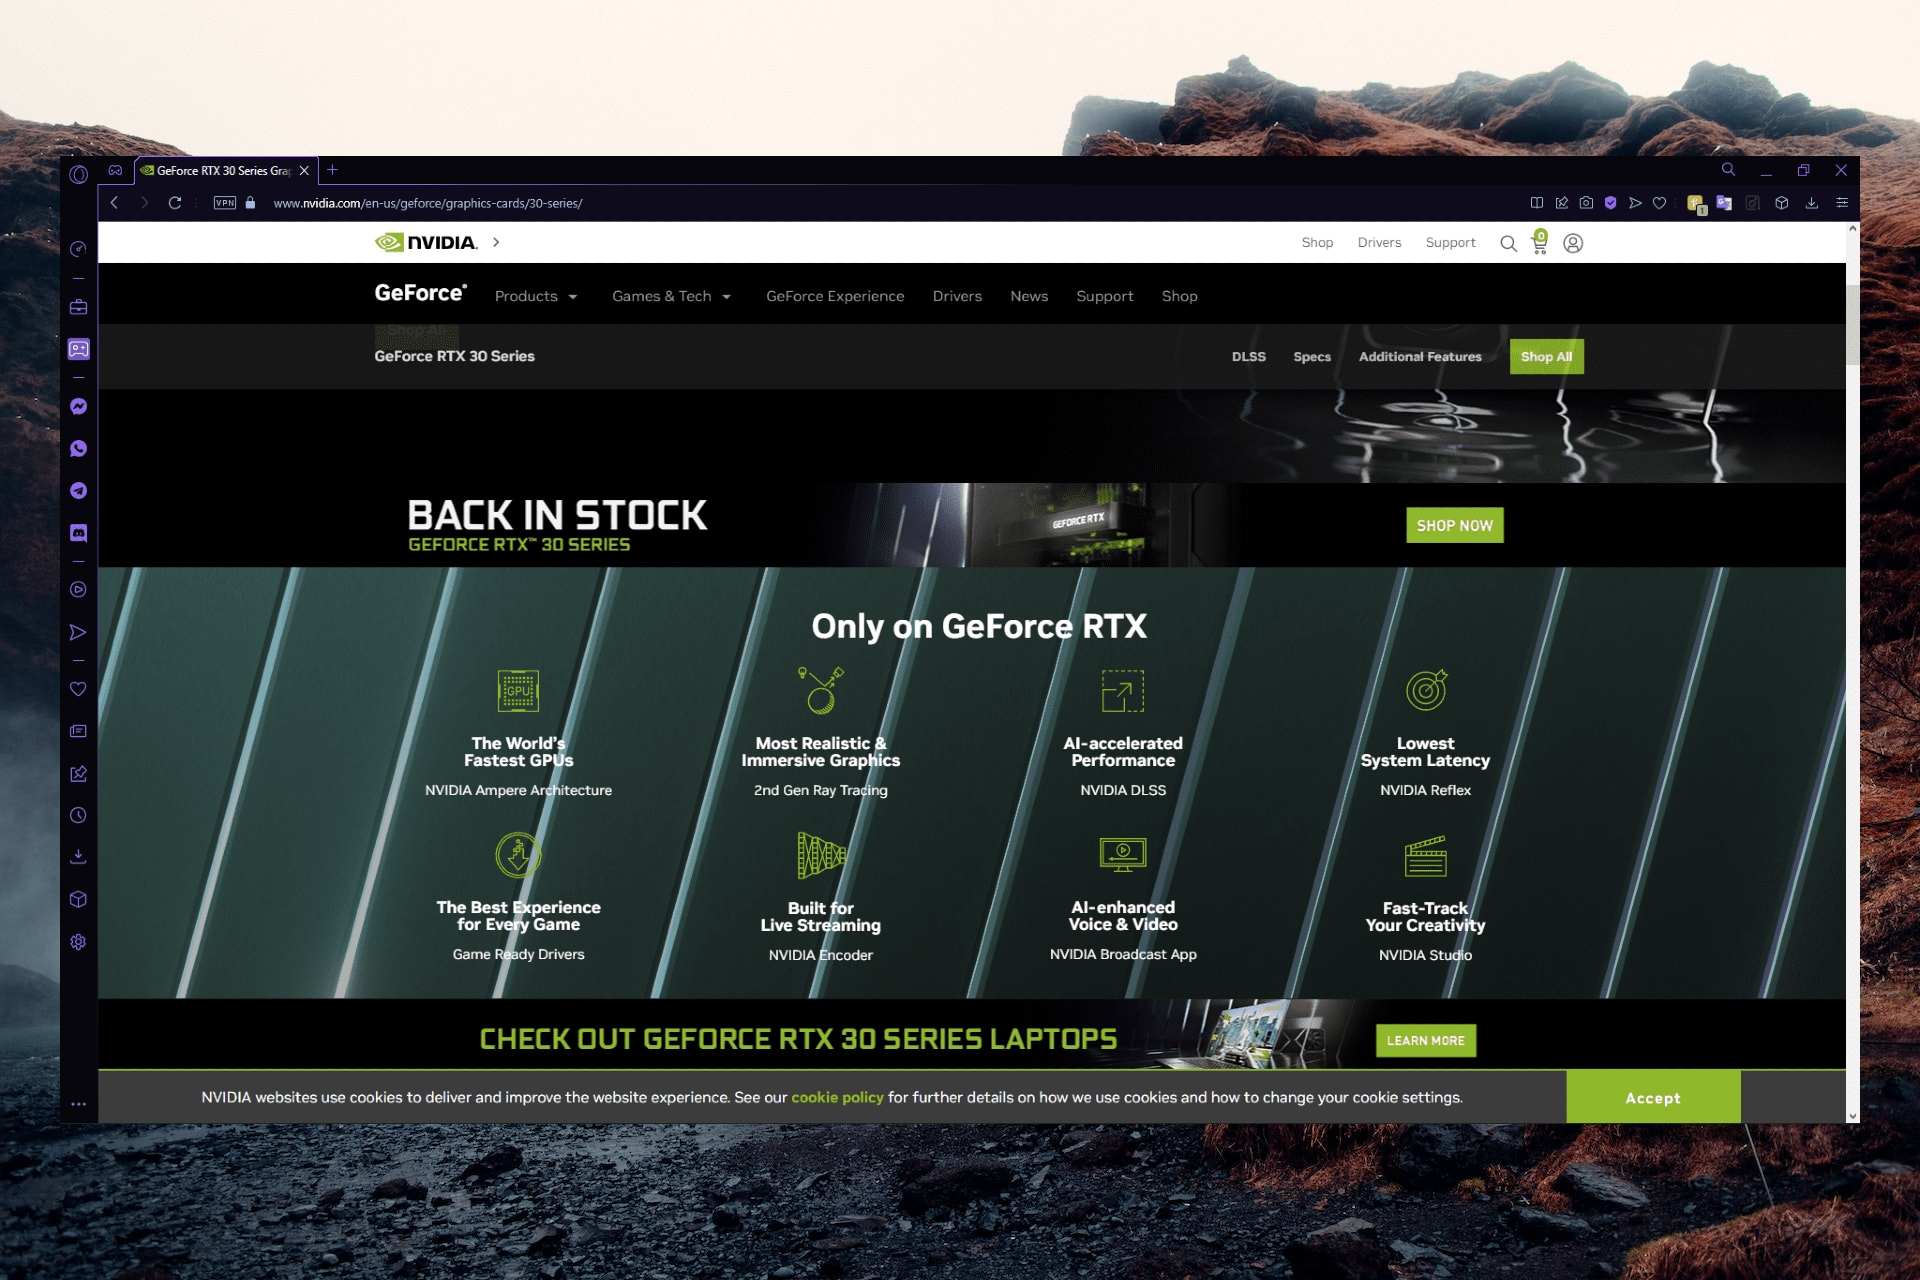
NVIDIA GeForce GPU.

Is LHR GPU good for mining?

No, LHR GPU is not good for mining. The purpose of LHR is to lower the hash rate and make your GPU less appealing to crypto miners. The LHR GPU is meant to stabilize the prices for graphics cards since the effects of the cryptocurrency gold rush.

Overall, the only major difference between LHR and non-LHR GPU is the hash rate and limitations for crypto miners. With the demand for GPU increasing and resulting in price inflation, NVIDIA created LHR cards to stabilize the market. Let us know in the comments which GPU you prefer to use.

Is The Monese App Not Working? Use These 5 Methods to Fix it

If you’re looking for current accounts and money transfer services as an alternative to traditional banks, then Monese is a service you should consider. However, in many aspects, Monese is very similar to other financial services, such as Revolut, PayPal, or Payoneer.

Unfortunately, Monese and all the other mentioned services have one thing in common: they are electronic payment systems. This means they run using computers, servers, and, of course, the Internet.

This is what a Monese user usually sees before not being able to access the account:

We’ve made some improvements to our app that you’ll need to continue using your account. Our latest terms and conditions can be viewed in the updated app

Like any service that runs electronically, Monese is bound to experience the occasional downtimes, so let’s explore some of the most common reasons.

Quick Tip:

All transactions that can be done from the mobile app can be done from Monese’s website as well. Because of this, you can try on Opera One, we managed to make transactions successfully here.

This powerful browser allows you various useful features, like a built-in VPN, adblocker and integrated virtual wallet. Transactions within Opera One are secured, thanks to these built-in functions.

Opera One

Test the connectivity with Monese in this browser, and see if you can fix the problem there.

Is the Monese app down?

The first step to figuring out the actual issue with the Monese app will need to make sure that the servers are not down.

To do so, we can use the official Service Status from Monese.

At the time of writing, this is how the Monese servers look:

Source: Monese.com

As you can see from the image presented above, there are some issues with the Incoming Transfers.

Whenever you have any issues with Monese, you can open up this article and check the official website.

Is Monese free?

Monese offers both free and paid services for its customers. The free version has no monthly fee and allows you to withdraw from ATMs, top up your card with cash, etc.

Even though the free subscription has some limitations, it still provides an excellent overall service. But, of course, if you want to surpass those limits, you can always choose the Classic or Premium subscriptions.

For more information on this topic, feel free to visit the official Monese pricing information.

Why is my Monese card not working?

Even though there could be other reasons, users have encountered issues with the app lately.

Now that we understand what type of issues the app users have faced in the last 24 hours, let’s also cover some of the most common reasons for which the Monese card might not work:

  • The card details were incorrect
  • Funds were not sufficient when you tried topping up
  • You have surpassed the daily or monthly limit
  • The issuer of your card is not part of the 3D Secure Program
  • You’ve gone over the top-up limits

Why is my Monese account blocked?

Usually, Monese accounts get blocked to limit or stop unauthorized use of the account or card.

To re-activate the locked account, feel free to contact the company’s support team and confirm that it was you who accessed the account.

Another situation that might end up with you having your account blocked is if you have been using the service in a fraudulent manner or for any illegal activities.

To protect the security and privacy of all users, Monese ensures that no suspicious transactions will pass through without in-depth scrutiny from the company.

That being said, there are many variations to these issues on Monese. Here are some of them:

  • Monese something went wrong
  • Monese location verification failed
  • Monese not working
  • Monese not responding

In other cases, the Monese account ends up being suspended because of using inaccurate or incomplete information when applying for the service itself.

Now let’s see how we can tackle and solve this problem once and for all.

What can I do if the Monese app is not working?

1. Check your internet connection

Even though the number of variables when dealing with this issue can be large, most commonly, when users experience problems with the Monese app, it is caused by a faulty or unstable internet connection.

To ensure that this element is not getting your way, try out other apps and websites that require an internet connection and check if everything works well.

If it does, move to the next solution.

If your internet connection disconnects constantly or isn’t strong enough, it would be best to contact your Internet Service Provider (ISP) and ask for help.

2. Restart your device

Rebooting your device, whether you’re using a PC, mobile, or virtual machine to access the Monese services, will ensure that all connections are reset.

In some cases, this will automatically solve your issue, and you will get back to using Monese as quickly as before.

  1. Click the Windows logo from the taskbar.
  2. Choose the Power button.
  3. Click on Restart.
  4. Accept any UAC pop-ups and choose Restart anyway if required.
  5. Check if you can reaccess your Monese account.

3. Check if the problem is the Monese mobile app

monese not working mobile app

Portability is one of Monese’s selling points; that is why many users use it in conjunction with the mobile app.

As such, some issues may come from the app itself:

  • Your mobile phone doesn’t have the latest version of the app installed
  • Your phone is not connected to the Internet
  • You have a faulty Monese app Installation

4. Test your browser and virtual card

If you’re having problems with Monese and think that your browser is to blame, consider doing one of the following:

  • Clearing your current browser‘s cache and cookies
  • Changing your browser altogether

If you notice that Monese still doesn’t work even after checking all the variables mentioned above and below, you might consider closing it and switching to the best browser that supports Monese transactions. As mentioned before, Opera had the best results in our tests.

If you don’t want to give up your virtual credit card provider, switching to another one may get you out of this jam for the time being. The advantage of using a virtual credit card number is that you can do it independently for each subscriber.

If one of your virtual card numbers is compromised due to a data breach, or if a single payee fails to cancel anything you did not want to auto-renew, you can disable that virtual number only.

Choosing another service, even if only temporarily, will help you complete your transactions and save you time while the Monese issue is rectified.

5. Check if the Monese services are down

First, make sure that Monese is down by visiting their status website.

Here you can see all of their listed services and their operational status.

These include:

If any of these systems have anything besides Operational written next to them, you can do anything with Monese except that.

Additionally, you can use the same website to see a log of past issues to check whether there were problems in the past that may have affected you as well.

How can I contact Monese?

You can contact Monese by visiting the official Monese customer service for the app and services.

How to get money back from Monese?

To get your money back from Monese, you will need to wait for 5 to 10 working days. The exact period to wait will depend on the respective’s merchant’s refund policies.


Are you also having problems with the Monese service? Please share your experiences with us in the comments section below.

Download & Install Avant Browser for Windows XP 32/64-bit

Browsers are of different kinds. The differences are based on the service they offer. However, the Avant browser is one of the fastest browsers in the market. It was designed by a Chinese programmer known as Anderson Che. So, we’ll discuss how to download the Avant browser for Windows XP.

The browser was built mainly on Windows and offered users several features. Hence, the browser is available for Windows XP and other Windows OS.

Furthermore, the Avant browser has many features that users can enjoy when downloading and installing. Some parts are fast browser speed that allows users to surf the internet quickly and smoothly.

Likewise, it is a robust browser that can run multiple browsing windows simultaneously without affecting the loading speed. Also, the browser features a user-friendly interface that gives you a good browsing experience.

The Avant browser uses the tri-core rendering engine that allows it multifunction without freezing or slowing down. Also, it comes with inbuilt tools like the Ads blocker and password manager that helps take proper care of your browser sessions and security. Users can enjoy a customizable browser interface that allows them to adjust the display to their taste.

Nonetheless, the Avant browser is unavailable on most of our operating systems. However, it is available on Windows and other platforms like Windows XP and Vista.

Most of the computers that still run on these Windows subsidiaries are old and can be slow. Hence, downloading and installing the Avant browser will help you surf the internet at an ultra-fast speed regardless of the computer speed.

What is the latest version of the Avant browser?

Avant Browser is a reliable browser that has been around for years. It has gone through several updates. However, the latest version of the Avant browser is the 2020 build 3. It was released on the 17th of March 2020 with many features that make it one of the best in the market.

Furthermore, the latest version features a more reliable page zoom and customization. Likewise, the Chrome: 80.0.3987.132 update for the Avant browser was included.

Is Avant still supported?

The Avant browser can still work on Windows devices. However, not all Windows devices still support the Avant browser, but there are ways to get around it. For instance, if you want to use the Avant browser on Windows XP, you can’t run the latest build because they aren’t compatible.

So, to download and install the browser on Windows, you need to download 2017 build 5 because it is the last version that supports Windows XP. Likewise, you can download versions that are below the 2017 build.

Quick Tip:

If you want a reliable and fast browser, you can also install Opera on your Windows XP. We recommend it because it’s light and capable to work fine even on older, slower PCs.

You won’t have to go through much trouble because the supported Opera version (Opera 36) for Windows XP is available for download on the browser’s official page, so you know it’s safe and legit.

Opera

Easily download and install Opera to your Windows XP for fast and secure web surfing!

How do I download & install Avant on Windows XP?

  1. Launch any browser on your computer and go to the Avant browser’s page.
  2. Scroll down the screen and select the version you want to download.
  3. Click the Download button and wait till it is complete.
  4. Double-click on the downloaded file and install the browser.
  5. Follow the prompts till you are done with the installation process.
  6. Launch the Avant browser on your computer.

However, we recommend that users using Windows XP download the Avant browser old version or any version from the 2017 build 5 and below.

Furthermore, several other browsers are as reliable as the Avant browser can easily download and install them on your computer. Hence, we recommend you read through our article about the 20 best browsers with the highest support for HTML.

In conclusion, some browsers work best for different operating systems. Hence, users can read through some of the best lightweight browsers for Windows 10/7.

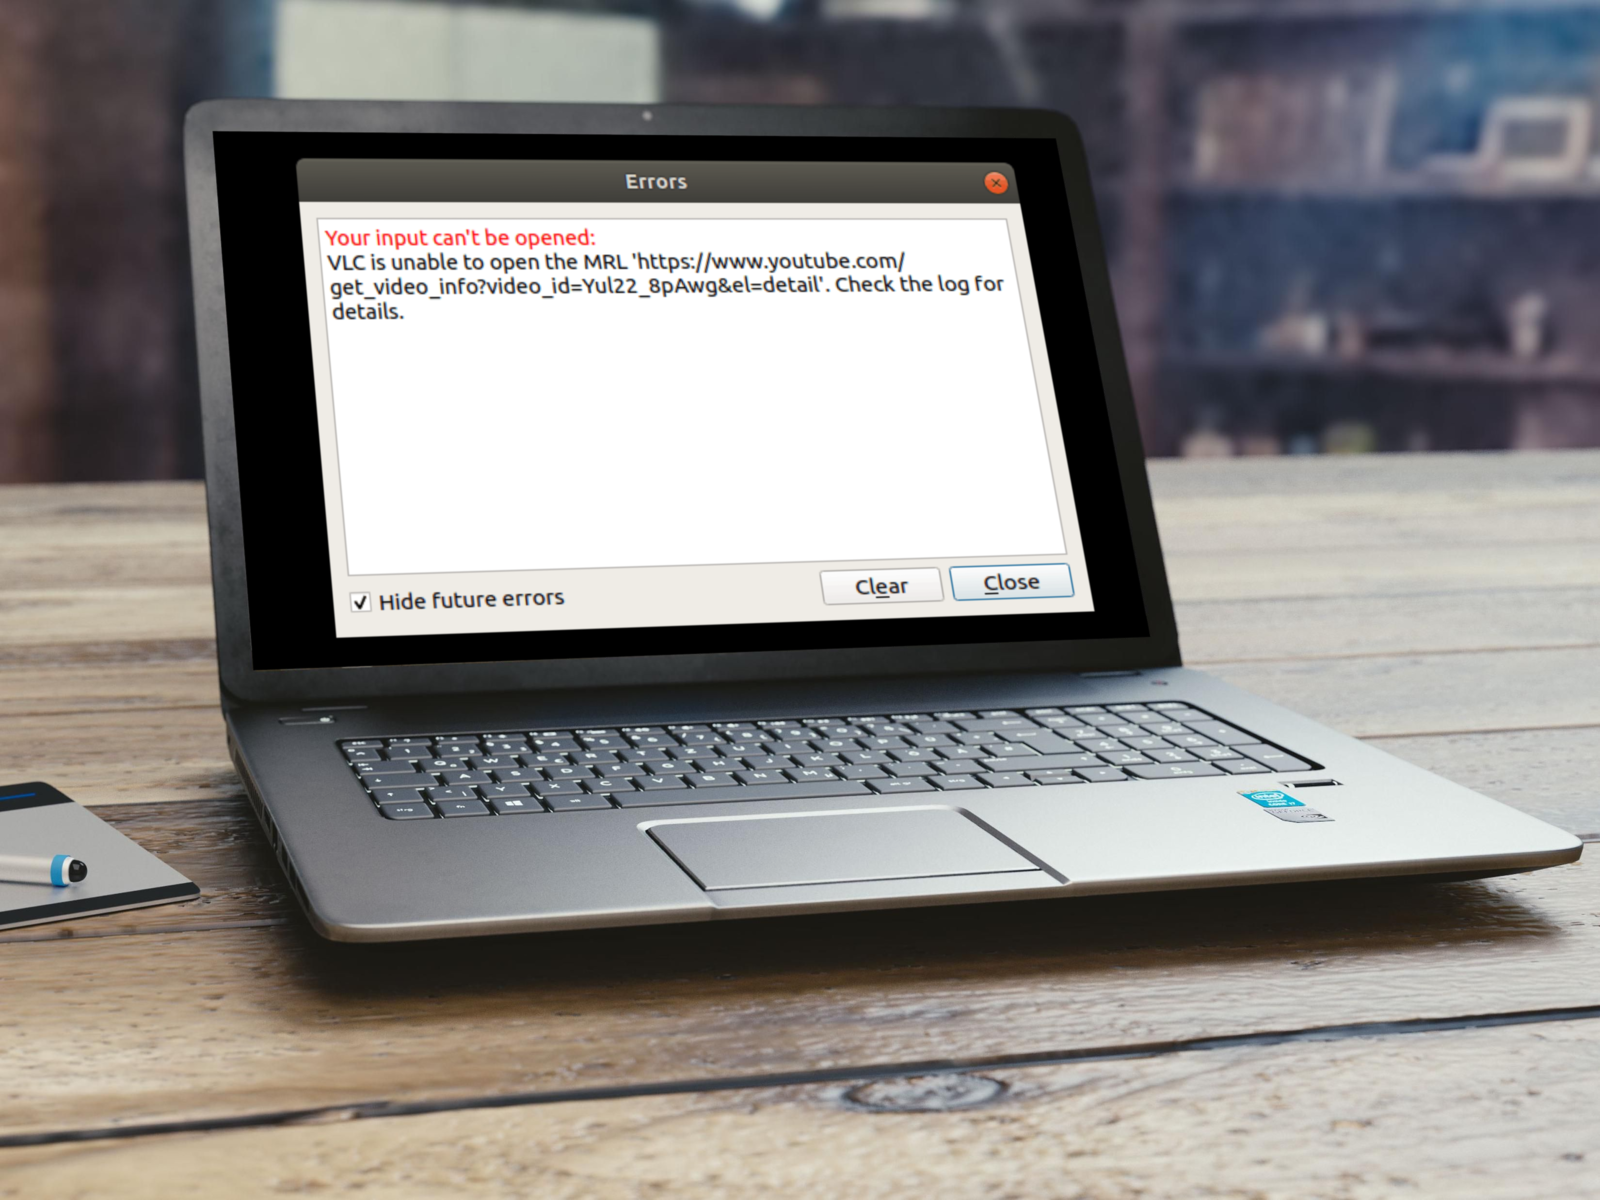
3 Quick Ways to Fix VLC When It is Unable to Open the MRL

Are you seeing VLC is unable to open the MRL error wherever you are trying to play a video on the VLC Player?

If so, then you are not alone. It is one of the common errors of the VLC media player that pops up when you want to stream videos on VLC from a different source.

Notably, this error is triggered when you try to play videos from YouTube or other online sources and the VLC player is not able to find the target file.

This means you will come across the VLC is unable to open the MRL error when you try to open a file or stream a video that is not physically located on the local computer.

Thankfully, in this guide, we will give you three effective solutions that have been tested and tried to fix the VLC is unable to open the MRL error and help you get back to content watching. Let us get right into it.

What is VLC MRL?

MRL stands for Media Source Locator. It helps the VLC media player locate the multimedia resource. MRL is used by Xine media players as well as the Java Media Framework, in addition to VLC.

A media resource locator (MRL) is known as a string of characters used to identify a multimedia resource or part of a multimedia resource. An MRL is often used to identify inputs or outputs to the VLC media player.

You will come across the VLC is unable to open the MRL error when you try to open a media file that is located on external storage, online, or on another server. If VLC is unable to locate the file, then you will be shown this error.

Quick Tip:

If VLC is unable to open a certain video file format, you can try another media player. CyberLink Power DVD is a software decoder that allows you to watch high-quality MPEG-1 and MPEG-2 videos.

PowerDVD requires only a DVD drive on your PC to play DVDs, VCDs, SVCDs, and mini DVDs, as well as other video and audio files.

CyberLink Power DVD

Try to play your movie in this app and see if you get the same error.
Free trial Visit website

How do you find MRL?

Notably, the MRL syntax is:

[[access][/demux]://]URL[#[title][:chapter][-[title][:chapter]]] [:option=value …]

How do you fix VLC Cannot open MRL file?

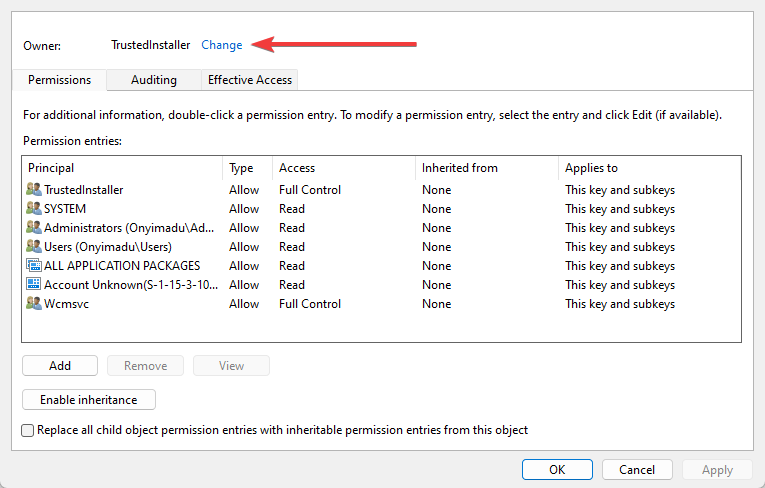
1. Claim the file ownership

  1. Right-click on the file on which you are getting the error.
  2. Select Properties from the drop-down list.
  3. Switch to the Security tab.
  4. Click on Advanced.
  5. Click on the Change button for the Owner.
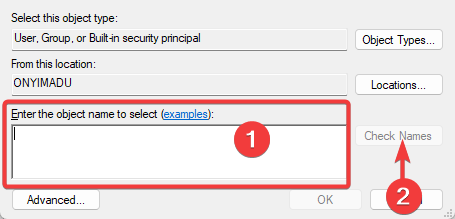
  6. In the new window that opens, type the below in the Enter the Object Name to select box. Administrator
  7. Click OK.
  8. Check the Replace All Child Object Permission Entries With Inheritable Permission Entries From This Object box.
  9. Click on Apply and check if this fixes the issue or not.

This issue, as already mentioned, happens when you try to run a video from an external drive. In such a case, you should ensure that you have proper rights to run the video.

Following the above steps, you can claim ownership of the file and try running it on the VLC media player to check if this fixes the issue or not.

If you are facing other issues, like VLC could not open the MP4a audio encoder issue, we recommend you check out this informative guide to find solutions.

2. Update or reinstall VLC

Update VLC

  1. Open VLC media player.
  2. Click on Help.
  3. Select Check for Updates.
  4. VLC will check if a new update is available, and if it detects one, it will prompt you to install the update.

Reinstall VLC

  1. Open the Start menu.
  2. Search Control Panel and open it.
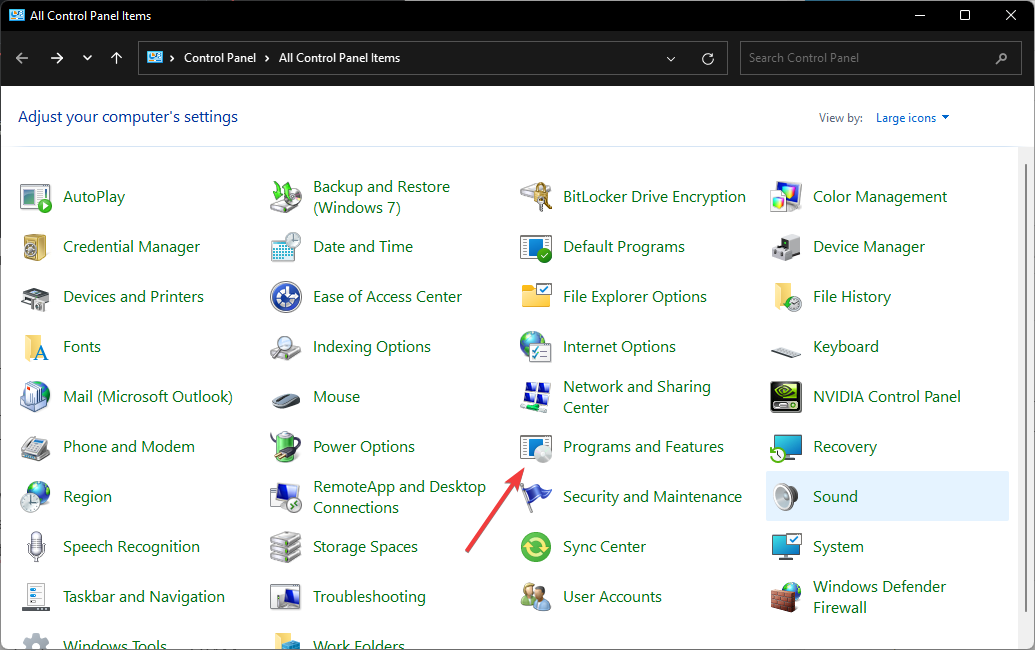
  3. Click on Programs and Features.Programs and features control panel
  4. Select VLC.
  5. Click on the Uninstall button at the top.
  6. Head over to the official website.
  7. Download the VLC media player software.
  8. Follow the on-screen instructions to install VLC on your PC and check if this fixes the issue or not.

3. Check the source video

There are chances that the video you are trying to stream on VLC itself has a problem, which is why you are coming across the VLC unable to open the MRL issue.

In such a case, we would suggest you copy the URL and try running it on another player. You can also take the help of some of the online streaming players.

If the video is not working on another player, then the problem isn’t with the VLC player, but with the source of the video instead.

How do I allow VLC through the Firewall?

  1. Open the Start menu.
  2. Search for Windows Defender Firewall and open it.
  3. Click on the Allow an app or feature through Windows Defender Firewall on or off.
  4. Click on Change settings.
  5. Scroll down and locate VLC Media Player. If it is not there, then click Add at the bottom and add VLC from its installation directory.
  6. Tick the box next to VLC Media Player.
  7. Select both the Public and Private network boxes for it.
  8. Click OK to confirm your settings.

Chances are that the Windows Defender Firewall isn’t allowing the VLC player to stream video from a website for security reasons, which could be a false alarm.

In such a case, simply allow the VLC media player software through your Windows Defender Firewall and check if this fixes the issue or not.

VLC is unable to open the MRL on YouTube?

  1. Head to this website.
  2. Copy the codes in the .Iua file on a notepad.
  3. Rename the file to youtube.luac.
  4. Copy the file to the Iua folder where you have installed the VLC Media Player, which should be the below:
    C:\Program Files (x86)\VideoLAN\VLC\lua\playlist
  5. Within the Iua folder, open the playlist folder.
  6. Paste the youtube.Iuac file inside the playlist folder.
  7. Open the VLC player and check if the player is streaming the YouTube video or not.

In case the above doesn’t help, you can check out our guide on the best universal video players that you can install on your Windows OS PC and enjoy video watching.

That is it from us in this guide. Let us know in the comments below if this guide helped you fix the VLC is unable to open the MRL error or not. You can also share any other method that helped you resolve the problem.

Posted in Fix

Opera GX CPU Limiter Not Working? Here’s What To Do

For many users, the Opera GX CPU limiter is not working properly (i.e. not doing its job) or the slider is completely missing. If you too experience these, you’re in the right place.

We will give you effective fixes to put an end to this. Let’s jump right in.

How do I fix Opera GX if the CPU limiter is not working?

1. Check CPU Limiter settings

  1. Launch Opera GX.
  2. From the sidebar, click on the cogwheel icon to open Settings.
  3. Select GX from the left menu.
  4. Scroll down and ensure the toggle for Keep limiters enabled after browser restart is turned ON.

2. Enable GPU Limiter from GX Control

  1. Open opera GX.
  2. Hit the GX Control icon in the Opera GX sidebar.GX control button
  3. Scroll down to CPU Limiter, and make sure to toggle-on the button to enable it. opera gx enable cpu limiter

3. Disable conflicting extensions

  1. In Opera GX, click the Opera icon to open the Menu.opera gx menu icon
  2. Select Extensions> Extensions.opera gx extensions settings
  3. Toggle off the buttons and disable all extensions.disable extensions opera gx
  4. Check if the CPU limiter is now working. If it does, re-enable each extension one by one. When the CPU limiter stops working again once you activate a specific extension, you’ll find your culprit. Keep it disabled when you need the limiter to work.

4. Create a new user profile

  1. Type opera://settings/side-profiles-settings in the Opera address bar to find profile settings.opera gx profile settings
  2. Hit the Create profile button.create profile button in opera gx
  3. Enter the profile’s name, pick a color, a configuration, then hit the Add new profile button.new profile settings in opera gx

5. Scan the PC for viruses

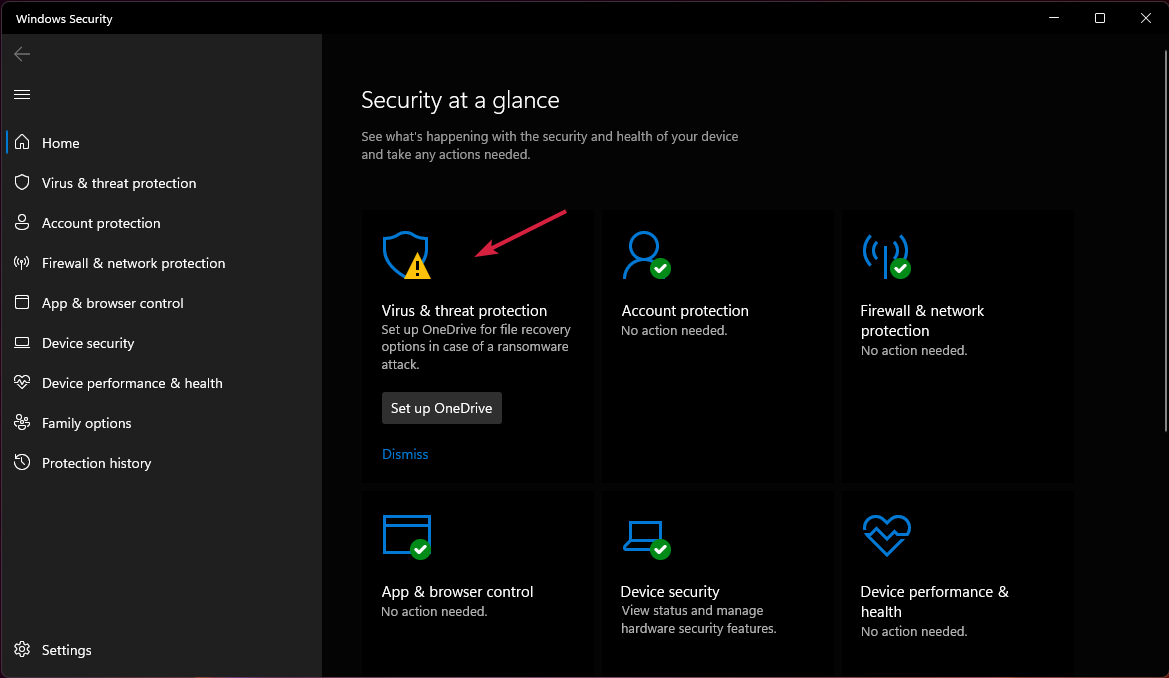
  1. Open the Start menu.
  2. Search and open Windows Security.
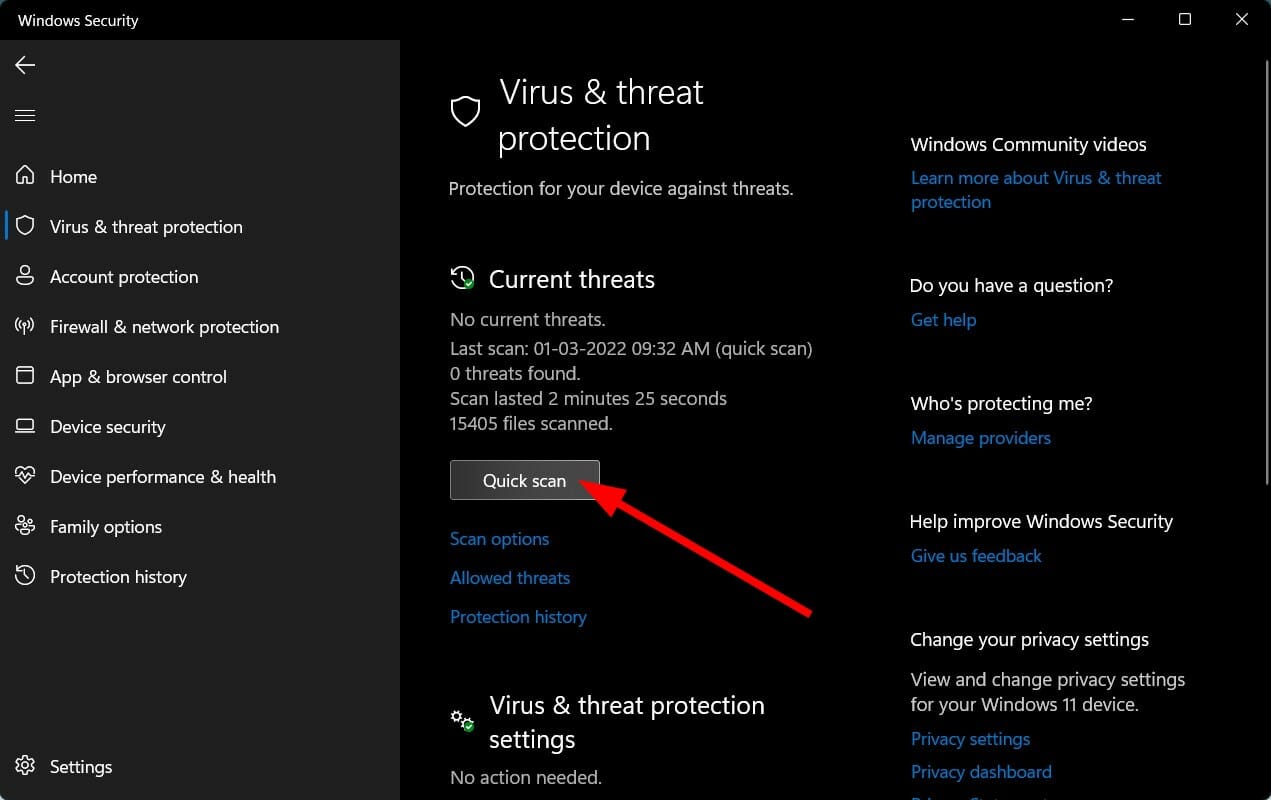
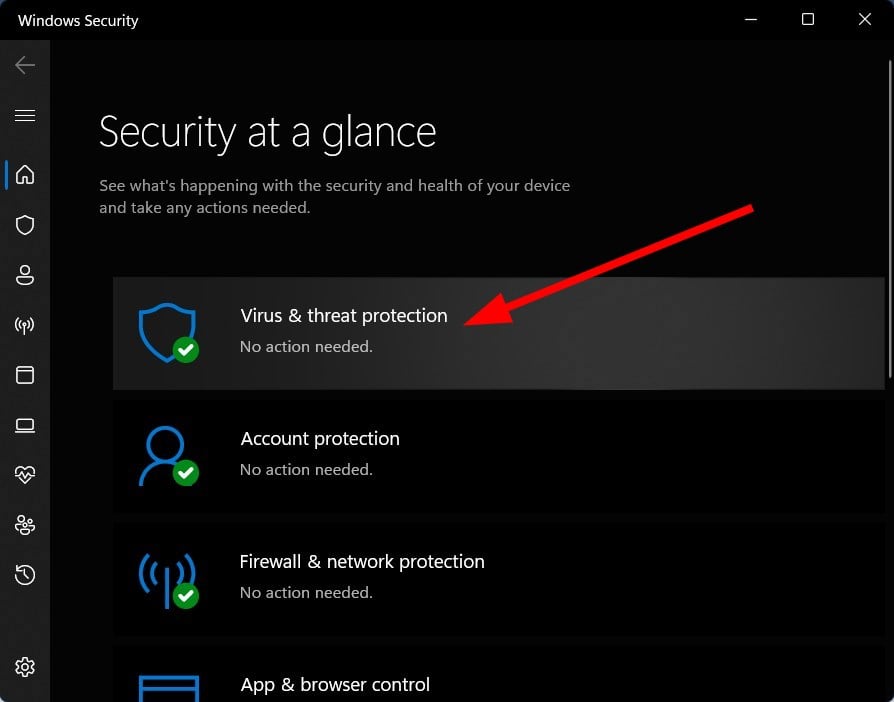
  3. Click on Virus & threat protection.
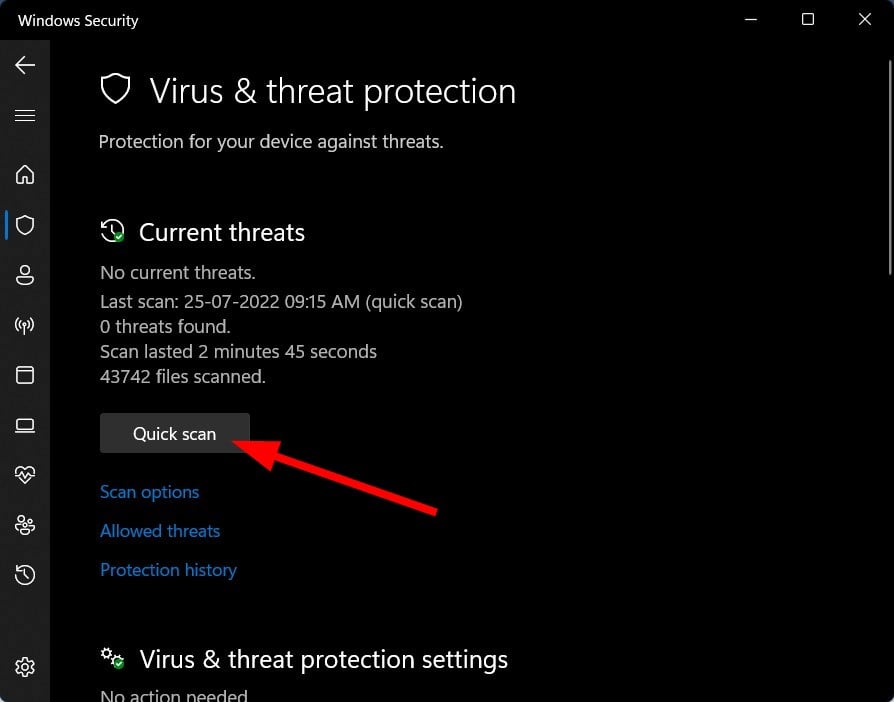
  4. Select the Quick scan button.
  5. Let the scan finish, and remove unwanted programs or viruses from your PC.

We used Windows Security as an example, but the same applies if you use a third-party antivirus. And if you don’t have any security utility, please install one.

Even if you think you only access safe sites and apps, you can never be too sure. Enable Windows security or use a reliable third-party antivirus for Windows 11.

6. Reinstall Opera

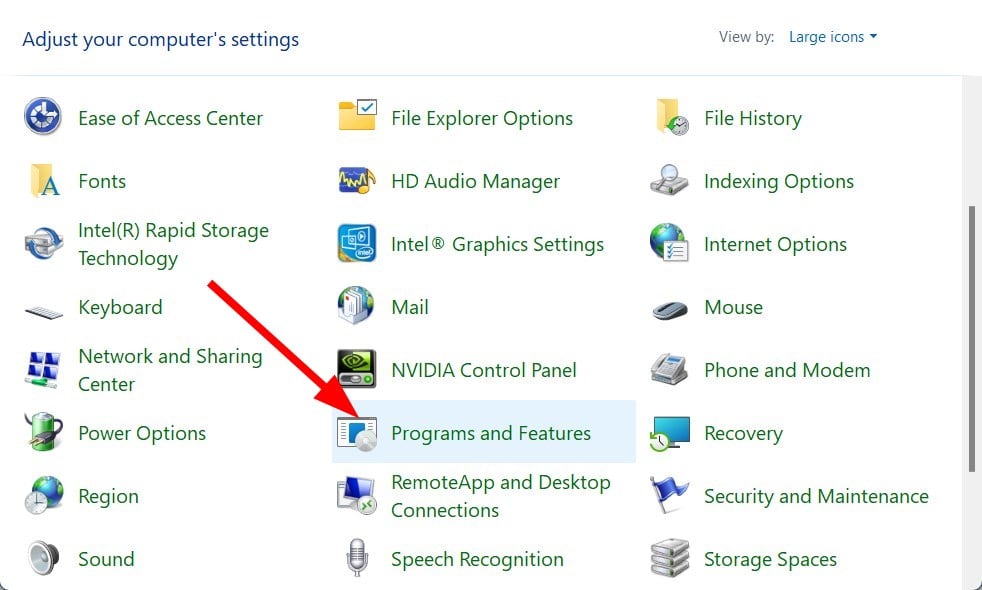
  1. Open Control Panel.
  2. Click on the Programs and Features options.program and features
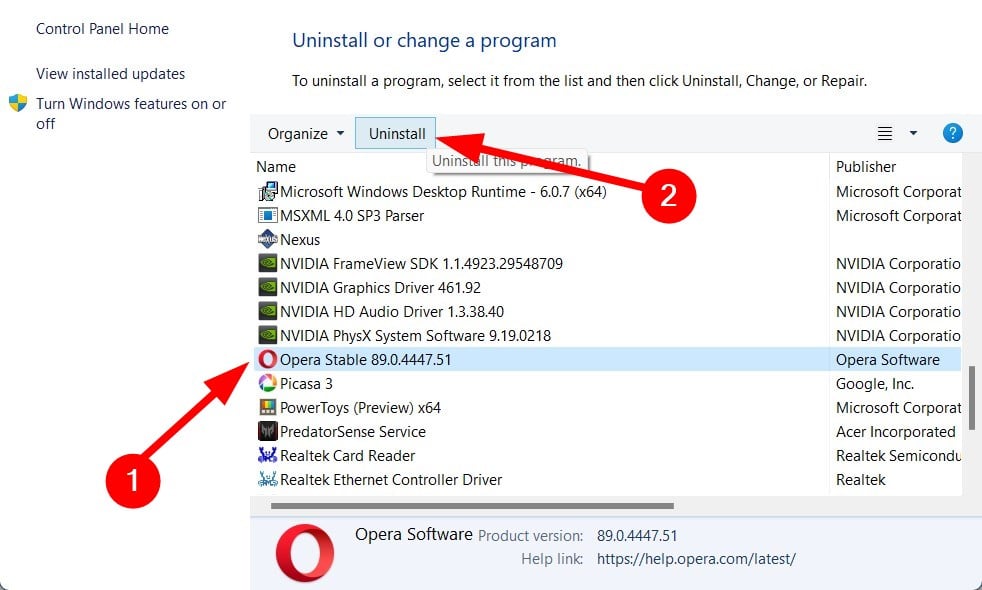
  3. Select Opera GX from the list of apps.
  4. Hit the Uninstall button at the top.
  5. After Opera is successfully uninstalled, restart your PC to remove all remaining files.
  6. Open the official website.
  7. Download Opera GX browser.
  8. Install it and do not interrupt the process.
  9. Check if this fixes the issue or not.

There are chances that some important files went missing during the installation. Reinstalling might help fix the problem.

Does Opera GX use a lot of CPU?

Yes, a lot of users have reported with proof, that the Opera GX indeed uses a lot of CPU and RAM – somewhere between 30% and 70%. In this case, you can make use of the Opera GX Control and limit the CPU and RAM for the browser.

How do I make Opera use less CPU?

You can limit the resource access of the Opera GX browser using the built-in CPU and RAM limiter that is located under the Opera GX Control.

  1. Launch the Opera GX browser.
  2. Click on the Speed dial/GX Control in the left column. This will open the Opera GX Control.
  3. First, you will see the RAM limiter toggle.
  4. Simply turn ON the RAM limiter option.
  5. Select the amount of RAM you would like the browser to use, using the slider.
  6. Scroll down a bit and you will see CPU usage control.
  7. Select how much CPU you would like the browser to use. Do note that Opera GX does not let you allocate the number of cores to the browser.

Does Opera GX boost your FPS?

In a bunch of tests, it has been found that despite being a browser for gamers, Opera GX isn’t that good.

While the hardware acceleration does get better RAM and CPU management in Opera GX, the browser does not boost your FPS in any way.

Besides, you will get better results with Google Chrome having hardware acceleration turned off. In case, you want some better alternatives, you can check out our guide that lists some of the best browsers for your PC.

That is it from us in this guide. Let us know in the comments below if this guide helped you fix the Opera GX CPU Limiter not working issue.

5 Best Browsers that Support Zendesk [Ranked by Integrations]

With the help of Zendesk browser support, you may communicate with customers utilizing this customer support platform.

Zendesk unifies all your customer interactions into one simple-to-use platform, whether your customers prefer to connect by phone, chat, email, social media, or any other channel.

This makes it simple to manage all your support requests, respond to inquiries quickly, and assess the efficiency of your customer service agents.

Before using ZenDesk, you must confirm that the computer meets ZenDesk system requirements and that JavaScript, Cookies, and local storage are enabled in the browser.

Let’s move on to the list of some of the safest browsers with ZenDesk browser compatibility.

Is Zendesk browser based?

Zendesk Support is a web-based SaaS (software as a service) program accessed through a web browser. In other words, yes, it is web-based, and the software requires a browser to run.

According to the official website, Chrome, Safari, Edge, and Firefox are the most supported browsers. The software will, however, function on most chromium-based browsers.

What browsers does Zendesk support?

Opera One – Offers speed, privacy, and user experience

Although Zendesk developers have not officially listed Opera One as a supported browser, you can use Opera One to access the Zendesk tool.

Opera One is incredibly fast and allows for good multitasking, making handling tasks like customer service or ticket handling easy.

There is no need to utilize a third-party ad blocker because Opera One has an integrated ad blocker. Aside from this, it is secure, and cutting-edge security procedures will stop any data leaking.

Additional features:

  • Social Media Side Bar
  • Built-in AI
  • Ad Blockers and VPN

Opera One

Go with this highly secure and private browser that ensures Zendesk access.
Free Download Visit website

Google Chrome – Highly customizable

Google Chrome and Zendesk are easily connected, and Chrome is compatible with most of the tool integrations. For example, you may set up a ticketing system, control users, or even make chat groups.

You can also download the ZenDesk Chrome extension to have the software within the browser for easy accessibility.

In addition, you can set up the Chrome Developer Tools to assist with analyzing, manipulating, and debugging tools.

This means that in addition to using ZenDesk, you may also use the development version of the browser to fix any flaws or problems with the software.

Additional features:

  • Live Captions for Any Video or Audio
  • Extensions in Incognito Mode
  • Highly customizable

⇒ Get Chrome

Mozilla Firefox – One of the earliest browsers to support APNG

Another browser that ZenDesk officially supports is Firefox.

When you use Firefox on a host-mapped domain, Zendesk can detect this and request you to provide permission for Zendesk to utilize cookies.

Zendesk developers are currently updating the service to function seamlessly with Firefox. Consequently, following browser iterations will also support the service.

Additional features:

  • Customizable Toolbar
  • Add on Compatibility
  • Enhanced Tracking Protection

⇒ Get Firefox

Safari – Private browsing

safari browser

Apple Safari’s most recent updates have incorporated a security feature that could affect Zendesk compatibility.

This security feature was called Apple’s Intelligent Tracking Prevention (ITP).

Still, thanks to the active Zendesk developers, a new flow was built that detects when a Safari browser is being used on a host-mapped domain and asks you to grant Zendesk permission to utilize cookies.

Because of this, Safari has full compatibility with the software, and you can use the browser to work with the service.

Additional features:

  • Private Browsing
  • Tab Bar Location Customization
  • Customizable Start Page

⇒ Get Safari

Microsoft Edge – Extension support

edge browser

Microsoft Edge is one of the browsers the service officially supports, and the software has been enhanced to function appropriately with the browser.

In addition to performing as well as other web browsers, Microsoft Edge also uses less RAM. As a result, it is simple to install on business computers and can be used to improve customer service.

Additionally, it supports extensions that provide any missing functionality from the browser.

Additional features:

  • Dark Mode
  • Extension Support
  • Customization of Page Layout

⇒ Get Microsoft Edge

Is Zendesk cloud-based?

Zendesk does make use of the cloud. Zendesk’s cloud-based CRM provides all the advantages of cloud computing in a few simple-to-implement solutions.

While using Zendesk, you will quickly notice how the cloud can change your business.

Zendesk strives to improve customer engagement for support, sales, and customer success teams. As a result, you may spend less on equipment and retain all your consumer information in one location.

You can utilize the capabilities of this management software using a suitable browser, which will help you improve the customer service for your company.

Chrome is the best browser for Zendesk browser support, but other browsers mentioned above are also good at working with the software.

In the comment section below, let us know which browser you chose and why.

Download Maxthon Browser for Windows 10 & 11 [32/64 bit]

We all use the internet daily for professional, domestic, and recreational purposes. However, there are several browsers that you can download on your device.

Likewise, browsers can differ based on operating systems, like Windows, Linux, and macOS. Hence, we’ll discuss how to go about Maxthon download for Windows 10 and 11.

It depends on the Chromium code. Likewise, there is a version of the browser for mobile devices. Maxthon is not a widely known browser, but it offers the best features compared to many other browsers.

Furthermore, the Maxthon browser has many features that are not available on other browsers. Apart from being a browser that supports blockchain apps, the Maxthon browser provides technical support for web apps.

Also, it is one of the browsers with the strongest security and privacy system. This feature is essential for users’ data protection because internet fraud is a common issue.

Moreover, the Maxthon browser is best for online anonymity. It allows you to browse the internet without being noticed or detected. Hence, it allows you to access army websites that aren’t available on some other browsers.

Likewise, the browser comes with inbuilt tools like an Ad blocker and incognito mode that helps you browse the internet without being interrupted by ads. The incognito mode is reliable for users who want to visit some websites but don’t want to save their browsing data.

Another advanced feature of the Maxthon is cross-device sync. The syncing feature helps users synchronize browser settings and data across different devices for easy access. However, it has the best safety ratings because of its intolerance for malware and viruses.

What is the latest version of the Maxthon browser?

The latest version of the Maxthon browser is Maxthon 6.1.3.3000. This new version is embedded with sophisticated features like HTML 5 support which is unique to only a few browsers.

Also, it comes with an inbuilt Offline installer for Pc that allows you to send files among different devices. Unlike the previous versions of the Maxthon browser, it is faster and more efficient.

Furthermore, it features a dual-core display design that helps users load web pages quickly and smoothly. Likewise, the new version has more customizable features that allow you to configure your tab settings and browser interface.

Nevertheless, the Maxthon browser has a portable version that requires less space than the full version. It is considerable for those who need a short time browser with a small size.

Is the Maxthon browser free?

The Maxthon browser is a free web browser app. It is a reliable and fast browser that houses several features. Unlike some browsers, Maxthon offers many advanced services to users freely, without having to pay anything. However, the browser is free for every operating system.

Quick Tip:

If you want a reliable browser that is secure and offers dedicated support for all popular operating systems, we recommend trying Opera One.

Just like Maxthon, it’s very customizable, with a wide range of installable extensions, tons of integrations, and useful tools to create your own workspace. Also it comes with native AI and a modular AI-ready design.

Opera One

Enjoy fast browsing and create your own workspace with Opera One!
Free Download Visit website

How do I download & install Maxthon on Windows 10 & 11?

1. Use the main installer

  1. Launch your browser and go to the Maxthon browser official website.
  2. On the homepage, navigate to the right side of the screen and select PC Download (32/64-bit).
  3. Click on the downloaded file and choose the installation directory.
  4. Follow the Wizard installer and the onscreen prompts.
  5. Click on Install.
  6. Now, wait for the installation to finish.
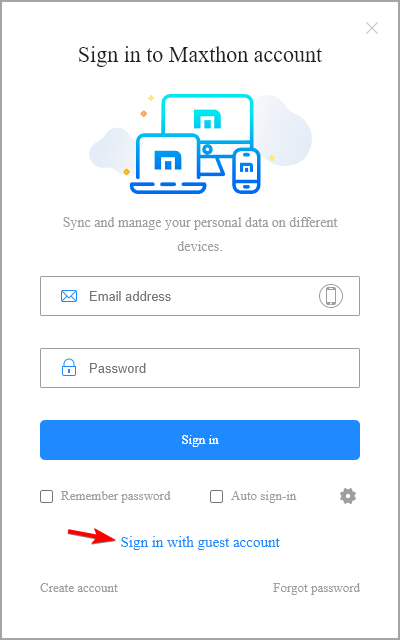
  7. After the setup is finished, click on Sign in with a guest account.

After the installation is complete, you can set up your browser and sign in with the necessary data. However, the free download for Windows 10/11 64-bit / 32-bit is available on the official website.

2. Use the Portable version

  1. Go to the Maxthon official download page.
  2. Select Portable version (32/64-bit).
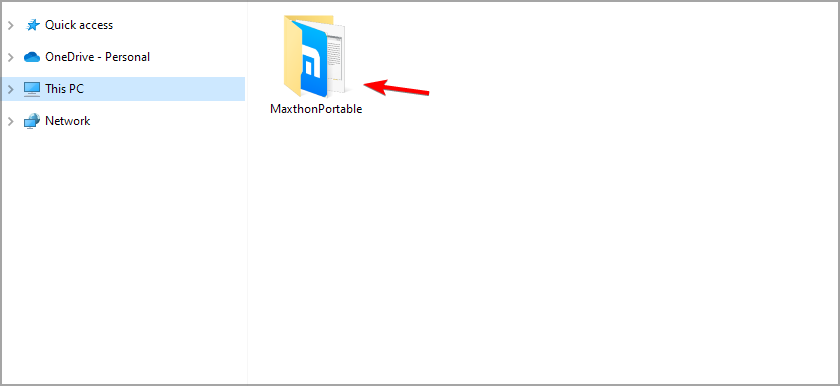
  3. Wait for the download and unzip the compressed MaxthonPortable to the desired location.
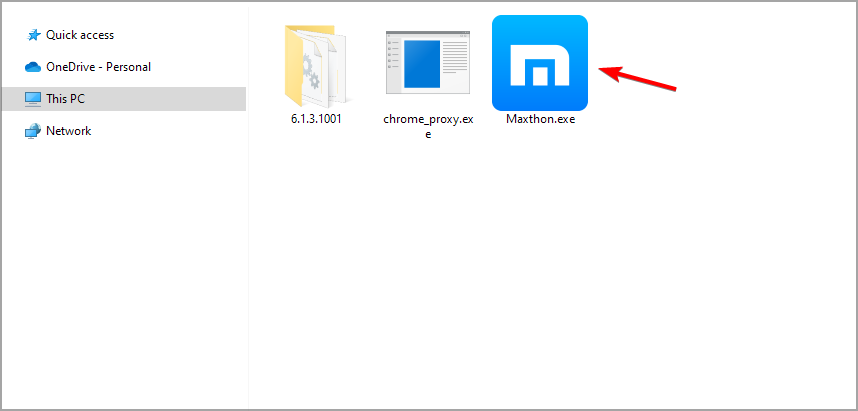
  4. Locate it and run the Maxthon.exe file.

How do I update my Maxthon browser?

  1. Launch the Maxthon browser.
  2. Click on the Menu button.
  3. Scroll down and select Check for updates.

It will automatically check for updates and install them if any are available. After the update is complete, restart your browser and enjoy the new features.

Conclusively, users can refer to our article about how to install the Maxthon browser on Windows 10 for more guidelines.

Also, we recommend you read about how to activate the dark mode inside the Maxthon browser. It will help you protect your eyes from the stress of staring at the screen for a long.

Leave your questions and suggestions below in the comments section. We’d like to hear from you.

How to Use VPN on PS4 & 5 Best VPN for PS4 to Pick From

PlayStation 4 doesn’t have native support for VPN. That means that you can’t go to the PlayStation Store to find, download, and install a VPN client like on Android or iOS.

However, you can still add VPN functionality to your PlayStation 4 in other ways.

Besides, A PS4 VPN comes in handy for several reasons, such as:

Our guide below shows the exact steps to help you use VPN for PS4 by sharing a Windows 10 VPN connection (Wi-Fi and wired), configuring DNS servers on PS4, and installing a VPN at the router level.

But you can’t start before getting equipped with a reliable VPN. Discover the 5 best VPNs for PS4, which we rated by security and speed, as well as gaming and streaming features.

Can you put a VPN on a PS4?

Yes, you can install a VPN on your PS4. Despite Playstation not offering a native VPN, you can install a third-party client to secure your connection.

Keep in mind that some PS4 and PS5 games block VPN usage. That is generally for security reasons or to avoid in-game cheating.

For this reason, it’s advised you use a premium VPN that is capable to encrypt your traffic and make it appear as if you browse on local traffic.

Make sure to enable double VPN or obfuscation mode if your VPN client offers them.

How do I use VPN for PS4?

1. How to use VPN on PS4 on PC

1.1 Set up Windows 10 VPN with PS4 (wired)

  1. Sign up for a PIA subscription plan.
  2. Download and install PIA for Windows 10.
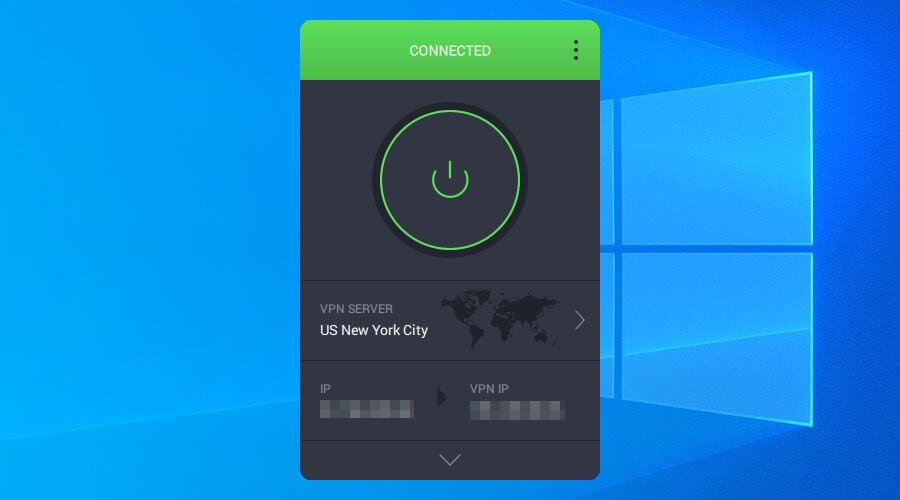
  3. Connect to a PIA VPN server.PIA is connected to a US VPN server
  4. Connect Windows 10 and PS4 using an Ethernet cable.
  5. Right-click the Start button and go to Network Connections.
  6. Click Change adapter options.
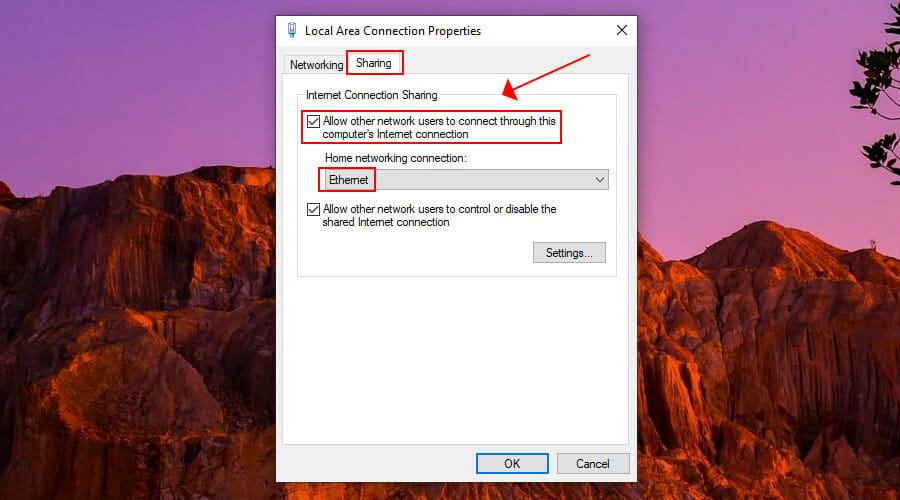
  7. Right-click the PIA connection and go to Properties.enable Ethernet sharing on Windows 10
  8. Switch to the Sharing tab.
  9. Enable Allow other network users to connect through this computer’s Internet connection.
  10. Set Home networking connection to your Ethernet connection.Set up an Internet connection on PS4
  11. On the PS4 home menu, select Settings.
  12. Go to Network > Set Up Internet Connection.
  13. Select Use LAN Cable > Easy.

Sharing your Windows 10 VPN connection with your PS4 through an Ethernet cable is the best option. You can easily switch VPN servers from the desktop client and control various gaming features, such as native port forwarding, DNS servers, VPN protocol, encryption mode, and proxy server.

The only downside is that you must keep your Windows 10 PC turned on while you play on PS4 through VPN, as well as keep it as close as the LAN cable allows it.

2.1. Set up Windows 10 VPN with PS4 (wireless)

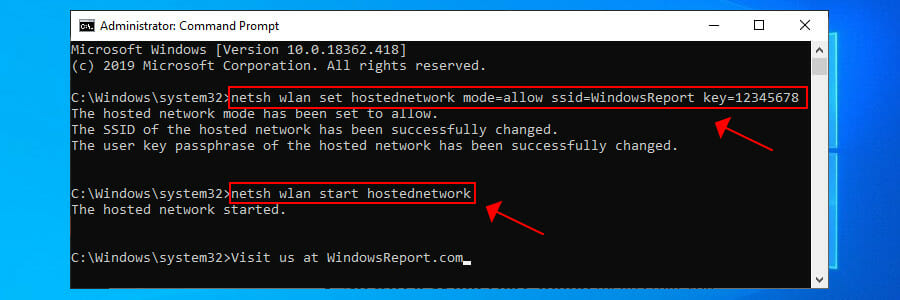
  1. Run Command Prompt as admin*.
  2. Paste this to create a hosted network**:netsh wlan set hostednetwork mode=allow ssid=ConnectionName key=Password
  3. Replace ConnectionName and Password with what you want.
  4. Paste this to start the hosted network***:netsh wlan start hostednetwork
  5. Sign up for a PIA subscription plan.
  6. Download and install PIA.
  7. Connect to a PIA VPN server.PIA is connected to a US VPN server
  8. Right-click Start and go to Network Connections.
  9. Click Change adapter options.
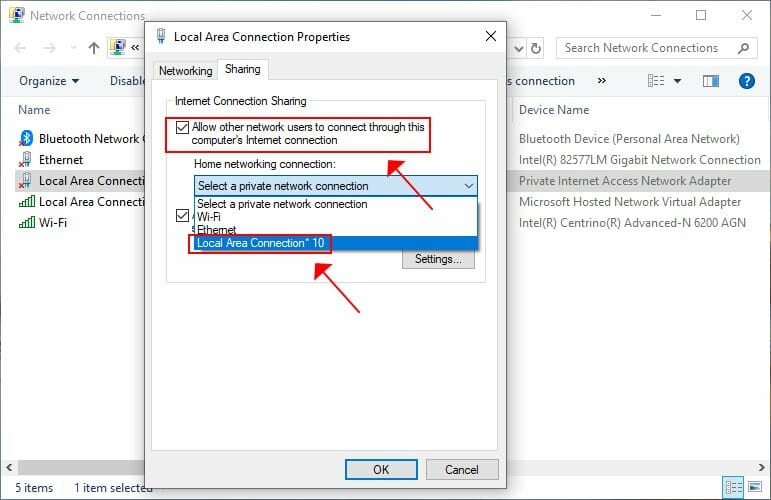
  10. Right-click the PIA connection and select Properties.enable Internet connection sharing on Windows 10
  11. Switch to the Sharing tab.
  12. Enable Allow other network users to connect through this computer’s Internet connection.
  13. Set Home networking connection to the connection created by Microsoft Hosted Network Virtual Adapter.Set up an Internet connection on PS4
  14. On the PS4 home menu, select Settings.
  15. Go to Network > Set Up Internet Connection.
  16. Select Use Wi-Fi > Easy.
  17. Choose your Wi-Fi network and enter the password.

*If you can’t run Command Prompt as admin, check out our quick fixes.

**You can check if your Windows 10 PC supports hosted networks using netsh wlan show drivers.

***If the hosted network can’t start, make sure to diagnose and fix the problem.

The wireless option is preferred when you don’t have the possibility to plug an Ethernet cable into your Windows 10 PC and PS4. Plus, you don’t have to keep the gaming console and desktop close together, as long as the router is nearby.

However, your Windows 10 PC must support hosted networks in order for this to work. If your Wi-Fi card is too old, you have to buy a new Wi-Fi adapter.

On top of that, Wi-Fi connections aren’t as stable as Ethernet connections, which is a huge requirement for PS4 online gaming.

2. How to use a VPN on PS4 without PC

2.1. Set up Smart DNS servers on PS4

  1. Sign up for a CyberGhost VPN subscription plan.
  2. Log in to your CyberGhost VPN account in the web browser.
  3. Add your IP address to the Smart DNS whitelist.
  4. Copy the primary and secondary DNS server addresses.
  5. On the PS4 home menu, go to Settings > Network > Set Up Internet Connection.configure DNS servers on PS4
  6. Select Wi-Fi or LAN cable, depending on how the PS4 goes online.
  7. Choose Custom mode.
  8. Set IP Address Settings to Automatic.
  9. Set DHCP Host Name to Do Not Specify.
  10. At DNS Settings, select Manual.
  11. Enter the primary and secondary DNS servers from CyberGhost VPN.

Setting up the exclusive DNS servers provided by the VPN client on the PS4 is an excellent way for avoiding geo-blocks and accessing restricted content on the web browser. You can unblock Netflix catalogs from other regions, watch Hulu or BBC iPlayer if it’s not available to your country, and so on.

Plus, the streaming quality and connection speed should be better because this method doesn’t use encryption. On the downside, it can’t protect you from DDoS attacks, so you have to rely on the security features of your router.

2.2.. Set up the VPN on your router

  1. Log in to your router admin panel.
  2. Check if your router supports VPN client mode.
  3. Sign up for a PIA subscription plan.
  4. Find the VPN client area on your router’s firmware.
  5. Specify the PIA account credentials.
  6. On the PS4 home menu, go to Settings.Set up an Internet connection on PS4
  7. Go to Network > Set Up Internet Connection.
  8. Choose Use Wi-Fi > Easy.
  9. Select your home Wi-Fi network.

Installing the VPN client at the router level is a great way to protect the devices of the entire household. It redirects network traffic through VPN servers for all connected devices.

That means that anyone connected to your Wi-Fi can hide their IP address and geo-location, unblock streaming services, defeat censorship, reduce their ping while gaming, and so on.

However, your router must support VPN client mode in order for this to work (VPN server mode is something entirely different).

Otherwise, you have to install new firmware on your router that allows VPN client connections, but only if your router lets you set up custom firmware, such as DD-WRT, Tomato or OpenWRT (free and open-source).

Another solution is to buy a pre-flashed router with a VPN client ready to go, but this could turn into an expensive ordeal. Check out the best VPN routers for gaming.

What are the best VPNs for PS4?

Private Internet Access – the biggest number of servers

Created by Kape Technologies, Private Internet Access (PIA) is the top VPN for your PlayStation 4. It has a huge network of VPN servers: more than 3,300 in 48 countries. You can use it to lower your ping in online games.

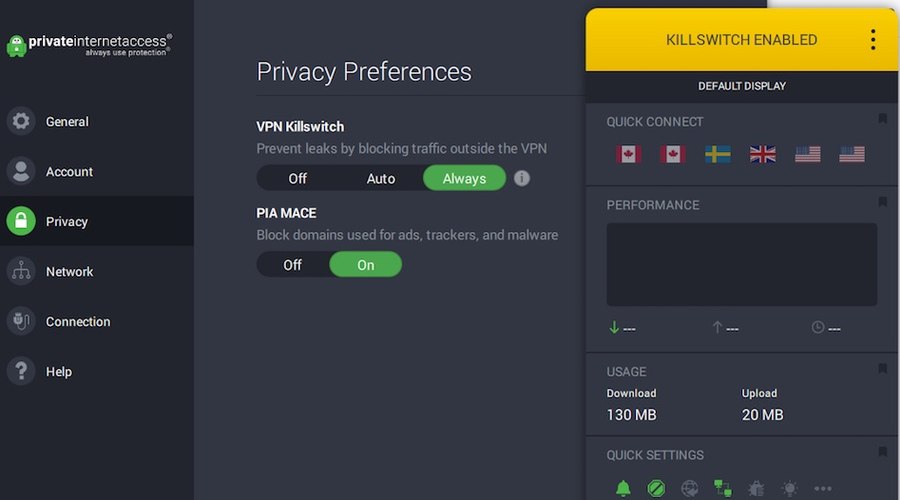
Furthermore, PIA supports OpenVPN and WireGuard protocols with up to 256-bit encryption. It also comes with port forwarding, split tunneling, a kill switch, as well as static and dynamic IP addresses.

The tool permits 10 simultaneous device connections. Or, you can easily set up the VPN client on your router using OpenVPN, since the router connection counts as only one. Also, PIA is the best VPN for Windows 10 laptops.

What else you must know about PIA:

  • A strict no-logging policy
  • No IP or DNS leaks
  • 24/7 live chat support
  • 30-day money-back guarantee (no free trial)

Private Internet Access

Use this fast and secure VPN to improve your PS4 gaming experience.<br>
Check price Visit website

NordVPN – best server obfuscation feature

Made by Tefincom & Co., NordVPN is one of the most secure virtual private network solutions in the industry, and ideal for PS4 users. It covers more than 5,100 servers spread across 59 different countries.

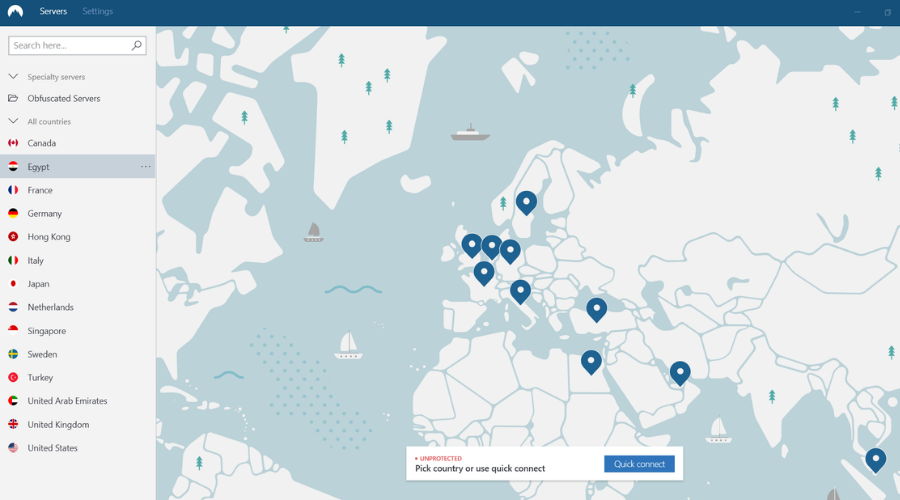
NordVPN uses OpenVPN for data protection and puts emphasis on security. In addition to regular VPN servers, it has Double VPN, Onion-over-VPN, obfuscated, and P2P servers, along with Dedicated IP servers.

Plus, this VPN can protect your from viruses thanks to a malware blocker for web browsers called CyberSec. NordVPN is compatible with all major devices and can protect up to 6 devices at the same time. You can also set it up on your router or configure its Smart DNS servers on your PlayStation 4.

What else you must know about NordVPN:

  • No identifying logs
  • No IP or DNS leaks
  • 24/7 live chat support
  • 30-day money-back guarantee (no free trial)

NordVPN

Protect your PS4 from hackers by turning to this ultra-secure VPN.
Check price Visit website

Surfshark – best for unlimited connections

Developed by Surfshark LTD, Surfshark is a popular choice among users who prefer a budget-friendly app that delivers the best VPN protection for PS4. It has more than 1,700 VPN servers in over 63 countries, each protected by private DNS.

You can use Surfshark to protect any number of household devices, so you don’t have to set it up on your router for more simultaneous connections. But you can still install the OpenVPN profile to share the VPN connection with your PS4.

Surfshark features OpenVPN and WireGuard, obfuscated and multi-hop VPN servers, split-tunneling mode, and a kill switch. You can also configure its Smart DNS servers on your PlayStation 4.

What else you must know about Surfshark:

  • No tracking logs
  • No IP or DNS leaks
  • 24/7 live chat and email support
  • 30-day money-back guarantee
  • 7-day free trial for Android and iOS

Surfshark

Set up this affordable VPN on your PlayStation 4 for secure and high-speed connections.
Check price Visit website

CyberGhost VPN – most user-friendly apps

Owned by Kape Technologies, CyberGhost VPN is the best free VPN for PS4 because it offers a free trial for Windows and Mac. It has the most extensive server coverage on this list: more than 6,500 in 89 countries.

You can use CyberGhost VPN to secure your Internet connection with 256-bit encryption OpenVPN. Or, if you want to skip the encryption part, you can set up its Smart DNS servers on your PlayStation 4 to access geoblocked content effortlessly.

CyberGhost VPN has DNS leak protection, split-tunneling mode, trusted Wi-Fi networks, and a kill switch. It supports 7 simultaneous devices and can also be installed on routers.

What else you must know about CyberGhost VPN:

  • A zero-logging privacy policy
  • No IP or DNS leaks
  • 24/7 live chat support
  • Up to 45-day money-back guarantee
  • 1-day free trial for Windows and macOS
  • 7-day free trial for Android and iOS

CyberGhost

Set up this VPN on your PS4 to enjoy unlimited streaming and better gaming.
Free trial Visit website

ExpressVPN – best VPN protocol for high speed and security

Made by Express VPN International LTD, ExpressVPN is one of the fastest VPNs for streaming, and you can use it to share your VPN connection with PS4. It’s also possible to configure ExpressVPN Smart DNS settings on PlayStation 4, as well as to install the VPN client at the router level.

The service covers more than 3,000 VPN servers in 160 locations and 94 countries. It uses OpenVPN to encrypt your traffic and also comes with a kill switch and split-tunneling feature. Plus, ExpressVPN works in China.

What else you must know about ExpressVPN:

  • No-logging policy
  • No IP or DNS leaks
  • 24/7 live chat support
  • 30-day money-back guarantee
  • 7-day free trial for Android and iOS

ExpressVPN

Set up this powerful VPN on your PlayStation 4 to reduce your ping in online games.
Free trial Visit website

In conclusion, you can still set up a VPN on PS4, even if the gaming console doesn’t have native VPN support.

It all comes down to picking the best scenario: sharing your Windows 10 VPN connection in wired or wireless mode, configuring Smart DNS settings on PlayStation 4 without encryption, or installing the VPN at the router level.

Using one of the 5 best VPNs for PS4 that we described above, you will significantly improve your gaming experience by adding more security, removing lag, and accessing exclusive game deals available to other regions.

How to Disable Specific Device Driver Update on Windows 10

Like many other Windows 10 users, you may need to disable a driver update for a specific device. We explore this and show you all you need to achieve this successfully.

Before we go into it, you should note that drivers are often essential software, so you should disable them only if necessary.

If you use the newest OS, you may love this guide, where we covered disabling automatic driver updates for Windows 11.

Are driver updates optional in Windows 10?

Driver updates are automatic on Windows 10, but they may be optional. The standard process happens through Windows Update, but you can turn this off.

You may manually update drivers using the Device Manager utility when Windows Update is turned off. With this tool, you can randomly select what driver will or will not be installed.

You should note that choosing to update drivers optionally gives you more control but exposes you to a higher risk of security breaches.

How can I disable driver update for specific device in Windows 10?

1. Use the Group Policy Editor

    The first method involves manually tweaking the Group Policy Editor. All you need to do is access it and change some values to restrict updates installation on a specific drive of your choosing.

  1. 1. Right-click on Start, then choose Device Manager.

  2. 2. Find the drive you want to block updates on and right click on it.

  3. 3. Select Properties from the list of options.

    device manager control panel properties
  4. 4. Go to the Details tab.

  5. 5. In the Property drop-down menu, click on Hardware Id.

  6. 6. Select all Ids, then copy + paste the data in any text editor.

  7. 7. Press the Windows + X keys on your keyboard and type gpedit.msc. Select Run As Administrator.

    open gpeditmsc
  8. 8. Then follow this path: Computer ConfigurationAdministrative TemplatesSystemDevice InstallationDevice Installation Restrictions

  9. 9. Select Prevent installation of devices that match any of these device IDs.

  10. 10. In the Policy window, click Enable, and then Show.

  11. 11. Copy Ids one by one from the saved document and paste them in separate Volume columns.

  12. 12. Save changes and exit Group Policy Editor.

  13. 13. At the next update, you should be prompted with an error. That is the confirmation that the tweaks were successful and the selected drivers won’t install anymore.

This complex solution won’t work on the Home edition of Windows 10. You’ll need the Professional, Enterprise, or Educational version to access Group Policy Editor.

Keep in mind that updating your drivers is an advanced procedure. If you’re not careful, you can cause permanent damage to your system by downloading the wrong driver versions.

We strongly recommend a dedicated tool to download all the outdated drivers on your PC on a schedule, not necessarily daily, to avoid certain conflicts.

Outbyte Driver Updater

Let your PC performance peak by optimizing and updating all your drivers.

2. Prevent auto-updating on a metered Wi-Fi connection

  1. Press Windows + I to open Settings.
  2. Go to Network & Internet.
    windows 10 disable driver update for specific device
  3. Choose Wi-Fi on the left side panel and click Manage Known Networks.
    windows 10 disable driver update for specific device
  4. Select your Wi-Fi network, click Properties, and enable Set as a metered connection.
  5. If you are using more wireless networks, you’ll have to set them up individually.

Since Microsoft forgot to implement standard selection, we must use tricks. This is a simple workaround that will prevent Windows 10 from updating.

Windows automatically sets limited connections to metered, but you can do it with Wi-Fi.

3. Block auto-updating on a metered Ethernet connection

  1. Press Windows + R, type regedit, and hit Enter.
  2. Navigate to the path below:
    Computer\HKEY_LOCAL_MACHINE\SOFTWARE\Microsoft\Windows NT\CurrentVersion\NetworkList\DefaultMediaCost
  3. Right-click on DefaultMediaCost, and choose Permissions.
    windows 10 disable driver update for specific device
  4. Select Advanced, and click Change at the top.
  5. Type your Microsoft account e-mail address in the Enter the object name box, then click Check name and confirm.
    windows 10 disable driver update for specific device
  6. In the Permissions for the DefaultMediaCost window, select the Users group, then check the Full Control box, and confirm.
  7. Right-click Ethernet and choose Modify, and in the Value Data box, type 2 instead of 1.
  8. Save the settings.

Regarding the Ethernet connection, Microsoft thinks that all Ethernet connections have unlimited data; we know that is false.

You’ll have to use a registry edit to tweak the wired connection. Remember that Registry Editor misuse can cause all kinds of trouble, so use it carefully.

If you can’t access the Regedit, follow our useful guide to fixing the Registry Edit access error.

4. Hide troublesome drivers with the Show or Hide updates tool

  1. Download the Troubleshooting tool.
  2. Click on the download and let the tool scan for the available updates.
  3. If there are available updates, you can choose whether you want to hide them or not.
  4. Click on an update to hide.
    windows 10 disable driver update for specific device
  5. When the next update occurs, selected updates will be skipped.

Since even Microsoft is aware of possible driver malfunctions that may occur after updates, they prepared a downloadable tool. You can’t block updates with built-in software, so this solution is viable.

Microsoft presents this tool as a temporary solution, but we think you can use it as long as you want.

If your PC insists on automatic Windows updates no matter what, read our guide about fixing Windows automatic updates.

That’s about it; if you have any comments, questions, or suggestions, just let us know in the comments section below.

How to back up the Taskbar in Windows 10

Having your taskbar backed up in Windows 10 can help you out whenever you want to reinstall your Windows operating system or perhaps upgrade to a newer version of Windows.

This backup of your taskbar will allow you to restore the apps you had in the previous version of Windows or in the previous copy, just by following a few easy steps.

So, before you go and reinstall your operating system, we would suggest you follow the tutorial listed below and create a backup copy of your taskbar to use later when you need it.

Note: When you place the backup of the taskbar to a new Windows operating system, be sure to have all the apps you had in the previous version that were pinned to the taskbar.

If not, install them again for the Microsoft Store.

How can I back up the Taskbar in Windows 10?

1. Tweak your Registry and backup the taskbar

    You can backup your taskbar by editing the Registry. The Registry Editor allows you to save backups of your pinned taskbar apps for later use.

  1. 1. Press and hold the button Windows and the button R on your keyboard.

  2. 2. A run window should appear where you will have to type in there regedit.

    Run regedit windows
  3. 3. Hit Enter on the keyboard.

  4. 4. The Registry Editor window should pop up on the screen.

  5. 5. On the left side in that window, you will need to left-click on the HKEY_CURRENT_USER folder.

  6. 6. Now, you need to left-click on Software.

  7. 7. In the Software folder, select Microsoft.

  8. 8. Navigate to the Windows folder.

  9. 9. While there, left-click on the CurrentVersion folder.

    microsoft windows current version registry editor
  10. 10. Go to the Explorer folder.

  11. 11. From there, open the Taskbar folder.

  12. 12. Right-click on the Taskbar folder you have on the left.

  13. 13. From the menu presented, left-click on the Export feature.

  14. 14. Now you will need to name the backup file as you like.

  15. 15. Save the .reg file to an external USB stick or an external hard drive for backup because you will need it later.

  16. 16. After you saved the export of the taskbar to your desktop, you will need to press and hold again the button Windows and the button R.

  17. 17. When the Run window pops up, you need to type in there the next command: %AppData%MicrosoftInternet ExplorerQuick LaunchUser PinnedTaskBar

    backup copy windows 10 taskbar
  18. 18. Press the Enter button on the keyboard to run the command.

  19. 19. You will now have in front of you the folder taskbar with all the apps you had pinned to it.

This is only the first part of our tutorial on how to backup your Windows 10 Taskbar. The steps to follow in the second part are listed below.

2. Restore the copied taskbar shortcuts from an external drive

  1. Press and hold the Windows key + R to open the Run window.
  2. In the Run window type the command posted here:
    %AppData%MicrosoftInternet ExplorerQuick LaunchUser PinnedTaskBar
  3. In the folder that opened up, you will need to copy the backup shortcuts you made a couple of steps above.
  4. Press and hold the Windows key + R shortcut once more.Windows + R
  5. Write regedit in the Run window.
  6. Press Enter on the keyboard.
  7. After the Registry Editor is opened, leave it there and move on to the following steps.
  8. Right-click in the taskbar on an open space.
  9. Select from there Task Manager by left-clicking on it.
  10. Under the Processes tab, close the explorer.exe by left-clicking on it. Then, left-click on the End Process button you have in the lower right side of the Task Manager window.
  11. Select the Registry Editor window and left-click on the File menu presented on the upper left side.
  12. Select from the File menu the option to Import.
  13. Now you will need to go and import the .reg file you made a couple of steps above from the USB stick or the external hard drive.
  14. After you import it, you can go again to the Task Manager window and left-click on the File feature.
  15. Left-click on Run new task next.
  16. Write in the run box explorer.
  17. Press the Enter button on the keyboard.
    Note: This will open your explorer.exe, the process you ended in the steps above.

Now comes the most important part of this tutorial where you will need to copy all of the shortcuts from the folder above to an external drive.

In this manner, whenever you reinstall Windows 10, you can restore this backup taskbar to the new system.

After following all these steps, we can only hope you managed to make a backup copy of your taskbar and install it in your new Windows operating system.

For a pleasant PC experience, feel free to take a closer look at our Windows 10 Tips section.

You don’t need to be a pro. Our mission is to make your job a lot easier, so bookmark this Tech Tutorials Hub for further reference.

If you have any questions on this subject, you can write to us below in the comments section. We’ll help you as soon as possible.

No AMD Graphics Driver is Installed: 5 Ways to Fix it

The No AMD graphics driver is installed error arises on Windows 11 PCs with AMD GPUs. It is an error that occurs for some users when they select the AMD Radeon Settings context menu option. Instead of AMD Radeon Settings opening, this error message pops up:

No AMD graphics driver is installed, or the AMD driver is not functioning properly. Please install the AMD driver appropriate for your AMD hardware.

That error message highlights an issue with the AMD graphics driver. It often means a PC has an outdated, incompatible, or corrupted AMD driver, leading to more issues. For example, updating the AMD graphics driver is critical when it comes to solving Display driver amdwddmg stopped responding errors in no time.

How can I fix the No AMD graphics driver is installed error?

1. Update Windows 11

  1. To open Settings, click the pinned shortcut for that app on the Start menu.
    Settings app shortcut windows 11 no amd graphics driver is installed
  2. Select Windows Update to view the update options.
  3. Press the Check for updates button there, and select to download and install available updates found.
    Check for updates button windows 11 no amd graphics driver is installed
  4. If any optional updates are available, click the Download and install buttons for them.

2. Update your AMD graphics card driver

    In some cases, updating the AMD graphics card driver solved the issue for users. To do so, you need to download and install the newest driver that matches your GPU’s specifications from the AMD official website.

  1. 1. Press the Windows + S keys simultaneously.

  2. 2. Input dxdiag in the search box.

  3. 3. Select DirectX Diagnostic Tool from the list of results.

    dxdiag windows 11
  4. 4. Click the Display tab, and note down the graphics card model and driver version details written there.

    display tab windows 11
  5. 5. Then open the AMD driver download page in a browser of your choice.

  6. 6. Select Graphics on the menu there.

  7. 7. Choose your graphics card model on the submenus, then press the Submit button.

    submit amd installer
  8. 8. Select Windows 11 64-bit on the Drivers and Software page.

    windows 11 amd download
  9. 9. Click on Release Notes to check if the driver package’s version matches your GPU’s current driver.

  10. 10. Press the Download button to save the driver package.

  11. 11. Click File Explorer on the taskbar to open the File manager.

    file explorer windows 11
  12. 12. Open the folder to which you downloaded the AMD driver package.

  13. 13. Right-click the AMD driver package to select Run as administrator.

    run as admin amd driver
  14. 14. Click Install to extract the driver package.

  15. 15. Finally, install the AMD driver by following the setup wizard’s instructions.

You can also update AMD graphics drivers with Fortect Driver Updater and other driver updater software. It provides a quicker and more straightforward way to update GPU drivers in just a few clicks. It scans your PC, tells you what devices need new drivers, and includes an option to update them.

⇒ Get Fortect Driver Updater

3. Reinstall the AMD graphics card driver

  1. If you already have the latest AMD graphics card driver, try reinstalling it instead. Right-click the Start menu’s button and select the Device Manager shortcut.
    Device Manager option windows 11 no amd graphics driver is installed
  2. Double-click Display adapters to view the devices for that category.
  3. Right-click your AMD graphics card driver to select Uninstall device.
    Uninstall device option windows 11 no amd graphics driver is installed
  4. Then select the Delete the driver for this device checkbox on the confirmation window.
  5. Click Uninstall to confirm your chosen options.
    The Uninstall option windows 11 no amd graphics driver is installed
  6. Open the Start menu, and click its Power button. Then select to restart Windows.
    Restart option windows 11 no amd graphics driver is installed
  7. Windows might automatically reinstall the AMD driver after the restart. If it doesn’t, manually download and install the latest AMD driver package as outlined in the previous resolution.
Note icon NOTE
You can thoroughly uninstall the AMD drivers with the AMD Cleanup Utility, which might be a better option than Device Manager.

4. Reinstall Microsoft Visual C++ 2005

  1. Press the Windows + R keys on your keyboard at the same time.
  2. Input this Run command for opening Programs and Features and click OK: appwiz.cpl
    The appwiz.cpl command windows 11 no amd graphics driver is installed
  3. Select any current Visual C++ 2005 Redistributable pack installed, and select the Uninstall option.
    Uninstall button windows 11 no amd graphics driver is installed
  4. Next, open the Visual C++ 2005 Service Pack page in a browser.
  5. Click the Download button there.
    Download option windows 11 no amd graphics driver is installed
  6. Select to download the 64-bit package.
    The 64-bit checkbox windows 11 no amd graphics driver is installed
  7. Open the folder that includes the downloaded Visual C++ 2005 package in Explorer.
  8. Double-click the Visual C++ 2005 package to install it.

5. Reinstall AMD Software

  1. Open the Windows uninstaller utility as outlined in the first two steps of the previous resolution.
  2. Select AMD Software in the Programs and Features applet.
  3. Click Uninstall to remove AMD Software.
  4. Open the AMD Software page, and select the Download Now option.
    Download Now button windows 11 no amd graphics driver is installed
  5. Reinstall the AMD Software using the downloaded installer.

Third-party software uninstallers, such as IObit Uninstaller, are generally better alternatives to the Programs and Features applet. Windows 11’s default uninstaller lacks IObit Uninstaller’s options for erasing leftover residual files and registry keys from uninstalled software.

There aren’t many confirmed potential fixes for the No AMD graphics driver is installed error. However, the resolutions above will likely resolve that AMD driver error for most users. The second resolution for updating drivers is especially widely confirmed to fix the issue.

Which one worked for you? Do not hesitate to let us know in the comments area below.

Rainbow Six Siege Error Code 10–0x000001f4: 5 Ways to Fix

In this piece, we’ll show you how to deal with the 10-0x000001f4 Rainbow Six Siege error. This is among the common connection errors of the game. It’s usually linked to connection issues or corrupt game files. Here’s how to fix it:

How can I fix the 10-0x000001f4 error in Rainbow Six Siege?

First, check if R6 servers are up and running. If there’s an outage, you’ll need to wait it out. If the servers are fine, here’s what to do if the issue is on your end:

1. Restart your console

  1. Press the PlayStation button on the controller.
  2. Select the Power icon.
  3. Lastly, pick Restart PS5.
  4. Wait for your console to restart.

Alternatively, you can use the Turn Off PS5 option if the previous method doesn’t work.

2. Verify the integrity of the game files

Steam

  1. Launch Steam.
  2. Go to your Librabry and find Rainbow Six Siege.
  3. Click on it and select Properties> Local Files.
  4. Hit Verify integrity of the game files.verify integrity of game files steam

Ubisoft Connect

  1. Launch Ubisoft Connect.
  2. Go to your game library, select Rainbow Six Siege, and click on Properties.
  3. Choose Verify Files and let the process complete.verify game file ubisoft

3. Install the latest updates

  1. Select Rainbow Six Siege from the menu.
  2. Press the Options button.
  3. Now choose Check for updates.

Once the game is updated, the problem should be gone.

4. Update system software

  1. Navigate to Settings.
  2. Next, select System.
  3. Select System Software Update and Settings.
  4. Now choose Update System Software.
  5. Select Update Using Internet.
  6. Lastly, click on Update.

After updating your system, check if the problem is resolved.

5. Change DNS

  1. Open Settings.
  2. Select Network.
  3. Now select Settings and then Set up Internet Connection.
  4. Select your network.
  5. Now choose Advanced Settings.
  6. Pick DNS Settings and change it to Manual.
  7. Now enter 8.8.4.4 as Primary DNS and 8.8.8.8 as Secondary DNS.
  8. Save changes.

Changing DNS can improve the browsing speed and can also help you fix error code 4-0xFFF0BE25; read this guide to learn more.

Why can’t I connect to Siege servers?

If this happens, there’s likely a cache issue, so restarting your console might help. Updating the game and operating system and fixing DNS issues as shown above should also help. Ultimately, it’s possible that there’s a server problem on the game’s end, in which case you’ll have to wait.

What is error code 3-0x0001000b?

This is another Rainbow Six Siege error, and it appears on the PC. The error occurs when you access the browser. The issue is caused by JavaScript, so make sure that it’s enabled if you want to avoid the problem.

Conclusion

Fixing the 10-0x000001f4 Rainbow Six Siege error is pretty simple and in most cases, the issue is caused by missing updates.

In some instances, it might be necessary for you to adjust your DNS to fix this issue, so be sure to try that as well.

This isn’t the only error and users reported Rainbow Six Siege Error Code 2-0x0000d00c, but we covered that one in a separate guide.

Did you manage to find a different solution to this problem? Let us know in the comments section below.

Posted in Fix

How to compress GIFs without losing quality

Although GIF files are still one of the most popular image formats out there, they can use more space than you expected on your Windows 10 device.

If you are looking to gain more free space on your PC or if you want to safely store or transfer your personal data, compressing your GIF files is the way to go.

There are plenty of compression tools available on the market, and choosing the right one is important for keeping intact the quality of the compressed file.

In this article, we will show you some easy tips on how you can compress all your files, especially GIFs, without losing quality.

5 methods to compress GIFs without losing quality

1. Use a third-party tool

If you are looking for a way to compress your GIFs without losing quality, then we recommend using dedicated software, such as WinZip.

It offers great features, such as editing, sharing, or moving the files stored on your PC  or cloud services.

Moreover, WinZip is more than just a simple compression tool as it also allows you to share, manage, protect, and even backup your files.

Once you download WinZip, all you need to do is to right-click on the gif file and choose Zip from the menu. Next, you need to save your Zip file in the desired location.

WinZip supports the following compression formats: Zip, Zipx, RAR, 7z, TAR, GZIP, VHD, XZ, and more.

Now, let’s have a quick look at its key features:

  • Extracts multiple files.
  • Option to repair ZIP files.
  • Powerful compression tools.
  • Password protection for your ZIP files.
  • Archiving tools.
  • Integrated File Manager and File Splitter.
  • Data back-up and sharing options.
  • Connects with Dropbox, Google Drive, OneDrive etc.

WinZip

The best-compressed file manager, so you won’t lose the quality of your GIFs when packing them.

2. Use the built-in compression feature

    You can also zip GIFs using the built-in compression feature in File Explorer. The files will retain their quality and only change their size.

  1. 1. Press the Windows + E keys on your keyboard to open File Explorer.

  2. 2. Go to the Share tab.

  3. 3. Right-click on the gif files you want to compress.

  4. 4. Next, select Zip.

    compress gif without losing quality zip file
  5. 5. A compressed folder will be automatically created in the same location with the same name as the file/folder you zipped.

  6. 6. You can add new files or folders to the zipped folder at any time by drag & dropping the data you want to be compressed.

Note: You use drag & drop to add new files and folders at any time.

3. Reduce the number of colors

If you are using bright or intense colors in your GIF, they do take up more space. Using 2-3 colors would significantly reduce its size.

We know that reducing the number of colors to only a few can have an impact on the overall composition of the image.

One trick you might want to try could be finding a balance between the fewest number of colors and the best-looking image.

Don’t forget to experiment with the three color-reduction palettes: perceptual, selective, and adaptive. They will help you figure out which one is the best-looking image at the smallest size.

4. Use simple shapes

If possible, we would definitely recommend you use illustrations any time you can, instead of photographs.

Creating the same effect and impression from simple shapes and colors can be a challenge but it’s worth trying.

You can use Adobe Creative Cloud to create amazing illustrations without wasting too much time with complex steps.

5. Use an online GIF compressor

If you have already created your GIf and don’t want to modify its elements, there is another easy way that could help you reduce its size.

You can use an online GIF compressor, that will reduce the size while retaining the quality.

Make sure to check if there are any size restrictions or limitations before deciding which online tool to use. Also, as this will simply download the GIF, make sure that your antivirus is active.

You can never be too sure or protected when it comes to downloading files over the Internet.

As you can see compressing a GIF file is pretty simple and can be done with just a few easy steps.

You can either create your GIF keeping in mind some simple steps or you can use a dedicated tool that can make all the work for you. You can also copy and paste your faves!

Make sure to bookmark our File Compression Hub for more details.

In our File Opener section, we have gathered even more in-depth articles and recommendations.

If you’ve got additional tips and tricks on how to zip files and folders on Windows 10 PCs, please let us know in the comments section below.

How to Delete Sync Files in Outlook [2 easy ways]

Privacy is a sensitive topic nowadays since you don’t know where your personal info may end up.

This is an issue that some users encountered:

I was cleaning up with WinDirStat when I found […] a lot of images and videos from years ago, the funny thing is these images and videos are from an old computer which doesn’t exist for a year, somehow these files were synced up to my account back then and now to my new laptop.

Apparently, users are highly concerned that their personal information may be synced with plenty of computers they no longer use.

However, further research revealed that the images and videos the user was using were, in fact, part of the Outlook cache:

[…]OP is seeing the cache related to the Mail app, and any emails and such that synced in regards with that.

What does this sync do?

In theory, this sync allows users to have access to their private files on pretty much every PC they log in with their account.

Unfortunately, this also means that those using public PCs are in danger of having their personal information made public.

As such, this article was devised to help you completely delete your Outlook cache step-by-step.

How can I delete synced files from other PCs?

1. Delete the Outlook Cache on a certain PC

    You can remove synced files from another computer to your main one by deleting the Outlook cache. If you remove the Outlook cache, it won’t delete emails, contacts, or other useful information. Therefore, this method is perfectly safe to use.

  1. 1. Close Outlook if it is opened on your PC.

  2. 2. Press Windows + R to bring up the Run dialog.

    open run
  3. 3. In the Run dialog box, enter %localappdata%MicrosoftOutlook and hit Enter.

  4. 4. Enter the RoamCache folder to view the cache files.

    roamcache folder
  5. 5. This would be a good time to make a back-up of the cache files so that you can restore them if something goes wrong.

  6. 6. Select all of the files you want to remove, then press Delete, or right-click the highlighted files and select Delete.

  7. 7. Outlook will automatically make new cache files when you open Outlook.

  8. 8. Keep note that if you want complete privacy, you have to repeat this process on any new PC you want to log in with your Outlook Mail.

2. Completely turn off Indexing on your PC

1. Press Windows + R
2. Type in control.exe
3. Change view (top right) to Small Icons
4. Click on Administrative Tools
5. Click on Services
6. Scroll down till you find either Indexing Service or Windows Search
7. Double-click on Windows Search and click the Stop button
8. Change the Startup Type to Disabled
9. Restart your PC

Completely Disable File Indexing

If you want to feel even more secure, you can try out some of the best email privacy software that is out there.

We hope that our article helped you. Let us know how you feel about it and whether you have any questions in the comments section below.

Windows 12: Everything to know about release date, price & features

With Windows 11 released on October 5, 2021, many of us are thrilled at the tech and again have fallen in love with this Microsoft creation, all its quirks, and features.

Well, while you get sucked in, let us take an early exploration of the yet-to-be-released Windows 12, going through what may be and what you might expect.

Before diving into it, if you are yet to get a grip of Windows 11, you should check out some top Windows 11 explainer books.

When will Windows 12 be released?

We can not answer this on good authority at the moment, but many sources seem to believe 2024 will be the year, let us give you a history of the roadmap for Microsoft’s OS releases.

Windows 12

A three-year upgrade cycle is nothing new for Microsoft. Microsoft continued to use this update schedule following the 2006 introduction of Vista.

Windows 7 and 8 were launched in 2009 and 2012, respectively, respecting the three-year delay, and three years later, in 2015, Microsoft released Windows 10. 

However, Microsoft abandoned its regular three-year upgrade schedule with Windows 11, which was rolled out in 2021.

Will they stick to 6 years or revert to the three-year pattern? Your guess is as good as ours.

What can we expect from Windows 12?

Configuration and system requirements

It may be too early to be sure of anything, but we feel we may get a Windows 12 release date for 2024. But more importantly, what system requirements can we expect with the release?

Let us look at some of the requirements for older Windows operating systems to speculate on what may be in Windows 12.

Windows 8Windows 10Windows 11Windows 12
Processor1 GHz or faster processor1 GHz or faster processor or SoC1 GHz with 2 or more cores on a suitable 64-bit CPU or SoC ?
RAM2 GB for 64-bit or 1 GB for 32-bit2 gigabytes for 64-bit or 1 gigabyte for 32-bit 4 gigabyte?
Storage20 GB for 64-bit or 16 GB for 32-bit20 gigabytes for a 64-bit or 16 gigabytes for a 32-bit64 GB or larger storage device?
System firmwareSecured Boot requiring a new UEFI BIOSUEFI, Secure Boot capableUEFI, Secure Boot capable?
Graphics cardDirectX 9 compatibility with WDDM 1.0 driverDirectX 9 compatibility with a WDDM 1.0 driverDirectX 12 compatibility with WDDM 2.0 driver?

Taking the above table into account, we can speculate about some elements. But, of course, our speculation is not based on any actual data.

As soon as Microsoft sets out to share the details of their newly-released OS, we will have accurate data to work with. Until then, here are our projections for the new Windows 12 OS.

Processor

The 8 and 10 OS versions supported 1GHz 32 and 64-bit processors. However, we saw changes in Windows 11’s system requirements, with minimum support for dual-core 1GHz 64-bit CPUs.

Microsoft is strict in this regard, yet we have some confirmed tips for installing Windows 11 on an unsupported CPU.

So what will Windows 12 offer? Your guess is as good as ours, but we can expect they carry on supporting only 64-bit processors.

Since Microsoft still supports 32-bit applications, we may expect that this support will not end even after the rollout of Windows 12.

RAM

In the current Windows, there was a step up in RAM requirements. Note that some significant consequences exist if you install Windows 11 with limited RAM.

Will this remain the same, or will Windows 12 require at least 6 GB of RAM? An upgraded RAM requirement may be in play since we expect a much more capable OS, and RAM is a massive element.

Storage

32-bit storage has been in every Windows version since Vista. However, since this was excluded in the current version, we expect this to be consistent in the new OS.

This tech shift is essential because 64-bit storage has better software performance, better computer performance, increased memory support and enhanced security features.

As for those worried about the common free space required error, rest assured that it can be fixed in no time.

System firmware

System firmware is in charge of delivering necessary runtime and boot functions to the system.

Secured Boot requiring a UEFI has been the standard for a few years. However, Microsoft could string a fast one on us, but we can expect that the consistency will be carried over to the next OS version.

Graphics

Since DirectX 12 compatibility has only been introduced in the current Windows OS, and we’ve all seen how simple it is to download DirectX 12 in Windows 11, we expect the next version to carry on with these graphics cards.

So, if you are changing computers, you may want to keep this in mind so that they remain relevant whenever Windows 12 is released.

Will the new OS be a free upgrade?

Microsoft focuses on making many of its services free and easily accessible.

In the current OS, for example, you could do a free upgrade from Windows 10 to 11 Home edition, as long as the PC meets the minimum system requirement. However, you will need to buy a product key to upgrade to the Pro version of the OS.

In older versions like 7 and 8, you usually would have to pay for the keys. Will Microsoft revert to making all Windows 12 editions paid, or will there be a free Home version and a paid Pro version?

We can speculate that they are more likely to stick with the release pattern for the latest OS, retaining a free for all edition and a paid version with some security features. So you may as well prepare a budget if you like the extra features of a Pro version.

Also, note that there are several methods to switch to a new OS, and the most popular ones include an upgrade and clean install. Don’t hesitate to understand the difference and the advantages of each method.

Windows 12 possible features

We don’t know what new features the OS will provide, and Microsoft probably has no clue either at this point.

Let’s have a look at what Microsoft has in the plan for Windows 11. Then maybe we can speculate on the situation for Windows 12.

While using the wonderful visual creations of Addy Visuals, here is what we would love to see:

  • A cleaner-looking desktop and taskbar setup
  • A fresh device battery overview menu
  • A functional music-control taskbar element
  • A slimmer and intuitive Network connections taskbar menu
  • New file explorer design
  • An enhanced file explorer with advanced features like the Finder on Mac

Microsoft does not release these renditions, so there will more likely be using different designs and concepts.

Knowing what to expect from a new Windows OS release is excellent.

Will Windows 11 gradually evolve into Windows 12 by using updates?

According to rumors, the Sun Valley 2 version will be the last update added to Windows 11. This will usually be done before switching to a new operating system.

The Sun Valley 2 version of Windows 11 is called 22H2 and is the first significant update to Windows 11. Microsoft has announced that it is expected to be released sometime in the third quarter of 2022.

The Windows 11 22H2 Sun Valley 2 will be a free update for all users.

Sun Valley 2 is just an internal code name for the release, so that the last name could be different.

The update for Windows 11 will include some adorable aesthetic updates, and also some significant ones, and some new elements:

  • New interface for the Alt+Tab shortcut key

As one of Windows’s most helpful keyboard shortcuts, the tab switching feature will get a complete revamp, allowing for a more streamlined and intuitive experience.

Microsoft is trying to reduce the amount of blurriness appearing on the screen when using the Alt+Tab feature and plans to make it slimmer and faster.

  • Support for taskbar drag-and-drop

Dressing an item on and from the taskbar easily is an essential element that enables users to streamline their Windows experience in a second.

  • Tabs in Windows Explorer

Using tabs in Windows Explorer, like in the case of browser software, helps users better organize their space and easily access any account they need.

  • New security feature added: Smart App Control

The Smart App Control feature found in the soon-to-be-released Windows 11 22H2 will protect your system from any unwanted intrusions.

This app is set to also stop any files from automatically being downloaded or installed, thus reducing the exposure to viruses and phishing attempts.

Could Windows 12 be designed entirely from scratch?

As with the 10X edition, we can see the steps Microsoft has taken to consolidate the position of Windows 11 with the new 22H2 edition.

After a close analysis, we can assume it will be the same for Microsoft’s Windows 12 release. It will be released as a stand-alone edition OS.

This radical approach creates the prospect of a whole new design, albeit, given the size of the operating system’s user base, we think the likelihood of drastic change is low.

Whichever of the two outcomes becomes the case will be a huge determiner of what features we may expect. 

Are we going to be forced to upgrade to Windows 12?

No is the most probable answer to this question, even though we can expect surprises at any point.

Microsoft’s efforts to coerce people into installing newer versions of Windows have been significantly reduced.

For example, users of Windows 10 may still elect to upgrade to Windows 11; this policy will probably remain in place for foreseeable future versions.

If your version of Windows is getting close to the end of its support term, upgrading to new versions may be required.

For instance, if you use the Pro or Home version of Windows, the first rollout of Windows 11 will be maintained for 24 months.

Therefore, even though Windows 11 version 22H2 is optional, it will likely be automatically installed in 2023, so you may continue receiving security updates.

Though it is yet unknown how the support periods will operate, the same reasoning will presumably hold for Windows 12.

This article has dissected the trends following Microsoft OS releases from the beginning. But this guide should have prepared you for what you may expect.

Let us know your thoughts. Do you agree with our recommendations, and what do you think the new OS will be like? Please share with us in the comments below.

Windows 10 Calibrate Touchscreen Missing [Fix]

Windows 10 is optimized for touchscreen monitors, but just like with any new operating system, some incompatibilities between various OS settings are possible.

For example, users have reported that they cannot calibrate their touchscreen. So in this article, we’re guiding you to fix this issue.

We’re addressing users of any Windows 10 device, yet we do have a separate article tackling screen calibration issues specifically for laptops. Feel free to also check that out.

How do I calibrate the touchscreen on Windows 10?

Obviously, you’d want to start by putting the native Windows tools to good use. As such, one of the first things you’d need to try is running the built-in troubleshooter.

Here’s how to do that:

  1. Type troubleshoot in the home screen search bar.
  2. Select Troubleshoot from the left-hand screen.how to calibrate touchscreen
  3. Go to Hardware and Devices.
  4. Click Run.
  5. Follow the instructions and allow the process to finish.

1. How to calibrate the touchscreen by updating the touchscreen drivers

  1. Open Device Manager and expand the Human Interface Devices section.Human Interface Devices section
  2. Find your touchscreen. (It’s probably called HID-compliant touchscreen or something similar.)
  3. Right-click on Enable.
  4. If the option isn’t available, click Update Driver Software.
  5. Now, choose Browse my computer for driver software.
  6. Select the C: drive and check the Include subfolders option.
  7. If this doesn’t work, repeat the process and choose Search automatically for updated driver software.

Although this is the classic way to update drivers, it might fail at times, since it involves you choosing the right driver.

This is why we recommend using Outbyte Driver Updater – a third-party dedicated tool that will help you with quickly updating all drivers, not just the touchscreen one.

You only need to install the tool, launch it, and run a full system scan. Outbyte Driver Updater will find outdated software and recommend fresh ones from a massive online database.

From this point onward, you can choose whether you want to update all drivers at once, or each one, in turn.

Outbyte Driver Updater

Save time by updating all drivers with ease with this innovative and reliable tool.

2. Clean your display to help calibrate the Windows 10 touchscreen

Touchscreens are quite sensitive devices, and sometimes grease and dirt can cause them to not work properly.

To prevent this, you should regularly clean your touchscreen display.

3. How to calibrate the touchscreen in Windows 10 with the default drivers

  1. Go to the Human Interface Devices section as shown in the first solution.Human Interface Devices section
  2. Find your touchscreen device, right-click it, and click Uninstall.
  3. Check Delete the driver software for this device then hit OK.
  4. Restart your computer and the default driver should be installed on the spot.

4. Check other input devices to recalibrate the Windows 10 touchscreen

  1. Open Device Manager and go to Human Interface Device section.
  2. Find USB Input Device. (If there are more options, you might have to repeat it for all of them.)
  3. Select Properties and go to the Power Management tab.Check other input devices
  4. Uncheck Allow this computer to turn off this device to save power.

This will keep your device powered at all times, but your computer will use more power as a result. Still, it can solve the calibration problem.

5. How to install the touchscreen driver in compatibility mode

  1. Download the setup file for the driver from de manufacturer’s website.
  2. Right-click on the file and select Properties.
  3. From the Compatibility tab, check Run this program in Compatibility mode.
  4. Install the driver.

    6. How to calibrate the touchscreen in Windows 10 using Control Panel

    A very easy method to calibrate your touch screen on Windows 10 is to manually do it through Control Panel.

    From the Hardware & Sound menu, you can manually calibrate your touchscreen to your liking.

  1. 1. Type Control Panel in the home screen search bar and open the program.

    control panel windows 10 settings
  2. 2. Go to Hardware & Sound and look for Tablet PC Settings. 

  3. 3. Click the Calibrate the screen for pen or touch input option.

    how to calibrate touch screen windows 10 hardware and sound
  4. 4. Follow the instructions to complete the calibration.

  5. 5. Your touchscreen is now calibrated.

This solution was suggested by a reader using a 2016 Dell Inspiron touchscreen laptop with a 1080p screen.

That’s it. We hope this article helped with the calibration issue and that you are now able to use the touchscreen properly.

Any suggestion or feedback on this topic is appreciated, so feel free to use the comments section below.

We’ve Run Into a Problem With Your Microsoft 365 Subscription

Office 365 is one of the most used services worldwide. Users rely on it for simple tasks like writing a Word document, or for more complex presentations in PowerPoint.

Needless to say, they count on Office to deliver the same experience every time.

But sometimes, you can encounter all sorts of issues and bugs with it, despite the continuous development done by the Redmond giant.

If you deactivate the licenses for any of the Office services, you may bump into unexpected problems.

For example, a yellow warning bar may appear above an Office application that contains the following message:

ACCOUNT NOTICE. We’ve run into a problem with your Microsoft 365 subscription and need your help to fix it.

How can I fix Office Error we’ve run into a problem?

We have prepared a step-by-step guide for you with possible solutions to the Microsoft 365 subscription error.

By following every solution, you should be able to fix the error in just a few minutes.

We’ve run into a problem with your Microsoft 365 subscription is an error that can have multiple causes.

The most likely reason why you are getting this error is that there is an issue with your subscription Payment.

    How to fix: We’ve run into a problem with your Microsoft 365 subscription

    In order to fix the error, you can check your Microsoft license, update your payment information, run the Support and Recovery Assistant or reinstall Office.

  1. 1. Check if you have a valid license
    1. Firstly you need to verify if you are logged in. If not, log in with your private, school or work account.
    2. Navigate to the browser header, go to Settings, and then to My Application Settings.
    3. Select Microsoft 365.
    4. When you get to the My Account page, select Subscriptions.
    5. You can see there the latest version of Office, OneDrive for Business, SharePoint Online, or Exchange Online.
    6. If you do not see the latest Office desktop version, your administrator probably has not assigned you any. For your private account, you have to get a valid Office license.
    microsoft office sign in account types
  2. 2. Update your Payment information
    1. Close all Office apps and go to your Payment options page.
    2. Sign in with your Microsoft 365 subscription e-mail and password.
    3. Update your payment method if it shows an error.
    4. Now you can test whether Office works by restarting Word or Excel.
    office payment options
  3. 3. Run the Microsoft Support and Recovery Assistant
    1. Download the Microsoft Support and Recovery Assistant.
    2. Install the application on your PC and run it.
    3. Select Office, and click Next.
    4. Follow the on-screen steps.
    microsoft support and recovery assistant windows
  4. 4. Reinstall Office
    1. Reinstall Office by using an easy fix tool to completely erase it from your PC. Signing out of Office does not uninstall it automatically.
    2. First, sign in with a Microsoft account.
    3. Select Install Office.
    4. Choose Run/ Setup/ Save File, depending on your browser.
    5. You have to see You’re all set! Office is installed now when you are done.
    office install windows

Microsoft Office 365 is a great way to access Microsoft’s suite of office tools on a subscription basis, just make sure you’re up to date so everything works normally.

Here’s one more thing that’s worth mentioning. You might have noticed that we used both Office 365 and Microsoft 365 to refer to this great service as well as to the error addressed in today’s guide.

We did so in order to make things easier for you. Microsoft actually rebranded Office 365 back in 2020 and changed its name to Microsoft 365.

By adding a few cool and interesting features and updating the pricing plans to make them even more competitive, a new product was born and we simply cannot get enough of it.

You can download and install Microsoft 365 from our secure page and give it a try to see for yourself. If you have any more questions or suggestions, feel free to leave them in the comments section below.

6 Best VPN With Open Ports For Safe Port Forwarding

VPNs are largely useful when it comes to securing your digital presence, regarding both security and privacy. However, these VPNs are also becoming less and less comfortable for whoever wants them out of the picture.

As a result, some ISPs got more creative so as to block VPN access in more effective ways, and the major players in the VPN industry retaliated.

Take torrenting, for instance. This type of activity, along with P2P file sharing, is somewhat frowned upon, even when the context is right. That’s definitely one of the reasons torrenting (even legally) is heavily regulated by ISPs, and oftentimes even throttled or blocked.

As a response to this situation, VPNs started to implement port forwarding capabilities within their services. If you need a VPN with open ports, make sure you don’t miss this article. We’ll try to keep it short and informative.

Why would you need a VPN with open ports?

Open ports are quite an invitation even for low-level hackers. Just to paint a pretty picture, know that your Windows PC has a total of 65,535 TCP ports and the same number of UDP ports. Long story short, there are a lot of them.

Naturally, you’d want these ports to be closed, as many of them as possible. However, running a tight ship might also mean that certain services will be affected, so you’ll need to reach a compromise.

Using a VPN that allows port forwarding seems to be the safest way to go about that. Here are the top reasons you may need to open ports:

  • Optimizing P2P downloads and uploads
  • Access personal devices such as your PC or router from anywhere
  • Host game servers that your friends can connect to

As you can see, there’s plenty enough reason for you to need a port-forwarding capable VPN in your daily routine.

How to open ports on VPN

Opening ports on your VPN, also referred to as port forwarding, may sound pompous but it’s not really hard to achieve. We’ll show you how to enable port forwarding on Private Internet Access.

It’s a premium service, but it’s very worth it and offers great privacy features, as opposed to free VPN clients.

  1. Get a PIA subscription. We recommend it for its strong encryption and unlimited bandwidth.
  2. Download and install PIA on your Windows PC
  3. Launch the PIA VPN client, but don’t connect to any server yet
  4. Click the More button (it looks like three dots stacked vertically)
  5. Access the Settings window
  6. Head over to the Network category
  7. Make sure to enable Request Port Forwarding
  8. Close the Settings window.
  9. Connect to the server of your choice.

Note that enabling the port forwarding feature might make some servers unavailable. PIA, for instance, has port forwarding compatible with most of its non-US servers.

As a side-note, servers that don’t support port forwarding will be greyed-out, and thus not accessible to you.

What are the best VPNs with open ports?

Private Internet Access – largest server network

PIA, short for Private Internet Access, is a great VPN service offered by Kape Technologies. It lets you use port forwarding, but also provides you with a huge variety of security/privacy features and helps you circumvent geoblocking.

It has approximately 12,000 servers in 96 locations in 75 countries. Additionally, note that PIA uses bare-metal servers, all of which support the popular WireGuard protocol.

Here’s a list of PIA’s main features:

  • Helps you encrypt traffic on public Wi-Fi networks
  • Supports P2P and torrenting activities
  • Comes with OpenVPN, WireGuard, PPTP, and L2TP/IPsec support
  • Lets you connect up to 10 devices on the same account
  • Has embedded protection against ads, malware, and trackers (PIA MACE)
  • Zero-logging policy
  • Comes with several VPN gateways
  • Includes SOCKS5 proxy

Private Internet Access

Keep your internet activity private by using the multitude of servers PIA has to offer.
Check price Visit Website

Perimeter 81 VPN – business-oriented cloud VPN

Perimeter 81 VPN is a great VPN if you are interested in a security solution for your business.

This VPN delivers its security protocols over the cloud, that way you can deliver protection on all the devices used by your employees or your network. The port forwarding is easily set up from the settings menu of the application.

Perimeter 81 VPN meets all the required compliances and it also offers product integration with some of the most used platforms in business, such as Microsoft Azure, Amazon AWS, Salesforce and more.

Main features of Perimeter 81 VPN:

  • Multi-factor authentication
  • Automatic Wi-Fi protection
  • Identity management
  • Zero thrust access across multiple platforms
  • Site to site interconnectivity
  • Split tunnelling

Perimeter 81 VPN

Keep your browsing safe with this cloud-delivered VPN solution.
Check Price Visit Website

ExpressVPN – port forwarding support for routers

ExpressVPN is among the biggest names in the VPN market.

As opposed to other mentions on this list, ExpressVPN doesn’t let you set up port forwarding from within the app, but it works on routers.

If you install the VPN client to your router, you can easily enable and disable port forwarding. You can find extensive guides and tutorials on how to set up the VPN on your router and how to enable port forwarding directly on the ExpressVPN website.

Other key features of ExpressVPN include:

  • Thousands of servers all around the globe
  • Among the fastest VPN port forwarding services
  • AES-256 bit encryption
  • Support for all major platforms and operating systems
  • Split tunneling
  • Secure killswitch
  • 7-day free trial for mobile users

ExpressVPN

Configure ExpressVPN on your router and enable port forwarding for fast and secure downloads!
Free trial Visit website

PureVPN – fast and secure connections

PureVPN is a VPN service owned by GZ Systems Ltd, a Hong Kong-based company that was founded in 2007. This VPN lets you open ports that are normally not available on your Windows computer or router, a feature that can conveniently be used in other places, as well.

Additionally, you can choose from various categories of servers to connect to, including Internet Freedom, Stream, File Sharing, Dedicated IP, and Security/Privacy.

To enable the Port Forwarding feature on PureVPN, just head to its Preferences section, navigate to the Port Forwarding category, and flick the switch to the On position.

PureVPN’s main features include:

  • Internet killswitch to protect you against accidental VPN disconnections
  • Multi-port (lets you connect through another port)
  • Network type selector (automatic, non-NAT, NAT)
  • Built-in ping test
  • IPv6 leak protection
  • Proprietary PureVPN DNS servers
  • More than 2,000 servers in over 180 locations across more than 140 countries
  • No-logging policy

PureVPN

Try different categories of servers based on your specific needs, with PureVPN.
Check price Visit Website

PrivateVPN – easy configuration for port forwarding

PrivateVPN makes our list of the best VPN services for port forwarding as the feature is enabled by default.

In order to benefit from this VPN’s open ports feature, just click the Advanced button to expand the app, then look after the Port forwarding section in the Dashboard category.

Write down that port, and you can use it to clear the way on your connection, whether you’re using it for gaming purposes, or want to optimize your torrenting download/upload speed values.

PrivateVPN’s main features:

  • Strong encryption protocols that can keep you secure and anonymous
  • Zero-logging policies to ensure even greater privacy
  • Bypass geoblocking without restrictions
  • OpenVPN, L2TP/IPsec, PPTP, IKEv2 protocols supported
  • Servers in 60 countries

PrivateVPN

Use this trustworthy VPN to bypass restrictions and get fast connections!
Check price Visit website

Proton VPN – advanced VPN customizations

ProtonVPN

Proton VPN is a software created by a Swiss company and hence protected by Swiss privacy laws.

Port forwarding is supported by Proton VPN and it’s very easy to do so due to its hassle-free and intuitive interface. This is also a multi-platform application and most of the more important features are included in the free version of the app.

The Proton VPN team is also very adamant about their strict no-logs policy, which should create extra trust around this VPN.

Additional features of Proton VPN:

  • Strict no logs policy
  • Tor over VPN support
  • Open source
  • VPN accelerator
  • Adblocker (NetShield)

Proton VPN

Enjoy the strict no-logs policy, protected by Swiss privacy laws with ProtonVPN.
Check Price Visit Website

Can you get hacked through port forwarding?

Is port forwarding a good idea?

Port forwarding surely has its benefits. It can speed up download speed when using torrents.

Many advise against using port forwarding because your connection becomes vulnerable to attackers. That is true if your network is not safe, to begin with.

This means, you already have vulnerabilities within your network and port forwarding can make you easier to hack. That being said, with a strong firewall and antivirus there’s not much to be worried about.

Should I disable port forwarding?

You can disable it when you do not need it. If you use a modern VPN, you can easily enable/disable port forwarding in just a few clicks. The risks of leaving it open are however minimal.

The VPNs we recommend above all encrypt your data and keep no activity logs, so the risk of a hacker being able to actually get information about you is very low.

To wrap it up, whether you need a VPN with open ports for gaming, torrenting, or accessing devices back home remotely, some services offer port forwarding, and it’s quite easy to set up, as well.

Although port forwarding is a quite popular operation among gamers, please note that opening ports on your devices might subject you to a broad variety of risks. Naturally, using a VPN while forwarding ports will significantly reduce these risks.

Reduce TIFF File Size: Compress it Without Quality Loss

There are various file formats you can save images with, and TIFF (Tag Image File Format) is one of them. In case you’re not familiar with it, we can’t blame you.

JPEG is a much more prevalent format for images on the web, but TIFF is still widely utilized in the publishing and graphics industries.

The main concern when using this format is the size, and many reported that their output is larger than they initially expected. This can be a problem, especially if you’re planning to send the file to someone else.

Luckily, there are a couple of methods that you can use to make a TIFF file smaller, and in this guide, we’re going to show you the best ones.

Why are my TIFF files so large?

TIFF files are somewhat larger than alternatives because this is a non-compressed image format. Unlike JPEGs, this file type is not compressed, which makes it great if you want to preserve picture quality.

Thus, TIFF images typically have somewhat larger file sizes than other popular image formats.

Can you compress a TIFF file?

Yes, you can compress TIFF files with various software and web app compression tools. By doing so, you’ll save some precious space on your PC.

Moreover, compression will come in handy if you want to share files with others over the Web since it might take you a while to send an uncompressed picture.

If needed, you can also combine TIFF files easily with specialized software or various online tools.

How to compress TIFF files in 3 different ways

1. Use Paint to resize a TIFF file

    You can easily reduce the size of a TIFF file by modifying it in Paint. The tool has a built-in Resize option that lets you resize any file you open with it.

  1. 1. Press Windows Key + S.

  2. 2. Type paint and select Paint from the list of results.

    open paint windows
  3. 3. Next, click the File tab and select Open.

    open file paint
  4. 4. Then select a TIFF file from your computer that you want to compress, and click the Open button.

  5. 5. Click the Resize option on Paint’s Home tab.

    reduce tiff file size paint
  6. 6. Select the Pixels radio button.

  7. 7. Input a lower pixel value in the Horizontal box for resizing images.

  8. 8. Ensure that the Maintain aspect ratio checkbox is ticked.

  9. 9. The Vertical pixel value will be automatically changed as well.

  10. 10. When you’ve reduced the resolution, click the File tab again.

  11. 11. Select Save as and then choose Other formats.

    reduce tiff file size other formats paint
  12. 12. Next, set TIFF in the Save as type drop-down menu and input a file title in the text box.

  13. 13. Finally, click the Save button. Your file is now compressed.

    compress tiff file save file
  14. 14. You will be able to find the save file in the previously chosen location.

Tip icon Tip

2. Crop a TIFF file

  1. Press Windows Key + S, type paint, and select Paint from the list of results.
    open paint windows
  2. Click File and select Open in Paint.
    paint open in windows file
  3. Choose a TIFF to edit, and click Open.
  4. Then click the Select button on the Home tab.
    select file paint
  5. Next, press and hold the left mouse button and drag the mouse to select an area of the image to crop. Everything outside that area is cropped from the image.
  6. Press the Crop button to apply the cropping, which will erase the area left outside the selected part of the photo.
    crop in paint
  7. Click on File, select Save as and Other formats. Then you’ll need to select the TIFF format on the Save as type drop-down menu and enter a title for the file.
    select other formats paint
Note icon NOTE
A crop tool is for cutting out superfluous picture areas. This method is recommended if your image includes some areas that aren’t essential to retain. If you don’t want to delete any areas of your picture, try the other methods for reducing TIFF file sizes instead.

3. Compress TIFFs with Lossy compression

  1. Open the Compress TIFF web app in a browser.
  2. Click the Add Files button within the Compress TIFF app.
    add files windows
  3. Next, click Select From Local Disk to open a TIFF file saved on your PC’s hard drive.
    local disk windows select
  4. Then select a TIFF file to compress, and press the Open button.
  5. Drag the Output File Size bar slider to the left to choose an output file size for your TIFF image. The further left you drag that bar’s slider, the more the image will be compressed.
    tiff resize choose dimensions
  6. Click the Compress drop-down menu to choose a compression method. Lossy is the best compression method, but that option will also degrade picture quality more than the LZW lossless alternative.
    press the compress button
  7. Press the Compress Now button.
  8. Thereafter, click the Download button to save your compressed TIFF image.

How do I reduce the file size of a TIFF without losing quality?

Your best bet is to compress a TIFF with a lossless compression method. If you need to attach TIFF pictures to an email, compressing them within a ZIP archive would be a good idea.

Alternatively, you can compress those files without sacrificing quality with the LZW lossless compression method.

How to make a Vector file from a TIFF?

  1. Open the TIFF to EPS converter webpage within your browser.
  2. Click the TIFF to EPS converter’s Choose File button.
    choose the tiff file
  3. Choose a TIFF image to convert, and press the Open button.
  4. Press the Convert button.
    compress tiff file
  5. Then click the blue Download button to save the EPC vector file to your hard drive.
Note icon NOTE
EPS is one of the four vector file formats based on mathematical grid points. The other vector formats are SVG, PDF, and AI. Vector images are more file-size efficient than pixel raster alternatives.

So, that’s how you can make a TIFF file smaller by compressing, cropping, and reducing its resolution. Alternatively, you can convert a TIFF image to a vector file one to reduce a photo’s overall file size.

You can do this with most image editing applications, but for the best results, we recommend using specialized and reliable software.

We hope that you found this guide helpful. If you found another way to reduce the size of TIFF files, feel free to share it with us in the comments section.

Vivaldi version 5.4 comes with a ton of new features

We know that a lot of you are using Internet browsers such as Microsoft’s Edge, Opera, Google Chrome, or Safari, but there are a lot of other good choices out there as well.

Today, we’re going to take a closer look at the Vivaldi browser, because the last version launched by the company is packed with goodies.

After being upgraded with such useful improvements, Vivaldi is now much faster and better and we’re about to take a closer look at all these features.

What’s new for Windows users with Vivaldi 5.4?

The first interesting new functionality we’re going to focus on has to do with Web Pannels. With this feature, managing what happens on your most popular websites will get a lot easier.

As the company stated, these sticky non-tabs in the browser’s sidebar will help you create a split screen view, for better management.

And, since we don’t want sound randomly blasting in our ears when we access a website, developers added the ability to mute the Web Panels.

This will be extremely useful when dealing with social media and other pages that will randomly play sound when you least expect it.

Vivaldi users will surely know that unlike in most popular browsers, Mouse Gestures in Vivaldi can perform literally any action you like and you can even customize that to your liking.

It is also known that until now you weren’t able to select what the Rocker Gestures do, but that is all about to change in Vivaldi version 5.4.

The company stated that you can therefore assign any command to both gestures, which is one of the features that users have heavily requested. How’s that for company feedback?

All you have to do is click and hold one button, click the other button, release the first button and let go.

Also, you can rock across the mouse from right-to-left or left-to-right, with each direction you rock giving you a totally different result.

There are moments when you want to share your discovery with a friend, but making him also search for that paragraph can get tedious at times.

That is why, when using Vivaldi, you can now right-click and choose Copy link to highlight. Now, when you send that URL to anyone using a Chromium-based browser, it will take them directly to the highlighted material.

But wait, there’s more! Vivaldi now also has an option that will automatically upgrade all navigation to HTTPS and will also display alerts before loading websites that don’t support it. Thoughts?

Vivaldi Browser

Simplify your work and life with the latest version of the highly popular freeware, cross-platform web browser known as Vivaldi.

These above-mentioned HTTPS upgrades will allow users to browse the Internet without interruptions over a secure connection wherever possible.

The 1.1 version of Vivaldi Mail is also a result of the company working hard towards fine-tuning it, and the result is something you will definitely want to use.

Keep in mind that the statement above also applies to the Calendar and Feed Reader for the popular Vivaldi browser.

After all the work that has been put into this vital part of the browser, Vivaldi Mail works better than before with some huge differences in speed and performance.

Vivaldi Mail is powerful. You can handle your emails (even large volumes of them!) better than ever from all accounts efficiently under one roof, without having to deal with other web-based clients or work with yet another application window on your desktop.

To be more exact, you can now:

  • Manage all messages from the Mail Panel
  • The counters show two numbers in any view
  • Choose different customizable views and layouts
  • Organize mails with Flags and Labels
  • Control views with toggle buttons and a search bar
  • Customize mail navigation with Keyboard Shortcuts and Quick Commands
  • Prepare emails in advance and queue them
  • View the feed items within the Mail Panel 
  • Add Calendar accounts easily
  • Control how much data you would like to see
  • Add or edit events quickly
  • Find, create and edit an event with the help of Event Editor

Have you tried the latest features brought to the Vivaldi browser via version 5.4? Share your experience with us in the comments section below.

Fix ERR_EMPTY_RESPONSE on Windows 10, All Browsers [Chrome, Edge]

Windows 10 users have a range of web browsers to access the Internet, and sometimes they may encounter certain issues. A common error encountered by many is ERR_EMPTY_RESPONSE in Windows 10.

The error prevents users from accessing the website and can be tricky to resolve since the underlying cause or other relevant information is not provided.

So, if you have been wondering how to fix the ERR_EMPTY_RESPONSE error in Windows 10, here’s all you need to know and the most effective solutions for it.

What does the ERR_EMPTY_RESPONSE error mean?

The error basically indicates that the browser didn’t receive a response from the website for your request. In this case, the exchange of data is limited, and as a result, you cannot access the website.

The ERR_EMPTY_RESPONSE on all browsers is encountered for more or less the same reasons. It’s either an issue with the website or the network connection at your end, though it’s mostly the latter.

Maybe your network settings are misconfigured, the browsing data is corrupt, problematic extensions are installed on the browser, or third-party apps conflict with its functioning.

No matter the underlying cause, the solutions listed in the next section should get things up and running in no time.

Quick tip:

If you’re looking for a browser that is not affected by the ERR_EMPTY_RESPONSE error in Windows 10, we recommend Opera One.

Unlike other resource-hungry browsers, this one is a lot faster because it uses less RAM and CPU although it comes with a variety of built-in features.

Opera One

You don’t have to take our word for all this, so download it for free and convince yourself.

How do I fix the ERR_EMPTY_RESPONSE issue?

1. Use Command Prompt

  1. Press Windows + X to open the Power User menu and then select Command Prompt (Admin).command prompt (admin)
  2. Click Yes in the UAC prompt that appears.yes to fix err_empty_response windows 10
  3. When Command Prompt opens, paste the following commands one at a time and then hit Enter after each:ipconfig /release ipconfig /all ipconfig /flushdns ipconfig /renew netsh int ip set DNS netsh winsock reset

Once done, close the Command Prompt and restart your PC. Now, check if the ERR_EMPTY_RESPONSE issue in Windows 10 is resolved.

2. Try using the Incognito mode

Every browser offers an incognito or private mode for a secure browsing experience. Press Ctrl + Shift + N to open the Incognito Mode in Chrome, and try accessing the website now.

Incognito Mode in Chrome

In case a connection with the website is established, it’s most likely the extensions, disabled by default in incognito mode, that are causing the issue, and the next method should help fix that. While if the problem persists, it’s the network settings to blame.

3. Disable extensions

  1. Launch Chrome, paste the following path in the address bar, and then hit Enter:chrome://extensions/
  2. Toggle off all the extensions listed here to disable them.disable extensions
  3. Once done, relaunch the browser.
  4. If the problem doesn’t appear anymore, try enabling extensions one by one until you find the one that is causing this issue to appear.
  5. Now, click on the Remove button under the problematic extension.remove to fix err_empty_response windows 10
  6. Again, click Remove in the confirmation prompt.Remove

4. Disable VPN software

According to users, these types of problems can appear if VPN software is running on your PC.

VPN software is a great solution if you want to protect your privacy online, but sometimes VPN tools can cause this issue to appear.

If you have any VPN software installed, be sure to disable or uninstall the app and check if that fixes the problem.

5. Clear browsing data

  1. Launch the browser, and then press Ctrl + Shift + Del to open the Clear browsing data utility.
  2. Click on the Time range dropdown menu, and select All time.all time
  3. Check Browsing history, Cookies and other site data, and Cached images and files, and then click the Clear data button.clear data to fix err_empty_response windows 10

Once done, relaunch the browser and check if the ERR_EMPTY_RESPONSE error in Windows 10 is fixed. If not, head to the following method.

6. Clean the Temp folder

  1. Press Windows + R to open the Run command, enter %temp%, and then click OK.%temp%
  2. Now, press Ctrl + A to select all the files here, and hit the Del key to delete them.select all
  3. Choose the appropriate response in case a prompt pops up.

Oftentimes, it’s the files stored in the temporary folder that can trigger issues. These files are created by apps to run efficiently and should ideally be deleted by them, but that’s not always the case.

So, clean the Temp folder, and check if the ERR_EMPTY_RESPONSE error on Chrome in Windows 10 is resolved.

7. Clear Google Chrome DNS cache

  1. Open Chrome, paste the following path in the address bar, and then hit Enter:chrome://net-internals/#dns
  2. Click the Clear host cache button.clear host cache

Once done, relaunch the browser for the changes to come into effect and check if the ERR_EMPTY_RESPONSE error in Chrome is fixed.

8. Change your DNS

  1. Press Windows + R to open the Run command, enter ncpa.cpl, and then click OK.ncpa.cpl to fix err_empty_response windows 10
  2. Locate your active connection, right-click on it, and then choose Properties.properties
  3. Select Internet Protocol Version 4 (TCP/IPv4) and click on Properties.properties
  4. Select Use the following DNS server addresses and enter the following DNS servers in the provided fields:
    • Preferred DNS server: 8.8.8.8
    • Alternate DNS server: 8.8.4.4change DNS server to fix err_empty_response windows 10
  5. Once done, click on OK at the bottom to save the changes.ok

The ERR_EMPTY_RESPONSE error in Windows 10 can be problematic and prevent you from accessing the Internet, but we hope that you managed to fix it by using one of our solutions.

Though the solutions focus on Chrome, they would help fix the ERR_EMPTY_RESPONSE error on Edge as well as other browsers.

Also, find out the best ways to speed up Chrome when it’s running slow.

Before you leave, we have a great guide on Error_Bad_Net_Resp message, so don’t miss it.

Tell us which fix worked for you in the comments section below.

The Best Way to Install Avast Online Security on Chrome

Google Chrome is the most popular browser among Windows users. Nowadays, hackers are extremely clever and use every possible gateway to reach their goals.

In many cases, the main malware entry point in your browser. As a result, using the best antivirus program to protect your computer is no longer enough.

You should also secure your browser and install an anti-malware tool or a security extension. One of the best you can use is the free Avast Online Security extension available for Chrome, Firefox, and other popular browsers.

This guide will show you how to install the extension on your Chrome browser to guarantee your online security.

Which is better, Avast Security Browser or Chrome?

Avast Security Browser is one of the new kids on the block in the browser industry. It is a privacy-oriented browser that secures users’ data at the forefront of its operation. So, regarding online privacy and security, Avast Browser is head and shoulder above Chrome.

Chrome, on the other hand, is a performance-focused browser. It prioritizes speed and ease of use and is no slouch regarding user security and privacy. If the comparison is purely performance-based, Chrome is the clear winner.

For a more in-depth analysis of the difference between the two browsers, check our detailed Avast Browser vs. Chrome guide.

Quick Tip:

While the antivirus might not be enough to protect you when browsing, adding additional protection to your browser is strongly recommended.

Opera One already has a great set of security features integrated. A built-in Ad Blocker to remove all the ads, a tracker blocker, and a free VPN. Plus, it also comes with native AI.

Opera One

Browse the internet without worries with these built-in security tools.
Free Download Visit website

How can I install the Avast Online Security extension on Chrome?

  1. Visit the Chrome Web Store to download the Avast Online Security extension.
  2. Click the Add to Chrome button.
    add to
  3. Click the Add extension button when prompted.
    add extension

You can install the Avast Online Security extension to secure your Chrome browser. This extension has over 10 million users and highly positive reviews.

This tool allows you to browse without worry or fear. Avast remains in your browser’s corner and scans every site you visit. In this manner, you can detect security threats earlier and take the necessary measures.

At the same time, it also fixes any typos you may make when typing in the URL bar. It is worth mentioning that if you have the Avast SafeZone Browser installed, the extension launches automatically when connecting to particular websites.

Is Avast Online Security safe?

The Avast Online Security extension stops phishing attacks and shows user reviews so you can have more information about the website you visit. In this manner, the tool uses the community’s experience to analyze the security level of the websites you’re visiting.

When visiting a website with a bad reputation, the extension immediately warns you about it. You can also add your contribution to the community and rate the websites you’ve visited with a thumbs up or thumbs down note.

Avast’s security extension blocks all phishing attempts and prevents hackers from stealing your data. The tool also blocks cookies from tracking your online activity and collects information about your behavior.

Here are some alternatives to popular security extensions

As an alternative, you may also consider enhancing online security using the standalone Avast Secure Browser.

Browser extensions are essential to take the maximum from your browser. However, they still come from a third-party source, and issues arise.

Adding an extension to Chrome that’s already resource-hungry might take a toll on your system. Not with Avast Secure Browser.

This way, you can get the Avast extensions easily and also integrate them with end-to-end protection from Avast Antivirus for free.


Here’s one more option to consider, UR Browser. To begin with, it has a mixture of protective features.

Editor's recommendation
ur browser
  • Fast page loading
  • VPN-level privacy
  • Enhanced security
  • Built-in virus scanner

You’re automatically alerted to suspicious sites and always redirected to the secure HTTPS website. That way, you’ll never be the victim of phishing. Add the 2048-bit RSA encryption key for SSL certificates to the list, and you have paramount safety while browsing the internet.

Learn more about this amazing, privacy-oriented browser today. What is the best way to do it? Give it a try.

How to pause Windows 10 updates for 35 days

Forced updates have been annoying Windows 10 users since the launch of Microsoft’s latest desktop operating system.

Therefore, the ability to defer updates has been one of the most in-demand features for the Windows 10 OS, which takes its cue from user feedback.

Thankfully enough, there is already an option hidden within the OS that lets you pause updates for 35 days.

The feature allows you to have wider control over the type of updates to install and when to do so. Although some users have spotted the feature, it is not exactly very visible unless you navigate to the right place.

That is precisely why we’ve decided to create this step-by-step guide to help you pause your Windows 10 updates, and get better control over your PC.

To learn more about using hidden Windows 10 features, visit our Windows 10 Hub.


How to pause Windows Update in Windows 10?

    You can pause Windows Updates from the built-in Control Panel Settings. In the Windows Update menu, you you can select to postpone updates for 35 days.

  1. 1. Press Start to open the Start Menu.

  2. 2. Navigate to Settings.

  3. 3. Choose Update & Security from the list of options.

    windows settings pause updates
  4. 4. Go to Advanced Options.

    setup pause windows 10 updates
  5. 5. Navigate to Pause updates.

  6. 6. Right under Pause until, press on the Select date drop-down menu.

    How to pause Windows Update in windows 10 select date
  7. 7. Choose any date between the next day and whatever date is up to 35 days away.

    pause windows updates for 35 days

The feature also allows users to postpone feature updates or quality updates for a certain number of days. For starters, feature updates bring fresh capabilities and improvements.

Users can defer these updates for up to one year. On the other hand, quality updates meant to introduce security fixes can be put off for only a month.

However, remember that updates also come with security improvements as well, such as the Patch Tuesday updates.

That being said, unless you are using a very good third-party antivirus to keep you safe, you are also putting yourself at risk by postponing updates.

This is especially the case since within a 35-day Windows you can miss out on two rounds of Patch Tuesday updates, so you are exposing yourself to threats like Exploit Wednesday and Uninstall Thursday.

If you like our tutorials, you can find the rest of them on our How-To page as well.


By following these steps, you should now be able to postpone Windows 10 updates with ease.

Let us know if you found this feature useful by leaving your opinions in the comments section below.


Phoenix Browser For PC: Can You Download it?

Many are wondering if is it possible to download Phoenix Browser for PC, and in today’s guide, we’re going to answer this question.

Is there a Phoenix Browser for PC?

No, there’s no Pheonix Browser available for PC, but that doesn’t mean that you can’t run it.

How do run Phoenix Browser on my PC?

Use Android emulator

  1. Install a trusted Android emulator on your PC. For example, we installed BlueStacks.
  2. Once installed, launch the emulator, and click on the PlayStore app shortcut on the home screen. playstore shortcut
  3. Next, sign in with your Google ID. sign in with Google ID
  4. Now, search for the Phoenix Browser and as you see the result, click on the Install button.install phoenix browser

Where can I download the Phoenix Browser?

As shown above, you can get Pheonix Browser from the Google Play Store.

Is the Phoenix Browser safe?

Yes, the browser is safe to use, however, a few users reported that it shows ads, so this might not be what some users want.

Is Phoenix Browser free?

The browser is available for free, and you can install it on as many devices as you want.

As you can see Phoenix Browser for PC doesn’t exist, but you can still run it by using an Android emulator if you want.

To learn more about browsers, we have a great guide on how to download Aloha Browser. If you’re looking for something different, don’t miss our Thorium Browser review.

Let us know if you were able to do it and don’t hesitate to ask any questions in the comment below.

Find Out How to Browse Privately on Any Device With Ease

Many web browsers support a private browsing feature that allows you to protect your privacy.

If you’re sharing your PC with someone or don’t want someone to see your browsing history accidentally, you might want to try using the private browsing feature.

This feature is handy if you want to protect your privacy, and today, we’re going to show you how to enable private browsing in all major browsers on Windows 10.

What does private browsing do?

Before we show you how to use the private browsing feature, let’s quickly explain it. First, private browsing isn’t similar to VPN or proxy, meaning that this feature won’t make you anonymous on the Internet.

This means that your network administrator or ISP will still be able to track your online activity. Private browsing doesn’t protect you from your ISP or hide your IP address.

So what does private browsing do? It prevents other PC users from accessing your browsing history and visiting websites. This is useful if you share your PC with a family member or a roommate.

Using the private browsing feature, you won’t save any cache or cookies, so your Internet activity won’t leave any traces on your PC.

Once again, using private browsing won’t hide your IP address, so your ISP and network administrator will be able to monitor your internet traffic and activity.

In addition to not storing your browsing history, private browsing will keep you logged off from any websites you visit.

For example, if you try to access Facebook while in private browsing mode, you’ll have to log in again. In addition, the private browsing mode doesn’t save any cookies, so it won’t remember your passwords or websites to which you automatically log in.

As you can see, the private browsing feature is handy for all users sharing their PCs with others. Now that you know how private browsing works and what it can do, let’s see how to use it with popular web browsers.

How do I browse completely privately?

You have first to understand what is being tracked:

  • Your IP address
  • Accounts you’re signed into
  • Cookies
  • Your online fingerprint or user agent string

The best tips we can give you for browsing completely anonymous are:

  • Remember to turn on your browser’s private browsing mode
  • Always Turn on Do Not Track options
  • Always use a VPN
  • Try using a remote search engine
  • Do not log into your accounts
  • It would be best if you permanently disabled unnecessary browser plugins

We are about to show you how to browse privately on Chrome, as we’re pretty sure this knowledge will help you in the future.

If you don’t want to set such restrictions, ensure your browser is not in private browsing mode. If you do, we can show you how to enable Incognito mode in Chrome for Windows 10.

What is the most private browser to use?

All the browsers available on the market feature a dedicated private browsing option. Sometimes, enabling this feature requires you to follow a few specific steps.

If you’re looking for a browser with a more straightforward user interface that allows you to turn on private browsing quickly, you can install Opera One.

This privacy-focused browser comes with an advanced private browsing mode that automatically deletes all the trackers after you close your tabs. In this manner, you no longer have to clear your browsing history each time.

In addition to private browsing, this browser has a built-in Opera VPN tool that you can use if you want extra security and privacy. Opera One also has a built-in AI and a modular AI-ready design for the integration of other AI technologies.

Opera One

Get a taste of ultra-fast, ultra-secure, 100% private browsing with the most privacy-focused browser!

To start a private browsing session in Opera One, you need to do the following:

  1. In the top left corner, click the Menu icon. The icon usually has the Opera logo, so you’ll quickly recognize it.
  2. Now choose the New private window option from the menu.
  3. After doing that, a new private browsing window will appear.

Like all other browsers, Opera One also has a keyboard shortcut for private browsing so you can quickly activate it. To start private browsing, press Ctrl + Shift + N.

If needed, you can also open any link in a private browsing window with ease. To do that, follow these simple steps:

  1. First, locate the link that you want to open.
  2. Then, right-click it and choose the Open link in the private window from the menu.
  3. After that, the selected link will open in a private browsing window.

Using its Taskbar or Start Menu icon, you can also start Opera One in private browsing mode. Again, this is relatively simple, and you can do it by following these steps:

  1. First, locate Opera One’s shortcut on your Taskbar or in Start Menu.
  2. Then, right-click the shortcut and choose the New private window from the menu.

This method is helpful if you want to start Opera One in private mode without creating it regularly.

If you want to run Opera One in private browsing mode by default, you can do so by changing its shortcut properties. To do that, follow these steps:

  1. First, locate Opera One’s shortcut, right-click, and choose Properties from the menu.
  2. Once the Properties window opens, locate the Target field and add –private after the quotes. Finally, click on Apply and OK to save changes.
  3. If you get a security prompt, click on Continue.

After that, you need to use that shortcut, and Opera One will automatically start in private browsing mode. Remember that only this shortcut will start Opera One in secret, meaning you can usually use the regular shortcut to create it.

Opera One supports private browsing, but it also has a built-in VPN feature that can offer an extra layer of security. Other browsers also support VPN, but you need to download various third-party plugins to use it.

By default, Opera One offers its VPN, so if you want to protect your online privacy from your ISP, you might want to try Opera One.

Not convinced yet?

Opera One offers additional privacy and security features, including:

  • Tracking cookies are automatically blocked
  • You can decide which ads to block and which you allow
  • Companies can’t profile your online activity
  • Built-in AI and modular AI-ready design
  • The built-in VPN fully encrypts your connection

Now, if you prefer to stick to your current browser, read on to learn the steps you need to follow to enable private browsing.

How to browse privately on Mac is also information you need if you are a macOS user. That being said, more details on how to go incognito on your iPhone should also interest you.

How to use private browsing?

1. Use private browsing in Firefox

Firefox is a web browser focused on user privacy, and just like any significant browser, it fully supports private browsing features. To start a private browsing session in Firefox, do the following:

  1. In the top right corner, click the menu icon.
  2. Now click on New Private Window.
  3. After doing that, a new private browsing window will appear.

If you don’t want to save your internet history, use the new private browsing window. You can use it alongside your regular Firefox window without any problems or privacy concerns.

As for private browsing in Firefox, it won’t save any visited websites or form and search bar entries. In addition, this mode doesn’t save new passwords and doesn’t show you the list of downloaded files in Firefox.

Lastly, the private browsing mode won’t save any cookies or cached web content. However, all your bookmarks created during a private browsing session will be saved, so you can access them using the normal mode.

Even though the downloaded files won’t be shown in download history, they will remain on your computer.

You can also open a private browsing window simply by pressing Ctrl + Shift + P on your keyboard.

You can also start a private browsing session for any link simply by right-clicking the link you want to visit and choosing Open Link in New Private Window from the menu.

Another way to start Firefox in a private browsing mode is to use its Taskbar or Start Menu icon. This is relatively simple, and you can do it by following these steps:

  1. First, locate the Firefox icon in Start Menu or your Taskbar and right-click it.
  2. Next, choose a New private window from the menu.

You can also automatically start Firefox in private browsing mode. Remember that this method won’t show you a notification message, but you can rest assured that your browsing history isn’t saved.

To automatically start Firefox in private browsing mode, do the following:

  1. Click the menu icon and choose Options from the menu.
  2. Navigate to the Privacy tab, and in the History section, set Firefox will to Never remember history.
  3. You’ll get a confirmation dialog asking you to restart Firefox to apply changes. Click on Restart Firefox now button.

After doing that, Firefox will always run in private browsing mode whenever you start it.

If you want, you can create a shortcut to start a private browsing session. To do that, follow these steps:

  1. Locate the Firefox shortcut, right-click, and choose Properties from the menu.
  2. In the Target, field add -private-window after the quotes. After doing that, click on Apply and OK to save changes.

Once you save the changes, you can use that shortcut to start Firefox in private browsing mode quickly. But, of course, you can also have another shortcut that you can use to create Firefox in trathe ditional way.

2. Use private browsing mode in Chrome

Chrome also fully supports private browsing, and this feature is called Incognito Mode in Chrome. To use Incognito Mode, you need to do the following:

  1. First, click the menu icon in the top right corner.
  2. Then, choose the New incognito window from the menu.
  3. A new private browsing window will now appear.

Like in any other private browsing mode, your history, cookies, and input data won’t be saved, so your privacy will remain protected from other users on your PC.

Chrome won’t keep any downloaded files in its records, but they will remain on your hard drive once you’re done browsing. In addition, all bookmarks saved during the private browsing session will remain.

You can also quickly start Incognito Mode if you want by using a Ctrl + Shift + N shortcut. You can also open any link in Incognito Mode by right-clicking the link you want to visit and choosing the Open link in the incognito window option.

You can also start Chrome in Incognito Mode right from its shortcut in Taskbar or Start Menu. To do that, follow these simple steps:

  1. First, locate the Chrome shortcut in Start Menu or on your Taskbar.
  2. Then, right-click the shortcut and choose the New incognito window from the menu.
  3. After doing that, Chrome in Incognito Mode will start.

If you always want to start Chrome in Incognito Mode, you can do that by modifying its shortcut. This is relatively simple, and you can do it by following these steps:

  1. Locate Chrome’s shortcut and right-click it. Choose Properties from the menu.
  2. When the Properties window opens, locate the Target field and add –incognito after the quotes. Now click on Apply and OK to save changes.

After that, you can always use that shortcut to start Chrome in Incognito Mode.

Like with Firefox, Incognito Mode doesn’t interfere with your browser, so you can have a regular and private browsing window open side by side and use them together without any problems. Alternatively, you can install Ungoogled Chromium which does not track your activity.

3. Use private browsing in Edge

So far, we only covered third-party browsers, but Microsoft browsers such as Edge also support private browsing. Starting a private browsing session in Edge is quite simple, and you can do it by following these steps:

  1. Open Microsoft Edge.
  2. Click the menu icon in the top right corner and choose New InPrivate Window.
  3. After doing that, a new private browsing window will appear.

If you want to start a private browsing session in Edge quickly, you can use Ctrl + Shift + P shortcut. Unfortunately, the Edge doesn’t have a private browsing option in its context menu, and that’s its only flaw.

All previous entries on our list have this option allowing you to open the desired link in a private browsing window easily.

Unfortunately, this option isn’t available with Edge, so if you want to open a specific link in a private browsing window, you’ll have to copy it manually.

You can also start Edge in a private browsing mode right from its Taskbar or Start Menu shortcut. To do that, follow these steps:

  1. Right-click the Microsoft Edge shortcut in your Taskbar or Start Menu.
  2. When the context menu appears, select the New InPrivate window.

After that, a new private browsing window will appear without starting Edge in a regular mode. Unfortunately, unlike other browsers, you can’t modify Edge’s shortcut and force it to always start in a private browsing mode.

As you can see, Microsoft Edge supports private browsing but lacks certain features that other browsers have.

If you’re a regular Edge user and don’t need these options, you’ll find this private browsing feature more useful.

4. Use private browsing in Internet Explorer

As we already mentioned, Microsoft’s browsers also support private browsing, and Internet Explorer is no exception. To start private browsing in Internet Explorer, you need to do the following:

  1. Start Internet Explorer.
  2. In the top right corner, click the Gear icon and choose Safety > InPrivate Browsing.

After that, a new private browsing window will appear and won’t save your history or cookies while using it. In addition, this browsing mode will disable all extensions and toolbars once you start it.

If you want to start a private browsing session in Internet Explorer quickly, you can do so by using Ctrl + Shift + P shortcut.

Like Microsoft Edge, Internet Explorer doesn’t allow you to open links in private browsing mode quickly.

The option is missing from the context menu, so if you want to visit any specific website, you need to start private browsing mode manually and enter the desired URL in the private browsing window.

Internet Explorer lets you quickly start InPrivate Browsing mode right from its Taskbar or Start Menu shortcut. To do that, follow these steps:

  1. First, locate the Internet Explorer shortcut on your Taskbar or Start Menu.
  2. Then, right-click the shortcut and choose the Start InPrivate Browsing option from the menu.

This is a great way to start a private browsing session in Internet Explorer without starting the regular session.

If you want, you can modify Internet Explorer’s shortcut and force it to always start in InPrivate Browsing mode. Again, this is relatively simple, and you can do it by following these steps:

  1. Locate the Internet Explorer shortcut, right-click, and choose Properties from the menu.
  2. In the Target, field add -private after the quotes. Now click on Apply and OK to save changes.

After that, you can use this shortcut always to start Internet Explorer in private browsing mode. If you want to start it in normal mode, use any other shortcut.

The private browsing mode is quite useful, especially if you want to protect your online activity and privacy from other users on your PC.

Is private mode private?

Theoretically, in Incognito or Private mode, none of your browsing history, cookies and site data, or information entered in forms are saved on your device.

This means that your activity shouldn’t appear in your browser’s browser history, so people who also use your device won’t see your activity.

That being said, know that Incognito mode does not mask your online activity from network administrators, Internet service providers, or anyone else who may be snooping on your Internet connection.

Furthermore, if you are logged in to your online accounts and profiles while using Incognito mode, you can still be identified, and your activities can still be tracked.

Is private browsing the same as incognito?

We’re talking about the same thing. Private Internet browsing features go by many names.

For example, Incognito Mode in Google Chrome and InPrivate in Microsoft Edge are the same things, in case you were wondering.

However, if you ignore the name, they all work roughly the same way, letting you open a unique browser window.

Knowing how to browse privately on Safari is something you should know if you want your Internet fingerprint to be as small as possible.

That goes hand in hand with how to browse privately on iPhone, but that goes without saying, as they both use the same browser.

And, since we’re speaking about mobile devices, you should always check out some methods to browse privately on Android.

If you want to stay anonymous & access geo-restricted sites while keeping your browsing history safe and away from snoopers, you can check out the list of extensions to unblock websites.

We showed you how to start a private browsing session in all major browsers, so if you haven’t used this feature before, feel free to try it out and share your experience with us by reaching out in the comments section below.

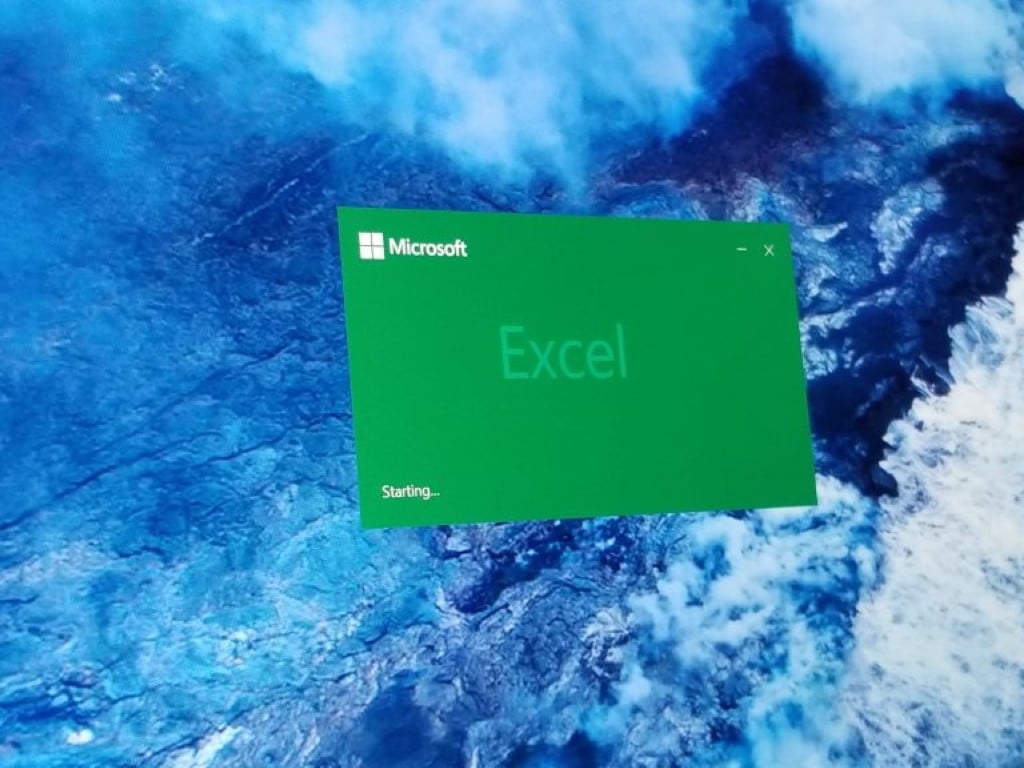
YouTube Thumbnails Not Showing In Chrome? Try This!

Can’t see YouTube thumbnails when using Chrome? It might be because of corrupt files and cookies, poor internet connection, or compatibility problems.

Below, we’ll show you all you need to know to fix this error in just a few steps.

How do I restore thumbnails on YouTube?

1. Check your internet speed

  1. Open your Google Chrome browser. 
  2. Go to this Speedtest page.
  3. Click on Run Speed Test and wait as the information on your internet speed shows up.ookla speed test chrome
  4. If your internet speed is slow, consider refreshing your internet and checking your thumbnails. 

2. Clear your browsing cache

  1. Open your browser.
  2. Press CTRL + Shift+ Del on your keyboard.
  3. Choose All time as the time range.choose clear browsing data time range
  4. Check Cache images and files and then click on Clear data.metamask not showing balance

3. Disable hardware acceleration

  1. Open Chrome.
  2. Type chrome://settings in the search bar & press Enter.
  3. Scroll down to System.
  4. Find Use graphics/ hardware acceleration when available and un toggle the button.
    chrome turn hardware acceleration
  5. Go back to YouTube and check if the thumbnails are working.

After that, go to YouTube and see if the thumbnails are still broken or not.

How to add thumbnails to YouTube videos

There are 3 ways to add thumbnails to your video: 

  1. Through YouTube’s automatically generated thumbnails. 
  2. Use a custom-generated thumbnail if you have a verified account.
  3. Through the YouTube studio app on your mobile device. 

The size should be 1280×720 px with the JPG, GIF, or PNG formats. It should also be less than 2MB in size. If you choose the wrong size, the YouTube thumbnail does not show issues that may occur on platforms like Facebook and other social media.

This article has shown you how to fix YouTube thumbnails not showing problems on Chrome and other browsers, not only for particular videos but for playlists as well.

In case you’re having additional problems, discover 6 simple methods to restore Google Thumbnails, we have a dedicated article for that.

Feel free to share what method worked for you by using the comment section found below this article.

3 Best Methods to Solve the Microsoft Sway Error

Microsoft Sway is a valuable service, but some users reported Microsoft Sway sign-in errors while trying to use it. Here’s how one user describes the issue in the Microsoft Tech community:

Hi – I cannot sign in to Sway these last few days. I keep getting:
Sign in
Something went wrong, and we can’t sign you in right now. Please try again later.
The Microsoft account login server has detected too many repeated authentication attempts. Please wait a moment and try again.
Is this a setting issue on my part, or is there an issue with the server?

This can be annoying, so let’s see how to fix it once and for all.

Why is Microsoft Sway not working?

We’re glad you asked. However, please remember that the most common cause of Sway not working is issues relating to Microsoft servers, and Microsoft Sway might be down.

When faced with these situations, sway.office.com would have refused to connect. Thus, you should note that to perform actions like edits, you must be logged in.

Messages you get in Sway, such as your account is not enabled, are a clear sign something is wrong, and we will help you fix that.

Sway asking for sign-in credentials is also a sign, mainly if you are used to the software storing this login information.

Is Microsoft Sway still supported?

Microsoft still supports the Sway service. However, know that the Sway app has been shut down since September 24, 2021.

That said, Sway sites are stored on Microsoft’s servers and tied to the user’s Microsoft account. This means that they can be viewed and edited from any web browser through Office on the web.

Users thought that the service disappeared entirely after receiving the following error message:

Something went wrong and we can’t sign you in right now. Please try again later.

The Microsoft account login server has detected too many repeated authentication attempts. Please wait a moment and try again.

How can I fix the Microsoft Sway error

1. Try a different web browser

If you’re having problems with Microsoft Sway, try accessing it using a different web browser. There are many excellent web browsers on the market, but if you want a fast, reliable, and secure browser, Opera One is just what you need.

Opera One Browser is based on the Chromium engine, so it’s similar to Chrome but has several distinct features. Unlike Chrome, Opera One won’t send your data to Google, and thanks to the advanced privacy and tracking protection, you’ll remain protected while surfing the web.

In addition, this browser has a built-in VPN, phishing protection, and a malware scanner for downloaded files. Plus, it comes with it’s own built-in AI.

Opera One

Log into Microsoft Sway, as well as all other Office products, with the help of this speedy, stable, and secure web browser.
Free Download Visit website

2. Log out of all Office applications

Sometimes you can fix the Microsoft sway sign-in error simply by signing out of all Office applications and logging back to Sway:

  1. Log out of all Office applications.
  2. After doing that, log back into Sway.
  3. Check if the error message still appears.

3. Use the private browsing feature

If you’re having problems with Microsoft sway sign-in error, you might be able to fix it by using the private browsing feature on your browser:

  1. Open your browser and click the Menu icon in the top right corner:
  2. Select New Private Window. Alternatively, use the keyboard shortcut to open it.
    private browsing Microsoft Sway sign in error
  3. Once the new private window opens, try reaccessing Microsoft Sway.

Note: We showed you how to enable private browsing in Firefox, but the process is similar for all major web browsers.

If you encounter Microsoft Sway sign-in error, try accessing in Incognito or Private browsing mode since that’s the solution that worked for most users.

Microsoft sway being down is a clear sign of something going wrong with the tech giant’s servers, so don’t panic; it’s not something on your end.

When faced with this predicament, check the Microsoft sway status. Needless to say that servers not being up will make it impossible to perform any Microsoft sway download.

Many also reported that Microsoft Sway is lagging, but we have a dedicated guide that addresses this issue, so don’t miss it.

Please let us know if you found our article helpful by leaving a comment below.

3 Ways to Access & Delete your Saved Passwords in AOL Browser

AOL Browser, also known as AOL Explorer, is a graphical web browser built by AOL, with its first release in 2005. It came as a standalone free browser or as additional software for users installing AOL Instant Messenger.

Just like other browsers, the AOL browser gives users options to save their passwords. However, one of the most common searches online with this browser has been AOL browser deleting the saved password.

So how do you access and delete your saved password in the AOL browser? Before discussing this, it is essential to note that the AOL browser supports tabbed browsing. It is built based on the Trident browser engine from Microsoft.

In 2006, the company released AOL OpenRide and AOL Desktop a year later. Both these two were released as improved versions of the AOL browser.

Does AOL have a password manager?

As discussed above, AOL browser has tried to implement a system that saves their users’ passwords. This is a feature you will find in almost all browsers.

It is great that you do not have to manually enter your usernames, emails, or passwords every time you log into your favorite websites or web applications.

For this feature to work well, it needs an elaborate password manager. This means that the AOL browser comes with its own password manager for users to set the browser how they would like to, especially regarding their passwords.

Where is my AOL password stored?

AOL passwords are stored in the AOL browser password manager. You can access these passwords from the settings tab, disable the manager, or even delete some or all of them.

Quick Tip:

If you encounter problems with the browser password manager, you may want to try using a third-party program with easier management.

RoboForm is a great tool that will allow you to store passwords across any device or browser. Also, it provides you with an additional layer of protection, and it comes also with a random password generator.

RoboForm

A smart and easy way to keep all your passwords safe and secure.
Free trial Visit Website

How do I delete saved passwords in AOL?

1. Clear browsing data

  1. Launch the AOL browser, click on the Menu icon in the top right corner, and select Settings.aol browser delete saved password - settings
  2. Select Privacy and security on the left-hand side.
  3. Click on Clear browsing data.privacy and security
  4. On the window that appears, select Advanced.
  5. Select Passwords and other sign-in data, then click on the Clear data button.Clear passwords - aol browser delete saved password

2. Delete selected password

  1. Launch the AOL browser, click on the Menu icon in the top right corner, and select Settings.AOL settings
  2. On the left-hand side, click Autofill and select Passwords on the menu that appears.Autofill - aol browser delete saved password
  3. To delete a saved password, click on the three dots alongside the password and then select Remove password. AOL remove password

3. Disable password saving

  1. Launch the AOL browser, click on the Menu icon in the top right corner, and select Settings.AOL settings - aol browser delete saved password
  2. On the left-hand side, click Autofill and select Passwords on the menu that appears.AOL autofill
  3. Disable Offer to save passwords.Disable passwords - aol browser delete saved password

How do I delete a username from the AOL login screen?

It is important to note that the username you want to delete from the AOL login screen is not stored on the AOL website but your browser or even as a cookie.

However, the information is on your computer. Therefore, you can delete this username by visiting your browser’s settings, navigating to passwords, and then deleting the username.

The AOL browser has been in existence for almost two decades. However, even though its support was discontinued a few years ago, it is still common among some users.

As seen above, you can access and delete your saved passwords in this browser, just like in other browsers. Let us know how the procedure went for you in the comments area below.

How to Use China Post Tracking App to Pinpoint Your Parcel

The China Post tracking is the most efficient parcel delivery online application, and it can monitor your parcel delivery from day one after you make the purchase until it reaches your doorsteps.
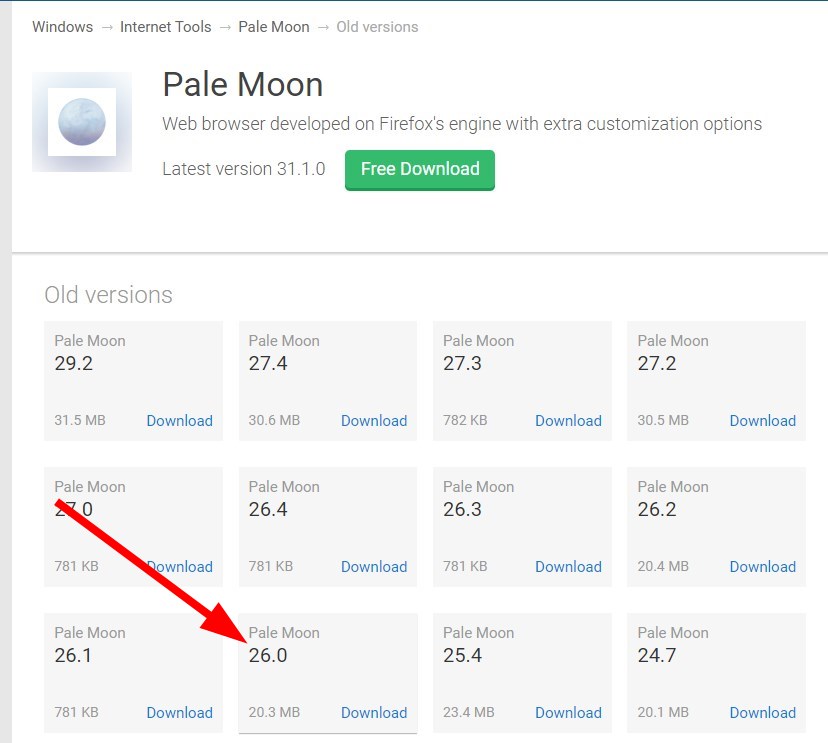
The best way to track a China Post is by using the Ordertracker website application but you can use many other websites that will get you almost the same information.

What is China Post tracker?

If you’re expecting to get something from China, it’s most likely through China Post, a trusted name in the mail, package, and freight delivery industry.

The parcel delivery service is just a part of the business. China Post offers domestic and international postal logistics, distribution of printed media, correspondence, and many more.

China Post has no less than 927,171 employees and was ranked 2nd among all postal companies in 2019 with a revenue of almost $90 million.

How can I track a parcel through China Post service?

You may ask how do I track China Post? It’s extremely easy but you will first need to get in the position to send or receive a parcel.

For instance, after you make a purchase, you will get a unique tracking ID that you will need to use in order to track your parcel from the point of departure to your door.

You just need to type or paste the tracking ID into the search window from the app and hit the Track a parcel button underneath.

There are three types of parcels, and all of the IDs have 13 characters (letters and digits):

  • Large packages will have the tracking ID starting with CP, then you will see 9 digits and the CN letters at the end that stand for China
  • Small packages will have a tracking ID that will start with R and another letter, then again 9 digits and the CN suffix
  • Express Mail Services will have the ID starting with E and another letter, followed by 9 digits and the CN or CS letters at the end.

How much time does the shipping takes?

Of course, the shipping time will greatly depend on the means of delivery. If it gets by air it will take a lot shorter than a hybrid or a surface-only method.

That can vary from only a few days for the Express Mail service to up to 3 months for surface delivery. We have an estimated time delivery table for the main regions of the world, provided by the company.

DestinationAir ParcelSurface Air LiftSurface ParcelExpress Mail
China Neighboring Countries7 – 15 days30 – 60 days60 – 120 dayswithin 3 days
European and American Countries10 – 30 days30 – 60 days60 – 120 dayswithin 5 days
Other Countries and Regions15 – 40 days30 – 60 days60 – 120 dayswithin 4 days

Usually, the website where you make the purchase will tell you an estimated time of arrival for the parcel but that is why the China Post tracking app is so important.

You will see exactly where your package is at any moment, and you will be able to estimate when it will reach you.

Of course, nobody will be able to tell you with utmost precision anything from the start because there are such unforeseen events that can alter the delivery time.

China Post package details

It’s important to know that, as you’ve noticed above, the packages are classified as a Small Package or a Large Package according to their size and weight.

The Small Parcel has to be under 2 kg (4.4 lb) and with a size smaller than 90x90x90 cm (35.4×35.4×35.4 in) to be shipped from China to any international destination.

If your package weighs more than 2 kg but less than 30 kg (66.1 lb), it will be classified as a Large Package. The company says that although the package is bigger, the delivery is cheaper than any express delivery.

Both types of packages can be sent over on three types of services: Air Parcel, Surface Air Lift (SAL), and Surface Parcel.

The shortest delivery is achieved by a fourth method, the Express Mail (EMS) delivery that is extremely fast but more expensive than any other method, of course.

The difference between Ordinary and Registered Mail

This is probably the most important aspect of all. Sometimes, you will be able to select between Ordinary or Registered Mail.

The first one is cheaper, but you won’t get any shipment tracking service. That means you won’t be able to see it moving towards the destination.

Moreover, you won’t have any compensation if your item gets lost. That’s why we would recommend only going for the Registered Mail service.

China Post tracker

China Post tracker

Track your China Post parcel from the store to your door with this simple online app.

We have ordered some packages through China Post, and it never failed to deliver in time. And the tracker worked perfectly all through the way to our homes.

Have you used the tracking app from China Post? Don’t hesitate to let us know in the comments section below.