Fix: Clicker Heroes Problems On Windows 10/11

clicker heroes gameplay windows 10

Many people enjoy playing simple games on Windows 10, and one of these games is Clicker Heroes. This game is extremely popular, but it also has certain issues, and today we’re going to fix these issues on Windows 10.

How can I solve Clicker Hero issues on Windows 10?

  1. Clicker Heroes save problem
  2. Clicker Heroes can’t connect
  3. Clicker Heroes crash
  4. Clicker Heroes not loading
  5. Clicker Heroes black screen

Clicker Heroes save problem

Solution 1 – Disable Flash plugin in Chrome

It has been reported that Clicker Heroes has a saving problem when using Google Chrome, and not being able to save your progress can be a big problem.

In order to fix this problem, you can always switch to a different browser when playing Clicker Heroes, but that isn’t always the best solution, especially if you want to keep using only one browser.

Another solution is to disable Flash plugin in Chrome, and to do that, you need to follow these steps:

  1. Open Chrome and click the Menu button in the top right corner.
  2. Choose Settings from the menu.clicker heroes chrome settings
  3. When Settings window opens, scroll down and click on Advanced settings.clicker heroes chrome advanced settings
  4. In Privacy section click on Content settings button.clicker heroes chrome content settings
  5. Scroll down to Flash section and click on it.
  6. Uncheck the Ask first (recommended).clicker heroes chrome flash settings
  7. Restart Chrome and check if the problem is resolved.

If the problem still persists, you might want to temporarily switch to a different browser when playing Clicker Heroes.

Solution 2 – Delete Clicker Heroes session files from your computer

If you play Clicker Heroes on two different Steam accounts, sometimes you might access save game from another account, even if you’re not logged in to that account.

This is a strange problem, but you can fix it doing this:

  1. Make sure that Steam is closed.
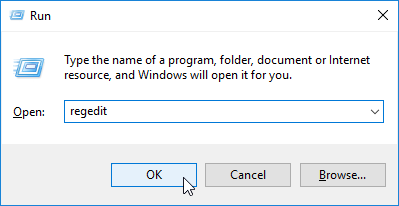
  2. Press Windows Key + R and type %appdata%. Press Enter or click OK.
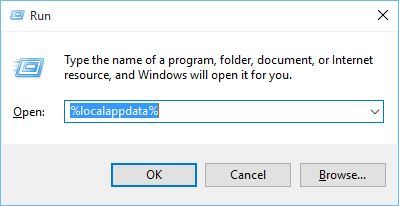
    localappdata-run
  3. When App Data folder opens, find com.playsaurus.clickerheroes AccountSO.sol folder. The folder name might be different on your computer, so keep that in mind.
  4. Delete that folder, or move it to Desktop so you can use it for backup.
  5. Start Steam and run Clicker Heroes again. Your save should be downloaded from the cloud.

Clicker Heroes can’t connect

Solution 1 – Use incognito tab

Players have reported that Clicker Heroes can’t connect to the server, and this is a big problem because you won’t be even able to play the game.

In order to fix this issue, some users are suggesting that you should start the game in incognito tab. To do that in Chrome, follow these steps:

  1. Click the More icon in the top right corner.
  2. From the menu choose New incognito window. In addition, you can open Incognito window by pressing Ctrl + Shift + N on your keyboard.clicker heroes chrome new incognito window
  3. When Incognito window opens, start the game and see if the issue is resolved.

Even if you don’t use Google Chrome, you can access Incognito mode / private browsing in any modern browser by following similar steps.

Solution 2 – Restart your browser

Sometimes these types of issues can be caused by your browser, and if Clicker Heroes can’t connect to the server, perhaps you just need to close your browser and start it again.

This is the simplest solution, but few users have reported that this solution has fixed their problems.

Solution 3 – Clear your cache

If Clicker Heroes can’t connect to the server, maybe the issue is caused by your browser cache, so you need to clear it.

Users have reported that issue was resolved after clearing cache in their browser, so let’s see how to clear cache in Google Chrome:

  1. Click More icon in the top right corner and choose Settings.
  2. In Settings tab click on Show advanced settings.
  3. Go to the Privacy section and click on Clear browsing data button.
  4. When Clear browsing data dialog opens, make sure to choose Advanced and Time range is set to All time. Check Cookies and other site data, Caches images and files and Hosted app data from the list.
  5. Click Clear browsing data button.
  6. Restart your browser and check if the issue is resolved.

We have shown you how to clear cache on Google Chrome, but the procedure is similar for all other modern browsers.

Clicker Heroes crash

Solution 1 – Start the game directly from Steam folder

Users have reported that Clicker Heroes crashes when they try to start it on their computer.

If you are getting Clicker Heroes has stopped working message while trying to start Clicker Heroes on Windows 10, you might need to start the game by running the game’s .exe file instead of launching it through Steam.

To do that, follow these steps:

  1. Make sure that Steam is closed.
  2. Go to Steam installation directory and open SteamApps folder. By default the location should be C:Program FilesSteamSteamApps.
  3. SteamApps folder contains all your Steam games, therefore you need to find Clicker Heroes folder in it. By default, Clicker Heroes should be located in SteamAppscommonClicker Heroes folder.
  4. Once you’ve found Clicker Heroes folder, open it and find Clicker Heroes .exe file. Run it, and the game should start without any problems.

Solution 2 – Disable or uninstall your antivirus software

Users have reported that Clicker Heroes sometimes crashes due to your antivirus or firewall software. In some cases, your antivirus can recognize Clicker Heroes as a harmful application, and this will cause Clicker Heroes to crash.

If you are experiencing crashes, you might want to temporarily disable your antivirus or firewall software in order to fix this problem.

In addition, make sure that you add Clicker Heroes to the list of exceptions in your antivirus and firewall application.

If that doesn’t help, you can temporarily remove your antivirus / firewall software.

Solution 3 – Run the game as administrator

If Clicker Heroes crashes on your PC, you could fix this issue by running it as administrator. To do that, follow these simple steps:

  1. Locate Clicker Heroes .exe file and right click it.
  2. Choose Run as administrator from the menu.
    run-as-administrator

Users have reported that this method is working for them, but you’ll have to repeat this process every time you want to play Clicker Heroes. If you want to make this process a bit more straightforward, do the following:

  1. Right click Clicker Heroes .exe file and choose Properties.
  2. Go to Compatibility tab.
  3. Make sure that you check Run this program as administrator.
    run-this-program-as-administrator
  4. Click Apply and OK to save the changes.

Now Clicker Heroes will always start with administrator privileges . If you launch Clicker Heroes through Steam, you can set Steam to run with administrator privileges by following the same steps.

Solution 4 – Turn off Steam overlay

If Clicker Heroes crashes on your PC, you might want to disable Steam Overlay. Steam Overlay is a useful feature, but in certain cases in can cause instability issues. To disable Steam Overlay, do the following:

  1. Start Steam.
  2. Click Steam > Settings.Steam app - settings
  3. In Settings window, choose In-Game option.
  4. Make sure that Enable the Steam Overlay while in-game option is not checked.
    steam-in-game
  5. Click OK to save changes.
  6. Restart Steam and try running the game again.

Clicker Heroes not loading

Solution 1 – Close all Steam processes using Task Manager

Users have reported that Clicker Heroes isn’t loading on their computer, and according to them, after clicking the game icon, nothing happens.

This is a strange problem, but it can be fixed by turning off Steam through Task Manager.

  1. If Steam is running, close it.
  2. Start Task Manager by pressing Ctrl + Shift + Esc on your keyboard.
  3. Locate all Steam related processes and close them one by one. To do that, just right click a process and choose End task from the menu.
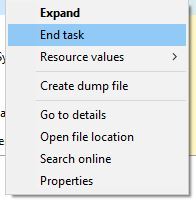
    end-task
  4. After you’ve ended all Steam processes, try launching the game again.

Solution 2 – Restart your computer

Sometimes Clicker Heroes can’t load if Steam update needs to be installed, and in order to fix that you just need to restart your computer.

After your computer restarts, run Steam again, let it install any updates and try to run Clicker Heroes again.

Solution 3 – Delete content_log.txt file

In rare cases, if Clicker Heroes crashes, you won’t be able to start it again, even if you restart your computer. This is a strange problem, but you can fix it by deleting the content log.

To do that, follow these steps:

  1. Open C:Program Files (x86)Steamlogs folder.
  2. Locate content_log.txt file and delete it.
  3. Start the game again.

Clicker Heroes black screen

Solution 1 – Launch the game using game’s .exe file

If you have issues with Clicker Heroes and black screen on Windows 10, you should try launching the game directly from its directory.

By default, installation directory should be C:Program FilesSteamSteamAppscommonClicker Heroes. Once you enter the game’s directory, just run game’s .exe file from there.

Solution 2 – Delete Clicker Heroes folder from AppData

Black screen issues with Clicker Heroes can be annoying, and if you’re having these issues, you might want to delete clicker Heroes folder from AppData folder. To do that, follow these steps:

  1. Press Windows Key + R and enter %appdata%. Press Enter or click OK.
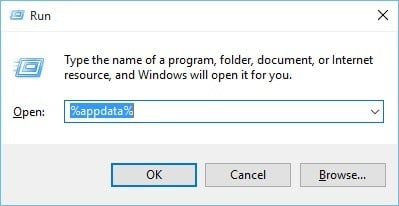
    appdata-run
  2. When AppData opens, find com.playsaurus.heroclicker folder and delete it.
  3. Try running the game again.

Solution 3 – Disable Steam Cloud and delete clickerHeroesSave.txt

If you are having Clicker Heroes black screen issues, you can try deleting clickerHeroesSave.txt file from your computer. To do that, do the following:

  1. Start Steam, and find Clicker Heroes in your library.
  2. Right click it and choose Properties.
    steam-properties
  3. Go to Updates tab and uncheck Enable Steam Cloud synchronization option.
    steam-cloud
  4. Now close Steam and go to Steam installation directory. By default it should be C:Program FilesSteam.
  5. After you’ve switched to Steam installation directory, go to userdata folder.
  6. Now you need to find clickerHeroesSave.txt. You can use the search bar in the top right corner.
    userdata-steam-search
  7. Right click clickerHeroesSave.txt from search results and choose Open file location.
  8. Create a copy of clickerHeroesSave.txt and save it on your Desktop, just in case. Now delete clickerHeroesSave.txt from its original folder.
  9. Go “up” one folder (you can press Alt key + Up arrow on your keyboard) and find remotecache.vdf file. Open that file with Notepad and change the Size variable to 0.
  10. Try running the game again. If your save games are missing, you can turn on Steam Cloud synchronisation or you can just copy clickerHeroesSave.txt to its original location.

It will also optimize your PC for maximum performance.

We have covered some of the common Clicker Heroes issues on Windows 10, and if you’re having any of these issues, make sure that you try out our solutions.

Don’t forget to share your experience with Clicker Heroes in the comments section below and tell us what solution worked for you.
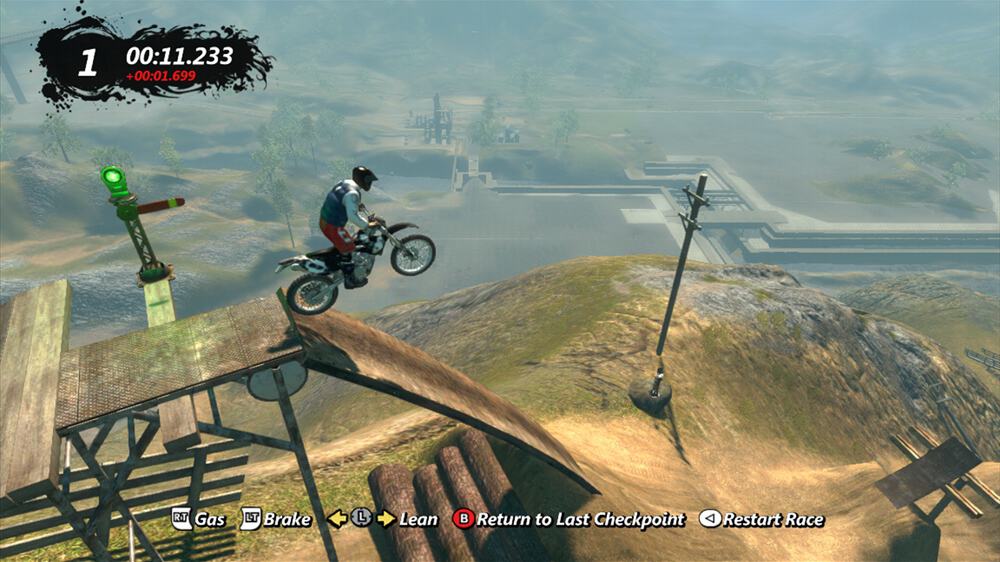
Ninja Gaiden 3: Razor’s Edge and Trials Evolution are now backward compatible on Xbox One

Two new Xbox 360 games are now playable on Xbox One starting today. Ninja Gaiden 3: Razor’s Edge, an action-adventure hack and slash game released in 2012 is joining Ninja Garden Black and the recently added is the first title to join the Xbox One Backward Compatibility list. As a reminder, previous episodes Ninja Gaiden Black (an OG Xbox game) and its Xbox 360 sequel Ninja Gaiden 2 are already playable on Xbox One.

The other game that became backward compatible today is the racing game Trials Evolution. This one remains of the most critically acclaimed episodes in Ubisoft’s popular Trials series, though be aware that it may not be available to purchase in all regions on the Xbox marketplace.

The Xbox One Backward Compatibility list currently includes more than 500 Xbox 360 and OG Xbox games, and Microsoft keeps adding new titles at a regular pace. Some of these games are also enhanced for the Xbox One X with 4K graphics, which is a great way to breathe new life into some classics such as Gears of War 2, Fallout 3, or Red Dead Redemption. The full list of backward compatible games is available on Major Nelson’s website.

Stable Tor 6.0 browser released for Windows 10

Since we initially published this article, TOR Browser got a few more iterations and it currently resides at the stable version 8.0. Tor Browser 8.0 (based on Firefox 60 ESR) brings the following improvements and features:

  • New user onboarding
  • Improved bridge fetching
  • Better language support
  • A variety of bug fixes
  • Stability and minor UI design improvements.

You can find it here.


How about a browser that is as much privacy-oriented as it’s fast?

The TOR Browser and the whole TOR Project are based on privacy and online anonymity which is remarkable. However, TOR operates under some strict rules which can discourage not-so-tech-savvy users. That’s where UR Browser comes into play.

ur browser

UR Browser takes the best of the mainstream browsers (based on the well-known Chromium project) but takes it up a notch with a variety of privacy-oriented features. To put it plainly, it looks like Chrome but works as TOR to some extent, being the best of the two.

The built-in VPN will ensure your online signature is always hidden while multiple mods of privacy will ensure you’re not tracked or forcibly redirected to suspicious websites.

You can give UR Browser a try and learn for yourself. The download link is below.

Editor's recommendation
ur browser
  • Fast page loading
  • VPN-level privacy
  • Enhanced security
  • Built-in virus scanner


The Tor team finally released a stable version of its Tor web browser. The 6.0 edition adds code signing for Apple’s OSX, letting Mac users finally install Tor without going through Gatekeeper issues.

The Tor Browser is based off Firefox architecture and as such, the core Firefox build was updated to version 45-ESR. Furthermore, there are several similar updates, the most notable being OpenSSL, HTTPS-Everywhere, and Torbutton.

Just last month, Mozilla released Firefox 46 final alongside the Firefox 47 beta, so as it stands, the main Firefox base code is ahead of what Tor offers.

There’s also a new security layer added to Tor Browser 6.0. Now, when a user downloads a file, the browser checks the hash of the downloaded file along with its signature before finally applying the download.

And remember that long-standing DLL issue? The developers finally managed to release a fix for it, so now the browser should be much safer than before.

The release also features new privacy enhancements and disables features where we either did not have the time to write a proper fix or where we decided they are rather potentially harmful in a Tor Browser context.

Here’s what the Tor team had to say via a recent blog post:

On the security side this release makes sure that SHA1 certificate support is disabled and our updater is not only relying on the signature alone but is checking the hash of the downloaded update file as well before applying it. Moreover, we provide a fix for a Windows installer related DLL hijacking vulnerability.

As per usual with these type of releases, there is a long list of bug fixes and other important details for advanced users to comb through. We doubt the team managed to get rid of every issue, but from what we have seen from the release notes, over three dozen bugs have been addressed.

Microsoft also recently updated its Edge web browser Insiders, but users are still complaining of frequent crashes, so a fix should be inbound.

RELATED STORIES YOU NEED TO CHECK OUT:

Looking for an alternative to Internet Explorer? Download UC BrowserHD

Internet Explorer 11 in Windows 7 and Windows 8.1,  is a pretty great browser, but if you want to try out an alternative, then UC BrowserHD should be one of your first choices.

uc-browser-hd-windows-8-app-review

Microsoft Edge is also a terrific browser, but if you are interested in an alternative on Windows 10, have a look at UC BrowserHD. Although like in all other versions of Windows, Internet Explorer is also included in Windows 10, users still turn to other browsers to satisfy their web searching needs.

Also, there are some great alternatives on the Windows Store, and today, we’ll be talking about one of them.

The app in question is UC BrowserHD, developed by UCWeb Inc. for Windows 10, Windows 8.1 users that want a customizable internet browser that is both easy to use and free.

If you are interested in a good web browser for Windows 10, Windows 8.1, then give this app a try.

UC BrowserHD for Windows 10, Windows 8.1

Although the app has some nice features, it is still very simple to navigate and set up. After only 2-3 minutes you can see all that it can do and it will feel very natural to use it. Also, if you are used to IE10, then the bottom-placed address bar will not bother you at all.

In terms of features, the browser has pretty much all the features you’d like, starting with Google and other engines search from the main screen, access to bookmarks, settings, and downloads from the main address bar, incognito browsing and the possibility to download images or files.

UC BrowserHD for Windows 10

[UPDATE] The latest version maintains the high speed and low data consumption, adding new security features for a safe surfing experience. UC Browser is able to block potential sources of malware and viruses before they get the chance to load on your PC.


We strongly recommend a full-dedicated VPN tool for enhanced security and privacy. Get now CyberGhost VPN (currently 77% off ). It protects your PC from attacks while browsing, masks your IP address and blocks all unwanted access.


One issue with the downloading process that I noticed is the missing option to specify where to download files, but other than that, it handled pretty good downloading tasks.

One other issue that I had with the browser is the poor support for Flash, making YouTube videos pretty hard to see.

UC BrowserHD review

In terms of UI and customizability, the user has at his disposal a quick launch table with customizable tiles. It is very similar to Opera’s approach, but the developers have added some extra quick launch shortcuts, carefully categorized in the right of the screen.


Fast, secure, privacy-oriented browser for an enjoyable browsing

Now that small-market browsers are up there with the big guys, we can safely say that there are valid alternatives to Chrome, Firefox, or Edge. The one that comes to mind is UR Browser which is built-in on the Chromium base.


Being built on the Chromium Open Source project, it allows for all Chrome Web Store extensions to be installed. However, some built-in features, like Moods, VPN, and antivirus, take it a mile further. Forgot about browsers which hog on your resources and track your digital signature.

With UR Browser, you can rest assured that you’ll stay anonymous and secure, but not paying price for it with slow loading speeds. Check UR Browser now and see for yourself.

Editor's recommendation
ur browser
  • Fast page loading
  • VPN-level privacy
  • Enhanced security
  • Built-in virus scanner

Of course, if you’re inclined to learn more about UC BrowserHD first, continue reading below.


Overall, the UI looks good and it’s very responsive, but there is one single problem: I have used the app on a Windows 8, Windows 10 computer, therefore I do not have a touch interface, and the scrolling on the home screen is terrible with a mouse.

UC BrowserHD app review

The user has to click on the little “-” button in the lower right corner and from there, choose the category that he is interested in. Other than this, I can’t say I found anything wrong with the app, and I would use it for quite some time. It has proven to be very easy to use, the UI is intuitive and responsive and it presents itself with the excellent build quality. A definite winner!

RELATED ARTICLES TO CHECK OUT:

How to Record Live TV on Windows 10

Gone are the days when Windows came with a Media Center included right inside the OS.

When Windows 8 was released, Microsoft actually killed the inclusion of Windows Media Center inside the operating system by default.

But you could purchase a license or download Windows Media Center from Microsoft’s website in order to have it on your Windows 8 or Windows 8.1 PC.

When Windows 10 was initially released, you could install Windows Media Center on it but it was later killed by Microsoft.

According to them, Windows Media Center wasn’t really being used by many people altogether.

It was a great software to have in case you also had a TV tuner card installed in your PC.

You could watch and even record live TV using Windows Media Center. Now that Windows 10 doesn’t really have a Media Center, there are third party options that you can use. Read more below.

How you can watch and record live TV on Windows 10

  1. Using Xbox Game DVR
  2. With MediaPortal
  3. Using Kodi

Method 1 – Using Xbox Game DVR

record live tv windows 10 xbox game dvr

This is a new feature in Windows 10 that lets you capture games with the Xbox app that comes included.

You can start the Xbox app and enable Game DVR in order to start recording. Not just games, but you can record desktop, videos from a video player and more.

Follow the procedure to enable Xbox Game DVR.

  • Open Start Menu and type Xbox.
  • Open the first result that pops up and it will open in a new window.
  • If you already don’t have a Xbox account, you will be asked to create one.
  • After creating an account you will see the home of the app.

record live tv windows 10 xbox game dvr 2

  • You will need to setup the Game DVR which is a one time process.
  • After the Game DVR has been set-up, open the program that you use to watch TV.
  • You can press Windows Key + G in order to bring up the Game bar.
  • Once it is open, you can start recording what is being shown in the program and it will be saved once you stop it.

Read Also: How to use Windows 10 PC as TV tuner: 4 best apps to install

Method 2 – With MediaPortal

record live tv windows 10 mediaportal

MediaPortal used to be a project that was derived from another PVR application known as XBMC. But the developers of MediaPortal have now worked to develop it as a standalone program.

MediaPortal as a PVR program is able to do a lot of things. One of which is being able to interact with the TV tuner card if it is installed in the PC it is being used it.

You can use MediaPortal to record live TV after easily installing it on Windows 10.

record live tv windows 10 mediaportal 2

There are different ways that you can go through to start recording TV in MediaPortal. Take a look at the number-wise list below.

  1. While watching live TV, press R and it will start recording.
  2. You can press F9 key on your keyboard to bring up the Info menu and there will be an option to start recording.
  3. Check for the Record Now button on the TV Home screen and click it.
  4. You can also choose a show in the TV Guide and you can schedule the show for recording.

Method 3 – Using Kodi

record live tv windows 10 kodi

Kodi which was previously known as XBMC is one of the most used PVR programs. It can also be used on Windows 10.

The best thing about Kodi is the fact that you can make it more functional with the add-ons that you can install in it. To enable recording live TV using Kodi, follow these steps.

  • Open Kodi and follow System > Add-ons > PVR IPTV Simple Client > Enable.
  • After enabling, choose Configue on the same screen and set the following:
    • For General set Location to Remote Path (Internet address)
    • The Select M3U Play List URL and paste this link EXACTLY: https://pastebin.com/raw/26xMQVL8
  • You also need to turn off Cache m3u at local storage in General.
  • Now go back to your Kodi homescreen and choose System again.
  • Navigate to System > Live TV > General > Enabled.
  • You also need to go to System > Live TV > Playback and turn off Start playback minimised.
  • After than you will need to follow this Wiki page in order to setup recording.

You need to follow the Wiki because we can’t explain how it works because this depends on where you live.

Following it is easy so you won’t face any problems. These were some of the best ways to record live TV on Windows 10.

If you have any queries, you can get them cleared in the comments section below.

READ ALSO:

Fix Guild Wars 2 issues in Windows 10/11 with our easy steps

Guild Wars 2 is a popular massive multiplayer online game that was released in 2012, but it seems that this game has some issues with Windows 10, so let’s have a closer look at them.

It has been reported that this game suffers from frequent crashes and graphical glitches on Windows 10.

It can be quite annoying when you can’t enjoy your favourite game after investing so much time into it, so without further delay, let’s fix these Guild Wars 2 issues.fix Fix Guild Wars 2 Issues in Windows 10

How can I fix Guild Wars 2 problems in Windows 10?

  1. Disable Razer Synapse data tracking
  2. Reinstall DirectX
  3. Add -repair parameter
  4. Reinstall Nvidia drivers
  5. Change the game from fullscreen to borderless window mode
  6. Close EVGA PrecisionX 16
  7. Delete the local.dat file
  8. Switch to 64-bit beta client
  9. Change Anti-aliasing settings in Catalyst Control Center
  10. Disable certain in-game settings

Solution 1 – Disable Razer Synapse data tracking

There’s a Graphics Enhancement Mod for Guild Wars 2, also known as GEMFX, and it has been said that Guild Wars 2 crashes on launch when using this mod.

One of the options is to disable this mod, but if you’re using Razer Synapse you might want to disable data tracking. To uninstall Razer Synapse data tracking do the following:

  1. Go to C:ProgramData -> Razer -> Synapse -> ProductUpdates -> Uninstallers -> RzStats.
  2. Run the uninstaller from that folder and you should be able to remove Razer Synapse data tracking.
  3. Try running Guild Wars 2 again.

Solution 2 – Reinstall DirectX

There are reports regarding DirectX crash when using GEMFX mod. In order to fix this issue you need to download and install DirectX 9.0c. You can download all the files that you need from here.

Solution 3 – Add -repair parameter

Most of us enjoy our favourite games in full-screen mode, but it seems that this mode makes Guild Wars 2 freeze and crash.

In order to fix that, you need to add -repair parameter to the game by following these instructions:

  1. Find Guild Wars 2 shortcut and right click it. Choose Properties.
  2. Find the Target field. In the Target field there should be a path to the game’s installation directory. By default it should be: C:Program Files (x86)Guild Wars 2Gw2.exe, but it might be different on your computer.
  3. Now add -repair parameter after the quotes in the Target field. Your Target field should look like this: C:Program Files (x86)Guild Wars 2Gw2.exe -repair.
  4. Save the changes and start the game using the shortcut.
  5. After you start the game it will scan your game files for any missing or corrupted files and replace them. We have to warn you that this process might take a while, up to an hour, sometimes even more, so you’ll need to be patient.
  6. After the repair has been performed you can go and remove -repair parameter.

Solution 4 – Reinstall Nvidia drivers

There have been reports that Guild Wars 2 has some issues with Nvidia drivers on Windows 10, and the best solution in this case is to reinstall the drivers.

When you uninstall Nvidia drivers make sure that you restart your computer, and after installing latest Nvidia drivers make sure that you restart your computer again.

In certain cases, your system can operate better using older versions of drivers. As confirmed by our readers, you can try this solution to fix Guild Wars 2 issues. Make sure to stop automatic driver updates and download older Nvidia driver.

It’s crucial that you restart your computer after uninstalling and installing display drivers in order for this process to be successful.

Solution 5 – Change the game from fullscreen to borderless window mode

Another problem with Nvidia drivers is that sometimes the game minimises and crashes, and in order to fix that it’s suggested that you change your mode from full-screen to border-less window.

After changing the game mode from full-screen to border-less window, restart the game, and change it back to full-screen again.

Solution 6 – Close EVGA PrecisionX 16

EVGA PrecisionX 16 is a popular overclocking tool for Nvidia graphic cards, but despite its popularity, this tool can cause some graphical glitches with Guild Wars 2.

Users report that they have encountered invisible cursors and black box around the cursor, and the solution to these glitches is to close EVGA PrecisionX 16 software.

Solution 7 – Delete the local.dat file

Some users have complained that their game crashes giving them out of memory error. This issue has been reported on computers with 16GB or more of RAM, so it’s safe to assume that the issue isn’t caused by lack of memory.

After some research it was concluded that the main cause of these crashes is local.dat file that is created by the game. This file holds some game data, and due to constant patches sometimes the data can get corrupted, so it’s advised to delete this file.

To delete local.dat file follow these instructions:

  1. Open File Explorer
  2. Go to the following location:
    • %appdata%Guild Wars 2
  3. In there you should find local.dat file. Delete it.
  4. Start the game again.

After deleting local.dat you will have to change your graphic and sound settings because they will return to default values.

Solution 8 – Switch to 64-bit beta client

Constant crashes and out of memory errors are reported by the users, and game developers have advised switching to a 64-bit beta client.

According to them, 64-bit client utilises your memory better. Just go to the game’s website and download the 64-bit beta client and move it to the game installation directory.

You won’t have to download the game again, and you can continue where you left off.

Solution 9 – Change Anti-aliasing settings in Catalyst Control Center

It has been reported that Guild Wars 2 has its share of issues with Anti-aliasing settings, so if you use AMD card it’s advisable to change those settings in Catalyst Control Center.

  1. Go to Catalyst Control Center.
  2. Open the advanced view.
  3. Click the Gaming tab.
  4. In Gaming tab click 3D Applications Settings.
  5. Change the Anti-aliasing setting to Use Application settings.
  6. Click Apply to save the changes.

Solution 10 – Disable certain in-game settings

If you’re getting low performance and experiencing crashes, you might want to disable certain options in video settings.

Video options such as character animation and high-resolution textures can cause some issues on older computers, so make sure that you disable them.

Find out more about Guild Wars 2 crashes in this article:
How to fix Guild Wars 2 crashes on Windows 10.

Gamers in regions with unstable internet experienced lag issues and have been able to quickly solve them by using VPN.

We hope that our solutions were helpful and you can share useful opinions in the comments section below.

What other issues have you encountered in Guild Wars 2 and how did you manage to solve them?

[wl_navigator]

Outlook hackers stole Bitcoin and other cryptocurrencies from users

As it turns out, the fact that hackers were able to view the private emails of users of Microsoft’s free Outlook.com service wasn’t even the worst of the news. On top of it, they were also able to steal some cryptocurrencies from “multiple victims” according to a report from Motherboard (via CoinDesk).

One of the victims, Jevon Ritmeester, claims that he lost as much as one bitcoin (worth roughly $5,400 as of the time of this writing) to a hacker that gained access to his Kraken cryptocurrency exchange account. As he describes in his post on the Tweakers, the hackers seemed to have successfully reset his cryptocurrency exchange account password and then move all emails from it to the junk folder and have it automatically forwarded it to what appears to be the hacker’s email address.

Additionally, multiple users on Reddit have also reported loss of cryptocurrency, with one going by shinratechlabs reporting that he lost “25,000 in crypto,” not defining which currency. Another Redditor replied and stated that he lost as much as $5,000, with similar forwarding and deleting rules found in his email accounts as was seen in Ritmeester’s. Another user also said that he gave multiple warnings to Microsoft, and that “for nearly two months there was something major going on,” suggesting there was “complete ignorance on their part.”

Ritmeester told Motherboard that he intends to “at least file a police report,” previously citing that he thinks Microsoft is “trying to cover up and is not taking this seriously.” Feel free to shoot a comment below if you’ve seen something similar happen to you or someone else.

Windows 10 version 1809 gets minor patch to fix Japanese calendar bug, but you can only install it manually

Microsoft has quietly released a new optional patch for Windows 10 version 1809 yesterday, with the build 17763.439 (via ComputerWorld). This new cumulative update is a pretty minor one, though it includes nine different fixes to support the new Japanese Era and its associated calendar that began on May 1, 2019.

Here is the full list of quality improvements included in this new patch:

  • Addresses an issue that prevents the CALDATETIME structure from handling more than four Japanese Eras. For more information, see KB4469068.
  • Updates the NLS registry to support the new Japanese Era. For more information, see KB4469068.
  • Addresses an issue that causes the DateTimePicker to display the date incorrectly in the Japanese date format. For more information, see KB4469068.
  • Addresses an issue that causes the Date and Time Settings control to cache old Eras and prevents the control from refreshing when the time enters the new Japanese Era. For more information, see KB4469068.
  • Updates fonts to support the new Japanese Era. For more information, see KB4469068.
  • Addresses an issue that prevents an input method editor (IME) from supporting the new Japanese Era character. For more information, see KB4469068.
  • Addresses an issue that causes the Clock and Calendar flyout control to display the day of the week incorrectly mapped to a date in the month of the new Japanese Era. For more information, see KB4469068.
  • Adds alternative fonts for the new Japanese Era fonts. For more information, see KB4469068.
  • Enables Text-To-Speech (TTS) functionality to support new Japanese Era characters. For more information, see KB4469068.
  • Addresses an issue in Unified Write Filter (UWF) that prevents Hibernate Once/Resume Many (HORM) from working as expected on Unified Extensible Firmware Interface (UEFI) systems.

Interestingly, this optional update isn’t available on Windows Update yet. Microsoft noted that it’s only available through Windows Server Update Services (WSUS), and you can also get it from the Microsoft Update Catalog website. In case you decide to skip it, be aware you’ll still get all these fixes in the next Patch Tuesday Update, to be released on May 14.

Redesigned Skype icon appears in latest desktop Insider build

Microsoft is still in the process of rolling out redesigned icons for its most important apps such as the Office suite, Microsoft Teams, and OneDrive, and it appears Skype is next on the list. A slightly redesigned Skype icon is now available on the desktop for Skype Insiders, and you should see it after installing the preview build 8.45.76.24.

The new icon isn’t a significant departure from the previous icon, it’s actually very subtle compared to the Fluent Design refresh we’ve seen for the Office and OneDrive icons. Skype is a now very old brand, and it’s probably a good thing that the new icon will remain instantly recognisable by the majority of the userbase. Actually, it’s very likely that some users won’t notice the change at all.

As of this writing, the new icon is only live on the Skype Preview desktop app, but you can expect it to appear on mobile pretty soon. Let us know what you think about the redesigned icon in the comments below.

Windows update standalone installer stuck searching [Fixed]

If you are trying to search for updates using the Windows update standalone installer, you may encounter a never-ending search for the update. This can be caused by several reasons, and the issue has affected all the previous version of Windows including 7,8 and the latest Windows 10.

If you are facing a similar problem and the Windows update standalone installer is stuck at searching for update screen without any progress, here are a couple of fixes to resolve the same.

Fix Windows update standalone installer stuck at searching for updates

  1. Disable Automatic Updates (Windows 7/Windows 8)
  2. Update via WSUS Offline Updater (Windows 7 / 8)
  3. Run the Windows Update Troubleshooter  (Windows 10)
  4. Download Most Recent SSU
  5. Download Most Recent KB
  6. Fix Windows File Corruption

1. Disable Automatic Updates (Windows 7/Windows 8)

If you are using Windows 7, try to disable automatic Windows updates and then try to run the standalone installer. Here is how to do it.

  1. Type window update in the search box.
  2. Select Windows Update under Programs.
    Never check for update - Windows 7 - change settings
  3. From the Control Panel, click on Change Settings.
    Never check for update - Windows 7
  4. Click the drop-down menu under Important Updates and select “Never check for updates”.
  5. Click OK to apply the changes.
  6. Restart your computer and wait for the PC to boot normally. Run the standalone update installer and check for any improvements.

If you are still facing the same problem, do the following:

  1. Download KB4490628. Make sure you download the right version of the software depending on your OS edition and build. Run and install the SSU driver.
  2. Restart your PC.
  3. Go to Windows Update > Change Settings. Under Important Update, click the dropdown menu and select “Install updates automatically (recommended). Click OK to save the changes.
  4. Click on check for update and install any pending update.

2. Update via WSUS Offline Updater (Windows 7 / 8)

Alternatively, you can also use WSUS Offline updater, a small open source software utility to download missing updates from the Microsoft server automatically.

  1. Begin with downloading WSUS Offline Updater.  Make sure you download the most recent version of the tool from the page.
  2. Extract the wsusoffline.zip file.
  3. Run the UpdateGenerator.exe.
    WSUS Offline Update
  4. Check “Verify downloaded updates “ and “Include C++ Runtime Libraries and .Net Frameworks” boxes.
  5. Click on Start to download the missing updates.
  6. Once the downloading of updates is over, close UpdateGenerator.exe.
  7. Go to the wsusoffline folder again, and open Client folder.
    uninstallaerexe wsus offline update
  8. Double-click on Updateinstaller.exe.
  9. Check “Update C++ Runtime Libraries” box and click Start.

Wsus Offline Installer will start installing all the pending updates downloaded in the last phase. The update installation may take a few minutes to a few hours.


3. Run the Windows Update Troubleshooter  (Windows 10)

Microsoft allows you to download Windows Update troubleshooter. The troubleshooter scans the PCs for the update related problems and suggests solutions accordingly.

  1. Download Windows Update Troubleshooter.
  2. Run the Troubleshooter after the download is complete.
    Windows update troubleshooter
  3. Click on Next and follow the on-screen instructions in the wizard.

The troubleshooter will scan the system and suggest appropriate fixes to resolve the issue.


4. Download Most Recent SSU

If the troubleshooter failed to find and fix the problem, you can download and install the most recently SSU (Servicing Stack Update) from the Microsoft site.

Before downloading the SSU, make sure you know your system’s OS version and the edition. Here is how to determine whether you are using 32-bit or 64-bit Windows.

  1. Click on Start and open Settings.
  2. Go to System > About and System type.
    About System Windows 10
  3. Now go to SSU download and under Method 2, click on Microsoft Update Catalog.
  4. Download either 32-bit or 64-bit SSU update.
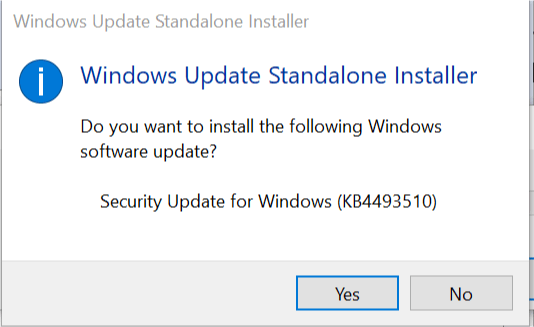
  5. Run the Servicing Stack Update by double-clicking on it.
    Windows Standalone Installer - Do you want to install update
  6. If everything goes right, it will scan your PC for pending update and prompt you to install the pending update.
  7. Click Yes to proceed with the installation.

Restart your PC and again check for any pending update.


5. Download Most Recent KB

If installing the most recent SSU did not resolve the problem, try downloading the most recent KB from the official Microsoft source.

  1. First, check your Windows edition by going to Start > Settings > System > About and System Type.
  2. Next, go to the Update history page.
    Download Most Recent KB - KB Number
  3. Find the most recent KB for your version of Windows 10. Note down the KB number for the most recent KB.
  4. Now go to Microsoft Update site and search for the KB number from the above step.
    Download Most Recent KB - KB download Page
  5. Download the most recent KB. After the download is complete, double-click on the KB to start the update.

6. Fix Windows File Corruption

If the issue still persists, you can run the System File Checker and Deployment Image Servicing and Management tool to fix the file corruption. Here is how to do it.

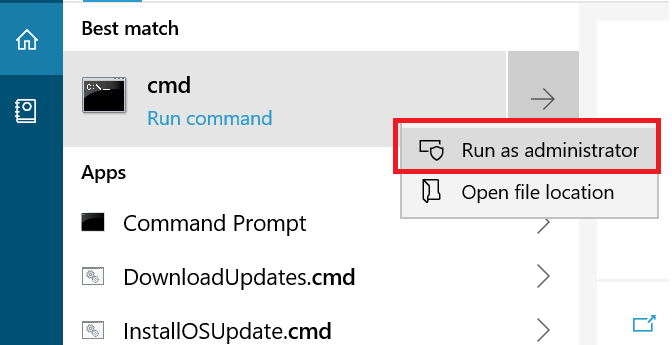
  1. Open Command Prompt as admin. To do this, type cmd in the search, right-click on Command Prompt and select Run as Administrator.
    Cmd as admin
  2. In the Command Prompt type, the following command and hit enter:
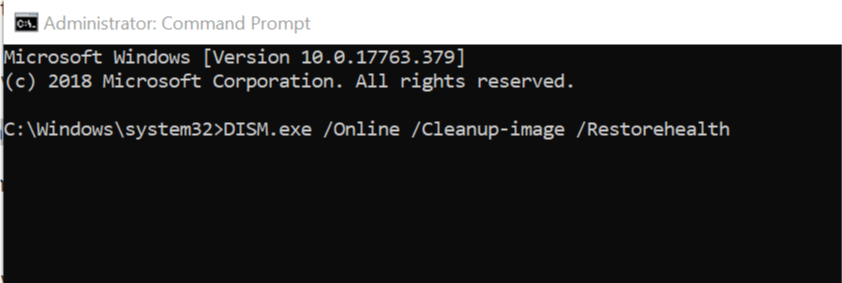
    DISM.exe /Online /Cleanup-image /RestorehealthRun DISM command - Windows Update fix
  3. Next, type this command and hit enter.
    Sfc /scannowrun Sfc scannow command - Windows update fix

Note: The first and the second command may take several minutes to complete the operation.

Once done, close the command prompt and restart your system.

After the restart, try to run the Windows Standalone installer or check for Windows update and check for any improvements.

RELATED STORIES YOU MAY LIKE:

Windows Was Unable to Complete the Format on CD [Fix]

Are you experiencing Windows was unable to complete the format with your CD? CD-RW is an advanced form of CD, which is designed in such a way that it can be read, erased, written, and rewritten.

At times, formatting CD-RW may be necessary, especially in the event of corruption, which prevents the CD-RW from loading correctly. In this case, formatting such a CD-RW might be the ultimate solution.

However, what happens if your PC cannot complete the formatting process? We’ll be providing you with several quick fixes in this article.

How do I fix Windows was unable to complete the format on a CD?

1. Format CD-RW

Note icon NOTE
Before you proceed, ensure the CD drive is compatible with CD-RW.
  1. Place the faulty CD-RW in your PC’s CD drive.
  2. Press Windows + E to open File Explorer, and go to This PC.
  3. Navigate to the CD-RW removable drive and click on it.
  4. Locate and click on Manage.
  5. Click on the Toolbar.
  6. Locate and select Format to open the format window.format menu windows was unable to complete the format cd rw
  7. Click on the File System drop-down, and select a disk format system, preferably UDF 2.01, UDF 2.50, or UDF 2.60 (for Windows 7 and newer versions)
  8. Now, click on Start.
  9. Click OK again on the pop-up window to complete the format process.

This would format CD-RW completely, without any form of hitch, provided there is no form of system error or corruption. However, if you are still getting the Windows was unable to complete the format error, you can attempt the next method outlined below.

2. Format CD-RW using Disk Management

  1. Insert the CD-RW into your PC’s DVD/CD drive.
  2. Open Control Panel, and select Administrative Tools.
  3. Click on Computer Management.
  4. On the displayed options, locate and select Disk Management.windows was unable to complete the format cd rw disk management
  5. Locate the removable storage medium (CD-RW) you want to format.
  6. Right-click on it and select Format.
  7. In case you have partitions on the disk drive, delete them before running the format.

By following the above-outlined steps, the CD-RW should now be completely formatted and should be accessible for storing data.

3. Erase CD-RW

  1. Insert the CD-RW (rewritable) disc into your system’s disk drive.
  2. Open File Explorer.
  3. On the Explorer’s window, click on the CD-RW icon.
  4. Navigate to the toolbar, and locate Erase this disc.this PC windows was unable to complete the format cd rw
  5. Follow the on-screen commands to complete the format process.

If the Windows was unable to complete the format error is still there, you can try to fix it using the Erase this disc option. This will wipe off the CD-RW completely.

This action will clear off all the files on the CD-RW, providing you with a clean/blank rewritable disk. To be on the safe side, it is recommended you back up important files on the disc before running the format/erase process.

The error occurs for several reasons, ranging from file corruption to disc damage but can be easily fixed with a quick or deep format.

Before you leave, do check some effective disc burning software and get one today!

In any case, we hope that our solutions were helpful to you.

Wolfenstein II and Wargroove are now playable for all Xbox Game Pass gamers

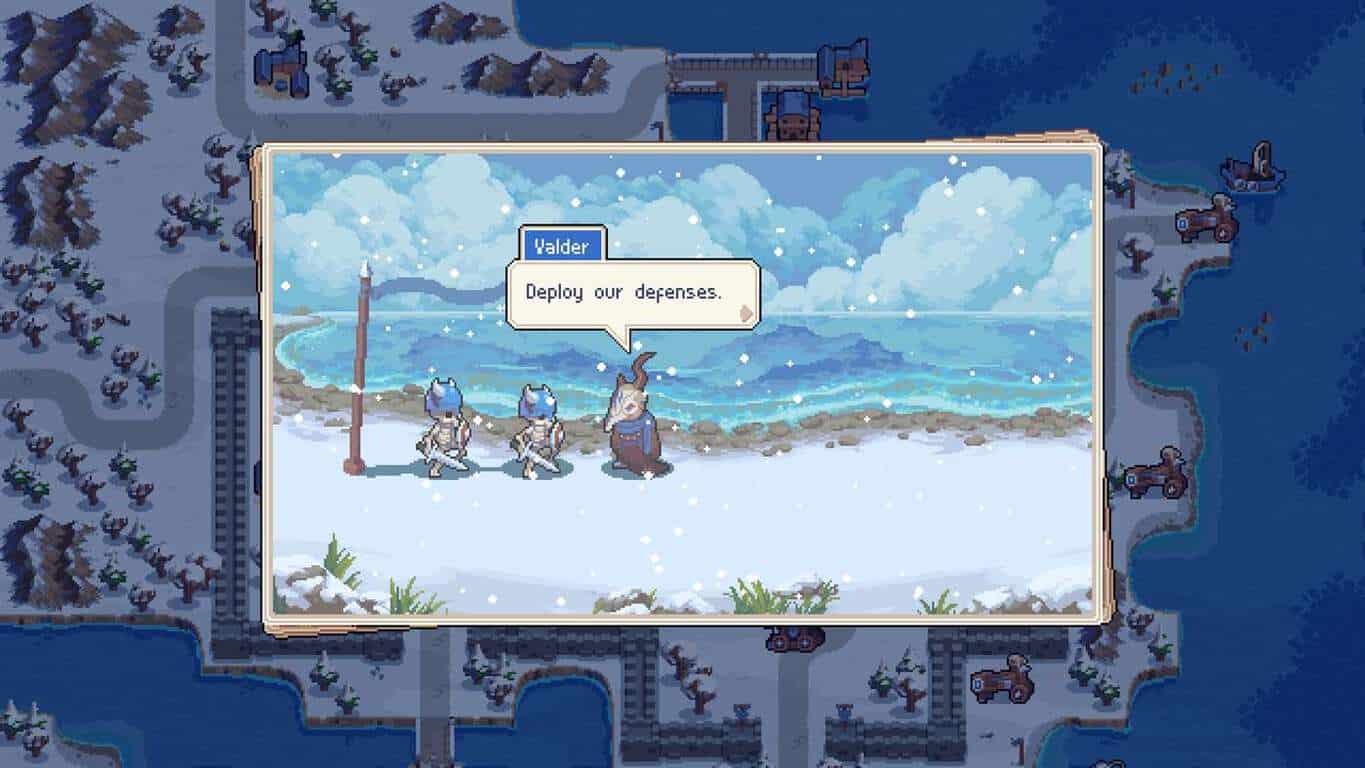
The two Xbox One video games, Wolfenstein II: The New Colossus and Wargroove, are now both completely playable for all Xbox Game Pass users.

That means those with an Xbox Game Pass subscription can download both games and play them in full as if they owned them outright.

Wolfenstein II: The New Colossus and Wargroove are two of six new games coming to Xbox Game Pass this month. All six will be replacing six other games such as Star Wars: The Force Unleased which are leaving the service on May 15th.

Wolfenstein II: The New Colossus

Wolfenstein® II: The New Colossus™ is the highly anticipated sequel to the critically acclaimed, Wolfenstein®: The New Order™ developed by the award-winning studio MachineGames. An exhilarating adventure brought to life by the industry-leading id Tech® 6, Wolfenstein® II sends players to Nazi-controlled America on a mission to recruit the boldest resistance leaders left. Fight the Nazis in iconic American locations, equip an arsenal of badass guns, and unleash new abilities to blast your way through legions of Nazi soldiers in this definitive first-person shooter.

Wargroove

Command an army, customize battlefields, and challenge your friends, in this richly detailed return to retro turn-based combat! When war breaks out in the Kingdom of Cherrystone, the young Queen Mercia must flee her home. Pursued by her foes, the only way to save her kingdom is travel to new lands in search of allies. But who will she meet along the way, and what sinister challenges will she face?

Are you more excited for Wolfenstein II: The New Colossus or Wargroove? Let us know which video game you’ll play in the comments below and then like us on Facebook for more Xbox gaming news.

The app was not found in the store. ?


The app was not found in the store. ?

Star Wars: The Force Unleashed and 5 other video games leaving Xbox Game Pass this month

Six games will be leaving Xbox Game Pass this month on the 15th according to a post on TA.

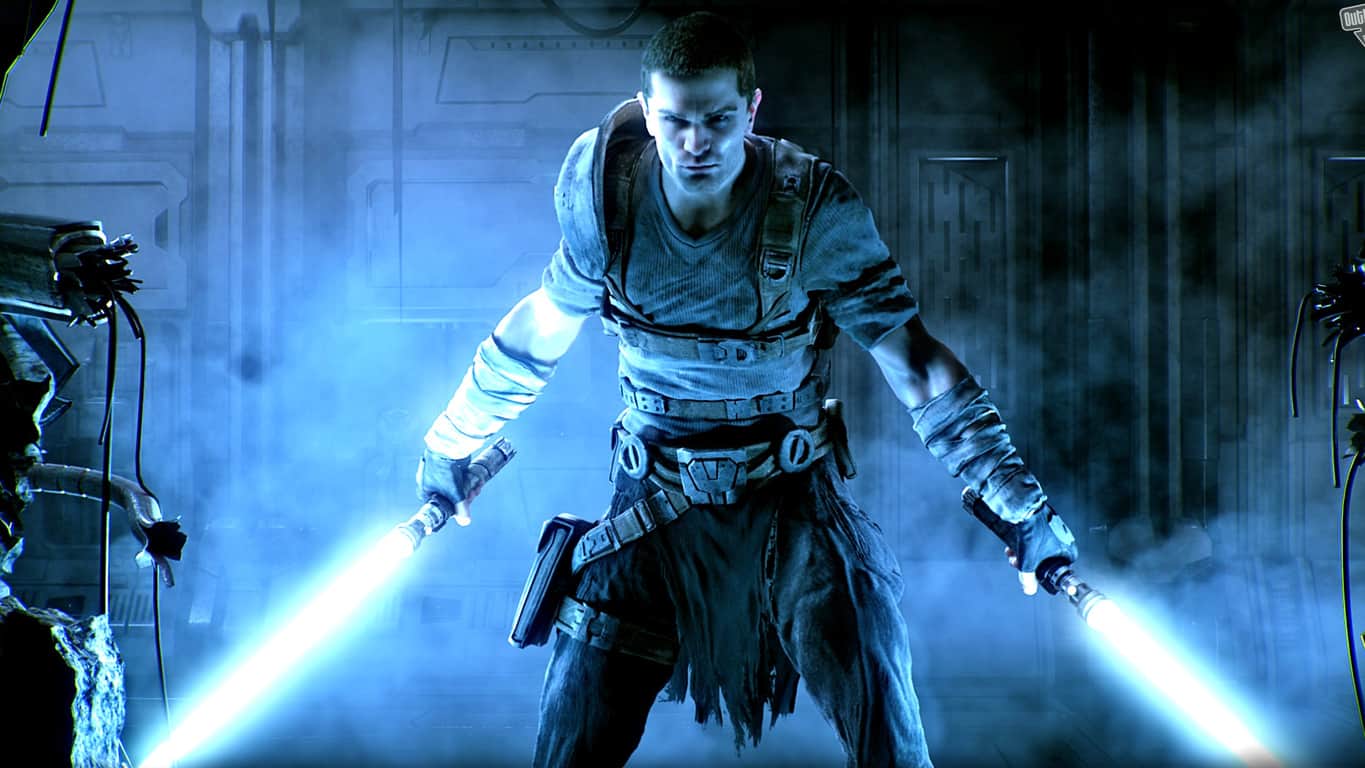
Two Xbox One titles, Mega Man Legacy Collection and MotoGP 17 will be leaving Microsoft’s game subscription service along with the Xbox 360 titles (which are also playable on the Xbox One), Comic Jumper, Ms. Splosion Man, Star Wars: The Force Unleashed, and Star Wars: The Force Unleashed II.

As is usually the case, these six video games will be replaced by six other titles throughout the month. These games are Wolfenstein 2: The New Colossus, Surviving Mars, Tacoma, Black Desert, For the King, The Surge, Lego Batman 3, and Wargroove.

Xbox Game Pass is a paid subscription service that gives subscribers full access to around 100 video games from Xbox, Xbox 360, and Xbox One libraries.

Do you use Xbox Game Pass? Let us know which of the above games you’re sad to see go in the comments below and then follow us on Twitter for more Xbox gaming news.

Xbox Game Pass for Console

Windows 10 Forza Street video game could be coming to Nintendo Switch

The Windows 10 video game, Forza Street, could be coming to the Nintendo Switch sometime in the future according to some code pulled from the title over at AR12Gaming.

The code makes reference to the Nintendo Switch console numerous times and also mentions Android and iOS, both platforms which have been confirmed for a future release.

The launch of Forza Street on the Nintendo Switch would make complete sense given the recent increase in Microsoft and Nintendo collaboration that’s resulted in the launch of the Xbox One Console Exclusive title, Cuphead, on the Switch.

Several rumors and developments have also suggested that other Xbox franchises like Ori could be coming to the Nintendo Switch in addition to Xbox Game Pass and other Xbox Live functionality.

Forza Street isn’t technically a new video game as, until last week, it went by the name of Miami Street. The rebranding of it as a Forza title did bring with it some content updates though and the promise of bigger improvements going forward in addition to launches on iOS and Android.

Have you played Forza Street yet and would you play it on the Nintendo Switch? Share your thoughts with the community in the comments below and then follow us on Pinterest for more gaming content.

Forza Street
Forza Street
Developer:
Microsoft Studios
Price:
Free

How to Access Microsoft Update Catalog on any Browser

Microsoft promised it would allow users to access the Update Catalog on any browser, but for the time being, users still have to use Internet Explorer 6.0 or later to download the updates.

If you’re planning to install Internet Explorer for the sole purpose of downloading updates from Microsoft‘s Update Catalog, there’s an alternative. You can access the Update Catalog on any browser using the site’s RSS feed by following these steps.

How do I access the Update Catalog on any browser?

How to access the Update Catalog for Windows 7 on any browser

  1. The standard RSS feed URL is https://catalog.update.microsoft.com/v7/site/Rss.aspx?q=KB
  2. Replace KB with the actual KB code you’re looking for
  3. This loads the RSS feed for that KB article
  4. In the list of options, search the download link you need
  5. Copy the download link in your browser‘s address bar > the interface of the Update Catalog is now visible
  6. Click on Download now and install the KB on your machine.

How to access the Update Catalog for Windows 10 on any browser

  1. Use the standard pattern https://catalog.update.microsoft.com/v7/site/Rss.aspx?q= and add windows+10 as a search term at the end of the string
  2. Example: https://catalog.update.microsoft.com/v7/site/Rss.aspx?q=windows+10
  3. All the Windows 10 cumulative updates are listed
  4. Copy the link of the update you want to download
  5. Paste it in your browser‘s address bar and you’ll access Microsoft‘s Update Catalog for Windows 10.

Download Windows updates faster with Opera One

If you need to download a small installation file, it doesn’t really matter what browser you use. But, when it comes to large files, looking at that download meter slowly moving might be bothersome. Not with Opera One

Opera is among the browsers with the highest speed rates. With its help you will be able to download the Windows updates quickly, with no interruptions.

⇒ Get Opera One

FAQs

How can I access the Microsoft Update Catalog without Internet Explorer?

You can use the RSS feed method. Just enter https://catalog.update.microsoft.com/v7/site/Rss.aspx?q=KBXXXXXXX in your browser’s address bar, replacing KBXXXXXXX with the specific update code.

Does the RSS feed method work for all Windows versions?

Yes. You can use it for Windows 7, Windows 10, or any other supported version by adjusting the query term in the URL (for example, add windows+10 for Windows 10 updates).

Can I download updates directly from Chrome, Firefox, or Opera?

Yes. Once you open the RSS feed link, copy the desired download URL and paste it into your browser without using Internet Explorer.

Is Opera One faster for downloading large Windows updates?

Yes. Opera One handles large files efficiently, supports high-speed downloads, and helps avoid interruptions compared to older browsers.

Now that you know how to use Microsoft Update Catalog, you can use your knowledge to update Windows 10 offline with ease. For more information on accessing the catalog and updating offline, check our guide on how to access Microsoft Update Catalog properly.

It creates chunks of data, fragments if you like it, to make the downloading large files (like certain Windows updates from the Update Catalog), the most nimble experience. Give it a shot and see for yourself.

Windows 10 Photos App supports new image search features

Microsoft added a series of new improvements and features to its Windows 10 Photos App. The new improvements are currently available to Windows Insiders only.

These features increase the current version of the Windows 10 Photos app to version 2019.19031.17720.0.

You can now upload an image that is saved in your library to look for similar photos on the web.

Once you open the photo, you can right click on it and select the Search similar images in Bing option to use the feature.

The app will then open your default browser that shows similar images available on the web. Users will no longer have to explore several web pages to search for specific images. The pre-installed Photos app does this work for you in just a few clicks.

Microsoft also added an additional new feature named Duplicate project. You can now use this option to keep a copy of your existing project on the disk.

The update also brings four new exciting animated text styles that you can add to enhance your photos. You can apply Bold, Quiet, Cinema or Boom styles on your favorite images.

New features ahead for the Windows 10 Photos app

A few months ago, Microsoft released a new update for Microsoft Photos app. The changelog suggests that Microsoft added a new option in the settings menu.

This option can be used to disable automatic album creation. Moreover, the update introduced new improvements and bug fixes.

Windows 10 Photos app allows users to create albums, view and edit their photos, videos and more. You can also use your existing videos and photos to create a video remix within a few minutes.

The built-in video editor can be used to change text, music, filters, music, and camera motion. You can enhance your videos by adding 3D effects such as explosions, butterflies, and lasers.

You can download the latest version of Microsoft Photos from the Microsoft Store.

RELATED STORIES TO CHECK OUT:

Fix: Web browsers don’t work in Windows 10 Anniversary Update

The Anniversary Update was launched in 2016, and despite the fact the majority of problems was reported earlier, complaints about issues caused by the second major update for Windows 10 keep coming in.

In today’s article, we’re going to talk about problems with web browsers after the Anniversary Update, which a few users reported lately.

According to them, they’re unable to connect to the internet using any browser in Windows 10 version 1607.

“After installing Windows 10 Anniversary, I experienced problems with internet browsers: Edge, IE 11,and yes Chrome. Initially, the issues started with Edge. I noticed a number of web pages needed to be recovered. Also, notifications would cause the entire desktop to freeze. Web sites that I experienced issues with were: MSN, Amazon, and Yahoo,” said one user of Microsoft’s forums.

If you’re facing this issue, as well, keep reading this article, because we’ll try to solve it for you

Web browsers don’t work in Windows 10 Anniversary Update

  1. Clear browsing data
  2. Try another browser [QUICK SOLUTION]
  3. Disable Adobe Flash player
  4. Turn off Firewall
  5. Turn off antivirus
  6. Make sure you’re connected to the internet
  7. Run network troubleshooter

Solution 1 – Clear browsing data

The first solution for any browsing problem that anyone is going to recommend you is to clear browsing data. This solution doesn’t solve the problem in most cases but can be sometimes useful, and it won’t hurt if you try it.

Although the precise method of clearing browsing data varies from browser to browser, it’s basically same or very similar. So, if you know how to do it on one browser, you’ll know how to do it on another.

We’re going to show you how to clear browsing data in Microsoft Edge, so just in case, you’re not sure how to do it. Here’s exactly what you need to do:

  1. Open Microsoft Edge
  2. Open the three-dotted menu, and go to Settings
  3. Under Clear browsing data, click on Choose what to clear
  4. Now, check all browsing data you want to delete, and click on Clearclear edge browsing data
  5. Restart your browser, and try to connect to the internet again

This process is pretty much same for other browsers, so whichever browser you’re using, you now know how to delete browsing data. If clearing browsing data didn’t get the job done, try with some of the solutions listed below.

Solution 2 – Try another browser (UR Browser recommended)

The majority of reported cases of browsers not working on the Windows 10 Anniversary Update concern mainstream browsers.

What if you, at least for the time being, switch to an alternative which might be over your expectations? We at WindowsReport highly suggest the UR Browser.

This lightweight and the fortress-like privacy-oriented browser should work without any issues on any Windows 10 iteration to date. It’s based on Chromium but has a plethora of features to make your browsing experience as safe and fast as possible.

Also, in comparison to some other browsers, it comes with a variety of built-in features so you won’t need to reach for the sketchy extensions.

Try it now for free and check whether the problem with the Anniversary Update is still there.

Solution 3 – Disable Adobe Flash player

Users who encountered browser problems after installing the Anniversary Update actually confirmed disabling Adobe Flash Player as a solution for their problem.

So, if you noticed that your browser doesn’t connect to the internet right after installing the Anniversary Update, there’s a big chance it was caused by Adobe’s software.

Adobe Flash Player is integrated with most browsers, so all you need to do is open settings of your browser and disabled Flash Player. Once again, we’re going to show you how to do that on Edge, but if you need more instructions on how to disable Adobe Flash Player in other browsers, just let us know in the comments.

Here’s how to disable Adobe Flash Player in Microsoft Edge:

  1. Open Microsoft Edge
  2. Open the three-dotted menu, and go to Settings
  3. Now, click on Advanced Settings
  4. Uncheck the Use Adobe Flash Player optionedge disable flash player
  5. Restart Microsoft Edge

According to most users who encountered problems with browsers in the Anniversary Update fixes the problem. However, even if this workaround didn’t get the job done, we prepared a few more solutions for you, so check them out below.

Solution 4 – Turn off Firewall

Some antivirus programs’ firewall can sometimes cause problems with web browsers. So, if you’re using third-party antivirus software, try disabling its firewall, and try to connect to the internet again.

Since we’re talking about disabling firewalls, you can try the same thing with Windows 10‘s built-in firewall.

If you’re not sure how to disable Windows 10‘s Firewall, here’s what you need to do: tu

  1. Go to Search, type firewall and open Windows Firewall
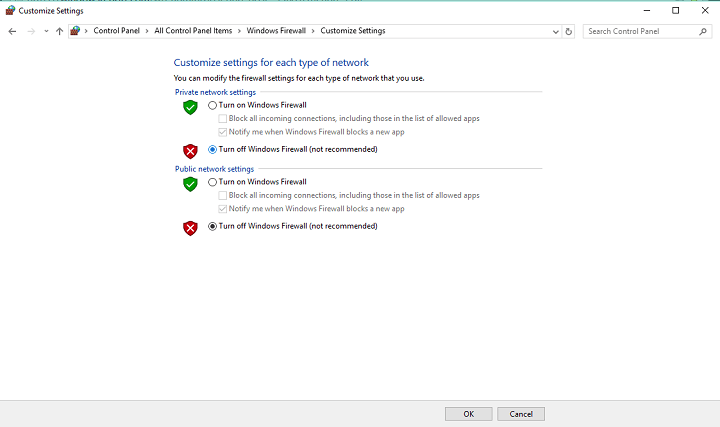
  2. Now, click on Turn Windows Firewall off or on
  3. Go to Turn off Windows Firewall

disable windows firewall

Disabling Firewall in some cases solves the problem, but once again, it might not work for everyone. So, if disabling antivirus program’s or Windows 10‘s Firewall wasn’t helpful, try some of the solutions listed below.

Solution 5 – Turn off antivirus

Similarly to the previous case, there’s a chance that your antivirus program actually prevents your browser form working, especially if running along with Windows Defender.

Incompatible antiviruses already caused a bunch for problem in the post-Anniversary Update Windows 10, so they easily might cause browsing problems, as well.

So, try disabling or uninstalling your antivirus, and see if the problem is resolved. If not, move on to another solution.

Solution 6 – Make sure you’re connected to the internet

Maybe your browser is not even a problem, maybe you’re simply not able to connect to the internet. You can easily determine that just try connecting to the internet with something other than your browsers, like Skype or some Windows 10‘s UWP app.

If you’re unable to connect, you definitely have more problems than just browsing issues.

In case you’re not able to connect to the internet after the Anniversary Update at all, check out this article, and you might find a solution.

Solution 7 – Run network troubleshooter

And finally, if none of the solutions listed above managed to solve your problem browsing internet in Windows 10 version 1607, you might try running the network troubleshooter.

This tool is Windows 10‘s own, built-in diagnostics kit, which solves various system-related problems.

To run Windows 10 network troubleshooter, do the following:

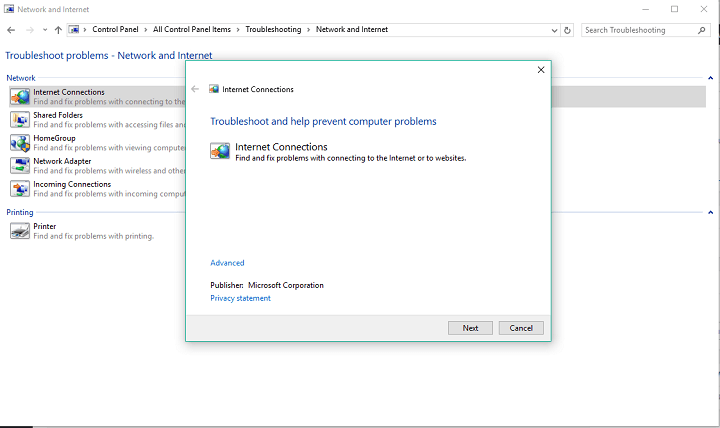
  1. Go to Search, type troubleshooter, and open Troubleshooting
  2. Now, under Network and Internet, go click on Connect to internet network-troubleshooter-anniversary-update browser problem
  3. The wizard will automatically run, and it will scan your computer for potential networking problems.
  4. If any issues are found, the wizard will try to solve them
  5. Once the wizard is finished solving potential problems, restart your computer

That’s about it, after performing some of these solutions, you should be able to browse the internet normally, once again. However, if you have any comments, questions or suggestions, please let us know in the comments below.

RELATED STORIES YOU NEED TO CHECK OUT:

Couldn’t add external users as a member in SharePoint [FIX]

SharePoint users reportedly facing difficulty while granting an external user permission to an external content type in Office 365 SharePoint admin center. Basically, the users are unable to add external users as a member on SharePoint.

The issue can also occur with the older version of office and SharePoint including SharePoint 2010. If you are also unable to add an external user to the SharePoint, here are a couple of fixes you can try to fix the issue.

Fix Couldn’t add as a member in SharePoint

  1. Grant External Content Type Access to Everyone / All User
  2. Turn on External Sharing
  3. Use PowerShell Cmdlet
  4. Logout of Microsoft Accounts

1. Grant External Content Type Access to Everyone / All User

To resolve this issue, you need grant access to the Everyone or All User groups to the External Content Type. Once done, use list permission to manage permissions to the external resource. Here is how to do it.

  1. Launch and browse the SharePoint Admin center.
  2. Click on Secure Store.
  3. Select the Target Application ID ( used for the external list) and click on Edit (on the ribbon).
  4. In the Members box, add the Everyone group and click OK (bottom of the page).
  5. Go back to SharePoint Admin center and click bcs.
  6. Click on “Manage BDC Models and External Content Types” option under bcs menu.
  7. Select BDC Model (used for the external content) and select Set Metadata Store Permissions.
    Sharepoint couldn't add member - Permission box add user
  8. Now you need to add Everyone to the permissions box in the set Metadata store permission dialog box.
  9. Click Add to add the user.
  10. From the list of available accounts or the metadata store, select the Everyone group. Make sure that the Execute box is checked.
  11. In the dialog box, at the bottom, select Propagate permissions to all BDC model, External System and External Content types in the MDC Metadata Store. Check all the boxes listed above and click OK.

Once done, you need to manage access to the external list by using SharePoint permissions. The external content exists on the SharePoint site.


2. Turn on External Sharing

If you haven’t already noticed it, it is possible that you may have turned off External sharing on Office 365, SharePoint and Site. Try turning on External Sharing to see if that resolve the issue.

To turn on External Sharing on SharePoint Online, do the following.

  1. Open Microsoft Online Administration Center.
  2. Click the Manage link below SharePoint Online.
  3. Click on Manage Site Collections (the left pane) from the Administration center window.
    External Sharing - SharePoint Online
  4. From the Administration center dashboard, click on Settings and select “Manage External Users” option from the Menu.
  5. Select the Allow button and click on Save to apply the changes.

That’s it! Try to add external users to SharePoint and check if the issue is resolved.


3. Use PowerShell Cmdlet

PowerShell cmdlet

Good folks at Microsoft community has provided a PowerShell based cmdlet that can fix the issue when you run it through SPO PowerShell Module. Here is how to do it.

  1. First, download and install the SPO PowerShell Module from here.
  2. Run the Power ShellModule as Administrator.
  3. Use the following command to connect:
    $adminUPN=”[email protected]”
    $orgName=”Contoso”
    $userCredential = Get-Credential -UserName $adminUPN -Message “Type the password.”
    Connect-SPOService -Url https://yourcompany-admin.sharepoint.com -Credential $userCredential
  4. Replace the specifics like username, user credential and URL with your site URL and credential and connect.
  5. Once connected, type the following command and hit enter.
    set-sposite -identity $Siteurl -sharingcapability ExternalUserAndGuestSharing

If successful, launch SharePoint and try to add the external user and see if the issue is resolved.


4. Logout of Microsoft Accounts

Microsoft Outlook account

If the user sees “We are sorry [email protected] can’t be found in Microsoft.SharePoint directory”, error it could be a because of an authentication token creating conflict with the server. One way to fix this is to log out of all the Microsoft Accounts from the problematic device.

After signing out of all the Microsoft Accounts, follow the next method before you try to sign in again.


5. Clear Browser Cache

While your web browser stores cache to speed up the page loading, a bad cache can at times create conflict with the site resulting in server and login error in SharePoint site. Try clearing the browser cache and then try again.

Clear Cache for Chrome

  1. Launch Chrome. Click on the Menu icon (three dots) and select Settings.
  2. Click the Search bar and type Cache. Click on Clear browsing data.
    Clear Chrome Cache data
  3. Under the basic tab, check the “Cached images and files” and “Cookies and other site data” option.
  4. Click on Clear data button.

Clear Cache for Microsoft Edge (Chromium)

  1. Open Microsoft Edge.
  2. Click Settings and more (three dots) and select Settings.
  3. Under Settings, click on Privacy and services tab.
    Microsoft Edge Chromium - Privacy and services
  4. Clean on Clear browsing data.
    Clean Browser data cache on Microsoft Edge Chromium
  5. Here select the “Cookies and other site data” and “Cached images and files” options.
  6. Click on Clear button.

After the browser cache is cleared, restart your system and login to your Microsoft Account. Try to add the user to SharePoint and check for any improvements.

We recommend using a browser that doesn’t use a lot of processing capacity and has built-in tools that aim to provide a safe environment to share and store your data.

⇒ Get Opera One

RELATED STORIES YOU MAY LIKE:

Windows Lite reportedly may not be publicly announced until 2020

If you were expecting Microsoft to announce some big software news at its Build developer conference next week, it looks like you’re setting yourself up for disappointment. Tom Warren from The Verge previously reported that Microsoft wouldn’t be talking about Windows Core OS and one of its derivative dubbed “Windows Lite” at Build, and today Windows Central is reporting that Microsoft may well not announce the new software projects until 2020.

Windows Lite is the unofficial name for a new lightweight OS designed for Chromebook-like PCs and innovative form factors such as dual-screen devices. According to Zac Bowden’s information, Microsoft Edge’s recent switch to Chromium may be one of the reasons why Microsoft need some time before publicly announcing Windows Lite, as the new Chromium-based Edge doesn’t run yet on the new OS.

I hear Microsoft wants Windows Lite to go into broader internal testing sometime this summer. It’s likely that by then, the new Microsoft Edge will be up and running on Windows Lite. So, realistically, the earliest we should expect to see Microsoft announce Windows Lite is sometime this fall. But even, that’s not guaranteed, because Windows Lite isn’t scheduled to start shipping on devices until sometime in 2020 at the earliest. It all depends on whether Microsoft is planning a public preview for Windows Lite before it starts shipping.

If Microsoft isn’t planning a Fall event to unveil Windows Lite, we hope that we’ll get some exciting Windows 10 news to compensate. Unfortunately, we still don’t know anything about the upcoming 19H2 update, which could be a minor update in preparation for a much more substantial release (20H1) in Spring 2020.

Microsoft Imagine Cup Championship finals to kick off Build 2019

The seventeenth annual Imagine Cup championship is taking place on May 6 at 8 AM Pacific Time right from Microsoft Build. For those who might be unfamiliar, the Imagine Cup brings teams of students all of whom create applications to “solve the toughest problems” using Microsoft’s technologies.

The winning team will take home $100,000 in cash plus Azure credits and will also get to meet Microsoft CEO Satya Nadella for a one-on-one mentoring session. Many teams are participating, so you’ll be able to watch what the finalists have to offer on the date above.

Last year saw the Canadian smartARM as the winner of the 2018 Imagine Cup for their robotic psosthetic hand with a built-in camera at the palm used for recognizing objects to find the best grip. The prosthetic was made possible thanks to Microsoft Azure Computer Vision and machine learning in the cloud.

If you head over to the Imagine Cup website, you’ll be able to find more information this year’s competition taking place next week, as well as add the event to your calendar to be able to livestream the event.

Delivery Status Notification (Failure): 3 Ways to Fix it

Spammers quite often come up with new and clever techniques to spam email account users with unwanted product recommendations or force them to download and install malware-infected programs. The Delivery Status Notification (Failure) error is an example.

If you are facing the issue, you may have become a victim of the same. The users receive a delivery status notification for the emails they haven’t sent with an HTML file attachment that usually redirects to some shady websites.

Keep reading to learn how to stop getting Delivery Status Notification (Failure) in Gmail and other accounts!

How do I fix Delivery Status Notification Failure?

Before we head to the slightly complex solutions, try these quick ones:

  • First, you should not open the email attachment, as it may contain a third-party script. Open the email if necessary to see if it is a legitimate delivery notice. But don’t open any attachments in those emails.
  • Make sure the recipient’s email address is correct before taking other measures.
  • Restart the device. A reboot often fixes Delivery Status Notification (Failure) in a Live Mail account or Outlook client.
  • Verify whether the email servers are down. If the forwarding server is down for maintenance or other reason, your emails may bounce back, resulting in an error. In this case, wait for a couple of hours.
  • Check your email for large attachments. While your email service provider may support large email attachments, the recipient’s email service provider may have set limitations on attachments.

If none work, move to the fixes listed next.

1. Check your PC for malware

If you have already opened the email attachment, you may want to run a full security scan of your PC to check for any unwanted program traces or group policies.

Malware-byte-virus-removal

In case you don’t have a security program installed already, try the TotalAV solution. It comes with high detection scores and impeccable malware removal and protection.

⇒ Get TotalAV

2. Change your Email Account Password

  1. Go to the Live Password Reset page.
  2. Enter your email address and click Next.
    Reset Microsoft account Hotmail password
  3. Microsoft will ask you to verify your identity. You can either use your backup email to receive the confirmation code or use your mobile number to get a text.
  4. Select any of the verification methods, enter the verification code, and enter your new password.
  5. Make sure you enter a strong password consisting of letters, numbers, and special characters.
  6. Login with your new password.
  7. You may also need to update other applications linked to your Outlook account with the new password.

Some users have reported that changing their Live / Outlook account password stopped the spam emails and helped them get rid of the error.

Check your email account’s Sent Item folder and verify whether you get Delivery Status Notification (Failure) for emails you didn’t send. If sent, you may need to change your email account password to be on the safer side.

3. Disable Automatic Reply for your account

  1. Log in to your Outlook account, and click on the Settings icon.
  2. Click on View all Outlook Settings.
    view all outlook settings
  3. Go to the Mail tab and select the Automatic replies option.
    Outlook - Mail - Automatic Replies
  4. If you find the feature enabled, toggle the switch to turn off Automatic replies for your Outlook account.Outlook Disable automatic replies
  5. Click the Save button and exit the settings page.

If you have set up Automatic Reply for your account, it may result in the Delivery Status Notification (Failure) message. Try to disable automatic reply for your account and see if that resolves the error.

Before you leave, find out how the best email scanner software to protect prevent hacking attempts and data loss.

For any queries or to share the measures that worked for you, drop a comment below.

Xbox’s xCloud streaming service reaches “takehome” milestone

Microsoft’s Project xCloud, the under-development service which brings cloud streaming of Xbox games to phones and desktops, has reached the “takehome” milestone, as announced by Xbox head Phil Spencer on Twitter (via Thurrott).

The service has been in very limited testing under tightly controlled networks from within the company, however now employees working on the project can take their game streaming into the general public and at home. This will allow the development team to further test the product on the varying network conditions before the project is officially available in “public trials later this year” in the words of Spencer.

We’re expecting to hear a lot more about xCloud during E3 next month, and Brad Sams from Thurrott has pointed out that an in-home demonstration of the service could be shown off at the event. Is xCloud something you’d use more at home or on the go? Feel free to let us know in the comments.

Xbox Ambassadors will soon be able to set their Specializations and win exclusive Xbox Live badge

Microsoft announced two interesting updates for its Xbox Ambassadors program yesterday. Since its launch its 2011, the program has become the place to go for Xbox fans who want to share their expertise with the community, as well as complete some challenges to get exclusive rewards.

Xbox Ambassadors have their own profile distinct from their Xbox Live identity, and this Ambassador profile will soon get a new Specializations tab where Ambassadors will be able to display their preferences about games, skills, social media platforms, and more. “This is the first step in a larger objective for the program to create a more personalized Ambassador experience, the Xbox team explained in the announcement. “Once we know what Ambassadors are most interested in, we can use those insights to solidify partnerships with Xbox teams and studios that give our community more opportunities that are meaningful to them.”

Specializations in Xbox Ambassadors Profile will go live “in the near future,” and the Xbox team didn’t provide a more precise ETA. However, a separate blog post published yesterday also announced that all Xbox Ambassadors who reached Bronze tier will soon unlock an exclusive Xbox Ambassadors badge for their Xbox Live profile. This has been one of the top-requested features from Ambassadors according to the team, and the badge will start to appear on the Xbox Live profiles of eligible members on May 7 (with an option to turn it off).

If you have yet to join the Xbox Ambassadors program, you can do on this page. To get on board, be aware that you’ll need to be 17 years of age or older, have a Gamerscore 1500 or higher as well as no enforcement actions on your Xbox Live account within the last year. You may also want to join the official Xbox Ambassadors Discord server which already includes more than 7K members.

Sorry we’re having trouble getting this optional feature installed [FIX]

Windows 10 comes with multiple language options making it easier for the non-English users to use the Windows OS. However, if you have installed the Windows OS with a single language pack, you may want to install other languages easily from the settings.

However, at times the user may face Sorry we’re having trouble getting this optional feature installed error while downloading any optional features such as language packs, etc. If you are facing similar error, here is how to fix it.

What to do if you can’t install optional language packs

  1. Turn off Metered Connection
  2. Restart your PC in Clean Boot Mode
  3. Install Language Packs Manually

1. Turn off Metered Connection

Windows 10 allows you to turn on the Metered Connection feature to prevent the OS from downloading automatic updates on a limited network data connection.

If you have the feature turned on and are getting the error, turning it off can fix the issue.

  1. Click on Start and select Settings.
  2. Select Network and Internet.
  3. Go to Data usage.
    Data usage Limit Never - Optional Features failed to download error.
  4. Under Background data select “Never” for “Limit what Store apps and Windows features can do in the background.”
  5. Go to WiFi tab, click on Manager known networks.
    WiFi - Manager Known Networks
  6. Click on your WiFi / Hotspot Network and click Properties.

  7. Scroll down and Turn off “Set as metered connection” option.

Close the settings window and try to download the language pack and check for any improvements.

2. Restart your PC in Clean Boot Mode

By restarting your PC in Clean Boot mode, you can make sure that no third party software installed on your system is creating conflict with the download and update operation.

  1. Press Windows Key + R to open the Run dialogue box.
  2. Type msconfig and hit enter.
  3. In the System Configuration window, go to Services tab.System Configuration - Services - Hide microsoft services
  4. Tick the “Hide all Microsoft services” box at the bottom. This will hide all the important services related to the OS.
  5. Select, all the other remaining services and click on Disable All.
  6. Go to the Startup tab, click on Open Task Manager.
  7. From the Startup tab in Task Manager, disable all the startup services.Disable Startup Services -Windows
  8. Close the Task Manager. Click OK on the System Configuration window to save the changes.
  9. Restart your computer.

Once the system is booted in the clean boot state, try to install the optional features, in this case, the language pack and see if it can be successfully installed.

If the optional features can be installed in the Clean boot state, then you probably have a third-party software creating conflict with the Windows update and installation.

To fix this problem, you can try to uninstall any recently installed software on your PC.

  1. Go to Setting > Apps > Apps and Features.
    Uninstall App
  2. Select any of the recently installed programs and uninstall it.
  3. Restart the PC to save the changes.

3. Install Language Packs Manually

First, download the language pack you want to install from the internet. Make sure you download the language pack that is supported by your Windows 10 build and edition (32-bit/64-bit). Once downloaded, follow the below steps to install the language pack manually.

  1. Press Windows Key + R to open the Run dialog.
    run lpksetup
  2. Type, lpksetup.exe and hit enter.
  3. You will see  Install or Uninstall display languages option — select Install display languages.
    Install Uninstall Display languages
  4. Click the Browse button and select the downloaded Language pack (.cab) from your hard drive and click OK.
    African language pack install
  5. Click Next to continue and wait for the installation to complete. The installation does take some time, so have patience until it is installed.

Once the language pack is installed, you need to switch the language for your user account.  Here is how to do it.

  1. Open Control Panel (type control panel in the search bar).
  2. Click on Clock and Region > Region.
    Language Preferences - Add a Language
  3. Click on Languages Preferences.
  4. In the Settings page, click on Add a language.
    Add a Language - Settings - Windows 10
  5. Search for the language pack you installed and select it.
  6. It may ask you to install the selected Language pack again. Make sure the box “Install language pack and set as my Windows display language” is checked.
    Install Language Pack and set as my Windows display language
  7. Click on Install to proceed.
    Display language multiple
  8. If you want,  you can change the Display language from the Languages screen again.

Restart your PC, and you should have installed your preferred language as a display language without any error.

Note that, like the first solution, for you to be able to install language packs manually, make sure the metered connection is turned off. Microsoft does not download any major update packages over the metered connection to save the data.

How to connect your TV to Microsoft Surface 2 tablets

How many times we’ve wanted to watch a movie on a bigger screen than the one we have on our tablet? Also, how many times we wanted to make a presentation for someone at work and the screen was too small for them to understand?

Well, with Windows RT we have the feature to connect a bigger tv or a projector directly to our tablet.

Everything we see on our tablet will also be showing on our tv or projector. This way we won’t have to worry about not being able to view our favorite movie or play our favorite game.
Connect Windows RT to tv
Connecting your Windows RT operating system to the tv is a relatively easy way to achieve, but first you will need a cable to connect to the tv.

Unfortunately, the wireless transmission isn’t available on Windows RT tablets but they implemented this on Surface 2 tablets in a newer edition.

The good thing about this is that the video adapters are relatively cheap. You can probably find them at any electronics store situated near you.

Nevertheless, Windows RT users did had some problems connecting to the tv in their homes. For this reason we will show you a quick tutorial below.

This will explain exactly how to connect Windows RT to the tv by cable or by wireless transmission on tablets with Surface 2 in a few easy steps.

Steps on how to connect the TV to Windows RT operating system

How to connect your Windows RT operating system by cable to a tv:

  1. First of all we need to figure out which cable to use. Usually most TVs have a HDMI port. In this case we need a HDMI cable (see lower right picture) with a Surface HD Digital AV Adapter (see lower left picture).Windows RT to tv Windows RT to tv
  2. Now connect the HDMI cable to the TV with HDMI port and the other end of the cable to the Surface HD Digital AV Adapter.
  3. Lets plug the Surface adapter to the HD video out port situated on the upper right side of the Surface Windows RT.
  4. Drag your mouse cursor to the lower right side of the Windows RT screen.
  5. Click (left click) on “Devices”.
  6. Click (left click) on “Project” in order to choose the options you want for your screens.
  7. You will have four options for your screen in “Project“.
  • Duplicate option : this will allow you to see on both screens
  • Extend option : this feature will allow you to see the desktop or a movie you are watching spread on both screens.
  • PC screen only : You can only see on your Surface Windows RT screen.
  • Second screen only : you are able to see only on the tv, your surface Windows RT screen will be blanked out.

Now depending on the features you want to have, you can choose one of the above mentioned.

How to connect your Windows RT Operating system via wireless connection:

Remember, this only works on Surface 2 Windows RT tablets.

  1. Drag your mouse cursor to the lower right side of the Windows RT screen
  2. Click (left click) on “Devices”
  3. Click (left click) on “Project” in order to choose the options you want for your screens.
  4. Click (left click) on “Add a wireless display“
  5. A list of wireless devices will appear on the screen.
  6. Choose the wireless device you recognize as your TV or monitor.

These are the two easy tutorials on how to connect your Windows RT with an outside TV. If you have any thoughts on this let us know below by writing us a few ideas.

READ ALSO:

How to retrieve your files from Windows.old

You just upgraded your system to Windows 10, and now you want to retrieve your old files from Windows.old?

Well, you better hurry up, because Windows.old is not going to be there for ever. If you don’t get your files on time, they’ll be gone forever.

windows.old windows 10

What is Windows.old, and how do you recover files and data with it

So what is the Windows.old folder exactly?

Well, when you upgrade your system from one version to another, all files and data from your old system are stored in Windows.old folder.  So, you can access them, even after the upgrade to the newer version of Windows.

But, Windows.old folder only appears if you perform an upgrade. If you clean install Windows, and perform a hard drive format before that, you won’t get Windows.old folder

As we said, data and files from your old Windows are stored in this folder, so you can retrieve from there. Files from Windows.old are also used for Recovery option in Windows 10.

Window.old indeed takes some space on your HDD, and deleting it will give you some extra free memory.

But there’s a catch, maybe you won’t even need to delete it manually. Windows will delete it automatically after some time to free up some disk space.

windows.old windows 10 recovery

And that’s the topic of our article actually. We saw a lot of people complaining on Microsoft forum how their Windows.old folder just disappeared. Also, they’re unable to retrieve their valuable files.

Well gentlemen, if these files are so valuable to you, what took you so long to just copy them to another folder?

So, if you also have valuable files in Windows.old folder, copy them to a safer location as soon as possible. Windows will automatically delete this folder after 30 days.

As you can see when you go to Settings>Recovery>Go back to Windows 7/8/8.1, you can see the message which tells you that this option will only be available for 30 days.

So basically, as long as you have this option in your Settings, Windows.old is still present on your computer, because they’re tightly connected, as we said before.

Microsoft says that it’s impossible to retrieve files once the Windows.old folder is deleted, and we tend to believe in that.

Some people say that installing some third-party software for file recovery. Since no one actually confirmed that using such kind of program to get Windows.old folder back, we advise you not to waste your time with that.

If you don’t know how to get files from Windows.old to your computer, it can’t be simpler.

You need to search through Windows.old folder for a certain file, or more files you want to get back. Then, simply copy them to another location.

On the other hand, if you’re sure you’ve copied everything from this folder, or you have nothing to copy at all, you can delete Windows.old folder by yourself. This will free up to 20GB of disk space.

Unfortunately, you can’t delete this folder normally, like any other folder in Windows. So, you’ll have to do a couple of things to delete it, and here’s how to do that:

  1. Go to Search, type disk cleanup, and open Disk Cleanup
  2. Choose C:/ and press Enter
  3. Click Cleanup system files
  4. Find Previous Windows installation(s) in the list, and check itwindows.old disk cleanup
  5. Click OK and wait a few moments

That’s about it, after performing this, Windows.old will be gone from your computer. So, you can delete it by yourself, or you can let Windows delete it automatically, it’s completely up to you.

Once again, if you have meaningful files in Windows.old, don’t be lazy, don’t wait more than a month to move them to another location, because there’s a chance you’ll lose those files forever.

However, if you don’t have valuable files in this folder, you don’t have to wait for Windows to delete it, you can delete it by yourself and free up some space, right now.

Read Also:

Fix: WD My Cloud Not Working in Windows 10

Many people use cloud services to store their essential files, and one of those services is WD My Cloud. Although WD My Cloud is an excellent service, it seems that some Windows 10 users are having problems with it.

According to users, WD My Cloud used to run perfectly on Windows 7, but after upgrading to Windows 10, there seem to be some issues.

Today, we’re going to try to resolve these issues. If you’re having problems with WD My Cloud, you might want to try one of the following solutions.

How can I fix WD My Cloud issues in Windows 10?

1. Add My Cloud to the list of credentials

  1. Open Control Panel > User Accounts and go to the Credential Manager.credential manager
  2. Next choose Windows credentials and click on Add a Windows credential.Add a windows credential
  3. In the Internet address field enter the name of your My Cloud device.add a windows credential internet, user name, password
  4. In the Username field enter the username that you use to access My Cloud.
  5. In the Password field enter your password.
  6. After you’ve saved your changes restart your computer and try accessing My Cloud again.

We have to mention that some users advise not to use a PIN, so instead of using PIN, make sure that you use your username and password.

2. Modify the Registry

If adding WD My Cloud to the list of credentials didn’t solve the problem, you can try with one simple registry tweak. To perform this registry workaround, follow these steps:

  1. Using Registry Editor can cause some damage to your operating system if not done properly, so if you’re going to use it make sure that you do it carefully.
  2. Open Registry Editor. You can open it by pressing Windows Key + R and typing regedit.regedit run
  3. When the Registry Editor opens navigate to:
    • HKLMSYSTEMCurrentControlSetServicesLanmanWorkstationregistry editor HKLM SYSTEM CurrentControlSet Services
  4. Next, on the right side you need to create a new DWORD called AllowInsecureGuestAuth registry editor new DWORD
  5. Edit the AllowInsecureGuestAuth DWORD you’ve just created and set its new value to 1.
  6. Close Registry Editor and restart.

3. Change Internet Protocol Version 4 (TCP/IPv4) settings

If your shares don’t show up as they did on Windows 10, you might want to try the following steps:

  1. Open Control Panel.
  2. Go to Network & Internet > Network and Sharing Center in Control Panel.
  3. In Network and Sharing Center go to Change Adapter Settings.change adapter settings
  4. Find the adapter that you’re currently using, right click it and choose Properties.
  5. Select Internet Protocol Version 4 (TCP/IPv4) and click Properties.ipv 4 proprieties
  6. When Properties window opens go to Advanced > WINS.ipv 4 advanced
  7. Click on Enable NetBIOS over TCP/IP and click OK to save your settings.

4. Perform a Network Reset

This is a rather simple and quick fix that had a lot of success for many users. To try it yourself, follow the steps:

  1. Press the Windows Key +I
  2. Windows Settings should appear. There select Network & InternetNetwork and Internet
  3. In the left panel select Status
  4. In the bottom, the last option should be Network Reset. Click on it and then confirm with Reset Nownetwork reset

That’s about it. We hope this article helped you solve your problems with WD My Cloud on Windows 10. If you’re on Windows 11, we have a similar guide on what to do if WD My Cloud is not showing on the network, so don’t miss it.

If you have any questions or if you found another way to solve the problem, reach for the comments section below.

Edge Insider moves web app installs to Windows 10 top level after feedback

After listening to feedback from Edge Insiders, Microsoft has changed how web apps appear on the Windows 10 Start Menu. The new Chromium-based browser allow users to quickly install web apps from the browser’s ellipsis menu, but until now these web apps were somewhat hidden in an Edge app folder in the Windows 10 Start Menu.

That wasn’t really great for discoverability, and Microsoft has changed it to make web apps installs show up at the top level of the Windows 10 Start Menu. This change is automatic on the Canary and Dev channels, and it doesn’t require an app update.

Web apps are quite a big deal in Microsoft Edge, especially since the company adopted the Chromium open source project to improve compatibility with modern web technologies. However, it’s quite a bumpy road so far, as there are some surprising compatibility issues with some of Google’s web apps such as Google Docs or Google Meet. Unfortunately, that’s the kind of issue that could make it difficult for some Edge users to finally leave Google Chrome behind.

May the fourth be with you – Microsoft Store celebrates Star Wars “holiday”

As you can probably tell from the pun, May 4th is Star Wars Day. To celebrate such an occasion, the Microsoft Store is hosting a sale which knocks down the price of multiple games in the Star Wars universe.

Star Wars Battlefront II for the Xbox One is just $7.50 right now, which is 70% off its $24.99 price. Additionally, the LEGO Star Wars: The Force Awakens is also half off, bringing the game to just $10, or $15 if you want to go with the Deluxe Edition.

Numerous Xbox 360 games are also on sale, and Xbox One owners also have the benefit of being able to play most of the games on the newer console. The LEGO Star Wars: The Complete Saga is on sale for $6.99 (65% off), Star Wars: Battlefront and Battlefront II are both 40% off, and many other games are also on sale. You can head over to the Microsoft Store to see all of the games on sale.

In addition to the games on sale, the Microsoft Store is also expected to host a Star Wars movie sale later this week, just as it did last year. We’ll just have to wait and see, so feel free to sound off in the comments which games or movies you’ve been looking at.

Unreal Tournament 2004 fullscreen not working [Windows 10/11]

Windows 10 is the latest operating system from Microsoft, and sometimes new operating systems have issues with older software. One of these issues is related to a video game called Unreal Tournament 2004.

Users report that Unreal Tournament 2004 isn’t working in fullscreen, so let’s see if we can fix this.

Unreal Tournament 2004 is an old game, so some issues are expected. Users report that they are getting errors when they are trying to run the game in fullscreen.

This isn’t just related to Unreal Tournament 2004 and other games that use Unreal 2 engine are having these issues as well.

It appears that there are no issues in window mode, but let’s see if we can make Unreal Tournament 2004 run in fullscreen.

What to do if Unreal Tournament 2004 isn’t working in fullscreen:

  1. Use OpenGL
  2. Set ReduceMouseLag to False
  3. Run the 64-bit version of the game

Solution 1 – Use OpenGL

To do this, you’ll need to locate the UT2004.ini file and change it. This file should be located in the Unreal Tournament 2004 installation directory.

When you find the installation directory, locate the System folder and in there you should find UT2004.ini.

  1. Right click UT2004.ini and choose Open With.
  2. Select Notepad from the list of applications.
  3. Find the following lines and set them to these values:
    • [Engine.Engine]
    • ;RenderDevice=D3D9Drv.D3D9RenderDevice
    • RenderDevice=OpenGLDrv.OpenGLRenderDevice
  4. Save the changes.

Now your game should be working properly.

Solution 2 – Set ReduceMouseLag to False

  1. Open the UT2004.ini file like in previous solution.
  2. Find the ReduceMouseLag=False and set it to ReduceMouseLag=True.
  3. Save the changes and start the game.

Solution 3 – Run the 64-bit version of the game

These issues with fullscreen appear only on 32-bit version of Unreal Tournament 2004, so you might want to try using the 64-bit version of the game. If you have all the patches, you probably have 64-bit version launcher for the game in its installation directory.

We hope that one of our solutions worked for you. Feel free to tell us in the comments section below what other issues did you encountered in UT2k4 and how did you fixed them.

[wl_navigator]

Facebook is building a new faster, smaller Messenger app for Windows and MacOS

There has been talk about Facebook’ efforts to consolidate its disparate app framework to a unified backend and create one master messaging platform for the company.

Facebook hasn’t made any distinct moves to create its new homogenous messaging service but it has announced that it’s going back to the drawing board to offer users a new messaging experience across smartphones, tablets, and PCs.

As Facebook opens its annual F8 developer’s conference this week, the company seems intent to bring Project LightSpeed to the masses.

According to VentureBeat, Project LightSpeed represents Facebook’s efforts to provide a drastically reduced Messenger App footprint for mobile and PC users with the mobile version coming in at less than 30MB in size but retains all of the features built baked into the normal app unlike its Messenger Lite alternative. The current Messenger App weighs in at a hefty 410 MB for mobile users to download while Messenger Lite comes in at sparse 6.1 MB, but again, with several features stripped out.

Beyond the sheer size of the app, Facebook would also like to reduce the loading time of the app as well on mobile, down to less than two seconds from click to launch according to the blog post.

In addition to addressing the Messenger experience on mobile, Facebook is also looking to update its PC and Mac experiences as well that include new group chat and video call features that will coincide with the company’s efforts to meld new social aspects into the platform.

Similar to Instagram, Facebook is going ‘everything but the kitchen sink’ route with its roadmap for Messenger as the company plans to integrate a “digital living room,” into the app. The idea behind the digital living room is that it would offer users a single secure place for users to engage with content from their trusted sources/friends.

Facebook is currently testing its new apps internally but expects to roll out its new efforts starting in late 2019. You can read more about the new Messenger now that Facebook has finally published the blog post.

MSN Weather App is Not Working in Windows: 3 Tested Solutions

Users have reported that the MSN Weather app no longer works in Windows. So, we’re going to offer you a couple of solutions, and we hope that at least one of them will help you.
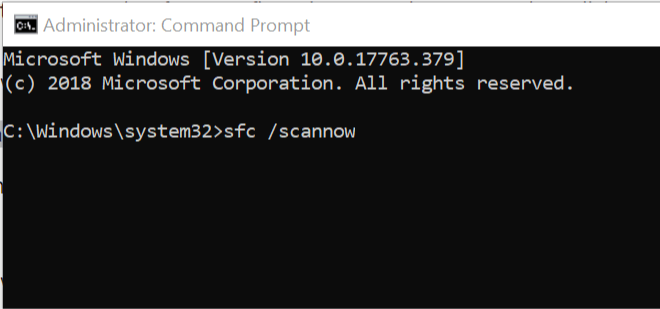
Why is the MSN Weather app not working?

Like any other app, MSN Weather is prone to bugs, poor OS integration, or even conflicts with other Windows systems. Here are some of the main possible causes:

  • Poor update implementation – MSN Weather is updated automatically, and if the latest update is bugged, this issue may occur.
  • No internet connection – The MSN app needs to connect to the internet to return weather results; if that is poor, the software might have issues starting.
  • Corrupt files – If some of the app’s files get corrupted, the program will fail to run.

Now that we know the problems, let’s fix it by following the solutions below.

What do I do if the MSN Weather app doesn’t work?

1. Rename the configuration file

  1. Press the Windows key + E to open File Explorer.
  2. Go to the following directory (write your username, instead of YourUser): C:\Users\YourUser\AppData\LocalPackages\Microsoft.BingWeather_8wekyb3d8bbweLocalState
  3. Find the file called configuration_3.0.4.366.sqlite
  4. Rename that file to configuration_3.0.2.258.sqlite weather app doesn't work
  5. Once you’ve renamed the file, close File Explorer
  6. And now, the MSN Weather App should work

Something went wrong with applying the latest update for the Weather app, and that error negatively affected the configuration file of MSN Weather, which is necessary for running this app.

After renaming the configuration file as instructed in the solution above, and Weather app will probably work fine again.

2. Reinstall the MSN Weather app

  1. Go to Search, type powershell, and open PowerShell as administrator.
  2. Enter the following command and press Enter: Get-AppxPackage *bingweather* | Remove-AppxPackageweather app doesn't work windows
  3. And wait for the process to finish.

Most of our readers reported that renaming the configuration file solved the problem for them, but if you’re still unable to run the MSN Weather app, you can try to uninstall it, and then install the updated version from Microsoft Store again.

Just like it’s the case with most other Windows 10 built-in apps, you can’t regularly uninstall the Weather app, just by choosing Uninstall from the Start Menu.

3. Reset your system

  1. On the login screen, hold Shift, right-click on Power, then select Restart.
  2. Select Troubleshoot, Reset this PC, and Keep my files options.

That would reinstall Windows 10 and will keep your files. Also, it will remove changes, apps, and drivers you or your PC manufacturer had installed.

Of course, resetting your system can be too extreme to retrieve the MSN Weather app. There are a lot of excellent third-party free weather apps out there you can install.

Did you manage to restore the MSN Weather app to working order? Let us know in the comments section below.

Microsoft works with VA to provide Xbox Adaptive Controllers for veterans’ rehabilitation facilities

Microsoft has announced that it is partnering with Veterans Affairs to provide its Xbox Adaptive Controller to 22 initial VA rehab centers in the U.S. For those unfamiliar, the Adaptive Controller allows those with limited mobility, including injured veterans, to play virtually any game through customized setups including by using external buttons, switches, and joysticks to adapt to their needs.

As explained in the Redmond giant’s press release, gaming is not only relieves stress and helps brings injured veterans into society, but can also be used to improve muscle activation as well as hand-eye coordination. As such, Microsoft will donating Xbox Adaptive Controllers, game consoles, and various games, and additional equipment to the rehab centers.

“When I first heard about the Adaptive Controller, I just thought it was amazing that they’re actually trying to do stuff for guys who aren’t able to compete as well as others playing video games,” said Mike Monthervil, a veteran who was injured in July of 2014 just three days before his discharge date. He lost much of his finger and hand function, so traditional controllers for people like him are impossible to use.

However, thanks to the Adaptive Controller, injured veterans like him are able to rejoin the gaming community. “I think gaming is helping soldiers like myself getting back into playing and doing what they love, and are bringing joy back to their life,” he went on towards the end of the video.

“We owe so much to the service and sacrifice of our Veterans, and as a company, we are committed to supporting them,” said Satya Nadella. “Our Xbox Adaptive Controller was designed to make gaming more accessible to millions of people worldwide, and we’re partnering with the U.S. Department of Veterans Affairs to bring the device to Veterans with limited mobility, connecting them to the games they love and the people they want to play with.”

Ex Microsoft President Steven Sinofsky hosts an hour and 14 minute long “unauthorized biography” of Clippy

Over the past 20 years, Microsoft has built several products that didn’t fare very well in the market, to the point where they even became subject of mockery. From Microsoft Bob to Clippy to the short-lived Kin mobile phone, it seems that Clippy may be probably the rare exception that now generates some kind of nostalgia among long-time Microsoft fans.

Clippy (née Clipit) has been officially retired in April 2011, and eight years after its demise Steven Sinosfky, the former President of the Windows Division has participated to an hour and 14 minute long “unauthorized biography” of the Office Assistant. This is actually from the latest a16z podcast from Andreessen Horowitz, a private American venture capital firm that Sinofsky joined as a Board partner after leaving Microsoft back in 2012.

https://twitter.com/stevesi/status/1122199404536942592

As a person who previously had a key role on the development of Microsoft Office, Sinofsky has some unique insights about what was pretty much a very early version of the digital assistants many of us now use almost every day. “In the 90’s software was really hard to use”, explained Sinofsky in a long Twitter thread, adding that “the choice to take on massive risk in a feature like Clip-It should not be under-estimated. I love this part of that era of MS. Taking risk as a leader, regardless of how secure, is a truly differentiated part of culture,” he continued.

Microsoft obviously failed to achieve what it wanted to do with Clippy, but the former Office Assistant still has its fans after all these years. As a matter of fact, Clippy was almost resurrected as a downloadable pack of stickers for Microsoft Teams last month, but the software giant quickly removed them from the Internet. “Clippy is flattered by all the attention but plans to continue his retirement,” a Microsoft employee announced on the Microsoft Teams feedback website.

Windows Media Player Won’t Rip a CD: 4 Ways to Fix it

Windows Media Player is a media player software used by many for its features. However, users reported that Windows Media Player won’t rip a CD on their PC.

If you want to convert your audio to MP3, you won’t be able to do it without this feature. Luckily, it’s rather easy to fix this problem.

Why can’t I rip music with Windows Media Player?

  • Multiple music libraries on your PC might be coming into conflict.
  • In some rare instances, missing codes can cause problems with CD ripping.
  • The default Music library isn’t properly set on your PC.

How do I get Windows Media Player to rip a CD?

1. Manage music libraries

  1. Open Windows Media Player.
  2. Press Alt to open the File context menu
  3. Go to File and select Manage Libraries. Lastly, go to Music.
  4. Delete all music libraries except the default one, where your music will be placed windows media player won't rip music
  5. Try to rip your music again

2. Install necessary codecs

  1. Visit K-Lite Codec Pack download page.
  2. Download the software.
  3. Once it’s downloaded, run the setup file to install it.

After you install the codecs, check if the problem is resolved.

3. Improve the quality of ripped music

  1. Open Windows Media Player.
  2. Right-click on the ribbon of Windows Media Player and choose Tools and then Options.windows media player options
  3. Go to Rip Music and turn the audio quality to the maximum for each format.windows media player max quality
  4. Click Apply to save the modifications, then try to see if still Windows Media Player cannot rip music.

4. Restore to Default the music library folder

  1. Close Windows Media Player or make sure it is closed.
  2. Open File Explorer, find Music section, right-click on it and click Properties.
  3. Select Location tab and click Restore Default. music properties default
  4. Restart your computer to see if you can rip music with Windows Media Player.

If Windows Media Player won’t rip the CD, these steps will surely help you. In case the problem is still there, you might want to consider using a different CD ripper software.

How did you fix this problem on your PC? Share your solutions with us in the comments section.

The Xbox One X Enhanced Borderlands: Game of the Year Edition is 33% off with this week’s Deals with Gold

The freshly-released Borderlands: Game of the Year Edition highlights this week’s Deals with Gold on Xbox One. The remastered version of the 2009 game has been released earlier this month on Xbox One with support for 4K at 60FPS on Xbox One X, and you can now get it for just $20.09 (33% off) with Xbox Live Gold.

Borderlands: The Handsome Collection, the bundle that includes Borderlands 2 and Borderlands: The Pre-Sequel is also 75% off this week, and both games also received a 4K update earlier this month. These are all well-timed discounts as Borderlands 3, to be released on September 13 on Xbox One, will get its gameplay reveal event tomorrow, May 1st.

This week’s Deals with Gold also include up to 75% discounts on the Forza Horizon 4 Expansions Bundle, Hitman 2, NieR:Automata Become as Gods Edition, and The Crew 2. Don’t forget to take a look at the Focus Home Interactive Publisher Sale featuring Vampyr and Farming Simulator 19, as well as the Star Wars Day Sale including several Xbox One and backward compatible Xbox 360 titles. The full list of discounted games can be found on Major Nelson’s blog.