FIX: Windows 10/11 Calendar App Keeps Crashing

A few of our readers have been reporting that their Calendar app keeps crashing in Windows 10, Windows 8 and even in Windows 8.1. So, we’ve decided to have a look at the errors for ourselves and try to provide some working fixes for those in need. Read below for more.
windows 8 calendar crash
Some Windows 8, Windows 8.1, Windows 10 and also Windows RT users are apparently struck by problems with the built in Calendar app. My immediate recommendation is to make sure they’re running the latest version of the app, as Microsoft frequently updates the built-in apps with fixes for various bugs. You’re probably already running it, unless you have ticked off automatic updates. The Calendar app is usually updated along with the Mail and People apps, so you might be having problems with all of them. Here’s what one user is saying:

when i try to open my calendar app it seems to crash and i have not been able to get it open since, even after shutting down, looking for updates etc.. any ideas?

How to fix Windows 10, 8.1 Calendar app crashes

  1. Uninstall the Mail and Calendar App
  2. Install the latest Windows updates
  3. Refresh your PC
  4. Use a third-party calendar app

What you can do is try the following – uninstall the built-in Mail app along with the People, Calendar and Messaging apps, as they are bundled together. After that, sign out from your Windows 10, Windows 8 or Windows RT device (Surface, most likely). Restart your device then download only the Mail app from the Windows Store which will also download the Calendar one. However, before you do all of this, make sure your Calendar appointments and Mail data is synchronized to your Microsoft account.

Just for the sake of it, make sure you have performed the latest Windows Update, as well. If none of the mentioned steps don’t work, then you can go ahead and try performing a Refresh of your Windows RT or Windows 10, Windows 8 system. Don’t worry, it’s not similar to the old System Restore as you won’t lose any important files whatsoever.

If the issue persists or you don’t want to use System Restore, you can download and install a third-party calendar app. For more information about the best calendar apps to use on your Windows computer, you can check out this list.

If you’ve got additional tips and suggestions on how to fix Calendar App crashes, you can share them in the comments below.

RELATED STORIES TO CHECK OUT:


Download and install Tails OS on Windows 10/11 PCs

Tails is an encrypted operating system that provides a highly secured environment for users to be working in. In fact, Tails happen to be the world’s most secured operating system that promises user’s privacy of the highest order. Short for ‘The Amnesic Incognito Live System’, Tails OS is also easy to install and run on a Windows 10 device, with no trace of your activities left on the machine.

It achieves the high standards of security and privacy by encrypting all local files while all internet connections are run through Tor. That is not all as Tails also includes the entire gamut of open source secured communication tool to ensure all your interactions everywhere is always out of purview of prying eyes.

Another aspect of Tails and which adds to its security credentials is that the entire operating system can be run from just a USB drive. In fact, the Tails OS isn’t actually installed on your Windows 10 device but on a USB drive. You then select the USB drive in te ‘boot menu’ when the computer is booting. That also makes it really easy for the OS to be installed and run on just about any device that offers a USB slot. And when you are done, you simply pull off the drive and that is all, there is no trace of any of your working left on the machine.

Also, while Tails is fairly easy to operate for all users, those with a Linux background should still have an edge. That’s because Tails 2.0 is built on the Debian kernel. It also runs GNOME 3.1 and includes a host of Linux productivity suite like OpenOffice, GIMP, and Audacity as part of the standard package.

Pre-requisites to run Tails OS on Windows 10

So now that we have an idea of the basics of Tail, here is how you can download and install on a flash drive to run on a machine of your choice. Also, the entire process can last about 2-3 hours of time as well.

However, before we start with the installation process, here is what you will need:

  • Two USB drive of at least 4 GB capacity. (One is used to install Tails while the other is used to run the OS).
  • A mobile or a tablet that will be needed to scan QR codes.

Download Tails on Windows 10

  • A general pre-requisite would be to ensure your machine is free from virus before you actually download Tails. Also, it would be convenient to have Firefox on your device to download Tails. So if you haven’t got that, install Firefox first.
  • Once you have launched Firefox, navigate to the Firefox add-on section, search for Tails browser add-on and install the same. The plugin serves to authenticate the OS image file download.
  • Go to the official Tails OS site to download the same. It is located at ‘https://tails.boum.org/install/index.en.html’
  • Select your operating system and let the download process to begin.
  • The next step to do after you have downloaded the OS is to verify the same. This is a crucial step to prevent man-in-the-middle-attacks or other such security risks.

Install Tails on Windows 10

  • Insert one of the USB drive.
  • Download the Universal USB Installer that will install an intermediary Tails in the USB drive.
  • There will be the usual warning pop-up asking you to consent to an external program making changes to your hard drive. Agree to it to let the process start.
  • Follow on-screen instructions to install the Tails image on your USB drive.
  • It extremely important that you go through the instructions URL minutely. Use your mobile or tablet to do that. Since you will be required to restart your machine, the instructions here will help you get back online quick enough.
  • When the PC is re-booting, press Boot Menu Key to set Tails as the preferred OS to load. Usually, you will be required to select the option ‘Boot Tails from your USB drive’.
  • You will get to see the ‘Welcome to Tails’ prompt.
  • It is here that you are needed to insert the second USB drive while keeping the first USB drive inserted.
  • Next, select Tails installer under Applications and follow on-screen instructions. This will install Tails on the second USB drive.
  • After the installation is completed successfully, shut down the PC.
  • You can now remove the first USB drive but keep the second inserted.
  • Start you PC and you should see the Boot loader menu that will allow you to select Tails.
  • However, in the unlikely scenario of things not falling in place as it should, you will be required to go for troubleshooting steps. Refer here for the same.
  • Boot up your PC

So there you have it, access to one of the most secure operating systems on planet earth. That said, Tails also has its limitations in that it isn’t that secured if the hardware or software itself has been compromised. That makes it imperative for you to do a security audit of your PC to ensure the platform is safe enough to allow for a clean and secure installation of Tails. Improper usage of Tails too can compromise your anonymity. However, if you have got the above concerns taken care of, you can easily be one of the most anonymous persons on earth.

Meanwhile, here is some related info that you might want to go through.

Cursor Jumps When Typing: 3 Ways to Stop it

Your mouse and keyboard are the most important peripherals, but sometimes issues can appear. Many reported that their cursor jumps while typing.

This can be a problem, and it may cause you to lose focus or accidentally click something else on the screen.

This issue is somewhat different than the erratic mouse movement we covered earlier, so let’s see how to fix this typing issue.

Why does my cursor jump around on my HP laptop?

  • You’re touching the touchpad accidentally with your palms while typing.
  • Your pointer settings aren’t properly configured on your PC.
  • An outdated touchpad driver can cause this and many other problems on your PC.

How do I stop my cursor from jumping around while typing?

Before we start, you should pay attention to the following:

  • If you’re on a laptop, ensure your hands aren’t touching the touchpad. Some touchpads are rather sensitive, which will cause the mouse to jump and, subsequently, the cursor moves while typing.

1. Disable the touchpad

  1. Press the Windows key + I to open the Settings app.
  2. Navigate to Devices.
  3. Next, select Touchpad from the left pane. Set the Touchpad to Off.

This is a decent solution, but only if you use a mouse instead of a touchpad.

2. Hide the mouse pointer

  1. Open the Settings app and go to the Devices section.
  2. Navigate to Mouse in the left pane and click on Additional mouse options.
  3. Head to the Pointer options and check the Hide pointer while typing.
  4. Save changes.

This might not fix the core issue, but the pointer won’t jump around anymore on your PC.

3. Update the touchpad driver

  1. Visit your laptop manufacturer’s website.
  2. Select your model and go to Driver & Utility section.
  3. Locate the touchpad driver and click on Download.
  4. Once the driver is downloaded, run the setup file to install it.

However, if that process is too bulky and tech-wise, we know the perfect alternative for driver installation.

You can better utilize a custom driver application to maximize the process of updating old drivers or fix your problematic touchpad device driver.

These are just a couple of solutions to help if your cursor jumps when typing. In case you have additional problems, we have a guide on what to do if the mouse jumps around, so you might want to check it out.

Did you find a different solution for this problem? If so, share it with us in the comments below.

Download BlueStacks Android emulator for Windows 10/11

Bluestacks reached its fifth iteration for Windows PCs: BlueStacks 5. You can download it for free from the tool‘s official website.

With the help of this Android emulator, you can play your favorite mobile games on your Windows 10 PC up to six times faster than on any phone.

Of course, that also depends on the number of resources that you have on the system you are running it on.

BlueStacks is an American technology company that gave its name to the Android emulator for Windows and Mac.

This is one of the best free Android emulator recommended for playing games like PUBG Mobile or Lineage 2 Revolution and enjoy a new gaming experience on your PC.

BlueStacks

Get the best Android apps and run them in the comfort of your Windows system.

How can I download BlueStacks for Windows 10?

Follow these steps to install BlueStacks on Windows 10:

  1. Download BlueStacks. You can also download it and get a free game so go ahead and enjoy it!
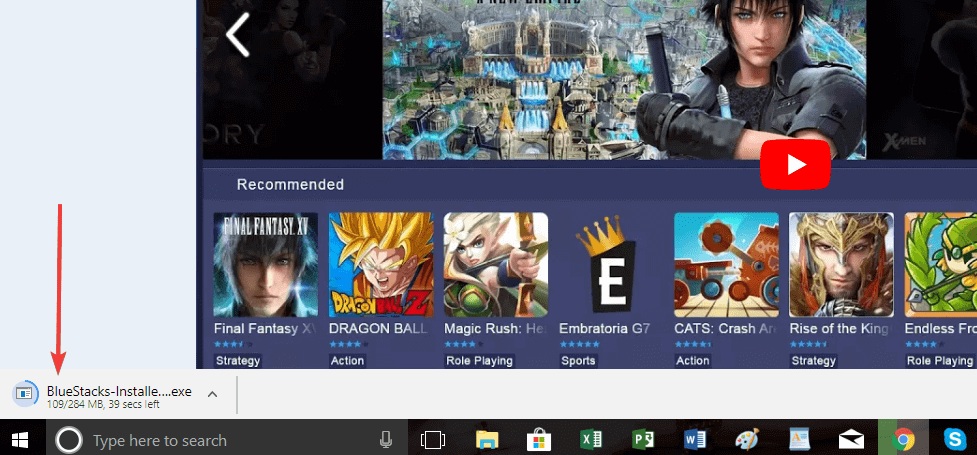
  2. Next, you will see the .exe file for BlueStacks-Installer being downloaded. Once it’s finished, click on it and run it.
    bluestacks install
  3. If you get the Do you want to run this file? pop-up, just ignore it. BlueStacks is completely safe and will not harm your PC. Go ahead and click Run.
  4. Do the same for the next step, if you get the Do you want to allow this app to run on your device? Click Yes.
  5. Now, you’re almost there. Go ahead and click Install to start installing BlueStacks on your PC.
  6. Wait until the installation process is finished. As suggested by BlueStacks, you might want to disable your antivirus temporarily. Don’t worry, it won’t let any viruses in. Once it’s finished, click on Complete.
  7. Now, you need to wait a couple of minutes in the Starting the Engine step of the process. This is needed for the Android Emulator to assess your PC performance and work accordingly.
  8. Next, you will need to log in with your Google account. This might seem annoying, but it is actually a sign that BlueStacks has a professional relationship with Google, thus being able to download any Android game or app on your PC. If you are already logged in with a Google account, make sure to use that one.
    BlueStacks login google account
  9. The final step is to make sure everything is running smoothly on your PC. Go ahead and install your favorite game.

All games come from the Google Play Store itself, and most of them are free. Install one, see if it runs on Bluestacks. You can download any Android game that you wish.

How can I download Bluestacks for Windows 11?

  1. Head to the Bluestacks official website and click the Download button for your preffered version.
  2. Wait for the installer to download, then click the exe file.
  3. Click Yes in the User Account Control.
  4. Now click on the Install now button.
  5. Let the wizard download all Bluestacks packages and install them to your PC.
  6. When the installation is complete, the wizard will automatically start Bluestacks.
  7. Now you can get apps from the Play Store or Game Center. You can access and use any mobile device app that is available in the Play Store.
  8. Sign up with your gmail account and enjoy mobile apps on your PC.

If a game is not available in your country you can circumvent that problem using one of the best VPNs for Bluestacks to run Android apps & games on PC.

Download Skype Desktop Version for Windows 10 & 11

Who hasn’t heard about Skype? We have talked in the past both about the desktop and the touch application, and now we’re coming up with an article to keep up with all the updates that the official Skype desktop app for Windows 10 & 11 receives.

We are sure there are people who do not like the touch version of Skype for Windows 10 and prefer the good old desktop version.

In this guide, we will take you through the steps to follow to download the Skype desktop version on your PC.

How can I download the Skype desktop app for Windows 11?

1. Download from the official website

  1. Visit the Skype official website.
  2. Click the Get Skype for Windows 10 & 11 button.
    get desktop skype windows 10
  3. Now, wait for the download to complete.
  4. Finally, double-click the downloaded file to run it and follow the onscreen instructions to complete the installation.

The first place to go if you need to download the desktop version of Skype on your PC is the official website. After downloading the file, the installation process is pretty easy and straightforward.

2. Get Skype from Microsoft Store

  1. Click the Microsoft Store icon on your Taskbar to launch it.
  2. Type Skype in the search bar and select the corresponding option.
    type
  3. Finally, click the Get button and wait for the installation process to complete.
    get

The easiest way to download the desktop version of Skype on Windows 10 is via the Microsoft Store. This does not just download the app but also installs it.

How can I download the Skype desktop app for Windows 10?

As you might have noticed, the newest Skype desktop version works seamlessly for Windows 10 & 11.

Luckily, the procedures we lined up above are the same for Windows 10 as well so feel free to use them if you didn’t upgrade to the latest OS.

With this, we can conclude this guide on how to download the desktop version of Skype on your PC. You should now be able to use the latest version of the app without issues, provided you follow the steps above.

If you have already a classic Skype desktop version that is no more supported, you can read our guide in order to keep using your old Skype version on Windows 10.

Feel free to let us know if you encounter any issues installing Skype in the comments below.

Here are the main highlights from today’s Gamescom Inside Xbox announcements

The Xbox team has just wrapped up a special episode of Inside Xbox which aired live from gamescom in Cologne, and the 2+ hours live stream packed much more gaming news than expected. First of all, we got some important updates for certain Microsoft Studios titles, including the Xbox One version of PUBG.

Following its launch in beta in December, PUBG 1.0 will be released on September 4 and introduce the new Sanhok map and War Mode, as well as an in-game currency to buy cosmetics and more. The full release of PUBG on Xbox One will also be available as a physical disc that comes with an exclusive collection of cosmetic items inspired by the Xbox brand.

Rare’s pirate game Sea of Thieves will also get a new content update on September 19 called Forsaken Shores. This third free update will introduce a new volcanic world, forcing pirates to deal with new environmental threats such as volcanos and geysers.

State of Decay 2, the latest big Xbox/Windows 10 exclusive released back in May is also getting a new Daybreak Pack on September 12. This DLC will bring a new defense game mode where you’ll have to team up with up to three friends to fight off waves of enemies. The Daybreak Pack will be free for players who own the game’s Ultimate Edition, and it will available for everyone else as a $9.99 purchase.

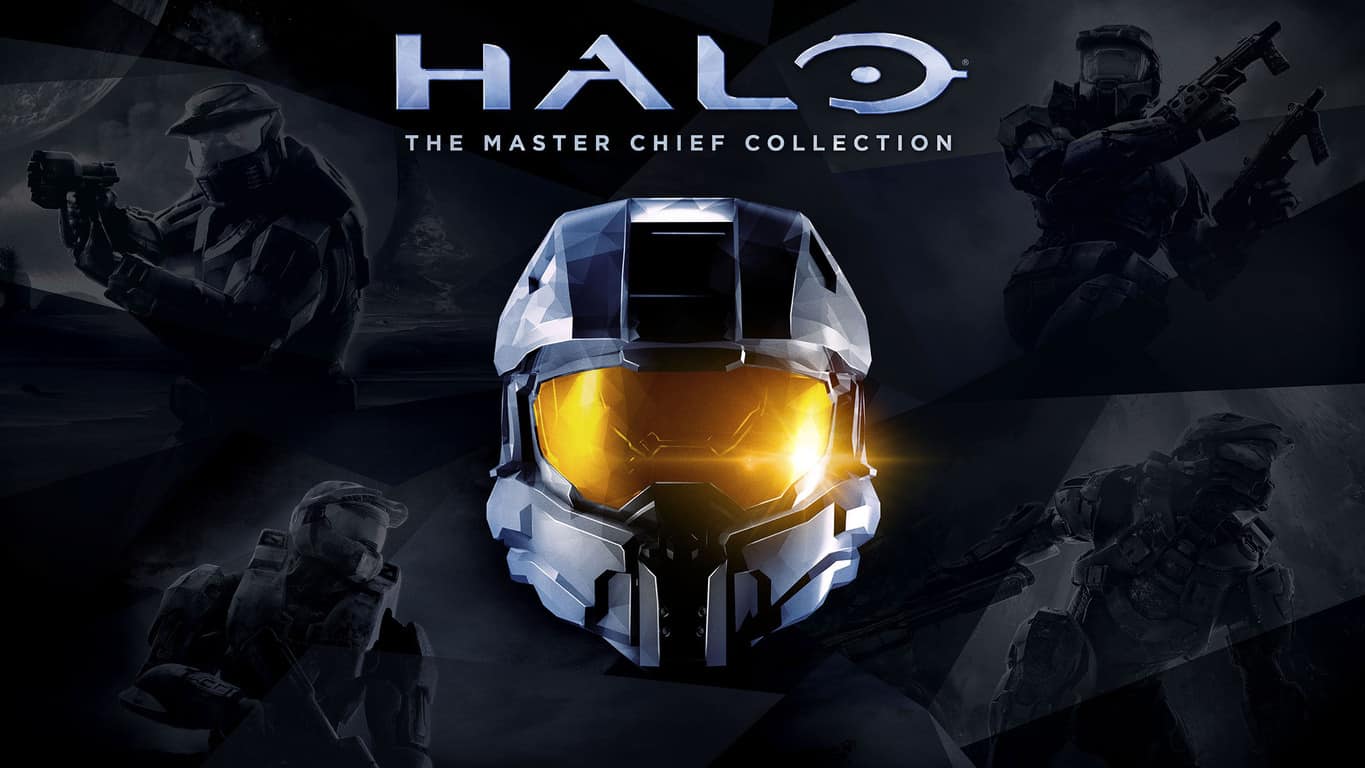
Nearly four years after its release on Xbox One, Halo: The Master Chief Collection will get a major update on September 1 with improved matchmaking, visual enhancements for the Xbox One X and more. On this occasion, the Xbox One anthology will also join the Xbox Games Pass catalog on September 1, which is great news for Xbox gamers who have yet to discover these old Halo games in their best presentation ever.

Even though the existing Xbox mobile apps have an Xbox Store section featuring Xbox Games Pass, Microsoft apparently thought that its gaming subscription deserved to have a dedicated app. A new Xbox Games Pass app for iOS and Android is launching in beta today, and it will let you browse the catalog and download any games you want right from your phone.

If you’re looking for a new Xbox One console right now, Microsoft also announced 8 new Xbox One bundles today including the Xbox One X Gold Rush Special Edition Battlefield V Bundle. We also got a glimpse at the Xbox Wireless Controller – PlayerUnknown’s Battlegrounds Limited Edition and its exclusive trigger grips, and the Xbox team also announced new Shadow and Camo Xbox Design Labs Controller colors which are now available online.

The Xbox One X Gold Rush Special Edition Battlefield V bundle.

Last but not least, Microsoft didn’t forget PC gamers today as it has teamed up with THQ Nordic to release five of its Xbox Play Anywhere games on Steam and at physical retailers. That’s right, ReCore: Definitive Edition, Super Lucky’s Tale, Disneyland Adventures, Rush: A Disney-Pixar Adventure and Zoo Tycoon: Ultimate Animal Collection will be able to reach a whole new audience starting September 14. This is a really interesting move, especially at a time when Microsoft is using Microsoft Store exclusivity to push more gamers (including PC gamers on Windows 10) interested in Microsoft Studios games to subscribe to Xbox Games Pass.

Microsoft also had many guests on stage to discuss upcoming Xbox One releases including Forza Horizon 4, Fallout 76, Shadow of the Tomb Raider, Devil May Cry 5, and more. You can learn more about these games by checking the detailed recap on Xbox Wire.

Download The Latest Opera Version for Windows 10, 8.1

These days I realized that my Firefox and Chrome browsers have become slower, and I’m not sure what seems to be the reason, since my system is pretty powerful. Then I remembered about Opera and decided to download it right away.

The Opera browser is known for the fact that it is really fast and it comes with some really cool data compression features which the browser has recently launched for mobile platforms, as well.

However, right now there isn’t a touch version of the Opera app in the Windows Store, so until and if that moment arrives, we’ll have to resort to the desktop version. I just hope you’re not running on Windows RT. After using Opera for a few days on Windows 10, 8.1 I realized that I’ve fallen in love and that I will soon ditch Firefox and Chrome for it.
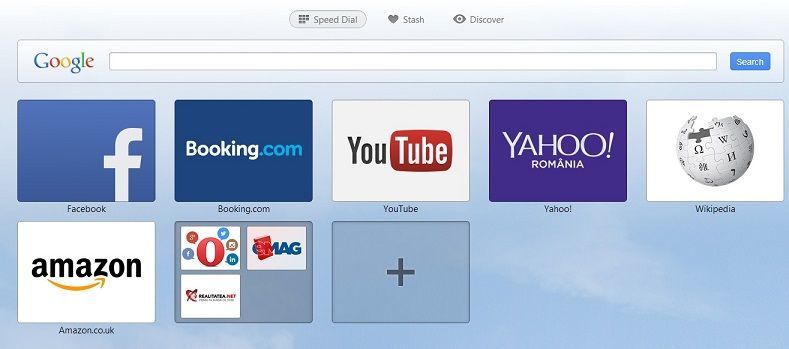
download opera windows 8
Opera comes with the basic features that any browser should have, such as pop-up blocking, tabbed browsing, integrated searches and others. But what sets this browser apart is, as I’ve mentioned, the ability to have a ultra snappy internet browsing session, with or without loading of images. Other features like Opera‘s own email program and the RSS Newsfeeds are professionally made. Here is the description of some more:

The Discover feature gives you top-quality news and entertainment from around the globe. Enjoy new content from a variety of categories and read articles from your region, in your language. Opera has one intuitive, powerful location for searching and navigating the web. Search using multiple providers and view site suggestions as you type.
Off-Road mode compresses pages for faster, all-conditions browsing. It helps you stay online when your connection slows down. Found something you’ll want to come back to? The Stash feature captures a page with one easy click and organizes your pages into a simple, sophisticated list. Scan your Stash in a resizable page preview or search what you’ve saved, by keywords.

So, without further ado, let’s provide download links for the famous Opera browser for Windows 8.1, 10 and also keep you update with the latest version and all that has been made new inside the app.

Get Opera browser for Windows 10, 8.1

get opera browser windows 10
 

Download Opera browser for Windows

UPDATE: At the time of writing, the latest Opera version is Opera 55. This new browser version brings a series of important fixes and improvements:

The new stable build of our browser includes a smarter layout for the settings page, an expanded security badge and page information pop-up for better page control, easier Chrome Web Store extension installation and more accessible bookmarks.

For more information about the latest Opera version, you can check out the company’s official blog post.


This update was released on 2015-12-08 and it comes with a couple of some important features that you will find below. It comes with a size of 34.4 MB. For more details on this specific update, go ahead and have a look at Opera‘s official post on this.

General and user interface changes
The Discover feature is now the news feed. We changed the name to make the feature more intuitive and accessible.
Opera supports MSE audio (audio/mpeg and audio/aac mimetypes), enabling playback from Google Play Music and similar services.
Improved downloads by adding some new functionality. For example, you can cancel a download directly from the pop-out and resume a download if it was interrupted by Opera closing.
Opera for Mac now includes a share button that lets you share a page through most apps on your computer, like Mail or Messages or Twitter and so on.
Updated support for the latest Chromium/Blink release, version 47.
Stability enhancements and bug fixes

Major security update [April, 2014]

Opera has issued a fresh update which will get itself installed automatically and it brings a big security improvement – fix for the Heartbleed bug. Here’s what the folks over at Opera said about the update:

As discussed in our blog post about Heartbleed, the standalone autoupdater for Opera 12 on Windows was vulnerable to a Heartbleed attack from someone who would be in possession of a valid Opera certificate. While fixing this, we also found another issue with our autoupdate on Windows which might be exploited by someone in possession of such a certificate. Successful exploitation, which would require using a third, unrelated bug on Windows, could allow a mischievous man in the middle to run arbitrary code on the computer. Opera 12.17 is therefore a recommended security upgrade on Windows. While it is unlikely that someone has gained access to a certificate of ours, we cannot rule out that some foreign intelligence agency has done so, and we want to be on the safe side.

Download Opera for Windows 8, 10 [Version 20.0.1387.91]
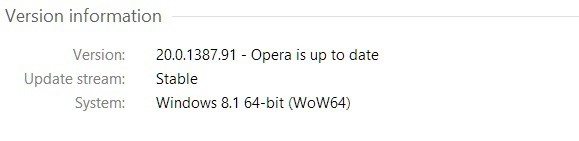
download opera windows 8.1
A new version has been released for the Opera browser on April 3 2014, and it brings some improvements that might help quite a few folks. First, the ff-Road mode which has been reported not to work on some ISPs has now been fixed. Also, the issue with the auto-update prompting for credentials and then exiting immediately has been taken care off, as well. Those who are using the Russian version of Opera have probably noticed that “Compression mode” has been renamed into “Opera Turbo”. So, that’s about it for this version.

Download Opera for Windows 8, 10 [Version 20.0.1387.82]
download opera browser windows 8
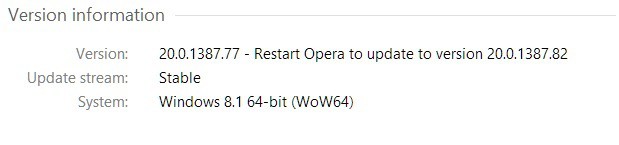
A new minor update has been made available for the Opera browser and you will get it automatically when you will open the browser again. You can then go to Opera in the about section and see that it’s there, just like in my above screenshot. Unless you have received the update automatically, follow the above link to get it. The official changelog only contains two changes and these are – Chromium updated to 1750.154 and an invalid dereference in autofill code has been fixed.

Download Opera for Windows 8.1, 10 [Size 33.13MB, Version 20.0.1387.77, Updated March 13, 2014]

This release has been made available with the usual stability fixes and also has fixed the problem where Adblock was not working properly when opening pages in new tabs. The following problems: crash on startup in >extensions::OneShotEvent; download callout items won’t open and tone down mixed content graphics for some Windows users have also been taken care of.

Xbox Games Pass is getting an updated Halo: MCC on September 1, new mobile apps for iOS and Android

After months of testing with Insiders, Microsoft announced today that the first update in years for Halo: The Master Chief Collection will be available on September 1. This major update will bring improved matchmaking, customizable installation options, offline LAN support as well as 4K and HDR support on the Xbox One X.

This is just the first in the series of upcoming updates for Halo: MCC, as developer 343 Industries is still working hard to bring more improvements to the collection of classic Halo games. The Xbox One anthology will also become available on Xbox Games Pass on September 1, joining Halo 5: Guardians, Halo Wars: Definitive Edition and Halo Wars 2.

That’s not the only thing that Microsoft announced for Xbox Games Pass subscribers, as a dedicated Xbox Games Pass app is also launching today in beta on Android and iOS. The app will allow you to browse the catalog and download any game you want on your console when you’re on the go. The main Xbox mobile app already had an Xbox Store section featuring Xbox Games Pass, but Microsoft apparently thought that its gaming subscription service deserved more. The Xbox Games Pass is available from the Google Play Store today, and iOS users can request access to the beta on this page.

The app was not found in the store. ?

Slack, the collaboration service Microsoft is chasing with Teams, is worth $7.1 billion

The enterprise messaging app Slack is now worth more than $7.1 billion following a new $427 million funding round, the company announced today (via CNBC). That’s pretty impressive for a product that launched just four years ago, but is already being used by more than 500,000 organisations across the world.

So far, Slack has raised more than $1.26 billion from investors, and the company isn’t expected to go public before 2019 at the earliest. “We pursued this additional investment to give us even more resources and flexibility to better serve our customers, evolve our business, and take advantage of the massive opportunity in front of us,” the company said today. “Even with our rapid growth in just four years—we now have more than 8 million Daily Active Users (DAUs) and more than 70,000 paid teams—there is still enormous potential to change the way that people and organizations collaborate and work together.”

A couple of weeks ago, Slack also announced that it was purchasing the IP for Atlassian’s HipChat and Stride, encouraging users of these services to transition to Slack before they shut down next year. Slack definitely remains an early leader in the enterprise messaging space, but Microsoft Teams is now chasing its tail with its new free tier for freelancers and SMBs. Microsoft has the advantage of having over 100 million commercial active users for Office 365, but not all of them are using Microsoft Teams yet.

Take a peek inside Microsoft’s recent One Week Hackathon

Partly due to the political climate in the world and the back and forth finger pointing of international powers, hacking has become a more commonplace verb at plenty of breakfast tables around the world.

While the current connotation is perceptually negative at the moment, there is a lot of good that can come from the understanding, use and participation in the hacking community.

Jess Huckins, a writer at Microsoft Research and freelance editor, takes us on a tour of her time during Microsoft’s One Week, which includes employee activities such as Expos, Science Fairs, a Give Fest and Hackathon.

Huckins presumably participated in most if not all the events of the week, but her writings about the Hackathon were of particular interest and wound up as a post on Medium.

The Microsoft Hackathon varies from any similar event I’ve witnessed. A mashup of “hacking” and “marathon,” the word “hackathon” typically conjures images of engineers coding at 3 A.M. while pounding black coffee. Here, though, employees and interns from across the company come together to create, innovate, and hack on ideas that light them up. In 2017, more than 18,000 people in 4,000 cities and 75 countries participated, making this the world’s largest private hackathon.

In meeting with several organizers and employees, Huckins was quick to point out the difference between the misconceptions surrounding the idea of “Hackathons” versus the reality of Microsoft’s approach.

Instead of people sleeping under tables and making questionable dietary choices in the wee hours of the night, Microsoft clears its tents out every night around 7 P.M. The seemingly early curfew is mostly likely meant to give coders a chance to clear their minds and return the following day with fresh perspective and creative workarounds.

The other misconception Huckins highlights is the very nature of what’s being hacked. Instead of computer screens filled to the brim with code attempting to shutdown, break into or crash security threats, most of the hacking done during Microsoft’s Hackathon, was for good.

 Other projects were decidedly personal. Cormier McSwiggin, inspired by her previous work with nonprofits, said she joined her Hackathon team because it aligned with her politics. “We’re trying to create a design that would benefit people living with ASD, and that also is a great opportunity for us to think of accessibility, UI, and UX from the very beginning rather than as an afterthought.”

User researcher Keola Ching was inspired by his stepmother, who had ALS, to create a device that would improve a quadriplegic person’s quality of life by giving them more control over their environment and reducing caregiver burden. “Three of us have very personal reasons to be part of this team,” he said. “Two have lost family members to ALS, and one of the engineers has a father who has been quadriplegic for quite some time.”

While there is a need and market for Black, White and Grey Hat Hackers the world over, it’s nice to know that the term is broadening to call attention to the extensive knowledge of people have for taking current systems and improving them.

Watch today’s Gamescom Inside Xbox episode on Mixer and get exclusive Sea of Thieves content

The Xbox team is bringing its monthly Inside Xbox live show to the Gamescom conference in Cologne, Germany today, and those of you who watch it on Mixer will get another free “Mixpot” digital gift. This time, Microsoft will offer a free Huntress Figurehead to add to your ship in Sea of Thieves, Rare’s popular pirate game released on Xbox One and Windows 10 earlier this year.

Today’s Inside Xbox episode will also bring some news about Sea of Thieves’ Forsaken Shores free expansion, but we also expect to get some updates about State of Decay 2, PUBG, Forza Horizon 4 and more upcoming Xbox One games. The Xbox accessories team is also present at Gamescom, with Xbox product marketing manager James Shields doing some teasing on Twitter yesterday.

The Gamescom Inside Xbox episode will kick off at 7:30AM PST / 4:30PM CEST on mixer.com/xbox, and make sure to link your Microsoft account to your Mixer account if you want to grab the exclusive Sea of Thieves content during the show.

Windows XP Second Edition: Let’s All Wake Up

Recently, some forum postings in the online environment have let the imagination of certain Windows XP lovers run wild – the most nostalgic ones hope that there will be a Second Edition of the almost dead Windows XP. We analyze below why this isn’t possible, but we also leave some room for imagination.
windows xp second editionRumors and the idea of a Second Edition for the incredibly popular Windows XP operating system have been surfacing right before Microsoft was ready to unveil Vista, which ultimately turned out to be a flop. But now, some new forum threads have been appearing on the Microsoft Community forums, asking Redmond to come up with a special Second Edition of Windows XP, rather than just to kill the operating system and leave hundreds of millions of computers vulnerable to hacker attacks. So, let’s have a look at what some users have been saying on these forums

Read Also: Calendar Apps for Windows 8: Some of the Best to Use

I personally would love to have a windows xp second edition. I love the windows xp user interface, everything about it. Also your Enterprise consumers use Windows XP and are holding on to it because their software is dependent on it. Home Users love it because it is simple to use and is still fun to use. I love it for all of these reasons, plus i love how resource friendly it is and how simple it is to use. I am an advanced windows user, and when windows 8 came out, it confused me a lot because the UI was different. If you were to create an XP second edition, I’m sure your customers would buy up 200 million or more licenses in the first few months. I know i would buy them for all of my current computers. I have windows XP in a Virtual machine and i see why everyone loves it. So please create a windows XP second edition. If anyone agrees with me, then post it in the discussion.

Another dreamer weighs in with his idea, saying that a second edition of the Windows XP would be a “goldmine”.

That’s a fantastic ideal. And don’t change the interface. And feel of it. Plus make old software and games work on it. Give it the latest Direct X.  People would definitely buy it. I certainly would. But we know Microsoft is too dumb to realize they have a goldmine in a XP2 version. I bet all the IT people would upgrade too. I would like it to have visual styles and be able to change the colors. I always keep my fingers cross on a second XP version. Gates is back, he should think about it. There should be a petition for it. I can’t stand Windows 7. Tried it, hated it.

Those who are using Windows XP are obviously the same users that haven’t moved to Windows 7, let alone Windows 8 or even Windows 8.1. A second edition of the Windows XP doesn’t make sense especially because Microsoft hope it will manage to make money from the switch to Windows 8. Secondly, the world just needs to move on. Sadly, we don’t have the choice to keep using old software as we’d love to, so we just have to face the fact that we don’t have control over this.  Microsoft will stop offering security patches but it won’t offer Windows XP to third part developers, either, because there will definitely be plenty available to customize a version of Windows XP into a second edition.

Another important thing which needs to be mentioned is the fact that people rarely buy stand-alone Windows licenses, as most of the purchases of new Windows version are linked to new computers. So, a second edition of Windows XP would appeal only to those willing to pay separately for such a product and there won’t be too many of them. If I were at Microsoft’s helm, I would rather discontinue Windows Vista than XP, but that’s just me. However, what’s still scary is the fact that Windows XP remains the most used Windows version worldwide, so it will be interesting to see to what new Windows version they will flock to.

Windows XP in 2018

Windows XP is a system that was the main OS for the majority of PC users for many years. But all the good things come to an end. In 2017, Windows XP with Windows 10 was the main OS from Microsoft present on market, even if Windows XP stopped being supported in 2014. If you want to keep this awesome OS on your pc, you can check our guide on how to keep Windows XP forever on your PC.

Read Also: Steam ends support for Windows XP and Vista in 2019

Parallels Desktop 14 for Mac is out today with improved performance and support for the next Windows 10 update

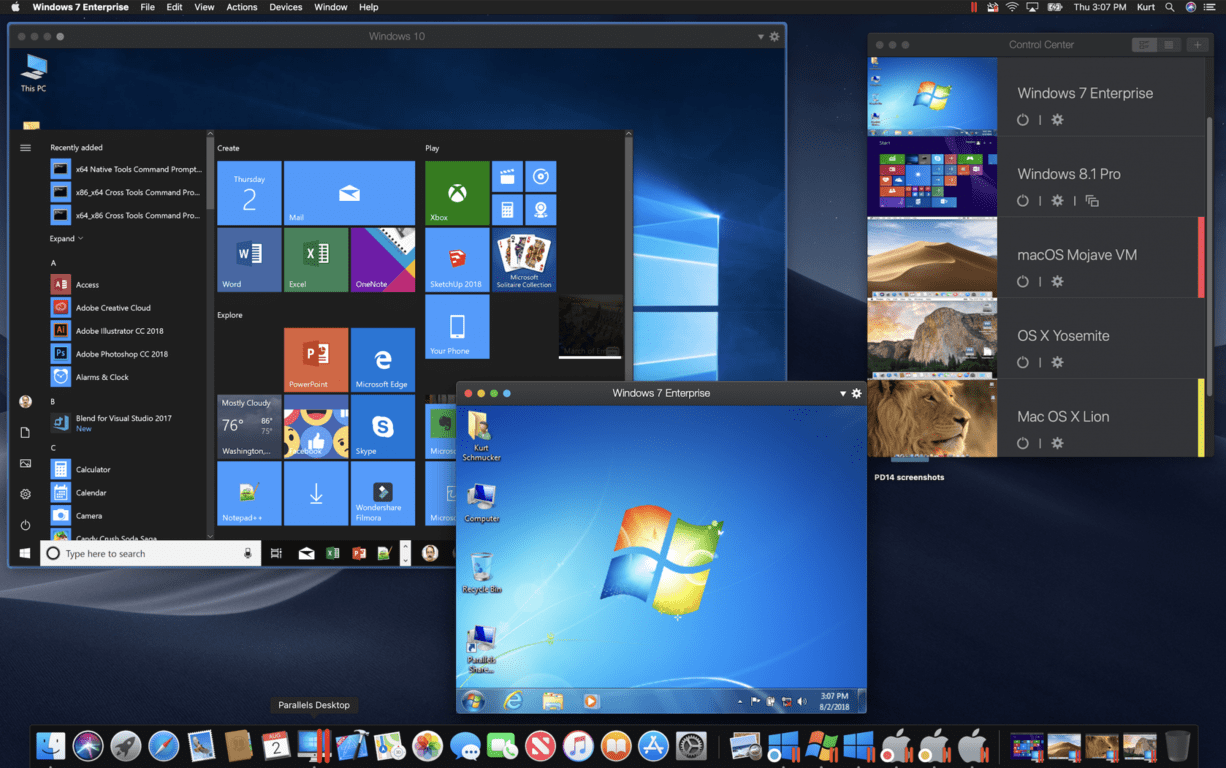
Parallels is launching today Parallels Desktop 14 for Mac, the latest version of its virtualization software that we’ve been using to run Windows 10 on a Mac. The new major release is ready for the upcoming Redstone 5 update for Windows 10 as well as macOS Mojave, which will both be released later this Fall. Parallels Desktop 14 brings several improvements across the board for Mac users including improved performance, storage optimizations and more.

“Millions of Parallels Desktop customers highly value performance and efficiency,”said Jack Zubarev, Parallels president. “With Parallels Desktop 14, we’ve taken those to the next level by focusing on graphics and storage, allowing customers to save as much as 20 GB of disk space while enjoying the best-ever performance,” he continued.

Parallels claims that Parallels Desktop 14 users should see up to 80% faster application launch, up to 10% faster application launch, and up to 17% more FPS in Coherence mode. As a reminder, Coherence mode is a neat feature that allows you to completely hide the virtual machine and use Windows 10 apps on macOS like any other Mac app, as seen below.

You can run any Windows 10 app you want on your macOS desktop with Coherence mode.

Performance improvements are great, but Parallels also did some work to make virtual machines use less storage than before. A new Free Up Disk Space pop up will suggest some actions to save up to 15% of storage on your Mac hard drive, which is nothing to sneeze at.

There are a lot of other new features in this release, especially for those using the virtualization software with the new MacBook Pros with Touch Bar: Parallels says that more popular Windows apps such as OneNote, Visual Studio, AutoCAD and Sketchup now support the Touch Bar, and there’s also a Touch Bar Wizard to put your favourite app shortcuts right at your fingertips. Other highlights in this release include support for Ink Gestures in Word as well as pressure sensitivity in Powerpoint (using the trackpad, since there are no Macs with touchscreens), improved OpenGL support, compatibility with shared 4K cameras and smart card readers.

Parallels Desktop 14 for Mac is available today as a $99.99 purchase for the perpetual release, but it’s also available as a free update for customers who pay for a $79.99 Parallels Desktop for Mac annual subscription. There’s a lot to like in this release, especially the performance improvements and better support for Windows 10 features such as Windows Ink. Parallels Desktop for Mac probably remains an ideal solution for having the best of both worlds on your Mac, without having to constantly switch between macOS and Windows 10. 

How to Join a Domain on Windows 10

Both Windows 10 and Windows 8.1 come with most of the same settings that were there in Windows 8 and in Windows 7, but they have received a visual makeover and are now better organized. Here is our quick guide on how you can join a domain on Windows 8.1, Windows 10 respectively.
join domain windows 8.1
For those who are new to the concept, a domain is a group of network computers that share a common database and security policy and it has a unique name. There can be quite a lot of computers in a single domain, managed by an IT admin and with Windows 8.1, 10, it’s now much easier to join a domain than it was before. This quick step-by-step guide follows the same instructions as with the tutorial on how to rename your PC in Windows 10, 8.1, so read that, as well.

If you were wondering about this, then let me make it clear – you can also join with your Windows 10, 8 tablet, but the process could be different with a Windows RT device, but we’ll cover that in a future story.

Easy steps to join a domain in Windows 10

This guide applies to Windows 8.1. The Windows 10 guide is available below.

1. Open the Charms Bar – go to the top right corner or press Windows logo + W

2. Choose the search button and type there ‘PC Settings‘ in the box

join domain on windows 8.1

3. From the ‘PC Settings’ main menu, select the ‘PC and Devices‘ sub-section.

join a domain on windows 8.1

4. From the ‘PC and Devices’ menu, click or tap on the PC info section.

join domain network on windows 8.1

5. Here, you can easily join a domain name, provided you know its exact name or IP address.

join a domain on windows 8

On Windows 10, go to Settings > Accounts > Access work or school. Click on the “+” button to connect to the network managed by your organization. Once you’ve done that, the sign in screen appears, and you’ll be able to enter your domain name user account and password to log in.

join domain windows 10 pc

So, that was about it. In a future article, we will be discussing the reasons of why exactly you can’t join a domain, because our readers have apparently requested a fix for this.

RELATED STORIES TO CHECK OUT:


How to Show or Hide Windows Store Apps on the Taskbar

The latest Windows 10, 8.1 Update has brought a really useful feature for lovers of the good old taskbar – the ability to see there apps from the Windows Store that you have opened. Here’s how to enable and disable this feature.
show hide windows store apps taskbarJust like with many other settings inside Windows 10, Windows 8.1, showing or hiding the Windows 10, 8.1 apps that you download from the Windows Store is really easy to do. Unfortunately, those of you who are running on Windows RT or RT 8.1, you don’t have the desktop interface, so you don’t even have to enable or disable this feature. This is one of the improvements that the Windows 10, 8.1 Update has brought for desktop users, as it makes apps feel more like a part of the entire system and not separate.

As you can see in the above screenshots, the Windows 10, 8.1 apps that I have minimized now appear on the taskbar along with the rest of desktop programs. Personally, I am really grateful that Microsoft brought this feature in Windows 8.1, as now I can see where all my apps are and don’t have to frantically use the eternal “alt+tab” combination. So, if you have installed Windows 10, 8.1 Update but you are not receiving this feature or, for a certain reason, you want it gone, here are the steps that you need to take.

Quickly bring Windows Store apps to the taskbar

The guide below applies to Windows 8.1. The Windows 10 guide is available below this one.

1. Open the Charms Bar – either by going to the top right corner with your mouse or finger or by pressing the  Windows logo + W.
2. Choose the search button and type there ‘PC Settings‘ in the box, make sure you’re searching in ‘everywhere’.
show hide windows store apps taskbar 2
3. From the ‘PC Settings’ main menu, select the ‘PC and Devices‘ sub-section.
show hide windows store apps taskbar 3
4. From the ‘PC and Devices’ main menu, choose the ‘Corners and Edges‘ sub-section.
show hide windows store apps taskbar 4
5. From ‘App Switching‘, simply choose if you want Windows Store apps to appear on the taskbar. It’s as simple as that!
show hide windows store apps taskbar 5

On Windows 10, you can simply right-click on the app that you want to pin to the taskbar > select More and then click on the option the ‘Pint to Taskbar’ option.

For example, I wanted to pin the Telegram app to the taskbar, so I right-clicked on the app and then I selected More. A new window appeared on the screen and I simply selected the Pint to Taskbar’ option.

pin windows 10 apps taskbar

If you want to unpin apps from the taskbar, you need to follow the same steps, but this time you’ll click on the option ‘Unpin from taskbar’.

Now, if you have enabled or disabled it, please let me know what you think of this feature. I for one find it really useful, but I wonder what is the argument of those who want it gone. Please express yourself in the comment section from below.

RELATED STORIES TO CHECK OUT:


How to Enter or Change Windows 10 Product Key

Another quick guide from WindowsReport is here – this time we’re going to tell you how you can quickly and easily enter or change your Windows 10, 8.1 product key, if you are in need of such an operation. Read below for more.
change enter windows 8.1 product key
Some of you might get the feeling that the single moment when you will be needing your Windows 10, 8 product key is only during the installation process itself. However, you need to keep it handy all the times, as you might need it for a reinstall or whenever your credentials could be affected, such as with some botched Windows 10, 8.1 Update installations. Below, we’re going to enlist some easy steps that you can take in order to enter your product key in Windows 10, Windows 8.1 to validate it or to change it.
The steps that you need to take are the same when looking to access PC info, rename your PC or join a domain. So you can read those articles, or follow the simple guide from below to arrive to the setting page that you need to access.

How do I enter a new Windows 10, 8.1 product key?

Change your Windows 8.1 product key

1. First of all, you will need to open the Charms Bar by swiping to to the top right corner or pressing Windows logo + W
2. Then, you have to choose the search button and type there ‘PC Settings‘
enter change windows 8.1 product key
3. From there, you now need to select the ‘PC and Devices‘ sub-section
enter change windows 8.1 product key 2
4. From the ‘PC and Devices’ menu, choose the PC info section
enter change windows 8.1 product key 3
5. Enter or change your product key here, and be careful that dashes will be added automatically. You can find the Product ID of your Windows 8.1 either on the DVD or on the email which confirms your purchase.
enter change windows 8.1 product key 4

Change your Windows 10 product key

The steps to follow on Windows 10 are a bit different:

  1. Go to Settings > Update & Security > Activation
  2. Locate the option ‘Change product key‘.

change product key windows pc

You can either go to the Microsoft Store and buy a genuine key or use one that you already own.

As a quick reminder, if you’re not running a genuine Windows OS version, this may trigger many technical issues on your device. The safest solution to avoid them is to install a genuine Windows 10 version.

This was really easy, wasn’t it? Now that you have changed your product key, you will see what is the edition of Windows that you are running and whether it is activated or not.

For more information on your Windows key, you can check out the guides below:


How to Update Windows 10, 8.1 Apps Automatically

Some time ago, we shared with you some basic tips that you could use in order to choose how to install system updates on Windows 10, Windows 8 or Windows 8.1 via the built-in Windows Update function. Now we’re sharing some tips with regards to the update process of apps.

If you are new to Windows 8.1 or Windows 10, then you should now that it brings a set of some important changes over Windows 8, but you might not be acquainted with all of them. A very simple settings that you can enable or disable is the updates which your downloaded and installed Windows 8, 10 apps receive. If you are a frequent user of Windows 10,8 apps, then you probably haven’t even noticed that they are set to automatically receive updates. Here’s how to change this.

If you would like to install updates yourself, and see what they are all about, then you might how want to change how are Windows 8, 10 apps get updates. Or, maybe you’re not interested in this, and you’d like this to be set up automatically. Here are the easy steps that you need to take.

Choose how Windows 10 installs app updates

1. Open up your Windows Store, then swipe to the top right corner with your mouse or finger to Open the Charms Bar. From there, go to Settings.

microsoft store settings


2. From there, select ‘App Updates‘

update microsoft store apps automatically


3. Now, you can select your apps to receive updates automatically or not. If you want to check for yourself, then you can do this whenever you want, but usually, you will receive a notification on the top right corner like in the first screenshot.

In case you can’t install app updates, here are a few solutions to quickly fix this problem:

  • Reset Windows Store
  • Run the built-in app troubleshooter
  • Run SFC scan

For more information, you can check out this troubleshooting guide. Although it refers to a specific Microsoft Store error, you can follow the instructions to fix app update issues as well.

That is all you need to do in order to customize your Microsoft Store app update settings. Let me know by leaving your comment below what your preferred method of getting app updates – automatically or manual download?

RELATED STORIES TO CHECK OUT:


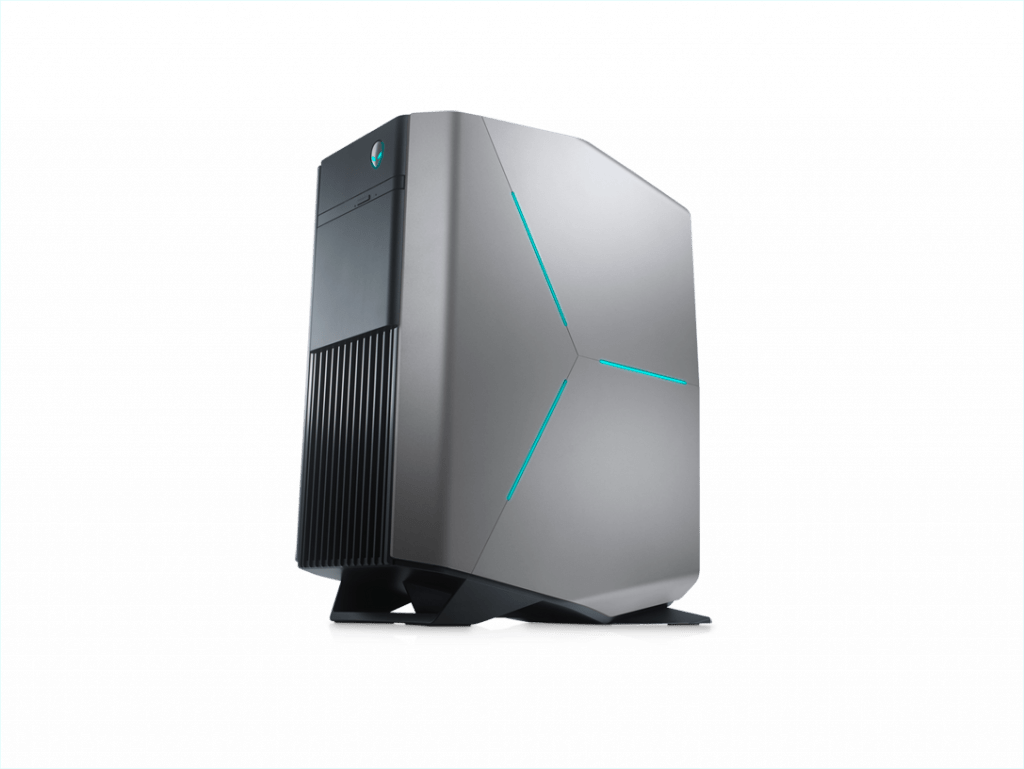
Gamescom 2018: Check out these freshly announced Dell Alienware Windows 10 laptops and desktops

Ahead of the first day of Gamescom today, Dell took the wraps off their latest Alienware gaming desktops and monitors. The desktops and laptops come packed with the latest 8th Gen Intel Core i9 k-Series processors, NVIDIA or AMD graphics cards, and plenty of power under the hood, so here’s what you need to know.

First off, there is the Alienware Aurora. This Windows 10 desktop is designed for VR experiences, including Oculus VR and HTC/VIVE, and comes with total 600W (2x 300W) of dedicated desktop graphics. You’ll also find liquid cooling and 120W of dedicated power for overclocking the CPU. Dell is opting to use a MicroATX motherboard with this desktop, so you’ll be able to experience 4K gaming and even up to 12K gaming. It all supports Intel Optane memory, technology, and you can use up to five storage drives and one optical disc drive. Other features are listed below.

  • Tool-less design, for access to graphics, expansion cards, hard drives, and memory
  • AlienFX customizable lighting
  • Exhausts at the top and rear of the system
  • Killer Gigabit Ethernet hardware and software
  • 11ac wireless technology on all configurations
  • Whisper-quiet operation
Alienware Aurora

Next up, is the Alienware 15 ($1,399) and Alienware 17 ($1,599) laptops, which now come with an anodized aluminum, and magnesium alloy build and design. This beast of a gaming laptop comes with 8th Gen Intel Core i9 k-Series processors, and a super flashy Alienware TactX keyboard, with per key RBG LED. It also supports the highest performance available AMD- or NVIDIA-based graphics cards using GDDR5 video memory and has an optional 120Hz TN+WVA 400-nits display designed for NVIDIA G-Sync experiences. Other notable features are below.

  • Copper thermal management
  • New speaker design that includes internal smart-amps
  • Access to internal components through a new bottom door mechanism
  • 80 quadrillion lighting combinations via per key RGB lighting with many effects and modes
  • Support for desktop graphics cards from NVIDIA or AMD with the optional Alienware Graphics Amplifier
  • Killer Networks e2500 Gigabit Ethernet and Killer 1550 Networks 802.11ac 2×2 Wireless with Bluetooth 5.0 technology
  • 3 USB 3.0 ports
  • One USB Type C Thunderbolt 3 Port
Alienware 15 and 17,

Finally, Dell also announced new 24-inch FHD resolution and 27-inch QHD gaming monitors. These monitors allow for sharp tear-free gaming, can be overlocked at 144Hz and 155Hz, and support AMD FreeSync.  Other features on the monitors include tilt, pivot, swivel, and height adjustable stands. The 24-inch monitor will cost $319, and the 27 inch $549.99.


Is Windows 8, Windows 10 Only for Touch Screens [Tablets]?

I have a lot of friends that tend to consider me the computer guy that knows it all. Personally, I don’t believe that’s true and have said many times that I am a technology journalist. Nonetheless, it never ceases to amaze what funny questions I might be getting from my friends and family. And if you’re like me, then you have probably heard this so many times until now – is Windows 8, Windows 10 only for touchscreen? Is Windows 8, Windows 10 only for tablets?.

A very short answer would be like this – no, Windows 8, Windows 10 is not only for touchscreen devices, tablets and other machines and it could not possibly be only for that category of gadgets. But, the people that are asking this question apparently are in the middle of a perception issue and they need not a simple answer, but they need guidance. We all know that Windows 8, has probably been the biggest overhaul to the Windows system since Windows 95, and this has left many users frustrated.

windows 8 is for touch

If you’re going to use the Modern UI only with your keyboard and mouse, it won’t be as fun as using it with only your fingers. The same, obviously, goes for a lot of apps found within the Windows Store. But, if you’re operating from a non-touch device (like I mostly do), then nobody is stopping you from operating in Desktop mode. Personally, I work and play in the Modern UI only on touch devices, since it’s awkward to do it otherwise. And on top of that, touchscreen devices aren’t quite cheap, to be frank. And some important personalities, like Tim Cook, Apple’s CEO, are actually critical of Windows 8‘s idea

You can converge a toaster and a refrigerator, but those things are probably not going to be pleasing to the user. You wouldn’t want to put these things together because you wind up compromising in both.

This means that we shouldn’t be expecting any touch-enabled laptops from Apple in the near future. But could this be true? Maybe people are “getting sick” of the touch experience: they already have that on smartphones and tablets, maybe they will never switch to a full-touch experience (I know I wouldn’t) but maybe the next generation of users will. We are used to physical keyboards, mice, and all that, but what about those consumers that will find a smartphone and a tablet the normal things? Windows 8 is precisely for them.

But, for those from the present who are not fans of the touch experience or, so far, they can’t afford or they don’t use a touch device, here are a few tips to try and make your non-touch experience on par with the touch one.

Tips/hotkeys for non-touch Windows 8, Windows 10 users

charms bar windows 8

Windows 8, just like Windows 7 and all the versions before, has a huge collection of hotkeys. We’re going to enlist for you only those that will help you make the most out of Windows 8 and its touchy flavor. Actually, after a while, after mastering these hotkeys, you’ll have a feeling that your non-touch experience is even faster and more efficient than the touch one.

  • Spacebar – when your screen is locked and presumably you don’t have a password, just hit the spacebar to unlock!
  • Windows icon + L – use this combination to quickly lock the screen
  • Windows + X – this will bring up a quick settings tab from you can go to different places in your computer; call it a mini-version of Start Menu used to be
  • Windows + Q – this quick combination will instantly show you all the apps that you have
  • Windows + W – brings up the Search menu which allows you to search everywhere, even in the Windows Store!
  • Windows + Tab – this is similar to Alt+Tab, only that it integrates the new functions found in Windows 8
  • Windows + E – wherever you are, bring up the Computer by pressing this
  • Windows + . – yes, Windows + DOT will bring you the “sexy” Cascade view
  • Windows + H – we live in social networking times, so we all must adapt. This will allow you to instantly share any opened picture
  • Windows + C – this will reveal the so-much-talked-about Charms bar that I actually like
  • Windows + , – this will make everything you’re currently working invisible and will allow you to glimpse at the Desktop

Windows on touchscreens [2018 update]

Even if Windows 8, 8.1 and 10 were believed to be more adapted for touchscreens, they have become great for operating on normal screens. In fact, Windows 10 and 8, 8.1 editions have many issues on touchscreen devices. For example, many users cannot calibrate their touchscreen on Windows 10. Another common problem is related to Asus laptops touchscreens. If you are experiencing issues with your touchscreen,  we recommend you to disable it temporarily.

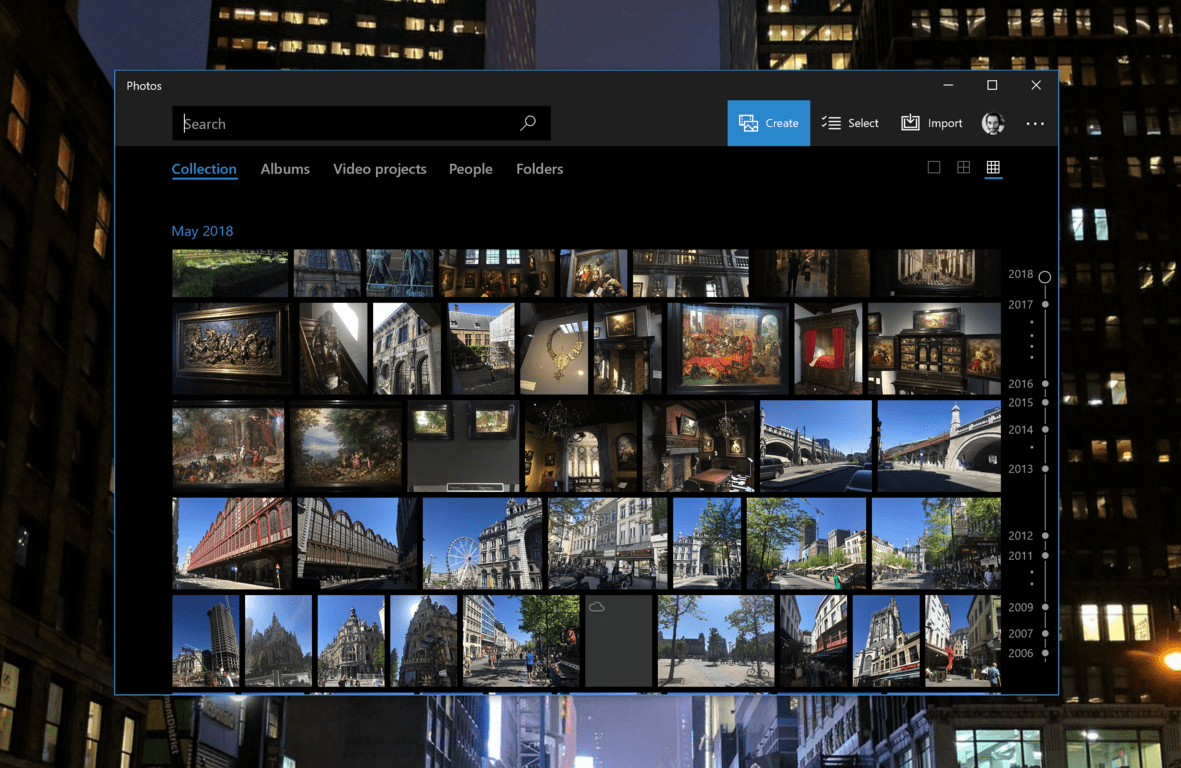
Fast Ring Windows Insiders get updated Photos app with new image editing UI

If you’re a Windows Insider in the Fast Ring you might want to head to the Microsoft Store and check for some inbox app updates. Spotted by Windows Observer, Microsoft recently released a new version of the Windows 10 Photos app, complete with a new image editing UI.

This new version reportedly breaks up the image altering options into three different editing screens. That is a major change from previous versions of the Windows 10 Photos app, where all editing tools were available at a quick glance on the right-hand side of the UI.

Additionally, opening the edit function on a photo in this version will now default you to a crop and rotate page. You can then use the tabs on the top of an image to switch to filters and the other options, as seen below.

The new image editing UI, image via Windows Observer

This version apparently also introduces a new drop-down menu for adding Animated text. That feature shows up on Skip Ahead devices, whereas the new editing options only appear on Fast Ring. This all might as well be in A/B testing for now, as we’re not seeing it on any of our Insider machines just yet, so best to check it out and let us know your thoughts in the comments below.

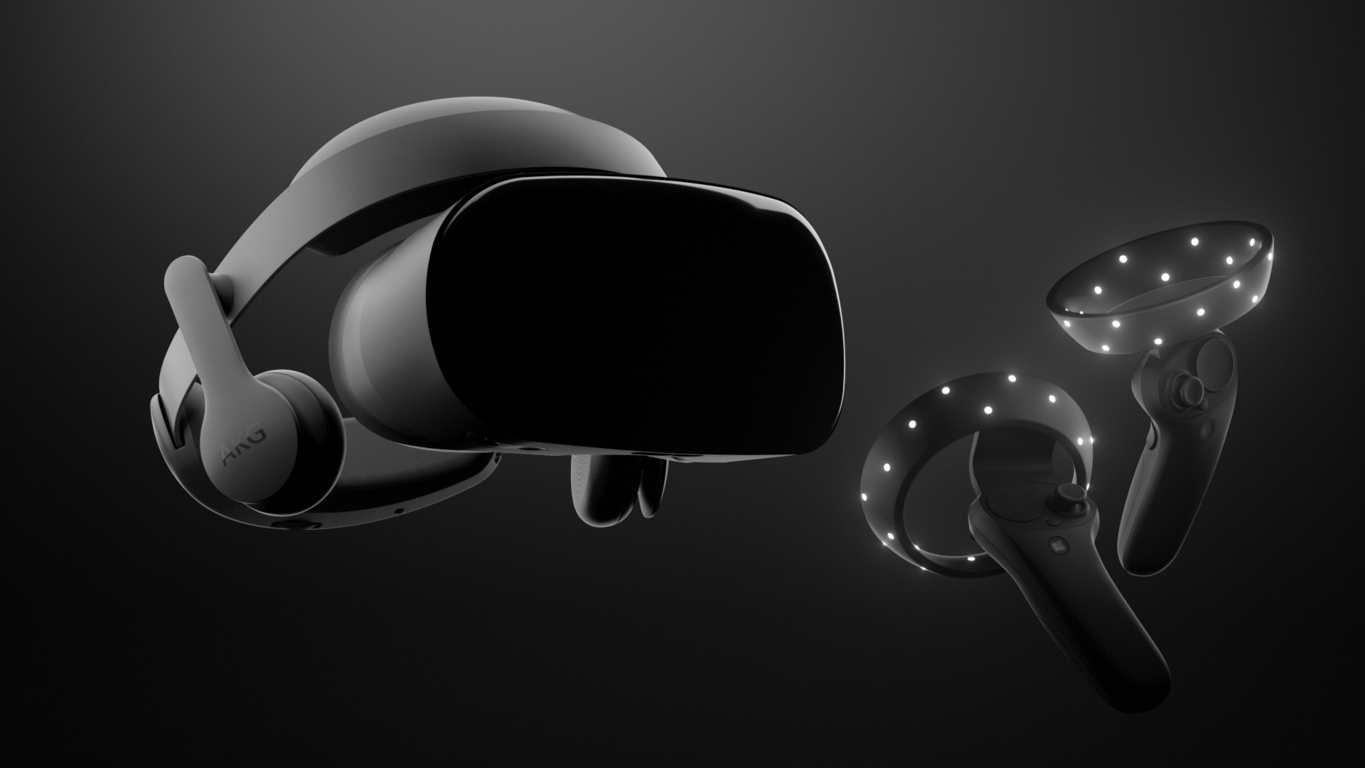
Samsung could be working on a new Odyssey Windows Mixed Reality headset

When Microsoft originally launched a lineup of Windows Mixed Reality headsets, Samsung’s $499 HMD Odyssey was dubbed the premium offering of the bunch. Spotted by Road to VR, a little over half a year later, it is looking as though the Korean firm is working on a new version of the Odyssey, though it might just be a minor upgrade (via Thurrott.com.)

The news primarily comes from an FCC listing for “Odyssey+” which revealed a new XE800ZBA model number for the would be updated headset. Though that listing does not provide any external, internal, or test set up photos, it does also suggest a new “‘AMOLED+SFS” display, “Wider Eye box” and “Anti Fog” set up for the updated headset.

The original Odyssey HMD on the right, and the new one on the left. Image via Road to VR/ Samsung

As seen in the diagram above, both the wider eye box and the Anti Fog set up are different from the previous Odyssey HMD. It is likely coming to help address both the fogging and uncomfortable design problems reported by some users with the first generation HMD. But asides from that, it’s not clear from the listing what else is new, or what the “AMOLED+SFS display” refers to.

With the headset now passing through the FCC, it should not be too long before an official public unveiling. There’s still no word on pricing,  availability, or if the viewing angles and resolution will be the same, so will have to tell. Best to keep tuned for more in the months ahead.

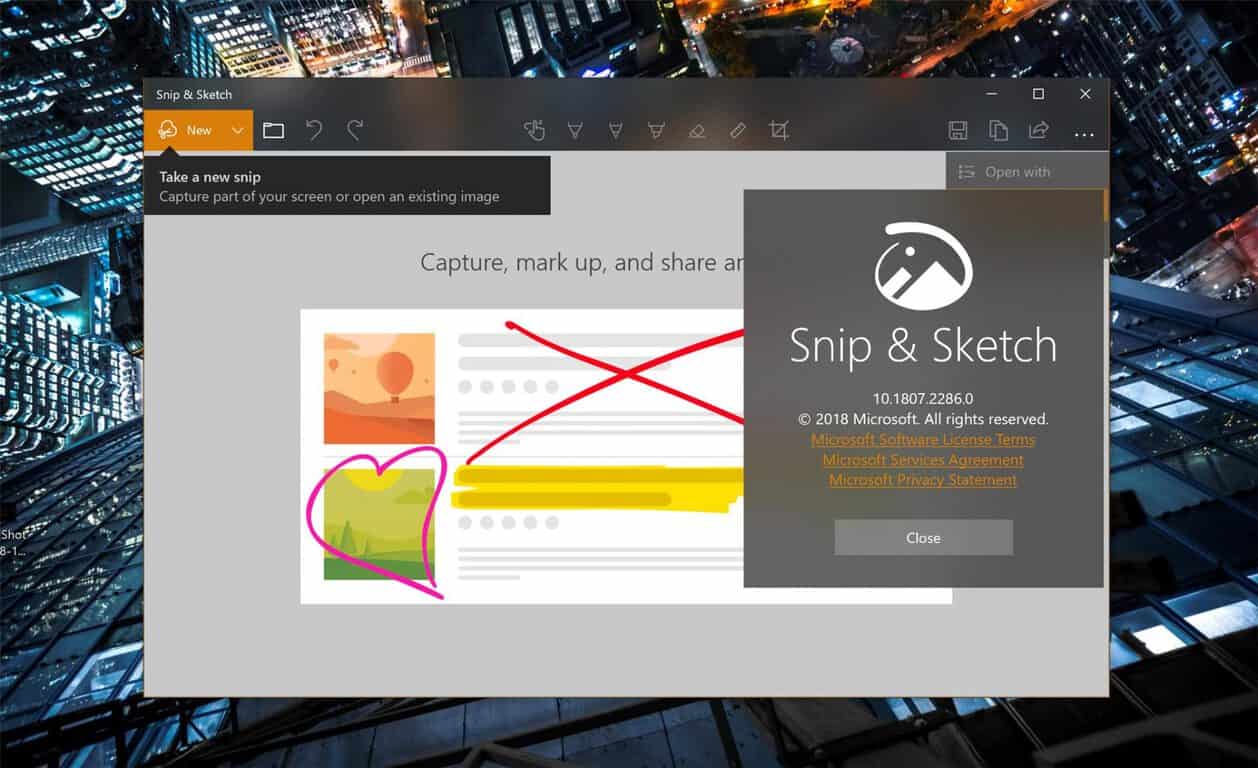
Microsoft renames Screen Sketch app to Snip and Sketch, adds new features

Way back in June, Microsoft introduced Screen Sketch, a new Windows 10 screen capture experience for Windows Insiders. With its many new features in tow, it was even foreseen as a consolidation to the snipping tool. Well, a few months later, Microsoft has re-named the Screen Sketch app to Snip and Sketch, also adding new features in the progress (via Neowin.)

The name change is currently being tested with Skip Ahead Insiders and comes in version 10.1807.2286.0 of the application. This release also delivers new methods of capturing the screen, including taking instantaneous snips from the “New” menu, and delayed snips of up 3-10 seconds.

This same feature was already present in the old screen snipping tool, so it makes sense now to see it ported over to the new app. Anyway, you can expect for Microsoft to continue testing the new Snip and Sketch app with Windows Insiders for the foreseeable future before eventually rolling it out to all Windows 10 users. The app at one point had an issue where captured images were blurry, so there is definitely more work and testing to be done on the road ahead.

Snipping Tool
Snipping Tool
Price:
Free


Forza Horizon 2 will be removed from the Xbox Store on September 30

The Xbox One racing game Forza Horizon 2 will reach “end of life” status next month, a blog post on the official Forza Motorsports website revealed on Friday. The game is currently free for Xbox Live Gold subscribers through the end of the month, but it will be removed from the Xbox Store on September 30. Those of you who grab it for free or purchase it before that date will still be able to download it once it disappears from Microsoft’s digital store.

Here is what the official announcement said:

A heads up for the Forza community: Forza Horizon 2 will reach “end of life” status on September 30. That means that the game and its associated DLC will no longer be available for purchase. After September 30, players who own Forza Horizon 2 will still able to download and play the game and its associated content as normal. However, Forza Horizon 2 and its DLC will no longer be for sale. Forza Horizon 2 is currently available as part of August Games With Gold so, if you haven’t played it already, now is a great time to grab it.

The blog post didn’t really explain why the game has to be removed (it was released just four years ago), especially since the game will continue to work as usual after September 30. Microsoft also delisted the first Forza Horizon game from the Xbox Store two years ago, but that game has since received some enhancements for the Xbox One X earlier this year.

Our colleagues over at Polygon suggest that licensing issues could be the cause of the removal, and the same thing usually happens for sports games or other games that used licensed music. Anyway, Xbox Live Gold should really grab the open world racing game for free before the end of the month, because soon your only chance to play the game will be to get the physical disc.

DON’T Install Windows 8.1 Yet, Unless You Want Annoying Errors

What many people seem to forget is that Windows 8.1 is still in preview, in beta, which means not yet ready. Which, for those of you that have experiences with installing previews, means – very dangerous and might cause unwanted problems to your machine. That’s exactly what has happened to me, so my sincere and honest advice to all you out there is – don’t install Windows 8.1 at the moment!

You might be curious to get Windows 8.1 (especially because it is for free), but I suggest you to await a stable release, if you don’t want to have issues with your computer. At the moment, I am writing this post from another computer because I was unable to solve the issue with my Windows 8 computer (licenced, that is). Let me tell you what happened.
windows 8.1 error

Be wise and don’t hurry with installing Windows 8.1

Just like all the curious folks out there, I decided to go ahead and install the Windows 8.1 update, without being careful and listening to Microsoft’s gold advice:

Create a USB recovery drive before installing Windows 8.1 Preview so that, if you don’t like the Windows 8.1 update or you feel that it is not for you, you could go back to Windows 8 when needed.

I didn’t listen to that and got myself in trouble. I managed to install and right at the middle, after passing the “getting devices ready” part of the installation, I received that dumb message “install could not be completed” and after that “restoring to a previous version of Windows”. And guess what, it did not return to a previous, untouched version of Windows, which is Windows 8. And, at the moment, it’s also pretty hard to delete Windows 8.1, especially because it didn’t finish to install.

Issues when installing Windows 8.1

So, whenever I try to log in, I get various BSOD (blue screen of death) messages. The single solution to have that fixed is to refresh my PC using a USB recovery tool with Windows 8, which, naturally, I forgot to make in the first place. And, believe me when I say that I am not the single one having issues after installing Windows 8.1 preview. Here is a short list of errors:

We will try our best and come up with some solutions for your update problems with Windows 8.1, but, most likely, the biggest problem of them all is the fact that you trusted the preview and installed.


Important Update: We have managed to create fixing guides only for two of the problems listed above. However, they are not the only issues you can encounter. You will see on our site that thousands of errors can occur on your PC. In this case, just install Windows 8.1 on your PC and see how it works. Whenever it gives you a hard time – check our site for a fix.

What do You Get With Windows 8 Pro over Windows 8

Many users that are currently using Windows 8 or an even older version of Windows 8 are still puzzled by this question – what will I get if I switch to the ultimate, Windows 8 Pro version? This is a good question indeed, and we’ll have rundown of the features that are present only on Windows 8 Pro, so you could know if it’s worth the money or not. Windows 8 is just about right for the vast majority of people and the Pro version is only aimed at, well, professionals, right?

After all, paying $200 for Windows 8 Pro is no easy money, right? The price is much cheaper if you upgrade from Windows 8, of course. However, many are still angry over the fact that Media Center wasn’t included by default in Windows 8 and users have to add features to Windows 8 in order to obtain it. Let’s have a detailed look what you’ll be getting in the Windows 8 Pro version and isn’t featured in Windows 8. In the picture we’ve also included features of Windows 8 Entreprise, for those running a business.

windows 8 vs windows 8 pro

Windows 8 Pro features: what’s different from Windows 8?

Unlike previous versions, with Windows 8, Microsoft has decided to limit the number of operating systems, releasing Windows RT, Windows 8 and Windows 8 Pro. Windows 8 Pro is somewhat similar to what Windows 7 Professional or Ultimate used to be. The Media Center option, albeit free, is also not included by default in Windows 8 Pro, therefore you will have to add it on your own, by typing “add features” in the Search Charm bar. And if you are running Windows XP, Windows Vista, or Windows 7, the great news is that you’ll have to pay only $40 to upgrade to Windows 8 Pro. This will definitely help increase the popularity of Windows 8 and the Pro edition, as well.

To keep it nice and simple and not puzzle the reader anymore with complex details, these are the things you’ll be getting with Windows 8 Pro, but if you’re a professional reading this, chances are you were already expecting this:

  • Domain-joining & Group Policy: Organizations using Windows Server domains and Group Policy will need the Professional edition of Windows 8.

  • Remote Desktop Server: You can connect to remote desktop servers from a Windows 8 PC, but you’ll need the Professional edition of Windows 8 to host a Remote Desktop server. However, you can use third-party remote desktop services like TeamViewer or VNC on the standard edition of Windows 8.

  • BitLocker and Encrypting File System: Windows’ encryption features are only offered on Windows 8 Professional. If you don’t swear by these features, you can install TrueCrypt for free on all editions of Windows 8.

  • Hyper-V: The Hyper-V technology found in Windows Server can be used by Windows 8 Pro users to run virtual machines. Everyone else can just download VirtualBox or VMware Player for free.

  • Virtual Hard Disk Booting: Windows 8 Pro can boot from a VHD file. If this means nothing to you, you don’t need this feature.

As you can see, these are really features that only IT or business users will need and that’s why Windows 8 Pro is precisely for them. Many people think Windows 8 Pro has some goodies even for the average users, but they are being confused. Windows 8 is just as good for you as it is!

Keep in mind that the most important features that you might need, are present in Windows 8 Home edition. Whenever you would like to do and fix, can be executed on this version. If you have the possibility to pay less on Home Edition – take it. It worth the money. So, if you are not one of the geeks that want to develop programs on your PC, do not bother about Windows 8 Pro.

What’s New in Windows 8.1


What new features to expect from Windows 8.1 if I install it?

  1. Personalization & User Interface in Windows 8.1
  2. Search in Windows 8.1
  3. Apps, Windows Store, SkyDrive & Internet Explorer in Windows 8.1
  4. PC Settings + Other Improvements in Windows 8.1
  5. Windows 10: what’s new?

windows 8.1 update new

We all thought that Microsoft was going to name the first update to Windows 8 “Blue”, but apparently things are different. The first official update has been dubbed simple, Windows 8.1, and the announcement has been made today. It might seem like a small update to some, but once you’ll get a closer look at the things Microsoft will change, you’ll realize this is actually going to have a big impact and will, perhaps, make consumers give Window 8 the love it deserves.

Announced on Windows’ corporate blog, the Windows 8.1 update comes to solve frustrations amongst users and to make things right. Microsoft has announced that this is only a preview, but a working link has yet to be provided. Without further ado, let’s have a close look at all the things that Microsoft plans to change in Windows 8 with the 8.1 update.

Windows 8.1 – What is new in this version?

windows 8.1 what's new

Just as expected, Windows 8 remains touch oriented, as it was thought from the very beginning. Probably the most talked about feature will be the Start button, which has been so missed by consumers all over the world. Windows 8.1 has also brought significant changes to its Search, Multitasking and Lockscreen features. To make it much easier for readers, we’re going to group the most important changes according to the Windows team and briefly describe them.

Personalization & User Interface in Windows 8.1

  • The improved lock screen functionality now allows to take Skype calls, take pictures even if the PC is locked
  • New large and small live tiles as animated icons that will appear on the Start Screen
  • The Weather tile now covers 3 cities and 3 days of forecast
  • Apps will automatically be pinned to the Start Screen
  • Start Screen background will now include motion pictures
  • Snap View which lets you control how much of the screen a certain app should use
  • The Start button is back, but not the Start menu

Search in Windows 8.1

  • The Search future has been seriously revamped, mixing search results from your computer with those from the web, powered by Bing, of course. All of this is done in a nice and appealing manner. So, if you’ll search for, say, Bee Gees, it will make a resume of the info it found online and also let you listen to their songs.

Apps, Windows Store, SkyDrive & Internet Explorer in Windows 8.1

  • SkyDrive is becoming more embedded inside Windows 8, so you will be able to browse all the files available on your computer, as well as on your cloud storage, even when offline.
  • All the core Windows 8 apps will receive significant updates
  • Improvements coming to the Windows Store, meaning that finding new and specific apps will no longer be a hussle
  • Internet Explorer will arrive with Windows 8.1, bringing faster browsing speeds and increase support for touch

PC Settings + Other Improvements in Windows 8.1

  • When the future version of Windows Phone will be released, it will allow users to sync it with Windows 8. So, you will be able to resume on your phone where you left off on your PC
  • Reading list function in the Share Charm that will work as a bookmarks list
  • The Camera app will include full panoramic support
  • The ability to change PC settings without having to go to the Control Panel

Windows 10: what’s new?

For those of you who want to go further and upgrade to Windows 10, here are some of new great features that Windows 10 1803 have:

  • Windows Autopilot – provides a great lyfecycle device management
  • Windows 10 Subscription activation – supports Inherited Activation. This feature let your Windows 10 virtual machines to inherit activation state
  • New DISM commands – new installation/uninstallation commands inserted (check them here)
  • SetupDiag – a new diagnostic tool that helps you see why a specific WIndows update failed

There are other interesting features that Windows 10 1803 have. We suggest you to check all of them on Microsoft’s official website. If you simply want to install Windows 10 on your machine – feel free to check our site whenever you have a problem or an error. We monitor all these issues daily and creating fixing guides.

READ ALSO: New Windows 10 preview build shows what’s next for the OS

How to uninstall Windows 10 Update Assistant


How to disable Windows 10 update assistant permanently

  1. Uninstall the Windows 10 Update Assistant
  2. Turn Off Update Assistant’s Scheduled Tasks

The Windows 10 Update Assistant enables users to upgrade Windows 10 to the latest builds. Thus, you can update Windows to the latest version with that utility without waiting for an automatic update.

However, the Update Assistant is hardly essential as the updates will eventually roll out to you without it.

You can uninstall the Win 10 Update Assistant much the same as most software. However, some users have discovered that the Update Assistant has a habit of automatically reinstalling.

Thus, you might also need to turn off some scheduled tasks for the Update Assistant after uninstalling it.


Which is the latest version of Windows 10? Find out from our constantly updated article!


How to remove Windows 10 update assistant permanently

Uninstall the Windows 10 Update Assistant

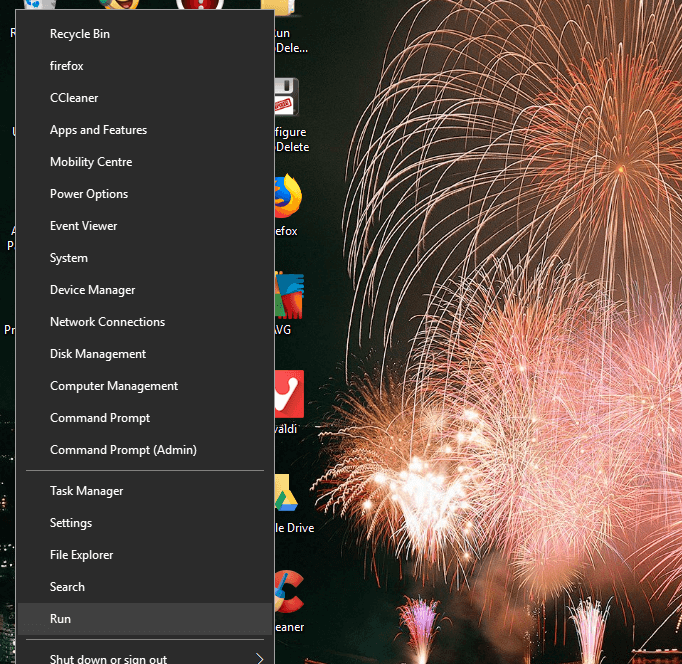
  • To uninstall the Windows 10 Update Assistant, right-click the Start button and select Run.

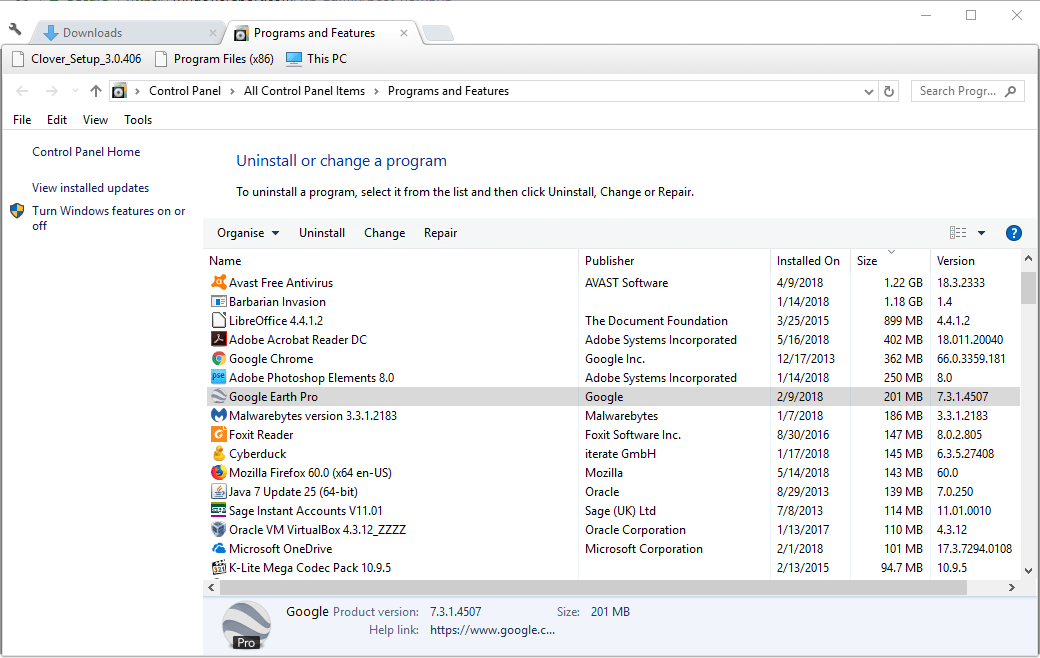
  • Enter ‘appwiz.cpl’ in Run’s text box, and click the OK button.

  • Select the Windows 10 Update Assistant in the software list.
  • Click the Uninstall option.
  • Then click Yes to further confirm.
  • Next, click the File Explorer taskbar button.
  • Select the Windows10Upgrade folder in the C: drive.
  • Press the Delete button.
  • Restart your desktop or laptop.

Epic guide alert! This is how you delete downloaded Windows Updates which failed to install!


Turn Off Update Assistant’s Scheduled Tasks

After you’ve uninstalled Windows 10 Update Assistant, you might also need to turn off the scheduled UpdateAssistant, UpdateAssistanceCalenderRun and UpdateAssistantWakeupRun tasks.

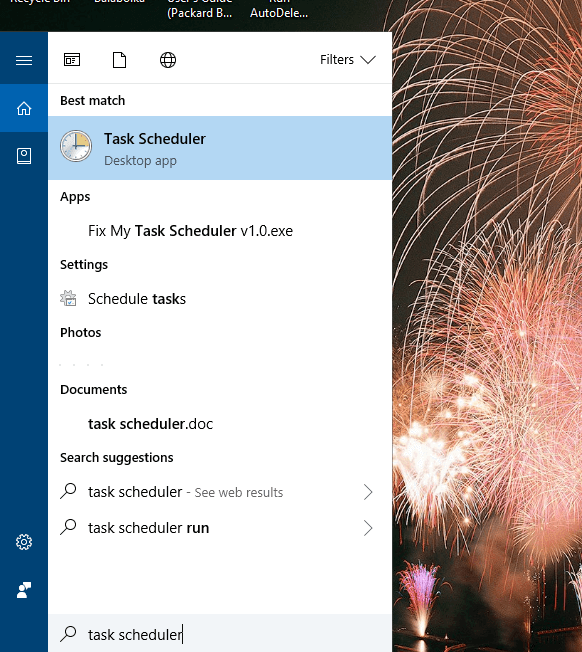
To do that, open the Cortana app.

  • Enter ‘Task Scheduler’ in Cortana‘s search box.

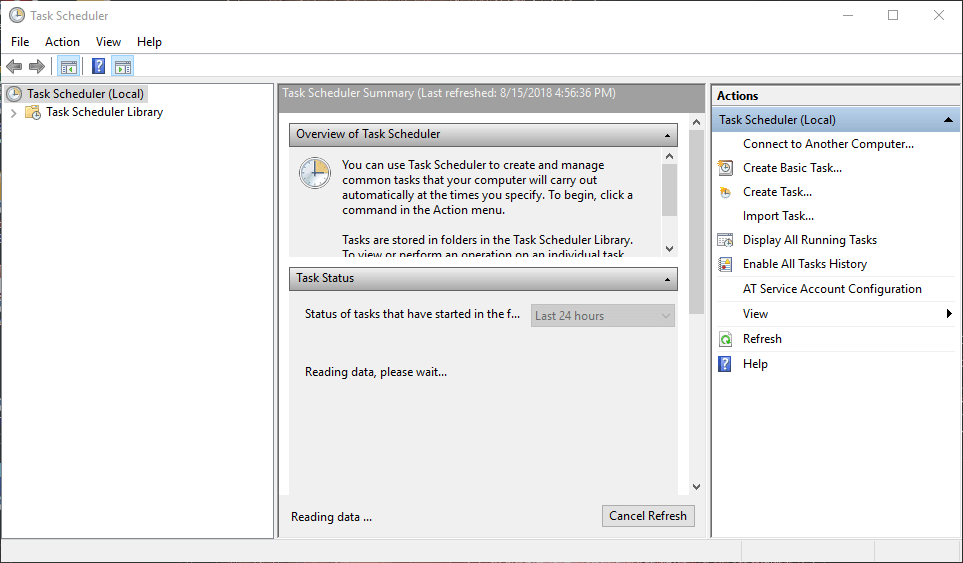
  • Double-click Task Scheduler > Microsoft > Windows > UpdateOrchestrator on the left of the Task Scheduler window.
  • Turn off the UpdateAssistanceCalenderRun, UpdateAssistant and UpdateAssistantWakeupRun scheduled tasks by selecting them and clicking their Disable options.
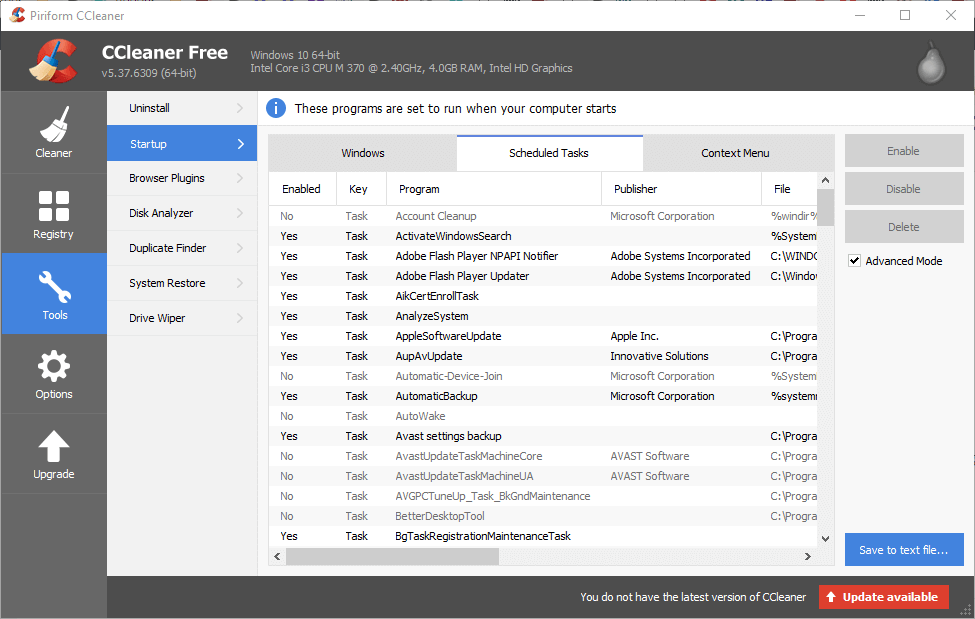
  • To check if there are any other scheduled update tasks that might reinstall the Update Assistant, add the freeware CCleaner to Windows by clicking Download on this page. Then you can open CCleaner’s setup wizard to install it.
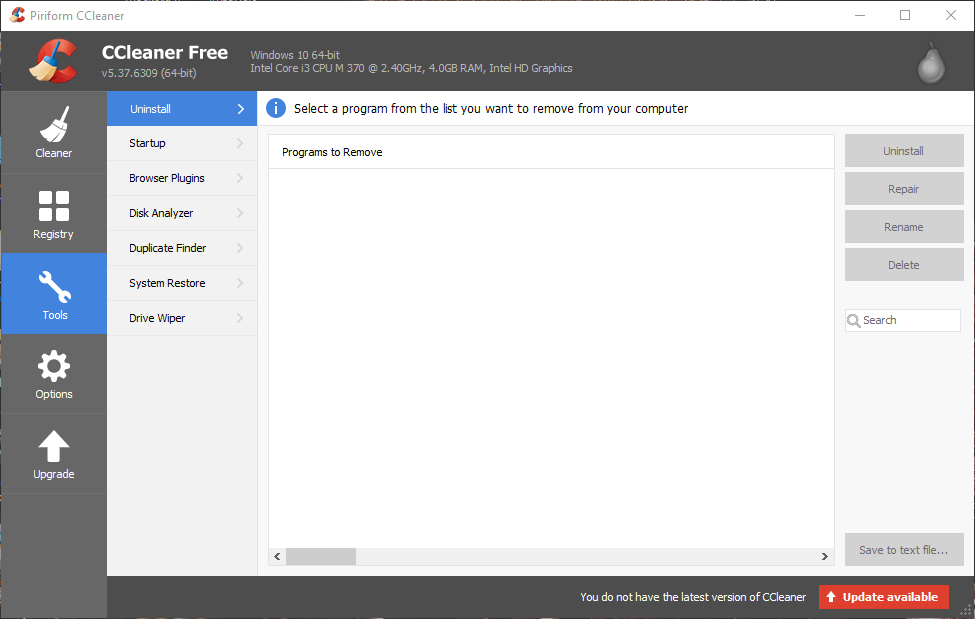
  • Open CCleaner and click Tools.

  • Click Startup to open a list of startup software.
  • Then click the Scheduled Tasks tab shown directly below.

  • Select the Advanced Mode option.
  • Disable any Windows 10 Upgrade or Windows Update scheduled tasks listed there. You can turn off a scheduled task by selecting it in CCleaner and clicking Disable.

So that’s how you can both uninstall the Windows 10 Update Assistant and turn off scheduled tasks that might later revive it. You can also more thoroughly uninstall the Update Assistant with third-party uninstallers.

Check out this post for further third-party uninstaller software details.

RELATED STORIES TO CHECK OUT:

[FIXED] An error occurred while checking for updates in VLC


VLC won’t update on Windows 10

  1. Check the connection
  2. Allow VLC to communicate through Firewall
  3. Run VLC as admin
  4. Disable a third-party antivirus
  5. Update VLC manually

VideoLAN’s VLC Media Player is the definition of a good media player. It covers so many audio and video formats, which makes it a go-to player whenever others fail. And it’s completely free, without overpriced features competition offers.

Playback issues are also quite rare, as it isn’t dependent on third-party codec packs.

However, there are some minor problems here and there. One of the reoccurring errors is the An error occurred while checking for updates error.

As you know, VLC will prompt you whenever a new version is available. On the other hand, you can check for updates manually under the Help section.

And that’s when the aforementioned error appears. We enlisted some viable solutions for the problem, so check them out below.

How to fix update errors on VLC

1: Check the connection

Let’s start by checking the connection. We need to be sure that your PC can connect to a dedicated server and check for available updates.

If the problem is general in nature and you can’t connect to the internet at all, we enlisted some steps which should help.

On the other hand, if the problem is isolated and VLC won’t update, continue with the steps below.

Here are some basic troubleshooting steps to resolve the problem:

  • Restart your PC and router.
  • Flush DNS.
  • Use a LAN cable.
  • Run Connection troubleshooter.

Limited internet connection? Fix the issue in no time with our detailed guide!


2: Allow VLC to communicate through Firewall

Another possible reason for update issues lies in Windows Firewall. Namely, if you haven’t allowed VLC to freely communicate through Windows Firewall, it won’t be able to connect to a dedicated server.

Thus, the client won’t be able to update. Therefore, make sure to allow VLC through the Firewall before moving to additional steps.

Follow these steps to allow VLC through Windows Firewall:

  1. In the Windows Search bar, type Allow and open “Allow an app through Windows Firewall“.vlc an error occurred while checking for updates
  2. Click “Change settings“.vlc an error occurred while checking for updates
  3. Locate VLC and check the “Private” box.vlc an error occurred while checking for updates
  4. If VLC Media Player isn’t on the list, click “Allow another app…” and add it. It should be in Program Files (Program Files x86), in the VideoLan folder.
  5. Confirm changes and try updating VLC again.

Check out this guide and learn how to open Firewall ports like a real technician!


3: Run VLC as admin

If some third-party application can’t execute certain features, it might be due to system limitations. Windows 10 as a platform isn’t exactly keen to allow third-party applications to download anything.

These permissions should be granted after the program is installed from a trusted source. However, seemingly, that’s not always the case.

So, what you’ll need to do to avoid possible system-imposed boundaries is to run VLC as an administrator. If you’re not sure how to set this permanently, follow these steps:

  1. Right-click on the VLC desktop shortcut and open Properties.
  2. Choose the Compatibility tab.
  3. Check the “Run this program as an administrator” box.vlc an error occurred while checking for updates
  4. Confirm changes.

4: Disable a third-party antivirus

Besides the Windows Firewall exclusion, there are also the security measures a third-party antivirus brings. If you’re using some of the advanced security suits, chances are that it comes with the dedicated Firewall.

These can, regardless of Windows Firewall settings, block some third-party apps from accessing the online content.

Now, you might as well whitelist the VLC Media Player, but disabling the Firewall temporarily (until the updates are administered) is a much better choice.

It won’t do you any harm if you disable antivirus completely for a limited time. Just don’t forget to re-enable it later on.


Choose the best antivirus tools from this fresh list to avoid any unpleasant surprise!


5: Update VLC manually

Finally, if none of the previous steps worked, we suggest trying the manual approach.

Namely, if you’re sure that there’s a new version of VLC Media Player and you can’t get it via the over-the-air update, there’s another way.

Just navigate to the official website and download the version which suits you best. VideoLAN even offers the UWP version of the player you can find in the Store. If that’s your cup of tea.

You can download the latest iteration of VLC Media Player, here. And if you’re keen to try out the UWP version from Microsoft Store, navigate here.

RELATED STORIES YOU SHOULD CHECK OUT:

[Update, Windows Timeline support too] Windows 10 Twitter PWA picks up ability to upload videos, see profile cards with hover

It’s been a while since the Twitter PWA was updated with significant new features, but that has just changed. Indeed, the app recently picked up both the ability to upload videos and also see a profile card with a hover.

Update: The Windows 10 Twitter PWA is also getting support for Windows Timeline. Now, when you view live events or moments, an entry will be created in Windows Timeline so you can return to it later to see updates.

To upload a video on the Twitter PWA, all you need to do is compose a tweet, then click the insert media icon on the left. You can then select your video file, and get a small preview of the video below the compose box. Interestingly, this preview video uses the same media player UI as Windows Phone 8.

Additionally, as the name of the second feature implies, you can now hover your mouse over the name of a profile to see a preview of the profile. The pop-up box will show you the bio, the number of followers, and the number of people the person is following.

Support for video uploads has been one of the most anticipated features for the Twitter PWA, but it does have a 15 MB limit at the moment. Anyway, you won’t need to download any updates for this to work, as all PWAs are updated automatically. Check it out now, and let us know in the comments below if it is working for you.

Twitter
Twitter
Developer:
Twitter Inc.
Price:
Free

Microsoft takes Store shopping cart feature offline, says it will return in the next few weeks

About three days ago, Microsoft started testing a shopping cart feature for the Xbox Store with select Insiders. And with the store being universal across all of Microsoft’s platforms, the shopping cart even showed up on Windows 10. Well, Microsoft’s Brad Rossetti just announced today that the feature is now going offline, and will return in the next few weeks.

Though the feature went down quickly, Rossetti notes that it is being taken down for “fixes and improvements” sent in by Xbox Insiders. That’s actually all for the good, as even we had noted that the cart’s “Save for later” feature on Windows 10 didn’t show up on all store listings.

At any rate, we’re looking forward to the next instance of the shopping cart feature. You may recall that Microsoft also recently removed Sets on Windows 10, so this isn’t the first time an under development feature was pulled early. Anyway, Xbox Insiders are known to give good feedback, and Microsoft’s decision to pull the shopping cart feature only helps ensure a quality experience for everyone once it rolls out to the general public.

How do I turn off visual effects on Windows 10, 8.1?


How do I turn off Windows animation?

  1. Change Performance settings
  2. Use Ease of Access options

How do I stop Windows animations? That’s a question that many Windows users have in mind. For those of you who have Windows 10, Windows 8.1 and you want to disable the animation feature, this can be done very easy. Animations are nice to have around when you let your kids play at the computer, for example. If you want to do some real work, the animations on Windows 10, Windows 8.1 can be quite distracting. Actually, it might take you longer to finish your work than you want.

Animations on Windows 10, Windows 8.1 basically make your operating system more colorful by adding a few extra features to the system. However, for a user that wants to keep the Windows 10, Windows 8.1 PC just for working purposes, it isn’t very useful. Animations increase your operating system’s response time. We will see exactly how to disable user interface animation on Windows 10, Windows 8.1 in a couple of steps below .

Steps disable UI animations for Windows 10, 8.1

Change Performance settings

  1. Move the mouse over the right side of the screen.
  2. Click (left click ) in the search box right under Apps under the Search menu.
  3. Type in there “Computer”
  4. Click (right click) on the Computer icon that appeared on the left of the screen.
  5. Click (left click) on “Properties” in the lower side of the screen.
  6. Click (left click) on “Advanced system settings” situated on the right in the window “System”advanced system settings windows 10
  7. Under the “Performance” section in the Window we need to click(left click) on the “Settings…”performance settings windows
  8. Now a window “Performance Options” pop-ed up, click (left click) on “Visual effects “tab situated on the upper side of this window.
    • Note: On Windows 10, you can quickly access the Performance Options window by typing ‘performance’ in the Search menu. Then double-click on ‘Adjust the appearance and performance of Windows’ to access performance settings.Adjust appearance performance Windows PC
  9. Click (left click) on “Custom:” in that window.
  10. From here, if we want to disable the animations, we only need to uncheck the ones we don’t want from the left of the name.
    Example:”Animate controls and elements inside windows”, “Animate Windows when minimizing and maximizing” or “Animations in the taskbar” are just a few animations we can disable from this menu.disable windows 10 animation effects
  11. Click(left click) on “Apply” situated on the lower right side of the “Performance Options” window.
  12. Click (left click) on “OK” situated on the lower left side if the “Performance Options” window.

Use Ease of Access options

Furthermore, in order to turn off Windows 10 animations, you can also use the Ease of Access option from Control Panel.

  1. Go to the Ease of Access Center > click on ‘Optimize visual display’optimize visual display windows 10 control panel
  2. Check the box ‘Turn off all unnecessary animations (when possible)’ > restart your computer.

turn off ll unnecessary animations windows 10

Keep in mind that if you disable these animations, it will not only help with the work you are trying to do on your Windows 10, Windows 8.1 PC but it will also improve the performance of the operating system.

So, these are the steps you need to do in order to disable UI animations on Windows 10, Windows 8.1 .Don’t hesitate to write to us below for any extra opinions on this matter and what we could do to make your experience on Windows 10, Windows 8.1 better.

RELATED STORIES TO CHECK OUT:


OneCast iOS app lets you stream Xbox One games to iPhones

Game streaming enables players to stream games from consoles so they can play them on alternative devices. Microsoft announced at E3 that its building a game-streaming service so that players can stream to a range of devices. However, you don’t have to wait for Microsoft to establish its game-streaming network to stream Xbox games to iPhones. You can now stream Xbox One games to iOS devices with the new OneCast app.

The developer Owen Stanley first released OneCast for the macOS earlier in 2018. Now the publisher has extended OneCast to iOS platforms. Thus, you can utilize the app to stream Xbox One games to some Apple iPhone, iPad and Mac devices. The new app is retailing at $11.99 at iTunes, and the Mac app is available for $20.

The new iOS app can stream Xbox One games to iPhones and iPads at a FHD 1080p resolution. Users can set up multiple profiles so that they can utilize alternative Xbox One consoles if required. The app also provides various control modes, which include a built-in virtual controller.

How to stream Xbox games to iPhone

Note that you’ll need an iOS 10 mobile or higher to stream games to iPhones. Users need to sign in to OneCast with an Xbox Live gamertag. The gamertag will register your Xbox One for the app so you can stream games. You’ll also need to have your Xbox One and iOS device connected to the same network.

OneCast is the first app to bring Xbox games to Apple platforms, but not the first to provide Xbox One streaming. The Xbox app enables players to stream Xbox One games to Windows 10. However, the release of the OneCast iOS app further highlights that game streaming is expanding. Microsoft and EA have also confirmed that their upcoming game-streaming networks will stream games to mobile devices.

For further OneCast details, check out the app’s website. There you can click Download for Mac to add the app to Apple desktop. You can get the iOS OneCast app from this iTunes page.

How to Enable a Startup Sound on Windows 10

Windows 10 removed the startup sound, and many users miss it. In fact, many want to enable startup sound on Windows 10.

We already wrote how to enable system sound on your PC, but in today’s guide, we’re going to focus solely on the startup sound.

Why doesn’t Windows have a startup sound anymore?

  • The startup sound was removed in Windows 8.
  • According to the developers, Microsoft wanted to focus more on portable devices.
  • Having a startup sound would add a bit more noise to the device every time you boot it, so it was removed.

How do I turn on startup sounds in Windows 10?

1. Tweak your registry

  1. Press and hold the Windows button and the R button.
  2. The Run dialog box will open, type in the box regedit and press Enter on the keyboard.
  3. Click (left click) on HKEY_CURRENT_USER on the left of the window.
  4. Under HKEY_CURRENT_USER click (left click) on AppEvents.eventlabels registry editor windows 10
  5. Under AppEvents, click (left click) on EventLabels.
  6. Under EventLabels, you will have access to several options related to sound on Windows 10.
  7. Look Under EventLabels and find WindowsLogon and click (left click) on it.
  8. On the right side pane, look for ExcludeFromCPLwindows logon sound
  9. Double-click (left click) on ExcludeFromCPL and change the value in the box to 0.excludefromCPL windows registry
  10. You can do the same to enable other sounds specific for Windows 8, Windows 10.
  11. Close the Registry Editor window.
  12. Now, all you have to do is to open in Control Panel the Sound Application you have there and you will be able to customize Windows logon sound.
  13. Restart your  Windows 10, 8.1 PC and see if the startup sound works for you.

2. Enable startup sound from Personalization settings

  1. Right-click on your desktop and go to Personalizepersonalize windows 10 right-click desktop
  2. Navigate to Sounds and locate Play Windows Startup sound.play windows startup sound
  3. You can enable Windows Startup sound by checking the Play Windows Startup sound option. You can also customize the startup sound and choose the one that you like.
  4. Click on Apply on the lower side of the window.
  5. Restart the PC and check if the sound works.

There you have it. You can now enable startup sound on Windows 10 PCs in just a few quick steps.

To learn more, we have a great guide on how to change startup or shutdown sounds on Windows 10, so be sure to read it.

If you have other ideas or suggestions, let us know in the comments below.

Fix: CD ROM Missing in Windows 10/11


How can I fix CD ROM drive issues?

  1. Fix missing CD ROM drive using Command Prompt
  2. Run the Hardware and Device troubleshooter
  3. Uninstall CD/DVD ROM drivers
  4. einstall IDE ATA/ ATAPI Controllers

how to detect cd rom in Windows 8

After upgrading from Windows XP or Windows 7 to Windows 10, you might encounter difficulties regarding the CD ROM drive. Usually, the CD ROM is not broken in this case, but the Windows 10 or 11 operating system fails to detect it.

If the CD ROM drive is missing from your Explorer, then it will not recognize it if you try to insert a CD. In this case, you must see if you can detect the CD ROM drive from your PC’s BIOS.

If you can, then follow the instructions below or a detailed explanation on how to fix your CD ROM issues on Windows 10 operating systems.

How to fix CD ROM drive issues on Windows 10?

1. Fix the missing CD ROM drive using Command Prompt

  1. Move the mouse cursor to the left corner of your screen.
  2. Click (right click) on the Start menu.
  3. We will need to run “Command Prompt as Administrator”.
  4. Type in the start menu “cmd” and then press and hold the buttons “Ctrl”, “Shift,” and “Enter” (this will run the command prompt as administrator).
  5. In the command prompt window, you need to type the following command: reg.exe add “HKLMSystemCurrentControlSetServicesatapiController0” /f /v EnumDevice1 /t REG_DWORD /d 0x00000001
  6. After you typed the command exactly as shown above, press “Enter” on the keyboard.
  7. Restart your Windows 10 PC.
  8. Go back to Explorer and see if you CD ROM is showing correctly.

2. Run the Hardware and Device troubleshooter

  1. Press and hold the button “Window” and the button “R”.
  2. Type in the window that pops up “Control Panel”
  3. Now in The search box presented in “Control Panel” type “Troubleshooting”
  4. Click (left click) on “Hardware and Sound” in the troubleshooter window.
  5. Click (left click) on “Hardware and Devices”.hardware and devices troubleshooter control panel
  6. Let Windows 10, 8.1 finish the check.
  7. Restart the PC and check if your CD ROM drive shows up in Explorer.

On Windows 10, you can launch the Hardware and Devices Troubleshooter from the Settings page, as shown in the screenshot below.

Hardware and Devices troubleshooter

The CD drive may also be corrupted and throw the CDrom.sys error, so this check should address these issues.

3. Uninstall CD/DVD ROM drivers

  1. Press and hold the buttons “Windows” and “R”.
  2. Type in the window that shows up “devmgmt.msc”
  3. Go to the CD/DVD ROM drivers on the left and expand it
  4. Click (left click) on the drivers.
  5. Click (left click) on “Properties”
  6. Click (left click) the tab that says “Uninstall”uninstall cd rom driver
  7. Click (left click) on “OK”
  8. Download from the Manufacturers website the driver for your CD ROM.
  9. After you download the driver, click (right click) on the executable file of that driver.
  10. Click (left click) on “Properties” and go to the tab that says “Compatibility”
  11. Click the checkbox next to “Run this program in Compatibility mode” and select Windows 7.
  12. Click (left click) on “OK” and then try to install this program but running it by “Run as administrator” option.

4. Reinstall IDE ATA/ ATAPI Controllers

If the issue persists, try uninstalling ATA/ ATAPI drivers. You’ll then reinstall them and check if this workaround solves your problem.

  1. Go to the DVD/CD-ROM drives and IDE ATA/ATAPI controller drive in Device Manager
  2. Right-click on each drive listed under IDE ATA/ATAPI controllers> select Uninstalluninstall ATA ATAPI controller driver
  3. Go to Action > Scan for hardware changes
  4. Restart your computer to reinstall ATA/ ATAPI drivers.

You can use these options to fix your CD ROM-detecting issues. If you have any questions on this subject, let us know in the comments below. Which of the solutions listed above help you fix the problem?

How to Downgrade From Windows 10, 8.1 to Windows 7


Revert to Windows 7 from Windows 10


In this guide, we are going to show you exactly how you can downgrade your system from Windows 10, Windows 8.1 to Windows 7operating system.

The reasons as to why users might want to downgrade vary quite a lot. I think that in most cases, people just didn’t get used to the new Windows 10, 8.1 interface.

Most likely, some of the apps they used frequently on Windows 7 are no longer supported on Windows 8.1 or Windows 10.

What you need to keep in mind if you want to downgrade from Windows 10 to Windows 7 is the fact that Microsoft doesn’t support downgrading. The company wants all its users to run the latest version of Windows.

Also, it will only be possible to downgrade from Windows 10, 8.1 Pro edition to Windows 7 Professional or Windows Vista Business.


Keep your Windows 7 forever! Learn how by reading our comprehensive guide!


Steps to go back to Windows 7

Use your Windows 7 install disk

  1. First of all, we need a preconfigured disk with Windows 7 Premium on it. If you don’t have one already, you can call the shop from where you bought the PC from and ask them if they have a Windows 7 Premium CD or preconfigured disk.
  2. You will need to order the disk or download it from the internet as an ISO image and burn the CD yourself.
  3. The next step, you  need to take is to open the Device Manager by pressing and holding the “Window” button and the “X” button.
  4. In theDevice manager, expand all the devices you have there. You will need to make a print screen of the devices or just write them down, the most important ones are basically the “display adapter”, “network adapter” and the “Pointing device”(if it is not a mouse).device manager
  5. After you wrote them down, go on the manufacturer website of each device and download the drivers necessary for Windows 7. After you downloaded them, you cannot keep them on the PC. Instead, copy them to a USB stick or a CD.
    Note: Do not copy the drivers to the Windows 7 CD.
  6. Make a list of all the apps you have on the PC to be sure to install them after you get your Windows 7 up and running
    Note: Apps downloaded from the Windows Store will not work on Windows 7, unfortunately.
  7. Be sure to back up all you personal data you will need like emails, movies, music on a USB thumb drive or an external hard drive.
  8. After you backed up all your data, you can now proceed with the Windows 7 installer disk.
  9. Reboot the PC and place the Windows 7 disk in the PC.
  10. It might ask you to boot from Windows 7, in this case select Windows 7.
  11. The Windows 7 Premium Installer will prompt you for the partition where to begin installation and of course to format the partition.
  12. During the installation of Windows 7 premium, it will reboot one time and then it should finish the installation.
  13. You will need to install the devices you have written down above and saved to your USB as well as the personal data and apps you had on Windows 10, 8.1.

Return to Windows 7 using the Settings page

If you installed Windows 10, 8.1 using Windows Update, you can quickly go back to Windows 7 by using the Recovery option from the Settings page. Here are the steps to follow:

  1. Go to Settings > Update & security
  2. Select Recovery > Go back to Windows 7
  3. Hit the Get started button > wait until your computer has reverted to an older version

Uninstall the Windows 10 Downloader

Now that you finally uninstalled Windows 10 and reverted to Windows 7, Microsoft is going to constantly suggest you should upgrade your system.

If you want to get rid of these annoying suggestions, you need to remove the Windows 10 downloader. For more information and the steps to follow, check out this guide.


Are Windows 7 updates still available? Find out more information about your favorite operating system from here!


This is how you can downgrade from your Windows 10 or Windows 8.1 computer to Windows 7 Premium. Make sure you have backed up your data as you will definitely need it for Windows 7.

For any additional ideas on downgrading to Windows 7 Premium, let us know in the comments below. We will see what we can do to help you further.

RELATED STORIES TO CHECK OUT: