How to remove Startup Programs in Windows 10 [Full Guide]

Does it take a long time to start up your operating system? Maybe the boot process is lengthy because there are many applications that load at startup.

There are different tools to manage startup apps. It can be done via the Startup Manager, Task Manager, Explorer, or Registry editor. Below, you can find a few methods that will guide you through the process of adding or removing the startup apps.

You can, also, learn how to enable or disable different apps.
startup app

How to manage Startup Programs in Windows 10

    How to remove Startup Programs in Windows 10

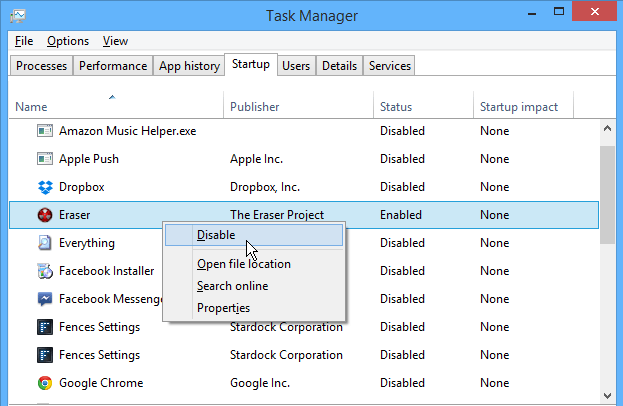
    You can easily remove startup programs in Windows 10 by using the built-in Startup Manager tool. This tool allows you to configure which programs and apps you want your PC to start upon booting. You can either enable or disable them in just a few clicks.

  1. 1. Press the key combination Win + R  and enter the following command: taskmgr /0 /startup. This will open the Startup tab.

  2. 2. In the Startup tab, you can observe a list of applications that are starting when your PC boots.

  3. 3. Disable startup application: Right-click on the application you want and select from the menu the Disable feature. The application will no longer start with the OS.

  4. 4. Enable startup application: Right-click on the application you want and select from the menu the Enable feature. In this case, the application will start with the OS.

Use the File Explorer

  1. Press the Win + R key combination.
  2. Enter the following command: shell:Startup, and press the Enter key.
    Note: If you want to add or remove startup apps for all users, you need to enter the following command: shell: Common Startup.
  3. A Startup window will open. Find the application executable file that needs to load when Windows boots.
  4. Create a shortcut of this app. Copy it and paste it in the Startup window. This is the way for adding a startup application in Windows 10.
  5. To remove the application, delete the shortcut from the Startup folder.

Use the registry

  1. Press the Win + R key combination.
  2. Enter the following command: regedit without quotes and press the Enter key.
  3. Navigate to the following path or register key:
    HKEY_CURRENT_USERSoftwareMicrosoftWindowsCurrentVersionRun
  4. In the name column, you can find the application that starts automatically, when Windows boots.
  5. Remove the application from the Startup:
    • Right-click on the application name and choose Delete feature.
  6. Adding the application in the Startup:
    • Right-click in the Registry Editor window and select New -> String value feature.
    • Add value name (the name of the application).
    • Add value data: enter the full path to the executable (*.exe) of the application that you wish to run at the startup.

Looking for the Windows 10 Startup Folder? Check out this amazing guide that will point you to its location in no time.


Use the Group Policy Editor

If you want to add applications to startup, you can do so using Group Policy Editor. We have to mention that this tool isn’t available in Home versions of Windows, but if you’re using Pro or Enterprise version, this tool should be available for you.

To add an application to startup using Group Policy Editor, do the following:

  1. Press Windows Key + R and enter gpedit.msc. Press Enter or click OK.
  2. When Group Policy Editor opens, in the left pane navigate to User Configuration > Windows Settings > Scripts (Logon/Logoff). Now in the right pane double click on Logon.
  3. Logon Properties window will appear. Click on the Add button.
  4. When Add a script window opens, click on the Browse button.
  5. Select the application you want to start. After doing that, click on OK.
  6. Now click on Apply and OK to save changes. After saving the changes, restart your PC and check if the application starts automatically with Windows.

This is a simple method, but in order to use it, you need to have Pro or Enterprise version of Windows. If you’re a Home user, you’ll have to look for a different solution.

Use the Task Scheduler

Windows comes with a useful tool called Task Scheduler. Using this tool you can set certain applications to start at a specific time, but you can also use it to add applications to startup.

The tool is relatively simple to use, and you can create startup applications by following these steps:

  1. Press Windows Key + R and enter taskschd.msc. Press Enter or click OK.
  2. When Task Scheduler starts, in the right pane click on Create Task.
  3. Create Task window will appear. Enter the name of your task and check Run with highest privileges option. In the Configure for field choose Windows 10.
  4. Go to the Triggers tab and click on the New button.
  5. When the New Trigger window opens, set Begin the task to At log on. If you want, you can set this task to run only for a specific user or for all users on the PC. If needed, you can even delay and repeat the task. After choosing your settings, click on OK.
  6. Navigate to the Actions tab and click on New.
  7. Set Action to Start a program and click on the Browse button.
  8. Choose the desired application and click on OK.
  9. Click OK again to save your task.

After doing that, the desired application will start automatically every time with Windows. Task Scheduler is a powerful tool and it allows you to configure your tasks any way you want.

This method is perfect for advanced users who want to have full control over their tasks and startup applications. Even if you’re a basic user, you should be able to add applications to startup by using this solution.

Use dedicated tools to manage Startup programs

If previous solutions seem a bit complicated for you, you might need something more user-friendly. Not long ago we covered the best apps to manage startup items, and while most of these apps allow you to disable or remove startup items, some of them have the ability to add new apps to the startup.

Most of these applications are free and relatively simple to use, so we strongly suggest that you check them out if you’re looking for a user-friendly way to add startup items.

Check programs’ configuration

The simplest way to add a program to startup (or remove startup programs) is to check its configuration. Most applications can start automatically with Windows, and in order to do that, you just have to check their settings.

Now you just have to find start with Windows or similar option and check it. After doing that, the application will automatically start as soon as Windows starts.

As you can see, this is a simple method but it requires you to check and change individual settings for all applications that you want to add to startup.

Keep in mind that some applications don’t even support the startup option, so this method won’t work for them.

Many of these tips can be applied if you want to disable startup programs on Windows 7, so don’t hesitate to try them.

There you go, some quick and simple methods that will allow you to manage the startup apps. How do you handle startup apps? Share your experience with us by leaving a comment below.

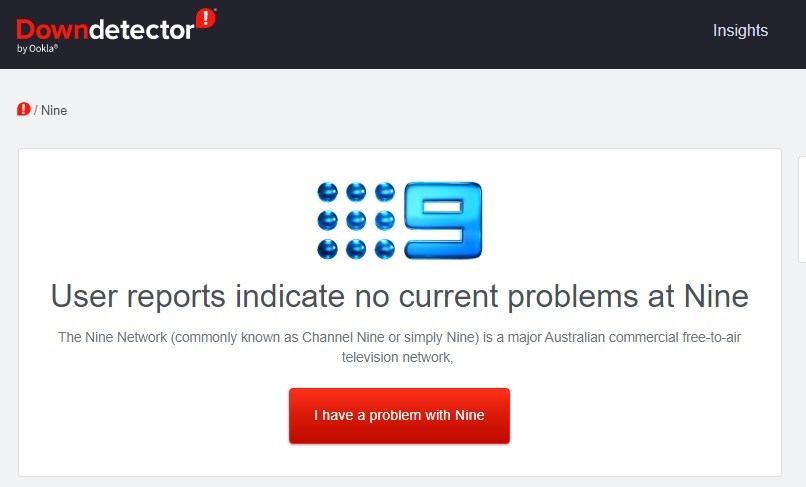
3 Ways to Fix 9Now if it Keeps Logging You Out

9Now is an on-demand, catch-up TV service in Australia. On 9Now, you can watch Channel 9, 9Gem, 9Go!, 9Life, and 9Rush, along with live news via 9news.com.au.

You can stream 9Now on your mobile, tablet, TV, computer, or any device. Notably, all you need to do is create an account on 9Now, and you are all set for streaming.

The best part about watching content on 9Now is that it is completely free of charge. Apart from live TV, you can watch TV shows and other exclusive content from Nine’s TV channels.

While watching free content is a breeze at 9Now, there are several user reports that have claimed to face 9Now keeps logging out issue. This could be pretty frustrating because it prevents you from watching content with no hassle.

Thankfully, in this guide, we have listed some effective solutions that will help you to fix the 9 Now keeps logging out issue, and get back to streaming. Let us check out the guide.

Why does 9Now keep dropping out?

It has been found out that there isn’t one specific reason why you may come across 9 Now logging you out of the problem.

After going through the internet, we found out that the following are some of the most common causes that could trigger the 9 Now logging you out the issue:

  • Your internet connection is faulty
  • Check 9Now server status
  • Check your browser settings

Now that you are aware of the common causes that could trigger the problem for you, let us go through the solutions that will help you resolve the 9 Now keeps logging you out the problem.

How do I fix 9Now if it keeps logging out?

1. Check 9Now servers

It is very important that 9Now servers are up and stable. If because of any issues, 9Now servers are down, you will come across not only this but different problems when accessing 9Now.

In order to get rid of this doubt, you can make use of websites such as Downdetector to keep a check on the server status of 9Now. Moreover, you can also check 9Now’s official Twitter handle in order to keep yourself up to date about any issue announcements.

2. Check your internet

A stable internet connection is crucial for 9Now to work without any hiccups. You can check in with websites such as Fast or Speedtest to know the actual condition of your internet connection.

If you see any issues with your internet, then you can first try rebooting your router. In case that doesn’t help, then you should get in touch with your ISP and get the issue resolved. Once everything is set check if you are still coming across the 9Now keeps logging out issue or not.

3. Tweak your browser settings

  1. Open Google Chrome.
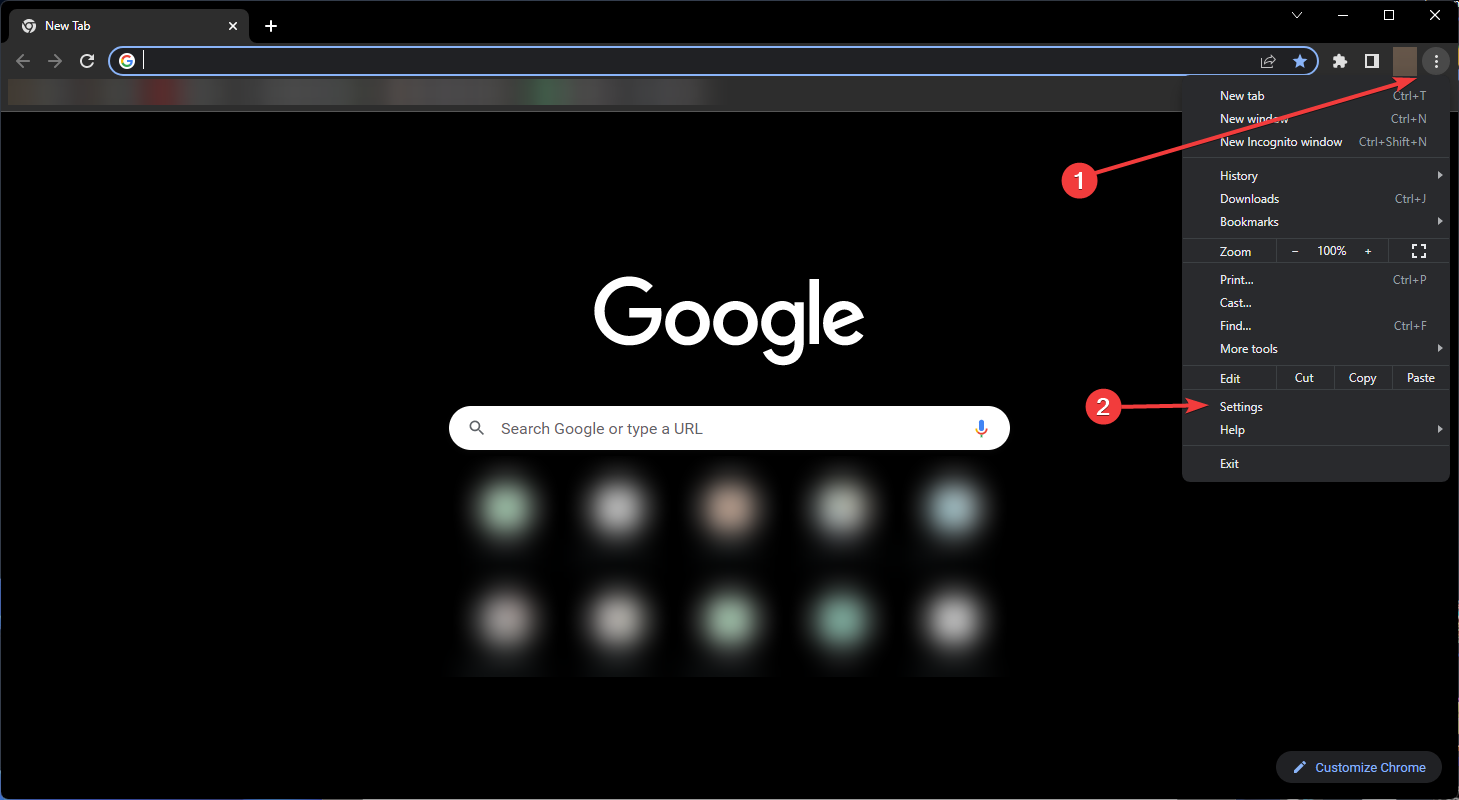
  2. Tap on the 3-dot icon.
  3. Select Settings.settings of google chrome
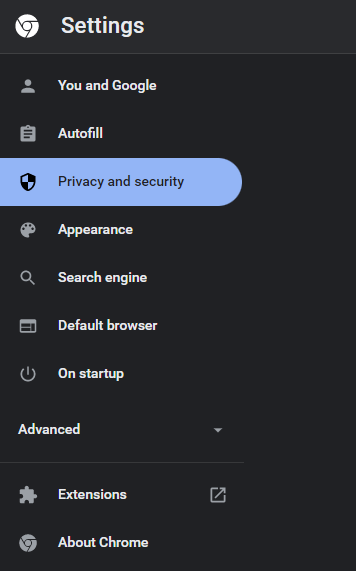
  4. From the left pane, click on Privacy & security.
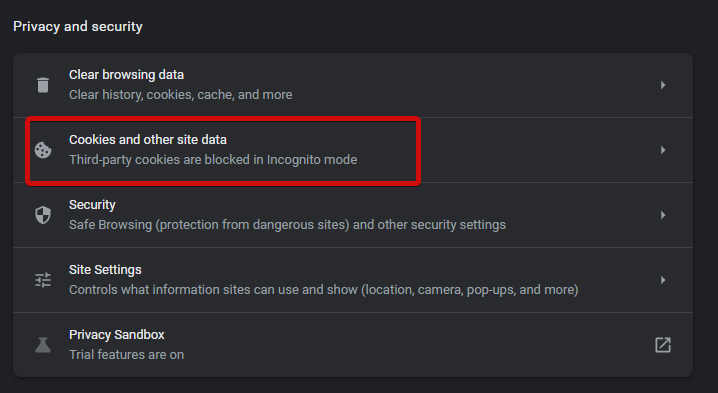
  5. Then select Cookies and other site data.
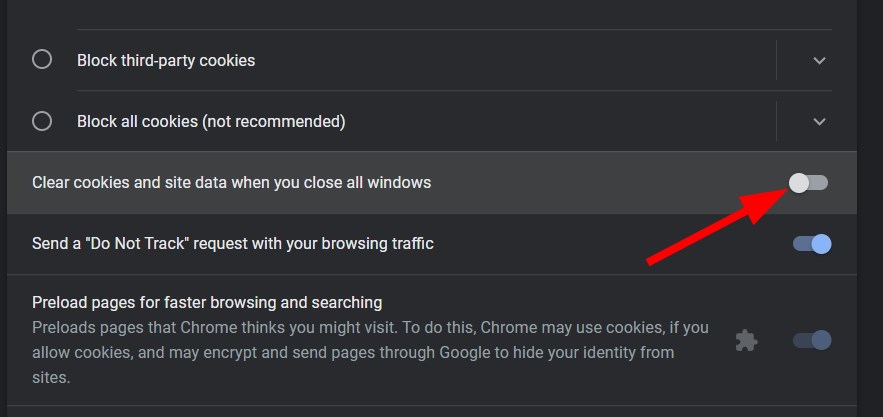
  6. Scroll down and toggle off Clear cookies and site data when you close all windows option.

Cookies and cache data are stored in your PC which contains your personal settings for a website. When you clear them, you also clear your personalized settings.

This could be one of the reasons why 9 Now is logging you out from time to time when you are watching content or using the 9Now website.

Try following the above steps and toggling off the clear cookies and site data option when you close all windows and check if this resolves the issue or not. Clearing the data will also help with 9Now Error Code P2.

4. Switch to the app (Bonus tip)

If you are still experiencing issues with the 9Now website and it is asking you to log in again and again, then we would suggest you either switch over to another browser or for the time being, use the 9Now app on your Android or iOS device.

Well, the above solutions should surely help you fix the 9Now keeps logging out problem. If you applied a different solution to resolve the issue, feel free to let us know in the comments below.

Posted in Fix

Opera GX vs Chrome: Which Is Better for RAM Usage, Speed & Privacy

Google Chrome is still one of the most popular web browsers across platforms. Using the Chromium open-source engine and abundant extensions, Chrome is a preferred choice for new and experienced users.

However, due to the concern related to privacy issues, Chrome alternatives are coming fast. One of the popular Chrome alternatives is Opera GX.

A browser based on the open-source Chromium project targets power users and gamers. If you want more in-depth information about this topic, explore our Opera GX Review.

While both browsers share the same core, Opera GX offers more customization and privacy features. Free VPN, ad blocker, and Flow are some of the additional features provided by the Chrome alternative.

That said, is it the right time to switch to Opera GX? We compared both browsers in different categories, including performance, features, design, security, and more, to find the best browser among the two.

Is Opera GX better than Chrome?

A few elements need to be considered to answer this question, like how you want to use your browser and what you expect from it.

If you’re a gamer, Opera GX has some excellent gaming-related features that can come in handy, while Chrome enables you to expand its functionality by adding extensions.

We will break down all elements of comparison between these two capable browsers in the lower section in this guide, so make sure to read all the presented information.

⇒ Get Opera GX

Opera GX vs. Google Chrome: which one should you choose?

➡ UI & Design 

Opera GX vs Chrome

In terms of design and user interface, both browsers are miles apart. While Chrome features the traditional Chromium-based design language, Opera GX offers in-your-face design elements.

Opera GX features a gaming-inspired theme with Razer Chroma integration built into the browser. With dark themes and bright colors, GX can complement any gaming rig with RGBs.

The Chroma integration works beautifully with any of your Razer Chroma-enabled accessories. In addition, users can further customize the GX browser using the Easy Setup tab.

You can choose one of the few pre-selected colors and set it as the browser’s highlight. Opera also offers customizable wallpapers; however, the wallpaper feature is available on the Chrome browser.

Launching the GX browser, you will find shortcuts to popular social media and streaming services such as Twitch, Discord, Reddit, and YouTube.

You can add more sites if you want to. There’s also quick information on your city’s weather and a shortcut to take a snapshot.

Both browsers use similar icons for essential functions, but the gaming browser has much more on the sidebar. We will talk about it later in the article.

Click on the controller icon on the top-left side, and Opera GX will show game deals, upcoming releases, and tournaments.

➡ Performance 

Opera GX vs Chrome

When comparing the Opera gaming browser vs. Chrome, we see they are both based on the same core, so there is no surprise that both are fast browsers. Granted that Chrome is slightly better in the Jetstream benchmark, it’s hard to notice the difference in day-to-day usage.

Opera GX does have a significant advantage over Chrome: resource usage. Chrome is known for being a memory hog.

Opera GX vs. Chrome RAM usage

BrowserRAM UsageTest conditions
Opera GX740 MB5 tabs open
Chrome1263 MB5 tabs open

Opera’s browser is not only more efficient when it comes to memory usage, but it also comes with built-in resource management tools.

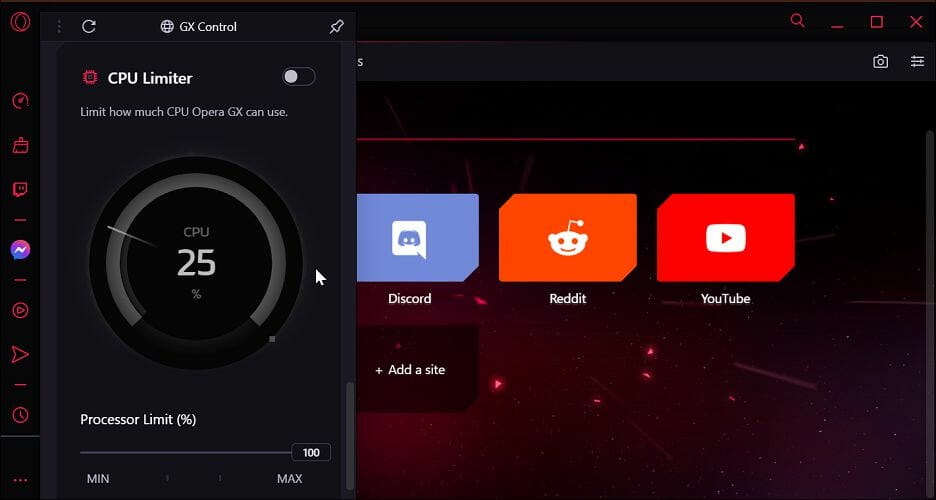
The GX Control feature that includes a RAM and CPU limiter is among the most interesting. Click the GX control button to access the CPU and RAM limiter options.

Opera GX vs Google Chrome

Using GX control, you can force the browser to use only a fraction of your system’s memory and limit CPU usage to only 10%.

This may slow down the browser but is helpful if you want to allocate more resources to your games. Several gamers tend to keep their browsers open when gaming and GX control should help you better allocate your resources.

If you are bothered about Chrome eating up your memory resource, the GX browser offers better control and is a winner in this segment.

Opera GX vs. Chrome speed tests

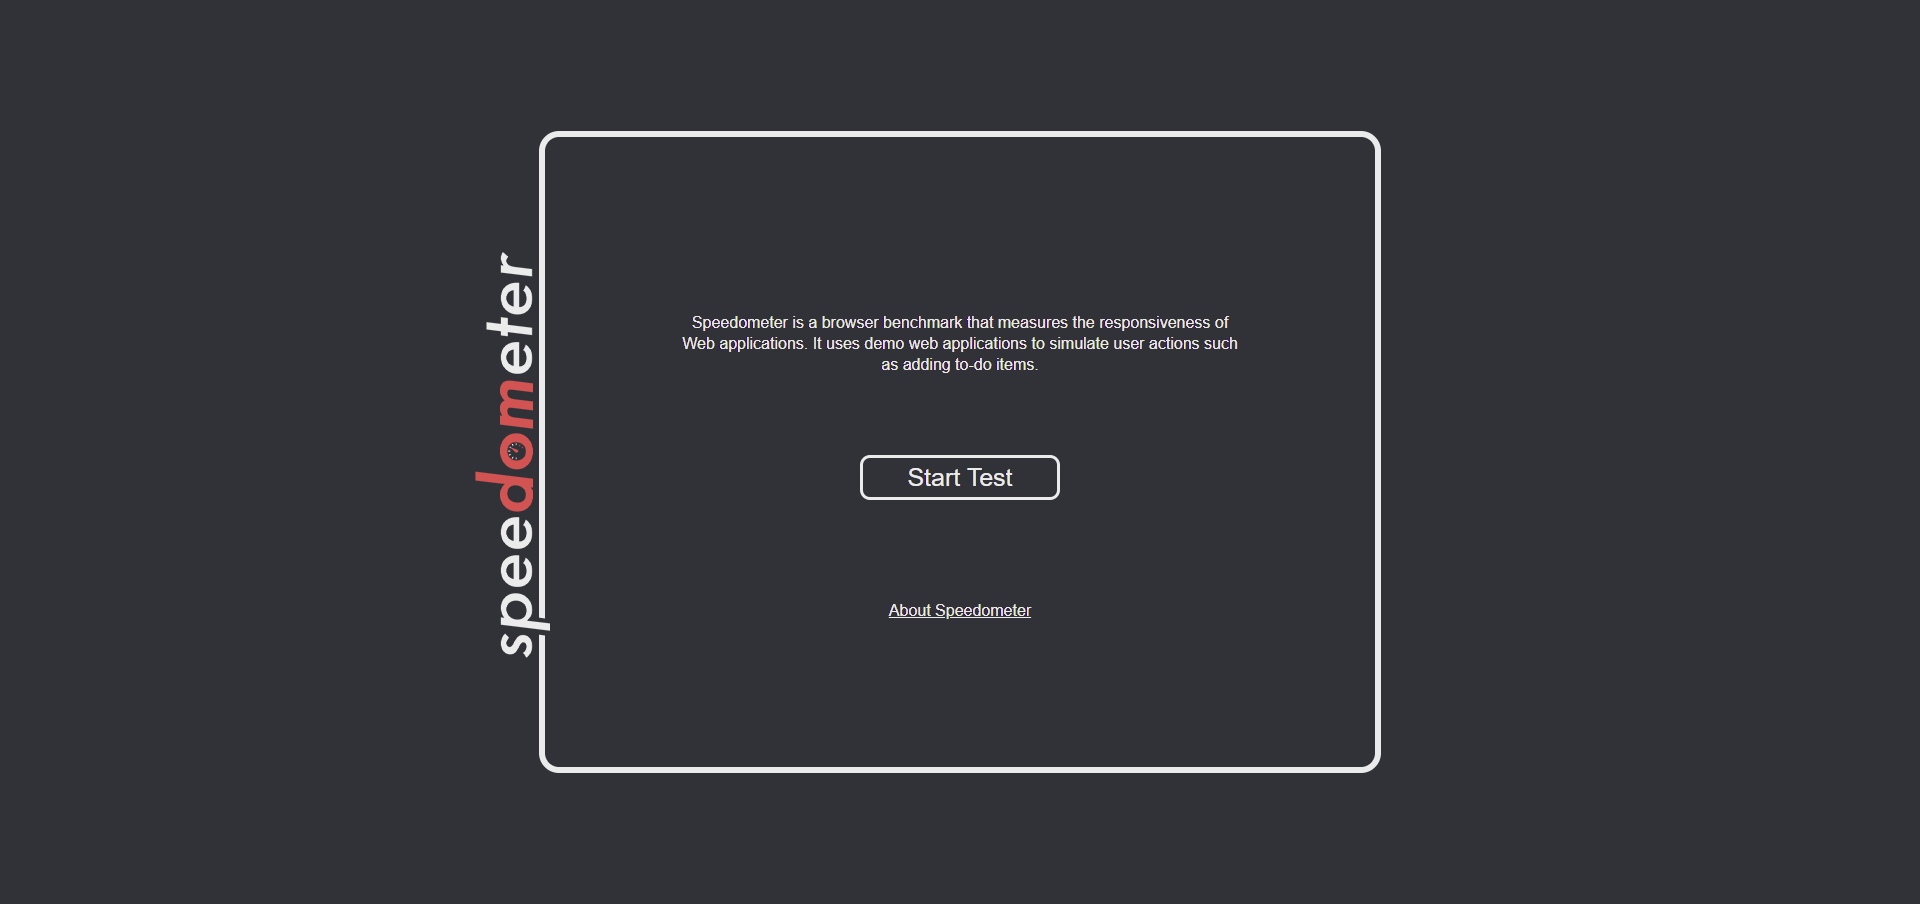
Our team of experts has used the BrowserBench online platform and the Speedometer 2.0 benchmark test to get exact results for the speed tests.

This benchmark tests the browser by simulating various quick tasks that the browser needs to deal with and thus can measure the number of runs performed in a minute of testing.

A greater number in the test results signifies better speed and performance.

BrowserSpeed test resultsConditions
Opera GX130 runs/minuteSpeedometer 2.0 test without any other tabs open
Chrome126 runs/minuteSpeedometer 2.0 test without any other tabs open

As you can see from the table above, Opera GX could run 130 actions in a minute, while Chrome only reached 126 runs simultaneously.

Even though the difference is not very large, the answer to the question Is Opera GX faster than Chrome is a resounding: Yes.

Opera GX vs. Chrome performance tests

To test the performance of both these browsers, our team of testers has used the Jetstream 2 and the MotionMark benchmarks:

BrowserJetstream 2 scoreMotionMark scoreCPU usage
Opera GX161.531586.141 – 2.3 %
Chrome152.992649.061.1 – 2.9 %

As you can see from the information presented above, even though Chrome is a good browser with loads of extensions and speedy browsing, Opera GX still comes out on top.

The benchmark results support our suggestion, as the JetStream 2 and MotionMark tests have shown better results for Opera.

Choosing the Opera browser will ensure that your work and home life can be entirely separated by using the Workspaces feature and have easy access to your social media accounts, messenger, a music player, and even a built-in VPN service.

Based on these ideas, we recommend Opera instead of Chrome, but the correct answer for your circumstances will come down to your decision based on the information you’ve read.

➡ Features 

Opera GX vs Chrome

Switching from Chrome to the Opera GX browser is easy enough. Install the browser, and you are greeted with an option to import all your browser data automatically.

This is a standard practice among modern browsers but a nice feature nonetheless. Finally, moving to the extension bits, Chrome has the best extension available for the browser, thanks to the Chrome Store.

That does not mean Opera GX lags when it comes to extension availability. You can install extensions from the Opera add-on page and Chrome extensions from the Chrome web store. Almost all the Chrome extensions we installed on Opera GX worked without issues.

Opera GX offers some features that Chrome does not—beginning with the built-in Snapshot feature. Click the camera icon, and then you can capture the entire screen or a selected area.

That’s not it; you can edit and annotate captured screenshots with text, emojis, markings, blur text, and even add a selfie to the screenshot.

Opera GX vs Google Chrome

Besides the snapshot icon resides the Privacy button. Clicking on it will bring up the ad and tracker blocker features.

The built-in adblocker feature is a boon as you don’t have to install third-party ad blocker extensions to eliminate annoying in-page and pop-up video ads.

Enabling the Block Tracker option will prevent the websites from tracking the users across the Internet.

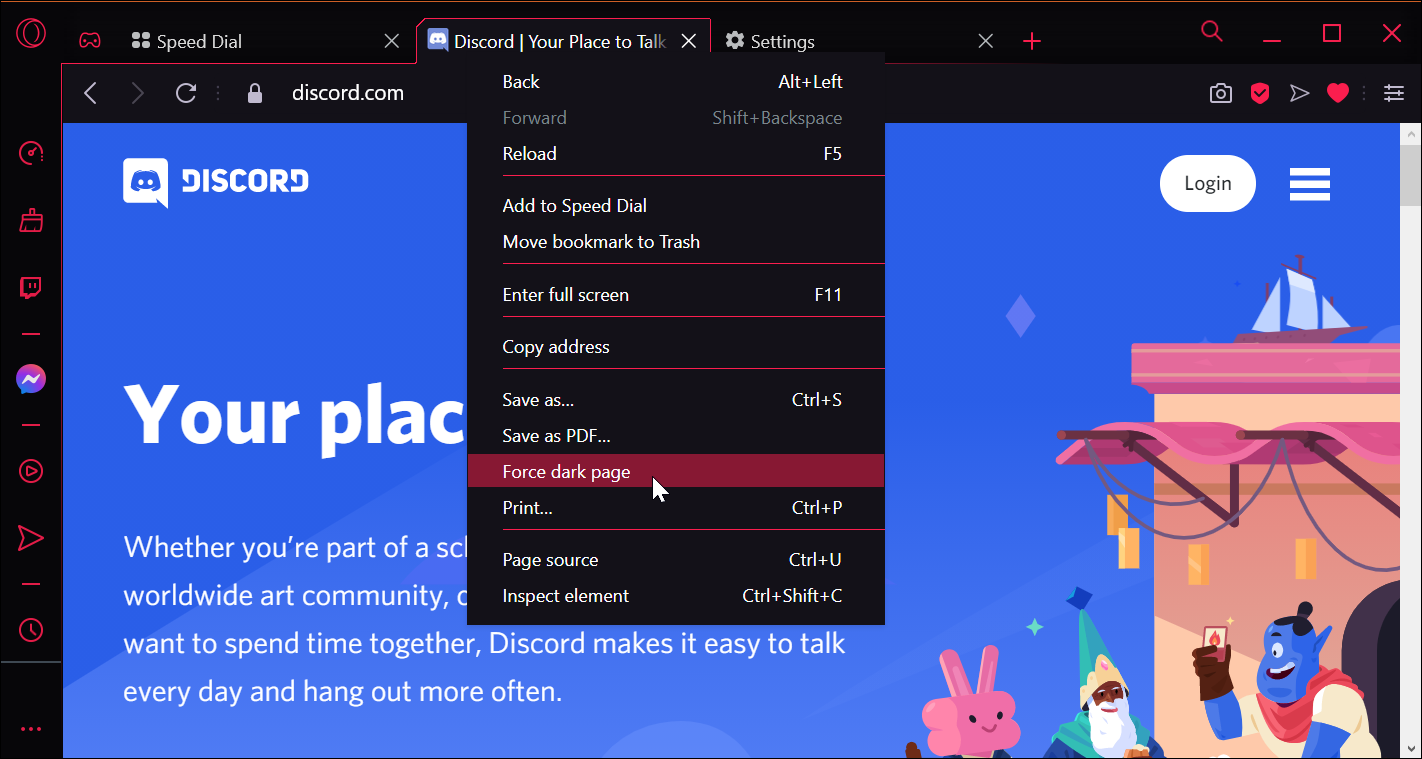
Enter the Dark Mode. Yes, Chrome doesn’t have this feature. Unfortunately, Google’s browser does not support third-party websites’ full Dark Mode feature. There are some extensions, but they are unreliable.

Opera GX does this job to perfection. Right-click on any open web page and choose the Force Dark Page option, and Oprea will enable the dark mode for the specific web page. This is an excellent and essential feature that all web browsers should adopt.

There are a few more unique GX features that you will not find in Google Chrome. We have discussed them in detail below. 

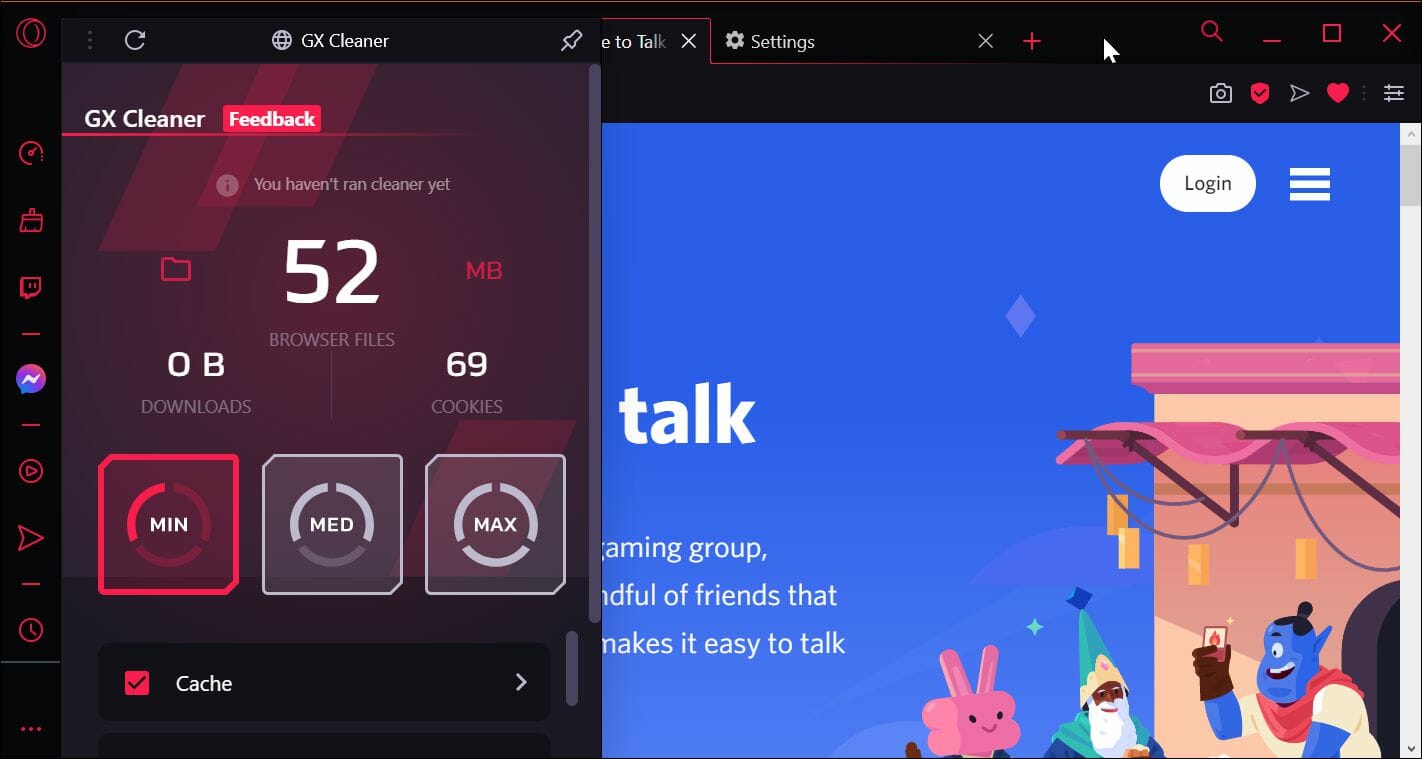
GX Cleaner – On the left tab, click the GX Cleaner icon. A built-in cleanup utility cleans up your browser for a faster and smoother experience. You can select and clean browsing history, downloads, sidebar icons, cache, and cookies. 

Opera GX vs Google Chrome

Social Media and Streaming apps shortcuts – GX browser offers quick access to Facebook Messenger that opens in the browser. Then there is a Twitch shortcut that opens the in-browser Twitch web app.

You can log in and use the streaming platform without switching to a different tab.

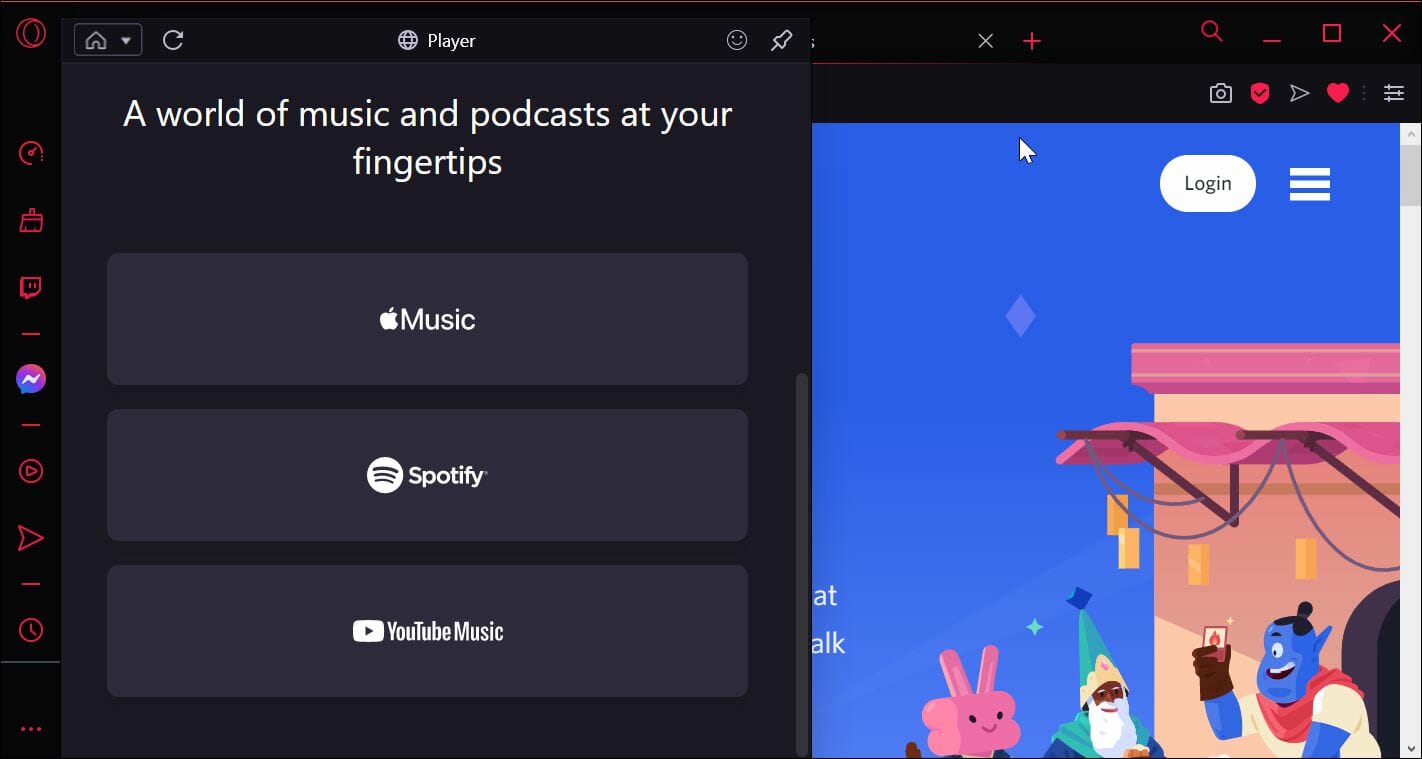
Play – The play button consists of three major audio streaming platforms: Apple Music, Spotify, and YouTube Music.

While Spotify and YouTube Music work with or without subscriptions, you can log in to your Apple Music account and stream audio without leaving the browser.

My Flow – My Flow is another unique feature of Opera browsers, including GX. It allows you to connect all your devices with My Flow to send messages and files between your mobile and desktop.

Download the Opera Touch browser on your phone to use the feature and scan the QR code. 

The seamless integration between Chrome and Google services such as Google email, calendar, docs, and maps is where the Chrome browser races ahead. If you use these services extensively on the browser, Chrome has the edge over Opera GX.

➡ Syncing

Chrome browsers can sync almost everything across the device, including passwords, bookmarks, and history. It also handles sync seamlessly between all your devices irrespective of the platform.

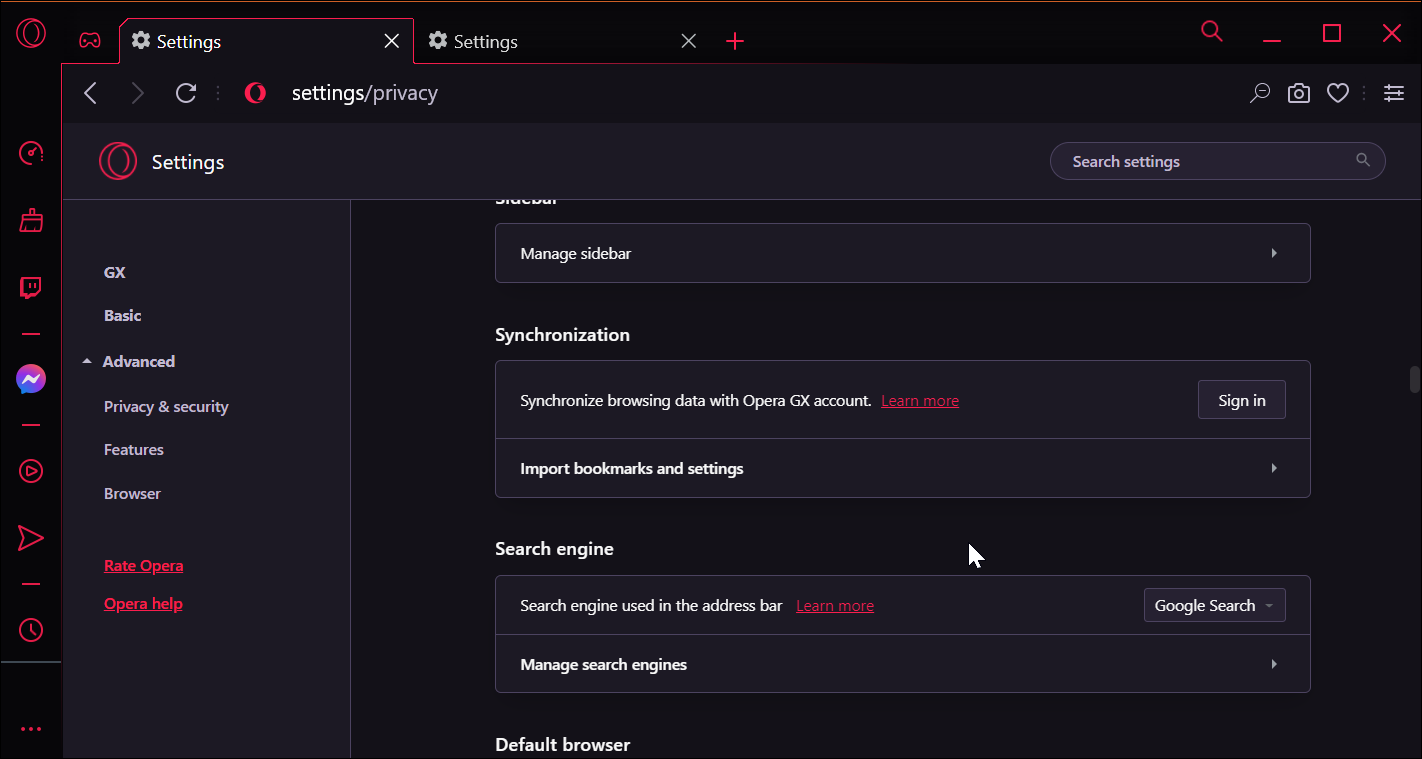
Opera GX also offers impressive sync for almost every browser aspect, including bookmarks, speed dials, history, passwords, and more. However, it is still in its early development phase. 

➡ Security and Privacy 

Opera GX vs Chrome

Opera GX has more privacy settings than Chrome. Also, Chrome being a Google product has always been a topic of debate regarding data privacy.

Chrome block third-party cookies and offer a browser cleanup tool to find and remove malicious software and identify dangerous websites, extensions, and downloads. 

Opera GX also offers most of these features and some more. For example, the built-in ad-blocker prevents the users from clicking on fraudulent websites, blocks all third-party trackers, and allows anonymous browsing through a built-in VPN.

Opera GX vs. Chrome privacy tests

To perform these tests, our team of testers has used the BrowserAudit online tool to check for any security and privacy issues found in these two browsers.

These benchmark tests have been carried out under the same conditions to avoid redundant test results.

The BrowserAudit tool runs a total of 400 tests that cover the entire spectrum of elements required for your browser to provide you with online privacy and simplify the process. Therefore, we will only note the number of tests passed out of the total.

Below, you can see the results of our tests:

BrowserBrowserAudit benchmark scores
Opera GX368/400
Chrome365/400

As in the case of the previous benchmark tests, the difference between Opera GX and Chrome when it comes to online privacy is not large at all.

The Opera GX benchmark results confirm that this browser is a better choice than Chrome.

Opera GX vs. Chrome vs. Firefox tests

Choosing the best browser between these three will also come down to your personal preference and how you plan on using your browser.

BrowserPriceLatestRelease dateOwned byCPU usageRAM usageBrowserAudit benchmarkSpeedometer benchmark
Opera GXFree86.0.4363.6418 May 2022Opera Software1 – 2.3 %740 MB368/400130 runs/minute
ChromeFree103.0.5060.6627 June 2022Google1.1 – 2.9 %1263 MB365/400126 runs/minute
FirefoxFree102.028 June 2022Mozilla Foundation1.4 – 2.3 %415 – 478 MB376/400117 runs/minute

As you can see from the information presented above, Opera GX takes the win regarding CPU usage levels, followed by Chrome and Firefox.

In the BrowserAudit privacy and security test Firefox won the battle with a score of 376/400 passed tests, Opera GX with a score of 368/400, and Chrome in 3rd place with 365/400.

When testing these browsers’ speeds, Opera took the lead with 130 runs/minute. In the 2nd place, we have Chrome with 126 runs/minute, and Firefox takes the last place with 117 runs/minute.

Conclusion

Compared to Firefox or Chrome, Opera wins this competition, offering you better performance because of lower CPU usage and incredible browsing speeds unmatched by the other two options.

➡ Cross-platform compatibility

Opera GX is a game-inspired browser and is available for Windows OS, which of course, is the only central PC gaming platform in the market today. 

⇒ Get Opera GX

Google Chrome is available on almost all the major platforms, including Chromebook, Android, iOS, Windows, Linux, macOS, and iPadOS.

⇒ Get Chrome

Opera GX offers everything that Chrome does and some more

Tip icon Tip
If you want to customize your browser to match your gaming and extensively access streaming and social media platforms, Opera GX is a better choice.

It offers exceptional security features, a built-in ad blocker and tracker blockers, a VPN to browse anonymously, and integration of popular social media apps such as Discord, YouTube, Twitch, Reddit, and more without leaving the browser.

In sum, Opera GX is a better browser for gamers and regular users who consume multimedia content online extensively.

The customization options offered are unlike what we have seen on any other Chromium-based browser till now. In addition, control over resource usage and better privacy features make it a great alternative to Google Chrome.

2 Ways to Fix No Proceed Option Certificate Error in Chrome

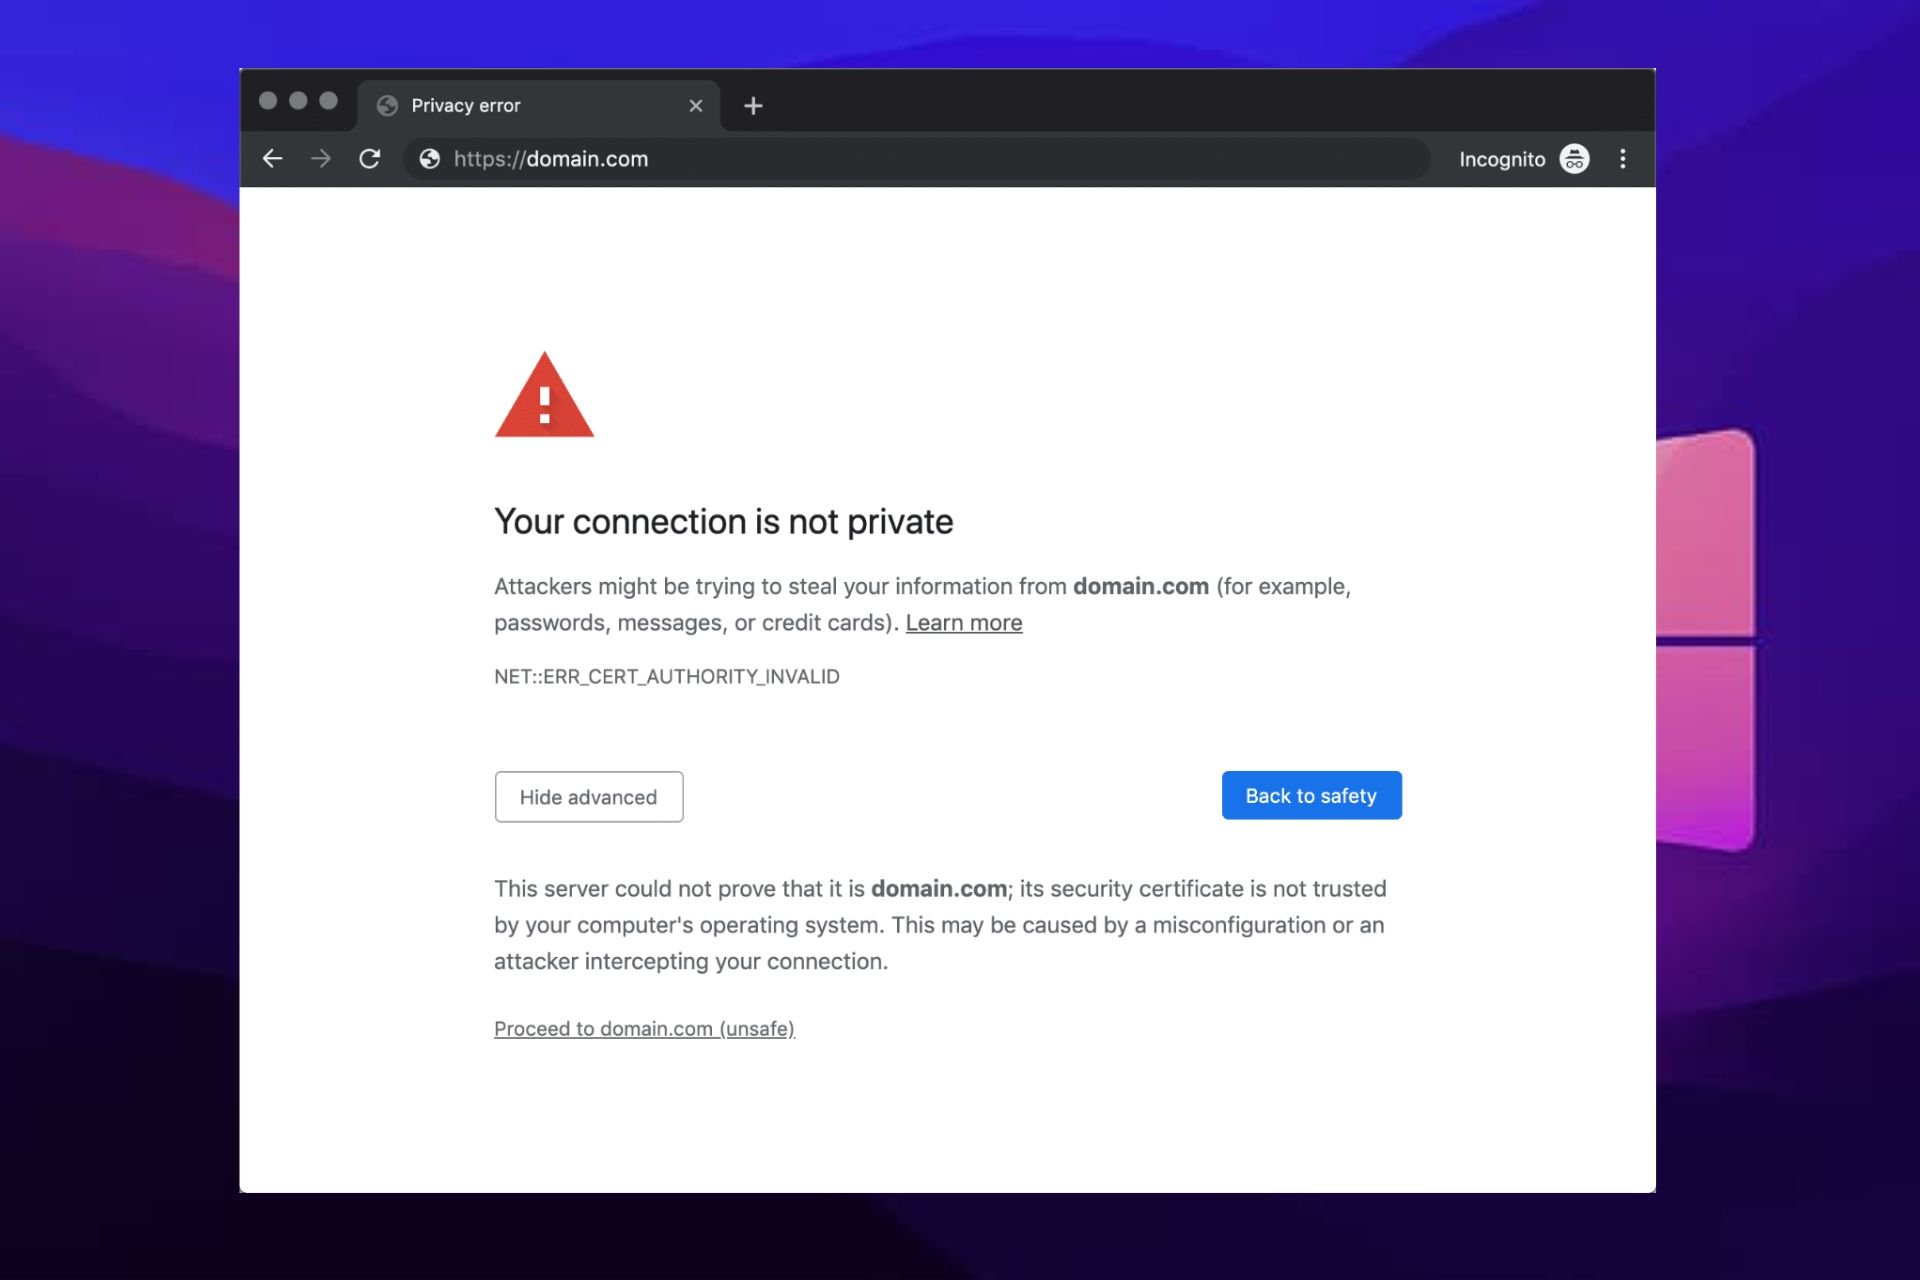
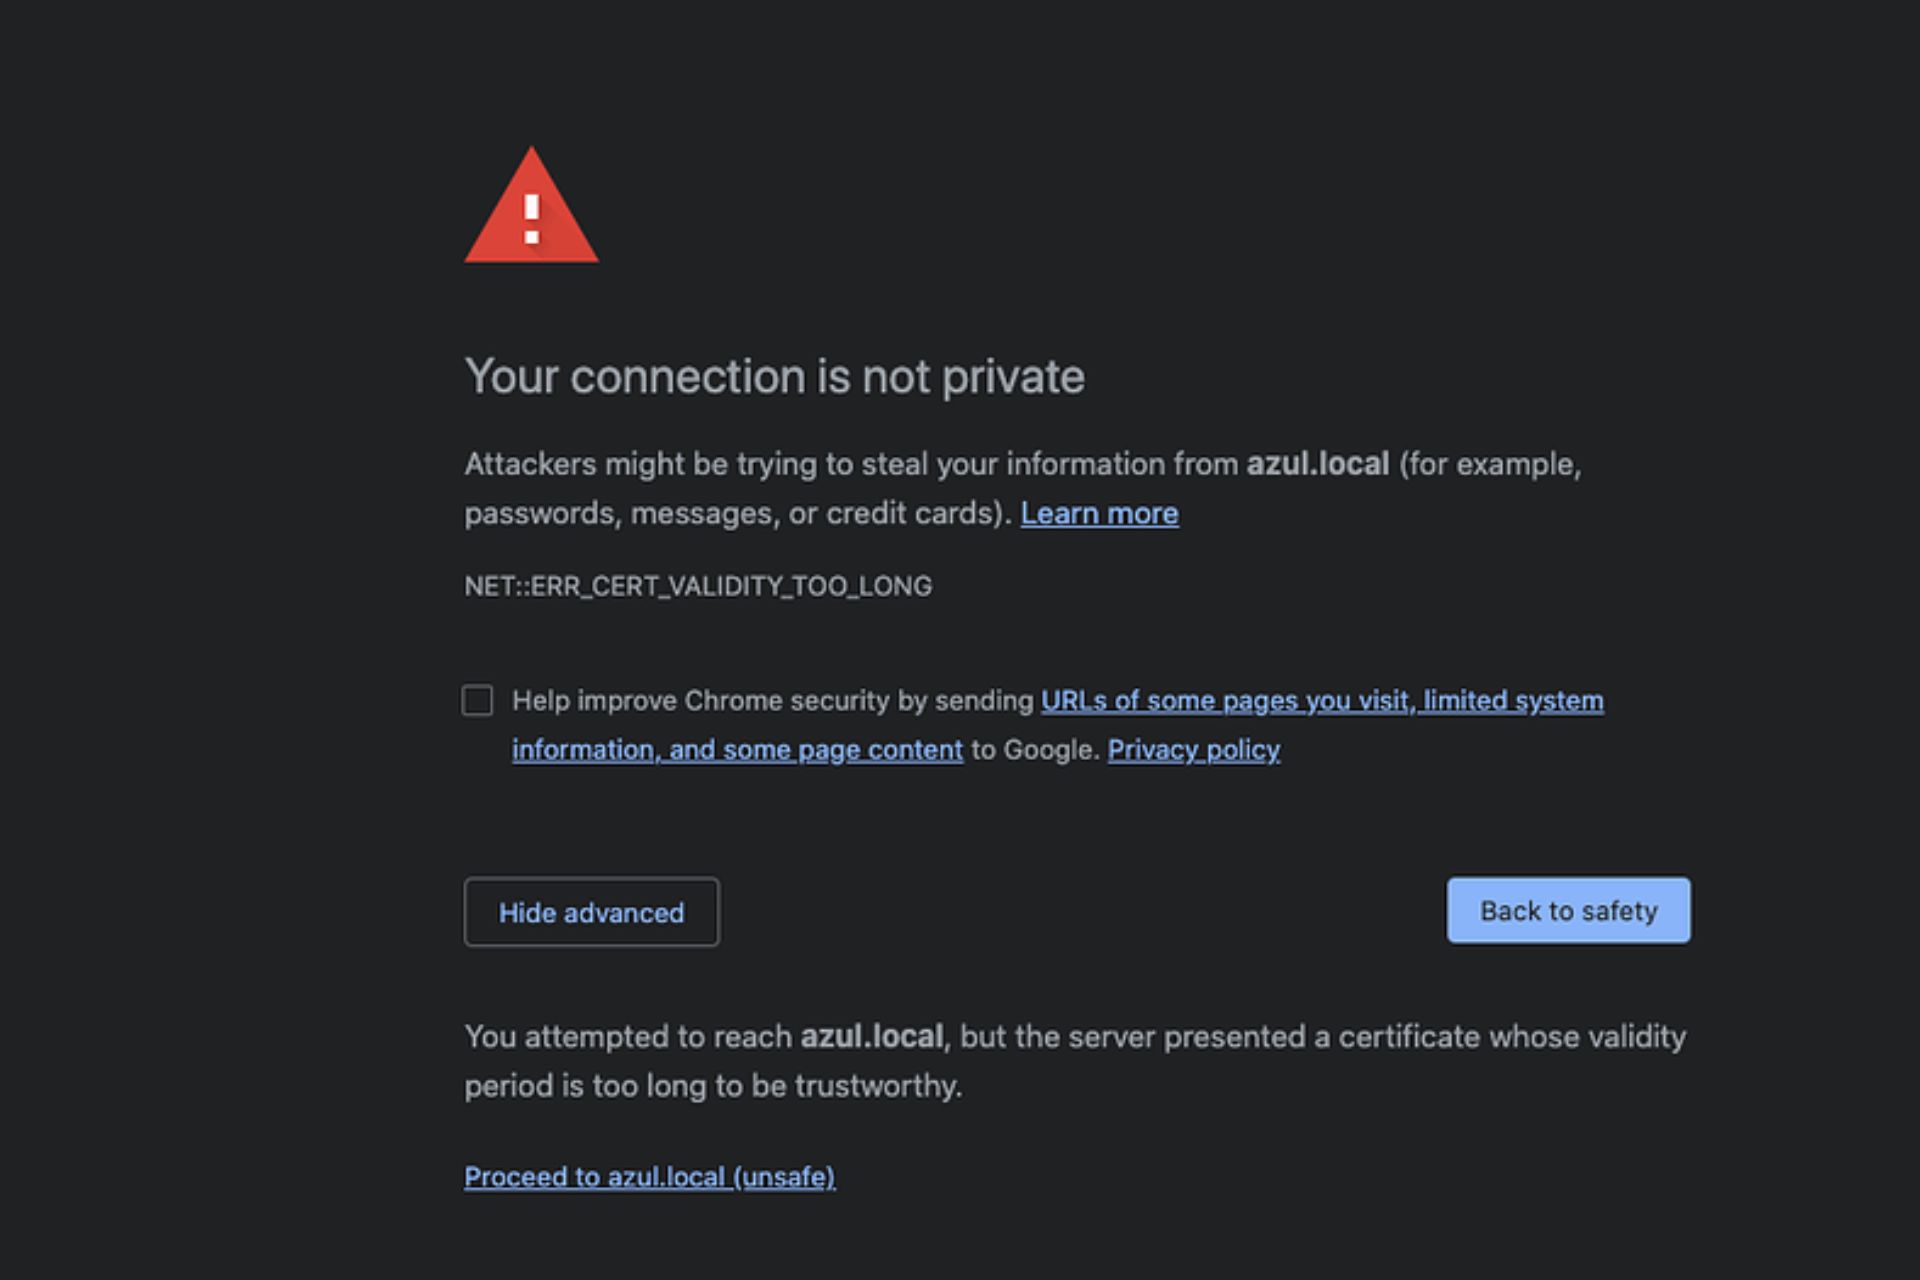
When you’re trying to access a website and Google Chrome says the certificate is not secure, or there is a certificate error, but you know the certificate is valid, it is warning you that the webpage you are on has a mixture of HTTPS and HTTP resources.

Experiencing this every day can be downright frustrating and even scary at times. Depending on the type of error, it could also mean downtime for your website, which means you’re losing money. Or it might just be that the browser on your computer needs fixing.

Whichever it may be, worry less. This article will provide you with three possible ways to get past your Chrome certificate error no proceed option.

Why am I getting certificate errors in Chrome?

The certificate errors warning you receive on a webpage means the website does not provide an encrypted connection. The following are some common Chrome errors you might receive when using the web browser and what they mean:

1. This webpage has a redirect loop or ERR_TOO_MANY_REDIRECTS – The webpage you’re trying to access has too many redirects; probably because the cookies are not working correctly.

2. This webpage is not available or ERR_SSL_VERSION_OR_CIPHER_MISMATCH – The website you’re visiting has an outdated security code, and Chrome blocks the connection.

3. Connect to a network – You have to sign in before using your Wi-Fi portal and connect to the website.

4. Delete Expired DigiCert Certificate (Mac computers only) – The webpage uses a certificate that isn’t set up right on your computer.

5. This site can’t provide a secure connection; network error sent an invalid response or ERR_SSL_FALLBACK_BEYOND_MINIMUM_VERSION – If the page had a problem which Chrome couldn’t understand, you’d see this error; the solution is to ‌contact the website owner.

Quick Tip:
Use a different browser like Opera One to access secure sites without errors. It updates monthly, includes a free VPN, built-in AI, and blocks phishing or malware threats automatically.

Opera

Opera

Browse safely and smoothly with this fast, secure browser packed with smart features.
Check price Visit website

How can I fix Chrome’s no proceed option error?

1. Check if your date and time are correct

  1. Right-click the clock in the bottom right corner and click on Adjust date/time.
  2. The date and time window will now appear.
  3. Toggle off the Set time automatically option.
  4. Wait for a few moments and turn this option back on again.
  5. Alternatively, you can adjust the time and date manually by clicking the Change button.

One of the most common causes of Your connection is not secure message is incorrect date and time. Many websites use security certificates, and each certificate has its own expiration date.

If the time or date on your PC isn’t correct, your browser might detect the required certificate as outdated, thus giving you this message.

2. Bypass the warning

  1. When the message appears, click on Advanced.
  2. Now click on Add Exception.
  3. Click on Confirm Security Exception, then return to the page and click to proceed to the site.
  4. If you want, you can view more information regarding the problematic certificate by clicking the View button.

If the error appears while trying to visit a trusted website, you can simply bypass the warning and proceed to the site irrespective.

How to get Chrome to ignore certificate errors?

  1. Launch the Chrome browser.
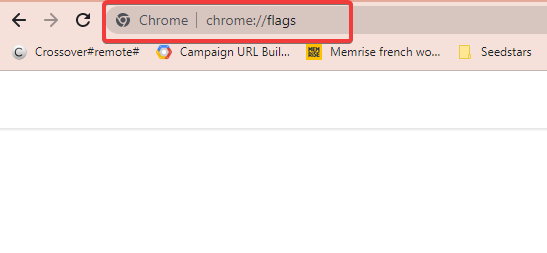
  2. On the address locator input the link below: chrome://flags/
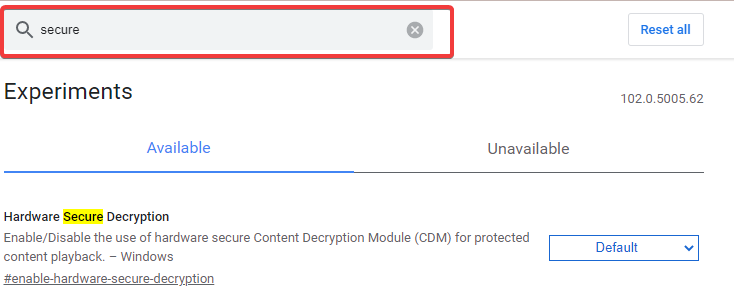
  3. Type secure in the search box and click Enter.

  4. Scroll down to the Allow invalid certificates for resources loaded from localhost flag.
  5. Click on the dropdown list and select Enabled.

  6. Restart the browser and try to reaccess the link.

You can tell Chrome to ignore all SSL certificate errors by passing the following at the command line at launch.

In conclusion, we hope you find this post useful in solving the net err_cert_invalid Google Chrome error problem on your Windows 10/11 PC.

Comment below if you have any questions. Feel free to list additional troubleshooting methods as well.

No Audio on Some Twitch Streams & Vods: 5 Ways to Fix It

This guide is for you if you notice that you have no sound on some Twitch streams.

Twitch is one of the world’s biggest live-streaming platforms that users can utilize via the Twitch website or app.

Even if our experiments showed that it works great in both versions, some users have said in forum posts that they can’t hear specific Twitch streams they follow.

We’ve compiled a series of solutions to solve this annoying problem quickly. But before discovering them, let’s see why this can arise.

Why there is no audio on some Twitch streams?

If you notice that there is no audio on some Twitch streams, you should take a look at the following reasons that explain this error:

  • Outdated drivers – When device drivers are outdated, your PC can cause noticeable performance and app-related problems. Remember that you should constantly update them, and we’ll show you how to do it quickly.
  • Wrong stereo settings – To make your audio work on any stream you need, configuring the stereo settings is an important step. Keep on reading and discover the quickest way to do it.
  • Temporary bugs – If you have no audio on some Twitch streams, your browser might have short-term problems. We strongly recommend resetting it; you’ll see how later in this guide.
  • Browser-related problems – If the problem isn’t related to any temporary issue, it could be a bit more serious. To ensure you won’t face this error again, you should try using another browser dedicated to streaming.

Let’s get to addressing the Twitch no sound issue on some streams.

Quick Tip:

Before trying anything else, you may need to use another efficient browser for uninterrupted Twitch streaming.

You have the Opera GX browser that includes navigation features and Twitch support integrated on your sidebar. Hence, you can follow the best streaming channels without sound difficulties or errors.

Opera GX

Stay tuned to your favorite Twitch content using this browser without any media issues.

What can I do if there is no audio on some Twitch streams?

1. Run the Playing Audio troubleshoot

  1. Use the following keyboard shortcut: Windows + I.
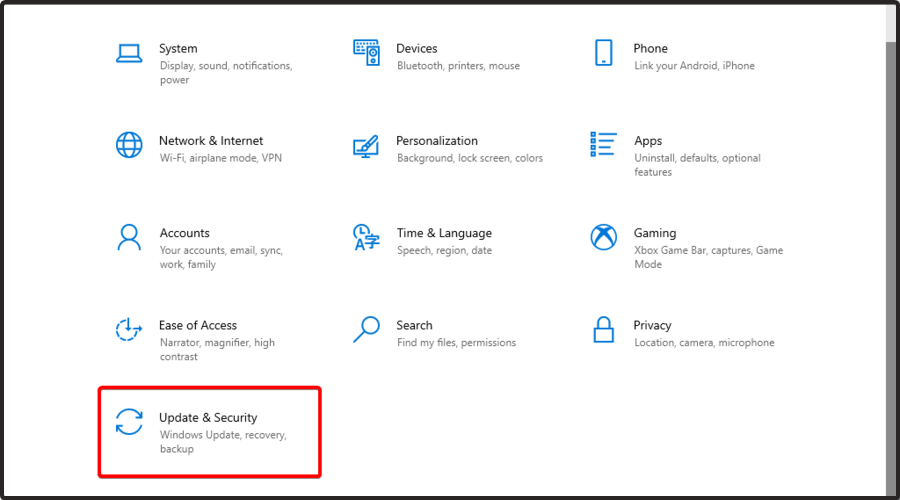
  2. Navigate to Update & Security.
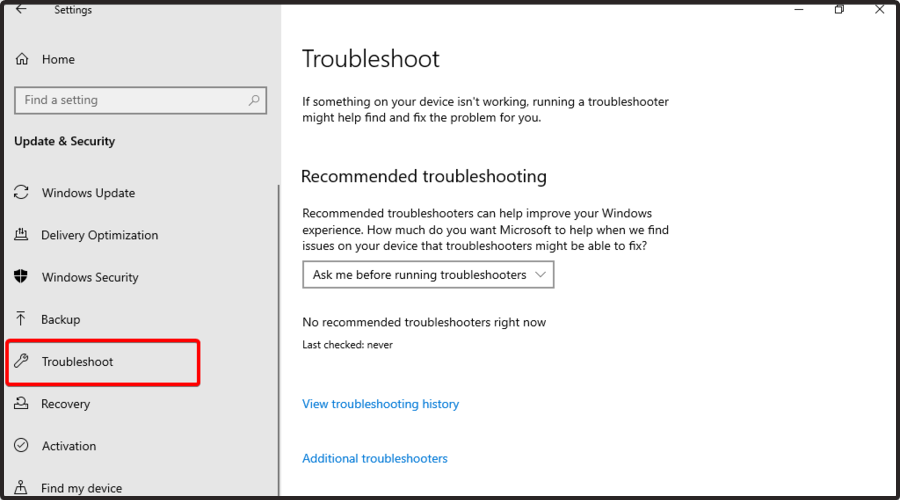
  3. From the left window pane, select Troubleshoot.
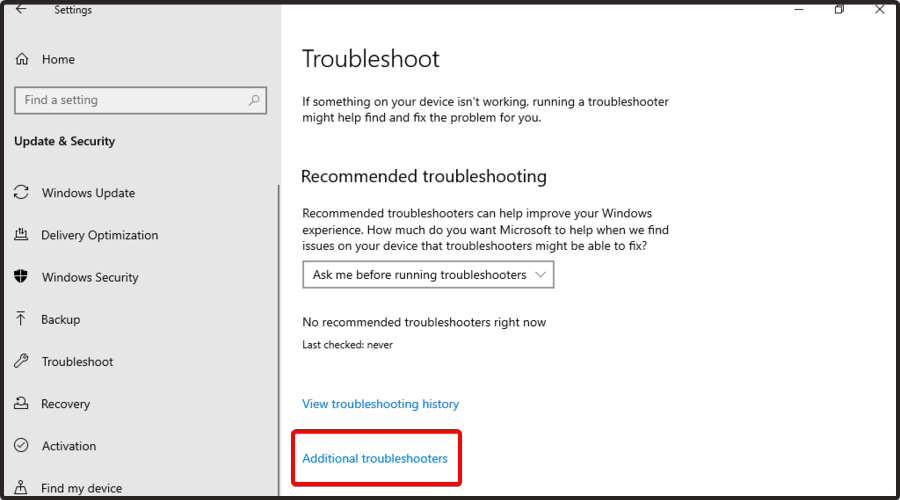
  4. Look at the right window pane and click on Additional troubleshooters.
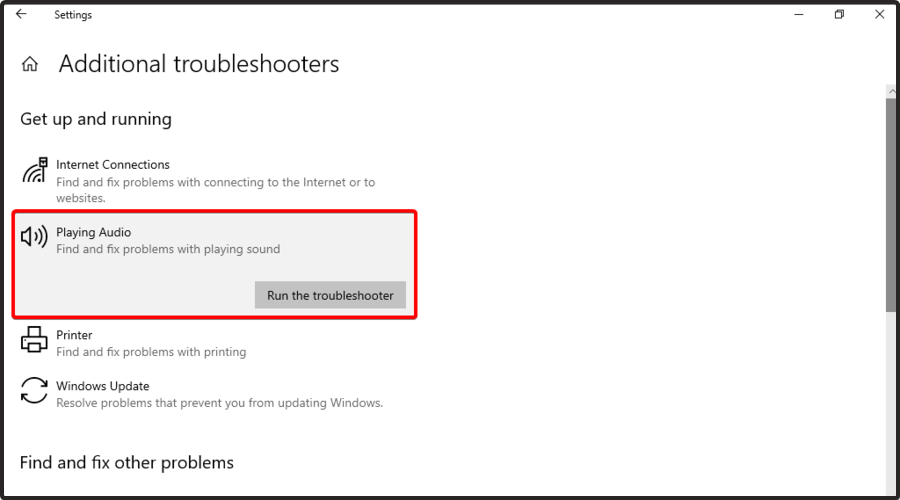
  5. Select the Playing Audio troubleshooter, and press on the Run the troubleshoot button.

Your system will automatically search for audio-related problems. If any are found, you’ll be notified, and you should follow the on-screen instructions.

However, if your OS can not discover any errors, make sure you keep on reading. After these steps, move to the next solution if you still can’t hear the Twitch stream audio.

2. Update & fix audio device drivers

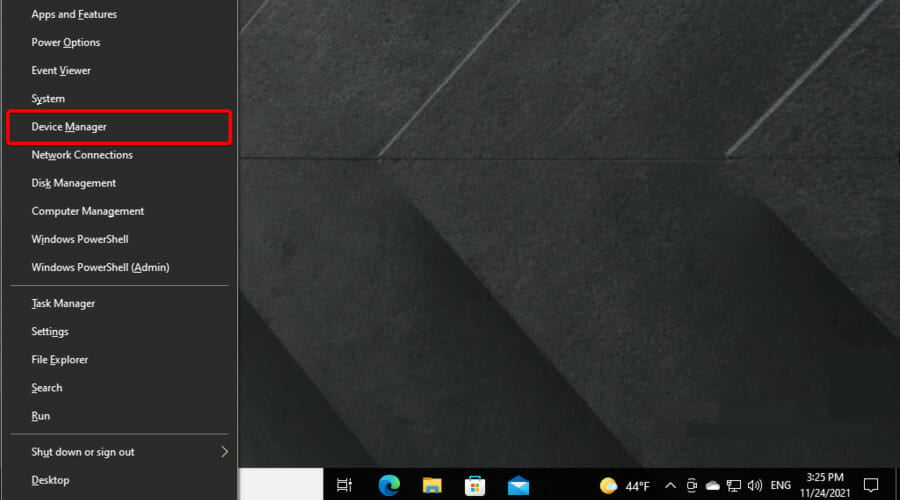
  1. Press simultaneously on the following keys: Windows + X.
  2. Choose Device Manager from the list.
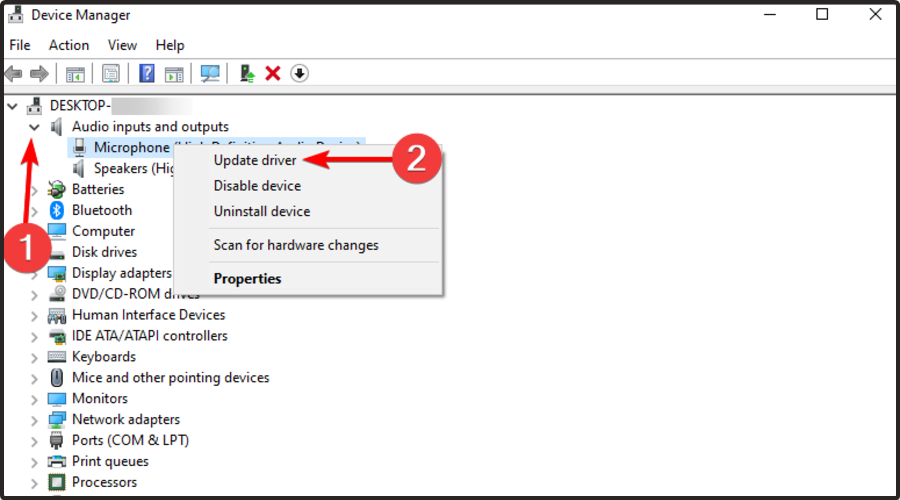
  3. Expand the Audio inputs and outputs section, right-click on your audio device, then choose to Update Driver.
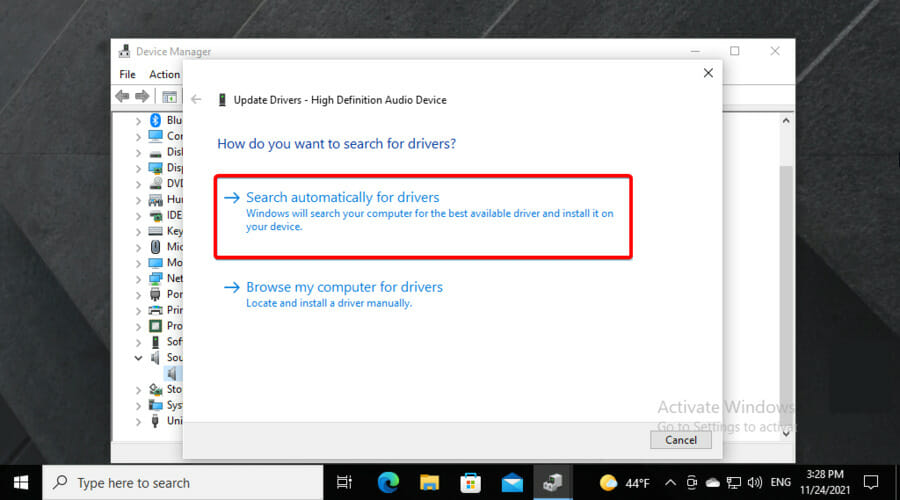
  4. Choose Search automatically for drivers.
  5. Install any recommended drivers.
  6. Check if the no sound issue on Twitch is resolved.

If you want to simplify the process considerably and ensure a long-term solution to this issue, we recommend you try specialized driver updater software.

These tools will scan your PC’s hardware and peripherals with a few clicks for timely driver updates. You may rely on this tool to make such changes to ensure a proper update with the most recent audio device drivers.

3. Select the stereo setting for audio devices

  1. Click on the arrow in the right-bottom corner of your Taskbar, then right-click on the Sound icon.
  2. Next, click Open Sound settings.
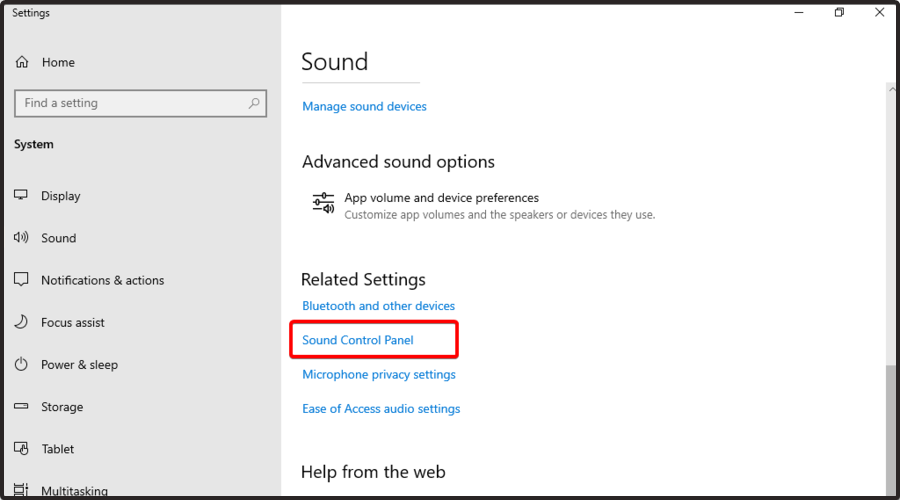
  3. Click Sound Control Panel to open the window shown directly below.
  4. Select the audio device you use to listen to Twitch stream, then click the Configure button.
  5. Select the Stereo option if it’s not selected, then click on Next.
  6. Click on Finish to apply the new setting.

Note: This resolution is more specifically for Twitch users who need to fix streams’ sound for audio devices with surround sound enabled. Once done, verify if the problem with Twitch audio not working is resolved.

4. Disable audio enhancements

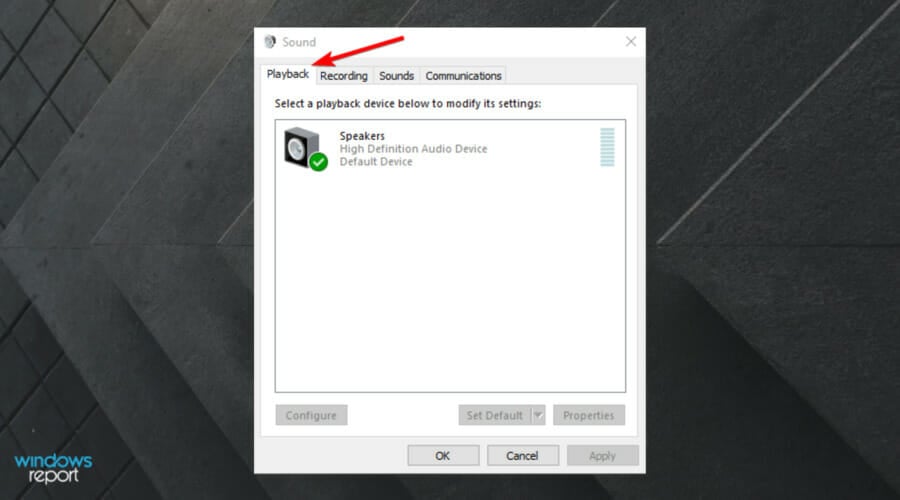
  1. Click on the arrow in the right-bottom corner of your Taskbar, then right-click on the Sound icon.
  2. Next, click Sounds.
  3. Then select the Playback tab.
  4. Click on the listed audio device you’re utilizing and select Properties to open Speaker Properties.
  5. Select the Enhancements tab shown directly below.
  6. Select the Disable all enhancements checkbox.
  7. Click the Apply button, then press OK to close the window.
  8. Check if the no sound issue on Twitch is resolved.

Once you have followed these steps, verify if you still have no sound on Twitch, in which case you should try the next step.

5. Reset your browser

5.1 Chrome

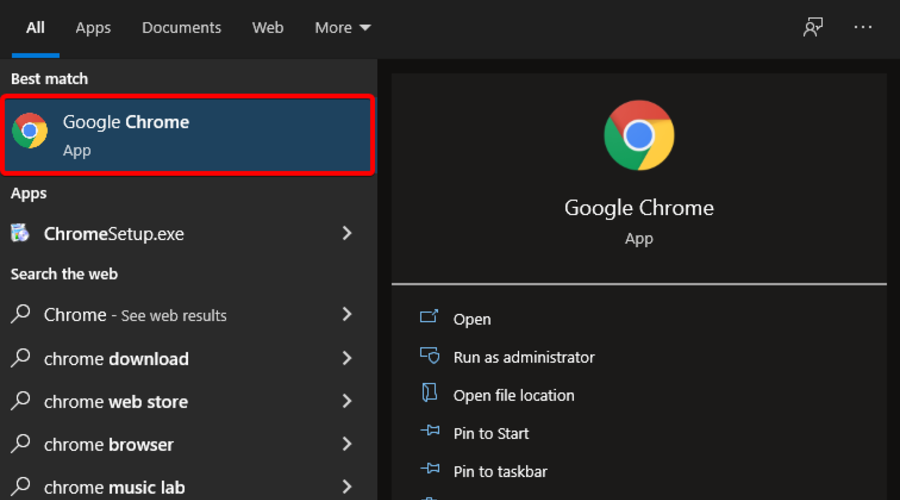
  1. Hit the Windows key, type Chrome, then open the first result.
  2. Click on the Customize and Control Google Chrome menu button (the three vertical dots placed in the right-top corner of the window).
  3. Select Settings to open that tab in Chrome.Twitch no soundTwitch no sound
  4. Scroll down, expand the Advanced section, then click on Reset and clean up.Twitch no sound
  5. Click on Reset settings in the right window pane to their original defaults.
  6. Confirm by clicking on the Reset Settings button.Twitch no sound

5.2 Firefox

  1. Press on the Windows key, type Firefox, then open the browser.Twitch no sound
  2. Click on the Firefox menu button (marked as three horizontal lines in the right-top corner of the window).Twitch no sound
  3. Select the Help option.twitch no sound
  4. Then select Troubleshoot mode to open the tab in the shot directly below.Twitch no sound
  5. Click on Restart to reset the browser.
    https://windowsreport.com/wp-content/uploads/2022/07/Open-edge.png

5.3 Microsoft Edge

  1. Hit the Windows key, type Edge, then click on the first result.
    twitch no sound
  2. Press Edge’s Alt + F keyboard shortcut.
  3. Navigate to Settings.
    Twitch no sound
  4. From the left window pane, click on Reset settings, then choose to Restore settings to their default values.
    twitch no sound
  5. Check if the no sound issue on Twitch is resolved.

What other Twitch audio issues should I be aware of?

Like any other app, Twitch can generate a few problems. The audio ones seem the most commonly reported, so we’ve decided to show you a list of them.

  • Twitch audio delay – Users claimed it to be the most annoying issue. Fortunately, in case you face it, you can always check some dedicated solutions to fix it in a few seconds.
  • Twitch audio only on browser – In this case, remember that the Twitch audio-only in browser feature is a great option that helps save significant device resources. However, to use it in the desktop app, make sure you verify our dedicated guide.

These are the most efficient methods if you have no audio on some Twitch streams. Also, remember that the potential resolutions above might fix the most common issues on Twitch.

However, if you still need other fixes, you can submit a support ticket via Twitch’s Contact Us page. We hope that the no audio issue on your Twitch stream is solved. Users also experienced the Twitch error of no sound on VOD; these fixes should also help.

Feel free to comment in the dedicated section below for any additional questions or related curiosities.

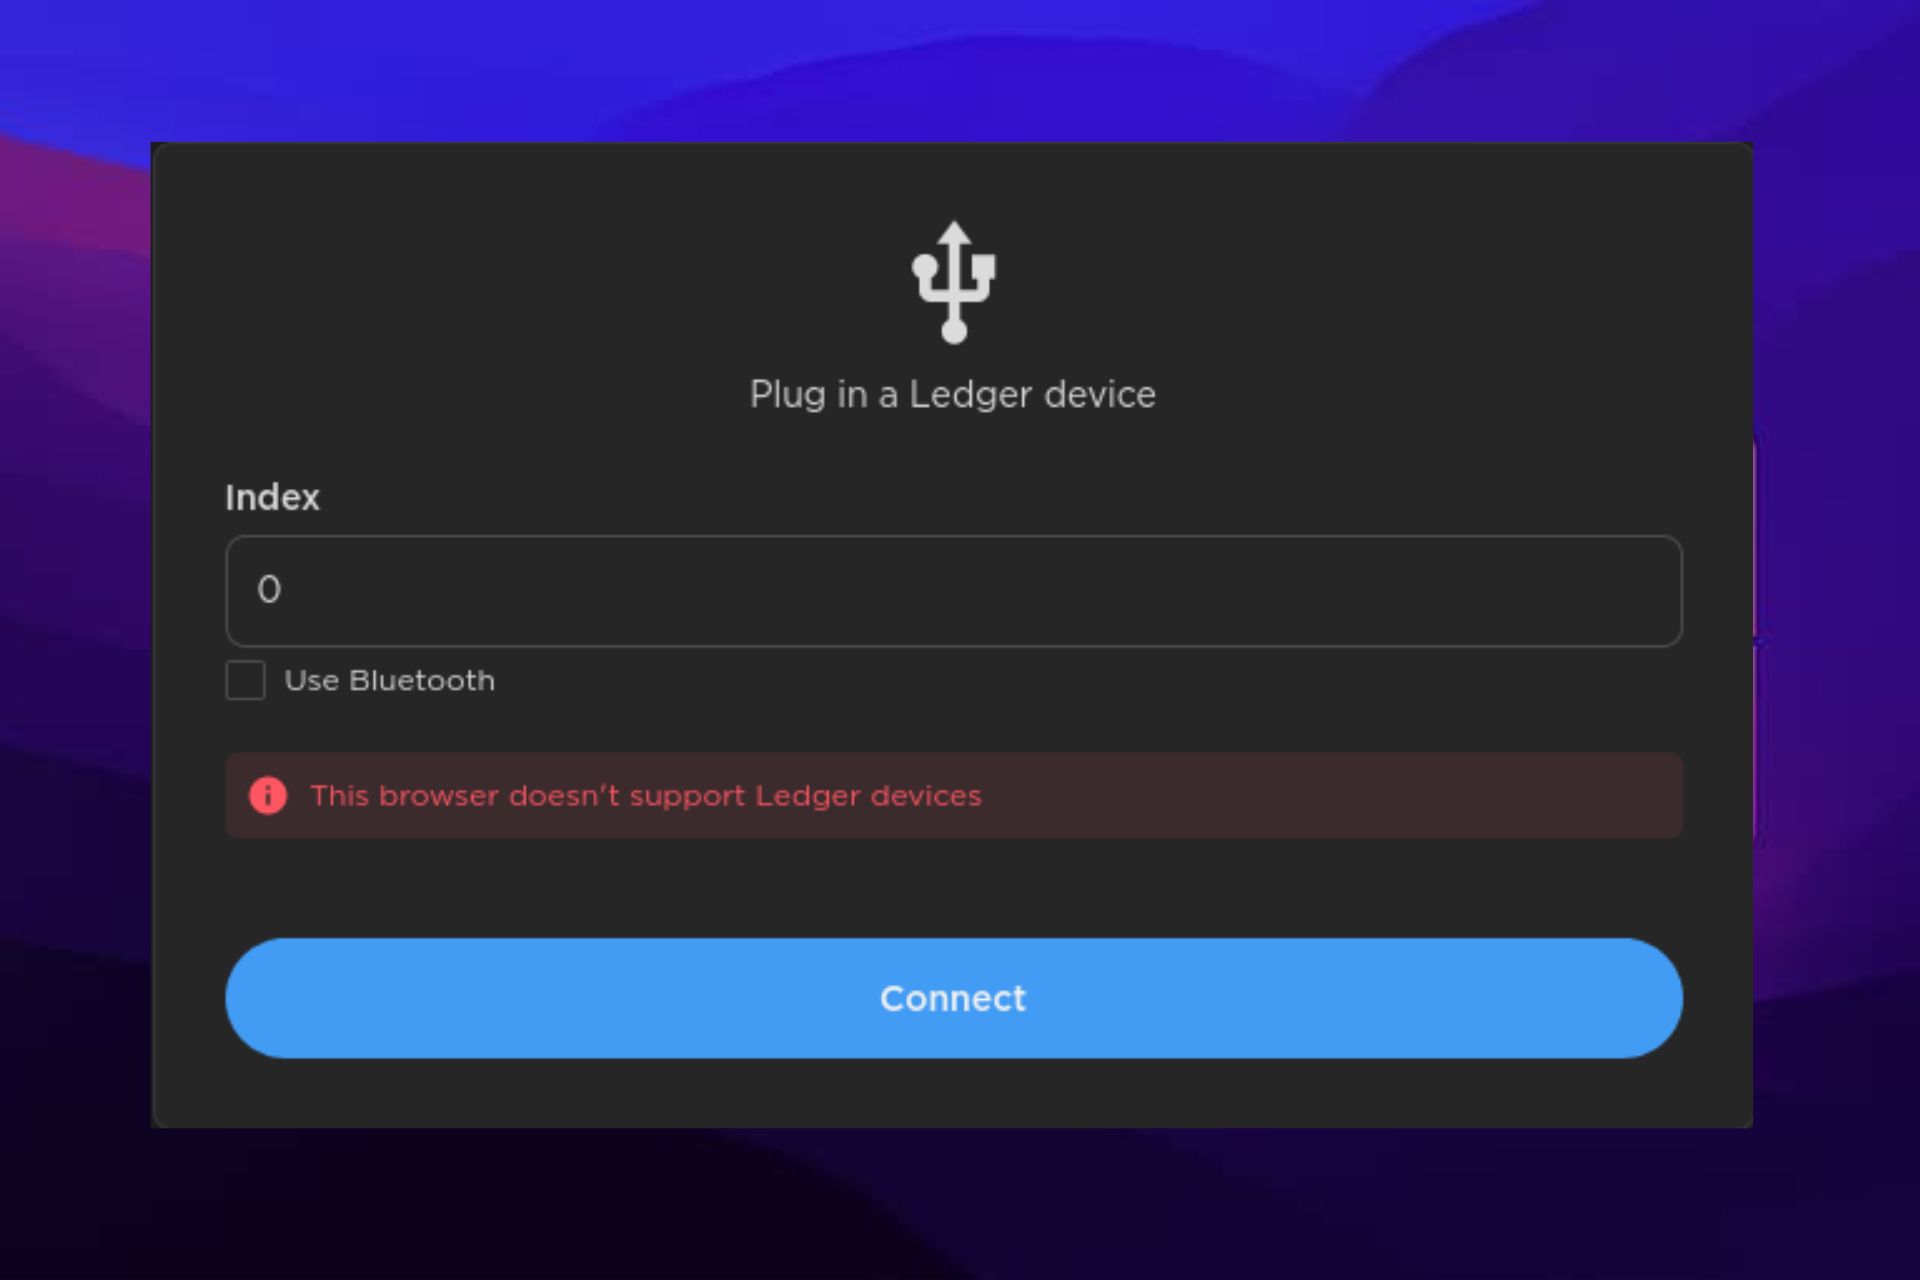
Fix: This Browser Doesn’t Support Ledger Devices

Have you been encountering This browser doesn’t support Ledger devices problem? Well, you need to know that Ledger Chrome apps have been deactivated and replaced by Ledger Live for security purposes.

A Ledger device can securely store your cryptocurrency and protect them with your own private keys. It acts like a bank vault that you own, and only you have access to.

The Ledger is a device that acts as a crypto wallet. It can hold multiple currencies offline. You can easily connect the Ledger hardware with MetaMask.

However, sometimes, you may encounter MetaMask not connecting to the Ledger issue. That is enough to ruin your experience with that software crypto-wallet.

Go through this article to find solutions along with some other helpful information.

Why is my Ledger not connecting?

We have tried to find out what may cause such problems in most situations. After doing some deep research, we have found the following ones:

  • Incompatible version of the browser and extension
  • Not connecting the Ledger in the proper way
  • Outdated Ledger firmware
  • Outdated Ethereum app
  • Problematic browser

Moreover, there can be other technical issues that can produce Ledger connectivity issues with MetaMask. Fortunately, you can quickly get rid of it if you follow some tricks.

Quick Tip:

Try another browser with Ledger management options and support. We recommend Opera One because it’s light and easy to use. Plus it’s very secure for crypto, having integrated antitracking and VPN.

It’s worth mentioning that Opera One has an integrated Crypto Wallet feature that helps users make secure transactions and manage tokens and collections. This browser also bring it’s own AI.

Opera One

Use a browser with dedicated support for Ledger for seamless and secure currency management and transactions.
Free Download Visit website

How can I fix This browser doesn’t support Ledger devices error?

1. Update MetaMask extension

1.1. Update Chrome extensions

  1. Open the Google Chrome app.
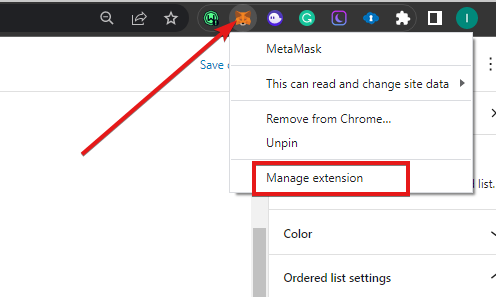
  2. Right-click on the MetaMask icon in the upper right side of the browser and select Manage extensions.
  3. Click on Update.

1.2. Update the Firefox add-ons

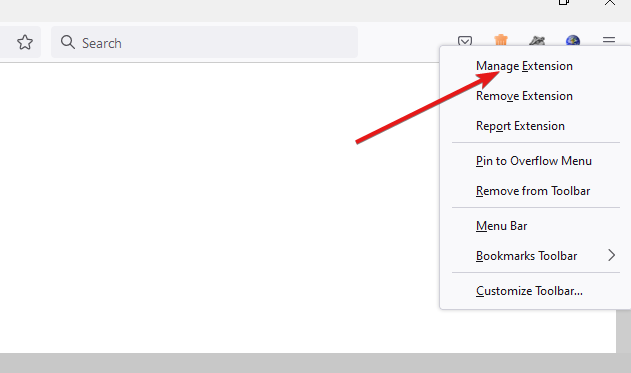
  1. Open the Mozilla Firefox browser.
  2. Type this address about:add-ons in the address bar and press Enter.
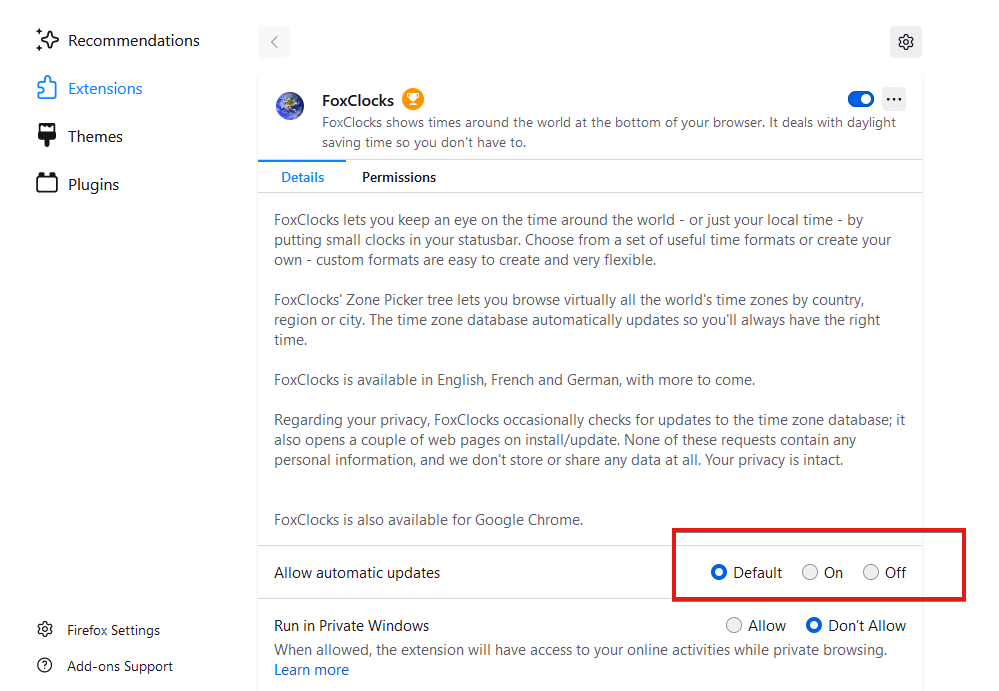
  3. Click on the gear icon and then select Check for updates.

2. Update your browser

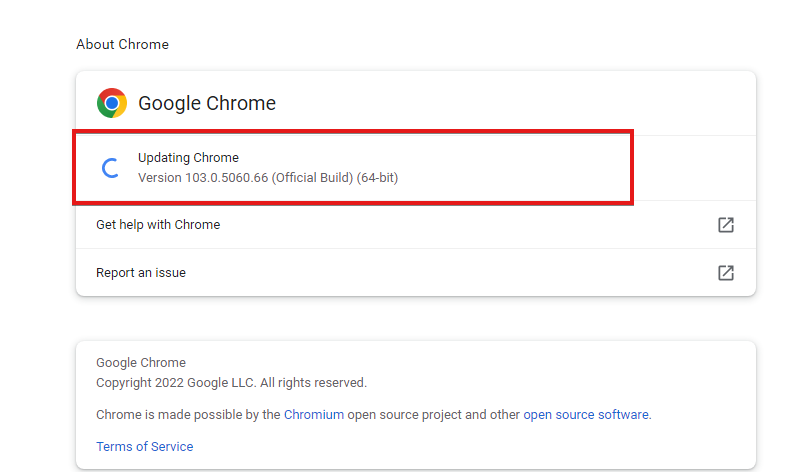
  1. Open Chrome again.
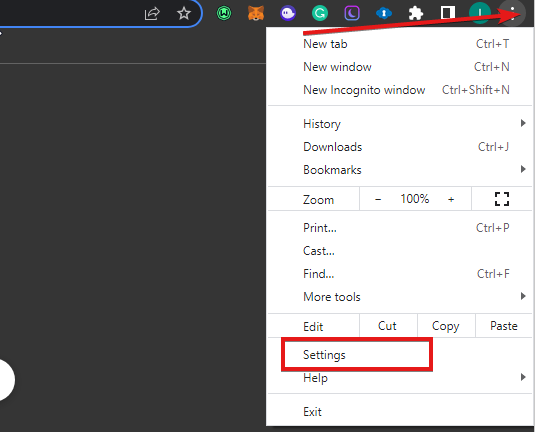
  2. Click on three vertical dots on the top right corner and then go to Settings.
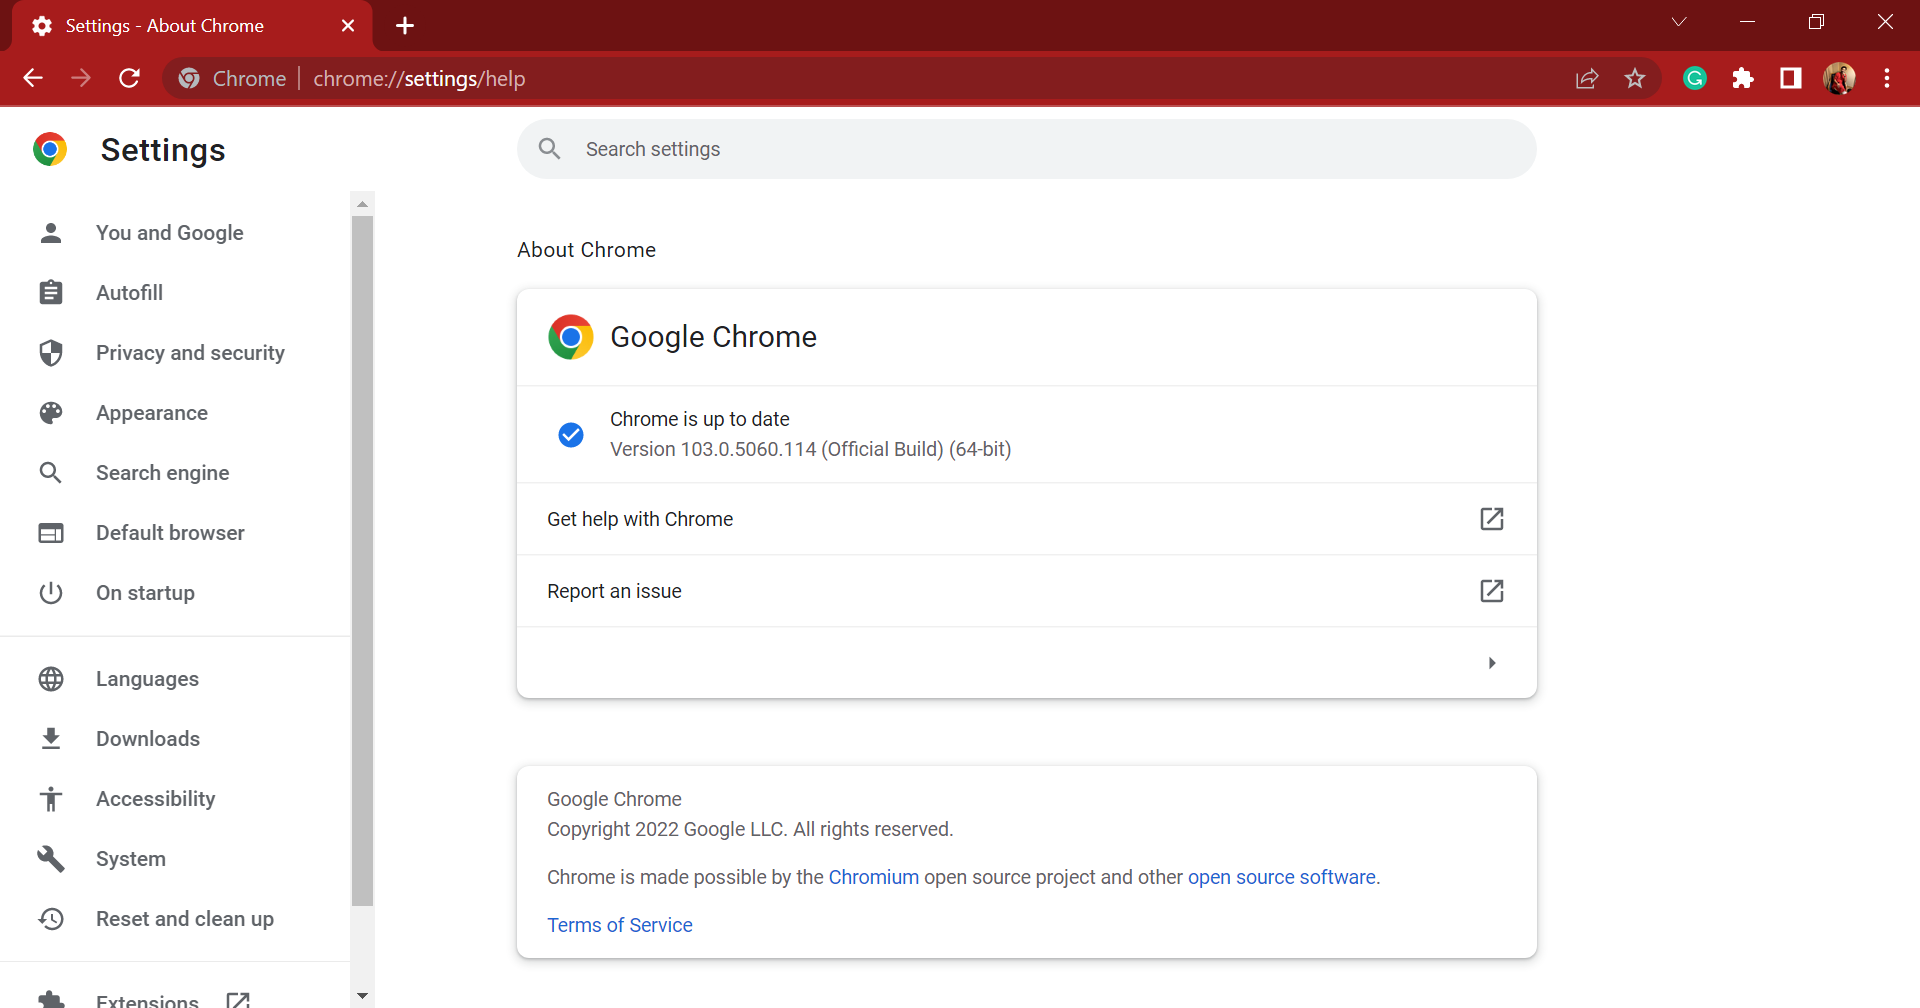
  3. Click on About Chrome.
  4. Google Chrome will check for the update and install automatically if it finds any newer versions available.
  5. Relaunch Chrome.

You can try the same steps for your other browsers, and we believe you should be able to update your browser. Since browser compatibility could cause the browser doesn’t support the ledger device’s errors, this should fix the issue.

3. Close Ledger Live

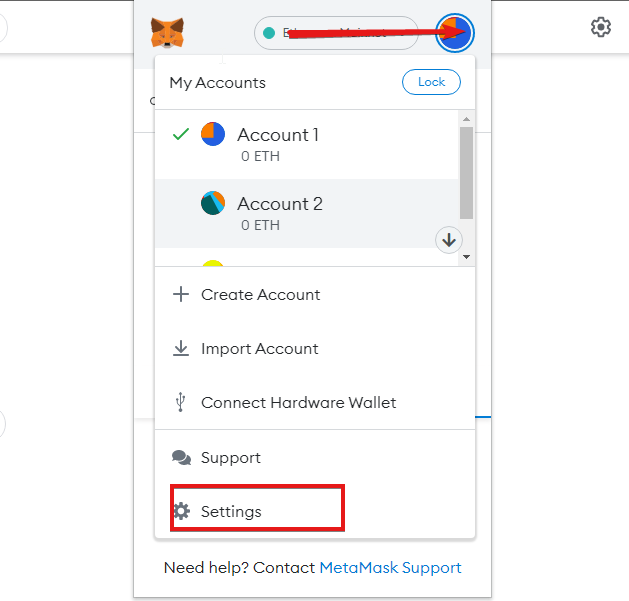
  1. Click on the MetaMask extension icon.
  2. Click on Profile and go to Settings.
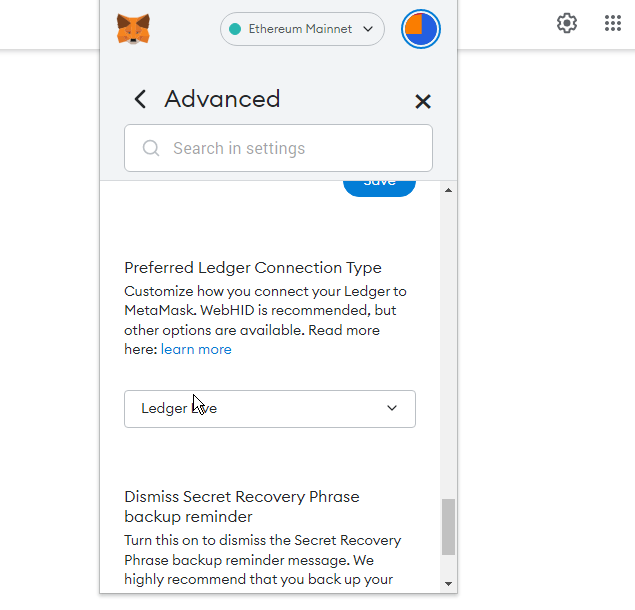
  3. Go to Advanced.
  4. Toggle off the Ledger Live.
  5. Now try to connect the Ledger again.

The above methods are the best ways to fix browsers doesn’t support Ledger devices. However, you can check out our guide on how to Metamask not connecting to Ledger if you encounter this issue.

Also, our article on what to do if your computer doesn’t recognize Ledger Nano S might be useful if you encounter such problems also.

If you have an opinion on this, feel free to let us know in the comments box.

Best Browser for Watching Videos & Streaming [YouTube, Netflix]

Browser video playback has come a long way largely thanks to the advent of HTML5 video, which has largely replaced browser plug-ins such as Flash.

Users can watch high-resolution videos on websites such as YouTube or subscribe to video-streaming services to watch movies and shows within their browsers.

The best browser for online video supports most HTML5 video and audio codecs provides fast browsing speeds and has plenty of extensions so that users can enhance and customize playback.

When choosing the best browser for streaming video on Windows 10 and 11, it can get confusing with all the information found online, and for this reason, we’ve compiled a great list of the best Windows browsers for watching videos.

Which browsers can play 4K video?

As the evolution of video equipment and image quality keeps improving exponentially, almost all well-known browsers can play videos in 4K quality, but not all of them perform the same.

Opera One and Opera GX are our top recommendations for watching 4K videos because of the easily-accessible VPN and adblocker, which will significantly improve your experience no matter if you’re using it on Netflix or other streaming services.

Added to that, having easy access to all messengers and social media accounts can be extremely useful if you want to share your favorite videos with your family and friends.

You could of course also play 4K videos on your Edge, Firefox, or Chrome browsers, but when considering the overall performance, Opera One is still the best.

What are the best fast browsers for YouTube and video streaming?

Opera One – The best browser for streaming

Opera One incorporates some unique video options and features that users won’t find in most alternative browsers, making it one of the best browsers for YouTube.

It includes a video pop-out that enables users to move videos out of the Opera One page tabs into separate standalone frames and put them anywhere on the Windows desktop. Only this feature makes the app the best browser for movies, as having customization options can be extremely useful.

Turbo Mode is a similar feature to the Opera One desktop browser that can save bandwidth when playing videos and speed up browsing.

Mobile versions of the browser enable users to compress videos, which reduces buffering, making it the best browser to watch Anime with. Additionally, Opera One incorporates a 360 video player for virtual reality headsets.

The browser’s built-in ad blocker will remove ads from video website pages and their clips, which will further speed up browsing on YouTube, Vimeo, and other sites. The processing speeds also make Opera One the best browser for Netflix.

You can find 195 extensions for YouTube in the browser’s own extension library if you enter the keyword YouTube in the add-ons search box.

If preferred, one can also add Chrome’s video extensions to Opera One, as it’s based on the same Chromium engine.

Other useful features:

  • Built-in free and unlimited VPN service
  • Screenshot tool included
  • Syncs browsing data across devices
  • Share notes, links, and files by using the Opera One Flow feature

Opera One

Use the video pop-out feature in Opera One to detach videos and stream without switching between tabs.

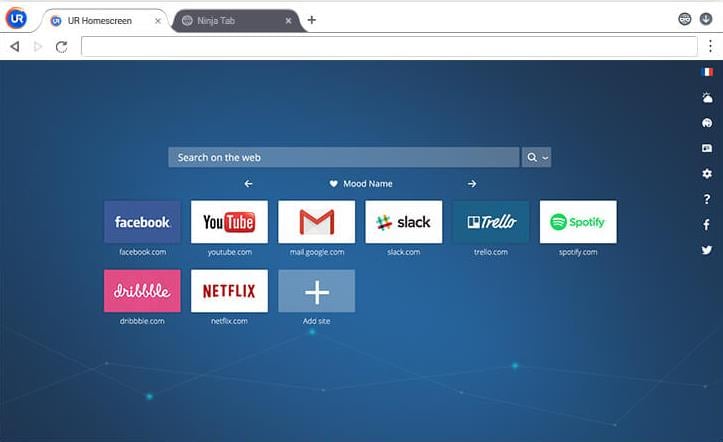
UR browser – Good browsing speeds and privacy features

UR is one of the best browsers for watching videos that you have probably never heard of. Yet, UR has been getting some rave reviews and scores highly on HTML5 video, audio, and streaming benchmarks.

This browser is great for watching videos on websites primarily because it’s based on the same Chromium engine as Chrome and Chromium-Edge.

Thus, the HTML5 support is comparable to Google’s flagship browser; and users can utilize Chrome’s video extensions to customize playback on YouTube and other websites.

UR also boasts a built-in VPN that allows you to watch location-restricted content. Few other browsers can match this feature.

Other useful features:

  • 3 levels of privacy and security
  • Low impact on system resources
  • Great UI
  • Customizable with add-ons and extensions

UR Browser

Use UR browser to get rid of the ads, trackers, and cookies, and enjoy a smooth video streaming experience.

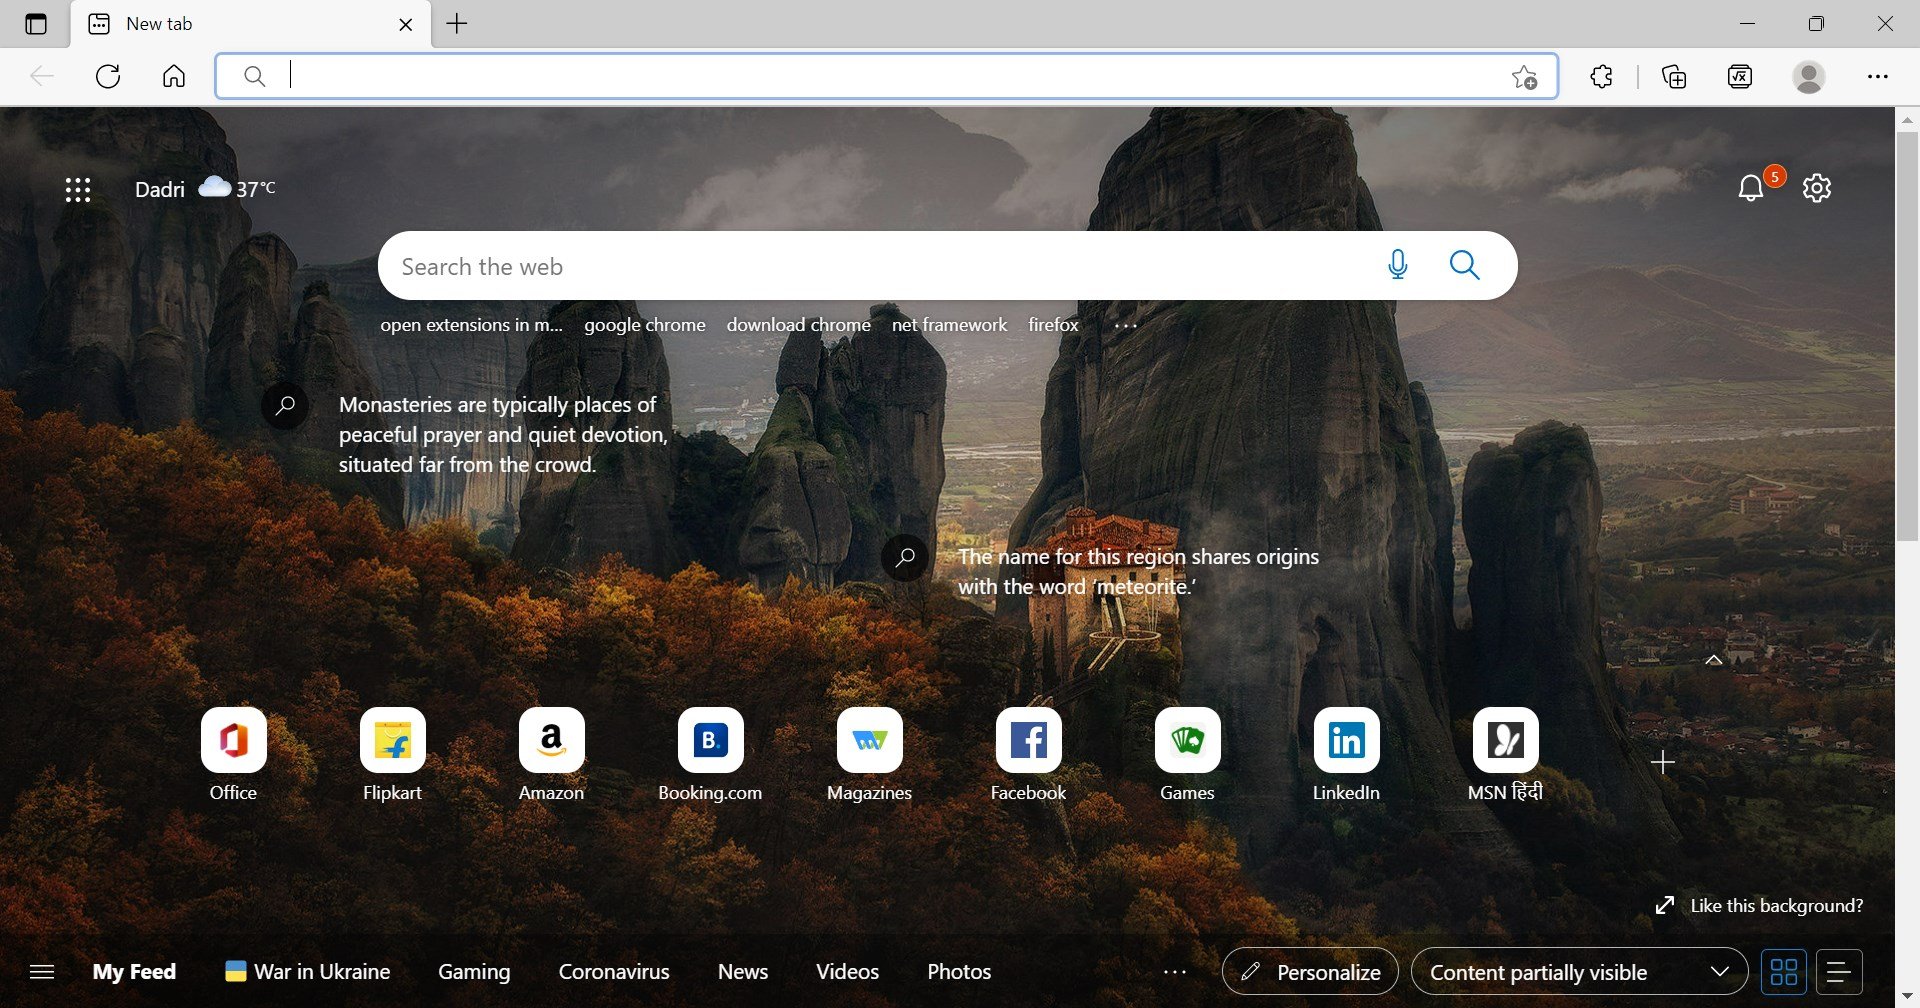
Edge – Faster than other browsers but lacks in features

Microsoft Edge is the browser included with Windows 10 that most users overlook in favor of other alternatives. Yet, Edge is certainly one of the best browsers for videos.

Edge is the only browser that currently supports all HTML 5 video and audio codecs. It’s also the only browser that can play Netflix video at a 4K resolution thanks to its PlayReady DRM tech.

The browser provides the most battery-efficient video playback on laptops. Furthermore, Edge users can add Chrome’s YouTube extensions now that it’s embracing a Chromium engine.

Other useful features:

  • Chromium engine with a revamped interface
  • Supports all Chrome extensions
  • Can customize starting page
  • Useful in business and home settings
  • Good browsing speeds

⇒ Get Edge

Google Chrome – Huge number of extensions and addons

Google Chrome boasts a massive user base nowadays. It generally provides the most extensive HTML5 support and incorporates the latest web technologies to ensure the best video playback.

Chrome is among the fastest browsers for streaming videos. In addition, users can add many great YouTube video extensions to Chrome, such as Magic Actions, Turn Off the Lights, YouTube Plus, and more.

Chrome is also a good choice for streaming, and users can certainly be sure all the extensive video-streaming services support Google’s flagship browser.

Watching Netflix movies at a high-definition resolution with the Netflix 1080p extension is among Chrome’s top features. In addition, there are numerous Netflix extensions in Chrome’s vast add-on repository.

Other useful features:

  • Malicious website identification
  • Built-in adblocker
  • Frequent security updates
  • Can stream multimedia to Chromecast devices

⇒ Get Chrome

Vivaldi – Great customization features

Another great browser that can be used to play videos online and have a great viewing experience is Vivaldi.

This browser has many customizable elements, allowing you to make your browsing experience your own.

Workspaces are customized just by quickly dragging and dropping elements from one location to another, and pinning the tabs to the sidebar can make you even more efficient.

Additionally, Vivaldi doesn’t track or store your data, so no third parties will ever have access to your data.

Other useful features:

  • Great bookmarks organizer features
  • Reader-view option allows you to read without distractions
  • Can sync data across devices
  • Advanced browser history

⇒ Get Vivaldi

Which browser has a built-in video player?

Opera One is the only browser on the market with some advantageous video-related features. This versatile browser has a built-in video player that allows users to customize how they watch online videos.

The video pop-out element can be beneficial, allowing you to move videos out of Opera One’s page tabs into standalone frames.

This feature can be handy when used properly, as in the case of comparing products by using video reviews, hunting for your favorite items on shopping platforms, etc.

As you can see, Opera One, UR, Edge, and Chrome are all excellent browsers for watching videos that also fully support HTML5 multimedia.

They’re all Chromium-based browsers and share Chrome’s repository for video websites and streaming services. So, Chromium browsers are the best for playing videos.

Which browser do you prefer? Share with us your experience using the dedicated comments area.

7 Ways to Fix HTTP Error 404 Not found [Browser Error]

When browsing the Internet, you might sometimes encounter specific errors. One of the most known errors is HTTP error 404 Not Found, and today, we will show you how to fix this error on Windows 10.

The error has several variations, each with a unique error message. We have listed the common ones below:

So, let’s find out about Error 404 in Windows 10 and its most effective solutions.

What is causing the 404 error?

Error 404 is a Hypertext Transfer Protocol (HTTP) standard response code that tells the users that the client could communicate with the server but couldn’t deliver the requested file.

This is the most common Internet error, and it appears when a user tries to access a broken or expired link. For example, error 404 can appear if you didn’t correctly enter the URL or tried to access a specific deleted or moved page.

Misconfigured settings or proxies have been found to lead to this and the HTTP 302 error in several cases. Also, if the browsing data is corrupt, you might encounter the error 404 in Windows 10.

How do I fix error 404 on my computer?

1. Check your URL

You can fix the error by simply checking your URL. In most cases, the 404 issues are caused by a mistyped URL. While entering the URL, ensure the path after the forward slash is correct.

If the URL is correct, you should know that this error can appear if the desired page is moved or deleted. If that’s the case, your only solution is to wait until this issue is fixed or contact the website administrator.

2. Clear your browsing data

Note icon NOTE
The steps listed here are for Google Chrome, and should provide an understanding of the process.
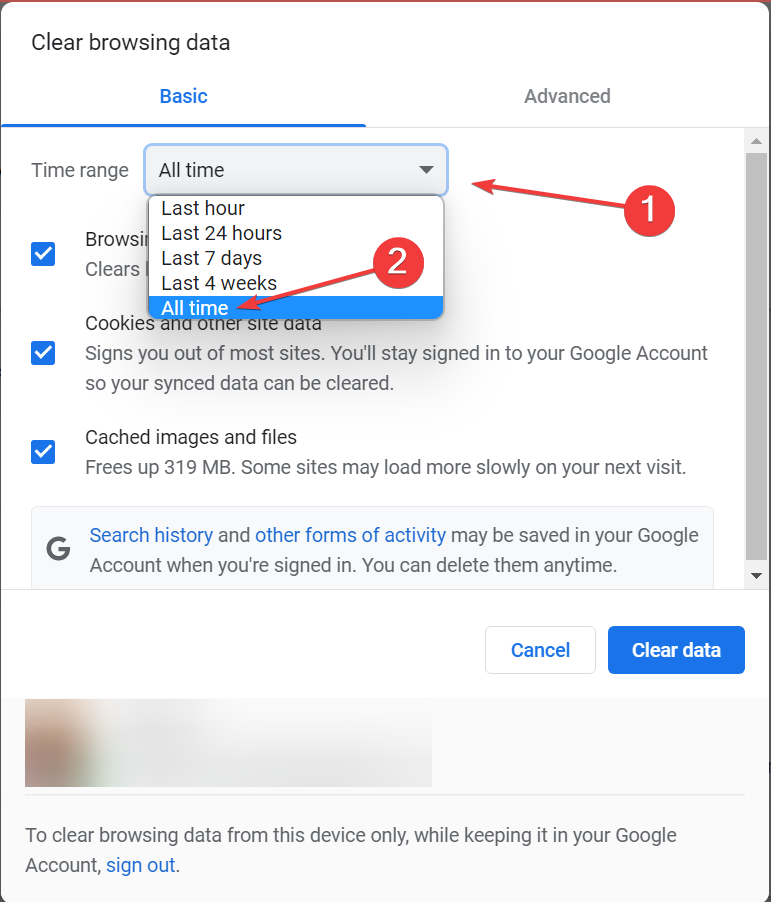
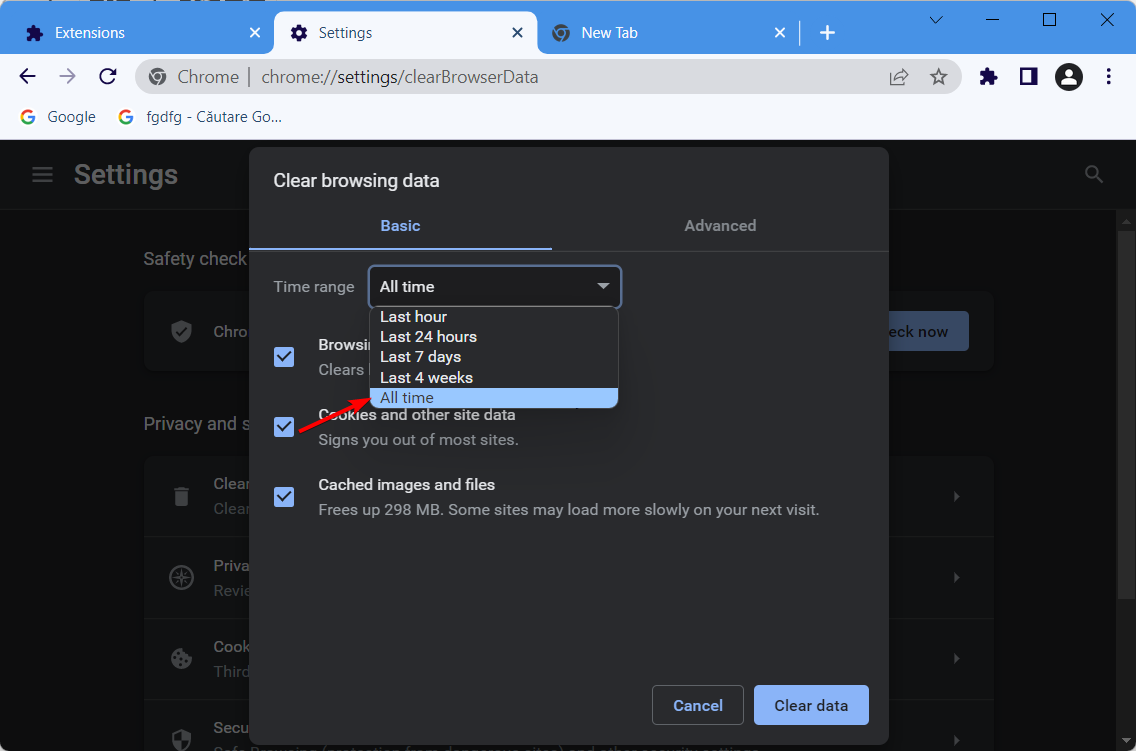
  1. Launch the browser, and press Ctrl + Shift + Del to open the Clear Browsing Data box.
  2. Select All time from the Time range dropdown menu.Time range
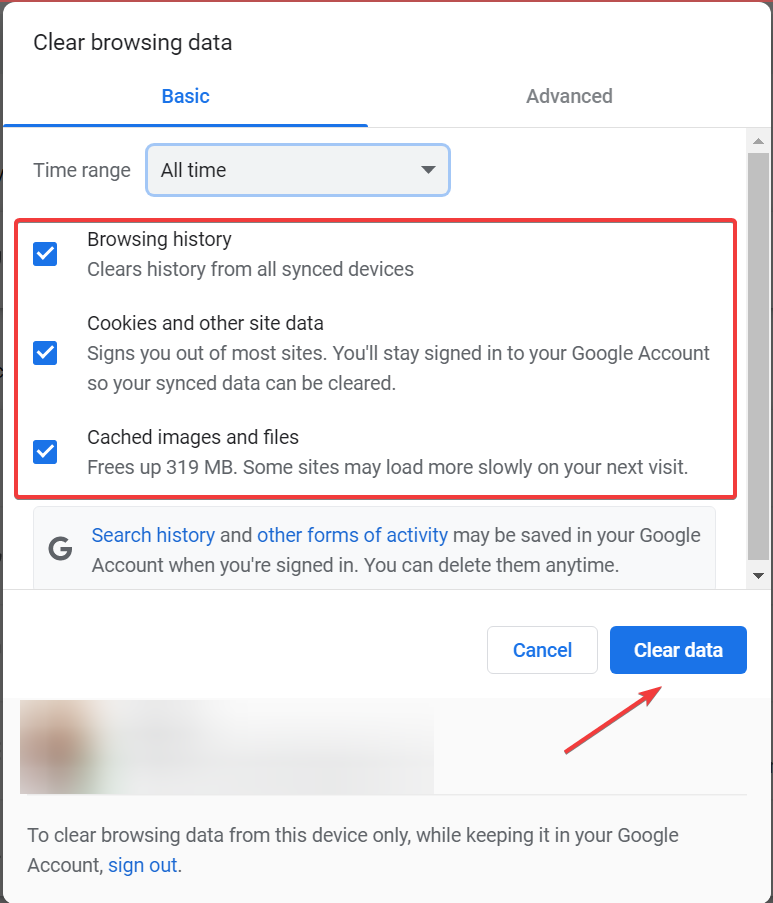
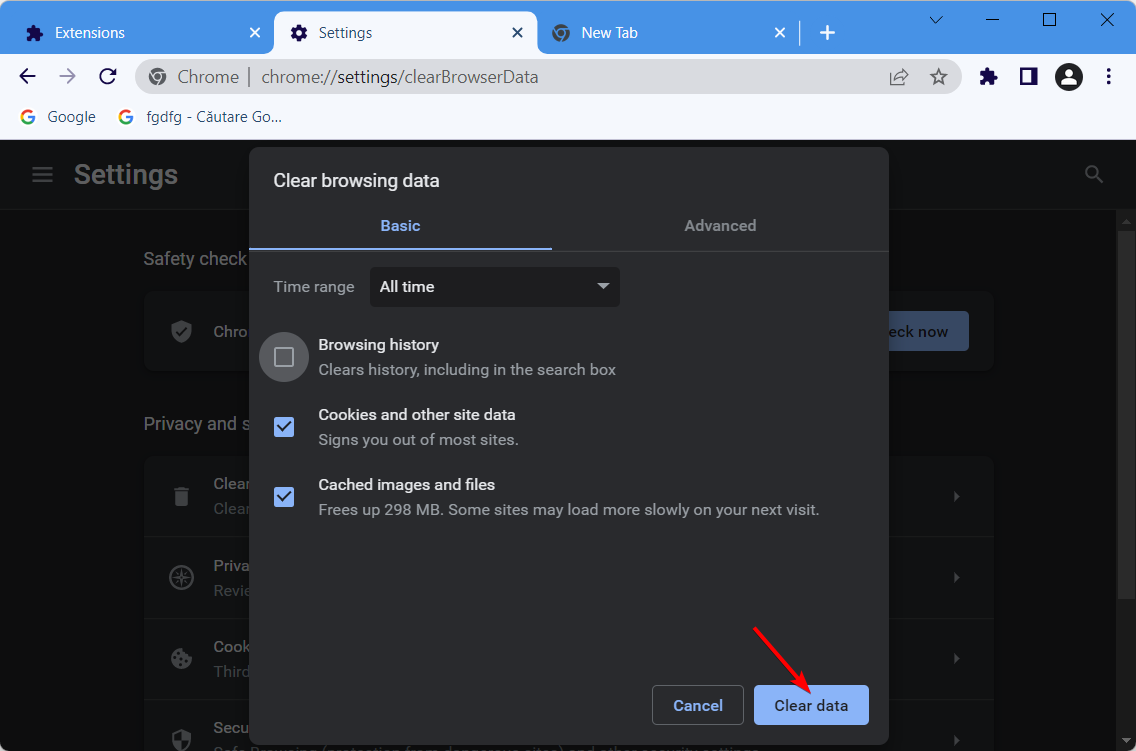
  3. Now, tick all the three checkboxes here, and then click on the Clear data button.Clear data to fix error 404 windows 10
  4. After the process is completed, relaunch Chrome for the changes to fully come into effect.

Users reported that your browser cache can cause this issue, and one of the easiest ways to fix this problem is to clear the cache.

Even if you don’t use Google Chrome, you can quickly clear your cache by following similar steps in your web browser. Also, this method would work if you come across error 404 on Javajunkies.

3. Try entering the desired URL into Google’s search

If you can’t access a certain URL, you might want to enter it in a Google search. Even if you enter the wrong URL address, Google should give you the link to the correct address in your search results.

If the problem persists even while using Google’s search results, it’s quite possible that the desired page is moved or deleted by the website administrator.

4. Use Google cache

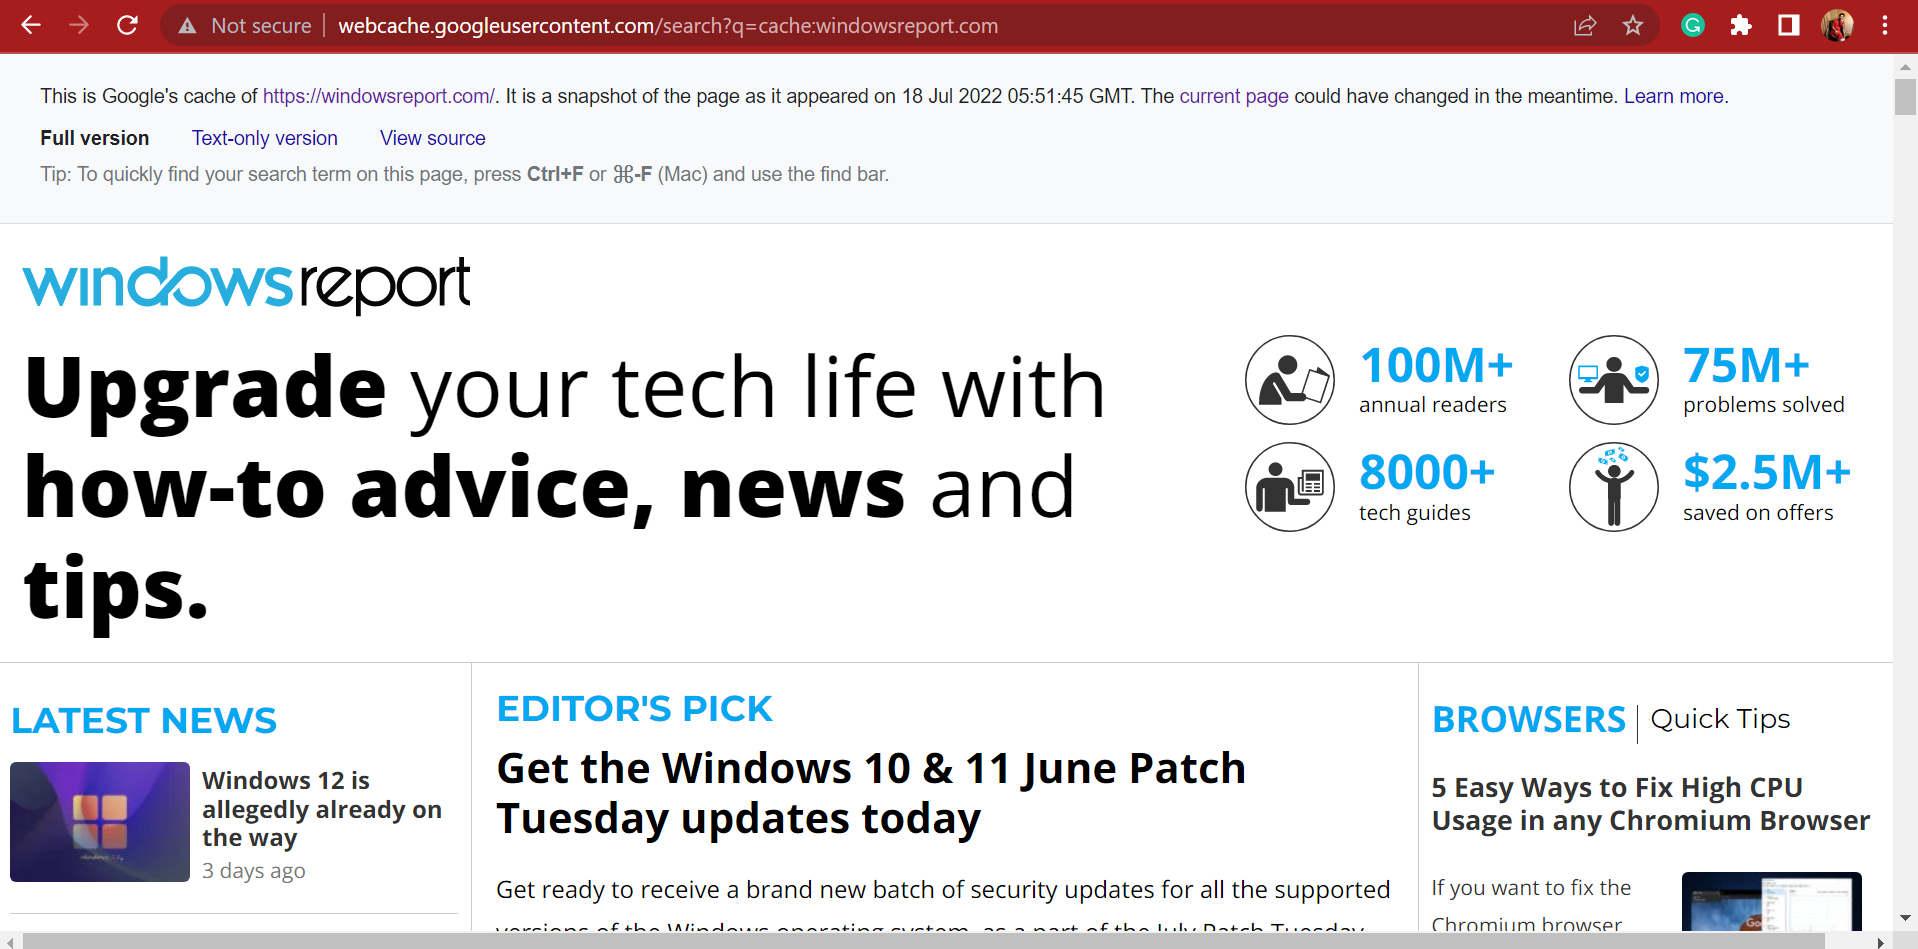
To prevent these types of problems, Google often caches web pages so you can view them even if the page is removed or if the website is down.

To access Google Cache, simply enter this address followed by the URL to the website you are trying to access, and press Enter:https://webcache.googleusercontent.com/search?q=cache:

For instance, if you are looking for WindowsReport, the complete link would be:https://webcache.googleusercontent.com/search?q=cache:https://windowsreport.com

This also helps when faced with Error 503 Maximum threads for service reached.

5. Disable the proxy

5.1 Use the LAN settings to disable the proxy

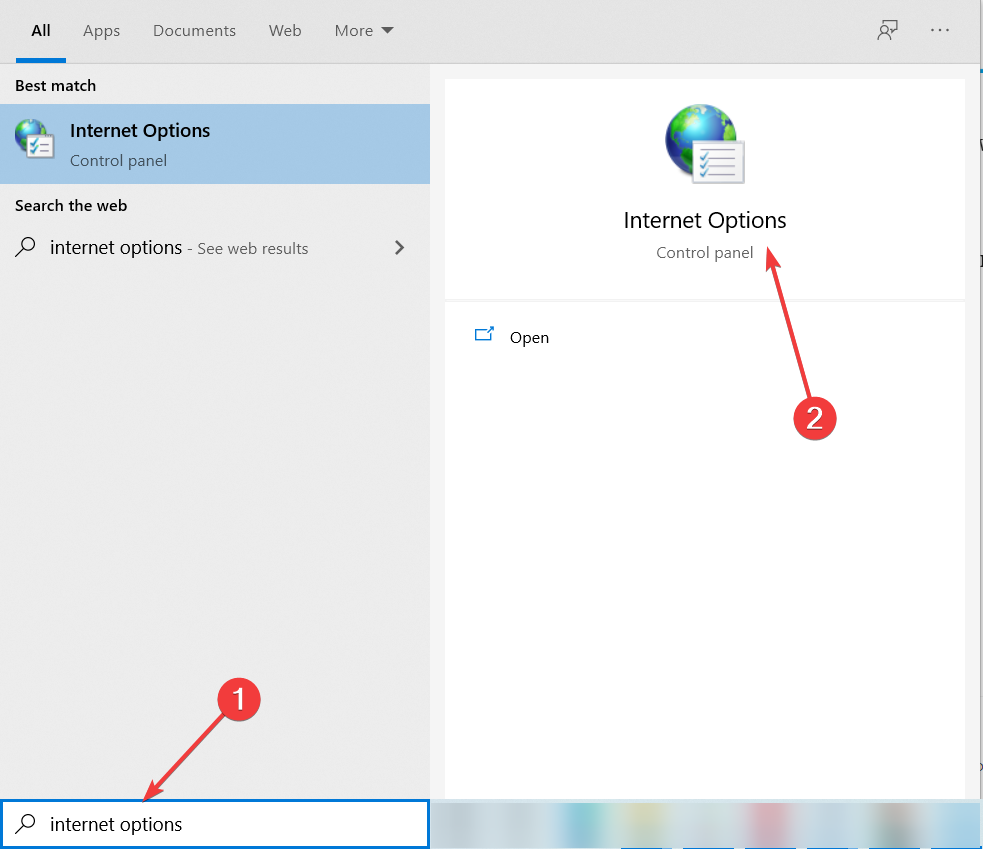
  1. Press Windows + S, enter Internet Options, and click on the relevant search result.
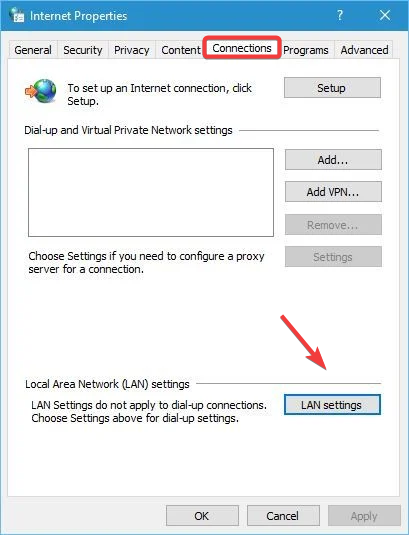
  2. Go to Connections tab and click on LAN settings.Lan Settings
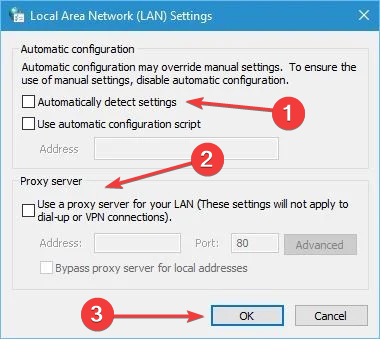
  3. Make sure that Automatically detect settings and Use a proxy server for your LAN options aren’t checked, and then click OK.disable proxy
  4. Click Apply and OK to save the changes.

5.2 Use the Settings app to disable the proxy

  1. Open Settings app and go to Network & Internet.
  2. Navigate to the Proxy tab.
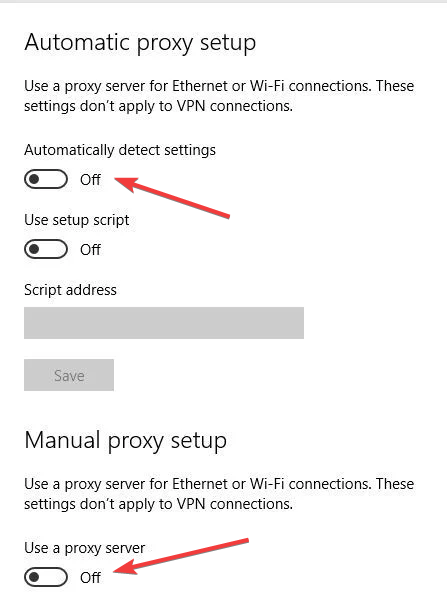
  3. Turn off Automatically detect settings and Use a proxy server options.Disable proxy to fix error 404 windows 10

The proxy can often interfere with your Internet connection, and sometimes it can even cause the error 404 to appear in Windows 10.

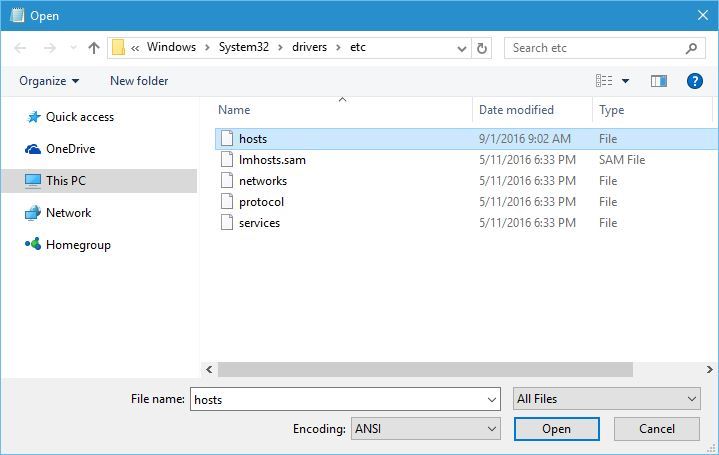
6. Change the hosts file

  1. Open Notepad, go to the File menu, and select Open.
    http-error-404-open-1
  2. Go to this folder:C:\Windows\System32\drivers\etc
  3. In the bottom right corner change Text Documents (*.txt) to All Files.
  4. Select hosts and click Open.
    http-error-404-open-2
  5. Locate the name of the website that is giving you error 404 and remove those lines. Users reported having these lines for example:
    • 79.106.2.131 localhost
    • 79.106.2.131 facebook.com
    • 79.106.2.131 www.facebook.com
  6. After removing the problematic lines, press Ctrl + S to save changes, and the error should be permanently fixed. Keep in mind that those lines might look different on your PC.

Removing the wrong lines can cause problems with specific applications. Therefore, it might be a good idea to create a backup of hosts file.

A few users reported that they couldn’t access their favorite websites due to this error. If you can’t access only one or two websites, a malicious user or malicious software might change your host file.

7. Contact the website’s administrator

If nothing else works, the problem most likely lies at the website’s end, and it’s best to contact the administrator. Maybe they would provide the new URL for the website or page you are trying to access.

And in case there’s an issue at the backend, they should resolve it once apprised of the same. And this would fix error 404 in Windows 10.

HTTP Error 404 is one of the most common errors on the Internet, but we hope you solved this problem by using the solutions from this article.

Also, you can find out how to fix the HTTP 401 Unauthorized Error as well as 406 Not acceptable error. For streaming services like the Apollo TV 404 error, see how you can bypass it.

If you know of another fix to this problem or have questions regarding error 404, please share them in the comments section below.

New Office 365 Phishing Campaign uses multi-factor authentication

We haven’t touched the topic of malware and cyberattacks in some time, so we’re going to get back on that horse and blow the whistle.

You might not be aware of it yet but top security researchers and engineers at Microsoft actually stumbled upon a massive phishing attack that has been targeting more than 10,000 organizations since September 2021.

We’ve talked about a similar phishing campaign targeting Office 365 users late last year as well, a sign that attackers just won’t relent.

Yes, that is a lot of targets, and we are about to elaborate on the matter and tell you exactly what to look out for when using Office.

Microsoft experts pull the covers off new phishing campaign

The cybercriminals involved in this scheme used adversary-in-the-middle (AiTM) phishing sites to facilitate stealing passwords and related session data.

As a result, this allowed the malicious third parties to bypass multi-factor authentication protections to access user email inboxes and run follow-up attacks using business email compromise campaigns against other targets.

The above-mentioned main cyberattack targeted Office 365 users and spoofed the Office online authentication page using proxies.

Hackers used emails with HTML file attachments that were sent to multiple recipients of an organization, in which recipients were informed that they had a voice message.

From there, clicking to view the included attachment would open the HTML file in the user’s default browser, informing the specific user that the voice message was being downloaded.

Nothing further from the truth, as the victim was actually redirected to a redirector site from where the malware would latch on.

This phishing site looked exactly like Microsoft’s authentication site, with the exception of the web address.

The next step was for the victims to be redirected to the main Office website once successfully entered their credentials and completed the second step of verification.

Once this was done, the attacker would have already intercepted the data, and therefore all the information he needed, including the session cookie.

It goes without saying that after that, malicious third parties have disastrous options such as identity theft, payment fraud, and others. 

Microsoft experts state that the attackers used their access to find finance-related emails and file attachments.. while the original phishing email that was sent to the user was deleted to remove traces of the phishing attack.

Providing your Microsoft account details to cybercriminals means that they have unauthorized access to your sensitive data, such as contact information, calendars, email communications, and more.

The best ways to stay protected against such attacks is to always double-check the source of any emails, not click on random stuff on the internet, and not download from shady sources.

Remember them, as these simple precautionary steps might just save your data, your organization, your hard-earned funds, or all of them at once.

Have you also received such a shady email from attackers pretending to be Microsoft? Share your experience with us in the comments section below.

HDR Video Streaming Not Supported [Windows 11 Fix]

Streaming HDR video online with display quality is one thing everyone enjoys. However, there are some issues you can encounter with play steam such as the play streaming HDR video not supported.

Furthermore, the HDR (High Dynamic Range) video streaming is a tool that Upscales video, presenting it with more contrast and color features. Also, it increases the luminance and the standard of media content broadcasts.

Why can I not enable HDR?

1. Outdated video card driver on Windows

Windows updates its drivers to help them perform better. So, if drivers like the video card driver are not properly installed or are not up-to-date, it’ll cause issues with the display.

2. HDR compatibility

Sometimes, people try to enable some features on their devices without researching if they are compatible with the device in question. However, your device display may not be capable of running HDR content, so you won’t be able to enable it.

3. TV or Monitor not supporting HDR steam option

People complain that they can’t enable HDR on their TV or monitor. However, some devices are not built to work with HDR stream displays, which makes them not support the feature.

4. Outdated Windows

Mostly, running Windows that is not up-to-date can cause several issues with your computer. So, it can also be a factor if you cannot enable or access the HDR stream option on your computer.

How do I fix streaming HDR video not supported?

1. Backdate your Windows version

  1. Press the Windows + I key on your keyboard.
  2. Click the Update and Security option.
  3. Select the Recovery tab, then scroll down to the Go back to the previous version of the Windows section on your screen.
  4. Click on Get started and follow the prompts to restore your PC to the earlier version of Windows.

After the restore is complete, check if you can enable the Stream HDR option in your device’s settings.

However, this solution works for users with Windows 11. It is a good fix for the Play streaming HDR video not supported in Windows 11.

2. Update your Windows version

  1. Press the Windows + I key on your keyboard.
  2. Click the Update and Security option.
  3. Select Windows Update and click on Check for updates.

Windows will check for updates and automatically install if there’s any update available.

3. Update video card drivers

  1. Press the Windows and R keys on your keyboard to prompt the Run command.
  2. Input devmgmt.msc and press Enter to open Device Manager.
  3. Click on Display adapters and select Graphics card.
  4. Click on the Update driver option.
  5. Select Search automatically for updated driver software.

Windows automatically find and install updated drivers for your video device. You can do this for all drivers under the Graphics card for safety’s sake. There are third-party tools that can do this automatically for you, preventing conflicts between incompatible drivers.

You may rely on the Outbyte Driver Updater utility to make such enhancements to ensure a proper update with the most recent display adapter drivers.

You will notice an increase in the performance of your device after downloading and installing the most recent drivers available, without the hassle of looking for them every time.

After the drivers are updated, the play streaming HDR video not supported error will be fixed.

Can I enable HDR on an unsupported display?

It is possible to enable HDR on an unsupported display. Sometimes, the HDR not supported error occurs due to some activities on the device, some of which is mentoring above.

Likewise, the HDR display might be available on a device but is not enabled, so it can prompt the HDR not supported error. However, following the solutions above, you can enable HDR on an unsupported display.

Stream HDR video keeps turning off – What should I do?

  1. Click the Start button in the bottom-left corner, then type Settings.
  2. Select Settings from the option.
  3. Select System, then go to Display.
  4. Click the HDR-capable display menu if multiple displays are connected to your computer.
  5. Turn on Use HDR.

By doing this, the stream HDR video option will be available for multiple displays and won’t be going off.

In conclusion, these are the best troubleshooting fixes for playing streaming HDR video not supported error.

However, Auto HDR not working in Windows 11 is another issue you can encounter with HDR. Hence, click the link above to read our article about how to fix it.

Also, you can read through the best 4K monitors with HDMI 2.0 if you need more information.

You can leave your questions and suggestions below in the comments section. We’d like to hear from you.

5 Ways to Fix Microsoft Teams if it’s Not Downloading Files

In an age where the Internet brings us closer together regardless of how far apart we are, the way we interact with our colleagues has changed as well.

For example, you have specialized software called collaborative software that helps teams get in touch. These tools help you to speak and create interactive meetings with your mates.

One such collaborative tool is Microsoft Teams, and it includes all the tools you could possibly think of, including instant chat, video conferencing, file transfer, and more.

Speaking of which, some users have been reporting having issues with Microsoft Teams’ ability to download the files that others have posted.

So after loading excell and word files to the team nobody can download anything. But everything is available in SharePoint and files are not corrupted. Any ideas?

This issue seems to be quite prevalent, and many solutions were tried, some of which were more or less successful.

Why are my Microsoft Teams files not downloading?

You should check to see if the services are temporarily down or inaccessible if you are unable to upload files to Microsoft Teams meetings or chats or download them.

It’s also possible that you don’t have the appropriate rights to view the files you’re trying to download from Teams, which is another typical source of this issue.

One more thing to look into is whether or not the cache in your browser is causing problems with Microsoft Teams. Therefore, you will need to delete it from your system as we’ve shown below.

This being said, let’s jump into the list of methods we have found that work best in fixing the Teams download not working issue. Keep on reading!

How do I download Microsoft Teams files?

1. Change the browser used for Microsoft Teams

As you may know, you need an Internet browser to launch Microsoft Teams, and it will usually go for the one you designated as the Default one.

However, if you see that you are having download issues with your current browser, simply download and try using another one until one works.

But if you’re looking for a browser that will handle Microsoft Teams in a secure manner, we recommend you choose one with a built-in VPN and AdBlock.

In terms of performance, Opera One includes a one-of-a-kind Turbo function that may be applied when your internet connection is very slow.

Opera One also provides data savings through compression methods not seen in other browsers, thus handling file downloads in Microsoft Teams effortlessly.

Opera One

Use all MS Teams’ features with no effort with this lightning-fast and responsive browser!

2. Clear the cache of your browser

  1. Tap the Windows key, then type Chrome and click the Google Chrome result in order to open it.chrome-search twitch extensions not working
  2. Next, use the following keyboard shortcut to open the Clear browsing data menu: Shift + Ctrl + Delete and choose All time as the time range to delete the cache.all-time-chrome images not loading in chrome
  3. Checkmark the Cached images and files option and uncheck the others.cached-data teams not downloading files
  4. And lastly, click Clear Data. The Chrome not displaying images issues will be resolved. If you were unable to download recording from Teams of any other type of file, that issue will be resolved.clear-data images not loading in chrome

Download issues can also occur if the browser you are running has the cache filled with too much redundant data.

As such, clearing it from time to time should eliminate any risk of you encountering download issues in Microsoft Teams.

Each browser has different steps that you need to take to clear the cache, so depending on what browser you are using, check the developer’s website for more details on that matter.

3. Download via the File tab

  1. Open the Microsoft Teams app from your desktop and go to the conversation where the file was shared.
  2. Above the conversation, select the Files tab.files teams not downloading files
  3. Find the file you need then click anywhere on it besides its name, then choose Download.file-download teams not downloading files

Each team has more tabs to manage the conversation. In the File tab, you can see every document that was shared in the channel. You should not have any issues if you download them from that location.

If Microsoft Teams also crashes when you open it and you have to try opening it multiple times, you can use our guide to fix the problem.

4. Use SharePoint for file uploads and downloads

Microsoft Teams’ download and upload services are hosted by SharePoint, with Teams acting as only an interface.

Many users reported that while they do have the download issue with Microsoft Teams, they can download and upload files from the corresponding SharePoint folders without any problems.

Admittedly, this is more of a workaround at best, but it should get you going until you find a permanent solution for your problem.

5. Make sure you have the permissions to download files

Some users reported that while they cannot download files from their own Team, they can from others. Thus, make sure that you have all the permissions, which include the ability to download files.

Check out our guide on how to create and manage your Team members, for a more detailed guide that will make sure you will have the right permissions.

By following these steps, you should be able to fix any file download issue you may be having with Microsoft Teams.

Where does Microsoft Teams save files?

The files that you post to a channel are saved in the SharePoint folder associated with your team. You may access these files by clicking the Files button that is located at the very top of each channel.

SharePoint is a website-based collaboration solution that enables corporate teams to work together more effectively through the utilization of workflow applications, list databases, and various other web elements as well as security measures.

Moreover, SharePoint provides the organization that is utilizing the platform with the ability to regulate user access to information and automate workflow procedures across all of the firm’s different business divisions.

If you encounter syncing issues, take a look at our post on how to fix OneDrive SharePoint sync issues in Windows 10/11.

Your OneDrive for Business folder will be used to store any files that you post to a one-on-one or group chat, and those files will only be shared with the other participants in that conversation.

The files stored in OneDrive that are displayed in Teams are not the files stored in your personal OneDrive but rather the files stored in OneDrive for Business, which is connected with your Microsoft 365 account.

We recommend that you check out our guide on how to backup OneDrive for Business to make sure you don’t lose any important files from your Teams.

Do you know of any other method that fixed this issue? Let us know in the comment section below. Thanks for reading!

Prepare to receive notifications about Windows 8.1 reaching end of support

If you still haven’t upgraded to Windows 11, or Windows 10 for that matter, you should know that Microsoft will start bombarding you with notifications.

You should know that the company is soon going to start sending notifications to Windows 8.1 users about the upcoming end of extended support.

Remember that this outdated OS is set to reach the end of its support period on January 10th, 2023, and the warning messages will appear starting with July 2022.

Windows 8.1 end-of-service notifications are incoming

As the Redmond giant stated, the above-mentioned notifications will resemble the ones Microsoft used in the past to remind Windows 7 users about the upcoming end of support.

If you are a Windows 8.1 user, you surely know that Microsoft originally retired all Windows 8 support in 2016, but the updates will completely stop starting with January 2023.

Furthermore, the company will not be offering an Extended Security Update (ESU) program for Windows 8.1, just in case you were wondering.

That being said, businesses won’t be able to pay for additional security patches and will have to upgrade or accept the risk of running software without security updates.

Many will not consider this a big loss, as Windows 8.1 was never very popular, to begin with. The original Windows 8 version was heavily criticized for things such as its over-reliance on touch-based interaction.

Now, Windows 8.1 users will now need to decide whether to upgrade to Windows 10 or buy a new rig that can support the latest OS.

As you know, Microsoft was adamant about the new system requirements for Windows 11, so an upgrade from Windows 8.1 to 11 is pretty much out of the question.

However, you can also go for Windows 10, operating system which will continue to be supported until October 14th, 2025.

Just to clarify things, Windows 8.1 devices won’t simply go blank starting with the end of support that comes on January 10th, 2023.

However, everything you do after will be at your own risk, as without software updates and security fixes you will be exposed. 

That’s something to keep in mind when dealing with software that the manufacturer deems as obsolete and no longer worthy of any effort.

But, as you might have observed, even old and obsolete versions of Windows still receive some updates during Patch Tuesday rollouts, only for major problems.

For anything else, you are pretty much on your own. Remember that when considering what OS to switch to before January 2023.

Have you also started receiving these EOS notifications on your Windows 8.1 device? Share your experience with us in the comments section below.

Microsoft backtracks on decision to prohibit sale of free open-source apps in Microsoft Store

Earlier in the month, the community was raging against Microsoft for prohibiting the sale of free open-source apps in the Microsoft Store. The policy changes were to take effect on July 16 and also covered even the sale of legitimate open source applications like Krita, and WinSCP, but Microsoft has now backtracked a bit.

Per Giorgio Sardo, who is the general manager of apps, partners, Microsoft Store, there are two specific changes. The changes impact Microsoft Store policy 10.8.7, and 11.2. Microsoft has removed the previous mention to open source pricing. He also points that if there is intellectual property concerns about an app, they can be reported online. This is a clear reference to the original reasoning behind the initial change in policy, which was to target fake apps and scammers.

Microsoft’s clarification and change on the stance took about two weeks, did they do the right thing? Let us know your thoughts on this in the comments below.

3 Best Browsers for Streaming Shudder on All Your Devices

Shudder is a pretty cool video-on-demand streaming service that specializes in horror movies. It has a combination of movies and original content, both old and new.

You get classics like John Carpenter’s The Thing from 1982 and George Romero’s Night of the Living Dead, the zombie movie that started it all, from 1968. For exclusives, you get the likes of The Queen of Black Magic and the revamped Creepshow.

If you’re a big fan of horror movies, Shudder is highly recommended. You can watch it on the official app which you can get from the Google Play and Apple App stores. It’s on Xbox, Roku, and Sling.

Is Shudder free with Amazon Prime?

No, Shudder is not free on Amazon Prime. You can, however, subscribe through Amazon Prime Video Channels by adding the service to your Amazon Prime account.

This means that you’ll have to pay extra to use it on Amazon Prime. There’s also the option to add the service to YouTube TV if you so wish. Plus there’s a seven-day free trial for you to try out Shudder before you commit to buying.

You can watch Shudder on Chrome, Firefox, Safari, and Opera One. This guide will tell you which of these browsers is the best for Shudder.

What are the best browsers for Shudder?

Opera One – Lightweight browser that keeps Chrome extensions

Next, we have Opera One. This browser has the unique distinction of supporting Chrome extensions. You can do this by simply downloading the extensions themselves from the Chrome Web Store.

There is indeed an Opera One extension that allows you to install Chrome add-ons, but that has since become obsolete due to the browser’s new native support. So you can enjoy the likes of Scener, Picture-Picture, and more.

Besides the extensions, what makes Opera One better than Chrome is how much of a computer’s resources it takes comparatively. In truth, the amount really isn’t that great, just a few megabytes, but that difference is notable.

Additional features

  • Free VPN and Ad blocker
  • Workspaces and Tab Islands
  • Native AI and modular AI-ready design

Opera One

Streaming on this browser is made easy with the built-in VPN and a vast library of add-ons.
Free Download Visit website

Chrome – Extensions enhanced viewing experience

Kicking things off, we have Google Chrome. This browser is arguably the best one on this list thanks to its robust video playback features. The browser has features that allow you to control video in a different tab.

You can also control whether the movie on Shudder will autoplay, plus it supports Chromecast. You can connect your Chromecast to your Shudder account and then onto your TV.

And what would a Chrome entry be without mentioning the vast library of browser extensions? These add-ons can greatly enhance a viewing experience and we recommend installing Scener.

Scener is an extension that lets you host watch parties with your friends where you can all enjoy a horror movie together. It comes highly rated and was even featured on Chrome Web Store for a time.

Additional features

  • Chrome also comes with a password manager to protect your information
  • The browser has a lot of other extensions to enhance movie watching
  • Consistently updated with new features

⇒ Get Chrome

Firefox – Best security features out of the three

The final entry on this list is Mozilla Firefox. Like Chrome, this browser has its unique extension that enhances the viewing experience. And similarly, you can host watch parties via the aptly named Watch Party plug-in.

There’s also Jelly Party which some people prefer since it has an in-app chat room and the ability to send emojis on there. It’s definitely one of the more interactive extensions out there.

But where Firefox shines best is in its security measures. The browser has a password manager and tracking protection to stop third-party cookies from following you. This is great to keep your data private.

Additional features

  • You can sync up your account on Firefox across various devices
  • Other extensions can add Picture-in-Picture mode
  • Mozilla has a Firefox Monitor program to let you know if your data has been breached

Why is Shudder so laggy?

According to Shudder’s own support page, a laggy video could be due to low internet speeds or too many windows taking up computer resources. They first recommend running a speed test to see if your connection meets the 20Mbps requirement.

They also recommend that you close any and all unnecessary windows and apps. These things can cause a slow internet connection. We also recommend clearing out the browser cache.

Let us know your choice in the comments area below.

Microsoft introduces new “Meet Windows 11” video series

If you are intending to transition to Windows 11 or already have, but haven’t quite gotten the hang of it, worry not! Through a blog post, Microsoft has announced that they have released a series of videos dubbed Meet Windows 11 that will help you get up to speed with everything from keyboard shortcuts to learning how to customize your experience based on your preferences.

Meet Windows 11 consists of 3 videos, the first one will help you grasp the basics such as universal search and Microsoft accounts. The second video will help you learn how to enhance and customize your Windows experience. Be sure to also check out our expert guides on how to customize icons, taskbar, and cursor in Windows 11.

And finally, the last video gets a bit more detailed where you will get to explore “new and refreshed apps” such as Microsoft Store and Phone Link. Also, get to learn how to make the most out of Phone Link through our guide.

5 Best Browsers To Watch Sky Go On All Your Devices In 2026

Watching online TV has never been easier in this streaming era, including the Sky Go service from Sky TV. Getting access to your favorite shows at the time that is most convenient for you is a remarkable feat.

If you have a Sky TV subscription and want to use the Sky Go service on your Windows PC to watch your favorite TV channels, you will find that Chrome doesn’t support the website anymore.

This happened because Sky Go requires a plugin called Microsoft Silverlight to work, and Google stopped supporting this app recently.

For these reasons, in this article, we will explore some of the best browsers available on the market that allow you to access Sky Go easily.

Can I watch Sky Go on a browser?

Yes, you can watch Sky Go on all modern browsers. However, as mentioned above, the browser must support the Microsoft Silverlight plugin.

These include Opera One, Firefox, Safari, and Edge. As you can see, there are some issues with Chrome.

There is a workaround to fix the problem on Chrome 42 to 44 versions, but from version 45, there is no solution other than using a different browser.

Does Sky Go work on all browsers?

As we highlighted above, Sky Go won’t work if you have the latest version of Google Chrome because it doesn’t support the Microsoft Silverlight plugin.

That’s terrible news because Chrome is the most popular browser out there, but you will find below a great selection of software you can watch Sky Go online without an app.

What is the best browser to use with Sky Go on PC?

Opera One – Best for streaming

The Opera One browser is a reliable software option for you to use with your Sky Go account. It loads web pages faster than many browsers out there. In the video streaming department, it performs slightly better than the browsers occupying the second and third positions in this article.

The customization options of Opera One are extensive. The interface and menus are intuitive and easy to use, even for new users.

So, if you’re thinking about switching to a new browser but are afraid of the learning curve, rest assured, you will get the hang of Opera One in just a few minutes.

The capabilities of this browser are firm and can be compared to other browsers without any problem. The privacy strength of Opera One is excellent, thanks to its built-in VPN and adblocker.

Using built-in privacy tools, Opera One prevents many cyber-attacks by blocking virtually all access points, making it impossible for hackers to steal your private information while browsing the Internet.

Here are some of the main features:

  • Incorporated VPNs for geo-restricted regions
  • Intuitive and sleek interface
  • Fast web-page loading times
  • Lightweight and efficient
  • Completely free

Opera One

Enjoy the best and fastest streaming of content on Sky GO with the help of this lightweight browser.

UR Browser – Fast and reliable

UR Browser is a very versatile and fast browser that allows you to use the Sky Go web player on your PC without any issues.

The speeds clocked by this browser will save you from lags while video streaming, provide crisp audio reproduction, and without any compatibility issues whatsoever.

This software is our top pick for watching online TV with Sky Go because it combines two of its greatest strengths.

UR Browser also contains a built-in VPN service that can be used to get access to video content from restricted countries and also keeps your information safe from prying eyes online.

This tool doesn’t load any ads or pop-ups, and that is extremely useful in a market saturated with commercials.

There have been issues with Sky Go browser blocking cookies, so make sure that you enable them before starting to watch.

UR Browser

The ultimate browser for private and secure streaming of content, even from geo-blocked regions.

Mozilla Firefox – Good for streaming

Firefox is another great option to watch Sky Go on your Windows 10 PC. It gives you the power to customize the way your browser looks and works by being able to add extensions and add-ons.

In the past years, the number of extensions available for Firefox was reduced considerably, and even though this browser is still one of the best options, some users were disappointed with the change.

Since it was revamped as Quantum, Firefox offers relatively decent loading and streaming speeds. Still, it is hardly comparable with the speeds of UR Browser.

The extensions from the Mozilla App Store can help to protect your privacy but are not as efficient. Third-party companies create them, and the risk of stealing your information remains very high.

Another reason for Firefox being placed at this top in the third place is the fact that users have reported streaming issues with Sky Go.

It is still unclear if an internal server issue from Sky caused the problem, but that caused a lot of users to migrate to other software options.

⇒ Get Mozilla Firefox

Safari – Best for Mac users

If you’re a Mac user, the best chance of watching Sky Go on a browser is Safari which still supports Silverlight.

As you know, it’s a decent navigator with plenty of features, and it’s very well blended into the macOS environment.

And although you can still use Safari for Windows, Apple doesn’t recommend it because it doesn’t support the OS anymore.

Safari comes with some excellent privacy protection features like machine learning-powered Tracking Prevention, Password, and anti-phishing protection, and Apple Pay-ready for secure online payments.

Overall, if you want to enjoy Sky Go on your Mac, Safari may be one of the best choices.

⇒ Get Safari

Internet Explorer – Best old-era browser

As we all know, Internet Explorer is one of the slowest and most buggy browsers you could use, but it can be useful in specific situations. In this case, IE works well with Sky Go.

Its successor, Microsoft Edge, doesn’t work with Sky Go even though the Silverlight app is created by Microsoft.

However, it will work if you open the page in Internet Explorer mode from Edge but that is not guaranteed either.

The processing and streaming speeds of Internet Explorer are slower than any of the browsers we mentioned in this article. Regarding the online security this browser offers, the offer is close to none.

You can’t extend the capabilities of this software with too many extensions, but you can download an ad blocker to at least be partially protected from ads.

What devices are compatible with Sky Go?

All devices that can open a browser can stream Sky Go content as long as the software supports Microsoft Silverlight.

As you’ve read above, there is a Sky Go browser compatibility problem because Silverlight has been out of support from October 2021.

However, if you have a mobile device, we recommend using the dedicated app on Google Play Store and Apple’s App Store.

In this article, we explored some of the best browsers available on the market that allow you to watch your favorite TV shows online with the Sky Go service.

By far, the best option for this task comes with Opera One, followed by UR. The speed for both streaming and loading pages of this browser is amazing. Alternatively, you can use the Sky Go Windows 10 application.

These browsers can be a blessing if you can’t watch your favorite channels on your Sky Glass due to stuck at software update in-progress issue or your Sky Glass remote is not working. Many also reported that Sky Glass won’t turn on, but we addressed this issue in a separate guide.

Please feel free to let us know if this guide has helped you watch your favorite shows on Sky Go by using the comments section found below this article.

Fix ERR_SSL_KEY_USAGE_INCOMPATIBLE in 4 Ways

The err_ssl_key_usage_incompatible error in Chrome indicates an issue with the SSL certificate, affecting the secure connection to a website.

This error can arise from various factors, including outdated Chrome versions, incorrect system time, or problematic extensions. No matter the cause, here’s how to fix it:

How do I fix ERR_SSL_KEY_USAGE_INCOMPATIBLE in Chrome? 

1. Update Chrome

  1. Launch your Chrome browser and click the three vertical ellipses in the top right corner.
  2. Click Help, then select About Google Chrome.about google chrome
  3. Check if there is an update available.check for chrome update

2. Disable extensions

  1. Navigate to your browser and in a new tab, enter the following address: chrome://extensions/
  2. Disable extensions one by one until you find the culprit.disable chrome extensions

3. Use incognito mode

  1. Launch your Chrome browser and click the three vertical ellipses in the top right corner.
  2. Select New incognito window.new incognito window in chrome

4. Try another browser

You should run your SSL certificate through its tests on another browser that supports this validation. Because Opera One is a privacy-focused browser, we suggest testing it out.

You may handle certificates under Opera One’s Advanced settings and add them as needed. We must also note that Opera is Chromium-based and supports a lot of Chrome’s features and extensions.

So if it gives you fewer headaches than Chrome and you want to make a permanent switch, know that doing it is easy and hassle-free.

Opera

Verify the integrity of your SSL certificates and browse the web in a more secure browser.

Other things to try

– Create a New Self-Signed Certificate: If using a self-signed certificate, ensure it includes the DigitalSignature parameter. Use PowerShell to generate a new certificate with the correct parameters:

New-SelfSignedCertificate -Type Custom -DnsName "server", "server.domain.local", '192.168.0.1' -KeyUsage "DigitalSignature","KeyEncipherment","KeyAgreement" -KeyAlgorithm RSA -KeyLength 4096 -CertStoreLocation "cert:\\CurrentUser\\My" -FriendlyName "YourCertName" -NotAfter (Get-Date).AddMonths(36) -Subject "YourSubject"

– Export and Install the Certificate: After creating the certificate, export it and then install it to the Trusted Root Certification Authorities on your machine. This ensures that Chrome recognizes and trusts the certificate.

– Adjust System Time: Ensure your computer’s clock is accurately set, as incorrect time settings can lead to SSL certificate errors.

– Check for Chrome pduates: Always keep Chrome updated to the latest version to avoid compatibility issues with SSL certificates.

Why does Chrome say err_ssl_key_usage_incompatible? 

If you see this message, your web browser has detected a problem with the certificate being used by the website. There are several reasons why this might happen:

  • Expired certificate – The most common reason why Chrome says your certificate is invalid is that the certificate has expired. To fix this, simply renew your certificate.
  • Your computer clock is set incorrectly – Your time will determine the validity of your SSL certificate. Chrome checks whether websites’ SSL certificates are still valid by comparing them against system time; if your computer’s clock is off by too much, then all certificates will appear invalid. 
  • An out-of-date version of Chrome – Ensure your computer is running the latest version. If not, install an update or upgrade your device.
  • Third-party extensions – If you have any third-party extensions or programs installed on your computer that might interfere with Chrome’s ability to verify the certificate, temporarily disable them and see if it helps resolve the problem.

How do I update SSL in Chrome? 

The SSL certificate is one of the most important components of any website. It provides a secure connection between your browser and the website you’re trying to reach. 

Without it, your connection is not secure, and anyone who can intercept your data can see what you’re doing on the Internet.

It is why you need to update it if it is expired. Chrome’s certificate auto-update feature is enabled by default, so you shouldn’t need to change any settings. The browser will automatically download and install new certificates as they become available.

However, you can manually check for updates if you still get the error. If that still doesn’t work, uninstall and reinstall the browser and restart your PC.

You can also secure your certificate if Chrome says it’s not valid to ensure your identity is always protected.

If you have additional thoughts on this topic, feel free to leave them below in the comments section.

2 Ways to Fix no Compatible Source Was Found Error in Firefox

The Mozilla Foundation created Firefox as an open-source and free web browser. But while streaming on your browser, it may have displayed the message no compatible source was found for this video in Firefox. In this article, we will cover all possible fixes.

Despite Firefox’s robustness and impressive feature list, you may often encounter errors streaming videos on the browser. For example, you may have problems playing DRM-protected video from Hulu, Netflix, Disney+, Amazon Prime, and other streaming services.

Additionally, the error code 102630, when videos can not be played is just another common streaming problem you may have.

Firefox’s compatible source error is similar to the non-Chromium browser’s error of where the video file cannot be played.

Quick Tip:

If Firefox keeps giving you trouble, try loading videos using an alternative browser, like Opera. It’s similar in terms of user experience and is praised for its low-error rate.

The browser is lightweight and gets updated frequently, so it should support most formats. Moreover, it includes a built-in VPN that will help you unblock geo-restricted content on VOD platforms.

Opera One

Enjoy media content and fast browsing with no bumps along the way!

What video formats are supported by Firefox?

Because patents control some music and video file formats, third-party programs are essential to use them. However, Firefox can play open as well as patented media natively.

Firefox Open Media

The Firefox browser is able to play uncompressed audio stored in a WAV container format (.wave,.wav file formats).

Additionally, Opus audio, Vorbis audio, VP8 video, and Theora video are open-source audio and video compression standards that are free to use.

These standards are used in the Firefox browser once they are encoded in the WebM (.webm file format) or Ogg container formats (.ogg, .ogv, .oga, .spx, .ogx, .opus).

MP3 playback (.mp3 file type) and FLAC  playback (Free Lossless Audio Codec) are also supported by Firefox.

Patented media

The audio and video reduction formats H.264 or MPEG-4 AVC and AAC are patented. 

But, using the in-built OS libraries, they may be displayed in Firefox. So, if they are incorporated in any MP4 container format, neither Mozilla nor you will have to pay a charge to view them.

How do I fix no compatible source was found for this media?

1. Delete cookies and site data

  1. Click on the three horizontal lines at the right top corner of the browser.
    no compatible source was found for this video firefox
  2. Click on Settings from the options presented.
  3. On the left pane, click on Privacy & Security.
  4. Scroll down to Cookies and Site Data, and hit the Clear Data button.
  5. Restart your browser.

Clearing cookies will also be a solution if you get the no compatible source was found for this media 0x10600003 error in Internet Explorer.

2. Uninstall and Reinstall firefox

  1. Click on the Start menu, type control panel, and then select Uninstall a program.
  2. Search Mozilla Firefox, click on it, and select Uninstall at the top of the window.
  3. In the next window, accept the uninstall.
  4. On the Refresh Firefox Instead window that displays, select Next.
  5. Select Uninstall on the next window.
  6. Restart your computer.
  7. Download the Firefox installer from the official website.
  8. Double-click on the downloaded file to start the installation.
    no compatible source was found for this video firefox
  9. When prompted to allow the app, click Yes.
  10. Click Next on the install wizard’s window.
  11. Select Standard and click Next.
    no compatible source was found for this video firefox
  12. Click on Install.
    no compatible source was found for this video firefox
  13. In the end, click on Finish.

This fix will be effective if no compatible source was found for this media in Chrome or Opera One. The only difference will be that you will be downloading and installing Opera One or Chrome in the place of Firefox.

Firefox is a robust browser, and if you have any video compatibility issues, this article should help you resolve them. While we have not given these fixes in any particular order, we encourage you to opt for totally switching browsers only when other fixes fail.

This and other Firefox issues on Windows 10 & 11 can usually be fixed in a few steps. And there you have it, our fixes for no compatible source was found for this media in Firefox.

We hope you have found this article helpful, and we look forward to hearing from you in the comments.

How to Fix the ERR_CERT_VALIDITY_TOO_LONG Error (Quick Guide)

The ERR_CERT_VALIDITY_TOO_LONG error in Chrome appears when an SSL certificate exceeds the maximum allowed validity period. Since September 2020, most browsers limit certificate lifespan to 398 days. Anything beyond that will trigger a net::err_cert_validity_too_long or certificate validity too long error.

This guide shows you how to fix or avoid the issue in both local setups and live websites.

What Causes the Certificate Validity Too Long Error?

  • Browser Policy Change: Modern browsers like Chrome and Safari now enforce stricter certificate policies. Any SSL certificate valid for more than 13 months (398 days) is rejected.
  • Misconfigured SSL Certificates: Some web hosts or self-signed certs may still use 2–3 year durations by default.
  • Local Development with Long Expiry: When generating certificates for local environments (using OpenSSL or mkcert), devs often use long-term validity by mistake.

How can I fix the Chrome certificate validity too long error? 

1. Update your system time

If the clock on your computer is not in sync with the server, it could result in a wrong certificate expiration date. Once Chrome detects your computer’s clock is incorrect, it will display an error message. 

This may have happened if you have traveled recently and not reset your time and date settings to your current time zone. You can manually do so through the control panel.

2. Update your OS/browser

This is probably the easiest solution, but if you haven’t updated your operating system in a while, it might be time to do so. Using an older version of Windows or macOS may bring up bugs and errors with third-party software such as Chrome. 

If you’ve updated your OS and still have issues with Chrome not loading websites properly, it might be time for another update — specifically for Chrome itself. 

This can happen if there are bugs in the browser code itself or if security updates are needed to ensure that users’ data remains safe from hackers trying to steal login information and other sensitive data.

3. Clear SSL cache 

  1. Hit the Windows key, type Control Panel in the search bar and click Open.
  2. Navigate to Network and Internet.
  3. Click on Internet Options.
  4. Go to the Content tab and hit the Clear SSL state button.
  5. Retry your site again.

How to disable certificate check in Chrome?

The SSL certificate check is a security feature that helps protect people who visit your website. It prevents your website from being impersonated and encrypts information sent between you and your visitors.

However, it can easily become a nuisance if it continuously blocks websites that are not harmful. You can disable this feature for development purposes or during testing to allow any site to open in Chrome.

Disabling the certificate check will allow you to access blocked sites and download otherwise inaccessible content. To do so, follow the steps below:

  1. Find the Google Chrome shortcut on your Desktop, right-click on it and select Properties.
  2. Navigate to the Target string and add the following string at the end: --ignore-certificate-errors
  3. Press OK to effect the changes.

Hopefully, you have been able to resolve the Chrome validity certificate too long error with one of our recommended solutions.

You may also experience certificate errors in Microsoft Edge, but you can refer to our detailed guide on how to bypass the issue.

If you have the time, you can also create a self-signed certificate which will go a long way in helping you avoid similar problems in the future.

Let us know of any other solution not mentioned above that may have helped you resolve this issue in the comment section below.

Remote Browser Isolation: What is it & How it Really Works

As technology and the internet gets more advanced, so do the threats that come with it. With so much of our lives and personal information on the web, it’s necessary to have air-tight security to keep it safe. Keep reading to learn more about Remote Browser Isolation and how it works.

Website and PC security are of the utmost importance. Check out our recommendations for the best website security software to add extra protection to your PC.

What is Remote Browser Isolation?

Remote Browser Isolation (RBI) is a security process for web browsing that protects users from internet threats like malware and hacking. RBI differs from local browser isolation, which requires hardware or software elements. RBI is a service from a third-party provider, like Cisco Umbrella.

Cisco Umbrella Remote Browser Isolation service.

One of the most common ways cyber hackers get malware to unsuspecting users is through phishing emails. These are scam emails that contain a link to a website with malicious code that is embedded in the webpage.

This code can steal personal information and invade the user’s computer. RBI is designed to protect users from this.

What are the key benefits of browser isolation?

1. Provides top-notch security

Browser isolation gives users protection from malicious websites and links because any local code and URLs open on a remote server and thus don’t take place on the user’s personal PC. This security also extends to emails to protect against phishing as all web-based emails are rendered on the server.

The isolated browser service also prevents any malicious files from downloading on a computer. All downloads are scanned to detect any threats before they are permitted to be downloaded to a PC.

Security features of RBI.

Advanced anonymous browsing features protect users from trackers and hide browsing activity from cybercriminals. It operates like a private browsing window and clears any cookies and history after ending a browsing session.

2. Protects personal information

One of the major key benefits of RBI is the protection of user data like addresses, passwords, identification numbers, etc. Users can have peace of mind when entering their personal or sensitive information online as there is no local data caching.

RBI operates using a Zero Trust security model. This model trusts nothing and no one, including users, applications, and websites. Zero Trust architecture requires strict verification of every entity using a private network.

Zero Trust security model.

3. Uses fewer PC resources

Because the isolation happens remotely rather than locally directly from a user’s PC, it uses up fewer computer resources. All the resources needed come from the remote servers and therefore provide air-tight security while being extremely lightweight on PCs.

Are there any drawbacks to RBI?

One of the main drawbacks to an RBI service is the cost. Detecting malware on webpages and rendering sites in pixels is a resource-heavy task and thus can be expensive. Luckily most services provide free demos for companies to try before they commit.

RBI demo.

Large organizations and companies use these services especially when employees deal with sensitive information and require extra protection.

Because there is no local data caching and RBI operates on a Zero Trust security model, data like usernames, passwords, addresses, etc. are not saved. This means users must manually enter their information on websites each time. Auto-fill makes browsing faster and easier, but it is also a security risk that RBI eliminates.

How many types of browser isolation are there?

There are three main types of browser isolation: client-side, on-premise, and remote. Here’s a closer look at each type.

  • Client-side browser isolation loads web pages and codes directly from a user’s device. Sandboxing keeps code and content separate so any malware doesn’t compromise a PC. This uses up more computer resources than with RBI.
  • On-premise browser isolation operates like RBI but rather than content going through a remote server, it takes place on an internal server managed by your organization.
  • Remote Browser Isolation or sometimes known as cloud-hosted browser isolation creates an isolated environment on a remote server in a cloud. Within RBI, there are two main ways to isolate a device: DOM mirroring and pixel reconstruction.
    • DOM mirroring filters out specific types of content before it reaches a user. This technique prevents content considered dangerous from getting to a user’s device while displaying content deemed safe.
    • Pixel reconstruction, or visual streaming, is when the browser runs entirely on the remote server and only displays the pixels of the page to a user. This isolates the browser entirely and the user receives a visual rendering of the content.

RBI offers the same level of security as local browser isolation but is much more lightweight on user computers. Because webpages and code are executed on a remote cloud server, nothing takes place on your device.

How does Remote Browser Isolation work?

Users fall victim to malicious websites because their browser will run the code thinking it’s legitimate. RBI prevents this code from executing by running in a sandboxed state by rendering the webpage in a cloud-based remote server.

When a user visits a webpage with RBI, the page loads on the remote server and provides a rendering of the page and thus eliminating any malicious code. This doesn’t impact how the page operates or its features so users can browser normally while remaining secure.

How Remote Browser Isolation works.

Not every webpage you visit renders on a remote server. If RBI detects potential malware on a page it will evaluate it to detect anything malicious. If it does detect something wrong, then the webpage will load through the remote isolated browser.

The content that the user sees through their default browser is a collection of pixels on an HTML5 base instead of the code that renders the page.

We hope you enjoyed our guide on Remote Browser Isolation and how it functions. For more information on security tips and tricks, check out our guide on the best security settings for Windows 11 for maximum security. Let us know in the comments what you think of RBI or if you already use it.

[Update, it has been fixed!] Are you having issues with Outlook.com today? Microsoft is looking into it

If you’re having issues with Outlook.com today, then you’re not alone. Microsoft is aware of this problem and is looking into the reason for users being unable to access Exchange.com and Outlook.com services.

Update: Microsoft has declared this issue as fixed. Officially, Microsoft says that users in the North-Eastern United States may have been unable to access Exchange Online. Our original article is still below, and here are the company’s findings, as noted on the Microsoft 365 Admin Center.

Final status: After a period of extended monitoring, we’ve confirmed that the issue is resolved.

Scope of impact: This issue could have impacted any user attempting to access Exchange Online and were located in the North-Eastern United States and surrounding geographical regions.

Start time: Monday, July 18, 2022, 9:02 AM (1:02 PM UTC)

End time: Monday, July 18, 2022, 11:20 AM (3:20 PM UTC)

Preliminary root cause: A network router was performing below acceptable thresholds, resulting in impact. We’ll provide more information within the Post-Incident Report.

——

This problem first started at around 9:34 AM ET this morning on July 18 and as of writing is still ongoing according to the Service health dashboard. According to Bleeping Computer, users also had issues with signing in and accessing and reviewing emails via Outlook.com and Exchange Online.

Microsoft tagged the issue in the Microsoft Admin Center with EX401976 and OL401977. Since initial reports, there have been three updates at the time of publishing. One of the latest indicated that there may be an unexpected drop in network availability, which is contributing to the degraded experience.

As of 11:00 AM ET, Microsoft says that they’ve identified the availability drops within network telemetry and are analyzing network infrastructure to isolate the source of the issue. The next update is due in another hour, and we’ll do our best to keep you posted on the latest.

How to Fix This Content Cannot Be Displayed in a Frame Error

Internet Explorer was discontinued in 2022 and no longer receives updates from Microsoft.

But, if you still use it, via a virtual machine or through the Microsoft Edge IE mode, you might encounter the “This content cannot be displayed in a frame” error.

Today, we’ll guide you through fixing this issue step by step. That said, keep in mind that, for better safety, you should consider switching to a modern browser—we’ll talk more about alternatives below.

How do I fix the content cannot be displayed in a frame error?

1. Change your IE privacy settings

  1. Click on the Start menu, type internet options, and click on the Internet Options app.
    this content cannot be displayed in a frame
  2. Click on the Privacy tab, then click on the Sites button.
    this content cannot be displayed in a frame
  3. In the Address of website text field, type in the name of the website triggering the error, then click on Allow and OK.
    this content cannot be displayed in a frame

If this doesn’t work, you’ll need to go into your Internet Explorer security settings and change them.

2. Reset all the zones to the default level

  1. Click on the Start menu, type internet options, and click on the Internet Options app.
    this content cannot be displayed in a frame
  2. Click on the button labeled Reset all zones to default level.
  3. Select Local intranet from the list of four Internet zones, and click the Sites button.
    this content cannot be displayed in a frame
  4. Click on the button labeled Advanced.
  5. If there are any websites in the Website list, click on them and click the Remove option.
  6. Click on Close and click on OK.
  7. Redo this process again, but this time for Trusted sites and then for Restricted sites in step 3.

Internet Explorer may be displaying this error due to a security breach due to phishing or stolen content.

3. Change the Compatability View settings

  1. Launch IE and navigate to the website with display issues.
  2. Click on the Page menu and then select Compatibility View settings.
  3. Input the name of the website into the Add this website text field, click on Add and then close.
    this content cannot be displayed in a frame

4. Try a better browser

Since Internet Explorer is obsolete at this point, it’s no surprise that it displays errors and bugs. For a better web experience, we highly recommend switching to a modern, reliable browser.

A good alternative that checks all the boxes when it comes to features, performance, and reliability is Opera.

This tool is fast, powerful, modern, has extensive add-on support, and can even be customized to look and feel however you like it. More so, it is far more stable than IE, so errors like the above will not happen.

Opera

Don’t waste time fixing obsolete browsers when you can surf the web faster than ever before!

What does it mean when it says this content Cannot be displayed in a frame?

It simply means that the browser can no longer display embedded views of your files or projects. This sometimes happens after a server update and is known to be caused by the following:

  • HTML code problems
  • Missing .Net framework installations in older PCs
  • Compatibility problems with downloaded web page

This issue is not specific to IE, and a similar problem in Safari is txtag this content cannot be displayed in a frame. On PC, users may also experience an Office online frame error. While this is unrelated to IE, they often have the exact causes.

Nevertheless, we hope you can use this guide to resolve the troublesome error message.

Note that while trying to resolve the issue, if the publisher of this content does not allow it to be displayed in a frame, there may be nothing you can do. Many admins have claimed that this may be disabled to help protect the security of information you enter into the website.

Let us know in the comments if this has been helpful.

Fix: Internet Explorer Blocked Website from Installing ActiveX

If you still use the ancient Microsoft web browser and see popups like Internet Explorer blocked this website from installing an ActiveX control, this article is for you. Here, you will find relevant information and an effective solution.

ActiveX is an increasingly antiquated software framework that is still utilized within Internet Explorer and other Microsoft applications.

It enables some websites to display interactive content, such as toolbars and games. However, in recent years, this technology has been outdated. Even if you depend on it, you may face many problems like IE ActiveX interface marshaling library won’t open or anything else.

In addition, ActiveX controls can also assist malware in installing unwanted software on Windows.

Consequently, IE automatically blocks ActiveX controls installation. That will happen for users who have enabled the ActiveX Filtering setting.

Then, some content might be missing from a page. When filtering isn’t enabled, users might still see prompts at the top of IE requesting permission to install an ActiveX control.

Quick Tip:

You’ve seen how tricky Internet Explorer’s ActiveX Filtering setting really is, and deselecting it or turning it off for specific websites might not necessarily sound like music to your years.

Instead of wasting valuable time on fixing ActiveX-related errors, install Opera One. The first thing to point out is that it never blocks ActiveX controls installation.

Opera One

If Windows 10 is blocking ActiveX install for IE, consider using a reliable alternative.

Does IE 11 support ActiveX?

Yes. Internet Explorer 11 supports ActiveX. Even though there are both pros and cons, this is still supported by the IE11. However, the new Microsoft Edge that has replaced the IE on modern Windows doesn’t support ActiveX.

Where are ActiveX controls stored in windows 10

Not only on Windows 10 but also on any Windows versions, the ActiveX control files are stored in the following location of the system drive:

C:WindowsDownloaded Program Files

How do I run ActiveX on Windows 11?

Windows 11 has not come with Internet Explorer. Instead, it has Microsoft Edge as the one and only default web browser. Fortunately, you can enable IE mode here to access websites and web applications that require IE features to function properly.

The IE mode should automatically run ActiveX without any issue. Here are the steps to enable IE mode on Edge:

  1. Open Microsoft Edge.
  2. Type the following address in the address bar and hit enter: edge://settings/defaultBrowser
  3. Enable the option Allow sites to be reloaded in Internet Explorer mode (IE mode).enabling ie mode microsoft edge
  4. Relaunch Edge.

How can I stop Windows 10/11 blocking ActiveX install for IE?

1. Turn Off ActiveX Filtering for All Websites

  1. On IE, click on the gear icon in the top right corner.clicking gear icon internet explorer
  2. Then, select Safety and deselect a ticked Active X Filtering option.disabling activex filtering ie
  3. Alternatively, you can open the start menu, search for the Internet Options and open it.
  4. Go to the Custom level button on the Security tab.going custom level internet options windows
  5. Then, select Disable for the Allow ActiveX Filtering setting shown in the snapshot directly below.disabling activex filtering internet options

2. Turn Off ActiveX Filtering for a Specific Website

When ActiveX filtering is on, a blue circle, or stop icon, appears on the right side of Internet Explorer’s URL bar.

Users can click on that to open a dialog box window that states, Some content is filtered on this site.

Then users can click the Turn Off ActiveX Filtering button on that dialog box to enable ActiveX controls for a specific website. However, the filter will still block ActiveX controls on other pages.

3. Add Pages to Trusted Sites

  1. Open the Internet Options as shown in method 1.
  2. Go to the Security tab.
  3. Select the Trusted sites option.
  4. Click on Sites.clicking sites trusted websites windows internet properties
  5. Enter the URL that showed the error: internet explorer blocked this website from installing an ActiveX control.
  6. Press the Add button.adding trusted websites windows internet properties
  7. Deselect the Require Server Verification (https:) for all Sites in This Zone option.
  8. Click the Close button.

Windows might also block ActiveX controls from installing when the publisher cannot be verified.

Then, an error message will pop up stating that Windows has blocked this software because it can’t verify the publisher.

Then it might be a good idea not to install ActiveX. Nevertheless, users can still deselect a Require server verification option to install ActiveX even when Windows can’t verify the publisher.

4. Turn Off ActiveX Control Prompts

  1. Go to the Custom level option on Internet Options like before.
  2. Then scroll down to the Automatic prompting for ActiveX controls option and select Disable.
  3. Select Enable for the Run ActiveX controls and plug-ins option.
  4. Select Enable for the Download signed ActiveX controls option.
  5. In addition, select Enable for both the script ActiveX controls settings. Just select Enable for all the ActiveX settings that include Prompt radio buttons.

So, that’s how Internet Explorer users can lift ActiveX control blocks to remove content filtering from pages.

For some users, a warning message like Failed to load popup blocker assistant ActiveX Control may appear after doing the above changes. Ignore it. But, if you don’t want to get this warning, Automatic prompting for ActiveX controls.

5. Enable Turn off blocking of outdated ActiveX controls for Internet Explorer

  1. Open the start menu, type the following command, and press enter: gpedit.msc
  2. Go to Computer Configuration and then Administrative Templates.
  3. Expand Windows Components and then Internet Explorer.
  4. Then, Go to Security Features and then Add-on Management.
  5. Double-click on Turn off blocking of outdated ActiveX controls for Internet Explorer and enable it.double-clicking Turn off blocking of outdated ActiveX controls for Internet Explorer

However, do it only when you need this. It is because enabling this option may make you vulnerable to various malware and online threats. It is always recommended to leave it configured or disabled.

Download signed ActiveX controls grayed out

When you try to enable or disable ActiveX control on Internet Options, you may find that the option Download signed ActiveX controls cannot be enabled or disabled because the option is grayed out. If it happens to you, it means you lack privileges to make some changes on the IE.

To get rid of it, you need to contact the system administrator. However, if you are the admin of the computer, it means you have made some changes in the registry or group policy that should be restored to the previous state. A system restore can help you to achieve it if you have no clue.


These are the ways to fix Internet Explorer blocked this website from installing an ActiveX Control. Remember that ActiveX can compromise your system with unwanted software and content. Apply the fixes only when you need ActiveX badly.

If you have any opinion or know a better solution, feel free to let us know in the comment box.

3 Ways to Fix tModLoader Mod Browser Not Working

Terraria is a game full of entertaining mechanics, but when it comes to the game’s problems tModLoader mod browser not working error can be the most annoying.

Terraria, like many other games, allows users to download different skins and customizations for the in-game assets.

tModLoader is an open-source Terraria modification and expansion that allows players to create and play mods.

But recently, its users have reported errors and problems like the tModLoader mod browser not working, which we will resolve in this article.

Why is my tModLoader mod browser not working?

tModLoader mod browser may not work for a few reasons. Here are the two most common culprits:

  • Heavy loads of mods
  • Server maintenance

Our solutions should be helpful regardless of your browser issue.

What mods to install on tModLoader to make the game interesting?

Calamity introduces a plethora of new weapons (melee, ranged, and magic), armor load-outs, items, accessories, and various new products and accessories.

The Super Terraria World mod turns the main game into a fully realized RPG with detailed quests, skills, NPCs, and everything else a role-playing adventure fun should have.

If you’re experiencing Terraria packet loss, follow this article’s easy steps.

What can I do if the tModLoader mod browser isn’t working?

1. Use the Steam workshop

  1. Open Steam and go to the WORKSHOP section.
    Open workshop
  2. Search for Terraria.
    search terraria in steam workshop
  3. If you see a mod you like, either check the box or click the mod, scroll down and click Subscribe.
    subscribe
  4. Once you’ve subscribed, it’ll be waiting in your Terraria workshop hub to be enabled.

Because of Steam’s excellent assistance, getting the tModLoader from there is strongly recommended to avoid problems where the tModLoader mod browser is not working.

2. Check the forum for any problem reports

The next method is to check the Terraria forums to see if the servers are down.

When the servers are down for maintenance, players cannot view the game mods list or download files from the mod browser. Server maintenance may also lead to tModLoader not opening.

The best solution is to wait a couple of days until the servers are back up.

3. Remove some of the mods

  1. Open your Mode list.
  2. Click the More info icon for every single mod.more info
  3. Press Delete at every single mod.

Installing an excessive number of mods can cause the application to crash and interfere with game files, resulting in various issues such as tModLoader not working. In this case, the tModLoader will be unable to access the Steam workshop.

What are the other services of tModLoader?

tModLoader also provides the means of sharing user-created mods with hundreds of players worldwide.

This modding tool is designed to make updating to future Terraria versions and troubleshooting issues like the tModLoader mod browser is not working as simple as possible.

Server maintenance can be the main issue of this issue; thus, patience is the best solution.

Because many players or developers meet to exchange ideas and solutions, the forums are the ideal area to look for fixes.

While many users have reported that the mod browser encountered an error, there is still no official fix to this problem.

If you can’t connect to the Terraria server, follow the steps outlined in this article.

Let us know if you were able to solve the problem or if you know of another way to resolve tModLoader mod browser is not working in the comments section below.

5 Ways to Fix Checking Your Browser Error on Cloudflare

If you’ve sometimes wondered Why is Cloudflare checking my browser? You’ve come to the right place. In this article, we’ll explain why you get this message in the first place.

Cloudflare offers these services to websites that want to protect their servers from Denial-Of-Service (DDoS) and other types of cyber attacks.

Because of the size and power of Cloudflare, a DDoS attack would not work on their server. This allows other websites to use Cloudflare protection for a fee.

This article will explore the reasons for this happening and answer essential questions.

What is Cloudflare checking your browser?

Similar to Bad Behavior, the Cloudflare BIC (Browser Integrity Check) scans for standard HTTP headers that spammers often misuse and block access to your website if it finds any.

It also presents difficulties for user agents with malicious crawlers, bots, or users.

By default, Browser Integrity Check is turned on. You may deactivate the BIC as an administrator using a firewall bypass rule. Additionally, you may selectively activate or disable this functionality for certain areas of your website using a Page Rule.

Why does it say checking your browser before accessing?

If you see the Checking your browser message, it simply means that the website you’re trying to access hired CloudFlare to protect their page against DDoS attacks.

For this reason, a temporary page will be presented to you containing the message mentioned above, and at the same time, the servers are checking if your PC is genuine.

How do I disable CloudFlare browser check?

1. Use an alternative browser

We recommend downloading and installing Opera One on your device to protect your user data and block cyberattacks.

The sites protect their data by checking your IP, the type of packet sent to the website server, its size, and the rate at which they are received, along with other details. Opera One offers a free and unlimited VPN, which helps mask your IP address.

Moreover, with Opera One, you get a built-in ad blocker so that you can navigate the internet with fewer distractions.

Let’s have a look at some more key functionalities:

  • Data synchronization.
  • Easy to use search function through open tabs.
  • Integrated social media accounts.
  • Free VPN that ensures all your data is kept private.
  • Battery saver function.

Opera One

Enjoy navigating the Internet without having your browser crash multiple times!

2. Scan your PC

  1. Click on the Start menu, type windows security, and then select the Windows Security app.
    cloudflare checking your browser
  2. Click on the Virus & threat protection option.
    cloudflare checking your browser
  3. Select the Scan options menu.
  4. Select Full scan from the list of options, then hit the Scan now button.
  5. Wait for the scan to complete and see if the error message still appears.

3. Disable your browser extensions or add-ons

  1. Launch your browser.
  2. Copy and paste the link below into your Address bar and hit Enter.
    chrome://extensions/
    cloudflare checking your browser
  3. Toggle off the disable switch of your extensions, starting from your most recently installed extensions.
  4. Check to see if the error message still appears.

4. Set your date and time to automatic

  1. Right-click on the date and time icon on your taskbar.
  2. Select Adjust date and time.
  3. Make sure the Set time automatically option is enabled.

Now you should verify if it is still checking the browser before granting website access.

5. Use a VPN

Using a VPN masks your IP address, so you will not be affected if Cloudflare is restricting a specific IP or region.

Virtual Private Networks, or VPNs, are used to link your computer to various locations across the globe safely. Choose one of the best VPNs for Windows if you don’t already use one.

Cloudflare checking your browser loop

You should wait patiently when you are stuck in checking your browser before accessing a website. Most of the time, this will correct itself, and you will not have to take action.

If this becomes a loop, you should try any of the solutions listed in this article. A loop means that something is wrong with your browser or computer, and you will not be allowed access to the website until you resolve the problem.

This article answers the question: Why is Cloudflare checking my browser?

We can conclude that the Cloudflare browser check performed by some websites is not damaging in any way to your PC and is only performed to make sure your PC is real.

8 Ways to Fix the Source File Could Not Be Read Error

You just encountered the error could not be saved because the source file could not be read. This article will show you all you need to know about this error.

First, despite a few errors you may encounter using the Firefox browser, you should know that it is a robust and reliable internet browser.

However, like every browser, you will get the occasional bugs or errors. These errors may stop you from accessing web pages or viewing files. In some cases, you will only need to try again later, while in others, you will need to apply some fixes.

For the error message could not be saved because the source file could not be read, you will have to apply some fixes, and we will recommend the best solutions.

You will be able to resolve most Firefox issues on Windows 10 and 11 by following a few easy steps and the source file error is not much different.

What does Source file Not Read mean?

When users attempt to download a file online and store it in a chosen location using the Firefox browser, an error known as Source file could not be read may appear. This error can be associated with any material, including games, music, etc.

When you get the error message, it is usually because of any of the following reasons:

  • The source file is corrupted
  • You have a bad internet connection
  • Bad browser configuration settings
  • Bad or corrupted extensions

Whatever the case, we will show you how to correct the error.

How do you fix could not be saved because the source file could not be read?

1. Switch to another browser

If you have trouble downloading files in Firefox permanently, you should consider switching to Opera. We think you won’t face the same issues based on the new improvements and features of the browsers.

Opera’s new features overshadow other popular extensions, like Firefox or Chrome. Opera’s main features include the video pop-up, embedded VPN, interactive messaging, and My Flow.

Thanks to the built-in ad blocking, the web pages are loaded quicker, and needless ads or pictures will not disturb you.

The installation requires only a few seconds so switching to Opera is easy.

Opera One

Leave any web errors behind and pick this freshened browser choice.

2. Check your Internet connection

First, check your internet connection hasn’t gone down. The server might have been interrupted when downloading. As such, open a few website pages in your browser.

If they don’t open, then a lost connection is the issue. This article provides further details for fixing network connections.

3. Delete the compreg.dat file

  1. Launch Firefox, paste the address below in the Adress bar, and then hit Enter.
    about:support
    could not be saved because the source file could not be read
  2. Under the Application Basics section, search for Profile Folder and click the Open Folder button.
  3. Close the Firefox browser.
  4. Right-click Compreg.dat and click the delete icon to erase the file.
    could not be saved because the source file could not be read

4. Adjust the network.http.accept-encoding setting

  1. Launch Firefox, paste the address below in the Address bar, and then hit Enter.
    about:
    config
  2. Click the Accept the Risk and Continue button.
    could not be saved because the source file could not be read
  3. Click on the Show all button.
    could not be saved because the source file could not be read
  4. Scroll to the network.http.accept-encoding, then click the edit icon.

  5. Erase all the value text in the text box, and hit Enter.

5. Disable download manager extensions

  1. Launch the browser.
  2. Click the menu icon and select the Add-ons and themes option.
  3. If you have the Download Manager extension, click the switch to disable it.

Try again and see if the error message could not be saved because the source file could not be read has disappeared.

6. Adjust the attribute setting for places.sqlite

  1. Launch Firefox, paste the address below in the Address bar, and then hit Enter.
    about:support

    could not be saved because the source file could not be read
  2. Under the Application Basics section, search for Profile Folder and click the Open Folder button.
  3. Right-click places.sqlite and select Properties.
    could not be saved because the source file could not be read
  4. Uncheck the Read-only checkbox, then click Apply and OK.

7. Reset the Firefox browser

  1. Launch the Firefox browser.
  2. Paste the address below in the Address bar, and then hit Enter.
    about:support

    could not be saved because the source file could not be read
  3. Click the option to Refresh Firefox on the top right side.
  4. Select the Refresh Firefox again.

8. Reinstall the Firefox Browser

  1. Open Run by pressing the Win key + Rr.
  2. Enter appwiz.cpl in the Run text box, and click the OK button.
  3. Then select Mozilla Firefox, and press the Uninstall button.
  4. Follow the wizard to complete the uninstallation.
  5. Launch a browser and download Firefox.
  6. Double-click on the downloaded file and follow the wizard to complete the installation.

One of those resolutions will probably fix Firefox so that you can download software and documents with the browser once more.

Clearing your download history, selecting an alternative download folder, and switching the anti-virus software off might also help resolve the issue.

We wrote about common fixes in our Troubleshooting Hub so make sure to bookmark it. Firefox is a great browser, but if you have any more issues, be sure to check our Web Browsers Hub for more guides like this one.

If you have read to this point, the error message could not be saved because the source file could not be read and should have been resolved.

If you have further suggestions for fixing this Firefox issue, please share them below.

Best Online Checkers With Friends [Top 5 Websites]

While not as popular as chess, Checkers is also an entertaining board game to play, and when you don’t have an actual board, there are a few good websites where you can try a quick game for free.

For more mobility, you can also find many great apps you can download on your device, be it a PC, tablet, or smartphone.

But right now, we’ll be looking at web-based alternatives to play Checkers online.

Note that you will get the most out of these games by using any of the best browsers for playing online games.

Quick Tip:

Opera GX is one of the best browsers for playing Checkers with a friend online and enjoying customizable built-in features. Change your style, set up limiters for resources, and play Checkers like a pro.

This game-changer browser was created for those who want to have fun while customizing their browsing style. Opera GX has built-in messengers and advanced settings to restrict network traffic as well.

Opera GX

Vivid colors, sleek interface, sidebar messengers integration in one place.

Can you play Checkers with a friend online?

An excellent old Checkers game is always between friends, but with innovation and tech, has that been lost? No!

The best online Checkers are still played with your friends. In some of these games, you may be able to send invitations to specific people to join in the fun or randomly pick new people online.

In this article, most of the Checkers games we share allow you to play with your friends.

Which is the best Checkers app?

247 Checkers – Most feature-rich

247checkers

To sum up this experience in a few words: click and play, no registration or fill-in forms needed, and no intrusive ads.

You can play against a computer or share your device with a friend or family member to play against one another.

The website also has seasonal Checkers boards, adapted for various seasons or seasonal events such as Halloween or Easter.

Additional features:

  • Cross-device compatible
  • Winning prizes (fake money)

⇒ Play Checkers on 247 Checkers

MSN/Zone.com – Best free online Checkers game

msn games

Microsoft offers this classic Checkers game on their unique Game Zone and other classic board games such as bridge, chess, or backgammon.

Accessing the game is pretty simple, and you can opt to log in with a Microsoft account for a more personalized experience. Otherwise, you can play without registering, choose the computer as an opponent, or wait for a real opponent to connect. 

You receive various ratings based on your game experience, which can later help you advance in the leaderboard if you’re into rankings. 

Additional features:

  • Nice game graphics
  • A leaderboard

⇒ Play checkers in the Zone

Checkers365.com – best online Checkers with friends

checkers365.com

Here is another quick-access website to try out your best moves on a Checkers board.

The board design is simple and just what regular Checkers games need. While there’s no background music, there is sound whenever a player makes a move. You can pause anytime just by changing the browser tab and then resume the game by returning to the tab.

The full-screen option allows you to focus on the game completely.

Additional features:

  • Nice board graphics
  • Cool game sounds

⇒ Play Checkers on Checkers365

Mathisfun.com – Best for kids

mathisfun

Math is Fun is an open-source educational website aimed at kids up to 12 years old. It primarily offers Math-related resources according to the current curriculum and free online games that help students train their memory, logic, and valuable strategies.

Checkers is among these games, so this would be an excellent opportunity to play the game with your kid.

You have three boards to choose from, depending on the difficulty level and three expertise levels, if you play against a computer.

Additional features:

  • Practice mode
  • Drag and drop function

⇒ Play Checkers on Mathisfun

Draughts.github.io – Most ad-free

draughts online

Github hosts this website, so it’s safe to use. Once again, no registration is necessary, and no ads will interfere with your game.

You will always play against a computer since there’s no option to choose another partner. Also, the computer will always tell you what to do if the move is wrong – so this might be a very good option for beginner players.

The site is also a good learning material for various variants of Draughts/Checkers throughout the world.

Additional features:

  • Different game levels
  • Simple graphics

⇒ Play Checkers on Github

As you can imagine, these are just some of the most accessible websites where you can play Checkers online. Equipped with your internet browser, you can now play away.

If you’re also curious to know more about online games, visit our separate Online Games Hub. Also, in our Gaming Hub, you’ll find more useful material on this popular topic.

Tell us which is your favorite one in the comments section below.

5 Ways to Bypass the Browser does not Support Geolocation Error

How annoyed do you get to see new Windows popping out of nowhere, asking for your location while browsing the internet? However, some people find it normal to allow websites to have their locations.

The new window that pops up is an attempt by the website you are navigating to acquire information about your location. Some browsers give you the option to either allow or deny the location access.

The browser does not support geolocation error is an issue users complain about. Hence, this article will discuss ways to bypass this.

Why is geolocation not working?

1. Geolocation is disabled on your browser

There is a possibility that the geolocation system on your browser is not running, meaning it is disabled. It can cause the current position not working error in Chrome and other browsers.

2. Outdated browser

Most of the issues that affect your browser can occur because it is not up-to-date. Likewise, it prevents it from having the necessary patches it needs to fix the bugs plaguing it. So, running a browser that isn’t up-to-date can cause it not to support geolocation.

3. Location is off on your device

Geolocation can only detect your precise location if the location service on your computer or mobile device is running. To be sure of this, you can check your device settings to see if it is on or not.

4. Third-party app interference

Applications like VPN can cause geolocation issues on your browser. Some VPNs can block websites from accessing your location for some reason. Thus, it can prompt the browser does not support geolocation error.

Furthermore, running an antivirus application on your device can cause a geolocation issue. But, again, it is because it can detect suspicious activity from the client.

Quick Tip:

It’s quite easy to come through this geolocation issue in your browser by choosing the featured one from Opera One.

You can easily bypass geolocation errors on this browser due to its flexible technology, app integrations, or the integrated VPN to switch your servers anytime. Also it comes with it’s own native AI.

Opera One

Never worry about geolocation with this highly secure and customizable browser.
Free Download Visit website

Where is geolocation in the browser settings?

  1. Launch your Chrome browser.
  2. Click on the Menu button in the top-right corner of the screen and click Settings.
  3. Then select Site Settings under Privacy and Security options.
  4. Select Permissions and click on Location from the drop-down.
  5. Toggle On/Off the Ask before accessing the option.

What can I do if my browser doesn’t support geolocation?

1. Adjust the location permission setting

  1. Launch your Chrome browser.
  2. Click on the Menu button in the top-right corner of the screen and click Settings.
  3. Then select Site Settings under the Privacy and Security options.
  4. Select Permissions and click on Location from the drop-down.
  5. Turn on the Sites can ask for your location option.

2. Update your browser

  1. Click the Menu button in the top right corner.
  2. Click Settings, then select Help from the drop-down.
  3. Press About Google Chrome. Chrome will manually check for an update.

Since an outdated browser could cause the browser not to support geolocation, updating it should fix the issue quickly.

3. Turn on your device location

  1. Go to Start on your computer.
  2. Click on Settings and the Privacy and Security option.
  3. Select Location from the option.
  4. Switch the Let apps access your location setting On.

It will give apps access to use your device location and also allow geolocation to navigate your browser.

4. Turn off Windows Defender Antivirus

  1. Click the Start button on your computer.
  2. Type Windows Security in the search box.
  3. Select the Virus & threat protection option.
  4. Click Manage settings, then toggle off the Real-time protection option to turn off Windows Defender Antivirus.

5. Check your internet connection

A poor internet connection can prevent websites from connecting to your location. So, performing a power cycle on your router can fix this.

How accurate is HTML geolocation?

HTML geolocation is more accurate than other location navigators like IP geolocation. Using HTML gives you more precise geolocation. It is easy to understand and best for devices with GPS services.

Consequently, turning on location access for some websites can be dangerous and lead to issues like browser leaks.

These are the best fixes for the browser does not support geolocation error. The location modification settings will likely be the best option from our guide.

In conclusion, we have an article on the best browsers with the highest support for HTML that you can read through. Hence, click on the link above to know more about it.

Windows news recap: Global PC sales fall, Microsoft 365 app support on older Windows being dropped, and more

Welcome back to our Windows news recap, where we go over the top stories of the past week in the world of Microsoft’s flagship operating system.

Global PC sales down, including 12.6% drop in Chromebook sales, says Gartner

According to preliminary data from Gartner, there’s been a large fall in global PC sales, with Chromebooks seeing a particular decrease of 12.6%. The drop in PC sales is being attributed to the conflict in Ukraine, as well as inflationary pressures, and generally lower demand.

Parallels Desktop For Chromebook Enterprise

Microsoft dropping support for Microsoft 365 apps on Windows 7, Windows 8.1 on January 10, 2023

Support for Microsoft 365 apps on several older versions of Windows will cease on January 10, 2023. Affected versions include Windows 8.1, the three-year Extended Security Updates (ESU) paid program for Windows 7 and Windows Server 2008 R2.

Microsoft dropping support for Microsoft 365 apps on Windows 7, Windows 8.1 on January 10, 2023 - OnMSFT.com - July 12, 2022

Xbox Series X|S can now run Windows 98 and classic PC games like Quake, Half-life

Thanks to DOSBox Pure emulator and Retroarch frontend programs, it is now possible to run Windows 98 on an Xbox Series X|S, and subsequently, play classic PC games, such as Quake and Half-life.

That’s it for this week. We will be back next week with more Windows news.

3 Surefire Fixes for the Rec Room Error Code Summer

Rec Room is an excellent online platform built for gamers. It is a complete package where users can interact, play, and create games.

Recently, the users have been complaining about various issues with the Rec Room error code summer, one of the significant problems. This error is devastating as it prevents gamers from accessing the platform.

Like we did with another log-in issue in Valorant’s error 7, we have provided three effective fixes to help solve the problem efficiently in this guide.

Why is my Rec Room showing error code summer? 

The Rec Room error code summer is a temporary issue caused by server downtime. While this is a rare occurrence, it is a well-known culprit.

Another reason for the error code is the interference of antivirus or firewall. 

Lastly, the issue might be due to a technical problem on Rec Room’s part that you can’t trace.

We also have comprehensive guides on how to fix the Rec Room error code Student and Rec Room error code Notebook if you’ve encountered them.

Quick Tip:

The world’s first gaming browser, Opera GX, includes Discord support as well as sidebar integration for fast access to any game room. You just need to log in and search for Rec Room and you are on.

It may also make things easy if one server is down, thanks to the built-in VPN that can change your location. Opera GX Discord integration makes it simple to keep up with chats with online contacts.

Opera GX

Sidebar integration for Discord and quick access for Rec Room and other game-related chats.

How can I fix the Rec Room error code summer?

1. Check Rec Room server status 

discord

If you see the error code summer when trying to log in to Rec Room, the server is the first thing to check. You can get a live report on the server status from the official Discord channel.

Also, you can check the Rec Room subreddit or the Twitter page for any updates on the server. Unfortunately, if this is the cause of the error code, you have no choice but to wait for it to be resolved.

2. Disable antivirus

If you have an active antivirus or firewall on your PC, it might be blocking Rec Room’s network traffic. In this case, you need to disable the software temporarily to connect to the Rec Room.

After the connection, you can activate it again. However, if the antivirus is too important, you can add an exception for RecRoom_Release.exe on it.

3. Contact support

contact support rec summer room error code

If you still can’t pass the error code, you might need to contact the official Rec Room technical support. This is because the issue might be beyond you and requires the input of an expert.

The Rec Room error code summer can be frustrating as it prevents you from logging in to the platform. Fortunately, it is a temporary issue you can fix in a few steps.

Are you facing issues in other gaming issues like the ESO unexpected internal error? Our article on the topic will show you how to solve the problem quickly.

Feel free to let us know the fix that helped you get back to creating and playing games on Rec Room in the comments below.

5 Best Browsers for Amazon Prime Videos [Streaming Guide]

In determining which browser is best for watching Amazon Prime videos, it is important that you consider important aspects such as speed, battery usage, or support for high-definition.

In general, you can use any browser to watch Amazon Prime, but definitely, the user experience won’t be as good as with a browser that comes with the above-mentioned options.

So, in this article, we will explore some of the best browsers you can use in order to make an informed decision, so make sure to keep reading.

Can you watch Amazon Prime Video on browser?

Yes, Prime Video can be accessed on a web browser, and you can easily watch your favorite content. To do that, simply go to Prime Video’s official website, log in with your Amazon Prime credentials, and you are good to go.

Also, Prime Video runs on all major browsers, including Opera One, Chrome, Firefox, Edge, and Safari. In case you face any trouble with it, just install the latest version of the browser.

How do I update my browser for Prime Video?

Almost all the major web browsers have an About option placed under the Help section in the menu, and clicking on it will make the browser automatically download updates. For instance, it’s About Google Chrome for Chrome or About Opera in the Opera One browser.

And, if your browser works fine, it should automatically locate and install the available updates.

Which browser is the best for Amazon Prime?

Opera One – The best streaming experience

Opera One comes with unique video features that are difficult to find in other browsers, which is why it is our first recommendation. It is, undoubtedly, the best browser for Amazon Prime Video.

This browser includes a video pop-out that allows you to move the video from the Opera One page into a separate frame or put it anywhere on the Windows desktop.

Moreover, the turbo mode will save bandwidth when playing videos and speed up your browsing.

This browser comes with a built-in VPN and an ad-blocker that will ensure your online privacy and that you won’t be bothered while watching Amazon Prime videos by annoying commercials.

UR Browser – Lightweight and quick

UR Browser is one of the best browsers to watch online videos, and it has definitely not gotten the deserved praise and attention.

This is a great browser for watching videos on websites, thanks to the fact that it is based on the same Chromium engine as Chrome and Chromium-Edge.

The HTML5 support is comparable with Google’s browser. Moreover, you can utilize Chrome’s video extensions to customize the playback on any website you want.

Additionally, UR Browser comes with a built-in VPN that will allow you to watch content with geographical restrictions.

Edge – Offers decent streaming

Although Edge is included with Windows 10 and is overlooked by many users in favor of other alternatives, this is one of the best browsers to use for playing Amazon Prime videos.

This is the only browser that supports all HTML5 video and audio codecs. Moreover, it is the only browser that can also play 4k resolution videos, thanks to the PlayReady DMR tech.

Edge provides the most battery-efficient video playback on laptops, so you won’t find it as often with a low battery as you would when using other browsers.

Furthermore, you can add Chrome’s YouTube extensions thanks to the existence of the Chromium engine.

⇒ Get Edge

Google Chrome – Streams videos without lag

Google Chrome is one of the most used browsers out there. It is the perfect choice for most things, including being the best browser for Prime Video.

It provides extensive HTML5 support and also incorporates the latest web technologies to ensure a high-quality video playback.

Moreover, Google Chrome is one of the fastest browsers for streaming videos. You can also add any YouTube video extension wanted, such as Magic Action, YouTube Plus, and many more.

With this browser, you can be certain that the streaming will work perfectly and no lag will occur.

⇒ Get Google Chrome

Mozilla Firefox – Advanced and feature-loaded

Mozilla Firefox continues to be a major player in the web browser realm and is also one of the first choices for playing Amazon Prime videos.

Thanks to the Refined Prime Video extension that you can install on Mozilla Firefox, your video experience will be improved significantly.

Thanks to this extension, any previous technical issues that were happenings are solved, and you’ll be thrilled to have used this browser.

Moreover, thanks to the built-in privacy option, Mozilla Firefox is also a safe browser to use that will ensure all your data is protected.

⇒ Get Mozilla Firefox

Which browser is better for streaming video?

All the five browsers listed here would work fine to stream videos, but if you are looking for the best one, we recommend Opera One.

Videos stream without lag on Opera One, even with a decent Internet plan. Additionally, the built-in VR 360 player simply revolutionizes the experience. Besides, the wide range of extensions allows users to modify how Opera One functions and enhance the streaming experience.

These were the best browsers for Prime Video. As you can see, there are some fantastic options to choose from. Also, discover the best browsers for streaming Netflix on your computer.

Please let us know in the comments section below which one you have tried. We would love to hear your thoughts.

Fix: Could Not Move Extension Directory into Profile

Chrome is known for the huge number of extensions it supports. The Google Chrome store is flooded with extensions/plugins across every category.

While installing and using plugins is pretty easy, there are cases where things can get a bit ugly. This is one such case where Chrome users are not allowed to install the browser extension, the following error message appears: Could not move extension directory into profile.

It is most likely to happen when one is reinstalling an old extension. What happens, in this case, is that the browser is not able to move the extension into the profile folder.

Where are Google Chrome extensions stored?

When Chrome extensions are installed, their contents are extracted and placed in the Extensions folder, which can be found at: C:\Users\user_name\AppData\Local\Google\Chrome\User Data\Default\Extensions

extensions could not move extension directory into profile.


Each extension will have its folder titled after its ID, which will be used to store the extension.

How do you move an extension?

To copy an extension, you can right-click on the extension folder and copy it. Then you can paste it inside other Chrome profile folders to have the same extension.

To completely move the extension, you can follow the same procedure, but instead of copying it, you can cut it.

Could not move extension directory into profile message can prevent you from installing new extensions. Speaking of this issue, here are some similar problems that users reported:

  • An error has occurred could not move extension directory into profile. Reload close – This issue can occur due to certain glitches in Chrome. To fix the problem, just restart Chrome or rename its Default directory.
  • Google Chrome could not unzip extension – This is a similar issue, but you should be able to fix it using the solutions from this article.
  • Chrome could not move extension directory into profile – This is similar to the issue above

This being said, let’s jump into the list of solutions you can implement and fix the Could not move extension directory into profile issue. Follow along!

How do you fix an error has occurred could not move extension directory into profile?

1. Restart your browser/PC

restar pc could not move extension directory into profile.

Sometimes these types of problems can appear due to temporary glitches, and one way to fix them is to restart your browser or your PC. If glitches occur, just restart your browser and check if that helps.

If the issue is still there, restart your PC and check if the problem is still present. This is a simple solution, but several users claim that it works, so you might want to try it out.

2. Try another browser

While you are busy troubleshooting Chrome’s extension issues, you may need to use a different browser in the meantime. As such we suggest you choose Opera One as an alternative.

It is made using the Chromium engine, meaning any Chrome extension that exists is also compatible with Opera One.

More so, it is highly customizable, allowing you to easily add and arrange the extensions in your sidebar in whatever manner you need. This ultimately makes it easy for adding and removing them to and from your profile.

Opera One

Relish impressive UI customization features, including the ability to arrange your extensions to better suit your needs.

3. Disable your antivirus

  1. Right-click on the antivirus icon from your Taskbar and click on the Disable for 10 minutes option.avast-shield-off could not move extension directory into profile.
  2. No matter what antivirus software you are using, the steps will be similar.

In some rare instances, it’s possible that your antivirus is causing Could not move the extension directory into profile message. To fix this problem, it’s advised to disable certain antivirus features and check if that helps.

If the issue is still there, you might have to disable your antivirus altogether. In some rare cases, you might even have to remove your antivirus in order to fix this problem.

If removing the recurring antivirus does the trick, you should consider switching to a different antivirus solution.

Nonetheless, after installing a compatible antivirus tool run a full PC scan to comprehend security, privacy, and identify potentially unwanted programs.

4. Clear your cache

  1. Tap the Windows key, then write Chrome and click the first result to open the browser.chrome-search twitch extensions not working
  2. Now use the following keyboard shortcut to open the Clear browsing data menu: Shift + Ctrl + Delete. Select All time as the time range.all-time-chrome images not loading in chrome
  3. Next, checkmark the Cookies other site data and Cached images and files options.cookies-and-cache-chrome images not loading in chrome
  4. Lastly, click Clear Data.clear-data images not loading in chrome

Cookies are little text files that are generated by websites that you visit. They make your time spent online more convenient by preserving the info you browse with.

When you return to a website, the cache will remember specific elements of the page, such as photos, which will allow the pages to load more quickly.

After clearing the cache, check if the problem is still there. In addition to clearing the cache, we recommend using CCleaner to remove the junk files from your PC, so you can do that as well.

Sometimes you might fix Could not move extension directory into profile error simply by clearing the cache, so be sure to try that.

5. Empty the Recycle Bin

According to users, they managed to fix Could not move extension directory into profile in their browser simply by emptying the Recycle Bin.

Several users reported that the issue was completely resolved after cleaning the Recycle Bin, so you might want to try that.

Once you clean your Recycle Bin, the issue should be completely resolved, and you’ll be able to install extensions once again.

6. Create a new Default folder

  1. Press the Windows key + R, enter %localappdata%, and press Enter or click OK.run-local-data could not move extension directory into profile.
  2. Navigate to the Google followed by Chrome and User Data directories.google-directory could not move extension directory into profile.
  3. Locate the Default directory and rename it to Default-backup by clicking once on it.default-backup could not move extension directory into profile.
  4. Now cut the folder by right-clicking on it and tapping on the scissor icon, then paste it somewhere else. Restart Chrome to automatically create a new Default folder and check whether the error is gone.

Once you rename the directory, Google Chrome should recreate it and the Could not move extension directory into profile error will be resolved.

7. Remove the problematic extensions

  1. To fix the Could not move extension directory into profile, open a new Chrome window and click on the three-dot menu followed by More tools and Extensions.extensions-chrome your connection was interrupteda network change was detected. err_network_changed
  2. Lastly, click on the toggle button under your extensions to turn them off.disable-ext your connection was interrupteda network change was detected. err_network_changed

After disabling all extensions, check if the problem is still there. If the issue doesn’t appear anymore, you need to enable extensions one by one until you find the one that is causing this issue.

Once you find the problematic extension, keep it disabled or remove it from Chrome. Many users reported that the HTTPS Everywhere extension was causing this issue, so if you’re using it, be sure to disable it and check if that helps.

8. Reinstall Google Chrome

Sometimes your installation might get corrupted, and that will cause this and many other errors to appear. To fix the issue, users are suggesting reinstalling Google Chrome.

There are several ways to do that, and the most effective one is to use uninstaller software, that removes required files and all cache stored.

In case you’re not familiar, uninstaller software is a special application that will completely remove the selected application along with all of its files and registry entries.

By using uninstaller software, you’ll completely remove Chrome from your PC ensuring that there aren’t any leftover files. Now you just need to install Chrome again and the issue should be resolved.

What to do if I could not move extension directory into profile on Mac?

In the case of Mac users, you can apply all of the above methods to your device. However, if you keep getting Could not move extension directory into profile message, the issue might be related to your version of Chrome.

Although Chrome is a great browser, issues can sometimes appear, and the best way to fix them is to keep your browser up to date.

If your browser is already up to date, we advise you to try Chrome Beta or Chrome Canary. The Beta version usually offers new fixes, and it’s stable for use, for the most part, so you might want to try it out.

On the other hand, the Canary version is an experimental version, and it usually has the latest fixes available that aren’t fully tested.

As a result, the Canary version might not be stable, but it should have the latest fixes installed. To download and install the latest Chrome version, check our Google Chrome installation guide.

Could not move the extension directory into profile message can cause many problems and prevent you from installing extensions in Chrome, but we hope that you managed to fix this problem by using one of our solutions.

Don’t hesitate to leave a comment in the section below and share your thoughts with us. Thanks for reading!

3 Best Browsers To Watch Vivamax On Your PC

Vivamax is an online platform to stream Filipino classics and blockbuster movies, and bench popular television series. Users only need to purchase a single subscription to enjoy all the Pinoy entertainment.

Streaming on Vivamax allows users to catch the premiere of originals and exclusives weekly. In addition, the platform includes Korean, Asian, and Hollywood genre movies with optional Filipino audio.

You can access Vivamax on your web browser without any additional software. All you need to do is open and log in to Vivamax.net and start watching.

So in this post, we have compiled a list of the best Vivamax browsers to use in 2022.

Where is Vivamax available?

Vivamax is currently available in 71 territories. These include the USA, Canada, Hawaii, Guam, middle-east countries, etc. It aims to be accessible to every Filipino around the world.

To use Vivamax, users can directly log in to the website or download its application from the Google Play Store or the Apple app store.

How do I watch Vivamax online?

You need to create an account on Vivamax and choose your subscription to enjoy watching various movies and originals. Once you purchase a subscription, log into your account and watch your favorite movies.

For only PHP 149/month, you may enjoy content from different categories produced by Vivamax and content from its local and worldwide partners. Stream as much as you want.

What are the best browsers for Vivamax?

Opera One – Save and collect web content easily

If you want something as lightweight yet speedy as your Vivamax browser, Opera One is the way to go. This Chrome-powered browser is frequently considered a more sophisticated version of Google Chrome.

One of its distinguishing features is a hotlist that functions as both a web directory and a bookmark file. It may, however, be easily removed based on the user’s preferences.

Aside from that, one of Opera’s features is keyboard and mouse controls. Many plugins are also available, including RealAudio, RealVideo, and ShockWave.

Opera One

Don’t miss any Filipino classics with this fully integrated browser that ensures your Vivamax shows.

Google Chrome – Sync with Google services and accounts

Chrome is one of the most popular Vivamax browsers globally. It provides a refined and private surfing experience and a number of add-ons, privacy settings, as well as a simple user interface.

Because Chrome is cross-platform, it is convenient to sync data across all of your devices. It provides a variety of add-ons to make your browsing experience more convenient.

The Chrome browser uses AES-256 encryption standards to secure local passwords and cookies. It also makes use of the data protection API integrated into the operating system to handle encryption sources.

⇒ Get Google Chrome

Microsoft Edge – Simple privacy controls

vivamax browser

The Edge browser is now offered as an alternative to Internet Explorer. It contains a variety of features and perks that make it a viable alternative to major browsers such as Chrome and Firefox for browsing through Vivamax movie list.

The browser is strong, with built-in anti-phishing and malware protections making it one of the best Vivamax browsers. It now includes password encryption stored in the OS storage space.

Microsoft also improved the browser’s gaming capabilities by adding a customizable gaming home page. It includes exclusive Xbox features and selected content to enhance the gaming experience of users.

Many users have complained about Microsoft Edge keeps crashing error. If you’re among those, read this post to fix it.

⇒ Get Microsoft Edge

Can I watch Vivamax offline?

You can save your data by downloading Pinoy titles on your device. Further, you can watch them offline anytime, anywhere.

You can watch new titles and Filipino-made Originals exclusively on Vivamax. Access the most extensive library of Filipino content with no ad interruptions.

These were the best Vivamax browsers. Among the above-mentioned, Opera and Chrome are the two most recommended browsers you can try.

If this guide was helpful, do let us know in the comments below.

PayPal Bitcoin Scam Email: How to Protect Yourself from It

Scammers are active now more than ever, and they are trying everything they can in this digital world to lure innocent people into handling their personal information so that they can extract money from them.

Although the current state of Bitcoin is not beneficial or interesting, for scammers, it simply doesn’t matter.

You will find several user reports regarding the PayPal Bitcoin scam email on Reddit and official forums. Reportedly, people receive an email saying that they have purchased some amount of Bitcoin and the amount has been debited from their account.

Then there is an attachment or link given in the email, which the users are asked to click or open to check the details. As soon as they click on the link or download the attachment, their PC is injected with a virus and all of your personal data is locked behind a paywall.

This is just one of the many different ways scammers are trying to extract money from PayPal users. In this guide, not only will you learn about this PayPal Bitcoin scam email in-depth, but we will also give you a list of solutions that you can follow to safeguard yourself from such scams.

What is the PayPal Bitcoin scam email?

According to user reports, the PayPal Bitcoin scam email will arrive in your inbox with the subject line having an invoice number, your name, etc. Again, this is just one of the most common examples that have been reported by users. The PayPal Bitcoin scam email that you receive could be in a different format.

The fake email will contain a fake invoice, with the details of the purchase of the Bitcoin. However, do note that although the invoice generated is fake, clicking on the link or attachment might actually transfer payment from your PayPal account to theirs.

As reported by one user, here is a good example of a PayPal Bitcoin scam email:

Thank You for choosing Paypal for placing your Order BITCOIN.
Your order has been successfully placed.
The Payment will be shown soon within the next 5 to 10 hours on PAYPAL
PRODUCT INFORMATION
Memo Id: CAFV365BNA
Item Name: BITCOIN (BTC)
Order Placed Date: 28th JAN 2021
Receiving Date: Day After Place The Order.
Price: 457.25 USD
Charge Mode: PAYPAL

If you Wish to Cancel then please feel free to contact our Billing Department as soon as possible.
You can reach us on: ###########

Some users have reported that when they try to contact the number given in the fake email, the fake customer support member asks them to install software on their PCs.

As soon as you install the software on your PC, you will give access to the scammer, and all of your personal files will be locked behind a paywall, and they will start asking for money in order for you to gain back access to your files.

In the next section, you will learn how you can spot fake emails or messages.

Quick Tip:

To protect yourself against fraud and phishing, we suggest a bulletproof solution. TotalAV’s anti-phishing technology is all about preventing and protecting against zero-day attacks.

They were the first to uncover these phishing attacks on PayPal, thus they developed the most complete anti-phishing solution for emails.

TotalAV

Advanced prevention and protection to keep you away from PayPal phishing attempts.
Free Trial Visit Website

How to identify fake PayPal Bitcoin email?

1. Impersonal greetings

PayPal Bitcoin scam email will always come with generic greetings. Some examples of impersonal greetings are Dear user, Hello, PayPal member, Hello, etc.

If you did not know, then you should now know that every email from PayPal will always use the full name as listed and registered in your PayPal account.

If the email you received comes with any of these impersonal greetings, then you can now understand that the email is fake and is not an official email from PayPal.

2. The email contains an attachment

While official PayPal emails can also contain an attachment, you should not open the attachment linked to an email, unless you are 100% sure that it is from a legit source.

You can go through the above steps to identify fake emails, and the below-mentioned tips will also help you detect fake emails.

3. Contains fake URL

The PayPal Bitcoin scam email that you will receive has a high probability of containing a URL inside it. The scammer will tell you that you need to click a URL to verify your account or purchase.

But before you do that, it is very important to check if the URL is redirecting your official PayPal website or not.

You can easily check it by hovering your mouse cursor over the URL and checking if the URL is redirecting you to a legit website or not.

4. Asks for sensitive info

If the email you have received asks for information such as your credit or debit card number, phone number, or any other account-related information, then this is a red flag.

PayPal will never ask its users for their personal information, let alone sensitive information as mentioned. If the email asks for sensitive information, then you need to stay away from it.

5. Grammatical mistakes

Another super easy way of identifying a fake email is by checking its grammar. Note that an official email will not only have professional greetings but will also be grammatical error free.

If you spot typos, spelling errors, or grammatical mistakes, then understand that it is a fake email, and you should simply delete or report the email spam.

How can I protect myself against the PayPal Bitcoin scam email?

1. Send the email to the PayPal team

  1. Forward the entire email to [email protected].
  2. Do not alter anything in the email that you have received, including the subject line and the message or the attachment.
  3. Once you have sent the entire email to PayPal as it is, delete it from your inbox.

Phishing is an illegal way of getting sensitive information and then using it to manipulate users into giving away their money.

If you ever receive a spoof or fake email just like the PayPal Bitcoin scam email, then you can follow the steps above and send the email to the PayPal team that will track down the activity and will help you protect your account.

2. Don’t rely much on HTTPS

A hacker, by definition, will try to cover as many bases as possible.So, you shouldn’t be surprised to see the website or attachment in the email having HTTPS in it.

An HTTPS certificate doesn’t always mean that the website is legit. Anyone can create an encrypted website and spoof you into believing that it is an official website.

Do your research, and follow the tips above to detect fake emails. And if you aren’t sure about it, you should simply ignore the email.

3. Search for the URL manually

In the event that a URL is mentioned in the PayPal email that you have received, one trick of verifying if the URL mentioned is a legit one is to search for it manually.

If it says that you need to verify your account or purchase, then it is 100% that that information or notification will be available on your personal PayPal account page as well.

Type the official website by yourself, and see if there is any such information available or not.

4. Contact PayPal through the Contact page

In order to make the email look legit, scammers will also include certain phone numbers in the email, making you believe that it is PayPal’s customer care number.

But, you should never contact the number given in such emails. If you wish to contact PayPal customer support, then you can visit the official Contact page of PayPal in the Help Center or use PayPal customer care number 1-888-221-1161.

5. Run a PC scan

antivirus scan

If you opened a link or downloaded the software attached to the fake email, then your PC is at a high risk of being attacked by scammers.

In such a case, you should immediately run a virus scan on your PC. You can also update your computer’s security software.

If you haven’t installed an antivirus on your PC, then you should definitely do it. In case you are confused, you can check out our dedicated guide that lists some of the best antivirus software for Windows PC.

6. Contact customer support

Our advice when you receive an email from PayPal and you have doubts regarding it should be to simply contact customer support.

You can connect with PayPal customer support via phone, email, or message and tell them about the email that you have received.

Customer care will help you by letting you know if there was any transaction done on your account as mentioned in the email or not. You can also ask active community members for a resolution.

Well, that’s it from our side in this guide. We have tried to give you all information regarding the PayPal Bitcoin scam email that several users have reported.

Following the tips mentioned in this guide, we hope that you will now be able to identify a fake email and protect your personal information from scammers.

Let us know in the comments below if this guide helped you in any way, and also do let us know if you have ever received a fake PayPal email or not.

3 Quick Ways to Fix Sundance Now if It Won’t Stop Buffering

If you’re a Sundance Now subscriber, you know what it’s like to be stuck in an endless cycle of buffering just when you are in the middle of an interesting watch.

The Sundance Now app is a streaming service that allows you to watch popular shows on your Apple TV, Roku, Amazon Fire Stick, and more. It is free to download and offers you several free movies and TV shows to stream.

Sundance Now has a variety of shows, but sometimes, it can be frustrating when you are interrupted often. 

You can choose to troubleshoot the error or choose streaming software to make your experience a little more bearable.

Why is my Sundance Now not working? 

There are a few reasons why your Sundance Now is not working. Some of the reasons include:

  • Server issues – If you are having trouble accessing Sundance Now app, it may be due to an outage or server problem. It could be that there is an error with the service. If this is the case, then you should check the website for an update on the issue. 
  • Inadequate bandwidth – The bandwidth required by the Sundance Now app depends on the number of devices streaming simultaneously. If you have multiple devices streaming all at once, you may end up with buffering issues or a Sundance Now error fetching video.
  • Outdated flash player – If you are using a browser to stream Sundance Now, you may experience buffering issues if your Adobe flash player is not up-to-date.
  • Poor internet connection  – Sometimes, the Sundance Now app is just not working because of a poor connection. To ensure your internet connection is working correctly, try watching a video on another device and see if it plays smoothly.

What causes buffering problems? 

The most common cause of buffering problems is slow speeds. The slower your connection, the more likely you’ll experience buffering. 

Another common cause of buffering problems is congestion on the internet itself. If too many people are trying to access the same thing simultaneously (such as a video), it can slow down everyone else’s experience. 

With multiple devices running simultaneously,  there may not be enough bandwidth available for all of them to run smoothly at the same time.

How do I fix Sundance Now if it keeps buffering? 

1. Check your internet connection

The first thing you want to do is make sure that your internet connection is stable and running at optimal speeds. If it’s not, you won’t be able to stream shows without issues. You can use an internet speed tester to test your internet connection to ensure optimal speeds. 

Additionally, you’ll also want to make sure that you have a wired connection if possible. Wi-Fi can be much slower than wired connections in general and cause issues with streaming services like Sundance Now.

2. Change quality settings

When too many people are using the internet, you may want to adjust your quality settings to accommodate everyone and stop the buffering.

If you had set the video to stream in 4K or HD, change the quality setting to a lower resolution, say 480p and reload the page. If it’s still not working properly, try lowering the quality again until it works.

3. Upgrade your router

If you have an older router, it may not be able to handle streaming HD videos. Many older routers simply don’t have enough processing power to handle streaming videos and other online activities.

A good rule of thumb is to replace your router every few years as technology advances and demand for more bandwidth increases. You can check out our recommended selection of routers with stable internet connection if you are in the market for one.

What’s the difference between Sundance and Sundance Now? 

Sundance or Sundance TV is a pay TV package where you can access live TV and all the other shows. You would basically be paying for a package for cable TV.

When it comes to Sundance Now, is a subscription-based streaming service that features dramas, documentaries, comedies, and more. The platform offers access to the complete library of shows you love and exclusive content.

The main difference is that for Sundance Now, you get access to exclusive content, which may be cheaper since you are not paying for cable TV. Since Sundance is available as a national network cable channel, some content must be edited to adhere to certain standards.

Can I watch Sundance Now on my smart TV?

Yes, you can. You can download Sundance Now on your smart TV from the Google Play Store or App Store on Apple, depending on your TV’s OS. Download the Sundance Now app on your smart TV, log in to your Sundance Now account, and start watching.

We hope you have been able to fix any issues with Sundance Now buffering and are back to enjoying uninterrupted streaming.

You may also encounter an issue where Hulu keeps buffering but worry not, as we have adequately covered how to fix the problem.

We also have an excellent recommendation of browsers without buffering if you don’t want to download the standalone app.

Let us know of any other workaround you have successfully tried in the comments section below.

Netio.sys Blue Screen on Windows 11: How to Fix it

The netio.sys blue screen in Windows 11 is a familiar issue users face after installing the latest updates. When this error occurs, your system screen will turn blue and reboot or crash unexpectedly. It is an irritating error code that shows on your screen with some confusing warnings.

This error mainly occurs if the recently installed update file is corrupted. However, there are many other reasons this might happen.

So in this post, we have compiled a list of some troubleshooting methods that may help you fix this issue.

What is Netio.sys?

Netio is a utility that measures a network throughout the TCP/IP. Netio.sys on the other hand is a BSoD error that appears along with several different error messages on your device.

Some of the error messages users generally receive with Netio.sys Blue Screen on Windows 11 are:

  • PAGE_FAULT_IN_NONPAGED_AREA – This indicates that invalid system memory has been referenced. Typically the memory address is wrong or the memory address is pointing at freed memory.
  • SYSTEM_THREAD_EXCEPTION_NOT_HANDLED – This error code indicates that a system thread generated an exception that the error handler did not catch. To interpret it, you must identify which exception was generated.
  • DRIVER_IRQL_NOT_LESS_OR_EQUAL – This error implies that your computer is unable to identify or point out the particular driver that is using an improper address. It usually occurs due to faulty, improperly configured, or corrupted drivers and it shows as a blue screen of death.
  • IRQL_NOT_LESS_EQUAL – This error means that something is wrong with a device driver, your device’s memory, or antivirus software on your device.
  • SYSTEM_SERVICE_EXCEPTION – It indicates that an exception happened while executing a routine that transitions from non-privileged code to privileged code.
  • KMODE_EXCEPTION_NOT_HANDLED – This error occurs in Windows 10 when the different applications overwrite each other’s memory. It can crash the software and the operating system.

If you have received any of these above messages on your device, then try these troubleshooting methods mentioned below to fix the netio.sys blue screen in Windows 11.

How do I fix Netio system blue screen?

1. Restart your device

  1. Press Windows key + F4 to open the Shut Down Windows dialog box.
  2. Select Restart under What do you want the computer to do.
  3. Click on OK to restart your device.
    netio.sys blue screen windows 11

Restart your device before starting with the troubleshooting methods mentioned below to solve this issue. In addition, restarting your device helps get rid of minor bugs and errors.

2. Run SFC Scan

  1. Click on Start and search for Command Prompt.
  2. Click on Run as Administrator.
    Open CMD
  3. Type the following command and press Enter:
    sfc/scannow
    netio.sys blue screen windows 11
  4. Restart your device and check if this error is fixed.

Corrupted files on your device can also be responsible for netio.sys blue screen in Windows 11. Run SFC or System File Checker scan to get rid of these corrupted files.

Several users complain about the fact that they are unable to run SFC scan on their device. Rest assured that our guide shows you what to do in case that happens.

3. Run a DISM scan

  1. Click on Start and search for Command Prompt.
  2. Click on Run as Administrator.
  3. Type the following command one by one and press Enter:
    DISM /Online /Cleanup-Image /CheckHealth
    DISM /Online /Cleanup-Image /ScanHealth
    DISM /Online /Cleanup-Image /RestoreHealth

    Restore health
  4. Restart your device and check if the error message still appears.

System image corruptions are also known to cause netio sys bf02 issue in Windows devices. Running a DISM Scan will find and repair system image corruptions.

4. Disable third-party antivirus

Uninstall Antivirus

The Netio.sys blue screen in Windows 11 can also occur due to third-party antivirus software installed on your device. Disable the antivirus program and check to see if the problem has been resolved.

If deactivating the software does not work, temporarily remove the antivirus software and review for the same.

5. Run CHKDSK Scan

  1. Click on Start and search for Command Prompt and select Run as Administrator.
  2. Type the following command and press Enter:
    CHKDSK C:/f/r/x
  3. The command won’t start running as your device’s root drive is already in use. Instead, it will ask you to begin scanning when you restart your PC.
    netio.sys blue screen windows 11
  4. Type Y, press Enter and then reboot Windows.

CHKDSK is a Windows program that checks and resolves system problems. It verifies that the file’s size, location, and other details match the data on the hard disk. It also checks to see if any areas of the hard disk are corrupted, which might be the source of the problem.

6. Update the Network Adapter

  1. Press Windows key + R to open the Run dialog box.
  2. Type devmgmt.msc and hit Enter.
    Devmgmt
  3. Expand the Network adapters section to see the list of adapters on your device.
  4. Right-click on your Network Adapter and select Update driver.
    netio.sys blue screen windows 11

The netio.sys blue screen in Windows 11 can also occur due to outdated or corrupt network drivers. It’s critical to keep network drivers and adapters in good working order. They’re responsible for connecting your device to the internet.

To resolve this concern on your PC, you can employ driver updating software that will scan your system and detect all outdated drivers to fix them in minutes.

⇒ Get Outbyte Driver Updater

7. Clean Boot your PC

  1. Click on Start, search for system configuration and open it from the search results.
  2. Navigate to the General tab and check the Selective Startup and Load System Services options under it.
    Clean boot General
  3. Now navigate to the Services tab and check the option Hide all Microsoft services.
  4. Now click on Disable all at the bottom right corner and click on OK to save the changes.
    netio.sys blue screen windows 11

Windows will now start with a minimum set of required drivers and programs by performing a clean boot. It will ensure if a third-party or background program is causing netio.sys blue screen in Windows 11.

Many users have also complained about the Netio.sys BSOD Windows 10. If you’re among those, read our post to fix it.

8. Run System Restore in Safe Mode

  1. Long press the power button until the Automatic Repair message appears.
  2. Navigate to Troubleshoot, followed by Advanced options, and select Open System Restore.
    sys-res
  3. Now, select your username and enter your password.
  4. Click on Next, and select a restore point before the Netio.sys BSoD error started. 
  5. Now follow the instructions on the screen to restore your PC.
    sys-restore-next

Changing your computer’s settings or switching on a function can be why netio.sys blue screen in Windows 11 occurs. You’ll have to restore these settings to default to fix this BSOD error.

9. Reset your device

  1. Click on Start and go to Settings.
  2. Next, click on Windows Update and select Advanced Options in the right pane.
  3. Scroll down and click on Recovery.
  4. Finally, click on Reset this PC and follow the instructions on the screen.
    netio.sys blue screen windows 11

If none of those mentioned above steps solved your problem reset your Windows 11 device. Sometimes there is a problem with Windows core files that you cannot verify manually.

This was how you can fix netio.sys blue screen in Windows 11. If the troubleshooting methods didn’t solve this error, try reinstalling Windows. But this should be only a last resort.

If you still have any issues, feel free to drop a comment below. We’re eager to hear from you.