Microsoft’s Council for Digital Good promotes “positive online behaviors” in open letter to US lawmakers

The Internet has arguably become a dual edge sword for most users. Easy and free access to the world knowledge base, but a cesspool of unfiltered negativity and danger due in part to the inherent anonymity it offers users.

Microsoft would like to try and address the latter claim by penning an open letter to U.S. law and policy makers. The letter from Microsoft’s Council for Digital Good, calls on lawmakers to address the meshing of real and digital issues of sextortion and cyberbullying by promoting modern laws that would essentially help to protect in-school education.

“As young people who have encountered some of these problems firsthand, our goal as the Council for Digital Good is to provide strategies, solutions and resources for other young people in these situations,” council members wrote. “For our sake and for that of future generations, it is imperative that we amplify discussions about making the internet a more productive, civil, and safe place.”

Microsoft would like lawmakers in Washington, D.C. to help tout the real world consequences when internet users, children in particular, succumb to digital risks. Microsoft’s council for well being of internet users is recommending that internet behavior and safety become a prioritized portion of in-school online education.

Offering more than penned letters, Microsoft’s CDG council members held a two-day summit where panels discussing the importance of cyber safety the promotion of kindness and maturity online, were held. The first lady, Melania Trump also met with council members, teens and other individuals to discuss projects and presumably align her own anti-bullying “Be Best” campaign tenants.

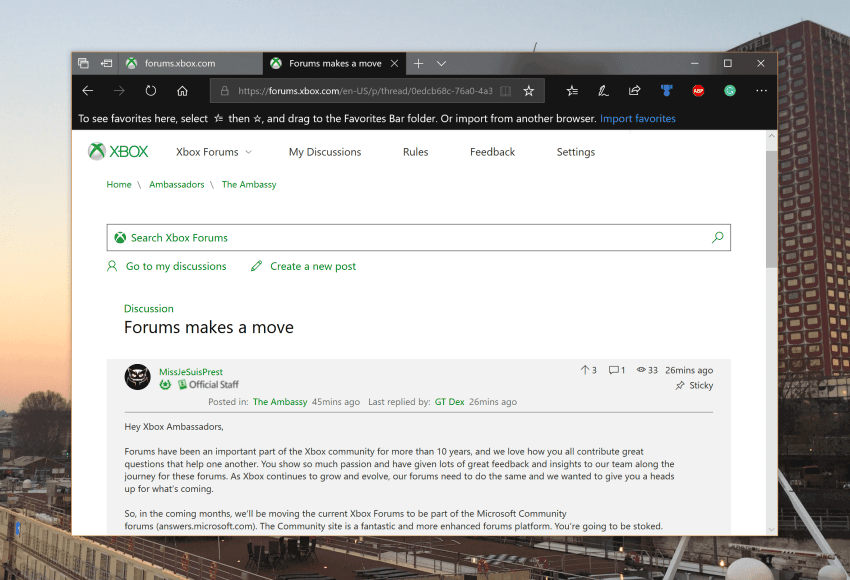
Xbox Forums make the move to Microsoft Answers

Last month, we noted that Xbox Forums would be moving to the Microsoft Community Forums.  The move was part of Microsoft’s plans to “empower users with discussions,” but there wasn’t an exact timeframe for when things would fully transfer over. Well, it looks as though part of the move is now complete as an official announcement is now out (via MSPoweruser.)

The announcement can be seen in full here, as posted by Mister Quimby, a Microsoft Agent, Ambassador, and Moderator. He explains that “the time has come for the forums to move” adding that “very soon, we’ll be redirecting all of the forum threads to open only in their new home in the Microsoft Community forums.”

It is being urged for Xbox forum members to head to the Microsoft Answers Forums and start using it today. Users can still view all their threads via forums.xbox.com or the Community forums, but it’s still best to try out the Microsoft Answers forums and fill out this survey.

Per Mister Quimby, forums.xbox.com will be turned off once all the features od the Xbox area of the community forums are fully finished and tested. So it’s best to try out our right now and get yourself acquainted.

Slack to acquire Hipchat, Stride, as pressure from Microsoft Teams mounts

In a surprise announcement yesterday, Slack revealed a new partnership with Atlassian, owner of several popular enterprise-focused apps such as HipChat, Stride and Jira. Slack will purchase the IP for HipChat and Stride (a successor to HipChat), and help customers transition to Slack before Atlassian’s apps are discontinued next year.

The partnership will allow Atlassian to focus on its other assets such as its issue tracking solution Jira and the project management app Trello, and the company will also be making a “small, but symbolically important investment” in Slack. On the other hand, the latter will be able to boost its user base thanks to users migrating from HipChat and Stride, something that the company will need to compete with the increasingly popular Microsoft Teams.

Earlier this month, Microsoft announced a free version of Teams, which is now available worldwide in 40 languages. The Redmond giant says that more than 200,000 businesses are now using Teams across 181 markets, while Slack claims it’s already being used by 500,000 organizations. With its free tier, Slack quickly become popular among startups and small businesses, but the company can’t really afford to underestimate Microsoft Teams and all its synergies with other Office 365 apps.

“Hundreds of thousands of teams are already using Slack with JIRA, Confluence, Bitbucket, Trello, etc. — this will have a big impact,” said confidently Slack CEO Stewart Butterfield. It’s true that Slack is still enjoying some great momentum this year, but the footsteps from Teams should certainly get louder in the near future.

National FFA Organization and Microsoft partner to help more than 650,000 US students learn digital skills

The National FFA Organization and Microsoft yesterday announced a new partnership which will help more than 650,000 US students learn digital skills. The partnership will also bring science, research, and entrepreneurship opportunities to classrooms across the US as part of a Blue 365 initiative.

For those unfamiliar, the National FFA Organization provides leadership, personal growth and career success training through agricultural education. It is expected for Blue 365 to be unveiled in Indianapolis, Indiana, this October at the 91st National FFA Convention & Expo.

Blue 365 aims to solve the most critical challenges facing farming communities, like respecting the planet or feeding the world. This partnership was announced at an event in Fargo yesterday with National FFA CEO Mark Poeschl and Microsoft’s Brad Smith and Mary Snapp. As explained by Brad Smith, President and Chief Legal Officer at Microsoft:

“While digital technology is transforming every part of the American economy, not everyone is acquiring the skills to thrive…As a company, we’re focused on ensuring everyone, regardless of their geography or circumstance, has access to the digital skills they need to compete and prosper. And our partnership with the National FFA will expand this work, helping students across the country prepare for digital jobs and the farms of the future.”

Mary Snapp, Corporate Vice President and Lead for Microsoft Philanthropies, dived deeper into the partnership in a blog post on LinkedIn. She also penned another post which revealed that Microsoft is investing $500,000 in partnerships for two computer science and STEM learning opportunities for students of color in Seattle.

The NHL 19 open beta is now live on Xbox One consoles for gamers to play

The open beta for EA Sports NHL 19 is now live on all Xbox One consoles. The beta version of the game can be downloaded from the Store for free and gamers can now dive right in.

The proper, full version of NHL 19 isn’t due for release until September 14th so those participating in the open beta should keep in mind that this is an early version of the game, that it’s being used for testing, and that it may differ from the final version of the game when it comes out in a few months.

NHL 19 is a hockey video game that allows players to create their own character and team and play against over 200 famous hockey athletes. The game will feature over 900 customization options and apparently will feature improved responsiveness over previous entries in the series.

Will you play the NHL 19 open beta? Share your impressions with the community in the comments below and follow us on Pinterest for more Xbox content.

NHL® 19 Beta
NHL® 19 Beta
Developer:
Electronic Arts
Price:
Free

How to download Windows Live on Windows 10

Microsoft is quite attached to UWP apps and their development that there’s a little space for the old Windows programs. Microsoft Essentials 2012 was the last iteration which provided users with Windows Live. And that suite was a fan favorite for a long time. Now, many of users who moved to Windows 10 had a hard time getting used to the UWP successors.

Download and configure Windows Live Mail in Windows 10

Now, even though the Essentials suite was discontinued back in January of 2017, you can still use it. This includes Windows Live Mail, which is, based on the opinions of so many users, much better choice than the subpar built-in Mail & Calendar app. In regards to lack of support, we’re glad to inform you that it won’t take much out of Windows Live. Even though security patches are not available and this email client isn’t the safest one to use, it’s still available. If you can deal with it, the app still can be used on Windows 10.

There are no too much available sources to get the application suite, though. Since it was officially discontinued, the download links are either rather scarce or come from suspicious third-party sources. Luckily, we find and tested one semi-official download link and it worked out just fine. The installation and configuring settings is just like with any third-party email client.

Here’s how to get Windows Live as the part of the Essentials 2012 suits:

  1. Download Essentials 2012, here.
  2. Install the suite and open Windows Live Mail.
  3. Open Properties and choose File > Options > Email accounts.
  4. Add your Microsoft account and credentials.
  5. Check the “Manually configure server settings” box.
  6. For the incoming server, enter mail.outlook.com and choose port 993.
  7. For the outgoing server, enter smtp-mail.outlook.com and choose port 587.
  8. Save settings and wait until the emails are synchronized.

That should do it. If this was helpful, make sure to give us a shout in the comments section below.

Fix: Windows 10/11 Facebook app has no sound

The Facebook app found in Microsoft Store is only recently getting a larger number of users. Lots of folks are still gravitating towards browsers, even though this UWP port-like Facebook app is not bad at all. If we exclude Facebook‘s practice to mandatory pair it with Facebook Messenger.

All in all, the app is useful and we can recommend it. However, lots of good things a social network like Facebook offers are diminished by the lack of sound. That’s exactly what some users experienced as they were unable to reproduce sound while playing videos.

How to fix sound issues on the Facebook app for Windows 10

  1. Run app troubleshooter
  2. Check the sound and video drivers
  3. Reset the app settings
  4. Reinstall the app
  5. Reduce the sound sampling rate
  6. Re-register apps

1: Run app troubleshooter

The first thing we suggest is running the Store Apps Troubleshooter. This built-in troubleshooting tool found in Settings should address the usual issues concerning Microsoft Store app. If it doesn’t resolve them, it should at least give you a better insight into what’s causing the sound distortion.

If you’re not sure where to find this troubleshooter, follow the steps we provided below:

  1. Open Settings.
  2. Choose Update & Security.windows 10 facebook app no sound
  3. Select Troubleshoot under the left pane.
  4. Expand the Store Apps Troubleshooter.windows 10 facebook app no sound
  5. Run the troubleshooter.

You can also run the Sound troubleshooter under the same section. It might resolve the sound-related issues.

2: Check the sound and video drivers

After that, let’s confirm that sound and video drivers are properly installed and up to date. Of course, this expands to overall system performance, so you’ll probably already be aware of the faulty sound device and graphics card. However, you can try and update them or even better, install the drivers from the official source instead of relying on Windows Update.

Here’s the list of 3 major OEMs where you can find the drivers for your graphics card:

3: Reset the app settings

To resemble the app troubleshooting on some other platforms, Microsoft offers factory reset of individual apps in Windows 10. That option can come in handy, especially since lots of apps are seemingly performing below the initial expectations.

Now, the Facebook app is a rather good UWP port (by UWP standards, at least). But there are certainly some issues surrounding it. So if the sound suddenly starts missing when playing videos in the Facebook app, resetting the app should help.

Here’s how to reset the Facebook app in Windows 10:

  1. Right-click Start and open Settings.
  2. Choose Apps.windows 10 facebook app no sound
  3. Under the Apps & features, search for Facebook.
  4. Expand Facebook and select Advanced options.windows 10 facebook app no sound
  5. Scroll down and click Reset.windows 10 facebook app no sound

4: Reinstall the app

If the resetting fails, reinstallation should take it the step further. With one little tweak included. If you just reinstall the app which malfunctions, chances are it’ll continue doing. On the other hand, if you perform a clean reinstallation (clear all remaining associated files prior to installation), the issues won’t reoccur.

Here’s how to reinstall the Facebook app in Windows 10:

  1. Navigate to Settings > Apps > Apps & features and look up for the Facebook app.
  2. Click Uninstall to remove it.windows 10 facebook app no sound
  3. Run one of the free uninstallers we suggested in this list.
  4. Navigate to Microsoft Store and install Facebook again.windows 10 facebook app no sound

5: Reduce the sound sampling rate

Some user reports state that the sample rate is the core of the problem. Namely, after reducing the sample rate, the sound issues on Facebook (and other apps, for that matter) completely stopped. This can be done in device sound settings. Once you’ve done it, the sound in the Facebook app should restore fully.

Here’s what you need to do:

  1. Right-click on the Sound icon in the notification bar and open Sound options.
  2. Click on the Device properties.windows 10 facebook app no sound
  3. Select the Advanced tab.
  4. Change the default format to a lesser value and confirm changes.windows 10 facebook app no sound
  5. Restart your PC and open Facebook.

6: Re-register apps

Finally, if the issue is wide-spread, you can try and re-register the whole Store. This helped some users, while others decided that the alternative wrapper is a better deal than the official Facebook app. The re-registering procedure is rather simple and you’ll need to use the PowerShell elevated command-line to execute it.

Follow these steps to re-register Microsoft Store:

    1. Right-click on the Start and open PowerShell (Admin).
    2. In the command-line, copy-paste the following command and press Enter:
      • Get-AppXPackage *Microsoft.WindowsStore* | Foreach {Add-AppxPackage -DisableDevelopmentMode -Register “$($_.InstallLocation)AppXManifest.xml”}windows 10 facebook app no sound
    3. When it’s done, close the PowerShell and open the Facebook app and give videos another try.

That’s it. In case you still have sound issues in the Facebook app, try some wrappers found in the Microsoft Store. Either way, if you succeed or fail, make sure to keep us posted. That’s the purpose of the comments section below.

RELATED STORIES YOU SHOULD CHECK OUT:

How to Speed up Slow Shutdown in Windows 10/7

If you are wondering how you can speed up the shutdown process in Windows 10, then this is the right tutorial for you. Luckily for us, the slow shutdown that you encountered in the operating system can be solved by modifying some Registry items. So, follow the steps listed below to find out how to speed up the slow shutdown in Windows 10. This will only take you a couple of minutes of your time.
How to speed up slow shutdown (Windows 10)
When you try to launch the shutdown process, the Windows 10 operating system will have to wait for the running applications to close first. So, this is mainly the one issue that is taking so much time to process. Also, please create a back up copy of all your important files, folders and applications because there is always the possibility to damage the operating system if you modify something wrong in the system registries.

How to fix slow shutdown in Windows 10/7

  1. Change WaitToKillServiceTimeout value
  2. Run the Power Troubleshooter
  3. Create a shutdown shortcut

1. Change WaitToKillServiceTimeout value

  1. Press and hold the “Windows” button and the “R” button.
  2. Now you should have the “Run” window in front of you.
  3. In the run dialog box write the following: “regedit” without the quotes.
  4. Press the Enter button on the keyboard.
    Note: If you are prompted by a user account control window, left click or tap on the “Yes” button to proceed.
  5. On the left side panel double, click or double tap on the “HKEY_LOCAL_MACHINE” folder.
  6. From the “HKEY_LOCAL_MACHINE” folder, find and double click to open the “SYSTEM” folder.
  7. Within the “SYSTEM” folder, find and open the “CurrentControlSet” folder.
  8. Now in the “CurrentControlSet”, find and double click to open the “Control” folder.
  9. On the right side panel, search for the “WaitToKillServiceTimeout” REG_SZ.wait kill service timeout windows 10
  10. After you found it, double click or double tap on it to open.
  11. Under the Value Data field, you will need to modify that from “5000” to “1000”.
    Note: This value is the time in which an application will be shutdown by Windows if it has not closed yet.
  12. Left click or tap on the “OK” button to save your changes.
  13. Now go on the left side panel again and double click or double tap on the “HKEY_CURRENT_USER” folder to open it.
  14. From the “HKEY_CURRENT_USER” folder, find and open the “Control Panel” folder.
  15. In the “Control Panel” folder, you should find and open the “Desktop” folder.
  16. On the right side panel, you will have to created 2 “REG_SZ” values.
  17. Name one of the “HungAppTimeout” without the quotes.
  18. Name the other REG_SZ as “WaitToKillAppTimeout” without the quotes.
  19. After you successfully created them, double click on “HungAppTimeout” first.
  20. In the value data field, you can lower the time it takes for an app to shutdown.
    Note: Keep in mind that if you drastically decrease the time for this REG_SZ file then the application might fail to save your changes properly. So, if you do decrease the time, please make sure to save your changes in the apps you are running when you shutdown the Windows 10 device.
  21. Double click or double tap to open “WaitToKillAppTimeout”.
  22. In the value data field, decrease the value as well but the minimum should be “1000” ms.
  23. After you made all your changes, close the Registry Editor window.
  24. Reboot your Windows 10 operating system.
  25. After the reboot is completed, you can try out your shutdown feature to see if the timing has improved.

2. Run the Power Troubleshooter

Your computer may take longer to shut down due to incorrect or incompatible power settings. You can quickly solve this problem by running the built-in Power Troubleshooter from the Settings page. So, navigate to Settings > Update & Security > Troubleshoot > select and run the troubleshooter as shown in the screenshot below.

power troubleshooter windows 10

3. Create a shutdown shortcut

If you know that you computer usually takes a few minutes to completely shutdown, you can also create a shutdown shortcut which will immediately shut down the system.

  1. Right-click on your desktop > select New  > Shortcut (You’ll enter the specific command strings to make your new shortcut immediately shutdown your computer
  2. Type Shutdown.exe -s -t 00

And you are done. If you carefully followed the steps above, you have decreased the shutdown time of your Windows 10 operating system by the time your read this line. If you do run into any issues along the way,please write us in the comments section below and we will help you further as soon as possible.

RELATED STORIES TO CHECK OUT:


.

Windows 10 build 18204 bugs: High CPU usage, apps are missing

Windows 10 build 18204 is the very first Redstone 6 build release. Skip Ahead Insiders can now download and install this build on their computers and test the new features.

Unfortunately, some Insiders are still struggling to install this build. Well, this is not the only issue affecting Windows 10 build 18204.

In this post we’ll list the most common bugs affecting Windows 10 build 18204 just to give you an idea of what to expect in terms of issues.

Windows 10 build 18204 reported issues

  • High CPU usage

Here’s how one user describes this problem:

I have just upgraded to Build 18204. When I go to System Configuration Boot Advanced Processors 4 and Maximum Memory and reboot, the system runs slow and when I check CPU in Task Manager it shows two processors and four logical processors. When I uncheck processors and maximum memory and check task manager, it shows four processors and eight logical processors.

For more information on how to fix this issue, check out the guides listed below:

  1. 5 Best software to fix high CPU usage
  2. Fix: High CPU when browsing the Internet
  3. Windows 10 Update process (wuauserv) causes high CPU usage [FIX]
  • Time won’t set automatically

Some Insiders also noticed the computer clock often fails behind.

8204: Time fails to set automatically. Just spinning dots forever, network is working fine. Screenshot shows 05:52am when in fact was 21:52pm

Windows 10 build 18204 bugs

If you’re experiencing the same problem, you may want to check out our dedicated troubleshooting guide on how to fix Windows 10’s clock if it’s wrong.

  • Some apps are missing

If you can’t find some of your apps or programs after installing Windows 10 build 18204, you’re not the only one. For example, some users reported that the gaming menu is missing, while others can’t find Groove and WMP.

  • PowerShell crashes

Other Insiders complained about PowerShell crashing after just a few seconds. This bugs makes it impossible for Insiders to actually use the tool.

We’ll end our list here. If you encountered other issues after installing Windows 10 build 18204, let us know in the comments below.

RELATED STORIES TO CHECK OUT:

How to Turn off Touch Screen on Windows 10 Quickly

Many of you might have already gotten used to the touch screen displays used on Windows 10. But what if you want to remain to the plain old simple keyboard and mouse devices?

Well, the tutorial below will show you how exactly you can disable the touch screen feature in the Windows 10 operating system in the shortest time possible and get back to your normal days’ work.

How do I turn off touch screen in Windows 10?

1. Use Device Manager

  1. Press the Windows key + X and select Device Manager.
  2. Double-click the Human Interface Devices option to expand it.
  3. Now, right-click the HID-compliant touch screen option.disable touch screen windows 10
  4. Next, select the Disable device option.
  5. Finally, click the Yes button to confirm the action and restart your PC.

An easy way to turn off the touch screen on Windows 10 is to go via the Device Manager.

If you would like to get the touch screen feature up and running again, you will only have to open the Device Manager window, locate the touch screen device again, right-click on it, and select the Enable feature.

2. Disable Tablet Mode

  1. Press the Windows key + I and select the System option.
  2. Click Tablet mode in the left pane.
  3. Finally, select Don’t switch under When this device automatically switches tablet mode on or off.
    tablet mode

And that’s it, you now know how to turn off the touch screen feature for your Windows 10 operating system.

If yu want to enable or disable Tablet mode on Windows 11 instead, we have prepared a guide to help you do it.

If you do run into any issues after following the steps listed above, you can always write us in the comments section below, and we will be more than happy to help you further.

5 Best Smart Home Apps for Windows 10/11

Looking for the best smart home apps for Windows 10 PC? We’ve got you covered. Read this guide to learn what are the best smart home programs to use right now.

Due to technological advances, several smart homes and smart home software have sprung up over the years. However, these smart devices in the home don’t just control themselves. A software is needed to automate all these processes.

This post gives you some of the best smart home programs that can be used to automate your home devices. The software reviewed in this article differ from each other in terms of some features —  though they all provide general services which ensure convenient automation of devices.

What are the best smart home programs for Windows 10?

OpenHAB

OpenHAB has a large following among smart home users, as it has an active community of users. The software uses a stable open source Javascript which allows multiple support of devices and ensures you can easily integrate different devices on the software. This tool uses a powerful software engine which enables users flexibility as there are several plugins which can be installed to ensure user preference is achieved.

Your devices can easily be controlled using specific apps and users can customize the software with the inbuilt design tools. So therefore, OpenHAB is an excellent home software app to use due to its flexibility and compatibility to hundreds of devices.

⇒ Get OpenHAB

Castle OS

Castle OS is a popular smart home software that has integration with over a hundred different smart devices. Users are able to use the various features to conveniently automate their homes. Castle OS supports several popular home apps such as UPB, WeMo, LightwaveRF, Sonos, Ecobee and Nest,

Users can access the unique voice control system by connecting a Microsoft Kinect, this allows ease in controlling several devices by saying command prompts.

Meanwhile, Castle OS helps keep track of your home energy consumption which allows you to know the devices consuming much power in your home.

The scheduling feature is also effective as you can easily create time scheduled events and receive notifications of events via Email or SMS. Also, Castle OS is an excellent Home software to employ for your Windows O.S and is compatible with Windows 10.

⇒ Get Castle OS

Creston

smart home apps windows 10

When it comes to a home apps that features state of the art technology and features, Creston is up there. The software may be of a premium price to other home app software but it gives good value for the price.

Creston specifically develops devices which can be purchased in addition to the software. The user interface allows for customization by users and it can be ideal for setting up a conference center.

The voice control is also automated to allow ease and convenience in controlling smart home devices.  Overall Creston is a good solution for smart home users as they get extensive features from the software.

⇒ Get Creston

Iobroker

smart home apps windows 10

Iobroker is a budding smart home apps software which has a thriving community and offers quality services. The software can be used to control devices in all areas of your home from the garage, kitchen to individual rooms in your home.

It is compatible to multiple devices which makes it ideal home app software. iobroker uses an open Javascript and supports Windows,Linux, OSX and Raspberry devices.

The user interface is clean and easy to use for beginners with all menu arranged precisely for scalability. You can easily set voice controls and use the command prompts to control various devices in your home or office.

Lastly, iobroker is an efficient home app software as it performs the basic needs of a smart home owner and supports numerous operating systems.

⇒ Get Iobroker

EventGhost

smart home apps windows 10

EventGhost is a simple automation software that allows users to access different input devices to trigger control of connected devices. It does not provide extensive features like the other software on the list but it lightweight and can perform the majority of the tasks needed by a smart home user on a small scale.

In addition, EventGhost allows the use of input devices like wireless remote to control home devices. The interface as to be expected is simple with different task icons in the menu which have specific functions.

To enjoy more features, you would need to download several plugins which could be the downside of the app. Infrared motions work exquisitely and can be easily setup by following the tutorials on the software website. You can always try EventGhost since it is free to download and check out the features.

⇒ Get EventGhost

Conclusion

These are the best smart home software for smart home owners. They have been tested and found to possess features needed. In addition, they are all compatible with Windows 10.

Issues with smart home apps can happen on any setup. If your lights stop responding, check our Wiz app not working guide for quick fixes.

Meanwhile, EventGhost is lightweight to use but with limited features while Creston is the most expensive of the apps listed above. Our recommended smart home software to utilize in your home is OpenHAB, as it gives all the necessary features and compatibility needed for a smart home software

Some Office 2019 and Windows 10 Enterprise users to see price hikes in October, Microsoft confirms

Noted by ZDNet’s Mary Jo Foley, Microsoft is planning on increasing the prices for some Office 2019 and Windows 10 Enterprise users come October 1st. The pricing changes were initially mentioned in a blog post yesterday and are coming because the company wants to “create more consistency and transparency across purchasing channels.”

According to Microsoft, the first of the pricing changes impact the commercial business on-premises versions of Office 2019. These prices will go up by 10% over the current rates, impacting the Office client, Enterprise CAL, Core CAL, and server products.  As explained in the blog post:

Microsoft will be making a series of changes across our program and product portfolio to provide unique offers that support customer digital transformation, improve the buying and selling experience, and make it easier to do business with Microsoft. We continue to execute on our Modern Commerce strategy by introducing programmatic changes across our VL programs that relate specifically to offer pricing and discounting.

Microsoft is also making changes to Windows 10 Enterprise, raising prices to $83 per user in order to match the rates of Windows 10 Enterprise E3. In addition, Windows 10 Enterprise E3 per user offers will be re-named to as Windows 10 Enterprise E3. And finally, Microsoft will be renaming Windows 10 Enterprise E3 per Device as Windows 10 Enterprise. Other price changes mentioned by the company can be seen below.

  • Windows 10 Enterprise E5 per device will be discontinued
  • Establishing a single, consistent starting price across all programs aligned to web direct for online services (OLS)
  • Removing the programmatic volume discounts (Level A and Open Level C) in Enterprise Agreement (EA)/EA Subscription, MPSA, Select/ Select Plus, and Open programs (Open, Open Value, Open Value Subscription)
  • Aligning government pricing for on-premises and online services to the lowest commercial price in EA/EAS, MPSA, Select Plus, and Open Programs
  • Delivering a newly designed Customer Price Sheet that better outlines how a customer’s price was derived (direct EA/EAS only)

These prices can be confusing for the non-technical type, so you can check out the modern commerce page for more information on any price changes. All price changes will take into effect in October of 2018, and impacted users will have a preview on the September 2018 price listing.

Windows 10 April update now on 84% of Windows 10 PCs running AdDuplex ads

The propagation of the Windows 10 April Update continued this month to reach 84.2% of Windows 10 PCs, AdDuplex said today in its latest report for the month of July. As usual, the company’s data only takes into account PCs running Windows Store apps that use AdDuplex’s SDK. In other words, this is just a small sample of the Windows 10 user base, but without any hard data from Microsoft this is still the best we have for now.

“As April 2018 Update has reached 3/4 of all PCs running Windows 10 last month, it was clear that the growth can only slow down, noted AdDuplex. “While that definitely happened, A18U still gained more than 6%.”

Ahead of the release of Microsoft’s new Surface Go tablet, the cross-promotion network for Microsoft Store apps and games also shared a snapshot of the Surface family of devices in July 2018. Almost three years after its launch, the Surface Pro 4 remains the most popular device (31.47%) in AdDuplex’s sample, while the 2017 Surface Pro (17.39%) is slowly gaining ground on the Surface Pro 3 (20%).

Both the Surface Laptop and Surface Book 2 also remained below the 5% bar in July. “It will be interesting to see if Surface Go manages to make a serious dent in this chart in the upcoming months,” AdDuplex said.

Xbox Beta Insiders can download a new 1806 build that fixes annoying app & game launch bug

Following the release of the July update for the Xbox One earlier this month, Microsoft is now working to fix an annoying bug that can cause select apps and games to crash at launch. And because Preview Alpha and Skip Ahead Insiders are already testing the upcoming Fall update for the Xbox One, Microsoft is now testing the fix for the July Update with Beta Insiders.

If you have already joined the Xbox One Preview Beta Ring, the build 1806.180723-1749 is now available to download. In addition to fixing the bug with games and apps failing to launch, this build should also resolve the issue with Wireless and Wired networks failing to be detected when the console wakes from Instant on/connected standby, as well as an issue with the Microsoft Store giving an 0x80070bfa error in some circumstances.

It’s important to note that this build is a 3.4GB download, but it won’t factory refresh your console. Preview Delta and Omega Insiders should receive these fixes over the coming days before they become generally available for all Xbox One owners.

Add Safe Mode to Boot Menu on Windows 10: 2 Ways to do it

If you like the old boot menu of the Windows 7 operating system with the Safe Mode feature included, the good news is that you can add the Safe Mode to your Windows 10 boot menu too.

This requires just a few tweaks and commands, and we will show you how to do it in this guide.

Can you enter Safe Mode from the boot menu?

You can enter Safe Mode from the boot menu, among other options, to enable the troubleshooting mode. However, unlike Windows 7, you need to add Safe Mode to your boot menu on Windows 10.

This is relatively easy to do, as shown in the following sections of this guide.

How can I add Safe Mode to the boot menu on Windows 10?

1. Add Safe Mode Minimal using Command Prompt

  1. Press the Windows key, type cmd, and select Run as administrator under Command Prompt.
    cmd admin add safe mode to boot menu windows 10
  2. Type any of the commands below for the type of Safe Mode you want to add and hit Enter: bcdedit /copy {current} /d "Windows 10 Safe Mode"option or bcdedit /copy {current} /d "Windows 10 Safe Mode with networking"networking or bcdedit /copy {current} /d "Windows 10 Safe Mode Command Prompt"command
  3. Finally, wait for the command to finish running.

The first step towards adding Safe Mode to the boot menu on Windows 10 is to activate it by running some commands. After doing this, you must proceed to solution 2 to make the Safe Mode option available on the boot menu.

2. Enable the option in System Configuration

  1. Press the Windows key + R, type msconfig, and click OK.
    msconfig add safe mode to boot menu windows 10
  2. Click the Boot tab at the top.
  3. This will show your default OS boot option and the new entry you created in solution 1.
  4. Now, select the entry you created.
  5. Check the Safe Boot box.
  6. Next, tick the radio button for Minimal to enable Safe Mode, Network for Safe Mode with networking, or Alternate shell for Safe Mode with Command Prompt.
    alternate
  7. Now, enter the seconds you want the boot option to be available in the Timeout box.
  8. Mark the box for Make all boot settings permanent.
  9. Click the OK button.
    timeout
  10. Finally, choose your preferred option to restart your PC.

After restarting your PC, Safe Mode should be successfully added to your boot menu on Windows 10.

How to start Windows 10 in Safe Mode while booting?

  1. Power off your PC. Now, power it on and press and hold the Power button to forcibly shut it down when the manufacturer’s logo comes up. Repeat this twice to bring up the Advanced startup menu.
  2. Now, select Troubleshoot > Advanced options.
    advanced
  3. Choose the Startup Settings option.
    startup settings
  4. Next, click the Restart button.
    restart
  5. Finally, when your PC restarts, choose the corresponding button to select your preferred Safe Mode option.
    safe mode

This is the way to boot Windows in Safe Mode from power.

Safe Mode is a vital troubleshooting option that starts your PC with only the required drivers and processes.

Adding Safe Mode to your boot Menu on Windows 10, as shown above, saves you the stress of going to the Advanced startup menu whenever you need it.

If Safe Mode keeps crashing on your Windows 10 PC, check our detailed guide to fix it.

Feel free to let us know in the comments below if you encounter any problems applying the steps in this guide.

Microsoft launches Windows 7 upgrade campaign but will it succeed?

Windows 10 is well on its way to becoming the world’s foremost desktop platform, but Windows 7 still retains a substantial user base. Microsoft confirmed that it will stop supporting Windows 7 by 2020 a while back. Now the software giant is starting a new Windows 7 upgrade campaign that will remind users that Microsoft will stop supporting Win 7 in 2020.

Microsoft has reputedly requested its channel partners to bang the drum about Windows 7‘s 2020 end of support date. Thus, the company’s channel partners will make it all the clearer that Windows 7 will no longer be a supported platform from 2020. One Microsoft product and marketing manager stated, “The end of support is coming in 2020 and it’s time to make the shift to 10.” That campaign message will become all the more urgent in 2019.

Windows 7 upgrade campaigns are not entirely new. Microsoft also initiated a similar upgrade campaign in 2015 when Windows 10 was new. That was a Get Windows 10 campaign that included a series of 10 Reasons to Upgrade videos. Furthermore, the software giant gave Windows 10 away to Win 7 users for a year.

Yet, despite such campaigns, NetMarketShare data highlights Windows 7 still has a larger user base than Win 10. Win 7‘s user base percentage figure amounts to 41.74% compared with Windows 10’s 35.71% share. As such, Windows 7 could potentially become the new XP, which retained a substantial user base even when Microsoft stopped supporting the platform. Windows XP’s current NetMarketShare user base figure stands at 4.08%, which is higher than Win 8’s share.

So, Microsoft is now renewing its Windows 7 upgrade campaign to convince more users to upgrade to Win 10 before 2020. Windows 10 will have probably eclipsed Windows 7‘s user base by then, but Win 7 will still likely remain among the foremost desktop platforms for some time.

Microsoft is fixing Windows Update so that your PC will no longer reboot while you’re busy

One of the most well documented (and often mocked) problems with Windows is the way in which the OS will install updates at the worst possible times. Well, Microsoft has heard the complaints and is now promising that your PC will soon no longer update when you’re working or leaving it five minutes to get some coffee.

A note on the improvement was mentioned in a blog post today for Windows 10 Insider Preview Build 17723 and Build 18204. “We heard you, and to alleviate this pain, if you have an update pending we’ve updated our reboot logic to use a new system that is more adaptive and proactive,” explained Microsoft’s Dona Sarkar and Brandon LeBlanc.

They both went on to explain that Microsoft has now trained a predictive model which can accurately pick the right time to restart your device to update. The model can also check if your device is being used, or predict if you’ve just temporarily stepped away from your PC.

Microsoft doesn’t yet have anything specific on the exact accuracy of the model but did say that it was being used on internal devices. Sarkar and LeBlanc also say that they’ve seen “promising results upon rollout” and are able to update the model with the least possible turnaround time based on “insights from its performance.”

This is not the first time that Microsoft has made improvements or tweaks to the Windows Update service. The company previously worked to reduce the “offline time” when installing a featured Windows 10 Update. Anyway, since Microsoft is known as the company that empowers people, it is nice to see that they can finally empower Windows 10 to not disrupt workflows across the world

Windows 10 KB4340917 fixes user account and remote session issues

The Windows 10 April Update just got a new cumulative update: KB4340917. This patch brings quite a long list of fixes and improvements. The most important bug fixes concern time zone information, RemoteApp sessions, Bluetooth connections and more.

You can download and install KB4340917 by going to Settings > Update & Security > Windows Update and then check for updates. You can also install the KB4340917 standalone package from the Microsoft Update Catalog website.

What’s new in KB4340917?

Here are the main changes that KB4340917 brings along:

  • Fixed the issue that causes devices within Active Directory or Hybrid AADJ++ domains to unenroll from Microsoft Intune or third-party MDM services after installing provisioning package updates (PPKG).
  • Time zone information should now update correctly.
  • Addresses an issue with registration in the “Push to Install” service.
  • The AppData\Local and AppData\Locallow folders should now synchronize correctly in Roaming User Profiles.
  • Peripherals that use Quality of Service (QoS) parameters for Bluetooth connections should work properly now.
  • The update also fixed the issue that causes SQL Server memory usage to grow over time.
  • The patch addresses the issue that prevents OpenType fonts from printing in Win32 applications.
  • The DNS Response Rate Limiting should no longer trigger memory leaks when enabled with LogOnly mode.
  • KB4340917 also fixes the issue in a RemoteApp session that may result in a black screen when maximizing an app window.

You can check out the full KB4340917 changelog on Microsoft’s Support page. Microsoft also listed a known issue affecting this update, but apart from this minor bug, users haven’t reported any other issues.

If you installed KB4340917 on your Windows 10 v1803 computer and you experienced any issues afterwards, do let us know in the comments below.

Here are the fixes and known issues with Windows 10 19H1 build 18204 and Redstone 5 build 17723

Microsoft today pushed out Windows 10 Redstone 5 Insider Preview build 17723 and 19H1 (Redstone 6) build 18204. These builds come with a set of new features, but also has a set of known issues and a long list of fixes which you need to take note of before installing on your PC. Have a look below for more information.

Fixes, Changes, and Improvements:

  • We fixed an issue resulting in the “…” menu not working in multiple apps (including Microsoft Store, Photos, and Screen Sketch) where clicking on any of the items would just make the menu dismiss.
  • We fixed an issue where in certain cases on PCs with multiple monitors, all the windows might have appeared shifted “up” and mouse input going to the wrong location.
  • We fixed an issue where SNMP and the Windows Event Log service might start using an unexpectedly high amount of CPU in the last flight.
  • We fixed the issue with Windows Defender Application Guard no longer working after installing the Build 17713.1002 Cumulative Update.
  • We fixed an issue from the last flight where upon rebooting in order to start upgrading to the build, the system would boot back into the current build rather than the new one.
  • We fixed an issue resulting in upgrades to the previous build failing with error 0x8007001f.
  • We fixed an issue from the previous flight where Window Recovery Environment (WinRE) would not launch and resulted in “Reset this PC” and “Advanced startup” flows to be broken and appear to do nothing. We also fixed an issue from the flight before last (not visible in the last flight due to the aforementioned bug) where “Reset this PC” would initiate and rollback without completing the intended reset.
  • We fixed an issue resulting in some laptops experiencing a CRITICAL PROCESS DIED bug check when the PC was put to sleep by closing lid and the connected power disconnected.
  • We fixed an issue resulting in ShellExperienceHost.exe crashing when trying to pin apps to Start Menu via drag and drop.
  • We fixed an explorer.exe crash when launching the Default Apps Settings page via WIN+R ‘control /name Microsoft.DefaultPrograms /page pageFileAssoc’.
  • We fixed an issue where .mkv files were using a generic app icon in File Explorer instead of a thumbnail.
    Delivery Optimization Settings now has a new icon.
  • We fixed an issue where suggestions on the main page of Settings would appear after a delay, making the Settings categories shift unexpectedly.
  • We fixed an issue where Notification Settings listed every possible quick action in the enable/disable quick actions section, even those not applicable to the PC being used (including two Focus Assist entries).
  • We fixed an issue where the systray overflow area could end up drawing slightly below the taskbar.
  • We fixed an issue resulting in the network state in the taskbar potentially becoming stale in recent builds (showing there was no connection when there was, and vice versa).
  • We fixed an issue where pinging PCs by name on the same LAN would do a case-sensitive name check.
  • We fixed an issue where using v6v4tunnel to establish a tunnel didn’t work.
  • We fixed an issue in Command Prompt from the previous flight where if a typed string wrapped around to a second line, you could only delete it up to the line break.
  • We fixed an issue resulting in Task View / Timeline crashing on launch for some Insiders in recent builds.
  • We fixed an issue where right-clicking an activity in Timeline was missing the “clear all from day” option.
  • When you open a PDF using Microsoft Edge, the activity will now be listed in Timeline.
  • We fixed an issue where sometimes you would see windows unexpectedly quickly reorder after exiting Task View without selecting a window.
  • We fixed an issue from recent builds where the clock in the taskbar was leaking graphics device context handles (HDCs) every time it redrew, leading to performance issues the longer a PC was running. Multiple factors can impact performance, so if you’re continuing to notice any issues after upgrading to this build, please log feedback including a performance trace with a short repro and description.
  • We fixed an issue resulting in not being able to distinguish the border between two overlapping Command Prompt windows.
  • We fixed an issue resulting in the tops of apps in tablet mode being clipped (i.e. missing pixels).
  • Thanks everyone for sharing your feedback about the new welcome screen string prompting you to lock your PC. For the time being we will be reverting this to the previous string “These updates will protect you in an online world”.
    We’ve made some tweaks to the design of the Cortana & Search landing page, specifically in situations where Cortana isn’t enabled/supported.
  • We fixed an issue resulting in Microsoft Jigsaw hanging on launch in recent builds.
  • The settings menu in Microsoft Edge (“…”) is now acrylic.
    When you right-click a book in the Microsoft Edge Books pane, you’ll now see an option to share the book.
  • We fixed an issue that could result in Microsoft Edge spellchecking even though spellchecking was turned off in Settings.
  • We fixed an issue where using the mouse wheel in Microsoft Edge would unexpectedly do a forward/back through browser history if focus was in the address bar and “Scroll inactive windows” was disabled.
  • We fixed an issue where when using certain sites to listen to music in Microsoft Edge, your mouse might experience a small freeze if moving when the song changed.
  • We fixed an issue resulting in apps like Adobe XD crashing on keypress in recent flights.
  • We fixed an issue that could result in a deadlock on certain devices after using the pen to ink.
  • We fixed an issue where the touch keyboard would still have a launch animation even if “Show animations” was turned off in Ease of Access Settings.
  • We fixed an issue where launching regedit.exe (or any .exe that requires elevation) from a non-elevated cmd window using the “start” start command produced a “parameter is incorrect” error.
  • We fixed an issue causing Narrator speech to fade when waking from sleep mode.
  • We fixed an issue where the error “Your fingerprint couldn’t be recognized. Try using a different finger.” was displaying unexpected characters in place of the apostrophe.

Known Issues:

  • The clock & calendar flyout may not appear until bringing up Start or Action Center (and then they will both appear at the same time). This same issue may also result in notifications not appearing until Start or Action Center is opened.
  • We’re progressing in our work on adding dark theme in File Explorer and the Common File Dialog – you’ll notice improvements in this build, although we still have a few things left to do. You may see some unexpectedly light colors in these surfaces when in dark mode and/or dark on dark text.
  • When you upgrade to this build you’ll find that the taskbar flyouts (network, volume, etc) no longer have an acrylic background.
  • When you use the Ease of Access Make Text bigger setting, you might see text clipping issues, or find that text is not increasing in size everywhere.
  • When you set up Microsoft Edge as your kiosk app and configure the start/new tab page URL from assigned access Settings, Microsoft Edge may not get launched with the configured URL. The fix for this issue should be included in the next flight.
  • On Build 17723 (but not Build 18204), you may see the notification count icon overlapping with the extension icon in the Microsoft Edge toolbar when an extension has unread notifications.
  • On Windows 10 in S Mode, launching Office in the Store may fail to launch with an error about a .dll not being designed to run on Windows. The error message is that a .dll “is either not designed to run on Windows or it contains an error. Try installing the program again…” Some people have been able to work around this by uninstalling and reinstalling Office from the Store. If that doesn’t work, you can try to install a version of Office not from the Store.
  • When the Narrator Quickstart launches, Scan Mode may not reliably be on by default. We recommend going through the Quickstart with Scan Mode on. To verify that Scan Mode is on, press Caps Lock + Space.
  • When using Scan mode you may experience multiple stops for a single control. An example of this is if you have an image that is also a link. This is something we are actively working on.
  • If the Narrator key is set to just Insert and you attempt to send a Narrator command from a braille display then these commands will not function. As long as the Caps Lock key is a part of the Narrator key mapping then braille functionality will work as designed.
  • There is a known issue in automatic dialog reading where the title of the dialog is being spoken more than once.

As you can tell, Microsoft is ramping up the fixes for Redstone 5, so best to keep the feedback coming before the Fall release. Also, please keep in mind that Microsoft is running the second Redstone 5 Bug Bash from July 27th through to August 5th, 2018. You can send your feedback during this period and enter for the chance to go to Microsoft’s Redmond campus and meet the Insider team.

How to Improve your USB Data Transfer in Windows 10

If you carefully read the lines below you will find out how exactly you can improve your data transfer for the USB flash drive using the Windows 10 operating system. Seeing that most of the Windows users have a portable USB drive this tutorial comes in handy when you are a bit out of time and wish to make a quick transfer of your important data.
How to improve your data transfer for the USB flash drive (Windows 10)
Also keep in mind that this tutorial is made for the USB 2.0 technology and what specific tweaks you can apply in Windows 10 Technical Preview to speed up the data transfer.

If you wish to have a much better data transfer the USB 3.0 technology will surely be for you but one of the main issues with the USB 3.0 is that not all devices have yet a USB 3.0 port (blue usb connector) therefore they still operate at the USB 2.0 transfer speed.


Check out these best USB-C flash drives for lightning-speed data transmission!


Improving the data transfer for the USB flash drive in Windows 10: what to do?

This is what you have to do in order to improve USB flash drive data transfer:

  1. Insert your USB 2.0 into the Windows 10 device.
  2. Open the Windows Explorer window.
    Note: Make a backup copy first of all your data you have on the USB flash drive.
  3. Right-click or hold tap on the USB flash partition.
  4. From the menu that appears left click or tap on the “Format…” feature.
  5. Now you have the “Format Removable Disk” window in front of you.
  6. Under the “File System” topic you will have to left click or tap on the drop-down menu and select from there “NTFS”.
  7. Uncheck the box next to the “Quick Format” feature.
  8. Left click or tap on the “Start” button to proceed with the formatting.
  9. After you successfully formatted the USB flash drive right click or hold tap again on the USB flash partition.
  10. Left click or tap on the “Properties” feature present in the sub-menu you opened.
  11. Left click or tap on the “Hardware” tab situated in the upper side of the Properties window.
  12. Now from the Hardware tab left-click or tap on the “Properties” button you have in the lower right side in the window.
  13. Next, you will have another window that pops up names “Device Properties”
  14. Left click or tap on the “General” tab situated in the upper side of the window.
  15. Left click or tap on the “Change Settings” button.
  16. In the next window left-click or tap on the “Policies” tab situated on the upper side of the window.
  17. Left click or tap on the “Better Performance” feature to select it.
  18. Now Left click or tap on the “OK” button to save your changes.
  19. Close the windows you opened so far and open the “This PC” folder.
  20. Right-click or hold tap on the USB flash drive partition.
  21. From the sub-menu select the “Eject” option by left-clicking or tapping on it.
  22. When the Windows 10 system gives you a pop up that it is safe to remove the USB please remove it from the device.
  23. Plug the USB flashback into the Windows 10 device.
  24. Check again the data transfer of your USB flash device to see how much it improved.

USB Enclosures for the fastest data transfer

If you do need fast speed to transfer data, and even after the guide above you are not satisfied, try switch to a USB enclosure. NekTeck is a great enclosure compatible with all major platforms.

Qicent is another great enclosure that you can use in order to transfer data at high speed. For all interested in high transfer speeds, you must know that USB 3.2 was announced and that should improve data transfer speed.

And you are finished; following the steps above will surely improve the data transfer of your USB flash device in Windows 10 but do not expect the USB 2.0 to transform itself into a rocket.

If you want a better data transfer for your USB flash drive you will have to change to the USB 3.0 as stated above.


Looking for the best USB flash drives? Here are the best options.


Also, if you do run into issues along the way in the steps above please do not hesitate to write us in the comments section of the page situated below.

READ ALSO: How to Enable the Legacy Windows 7 Boot Menu Using Windows 10

Enabling NumLock for Logon Screen and Lock Screen in Windows 10: How To

If you already got used to the Windows 10 Technical Preview operating system then you also noticed that the NumLock is not enabled by default for the Logon screen and also for the Lock screen. Therefore by following the lines below, you will be able to set the NumLock to enabled by default in Windows 10.
How to enable NumLock for Logon screen and Lock screen (Windows 10)
The tutorial below will describe two methods on how to enable the NumLock for the Logon screen and Lock screen in Windows 10, you will have to keep in mind that for the method that requires a registry tweak in the Windows 10 operating system it will be a good idea to make a backup copy of your important files, folders, and applications.

How to enable NumLock for the Logon screen and Lock screen of Windows 10?

In order to enable NumLock on the logon screen in Windows 10 and customize it, here is what you need to check:

  1. Enable NumLock from your keyboard
  2. Enable it from Registry Editor
  3. Windows 10 Logon screen tips

1. Enable NumLock from your keyboard

  1. Reboot your Windows 10 operating system first.
  2. When the device starts you should have the Logon window in front of you.
  3. Now press the “NumLock” button on the keyboard and make sure the green light on the keyboard that specifies that NumLock is active is turned on.
  4. Now left click or tap on the power button situated in the lower right side of the Logon screen.
  5. Left click or tap on the “Restart” option you have there.
  6. Now after the Windows 10 operating system reboots the NumLock feature should be active by default.

2. Enable it from Registry Editor

  1. Press and hold the “Windows” button and the “R” button.
  2. You should have the “Run” window in front of you.
  3. In the run dialog box write the following: “regedit” without the quotes.
  4. Press the Enter button on the keyboard.
    Note: If you are asked by a user account control window to allow access to the Registry Editor left-click or tap on the “Yes” button to proceed further.
  5. Now the Registry Editor window should be in front of you.
  6. On the left side panel left-click or tap on the “HKEY_USERS” folder to open it.
  7. From within the “HKEY_USERS” folder find and left click or tap to open the “.DEFAULT” folder.
  8. In the “.DEFAULT” folder left-click or tap on the “Control Panel” folder to open it.
  9. In the “Control Panel” folder left-click or tap on the “Keyboard” folder to open it.
  10. On the right side panel search for and double-click to open the “InitialKeyboardIndicators” string.
    Note: If you do not have this specific file please right click on an open space in the right panel and left click or tap on the “New” option to create one with this name.
  11. Under the “value data” field you will need to write there the following: “80000002” without the quotes.
  12. Left click or tap on the “OK” button to save your changes.
  13. Now close the Registry Editor window as well.
  14. Reboot your Windows 10 operating system.
  15. When you get to the Logon screen or Lock window of your Windows 10 check to see if your NumLock is enabled.

3. Windows 10 Logon screen tips

If you are interested in more tricks you can do with the Logon screen then you are in the right place. We will help you with a dedicated guide if you want to change your Logon screen in Windows 10, 8.1.  We also created a step-by-step instruction for all users that want to disable logon screen background image in Windows.

You not only may change the appearance of your logon screen or disable it, but also encounter some issues. Some users encountered issues with LogonUI.exe in Windows 10. Be sure that you follow all the instructions in our fix article so you get rid of this issue.

And you are finished, following one of the two methods posted above will enable your NumLock feature in the Logon screen as well as the Lock screen of your Windows 10 Technical Preview system. Also if you need further assistance or if you stumbled upon any issues along the way in this tutorial please write us in the comments section of the page situated below and me or my colleagues will help you as soon as possible.

READ ALSO: Enable NumLock on Startup in Windows 10 [How to]

Complete List of Windows Shell Commands: Basic and Advanced

If you want to learn the most useful Shell commands used in Windows 10, as well as many other specific commands, read this guide. We bet you probably didn’t know some of these commands were even available until now.

By using these Shell commands, you can access a specific system folder or one of the Control Panel applets available in your Windows 10 operating system. Keep reading to find all the Windows Shell Commands.

What are the various Windows Shell Commands?

Tip icon Tip
These commands can be executed via Run. Paste the one you want to execute and click OK.
  1. This command accesses the account pictures folder you have in your Windows 10 device- shell:AccountPictures
  2. Adds a new program folder- shell:AddNewProgramsFolder
  3. Accesses administrative tools folder- shell:Administrative Tools.
  4. Accesses AppData folder in the Windows 10 system- shell:AppData
  5. Accesses Application Shortcuts folder- shell:Application Shortcuts
  6. Accesses the Apps Folder- shell:AppsFolder
  7. Accesses the Apps updates folder- shell:AppUpdatesFolder
  8. Accesses the Cache folder- shell:Cache
  9. Access camera roll folder- shell:Camera Roll
  10. Accesses the temporary burn folder- shell:CD Burning
  11. Accesses the Remove/Change program folder- shell:ChangeRemoveProgramsFolder
  12. Accesses the Administrative Tools folder- shell:Common Administrative Tools
  13. Accesses the Common AppData folder- shell:Common AppData
  14. Accesses the public desktop folder- shell:Common Desktop
  15. Accesses Public Documents folder- shell:Common Documents
  16. Accesses Programs folder- shell:Common Programs
  17. Accesses the start menu folder- shell:Common Start Menu
  18. Accesses Startup folder situated in the Windows 10 system- shell:Common Startup
  19. Accesses Common Templates folder- shell:Common Templates
  20. Accesses Downloads folder- shell:CommonDownloads
  21. Accesses the music folder- shell:CommonMusic
  22. Accesses Pictures folder- shell:CommonPictures
  23. Accesses the ringtones folder- shell:CommonRingtones
  24. Accesses the public Video folder- shell:CommonVideo
  25. Accesses the Conflict folder in the Windows 10 system- shell:ConflictFolder
  26. Opens up the connections folder- shell:ConnectionsFolder
  27. Opens the Contact folder- shell:Contacts
  28. Opens the Control panel folder- shell:ControlPanelFolder
  29. Opens the Cookies folder- shell:Cookies
  30. Opens the Credential manager feature- shell:CredentialManager
  31. Opens up the Crypto keys folder- shell:CryptoKeys
  32. Opens the CSC Folder- shell:CSCFolder
  33. Opens up the Desktop folder- shell:Desktop
  34. Opens the metadata store folder- shell:Device Metadata Store
  35. Opens the Documents Library folder- shell:DocumentsLibrary
  36. Opens the Downloads folder- shell:Downloads
  37. Opens the DpapiKeys folder- shell:DpapiKeys
  38. Opens the Favorites folder- shell:Favorites
  39. Opens the Fonts folder- shell:Fonts
  40. Opens the Games folder- shell:Games
  41. Opens the Game Tasks folder- shell:GameTasks
  42. Opens the History folder- shell:History
  43. Opens the HomeGroup folder for the current user- shell:HomeGroupCurrentUserFolder
  44. Opens HomeGroup folder- shell:HomeGroupFolder
  45. Opens the Implicit Apps shortcut folder- shell:ImplicitAppShortcuts
  46. Opens Internet Folder- shell:InternetFolder
  47. Opens Libraries folder- shell:Libraries
  48. Opens the Links folder- shell:Links
  49. Opens Local AppData folder- shell:Local AppData
  50. Opens Local AppDataLow folder- shell:LocalAppDataLow
  51. Opens LocalizedResources folder- shell:LocalizedResourcesDir
  52. Opens MAPI folder- shell:MAPIFolder
  53. Opens LusicLibrary folder- shell:MusicLibrary
  54. Opens My Music folder- shell:My Music
  55. Opens My Video folder- shell:My Video
  56. Opens MyComputer folder- shell:MyComputerFolder
  57. Opens NetHood folder- shell:NetHood
  58. Opens NetworkPlaces folder- shell:NetworkPlacesFolder
  59. Opens OEM Links folder- shell:OEM Links
  60. Opens OneDrive folder in Windows 10– shell:OneDrive
  61. Opens Original Images folder- shell:Original Images
  62. Opens Personal folder- shell:Personal
  63. Opens PhotoAlbums folder- shell:PhotoAlbums
  64. Opens PicturesLibrary folder- shell:PicturesLibrary
  65. Opens Playlists folder- shell:Playlists
  66. Opens Printer folder- shell:PrintersFolder
  67. Opens PrintHood folder- shell:PrintHood
  68. Opens Profile folder- shell:Profile
  69. Opens ProgramFiles folder- shell:ProgramFiles
  70. Opens ProgramFilesCommon folder- shell:ProgramFilesCommon
  71. Opens ProgramFilesCommonX64 folder- shell:ProgramFilesCommonX64
  72. Opens ProgramFilesCommonX86 folder- shell:ProgramFilesCommonX86
  73. Opens ProgramFilesX64 folder- shell:ProgramFilesX64
  74. Opens ProgramFilesX86 folder- shell:ProgramFilesX86
  75. Opens Programs folder- shell:Programs
  76. Opens Public folder- shell:Public
  77. Opens PublicAccountPictures folder- shell:PublicAccountPictures
  78. Opens PublicGameTasks folder- shell:PublicGameTasks
  79. Opens PublicLibraries folder- shell:PublicLibraries
  80. Opens Quick Launch folder- shell:Quick Launch
  81. Opens up recent items folder- shell:Recent
  82. Opens up recorder file in the Windows 10 system- shell:RecordedTVLibrary
  83. Opens the system Recycle Bin folder- shell:RecycleBinFolder
  84. Opens up the Resource folder- shell:ResourceDir
  85. Opens up Demo folder- shell:Retail Demo
  86. Opens up the Ringtones folder in Windows 10– shell:Ringtones
  87. Opens up the Roamed Tile images folder- shell:Roamed Tile Images
  88. Opens the Roaming Tiles folder- shell:Roaming Tiles
  89. It opens the SavedGames folder you have in the Windows 10 system- shell:SavedGames
  90. Opens the Screenshots folder- shell:Screenshots
  91. Opens the Search folder- shell:Searches
  92. Opens the Search History folder you have in the system- shell:SearchHistoryFolder
  93. Opens the Search Home folder- shell:SearchHomeFolder
  94. Opens the Search templates folder- shell:SearchTemplatesFolder
  95. Opens the SendTo folder- shell:SendTo
  96. Opens the SkyDriveCameraRoll folder- shell:SkyDriveCameraRoll
  97. Opens the SkyDriveMusic folder- shell:SkyDriveMusic
  98. Opens the SkyDrivePictures folder- shell:SkyDrivePictures
  99. Opens up the Start menu folder- shell:Start Menu
  100. Opens the AllPrograms folder you have in the start menu- shell:StartMenuAllPrograms
  101. Opens the Startup folder- shell:Startup
  102. Opens the SyncCenter folder- shell:SyncCenterFolder
  103. Opens the SyncResults folder- shell:SyncResultsFolder
  104. Opens the SyncSetup folder- shell:SyncSetupFolder
  105. Opens the System folder- shell:System
  106. Opens the SystemCertificates folder- shell:SystemCertificates
  107. Opens SystemX86 folder- shell:SystemX86
  108. Opens the Templates folder- shell:Templates
  109. Opens the ThisPCDesktop folder- shell:ThisPCDesktopFolder
  110. Opens User pinned folder- shell:User Pinned
  111. Opens the user profiles folder- shell:UserProfiles
  112. Opens Program Files folder- shell:UserProgramFiles
  113. Opens Program Files Common folder- shell:UserProgramFilesCommon
  114. Opens the Files folder from a specific user you are logged in with- shell:UsersFilesFolder
  115. Opens the Libraries folder for a specific user- shell:UsersLibrariesFolder
  116. Opens Video library folder- shell:VideosLibrary
  117. Opens the Windows folder- shell:Windows

It’s worth mentioning that you can use the Windows shell commands listed above in CMD and File Explorer as well.

You can also explore a complete Command Prompt commands list to learn more system-level actions you can perform from CMD and enhance your Windows control skills.

You can also take your command-line skills further with this complete Windows PowerShell scripting tutorial that explains how to automate tasks and write scripts in Windows step by step.

Learn how to manage Volume Shadow Copies from Command Prompt using the Vssadmin Commands guide.

Before you leave, find out how to run a virus scan from the Command Prompt.

If you have any questions related to this guide, let us know in the comments below, and we will help you as soon as possible.

Bitdefender Antivirus Plus 2019: The best affordable antivirus for Windows users

We recently reviewed Bitdefender Total Security 2019 and Bitdefender Internet Security 2019, but Bitdefender released another product. Bitdefender Antivirus Plus doesn’t have all the advanced features that other products have, but it still offers great protection for most users.

Bitdefender Antivirus Plus 2019, what does it have to offer?

Complete real-time protection

Just like the other members of the BitDefender family, Bitdefender Antivirus Plus 2019 offers advanced real-time protection against all types of malware. Of course, multi-layer ransomware protection is still available, so your PC will remain safe from ransomware attacks.

bitdefender antivirus plus 2019 scanning
Rescue Mode feature is still present, so if your system is infected by a rootkit, you can boot to a safe environment and prevent all malicious applications from booting with your system.

bitdefender antivirus plus 2019 scanning settings
Advanced Threat Defense feature is also available allowing Bitdefender Antivirus Pro 2019 to analyze application behavior in real-time and inform you if anything suspicious occurs.


Online security against malicious websites

Similar to other members of the BitDefender family, Bitdefender Antivirus Plus 2019 offers a Web Attack Prevention feature that informs you if any of your search results is malicious. Thanks to this feature, you’ll never visit a malicious website by accident again.

Anti-phishing and anti-fraud features are still present, so you’ll be certain that your personal information is safe at all times. The application also has a Social Network Protection feature that will help you identify malicious links on social networks.


Password manager, Safe Online Banking, and other features

If you’re concerned that malicious users might obtain your personal or banking information, we’re pleased to inform you that Bitdefender Antivirus Plus 2019 has a Safe Online Banking feature. Thanks to this feature, you can make safe purchases in a dedicated and secure browser.

If you’re concerned about your privacy, we’re happy to inform you that Password Manager is still available. Using this feature you can store all your passwords, personal information, and other important data, and use it to instantly log in to certain websites or to fill forms. Of course, all your data is password protected, so other users won’t be able to access it.

bitdefender antivirus plus 2019 password manager
The application also has a File Shredder feature allowing you to permanently delete any file from your PC in just a couple of clicks.
bitdefender antivirus plus 2019 file shredder
Vulnerability Assessment feature is also there allowing you to see potential vulnerabilities on your system, including missing system updates, missing passwords or outdated applications.

VPN is available in this version as well, but you’re limited to 200MB per day and forced to use a random server. If you want to remove these limitations, you’ll have to purchase a VPN subscription.
bitdefender antivirus plus 2019 VPN


Maximum performance without high system usage

Just like all other applications from Bitdefender family, Bitdefender Antivirus Plus 2019 uses Bitdefender Photon technology in order to optimize hardware usage and bring maximum performance.

The application also supports cloud scanning allowing your system to use its resources for other important tasks. The application also has Battery Mode that will automatically tweak your system settings in order to save your battery.

If you enjoy in multimedia or games, there are Game and Movie modes available, so your multimedia experience won’t suffer due to your antivirus.


Anti-Theft, Firewall, Safe Files, File Encryption and other missing features

For the most part, Bitdefender Antivirus Plus 2019 offers the same features as Bitdefender Internet Security, but unfortunately, some important features are missing. The most notable missing feature is the firewall, so if you want to control which applications have Internet access, you’ll have to use Windows Firewall instead.

Safe Files feature is also missing, so you can’t lock your files and prevent other applications from opening them. Another missing feature is File Encryption, so if you want to encrypt your files and prevent other users from opening them, you’ll need to use a third-party application.

Wi-Fi Security Advisor and Webcam Protection features are also missing, but most users probably won’t miss them too much. Another feature that is missing from this version is Parental Control, so if you want to monitor and limit the computer usage for your kids, you’ll need to consider a different software.

Anti-Theft feature isn’t available in this version, so if you want to keep track of your devices, you might want to consider using different software.


Conclusion

Bitdefender Antivirus Plus 2019 is missing certain features, most notably Anti-Theft, Parental Control, and Firewall. This isn’t a major problem since you can use other applications that offer the same functionality.

In addition to the missing features, we have to mention that Bitdefender Antivirus Plus 2019 is available only on Windows. If you want a multi-platform security solution, Antivirus Plus might not be for you.

Bitdefender Antivirus Plus 2019 offers the high-quality protection that we expect from Bitdefender, but it’s missing a couple of somewhat important features. However, Bitdefender Antivirus Plus 2019 is the most affordable out of all Bitdefender products, which is definitely a plus.

If you’re a home user that wants solid antivirus protection without any advanced features, or if you simply want an affordable but reliable antivirus, Bitdefender Antivirus Plus 2019 is just what you need.

Fix Audio Issues in Windows 10/11

I know most of our users who are running Windows 10 Technical Preview had a lot of issues with the sound features. I can tell you that we have a good fix to the many sound issues you have encountered in the past and you only need to follow the tutorial below in order to find out what you need to do and fix the audio issues in Windows 10 Technical Preview.
How to fix audio issues in Windows 10
Seems that after Microsoft released the new build 10041 for Windows 10 Technical Preview a lot of audio issues have been fixed including the Realtek static noise issue and also a lot of USB audio issues like the “Rode Podcaster” microphone. But you will find out what fixes are included in this new build of Windows 10 and also how to make your update to the new build by reading the lines below.

How to fix audio issues in Windows 10 Technical Preview?

Here is what you will have to check in this article in order to fix your sound issues:

  1. Issues fixed by 10041 build
  2. Issues that were not fixed
  3. Install Windows 10 Technical Preview latest build
  4. Windows 10 sound issues and their fixes

1. Issues fixed by 10041 build

  • Realtek “static noise” issue which after you make the Windows update you can go directly to your Device manager and update the card driver to the last version 6.0.1.7458 which was released on 3/2/2015.
  • USB audio issues including the problems you may have had with the Rode Podcaster microphone.
  • HDMI audio issues on the Surface Pro 3 in this new build are now fixed.
  • Your Deezer application, as well as the Spotify application, are now fixed and you can use your music playback feature normally.
  • The Creative X-Fi issues are fixed and you only need to update the driver from Device Manager.

2. Issues that were not fixed

  • While trying to install the driver from Realtek you get the following timeout message “error 0x800705b4”
  • “VIA HD Audio” unfortunately still does not play all sounds, only the system sounds and the sounds from a few apps work.

3. Install Windows 10 Technical Preview latest build

  • On the Start screen of your Windows 10 operating system, you will have to left click or tap on the “Settings” feature.
  • From the “Settings” sub-menu find and left click or tap on the “Update & recovery” feature.
  • Now find and left click or tap on the “Windows Update” feature.
  • Find the “Check for Updates” button and left click or tap on it.
  • Follow the instructions on the screen to finish the Windows 10 update.
  • After you successfully brought your Windows 10 to the latest build you will have to reboot your device.
  • After the device starts, check to see if your audio issues have disappeared.

And you are all done if you successfully brought your Windows 10 device to the latest build you should have fixed most of the audio issues you had in the past.

4. Windows 10 sound issues and their fixes

You might have sound problems after Windows 10 April update but we have the right fix for that. Before trying to fix that, be sure that the cause is this patch. It is important as you may lose sound after installing Nvidia Graphics drivers. We recommend you to be sure you know where lies the problem so you won’t do anything that could damage your system.

Sometimes you may simply not have sound because you will have the ‘Audio device disabled’ error in Windows 10. In this case, try to update/reinstall your audio drivers or try the other solutions from our guide.

Also if you have other questions regarding this subject please write us in the comments section of the page situated below and me or my colleagues will help you further as soon as possible.

READ ALSO: Audio Issues in Windows 10: How to Fix Them

SOLVED: Xbox error 0x83750007 in Windows 10/11

Since it was introduced, the Xbox App has been plagued by issues. This Xbox companion has an important role in Microsoft’s gaming ecosystem, especially due to cross-platform features. Nonetheless, judging by the reports, the variety of errors and overall lackluster performance on Windows 10 speaks volumes about it. One of the common log-in errors goes by the “0x83750007” code. Today, we’ll try and help you resolve it.

How can I fix Xbox sign in error 0x83750007?

  1. Run Store apps troubleshooter
  2. Check the connection
  3. Update Xbox App
  4. Reset Xbox App
  5. Check the date and time
  6. Change your credentials and try again
  7. Remove the Microsoft account and try signing in
  8. Select Normal boot
  9. Check the services
  10. Reinstall the Xbox App

1: Run Store apps troubleshooter

The Xbox App comes pre-installed in Windows 10, with all other kinds of bloatware. Of course, what’s bloatware for someone, it’s rather useful for others. At least if it works as it’s supposed to. Now, the fact that this is a Windows 10 app, allows you to tackle all issues by simply running the dedicated troubleshooter.

Here’s how to run the dedicated troubleshooter in Windows 10:

  1. Open Settings.
  2. Choose Update & Security.
  3. Select Troubleshoot from the left menu.
  4. Scroll to the bottom and expand Store Apps troubleshooter.xbox error 0x83750007
  5. Run the troubleshooter.

2: Check the connection

This and similar errors mostly occur due to integral in-app issues. However, as the access to your Xbox account and Xbox Live requires a connection, it’s worth checking out your network. There are some things you should try out, as certain reports speak about blockage imposed to Xbox Live. For some, it was the router’s firewall, while others had issues with the Windows Firewall and firewalls provided by third-party protective

Here are some steps you can try out prior to sign in and hope for the resolution:

  • Restart your PC and router.
  • Make sure LAN cable is plugged in.
  • Navigate to Firewall and allow Xbox (and associated services) to communicate freely.
  • Disable all third-party firewalls.
  • Flash DNS.

— READ ALSO: Fix: Xbox App Server Blocked Connectivity on Windows 10

3: Update Xbox App

Updating the app might help, as well. Even though updates for all apps are automatically administered, it’s worth giving the manual approach a try. Since you can’t update the app, you can try the Beta version. Maybe the current iteration is having issues and the next one in line might provide a fix. We can’t be sure about the results, but it won’t cost you to give it a go.

Follow these steps to update the Xbox App:

  1. Open Microsoft Store.
  2. Search for Xbox Beta and open Xbox (Beta) app.xbox error 0x83750007
  3. Install it and try signing in.

Since this isn’t a stable version, expect other issues. But, it should at least allow you to sign in, so keep it for the time being.

4: Reset Xbox App

If updating is a step forward, resetting the app is a step back from a possibly faulty version. This option comes in handy with all kinds of strange behavior Microsoft Store apps are known for. And we’ll know the whole ecosystem is somewhat troublingly unreliable. Either way, try resetting the app and it might come with a payoff.

To do so, follow these steps:

  1. Open Settings.
  2. Choose Apps.
  3. Under the Apps & features, search for Xbox.
  4. Expand it and open Advanced options.xbox error 0x83750007
  5. Click Reset.

5: Check the date and time

In order to connect to a dedicated Xbox server, we can’t have any time discrepancy. If your date and time settings are not correct, you’ll probably run into a stall. This is why we encourage you to confirm that both date and time are correctly set. In order to avoid further concerns, we suggest setting automatic time and date options obtained online.

Here’s what you need to do:

  1. Right-click Start and open Settings from the Power menu.
  2. Select Time & Language.
  3. Under the Date & Time section, enable the ‘Set time automatically‘  and ‘Select time zone automatically‘.xbox error 0x83750007

6: Change your credentials and try again

Even though this is a far-fetched workaround, it still might help. If you tried to log in multiple times in succession, the login sequence might be corrupted. That’s why we suggest resetting your password and trying to log in again. Hopefully, this will deal with the bug at hand and you’ll be able to access your account.

Here’s how to reset your Xbox Live credentials:

  1. Navigate to Security basics site.
  2. Sign in with your Microsoft account associated with Xbox.
  3. Click on the Change password option.
  4. Change your current password and open the Xbox app again.xbox error 0x83750007
  5. Try signing in with the new password and look does it works.

7: Remove the Microsoft account and try signing in

If that won’t work, we have a similar workaround. Chances are you’re using the same Microsoft account to manage Windows 10 and sign into the Xbox App. For no apparent reason, this seems to be an issue. Namely, some users were finally able to log into their Xbox account by switching to a Local account instead of the Microsoft one.

Here’s what you need to do:

  1. Open Settings.
  2. Choose Accounts.
  3. Sign in with the local account.xbox error 0x83750007
  4. Navigate to Xbox app and try signing in again.

8: Select Normal boot

This is where the major system configuration meddling comes into play. For some reason, the custom startup options automatically disable the responsible Xbox services. This isn’t a rule, not at all, but since we’re slowly depleting options, you can give it a go. It won’t cost you a thing and you can always change the way your PC starts later on.

Follow these instructions to enforce the Default startup settings:

  1. In the Windows Search bar, type msconfig and open System Configuration.
  2. Under the General tab, select Normal startup and click Ok.xbox error 0x83750007
  3. Restart your PC and look for changes.

9: Check the services

Now, the dedicated Xbox services are the next step. We need you to confirm that those are up and running when the app is opened. There are multiple services associated with Xbox on Windows 10, but the most important ones, concerning the error at hand, are Xbox Live Networking Service and Xbox Live Auth Manager. If they’re down (stopped), you won’t be able to log into your Xbox account.

Here’s what you need to do:

  1. Open the Xbox app and minimize it.
  2. In the Windows Search bar, type Services and open Services from the list of results.
  3. Press “X” and you should see several Xbox-related services.xbox error 0x83750007
  4. Right-click on the Xbox Live Networking and click Start in the contextual menu.
  5. Repeat the procedure for Xbox Live Auth Manager.
  6. Try signing in again.

10: Reinstall Xbox App

Finally, if none of the previous solutions helped you address the issue, we can only recommend two options. The first one is the complete reinstallation of the Xbox app through PowerShell. If that fails, you can reset your PC to factory values and hopefully, with the system refresh, the “0x83750007” sign-in error won’t reoccur.

Follow these steps to re-register (reinstall) the Xbox App in Windows 10:

    1. Right-click Start and open PowerShell (Admin).
    2. In the command-line, copy-paste the following commands one by one and press Enter after each:
      • Get-AppxPackage Microsoft.XboxApp | Remove-AppxPackagexbox error 0x83750007
      • PowerShell -ExecutionPolicy Unrestricted -Command “& {$manifest = (Get-AppxPackage *XboxApp*).InstallLocation + ‘AppxManifest.xml’ ; Add-AppxPackage -DisableDevelopmentMode -Register $manifest}”
    3. Wait until the app is re-registered on your system and restart your PC.
    4. Open the Xbox app, enter your credentials, and hope for the best.

With that said, we can conclude this article. If you have any alternate solutions or questions concerning the aforementioned error, feel free to write them down in the comments section below.

RELATED STORIES YOU SHOULD CHECK OUT:

How to Change Windows 10 Window Colors and Appearance

I know most of you running a Windows 10 device were wondering if they can change the colors and appearances in the operating system. Well, the answer to your question is yes and you only need to follow the tutorial posted below in order to find out how exactly you can change the colors and appearances in Windows 10.
How to change Windows 10 window colors and appearance
In order for you to select your Windows 10 colors and appearances you will first need to turn on the “show color on Start, taskbar, and action center” feature if you haven’t already. If you turn on this feature you will be able to change to your liking the Start menu colors, the taskbar colors, and the action center background will have your preferred color as well.

Change Windows 10 colors and appearances

  1. Press the “Windows” button on the keyboard to open the Start menu in Windows 10.
  2. In the upper side of the Start menu, you will have to left click or tap on the “Settings” feature.
  3. Now in the Settings menu, you will have to find and left click or tap to open the “Personalization” feature.

Now for changing to a specific color if you are using a Windows default theme:

  • In the Personalization window left-click or tap on the “Colors” feature situated in the left side panel.
  • Turn on the “show color on Start, taskbar, and action center” feature.
  • Move the slider for the “Automatically pick a color from my background. ” to off.
  • Now from the menu of colors left-click or tap on a color you wish.
  • Now close the Settings window you opened and reboot your Windows 10 operating system.

How to let your Windows operating system pick a color from your background(only if using Windows default theme):

  • From the Personalization menu you need to left click or tap on the “Colors” feature again.
  • Turn on the “show color on Start, taskbar, and action center” feature.
  • Turn on the feature “Automatically pick a color from my background“.
  • Close the Settings windows and reboot your Windows 10 operating system.

How to choose your color if you are using a high contrast theme:

  • Left click or tap on the “Colors” feature situated on the left side panel in the Personalization window.
  • Find and left click or tap to access the “Go to high contrast color settings” link situated on the lower side of the window.
  • In this next window left-click or tap on the color you wish to change and from the colors, menu chooses the color you want.
  • Now left click or tap on the “Apply” button.
  • Left click or tap on the “OK” button in the same window and close the Settings menu.
  • Reboot your device and check to see if the colors have changed.

Useful Windows 10 customizing hints and tips

For some of our readers changing the color and appearance of specific communication, windows are something they need in order to navigate quickly through a large number of opened tasks. For this, we have a dedicated article that teaches you how to customize the colors of your start menu and taskbar. If you simply want to change the color of a window, this is not so complicated.

If you do navigate on Facebook and it starts being annoying, try to change its color schemes and customize it. Finally, if you simply want to calibrate the colors, the brightness or the contrast of your Windows screen, here’s how to do it.

You are done, now you know exactly how to change the colors and appearances in your Windows 10 operating system but if you do run into any issues along the way you can always write us in the comments section of the page situated below and me or my colleagues will help you further as soon as possible.

READ ALSO: Strategy Game ‘Age of Sparta’ Available as Free Download from the Windows Store

Fix: Broadcom WiFi can’t find wireless network

After upgrading to Windows 10 some users report that they cannot find any wireless networks and that can be a major problem since most of us use internet on daily basis. If you’re having this issue you might want to check some of these solutions below.

What to do if Broadcom WiFi cannot find any wireless networks

Table of contents:

  1. Upgrade your wireless adapter drivers
  2. Disable unsupported VPN software
  3. Delete your wireless profile
  4. Run the Troubleshooter
  5. Reset your router
  6. Check if the network is enabled
  7. Reset the network

Fix: Broadcom WiFi won’t connect

1. Upgrade your wireless adapter drivers

Usually these kind of problems are caused by driver incompatibility, but you can try to fix that by installing the latest Windows 10 drivers.

If you’re having a built-in WiFi card you might want to download the latest drivers for your motherboard, but if you’re using a dedicated WiFi card make sure that you download drivers from the WiFi card manufacturer. Make sure that you download the latest drivers, preferably one optimized for Windows 10.

If there are no Windows 10 drivers available you can always install Windows 8 drivers in compatibility mode. To install drivers in compatibility mode do the following:

  1. Find the driver setup file, and right-click it.
  2. Choose Properties from the menu.
  3. Go to Compatibility tab.
  4. Find “Run this program in compatibility mode for” and choose Windows 8 from the list.
  5. Click OK and Apply to save the changes and then run the setup.

Update drivers automatically

If you don’t want the hassle of searching for drivers on your own, you can use a tool that will do this for you automatically. Of course, as you’re not able to connect to the internet at the moment, this tool won’t be useful.

However, once you get online, it will help you to keep all your drivers up to date, so you won’t be in this situation anymore.

We strongly recommend updating drivers automatically and safely with a full-dedicated tool that will help you to avoid permanent damage to your PC by downloading and installing the wrong driver versions.

One of our top recommendations when it comes to driver utilities is Fortect Driver Updater. It is lightweight with a straightforward user interface.

After you download and install the software, let it scan your PC and identify whether you have any outdated or damaged drivers.

It has a large driver database and automatically finds the perfect version for your specific hardware. You can set it up to regularly update your drivers and never think about it again.

⇒ Get Fortect Driver Updater

2. Disable unsupported VPN software

If you’ve upgraded from Windows 8 to Windows 10 you might have unsupported VPN software installed. To uninstall it, follow these steps:

  1. Open Command Prompt as administrator. You can open it by pressing Windows Key + X and choosing Command Prompt (Admin) from the list.
  2. Enter netcfg –s n in Command Prompt.
  3. You should get a list of networking protocols, drivers and services. Search the list for DNI_DNE. If the DNI_DNE is
  4. present proceed to the next step. If there’s no DNI_DNE on your list, skip this solution.
  5. Enter the following line into the  Command Prompt and press Enter:
    • reg delete HKCRCLSID{988248f3-a1ad-49bf-9170-676cbbc36ba3} /va /f Wi-Fi-does-not-work broadcom
  6. Next, enter in this:
    • netcfg -v -u dni_dne broadcom wifi doesn't work windows 10
  7. Restart your computer and see if the issue is resolved.

We hope that at least one of these solutions helped you with your problem with Broadcom WiFi. However, if you didn’t solve the problem, even after applying these fixes, you can check out our article about problems with WiFi adapters in Windows 10, and maybe you’ll find the solution there.

3. Delete your wireless profile

If updating the Broadcom driver didn’t get the job done, we’re going to try resetting your network profile. The first thing you need to do is to delete it:

  1. Go to Search, type cmd, and open Command Prompt as Administrator. 
  2. When Command Prompt stats type in the following command and press Enter: netsh wlan delete profile name=”WirelessProfileName” (be sure to replace WirelessProfileName with the actual name of your wireless connection)

Once you reconnect, the new wireless profile will be created automatically.

4. Run the Troubleshooter

Now, let’s try Windows 10‘s built-in troubleshooting tool. This tool can resolve various system issues, including our network problem. Heres how to run it:

  1. Go to Settings.
  2. Head over to Updates & Security > Troubleshoot. 
  3. Select Internet Connections, and go to Run the Troubleshooter. 
  4. Follow further on-screen instructions and let the process finish.
  5. Restart your computer.

5. Reset your router

The problem can be caused by improper router configuration, and of course, you can fix it by resetting your router. To do that, just press the reset button on your Realtek router, or open the router settings and select the reset option.

Before resetting your router you might want to save and export your configuration so you don’t have to enter it manually.

For more information on how to reset your router or how to export your router’s configuration, be sure to check your router’s manual.

6. Check if the network is enabled

Although it sounds unlikely, it’s possible that your Broadcom device isn’t even enabled. So, make sure to eliminate that possibility:

  1. Go to Search, type devicemngr, and open Device Manager.
  2. When Device Manager opens, locate your wireless adapter and double click it to open its properties.
  3. Go to Driver tab and look for Enable button. If you don’t see the Enable button, it means that your device is enabled and working.

7. Reset the network

If none of the previous solutions worked, the last thing we’re going to try is resetting the network. Here’s how to do that:

  1. Go to the Settings.
  2. Navigate to Network & Internet > Status.
  3. Scroll down and locate the Network reset option. This feature allows you to set your network component to default. You might need to reinstall certain network software afterward.
  4. Go to Reset now, and click Yes.
  5. Wait until your PC restarts and then check if your Ethernet connection is available.

If you have any comments or questions, just reach to the comments section below.

KM Player for PC: How to Download & Install

KM Player is one of the best video players you can download on your Windows PC. The app offers you a variety of options and allows you to play just about any video.

Also, it is pretty easy to install, so you won’t go through much stress.

How can I download KMPlayer on Windows PC?

1. Download KM Player

  1. Visit the KMPlayer website and click the KMPlayer for Windows button.
    for windows km player for pc
  2. Click the Download for KMPlayer button.
  3. Now, double-click the downloaded file to run it and click Yes when prompted by UAC.
  4. Next, select your language and click OK.
    language
  5. Click the Next button on the Welcome page.
    welcome km player for pc
  6. From here, click I Agree on the license agreement page.
    i agree
  7. Click the Next button on the components page.
    next
  8. Finally, click the Install button and wait for the process to complete.
    install km player for pc

2. Useful features in KM Player:

One of the best features you have in KM Player is that you can do pretty much all you want and customize the user interface just by doing a few clicks.

The options you have include also the adding of the Screen Controls feature, the Pan & Scan feature, the 3D Subtitle Control feature, the Capture feature and the Control Box feature.

What are the KMPlayer alternatives to consider?

Not only KMPlayer can be used when speaking about different formats. If you do not arrive to run some specific formats, especially MKV videos in Windows 10, we recommend you to switch to another player.

We have some great media player software compiled and you can try them in order to watch your favorite videos.

Let us know in the comments section if this information helped you and share with us your experience.

Fix: Err_ssl_protocol_error in Windows PC

Many Windows 10 and Windows 11 users have stumbled upon the error code err_ssl_protocol_error while trying to access specific websites on Google Chrome.

Trying to refresh the page seems to help in the short term (because, eventually, it will get your website up and running). Also, the users reported various issues, such as err_ssl_protocol_error localhost, while trying to access localhost pages in Chrome.

We will see what version of Google Chrome you need to update to fix code err_ssl_protocol_error on Chrome Windows 10 once and for all.

How can I fix err_ssl_protocol_error on a Windows PC?

1. Update your Chrome browser

Note icon NOTE
The version of Google Chrome you need to download is 5.0.342.9 or the latest one you can find on their website.

After you downloaded the new version of the Google Chrome application you will need to install it by following the instructions on the screen.

  1. Close all Google Chrome windows you have opened.
  2. Reboot your Windows 8.1 or Windows 10 device.
  3. Try opening the Google Chrome application after the operating system is up and running.
  4. Now you should have everything working without having to deal with the error code “err_ssl_protocol_error” anymore.

Left-click or tap on the link posted above to access the Google Chrome website and download the latest version of Chrome from there.

2. Disable Chrome QUIC Protocol

Many users confirmed that turning off the Chrome QUIC Protocol help them fix the problem. Here are the steps to follow:

  1. Enter the following command in a new browser tab:  chrome://flags/#enable-quic
  2. Now, use the drop-down menu to disable the feature, as shown in the screenshot belowdisable Experimental QUIC protocol

3. Disable Chrome extensions

Follow the next steps to disable your Chrome extensions:

  1. Open your Google Chrome browser
  2. Click on the vertical dots at the top right of your window
  3. Find and select the Settings
  4. On the Settings menu, click on Extensions button
  5. Uncheck the needed extensions from your list

In rare cases, Chrome extensions may trigger the annoying Err_ssl_protocol_error. To rule out this possible reason off your list, go ahead and disable all your browser extensions and test if the error persists.

If this is not the case, this means that one of your browser extensions is the culprit. Enable your browser extensions individually to identify and uninstall the faulty extensions.

4. Clear SSL State

Clearing your SSL State is one of the quickest ways to fix browser issues. These are the steps to follow:

  1. Launch Control Panel > go to Network and Internet
  2. Navigate to Network and Sharing CenterNetwork and Sharing Center
  3. Select Internet Options > go to the Content tab > hit the Clear SSL state buttonclear SSL state
  4. Restart your computer > launch Chrome and check if the problem persists.

5. Try an alternative browser

You can also consider an alternative browser to fix this error. Opera One, for example, is a better solution to avoid this issue, plus upgrading your internet speed and capabilities.

You don’t have to worry about data integration and bookmarks because you can use the import option to get everything from other browsers. Plus, it provides connectivity between your devices to transfer files quickly.

More importantly, you can get built-in features right in your browser and thus don’t have to download other extensions or add-ons that may cause err_ssl_protocol_error on Chrome Windows 10.

Therefore, with dozens of features, this qualitative browser is a suitable way to be more protected on the web and benefit from a more stable browsing experience.

Opera One

Get a browser alternative and benefit from this easy customization and enhanced security browsing.

There you go; it’s not hard to get rid of the error code “err_ssl_protocol_error” from your Windows device. These errors affect consoles, and we have a guide on how to handle SSL handshake errors on PS4/PS5, so don’t miss it.

If you have any other questions about this guide, please write in the comments section below.

Microsoft Edge is better at blocking phishing attacks than Chrome

If you’re still not sure whether you should install the Edge browser on your computer or not, here’s a new reason in favor of this idea: Microsoft Edge beat some of the most popular browsers in phishing tests.

Yes, this means that Edge is much better at identifying and blocking phishing attacks than Chrome and Firefox. Tests conducted by NSS Labs showed that Microsoft’s favorite browser blocked 96% of socially-engineered malware (malicious links and pop-ups), whereas Chrome successfully blocked only 88% and Firefox blocked 70% of these threats.

Edge blocks 92% of phishing attacks

As far as phishing attacks are concerned, Edge blocked 92% of malicious URLs, while Chrome blocked 75% of them. Firefox, on the other hand, got even worse results, blocking only 61% of phishing attacks.

Phishing attacks target both individual users, as well as business organizations. This is actually one of the biggest cyber security problems nowadays, as hackers can get their hands on sensitive personal and corporate information. Moreover, the number of email phishing campaigns have been continually increasing in recent years with phishing attacks becoming more and more complex. This means that detecting and blocking these threats has become more difficult.


In case you want to be secure while surfing the internet, you will need to get a full-dedicated tool to secure your network.  Install now Cyberghost VPN and secure yourself. It protects your PC from attacks while browsing, masks your IP address and blocks all unwanted access.


As a result, the safest approach is to prevent these attacks. Here’s how you can do this:

  • Install a reliable antivirus software on your computer to protect your machine against the latest threats.
  • Install an anti-malware tool: This will target specific cyber threats that are perhaps more difficult to spot by conventional antivirus software.
  • Avoid clicking on suspicious links or opening emails that you didn’t request.

RELATED STORIES TO CHECK OUT:

Install KB4345421 to fix error 0x000000D1 on Windows 10 v1803

If you’ve often experienced error 0x000000D1 after installing the latest Windows 10 April Update patches, then download and install KB4345421 to fix this problem for good. Microsoft rolled out this hotfix just one week after it released the problematic updates that triggered the issue mentioned above.

This is not the only bug fix that this update brings. Here is the complete list of KB4345421 improvements and fixes:

  • The update fixed the issue with the DHCP Failover server that may cause enterprise clients to receive an invalid configuration when requesting a new IP address. This results in a loss of connectivity.
  • The issue that may cause the restart of the SQL Server service to fail occasionally with the error, “Tcp port is already in use” has also been fixed.
  • The bug where the W3SVC remains in a “stopping” state, but cannot fully stop or it cannot be restarted has been fixed as well.

Download KB4345421

As always, you can automatically download KB4345421 via Windows Update or you can simply install the stand-alone update package from Microsoft’s Update Catalog.

KB4345421 issues

While Microsoft said it was not aware of any issues affecting the update, some Windows 10 users reported their computers often froze when they tried to create a new Windows 10 image. Here’s how one user describes this issue:

I tried to create a new windows 10 image from the scratch with windows media CD, then I updated it, and when it reaches a different update (KB4284848) it freezed and I can’t do anything except force restart, so I took a new dell PC right from the box never been used and I ran windows updates and it reached (kb4345421) and it also freezed. I updated All drivers, BIOS, chipset…etc.

If you encountered other issues after installing update KB4345421, do tell us more about your experience in the comments below.

Prevent a User From Changing Password on Windows 10 [How to]

Having a password on your Windows profile is important, but sometimes you want to prevent users from changing passwords in Windows 10.

This is important if you’re an administrator and want access to other accounts in your network. We already wrote about how to change password or username, and in this guide we’ll show you how to keep them.

How do I password-protect a user in Windows 10?

  1. Open the Settings app and go to Accounts.
  2. Select Sign-in options and expand the Password section.
  3. Click on Add and follow the instructions on the screen.

How do I prevent a user from changing the password in Windows 10?

1. Use the Computer Management feature

  1. Press Windows key + X and select Computer Management icon.
  2. Click on System Tools and then click the Local users and groups. Next, click on the Users folder.
  3. Double-click the user that you want to restrict from changing the password.
  4. In the next window that appears you will have to check the box next to User cannot change password field.
  5. Click Apply and OK to save changes and restart your PC.

2. Use Registry Editor

  1. Press Windows key + R and enter regedit. Click OK.
  2. Navigate to: HKEY_CURRENT_USER\Software\Microsoft\Windows\CurrentVersion\Policies
  3. Right-click the empty space in the right pane and expand the New menu and select New DWORD (32-bit).
  4. Name the DWORD DisableChangePassword.
  5. Now that you have created it you need to double-click on it.
  6. In the Value data field write 1 and press the OK button.

This might not be the simplest way to prevent a user from changing password Windows 10, but it will get the job done.

3. Use Group Policy Editor

  1. Press Windows key + R and type inside the Run Box gpedit.msc.
  2. Double-click on User Configuration\Administrative Templates \System\Ctrl+Alt+Del Options
  3. Double click on Remove Change Password and select Enabled.
  4. Click Apply and close the window.

This is pretty much all you need to do in order to prevent users from changing the password in Windows 10.

In case you want to remove the password on Windows, we have a great guide that can help you with that as well.

Please write us below if you have any other questions related to this subject; we will help you as soon as possible.

Here’s how to fix Gmail error 76997 once and for all

If you’re getting error 76997 when using your Gmail account, this troubleshooting guide will help you solve the problem.

Gmail’s emailing service is one of the most used across the world, and has many new and advanced features, plus an interactive interface that makes it a favorite among its users.

However, the service doesn’t come without errors just like other services or even software programs, and this can affect work, communication, and even productivity in general besides ongoing processes.

Gmail users have reported various technical problems, most of which are easily resolved by their support team. Among these errors is the 76997 error, an error code that occurs when you try sending a single email to a group of contacts, but sometimes even to a single recipient.

Tackling Gmail problems, however, need not require a wealth of technical knowledge, so here are a few troubleshooting fixes and other solutions you can use to resolve the Gmail error 76997.

How can I fix Gmail error 76997 for good?

  1. Switch your email server to another email client
  2. Create a contact group
  3. Enable Labs
  4. Clear browser cache data
  5. Scan for Malicious Software
  6. Disable all Third-party Software
  7. Perform a Clean boot
  8. Disable extensions (Chrome)
  9. Disable Labs

1. Switch your email server to another email client

Many users reported various errors while accessing Gmail using their browsers. Because Gmail is a very heavy web app, many things could go wrong. This is especially true if you are running multiple browser extensions that could interfere.

Since Google doesn’t provide an official email client for Windows, users must choose a client themselves. Forget about the one built-in with Windows.

Think bigger. Think wider such as adding multiple accounts. Viewing all your messages in one unified inbox.

Integrating with other services such as WhatsApp, Slack, Dropbox, Evernote and many more. It’s starting to sound like the real deal, doesn’t it?

Mailbird offers all of these and more: a customizable email client for Windows that offers the possibility to quickly make LinkedIn LookUps right as you are reading an email you just received and need to find out more about that person.

It’s great for your Gmail account because it also integrates with other Google products such as Calendar, Docs and Hangouts.

Mailbird

Mailbird

Powerful email client for Gmail on Windows 10
Free trial Download


2. Create a contact group

You can create a contact group and then email that group, to do this:

  • Go to Google Contacts.
  • On the left under “Labels,” click Create label (or go to group contacts in old Contacts.)
  • Type a name, then click OK.

— RELATED: FIX: Gmail won’t load in Chrome on Windows 10

3. Enable Labs

Gmail error 76997 may be caused when all Gmail labs are disabled, so to enable one Labs, do this:

  • Open your Gmail account.
  • Click the Gear icon on the upper right side.
  • Select Settings.
  • Click the Labs tab.gmail labs
  • Enable an Available Labs.
  • Click save changes to confirm

4. Clear browser cache data

Gmail error code 76997 can be caused when the Gmail cache stored in your browser interrupts the operation. Clear cache and restart your browser. To do this:

Google Chrome

  • Open Google Chrome in the address bar, type in chrome ://settings/clearBrowserDataclear browsing data chrome
    In Clear the following items from, select the beginning of time.
  • Check all checkbox below Clear the following items from
  • Then, click Clear Browsing Data.

5. Scan for Malicious Software

If your Windows operating system is running a malicious code, you could get Gmail error 76997. In this case, perform a full antivirus scan to check for any such malware, which you can do using your security software program or Windows Defender, or even Microsoft Security essentials if you don’t have an antivirus. Ensure these are updated then run the scan.

— RELATED: SOLVED: ‘Something’s not right’ Gmail error

6. Disable all Third-party Software

Third party apps could cause Gmail error 76997, through an extension or plug in your browser, or even through a Windows application that runs each time you start up your computer. Disabling these third party apps may fix the problem.

7. Perform a Clean boot

  • Click start and type msconfig then select System Configuration from the search results.
  • On the Services tab of the System Configuration dialog box, tap or click to select the Hide all Microsoft services check box, and then tap or click Disable all.

Windows Defender is not removing Trojan

  • On the Startup tab of the System Configuration dialog box, tap or click Open Task Manager.

Windows Defender is not removing Trojan

  • On the Startup tab in Task Manager, for each startup item, select the item and then click Disable.
  • Close Task Manager.
  • On the Startup tab of the System Configuration dialog box, click OK, and then restart the computer.
  • Try to open Gmail.

8. Disable extensions (Chrome)

  • Open a new tab in Google Chrome.
  • Type this path ://extensions/ into the address bar.
  • Disable or Uninstall unnecessarily apps.</li>

9. Disable Labs

You can disable Labs one at a time to figure out which one is causing Gmail error 76997. To do this:

  • Open Gmail.
  • In the top right, click Settings
  • Click Settings.
  • Click the Labs tab.
  • Next to any labs you have enabled, select Disable.
  • At the bottom of the page, click Save Changes.

Were you able to resolve the Gmail error 76997 using any of these solutions? Let us know in the comments section below.

[wl_navigator]

How to stop Windows 10/7 from searching for Wi-Fi networks

Your list of wireless networks can get a tad huge if you have a lot of neighbors nearby. So, seeing that this can get very annoying very quickly, this short tutorial will show you how you can make your Windows 10, Windows 10 or Windows 7 device stop the search for Wi-Fi networks.

You can very easily access the feature to configure your very own wireless network search and stop the searches for others in Windows 8 or Windows 10. You only need to carefully follow the steps listed below and you can adjust this option as you wish.

How do I stop my PC from searching for Wi-Fi networks?

1. Disable Wireless Autoconfig

  1. Press the hold the “Windows” button and the “R” button.
  2. You should have in front of you the “Run” window.
  3. Write in the box within the window the following line: “Services.msc” but without the quotes.
  4. Press the “Enter” button on the keyboard.
  5. Left click on one of the options in the right panel side.
  6. Press on your keyboard the “W” button.
  7. Now you should find the Wireless Autoconfig feature or WLAN Autoconfig (on Windows 10)disable wlan autoconfig
  8. Right click on the Wireless AutoConfig option you have on the left side panel.
  9. Left click on the “Properties” option you have in that menu.
  10. Left click on the “Stop” button under the “Services status” topic.
  11. You will have there a feature that says “Startup type”.
  12. You will need to left click on the drop-down menu on the right side from “Startup type” and left click on the “Manual” option.wlan config startup type
    Note:You can also undo the changes by following the steps above and change back to the automatic search of the Wireless Networks
  13. Left click or tap on the “ok” button button to close the window.
  14. Reboot your Windows 8 or Windows 10 device.
  15. Check and see if you still have your searching for the wireless networks enabled.

2. Forget other Wi-Fi networks

Another way to reduce the number of wireless networks available on the list is to simply use the Forget option. In this manner, you Windows computer will simply delete the networks it previously connected to or detected.

Here are the steps to follow:

  1. Go to Settings > Network and Internet > Manage known networks
  2. Right click on the wireless networks that you want to delete > select Forget > restart your computer.

Now that you know how to stop your searching for the wireless networks in Windows 8 or Windows 10, you can go ahead and configure only the network you want to use for your operating system. If you have any questions on this article, let us know in the comments below and we’ll do our best to help you further with this issue.

RELATED STORIES TO CHECK OUT:


Full Fix: Opencl.dll Problems in Windows 10/11, 7

Although Windows 10 is becoming the most popular Windows on the market, it still has occasional bugs. Speaking of bugs, users have reported problems with opencl.dll in Windows 10, and today we’ll try to fix that.

How to Fix Opencl.dll Problems in Windows 10

Opencl.dll is an important file, and if this file is missing, you might encounter various issues. Speaking of issues, here are some problems reported by users:

  • Opencl.dll missing Windows 10, 8, 7 – According to users, this issue can appear on any version of Windows, but you should be able to fix the problem by using one of our solutions.
  • Opencl.dll corrupt – Sometimes this file can get corrupted, but you might be able to fix the problem simply by using the Windows 10 ISO file and DISM command.
  • Opencl.dll missing from your computer – If this file is missing from your PC, you might not be able to run certain applications, but you can always copy the file from another PC.
  • Opencl.dll missing AMD – According to users, this problem can appear due to your graphics card drivers, and to fix the problem you just need to update your drivers to the latest version.
  • Opencl.dll cannot be found – Sometimes the necessary files might not be found, but you should be able to fix the problem simply by installing the latest Windows updates.

1. Update your graphics card drives

As we already mentioned, opencl.dll is related to your graphics card, so it wise to check for latest driver updates. To do this, go to your graphics card manufacturer’s website and find your graphics card model. Check for the latest drivers and install them. After the latest drivers have been installed check if the issue has been resolved.

You can manually update your graphic card drivers through Device Manager from Display adapters. Select the drivers you need and right-click to Update your drivers. After the updating process is finished restart your PC.

We also recommend a specialized third-party tool to automatically download all the outdated drivers on your PC.

2. Use Windows Image File

In order to do this, you’ll need to have Windows 10 ISO of the exact build that you have installed. We have to mention that this solution is a bit more advanced, so if you don’t know how to do it, maybe it’s best to contact an expert.

  1. Mount the ISO image.
  2. Run Command Prompt as admin.
  3. Create a temporary directory to mount Windows Image File using the following command:
    • mkdir C:WIM
  4. Mount the WIM file:
    • Dism /Mount-Wim /WimFile:D:sourcesinstall.wim /index:1 /MountDir:C:WIM /ReadOnly
  5. Run DISM:
  6. Dism /Online /Cleanup-Image /RestoreHealth /Source:C:WIMWindows /LimitAccess
  7. After the process is completed unmount the image and delete the folder created in Step 3:
    • Dism /Unmount-Wim /MountDir:C:WIM /Discard
    • rmdir C:WIM
  8. Restart your computer.

3. Copy the missing file

According to users, one way to deal with Opencl.dll problems is to copy the missing file manually. To do this, it’s usually best to copy the file manually from another PC.

To fix the problem, simply copy the file to C:WindowsSystem32 directory. If you’re using a 64-bit version of Windows, you need to copy the missing file to the C:WindowsSysWOW64 directory as well.

Before you copy these files, be sure to create a backup of original files, just in case. Once you overwrite the original files, you’ll need to register the new files. To do that, just do the following:

  1. Press Windows Key + X to open Win + X menu. Now choose Command Prompt (Admin) or PowerShell (Admin).
    Opencl.dll missing Windows 8
  2. Now enter regsvr32 opencl.dll command and press Enter.

After doing that, the problem with the DLL file should be resolved.

A couple of users reported that you can copy the file from another directory on your PC. According to users, the file is located in Nvidia drivers directory, and you just need to copy it by following these steps:

  1. Go to C:Program FilesNVIDIA CorporationOpenCL directory. Locate OpenCL64.dll, right-click it and choose Copy from the menu.
  2. Go to C:WINDOWSSystem32 directory, and paste the file there. Be sure to change its name from OpenCL64.dll to OpenCL.dll.

After doing that, the problem should be resolved and everything will start working again.

4. Download the latest OpenCL runtime package

If you’re having problems with Opencl.dll, you might be able to fix the problem simply by downloading the OpenCL runtime package. According to users, you can download OpenCL runtime right from Intel’s website.

Once the runtime is downloaded, run the setup file to install it. After everything is installed, the issue should be resolved.

5. Uninstall your graphics card drivers and perform a DISM scan

According to users, Opencl.dll is related to your graphics card drivers, and in order to fix the problem, it’s advised that you uninstall your graphics card drivers and switch to the default drivers. To do that, just follow these steps:

  1. Press Windows Key + X and choose Device Manager from the list.
    Opencl.dll missing from your computer
  2. Locate your graphics card driver, right-click it and choose Uninstall device.
    Opencl.dll corrupt
  3. Confirmation menu will now appear. If available, check Remove driver software for this device button. Now click the Uninstall button.
    Opencl.dll missing from your computer
  4. After removing the driver, click on Scan for hardware changes icon and your system will automatically install the missing drivers.
    Opencl.dll missing AMD

Once you remove your driver, repeat the steps from Solution 2 to repair your system.

6. Prevent the driver from automatically updating

According to users, in order to fix this problem you need to prevent your graphics card driver from updating automatically. If you have a graphics card driver already installed, be sure to uninstall it from Device Manager.

Now, you need to prevent Windows from automatically updating the driver. After doing that, download the latest driver from your graphics card manufacturer and install it. Once the driver is installed, the problem with opencl.dll will be completely resolved.

7. Disable your dedicated graphics card

Opencl.dll issues are usually caused by your graphics card drivers, and if you can’t fix the problem, it’s advised that you temporarily disable your dedicated graphics card.

Keep in mind that this is just a workaround, and until the proper drivers are released, it’s advised to use an integrated graphics card. Your integrated graphics card might not be able to handle the latest games, but at least your PC will be stable so you can perform the most basic tasks without issues.

To disable your dedicated graphics card, be sure to check the graphics card software on your PC. Alternatively, you can disable your graphics card right from BIOS.

8. Perform a DISM and SFC scans

Users found out which directory is causing problems with opencl.dll, and in order to fix the problem, you just need to run DISM and SFC scans. To do that, just follow these steps:

  1. Mount Windows 10 ISO image.
  2. Start Command Prompt as administrator and run the following commands:
  • Dism /Online /Cleanup-Image /RestoreHealth /Source:esd:F:sourcesinstall.esd1WindowsWinSxSwow64_microsoft-windows-r..xwddmdriver-wow64-c_31bf3856ad364e35_10.0.10586.0_none_3dae054b56911c22
  • sfc /scannow

After doing that, the problem should be completely resolved.

9. Install the latest updates

This can be just a Windows 10 bug, and like most Windows bugs, you can fix it with the latest updates. Microsoft is working hard to fix various Windows issues, and if you want to ensure that your system is bug-free, it’s advised to keep your system up to date.

By default, Windows 10 installs the missing updates automatically, but sometimes you might miss an update or two. However, you can always check for updates manually by doing the following:

  1. Press Windows Key + I to open the Settings app.
  2. Go to Update & Security section.
    Opencl.dll corrupt
  3. Click Check for updates button.
    Opencl.dll cannot be found

Windows will now check for available updates and download them automatically in the background. Once the updates are downloaded, restart your PC to install them and the issue should be completely resolved.

That’s about it, I hope this article helped you to solve the problems with Opencl.dll on your computer. To find out more about solving the problem with missing DLL files in Windows 10, check out this article.

If you have any comments, or questions, just write them down below.

Fix: RAM Usage Went up After Installing Windows 10/11

I know that a lot of users who upgraded to the Windows 10 or the Windows 8.1 operating system might have some memory RAM related issues. But you will find out below some tips on how to fix your Windows 8.1 or Windows 10 if the RAM usage went up after the update you made.
RAM usage went up after installing Windows 8.1, Windows 10 Fix
The RAM usage went up after installing Windows 10 or Windows 8.1 first of all because the new operating system from Microsoft needs a few more RAM memory to operate as well as the applications you have installed on it. The lines below will show you how to better optimize your operating system and get your RAM memory down a notch.

How to fix RAM usage if it went up after the installation of Windows 10

  1. Adjust RAM performance
  2. Check problematic apps
  3. Disable startup programs
  4. Defragment your drives
  5. Open only needed applications
  6. Run a virus/malware scan
  7. Reboot your PC periodically

First option: Adjust RAM performance

  1. On the start screen of your Windows 8.1 or Windows 10 device you need to left click or tap on the “Desktop” icon.
  2. You will have there a “Computer” icon. You will have to right click on it or tap and hold in order to bring up the next menu.
  3. Left click or tap on the “Properties” option.
  4. Now in the properties window you will need to left click or tap on the “Advanced System settings” feature situated on the left side in the window.
  5. Now you have in front of you the “System properties” window.
  6. In the window above you should have a “Performance” topic and you need to left click or tap on the “Settings” icon.
  7. Now you have a “Performance options” window in front of you.
  8. Left click or tap on the option “Adjust for best performance”.
  9. Left click or tap on the “Apply” button.
  10. Left click or tap on the “OK” button to close this window.
  11. Close all the other open windows.
  12. Reboot your Windows 8.1 or Windows 10 operating system.
  13. Check and see how your RAM usage is doing now.

Second option: Check problematic apps

For a better improvement on your RAM usage, you will also have to check all the apps you are using inside Windows 8.1 or Windows 10 operating system.
Note one: Uninstall the apps that you are not using or don’t need in the Windows 8.1 or Windows 10 operating system.
Note two: Check if one of your apps is using more RAM memory then it is supposed to(You can check this by opening the task manager and looking into the processes tab to see which app is using the most memory).

Third option: Disable startup programs

See what programs are running at startup of the Windows 8.1 or Windows 10 device.

If you don’t need all of them to startup when the Windows 8.1 or Windows 10 boots I would suggest taking them out and opening them only when you need it. You can use the described steps below to take out a specific app from the startup feature.

  1. Press and hold the button “Windows” and the button “R”.
  2. Now that your run window shows you will need to write in there “msconfig” without the quotes.
  3. Press the “Enter” button on the keyboard.
  4. Now that you have the “Task manager” window in front of you left click or tap on the “Startup” tab situated in the upper side of the window.
  5. You will have there a list of programs that run at startup.
  6. If you want to disable them you only need to right click or tap and hold on a specific application and left click or tap on the “Disable” feature.

Fourth option: Defragment your drives

  1. Press and hold the “Windows” button and the “R” button.
  2. In the run window you will need to write the following: “dfrgui” without the quotes.
  3. Press the “Enter” button on the keyboard.
  4. In the new window that shows you will need to left click or tap on the hard drives you want to defragment.
  5. After you have selected the hard drives you will need to left click or tap on the “Optimize” button and follow the instructions on the screen to finish the defragment process.
  6. After the defragmentation is completed reboot your Windows 8.1 or Windows 10 device and try to see if it improved your RAM usage.

Fifth option: Open only needed applications

Try to open only the applications you need in Windows 8.1 or Windows 10. If you have more apps opened that you don’t use please close them to ensure a better functionality of the Windows 8.1 or Windows 10 system.

Sixth option: Run a virus/malware scan

Run a full system virus scan to ensure that you don’t have any third party programs that make your system RAM take up more usage.

Seventh option: Reboot your PC periodically

It is always helpful in case your Windows 10 or Windows 8.1 operating system is not working at the speed you want it to reboot it once in a while. If you do a reboot of the system this would ensure that you don’t have blocked applications in your processes even though you closed the previously.

How to Fix High RAM Usage in Windows 10

Solutions from the first part of the article apply to Windows 8.1 and Windows 10 Technical Preview! So, we found a couple of more solutions that might be helpful in solving the high RAM usage problem in the full version of Windows 10.

Solution 1 – Disable Windows tips

Ever since the Technical Preview, and it looks like it’s still present in the full version of Windows 10, the system will ocasionally show you some tips about using or some other system-related actions. As some users who were facing the high RAM usage problem in Windows 10 said, this proved to be a huge ‘memory-eater.’ So, since this isn’t an important part of the system, and you probably figured out how to use Windows 10 on your own by now, you can disable this feature, and hopefully you’ll regain some of your memory’s used space. Here’s how to easily disable “Show me tips about Windows” feature:

  1. Open Settings app
  2. Go to System
  3. Under Notifications & actions tab, uncheck Show me tips about Windows high ram usage windows 10

There you go, you computer should be at least a little faster now. But, if you’re still experiencing the high RAM usage problem, check out another solution below.

Solution 2 – Change Memory Management Settings

To change a Memory Management settings, you’ll have to perform a little registry tweak. Here’s exactly what you need to do:

  1. Go to Search, type regedit and hit Enter
  2. Go to the following path:
    • HKEY_LOCAL_MACHINESYSTEMCurrentControlSetControlSession ManagerMemory Management
  3. Find ClearPageFileAtShutDown and change its value to 1 high memory usage windows 10
  4. Restart your computer

There you go, the few options above will help your Windows 8.1 or Windows 10 operating system use only the necessary RAM memory and ensure that your system is working at the speed it is intended. Also you can write us below any other questions related to this article and we will help you further in the quest of making your operating system work better.

You can also check our dedicated guide in order to fix low memory on Windows 10, 8.1 or 8. You can sometimes get other common error: Your computer is low on memory. Do not bother if you get this error message as our team managed to create a fix guide for ‘your computer is low on memory’ and its solutions will help you get rid of this issue.

READ ALSO: Windows 7 SP1 to Windows 10 Upgrade to be Performed Through Windows Update