Isn’t it cool how we’re able to stay up-to-date with all that’s happening in the world straight from our taskbars? It’s a quick method to keep you in the loop while you’re working if you don’t have time to catch the news.
Well, some users are in the dark as their news and interests are not showing in their taskbars. It could probably be an internet problem, but let’s explore all avenues to get this important widget back.
Why are news and interests not updating?
If you’re wondering why your news and interests widget is not updating or showing up on your taskbar, below are some possible reasons:
The widget is hidden – While the news and interest widget may be an important piece of information, some find it disturbing. They may hide it from the taskbar to prevent it from popping up whenever you hover your mouse around that area.
Disabled widgets – In some cases, the widgets are disabled, and you may have to enable them to regain your news and interests widget.
Conflicting widgets – If you’ve downloaded third-party widgets similar to the news and interests widget, they may not show up because the other program has disabled apps that perform the same tasks.
Outdated OS – If you’ve not checked for system updates in a while or disabled them permanently, this could be why your news and interests widget is not showing.
Poor connection – If you’re having issues with your connection, the news and interests widget may not show up because data cannot be fetched.
Virus infection – If a virus has sneaked into your system, some features may not work as they usually do, which may be why your news and interests widget is not showing.
How do I get the News and interests back on my taskbar?
Check off the following conditions before moving to the slightly technical solutions:
Ensure your Taskbar is not hidden and docked at the bottom.
Check and ensure you have a stable internet connection.
Try restarting your PC.
1. Check for updates
Hit the Windows key and click on Settings.
Click on Windows Update then select Check for updates.
Wait for the scan to complete and if available, click on Download & install.
2. Run a virus scan
Press the Windows key, search Windows Security, and click Open.
Select Virus & threat protection.
Next, press Quick scan under Current threats.
If you don’t find any threats, proceed to perform a full scan by clicking on Scan options just below Quick scan.
Click on Full scan, then Scan now to perform a deep scan of your PC.
Wait for the process to finish and restart your system.
Even though you’re using Windows Defender to protect your PC, it’s not completely secure against more advanced malware attacks. In order to get powerful virus defence, you would need an upgrade.
Fortunately, you can find plenty of useful antivirus tools and rely on their improved security and high detection rate for all kinds of threats.
3. Enable via Group Policy
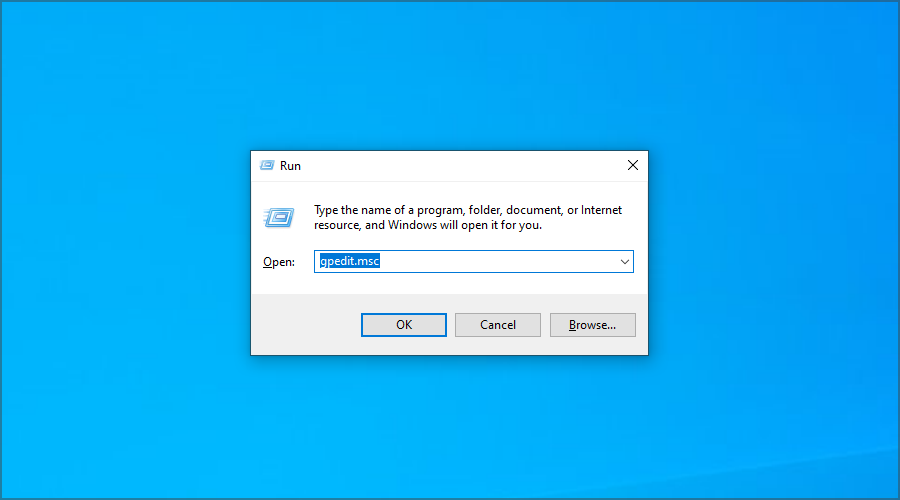
Hit the Windows + R keys to open the Run command.
Type gpedit.msc in the dialog box and hit Enter.
Navigate to the following location: Computer Configuration/Administrative Templates/ Windows Components/News and interests
Double-click on Enable news and interests on the taskbar.
Check the Enabled box, then click Apply and OK to save changes.
We highly encourage you to avoid editing the registry, but if necessary, before you make any changes, ensure you create a backup or a restore point. This will ensure you have a safe point of return in case anything goes wrong.
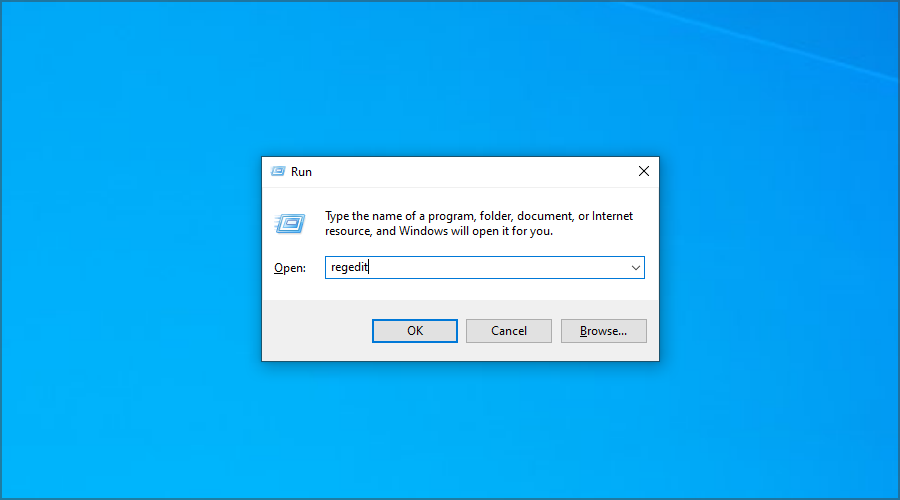
Hit the Windows + R keys to open the Run command.
Type regedit in the dialog box and hit Enter.
Navigate to the following location: HKEY_CURRENT_USER\Software\Microsoft\Windows\CurrentVersion\Feeds
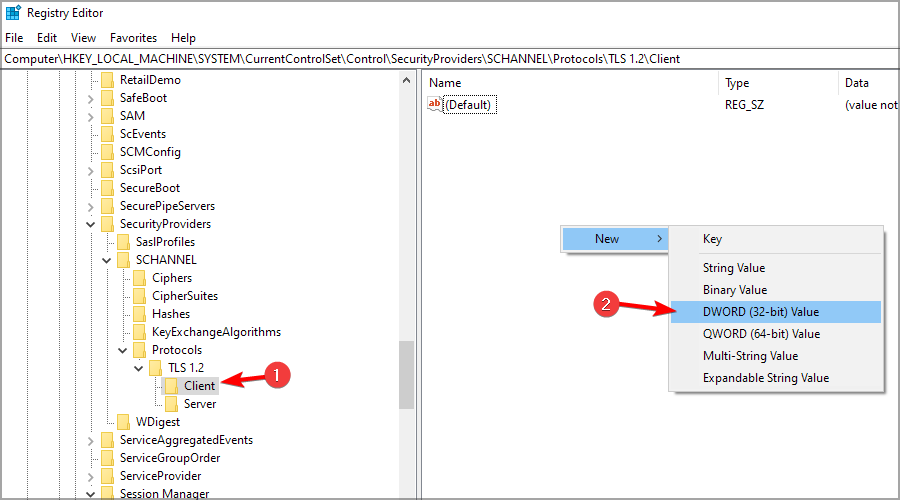
Right-click on ShellFeedsTaskbarViewMode, but if unavailable, right-click on a blank space on the right the select New DWORD (32-bit) Value. Rename it as ShellFeedsTaskbarViewMode.
Double-click on it and enter 1 in the Value data entry.
Close the registry editor and restart your PC.
You’ll find that most of the time, you had just not enabled the feature, and all it takes is to tweak these settings.
With that out of the way, we’d like to direct your attention to another interesting guide. If you’d like to change your widget language, we have all the details on how to go about it.
Do let us know of any additional thoughts you may have on this topic in the comment section below.
Are you experiencing problems with Yahoo and VPN? This isn’t uncommon, and if you encounter this issue, you won’t be able to access Yahoo at all.
This is a difficult issue to tackle, but we’ll try to provide you with several potential solutions that you can try.
Which VPN is good for Yahoo?
It seems that Yahoo is having issues with various VPNs, and one of the most common causes for login issues is your VPN, so using one with Yahoo is discouraged.
What can I do if Yahoo isn’t working with VPN?
Before you try any other steps, you might want to try using a different browser and check if that helps. You can also try temporarily disabling our VPN as a workaround.
1. Use the Forgot username option
Visit the Yahoo Mail page.
Click on the Forgot username link.
Next, enter your email, recovery email, or phone number and click Continue.
Follow the instructions on the screen to complete the process.
While Yahoo doesn’t necessarily block VPNs, your choice of providers can still determine your experience with its service. You may also get the temporary error 15 if you’re in a different location, so try switching it off.
Don’t you just hate it when you immediately hit send on an email and suddenly remember you forgot to add someone’s email address? Well, this can be a thing of the past with Outlook’s delay email feature.
Mistakes are not the only reason email users choose to delay emails. Most email clients have an automatic sending button, but sending email messages at the right time is considered proper email etiquette.
Using this simple scheduling feature, you may score a few points with your boss for observing time.
How can I delay sending an individual email in Outlook?
1. Use the Outlook desktop version
Launch your Outlook mail from your desktop or search for it from your app list.
Click on the New mail tab, and in the email composition window, fill in all the necessary details to compose a new email or reply to an already existing email from your inbox.
Navigate to the Options tab and select Delay Delivery.
Go to Delivery options section, tick the Do not deliver before check box, select the time frame, then click Close.
Once you exit this window, you can go about typing your message and hit send. It will then be in your Outgoing mail until its scheduled delivery time.
If you wish to edit the delivery time, you can follow the above steps and adjust the time. To disable it, clear the Do not deliver before check box.
2. Use Outlook browser version
Open your browser and login to your Outlook mail and click on the New mail option on the taskbar at the top.
Fill in the necessary entries for the receiver, subject and compose the message in the email window.
Click on the drop-down arrow next to the Send option and select Schedule send.
A new window will pop up where you can set a custom date and time, you’d like your message to be delivered.
In case emails are not sending in your Outlook email, check out our detailed article on what to do.
Unfortunately, the delay or email scheduling option in Outlook mobile versions is unavailable. The only workaround is to use your mobile browser and switch to the desktop version to enable this feature.
How can I delay sending all emails in Outlook?
Launch your Outlook desktop app and click on the File tab.
Select Rules, and click on Manage Rules & Alerts in the drop-down menu.
A Rules & Alerts window will open. Click on the Email Rules tab and select New Rule.
Go to the Start from a blank rule section, click on the Apply rule on messages I send option, and hit Next.
A new dialog box will pop up with scheduling options for the emails you wish to delay.
Once you click any of these options, the standard delay for all messages will not apply. Therefore, ignore all these rules and simply click on Next.
In the next Rules Wizard pop-up window, tick the defer delivery by a number of minutes check box to set the Outlook delay send rule.
Next, move to Step 2: toEdit the rule description(click an underlined value) at the bottom. Here’s where you’ll define the number of minutes as specified in 7 above. Click on the hyperlinked text, which will open a small dialog box where you can specify the period of time you wish to defer the email by then hit OK then Next.
Finish the rule setup by filling in the Specify a name for this rule section in case you want to create more rules in the future to avoid confusion.
Ensure you check the Turn on this rule box and then click on Finish.
If you have multiple Outlook accounts and wish to apply the same email delay rule, also check the Create this rule on all accounts box.
Click the Finish button and confirmation dialog box that appears to finish setting up. Now all your messages will remain in your Outbox folder until their scheduled time.
If you’d like to reschedule email delivery in Outlook, simply go to your Outgoing emails. Here you can edit the minutes check box again.
In case the email scheduling is not working, and emails are stuck in your outbox after the delivery time has elapsed, we have an article on what to do.
How can I disable or schedule automatic send/receive in Outlook?
Launch your Outlook app, select File, and under the Options menu, click on Advanced.
Go to the Send and receive section and uncheck the Send immediately when connected box.
Click on the Send/receive option and in the pop-up window that appears, uncheck the Schedule an automatic send/receive every … minutes and Perform an automatic send/receive when exiting boxes.
Now click on Close to save these settings.
From here, you will only have to press the F9 button when you’re ready to send these messages.
To schedule the automatic send/receive option, follow the above steps, but in step 3, ensure to check the Schedule an automatic send/receive every … minutes, then adjust the email send time to an interval you’re comfortable with.
The only downside to this email delivery option is that you might miss out on important messages, especially when your inbox is not updating due to connection issues.
The next time you have a really important email or message that you don’t want to hit the inbox too soon, add an extra delay to the send time using the steps outlined above.
Hopefully, this brings you a step closer to better email productivity. Instead of keeping your emails in your drafts folder for long periods of time, try scheduling them.
You may also want to check out other modern email clients with email schedulers and see what they have to offer. Not only will you benefit from a cleaner interface but also out-of-office auto-reply, and email templates, among other features.
That’s it for this article, but we’d love to hear more from you. Which email scheduling option do you prefer and why? Drop us a comment down below.
Emojis are part of everyday online communication, and many wonder how to add emoji to Outlook email. This is simpler than you think; this guide will show you how to do it.
How do I insert emojis in Outlook?
1. Use the Windows Emoji Picker
Press the Windows key, type outlook, and click Open.
On the Outlook window, click New Email to start composing an email.
Go to the email body or Subject field, click it, and press Windows + . to open Windows Emojis Picker.
Select any emoji you want to add to your email message, and it will appear in your message window.
Press the Windows key, type outlook, and click Open to launch the email client.
On the Outlook window, click New Email to start composing an email.
On the New Email window, go to the Insert tab.
Locate and click Symbols, then click More Symbols.
In the Symbol dialog box, for Font, select Wingdings or Segoe UI Emoji from the drop-down list.
If you don’t see the smileys right away for the Segoe UI Emoji font, scroll down to find the one you want. You can also select Extended Characters- Plane 1 from the Subset drop-down.
Click Insert to add the smiley face to the body of your email.
Outlook groups are helpful because they allow you access to a shared mailbox and calendar, but have you ever wondered how to delete an Outlook group?
If you don’t need to manage a group anymore, you can quickly delete it, but remember that doing so will delete all the data associated with that group.
However, a deleted group can be recovered for up to 30 days, but that requires help from the IT administrator. In today’s guide, we will look at removing a group properly, so let’s start.
Why can’t I delete group emails in Outlook?
To delete group emails in Outlook, you need to be a group owner or have permission to delete emails.
Sometimes, technical glitches can interfere with this process, and users report waiting a bit before their changes are applied.
This isn’t unexpected since there’s a difference between deleting a single email and the entire group thread.
The group thread contains multiple emails that might be connected to two or more group members. Deleting it will remove an entire conversation for multiple users, which is why this requires additional permissions.
In case you’re not familiar with this feature, we have a great guide on how to create group email in Outlook.
How do I delete a group in Outlook?
1. Use the Outlook app
Open Outlook and locate your group in the left pane under Groups.
Now select Edit Group from the ribbon menu. This will open the Outlook group management window.
Click the Delete group button.
Check I understand that all group content will be deleted and click on Delete.
After doing that, your group will be deleted along with all of its data. This also includes your shared mailbox in Outlook.
2. Use the Outlook Web app
In the left pane, locate Groups and select your group from there.
Click on the More icon and choose Settings.
Now click on Edit group.
Locate the Delete group option and click it.
Check I understand that all group content will be deleted and choose Delete.
Keep in mind that the steps might be slightly different if you’re using the older version of Outlook for the Web.
Event logs are reports that detail major and minor changes and even errors. A log is generated if a service or startup app fails to run on the first attempt. But when the number of logs becomes significant, users may want to disable Windows event logs.
Individual logs take up a minuscule amount of space on the disk, but if thousands of such reports are generated daily and stored on an SSD, you are looking at a diminished performance down the line.
Keep reading to find out how to turn off event logging in Windows!
Is it OK to disable Windows event log?
Yes, there’s no harm in disabling event logs. Remember, these logs are just reports that help troubleshoot issues. They don’t perform any actions or automatically fix the problem at hand.
For many users, they, surprisingly, are the source of the problem. Their corrupt state can trigger errors or lead to dwindling system performance.
So, if you are sure that the event logs won’t be needed, disabling them won’t cause any issues. However, if storage space is not a concern, we recommend allowing Windows to generate and record event logs. And you can clear them by running Disk Cleanup every month or so.
How can I disable the Windows event logs?
1. Disable the dedicated services
Press Windows + S to open Search, type Services in the text field, and click on the relevant search result.
Now, scroll down, locate Windows Event Log, right-click on the service, and select Properties.
Select Disabled from the Startup type dropdown menu, click the Stop button, and then on OK to save the changes.
Similarly, disable the following two services as well:
Windows Error Reporting Service
Windows Event Collector
Finally, restart the computer for the changes to come into effect.
If you want to disable event logs in Windows 10 or the latest iteration, a quick option is to disable all the related services. The PC won’t be able to register any more logs in their absence.
2. Via Command Prompt (CMD)
2.1 Disable the Event Log service
Press Windows + R to open Run, type cmd, and hit Ctrl + Shift + Enter.
Click Yes in the UAC prompt.
Now, paste the following two commands individually and hit Enter after each:sc config eventlog start= disablednet start eventlog
Restart the computer for the changes to apply.
The two commands we executed terminated the Windows Event Log service right away and disabled it from running at startup on subsequent reboots.
Press Windows + S to open Search, type Command Prompt in the text field, and click on Run as administrator.
Click Yes in the prompt that pops up.
Now, execute the following command: auditpol /set /subcategory:"Filtering Platform Connection" /success:disable /failure:enable
The command will stop Windows from logging Audit Success in Windows Filtering Platform, and it will only register the Audit Failure logs. Remember, this won’t altogether disable Windows event logs, but it will certainly reduce the number.
3. Disable specific logs with the Registry Editor
Press Windows + R to open Run, type eventvwr in the text field, and click OK.
Locate the type of log you want to disable and double-click on it.
Now, go to the Details tab, and copy the Guid Iisted here.
Press Windows + R to open Run, type regedit in the text field, and hit Enter.
Click Yes in the prompt that appears.
Next, paste one of the following paths in the address bar depending on the log type and hit Enter: HKEY_LOCAL_MACHINE\SYSTEM\CurrentControlSet\Control\WMI\Autologger\EventLog-SystemHKEY_LOCAL_MACHINE\SYSTEM\CurrentControlSet\Control\WMI\Autologger\EventLog-SecurityComputer\HKEY_LOCAL_MACHINE\SYSTEM\CurrentControlSet\Control\WMI\Autologger\EventLog-Application
Locate and select the GUID you copied earlier in the navigation pane under the related key.
Double-click the Enabled DWORD on the right.
Enter 0 under Value data and click OK to save the changes.
Finally, restart the computer for the changes to apply.
That’s it! Using the registry, you can disable specific Windows event logs, be it for System, Security, or Application. Though the process is slightly complex and time-consuming, the changes made here apply throughout.
Did you know aside from updating Windows via the built-in update tool, you can also do so via the command line? It’s a common workaround when one fails, but what do you do when both fail?
This is the latest headache for Windows users as they try to update Windows Subsystem for Linux. You’ll get the error 0x80070661 via Windows Update and an error message that says 0x80070661, this processor type does not support this installation packagevia the command line.
The WSL software is a critical update, especially for those who like to test other OSes on Windows, so here’s a breakdown of how to resolve this error.
What is error 0x80070661 this processor type does not support this installation package?
The error 0x80070661 is related to the Windows Subsystem for Linux application, which allows you to run other operating systems in Windows without the need for a virtual machine. While you can download it from the Microsoft Store, it needs other components to run.
For instance, once you’ve downloaded it from the Microsoft Store, you’ll need to run Windows Update to install necessary bug fixes and updates. In short, the two go hand-in-hand, so you may get the error 0x80070661.
Now, onto the this installation package is not supported by this processor type message. This indicates that the WSL system and your processor are incompatible. The program may have been working well, but suddenly, it is no longer supported.
This should not be a cause for alarm. As certain programs are updated, they become incompatible with older software.
For instance, your WSL may have been upgraded to a newer version, but if your Windows is outdated, there may be a miscommunication between the two software.
How can I fix error 0x80070661?
A few preliminary checks to perform before any technical troubleshooting include:
Inside the search box type Ubuntu then click on the three ellipses and choose Uninstall.
Now type Linux and click on the three ellipses next to Windows Subsystem for Linux WSLg Preview followed by Uninstall.
Repeat the step for Windows Subsystem for Linux Update.
Now go back and access Optional features inside the Apps section.
Click on More Windows features under the Related settings section.
Now, uncheck the Virtual Machine Platform as well as Windows Subsystem for Linux. That’s it! Restart your computer to apply the changes made.
Install WSL from the Microsoft Store again and see if the issue persists.
You can also download the update manually from the Microsoft Update Catalog. Some users reported a success story after going this route, so if all the steps above fail, this might be it for you.
We also advise you to get one of the Windows Update repair tools, which can fix errors such as 0x80070661 slightly faster.
That brings us to the end of this guide but do share with us any observations you may have made regarding this error in the comment section below.
Sales Copilot is the latest offering from Microsoft meant to simplify tasks for sellers through automation. But when users try to access it, many find that Sales Copilot is unavailable in their location.
Microsoft Sales Copilot eliminates the need to enter the data in sheets or CRM systems manually and employs AI to streamline things, saving significant time seamlessly. So, if you want to try the add-in but can’t, the information presented below will help.
Why is Copilot not available?
Here are a few reasons you find that Microsoft Sales Copilot is not available:
Connected to a VPN: A VPN is used to mask online activity and change the geographical location on the web, and this often affects access to services restricted in specific regions.
Misconfigured network settings: Network settings affect how a device interacts with the web, and when the relevant settings are misconfigured, you won’t be able to use Sales Copilot.
Not yet released in your region: There’s a chance that you are located in a region where Microsoft Sales Copilot is not yet released, and as a result, it reads, Copilot is not available in your location.
Which regions support Sales Copilot?
Since the Copilot is a recent release, the availability is limited. Here are the countries Microsft Sales Copilot is not available:
Ascension
Cabo Verde
China
Cuba
Curaçao
Côte d’Ivoire
Iran
Myanmar
North Korea
Palestinian Authority
Russia
St Helena
Timor-Leste
Tristan da Cunha
Syria
If you reside in any of these countries, wait for Microsoft to release Copilot, if that happens officially.
Remember, there’s no information as to when Microsoft will make Sales Copilot available to users worldwide, but a few changes should help get things running.
What can I do if Copilot is not available in my location?
Before we start with the slightly complex solutions, try these quick ones first:
If you have a VPN, firewall, or any program that could modify the network settings on the PC, disable it.
Verify that you are installing Sales Copilot from a Microsoft 365 administrator account.
Wait 24-72 hours, then try accessing Sales Copilot again.
Ensure you are connected to the CRM since it is vital to run Sales Copilot.
If none work, head to the fixes listed next.
1. Change the DNS server
Press Windows + I to open Run, type ncpa.cpl in the text field, and hit Enter.
Now, right-click on the active network adapter, and select Properties.
Select Internet Protocol Version 4 (TCP/IPv4) from the list, and click on Properties.
Choose the Use the following DNS server addresses option, and then enter the following:
Preferred DNS server: 8.8.8.8
Alternate DNS server: 8.8.4.4
Once done, click on Apply and OK to save the changes.
Often the configured DNS server is responsible when you find that Copilot is not available in your location and, subsequently, can’t be accessed.
2. Use a VPN
Though it may sound contradictory to what we recommended earlier, using a VPN has its own benefits. While the results are not guaranteed, you may just as well give it a shot when the Copilot is not available in your location issue arises even if you are in a supported region.
Go with an effective VPN tool, set it up, and choose a server based in the USA. This should help some of you get rid of the issue.
For more specific suggestions, we guarantee the following VPN can help you establish your connection privately and access this service without any content restrictions.
ExpressVPN
Activate this reliable software to access Sales Copilot no matter where you are.
If nothing works and you are not in a region where Sales Copilot is unavailable, the last option is to contact Microsoft Support.
They can identify whether it’s a bug blocking access or the missing permissions to blame. But no matter the case, the support team should, in all likelihood, figure out the problem and provide a solution.
Microsoft has released Windows Copilot with the latest update of Windows, but many reported that Copilot is not available on Windows 11 23H2, however, we addressed this issue in a separate guide. If you already tried the feature and didn’t like it, check out this step-by-step guide to remove it from your PC.
By now, you should have figured a way out when Microsoft Sales Copilot is not available in your location. Before you leave, find out how to speed up apps in Office 365.
For any queries or to share what worked in your case, drop a comment below.
Apple users rely on iCloud for data synchronization, and many wonder how to sync iCloud contacts with Outlook on their computers.
By doing so, they can automatically transfer their contacts, allowing them to connect both services seamlessly. In today’s guide, we’re going to show you how to sync iCloud with Outlook properly, so let’s get started.
Why don’t my iCloud contacts show up in Outlook?
If your Internet connection isn’t stable, you might be unable to sync your contacts properly.
Not using the correct Apple ID on your PC will lead to contacts not showing up on your PC.
In some rare cases, there may be an issue with Apple servers causing the problem.
The incorrect date and time on your PC will also cause sync problems.
Users also reported various issues while syncing, such as duplicated or missing contacts, so keep in mind that sometimes problems such as these can occur.
Make sure you check Contacts and Calendars, then click Apply.
This is the simplest and the best way to move iCloud contacts to Outlook. We also have a great guide on how to download iCloud on Windows, so be sure to check it out.
2. Import contacts manually
For Windows:
Open your browser.
Make sure you’re signed in to iCloud in the browser.
Once you log in successfully, go to sync status and choose Add source.
Select Apple iCloud on the list.
Enter your email address and app password. If you don’t have one, you’ll need to generate it.
Next, select Office 365 / Outlook.com and add the source.
Click on What to sync.
Select Contacts and configure the settings. Once you’re done, click Save.
Next, click on Direction and set the desired direction.
Lastly, click on Sync all.
While this service works great for the most part, you should be careful when granting third-party services access to your email data and other personal information.
Some services might sell your data to advertisers without your knowledge. In some cases, certain services might get hacked, and your data will become available to hackers.
To stay safe, always research and only use third-party services you completely trust.
If you ever wondered how to sync iCloud contacts with Outlook, now you know how to do it properly. The simplest way is to download an iCloud client for Windows, but you can also do it manually using vCard.
To learn more about contact sharing, out guide on how to download Outlook contacts can be most informative.
In case you have any issues, we have a great guide on how to fix the lost contacts after upgrade, so be sure to check it out.
What method do you use to sync contacts with Outlook? Let us know in the comments section below.
It’s official: Quake 2 is coming to Xbox Series S and X. Microsoft Store as well as Xbox Store updates the game’s pages and the game is now available to play on your PC and Xbox. It’s also on Game Pass, so if you already have a Game Pass subscription, you can just download the game and play it.
Quake 2, which is a classic FPS, was released in 1997, and it’s still played by a large community of people. The original Quake even made its way on Xbox Series X and S consoles a couple of years ago, and people were also pleased about the news back then.
When Microsoft fixed the matchmaking servers on both games, the games and the Xbox consoles have become the top-selling games and consoles for a week, back in July. So it’s clear that people love old games. Quake 2 is a classic, so bringing it back to consoles will most likely have a lot of commercial success. Here’s what we know about it.
And recently, there have also been reports that an Enhanced Edition of Quake 2 is also in the works, further suggesting that Quake 2 is indeed coming to Xbox.
On August 10, Quake 2 was released on Microsoft Store and Xbox Store, and you can download it now. The game is on Game Pass as well, so if you already have a subscription, then you should only download and install it.
Quake 2 Remastered, but officially out just as Quake 2, was remastered and repolished by Bethesda Softworks.
The game comes with its own original story campaign, plus a brand-new expansion, Call of the Machine, which has 28 new campaign levels that can be played in a multiplayer mode as well.
The game also:
Supports 4-player local split-screen multiplayer on Xbox One.
Supports 8-player local split-screen multiplayer on Xbox Series S and X.
Here are all the new features coming to Quake 2:
Get the Original Mission Packs: The Reckoning and Ground Zero
Play the All-New Expansion “Call of the Machine”
Get Quake II 64 for Free
Enjoy Online & Local Multiplayer/CO-OP
Play Together with Crossplay
Take Quake II Anywhere With xCloud Portability
Quake 2 is available now, so go play it. You have the weekend ahead to try this classic, enhanced. And let us know how you like it.
FXNOW is a superb streaming website letting users access an enormous library of movies, TV shows, live events, etc.
However, this streaming service is US-only, which means it’ll block your access if you’re outside the United States.
Since not all VPNs can overcome this geo-restriction, you might encounter the FXNOW not working with VPN error while trying to access the platform.
So, we’ve provided step-by-step instructions to fix your FXNOW issues in no time.
Let’s dive in!
FXNOW not working with VPN? Here are some quick fixes!
To enjoy FXNOW worldwide, you need a VPN to hide your actual IP address and connect you to a virtual location in the US.
However, several factors are in play: the VPN’s encryption protocol, server speed, and overall performance directly impact the end result.
But there’s a solution to every problem, and if you want to catch up on your favorite TV shows, we have you covered:
1. Change Server
Like most streaming platforms, FXNOW also has implemented a system to detect users accessing their websites with VPNs.
When multiple users visit FXNOW with the same IP address, the system knows that the IP is shared and likely belongs to a VPN server
When this happens, the IP gets blocked, and you encounter errors when visiting the website. The first and simplest action you can take to solve this problem is to switch to another server.
Here’s how to do it on ExpressVPN:
Open your Start Menu, type ExpressVPN, and press Enter.
Click the Ellipsis icon and pick a server you haven’t used yet, then hit the Power button.
Enjoy streaming on FXNOW!
Keep in mind that in some cases you might need to try several different servers before finding one that works.
2. Clear browser cookies and cache
Cookies and cached data aren’t to cause any harm, as they’re responsible for providing you with a more personalized online experience.
However, these files also collect information about yourlocation. Therefore, when you try to access the restricted website with a VPN, your real location gets exposed, causing errors.
Here are the steps on how to clear cookies in Google Chrome:
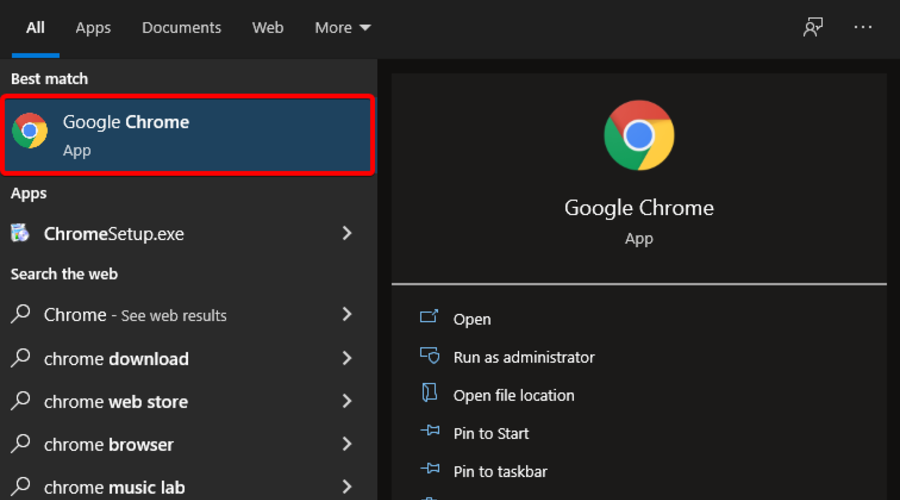
Open your Start Menu, type Chrome, and press Enter.
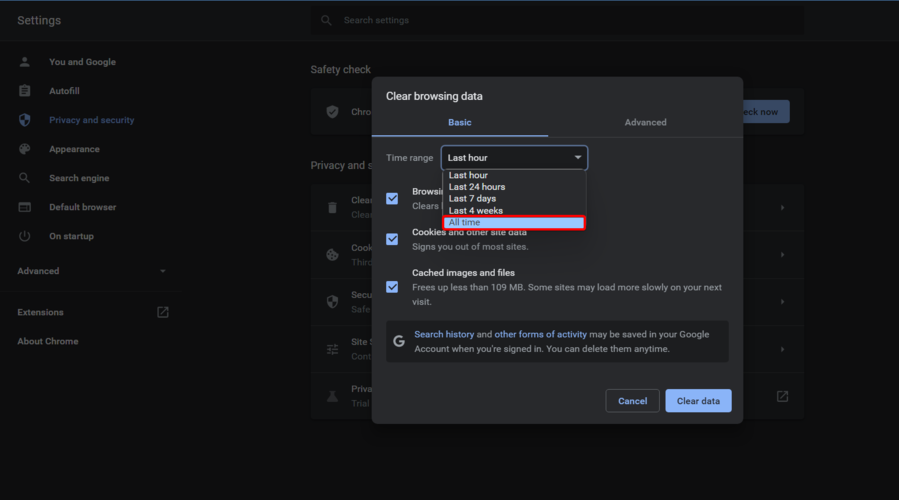
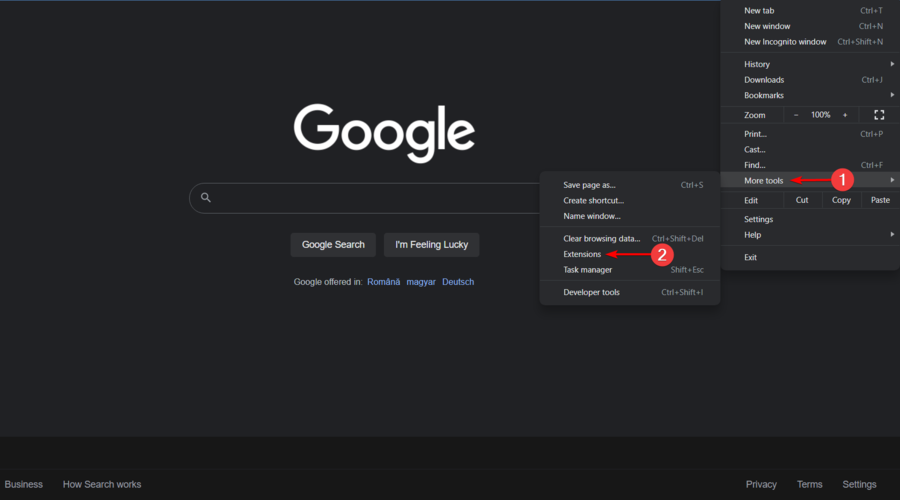
Expand the Kebab menu, hover over More Tools, and choose Clear browsing data.
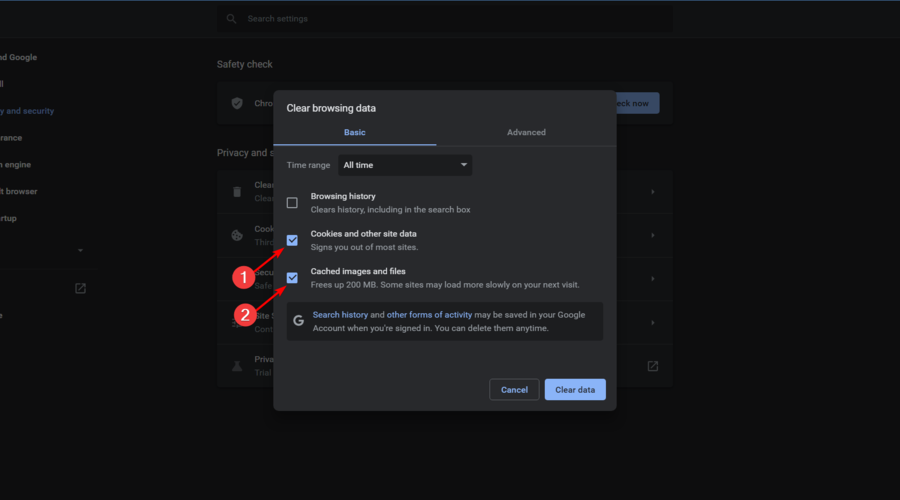
Choose a Time range, check the box by Cookies and other site data, and click Clear data.
Finally, Restart your device.
Revisit FXNOW.
3. Change Your VPN Provider
If you’ve tried the quick fixes above and your VPN is still not working with FXNOW, then your current service probably lacks the necessary security features to bypass the platform’s geo-restrictions.
It might have all of its servers blocked, or be accidentally leaking your real location and IP address, among other reasons.
Whichever the case, it’s time to consider changing your VPN provider.
Upgrading to a premium VPN will make sure you have a wide variety of servers to choose from, while also adding high speeds for buffer-free streaming, and advanced leak-prevention features.
During our tests, ExpressVPN proved to make quick work of FXNOW’s geo-blocks, so this is the service we recommend.
Pick the preferred payment method and click Join Now to purchase the license.
Download the right app for your device.
Follow the on-screen guideline to Install the software.
Open it, hit the All Locations tab and pick any server in the US.
Click the Power icon to connect.
Enjoy FXNOW without restrictions.
Does FXNOW block VPNs?
Yes, FXNOW blocks VPNs. This platform is US-based and broadcasts its content only to users within the country.
Otherwise, the company faces fines and punishments for violating copyright agreements.
That explains why users outside the USA face this error:Thank you for your interest in FX Networks. The content you are trying to access is not available in your region.
How does FXNOW detect my VPN?
Streaming platforms and online services employ various technologies to detect and block VPN usage.
Here’s a list of possible ways FXNOW blocks VPNs:
Identifying VPN traffic: FXNOW streaming service can detect your VPN by the unusual amount of different connections coming from the same IP address, indicating that there’s a VPN involved.
GPS data collection: Mobile apps and browsers collect GPS data, mainly because it’s profitable, as they sell the information to advertising companies and marketers. Streaming services cross reference your GPS data with your IP address, and when they don’t match, you get blocked immediately.
DNS server information: The conflict between DNS settings and IP addresses is another way streaming services detect VPNs. Accordingly, streaming services could override a user’s current DNS setup and reveal where they connect from.
Does FXNOW work with a VPN?
Yes, but it depends on the quality of the servers and the security protocols your VPN provider offers.
Not all providers can deliver.
But connecting to a reliable VPN will surely let you change your IP address and location and conveniently access the streaming service.
Also, premium providers offer high-end encryption technology to ensure no data leakage, leading to better safety measures.
In contrast, free VPN services offer a limited number of servers with minimum security features and often fail to bypass geo-restrictions.
With that said, what are the top services for FXNOW?
Best VPNs for FXNOW
After testing the leading providers, here are our top picks for the streaming platform:
FXNOW blocks suspicious non-US IPs to maintain privacy; However, users can use a VPN to enjoy streaming TV shows on the platform.
There are simple solutions to FXNOW not working with VPN, such as switching the server, clearing cookies and cache, or using other VPN providers such as Express VPN, CyberGhost, and PIA.
Finally, try various methods, and remember that your privacy is worth spending a few bucks on a premium VPN provider.
You can also follow our FXNOW activate guide to set up your account and device correctly before you start troubleshooting VPN issues.
Windows 365 Switch is finally released in the Windows Insider Program, along with the Windows 365 Cloud PC preview. For those of you who don’t know, earlier this year, Microsoft hinted at the Windows 11 having a cloud version, that you can access from any device, as long as it’s connected to the internet.
Now, it seems that the Redmond-based tech giant is keeping up to its promises. In this week’s Insider Program updates, you can actually preview the Windows 365 Switch feature, and we’ll show you how you can do it.
With it, you’ll be able to easily switch between your local, offline Windows 11, and your cloud-based Windows 11 with just a few clicks.
Windows 365 Switch provides the ability to easily move between a Windows 365 Cloud PC and the local desktop using the same familiar keyboard commands, as well as a mouse-click or a swipe gesture through Task View on the Windows 11 taskbar.
Microsoft
How to enable and use Windows 365 Switch?
First things first, you need to make sure both your local PC and your cloud PC are enrolled in the Windows Insider Program. After you’ve done it, enroll in the Beta Program and download the latest Windows Beta versions on both PCs.
Enrolling them there requires some time, especially downloading and installing these Windows versions, so make sure to take time to do it.
Go to Microsoft Store and look up the Windows 365 app.
Click on Get and install the app on your PC.
After the installation is complete, open the app.
Switching up to your Cloud PC
As with many other Microsoft products, Microsoft will walk you through Windows 365 the first time you open it.
When the mini-tutorial is done, you’ll notice a new icon on your Windows 11 taskbar.
Click on the icon, and you’ll open Windows 365, where you can connect to your Cloud PC.
Once it’s connected, select the three-dots icon, and choose the Add to task view option. This will enable Windows Switch.
As you can see, you’ll be able to easily switch from your local PC to your Cloud PC with a few clicks.
To get used to the switching experience, just hover over the Windows Task view icon in the taskbar.
Windows 365 Cloud will automatically open, and you can now connect to your Cloud PC.
Once you’re connected to your Cloud PC, you can go back to your local PC using the same way.
This is how you use Windows 365 Switch. However, you need to know that the feature is still rolling out so there might be issues with it every now and then. If so, don’t forget to send your feedback to Microsoft.
And let us know your experience with this new feature in the comments section below.
Minecraft is a popular game that lets the player’s imagination run wild. And while it runs seamlessly for most users, some face issues with Minecraft. The worst of all being when Minecraft is not accepting payment.
Some also reported getting the Oops! Something went wrong when saving your card error in Minecraft.
There currently are two purchase options on the official website, the simple Minecraft edition, priced at $29.99, and the Deluxe Collection, priced at $39.99. And if you can’t purchase either of the two, keep reading to find out how to fix things!
Why is Minecraft not accepting payments?
Here are the primary reasons the Minecraft purchase doesn’t go through:
Issues with the server: In most cases, the issue is temporary and arises due to a server outage. Also, it may be localized. Say, people only in a particular region can’t make payments.
Misconfigured network settings: If you run apps that could modify the network parameters, especially a VPN or firewall, these could conflict with the payment.
Payment blocked by the bank: A few users reported that their bank or credit card partners blocked international payments. And since Mojang is based in Sweden, they couldn’t make the purchase.
Outdated or incompatible browser: Often, an incompatible or outdated browser is responsible when Minecraft is not accepting payments.
The account is suspended: You can’t make payments to Mojang when the account is suspended.
What payment methods does Minecraft accept?
Minecraft accepts most payment options, so you shouldn’t face issues finding one that’s supported. Here is a list of payment methods accepted by Minecraft:
MasterCard
Visa
American Express
Discover
Google Pay
Apple Pay
PayPal
What can I do if Minecraft is not accepting payment?
Before we start with the slightly complex solutions, here are a few quick ones to try:
Wait for a while and retry the payment.
Try another browser to make the payment. We recommend using Opera, Google Chrome, Microsoft Edge, or Mozilla Firefox.
Disable any VPN or firewall running on the PC.
Make sure you are in the same country where the card was issued because banking partners often block transactions made from other countries.
In case you are using a prepaid credit card, make sure it has enough balance.
Use another card if you have one, or try another payment option, say PayPal, Apple Pay, or Google Pay.
Purchase Minecraft from another source, say Steam, Microsoft Store, or Xbox.
Get a Minecraft Prepaid Card and redeem it on the official website.
If none work, move to the fixes listed next.
Tip
Browser-based solutions listed here focus on Google Chrome. If you use another web browser, the process remains similar. For the exact steps, head to the official website.
1. Update the browser
Launch the browser, click on the ellipsis near the top right, hover the cursor over Help, and select About Google Chrome.
Let Chrome find any available updates and then install them.
Once done, relaunch the browser for the changes to come into effect.
When Minecraft is not accepting payment, your primary approach should be to update the browser since an outdated browser turned out to be a dominant underlying cause.
2. Disable all browser extensions
Launch the browser, paste the following path in the address bar, and hit Enter:chrome://extensions/
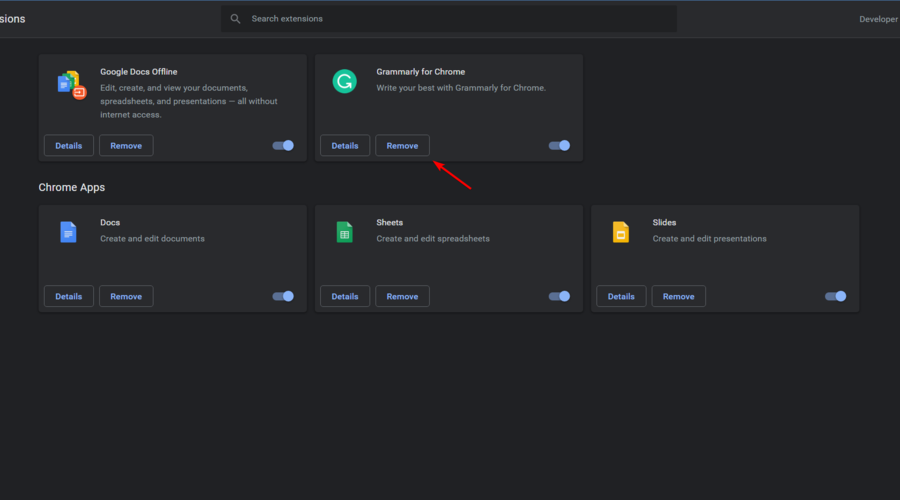
Now, disable the toggle under every extension listed here.
Relaunch the browser for the changes to apply.
Make the purchase on the Minecraft website.
Once it’s processed, you can re-enable the browser extensions.
A few extensions, especially those for VPN and firewall, trigger issues when making payments. Even if the extension is not running, we recommend disabling it to avoid conflicts.
Many reported facing the problem because the banking partner or card provider declined international payments to Sweden, the country where Mojang is headquartered. This turned out to be the case with most users.
So, we recommend you contact the banking partner and specifically instruct them to process the payment made on the Minecraft website.
Once done with these, you shouldn’t find Minecraft not accepting payment and even get rid of other trivial purchase-related issues.
Sometimes when you write an email, you can send it by mistake, which is why many want to know how to avoid accidentally sending messages in Outlook.
Sending an email by accident will make you look unprofessional, and it can lead to an unintentional data leak, so it’s crucial to ensure that your emails reach the right person every time, and today we’re going to show you how to do that.
What happens if you accidentally send an email to the wrong person?
The data sent in the message will become available to the wrong recipient.
If it’s a business email, you might accidentally send confidential business information to a third party.
This can lead to potential security issues such as data leaks and more.
How do I stop Outlook from accidentally sending emails?
Here are a few tips that you can use to prevent yourself from sending emails by accident:
Add a random string in Cc or Bcc field. This will prevent Outlook from sending that email message because the recipient address isn’t in the right format.
Use the Work Offline option to go offline in Outlook. After that, you can write your email and once you want to send it, go back online to do so.
1. Change Outlook settings
Click on File and choose Options.
From the left pane, select Mail. In the right pane, go to Send messages section and uncheck CTRL + ENTER sends a message.
Save changes by clicking OK.
Many users have sent unfinished mail by accidentally using this keyboard shortcut, but with it disabled, you won’t ever send an email by accident.
This isn’t the most reliable method since it will only work if you’re using the shortcut above.
In the right pane, locate Send and receive section. Make sure that Send immediately when connected option is disabled.
Save changes.
By disabling this feature, emails in Outbox won’t be sent automatically as soon as you connect, instead, they will wait for the scheduled send and receive session.
To achieve maximum performance on your laptop, it must have proper cooling. This is especially important if you’re performing resource-intensive tasks.
If, for some reason, you can’t achieve this, the performance of your laptop will be affected to prevent overheating and damage to your PC.
In this guide, we’ll show you how to fix CPU throttling on your laptop and make it snappy again.
What causes CPU throttling?
High temperature is the leading cause of CPU throttling. When you’re performing intensive tasks, your hardware generates more heat.
To prevent overheating and damage, your computer reduces the performance of your processor. Doing so will make your PC slower, but it won’t overheat and will remain stable.
If you notice unusual values, try cleaning the laptop air vents with pressurized air. If your device isn’t under warranty, open it and clear the dust and the heatsink.
You can also replace the thermal paste on the CPU while you’re at it. This is a highly technical procedure, and you can damage your laptop if you’re not careful, so use extra caution or contact an expert.
How can I fix CPU throttling on a laptop?
1. Change the power plan
1.1 Change the power plan mode
Press Windows Key + S and enter power plan. Select Choose a power plan from the list of results.
The Power Options window will now appear.
Select High performance from the list of power plans.
Keep in mind that changing the power plan to High performance will drain your battery faster.
1.2 Adjust the power plan settings
Use Windows Key + S shortcut to open the search.
Now enter power plan and select Choose a power plan.
Locate your currently selected plan and click on Change plan settings.
Navigate to Change advanced power settings.
Now expand the Processor power management section.
Set Minimum processor state and Maximum processor state to 100% for both On battery and Plugged in.
Click Apply and OK to save changes.
Some of our readers reported that setting the processor state to 99% instead of 100% fixed the problem for them, so try that as well.
2. Use the Group Policy Editor
Press Windows Key + R and enter gpedit.msc. Press Enter.
In the left pane, expand Administrative Templates in the Computer Configuration. Now choose System. Head over to the Power Management and select Power Throttling Settings. In the left pane, double-click Turn off Power Throttling.
Set it to Enabled and click on Apply and OK to save changes.
3. Use the Registry Editor
Press Windows Key + R and enter regedit. Press Enter.
Navigate to the following path in the left pane: HKEY_LOCAL_MACHINE\SYSTEM\CurrentControlSet\Control\Power
Right-click the Power key. Expand the New section and select Key. Enter PowerThrottling as the name of the new key.
Go to the PowerThrottling key. Right-click the right pane, expand the New section, and click on DWORD (32-bit) Value.
Set the name of the new DWORD to PowerThrottlingOff. Now double-click the DWORD to see its settings.
Set the Value data to 1 and click on OK.
How do I check which processes are being throttled?
Press Ctrl + Shift + Esc to start Task Manager.
Navigate to the Details tab. Now right-click any of the columns and choose Select columns.
Select Power Throttling and click on OK.
Now you should have a new Power throttling column showing all the applications being affected.
What is the normal temperature for a laptop?
Laptops are designed to handle high temperatures, and any CPU temperature below 60 C or 140 F is perfectly normal for a laptop.
If you’re performing intensive tasks, expect values up to 70 C or 160 F. Regarding the GPU, the optimal is 45 C or 110 F if you’re using it normally.
However, your graphics card can reach 80 C or 175 F if you use your device under a full load. If you’re having any issues with overheating, using a laptop cooling pad might help.
CPU throttling can be a problem and negatively impact your performance, but we hope this guide helps you fix this issue on your laptop.
Upgrading your PC is relatively simple, and in most cases, you just need to remove one component and replace it with a new one and that’s it.
However, the process can get a bit complicated if you’re trying to upgrade your motherboard. This is because all your hardware is connected to it, so you’ll need to remove it beforehand.
In today’s guide, we’re going to show you how to change the motherboard without reinstalling Windows, so be sure to closely follow our instructions.
Do I have to reinstall Windows after replacing the motherboard? In most cases, that won’t be necessary. Windows will automatically detect that there was a hardware change and install the required drivers during the first boot.
However, if you have an OEM Windows license that is associated with a certain machine, you can’t change the components on that machine because the system will detect it as a new one.
In this particular case, you’ll have to completely reinstall the OS. If you’re looking for reliable hardware that is future-proof, consider getting a TPM 2.0 motherboard.
Do I have to activate Windows after replacing my motherboard? Although it’s not necessary to reinstall your operating system, you should know that Windows needs activation after the motherboard replacement.
This is expected since the PC stores the activation key on your motherboard, and if you replace it, the system won’t be able to find it.
How can I change the motherboard without reinstalling Windows?
1. Remove the old motherboard
Turn off your PC and unplug it from the wall outlet.
If your power supply has a switch on it, set it to the Off position.
Leave your PC disconnected for a few minutes.
Now remove the computer case.
First, remove any hardware that you have connected to your motherboard. This includes PCI-E cards, such as your graphics card, etc.
Next, you need to disconnect any storage devices that are connected, such as HDD and SSD drives.
Remove your RAM by releasing the lock mechanism. Store your modules in a safe location.
Disconnect any power cables that are connected to your motherboard. There should be two connectors: a 20/24 pin connector and a 4/8 pin connector.
Remove the CPU cooler. This process varies depending on the cooler that you’re using.
Raise the CPU lever and remove your CPU carefully.
Be careful that you don’t damage your CPU and store it in a safe location.
Now you should disconnect the front panel connectors. This includes audio, USB, and power/restart connectors.
Locate the screws that are holding your motherboard. There should be 4-8 of them. Remove the screws carefully.
Double-check if all cables are disconnected from the motherboard. If any cables are left, you might snag them and damage your PC.
Carefully remove your motherboard.
Lastly, remove the IO plate from the back of the case.
2. Insert the new motherboard
NOTE
This is an advanced procedure, and if you’re not careful, you might cause permanent damage to your computer, so use extra caution or contact a professional.
Mount the RAM modules to the new motherboard.
Now take your CPU and clean the thermal paste residue carefully with a microfiber cloth and rubbing alcohol.
Now do the same for the heatsink.
Raise the CPU level and insert your CPU carefully. The CPU can be inserted only in one position, and if you’re not careful you will permanently damage your CPU.
The CPU should fit in the socket without any use of force. Once the CPU is in place, carefully lower the lever.
Add the thermal paste to your processor. You need less than a pea-sized amount. If you use too much paste, it will spill over your motherboard and damage it, so be cautious.
Now add your cooler and connect its power cable to the CPU fan pins on the motherboard.
Take the new IO plate and add it to the back of the case.
Take your motherboard and place it on the standoffs on your case.
Use the screwdriver to tighten the motherboard to the standoffs.
Now you need to connect the main motherboard power cable (20 or 24 pins) and the CPU power cable (4 or 8 pins).
After doing that, take your storage devices and connect their cables to the motherboard.
Connect the front panel cables. This includes power, USB, and audio headers. Keep in mind that power headers need to be connected to specific pins, so be sure to check your motherboard manual for instructions.
Now add your PCI-E cards, such as your graphics card for example.
Double-check once again if everything is properly connected.
Close your computer case and set the switch on the power supply to the On position.
Press the Power button on your case and wait for Windows to boot.
Windows might perform the initial setup because of the hardware change.
How do I activate Windows after changing my motherboard?
1. Using the Settings app
Press Windows Key + I to open the Settings app.
Navigate to the Update & Security section.
Select Activation from the left pane.
Choose Troubleshoot in the right pane.
Select I recently changed hardware on this device.
Enter your Microsoft credentials when asked to.
Select your device and click on Activate.
Keep in mind that for this process to work, you need to associate your activation key with your Microsoft account beforehand.
2. Using the product key
Press Windows Key + I shortcut to open Settings.
Go to the Update & Security.
Select Activation and click on the Change product key.
Enter your product key.
For more information on how to do this, we suggest reading out how to activate Windows guide.
What to do if my PC is beeping after changing the motherboard?
In case your computer is beeping after changing the motherboard, turn it off immediately. This is an indication of a major error.
Check if your hardware is properly connected and try to start your computer again. If the beeping continues, try to memorize the pattern.
This is known as beep code, and you can use it to troubleshoot hardware issues that you have. Keep in mind that each motherboard has a different set of codes, so find the ones that match yours.
As you can see, it’s easy to change the motherboard without reinstalling Windows, and in most cases, your system should work without any issues.
In case any problems occur, and your OS can’t boot properly, we suggest reading our guide on how to reinstall Windows.
Have you ever replaced your motherboard and it required you to reinstall your operating system? Let us know in the comments below.
If a random app opens instead of typing letters every time you press a key on the keyboard, it indicates that the keyboard is automatically doing shortcuts.
In this guide, we will explore some expert-tested solutions to fix the keyboard stuck on shortcuts issue after discussing its common causes.
Why is my keyboard doing weird things when I type?
The keyboard stuck on shortcuts could occur due to various reasons; some of the common ones are:
Malfunctioning keyboard – Sometimes, when your keyboard is physically damaged or stuck, it could cause these issues. Try replacing it with some other keyboard or enable the on-screen keyboard.
Outdated keyboard driver – If the keyboard driver on your computer is either corrupted or incompatible, it might not work correctly. Try updating the driver to fix the issue.
Sticky keys – If the Filter & Sticky keys are enabled, the keyboard shortcuts could be stuck. Go to the Ease of Access settings to turn off these options.
Buggy Windows update – A bad Windows update could cause many problems, including this one. Check for a newer update or uninstall the latest one.
Now that you know the causes of the issue, move to the next section to learn how to fix the Keyboard shortcuts stuck issue.
How do I stop my keyboard from doing shortcuts?
Before engaging in advanced troubleshooting steps, you should consider performing the following checks:
Check your keyboard for physically stuck keys.
Try restarting your computer sometimes; this neat little trick could help you fix all issues.
Replug your external keyboard if applicable.
Try to plug your keyboard into a different USB port if using the wired one.
Use another keyboard to know if there is a hardware issue.
Try using Ctrl + Alt + P or Ctrl + Alt + Delete key combinations to reverse the action.
Press Windows + Ctrl + O shortcut keys to enable the on-screen keyboard to verify if the issue is only related to a physical keyboard.
If nothing helped, check out the detailed solutions to eliminate this annoying issue. These methods work both for physical keyboards and laptop keyboards.
1. Use the keyboard troubleshooter
Press Windows + I to open the Settings app.
Go to System, and click Troubleshoot.
Next, click Other troubleshooters.
Locate Keyboard and click Run.
Follow the on-screen prompts to complete the process.
2. Disable the Sticky keys, Filter keys & Toggle keys
Press Windows + I to open the Settings app.
Go to Accessibility, and locate Keyboard under Interaction.
Next, look for Sticky keys, Toggle keys, and Filter keys, and ensure all are disabled.
This is how you can turn off sticky keys to fix the keyboard automatically doing shortcuts issue. Also, you can enable or disable the on-screen keyboard from here.
Type devmgmt.msc and click OK to open the Device Manager.
Locate Keyboards, click it to expand, right-click the keyboard option, and choose Uninstall device.
Once the device is uninstalled, click Action, then choose Scan for hardware.
Wait for a while, and the driver will be reinstalled.
4. Edit the value for the WindowsInkWorkspace key
Press Windows + R to open the Run dialog box.
Type regedit and click OK to open the Registry Editor.
First, we will create a backup of registry entries; for that, go to File, select Export, and save the .reg file in an accessible location.
Navigate to this path: Computer\HKEY_LOCAL_MACHINE\SOFTWARE\Policies\Microsoft\WindowsInkWorkspace
If you can’t find the WindowsInkWorkspace key, right-click the Microsoft key, choose New, then select Key. Name the key WindowsInkWorkspace.
Once you have created or located the key, right-click it, select New, then choose DWORD (32-bit) Value. Rename it AllowWindowsInkWorkspace.
Double-click the newly created DWORD, change the Value data to 0, and click OK.
Reboot your computer to save the changes.
5. Uninstall a Windows update
Press Windows + I to open the Settings app.
Go to Windows Update, and select Update history.
Next, click Uninstall updates under Related settings.
You will get a list of installed updates; go to the latest one, and click Uninstall.
Restart your computer and check if the keyboard shortcut stuck issue persists.
If nothing worked for you, you must try to perform a system restore to fix the keyboard automatically doing shortcuts problem.
How do I reset my keyboard settings?
To reset the keyboard settings, you need to remove the language from the preferred languages section on your Settings app; here is how to do it:
Press Windows + I to open the Settings app.
Go to Time & Language, and choose Language & region.
Next, under Preferred languages, check if you have more than one language listed; if not, to remove the added one, you have to add another language, as the primary language can’t be removed.
Click Add a language.
Select a language from the Choose a language to install window and click Next.
Click Install.
Once installed, go to the old one in the list, click the three horizontal dots icon, and select Remove. This will reset the keyboard settings.
Now, click Add a language, follow the steps from 4 to 6 to add the preferred one back, and click Move up to make it primary.
Can I disable keyboard shortcuts?
Yes, you can turn off keyboard shortcuts to prevent this issue in the future with the help of Group Policy Editor or Registry Editor. Here we are mentioning the method using Registry Editor:
Press Windows + R to open the Run dialog box.
Type regedit and click OK to open the Registry Editor.
Navigate to this key: Computer\HKEY_CURRENT_USER\Software\Microsoft\Windows\CurrentVersion\Policies
Locate the Explorer key; if you can’t find it, right-click Policies, select New, then choose Key. Name the key Explorer.
Once you have located or created the key, right-click it, choose New, then DWORD(32-bit) Value, and name NoWinKeys or NoKeyShorts.
Double-click the newly created DWORD, set the Value data as 1 to turn off shortcuts, and click OK.
Reboot your PC to complete the process.
You can set the Value data to 0 to reenable shortcuts to know about the best keyboard shortcuts for Windows 11.
So, these are the methods you can follow to fix the keyboard automatically doing shortcuts issues and get the control back.
Please feel free to give us any information, tips, and your experience with the subject in the comments section below.
To determine the urgency of an assigned task on Outlook, you can use the inbuilt priority levels (High, Normal, and Low), color tags, due date, and the status field.
However, if you want to add more details, you need to create a custom priority field in Outlook, which requires a few extra steps.
In this comprehensive guide, we will explain the step-by-step instructions to create & add custom priorities, along with the steps on how to customize priorities in Outlook.
What are priority fields in Outlook?
In Outlook, the priority field shows the level of importance assigned to a task, email, or other items, which indicates if you can delay the task or should handle it immediately.
Adding tags, including relevant info in the subject field for a task, will further help you sort the to-do list and help attend to the high-priority items first.
The default priority settings have three options, High, Medium, and Low, which are not always enough, especially when you are working in a team wherein members might have varying interpretations of priorities.
Also, customizing the priority field can help you adapt Outlook task management, thereby personalizing the workflow.
For further personalization, you can customize the Outlook Quick Access toolbar so that you can access all the frequently used options right in front of you, which makes using the app easier than ever.
How do I create a custom field in Outlook?
1. Create a custom field
Press the Windows key, type outlook, and click Open.
Go to the navigation bar and select the Tasks folder. In the new window, you will see the task assigned listed in the right pane.
Next, right-click the column header bar to get the context menu and select Field Chooser.
On the Field Chooser dialog box, click New.
On the New Column window, type in the name you want to assign to the column. For Type and Format, Text is selected by default, but you can change the field type according to the column name or purpose. Once you have entered all the details, click OK.
Once the column appears in the Field Chooser window, drag and drop it to the column header bar to add it.
You can create as many columns as you like to streamline the task list further but if you add too many, things will get complicated.
2. Enable Allow in-cell editing to define the priority
NOTE
Unlike the Inbox folder, the Task folder already has the Allow in-cell editing feature enabled; however, if you can’t type in, follow the steps to enable it.
In the Tasks folder, go to the View tab, and from the Current view header, select View Settings.
On the Advanced View Settings window, select the Other Settings button.
Next, locate Column Headings and Rows, place a checkmark next to Allow in-cell editing, then click OK.
On the task list, locate the new column you added and add the number or text defining the importance of an individual task.
If you want to prioritize your emails from a sender and ensure all of them deliver to your Inbox, you must know how to whitelist an email in Outlook.
How can I use custom priority fields?
Adding custom priority fields can help you personalize the tasks per your preferences, enhancing productivity and increasing clarity & efficiency.
Here are a few ways which can help further understand how it is useful:
Time-sensitive projects or tasks – If some of the tasks mentioned in your list are approaching their due date, you can use the custom priority fields to assign them high-priority levels.
Context-related priority – For different task contexts, such as high-value clients and deadlines, you can add a priority field to deal with the task accordingly.
Risk – Add a risk priority field to display the probable risks associated with the task assigned.
Follow-up – A Follow-up priority field can highlight the task that needs a follow-up; you can label the task as Follow-up-High.
Team collab – Use it to inform the task importance within your team to increase communication and efficiency.
What are the best practices to follow for custom priority fields on Outlook?
For better Outlook task management, you first need to understand the context of the tasks in a project, then add an appropriate custom priority field.
Furthermore, to use the feature effectively, here are a few tips you must keep in mind:
Relevance – While choosing a column name, type, & format, you must keep the tasks in mind, as a relevant label can help you assess task importance quickly.
Workflow – Customizing priority fields should make sense to you and align with your workflow.
Sorting by numbers – Using numbers as field types can help you mention the task priority in ascending or descending order, which helps assess the urgency level.
Review task priority – You must check the custom priorities regularly to check if it fits your current requirements.
Don’t use the same approach – Managing tasks is subjective to a person and task at hand; therefore, you must choose the custom priority fields that suit your needs and the task assigned.
Simplify – Don’t add too many of them, as it could confuse you and defeat the purpose of providing clarity.
How do I set custom priority in Outlook tasks?
You can right-click the column header bar on the Taskslist, choose Field Chooser, add a new column, name it and define the field types accordingly.
Once it is created, you can drag and drop the column to the Task list to add it to the column header. Next, you can mention the priority according to urgency or other preferences.
So, this is how you can create a custom priority field in Outlook to label the tasks as per the context, time sensitivity, risk involved, and more.
If you find the Outlook indexing is slow and want to fix it, we suggest you check out this guide to speed up indexing in Outlook on Windows 11.
Please feel free to give us any information, tips, and your experience with the subject in the comments section below.
If you mistakenly click on the Dismiss Allbutton when you see the Outlook reminders pop-up, you cancel all the upcoming meeting reminders, messing up your schedule.
This guide will help you restore the accidentally dismissed Outlook reminder. We will explore the step-by-step instructions to retrieve reminders for your meetings and tasks on Outlook.
What happens when you dismiss a reminder in Outlook?
When a reminder window appears, you can either click Dismiss or Snooze; dismissing a reminder on Outlook means you are aware of the upcoming event and don’t want to be reminded again.
Furthermore, it will not cancel the event or task, but it won’t be reminded about the same until you set a new reminder.
To retrieve Outlook reminders, you can open the Appointment or Meeting window, locate the Reminder column, and choose the time from the Reminder dropdown to get notified.
If your Outlook is not updating your inbox, and you can’t see the newer emails in your mailbox, we advise you to read this article to fix this problem.
How do I recover a dismissed reminder in Outlook?
1. Retrieve a single dismissed reminder
1.1 For Calendar events
Press the Windows key, type outlook, and click Open.
Go to the navigation bar, and select the Calendar folder, which is located just below the email folder.
Once the Calendar opens, go to the item for which you want to undo the reminder and double-click it.
From the Ribbon, locate the Options group, go to Reminder, and choose the time from the reminder dropdown list next to it.
This is how you can restore accidentally dismissed Outlook reminders for a meeting or appointment.
1.2 For tasks
On Outlook, go to the navigation bar, and click the To Do option from the list.
Now, from the left pane, click Tasks, select the task, click Remind me option from the right pane, and either select the time from the given options or click Pick a date or time.
Click Save to complete.
This is how you can retrieve Outlook reminders; if you want to recover multiple dismissed reminders in Outlook, move to the next section.
Press the Windows key, type outlook, and click Open.
Go to the navigation bar, and select the Calendar folder, which is located just below the email folders.
Next, go to the View tab, click Change View from the Ribbon, and select List view from the dropdown menu. Now the calendar events will appear in a list.
Next, click View and select Add Columns.
In the Show Columns dialog box, under Available Columns, select Reminder, and click the Add button.
Now Reminder will be added in the Show these columns in this order field, you can click Move Up or Move Down to change the position of the same.
Once you have made a choice, click OK.
Go to the Calendar folder, and you will find the Reminder column added to the appointment and task mentioned in the list.
Go to the Instant Search bar located at the top of the Outlook window and type: modified:today
You will get a list of the calendar items modified that day, click each item in the Calendar and go to the Reminder dropdown and choose time accordingly.
You can also select reminder sound from the Sound option for each event or appointment listed.
2.2 For tasks
On Outlook, click the File tab.
Click Options.
On the Outlook Options window, select Customize Ribbon, locate & select the Developer option and click OK.
Next, you will see the Developer tab in the Ribbon now, click it and then Macro Security.
On the next window, select the radio button next to Notifications for all macros and click OK.
Go to the Developer tab again, and select Visual Basic.
In the left pane, expand the Microsoft Outlook Objects and double-click ThisOutlookSession to open it.
Now in the right pane, copy and paste the following code and close the Visual Basic window:
Sub RestoreReminders()
    Dim objSelection As Outlook.Selection
    Dim objItem As Object

    'Get the selected item
    Set objSelection = Application.ActiveExplorer.Selection

    If objSelection.Count Then
       For Each objItem In objSelection
           'Check if the item had a reminder or not previously
           If objItem.ReminderTime <> #1/1/4501# Then
              objItem.ReminderSet = True
              objItem.Save
           End If
      Next
    End If
End Sub
Go to the Developer tab, click Macros from the Code options, and select the module to restore the Task reminders on Outlook.
Now go to the To Do bar and click the Tasks; check the tasks listed, and you will see the Outlook reminders are retrieved.
You can follow these methods to retrieve accidentally dismissed Outlook reminders and get notifications for every upcoming event or task to avoid missing out on any meetings or tasks.
If you are facing other issues with reminders, like Outlook not dismissing reminders, we suggest you check out this informative guide to resolve the issue.
If you want to know more about creating a reminder, customizing reminder sound, managing your reminder list, or dealing with error messages related to it, feel free to mention your queries in the comments section below.
If you ever sent an email you may have noticed certain prefixes in the subject box. This is why many are wondering how to get rid of Outlook subject prefix FW and RE.
While these prefixes don’t affect users negatively in any way, some might find them distracting, therefore, in today’s guide, we’re going to show you the best way to get rid of them.
What is “RE” and “FW” in Outlook?
These are email subject abbreviations, and they are used to distinguish new email messages from the ones that you’ve replied to or forwarded.
RE – Stands for a reply and it appears on all new emails that you’ve previously responded to.
FW – Stands for a forwarded message, and it means that this message was written for someone else originally, but it was forwarded to you.
While these are useful, some may find them distracting. In some cases, you might even get multiple abbreviations in a subject field thus making the subject of the message less visible.
This is the reason why they want to remove them so badly, and if you’re one of those users, keep on reading.
Why do “FW” and “RE” prefixes appear in Outlook?
This is the default behavior not just in Outlook but in every email client and service. These abbreviations are used to help you distinguish quickly between forwarded emails and the ones that you’ve already replied to.
Since these are added to the subject field, you can see this distinguish these messages at a glance, without having to open them.
These are added automatically to all email messages as soon as you reply or forward them, and that’s a common practice that all email services use.
How to manually get rid of “FW” and “RE” prefixes?
Manually edit the subject line before replying
Click the reply option in the email message that you want to respond to.
Look for the Subject field and remove FW or RE from it.
Write your reply and once you’re done, click Send.
Few of reported that they can’t complete these steps because Outlook view is not showing subject, but we showed you a way to fix that in a different guide.
While this method is simple, it’s not the most convenient since you have to do this for every single email that you’re replying to.
It can get tedious, and sometimes you might even forget to remove it thus causing your email subjects to look inconsistent.
To learn more about Outlook, we have a great guide that shows you how to mark all emails as read, so don’t miss it.
How to get rid of the “FW” and “RE” prefixes automatically in Outlook?
1. Use the VBA script
In Outlook, navigate to the Developer bar. Next, click on Visual Basic. Alternatively, you can use Alt + F11 shortcut.
Go to Insert and select Module.
Now paste the following code and save it:
Sub Application_ItemSend(ByVal Item As Object, Cancel As Boolean)
   Dim strSubject As String
   If InStr(Item.Subject, "RE") > 0 Then
      'If you don't want the prompt,
      'You can remove the MsgBox line and its correspoding "Else … End If" lines.
      If MsgBox("Do you want to remove the prefix 'RE'?", vbYesNo) = vbYes Then
         strSubject = Replace(Item.Subject, "RE:", "", vbTextCompare)
      Else
         strSubject = Item.Subject
      End If
   End If

   If InStr(Item.Subject, "FW") > 0 Then
      If MsgBox("Do you want to remove the prefix 'FW'?", vbYesNo) = vbYes Then
         strSubject = Replace(Item.Subject, "FW:", "", vbTextCompare)
      Else
         strSubject = Item.Subject
      End If
   End If

   Item.Subject = Trim(strSubject)
   Item.Save
End Sub
The code is pretty simple and it checks if FW or RE appears in the Subject field. If it does, users will be asked if they want to remove it.
If they want, the Subject field will be automatically updated.
In Outlook, select the emails whose prefix you want to remove.
Click the Kutools tab and choose Remove subject prefix.
Next, choose Selected messages and check which prefixes you want to remove.
Lastly, click OK.
You can also remove prefixes from entire folders as well. To do that, repeat the same steps, but in step 4 select Folders and then choose the desired folder.
Therefore, we recommend using a VBA script or one of many available Outlook add-ins to automate the process.
In case you’re having issues with any of these add-ins, we have a guide on how to fix This add-in could not be started error, so be sure to check it out.
What method do you use to remove RE and FW from the Subject field in Outlook? Let us know in the comments below.
Meeting IDs and passcodes serve the purpose of deterring unauthorized participants from accessing a meeting. Additionally, they aid in recognizing individuals participating in the meeting. Meeting IDs and passwords are already available for Microsoft Teams but not for Microsoft Teams Rooms.
While we’re not sure why it is taking this long for Microsoft to implement it, we could only guess that they have different priorities, such as improving the audio and video quality or maybe implementing meeting IDs and passcodes for Teams Rooms will require significant testing and validation.
This update, designated with Feature ID 101332, has been included in the roadmap since April 4, 2023. It underwent its latest modification on August 10, 2023. It is specifically tailored for Teams Rooms Pro customers.
This security feature will be deployed during the General Availability release phase. While a preview is available in December 2024, the full rollout will commence in the same month. This enhancement will be accessible across various platforms, including Desktop, and applicable to different cloud instances, including Worldwide (Standard Multi-Tenant), GCC High, and GCC.
In an unforeseen turn of events, software giant Microsoft had to withdraw the August security updates for its Exchange Server from Windows Update. This decision was made in response to the discovery that these updates disrupt Exchange on non-English installs, creating severe issues for users.
We are aware of Setup issues on non-English servers and have temporarily removed August SU from Windows / Microsoft update. If you are using a non-English language server, we recommend you wait for the deployment of August SU until we provide more information. Please see Known Issues below for more information, notes Microsoft.
A Bumpy Patch Tuesday
The incident took place on August 8th, the day of the monthly Patch Tuesday for 2023. Microsoft had released new security updates for the Exchange Server. These updates were designed to fix six different vulnerabilities, including four remote code execution flaws, one elevation of privileges flaw, and a spoofing vulnerability that could be manipulated for an NTLM Relay Attack.
However, serious problems arose when Microsoft Exchange administrators started implementing the updates on non-English servers. Following the installation, the Exchange Windows services ceased to start, rendering the system inoperable.
Response from Microsoft
Microsoft promptly updated the August 2023 Exchange Server Security Updates bulletin to caution users about the issue. The company also temporarily removed the updates from Windows and Microsoft Update for further investigation. They advised the users of non-English language servers to hold back deployment until further notice.
Delving deeper into the problem, a support article described the root cause as an issue with localization in the Exchange Server’s August 2023 SU installer. This issue arose while installing the updates on non-English operating systems, effectively stopping the installer and rolling back changes. This unfortunate sequence left Windows services of the Exchange Server in a disabled state.
An Interim Solution
For those affected by the faulty update, Microsoft offered a temporary solution to enable Windows servers and restart the Exchange Server. This solution entailed resetting the service state through a PowerShell script if users already tried installing the SU. Following this, a computer restart and account creation in Active Directory (AD) were necessitated. After allowing time for AD replication, users were advised to restart the Exchange Server SU installation.
Additionally, after the successful installation, users were required to run specific commands as directed by Microsoft. Restarting the Exchange server after following the instructions would lead to a successful installation, after which the temporary AD account created could be safely deleted.
So, for those running their servers on English language installs, the need of the hour is to download and install the updates to fend off the disclosed vulnerabilities. These unforeseen complications underline the complexity of maintaining a global software system and solving real-world cybersecurity threats simultaneously. It also underscores the pivotal role of software updates, even when they might cause temporary disruption.
If one needs proof that the mini PC has indubitably arrived, then look no further than the Ace Magician AMO6 Pro. This tiny (and I do mean tiny—as in significantly smaller than a Mac Mini in terms of width and depth, and only slightly taller) compact computer packs a considerable punch beneath its modest exterior.
And it’s a nicely aesthetic exterior at that, with a decidedly minimalist approach to its semi cubic design. A triangular power button occupies one corner of the unit and gives it just a bit of modern flair. While the shell is made of plastic, the build quality is premium and the unit has just enough weight to feel substantial. In all this it emulates Ace Magician’s AD15 mini PC, which we also reviewed recently.
But by now you probably have one burning question in mind: can this tiny machine really serve as my primary PC? The answer is…well, down below.
Ace Magician AM06 Pro specs and features
Dimensions
5.19 x 5.19 x 1.96 inches
Weight
2.48 lbs.
OS
Windows 11 Pro
RAM
16 GB DDR4 (upgradable)
Storage
M.2280 NGFF 512GB SSD @2.3-4.3GHz (upgradable)
CPU
AMD Ryzen 5 5600U
GPU
Integrated AMD Radeon RX Vega 7
Ports
USB 3.0 x2
USB 2.0 x2
USB Type-C x2
3.5mm audio I/O x1
DCIM microphone x1
LAN/Ethernet x2
Displayport x1
HDMI x1
Kensington lock x1
Package contents
AMO6 mini PC
User manual
Power adapter/cable
HDMI cable
VESA Mounting bracket + screws
SATA plug
Summary
So back to that fundamental question, “will this work as my main machine?” The answer is emphatically yes, this can absolutely be your daily driver for everyday use—work, school, you name it, with no compromises. The AMO6 is no desktop trinket, to be sure. It’s a fully functional desktop, and has the hardware to handle just about anything you can throw at it…within reason, of course. Heavier tasks like video editing are no problem for this little PC, nor is multitasking; this can handle up to three displays all running at 4K resolution.
As far as gaming is concerned, the Ace Magician AM06 Pro is a perfectly serviceable machine for moderate gaming. However its integrated AMD Radeon RX Vega 7 graphics means this probably won’t be your ideal Starfield rig, just as an example, and I wouldn’t call this a gaming PC per se.
The AMO6 Pro is especially ideal for use in a limited-space environment, especially since it’s (very easily) VESA mountable. It is also serviceable as a portable workhorse for travel when paired with a wireless keyboard and a portable monitor. Not an ideal setup, and it’s definitely not going to replace your travel laptop, but serviceable.
The verdict
Overall, the Ace Magician AMO6 delivers a whole lot of PC for your buck at $299.99 (or $359.00 for the AMD Ryzen 7 model). And if for some reason what it packs in its tiny shell isn’t enough to suit your needs, the AMO6 is so easy to upgrade almost anyone could do it. Opening up the unit is as simple as removing four screws, and the unsoldered RAM chip and SSD module are both easily interchangeable without having to get too hands-on.
That said, the AM06 is a fantastic value, and anyone in the market for a (very) small form-factor desktop that doesn’t compromise performance or quality will find an easy winner in this.
Cons:
Not the best choice for a dedicated gaming PC that can run the most demanding games
Software issues will appear sooner or later, and Outlook is no exception. This is the reason why many are looking to use Outlook logging.
Using this feature, you can see a detailed activity in Outlook and use that information to diagnose and fix various issues. In case you haven’t used this feature before, today we’re going to show you all of its features.
What is Outlook logging?
This is a troubleshooting feature, and it’s used for diagnostic purposes. It records vital information regarding Outlook’s activities and performance and helps users troubleshoot various issues.
If you’re interested in logging, we have a great guide on how to view Windows 11 error logs, so be sure to check it out.
How to Enable or disable logging in Outlook?
1. Modify the advanced options in Outlook
In Outlook, navigate to the File tab and click on Options.
In the left pane, click on Advanced.
Locate the Other section in the right pane.
Check Enable troubleshooting logging (requires restarting Outlook) and save changes.
Restart the Outlook.
After doing that, the Outlook logging feature will be enabled. To disable Outlook logging, follow the same steps, but be sure to uncheck the option from step 4.
Using this feature can help if Outlook cannot log on or if you’re having any other issue.
2. Modify the registry
Press Windows key + R and enter regedit.
Navigate to HKEY_CURRENT_USER\Software\Microsoft\Office\16.0\Outlook\Options\Mail
In the right pane, locate EnableLogging and double-click it.
Set Value data to 1 to enable logging or to 0 to disable it.
3. Modify Group Policy
Press Windows key + R and enter gpedit.msc.
In the left pane, navigate to User Configuration\Policies\Administrative Templates\Microsoft Outlook 2016\Outlook Options\Other\Advanced
Double-click on Enable mail logging (troubleshooting) and set it to Enabled. Save changes.
If you want to disable logging, repeat the same steps but set Enable mail logging to Not configured.
This location is the same for all versions of Outlook and Windows.
If you’re on macOS, the location changes depending on the version you’re using as follows:
Outlook for Mac 2011 14.0.0 – 14.2.4: ~/Desktop/
Outlook for Mac 2011 14.2.5 – current: ~/Desktop/OfficeLogging/
Outlook 2016 for Mac 15.3 – 15.11.2: ~/Library/Group Containers/ UBF8T346G9.Office/OfficeLogging/
Outlook 2016 for Mac 15.12.3 – current: ~/Library/Containers/com.microsoft.outlook/ Data/Library/Logs/
How to access and read Outlook logs?
Press Windows key + R and enter the following: %localappdata%/Temp
Navigate to the Outlook Logging directory.
Locate one of the following files:
OPMLog.log – If you’re using SMTP or POP.
IMAP-emailaddress-Incoming-date-time.log – If you’re using IMAP protocol.
Go to the Hotmail folder and locate HTTP-emailaddress-date-time.log if you’re using Hotmail.
Right-click the desired file and choose Open with. After that select Notepad or any other text editor.
As you can see, it’s pretty simple to enable Outlook logging on Windows, and it can be done from Outlook or by modifying the group policy or your registry.
Unfortunately, it’s impossible to change Outlook logging settings but don’t let that discourage you from using this feature.
A meeting room is a place where ideas collide, decisions are made, and businesses evolve. However, the current digital landscape of meetings can be daunting, with multiple topics, diverse perspectives, and different time zones.
Both AI tools have a similar goal – to make meetings productive, engaging, and accessible.
Intelligent Recap and Copilot: Two Faces of One Coin
The Intelligent Recap and Copilot may have different functions, but they share a common objective – to enhance the value of your meetings. Through their careful analysis of the content and context, they provide customized and relevant insights.
Intelligent Recap: What, Why, and How?
Available in Teams Premium, Intelligent Recap functions like an AI-powered assistant that delivers a personalized summary of the meeting. Whether you missed the meeting or want to revise some points discussed, Intelligent Recap is there to help.
This tool is more than just a meeting recorder. It acts as your assistant by providing a summary of the main points from the meeting. You can edit, add, delete, or share these notes as needed. It also identifies tasks that arise from the meeting and suggests ways for you to review, assign deadlines, track progress, or link to other apps like Planner or To Do. Additionally, it creates unique highlights for each participant based on their role, interests, and involvement in the meeting.
Components of Intelligent Recap consist of the meeting summary, transcript, participant list, attachments, sentiment analysis, word cloud, and a timeline of events, making it an end-to-end tool to keep your meetings well-organized.
Microsoft M365 Copilot: Going Beyond!
Copilot is an AI-powered assistant that uses conversational AI technology powered by GPT to provide real-time and interactive responses. For example, if you want to know what John said about the budget, you can ask Copilot, and it will retrieve the relevant information from transcripts, notes, tasks, or attachments, explains Microsoft.
Copilot promotes collaboration by allowing you to share insights with other participants or save them for later reference. Feeling unsatisfied with its responses? You can rate the responses to help improve the system over time.
Differences and Similarities: Intelligent Recap and Copilot
While it’s clear that both these features enhance meeting productivity using AI, their purposes and functionality differ. Intelligent Recap focuses on auto-generating consistent meeting notes and action items and helps you save time with a summarized meeting recap.
On the other hand, Copilot converts your valuable meeting minutes into informative insights and helps in brainstorming ideas or formatting information into structured forms. It almost works as a cognitive extension of your thinking process.
Using Intelligent Recap and Copilot Together
The essence of these features lies in their collaborative usage. Enabled through Microsoft Teams settings, you can utilize Copilot for meeting preparation and maintain a guided discussion. Also, it can function as your real-time annotator during the meeting. Similarly, post-meeting, you can review the reports through Intelligent Recap.
Whether you’re a student, an educator, or anyone seeking personal growth, mastering the art of public speaking can significantly impact your life. Educators play a vital role in nurturing these skills in students, equipping them with the tools to become confident public speakers. One innovative tool that has gained prominence in this domain is Speaker Coach, already included in the Microsoft 365 suite of products. Public speaking not only enhances self-confidence but also prepares individuals for success in various aspects of life.
Mastering Public Speaking with Microsoft Learning Accelerators
Public speaking can be a daunting task for many students, but Microsoft Learning Accelerators provide a solution that empowers students to become confident and effective communicators. These accelerators are an integral part of well-known tools like Microsoft Teams, OneNote, PowerPoint, and Word, offering a range of foundational and future-ready skills to help students excel in their academic and professional journeys.
Speaker Coach: Your virtual speaking companion
One standout Learning Accelerator is Speaker Coach, a free and readily available tool designed to assist students in honing their public speaking prowess. Whether presenting a classroom report, discussing financials at work, or sharing ideas from a podium, effective public speaking is crucial. Speaker Coach, available in PowerPoint and Clipchamp, serves as a virtual assistant, providing personalized insights and guidance to help students improve their public speaking abilities.
Speaker Coach goes beyond traditional methods by utilizing advanced technology to provide tailored feedback to students. Through audio analysis, it assesses pace, pitch, filler words, and pronunciation. With its expert-like capabilities, Speaker Coach replicates the experience of having a public speaking trainer, ensuring that students receive valuable insights without external critiques. This approach fosters a comfortable environment for even the most apprehensive students to practice and enhance their public speaking skills.
Embrace Speaker Coach in PowerPoint for Enhanced Confidence
Empower your students to conquer public speaking anxiety with Speaker Coach in PowerPoint. This versatile tool is accessible for practice whenever students desire. To begin, open PowerPoint and log in with a Microsoft account. Speaker Coach is available on PowerPoint desktop app and PowerPoint for the web across Windows, Mac, and iOS platforms. For optimal performance, ensure that the Office user interface language aligns with the desired language for Speaker Coach.
How to get started
Using Speaker Coach is simple and user-friendly. Here’s how:
Open your presentation in PowerPoint on the web or within the app.
Sign in with your Microsoft account (hotmail.com, outlook.com, live.com, msn.com), or your Microsoft 365 work or school account.
Navigate to the Slide Show tab and select Rehearse with Coach.
If you’ve disabled the Simplified Ribbon, access Speaker Coach through the View tab.
Your presentation will open in full-screen mode, like a Slide Show, press Esc to exit out of full-screen mode.
Click Start rehearsing when you’re ready to begin rehearsing.
As you speak, Speaker Coach provides on-screen guidance, offering insights on pacing, language, and more.
Once you’ve completed your rehearsal, exit the full-screen view. You’ll receive a Rehearsal Report summarizing your performance and recommendations.
Comprehensive feedback with real-time insights
Speaker Coach generates a personalized rehearsal report at the end of each practice session. This comprehensive report is tailored to the specific practice session, featuring interactive feedback and analysis. The report covers various metrics that influence audience perception, including:
Elapsed Time and Slide Count
Filler Word Usage
Repetitive Language
Inclusiveness in Language
Speaking Pace and Suggestions
Pitch Variation
Originality in Delivery
Pronunciation Accuracy
Speech Refinements
Optional Body Language Analysis
Rehearse, Improve, Excel
Experience the transformative power of Speaker Coach for yourself and your students. This invaluable tool is available for free in PowerPoint and Clipchamp, with integration into Microsoft Teams on the horizon. Amplify your public speaking skills and support your students in their journey to becoming confident communicators.
To delve deeper into the art of public speaking, explore the wealth of Microsoft resources available. Equip yourself and your students with the skills needed to captivate audiences and convey ideas effectively.
As you might know, Baldur’s Gate 3 will come to Xbox, as per a tweet made by the director of publishing at Larian Studios, the studio behind the game. However, it might take some time before it can be finally fixed for Xbox.
Plus, Michael Douse promises that the studio is working to achieve seamless drop-in, drop-out co-op on Xbox Series X, something that no other RPG of the similar has achieved before. So the stakes are high.
We have quite a few engineers working very hard to do what no other RPG of this scale has achieved: seamless drop-in, drop-out co-op on Series S. We hope to have an update by the end of the year.
Michael Douse
We have quite a few engineers working very hard to do what no other RPG of this scale has achieved: seamless drop-in, drop-out co-op on Series S. We hope to have an update by the end of the year.
However, the studio hopes to have an update by the end of this year. So, if we’re to take this as it is, it means that Baldur’s Gate 3 won’t be coming to Xbox this year, at least. But it will come in 2024, most probably.
But despite this, a lot of users are somewhat upset at the fact that Baldur’s Gate is available on Steam Deck, and it’s not yet available on Xbox.
Baldur’s Gate 3 might not be on Xbox yet, but it’s coming to Windows 11 devices
Baldur’s Gate 3 will be released on Windows 11 devices on August 3rd, 2023, and the game has been highly anticipated.
The system requirements are not so demanding, however, you’ll need to free some space on your hard drives to play it. Here are the requirements for PCs.
Minimum requirements:
Requires a 64-bit processor and operating system OS: Windows 10 64-bit
Processor: Intel I5 4690 / AMD FX 8350
Memory: 8 GB RAM
Graphics: Nvidia GTX 970 / RX 480 (4GB+ of VRAM)
DirectX: Version 11
Storage: 150 GB available space
Recommended requirements:
Requires a 64-bit processor and operating system OS: Windows 10 64-bit
Processor: Intel i7 8700K / AMD r5 3600
Memory: 16 GB RAM
Graphics: Nvidia 2060 Super / RX 5700 XT (8GB+ of VRAM)
DirectX: Version 11
Storage: 150 GB available space
Baldur’s Gate is fully functional on Steam Deck
According to Valve, the game is fully functional on Steam Deck. However, a lot of people are surprised that the game can run on a mobile device, but it’s not out on Xbox yet.
You realize that the steam deck has a 800p screen right? Cyberpunk is verified for SD too, and it runs at barely 30fps. This isn’t acceptable performance for the Series S and the problem is split screen coop, Larian themselves have confirmed this.
Baldur’s Gate 3 apparently is delayed on xbox because of the series s being less powerful, yet it runs on the steam deck completely fine, I’m calling b********.
What do you think about it? Let us know in the comments section below.
If Discovery Plus is not working with your VPN, you will get an error message that says “Please try again later. ERROR CODE: FALLBACK.” This error could be due to connectivity concerns and server issues.
Discovery Plus is a platform that provides on-demand streaming services to viewers. On this channel, you can stream sought-after shows like The Laundry Guy and HGTV House Party.
However, it is geo-restricted outside the United States, which is why many use VPNs with it. What happens though when the VPNs stop working?
This shouldn’t be a big deal as I have put together a number of ways that worked for me to fix it easily. So keep reading to find out.
Is Discovery Plus not working with VPN? Try this!
If you fire up your VPN and still can’t bypass the block, I got you.
Follow the simple fixes below to get access back:
1. Connect to a different US server
Discovery Plus has stopped working because the website has blocked your VPN IP address. In this case, you will have to change to a different server to get a new IP.
Then, you would be able to gain access to Discovery Plus. However, if the new VPN IP has also been blacklisted by this website, keep changing servers until it works.
Follow these steps to change servers;
Launch and log in to your VPN app.
Expand the ellipses or arrow beside the existing location to see the server list.
Click on the server of your choice.
Go back to the Discovery Plus app or website.
2. Delete your browser cookies and Cache
You’ve likely accepted cookies on websites more than you eat them. These files store data on your country, browsing preferences, and so on.
Since Discovery Plus does not register your location information frequently, it will still have data on your original region even when your VPN is active therefore blocking your access.
However, when you clear cookies and cache, Discovery Plus will be forced to take the location of the VPN which will enable get access to the website or app.
Follow these steps to clear your browser cookies:
Open your browser.
Now, click on the three dots in the upper right corner of your browser to access the menu.
Scroll down to more tools and click on it.
Select clear browsing data.
On the Basic tab, click the drop-down and select “All Time”.
Check all the boxes besides browsing history, cookies, and other sites.
Then, click the Advanced tab.
Repeat the process.
Click on clear data.
Try using Discovery Plus again.
3. Try a different protocol
One of the methods Discovery Plus uses to restrict VPNs is port blocking. A VPN port is a specific number that is used by a VPN protocol to establish a secure connection.
Each VPN protocol uses a different port number. For example, the OpenVPN protocol uses port 1194 by default.
This means that if Discovery Plus has blocked the port of the VPN protocol you are using, you will not be able to access the service.
Apart from that, Some protocols are better suited for streaming video, while others are better suited for gaming or file sharing.
I recommend OpenVPN or WireGuard because both are secure and faster for streaming.
Follow the steps below to transit from one protocol to another.
Open and log in to your VPN app.
Navigate to Options or Settings.
Go to Connection and click on VPN protocols or VPN preferences.
Choose a different protocol.
You should be able to unblock Discovery Plus now. Happy streaming!
4. Allow your VPN through your device Firewall
If your device firewall mistakenly views your VPN as a threat to the system, it will stop it from operating
A good way to check if that’s the case is to see if other apps and services, besides Discovery Plus, have trouble connecting or working properly when you connect to VPN.
When this happens, you should give you VPN the necessary permissions.
On the Start menu, search for Windows Security. Click to open it.
Click on Firewalls & network protection.
Select Allow an app through Firewall.
Click the Change settings button.
Check the box beside VPN if it is empty.
If you cannot find your VPN on the list, click the Allow another app button at the bottom right of the window. Add your VPN to the list, confirm your settings and close the panel.
Go ahead and try using streaming on Discovery Plus again.
5. Upgrade to another VPN
If you have still not resolved Discovery Plus not working with VPN at this point, then your VPN is not good enough to get around the service-blocking techniques.
So you need to upgrade to a VPN with measures to stay one step ahead of the service.
Attempt to access Discovery Plus again. It should work now.
Does Discovery Plus block VPNs?
Discovery Plus blocks VPNs because it has strict copyright and licensing agreements stipulating that it can only broadcast its content in the United States.
And if these agreements are breached, Discovery Plus could face severe financial repercussions. So to prevent this, it blocks VPNs from accessing its service.
How does Discovery Plus detect my VPN
Discovery Plus detects your VPN in a few ways:
IP address: Discovery Plus can track your IP address to see if it corresponds with an IP of any popular VPN.
Port number: VPNs use specific port numbers to encrypt your traffic. Discovery Plus can track the port numbers you’re using to connect to a VPN server.
DNS requests: Discovery Plus can track your DNS requests to determine if you’re using a VPN.
WebRTC: WebRTC is a technology that allows websites to access your local webcam and microphone without your consent. Discovery Plus can use WebRTC to determine if you’re using a VPN.
Does Discovery Plus work with a VPN?
Discovery Plus works with VPNs that have put in place modern measures to ensure security and privacy.
A VPN with a massive number of fast IP addresses would be excellent for streaming Discovery Plus. This is because there would be less chance to share your IP address with another customer.
Therefore, you don’t have to worry about your servers being blacklisted. In addition to that, it’s best to use a VPN that maintains a strict no-log policy and uses 256-bit military encryption.
Best VPNs for Discovery Plus
With thousands of VPNs in the market and new ones emerging yearly, you can get stuck on choosing the best one for Discovery Plus. But we got that covered!
This VPN offers more than 3,000servers across 90 countries, with 25 highly optimized server locations like New York, Miami, Dallas, and Atlanta in the USA.
Not only that, it also has servers in Denmark, and Poland, Netherlands, the European countries where Discovery Plus is available. I tried a few of them and it worked.
Moreover, these multiple servers are beneficial because if one location does not work, you can easily switch to a different server.
Then, ExpressVPN uses 256-bit encryption to keep your online activities hidden around the clock by scrambling your traffic.
This means that the chances of Discovery Plus working out that you are using content outside the USA are few.
In addition to that, all ExpressVPN servers run on 10Gbps, ensuring smooth streaming on any device of your choice. Matter of fact, with one account you can link up to eight devices at once.
Furthermore, ExpressVPN has a built-in protocol called Lightway. What it does is boost the servers’ speed and help enhance your internet connection.
Pros
Fast servers
Thousands of IP addresses
8 simultaneous connections
24/7 live chat
Easy-to-use app
30-day money-back guarantee
Cons
Expensive
ExpressVPN
Unblock Discovery Plus within seconds with this error-free VPN!
CyberGhost offers a server network of about 9400+servers across 91 countries. It’s also providing about 1,230 highly optimized servers in the USA.
In addition to that, this VPN has over 700 super-fast servers in the UK. This makes it one of the most reliable VPN providers for streaming, with blazing-fast speed.
Furthermore, CyberGhost offers users unlimited bandwidth for streaming all day long if that’s your thing.
Also, this VPN uses AES 256-bit encryption to encode your traffic, hence making it impossible for Discovery Plus to detect your activities.
When you use a regular IP address with a VPN for example, your IP changes every time you connect to the VPN.
This makes it more difficult for websites and services to track your activity, but it also makes it easier for them to blacklist your IP address.
However, CyberGhost lets you choose a dedicated IP address stays the same every time you connect. With this, it will be almost impossible for Discovery Plus to blacklist your IP.
Additionally, CyberGhost has WebRTC protection to prevent information from your device from leaking. DNS protection is also well put in place to conceal your IP address from Discovery Plus.
Pros
1230 reliable US servers
7 simultaneous connections
30-day money-back guarantee
Easy-to-use app
Cons
Expensive
Limited payment options
CyberGhost
Watch your favorite Discovery Plus shows from anywhere with this unblocking VPN!
NordVPN offers a large server network of over 5,200+ servers across the globe and over 2000 highly optimized servers across 16 locations in the USA.
Furthermore, by using 256-bit military-gradeencryption this VPN scrambles your traffic.
This helps prevent ISP throttling as it obscures your activity online so you can enjoy Discovery Plus without limitations.
Here’s the best part:
In addition to that, NordVPN has a feature named SmartPlay that automatically optimizes your server for streaming.
This means that you don’t have to manually configure your VPN to get a lag-free watch time.
Also, if you enjoy watching many episodes of a season at a go then NordVPN should be your go-to VPN. It offers users unlimited bandwidth to sustain long hours of streaming without buffering.
Pros
Lightning speed servers
Strict no-logs policy
6 simultaneous connections
30-day money-back guarantee
Easy-to-use app
Cons
No refunds for purchases from iTunes/App Store
NordVPN
Unblock Discovery Plus hitch-free using NordVPN’s advanced features!
This is the best low-cost VPN to watch Discovery Plus from outside the USA. Also, it offers 3, 200+servers in 100 countries. This includes about 600 well-streamlined USA servers in 25 locations.
Additionally, Surfshark has optimized servers in Denmark, Netherlands, Poland, Spain, Sweden, Italy, and Ireland, where Discovery Plus is also accessible.
All these servers run entirely on RAM which means that they don’t record of your activities online.
In addition to that, these servers are fast enough to stream movies buffer-free on Discovery Plus.
SurfShark VPN also offers AES-256 encryption to encode your internet traffic. It also has the WireGuard protocol to boost your connection speed during streaming.
Furthermore, this VPN incorporates split tunneling to allow you to use a VPN only for Discovery Plus while using your normal internet connection for other apps.
Not only that, Surfshark allows users to connect to as many devices as possible with only one account. So, if your friends wish to watch Discovery Plus too, you are all covered.
Pros
Fast servers
Unlimited simultaneous connections
30-day money-back guarantee
24/7 live chat
Strict no-logs policy
Easy-to-use app
Cons
Slow speed on some server locations
Surfshark
Watch Discovery Plus with no limitations using Surfshark’s reliable service!
Discovery Plus blocks VPNs due to copyright and licensing agreements. Apart from that, overcrowded servers and poor network connection can also cause issues with VPN.
Before you go, don’t forget to check our guide on Discovery Plus error 400, since it can help you with any login issues that you may experience.
As long as you follow the solutions in this article, you should be able to fix this in no time and get back to enjoying your streaming again. However, if you keep facing problems, contact Discovery Plus customer support.
It’s well known that Microsoft has been at the forefront of AI, ever since the subject gained popularity. Nowadays, the Redmond-based tech giant is a usual sight in all AI matters. Let’s take a look at Llama 2, which is the LLM AI product of the partnership between Microsoft and Meta.
Even more, Microsoft is also a founding partner at the Frontier Model Forum, and together with Anthropic, Google, and OpenAI, the company pledges to safer AI development.
So when it comes to AI, Microsoft is there. This is why the company has forged a partnership with Aptos Labs (not to be confused with Microsoft’s new default font, however), with the aim of bringing the web3 technology into the mainstream.
In a press release, Aptos Labs will collaborate with Microsoft on an AI assistant called Aptos Assistant, to help people understand the benefits of onboarding into web3.
Artificial Intelligence and blockchain technologies are quickly converging for one important reason: they are both generational breakthroughs that profoundly impact the evolution of the internet and shape society. Together with Microsoft, our shared vision is to ensure that this technology is accessible to more people and organizations than ever before.
Aptos Labs
However, it’s very important to know what web3 is, and then we could make informed decisions on whether we like to onboard on it or not. So what is web3 technology? And why it is considered the future of the Internet?
What is web3 technology?
A mere search on the Internet describes web3 as an idea of a new iteration of the World Wide Web which would include decentralization blockchain technologies as well as token-based currencies and economics.
While there is a lot to say about web3, you need to know that the main goal of it is to decentralize the Internet. For now, all the big tech companies, including Google, Amazon, Meta and Microsoft, and the most recent TikTok, have a monopoly on user’s data.
Web3 would decentralize this data, and it would change the Internet’s architecture to such a degree that it would radically change the way we, as users, interact with it and financially benefit from it.
Some of the most important features about the web3 technology include:
AI – artificial intelligence is an important key in web3 technologies because it can be used to curate and generate content tailored to each user.
Blockchain technologies – which would allow for a faster, encrypted, and more authentic share of data.
Cryptocurrencies – virtual tokens that can be used to purchase virtual and physical goods without being tied to a financial authority.
What would web3 mean to you, as a user?
Well, it’s hard to pinpoint exactly the advantages and disadvantages of using web3 since the technology is just at the start of its era, but there are some important points to remember.
Web3 advantages would include:
Privacy and security.
Transparency.
Financial decentralization.
Personalized internet experience.
However, the disadvantages so far are also numerous:
Lack of regulations and laws which can leave you defenseless in case of a bad point.
The complexity of web3 technology will be a real challenge for IT managers and admins.
Security is also a drawback, even it if’s theoretically stronger here. It will be also harder to solve or intercept cybernetic attacks.
And for now, the web3 technology requires a lot of hardware power.
Why would Microsoft want to bring web3 technology into the mainstream?
The Redmond-based tech giant has been investing a lot of resources in AI, and currently, the company is probably the best AI developer in the world. The web3 technology would require a lot of AI assistance, and generally, it will be an AI-driven Internet.
So Microsoft could see an opportunity here, to become the most important player on the market. Considering the other giants, such as Google, Amazon, or Meta, already have a sort of monopoly in their respective fields, Microsoft sometimes struggles with it, and the competition in the OS market is fierce.
But the company has found a fascination with AI products, and so far it has been very proficient at delivering the best AI solutions on the market. So in many ways, Microsoft is ready to embrace web3.
Not to mention, the web3 technology would greatly destabilize the tech market, and companies such as Meta and Google, which thrive on users’ data, would quickly be heavily affected by it.
So in this regard, it’s easy to see why Microsoft thinks web3 is the future.
But what do you think about it? Are you excited about the web3 technology or not? Let us know in the comments section below.
For many, the webcam is a vital part of the PC, allowing them to join online meetings in Teams, Google Meet, or Skype, amongst others. Also, some rely on it to record videos. But a few users found that Windows 11 camera is freezing.
The problem is not new. Users faced webcam issues in Windows 10 as well, but given that the latest iteration is relatively new, many more issues can cause Windows 11 camera problems. So, troubleshooting things is a tad more difficult. Keep reading to find out more!
Why is my camera freezing on Windows 11?
Here are the common reasons you are facing Windows 11 camera problems and freezes:
Issues with the webcam drivers: Users who faced the issue reported that an incompatible, corrupt, or outdated camera driver was the underlying cause.
Misconfigured privacy settings: The configured settings play a vital role in the webcam’s performance, and if any of these are misconfigured, the webcam won’t work as expected.
Corrupt system files: When the system files are corrupt, you will face performance issues with both Windows and the connected hardware, including the webcam.
Bug in the installed version of Windows: In some cases, users reported that the Windows 11 webcam was freezing after a Windows update. If things worked fine on the previous version, it’s likely a bug to blame.
Third-party apps triggering conflicts: Several programs, especially third-party antiviruses and security software, were found to cause issues with the integrated webcam in Windows 11.
How do I fix camera freezing in Windows 11?
Before we move to the slightly complex solutions, try these quick ones first:
For users with external USB webcams, connect these to another computer and check whether the situation improves. If the issue doesn’t appear, the problem lies with the previous PC.
Terminate any webcam software you have running on the computer.
Press Windows + I to open Settings, and click on Troubleshoot in the System tab.
Click on Other troubleshooters.
Now, click the Run button next to the Camera entry.
Follow the on-screen instructions to complete the troubleshooting process and make the recommended changes.
Once done with the Camera troubleshooter, run the Windows Store Apps troubleshooter.
Often the built-in troubleshooters help quickly fix issues arising out of trivial misconfiguration. Also, the Windows Store Apps troubleshooter helps when the Camera app keeps freezing or crashing in Windows 11.
2. Check the privacy settings
Press Windows + I to open Settings, go to Privacy & security from the navigation pane, and click on Camera under Permissions.
Make sure the toggle for Let apps access your camera is turned on.
Now, verify whether the app which is crashing or freezing has access to the webcam. If not, enable the toggle next to it.
When users found Microsoft Teams or Google Meet freezing the webcam in Windows 11, it was the missing permissions or misconfigured camera settings to blame. Simply granting camera access did the trick!
3. Reinstall the webcam drivers
Press Windows + S to open Search, type Device Manager in the search box, and click on the relevant result.
Now, double-click the Cameras entry, right-click on the problematic webcam, and select Uninstall device.
Again, click Uninstall in the confirmation prompt.
Finally, restart the computer for the changes to come into effect.
Many users found that when the integrated or external webcam didn’t work, reinstalling the webcam drivers got things up and running if Windows 11 camera keeps freezing.
4. Repair the corrupt system files
Press Windows + R to open Run, type cmd, and hit Ctrl + Shift + Enter.
Now, paste the following commands one at a time, and hit Enter after each to run the DISM tool:DISM /Online /Cleanup-Image /CheckHealthDISM /Online /Cleanup-Image /ScanHealthDISM /Online /Cleanup-Image /RestoreHealth
Next, execute these commands to run the SFC scan: sfc /scannow
When Windows has corrupt system files, the integrated webcam, a critical hardware component, may fail to work. In this case, the DISM tool and SFC scan help repair these corrupt files with their cached copy stored on the PC.
In case the command failed to work, there is another way to fix it. You can effectively solve corrupted system files with standalone repair tools for Windows devices.
5. Update drivers
Press Windows + X to open the Power User menu, and select Device Manager from the list of options.
Expand the Cameras entry, right-click on the integrated or USB webcam, and select Update driver.
Now, select Search automatically for drivers and wait for Windows to install the best one available locally.
Restart the computer for the changes to apply.
When running outdated drivers, you may find the Windows 11 camera freezing from time to time. And if you download camera driver in Windows 11, things should work.
Besides, if you can’t find the driver update automatically, head to the manufacturer’s website, locate the latest driver version, and manually install the driver.
Press Windows + S to open the Search box, type Microsoft Store, and click on the relevant result.
Go to the Library from the bottom left.
Now, click on Get updates.
If a newer version of the Camera app is available, download it.
For users who rely on the Camera app to record videos or capture simple selfies, it could be the app itself to blame and not the camera hardware component for freezing in Windows 11. And updating the app should get things running.
7. Modify the Registry Editor
Press Windows + R to open Run, type regedit in the text field, and click OK.
Click Yes in the UAC prompt that pops up.
Paste the following path in the address bar at the top and hit Enter:HKEY_LOCAL_MACHINE\SOFTWARE\Microsoft\Windows Media Foundation\Platform
Now, right-click on the empty portion, hover the cursor over New, select DWORD (32-bit) Value, and name it EnableFrameServerMode.
Double-click on the DWORD you just created, enter 0 under Value data, and click OK to save the changes.
When everything else fails to fix a freezing camera in Windows 11, you can always rely on the Registry hack shared by Rafael Rivera. Some quick changes to the Registry, and you should have the webcam up and running.
Before you start with the modifications, back up the Registry Editor or create a restore point to revert the changes in case things don’t turn out as expected. Also, follow the steps as it is, and do not change any other keys.
Windows is known to be a user-friendly OS, offering a wide array of customizations and abilities with minimal crashes. And it becomes all the more important for users running the OS for critical tasks. But many found that Windows 11 freezes when printing.
While printing issues have troubled users for long, even on the previous iterations, problems with Windows 11 are a tad more complex since the iteration is relatively new and not yet polished. But when in the situation, you can easily troubleshoot things!
Why does Windows 11 constantly freeze when printing?
Here are a few reasons your computer freezes when trying to print in Windows 11:
Corrupt system files: A common reason the PC crashes while printing in Windows is corrupt system files. These trigger a range of other issues as well.
Conflicting programs: If programs crash when trying to print in Windows 11, it could be that other apps are conflicting with them.
Critical services not running: Several services are vital for the effective functioning of the computer while printing, and if these are not running, you are bound to run into errors.
Issues with the cache: The printer cache is a vital component, and if it’s corrupt or unreadable, users reported that Windows 11 freezes when printing.
Outdated, corrupt, or incompatible drivers: Drivers, too, are critical to the printing process, and issues with them can cause Windows 11 to crash or freeze.
What can I do if Windows 11 freezes when printing?
Before we move to the slightly complex solutions, here are a few quick ones:
Restart the computer and the printer.
Run the dedicated Printer troubleshooter.
Install the latest Windows updates if any are pending.
Disable any third-party antivirus or security software installed on the PC.
Remove and add the printer again. This time, add it as a network printer instead of one hosted on the server.
If none work, head to the fixes listed next.
1. Change the default printer
Press Windows + I to open Settings, go to Bluetooth & devices from the navigation pane, and click on Printers & scanners.
Disable the toggle for Let Windows manage my default printer.
Now, select the printer you want to set as default, the one that’s triggering issues.
Finally, click the Set as default button.
Many users reported that changing the default printer fixed things if Windows 11 freezes when printing. Just make sure to set the preferred printer as the default device, and things should be good to go!
2. Restart the Print Spooler service
Press Windows + R to open Run, type services.msc in the text field, and hit Enter.
Locate the Print Spooler service, right-click on it, and select Properties.
Now, click the Stop button.
Press Windows + E to open File Explorer, paste the following path in the address bar, and hit Enter:C:\Windows\System32\spool\PRINTERS
Press Ctrl + A to select all the files and hit Delete to clear them.
Head back to Services, select Automatic from the Startup type dropdown menu, click the Start button, and then OK to save the changes.
If you can’t access the Printers folder, take full folder access and then delete the files. Once done clearing the cache and restarting the Print Spooler service, you shouldn’t face Windows 11 freezes when printing.
Press Windows + X to open the Power User menu, and select Device Manager.
Expand the Printers entry, right-click on the affected printer, and select Update driver.
Choose Search automatically for drivers and wait for Windows to install the best one available locally.
Once done, restart the computer.
Often, it’s the outdated drivers triggering computer freezes when printing; in this case, it’s best to update the printer drivers.
If Windows can’t find one, head to the manufacturer’s website, locate the latest version and manually install the driver. This should also fix things if programs crash when trying to print in Windows 10.
However, if this process takes too much time or it seems too technical, you can use an automatic driver alternative to install any drivers on your PC. So, the software application will quickly scan the system for outdated drivers and give you the full list from which you can update them accordingly.
Press Windows + S to open Search, type Printers & scanners in the text field, and click on the relevant result.
Select the default printer or the one triggering issues, and then click on Printer properties.
Go to the Ports tab, select another port from the list, and click OK to save the changes.
A user reported that changing the ports from USB001 to USB003 did the trick. Though it won’t be the exact same change for you, choosing the correct port should work if Windows 11 freezes when printing.
5. Repair the corrupt system files
Press Windows + R to open Run, type cmd, and hit Ctrl + Shift + Enter.
Click Yes in the UAC prompt.
Paste the following commands individually and hit Enter after each: DISM /Online /Cleanup-Image /CheckHealthDISM /Online /Cleanup-Image /ScanHealthDISM /Online /Cleanup-Image /RestoreHealth
Once done, run the following command for the SFC scan: sfc /scannow
When it’s the corrupt system files to blame for freezes in Windows 11 while printing, running the DISM tool and SFC scan should do the trick. The two help identify corrupt system files and replace them with their cached copy.
6. Uninstall conflicting applications
Press Windows + R to open Run, type appwiz.cpl in the text field, and hit Enter.
Select the application(s) installed around the same time the problem first appeared, and click Uninstall.
Follow the on-screen instructions to complete the process.
Finally, restart the computer for the changes to apply and check for improvements.
Oftentimes, a third-party program may cause Windows 11 to freeze when printing or crash other programs, including Edge, Word, and Chrome. Here, it’s best that you uninstall the conflicting application.
These could be printer management software, a security program, or one that can modify the connections.
7. Perform an in-place upgrade
Tip
The steps here are for Windows 11. For users running Windows 10, it’s just as simple to do an in-place upgrade.
Go to Microsoft’s official website, select the product language and OS edition, then download the Windows 11 ISO.
Open the ISO file and run setup.exe.
Click Yes in the prompt that appears.
Click Next to proceed.
Now, click on Accept to agree to Microsoft’s license terms.
Finally, make sure the setup reads Keep personal files and apps, and then click on Install.
Wait for the in-place upgrade to complete. It may take a few hours.
When nothing else works, the last option is to perform an in-place upgrade. An in-place upgrade is basically like reinstalling Windows over the existing setup. And there’s no downside to it! You wouldn’t lose any stored files or apps.
By now, you should have fixed things if Windows 11 freezes when printing and the two should work perfectly fine.
You can now add notes to your site passwords in Chrome to remember important details related to that particular account. Up until now, you might have used third-party extensions to get things done. But, it’s better that Chrome’s password manager now has a built-in note-taking feature as well.
It is one of the new ways of managing passwords using password manager on the Chrome browser with the help of which you can safely annotate site passwords. You can add custom notes like when did you last update your account on that particular site.
While using a password manager on any browser takes care of your logins, it’s still better to add notes for password recovery. You can also add special instructions or requirements to the notes for seamless logins.
The feature can prove to be super helpful for sites with confusing names. You can just make a note like why did you make an account on the site or did you find something important on the site.
Well, there can be many other useful scenarios. So let’s dive straight into how you can create notes to passwords stored on the Chrome browser.
Can you add notes to Chrome passwords?
Yes, you surely can! Google Chrome now natively supports a note-taking feature for your saved passwords. It is more like adding comments to your password entries so that you could know more details about the sites.
We visit dozens of websites and a note beside the stored password can help you save your time. You can quickly find out why did you visit that particular site in the past.
How do I add notes to saved passwords on Chrome?
Adding notes to saved passwords in Chrome is simple. You just have to log in to your master account to manage passwords.
Follow the below guide and know how you can put notes on the saved passwords.
Go to the horizontal lines menu provided at the top-right corner of the Chrome toolbar.
Click on “Google Password Manager.”
You will then see the list of saved passwords for the sites you have visited in the past.
Tap on any website in order to create a note.
A new window “Windows Security” will open where you need to enter your password/pin to proceed further.
Once you log in to your main Windows account, you will see your Username, Password, site name, and a text box to make a note.
Click on the Edit button provided below to edit the Note section.
Another window will open where you will make a note and then click Save to create a note.
And, this is how you add password-protected notes in Chrome browser on Windows desktop. Follow the same steps in case you’re using an Android phone. But here’s a quick rundown.
Open Chrome on your Android device.
Tap the three-dot menu in the top corner.
Select Settings.
Select Password Manager.
Tap on any saved site password.
After verifying your identity, tap Edit.
Write a note in the text box and hit Save.
Note: You can access password-protected notes on different devices as well. To do so, make sure syncing is enabled in Chrome Settings.
Can I use a Chrome extension to add password-protected Notes?
It’s possible that you like third-party extensions more because they offer more. For instance, AI Chrome extensions are on the rise these days as they help you supercharge your productivity.
Third-party password manager extensions do offer additional features as well and there are many extensions that help you make notes for your saved passwords. But, we are suggesting only a couple of extensions that are free to install on the Chrome browser.
LastPass – It is a popular third-party extension on Chrome that lets you add notes to your stored passwords. It’s more than a password manager which offers various useful features as well.
BitWarden – It’s another widely known password manager extension on Chrome that offers a note-taking feature. You can make notes for your password entries on the browser while keeping a check on your security.
Well, you must give a try to Chrome’s new feature of Password Manager before using an extension. Let us know what type of notes you are adding to your saved passwords on the Chrome browser.
Microsoft has released many new features in the Windows Insider Program recently. Last week, the Redmond-based tech giant enabled you to use Voice Access commands in the Windows 11’s lock screen. This means you can spell your PIN instead of typing it down.
But many other exciting features were enabled on Windows 11. For example, you’ll be able to dim the lights of your screen with your eyes, due to Access Sensing’s new feature, Adaptive Dimming. The feature will come to live Windows 11 servers later this year.
And it seems that Microsoft Edge has also gotten a new feature from Microsoft. You’ll be able to export your browser history in Edge, according to the latest findings of the Windows enthusiast, @Leopeva64.
The feature is Edge Canary, so it’s not officially released yet. Plus, it’s undergoing a controlled rollout, so it might suffer some drawbacks, especially if you’re going to try it now. But it’s coming to Edge later this year.
Here’s how to export your Edge browser history
Open your Edge browser, go to the History panel, and click on it.
Depending on your settings, you can open it in a new tab, or not, but either way, there should be an option called Export browsing data.
Clicking on it will open up a File Explorer window to save your Edge browser history.
For now, the feature might not work as intended as it’s still in a controlled rollout state, but it will be fixed as feedback is provided.
Currently, the only format you can save your Edge browsing history is the CSV format, which the comma-separated values, basically text only. If you want to know how to delete it automatically, we have just the guide for that.
However, other formats will be available soon, and we’ll make sure to keep this article updated when that happens. But it’s a step in the right direction for Microsoft, which has been updating Edge and making it faster than ever.
Let’s not forget that the browser was ahead of the game with Bing Chat, the AI tool, and you could use it together to enhance your web navigation experience. Just recently Microsoft announced that Bing Chat is coming to other browsers as well, although in a limited capacity compared to Edge.
Are you excited about this new feature? Let us know in the comments section below.
TLS is a security protocol that ensures communication over the Internet by encrypting data. At times, you may need to adjust its registry keys for troubleshooting or any other modification.
The problem comes in when TLS is not showing in your registry. This will be our focus topic for today as we show you how to enable it in your registry.
Why is TLS 1.2 missing in the registry?
The registry is a database of information about the configuration of your computer. It’s used by Windows and other programs to store settings and information about your computer’s hardware, software, and users.
Since TLS is a critical security component, it is expected to be in the following default path: HKEY_LOCAL_MACHINE\SYSTEM\CurrentControlSet\Control\SecurityProviders\SCHANNEL\Protocols\TLS 1.2\Client\Enabled
However, if it is not showing in your registry, it could mean you have not enabled the feature or been disabled by default.
Older versions of TLS are known to be prone to attacks, so it is better to have them disabled as they pose a huge security risk.
Another reason it may be missing is if you have an invalid certificate. An expired or invalid certificate cannot have the corresponding key stored in the registry, so the TLS will not show in your registry.
Nevertheless, this does not mean it is impossible to enable it. The good news is that you can easily create a new key and enable the TLS protocol from your registry; below is how to do it.
Now proceed with the following steps to enable TLS:
Before you make any changes to the Registry Editor, we recommend that you backup your registry or create a restore point. This way, if anything goes wrong, you can undo the changes and avoid damage to your PC.
Hit the Windows + R keys to open the Run command.
Type regedit in the search box and hit Enter.
Navigate to the following path: Computer\HKEY_LOCAL_MACHINE\SYSTEM\CurrentControlSet\Control\SecurityProviders\SCHANNEL\Protocols
Right-click on the empty space in the right pane and choose New, and then Key.
Name the new key TLS 1.2 and click to expand it.
Navigate to TLS 1.2, click on the empty space in the right pane, and add two new keys. Name the first one Client and the second one Server.
Now, select the Client key, right-click in the right pane and select New,and then DWORD (32-bit) Value.
Name the DWORD DisabledByDefault, and double-click it.
Ensure that the Base is Hexadecimal, and the value is 0 (zero).
Create a new DWORD and name it Enabled, and double-click it.
Ensure that the Base is, again, Hexadecimal and the Value is set to 1.
Mozilla Firefox is still a very popular web browser, even in the age of Chrome, and AI-enhanced Microsoft Edge. Recently, the company announced that Firefox will no longer be supported on Windows 7, 8, and 8.1. Extended support is offered up until September 2024 for these Windows versions.
And after that, you’ll have to update to Windows 10 or Windows 11. We recommend updating to Windows 11 because Windows 10 will reach the end of support in October 2025. Either way, you can still use Firefox on Windows 7, 8, and 8.1 for now, but make sure to update it to version 115.
As you may know, Firefox doesn’t officially support the Mica effect. Edge and Chrome, for example, support it, and the effect appears as a translucent layer which reflects the colors behind it. The effect is inspired by the now-classic Aero design back from Windows 7.
However, there might a way you can add the Mica Effect in Firefox on Windows 11. This Reddit user managed to do it, although using some unconventional ways.
How to add the Mica effect on your Firefox in Windows 11
For starters, you need to know one thing. The supposedly Mica effect-lookalike on Firefox uses a code to activate transparency. This code, according to the Reddit user, was desgined for Windows 7 and Windows 8. It was also unfortunately removed in Firefox 117.
And if you by any chance had the transparency activated, starting this Firefox version, it will be removed. So, if you’re a Firefox user and you want transparency on your browser, here what you should do:
Download WaveFox, which is the code that will enable the Mica effect on Firefox.
Install WaveFox by following the instructions on GitHub.
That’s it. Reboot your browser, and you should have the Mica effect on Firefox, now.
Unfortunately, this is the only way you can have this effect for now. However, Mozila Firefox developers might implement a default Mica effect theme on Firefox in the future.
Until then, though, try this method and see if it works. And let us know your experience with it in the comments section below.
Many people use this app to watch their favorite games, but some of them reported that Twitch chat is not loading.
This isn’t a big problem, but it can be annoying, especially if you want a full Twitch experience, so today we’re going to show you how to fix this issue.
Before showing you what to do to easily fix this issue, let’s take a look at some causes that explain why it can appear.
Why is the Twitch chat not loading/connecting?
It is always important to be aware of what stands behind your system errors, so we’ve compiled a dedicated list of reasons:
Internet problems – Before anything else, you should make sure that your Internet hasn’t get into troubles. Thus, you can restart the router and check its status.
Extensions, cache or emotes affecting your app – These might sometimes block or interfere with Twitch. We’re going to show you how to temporarily disable them, so keep on reading.
Browser related issues – If you want to get the best out of the streaming experience, it’s important to use a browser that has Twitch integration. You’ll discover which one you should use, later in this guide.
What can I do if Twitch chat isn’t loading/connecting?
1. Try a different browser
According to users, sometimes Twitch chat is not loading because your browser might possibly run into different troubles.
Apparently, several users reported that after switching to Opera GX, the problem was resolved.
By choosing Opera GX, you have integrated support for Twitch right on the sidebar. This feature allows you fast access to Twitch streaming or chat, without any loading issues.
Plus, this private and feature-rich browser will instantly load any website (and we do mean any, even the blocked ones due to its integrated VPN tool), thus allowing you to surpass any Twitch chat connection issues.
It’s worth mentioning this browser has extra protection that can solve different server connection problems.
Hence, you can connect to different servers around the world and bypass network issues on your PC.
Opera GX
Use the Twitch chat directly from the sidebar and get quick notifications on your favorite streamers’ activity!
Press the Power button on your router. If you have both modem and router, be sure to turn off both devices.
Wait for a couple of moments and turn your router back on again.
Wait while your router boots completely. This should take about 30-60 seconds.
In some instances, problems with Twitch chat can occur due to issues with your router. Glitches with your router can occur, and if you encounter them, you might have to restart your router.
Once your router boots, check if the problem is still there. This is a quick workaround, but several users reported that it works for them, so you might want to try it out.
3. Try using the Incognito mode
Hit the Windows key, type your browser’s name, then open the first result (In this case, we choose Chrome).
In the top-right corner, click on your browser’s general menu (Usually marked as 3 dots or 3 lines).
Now, click on New incognito window / New private window.
If you’re having issues with Twitch chat, the cause might be your extensions or cache. This can be a problem, but many users reported that you can troubleshoot the issue simply by opening Twitch while using Incognito mode.
In case you don’t know, Incognito Mode is a special segment of your browser that allows you to browse the web without any extensions and without using any cache, therefore it’s perfect for troubleshooting. To use Incognito mode, do the following:
Once the new window appears, open Twitch in it and check if the problem with Twitch chat is still there. If not, it means that your cache or your extensions are the problems.
4. Make sure that Twitch is added to whitelist in AdBlock
Many users use AdBlock in their browser, and as we previously mentioned, sometimes extensions such as AdBlock can interfere with certain websites. To fix the problem, be sure to temporarily disable AdBlock and check if that helps.
If disabling the AdBlock solves the problem, check your AdBlock settings and be sure to add Twitch to the exclusions list. After making these changes, check if the problem is still there.
5. Clear your cache
5.1 Chrome
Hit the Windows key, type Chrome, then click on the first result.
Use the following keyboard shortcut to open the Clear browsing data menu:Shift + Ctrl + Delete.
Select All time as the time range.
Checkmark the Cookies other site data and Cached images and files sections.
Click on the Clear Data button.
5.2 Mozilla Firefox
Press on the Windows key, type Firefox, and open the first result.
Click on the 3 horizontal lines button from the top right corner.
Navigate to History.
Click on Clear Recent History.
Click on the Time range dropdown menu and select Everything.
Checkmark anything you want to clear from the History and Data sections. We recommend checking all the boxes except Active logins.
Click on OK.
Now, go again to the Firefox general menu.
Navigate to Settings.
From the left window pane, choose Privacy & Security.
Scroll down to Cookies and site data, then click on the Clear Data… button.
As we already mentioned, if Twitch chat isn’t loading on your PC, the issue can be your cache. To fix the problem, it’s advised that you clear your cache. Once the cache is removed, check if the problem with Twitch chat is still there.
You can also perform this task automatically by using specialized optimization and clean-up software. They can simplify the process and save you some time.
Dedicated cookie cleaner software usually includes additional features that will take care of clutter beyond your browser.
They can scan and remove useless temp files, duplicates, and more. Having a clean PC can significantly increase performance.
This type of utility is generally easy-to-use. You just open, select what you want to scan for clutter, get a report, and decide what you want to delete and what you want to keep.
They take you through each step of the process with intuitive controls and easy-to-understand help sections.
6. Disable browser extensions
6.1 Chrome
Hit the Windows key, type Chrome, then open the first result.
Click on the Customize and Control Google Chrome menu button (the 3 vertical dots placed in the right-top corner of the window).
Hover the mouse over More tools, then click on Extensions.
On to the extension you want to remove, clickRemove.
Confirm by clickingRemove.
Repeat the process to all your extensions.
6.2 Mozilla Firefox
Press on the Windows key, type Firefox, then open the first result.
From the top-right corner of the window, navigate to Firefox menu (marked as 3 horizontal lines).
Navigate to Add-ons and themes.
From the left window pane, select Extensions.
Find the ones you want to disable, click on them then on the Disable button.
If you want to delete an extension entirely, click Remove.
According to users, your browser extensions can sometimes cause this problem to appear. If Twitch chat isn’t loading in your browser, try disabling all extensions to prevent any interference. To do that, follow these steps:
If the issue doesn’t appear anymore, it’s certain that one of the disabled extensions is causing the problem. To pinpoint the cause, you’ll have to enable extensions one by one until you manage to recreate the problem.
Once you find the problematic extension, disable it or remove it from your browser and the issue should be resolved.
To fix the problem, it’s advised that you disable the proxy and check if that solves the issue. To disable proxy, you just need to do the following:
Once the proxy is disabled, check if the problem is still there. Many users reported that disabling their proxy fixed the problem with Twitch chat, so be sure to try that. If you’re still concerned about your privacy, we suggest using the best VPN for Windows 10 PCs.
8. Disable the GIF emotes
A big part of Twitch chat is its emotes, and there’s a plethora of emotes to choose from. However, some users reported that GIF emotes can cause problems with Twitch chat and cause it to stop working.
To fix this problem, users are suggesting disabling GIF emotes completely.
After doing that, the problem with Twitch chat will be resolved and everything will start working again.
9. Change the DNS and flush your DNS cache
9.1 Change the DNS
Use the following keyboard shortcut to open the Settings menu: Windows + I.
Navigate to Network & Internet.
From the right window pane, click on Change adapter options.
A list of available network connections will appear. Right-click your network connection and choose Properties from the menu.
Select Internet Protocol Version 4 (TCP/IPv4) from the list, then click on Properties.
When the new window appears, select Use the following DNS server addresses.
Now enter 8.8.8.8 as the Preferred and 8.8.4.4 as the Alternate DNS server.
Click the OK button to save changes.
According to users, sometimes Twitch chat might not work due to your DNS. To fix the problem, users are suggesting changing the DNS.
After making these changes, check if the problem is still there. Bear in mind that now you’ll be using Google’s DNS so your latency might be a bit higher, especially if you don’t live in the US.
9.2 Flush DNS cache
Hit the Windows key, type cmd, right-click on the first result, then choose to Run as administrator.
Once the Command Prompt opens, input the following command, then press on the Enter key: ipconfig /flushdns
In addition to changing your DNS, some users are advising you to clear your DNS cache. This is quite simple, and you can do that by following the steps above.
After the command is executed, your cache will be cleared and the issue should be resolved.
What are the most common Twitch chat problems?
Twitch chat issues usually aren’t a big problem, but they can impact your viewing experience on Twitch. Speaking of Twitch chat, here are some common problems that users reported:
Twitch chat won’t show, load – This issue can occur due to extensions and cache, and in order to fix the problem, it’s advised that you clear your cache and disable your extensions.
Twitch dashboard chat not showing – Sometimes this problem can occur due to your proxy. To fix the issue, be sure to disable your proxy and check if that helps.
Twitch chat not loading with AdBlock – AdBlock is one of the common extensions that can cause issues with Twitch chat. To fix the problem, disable AdBlock or add Twitch to the exclusions list.
Twitch chat not showing up, appearing, visible – These are just some common problems that you can encounter with Twitch chat, but you should be able to fix them using our solutions.
Twitch chat not working in Chrome – In some instances, the problem might be your browser. To fix the problem, temporarily switch to a different browser and check if that helps.
In most cases this issue is caused by your cache or extensions, so be sure to clear the cache and disable all extensions. If that doesn’t work, feel free to try all other solutions from this article.
Make no compromises at all when it comes to your entertainment – enjoy crisp sound on Twitch thanks to this Twitch Audio Guide. Explore our Web Apps Hub for more handy tips and tricks.