Surface pen driver error: 3 quick solutions to fix it

Are you worried about your Surface pen driver error problem? Do not worry, we’ve got you covered. This post is meant for you.

Surface pens are essential accessories used on surface mobile devices such as tablet or mobile phones. In addition, you can draw and write on the tablet just like you would on a sheet of paper. However, like every other tool, the surface pen may suddenly cease to work properly. How would you tackle such a situation?

In this post, we will be showing you proven methods to solve surface pen driver error with all surface pen models.

3 ways to fix Surface pen driver issues

  1. Use your tablet to fix the Surface pen
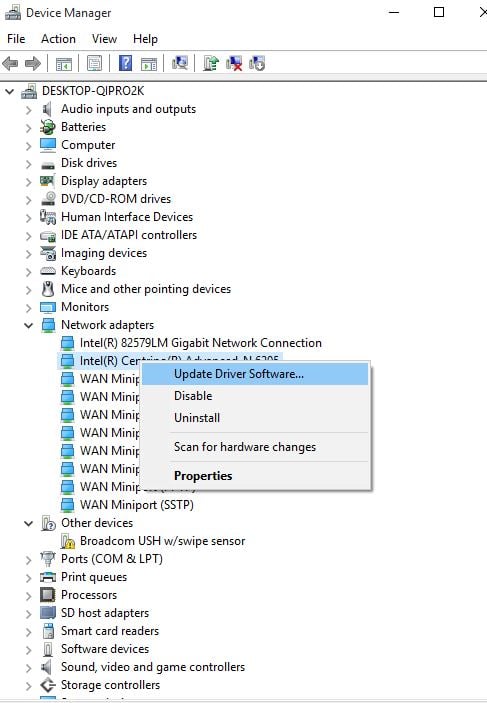
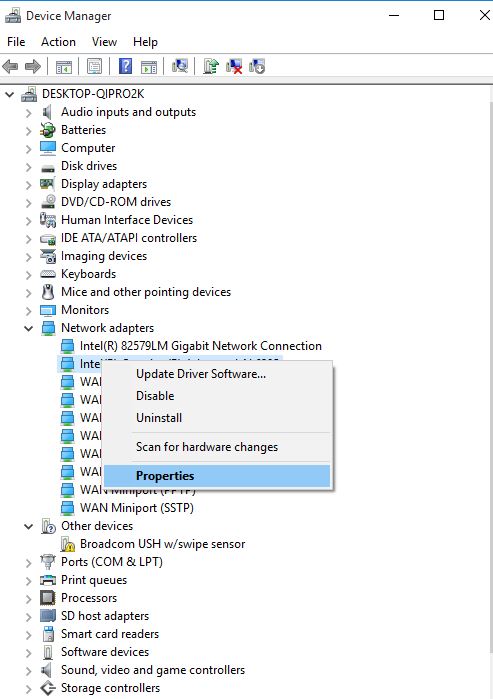
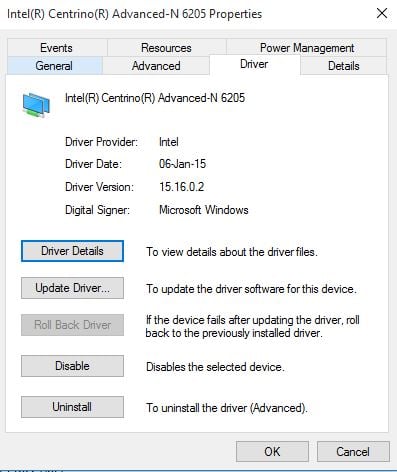
  2. Update the Surface pen drivers
  3. Change the battery of your Surface pen

Solution 1: Use your tablet to fix the Surface pen

You probably know how to connect the surface pen to the tablet through Bluetooth. Windows users reported that they were able to solve the Surface pen driver problem simply by connecting to their surface tablet. Here’s how to do this:

For Windows 8.1 users, Follow these steps:

  1. On your Surface tablet, go to settings.
  2. Select ‘change PC settings’.
  3. When the window of PC settings opens, go to Bluetooth.

For Windows 10 users, Follow these steps:

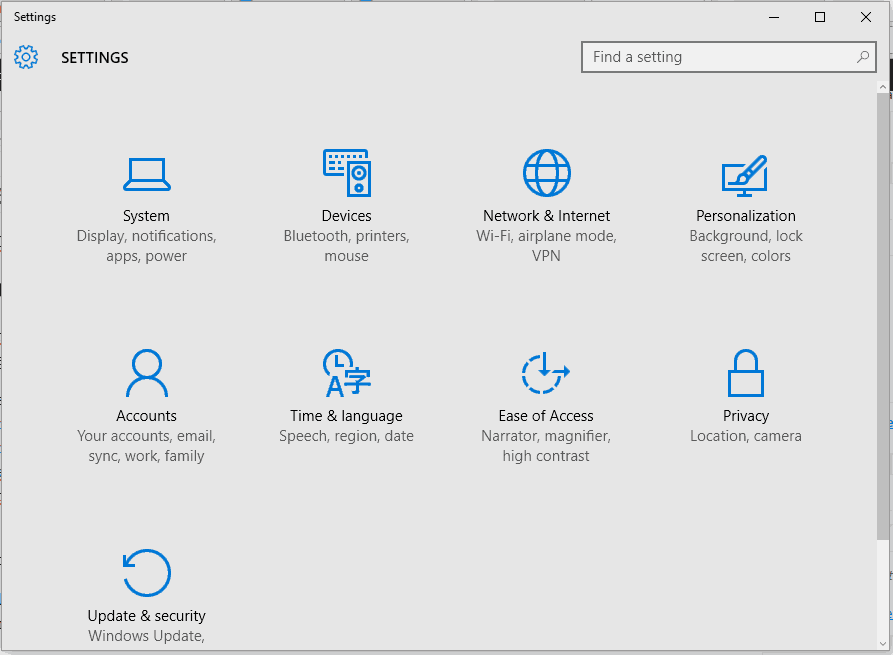
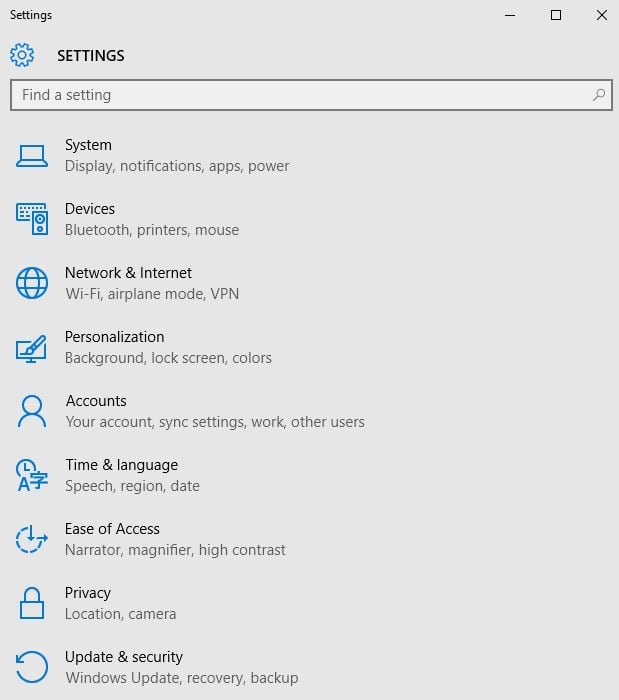
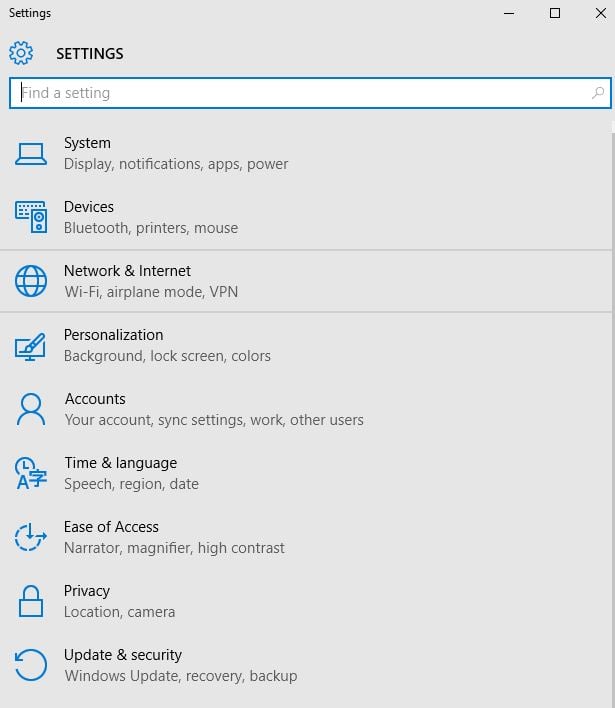
  1. Go to settings, select devices then Bluetooth & other devices.
  2. Click on Surface pen and select “remove device”.
  3. This will result in your Surface pen being invisible under Bluetooth.
  4. Press and hold your pen’s top button for up to 7 seconds and only stop when a green light flash in the middle.

Meanwhile, after the above steps, your surface pen will appear under Bluetooth again. Then select “pair”.

Solution 2:  Update the Surface pen drivers

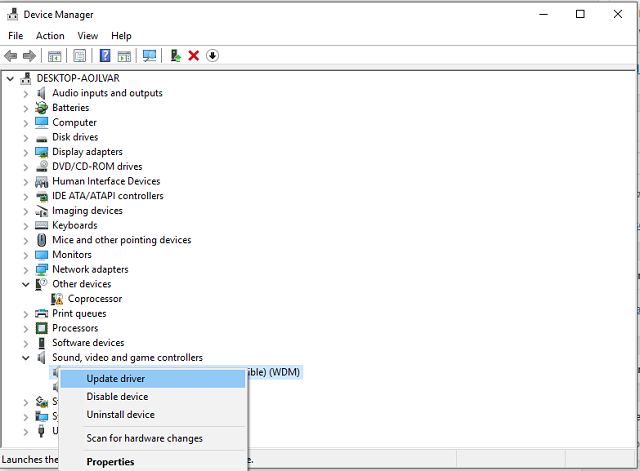
Your Surface pen drivers might be outdated or damaged, so a quick update or repair can fix the problem. You can do so manually, by double-clicking the .exe file to initiate the firmware update.

Alternatively, we recommend using third-party software to update the right drivers for you in a fast and secure way.

In a matter of seconds, Fortect Driver Updater will scan your system for errors or missing drivers and generate a report. The software will scan your PC’s hardware and peripherals for potential driver upgrades with a few clicks.

Fortect Driver Updater is an excellent choice for this task. It has a friendly interface and is simple to use, even for computer rookies.
Make use of one to save yourself some time.

⇒ Get Fortect Driver Updater

Solution 3:  Change the battery of your Surface pen

The perfect battery for your surface pen is an AAAA battery. Your new Surface pen should come with that type of battery. Do you notice malfunctioning buttons or experience difficulty when trying to write with them? The first step to carry out should be to swap the current battery with a new one.

You can also charge your Surface pen using various methods if it is not using rechargeable batteries.

However, if you are unable to fix the Surface pen driver problem using all the solutions we mentioned above, you may consider returning it to the Microsoft store for warranty replacement.

Do share with us your experience in solving the surface pen driver error problem. Feel free to comment below.

How to show most used apps on Windows 10

The Start menu is Windows 10’s primary app launcher and includes an indexed list of the software along with tile shortcuts to open apps with.

You can also add a handy Most Used App list to the top of the menu, which provides shortcuts to software you open more often.

How to Configure the List of Most Used Apps on PC

The Most Used software list is a handy list of apps you can add to or remove from right on the Start menu with a settingWindows provides:

  • Press the Cortana button on the taskbar and enter ‘most used’ in the search box.
  • Click Show most used apps in Start to open the window directly below.
  • This window includes a Show more used app option. Click that setting to switch the Most used list on.
  • Click the Start button to open the menu, which will now include a Most used list on it as below.
  • You can also remove an app from the Most used list by right-clicking it, selecting More and Don’t show in this list.

How to fix the Most Used List in Windows 10

The Windows 10 Creators Update was first rolled out in April 2017. However, some Windows users have found the Show most used apps option grayed out after the update.

This is because of the new Let Windows track app launches to improve Start and search results setting introduced in the Creators Update. You can fix the Most used list by switching that option on as follows.

  • Press the Win key + I hotkey to open the Settings app.
  • Then, select Privacy to open the General options below. The updated Windows will include a Let Windows track app launches to improve Start and search result setting there.
  • Switch the Let Windows track app launches to improve Start and search result setting on. Now you can also select the Show most used apps option, which is no longer grayed out.

The Most used list is certainly a convenient part of the Start menu. The Show more used app option is just one of the Start menu‘s numerous customization settings.

You can also customize the Start menu‘s color scheme, transparency and Live Tiles.

No Boot Screen on Windows 10/11? Here’s how to Fix it

Experiencing boot problems in Windows 10 is a common situation that can be addressed by using certain troubleshooting solutions. In this article, we will see how you can fix these boot issues and repair your Windows 10 system.

How can I fix the no boot screen issue on Windows 10?

Before proceeding to the solutions in this section, try the following troubleshooting steps:

  • Force restart your PC
  • Remove all peripheral devices
  • Check your video connection
  • Wake up display

If these do not work, explore the fixes below:

1. Reinstall/update the video driver

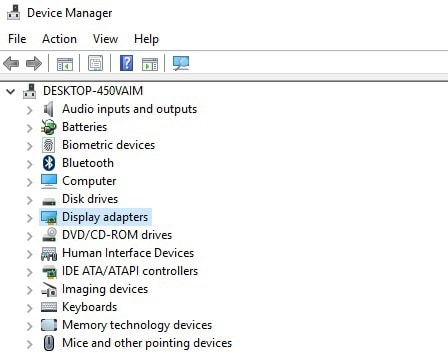
  1. Press the Windows key + X and select Device Manager.
  2. Double-click the Display adapters option to expand it.device manager drivers
  3. Now, right-click your display device and select Update driver.
  4. Click Search automatically for drivers and install any available updates. your video driver and choose to update it.
  5. Finally, if that isn’t fixing the problem, return to Device Manager and, remove the driver, then reinstall it manually.

The no boot screen issue in Windows 10 might happen if your video driver is outdated or if it must be reinstalled:

If your computer has two graphic processors (integrated and dedicated video graphics), you might experience a conflict between these two processors. Try switching the video connection to the integrated graphics, as it could be a problem with the discrete card.

2. Turn off fast startup

  1. Press the Windows key + R, type control, and click OK.
  2. From Control Panel, click on System and Security.power options control panel
  3. Select Power options.
  4. From the left panel, pick Choose what the power button does.
  5. From the next window, click on the link that says Change settings that are currently unavailable.disable fast startup
  6. Uncheck the Turn on fast startup(recommended) feature.
  7. Save your changes and restart your Windows 10 system.

3. Disable high contrast feature

  1. Press the Windows + I hotkeys and click Ease of Access.settings windows 10
  2. From the left pane, click on High contrast.turn off high contrast windows 10
  3. Under Choose them dropdown select None.
  4. Restart your computer when that’s done.

4. Create a new Microsoft account

  1. Press the Windows + I hotkeys and select Accounts.account settings windows 10
  2. Scroll down and click on Add a Microsoft account.
  3. Follow on-screen prompts in order to create a new account.
  4. Make sure you ensure administrator rights.
  5. Restart your Windows 10 system through the newly created account.

5. Repair in Advanced startup

  1. Insert your Windows 10 installation CD.
  2. Start your PC and when the blue screen appears, press and hold the Power key.
  3. Repeat this process three times.
  4. The Advanced Options menu should be displayed.
  5. From there, select Troubleshoot.
    troubleshoot
  6. Now, select Advanced options.
  7. Just follow the on-screen prompts for applying a system reset or a system repair.

If, after completing the guidelines from above, you are still experiencing the no boot screen malfunction, you can also try to repair/restore your Windows 10 system. You can do it by using your Windows 10 installation CD.

If you can access your Windows 10 system, you can also run an SFC scan in an elevated Command Prompt.

Hopefully, the boot screen is now available on your PC. If the issue persists, try to describe your particular situation in detail using the comments field below or our contact form.

Other users reported that their PC is stuck on boot screen, but we tackled that in a separate guide. If you would like to customize your boot screen, we have a whole article on how to change the boot logo on Windows 11, so don’t miss it.

Based on the info you provide us with, we can try to find the right troubleshooting solution. Also, stay close for further Windows 10 tips and tricks.

Fix: Screen Resolution Changed after Nvidia Driver Update on PC

Screen resolution changed by itself on your computer? Updating drivers is an essential action in all Windows operating systems.

But some users of NVidia graphics cards reported that after they updated the video driver, screen resolution changed and they were unable to bring it back to normal.

This error could occur in both Windows 8 and Windows 10 operating systems. But we expect it to appear more to Windows 10 users because Windows 10 gets more updates, and new improvements and compatibility fixes are being released every day.

So there’s a big possibility that your NVidia driver is just not compatible with Windows 10, just like a lot of other drivers or software.

The incompatibility of the driver with the operating system could cause a lot of problems, and messed-up screen resolution is just one of them.

How to fix screen resolution changes after Nvidia driver update

If your screen resolution changed, after the Nvidia driver update, you can try one of the solutions below, that most likely will solve your issue:

  1. Roll back your graphics driver
  2. Update Windows
  3. Disable your screen saver
  4. Manually change resolution

1. Roll back your graphics driver

So, to bring your screen resolution back to normal, or solve whichever graphical problem you have, you’ll have to roll back your driver to the version that worked well for you. To roll back your driver to the previous version, follow these steps:

  1. Right-click on This PC and go to Properties
  2. From the left pane select Device Managerroll back display driver
  3. Under Display Adapters, find your NVidia driver, right-click on it and go to Properties
  4. Beneath Driver tab, go to Roll back driver
  5. Restart your computer

This solution could be applied to both Windows 10 and Windows 10/8.1 operating systems, and it should solve your problems with screen resolution. On the other hand, if you’re unable to roll back your driver, go to NVidia website, find the working version of the driver, download it and install it manually.

In order to properly manage your drivers and uninstall or roll back to previous versions, you certainly need secure driver management tools. You’re in luck because the perfect job for this is Fortect Driver Updater.

2. Update Windows

All the drivers running on your computer depend on Windows 10 to work properly.

In other words, running outdated Windows versions may trigger various issues, including driver incompatibility problems and driver errors.

To avoid that, install the latest Windows 10 updates on your computer. Here’s how to do that:

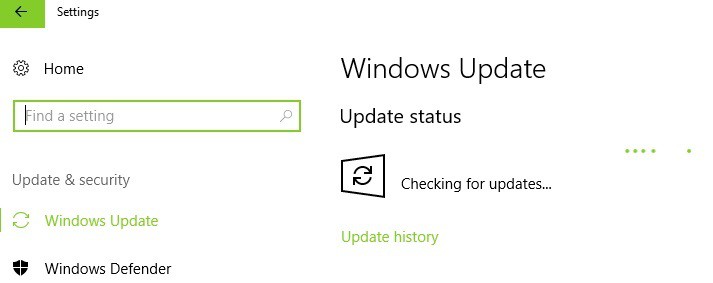
  1. To access the Windows Update section, type “update” in the search box. This method works on all Windows versions.
  2. Then go to Windows Update, check for updates and install the available updates.
screen resolution changes after update

3. Disable your screen saver

Some users said that disabling the screen saver helped them fix the problem. So, go to Settings > Lock Screen >scroll down to Screen Saver settings > disable the screen saver.

4. Manually change resolution

If none of the solutions listed above worked, you only have one option left: manually adjust your display resolution.

  1. Right-click on desktop > select Display Settings
  2. Go to Resolution and use the drop down menu to select the right resolution for you.
screen resolution changes after update

Applying one of these solutions will probably solve your resolution issue without that much effort. However, if you find any other useful information or method, make sure to let us know in the comment section below!

Gray Screen of Death: How to Properly Fix it

Some might have heard of the Blue Screen of Death, but what about the Gray Screen of Death? While BSOD causes are well-known and can appear due to hardware, this is a software issue.

If you’re getting a Gray Screen of Death, this guide will show you the best ways that you can use to fix it.

What causes the gray screen of death?

  • Outdated AMD drivers can often cause this problem, so be sure to update AMD drivers regularly.
  • Bugs with AMD drivers can sometimes cause this issue as well.

 How do I fix the grey screen of death in Windows?

1. Update the AMD driver

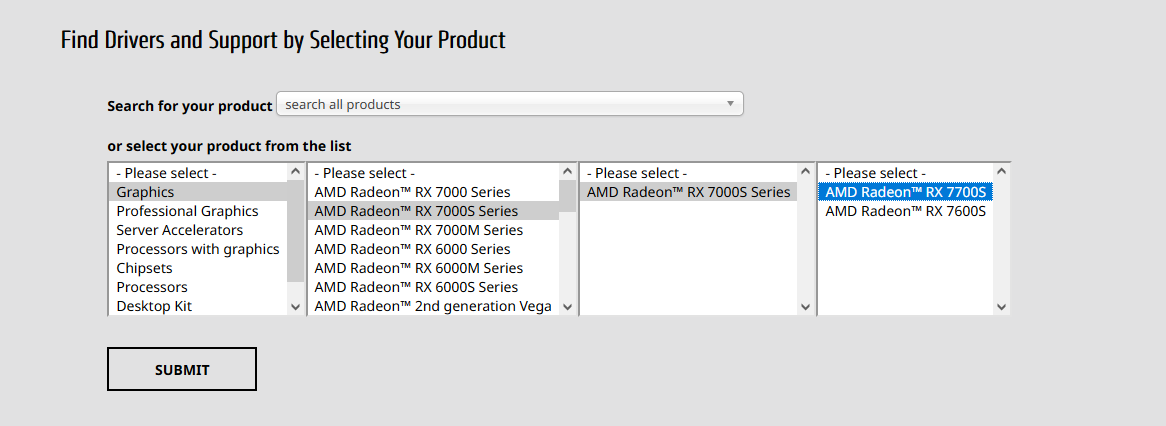
  1. Visit the AMD download page and select your graphics card on the list.
  2. Select your version of Windows and click the download button.
  3. Once the driver is downloaded, run the setup file to install it.

2. Fully uninstall the ATI graphics card driver and update it

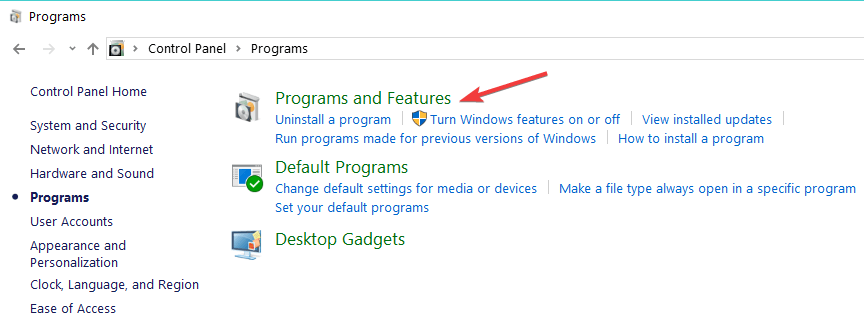
  1. First, open the Control Panel and click Programs and Features to open the window shown in the shot below.Programs and Features
  2. Select the AMD Catalyst Install Manager listed there and click the Change button.
  3. Click the Uninstall Manager option on the Catalyst Install Manager window, and select to remove ALL the AMD software components. You should be left with VGA drivers.

Some users are suggesting to use Display Driver Uninstaller, and you can do that by following these steps:

  1. Open the Display Driver Uninstaller software by right-clicking its icon and selecting Run as administrator.
  2. Select AMD from the Selected graphics driver drop-down menu to clean any ATI fragments found.
  3. Follow the instructions on the screen to complete the process.

After that, you need to follow the steps from the previous solution to download and install the latest version of AMD drivers.

In case you encounter AMD driver installation problems, we have a dedicated guide that can help you with that.

3. Run the Hardware and Devices troubleshooter

  1. Open the Settings app.
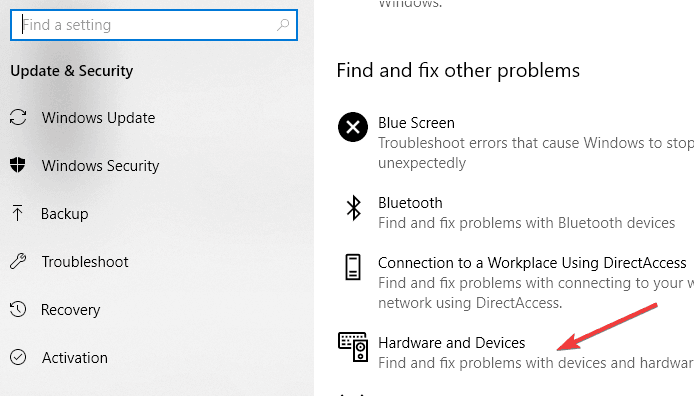
  2. Navigate to the Update & Security section and select Troubleshoot in the left pane.
  3. Now run Hardware and Devices troubleshooter
troubleshoot hardware and devices

After running the troubleshooter, don’t forget to restart your computer.

As you can see, this issue can be easily fixed, and it’s not as serious as a Blue Screen of Death.

Since this is an AMD driver issue, you might want to check our guide on how to roll back AMD drivers on your PC.

We hope you fix the gray screen of death using the solution listed above. If you come across other troubleshooting methods, feel free to list the steps to follow in the comments below.

Outlook.com was hacked, and it’s worse than expected as hackers also had access to some email content

Microsoft’s Outlook.com service has been the subject of a pretty serious hack in recent weeks. Microsoft first confirmed to Techcrunch that its email service has been compromised for months, with hackers being able to access subject lines of emails and names of people within conversations in select Outlook.com accounts.

However, following a new report from Vice’s Motherboard website revealing that hackers were actually able to read the content of emails, Microsoft has been forced to change its stance.

Microsoft confirmed to Motherboard that it sent breach notification emails to Outlook.com users who had their emails read by hackers, and the company added that this was just 6% of users affected by the hack. “We addressed this scheme, which affected a limited subset of consumer accounts, by disabling the compromised credentials and blocking the perpetrators’ access,” a Microsoft spokesperson told Motherboard in a statement.

The hack is apparently the consequence of hackers gaining access to customer support account for Outlook.com, a tool that does give support agents full access to Outlook.com emails. “Microsoft, like many other tech giants, does have the ability to scan or read user’s messages. In 2014, Microsoft looked into the email account of a French blogger to identify a Windows 8 leaker,” highlighted the Motherboard report.

According to Motherboard’s source, hackers had access to this compromised support tool for at least six months, until Microsoft spotted the hack at the end of March. The Redmond giant disputes this claim, saying that the breach took place from 1st January 2019 to 28th March 2019. Anyway, this isn’t a good look for Microsoft and the email service considered as one of the best alternatives to Google’s Gmail.

Got a Windows 10/11 Apple iPhone driver error? Fix it now

iPhone is a great device, but many users reported Apple iPhone driver error on their PC. This can be a big problem, especially if you want to transfer files from your phone, so today we’ll try to fix this issue once and for all.

What to do if iPhone is not showing up on Windows 10 computer?

  1. Update iPhone driver
  2. Update Windows 10
  3. Force install device driver
  4. Check if Apple Mobile Device USB driver is installed
  5. Restart Apple Mobile Device USB driver
  6. Uninstall and download iTunes from Apple website

1. Update iPhone driver

This is the first thing you should do if you get an Apple iPhone driver error. An outdated driver may create conflict with your device, so be sure to update it by following these steps:

  1. Disconnect your iPhone from the PC.
  2. Make sure the iPhone is unlocked and reconnected it to PC. Use the official Apple USB cable. Close iTunes if it starts automatically.
  3. To update the driver, type Device Manager in the Cortana/search bar and open it from the search results. Or right-click on Start and select Device Manager.
  4. In the Device Manager, look for the Portable Devices section. Expand it, right-click on your iPhone model and select Update Driver.
  5. Select Search automatically for updated driver software. Windows will search for any available updates and install it automatically.
    search automatically Apple iPhone driver error
  6. Restart the PC. Now try to connect your iPhone and see if the error is resolved and detected by the iTunes.

Additionally, you can resolve this issue by automatically updating your iPhone driver using reliable driver update software for your Windows 10 PC.

2. Update Windows 10

If you’re still having issues with the Apple iPhone driver error, you can try updating the Windows 10 OS. Microsoft releases new improvements and bug fixes for third-party software bundled with the Windows update.

  1. To update Windows, go to click Start and open Settings.
    Windows Update Apple iPhone driver issues
  2. Click on Update and Security option.

If there is a new update, click on Download update. If the updates are already downloaded and pending install, click on the Install now button.

You may need to restart the PC after the update to apply the changes.

3. Force Install Device Driver

If you are facing an Apple iPhone driver error, you can fix it by installing the required drivers on your PC:

  1. Disconnect your iPhone from PC.
  2. Make sure the iPhone is unlocked and connect it to PC.
  3. Press Windows Key + R on your keyboard, copy and paste the following directory path and hit Enter / OK.
    • %ProgramFiles%Common FilesAppleMobile Device SupportDrivers
  4. From the Drive folder, go to View tab, and check the file name extension option in the Show/Hide section. 
  5. Next, locate usbaapl64.inf or usbaapl.inf file. Right-click on the file and select Install.
    Install Apple Mobile Device Driver Manually Apple iPhone driver error
  6. Do the same for all the files with a .inf extension in that folder.
  7. Disconnect your iPhone and restart your computer. After the restart, reconnect and open iTunes.

4. Check If Apple Mobile Device USB driver is installed

If the Apple Mobile Device USB Driver is not installed you might encounter an Apple iPhone driver error. A quick fix for this problem is to check if the said driver is functioning properly.

  1. Right-click on Start and select Device Manager.
  2. From Device Manager, scroll down and expand Universal Serial Bus Controllers section.
  3. Look for Apple Mobile Device USB Driver.
    Apple Mobile Device Driver Apple iPhone driver error
  4. If you see the driver, right-click on it and select Disable Driver. Right-click again and select Enable Driver option.

5. Restart Apple Mobile Device USB driver

If you can see the Apple Mobile Device USB Driver but you’re still getting Apple iPhone driver error, try restarting the AMDSs. Here is how to do it.

  1. Make sure you disconnect iPhone if it is connected to the PC. Close iTunes if running.
  2. Press Windows Key + R. Type services.msc and hit/OK enter.
    Apple Mobile Device Driver Service Apple iPhone driver
  3. In the Services window, look for Apple Mobile Device Services. Right-click on the service and select Properties.
  4. Set the Startup type to Automatic.
  5. Click the Stop button to stop the service.
    Apple Mobile Device USB Driver Service stop Apple iPhone driver error
  6. Click the Start button to restart the service and click OK to save changes.
  7. Restart your computer and launch iTunes to check for any improvements.

6. Uninstall and download iTunes from Apple website

One way to fix the Apple iPhone driver error is to download iTunes from the official Apple website.

  1. First, uninstall iTunes app from the Settings > Apps.
  2. Go to iTunes download page.
  3. Scroll down and click on Windows under Looking for other versions section and download the version that matches your system architecture.

Check if the problem is still there.

We have listed all the possible solutions for Apple iPhone driver error, so be sure to try them all.

Do you want to view in fullscreen: How to disable the pop-up

Most of the web browser apps are coming with dedicated security features to protect your Windows 10 system and personal files. Among these security add-ons, we can also discuss about the full-screen permission pop-up that can turn out to be quite annoying sometimes.

If you want to learn how to disable the ‘Do you want to view in full-screen?’ pop-up, check the guidelines below. We will list the steps to follow to disable the alert on the most important web browser clients that are currently used by the Windows 10 users.

Quick Tip:

Pop-ups can sometimes affect your online experience and they are hard to remove. Using a customizable browser with built-in privacy features like ad blockers can solve this issue.

Opera One not only comes with it’s own VPN and Ad blocker, but it also features a built-in AI and modular AI-ready design.

Opera One

Enjoy a seamless online experience with no pop-ups or interruptions with this versatile browser!
Free Download Visit website

How to turn off full-screen permissions on Windows 10

  1. Disable full-screen alert on Google Chrome
  2. Disable full-screen alert on Mozilla Firefox
  3. Disable full-screen alert on Microsoft Edge

1. Disable full-screen alert on Google Chrome

Each time you grant full-screen video access the actual website will be added into an exception list. This exception list can be accessed within Settings – > Advanced – > Privacy – > Content Settings – > Flash.

chrome flash permission settings

From that path you can see all the exceptions that were recently added. For turning off the full-screen permissions you just have to select one entry and change its hostname value into *://*/*.

2. Disable full-screen alert on Mozilla Firefox

Open the Firefox web browser and in the web address bar enter about:config. Agree with the alert and then in the search field enter dom.disable_beforeunload. Select this entry and change its value to true.

set full-screen-api.approval-required firefox

Then, in the Firefox web address bar enter about:permissions and find the full-screen-api.approval-required entry; set its value to false.

3. Disable full-screen alert on Microsoft Edge

Open Microsoft Edge and click on the Hub icon. From there switch to History tab. Select Clear History and uncheck the ‘Full screen permissions’ field. That should allow you to navigate towards websites without having to recheck the ‘do you want to view in fullscreen’ pop-up.

manage website permissions microsoft edge

Now you should know how to disable the ‘do you want to view in full-screen’ pop-up from your favorite web browser software. Do remember that the full-screen permission feature was installed for a certain reason: keeping you safe from possible malware attacks. As a quick reminder, ransomware attacks increased by two fold this year and hackers are actively seeking new ways to infect your PC.

Therefore, we recommend you to keep this setting available all the time. Turn it off only if you have Firewall protection enabled and an additional security program set. Yes, we’re talking about an antivirus program that offers web browsing advanced security features. For more information on the best antivirus software for browsing, check out this list.

More tips to keep your PC safe from malware attacks:

How to Fix Common Halo Wars 2 Install Errors

Halo Wars 2 is a real-time strategy game that allows players to lead Spartans, Warthogs, and other classic Halo fighting forces in a brutal and terrifying war. A new enemy has appeared on the biggest Halo battlefield ever, and your main task is to stop it.

But before you engage in fierce battles against your enemies, you may need to battle various technical issues first. Players report that various Halo Wars 2 bugs sometimes affect the game, limiting their gaming experience.

In this article, we’re going to focus on a series of error messages that may appear on the screen and how to fix them.

How can I fix the common Halo Wars 2 errors?

1. License Unverified error

This error indicates that you may have created a new Microsoft account to redeem the game code. If this is the case, here’s what to do:

  1. Complete your installation of Halo Wars 2.
  2. Restart your Windows 10 computer.
  3. Go to the Microsoft Store and sign in using the Microsoft account you used to redeem your code.
  4. Go to My Library and confirm that you added Halo Wars 2 to your list of games.
  5.  If Halo Wars 2 is available in your Library, you should be able to launch it. If Halo Wars 2 is not available in your game list, make sure you’ve used the right Microsoft Account to sign into the Microsoft Store.
  6. If you’re using the correct account, yet Halo Wars 2 is not visible in your library, contact Haloway support.

2. Install failed error

  1. Restart your Windows 10 computer.
  2. Disable all non-essential apps and programs.
  3. Restart the game‘s installation process.

This error usually occurs when other apps run in the background during the game install process. To get rid of this error, follow the above steps.

3. Target drive error

  • Make sure that your installation disc has no scratches or defects.
  • Check the target drive to make sure that there is no issue with the drive itself or writing data to that drive.
  • Restart your Windows 10 computer and launch the installation process again.

This error message informs you that there is a problem with your install disc or with the target drive that you are trying to install the game to.

4. Install error 0x80070005

  1. Launch the Store troubleshooter.
  2. Make sure you’ve installed the latest Windows updates.
  3. Clear Store cache.
  4. Run a full virus Scan.
  5. Disable your firewall and try to install the game again.
  6. Run an SFC scan.

This error occurs mainly on the Windows Store. If you’re experiencing error 0x80070005, follow the steps listed above.

5. Install error 0x80073cf9

For more information about this installation error 0x80073cf9, check our detailed guide.

That is about it for the common Halo Wars 2 error. You should now be able to fix most of them by applying the fixes in this guide.

If you’ve encountered other Halo Wars 2 error messages and found a workaround to fix them, use the comment section below to tell us more about your experience.

Posted in PC

Windows 10 news recap: Sling TV adds support for Microsoft Edge, Chromium-based Microsoft Edge now available for testing, and more

Welcome back to our Windows 10 news recap, where we go over the top stories of the past week in the world of Microsoft’s flagship operating system.

ARM64 version of Firefox browser begins beta testing

Mozilla has begun testing of its Firefox web browser on ARM64 devices. It is available for users running Windows 10 PCs with Snapdragon processors.

Mozilla Firefox browser on Windows 10

Sling TV adds support for the Microsoft Edge web browser

Microsoft Edge users can now use Sling TV to play media, making it easier to watch content and not have to switch to a different browser, or in some cases, an app.

Woman reading email on a Surface on bed

Microsoft makes Edge Chromium Insider preview available for download, get Dev or Canary channel builds now!

Microsoft’s new Chromium-based Microsoft Edge is now available for users to test on Windows 10. Through a new website, users can download a copy of Microsoft’s new web browser to give it a whirl and see how it works for them.

Chromium-based Microsoft Edge now lets you switch search engines on the Canary channel

Following the launch of Microsoft’s new Edge browser for testing, the company has already released an update to the Canary channel. This update allows users to change their search engine from Bing to either Google, DuckDuckGo or Yahoo.

That’s it for this week – we’ll be back next week with more Windows 10 news!

Microsoft’s Outlook.com has been compromised for months, email addresses and subject lines, and more were left exposed

If you or someone you contact via e-mail uses Microsoft’s webmail services, such as Outlook.com, then it is possible that you have been involved in a data breach.

Microsoft confirmed to TechCrunch this week that the firm’s webmail services have been a victim of a data breach. Data on customers was left exposed through a support agent’s credentials which were compromised, which cybercriminals used to access the data.

Of the data affected, Microsoft noted that the following information was left exposed:

  • Email addresses
  • Subject lines of emails
  • Names of people within conversations
  • Custom folder names

Microsoft noted that it doesn’t know which data has been viewed, or the reasons why, but that users may experience increasing phishing or spam emails as a result of the breach, therefore, it advises users to be more vigilant when checking their emails.

The breach took place over a long period of time, from 1st January 2019 to 28th March 2019. It isn’t clear how many people have been affected, but it says it was a “limited” number of people. The company did confirm that enterprise users have not been affected.

Microsoft has disabled the compromised account of the support agent to prevent more data being accessed.

In an email letter sent out to affected users, Microsoft said:

Dear Customer

Microsoft is committed to providing our customers with transparency. As part of maintaining this trust and commitment to you, we are informing you of a recent event that affected your Microsoft-managed email account.

We have identified that a Microsoft support agent’s credentials were compromised, enabling individuals outside Microsoft to access information within your Microsoft email account. This unauthorized access could have allowed unauthorized parties to access and/or view information related to your email account (such as your e-mail address, folder names, the subject lines of e-mails, and the names of other e-mail addresses you communicate with), but not the content of any e-mails or attachments, between January 1st 2019 and March 28th 2019.

Upon awareness of this issue, Microsoft immediately disabled the compromised credentials, prohibiting their use for any further unauthorized access. Our data indicates that account-related information (but not the content of any e-mails) could have been viewed, but Microsoft has no indication why that information was viewed or how it may have been used. As a result, you may receive phishing emails or other spam mails. You should be careful when receiving any e-mails from any misleading domain name, any e-mail that requests personal information or payment, or any unsolicited request from an untrusted source (you can read more about phishing attacks at https://docs.microsoft.com/en-us/windows/security/threat-protection/intelligence/phishing).

It is important to note that your email login credentials were not directly impacted by this incident. However, out of caution, you should reset your password for your account.

If you require further assistance, or have any additional questions or concerns, please feel free to reach out to our Incident Response Team at [email protected]. If you are a citizen of European Union, you may also contact Microsoft’s Data Protection Officer at:

EU Data Protection Officer
Microsoft Ireland Operations Ltd
One Microsoft Place,
South County Business Park,
Leopardstown, Dublin 18, Ireland
[email protected]

Microsoft regrets any inconvenience caused by this issue. Please be assured that Microsoft takes data protection very seriously and has engaged its internal security and privacy teams in the investigation and resolution of the issue, as well as additional hardening of systems and processes to prevent such recurrence.

It is advised to check both your inbox and spam email folders for an email from Microsoft. Some reports suggest Microsoft’s email, ironically, is ending up in spam folders for some users.

Here’s how to fix error 0xa00f4245 on Windows 10/11

We’ve all used a webcam on various occasions, but let’s say you stumble upon an error, more precisely error 0xa00f4245, on your Windows 10 machine. What now?

This Windows 10 webcam issue is mostly caused by improperly configured system files. This usually occurs when the computer’s registry system is overloaded with too much data, or when certain system files become missing or corrupted.

There are many instances when the privacy settings are blocking the camera access. But worry not, we have some solutions for you.

What to do if you can’t start your camera on Windows 10?

  1. Fix privacy issues
  2. Reinstall your webcam
  3. Reinstall chipset drivers
  4. Perform Automatic Repair
  5. Perform a reset

1. Fix privacy issues

Windows 10 allows users to allow or deny access to any connected devices, in this case, your webcam. In order to fix error 0xa00f4245 you’re going to allow access to your webcam, so please follow these steps:

  1. Open your Start Menu.
  2. Click on Settings.
  3. Type webcam into the search box located in the top-right corner of the window, and press Enter.
  4. Find and click on the Webcam privacy settings in the search results at hand.
  5. Find Allow apps to access your camera option and make sure that it is enabled.
    error 0xa00f4245 allow apps to access your camera
  6. You now have access to the camera.

Also, be sure to check if your antivirus or Windows Firewall is blocking access to the webcam.

2. Reinstall your webcam

In some instances, error 0xa00f4245 can appear due to corrupted webcam driver. However, you can fix that by reinstalling it.

device manager error 0xa00f4245

  1. Right-click on your Computer.
  2. Click on Properties and select Device Manager.
  3. In Device Manager, select your webcam, and then select Properties.
  4. Select the Driver tab, select Uninstall, and then select Delete the driver software for this device, and then select OK.

If your camera isn’t found in Device Manager, and this issue persists. Try using the camera with a different USB port on your device.

After you’re done with this solution, simply head on over to your webcam’s manufacturer website and download the latest drivers. Alternatively, you can use third-party tools to automatically update all your drivers with just a couple of clicks.

It works with all versions of Windows and makes updating drivers a breeze. Fortect Driver Updater may be set to find outdated drivers automatically.

However, a tool like Fortect Driver Updater not only downloads and installs drivers, but also manages them by troubleshooting, backing up, and restoring them.

With a few clicks, the software will scan your PC’s hardware and peripherals for potential driver upgrades. Use one to save yourself some precious time.

⇒ Get Fortect Driver Updater

3. Reinstall chipset drivers

Sometimes, the root of your problem isn’t the webcam not having permissions on your machine. You might be facing non-compatible chipset drivers for your motherboard. Head on over to the website of your motherboard manufacturer and search for Windows 10 chipset drivers compatible with your machine.

After you install them, check if the issue is still there.

4. Perform Automatic Repair

Maybe the previous solutions fixed error 0xa00f4245, but if you’ve gotten to this point, you might consider running an Automatic Repair on your system. To do this, follow these steps:

  1. Open the Settings panel.
  2. Go to Update & Security.
  3. In the Recovery section, click on Advanced Startup and select Restart now.
    advanced startup webcam error 0xa00f4245
  4. At the Choose an option screen, click on Troubleshoot.
  5. At the Advanced Options screen, click on Automated Repair.
  6. Choose an account and log in, when asked to do so.
  7. Automatic Repair will start and your computer may reboot during the process.
  8. You’re good to go.

5. Perform a reset

This solution should only be used as a last resort because it will erase all your stored data. So performing backups for essential files is strongly recommended.

  1. Firstly, head to the Settings panel.
  2. Go to Update and Security.
  3. Click on Recovery.
  4. Click on Get Started.
    reset this PC error 0xa00f4245
  5. At the Reset This PC section, click Get started.
  6. Click on Remove Everything.
  7. Follow the instructions to finish this procedure.

We hope these solutions we’re helpful in solving error 0xa00f4245. In the meantime, let us know in the comment section down below what issues have you faced while using a webcam on Windows 10.

How to fix error 49.4c02 on your HP printer

If you’re working from home or at the office, and encounter the 49.4c02 HP error code on your printer, we have some solutions on how to fix it.

Nothing can be more frustrating than when you’re just about done with your work on your computer, then you send it for printing and it won’t work.

When your printer displays the HP error code 49.4c02, it’s usually caused by a print job. Here are some steps you can take to fix the issue.

How can I solve HP printer error 49.4c02?

  1. Delete any jobs in the print queue
  2. Print a test page
  3. Disable Advance Printing Features
  4. Check whether you’re using the Franklin Gothic Book font
  5. Flash and update the firmware
  6. Contact your printer’s manufacturer

1. Delete any jobs in the print queue

You can do this by opening your printer device, usually, a little printer icon is found on the bottom right-hand corner of your computer. Right-click to open the print queue. Once the list opens up, delete all jobs.

2. Print a test page

Power off the printer, then disconnect the cable that plugs to your computer and power it back on. If your HP printer switches to a ready state when the cable is disconnected, print a test page.

If the test page prints, then the cause of the error is most likely one of the print jobs on the print queue.

If these steps don’t fix the chop, here are some solutions to help you fix the HP error code 49.4c02.

3. Disable Advance Printing Features

To execute this, follow these steps:

  1. Go to Windows Logo printers
  2. Choose the printer queue
  3. Left click and choose Printing preference
  4. Choose Advance option
  5. Under Document option, choose Advance Printing Features
  6. Change it to Disabled

Try printing again using a test page. If this doesn’t help, try the next solution.

4. Check whether you’re using the Franklin Gothic Book font

Sometimes the HP error code 49.4c02 can be as a result of printing a document with the Franklin Gothic Book font, especially on the HP MFP Series, causing it to display the error.

In this case, do the following:

  • For PCL 5e and PCL6 drivers, enable the ‘Send True Type as Bitmaps’ setting under the Advanced tab of either of the two drivers. This will allow the document to print without the HP error code 49.4c02.
  • For PS driver, set the True Type Font Download option to Bitmap. This allows the document to print without the HP error code 49.4c02. Go to the Advanced tab under PostScript Options to do this.

You can also install the font on the printer’s hard drive using the Web JetAdmin plugin known as Device Storage Manager. This allows the font or document to print without using the Bitmap settings as mentioned in the above two drivers.

5. Flash and update the firmware

Follow the steps below to flash your printer’s firmware when connected to your computer with a parallel cable:

  • Turn on your printer
  • Check whether Ready is displayed on the LCD
  • Print a test page
  • Check the firmware revision of your printer then do the following:
  1. Press Select button
  2. Press Down button to highlight Information menu
  3. Press Select
  4. Press Down to display Print Configuration on the LCD
  5. Press Select to print the test page

The firmware date and revision will be listed on the test page under Printer Information.

  1. Click Start
  2. Select Run
  3. In the Open box, type CMD or COMMAND
  4. Click Ok
  5. Go to the directory where the firmware is saved, for example, C:FIRMWARE, then type the path on the command window
  6. Press Enter
  7. Type copy /B *.RFU LPT1 on the command window prompt
  8. Press Enter to copy the firmware file to your printer and upgrade the firmware
  9. If successful, the LCD should display Receiving Upgrade

Note: there should be no interruptions during the upgrade process as this may damage the printer severely.

  1. Once the upgrade is complete, the LCD will display Ready.
  2. Turn off the printer then wait 15 seconds before turning it on again.
  3. Print a test page and check that the firmware revision is listed under Printer Information on the test page.

In case you encounter problems when upgrading your printer’s firmware, take the following steps for an emergency firmware update:

  1. Turn off the printer
  2. Hold down the Cancel button and turn on the printer. During this process, the memory will count up, and the Ready and Attention LEDs will remain on
  3. Release Cancel button
  4. Press and release Select button
  5. Press and release Resume You will see the message Load File and Execute on the LCD display
  6. Press and release UP Do this until the Program File to Slot 4 Flash displays on the LCD
  7. Press and release Select button
  8. Press and release Select button twice until Download File Now shows on the LCD
  9. Right-click Start on your computer
  10. Select Run
  11. In the Open box, type CMD or COMMAND
  12. Go to the directory where the firmware is saved, for example, C:FIRMWARE, then type the path on the command window
  13. Press Enter
  14. Type copy /B *.RFU LPT1 on the command window prompt
  15. Press Enter to copy the firmware file to your printer, and upgrade the firmware
  16. If successful, the LCD should display Receiving Upgrade

Note: there should be no interruptions during the upgrade process as this may damage the printer severely.

  1. Once the upgrade is complete, the LCD will display Ready.
  2. Turn off the printer then wait 15 seconds before turning it on again.
  3. Print a test page and check that the firmware revision is listed under Printer Information on the test page.

6. Contact your printer’s manufacturer

As a final resort, you can contact your printer’s manufacturer (in this case HP Support) to find out more about how to resolve the issue.

Let us know in the comments section whether these steps and solutions worked for you.

[wl_navigator]

How to fix frequent Risk of Rain 2 bugs on PC

Here we have it folks, the sequel to Risk of Rain, brought to us by Hopoo Games. If you’re familiar with the previous installment and its 2D rogue-like platforming, you’re gonna love Risk of Rain 2, with its new 3D enviroments and uncompromising  action.

You can now face off alien planets with up to four players in co-op mode. Loot hunting is back, and better than before, scavenge for that special item that either boosts your Offensive or Defensive capabilities.

Or if you’re inclined, gather credits and hunt for the upgrade station that’s scattered across the map.

But enough about the key aspects of the game, let’s talk about the bugs and issues that the game faces at the moment.

While still being in early access, many players have reported instances of bugs on numerous Steam threads.

Common Risk of Rain 2 bugs

  1. Game not launching
  2. Camera always points down
  3. Framerate issues
  4. Game stuck at first screen
  5. Save files disappearing
  6. Black screen with sound
  7. Multiplayer issues

1. Game not launching

Early access games are bound to have some hiccups, in this case players reporting that the game won’t launch in the first place.

The game won’t launch – crashes on startup!

2. Camera always points down

Strange things might happen to games in early access, in this case camera problems being reported. With the camera going to weird angles, or downright causing input latency for users.

The camera is always pointing down, or I’m getting weird input latency!

3. Framerate issues

Nobody likes it when a game starts to stutter uncontrollably, but Risk of Rain seems to be plagued by this issue at the moment, with many reporting this problem occurring during longer playthroughs.

Currently when I get to around 50-60 minutes, my framerate starts to tank in the large fights that occur. None of the settings really effect it at all and I’m 100% sure it’s not my hardware.

4. Game stuck at first screen

Some have been stuck at the main menu screen, with the Early Access disclaimer stuck on the screen, and no further progression is available from that point onward.

I can’t get past the first screen, and it says EARLY_ACCESS_DISCLAIMER.

5. Save files disappearing

Some users have reported the game not being able to save their progress. With most having to restart the game, to similar results.

i played ror2 and i have unlock a lot of things but every time i play on an other desktop i lose all my data and saves

6. Black screen with sound

There are some cases in which the sound works just fine, but the screen fades to black, and some have been waiting on that loading screen for ages.

On startup of the game I encounter a black screen that stays loading for a long time(I waited about 30 minutes to see if it would load).

7. Multiplayer issues

We all love to spend some in-game times with out friends. But Risk of Rain 2 doesn’t actually work that well on this aspect, with instances of the multiplayer not working at all or lagging to a crawl.

I have been having lag issues since release. The multiplayer is unplayable for me. It’s nothing but being in limbo for minutes at a time, being unable to interact or damage anything.

How do we fix these issues?

  1. Game launch
  2. Camera issues
  3. FPS fix
  4. Game stuck fix
  5. Save file fix
  6. Black screen issues
  7. Multiplayer fix

1. Fix Risk of Rain 2 launch issues
firewall Windows was unable to create

In order to do this, simply whitelist your game in your Windows Firewall, and add an exception rule to you game in your antivirus program.

2. Camera fix

Firstly, try unplugging and re-plugging your controller if you’re using one. Secondly you can access you Device Manager from the Start Menu, and try reinstalling your controller.

3. Fix Risk of Rain 2 FPS issues

  1. Open your Nvidia Control Panel;
  2. Select Manage 3D Settings and select Risk of Rain 2 from the Program Settings and set the Power Management to Prefer Maximum Power;
  3. Save your changes and exit.

4. What to do if Risk of Rain 2 got stuck

In order to work past the early access disclaimer screen, please check that your Window System Timezone is not Invalid in the Clock section.

5. Fix game file save bugs
properties steam play nothing happens steam

  1. Open up the Steam window;
  2. Click Library to open the game collection;
  3. Then right-click on Risk of Rain 2 and select Properties;
  4. Press the Verify integrity of game files button.

6. Fix Risk of Rain 2 black screen
Task manager Process tab

Press Ctrl+Shift+Esc to bring up your Task Manager, locate RoR2.exe and select it and click End Task. Now restart your game.

7. Fix Risk of Rain 2 multiplayer issues

Firstly you can repeat the steps shown in the save file fix. Also, try running the game on Administrator rights, and add an exception rule in your antivirus for the game.

We hope that these fixes were of use to you. In the meantime, let us know on what you think about the game so far, in the comment section down below.

RELATED STORIES TO CHECK OUT:

Posted in Fix

Destiny 2 Failed to Download Configuration Files [Fix]

Destiny 2 is one of the most played online-only multiplayer first-person shooter games, gaining even more celebrity with the latest release.

We all want to play our favorite games with the best graphical quality possible and without any interruptions in the form of errors and other issues. One of the most common issues when trying to play Destiny 2 on your Windows 10 PC is the error Destiny 2 failed to download configuration files.

If the error we mentioned above is known to you, then you came to the right place for the fix. In this article, we will explore some of the best strategies that can be used to fix this error and get back to playing Destiny 2.

How to fix Destiny 2 failed to download configuration files error?

1. Repair the game using the Blizzard app

One way to fix Destiny 2 failed to download configuration files error is to repair the game. To do that, follow these steps:

  1. Open your Blizzard app like you normally would.
  2. In the Games tab, navigate to Options, and choose Scan and Repair from the drop-down menu.scan and repair Destiny 2 failed to download config files
  3. This method should fix all the corrupted or missing files from your game installation.

2. Uninstall and re-install the game

Several users claim that reinstalling the game fixed the Destiny 2 failed to download configuration files error. To do that, follow these steps:

  1. First, open up Blizzard app, and navigate to Games tab.
  2. Search for the Destiny 2 game in the list of installed games, and uninstall it.
  3. Re-install the game as you did the first time.
  4. If the problem still persists, try Solution 1 again with a fresh install.

3. Try getting help from the official Blizzard team

contact support failed to download configuration files
  1. Try opening up Destiny 2, and note the error code mentioned underneath the error message.
  2. Go to this link.
  3. Search for the specific error code your Destiny 2 produces (Ex. error code: termite, weasel, etc.)

In this article, we explored some of the best ways to deal with the Destiny 2 Failed to download configuration files error.

The team at WindowsReport searched far and wide for the best methods to deal with this issue, and the first option we presented in this list has shown great results for other users.

If you’re stuck on Destiny 2 loading screen, we also have a dedicated guide that can help you fix that, so don’t miss it.

Please feel free to let us know if this guide helped with your problem, and also let us know if you found any other solution that worked by using the comment section below.

FIX: Service Host causes high CPU in v1709 of Windows 10/11

If you already installed the Fall Creators Update on your computer, you may have noticed that Service Host often triggers high CPU usage. This issue is quite frequent affecting thousands of users.

Usually, the culprits are these two processes: Service Host Local Service and Service Host Internet Connection Sharing.

service host high CPU windows 10

The reasons why your PC shows a high CPU usage are complex and range from update issues to corrupted files. Since this problem occurs shortly after you installed Windows 10 v1709 on your device, chances are that Windows Update got stuck when downloading an update.

How to fix Service Host high CPU usage

1. Run the System File Checker

The System File Checker can quickly detect and repair corrupted files that may have caused the issue.

Here’s how to run an SFC scan:

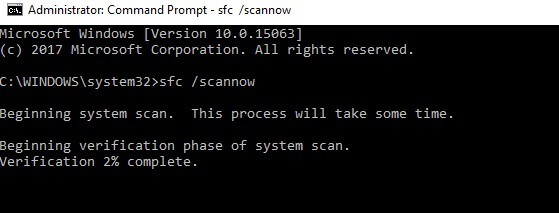
  1. Go to Start > type cmd > right-click Command Prompt > select Run as Administrator
  2. Now type the sfc /scannow command

sfc scannow cmd

3. Wait for the scanning process to complete and then restart your computer. All corrupted files will be replaced on reboot.

You can also use a dedicated tool, such as CCleaner, Advanced SystemCare, etc. Don’t forget to first backup your registry in case anything goes wrong.


2. Refresh DISM

If the first solution didn’t fix the proble, you can use Microsoft’s Deployment Image Servicing and Management tool.

  1. Launch Command Prompt as Admin
  2. Type the commands listed below and hit Enter after each one. Wait for the previous command to complete scanning and repair and only then insert the next one:
  • DISM.exe /Online /Cleanup-image /Restorehealth
  • DISM.exe /Online /Cleanup-Image /RestoreHealth /Source:C:RepairSourceWindows /LimitAccess
    sfc /scannow 

    Don’t forget to replace the “C:RepairSourceWindows” placeholder with the location of your repair source.

Check if the issue persists. If this is the case, go to the next solution.


3. Perform a network reset

Many users reported that sometimes the first two solutions only solve this issue temporarily. Fortunately, one resourceful Windows 10 user found a permanent fix and listed the troubleshooting steps on Microsoft’s forum:

  1. Go to Start > type ‘firewall’ launch the Windows 10 Firewall
  2. Click ‘Change notification settings’ > and toggled “Block all incoming connections including those in the list of allowed apps” back to default (not checked)windows firewall settings
  3. Run the following troubleshooters from Settings > Update & Security > Troubleshoot > Internet Connections/ Incoming connections
  4. windows 10 internet connections troubleshooterReset your network by going to Settings > Network and Internet > Network reset
  5. Remove network interfaces in Device Manager
  6. Restart your computer twice
  7. Put your network configuration settings back and check if Service Host is still causing high CPU usage.

There you go, we hope that the solutions listed above helped you fix Service Host high CPU usage.

4. Roll back to previous iteration of Windows 10

You can also, if necessary, roll back to previous version of Windows 10. Here’s how to do it:

  1. Press Windows key + I to open the Settings app.
  2. Choose Update & Security section.
  3. Select the Recovery from the left pane.
  4. Under the “Go back to the previous version of Windows 10” option, click Get started.Go back to the previous version of Windows 10
  5. Keep your files and start the resetting procedure.

Have in mind that this procedure will delete your applications, which might be a problem for some.

As always, if you found other workarounds to fix this problem, you can help the Windows community by listing the troubleshooting steps in the comments below.

RELATED STORIES TO CHECK OUT:

Accidentally Deleted Admin Account in Windows 10 [Fix]

If you accidentally deleted an admin account in Windows 10, whether you were in a rush or, perchance, something else contributed to this event, there are known ways to resolve the issue.

The problem is widespread and affects several users. It’s not just about losing data but also the administrative rights in Windows 10 that allow performing a range of advanced operations.

Fixing things after you accidentally deleted an administrator account in Windows 11 isn’t simple, but a few factors analyzed beforehand should help:

  • The number of administrator accounts on your computer.
  • How you deleted the administrator account (because it isn’t possible if you’re using a standard or guest account)?
  • Did you delete a local administrator or a Microsoft administrator account?

Now that you have a fair understanding of the situation, let’s find out what to do if an administrator account is deleted!

How do I recover a deleted admin account?

Here are a few solutions you could try:

  • Reinstall your computer’s previous operating system using the installation CD/DVD or a bootable USB, then upgrade to Windows 10 again.
  • In case you have created a restore point, performing a system restore will help recover the deleted administrator account.

If none work, move to the fixes listed next.

1. Create another Administrator account

  1. Click Start and select Settings.
  2. Go to Accounts.
  3. Click Family & other users.family & other users
  4. Click Add someone else to this PC.
  5. Type a username, password, and password hint.
  6. Click Next.
  7. Select the account and click on Change account type.
  8. Click the drop-down arrow and choose Administrator.
  9. Disable the previous administrator account.
  10. Restart your computer and log in to the new account you just created.

When you accidentally delete an administrator account in Windows 11, the best option is to create another one.

2. Change account type from the built-in administrator account

Tip icon Tip
If things don’t work out under normal settings, boot Windows into Safe Mode, and then enable the built-in administrator account.

2.1 Enable built-in administrator account

  1. Press Windows + R to open Run, type cmd, and hit Ctrl + Shift + Enter.
  2. Type the following command and hit Enter:net user administrator /active:yesadmin account
  3. The built-in administrator will be available to sign into
  4. Restart your computer

Go into administrator account and change the standard account to an administrator account using the steps below:

2.2 Change account type

  1. Click Start, type User account, and select the relevant search result.
  2. Select the local account, and click Change account type.
  3. Now, choose Administrator from the dropdown menu, and click OK to save the changes.change account type

2.3 Disable the administrator account

  1. Open Command Prompt with administrative privileges.
  2. Execute the following command: net user administrator /active: nodisable to fix accidentally deleted admin account windows 10
  3. Close the Command Prompt, and the built-in administrator account will be disabled.
  4. Restart your computer.

Your standard account is now your admin account, and the previous admin account is disabled. This way, you can continue using the PC with administrator privilege when you accidentally deleted the admin account in Windows 10.

Tip icon Tip
Reset Windows 10 to factory default and start from scratch if you can’t access the PC to make these changes. Though, this should be used as the last resort.

Before you leave, find out to repair a corrupt user profile to eliminate errors and improve performance. And for advanced troubleshooting, here’s how you can enable the hidden administrator account.

Any luck with these solutions? Let us know by leaving us a comment in the section below.

Something bad happened. Unknown layout specified in manifest [FIX]

During the past few days, users reported a new problem occurred while Windows Store was accessed. Apparently, without any particular reasons, the Windows Store app cannot be used anymore. When experiencing this issue you cannot download, update or install any apps. The alert that’s received says that ‘Something bad happened. Unknown layout specified in manifest’.

Microsoft officially announced that their tech team is already trying to find what’s causing this error message and how to fix it. Most likely, an update will be soon released in order to address this new Windows Store bugs.

But, until then, we will show you some troubleshooting solutions that may fix the ‘Something bad happened. Unknown layout specified in manifest’ Windows Store error.

How to fix Something bad happened. Unknown layout specified in manifest Windows Store error

  1. Reset the Store
  2. Initiate System File Checker
  3. Run Microsoft Safety Scanner
  4. Set Region and Language correctly
  5. Reset your PC 

Solution 1 — Reset the Windows Store app

Similar with other Windows Store malfunctions, this error can be caused by a system problem within the Store platform. So, you need to reset the app in order to get a fresh start. This process should fix the error along with other bugs or malfunctions that occurred on the Store. The reset can be applied by following:

  1. Press Win+I keyboard hotkeys for bringing up System Settings.windows 10 settings
  2. From there, click on Display.
  3. From the left panel select apps&features windows 10.
  4. Scroll and find the Store entry.
  5. Click on it and select Advanced options.
  6. Click on the Reset button from the next window.
  7. Restart your Windows 10 system in the end.

READ ALSO: Microsoft rebrands the Windows Store to Microsoft Store, reveals a new logo

Solution 2 — Initiate System File Checker

Another way in which you can fix the errors related with Windows Store is by running the Windows 10 default troubleshooter dubbed as System File Checker. This troubleshooting solution runs a system scan which will look for corrupted files and other similar Windows 10 issues. Afterwards, the troubleshooter will fix the problems automatically. And all you need to do is to apply these steps:

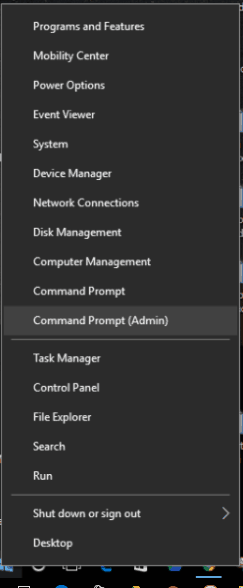
  1. On your computer open an elevated command prompt window: right-click on the Windows start icon and from the list that will be displayed pick ‘Command Prompt (Admin)’.elevated cmd
  2. Next, in the cmd window type sfc /scannow.
  3. Just wait while the scan is running – it might take a while depending on the amount of files which are stored on your device.
  4. In the end, restart your computer and try to use the Store.

For more information on the best tools that you can use to fix corrupted files, check out this article.

Solution 3 — Run Microsoft Safety Scanner

You can receive the ‘Something bad happened. Unknown layout specified in manifest’ error message if malware was somehow installed on your computer. So, you should initiate a security scan for making sure that your Windows 10 system is still protected.

By default, you can download the Microsoft Safety Scanner (you can get the software from this page) which can help you detect if there are inappropriate files installed on your PC. Additionally, you should also install a dedicated antivirus or antimalware program and perform a full scan for all the files that are currently stored on your device.

Solution 4 — Set Region and Language correctly

Apparently, if the region and language isn’t set correctly the Windows Store will not work properly and you can receive the ‘Something bad happened. Unknown layout specified in manifest’ alert message. So, verify these settings and make sure that everything is set how it should:

  1. Open System Settings by pressing the Win+I hotkeys.
  2. From there click on Time & Language.
  3. From the left panel of this window select Region & language.set region and language windows 10
  4. Now, from there you can set everything accordingly.
  5. Hint: you can try to change your current region to UK as this might fix the Windows Store problems according to some users who managed to do the very same thing.

As already pointed out, Microsoft knows about this new Windows Store problem which means that a possible system update might be developed as we speak.

5. Reset your PC

Finally, if you’re unable to fix the Windows Store with the steps we enlisted here and you’re in a dire need to use the Store, consider resetting your PC to factory settings an option. You can reset your Windows 10 PC by following these steps:

  1. Press Windows key + I to open the Settings app.
  2. Choose Update & Security section.
  3. Select the Recovery from the left pane.
  4. Under the “Reset this PC” option, click Get started.reset this pc

Don’t forget to share your own experience on the troubleshooting method that worked in your particular situation. Use the comment section below to contact us.

RELATED STORIES TO CHECK OUT:

More details about Xbox One S All Digital console leak ahead of public reveal

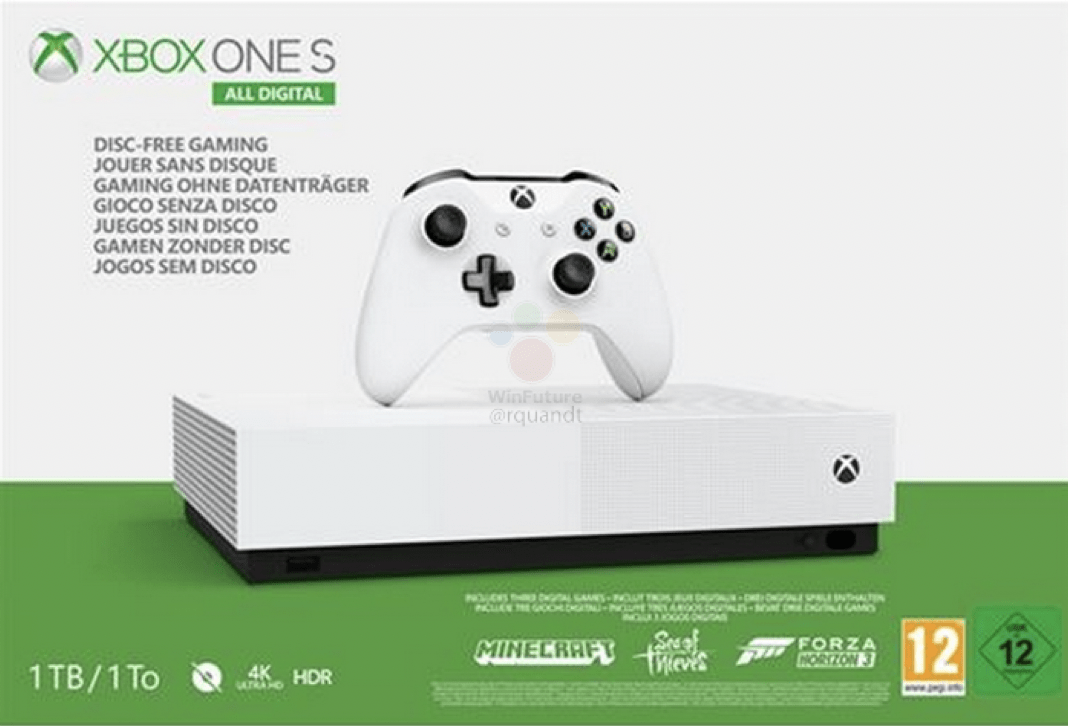
Microsoft is usually pretty good at keeping Xbox secrets, but we now have a good picture of what the upcoming Xbox One S All Digital console will look like. Windows Central previously shared a mockup of the official packaging, but Roland Quandt from the German blog Winfuture.de published two pictures of the retail box today.

This latest leak also confirms the May 7 release date we’ve heard before, but there’s also some exclusive pricing information. The Xbox One S All Digital console will be reportedly be priced at €229.99 in Europe, which roughly equals $260. If true, that’s a bit expensive for a console with no disc-drive, especially since the standard Xbox One S with its 4K Blu Ray player can often be found at $250 or less when it’s on sale.

This new report also confirms what we knew about this disc-less version of the Xbox One S. The design of the console will be pretty much unchanged except the missing Blu Ray player, and it will also come with a 1TB hard drive. The console will also ship with three games, Sea of Thieves, Minecraft and Forza Horizon 3.

Microsoft is expected to officially unveil its Xbox One S All Digital console on April 16 during the Inside Xbox livestream, and the company may also use this opportunity to unveil a new Xbox Game Pass Ultimate subscription that will combine the game subscription service with Xbox Live Gold.

Microsoft is experimenting with Xbox Live notifications for discounted games in your Wish List

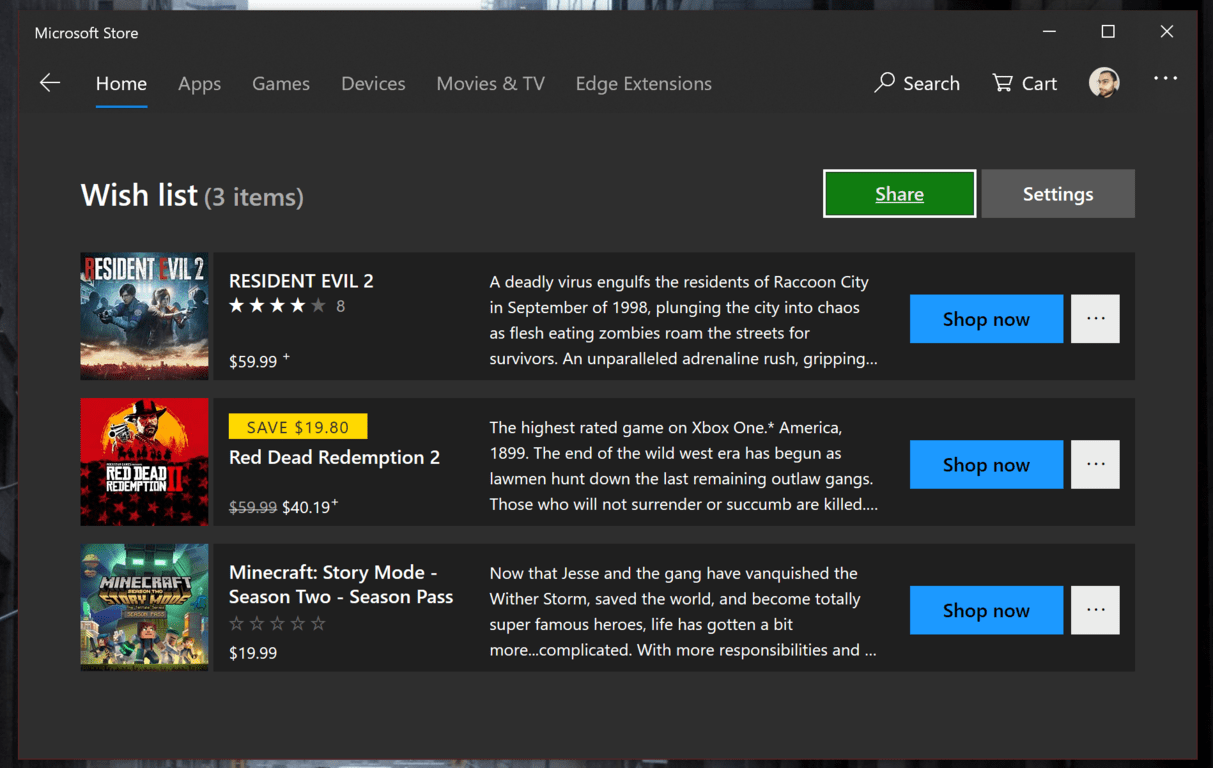
Microsoft is looking for ways to make the Wish List feature on the Xbox Store more useful for Xbox users. The company has started testing sending Xbox Live notifications to users when Xbox games in their Wish List are currently on sale.

Reddit user xektor17 shared the following screenshot of an Xbox Live notification informing him that the Red Dead Redemption 2 game he added in his wish list was being discounted during the current Xbox Spring Sale (via Windows Central). Xbox’s Major Nelson confirmed in the Reddit thread that the Xbox team was “testing this out with a small group of folks.”

Xbox just notified me that a game on my wishlist is on sale! from xboxone

Microsoft is already using Xbox Live notifications to notify Xbox gamers about new Xbox Game Pass releases or share other Xbox-related news. The good thing is that these notifications can be seen in the Xbox app for Windows 10, iOS and Android, so users can see them when they’re away from their consoles.

Do you have many games in your Xbox Store Wish List, and would you like to get personalized notifications when they’re on sale? Sound off in the comments below.

Fix: Shadow of War has stopped working on PC

Well, well, well, we’ve got another AAA title with the emerging issues that render it completely unplayable for some users. Yes, that seems to be the case for Shadow of War, the sequel to highly-regarded Shadow of Mordor.

The game is, as we ourselves can witness, quite a treat if we exclude a micro-transactions and crashes that seem to plague a lot of users.

Some of them are able to start the game and just anxiously wait for the crash to happen. Others? Well, they can’t start it in the first place.

For that purpose, we conducted a little research in order to provide you with a few solutions. We hope they’ll serve you justice and you can look them up below.

How to fix Shadow of War sudden crashes on PC

  1. Check the system requirements
  2. Update GPU drivers
  3. Install C++ Redistributables, .NET Framework, and DirectX
  4. Check the game integrity with Steam
  5. Run the game as admin/in compatibility mode and from the installation folder
  6. Shut down background programs
  7. Reinstall the game

Solution 1 – Check the system requirements

First things first. You’ve probably checked the system requirements before you decided to buy the sequel to Shadow of Mordor. However, in case something slipped from you, here are the system requirements you need to meet in order to even start this game, let alone play it.

Minimum system requirements for Shadow of War:

  • OS: Windows 7 SP1 with Platform Update for Windows 7
  • CPU: Intel i5-2550K, 3.4 GHz
  • RAM: 8 GB RAM
  • GPU: GeForce GTX 670 | Radeon HD 7950
  • DirectX: Version 11
  • Network: Broadband Internet connection
  • Storage: 60 GB of available storage space

Recommended system requirements for Shadow of War:

  • OS: Windows 10 version 14393.102 or higher required
  • CPU: Intel Core i7-3770, 3.4 GHz
  • RAM: 16 GB RAM
  • GPU: GeForce GTX 970 or GeForce GTX 1060 | Radeon R9 290X or Radeon RX 480
  • DirectX: Version 11
  • Storage: 60 GB of available storage space

Once you’re certain that your gaming rig can run Shadow of War without a hitch, continue with the steps below.


Solution 2 – Update GPU drivers

Another thing that’s essential for seamless gaming concerns GPU drivers. As you’re well aware, without the proper drivers, even the top-notch GPU’s are as useful as a screen door on a submarine. Basically, in order to use the full potential of your GPU, you’ll be needing the corresponding drivers.

As the case shown on so many occasions, the generic drivers provided by Windows Update in Windows 10 or even Windows 7 for that matter, just won’t suffice. In addition, some graphics processors require legacy drivers.

So, let’s follow the tracks of the problem to an official OEM site and found ourselves a well-balanced and compatible driver.

On the other hand, if the GPU isn’t responsible for your problem, just move to the next step.


In order to boost your game performance and get rid of slowdowns, lags, low FPS and other annoying issues, we recommend downloading Game Fire (free).


Solution 3 – Install C++ Redistributables, .NET Framework, and DirectX

Windows is the king of PC gaming for a good reason, and that’s, ladies and gents, the compatibility. However, even though you’re in rush to enjoy the Shadow of War, that reminiscence to The Lord of the Rings, there are still some things you’ll need to check in order to play this game on Windows 10 platform. And these are C++, .NET Framework and, last but not least, DirectX.

Some users reported that the crashes left after they installed the latest version of the Windows Runtime C++ 2017. Now, we’ll take that to another level and advise you to, besides the latest C++ version, install both 2015 and 2013 versions, respectively.

Furthermore, if you run Windows 10 with the 64-bit architecture, install both 32-bit and 64-bit Visual Studio C++ variations. They can be found here.install redistributables

Now, after we dealt with the C++, let’s move to .NET Framework and install that, too. There’s a high probability that you’re already having a .NET Framework of some kind since that’s covered with the Windows Update. However, it won’t hurt to navigate to this site, download and install the latest .NET Framework version.

Finally, the most important part of Windows 10 following software is DirectX. Download and install the latest DirectX version and look for changes. You can do so by following this link.


Solution 4 – Check the game integrity with Steam

Since most of the PC users obtained their copy of Shadow of War through Steam, let’s use its desktop client to fix the possible corruption of the game files. Namely, the game installation files can get corrupted or incomplete for some reason. We point our finger at malware, as the main suspect.

Luckily, with the Steam client, you can check for the integrity of the installation files. If the tool finds out the affected files, it should re-download the missing or corrupted files. In order to run this tool, follow the steps below:

  1. Open the Steam app.
  2. Select Library.
  3. Right-click on Shadow of War and open Properties.steam game properties
  4. Select the Local Files tab.
  5. Click on the ”Verify the integrity of game files” button.verify integrity of game files

Solution 5 – Run the game as admin/in compatibility mode and from the installation folder

Moving on. The way the system reacts to Shadow of War can also be an issue. Namely, some users reported that, by changing the compatibility mode and granting the game administrative permissions, they were able to run the game without crashes. At least, not for some time.

This seems to be more of a workaround than a solution per se since the game crashes eventually. At least, in most cases. Either way, it won’t harm and it might help, so here’s how to do it:

  1. Navigate to the game installation folder. By default it’s: C:SteamsteamappscommonShadowOfWarx64ShadowOfWar.exe
  2. Right-click on the ShadowOfWar.exe and open Properties.
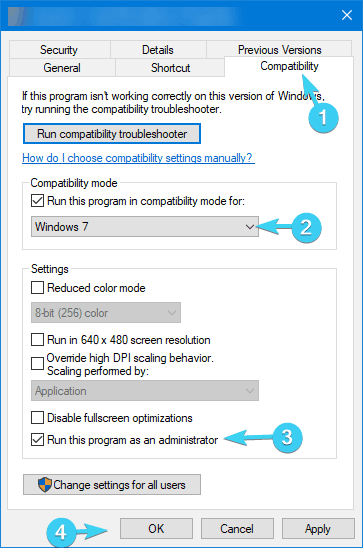
  3. Choose the Compatibility tab.
  4. Check the ”Run this program in compatibility mode for” box.
  5. From the drop-down menu, select Windows 7.
  6. Now, check the ”Run this program as an administrator”.
  7. Click OK to confirm changes.run program in compatibility mode

After that, we advise you to run the game from the installation folder, by double-clicking the ShadowOfWar.exe. Let’s eliminate Steam from the equation and give it a go. In case you’re still experiencing sudden crashes once the game starts or the game won’t start at all, check the remaining solutions.

  • ALSO READ: Common Wolfenstein 2: The New Colossus bugs and how to fix them

Solution 6 – Shut down background programs

Now, although everything looks like the Shadow of War is the initiator of the issues, we encourage you to check the background programs, too. Namely, some users reported that programs like MSI Afterburner are the real reason why the game crashes.

Since we’re unable to distinguish one program, we advise you to start your system with the Clean Boot procedure and look for changes.

If you’re not sure how to do it, follow the steps below:

  1. Press Windows key + R to open the Run command line.
  2. In the command line type msconfig.msc and press Enter to open System Configuration.
  3. Under the General tab, select the Selective startup.
  4. Uncheck the ”Load startup items” box.system configuration disable load startup items
  5. Now, navigate to the Services tab.
  6. Check the ”Hide all Microsoft services” box.
  7. Click on the Disable all and then OK to confirm changes.system configuration disable non-microsoft services
  8. Finally, restart your PC and start the Shadow of War again.

If even this wasn’t enough to resolve the problem and you’re still stuck with the same crashes that tear through your nerves, make sure to check the one last step.


Solution 7 – Reinstall and update the game

Finally, there stands the reinstallation as the last resort. Reinstalling the digital copy of the game can take some time, but we reckon that it’s still worth it if makes the game work.

A lot of users reported the crashes and all that fuss, however, the majority runs the game without problems whatsoever. So, either we’re looking at the isolated optimization problem or you did something wrong down the stretch.

Here’s how to reinstall Shadow of War:

  1. Navigate to Steam and open Library.
  2. Right-click on Shadow of War and choose Uninstall.steam uninstall game
  3. Now, before we move to installation, make sure to delete Shadow of War files from folders located in C:Program FilesSteam and C:Users: your username:AppData.
  4. Open Library again, right-click on Shadow of War and click Install.steam install game

With that, we’re done. We can only hope that Monolith Productions, developers responsible for the game, will sort things out and let troubled players finally slain some orcs. As a side note, don’t forget to tell us about your experience with Middle-earth: Shadow of War. You can do so in the comments section below.

RELATED ARTICLES YOU SHOULD CHECK OUT:

Lcore.exe Network Usage Problems [Fix]

Some gaming peripherals come with a dedicated software that allows you to customize its settings. However, sometimes the software can cause problems on your Windows 10 PC. Users reported high network usage by lcore.exe, and today we’re going to show you how to fix this problem.

Lcore.exe high network usage, how to fix it?

  1. Stop Arx Control
  2. Block Lcore.exe in Windows Firewall
  3. Reinstall the software

Solution 1 – Stop Arx Control

Some Logitech devices support Arx Control feature. This feature allows you to see additional game information on your smartphone or tablet. In addition to showing in game information, this tool also allows you to configure your peripherals. For example, you can change the DPI or use a certain macro simply by using your smartphone. In addition, the application also allows you to monitor your hardware and check the GPU or CPU temperature and usage. The application also allows you to control media playback or to launch certain games with a single tap.

Arx Control is quite useful, but it can increase the network usage of Lcore.exe process. To fix this problem, you need to completely stop Arx Control. After closing Arx Control, network usage of Lcore.exe should come back to normal. Some users are also suggesting to disable Mobile Service in Arx Control tab. After doing that, the issue will be completely resolved.

Solution 2 – Block Lcore.exe in Windows Firewall

If you’re concerned by Lcore.exe network usage, you can block the application from accessing the Internet. To do that, you need to configure your firewall. To block Lcore.exe you need to do the following:

  1. Press Windows Key + S and enter windows firewall. Select Windows Firewall from the list.
    windows firewall
  2. When Windows Firewall opens, click on Advanced settings in the left pane.
    windows firewall advanced settings
  3. Windows Firewall with Advanced Security window will now open. In the left pane, click on Outbound rules.
    Outbound Rules Windows Firewall
  4. In the right pane, click on New Rule.
    Add New outbound rule for Windows Firewall
  5. New Outbound Rule Wizard will now start. Select Program from the list and click Next.
    choose program for outbound rule in Windows Firewall
  6. Select This program path and click Browse button. Now locate and select Lcore.exe. After you’re done, click the Next button.
    choose application for outbound rule windows firewall
  7. Select Block the connection option and click on Next.
    block the connection for outbound rule windows defender
  8. Check Domain, Private and Public and click the Next button.
    make outbound rule apply to domain, private, and public networks
  9. Lastly, enter the Name and Description for the new rule. Once you’re done, click Finish.
    block lcore.exe windows firewall

After doing that, Lcore.exe won’t be able to access Internet anymore. If you’re using a third-party firewall, we advise you to use it instead of Windows Firewall to block this application. It’s worth mentioning that blocking this application can cause certain issues with Logitech software, so keep that in mind.

Solution 3 – Reinstall the software

Finally, if the Arx Control application went rogue for some reason (file corruption, system conflicts, being outdated), we suggest reinstalling it and acquiring the latest iteration from the official support website. Just navigate to Control Panel and remove it from there. You might as well uninstall the driver. After that, just navigate to the official Logitech website and download software again.

If Lcore.exe has high network usage on your PC, you can easily fix that problem simply by disabling Arx Control. If the issue still persists, you might have to completely block Lcore.exe from accessing the Internet.

READ ALSO:

Windows 10/11 can’t find Wi-Fi adapter: 7 quick fixes to use

A Wi-Fi adapter is a device that adds wireless connectivity to your laptop or PC, and can be available as an external USB, PCI or PCI express card, which you plug into a USB port or empty slot on your computer’s motherboard.

The adapter lets you connect to a wireless network whether you’re at home, at the office, or in a public place.

You can use the connection from a Wi-Fi adapter for fast and high quality internet connections, or to access shared files on a network, devices, and documents.

Here are the solutions you can use when Windows 10 can’t find Wi-Fi adapter.

FIX: Windows 10 can’t find Wi-Fi adapter

  1. Troubleshoot network adapter
  2. Update network adapter driver
  3. Roll back the network adapter driver
  4. Temporarily turn off firewalls and any antivirus or malware prevention software
  5. Uninstall the network adapter driver then restart
  6. Reinstall network devices

1. Troubleshoot Network Adapter

This is an automated, built-in Windows tool that finds and fixes common Network Adapter settings issues on your computer. It also checks if adapter’s drivers are updated or not, and give clues on the hardware failures related to it.

Take these steps to run the troubleshooting on Network Adapter and see if it identifies the issue:

  1. Click Start
  2. Go to the search field box and type Troubleshooting
  3. Select Troubleshooting from the search results
  4. Click View all on the left panecontrol panel troubleshooting
  5. Click Network Adapter
  6. Click Next
  7. The detection process to identify any issues will begin
  8. Select the network adapter to diagnose
network adapter troubleshooting control panel


If that didn’t work, try the next solution.

2. Update network adapter driver

When your network adapter driver is incompatible or outdated, then Windows 10 cannot find Wi-Fi adapter. A recent Windows 10 upgrade driver could have been designed for a previous version of Windows.

Update the adapter driver using these steps:

  1. Right click Start
  2. Select Device Manageropen device manager
  3. Select Network Adaptersdevice manager network adapters
  4. Click on the network adapter name
  5. Right click the network adapterupdate network adapter's driver
  6. Select Update driver
  7. Click Search automatically for updated driver software
  8. Once the steps are complete, click Close
  9. After installing the updated driver, click Start>Power>Restart
Note icon NOTE
If Windows doesn’t find a new driver, visit the device’s manufacturer website and download the latest network adapter driver from there.

If your computer cannot connect to the internet, download a driver from a different computer, save it to a USB flash drive, then manually install it on your own computer.

How to manually install the network adapter driver

Depending on the file you downloaded from the manufacturer’s website, do the following:

  1. For a .exe (executable) file, double click on it to run the file then install the drivers
  2. For individual files, check a file with .inf extension and another with .sys extension then do the following:
  3. Go to the search box and type Device Manager
  4. Click Device Manager from the search resultsWindows 10 can’t find Wi-Fi adapter
  5. Select Network adapters and go to the network adapter name (you can also check under Other Devices if yours isn’t listed here)Windows 10 can’t find Wi-Fi adapter
  6. Right click the network adapter and select Update driver softwareWindows 10 can’t find Wi-Fi adapter
  7. Click Browse my computer for driver software
  8. Select Browse then the location where the driver files are stored
  9. Click Ok
  10. Click Next
  11. Once installation is complete, click Close

After installing the updated driver, click Start>Power>Restart

3. Roll back the network adapter driver

If you were previously connected to the internet and installed a new network adapter driver, try to roll it back to a previous version and check if it helps.

Here’s how to do this:

  1. Right click Start
  2. Select Device Managerdevice manager
  3. Select Network Adapters then click on the network adapter name
  4. Right click on the network adapter
  5. Select Propertieswi-fi network adapter properties
  6. Select Driver tabwi-fi network adapter driver properties
  7. Select Roll Back Driver. If the button is unavailable, then there’s no driver to roll back to.roll back network adapter driver
  8. After rolling back to the previous version of the driver, select Start>Power>Restart
Note icon NOTE
If Windows doesn’t find a new driver, visit the device’s manufacturer website and download the latest network adapter driver from there.

If your computer cannot connect to the internet, download a driver from a different computer, save it to a USB flash drive, then manually install it on your own computer.

4. Temporarily turn off firewalls and any antivirus or malware prevention software

A firewall, antivirus or anti-malware program, may at times prevent you from finding your Wi-Fi adapter. If this is the cause of the issue, turn either of the three off temporarily then try to connect again.

Ensure you turn these programs back on immediately after you’re done to prevent hackers, viruses and worms from damaging your system.

5. Uninstall the network adapter driver then restart

This approach works if your connection was interfered with after a recent update or upgrade. Before uninstalling, ensure you have drivers available as a backup, then visit your PC manufacturer’s website for the latest driver. You need to know the manufacturer, and model name or number to do this.

Here are the steps to take:

  1. Right click Start
  2. Select Device Manager
  3. Click Network adapters then the adapter namenetwork adapter device manager
  4. Right click on the network adapter
  5. Click Uninstall device>Delete the driver software for this device check box>Uninstall
  6. Once you uninstall the driver, click Start>Power>Restart

After your computer restarts, Windows will automatically search for and install the network adapter driver. If it doesn’t, try installing the backup driver you saved prior to uninstalling.

6. Reinstall network devices

This should be used as a final resort, and can help solve connection problems after an upgrade to Windows 10, plus fix issues where you can connect to the internet but not to shared network drives.

Do the following to use network reset and reinstall network devices:

  1. Click Start
  2. Select Settingssettings windows 10
  3. Click Network & Internetnetwork & internet settings windows 10
  4. Select Status
  5. Click Network Reset
  6. In the network reset screen, select Reset Now then click Yes to confirm

Wait for your computer to restart and check if it fixes the problem.

Let us know if any of the solutions we shared worked for you.

Remove default apps from Windows 10/11 Image with this script

Windows 10 comes with a series of default apps that cannot be deleted. Some of these apps include the Xbox app, OneNote, the apps for Mail, Music, Movies and TV and Calendar, Groove Music, etc.

The problem is that not all users need these apps and they end up occupying space. Having the option to quickly delete them would make many users happy.

Unfortunately, when you install the next major OS version on your computer, these unwanted apps and programs return alongside other bloatware.

The good news that you can avoid bloatware by downloading the Windows 10 Bloatware-free edition. If you prefer tweaking your PC, you can also use dedicated PowerShell scripts to delete the unwanted apps.

Remove Windows 10 bloatware with this PowerShell script

One resourceful Reddit user recently published an interesting script that allows Fall Creators Update users to quickly and easily remove default apps.

First, run Powershell in administrator mode, and then launch the command Set-ExecutionPolicy RemoteSigned to run your own scripts.
Save your script with a .ps1 extension, and then simply execute it.

Here are the instructions to save:

$AppsList = ‘Microsoft.3DBuilder’,
‘Microsoft.BingFinance’,
‘Microsoft.BingNews’,
‘Microsoft.BingSports’,
‘Microsoft.MicrosoftSolitaireCollection’,
‘Microsoft.People’,
‘Microsoft.Windows.Photos’,
‘Microsoft.WindowsCamera’,
‘microsoft.windowscommunicationsapps’,
‘Microsoft.WindowsPhone’,
‘Microsoft.WindowsSoundRecorder’,
‘Microsoft.XboxApp’,
‘Microsoft.ZuneMusic’,
‘Microsoft.ZuneVideo’,
‘Microsoft.Getstarted’,
‘Microsoft.WindowsFeedbackHub’,
‘Microsoft.XboxIdentityProvider’,
‘Microsoft.MicrosoftOfficeHub’

ForEach ($App in $AppsList){
$PackageFullName = (Get-AppxPackage $App).PackageFullName
$ProPackageFullName = (Get-AppxProvisionedPackage -online | where {$_.Displayname -eq $App}).PackageName
write-host $PackageFullName
Write-Host $ProPackageFullName
if ($PackageFullName){
Write-Host “Removing Package: $App”
remove-AppxPackage -package $PackageFullName
}
else{
Write-Host “Unable to find package: $App”
}
if ($ProPackageFullName){
Write-Host “Removing Provisioned Package: $ProPackageFullName”
Remove-AppxProvisionedPackage -online -packagename $ProPackageFullName
}
else{
Write-Host “Unable to find provisioned package: $App”
}
}

You can also use another dedicated PowerShell script available on GitHub. Windows10Debloater removes bloatware and disables Cortana without breaking the search function. Albeit, this is quite a safe procedure, we still suggest creating a restore point on your PC prior to running the script.

RELATED STORIES TO CHECK OUT:

How to download Windows 10 Icon Packs

Even if Windows 8, Windows 10 look much better than older versions of Windows, some of us still want to customize our devices to make them look different than the default layout.

One way to do this is to change the themes, change fonts or other elements. A great way to customize our Windows 8, Windows 10 computers is to change the default icons and add some custom designs.

While in the past this was easily done with icon packs and customization software, in Windows 8, Windows 10, these programs are no longer available.

There might be some Transformation Packs that work on Windows 10, Windows 8, but I don’t recommend using them, as they are oftentimes riddled with bugs and they make your system unstable.

How to download icon packs for Windows and replace default Windows icons?

Customizing your Windows 10 installation is rather simple with icon packs, and in this article we’re going to cover the following topics:

  • Windows 10 folder icons pack – The best way to change your icons is to download an icons pack. In this article we’ll show you in detail how to download an icon pack, extract it and change your icons.
  • Icon pack Windows replacement – Using an icon pack you can easily replace almost all Windows icons. However, if you want to replace all system icons, you might want to use a third-party application to do so.
  • Windows icons too big, too small – One problem that many users encountered is that their icons are too big or too small. We already wrote an article on how to fix large icons in Windows 10, so be sure to check it out.
  • Windows icons not showing, flashing – According to some users, their icons aren’t showing. We already covered how to fix missing icons on Windows 10, so you might want to check that article for detailed solutions.
  • Windows icons white boxes – This is another issue caused by missing icon files. Many users reported that they are getting white boxes instead of icons on their PC.
  • Windows icons won’t open, load – Another problem that users reported is the inability to open or load their icons. This issue can be caused by missing icon files, but you can easily replace them.
  • Windows icons rearrange themselves – Several users reported that icons keep rearranging themselves. This is a minor problem and it can be fixed by changing your settings.
  • Windows icons upside down – This is an unusual problem that can sometimes appear. According to users, sometimes their icons can be upside down. This is most likely related to your graphics configuration.
  • Windows Taskbar icons missing, not showing – Several users reported that icons on their PC are missing or not showing at all. However, you should be able to fix that issue by following our guide.

Downloading icons for Windows 10, Windows 8

Icon files are found pretty much everywhere. Also, you can download entire icon packs that are dedicated for using with other programs and select from them the .ico files.

These are the icon files which can be swapped for the default ones. I’ll give you a few examples of icon packs, but there are lots other on the web and all you need to do is search for them.

IconArchive, IconFinder and FindIcons are the biggest icon databases on the web, and they store pretty much any icon you might want. These icon search engines are your best bet in finding any particular icon you want.

To find a certain icon, you just have to follow these simple steps:

  1. Visit any website that hosts icons.
  2. In the search bar enter the desired term.
    Windows icons white boxes
  3. Now you’ll see the list of icons that meet your search criteria. Select the desired icon.
    Windows icons won't open
  4. You should be presented with several download options. Select to download your icon in .ico format.
    Windows icons rearrange themselves

As you can see, downloading new icons is rather simple, and many website support various filters allowing you to sort your icons by color or size.

Finding new icons is rather simple, but if you want to change multiple icons on your PC, you’ll have to download each icon individually.

Apart from searching icon websites, users can download icon packs and extract the icon files.

I’ll show you in a few minutes how to change the default icons with .ico or .icl files. For now, here are a few icon packs that you might want to take a look at:

Keep in mind that other image files do not work as icon files, and if you want to create your own icons from images, you might want to look for some image converters that offer this option.

We already covered some of the best tools to convert icons in Windows 10, so be sure to check them out.

If you try to add a regular image as an icon, Windows 8, Windows 10 will not let you, so be sure to keep this in mind when you are downloading icon packs.

Some of them have other formats because they are used by dedicated programs that install them on other versions of Windows.

If you download an icon pack, all icons will be placed inside of a .zip archive. Windows can work with zip archives without using a third-party solution, so there’s no need to install anything.

However, if you frequently work with .zip and other archives, we recently wrote an article on best file archivers for Windows, so be sure to check it out.

Once you download an icon pack, you just need to do the following:

  1. Double click the downloaded archive to open it.
    Windows icons white boxes
  2. Once the archive opens, simply extract all the files to the desired location. You can also quickly extract files simply by dragging and dropping them.

Using an icon pack has its advantages, since you’ll download multiple icons in an archive, but before you can actually use them, you’ll need to extract the files by following the instructions above.


Changing the Default Icons

Changing an icon is very simple, and you can do it in just a couple of clicks. To change an icon of any application or shortcut, you just need to do the following:

  1. Locate the shortcut or application whose icon you wish to change and right click it. Choose Properties from the menu.
    Windows 10 folder icons pack
  2. When Properties window opens, you need to click on Change Icon button.
    Icon pack Windows replacement
  3. When Change Icon window opens click on Browse button.
    Windows icons too big
  4. Now select the folder that has your downloaded icons.
  5. Once you go back to Change Icon window the list of available icons should be updated. Now select the desired icon and click on OK.
    Windows icons not showing

After doing that, the shortcut icon should be updated.

You can also change the icon for any folder on your PC. This process is slightly different for folders, but you can change the icon by doing the following:

  1. Right click the directory whose icon you wish to change. Choose Properties from the menu.
    Windows 10 folder icons pack
  2. Navigate to Customize tab. Now in the Folder icons section click on Change Icon button.
    Icon pack Windows replacement
  3. List of icons will now appear. If you want to use a custom icon, click on Browse button.
    Windows icons too small
  4. Select the desired icon. Now go back to Change Icon window and click on OK to save changes.
    Windows icons flashing

Keep in mind that these changes only apply for the file or folder you selected, so if you want to change multiple icons, you must do it one at a time.

Changing the icons is one of the easiest and simplest ways to customize Windows 10, and after reading our guide you should be able to change any icon on your PC with ease.


READ ALSO:

Windows 10 Creators update causes battery drain [Fix]

For Windows-powered portable devices, the battery endurance has always been a touchy subject. Some users were satisfied, others, well, not so much. With Windows 10 Creators Update, the battery life should be improved or at least you’ll get to be more in control over main battery consumers.

However, it seems that some users encountered sudden battery leaks or reduced battery life after the upgrade. We certainly hope that some of the upcoming patches will address that. But, while we are at it, there are ways to troubleshoot battery issues and, at least temporarily, resolve battery drains.

So, if you have any battery issues in the Creators Update, look no further. We prepared a few workarounds below.

How to fix battery drain on Windows 10 Creators Update

  1. Check your Power plan
  2. Enable Battery Saver
  3. Disable large consumers
  4. Use 3rd-party tool to improve battery life
  5. Update drivers
  6. Reinstall Windows 10

1. Check your Power plan

The first thing you should check are Power Settings. On some occasions, Windows Update may change your custom settings. For example, your Power plan may be changed to High Performance instead of Power saver. And that is not only related to brightness or display settings, but covers a lot of advanced power options that impact battery life drastically.

So, what you need to do is to retrieve your old settings before moving on with additional steps. And this is how to do that:

  1. Right-click on Battery icon in the Notification area and open Power Options.
  2. Now, you can select either Balanced or Power saver plan.
  3. Select one and open Change plan settings.
  4. Click on Restore default settings for this plan.battery power plan
  5. When prompted, click Yes and that should restore your settings to default.

Moreover, you can change the Advanced power settings to decrease battery drainage.

2. Enable Battery Saver

Another feature that is important but can somehow get displaced after the update is Battery Saver. Namely, this feature was one of the notable changes years ago. Battery Saver is Windows 10’s built-in feature that helps you manage your battery consumption while monitoring apps/programs.

This is how to enable Battery Saver:

  1. Open Settings app.
  2. Click on System.
  3. Select Battery Saver.battery settings
  4. Here you can turn Battery Saver on immediately or set an automatic start when battery level falls below designated percentage.
  5. Save your settings.

This should improve your battery life, at least marginally. But, it’s a good start, nonetheless.

3. Disable large consumers

Besides Battery Saver, you can use a specific tool that analyzes your system and list the programs/apps that are the largest consumers. That should give you the valuable insight and help you reduce the battery drain. Moreover, you can set the monitoring from last 24 hours up to 1 week.

With that detailed information, you’ll be able to find the possible culprits for battery drainage and stop their respective processes.

This is how you can use ‘Battery Use’ to your advantage:

  1. Open Settings app.
  2. Open System.
  3. Select Battery Saver.
  4. Click on Battery Use.
  5. There you can prevent the apps from working in the background. Have in mind that this works only with Windows 10 universal apps and not with the standard, desktop programs.
  6. Scroll down to find a list of apps and programs usage of battery.
  7. Click on the individual app to access the detailed application of battery usage.

That should give you enough insight to find and terminate power-hogging apps and programs.

4. Use 3rd-party tool to improve battery life

If you’re not satisfied with the built-in power-saving and monitoring tool, you can always try 3rd-party alternatives. Some of those are quite advanced in real-time monitoring, while others will control your system and offer automatic power saving features. Some OEMs offer their own solutions, like Samsung Life Extender, so if you own a Samsung laptop, you’re already good to go.

We have an article with a detailed explanation of tools that should help you to drastically reduce battery drainage. You can find it here.

5. Update drivers

One thing we can’t stress enough is an impact a faulty driver can have on all around PC performance. And, in this case, the unstoppable battery drainage. So, make sure that all of your drivers are up-to-date and functioning.

You can check and update your drivers this way:

  1. Right-click the Start menu and open the Device Manager.
  2. If you find any drivers with an exclamation point, make sure to update them. Right-click and choose Update Driverdevice manager
  3. However, if you’re unable to update drivers trough Windows Update, you should right-click the faulty device and open Properties.
  4. Now, open Details list and locate DriversId in the drop-down menu.
  5. Copy the first line of the driver’s identification and paste it in a web browser.
  6. Once you’ve found appropriate driver, download and install it.

We strongly advise you to use only trusted, official drivers issued by manufacturers. That should keep you off the malware and other possible issues.

6. Reinstall Windows 10

If you’re not sure what’s the culprit for this issue after all previous steps, your best bet to resolve the battery drainage is reinstallation. Namely, if your hardware (in this case battery) is in the good condition and the problems started after an upgrade to the Creators Update, you should easily resolve it by reinstalling the system and starting from the scratch.

To reinstall the system you’ll need the Media Creation Tool and USB/DVD for installation setup. You can get Media Creation tool here.

If you’re not sure how to perform a reinstallation, we have an explanatory article with the detailed step-by-step procedure. You can find it here.

After going through the list of workarounds, you should be relieved of any battery issues inflicted by the latest update. But, if there’s something you’ll add to the list of solutions or maybe a question regarding the subject, we look forward to hearing from you.

The comments section is just below.

RELATED STORIES YOU NEED TO CHECK OUT:

Windows 10 20H1 build 18875 fixes screen flickering issues

Windows 10 20H1 build is now available to Fast and Skip Ahead Insiders. As a quick reminder, Microsoft is merging these two Insiders rings starting next month.

This means that Fast and Skip Ahead Insiders will receive the same preview builds in the future. Slow and Release Preview rings can still access Windows 10 May 2019 Update builds until Microsoft release the OS to the general public.

The company plans to launch the next feature update later this year. However, 20H1 is expected to launch in the first half of 2020.

Now, getting back to Windows 10 build 18875, let’s have a look at the list of general fixes and improvements. 

Windows 10 build 18875 improvements and fixes

1. Lock Screen freezing issues fixed

Microsoft finally fixed the lock screen freezing issues that were affecting Windows 10 PCs. Previously, users reported experiencing this bug while interacting with the touch keyboard and switching keyboard layouts.

2. Settings crashing bug fix

Windows 10 users reported quite frequently that the Settings app crashed. Windows 10 build 18875 fixed this issue for affected users.

3. Device Setup message bug fix

Windows 10 was continuously prompting some Insiders to setup their devices on every restart. Thankfully, this recent release fixed this issue too.

4. Applications flickering fix

Microsoft resolved another issue that was responsible for flickering issues in some applications.

5. Unexpected battery drain bug

Finally, Windows 10 build 18875 resolved the annoying battery drain issues. This bug was potentially caused by pinning Photos tile to Start menu.

Windows 10 build 18875 known issues

This build brings three known issues to the table. An update to the latest 19H1 Insider Preview builds can trigger system crashes for users who are running older versions of anti-cheat software.

Furthermore, Microsoft did not resolve the functionality issues in Creative X-Fi sound cards and some Realtek SD card readers. 

Download Windows 10 build 18875

The ISO files for Windows 10 build 18875 are not available yet. However, you can grab this update through Fast and Skip Ahead rings.

If you enrolled in the Fast and Skip Ahead rings, then the update will automatically download on your system. Insiders can manually download the update from Settings >> Update & security >> Windows Update and navigating to Check for updates.

You can expect to encounter other issues as well due to the fact that this version is an early development build.

RELATED ARTICLES YOU NEED TO CHECK OUT:

Fix: Hulu Plus PB4 Error in Windows 10

Hulu Plus is one of the best Windows 10 and Windows 8.1 streaming apps currently available in the Windows Store.

However, many Hulu Plus users have been reporting the PB4 error.

I am not able to enjoy Hulu Plus services on Windows 8/Windows 8.1 myself because I’m based out of the United States.

Many of our readers have sent in this question, asking how to solve the annoying PB4 error that they are having while running on Windows 8 or Windows 8.1.

Some have been experiencing PB3 errors, as well, but the nature of these two problems is the same, so we’ll try to apply the same fixes, which you’ll see that are very simple and straightforward.

Some basic tips to get rid of PB4 error in Hulu Plus

Hulu Plus PB4 error can cause many problems, and in this article we’re going to cover the following issues:

  • Hulu app not working Windows 10 – This error message can be serious and it can prevent your Hulu app from working on Windows 10. However, you should be able to fix the problem by using one of our solutions.
  • Hulu plus PB4 error Windows 8 – This error can appear on older versions of Windows as well, and you might experience it even if you’re using Windows 8 or 8.1.
  • Hulu Windows 10 PB4 – This error can also appear on Windows 10. This is most likely a driver-related issue and it can be easily resolved.
  • Hulu plus unable to start – Sometimes you might not be able to start Hulu due to this error. If you have this problem, try reinstalling the Hulu app and check if that solves the issue.

This problem is only affecting Windows 8 and Windows 8.1 users, and it seems that with the release of Windows 8.1, some of these issues have been taken care off.

So, you also need to make sure that you make the jump to Windows 8.1, despite the fact that there are many who’d like to see it uninstalled. If you are running Windows 8.1 already, then follow the below mentioned steps.

How can I fix Hulu Plus PB4 errors?

  1. Edit your registry
  2. Update your drivers
  3. Set your speakers as the default audio device
  4. Reinstall and reset the application

1. Edit your registry

If you’re getting Hulu Plus PB4 error, you might be able to solve it simply by modifying your registry.

According to users, this problem occurs because a set of older drivers made some incorrect changes to the registry.

To fix the problem, you need to manually edit your registry by doing the following:

  1. Press Windows Key + R to open the Run dialog. Enter regedit and press Enter or click OK.
    regedit run window Hulu app not working Windows 10
  2. When Registry Editor opens, navigate to
    • HKEY_LOCAL_MACHINESOFTWAREMicrosoftWindowsCurrentVersionAudio
  3. In the right pane, double click on DisableProtectedAudioDG. If this DWORD isn’t available, you can create it by right clicking the right pane and choosing New > DWORD (32-bit) Value from the menu.
    disableprotectedaudioDG dword Hulu plus PB4 error Windows
  4. Set the Value data to 0 and click on OK to save changes. If using Value data 0 doesn’t fix the problem, you might want to set it to 1 and check if that solves the issue.
    edit value data Hulu Windows 10 PB4

Many users reported that modifying this DWORD fixed the problem for them, so be sure to try it out.

2. Update your drivers

  1. Right-click the Start button and select Device Manager from the list.
  2. Click on the Network adapters section to expand it.
  3. Right-click the network adaptor and select Update driver in the options list.
  4. If there’s a better driver, the system will install it and you will have to restart your PC.

If you don’t want to install the drivers yourself, we suggest you use dedicated driver update software that will do this for you.

A professional driver update tool will help you update drivers automatically and most importantly prevent damage caused by installation of incorrect driver versions.  

All you have to do is select the drivers you want to upgrade and leave the rest for the automated software.

3. Set your speakers as the default audio device

Several users claim that you can fix Hulu Plus PB4 simply by disabling default HDMI sound and setting Speakers as the default audio device.

According to them, this issue occurs after connecting the second display with their PC via HDMI.

This causes the HDMI sound channel to become the default device and this error to appear. To fix the issue, you just need to set your speakers as the default audio device.

This is rather simple and you can do it by following these steps:

  1. Right click the sound icon in the bottom right corner and choose Playback devices from the menu.
    playback devices Hulu plus unable to start
  2. Right click the empty space and make sure that both Show Disabled Devices and Show Disconnected Devices options are checked.
    show disabled devices Hulu app not working Windows 10
  3. Right click Speakers and choose Set as Default Device.
    sound window set as default device Hulu plus PB4 error Windows 8
  4. Now locate HDMI device on the list, right click it and choose Disable from the menu.
    disable audio device Hulu Windows 10 PB4

4. Reinstall and reset the application

According to users, sometimes you can fix this problem simply by reinstalling the application. It seems that Hulu Plus PB4 error occurs if you change your audio settings.

In order to fix this problem, you need to remove Hulu and install it again. To do that, follow these steps:

  1. Press Windows Key + I to open the Settings app.
  2. When Settings app opens, go to Apps section.
    Hulu plus unable to start apps settings app
  3. Now select the Hulu app and click on Uninstall.
    uninstall app Hulu app not working Windows 10

After removing the app, you need to download it again from Windows Store and check if that solves the problem.

If reinstalling the application doesn’t help, you can always reset it by doing the following:

  1. Open the Settings app and go to Apps section.
  2. Select Hulu app from the list and click on Advanced options.
    advanced options Hulu plus PB4 error Windows 8
  3. Now click on Reset button.
    reset app Hulu Windows 10 PB4
  4. Click on Reset button again to confirm.
    reset app Hulu plus unable to start

After resetting the application to default, check if the problem still appears.

If you are running Windows 8 through a virtual machine, like VMware or Parallels or maybe using this device through a partitioned computer such as a Macbook, chances on getting the PB4 error are much higher.

So just make sure that you’re running the latest version and that your software is legit.

If you know of other solutions, then let us know by leaving your comment below.

READ ALSO:

Microsoft kicks off massive Xbox’s Spring Sale with console and game savings

Microsoft has just kicked off a massive Xbox Spring Sale today. More than 500 digital games and add-ons for Xbox One and 360 are up to 65% off through April 22, and you can save up to 10% more with an Xbox Live Gold subscription.

Here are some of the most interesting games in the list, please notes that all prices include the additional discount for Xbox Live Gold members.

  • Ace Combat 7: Skies Unknown – $35.99
  • Assassin’s Creed Odyssey – $24
  • Battlefield V – $30
  • Call of Duty: Black Ops 4 – $30
  • Crash Bandicoot N. Sane Trilogy – $20
  • Fallout 76 Standard Edition – $40.19
  • Far Cry New Dawn – $20
  • Forza Horizon 4 Standard Edition – $35.99
  • Madden NFL 19 – $9
  • Metro Exodus – $44.99
  • Red Dead Redemption 2 – $40.19

In addition to all these game discounts, Microsoft is also offering 3 months of Xbox Game Pass for just $1, a limited-time offer only available for new members. If you’re not an Xbox Live Gold subscriber already, you can also get one month of Gold plus 1,000 couns of Apex Legends virtual currency for just $1.

If you’re considering upgrading to the Xbox One X, we remind you that the cool-looking Robot White Special Edition 1TB console with Fallout 76 is still priced at $399 ($100 off), and it’s the same price for the same bundle with a black Xbox One X. Lastly, you can also save $5 US ($10 CA) on Xbox Design Lab controllers starting tomorrow, April 13 through April 22. You can learn more about all Spring Sale deals on Major Nelson’s blog.

Is Microsoft planning a big consumer push with Cortana@Home?

Microsoft had a real chance to lead the pack when it comes to digital assistants, but Cortana’s slow pace of evolution relegated it as a me-too product that doesn’t have much to stand out. The main problem with Cortana has always been its limited market availability, with Microsoft focusing mostly on consumers in the US and the UK.

We’ve already seen a couple of Cortana-powered products such as the Harman Kardon Invoke speaker, the Glas smart thermostat, and Microsoft’s Surface headphones. But truth be told, these three devices are definitely not much compared to the much bigger ecosystems of connected appliances using Amazon’s Alexa or Google Assistant.

As it turns out, it does seem that Microsoft had a plan to make a bigger consumer push with Cortana-powered devices. Microsoft watcher WalkingCat recently discovered the existence of a Cortana@Home engineering team within Microsoft. The team is still mentioned on the LinkedIn profile of a Microsoft employee named Craig Miller.

https://twitter.com/h0x0d/status/1116509145492930565

In February 2018, Miller became Engineering Manager for Cortana@Home, and the exec wrote in his job description that his team was “building up a plan to go after the Consumer market like never before.” Moreover, Miller wrote that he was “excited to also lead up our Devices engineering team which is responsible for lots of new IoT devices over the next 12-24 months.”

We have yet to see the result of these ambitious plans, but it seems that Miller’s job has since evolved into something bigger, but still related to digital assistants. Back in January 2019, Miller was promoted to Director of Engineering, Assistant Experiences and Devices at Microsoft, and his new job description on LinkedIn no longer explicitly mentions Cortana: The key word is probably “voice-first experiences,” something that now includes Alexa on both Windows 10 PCs and Xbox One consoles.

As you may now, the upcoming May 2019 Update for Windows 10 will separate Cortana from Windows Search, a change that seems like a retreat. Five years after its launch on Windows Phone, Cortana still has far less skills compared to Alexa, which is probably why Microsoft teamed up with Amazon to make the two digital assistants talk to each other. Cortana still has a lot of value as a gateway to Office 365 data, but its consumer future seems increasingly complicated.

Katie Bouman, the woman behind the black hole photo was a Microsoft intern

Unless you’ve been living under a rock, you’ve probably come across the new black hole image at least a couple times this week. Black holes have historically been impossible to observe because of their nature of swallowing every bit of light that tries to escape it.

Katie Bouman, a computer scientist who was a student studying at MIT, is the person who is credited with coming up with the algorithm that made the capturing of the image possible. What’s especially interesting is that she also used to be an intern at Microsoft, as pointed out by Xbox’s Major Nelson.

More than 55 million light years from earth and centered inside of the Messier 87 galaxy, the black whole was captured by using the Event Horizon Telescope. EHT for short, it’s actually a network of eight telescopes across the globe that detect radiation from the particles that surround the beast.

Of course, Bouman isn’t taking all of the credit for the image, explaining that: “We’re a melting pot of astronomers, physicists, mathematicians and engineers, and that’s what it took to achieve something once thought impossible.”

Windows 10 version 1809 features many gaming improvements inspired by user feedback

Microsoft is big these days on collecting user feedback, and that includes Xbox and Gaming on Windows 10. Yesterday the PC Gaming team posted on some ideas, inspired by user feedback in the Xbox Idea Hub, a subreddit of the Xbox Insider Reddit group, that made it all the way in to shipping Windows 10 code, and are now part of the Windows 10 1809 update.

Because of your feedback, Windows can now disable processes while playing a game, the most requested feature on the Idea Hub with 5,115 votes. Just go to Settings > Gaming > Game Mode, and toggle the feature on to delay Windows Update driver installs and restart dialogs. Windows Notifications are now also hidden by default when playing a PC game, but you can control what notifications are still visible by going to Settings > System > Focus Assist.

Users providing feedback have also influenced the introduction of a battery indicator for connected Xbox controllers, the ability to automatically adjust power profiles to emphasize performance when a game is launched, and share screenshots to Twitter while playing a game.

Feedback is important, and who knows, maybe your favorite suggestion will make it in to the next version of Windows!

Sling TV adds support for the Microsoft Edge web browser

Sling TV has finally added support for Microsoft’s Edge browser with a service update earlier today. This means that Windows 10 users can now view Sling TV media directly from within Microsoft Edge without having to open the Sling TV app.

“At Sling TV, we continue to bring your favorite live and on-demand TV to all your devices, whether it’s on your big screen at home or mobile phone when you’re on the go,” Sling TV’s vice president of product management, Jimshade Chaudhari said in an official statement. “Today, we’ve expanded our device platforms by launching on the Microsoft Edge browser, giving you another option to instantly watch Sling TV on your computer. Windows 10 users now don’t have to leave their Edge browser to watch Sling TV; simply visit sling.com to start streaming.”

Sling TV added support for the Google Chrome web browser back in 2017 so this Microsoft Edge functionality is long overdue.

How do you watch Sling TV content? Do you prefer an app or a web browser? Share your thoughts with the community in the comments below and then follow us on Pinterest for more tech content.

Here’s how to fix Windows 10/11 needs GPT partition error

So you’re trying to upgrade your Windows, or perform a clean installation, but suddenly you get Windows 10 needs GPT partition error. Things don’t look so good, but in order to understand what’s happening, let’s delve deeper into this.

GPT stands for GUID Partition Table, serving as the default partition structure on newer machines for managing sub-partitions on your drive. GPT is part of the Unified Extensible Firmware Interface or UEFI, which means that any system based on UEFI should be installed on a GPT drive. But that’s enough for introduction, so let’s see what solutions are at hand.

How do I fix Windows 10 needs GPT partition error?

  1. Boot in UEFI Mode
  2. Change GBT to MBR
  3. Switch from UEFI to Legacy

1. Boot in UEFI Mode

In order to fix Windows 10 needs GPT partition error, you should first make sure that your motherboard supports UEFI. If it does, follow these steps:

  1. Reboot your machine and enter BIOS.
  2. Select Enable UEFI boot, and then select Save settings and exit BIOS.
  3. Continue with your Windows installation.

2. Change GPT to MBR

If you’re getting Windows 10 needs GPT partition error, you might want to consider switching to MBR. Master Boot Record or MBR, can be considered the better option to boot from. In order to do this, follow these steps:
command prompt Windows 10 needs GPT partition

  1. Firstly, press Win + R to open your Run box, then type: cmd and press Enter to bring up Command Prompt.
  2. Now type: diskpart.exe and press Enter to start the DiskPart.
  3. Next, type: list disk and press Enter.
  4. Next, you will type: select disk, followed by the drive letter or your disk that you want to change.
  5. Now type in: convert MBR and press Enter.
  6. To finish up, type: exit to finish the task.

Bear in mind that diskpart is an incredibly powerful and somewhat advanced tool, so be extra cautious while using it. If you’re not careful, you can cause permanent file loss.


3. Switch from UEFI to Legacy

This is a good alternative if the Windows 10 needs GPT partition error still appears. To switch to legacy boot, simply follow these steps:

  1. Shut down your computer.
  2. Power up your system, and as soon as the first logo screen appears, immediately press F2 to enter the BIOS menu.
  3. Now select Boot.
  4. With Boot Mode selected, press Enter, and then use the down arrow to select Legacy BIOS.
  5. Press Enter again.
  6. Press F10, and select Yes to save the change and exit the BIOS.

Your hard drive partition style must be set up to support either UEFI mode or the legacy BIOS-compatibility mode.

Some users are also suggesting to create a boot partition. In order to do that, follow these steps:

  1. Start Windows 10.
  2. Open the Start Menu.
  3. Type diskmgmt.msc to access Disk Management, and press Enter.
    create and format hard disk partitions GPT partition
  4. Make sure that you have any unallocated space available on your hard disk. If you do, right-click on that unallocated space and click New Simple Volume.
    new simple volume GPT partition
  5. Follow the on-screen instructions.

There you go, these are some solutions that might help you fix Windows 10 needs GPT partition so be sure to try them all.

RELATED STORIES TO CHECK OUT:

Xbox One’s Prey and The Golf Club 2 are now available on Xbox Game Pass

The Golf Club 2 and Prey are the two latest Xbox One video games to join the Xbox Game Pass library. Each of these titles are now available to download and play for free by anyone with an active Xbox Game Pass subscription and an Xbox One console.

Prey is a first-person Sci-Fi action video game that’s considered to be a reboot of the franchise instead of a sequel to the original Prey video game. It launched on the Xbox One in 2017 and was generally well-received by critics with many enjoying its atmosphere and action.

The Golf Club 2 is a sequel to The Golf Club which is also currently playable as part of Xbox Game Pass (though will be leaving at the end of the month). The Golf Club 2, as its name suggests, is a golf video game. It originally launched on the Xbox One back in mid-2017 and features a solid single-player career mode and realistic graphics and gameplay.

Prey and The Gold Club 2 aren’t the only new titles joining Xbox Game Pass this month. Monster Hunter: World and The Walking Dead: A New Frontier will come to the service on April 18th, Life is Strange 2: Ep. 2 on April 24th, and Resident Evil 5 will join Xbox Game Pass on April 25th.
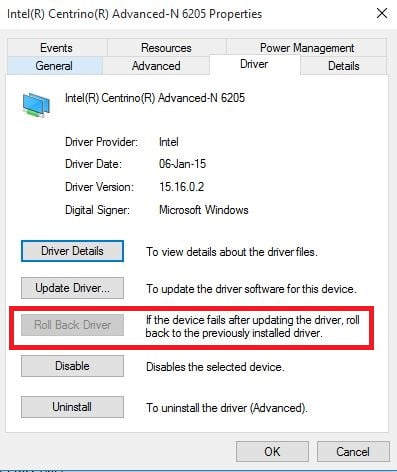
Xbox Game Pass is a paid subscription services that gives members full access to around 100 video games on Xbox One. New titles are added to the services each month while others are rotated out.

Are you an Xbox Game Pass subscriber? Let us know which games you’ll be playing this month in the comments below and then follow us on Pinterest for more Xbox gaming content.

Prey
Prey
Developer:
Bethesda Softworks
Price:
Free


The Golf Club 2™
The Golf Club 2™
Developer:
Maximum Games
Price:
Free

Windows 10 Twitter app has a very cool hidden #sakura animation that you need to try

Cherry blossom viewing, also called hanami, is incredibly popular in Japan and it’s happening right now.

In celebration of this national pastime, Twitter has added the cherry blossom emoji next to all instances of the #cherryblossom, #sakura, #桜 (the Japanese kanji for sakura), #花見 / #お花見 (hanami, the Japanese word for cherry blossom viewing), and #벚꽃 (cherry blossom in Korean) hashtags on the platform regardless of region.

What’s particularly cool is that when a user likes a tweet that contains any of these hashtags, an impressive cherry blossom animation appears in place of the usual heart one. Check out the above image to see it in action.

Both the emoji and animation currently only work within the Windows 10 Twitter app and on the web version of the social network. It’s unclear how long this little feature will work for so it’s worth checking it out now in case it’s removed as quickly cherry blossoms fade after a full bloom.

Have you noticed this cherry blossom Easter egg? Do you like it? Let us know in the comments below and then follow us on Twitter for more Windows news.

Edit: This feature is also functional on the Android Twitter app. Cheers, Robert for the info!