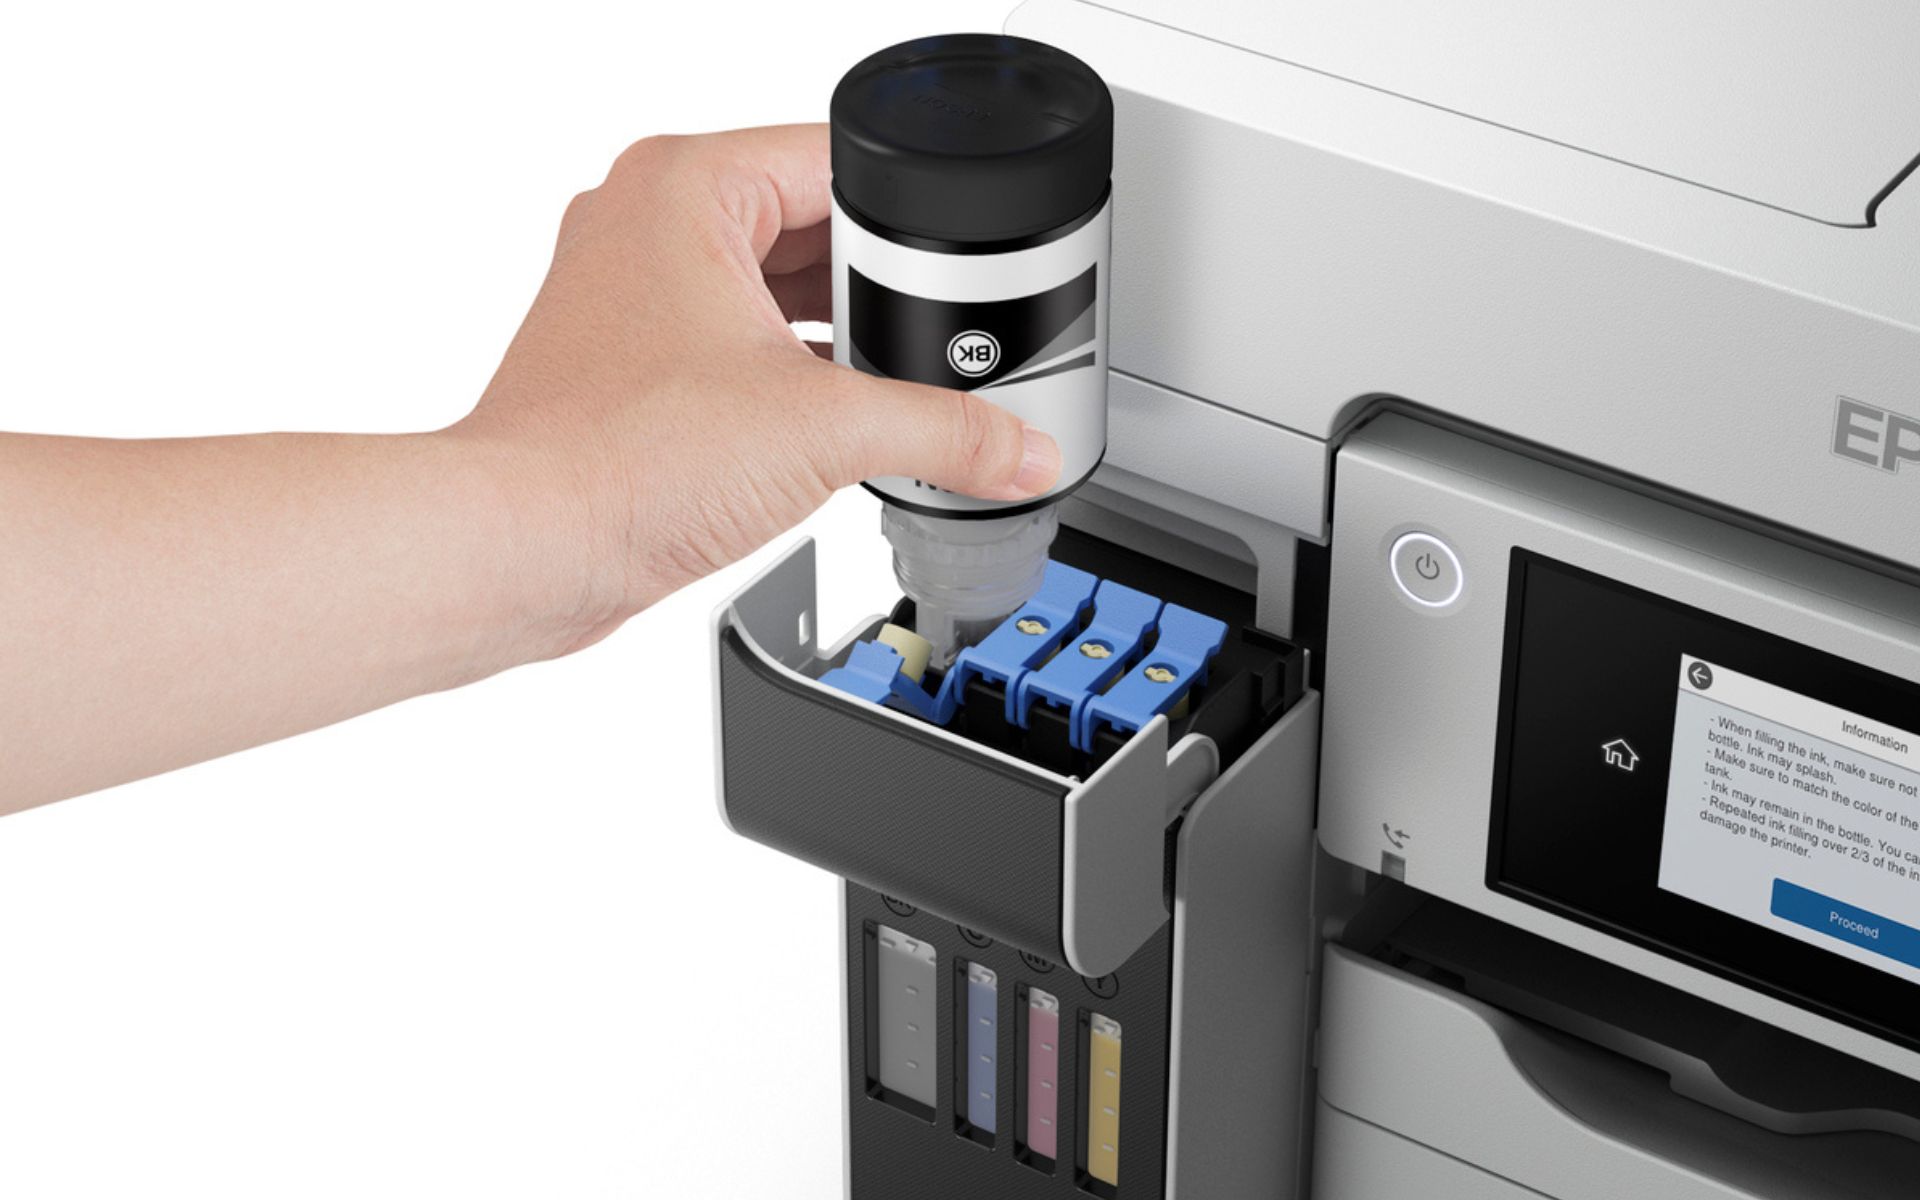
Epson Printer won’t Print Black and White without Color Ink

Printer makers are known to configure their printers in a way where the printer may stop printing if one of the ink cartridges is depleted. Even if you have a full black ink cartridge and want to print in black and white, the printer still will not print.

If your Epson printer doesn’t print black and white without color ink, you can force the printer to print in black and white with a workaround.

In this article, we discuss both the official workaround and other steps that can help you to print black and white without color ink in Windows.

The printer won’t print black and white without color ink

1. Epson printer won’t print black without color ink

Set Grayscale in Print Options:

Epson printer won't print
  1. Make sure the print job is canceled. When the Epson Status Monitor status appears click Cancel or Stop.
  2. Load plain paper in the tray.
  3. Click File.
  4. Select Print or Print Setup
  5. Click on Properties or Preference
  6. Open the Main
  7. Select the appropriate Quality Option settings.
  8. Select Plain or Envelope as the Type setting.
  9. Choose the Grayscale checkbox in Print Options.
  10. Click OK to close the printer settings window.

Now try to print your file to see if the Epson printer can only print in Black and White. Epson Status Monitor will appear on your computer screen, simply click Print in Black to print with black ink.

Note that, according to Epson, this workaround will only work on SX420W/SX425W/NX420 series printers. If you have a different model, give it a try to see if it works.

2. Force print in Black and White

Epson printer won't print
  1. Close any applications that you are using to print.
  2. Press Windows Key + R to open Run.
  3. Type control and click OK to open Control Panel.
  4. Click on Hardware and Sound.
  5. Right-click on the printer that you are trying to configure.
  6. Select Printer Preferences.
  7. Open the Color
  8. Select the Print in grayscale
  9. Select the High-quality setting in the drop-down list under Print in grayscale option.
  10. Click Apply and OK to save the changes.

Close the Devices and Printers window. Open any program with a print functioning and try printing the file. Click OK on any prompt that will confirm printing in black and white only.

3. Disable Epson Status Monitor

Epson printer won't print
  1. Press the Windows key.
  2. Type control and click on Control Panel.
  3. Go to Hardware and Sound > Devices and Printers.
  4. Right-click on your printer and select Printer Preferences.
  5. Find the box that read Speed and Progress.
  6. Locate Disable Epson Status Monitor and check the box to disable it.
  7. Select Save.

By following the above steps, you can disable the annoying Epson Status Monitor warning message that may occur due to the use of third-party ink cartridges.

4. Run Printer Troubleshooter

Epson printer won't print
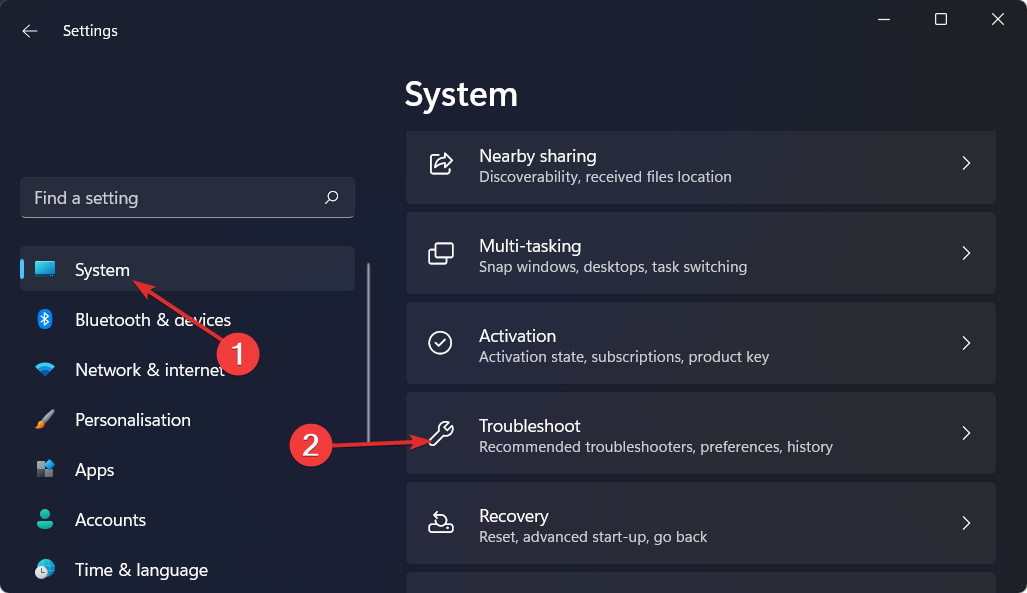
  1. Press Windows Key + I to open Settings.
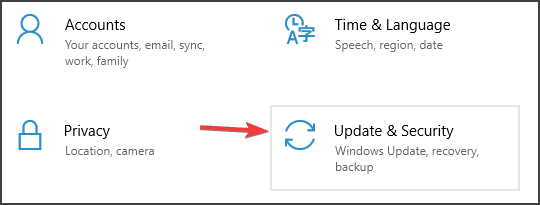
  2. Open Update and Security.
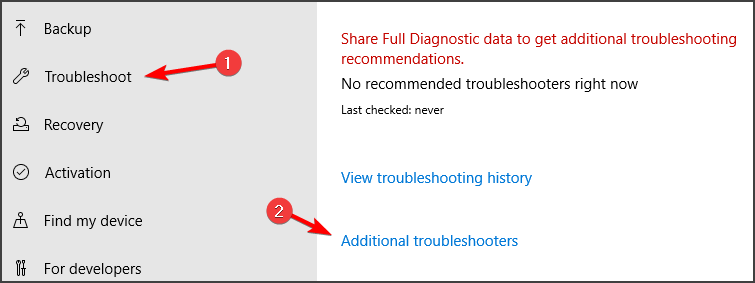
  3. Open the Troubleshoot tab.
  4. Click on Printer.
  5. Click the Run the troubleshooter button.
  6. Follow on-screen instructions and apply any recommended fix.

Once applied, try printing in black and white to see if the error is resolved.

If the issue persists, you may want to check if there is an issue with the printer hardware. Try removing the cartridge and looking for any debris that might be blocking the printing. Also, check if you have sufficient ink to print in black and white.

Most printers require the user to use their proprietary ink cartridges and do not print if a third-party ink cartridge is used. We have some excellent Epson ink cartridge recommendations below.

5. Clean the Printhead

  1. Open your Epson printer utility on your PC or Mac.
  2. Run a Nozzle Check to confirm black ink flow.
  3. If gaps appear, run the Printhead Cleaning process.
  4. Wait 30 minutes, then run the Nozzle Check again.
  5. Repeat up to 3 times if needed.

6. Update or Reinstall the Printer Driver

  1. Visit Epson’s Support Page.
  2. Search your model and download the latest driver for your OS.
  3. Uninstall the current driver via Control Panel > Programs (Windows) or Applications (Mac).
  4. Install the downloaded driver and restart your system.

Alternative: If you want a faster and more automated method, use Fortect Driver Updater. It scans your system, detects outdated or missing printer drivers, and updates them automatically without manual searching.

7. Adjust Paper and Quality Settings

  1. Open the print dialog before printing.
  2. Set the Paper Type to match your sheet (e.g., Plain, Glossy).
  3. Choose a Draft or Standard quality option for quicker printing.

8. Check Firmware for Restrictions

  1. In your printer’s menu, look for Maintenance or Setup.
  2. If available, disable any “Prevent Printing” settings related to ink status.
  3. Update firmware if an option appears in the Epson software.

Best Epson ink cartridges to buy

1. Epson T252XL120 DURABrite (Black)

Epson printer won't print

Epson’s revolutionary DURABrite Ultra Ink produces smudge, fade, and water-resistant prints for brilliant results on both plain and glossy papers.  You can only replace the cartridge that runs out with individual ink cartridges.

⇒ Get Epson T252XL120 DURABrite

2. Epson T069120-BCS DURABrite

Epson printer won't print

Epson T069120-BCS DURABrite comes in an Ultra Black and Color Combo pack that contains Black, Cyan, Magenta, and Yellow color cartridges. It is an excellent choice for occasional printing. If you are into high-volume printing, look for XL/High-Capacity package.

⇒ Get Epson T069120-BCS DURABrite

The Epson printer won’t print black and white without color ink usually occur if your printer notices the ink cartridges to be depleted. However, you can bypass this issue using the workarounds listed in the article above.

Windows Update Error 0x8024401c [Solved]

We can safely say that Windows 10 is quite an improvement compared to the previous versions of the system despite Windows 7 setting a pretty high bar.

Nonetheless, it seems that Microsoft, while trying to improve the all-around experience, can get a bit stuck with some issues — especially the ones that are related to mandatory updates.

One of those issues is the Windows Update error 0x8024401c, which can be caused by various factors. Fortunately, it can be fixed by various workarounds.

So, if you’ve encountered this problem, we’ll address it with a few possible solutions.

How do I fix the Windows Update error 0x8024401c?

1. Install new drivers

Because of inappropriate drivers, especially for older peripheral devices (e.g. printers, ethernet card etc.), Windows 10 updates may become obstructed. Thus, you might encounter the error code 0x8024401c, for example.

And that goes for other update errors, not just the one we are addressing today.

For that reason, you should uninstall generic drivers and install the ones provided by the original equipment manufacturer. To do so, follow these instructions:

  1. Press Windows logo + X key.
  2. Click on Device manager.
  3. Select the not-working driver.
  4. Right-click on it and open Properties.
  5. Open the Details tab.
  6. Navigate to Driver Ids in the drop-down list.
  7. Open the Driver tab and uninstall the driver.
  8. Copy the first line, paste in your web browser and search for original manufacturer site.
  9. Download the drivers.
  10. Install them and restart PC.

Although you may find a lot of results for your specific device, we advise you to download the drivers from trusted sources.

Learn from our guide to update your drivers like a pro!

1.1 Update drivers automatically

We also strongly recommend the Outbyte solution. It automatically identifies each device on your computer and matches it with the latest driver versions from an extensive online database.

Drivers can then be updated in batches or one at a time, without requiring the user to make any complex decisions in the process.

Thus, you keep your system safe from downloading and installing the wrong driver versions.

2. Perform an SFC scan

The SFC tool is a built-in tool that lets you check and repair corrupted or incomplete system files. As you are probably aware, malware can inflict system errors on your system.

For that reason, we advise you to get rid of third-party software while updating and use Windows Defender instead. Moreover, you can use this tool to scan your system for additional flaws.

Here’s what you need to do:

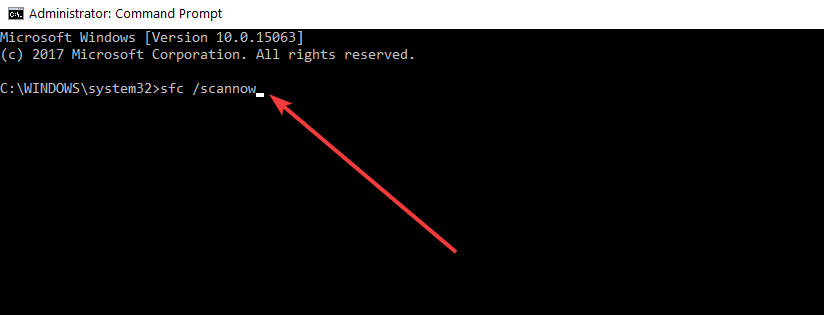
  1. Press Windows key + X and open Command Prompt (Admin).
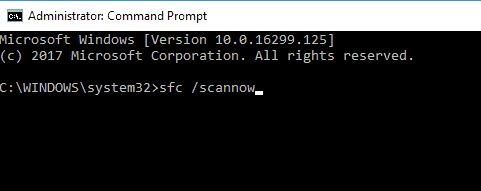
  2. In the command line type sfc/scannow
  3. The process will check all files and automatically replace corrupt ones.

When you are sure your files are spot on, give updating another try.

3. Uncheck iPv6 and go with the iPv4 network

Some users found an interesting workaround for this issue. On some occasions, this error is related to a failed connection with servers that result in a timeout.

For that reason, updates can’t be downloaded and the whole process gives you a tough time.

When this happens, disable the iPv6 protocol and go exclusively with the iPv4 network:

  1. Press Windows key + X and open Network connections.
  2. Right-click on the connection (either LAN or Wi-FI) you’re currently using and choose Properties.
  3. In the list of the connection items, uncheck the iPv6 box and confirm the selection.
  4. Go to Windows Update and check for updates.

That should get you moving and allow needed updates to be installed on your computer.

In case you have any additional workarounds that proved successful or questions concerning the ones presented for the Windows Update Error 0x8024401c, do tell us in the comments.

Excel Date Format is Not Changing: How We Fixed it

If your Excel software is not changing the date format, you have to know that you’re not the only one experiencing this issue.

This problem seems to be spread across a variety of platforms and versions of Excel, but don’t worry, we will give you step-by-step instructions to fix it.

This method will fix Excel if it doesn’t change the date format

  1. Click the Data tab from the top menu of your screen.
  2. Choose the Text to columns option from the menu.
  3. Tick the box next to the option Delimited to activate it.
  4. Press the Next button two times to move through the setup pages.
  5. Select Date -> click the drop-down menu -> choose the MDY custom option.
  6. Click the Finish button.
  7. Select any empty cell inside your Excel document -> press the Ctrl+1 keys on your keyboard.
  8. Select the Custom format option found at the bottom of the list.
  9. In the text box -> type YYYY/MM/DDD -> press Ok.

Here’s how to change the Windows default date format

Because in some cases the formats used for dates can be confusing, it is recommended that you change the default Windows date format to simplify the process in the long run.

Of course, this specific setting will depend on your requirements, but you can follow these steps to set it:

  1. Press Win+R keys -> type control international > press Enter.
  2. Under the Formats tab -> check or change the default formats available.
  3. Click the drop-down lists and choose the desired option.
  4. Press Ok to save the settings.
Note icon NOTE
Changing the Windows date format settings will affect all the applications installed on your PC, and not only the options found in MS Excel.

Conclusion

In today’s article, we discussed the most efficient way of dealing with Excel not changing the date format.

If you found this guide helpful please don’t forget to let us know. You can do so by using the comment section found below this article.

Fix: Radeon Host Service has High GPU Usage

The service called Radeon Host Service has been seen taking heaps of GPU resources. If this happens, you’ll need to act fast and fix your GPU memory to protect your hardware.

High GPU usage is usually do to intense usage by one or more apps, incorrect settings or an old or corrupted graphics card driver.

The first things you can try are to reinstall the problematic game or the AMD Radeon Settings app. You may also lower the game’s graphics settings. If that doesn’t work, try the solutions below.

How can I free up GPU resources from Radeon Host Service?

1. Disable ReLive and Record Desktop

  1. Open the AMD Radeon Settings app and select the ReLive tab.
  2. In the following window, click the Global tab.
  3. Click the toggle switches next to ReLive and Record Desktop to turn both off.

2. Disable Instant Replay and more on AMD Software: Adrenaline Edition

  1. If you use AMD Software: Adrenaline Edition, open it and click the gear icon in the top right corner.
  2. Click the General tab.
  3. Under the Media section, click the toggle switch next to Instant Replay and Instant GIF to turn it off.
  4. Under the Recording section, disable Record Desktop, Show Indicator, and Borderless Region Capture.

3. Change Windows Power Plan

  1. Open the Control Panel and select Power Options. If you don’t see it, make sure View By is set to Large icons.
  2. Select either Balanced (recommended) or the High performance power plan, although it’s recommended that you select the latter.

4. Fix drivers with AMD Cleanup Utility

  1. Go to the AMD Cleanup Utility page and select AMD Cleanup Utility for Windows to download the software automatically.
  2. Go to the file’s location and double-click it to run it.
  3. A small window will appear asking if you want to restart your Windows computer in safe mode. It’s highly recommended that you select Yes.
  4. Click OK on the following prompt to continue with the cleanup. It explains what the process will entail.
  5. When finished, a window appears telling you the process has been completed. Click Finish, then Yes to reboot your system and complete the process.

5. Roll-back drivers

  1. Open the Device Manager.
  2. Expand Display adapters, right-click a graphics card, and select Properties.
  3. If available, go to the Driver tab and click the Roll Back Driver button.

Rolling back drivers should be considered to be a last-ditch effort. This will revert the drivers to an earlier version until AMD releases a fix.

What are other ways that I can take better care of my GPU?

There’s a peculiar problem you should be aware of. Users have complained of their GPU fans spinning and then suddenly stopping repeatedly. This is usually because the RAM battery needs replacing.

You can also try updating the GPU driver. We recommend learning what to do if the Device Manager doesn’t recognize your AMD graphics card. You may have to install drivers in Compatibility Mode.

Feel free to comment below if you have questions about addressing GPU problems. Also, leave comments about guides you want or information on other hardware problems.

Fix: 0xa00f4244 NoCamerasAreAttached Windows Camera Error

A camera as a device holds a firm place in Windows 10 and Windows 11 but even built-in cameras on laptops or third-party cameras misbehave occasionally. Such is the case with the Windows Camera App Error Code 0xa00f4244 NoCamerasAreAttached.

Windows users have the built-in Windows 10 or 11 Camera application as their default camera software. It is a very simple application that lets you test out your camera capabilities, take quick snapshots, and record video footage.

If you have problems with your camera application or with other related apps that use the device, we advise you follow the guide below to see how to check camera permissions, reset your camera, and more.

The most common camera-related error Windows 10 and 11 users encounter goes by the code 0xa00f4244 and it comes with the We can’t find your camera message.

Luckily, when there’s a problem – there’s a solution. Or, a few of them, just to be certain. So, make sure to check them out and reclaim your camera usability back in a few easy steps.

What does the Windows Camera App error code 0xa00f4244 mean?

There are a few possible explanations for the Windows camera app error code 0xa00f4244. This error happens because the application for your camera was not installed correctly. And the system was unable to identify its presence.

Alternatively, it’s possible that the camera is being blocked by your antivirus program, which you can opt to uninstall and choose a better antivirus software that doesn’t interfere with safe processes.

How do I fix the error 0xa00f4244 NoCamerasAreAttached?

1. Check drivers

  1. To fix the 0xa00f4244 nocamerasareattached error in Windows 11/10. Right-click the Start menu and choose Device Manager.device-manager-w10 amd driver install problems
  2. Navigate to Cameras and expand the sub-menu in order to see your camera, then right-click on the camera device and select Update driver.update-driver-cam 0xa00f4244 nocamerasareattached

If your driver is up to date but the issue is resilient, there’s a chance the latest driver update broke the camera for you. In this case, we advise you to try and roll back the camera driver.

  1. Right-click the Start menu and choose Device Manager.device-manager-w10 amd driver install problems
  2. Navigate to Cameras and expand to sub-menu in order to see your camera, then right-click on the camera device and open Properties.prop-cam 0xa00f4244 nocamerasareattached
  3. In the Driver tab, click on the Roll Back Driver button. The 0xa00f4244 nocamerasareattached error in Windows 10 will be fixed.

Finally, the fact that you have a proper driver may not suffice. Namely, generic drivers aren’t exactly the best fit for the job.

True, sometimes Windows Update will provide you with the official drivers, but it’s always the safest bet to download drivers from the official site of the equipment manufacturer.

If you want to save time, you can use dedicated driver updater software. This type of tool will scan your whole PC, identify any outdated drivers, and install the latest versions available.

2. Make sure you turn on the Camera app

  1. Type settings in the taskbar and open the Settings panel then head to the Privacy section.
  2. Select Camera. If it says Camera access for this device is off, click on the Change button and toggle the button corresponding to Allow apps to access your camera to On.camera-on 0xa00f4244 nocamerasareattached

Alternatively, if you want to be more precise, you can scroll down and select the exact apps that you want to grant camera access to. Generally here’s where you will find your Camera app and other apps that use your camera such as VOIP apps.

For each app, you will have to toggle the On/Off button according to your preferences.

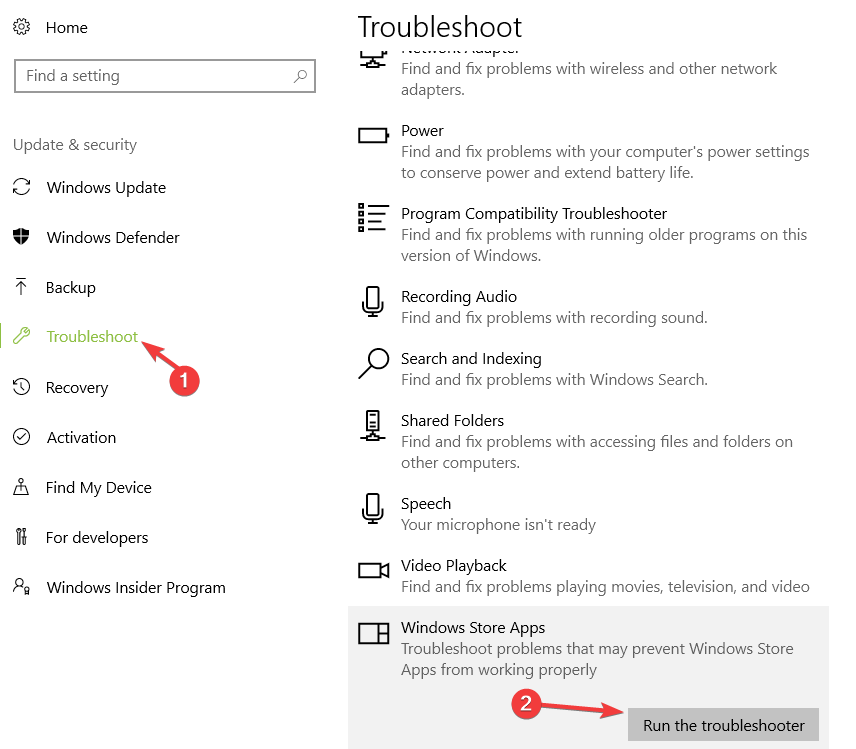
3. Run the Store Apps Troubleshooter

  1. Press Windows + I to open the Settings app then choose Update & Security.update-security nmi hardware failure windows 10
  2. Select Troubleshoot from the left pane.
  3. Scroll to the bottom and click on Windows Store Apps.
  4. Click on the Run the troubleshooter button.
    windows store apps troubleshooter Camera error code 0xa00f4244

If Windows detects any malfunctions or problems within your Camera app, it will provide a report at the end of the troubleshooting scan.

This report will let you know what can be done about the issue. In most cases, if any problem is found, the troubleshooter will give you easy-to-follow prompts on how to solve it, you just have to follow along.

After running the troubleshooter, check if the Windows Camera App Error Code 0xa00f4244 is still present in the Camera app.

4. Scan for malware

  1. First, open Windows Defender from the notification area.
  2. Choose Virus & threat protection.
  3. Select Scan Offline.windows defender scan Camera not working due to error code 0xa00f4244
  4. Your PC will restart and the scanning procedure should commence.
  5. After that, open Windows Defender again and select Virus & threat protection.
  6. Open Virus & threat protection settings and enable the Cloud-based protection.

If you want to benefit from more advanced security features and get more accurate scan results, we strongly recommend you use a third-party antivirus along with the Windows Defender.

The built-in app is a very good and strong utility, but professional antivirus tools have higher detection rates and protect your PC on all fronts.

You can nowadays find plenty of light and highly functional antiviruses that will protect you in real-time without taking a toll on your PC’s speed.

The scan process is pretty straightforward for most antiviruses and highly similar to what we did in Windows Defender.

5. Reset the camera app

    Resetting the camera eliminates all app-related data, allowing it to work as new. Many Windows 10 and Windows 11 users report that this trick fixed theiru003cspanu003e u003c/spanu003eu003cemu003ewe can’t find your camera 0xa00f4244u003c/emu003eu003cspanu003e u003c/spanu003eerror.

  1. u003colu003ern tu003cliu003eu003cspanu003eType u003c/spanu003eu003cemu003esettingsu003cspanu003e u003c/spanu003eu003c/emu003eu003cspanu003ein the taskbar and open the Settings panel then go to u003c/spanu003eu003cstrongu003eAppsu003c/strongu003eu003cspanu003e.u003c/spanu003eu003c/liu003ernu003c/olu003e

    apps-w10 0xa00f4244 nocamerasareattached
  2. u003cspanu003e2. Select u003c/spanu003eu003cstrongu003eApps and featuresu003c/strongu003eu003cspanu003e from the left menu, then locate your u003c/spanu003eu003cemu003eCamera appu003c/emu003eu003cspanu003e and click on it.u003c/spanu003e

  3. u003cspanu003e3. Click on u003c/spanu003eu003cstrongu003eAdvanced optionsu003c/strongu003eu003cspanu003e.u003c/spanu003e

  4. u003cspanu003e4. Scroll down and click on the u003c/spanu003eu003cstrongu003eReset buttonu003c/strongu003eu003cspanu003e.u003c/spanu003e

    reset-cam 0xa00f4244 nocamerasareattached
  5. 5. u003cspanu003eThe u003c/spanu003eu003cemu003ewe can’t find your camerau003c/emu003eu003cspanu003e error will be fixed.u003c/spanu003e

6. Tweak the registry

  1. In the Windows Search bar, type regedit, then right-click the Registry Editor and run it as an administrator.
  2. Click on File, choose Export, and backup your registry. If something goes wrong, you can restore it with ease. In addition, you can create a Restore Point, just in case.file-export 0xa00f4244 nocamerasareattached
  3. Now, follow this path for 32 bit system: ComputerHKEY_LOCAL_MACHINESOFTWAREMicrosoftWindows Media FoundationPlatform
  4. And for 64-bit system: ComputerHKEY_LOCAL_MACHINESOFTWAREWOW6432NodeMicrosoftWindows Media FoundationPlatform compture-path 0xa00f4244 nocamerasareattached
  5. Right-click in the right window and choose New and select DWORD (32-bit) Value.
    new dword Camera not working error code 0xa00f4244
  6. Name this value EnableFrameServerMode.
  7. Right-click and choose to Modify this newly created registry value then set its value to 0 (zero) and save changes.
  8. Restart your PC and you should be good to go.

Because of the difference in encoding standard certain cameras just won’t work in Windows 10 or Windows 11, and that can lead to error 0xa00f4244 in the Camera app, but this registry change should fix that.

7. Repair the Microsoft Store

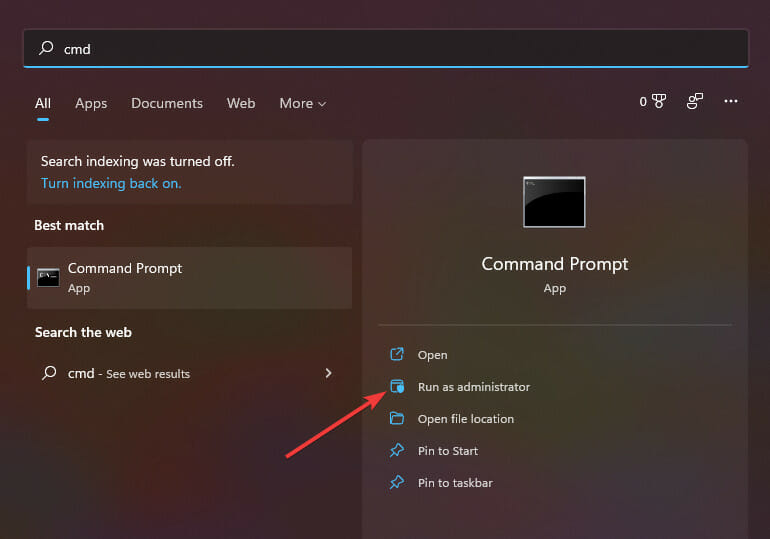
  1. Type cmd in Windows search and click on Run as administrator to start Command Prompt with full privileges.cmd-run-admin 0x80070002 windows update
  2. Type the following commands and press Enter after each one:

net stop bits
net stop wuauserv
net stop appidsvc
net stop cryptsvc
Del "%ALLUSERSPROFILE%Application DataMicrosoftNetworkDownloader*.*"
rmdir %systemroot%SoftwareDistribution /S /Q
rmdir %systemroot%system32catroot2 /S /Q
regsvr32.exe /s atl.dll
regsvr32.exe /s urlmon.dll
regsvr32.exe /s mshtml.dll
netsh winsock reset
netsh winsock reset proxy
net start bits
net start wuauserv
net start appidsvc
net start cryptsvc
net-stop 0xa00f4244 nocamerasareattached

Hopefully, this solution will fix Microsoft Store and all its components and your camera will be recognized, so that you never see the Windows Camera App Error Code 0xa00f4244 again.

8. Use a third-party camera app

Finally, if none of the presented solutions sufficed, we can only recommend trying and switching to an alternative camera app.

Most of them are not Metro-style apps and they come with their own formatting software and, occasionally, drivers as well. Of course, the best of them all is the one provided by the OEMs themselves.

That should be it. We hope that you managed to sort the Windows Camera app error code 0xa00f4244.

How can I fix 0xa00f4244 nocamerasareattached on Windows 11?

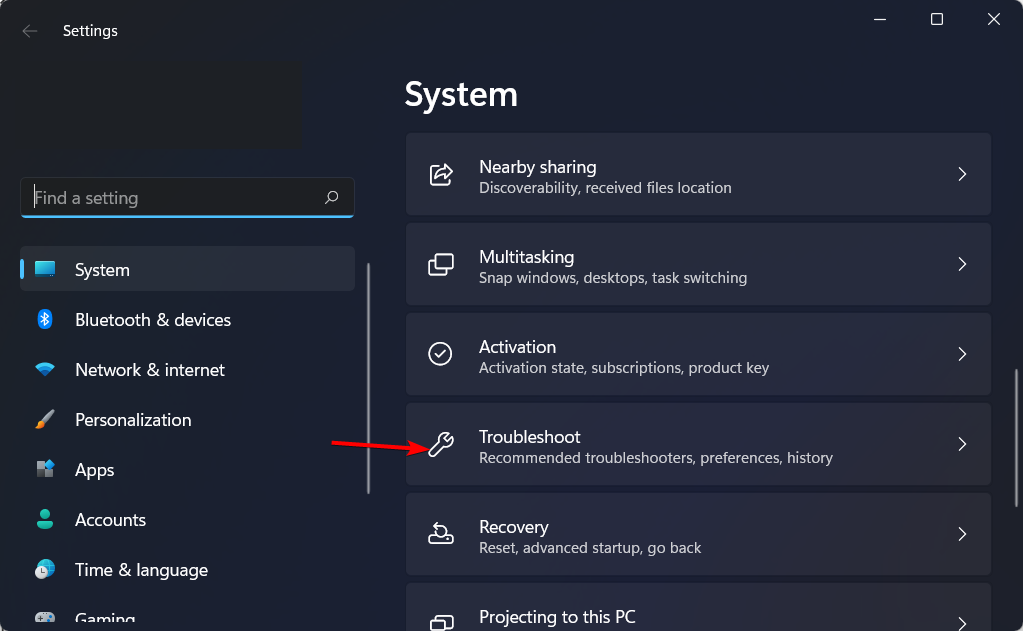
  1. Press Windows + I then scroll down to the Troubleshoot section and select it.troubleshoot-opt-w11 0xa00f4244 nocamerasareattached
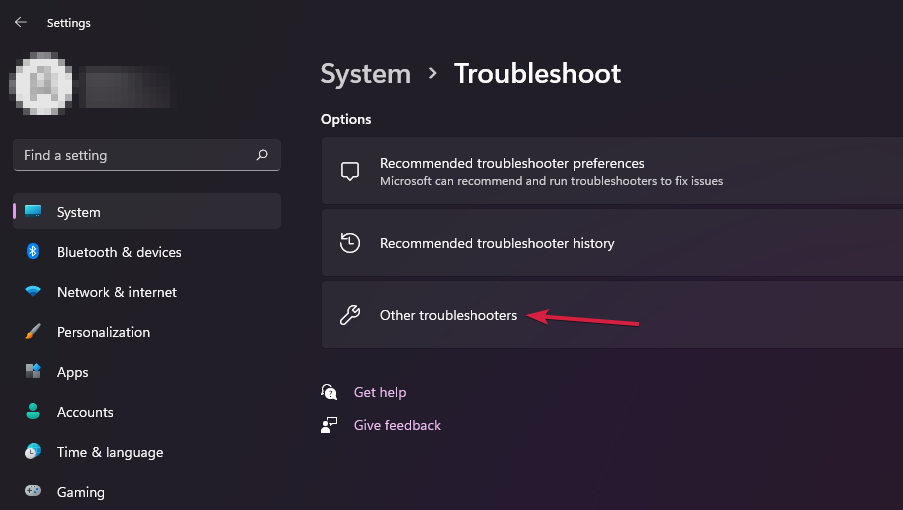
  2. Click Other troubleshooters.
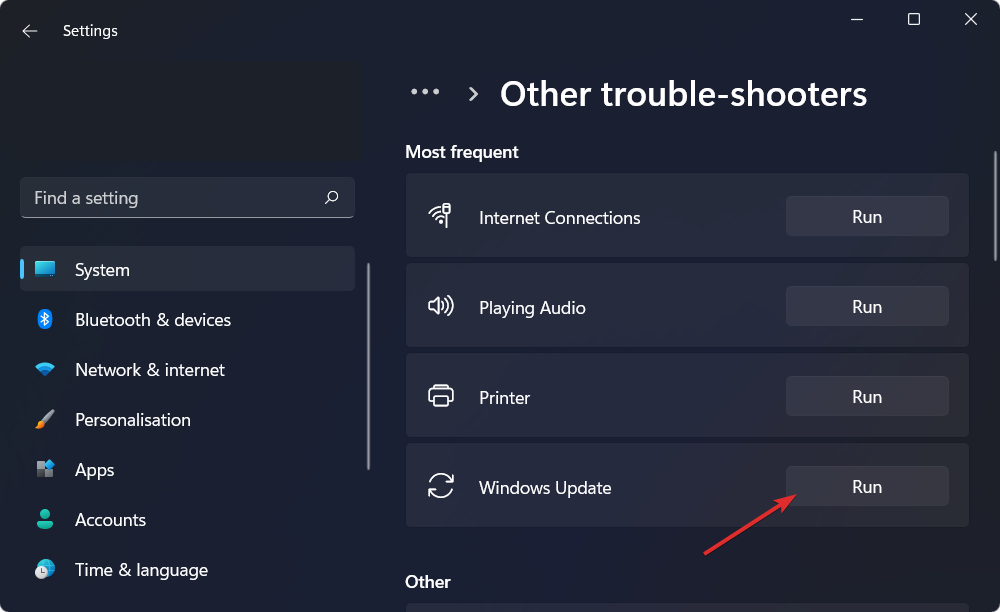
  3. Scroll down the click the Run button next to the Camera troubleshooter.run-cam 0xa00f4244 nocamerasareattached

By running the Windows 11 built-in Camera troubleshooter, you may find detailed information about what went wrong with your camera, and how to fix it.

On what devices does the no camera attached 0xa00f4244 error occur?

According to user reports, we can’t find your camera 0xa00f4244 error message seems to be more prevalent for the following laptop manufacturers:

  • 0xa00f4244 NoCamerasAreAttached on Dell – Ensure that the camera is turned on by going into the BIOS of your Dell laptop and selecting the appropriate option. You can either restart the computer or turn it back on.
  • Surface Pro 0xa00f4244 NoCamerasAreAttached – The error number 0xa00f4244 NoCamerasAreAttached is often triggered when the Windows Camera app is disabled, as this is the most common cause.
  • Acer 0xa00f4244 NoCamerasAreAttached – It is recommended that you delete the camera driver and then reinstall it.
  • 0xa00f4244 NoCamerasAreAttached on Asus – Make sure to run the Windows camera troubleshooter.
  • MSI 0xa00f4244 NoCamerasAreAttached – The error number 0xa00f4244 NoCamerasAreAttached comes from the Camera app, and it typically displays when the application is unable to recognize your webcam in the correct manner.
  • 0xa00f4244 NoCamerasAreAttached on HP – In order to resolve this issue, verify that the webcam is the active device, remove and reinstall any applications you currently have, put your webcam through its paces, and finally, bring the webcam drivers up to date.
  • Samsung 0xA00F4244 NoCamerasAreAttached – To save time, you may use a dedicated driver updater which we’ll mention below.
  • 0xa00f4244 NoCamerasAreAttached on Lenovo – Your privacy settings are preventing the camera from working properly.

If you use any of these and encounter the issue, make sure to check out all the solutions presented in the guide below, as they should remediate the issue and allow you to use your camera app with no problem.

How do I fix my laptop camera not found?

The camera on a laptop can be put into a variety of functions; however, the two most common ones are taking pictures and participating in online video chats, such as those found on Skype or Google Hangouts.

However, there is no guarantee that the built-in camera on the laptop will always start up or function in the way that was originally intended for it too. Videoconferencing apps, as may be anticipated, are more likely to be negatively affected than other types of apps.

When making a video chat on a laptop, one of the most important pieces of hardware to have is a camera that works. Thus we recommend that you check out our dedicated post on how to fix your laptop camera in 9 easy ways.

How to stop antivirus from blocking my camera?

While security software is necessary, it’s also a fact that it can occasionally get in your way and block legitimate processes and apps.

That might just as well be your case with your very own guarding acting overzealously.

Note icon NOTE
u003cemu003eHow do I unblock my camera with antivirus?u003c/emu003eu003cbru003eu003cemu003eu003cbru003eu003c/emu003e➡ First of all, make sure you granted permissions for apps to access the camera as shown in our solution no 2.u003cbru003e➡ Next, access your antivirus settings and set an exception rule to always allow the camera app through.u003cbru003eu003cbru003eThe precise setup will vary according to your software provider, but you needn’t worry, the terminology and functionality will be similar to the Microsoft Defender antivirus, so it’s pretty intuitive.

If you have additional issues, questions, or suggestions in regard to the 0xa00f4244 NoCamerasAreAttached error, make sure to tell us about that in the comments section below.

Calligraphy Software for PC: 7 Best in 2026

Calligraphy is a visual art that refers to the execution of lettering with a brush, or other writing instruments.

Now let us shift the point of interest towards the digital era and yes, it is possible to practice calligraphy on your PC.

There are three types of calligraphy: Western, Eastern, and Arabic, each reflecting the language and handwriting of a specific region of the globe.

Unlike the conventional form of writing, digital calligraphy requires no special pens, inks, or brushes. However, it does require quality software that comes with various brush presets.

One might ask why bother with digitalizing calligraphy or creating calligraphic fonts when there are already so many designs available to choose from.

As in all other areas, it is important to find your own voice or in this case your own writing style in order to make your work stand out from the plethora of similar services available on the market.

If so, take a look at our selection below, compare and explore the different capacities that each software has to offer and become an expert at digital calligraphy.

What is the best software for calligraphy?

Adobe Illustrator – Vector-based structure

Adobe Illustrator

When it comes to the state of the art of illustration, Adobe Illustrator is the best software that money can buy.

The graphics software is used by millions of designers and artists to create anything from mobile graphics to book illustrations and much more.

One of its distinguishing features is its vector-based structure which means you will never have to deal with resolution issues. Your calligraphy can be easily scaled larger or smaller while preserving intact quality.

Besides, the Image Trace feature can quickly scan your calligraphic fonts and transform them into vectors. The Illustrator also boasts a user-friendly brush widely appreciated for its accurate results.

The tools included in Illustrator’s suite enable you to find a font style that fits your work or turn to other graphic designers for calligraphic design inspiration.

You can even import your favorites by choosing from over 17,000 high-quality fonts with Adobe Fonts or sync with Adobe Stock and use it as a basis for custom fonts.

With Adobe Illustrator you can make your own custom font design based on handwriting or serif or sans serif fonts.

Not only that, but you can also create custom letterforms that fit your unique layout and design.

Let’s quickly go through its key features:

  • Adobe Originals (available in Illustrator’s font menu, it allows you to choose an existing font to kick off your design process, then adjust the weight, width, or slant to suit your specific needs)
  • Sketch-based development (you can either draw by hand in Illustrator or import hand lettering / digital art from Adobe Photoshop)
  • Image Trace (transform your imported font sketch into an easily edited vector graphic to refine your work)
  • Integration options (third-party plug-ins can easily be integrated to help you finalize and manage your fonts)

Adobe Illustrator is a paid service, but you can try it out for free for 7 days. You can integrate it within the Creative Cloud if you use other Adobe products.

Adobe Illustrator

Take your project from average to eye-catching with Adobe Illustrator! Its calligraphy and custom fonts make all the difference.
Free Trial Visit Website

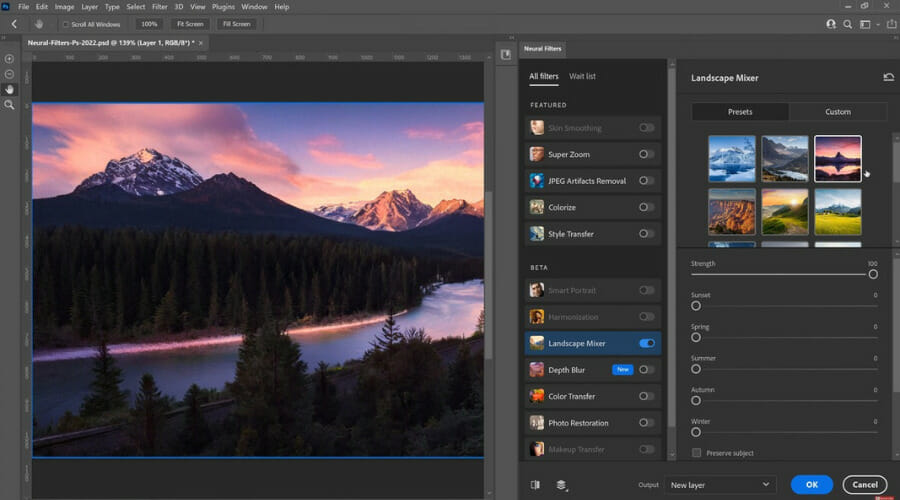
Adobe Photoshop – Unique designs

best software for calligraphy

Adobe Photoshop is the most popular graphics software for professionals and there are good reasons for that.

It’s the pinnacle when it comes to calligraphy work thanks to its numerous brushes and special effects, not to mention the fact that it gives you complete control over the lettering since you can edit your graphics pixel-by-pixel.

In calligraphy, each letter is carefully thought out according to the artist’s vision.

This leads to a wide variety of styles and Photoshop brushes cover them all: from spray paint or ink wash effect, precise linework shading with pencil, ink, and charcoal brushes, and watercolor brushes to splatter effects.

You can perfect your calligraphy brushstrokes with thousands of preset high-quality Photoshop brush sets or create your unique, custom drawing brushes and sync them with Creative Cloud libraries.

You can create unique calligraphy designs by playing around with effects and color options.

Users can also create custom brushes or use one from the comprehensive brush preset collection.

Let’s quickly go through its key features:

  • Your work is automatically saved to the cloud for quick access, no matter where you are
  • Lens Blur offers a more natural and realistic look when blurring an object in the foreground
  • Improved Content-Aware Fill
  • Object Selection tool (create fast and precise selections by drawing a simple rectangle)
  • Performance improvements (smoother panning, zooming, and navigating)

Adobe Photoshop is a subscription-based service that is integrated into the Creative Cloud. It has a 7-day free trial.

Adobe Photoshop

Make your calligraphy stand out with custom brushes, advanced lettering options, and more.
Free Trial Visit Website

Graphic Design Studio – Full artistic color palette

Graphic Design Studio is a powerful vector drawing tool that enables you to sketch out your design or import a vector graphic in SVG format to add your own creative touch.

When it comes to calligraphy, the tool is suitable for both professionals and beginners who can use pre-designed graphics without the hassle of starting from scratch.

With a full artistic color palette, easy-to-use pen and pencil, and tools that allow you to control size, shape, text, lines, and layers, you can start creating unique and stunning lettering designs with a creative edge in no time.

Graphic Design Studio gives you a plethora of inspiring tools, including over 2 000 pre-designed vector graphics and images.

The tool lets you also create your own presets and add them to the Component Library, so you can reuse them in the future.

It comes with full layering support, so you can tweak and change up your lettering without disturbing other parts of your design.

Let’s quickly go through its key features:

  • Powerful editing tools
  • Full support for SVG files, including import and export
  • Creative filters and effects (3D tunnel effects and unique shapes, blurs, shadows & glows)
  • Creative background and fill textures
  • Artistic color palettes and gradients
  • 65+ commercial use fonts

Graphic Design Studio is a paid product, so if you want to use you will have to purchase a license.

Graphic Design Studio

Step up your calligraphy game and create remarkable letterings with Graphic Design Studio’s practical pencil toolset.
Check Price Visit Website

Caligrafile – Curated archive of 500+ supplies

 best software for calligraphy

Caligrafile is not a simple calligraphy tool because it includes diverse word lettering and editing tools for professional writers or hobbyists.

You can start with this tool if you need an integrated platform to find and use multiple fonts or calligraphy tools.

More exactly, this platform offers an archive with valuable lettering supplies, magazines, or even physical pens and nibs.

It’s possible to employ this tool for seamless integrations with productivity or email tools, such as Office 365, Google Workspace, or Slack.

Besides this, you’re not limited only to lettering or font software as the platform offers design tools, practice sheets, pad and brushes & mockups.

It is worth mentioning that you have customizable tags and labels to create a personalized system and set tags to your documents or files.

Let’s quickly go through its key features:

  • Organized collection of brushes
  • Accesorries for caligraphy practice
  • Illustration or design tools
  • Intuitive guides for learning
  • Font favorite apps

⇒ Get Caligrafile

FontLab 8 – Improved font curves and coloring

 best software for calligraphy

FontLab 8 is a popular font editor with professional and detail-oriented tools for creative and colorful fonts.

This typeface solution is tailored for professionals and artists of all levels for creating mind-blowing lettering projects.

It has multiple standout capabilities that can turn any font designs into convincing artworks or marketing products.

For example, you have professional Bezier drawing assets for creating fluid letterforms and font types precisley.

Other worth mentioning features for this calligraphy solution are the drafting sketchboard, font variations, or OpenType functions like alternates or substitutions.

Let’s quickly go through its key features:

  • Available on MacOS and Windows devices
  • Editing and refining tool
  • Precised numeric values
  • Color fill with gradients or full colors

⇒ Get FontLab 8

Calligraphr – Simple user interface

Calligraphr is a popular app that allows you to transform your calligraphy into fully functional vector-based fonts with genuine custom designs.

Creating your own calligraphic artwork has never been easier thanks to the pens and pencils as well as the color, line thickness, and transparency of each tool boasted by this software.

The best part is that you can even modify characters after scanning thanks to the internal image editor.

You can create standard font files (TFF or OTFF formats) which can be easily editable and included in other font or graphical editing software.

Caligraphr also includes character randomization which is an essential solution when you want to simulate genuine handwriting.

This calligraphy tool supports multiple languages, so you can easily access and edit all sorts of characters.

Let’s quickly go through its key features:

  • Simple user interface
  • Ligatures (suitable character sequences are automatically replaced with your specified ligatures)
  • Customizable templates (with exactly the character set you need for your font)

Calligraphr has a free as well as a paid version. The free version lets you freely create and design calligraphy, but it does have some limitations on the number of fonts you can make at the same time.

⇒ Get Calligraphr

Inkscape Calligraphy – Custom pen degrees

best software for calligraphy

Inkscape is definitely a powerful contender in the race for the best calligraphy tool thanks to some nifty features like the undo command which would not be possible with a traditional pen and ink.

Thanks to its flexibility, the tool enables both advanced and beginner users to design intricate calligraphy. Plus, Inkscape is able to utilize the pressure and tilt sensitivity of a tablet pen.

You can take full control of the look of your design with width and thinning settings, so your calligraphy looks exactly as you envisioned.

Inkscape also gives you the possibility to fully control the angle and fixation of your pen, with custom pen degrees, from 0 to 90 or -90.

Let’s quickly go through its key features:

  • Tremor (to give a more natural look to the calligraphy strokes by producing anything from unevenness to blotches and splotches)
  • Wiggle and mass

You can take full control of the look of your design with width and thinning settings, so your calligraphy looks exactly as you envisioned.

Inkscape also gives you the possibility to fully control the angle and fixation of your pen, with custom pen degrees, from 0 to 90 or -90.

⇒ Get Inkscape

By emulating the look of handwriting, calligraphy fonts are more artistic than the average font.

If you decide to create your own, you have even better chances to produce an eye-catching design that is sure to impress the right audience for your project.

So why not try your hand at digital calligraphy with the help of a specialized tool? Let us know how that worked for you in the comments section below.

7 Best Music Sequencer Software for Music Producers

A music sequencer is one of the key components of a recording setup. It is an essential program for every music producer and studio engineer.

However, getting the hardware could be too expensive for a low-budget music-producing firm or professional. Hence, the advent of music sequencer software seeks to bridge this gap and make the program available at affordable prices.

A standard music sequencer software is designed to organize sound sequences from a series of MIDI operations.

In plain words, sequencers allow sound engineers, music producers, or music enthusiasts to create (record) and manipulate (edit) songs or recordings to generate desired outputs.

A typical music sequencer is a very technical device, requiring a certain level of expertise to operate.

As such, there are only a handful of standard music sequencer applications out there, as most of the available ones are of low quality, especially some of the so-called free sequencers.

In this article, we bring you five of the best music sequencer software currently available in the market.

What’s the best music sequencer software for PC?

Adobe Audition – Professional audio

Adobe Audition is a professional audio workstation that allows you to create, mix, and design sound effects.

It is recognized as one of the industry’s best digital audio editing software, providing everything you need to create and mix audio tracks.

Adobe Audition is designed to accelerate video production workflow and audio finishing thanks to its complex toolset, including multitrack, waveform, and spectacular display.

You can do everything with this music editing software from creating, mixing, editing, and restoring audio content.

With Adobe Audition, you can record audio tracks from connected input devices and start post-producing them.

You can also use the virtual studio options to create digital audio tracks and edit them with fade-in and fade-out effects, add studio reverb, and more.

The tool also supports multitrack editing, so you can overlap multiple compositions to create a final robust audio track.

Let’s quickly go through its key features:

  • Robust audio toolkit to record, edit and integrate music clips
  • Seamless workflow with Adobe Premiere Pro
  • Essential Sound panel (achieve professional-quality audio)
  • Remix (easily and automatically rearrange any song to fit any duration)
  • Repair and restore (best tools for fixing audio, including spectral frequency display, Diagnostics panel, and effects)

Adobe Audition is part of the Creative Cloud and works well with other Adobe products such as Premiere Pro. You can try it out for free for 7 days.

Adobe Audition

Adobe offers not just a music sequencer, but a state-of-the-art audio workstation to make your audio pieces sound smashing.
Free trial Visit Website

FL Studio – 80+ Plug-ins

FL Studio best music sequencer software

FL Studio is an all-inclusive music-producing software, better known as a DAW – Digital Audio Workstation.

It is one of the best music sequencers in the market, and as a versatile software, its functions go beyond sound sequencing. FL Studio is cross-compatible with both Windows and macOS computers.

The music sequencer software is designed to create, mix, edit, arrange, and master music or recording. With FL Studio, you don’t need an army of music-producing programs, as it offers everything you need in one package.

FL Studio lets you create and edit audio tracks with piano roll and pattern clips.

It also provides access to plenty of clip types such as playlists, audio recordings, automation clips, Slicex, Edison, and more.

Some of the key features of FL Studio include:

  • Step Sequencer
  • Piano Roll
  • 80+ Plug-ins (automation, phasing, reverb, bit crushing, equalization filtering, and more)
  • VST & ReWire support
  • Live DJ Control
  • Event Editor
  • Automation Editing/Recording
  • Audio Key Generator
  • Vectorial Interface

The above-highlighted features make FL Studio one of the best music sequencer software out there. And for that reason, it is the ultimate choice of many music producers and sound engineers across the globe.

FL Studio

Try FL Studio to create, mix, and master music by using its amazing features.
Free Trial Visit Website

Acid Pro – Drum grid mode

Acid Pro 10 is yet another professional-level software that includes all tools necessary to complete a music production project from start to finish.

It incorporates a playable MIDI chopper that lets you sample from beats, loops,, and drum kits. 

Along with that, it also includes a Beatmapper that’s a fast solution when it comes to remixing music. You can upload pre-existing audio files and play around with tempos, and time signatures, add additional audio clips, edit pitches, and more.

This music production software also includes a Morph Pads view where you can see, edit and adjust plenty of audio effects.

Acid Pro 10 also includes professional plugins from Branworx. These include a synthesizer, a buss compressor, and more.

The tool can also be used for audio recording. You can record multiple tracks at the same time so you can, later on, put them together and create a professional-sounding audio file.

Other key features of Acid Pro include:

  • Inline editing
  • MIDI track freeze
  • MIDI filtering and processing
  • Drum grid mode

Acid Pro 10 is a licensed-based software, but if you want to try it out, you can download the free trial version directly from their website.

Acid Pro 10

Create amazing audio production with professional tools and plugins!
Free trial Visit Website

Steinberg Cubase – User-friendly interface

Steinberg Cubase, simply tagged Cubase, is one of the leading music sequencer software in the world, with hundreds of thousands of users across the globe. The software is supported on both Windows PC and MacBook.

Like FL Studio, Cubase is an industry-class all-around music production package, allowing you to record, edit, mix and repeat music as you see fit.

It is flexibly designed to, not only sequence audio tracks but also compose and create beats.

In a nutshell, it is optimized to produce a music track from start to finish, as every needed music production tool is hosted on the software.

Steinberg Cubase features an exceptional next-generation audio engine with a 64-bit floating-point resolution at a 197 kHz sample rate.

This means that the software is able to produce extremely clear and well-defined sound quality.

The tool also provides a very pleasant user experience. Although it is packed with features, the user interface is not intimidating at all.

It integrates the MediaBay library where you can add and organize your content, so you can easily access and edit your tracks without having to browse around separate folders.

Some of these tools/features include:

  • Control Room
  • Audio Alignment
  • Swift & Multi-take Comping
  • OMF & AAF Support
  • Track Archives
  • MixConsole History
  • Note Editing (MIDI style)
  • MIDI Effects
  • VST System Link

Cubase is available in three basic versions: Pro 10, Artist 10, and Element 10. 

⇒ Get Steinberg Cubase

Ableton Live – Sound Library

Ableton Live is a dual-purpose music sequencer software, designed to serve as a live music performance tool and a digital audio workstation.

The software is supported on both Macbook and Windows PC, with exclusive support for all modern Windows OS (from Win7 to Win10).

Ableton Live’s live performance suite makes it highly suitable for DJs. And this alone stands it out as one of the most widely used music software across the globe.

Furthermore, despite being a dual-purpose package, Ableton Live can stand toe-to-toe with any music sequencer software in the market.

And like other leading music sequencers, it is well-equipped to edit, arrange, mix, compose and master audio tracks.

The software hosts a dynamic set of live performance and DAW (digital audio workstation) tools, some of which include:

  • MIDI Sequencer
  • MIDI Editor (for multi-clip editing)
  • Multitrack Recording
  • Sound Library
  • Track Freeze
  • VST & Support

Ableton Live offers a 30-day free trial to first-timers, after which they can opt for one of the three available licensed editions.

The available editions include Live 10 Intro, Live 10 Standard, and Live 10 Suite.

⇒ Get Ableton Live

Renoise – Unlimited add-ons

Renoise is a top digital audio workstation (DAW), which is widely used as a music sequencer by creative artists and music producers.

It is dynamic, flexible, and built to support all major computer operating systems, including Windows, Linux, and macOS.

Renoise, like most standard music sequencer software, uses a tracker-based system to compose, arrange/rearrange, edit, mix, and master sounds, aiming to produce top-quality (error-free) tracks or records.

The software hosts a user-friendly UI, making it ideal for rookie studio engineers or producers.

Its powerful set of features is also fairly easy to use, with a flexible (customizable) blend, to adopt and apply the features as you see fit.

Other key features of Renoise include:

  • Plugin support
  • Sampler
  • Pattern Matrix
  • Tracker interface
  • Native FX

Some of the noteworthy features of Renoise include a sampler, tracker interface, graphical automation envelopes, plugin grabber, unlimited add-ons, multichannel in/out support, flexible routing, ReWire support, pattern matrix, VST support, native FX effects (26+), spectrum analyzer, open sound control (OSC), track grouping, free upgrades, manual guide and more.

⇒ Get Renoise

Reason – Audio merger and splitter

Reason, from Propellerhead, is a popular digital audio workstation, and it rounds up our list of best music sequencer software. The software is exclusively built for only Windows PC and MacOS computers.

Reason is a dynamic music-producing platform that allows you to create (compose), record, mix, edit and master audio content, with little expertise. Its UI is also fairly easy-to-navigate, making it very ideal for music producers with basic to medium-tech proficiency.

In the same vein, Reason provides a flexible platform, which, although simple, is complex enough for highly technical studio engineers or music producers. As such, it is built to serve the needs of all classes of users.

Its usage is further made easy by the comprehensive video guide on the host website.

Reason, like any standard DAW, is equipped with a host of best-in-class features/tools, each designed to serve a set of unique functions, toward creating a near-perfect sound blend or audio track.

Some of these features include:

  • ShapeShifting & Polysonic Synthesizers
  • Sample Manipulator
  • Players (creative performance utilities)
  • Sound Library (up to 7 GB)
  • Vocal Ensemble
  • Drum Machine (pattern-based)
  • Acoustic Piano
  • Pitch Adjuster
  • VST Support
  • Audio Merger & Splitter
  • Audio Effects (synchronous modulation, echo, and more)

Besides that, Reason is a propriety-licensed music sequencer software; hence, it is not available for free.

However, before a full purchase, there is a free trial version on offer, which is valid for a limited period of 30 days.

⇒ Get Reason

Above are some of the best music sequencer software available. And they have been selected and rated based on their respective user-friendliness, compatibility, features, and affordability among others.

Therefore, if you are a music producer who is looking to simplify the studio workflow, the above-listed software are some of the best options for you.

3 Easy Fixes if Cricut Won’t Connect to Design Space

If your Cricut won’t connect to Design Space, and you are looking for ways to deal with this issue, your search ends here. Design Space is a graphics design software that comes free with Cricut.

This utility is cloud-based and easy to use, so you can put it to work any time you need to, wherever you are. However, that does not mean that you will be exempt from dealing with occasional Cricut connection issues.

For instance, Design Space not recognizing Cricut is unfortunately quite common. While we’re at it, let’s see some other frequent problems reported by users:

  • Cricut Explore Air 2, Maker not connecting to Design Space
  • Cricut Explore Air 2 not connecting to computer
  • Design Space not recognizing Cricut – If such is the case, Cricut Design Space won’t connect to the machine.
  • Cricut Design Space not connecting to Internet
  • Cricut won’t connect with USB, to Bluetooth – If such is the case, Cricut won’t connect to the computer.

Why is my Cricut not connecting?

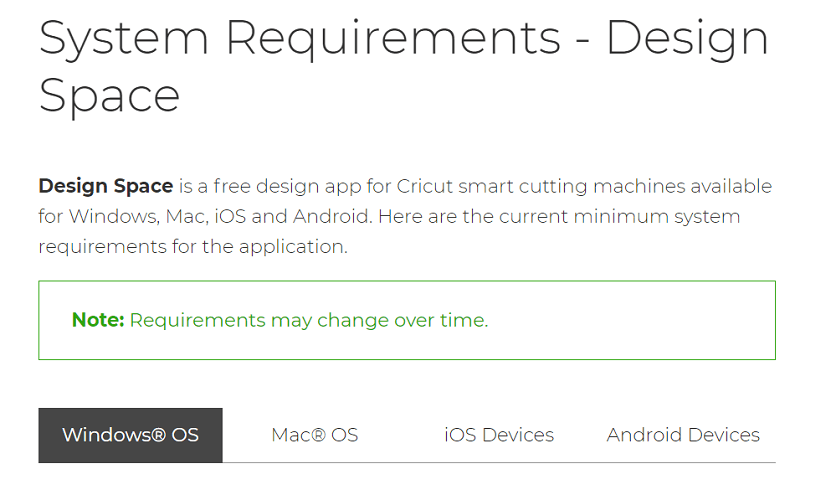
There can be many possible culprits behind the Cricut not connecting situation. Obvious reasons include making sure that the device is actually turned on and that the official requirements match.

Good instincts imply making sure that your system complies with the official specifications:

if pc is incompatible cricut won't connect to design space

Minimum requirements for Windows

  1. At least 4GB of RAM.
  2. Bluetooth connect or an unused USB port.
  3. 50MB of free space available.
  4. The computer must be running Windows 8 or above.
  5. AMF processor or the Intel Core series processor.

Meanwhile, there can also be other more subtle ones such as USB driver issues or third-party security software (firewall or antivirus) blocking the connection.

What to do if your Cricut won’t connect?

Before we dig in, here are a few useful tips you can implement:

  • Clear the cache and history of your web browser
  • Scan your computer for malware
  • Defragment the hard disk.
  • Make sure your firewall or antivirus is blocking Cricut connections

1. Check your Internet connection

The first thing to check when Cricut won’t connect to Design Space is the internet speed. To use Cricut with Design Space, your internet download speed must be at least 2 Mbps, and the minimum upload speed is 1 to 2 Mbps.

Run an internet speed test to determine if yours is up to these recommended speeds.

If it is not, then the speed may be the problem. To get faster internet speeds, you may want to change your modem or switch to a different ISP altogether.

If Design Space still fails to load or keeps freezing after you confirm your internet speed and reconnect, follow our full Cricut Design Space not working troubleshooting guide for step by step fixes covering cache cleanup, app updates, and clean reinstall.

2. Check Bluetooth or USB connections

  1. Use the Windows + X shortcut on your keyboard and select Settings.
  2. Go to Devices and toggle the Bluetooth switch to On if it’s not the case.
  3. Then, click on Add Bluetooth or another device. Your Cricut device has a built-in Bluetooth module, so you only need to make sure the device is turned on and in proximity to your PC (approximately 3 meters).
  4. If the Cricut device is already on the list, you might want to choose one of these options instead: Forget or Remove device.
  5. Pair the two again and check if the Cricut connection issues are solved.

If you’re going for USB instead, use a suitable cable and make sure your USB drivers are properly installed, up to date, and ready to use.

You can perform these tasks manually via the Device Manager on your PC or automate the process with the help of a specialized driver updater tool such as Outbyte Driver Updater.

3. End background processes

  1. 1. Press the following key combination: CTRL + ALT + DELETE.

  2. 2. Click on Task Manager.

  3. 3. Next, navigate to the Processes tab, if you are not already there.

    In this window, you will find a list of all the applications and processes currently running, as well as the percentage of CPU, memory, and other resources they are using.

  4. 4. Click on the Memory tab, so that the little arrow beside the percentage faces downward.

  5. 5. Next, right-click on the first item on the list and hit End task.

  6. 6. Do this for the first few applications or processes on the list, retrying Cricut after closing each one.

  7. Be sure not to close a program or process that is in use. When loads of applications are running in the background, Cricut won’t connect to Design Space.

The above tips will boost your computer speed. In turn, the faster system can deal with the Cricut that won’t connect to Design Space.

Do you have a Cricut that will not connect to Design Space? How did you get to fix it? If these guides solved the issue, feel free to tell us about it in the comment section below.

Windows Update Error 0x800F0923 [SOLVED]

If you’ve been trying to install the latest Windows 10 updates or upgrade to Windows 10, but you couldn’t complete the update process due to error 0x800F0923, this post may help you.

Error 0x800F0923 is one of the most frequent Windows 10 update errors. It occurs when either a driver or app isn’t compatible with the updates that users are trying to install.

Oftentimes, the culprits are the graphics driver, an outdated hardware driver or an old program or security software.

How can I fix the Windows Update error 0x800F0923?

1. Update your drivers

Update drivers manually

  1. Open Win + X menu by pressing Windows Key + X.
  2. Now choose Device Manager from the list.
  3. Expand the categories to find the name of your device > right-click it > select Update Driver.
  4. For graphics cards, expand the Display adapters category > right click your graphics card > select Update Driver.
    Windows Update error 0x800f0923
  5. Select Search automatically for updated driver software.
    0x800f0923 Server 2012
  6. If Windows doesn’t find a new driver, look for one on the device manufacturer’s website and follow their instructions.

Several users reported that error 0x800F0923 was caused by their drivers. Sometimes outdated drivers can prevent you from downloading new updates, but you can fix the problem by updating the drivers manually.

1.1 Update drivers automatically

Be aware that permanent damage can be caused to your PC by installing the wrong driver version. Thus, we recommend you use Outbyte Driver Updater (100% safe and tested by us) to do it automatically.

The tool is easy-to-use, and besides launching it, choosing what to fix, and then restarting your PC, there’s nothing for you to actually do since it is fully automated.

You can even set it to run constantly in the background, being available in the System Tray.

This allows it to periodically scan the Internet for more recent drivers and apply them as well.

Outbyte Driver Updater

<a>f you need drivers to be updated, then go ahead and gives Outbyte Driver Updater a try, since it will make everything easier.</a>
Free Trial Visit website

2. Temporarily disable your security software

A common cause of error 0x800F0923 might be your antivirus software. Third-party antivirus tools tend to interfere with your system, and that can sometimes lead to this error. However, you might be able to fix the problem simply by disabling certain antivirus features. If that doesn’t solve the problem, you can try temporarily disabling your antivirus and see if that helps.

In the worst-case scenario, you might have to remove your antivirus to fix the problem with Windows Update. Even if you remove your antivirus, Windows 10 comes with Windows Defender, so you don’t have to worry about your safety.

If removing the antivirus solves the issue, it might be a perfect time for you to consider switching to a different antivirus solution. There are many great antivirus applications on the market, but if you want a tool that will offer great protection without interfering with your system, we recommend you try TotalAV.

Not only is it a world leader when it comes to cyber-protection, but it also offers all that protection without any of the common drawbacks, such as a laggy PC or limited network accessibility.

3. Use Microsoft’s update troubleshooter

  1. Open the Settings app by pressing Windows Key + I.
  2. Now navigate to the Update & Security section.
    0x800f0923 Server 2012
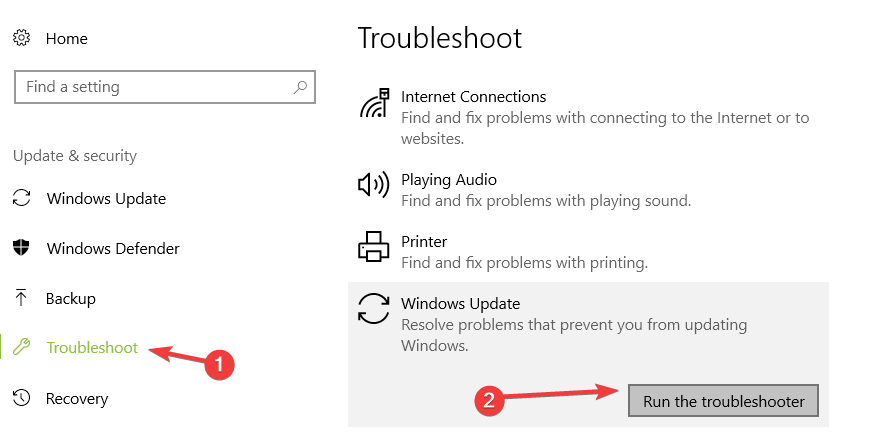
  3. Select Troubleshoot from the menu on the left and click Windows Update in the right pane.
  4. Now click Run the troubleshooter button.
    Windows Update error 0x800f0923
  5. Follow the instructions on the screen to complete the troubleshooter.

According to users, sometimes you might be able to fix error 0x800F0923 simply by running Windows Update troubleshooter.

As you might know, Windows 10 comes with various troubleshooters that can fix common problems automatically.

Once the troubleshooter is finished, the issue should be completely resolved and Windows Update will start working again.

4. Check your computer’s compatibility

If error 0x800F0923  is preventing you from upgrading your computer to Windows 10, make sure that your device is compatible with this OS version.

Here’s what you need to do:

  1. Check the Windows 10 Creators Update system requirements
  2. Go to your computer manufacturer’s website and check the list of devices supporting Windows 10

Also, make sure that your antivirus supports the latest Windows 10 version.

5. Remove SPTD drive

  1. Open Device Manager.
  2. Now locate SPTD driver on the list, right-click it and choose Uninstall device from the menu.
    0x800f0923 Server 2012
  3. When the confirmation dialog appears, click Uninstall.
    0x800f0923 laptop

After removing the driver, check if the problem is resolved.

Alternatively, you can disable this driver from Registry Editor. To do that, you just have to follow these steps:

  1. Press Windows Key + R and enter regedit. Now press Enter or click OK.
    0x800f0923 laptop
  2. In the left pane, navigate to this key:
    • HKEY_LOCAL_MACHINESystemCurrentControlSetServicesSptd
  3. In the right pane, double-click the Start DWORD.
  4. Change its value to 4 and click OK to save changes.

In some cases, certain drivers can prevent you from downloading updates and give you error 0x800F0923. SPTD driver is a common cause of this problem, and in order to fix the issue, you need to remove this driver.

After doing that, check if the problem is still there.

You can also uninstall the driver simply by downloading and running SPTD Driver setup file. To do that, just download the setup file from SPTD’s website. When you start the setup file, select Uninstall option to remove the driver.

We have to mention that this driver is related to Alcohol 120% software, so if you’re using this tool or any other similar kind of software, be sure to remove this driver.

6. Reset Windows Update components

  1. Press Windows Key + X and choose Command Prompt (Admin) or Powershell (Admin) from the menu.
    Windows Update error 0x800f0923
  2. When Command Prompt opens, run the following commands:
  • net stop wuauserv
  • net stop cryptSvc
  • net stop bits
  • net stop msiserver
  • Ren C:WindowsSoftwareDistribution SoftwareDistribution.old
  • Ren C:WindowsSystem32catroot2 Catroot2.old
  • net start wuauserv
  • net start cryptSvc
  • net start bits
  • net start msiserver

In order to download Windows Updates, Windows Update and other related services need to work properly.

If there’s an issue with one of these services, you’ll encounter error 0x800F0923 or another similar errors. However, you can fix the issue by resetting Windows Update components.

After the commands are executed, try to perform Windows Update again and check if the error reappears.

If you don’t want to manually restart these services, you can always create a Windows Update reset script that will automatically reset all required services with just a single click.

7. Manually install the update

  1. First, you need to find the KB number of the update you’re trying to download. To do that, you need to open Windows Update and find the KB number of the problematic update or check the Windows Update History website.
  2. After you find the KB number, visit Microsoft’s Update Catalog website and search for the problematic update using the KB number.
  3. List of results will now appear. You should see updates for different architectures, so be sure to download the update that matches your system architecture.
    0x800f0923 laptop

If you can’t download updates due to error 0x800F0923, you might be able to circumvent this problem simply by downloading the updates manually. This isn’t as hard as you think, and you can do it by following these steps.

Once you download the update, install it and the issue should be resolved. Keep in mind that this solution won’t fix the core problem, so you might encounter this issue again when trying to download future updates.

8. Perform an in-place upgrade

If other solutions can’t fix error 0x800F0923, you might have to perform an in-place upgrade. This is relatively simple to do, and you can perform it by following these steps:

  1. Download and run Media Creation Tool.
  2. Select Upgrade this PC now and click Next.
  3. Wait while the setup prepares the necessary files.
  4. Select Download and install updates (recommended) and click Next.
  5. Once the updates are downloaded, follow the instructions on the screen until you get to the Ready to install screen. Now click Change what to keep.
  6. Choose Keep personal files and apps. Now click Next.
  7. Follow the instructions on the screen to complete the setup.

Once the setup is finished, you’ll have the latest version of Windows 10 installed and the issue will be resolved.

This issue can be quite problematic and prevent you from downloading new updates. Speaking of this error, here are some similar issues that users reported:

  • Windows Update error 0x800f0923 – This error usually occurs when trying to download Windows Updates. To fix the issue, simply reset Windows Update components and check if that helps.
  • 0x800f0923 Server 2012 – This issue can also affect Server 2012, and if you’re using it, be sure to try some of our solutions.
  • 0x800f0923 laptop – Many users reported this error on both laptops and desktop PCs. The simplest way to fix this error on any PC is to download and install the update manually, so be sure to try that.

The Windows Update error 0x800F0923 can be problematic, but we hope you managed to solve it using one of our solutions.

Excel Won’t Scroll? Here’s How to Fix [Simplified Guide]

Some Excel users have posted on software forums asking how they can fix Excel files that don’t scroll. Those users can’t scroll down their spreadsheets with the scroll bar or their mouse wheels.

Here are a few potential fixes for Excel scrolling issues that stop you from scrolling through spreadsheets as you would usually expect.

How can I fix an Excel file that doesn’t scroll?

1. Select the Unfreeze Panes options

  1. In most cases, users can’t scroll down Excel spreadsheets because there are frozen panes within them. To unfreeze panes in Excel, select the View tab.
  2. Click the Freeze Panes button.
  3. Then select the Unfreeze panes option. Thereafter, try scrolling down the spreadsheet.
Unfreeze Panes option excel file will not scroll down

2. Restore missing scroll bars

  1. If the scroll bars are missing in Excel’s window, the scroll bar options probably aren’t selected.
  2. Select Excel’s File tab.
  3. Click Options to open the window in the image directly below.Excel Options window excel file will not scroll down
  4. Click the Advanced tab on that window.
  5. Then select the Show vertical scroll bar checkbox.Show vertical scroll bar option excel file will not scroll down
  6. Select the Show horizontal scroll bar option if Excel doesn’t display that scroll bar.
  7. Click the OK button to exit.

3. Is the Shift key stuck?

You can’t scroll down windows with the Shift key pressed. So, it might be worth checking if the Shift key is in any way jammed. If so, you probably won’t be able to scroll down in other software along with Excel.

The best way to fix jammed keys is to clean the keyboard by shaking it upside down and blowing the keys with compressed air duster cleaners.

4. Deselect the Zoom on roll with IntelliMouse option

  1. If a Microsoft IntelliMouse wheel zooms in on a spreadsheet instead of scrolling down it, you probably need to deselect the Zoom on roll with IntelliMouse option. Select the File tab in Excel.
  2. Click Options on the left of Excel.
  3. Select the Advanced tab on the window that opens.
  4. Deselect the Zoom on roll with IntelliMouse checkbox if selected.The zoom on roll with IntelliMouse option excel file will not scroll down
  5. Press the OK button.

So, those are some of the best resolutions for fixing Excel spreadsheet scrolling. Remember that you can also open the file that doesn’t scroll in Excel within an alternative spreadsheet application.

One of our readers said that he manage to fix the problem by selecting all the cells in the spreadsheet and making the automatic height adjustment.

The spreadsheet will probably scroll fine in applications such as LibreOffice Calc.

If you have any other questions or suggestions, leave them in the comments section below and we’ll be sure to check them out.

Getting Windows Ready Stuck [SOLVED]

One of the problems that troubled a lot of PC users is that the screen gets stuck on the following message: Getting Windows ready. Don’t turn off your computer.

The message is displayed so you understand that some optimization and configuration processes are working and you shouldn’t disrupt them by turning off your machine.

If your computer is stuck on getting Windows ready, then read on to find out how long to wait for and when to take action and fix the issue.

Getting Windows ready – how long to wait for?

Note that the estimated waiting time is around 5 minutes or so. However, some users were waiting for ages, and it seems that this issue is more prone to HP, DELL, and Lenovo PC and laptop users.

You can usually figure out if the process is stuck if there is no animation on the Getting Windows ready screen.

Why is my computer stuck at the Getting Windows ready screen?

There are various issues that can occur with Windows updates, and in this article, we’re going to focus on the following problems:

  • Getting Windows ready infinite loop/ update loop/ boot loop/ restarting loop – Many users reported that they are stuck in a restart loop that prevents them from accessing Windows
  • Getting Windows ready after a restart – This issue is most likely caused by an incomplete update, and Windows will try to finish its installation every time you restart your PC
  • Getting Windows ready working on updates – This is a variation of this message that appears usually after a major Windows update. To fix this problem, be sure to try some of the solutions from this article
  • Getting Windows ready stuck after update – In certain cases, this can appear after installing an update; sometimes the installation process isn’t finished and that causes this message to show up

It’s hard to address this issue, though, since you’re unable to reach your system and perform troubleshooting. Here are some workarounds you can try out below.

How can I fix Getting Windows Ready stuck?

1. Hard shut down your PC

After some time, you should hard shut down your PC. Keep in mind that this isn’t as dangerous as some would say. The procedure may be finished after a while, but the screen will remain in an idle state.

The best way to determine the right time for the hard restart/shutdown is to look at the HDD activity lamp. If the lamp isn’t blinking, that means that the procedure is over, and you should shut down your PC.

If the system starts as intended, you should be good to go. If that’s not the case, your only viable option is to start the reinstallation procedure from scratch.

But this time we advise you to perform a clean reinstall. There’s a grave danger that your system won’t perform like it’s supposed to after this kind of failure.

2. Perform a Startup Repair

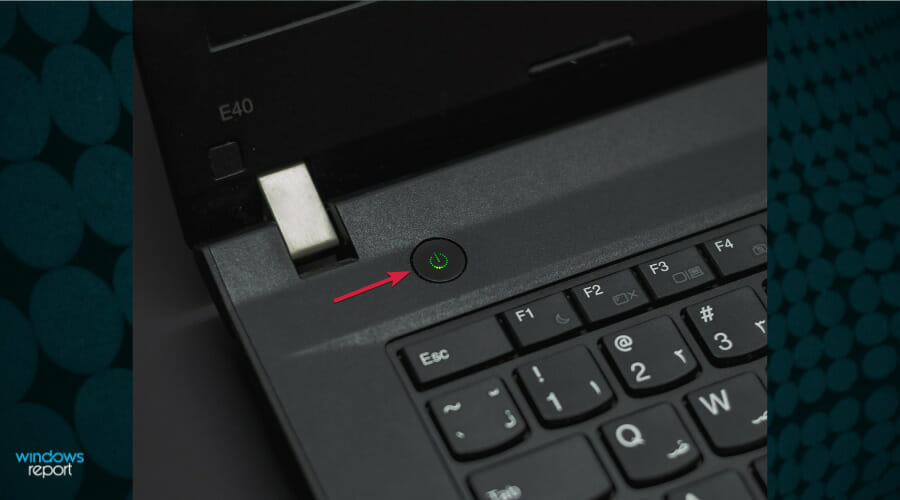
  1. Hold the Shift key down and press the Power button at the same time.
  2. Continue holding the Shift key, while the machine is powering on.
  3. When the PC restarts, you’ll see a screen with a few options. Click Troubleshoot.
  4. Click on Advanced options.
  5. In the Advanced options menu, choose Startup Repair.
  6. In the Startup Repair screen, choose an account. You’ll need an account with Administrator privileges to continue.
  7. After entering the password, click Continue.
  8. Wait for the process to finish and restart your PC afterward.

3. Perform a clean reinstallation

A clean reinstallation should get you going and fix the Getting Windows Ready stuck issue. Make sure you back up sensitive data from the system partition and have your license key ready because otherwise, you’ll be in a lot of trouble.

Moreover, the reinstallation process is not as lengthy and you should be able to finish it in less than one hour or so, including driver check-up and customization of the system to your liking.

To perform a clean installation of Windows 10, you’ll need to create a Windows 10 installation media using the Media Creation Tool. Since you can’t access your PC, you’ll have to create installation media on another PC. After doing that you need to follow these steps:

  1. Connect the Windows 10 installation media to your PC and boot from it. Keep in mind that you might have to press the appropriate key or change your boot priority in BIOS in order to boot from Windows 10 installation media.
  2. Choose the desired language and click on Next.
  3. Click on Install Now and follow the instructions on your screen. Keep in mind that clean install will remove all files from the selected drive, so be sure to back up important files beforehand.

In addition, you must select the correct drive in order to perform a clean install. If you accidentally select the wrong drive, you’ll remove all files from that drive, so be extra cautious.

After the setup process is completed, the problem should be completely resolved. For more information, our guide on how to perform a clean reinstallation will provide you with a detailed explanation.

Since clean install can be a complicated procedure, many users are suggesting resetting Windows 10 instead.

To do that, you need to do the following:

  1. Follow Steps 1 and 2 from above.
  2. Now click on Repair your computer.
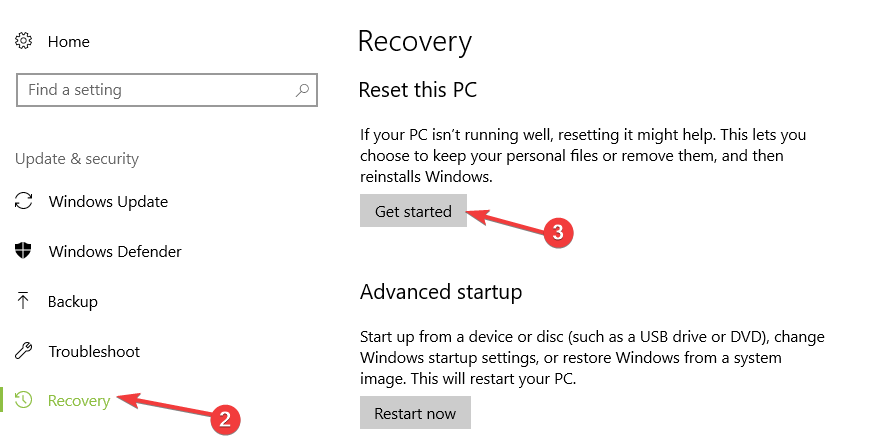
  3. Select Troubleshoot, then Reset this PC, and finally click on Remove everything.
  4. Select your Windows installation and choose Only the drive where Windows is installed, then Just remove my files.
  5. Now click on the Reset button to start resetting your Windows 10 installation.

Both reset and clean install will remove all files from your system drive and reinstall Windows 10, so feel free to use any of these methods.

If you need more details, we have a complete guide on how to reset your PC that will help you all through the process.

4. Uninstall recently installed software

  1. Click the Start button and select Settings.
  2. Now click on Apps.
  3. Just select the recently installed app and select Uninstall.

If your Windows update process went smoothly prior to installing particular software on your computer, then we may have found the culprit.

That means that probably, the respective software solutions are not fully compatible with the latest Windows 10 OS version, you may encounter update errors.

So, before downloading any software on your PC, make sure it’s fully compatible with your OS.

In this case, use the Power button to turn off your computer, power it back on, and uninstall any recently installed apps and programs. Then restart your machine and check for updates again.

How to fix Getting Windows ready restarting loop?

Some of our readers experienced a boot loop with the Getting Windows ready window every time and that can be extremely frustrating.

However, the solution to this problem is to start the PC in Safe Mode and then use some of the troubleshooting methode described above.

We actually have an extensive guide on what to do if your PC is stuck into a boot loop and you will find a lot more information.

The installation process of Windows gradually becomes easier with every new system introduction. Most of us remember the lengthy installation procedure of XP, with all the buzz about drivers and initial setup. Luckily, that’s not the case with Windows 10.

But there’s good reasoning why users detest oversimplified installation processes. Firstly, most of your drivers are auto installed through the setup.

Secondly, there’s something that may go wrong with the installation. And when that happens, you may run back to Windows 7 or even good old Windows XP.

Another common issue encountered by users is Preparing Windows is Stuck. Learn to fix it by following our solutions in the dedicated guide.

We certainly hope this will help you upgrade to the latest Windows edition and unblock the computer stuck on Getting Windows ready.

If you have any comments or questions about your Getting Windows Ready stuck issue experience, make sure to post them below.

Surface Pro Stuck On Preparing To Configure Windows: Fix

Surface Pro 4 is indeed a great Windows 10 device, but that doesn’t mean you won’t experience any software-related problems while using your tablet. A lot of users reached to us, reporting an annoying issue which usually happens during the boot sequence — the Surface Pro gets stuck on preparing to configure Windows situation.

This error is caused by a Windows 10 update. It can be a small OS improvement or even a driver update which will require a system restart. Well, during that restart you will receive the usual ‘Preparing to configure Windows. Do not turn off your computer’ message. The issue is that everything will get stuck and your tablet will ‘try’ to complete the update process for like seems an eternity. Anyway, here is how you can fix this Windows 10 malfunction:

How to fix Surface Pro stuck on preparing to configure Windows?

  1. Be patient
  2. Force-power off your device
  3. Disconnect all peripherals
  4. Apply repairs with the bootable Windows 10 drive
  5. Repair or restore Windows 10

1.Be patient

Well, if you’re stuck on preparing to configure Windows it means that your Surface Pro 4 is trying to apply the updates. Sometimes this process can take a while and that’s not strange at all since particular update patches are applying numerous files and software on your device. So, the first thing to do is to be patient.

You should wait for at least 3 hours in order to see if something happens. Just remember to plug in the charger first and then you can consider letting it go overnight if that’s not a problem for you. However, if after 3 hours nothing changes, consider applying the methods from below or even performing a full factory reset on Surface Pro if necessary.

2. Force power off your Microsoft Surface Pro 4

If you’re still stuck on the preparing to configure Windows message, then you should force shut down your tablet. In that way you can stop the update process and initiate a fresh restart – hopefully, everything will be working normally afterward.

So, for powering off your device you need to press and hold the Power button until everything switches off – don’t worry, if nothing happens first; keep pressing the Power key for a minute or so.

3. Disconnect all peripherals

If peripherals are attached to your Surface Pro 4, then the update process might freeze. Therefore, switch off your tablet and then remove any connected peripherals before initiating a fresh restart.

You should remove all the connected devices including external hard drives, SSD, USB flash drives, keyboard, mouse and so on. Then, initiate a fresh restart and if everything works well, reconnect your peripherals.

4. Boot into the Safe Mode

You can also try booting into the Safe Mode. There might be a minor stall caused by a driver failure. It’s more than an unexpected circumstance, considering that Surface Pro 4 is a Microsoft’s device, but nothing is impossible. After you boot into the Safe mode, you can disable certain devices from the Device Manager, and reboot your PC. This should allow Windows 10 to load and then you can re-enable devices and they should be automatically updated.

Follow these steps to boot into the Safe mode on Surface Pro 4:

  1. Reboot your PC forcibly 3 times to summon the Advanced recovery menu.
  2. Choose Troubleshoot.
  3. Select Advanced Options and then Startup settings.
  4. Click Restart.
  5. Choose Safe Mode (or Safe Mode with Networking).
  6. Right-click Start and open Device Manager.
  7. Disable secondary devices. Just expand the section, right-click on the device and choose Disable device from the contextual menu.
  8. Reboot your PC and, hopefully, this will get you past the initialization screen.

5. Repair or restore Windows 10

If you cannot manage to resolve the Surface Pro 4 stuck on preparing to configure Windows problem you should consider in repairing or in restoring the Windows 10 system (in this case a hard reset might not be enough, that’s why I’m guiding you directly to a more complex troubleshooting solution). On the Surface Pro 4, you can initiate a system repair or a system restore by following:

  1. Press and hold the Windows start icon and choose Control Panel from the list that will be displayed.
  2. Use the Control Panel search box and type recovery.
  3. Select Recovery and navigate towards Open System Restore and tap on Next.
  4. For initiating a reset go to Settings and access Update & Security.
  5. Tap on Recovery and choose Reset this PC and when done choose “Get started”.

These solutions should help you fix your Surface Pro 4 after it got stuck on preparing to configure Windows. If you are still dealing with this issue, consider taking your device back to service and ask for further technical assistance. If there are any major problems, your warranty should cover everything, so from this point of view, you have nothing to worry about.

Let us know how you managed to fix this error in the comments field below.

Error Code 80244010 in Windows Update [SOLVED]

The Windows Update error 80244010 can arise in various Windows platforms. When Windows can’t search for and find new updates, users see an 80244010 error code.

The error message states:

Windows could not search for new updates.

It’s an issue that often arises on desktops or laptops connected to a LAN network. If you need to fix error code 80244010, check out the potential resolutions below.

What causes the windows update error 80244010?

There are several possible causes for the Windows Update error 80244010. Some of the most common causes include:

  • Network connectivity issues – This error can sometimes occur if your computer cannot connect to the internet or the Windows Update servers.
  • Firewall or antivirus software – Your firewall or antivirus software may be blocking the Windows Update process.
  • Corrupted system files – This error can also be caused by corrupted system files, preventing the Windows Update process from completing successfully.
  • Insufficient disk space – If your hard drive is full or almost full, this can cause the Windows Update process to fail.
  • Pending updates – If you have pending updates waiting to be installed, this can also cause the error 80244010 to occur.

To fix this error, you may need to troubleshoot your network connectivity, and try the suggestions listed below.

How do I fix the Windows Update error 80244010?

1. Run the Windows Updater troubleshooter

First, open the Windows Update troubleshooter, which might provide some resolutions for error 80244010.

  1. To do that via the Control Panel, press the Windows key + R hotkey.
  2. Input Control Panel in the Open text box, and click the OK button.
  3. Select the All Control Panel Items option shown below.All Control Panel Items option Windows Update Error Code 80244010
  4. Click Troubleshooting to open the applet directly below.
     Troubleshooting applet Windows Update Error Code 80244010
  5. Click View All, and then select Windows Update.
  6. Click Advanced to select an Apply all repairs automatically option.Windows Update troubleshooter Windows Update Error Code 80244010
  7. Press the Next button.
  8. Select the Apply this fix option.

2. Run a System File Checker Scan

As error 80244010 can be due to corrupted system files, a System File Checker scan might resolve it.

  1. Press the Windows key + S hotkey.
  2. Enter cmd in the search box.
  3. Right-click Command Prompt to select Run as administrator.
  4. Enter this command first:
    • DISM.exe /Online /Cleanup-image /Restorehealth.
    • Press the Return key after entering.
  5. Then enter sfc /scannow in the Command Prompt, and press the Return key.sfc /scannow command Windows Update Error Code 80244010
  6. Wait for the SFC scan to finish. Restart Windows if the scan repairs files.

3. Reset the update components

Resetting Windows Update’s components might fix error 80244010.

  1. To do that, open the Command Prompt as an administrator.
  2. Then input the separate commands below:
    • net stop wuauserv
    • net stop cryptSvc
    • net stop bits
    • net stop msiserver
  3. Enter the command ren C:WindowsSoftwareDistribution SoftwareDistribution.old, and press the Return button.
  4. Then input ren C:WindowsSystem32catroot2 Catroot2.old in the Prompt, and press the Enter key.rename command Windows Update Error Code 80244010
  5. Input these commands separately to restart their services:
    • net start wuauserv
    • net start cryptSvc
    • net start bits
    • net start msiserver

4. Enable the Detection Frequency in Group Policy Editor

If you’re encountering error 80244010 on a network server or client, try enabling Detection Frequency with the Group Policy Editor.

  1. Open the Run accessory.
  2. Input gpedit.msc in the Open box and click OK to open Group Policy Editor.
  3. Then click Computer Configuration, Administrative Templates, Windows Components, and Windows Updates on the left of Group Policy Editor.Group Policy Editor Windows Update Error Code 80244010
  4. Double-click the Automatic Update detection frequency policy on the right of the window.
  5. Select the Enabled option.
  6. Then enter a value less than the default 22 in the interval text box.
  7. Click the Apply option.
  8. Click OK to close the window.

5. Reset Windows

Resetting Windows to refresh it might also fix error 80244010.

  1. You can reset Windows 10 by entering reset in the search box.
  2. Click Reset this PC to open the Settings window as shown directly below.
    Get started button Windows Update Error Code 80244010
  3. Click Get started to open the Reset this PC window.
  4. Select the Keep my files option.
    Keep my files option Windows Update Error Code 80244010
  5. Press the Next and Reset buttons.

Those are a few of the confirmed fixes for error 80244010. Let us know which of these solutions worked for your PC by leaving us a message in the comments section below.

PowerPoint Cannot Play Media on Windows 10/11 [FIXED]

PowerPoint presentations combine a variety of media into slideshows. Most PowerPoint users will probably add at least a little audio and video to make the presentations more interesting.

However, PowerPoint doesn’t support every media format. So if the application isn’t playing audio and video in a presentation, that’s probably due to incompatible media formats or not having the required codecs for them.

What to do if you can’t play audio or video in PowerPoint

1. Set the Media Compatibility

  1. Go to the File menu, and select Info. 
  2. PowerPoint will detect if your media is incompatible with the program, and the Optimize Media Compatibility option will appear. So, select that option, and PowerPoint will optimize the embedded media.
  3. Let the wizard scan the embedded media. If an immediate solution is available, the wizard will resolve the problem automatically.

If PPT cannot play media, the first thing we’re going to try is setting the proper media compatibility settings in PowerPoint. This option will set everything in place, allowing you to play the embedded media seamlessly.

If the Optimize Media Compatibility option can’t resolve the problem, it’ll at least show you the culprit. Using that info, you’ll know what to do further. This brings us to our next three solutions…

2. Use a different presentation software

We know that everybody uses PowerPoint to create and play presentations but why not try a different tool? You can find various programs that will offer the same or better value, and help you create impressive projects.

Using the right program, you will create dynamic slideshows with media like video clips, music, or animated graphics that grant others appreciation.

You can benefit from all features offered by these practical tools and choose the one from professional presentation software that suits your needs the best.

3. Check the codecs

If sound won’t play in PowerPoint, it’s possible that you don’t have the right multimedia codecs installed on your computer.

So, check your codecs, if you have any installed already, make sure to update them. If not, install them.

If you’re not sure which codec pack to pick, check out our list of the best audio and video codecs for Windows.

4. Make sure the audio/video format is supported

We’ve come to the probable core of the problem. In fact, if you’re unable to play video or audio in your PowerPoint presentation, there’s a huge chance you’re using an unsupported media format.

When it comes to audio, PowerPoint 2010 mainly uses WAV files! So, if you’re using an MP3 file in your presentation, you may encounter some problems.

Things are slightly better in PowerPoint 2016. In addition to .wav files, this version also supports .m4a files encoded with AAC audio. Any other format is not guaranteed to work.

As for videos, the range of compatible formats is also quite limited. Microsoft recommends .wmv files for PowerPoint 2010, while the 2016 version adds up .mp4 files encoded with H.264 video and AAC audio.

Microsoft also notes that Flash videos might not work in the newer versions of PowerPoint (2013 and 2016).

5. Convert your audio or video file

As we said, even though PowerPoint may support the current format of your video or audio, it’s always the best idea to simply convert it to .wmv/.wma.

Fortunately, there are dozens of tools that can convert your media in no time. And since the choice is quite broad, we compiled a list of the best audio/video converters for Windows.

So if PowerPoint sound is not working, be sure to use a file converter and turn it into a suitable model.

6. Set the link value

  1. Go to Tools > Options.
  2. Select the General tab.
  3. Set the value for Links Sounds With File Size Greater Than 500000 KB (or whichever size is larger than the file you’re trying to embed).
  4. Click OK to save the changes.

Although using .wma files is recommended, it might be impractical. Mostly because .wma files are larger than other formats. And since PowerPoint has a little thing called limited link value.

This option prevents you from including large files in your presentation. So, if your file exceeds the limit, you won’t be able to embed it.

So If PPT cannot play media, be sure to this little trick.

7. Clear the TEMP folder

  1. Press the Win key + R.
  2. In the Run window, enter the following path:  %temp% 
    run temp powerpoint cannot play media
  3. Select all the files with the TMP extension.
  4. Delete the files.
  5. Restart your computer.

Tons of temporary files are stored in your TEMP folder, and that may affect PowerPoint. So, if you’re sure you’re using the right formats and have all the necessary codecs installed, try clearing this folder.

Hopefully, this should help you if PowerPoint cannot play media files.

So those are a few ways for you to fix PowerPoint presentations that aren’t playing video and audio.

Make sure the media file formats are compatible with PowerPoint and have the required codecs.

Windows Update Error 80072EFE Server 2012 r2 [SOLVED]

Sometimes certain errors such as the Windows Update error 80072EFE Server 2012 r2 can appear and prevent you from downloading updates. This can be a major issue since you can leave your system vulnerable.

However, there’s a way to fix this problem, and in today’s guide, we’re going to show you how to fix this error once and for all.

Additionally, this Windows update error 80072EFE server 2012 r2 can indicate that you don’t have internet access or it is not properly configured to get the security update.

How can I fix the Windows Update Error 80072EFE Server 2012 r2?

1. Use the command line

  1. Press Windows Key + X and select PowerShell (Admin) from the list. You can also use Command Prompt.
    powershell admin twinui not working
  2. Now run the following commands one by one:

net stop wuauserv

net stop cryptSvc

net stop bits

net stop msiserver

ren C:\Windows\SoftwareDistribution SoftwareDistribution.old

ren C:\Windows\System32\catroot2 catroot2.old

net start wuauserv

net start cryptSvc

net start bits

net start msiserver

pause

After running these commands, check if the Windows could not search for new updates Windows Update Error 80072EFE Server 2012 r2 message still appears.

2. Run the Windows Update troubleshooter

  1. Open the Settings app. You can do that quickly with Windows Key + I shortcut.
  2. Navigate to the Update & Security section.
  3. Select Troubleshoot from the menu on the left and go to Additional troubleshooters.
  4. Select Windows Update and click on Run the troubleshooter.
  5. Wait for the scan to finish.

After the scan is finished, check if the problem is still there.

3. Download the update manually

If the solutions above didn’t work out, you can also try and download and install the update manually on your PC.

According to users, this can help you fix the issue and you can find and install your missing update on Microsoft Update Catalog.

Hence, you can just type the name of your server update and follow the process to manually install it on your computer.

4. Instal the SSU

In order to install a security update for Windows Server 2012, you need to also have installed the SSU (Servicing stack updates)

This service assures the reliability of the update process while installing the latest quality updates. It’s recommended to install it first and avoid updating issues.

More exactly, when you install a new security update on your system, you should see the latest SSU available and install it first.

5. Create a new administrator account

  1. Open the Settings app and go to Accounts.
  2. Select Family & other users and click on Add someone else to this PC.
  3. Select I don’t have this person’s sign-in information.
  4. Now select Add a user without a Microsoft account.
  5. Enter the username and password for the new account.
  6. Switch to the new account and check if the issue still appears.

If the Windows Update Error 80072EFE Server 2012 r2 message is gone, it means that you had some file corruption issues, but creating a new account usually fixes that. Now you just have to migrate all your files from the previous user account to the new one.

Windows could not search for new updates error messages can leave your system vulnerable, but we hope that our solutions helped you fix the problem.

If you found a different solution on your own, feel free to share it with us in the comments section below.

8 Best Automated Trading Platforms For Speed, Precision & Profit

Looking for the best-automated trading software? You’re in the right place. Today, we’ll walk you through the best options that’ll help you speed up the process, get precision, and take the emotion out of trading.

With these platforms, you can automate your trades, backtest strategies, and access real-time market data, all at the push of a button. Whether you’re into stocks, crypto, or options, we’ve got you covered.

What are the best automated trading software for Windows PC?

Disclaimer: Copy Trading does not amount to investment advice. The value of your investments may go up or down. Your capital is at risk.

1. eToro – Award-winning CopyTrade technology

eToro is a social trading platform designed for beginners and experienced investors alike. It allows users to automatically copy the trades of seasoned traders, making it ideal for those with limited time or experience.

It supports trading in a wide range of assets and provides transparent fees and educational tools to guide users through their trading journey.

✅ Pros

  • Award-winning CopyTrade technology, enabling users to automatically replicate the actions of an experienced investor
  • Over 2000 available assets
  • Social trading network
  • Ready-made portfolios
  • Clean and responsive interface
  • Advanced charting
  • Transparent fees
  • Educational content via the eToro Trading Academy

❌ Cons

  • eToro USA LLC does not offer CFDs, only real Crypto assets are available
  • A withdrawal fee of $5
eToro

eToro

Minimize your risks and copy the trades of the most successful investors across the world with eToro.

Disclaimer: 74% of retail investor accounts lose money when trading CFDs with this provider. You should consider whether you can afford to take the high risk of losing your money. eToro USA LLC and eToro USA Securities Inc.; Investing involves risk, including loss of principal; Not a recommendation.

TradingView – Modern and intuitive interface

best cryptocurrency live price platform

TradingView is a cloud-based trading platform with a social community of over 10 million investors. It stands out for its intuitive charting and real-time alerts. It offers a vast library of user-generated strategies and technical indicators.

Those can be integrated into your trading approach. The platform is designed for traders who value real-time market analysis and a vibrant social trading community for sharing insights and strategies.

✅Pros

  • Over 100,000 strategies generated by the community
  • Automated analysis
  • Modern and intuitive interface
  • Wide library of technical indicators, including over 5000 indicators made by users
  • Pine Script Native language, allowing scripts and indicators to be created with fewer lines of codes
  • Direct market access
  • Cloud-based and server-side trading alerts for price, indicators, strategies, and drawing tools
  • Mobile apps for iOS and Android

❌ Cons

  • Limited level 2 market data
  • No offline usage
TradingView

TradingView

Explore a modern trading experience with TradingView.
Check price Visit website

ZuluTrade – Strong user community

ZuluTrade was founded in 2007. It’s an online trading platform with some social elements and the ability to copy trading options and add automation.

Regulated by the HCMC, they offer APIs for traders, scripts, and auto-execution options. They’ve gained a lot of respect back in 2015 when the platform was awarded an EU Portfolio Management License.

Since you are looking for automated trading software, here are the 3 main features of ZuluTrade.

  • The Automator
    • As early as 2016, this functionality was added.
    • Based on the rules that you add, when certain events occur, the Automator will send you an email notification or will automatically execute certain actions.
  • ZuluScript
    • Basically, this offers the chance to talk to trading bots by creating scripts.
    • This trade automation allows you to perform much more trades than if you were to place orders manually.
  • ZuluGuard
    • With so much automation going on, you might risk losing everything in case of glitches.
    • This unique feature for risk management asks for the amount of capital you have available and calculates a trading exit value for all opened trades.

In case the specified threshold is achieved, then all open positions will be automatically closed, thus minimizing any potential loss.

ZuluTrade

ZuluTrade

Check price Visit website

Learn2Trade – Pro-level educational support

Learn2Trade provides forex trading signals and in-depth educational content aimed at both novice and experienced traders.

Through its private Telegram channel, users receive real-time trading alerts and access to expert analysis.

The platform is known for its comprehensive resources, which include forex courses, strategy guides, and market updates, making it an ideal choice for those looking to improve their trading skills.

✅ Pros

  • Pro-level educational support
  • Risk management guides
  • Up to 10 signals per day
  • Daily technical information
  • Secure, real-time alerts via Telegram
  • Free forex signals
  • 24/7 chat with pro traders for VIP users

❌ Cons

  • Signal accuracy can be quite low
  • Unotified auto-renewal of subscription

⇒ Get Learn2Trade

SierraChart – Lightweight and easily customizable

SierraChart is a powerful charting and technical analysis platform, ideal for traders seeking customization and flexibility.

It allows users to access real-time market data from global financial markets and supports multiple data services.

With its lightweight design and offline data access, SierraChart ensures that users can continue trading and analyzing markets even when disconnected from the internet.

✅ Pros

  • It is lightweight and can easily be modified
  • Simple, stable and offers helpful Support
  • Very good trading software
  • It is appealing

❌ Cons:

  • The built-in backtesting is buggy and not very elegant when it comes to designing systems to backtest
  • Loss of internet connection usually results in malfunction

⇒ Get SierraChart

Ninja Trader – Great technical support

Ninja Trader has multiple interfaces such as the Chart Trader, SuperDOM, and the FX Board.

The Chart trader includes drawing tools and allows users to place and modify orders from one main window. It also includes some trade management features such as profit targets and more.

The second interface option, The Super Dom is configured as a real-time visual order book. It offers live insights into the markets.

The FX Board displays trading trends in a tile-type layout. Users can quickly submit orders and check all active orders in just a few clicks.

✅ Pros

  • In milliseconds, users can submit and manage their stop loss and profit target orders
  • Orders and trades can be placed and managed directly within a chart
  • Order Entry Hot Keys: Drive order submission, cancellation, modification, and close positions
  • Users can run automated trading strategies
  • Various orders can be submitted in order to protect an open position, when one is filled, the other is canceled automatically
  • Users can set up complex alerts that will trigger based on pre-defined alert conditions
  • Users can make use of tabbed windows in order to maximize screen real estate and enhance the efficiency of the workspace
  • SuperDOM Indicators and Columns
  • Demo mode is free to use
  • Several brokerage offerings
  • C# programming provides extreme flexibility
  • Several charting types are supported
  • Great technical support

❌ Cons

  • The data feed is not included
  • Programming is usually longer compared to other platforms
  • Loss of internet connection will result in a malfunction
  • Low supported brokerages

⇒ Get Ninja Trader

AvaTrade – Risk tolerance

AvaTrade is a versatile trading platform that offers both automated trading and risk management tools.

It supports a wide range of assets, including forex, stocks, and cryptocurrencies, and provides features like AvaProtect, which helps limit potential losses.

AvaTrade’s user-friendly interface makes it easy for traders of all levels to access the tools they need while ensuring compliance with international regulations.

✅ Pros

  • Risk tolerance
  • Management tools
  • Over 1,000,000,000 strategies are available
  • A user-friendly interface
  • Simple Usage
  • Enables advanced strategies for all traders
  • Automatic Updates. It updates directly on the platform daily, to ensure strategies and current market status synchronize
  • Traders from all levels can easily benefit from their services
  • Unique Algorithm

❌ Cons:

  • Loss of internet connection usually results in malfunction

⇒ Get AvaTrade

Protrader – Professional-looking design

ProTrader is a high-functionality trading platform designed for professional traders. It combines market analysis tools with an attractive, customizable interface.

The platform allows users to trade multiple asset types, such as stocks, forex, and options, with a focus on providing real-time market insights.

ProTrader’s professional design and customizable workspaces ensure that traders can tailor their experience to suit their needs.

✅ Pros:

  • Market analysis
  • Running of Algorithmic strategies
  • Risk management
  • Investors are able to set up their trading terminal exactly the way they desire it to be, even down to the color scheme.
  • Workspaces view creation
  • ProTrader trading platform has two pre-loaded workspaces, the Beginner and Professional, in order for users to select the one that fits their requirements easily without bothering about customization
  • The overall design is professional-looking and beautiful
  • The platform contains market features that a lot of investors are in need of
  • It allows the trading of a wide range of instruments and assets, providing investors the option of selecting forex, stocks, options, CFDs, and futures

❌ Cons:

  • The charting area of the ProTrader platform is small

⇒ Get ProTrader

Automated trading software comes with lots of advantages and very few disadvantages. These solutions enable users to trade while sleeping, lower emotion due to its ability to make non-subjective trades, and also it has a micro-second decision processing ability.

Go for the one most suitable for you. Click on the software link available at the end of the description.

Is automated trading worth trying?

Automated trading is not inherently more profitable than human-monitored trading, but it has the benefit of saving a lot of time and completely removing emotion-based decision-making.

They can be very beneficial for beginner traders, as they can automate and copy trades of more experienced investors.

Pros:

  • Backtesting
  • Increased order speed
  • It lets you trade from multiple accounts simultaneously
  • Objective decision making
  • Convenient

Cons:

  • Algorithms may fail
  • Risk of overfitting and wrongfully predicting positive results
  • Highly dependent on good connection speed

Can you automate day trading?

Day trading can be automated with the help of the above-mentioned tools. Users prefer to implement automation when they already have good indicators that their strategy is going to have a positive outcome.

Automated trading software can be just as valuable for saving time, getting the best price, and removing some of the risks of day trading as they are for any other type of trading.

There is always a risk of loss, both in manual and automated strategies, so it is highly dependent on the user’s intentions and preferences.

To learn more about trading and the tools that help, visit our dedicated Trading Hub.

If you are looking for the right tools to accelerate your business, visit our Business Software section. 

Windows Update Error 0x8e5e03fa [Fixing Guide]

The error 0x8e5e03fa is a Windows Update issue that arises for some users when trying to manually install specific cumulative updates, such as KB30814444, via Settings.

The error message states, There were problems installing some updates, but we’ll try again later.

The error message also includes error code 0x8e5e03fa along with the update details.

Read more about the solutions below.

How can I fix Windows Update error code 0x8e5e03fa?

  1. Run the Windows Update Troubleshooter
  2. Reset the Windows Update Components With a Batch File
  3. Install the Update Within an Alternative User Account

1. Run the Windows Update Troubleshooter

The Windows Update troubleshooter is included in Win 10 to resolve update errors.

That troubleshooter doesn’t always fix update errors, but it might still be worth running to see if it provides a resolution. Users can open the Windows Update troubleshooter as follows.

  1. Launch Cortana with the Windows key + Q hotkey (or click in the Type here to search box in Windows 10 1903).
  2. Then enter ‘troubleshoot’ in the search box, and click Troubleshoot settings.troubleshoot windows update
  3. Select the Windows Update troubleshooter within the Settings app.
  4. Click Run the troubleshooter to open the Windows Update troubleshooter.windows update troubleshooter detecting problems
  5. Thereafter, the troubleshooter might detect and automatically fix error 0x8e5e03fa. If so, it will provide some further details.

2. Reset the Windows Update Components with a batch file

This is a resolution users have widely confirmed fixes error 0x8e5e03fa. The resolution runs a batch file that resets Windows Update components.

This is how users can reset Windows Update components with a batch file.

  1. Open Cortana’s search box.
  2. Input the keyword Notepad in Cortana’s search utility. Then click Notepad to open that text editor’s window.
  3. Then enter (or copy and paste) this text into Notepad:net stop wuauservnet stop cryptSvcnet stop bitsnet stop msiserverren C:WindowsSoftwareDistribution SoftwareDistribution.oldren C:WindowsSystem32catroot2 Catroot2.oldnet start wuauservnet start cryptSvc

    net start bits

    net start msiserver

    batch reset update services

  4. Click File and select Save as to open the window in the snapshot directly below.save batch file as bat
  5. Then select All Files in the Save as type drop-down menu.
  6. Enter Fix.bat in the File name text box.
  7. Select to save the file to the desktop.
  8. Press the Save button.
  9. Then close Notepad.
  10. Now users should find a Fix.bat file on the desktop. Right-click Fix.bat to select the Run as administrator option.run as administrator
  11. Click Yes on any UAC dialog box that opens to run the batch file.
  12. Thereafter, the Command Prompt will open and reset Windows Update components.

3. Install the Update Within an Alternative User Account

The required updates might download and install without any issues within an alternative Windows account. So, setting up a new user account might be worth a shot.

This is how users can activate a built-in admin account from which they try installing Windows updates.

  1. Right-click the Start button to open a menu, and then select Run to open that accessory.
  2. Enter cmd in Run, and press the Ctrl + Shift + Enter keyboard shortcut.
  3. Enter net user administrator /active:yes in the Prompt’s window and press Return to activate the built-in admin account.net user administrator /active:yes cmd
  4. Close the Command Prompt.
  5. Log out of Windows, and then log back in with the new Administrator account.
  6. Check for updates within the new Administrator account.

Those resolutions should fix error 0x8e5e03fa for some users.

Note, however, that users can also manually download and install the required updates from the Microsoft Update Catalog.

Thus, users can get the updates from there instead of clicking the Check for updates button in Settings.

What to do if SharePoint is not Saving Changes [Guide]

Sharing your workspace with multiple users becomes so much easier with the introduction of cloud-based applications, like SharePoint. Users can do everything within the browser without resorting to desktop applications. However, seamless in theory, this approach seemingly has some issues going against it.

Some users were unable to save changes to online files and were met with the ‘Unable to Save your Changes, please save a local copy’ error.

What to do if SharePoint won’t save changes in a browser

1. Clear the browser’s cache

Let’s start by clearing the browser’s cache. The error while saving files you’ve made changes to almost exclusively affects the online-based SharePoint version. This might occur due to various reasons, and the usual suspect is a widespread bug that is, allegedly, solved.

However, you can always try and use an alternative browser or, furthermore, clear the cache from the one you normally use.

Here’s how to clear the browser’s cache:

Google Chrome and Mozilla Firefox

  1. Press Shift + Ctrl + Delete to open the “Clear browsing data” menu.
  2. Select “All time” as the time range.
  3. Focus on deleting ‘Cookies’, ‘Cached Images and Files‘, and other site data.
  4. Click on the Clear Data button.clear cache in Chrome/Firefox

Microsoft Edge

  1. Open Edge.
  2. Press Ctrl + Shift + Delete.
  3. Check all the boxes and click Clear.clear cache in Edge

2. Try an alternative browser

This is another viable step. The majority of Microsoft applications (older ones especially) work best with either Internet Explorer or Edge. You can give it a go and look for improvements. If the problem is persistent make sure to move to additional steps.

Another very reliable, secure, and error-free option browser is Opera One. It’s fast, simple, and implements lots of useful features, such as VPN and AI.

⇒ Get Opera One

3. Check permissions

Moreover, making sure that the user is allowed to make changes to the affected file is of utmost importance. Some reports state that the changes are not saving for some users while others can make them without problems. That’s why we suggest confirming that an affected user has the necessary permissions.

In addition, some tried resetting permission settings and this resolved the issue at hand.

4. Save the file locally and re-upload it

Finally, if none of the previous steps worked for you, we advise you to try saving changes locally on your system and re-uploading it to SharePoint again. Issues like this happen rarely, but the file might get corrupted and thus it can’t be edited in the cloud workspace. The error prompt suggests that so try to follow it through and, hopefully, the problem won’t reoccur anymore.

That’s it. Make sure to tell us whether these steps helped you or not in the comments section below.

Some Update Files are Missing or Have Problems [SOLVED]

Windows update errors are not uncommon. For example, one update issue has an error message that states, Some update files are missing or have problems.

That error arises for some users when they try to download and install updates via Settings. Consequently, Windows can’t install the updates.

Some update files are missing or have problems error poses a significant security threat to most, and you must fix things at the earliest. And you will be able to after going through the following sections.

How can I fix the Some update files are missing or have problems error?

1. Run the Windows Update troubleshooter

  1. Press the Windows + I to open Settings, and click on Update & Security.update & security
  2. Select the Troubleshoot tab, and click on Additional troubleshooters on the right.additional troubleshooters
  3. Select Windows Update and then click on the Run the troubleshooter button.windows update
  4. Now, follow the on-screen instructions to complete the troubleshooting process.instructions

Once you have run the troubleshooter successfully, verify if the Windows Update some update files are missing 0x8007000d error along with any other problems you may have with the update process is resolved.

2. Run a system file scan

  1. Type Command Prompt in the Search menu, and click Run as administrator.command prompt
  2. Click Yes in the UAC prompt.
  3. First, input the following command and hit Enter: DISM.exe /Online /Cleanup-image /Restorehealth
  4. After that, type in this file check command and press Enter: sfc /scannow
    The sfc command Some update files are missing or have problems
  5. Wait for the SFC scan to complete and display the result.

Once done, the Some update files are missing error should be resolved. If not, head to the next solution.

3. Reset Windows Update components

  1. Press Windows + R to open the Run command, type services.msc, and click OK.services.msc
  2. Right-click the Windows Update, Application Identity, Cryptographic Services, and Background Intelligent Transfer services listed there and select Stop from the context menu.
    Services window Some update files are missing or have problems
  3. Next, press Windows + E to open File Explorer, and head to the following location: C:\Windows\SoftwareDistribution\Download
  4. Then, press the Ctrl + A hotkey to select all items within that folder.
    Download folder some update files are missing or have problems
  5. Hit the Del key, and choose the appropriate response in case a confirmation prompt appears.
  6. Now, head back to Services, right-click on Application Identity, Cryptographic Services, Background Intelligent Transfer, and Windows Update services, and select Start from the context menu.

Once done with the reset, verify if the 0x80073712 Some update files are missing or have problems error is fixed in Windows 10.

4. Disable third-party antivirus software

Try disabling third-party antivirus software before you look for updates in the Settings app since, for many users, it was the antivirus that blocked these.

Right-click the system tray icon for your antivirus utility to bring up a context menu that will probably include a Disable option. Temporarily disable the antivirus utility for a few hours.

Or you could switch to a reliable and effective antivirus for Windows 10 that doesn’t conflict with the core functioning of the system.

5. Reset Windows 10

  1. Press Windows + I to launch Settings, and click on Update & Security.update & security
  2. Next, select the Recovery tab from the navigation pane, and click on Get started under Reset this PC.get started
  3. Now, choose the appropriate option and preferences for the reset and start the process.reset

Resetting Windows 10 removes all software that did not come pre-installed on your PC. Therefore, this resolution is suggested as a last resort only. Try the other potential resolutions first.

How can I fix Some update files are missing or have problems on Windows 11?

As with the previous iteration, your primary response to the error should be to run the dedicated Windows Update troubleshooter. If that doesn’t help fix things, restarting the Windows Update service might.

Or, you could go ahead and reset the Windows Update components. In case nothing else works, you can always manually install the updates from the Microsoft Update Catalog, the steps for which are provided in a later section.

What causes the Some update files are missing error?

The Some update files are missing error is usually due to a corrupted Windows update cache. Windows Update cannot correctly apply available updates when the cache is corrupt. And, resetting Windows Update components can resolve the issue.

However, this issue can also occur because of third-party antivirus utilities. Some third-party antivirus software or firewalls might block or interfere with the Windows Update process.

How do I repair Windows 10 missing files?

It depends on whether the missing files are simply personal ones or system files. If it’s the former, you will have to get them all over again.

Running a DISM (Deployment Image Servicing and Management) or SFC (System File Checker) scan for system files should do the trick.

If the Windows 10 update files are missing, resetting the Windows Update components would work.

Does updating Windows delete files?

No, updating Windows, or for that matter, upgrading to a newer iteration doesn’t delete the files stored on your PC.

But resetting Windows may delete the stored files; that, too, only if you have selected the option for it. Otherwise, your files are safe, and you can go ahead and update Windows.

How to manually install Windows 10 updates?

  1. First, open the Microsoft Update Catalog in a web browser.
  2. Enter the KB (Knowledge Base) number for the update you intend to install in the search box and click Search.
  3. Then click Download for the update you need to install.
    Microsoft Update Catalog Some update files are missing or have problems
  4. Next, click the download link for the update that opens.
  5. Open the folder you downloaded the update to in File Explorer.
  6. Then click the downloaded MSU update file to install the latest version.

You can manually install the required Windows 10 updates by downloading them from the Microsoft Update Catalog. That catalog includes hotfix, device driver, and system updates for currently supported Windows platforms.

Who can I contact for further support about this issue?

The Microsoft support service for Windows might be able to provide different resolutions for the Some update files are missing error.

Open the Contact Microsoft Webpage in your browser, and click the Get Support link. Then enter an error description in the text box, and click Get Help > Contact Support.

On Microsoft’s community forum, you can also discuss this Windows error with agents and advisors. To do so, click Ask a question on the Windows forum. Then you can enter details about the issue you need to fix in the text box.

So, that’s how you can fix the Some update files are missing Windows 10 error. With that issue resolved, you’ll be able to download and install all available Windows 10 updates again.

Also, find out how to install updates offline in Windows 10.

Users who have discovered other ways to fix the same update error are welcome to share their resolutions below.

Microsoft Security Essentials Not Updating [SOLVED]

Keeping your Windows Operation System up to date has many benefits. First of all, you have access to all the latest features that Microsoft has to offer.

Second, the latest updates also bring along bug fixes, making your PC free from bugs and glitches, that your PC might have had prior to the latest update.

Another advantage is that the latest Microsoft Update works automatically with Microsoft Security Essentials, this ensures that your Windows PC has the latest virus and spyware definitions installed, protecting you from viruses or malware.

However, when trying to update the Microsoft Security Essentials, if you come across a message indicating that the updates have failed, I have the solution for you.

In this guide, you will find some of the most effective solutions that can help you resolve the Microsoft Security Essentials update error. Let us check them out.

What are the symptoms of the Microsoft Security Essentials update error?

As mentioned, Microsoft Security Essentials relies on Microsoft Updates to update the anti-virus definitions three times daily.

Microsoft Security Essentials, or MSE, can have problems sometimes with automatic updating. The solution to this is that you can also install the updates manually.

But having the option to automatically update keeps one task off the list, so you do not need to manually check for updates and install them one by one.

There are a few common symptoms of the Microsoft Security Essentials update error are:

  • An error message saying the updates cannot be installed.
  • An error message saying that the automatic updates for Microsoft Security Essentials failed.
  • An error message indicating that the updates cannot be downloaded because of no internet connection.
  • Your PC fails to automatically check for the latest MSE updates.
  • You receive an error message that the virus and spyware definition updates are already installed.

How can I fix the Microsoft Security Essentials not updating issue?

1. Run the Windows Update troubleshooter

  1. Press the Win + I buttons together to open Settings.
  2. Under System, scroll down and click on Troubleshoot.system-troubleshoot windows 11 error after update
  3. Select Other troubleshooters.Other troubleshooters
  4. Hit the Run button next to Windows Update.windows-update-troubleshooter windows 11 not updating after restart
  5. The troubleshooter will look for any errors.
  6. Once the diagnosis is complete, it will prompt you to perform actions to resolve the issue.
  7. After the troubleshooting process is complete, restart your PC.

The Windows Troubleshooter is a great tool that helps detect any issues and fix any common problems that you may be having on your PC.

Using the Windows Update troubleshooter, your system will automatically look for the solutions to this problem and prompt you to perform them to possibly fix the problem at hand.

2. Use a specialized software

There are chances that because of corrupt system files you are experiencing the Microsoft Security Essentials not updating error on your PC.

While there are multiple competent in-built Windows tools that can help you detect and fix corrupt or faulty system files, I definitely recommend using trusted third-party software.

3. Reset your Internet Explorer settings

  1. Open the Start menu.
  2. Search for Internet Options and open it.
  3. Switch to the Advanced tab.
  4. Under Reset Internet Explorer, click Reset.
  5. Click on Reset again.
  6. Once the Internet Explorer reset process is complete, click on OK.
  7. Restart your PC.

When you reset the internet settings, it will delete all the temporary or cache files, cookies, and browsing history, along with all of your saved passwords.

For many users, resetting the Internet Explorer settings has helped fix the Microsoft Security Essentials update error.

4. Delete the Software Distribution folder

  1. Click on the Start menu.
  2. Search for Command Prompt and run it as administrator.command prompt
  3. Type the below command and press Enter to stop the Windows Update Service. net stop wuauserv
  4. Execute the below command to stop the Background Intelligent Transfer Service. net stop bits
  5. Now head over to the C:>Windows>SoftwareDistribution folder.
  6. Press Ctrl + A to select all files inside the Software Distribution folder and press the Del button to delete them.
  7. Restart your PC.
  8. Open the command prompt again and run the below command to restart Windows Update Service. net start wuauserv
  9. Type the below command and press Enter to restart Background Intelligent Transfer Service. net start bits

The Software Distribution folder contains temporary files related to Windows Updates. When you delete all the files inside this folder, Windows will reconfigure the folder and download all the necessary files, hopefully fixing the Microsoft Security Essentials update error.

5. Set the correct date and time of your PC

  1. Press Win + I to open Settings.
  2. Select Time & language from the left pane.
  3. Choose the Date & time option.date and time
  4. Ensure to toggle on the Set time automatically option.

Microsoft Security Essentials will throw you an error if the date and time on your PC aren’t set correctly.

Using the above steps, you can check as well as set the correct date and time and possibly fix the issue at hand.

6. Rename the Software Distribution folder

  1. Click on the Start menu.
  2. Search for Command Prompt and run it as administrator.command prompt
  3. Type the below command and press Enter. cd %windir%
  4. Execute the below command. ren SoftwareDistribution SDTemp
  5. Exit command prompt.
  6. Reboot your PC.

7. Reset the Microsoft antivirus update engine

  1. Click on the Start menu.
  2. Search for Command Prompt and run it as administrator.command prompt
  3. Execute the below commands one by one, and press Enter after each command. Cd/ Cd program files\microsoft security essentials Mpcmdrun -removedefinitions -all Exit
  4. Reboot your PC.

Now you can open Microsoft Security Essentials, switch over to the Update tab and click Update. This should resolve the issue.

Microsoft has ended support for Microsoft Security Essentials on January 14, 2020. This means that it is no longer available to download manually.

However, Microsoft will continue to release signature updates for Microsoft Security Essentials to support systems until 2023.

So, not only we, but Microsoft also advises that you should move to the latest Windows 11 operating system to continue receiving the latest security updates, and also enjoy all the latest features Microsoft has to offer.

Let us know in the comments below which of the above methods helped you fix the Microsoft Security Essentials not updating issue.

Windows Update Error 0x8024000b [Solved]

Error 0x8024000b is another in a long line of Windows Update error codes. That error, like the other update issues, stops Windows receiving updates. This error arises when Windows can’t access the manifest update file.

When the error occurs, you’ll see an error 0x8024000b and Operation was cancelled error message within Settings’ Windows Update tab. Read on to find out how to fix it.

How can I fix the error 0x8024000b?

1. Run the Windows Update troubleshooter

Numerous users have confirmed that the Windows Update troubleshooter fixed error 0x8024000b for them.

  • First, click the Type here to search taskbar button in between Cortana and the Start menu.
  • Enter troubleshoot in the Type here to search box.
  • Click Troubleshoot settings to open a Troubleshoot tab in Settings.
    Troubleshoot tab Windows Update Error 0x8024000b on Windows 10
  • Select the Windows Update troubleshooter, and click its Run the troubleshooter button.
    Windows Update troubleshooter Windows Update Error 0x8024000b on Windows 10
  • If the troubleshooter has a potential resolution, click the Apply this fix option.

2. Clear superseded updates

Clearing superseded updates on your desktop or laptop is another way to fix error 0x8024000b.

  1. To do that, open the Cleanup (decline) superseded updates page on Microsoft Technet.
  2. Click the Cleanup-WSUSserver.ps1 button on that page.
    The Cleanup Cleanup-WSUSserver.ps1 button Windows Update Error 0x8024000b on Windows 10
  3. Open File Explorer by clicking its taskbar button.
  4. Open the folder you downloaded the script to.
  5. Right-click the script file and select the Run with Powershell context menu option.
  6. Then restart Windows after running the script.

3. Change the Spupdsvc.exe’s file title

  1. Try renaming the Spupdsvc file. To do that, press the Windows key + R key combination, which opens Run.
  2. Input this command into Run’s text box and press Enter:
    • cmd /c ren %systemroot%System32Spupdsvc.exe Spupdsvc.old.
      rename Spupdsvc command Windows Update Error 0x8024000b on Windows 10
  3. Close Run’s window, and restart your desktop and laptop.
  4. Run the Windows Update once more.

4. Reset Windows Update components

Some users might need to reset Windows Update components to fix error 0x8024000b.

  1. To do so, open Windows 10’s search utility.
  2. Type cmd in the search utility’s text box.
  3. Right-click Command Prompt to open its context menu, and select the Run as administrator option.
  4. Then input these separate commands into the Command Prompt:
    net stop wuauserv
    net stop cryptSvc
    net stop bits
    net stop msiserver
  5. Enter Ren C:WindowsSoftwareDistribution SoftwareDistribution.old in the Prompt, and press the Return keyboard key.
    Rename SoftwareDistribution command Windows Update Error 0x8024000b on Windows 10
  6. Input the Ren C:WindowsSystem32catroot2 Catroot2.old command and press Return to edit the catroot2 folder title.
  7. Enter the following commands separately, and press Return after each one:
    net start wuauserv
    net start cryptSvc
    net start bits
    net start msiserver

5. Restore Windows to an earlier date

  1. Rolling Windows back to a restore point with System Restore might also be worth a shot.
  2. Enter rstrui in Run and click OK to open System Restore.
  3. Press the Next button to proceed to the restore points list.
  4. Select the Show more restore points option to fully expand the list of restoration points.
    The Show more restore points check box Windows Update Error 0x8024000b on Windows 10
  5. Choose a restore point that will roll back Windows to a time when there wasn’t an update issue.
  6. You’ll lose some software installed after the selected restore point.
    • To see what software gets deleted, click the Check for affected programs button.
      The scan for affected program window Windows Update Error 0x8024000b on Windows 10
  7. Click Next and Finish to roll back the platform.

So, try fixing error 0x8024000b with the resolutions above. They are among the most likely fixes for the error, as researched online.

Let us know which of the solutions worked best by leaving us a message in the comments section below.

How to Automatically Sync Sharepoint Libraries to OneDrive

OneDrive is one of the foremost cloud storage services for Windows. Microsoft SharePoint is a collaboration platform many organizations utilize for document management and storage.

Users can synchronize files in SharePoint Online libraries with OneDrive for Business across devices. It has been possible to automatically sync internal SharePoint libraries to a group of users since 2018.

However, there are some prerequisites and limits for SharePoint library/OneDrive automatic syncing. These are the prerequisites and limits:

  • The OneDrive Files On-Demand Must policy needs to be enabled
  • Must have Windows 10 (1709) or later
  • There’s a 1,000-device limit for syncing a specific document library
  • OneDrive ADML and ADMX files need to be copied into certain directories to enable the sync automatically policy for SharePoint libraries (as outlined below)
  • You’ll need to have OneDrive for Business installed
  • Don’t enable automatic syncing for SharePoint libraries that include more than 5,000 files

With all required prerequisites met, you can configure the SharePoint library to automatically sync with OneDrive via Group Policy Editor or Microsoft Intune.

To utilize Group Policy, you’ll also need Windows 10 Pro or Enterprise. This is how you can sync SharePoint to OneDrive automatically.

How do you automatically sync SharePoint libraries with OneDrive?

1. Install the OneDrive ADMX and ADML policy files

  1. First, open the File Explorer window by clicking the folder button on the taskbar.
  2. Open this folder in File Explorer: C:\Users\[USER]\AppData\Local\Microsoft\OneDrive\19.043.0304.0004\adm\
    adm folder sync sharepoint to onedrive automatically
  3. Right-click the OneDrive.admx file and select Copy.
    The copy option sync sharepoint to onedrive automatically
  4. Open this folder path: %systemroot%\PolicyDefinitions
  5. Right-click a space within the PolicyDefinitions folder and select Paste.
  6. Return to the adm folder at the path specified in step two.
  7. Then, you’ll need to right-click OneDrive.adml and select the Copy option for it.
  8. Next, open the language subfolder (such as en-US or en-UK) within the PolicyDefinitions folder.
  9. Right-click within the language subfolder to select Paste, which should add the OneDrive.adml file there.
Note icon NOTE
You’ll need to install the sync client admin template files as outlined above for both the Group Policy Editor and Intune methods below.

2. Automatically sync SharePoint with OneDrive via the Group Policy Editor

Copy the library ID 

  1. Open the Office 365 login page in a web browser.
  2. Click the Sign in button there to log in to your Office 365 account.
    The Office 365 page sync sharepoint to onedrive automatically
  3. Select SharePoint to log in to it.
  4. Open a SharePoint library you want to sync with OneDrive.
  5. Click the Sync button shown directly below.
    The Sync option sync sharepoint to onedrive automatically
  6. Next, click the Copy library ID option on the Getting ready to sync box that opens.
    Copy library ID option sync sharepoint to onedrive automatically
  7. Check you’ve got the link copied by pasting it into a Notepad text file with the Ctrl + V hotkey.

Enable the team site libraries policy

  1. Now you’ll need to launch Run, which you can do by pressing the Windows and R key combination.
  2. Enter this text in Run’s Open box: gpedit. msc
  3. Click OK to open the Group Policy Editor window.
    The Group Policy Editor window sync sharepoint to onedrive automatically
  4. Select User Configuration and Administrative Templates within Group Policy Editor.
  5. Then, select OneDrive on the left of Group Policy Editor.
  6. Double-click the Configure team site libraries to sync automatically policy for OneDrive.
  7. Click the Enabled radio button for that policy.
  8. Press the Show button for libraries.
  9. Input a name for the synced library within a blank Value name box.
  10. Then, paste the copied library ID into the Value field by pressing the Ctrl + V keyboard shortcut.
  11. Click OK on the Show Contents window.
  12. Press the Apply button, and click OK to exit the policy window.

There’s also a OneDrive sync policy at Computer Configuration > Admin Templates > OneDrive within Group Policy. That device policy applies to all users who log in.

3. Sync SharePoint with OneDrive with Microsoft Intune EndPoint Manager

  1. Copy the library ID for the library you want to automatically sync as outlined within the first seven steps of the previous method.
  2. Log in to your Intunes Endpoint Manager admin center within a web browser.
    Microsoft Endpoint Manager sync sharepoint to onedrive automatically
  3. Click Devices on the left of Intune.
  4. Select Profiles in the left sidebar, and click the Create profile option.
  5. Select Windows 10 and later on the Platform drop-down menu.
  6. Next, select the Administrative Templates option on the Profile type drop-down menu.
  7. Press the Create button to set up the profile.
  8. Input the name and optional description for the profile.
  9. Click the Next button to proceed to Configuration settings.
  10. Select User configuration and OneDrive.
  11. Then input Configure team site libraries to sync automatically in the search box to find that policy.
    The Configure team site libraries to sync option sync sharepoint to onedrive automatically
  12. Select the Enabled option for the Configure team site libraries to sync automatically policy.
  13. Input the library’s title in the Name text box.
  14. Paste the copied library ID in the Value box.
  15. Press the OK button.
  16. You can leave the Scope tags tab blank, and click the Next option.
  17. In the Assignment tab, you’ll need to specify a group that includes target users.
  18. Click the Next and Create buttons to finish.

After setting up automatic sync, you may also want to organize your content for easier collaboration. Check out our guide on how to move files in SharePoint to keep your libraries structured and efficient.

Why is my SharePoint not syncing with OneDrive?

Sharepoint sync issues with OneDrive can arise from installation issues with the OneDrive app and local/server file copy conflicts.

The Microsoft Office Upload Center’s cache can also stop SharePoint from syncing with OneDrive. Check out our OneDrive not syncing guide for potential fixes.

So, that’s how you can configure SharePoint libraries to sync with OneDrive with Group Policy Editor or Intune automatically.

If you want to keep the files on the cloud, you can copy files from the OneDrive account to another, read this guide to learn how.

Whichever method you utilize, note that it can take up to eight hours for a SharePoint library to sync when you next log in to OneDrive automatically.

Code 9c48 Error in Windows Update [SOLVED]

Some users have posted on Microsoft’s support forum about Windows Update error code 9c48. That issue has an error message which states:

Windows Update encountered an unknown error.

This error can arise for users when they try to install specific updates, which can often be for Internet Explorer or Edge. Although error 9c48 is no longer relevant to the unsupported Windows 7, it can also arise in Windows 10 and 8.1.

How do I fix Windows Update error 9c48?

1. Run the Windows Update troubleshooter

  1. Some users have said the Windows Update troubleshooter helped fix error 9c48.
  2. To open Windows Update troubleshooter, press the Windows key and S at the same time.
  3. Enter troubleshooter as the search keyword.
  4. Click Windows Update Settings to open the window as in the snapshot directly below.
    The Troubleshoot tab Windows Update Error Code 9c48
  5. Select Windows Update, and then click the Run this troubleshooter button for it.
  6. If the troubleshooter provides a potential resolution, click the Apply this fix option.
    Windows Update troubleshooter Windows Update Error Code 9c48
  7. Thereafter, restart your desktop or laptop.

2. Check the Windows Modules Installer

Error 9c48 can arise when the Windows Modules Installer isn’t enabled.

  1. To check if that service is enabled, open Run by pressing the Windows key + R keyboard shortcut.
  2. To open the services window, enter services.msc in the Open box and click OK.
    Services window Windows Update Error Code 9c48
  3. Double-click Windows Modules Installer to open the properties window for it.
    Windows Modules Installer Properties window Windows Update Error Code 9c48
  4. Select the Automatic option on the Startup type drop-down menu.
  5. Click the Apply button.
  6. Select the OK option.

3. Uninstall third-party antivirus software

Third-party antivirus software, such as AVAST and McAfee, can be responsible for error 9c48.

  1. To uninstall your antivirus utility, launch the Run accessory.
  2. Input appwiz.cpl in the Open box, and click the OK button.
    The uninstaller applet Windows Update Error Code 9c48
  3. Select your antivirus utility in the Programs and Features Control Panel applet.
  4. Click the Uninstall option.
  5. Select Yes to confirm, and then go through the uninstall wizard for the software.
  6. Restart Windows after uninstalling your antivirus utility.
    • Thereafter, Windows Defender can replace the uninstalled antivirus software if removing it resolves the issue.

Before uninstalling antivirus software, you can disable it to see if that fixes the update issue by right-clicking its system tray icon and selecting a disable or turn off the option.

If that does resolve the issue, uninstall the antivirus utility as outlined above.

4. Rollback Windows

Windows’ System Restore utility might fix error 9c48 if your desktop or laptop includes a restore point that predates the time error 9c48 started to stop updates on it.

  1. First, launch the Run accessory.
  2. Input rstrui in Run’s text box and click OK to open System Restore.
  3. Select the Choose a different restore option if System Restore displays that setting.
  4. Click Next to proceed to the list of restore points.
  5. Select the Show more restore points option if System Restore displays it.
    Show more restore points option Windows Update Error Code 9c48
  6. Choose a restore point that will restore the desktop or laptop to a date when error 9c48 wasn’t an issue on your laptop or desktop.
  7. If in doubt, go for the oldest restore point.
  8. Your software installed after the selected restore point gets deleted.
    • To check what software gets removed, click the Scan for affected programs option.
      Scan for affected programs window Windows Update Error Code 9c48
  9. Click the Next button, and then select Finish to confirm.

The above resolutions could fix Windows Update error code 9c48 on your desktop or laptop. As a last resort, reset Windows if the above resolutions don’t resolve error 9c48.

The Factory reset Windows 10 post provides further details for resetting the platform.

Which one of our verified methods helped you with this Windows Update error? Let us know by leaving a message in the comments section below.

0x8024002e Error in Windows Update: 5 Ways to Fix it

If you encounter Windows Update error 0x8024002e, you won’t be able to download new updates. This means that you’ll miss out on important features and security updates.

A lack of updates can cause issues and make your system vulnerable, so it’s essential to fix this error, and this guide will show you the best ways to do it.

What is error code 0x8024002?

This is a Windows Update error code, and it’s usually caused by the following:

  • Temporary glitches with Windows Update.
  • Corrupted Windows Update cache.
  • The issue can appear if the necessary services aren’t running.

How do I fix error code 0x8024002E?

1. Check the Windows registry

  1. Press the Windows key + R together. In Run window, type regedit and then hit Enter.
    regedit run window Windows Update 0x8024002E
  2. Find HKEY_LOCAL_MACHINE\Software\Policies\Microsoft\Windows\WindowsUpdate
    windows registry editor Windows Update 0x8024002E
  3. Locate DisableWindowsUpdateAccess in the right pane, double-click it, and set its value data to 0.
  4. Restart Windows Update service.
  5. Optional: Restart your PC.
  6. Check if the problem is still there.

2. Troubleshoot Windows Update

  1. Navigate to the Control Panel and search for Troubleshooting.
    troubleshooting Windows Update 0x8024002E
  2. Now, select View All.
    view all troubleshooting Windows Update 0x8024002E
  3. Then, select the Windows Update option.
    windows update troubleshooter Windows Update 0x8024002E
  4. Follow the instructions on the screen to complete the troubleshooter.

3. Perform a System Restore

  1. Press the Windows key + R and enter rstrui.
  2. Look for Show more restore points option and check it, if available. Select the desired restore point and click Next.
    system restore restore points
  3. Follow the instructions on the screen to complete the process.

4. Restart some core services

  1. Press Windows + R, type services.msc, and hit Enter.
  2. Double-click on Background Intelligent Transfer Service, then set the Startup type to Automatic.
  3. Repeat step 2 for the Windows Update service.
  4. Restart the computer.

5. Delete files from the SoftwareDistribution folder

  1. Open File Explorer and navigate to the following directory: C:\Windows\SoftwareDistribution\Download
  2. Select all files.
  3. Lastly, press the Delete key to delete them.

Keep in mind that you might have to disable the Windows Update service to delete these files.

How to clear the Windows Update cache?

  1. Press Windows key + R and enter cleanmgr.
  2. Scan your C drive.
  3. When the applet starts, click on Clean up system files.
  4. Select Windows Update Cleanup and click OK.

For more information, visit our guide on how to clear the Windows Update cache.

We hope that this article has been able to help you in solving the 0x8024002E error. This isn’t the only issue; many reported There were some problems installing update messages.

Other errors, such as error code 80200056 and Windows Update error 0x80080008, were less descriptive, but we covered those in separate guides.

Please let us know in the comments section below if you found our solutions helpful.

How to Fix SharePoint not Syncing Issues in Windows 10/11

OneDrive is a cloud solution for Windows that lets you store your personal files securely, for remote access from any location, device, and at any time – plus on any browser.

It works just like Google Drive or Dropbox, but with different storage capacities and capabilities. That’s why OneDrive to SharePoint sync issues are quite debilitating.

Some of the OneDrive SharePoint sync issues include sync conflicts, item threshold, no metadata sync or inability to sync individual folders, and the ease of deleting a file or folder.

These also make for reasons why OneDrive doesn’t and SharePoint doesn’t sync, so we’ll share some solutions you can use to resolve the issues.

How do I fix OneDrive SharePoint not syncing issues:

1. General troubleshooting tips

If you want to get the most out of your OneDrive and make syncing trouble-free, some of the things you can do include:

  • Updating to the latest version of OneDrive
  • Syncing only what you need because OneDrive files on-demand let you access all files without having to download all and using up your device’s storage.
  • Check that you’re not syncing too many files simultaneously. If OneDrive is stuck for a long or shows the Processing status as 0KB of xMB then you may have many files on the drive or many files pending to be uploaded, which can drag sync time. For this, add the files to the OneDrive desktop app instead of using the Upload button on the website
  • Mark files as offline on all mobile devices, so you can read anytime even when offline (they’ll be read-only)
  • Stay within the storage limit – check and compare the OneDrive storage size you have to the available computer disk space. If they’re both limited, you have to move or delete some files or reduce the number. Alternatively, you can buy more storage, or choose which folders to sync with your computer
  • You can also stop and restart your syncing
  • Check that your file and folder names don’t have unsupported characters, and/or invalid file types
  • Ensure the file sizes, item counts, and file path lengths are within the recommended and acceptable limits.

2. Configure the new OneDrive sync client

You can fix OneDrive SharePoint sync issues by configuring and enabling the new OneDrive sync client in the SharePoint Admin center. Here’s how:

    1. Open Office 365 Admin Center
    2. Go to the SharePoint Admin center (Admin Centers>SharePoint)
    3. Click Settings and select Start the New client
    4. Click OK, and wait while the change is propagated in your environment (may take some hours)
    5. Uninstall the old sync client from the desktop as it is no longer needed – Control Panel>Programs>Uninstall
      OneDrive Sharepoint sync issues
    6. Re-sync the libraries you synchronized previously using the new client (do this for all libraries that you want to sync or resync
    7. You can select the folders you want to sync with your laptop (though this is optional)

3. Check if the issue is with a specific folder

You will know if the sync is broken when the dark blue cloud icon (OneDrive) in your system tray displays a red X on it. You can right-click on this icon to check the sync errors, which lists all files or folders that aren’t properly communicating. Here’s how to check if it’s a specific folder:

    1. Upload a new file to the OneDrive for Business library by clicking upload in the library
    2. Right-click OneDrive for Business and click Sync now.
    3. Move your mouse to the OneDrive for Business icon in the taskbar of your computer. Can you see a text similar to OneDrive for Business – Syncing files, xx remaining OR OneDrive for Business – processing changes
    4. Go to a real SharePoint document library like a team site document library.
    5. Click Sync to check whether OneDrive can sync a normal SharePoint document library.
    6. Let another person share a folder in the OneDrive for Business library with you and try syncing that library to check the outcome.

4. Get permissions at the library and site level

If you’re using a legacy OneDrive for Business sync client to sync a SharePoint online team site library, you need the proper permissions at the library and site level. Here’s how to check if you have edit or higher permissions at the library level:

  1. Go to the library in SharePoint Online > LIBRARY > Library settings > Permissions and Management > Permissions for this document library. 
  2. Click Check permissions > type your account into the box > Check Now.  If the account doesn’t have the permissions, please click Stop Inheriting Permissions.
  3. Click Grant Permissions to assign the Edit permission to the account used to sync the library.

If you are not a SharePoint admin, contact the admin or global admin to re-add your account into the Admin group of the site collection.

A SharePoint admin or global admin can go to SharePoint admin center > Site Collections > select the site collection > Owners > Manage admins > Site Collections Administrators > add your account > OK.

If there is another site collection admin, he can go to Site Settings > Users and Permissions > Site Permissions > Teamsite Owners > New > Add users to this group. 

After that, clear the OneDrive for Business cache with the Fix it Tool and stop syncing the library. Sign in again and resync the libraries.

Note: This tool can cause data loss.

To sync specific folders from a SharePoint library, do the following:

  1. On the Office 365 app launcher, choose SharePoint.
  2. Click the site that you want to sync.
  3. Select Documents or navigate to the subfolder that you want to sync.
  4. Click Sync, and then choose Sync now.
  5. Choose the folders that you want to sync, and then click Start sync.

5. Tweak the Registry

If the OneDrive SharePoint sync issues persist, please try the steps below to check the outcome:

  1. Backup all the files in your OneDrive for Business folder, if it still exists.
  2. Right-click Start and select Run
    OneDrive Sharepoint sync issues
  3. Type Regedit and press enter to open Registry Editor.
    OneDrive Sharepoint sync issues
  4. Go to HKEY_CURRENT_USERSoftwareMicrosoftOneDriveAccount
    OneDrive Sharepoint sync issues
  5. Find and delete the identities related to your business account.
  6. Open OneDrive and try to add your business account again

6. Change sync settings

To change the folders that sync for a site, or to stop syncing all files on a site, take the steps below:

  1. Right-click the blue OneDrive cloud icon in the notification area on the taskbar
  2. Click Settings. You may need to click the Show hidden icons arrow  next to the notification area to see the OneDrive
  3. Select the Account tab to see a list of all your syncing sites
  4. Click Choose folders for that library to change the folders you’re syncing, and then choose the folders that you want to sync.
  5. To stop syncing a site, click Stop sync next to the site. Copies of the files remain on your computer, which you can delete if you like.
  6. Right-click Start and select Run
    OneDrive Sharepoint sync issues
  7. Type regedit to open Registry Editor
    regedit
  8. Navigate to HKEY_CURRENT_USERSOFTWAREMicrosoftOneDrive, make sure the value of TeamSiteSyncPreview is set to 1.

7. Switch to another cloud storage solution

If you’re facing synchronization issues, it’s high time you consider using a proper, specialized tool to streamline your assets and get everything in order.

Sync is currently the best in the niche and it works like a charm allowing you to sync all your assets effortlessly. Moreover, you can store, share, and access your files from anywhere since they are securely uploaded to the cloud.

Sync’s cloud storage platform is 100% dedicated to keeping your data private and secure through powerful end-to-end encryption. Plus, similarly to OneDrive, Sync provides 5 GB storage space completely free with the possibility to upgrade at any time.

Just when you thought this tool has revealed all of its perks, Sync proves that we are merely reaching the tip of the iceberg. This powerful all-in-one software delivers supreme collaboration tools, productivity enhancements, and data recovery features to cover every single one of your needs.

Let’s quickly look at its key features:

  • Sync and back up your files in real time across all of your computers and devices
  • Encrypted cloud storage platform for supreme privacy
  • Sharing and collaboration tools and features
  • Data protection, file history, and strong data recovery features
  • Advanced share controls with password protection and granular permissions
  • Selective sync feature available

⇒ Get Sync

Did any of these solutions help? Let us know in the comments section below.

Code 66a Error Windows Update [SOLVED]

Are you wondering how to fix the Windows update error 66a? Do not worry! The Windows Report team has enlisted working solutions for you.

Windows users who experience the code 66a error reported PC crashes and slow PC processes, and the Error Code 66A .NET Framework prompt is displayed.

This error message appears during several instances, such as during Windows shutdown/startup, or while the .NET framework is running.

Meanwhile, we have compiled applicable solutions to fix the Windows update error code 66a. You can try out any of the enlisted solutions below to fix the problem.

How do I fix the error code 66a?

1. Run a SFC scan

  1. Go to Start then type cmd.
  2. Right-click on Command Prompt and select Run as Administrator.
    fix windows 10 error 0x80071a91
  3. Now, type the following command: sfc /scannowSFC scan
  4. Wait for the scanning process to complete and then restart your computer.
  5. All corrupted files will be replaced on reboot.

The System File Checker scans for corrupt or missing system files and repairs them. You can perform the SFC scan by following the aforementioned steps.

2. Use a registry cleaner

Software leftovers, missing DLLs, and invalid Windows registry keys can also cause Windows update error code 66a problem.

Therefore, you can also use a dedicated system restoration tool to check for file corruption or harmful software that resides on your PC. The tool will periodically scan your device and make sure everything is working.

3. Run the system restore in safe mode

  1. Shut down your PC and turn it on again.
  2. Navigate to the Run in Safe Mode option, and hit Enter.enable safe mode PC
  3. Go to Start, then type system restore, and then hit Enter.
  4. Follow the prompts to revert to a certain restore point.
  5. Wait for the process to complete, and then reboot.

Safe mode will start your PC in a diagnostic mode with only basic files and drivers running so you can perform a system restore to revert your system back to a point before you get the error message.

If you have never created a restore point before, give this helpful guide about creating Windows 10 restore points a ready, then you may proceed to the next solution to undo Windows update.

4. Revert Windows update changes

  1. Open the Settings app. You can do that quickly by using the Windows Key + I shortcut.
  2. When Settings app opens, navigate to the Update & Security section.how to fix windows update error code 66a
  3. Select the Recovery section from the left pane.
  4. Under the Go back to the previous version of Windows 10 option, click Get started.how to fix windows update error code 66a
  5. Keep your files and start the resetting procedure.
  6. After uninstalling recent updates, check if the issue still persists.

5. Scan the PC for malware

Some Windows users ignore the warning message and they click on random links in the mail which contain hidden malware.

This ends up compromising their systems due to malware infection, their data and sensitive information gets leaked to unauthorized access, or they get errors such as the Windows Update error code 66a.

The ideal step in order to prevent such things from happening is downloading and installing a third-party antivirus software that will deal with all virus-related problems.

This includes phishing, trojans, adware, spyware, and all the known and unknown threats that we usually have to deal with while browsing the internet.

Be safe, and choose a program that utilizes advanced AI and machine learning algorithms to monitor and quarantine suspicious activity.

⇒ Get TotalAV

6. Uninstall the .net framework extended

  1. Click the Start button, and then click on Control Panel.
  2. Click Programs and Features, or Uninstall a Program under the Programs category.PureVPN Windows 10 not working
  3. In the list of installed programs, search for .NET framework extended.
  4. Click the Uninstall/Change button, which appears at the top of the program list, and follow the instructions to uninstall .NET framework.

7. Reinstall .NET Framework

  1. Click the Start button, and then click on Control Panel.
  2. Click Programs and Features, or Uninstall a Program under the Programs category.PureVPN Windows 10 not working
  3. In the list of installed programs, search for .NET framework.how to fix windows update error code 66a
  4. Click the Uninstall button, which appears at the top of the program list, and follow the instructions to uninstall .NET framework.
  5. Restart your PC afterward.
  6. Download the .NET framework.
  7. Double-click on the executable file, and follow the prompts to install .NET framework.

Reinstalling .NET Framework can also fix Windows Update error code 66a problem. However, in order to reinstall .NET Framework, you have to fiddle with the Control Panel.

In addition, you may consider downloading several versions of .NET framework most especially the recent one. Check this guide dedicated to fixing .NET Framework issues for more information.

8. Rerun Windows update

  1. Go to Start, then type update in the search box, and click on Windows Update to proceed.
  2. In the Windows Update window, click check for updates, and install the available ones. Please uninstall current Bluetooth installation before continuing Dell
  3. After the update is complete, restart your PC.

An incomplete Windows update can also result in the Windows Update error code 66a problem.

Also, there are instances where the Windows Update process is halted or disrupted by the background process.

Therefore, we recommend that you rerun the Windows update; also, you should ensure the update process is completed. This should fix the Windows Update error code 66a problem.

9. Perform a clean boot

  1. Go to the Search box, and then type msconfig.
  2. Select System Configuration to open the dialog box as below:
  3. Find the Services tab, and then select Hide all Microsoft services box.
  4. Next, click Disable all.
  5. Go to the Startup tab.
  6. Click Open Task Manager.
  7. Right-click on each process, and select Disable.
  8. Close Task Manager, then click Ok.
  9. Finally, reboot your PC.

Software conflicts by .NET framework dependent applications can also cause the Windows Update error code 66a. These applications may run in the background whenever you start Windows.

Nevertheless, the clean boot starts up your PC devoid of any software conflicts. Therefore, you have to be logged on as the administrator before you proceed with these steps:

This concludes our article today. Here’s a list of the best tools to fix Windows update problems in case you need more help with the subject.

Hope you are able to fix the code 66a error in Windows Update problem by using any of the enlisted solutions above? Let us know if you have any questions. Feel free to comment below.

One Monitor Is Brighter or Darker Than the Other? Here’s How to Fix It

Even when using two identical monitors, one screen might look slightly brighter or darker, despite having the same settings. This usually comes down to panel variations or small calibration differences, not a hardware issue. Adjusting the right brightness settings on your second monitor can fix it. Here’s how you can calibrate both displays and fix mismatched screen output quickly.

Why is one of my monitors brighter than the other?

  • The age difference between monitors often affects their similarity. When a monitor is older than the other one, it may also be slightly less bright.
  • Keep in mind that the latest laptop monitors often sacrifice color reproduction for lightweight functionality.
  • Any differences in wall color or furniture color have a high impact on the light that’s arriving at the monitor. Try to compare your dual monitors under similar lighting conditions.
  • Finally, keep in mind that it’s hardly impossible to match two screens from different monitor models, manufacturers, and panel technologies as far as color is concerned.

How do I fix the brightness on my second monitor?

1. Manually adjust the difference

Gamma panel


As said before, if it isn’t happening to a professional monitor that comes with colors calibrated, you’re most likely experiencing a variation in production.

In this case, you will need to give a boost to your monitors to match each other.

That’s why we recommend manually adjusting the difference.

You could adjust Gamma/ Brightness and even color correction, either in Windows settings, monitor settings, or the Graphics card Settings Panel.

2. Calibrate display via Color Management

calibrate display via Color Management
  1. Just search for Color Management in the search box.
  2. Then follow the wizard to set up both your monitors.
  3. You need to do the same with both screens.

There is also a Color Management option in Windows which may help you out. With it, you can accurately calibrate your display colors.

Color Management lets you check the proper brightness, contrast, etc. based on the monitor, so give it a try as well and let us know if it works.

3. Use the same color profile when dual monitor colors are not matching

use the same color profile
  1. Go to Color Management again.
  2. Once it opens, select a monitor, and check the box that says Use my settings for this device.
  3. Click the Add button, then choose a color profile.

You’ve done your best, but it seems that you just can’t reconcile the differences easily. Remember that all monitors use the System’s default color profile.

If you think that the Color profile is the culprit, change the color profile as well. Do the same with the second monitor and check whether it fixes the problem or not.

4. Use the same type of ports to connect the monitors

use either DVI or HDMI port


If you use different ports (DVI, VGA, HDMI) to connect your dual monitors, you may get high or low color depth and different brightness levels. Stop using the VGA port to fix this.

Instead, use either DVI or HDMI port to connect both monitors and see if you notice any improvement. Have a look at these high-speed HDMI cables while you’re at it and pick the one that best suits your needs.

Following the above tricks can bring your dual monitors as close to the brightness and color ideal as technology makes it possible these days.

If you are lucky enough, you may be pleased with the result. Nevertheless, sometimes the differences may still exist even after trying all these methods.

Windows Update Error 0x80240017 [SOLVED]

One of the most common issues that might occur while updating Windows’s built-in apps and programs is the 0x80240017 error code.

Read this article to find out how to fix it and get your updates up and running.

What causes the error 0x80240017?

The error code 0x80240017 usually appears due to the fact that your system has changed after you installed a third-party application.

It can also occur because something has changed in the registry after a reboot and you do not have the required system permissions.

This troubleshooting guide will show you what solutions you can use to fix this error once and for all.

How can I fix the Windows Update error 0x80240017?

1. Clear and reset the Microsoft Store cache

  1. Reboot your operating system.
  2. To start Windows 10, log in with your administrator account if you haven’t already.
  3. Go to your Desktop tile and hold the Windows and R buttons at the same time.
  4. Now you have the Run window in front of you.
  5. In the Run dialog box, enter the WSReset.exe command.WSReset command
  6. Press the Enter key on the keyboard.
  7. Reboot your operating system once more and log in again with your administrator account.
  8. Check if the error persists.

2. Run the built-in Windows Update Troubleshooter

  1. Go to Search > type settings > double click on the first result.
  2. Go to Update & Security > select Troubleshoot.
  3. Now in the Troubleshooting window, locate the Windows Update Troubleshooter.
  4. Select the Windows Update troubleshooter and run it.windows update troubleshooter
  5. Now a scanning process will begin and it will tell you if any issues have been found and fixed.
  6. Follow the on-screen instructions to finish the troubleshooting steps.
  7. Scroll down and run the Microsoft Store Apps troubleshooter as well (follow the same steps listed above).windows store app troubleshooter
  8. Reboot your Windows 10 device.
  9. When the device starts, check if you still get error code 0x80240017 while trying to update your apps and programs.

3. Take full control over File Explorer and the WindowsApps folder

  1. Reboot your Windows 10 device and log in with your administrator account.
  2. Open the C:/ partition or wherever partition you have installed your Windows 10 OS on.
  3. Double click to open the Program Files folder.
  4. Select the View tab situated on the upper side of the File Explorer.
  5. From the list that appears, check the box next to Hidden items under the Show/hide topic.
  6. Now in the Program Files folder, locate the WindowsApps folder.
  7. Select the WindowsApps folder.windowsapps folder
  8. Select the Properties feature you have on the menu that appears.
  9. Go to the Security tab situated in the upper side of the Properties window.
  10. Select the Advanced button.
  11. Double click on the username you use.
  12. Make sure that the Type field is set to Allow and This Folder, subfolders and files.
  13. Check the box next to Full Control.
  14. Left-click or tap on the OK button.
  15. Open the C: partition once more.
  16. Double click on the Users folder to open it.
  17. Double click on your username to open the folder.
  18. Double click to open the AppData folder.
  19. Double click to open the Local folder.
  20. Now, within the Local folder, search for the WindowsApps folder.
  21. Right-click on the WindowsApps folder.
  22. Left-click or tap on the Properties feature.
  23. Left-click or tap again on the Security tab.
  24. Left-click or tap on the Advanced button.
  25. Now you will need to set the permissions for this folder as you did for the one above.
  26. Left-click or tap on the Apply button again.
  27. Left-click or tap on the OK button > close all the windows you opened so far.
  28. Reboot your Windows 10 PC.
  29. After the device starts, check again to see if you still get the error 0x80240017.4.

4. Run SFC scan

If certain system files got corrupted or deleted, this may trigger update issues and errors. Fortunately, you can quickly fix this problem by running a System File Checker scan.

This tool will quickly scan your system and identify missing or corrupted files which will then replace. Here are the steps to follow:

  1. Go to Start > type cmd > right click on the first result > Run Command Prompt as administrator.
  2. Type the sfc /scannow command and hit Enter.Windows 10 white screen crash
  3. Wait until the process completes and then restart your computer > check if this workaround solved your problem

5. Reinstall the Microsoft Store app

Sometimes, the Microsoft Store itself is the culprit for all the issues and errors that you’re experiencing. In this case, the quickest solution is to simply uninstall the Microsoft Store app.

  1. First of all, log out of the app.
  2. Then, navigate to Start > go to Apps & features > type store in the search box.
  3. Select the Windows Store app > click on Uninstall.uninstall microsoft app store
  4. Restart your PC.
  5. Reinstall the Microsoft Store app> log in and try to install the latest app updates to see if the issue persists.

6. Scan your computer

If the error persists, try running a full system scan. Viruses, malware and other types of cyber threats could also trigger error 0x80240017 when you try to update your apps.

If you haven’t installed a reliable antivirus solution on your computer yet, check out this list of the best antivirus tools that you can use on your Windows 10 machine.

Install the one that suits your needs best, and run a full system scan.

7. Reset your PC

Note: It is recommended that you back up your files and folders before attempting the steps below

  1. Go to Settings > Update & Security.
  2. Select the Recovery feature.
  3. You will have there an option named Refresh your PC without affecting your files and under it, you will need to select the Get Started button.recovery pc
  4. Now follow the on-screen instructions finish the Reset process.
  5. Reboot your Windows 10 device.
  6. Check again to see if error 0x80240017 has been fixed.

8. Reinstall the OS

If the methods above did not work, then I would suggest you backup your important files and folders that you have in your Windows 10 directory and perform a complete reinstall of the operating system.

If necessary, check out this guide on how to fix Windows can’t automatically find new drivers.

That’s it, we hope these methods fixed error 0x80240017 on Windows 10 when you try to use the update feature.

If you do have additional questions related to this subject, you can list them in the comments section below. We will get back to you as soon as possible.

Windows Update Error 0x80004005 [SOLVED]

The error code 0x80004005 prevents Windows users from updating their operating systems. 

If you’re stuck with this error, follow the step-by-step guidelines below.

How can I fix the 0x80004005 Windows Update error?

1. Run the Windows Update Troubleshooter

  1. Press Windows key + I to open the Settings app.
  2. Choose Update & Security.
  3. Open Troubleshoot from the left pane.
  4. Select Windows Update and click on Run the troubleshooter.Windows 10 update error 0x80004005
  5. Follow the instructions until the procedure ends.

In case this solution fell short, we’ll probably need to get the big guns into play. Continue with the further steps.

2. Run SFC

  1. In the Windows Search bar, type cmd.
  2. Right-click the Command Prompt and run it as an administrator.
  3. In the command line, type the following command and press Enter:
    • sfc /scannow
  4. The scanning procedure should last approximately 15 minutes.Windows 10 update error 0x80004005

Still, if the tool hasn’t located any system errors and the problem is persistent, try the remaining solutions.

3. Reset Update services

  1. In the Windows Search bar, type cmd.
  2. Right-click the Command Prompt and run it as an administrator.
  3. In the command-line, type the following commands and press Enter after each:
    • net stop wuauserv
    • net stop bits
    • net stop cryptsvc
    • Ren %systemroot%SoftwareDistributionDataStore *.bak
    • Ren %systemroot%SoftwareDistributionDownload *.bak
    • Ren %systemroot%system32catroot2 *.bak
    • net start wuauserv
    • net start bits
    • net start cryptsvc
  4. After that, check for updates again.

4. Check your PC drivers

  1. Press Windows key + X to open the Power User menu.
  2. Choose Device Manager from the list.Windows 10 update error 0x80004005
  3. Look for the yellow exclamation point. Those are the devices without the proper drivers.
  4. Now, depending on the type of device you can:
    • For lesser devices like a webcam or universal serial bus controllers: right-click on the device and choose Update Driver.
    • For GPU and sound devices, navigate to the official OEM’s site and download certified drivers.
  5. Once you’ve dealt with the missing drivers, restart your PC and check for updates again.

4.1 Update drivers automatically

In order to prevent PC damage by installing the wrong driver versions, we recommend doing it automatically by using a specialized driver updater tool that will download and update the correct version.

⇒ Get Outbyte Driver Updater

5. Download the update manually

  1. Copy the name of the troubled update file.
  2. Go to Microsoft Catalogue here.
  3. Paste the name in the dedicated search box.error 0x80004005
  4. Download the file. Make sure that it responds to your system architecture (x86 or x64).
  5. Install the update file.
  6. Restart your PC.
  7. Check for additional updates to look for changes.

6. Clean boot your PC

  1. Go to Start > type msconfig > hit Enter
  2. Go to System Configuration > click on the Services tab >  check the Hide all Microsoft services check box > click Disable all.hide all microsoft services
  3. Go to the Startup tab > Open Task Manager.
  4. Select each startup item > click Disable
  5. You can now close Task Manager > restart the computer.disable startup programs

Let us know if you have any more questions about this error in the comments below.

Fix: Windows 11 Terminal Typing on its Own

Typing commands is a gateway to accomplishing many tasks, but when Windows 11 terminal is typing on its own, it can become very frustrating.

A few users have complained of this on the new OS, and we established that a few common triggers would lead to this situation.

Let us explore it and show you all you need to know to resolve this auto-typing issue.

Why is my Windows Terminal typing on its own?

There could be a few reasons your Windows Terminal is typing independently. At the top of the list are the following:

  • Hardware issues – It could be a hardware issue, such as a stuck key on your keyboard. Using the best keyboards will reduce the occurrence of this problem.
  • Virus – Computer viruses could manifest in several forms, and this erratic typing on the terminal is one example. We recommend using the best anti-malware tools.
  • Conflicting programs – In some cases, newly installed third-party applications could trigger this problem.

Now we have discussed possible triggers, let us introduce you to some recommended fixes.

What do I do if Windows Terminal is typing on its own?

To troubleshoot this issue, the first thing you should try is restarting your computer. This should be done before any other complicated solutions because it will often resolve any problems caused by software.

1. Scan for malware

  1. Visit the Microsoft Windows Scanner link and download the more appropriate scanner for your computer.
    windows 11 terminal typing on its own
  2. Run the downloaded file.
  3. Accept the terms, then click Next.
  4. Select Full scan and click Next.
    windows 11 terminal typing on its own

Once you’ve finished the procedures, the utility will begin scanning your computer, which will take some time. You will get a report from the tool detailing the software found and eliminated when this operation is finished.

2. Uninstall recently installed software

  1. Press Windows + R, type control panel, and hit Enter.
  2. Click on Uninstall a program.
    windows 11 terminal typing on its own
  3. Go through the program list, click on any recently added program, then select Uninstall.
  4. Follow the wizard to complete the uninstallation, then check if Windows 11 terminal is still typing.

3. Change or repair your keyboard

If none of the above solutions have worked, it is likely a hardware issue, and we recommend that you change or repair your keyboard.

The process of keyboard repair may be complicated, but you can see a qualified technician for more assistance. However, before you do that, you should check that nothing is stuck underneath your keys. Dry-blowing the keys may help.

In conclusion, we like to note that any of the above solutions may come in handy. However, since we have not written them in any particular order, you should try what seems most appropriate.

Pressing individual keys and feeling for their touch sensitivity may tell if something is stuck underneath. Also, if you already use any of the best antiviruses, you would be able to avoid virus infection that may trigger this problem.

Lastly, note that this is not specific to the new OS, and Windows 10 Terminal typing on its own is a problem some users have faced.

Tell us what worked for you in the comments below.

FIX: Power BI not connecting to SharePoint List [Guide]

Power BI Desktop is software with which users set up charts and interactive visualizations for connected data sources. SharePoint lists are data sources users can connect to Power BI with.

However, some users have stated in forum posts that they can’t connect Power BI with their SharePoint lists. The URL isn’t valid or Access to resource forbidden are two errors that arise for some BI users when they try to connect SharePoint lists.

First, double-check the SharePoint list’s URL entered in the URL text box when a “URL isn’t valid” error arises. Users need to specify SharePoint sites as follows: https://<companyname>.sharepoint.com/xyz_Test/. Make sure that the URL entered doesn’t include any typos.

Power Bi unable to connect to a SharePoint Online list

1. Enter Microsoft Account Credentials for SharePoint List

  1. Some users have fixed “URL isn’t valid” connection errors for SharePoint lists by editing the data sources’ permissions so that they include Microsoft account credentials. To do that, click the File tab in Power BI Desktop.
  2. Select Options and settings > Data Source Settings to open a Data source settings window.
  3. Select the SharePoint list in that window.
  4. Click Edit Permissions to open an Edit Permissions window.Edit Permissions window power bi won't connect to sharepoint list
  5. Click Edit to enter Microsoft account credentials.
  6. Then press the OK button.

2. Clear the SharePoint List’s Permissions

  1. Clearing permissions for SharePoint list data sources can resolve “Access to resource forbidden” connection errors. Users can do that by opening the Data source settings window as outlined above.Data source settings power bi won't connect to sharepoint list
  2. Then select the Global Permissions option.
  3. Select the SharePoint list listed within the window.
  4. Press the Clear Permissions button.
  5. Select the Close option.
  6. Then users can re-enter the credentials for the SharePoint list.

3. Try Connecting a SharePoint List With OData Feed

  1. Alternatively, users can try connecting their SharePoint lists with OData feed when they can’t connect them via the Get Data dialog window. Press the Get Data button on Power BI’s Home tab.
  2. Click OData Feed to open the window shown directly below.OData Feed window power bi won't connect to sharepoint list
  3. Enter the SharePoint list URL feed in the text box with the following format: http: //SITE_URL/_vti_bin/ListData.svc.
  4. Select an authentication method for the SharePoint list data source.
  5. Click the Connect button.

Those are a few resolutions that might resolve Power BI connection errors for SharePoint lists. For additional resolutions that might fix SharePoint list connection errors, check out the Power BI support website. Users can send Power BI support tickets by clicking the Create Support Ticket button on that site.

RELATED ARTICLES TO CHECK OUT: 

6 Best MKV File Converters for Windows 10 to Get Today

Our digital video age is full of various video formats and since developing new video formats has become the goal of some software and hardware vendors the video format list will not cease to grow.

Converting videos is not a task as complex as editing videos, but most people make the mistake of seeing video conversion as a complicated or expensive action that requires sci-fi software. But it’s not the case, as you can even convert videos for free.

There are a lot of reasons for which you need a video converter and we’ll get back to this discussion at the end of this article.

What I should know about video formats?

You should know that you need a thick book full of scientific terms to know what each video format means and to understand the details regarding how video formats are created. On the other hand, to perform a video conversion, you don’t have to be a rocket scientist, so some basic knowledge will be enough.

Most video files have at least two types – the codec and the container.

The container format is a computer file format that can contain all kinds of data which is compressed in a manner of standardized codecs. The container describes the file’s structure (where the pieces are stored, how they’re interleaved, which codecs are used by which pieces and so on).

The codec (short from compressor/decompressor) will allow you to store the digital photos, music, and movies in the form of compressed and easily manageable files that you’ll be able to open or to decompress to deliver their original content. The most popular video codecs include DivX, XviD, 3ivx, MPEG(MPEG-1,2,3,4), ReadVideo.

A video is made up of various frames (snapshots), and the frame rate is the number of still pictures per unit of time of video or FPS. Motion pictures that are shot on film do so at 24 FPS. Audio and video file resolution is measured in kilobytes per second (kbps), and this is called bitrate. The higher the bitrate, the better is the video quality.

Aspect ratio is about the dimensions of video screens and the video picture elements.

A video is made up of static images that are being flashed before our eyes in rapid succession and when we say picture resolution we mean the elements, the pixels that comprise these pictures. In theory, the video conversion will not improve the video quality, and therefore you should not expect better quality than one of the source videos.

Choosing a good video converter

A high-quality video converter is crucial to whether you can successfully finish video conversion. There are lots of available video converter apps, but excellent video conversion software can make you look like a video professional with only minimal effort.

Usually, video converter tools feature preset optimized profiles and these preloaded profiles will cover most requirements. You will be able to customize the bitrate, the frame rate, the video size, the aspect ratio, and more the make your final video look perfect.

Given the fact that most video conversion tools are trialware, you will be able to give them a try before deciding on getting something. Here are the elements that you should be looking for when purchasing video converter software:

  • Input files – the tool should accept a large variety of input files especially the source video formats.
  • Output files – you may need to output to a few file formats, but the number and breadth of output files will determine the strength of the tool’s overall performance.
  • Key features – the tool’s features should include the ability to adjust multiple options (codecs, video size, frame rates, bitrates) to ensure the highest quality possible. Even if you might think that some of the features might be only for advanced users, you’ll find out that they are essential for your success as well.
  • Ease of use – the tool’s interface should be an easy and intuitive one and non-threatening to the new user; the video conversion tasks usually involve just a few clicks.

Please note that if the MKV file is damaged, you won’t be able to convert it. The highlighted guide will help you fix it though. All this being said, here is our top converter tools list.

Which are the best MKV video converting tool?

Aiseesoft Total Media Converter

Aiseesoft Total Media Converter can easily convert between various video formats such as MP4, H.264/MP4 AVC, H.265/HEVC, MTS, MXF, MOV, AVI, DivX, WMV, MKV, FLV, WTV, VOB as well as 4K, HD and 3D video formats.

It can be as video conversion software that converts any of your videos to MP4, MP3, WMV, MOV, etc. for playback on your TV or mobile device.

Besides its enormous converting potential, this tool is very easy to use. The interface is very intuitive, and it unlocks the most needed/interesting/powerful features really easily.

Aiseesoft Total Media Converter

Use Aiseesoft to convert any video/audio file to all popular video and audio formats.
Free download Visit website

iSkysoft Video Converter

iSkysoft Video Converter is a very powerful and convenient converter tool that features high conversion speeds and amazing output quality.

The converted MP4 files can be used on your iPod, TV, iPhone, mobile phone, Android phone, and more portable devices.

The tool can convert your MKV to MP4 video format or any other video format and of course vice versa.

You will be able to customize and edit videos before conversion, and you can also upload the final videos to websites such as Facebook, YouTube, and Vimeo.

You can also download videos from more than a thousand popular websites, and the tool is compatible with the latest operating systems including the one and only Windows 10.

iSkySoft Video Converter

Convert MKV files to any format and use the built-in editor to create shareable content.
Check price Visit website

Any Video Converter

This is an excellent downloading and conversion toolkit which is so easy to understand and work with, that it is tough to believe it’s free.

You can use it to rip files from discs, and download videos from Facebook, YouTube, Vimeo, Dailymotion, and more.

Plus, you will be able to apply effects and filters and then save them or burn them to DVD in any format you want.

The video can be downloaded and converted into batches, and simple conversions can be successfully completed with just a bunch of clicks.

The tool is free to use, but when you run the installer you will see that you will be offered a security program and the program will suggest that you change your default search engine to Yahoo. In case you want to avoid this, select Click here to customize the installation and then uncheck the box.

The premium version of this tool will include more features such as the ability to remove DRM protection and to record streaming video, but the free version is fantastic as well.

Any Video Converter

Download and convert video files to any format, easily and safely.

Freemake Video Converter

Freemake has produced powerful yet very easy-to-use tools and made them available for free, and the Freemake Video Converter is no exception.

This tool can not only convert files from your hard drive to almost any existing format but it can also be used to download and convert online videos from YouTube for instance.

The software features easy editing tools to trim unwanted footage, and you also have the ability to add subtitles, to convert to and from DVD. The tool has all your daily conversion needs covered and it offers much more.

On the other hand, you should be aware of the fact that the free version of the software will add a branded splash screen to the beginning of your video. It’s not such a big deal, as the splash is not obstructive and the main video will not be watermarked.

If you can live with that, then the Freemake Video Converter might become your best friend, so give it a try and see how it works for you.

⇒ Get Freemake Video Converter

Handbrake

This is a powerful converter that is well known to Mac users and less popular with Windows users, but this doesn’t mean that you should overlook it.

This is an excellent choice for anyone who works on multiple platforms and also for everyone who is dedicated to Windows.

The tool has lots of features that will allow for fine-grained control of video conversion, and they include very precise cropping, frame rate adjustment, advanced filtering and more.

You will also find some presets for quick results in case you are interested in such a thing.

The main reason for which you’ll love the software is the fact that it’s free and open-source, and you can use it to convert videos from almost any format.

⇒ Get Handbrake

MediaCoder

This universal converter features a few cutting-edge technologies that will make video editing amazing because it lets you take control of the whole process.

The tool is updated once a week, and this means that you will come across the latest versions all the time.

MediaCoder has everything you need: ripping of CD, VCD, DVD, and BD and the filters will help improve the converted files. The tool also features transcoding parameters that will make tuning and adjusting the video parameters as easy as possible.

During the whole process of conversion, the software will make it possible to reduce the sizes of big files and also the extraction of audio from video, which is pretty great.

⇒ Get MediaCoder

Converting video files can be a tricky process, but it is useful. Besides, the tools that we mentioned above will help you to get the job done perfectly.

For more useful material on the same topic, see our MKV separate page.

Also, in our Video Hub, you’ll find a lot of guides and recommendations that might be helpful.

Fix: Windows 10 Update Error 0x800736b3

Windows Update feature is the essential part of the Windows 10 surrounding. In addition to regular updates, Windows 10 users can expect a lot from the major updates that are scheduled for release twice per year.

Nonetheless, even though the timely support has brought a lot of improvements, users still a multitude of issues with Windows Update and its features. One of those numerous issues is followed by the error code 0x800736b3. This specific error prevents downloading certain cumulative updates and mainly affects dotNet Framework. So, if you have an issue with this error code, we prepared a few workarounds worth checking out.

How to resolve update error 0x800736b3 in Windows 10

  1. Use a third-party system repair tool
  2. Use DISM and system installation drive
  3. Download offline dotNet Framework installer
  4. Check your hardware
  5. Run the Update troubleshooter
  6. Run the SFC scan
  7. Reset Windows Update components
  8. Make sure the Windows Update service is running
  9. Make sure the BITS service is running
  10. Change DNS settings
  11. Reinstall Windows 10 from scratch

1. Use a third-party system repair tool

An effective solution would be to install a trustworthy program designed to repair all Windows files in critical condition.

Let this software scan your PC and detect errors, malware, as well as other bugs that affect your PC’s performance and security.

Use the automatic repair function to enable it to start fixing all the files and compromised system settings.

2. Use DISM and system installation drive

Deployment Image Servicing and Management (DISM) is a built-in Windows tool whose main function is to scan and repair corrupted files. In order to repair this specific error, you’ll need to obtain a USB/DVD with Windows 10 setup. Some users tried with the standard update through DISM, but the SXS file was missing. That is why you’ll need the setup media or ISO. Follow these instructions to resolve this issue:

  1. Insert USB or DVD with Windows 10 installation (the same architecture as your current version).
  2. Right-click Start and run Command Prompt (Admin).
  3. In the command line, type the following command:
    • Dism /online /enable-feature /featurename:NetFx3 /Source:X:sourcessxs /all /LimitAccess
  4. Replace the X with the drive letter of the destination media setup.
  5. The process will take the needed file and your issue should be resolved.

3. Download offline dotNet Framework installer

On some occasions, the mentioned error can be related to the dotNet Framework’s failed installation. Besides updates, the lack of DotNet Framework can cause a lot of troubles with the all-around system behavior. So, your first step is to try and download the offline installer of the latest version.

  1. Find the corresponding version here.
  2. Download and save file.
  3. Start the file and confirm.
  4. The process may be a bit long.

Once the process is installed, check out the applications that utilize dotNet and see if the process is functioning.

If you are not sure where to start and need more help, we have an extended guide that explains how to download and install .NET Framework to your Windows PC.

4. Check your hardware

While the software is the probable culprit for this issue, you should check out your RAM and HDD, also. There is a large variety of third-party tools you can use to check on HDD life and boot sector errors. Furthermore, you can use similar tools to check the RAM health.

5. Run the Update troubleshooter

Microsoft introduced a handy tool for resolving various system issues including update errors simply called the Troubleshooter. This tool is certainly something you should try when resolving these problems because it can tweak the problem for you without big efforts from your side.

Here’s how to run the Update Troubleshooter in Windows 10:

  1. Go to Settings.
  2. Head over to Updates & Security > Troubleshoot. 
  3. Select Windows Update, and go to Run the Troubleshooter. 
  4. Follow further on-screen instructions and let the process finish.
  5. Restart your computer.

6. Run the SFC scan

If none of the previous solutions worked, let’s try a few troubleshooting tools. The first one is the SFC scan. This command-line tool scans your computer for potential issues and resolves them if possible. So, it might be helpful in this case, as well.

Here’s how to run the SFC scan in Windows 10:

  1. Right-click on the Start Menu button, and open Command Prompt (Admin).
  2. Enter the following line and press Enter: sfc/scannow
  3. Wait until the process is done (it may take a while).
  4. If the solution is found, it will automatically be applied.
  5. Now, close the Command Prompt and restart your computer.

7. Reset Windows Update components

According to users, sometimes this problem can be caused by Windows Update components. To fix the issue, you need to restart all Windows Update components manually. To do this, you just need to run a couple of commands in Command Prompt. To do that, just follow these steps:

  1. Start Command Prompt as administrator.
  2. When Command Prompt starts, run the following commands:
  • net stop wuauserv
  • net stop cryptSvc
  • net stop msiserver
  • ren C:WindowsSoftwareDistribution SoftwareDistribution.old
  • ren C:WindowsSystem32catroot2 Catroot2.old
  • net start wuauserv
  • net start cryptSvc
  • net start msiserver

8. Make sure the Windows Update service is running

The Windows Update service is an essential service for receiving updates. But on some occasions, it can crash and stop working. What you need to do is restart the service and see if there is an improvement in the Update protocol. Here’s how:

  1. Go to Search, type services.msc, and open Services.
  2. Find the Windows Update service. Right-click and open Properties.
  3. On the General tab, find Startup type and choose Automatic.
  4. If the service is not running, right-click and choose Start.
  5. Confirm selection and close window.

9. Make sure the BITS service is running

The same thing goes for another crucial service for delivering Windows Updates, Background Intelligent Transfer Service:

  1. Press Windows key + R. In search line type services.mscand press Enter.
  2. Look for Background Intelligent Transfer Service (BITS) and double-click it to open its properties.
  3. If the service isn’t running, click the Start button.
  4. Choose Recovery tab and make sure that First failure and Second failure are set to Restart service.
  5. Confirm selection and check for updates.

10. Change DNS settings

According to Microsoft’s community forums, changing the DNS server address could be the solution. So, that’s the workaround we’re going to try first. Here’s what you need to do:

  1. Go to Windows Search, type control panel, and open Control Panel.
  2. Go to Network and Sharing Center, and click on Change adapter settings from the left pane.
  3. Choose the network you’re currently using, right-click it, and choose Properties.
  4. Scroll down to Internet protocol version 4 (TCP/IPv4), and choose Properties.
  5. Now, choose Use the following DNS Server addresses
  6. Enter the following values:  DNS Server – 8.8.8.8 and Alternate DNS Server – 8.8.4.4
  7. Save changes, and restart your computer

11. Reinstall Windows 10 from scratch

In case your system shows signs of performance drop and the previous steps proved inadequate, you should reinstall the system from the scratch. You can use Media Creation Tool and create a bootable USB or DVD drive setup. However, make sure you back up files from the system partition and license key. The process is not lengthy as it looks and you don’t need any advanced knowledge to perform the reinstall.

What is Windows update error 0x800736b3

The Windows update download error 0x800736b3 error does not allow the newest system updates to install on your machine.

This can be caused by several culprits, including corrupt .NET Framework files or corrupt system files.

The issue may also come as a direct indicator of malware infection, so make sure to run a thorough antivirus scan.

In most cases, the problem is not major and can be easily fixed in just a few steps.

It is however essential to make sure that your updates are enabled and well-functioning, otherwise you will not be able to benefit from the latest Windows applications updates and security implementations.

Those were our solutions for this issue. In case you are having any thoughts or questions, please be free to share them with us in the comments.

Busy-on-Busy call setting coming to Microsoft Teams this year

The Redmond-based tech giant never stops tweaking the communication platform it is so popular for, meaning the Teams app.

We’ve seen a lot of improvements lately, and there are still a lot more to come, as you are about to see in this article.

For example, the web version of Teams already got fitted with background effects and Live Captions. You can also use Viva Connections through the Teams mobile app.

And, after promising to introduce an enhanced visual layout to Teams next month, Microsoft has plans to release another exciting feature this February.

Teams will soon offer better in-app call management

The software colossus is now considering bringing one of the widely-requested call setting to Teams users on both Windows and Mac.

Microsoft is now working on Busy-on-Busy end-user setting, which we will see on our apps sooner than you might think.

This new call setting will actually manage how incoming calls are routed when you are busy in an existing call or meeting.

Keep in mind that, in a scenario where you are busy speaking to someone else, you are allowed to choose from a couple of busy options:

  • You can let the calls come through
  • Play a busy signal
  • Redirect the call

In fact, these busy options are not entirely new to Microsoft Teams users, as administrators can already configure Busy-on-busy with a policy from Microsoft Teams Admin Center.

However, what changes next month is that besides administrators, the end user will also be able to manage their incoming calls when they are busy in an existing call directly from the Calls settings in the Teams app.

Even though not yet confirmed, the Busy-on-Busy call setting will likely be set to Disabled by default, so you will have to turn it on yourself.

For the time being, in the Calls settings in the Teams app, you can add or remove delegates, change your default mic, speaker, or camera, make a test call, set call answering rules, and more.

But, while Microsoft is targeting February to launch the busy options to Teams users for Mac and Windows, there is always a chance of the company delaying it to later months.

We’ll just have to wait and see what happens in the near future. Leave a comment below and express your opinion on other features that might enhance the Teams experience.

FIX: SharePoint Documents won’t Open in Application Solved

SharePoint is a handy collaborative platform from which users can usually open MS Office documents.

However, a few SP users have stated in forums that SharePoint documents won’t open in the application solved.

Documents don’t open when they select to open them with client MS Office software from within SP.

Here are a few resolutions that might fix SharePoint issues for opening Excel or Word documents.

What to do if SharePoint won’t open Excel/Word files?

1. Turn Off Protected View

  1. Open the Word or Excel application.
  2. Click the File tab.
  3. Select Options to open the window shown directly below.
  4. Click Trust Center on the left of the window.
  5. Press the Trust Center Settings button to open further options.
  6. Click Protected View on the left of the Trust Center window.
  7. Then deselect all the Enable Protected View settings, and press the OK button.

It might be the case that Protected View is blocking the document opening.

When that happens, a Word experienced an error trying to open the file error message pops up or the document might hang.

To fix that, you can turn off Protected View for MS Office applications as described above.

2. Try using Stellar Repair Toolkit Office

  1. Firstly, open Control Panel and go to Programs and Features section.
  2. Right-click the specific Microsoft application you’re interested in – Excel or Word.
  3. Up next, select Online Repair to start fixing the selected software.
  4. If the above procedure may take some time, you can also choose to select Quick Repair to fix potentially corrupted files.

When SharePoint refuses to open Excel or Word documents, the next thing you should do is to use the powerful Stellar Repair Toolkit Office.

This toolkit has it all, from features dedicated to repairing corrupt MS Word documents and files from dealing with corrupt MS Excel and restores data to new Excel files.

Regular users looking for convenience will most likely appreciate that it even repairs pictures inserted in Word files and preserves worksheet properties.

⇒ Get Stellar Repair Toolkit for Office

3. Restore Advanced Settings to Default

  1. Some users have confirmed that restoring advanced net settings can fix Office documents not opening from SharePoint libraries. To do that, open Cortana’s search box by clicking the Type here to search button.
  2. Enter the keyword Internet the search box, and select to open Internet Options.
  3. Select the Advanced tab in the snapshot directly below.
  4. Press the Restore advanced settings button.
  5. Then click the Apply and OK buttons.
  6. Restart your laptop or desktop.

4. Repair a Corrupted File

  1. To check if a file is corrupted, download it from SharePoint by clicking the Download option. Then try opening it from Word or Excel from the C: drive folder you saved it to.
  2. If you still can’t open the document, you can fix it with the Open and Repair recovery option in MS Office applications. Click the File tab and select Open to open the window in the snapshot below.
  3. Select the corrupted file with a single click.
  4. Click the small arrow on the right of the Open button to expand the menu shown directly below.
  5. Select the Open and Repair option on the drop-down menu.
  6. Alternatively, you can repair a corrupted MS Word document by opening this page, pressing the Choose file button to select the document, and then clicking the Secure Upload and Repair option.
  7. To repair an Excel document, open this webpage in a browser. Click Choose file to select the Excel document, and press the Secure Upload and Repair button.

Your Excel or Word file might be corrupted. If so, then you’ll need to repair the file to open it. This is how you can repair a corrupted Office document.

5. Open SharePoint in Internet Explorer 11

open SharePoint in Internet Explorer 11

If you’re utilizing SharePoint within Google Chrome, Edge, or Firefox, consider switching to Internet Explorer 11 instead.

The 32-bit Internet Explorer is the most compatible browser with SharePoint as it fully supports ActiveX controls. ActiveX is essential for launching documents in earlier SharePoint versions.

So try opening a Word or Excel file from a SharePoint document library within IE. You can launch Internet Explorer by entering the keyword IE in Cortana’s search box.

6. Check your Office Account

Office Account
  1. Open the MS Word or Excel client application.
  2. Click the user account name at the top left of the window.
  3. Then click Sign out.
  4. Select an alternative account to sign in with if there is one. Sign in with an account that matches the one you’re utilizing in SharePoint.
  5. Alternatively, you might need to add a SharePoint account by clicking Add Account. Enter your SharePoint account details, and press the Sign in button.

Note that your SharePoint account should match your MS Office client account. If you’re using different accounts for SharePoint and MS Office, that might be why SP doesn’t open Excel and Word files.

Some users have stated that they needed to add their SharePoint Online accounts again after renewing MS Office subscriptions. This is how you can check, and change, your MS Office account.

Those are some of the resolutions that might fix SharePoint so that you can open Word and Excel files directly from its document libraries again.

Also, make sure that your browser includes SharePoint Online within its trusted sites. If you have discovered another fix for SharePoint not opening MS Office documents, feel free to share it below.

Best Tools to Edit PDF for Windows 11: Top Picks in 2026

Since Windows 11 doesn’t come with a built-in PDF reader or editor, this guide will look at the best free Windows 11 PDF editors you can install on your PC to make your choice an easier one.

Here’s a quick look at them:

PDF EditorPlatformDocument SignaturePDF ConversionOCR FeatureUnique Features
pdfFillerOnlineYesYesNoMerge, split, smart tags
Soda PDFDesktop, OnlineYesYesYes24/7 support, money-back guarantee
Adobe Acrobat ReaderDesktopYesYesYesComments, annotations
MobiPDFDesktopYesYesYesFillable forms, comprehensive menus
DocHubOnlineYesYesNoPDF workflows, templates
Icecream PDF EditorDesktopYesYesNoCustom stamps, language options
SwifDoo PDFDesktopYesYesYesAnnotations, watermarking, encryption
PDF ElementDesktopYesYesYesCheckboxes, templates, collaboration
Nitro PDF Pro FreeDesktopYesYesYesQuickSign, OCR, file format support
Readiris PDF Editing ToolDesktopYesYesYesScan conversion, color texts, multi-app compatibility
PDF CandyOnlineYesYesNoWatermarking, resizing, password protection
Foxit PDFDesktopYesYesYesNotepad-like view, handwriting signature
TinyWowOnlineYesYesNoAnimated GIFs, PDF Translator

Now, let’s take a closer look

What are the best Windows 11 free PDF editors?

pdfFiller – Best online PDF editor

You don’t need to download anything because with pdfFiller you may easily edit a document right in your browser.

Actually, with this tool, you may easily fill out any PDF document on any desktop or mobile device.

You will be able to highlight, blackout, erase and insert text anywhere on a PDF. Not only that, but it’s also possible to insert images.

If you need to convert your PDF into another format, you may do so with just a few clicks. Plus, add, delete, or rearrange pages as you please.

pdfFiller also helps you merge or split PDFs and organize them using smart tags if needed.

As for storage, you have your own cloud space, but the tool also has integrations for Google Drive, Box, OneDrive, and Dropbox.

Let’s review some of its best features:

  • Document signature for authentication
  • Powerful PDF conversion
  • Full document editor
  • Very easy to use by anyone
  • Cloud-based app, available from any location or device
pdfFiller

pdfFiller

Edit your PDF documents and sign them securely with a free editor that offers all the tools you need!
Free Trial Visit Website

Soda PDF – Best PDF editor

Soda PDF is an industry-leading PDF editor with excellent PDF tools to help you modify your documents easily.

With this software’s easy-to-use tools, you can edit the text and customize the content and layouts of all your PDFs.

Soda PDF lets you insert images, links, page marks, headers, and footers, and highlight essential information in your current PDF file.

Moreover, you can reorder, rotate, delete, move, or even extract pages and identify the front from your preferred PDF document.

It also has tools that allow you to create, convert, e-sign, and secure your PDFs without compromising the content.

Other best features include:

  • 24/7 support
  • 30-day money-back guarantee
  • OCR feature
  • Online access
  • Ultra-fast and lightweight

Adobe Acrobat Reader – Versatile tool

Adobe Acrobat is one of the best PDF editors for Windows 11. It’s free, and many people use it, including businesses and companies.

With it, you can do everything you want at no cost. It has a tabbed view that enables users to open several PDFs at once.

It is the most popular used PDF editor for Windows 11. It gives users many options, e.g., using a hand tool to draw, highlight, underline, and add bookmarks to the document. 

You can share files with others and protect them from third-party users with the help of passwords and the inability to copy, edit, or print.

Some of its key features include:

  • Organize the PDF by adding new pages, cropping, rotating, extracting, etc
  • Sign electronic forms
  • Export to other formats like Word, PPT, Excel, JPG
  • Enables users to add comments, annotations, and highlights to the PDF document

MobiPDF – Modern and simple interface

If you need a PDF editor with a simple and effective interface, MobiPDF can be an excellent choice.

With this tool, you may control the entire structure of your PDF such as adding or removing pages, adding new content, handling the different objects and fonts, and many more.

Editing the text and images, rearranging the pages, or inserting bookmarks is extremely easy for anyone to do because all the menus are very comprehensive.

And when editing is done, you can convert your PDF to Word, Excel, or ePub with a single click.

With MobiPDF, you may also work with fillable forms and sign the document by writing, typing, or inserting an image.

The software also comes with a built-in OCR tool that will help you create searchable PDFs from scans.

Here are some of its key features:

  • Edit and convert PDF without any prior knowledge of document management
  • Form-filling features and digital signage
  • One-click PDF conversion to Word, Excel, or ePub
  • Modern and user-friendly interface
  • OCR scanner built-in

DocHub – Free PDF workflows

DocHub is not a simple online PDF editor because it offers much more, starting from digital signatures and annotation edits.

First, you should know about editing and form filling which will improve your workflow extensively. Plus, it gives the user the complete PDF experience including drawing or adding images.

If you’re going through dozens of files and need a free usage PDF tool, there is no greater tool than this. Simply create new templates and fill documents locally or directly on Gmail or Drive cloud.

Moreover, DocHub offers document-signing features so you can edit official files without any additional costs. So, you can benefit from everything for free or upgrade to the Pro version.

While the free version is beneficial, you can simplify the process even more and benefit from unlimited edits with the Pro plan.

Here are some of its key features:

  • Page annotation and PDF merge
  • Unique templates and distribution
  • Free eSignatures
  • Premium editing tools
  • 256-bit file encryption

Icecream PDF Editor – Great interface

Icecream PDF Editor has both free and premium versions. It is one of the best PDF editors to use, no matter which type of document.

It has four editing modes that enable it to edit, annotate, fill forms, and manage different pages.

It gives users the ability to change to other languages like French, Spain, English, etc. It secures as it gives users the option of protecting documents using passwords.

You can also add custom stamps to your PDF documents when using the editor. It has a pretty UI making it easy to use and improving the user experience.

Other features of the editor include:

  • Ability to add and remove other pages from a document
  • You can add all types of image formats to the PDF document
  • It can draw shapes, lines, and arrows to a file
  • Easy to combine and extract PDF pages

Icecream PDF Editor

Icecream PDF Editor is an all-in-one software that allows you to edit all PDFs efficiently.
Free Trial Visit Website

SwifDoo PDF – Best annotation tool

SwifDoo is an outstanding all-in-one PDF tool that allows you to convert, create, compress, merge, and sign PDF documents instantly.

It has a powerful system for PDF annotation. It offers many practical tools to help you comment on your PDF files, including highlighting, underlining, shaping, and many others, which solves your issues easily.

You can also encrypt and decrypt your PDF files as you wish. On top of that, you can add watermarks and e-signatures to your files which can protect the copyright substantially.

Other best features of SwifDoo PDF include:

  • Only takes up 10MB of disk space
  • Intuitive tabbed interface
  • Safeguard sensitive and private information
  • Fast PDF converter

SwifDoo PDF

A PDF software with exceptional features that helps you create, convert and so much more in an easier way.
Free Trial Visit Website

PDF Element – Good PDF editing features

PDF Element is an advanced editor with many modules that make it easier to handle PDFs and it’s mostly used by businesses and Fortune companies to control their content and keep it private.

With this app, it is easier to customize it by using the checkboxes, templates, buttons, and more.

You can change the fonts, check the spelling, and use OCR to edit scanned files and create and fill PDF forms.

PDF Element can protect your files using password encryption and permissions and has lots of collaboration features.

Features of PDF Element include:

  • OCR feature
  • Create and fill PDF forms
  • Password encryption and permissions
  • Collaboration features
  • Convert PDFs into other formats like images or Word documents

PDF Element

Get a PDF editor with security to protect your files using password encryption and permissions.
Free Trial Visit Website

Nitro PDF PRO Free – Great file format compatibility

Nitro is one of the most powerful and commonly used PDF editors after Adobe and Foxit editors. It has a user-friendly interface with powerful features that makes editing PDFs easier.

It has a QuickSign feature that enables users to sign documents easily, especially forms. Even more, it comes with OCR features that help in recognizing scanned documents.

You can also improve the document’s security by sending a digital certificate to the users who need access to the file.

Other features of the editor include:

  • It supports over 250+ file formats
  • Easy to collaborate with other users 
  • Has the ability to type, draw and upload photos to the document
  • Ability to share feedback through highlights, comments, and sticky notes
  • Ability to change the orientation and color of the documents

Nitro PDF Pro Free

Get a DF editor that supports over 250 file formats and presents the OCR technology essential for editing scanned PDFs.
Free Trial Visit Website

Readiris PDF editing tool – Ideal for scanning PDFs

Readiris is a management PDF software that helps convert scanned documents into editable PDFs through OCR technology. It’s easier to install and use due to its simple user interface.

It saves time by converting files in less time due to its speed to generate tables, text, graphics, numbers, words, and not only.

It offers a 10-day free trial to test for premium features if you are interested in upgrading.

Other features include:

  • It can produce colored texts and backgrounds
  • It produces documents formats that work with over 70 applications from browsers, word processing programs, design software
  • Ability to work with image formats

Readiris PDF editing tool

Get a PDF software that converts scanned documents into editable PDFs through OCR technology.
Free Trial Visit Website

PDF Candy – Great PDF converter

It’s a free online editor with over 40 features that simplify PDF editing. These tools help in the conversion of PDFs, editing, uploading, deleting, cropping, splitting, extraction, and more.

This software solution is reliable and has important features like adding watermarks, resizing pages, adding passwords, and extracting pages.

It limits performing one task per hour for freebies and 6 USD monthly for a premium upgrade.

Some of its key features include:

  • RTF to PDF conversion
  • The option to add watermarks
  • You can extract text and images
  • PDF rotation

PDF Candy

A free online editor with over 40 features and a Jack-of-all-trades when it comes to PDF editing.
Free Trial Visit Website

Foxit PDF – Lightest PDF editor

Foxit is one of the best free PDF editors working with the Windows 11 version. Foxit is lighter and has many features compared to the other PDF editors.

It has a text viewer mode that enables text display like a Notepad-like view and simplifies the formatting. You can use this PDF editor to sign documents with your handwriting or signatures.

Some of the best features of Foxit PDF include:

  • Easy to collaborate with others when working in a team
  • It has many editing features, i.e., merging and adding PDF pages recognizing OCR documents
  • Has advanced security features that protect the PDF from unauthorized users

⇒ Get Foxit PDF

TinyWow – Free online PDF editor

TinyWow - Windows 11 free PDF editor

With advanced features like eSign, Remove Password, Split, Compress, and Rearrange, TinyWow is a free and easy-to-use PDF editor available to fulfill all your editing needs.

Add animated GIFs, dancing emojis, or even create your own mini-movies within your PDFs and bring your PDFs to life.

This tool lets you highlight, underline, and strikethrough text in vibrant colors that practically jump off the page.

You can edit PDFs, convert them to Word, Excel, & PowerPoint, merge PDFs, and even convert JPG images to PDFs without any hassle.

Its PDF Translator feature can translate the PDF document into the desired language, all you need to do is upload your PDF, and within a couple of minutes, you get the output.

Some of the best features of TinyWow include:

  • Crop, rotate, merge, and compress PDF files with ease
  • Removes the watermark from the document
  • Extracts text from PDF
  • Converts MS Outlook file to PDF

⇒ Get TinyWow

Why should I save my documents as PDF?

These editors give users, businesses, and students the ability to change PDF documents that are protected from editing.

PDFs are important when dealing with documents. It ensures that the format and layout of the document aren’t altered.

When creating PDFs, you can merge different files like images, screenshots, and Word documents to form one PDF document making it the best to use.

There are also browser-based PDF editors that can’t match the desktop editor’s features. The Internet provides many free PDF editors for Windows 11.

The web-based programs can help if you are in a hurry and want to edit the documents immediately.

Most of them limit their extensive features, which require a subscription making it hard to enjoy the benefits you would get when using installed editors on your Windows 11 PC.

Free PDF editors lack other extensive features found when using the paid version of PDF editors. Some of the features you may miss include AI editing, text recognition, and extreme formatting.

We hope at least one of the above editors caught your eye. Please give us feedback on the one you found helpful in the comments section below.