Just Cause 4 is now available in Xbox Game Pass on Xbox One

Just Cause 4 is the latest major video game title to join Xbox Game Pass’ library of playable games. The game launched in December 2018, just three months ago, and is the fourth entry in the popular Just Cause series that follows the character of Rico Rodriguez on a variety of adventures with heavy action and explosions.

Here’s the official game description and trailer:

Just Cause 4 is a huge open world game full of stunts, destruction, and conflict – buy now and for a limited time only receive bonus content – the Deathstalker Scorpion Pack containing customized gear crafted by Rico Rodriguez himself.

Welcome to Solís, a huge South American world home of conflict, oppression and extreme weather conditions. Just Cause 4 sees rogue agent Rico Rodriguez land in Solís to hunt down the truth about his past, at any cost. Strap into your wingsuit, equip your fully customizable grappling hook, and get ready to bring the thunder!

Xbox Game Pass is Microsoft’s subscription service that gives members around 100 full Xbox games to play in exchange for a monthly fee.

Are you an Xbox Game Pass subscriber and will you play Just Cause 4 now that it’s part of the service? Share your thoughts with the community in the comments below and then follow us on Pinterest for more Xbox gaming content.

Just Cause 4 - Standard Edition

Unauthorized changes blocked: 3 ways to remove these notifications

Some users might spot “Unauthorized changes blocked” notifications at the bottom right corner of the Windows 10 desktop. Those notifications inform users that Windows Defender’s Controlled FolderAccess has blocked an app modifying a folder.

So, the notifications appear when Controlled Folder Access is turned on.

Although Controlled Folder Access prevents unauthorized folder changes from unwanted programs (i.e. virus), it might also block some valid apps modifying folders.

One user stated: “Suddenly, I can no longer download photos from my SD card using the port on my laptop and my Photoshop Elements 15. I get the following messages: ‘Unauthorized changes blocked.’”

This is how users can turn off Controlled Folder Access to remove the “Unauthorized changes blocked” notifications.

How do I turn off Controlled Folder Access alerts?

1. Turn Off Controlled Folder Access via Windows Defender

  • To turn off Controlled Folder Access in Windows 10, press the Windows key + Q keyboard shortcut.
  • Enter the keyword ‘Windows Defender’ in the search box.
  • Click Windows Defender Security Center to open the window shown directly below.

  • Click the Virus shield icon on the left of the window.
  • Then click Ransomware protection to open the settings shown directly below.

  • Now toggle the Controlled Folder Access option off.

— RELATED: Microsoft adds direct KB links in Windows 10 error notifications

2. Turn Off Controlled Folder Access With PowerShell

  • Alternatively, users can turn off Controlled Folder Access With PowerShell. To do so, open Cortana’s search box.
  • Enter the keyword ‘PowerShell’ in the search box.
  • Right-click PowerShell and select Run as administrator to open it.

  • Then enter ‘Set-MpPreference -EnableControlledFolderAccess Disabled’ in the PowerShell, and press the Return key.

3. Permit Apps Through Controlled Folder Access

Users can also permit specific apps through Controlled Folder Access. That will ensure the “Unauthorized changes blocked” notification doesn’t appear for trusted software. This is how users can allow apps through Controlled Folder Access.

  • Open the Cortana app by clicking the Type here to search button.
  • Input ‘Windows Defender’ in the text box, and click Windows Defender Security Center to open it.
  • Click the shield button.
  • Click Ransomware protection > Allow an app through controlled folder access to open the options shown directly below.

  • Then click Add an allowed app to open the window in the snapshot directly below.

  • Select a program to permit through Controlled Folder Access, and press the OK button. The WDSC window will then list software excluded from CFA as in the snapshot below.

So, removing “Unauthorized changes blocked” notifications in Windows 10 is straightforward and doesn’t require any registry hacks. Remember that Controlled Folder Access can also block unauthorized folder access from suspicious apps.

Therefore, it might be better to keep CFA on and add software exclusions to it.

RELATED ARTICLES TO CHECK OUT: 

Download Movie Guide app to turn your PC into a movie database

After reviewing some gaming and educational Windows 8 and Windows 10 applications, it’s time to move to entertainment with a movie application for Windows 8 and Windows 10 called Movie Guide.

Watching movies on your Windows 8 and Windows 10 device will be one of the most active things you’ll be doing and while we wait for IMDB to release a compatible application with the newly released Windows 8 and Windows 10 ecosystem, we will review Movie Guide now!

If you can’t wait to try out this app, you can simply follow the link below to download it on your machine right now.

movie guide review for windows 8

Review: Movie Guide for Windows 10

With Movie Guide you are able to discover over 69’000 movies and even more actors with all their details. You can directly watch movie trailers, find similar movies or just browse through one of the specifically composed lists for now-playing, popular, upcoming or top-rated movies.

Currently, Movie Guide has a 3.5/5 rating in the Windows Store, but like I said with many apps before, this is going to change as more people will download and rate the application.

Currently, with an impressive number of more than 70,000 movies in their database, Movie Guide is a Windows 8 and Windows 10 movie application that seriously challenges the official IMDB app. o watch.

Movie Guide’s way of arranging actor, director’s information is sometimes similar to Wikipedia, as you can see from the images. You can see movie trailers inside the applications, ratings for those movies, synapsis and even similar movies.

Movie Guide: Almost as good as IMDB

Just as with the well-known IMDB, you have watchlists along with lists with movies you have seen and have made a good impression on you. It’s obvious that a lot of work has been put into this application since every movie features a background picture related to the movie itself.

So, why doesn’t Movie Guide have a better rating if it’s that great? Well, plenty of users have reported that the application requires Flash to run and sometimes that can be buggy, even if the installation has been performed.

Also, many have reported that the application sometimes moves too slow and using it with a mouse and keyboard isn’t pleasant. We can only hope developers are listening to these complaints.

Everything is peachy with Movie Guide application for Windows 8 and Windows 10 but there’s a big drawback: there are no user-submitted reviews.

For example, when I go on IMDB, what interests me most is what other users think about a movie. Most of the time, those reviews are more accurate than official reviews of the movie, which is why I hope its developers include this in future versions.

To summarize, here’s what Movie Guide for Windows 8 and Windows 10 can do:

  • Be your reliable movie guide
  • Watch movie trailers
  • Find similar movies
  • Make watchlists and lists with your favorite movies

RELATED STORIES TO CHECK OUT:

Xbox Game Studios rumored to be buying another studio, this time Relic Entertainment, home of Age of Empires 4

Microsoft is rumored to be looking onto acquiring Relic Entertainment, a Canadian game development company known for their work on the upcoming Age of Empires 4 game. The rumor comes from a well-known leaker who goes by the name of Klobrille on Twitter. As noted by Game Rant, the user has built his reputation by accurately leaking accurate info such as the development of Age of Empires 4 prior to the E3 2016 event.

Such an acquisition could make sense for Microsoft, especially given the collaboration between the two companies for the development of the Age of Empires series. The Redmond giant also acquired numerous other companies last year including Playground Games, Undead Labs and Ninja Theory as announced during E3 2018. Perhaps the acquisition of Relic Entertainment could be announced at this year’s event, which interestingly won’t see anything from Sony this year.

One thing is for sure, there will be a segment for the Age of Empires franchise during one of the Inside Xbox this month, which the team says will include “exciting announcements” about the game. The developers encourage those interested to check out the official Xbox Mixer page to livestream the event next time the video becomes available.

That upcoming no-disc Xbox “Maverick” reportedly has a name, ready for pre-orders in April

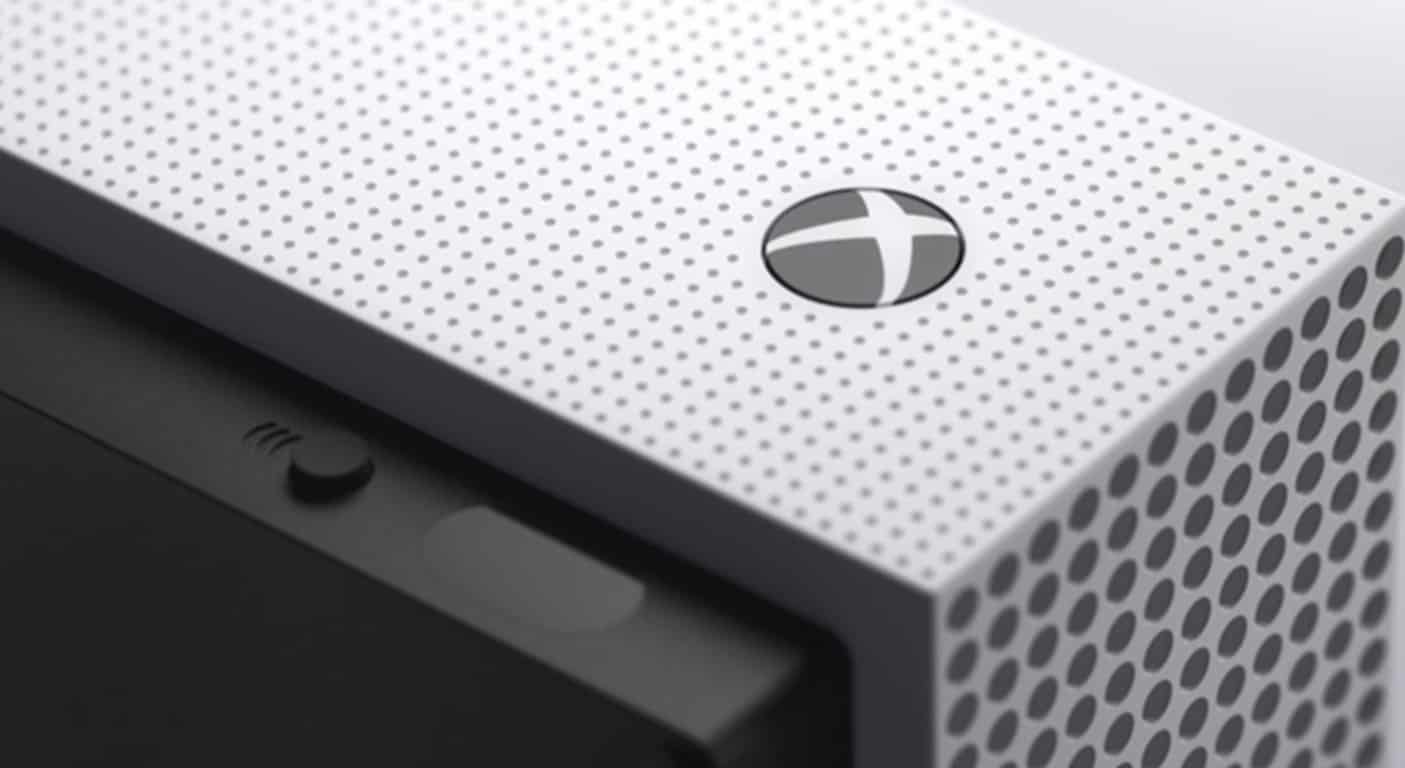
Apparently, the new upcoming no-disc Xbox “Maverick” will go by the name of “Xbox One S All-Digital Edition.” As noted in a report by Windows Central, the new Xbox One S All-Digital Edition naming will be used when the console is available for pre-order, starting sometime in April 2019. Xbox Maverick was first reported on by Brad Sams, along with Scarlett, Lockhart, and Anaconda being other Xbox codenames being mentioned.

The Xbox One S All-Digital Edition would be the first disc-less console by Microsoft. Currently, Microsoft sells the Xbox One S and Xbox One X. No confirmation on what the new All-Digital Xbox console will look like, although it may just be an Xbox One S without a disk drive. In addition, Windows Central notes that Microsoft is looking to offer a custom Fortnite Xbox console too, but no official word from Microsoft on whether this is true or not.

Microsoft may be updating its Xbox console lineup for a disc-less gaming and streaming future. With the Xbox Maverick being available for pre-order in April 2019, we could see next-gen Xbox consoles being revealed later this year. Microsoft is also working on bringing Project xCloud, its own cloud game-streaming service, to the masses.

Mrs. Trump visits Microsoft to talk child safety online

Despite the seemingly constant barrage of personal attacks Donald Trump engages in with journalists, heads of state or private citizens via Twitter, the First Lady persists with her anti-cyber bullying campaign.

Thanks to a report from GeekWire, we have glimpse into a recent visit from the First Lady Melania Trump who sat with Microsoft president Brad Smith to discuss how the two could leverage their respective influences and resources to help address online safety and accessibility.

Mrs. Trump visited Microsoft’s office in Redmond to learn how the company’s online efforts could presumably work to help promote her Be Best campaign.

Part of the Be Best campaign is directed at raising awareness of online well-being for children as well as partially addressing the opioid epidemic sweeping dense populations through the US.

During her 30-minute visit, Mrs. Trump was met by Smith as well as Microsoft VP Dave McCarthy, head of Xbox Phil Spencer, Microsoft safety officer Jacqueline Beauchere, and chief finance officer Amy Hood.

Microsoft executives showcased some Xbox related hardware and software that empowers parents to protect their children’s gameplay online as well as other company tools that help protect kids while on the internet, to which Trump added, “We need to educate the parents as well. Maybe some of them, they don’t even know about it and they just let their kids play. This is very, very informative.”

Microsoft President Brad Smith, First Lady Melania Trump, and Microsoft CFO Amy Hood discuss the ‘Be Best’ campaign. (GeekWire Photo / Monica Nickelsburg)

Smith also addressed the seeming hypocrisy of Mrs. Trump’s visit to discuss her Be Best anti-cyber bullying campaign amid her husbands online behavior with a diplomatic response issued later.

“We’ve always said that we’ll partner where we can, we’ll stand apart where we should. We have days when we disagree with this administration, just as we’ve had days where we’ve disagreed with other administrations, but today was a day where we could stand together to underscore an important message.”

The short visit looked to address the valley between parents and their children regarding the transparency of online activity. When children and parents keep an open dialogue about activities and protections taken to ensure a better well-being online, the easier it is to identify instances of malfeasance and cyber bullying by both parties.

In the marketplace, will Windows Lite be the next big thing, or just more of the same?

All the talk in Microsoft-watching land is about Windows Lite, Windows Core OS, Centaurus, Pegasus, and Andromeda. That may seem like a lot, but they’re all related. The idea apparently is to pare down Windows into a “core OS,” and then build experiences on top of it, including a pared down OS for Google Chrome-like devices (Windows Lite, or if you prefer code names, Santorini), a foldable tablet like device, bigger than a phone but with foldable pixie dust sprinkled on it (Centaurus), those Chrome killer laptops (Pegasus), and even the long rumored “Surface Phone,” Andromeda.

This is all exciting talk, and to be sure we’ll spend a lot of time here at OnMSFT.com bringing you the latest on this new initiative, but there’s a problem: all of this has been tried before in the marketplace, to not much success.

Way back in the days of Netbooks (lightweight, cheap laptops running Linux), Microsoft scrambled and got a flavor of Windows XP running on them in order to “kill” the Chromebooks of the time. That worked, for a while.

We all know what happened to Microsoft’s disastrous foray into mobile computing leading to the eventual death of Windows Phone, and while Microsoft Surface can be considered a success, it really hasn’t put much of a dent into Apple’s iPad. Windows 10 S has been another attempt to cut into Chromebook’s education market, but from all indications it’s withered on the vine. In fact, Microsoft has been chasing, and demeaning, Chromebooks for a long time:

Sure, it makes sense, a lot of sense, for Microsoft to cull out the core of Windows and build everything on top of that core: Surface Hub, HoloLens, Windows 10 itself, “Windows Lite,” laptops, foldables, and well, everything else. But as intelligent as an engineering solution that is, is it really going to mean much in the marketplace?

Chromebooks have a solid foothold in education, and a new device from Microsoft, whatever it’s running, isn’t going to magically change that. Same for iPads – the Apple ecosystem is firmly entrenched, and a new Centaurus device, while cool in its Microsoft-ish way, won’t cause Apple fans to throw out their iPads and their iTunes and their AirPods. Of course we have yet to see the third party pushes, the marketing efforts, and the actual overall cool factor of these new devices, but this isn’t the first time that Microsoft has tried to retake a market they once dominated, but frankly don’t anymore.

We’re heading into some exciting times for Microsoft, and could be hearing more about Windows Core OS and “Windows Lite” as soon as at Build in early May. It’s going to take a lot longer than that, however, for Microsoft to even begin to unseat Chromebooks or iPads, or even to (shudder) think about attacking the mobile space once again.

Download Evernote App for Windows 10/11 [Link and Review]

If you are on the lookout for a reliable note-taking app for your Windows 10 device, then Evernote should be among the best to take into consideration.

We have given a thorough review of the Windows 10 Evernote Touch app that you can read below to get a clear idea of what this app can do for you.

The second review is here after we reviewed Wikipedia for Windows 10. Now it’s time to review the Evernote app for Windows 10, one of the best note-taking software solutions out there.

We had the pleasure of talking with Phil Libin, the CEO of Evernote. We have used Evernote on Android, iOS, and on a laptop and personal computer, and we can say that we’re very pleased with it. Now, let’s see what Evernote for Windows 10 brings to the table.

evernote gif

Evernote app update for Windows 10

In 2016, Evernote received a new major update. The app now includes new features as:

  • Pulling up your notes by selecting Notebooks so you can group all of them into a single stack
  • The trash section now allows you to access your deleted items easier
  • The left sidebar can be reduced to a thin strip (in case you need some extra space)
  • Business and Personal sections introduced
  • A new search algorithm was added so you can find notes easier

Download Evernote for Windows 10

So, if you need a productivity-oriented note-taking app, Evernote is the right tool.

Evernote helps you focus on what matters most and have access to your information when you need it. Input typed notes or scan handwritten notes. Add to-do’s, photos, images, web pages, or audio … and it’s all instantly searchable. Organize notes any way you want and share with anyone. And Evernote syncs across your devices so your information is always with you, everywhere you go.

Review of the Evernote app

Evernote app

You know who the biggest rival and opponent of Evernote is, right? Yes, Microsoft’s very own OneNote software, is part of the Microsoft Office suite.

So, can Evernote be a worthy rival to OneNote and other note-taking apps or will they have to convince us with the next version?

Users should be aware that the Evernote application for Windows 10 is mostly optimized for a touch experience, so if you still want to use your mouse and keyboard with it, maybe you should stick with the desktop version.

Evernote is deeply integrated with Modern UI (the new name for the old Metro), and it will seem very natural at use, after you get used to it.

It might take you a while to get used to it, especially if you’re new to the Windows 10 game, but you’ll find it quite light and responsive in time.

The big tiles will seem useful for some, while others would have preferred more, smaller tiles. One of the basic features is the Swipe gestures:

  • Semantic zoom – somehow, it’s similar to the function with the same name in Wikipedia, allowing you to tap and jump to any grouping inside the app that you want.
  • App bar and Navigation bar – bring down the Application and Navigation bars that allow you to create notes, sync, and navigate to other application sections.
  • Charm bar – allows you pull the Charm bar where you can change the settings and perform searches.
  • Snap view – want to minimeze Evernote or share the screen with another application? Simply swipe from the left.
  • Swipe on objects – allows you to select multiples notes at the same time.

Evernote for Windows PCs – a smooth note-taking application

Evernote windows 10 app

We will try and confront the Evernote application with the OneNote from Microsoft in a future review, so that you could see which will better suit your needs.

One funny thing about Evernote is its age rating of 12+. In Evernote for Windows 10 everything is organized using Notebooks and Tags.

Here’s how the team at Evernote explains the Notebook and Tag view:

The Notebook View displays your notebooks however you like. You can view your list fully expanded or collapsed into Stacks. You can collapse or expand the list from the Charm Bar. We also indicate which of your notebooks are shared by displaying an icon inside of Shared Notebooks. Use the Semantic Zoom feature to zoom out of the notebook list to go directly to the items you want. The App Bar also lets you add a new notebook, if you’d like.
———————————————————————————————————
If you rely on tags to organize your notes, then you’ll love the Tag list in Evernote. For the basic use case, you can tap on a tag, then view the associated notes. For more precise results, notice that when you tap and tug on a tag to select it, certain other tags in the list grey out, while others don’t. The tags that stay visible are the ones that you’ve used together with the selected tag. Now, if you tap on a second tag, you’ll be able to quickly jump to a list of notes that are tagged with both.

How to use the Evernote app on a PC

Evernote templates

When you open your Evernote application for Windows or RT, you will see a horizontally scrollable list. There you will find the Nav, App, and Charms bar.

Your Evernote notes can capture text, images, video, web clips, web pages, and much more. One drawback with the current version of Evernote for Windows 10 is that you can only edit plain text, meaning rich formatting isn’t yet supported.

If you’re unfamiliar with Evernote, you should know that once you create, save, or update a note, it gets synced with all your other devices where your Evernote account is installed.

If you’ll ever encounter an error, you can always ask their support or go on the Forums.

If you don’t want to learn how to use Evernote on your own, you might want to try out the official guide from the website. You will learn the following after completing the guide:

  1. Navigate Your Account
  2. Create & Edit a Note
  3. Sync Your Account
  4. Browse Notes
  5. Organize Notes
  6. Search Notes
  7. Share Notes

What I didn’t like about Evernote for Windows 10 was that many times, I had the feeling that a lot of space wasn’t properly used and that there was a lot of free space that could’ve been better optimized.

Maybe this is why Evernote has only a 3 out of 5 rating.

Evernote for Windows 10 is built with the core meaning of tiles and leverages the power of Windows 10. Using Evernote, you can Auto-synchronize notes amongst your devices, use it for research (using the Wikipedia application for it, as well), and even use it as a virtual whiteboard.

We will update this review of Evernote for Windows 10 if new versions are available.

Download Wikipedia App for Windows 10/11 [Link and Review]

Wikipedia app is one of the best apps for Windows 10. Curious to learn more about this app? Read this extensive review below.

wikipedia windows 8 app

If you are looking for the biggest free encyclopedia to download on your Windows 10 tablet or laptop, you should be glad to hear that Wikipedia has its own official Windows app in Microsoft Store.
One of the most awesome Windows 10 applications that you can currently try in the Microsoft Store is, without a doubt, the Wikipedia application. I think it’s the best education application in the whole white world.

What else can beat a huge, always-growing library of knowledge, and all for free? There are more than 20 million articles about anything you’d like to read.

Wikipedia is the free encyclopedia containing more than 20 million articles in 280 languages, and is the most comprehensive and widely used reference work humans have ever compiled.

If you’ve been using Wikipedia until now only on the web, don’t be too surprised by the big difference in the Windows 10 application.

RT users should not worry; this Wikipedia app works just the same on ARM, x64, or x86 devices.

This means that the experience will be just the same whether you’re on a Windows RT or Windows 10 device.

Currently, the application has a 4 out of 5 ratings, rated only by 600 persons. As Windows 10 versions will become more popular, expect that number to increase a lot.

Curious to get a first-hand experience with the Wikipedia app? Follow the download link below and install it on your PC.

wikipedia windows 8 review

Update to Wikipedia app for Windows 10

Since 2012, Wikipedia app has evolved. Now it has a proud 4/5 rating on Microsoft store. Here are some of the new features :

  • The new “explore feed” feature shows trending articles right on the home screen
  • The app was equipped with a word processor for editing/formatting/changing constantly evolving content
  • You can now use an integrated voice search feature
  • You can use Wikipedia app in nearly 300 languages

Review of the Wikipedia app

The first difference that you’ll encounter will be the main screen. There, just like you can see in the picture below, you will find the importance of the day in history, featured articles and pictures, and the articles recently updated by users across Wikipedia.

You will find Wikipedia under the Books&Reference category, but here’s a direct link to it (you’ll find it at the end of the article, as well).

Be sure to check out this article and bookmark it if you like because we will be constantly updating it as more versions of the Windows 10 Wikipedia app will appear.

For now, it’s the first version, and it’s only natural that there are issues.

One of the biggest changes you’ll notice with this application is that you can pin articles to your Start screen for a later read, which will be quite useful to users.

I always didn’t have enough patience to finish reading articles on Wikipedia, especially since there were a lot of other tabs open. Let’s hope that this feature will help me finish all my articles.

Like many other apps optimized for the touch experience, you’ll notice that the Wikipedia application is shinier and somehow, the user experience feels more natural.

Maybe it’s because Windows 10 is the biggest change since 1992, or Wikimedia has just done a wonderful job.

I don’t know what the reason is, but I like the Windows Wikipedia application much more than any other application, be it for Android, iOS, Windows Phone or even the website itself.

Early reviews find Wikipedia a very useful app

You’ll find especially helpful the quick search feature, since it will seem so easy to discover the subjects and stories that you’re interested in. But when it comes to the application’s formatting, there are ups and downs. Here’s what Ryan Matthew Pierson with the LockerGnome had to say about this:

If the primary image has a long caption, that caption will carry over to the second column of the magazine-like arrangement. On some articles, it creates a white space that could easily be filled in by something else. When you drag the application to a side panel, everything seems to snap into place and you get an incredibly cool (and useful) resource along the side of the screen. This makes one of the more important features of Windows 8 that much more useful.

What’s awesome about this is how easily everything is set up. You can change a page’s language if you’re uncomfortable with English. The easiest part is to search in Wikipedia, you have to start typing and that’s all. Wikipedia will then find the article and deliver it to you.

One issue that Wikipedia app currently has is with large screens, as reported by TechWhack. Softpedia has also a good opinion about the Windows 10 optimized Wikipedia:

The app makes ample use of tiles; the home screen is entirely made up of tiles leading to either photos or articles. The article view is catered to Windows 8 as well. You’ll see the page layout customary to Windows 8 apps, the entire thing is quite slick. Even the infobox has been hidden away to leave room for the text and the photos. The app integrates with the global search feature in Windows 8 as well. There’s support for sharing features, you can snap it to the side of the screen and there’s even a pinch to zoom feature to quickly get to the section list. And just like the Android one, the app is open source.

Main features of the Wikipedia application

Although nothing can beat and match your experience with an application, you still need to know what you’re getting on the tablet. So, let’s summarize just what can Wikipedia on Windows RT and Windows 10 do for you:

  • Search – the app integrates almost unseemingly inside Windows 8 and Windows 10 and allows you to search either from the Wikipedia application or actually right from the Windows 8 global search widget.
  • Share – if you’ve used Wikipedia on Android and iOS, then you know you can share Wikipedia articles on social media or email. But the new sharing system in Windows 8 and Windows 10 really makes that a pleasure.
  • Snap – snap is like minimizing an application in a previous Windows version, only that the Wikipedia applications automatically flips to a single-column view. Imagine working on a history project and having the Wikipedia app in your sidebar. Absolutely terrific.
  • Semantic zoom – we have reported that Wikipedia app might not be that awesome on large screens, but you should know that by using semantic zoom on large articles, you can go to any section of the article that you want.
  • Pin articles – using the right-click function you can pin certain articles to your main screen for a later read.

So, have you installed the Wikipedia app on your Windows computer? Tell us more about your experience in the comments below.

Anthem video game is apparently causing console crashes on Xbox One and PS4, EA is investigating

Things are apparently not going so well for Anthem, BioWare’s new online RPG released last month on Xbox One, PlayStation 4 and PC. The game received worse reviews than Mass Effect: Andromeda, BioWare’s previous game that was also plagued with issues at launch, and Anthem is unfortunately not faring any better on the technical front.

Yesterday, Kotaku reported that many PlayStation 4 players have been complaining that Anthem can cause their consoles to randomly shut down. Worse, one PS4 owner claimed on Reddit that his console has been completely bricked following a shut down that happened while he was playing Anthem.

Forbes video games journalist Paul Tassi, who recently reviewed Anthem on Xbox One X, said that he experienced similar shut down issues while playing the game on Microsoft’s console. He explained:

Like the PS4 crash, my crashes on Xbox didn’t just restart the console, they act like someone yanked the cord out of the wall completely. My Xbox is usually on “sleep” mode as in, when it’s off, it’s not really off as you can boot it quickly to get back to what you were playing. But both times when Anthem crashed during a mission and shut off the console, it was off off, as in the entire console had to restart from scratch. Xbox does not do the disk-checking animation like PS4 does when it shuts off involuntarily, but it was a similar situation. I have literally never seen this happen with any game on Xbox before, and thought it was bizarre, but didn’t think too much of it until I saw what a widespread problem it apparently was.

The good news is that EA has already acknowledged these shut down issues and has asked affected gamers to share their crash data reports with the company. Still, this is terrible PR for the company and we hope the company will be able to quickly provide a fix.

Anthem isn’t the only game to have shipped in a broken state over the past couple of months. Fallout 76 was a huge disappointment for Fallout fans, forcing developer Bethesda to quickly discount the game and offer some free DLCs to early adopters. EA’s situation with Anthem is more worrying as this is a brand new IP from BioWare, a talented studio that doesn’t really have a lot of experience with Destiny-like loot shooters. Anthem received praise for its beautiful graphics (the game runs in 4K on Xbox One X), but most reviews have pointed out the insane loading times, repetitive missions, and lack of true solo mode.

EA and BioWare took quite a big risk with Anthem, but in this “games as a service” era the game could look quite different in the near future. Have you been disappointed by Anthem so far, and do you think BioWare can still fix the game? Let us know in the comments below.

Download TidyTabs to tabbify all your PC windows

Using simple drag and drop operations, you will be able to add tabs to all the windows opened on your PC. How is this possible?

With a free and commercial program called TidyTabs which works with Microsoft Windows devices and which will add tabs instead of spawning multiple program windows.

There are a few programs that introduced tabs on Windows, especially for Windows Explorer, such as Better Explorer, Clover, QTTabBar or Tab Explorer. These tools add tabs so that users can quickly access multiple locations.

Other programs have introduced tabs on a system-wide level and we’ll mention WinTabber or Windows Tabifier, which have used a shell approach.

On the other hand, Stick is pinning tabs to the top of the screen, but TidyTabs is even more revolutionary, because it allows users to join program windows by dragging and dropping.

Interested in downloading TidyTabs? Follow the direct download link listed below.

TidyTabs is the perfect tool for tabbifying all your Windows 10 windows. For additional features, you can download TidyTabs Pro.

This program is compatible with all Windows 10 versions as well as Windows 7 and Windows 8.1.

Give every window a tabbed user interface
TidyTabs is a tool that brings tabbed browsing to all of your programs. Ever wanted to have Chrome-style tabs in Windows Explorer, Microsoft Office or PuTTY? TidyTabs does just that. It integrates nicely with the OS and you will feel like the multi-tab functionality is a core part of Windows.

How to use TidyTabs

TidyTabs DragAndDrop

TidyTabs has a free version that comes with limitations to only three tabs per window, and it doesn’t give users the possibility to reorder or rename them, close them using middle-clicks and it also doesn’t support multi-monitor setups.

To get these restrictions lifted, users must upgrade to the Pro version, which costs $9.00.

Each window will have tabs added automatically, but when there’s one program attached, the tab will not be displayed and to see it, users will need to move the cursor to the top of the window.

The tab will appear either on the top of the window or in the main title bar.

The drag and drop operation will be used to merge the window with another open program window, which will make tabs become semi-transparent.

When closing a program window, tabs will be also closed, but they can be also closed by right-clicking on them selecting “close active tab”, “other tabs” or “all tabs”.

In the settings section of TidyTabs, users can select to change tab transparency settings. If the transparency level of inactive windows is set to 0%, tabs will no longer be displayed.

RELATED STORIES TO CHECK OUT:

How to export your data from Microsoft Health, now that it’s about to close

After last week’s announcement that Microsoft Health will be taken offline on May 31, you might feel like now’s the time to start exporting your health data. Once support ends, you won’t be able to access any data which has been synced from your Microsoft Band or Lumia Motion Data. If you want to create an archive of all your Microsoft health stats, read on to find out how.

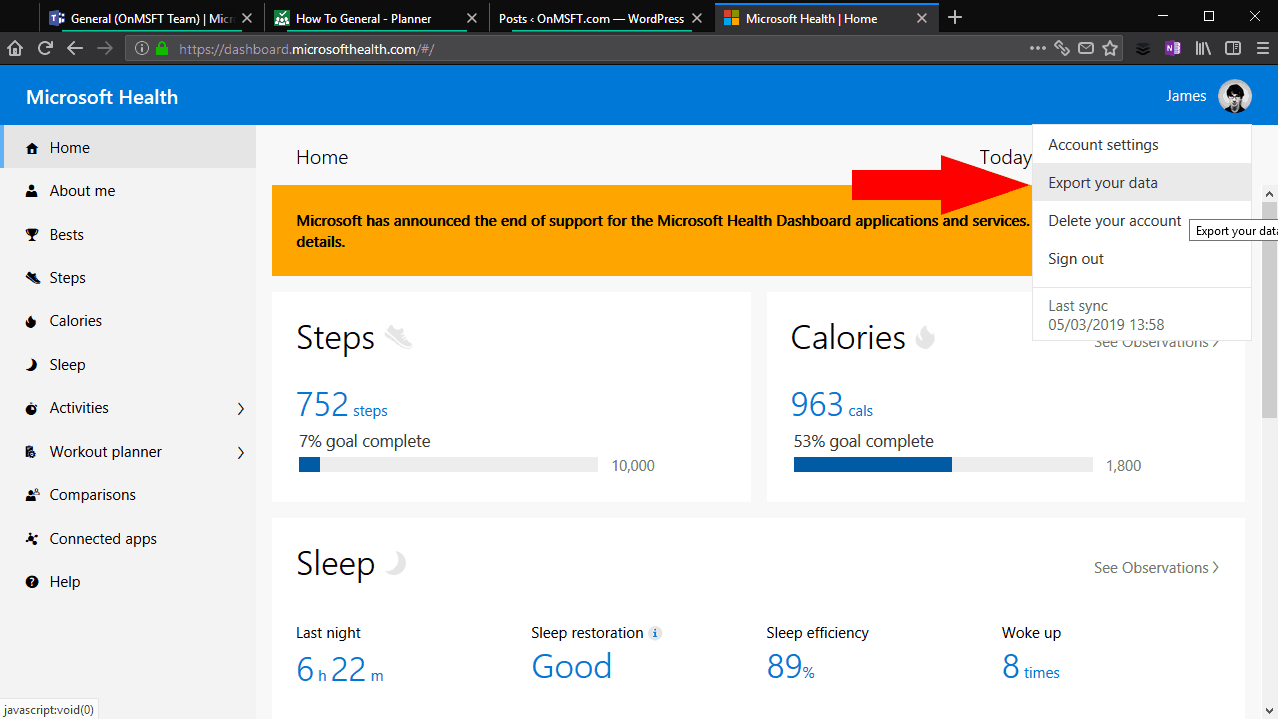
You can’t export data from within the Microsoft Band mobile app. Instead, head to the Microsoft Health web dashboard at dashboard.microsofthealth.com. Login with your Microsoft account if you’re prompted to authenticate.

Exporting data from Microsoft Health

You’ll arrive at the Microsoft Health dashboard homepage. Click your user profile picture in the top-right corner to reveal the profile menu. Next, click the “Export your data” link in the menu. It’s worth noting that this panel also shows when your Band last synced to the cloud. If it was a few hours ago, you might want to force a sync before exporting your data, to ensure your latest activities are included.

Exporting data from Microsoft Health

After clicking “Export your data,” you’ll see an overlay appear in your browser. Here, you can choose which types of data to export, as well as the time period to include. Generally, you’ll want to include every possible activity type to create a complete archive of your Microsoft Health profile. However, if you never used an activity, or just don’t want to retain it, feel free to exclude it from the archive.

The panel gives you a variety of time range options for the export. You can choose from the past week, month or year, or configure your own custom time range. Unfortunately, you can’t select a timespan that lasts longer than a single year. Consequently, you’ll need to repeat this procedure multiple times – once for each year you used the service – to export all of your data.

Exporting data from Microsoft Health

The final option lets you choose the file format to produce the export as. Selecting “Excel” will generate a formatted Excel spreadsheet which can make it easier to consume the data. However, this won’t be compatible with other applications, such as third-party services which can import fitness data. We’d recommend sticking to CSV – you can still open and format these files in Excel, and they can be readily parsed by other applications too.

Click “Export” to export your data. A new browser tab will open to handle the download. You’ll be left waiting for a few moments while your data is collated and prepared. After a minute or so, you should see the file download begin in your browser. It will be delivered as a ZIP archive containing your CSV or Excel files. Now your activities are exported, you can open the files in a spreadsheet app such as Excel, or start scraping them in your own applications to manually parse the data.

Got FPS issues in Ark: Survival Evolved? Here’s how to fix them

ARK: Survival Evolved has a formidable player base and such, its developers are using player feedback to polish the game before release. Preliminary reviews are positive but time will tell if the game indeed meets gamer standards.

The graphics look great but that that comes at a cost: ARK is a quite demanding game. For that reason, a playable FPS is not easy to achieve, especially on older PCs with underwhelming GPU and CPU capabilities.

For that reason, here are a few workarounds to improve your FPS up to 50%.

Game Fire is a game booster that will get rid of low FPS, freezes, lags, and other issues while playing. Download it now (free) for a better gaming experience.

Improve your Ark: Survival Evolved performance with our optimization guide

  1. Insert various launch commands
  2. Change GameUserSettings.ini file
  3. Change the Engine.ini file
  4. Restore default settings

Solution 1 – Insert various launch commands

There are a large variety of launch commands that can prove useful in optimizing overall gameplay and improving FPS. They are all safe to use but can cause crashes or lags. We advise you to try them out since it is easy to get rid of them in the case of malfunction. This is the way you can insert those commands:

  1. Open Steam client.
  2. Open library and choose Ark.
  3. Right-click and open Properties.
  4. In the General tab, select Set Launch Options.
  5. In the command line type following lines with spacing:
  • -useallavailablecores – Makes your PC use all available CPU cores.
  • -high -Sets game as a high priority process.
  • -sm4 – Runs DX10 shader model.
  • -d3d10 – Runs DX10 mode.
  • -nomansky – Lowers in-game sky quality.
  • -lowmemory – Optimizes the game for 4GB RAM
  1. Save your selection and run the game.

In case of any issues, you can retrieve your original setup by going to Set Launch Options and delete all commands.

Solution 2 – Change GameUserSettings.ini file

Additionally, you’ll probably want to change some settings. You can change the majority in the game settings menu but we offer you a whole settings list of edited values. You can change GameUserSettings.ini file this way:

  1. Go to the Steam client.
  2.  Open Library and right-click Ark: Survival Evolved.
  3. In the Local Files tab open Browse Local Files.
  4. Open Shooter game folder.
  5. Click Saved, then Config and finally open WindowsNoEditor.
  6. Find GameUserSettings.ini file.
  7. Open with Notepad and delete all.
  8. Copy and paste these values:
[/script/shootergame.shootergameusersettings]
MasterAudioVolume=0.317460
MusicAudioVolume=0.412698
SFXAudioVolume=0.519841
CameraShakeScale=0.000000
bFirstPersonRiding=True
bThirdPersonPlayer=False
bShowStatusNotificationMessages=True
TrueSkyQuality=0.000000
FOVMultiplier=1.250000
GroundClutterDensity=0.000000
bFilmGrain=False
bMotionBlur=False
bUseDFAO=False
bUseSSAO=True
bShowChatBox=False
bCameraViewBob=False
bInvertLookY=False
bFloatingNames=True
bChatBubbles=False
bJoinNotifications=True
bCraftablesShowAllItems=True
LookLeftRightSensitivity=1.000000
LookUpDownSensitivity=1.000000
GraphicsQuality=4
ActiveLingeringWorldTiles=12
bUseVSync=False
ResolutionSizeX=1920
ResolutionSizeY=1080
LastUserConfirmedResolutionSizeX=1920
LastUserConfirmedResolutionSizeY=1080
WindowPosX=-1
WindowPosY=-1
bUseDesktopResolutionForFullscreen=False
FullscreenMode=1
LastConfirmedFullscreenMode=1
Version=5
bHideServerInfo=False
LastServerSearchType=2
LastServerSearchHideFull=False
LastServerSearchProtected=False
HideItemTextOverlay=True
bDistanceFieldShadowing=True
LODScalar=1.000000
HighQualityMaterials=False
HighQualitySurfaces=False
bTemperatureF=False
bDisableTorporEffect=True
VoiceAudioVolume=1.277778
bLocalInventoryShowAllItems=False
bRemoteInventoryShowAllItems=False
ClientNetQuality=3
bToggleToTalk=False
bChatShowSteamName=True
bChatShowTribeName=True
EmoteKeyBind1=0
EmoteKeyBind2=0
bNoBloodEffects=False
bLowQualityVFX=True
MacroCtrl0=
MacroCtrl1=
MacroCtrl2=
MacroCtrl3=
MacroCtrl4=
MacroCtrl5=
MacroCtrl6=
MacroCtrl7=
MacroCtrl8=
MacroCtrl9=
bSpectatorManualFloatingNames=False

[ScalabilityGroups]
sg.ResolutionQuality=100
sg.ViewDistanceQuality=3
sg.AntiAliasingQuality=0
sg.ShadowQuality=2
sg.PostProcessQuality=0
sg.TextureQuality=2
sg.EffectsQuality=0
sg.TrueSkyQuality=0
sg.GroundClutterQuality=0
sg.IBLQuality=0
sg.HeightFieldShadowQuality=2

[SessionSettings]
SessionName=ARK #563569[/script/engine.gamesession]
MaxPlayers=70

[AdminPassword]
Password=
ServerPassword=

9. Save and close.

Solution 3 – Change the Engine.ini file

The procedure is similar, if not the same, with the Engine.ini file. The path is the same since the Engine.ini file resides in WindowsNoEditor. Open the file with Notepad and delete all. Move on, copy these values and paste them to the ”ini” file:

[/script/engine.renderersettings]
r.DefaultFeature.Bloom=False
r.DefaultFeature.AutoExposure=False
r.DefaultFeature.MotionBlur=False
r.DefaultFeature.LensFlare=False
r.EarlyZPass=0
r.SSAOSmartBlur=0
r.HZBOcclusion=0
r.AmbientOcclusionLevels=0
r.BloomQuality=0
r.DepthOfFieldQuality=0
r.SSR.Quality=0
r.SSS.Scale=0
r.SSS.SampleSet=0
r.DetailMode=0
r.LensFlareQuality=0
r.MaxAnisotropy=0
r.oneframethreadlag=1
r.LightShaftQuality=0
r.RefractionQuality=0
r.ExposureOffset=0.3
r.ReflectionEnvironment=0
r.Atmosphere=0
r.Shadow.MaxResolution=2
r.SimpleDynamicLighting=0
r.UpsampleQuality=0
r.ViewDistanceScale=0.4
r.TrueSkyQuality=0[/script/shootergame.shooterengine]
bFirstRun=False
FrameRateCap=200
FrameRateMinimum=200
[Core.System]
Paths=../../../Engine/Content
Paths=../../../ShooterGame/Content
Paths=../../../Engine/Plugins/Experimental/CharacterAI/Content
Paths=../../../Engine/Plugins/TrueSkyPlugin/Content
[SystemSettings]
TEXTUREGROUP_World=(MinLODSize=1,MaxLODSize=2,LODBias=0,MinMagFilter=aniso,MipFilter=point)
TEXTUREGROUP_WorldNormalMap=(MinLODSize=1,MaxLODSize=2,LODBias=0,MinMagFilter=aniso,MipFilter=point)
TEXTUREGROUP_WorldSpecular=(MinLODSize=1,MaxLODSize=2,LODBias=0,MinMagFilter=aniso,MipFilter=point)
TEXTUREGROUP_Character=(MinLODSize=1,MaxLODSize=4,LODBias=0,MinMagFilter=aniso,MipFilter=point)
TEXTUREGROUP_CharacterNormalMap=(MinLODSize=1,MaxLODSize=4,LODBias=0,MinMagFilter=aniso,MipFilter=point)
TEXTUREGROUP_CharacterSpecular=(MinLODSize=1,MaxLODSize=4,LODBias=0,MinMagFilter=aniso,MipFilter=point)
TEXTUREGROUP_Weapon=(MinLODSize=1,MaxLODSize=64,LODBias=0,MinMagFilter=aniso,MipFilter=point)
TEXTUREGROUP_WeaponNormalMap=(MinLODSize=1,MaxLODSize=64,LODBias=0,MinMagFilter=aniso,MipFilter=point)
TEXTUREGROUP_WeaponSpecular=(MinLODSize=1,MaxLODSize=64,LODBias=0,MinMagFilter=aniso,MipFilter=point)
TEXTUREGROUP_Vehicle=(MinLODSize=1,MaxLODSize=256,LODBias=0,MinMagFilter=aniso,MipFilter=point)
TEXTUREGROUP_VehicleNormalMap=(MinLODSize=1,MaxLODSize=256,LODBias=0,MinMagFilter=aniso,MipFilter=point)
TEXTUREGROUP_VehicleSpecular=(MinLODSize=1,MaxLODSize=256,LODBias=0,MinMagFilter=aniso,MipFilter=point)
TEXTUREGROUP_Cinematic=(MinLODSize=1,MaxLODSize=128,LODBias=0,MinMagFilter=aniso,MipFilter=point)
TEXTUREGROUP_Effects=(MinLODSize=1,MaxLODSize=128,LODBias=0,MinMagFilter=linear,MipFilter=point)
TEXTUREGROUP_EffectsNotFiltered=(MinLODSize=1,MaxLODSize=128,LODBias=0,MinMagFilter=aniso,MipFilter=point)
TEXTUREGROUP_Skybox=(MinLODSize=1,MaxLODSize=256,LODBias=0,MinMagFilter=aniso,MipFilter=point)
TEXTUREGROUP_UI=(MinLODSize=1,MaxLODSize=256,LODBias=0,MinMagFilter=aniso,MipFilter=point)
TEXTUREGROUP_Lightmap=(MinLODSize=1,MaxLODSize=8,LODBias=0,MinMagFilter=aniso,MipFilter=point)
TEXTUREGROUP_Shadowmap=(MinLODSize=1,MaxLODSize=2,LODBias=0,MinMagFilter=aniso,MipFilter=point,NumStreamedMips=3)
TEXTUREGROUP_RenderTarget=(MinLODSize=1,MaxLODSize=128,LODBias=0,MinMagFilter=aniso,MipFilter=point)
TEXTUREGROUP_MobileFlattened=(MinLODSize=1,MaxLODSize=2,LODBias=0,MinMagFilter=aniso,MipFilter=point)
TEXTUREGROUP_Terrain_Heightmap=(MinLODSize=1,MaxLODSize=2,LODBias=0,MinMagFilter=aniso,MipFilter=point)
TEXTUREGROUP_Terrain_Weightmap=(MinLODSize=1,MaxLODSize=2,LODBias=0,MinMagFilter=aniso,MipFilter=point)
[Oculus.Settings]
bChromaAbCorrectionEnabled=True
bYawDriftCorrectionEnabled=True
bDevSettingsEnabled=False
bOverrideIPD=False
bOverrideStereo=False
bOverrideVSync=True
VSync=False
bOverrideScreenPercentage=False
bAllowFinishCurrentFrame=True
bLowPersistenceMode=True
bUpdateOnRT=False
FarClippingPlane=0.000000
NearClippingPlane=0.000000
[WindowsApplication.Accessibility]
StickyKeysHotkey=False
ToggleKeysHotkey=False
FilterKeysHotkey=False
StickyKeysConfirmation=False
ToggleKeysConfirmation=False
FilterKeysConfirmation=False

Save document and close.

Solution 4 – Restore default settings

If these changes make your FPS worse or cause crashes or bugs, you can restore original files with ease. Follow this path in order to retrieve original settings:

  1. Go to already mentioned WindowsNoEditor folder and delete it.
  2. Open Steam client and open Library.
  3. Right-click Ark and open Properties.
  4. In Local files tab click Verify integrity of game cache.
  5. The client will redownload stock folder.

Keep in mind these are just workarounds. We have to wait for the full version of the game for full optimization. Additionally, it is advisable to upgrade your hardware in order to play.

If you are keen to share other tips, please tell us in the comments section.

What software can I use to add tabs to Windows 10/11?

Every browser has tabs with which you can open multiple website pages. However, Windows doesn’t include tabs to open software and folders with. Microsoft could integrate tabs into Windows in a various ways.

There are, however, a few third-party software packages that add tabs to File Explorer, software windows and the desktop. This is how you can add tabs to Windows 10 with TidyTabs, Stick and Clover.

How to enable Tabs in File Explorer using third-party tools

1. TidyTabs

TidyTabs is a freeware package (with a Pro version) that adds tabs to software windows. The freeware version of TidyTabs adds up to three tabs to windows with which you can switch between running software packages.

They’re like software taskbar buttons included at the top of windows. Instead of opening program windows with the taskbar buttons, you can switch between them with the tabs.

  • First, click Download on this page to save the TidyTabs installer to your hard disk.
  • Run through the setup to install TidyTabs. Then you should find a TidyTabs icon in the system tray as below.
tabs
  • Open, and maximize, a software window; and then move the cursor to the top center of the window. You’ll see a new tab for the program as in the snapshot below.
tabs2
  • Click the Restore Down button, and then move the cursor the top-left corner of the program window. You’ll find the tabs at the top left corner of non-full-size windows as below.
tabs3
  • Now open three program windows, and click their Restore Down buttons so they aren’t maximized.
  • Left-click a tab on one of the program windows, hold the mouse button and then drag the window tab. A small, transparent window should appear as below.
tabs4
  • Now drag and drop that window onto the tab in another open program. That will add a second tab to both the windows as shown in the snapshot directly below.
tabs5
  • As such, now you can click on the two tabs at the top of the windows to switch between both programs much the same as their taskbar buttons.
  • Repeat the previous three steps to add a third program tab to the top of the windows as shown in the snapshot below.
tabs6
  • You can right-click a software tab to open its context menu shown directly below. That includes additional close tab options.
tabs7
  • Double-click the TidyTabs system tray icon to open the software’s customization window.
  • You can adjust the tab transparency by clicking the Appearance tab. Drag the Tabs transparency bars left and right to adjust the transparency levels.
  • Click Apply > OK to confirm any selected settings.

2. Clover

File Explorer doesn’t have any tabs to open multiple folders in a single window with. It really should do, but Microsoft hasn’t addressed this obvious shortcoming yet. However, EJIE Soft Studio’s Clover software adds tabs to File Explorer comparable to those in Google Chrome.

  • Click Download on this Softpedia page to save Clover’s installer.
  • Run the Clover setup wizard to install the software.
  • Then open File Explorer and hey presto! Now Explorer has a tab bar as shown in the shot directly below.
tabs8
  • Press the New tab button to open new folder tabs. Or you can press Ctrl + T instead.
  • You can press Ctrl + Tab to cycle through the tabs. Or move the cursor over a tab and then roll the mouse wheel to cycle through them.
  • Clover has a Pin tab option you can select to pin tabs with. You can right-click a tab to open its context menu and then select Pin tab.
  • The tab context menu includes a Reopen closed tab option. So you can select that to reopen the most recently closed folder tab.
  • Some might also note the Bookmark this page context menu option. Select that option to save folders to bookmarks for quicker access.
  • Click the spanner icon at the left of the tab bar and then select Bookmarks to open bookmarked folders from the menu below.
tabs9
  • You can also add a bookmarks bar to Clover by clicking the spanner button and then selecting Settings.
  • Select the Always Show the bookmarks bar option on the Settings window. Now you can open folders from the bookmarks bar.

3. Add Tabs to the Windows Desktop

Tabs would also be a handy addition to the Windows desktop. Stick is a program that adds notepad, folder explorer and Web browser tabs to the sides of the desktop.

Then you can browse websites, save some notes and open folders with the tabs.

  • Click the Download Stick 2.8 button on the software’s website to save the setup wizard. Or you can get it from MajorGeeks.
  • Open the setup wizard to add Stick to Windows.
  • When you first run Stick, a Getting Started with Stick dialog appears for the only time. You can add tabs to the desktop with that, but any other time you’ll need to right-click Stick’s system tray icon and select Tab Manager to open the window below.
tab10
  • Click Add Tab and select Notes from the drop-down menu. That will add a Note tab to the top of the desktop as below.
tab11
  • Now you can move the cursor over that tab to open the notepad shown in the snapshot below. This is a handy Notepad alternative for you to add notes to.
tabs12
  • Open the Tab Manager window again, click Add Tab and select Navigator to open the My Explorer Tab in the snapshot below.
tabs13
  • The My Explorer Tab is both a Web and folder browser. Enter a URL in the Address bar to open websites with it.
  • To open folders in the My Explorer Tab, you can select a folder button on its toolbar. That will open a Browse for Folder window you can open a folder in the tab with.
  • To configure the navigator tabs to open more specific folders when you select them, right-click the tab on desktop and select Explorer Properties to open the window below.
tabs14
  • Click the URL/Folder button and choose a folder for the tab to open with. That becomes the tab’s home folder.
  • You can move tabs on the desktop by dragging them left and right. To move them to other sides of the desktop, right-click a tab and select one of the pin options on the context menu.

Update: It seems that the initial download link is no longer available on the tool’s official website. But you can use third-party download platforms to get the tool.

TinyTabs, Stick and Clover are just three of the software packages that bring tabs to Windows. WindowTabs, QTTabBar and TabExplorer are a few other programs that add tabs to File Explorer and application windows.

Hopefully Microsoft will consider adding tabs to future Windows platforms, but for now you can add them to the OS with third-party software.

As you all know Microsoft has already announced a similar feature called Sets. Basically, this feature groups File Explorer windows together. However, it seems that the tech giant hasn’t had the time to fully implement Sets into its new Windows 10 OS versions.

Since Microsoft is taking so long to actually bring Tabs to Windows 10, many users are wondering whether this is still a valid idea for the company or not.

Well, recent report suggest that Microsoft will focus heavily on bringing Tabs to File Explorer after it has completed the Chromium on Edge transition. And this may take a few more months.

Who knows, if everything goes according to plan, Tabs on Windows 10 might be available as a fully-fledged feature in 2020.

RELATED GUIDES TO CHECK OUT:

Windows 10 on ARM could soon work on the Nintendo Switch thanks to hackers

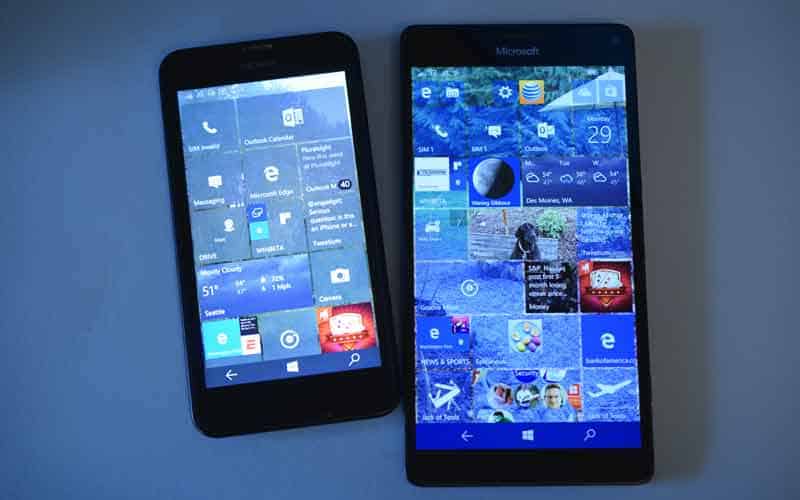
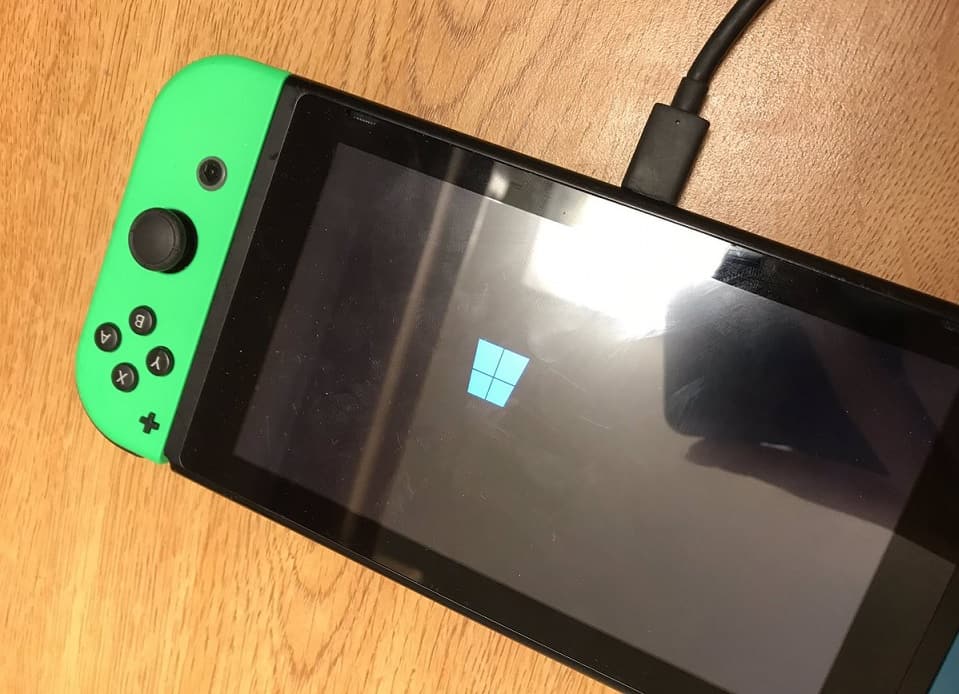
The idea of running the full version of Windows 10 on a phone such as the Lumia 950 is certainly cool, especially if that phone can be docked and hooked up to any monitor to bring the full desktop computing power to anywhere. However, what might be even more strange is that a group of hackers are currently working on bringing the Windows 10 on ARM computing experience over to the Nintendo Switch.

According to a tweet from someone named Ben (spotted by Windows Latest), the OS is not quite working on the system. That said, WL mentions that a series of tweaks to the operating system, such as that for memory management, are required for a successful run.

While the idea of having a Windows 10-powered Nintendo Switch is definitely strange sounding at first, it also makes a lot of sense if you think about it. The console is a small tablet at first, but can be docked to a television or monitor to bring everything to the larger screen. This is especially useful as the dock is bundled with the console as part of its $299 price point.

If course, due to the Switch running a customized NVidia Tegra ARM-based processor, only the Windows 10 on ARM version will work. Most programs were designed for the Intel-based architecture in mind, so the system has to emulate it in order for those applications to work. This, in turn, can considerably reduce performance, so don’t expect too much coming out of this experiment.

Still, it’s certainly an interesting thought, and only a real look at the system can tell you whether the work to install it is really worth the trouble. For now though, it seems that a remote desktop client is the best way to access Windows 10 from your pocket-sized device, for now anyway.

Full dark mode in Windows 10 Mail app starts rolling out to all users

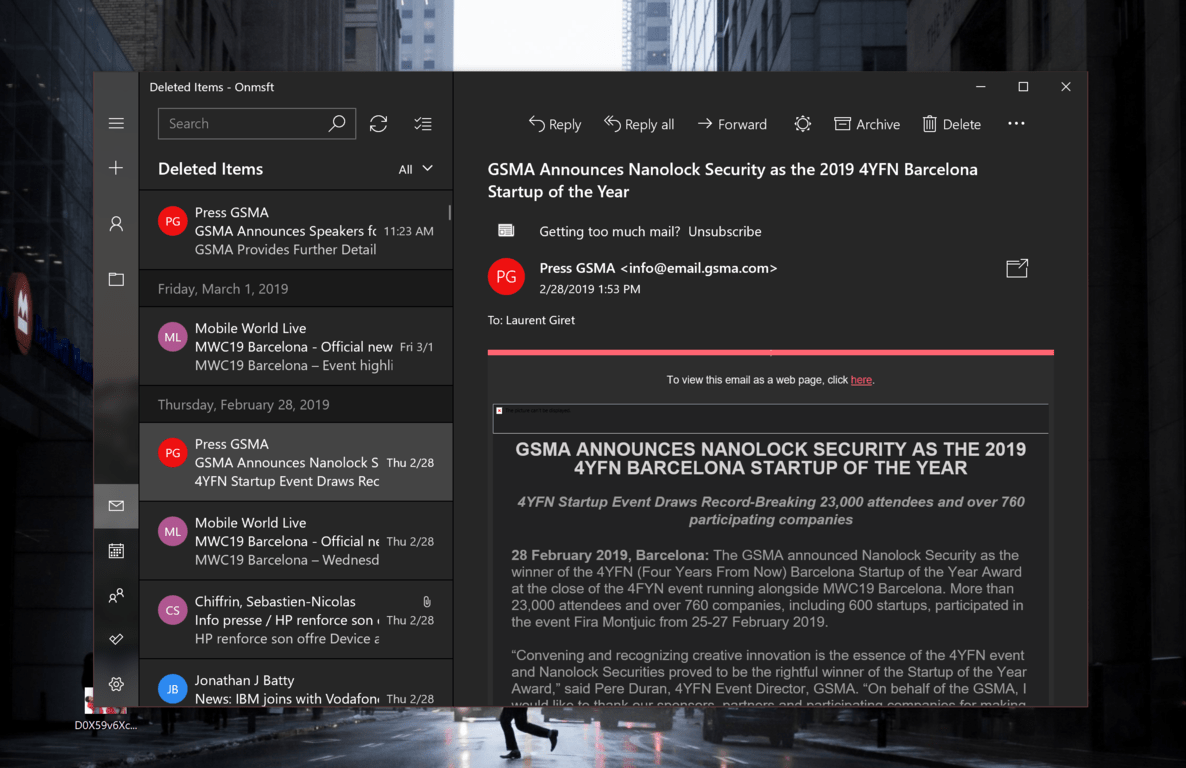
Following some testing with Windows Insiders, Microsoft has started rolling out the improved dark mode in its Windows 10 Mail app (via The Verge). This inbox app has had a dark mode since the launch of Windows 10 four years ago, but until now the email preview pane always kept a white background, which made this dark mode pretty much unfinished.

This finally changes with the update rolling out this week, and you’ll notice that Microsoft has also added a “turn on/off the lights” button in the top bar to switch between a white and dark preview pane background at will.

Another neat new feature we’ve spotted in the Windows 10 Mail app is the ability to set a default font per account. You can find this new feature in Settings > Default Font, and checking it out will should also make you notice some persisting UI inconsistencies. Most in-app settings use a slide-out menu from the right, but others use a pop up windows with a white background, even though when you’re using the app with dark mode enabled.

The app still uses white backgrounds for some pop up windows.

Are you satisfied with this improved dark mode in the Windows 10 Mail app, or do you think Microsoft can still do better? Sounds off in the comments below.

Is Windows 10/11 ICMP blocked? Check out our expert tips

ICMP is the Internet Control Message Protocol sent when users utilize the ping utility. The ping utility is handy for checking if network-connected devices are active. Thus, pinging can come in handy for checking network connections.

However, firewalls block ICMP pings for users by default. Consequently, users can’t ping when there’s a firewall up. So, it’s pretty obvious what users need to do to fix the ICMP pings!

How to Fix Blocked Pings in Windows 10

1. Turn Off the Windows Defender Firewall

Most users will, of course, turn off the Windows Defender Firewall before they enter a ping in the Command Prompt. Turning WDF off is perhaps the most straightforward way to fix pinging. Users can turn off the WDF as follows.

  • Open Cortana by pressing the Windows key + Q hotkey.
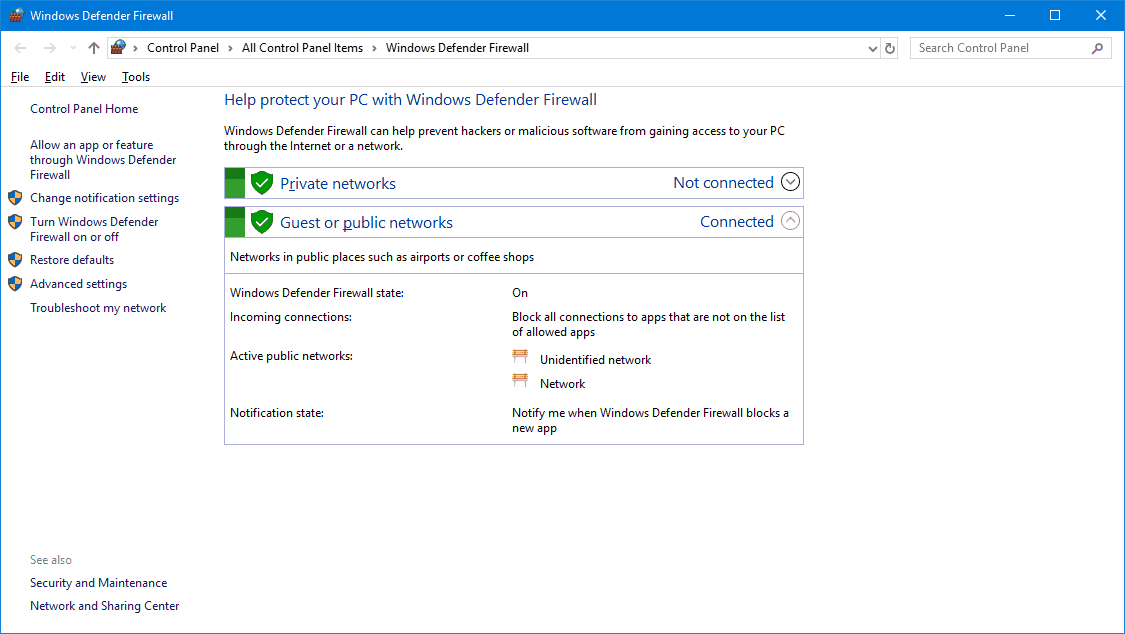
  • Enter ‘firewall’ to search for the WDF, and then select to open the Windows Defender Firewall Control Panel applet.

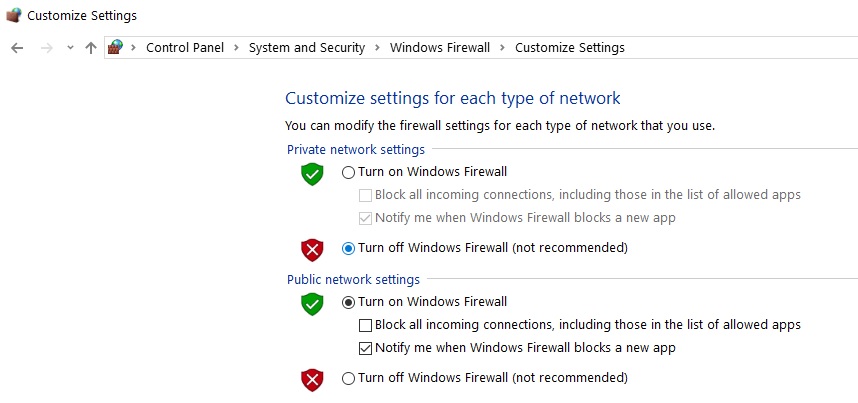
  • Click Turn Windows Defender Firewall on or off on the left to open the settings in the snapshot directly below.disable windows firewall
  • Then click the Turn off Windows Defender Firewall radio buttons.
  • Select the OK option.
  • Users can select the Turn on Windows Defender Firewall settings after pinging.

2. Enable Ping Through the Firewall

However, users can also ping without turning WDF off. Users can do that by setting up a WDF ping request exception. Follow the guidelines below to establish a ping request exception.

  • Right-click the Start button to open the Win + X menu.
  • Select Command Prompt (Admin) to open the Prompt’s window.
  • First, enter ‘netsh advfirewall firewall add rule name=”ICMP Allow incoming V4 echo request” protocol=icmpv4:8,any dir=in action=allow’ and press the Return key to set up an ICMPv4 exception.

  • Then input ‘netsh advfirewall firewall add rule name=”ICMP Allow incoming V6 echo request” protocol=icmpv6:8,any dir=in action=allow’ in the Command Prompt’s window as shown directly below, and press the Enter key.

  • Thereafter, users can enter their pings in the Command Prompt.

3. Disable Third-Party Antivirus Software

However, if the ICMP ping still times out, there must be a third-party firewall blocking it. Some users will also need to disable third-party antivirus software, which include their own firewalls. To do that, right-click the antivirus utility’s system tray icon to open its context menu. Then select a context menu option that will disable the antivirus software, which might be a turn off, disable, stop, or shut down option. Alternatively, users can stop antivirus software starting with Windows as follows.

  • Open the Win + X menu by right-clicking the Start button.
  • Click Task Manager to open that utility.
  • Select the Start-up tab on the Task Manager.

  • Select the antivirus utility on the Start-up tab, and press the Disable button.
  • Then restart Windows.

So, that’s how users can fix blocked pings. Then users can check their connections with pings.

RELATED ARTICLES TO CHECK OUT: 

When is the Tabs feature coming to File Explorer?

Last year, Microsoft revealed its plans to bring Tabs in File Explorer in Windows 10. The feature was initially expected to be available in October 2018.

Microsoft planned to make use of the Sets feature for further projects. Sets basically work by grouping related content into tabs. It works similarly to the way a web browser works by grouping documents, web pages, and apps whenever needed.

The Sets feature is already available in a couple of Microsoft Store apps including Microsoft Edge, OneNote, Mail, and Calendar application. It is a pretty handy feature if you want to manage your work by opening a tab for the documents folder, a tab for your email app and the pictures folder.

It makes it easier for you to switch between all of them.

https://youtu.be/3lEjuU-XFHg

You might not remember that apart from introducing the Tabs in File Explorer Microsoft planned to launch a new feature allows the users to restore previous sessions. It has been a core part of the web browsers for decades, so it is going to work just like it has done in the web browsers.

Is Microsoft still working on Tabs in File Explorer?

The feature is one of the most demanded features and it was voted by around 22 thousand+ insiders at the time of its announcement.

In fact, the feature was available to the Insiders running build 17618 for testing purposes. Additionally, the company planned to offer support for Notepad, Powershell, File Explorer, and Command Prompt.

Microsoft has not shared any release date information yet about Tabs in File Explorer. Most of the users are now wondering whether Microsoft is still working to develop the feature or it dropped the idea completely. If you are one of them here is the answer.

First Edge on Chromium, then File Explorer Tabs

According to the reports, Microsoft wants to first complete the development of Chromium-based Edge browser before moving to the File Manager Tabs feature.

The company is still working on the feature but it might have been slowed down due to the fact that Microsoft Sets depends on Edge. As a matter of fact, Sets are also an important part of the Windows Lite (Santorini) UI that will be released during the first half of 2020.

Furthermore, Microsoft wants to implant all the Edge features in the in Chromium project and the implementation of the features is currently work in progress. Therefore, Microsoft is waiting so that the shift to Chromium takes place successfully to speed up the development of the forthcoming feature.

It’s surprising that Microsoft has not thought about this feature for years. This is an important usability feature that needs to be developed to facilitate the life of Windows users.

The tech giant is doing pretty well as far as other products including Azure, Surface, TypeScript, HoloLens 2, Visual Studio, and Office are concerned. Even Skype is performing pretty well after the recent restructuring.

Get Tabs in File Explorer today with these third party tools

You might not be interested in waiting for Microsoft to finish the development of this feature. There are many third party tools that offer the same feature and are already available for download.

Some of these tools allow users to add tab functionality to the existing Windows File Explorer. While others have tabs feature and can be considered as an alternative to the Windows File Explorer.

1. Groupy

You might be surprised to know that the Groupy app actually offers a lot more features as compared to the Sets feature of Microsoft.

It manages the apps in a similar way just like you use a web browser to manage webpages in separate tabs. Another advantage is that it supports Windows 7, 8.1, and 10 operating systems.

You can use it to tab all of your open Google Docs, AdWords, Office docs into neat sections.

Another unique feature that might be appealing for the users that the software remains tabbed groups in its memory and you can easily reopen them when required.

Key features include:

  • Drag and drop application support
  • Organize documents and applications
  • Save groups of applications
  • Update existing groups with New tabs
  • Automatic grouping of similar app instances

However, email activation is required for using the software. It allows the users to switch between the tabs using Alt + Tab.

If you are interested in the software its license is available at a price of $9.99. At the time of writing this article, the Groupy is at a sale for $4.99 so it is the best time for purchasing the license.

2. QTTabBar

Most of the users have recommended using QTTabBar. It is a freeware that adds quick access tools for enhancing Explorer‘s experience. QTTabBar offers a couple of unique features. It helps the users in tracing folders and files in a better way. You can save a lot of time as you will no longer have to use the manual method anymore. All of its options are user-friendly and easy to understand.

Some of the key features provided by QTTabBar are:

  • Image Preview
  • Pin folders
  • Allows to group frequently used drivers and folders
  • Add programs to use as an Application Launcher
  • Switch between the tabs using keyboard shortcuts
  • Allows copying folder name and path
  • Saves the positions of Desktop icons

3. XYplorer

Many users recommend XYplorer as an alternative. It is basically a tabbed file manager me that meets the needs of Windows users.

Furthermore, it also includes a highly customizable interface, helps to automate frequently recurring tasks in an efficient way, and optional dual pane. It is preferred by users just because it is portable, lightweight, fast, and innovative.

Some of the major features that are offered by XYplorer are:

  • Dual panes
  • Queued file operations
  • Tabbed browsing
  • Six key navigation
  • A duplicate file finder
  • Batch rename
  • Folder view settings
  • One-click previews

It’s a paid program and you can either buy a Standard License at $ 39.95 per user or enjoy a Lifetime License for $79.95. 

It’s up to you if you want to use any of these third-party programs to enjoy the features that will be offered by the built-in Microsoft’s Tabs in File Explorer feature that is currently in the development stages.

Let us know in the comments section below if you are using any other third party tool. 

RELATED ARTICLES YOU NEED TO CHECK OUT:

Stats show Microsoft failed to convince Windows 7 users to upgrade

The year 2019 started right for Windows 10, as the analyst firms started reporting that Windows 10 finally overtook Windows 7 in terms of market shares.

Well, Windows 10 managed to maintain its share in the month of January but things were less favorable in February.

No doubt the operating system still maintains its lead but it recently lost some users and the change is visible. Stats show there has been 0.60 % declin in Windows 10’s market share.

Surprisingly, the share dropped from 40.90 % to 40.30 % just in a month. On the other hand, Windows 7‘s market share has seen an increase of 1.22 as it went up from 37.19 % to 38.41 %.

Notably, in the month of January Windows 10  maintained a lead of 3.71 % and but next month the OS was just 1.89 percentage points ahead of Windows 7. 

Additionally, StatCounter‘s figures also revealed the fact that Windows 7 has seen a decline of 1.16 % and Windows 10 has seen a growth of 1.6 % in February 2019.

We can clearly see from the figure that Windows 10 standards at 54.78 % market share while Windows 7 holds a share of 33.89%. The latest version of Windows leads with a slight difference of 20.89 %. 

4 years after Windows 10’s launch, Windows 7 maintains its user base

It is worth mentioning that it has been 4 years since Microsoft launched its latest version of Windows i.e Windows 10. Therefore, it is going to be a tough fight for Microsoft in the next 12 months to convince users to switch to Windows 10 while leaving Windows 7 behind.

We have seen that Microsoft has a history of releasing Windows 10 updates with a lot of bugs. That is the reason most of the Windows 7 users (individuals and enterprises) are delaying the upgrade to Windows 10.

They clearly don’t want to be a part of a team that is already dealing with critical issues.  Moreover, Microsoft is trying to facilitate the users in this regards by stating that technical assistance will be offered o those enterprises who will face any compatibility issues during the transition process.

Also, the company guarantees they will not face any issues while running the apps they have been using on Windows 7 for years.

Windows 7 users are still of the opinion that Microsoft has to reevaluate its strategy as most of the users in the third world countries are still running Windows 7 powered systems.

They are overwhelmed with all the different issues that are being faced by the Windows 10 users. It seems the OS has not offered any compelling reasons to Windows 7 users to make a transition.

But there is a drawback associated with sticking to Windows 7 as you will have to pay for extended support on a per-device basis beyond January 2020.

RELATED ARTICLES YOU NEED TO CHECK OUT:

How to completely uninstall Spotify on Windows 7

Music lovers will most definitely have used Spotify at one point or another. However, there almost always comes a time when you find something new and say goodbye to what you’ve known for the longest time.

This applies to users who want to completely detach and let go of Spotify from their computers or devices.

If you’re on Windows 7, the most popular OS in the world, and are struggling to wipe out the app from your computer, this is for you.

How to entirely remove Spotify on Windows 7

  1. Manually remove and delete all components or elements
  2. Use an uninstaller to automatically remove and delete related elements

Method 1 – Manually uninstall Spotify

This is a delicate process because you have to physically remove each file and/or folder related to Spotify and ensure that it is completely cleared from your computer before you proceed, otherwise, it will linger somewhere within.

Users taking the manual option to completely uninstall the app, and related files or elements are cautioned to ensure they clean out everything because Windows Uninstaller may not be effective in removing the app.  Most related files will still remain after removing or uninstalling the application itself, which can affect successful reinstallation of the app.

Ideally, to uninstall any program from your computer, you’d have to go through the Control Panel, then find the necessary program and uninstall it.

In order to carry out a complete uninstall of the app by yourself, here are quick and easy steps to follow:

  1. Right-click on Spotify app.
  2. Click Exit or Stop.
  3. Click Start.
  4. Select Control Panel.
  5. Click Uninstall a program.
  6. Select Spotify from the list of installed applications.
  7. Click Uninstall. This will display a panel for you to click and start the removal or deletion process.
  8. Once the uninstallation is complete, click Close.
  9. Reboot your computer.

Once you’ve successfully followed these steps, the next phase will be to completely clear out any files related to the app that is still within your computer.

Follow these steps to clear any related files:

  1. Check your C drive to confirm whether there are any files or folders related to Spotify still existing under your Programs folder and delete the files.
  2. If you’re sure you’ve deleted these folders, click Search from the start menu.
  3. Type regedit.
  4. Click Ok.
  5. The Registry Editor will open on your computer.
  6. Delete any Spotify registry entries you find.

You can also use these steps to completely delete any elements leftover that is on your local C drive:

  1. Open Finder.
  2. Click Go.
  3. Select Library.
  4. Open Caches.
  5. Delete the folder spotify.client
  6. Go back using the arrow.
  7. Open Application Support.
  8. Delete Spotify folder.

Other users have used the steps below:

  1. Go to C:Users<user>AppDataroamingSpotify.
  2. Delete all files in the folder
  3. Perform uninstallation.

When asked whether you want to proceed with uninstalling, as usual, click Yes.

Method 2 – Use an uninstaller to automatically and completely remove/delete Spotify

If you take this option, you’ll have to download a third-party uninstaller. This option is much better if you are not willing to meddle with registry entries and make changes on your own. Third-party uninstallers clear all associated files and folders, remove registry entries assigned to Spotify, and allow you to start from a scratch without worrying about possible corruption.

The whole procedure is rather intuitive and all you need to do is identify Spotify on the list of installed applications. Then, just click Uninstall and, once this process is complete, scan the computer for any leftover elements, then reboot your computer. Speaking of uninstalling software leftovers, check out this article to see what are the best tools to use.

Let us know if these worked for you, in the comments section.

This version of microsoft.aspnetcore.all is only compatible with netcoreapp2.1

Issues with Visual Studio error concerning the default set of APIs for building an ASP.NET Core application are rare. But they still happen from time to time.

The most common error is: This version of Microsoft.AspNetCore.All is only compatible with the netcoreapp2.1 target framework.

Even though it looks complex, it’s rather simple to resolve considering the developer’s standards. We have some steps to offer below.

How to fix the compatibility issue with aspnetcore.all

The problem at hand seems to be concerning a fair number of users. It’s, however, not hard to resolve. The first suggestion will probably deal with it, but you can always try additional ones.

The simplest solution is to just update Visual Studio. Obviously, the issue is with the netcoreapp version, as the error suggests. What you need to do is just update the Visual Studio firmware, delete the bin and obj folders and rebuild it again.

This shouldn’t be a hard task to follow. Although there might be some issues with .NET compatibility, they are rare.

After the update, the problem should be gone. On the other hand, if that doesn’t work, try replacing the value for Target framework to a right target environment. By editing the publish profile file(.pubxml).

You can also do it by opening your project, choosing Publish > Configure. The value will set on its own and all you need to do is save changes.

If you’re still bothered by the same error, try recreating the Publish profile. That should do it.

In case you’re still having a hard time dealing with this error, consider posting your issue to Stackoverflow forums, where good and knowledgable folks will gladly help you troubleshoot the problem.

Since these are generic solutions, it might need a specific approach for your unique problem.

Also, don’t forget to share your thoughts in the comments section below. We look forward to hearing from you.

RELATED STORIES YOU SHOULD CHECK OUT:

Download BSPlayer for Windows 10 & 11 [Free 32/64 Bit]

I have been using BSPlayer on my Windows 8.1 and then Windows 10 computer for many years now. I can safely assume that, at least for me, it is the best video player in the world.

The latest BSPlayer version is version 2.73 (at the time of writing). The update brings a few bug fixes, fixed the issue where the chapters were not always visible and also added updated codecs.

If you want to gain access to an additional set of features and options, you can download BSPlayer Pro. This version of the media player supports HD and HQ YouTube video streaming playback, offers DVD support, lets you capture video to file, has an integrated subtitle editor, and more.

If you’re interested in downloading BSPlayer, you can follow the download link listed below.

A few years ago, I shared with you the fact that I was pleased by how well BSPlayer works in Windows 10, 8. Now, after using the popular video player for quite a while, I can safely recommend it to all Windows 10, 8.1 and Windows 7 users.

However, some users have been reporting problems with the video after the Windows 10, 8.1 update:

I have a problem with any type of video after the update. After about two minutes of watching any type of video, in any program (BS Player, GOM player), even streaming on Youtube, or playing a game…

BSPlayer windows 10

I’ve seen many other small problems with the BSPlayer functionality in Windows 10, 8.1, but you can safely download the latest version following the link available in this post.

Here are the improvements that the latest BSPlayer version brings:

  • Fixed memory leak
  • Fixed error message when adding filters in
  • Fixed problem with YouTube links in playlist
  • Better support for LAV filters
  • Improved codec support

When choosing between RealPlayer or any other video player in Windows 10, 8.1, my vote goes to BSPlayer. You can choose to go PRO, if you really need those features.

Better BSPLayer Windows 10 compatibility

The latest BSPlayer versions bring of series of Windows 10 compatibility improvements that deliver a better user experience on this OS version. Thanks to these updates, the number of bug reports has significantly been reduced.

However, if you’re still experiencing BSPlayer issues on Windows 10, here are a few troubleshooting guides to help you fix the problem:

If you have been having other problems with BSPlayer in Windows 10, 8.1, let us know by leaving your comment below.


How to run DOS on a Raspberry Pi

Please note: this tutorial is not for beginners. This tutorial requires the use of Raspian terminal commands which are text-based, so you’ll at least need to have basic Linux knowledge. You can’t run actual MS-DOS on the Raspberry Pi as is, instead you will be running DOS via an emulator. By using a combination of QEMU PC emulator and FreeDOS, you can play classic DOS games and run other DOS programs on the Raspberry Pi. Once you’ve set up QEMU as the virtual machine and installed FreeDOS, you can run DOS programs and games on the Raspberry Pi.

At the moment, FreeDOS is the only DOS program that will allow you to run programs and games. The reason that you can’t install FreeDOS directly on the Raspberry Pi is because of the CPU architecture. Like any DOS, FreeDOS requires an Intel x86 CPU and a BIOS to provide basic runtime services. The Raspberry Pi operates using a completely different architecture, using an ARM CPU, which is not binary compatible with the Intel CPU and does not include a BIOS. Therefore, FreeDOS can’t run on the Raspberry Pi natively and instead must be used via an emulator.

Raspberry Pi Setup

First, you need a clean install of Raspbian installed on the Raspberry Pi. Raspbian is the operating system (OS) built specifically to be used on a Raspberry Pi. I used a Raspberry Pi 3 Model B+ for this, but any Raspberry Pi model should work. First, you need to install Raspbian to your Raspberry Pi. Follow the steps on how to install an OS to a Raspberry Pi. Raspbian is the OS you want to install. Once installed, you will want to open Terminal from the Raspbian desktop.

Install FreeDOS to a Raspberry Pi

QEMU is short for Quick EMUlator. QEMU is open-source virtual machine (VM) software that runs DOS as a “guest” operating system on Linux. It is no different from using a VM in Windows 10. The good news is that QEMU is already available on most Linux systems, including Raspbian, so there is no extra software to install.

By typing in a few lines of Linux commands, you can have FreeDOS up and running in no time. By using QEMU, you need to create every component of your Virtual Machine (VM). Here are the steps and commands you need to use to install and run FreeDOS. First, you need to define the virtual disk image in Linux for FreeDOS. Since FreeDOS doesn’t take up much space, I used the following command:

qemu-img create freedos.img 200M

This command instructs QEMU to create a disk image named FreeDOS.img that is 200 MB in size.
Now, you need to download and install the latest distribution of FreeDOS. Download the FreeDOS 1.2 CD-ROM “standard” installer (FD12CD.iso), as it works best for this scenario, so we will use that.

First, you need to tell QEMU to use the CD-ROM image and boot from that. Remember that the C: drive is the first hard drive, so the CD-ROM will show up as the D: drive. In order to add the rest of the parts to make FreeDOS work on the Raspberry Pi, copy and paste the following command in its entirety:

qemu-system-i386 -m 16 -k en-us -rtc base=localtime -soundhw sb16,adlib -device cirrus-vga -hda freedos.img -cdrom FD12CD.iso -boot order=d

After inserting the command, follow the prompts and FreeDOS will be installed in no time. For your information, the previous command line tells QEMU to create a an Intel i386-compatible virtual machine with 16 megabytes of memory, a US-English keyboard, and a real-time clock based on my local system time. The command line also gives my VM a classic Sound Blaster 16 sound card, Adlib digital music card, and standard Cirrus Logic VGA card. The file, freedos.img, is designated as the first hard drive (C:) and the FD12CD.iso image is designated as the CD-ROM (D:) drive. QEMU is set to boot from the CD-ROM drive (D:).

The FreeDOS 1.2 distribution is easy to install, all you need to do is follow the prompts. I provided some screenshots for what you should see after you insert the abovementioned Linux command for your reference.

After installation is complete, reboot FreeDOS. After reboot, the FreeDOS distribution package already comes with pre-installed games and applications to use on DOS running through the QEMU emulator on the Raspberry Pi. FreeDOS also offers additional links to other DOS programs and games available for download on its website.

Run FreeDOS on the Raspberry Pi

Doom
Now that you have FreeDOS installed in QEMU, you might want to see how well FreeDOS runs DOS applications and games. Performance issues are rare, but you may experience slow read/run times whenever you are doing any disk I/O, including writing large amounts of data. Overall, I have not experienced any issues running DOS applications and playing DOS games. Right now, my favorite game to play using FreeDOS in QEMU is Doom. Doom was my favorite game to play when I was growing up. Similar games, including Wolfenstein and Heretic work well too.

Again, because of the CPU architecture, you can’t run any DOS programs directly on the Raspberry Pi. However, it is nice to know that there is a workaround to run DOS applications and play DOS games on the Raspberry Pi via the QEMU PC emulator. Once you’ve set up QEMU as the virtual machine emulator and installed FreeDOS, you are all set to run all your favorite DOS programs and games on the Raspberry Pi.

Microsoft Australia shows of a rainbow Xbox controller, but you can’t get one (yet?)

In celebration of Sydney Mardi Gras 2019 (yep, that’s a thing), Xbox Australia released a relatively low-key video/gif of what looks to be a new custom colored Xbox One Elite Controller.

The video, which was first brought to our attention by Stevivor, depicts a colorless Elite controller that eventually becomes infused with a rainbow color scheme and just like that, Xbox Australia has seemingly ignited a forest fire of enthusiasm and anticipation for what could be a nice addition to the Xbox One arsenal of accessories.

Unfortunately, the new rainbow clad Elite Controller is more a proof of concept than an actual purchase option for anyone looking to style up their Xbox One console.

It does, seem as though there might be some potential in nudging Microsoft in the direction of actually making this new design a reality as Xbox Australia claims to be “keeping track of the numbers”, via their Facebook page.

Creative SB X-Fi has no Sound on Windows: 6 Ways to fix

Users who like their sound to be as crispy, and especially professionals, will go for an external sound card for a variety of reasons. The Creative Sound Blaster X-Fi XtremeMusic series are top-of-the-line sound cards.

However, they seem to have an issue on Windows, as either the sound is distorted or there’s no sound at all. We tried to shed some light on this problem, so check our solutions below.

How can I fix Creative Sound Blaster X-Fi sound issues?

1. Run the Sound troubleshooter

  1. Press the Windows key + I to open Settings.
  2. Choose Update & Security.
  3. Select Troubleshoot from the left pane.
  4. Expand the Playing Audio troubleshooter and click Run the troubleshooter.audio troubleshooter win 10 Creative SB X-Fi has no sound

For the majority of affected users, issues started after a major Windows update. And it looks that some system changes made after the update broke the Creative SB X-Fi soundcard.

The first step to try is running the built-in troubleshooter. This helped some users address both problems with sound quality and the complete absence of the audio output from Creative SB.

2. Disable and re-enable the device

  1. Right-click Start and open Device Manager.
  2. Expand the Sound, video and game controllers.device manager manager sound Creative SB X-Fi has no sound
  3. Right-click on SB X-Fi and choose Disable device from the contextual menu.
  4. Reboot your PC and re-enable the device.

If the previous step didn’t help you get the sound back to normal, we suggest navigating to Device Manager and disabling the device. Once you reboot your PC, you can re-enable it again, and hopefully, the sound will get back.

There seems to be a slight problem with certain external soundcards after system updates. This should deal with that.

3. Reinstall or rollback sound drivers

  1. Right-click Start and open Device Manager.
    device manager win + x menu Creative SB X-Fi has no sound
  2. Expand the Sound, video and game controllers.
  3. Right-click on SB X-Fi and choose Uninstall device.
  4. Reboot your PC and look for changes.

The next applicable solution is to stick with system-provided drivers. The thing is, you can either reinstall them, and the system will install drivers again, or roll back to a previous version.

One of the two options should work for you, so try them both and look for improvements or resolutions.

For a quicker process, you also have the option to use dedicated driver update software. It will automatically find the best driver versions for your sound hardware and install it in just a few moments.

⇒ Get Fortect Driver Updater

4. Change the bitrate

  1. Right-click on the Sound icon in the notification area and open Sounds.
  2. Choose the Playback tab.
  3. Right-click on your default device and open Properties.
  4. Under the Advanced tab and Default format, select 16bit 96000 Hz (Studio Quality) and confirm changes.
    bitrate advanced playback device Creative SB X-Fi has no sound

Another frequently mentioned solution is to change the default bitrate. Namely, it seems that the standard 16-bit bitrate doesn’t work well, but as soon as you change it to 24-bit Studio Quality, everything starts working.

Even though we can’t say with certainty what exact bitrate will work for you, you can try multiple options until you find out which one works.

5. Disable onboard sound

  1. Right-click Start and open Device Manager.
  2. Expand the Sound, video and game controllers.
  3. Right-click on the onboard sound device and disable it.
    disable device Creative SB X-Fi has no sound
  4. Reboot your PC.

Even though, theoretically, the onboard and Creative SB X-Fi should work together, we can’t be sure. Therefore, some users found a way to resolve the issue by disabling the onboard sound.

This might or might not work, but we suggest giving it a go. If it doesn’t work, you can always enable it again and try something else.

6. Uninstall everything and install the official driver

Finally, if nothing worked, you can ditch all you have and install a fresh set of drivers and associated applications. We can say that this is the last thing we could think of.

The exception is, of course, rolling back to the previous Windows 10 version or just waiting for Microsoft/Creative to deal with it.

  1. Uninstall Creative Suite.
  2. Delete all associated files from the Program Files and AppData folders.
  3. Open Registry Editor and delete these two entries: Computer\HKEY_CURRENT_USER\Software\Creative Tech Computer\HKEY_LOCAL_MACHINE\SOFTWARE\Creative Tech
    registry editor Creative SB X-Fi sound problems
  4. Reboot your PC and wait until Windows installs drivers.
  5. Download and install drivers from here.
  6. Reboot your system and check for improvements or resolutions.

With that said, we can conclude this article on the Creative SB X-Fi Windows with no sound. If Sound Blaster X-Fi Xtreme music is not working, check our detailed guide to fix it.

In case you have any questions or suggestions, be so good to share them with us in the comments section below.

What to do if iPhone disconnects from your Windows 10/11 PC

Users will often back up their iPhones and iPads to Windows 10 PCs with iTunes. However, some users have stated that an “iPhone disconnecting” error arises when they try to back up their Apple devices.

The full error message states: iTunes could not back up the iPhone because the iPhone disconnected.

Consequently, the users can’t back up their mobiles and tablets. Check out some of these potential resolutions for fixing the Windows 10 “iPhone disconnecting” error.

10 solutions to fix iPhone disconnecting error

1. Connect the iPhone With an Alternative USB Cable

First, check the USB cable that’s connecting the mobile with the PC. Try connecting the iPhone with an alternative USB cable if you have one. Ideally, the USB cable will be an MFi-certified one.

2. Connect the iPhone With an Alternative USB Slot

There might be something up with the USB slot the iPhone is plugged into. So, try connecting the phone with an alternative USB port. The phone might back up fine when connected with an alternative USB slot.

3. Unplug Other USB Devices

Other USB devices plugged in might generate USB connection errors. So, unplug any additional flash drives, external hard drives, gamepads, USB hubs, etc. Then connect the iPhone with one of the vacant USB ports.

4. Reset the iPhone’s Network Settings

Some users have confirmed that resetting their iPhones’ network settings fixed the “iPhone disconnected” error message. Users will still retain their data after resetting the network. To reset network settings on an iPhone, tap Settings, General, and Reset on the mobile. Then users can select a Reset Network Settings option.

5. Erase the Lockdown Folder

The “iPhone disconnected” error can arise due to corrupted Lockdown folder permissions. Thus, resetting the Lockdown folder, by deleting it, is another potential fix for the issue. Follow the guidelines below to erase the Lockdown folder in Windows 10.

  • First, launch Run with the Windows key + R keyboard shortcut.
  • Then enter ‘%ProgramData%’ in Run, and select the OK option.
  • Click the Apple folder to open it as in the snapshot directly below.
  • Then click the Lockdown folder to open it.
  • Press the Ctrl + A hotkey to select all files in the Lockdown folder, and press the Delete button. Users might need to be logged in as administrator to erase that folder.

6. Delete iTunes’ Backup File

The iTunes software saves a backup file each time users sync their iPhones with iTunes. The “iPhone disconnected” error might arise when that backup file is corrupted. So, try deleting that backup file as follows.

  • Open the iTunes window.
  • Click Edit and select Preferences to open a Device Preferences window.
  • Now select the backup file listed on the Device Preferences window.
  • Press the Delete button.
  • Click the OK button.

7. Edit the iTunes Backup Folder’s Title

There might also be corrupted backup files within the Backup folder. If so, changing that folder’s title might fix the issue. This is how users can edit iTunes’ Backup folder title.

  • Open the Run app.
  • Input ‘%appdata%’ in Run and click OK.
  • Then open the Apple Computer and MobileSync subfolders in the Roaming folder within File Explorer.
  • Right-click the Backup folder and select the Rename option.
  • Enter an alternative file title for the Backup folder, such as Backus.old.

8. Turn Off Third-Party Antivirus Software

Third-party antivirus software can block iTunes connecting with mobiles. So, try turning third-party antivirus utilities off by right-clicking their system tray icons and selecting a turn-off or disable option.

Alternatively, users can temporarily remove the antivirus from the system startup so they aren’t running when they back up files to iTunes. This is how users can remove antivirus utilities from the system startup in Windows 10.

  • Right-click the Start button and select Task Manager.
  • Then click the Start-up tab shown directly below.
  • Select the antivirus utility and click Disable.
  • Thereafter, restart Windows.
  • Open iTunes to back up your iPhone.

9. Fix iTunes With iTunes Repair Software

There are a few iTunes repair software that can fix numerous iTunes error messages. The iMyFone TunesFix software is among the best iTunes repair utilities that might come in handy for fixing the “iPhone disconnecting” error.

Users can try out a demo of iMyFone by clicking the Try for Free button on the software’s webpage. After installing iMyFone, open the software’s window and select the Repair Backup/Restore Errors repair mode. Then click Repair to fix iTunes.

10. Back up an iPhone With Alternative Software

Remember that there are alternative software to iTunes. So, users can back up their mobiles to desktops or laptops with other software instead of fixing the “iPhone disconnecting” error.

For example, users can back up Apple mobiles with the freeware CopyTrans Shelbee. This is how users can back up an iPhone with CopyTrans Shelbee.

  • Click Download on the CopyTrans Shelbee webpage to save the installer to a folder. Open that installer to add the software to Windows.
  • Connect the iPhone to back up to the desktop or laptop.
  • Open CopyTrans Shelbee, and select the Backup option on its window.
  • Select the Full Backup option.
  • Click the pencil button to choose a backup folder.
  • Then press the Start button.

There’s a good chance that some of the above resolutions will fix the “iPhone disconnecting” error for most users. In addition to those fixes, turning off Background App Refresh and turning on Airplane Mode and Low Power Mode on iPhones might also fix the backup error. Users who have fixed the “iPhone disconnecting” error with alternative methods are more than welcome to share those resolutions below.

Fatal Error No language file found problem? Try these fixes

The fatal error no language file found issue is blamed for a number of system malfunctions.

For example, your Windows PC may halt in the midst of a task and issue this error message. Other times, the system drags as it scans the computer for malware and other suspicious programs.

You may also notice a persistent lack of Windows stability when using your machine. These peculiar behaviors will keep nagging you until you take measures to get rid of the error message.

Thankfully, there are a couple of solutions that eliminate the annoying fatal error no language file found hitch permanently.

But let’s first delve into some of the triggers of this complication.

What causes language file found fatal errors?

Some of the most common reasons behind this error include:

  1. Problems in the existing installation of the anti-malware program Spyhunter.
  2. An attack by a nasty virus or some other malicious software.
  3. Corrupted Windows registry perhaps because of changes you may have made there.
  4. Trouble arising because you or a colleague may not have shut down your computer properly.
  5. Conflict brought about by a third party application.

Regardless of what triggered it, we all agree that this can be a stubborn error to troubleshoot.

How can I solve fatal errors related to language files?

Solving this error requires that you undertake some procedures all seeking to undo the changes that first provoked it.

Let’s now go through some of the fixes that will help you restore your computer to a normal functional state:

Fix 1: Run A System Restore

The System Restore tool automatically restores your system files and operating system configuration to at a recent point in time when things were working.

It’s thus a quick troubleshooting option if the error just started appearing…

Steps:

  1. Press the Windows + R
  2. Type sysdm.cpl and press enter.Fatal Error No Language File Found
  3. Click the System Protection.
  4. Now Select System Restore.Fatal Error No Language File Found
  5. Click Next.
  6. From the available restore points select your latest System Restore point that worked.Fatal Error No Language File Found
  7. Click next and follow the rest of the instructions to finish the restoration.
  8. Reboot the system and see if the error is gone.

Fix 2: Clean Boot

Booting your system in a Clean Boot state will help in determining whether the problem is being caused by any of the third party applications you have installed.

Clean boot also helps you isolate any startup items that could be bringing the hiccup.

Steps (Windows 10):

  1. While logged into the computer as an administrator, Click Start.
  2. Type msconfig.
  3. Click System Configuration (from the subsequent search results).fatal error No language file was found!
  4. Select the Services section in the System Configuration
  5. Select the check box Hide all Microsoft services and then click on Disable all.windows 7 Fatal error No languaje file found
  6. Now select the Startup tab.
  7. Tap or click the option Open Task Manager.fatal error No language file was found! 13 Jan 2015 windows 7 Fatal error No languaje file found 29 Nov 2013 After recovery from a previous date get Fatal error No Language ...
  1. Look for the Startup tab after the Task Manager opens and click on each startup item and choose Disable.Fatal error on startup Error ' "No languages texts found
  1. Exit the Task Manager.
  2. Click OK (once prompted) and restart your computer.

If the fatal error no language file found message ceases after the restart, then you need to spot the 3rd party app generating the challenge and uninstall it.

Please note that the clean boot mode offers limited functions so you have to reset your PC to a normal boot to access all features as soon as you’re through with your troubleshooting.

How to reset the PC to start normally:

  1. From the Start button, search for msconfig.
  2. Select msconfig/System Configuration.
  3. Click or tap the Normal Startup tab under the General section.
  4. Tap/click the Services tab.
  5. Uncheck the check box next to Hide all Microsoft services.hide all microsoft services
  6. Then click Enable all.
  7. Now select the Startup tab.
  8. Choose Open Task Manager.
  9. Enable each startup program (click to enable one by one).
  10. Click Restart when you’re prompted.

 If the issue comes back, try fix 3

Fix 3: Repair Corrupted/Missing System Files Using System File Checker

The System File Checker Windows utility allows you to scan system files for corruption and will also restore missing as well as corrupted files.

Remember that the fatal error no language file found is sometimes brought about by a missing/corrupted system file.

Steps:

  1. Clickon Start.
  2. Type Command Prompt/cmd in the provided Search box.
  3. Right-click on Command Prompt.
  4. Click Run as administrator. (Type your administrator password or click Allow when asked).Fatal Error No Language File Found
  1. Type the following sfc command on the command prompt windows then press enter:

         sfc /scannowFatal Error No Language File Found

Restart your system.

All the protected system files are scanned and those found missing/corrupted replaced or repaired.

  1. You should then re-open cmd and run the following Deployment Image Servicing and Management (DISM) Type each and press enter in the order given.

            Dism /Online /Cleanup-Image /CheckHealth

            Dism /Online /Cleanup-Image /ScanHealth

            Dism /Online /Cleanup-Image /RestoreHealthfatal error No language file was found!

The DISM also repairs and prepares various Windows images related to crucial settings including the Windows Recovery Environment and may also be beneficial.

Hopefully, these commands will remove the lingering computer error.

Fix 4: Run a Virus Check

As I mentioned earlier on, the troublesome fatal error no language file found is from time to time due to a malware infection.

Subsequently, running a full system virus scan makes sure that your machine is malware free and may help in stopping it.

Try to back up your crucial data before attempting a scan as affected data files could be deleted during disinfection.

Steps:

The procedure depends on your antivirus.

Fix 5: Uninstall The Spyhunter Software

SpyHunter is third-party anti-spyware software and seemingly offers protection against multiple online security threats.

The tool also provides customized fixes and is commonly used to remove some of the most distressing Spywares.

It however periodically conflicts with Windows settings leading to the fatal error no language file found issue.

The solution in such a case lies in completely removing the tool.

Steps:

  1. Click start.
  2. Type Control panel in the Windows Search box.
  3. Select Control Panel.windows 7 Fatal error No languaje file found
  4. Once the control panel window opens, Click Programs.
  5. Now select Programs and Features.Fatal Error No Language File Found
  6. Locate the SpyHunter app and right-click on it then choose Uninstall.
  7. Wait for the uninstallation process to complete.
  8. Reboot your PC and check whether you have succeeded.

More Guides Selected Just for You:

What is Eubkmon.Sys error? How can I remove it from my PC?

The eubkmon.sys error often leads to serious problems like blue screen, memory issues, and may even interfere with the booting process of your Windows computer.

You may also notice a slowing down in your PC’s overall performance as well as the computer hanging.

But what is eubkmon.sys error exactly and how can you fix it? Read on to get the answers.

First, let’s look at the EUBKMON.sys- the file which primarily originates the said issues..

What is eubkmon.sys?

Eubkmon.sys is a driver designed for the various versions of Windows. EUBkMon is actually an abbreviation for the EaseUS Todo Backup Monitor Kernel Driver.

The driver helps your system interact with the Todo Backup Free utility from EaseUS, a Chinese developer of utility software.

Like other drivers in Windows, the file can be found in the C:WindowsSystem32drivers folder.

What Is Eubkmon.Sys Error?

As I had mentioned earlier, the eubkmon.sys error is a bug associated with the said driver file. The error arises as a result of having an outdated or corrupt version of EUBKMON.sys .

The hitch can be frustrating and may make your computer unusable because of subsequent behavior. For instance, the machine develops a habit of restarting every now and then making it difficult for you to perform meaningful tasks.

Is Eubkmon.Sys Essential?

Drivers play an important role in the correct working of hardware as they are the channel through which an operating system communicates with the installed operating system.

For this reason, deleting the Eubkmon.sys file could disrupt some of your PC’s crucial functions but for instances when it’s extremely stubborn.

Warnings related to the Eubkmon.Sys Error

The eubkmon.sys error comes with other warnings including:

  • Driver Unload: The system can generate an error to the effect that a problem has just been detected…. and Windows shut down so as not to damage your computer (EUBKMON.SYS DRIVER_UNLOADED_WITHOUT_CANCELLING_PENDING_OPERATIONS).
  • Program stopped working correctly: You receive a notification that EUBKMON has made an app to halt and that Windows will notify you if it finds a solution (EUBKMON stopped working….Windows checking for solutions to the problem).
  • Memory access violation: The module EUBKMON.sys has encountered problems while accessing an invalid memory address FFFFFFFF or reading address 00000000.

What To Do if you Get Eubkmon.Sys Errors

Now that we know what is eubkmon.sys error, let’s look at ways of solving it.

Solution 1: Scan your System for Malware

Since cyber criminals are fond of hiding their malicious files by using the names of established programs, we advise that you check if your PC could be infected by a virus masquerading as eubkmon.sys..

Any top notch antivirus will nab the malware and delete it.

Solution 2: Scan and Repair Corrupted Files

Scanning your machine for corrupt files will resolve the issue if it’s due to damaged files:

Steps:

  1. Tap on the Start
  2. Type Command Prompt in the search dialogue box.
  3. When the results appear, Right-click on Command Prompt (Desktop app) and choose Run as administrator.What is Eubkmon.Sys Error
  4. As soon as the command prompt (elevated) pops up, type sfc/scannow and then press enter.
  5. Wait for the SFC (System File Checker) to run and follow any steps that it recommends.What is Eubkmon.Sys Error

6. Then type dism /online /cleanup-image /restorehealth and again wait.

This may mend any damaged files that could be the source of the eubkmon.sys error.

Solution 3: Run Automatic Disk Cleanup

The disk cleanup utility provides more hard drive cleanup options and may also be helpful considering that the eubkmon driver deals with hard disk backup.

One of the easiest ways of running the disk cleanup is by launching the Cleanmgr.exe from CMD.

Remember to specify your targeted hard disk from the command line.

Steps:

  1. Click Start
  2. Now click on Run.
  3. In the opened dialogue box, type c:windowsSYSTEM32cleanmgr.exe /dC then press Enter:Eubkmon

Replace C with the drive letter representing the hard disk you want to clean.

Solution 4: Uninstall Eubkmon

You can remove the Eubkmon itself:

Steps:

  1. Click the Start button and select Settings.EUBKMON.sys *** ERROR:
  2. Select System.
  3. Then choose Apps & features.
  4. Locate the Eubkmon program from the listed apps.
  5. Select Uninstall.EUBKMON.sys
  6. Wait for the uninstallation process to complete and restart your PC.

Solution 5: Uninstall the EaseUS Todo Backup Monitor

You can also completely uninstall the EaseUS Todo Backup Monitor as its one of the tools that is likely to trigger the errors linked to eubkmon.sys.

It’s best to do this while in safe mode as it may difficult to uninstall from the regular desktop.

Steps:

  1. Restart your PC.
  2. When the sign-in screen comes up, hold down the Shift key and select Power then Restart.What is eubkmon.sys?
  3. The PC again reboots to the Choose an option screen.
  4. Click Troubleshoot then Advanced options.page fault in nonpaged area windows 10
  5. From there, click Startup Settings then Restart.Eubkmon
  6. Your PC restarts yet again and this time displays a list of choices. Select 4 / F4 to move into Safe Mode.Eubkmon issue
  7. Now Press Windows + R. This will open the run dialog.
  8. Now type appwiz.cpl then press Enter.eubkmon sys bsod
  9. Select the EaseUS Todo Backup Monitor from the list and presseubkmon sys page fault
  10. Follow the next instructions on to complete.
  11. Restart once more but this time normally.

Solution 6: Update Your Windows

Updating your Windows 10 may help your device run smoothly and can help protect it from failing on account of the various eubkmon.sys errors.

Steps:

  1. Click Start
  2. Select Settings then Update & Security.Eubkmon error
  3. Choose  Windows Update.
  4. Select Check for updates and wait for the process to run to completion.Eubkmon blue screen

 OTHER USEFUL GUIDE SELECTED JUST FOR YOU

Common Football Manager 2018 bugs and how to fix them

Football Manager 2018 is out now! There are already tens of thousands of players enjoying the game, testing their management skills.

As its title suggests, Football Manager 2018 challenges you to lead your football club to victory. As a club manager, you are responsible for everything, you decide who to hire, what strategy to adopt on the field, etc.

As it happens with every newly released game, Football Manager 2018 is affected by a series of issues ranging from minor glitches to game crashes.

In this article, we’ll list the most frequent Football Manager 2018 bugs reported by gamers, as well as their corresponding workarounds, whenever available.

Make sure to bookmark this page so that you can quickly load it again in case you encounter similar issues.

Before we dive in, make sure that your computer meets the system requirements to run the game.

How to fix common Football Manager 2018 issues

  1. Low FPS
  2. FM18 won’t start
  3. Crash dumps
  4. A saved game won’t load
  5. ‘XML Parsing missing’ error message
  6. Match won’t run smoothly
  7. Mouse issues

1. Low FPS

The release version of the game brought FPS issues for some players, although the game used to run smoothly in beta.

Everything was okay while I am playing demo of FM 2018. But the game is released today and it became full version. Then I got really low fps on both game interface and match. I have installed the last version of my gpu drivers. Whats the problem ??

We recommend installing a reliable all-in-one tool designed to boost your computer’s performance and eliminate lag.

This type of software focuses the computer resources on the game you’re playing, turning off the other apps and settings that lead to overclocking. In this way, you’ll achieve higher FPS and the gameplay will improve exponentially.

Moreover, it provides real-time information about your system health, enabling you to customize the optimization process in the most efficient way. 

For more information on how to fix FPS issues, check out the troubleshooting guides below:

2. FM18 won’t start

Well, this is a classic issue. Many gamers struggled for a while until they managed to launch the game, while others are still trying to find a solution to fix this problem.

when i run the game it goes to the start screen with the music and stops. saying Fm manager 18.1 of 1040047 (staging) has stopped. any ideas . thanks

Here are a few solutions to fix Football Manager 2018 launch issues:

  • Run the game on your dedicated GPU and not the integrated GPU, if you use such a configuration.
  • Install the latest Windows 10 updates on your PC.
  • Run a full system antivirus scan.
  • Disable your Firewall and antivirus software and try to launch the game again.
  • Disable background apps and programs so that your system can direct all the necessary resources to the game.
  • Run System File Checker or use a dedicated registry cleaner to get the job done.

3. Crash dumps

We have another classic issue on the list: crash dumps. This problem has been affecting all Football Manager game editions, so players aren’t actually surprised that it occurs on the latest release as well.

Usually, these crashes occur in the middle of the gameplay.

How to fix crash dumps in Football Manager 2018

Of course, you can also use the workarounds listed above. If the issue persists, try these solutions as well:

  • Enable the borderless window. This action may temporarily fix crashes.
  • Install the latest GPU drivers updates on your computer.
  • Delete the game’s Save Game folder located in your user directory. Then, uninstall and re-install the game.

If nothing worked, wait until a hotfix is deployed.

4. A saved game won’t load

If you can’t load your saved games, rest assured, you’re not the only one. Quite a few gamers complained about this problem shortly after the game was launched.

Cant load my saved game , either from within game running or when trying to ‘load save game’ from title screen – the save file exists in my ‘Games’ folder within my documents ,but is not visible to select in the pop-up file selection window in game. Anyone else had this ?

The good news is that you can quickly fix this issue by adding .fm on the save file name. Right-click on it -> select Rename > add .fm > hit Play.

5. ‘XML Parsing missing’ error message

The annoying ‘XML Parsing is missing’ error prevents users from saving their progress. Moreover, every time they launch the game, they are asked to create a new profile.

I receive constantly the error message XML Parsing missing and something about token 2 and even if the game still works and do not crash, I am not able to save any game and every time I launch the game I get asked to create a new profile […]
I have checked the FAQ and there is already a topic regarding any XML issue, but I have followed the steps […] but still happening the same (or even more often) and do not know what do to. I have spent 35 € on a game I cannot play and after one day of research, I was not able to find any solution online.

Unfortunately, we don’t have a solution to fix this problem. We’ll continue to search for one and we’ll update this article accordingly.

6. Match won’t run smoothly

football manager 2018 issues FM 2018

Many gamers said that Football Manager 2018 still needs some polishing. It appears that the match engine is broken, causing various issues, including graphics issues, lag, choppy/ jumpy game sessions, etc.

“Match engine ????
ive got a good computer the game says i have excellent grapjics so why is the actual match a total mess ???doesnt run smooth at all ???? do i need to change a setting or something or is this IT ???? LIKE IT OR LUMP IT ??”

As a solution, try setting the game to low graphics, use key highlights, turn off shadow in match preferences, and install the latest driver updates. Also, don’t forget to install the latest game patch.

7. Mouse issues

Many players reported that sometimes the mouse seems to have a will of its own.

Hi, hope you are having a good fm 18 experience because Im not. Just downloaded the game and my mouse keeps going to the top right corner of the screen. I dont know how to fix this, can somebody help me?

For more information on how to fix mouse issues, check out the troubleshooting guides listed below. Hopefully, one of them will help you fix mouse issues in Football Manager 2018:

These are the most common Football Manager 2018 bugs reported by gamers. Of course, this list is not an exhaustive one, there are many other issues that occur rather rarely.

We’re sure that Football Manager 2018’s devs are working at full speed to fix these issues and will release a patch as soon as possible.

[Important News] Football fans would definitely not miss out on the most important football competition of the moment. Even if your country does not have a UEFA-approved broadcast partner, you can watch the Champions League stream free.

Check out the complete guide to watch UEFA Champions League on PC (live stream).

RELATED STORIES TO CHECK OUT:

Scaling Below 100% on Windows 11: Is it Possible

Microsoft has had issues with DPI scalling and blurry apps in Windows. To avoid these types of problems, users are wondering can Windows 11 scaling go below 100.

Usually, by changing the scale, the icons and text become more significant and more readable on high-resolution displays.

But can we make them smaller? We’re going to answer that in this guide.

How do I scale less than 100% in Windows 11?

Unfortunately, this isn’t possible since Windows Vista. The scaling options have been changed with Windows 7, and there’s no more option for scaling below 100%.

This means you won’t be able to set scaling below 100 on Windows 11.

What is the default scaling level in Windows 11?

Microsoft sets the default scaling level in Windows 11, and it’s most suitable for standard monitors.

Regarding the value, it’s set to 100% or 96DPI, but you can change it if you’re on a larger monitor.

What is the best custom scaling size for Windows 11?

There is no best scaling size. It all depends on your needs and display size. However, the general rule is the following:

  • Use 100% scaling on full HD resolution.
  • On 2K or 4K screens, use scaling larger than 100%

It all depends on your needs and DPI and screen resolution, so you’ll need to custom scale your Windows by experimenting with different values until you find the one that works for you.

Why does Windows recommend 150% scaling?

There are several reasons for this:

  • Windows detected a high-resolution display.
  • Text isn’t readable; therefore, Windows automatically recommended a higher scaling value.

So, to sum it up, Microsoft doesn’t allow going under the default 100% scaling, and even if you find the way, we won’t suggest it. If there’s a chance to change to a higher resolution, you can go with that, but in most scenarios, nothing but default and lower resolutions will work.

Consider getting a monitor with higher resolution if you’re really in need of smaller elements on your display. With that said, we can conclude this article.

In case you’re having issues with scaling, we have a great guide on Windows 11 scaling issues that you should read.

Did you find a way to scale below 100%? If so, share it with us in the comments section below.

Download Visual Studio 2019 and test the new features today

Microsoft has just rolled out the Visual Studio 2019 Release Candidate (RC). While the final version of the Visual Studio 2019 will be available to the general public at an online launch event on 2nd April.

What to expect in Visual Studio 2019?

Visual Studio 2019 comes as a complete package for both teams and individuals. The latest version is a lot more productive, faster, reliable and easier to get started and also easier to use for everyone.

This release introduced a couple of new features including expanded refactoring capabilities, IntelliCode for AI-assisted IntelliSense, smarter debugging and others. 

Moreover, two product channels have also been introduced along with the latest release. You can download Visual Studio 2019 RC from the release channel, while Visual Studio 2019 Preview 4 is available at the preview channel. 

Download Visual Studio 2019

If you are interested in getting early access to the upcoming version of Visual Studio, you can always download Visual Studio 2019 Release Candidate (RC).

Visual Studio 2019 will be available to the general users on 2nd April. You can easily install the Visual Studio 2019 RC build if you already have Visual Studio 2019 Preview builds and Visual Studio 2017.

The Visual Studio Preview can be downloaded from the official page. Additionally, you can always head towards the developer’s forum to report an issue or provide feedback to Microsoft. You can also use the UserVoice page in order to log feature requests and new product suggestions.

The preview channel will continue to offer an early look at upcoming features, just as you’ve become accustomed to in Visual Studio 2017.

Additionally, the company has also introduced Professional, Community and Enterprise editions for each of the two channels. Microsoft added some additional features to the Enterprise Editions and Professional of the IDE. 

The company said in an announcement that a preview of Time Travel Debugging (TTD) that has been integrated with the Snapshot Debugger will be available along with the Visual Studio Enterprise 2019. 

Furthermore, if you are interested in finding out in detail regarding the Visual Studio 2019 release you can simply head towards the Developer Community page.

RELATED ARTICLES:

Fresh Paint App to Download for Windows 10

Fresh Paint app for Windows 10 users is both fun and relaxing. Microsoft redesigned the tool for its latest OS version.
fresh paint windows 8
Fresh Paint
for Windows 10 is not the update for the Paint program that all Windows users have tried at least once.

You can still find the “old” paint inside the Windows Store. Even I prefer the actual Paint on my Windows 7 system because it’s much more easier than other programs to use it.

But let’s see in our review what comes new in Fresh Paint for Windows 8 and Windows 10.

Artists, starting designers, kids and average Windows 10 users will find this applications pretty entertaining, I can guarantee you that.

Here’s what new features Fresh Paint app brings on Windows 10

  • Intuitive UI, supporting touch, mouse, and stylus input
  • Draw or paint with watercolor, oil, pencil, pastel and pen
  • Natural pressure sensitivity allows precise control of the thickness of brush strokes
  • Import images, photos and even use your camera to capture an inspirational image to paint with
  • Available activity packs and coloring pages will entertain budding artists.
  • Print your artwork with high definition
  • Help your kids be creative and explore their imagination
  • Easily correct mistakes with the eraser tool and undo button.
  • Click the fan button to dry instantly all the paint on your canvas.
  • Easily share your paintings with people you care about.

Fresh Paint App for Windows 10 [Review]

The Fresh Paint application for Windows 8, Windows 10 and Windows RT devices has been amongst the first that have been released in the Windows store and for quite a while, it was actually the top application in the Entertainment section.

The biggest drawback of this application is that it won’t work that great unless you’re using it on a touch surface. And like I said, this isn’t meant to replace old Paint program, it’s a new, different approach.

fresh paint applicaiton windows 8 review
Your kids will love this application

Fresh Paint for Windows 10 update notes

Fresh Paint for Windows 10 was released in 2015. This version includes many interesting features like :

  • Allowing you to print your files in HD
  • You can now import images and photos to paint
  • Support for stylus, touch and mouse
  • Accelerated graphics rendering algorithm for a realistic painting experience

Fresh Paint for Windows 8 and Windows 10 review

Fresh Paint for Windows 8 and Windows 10 is a painting simulator that will prove to be useful to those that want to create some forms and art, but more likely, it will appeal to kids that can now play around with colors and shape without making a mess in the entire house.

To some extent, this is also a parenting application, too.

Everything that you create inside the Fresh Paint application is automatically saved and you can boast with your collection or your kid’s artwork at any time, by opening the gallery.

The application beautifully imitates a real scenario where you hve your palette and you can mix colors, too. Here are the tools that you will find inside the application, located on the top of your own painting screen:

  • Brushes
  • Crayons
  • Pencil
  • Blender
  • Eraser.

After you choose one of these tools, you can do an action that is found inside the old Paint, as well – changing the thickness. But the real beauty of the Fresh Paint app is the palette which has swatches, a bowl of water and an area where you can amalgamate colors in order to find the perfect one for your drawing.

And to make it even more real, you can clean up your brush in that boil of water, and the water will inherit the color of your brush.

Features and why Fresh Paint for Windows 8 and Windows 10 impresses

At the top, where you find the above mentioned tools, you will also find the option to change your canvas and to open up the gallery.

If  you think your painting has become a real mess and you’re not satisfied with it, you can use the “dry” button on the lower part of the screen.

You also have “Undo” and “Redo” buttons there, also the option to Center your drawing. PCAdvisor gives it a 4.5/5 rating and says the following:

Colour and texture are taken very, very seriously, so that you can just pick up a brush and slap some paint about, or mix and stain exactly the right shades. The way that colours interact is very realistic – you’ll get a tiny thrill the first time two strokes run in to each other and smear together into a different shade. With a bit of practice such multicolour streaking is a useful artistic tool. It’s also where ‘Dry’ comes in. Hit this and the colour you just laid on the page dries instantly, so that it won’t run into the next colour layer you apply.

For those of you that have a pen or stylus as an accessory for your tablet, you’ll discover how accurate your drawings and artwork will become with it. Fresh Paint for Windows 8, Windows 10 and Windows RT is an application made by Microsoft itself, just like the Microsoft Minesweeper game that we’ve recently reviewed.

You might think that you won’t be able to create too much art with this application, but the ability to insert image (as the one below) and to slightly modify them can trick your friends into thinking you’re an awesome artist.

I particularly enjoyed smudging images that are already created by great artists (reminds me of Johnny English and that painting that he ruined). Everything becomes very, very real and for some seconds you forget it’s a tablet that’s in front of you and there’s only an application, not real brush, not a real palette.

The majority of users’ review are positive, albeit there are some that report often crashes.

Other want such features as  higher output for resolution, fine tune adjuster for brushes. To recap, here’s what you can do with Fresh Paint for Windows 10 and Windows 8:

  • Use the tools to create realistic paintings.
  • Helps kids develop their imagination and express themselves.
  • Use asy-to-use paint templates, coloring pages and enough tools to paint awesome.
  • Import a photo, edit it, and convert it into a painting.

See the video below if you’re curious about the Fresh Paint application for Windows 8, Windows 10 and RT. The download link is at the bottom of the page.

Study shows Windows 10 fails to assist users during the update process

According to a recent research conducted by the University College, London, Microsoft does not care too much about the requirements of the non-Enterprise users as far as the updates are concerned.  In theory, Windows 10 Home should not install any updates while users are actively using their PCs.

The study involved 93 Windows 10 users and proved the following points:

  • Windows 10 Home’s Windows Update patching experience is frustrating for most of the users
  • Some of the users are even not familiar with using the Windows Update service/tools
  • Windows fails to assist the users during the update process
  • Windows built-in tools are inadequate to help users in making update decisions
  • The unexpected reboots during the update process disrupt the workflow
  • Microsoft should offer an alternate for the needed restarts

Some of you might be curious to know how the update process takes place, a flowchart of the Windows 10 Home update process has been published by the authors.windows 10 home updates


It is worth mentioning that some of the issues that have been highlighted in the study have already been addressed in the recent updates. Microsoft has put an icon in the taskbar indicating the users that they need an update. The feature will be available in April 2019 Update (19H1).

How did Windows 10 Home users respond to the research?

Annoyed by the huge volume of updates

It seems like users are pretty much annoyed with the huge volume of updates that take a lot of time and also chews up bandwidth as well.

This is simply going to lead to a permanent blocking of any updates, anytime, anywhere. I’ve already had to do that for several “Home” users because of the nearly-constant downloading of 4GB updates (taking all available bandwidth for days).

— RELATED: Survey confirms Windows updates trigger bugs for 50% of users

Users prefer to disable updates

While some of the frustrated users even took an extreme step by disabling the Windows Update service permanently.

As a matter of fact, they preferred to take the security risks that are associated with disabling the updates.

This is not surprising. I know someone who actually got fed up of their computer updating that they looked up how to stop it permanently. I found that they had disabled the Windows Update service. Re-enable it and explain why this is a very bad idea.

Lack of testing by Microsoft

While another user stated that Microsoft used to have a quality test team for Windows 7. While now it the number of bugs justify the fact that the tech giant is no longer focusing on quality assurance. It is just testing the products by releasing them to home users.

HOWEVER have in mind that the microsoft that handles Windows 10  isn’t the same that handled Windows 7 when it was in its prime and there used to be a quality test team that made sure updates issues were fewer, Windows 10 doesn’t seem to have that… its home users its beta testers.

The tradition of bugs in the first release

You might run into issues as Insiders are not property testing the builds and most of the times the builds rolled out with potential issues. Notably, Microsoft has a history of having bugs in its first release.

Microsoft has never had the reputation of nailing the first release.  If other Windows versions had forced you to install every update as it came down the pipe, we would have seen the same sorts of issues then as we do now.

— RELATED: Windows 10 October Update causes all these bugs

Downloading unnecessary apps

Surprisingly some of the users also have to delete all the newly installed apps that are of no use for a home user. They should have a feature to install only important security updates.

I would be fine with the updates if they were just for security issues. I’m sick of having to remove all the new Microsoft crapware every time a computer installs its gigabytes of updates. Why the hell does Win10 Enterprise have software for XBox anyway? Fortunately I only have to deal with it at work and at home I can use a reasonable OS where I control the updates but it’s still maddening.

Users lack the required knowledge

While few of the Windows users also blame the users to be lazy enough and lacking computer knowledge. The user states that often people don’t even try to understand the basics and that is the only reason they suffer during installation.
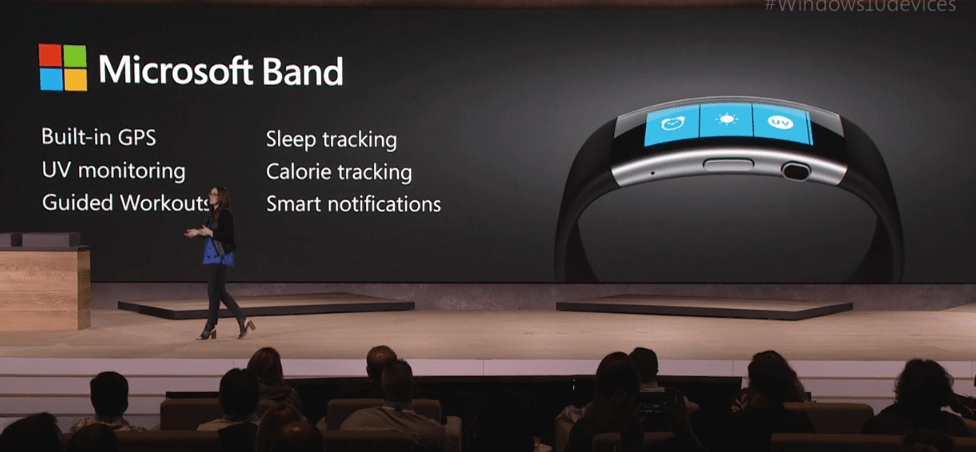
People just need to stop being lazy and educate themselves just a little on the technology that they use on a daily basis. Much of this would be alleviated if they took the time to understand the fundamental ‘how’s and ‘why’s of their computers instead of hitting ‘click click next’ every time something pops up on their screen. Security concepts and updates are not difficult to understand for most people if they just put a teeny bit of effort in.

One of the most important thing that should be considered by Microsoft is that around 28% of the users don’t even know about the Active Hours feature.

This feature allows the users to delay Windows update on their systems by setting a time beyond their working hours.

Microsoft seriously needs to think about creating awareness among Windows 10 Home users regarding its Windows Update service and tools. 

RELATED ARTICLES:

Windows 10 build 18845 fixes browser crashes and screen flickering

It’s Friday and, as always, Microsoft wants to keep its Insiders busy over the weekend. The tech giant rolled out a new Windows 10 20H1 build codenamed build 18845.

New emoji features

This build release brings a new set of emojis that now have keywords hooked up so that you may find them quicker. Simply type the keyword you’re interested in (such as smile, shoes) and the corresponding emojis will pop up on the screen.

Windows 10 20H1 emojis

Windows 10 build 18845 changelog

  • Microsoft fixed the issue which would cause the Bluetooth Hands-Free audio driver to hang.
  • All Insiders should now be able to access the Quests section of the Feedback Hub.
  • Microsoft Edge should no longer crash on launch.
  • File Explorer now looks a bit better when dark theme is enabled.
  • Microsoft also fixed a series of issues in certain languages (Adlam keyboard typing issues, Vietnamese auto-capitalizing bugs).
  • Microsoft also fixed the issue that could result in unexpected flickering if you used pen or touch in certain win32 apps to launch a second instance of the app when in tablet mode.
  • This build also addressed the issue that could result in DWM crashing after enabling high contrast.
  • The Family Safety icon in the notification area of the taskbar is now fully functional.
  • The taskbar search box text no longer becomes black on a black background.
  • Start menu no longer crashes when using Narrator to navigate pinned folders in Start.

Windows 10 build 18845 bugs

  • Launching games that use anti-cheat software may trigger a bugcheck (GSOD). Microsoft is still working on a fix.
  • For display calibration scenarios, monitors may be missing in the built-in Color Management application. You can use the Settings app to select color profile instead.
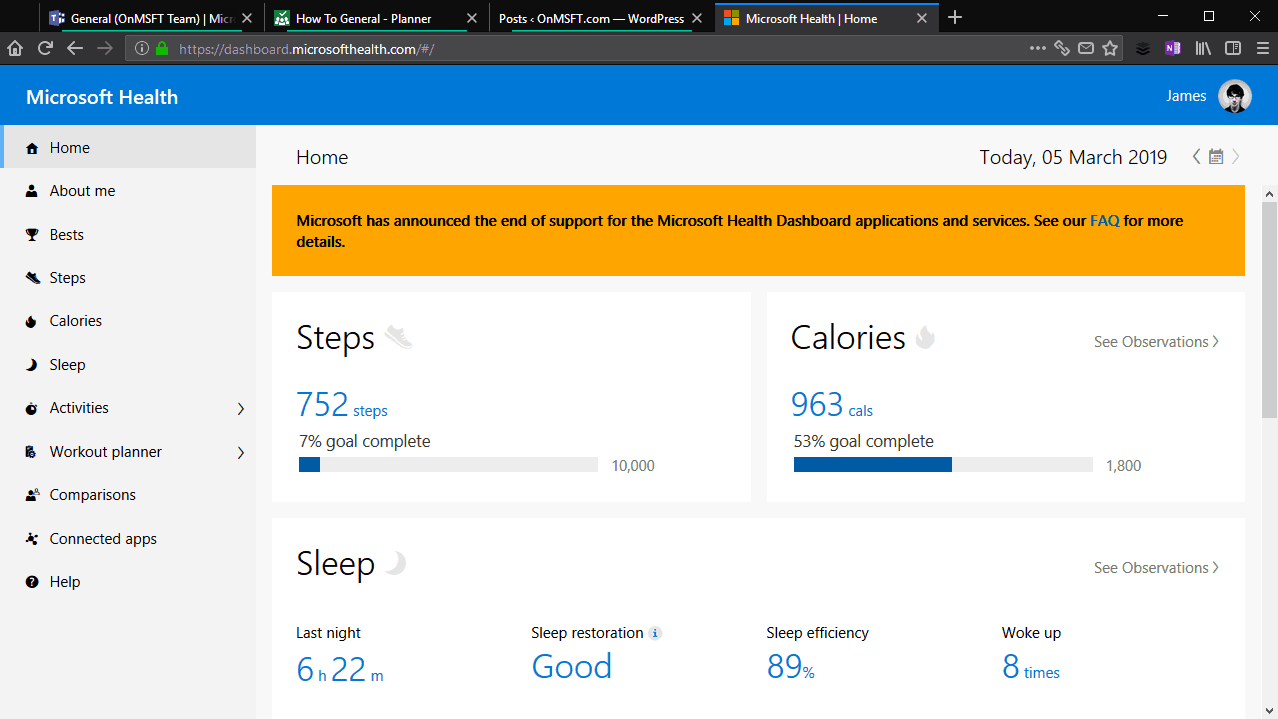
  • Some Realtek SD card readers are not functioning properly. 
  • In Windows Sandbox, if you try to navigate to the Narrator settings, Settings app crashes.
  • Mouse pointer color might be incorrectly switched to white after signing out and signing back in.
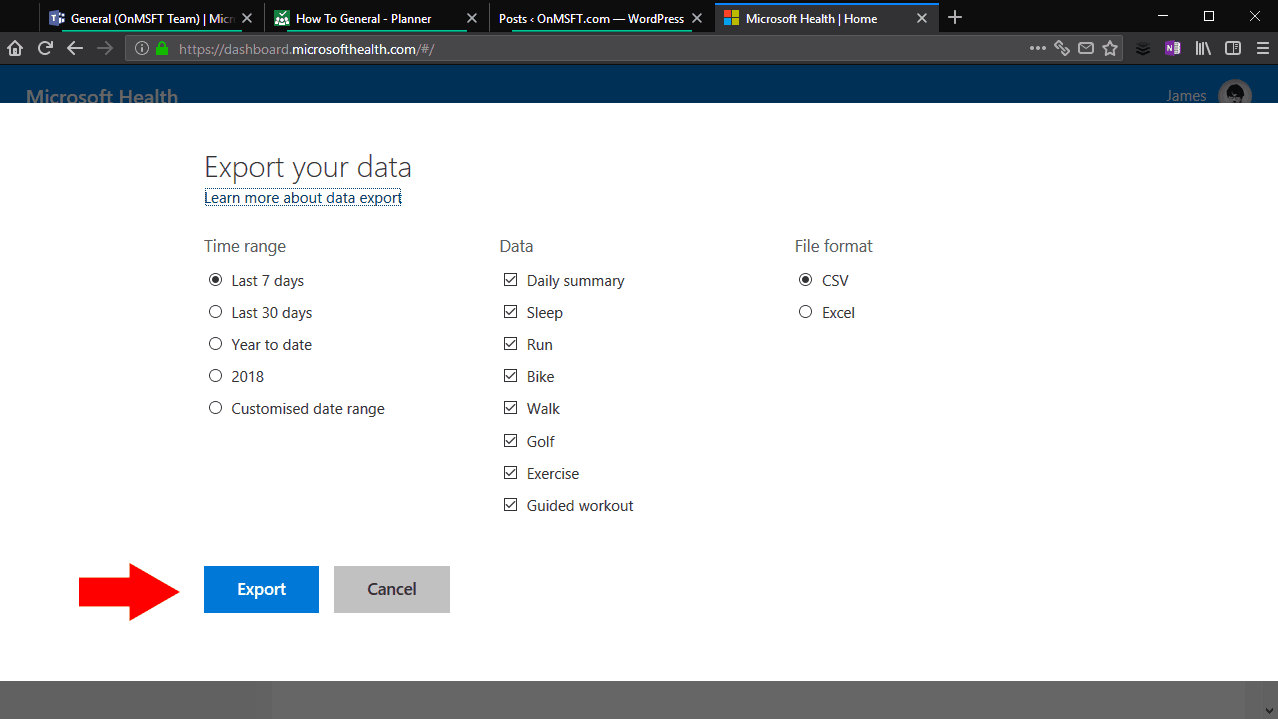
  • Creative X-Fi sound cards are not functioning properly. 

How has your Windows 10 build 18845 experience been so far?  Have you encountered other issues apart from the ones mentioned above?

Microsoft to sunset its Band and Health Dashboard apps in May, some customers can get refunds

Windows 10 Mobile isn’t the only product that will finally go out of support this year. If you’ve been using a Microsoft Band or the company’s Health Dashboard service, you may have received an email today explaining that both the Microsoft Band mobile apps and the Health dashboard web app will be retired on May 31.

For those unfamiliar, the Microsoft Band apps and the online Health dashboard could actually be used without having a Microsoft Band device, which have been discontinued in October 2016. If you have synced any data with the Microsoft Health Dashboard service, you’ll be able to export it on the site until May 31. If you still use your Microsoft Band device, you’ll be able to continue to do so with limited functionality after May 31, though Microsoft notes that it will be impossible to set it up again if you reset it after that date.

That’s quite surprising, but Microsoft is actually offering refunds to Microsoft Band owners that still have a device under warranty, or who used it between 12/1/2018 and 3/1/2019. If you’re eligible, you will be able to get $79.99 for your Band 1 or $175 for your Band 2, which is actually quite a lot for discontinued devices. “All eligible users will receive an email with refund instructions,” the company explained in a FAQ.

With no new hardware in the pipeline, it’s not surprising to see Microsoft shut down these services after some time. Yesterday, it’s the Microsoft Wallet app for Windows Phone that has been discontinued, and we doubt many users noticed.