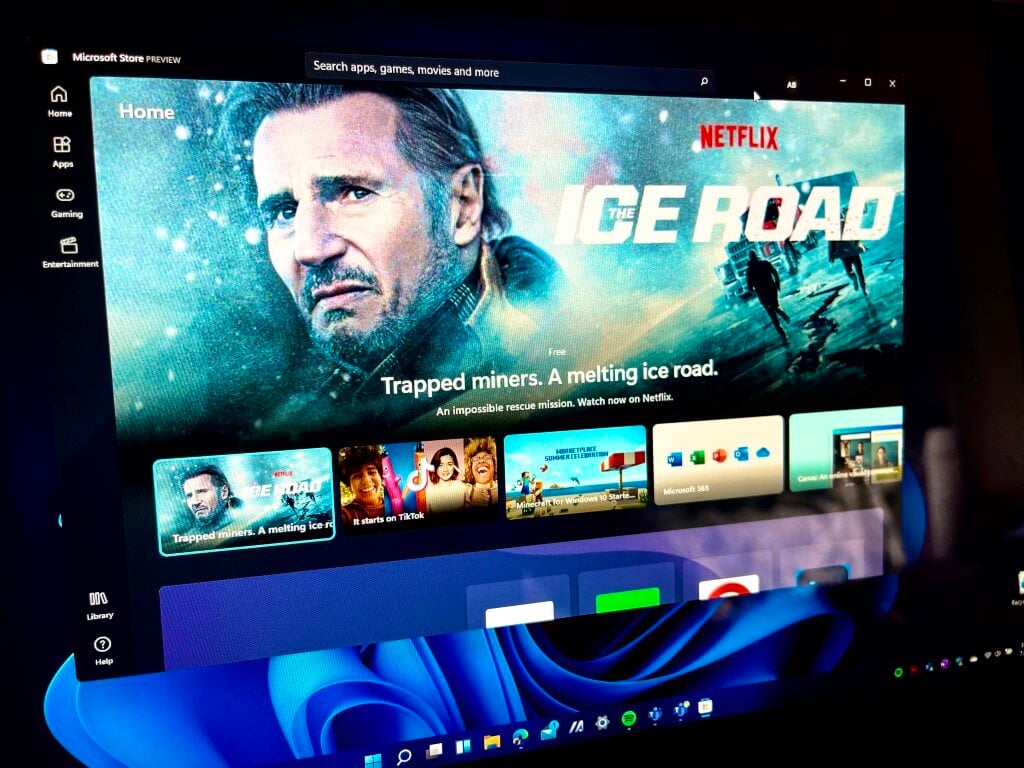
At Microsoft Inspire 2022, Microsoft is introducing the Microsoft Digital Contact Center Platform. The collaborative center solution brings together the best of Microsoft’s digital tools and Microsoft 365 to help power customer care.
A lot of the Microsoft Digital Contact Center Platform is dependent on Microsoft Dynamics 365, Microsoft Teams, Microsoft Power Platform, and Nuance (which Microsoft acquired back in April of 2021.) According to Microsoft’s Charles Lamanna, who is the corporate vice president of business applications and platforms, this platform is a “great yet flexible solution for contact centers.” Here’s what The new Microsoft Digital Contact Center Platform can do.
Enable omnichannel engagement and intelligent self-service.
Personalize and protect customer interactions
Improve agent productivity and modernize case mangement
Increase customer acquistion and revenue
Drive infastructure simplicitiy, flexibility, and innovation
Nuance is playing a huge role in the Microsoft Digital Contact Center Platform. Microsoft says that it gives customers and agents tools to resolve issues faster with more personalized service. Microsoft’s AI also is huge, since it can provide analytics to anticipate customer requests. You can learn more about the Microsoft Digital Contact Center over on Microsoft’s website.
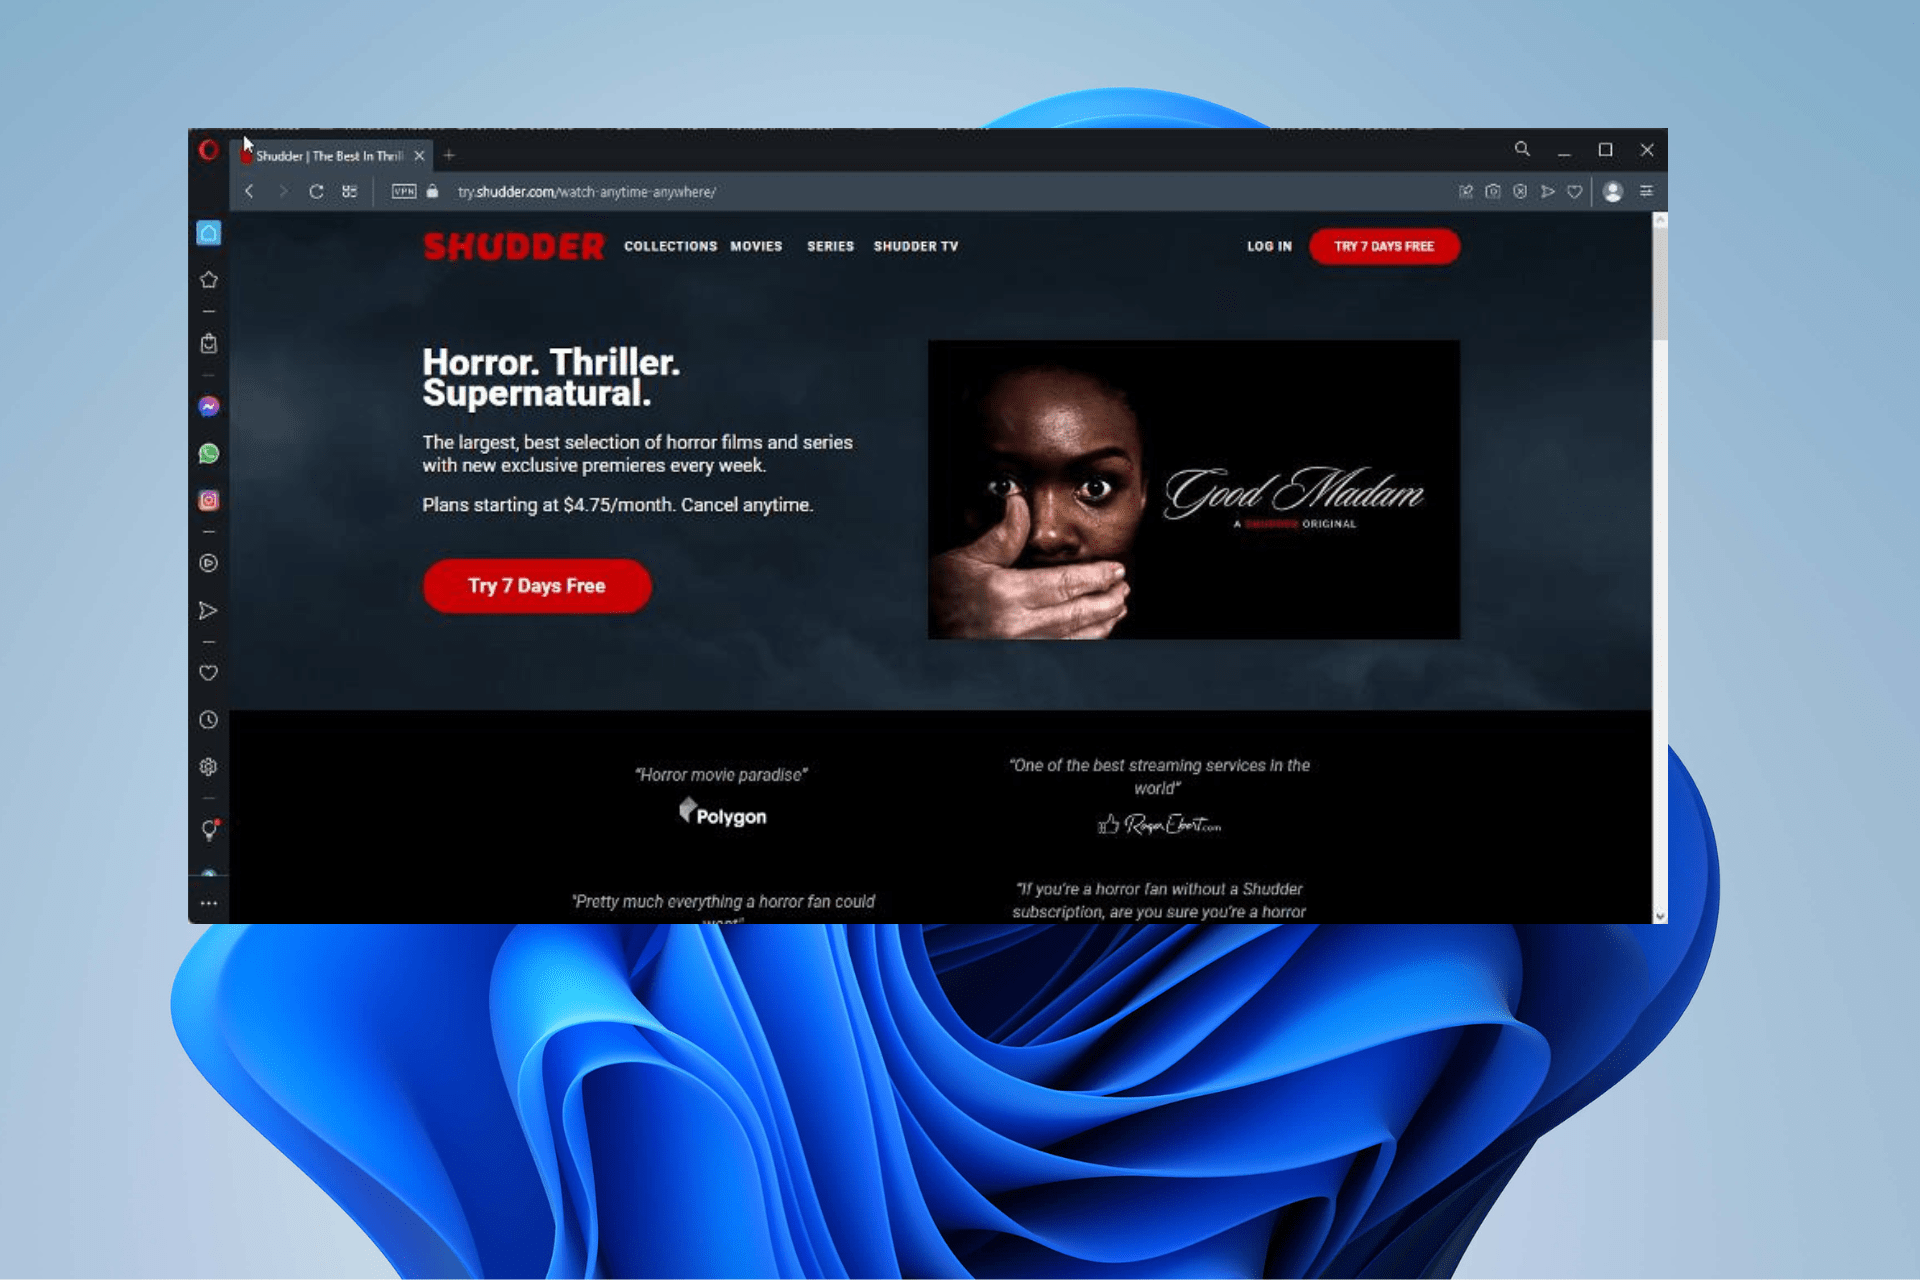
Jiotv is one of the leading video streaming services that offers you a wide range of entertainment content. If you are a fan of movie streaming apps, you will enjoy the variety at your disposal.
The platform has live TV channels, movies, sports, and other entertainment programs. If you are looking for an alternative to cable TV, Jiotv is the best option.
The user interface provides an excellent viewing experience for users who want to watch high-quality content on their devices without any hassles or problems while using the app.
Is JioTV available on a web browser?
Yes, JioTV is available on a web browser. It can be accessed through your PC, laptop, or tablet browser. You can watch it on the official website of JioTV. You can also watch its counterpart Jio Cinema on a browser, especially with loading issues like error 7050 or a streaming error 1.
If you are an Android user, you can get the app from the Google Play Store, while iOS users can access the app on the Apple Store.
Can I run JioTV on Android TV?
Well, you can run the JioTV app on your Android TV. The good thing is that the app is available on Google Play Store. So, you can easily download and install it on your device.
If your TV does not support the Google Play Store or Apple Store, you will have to download the APK file and install it manually.
Opera One is one of the best browsers available in the market today. It’s an ad-free browser that offers many features such as ad blocking, and a built-in VPN service.
The built-in VPN can be used to protect your privacy while you’re browsing on public Wi-Fi networks or while accessing websites that are blocked in your country.
You can also use Opera One to access geo-restricted content and streaming sites without having to install any additional extensions or plugins.
This browser also brings you battery saver mode which extends your browsing time. Also, the workspaces, tab islands, and the built-in AI will greatly improve your experience.
Additional features:
Lightweight browser that doesn’t consume much RAM or CPU power
It has an anti-malware feature
Opera One offers you private browsing
Built-in crypto wallet and anti-mining feature
Modular AI-ready design, for current and future AI integration
Opera One
Stream JioTV content without buffering using Opera One’s performance-oriented features!
Google Chrome is the most popular browser in the world, and it’s available on both iOS and Android. It has a huge number of extensions, including some specifically designed for JioTV.
For example, you can use Google Chrome to watch JioTV channels without having to install any third-party apps or plugins.
Mozilla Firefox is one of the best browsers for JioTV. It has a clean interface and user-friendly design. The browser also has great security features, allowing you to surf safely online.
Firefox also has a built-in password manager that allows you to save your passwords and log into websites without having to remember them all yourself.
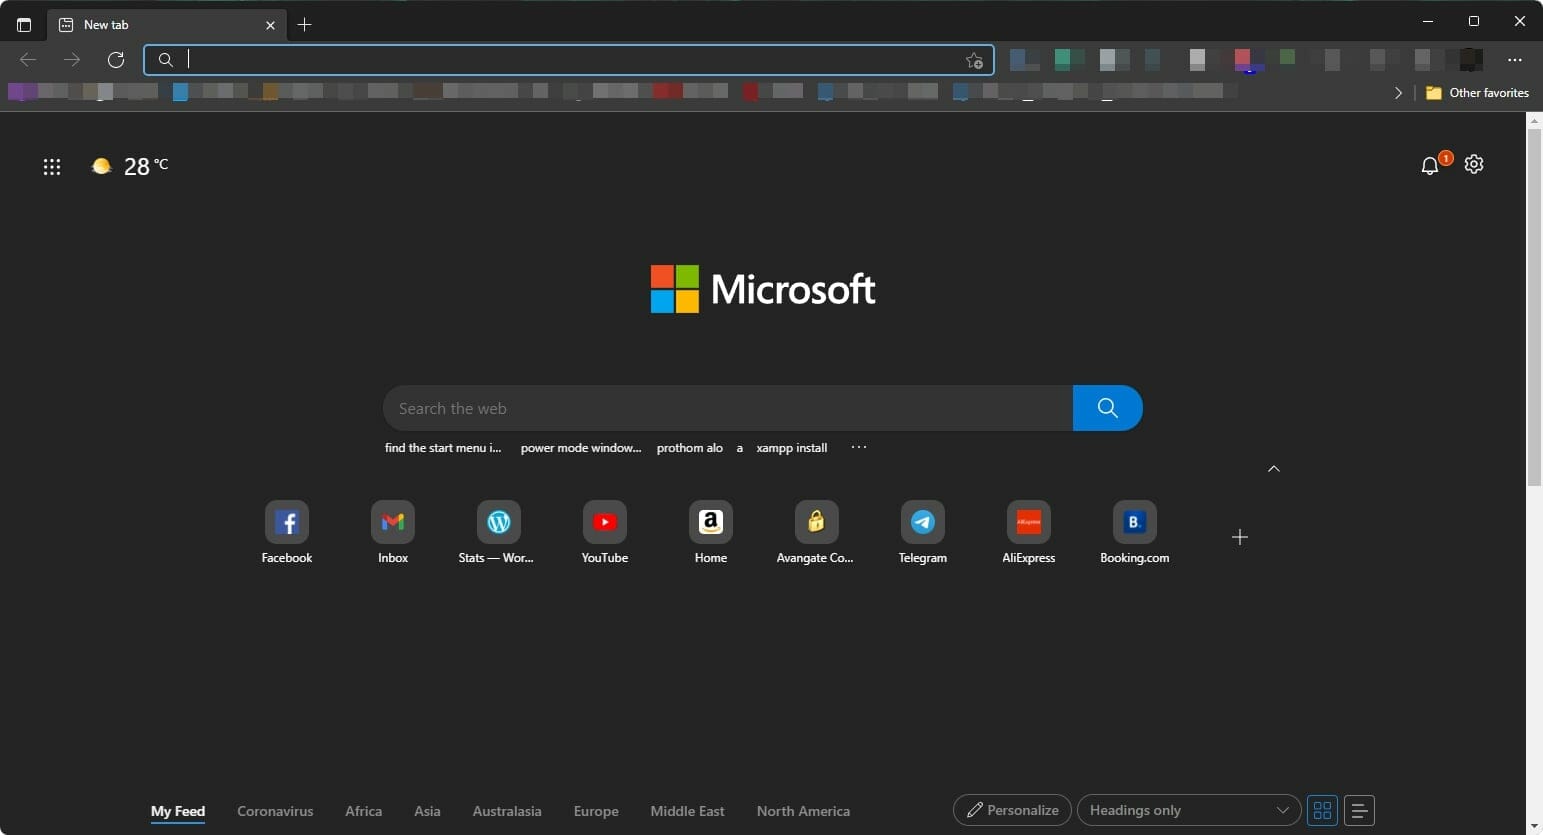
Microsoft Edge has a built-in adblocker, preventing ads from appearing when you browse online. This helps users save bandwidth and gives them an uninterrupted online browsing experience.
Security is always important when browsing the internet, as you never know what kind of malware threats might be lurking around every corner. You don’t have to worry about such threats with the Microsoft Edge browser.
Additional features:
High performance
Security
Password manager to fill in passwords automatically
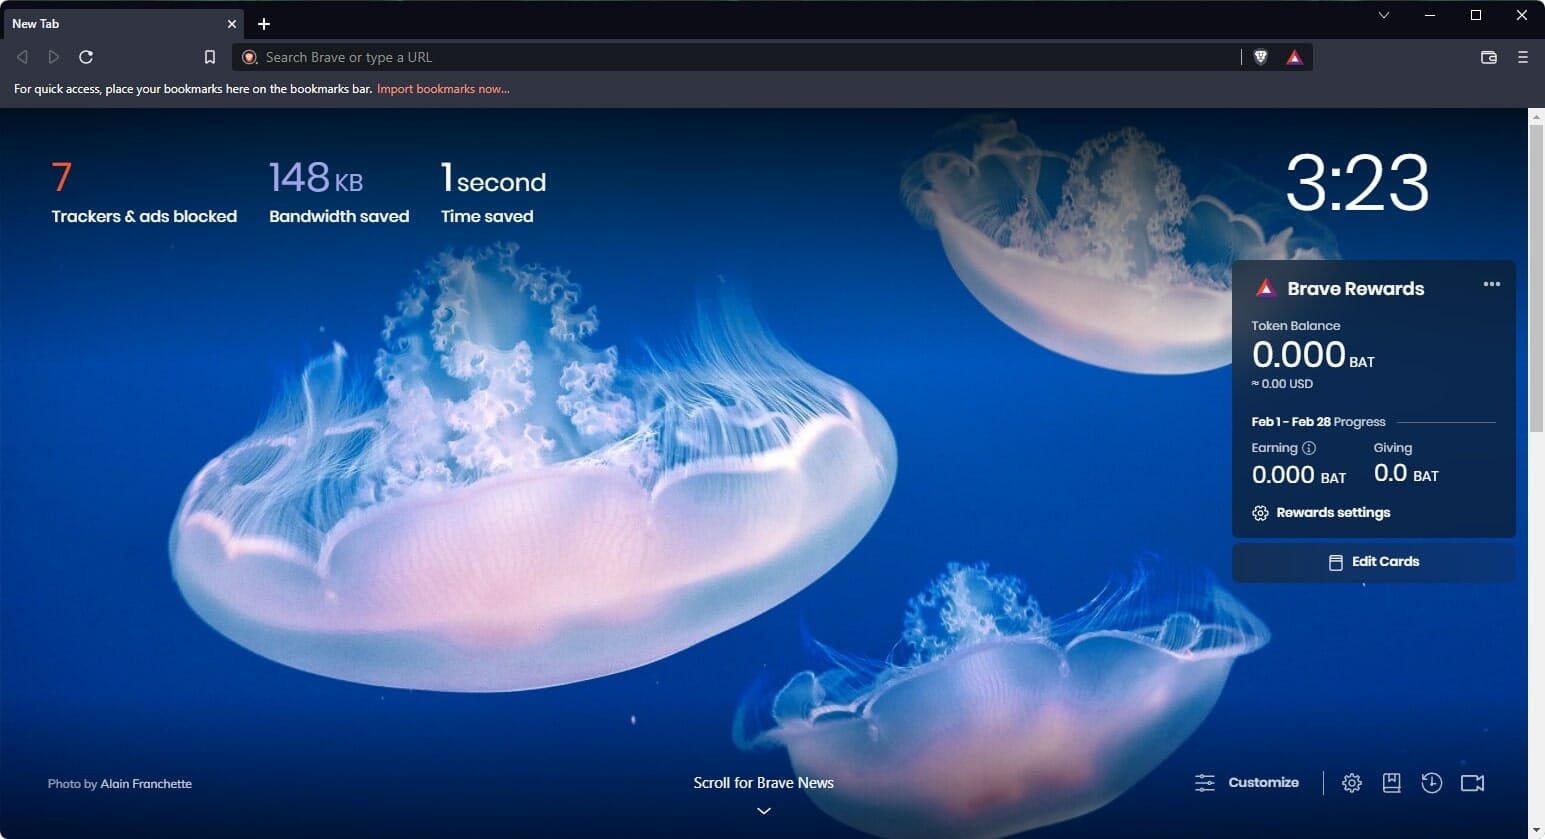
Brave is a browser that blocks ads and trackers by default. This means that it is ideal for JioTV users looking to surf the internet more securely and privately. The browser also gives you control over the data you share with websites, making it the best JioTV browser.
Another key feature that makes Brave ideal is that it uses less bandwidth than other browsers because of its advanced compression technology, which compresses images and text before sending them over the Internet.
Additional features:
Ad blocking
Speed boost
Sync feature so you can access your bookmarks from any device
There are a lot of options for watching TV from your computer. The simplest option is to use a streaming service like Netflix or Hulu, which offers a wide selection of movies and TV shows you can watch online.
Streaming TV services allow you to watch live and on-demand television on your computer or mobile device. These services require a subscription fee, but you’ll typically get a lot more content.
Another way is to download Kodi or Plex. These applications allow you to add channels to your computer, which gives you access to live and on-demand programming. Apart from Jiotv, we also have excellent recommendations on the best browsers to watch Showmax, so be sure to check out our article on the same.
Should you have any additional thoughts on this topic, let us know in the comment section.
Instagram is one of the most popular social media platforms out there. But, like any other app, it has its share of problems. One such issue is that Instagram will stop working on Firefox.
This can be a lot of trouble for you as it means you won’t be able to enjoy your favorite social media platform in your browser.
Aside from not working in Firefox, there are a plethora of problems associated with the application. Sometimes, Instagram cannot play videos, and other times, you can’t log in to Instagram but refer to our article for a workaround.
Can I use Instagram on Firefox?
You can use Instagram on Firefox, but some features may not be available. If you’re using a desktop computer, you can login to Instagram on a browser window.
However, if you want to take advantage of all the features in the app, it’s best to download it onto your phone or tablet.
Why isn’t my Instagram working in Firefox?
Bugs in Firefox – Sometimes, Instagram is not working on a browser because of a known bug in Firefox that causes this problem. You can try to open Instagram in another browser to see if it works.
You’re using a proxy – If you are using a proxy server or VPN on your device, Instagram may not work properly. To fix this issue, you need to change your proxy settings or remove the proxy from your browser.
Outdated browser – Some older versions of Firefox have trouble running newer websites like Instagram, so updating your browser might solve this issue for you.
Firewall settings – Your antivirus software or security software might be blocking access to Instagram. If this is the case, try disabling it temporarily to see if it fixes the problem.
Check your internet connection – If you are having trouble accessing Instagram, then there is a good chance that your internet connection is down or not working correctly.
If any of the above reasons are the cause for Instagram not working on Firefox, proceed to try and resolve the issue with our recommended solutions.
What can I do if Instagram doesn’t work in Firefox?
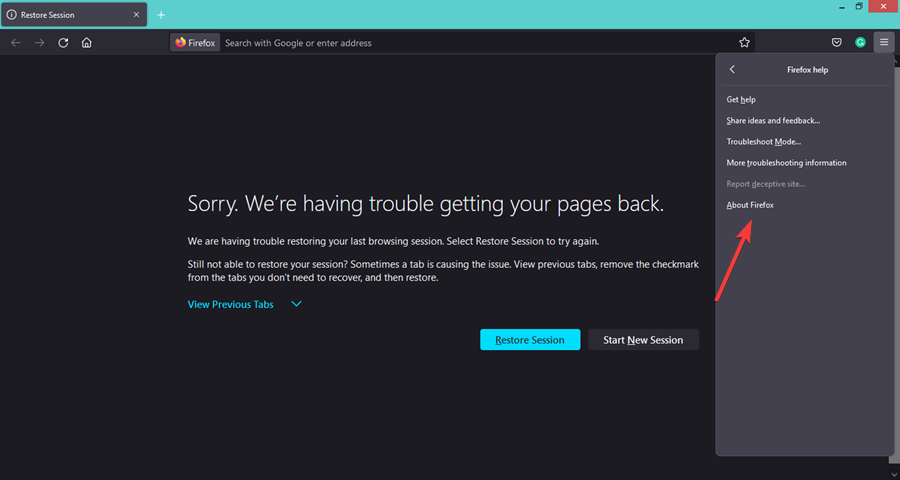
1. Update Firefox
Launch your Firefox browser and click on the three horizontal ellipses in the top right corner.
Select Help.
Click on About Firefox.
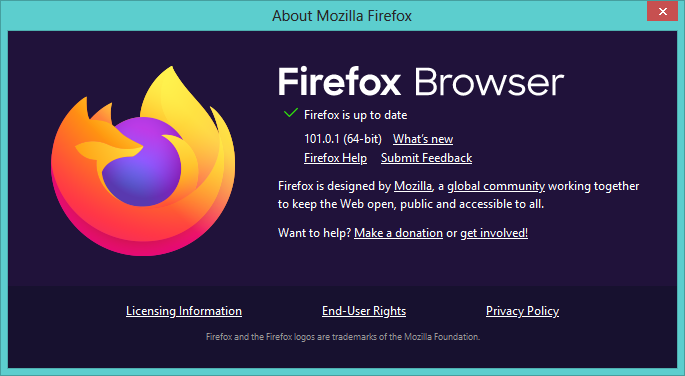
If your browser is up-to-date, you will get the following dialog box.
2. Check your proxy settings
A Proxy is a server that acts as an intermediary between your computer and the internet. However, since proxy servers are not always trustworthy, there are chances that some of them may have been blocked by Instagram.
If you’re using a proxy or VPN, temporarily disable it and see if the issue goes away. If it does, you’ll need to find out why the proxy is interfering with Instagram.
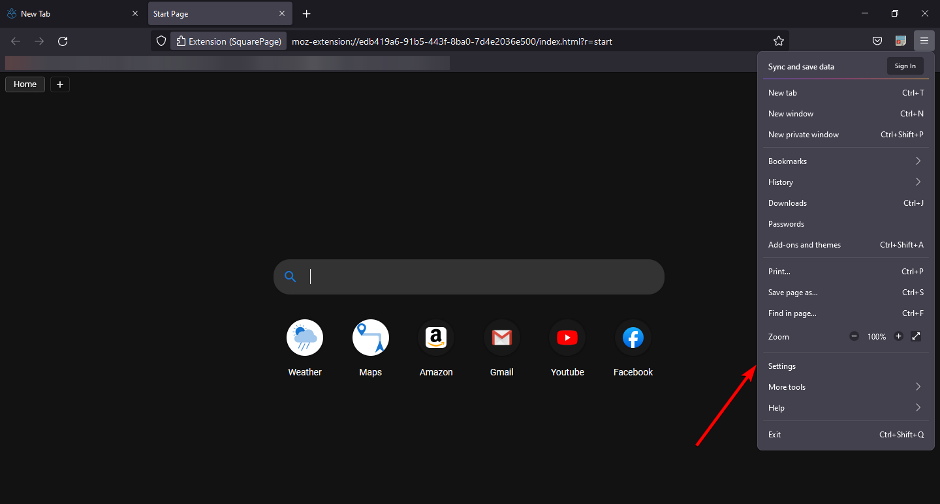
Launch your Firefox browser and click on the three horizontal ellipses in the top right corner.
Select Settings.
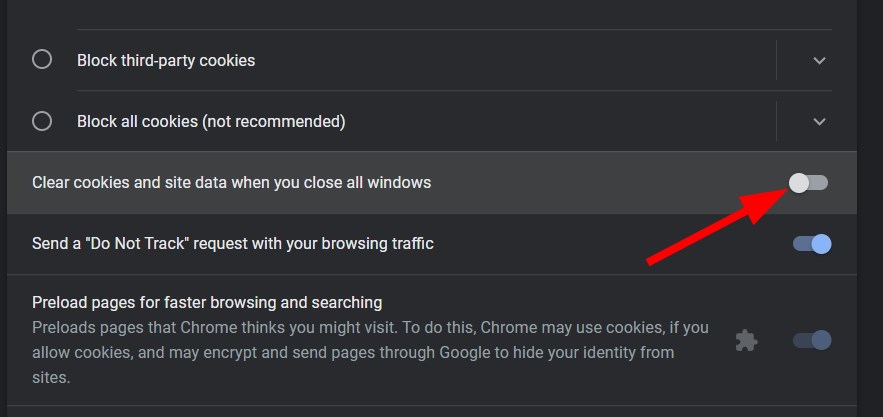
Navigate to Privacy & Security, then under Cookies and Site Data, select Clear Data.
4. Disable Windows Firewall
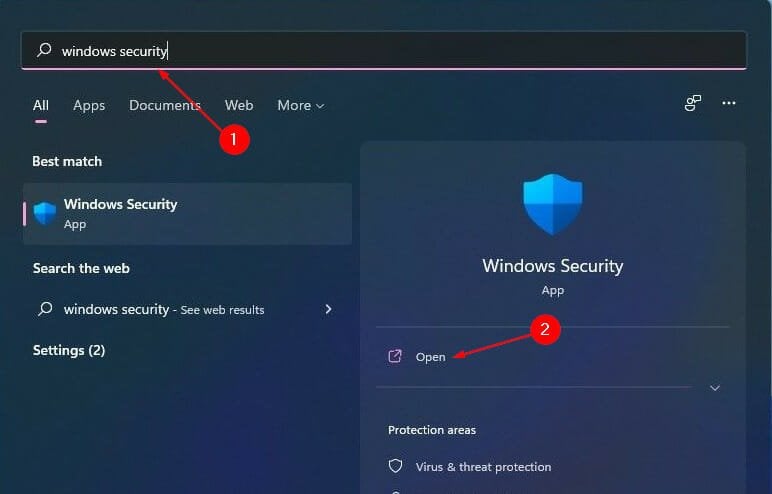
Hit the Windows button, type Windows Security in the search bar, and click Open.
Click on Firewall & network protection, then select Public network.
Locate Microsoft Defender Firewall and toggle the off button.
5. Scan for viruses
Press the Windows key, search Windows Security and click Open.
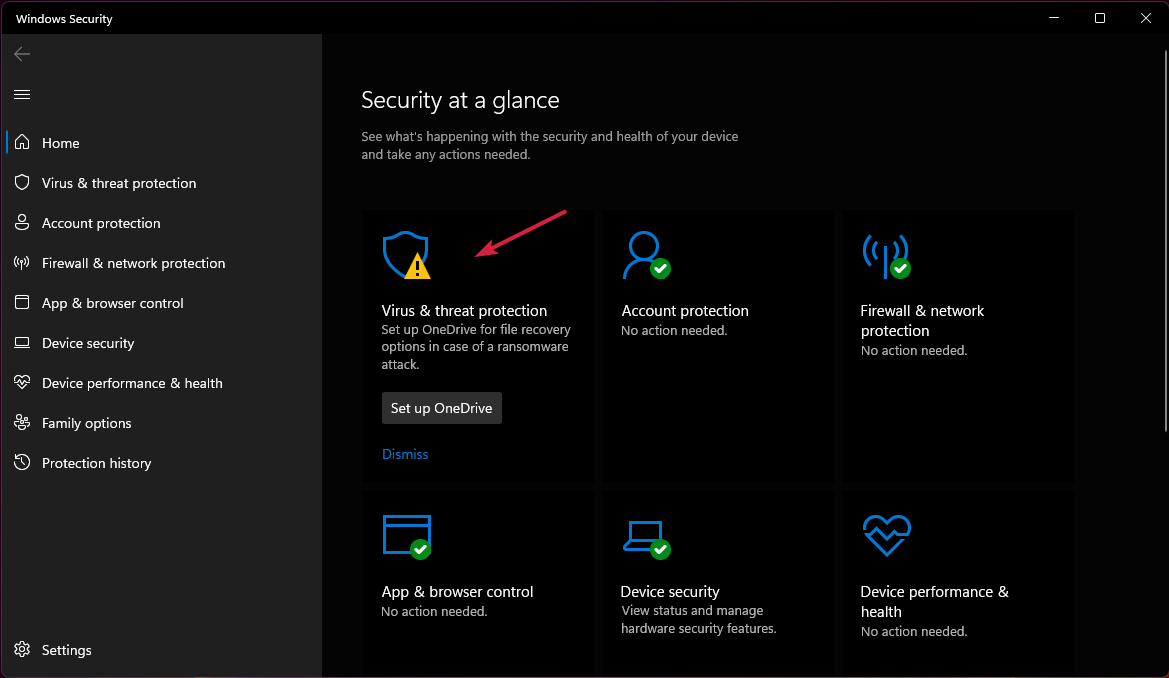
Select Virus & threat protection.
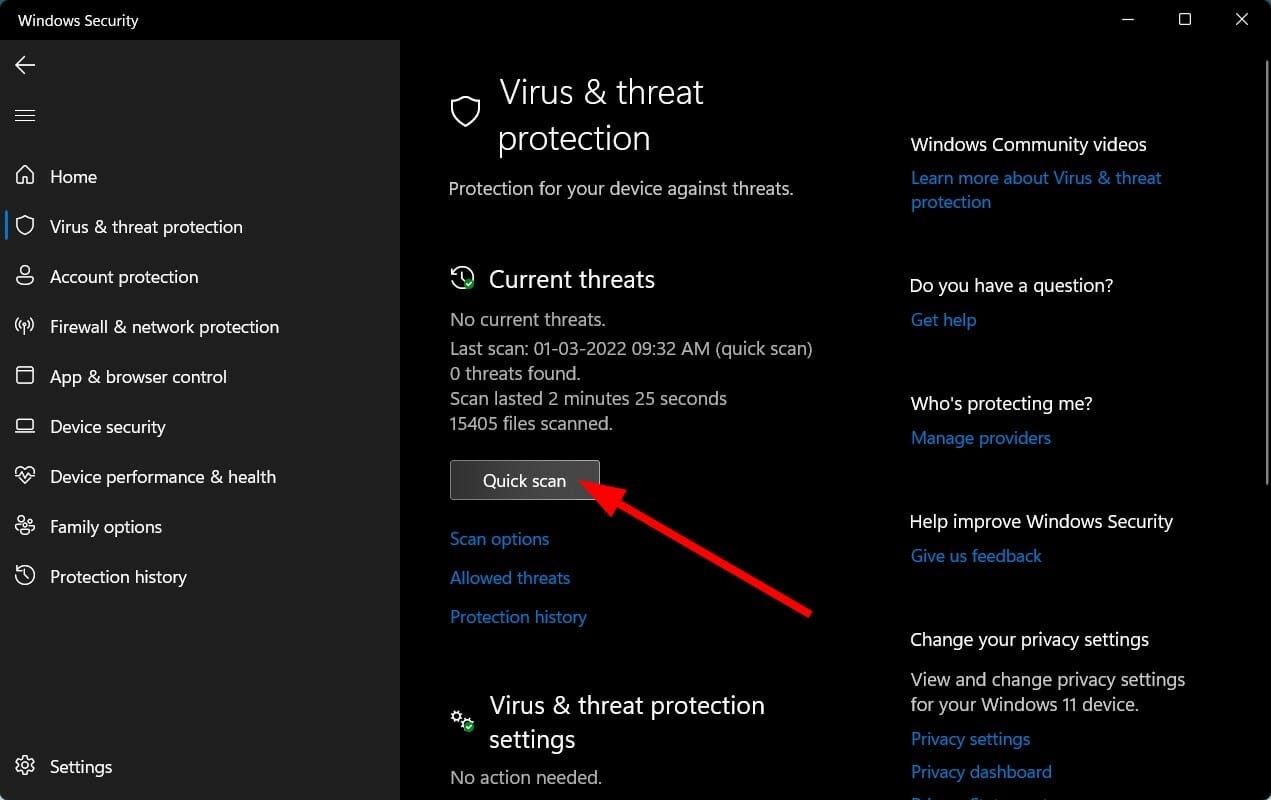
Next, press Quick scan under Current threats.
Wait for the process to finish and restart your system.
How do I fix compatibility issues in Firefox?
Firefox is a great browser that’s packed with excellent features, but you may find that it doesn’t work as expected with some of your favorite sites. Compatibility issues can occur when you install or uninstall software that affects the way your computer works.
If you suspect a program may have caused compatibility issues in Firefox, you can try uninstalling the application and restarting your computer.
Add-ons can also cause problems with websites in Firefox if they have been disabled or removed. For example, if you recently updated Firefox and lost functionality on a site, it could be due to an outdated add-on. Check and ensure your add-ons are up-to-date and reenable them if necessary.
In addition, always ensure that you are running the latest version of your browser as it is the most stable and has all the security features.
You may also experience the same issue with Instagram not working in Chrome, but we have adequately covered various ways you can resolve the problem.
Vivaldi is a freeware web browser that supports multiple platforms and is based on Chromium. However, several users reported that Vivaldi is slow on their devices.
For instance, users report a delay when opening or switching to another tab.
Thankfully, there are a few workarounds that you can perform to speed up the browser’s performance. But, before we head to that, let’s first find out why Vivaldi is running slow.
Why is Vivaldi running so slow?
Like any other browser, a few issues could lead to Vivaldi lagging on your system. The most common is having multiple tabs open at once. Though you can have several of them open at a given point, it would slow Vivaldi’s performance.
Then comes the extensions. These are too known to affect the functioning of the browser. Here, it’s not necessarily the quantity but also the quality that is critical. A single problematic or conflicting extension can considerably slow down Vivaldi.
Besides, certain browser settings, having a custom theme, or running an outdated version of Vivaldi can cause it to slow down. Sometimes, Vivaldi might be slow after an update, in which case you will have to wait for the next version to be released.
Considering these aspects, we recommend going with Opera One, but you can also try the other two. Though Opera One does offer a built-in VPN and ad blocker, the latter is known to fix the slow loading of pages, a common problem with Vivaldi.
Quick Tip: Use a lighter, more stable browser. We recommend Opera One because it’s up-to-date and uses very few system resources.
The browser removes the need to load unnecessary ads with its integrated, free ad blocker. It also has a battery-saving mode that can also contribute to better overall performance.
Opera One
If you’re looking for a fast and customizable browser with minimum impact on your OS, Opera One is the answer.
If you prefer to keep using Vivaldi, then start by tweaking some settings.
One reason for the browser’s slow pace can be an opened settings page (vivaldi://settings/all/). Normally, your first stop is in the settings tab, as you might want to make some changes to the browser before using it.
Once you finish customizing the browser, make sure to close the settings page. Otherwise, Vivaldi will delay other browser activities. Once done, check if Vivaldi’s slow startup problem is fixed. If not, head to the next method.
2. Modify or disable browser functions
Paste the following path in the address bar, and hit Enter:vivaldi://settings/startup/
Set the Startup with setting to Specific pages without assigning a URL to the field.
Now, enable the Lazy Load Restored Tabs option if you previously configured the browser to load the last session upon startup.
Now, paste the following path and hit Enter:vivaldi://settings/appearance/
Uncheck the Use Animation and Use Buttons in Range Controls boxes.
Then, paste the following path and hit Enter:vivaldi://settings/tabs/
Now, uncheck the following options under the Tab Options, Show Popup Thumbnails, Show Tab Thumbnails, Detect Page Title Notifications, and Use Unread Indicators.
Last, paste the following path and hit Enter:vivaldi://settings/mouse/
Uncheck the Allow Gestures and Allow Rocker Gestures boxes.
If you cannot live without all of the features of the browser, do not perform the mentioned changes.
However, you may choose to do away with some to increase the speed of Vivaldi. Extensions can also slow down your browser, so you may want to disable some of them, as mentioned.
Does Vivaldi use a lot of RAM?
Vivaldi is a lightweight browser and consumes lower resources compared to Chrome or Firefox. This is one of the major reasons why most users go for it, in addition to the several beneficial features offered by Vivaldi.
But, there have been cases where users reported encountering high RAM or high CPU usage with Vivaldi, but that’s generally due to an issue. In case you are unable to fix things, there is always the option to switch to a more reliable browser like Opera One.
That’s all about the issue and how you can speed up Vivaldi on your device. By the time you reach this part, the problem should be long gone. Also, find out what to do if Vivaldi is not loading pages.
Do you know any other methods to speed up Vivaldi? Share them with us in the comments!
Obsidian Entertainment’s survival game Grounded is headed for television. It is the latest game-to-television adaptation – joining the likes of Halo on Paramount+ and Arcane on Netflix – in what is increasingly becoming a entertainment trend.
Published by Xbox Game Studios, Grounded the game is set for a September 2022 full release, though the game is currently playable in preview form on Xbox Game Pass. Taking inspiration from movies like A Bug’s Life and Honey, I Shrunk The Kids, Grounded follows the adventures of four teenage friends who have been shrunk to the size of insects. Together they must survive the perils of the backyard and uncover a conspiracy that threatens the entire town. So far the game’s early access run has attracted more than 10 million players.
EXCLUSIVE: ‘Grounded’ is the latest videogame that is being adapted as a TV series. The Xbox videogame, which was inspired by ‘A Bug’s Life’ and ‘Honey I Shrunk The Kids,’ is being adapted by ‘Star Wars: Clone Wars’ writer Brent Friedman https://t.co/ANw7xaM2Mr
Xbox will be working with Waterproof Studios/SC Productions, Bardel Entertainment, and Kinetic Media to bring the Grounded show to fruition. Screenwriter Brent Friedman, who is also working on a TV adaptation of Earthworm Jim, has been tapped to direct the story of Grounded, which will loosely follow that of the game.
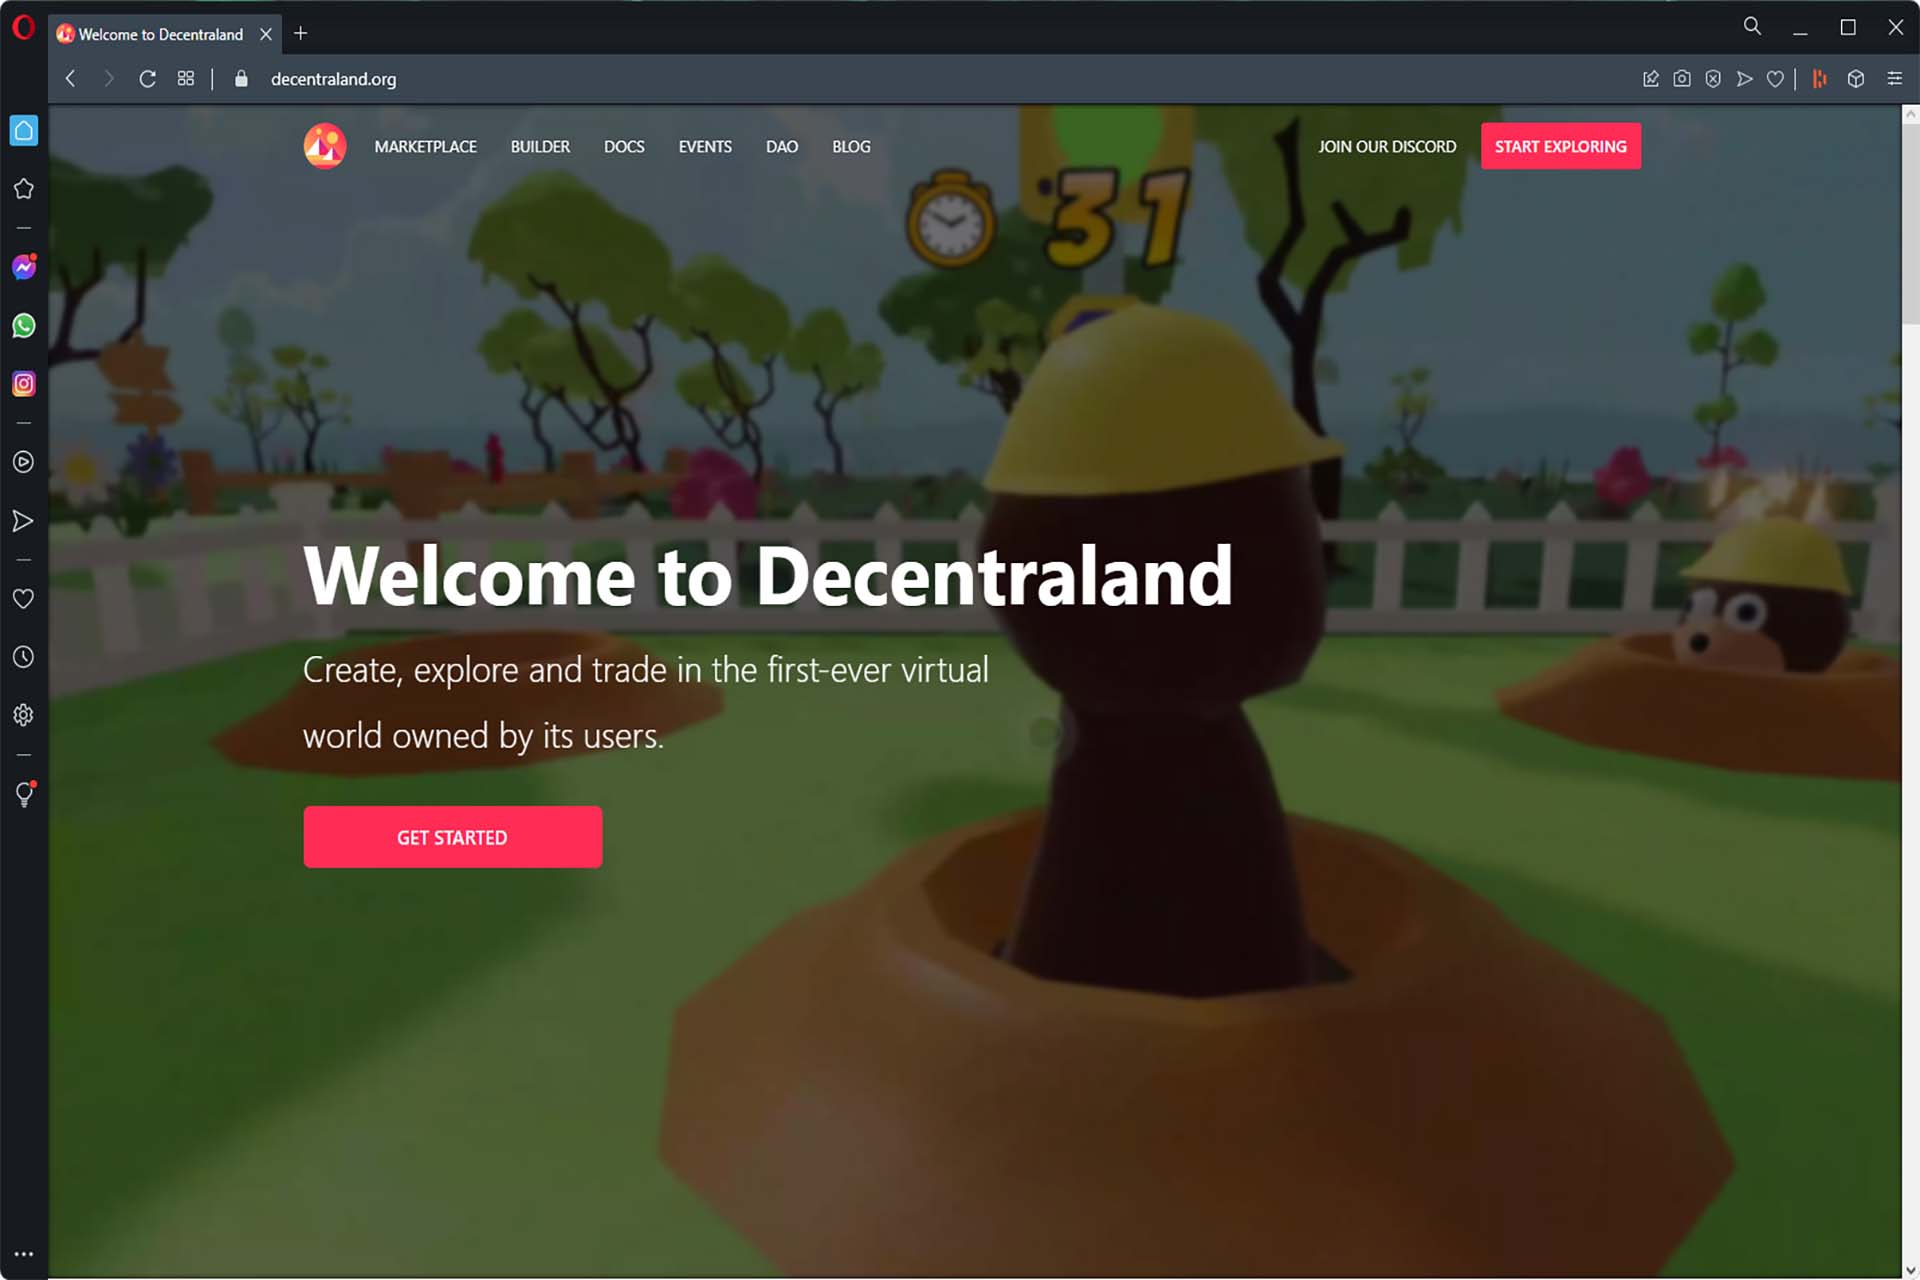
Are you looking for the best browser for Decentraland? This article will help you by providing you with a list of web browsers where you can play this game smoothly.
The Virtual World game Decentraland has been getting a lot of attention in recent years. Being a browser-based and free-to-play game, it has gained a lot of popularity.
Particularly, from any OS with a desktop-class browser, Decentraland is accessible. However, People also find it difficult to run this metaverse as some browsers are not entirely compatible with it.
What do I need to run Decentraland?
If you want to run Decentraland, you will need a desktop computer with a compatible web browser. For a better experience, Windows PC is best as Decentraland has a dedicated stand-alone version for Windows.
If you want to play this game, your computer must have a minimum Core i3-9100 or Athlon 3000G processor with NVIDIA GTX 670 or Radeon RX 550 or Intel UHD 630 graphics. All Apple Silicon Mac devices can run this version without any issue.
The minimum RAM requirement for Mac, Windows, and Linux is 4 GB.
How do I make Decentraland run better?
The first condition to make Decentraland run better is having a computer with recommended capacity. Then, there is scope for optimizations. For the best experience, you can do the following things:
Enabling hardware acceleration in the browser
Disabling unnecessary extensions and add-ons
Not opening additional tabs while playing Decentraland
Closing background apps and services
Applying the best Decentraland settings according to your hardware capacity, like lowering in-game graphics quality
How to choose the perfect browser for Decentraland?
Though you can play Decentraland metaverse on most modern browsers, It still has some requirements. Officially, the authority recommends users to use Chromium or Firefox browsers. However, this is not only the story.
To get the best experience with this virtual world, you should check the following things in a browser.
Is the browser using a fully compatible browser engine or not?
Does the browser support extensions like MetaMask?
Is the browser secured and trusted?
These three things should be considered when you want to choose an ideal browser for Decentraland. Particularly the browser engine is very important. You cannot simply get a smooth experience on any browser engines except Chromium and Firefox.
Yes, You may be able to play it on some other browsers like Safari. But, there may be a performance issue. And you may find that Safari is not working with Decentraland properly. Except for this, there is no Metamask extension on it.
So, You should make sure of the three things mentioned above before choosing a browser for Decentraland.
We have already created a list of best-performing web browsers for Decentraland. You can find the list below.
Which are the best browsers for Decentraland?
Opera GX – The best gaming browser for Decentraland
Opera GX is a very mature and popular web browser with a loyal user base. It is an open-source and game-oriented browser developed by Opera Software and available on all modern desktop platforms, including Windows, Mac, and Linux.
For being chromium-based, it can run Decentraland without any problem. So you can get the best experience with this virtual world game on Opera GX for multiple reasons.
Opera GX has its extension store. But, you can still use Chrome extensions like Metamask, which is necessary to have the best experience with Decentraland.
This browser has a built-in ad-blocker, VPN, and some cool privacy features that make it appealing to most users. Unlike other browsers, you will not have to manually apply the best settings for Decentraland. It is because this gaming browser already has the best things configured for this metaverse.
There are a huge number of Decentraland users who prefer Opera GX over other browsers to run this metaverse.
Opera GX
Choose this browser developed for gaming to collect your NFT or crypto assets on Decentraland.
Google Chrome is not only the most popular web browser, but it is also one of the best browsers for gaming. If you need to run Decentraland, there are not many better Chrome alternatives right now.
By being managed and developed by Google Inc., it has gained the trust of most people. It is a very dependable browser with sync capability across multiple devices.
But, the Chrome web store is the thing that made it even better. There are a lot of extensions that you can use. Decentraland users may need some extensions which are natively available for Chrome.
Else, Chrome has some excellent privacy features and the advantage of being in Google’s ecosystem. As a result, We have considered it as one of the best browsers for Decentraland.
After losing again and again in the browser market, Microsoft finally made the Chromium-based browser the MS Edge. It is right now the third most popular desktop browser. To play Decentraland, Edge has been a perfect choice.
Microsoft Edge has its extension store, but users also can download and install extensions required by Decentraland from the Chrome web store. It has the most benefits that you see on Chrome.
As it is a chromium-based browser, Decentraland is fully compatible with it. If you use Windows, Edge is the default browser right now. Else, It is available for Mac and Linux too.
So, If you want an alternative Decentraland browser to Chrome or Opera, Microsoft Edge should be the best choice.
Mozilla Firefox is another excellent and recommended browser for Decentraland. It is the only non-chromium browser on our list which is fully compatible with this virtual world game.
Firefox is a free and open-source browser managed by Mozilla Foundation. It is compatible with most modern games and web applications.
To give you an excellent experience with Decentraland, Firefox has multiple privacy features and an add-on store. In that store, you can find all necessary add-ons, which are alternatives to the Chrome extensions.
Firefox is the default browser in most Linux distros. However, it is available for Windows and Mac too. As a result, you can run this browser for any purpose on any operating system.
So, For Decentraland, if you do not like to use Chromium-based web browsers, consider using Firefox without worrying much.
Brave – Ideal for Decentraland and similar platforms
Brave is a free and open-source browser that is an excellent alternative to other popular ones. To play Decentraland, Brave is a wise choice.
In the Decentraland community, many users are using Brave exclusively to play this Virtual World game. Brave lets you use Chrome extensions without any problem. As a result, any required extensions for Decentraland are easily usable in this browser.
Except for these things, Brave is a very privacy-focused browser with a built-in ad-blocker that doesn’t act aggressively.
But, Another thing that makes Brave special is its reward system. This is the first popular browser that lets users earn money by sharing its profits. It is also the first browser with a built-in crypto wallet.
For all these features, this browser has been a perfect choice for users who like cryptocurrencies, NFTs, or virtual world games like Decentraland.
Sometimes, you may see that your web browser is not compatible with Decentraland. In the same or similar cases, you may see the following message:
Your browser is not among the recommended choices for an optimal experience in Decentraland. We suggest you use one based on Chromium or Firefox.
That message clearly states that you must use any of the Chromium or Firefox-based browsers.
In our list of best web browsers for Decentraland, Firefox is the only non-chromium browser. It has a reason.
Chromium is the most drastic and compatible browser engine for any type of web game and application. Else, Google has its extension stores where countless items are available. These are also accessible from any Chromium-based web browsers if configured correctly.
In our test, this type of browser also performs extremely well with Decentraland while maintaining minimum CPU, GPU, and RAM usage.
Not only Decentraland, but Chromium can also handle any browser-based game very well. As a result, it is the preferred browser engine for everyone. Thus, we have listed Opera GX as the best browser to explore Decentraland.
If you are new to the Decentraland or want to get the best experience, any of the browsers mentioned above are enough.
If you have already been exploring this virtual world, you can let us know in the comment box which Decentraland browser you prefer among the ones mentioned in the article.
BBC iPlayer is a pretty cool internet streaming, TV and radio, and catchup service from BBC, which is available for users of mobile phones, tablets, PCs, and smart TVs.
However, the service, which is only delivered to viewers based in the UK, usually has ads (what most people don’t like), but just for non-UK users, so if you’re in the UK, you’re safe from the annoyances.
However, not everyone can reside in the UK simultaneously to stream and enjoy the content, as some may be traveling. In contrast, others reside in countries where geo-restrictions on content apply. This is why they get VPNs to access such content.
Thankfully, the best VPNs for BBC iPlayer know how BBC bans their IP addresses and other streaming services. Most providers usually replace the blocked IP with a new one, but then it becomes a huge game between BBC iPlayer and the VPN vendors.
So what do you do when BBC iPlayerVPN is not working?
One of the most straightforward troubleshooting methods is restarting your device, but if this doesn’t help and you don’t know what else to do, try the solutions below.
What can I do if BBC iPlayer VPN is not working?
1. Preliminary checks
Sometimes BBC iPlayerVPN is not working because your VPN account may have expired, so you cannot connect. In this case, check with your VPN’s support team to confirm if your account is still valid or has expired.
It is also good to check third-party app settings like your antivirus or firewall settings, which sometimes block the PPTP and L2TP protocols, especially when your security level has been set higher than the average level.
In this case, disable the third-party apps or security software and try connecting again. If this helps, allow PPTP, L2TP, and IPSec through your antivirus and firewall, and then enable the security software again.
Check your router settings if you’re connected to a Wi-Fi router, and check for pass-through options for PPTP, L2TP, and IPSec under Router Firewall/Security tab and enable them.
If you don’t have these pass-through options, disable the router firewall and try again. If this works, allow PPTP, L2TP, and IPSec through your router firewall, then enable the firewall again.
You also need to ensure, first and foremost, that you’re entering the correct user credentials, which are your username and password for logins. You can confirm these details also with your VPN provider.
2. Change your VPN
Find a VPN that will replace IP addresses as soon as BBC iPlayer blacklists them. Similarly, some time may pass between when the IP address was banned and when the VPN provider changes it, and this can be a few days up to several weeks.
In this case, disconnect and then connect again, and try until you find an IP and servers that work. There are good VPN providers like Private Internet Access and CyberGhost. Remember, it’s vital to choose a reliable VPN solution. Otherwise, you may encounter the BBC iPlayer Error code: 02062.
Private Internet Access
Our top choice regarding VPNs is Private Internet Access. This US-based provider has been in this industry for some time and has maintained an impeccable reputation among privacy-conscious users.
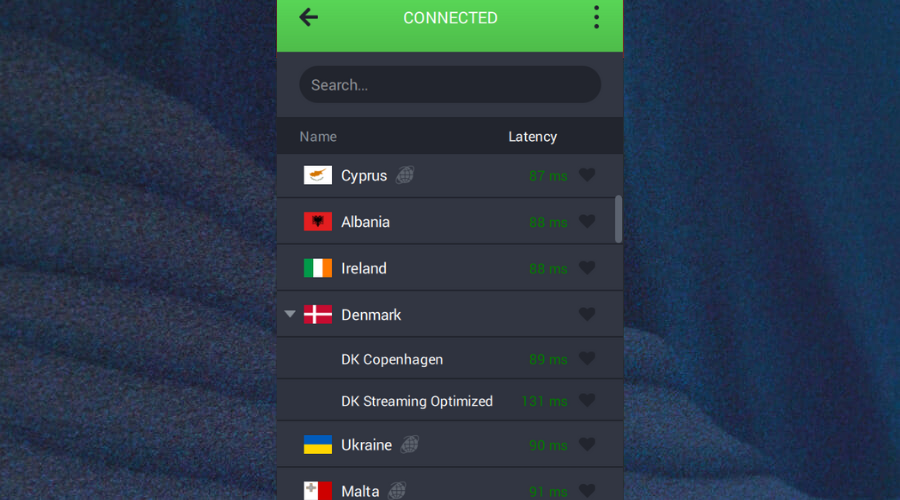
Private Internet Access focuses on privacy and performance and has a vast network of over 3200 servers.
Here are the top reasons we recommend it:
Over 180 servers in the UK in 3 different locations
No-logs policy
OpenVPN and WireGuard support on all servers
Connect 10 devices simultaneously using one account
Private Internet Access
Try this VPN service with multiple UK-based servers that will allow easy access to BBC iPlayer content.
This VPN has 6300 servers in over 90 countries, so you can access BBC iPlayer, whether the services are blocked or not where you reside.
Its Unblock Streaming feature lets you access many popular streaming services, including BBC, without testing servers manually. Kape Technologies also owns them.
By default, it provides features such as the hiding of IP, IP sharing as an additional security layer, and Leak Protection against IPv6 leaks, DNS, and port forwarding leaks.
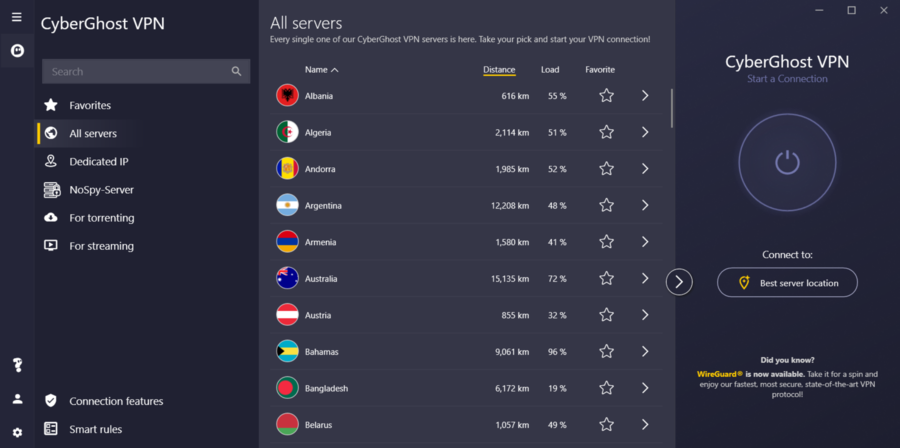
Once you’re successfully connected to the server, CyberGhost will send feedback about the website you’re connected to and want to watch, the current server location, and protection status.
CyberGhost
Watch BBC iPlayer shows with no lag with this great VPN source.
Uninstall the VPN app you’re running, sign in to your VPN account and follow the instructions to set up the VPN. Find the latest version for your device and then connect again, then see if you can access BBC iPlayer.
For Windows 10 users, here’s how to set up a VPN:
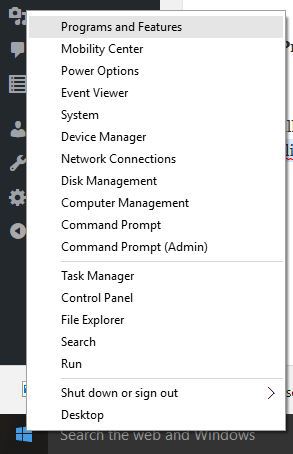
Right-click Start and select Programs and Features
Find your VPN from the list of programs and select Uninstall
In the SetUp Wizard, click You’ll get a notification after a successful uninstall, so click Close to exit the wizard.
If the VPN is still listed as available after uninstalling it, right-click Start and select Run
Type ncpa.cpl and press Enter to open the Network Connections window
Under Network Connections, right-click on the WAN Miniport labeled (your)VPN
Select Delete
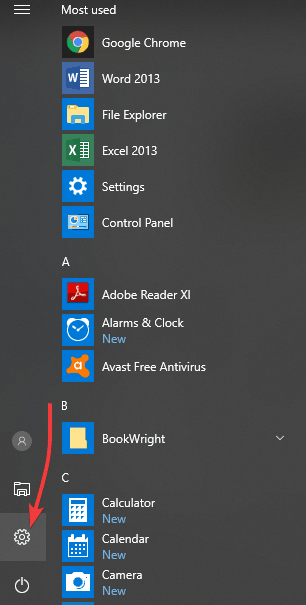
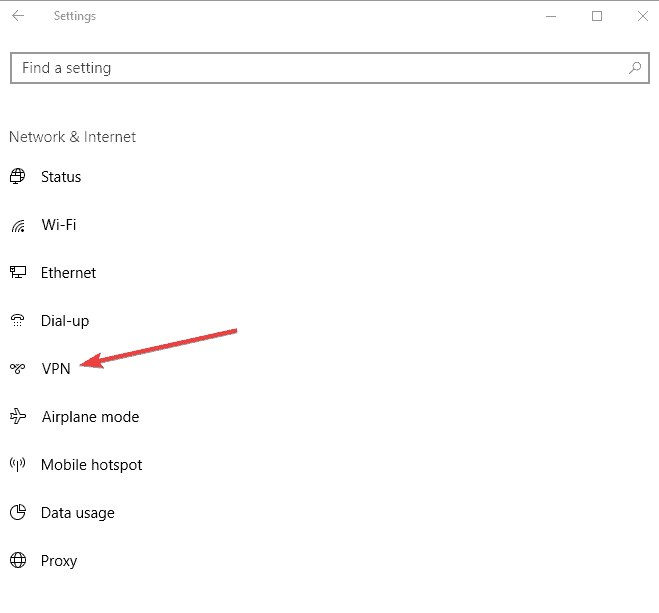
Click Start and select Settings
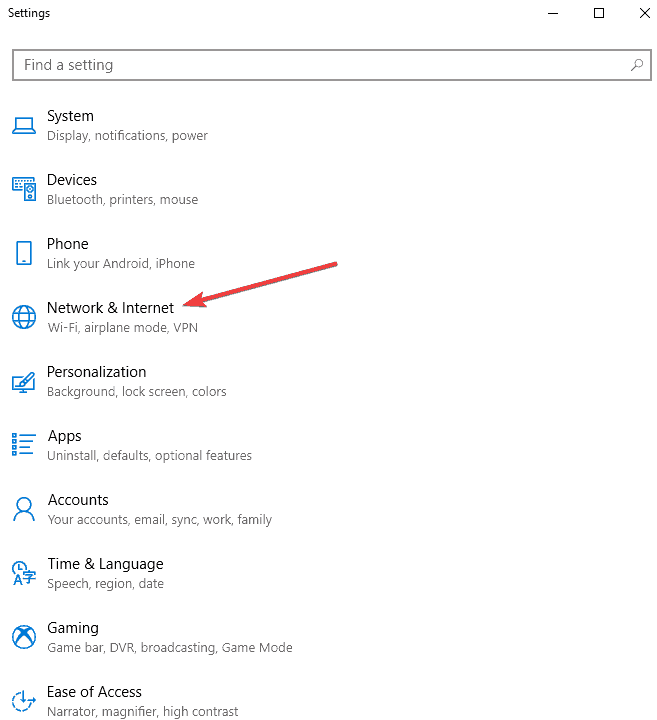
Click Network & Internet
Select VPN
If you see your VPN as available, delete it
Connect again to your VPN and see if you can access BBC iPlayer.
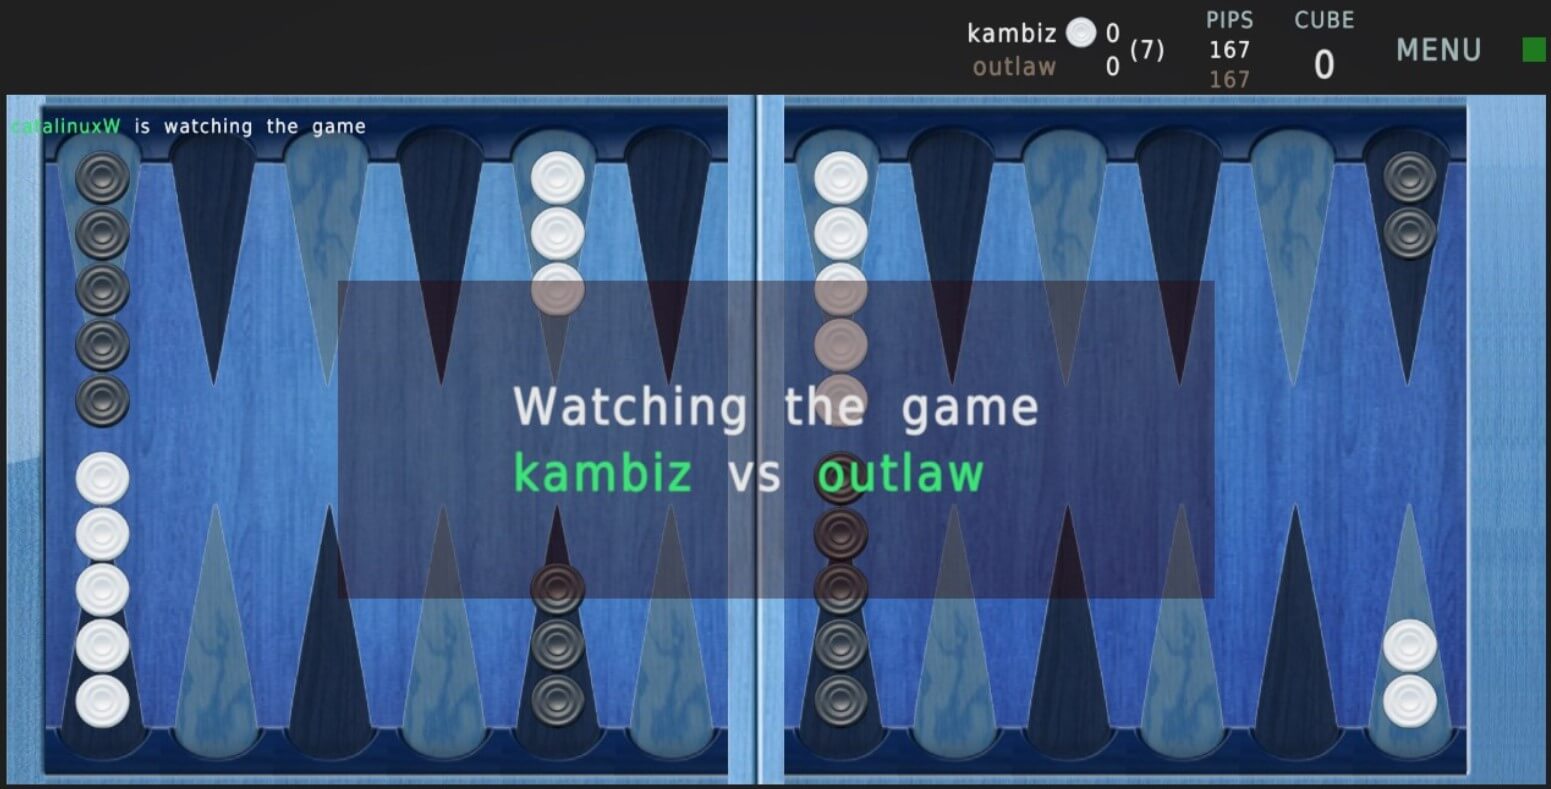
If you want to know which are the best Backgammon games for PC, you must have a passion. For your convenience, this article has all the information you need.
Backgammon is a classic game most of us have tried our hands at. With the advent of computers in almost any home, the option has arisen to play this game on the virtual machine and not using the physical board and pieces. Of course, Windows 11 and Windows 10 also come with Backgammon games through its Windows Store, especially.
This way, gamers can save the money they would spend on acquiring the set.Windows users also have at their disposal some pretty engaging Backgammon apps which will allow them to play, compete against other players, and win virtual championships.
Does Windows 10 & 11 have Backgammon?
Windows 10 and 11 don’t come with any Backgammon games pre-installed, at least for now. However, There are many Backgammon software available for both Windows 10 and 11 users.
You can find such games on both Microsoft Store and Steam, as well as third-party platforms. So, you will always get multiple games of your choice.
What is the best online Backgammon game to play with friends?
There are plenty of games that can give you an excellent Backgammon experience. Right now, we can mention the game 247Backgammon as the best web-based Backgammon game playable on all desktop platforms. For Windows PC, Backgammon Blitz is the best available one.
Microsoft doesn’t have a Backgammon Online game like they have many other similar games. But, for Windows, there are many options available for you from various developers. You can even get Backgammon games totally free and download them on your PC.
For your convenience, we have prepared the list of best Backgammon games for Windows 11 and 10 computers.
The Backgammon Blitz is one of the best Backgammon games available on Steam. It has got a lot of positive feedback in that store. The VooFoo Studios is behind the development of this game, and Nomad Games is the publisher.
One of the unique features of this game is you can implement your own extra rules in the game. Along with that feature, the game looks very beautiful with elegant graphics. You can play this item with your friends online or just using the local network.
The Backgammon, Chess & Checkers is developed and published by MobileFusion Apps Ltd. This game is also available on Steam. It is not a free game. However, it’s available at a very low price. Here, along with Backgammon, you can play Chess or Checkers against a virtual opponent.
The specialty of this game is you can play it in both VR and normal mode. This title has a beautiful-looking, high-quality 3D environment with excellent elements for VR mode.
The Backgammon is an addictive Backgammon game developed by UNBALANCE. This is one of the most popular Backgammon games in the Microsoft Store. It features 5 levels of difficulty, which should be challenging enough for all players, from absolute beginners to experienced Backgammon players. If you’re a beginner, this is the perfect app to learn and improve your game.
If you collect a certain number of models, you will get a special style board as a reward. The game supports Human vs. Computer and Human vs. Human when sharing the same device.
This is one of the most popular Backgammon apps that can be found in the Windows app store, rated highest by most of the users who have tried it. The concept is simple, gamers need to remove all the 15 pieces off the board before their opponent does the same to them.
The movements within the game are decided by sheer luck. Just throw the dice and see what comes up. Gamers can choose levels of difficulty and their opponent. Beginners can get their hand on gameplay with less difficult levels, but advanced users can choose to play against the computer.
This app features a highly advanced neuronal network acting as the computer, so be sure that you will be challenged. This Windows 10 and Windows 11 app will also display worldwide online high scores, so it will pump your motivation.
Backgammon Premium app for iPhone and iPad has already been given very high ratings by the Apple community. Now the app has made it to Windows 10 and Windows 11 as well and is threatening to offer endless hours of backgammon fun. Enjoy the high-resolution graphics and compete against 3 different difficulty levels. Your efforts will then be recorded in the high score so you can track your progress.
Not exactly your classic backgammon game, but checkers is a similar game. You also have to eat your opponent’s gaming pieces before he does the same to you. To do so, gamers must move their pieces over (jump) the ones of their partner.
The app features extensive high scores, 1 or 2-player mode, different difficulty levels, and very well-put-together graphics. Games can be paused or auto-saved, and if you make the wrong move on the board, you can always undo it.
The Backgammon Deluxe is another best game available on Microsoft Store developed by Random Salad Games LLC. It is free to play on your PC. This title allows you to play against another player online. However, for practice, you can easily play against the computer.
You can customize the board and pieces and also check your statistics easily in the free version. Overall, this can give a good experience to Backgammon lovers.
This one is another title available on Microsoft Store. Here, you can play up to 16 different Backgammon games, including Tabla, Tawla, Tavla, Tapa, etc. Though this game looks the same, each of them is unique for different rules.
You can play this game in both single-player and multiplayer modes. The local multiplayer benefit is also available in this item.
The Backgammon Reloaded is another best game for PC available on Windows Store. It is a free-to-play game. You can play against AI in cascade mode. Also, you can play against very high-skilled players online easily.
The UI and the gameplay experience are very much friendly to any type of Backgammon lover. Also, the multiplayer experience is very smooth. To explore the game in detail, you must try it once.
The Backgammon Ultimate is another best item available on Microsoft Store. You can play against AI with 5 different difficulty levels. It has good UI and can give you a very friendly gameplay experience.
This title automatically saves the game so you can continue where you left off. There is also scope to see the statistics so you can track your progress easily. However, it has no multiplayer facility.
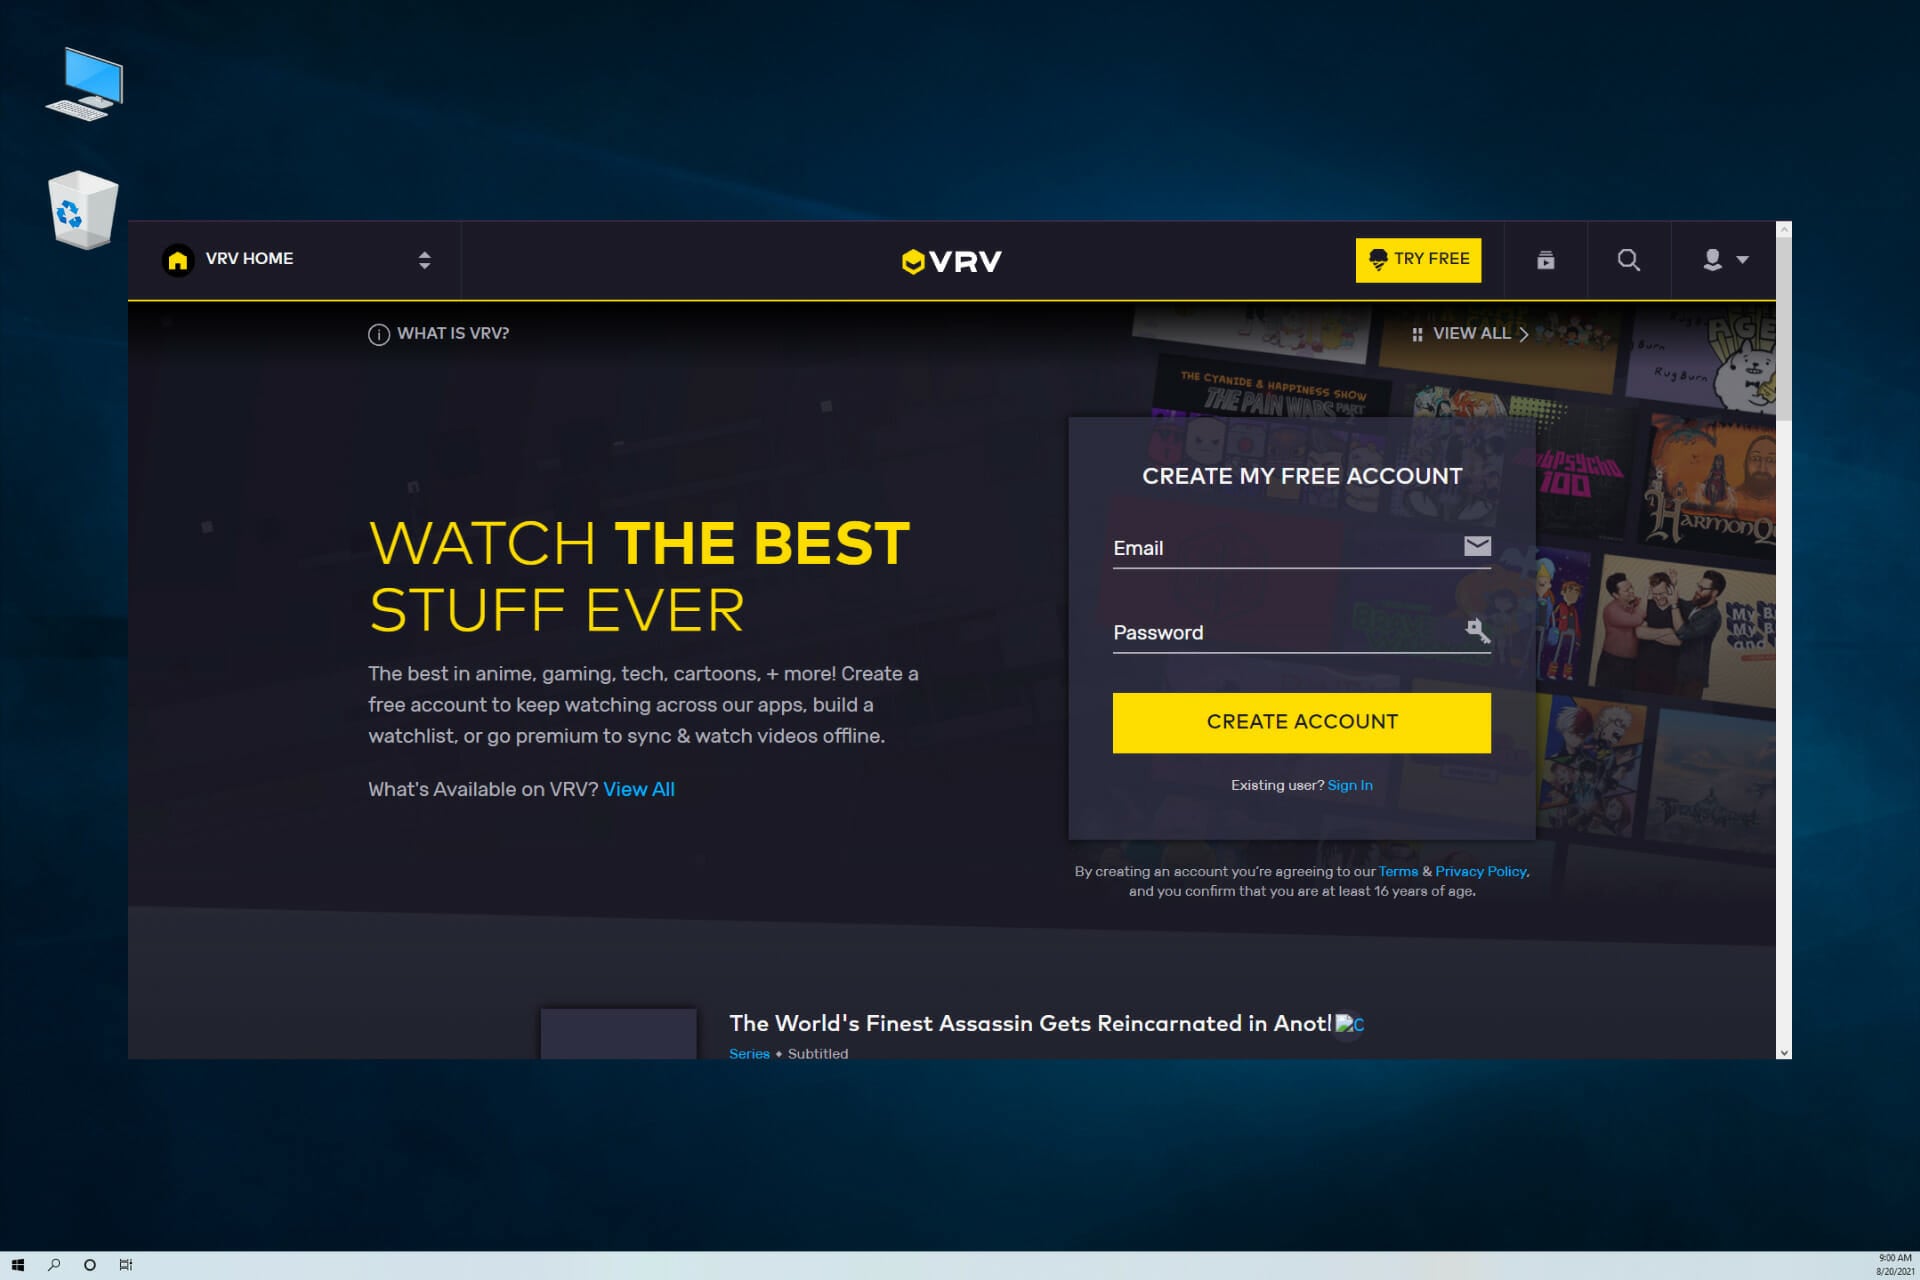
What do you do if VRV is not working on Chrome? Here is all you need to know.
A web browser is probably the only software used to access streaming content on the web, and if problems with your software occur, you won’t be able to enjoy streaming content.
This isn’t a significant issue if the service has a dedicated app for the PC, but let’s face it, most streaming platforms don’t create software for Windows, except for a handful of Microsoft Store apps.
Since your web client is the primary method of accessing this type of content, it’s paramount that you solve any problems that can prevent you from viewing multimedia.
Many reported that VRV is not working in Chrome, and in today’s guide, we’ll show you the best ways to correct this.
Quick Tip:
You can try a different browser that’s better suited for streaming platforms. Opera One is a great alternative that lets you enjoy VRV buffer-free.
With standard features such as bookmarks, add-ons, and customizable themes, you’ll adjust in no time. It also includes a free VPN that will allow you to access VRV even from outside the US.
Opera One
Stream VRV content with no effort using this light and a responsive web browser!
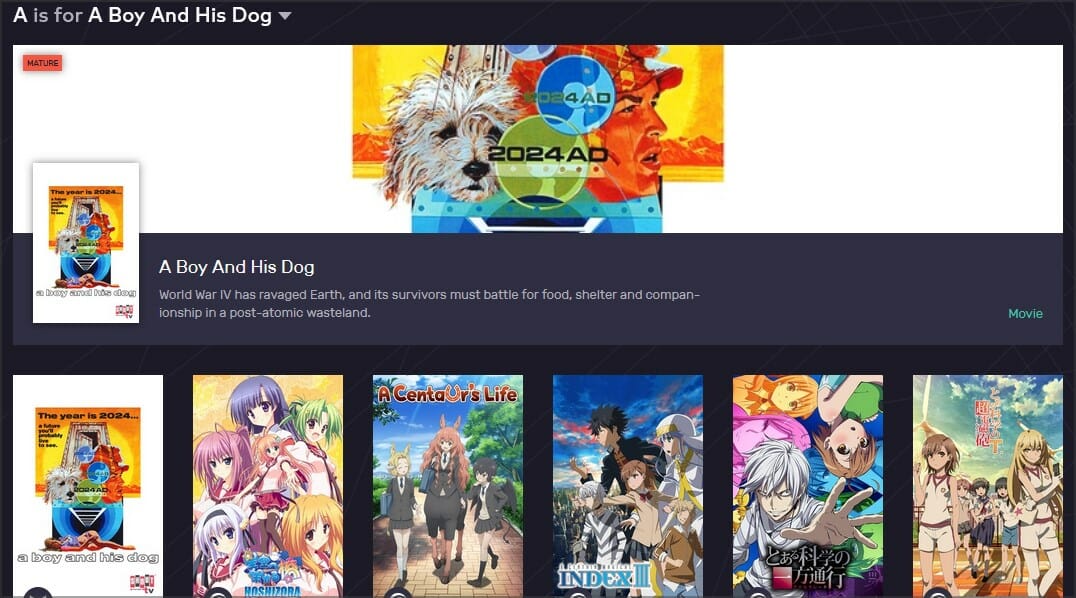
VRV is a streaming service owned by Crunchyroll, and it gives you access to anime, fiction, and gaming channels. This makes it perfect if you just want to relax with your favorite show or enjoy podcasts.
Keep in mind that VRV is not free, and while some content requires no payment, most of it does, and if you want to access it, you can choose between a premium bundle or an individual subscription.
Is there a VRV app available?
Yes, a dedicated app is available that you may use if the website isn’t working for you. Unfortunately, there isn’t a Windows version available, so you’ll have to take advantage of it on a different platform.
Luckily, you can use this service on a wide array of platforms, including your Xbox One, so we’re confident that you’ll be able to find the version that you can run on the VRV download page.
What can I do if VRV is not working on Chrome?
1. Check if VRV is down
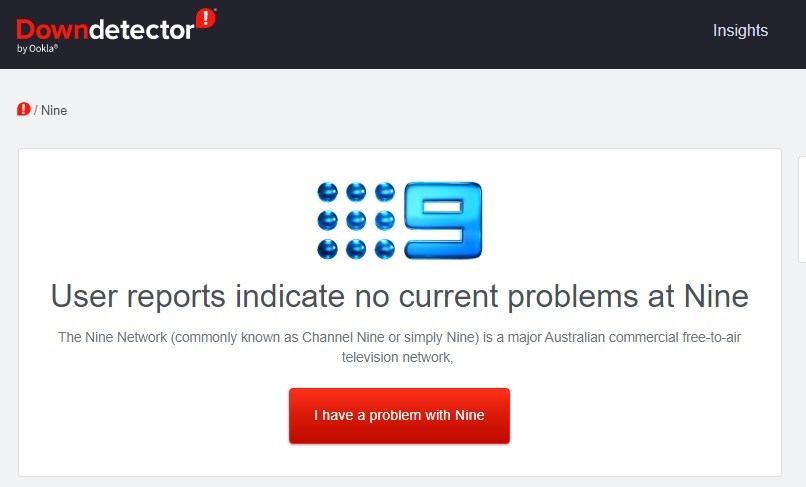
It might just be the case that the website is down when it’s not working in Chrome. To check if that’s the case, open the VRV DownDetector page in a web browser.
That page will tell you if there’s an outage, and if that’s the case, you might need to wait a day or two before the service starts working again. So if something goes wrong on VRV servers, it’s your best bet to know.
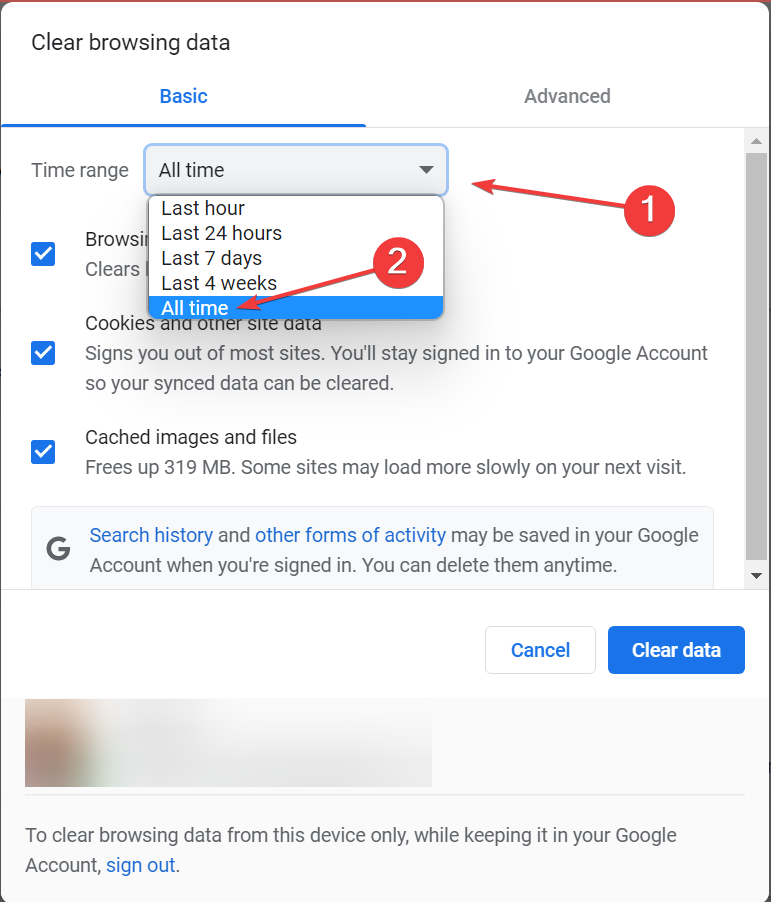
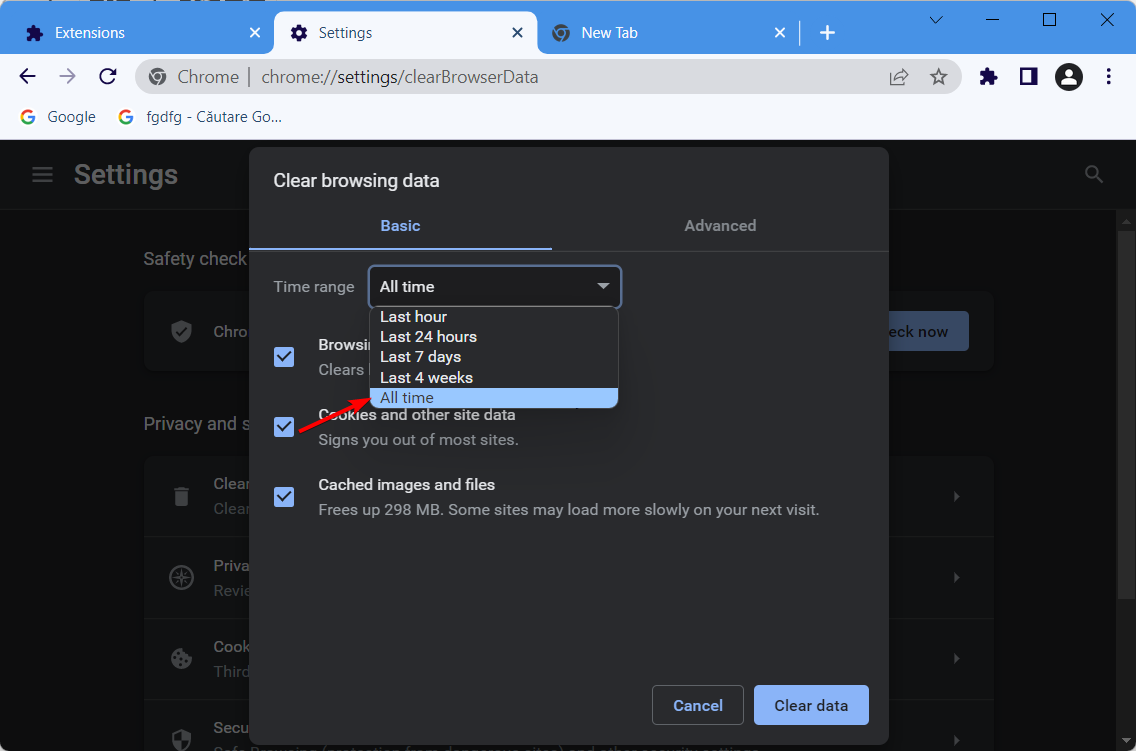
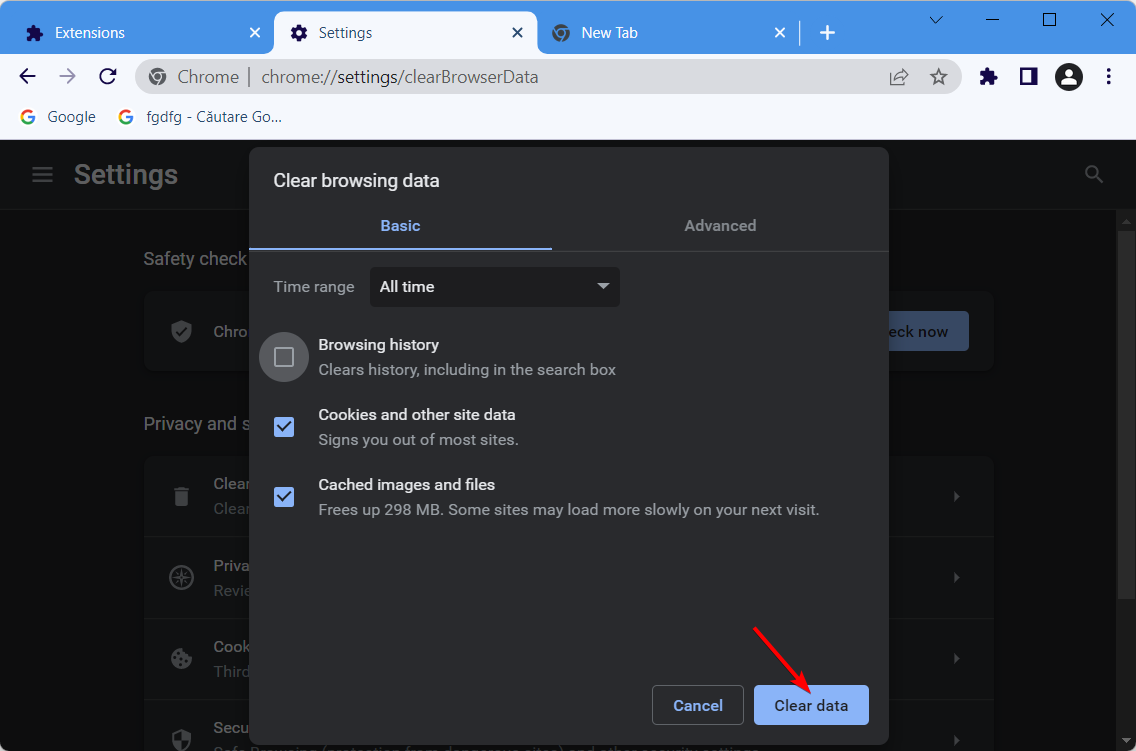
2. Clear Google Chrome’s cache
In Chrome, click the Menu icon in the top right.
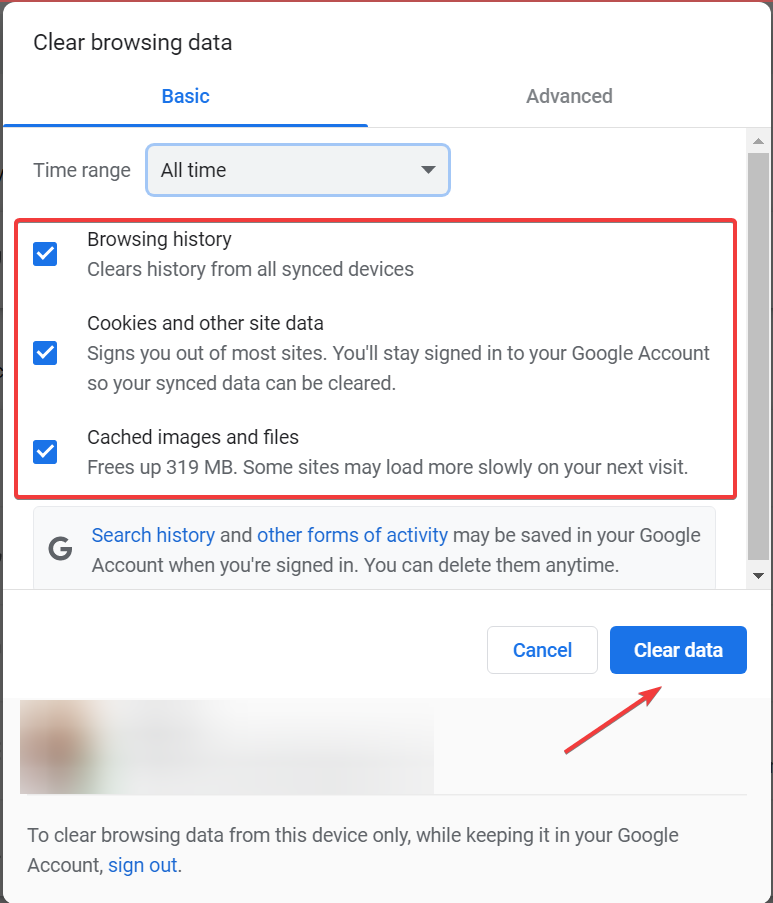
Expand the More tools section and select Clear browsing data.
Click All time on the Time range drop-down menu.
Then select the checkbox for the Cached images and files and Cookies and other site data. Now click on Clear data.
3. Close background programs and inactive tabs open in Chrome
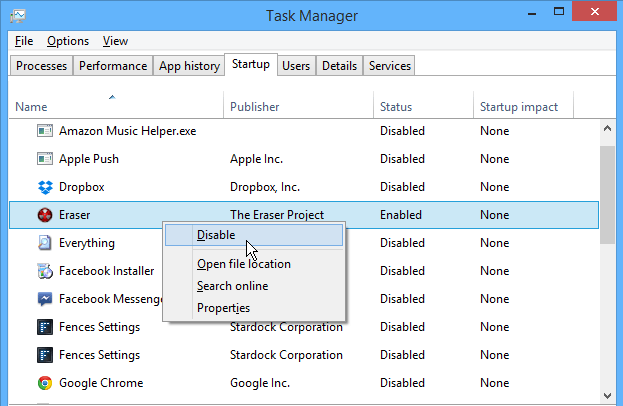
Right-click your taskbar to select the Task Manager option.
Select any apps listed on Task Manager’s Processes tab, and press the End task button to close them.
In addition, close third-party background programs listed under Background processes by selecting them and clicking End task.
Open Google Chrome, and close any inactive tabs you have open in your browser.
Then try watching some VRV videos.
4. Restart your router
Press the Power button on your modem/router to turn it off.
Wait for a minute or two.
Now press the Power button again.
Wait while the device boots.
Once the connection is established, check if the problem is still there.
In rare instances, there might be a hardware problem with your device, and if that’s the case, you might want to consider getting a new router with a USB port.
This is an excellent solution to try if VRV is not loading on Chrome or any other browser.
5. Disable hardware acceleration
Type the following within Chrome’s URL bar, and press the Enter key: chrome://settings/
Click the Advanced button at the bottom of the Settings tab.
Toggle off the Use hardware acceleration when available option.
After that, restart your Chrome browser.
Once you have followed these steps, try the next step if VRV is still not working on Chrome.
6. Turn off Chrome’s ad blocker
Click the Menu icon in the top right corner and select Settings.
Then click on Site Settings.
Scroll down and click Additional content settings and then select Ads.
Select All sites can show any ads to you option.
NOTE
If you have added any third-party ad blocker extensions, disable them. Resetting Google Chrome as outlined in the method below will disable all extensions.
7. Reset Google Chrome
Open the Settings tab in Chrome by entering the following in the address bar: chrome://settings/
Scroll all the way down, and click the Advanced button.
Then scroll down to the Restore settings to their original default option.
Click the Reset settings button to confirm.
In what regions is VRV available?
The service is currently accessible only in the United States, but we hope that this will change in the future. However, you can still access it using a VPN.
Suppose you plan to do so without any slowdowns, lag, or additional issues. In that case, we suggest you use Private Internet Access, as it has plenty of servers and is optimized explicitly for US performance.
With over 30000 servers, PIA is one of the most resourceful VPNs, offering a complete set of features that include advanced AES-256 bit encryption, split tunneling, private DNS, and unlimited bandwidth.
What’s the difference between VRV and Crunchyroll?
The two services are similar since they both allow you to watch anime, but with several differences. Crunchyroll is free, but it comes with ads, and it doesn’t offer any podcasts.
However, one advantage is that you can access it globally without any restrictions, but you won’t be able to find the unique content that VRV has.
Those potential resolutions are worth a shot if VRV is not working on Chrome or any browser. This is a cache issue in most cases, and clearing it should help.
You can contact VRV support via the VRV contact form webpage if you need more potential fixes. Some of the solutions in our fix video streaming guide might also help.
Our solutions are great if you have any VRV network error or your VRV premium is not working.
Did you find a way to fix this issue on your own? If so, feel free to share it with us in the comments section below.
Netflix’s new Resident Evil series has been receiving a lot of criticism from viewers and critics alike for its pacing, script, and characters since it launched this week. It’s not all bad news though as the show has also rewarded everyone with yet another hilarious example of characters in film using technology in a way that’s not only strange but is also kind of impossible.
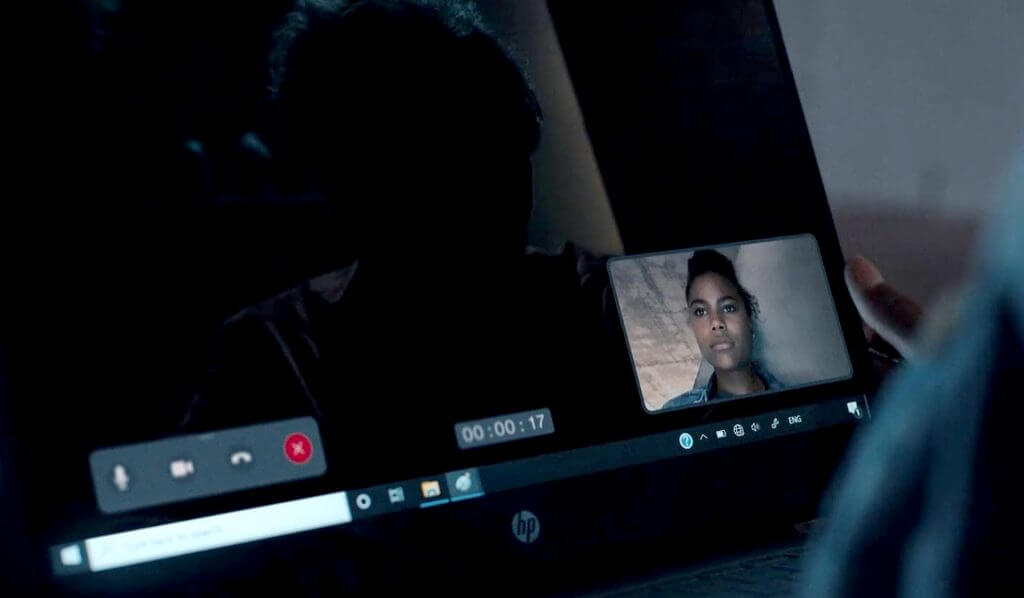
Spotted by Nick Dahlink on Twitter, Resident Evil’s second episode, around the 39 minute mark, shows a character making a video call on an HP laptop running Windows 10.
Netflix’s Resident Evil
This sequence doesn’t seem that strange at first but it’s hard not to laugh once you realise that not only is the app doing the video call Microsoft Paint (as seen by the highlighted icon in the taskbar) but the entire device appears to be offline (check out that globe icon that only appears when there’s no internet connection.)
Bloopers like this aren’t uncommon in shows and movies which often place digital displays on screens in post-production or shoehorn a sponsor’s product into a scene without knowing much about it.
One example of the latter is Charlies Angels (2000) which showed two boys playing Final Fantasy VIII, a single-player game, at the same time.
Probably the most infamous example of tech being misused in media is the music video for Dilemma when Kelly Rowland texts Nelly via Microsoft Excel on her Nokia and then gets frustrated when he doesn’t reply.
FarmVille two requires Flash to function. Unfortunately, in 2020 with the discontinuing of Flash on many browsers, the creators also announced the stopping of FarmVille 2.
It was also very popular as a Facebook game, but that version is also discontinued, however, you will still be able to play the Zynga game version.
You can still play offline but you will need a FarmVille 2 launcher download.
Opera GX continues to be one of the best browsers to use when playing FarmVille online, thanks to the unique features available.
This browser is a special version of Opera, and although it has been built specifically for gaming, it’s also an excellent choice for web browsing.
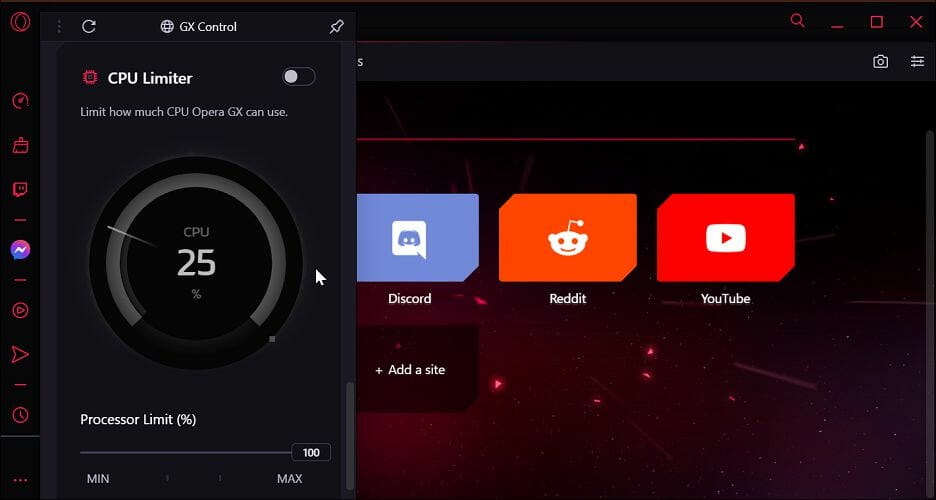
With Opera GX, you can fully control your CPU by seeing how much RAM is used and by which tasks.
You can free up some resources by closing some of the tabs that consume the most resources to reduce the lag; this makes it the best browser for FarmVille 2.
Moreover, thanks to the Network limiter, you will also be able to set maximum limits for upload and download.
Other great features:
Twitch integration
Discord integration
Free and unlimited VPN
GX Corner for the latest gaming news
Highly customizable
Opera GX
Use a browser that has been created specifically for games to enhance your gaming experience and avoid all interruptions.
Chrome is another excellent FarmVille 2 browser recommendation, thanks to how fast the browser is.
Moreover, this browser is also optimized for multitasking, and you can handle several open tasks at the same time.
As for your online security and privacy, Chrome has powerful features that ensure your online games won’t be interrupted by annoying advertising.
Even though Chrome was not built with specific features for online gaming, it is a great choice considering its speed, reliability, and lack of interruptions.
The primary reason why the game is slow is your processing power. According to Zynga playing forums, it will require a modern fast PC and would run better on an SSD.
You will also need a fast internet connection if you play online; if not, you will experience lag during gameplay.
Thanks to all the existing variety, you have plenty of available and powerful browsers to choose from, and this list contains the best browser for FarmVille 2.
That does not always make it a simple task, and we hope you’ll find the browser that is best for your gaming needs in this article.
Please share with us in the comments section below which browser you have tried and how was your gaming experience.
Microsoft’s Grounded video game, which is still in early access, is set to get an animated series spin-off.
The Grounded animated series will be set within the same world as the game (unlike the Halo TV series which is in a separate continuity than the Halo games) and is being produced by Obsidian Entertainment and Xbox in association with Waterproof Studios/SC Productions, Kinetic Media, and Bardel Entertainment.
“The series, which exists in the same universe as the game, follows four friends, who the summer before high school, plan “big things” to elevate their social standing, but their plans are upended when they stumble upon shrinking technology that makes them two inches tall,” the initial report on Deadline reads. “Now the four shrunken friends must learn to survive in a towering backyard that’s a jungle full of enormous predators and hiding a vast corporate conspiracy threatening their entire town.”
Brien Goodrich, who has previously worked on Xbox’s Halo video games, is currently slated to direct the Grounded animated series while Star Wars: The Clone Wars and Star Trek Enterprise writer, Brent Friedman, is a lock for writing duties.
“We couldn’t be more excited about diving into the whimsical universe of Grounded,” Bardel Entertainment’s CEO, Tina Chow told Deadline. “This partnership will be one of great collaboration, expanding on an already wonderful journey of exploration and adventure.”
This article will explore what to do when you get the error – Chrome not allowed to load local resource.
Bad networks or Javascript issues could cause it. Whatever the case may be, here’s how to fix it:
How do I fix not allowed to load local resource?
1. Change to Public DNS
Right-click on the Start menu and click on Settings.
On the left pane, click on Network & Internet, then scroll down and select Advanced network settings on the right pane.
In the Related settings section, click on More network adapter options.
Right-click on your adapter and select Properties.
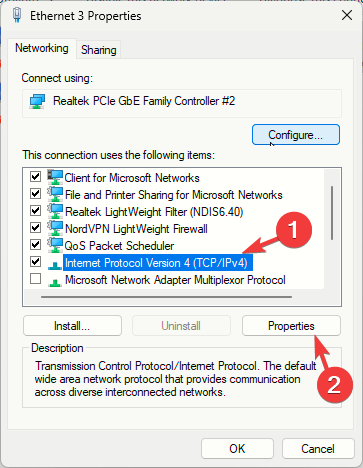
Select Internet Protocol Version 4 (TCP/IPv4), then click the Properties button.
Under the section for Preferred DNS server, type 8.8.8.8, and for the Alternate DNS server section, type 8.8.4.4, tick Validate settings upon exit and hit OK.
Relaunch your browser and try re-accessing the resource.
Updating your network setting’s DNS servers is a simple solution to this problem. For example, you may use any publicly accessible DNS servers on the internet.
Lastly, consistently utilize recognized and trusted server addresses when resolving domains for security reasons.
On your browser, type the address below and hit enter. chrome://net-internals/#dns
Click the button to Clear host cache.
Relaunch your browser and try re-accessing the resource.
When you browse the same domain repeatedly, Chrome employs DNS caching to speed up the site’s loading by mapping IP addresses from the cache.
Unfortunately, due to variances in IP addresses, Chrome DNS caching may create delays in loading the webpage when website admins change IP addresses. This is a good fix if your error is caused by JavaScript not allowed to load local resources.
You should have successfully resolved the error of Chrome not allowed to load local resources. Please note that these solutions are not in any particular order, and you should try whichever seems the easiest to implement.
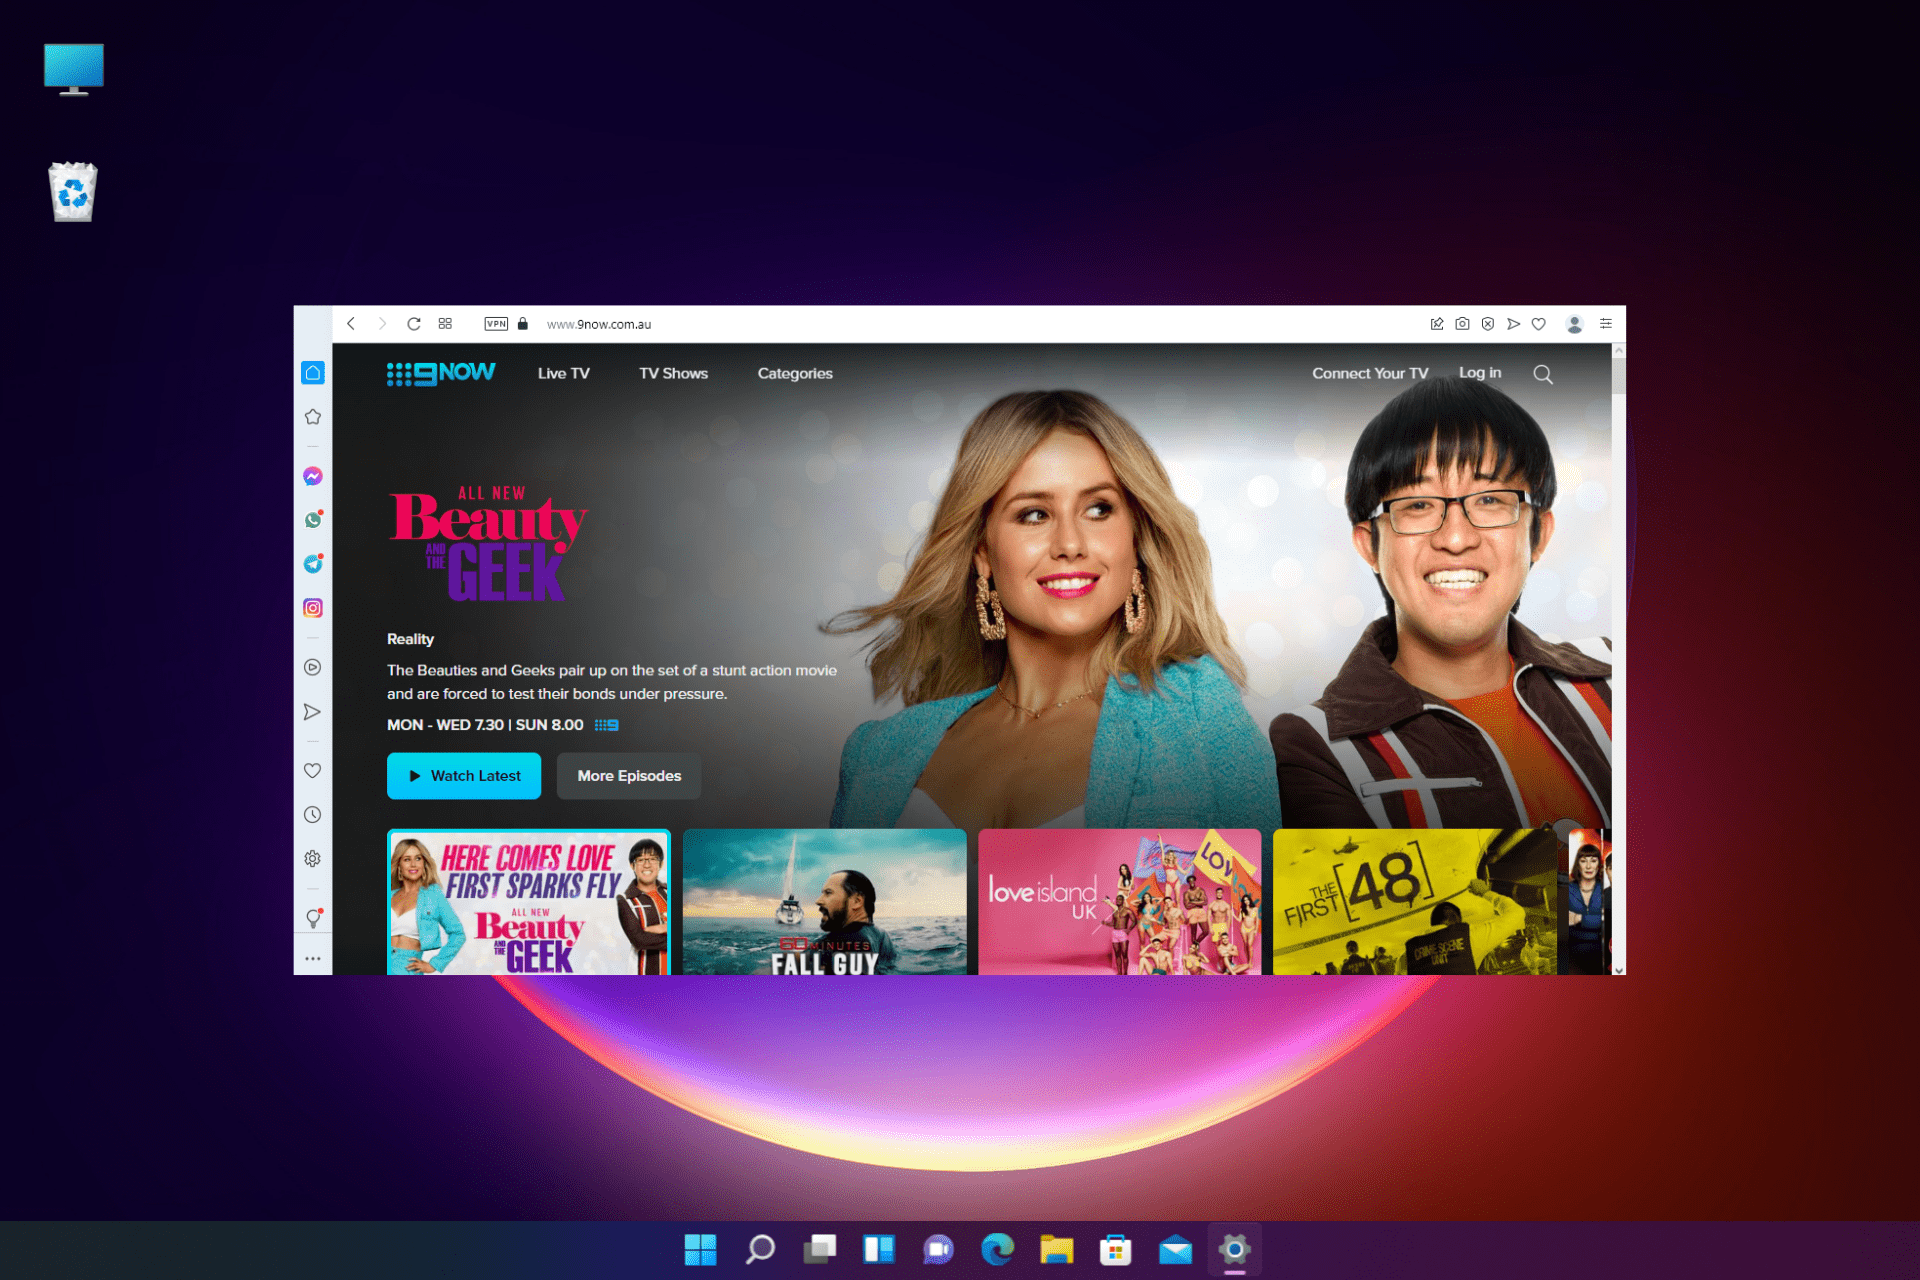
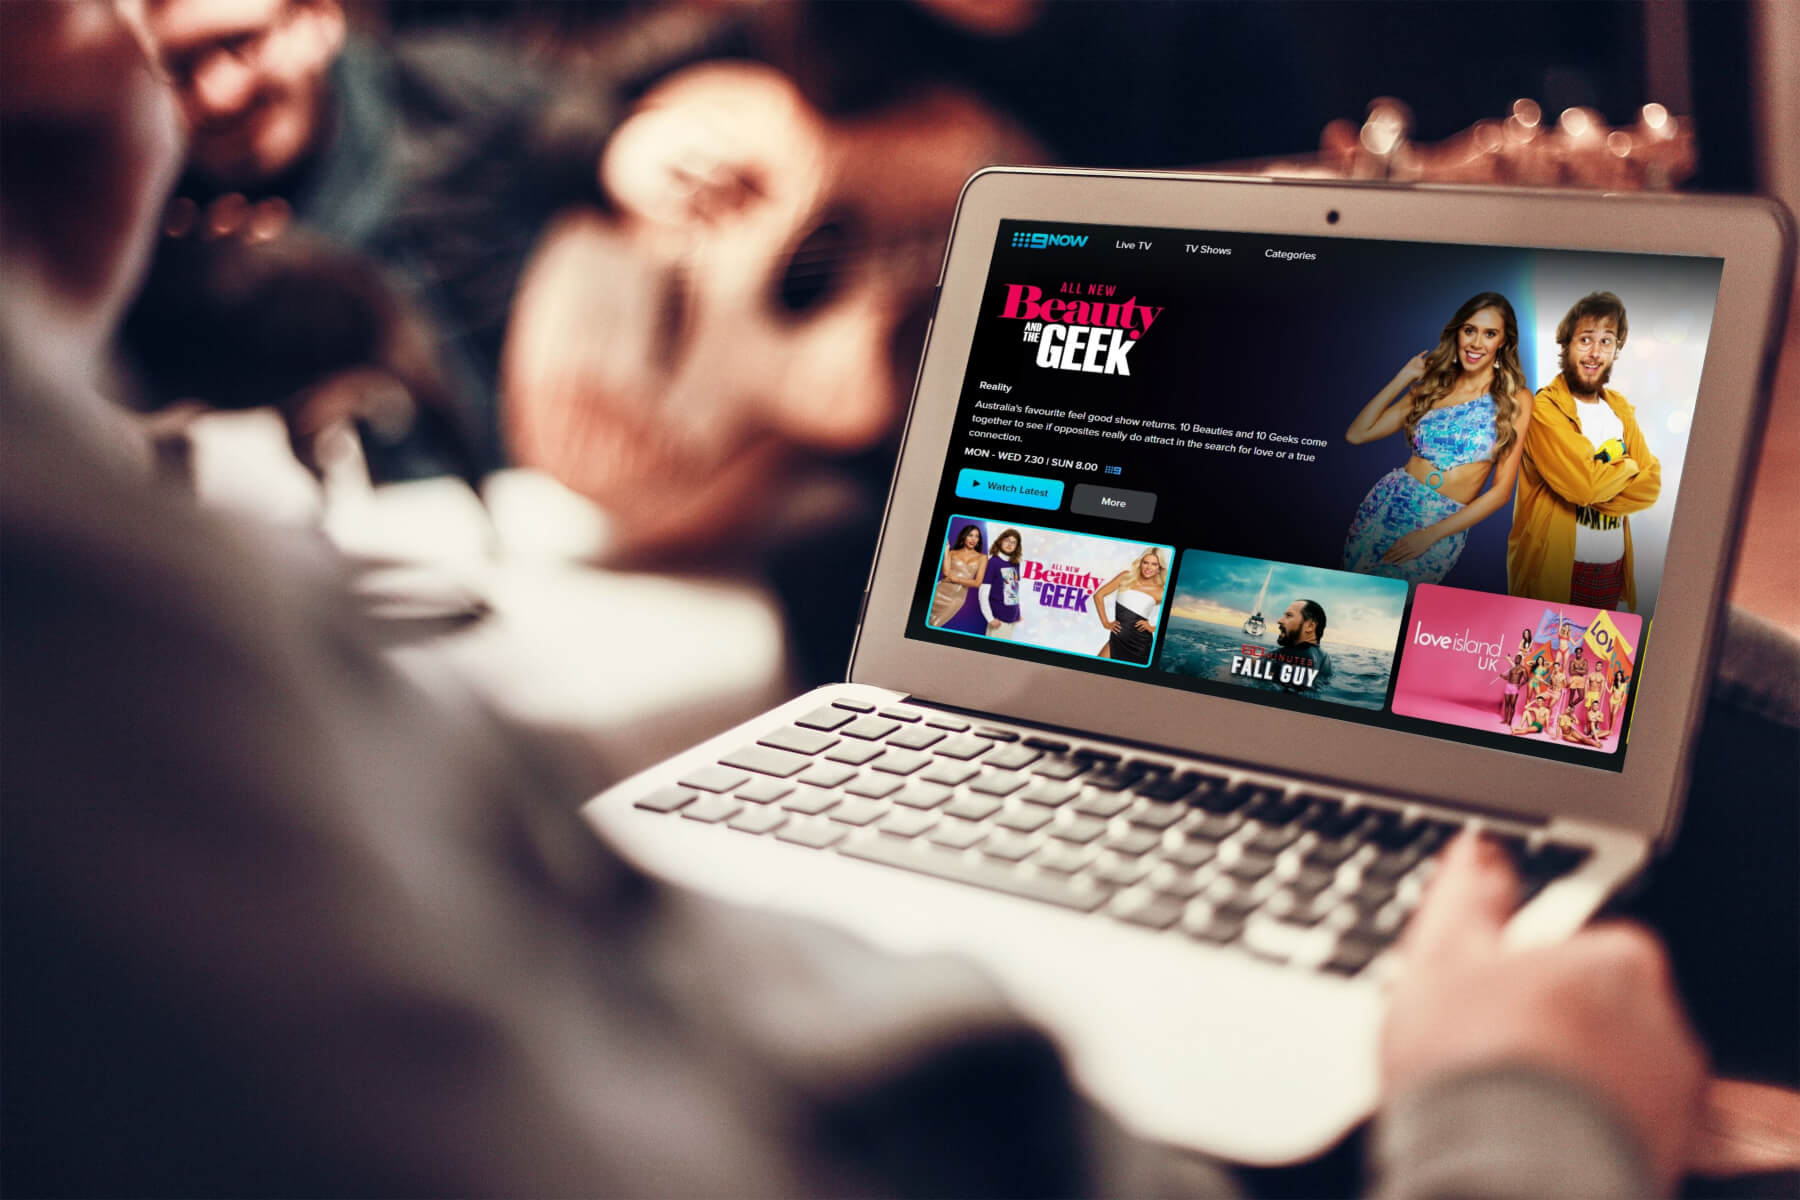
If you are fan of the 9Now TV by Channel 9, the good news is, you can watch your favorite shows on your computer or Smart TV using a browser.
You can even stream content on your PC and Smart TV, using your browser, however, make sure it’s compatible and not geo-blocked.
So, if you are trying to watch 9Now outside the region, you can try these best VPNs for video streaming in our detailed post for uninterrupted entertainment.
Can I watch 9Now on my computer?
Yes, you can watch 9Now on your PC using a compatible browser on the web and an active internet connection.
While 9Now recommends the latest versions of Chrome, Firefox, Safari and Edge, you can also use a few other browsers to watch your favorite shows in & outside Australia.
How do I connect 9Now to my TV?
To watch 9Now on your Smart TV using a browser, you must activate it, however, you need a second device for the activation.
It can be a PC/ laptop or you can activate the channel even through your mobile/ tablet app as show below:
Launch 9Now on your browser and click on Connect Your TV at the top right.
On the next page, select from Log in to your Nine Account or Create a Nine Account.
Next, open the channel on your TV, select an episode of a show you want to watch and sign in with the 9Now log in details.
Now, enter the 6 digit code on your computer that you see on your TV.
Once done, your TV should be activated in the next 30 seconds and the selected show should start playing.
Below are a few of our best browser recoommendations for a high-quality video streaming experience with 9Now.
While Google Chrome is the clear winner in terms of popularity, it also works as a great browser for the 9now TV.
One of the best Chromium-based browsers around, Chrome works faster in Windows 10 and hence, you can get the best streaming experience on this Windows version.
Its wide range of useful extensions also includes some of the well-known VPNs that help you watch 9Now on your browser, even outside the region.
Besides, if you are using Chrome on your mobile device to watch your favorite shows, you can even sync passwords, bookmarks, and settings effortlessly.
When trying to watch the 9Now shows through the app on your smart TV, it may sometimes fails to work.
It could be because you have not installed the latest version of the app on your TV. Hence, you must update the 9Now app as shown below:
On your smart TV remote, press the Menu or the Smart Hub button.
If you pressed Menu, select Smart Hub.
From the Smart Hub options, select App & Game Auto Update and then press ON.
Once done, the app will update automatically each time a latest version is available and you should not encounter any problems with the 9Now app on your smart TV.
So, if you are looking for a browser to binge on your favorite 9Now TV shows, live sports, etc., our list of browsers can help you with the best experience.
At the same time, you would not want any interruption while streaming, and hence, you can refer to our detailed guide on the best browsers for watching videos.
If you are looking for the best browsers for any other streaming service, do let us know in the comments box below.
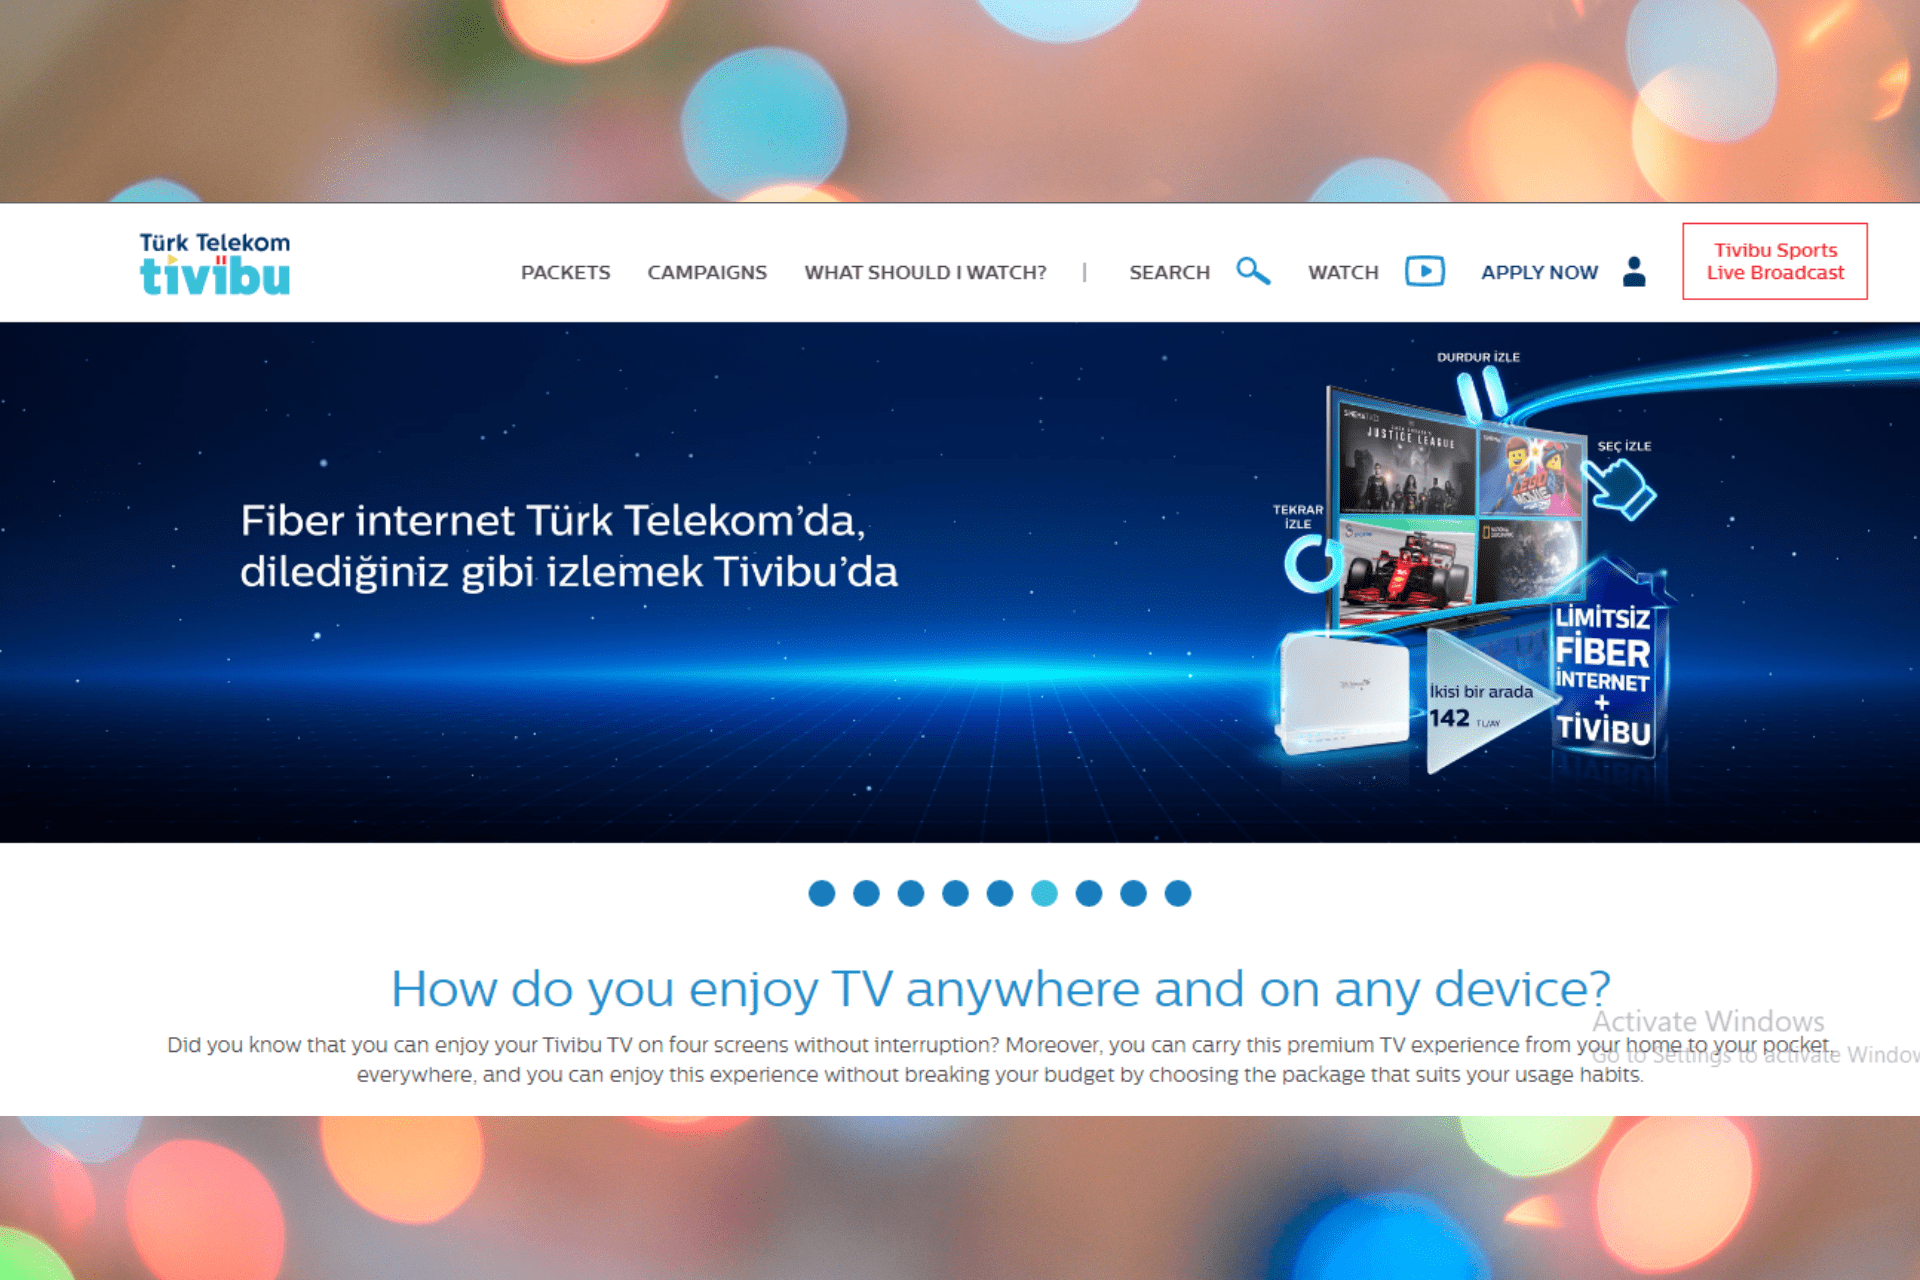
Tivibu is a digital TV platform service offered and regulated by Turk Telecom. It was introduced in 2010 when internet TV was relatively new.
You can enjoy your Tivibu TV on four screens without any interaction. This premium TV experience lets users enjoy anywhere by choosing the package according to their requirements.
Users can watch this platform on computers, tablets, mobile phones, or on their smart TV via Webcastv and web browsers.
So without any further ado, let’s know about the best Tivibu web browser in 2022.
What browsers support Tivibu?
Some of the browsers that support Tivibu are Chrome, Opera, and Firefox. In addition, you can watch movies on the website anytime with an Internet connection.
It also offers ease of stopping the watched movie and rewinding it.
Opera One is the finest Tivibu web browser if you want something speedy yet lightweight. This web browser powered by Chromium is frequently referred to as a more polished version of Google Chrome.
The Opera One web browser works excellently and is very concerned about privacy, keeping all of your data safe and secure.
Furthermore, in terms of features, Opera One will not disappoint. This Tivibu browser provides various features for modern users, such as a VPN, an ad blocker, a native AI, and others.
Opera One
Stream Tivibu without interruptions with the built-in VPN.
The following browser is developed with privacy in mind and comes with VPN support for Tivibu watching.
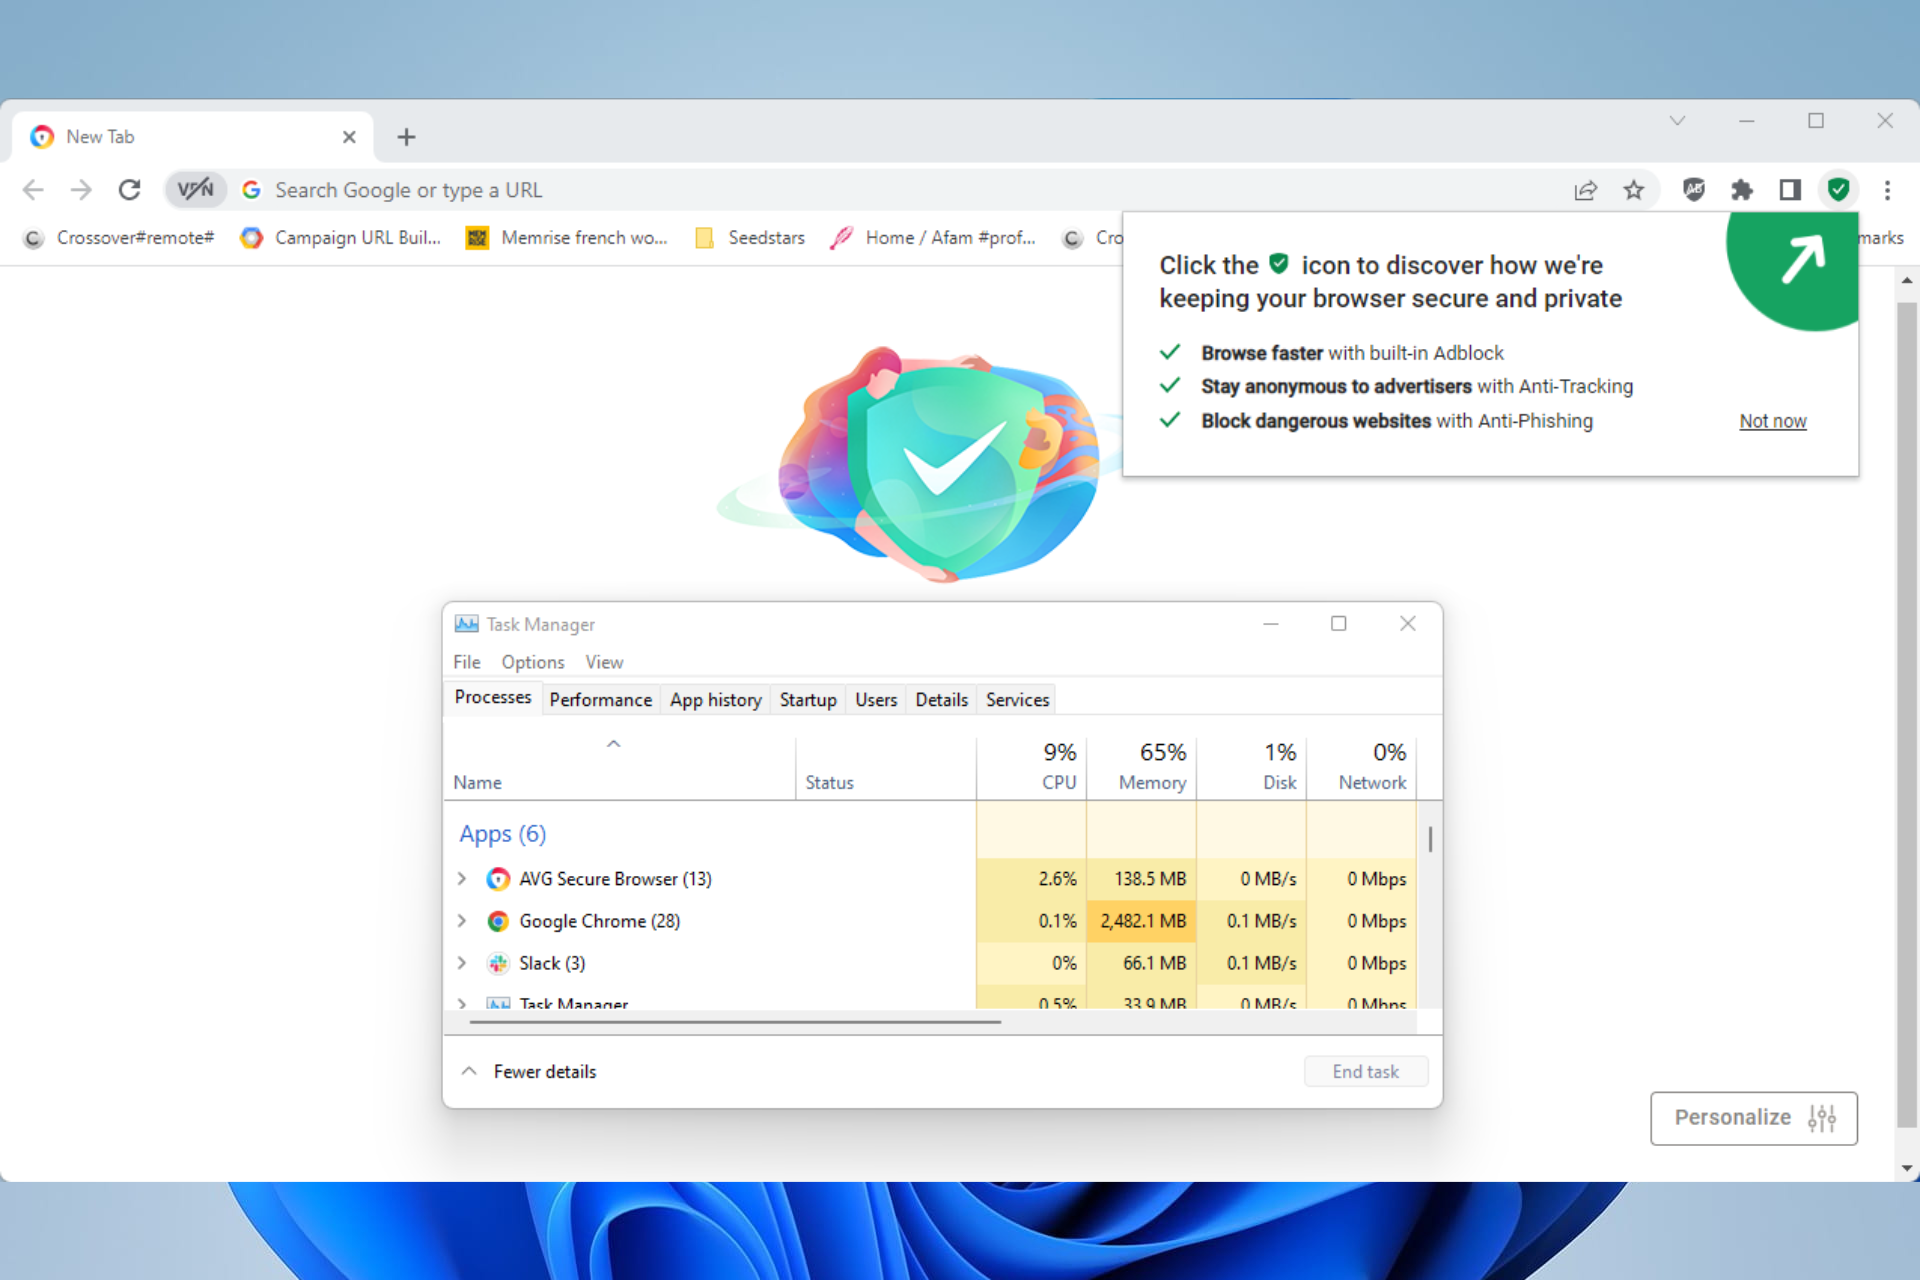
You can rely on the AVG browser due to its practical tools that ensure confidential navigation and a Cast option that allows you to watch streaming content on other screens.
More than this, you have easy integration with the AVG antivirus to be protected against malware or tracking scripts while you navigate online.
Regarding features, you will benefit from the Stealth mode which can mask your history and erase cookies from websites like Tivibu that may track you.
AVG Secure Browser
Experience quality streaming on Tivibu with the greatest secure browser.
Google Chrome is the Tivibu smart TV browser. As we all know, Chrome’s browsing experience isn’t the most private but is smooth. It offers several add-ons, privacy settings, and a simple user interface.
This Tivibu web browser is cross-platform and syncs data between devices. It has many extensions that you may use to increase the audio quality of any music, video, or other material you’re listening to.
It also has a website task manager, a visual browser history, and media controls. Chrome is extremely fast, especially when loading Google-owned websites like Gmail and Youtube.
Several users complain about Chrome black screen issues. Rest assured that our guide shows you what to do in case that happens.
Firefox is one of the greatest privacy-oriented Tivibu web browsers that has excellent audio quality. When using this, you don’t need any incognito mode to prevent trackers; the browser’s stealth mode is activated by default.
It offers the finest sound quality, with clear mids and higher bass than the others. It also includes default ad blocking and tracking, a clean user interface, and supports the Tivibu browser plugin.
Firefox by Mozilla is the best browser for all of your online needs. The lack of tabs may be annoying, but it is a fantastic browser tool.
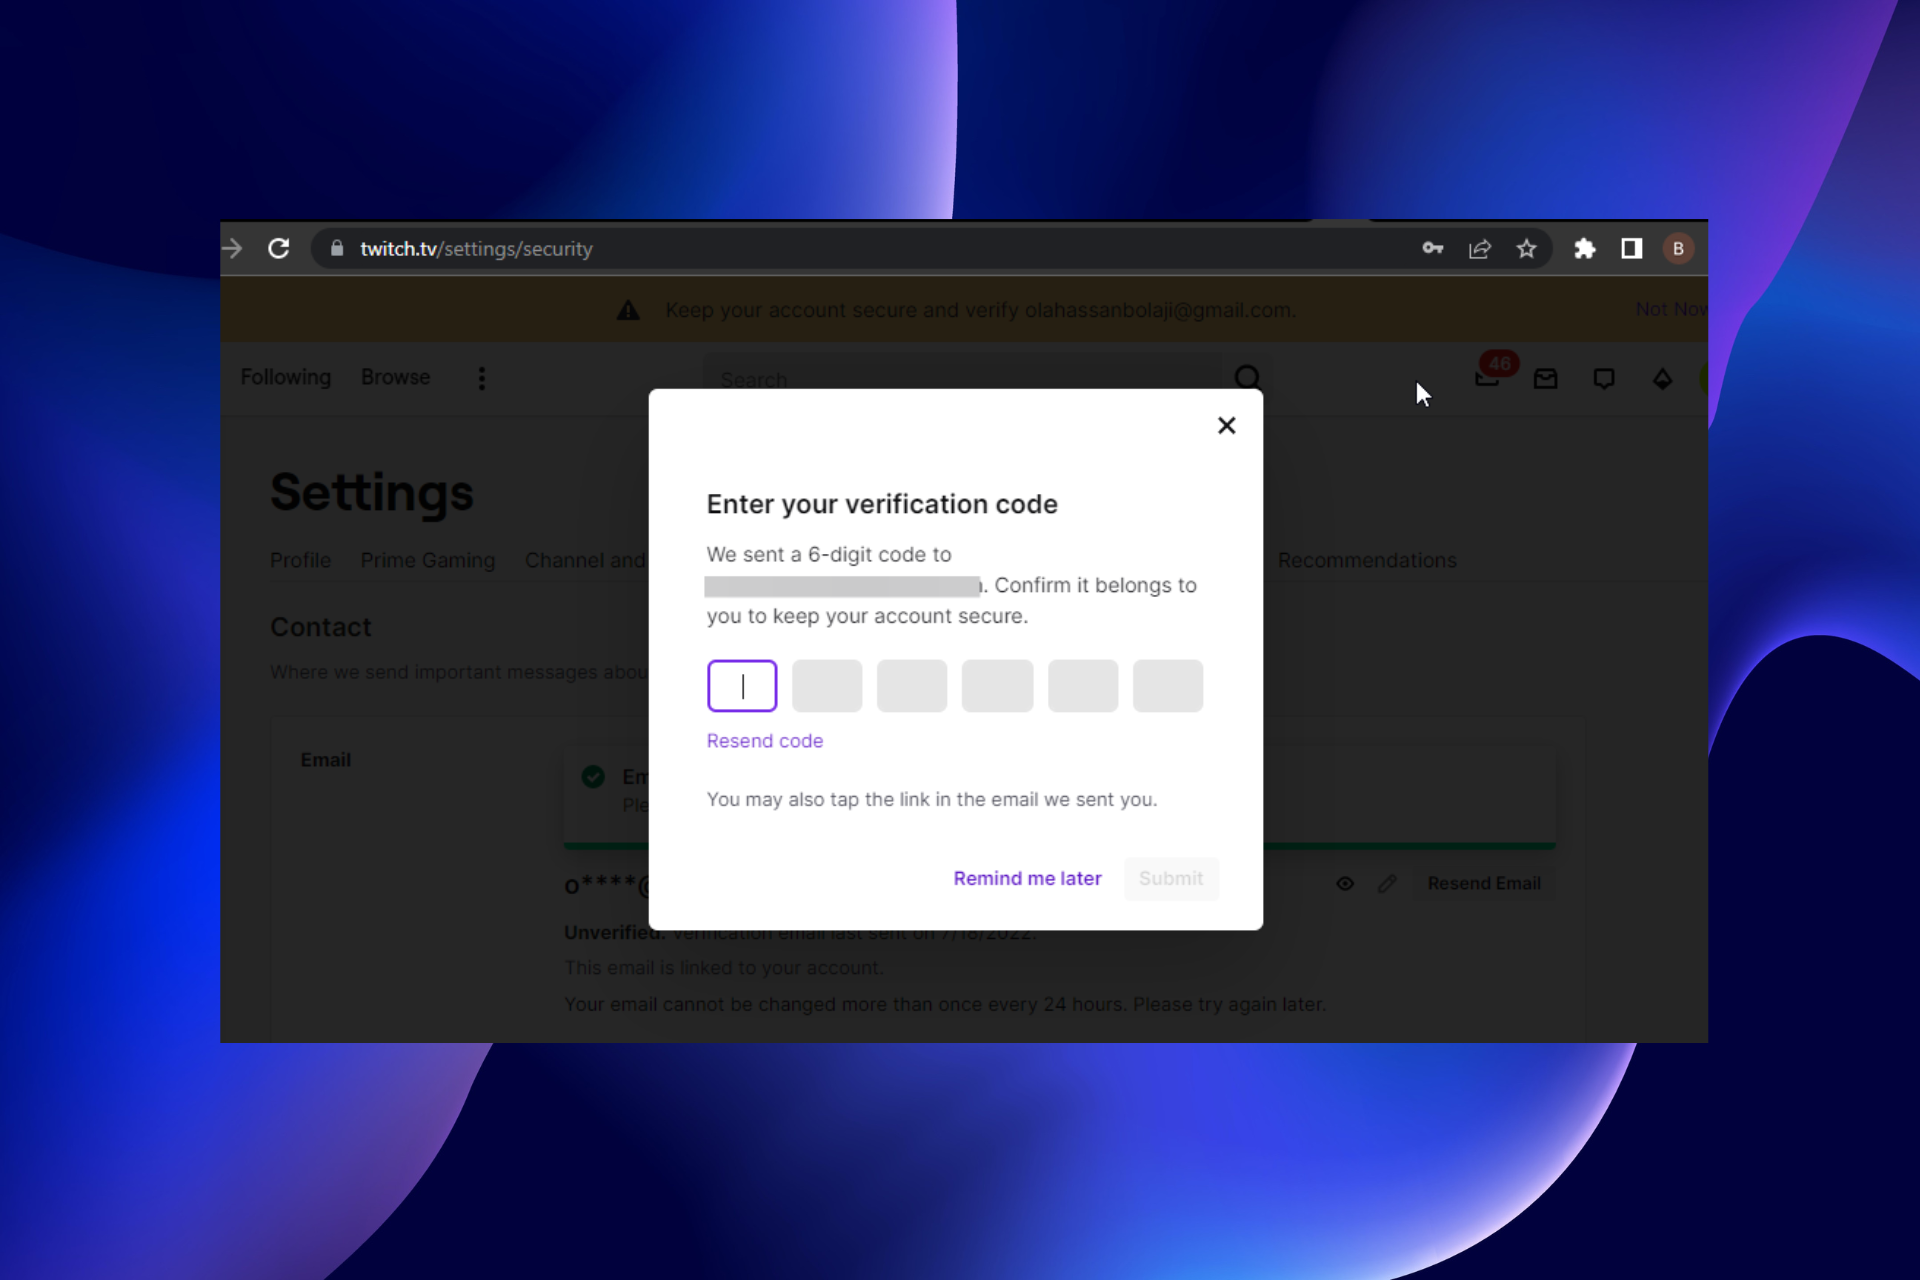
Twitch is a top-class streaming platform that prioritizes the security of its users. One of its security features is the verification code it sends when it detects an unusual login activity in your account.
Unfortunately, some users are complaining that this feature is not working. In most cases, they don’t receive the verification code at all, even when using the best browsers for Twitch.
This guide will take you through the steps to start getting the code again and regain access to your account.
Why am I getting a Twitch verification code?
Twitch sends the verification code if it notices a strange login activity on your account. You will receive this six-character code in your email if you log in on a new device.
You will also get the code when you log in from a new location. But it will only send the code provided you have a verified email address.
How long does it take to get a verification code from Twitch?
The Twitch verification code stops working after 10 minutes. So, you should get the code within this time frame.
However, the ideal time is around the 2 minutes mark. There might be a problem if it does not drop in your email after that time.
Editor’s tip
As a suggestion, you can try the Opera GX browser to get awesome gaming features and app integrations with Twitch for quicker access to your best gaming content.
What can I do if my Twitch verification code is not working?
1. Check spam
As mentioned earlier, the Twitch verification code only lasts for 10 minutes. However, some users still don’t get it even after that period.
To be sure the Twitch verification code is not working for you, check the spam folder on your email every two minutes. This is because your email provider might treat the mail as spam and keep it there instead.
Also, ensure your mailbox has space, as this can prevent you from getting the code.
2. Enable 2FA authentication
Go to Twitch TV on your browser and click on your profile picture.
Select the Settings option.
Click Security and Privacy in the top menu.
Choose the Set Up Two-Factor Authentication.
Click the Enable 2FA button.
Type your phone number and click the Continue button. This will be used to send a verification code.
Enter the seven-digit code sent to you via text message and click the Continue button.
Finally, click the Skip & Use SMS when asked to verify your code.
If Twitch fails to send you the verification code or it’s not working, you should enable the 2FA protection. This offers high protection, as it sends you a security code every time you try to log into your account.
3. Deactivate pop-up blocker
Click the menu button on your browser.
Choose Settings from the options.
Select Privacy and security.
Click on Site Settings.
Click the Pop-ups and redirects option.
Tick the radio button for Sites can send pop-ups and use redirects.
If you are trying to accessyour Twitch account from your browser and the verification code is not working, it is advisable to disable your pop-up blocker.
The only way to skip the Twitch verification code on your account is to enable 2FA. While this also uses a security code, it differs from the verification code you need to provide every time you switch devices or locations.
Also, this sends the security code as a text message to your phone. With this, you don’t need to worry about spam and other folders.
Twitch verification code is a standard security feature to protect your account. So, you will be missing a vital security feature if it’s not working. But with our detailed guide, you will start getting the code again in no time.
Feel free to let us know if you were able to solve the problem in the comments below.
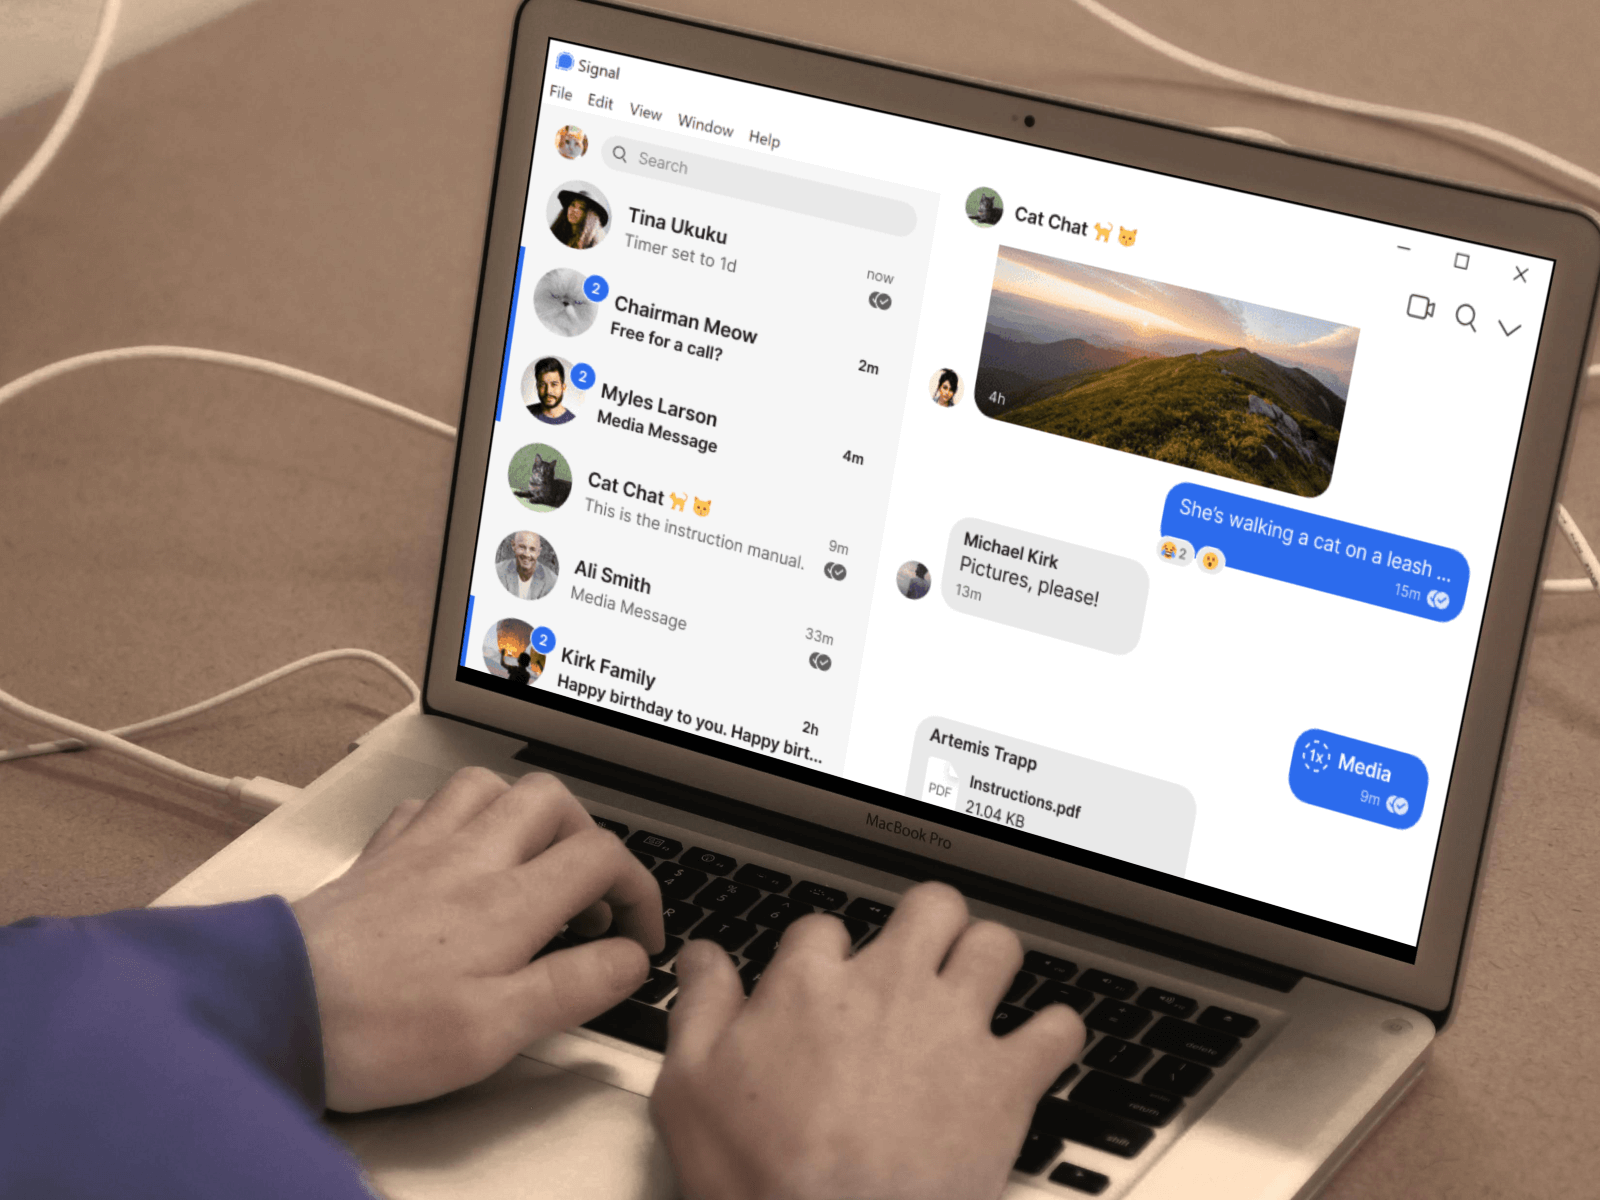
Is your Signal desktop application showing you This version of Signal desktop has expired error message? If so, and you are looking for solutions, then you have come to the right place.
Because, in this guide, we will give you in-depth information about why Signal desktop throws up this error and how you can fix the problem at your end.
Following WhatsApp’s controversial announcement that users must agree to share their data with Facebook in order to use the platform, several users switched to Telegram and Signal.
While Signal is regarded as one of the most secure messaging platforms, the hype has died down. However, users using the Signal app have reported facing This version of Signal desktop has expiredproblem on their PC.
This guide will explain the solutions and possibly help you resolve the issue. Let us check out the guide.
Why does Signal expire?
An app will show such error messages when you are running an old or outdated version of the app. It is crucial that you keep all the apps, be it on your phone or PC, up to date.
This is not only to enjoy the latest available features but also new updates bring security enhancements as per the latest trend, keeping your data safe and sound.
What is the latest Signal version?
Desktop: The latest Signal desktop version is v5.50.1
Android: The latest Signal Android version is v5.42.8
iOS: The latest Signal iOS version is v5.44.
How do I update my Signal app?
1. Update desktop app
Launch the Signal desktop app.
Click on your profile picture.
Select Update signal.
The above steps will help you manually check for the Signal desktop app update. However, there is an alternative way, that checks for new updates every time you open the app.
Navigate to File, then to Preferences.
Select the General tab from the left pane.
Then under the Updates section, check the box for Automatically download updates.
2. Update the smartphone app
On Android
Open Google Play Store.
Click on your profile picture.
Select Manage apps & devices.
Tap on See all details.
Check if a new update for the Signal app is available or not. If yes, then hit the Update button.
Scroll and check if a new update is live for the Signal app or not.
If yes, then hit the Update button next to the app.
Tip
You can also install the latest version of the Signal app manually by heading over to signal.org/install website on your phone or opening the Signal store page.
Why is Signal not updating?
There isn’t any specific reason why the Signal app isn’t updating on your device. If you are not able to update the app, then follow the solutions mentioned below to update the app.
1. Android/iOS
Update to the latest Android/iOS version: Check if a new firmware update is available. Often the app requires you to run a specific firmware in order to install the update. Install the latest update if available.
Check your internet connection: It is very important that you have a working and stable internet connection. Check if your internet connection is working fine or not.
Restart your device: Restarting your device will re-launch all system files from scratch, allowing to load those files that might have been missed during the previous session.
Clear Signal cache files: Clear cache files of the Signal app as corrupt cache files can cause multiple conflicts.
Manually download the latest version: Following the above editorial tip, you can manually install the latest version of the Signal app.
2. Desktop
Restart your PC: Similar to smartphones, desktops also often fail to load certain important files that prevent the smooth functioning of the PC. This can be fixed by simply restarting it.
Update your desktop: There are certain requirements to run and install the latest updates for the Signal app. Check if a new update is available for your Windows or macOS PC.
Disable antivirus: There could be chances that your antivirus software is conflicting with your apps. Disable the antivirus software and check if you can install the Signal update on your PC.
Use admin account: For tweaking system files and certain software, you need to have admin access. Check if you have proper admin access before you could update the app.
That’s it from us in this guide. We hope that you were able to fix the This version of Signal desktop has expired error from your PC. Let us know in the comments below which one of the above methods solved your problem.
Many users reported that Opera keeps opening new windows on their PCs, and that severely impacts their browsing experience. Luckily, there are ways to fix that.
Faulty search settings, malware, or an outdated version of Opera could be the cause. Regardless, here’s the fix:
How do I stop Opera from opening new windows automatically?
1. Check the Opera browser’s settings
Search for a random query on Google.
Click the Search Settings button from the right side of the screen.
Choose See all settings.
Make sure that the Where results open option is deactivated.
2. Check the extensions
Open Opera.
Click on the Menu in the top left corner.
Open Extensions and select Extensions.
Remove suspicious extensions from the list by clicking the X in the right corner.
Users reported that Find website used fonts and YouTube Enhancer are responsible for this problem, but other extensions can cause it too.
Lastly, don’t forget to check the system with your antivirus since this issue and others such as Download failed, virus detected message can be caused by malware.
What solution worked for you? Let us know in the comments!
Windows XP’s end of life has been reached on 8th April 2014, and since then this version of Windows was officially discontinued.
So, you either upgrade to Windows 10 or keep safely using Windows XP after 2014. Does Windows XP still work? The answer is, yes, it does, but it is riskier to use.
In order to help you out, we will describe some tips that will keep Windows XP secure. According to market share studies, there are a lot of users who are still using it on their devices.
Actually, it seems that many users aren’t willing to upgrade to Windows 10 due to various reasons. For them, knowing how to keep using Windows XP after 2014 is essential, or a must-have.
Because of that, we will show you the best tips you can use to protect yourself.
But that’s not the only reason why you shouldn’t want to upgrade to Windows 10, although eventually, you will have to do so.
You will not find compatible drivers with Windows XP. All modern laptops and desktops offer support only for Windows 10.
Therefore, if you want to keep on using your favorite Windows system – XP, don’t hesitate and check the tips explained and detailed in the guidelines below.
Don’t worry though, because there are a few tricks to use for keeping Windows XP secured even after EOS.
Can you still use Windows XP in 2022?
Yes, you can still use Windows XP, but there are a few things you should know. The software has been discontinued years ago, so you can’t download it from official sources.
This means that if you’re looking for Windows XP support, you won’t be able to get it from Microsoft or any other official source.
Also, many applications have been updated, and they may not support Windows XP. So don’t be surprised if you can’t run your favorite browser or other software on it.
Even though it’s possible to use it, you’ll likely encounter compatibility issues with modern software.
Can Windows XP still be installed?
Yes, it’s still possible to install Windows XP even after Windows XP’s end of life. However, Windows XP download can be an issue Microsoft isn’t hosting the ISO anymore, so you’ll have to rely on third-party sources.
This isn’t recommended, since third-party sources can be unsafe and modify the installation, so you should always use your original disc or ISO file from a reliable source.
Does Windows XP still get security updates?
No, Windows XP isn’t receiving security updates since 2014, and as such, it’s not safe to use, since it doesn’t offer protection against the latest malware.
What’s the risk in using Windows XP even though Microsoft no longer provides official support for the same? The risks are quite important as we are talking about the security field.
The end of Windows XP means no security updates were released after April 8th, 2014. So, if you don’t know how to properly protect your computer, it might be infected with various malware, bugs, worms, and viruses.
As for Windows XP security, the software is out of date and it won’t protect you, so keep in mind that you’ll be vulnerable to online attacks.
How to safely keep using Windows XP?
If you want to keep using Windows XP in 2022, you need to be very careful in order to ensure your safety. There are multiple ways to go about this, and you will find out all about them in the text below.
1. Use Windows XP in 2022 with a Limited Account
Due to the lack of newly released security updates, using Windows XP in 2022 might be risky. However, we have a workaround for this: you can use a Limited Account, also known as a day-to-day account.rnrnu003cspanu003eA Limited Account comes with important restrictions that can be used for protecting your computer for malware. Thus, you can safely keep using Windows XP indefinitely.u003c/spanu003e
1. u003cspanu003eFirst of all, log in as u003c/spanu003eu003cstrongu003eAdministratoru003c/strongu003eu003cspanu003e and go to u003c/spanu003eu003cstrongu003eControl Panelu003c/strongu003eu003cspanu003e.u003c/spanu003e
2. From there, click onu003cspanu003e u003c/spanu003eu003cstrongu003eUser Accountsu003c/strongu003eu003cspanu003e u003c/spanu003eand select your own account.
3. u003cspanu003eSelect u003c/spanu003eu003cstrongu003eCreate a new accountu003c/strongu003eu003cspanu003e and type your new pass key twice.u003c/spanu003e
4. Now tap onu003cspanu003e u003c/spanu003eu003cstrongu003eHomeu003c/strongu003e, then clicku003cspanu003e u003c/spanu003eu003cstrongu003eCreate a new accountu003c/strongu003e.
5. Save a new name for your account and picku003cspanu003e u003c/spanu003eu003cstrongu003eNextu003c/strongu003e.
6. u003cspanu003eUp next, select u003c/spanu003eu003cstrongu003eLimitedu003c/strongu003eu003cspanu003e and click on u003c/spanu003eu003cstrongu003eCreate Accountu003c/strongu003eu003cspanu003e.u003c/spanu003e
7. You have just created a Limited User Account.
Malware can do as much damage as the importance of the account it infects. Keep that in mind when using Windows XP. Due to these reasons, the best approach is to stay away from administrator accounts.
A limited account can’t install or remove all applications, or make system-wide changes, such as changing a hard disk’s partitions.
In addition, it’s important to install every Windows XP update to make sure that malware doesn’t interfere.
2. Switch to a better browser and go offline while using Windows XP
On your Windows XP, you should use, a safe and optimized browser that has all the features you need for smooth browsing.
Windows XP will no longer receive Internet Explorer official support which means that your web browser might not offer the security support you need.
Another solution you can apply is to go offline as much as possible. For example, when using different business programs you don’t need an internet connection enabled.
Most of the tools you use might go online for pointing updates or who knows what else. Not all these updates are official and you can catch some malware. Because of that, staying offline as much as possible is a good idea.
3. Run Windows XP on a virtual machine
If the tips from above are way too complicated for you and you rather upgrade your computer to Windows 10, then you should use a virtual machine to install Windows XP.
As we already stated above, some apps and programs can run only on Windows XP systems, which means that you must use a virtual machine on any other Windows OS, or else the mentioned tools will not work at all.
Installing a virtual machine is not that hard as you can use official software developed by Microsoft.
Anyway, it will be quite annoying to switch between your regular Windows platform to the virtual machine each time you need to use your programs, but at least you will be secure.
After Windows XP end of life, running the OS on the virtual machine is the safest way to use it.
4. Be cautious with what you install on your Windows XP PC
Although Windows XP no longer receives security updates, there are numerous ways in which you can still protect your computer against malware or viruses infections.
Anyway, the best manner will be, of course, to be more careful when installing software, when going online, when using your web browser and when downloading something on your laptop or desktop.
By trying to install only official programs, tested and recommended by other users, and by using proper antivirus and antimalware programs, you will be safe when using Windows XP.
5. Install a dedicated antivirus to keep using Windows XP
After Windows XP’s end of life, you won’t get any security updates, but you can still protect your computer. You can anytime download and install free or paid antivirus programs.
The free software is ok, but if you really want to secure your Windows XP system you should choose a paid version of antivirus.
In case you are asking about what happened to Microsoft Security Essentials, you should know that the software received the last update in June 2015.
In terms of security and protection, the anti-threat solution must support Windows XP with up-to-date anti-malware features, besides the anti-virus benefits.
6. Keep your drivers up to date to keep using Windows XP
It will be extremely important to keep your programs up to date by installing all the latest official updates. In this way, you can protect your Windows XP computer against basic malware infections.
You can also secure your programs and software with third-party driver updaters a tool that can scan your computer for out-of-date software and update it if it finds any new compatible driver options.
Can I upgrade Windows XP for free?
No, there’s no free upgrade option available for Windows XP. The software was discontinued in 2014, and since then there were 4 different iterations of Windows available.
Sadly, you can’t upgrade to a new operating system from Windows XP, and your only option is to purchase Windows 10 or Windows 11.
Now, as we pointed out in these guidelines, you can still use Windows XP long after Microsoft ended official support.
By using the tips described in this tutorial, you can safely protect your Windows XP computer without upgrading to Windows 10 and without choosing Linux instead of Windows.
Of course, eventually, the upgrade will have to be made as you will not find compatible drivers and software with older versions of the Windows system.
But until then, don’t worry, and keep using your favorite Windows OS on your laptop or desktop. If you choose to use it online, then be sure to check our guide on how to hide your IP address in Windows XP.
Before you go, we have a great guide on Windows XP Black Edition, so you might want to check it out since it offers some unique features.
Don’t forget to use the comments field below for sharing your Windows XP experience and, of course, for sharing other useful tips with us and with our readers.
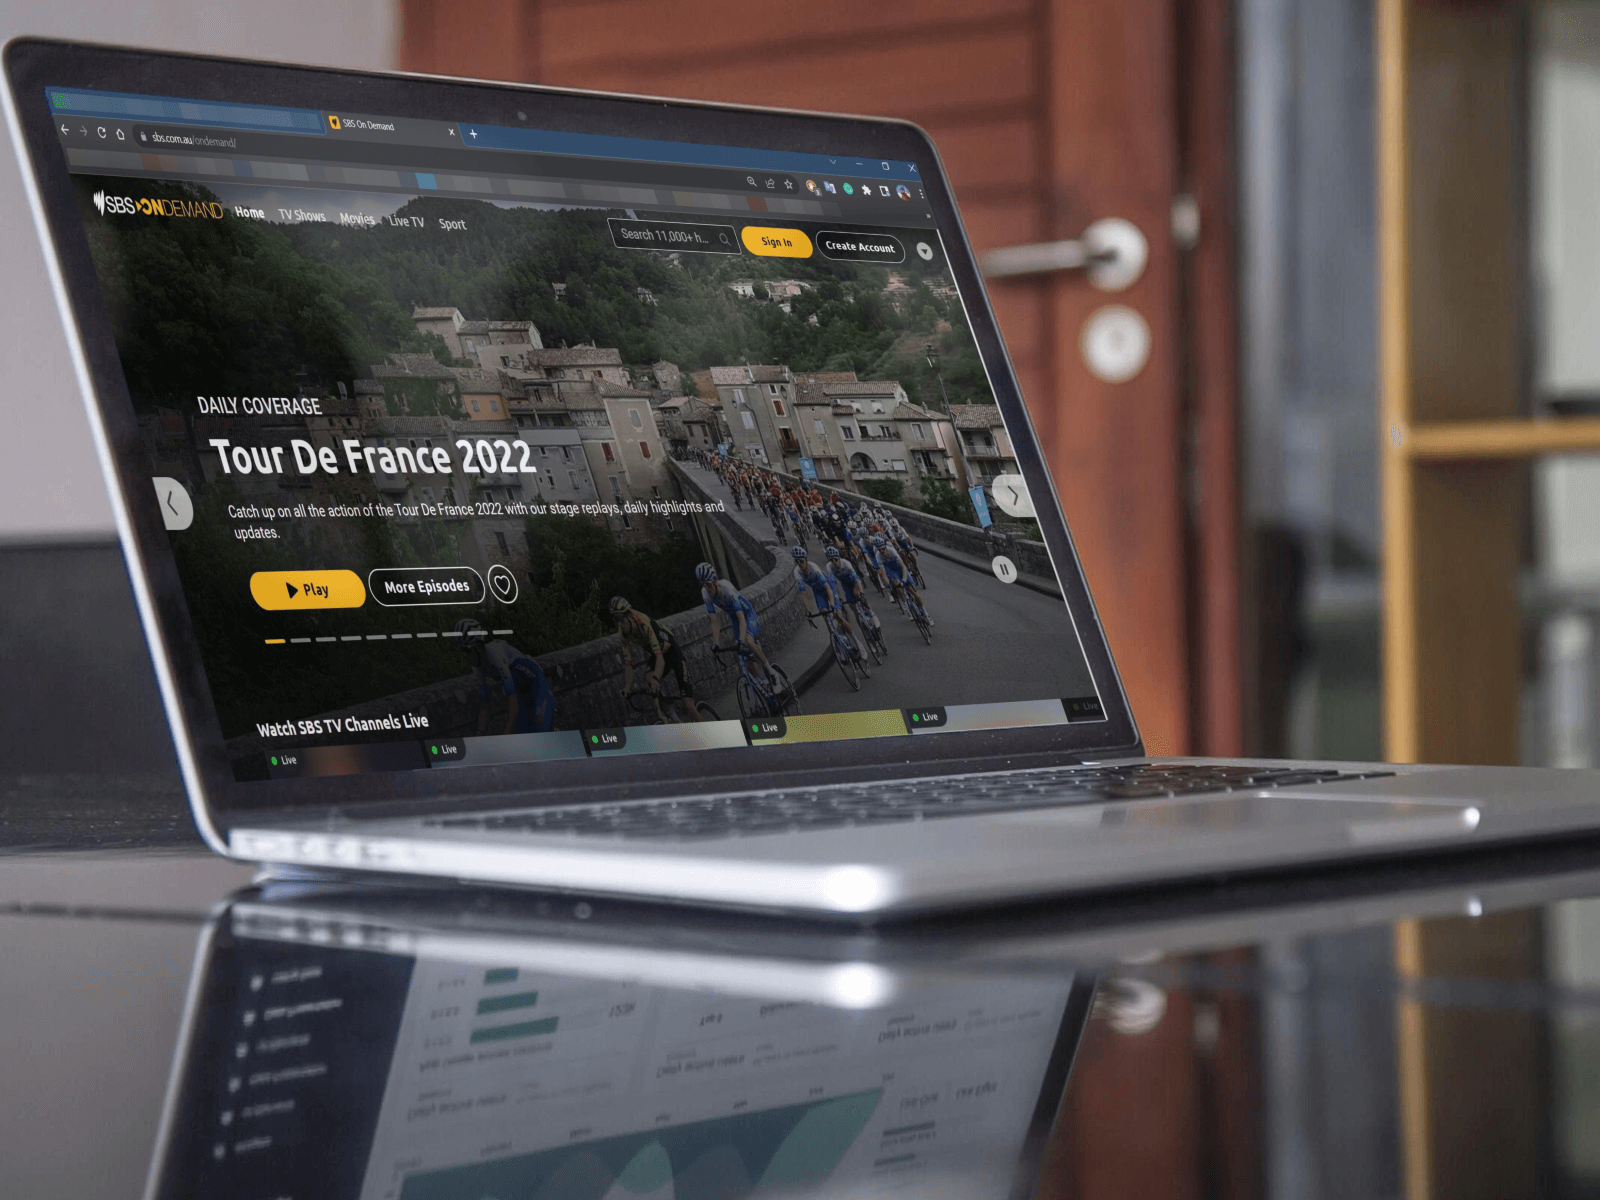
While there are plenty of video streaming options that give access to content for a subscription cost, SBS On Demand provides you with hours of watchable content for free.
Although there are a bunch of ads that are thrown at you, SBS On Demand is still a good place to watch movies, series, TV shows, live TV, news, sports, etc. if you reside in Australia. Other regions can still watch content on SBS On Demand, but they are limited.
However, if you are facing an issue where SBS On Demand keeps asking you to sign in every time you want to watch content, then it could be pretty frustrating.
In such a case, this guide is here to help you out. Because here, we will give you some quick fixes that will help you resolve the problem of SBS On Demand keeps asking me to sign in.
There could be multiple factors that could be triggering the SBS On Demand keeps asking me to sign in issue, but the solution that we have listed in this guide has helped users fix the problem. Let us check them out.
Why do I have to keep signing in to SBS On Demand?
Before we get down to the solutions to resolving the issue, let us take a list of common causes that might be triggering the SBS On Demand keeps asking me to sign in issue.
SBS On Demand is facing some technical difficulties
You have changed the password for your account
Your browser is clearing cookies and cache data every time to close it
The browser is having issues
These are just a few but the most common reasons you might come across SBS On Demand keeps asking me to sign in issue. Let us check out the solutions to fix it in the next section.
How do I fix SBS On Demand sign in problems?
1. Uncheck clear cookies and site data option
Launch Google Chrome.
Tap on the 3-dot icon.
Select Settings.
From the left pane, select Privacy & security.
Then click on Cookies and other site data.
Scroll down and toggle off Clear cookies and site data when you close all windows option.
Cookies and cache data store all of your personal settings for a website. When you clear them, your personalized settings are also erased, which could be one of the reasons why SBS On Demand is asking you to sign in every time you want to watch content.
Try following the above steps and toggling off the clear cookies and site data option when you close all windows and check if this resolves the issue or not.
2. Check if you changed your password
SBS On Demand allows you to create or sign in to your account by using your email address, Apple ID, Facebook, or Google account.
In case you make use of either an Apple ID, Facebook, or Google account to login into SBS On Demand, then you should check if you have recently changed the password for it or not.
If yes, then SBS will ask you to log back in again because the password has also been changed for the account you have connected with SBS.
Though SBS On Demand allows you to use the service on multiple platforms, it may appear that someone is attempting to use your account inadvertently when you use it on multiple devices at once.
In such a case, SBS may log you out of your account every time, you want to watch content on the platform.
Our advice would be to log out of all the devices and use it on the primary device that you wish to watch SBS On Demand content on and check if this fixes the issue or not. For many users, this tip has worked wonders.
That’s it from this guide on how you can resolve SBS On Demand keeps asking me to sign in problem. Let us know in the comments below, which method fixed the problem for you. Do share with us if you used a different solution to resolve the problem.
Most of us have used Steam at least once, and the platform is undoubtedly the most popular online gaming platform/store in the world.
As you know, Steam is available to all Windows, Mac, or Linux users for free. The only thing you pay for when you use Steam is the games themselves.
In fact, Steam has become so popular over the years that it’s pretty much impossible to mention PC gaming without at least saying the app’s name at least once.
Why did we say that the app will no longer be only for Windows, Mac, and Linux users? Because, get this, it’s going to be an integral part of Tesla cars as well.
We’re making progress with Steam integration. Demo probably next month.
You will be able to run Steam and play games in your Tesla
Some of you might think this is a joke, but Tesla is apparently looking to expand its collection of in-car games by integrating the Steam app.
In fact, Tesla CEO Elon Musk personally said that the company’s making progress with Steam integration and that we can expect a demo probably next month (August 2022).
If you know only a little bit about these cars, you surely found out that Tesla already offers a number of games through the built-in Tesla Arcade.
That being said, you have to realize how big adding Steam’s digital storefront to the car’s software could actually be.
Such a move could give users access to the entire Steam gaming catalog, which means that you can take a break from your drive, pull over, have a sandwich, and play Cyberpunk 2077.
Keep in mind that, even though this information is out, it’s still unknown if the integration will go so far as to allow users to make purchases on Steam while sitting in their cars.
team
Another question is if the car’s software can support all games in the Steam catalog and if this will affect the car’s performance at all.
People that kept a close eye on this matter remember that Ellon Musk still hasn’t delivered on promises to bring Cyberpunk 2077 and The Witcherto newer Model S and X vehicles.
Before you ask how can these cars run such complex and demanding games, know that they come outfitted with an AMD Ryzezn processor and a discrete AMD RDNA 2 GPU.
So, it’s safe to say that we can imagine our Tesla vehicles as extensions of our gaming dens, provided we don’t bring other devices on our trips.
Things are moving so fast technology-wise, that it would be surprising to see Windows 11, or even the upcoming Windows 12 running in these vehicles.
We remind you that recent details point to Microsoft moving back to a three-year release for new Windows operating systems.
This means that newer versions of Windows could end up being the official OS for quite a number of cars, provided Microsoft creates new partnerships in that direction.
What other Windows apps/features would you like to see run natively in your own car? Share your opinions with us in the comments section below.
We continue our nostalgic series of the best console emulators for Windows. After presenting you with the best NES emulators for Windows, we move on to the home of the world’s most famous hedgehog, Sega Genesis.
Sega Genesis or Sega Mega Drive is one of the most popular video game consoles of the late 80s and early 90s. Millions of kids worldwide, including me, grew up playing 16-bit games on this console.
Sega Genesis was discontinued long ago, but that doesn’t mean we can’t enjoy playing our favorite games anymore.
Can you play Sega games on PC?
Like every vintage console, a few Sega Genesis emulators for Windows 10 allow you to relive the experience of playing Altered Beast, Sonic the Hedgehog, Aladin, and more.
Although Sega Genesis doesn’t have as many emulators, we still managed to list the best Sega Genesis emulators for Microsoft’s operating system.
Remember that most of these emulators are pretty old, but despite their age, they’re still relevant even in Windows 10.
Quick Tip:
If you want to play games in your browser using an emulator, no other browser is better tailored to a gamer’s needs than Opera GX. The integrated chats and colorful interface will get your attention.
Browse the Opera GX Corner for games that will ship you back to your childhood. Furthermore, Opera GX is mobile platform compatible, so you may play Sega games directly in the browser.
Opera GX
Play games is a fully-optimized browser and take advantage of the plethora of in-built functions.
You will find classic gems like Streets of Rage 2, the Phantasy Star series, and more from every genre, including arcade, shooters, beat ’em ups, puzzlers, and others.
What are you looking for in a Sega emulator?
All of these emulators presented below also work if you are interested in the following:
Sega Genesis emulator – Choose any option you like from this article
Sega Saturn emulator for Windows 10 – For Sega Saturn, you can take a look at SSF
Best Sega genesis emulator – You can take your pick from an online emulator or one you install on your computer
Sega Mega Drive emulator for PC- Sega Genesis is known as Sega Mega Drive in markets outside North America
The best Sega Master System emulator – Kega Fusion, that we wrote about, is also a Sega Master System emulator
Now that we cleared that all up, let’s look at our selection of the best Sega emulators for Windows 10.
Kega Fusion is an amazing Game Gear emulator and probably the best possible choice. However, this emulator isn’t just compatible with Sega Genesis games, Sega CD, and others.
That means you can play any game ever made for these consoles on Kega Fusion. Unfortunately, it doesn’t support Saturn and Dreamcast.
This Megadrive emulator for PC is highly optimized, and games run smoothly on it, even on older machines.
It also offers basic features, like the ability to save games, cheat support, full-screen gameplay, online play, and various gamepad support.
It’s straightforward to use. All you have to do is open the emulator, load a ROM, and start playing.
Due to the mix of excellent performance and simplicity, Kega Fusion is among the most popular Sega emulators for Windows, and the majority of Sega community chooses it over its competitors.
Genesis Plus is another simple yet prolific Sega emulator for Windows 10. Genesis Plus remains at a high level of accuracy, providing one of the best Sega gaming experiences you can find.
Some gamers even state that some game bugs initially present on the console don’t appear in Genesis Plus.
Genesis Plus is fully compatible with all Genesis / Mega Drive ROMs, Sega/Mega CD, Master System, Game Gear & SG-1000 games.
It also covers the Sega Dreamcast emulator for Windows 10, so you’re all set in that department.
In addition, the Sega CD emulator for PC has features like gamepad support, emulation of all sound channels, and cheat codes support, but it doesn’t support full-screen gameplay.
The user interface can’t be more straightforward, making Genesis Plus an extremely easy emulator. First, you need to load a ROM and start playing the game.
Genesis Plus should work fine in Windows 10, but it may require you to install some additional files.
Gens is one of the oldest Sega emulators for Windows available. It was initially released in 1999 but is still compatible with the latest Windows operating systems.
It supports running Mega CD and Sega 32X emulator Windows 10 but requires their BIOS files, which are not shipped with the emulator.
When it comes to supporting games, Gens claims to support 92% of all Genesis games, but we haven’t managed to find any game incompatible with it (if you know a game that’s in that 8%, let us know in the comments).
However, if you want to play Sega games with your friends via Gens and Kaillera Client, you might face some performance issues, like lags or connection problems.
Additionally, Gens comes with some more valuable features, like recording what buttons are pressed and slowing down the gameplay.
Megasis is another pretty good Sega emulator for Windows. It offers some basic features, like the ability to save games, gamepad support, or graphical acceleration, but nothing spectacular besides that.
However, the best thing about Megasis is that it allows you to overclock the Mega Drive. By doing that, you can get rid of potential bugs, and have better, smoother gameplay.
You can even downclock the Mega Drive if you want to slow down gameplay. Although Megasis is quite old and hasn’t been updated for years, it should still work fine in Windows 10.
But just like it’s the case with Genesis Plus, you’ll maybe have to install some additional files to make it work.
If you don’t want to install an emulator on your computer or bother with finding proper ROMs for them, you can go online and play Sega games right in your browser.
A couple of websites allow you to play Sega games online using their emulator.
It’s the simplest, fastest, and easiest way to get your hands on a vintage Sega game you want to play. Just go to a site, browse from hundreds of available titles, and start playing.
Registration is not required, although you can create an account on some sites to save your game progress. The best online Sega emulators are Let’s Play SEGA, SSega, and Play Retro Games.
There you go. You now know all the tools that allow you to play Sega games on Windows 10.
Does it take a long time to start up your operating system? Maybe the boot process is lengthy because there are many applications that load at startup.
There are different tools to manage startup apps. It can be done via the Startup Manager, Task Manager, Explorer, or Registry editor. Below, you can find a few methods that will guide you through the process of adding or removing the startup apps.
You can, also, learn how to enable or disable different apps.
How to manage Startup Programs in Windows 10
How to remove Startup Programs in Windows 10
You can easily remove startup programs in Windows 10 by using the built-in Startup Manager tool. This tool allows you to configure which programs and apps you want your PC to start upon booting. You can either enable or disable them in just a few clicks.
1. Press the key combination Win + R and enter the following command: taskmgr /0 /startup. This will open the Startup tab.
2. In the Startup tab, you can observe a list of applications that are starting when your PC boots.
3. Disable startup application: Right-click on the application you want and select from the menu the Disable feature. The application will no longer start with the OS.
4. Enable startup application: Right-click on the application you want and select from the menu the Enable feature. In this case, the application will start with the OS.
Use the File Explorer
Press the Win + R key combination.
Enter the following command: shell:Startup, and press the Enter key. Note: If you want to add or remove startup apps for all users, you need to enter the following command: shell: Common Startup.
A Startup window will open. Find the application executable file that needs to load when Windows boots.
Create a shortcut of this app. Copy it and paste it in the Startup window. This is the way for adding a startup application in Windows 10.
To remove the application, delete the shortcut from the Startup folder.
Use the registry
Press the Win + R key combination.
Enter the following command: regedit without quotes and press the Enter key.
If you want to add applications to startup, you can do so using Group Policy Editor. We have to mention that this tool isn’t available in Home versions of Windows, but if you’re using Pro or Enterprise version, this tool should be available for you.
To add an application to startup using Group Policy Editor, do the following:
Press Windows Key + R and enter gpedit.msc. Press Enter or click OK.
When Group Policy Editor opens, in the left pane navigate to User Configuration > Windows Settings > Scripts (Logon/Logoff). Now in the right pane double click on Logon.
Logon Properties window will appear. Click on the Add button.
When Add a script window opens, click on the Browse button.
Select the application you want to start. After doing that, click on OK.
Now click on Apply and OK to save changes. After saving the changes, restart your PC and check if the application starts automatically with Windows.
This is a simple method, but in order to use it, you need to have Pro or Enterprise version of Windows. If you’re a Home user, you’ll have to look for a different solution.
Use the Task Scheduler
Windows comes with a useful tool called Task Scheduler. Using this tool you can set certain applications to start at a specific time, but you can also use it to add applications to startup.
The tool is relatively simple to use, and you can create startup applications by following these steps:
Press Windows Key + R and enter taskschd.msc. Press Enter or click OK.
When Task Scheduler starts, in the right pane click on Create Task.
Create Task window will appear. Enter the name of your task and check Run with highest privileges option. In the Configure for field choose Windows 10.
Go to the Triggers tab and click on the New button.
When the New Trigger window opens, set Begin the task to At log on. If you want, you can set this task to run only for a specific user or for all users on the PC. If needed, you can even delay and repeat the task. After choosing your settings, click on OK.
Navigate to the Actions tab and click on New.
Set Action to Start a program and click on the Browse button.
Choose the desired application and click on OK.
Click OK again to save your task.
After doing that, the desired application will start automatically every time with Windows. Task Scheduler is a powerful tool and it allows you to configure your tasks any way you want.
This method is perfect for advanced users who want to have full control over their tasks and startup applications. Even if you’re a basic user, you should be able to add applications to startup by using this solution.
Use dedicated tools to manage Startup programs
If previous solutions seem a bit complicated for you, you might need something more user-friendly. Not long ago we covered the best apps to manage startup items, and while most of these apps allow you to disable or remove startup items, some of them have the ability to add new apps to the startup.
Most of these applications are free and relatively simple to use, so we strongly suggest that you check them out if you’re looking for a user-friendly way to add startup items.
Check programs’ configuration
The simplest way to add a program to startup (or remove startup programs) is to check its configuration. Most applications can start automatically with Windows, and in order to do that, you just have to check their settings.
Now you just have to find start with Windows or similar option and check it. After doing that, the application will automatically start as soon as Windows starts.
As you can see, this is a simple method but it requires you to check and change individual settings for all applications that you want to add to startup.
Keep in mind that some applications don’t even support the startup option, so this method won’t work for them.
There you go, some quick and simple methods that will allow you to manage the startup apps. How do you handle startup apps? Share your experience with us by leaving a comment below.
9Now is an on-demand, catch-up TV service in Australia. On 9Now, you can watch Channel 9, 9Gem, 9Go!, 9Life, and 9Rush, along with live news via 9news.com.au.
You can stream 9Now on your mobile, tablet, TV, computer, or any device. Notably, all you need to do is create an account on 9Now, and you are all set for streaming.
The best part about watching content on 9Now is that it is completely free of charge. Apart from live TV, you can watch TV shows and other exclusive content from Nine’s TV channels.
While watching free content is a breeze at 9Now, there are several user reports that have claimed to face 9Now keeps logging out issue. This could be pretty frustrating because it prevents you from watching content with no hassle.
Thankfully, in this guide, we have listed some effective solutions that will help you to fix the 9 Now keeps logging out issue, and get back to streaming. Let us check out the guide.
Why does 9Now keep dropping out?
It has been found out that there isn’t one specific reason why you may come across 9 Now logging you out of the problem.
After going through the internet, we found out that the following are some of the most common causes that could trigger the 9 Now logging you out the issue:
Your internet connection is faulty
Check 9Now server status
Check your browser settings
Now that you are aware of the common causes that could trigger the problem for you, let us go through the solutions that will help you resolve the 9 Now keeps logging you out the problem.
How do I fix 9Now if it keeps logging out?
1. Check 9Now servers
It is very important that 9Now servers are up and stable. If because of any issues, 9Now servers are down, you will come across not only this but different problems when accessing 9Now.
In order to get rid of this doubt, you can make use of websites such as Downdetector to keep a check on the server status of 9Now. Moreover, you can also check 9Now’s official Twitter handle in order to keep yourself up to date about any issue announcements.
2. Check your internet
A stable internet connection is crucial for 9Now to work without any hiccups. You can check in with websites such as Fast or Speedtest to know the actual condition of your internet connection.
If you see any issues with your internet, then you can first try rebooting your router. In case that doesn’t help, then you should get in touch with your ISP and get the issue resolved. Once everything is set check if you are still coming across the 9Now keeps logging out issue or not.
Scroll down and toggle off Clear cookies and site data when you close all windows option.
Cookies and cache data are stored in your PC which contains your personal settings for a website. When you clear them, you also clear your personalized settings.
This could be one of the reasons why 9 Now is logging you out from time to time when you are watching content or using the 9Now website.
Try following the above steps and toggling off the clear cookies and site data option when you close all windows and check if this resolves the issue or not. Clearing the data will also help with 9Now Error Code P2.
4. Switch to the app (Bonus tip)
If you are still experiencing issues with the 9Now website and it is asking you to log in again and again, then we would suggest you either switch over to another browser or for the time being, use the 9Now app on your Android or iOS device.
Well, the above solutions should surely help you fix the 9Now keeps logging out problem. If you applied a different solution to resolve the issue, feel free to let us know in the comments below.
Google Chrome is still one of the most popular web browsers across platforms. Using the Chromium open-source engine and abundant extensions, Chrome is a preferred choice for new and experienced users.
However, due to the concern related to privacy issues, Chrome alternatives are coming fast. One of the popular Chrome alternatives is Opera GX.
A browser based on the open-source Chromium project targets power users and gamers. If you want more in-depth information about this topic, explore our Opera GX Review.
While both browsers share the same core, Opera GX offers more customization and privacy features. Free VPN, ad blocker, and Flow are some of the additional features provided by the Chrome alternative.
That said, is it the right time to switch to Opera GX? We compared both browsers in different categories, including performance, features, design, security, and more, to find the best browser among the two.
Is Opera GX better than Chrome?
A few elements need to be considered to answer this question, like how you want to use your browser and what you expect from it.
If you’re a gamer, Opera GX has some excellent gaming-related features that can come in handy, while Chrome enables you to expand its functionality by adding extensions.
We will break down all elements of comparison between these two capable browsers in the lower section in this guide, so make sure to read all the presented information.
Opera GX vs. Google Chrome: which one should you choose?
➡ UI & Design
In terms of design and user interface, both browsers are miles apart. While Chrome features the traditional Chromium-based design language, Opera GX offers in-your-face design elements.
Opera GX features a gaming-inspired theme with Razer Chroma integration built into the browser. With dark themes and bright colors, GX can complement any gaming rig with RGBs.
The Chroma integration works beautifully with any of your Razer Chroma-enabled accessories. In addition, users can further customize the GX browser using the Easy Setup tab.
You can choose one of the few pre-selected colors and set it as the browser’s highlight. Opera also offers customizable wallpapers; however, the wallpaper feature is available on the Chrome browser.
Launching the GX browser, you will find shortcuts to popular social media and streaming services such as Twitch, Discord, Reddit, and YouTube.
You can add more sites if you want to. There’s also quick information on your city’s weather and a shortcut to take a snapshot.
Both browsers use similar icons for essential functions, but the gaming browser has much more on the sidebar. We will talk about it later in the article.
Click on the controller icon on the top-left side, and Opera GX will show game deals, upcoming releases, and tournaments.
➡ Performance
When comparing the Opera gaming browser vs. Chrome, we see they are both based on the same core, so there is no surprise that both are fast browsers. Granted that Chrome is slightly better in the Jetstream benchmark, it’s hard to notice the difference in day-to-day usage.
Opera GX does have a significant advantage over Chrome: resource usage. Chrome is known for being a memory hog.
Opera GX vs. Chrome RAM usage
Browser
RAM Usage
Test conditions
Opera GX
740 MB
5 tabs open
Chrome
1263 MB
5 tabs open
Opera’s browser is not only more efficient when it comes to memory usage, but it also comes with built-in resource management tools.
The GX Control feature that includes a RAM and CPU limiter is among the most interesting. Click the GX control button to access the CPU and RAM limiter options.
Using GX control, you can force the browser to use only a fraction of your system’s memory and limit CPU usage to only 10%.
This may slow down the browser but is helpful if you want to allocate more resources to your games. Several gamers tend to keep their browsers open when gaming and GX control should help you better allocate your resources.
If you are bothered about Chrome eating up your memory resource, the GX browser offers better control and is a winner in this segment.
Opera GX vs. Chrome speed tests
Our team of experts has used the BrowserBench online platform and the Speedometer 2.0 benchmark test to get exact results for the speed tests.
This benchmark tests the browser by simulating various quick tasks that the browser needs to deal with and thus can measure the number of runs performed in a minute of testing.
A greater number in the test results signifies better speed and performance.
Browser
Speed test results
Conditions
Opera GX
130 runs/minute
Speedometer 2.0 test without any other tabs open
Chrome
126 runs/minute
Speedometer 2.0 test without any other tabs open
As you can see from the table above, Opera GX could run 130 actions in a minute, while Chrome only reached 126 runs simultaneously.
Even though the difference is not very large, the answer to the question Is Opera GX faster than Chrome is a resounding: Yes.
Opera GX vs. Chrome performance tests
To test the performance of both these browsers, our team of testers has used the Jetstream 2 and the MotionMark benchmarks:
Browser
Jetstream 2 score
MotionMark score
CPU usage
Opera GX
161.531
586.14
1 – 2.3 %
Chrome
152.992
649.06
1.1 – 2.9 %
As you can see from the information presented above, even though Chrome is a good browser with loads of extensions and speedy browsing, Opera GX still comes out on top.
The benchmark results support our suggestion, as the JetStream 2 and MotionMark tests have shown better results for Opera.
Choosing the Opera browser will ensure that your work and home life can be entirely separated by using the Workspaces feature and have easy access to your social media accounts, messenger, a music player, and even a built-in VPN service.
Based on these ideas, we recommend Opera instead of Chrome, but the correct answer for your circumstances will come down to your decision based on the information you’ve read.
➡ Features
Switching from Chrome to the Opera GX browser is easy enough. Install the browser, and you are greeted with an option to import all your browser data automatically.
This is a standard practice among modern browsers but a nice feature nonetheless. Finally, moving to the extension bits, Chrome has the best extension available for the browser, thanks to the Chrome Store.
That does not mean Opera GX lags when it comes to extension availability. You can install extensions from the Opera add-on page and Chrome extensions from the Chrome web store. Almost all the Chrome extensions we installed on Opera GX worked without issues.
Opera GX offers some features that Chrome does not—beginning with the built-in Snapshot feature. Click the camera icon, and then you can capture the entire screen or a selected area.
That’s not it; you can edit and annotate captured screenshots with text, emojis, markings, blur text, and even add a selfie to the screenshot.
Besides the snapshot icon resides the Privacy button. Clicking on it will bring up the ad and tracker blocker features.
The built-in adblocker feature is a boon as you don’t have to install third-party ad blocker extensions to eliminate annoying in-page and pop-up video ads.
Enabling the Block Tracker option will prevent the websites from tracking the users across the Internet.
Enter the Dark Mode. Yes, Chrome doesn’t have this feature. Unfortunately, Google’s browser does not support third-party websites’ full Dark Mode feature. There are some extensions, but they are unreliable.
Opera GX does this job to perfection. Right-click on any open web page and choose the Force Dark Page option, and Oprea will enable the dark mode for the specific web page. This is an excellent and essential feature that all web browsers should adopt.
There are a few more unique GX features that you will not find in Google Chrome. We have discussed them in detail below.
GX Cleaner – On the left tab, click the GX Cleaner icon. A built-in cleanup utility cleans up your browser for a faster and smoother experience. You can select and clean browsing history, downloads, sidebar icons, cache, and cookies.
Social Media and Streaming apps shortcuts – GX browser offers quick access to Facebook Messenger that opens in the browser. Then there is a Twitch shortcut that opens the in-browser Twitch web app.
You can log in and use the streaming platform without switching to a different tab.
Play – The play button consists of three major audio streaming platforms: Apple Music, Spotify, and YouTube Music.
While Spotify and YouTube Music work with or without subscriptions, you can log in to your Apple Music account and stream audio without leaving the browser.
My Flow – My Flow is another unique feature of Opera browsers, including GX. It allows you to connect all your devices with My Flow to send messages and files between your mobile and desktop.
Download the Opera Touch browser on your phone to use the feature and scan the QR code.
The seamless integration between Chrome and Google services such as Google email, calendar, docs, and maps is where the Chrome browser races ahead. If you use these services extensively on the browser, Chrome has the edge over Opera GX.
➡ Syncing
Chrome browsers can sync almost everything across the device, including passwords, bookmarks, and history. It also handles sync seamlessly between all your devices irrespective of the platform.
Opera GX also offers impressive sync for almost every browser aspect, including bookmarks, speed dials, history, passwords, and more. However, it is still in its early development phase.
➡ Security and Privacy
Opera GX has more privacy settings than Chrome. Also, Chrome being a Google product has always been a topic of debate regarding data privacy.
Chrome block third-party cookies and offer a browser cleanup tool to find and remove malicious software and identify dangerous websites, extensions, and downloads.
Opera GX also offers most of these features and some more. For example, the built-in ad-blocker prevents the users from clicking on fraudulent websites, blocks all third-party trackers, and allows anonymous browsing through a built-in VPN.
Opera GX vs. Chrome privacy tests
To perform these tests, our team of testers has used the BrowserAudit online tool to check for any security and privacy issues found in these two browsers.
These benchmark tests have been carried out under the same conditions to avoid redundant test results.
The BrowserAudit tool runs a total of 400 tests that cover the entire spectrum of elements required for your browser to provide you with online privacy and simplify the process. Therefore, we will only note the number of tests passed out of the total.
Below, you can see the results of our tests:
Browser
BrowserAudit benchmark scores
Opera GX
368/400
Chrome
365/400
As in the case of the previous benchmark tests, the difference between Opera GX and Chrome when it comes to online privacy is not large at all.
The Opera GX benchmark results confirm that this browser is a better choice than Chrome.
Opera GX vs. Chrome vs. Firefox tests
Choosing the best browser between these three will also come down to your personal preference and how you plan on using your browser.
Browser
Price
Latest
Release date
Owned by
CPU usage
RAM usage
BrowserAudit benchmark
Speedometer benchmark
Opera GX
Free
86.0.4363.64
18 May 2022
Opera Software
1 – 2.3 %
740 MB
368/400
130 runs/minute
Chrome
Free
103.0.5060.66
27 June 2022
Google
1.1 – 2.9 %
1263 MB
365/400
126 runs/minute
Firefox
Free
102.0
28 June 2022
Mozilla Foundation
1.4 – 2.3 %
415 – 478 MB
376/400
117 runs/minute
As you can see from the information presented above, Opera GX takes the win regarding CPU usage levels, followed by Chrome and Firefox.
In the BrowserAudit privacy and security test Firefox won the battle with a score of 376/400 passed tests, Opera GX with a score of 368/400, and Chrome in 3rd place with 365/400.
When testing these browsers’ speeds, Opera took the lead with 130 runs/minute. In the 2nd place, we have Chrome with 126 runs/minute, and Firefox takes the last place with 117 runs/minute.
Conclusion
Compared to Firefox or Chrome, Opera wins this competition, offering you better performance because of lower CPU usage and incredible browsing speeds unmatched by the other two options.
➡ Cross-platform compatibility
Opera GX is a game-inspired browser and is available for Windows OS, which of course, is the only central PC gaming platform in the market today.
Opera GX offers everything that Chrome does and some more
Tip
If you want to customize your browser to match your gaming and extensively access streaming and social media platforms, Opera GX is a better choice.
It offers exceptional security features, a built-in ad blocker and tracker blockers, a VPN to browse anonymously, and integration of popular social media apps such as Discord, YouTube, Twitch, Reddit, and more without leaving the browser.
In sum, Opera GX is a better browser for gamers and regular users who consume multimedia content online extensively.
The customization options offered are unlike what we have seen on any other Chromium-based browser till now. In addition, control over resource usage and better privacy features make it a great alternative to Google Chrome.
When you’re trying to access a website and Google Chrome says the certificate is not secure, or there is a certificate error, but you know the certificate is valid, it is warning you that the webpage you are on has a mixture of HTTPS and HTTP resources.
Experiencing this every day can be downright frustrating and even scary at times. Depending on the type of error, it could also mean downtime for your website, which means you’re losing money. Or it might just be that the browser on your computer needs fixing.
Whichever it may be, worry less. This article will provide you with three possible ways to get past your Chrome certificate error no proceed option.
The certificate errors warning you receive on a webpage means the website does not provide an encrypted connection. The following are some common Chrome errors you might receive when using the web browser and what they mean:
1. This webpage has a redirect loop or ERR_TOO_MANY_REDIRECTS – The webpage you’re trying to access has too many redirects; probably because the cookies are not working correctly.
2. This webpage is not available or ERR_SSL_VERSION_OR_CIPHER_MISMATCH – The website you’re visiting has an outdated security code, and Chrome blocks the connection.
3. Connect to a network – You have to sign in before using your Wi-Fi portal and connect to the website.
4. Delete Expired DigiCert Certificate (Mac computers only) – The webpage uses a certificate that isn’t set up right on your computer.
5. This site can’t provide a secure connection; network error sent an invalid response or ERR_SSL_FALLBACK_BEYOND_MINIMUM_VERSION – If the page had a problem which Chrome couldn’t understand, you’d see this error; the solution is to contact the website owner.
Quick Tip: Use a different browser like Opera One to access secure sites without errors. It updates monthly, includes a free VPN, built-in AI, and blocks phishing or malware threats automatically.
Opera
Browse safely and smoothly with this fast, secure browser packed with smart features.
Right-click the clock in the bottom right corner and click on Adjust date/time.
The date and time window will now appear.
Toggle off the Set time automatically option.
Wait for a few moments and turn this option back on again.
Alternatively, you can adjust the time and date manually by clicking the Change button.
One of the most common causes of Your connection is not secure message isincorrect date and time. Many websites use security certificates, and each certificate has its own expiration date.
If the time or date on your PC isn’t correct, your browser might detect the required certificate as outdated, thus giving you this message.
2. Bypass the warning
When the message appears, click on Advanced.
Now click on Add Exception.
Click on Confirm Security Exception, then return to the page and click to proceed to the site.
If you want, you can view more information regarding the problematic certificate by clicking the View button.
If the error appears while trying to visit a trusted website, you can simply bypass the warning and proceed to the site irrespective.
This guide is for you if you notice that you have no sound on some Twitch streams.
Twitch is one of the world’s biggest live-streaming platforms that users can utilize via the Twitch website or app.
Even if our experiments showed that it works great in both versions, some users have said in forum posts that they can’t hear specific Twitch streams they follow.
We’ve compiled a series of solutions to solve this annoying problem quickly. But before discovering them, let’s see why this can arise.
Why there is no audio on some Twitch streams?
If you notice that there is no audio on some Twitch streams, you should take a look at the following reasons that explain this error:
Outdated drivers – When device drivers are outdated, your PC can cause noticeable performance and app-related problems. Remember that you should constantly update them, and we’ll show you how to do it quickly.
Wrong stereo settings – To make your audio work on any stream you need, configuring the stereo settings is an important step. Keep on reading and discover the quickest way to do it.
Temporary bugs – If you have no audio on some Twitch streams, your browser might have short-term problems. We strongly recommend resetting it; you’ll see how later in this guide.
Browser-related problems – If the problem isn’t related to any temporary issue, it could be a bit more serious. To ensure you won’t face this error again, you should try using another browser dedicated to streaming.
Let’s get to addressing the Twitch no sound issue on some streams.
Quick Tip:
Before trying anything else, you may need to use another efficient browser for uninterrupted Twitch streaming.
You have the Opera GX browser that includes navigation features and Twitch support integrated on your sidebar. Hence, you can follow the best streaming channels without sound difficulties or errors.
Opera GX
Stay tuned to your favorite Twitch content using this browser without any media issues.
What can I do if there is no audio on some Twitch streams?
1. Run the Playing Audio troubleshoot
Use the following keyboard shortcut: Windows + I.
Navigate to Update & Security.
From the left window pane, select Troubleshoot.
Look at the right window pane and click on Additional troubleshooters.
Select the Playing Audio troubleshooter, and press on the Run the troubleshoot button.
Your system will automatically search for audio-related problems. If any are found, you’ll be notified, and you should follow the on-screen instructions.
However, if your OS can not discover any errors, make sure you keep on reading. After these steps, move to the next solution if you still can’t hear the Twitch stream audio.
2. Update & fix audio device drivers
Press simultaneously on the following keys: Windows + X.
Choose Device Manager from the list.
Expand the Audio inputs and outputs section, right-click on your audio device, then choose to Update Driver.
Choose Search automatically for drivers.
Install any recommended drivers.
Check if the no sound issue on Twitch is resolved.
If you want to simplify the process considerably and ensure a long-term solution to this issue, we recommend you try specialized driver updater software.
These tools will scan your PC’s hardware and peripherals with a few clicks for timely driver updates. You may rely on this tool to make such changes to ensure a proper update with the most recent audio device drivers.
3. Select the stereo setting for audio devices
Click on the arrow in the right-bottom corner of your Taskbar, then right-click on the Sound icon.
Next, click Open Sound settings.
Click Sound Control Panel to open the window shown directly below.
Select the audio device you use to listen to Twitch stream, then click the Configure button.
Select the Stereo option if it’s not selected, then click on Next.
Click on Finish to apply the new setting.
Note: This resolution is more specifically for Twitch users who need to fix streams’ sound for audio devices with surround sound enabled. Once done, verify if the problem with Twitch audio not working is resolved.
4. Disable audio enhancements
Click on the arrow in the right-bottom corner of your Taskbar, then right-click on the Sound icon.
Next, click Sounds.
Then select the Playback tab.
Click on the listed audio device you’re utilizing and select Properties to open Speaker Properties.
Select the Enhancements tab shown directly below.
Select the Disable all enhancements checkbox.
Click the Apply button, then press OK to close the window.
Check if the no sound issue on Twitch is resolved.
Once you have followed these steps, verify if you still have no sound on Twitch, in which case you should try the next step.
5. Reset your browser
5.1 Chrome
Hit the Windows key, type Chrome, then open the first result.
Click on the Customize and Control Google Chrome menu button (the three vertical dots placed in the right-top corner of the window).
Select Settings to open that tab in Chrome.
Scroll down, expand the Advanced section, then click on Reset and clean up.
Click on Reset settings in the right window paneto their original defaults.
Confirm by clicking on the Reset Settings button.
5.2 Firefox
Press on the Windows key, type Firefox, then open the browser.
Click on the Firefox menu button (marked as three horizontal lines in the right-top corner of the window).
Select the Help option.
Then select Troubleshoot mode to open the tab in the shot directly below.
Click on Restart to reset the browser.
5.3 Microsoft Edge
Hit the Windows key, type Edge, then click on the first result.
Press Edge’s Alt + F keyboard shortcut.
Navigate to Settings.
From the left window pane, click on Reset settings, then choose to Restore settings to their default values.
Check if the no sound issue on Twitch is resolved.
What other Twitch audio issues should I be aware of?
Like any other app, Twitch can generate a few problems. The audio ones seem the most commonly reported, so we’ve decided to show you a list of them.
Twitch audio delay – Users claimed it to be the most annoying issue. Fortunately, in case you face it, you can always check some dedicated solutions to fix it in a few seconds.
Twitch audio only on browser – In this case, remember that the Twitch audio-only in browser feature is a great option that helps save significant device resources. However, to use it in the desktop app, make sure you verify our dedicated guide.
These are the most efficient methods if you have no audio on some Twitch streams. Also, remember that the potential resolutions above might fix the most common issues on Twitch.
However, if you still need other fixes, you can submit a support ticket via Twitch’s Contact Us page. We hope that the no audio issue on your Twitch stream is solved. Users also experienced the Twitch error of no sound on VOD; these fixes should also help.
Feel free to comment in the dedicated section below for any additional questions or related curiosities.
Have you been encountering This browser doesn’t support Ledger devices problem? Well, you need to know that Ledger Chrome apps have been deactivated and replaced by Ledger Live for security purposes.
A Ledger device can securely store your cryptocurrency and protect them with your own private keys. It acts like a bank vault that you own, and only you have access to.
The Ledger is a device that acts as a crypto wallet. It can hold multiple currencies offline. You can easily connect the Ledger hardware with MetaMask.
However, sometimes, you may encounter MetaMask not connecting to the Ledger issue. That is enough to ruin your experience with that software crypto-wallet.
Go through this article to find solutions along with some other helpful information.
Why is my Ledger not connecting?
We have tried to find out what may cause such problems in most situations. After doing some deep research, we have found the following ones:
Incompatible version of the browser and extension
Not connecting the Ledger in the proper way
Outdated Ledger firmware
Outdated Ethereum app
Problematic browser
Moreover, there can be other technical issues that can produce Ledger connectivity issues with MetaMask. Fortunately, you can quickly get rid of it if you follow some tricks.
Quick Tip:
Try another browser with Ledger management options and support. We recommend Opera One because it’s light and easy to use. Plus it’s very secure for crypto, having integrated antitracking and VPN.
It’s worth mentioning that Opera One has an integrated Crypto Wallet feature that helps users make secure transactions and manage tokens and collections. This browser also bring it’s own AI.
Opera One
Use a browser with dedicated support for Ledger for seamless and secure currency management and transactions.
How can I fix This browser doesn’t support Ledger devices error?
1. Update MetaMask extension
1.1. Update Chrome extensions
Open the Google Chrome app.
Right-click on the MetaMask icon in the upper right side of the browser and select Manage extensions.
Click on Update.
1.2. Update the Firefox add-ons
Open the Mozilla Firefox browser.
Type this address about:add-ons in the address bar and press Enter.
Click on the gear icon and then select Check for updates.
2. Update your browser
Open Chrome again.
Click on three vertical dots on the top right corner and then go toSettings.
Click on About Chrome.
Google Chrome will check for the update and install automatically if it finds any newer versions available.
Relaunch Chrome.
You can try the same steps for your other browsers, and we believe you should be able to update your browser. Since browser compatibility could cause the browser doesn’t support the ledger device’s errors, this should fix the issue.
The above methods are the best ways to fix browsers doesn’t support Ledger devices. However, you can check out our guide on how to Metamask not connecting to Ledger if you encounter this issue.
Browser video playback has come a long way largely thanks to the advent of HTML5 video, which has largely replaced browser plug-ins such as Flash.
Users can watch high-resolution videos on websites such as YouTube or subscribe to video-streaming services to watch movies and shows within their browsers.
The best browser for online video supports most HTML5 video and audio codecs provides fast browsing speeds and has plenty of extensions so that users can enhance and customize playback.
When choosing the best browser for streaming video on Windows 10 and 11, it can get confusing with all the information found online, and for this reason, we’ve compiled a great list of the best Windows browsers for watching videos.
Which browsers can play 4K video?
As the evolution of video equipment and image quality keeps improving exponentially, almost all well-known browsers can play videos in 4K quality, but not all of them perform the same.
Opera One and Opera GX are our top recommendations for watching 4K videos because of the easily-accessible VPN and adblocker, which will significantly improve your experience no matter if you’re using it on Netflix or other streaming services.
Added to that, having easy access to all messengers and social media accounts can be extremely useful if you want to share your favorite videos with your family and friends.
You could of course also play 4K videos on your Edge, Firefox, or Chrome browsers, but when considering the overall performance, Opera One is still the best.
What are the best fast browsers for YouTube and video streaming?
Opera One incorporates some unique video options and features that users won’t find in most alternative browsers, making it one of the best browsers for YouTube.
It includes a video pop-out that enables users to move videos out of the Opera One page tabs into separate standalone frames and put them anywhere on the Windows desktop. Only this feature makes the app the best browser for movies, as having customization options can be extremely useful.
Turbo Mode is a similar feature to the Opera One desktop browser that can save bandwidth when playing videos and speed up browsing.
Mobile versions of the browser enable users to compress videos, which reduces buffering, making it the best browser to watch Anime with. Additionally, Opera One incorporates a 360 video player for virtual reality headsets.
The browser’s built-in ad blocker will remove ads from video website pages and their clips, which will further speed up browsing on YouTube, Vimeo, and other sites. The processing speeds also make Opera One thebest browser for Netflix.
You can find 195 extensions for YouTube in the browser’s own extension library if you enter the keyword YouTube in the add-ons search box.
If preferred, one can also add Chrome’s video extensions to Opera One, as it’s based on the same Chromium engine.
Other useful features:
Built-in free and unlimited VPN service
Screenshot tool included
Syncs browsing data across devices
Share notes, links, and files by using the Opera One Flow feature
Opera One
Use the video pop-out feature in Opera One to detach videos and stream without switching between tabs.
UR browser – Good browsing speeds and privacy features
UR is one of the best browsers for watching videos that you have probably never heard of. Yet, UR has been getting some rave reviews and scores highly on HTML5 video, audio, and streaming benchmarks.
This browser is great for watching videos on websites primarily because it’s based on the same Chromium engine as Chrome and Chromium-Edge.
Thus, the HTML5 support is comparable to Google’s flagship browser; and users can utilize Chrome’s video extensions to customize playback on YouTube and other websites.
UR also boasts a built-in VPN that allows you to watch location-restricted content. Few other browsers can match this feature.
Other useful features:
3 levels of privacy and security
Low impact on system resources
Great UI
Customizable with add-ons and extensions
UR Browser
Use UR browser to get rid of the ads, trackers, and cookies, and enjoy a smooth video streaming experience.
Edge – Faster than other browsers but lacks in features
Microsoft Edge is the browser included with Windows 10 that most users overlook in favor of other alternatives. Yet, Edge is certainly one of the best browsers for videos.
Edge is the only browser that currently supports all HTML 5 video and audio codecs. It’s also the only browser that can play Netflix video at a 4K resolution thanks to its PlayReady DRM tech.
The browser provides the most battery-efficient video playback on laptops. Furthermore, Edge users can add Chrome’s YouTube extensions now that it’s embracing a Chromium engine.
Google Chrome – Huge number of extensions and addons
Google Chrome boasts a massive user base nowadays. It generally provides the most extensive HTML5 support and incorporates the latest web technologies to ensure the best video playback.
Chrome is among the fastest browsers for streaming videos. In addition, users can add many great YouTubevideo extensions to Chrome, such as Magic Actions, Turn Off the Lights, YouTube Plus, and more.
Chrome is also a good choice for streaming, and users can certainly be sure all the extensive video-streaming services support Google’s flagship browser.
Watching Netflix movies at a high-definition resolution with the Netflix 1080p extension is among Chrome’s top features. In addition, there are numerous Netflix extensions in Chrome’s vast add-on repository.
Another great browser that can be used to play videos online and have a great viewing experience is Vivaldi.
This browser has many customizable elements, allowing you to make your browsing experience your own.
Workspaces are customized just by quickly dragging and dropping elements from one location to another, and pinning the tabs to the sidebar can make you even more efficient.
Additionally, Vivaldi doesn’t track or store your data, so no third parties will ever have access to your data.
Other useful features:
Great bookmarks organizer features
Reader-view option allows you to read without distractions
Opera One is the only browser on the market with some advantageous video-related features. This versatile browser has a built-in video player that allows users to customize how they watch online videos.
The video pop-out element can be beneficial, allowing you to move videos out of Opera One’s page tabs into standalone frames.
This feature can be handy when used properly, as in the case of comparing products by using video reviews, hunting for your favorite items on shopping platforms, etc.
As you can see, Opera One, UR, Edge, and Chrome are all excellent browsers for watching videos that also fully support HTML5 multimedia.
They’re all Chromium-based browsers and share Chrome’s repository for video websites and streaming services. So, Chromium browsers are the best for playing videos.
Which browser do you prefer? Share with us your experience using the dedicated comments area.
When browsing the Internet, you might sometimes encounter specific errors. One of the most known errors is HTTP error 404 Not Found, and today, we will show you how to fix this error on Windows 10.
The error has several variations, each with a unique error message. We have listed the common ones below:
Looks like we can’t connect to one of our services right now. HTTP 404
So, let’s find out about Error 404 in Windows 10 and its most effective solutions.
What is causing the 404 error?
Error 404 is a Hypertext Transfer Protocol (HTTP) standard response code that tells the users that the client could communicate with the server but couldn’t deliver the requested file.
This is the most common Internet error, and it appears when a user tries to access a broken or expired link. For example, error 404 can appear if you didn’t correctly enter the URL or tried to access a specific deleted or moved page.
Misconfigured settings or proxies have been found to lead to this and the HTTP 302 error in several cases. Also, if the browsing data is corrupt, you might encounter the error 404 in Windows 10.
How do I fix error 404 on my computer?
1. Check your URL
You can fix the error by simply checking your URL. In most cases, the 404 issues are caused by a mistyped URL. While entering the URL, ensure the path after the forward slash is correct.
If the URL is correct, you should know that this error can appear if the desired page is moved or deleted. If that’s the case, your only solution is to wait until this issue is fixed or contact the website administrator.
2. Clear your browsing data
NOTE
The steps listed here are for Google Chrome, and should provide an understanding of the process.
Launch the browser, and press Ctrl + Shift + Del to open the Clear Browsing Data box.
Select All time from the Time range dropdown menu.
Now, tick all the three checkboxes here, and then click on the Clear data button.
After the process is completed, relaunch Chrome for the changes to fully come into effect.
Users reported that your browser cache can cause this issue, and one of the easiest ways to fix this problem is to clear the cache.
Even if you don’t use Google Chrome, you can quickly clear your cache by following similar steps in your web browser. Also, this method would work if you come across error 404 on Javajunkies.
3. Try entering the desired URL into Google’s search
If you can’t access a certain URL, you might want to enter it in a Google search. Even if you enter the wrong URL address, Google should give you the link to the correct address in your search results.
If the problem persists even while using Google’s search results, it’s quite possible that the desired page is moved or deleted by the website administrator.
4. Use Google cache
To prevent these types of problems, Google often caches web pages so you can view them even if the page is removed or if the website is down.
To access Google Cache, simply enter this address followed by the URL to the website you are trying to access, and press Enter:https://webcache.googleusercontent.com/search?q=cache:
For instance, if you are looking for WindowsReport, the complete link would be:https://webcache.googleusercontent.com/search?q=cache:https://windowsreport.com
Press Windows + S, enter Internet Options, and click on the relevant search result.
Go to Connections tab and click on LAN settings.
Make sure that Automatically detect settings and Use a proxy server for your LAN options aren’t checked, and then click OK.
ClickApply and OK to save the changes.
5.2 Use the Settings app to disable the proxy
Open Settings app and go to Network & Internet.
Navigate to the Proxy tab.
Turn off Automatically detect settings and Use a proxy server options.
The proxy can often interfere with your Internet connection, and sometimes it can even cause the error 404 to appear in Windows 10.
6. Change the hosts file
Open Notepad, go to the File menu, and select Open.
Go to this folder:C:\Windows\System32\drivers\etc
In the bottom right corner change Text Documents (*.txt) to All Files.
Select hosts and click Open.
Locate the name of the website that is giving you error 404 and remove those lines. Users reported having these lines for example:
79.106.2.131 localhost
79.106.2.131 facebook.com
79.106.2.131 www.facebook.com
After removing the problematic lines, press Ctrl + S to save changes, and the error should be permanently fixed. Keep in mind that those lines might look different on your PC.
Removing the wrong lines can cause problems with specific applications. Therefore, it might be a good idea to create a backup of hosts file.
A few users reported that they couldn’t access their favorite websites due to this error. If you can’t access only one or two websites, a malicious user or malicious software might change your host file.
7. Contact the website’s administrator
If nothing else works, the problem most likely lies at the website’s end, and it’s best to contact the administrator. Maybe they would provide the new URL for the website or page you are trying to access.
And in case there’s an issue at the backend, they should resolve it once apprised of the same. And this would fix error 404 in Windows 10.
HTTP Error 404 is one of the most common errors on the Internet, but we hope you solved this problem by using the solutions from this article.
We haven’t touched the topic of malware and cyberattacks in some time, so we’re going to get back on that horse and blow the whistle.
You might not be aware of it yet but top security researchers and engineers at Microsoft actually stumbled upon a massive phishing attack that has been targeting more than 10,000 organizations since September 2021.
Yes, that is a lot of targets, and we are about to elaborate on the matter and tell you exactly what to look out for when using Office.
Microsoft experts pull the covers off new phishing campaign
The cybercriminals involved in this scheme used adversary-in-the-middle (AiTM) phishing sites to facilitate stealing passwords and related session data.
As a result, this allowed the malicious third parties to bypass multi-factor authentication protections to access user email inboxes and run follow-up attacks using business email compromise campaigns against other targets.
The above-mentioned main cyberattack targeted Office 365 users and spoofed the Office online authentication page using proxies.
Hackers used emails with HTML file attachments that were sent to multiple recipients of an organization, in which recipients were informed that they had a voice message.
From there, clicking to view the included attachment would open the HTML file in the user’s default browser, informing the specific user that the voice message was being downloaded.
Nothing further from the truth, as the victim was actually redirected to a redirector site from where the malware would latch on.
This phishing site looked exactly like Microsoft’s authentication site, with the exception of the web address.
The next step was for the victims to be redirected to the main Office website once successfully entered their credentials and completed the second step of verification.
Once this was done, the attacker would have already intercepted the data, and therefore all the information he needed, including the session cookie.
It goes without saying that after that, malicious third parties have disastrous options such as identity theft, payment fraud, and others.
Microsoft experts state that the attackers used their access to find finance-related emails and file attachments.. while the original phishing email that was sent to the user was deleted to remove traces of the phishing attack.
Providing your Microsoft account details to cybercriminals means that they have unauthorized access to your sensitive data, such as contact information, calendars, email communications, and more.
The best ways to stay protected against such attacks is to always double-check the source of any emails, not click on random stuff on the internet, and not download from shady sources.
Remember them, as these simple precautionary steps might just save your data, your organization, your hard-earned funds, or all of them at once.
Have you also received such a shady email from attackers pretending to be Microsoft? Share your experience with us in the comments section below.
Streaming HDR video online with display quality is one thing everyone enjoys. However, there are some issues you can encounter with play steam such as the play streaming HDR video not supported.
Furthermore, the HDR (High Dynamic Range) video streaming is a tool that Upscales video, presenting it with more contrast and color features. Also, it increases the luminance and the standard of media content broadcasts.
Why can I not enable HDR?
1. Outdated video card driver on Windows
Windows updates its drivers to help them perform better. So, if drivers like the video card driver are not properly installed or are not up-to-date, it’ll cause issues with the display.
2. HDR compatibility
Sometimes, people try to enable some features on their devices without researching if they are compatible with the device in question. However, your device display may not be capable of running HDR content, so you won’t be able to enable it.
3. TV or Monitor not supporting HDR steam option
People complain that they can’t enable HDR on their TV or monitor. However, some devices are not built to work with HDR stream displays, which makes them not support the feature.
4. Outdated Windows
Mostly, running Windows that is not up-to-date can cause several issues with your computer. So, it can also be a factor if you cannot enable or access the HDR stream option on your computer.
How do I fix streaming HDR video not supported?
1. Backdate your Windows version
Press the Windows + I key on your keyboard.
Click the Update and Security option.
Select the Recovery tab, then scroll down to the Go back to the previous version of the Windows section on your screen.
Click on Get started and follow the prompts to restore your PC to the earlier version of Windows.
After the restore is complete, check if you can enable the Stream HDR option in your device’s settings.
However, this solution works for users with Windows 11. It is a good fix for the Play streaming HDR video not supported in Windows 11.
2. Update your Windows version
Press the Windows + I key on your keyboard.
Click the Update and Security option.
Select Windows Update and click on Check for updates.
Windows will check for updates and automatically install if there’s any update available.
Press the Windows and R keys on your keyboard to prompt the Run command.
Input devmgmt.msc and press Enter to open Device Manager.
Click on Display adapters and select Graphics card.
Click on the Update driver option.
Select Search automatically for updated driver software.
Windows automatically find and install updated drivers for your video device. You can do this for all drivers under the Graphics card for safety’s sake. There are third-party tools that can do this automatically for you, preventing conflicts between incompatible drivers.
You may rely on the Outbyte Driver Updater utility to make such enhancements to ensure a proper update with the most recent display adapter drivers.
You will notice an increase in the performance of your device after downloading and installing the most recent drivers available, without the hassle of looking for them every time.
After the drivers are updated, the play streaming HDR video not supported error will be fixed.
Can I enable HDR on an unsupported display?
It is possible to enable HDR on an unsupported display. Sometimes, the HDR not supported error occurs due to some activities on the device, some of which is mentoring above.
Likewise, the HDR display might be available on a device but is not enabled, so it can prompt the HDR not supported error. However, following the solutions above, you can enable HDR on an unsupported display.
Stream HDR video keeps turning off – What should I do?
Click the Start button in the bottom-left corner, then type Settings.
Select Settings from the option.
Select System, then go to Display.
Click the HDR-capable display menu if multiple displays are connected to your computer.
Turn on Use HDR.
By doing this, the stream HDR video option will be available for multiple displays and won’t be going off.
In conclusion, these are the best troubleshooting fixes for playing streaming HDR video not supported error.
However, Auto HDR not working in Windows 11 is another issue you can encounter with HDR. Hence, click the link above to read our article about how to fix it.
In an age where the Internet brings us closer together regardless of how far apart we are, the way we interact with our colleagues has changed as well.
For example, you have specialized software called collaborative software that helps teams get in touch. These tools help you to speak and create interactive meetings with your mates.
One such collaborative tool is Microsoft Teams, and it includes all the tools you could possibly think of, including instant chat, video conferencing, file transfer, and more.
Speaking of which, some users have been reporting having issues with Microsoft Teams’ ability to download the files that others have posted.
So after loading excell and word files to the team nobody can download anything. But everything is available in SharePoint and files are not corrupted. Any ideas?
This issue seems to be quite prevalent, and many solutions were tried, some of which were more or less successful.
Why are my Microsoft Teams files not downloading?
You should check to see if the services are temporarily down or inaccessible if you are unable to upload files to Microsoft Teams meetings or chats or download them.
It’s also possible that you don’t have the appropriate rights to view the files you’re trying to download from Teams, which is another typical source of this issue.
One more thing to look into is whether or not the cache in your browser is causing problems with Microsoft Teams. Therefore, you will need to delete it from your system as we’ve shown below.
This being said, let’s jump into the list of methods we have found that work best in fixing the Teams download not working issue. Keep on reading!
How do I download Microsoft Teams files?
1. Change the browser used for Microsoft Teams
As you may know, you need an Internet browser to launch Microsoft Teams, and it will usually go for the one you designated as the Default one.
However, if you see that you are having download issues with your current browser, simply download and try using another one until one works.
But if you’re looking for a browser that will handle Microsoft Teams in a secure manner, we recommend you choose one with a built-in VPN and AdBlock.
In terms of performance, Opera One includes a one-of-a-kind Turbo function that may be applied when your internet connection is very slow.
Opera One also provides data savings through compression methods not seen in other browsers, thus handling file downloads in Microsoft Teams effortlessly.
Opera One
Use all MS Teams’ features with no effort with this lightning-fast and responsive browser!
Tap the Windows key, then type Chrome and click the Google Chrome result in order to open it.
Next, use the following keyboard shortcut to open the Clear browsing data menu:Shift + Ctrl + Delete and choose All time as the time range to delete the cache.
Checkmark the Cached images and files option and uncheck the others.
And lastly, click Clear Data. The Chrome not displaying images issues will be resolved. If you were unable to download recording from Teams of any other type of file, that issue will be resolved.
Download issues can also occur if the browser you are running has the cache filled with too much redundant data.
As such, clearing it from time to time should eliminate any risk of you encountering download issues in Microsoft Teams.
Each browser has different steps that you need to take to clear the cache, so depending on what browser you are using, check the developer’s website for more details on that matter.
Open theMicrosoft Teams app from your desktop and go to the conversation where the file was shared.
Above the conversation, select the Files tab.
Find the file you need then click anywhere on it besides its name, then choose Download.
Each team has more tabs to manage the conversation. In the File tab, you can see every document that was shared in the channel. You should not have any issues if you download them from that location.
Microsoft Teams’ download and upload services are hosted by SharePoint, with Teams acting as only an interface.
Many users reported that while they do have the download issue with Microsoft Teams, they can download and upload files from the corresponding SharePoint folders without any problems.
Admittedly, this is more of a workaround at best, but it should get you going until you find a permanent solution for your problem.
5. Make sure you have the permissions to download files
Some users reported that while they cannot download files from their own Team, they can from others. Thus, make sure that you have all the permissions, which include the ability to download files.
By following these steps, you should be able to fix any file download issue you may be having with Microsoft Teams.
Where does Microsoft Teams save files?
The files that you post to a channel are saved in the SharePoint folder associated with your team. You may access these files by clicking the Files button that is located at the very top of each channel.
SharePoint is a website-based collaboration solution that enables corporate teams to work together more effectively through the utilization of workflow applications, list databases, and various other web elements as well as security measures.
Moreover, SharePoint provides the organization that is utilizing the platform with the ability to regulate user access to information and automate workflow procedures across all of the firm’s different business divisions.
Your OneDrive for Business folder will be used to store any files that you post to a one-on-one or group chat, and those files will only be shared with the other participants in that conversation.
The files stored in OneDrive that are displayed in Teams are not the files stored in your personal OneDrive but rather the files stored in OneDrive for Business, which is connected with your Microsoft 365 account.
We recommend that you check out our guide on how to backup OneDrive for Business to make sure you don’t lose any important files from your Teams.
Do you know of any other method that fixed this issue? Let us know in the comment section below. Thanks for reading!
If you still haven’t upgraded to Windows 11, or Windows 10 for that matter, you should know that Microsoft will start bombarding you with notifications.
You should know that the company is soon going to start sending notifications to Windows 8.1 users about the upcoming end of extended support.
Remember that this outdated OS is set to reach the end of its support period on January 10th, 2023, and the warning messages will appear starting with July 2022.
Windows 8.1 end-of-service notifications are incoming
As the Redmond giant stated, the above-mentioned notifications will resemble the ones Microsoft used in the past to remind Windows 7 users about the upcoming end of support.
If you are a Windows 8.1 user, you surely know that Microsoft originally retired all Windows 8 support in 2016, but the updates will completely stop starting with January 2023.
Furthermore, the company will not be offering an Extended Security Update (ESU) program for Windows 8.1, just in case you were wondering.
That being said, businesses won’t be able to pay for additional security patches and will have to upgrade or accept the risk of running software without security updates.
Many will not consider this a big loss, as Windows 8.1 was never very popular, to begin with. The original Windows 8 version was heavily criticized for things such as its over-reliance on touch-based interaction.
Now, Windows 8.1 users will now need to decide whether to upgrade to Windows 10 or buy a new rig that can support the latest OS.
As you know, Microsoft was adamant about the new system requirements for Windows 11, so an upgrade from Windows 8.1 to 11 is pretty much out of the question.
However, you can also go for Windows 10, operating system which will continue to be supported until October 14th, 2025.
Just to clarify things, Windows 8.1 devices won’t simply go blank starting with the end of support that comes on January 10th, 2023.
However, everything you do after will be at your own risk, as without software updates and security fixes you will be exposed.
That’s something to keep in mind when dealing with software that the manufacturer deems as obsolete and no longer worthy of any effort.
But, as you might have observed, even old and obsolete versions of Windows still receive some updates during Patch Tuesday rollouts, only for major problems.
For anything else, you are pretty much on your own. Remember that when considering what OS to switch to before January 2023.
Have you also started receiving these EOS notifications on your Windows 8.1 device? Share your experience with us in the comments section below.
Earlier in the month, the community was raging against Microsoft for prohibiting the sale of free open-source apps in the Microsoft Store. The policy changes were to take effect on July 16 and also covered even the sale of legitimate open source applications like Krita, and WinSCP, but Microsoft has now backtracked a bit.
Last month, we shared a few updates to Microsoft Store policies to help protect customers from misleading product listings. We heard your feedback, and today we made a change to policy 10.8.7 and 11.2 https://t.co/fJd50I4J0c 1/3
Per Giorgio Sardo, who is the general manager of apps, partners, Microsoft Store, there are two specific changes. The changes impact Microsoft Store policy 10.8.7, and 11.2. Microsoft has removed the previous mention to open source pricing. He also points that if there is intellectual property concerns about an app, they can be reported online. This is a clear reference to the original reasoning behind the initial change in policy, which was to target fake apps and scammers.
Microsoft’s clarification and change on the stance took about two weeks, did they do the right thing? Let us know your thoughts on this in the comments below.
Shudder is a pretty cool video-on-demand streaming service that specializes in horror movies. It has a combination of movies and original content, both old and new.
You get classics like John Carpenter’s The Thing from 1982 and George Romero’s Night of the Living Dead, the zombie movie that started it all, from 1968. For exclusives, you get the likes of The Queen of Black Magic and the revamped Creepshow.
If you’re a big fan of horror movies, Shudder is highly recommended. You can watch it on the official app which you can get from the Google Play and Apple App stores. It’s on Xbox, Roku, and Sling.
Is Shudder free with Amazon Prime?
No, Shudder is not free on Amazon Prime. You can, however, subscribe through Amazon Prime Video Channels by adding the service to your Amazon Prime account.
This means that you’ll have to pay extra to use it on Amazon Prime. There’s also the option to add the service to YouTube TV if you so wish. Plus there’s a seven-day free trial for you to try out Shudder before you commit to buying.
You can watch Shudder on Chrome, Firefox, Safari, and Opera One. This guide will tell you which of these browsers is the best for Shudder.
What are the best browsers for Shudder?
Opera One – Lightweight browser that keeps Chrome extensions
Next, we have Opera One. This browser has the unique distinction of supporting Chrome extensions. You can do this by simply downloading the extensions themselves from the Chrome Web Store.
There is indeed an Opera One extension that allows you to install Chrome add-ons, but that has since become obsolete due to the browser’s new native support. So you can enjoy the likes of Scener, Picture-Picture, and more.
Besides the extensions, what makes Opera One better than Chrome is how much of a computer’s resources it takes comparatively. In truth, the amount really isn’t that great, just a few megabytes, but that difference is notable.
Additional features
Free VPN and Ad blocker
Workspaces and Tab Islands
Native AI and modular AI-ready design
Opera One
Streaming on this browser is made easy with the built-in VPN and a vast library of add-ons.
Kicking things off, we have Google Chrome. This browser is arguably the best one on this list thanks to its robust video playback features. The browser has features that allow you to control video in a different tab.
You can also control whether the movie on Shudder will autoplay, plus it supports Chromecast. You can connect your Chromecast to your Shudder account and then onto your TV.
And what would a Chrome entry be without mentioning the vast library of browser extensions? These add-ons can greatly enhance a viewing experience and we recommend installing Scener.
Scener is an extension that lets you host watch parties with your friends where you can all enjoy a horror movie together. It comes highly rated and was even featured on Chrome Web Store for a time.
Additional features
Chrome also comes with a password manager to protect your information
The browser has a lot of other extensions to enhance movie watching
The final entry on this list is Mozilla Firefox. Like Chrome, this browser has its unique extension that enhances the viewing experience. And similarly, you can host watch parties via the aptly named Watch Party plug-in.
There’s also Jelly Party which some people prefer since it has an in-app chat room and the ability to send emojis on there. It’s definitely one of the more interactive extensions out there.
But where Firefox shines best is in its security measures. The browser has a password manager and tracking protection to stop third-party cookies from following you. This is great to keep your data private.
Additional features
You can sync up your account on Firefox across various devices
Other extensions can add Picture-in-Picture mode
Mozilla has a Firefox Monitor program to let you know if your data has been breached
Why is Shudder so laggy?
According to Shudder’s own support page, a laggy video could be due to low internet speeds or too many windows taking up computer resources. They first recommend running a speed test to see if your connection meets the 20Mbps requirement.
They also recommend that you close any and all unnecessary windows and apps. These things can cause a slow internet connection. We also recommend clearing out the browser cache.
Let us know your choice in the comments area below.