How to Stop Opera GX from Opening on Startup [Easy Fixes]

Today, we’ll show you how to stop Opera GX from opening on startup, so it will no longer use up your PC’s resources when you don’t use it. Let’s get right to it.

How do I stop Opera GX from opening new tabs on startup?

1. Disable Opera GX browser assistant

  1. Type Task Manager and Windows search bar and press Enter.
    o
  2. Go to the Startup tab from the options and click it.
  3. Right-click on the Opera Browser Assistant icon.
  4. Select the Disable option from the menu.
    Stop Opera GX from Opening on Startup

2. Uncheck the option from the settings

  1. Launch Opera GX browser and go to Settings.
  2. Scroll down the list until you find the Basic section.
  3. Look for the Run when my computer starts option.
    Stop Opera GX from Opening on Startup
  4. Click on the option to toggle off.
  5. Restart your browser.

3. Try internal third-party tools

Another practical solution you may try is to utilize dedicated software for monitoring your OS and finding the internal apps faster.

There are different applications that can measure the performance of your PC and improve app productivity by editing and settings up your desktop files and application.

To be more specific, you can use Microsoft Sysinternals service to employ tools and activate them without searching them manually.

4. Check the Task Scheduler apps

  1. Type Task Scheduler in the search box and press Enter.
  2. Click on the small arrow to expand the library.
  3. Verify if Opera GX appears among the apps there.
  4. If yes, click on it and select Delete folder.
    click on it and select Delete folder
  5. Close the window.

This solution can be helpful if you installed the Opera browser and there are automated tasks involving this browser. Hence, you can solve it efficiently by following the presented steps.

5. Use another browser as the default

If any of the methods above didn’t work your issue, the last workaround is to use another browser as default and then get back to GX:

  1. Write Default apps on your home search bar.
  2. Type in the name of another browser from your PC. (e.g Microsoft Edge)
  3. Set it up as the default for particular file types or links.
  4. Or, press the Set default button on the top of the window.
    Stop Opera GX from Opening on Startup
  5. Close the window and see if the issue is fixed.

How to stop Opera GX from opening old tabs

  1. Go to browser Settings by clicking on the Opera icon.
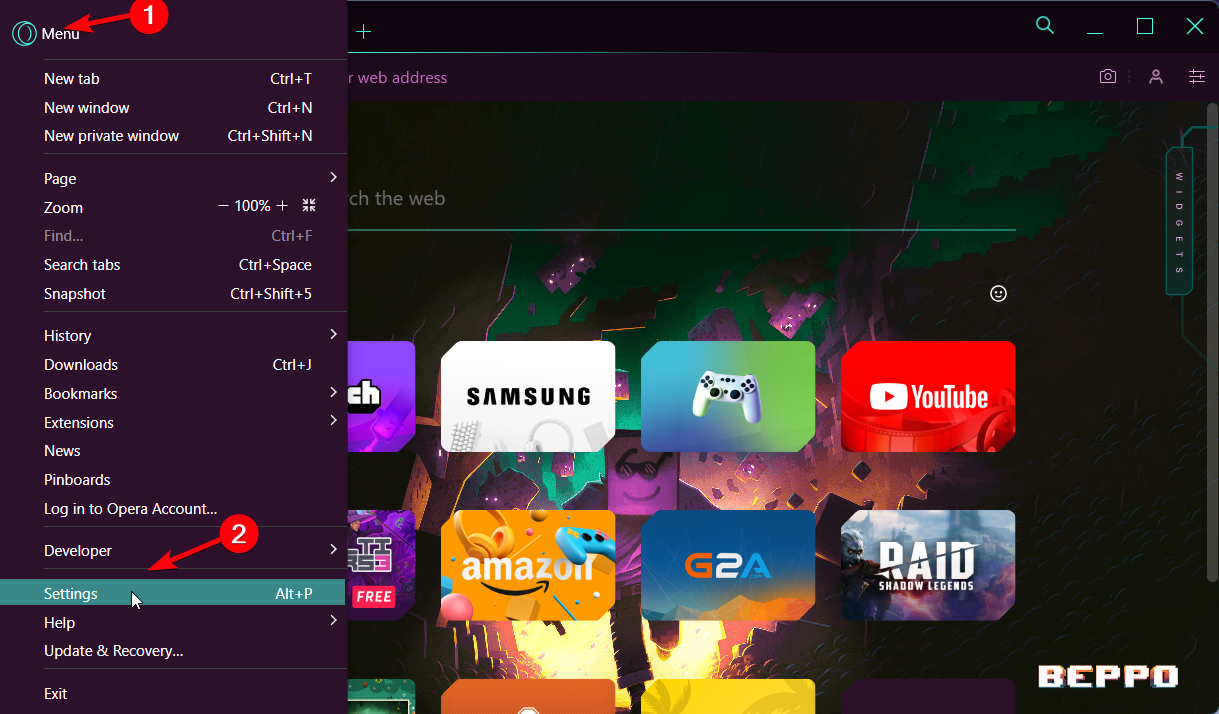
    Stop Opera GX from Opening on Startup
  2. Click on the Settings icon.
  3. Scroll down to the bottom of the page and locate the On startup section.
  4. Now, select Begin fresh with start page.
    Stop Opera GX from Opening on Startup

There are different users that encountered issues this kind of problem and asked how to stop Opera from opening new tabs.

That’s about it regarding this browser and how to stop Opera GX from opening on startup on Windows 10 or 11. Opera is a browser equipped to load high-traffic sites promptly but as you can see, it can sometimes face loading-related difficulties on its own.

As a last note, don’t hesitate to reach us for other useful browser tips, and share your experience with our guide in the comments section.

How to create & customize organizational charts in Visio

Microsoft has released new features to help you quickly create & customize org charts in Visio.

Org (short for organizational) charts are the perfect tools to educate people about the structure of a team. They are very useful to new people, especially, because they offer visual cues into the hierarchy of your company.

But they can also be used for restructuring your company or even hiring initiatives. So learning how to create and customize an org chart can be a very valuable asset.

For some time, Visio has become a very handy tool to create such org charts and the Redmond tech giant has been quietly investing resources into making it work flawlessly. So these new features are very welcome.

Just keep in mind that the new features are available to those with a Visio Plan 1 or Visio Plan 2 license. Without further ado, let’s get into it!

Here’s how you can create and customize your org charts with the new Visto features

Create your org chart with the Format Org Chart task pane

  1. Click on the Format Org chart below the Organization chart tabvisio org chart
  2. The Format Org chart will then open to the rightformat org chart
  3. Once open, you can create your chart with different fields and details as you can see below

Customize your org chart with the Change the Node style feature

  1. Go to the Node style in the task pane and click on it
  2. Select your option
  3. The org chart will automatically refresh with your new option

Personalize your chart with the Insert employee photo feature

  1. Click on the Upload Photo buttonupload photo button
  2. Select one or multiple photos
  3. Add them to your org chart

Add employee information with the Add additional employee fields

  1. Go to the Employee fields option
  2. Once there, select the fields you want to add to your org chart

Create work hierarchies in your org chart with the Add child notes feature

  1. Hover over any node in your org chart
  2. Once the ‘+’ button appears, click on itchild node
  3. Add a child note

Connect all your nodes together with the Snap Together feature

  1. Select the node you want to link
  2. Hover the node over an existing one to connect them in your org chart

The new Visio features are intended for customizations. For example, the new Format Org Chart feature lets you do a lot of things. You can change the org chart shape, you can upload photos, and even add employee fields to existing shapes.

With the Change the node style feature, you can change the style of the shapes in your org chart. You can also create visual cues to highlight the work hierarchy. For example, management roles can be represented by badge nodes, while assistant roles can be represented by rollout nodes.

The Insert employee photo feature allows you to upload multiple photos at once, and then manage them in your org chart.

The Add additional employee fields feature speaks for itself, but you have a lot of fields to choose from. For example, you can personalize your Visio org chart with information such as Department, Email, Address, Location, and Telephone.

With these being said, Visio is definitely a must-have tool for any organization, and it’s definitely one of the better options if you deal with work management and workflows.

Visio is currently part of the Office suite, and like all Microsoft products, it is designed to work best on Windows operating systems. However, if you are a Mac user, there are great alternatives for this product on the platform.

Do you work with flowcharts? Are you using Visio? Are you excited about these new features? Let us know in the comments section below.

Klif.sys Blue Screen Error: 5 Steps to Fix It

If you have encountered a Blue Screen of Death error displaying a stop code Klif.sys, this guide can help! We will cover all the available methods to fix the blue screen error right after discussing the causes.

What causes the Klif.sys Blue Screen of Death error?

The Klif.sys BSoD error is caused by an issue with the Kaspersky antivirus. The Klif.sys is a system driver that is installed with Kaspersky Lab products & it is responsible for intercepting and monitoring system events to protect your PC against malware and other threats.

There could be various reasons why this BSoD error occurred; some of the common ones are mentioned here:

  • Corrupted driver file – If the Klif.sys driver file becomes corrupted or damaged, it may trigger a BSOD error. Try running SFC and DISM scans to fix the error.
  • Incompatibility with Windows updates – Sometimes, a Windows update may conflict with the Klif.sys driver, leading to a BSoD error. Try uninstalling the latest update.
  • Conflicts with other software – If other security software or system drivers conflict with Klif.sys driver, it may trigger this blue screen error. Uninstall or disable the security software to resolve the problem.
  • Hardware issues – In rare cases, hardware issues such as a failing hard drive or memory may trigger a BSoD error related to Klif. sys. Try running a memory test.

Now that you know the causes, let us check out the solutions to fix it.

How can I fix the Klif.sys Blue Screen of Death error?

Before engaging in advanced troubleshooting steps, you should consider performing the following checks:

  • Restart your computer.
  • Try reinstalling the Kaspersky software.
  • Uninstall other third-party security software.
  • Make sure Windows is up to date.

If these minor tweaks didn’t work for you, move to the detailed solutions below.

1. Delete the Klif.sys file

  1. Press Windows + R to open the Run dialog box.Klif.sys Drivers Windows + R
  2. Type the following path and click OK: C:\Windows\System32\drivers
  3. Locate and select Klif.sys and click the Delete button.
  4. Now in the Run window, copy & paste the following path and click OK: C:\Windows\System32\DriverStoreDriverStore
  5. Search and select Klif.sys and click the Delete button.

2. Update all device drivers

  1. Press Windows + I to open the Settings app.
  2. Go to Windows Update, and click Advanced options.
    Windows Update Advanced options
  3. Under Additional options, click Optional updates. options klif.sys
  4. Click to expand and if there is an update available, select it and click Download and Install.Windows Updates Advanced options Klif.sys
  5. The driver updates available will be downloaded, and your computer will restart. So make sure you have saved all your work and closed all the apps running.

It’s equally possible to solve this issue or keep getting the same error if the updates are not available.

To raise the chances and certainly update outdated drivers, you can simply use an alternative tool developed to detect and fix old device drivers automatically.

⇒ Get Outbyte Driver Updater

3. Run SFC and DISM scans

  1. Press the Windows key, type cmd and click Run as administrator.CMD Run as administrator
  2. Type the following command to repair system files and press Enter: sfc/scannowSFCSCANNOW CMD klif.sys
  3. Wait for the scan to complete and if it comes up with an error, copy and paste the following commands one by one and hit Enter after every command:
    • DISM /Online /Cleanup-Image /CheckHealth
      DISM /Online /Cleanup-Image /ScanHealth
      DISM /Online /Cleanup-Image /RestoreHealth
      DISM
  4. Once the scan is complete, restart your computer to confirm the changes.

4. Perform a System Restore

  1. Press the Windows key, type control panel, and click Open.Control Panel start menu klif.sys
  2. Select View by as Large icons and click Recovery.Recovery Control Panel
  3. Click Open System Restore.Click Open system restore
  4. On the System Restore window, select Choose a different restore point and click Next.Next Choose a different restore point
  5. Select the desired point and click Next.Choose a point
  6. Click Finish.Finish

Windows will restart and restore it to the selected point. If the System Restore didn’t successfully complete, you can follow this informative guide to get fast solutions.

5. Run a memory test

  1. Press the Windows key, type windows memory diagnostic, and click Open.Memory diagnostic tool klif.sys
  2. Before moving ahead, save your work and close all the running applications. Once done, click Restart now and check for problems.memory-diag-tool 3
  3. Windows will restart and automatically run the diagnostics checks. Please be patient, as this process may take some time.Check test results

Once it is done, your Windows will restart, and you can see the test results. If there are no errors, then you can move further.

However, if there are errors listed, then your RAM might be faulty. You might have to clean and reseat the memory modules. If the errors persist, then you might have to replace them.

If nothing has worked for you so far, you must perform a clean installation of Windows.

So, these are the methods to fix What causes the Klif.sys Blue Screen of Death error. If you have any questions or suggestions, feel free to mention them in the comments section below.

How to use OneDrive’s Personal Vault feature to work better and safer

While going about your day, you’ll find that you often interact with a lot of files. In some instances, you might even find yourself handling delicate and classified information that you may prefer to keep private and away from unauthorized users.

OneDrive will help keep your files safe, It’s a cloud storage solution that allows you to keep your files in sync on all your devices.

Not only does the application let users protect and store files safely, but it also allows users to share files with others. What’s more, users also get to access the files from anywhere on any device.

Aside from these capabilities, OneDrive also allows users to password-protect important files with the Personal Vault feature. It’s a neat feature that provides an extra layer of protection for your files and folders.

Note: It’s worth noting that the Personal Vault feature is only available for OneDrive home and personal plans, therefore you’ll not be able to access it via your work or school account. You can also access it via OneDrive on the web, the mobile app, and from your Windows 10 PC.

In this guide, we’ll walk you through the process and show you how to skillfully password-protect important files on your Windows PC using the Personal Vault feature. Here’s what you need to do:

How to set up Personal Vault

Before proceeding to set up this feature, it’s important to know what it is first. According to Microsoft:

Personal Vault is a protected area in OneDrive where you can store your most important or sensitive files and photos without sacrificing the convenience of anywhere access.

Now that you’ve acquainted yourself you can now proceed to set up the feature by:

  1. Launch the Microsoft OneDrive app and head to the My files section on the homepage and select the Personal Vault folder.
  2. A small window will pop-up with a prompt asking you to Verify your identity. You might be requested to provide your email address and even phone number.
  3. Next, you’ll need to set up a verification method. If you selected text or email, a unique code will be sent to you that you’ll need to key in to access your Personal Vault.

You can also review solutions for missing vault access in OneDrive Personal Vault Not Showing Up which helps you restore the secure folder when it does not appear.

How to upload files to your Personal Vault

Since you’ve already set up Personal Vault, you now need to know how to upload important files and secure them with the feature.

Note: Users without a Microsoft 365 Family or Personal subscription can only upload up to three files in the Personal Vault. Those with active subscriptions can upload as many files as they’d like dependent on the storage space they have left.

  1. Launch the OneDrive app, and select the Personal Vault.
  2. Next, you’ll need to sign back into your Personal Vault folder using the identity verification method you selected (email/text).
  3. Select Upload and choose all the files you want to store in the Personal Vault folder, then select Open once you’re done.

Important: OneDrive’s mobile app lets users scan documents, take pictures, or shoot videos directly into their Personal Vault. This, in turn, prevents you from storing important and classified documents in accessible areas on your device.

How to move files from OneDrive to Personal Vault

While you now know how to upload files from your device to your Personal Vault, you might also want to add an extra layer to files that you’ve stored in OneDrive and opt to move them to the Personal Vault. Here’s what you need to do:

  1. Launch the OneDrive app and select the Personal Vault.
  2. Next, you’ll need to sign back into your Personal Vault folder using the identity verification method you selected (email/text).
  3. Now, select all the files you’d like to move to the Personal Vault and click on Move Items. Alternatively, you can drag the selected files onto your open Personal Vault.

How to lock and unlock your Personal Vault

If you’ve managed to set up and move important files to your Personal Vault. It’s important to learn how to lock and unlock the Personal Vault so that you can access your files whenever you want.

Here’s how to unlock the Personal Vault feature:

  1. Launch the OneDrive app on your Windows PC and select the Personal Vault folder.
  2. Next, verify your identity by using the verification method you have set up and enter the code sent to you via email or text.

Tip: You can opt to unlock your Personal Vault using the Microsoft Authenticator app. It’s quite convenient as you’ll not need an internet connection to generate an access code.

Here’s how you can lock your Personal Vault once you’re done uploading and using the files stored there:

  1. Head to OneDrive’s homepage and select the Personal Vault folder.
  2. Next, select the Personal Vault options icon, and then select Lock.onedrive personal vault feature

Secure your files with the Personal Vault feature

Protecting a folder or file with a password is an easy way to keep people out of your stuff if you’re sharing files with someone who doesn’t need to see everything in the folder. The Personal Vault feature will help keep your classified files private.

We hope that the above steps were able to help you password protect your files using OneDrive’s Personal Vault feature. Do you use the feature to protect your files? Share your experience with us in the comments.

Microsoft 365 Family
Price:
$99.99


Microsoft 365 Personal


OneDrive
OneDrive
Price:
Free

Featured image via Bing Image Creator

(Code 48) Software for this Device has been Blocked [Fix]

The error message for code 48 in Device Manager reads The software for this device has been blocked from starting. This error code 48 reveals that there is some issue with the device driver that failed to load properly. Let us get right through it.

Why am I getting the error code 48 in Device Manager?

There is a serious issue with the device driver which is why you are getting The software for this device has been blocked from starting code 48 error message in Device Manager.

We have listed some of the most common reasons that trigger this issue in Device Manager.

  • Corrupt driver files: If any of the files associated with the driver is corrupt, then you will see the error code 48 in Device Manager.
  • Windows version conflict: Chances are that the Windows OS version that you are running isn’t compatible with the device driver installed.
  • Virus infection: If your PC is infected with a virus or malware, then you will face all sorts of errors in your PC, including error code 48.
  • Corrupt system files: Corrupt system-related files can cause various issues on your PC, including errors related to Device Manager.

Now that we know why this happens, let’s fix the problem by using the solutions below.

How can I fix the code 48 error in Device Manager?

1. Update the driver

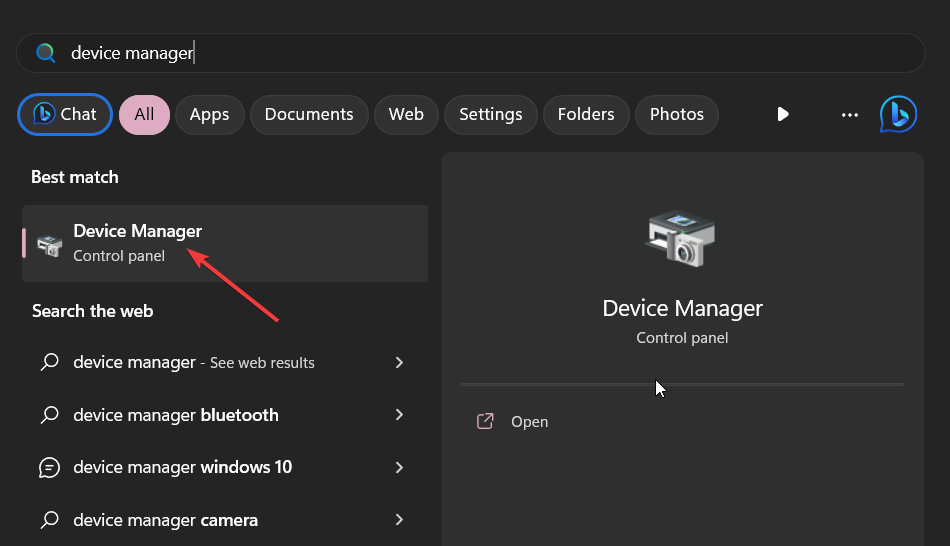
  1. Right-click the Start button and select Device Manager.
  2. Expand each section and double-click on the driver with which you are getting the error code 48.
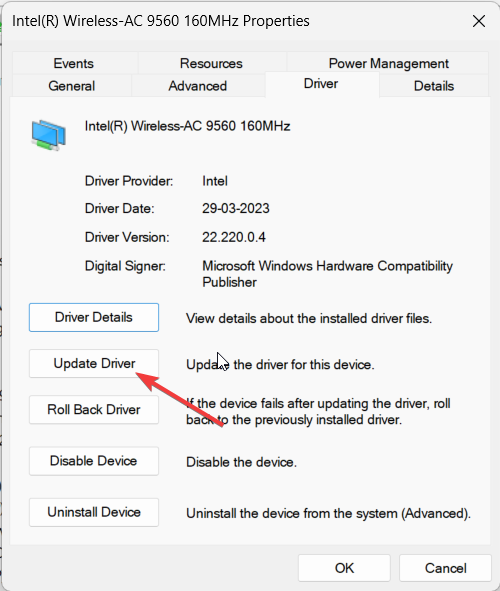
  3. Click on the Driver tab.
  4. Select Update driver.
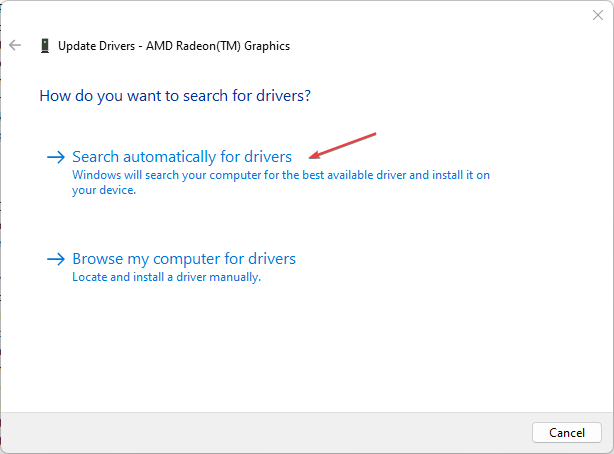
  5. Choose Search automatically for drivers option.
  6. Install the latest update.

Installing the latest update will resolve any underlying bugs that could be preventing the program from triggering the software for this device has been blocked from starting code 48.

For that reason, you should ensure the success of updating the PC drivers with the right version. You can definitely fix any outdated drivers using a professional tool with reliable and automated support.

2. Re-install the driver

  1. Open the Start menu by pressing the Win key.
  2. Type Device Manager and open it.
  3. Expand the appropriate section.
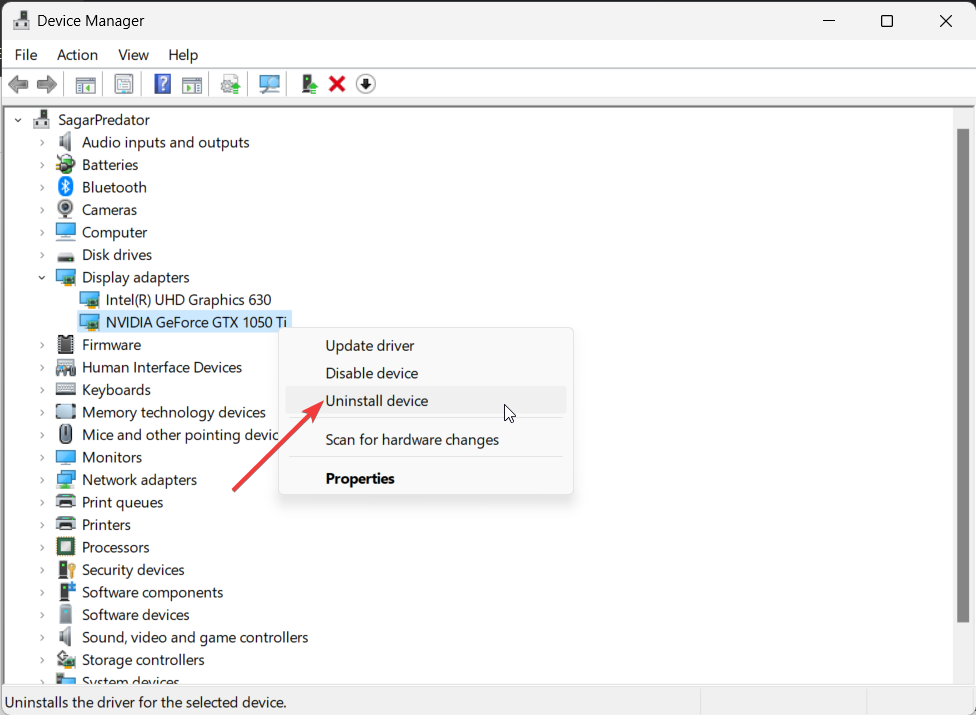
  4. Right-click on the driver with which you are getting the error code 48 and select Uninstall device.
  5. Restart your computer and your PC will automatically install the driver.

3. Disable Hyper-V

  1. Press the Win key to open the Start menu.
  2. Open Control Panel.
  3. Select Programs and Features.
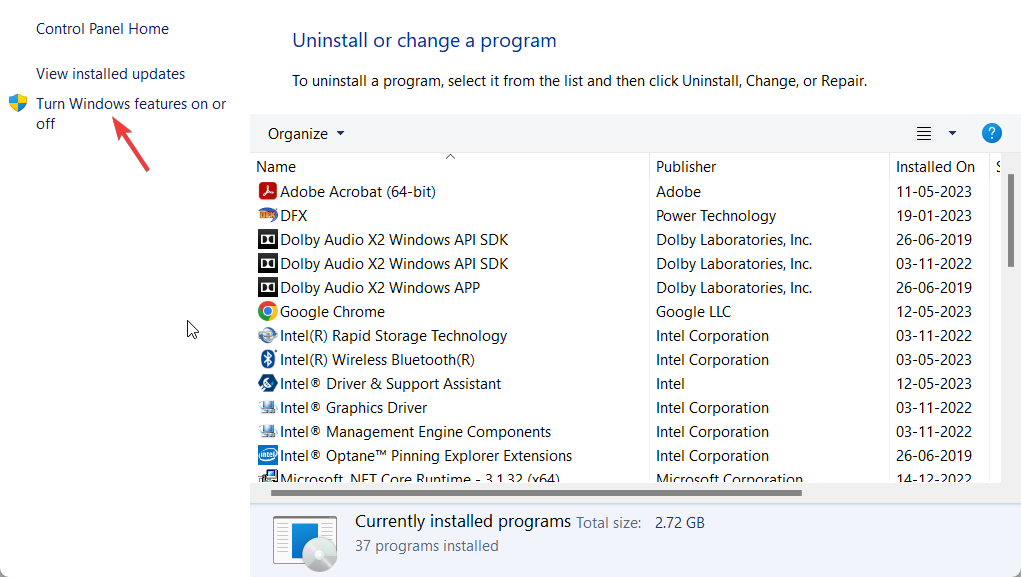
  4. Click Turn Windows features on or off.
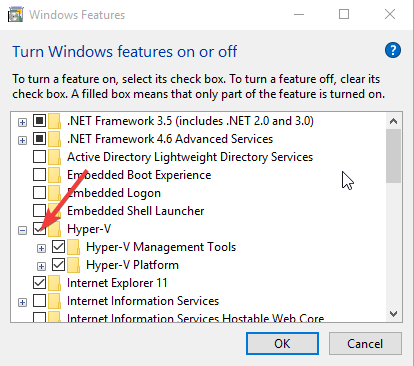
  5. Uncheck the Hyper V box.
  6. Click OK to disable Hyper-V on your system and restart your PC.

Some of our readers have reported that turning off the Hyper V feature on their PCs, fixed the software for this device has been blocked from starting code 48 error.

4. Turn off Memory Integrity in Core Isolation

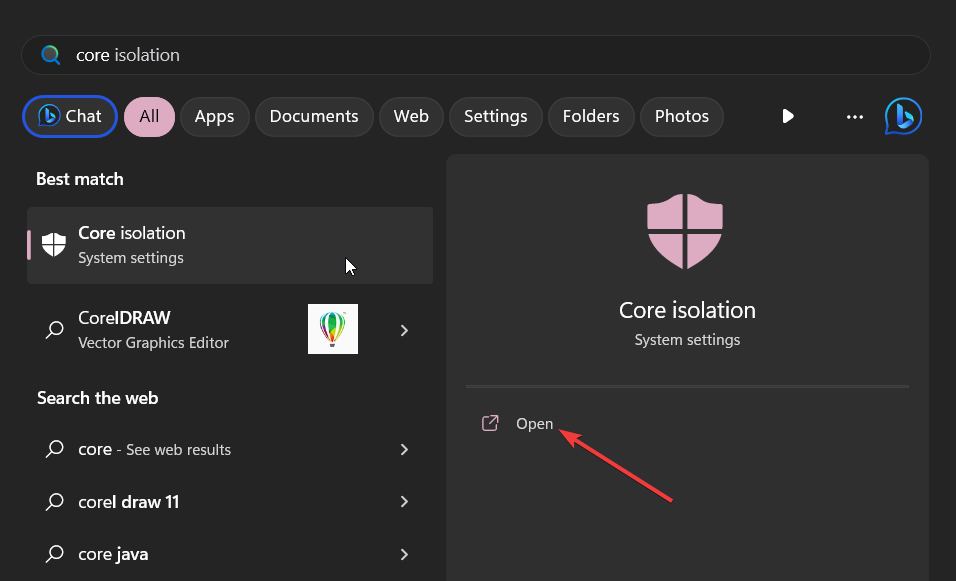
  1. Open the Start menu by pressing the Win key.
  2. Type Core Isolation and open the top result.
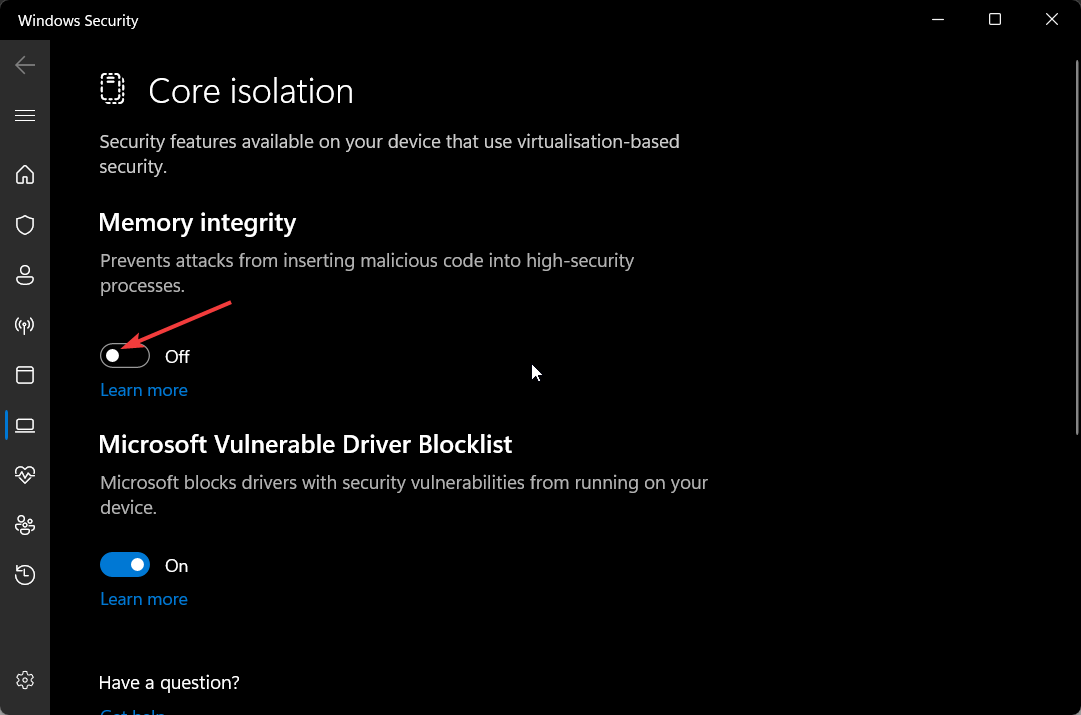
  3. Toggle off the Memory integrity option.
  4. Restart your PC.

Some of our readers have fixed this issue by simply disabling the Memory integrity feature on their Windows PC.

5. Run the System File Checker and DISM scans

  1. Open the Start menu by pressing the Win key.
  2. Open Command Prompt as an admin.
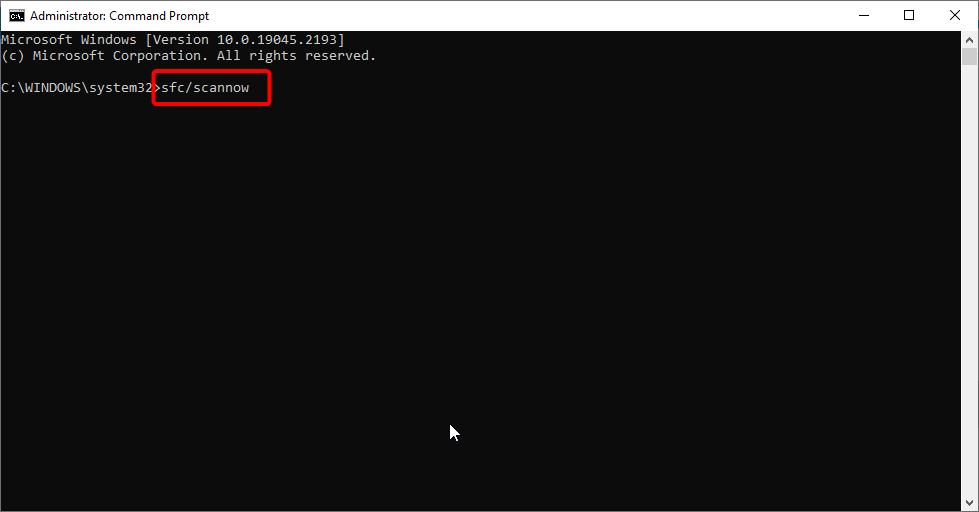
  3. Type the below command and press Enter.sfc /scannow
  4. Let the process complete.
  5. Type the below commands and hit Enter after each one.dism.exe /online /cleanup-image /scanhealth dism.exe /online /cleanup-image /restorehealth

Fixing the corrupt or missing system files can easily resolve most of the common DLL errors on your PC. Simply follow the steps and fix the problem.

6. Run the Windows Memory Diagnostic test

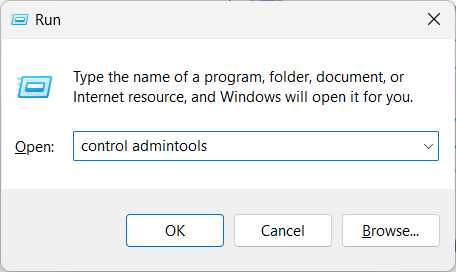
  1. Press the Win + R keys to open the Run dialogue.
  2. Type control admintools and press Enter.
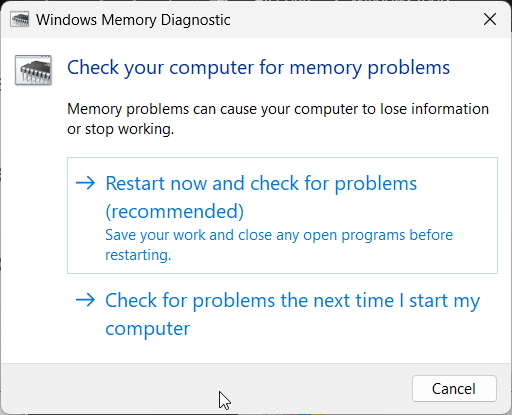
  3. You will be shown two options.
    • Restart now and check for problems (recommended)
    • Check for problems the next time I start my computer
  4. Select either of the options based on your convenience, but we would suggest you opt for the first.

Chances are that there is something wrong with the memory on your PC. When you run the memory diagnostic test, it will rectify the mistakes and possibly solve the software for this device has been blocked from starting code 48 error.

That is it from us in this guide. For users facing the code 18 reinstall drivers for this device error message, then you should check out our guide that lists some effective solutions to resolve the problem.

Feel free to let us know in the comments below, which one of the above solutions resolved the software for this device has been blocked from starting code 48 error message.

Shake to Minimize: How to Disable It on Windows 10

Shake to Minimize is a Windows multi-tasking feature that was first introduced with Windows 7. It allows you to quickly minimize all open windows on your desktop by shaking the active window.

The feature is disabled on your Windows by default. However, if it’s not, we can help!

How can I disable Shake to minimize on Windows 10?

1. Use the Settings app

  1. Press Windows + I to open the Settings app.
  2. Go to System.System1 Shake to Minimize
  3. Click Multitasking from the left pane.
  4. Locate Work with multiple windows, and toggle off the switch under Snap windows to disable it.Multitasking Shake to minimize

Now you have got control of your desktop back.

2. Use the Registry Editor

2.1 If DisallowShaking is present

  1. Press Windows + R to open the Run dialog box.Export
  2. Type regedit and click OK to open Registry Editor.
  3. Click File, then Export, and save the .reg file in the desired location.
  4. Navigate to this path: Computer\HKEY_CURRENT_USER\Software\Microsoft\Windows\CurrentVersion\Explorer\Advanced
  5. Locate DisallowShaking, and double-click to modify. Make sure the base is set to Hexadecimal and change the Value data to 1. Click OK.Disallowshaking Value data 1 Shake to maximize
  6. Restart your PC to confirm the changes.

2.2 If DisallowShaking is not present

  1. Press Windows + R to open the Run dialog box.Registry Editor Run command
  2. Type regedit and click OK to open Registry Editor.
  3. Click File, then Export, and save the .reg file in the desired location.Export - File Shake to maximize
  4. Navigate to this path: Computer\HKEY_CURRENT_USER\Software\Microsoft\Windows\CurrentVersion\Explorer\Advanced
  5. Right-click the empty space, select New, then choose DWORD (32-bit).New DWORD
  6. Now right-click it and select Rename. Name it DisallowShaking.Rename the registry
  7. Double-click to modify, set the base value to Hexadecimal and change the Value data to 1. Click OK.Disallowshaking Value data 1 Shake to maximize
  8. Restart your computer to save the changes.

3. Use the Local Group Policy Editor

  1. Press Windows + R to open the Run window.Group Policy Editor run command
  2. Type gpedit.msc and click OK to open Group Policy Editor.
  3. Go to this path: User Configuration\Administrative Templates\Desktop
  4. Locate and double-click Turn off Aero Shake window minimizing mouse gesture from the right-side pane.Shake to  minimize GPE
  5. Select Disabled and click OK.Disable
  6. Restart your PC to let the changes take effect.

So, these are the methods to disable Shake to Minimize feature on Windows 10 and enjoy a less cluttered and more focused desktop experience.

If you have any questions or suggestions, please mention them in the comments section below.

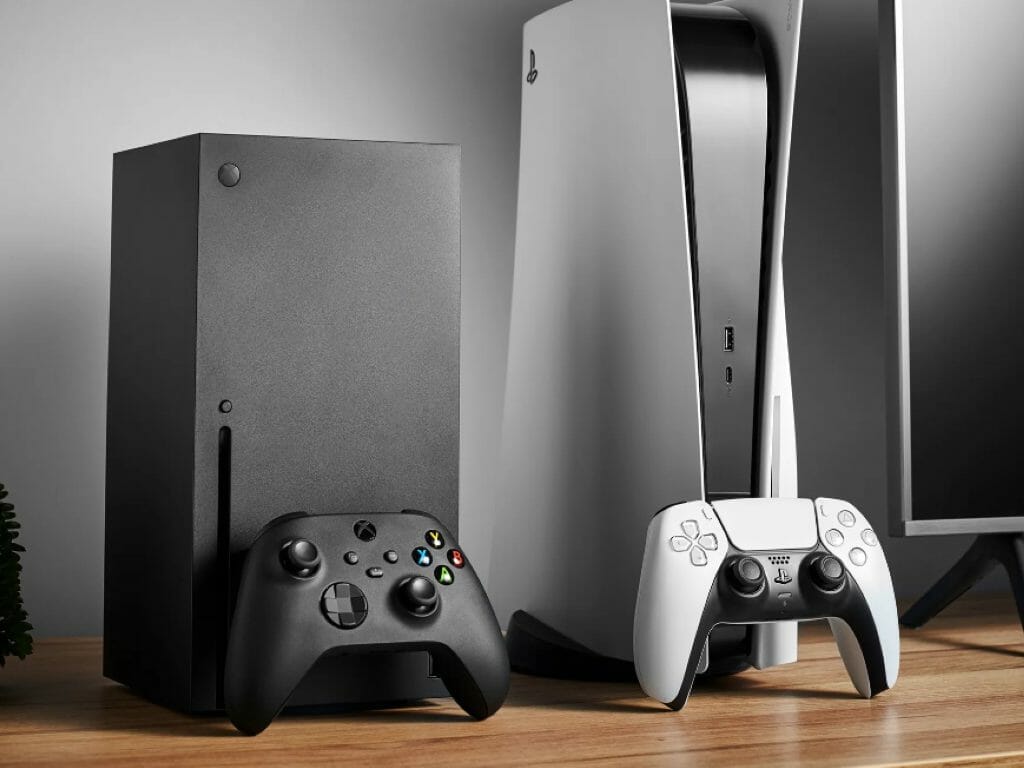
Sony announces PlayStation Showcase 2023 for next week, ahead of June Xbox Games Showcase

Sony has announced the upcoming PlayStation Showcase will be broadcast on Wednesday, May 24. The announcement was made over on the PlayStation Blog, which went on to tease some new first-party game projects from PlayStation Studios.

The show will run a bit over an hour, focusing on PS5 and PS VR2 games in development from top studios from around the world. Expect a glimpse at several new creations from PlayStation Studios, as well as spellbinding games from our third-party partners and indie creators.

With this announcement Sony has gotten the jump on both the Summer Games Fest and the Xbox Games Showcase. The latter is scheduled for June 11, and will be immediately followed by the Starfield Direct Showcase. Rumors abound over just what fans might get to see during the PlayStation Showcase, but new info on Spider-Man 2 sits at the top of the inevitable predictions lists.

Catch the PlayStation Showcase 2023 broadcast on Wednesday, May 24 at 1pm Pacific/9pm British time on YouTube or Twitch.

Via Eurogamer. 

What is Msdtc.exe & Should you Remove it?

Msdtc.exe is a component of the Microsoft Distribution Transaction Coordinator (MSDTC) program and it’s a very important part of any version of Windows. Therefore, you should not remove it. However, some viruses can disguise themselves under the MSDTC moniker and perform malicious actions.

What is Msdtc.exe?

As we have mentioned above, Msdtc.exe is a legitimate file that is part of the system and which you can find in the C:\Windows\System32 folder.

The Microsoft Distribution Transaction Coordinator (MSDTC) app allows multiple client applications to have more than one source of data, for a transaction. Then, its process coordinates the distribution across the servers of the transaction.

However, do not confound it with Msdt.exe which is the Microsoft Support Diagnostic Tool that is also a legitimate file.

Is Msdtc.exe a virus?

Usually, the file is perfectly safe and you shouldn’t mess with it or its process. In fact, stopping it or removing the file will cause issues with all the related software that uses it. Most likely, .NET Framework, ISS, and Visual Studio will be affected so we strongly recommend against removing it.

However, wrongdoers may also disguise their malicious software and processes under the Msdtc.exe file name (or with small letter differences) or its process.

Do I need to remove Msdtc.exe?

1. Find out if you have duplicate MSDTC duplicate services

  1. Right-click the Start button and select Task Manager.
  2. Click on the Services tab and look for MSDTC.
  3. MSDTC should have a single process under its name. If you find more, that’s a clear sign of infection.

2. Find out if Msdtc.exe is a legitimate file

  1. Press the Windows key + E to start File Explorer.
  2. Navigate to the following path: C:\Windows\System32
  3. Find Msdtc.exe, right-click on it, and select Properties.
  4. In the pop-up window, select the Details tab and see if the file is registered under the Microsoft trademark. If you can’t find any details about it or if there is something different, that is a sign of infection.
  5. Also, while in File Explorer, do a search on msdtc and see if there are any other iterations of the file with different extensions such as SYS or DLL. There should only be only an Msdtc.exe file so if you find any other, delete it right away.

These are the ways you can learn if Msdtc.exe is a virus or if it’s dangerous to your system. If everything is in order, do not attempt to remove the file.

How do I remove Msdtc.exe?

1. Perform an SFC scan

  1. Click the Search icon on the taskbar, type cmd, and select Run as administrator from the results.
  2. Type the following command and press Enter: sfc /scannow
  3. Wait for the scan to finish, restart your computer, and see if you see if the fake service is running.

2. Perform a full antivirus scan

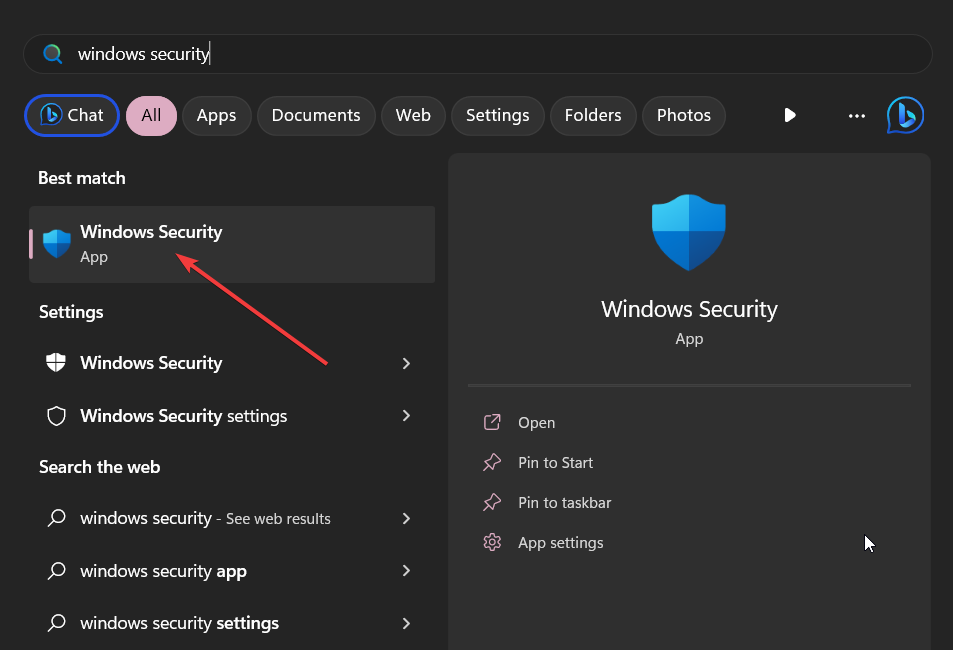
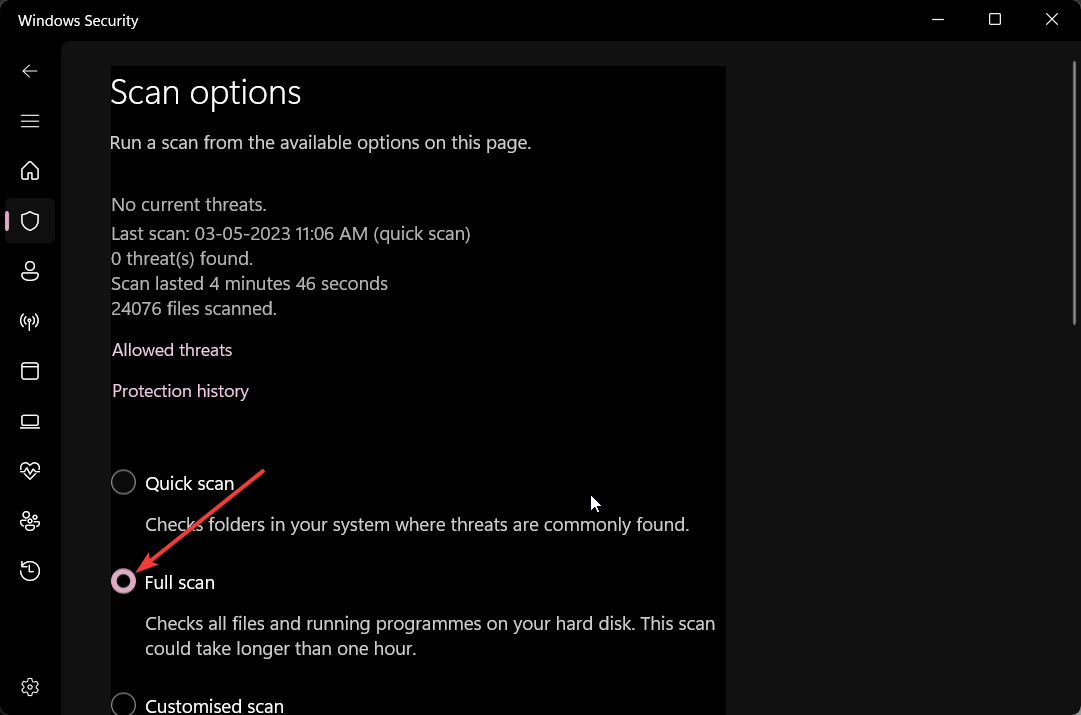
  1. Click the Search icon, type windows security, and launch the app.
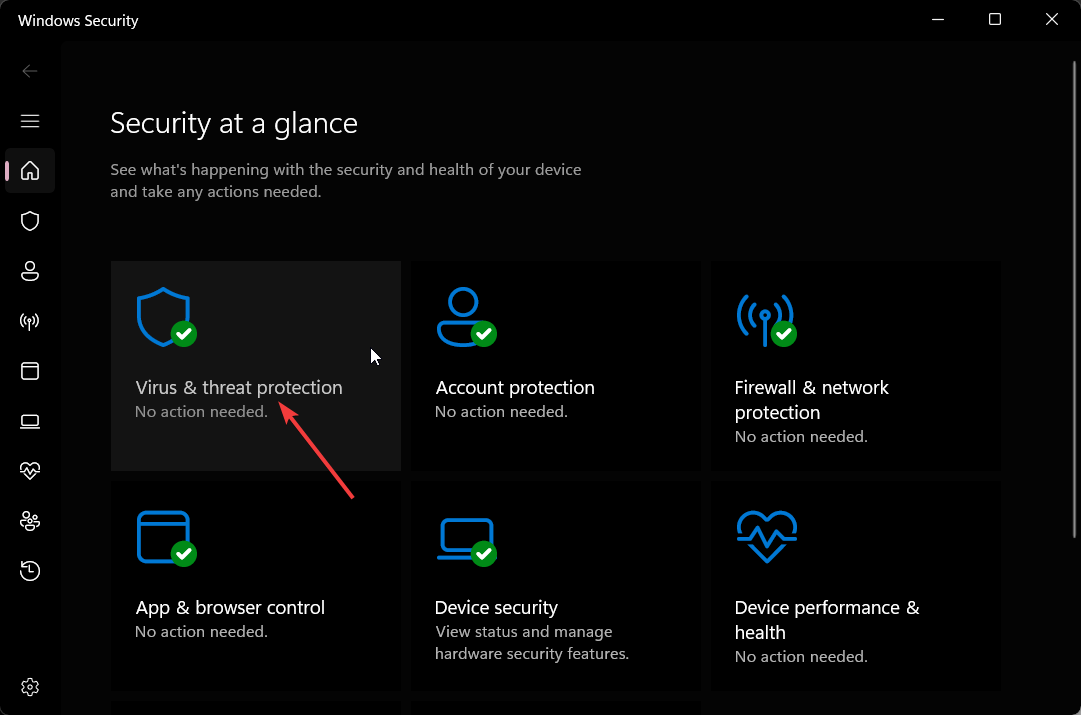
  2. Select Virus & threat protection.
  3. Now, select Scan options.
  4. Check the Full scan box and click the Scan now button below.

Windows Defender is pretty powerful but if the fake Msdtc.exe has taken over, you might need to scan your system with a more powerful antivirus.

Here concludes our article on Msdtc.exe and we hope that now you know what is it, if you need to remove it, and how to do that.

We also recommend reading our article on what to do if MSDTC encountered an error in Windows.

For any questions or viable solutions, let us know in the comments section below.

SynTPEnh.exe: What is it & How to Fix its Memory Errors

SynTPEnh.exe is an app that deals with additional configuration options for Synaptics touchpads. The process must be typically left running to ensure proper operation of the input device.

However, SynTPEnh.exe keeps crashing with memory errors and other error messages. In this article, you will learn all about SynTPEnh.exe and how to fix its memory errors.

What is SynTPEnh.exe?

As we highlighted above, SynTPEnh.exe, together with SynTPLpr.exe ensure the configuration options for the Synaptics touchpads that are installed in millions of laptops. However, there is a wide range of errors associated with SynTPEnh.exe and we will list the most important here:

  • SynTPEnh.exe needs to close
  • SynTPEnh.exe not a Win32 program
  • Can’t run SynTPEnh.exe
  • Sorry, we can’t find SynTPEnh.exe
  • SynTPEnh.exe is missing
  • Problem starting application: SynTPEnh.exe
  • SynTPEnh.exe quit
  • Fault in Software Path: SynTPEnh.exe

The causes for these issues range from accidental deletion of the file to missing Synaptics driver, corrupt system files, and even virus or malware infection.

Now that we know what we’re dealing with, let’s fix this problem with the solutions below.

How can I fix the SynTPEnh.exe memory errors?

Before getting into more complicated solutions, perform some quick methods that may fix the problems quicker:

  • Make sure you install all the latest Windows updates.
  • If your laptop came with dedicated software for the touchpad, reinstall it and see if the problem is solved.
  • Reinstall the software that triggers the error.

If none of these workarounds helped, perform the solutions below to fix the problems.

1. Make sure that the SynTPEnhService process is running

  1. Right-click the Start button and select Task Manager from the list of options.
  2. Go to the Services tab, look for SynTPEnhService, and check if it’s running. If so, move to the next solution.
  3. If it’s not, right-click on it and select Start.

2. Perform SFC and DISM scans

  1. Click the Search button, type cmd, and select Run as administrator to run Command Prompt with full privileges.
  2. Now, type or paste the following command and press Enter to run it: sfc /scannow
  3. Wait for the scan to finish, then type the following command and press Enter: DISM /Online /Cleanup-Image /Restorehealth
  4. Wait for the scan to finish, then restart your PC and see if the SynTPEnh.exe error still occurs.

Performing the SFC and DISM scans will fix any potential problems related to any corrupted system files or disk errors.

3. Re-register SynTPEnh.exe

  1. Click the Search icon on the taskbar, type cmd, and hit Run as administrator from the results.
  2. Now, type or paste the following command and press Enter to unregister the file: regsvr32 /u syntpenh.exe
  3. Next, type the following command and press Enter to re-register the file: regsvr32 /i syntpenh.exe
  4. The file should be re-registered and SynTPEnh.exe should work fine now.

4. Update or reinstall the Synaptics driver

  1. Right-click the Start button and select Device Manager.
  2. Expand the Mouse and other pointing devices category, right-click on the Synaptics Pointing Device, and select Update driver.
  3. Now, click on Search automatically for drivers.
  4. If the system finds any new versions, it will install the newest.
  5. Alternatively, in Step 2 of this solution, you can select Uninstall device, and then, restart the PC. Windows will find the appropriate driver and install it automatically.

As we mentioned at the beginning of the article, it is also a good option to check for the installation files that came with your laptop and manually reinstall the Synaptics drivers from the supplied media (if present).

These are the best solutions to fix the SynTPEnh.exe memory errors and we hope that now, your Synaptics device is working fine.

We also need to mention that all the solutions above work for both Windows 11 and 10.

If you need more information, we also have a complete guide on how to fix the Synaptics touchpad if it’s not working or it’s disabled automatically.

For any other questions or solutions, feel free to use the comments section below.

Elon Musk claims Microsoft controls ChatGPT creator OpenAI, Satya Nadella disagrees

In a recent interview with CNBC, entrepreneur Elon Musk voiced his dissatisfaction with the direction taken by OpenAI, the creator of ChatGPT, and raised concerns about Microsoft’s alleged control over the company. However, Microsoft CEO Satya Nadella promptly dismissed Musk’s claims as “factually incorrect.”

Musk, known for his involvement with companies such as Tesla and Twitter, asserted that OpenAI owed its existence to him. Although initially established as a non-profit organization in 2015, OpenAI later formed a “capped-profit” entity called OpenAI LP. Musk had invested approximately $50 million in the company during its founding year and played a pivotal role in the hiring process. He even claimed to have suggested the name “OpenAI.”

Expressing his apprehension, Musk questioned the relationship between OpenAI and Microsoft, implying that the tech giant exerted greater control over the AI research company. He raised concerns that as part of Microsoft’s investment, they possessed rights to all software, model weights, and other aspects of OpenAI. Musk said, “What exactly is the relationship between OpenAI and Microsoft? I worry that Microsoft made it more in control.”

Responding to Musk’s comments, Satya Nadella refuted the claims, stating they were factually incorrect. Nadella emphasized that OpenAI remained grounded in its mission of being controlled by a non-profit board. He expressed his respect for Musk but maintained that Microsoft only held a non-controlling interest in OpenAI, emphasizing their commercial partnership.

Nadella pointed out the collaboration between OpenAI and a “capped profit” company in pursuit of the powerful technology behind OpenAI LM. He acknowledged that Microsoft was the sole for-profit company comfortable working with a non-profit firm on such a large scale.

Despite Microsoft CEO discarding Musk’s claim, what Musk said might not be entirely wrong. Microsoft has integrated ChatGPT’s underlying technology into various platforms, including Bing, Edge, and Microsoft Office. Through their agreement, Microsoft can utilize ChatGPT’s base GPT language model technology and even tailor it for specific customers. Also, recent reports suggest that Microsoft has been developing a newer ChatGPT version to address privacy concerns.

Musk’s reservations regarding ChatGPT and similar AI technologies are not new. He previously joined forces with Apple co-founder Steve Wozniak in signing an open letter in March, calling for a pause in advanced AI development.

Contrary to that, during the interview, Musk expressed his desire to create a competitor to ChatGPT, named “TruthGPT,” to avoid AI bias. He envisions it as an AI that relentlessly seeks the truth and strives to comprehend the mysteries of the universe.

While the debate between Musk and Nadella continues, it is evident that their differing perspectives reflect the growing concerns surrounding the control, influence, and responsible development of generative AI technologies like ChatGPT. As the industry moves forward, striking a balance between profit-driven innovation and ethical safeguards will be crucial in shaping the future of AI.

Via: Business Today

Yahoo Mail Not Receiving Emails? Here’s What to do

While everyone has shifted over to Gmail, there are many who still use Yahoo Mail. However, many of our readers reported the Yahoo Mail not receiving emails issue.

There could be several reasons for this problem, which we will be discussing in this guide along with effective solutions to resolve the issue. Let us get right through it.

Why am I not receiving emails in my Yahoo Mail?

We dug up the internet and various forums and deduced a list of reasons that are responsible for Yahoo Mail not receiving emails issue.

  • Server issue: Chances are the Yahoo servers are down or under maintenance which is why you are not receiving emails in your Yahoo Mail.
  • Account setting errors: You might have accidentally tweaked the account settings wrongly which is why you are not receiving any emails.
  • Verify the block list: Accidentally, you might have added the sender’s email ID to the block list, so you are not receiving the email from them in your inbox.
  • Your browser cache is conflicting: Corrupt browser cache can often cause the browser to misbehave and malfunction.
  • The Yahoo Mail app isn’t updated: An underlying bug might be causing the problem with the app. If so, the temporary error 15 may also show up on your screen but we’ve already discussed how to address it.

Let us now look at the advanced solutions that will help you fix the Yahoo Mail not receiving emails problem.

What can I do if Yahoo Mail is not receiving emails?

Before applying the advanced solutions, we would suggest you resolve the problem using the below-mentioned quick fixes.

  • Check if the Yahoo servers are down or not. If yes, then all you can do is wait for the servers to go up and if this fixes the issue.
  • Change the browser and check if using a different browser resolves the issue.
  • Try restarting the Yahoo Mail app and then signing in with your account to resolve the problem.
  • Sign out and re-sign to your Yahoo account and check whether this fixes the issue.
  • If you’re using the Yahoo Mail app, try reinstalling it.

Let us now apply the advanced solutions and check if this resolves the issue or not.

1. Verify the block list

  1. Open Yahoo mail on a browser and sign into your account.
  2. Click the Settings icon and select More Settings.
  3. Click on Security and Privacy.
  4. Check if the sender’s email is listed there. If so, then select it and hit the Delete button.

The above procedure will remove the sender’s email from the blocked list. Now you can ask the sender to send the email and see if this resolves the issue or not.

However, that solves the problem only if you’re not receiving emails from one ore more senders that you blocked.

2. Clear the browser cache

  1. Launch your browser.
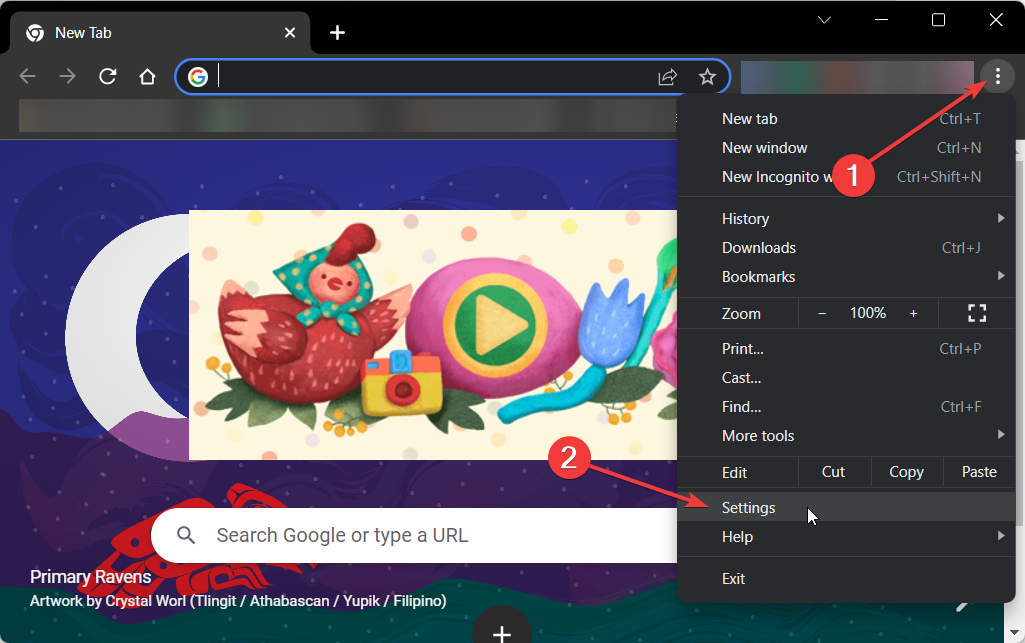
  2. Click on the menu icon and select Settings.
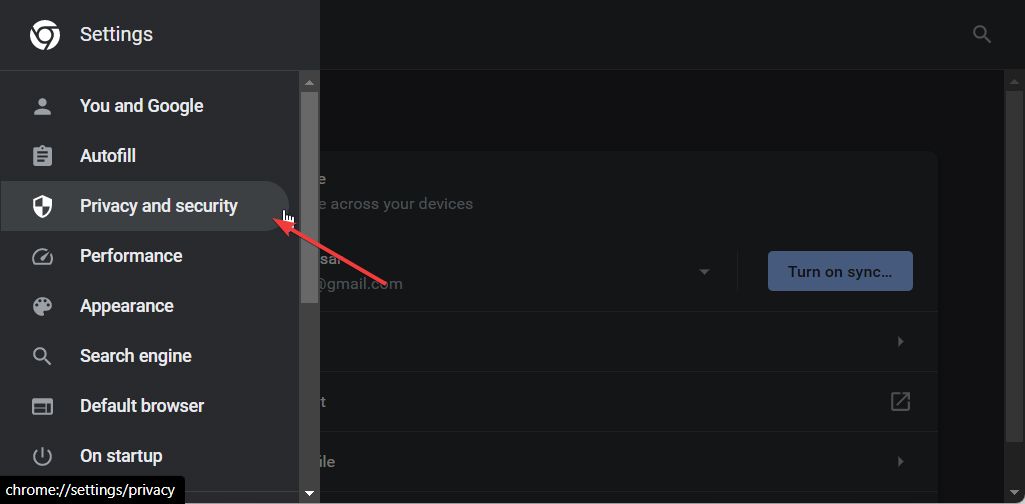
  3. Select Privacy and Security from the left.
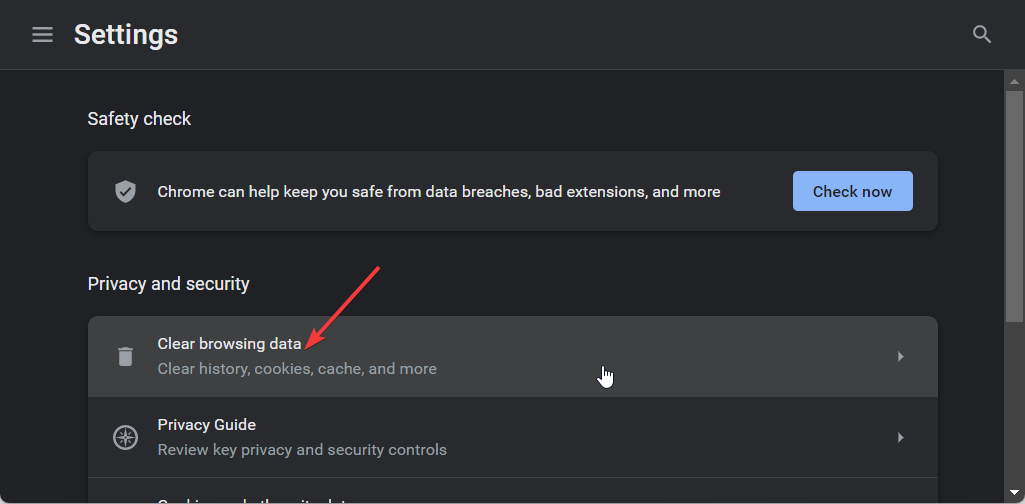
  4. Click on Clear browsing data.
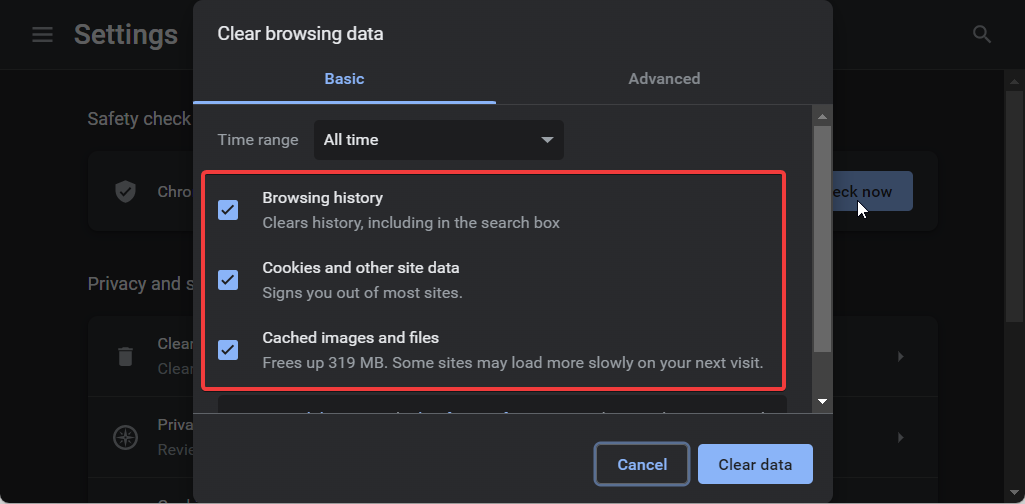
  5. Check the boxes for Cookies and other site data and Cached images and files options along with Browser history.
  6. Hit the Clear data button.
  7. Revisit the Yahoo Mail website and sign in to your account.

3. Check your Yahoo Mail storage

  1. Open Yahoo mail on a browser and sign into your account.
  2. Click the Settings icon and click on More Settings.
  3. Check the storage space left in Yahoo Mail on the bottom-left of the page.

Yahoo gives 1TB per user for Yahoo Mail, i.e. 1000GB. If there is no space left in your Yahoo Mail, then you need to make room for the incoming emails.

For that, you need to clean up the trash or spam folders. Also, you can take a backup of all the old or large emails and delete the emails that have large attachments that you no longer require.

We have a guide that lists some of the best Yahoo Mail backup software that you can use to back up your old emails.

4. Check the email filters

  1. Visit Yahoo mail on a browser and sign into your account.
  2. Click the Settings icon and click on More Settings.
  3. Click on Filters on the left pane to see all the filters you have created.
  4. You can locate and delete the filter that is blocking the email that is being sent to you.

Yahoo lets you use up to 500 filters to sort your emails. This a nice feature to quickly jump over to the emails that matter to you. However, having filters can also accidentally send emails to spam or some other folder.

That is it from us in this guide. We have a guide that explains how you can download Yahoo Mail on your Windows PC for free.

Feel free to let us know in the comments below, which one of the above solutions fixed the problem of Yahoo Mail not receiving emails.

OAWrapper.exe: What is It & Should You Remove It?

OAWrapper.exe is an executable file that belongs to the OpenAutomate wrapper process. It comes along with the NVIDIA GeForce Experience Application Ontology Software developed by an NVIDIA software developer.

In this guide, we’ll explore what oawrapper.exe is, what it does, and whether or not you should consider removing it from your computer.

What is OAWrapper.exe?

Oawrapper.exe is a program that is often included in software packages developed by Autodesk or with NVIDIA GeForce Experience Application Ontology software.

It is required for proper communication between the software and Autodesk applications, which are commonly used in the fields of design and engineering. This allows the NVIDIA software to recognize Autodesk applications and adjust its settings and performance accordingly.

Oawrapper.exe is important for Autodesk apps; however, if you don’t use the apps or having issues with them, you can remove the process.

How can I remove OAWrapper.exe?

Before removing the OAWrapper.exe process, it is important to consider the following prerequisites:

  • Make sure you don’t use Autodesk apps anymore.
  • Verify you have logged in using your Administrator account.
  • Create a backup of your computer.

Once you finish these checks, move to the steps to remove the process. You must follow the steps mentioned in the same order to complete it.

1. Check if the file is legit

  1. Press Ctrl + Shift + Esc to open Task Manager.
  2. On the Processes tab, navigate to OAWrapper.exe, right-click it and select Open file location.
  3. If it is located on this path, then it is a legit file: C:\Users\USERNAME\AppData\Local\NVIDIA\NvBackend\ApplicationOntology\
  4. If not, you can run a deep scan using an antivirus tool and remove the file.

2. Stop the OAWrapper.exe process

  1. Press Ctrl + Shift + Esc to open Task Manager.End task - OAWrapper.exe
  2. Go to the Details tab, locate & right-click OAWrapper.exe, and select End task.

This will disable Oawrapper.exe temporarily. However, the program may restart itself when you launch your Autodesk software again.

3. Uninstall the related software

  1. Press the Windows key, type control panel, and click Open.Control Panel start menu OAWrapper.exe
  2. Select Category by View as and click Uninstall a program.Programs
  3. The Programs and Features window will open. Locate & right-click the app and select Uninstall.Uninstall OAWrapper.exe
  4. Follow the on-screen instructions to complete the uninstallation process.

4. Delete the corresponding key from Registry Editor

  1. Press Windows + R to open the Run dialog box.Regedit OAWrapper.exe
  2. Type regedit and click OK to open the Registry Editor.
  3. Navigate to this path: Computer\HKEY_LOCAL_MACHINE\SOFTWARE\Microsoft\Windows\CurrentVersion\Run
  4. Locate OAWrapper from the right pane and select Delete.Delete Regedit OAWrapper.exe
  5. Click Yes to confirm the choice.

This will remove the OAWrapper.exe entry from Windows Registry, which should prevent it from running at startup.

If you got stuck or need more information, our guide on how to use Registry Editor on Windows 11 will help you.

So, these are steps that you can follow to remove the OAWrapper.exe file. If you have any questions or suggestions, feel free to mention them in the comments section below.

Wi-Fi USB Tethering not Working: Causes & How to Fix

With the USB Tethering feature, you can easily share your smartphone’s cellular data with your PC and use it on the go. This comes in handy in situations when there is no Wi-Fi availability.

In this guide, we will give you a bunch of solutions that will help resolve the Wi-Fi USB Tethering not working problem on your system. Let us get right into it.

Why is Wi-Fi USB Tethering not working?

We did our research and found out some common reasons that several readers have reported because of which they are facing the Wi-Fi USB Tethering not working problem.

Some of the reasons are listed below:

  • Multiple devices are connected simultaneously: Chances are that there are several wireless devices connected at the same time, causing the feature to malfunction.
  • Defective USB cable: The USB cable that you are connecting your PC with for Wi-Fi Tethering is defective and causing the problem.
  • Firewall is blocking the connection: Your Firewall or antivirus software might be getting in the way of a smooth connection on your PC.
  • Drivers aren’t updated: For optimal performance, you should ensure that the drivers on your PC are up to date.
  • Cellular data limit exceeded: It could be that your cellular mobile data plan is over which is why you aren’t able to use Wi-Fi USB Tethering.

Let us now apply the solutions and get rid of the Wi-Fi USB Tethering not working problem.

How can I fix the Wi-Fi USB Tethering not working problem?

Before applying the advanced solutions, let us apply some easy fixes and hopefully resolve the problem quickly.

  • Disconnect all other wireless devices and connect only the one on which you wish to use the internet.
  • Change the USB cable and check if this resolves the Wi-Fi USB Tethering not working problem.
  • Check if the cellular data pack on your smartphone isn’t exceeded. If so, then recharge your phone with a suitable internet pack and get going.

Now let’s apply the advanced solutions and fix the problem as quickly as possible.

1. Update the network driver

  1. Press the Win key to open the Start menu.
  2. Type Device Manager and open it.
  3. Expand the Network adapters section.
  4. Double-click on the network hardware.
  5. Switch to the Driver tab.
  6. Select Update driver.
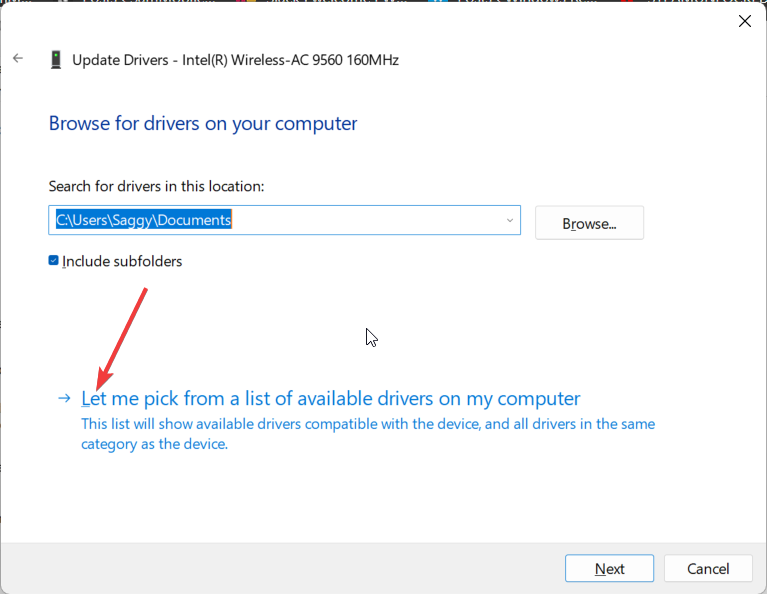
  7. Choose Browser my computer for drivers.
  8. Click on Let me pick from a list of available drivers on my computer.
  9. Uncheck the Show compatible hardware.
  10. Select Microsoft under the Manufacturer section and then select Remote NDIS based Internet Sharing Device.

Some of our readers have suggested that manually updating the network driver as shown above and selecting the Remote NDIS based Internet Sharing Device option helped them resolve the Wi-Fi USB Tethering not working problem.

In case the method didn’t give any results for you, there is an alternative way to update drivers automatically. With a dedicated software application, your PC will run without any issues.

⇒ Get Outbyte Driver Updater

2. Run the Network Troubleshooter

  1. Press the Win + I keys to open the Settings menu.
  2. Select Troubleshoot.
  3. Click on Other troubleshooters.
  4. Hit the Run button next to Network Adapter.
  5. Let the process diagnose and fix the issue for you.

3. Install the latest Windows update

  1. Press the Win + I keys to open the Settings menu.
  2. Click on Windows Update on the left.
  3. Hit the Install button to get any pending updates.
  4. Reboot your PC.

Windows should be updated to the latest available version to avoid any version conflicts within the installed or system programs.

4. Renew the IP address

  1. Press the Win key to open the Start menu.
  2. Type command prompt and run it as an administrator.
  3. Type the below commands and press Enter. ipconfig /release ipconfig /renew

Running the above commands will release the old IP configuration and the second command simply replaces or renews the IP configuration, which could be the reason you were not able to use the Wi-Fi USB Tethering on your PC.

5. Perform System Restore

  1. Open the Start menu by pressing the Win key.
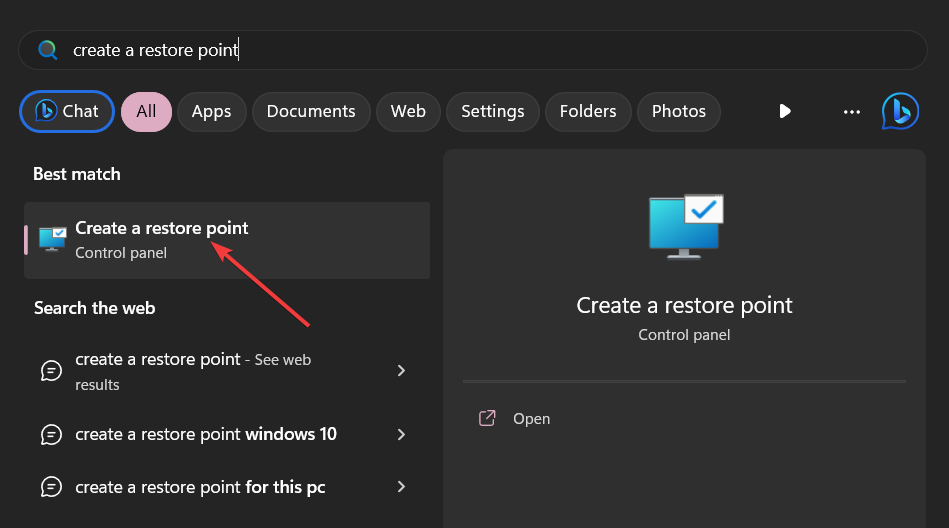
  2. Type Create a restore point and open the top result.
  3. Select the drive where you have installed the Windows OS and click on System Restore.
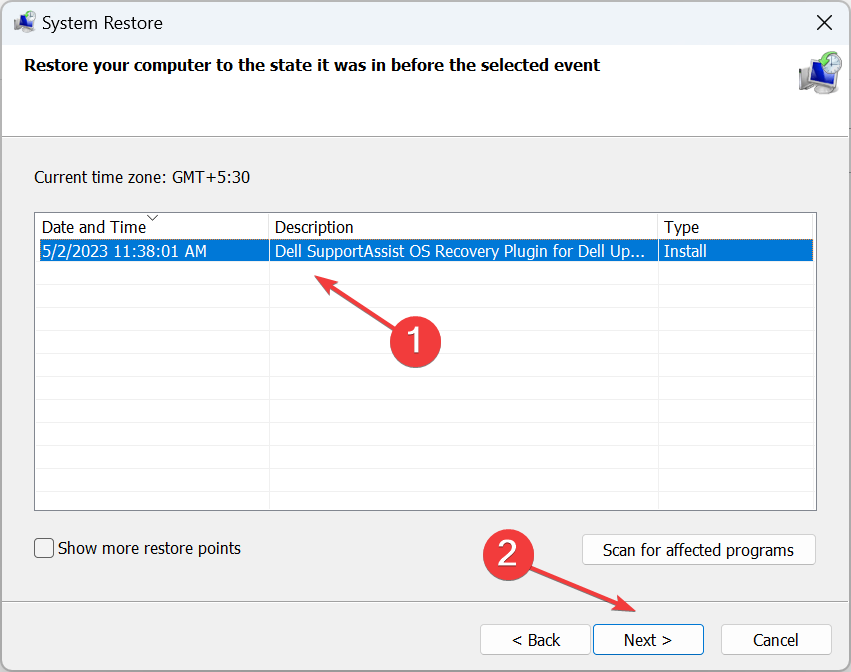
  4. Choose the restore point and select Next.restore to fix websites opening automatically in Chrome
  5. Click Finish to begin the process.

You can also use the System Restore process to take your PC to the normal state when everything was working smoothly. Chances are that a third-party application has tweaked the important tethering-related files.

However, do note that the restore process will work only when you have created a restore point previously. If not, then you can check out our guide that explains how you can create a system restore point.

Feel free to let us know in the comments below, which one of the above solutions resolved the Wi-Fi USB Tethering not working problem.

What is Bash.exe, And What Does It Do?

Bash.exe is a command line interface shell program that is commonly used in Unix-based systems such as Linux, macOS, and Windows.

In this guide, we will explore what bash.exe is, how it works, and some of the most common uses for this command shell.

What is Bash.exe?

Bash.exe is a command-line interface shell program that allows users to interact with the operating system of a computer using text commands.

It can interact with Windows programs and services, making it a useful tool for system administrators who need to manage Windows and Unix systems.

Bash.exe is a powerful and flexible tool for managing files, running programs, and automating tasks.

Where I can use bash.exe?

Bash.exe is a robust and flexible toolset that can be used in Windows for various purposes, some of which are listed below:

  • Running Linux/Unix commands – You can run these commands on your computer, which gives you access to a wide range of powerful tools and utilities.
  • Web development – It allows you to manage web servers, automate deployment tasks and perform other web-related tasks.
  • Git version control – You can use it to manage Git repositories, including cloning, pulling, committing, and pushing code to remote repositories.
  • Scripting – It lets you write shell scripts that automate repetitive tasks, manage system resources, and perform complex operations.
  • Data processing – Bash.exe can be used to process and analyze large amounts of data, including log files, system metrics, and more.

If you want to know how to create & run shell scripts on Windows, we suggest you read this informative guide with detailed steps.

How can I use Bash.exe?

1. Make/remove a new directory

MKDIR COMMAND BASH.EXE

Bash.exe allows you to create a new directory with mkdir command & remove one using rmdir on Windows.

For example, if you want to create a folder named script, copy & paste the following command to run it and press Enter: mkdir script

2. Navigate your file system

CD bash.exe

It helps navigate your file system in the command line itself. To change the directory, type the following command to change the directory to the script folder, copy & paste the following command and hit Enter: cd script

3. Create a bash file & make it executable

VIM bash.exe

Bash.exe allows you to create a bash file in your directory. For example, if you want to create the file with the name myscript.sh in the folder named script, then type the following command and press Enter: vim myscript.sh

CHMOD bash.exe

You can write your script in this file and make it executable with the following command: chmod +x myscript.sh

4. Automating tasks

It allows you to automate tasks by creating Bash scripts and running them on a schedule using the Windows Task Scheduler.

For example, you can create a Bash script that backs up your important files and schedule it to run every day at a specific time.

5. Installing and managing packages

Bash.exe allows you to install and manage packages on Windows using package managers such as apt-get or yum. For example, to install the git package, type the following command and press Enter: sudo yum install git -y

6. Create an alias

ALIAS COMMAND bash.exe

Aliases are shortcuts for complex commands or scripts, as they are usually short and easy to remember. These can be used to invoke the commands or scripts which you use quite often.

For example, If you have a script that you want to run multiple times, you can create an alias for the same to avoid calling the script again. Type the following command and hit Enter : alias m='/path/to/myscript.sh'

To run the script, you just have to type the word, and the task will be done.

7. Running scripts remotely

You can use it to run Bash scripts remotely on a Windows machine over a network. For example, you can use the ssh command to log in to a remote machine and execute a Bash script on that machine.

8. Running Bash on Ubuntu on Windows (WSL)

Bash.exe is the command-line executable that can be used to run Bash on Ubuntu on Windows, also known as Windows Subsystem for Linux (WSL).

With WSL, you can run Linux commands and applications on your Windows machine. For example, you can install and run the Apache web server on your Windows machine using WSL.

Overall, bash.exe provides a powerful and versatile set of tools for managing files, running commands, and automating tasks on Windows, making it a valuable tool for developers, system administrators, and power users.

If you have any questions or concerns, please mention them in the comments section below.

ChatGPT Click Failed: Quick Way to Fix This Error

ChatGPT is one of the most useful tools you can try, but many reported ChatGPT Click failed messages while using it.

This isn’t the only error you can encounter, and many reported that ChatGPT is not working for them at all.

If you encounter this issue, it means that ChatGPT can’t complete your request, and to fix the problem, first, we need to understand what causes it.

Why am I getting ChatGPT Click failed message?

  • Site configuration – Most websites have robots.txt configuration file that can allow or disallow bots to access it and read its content. It’s rather likely that this new feature is being blocked by it.
  • Website complexity – If website data is shown using static pages, ChatGPT should be able to read it. However, if the content is dynamically generated with JavaScript, you might get this error message.
  • Beta version – This feature was recently released, so some issues are expected. Hopefully, the developers will manage to fix those issues over time.

How can I fix ChatGPT Click failed error?

Use a third-party web browser plugin

  1. Go to the ChatGPT page.
  2. Click on Plugin store.
  3. Next, look for these plugins: Keymate AI Search, Web Pilot, and Wolfram Alpha.
  4. Click Install next to each plugin.
  5. Wait for them to install.

Once the plugins are installed, you should be able to browse the web with ChatGPT.

The web browsing feature in ChatGPT is quite new, and issues such as ChatGPT Click failed are expected. Hopefully, the developers will fix those problems soon.

To learn more about ChatGPT, we suggest reading our ChatGPT browser extensions guide for more ways to enhance this already great tool.

This isn’t the only issue and many also encountered Error searching knowledge in ChatGPT, but we have a dedicated guide that addresses this issue.

Did you find a different way to fix this problem? If so, feel free to share it with us in the comments section below.

Here’s how to recover your BitLocker key from OneDrive

BitLocker is a built-in feature in Windows 11 and Windows 10 that protects your data from unauthorized access. Whenever someone is trying to access your PC, you can use Bitlocker to encrypt your data.

However, there are times when you can get locked out of your system. In those cases, you need the Bitlocker key to gain access to your PC.

One of the most efficient ways to recover your Bitlocker key requires you to access your OneDrive. However, as spotted by this Reddit user, it seems that the Bitlocker key would stay hidden unless you have an active OneDrive account.

While the thread itself shows that several other users shared this experience, we still do not know for sure if the Bitlocker key is hidden under a paywall.

However, if you have an active OneDrive account, there are 2 ways to check for your Bitlocker Key.

How to recover your Bitlocker Key from One Drive?

1. Using your Microsoft account

  1. Log into your Microsoft Account
  2. On your Microsoft Account go to the Devices sectiondevices microsoft account
  3. Go to the device you want the Bitlocker Key for, and click on View details
  4. Once you’re there, head over to the Bitlocker data protection and select Manage recovery keysmanage keys onedrive

Keep in mind that you can access your Microsoft account from any device, so this solution is very useful when your current PC is locked.

2. Recover your Bitlocker key from your OneDrive cloud

  1. Go to your OneDrive cloud service
  2. Type in Bitlocker Recovery Key into the search barhow to recover your bitlocker key onedrive
  3. Check to see if the key is therebitlocker key onedrive

This works only if you uploaded the Bitlocker Key as a text document into your OneDrive cloud space. It is highly recommended for you to do so, because you can have access to it everywhere, at any time.

Since you can try both these ways from other devices, as long as you know your Microsoft credentials, you should have easy access to the Bitlocker Key.

It does require a functioning OneDrive account, as stated by this user who went through the same experience. Do you need to pay to have access? Well, as you could see from the Reddit threat, some agree that yes, but the majority agree that no, you have access to your Bitlocker key either way.

What do you think about it? Have you experienced this issue? Let us know in the comments section below.

Fvevol.sys BSoD: 5 ways to fix this error

Fvevol.sys is a part of the BitLocker Drive Encryption Driver file developed by Microsoft that is required for the proper functioning of Windows. Several of our readers have reported a sudden BSoD crash on their system that displays an error message- System thread exception not handled. What failed: fvevol.sys. 

Why do I encounter the fvevol.sys BSoD error? 

There are several possible reasons for the BSOD error triggered due to fvevol.sys. Some of them are: 

  • Buggy Windows updates – A bug-ridden Windows update can make the entire system malfunction and crash with a BSoD error. 
  • Hardware-related problems – Issues with hardware, such as corrupt hard disk drives can also cause such an issue. 
  • Corrupt drivers – Corrupt or obsolete system drivers also hinder the normal functioning of Windows, causing stop code crashes. 
  • Malware infection – Viruses and malware infections mess up your system like the one you are currently facing.  

Now that we know what we’re dealing with, let’s perform the solutions below to fix the problem.

How do I fix the fvevol.sys BSoD error on Windows? 

Try these workarounds before moving on to the advanced solutions explained a little later. 

If these methods did not help bypass the fvevol.sys BSoD screen, try the below methods. 

1. Boot your PC in Safe Mode

  1. Power off your PC by holding down the power button for 10 seconds. Press the button again to turn on your device and turn it off again as soon as the Windows logo appears. Repeat this step until the Automatic Repair screen gets displayed. 
  2. Hit the Advanced options button to initiate the automatic repair process. Fvevol.sys
  3. Choose Troubleshoot option from the next window. 
  4. Next, select Advanced options.
  5. Click Startup Settings from the Advanced options window.
  6. A list of safe mode variants will appear. Press the F5 key to enable Safe Mode with Networking. Fvevol.sys

In Safe Mode, your PC functions with a limited set of files, apps, and drivers. Now you can execute the troubleshooting methods listed below to get past the constant fvevol.sys BSoD loop.

2. Run SFC and DISM scan

  1. Press the Windows key to launch the Start menu, type cmd in the Search box and click the Run as administrator option in the search results. Fvevol.sys
  2. Click the Yes button on the User Account Control prompt. 
  3. Type or paste the following command and press the Enter key to initiate the SFC scan. SFC/scannow Fvevol.sys
  4. After the verification is 100% complete, type the following command and hit the Enter key. DISM /Online /Cleanup-Image /RestoreHealth Fvevol.sys
  5. After SFC and DISM scan is complete, restart your PC and see whether or not the BSOD crash occurs.

The SFC scan and DISM tool will analyze your protected system files to identify and restore damaged or corrupt instances.

3. Disable BitLocker Recovery 

  1. Open Search using the Windows + S shortcut, type powershell, and choose Run as administrator from the search results. Fvevol.sys
  2. Press the Yes button on the UAC window. 
  3. Type or paste the following command in the Powershell window and press Enter to execute it. Replace C with the letter representing each of the disk directories. Disable-BitLocker -MountPoint "C:" Fvevol.sys
  4. The decryption process will start, which can take several minutes depending on the size of the drive. Repeat the same steps to disable the BitLocker encryption for each drive. 

4. Perform System Restore 

  1. Click the Windows key to launch the Start menu, type create a restore point on top, and choose the relevant search result to access the System Properties window. fvevol.sys
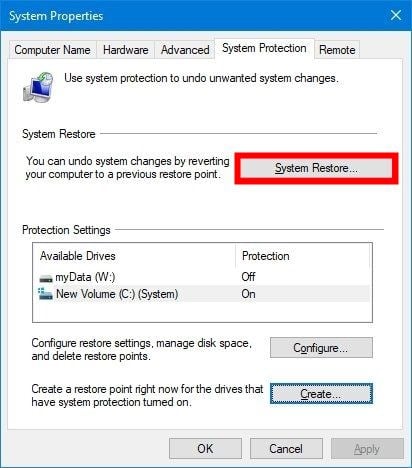
  2. While in the System Protection tab, press the System Restore button. Fvevol.sys
  3. From the list of restore points currently available, select the one when your PC was not experiencing the BSOD error and press Next. fvevol.sys
  4. Press the Finish button to confirm and initiate the system restore process to the chosen restore point. 

Performing a system restore will roll back all the damage caused by a recent change made to your computer, such as the installation of a buggy update, and resolving the pesky fvevol.sys BSoD error. 

5. Re-install Windows 

  1. Launch the Settings app using the Windows + I shortcut key.
  2. Scroll down the System settings and choose the Recovery option. Fvevol.sys
  3. Locate and hit the Reset PC button under the Recovery options section.
  4. A Reset this PC window will appear. Select the Keep my files option to reset Windows without affecting your data. Fvevol.sys
  5. On the next window, select the method you would like to opt for reinstalling Windows. You can go with the Local reinstall if you wish to install Windows locally on your PC. Fvevol.sys

Reinstalling Windows will reset all the misconfigured settings and will restore the system files to the default state, fixing the fvevol.sys BSoD error. 

So, these are the fixes that you should implement to get past the never-ending BSoD loop because of fvevol.sys failure. 

In case you also encounter the Hswultpep.sys BSOD error, refer to this guide to easily resolve the problem.

Which of these methods worked in your case, do let us know in the comments. 

What is User32.dll & How to Fix its Errors?

Users have reported coming across an error associated with the User32.dll file when trying to use a program on their Windows PC. This is one of the common DLL missing on Windows errors that you will face on your PC.

We will also explain what this Dynamic Link Library file means and how you can resolve errors associated with it. Let us get right into it.

What is User32.dll?

The User32.dll is a system DLL file that is used by the system to store graphical elements such as dialogue boxes, and windows.

If this gets corrupt, then you will issue it as soon as you open any program on your PC. The error message related to User32.dll could also pop up when the program wrongly accesses this DLL file.

It is usually located inside C:\Windows\System32 for 32-bit and for 64-bit in C:\Windows\SysWOW64\. Some of the common error messages that you will get related to User32.dll includes:

  • User32.dll Not Found
  • This application failed to start because User32.dll was not found. Re-installing the application may fix this problem
  • Cannot find (location)\User32.dll
  • The file User32.dll is missing
  • Cannot start (program). A required component is missing: User32.dll. Please install (program) again

Let us take a look at the solutions that will help you resolve the error related to User32.dll on your system.

How can I fix User32.dll errors?

Before getting into any complex troubleshooting, you should make sure that you are running the latest Windows update version on your PC.

This makes sure that there aren’t any version conflicts within your system. Now, let’s start with the solutions below.

1. Use a dedicated tool

To fix system-related DLL files, you shouldn’t use any download website to get the specific DLL. This is because they could be infected and cause further harm to your PC.

So, to avoid such situations, we would suggest you use a dedicated and one of the best DLL fixing tools.

Using our suggestion, you will be able to fix system-related DLL 100%, and third-party DLL errors as well. You can further use it to clean out junk files on your PC and also boost your PC’s performance.

2. Run SFC Scan and DISM

  1. Open the Start menu by pressing the Win key.
  2. Type Command Prompt and run it as an admin.
  3. Type the below command and press Enter. sfc /scannow
  4. Wait for the process to complete.
  5. Type the below commands and hit Enter after each one. dism.exe /online /cleanup-image /scanhealth dism.exe /online /cleanup-image /restorehealth

Fixing the corrupt or missing system files can easily resolve most of the common DLL errors on your PC. Simply follow the steps and fix the problem.

3. Reinstall the program

  1. Press the Win key to open the Start menu.
  2. Open Control Panel.
  3. Select Programs and Features.
  4. Choose your program and hit the Uninstall button.
  5. Visit the official website of the program.
  6. Download and install it on your PC.

Many of our readers have fixed the problem of User32.dll by simply reinstalling the program. You can follow the above steps and reinstall the program to resolve the issue.

4. Perform System Restore

  1. Open the Start menu by pressing the Win key.
  2. Type Create a restore point and open the appropriate result.
  3. Select the drive where you have installed Windows OS, and choose System Restore.System Restore System config
  4. Select the restore point and click Next.restore to fix websites opening automatically in Chrome
  5. Hit the Finish button to begin the system restore process.

If nothing works, then simply restore your system back to a state where everything was working normally on your PC by going through the System Restore process.

That is it from us in this guide. For users facing DLL missing errors on Windows 11, we have a guide that explains all the solutions to resolve the problem.

Several readers have also reported coming across the avformat-55.dll error and missing Wnaspi32.dll file, which you can easily resolve by applying the solutions in our guide.

We have also explained properly what is Wbload.dll and how you can fix Wbload.dll. Feel free to let us know in the comments below, which one of the above solutions resolved the User32.dll problem for you.

USB Device Over Current Status Detected: 3 Ways to Fix

We use all sorts of devices on our PCs, but many users reported USB device over current status detected message on their computer.

This error can cause many problems, and in many cases, Windows won’t boot due to it. As you can see, this can be a troublesome error, so fixing it as soon as possible is important.

Before we start fixing this issue, let’s learn what causes it in the first place.

What does USB device over current status mean?

This error message appears when there’s an issue with your USB port, and it’s usually caused by the following:

  • Short circuit on USB ports – Sometimes your pins can get bent, causing the USB port to short circuit.
  • Connection issues – In some cases, USB headers aren’t properly connected, so you need to check if everything is tightly connected.
  • Faulty motherboard – In the worst-case scenario, it’s possible that your motherboard is damaged and that’s what’s causing the issue.

How do I fix USB over current status detected?

Before we start fixing this issue, there are a few potential solutions that you might want to consider:

  • Check your connections – Few users reported that the cable orientation going from the USB header to the motherboard was wrong. Simply by changing the orientation of the cable that connects to the motherboard, the issue was resolved.
  • Check USB ports – Sometimes, pins on USB ports can get bent, and that can cause this problem to appear. In some cases, it’s possible to bend the pins on your own and fix the issue; however, we wouldn’t recommend this if your device is under warranty.
  • Motherboard replacement – Your motherboard may be having issues, so in some cases, the replacement is the only option available.

1. Disconnect everything from your PC

  1. Disconnect all cables from your PC.
  2. Now press and hold the Power button for 30 to 60 seconds.
  3. After doing that, connect all the cables again.
  4. Turn on your PC and check if the problem is still there.

Some users are also suggesting disconnecting all devices and trying to boot your PC, so you can try that as well.

2. Enable Re-Size BAR Support in BIOS

  1. Restart your PC. Keep pressing F2 of Del to enter BIOS.
  2. Navigate to Settings and select Advanced. Choose PCIe and then select PCI Sub-system Settings.
  3. Locate Re-Size BAR Support and enable it.
  4. Save changes.

For more information, check our guide on how to access BIOS if you’re having trouble following these steps.

3. Disconnect the USB panel

  1. Pinpoint the USB port that is causing this error.
  2. Turn off your PC and open the computer case.
  3. Locate the USB header on the motherboard that goes to that port
  4. Disconnect the cable.

After doing that, check if the problem is resolved.

We hope you found this guide useful and that you managed to fix the USB device over current status detected error.

In case the problem is still there, you might want to check our USB ports not working guide for more potential solutions.

What solution worked for you? Share it with us in the comments section below.

Firefox Tabs Keep Crashing Constantly: How to Stop & Fix It

Firefox is a great browser with a lot of features, but it’s not perfect. Sometimes your tabs keep crashing which can stall your work for long periods. When that happens, it can be annoying. 

You might be able to get it working again by reinstalling Firefox. But if the problem continues after that, you’ll need to start troubleshooting to get to the bottom of things. So, why do Firefox tabs keep crashing?

Sometimes, you get a Firefox crash report or crash log but often, you’re left with a confusing gah. your tab just crashed error message that won’t disappear from your screen and that’s pretty much it.

A common reason why your Firefox tabs keep crashing is an extension that’s causing problems with Firefox. Extensions can cause problems with all kinds of things, including Firefox battery usage and performance issues.

If you have an extension installed that’s causing such issues, disabling it may solve your problem.

Why do my tabs keep crashing Firefox? 

If you’re using Firefox, and you’ve noticed that your tabs keep crashing, it could be due to one or more of the following reasons:

  • Slow or faulty hardware – If there is not enough memory available on your computer system for Firefox to run smoothly without any hiccups, then it will lead to crashes. 
  • A temporary network problem – If your Internet connection is slow or if the server that hosts your favorite sites is down temporarily, this can cause some websites to load slowly or not at all — which can make Firefox unstable.
  • Malware infection – Malware such as viruses and spyware often affect the stability of web browsers like Firefox. Don’t hesitate to use an antivirus for safe browsing.
  • Too many tabs open – The problem is likely caused by a memory leak that occurs when you have too many tabs open at once in Firefox. Not having enough memory available to handle the task can cause Firefox to crash.

If any of the above causes your Firefox tabs to keep crashing, proceed to attempt one or more of our solutions below.

?️ Quick Tip:

Here’s a speedy way to bypass issues with Firefox tabs constantly crashing. Namely, you can switch to Opera and fix this irritating situation instantly.

Choosing this particular browser will enhance your web navigation with multiple workspaces, pinboards, ad-free websites, and tab tools.

⇒ Get Opera

How do I stop Firefox from closing with the last tab?

1. Update your browser 

  1. Launch your Firefox browser and click on the three horizontal ellipses in the top right corner.
  2. Select Help.
  3. Click on About Firefox.
  4. If your browser is up-to-date, you will get the following dialog box.

We know that sometimes updates can cause Firefox to freeze or not load but generally speaking, keeping your browser up to date is recommended in order to avoid version glitches and other anomalies.

2. Scan for viruses 

  1. Press the Windows key, search Windows Security, and click Open.
  2. Select Virus & threat protection.
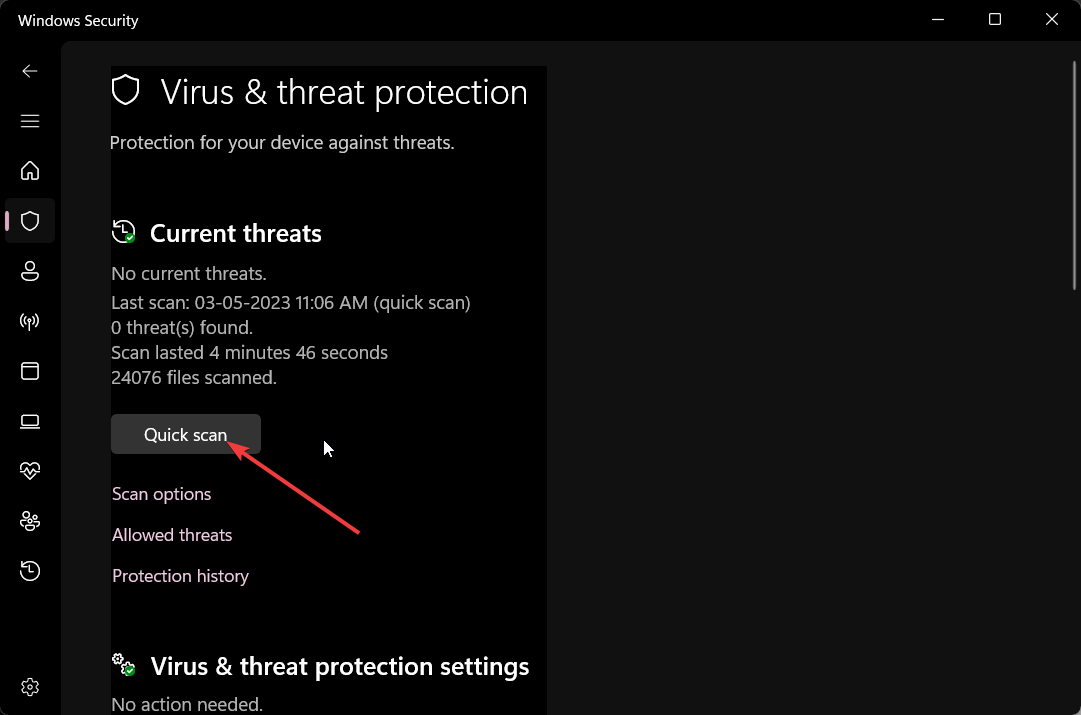
  3. Next, press Quick scan under Current threats.
  4. Wait for the process to finish and restart your system.

3. Disable extensions

  1. Launch your Firefox browser and click on the three horizontal ellipses in the top right corner.
  2. Click on Add-ons and themes.
  3. Select the extensions you wish to disable by toggling off the button.

If you have tried all of the above methods and your tabs are still crashing, you can try uninstalling and reinstalling the browser or simply try another browser. Sometimes it may just be a matter of downtime and when you try later, the issue will be resolved.

We hope that you have been able to resolve the issue where your Firefox tabs keep crashing and you are back to enjoying a smooth browsing session.

Let us know which solution worked for you in the comments section below.

DLL Files Missing in Windows 7? 8 Ways to Fix It

Dynamic Link Libraries, or DLL files, are important for the smooth functioning of your Windows 7 operating system.

In this guide, we will explore the causes of missing DLL files in Windows 7 and provide some solutions for fixing the issue.

What causes the DLL files missing error on Windows 7?

There are various reasons for the missing DLL files on Windows 7; some of the common ones are mentioned here:

  • Deleted accidentally – DLL files can be deleted unintentionally at the time of removing unwanted apps or cleaning your PC. Try reinstalling the affected app.
  • Corrupted system files – These files may get corrupted due to system crashes, malware attacks, or sudden power failures. Try running an SFC scan to fix the error.
  • Faulty installation – DLL files can be missing if a program was interrupted when getting installed on your computer. Reinstall the affected app.
  • System errors – System errors such as blue screen errors or stop errors can also cause DLL files to go missing or become corrupted.
  • Software installation – When installing or updating a program, DLL files required by that program may be overwritten or deleted.

Now that you know the causes, let us check out the solutions to fix the issue.

How can I fix the DLL files missing error on Windows 7?

Perform the following preparatory checks to ensure that the error is not a result of basic issues which may require only subtle tweaks:

  • Restart your computer.
  • Try reinstalling the app throwing the error.
  • Ensure your Windows is up to date.
  • Check the Recycle Bin for deleted the DLL file.

If these steps didn’t help you, move to the actual troubleshooting methods to fix the error.

1. Use a DLL fixer

Fixing DLL missing errors manually could be tricky and harm your PC if you are not tech-savvy. Therefore, it is suggested to use a third-party DLL fixer tool to handle this issue effectively.

Such a tool can scan your computer for corrupted DLL files and quickly restore or replace them. Thereby resolving the conflicts between third-party apps & operating systems, enhancing system performance, and achieving greater stability for your PC.

2. Run SFC & DISM scans

  1. Press Windows + R to open the Run dialog box.
  2. Type cmd and press Ctrl + Shift + Enter to run Command Prompt with administrative privileges.
  3. Copy & paste the following command to repair system files and hit Enter: sfc/scannow
  4. Wait for the scan to complete, then type the following command to restore Windows OS image files and press Enter: DISM /Online /Cleanup-Image /RestoreHealthSFC SCAN NOW DLL MISSING WINDOWS 7
  5. Once the command is executed successfully, restart your computer to let the changes take effect.

3. Run a malware scan

  1. Select the Start icon, type Microsoft Security Essentials, and then press Enter.
  2. From the Scan options, select Full.Run full scan - DLL missing on Windows 7
  3. Select Scan now.
  4. The tool will scan your computer and list out the threats and remove them to resolve the problem.

You may also choose one of the best antiviruses for Windows 7 and run a full scan on your PC.

4. Perform a System Restore

  1. Press Windows + R to open the Run window.System Properties  DLL Missing on Windows 7
  2. Type sysdm.cpl and click OK to open System Properties.
  3. Go to the System Protection tab, and click the System Restore button.Restore DLL files using System Restore
  4. On the System Restore window, click Choose a different restore point and click Next.Choose a different point DLL missing
  5. Select a restore point and click Next.
  6. Click Finish.

Windows will restart and be restored to the chosen point. If System Restore didn’t successfully complete, you can follow the steps mentioned in this informative guide.

5. Reinstalling the Visual C++ Redistribution

Note icon NOTE
This method may work for any DLL file which is associated with the Visual C++ Redistribution package.
  1. Download the Visual C++ Redistribution package from the official website.Visual Studio DLL missing Windows 7
  2. Double-click the installer to initiate the installation.
  3. Click Install and follow the onscreen instructions to complete the process.

6. Perform a clean install

Note icon NOTE
Before performing these steps, make sure you have backed up your computer and have a valid key handy to activate your Windows 7 license.
  1. Insert the Windows 7 installation disc or USB drive into your computer and restart it.
  2. Press any key when prompted to boot from the installation media.
  3. Choose your preferred language, time, currency, and keyboard settings from the options provided and click Next.Click Next, DLL files missing on Windows 7
  4. Click Install now.Windows 7 Install now
  5. Wait for the computer to boot. Next, read and accept the license agreement to proceed with the installation process.
  6. For Which type of installation do you want page, select Custom (advanced).
  7. If you want to create or delete partitions on your hard drive, you can do so during the installation process.
  8. Choose a physical location to store Windows 7.
  9. When the installation is nearly complete, and your system doesn’t restart automatically, then click Restart now.Restart now
  10. The installation will continue; wait for the setup to complete; your computer will restart.
  11. Now you can install the necessary drivers for your hardware and update Windows 7 with the latest security patches and software updates.

Once done, your computer will restart and install the apps that you like. This removes all the data from your computer and will install a fresh copy of Windows 7 on your computer.

7. Perform a Startup Repair

  1. Insert the Windows 7 installation disc or USB drive and restart your computer.
  2. Press any key when prompted to boot from the installation media.
  3. Wait for the Windows to load, then select your language preferences and click Next.
  4. Click Repair your computer on the bottom left corner of the screen. Wait for the System Recovery options to locate Windows 7 on your PC.Repair your Windows 7
  5. Select the operating system you want to repair, i.e., Windows 7, and click Next.
  6. Click Startup Repair.Startup Repair  & Repair files DLL files missing WIndows 7
  7. The Startup Repair tool will look for problems with crucial files responsible for the proper functioning of Windows 7. Wait while the tool tries to repair the system files; once done, click Finish. Your computer will restart to complete the process.

If you do not have the installation media, you can access the Windows Recovery Environment (WinRE) by pressing F8 during startup and selecting Repair your computer from the Advanced Boot Options menu.

8. Download a DLL file manually

Note icon NOTE
Using an unreliable website to install DLL files can be dangerous and is never recommended. However, If you know a trusted source, like DLL-FILES, you can follow the steps mentioned to restore the file.
  1. Go to the DLL Files website, search the DLL file using its name, select an appropriate option, and click Download.DLL Files Missing in Windows 7 Download
  2. Double-click the downloaded folder to open it, and locate and copy the .dll file.
  3. Go to this path and paste the file:C:\Windows\System32\
  4. Restart your computer to confirm the changes.

If you are facing missing the DLL files issue on your Windows 10, we advise you to read our informative guide to know solutions for this common problem.

So, these are methods that you can use to fix the DLL missing error on Windows 7. However, we remind you that Windows 7 is obsolete, and we recommend upgrading your OS to Windows 10 or 11.

If you have any questions or suggestions, feel free to mention them in the comments section below.

Lenovo ThinkPad T16 Gen 1 Review:  All about the business


The Good The Not So Good
Only 3.9 Pounds Heavy Throttling Under Load
Large 16 Inch Screen Fingerprint Magnet
Very Quiet Large Charger For 135 Watts

The Lenovo T16 series was created to address a core need of the business audience.  The first generation of the T16 Lenovo accomplished those basic needs with a thin, light boardroom-ready laptop with a 16:10 screen, an array of Thunderbolt 4 ports, and a built-in smart card reader, all packed into a thin and light design.

Specifications and Design

Being local to one of Lenovo’s main offices I was introduced to the ThinkPad lineup in the late 1990s when given a tour of the local assembly line.  I was impressed with the build quality then and even more so more than twenty years later. The build quality caught my attention when I pulled the T16 from its packaging.  Lenovo uses an aluminum top and a Polyphenylene sulfide bottom.  These materials help create a design that’s just 0.81 inches thick and weighs just 3.9 pounds.

Lenovo took the build quality one step further and tested the laptop against 12 military-grade certification methods and over 20 procedures.  When reviewing the T16 I made it my daily driver, in a typical workday it traveled, it was taken in and out of different bags, used on various surfaces and after two months of heavy use no scratches or scuffs were made.  If your travel bag has room for the 16-inch screen the T16 should be a joy to take along for any workday.  Being this thin and light doesn’t come without some drawbacks which we will discuss later in the review.  You can see the specifications table below for all the available configuration options.

Product ThinkPad T16 Gen 1
OS Up to Windows 11 Pro 64 or Linux
Processor Up to Core i7-1280P 14(6 P-Core + 8 E-Core), P-core 1.8GHz/ E-Core 1.3GHz
Graphics Up to NVIDIA GeForce MX550 2GB GDDR6
Memory Up to 48GB (16GB soldered + 32GB SO-DIMM) DDR4-3200
Display
  • 16” WUXGA 16:10 (1920×1200), Anti-glare, 45% NTSC, 300 nits
  • 16” WUXGA 16:10 (1920×1200), Anti-glare, 45% NTSC, 300 nits, Touch
  • 16” WUXGA 16:10 (1920×1200), Anti-glare, 100% sRGB, 400 nits, Low power, Eyesafe Certified
  • 16” WUXGA 16:10 (1920×1200), Anti-glare, 100% sRGB, 500 nits, ThinkPad Privacy Guard, Touch
  • 16” WQXGA 16:10 (2560×1600), Anti-glare, 100%sRGB, 400 nits, Eyesafe Certified
Storage One drive, up to 2TB M.2 2280 SSD
WLAN Intel Wi-Fi 6E AX211 + Bluetooth™ 5.1
Ports
  • (1) USB 3.2 Gen 1
  • (1) USB 3.2 Gen 1 (Always On)
  • (2) Thunderbolt 4/ USB4 40Gbps (support data transfer, Power Delivery 3.0, and DisplayPort 1.4)
  • (1) HDMI, up to 4K/60Hz
  • (1) Ethernet (RJ-45)
  • (1) Headphone/microphone combo jack (3.5mm)
  • Optional Ports:
  • (1) Smart Card Reader
  • (1) Nano-SIM card slot (WWAN support models)
Camera Up to FHD 1080p + IR Camera with ThinkPad Webcam Privacy Shutter
Keyboard 6-row, spill-resistant, numeric keypad, backlit, optional LED backlight
Navigation TrackPoint® pointing device and mylar surface multi-touch touchpad (67.6mm x 115mm/ 2.67 x 4.53 inches)
Audio 2 x 2W Stereo speakers, Dolby® Audio
Security Discrete TPM 2.0, TCG certified, Optional Touch style fingerprint reader in power button (match-on-chip), BIOS Security- Power-on password, supervisor password, system management password, NVMe password, USB FIDO device integration, Firmware Resiliency 3.0
Battery Up to 86Wh, Supports Rapid Charge (up to 80% in 1 hr) with 135W AC adapter
Mechanical Starting at 361.9 x 255.5 x 20.5mm (14.25 x 10.06 x 0.81 inches)

Starting at 1.769kg (3.9 lbs)

Color/Materials Storm Grey: Aluminum top, PPS bottom / Thunder Black: PC + 20%CF + 50% GF top, PPS bottom


Experience and Performance

When thinking about the user experience with the T16 we must consider the ideal customer.  The ideal buyer would be a small business or corporation that would likely be buying multiple units.  The look and feel in this scenario has less of an impact than being able to get the job done comfortably for the user. In our testing, this is where the T16 shined its brightest.  Opening the lid, immediately seeing the smile-shaped keys, with the red TrackPoint input system in the middle offers something familiar if you’re a long-time Lenovo user, if not the purpose of the TrackPoint can be a bit confusing, it’s not for everyone.  The ample-sized, easy-click diving board-style trackpad will likely be what most users choose for input.  One thing about the keyboard deck that was a bit disappointing is the fingerprint magnet.  So, if appearance during business interactions matters to you.  Make sure you pack your cleaning cloth.

Once you’ve opened the lid and it’s time to tap the power button and get to work, you’re going to notice something right away, near silence. Lenovo really managed to tune the fan curves down on the T-16, but that doesn’t come without some drawbacks we’ll get to in a minute.  Our model came equipped with the Intel Core-I7 1240P CPU.  The 12th generation Intel chip is what I like to call a “short sprinter” chip, it’s good for quick office tasks, compiling some code perhaps, but quickly hits its thermal limits with longer tasks under load such as simple 1080P video edits, while the fans did ramp up a bit if you are attempting some multitasking during the render process, you’d certainly see some slowdowns.

While slowdowns are typical when doing any rendering on a machine that doesn’t have a dedicated GPU, I bring this up for a specific reason.  While with most machines’ light multitasking, and rendering is certainly possible, you would observe screen flicker or a moment of the screen turning off and back on.  This would happen using the laptop screen or an external screen.  The T16 would return to normal operations when the intensive task was over. I attributed this to hitting the thermal limits of the machine.  While this doesn’t ruin the experience of using the T16, it is something prospective buyers should keep in mind.

Wrapping it Up

This is the first generation of the T16 lineup, and as expected nothing is perfect the first time.  However, Lenovo did get a lot right in this first generation. The T16 is a lightweight business machine with a 16:10 screen and ample connectivity with multiple Thunderbolt 4 ports. The 135-watt USB-C charger is a little large for a backpack but you can get 80 percent charge in just one hour, so it’s a good tradeoff when zipping between meetings or traveling.  With the proper expectations going in the first-generation T16 is a solid start opening for this lineup.  The entry-level spec of the T-16 starts just below $1200.

How to Enable or Disable Quiet Hours on Windows 11

Quiet Hours is a productivity feature of Windows 11 that helps you disable notifications. When enabled, your PC does not deliver any notifications to the user and stores them in the notifications area. 

Unlike the previous iterations of Windows, there is no direct way to turn on Quiet Hours on Windows 11 but we’ve got you covered.

How do I enable and disable Quiet Hours in Windows 11? 

1. Using Group Policy Editor

  1. Bring up the Run dialog box using the Windows + R keyboard shortcut. 
  2. Type the following command in the text box and hit the OK button. gpedit.msc Enable or disable Quiet Hours
  3. In the Group Policy Editor window, expand User Configuration in the left sidebar followed by Administrative Templates and Start Menu and Taskbar option.
  4. Next, look for the Turn off Quiet Hours option in the right section of the window and double-click it. 
  5. In the next window that pops up, make sure that the Enabled checkbox is selected. Enable or disable Quiet Hours
  6. After making the changes, press the Apply button followed by OK. 

If you ever want to disable the Quiet Hours feature, simply select the radio button next to Disable instead of Enable and hit the Apply button to save the changes. 

You can easily enable and disable the Quiet Hours feature in Windows 11 by modifying the Group Policy Editor.

However, there is a catch! Group Policy Editor is only accessible on Windows Pro and Enterprise editions. To execute the above steps on the Home edition of Windows, you need to enable and install Local Group Policy Editor on your PC. 

2. Using Registry Editor 

Note icon NOTE
Modifying the registry keys is risky so we recommend backing up your registry before implementing these steps.
  1. Open the Run dialog box using the Windows + R shortcut key, type the following command in the text box, and hit OK to launch the Registry Editor. Enable or disable Quiet Hours
  2. The User Action Control prompt pops up, press the Yes button to launch Registry Editor with administrative privileges. 
  3. Navigate to the following path in the Registry Editor window: Computer\HKEY_CURRENT_USER\Software\Microsoft\Windows\CurrentVersion\Notifications\QuietHours Enable or disable Quiet Hours
  4. In the right section, right-click anywhere on the empty space and choose New from the context menu, followed by DWORD (32-bit) Value from the sub-menu.
  5. Rename this 32-bit DWORD as EnableQuietHours. 
  6. Right-click EnableQuietHours and choose Modify from the context menu. 
  7. In the Edit DWORD (32-bit) value) window, assign 1 in the Value data field, and press OK to save the changes.  Enable or disable Quiet Hours

Now exit the Registry Editor window and restart your PC. The quiet Hours feature will now be enabled on your Windows system upon restart. 

If you ever want to disable Quiet Hours in Windows 11, follow the steps mentioned above. However, assign 0 in the Value data field instead of 1 and press OK to save the changes.  

Modifying the registry is the simplest way to enable Quiet Hours on your Windows 11 PC. 

In case, you make a mistake while modifying the registry and forgot to back it up, learn how to restore the registry from this guide.

That’s how effortlessly you can enable and disable the Quiet Hours feature on your PC running on Windows 11. 

In case you wish to enable and use Focus Assist, a sophisticated version of Quiet Hours for your Windows 11 PC, follow the steps provided in this guide. 

If you have any feedback or suggestions for us, feel free to let us know in the comments section. 

Mso.dll Missing: How to Fix or Download it Again

Mso.dll is a Dynamic Link Library file that is published by Microsoft. If this file is corrupt or missing on your PC, then it will cause issues with Microsoft Office.

In this guide, we will list down some effective solutions to resolve the Mso.dll missing issue and will help restore it. Let us get right into it.

Most likely any Mso.dll error would pop up because of corrupt registry files, corrupt system files, virus infection, or problematic installation. Let’s now check out the solutions that will help you resolve the Mso.dll error on your system.

How can I fix the Mso.dll missing error?

Before getting into more complicated troubleshooting, ensure that your PC is running the latest Windows update and no drivers are out of date. This helps prevent driver conflict or program version conflicts.

1. Use a dedicated DLL fixing tool

Since the Mso.dll is a system-related DLL, it is important to resolve the errors as they give rise to other issues on your PC.

However, dealing with such DLL errors can be pretty troublesome, if you don’t know where to start. In such a case, we would suggest you take the help of a dedicated DLL fixer.

Such a tool can resolve system-related DLL issues without a doubt. You can also use DLL troubleshooters to fix system crashes, remove viruses or malware, clean out junk files, and more.

2. Reinstall Microsoft Office

  1. Press the Win key to open the Start menu.
  2. Type Control Panel and open it.
  3. Select Programs and Features.
  4. Select Microsoft Office and hit the Uninstall button.
  5. Follow the on-screen steps to remove the program from your PC.
  6. Visit the official website and download Microsoft Office.
  7. Reinstall it and check if this fixes the issue or not.

Reinstalling the associated program will help you resolve the Mso.dll missing error. You can follow the same steps for reinstalling Microsoft Visual Studio.

3. Run the SFC Scan

  1. Open the Start menu by pressing the Win key.
  2. Type Command Prompt and open it as an administrator.
  3. Type the below command and press Enter. sfc /scannowsfc scan
  4. After the process finishes, restart your PC.

Often important system files are replaced, misplaced, or go corrupt because of which you will have multiple issues associated with them. Running the SFC Scan will help you fix the errors associated with system files and hopefully resolve the Mso.dll error as well.

4. Scan your PC for viruses

  1. Press the Win key to open the Start menu.
  2. Open Windows Security.Windows Security open Windows key
  3. Click on Virus & threat protection.
  4. Select Quick Scan.
  5. You can also click on Scan options and select Full scan for an in-depth scan.
  6. Apply the prompted fixes and restart your PC.

You should often scan your PC for viruses as this can help safeguard your private data also prevent duplicity of important system files.

We have a guide that lists down some of the best antivirus tools that you should check out to keep your PC safe.

Some of the common Mso.dll error messages that you will come across are listed below:

  • Mso.dll Not Found
  • This application failed to start because Mso.dll was not found. Re-installing the application may fix this problem.
  • Cannot find (location)\Mso.dll
  • The file Mso.dll is missing.
  • Cannot start (program). A required component is missing: Mso.dll. Please install (program) again.

We have a guide that explains how you can fix DLL issues on your Windows 11 PC. For Windows 10 users, we have a similar guide that explains solutions to resolve DLL errors.

Lastly, don’t forget to check our latest guide and see what to do if msxml4.dll is not found.

Feel free to drop your comment below and let us know which solutions helped you resolve the Mso.dll error on your PC.

Hogwarts Legacy player stats impress following last-gen release

Hogwarts Legacy has been a smashing success by every estimation since its initial release back in February. Just over two months later, the Warner Bros. Games action-RPG reached a staggering $1 billion in sales, and is likely to be the biggest release of the year. And that a year that has so far been stacked with hot releases. The game’s commercial success has been matched by its critical reception, as seen in our Hogwarts Legacy review roundup. 

Earlier this month Hogwarts Legacy finally came to last-gen consoles (excluding on Nintendo Switch, which had its version pushed back for a November release). And going by some of the player stats the game’s official Twitter account published this week, it’s safe to say Hogwarts Legacy’s popularity hasn’t waned much.

According to the post, gamers on Xbox One and PlayStation 4 have played over 17 million hours of game time collectively. The other stats are equally impressive.

Despite the controversy surrounding the game, we’ll likely be hearing more from Hogwarts Legacy before all is said and done. HBO is reportedly working on a TV adaptation, and a sequel is already rumored. Given the game’s success, it would not be the least surprising if we get a Hogwarts Legacy 2 announcement at some point in the not-too-distant future.

PnPUtil.exe: What is It & How to Properly Use It?

PnPUtil.exe is a command-line utility tool that comes with the Microsoft Windows operating system, starting with Windows Vista, which enables users to manage device drivers and driver packages.

In this guide, we’ll provide a detailed overview of PnPUtil.exe, explain how it works, and show you how to properly use it to manage device drivers in Windows.

What is PnPUtil.exe?

PnPUtil.exe is a command-line tool that provides a wide range of functionalities, including installing, uninstalling, exporting, and querying information about drivers and driver packages.

It can be used to update existing drivers, install unsigned drivers, and enable or disable device drivers.

However, as PnPUtil.exe is a command-line tool, it can be difficult for novice users to use it effectively.

How to use PnPUtil.exe?

Here are a few preliminary checks you should do before using the utility tool:

  • You are logged in to an account with administrative privileges.
  • Must have a driver package on your system.
  • If you want to install an unsigned driver, you should first disable driver signature enforcement on your system.

Now that you have checked all these things let us know how to use the tool.

  1. Press the Windows key, type cmd, and click Open.Command Prompt Click Open  pnputil.exe
  2. Type the following command to navigate to the directory containing PnPUtil.exe and press Enter: cd C:\Windows\System32
  3. To view a list of installed drivers on your system, copy and paste the following command and hit Enter: pnputil -epnputil.exe Command Prompt
  4. You will get a list of all the installed drivers on your computer, along with their publishers, version, and more.
  5. To install a driver package, type the following command after replacing <path_to_driver_inf_file> with the full path to the driver INF file you want to install, and press Enter: pnputil -i -a <path_to_driver_inf_file>cmd import pnputil.exe
  6. Copy & paste the following command after replacing <name_of_driver_package> with the name of the driver package you want to uninstall and hit Enter: pnputil -f -d <name_of_driver_package>Uninstall device
  7. To export a driver package to a text file named <exported_file_name>, type the following command after replacing <name_of_driver_package> with the name of the driver package you want to export and press Enter: pnputil -e -u <name_of_driver_package> > <exported_file_name>.txtExport information about the driver package
  8. Copy & paste the following command to query information about a specific driver package after replacing <path_to_driver_inf_file> with the full path to the driver INF file you want to query and hit Enter: pnputil -a <path_to_driver_inf_file>Install the driver

So, these are the steps you can use PnPUtil.exe to manage device drivers in Windows. You must remember that some PnPUtil.exe commands may require administrator privileges.

However, if the PnPUtil tool seems a bit too complicated, you can use one of the best driver updater software from our list.

If you have any questions or suggestions, feel free to mention them in the comments section below.

Microsoft says new AI exhibits signs of human-like reasoning abilities, but critics disagree

Researchers at Microsoft believe that the latest AI technology showcases notable indicators of reasoning abilities similar to human beings. The company has published a research paper titled “Sparks of Artificial General Intelligence,” which delves into the central theme that technologists have been striving to achieve and worrying about for several decades.

The researchers articulate their findings on how the new AI showcases proficiency beyond language handling through its ability to tackle intricate and revolutionary tasks like mathematics, coding, vision, medicine, law, psychology, and more without the need for any specific cues. In a recent statement, Bill Gates said that artificial intelligence (AI) holds the potential to facilitate literacy acquisition in children within the upcoming 18 months.

Essentially, according to the researchers, GPT-4 already boasts a higher intelligence quotient than most individuals. They expressed their amazement and remarked that GPT-4’s proficiency is remarkably close to the human level. They elaborate on its exceptional capacity for reasoning, problem-solving, strategic planning, abstract thinking, comprehension of intricate ideas, quick learning, and experience-based learning.

Dr. Bubeck, a French expatriate and former Princeton University professor, was among the researchers involved in the study. One of their initial endeavors was to solicit GPT-4 to compose a mathematical proof that demonstrated the infinity of prime numbers in a rhyming format. Following GPT-4’s presentation of an impressive poetic proof, Dr. Bubeck was taken aback by the system’s proficiency both mathematically and linguistically.

During a seminar at the Massachusetts Institute of Technology in March, he recalled being puzzled by the sheer excellence of the technology. For several months, the researchers continuously observed the system’s complex behavior, leading them to conclude its possession of an adaptable and thorough understanding of human principles and expertise.

However, as Microsoft researchers were utilizing a preliminary edition of GPT-4 without prepping it to prevent problematic content such as hate speech or misinformation, validating the assertions highlighted in the document would not be feasible for external professionals. Microsoft asserted that the system accessible to the public does not possess the same degree of efficiency as the one used for experimentation.

While Microsoft claims that its latest AI technology showcases traits similar to human-like reasoning, skeptics are not in agreement. According to some researchers, GPT-4’s lack of familiarity with the physical world could hinder its performance in terms of general intelligence. Furthermore, Maarten Sap, a professor, and researcher at Carnegie Mellon University, has commented on the trend of some major companies using research papers as a form of PR promotion. Sap notes that such papers may not adhere to established scientific evaluation standards, with Sparks of A.G.I. being a prime example of this approach.

As per Alison Gopnik, a psychology professor affiliated with the A.I. research group at the University of California, Berkeley, while systems such as GPT-4 may possess significant capabilities, it remains uncertain whether the text produced by these systems is indicative of human logic and understanding, New York Times reported.

Via New York Times

Our Xbox Game Pass roundup for the second half of May 2023

The first half of May was pretty solid for Xbox Game Pass, and the second half looks to be even better with some exciting new additions coming to the service. Among them is the latest edition of the FIFA franchise, not to mention some indie standouts like Planet of Lana, Cassette Beasts and Chicory: A Colorful Tale. Check out the full list of everything we know of coming in the second half of May.

FIFA 23 (Console and PC) EA Play

  • Eastern Exorcist (May 18)
  • Ghostlore (May 18)
  • Planet of Lana (May 23)
  • Cassette Beasts (May 25)
  • Massive Chalice (May 25)
  • Railway Empire 2 (May 25)
  • Chicory: A Colorful Tale (May 30)

Planet of Lana (Console and PC)

Unfortunately, there will also be a round of removals on Xbox Game Pass at the end of the month, as per usual. Below are the five games that will be leaving Xbox Game Pass on May 31.

  • Europa Universalis 
  • Evil Genius 2: World Domination 
  • FIFA 21 
  • Floppy Knights 
  • Lawn Mowing Simulator 
Evil Genius 2: World Domination
Evil Genius 2: World Domination.

The good news is that these games can be bought at a discount of at least 20% before they are removed, and of course they will be available for purchase afterward (though not with the discount). So now is the time to act if there is something on the list of removals you want for keeps. To learn more head over to the Xbox Game Pass Ultimate FAQ page.

Microsoft Presses On With HoloLens 2 by Launching It in Saudi Arabia

Microsoft has made a significant stride in the field of mixed reality with the launch of the HoloLens 2 headset in Saudi Arabia. This development marks a new chapter in the Kingdom’s computing landscape, as Microsoft aims to empower Saudi organizations across various industries and equip them with the necessary tools to gain a competitive edge on the global stage.

HoloLens 2 is an augmented reality (AR) device developed by Microsoft. It promises to deliver the most comfortable, intuitive, and immersive mixed-reality experience by leveraging the power of Microsoft Cloud and AI services. Together with Dynamics 365 mixed reality apps and industry ISV solutions, this technology brings tangible enterprise value to sectors such as manufacturing, automotive, healthcare, defense, and education.

The HoloLens 2 claims to be a cutting-edge tool that assures to transform the industrial metaverse by offering immersive collaboration features that boost the efficiency, safety, and productivity of frontline workers. Unfortunately, Microsoft has faced some challenges lately with the HoloLens 2. In January, Congress put a pause on purchasing HoloLens headsets for Army due to feedback from field tests where over 80% of soldiers reported experiencing issues while wearing them. Additionally, the hardware team responsible for the HoloLens faced layoffs in February, indicating the project is not delivering the expected results.

However, by launching the AR headset in Saudi Arabia, Microsoft is hoping to revamp its ambitious hardware project and move forward in the field of mixed reality. Recognizing the increasing demand for Microsoft’s trusted cloud services in Saudi Arabia, the company had previously announced its plans to establish a new cloud data center region in the Kingdom. Once operational, this cloud region will provide enterprise-grade cloud services, coupled with robust security and data residency, to organizations in the country, empowering them to embark on successful digital transformation journeys.

The availability of HoloLens 2 in Saudi Arabia, coupled with the forthcoming cloud data center region, demonstrates Microsoft’s commitment to supporting the Kingdom’s technological advancement and fostering innovation across industries. By bringing mixed reality experiences to the forefront, Microsoft is trying to revolutionize how organizations operate, collaborate, and achieve their goals, ultimately driving Saudi Arabia’s position as a global leader in the digital era.

Via: NewsWires

Fix: This Device is not Configured Correctly. (Code 1)

If you have encountered the error this device is not configured correctly (code 1) when connecting new hardware to your PC, then this guide can help!

In this guide, we will discuss some of the expert-recommended methods to fix the problem after explaining the causes.

Why the This device is not configured correctly (code 1) error occurs?

There could be various reasons for this error; some of the common ones are mentioned here:

  • Faulty device driver – If the device driver is outdated or incompatible with the operating system, the device may not work properly, leading to an error.
  • Malware infection – Malware or virus infections can cause various issues with the computer’s hardware devices. Try running a deep scan using an antivirus tool.
  • Hardware malfunction – If there is a problem with the hardware device, such as a faulty component or damaged wiring, the device may not work correctly, or the system may show this message.
  • Other devices or software interference – Sometimes, the error message can be caused by conflicts between the device and other hardware, or software components installed on your PC.
  • Registry errors -If there are errors or inconsistencies in the Registry related to the device driver or hardware, it can cause the error message. Try using a registry cleaner to fix the problem.

Now that you know the causes of the issue, let us move to the solutions.

How can I fix this device is not configured correctly (code 1) error?

Before we go to the advanced fixes, here are a few preliminary checks you should do:

  • Restart your computer.
  • Make sure your Windows is up to date.
  • Ensure you have logged in using an administrator account.
  • Back up important data before making any changes.

So, once you have checked these things, move to the actual troubleshooting steps.

1. Run a hardware troubleshooter

  1. Press the Windows + I to open the Settings app.
  2. Go to System, then click Troubleshoot.Troubleshoot This Device is not Configured Correctly. (Code 1
  3. Select Other troubleshooters.Other Troubleshooters
  4. Go to the hardware which is causing the problem, for example, Keyboard, then click Run.Keyboard troubleshooters

2. Update/reinstall the driver

  1. Press Windows + R to open the Run dialog box.Device Manager Run command
  2. Type devmgmt.msc and click OK to open Device Manager.
  3. Locate the problematic driver, right-click it and select Update driver.Graphics Driver update This Device is not Configured Correctly. (Code 1)
  4. Now choose Search automatically for drivers.Action scan for hardware changes
  5. Follow the onscreen instructions to update the driver.
  6. If the issue persists, then right-click the driver and choose Uninstall device.Uninstall graphics driver
  7. Click on the Uninstall button to confirm and wait for the process to complete.
  8. Click Yes to restart your computer.
  9. Now open the Device Manager again, go to Action, and select Scan for hardware changes.Action scan for hardware changes

The latest version of the driver, which is compatible with your computer will be installed. In any case, it’s possible that it won’t find the right driver version and you will need to do it manually.

Hence, you can forget that and use a professional solution developed to detect old or missing drivers and fix them from its extensive driver database.

⇒ Get Outbyte Driver Updater

3. Delete registry entries

  1. Press Windows + R to open the Run console.Regedit Runcommand
  2. Type regedit and click OK to open the Registry Editor.
  3. Navigate to this path: Computer\ HKEY_LOCAL_MACHINE\System\CurrentControlSet\Control\Class\{36fc9e60-c465-11cf-8056-444553540000}
  4. Locate UpperFilters, right-click it, and select Delete.Upper filters delete
  5. Confirm the selection and click Yes.
  6. Now locate LowerFilters, choose Delete, and then click Yes to confirm.Lower filters This Device is not Configured Correctly. (Code 1)
  7. Restart your computer to let the changes take effect.

4. Restore Windows to a previous version

  1. Press the Windows key, type control panel, and click Open.Click Open to launch Control Panel  Control Panel start menu This Device is not Configured Correctly. (Code 1)
  2. Select View by as Large icons and click Recovery.Go to Recovery
  3. Click Open System Restore.Open system restore
  4. On the System Restore window, select Choose a different restore point and click Next.Next Choose a different restore point
  5. Select the desired restore point and click Next.Select a point and click Next
  6. Click Finish.Click Finish

Windows will restart and restore your computer to the selected point. If the System Restore didn’t complete successfully, we suggest you check out this guide to know the solutions.

So, these are methods that you can use to fix the This device is not configured correctly (code 1) error. If you have any questions or suggestions, feel free to mention them in the comments section below.

2022 hit Stray is apparently headed to Xbox consoles

Last year Annapurna Interactive released what is likely its most successful game to date: Stray. The game stars a stray cat and its drone companion, who are trying to escape the ruins of a cyberpunk city inhabited by robots and a mutant bacteria.

Stray was a runaway hit, becoming the highest-rated game of the year on Steam as well as one of the most downloaded games on PS4/5. Stray also became known for viral videos of cats watching the game, which can be seen on the Twitter account @CatsWatchStray.

Now it looks like Stray may finally be making its way to Xbox consoles after nearly a year of PlayStation exclusivity (not counting Windows PC). The game has received a rating from the ESRB for Xbox One and Xbox Series X|S platforms. (The game was rated E10+, by the way). In its rating summary the ESRB says,

Players sometimes encounter parasitic blobs/mice-like bots that can attack and kill the cat. Players can access a UV light to defeat the mice-like bots, causing them to explode and emit splashes of colored liquid.

The description also notes that Stray features “animated blood” and “fantasy violence.”

Other than this ESRB listing, there has been nothing confirmed or even hinted at in terms of a release date. Stray was originally released on July 19, 2022 and with timed exclusivity deals often lasting for one year, that could be a possible release window for the Xbox version.

CRClient.dll not Found: How to Fix or Download it Again

Adobe Crash Reporter Client DLL or CRClient.dll by Adobe Inc. is an essential Dynamic Link Library (DLL) required for the proper functioning of software like Adobe Acrobat. If this DLL goes missing, you will not be able to launch the Adobe software or utilize its functionality.

Why do I encounter the CRClient.dll not found in Windows? 

If you run into the CRClient.dll file not found error, one or more of the following causes are the agents of harm:

  • Malware infection – Viruses and malware infections damage essential files, which can no longer be retrieved by Windows. 
  • Corrupt system files – The system files can get corrupted if there is an issue with the Windows update installation. 
  • Faulty program installation – If the app installation process gets interrupted, the related DLL files can go missing.
  • Corrupt registry – When the Windows registry gets corrupt, it triggers several DLL-related errors, including the one at hand. 
  • Obsolete graphic driver – An issue with the graphic driver on your Windows PC is also a probable reason for CRClient.dll not found error.

If the CRClient.dll missing error occurs on your system as well, follow the guide below to restore it. 

How do I fix the CRClient.dll not found error in Windows? 

Before implementing the advanced solutions explained below, you should make sure to: 

If these workarounds do not eliminate the issue, jump to these fixes.

1. Use a DLL fixer 

Issues like missing CRClient.dll errors mainly emerge because of the incompatibility between the Adobe software and the operating system. Diagnosing and fixing such issues requires help from an expert, especially if you are not familiar with system-related errors. 

In such a situation, you should employ a trusted DLL fixer, capable of resolving all sorts of DLL-related errors at a button click. 

2. Repair the system files

  1. Launch the Start menu by pressing the Windows key, type cmd in the search bar, and click Run as administrator from the right section. crclient.dll
  2. Click Yes on the User Action Control prompt to launch the command line tool with administrative privileges. 
  3. Now, type or paste the command given below and hit Enter to execute the SFC scan. SFC/scannow  
  4. Wait until the verification 100% complete message is displayed. Then, paste the following command and hit the Enter key once again. DISM /Online /Cleanup-Image /Restorehealth crclient.dll

After the DISM tool finishes scanning your PC, restart your system and then verify if CRClient.dll is not restored. 

SFC and DISM tool scans the protected system files and disk images for signs of damage and replaces them with the cached copy stored in the compressed folder, which in turn resolves the missing DLL file issue. 

3. Scan for viruses and malware 

  1. Launch the Settings app using the Windows + I shortcut. 
  2. Switch to Privacy and security from the left navigation menu and then select Windows Security from the right section. crclient.dll
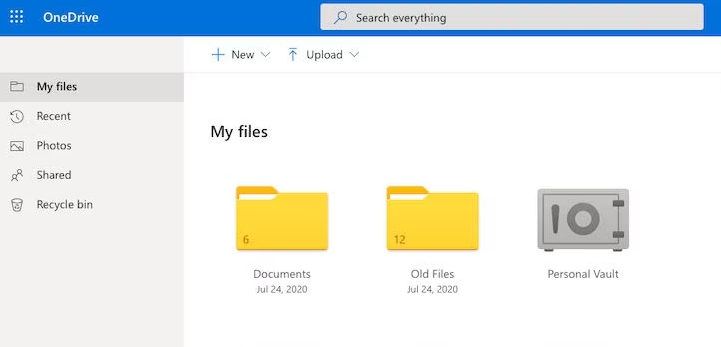
  3. Click Virus & threat protection. crclient.dll
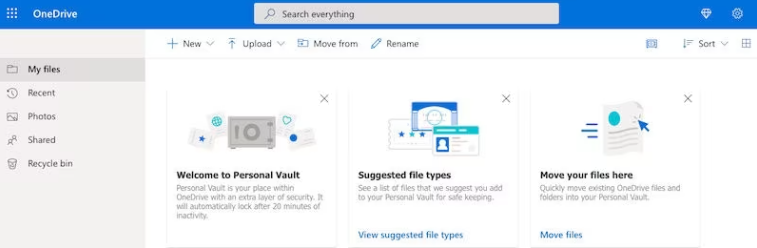
  4. Follow the Scan options link located in the next window. crclient.dll
  5. Select Microsoft Defender Antivirus (offline scan) from the list and press the Scan now button located underneath. crclient.dll

Microsoft Defender will scan your files, detect the threats and remediate them. Wait patiently for the process to complete, and check if the CRClient.dll is traceable by Windows. 

In case you rely on a third-party antivirus tool, you can use the tool to run a full scan of your system. 

4. Download and replace the missing DLL 

If none of the solutions provided above could restore the CRClient.dll file on your PC, then manually downloading and replacing the DLLs is your last resort. 

While downloading something from a shady source is always deterred, you can go ahead if you find trustworthy websites like dll_files.com which offer different versions of the DLL depending on the system architecture. Also, do not forget to scan your download link with an online virus scan tool. 

After the download is complete, move the contents to the following directory of your PC. C:\Windows\System32

Now restart your computer and launch the affected program; the CRClient.dll not found error will no longer bother you. 

That’s pretty much it! Hopefully, you were successful in resolving the missing CRClient.dll issue by implementing the easy fixes listed in this guide.  Recently we wrote about acroiefavclient.dll in another article, so you might want to check it out.

You might also be interested in restoring the missing VCOMP110.DLL on your PC if Windows reports it to be missing.

How to use Phone Link for iPhone on Windows 11

Microsoft just rolled out a plethora of new updates with Moment 2. Just like what the Redmond tech giant did by introducing the Bing AI chatbot to the taskbar, iPhone users are in for a treat on Windows 11 because the Phone Link app is now available for them. 

Phone Link was available from Windows 10 as a companion app to let users connect their phones to their PCs effortlessly. While it was only available for Android users back then, now iPhone users can sit back and relax.

Integrating Phone Link into iMessage provides users with an intuitive way to access their iMessage conversations on their computer without the need to switch between devices. This means that Apple users can stay connected to their colleagues, friends, and family without interruptions, regardless of their device.

After previously rolling out for several select insiders, Redmond officials finally launched the Phone Link app for iPhone users to all Windows 11 customers in 39 languages across 85 markets.

Without further ado, let’s try and jump in.

How to use Phone Link for iPhone on Windows 11?

1. Open the Phone Link app. Click iPhone.

2. Open your phone’s camera & scan the QR code shown. Make sure your Bluetooth is activated.

3. You’re in and connected!

Microsoft’s decision to bring Phone Link to Apple users is a significant step towards creating a more seamless and efficient communication experience across devices.

By providing an intuitive and easy-to-use integration, Microsoft is helping users stay connected, productive, and efficient, regardless of their devices.

In case you don’t want to use this feature, there’s a quick and easy way to completely disable Phone Link on Windows 11. Users who want an alternative connection method can check how to use Dell Mobile Connect for a different way to sync calls, messages, and notifications with Windows.

What do you think about this nice addition? Let us know in the comments!

What is SpeechRuntime.exe & How to Fix its Errors

SpeechRuntime.exe is an official Microsoft Windows executable file. An obsolete and corrupt version of the SpeechRuntime.exe file can cause various issues on your PC.

In this guide, we will explain what is the SpeechRuntime.exe file and how you can fix errors related to it. Let us get right into it.

What is the SpeechRuntime.exe file?

The SpeechRuntime.exe file is a part of the Microsoft Windows OS. It is usually found inside the subfolder of C:\Windows\System32, mostly inside the C:\Windows\System32\Speech_OneCore\Common.

It is a genuine Windows file and SpeechRuntime.exe stands for Speech Runtime Executable. It isn’t a trojan or malware-infused file on your PC.

How can I know if the SpeechRuntime.exe file is dangerous?

However, viruses and malware can infect this file and create duplicates of it. This can fool Windows to run the infected file in place of the original file and cause multiple issues.

Here are some of the error messages related to SpeechRuntime.exe that you may come across if the file goes corrupt:

  • SpeechRuntime.exe is not a valid Win32 application.
  • SpeechRuntime.exe encountered a problem and will close.
  • SpeechRuntime.exe can’t be located.
  • SpeechRuntime.exe can’t be found.
  • Problem starting application: SpeechRuntime.exe.

Let us now understand what solutions you can apply to resolve the SpeechRuntime.exe errors.

How can I resolve SpeechRuntime.exe errors?

Before starting any troubleshooting, make sure that you installed all the new OS updates.

1. Run the SFC Scan

  1. Press the Win key to open the Start menu.
  2. Type command prompt and open it as an administrator.CMD elevated 0x80080300
  3. Type the below command and press Enter: sfc /scannow sfc scan 0xc00ce556
  4. After the process completes, restart your PC.

Fixing corrupt system files will automatically resolve multiple issues related to the system files. You should run the SFC Scan command and let your system fix the problem for you.

Anyhow, a better method to diagnose your Windows system would be to use an efficient system repair solution. It will detect broken system files and restore your PC functionality and performance.

2. Perform a virus scan

  1. Press the Win key to open the Start menu.
  2. Open Windows Security.Windows Security open Windows key
  3. Click on Virus & threat protection.
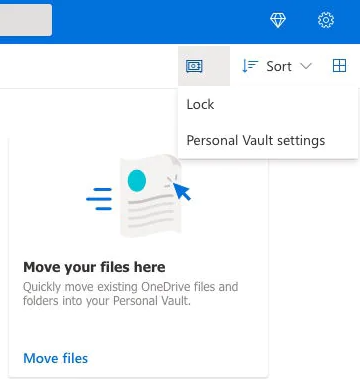
  4. Select Quick Scan.
  5. You can also click on Scan options and select Full scan for an in-depth scan.
  6. Apply the prompted fixes and restart your PC.

Viruses and malware can create a copy of important system files such as the SpeechRuntime.exe and cause malfunction on your PC. In such a case, scanning your PC at regular intervals for viruses will help keep your PC protected.

You can check out our guide that gives you a list of some of the best antivirus tools that will help keep your PC safe.

3. Run the Recording Audio troubleshooter

  1. Press the Win + I keys to open the Settings menu.
  2. Click on Troubleshooter.
  3. Select Other troubleshooters.
  4. Scroll down and hit the Run button for Recording Audio.
  5. The troubleshooter will begin diagnosing the issue and fix it.
  6. Restart your PC.

Many of our readers have fixed the SpeechRuntime.exe errors by running the Recording Audio troubleshooter on their PCs. You should also give it a try.

4. Update the audio driver

  1. Press the Win key to open the Start menu.
  2. Type Device Manager and open it.
  3. Expand the Audio inputs and outputs.
  4. Right-click on your audio driver and select Update driver.
  5. Select Search automatically for driver option.
  6. Install the latest driver and reboot your PC.

You should make sure that your audio driver is up to date to prevent any conflict with the speed process on your PC.

That is it from us in this guide. If you are getting crackling audio issue on Windows 11, then you should refer to the solutions in our guide.

You can also read our guide that will help you resolve the audio latency issue on your Windows 11 PC.

If your Windows 11 PC keeps changing the audio output, then you can apply the solutions in our guide to resolve the problem.

Feel free to let us know in the comments below, which one of the above solutions resolved any issues related to SpeechRuntime.exe.

d3d8.dll Missing or Not Found? 5 Ways to Fix It

Amongst the hundreds of DLLs published by Microsoft, not all are available by default in Windows, and some come bundled as a part of additional packages. One of these, the d3d8.dll, is related to DirectX, and when the DLL is missing, several apps fail to launch.

DLL or Dynamic Link Library files are shared by several applications, and some use them simultaneously. Besides, due to repeated changes made to DLLs, the chances of encountering an error with these are higher. So, let’s find out why d3d8.dll is missing in GTA 3 and other games.

Why is d3d8.dll not found?

Here are the primary reasons the DLL is not found in Windows:

  • Program not compatible with the OS: The errors with this particular DLL have been reported on forums as early as the year 2000, indicating that even the programs released back then required the DLL. So, incompatibility could be an underlying cause here.
  • Missing DirectX files: Since d3d8.dll is related to DirectX, issues with the software or missing files can lead to DLL errors.
  • DLL is unreadable: After repeated changes over time, a DLL may become unreadable to all or some programs.
  • Corrupt system files: A common reason you are getting the d3d8.dll error in ReShade is corrupt system files, and there are a few quick scans that might help.

What can I do if d3d8.dll is missing?

1. Use a dedicated DLL repair tool

While there are a few ways to replace or download d3d8.dll, most are either too complex or require additional resources that are often difficult to locate. That’s why most users go with a reliable DLL repair tool.

2. Run the program in compatibility mode

  1. Right-click on the affected program’s launcher, and then select Properties.properties
  2. Navigate to the Compatibility tab, tick the checkbox for Run this program in compatibility mode for, and select a previous iteration of Windows from the list.compatibility mode to fix missing d3d8.dll
  3. Once done, click on Apply and OK to save the changes.save changes

Often running a program in compatibility mode helps fix things when d3d8.dll is the faulting module. Remember, you may have to try out a few iterations before finding the one that works for the program.

3. Manually move the DLL from another device

Whenever a DLL is missing, experts recommend manually transferring it from another healthy device to the affected PC, given they both run the same operating system and the other computer has the DLL. For those wondering where do I put d3d8 dll, the file location is:C:\Windows\System32

In some cases, the DLL will be found in the program’s directory instead of the System32 folder. Whatever the case, when transferring the DLL, make sure to copy it to both the System32 folder and the program-specific directory.

4. Download DirectX End-User Runtime Installer

  1. Go to Microsoft’s official website, select the desired language from the dropdown menu, and click Download.directx to fix d3d8.dll
  2. Run the setup, and follow the on-screen instructions to complete the installation.setup
  3. Once done with it, restart the computer for the changes to come into effect.

Since the DLL is linked to DirectX, missing software or components are just as likely to trigger issues with d3d8.dll in Rome Total War. And installing the DirectX End-User Runtime package should do the trick.

5. Reinstall the affected program

  1. Press Windows + R to open Run, type appwiz.cpl in the text field, and hit Enter.appwiz.cpl
  2. Select the program that’s throwing the error, and click Uninstall.uninstall to fix missing d3d8.dll
  3. Choose the appropriate response when prompted and follow the on-screen instructions to complete the uninstallation.
  4. Once done, restart the computer and then reinstall the program from the official source.

Often the problem arises due to an improper app installation, especially when you have a missing d3d8.dll in Command and Conquer Generals. So, uninstall the application and then do a fresh install of it. You can also use an effective uninstaller software to clear leftover files and registry entries.

Besides, download one of the best DLL repair tools, as these will help prevent such errors from reappearing.

Tell us which fix worked for you in the comments section below.

Ucrtbased.dll was not Found: How to Fix This Error

Ucrtbased.dll is a crucial DLL file used by a series of applications and games. Unfortunately, some users get an error that ucrtbased.dll is not found while trying to open some apps.

If this DLL file is also missing on your Windows 10 or 11 PC, this guide will show you quick ways to get it back.

What is ucrtbased DLL for?

Ucrtbased.dll is an important part of the Microsoft Visual C++ package. It is the debug version of the ucrtbase.dll file, which is required by many applications, games, and even browser extensions during debugging.

This file ensures that software testing is easy and allows most Windows programs to function properly. Hence, if this DLL file is missing on Windows 11, a lot of software is bound to fail.

How can I fix ucrtbased.dll if it is not found?

1. Use a dedicated DLL fixer

Ucrtbased.dll is a system file integral to your PC’s smooth running. So, if it is missing, your best is to try to repair it instead of looking to download or copy a new one.

While different options are available, the best way to get the file working is to use a dedicated DLL repair tool. Such a tool will 100% restore the Ucrtbased.dll file since it is a Windows DLL file.

2. Reinstall the faulty app

  1. Press the Windows key + R, type control, and click the OK button.

    control  ucrtbased.dll
  2. Click Uninstall a program under Programs.
    uninstall a
  3. Now, right-click the faulty app and choose the Uninstall option.
    uninstall
  4. Finally, go to the official website to reinstall the program or use the original installation disk.
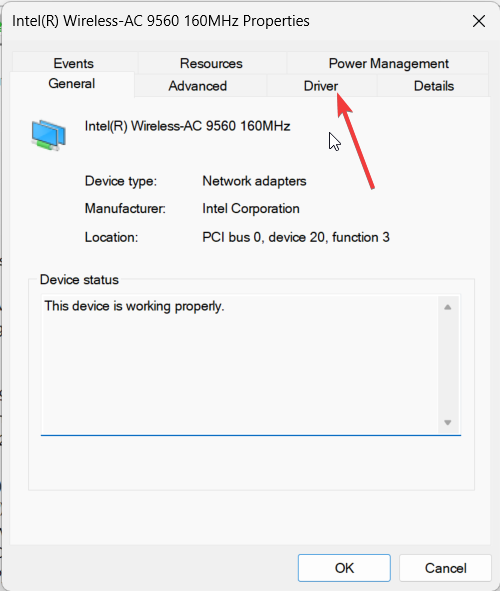
In some cases, the ucrtbased.dll not found error message might be due to a corrupt app installation. The quickest way to get it back is to uninstall and reinstall the app from official sources.

If you used an installation disk, ensure you reinstall the software using the original version from the developer.

3. Repair Microsoft Visual C++ redistributable file

  1. Press the Windows key + R, type appwiz.cpl, and click OK.
    appwiz ucrtbased.dll
  2. Right-click the Visual C++ Redistributable file and select Change.
    change
  3. Now, click on Repair and follow the onscreen instructions to complete the process.

Among the prominent causes of the ucrtbased.dll not found error is a corrupt Microsoft Visual C++ Redistributable file. Repairing the file should restore normalcy on your PC.

4. Run an SFC scan

  1. Press the Windows key, type cmd, and select Run as administrator under Command Prompt.
    cmd admin
  2. Type the command below and hit Enter to run it:sfc /scannowsfc ucrtbased.dll
  3. Finally, wait for the command to finish running and restart your computer.

Some users have found this ucrtbased.dll not found issue to be due to corrupt or missing system files. You need to repair these files using the System File Checker to get past the error message.

5. Perform a system restore

  1. Press the Windows key + R, type rstrui.exe, and click the OK button.
    rstrui
  2. Click Next on the page that pops up.
    next
  3. Now, choose your preferred restore point and click the Next button.
    restore point ucrtbased.dll
  4. Finally, click Finish.
    finish

Sometimes, you might be facing this ucrtbased.dll issue because of some recent changes made to your PC. Restoring your PC to a point when everything is working perfectly should do here.

6. Scan for malware

  1. Press the Windows key, type virus, and select Virus & threat protection.
    virus
  2. Click the Scan options link.
    scan options ucrtbased.dll
  3. Now, select your preferred scan option and click the Scan now button.
    scan now

In some cases, problems with ucrtbased.dll occur because of the activities of viruses on your PC. You need to perform a full virus scan to eliminate malware.

Alternatively, you can also use excellent antivirus software in TotalAV to eliminate even the most hidden malware on your PC.

This software does not tolerate malware, as it detects and removes them before they can cause problems on your PC.

We have reached the end of this detailed guide on how to fix the ucrtbased.dll not found error. Hopefully, you can solve the problem before exhausting our solutions.

Similarly, if Twitter.dll is missing on your PC, check our detailed guide to get it back.

Feel free to let us know the solution that helped you solve this issue in the comments below.