FIX: Windows 10/11 update hangs

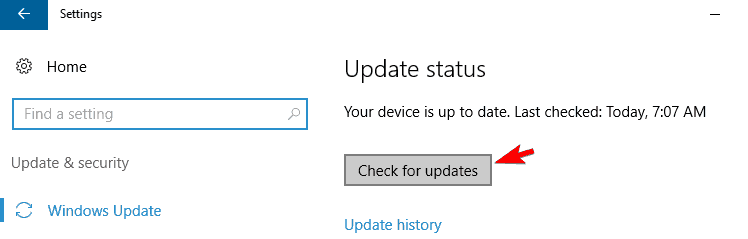
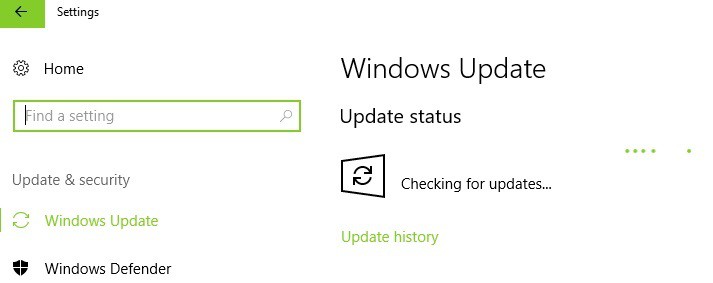
In order to keep your system stable and protected, Windows 10 automatically performs all the necessary updates in the background.

Downloading Windows Updates is rather important, but many users reported that Windows 10 Update hangs for some strange reason.

This seems like a big problem, but fortunately, there are several ways to fix it.

What can I do if Windows 10 update hangs?

Table of contents:

  1. Stop Windows Update services and delete SoftwareDistribution folder
  2. Be patient and wait for the update to finish
  3. Use Windows Update troubleshooter
  4. Restart your network connection
  5. Run the SFC scan
  6. Run DISM
  7. Disable your antivirus
  8. Delete the update and try again
  9. Restart Windows Update service

1. Stop Windows Update services and delete SoftwareDistribution folder

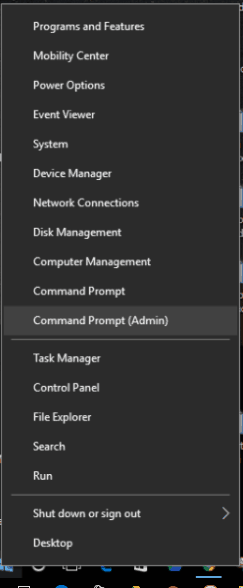
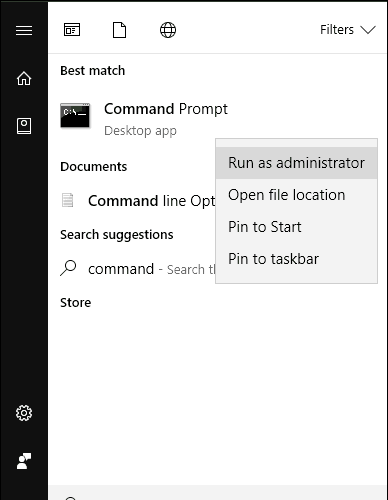
  1. Press Windows Key + X and choose Command Prompt (Admin) from the menu.
  2. Once Command Prompt opens, enter the following lines and press Enter after each line:
    • net stop wuauserv
      cmd net stop wuauserv windows update hangs
    • net stop bits
      cmd net stop bits windows 10 update hangs

Now you need to navigate to C:WindowsSoftwareDistribution folder. After you enter SoftwareDistribution folder, select all files and folders and move them to a safe location, for example to your Desktop.

In case some of these files are still in use, just restart your device and repeat all the steps again.

After you’ve managed to move all the files and folder from SoftwareDistribution folder you need to restart your computer once again and check if the Windows update still hangs.


Here is everything you need to know about Update Settings in Windows 10.


2. Be patient and wait for the update to finish

Sometimes these updates can take a long time to download, and Windows Update might seem stuck to you, but it’s actually working slowly in the background.

If Windows 10 Update hangs, leave your computer running over the night, and if everything is working correctly there should be some progress by the morning.

If the issue still persists, you might want to try some of our other solutions.


Why is Windows update taking so long? Maybe there’s a problem! Check these solutions!


3. Use Windows Update troubleshooter

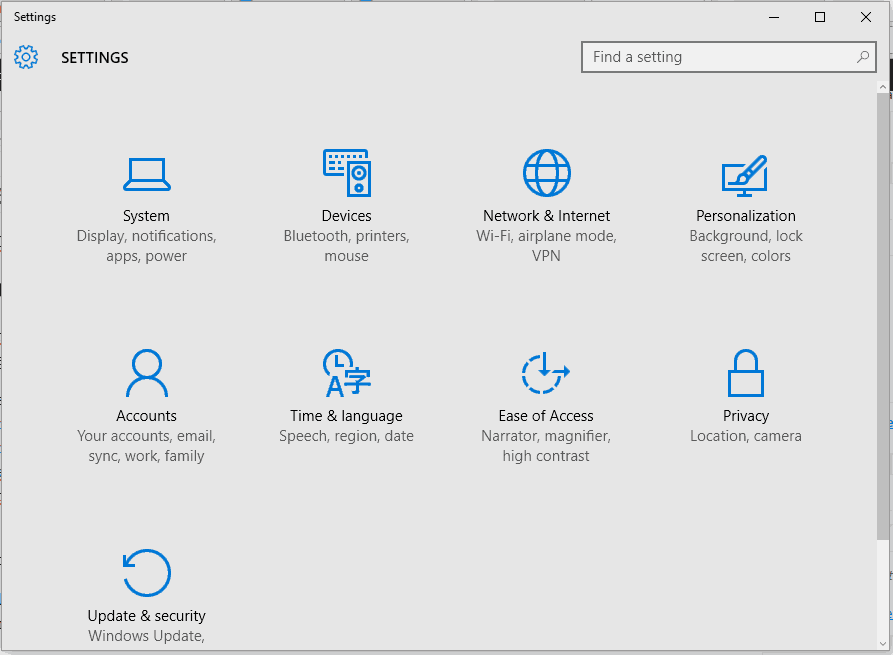
  1. Go to Settings.
  2. Head over to Updates & Security > Troubleshoot. 
  3. Select Windows Update, and go to Run the Troubleshooter.
    troubleshoot windows 10 update hangs
  4. Follow further on-screen instructions and let the process finish.
  5. Restart your computer.

After running Windows Update troubleshooter, check if Windows Update still hangs on Windows 10.


4. Restart your network connection

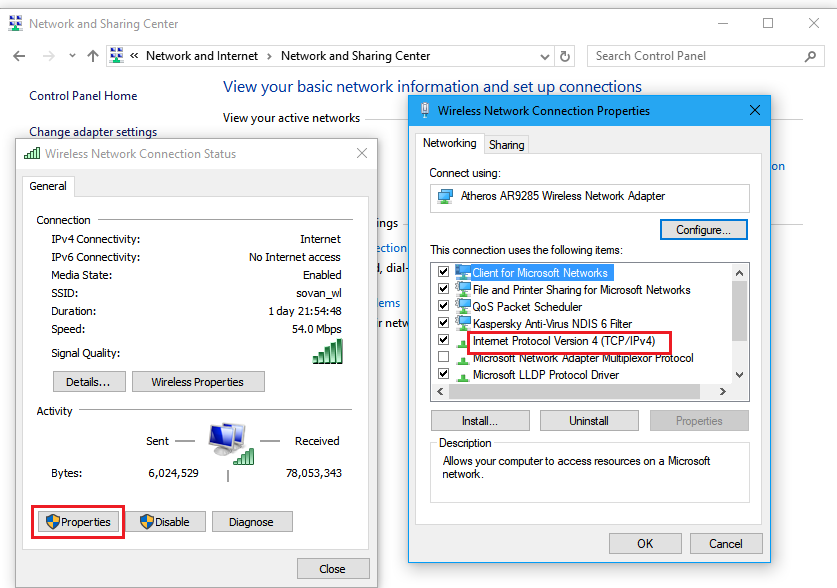
  1. Press Windows Key + S and type view network connections. From the list of results choose View network connections.
    view network connections windows update hangs
  2. Locate your connection, right click it and choose Disable.
    network connection disable windows 10 update hangs
  3. Right click your connection once again and choose Enable from the menu.

After you’ve enabled your network connection again, the issue should be resolved. In addition, you could try unplugging your Ethernet cable or try restarting your computer a few times.

In most cases, Windows Update isn’t actually stuck, it’s just working slowly, so if Windows 10 Update hangs on your computer, maybe it’s best for you to be patient and wait for it to download all the necessary components.

If you’re certain that update process is stuck, you could try restarting the Windows Update service and delete its cache files.


5. Run the SFC scan

  1. Right-click on the Start Menu button, and open Command Prompt (Admin).
  2. Enter the following line and press Enter: sfc/scannowcommand prompt sfc /scannow windows 10 update hangs
  3. Wait until the process is done (it may take a while).
  4. If the solution is found, it will automatically be applied.
  5. Now, close the Command Prompt and restart your computer.

Epic guide alert! Everything you need to know about System File Checker is right here!


6. Run DISM

  1. Open the Command Prompt as shown above.
  2. Enter the following command and press Enter:
    • DISM.exe /Online /Cleanup-image /Restorehealthcommand prompt dism cleanup-image windows 10 update hangs
  3. Wait for the process to finish.
  4. Restart your computer.
  5. In case the DISM can’t obtain files online, try using your installation USB or DVD. Insert media and type following command:
    • DISM.exe /Online /Cleanup-Image /RestoreHealth /Source:C:/RepairSource/Windows /LimitAccess
  6. Make sure to replace ”C:/RepairSource/Windows” path of your DVD or USB.
  7. Follow further on-screen instructions.

Check out this guide and learn to work in DISM like a real technician!


7. Disable your antivirus

Third-party antivirus programs don’t go along with Windows updates (and other Windows 10 features). So, it’s quite possible that your antivirus is actually blocking the update.

To see if that’s indeed the case, disable your antivirus for a couple of minutes. If the update finishes installing, your problem is solved.


8. Delete the update and try again 

  1. Go to Settings > Updates & Security > Windows Update.
  2. Go to Update history > Uninstall updates.
  3. Now, find the troublesome update (you can sort updates by date), right-click it, and go to Uninstall.
    remove update Windows 10 update hangs
  4. Restart your computer.

After doing that, check if the Windows 10 update still hangs.


Need more information on how to delete the Windows update? Check out this guide!


9. Restart Windows Update service

And finally, if none of the previous solutions worked, let’s restart the Windows Update service. Here’s how to do that:

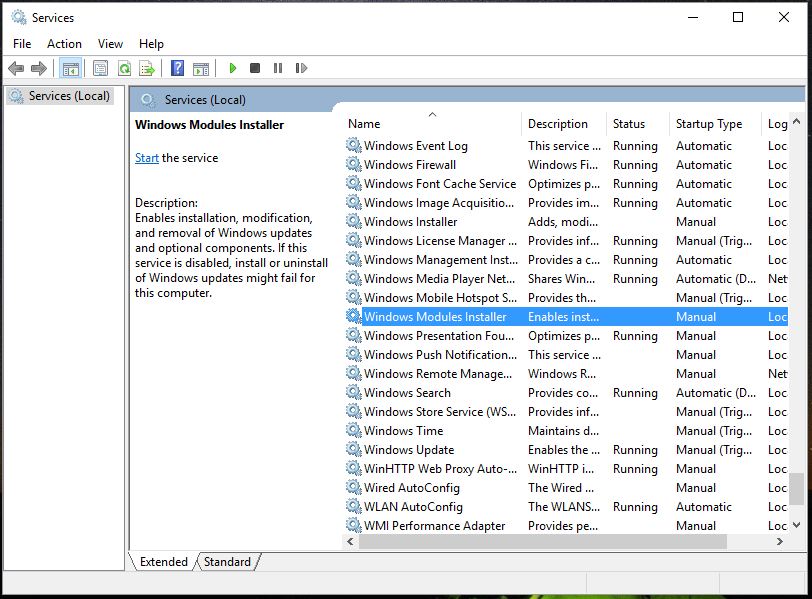
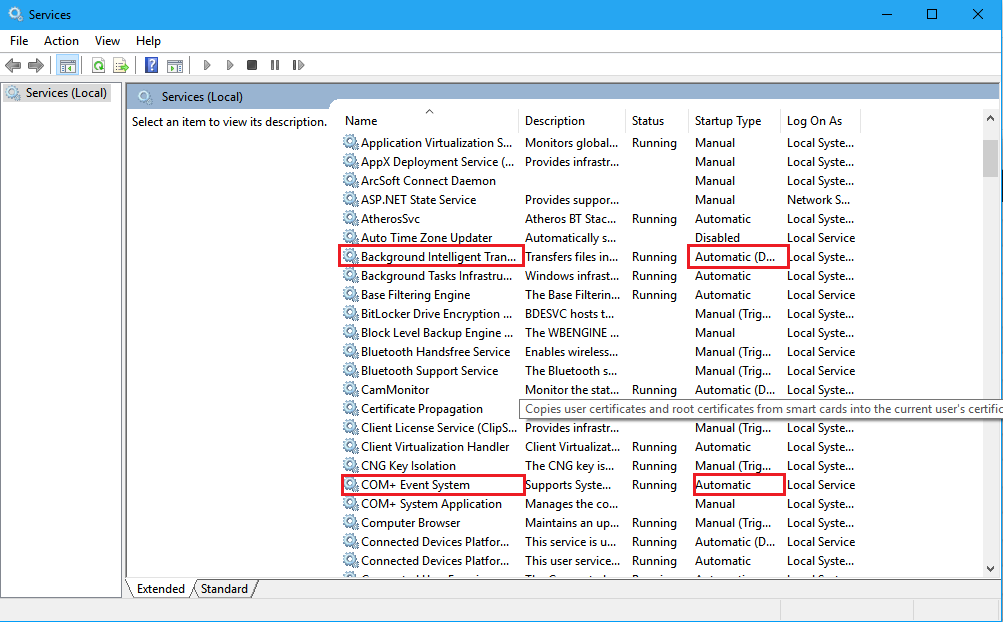
  1. Go to Search, type services.msc, and open Services.
  2. Find the Windows Update service. Right-click and open Properties.
    windows update service windows 10 update hangs
  3. Click Restart.
  4. Once the service restarts, go to the General tab, find Startup type and choose Automatic.
  5. If the service is not running, right-click and choose Start.
  6. Confirm selection and close window.

In addition to this problem, many users reported that Windows Update isn’t working on Windows 10, and if you have that problem, you might want to check some of our other articles.

[wl_navigator]

Uplay Can’t Connect: Why & How to Fix IT Instantly

Uplay PC is a portal to all of Ubisoft’s game titles available for the PC. Furthermore, users can earn rewards, buy third-party titles, and communicate and connect to other gamers on this software.

World-renowned games such as Rainbow Six Tom Clancy, Assassin Creed, For Honor, and more can be found on this gaming platform.

However, users sometimes encounter Uplay PC Windows 10 connection issues when opening the gaming portal.

If you are having difficulties connecting to the Uplay servers on Windows 10, then the below fixes may help you.

Can’t connect to Uplay servers, how do I fix it?

1. Software conflict

Sometimes if Windows Firewall is not up to date, it will cause problems when you open Uplay. If you update your firewall and the problem persists, then you will need to try turning off your firewall when you run Uplay.

Here is what you will need to do to turn off the Windows Firewall:

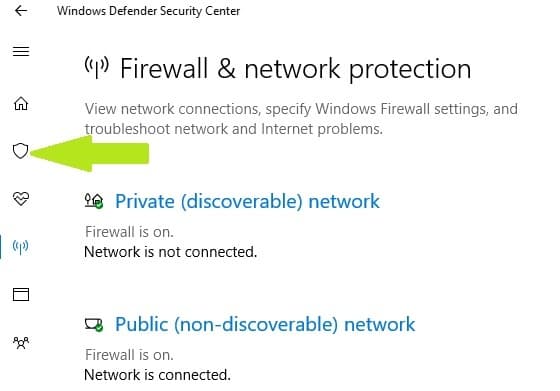
  1. Locate the Windows Firewall icon on the bottom right corner of your computer in the taskbar and click on it.
  2. Click on the Firewall & Network protection section.
  3. Then, open the Public (non-discoverable) network option located in the middle of the windows.
  4. Locate the Windows Firewall option and turn it off.

Users may have other antivirus programs installed on their computers. These programs can also prevent them from entering the Uplay servers. Therefore, it is advised to properly configure these applications in order for Uplay to run without restrictions on the local network.

If you utilize Virtual Private Networks (VPN) or Internet Connection Sharing (ICS) programs, then it is also recommended to shut them down.

These applications can interfere with the network of your Ubisoft games.


Did you know that your antivirus can block your internet connection? Read our guide to learn more!


2. Offline mode and proxy settings

Your Uplay program might be configured to start offline every time you open it. Also, there are proxy settings on Windows 10 that can cause connection problems for the Uplay gaming platform.

In order to fix these problems users should try these steps:

  1. First, you will need to open Uplay.
  2. Second, click on the menu icon which should be located on the top right side of the Uplay Windows.
  3. Click on the settings option once the menu is opened.
  4. Locate the Always start Uplay in Offline Mode option and uncheck it.
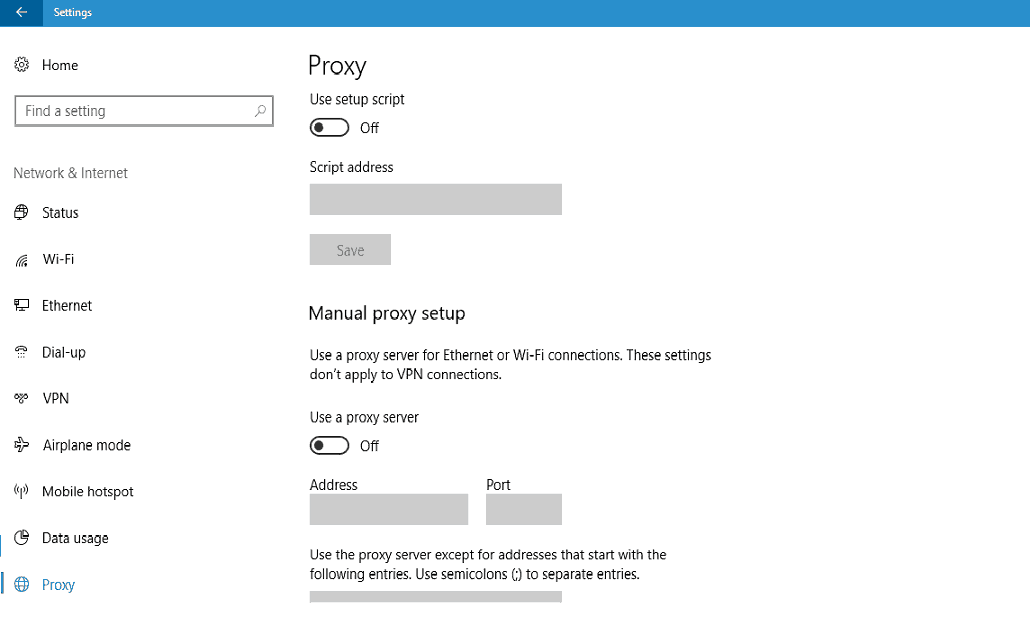
  5. You can also click on the Change proxy settings option below it if you think your settings are not configured properly.

3. Background programs

  1. Open start by clicking on the windows icon on the left side of your taskbar or by clicking on the start key on your keyboard.
  2. Simply type in Run and click on the application that shows up from the search.
  3. In the Run Windows type in msconfig in the open line.
  4. Press enter.
  5. If it is not selected, click on the general tab located on the System Configuration window.
  6. In this tab you will need to select the ‘selective startup’ option.
  7. You should see a checkbox with ‘Load startup items’ next to it. Uncheck this box.
  8. Click Apply then Ok. You will need to restart your computer for the settings to take effect.

Connection issues on Uplay PC Windows 10 could be caused by other applications running in the background. Therefore, before you start a game from Uplay, shutting down background applications may help the game to run better.

If this solution fixes the connection issue, then one of your programs that loads on startup is restricting internet access to Uplay servers.

You will want to locate this program and prevent it from loading on Windows startup.


Check out this guide to fix too many background processes in Windows 10 inf a few easy steps!


4. Restrictive Network Configurations

Network and ISP administrators sometimes place restrictions on your networks that may cause Uplay PC Windows 10 connection issues. If this is the case, you will need to contact your administrators to resolve the issue.


5. Flushing DNS files

  1. Open up Windows start menu.
  2. Type in command prompt.
  3. Click on the application that appears in the search.
  4. Once the command prompt window appears, type in this command: ipconfig /flushdns.
  5. Press Enter. You should see something like what is shown in the image below.

The DNS cache is what keeps the IP addresses of the web servers you have visited recently. It is possible that some of these files are corrupted or obsolete, which can hamper your internet connections with these servers.

Remember these instructions only work on Windows 10. Other versions of Windows will require different steps.


Check out this guide and learn to work in Command Prompt like a real expert!


6. Reset host files

Windows uses host files to map IP addresses to host names. Sometimes these files can have malicious entries. Thus, resetting can fix certain internet connection issues.

Here’s how you can reset host files:

  1. Download this compressed default Host files. These files can be used not only for Windows 10.
  2. Extract the compressed file and copy it to this folder: C:WindowsSystem32driversetc
  3. Click on replace.

These solutions solve the most common problems found when Uplay PC Windows 10 is not connecting properly.

If your problems persist even after using these solutions, then you may want to contact Ubisoft directly.


[wl_navigator]

Windows Store error 0x87AFo81: You can fix it within minutes

Windows Store is kind of going in the right direction in regard to aesthetics and features. However, if we exclude the redesign, there’s still a lot of problems Microsoft still needs to address. For example, the Windows Store error that goes by the 0x87AFo81 code.

Users who reported this error are having a hard time using Windows Store since this error erratically pop-ups from time to time. Nonetheless, for every problem, there is a solution. If you’re frequently prompted with the already-mentioned error in Windows Store, make sure to check the solutions we provided in the list below.

How to fix Windows Store error 0x87AFo81 on Windows 10

  1. Reset the Windows Store cache
  2. Run the Store Troubleshooter
  3. Disable your antivirus
  4. Update Windows Store
  5. Change the country or region to U.S.
  6. Sign out and sign in with another account
  7. Reset app packages

Solution 1 – Reset Windows Store cache

As all other applications, the Windows Store stores cache to speed up processing and make the overall usability easier. However, the cache has a tendency to pile up and, thus, affect the Store in just the opposite way. Namely, after the cache data overwhelms in size, it can cause slow-downs or, like in this case, errors.

So, what you’ll need to do is to reset the Windows Store cache with the simple command. Probably due to troubleshooting alignment in beta phases of Store, there’s still a simple tool that reset’s the cache in Windows 10, too.

Follow the instructions below to run it:

  1. Press Windows key + S.
  2. In the Search bar, type WSReset.exe and press Enter.
  3. This will restart Windows Store and clear the stored cache.

Solution 2 – Run the Store Troubleshooter

In addition, most of the contemporary Windows 10 problems can be easily addressed by running one of a dozen troubleshooters. After the Creators Update, troubleshooting tools are unified and you can access them with ease in the dedicated menu.

The Windows Store Apps Troubleshooter is the best-suited for Windows Store matters. You can access and run this troubleshooter by following the steps below:

  1. Press Windows key + I to open the Settings app.
  2. Choose Update & security.
  3. Select Troubleshoot from the left pane.
  4. Scroll to the bottom and highlight the Windows Store Apps troubleshooter.Windows Store error ''0x87AFo81''
  5. Click on Run the troubleshooter.
  6. The tool will try to determine Windows Store issues and resolve them accordingly.

Solution 3 – Disable your antivirus

A third-party antivirus is always a valid choice when it comes to protecting your computer. For various reasons, the likes of BitDefender or Malwarebytes are quite popular. On the other hand, we can agree that certain third-party antimalware solutions can and will occasionally cause issues within Windows 10.

Some users reported that their antivirus registered a few Windows Store processes as a false positive. Since we’re firm that Windows Store isn’t a virus, it’s recommended to disable the antimalware program temporarily.

If you start Windows Store and it performs without errors, maybe you should rethink switching a 3rd-party antivirus for Windows Defender.

Solution 4 – Update Windows Store

One would assume that Windows Store, as an essential part of Windows 10 platform, gets its updates with the rest of the bulk via Windows Update. Well, that’s not the case. Windows Store is characterized as any other app. More or less. You can’t uninstall it, but you can most certainly update it and resolve the issues at hand.

Namely, most of the Store-related issues that emerged after the Creators Update or even earlier were addressed with the frequent updates. And, with that in mind, we certainly advise you to navigate to Store and check for updates. That will, hopefully, resolve issues and enable you to use Windows Store in a seamless manner.

  1. Open the Windows Store app.
  2. Click on the 3-dot menu in the far right corner and open Downloads & updates.
  3. Click on the ”Get the updates” button.Windows Store error ''0x87AFo81''

If that can’t suffice and the problem is persistent, make sure to check the remaining solutions below.

Solution 5 – Change the country or region to U.S.

Offering-wise, Windows Store isn’t the same for every region and country. Some users are able to download only free apps, while others are unable to start the Windows Store in the first place. Luckily, that can be easily resolved by switching your region or country to U.S.

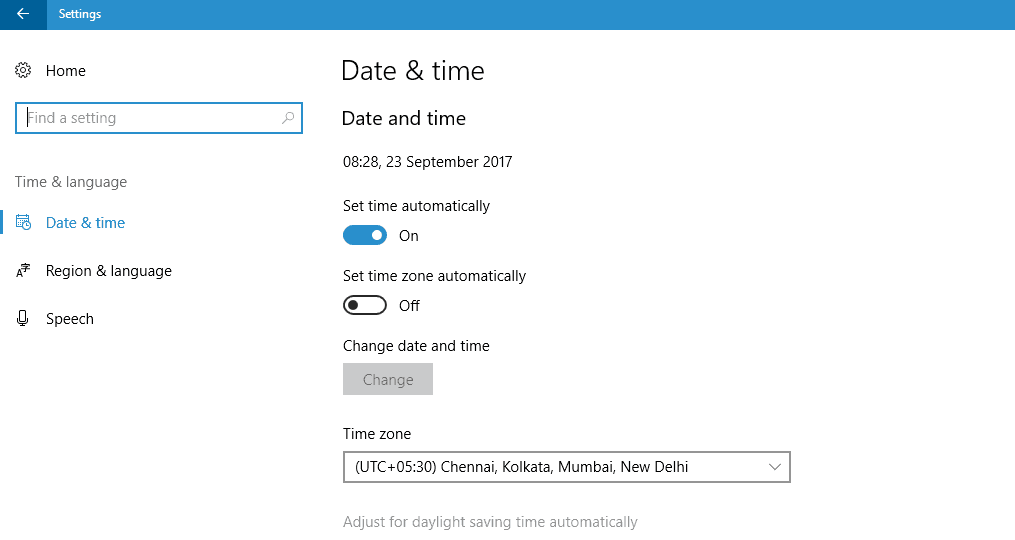
After they switched to the United States, the troubled users managed to access and use Windows Store just as intended. You can change your country/region preferences by following these steps:

  1. Press Windows key + I to summon the Settings app.
  2. Choose Time & language.
  3. From the left pane, select Region & language.
  4. Under the Country or region, select the United States.Windows Store error ''0x87AFo81''
  5. Restart your PC and look for changes.

Solution 6 – Sign out and sign in with another account

As you already know, for the full-featured Windows Store experience, you’ll need to log in with your Microsoft account. This is basically an e-mail account, with the exception that it might need a more detailed information exchange if you want to purchase something, like your address or phone number.

Now, you might ask what that has to do with the Windows Store error? It’s similar to the cache problem. The Store app stores you personal Library and preferences. Sometimes, for no apparent reason, you can experience issues with the certain account and have everything working perfectly with the other.

So, we advise you to try and login with an alternative account and, possibly, resolve the issue that way.

  1. Open Windows Store.
  2. Click on your account icon in the upper right corner.
  3. Select the active account and click Sign Out.
  4. Now, click again on the account icon and choose to Sign In.Windows Store error ''0x87AFo81''
  5. Click on Use a different account.
  6. Choose any other Microsoft-powered account. Outlook, Hotmail, Live or MSN.
  7. Insert your credentials and sign in.
  8. Look for changes.

Solution 7 – Reset app packages

Finally, if none of the previously presented solutions proved productive, there’s still one thing you can do. As we already stated above, you can’t uninstall Windows Store. But, you can reset it to default settings and thus resolve the possible bugs or stalls that are causing the error that’s bearing the ”0x87AFo81” code.

For that, you’re going to need a little help of Windows PowerShell and a pinch of attention. Follow the instructions below and we should be able to resolve the problem:

  1. Right-click Start and open PowerShell (Admin).
  2. In the command line, copy-paste the following command and press Enter:
    • Get-AppXPackage -AllUsers | Foreach {Add-AppxPackage -DisableDevelopmentMode -Register “$($_.InstallLocation)AppXManifest.xml”}windows store error 0x87AFo81
  3. Restart your PC.

That should conclude it. We truly hope that these were enough to get you going. In addition, make sure to post your questions or alternative solutions regarding the Store problem we addressed today. The comments section is below.

How to fix Loading the application Kaspersky error

When starting a Kaspersky Lab application, users often describe seeing the Loading the application window on their screen for a few seconds, and then nothing happens. The application refuses to start and immediate action is needed.

We’re saying that since this error creates a huge threat to the computer’s security. Below is a list of troubleshooting steps to resolve it. If you’re in this position too, then keep in mind that these steps get progressively more difficult.

We can only recommend attempting them in ascending order to avoid unnecessary time and effort. Good luck!

How can I fix Loading the application Kaspersky error?

1. Restart your computer

loading the application issue

A handful of your daily computer-related issues may potentially be fixed without too much hassle. These errors can range from problems with the RAM to Internet connection errors or buggy applications and the solution is as simple as restarting your computer.

Reboot your computer, check if the antivirus is properly running or not and turn this into a habit at least once per week.


Is your Windows 10 computer stuck on restart? Fortunately, we’ve got the right solutions for you.


2. Delete the Temp folders and files

Temp

  1. Go to the Start button.
  2. Click on the search bar.
  3. Then, you need to enter a cleaning command out of:
    %temp%
    Prefetch
    Recent
  4. Select all the files and folders that you want to delete.
  5. Next, press the Delete key on your keyboard or hit the Delete button from the Home menu.
  6. Choose to Skip if getting a File In Use or a Folder In Use warning during the temporary file deletion process.
  7. You won’t be prompted when the process is complete. Instead, the progress indicator will disappear. At that point, you may close the window.
  8. Finally, locate Recycle Bin on your desktop, right-click the icon, and choose Empty Recycle Bin.
  9. Confirm that you want to delete the items.

Note: You need to enter the cleaning command while using the PC in administrator mode. You can easily make yourself an administrator on Windows 10.

You should further try to delete the Temporary Files from the system. This does more than freeing up space but it also flushes out all different short-term tasks and data, allowing the PC and the installed programs to run more efficiently.

Don’t worry, manually cleaning out the Temp folders and file shouldn’t take ages. It could take longer than a minute only when you’ve got a large collection of temporary files.


3. Update to the latest Kaspersky version

latest Kaspersky version

  1. First of all, check the Kaspersky version that you are using by opening the folder where the software is installed.
  2. Then, you have to open the official Kaspersky site.
  3. Search for the update patches for the antivirus.
  4. Right-click on the downloaded file option.
  5. Follow the on-screen instructions to complete the installation procedure.
  6. Restart your PC for the changes to take place and activate the most recent version of the application.

Chances are you can get rid of the issue by installing the latest Kaspersky version on your PC. The updates contain the most recent files needed to fight against new viruses since the Internet is an incredibly fast-moving environment and the most needed bug fixes for the software itself.

Our advice is to make sure that your entire PC is up to date by enabling Automatic Update.


4. Remove and reinstall Kaspersky

Kaspersky wizard

  1. Open Run command box by simultaneously pressing the Windows key+R keyboard shortcut.
  2. In the Run command box, type Appwiz.cpl and click OK.
  3. In the Programs and Features window, look for the Kaspersky program and select it.
  4. Then, click on the Remove or Uninstall option.
  5. You will see the confirmation dialog. Click the Continue button.
  6. You should now see the Kaspersky setup wizard.
  7. When you see the Save the following data for reuse option, be sure to select License information.
  8. From here onwards, follow the on-screen instructions to uninstall Kaspersky.
  9. When the uninstalling procedure is completed, restart your computer.
  10. You may now download the newest version of the Kaspersky antivirus software.
  11. Right-click on the installed file and start the installation procedure.
  12. Follow the on-screen prompts as given.

If you’re still having trouble with loading the application, removing and reinstalling the Kaspersky software could also help. The above steps will show you the proper way to do so.

Even more, the Kaspersky setup will automatically use the previously saved information to activate your copy, so don’t worry about losing your license.

Did we miss anything of great value? In case you have any alternative suggestions, feel free to post them in the comments section below. We are thankful for your participation.

[wl_navigator]

FIX: Windows was unable to complete the format error

Windows 10 has many built-in settings and features through which we can initiate different processes or complete various tasks. What we all want is a stable firmware and intuitive solutions when we use our computers for daily tasks. That’s why problems like the Windows was unable to complete the format error are so frustrating.

Formatting a certain partition or external device – shouldn’t raise any sort of problems in the first place. Formatting your drive is a default feature that should offer instant hardware-oriented solutions regardless of what version of Windows you are currently using.

Usually, a format is required when you first use a USB memory stick, an external hard drive, a new SSD, or any other similar component. Additionally, in some situations, Windows might ask you to initiate a format for being able to use your flash drives.

And, independently from the already mentioned aspects, you might want to format your drive to erase data and files that are no longer useful for you.

NOTE: If possible, save the files that might still be required afterwards. The formatting process is a wipe operation that will erase everything from your drive – basically, in the end, it will be restored back to its default/factory state.

There are various reasons why the formatting process stops: there is a virus infection, there are bad sectors, there is a storage device damage or disk write protection is enabled.

However, there is a way in which you can still successfully complete the wiping process and here is what you need to do.

How do I fix Windows was unable to complete the format?

1. Use Disk Management

  1. Go to Desktop and right-click on the My Computer icon.
  2. From the Menu that will be listed choose Manage.
  3. From the left panel, under Storage, you have the Disk Management field listed. Select it.manage storage windows 10
  4. Now, on the main window, you will have all your drivers displayed – along with their partitions if there are any.
  5. From that list select the drive that needs to be formatted.computer management windows 10
  6. Right-click on it and select ‘Format’ – if there are any partitions, delete them first.
  7. Make sure that ‘Quick Format’ isn’t selected; choose the format type and complete the process.

If the format still cannot be completed, right-click on the driver and select delete volume. Afterwards, right-click on the driver again and choose new simple volume. Complete the wizard by following on-screen prompts for creating a new volume. After these steps are complete you can initiate the format.

You can also use a third-party app for completing the format process, or you can execute dedicated commands from command prompt, though that process might be a little bit more complicated. More on that in the section below:

2. How to erase a drive through CMD

  1. Go to Disk Management as shown above and write down the disk number that’s assigned to the device that you want to format.
  2. Then, open a command prompt window with developer rights – open Task Manager (CTRL+Alt+Del) click on File -> Run new task and enter cmd (make sure the ‘create this task with administrator privileges’ box is checked).cmd elevated
  3. In cmd type: diskpart and press Enter.
  4. Next, enter list disk and press Enter again.
  5. A list of available disks will be displayed.format disk cmd
  6. Just enter the disk number that’s assigned to your flash drive and press Enter.
  7. Type clean, press Enter and wait while the format process is completed.

If you’re having trouble accessing Command Prompt as an admin, then you better take a closer look at this guide.


There you have it; that’s how you can fix the Windows was unable to complete the format issue on Windows 10. You can tell us how everything turned out in the end by filling out the comment form from down below.

If you are still facing issues while trying to use the format feature we will try to assist you as soon as possible.

[wl_navigator]

Fan Tweaker / Speed Changer for Windows [5 Tested]

Keeping your system cool or reducing its noise can be easily done by adjusting your computer’s fan speed. This can be done both manually but also automatically via software for changing the fan’s speed. Such a program monitors temperatures from several sources and allows you to change the speed on your computer’s fan when it’s needed. There are various programs like this on the market, but we gathered five of the best ones that are compatible with computers running Windows 10 to show you their extended sets of features in order to help you make your decision much easier.

The best programs for changing your fan’s speed

SpeedFan

SpeedFan SMART

SpeedFan is a software for monitoring and controlling voltages, temperatures and fan speeds in computers with hardware chips.

This program is even able to access S.M.A.R.T. info and show you hard disk temperature. SpeedFan can access digital temperature sensors, and it can also change fan speeds accordingly, this way reducing noise.

Check out the best features that are included in this program:

  • SpeedFan monitors the temperatures from various sources.
  • If you configure the program the right way, you will be able to allow it to change the fan speed based on system temperatures.
  • When you are choosing the parameter for minimum and maximum fan speed, you should set these manually and listen to the noise.
  • When you hear no noise coming from the fan, this means that you can set the value as the minimum fan speed.
  • The program can also change the fan speed at a warning temperature that you have previously set.

The software is able to handle any number of hardware monitor chips, hard disks, temperature readings, voltage readings, fan speed readings, PWMs and more.


If you want to monitor your CPU temperature, check out these amazing tools that will do just that.


Check out more details and functionalities that are included in SpeedFan on the official site where you can also download the software.

Download SpeedFan

NoteBook FanControl

NoteBook FanControl is a program that is designed to provide users with the ability to control the computer’s fan speed.

After you install the software, it will integrate with your PC’s taskbar, and it’s great that the program is not an obtrusive one.

After you launch it for the very first time, you will see that it comes with a really straightforward interface that can be managed and understood even by beginners.

Check out the most important functionalities that are included in NoteBook FanControl:

  • You will be able to select one of the various configurations that are included in the program according to your laptop’s model and maker.
  • You can see whether your laptop is supported or not by visiting the dedicated section on the program’s official GitHub page.
  • Before starting the service, you have to choose one of the available predefined configs.
  • After picking your configuration, you can enable and disable the fan control service.
  • You can tweak the fan’s speed via a simple slider that is located in the middle part of the main menu.
  • NoteBook FanControl offers you a real-time CPU temperature reading and also the current speed of the fan.
  • You can configure the program to launch at system startup automatically.

NoteBook FanControl is a really easy-to-use program that will definitely come in handy when you need to get more out of your system’s cooling capabilities.

You can download NoteBook FanControl and try its great features for yourself.


Want to keep your laptop cool? Check out this list with the best cooling software available right now.


Argus Monitor

Argus Monitor is a really light program that runs as a background task, and it continually monitors the health of your hard disk.

It also offers you the ability to control the fan speed for the mainboard and GPU with a characteristic curve based on all the temperature sources that are available.

Check out the most impressive features and functionalities that come included in Argus Monitor:

  • You will be able to monitor your hard disk drive temperature and also the health status of your hard disk drive by continually checking the vital S.M.A.R.T. attributes.
  • The program is able to warn you with a probability of up to 70% before a hard drive will fail and this is just in time for users to be able to save their crucial data.
  • The software offers a graphical display of the temperature of the hard drives.
  • It also comes with monitoring and graphical display of GPU and CPU temperature.
  • You will see a graphical display of the core frequency as well that will enable you to check if the power management is working properly.
  • The HDD and SSD benchmark measures access time and transfer rates as well.

The program will also display the speeds of your system’s fans, and it allows you to control the speed of the fans effortlessly.

You will be able to test Argus Monitor for 30 days, and if you want to continue using it, you will have to purchase a license key.

You can check out more functionalities and details related to the software by heading to Argus Monitor’s official website.

EasyTune 5 by Gigabyte

EasyTune 5 by Gigabyte presents a convenient Windows based system performance enhancement and manageability tool.

Check out the best functionalities and features that are included in it:

  • It provides overclocking for enhancing the system’s performance.
  • You will also get C.I.A. and M.I.B. tools for special enhancement for CPU and memory.
  • EasyTune 5 by Gigabyte also comes with Smart-Fan control for managing fan speed control of the CPU’s cooling fan and the North-Bridge Chipset cooling fan.
  • It includes PC health for monitoring system status.
  • You can switch to different modes, and you can choose between the Easy Mode and the Advanced Mode.
  • The Easy Mode allows you to change the system Bus Clock.
  • The Advanced Mode lets you access the complete features of overclocking parameter settings such as configuring the C.I.A. and M.I.B. features.

You will be able to configure the fan speed of the CPU’s cooling fan according to a different temperature at different RPM. It is recommended to set the cooling fan of the CPU at full speed at 60oC.

You can check out more features and try EasyTune 5 by Gigabyte for yourself by heading to the official website of this tool.


If you’re looking to overclock your PC, check out the best tools that will help you do that with ease.


TPFanControl

TPFanControl is able to reduce the fan noise of you Thinkpads, and it has been created a Vista version of the software as well.

It is able to monitor CPU and GPU temperatures in the background and set the appropriate fan speeds for perfect cooling. You will be able to see the CPU and the GPU temperature at a glance with a notification icon.

Check out the best features that are included in this program:

  • The difference when you will run this program will turn out dramatic.
  • When you are using the system, and the CPU does intensive work, it will spin up the fan only for it to keep the temperature low.

To install the software on Windows 10, you just have to open the Start Menu and type cmd. Then you have to right-click on cmd.exe and select Run as administrator.


If you’re having trouble accessing Command Prompt as an admin, then you better take a closer look at this guide.


You have to navigate to the temporary directory that you unzipped the files to and type install. The files will be automatically copied to c:tpfancontrol. TPFanControl will start to run, and it will start automatically after reboot.

You can download TPFanControl to see how it works on your system.

These are five of the best programs that allow you to control the fan’s speed of your system and they are all compatible with Windows systems. Check out their complete sets of features and get the one that best suits your needs.

If you have any other questions or suggestions, feel free to leave them in the comments section below.

RELATED STORIES TO CHECK OUT:

FIX: This version of %1 is not compatible with Windows

Computer errors are relatively common and some Windows 10 users reported ERROR_EXE_MACHINE_TYPE_MISMATCH error on their PC.

This error is followed by this message:

This version of %1 is not compatible with the version of Windows you’re running

That being the case, we will cover all the steps that you need to take to fix this issue in the article below.


How do I fix the Version is not compatible with Windows error?

1. Change Android Studio settings

Many users reported that this problem occurs in Android Studio, but you can fix it by changing few settings. To do that, follow these steps:

  1. Download and install 32-bit JDK
  2. Click on File > Project Structure dialog.
  3. Now uncheck Use embedded JDK.
  4. Select the 32-bit version of JDK that you downloaded.
    • Optional: Decrease the memory footprint for Gradle in gradle.properties to -Xmx768m.

By default Android Studio uses embedded JDK, however this JDK requires 64-bit Windows in order to work. As a result, you’ll get this problem on any 32-bit version of Windows.

To fix it you just need to install JDK separately and change couple of settings as shown above. After doing that, Android Studio should start working without any problems.


2. Run the application as an administrator

  1. Find the application that is giving you this error and right-click it.
  2. Choose Run as administrator from the menu.

If running the application as an administrator fixes the problem, you’ll have to start it every time by using this method. Alternatively, you can set the application to always start with administrator privileges. To do that, follow these steps:

  1. Right-click the problematic application and choose Properties from the menu.
  2. Go to Compatibility tab and check Run this program as an administrator option.
  3. Now click Apply and OK to save changes.

Sometimes this error can occur if you don’t have the necessary privileges to run the desired application. However, you can grant yourself the necessary privileges by following the steps mentioned above.

After doing that, the application will always start with administrator privileges so you won’t experience this error anymore.


3. Download the problematic file again

In some cases, you can get This version of %1 is not compatible with the version of Windows you’re running error due to corrupted download. Sometimes your files might not be properly downloaded and this can lead to this and many other errors.

If you’re having this problem while trying to run downloaded files, we strongly recommend to download the problematic files again. After doing that, check if the issue still persists.

Alternatively you can download the problematic file using a different web browser and check if that solves the problem.


4. Make sure that you’re using the correct application

  1. Right click the problematic file.
  2. Choose Open with and select one of the suggested applications.

If you manage to open your file without any errors, you need to set a default application for this file type. To do that, follow these steps:

  1. Right click the problematic file and choose Open with > Choose another app.
  2. Now select the application that you want to use for this file type.
  3. Check Always use this app to open option and click on OK.
  4. Optional: If the desired application isn’t on the list, you can click on More apps > Look for another app on this PC. After finding the desired application, repeat the previous step.

Several users reported this error while trying to open images with certain applications. According to them, their settings were changed and all images were set to open with a nonexistent application.

To fix the problem, be sure to open the problematic file with the correct application.  Sometimes your default application settings don’t update properly leading to this and many other errors. If you’re having this problem, be sure to try this solution out.


5. Check if you’re using 64-bit version of Windows

This error can affect almost any application, and the most likely cause is the 32-bit version of Windows. Certain applications are optimized for 64-bit operating systems and they won’t work on 32-bit versions of Windows.

If you don’t know which version of Windows you’re running, you can easily check it by following these steps:

  1. Press Windows Key + S and enter system.
  2. Choose System from the menu.
  3. Once the System window opens, you can see all the necessary information regarding your PC in the System section under System type. You can see the type of processor you’re using as well as Windows version.
    • Keep in mind that 64-bit versions of Windows can only work with 64-bit processors.

In most cases, this error will occur if you’re trying to run a 64-bit application on a 32-bit Windows. These types of applications can’t run on 32-bit Windows, so you’ll have to reinstall Windows and switch to a 64-bit version.

Alternatively, you can check if the 32-bit version of the application you’re trying to run is available. If so, be sure to download it and it will work without any issues on 32-bit version of Windows.

Since 64-bit architecture offers better performance, some developers are developing applications exclusively for 64-bit systems. If that’s the case with your application, you won’t be able to run it at all, unless you install 64-bit version of Windows.


6. Set default application for ODM files

Many users reported that they are getting this error while trying to download ODM titles using OverDrive. The issue is caused because file association is changed, but you can fix that by following these steps:

  1. Press Windows Key + I to open the Settings app.
  2. Go to System section and choose Default apps.
  3. Scroll all the way down and click on Choose default apps by file type.
  4. Locate .odm file type and click Choose a default next to it.
  5. Select OverDrive and save changes.

After doing that, you’ll be able to work with ODM files with ease.

Alternatively, you can associate file extensions with applications by following these steps:

  1. Press Windows Key + X and choose Control Panel.
  2. When Control Panel opens, choose Default Programs.
  3. Select Associate a file type or protocol with a program.
  4. Locate .odm file type on the list and double click it.
  5. Select OverDrive and save changes.

Although this error occurs with ODM files and OverDrive, it can also happen with other applications and file types. Even if you don’t use OverDrive, you can try out this solution if you notice problems with specific file types.


7. Use a virtual machine

If you’re trying to run an old application and getting This version of %1 is not compatible with the version of Windows you’re running message, it’s rather possible that you’re trying to run a 16-bit application.

These types of applications can’t run on any new versions of Windows, but you might be able to circumvent this problem by using a virtual machine. Virtual machine is a virtualization software that allows you to run another operating system inside your current operating system.

Virtualization can be demanding on your resources, so before trying to use a virtual machine, be sure to check if you have enough hardware power to run it.

If you’re trying to run a 16-bit application, you can try installing 32-bit version of Windows XP on a virtual machine. This isn’t the simplest solution, especially if you don’t have an old copy of Windows XP lying around.

If you can’t set up a virtual machine with Windows XP, you might want to try using tools such as DOSBox. This is a DOS emulator you can use to run older 16-bit applications on your PC with ease.

Although this solution is relatively simple, it only applies to older applications that are giving you this error. If this problem occurs with any modern application, this solution won’t be able to fix it.


8. Reinstall the problematic application

This error can affect various apps, and the common cause for this problem is a corrupted installation.

To fix the problem you just have to uninstall the problematic application from your PC and install it again. Few users reported that reinstalling the application fixed the problem for them, so be sure to try it out.


9. Don’t install application in compatibility mode

  1. Right click the setup file and choose Properties from the menu.
  2. Go to Compatibility tab and make sure that Run this program in compatibility mode for option isn’t checked.
  3. Click Apply and OK to save changes.
  4. After doing that, try to run the setup again.

Compatibility mode is a useful feature for older applications, but it doesn’t work in all cases. Sometimes this feature can cause errors such as this one to appear, and in order to fix it it’s advised to turn this feature off.

Some applications, such as Norton antivirus, can give you this error during the installation process. It seems that these applications can’t install properly if you’re using compatibility mode.

To fix this issue, you need to turn off the compatibility mode for the application you’re trying to install.


10. Install the latest Windows updates

  1. Press Windows Key + I to open the Settings app.
  2. Once the Settings app opens, navigate to Update & security section.
  3. Now click Check for updates button. Windows will check for any available updates and download them in the background.

After downloading the necessary updates, try to run the problematic application again and check if the problem is resolved.

Windows 10 is a great operating system, but it’s not perfect, so certain bugs and glitches can occur once in a while. If you’re having this error on your PC, we advise you to download and install the latest Windows updates.

Microsoft is frequently releasing updates and fixing various bugs and glitches, and in most cases these updates are downloaded automatically in the background. However, sometimes it can happen that you skip an update, so it’s always a good idea to check for updates manually.


This error message and the ERROR_EXE_MACHINE_TYPE_MISMATCH error can appear on any PC. Fortunately for you, these errors aren’t serious and they’ll usually appear on 32-bit Windows while trying to run a 64-bit applications.

If you encounter any of these errors, feel free to try any of our solutions, but let us know which ones worked best for you by leaving us a message in the comments section below.

FIX: This program doesn’t run on Windows 10/11

As you know Windows 10 is the latest operating system from Microsoft, but using the latest operating system comes with certain limitations.

For example, sometimes you won’t be able to use old software, and you’ll get This program doesn’t run on Windows 10 error, so here are a few solutions on how to fix this.

What do I do if a program doesn’t run on Windows 10?

1. Run applications as administrator

  1. Right-click the application shortcut.
  2. Choose Run as administrator from the menu. program doesn't run

In the days of Windows XP most users used administrator accounts and most software was optimized to run in administrator mode by default. This has changed a bit with newer versions of Windows, but if some older software isn’t running on Windows 10 you can always try running it as administrator by following the above-mentioned steps.

2. Run application in compatibility mode

  1. Right-click the application that you’re trying to run.
  2. Choose Properties from the menu.
  3. Go to Compatibility tab.
  4. Check Run this program in compatibility mode for and choose operating system from the list.
  5. Click Apply and then OK.

If your application worked in previous versions of Windows but it doesn’t run in Windows 10, This solution might just work.

Note: While in Compatibility mode you can set to run this application in administrator mode all the time.

3. Run Program Compatibility Troubleshooter

  1. Right-click the application that you want to troubleshoot.
  2. Choose Properties and go to Compatibility tab.
  3. Click Run compatibility troubleshooter. This-program-doesnt-run-on-Windows-10
  4. Use the wizard to fix the compatibility issues.

4. Download older version of .NET Framework

Windows 10 comes with .NET 4.6 Framework installed, but some applications might require an older version of .NET Framework to function properly, so make sure that you visit Microsoft Download Center and download older versions of .NET Framework if the application requires it.

5. Use a virtual machine

If none of these solutions work for you, you might want to try using a virtual machine. If you’re not familiar with virtual machines, it’s a software that creates a virtual hard drive on your computer, and it allows you to run other operating systems on Windows 10.

This means that you can run Windows XP or Windows 7 on Windows 10. We have to warn you that using a virtual machine requires a decent amount of your hardware power, so make sure that you have enough RAM and hard drive space to run it.

By following these steps, you should be able to make pretty much any program run on Windows 10, as long as it is not too dated (e.g. from the pre-Windows XP era).

Let us know which of the above-written solutions worked for you by leaving us a message in the comments section below.

WordPerfect Won’t Save: 3 Easy Solutions to use

As with any computer document, WordPerfect file functions can become damaged, and users complain that they can’t save your files.

When this happens, the Save dialog box comes up but doesn’t point to the default file location they’re trying to use. Sometimes, the Save option brings up a window that requires the name and location to save the file.

Irrespective of the complexity of this issue, the solutions in this guide will help you fix it quickly, just like we did with the WordPerfect won’t work problem.

Why WordPerfect won’t save?

Below are some of the factors that can prevent your WordPerfect files from saving:

  • Compatibility issue: You can face issues saving your WordPerfect files because of compatibility problems. You can solve this by running the app in compatibility mode.
  • Wrong settings: Sometimes, this problem is caused by the Use enhanced file dialogs setting. De-selecting this setting should eliminate the problem.

What can I do if WordPerfect won’t save the file?

Before proceeding to the more sophisticated solutions in this section, below are more straightforward solutions to try:

  • Delete the template file for WordPerfect
  • Use the WordPerfect troubleshooting tool

1. Get Windows and Corel WordPerfect to work together

  1. Right-click the WordPerfect icon and select Properties.
    properties
  2. Click the Compatibility tab at the top.
  3. Now, check the box for Run this program in compatibility mode for.
    compatibility wordperfect wont save
  4. Finally, select Windows XP (Service Pack 3) and click OK.

An incompatibility issue between Windows and Corel WordPerfect could lead to this problem. So, run the WordPerfect program in compatibility mode for Windows XP (Service Pack 3).

2. Disable Use enhanced file dialogs

  1. Launch WordPerfect and click the Tools option.
  2. Select Settings > Files.
  3. Now, click the Document tab at the top.
  4. Finally, uncheck the Use enhanced file dialogs box.
    use enhanced

Many users have found the enhanced file dialogs feature to cause the WordPerfect won’t save issue. Disabling the feature solved the problem for them.

In other cases, some users found this feature disabled. To solve the problem, check the box for quality and remove all compatibility settings for the WordPerfect app.

3. Rename the PerfectFit Document Management folder

  1. Press the Windows key + E to open File Explorer.
    explorer
  2. Navigate to C: >Programs Files > Corel/WordPerfect Office > Programs.
  3. Now, select the PerfectFit Document Management folder.
  4. Rename the file to XXPerfectFit.
  5. Finally, click Yes when you get a prompt to confirm the action.

Another solution to this issue is to rename the PerfectFit Document Management folder. This allows the WordPerfect app to build another one and render the corrupt one useless.

We have reached the end of this detailed guide on how to solve the WordPerfect won’t save issue. All you have to do now is to follow the instructions carefully.

Similarly, If WordPerfect won’t print, check our detailed guide to fix it.

Feel free to let us know the solution that helped you solve the problem in the comments below.

How to stop sending messages by mistake in Microsoft Teams

Everyone here at OnMSFT uses Microsoft Teams on a daily basis, but I am frequently aggravated when I accidentally hit ENTER to begin a new line instead of using the correct SHIFT + ENTER command in Microsoft Teams. I am trained by default to use ENTER to begin a new line as I use Microsoft Word often when preparing to publish articles.

Microsoft Teams
Partial message example.

I could not find any information online for changing keyboard shortcuts in Microsoft Teams for sending messages. But after some exploring within Microsoft Teams, I found a solution.

Use the Format Button

For this solution, you do not need to change any settings or remember any keystrokes. The standard inline reply box is great, but only if your message is no more than a few words. Instead of remembering to hit SHIFT + ENTER for a new line in Microsoft Team, look no further than the inline input field, and click the first message extension.

Microsoft Teams, Microsoft, Messages

Once you click the first message extension, you have a much richer text editing experience by default, with plenty of room to type whatever you want for your message and use ENTER all you want to enter a new line.

Microsoft Teams, Microsoft, Messages

In addition, this expanded text interface allows you to edit your message how you want; add bold lettering, add bullet points, underline sections, and more. If you want to discard your message, you can use the trash icon in the upper right to discard your message. When you are ready to send your message, all you need to do is go to the right of the message and hit the send button.

How do you send messages in Microsoft Teams? Let us know in the comments.

Some files can’t be emptied from Recycle Bin [Windows 10/11]


What to do when you cannot delete certain files from Recycle Bin in Windows 10?

  1. Restore files
  2. Empty Recycle Bin in Safe Mode
  3. Empty Recycle Bin as Admin
  4. Empty Recycle Bin automatically

Like many of our Windows 10 users, you to might want to permanently delete at a certain point a file or a folder permanently from your operating system.

Seeing that some of our Windows 10 users are having difficulty with this issue you will find out a couple of lines below what you can do to fix the Recycle Bin and get your files permanently deleted.

In many of the cases, you will either not have the sufficient permissions to delete the specific folder from the Recycle bin or your Windows 10 OS is blocking your access to that folder because of a number of registry errors that it may encounter.

Either way, we will apply the methods posted below in order to solve your issue and get your system back and running in no time.

How do I fix Recycle Bin if it doesn’t empty completely in Windows 10?

1. Restore files

  1. Move the mouse cursor over to the upper right side of the screen in Windows 10, 8.1
  2. From the menu that appears you will need to left click or tap on the Search feature presented there.
  3. Write in the search box the following: restore your files.
  4. After the search is finished left-click or tap on the Restore your files with file history.
  5. You will be presented with a search box and you will need to write there the folder from Recycle Bin that you are not able to delete.
  6. Left-click or tap to select the file or files that you are not able to delete normally and left click or tap on the “Restore” button.
  7. Now that file should be restored where it was before you deleted it.
  8. Close the Restore your files with file history window and go to the file that you are having issues with.
  9. Left-click or tap on it to select it.
  10. Press and hold the button Shift and the button Delete.
  11. Left-click or tap on the Yes button to confirm the deletion.
  12. This should bypass your Recycle Bin folder and permanently delete your file.

2. Empty Recycle Bin in Safe Mode

  1. Move the mouse cursor over to the upper right side of the screen.
  2. When the menu bar appears left click or tap on the Search feature present there.
  3. In the search box, you will need to write the following: Control Panel
  4. After the search is finished left-click or tap on the Control Panel icon.
  5. Left-click or tap on the System and Security feature.
  6. Left-click or tap on the Administrative tools feature.
  7. In the list on the right side find and open the System Configuration feature.
    Note: You can also open system configuration by pressing and holding the Windows button and the R button and in the Run box you will need to write: msconfig.exe without the quotes. Then press the Enter button on the keyboard.
  8. Left-click or tap on the Boot tab situated in the upper side of the window.
  9. You will see there a topic named Boot options.
  10. Check the box next to the Safe Boot feature.
  11. Left-click or tap on the OK button to save the changes.
  12. Left-click or tap on the Restart button if you are asked if you do not then restart your computer anyway.
  13. After the restart of the Windows 8.1 operating system is completed it should get you to the safe mode configuration.
  14. Go to the Recycle Bin folder and try to delete the files you are having trouble with.
  15. To get back your normal startup system you will need to go again to the System Configuration window as you did above but this time uncheck the box next to Safe boot and reboot your operating system.

3. Empty Recycle Bin as Admin

  1. Log in with your administrative account in Windows 8.1 and access your Recycle bin folder.
  2. Try emptying it now.
  3. If it worked then you might not have sufficient permissions on the user you were logged in with.

4. Empty Recycle Bin automatically

You might try to empty your Recycle Bin using an automatic feature. Following the instructions from the previous link, you will see how to use the task scheduler in order to empty your Recycle Bin automatically.

On Windows 10 system you also have a great function that you can use in order to do the same thing.

Check this guide and see how can you enable this awesome feature that will automatically empty your recycle bin.

These are the steps that will get your Recycle Bin empty feature work again in Windows 10.

Please write us any other questions related to this article in the comments section of the page a little bit below and we will help you further with this situation.

Windows Resource could not start the repair service

Windows 10 is one of the most stable, secure, and smooth operating systems developed and released by Microsoft.

However, since we are discussing about a huge platform that is always under development stage, improvements are always welcomed.

But, sometimes these improvements are not rolled out as fast as we want. For this reason, many users decide to take the matter into their own hands.

So, we try to tweak built-in settings and features by using third party apps or by downloading and flashing processes which are not released by Microsoft.

Either way, we can end up in messing things up – we can damage internal files, the apps that we use can corrupt default registry, or who knows, something essential might be just erased.

Thus, problems occur and we have to find the perfect way to fix them.

Usually, the first troubleshooting process that we apply is the System File Checker or sfc.exe. This is a service featured by default within the Windows core center, located in C:WindowsSystem32 folder.

The utility performs a scan process that searches for corrupt Windows system files.

SFC (System File Checker) will also repair corruptions or system-related errors and can restore a Windows Restore Protection (WRP) package, through which your Windows 10 device can’t run properly anymore.

Good, so everything should be crystal clear for now. But, what should you do when the SFC scan isn’t working?

In most situations, if Windows Modules Installer isn’t enabled, the SFC utility will not complete the system scan, so you cannot fix the implied malfunctions.

Windows Modules Installer is a dedicated service also pre-loaded on the Windows software; this service must access WRP files and registry entries when the SFC scan is initiated.

Well, as obvious, if the service is disabled you will get a warning message or an error stating that Windows resource protection could not start the repair service.

You should now understand how the SFC scan is working and why you receive the Windows resource protection could not start the repair service Windows 10 error.

And based on the explanation above, the issues can be easily fixed by enabling Windows Modules Installer. Here is how you can achieve this fix.

How do I fix Windows resource protection error?

  1. Turn on your Windows 10 computer.
  2. From Desktop press the Win+R keyboard keys in order to bring the Run box.
  3. There enter: services.msc and click on OK.services.msc windows 10
  4. The Services window will be now displayed. From there you must double-click on Windows Modules Installer.windows module installer
  5. The general Settings panel will be launched. From there, switch to General tab.
  6. Startup type must be set to manual. If different, change the setting accordingly.
  7. Click on OK and then Apply the settings.trustedinstaller windows 10 sfc issue
  8. You can close the Service window now.
  9. Open an elevated cmd window: launch Task Manager (CTRl+Alt+Del), click on File, pick Run new Task and type ‘cmd’. Hint: make sure ‘create this task with administrative privileges’ is checked and then press OK.cmd elevated
  10. In the cmd window type sc config trustedinstaller start=demand and press Enter.
  11. Afterward, type net start trustedinstaller and press Enter.
  12. Done.

After applying the steps from above you should be able to initiate the SFC scan.

The Windows resource protection could not start the repair service error should be fixed so you can resume your troubleshoot initiative.

To start the scan, just launch the elevated command prompt window again and enter sfc /scannow (between sfc and ‘/’ there is a space).

Note: Depending on the problems or on your own Windows 10 configuration this scan might take a while; just do your work while the process is running.

If you have questions or if you need further information about the process that we just explained, don’t hesitate to contact us by using the comments area from below.

  • How do I boot up in safe mode?

You need to use the Recovery option from Update & Security. If you can’t boot your computer to Safe Mode, use our comprehensive guide to fix that.  

[wl_navigator]

Microsoft Teams adds 12 million daily users in a week

Microsoft Teams got 12 million new daily users in the last seven days, according to a report Microsoft released earlier today. The cloud-based communication and collaboration tool is now powering over 44 million remote workers and learners per day.

Microsoft Teams celebrates its third anniversary this week.

COVID-19 drives an unprecedented surge in Teams usage

The world is now turning to digital workspaces and video conferencing platforms like Teams to enable the continuity of business operations and learning in the wake of the coronavirus pandemic.

Microsoft is itself leading by example, allowing tens of thousands of its employees to work from home. They are using Teams to communicate and collaborate on workplace matters.

Already, we are seeing how solutions that enable remote work and learning across chat, video, and file collaboration have become central to the way we work. We have seen an unprecedented spike in Teams usage, and now have more than 44 million daily users.

Some schools have already closed in different parts of the world due to the COVID-19 threat. No wonder a proportion of the 12 million new Teams users comprise students and institutions of higher learning.

For example, the University of Bologna, Italy, moved 90% of courses to the cloud-hosted communication tool.

Fortune 100 companies are using Teams

It is quite an achievement for Microsoft Teams to earn the recognition of several of the largest and most successful corporations in the U.S. The Redmond tech giant said that 93 Fortune 100 companies are using the Office 365-powered product.

Part of the platform’s growth can also be attributed to its extensive reach, worldwide. It is available in 181 markets, and it supports 53 different languages.

Will Teams deliver on expectations?

With over 44 million daily users, Teams is probably the leading digital workspace tool by now. Before COVID-19, organizations used the platform for purposes like optimizing productivity and convenience.

But today, businesses are leveraging Teams as a necessity—a matter of survival. Companies want their operations to continue, and their employees want to stay safe.

So, can remote working with chat, video conferencing, and file-sharing tools work when it is the only option? Hopefully, the technology will meet user expectations in areas like latency, service availability, and data security.

Scalability is also critical to the reliability of Teams at times like this. Consider the case of an unexpected nationwide lockdown. Would all affected organizations manage to deploy Teams to hundreds of thousands of remote workers quickly?

The world will find out soon enough.

The access code is invalid: How to fix this PC error

If you’re getting the ERROR_INVALID_ACCESS  error code 12 with The access code is invalid description, follow the troubleshooting steps listed below to fix it.

Windows users may experience this error when trying to access various files, apps, or platforms using a specific access code. However, strangely enough, although the code is correct, users are not granted access to the respective apps and files.

There are also cases where the invalid code error prevents users from completing various actions, such as importing app or hardware settings or resetting passwords.

In order to make sure that the invalid code error is genuine and is not triggered by inappropriate keyboard layout, verify your keyboard settings first.

On Windows 10, go to Settings > Time & Language > Regions & Languages and select the appropriate keyboard layout.

Fix The access code is invalid error

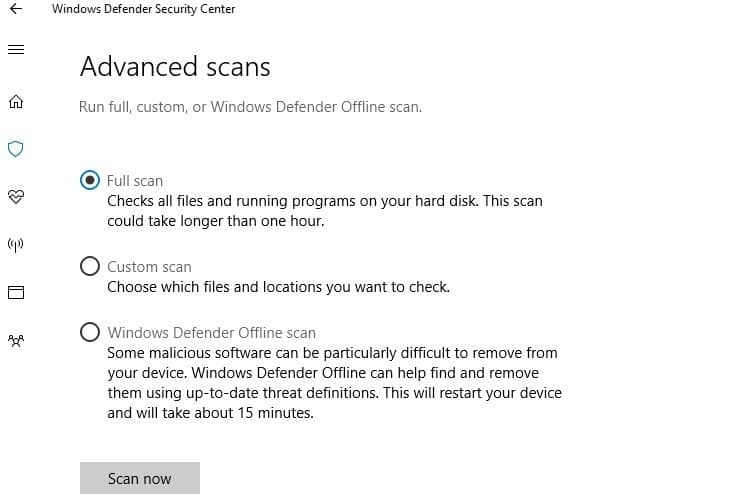
1. Run a full system scan

Windows Defender Security Center

Malware may cause various issues on your computer, including errors. Perform a full system scan in order to detect any malware running on your computer. You can use Windows’ built-in antivirus, Windows Defender, or third-party antivirus solutions.

2. Repair your registry using CCleaner

The simplest way to repair your registry is to use a dedicated tool, such as CCleaner. Don’t forget to first backup your registry in case anything goes wrong.


If you haven’t installed any registry cleaner, check out our article on the best registry cleaners to use on Windows 10.


3. Use Microsoft’s System File Checker to check for system file corruption.

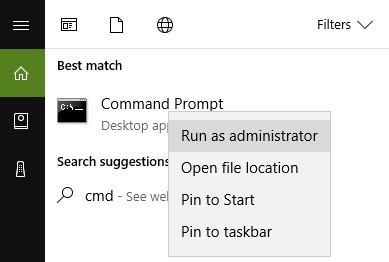
1. Go to Start > type cmd > right-click Command Prompt > select Run as Administrator

Cunning Command Prompt

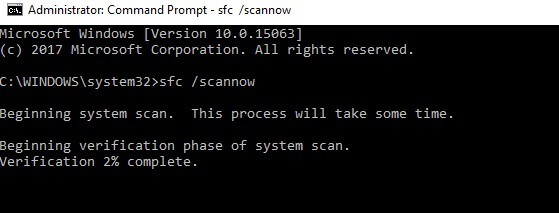
2. Now type the sfc /scannow command

System file checking scan

3. Wait for the scanning process to complete and then restart your computer. All corrupted files will be replaced on reboot.

4. Update your OS

Make sure that you’re running the latest Windows OS updates on your machine. As a quick reminder, Microsoft constantly rolls out Windows updates in order to improve the system’s stability and fix various issues.

Go to Windows Update, check for updates and install the available updates. To access the Windows Update section, you can simply type “update” in the search box. This method works on all Windows versions.

Windows update

If you’re looking for a particular update, go to Microsoft’s Update Catalog website. Simply type the KB number of the respective update, hit Enter and then click on the download button.

5. Remove recently installed software

If you recently installed new software on your computer, try uninstalling it. The respective software may have changed various elements on your computer triggering the invalid code error.

Go to Start > type Control Panel > select the program(s) recently added > click Uninstall.

Control Panel Programs

Then restart your computer, and copy the files again.

5. Use the hidden Administrator account

  1. Launch Command Prompt (Admin)
  2. Run the net user administrator /active:yes command to unlock the administrator account.
  3. Log off of your account > switch to the newly enabled Administrator account. Follow the initial steps that triggered error 12 and see if the Hidden Admin account helps.
  4. After you’re done using the account, go back to your main account.
  5. Launch Command Prompt as administrator again > enter net user administrator /active:no to disable the Administrator account.

You might also want to read our guide on how to make yourself an Administrator in Windows 10


6. Check your permissions

  1. Right-click the problematic directory > select Properties
  2. Go to the Security tab > click the Edit button.
    security permissions Windows 10
  3. Select your user name from the list > check Full control for Allow column in Permissions section.
    Security permissions modifications

if your user name isn’t on the list, add it manually and then change the permissions. Grant Full control to both Administrators and Users over the problematic folder, or even Full control to Everyone.

There is also one particular situation where ERROR_INVALID_ACCESS 12 (0XC) occurs, requiring you to use specific troubleshooting methods.

7. The access code is invalid error on printers

1. Go to Start > type powershell > right-click the tool > Run as Administrator

Running PowerShell

2. Type the get-printer/set-printer -PermissionSDDL command and hit Enter

Printer commands in PowerShell

Have you encountered the ERROR_INVALID_ACCESS in other situations? If so, you can also list the necessary troubleshooting steps in the comments below.

  • What is computer error code?
An error in Windows or other programs will cause the generation of an error code that is displayed sometimes on the screen. The error code is a certain number or set of words that help you or a professional to identify the problem. Of course, you can use the code to find a solution.
  • What is the system error?

A Windows system error, as the term describes it, is a problem with the operating system causing it to malfunction. The system error term can be extended, of course, to any other system.

[wl_navigator]

FIX: Error 0x80070002 in System Center 2012 Endpoint

Finding the right resources for keeping your network protected all the time might be a real challenge, especially when you have to secure several computers and notebooks from a certain group.

However, Microsoft might have the solution to your problem as it develops and provides an antimalware and antivirus complex service specially created for network groups: Microsoft System Center 2012 Endpoint Protection.

When System Center 2012 Endpoint Protection is installed and used along with the Configuration Manager you can be sure that your network and the devices connected are protected against malware attacks. Your only job is to properly install and set up the security software.

Even though the installation process should be the easiest part, some users reported problems while trying to complete the System Center 2012 Endpoint Protection (SCEP) installation wizard.

So, in this guide, we will try to fix the 0X80070002 error code that’s associated with this operation and which prompts you with the Cannot complete the system center endpoint installation message.

How can I fix Endpoint installer error 0x80070002 in Windows 10?

Right from the start, you have to know that this Microsoft security service can be installed only in certain conditions which include:

  • there shouldn’t be any other security feature installed on the computer where you want to complete the installation process
  • the original Windows (genuine) system must be running on your device
  • set the right permissions for the Microsoft System Center 2012 Endpoint Protection software.

So, here is how you can ensure all these conditions:

1) Uninstall additional antivirus and antimalware programs

The 0x80070002 error code might occur if there are other security programs running on your device. Now, uninstalling these programs through the System Center 2012 Endpoint Installer might not properly remove all the associated security files.

So, a manual uninstall is required; you can complete it by following:

  1. On your computer press the Win+R keyboard keys.
  2. In the Run box enter appwiz.cpl and press Enter in the end.appwizcpl
  3. The Programs and Features window will be displayed on your computer.
  4. Look for your antimalware and spyware programs and uninstall each entry one by one.
  5. Restart your Windows 10 system in the end.
  6. Retry the System Center 2012 Endpoint Protection installation process.

2) Allow permissions from Microsoft Client Manager

If you are currently initiating the install remotely, you need to set the right permissions first; otherwise, you will end up experiencing the 0x80070002 cannot complete the system center endpoint installation error log. So:

  1. Open the Configuration Manager service.
  2. Select Administration from the interface that will be displayed.
  3. Within Administration choose to expand the Overview entry.
  4. Also, expand Site Configuration and click on Sites.
  5. Select Configure Site Components and choose Software Distribution.
  6. Switch to Network Access Account.
  7. From here just add the user account that needs permission to access the content when that will be required.
  8. Resume the System Center 2012 Endpoint Installer process.

Hopefully, now you should be able to complete the System Center 2012 Endpoint Installer operation without receiving the 0x80070002 cannot complete the system center endpoint installation error message.

Tell us how everything worked during the troubleshooting process that was explained above as that’s the only way in which we can still help other users succeed with their own Windows 10 fixes.

[wl_navigator]

Pcdrcui.exe is Corrupt: Here’s How to Fix This Error ASAP

If you are getting the Pcdrcui.exe is corrupt error message when launching the PC Doctor application, we have come with the right fixes to solve this technical problem.

The Pcdrcui.exe application is powered by PC-Doctor Inc as an independent application. Also, there are two other applications powered by PC-Doctor using the same pcdrcui.exe name, namely Lenovo ThinkVantage Toolbox and Dell SupportAssist.

However, PC Doctor consists of a set of diagnostics, system information, and software tools. They can be used to check the hard disk, including scanning bad sectors and carrying out hard disk tests. Pcdrcui.exe is preinstalled in most of the Dell and Lenovo PCs.

However, some Windows users cannot run PC-Doctor, Dell SupportAssist, or Lenovo ThinkVantage, because this pcdrcui.exe file is corrupt.

Incorrect BIOS configuration, damaged or missing dynamic link library files, corrupt Windows registry, overheated CPU, malfunctioning HDD controller, lower CPU usage, and RAM shortage are some of the causes of the pcdrcui.exe error message.

In order to fix the pcdrcui.exe is corrupt error message, we compiled the solutions listed below.

How can I fix the error Pcdrcui.exe is corrupt?

1. Uninstall the application

Windows users can uninstall pcdrcui.exe so as to get rid of the error which is associated with it.

Although uninstalling the application will fix the pcdrcui.exe is corrupt error, the diagnostics, system information, and software features that characterize the application will be unavailable.

In order to uninstall pcdrcui.exe application, follow these steps:

  1. From the Start menu, go to Run or hold the Windows logo and press R at the same time.
  2. In the Run window, type appwiz.cpl and hit Enterpcdrcui.exe is corrupt
  3. The Program and Features will open; select one of the installed PC Doctor software on your PC, which could be PC-Doctor, Dell SupportAssist, or Lenovo ThinkVantage Toolbox.intel wireless 7260 AC driver issues
  4. Hence, click Uninstall to remove PC-Doctor, Dell SupportAssist or Lenovo ThinkVantage Toolbox from your PC.
  5. Restart your Windows after uninstall.

Note: The complete uninstall of the application will prevent the pcdrcui.exe is corrupt message from showing up ever again on your PC. This will result in the removal of the corrupt files and remove the security threats.

Keep in mind that some applications are incompatible with pcdrcui.exe and may cause problems if installed on your PC; these applications include Fitbit Connect, FrostWire 6.2.2, and Spybot.

2. Reinstall the application

You can also consider reinstalling pcdrcui.exe because the pcdrcui.exe is corrupt error. This method will replace the corrupted program files with a fresh copy.

Another advantage of this method is that the newly installed pcdrcui.exe application will run on your PC without the pcdrcui.exe is corrupt error message. In order to reinstall pcdrcui.exe; use this procedure:

  1. Uninstall pcdrcui.exe application namely PC-Doctor, Dell SupportAssist, or Lenovo ThinkVantage Toolbox from your PC using the steps mentioned in [Solution 1] above.
  2. Download and install PC-Doctor, Dell SupportAssist, or Lenovo ThinkVantage Toolbox from the PC-Doctor website.pcdrcui.exe is corrupt
  3. Hence, you can run PC-Doctor, Dell SupportAssist or Lenovo ThinkVantage Toolbox on your PC

Note: However, if reinstalling the pcdrcui.exe application causes a display of error pcdrcui.exe after complete uninstall, it is advisable you uninstall pcdrcui.exe again and install an alternative system utility application.

You can consider using an alternative system utility program like CCleaner, Windows Check Disk, or ReImage Plus. Meanwhile, CCleaner is available for download here.

3. Unblock pcdrcui.exe in Firewall

Windows Firewall is a network security system in Windows which regulates incoming and outgoing network traffic between your computer and other networks such as the Internet.

However, you can fix the ‘pcdrcui.exe is corrupt’ issue by unblocking pcdrcui.exe in the Windows firewall by following these steps:

  1. From the Start menu, type Run and hit the Enter key. Or, hold the Windows key and hit the R key.
  2. In the run windows, type firewall.cpl without quotes and hit the Enter key.pcdrcui.exe is corrupt
  3. Select the Allow a program or feature through Windows Firewall menu in order to enable pcdrcui.exe.pcdrcui.exe is corrupt
  4. Here, click Change settings and then click Allow another app menu at the bottom of window.
  5. Click Browse to locate the pcdrcui.exe program file in your hard disk
  6. Here, navigate to PC Doctor Toolbox for Windows located in the Program Files folder.pcdrcui.exe is corrupt
  7. Then, click Add and then click OK.
  8. Finally, you can launch Run PC-Doctor, Dell SupportAssist, or Lenovo ThinkVantage.

Note: In steps 5 and 6 above, the pcdrcui.exe program files may be in the program name PC-Doctor, Dell SupportAssist, or Lenovo ThinkVantage depending on pcdrcui.exe preinstalled software name on your Windows PC.

For instance, if you are using Lenovo PC, browse the Lenovo ThinkVantage program files to add to the unblocked app in Windows Firewall. This will fix the ‘pcdrcui.exe is corrupt’ error message.

Also, if you are using any third-party firewall software, follow the steps above and use your user account with Administrator privilege before making any firewall changes.

4. Repair your registry

You can use Microsoft’s System File Checker to check for system file corruption. The utility verifies the integrity of all protected system files and repairs files with problems when possible. Here’s how to run an SFC scan:

1. Go to Start > type cmd > right-click Command Prompt > select Run as Administrator

2. Now type the sfc /scannow command

3. Wait for the scanning process to complete and then restart your computer. All corrupted files will be replaced on reboot.

In addition, you can repair your registry using a dedicated repair solution. Such an application can repair and scan damaged files from your Windows PC in a few clicks.

Also, don’t forget to first back up your registry in case anything goes wrong.

5. Run a full system scan

Malware may cause various issues on your computer, including the Pcdrcui.exe is corrupt error. Perform a full system scan in order to detect any malware running on your computer.

You can use Windows’ built-in antivirus, Windows Defender, or third-party antivirus solutions.

Here’s how to run a full system scan on Windows 10:

  1. Go to Start > type defender > double click Windows Defender to launch the tool
  2. In the left-hand pane, select the shield icon
  3. In the new window, click the Advanced scan option
  4. Check the full scan option to launch a full system malware scan.

6. Update your OS

Make sure that you’re running the latest Windows OS updates on your machine. As a quick reminder, Microsoft constantly rolls out Windows updates in order to improve the system’s stability and fix various issues and errors.

To access the Windows Update section, you can simply type update in the search box. This method works on all Windows versions. Then go to Windows Update, check for updates and install the available updates.

We hope that the solutions listed above helped you to fix the pcdrcui.exe is corrupt error message. Feel free to comment below and share your experience with the rest of the Windows community.

WordPerfect macros will not work? Try these methods

Some Corel WordPerfect users describe the following situation: they have been typing a document for several days and it all worked just fine. Out of the blue, some of the macros stopped working.

If you are also at a loss about how to tackle the issue, check out some of the resolutions below. One of them should work for you too.

What can I do when WordPerfect macro is not found?

1. Fix any shortcuts-related problems

selected macro's code

Make sure that the macros do exist, so click the Macros button on the View tab of the ribbon. This will open the Macros dialog. While there, change the Macros in the dropdown to the Normal.dotm template.

If the names of all your macros show up in the list, click on any of them right away. Then, click the Edit button to enter the macro editor in a separate window, with the selected macro’s code displayed on the right.

Check all other macros the same way. If the macros are all there, then the issue resides in the shortcuts. Open the Options dialog and click the Customize item in the left panel. Then, click the Keyboard shortcuts Customize button in the bottom right corner.

In the Customize Keyboard dialog, make sure the Save changes option in the dropdown is set to Normal.dotm. Scroll the Categories list until reaching to Macros and click on it.

On the right side, all your macros should be listed. Click on each one in turn and look at the Current Keys box. Your choice of shortcut should appear there. If it isn’t complete or nothing shows up in that box, hit the Press new shortcut key box.

Finally, press the shortcut you want and click the Assign button. Don’t hesitate to repeat the process for the other macros.


2. Re-attach the normal template

WordPerfect new file

WordPerfect macros won’t work even after applying the above fix? Then, check if the normal template is attached by checking the Developer Tab. If not, try to re-attach the normal template to your document and see if the issue persists.


3. Move the macro files into the default macro folder

macro files in the default macro folder

  1. Open Windows Explorer.
  2. Enter into C:Program FilesHotDocsPlayerSource(WP version)Macros.
  3. Copy the files located in the Macros folder.
  4. Open WordPerfect.
  5. Find your way into Tools > Settings > Files next.
  6. Click the Merge > Macro tab and note the path of the default macro folder.
  7. Open the default WordPerfect macro folder in Windows Explorer.
  8. Then, it’s time to paste the macro files into the default macro folder.
  9. You may now click Tools > Options.
  10. Expand the Word Processors folder.
  11. Click your WordPerfect version and confirm the Macros Folder path matches the one seen before.

Worried that the macro is being canceled due to a Not Found condition processing? This error often occurs when assembling a form in LexisNexis Automated Forms while using WordPerfect, but the above steps are a quick fix.


Did you happen to copy and move your macros from an old machine to the new by using a CD? It might sound like a fast solution first, yet it isn’t the most efficient one. This often causes problems, especially when the folder itself is read-only.

For documents that are read-only, take a closer look at these fixes that really work. No less important, keep in mind that if macros are stored on a network server they might become slow to be accessed or completely inaccessible at times.

Which of these solutions did the trick for you? Let us know by leaving us a message in the comments section below.

[wl_navigator]

How to fix The server stumbled 0x80072EFD error

The Microsoft Store is where you discover exciting new apps or games. That also happens to be the only legitimate place to source your apps for the Windows 10 platform.

However, so much for the importance of the Store, oftentimes, you might end up viewing the message The server stumbled message after clicking on the Microsoft Store icon, with error code 0X80072EFD shown for further reference.

Frustrating that sure is but fret not, here are some possible workarounds.

How can I fix The server stumbled error?

1. Turn Off Manual Proxy Setting

The Server Stumbled

The Manual proxy setting turned on has often been linked to The server stumbled error. Here is what you need to do to turn it off.

  1. Launch Settings app. You can do this by either writing Settings in the search box or by clicking / tapping on Start and selecting Setting option.
  2. In the Settings app, click / tap on Network and Internet.
  3. Next click / tap on the Proxy tab. It is at the bottom in the left panel.
  4. Look for Manual Proxy Setup. It is along the bottom.
  5. There lies the Use a Proxy Server setting. Turn it off.

Close the Settings app and try launching Microsoft Store. It should work fine now. If not, read on for other possible tricks.


2. Check the Automatic Time Option

The Server Stumbled

Making changes to your time and date settings can also help solve the problem. It is not that a wrong date or time is causing the issue but changing the same has often been found to fix the error. Here is how you can do it.

  1. Launch Settings app once again.
  2. Click / tap on Time & language option.
  3. You should get to see the Date & time page right away. If not, click / tap on Date & time from the left pane.
  4. The Set Time Automatically is at the top. Turn the toggle to off.
  5. Scroll down a bit to find the Change button which gets enabled now. Click / tap on it.
  6. Change the time to anything but the current value.
  7. Click / tap on the Change button and close the Settings app.
  8. Try and see if the Store gets launched.

3. Set Services Startup time to automatic

There might be a few changes needed here to make the Store accessible again. Here are the steps.

  1. Launch Services application. You can do this by typing Services in the search box.
  2. In the Services app, look for BITS, COM+, Remote call, and Windows update.
  3. Right-click / long press on BITS (Background intelligent transfer services) and select Properties.
  4. In the Properties windows, under the General tab, set Startup type to Automatic (delayed start).
  5. Click/tap on Apply. Also, click on the Start button to let it run for the first time.
  6. Click/tap on OK to get back to the Services app.

Similarly, locate Com+ Event System.

  1. See if the Startup type is set to automatic.
  2. If not, then right-click / long press on it and select properties and make necessary changes here.

Next, locate the Remote procedure call and see if its Startup type is also set to automatic. If yes, move on or else, make suitable changes. The procedure is the same as mentioned above.

Locate Windows update and see the Startup type is set to anything but disabled. Other options include automatic and manual.

Click/tap on Apply and then on the Start button to let it run.


4. Check the Network Settings

You will need to make some changes in the network and internet settings in the Control Panel as well. Here are the steps.

  1. Right-click / long press on Start and select Control Panel.
  2. Click tap on Network and Internet option > Network and Sharing Center.
  3. Click/tap on your internet connection, which can be Wi-Fi or LAN.
  4. Click/tap on Properties
  5. Select Internet Protocol Version 4 and click/tap on Properties.
  6. Select Use the following DNS server addresses.
  7. Here you have the option to either user –
  8. Open DNS – Pre – 67.222.222Alter- 208.67.220.220

Or

  • Google DNS – Pre – 8.8.8.8

Alter – 8.8.4.4

  • Click/tap on OK and Save.

5. Enable automatic settings detection

There are a few other changes left to be made in the Control Panel. Here they are.

  1. In the Control Panel, click/tap on Network and Internet > Internet Options.
  2. In the Internet Properties window that opens, select the Connections tab.
  3. Click/tap on LAN setting along the bottom.
  4. In the LAN Settings windows, select the Automatically detect settings checkbox.
  5. Also, make sure the Use a proxy server for you LAN is unchecked. Delete anything that might be there in the Address and Port boxes.
  6. Click/tap OK on all the windows open.
  7. Close Control Panel.

See if the Store launches. It should, now.


6. Tweak the Registry

The Server Stumbled

If you continue to face the issue, it is time we moved on to the next fix. It is a bit advanced but you can still pull it off if you follow the instructions carefully.

  1. Open registry editor. You can do this by typing regedit in the search box in the taskbar.
  2. Navigate to this key here:
    HKEY_LOCAL_MACHINESOFTWAREMicrosoftWindowsNTCurrentVersionNetworkListProfiles
  3. Right-click / long press on Profiles key.
  4. Under the Performance tab, click/tap on Advanced.
  5. Check the Replace all child object permission entries with inheritable permission entries from this object setting.
  6. Click/tap on Apply.
  7. Re-start the machine to let the changes take effect.

So, these are all that you need to do to get Microsoft Store to be up and running. Let us know which of the above solutions worked for you.

[wl_navigator]

Fix Microsoft Store error: see details alert with ease

Do you have problems while trying to update your Microsoft Store apps? If you cannot properly use the Microsoft Store functionality, it’s time to act wisely and choose to apply the right troubleshooting solutions.

In this article, we’ll show you how to address the error: see details warning displayed by the Microsoft Store app each time you try to update your recently installed tools.

What can I do if getting Microsoft Store error: see details alert?

1. Restart your PC and reconnect to Microsoft Store

  1. Launch the Microsoft Store.launch Microsoft Store
  2. From the upper-right corner, click on the account icon and select the account name.
  3. Choose Sign out.
  4. Now, repeat the same steps but this time choose Sign in.

Usually, if minor issues are involved, you can address the Microsoft Store problems with a simple restart. So, first of all, restart your Windows system. Then, log off from Microsoft Store as described above.

Don’t know what to do if Windows 10 is not restarting? Fix the issue with the help of this complete guide.


2. Reset Microsoft Store

  1. Click on the Windows search icon – it’s usually located near the Microsoft Store start icon.
  2. In the search field type wsreset.type wsreset in run
  3. Click on the result with the same name.
  4. Wait while this command is executed.
  5. When done, open the Microsoft Store and check its functionality.

3. Run Windows troubleshooter scans

run Windows troubleshooter scans

  1. On your computer, open Start.
  2. Then, you need to search for Command Prompt, right-click the top result, and select Run as administrator.
  3. In cmd type sfc /scannow and press Enter.
  4. Afterwards, enter the following commands one by one: Dism.exe /online /cleanup-image /scanhealth and Dism.exe /online /cleanup-image /restorehealth.
  5. When done, close the cmd window and restart your Windows 10 system.
  6. Check if the issues are resolved.

First of all, run the Windows Update Troubleshooter. Just initiate the scan and wait while possible bugs and issues are fixed. If the Troubleshooter stops before completing the process, fix it with the help of this complete guide.

Similarly, initiate a system scan by following the steps above, with the help of the System File Checker. Having problems using the SFC tool? Check this useful guide and set things right once again.

Finally, use the DISM command tool and confirm that the Microsoft Store error: see details warning is gone for good.


Worried that DISM failed on Windows 10? Check out this quick guide and set things right again.


4. Apply Windows 10 updates

  1. Press the Windows key+I keyboard hotkey.
  2. System Setting will be displayed.
  3. Click on Update & Security.Update & Security
  4. From the next field switch to Windows Update.
  5. If there is an update available follow on-screen prompts and apply it.
  6. Then, check if the error, see details warning is still there or not.

Up next, verify if there are any Windows updates waiting for your approval and apply any available patches. Windows Update cannot check for updates? Check this guide to solve the issue quickly!


5. Create a new Microsoft account

  1. Once more, go to System Settings.
  2. This time, choose Accounts.
  3. From the left panel, switch to Family & other users.Family & other users
  4. Next, click on Add someone else to this PC.
  5. Follow the rest of the on-screen prompts and add a new account.
  6. Under this new account, you will be able to properly use your Microsoft Store app.

If your account got corrupted, you need to create a new one and here is how you can do that.


Having trouble opening the Setting app? Then, take a look at this article to solve the issue.


6. Reinstall the Microsoft Store app

  1. Launch the Windows search field.
  2. There, enter powershell.
  3. Then, click or tap the Windows PowerShell result and choose run as administrator.tap the Windows PowerShell result
  4. From PowerShell, now find the Microsoft Store entry; copy the Microsoft Store name as it’s displayed in PowerShell.
  5. Next, in PowerShell type remove-appxpackage insert copied package name here.
  6. The Microsoft Store app will be now removed from your Windows 10 device.
  7. You may now reinstall the app, so open the PowerShell command line window as explained above; you must run it with admin rights.
  8. In PowerShell type and execute the following command: Get-AppxPackage -allusers Microsoft.WindowsStore | Foreach {Add-AppxPackage -DisableDevelopmentMode -Register “$($_.InstallLocation)AppXManifest.xml”}.
  9. Restart your system in the end.

Can you reinstall the Microsoft Store? Not only that you can but it’s actually recommended to do so if you haven’t managed to fix the error: see details warning.

Follow the steps here detailed and of course, start by removing Microsoft Store from your PC.

Are things any better now? Do tell us how you eventually managed to fix the error: see details Microsoft Store warning and if you know other troubleshooting solutions that might solve this particular issue.

You can share your observations in the comments form available below.

[wl_navigator]

Windows Skips BIOS? Check out These Solutions

The most important system tweaks can be initiated and applied through BIOS. This special mode should be at your disposal anytime as it represents a built-in environment added by default to your motherboard.

Anyway, if you’re having problems while trying to access BIOS on your Windows 10 system, don’t panic. You can try to fix the Windows skips BIOS problem with the help of the following troubleshooting solutions.

What can I do if Windows skips BIOS?

1. Make sure you are using the appropriate reboot sequence

There are times when you might be using the wrong reboot sequence. Even though it might look like Windows is skipping BIOS, in fact, your system might be loading everything extra fast.

So, you must act quickly in order to access BIOS and in that matter, you need to know the right keyboard combination required in this situation. How do you get into the BIOS in Windows 10?

Be aware that accessing BIOS is different from one configuration to another. That’s why the right thing to do will be to access your manufacturer’s documentation.

Overall, you can go into BIOS by pressing repeatedly on F1, F2, F10, F12, or Delete. You can also choose to press these keyboard keys while pressing and holding the Power button.

Anyhow, if Windows is indeed skipping BIOS, try the next troubleshooting solutions for fixing this system malfunction.

2. Verify boot options and restart to UEFI

  1. Press the Win+R keyboard hotkeys in order to open the Run field.
  2. There enter msconfig.type msconfig
  3. From System Configuration, switch to the Boot tab.Boot tab
  4. The No GUI boot option shouldn’t be checked.
  5. Also, make sure you enter enough seconds into the Timeout field.
  6. You may now restart into UEFI from your Windows device, so press the Win+I keyboard hotkeys.
  7. From System Settings, click on Update & Security.Update & Security
  8. Switch to Recovery tab.
  9. Go to Advanced startup and click on Restart now.Restart now option
  10. From the next window, choose Troubleshoot.
  11. Then press Advanced options and pick up UEFI Firmware settings.
  12. Finally, click on Restart to UEFI.

Windows Troubleshooter has stopped working? Check this guide to solve the issue quickly!

3. Run a system scan

  1. On your computer open an elevated command prompt window: right-click on the Windows start icon and from there click on Command Prompt (Admin).elevated cmd
  2. In the cmd window type sfc /scannow and press Enter.
  3. Just wait while the scan is running – it might take a while depending on how many files are stored on your device.
  4. If errors are found, Windows will try to fix everything.
  5. Reboot your system in the end.

Sometimes, after a new Windows update is installed, or after you flash a new program, the BIOS is skipped during the Windows reboot sequence.

In that situation, you can try to run a system scan as the default Windows troubleshooter can fix any related malfunctions. Use the procedure described above in that regard.

If you’re having trouble accessing Command Prompt as an admin, you better take a closer look at this guide.

4. Update BIOS

update BIOS to fix Windows skips BIOS issues

If Windows skips BIOS it might be because of outdated software. Thus, before trying anything else you should make sure that BIOS is up to date.

Once more, the update process depends on your own manufacturer so check its documentation or just access its official webpage and download any available BIOS updates. Then, try to access UEFI on the next Windows reboot.

5. Reset BIOS

how to reset BIOS

The last troubleshooting solution to apply refers to a reset process. Shortly, you should reset BIOS. In this way, you will get a fresh start, and any related problems can be automatically fixed.

Usually, you can complete this reset by removing the BIOS battery. Now, depending on certain motherboards you might be able to use a dedicated reset button situation during which the battery doesn’t have to be removed.

Anyway, in this case, you will have to disassemble your computer, so be careful – if you are not a tech enthusiast, a better idea will be to ask for more experienced assistance.

The solutions explained above should help you fix the Windows skips BIOS issue. However, if you are still experiencing this problem, try to describe the situation in detail by using the comments area below. And you can also learn how to set BIOS for best performance.

Other users reported a different problem in which the computer keeps booting to BIOS, but we have a guide that addresses that.

We will try to find additional troubleshooting solutions based on the details you offered.

FIX: Start Menu won’t show up in Windows 10/11

One of the most iconic features of Windows as an OS is the Start Menu from which pretty much every other program is launched. However, some errors and issues can prevent it from appearing, even when you try to access it.

And if it somehow doesn’t show up due some system error, that could be a huge disappointment. Fortunately, there’s a solution if your Start Menu doesn’t show up in Windows 10.

How do I make the Start menu appear again?


Start Menu Won't Show Up In Windows 10 Technical Preview
1. Use PowerShell commands

  1. Go to Search and type powershell
  2. Right-click on the PowerShell icon and select Run as Administrator
  3. In PowerShell enter the following key and press Enter:
    • Get-AppXPackage -AllUsers | Foreach {Add-AppxPackage -DisableDevelopmentMode -Register “$($_.InstallLocation)AppXManifest.xml”}
  4. Wait for PowerShell to execute the command
    • A few errors might show up, ignore them
  5. When everything is finished try to open Start Menu again

There are a lot of factors in your system that could prevent your Start Menu from showing up, but Windows PowerShell could solve them for just a few moments.


2. Use the Registry Editor

  1. Press Windows key and R at the same time and type Regedit
  2. Open Registry Editor and navigate to the following key:
    • HKEY_LOCAL_MACHINESOFTWAREMicrosoftWindowsCurrentVersion ImmersiveShellLauncher
  3. Click Edit > New > DWORD (32-bit) Value, and name it UseExperience
  4. Double-click the newly created item and set the value to 0
  5. Click OK, close the Registry Editor and then restart your computer

If the PowerShell solution somehow didn’t work for you, you can try to fix your problem with Registry Editor, because your problem may lay somewhere in the registry.

Can’t access the Registry Editor? Things aren’t as scary as they seem. Check out this guide and solve the issue quickly.


If you follow these methods, you should be able to solve your annoying Start Menu problem in Windows 10.

If you have any additional comments or suggestions, please write them down in the comments section below.

[wl_navigator]

New report details possible new Microsoft 365 consumer services we could see during March 30 event

It’s now very much known that Microsoft will be hosting a virtual press event on March 30. Rumors indicate there won’t be a public livestream, but a new report out from Windows Central’s Zac Bowden details some of the new products and services we could see be revealed.

Microsoft 365 for consumers

Microsoft Office 365 icons

First off, it’s important to note that it is believed that this event will not be related to anything Surface. Instead, it will likely only be focused on productivity. As a result, it is believed the event will mainly be about a new subscription service for consumers, and judging from Windows Central’s report, the bundle could just be known as “Microsoft 365.”

[wpp range=”last30days” limit=3 taxonomy=’post_tag’ term_id=’11198′ wpp_start=’

More on Teams

    ‘ wpp_end=’

‘ wpp post_html=’

  • {thumb} {text_title}
  • ‘]

    However, unlike existing Microsoft 365 subscriptions for businesses and enterprises, this one is mainly for people who already depend on Office 365. This means that Microsoft 365 could end up replacing Office 365 Personal and Office 365 Home as we know it today. Pricing is not known, but it will, though, possibly be coming in April. It also could include extras like bonus fonts, templates, and some new services, which we describe next.

    The possible bonus features for consumers

    Along with including access to the Office 365 apps like Word, Excel, and PowerPoint, it is said that Microsoft 365 could come with some family and education-friendly perks. The most interesting of the bonus features and services could be a Grammarly-like editor for Microsoft Edge and Word. We’ve seen similar functionality in the Office 365 extension before, but Windows Central’s Zac Bowden provides the following extra details on what we can expect:

    “The new Grammarly-like editor is exciting, as it will enrich the writing process inside Word with definitions, sentence suggestions, and more. Many have been calling for Microsoft to buy Grammarly itself for some time, but it appears Microsoft is making its own competitor to the service instead. What’s cool about this is that I’m hearing it will also extend into Microsoft Edge, allowing users who pay for the subscription to get the same rich writing suggests on the web.”

    Also included could be a new family safety app for Android and iOS. Much like the experience that recently launched in Microsoft Edge Canary, this app would let parents “set rules, permissions, and track their children’s location all without having to load up a PC or the Microsoft Family website,” according to the report.

    It’s not known, though, if the app will have features that are exclusive only to those who are Microsoft 365 subscribers. It also might not be available right away when Microsoft 365 will launch. As per ZDNet’s Mary Jo Foley, possible new password manager from Microsoft could also be with this, too, though the details are scarce.

    Interestingly enough, one of the bonus features for subscribers could also be some new financing feature in Excel. This is where things are blurry, but Windows Central suggests it could “make things easier when it comes to dealing with bank statements and general financing.”

    Teams for Life?

    Much talk has been around Teams for Life, which is a rumored version of Microsoft Teams for family. However, according to Zac Bowden, this might not be here at launch with Microsoft 365 and it probably won’t be announced, either.

    There could also be a lot of other services in Microsoft 365 that won’t be there at launch, either. Anyway, we’ll just have to wait until March 30 to find out the truth. OnMSFT will be planning to cover the event as the news unfolds, so be sure to keep tuned.

    FIX: Windows Package Manager operation failed

    Package Manager is a command-line tool in Windows used to install, remove, and/or update packages while offline.

    You can easily add a package, expand .cab files, or even enable or disable a Windows feature offline or on a running Windows installation.

    Other things you can do with Package Manager include:

    • Installing or uninstalling Microsoft hotfixes
    • Add drivers to the driver store
    • Install language packs
    • Install or uninstall multiple packages in Windows using one command string
    • Add packages to offline images on Windows
    • Accept answer files as input under offline Servicing settings

    If you encounter an error message that says Windows Package Manager Operation failed, here are solutions to help you fix the problem.

    How do I fix Windows Package Manager operation failed?

    1. Run Windows Update troubleshooter

    The Windows Update troubleshooter automatically detects and fixes the most incorrect settings on your computer that brings the message Windows Package Manager Operation failed.

    Running Windows Update troubleshooter resolves any issues that prevent you from updating Windows, so follow these steps to run Windows Update troubleshooter:

    • Click Start
    • In the search field box, type Troubleshooting
    • Click Troubleshooting

    troubleshooting starting

    • Click View all in the left pane

    troubleshooting settings

    • Select Windows Update

    windows update search

    • Run Windows Update Troubleshooter and follow the instructions on the screen

    2. Run DISM tool

    If you still get the Windows Package Manager Operation failed message, run the DISM tool, or Deployment Image Servicing and Management tool.

    The DISM tool helps fix Windows corruption errors when Windows Updates and service packs fail to install due to corruption errors, like if you have a damaged system file.

    Here’s how to run the DISM command on your PC to check if it helps:

    • Click Start
    • In the search field box, type CMD
    • Click Command Prompt in the search results list

    command prompt launch

    • Type Dism /Online /Cleanup-Image /ScanHealth
    • Type Dism /Online /Cleanup-Image /RestoreHealth

    Once the repair is complete, reboot your computer and check if the problem persists.


     If you need to create a partition, ckeck our best partition manager software for Windows 10 top.


    3. Run a System File Checker scan

    A System File Checker scan checks or scans all protected system files, and then replaces the incorrect versions, with the genuine, correct Microsoft versions.

    If a Windows Resource Protection file is missing or corrupted, Windows may not behave normally, or some functions may not work, or Windows may even crash.

    Here’s how to run an SFC scan:

    • Click Start
    • Go to the search field box and type CMD
    • Select Command Prompt

    package manager

    • Right click and select Run as Administrator

    run command prompt as administrator

    • Type sfc/scannow
    • Press Enter
    • Restart your computer

    If the update installation issue persists, try the next solution.

    4. Automatic Repair in Windows Recovery Tool

    Using Windows 10 installation media, you can use Automatic Repair to detect and fix any problems that prevent your computer from starting.

    Such problems include drivers, program conflicts, malware, and memory.

    However, if you do not have installation media, you can download and create Windows 10 installation media, then follow the steps below to perform the Automatic Repair.

    • Insert installation USB media
    • Boot Windows Technical Preview from the installation media
    • Under Windows setup page, select Language to install
    • Select Time and currency format
    • Select Keyboard or input method
    • Click Next
    • Click Repair your computer
    • Select Troubleshoot
    • Select Automatic Repair, then choose the operating system
    • A blue screen will appear with an option to choose from. Choose Troubleshoot
    • Select Advanced options
    • Choose Automatic Repair from Advanced boot option
    • Follow the prompt’s instructions

    You can also check our most recent top with the best file tepair software for Windows 10.


    5. Perform an In-Place Upgrade

    If you perform the repair process and your computer doesn’t operate normally, you can try doing an in-place upgrade of the existing installation.

    An in-place upgrade is a final alternative before you reinstall the operating system. This takes the same time you’d take to upgrade, and some customized settings may be lost in the process.

    Take these steps to perform an in-place upgrade and repair installation of Windows:

    • Close all running apps
    • Insert the installation DVD
    • In the Setup windows, click Install now.

    If Windows doesn’t automatically detect the installation DVD, do the following:

    • Click Start
    • Go to the search field box and type Drive:setup.exe
    • Go to Programs
    • Click Setup.exe
    • Click Install now in the setup window
    • Click Go online to get the latest installation updates
    • Type the CD key if prompted
    • Go to Install Windows page and select the operating system you want to Upgrade or Inplace
    • Click Yes to accept the terms
    • Click Upgrade under the Which type of installation do you want screen
    • Restart your computer once the installation is complete

    Does this take away the Windows Package Manager Operation failure issue? Try the next solution if it doesn’t.

    6. Manually reset Windows Updates components

    Disclaimer: this solution contains steps that are part of modifying the registry. Please note that serious problems may occur if you do this incorrectly. Ensure you follow these steps correctly, and carefully.

    Back up the registry before you modify it, then restore it if a problem occurs.

    Follow these steps to manually reset the Windows Updates Components:

    • Right click Start
    • Select Command Prompt (Admin)

    coomand prompt as admin

    • Click Yes when asked for permissions

    command prompt window

    • Stop the BITS, Cryptographic, MSI Installer, and Windows Update Services by typing the following commands at a command prompt:
    • net stop wuauserv
    • net stop cryptSvc
    • net stop bits
    • net stop msiserver
    • Press Enter after each command you type
    • Rename the SoftwareDistribution and Catroot2 folder by typing the commands below in the Command Prompt then press Enter after each command you type:
    • ren C:WindowssoftwareDistribution SoftwareDistribution.old
    • ren C:WindowsSystem32catroot2 Catroot2.old
    • Restart the BITS, Cryptographic, MSI Installer, and Windows Update Services by typing the following commands in command prompt:
      • net stop wuauserv
      • net stop cryptSvc
      • net stop bits
      • net stop msiserver
    • Type Exit in the Command Prompt to close it

    Try running Windows Updates again to check if the issue has been resolved.

    Note: it isn’t recommended to uncheck the update option Give me updates for other Microsoft products when I update Windows.

    Windows Updates downloads and installs updates required to run Windows efficiently.

    7. Perform a Clean Boot

    If you still get the Windows Package Manager Operation failed, eliminate any software conflicts that may be causing the issue.

    Performing a clean boot for your computer reduces conflicts related to software that can bring up the root causes of the Windows Package Manager Operation failure.

    These conflicts can be caused by applications and services that start up and run in the background whenever you start Windows normally.

    How to perform a clean boot

    In order to successfully perform a clean boot on Windows 10, you have to be logged on as the administrator, then follow these steps:

    • Go to the search box
    • Type msconfig

    • Select System Configuration

    package manager

    • Find Services tab
    • Select Hide all Microsoft services box

    package manager

    • Click Disable all
    • Go to Startup tab
    • Click Open Task Manager

    package manager

    • Close Task manager then click Ok
    • Reboot your computer

    You will have a clean boot environment after all these steps are carefully followed, after which you can try and check if the problem is gone.

    Did any of these solutions resolve the Windows Package Manager Operation issue? Let us know in the comments section below.

    • How can I fix Package Manager operation failed?
    Start by running the Windows Update troubleshooter. If that doesn’t fix the problem, here’s our expert guide to help you solve that problem.

    [wl_navigator]

    Fix: Input file is not the format specified in WordPerfect

    When cutting plain text from Word and pasting in Corel WordPerfect, this specific error message may appear: Input file is not in the format specified. The same happens when users try to copy the text of an email composed on Outlook or a few lines from a website.

    Attempting to paste them into a WordPerfect document doesn’t work. Even if they never experienced this problem with any other program except WordPerfect, users should not rush into concluding that it is specific to a particular version of WordPerfect.

    It happens across platforms and old WordPerfect versions alike. As we have seen, many people have reported this issue online, so we are going to help them understand and fix it.

    What can I do if the Input file is not the format specified?

    1. Leave the browser open

    leave the browser open This error occurs if the browser is closed prior to pasting the copied text from a website. If it remains open, the text will paste into the WordPerfect document with no issues.

    In other words, all you have to do is to keep in mind this nifty trick: make sure the browser remains open for a few more seconds when attempting to paste the copied text into WordPerfect and you’ll get no hiccups.


    2. Use Notepad

    use NotepadLeaving the browser open seems an easy workaround. You may also try this if the first tip makes no difference.

    When trying to insert text from an email, paste it into Notepad first, copy and then paste it into WordPerfect. This should clear all formatting and get rid of the error for you.


    Aren’t you a Notepad fan? Check our top Notepad alternative picks.


    3. Choose the Paste Special option

    choose Paste Special

    Trying to cut from Word and paste in WordPerfect? Instead of clicking on the Paste button, try clicking on Edit > Paste Special to get a dialog box with additional choices. They vary depending on the formatting embedded in your source text, yet some of these options could help you out.

    No less important, if you paste it as a Microsoft Word Document, it doesn’t matter that it’s plain text only. It reached its destination as a box with an embedded Microsoft Word object.

    To edit the text, just double-click on it. This opens up a Microsoft Word window to allow you to edit it. And if you had any special formatting turned on for any of the originating text, you’ll need to manually restore that in the new document as well.

    If you’re still not able to get to the bottom of it, do note that older versions have a problem with the format. You have several choices in terms of newer versions, so you could try out making this change as well.

    For any other solutions that you might be aware of, don’t hesitate to reach for the comments section below. We’d appreciate that.

    [wl_navigator]

    Chkdsk Runs on Every Boot: How to Stop it

    The Check Disk Utility or Chkdsk.exe is used for detecting and fixing errors in your hard disk, but many reported that chkdsk runs on every boot.

    This isn’t the only issue with chkdsk; many reported that chkdsk got stuck on their PC as well. In today’s guide, we will show you how to fix the boot issues.

    Why does chkdsk run every startup?

    • Your PC has encountered a glitch, and it’s constantly running the disk scan.
    • The chkdsk isn’t properly configured, so it repeats the scan.
    • In some rare instances, there might be issues with your hard drive.

    How do I stop chkdsk from running at startup?

    1. Tweak some registries

    1. Press Windows + R and type in regedit.exe.
    2. Navigate to the following registry key: HKEY_LOCAL_MACHINE\SYSTEM\CurrentControlSet\Control\Session Manager
    3. In the right pane, you will spot BootExecute.
    4. Change its value from autocheck autochk * /. to autocheck autochk *

    If you are having problems opening the Registry Editor, check out our guide on how to access the Registry Editor.

    2. Use the Command Prompt

    1. Press the Start button and type in cmd.
    2. Type in the following line and press Enter: fsutil dirty query g:
    3. This command will query the drive, and there’s a high probability that it will tell you that your drive is dirty.
    4. Type CHKNTFS /X G:

    5. Restart your computer, and after that open cmd again and enter the following and wait for it to finish Chkdsk /f /r g:

    6. After all of that, run the following: fsutil dirty query g:

    By following these steps, you should be able to efficiently and permanently stop Chkdsk if it runs on every boot.

    To learn more about this feature, we recommend reading out guide on how to access chkdsk log file location and analyze your log files.

    For a detailed guide on CHKDSK and the latest version of Windows, check out this how to run CHKDSK on Windows 11.

    If you know of any other method that is good at solving this boot-related issue, leave us a message in the comments section below, and we will update the guide accordingly.

    Play Assassin’s Creed: Odyssey, Sea of Thieves, and Smite’s full legendary gods roster for free with Xbox Live Gold this weekend

    After a long week being stuck inside due to the coronavirus, another weekend of Free Play Days on Xbox One is here. As noted in a post on Xbox Wire, this weekend, Xbox Live Gold can play Assassin’s Creed Odyssey, Sea of Thieves, and Smite for free.

    Starting now and ending on Sunday, March 22, at 11:59 PM PDT, Xbox Live Gold members can play Assassin’s Creed Odyssey, Sea of Thieves, and Smite for free. As OnMSFT reported yesterday, Ubisoft is offering already offering deep discount prices for Assassin’s Creed Odyssey on Xbox One. Sea of Thieves is already available for free for Xbox Game Pass Ultimate members and Smite has always been a free Xbox One game since its release, although an Xbox Live Gold account is required to play Smite.

    As usual, you can download the Xbox One games directly through Xbox.com or find them via the Microsoft Store on your Xbox One console. Here is a look at the price drops for all of the Assassin’s Creed Odyssey Editions on Xbox One.

    Assassin’s Creed: Odyssey

    Don’t have Xbox Live Gold or Xbox Game Pass Ultimate? Sign up using the links below.

    Xbox Live Gold
    Xbox Game Pass Ultimate

    What game will you play during this weekend’s Free Play Days on Xbox One? Let us know in the comments.

    Here’s how to use Snapchat Camera on Windows 10 to spice up your Microsoft Teams calls

    When you’re working from home you have to keep your environment professional for conference-calls with your boss and colleagues during important meetings, However, there are some ways Teams can help spice up the work from home life.

    You could use GIFS and memes when chatting with Teams, but there’s also Snapchat Camera. Here’s a guide on how you can use the Snapchat camera to add funny filters to your Teams calls and give your coworkers some good old laughs (via Stephanie Stimac/ Twitter.)

    Step 1: Download Snapchat Camera

    To get started, we’ll just give you a friendly reminder: Snapchat Camera isn’t intended for you to use during important meetings. It’s more of a way for you to spice up the private chats with your coworkers in Teams. After all, you don’t want to get fired!

    Anyway, the first step in this process is heading online and downloading Snapchat Camera. The Snapchat Camera is different from Snapchat on iOS and Android and is a separate app available on MacOS and Windows 10. It will run on basically any modern computer that has a webcam.  Once downloaded and configured, you’ll be able to use the app as an input method during your video conferencing call and select a filter for your face or background. Downloading is easy, and you’ll just need to follow the steps in the setup prompts.

    Step 2: Launch Snapchat Camera

    Once installed, you’ll need to launch Snapchat camera and keep it running in the background. On the first launch, you’ll get a guide on how it works. It’s simple, much like the Snapchat app on iOS and Android.

    On the top, you’ll see Featured filters, which are some of the most popular filters being used at the time. There are also various categories such as “Cute” “Funny” “Gaming” “Character” “WFH” and more. You can play with these as you see fit, and even transfer them to the Snapchat app on your phone by scanning the code that appears next to your image. Once you’ve found the filter you want to use, click it, and close the window to minimize Snapchat Camera.

    Step 3: Head into Microsoft Teams

    Finally, once you’ve chosen your favorite Snapchat filter, you can head back into Microsoft Teams. You’ll want to start your video call with your coworker. On the page where you choose your audio and video settings, you’ll want to click Custom Setup and then click check under the Camera section, choose Snap Camera. You can then see a preview of the filter, and then join your call as usual, with the filter overlayed on your face throughout.

    If this doesn’t work, you can try joining the call as usual, with the default settings. Then, once in your call. hover over the middle bottom part of the screen with your mouse, and those . . . more actions. You’ll then want to select Show Device Settings and look for the Camera section. Be sure to choose Snap Camera and then close the Device Settings window with the X on the top. You should see your filter overlayed on your face now.

    Have fun!

    Snap Camera is a great way to have fun, as the filters can be downright silly sometimes. But, it also can be used outside of Teams, too. If you’re a gamer, you can use Snap Camera when streaming on Mixer or Twitch and switch up different lenses when you’re playing different games. And, if you’re the artistic type, you also can create lenses with Snapchat’s Lens Studio app. The possibilities are endless, so let us know your thoughts in the comments below.


    How to use Microsoft Planner to keep track of tasks when working remotely

    Microsoft Planner is a Kanban-style task management system aimed at busy teams and remote workers. Planner can help you to organise, assign and track tasks when you can’t discuss them in-person.

    Planner work occurs in “plans” which are tied to Office 365 Groups. When you create a new plan, it will automatically create a new group (unless you add the plan to an existing group). The group exists like any other in Office 365 – it will have its own SharePoint site, OneNote notebook and other resources.

    Creating a Microsoft Planner plan

    This may sound complicated at first but it helps to power some of Planner’s advanced integrations. In daily use, you shouldn’t need to worry too much about the underlying group model. You can use the Planner interface to create plans and add users to them, without getting involved in Office 365 group management.

    Plans and tasks

    Log in to Planner at tasks.office.com and click “New plan” in the left navigation menu. Name your plan and choose whether to make it public or private. Public plans are automatically visible to everyone in your organisation.

    Screenshot of managing tasks in Microsoft Planner

    Tasks within plans are arranged into a columnar Kanban structure. They’re represented as vertical lists (“buckets”) of cards which are displayed horizontally across your screen. You can add as many buckets as you need.

    Screenshot of managing tasks in Microsoft Planner

    To create a task, click in any bucket and type a name for the task. Optionally, choose a due date and assign the task to a user. It’ll then show up as a task for them to complete.

    Screenshot of managing tasks in Microsoft Planner

    Once a task has been created, you can click it to expose more options. These include the ability to add notes, checklists, comments and attachments. You can also indicate a task’s priority and current progress.

    The right side of the pane lets you select from colour-coded labels to add to the task – these will show up on the card back on the board screen. Click any label to change its name. Labels help you to distinguish between different kinds of task.

    Using Planner

    There’s no set way to use the options which are available. For smaller teams, a simple setup may suffice, with “To do,” “Doing” and “Done” buckets. You can then drag task cards between the buckets to create a clear overview of progress.

    Screenshot of managing tasks in Microsoft Planner

    Larger teams with a higher volume of tasks may benefit from a more structured approach. Plans which represent a linear process may include a bucket for each stage of the process (such as “Design”, “Develop”, “Test” and “Release” for software development, or “Plan”, “Write”, “Edit”, “Review” for writing). You could then use the “Progress” option on cards to indicate the completion status.

    Screenshot of managing tasks in Microsoft Planner

    To get more insight into tasks, you can use Planner’s built-in analytics capabilities. Click the “Charts” tab at the top of the display to obtain a visual breakdown of your plan. This reports on task status, bucket and priority, so you can clearly see how work is progressing. The Schedule tab gives you a calendar view that lets you see when work is planned to be completed.

    This article has given you a high-level overview of Planner’s basic concepts. We have more detailed guides available on specific features, should you want to learn more. Planner excels at replacing in-office whiteboards covered with columns of sticky notes. You can get an at-a-glance view of your tasks, which keeps everybody informed even in distributed remote-working teams.

    Fix: Can’t Boot Windows 10/11 After Installing Ubuntu

    Most likely when you reinstalled your Ubuntu system on your Windows 10 device, you might have gotten some error messages when trying to boot into Windows 10 operating system.

    Although this issue is not very common, I will explain to all our readers how you can fix it and prevent it from happening in the future.

    The error message that you might get is this: No boot disk has been detected or the disk has failed.

    But you don’t need to be alarmed because, in the majority of cases, your disk is not broken.

    The first step you should take is to check if you can boot into Ubuntu. If you can, then it is a Windows 8 or a Windows 10 issue, and you can fix it by following the steps listed below.

    What can I do if Windows 10 won’t boot after Ubuntu install?

    1. Use diskpart

    1. Place a USB or a DVD in the Windows 10 device with Windows recovery media.
    2. Reboot the Windows device and you should get to the Advanced Options window.
    3. In the window that shows after the device boots from the USB or DVD, you will need to left click on Troubleshoot.
    4. After left-clicking on Troubleshoot, you will need to select the Advanced Options feature.
    5. Left-click on Command Prompt feature.
    6. The Windows 10 device will restart and then you need to choose your account to sign in.
    7. Now after Windows restarts, you will get to a black window which is the command prompt.
    8. In the command prompt window type diskpart.
    9. Hit Enter on the keyboard.
    10. Type in the following command sel disk 0.
    11. Hit Enter on the keyboard.
    12. In the command prompt type list vol
    13. Hit Enter on the keyboard.
    14. The EFI partition you have there should be a FAT32 partition.
      Note: Depending on what volume your EFI partition is you will have to follow the next steps accordingly
    15. We will take for example that the EFI partition is Volume 2.
    16. Now type in the command prompt window sel vol 2
    17. Hit Enter on the keyboard.
    18. Type in the command prompt window assign letter=a
    19. After you hit Enter you will get a message saying DisKPart successfully assigned the driver letter or mount point.
    20. Type in the command prompt exit.
    21. Hit Enter on the keyboard.
    22. Now you will still have the command prompt window in front of you but you will be take out of the DISKPART> feature.
    23. Type in the command prompt window cd /d a:EFIMicrosoftBoot
    24. Hit Enter on the keyboard.
    25. Type in the command prompt window bootrec /fixboot
    26. Hit Enter on the keyboard.
      Note: The bootrec /fixboot command will repair your selected drive.
    27. Now type in the command prompt window the following command ren BCD BCD.old
    28. Hit Enter on the keyboard.
    29. Type in the command prompt window bcdboot c:Windows /l en-us /s a: /f ALL
    30. Hit Enter on the keyboard.
    31. Remove the USB or DVD with the recovery media and try a reboot of the Windows 10 system.

    2. Additional solutions

    If the steps listed above did not solve your problem, here are some additional solutions that you can use:

    • Download and install Boot Repair. With the help of this tool, you can repair boot errors on dual-boot machines. You can use it when you can’t boot Ubuntu after installing Windows 10, or when you can’t start Windows 10 after installing Ubuntu.
    • Boot in UEFI Mode. If you don’t use this boot mode, you may experience various boot issues when launching your Windows 10 OS. Keep in mind that OEMs usually install Windows 10 in UEFI mode by default. If you install Ubuntu in legacy mode, you won’t be able to boot to Windows 10 simply because you installed the two operating systems under two different modes. Make sure that both operating systems are installed in UEFI mode so that you can boot both of them.

    After the restart, everything should be back to normal, and you should be able to boot into Windows with your Ubuntu still running.

    You may also remove Ubuntu from the dual-boot sequence in Windows 11.

    If you have any questions about fixing your Windows 10 after installing Ubuntu, use the comments below to let us know.

    FIX: Your Browser has Been Locked in Windows 10/11

    Using your Windows  10 and 11 devices on a daily basis, whether we are talking about business purposes or only for your own entertainment, implies certain risks, which are mainly related to viruses or malware infection.

    A malware infection can become quite annoying and dangerous as your access might be restricted and also you might lose your data, or someone else might access your private files.

    The same might happen when noticing the Your Browser has been Locked error.

    First, you might think that this is a system alert caused by your Windows 10 system, though things are more complicated than that.

    So, if you are prompted with the mentioned message, it means that your Windows 10/ Windows 11 / Windows 8 / Windows 8.1 device is dealing with malware.

    Therefore, you have to act quickly in order to remove all your infected files and for being able to protect your device along with your personal data, info, and accounts.

    Anyway, the most important thing is not to panic.

    You should be aware that you must remove the Your Browser has been Locked malware and also you shouldn’t download any kind of software that is recommended by the virus.

    Furthermore, don’t pay anything even if the FBI or other governmental institution is prompting you to take action in order to restore your computer.

    This is a scam and you shouldn’t spend your money in vain.

    Now that we have cleared out what is with the Your Browser has been Locked issue, you need to learn how to remove the same – check the guidelines from below in that matter and for obtaining further info.

    How do I fix Your browser has been locked issue in Windows 10?

    1. Run Malwarebytes Anti-Malware
    2. Install a tool that blocks browser hijackers
    3. Install Windows Defender Browser Protection

    1. Run Malwarebytes Anti-Malware

    1. First of all, run Task Manager on your Windows 10device (you can launch Task Manager by using the Ctrl + Alt + Del sequence of keyboard keys).
    2. From Task Manager navigate through Processes tab.task manager
    3. From the bottom of the window select Show processes for all users.
    4. Now end all your processes that are related to your infected web browser.
    5. At this point your web browser window will be closed, so you can now remove the malware.
    6. First, download the free distributed Malwarebytes Anti-Malware tool on your computer – you can get it from here.
    7. Install the antimalware software on your computer by following the on-screen prompts.malwarebytes
    8. From the main window of Malwarebytes Anti-Malware select perform full scan and then click on Scan.
    9. Do note that the scan process might take a couple of minutes so be patient and don’t end the scan sequence.malwarebytes scan
    10. In the end, select the show results option; select all the infected files and click on Remove Selected.remove malware
    11. In the end, reboot your device and launch the Malwarebytes Anti-Malware software once more; this time choose the quick scan option and check if you have removed the Your Browser has been Locked from your Windows 10, 8 / Windows 8.1 machine.

    2. Install a tool that blocks browser hijackers

    To prevent similar events in the future, we recommend you install a reliable anti-browser hijacker.

    We already published a list of the best anti browser hijackers that you can install on your Windows 10 computer, so make sure to check it out.

    3. Install Windows Defender Browser Protection

    There are many security extensions that you can install on your browser to secure your browsing session.

    For example, the Windows Defender browser extension is one of the best tools that you can get on your computer.

    The tool protects you against a wide variety of online threats including phishing attempts and specially crafted websites that try to trick you into downloading malicious software.

    In other to prevent these situations in the future, make sure that your device is being protected against malware and virus infection.

    In that matter use strong and up-to-date antivirus and antimalware programs that offer real-time web browsing protection.

    If you have further or similar problems on your Windows-based device, don’t hesitate and use the comments field from below for talking with us.

    Of course, we will assist you as soon as possible with compatible troubleshoot solutions, just like the above-described one.

    FIX: Startup folder not working in Windows 10/11

    The most common problem with startup programs is that they tend to bloat your system and slow down the startup process.

    The dozens of programs in combination with an old HDD mean that you’ll wait for some time until the PC finally boots.

    However, there’s also the opposite of it – when programs in Windows Startup folder just won’t start no matter what you do.

    For the sake of dealing with this annoyance, we prepared an in-depth list that should provide you with enough resources to address this problem.

    In case you’re trying to make a program start with the system without success, make sure to take a look below.

    What can I do when programs from Startup folder won’t start?

    1: Check the Startup manager

    Back in the days, you had to turn to System Configuration in order to tweak the startup programs. There were all Windows services, too, so there are a lot of things you couldn’t touch.

    A tad overcomplicated for a standard user. Others turned to third-party tools that were more of a bloatware than the solution. Luckily, that’s not the case with Windows 10.

    Now, you can navigate to good old Task Manager and find all startup programs you need.

    You can enable or disable any of them based on your needs.

    This might seem like a simple solution, but it’s worth starting from the simplest one and gradually advancing to more complex solutions in the troubleshooting procedure.

    If you’re not sure how to use newly added Startup manager in Windows 10, follow the instructions below:

    1. Press Ctrl + Shift + Esc to open Task Manager.
    2. Open the Startup tab.startup folder windows 10 not working
    3. Select the programs you want to start with the system and enable them.
    4. Confirm changes and restart your PC.

    2: Reinstall the program

    After every installation, the program or application should automatically create a shortcut in the system’s startup folder.

    However, sometimes and for no apparent reason, the installation sequence simply skips on doing so.

    Even though the way of manipulating startup programs changed, the containing folder is still there with Windows 10. And it still needs those shortcuts to run as intended.


    You might also be interested in our guide on how to reinstall Windows Store apps in Windows 10


    What you should do in this scenario is to try to repair the installation or reinstall the program.

    Most programs offer the Repair option, but even the reinstallation shouldn’t take too much of your time, with only the largest ones being an exception.

    Here’s how to repair or reinstall the troubling program and, hopefully, enable it to create a startup entry:

    1. In the Windows Search bar, type Control and open Control Panel.
    2. In the Category View, open Uninstall a program.
    3. Navigate to a problem that refuses to start with the system, right-click on it, and choose Uninstall.
    4. Navigate to Program files or Program files (86) and delete the remainings in folders.
    5. Also, you can use a third-party cleaner like CCleaner to delete the remaining traces stored in the registry.
    6. Run the installer and install the program again.

    3: Run DISM

    Most of the steps we provided in this article relate to third-party programs. However, if some of the Windows-native applications won’t run at the startup, there’s an alternative way to address this.

    We’re referring to DISM or Deployment Image Servicing and Management tool.

    This tool can come in handy for various system-related issues, and since you’re unable to reinstall the, let’s say Task Manager, you can at least restart it with the little help of DISM.

    If you’re not confident running this tool, we made sure to present you two ways it can be used in Windows 10. Follow the instructions below:

    1. Type cmd in the Windows search bar, right-click on the Command Prompt and run it as an administrator.
    2. In the command line, type the following line and press Enter:
      • DISM /online /Cleanup-Image / ScanHealth
      • DISM /Online /Cleanup-Image /RestoreHealth
    3. Wait for the procedure to finish (it might take up to 10 minutes) and restart your PC.

    And here’s the alternative way to run DISM:

    1. Mount your Windows 10 installation media, either USB or ISO DVD.
    2. Open Command Prompt (already explained how to above).
    3. In the command line, type the following commands and press Enter after each:
      • DISM /online /Cleanup-Image /CheckHealth
    4. If there’s not any single error, enter this command and press Enter:
      • DISM /online /Cleanup-Image / ScanHealth
    5. If DISM finds any errors, enter the following commands and tap Enter:
      • DISM /Online /Cleanup-Image /RestoreHealth /Source:repairSource\install.wim
    6. Have in mind that you’ll need to replace the ”repair source” part with your installation media.
    7. Wait for the procedure to end and restart your PC.

    Although this is should help you with the majority of issues, it may not be the final solution for your issue. If that’s the case, make sure to continue with the steps we provided below.

    4: Insert the shortcut manually

    Now, the fact that you can’t locate the Startup folder in the Start menu like before, doesn’t mean that you can’t find it at all. It’s still there in Windows 10, hidden from the prying eyes.

    Now, we already informed you about automatically created shortcuts that are made just after the installation process is finished.

    However, since that’s not always the case, you’ll need to take the matters into your own hands and create the shortcut on your own.

    This shouldn’t be too much of a problem if you follow these instructions closely:

    1. Navigate to the installation folder of the troublesome program.
    2. Right-click on the exe file (program’s main executable) and create a shortcut.
    3. Press Windows + R to open the elevated Run command line.
    4. In the command line type to open the Startup folder:
      • shell:startup
    5. Copy the shortcut and paste it into the Startup folder.
    6. Restart your PC and look for changes.

    5: Create a batch file

    Another possible solution also requires a manual approach. Namely, you can create a batch file and force a program to start with the system.

    You’ll still be prompted with UAC message informing you about the program at every startup, nonetheless. But, đ at least you’ll be able to make it work.

    Some users advised this as the best workaround for the current state, at least until the problem is dealt with formally in the future.

    Here’s how to create and run the batch file that enables you to run any program at the startup:

    1. Right-click on the desktop and open New > Text document.
    2. In the document, paste the following lines but don’t forget to change the example with the path to the program’s exe file.
      • @echo off

        C:\Program Files\DAEMON Tools Lite\DTLauncher.exe

        exit

    3. After that, click on the File > Save as, and change the document’s extension to .bat instead of .txt.
    4. Close the document and double-click on it to run it.
    5. After the system starts next time, the program should start. Although, you’ll be prompted with UAC message.

    6: Force the elevated program with Task Scheduler

    The Task Scheduler is a built-in tool that enables you to create, schedule and run various tasks with the implementation of triggers and criteria you set.

    This, obviously, means that you can set an EXE file to run with the system startup, setting At Startup as criteria or trigger.

    If you never had a chance to use Task Scheduler to force a program to start with the system, make sure to follow these steps and we should be good to go:

    1. In the Windows Search bar, type taskschd and open Task Scheduler.startup folder windows 10 not working
    2. Expand Task Scheduler Library and click on Create Task under the right pane.
    3. Under the General tab, name the Task same as the program you’ll try to run. In this case, we’ve chosen DeamonTools for a showcase.
    4. Check the Run with highest privileges box.
    5. Select Windows 10 from the ”Configure for” drop-down menu and open the Actions tab.startup folder windows 10 not working
    6. Under the Actions tab, click New.
    7. From the Action drop-down menu, select Start a program.
    8. In the Program/script field, paste the following command:
      • %windir%\System32\cmd.exe
    9. In the ”Add arguments (optional)” section, add the Task name and the path to the program’s EXE file (installation folder) in this manner:
      • /c start Task Name Full Path of Programstartup folder windows 10 not working
    10. Don’t forget to replace the Task name and Full path to program’s EXE file above.
    11. Now, finally press OK to confirm changes and you should be able to see the newly-created task.
    12. Now press Windows + R to open the elevated Run command line.
    13. In the command line type to open the Startup folder:
      • shell:startup
    14. Copy the program’s shortcut and paste it into the Startup folder.
    15. Right-click on the empty space in the folder and click New > Shortcut.
    16. In the empty field, type the following line and click Next:
      • schtasks /run /tn “Task Name”startup folder windows 10 not working
    17. Don’t forget to change the task name with the name of your actual task we just created. In our case, DeamonTools.
    18. On the next screen, name the shortcut as the program is named. In our case DeamonTools Lite.
    19. The last thing is to right-click on the newly-created shortcut, open Properties > Shortcut, and change the icon.

    7: Disable UAC

    User Account Control or UAC is one of those security measures that are certainly helpful to some extent but can become bothersome over time.

    Especially if a certain program requires administrative permissions in order to run. By default, UAC will block these kinds of programs on startup, so the only thing that comes to our mind is to disable it completely.

    Now, have in mind that this can affect security and overall performance of the system, and it’s highly unadvised to turn UAC off.

    I’ve always turned it Off on Windows 7 for various reasons, but it seems that the drawbacks are higher when it comes to Windows 10.

    If you’re not sure how to disable User Account Control in Windows 10, follow the instructions below:

    1. Type UAC in the Search bar and open Change User Account Control settings.
    2. Move the slider to the bottom and confirm changes.startup folder windows 10 not working
    3. This should stop further prompts and enable you to start some of the troubled programs.

    We don’t advise you to keep this setup permanently since it can affect the performance of Windows Firewall and other related security features. It might not, but it’s always better to be safe than sorry.

    8: Edit registry

    Mostly everything that you do within the Windows interface can be taken to a higher authority, which is Registry.

    As you probably know, Windows Registry keeps all low-level settings of both system and third-party processes that appear in everyday use.

    That makes it quite dangerous, so make sure not to meddle with registry inputs if you’re not 100% sure what you’re doing.

    Nonetheless, with a careful approach, you should be able to easily force certain programs into starting with the system from the Registry Editor.

    Make sure to follow the steps below closely and we should be good to go:

    1. In the Windows Search bar, type regedit, and open Registry editor.
    2. Open the File option and create a backup of your current registry state.
    3. Follow this path:
      • HKEY_LOCAL_MACHINE\Software\Microsoft\Windows\CurrentVersion\Run
    4. Right-click on the empty space and choose New > String value.
    5. Name value exactly as the program you want to run is named.
    6. Right-click on the newly-created value and choose Modify.
    7. In the Value data field, paste the exact path of the program’s EXE file (including the exe file, like all the above-enlisted programs).
    8. Save changes and restart your PC.

    9: Reset this PC

    Finally, if you’ve reached the brink of your nerves and the system just won’t comply, the only remaining solutions we can offer is to start from a scratch.

    We won’t go as far as to recommend a clean reinstallation, and luckily, with Windows 10 you don’t need it. What you can do is to check for the recovery options and use Reset this PC.

    Restoring the system to its default values should be the final resort, but also it can help.

    In addition, you get to keep your files without losing any important data in the process. If you’re up for the task, follow the instructions below:

    1. Press Windows key +I to open Settings.
    2. Open Update & security.
    3. Select Recovery from the left pane.
    4. Click on Reset this PC and then on Get started.

    That should do it. In case you have anything to add to our list of solutions, make sure to do so in the comments section below.

    New secured-core PCs to thwart RobbinHood attacks

    Microsoft has provided detailed information about secured-core computers—a new class of devices with built-in fortification against cybersecurity threats.

    The company has been developing the fortified Windows 10 PCs jointly with its OEM partners. It is talking up a new chip-to-cloud strategy that provides multi-level system protection.

    RobbinHood malware attacks

    Secured-core PCs come with defenses against the RobbinHood malware (and other threats) enabled out of the box.

    Such a threat may prevent you from accessing your computer or data. Also, an attacker can use it to ask for a specific amount of money as a precondition for releasing your system.

    Baltimore’s government suffered a similar breach of cybersecurity last year after hackers seized part of the city’s information technology system.

    In a typical RobbinHood attack, the malware targets your operating system’s kernel. From there, it can execute the lowest-level and most sensitive functions of the OS.

    The ransomware contains multiple files, one of which can give an attacker elevated kernel privileges. Once this happens, the intruder may disable kernel-mode driver signing and validation.

    That breach paves the way for the loading of a malicious driver with kernel-level privileges like turning off security features or tools.

    That is why Microsoft is proposing a multifaceted approach to protecting the kernel. The strategy would involve building cybersecurity into the PC’s chip, OS, and the cloud.

    Guarding against kernel attack

    With secured-core devices, Hypervisor-protected code integrity (HVCI) verifies each driver that loads into the kernel. It makes it difficult for RobbinHood malware to introduce and run an unsigned driver in the kernel.

    Secured-core PCs are the latest hardware to provide driver control out of the box, with baseline configuration already set. Driver control is provided by a combination of HVCI & Windows Defender Application Control (WDAC) technologies.

    Additionally, these fortified devices come with built-in defenses against the execution of unverified code.

    Microsoft also talked about Kernel Data Protection (KDP), an upcoming Windows 10 feature. Its purpose is to prevent the illegal manipulation of kernel memory and data.

    Why hardware-backed security makes sense

    There are several ways to handle different types of ransomware in Windows 10. However, you can boost your PC’s security with hardware-backed defenses because these are not just OS-focused.

    Likewise, even with all the technical cybersecurity features at your disposal, you may be unable to match them with the right hardware profile.

    Also, getting the BIOS and OS settings right for optimal protection can be tricky sometimes.

    It will be interesting to see how secured-core devices stack up against persistent remote code execution (RCE) cybersecurity threats.

    Windows 10 build 19587 changes how unmute audio works

    Fast ring insiders have something fresh to explore today after Microsoft shipped out Windows 10 Insider Preview Build 19587.

    For the most part, the latest build comprises numerous fixes.

    It brings a couple of enhancements too, one of which touches on how to unmute volume. The other improves Narrator controls in Windows 10.

    What is new in build 19587?

    With this Windows 10 update, you have to raise the volume on your PC to unmute sound. The audio will not unmute using your physical keyboard’s media keys unless you do this.

    There is also some good news for those who rely on the Narrator screen-reading application to navigate or use Windows 10 software. Since the tool lets you pick your default audio device, it makes sense that Microsoft is updating it to make the selection process as smooth as possible.

    So, when you go to the volume flyout to pick your favorite playback device, the app will be describing the audio output using a more user-friendly string.

    Similarly, adding new devices is now much easier for Narrator users. The app provides you with more information so you can have meaningful interactions, such as with the Add Bluetooth dialog within the Settings app.

    Some of the problems this update fixes are:

    • Crashing of the Default Apps page in Settings when you attempted to alter defaults.
    • Inability to open some files in win32 apps from File Explorer. This issue affected files with very long paths that contained East Asian characters.
    • The failure to produce thumbnails for images inside a Work Folder.

    There are pending issues too, including:

    ARM PCs

    Fast ring insiders using ARM devices will not get Windows 10 build 19587 for the time being. Microsoft said that the update is triggering a bug check in those machines.

    BattlEye incompatibility

    It appears that Microsoft has not yet solved the incompatibility issues that prevent some preview builds from installing on machines with BattlEye. As such, if you have the anti-cheat software on your PC, you cannot upgrade to build 19587 for now.

    The GSoD error

    Some insiders are reporting the green screen of death (GSoD) when installing this build.

    Microsoft is suggesting a workaround in case you experience this error when restarting your machine to install the update.

    “If this happens, log in, schedule a time for the update to install, and then log off all user profiles before the scheduled install time. The install will then proceed as expected.”

    It is not clear if the proposed solution works for all affected Windows 10 users.

    FIX: Microsoft Teams mailbox does not exist

    Microsoft TeamsMicrosoft Teams is a popular hub for teamwork in Office 365. Microsoft Teams’ mailbox allows the users to receive and send emails directly from the MT interface.

    However, some users have reported that they are unable to view their mailbox in the Calendar tab as it shows Microsoft Teams error: Mailbox does not exist.

    There are multiple instances of this error occurring to other users as seen in the Microsoft Tech community.

    I configured Office 365 Hybrid ( sync users, configure exchange hybrid, configure federated domains( contoso.com, fabrikam.com) , all settings is ok. But when i log in my teams(with my —-“[email protected]”  credentials) on calendar tab i have an error  mailbox does not exist

    Follow the troubleshooting tips in this article to resolve the “Microsoft Teams error Mailbox does not exist” issue.

    How to fix Microsoft Teams error mailbox does not exist

    1. Verify OAuth Configuration

    Microsoft Teams error Mailbox does not exist
    The first thing you should do is to check the OAuth settings. You can test it using the Test-OAuthConnectivity cmdlet. You can learn more about using Test-OAuthConnectivity Cmdlet in the official forum.

    However, for a quick guide, you can use the following PowerShell command to verify the authentication.

    1. Right-click on Start and select PowerShell (Admin).
    2. In the PowerShell command window type the following command and hit enter to execute.
      Test-OAuthConnectivity -Service EWS -TargetUri https://outlook.office365.com/ews/exchange.asmx -Mailbox <On-Premises Mailbox> -Verbose | Format-List
    3. Make sure you change the required user authentication details from the above command.

    Microsoft Teams might make its way to Linux in the future


    2. Manually Return the Job and Contact Support

    Microsoft Teams error Mailbox does not exist
    If the issue persists, you can try to manually return the job as a workaround.

    Although this is not an ideal solution or not even a solution, if the issue is at the Microsoft Team’s end, you may need to do it manually.

    Several users have reported that the Microsoft Teams error Mailbox does not exist error resolved itself automatically after a few days.

    Make sure you contact the support in the meantime to let the Microsoft Teams developers know about the issue.


    3. Reinstall Microsoft Teams

    Microsoft Teams error Mailbox does not exist
    If the issue persists, you may want to uninstall and reinstall Microsoft Team.

    1. Press Windows Key + R to open Run.
    2. Type control and click OK to open Control Panel.
    3. Go to Programs > Programs and Features.The Programs and Features
    4. Select Microsoft Teams and click on Uninstall.
    5. Next, select Teams Machine Wide Installer and click on Uninstall.
    6. Reboot the computer after the uninstalling process is done.
    7. Download and install Microsoft Teams from the website again and check for any improvements.
    1. Go to Outlook and select your profile
    2. Go to More Settings and then the Advanced tab
    3. Click on Add to add your shared Microsoft Teams email address
    4. Hit OK and the mailbox will be visible in the left-hand pane
    • Can a shared mailbox send emails?

    Shared mailboxes can send emails without any problem. However, there is no information about the individual user sending the message as the common email address is listed in the sender field.

    [wl_navigator]

    Fix Microsoft Teams file unknown errors using these methods

    Microsoft Teams allows the app users to share PDF documents and other files from their SharePoint library with other users using the Add Cloud Storage option.

    However, some users have reported getting the annoying Microsoft Teams file unknown error while trying to share their files. You can find several users complaining of similar issues in the Microsoft Teams forum.

    I have a PDF document in a SharePoint library.
    I linked the SharePoint library to Teams using the “Add Cloud Storage” under the files tab.
    then linked to the PDF document in a post in the channel (using the browse for attachment option where I navigated into the now linked SharePoint library folder to select my PDF).
    Clicking the file causes it to try to render within Microsoft teams and shows an “Unknown Error” message.

    If you are also troubled by this error, here is how to fix Microsoft teams file unknown error in Windows computer.

    How to fix Microsoft teams file unknown error

    1. Sign Out and Restart Teams

    Microsoft teams file unknown error

    1. If you haven’t already, try to sign out of Microsoft Teams and restart the app.
    2. If it is a temporary cache related issues, a quick sign out and relaunch should help you resolve the error.
    3. Make sure you sign out of Team before you close the app.
    4. If the issue persists, keep the app closed for a few minutes and relaunch it again.

    2. Add Files from Conversation 

    Microsoft teams file unknown error

    1. Some users have reported a workaround where the user needs to upload the file from the Conversation.
    2. When uploading the file, a folder labeled General will be added. However, if you mess with the auto-generated file names, you may end up with Microsoft teams file unknown error.
    3. So make sure you upload the files as it is without making any changes to the file names.

    3. Open Files with Online Option 

    1. If the issue persists, try to open the file with Online feature.
    2. Click the “…” on the message and select Open Online.
    3. This should open the file in the Microsoft Teams web client.
    4. Although this a workaround, you should be able to access the file until a proper fix is found.

    4. Contact Support and Online Community 

    Microsoft teams file unknown error

    1. The Microsoft Teams community is very active and more than happy to help fellow Team users.
    2. You can reach out Microsoft Team Community forum online to get help.
    3. You can also contact Microsoft Team support using the app or the web client.

    5. Reinstall Microsoft Teams

    1. If the issue persists, the support may ask you to reinstall the Microsoft Teams desktop client again.
    2. At times, file corruption or any issues with the system files can affect the functionality of the app.
    3. Uninstall Microsoft Teams if necessary and reinstall the latest version from the official website.

    There does not seem to be any conclusive solution to Microsoft teams file unknown error. However, you can follow the troubleshooting tips in this article to resolve the issue.

    [wl_navigator]

    Fix: Ask Your Admin to Enable Microsoft Teams

    Microsoft Teams is a popular productivity software that offers a shared workspace to chat, meet, share files, and work with business apps.

    However, Microsoft Teams users reported a rather unusual Microsoft Teams error you’re missing out! Ask your admin to enable Microsoft Teams while trying to log in to the app.

    If you are also troubled by this error, here are a couple of troubleshooting tips to help you resolve this error on your Windows computer.

    How to fix Microsoft Teams error you’re missing out?

    1. Assign License for Microsoft Teams

    Microsoft Teams error you're missing out


    If you are the Office 365 Admin, you can assign a license for Microsoft Teams to one of your team members. Here is how to do it.

    1. Go to Office 365 Admin Center.
    2. Click on Users and select Active Users.
    3. Select the user and click on Edit for Product License.
    4. Check the Microsoft Teams box for the selected user.
    5. Now, ask the affected user to log in to their Microsoft Teams app and check if the Microsoft Teams error you’re missing out on is resolved.

    2. Enable Guest Access

    Microsoft Teams error you're missing out


    Suppose you are using Microsoft Teams in an education institution. In that case, you may want to enable Guest Access in your tenant before the student can access the Microsoft Teams dashboard without getting the Microsoft Teams error you’re missing out.

    1. First sign in to your Microsoft Office 365 with your admin account.
    2. From the Dashboard, go to Settings > Services & add-in.
    3. Click on Microsoft Teams.
    4. From the top-right corner, click the drop-down menu under the section Setting by user/license type.
    5. Select Guest from Business and Enterprise.
    6. Enable Microsoft Teams by toggling the On switch.
    7. Click Save to save the changes.
    8. Now ask your student to access the Microsoft Teams app and check for any improvements.

    3. Clear Local Cache

    Microsoft Teams error you're missing out


    Cleaning the Microsoft Teams app Local Cache can help you resolve the error. Here is how to do it.

    1. Open File Explorer app.
    2. Navigate to the following location:
      %appdata%MicrosoftteamsApplication cacheCache
    3. Delete all the files in this folder. If UAC asks for confirmation, click on Yes.
    4. After that, navigate to the following location:
      %appdata%MicrosoftteamsCache
    5. Delete all the files in this folder as well.
    6. Reboot the system and launch the Microsoft Teams desktop app. Try to sign in and check if the error is resolved.

    By following the steps in this article you can resolve the Microsoft Teams error you’re missing out issue.

    1. Go to the Office 365 Admin Center and select Settings
    2. Then click on Services & Add-Ins option
    3. Now, select Microsoft Teams, and the settings pane will appear on the screen
    • How do I get my Microsoft Teams administrator certification?

    To become a Microsoft Teams administrator, you must become Microsoft 365 certified. Teams is now part of the Office 365 Suite, and having the Microsoft 365 certifications qualifies you for a job as a Microsoft Teams admin.

    Even more, enabling Microsoft Teams Meeting Recommendations in the Start Menu is now possible, so take a closer look at our dedicated guide. And you can also quickly learn how to enable Microsoft Teams Together Mode.

    Keep in mind that this isn’t the only issue you can encounter, and many reported that the Microsoft Teams vertical scroll bar missing, but we covered that in a separate guide.