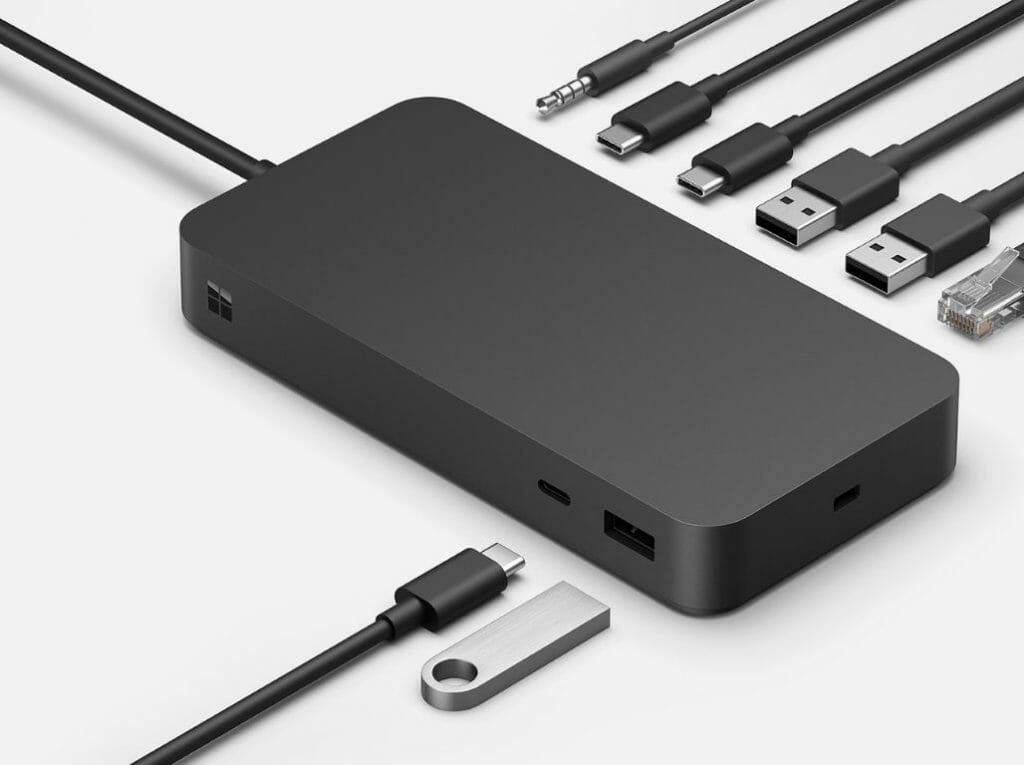
It was presumed that the device would go under Microsoft Surface Dock 3, but this is not the case. Instead, Microsoft decided to take an entirely different approach. The new entry “extends the support of Thunderbolt 4 connectivity in Surface Pro 9, Surface Laptop 5, and Surface Laptop Studio.”
Microsoft has indicated that Surface Thunderbolt 4 Dock will allow users to transfer their data at high speeds of up to 40Gbps and maximize their workspace. Additionally, with Thunderbolt support more users can make use of the device compared to previous models that shipped with a magnetic Surface Connector adapter limiting it to Surface devices only.
Additionally, Microsoft has also ascertained its commitment to ensuring that the same standards delivered by previous models are translated to the Surface Thunderbolt 4 Dock in terms of security, sustainability, and accessibility.
According to Microsoft the entry ships with three USB-C ports, three USB-A ports, a 3.5mm audio jack, a 2.5 Gigabit Ethernet port, and a security lock slot. It should be noted that you’ll not be able to charge your Surface device or any device for that matter using the USB-C port for anything above 15W.
Microsoft added that:
Windows 11 also ensures that settings are retained when connecting, so even if multiple devices use the same dock, each of them will have the display and connection settings that let them get right to work.
The dock features ports both at the front and back for easy access. What’s more, the ports at the back ship with raised tactile indicators. Microsoft also reaffirmed its commitment to sustainability and used recycled materials while assembling the new dock.
“Surface Thunderbolt 4 Dock improves IT efficiency for commercial customers, with features like Firmware Update through Windows Update, Wake on LAN from Modern Standby, and MAC Address Passthrough,” said the company in the blog post.
Warner Bros. is reportedly trying to ink a deal to make a television adaptation of J.K. Rowling’s Harry Potter books. To be clear, this is not to be confused with the recently reported HBO adaptation of the video game Hogwarts Legacy, which itself is based in the Harry Potter universe.
Hogwarts Legacy video game.
This adaptation of the books is also headed for HBO Max presuming the deal goes through (HBO became part of WarnerMedia Studios & Networks after last year’s merger between WarnerMedia and Discovery). Apparently the project will consist of episodic installments based on each of the books, with one book per season.
The news, which was first reported by Bloomberg, comes as other big fantasy book franchises continue to see small screen success with adaptations like Amazon’s House of the Dragon and The Lord of the Rings: The Rings of Power, as well as Netflix’ The Witcher.
2023 Update😕 Having established that Opera was off to go a good start last year, we become even more curious about its evolution throughout 2022, beyond the first quarter. Not so long ago we were wondering if Opera’s rankings and rating will manage to pull off the seemingly impossible and touch the company’s ambitious financial milestones. It turns out, they aced every single target from revenue growth to consumers’ database and everything in between. So, if you’re interested in browser statistics for 2022, and Opera in particular, get ready for an up-to-date comprehensive view of Opera browser ranking, rating, popularity, and a glimpse of what’s to come.
Opera browser revenue & statistics 2022 (4th quarter & full year consolidated financial results)
No more wondering – Opera did it! It not only met the forecasted numbers but even exceeded expectations with an overall 32% revenue growth for the year 2022.
That alone is an impressive achievement if we think about the global economical context dominated by high inflation rates and a lack of predictability across industries and sectors.
As far as the last quarter of 2022 is concerned, we also see a steady (but equally impressive) year-over-year revenue growth of 33%, bringing the yearly figure to $96.3 million.
Opera browser 2023 – What’s in store?
→ The company’s initial estimations place Opera’s 2023 revenue anywhere between $370 and $390 million. Will they bust the records again? We’ll just have to wait and see. (? To be continued…)
→ Another interesting step in Opera’s planned 2023 roadmap is the integration of AI-generated content into its flagship products.
As a true pioneer that’s been constantly at the forefront of web development and innovation, Opera takes a giant step and adds generative AI capabilities such as smart AI prompts and GPT-based chatbot services integrated directly into the sidebar. ? Fun times, right?
Opera
Get to know the cutting-edge tech that’s always on par with your needs – it’s free & always will be free.
Pretty much everyone has heard about Opera by now, considering the gigantic growth that the browser had over these last few years.
It is currently among the top browsers in the world, with over 350 million active users recorded right before the end of 2021, and is also one of the safest and most private browsers out there.
What Are Opera’s 1st Q Results For 2022?
The company behind this masterpiece, Opera Ltd., recently announced its unaudited consolidated financial results for the first quarter of 2022, which ended on March 31.
Opera’s co-CEO Song Lin confirmed that Opera’s performance in 2022 is off to a great start, stating that the results are ahead of expectations in terms of product portfolio, monetization, and financial results.
Opera officials also mentioned that due to earlier-than-expected core revenue generation, the company has actually exceeded the top of its guidance range for both revenue and adjusted EBITDA.
However, we’re sure that you want more details about this, so we are about to take a more in-depth look at these numbers for a better understanding.
According to the report, core search and advertising revenue have increased by 41% in this first quarter, thanks to a strong ARPU trend for the browser and news user base.
This is also based on Opera’s strong advertiser demand that goes beyond its inventory, through the Opera advertising platform.
The Opera browser actually had an average monthly active user base of 339 million monthly active users in this first quarter.
Available information points out that user growth was strongest in the US, with North America recording a 15% increase, followed by South America with 10%.
There’s also an Opera GX gaming browser, as we all know, which had over 16 million monthly active users across PC and mobile in the first quarter.
These stats represent a continued healthy trajectory with 14% sequential growth compared to the previous quarter.
Opera Ltd. also sold its minority stake in Nanobank and Star X, a transaction that represents cash proceeds of $211 million receivable without contingencies.
It’s important to stress the fact that the second sale, out of the above-mentioned ones, took place after the end of the quarter.
Furthermore, $182 million in cash and marketable securities at the end of Q1 were also present in the report, with the mention that the company continues to hold our 6.44% stake in OPay.
And, during the first quarter of 2022, Opera Ltd. proceeded to repurchase 569 thousand ADS at an average price of $5.33.
The total value of the ads amounted to $3 million while leaving $47 million remaining under the current buyback authorization.
Not to mention that the company provided support for most of the major blockchain ecosystems in Opera Wallet, and it released a beta version for the Opera Web3 browser.
What expectations are there for the rest of 2022?
Since the first-quarter results were impressive, expectations are clearly high for the rest of the year.
In fact, Opera is expecting a revenue of $300-$310 million for the rest of 2022 which, judging from the present numbers, is totally doable.
To be more exact, this actually represents an increase of 22%/midpoint, and of course an adjusted EBITDA somewhere between $50-$60 million/midpoint.
As far as the second quarter of 2022 goes, Opera Ltd. predicts revenue of $71-$74 million. Any person that is good with numbers can tell that that is a 21% year-over-year growth/midpoint.
For the second quarter, the adjusted EBITDA is expected to be situated between $8-$12 million, which is no more than a 14% margin at the midpoint.
These numbers are completely realistic and Opera totally has the resources and knowledge to pull this off, so it will be interesting to observe.
What is your first impression of the first quarter numbers presented by Opera Ltd. for 2022? Share your thoughts with us in the comments section below.
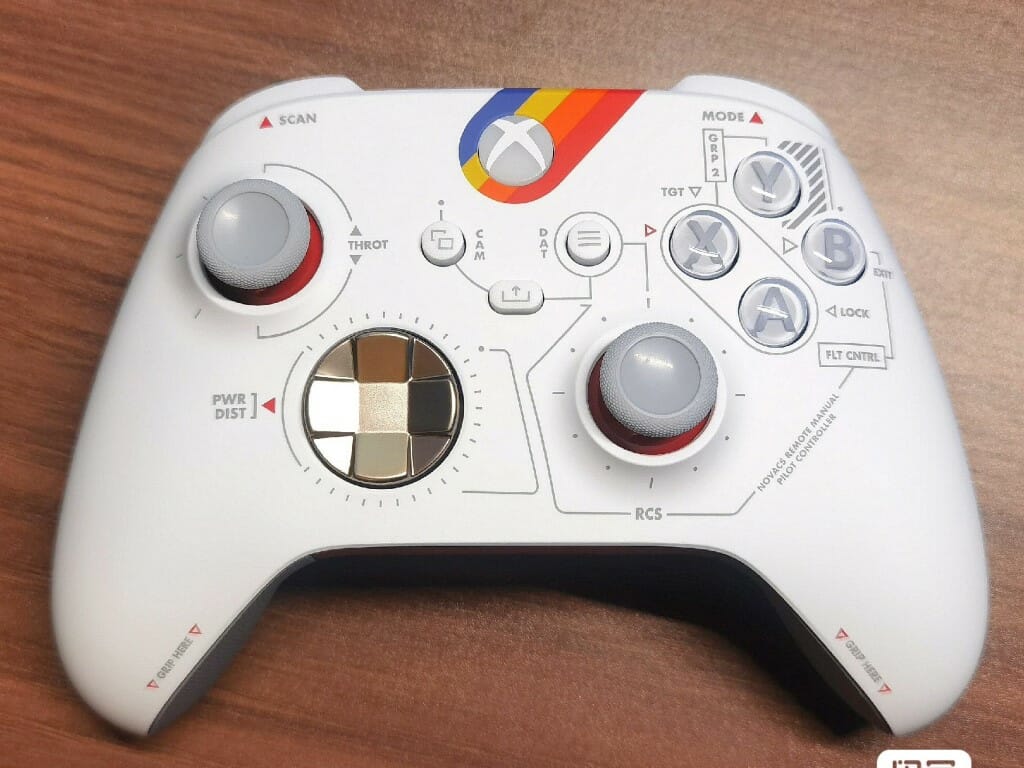
These images can also be seen over on Imgur. Here’s hoping it’s real, because the controller looks positively slick. Until we see more of this supposedly official Xbox product it’s probably best to take this “leak” with a grain of salt. The source of the images remains uncertain, with the poster simply stating that the pics “came from the Chinese internet.”
As for Starfield itself, the game is still set to release on September 6, 2023 after years of anticipation. Before that, we’ll be treated to a Starfield Direct showcase on June 11. An epic space role playing adventure from Bethesda, Starfield will likely be one of the biggest game releases of 2023. Expectations for the game are, if you’ll excuse the pun, stratospheric.
What do you think of this custom Starfield Xbox controller? If it is indeed real, will you be getting one? Or do you suppose it might come bundled with the game’ physical release, perhaps in a special edition along with a similarly themed custom Xbox console? Now that would be exciting!
In today’s world, it is essential to keep your PC updated, not only regarding the latest updates and drivers but also with the latest antivirus tools. While Windows OS comes built-in with Windows Defender, people still prefer opting for a third-party antivirus tool such as Norton.
Norton has been in the business for as long as you can remember talking about computers. This guide will give you a complete and comprehensive Windows Defender Vs Norton differentiation. Let us get right into this guide and get rid of the confusion.
What is Windows Defender?
When installing Windows OS on your PC, the first thing you should turn on is the Windows Defender.
As the name suggests, Windows Defender protects your PC from viruses and malware. It was introduced as a built-in tool with Windows Vista OS and has stuck with the OS since then.
Previously, it was available as a downloadable program in 2001 for Windows XP systems. It then replaced Microsoft Security Essentials in Windows 8 and evolved into Windows Defender.
It provides real-time protection against threats. Also, the SmartScreen feature will warn you if you visit a malicious website.
Installing Windows Defender separately is unnecessary as it comes pre-installed with Windows OS. Some of the notable features of Windows Defender include backing up files to OneDrive, parental control settings, tracking prevention, and more.
Here are some of the notable features of Windows Defender:
It is available as a built-in tool, free of cost.
Regularly updated with malware database.
Real-time threat protection.
Parental control settings.
Firewall and network protection.
Protection against fishing websites.
What is Norton Antivirus?
Norton antivirus is a name that almost goes hand-in-hand with PCs. It is a brand that has been around in this space since 1991.
It started as an antivirus and anti-malware software and later expanded into a proper internet security package known as Norton 360.
Norton antivirus protects your PC from viruses, spyware, worms, trojans, and other threats that could cause harm to your PC.
Also, Norton protects you when you visit malicious websites, download files, or open email. Norton gets updated timely so that it remains up to date with the latest threats.
Norton acquired LifeLock identity protection in 2017 and changed its name to Norton Lifelock. The latest acquisition of Norton Lifelock is with Avast Antivirus in 2021.
Some of the highlighting features of Norton antivirus include:
It comes with a built-in tool for banking and payment protection.
Receive antivirus database updates regularly.
Norton is updated regularly with an antivirus database.
Offers parental control features.
Comes with parental control features.
Does not offer a built-in VPN service.
It offers a built-in VPN service for internet protection.
It lets you back up your files to OneDrive.
It offers a PC cloud backup facility.
It doesn’t offer an identity threat protection feature.
Norton comes with identity threat protection.
Windows Defender is available free of cost, as a built tool with Windows OS.
To use Norton, you need to buy among the 4 subscription plans.
Effectively protects you against malware, adware, trojan, or spyware.
Offers great protection against malware, adware, trojan, or spyware.
The virus scanning abilities aren’t that great compared to Norton.
You can trust Norton to protect and remove viruses from your PC.
Takes more time when you perform a full in-depth scan.
Takes comparatively less time for a full in-depth scan.
Windows Defender vs Norton: Which one is better?
While we have gone through the comparison table above, let us understand which one in this Windows Defender vs. Norton comparison is beneficial in the real world.
1. Features
Hands down, Norton antivirus has more features than Windows Defender. However, you should note that Norton is a paid suite of antivirus tools, and Windows Defender comes free of cost.
Windows Defender is good enough to keep you safe if you aren’t involved in regular dealings with threats, downloading files from malicious websites, running pirated apps, etc.
Defender is good enough to detect most widespread malware but fails to detect the ones recently released in the market.
In such a case, Norton antivirus is the one you should opt for because it comes with better security features in its arsenal. It is better than Windows Defender and won’t leave a trace of malware or antivirus on your PC.
2. System performance impact
When selecting an antivirus tool, the one thing you should keep in mind is the impact of that tool on your system performance.
Windows Defender is an integral part of the Windows OS and doesn’t take up that many resources to protect your PC.
The good thing is that Norton, being a third-party antivirus tool also doesn’t impact much your PC’s performance.
As per an AV-Test, when Norton and Windows Defender were compared side-by-side, both tools had less impact on the system performance.
3. UI friendliness
When it comes to ease of understanding, Windows Defender has the best UI, which is straight to the point and gets the job done in a few clicks.
Not that Norton’s UI is that complicated; although it has many features, you have to use the tool before you can comment on Norton’s UI.
All features are placed perfectly in the Norton UI and have an extremely well-designed UI. So, when it comes to UI, it all depends on which software you use.
4. Pricing
This is where Windows Defender leads. Installing Windows OS on your PC gives you access to the Windows Defender free of cost.
All you need to do is enable the feature and let it protect you from threats. On the other hand, if you opt to go for Norton antivirus, you must first purchase a subscription plan and then activate it to use the tool.
As a free antivirus tool, Windows Defender is very well capable of protecting your PC. But you should also take extra precautions when dealing with things on your PC.
For Norton, if you have purchased the plan, then it is almost such that you don’t have to perform that much manual prevention to protect your PC.
Windows Defender vs Norton: Verdict
Suppose you are a business or someone involved with the internet and downloading files from all over the internet, while Windows Defender will protect you. In that case, you should opt for Norton antivirus.
Users don’t need to spend bucks on paid antivirus tools like Norton to protect their PCs.
Moreover, our advice is that when using freeware such as Windows Defender, you should also be extra careful with what you are dealing with. With Norton, you get that liberty of missing a few cues in between.
Our verdict would be casual users should stay away from Norton and continue using Windows Defender, while advanced users should check out Norton antivirus.
To learn more about the all-rounder Norton product, check out our interesting and detailed review of Norton 360 Deluxe to understand how it can protect all your devices.
We hope this guide helped you eliminate the confusion between Windows Defender and Norton. Let us know in the comments below if you have any doubts.
YouTube is our go-to source of entertainment. You can open the YouTube app on your mobile, desktop, tablet, or any other device and start streaming content from various content creators.
People have different tastes, and they would like to create a personally curated playlist of videos that they not only can view but can share with others.
What if you would like to take the YouTube playlist with you wherever you go? In such a case, we suggest you read this guide, as here we will show you the best YouTube playlist downloader for PC. Also, you can check the best YouTube apps for Windows 11.
What are the benefits of using a YouTube playlist downloader?
Well, you can stream videos online on YouTube and be done with it. However, it won’t be that convenient if you are on a limited mobile data plan.
Also, if you wish to view your playlists video, you will require access to a good amount of data balance to view the content in your preferred quality.
While you can download the playlist videos on YouTube, it will eat up your data, and you have to download them individually.
In such a case, a YouTube playlist downloaded for PC comes in handy, as it will download all the videos from your playlist in one go.
If you were looking for a tool that lets you download your YouTube playlist, then below is a curated list of YouTube playlist downloader for PC that you can opt for.
What are the best YouTube playlist downloaders for PC?
By Click Downloader is a great program you can install on your PC and back up all your videos. This tool supports YouTube, Dailymotion, Vimeo, Facebook, and 40+ sites.
It lets you download the entire YouTube playlist and channel easily. The By Click Downloader tool lets you choose among different video qualities to download the video, i.e., 720p, 1080p, 4K, and 8K.
You can also choose the format you wish to download the video. Some supported formats are MP3, MP4, AVI, FLV, WMV, 3GP, WEBM, MKV, WAV, AAC, and M4A.
The team behind By Click Downloader works around the clock to keep the software up to date and adds features as and when required.
Here are some of the key highlights of By Click Downloader:
It supports more than 40 websites.
You can select the format and quality of the video.
It is an easy-to-use program.
Lets you even download the entire Instagram page in 1 click.
ByClick Downloader
Try this intuitive app to easily back up all your preferred videos from YouTube.
Ddownr – Simple tool to download your YouTube Playlist
If you are looking for a no-nonsense YouTube playlist downloader for your PC, then Ddownr should be your pick to do the task.
It is free and lets you download your entire YouTube playlist or even multiple playlists without any issues.
All you need to do is visit the Ddownr website, paste the video URL or the YouTube playlist you wish to download, and the website will do the rest for you. It works on all platforms as long as it can run a web browser.
Apart from being free, one of the best features is that it lets you download videos or playlists in any format you would like.
Popular supported formats include MP3, WebM, M4A, and MP4. You can also select the quality of the video from which you would like to download the video in.
Here are some of the best features of Ddownr:
It is available free of cost.
Doesn’t require you to download any program or software.
Snapdownloader – Comes with a built-in video editor
Another option for Windows-faithful is the Snapdownloader. It is a brilliant application that works for Windows and lets you download videos from a plethora of websites, including YouTube, for later viewing.
You can use the Snapdownloader application to download videos in different formats, including 8K, 4K, QHD, 1080p, and HD.
Snapdownloader also comes with the option of converting your videos to different formats such as MP4, MP3, AVI, WMA
One of the best features of this tool is that it comes with a built-in video editor and trimmer. You can easily edit the videos as per your preference using the same app you used to download the YouTube playlist on your PC.
Here are some of the best features of Snapdownloader:
It supports over 900 websites.
You can convert the video into any popular format.
If you are looking for a powerful tool that will cater to all of your video and audio-related needs then you should opt for VideoProc.
It lets you download YouTube videos or playlists or videos from a wide range of websites, but it also lets you save them in batches, convert them into your apt format, and all of this is free of cost.
You can also convert your videos or compress large videos to H.265 format. It lets you capture your computer screen using its screen recording functionality.
Here are some of the key features of VideoProc:
You can save batch videos or playlists from different websites.
Change the output quality of the videos.
Convert videos and audio.
Use it as a screen recorder.
Lets you stabilize, add watermark, cut, trim, merge, etc., to a video.
YouTubePlaylist – Simple option to backup your YouTube playlist
YouTubePlaylist is another option for all platforms. You can easily use this tool on any browser and download the YouTube playlist on your PC.
It can automatically convert your favorite video into popular formats and audio. Apart from YouTube, you can download high-quality videos from Facebook, Vimeo, and other websites.
It has an easy-to-use interface; all you need to do is paste the video URL or playlist and hit the Enter button. You can then choose the entire playlist to download.
Here are the key features of YouTubePlaylist:
It is web-based.
Available for free.
Lets you download videos from other websites as well.
VideoHunter – Solid tool for downloading YouTube playlist
If you are searching for a downloader that lets you download the YouTube playlist on your PC and gives you a bit more options to choose from, then you should check out VideoHunter.
Apart from YouTube playlists, you can use VideoHunter to download videos in different qualities, including 720p, 1080p Full HD, 4K, and 8K.
You can also use VideoHunter to download playlists, channels, and even subtitles from videos. The developers claim it lets you save video and audio in bulk at 6x faster speed.
Here are some of the best features of VideoHunter:
Supports 1000+ websites.
Lets you extract playlists, channels, and subtitles.
Members of the Xbox Insiders program Alpha and Alpha Skip-Ahead rings can now preview the new “Friends & Community Updates” channel. The new channel was announced in a blog post on Xbox Wire. The Friends & Community feature isn’t exactly all-new to the Xbox experience, but it is now much improved with this more streamlined redesign.
We know that friends and community are front and center to your gaming experience. When you scroll down on Home you’ll be able to see a new channel called “Friends & Community Updates.
The Friends & Community Updates channel will bring together all the top things from your activity feed. You will be able to see achievements, game clips, screenshots and text posts from your friends, official clubs, or games that you follow.
The Xbox Insider Program allows fans to get access to the latest updates before they go mainstream, and give feedback. If you are interested in joining the Xbox Insider Program or would just like to learn more, head on over to the Xbox Insider FAQ page.
4 Unilever, one of the world’s leading Home Care, Personal Care, Nutrition, Beauty and Wellbeing suppliers, recently completed its complex migration to Microsoft’s Azure Cloud services to help support the company’s 3.4 billion active daily users.
In a press release yesterday, Microsoft highlighted its partnership with Accenture, a global 3rd party digital support company, which helped the company facilitate Unilever’s 148,000 employee base switch to Azure Cloud Services in just over 18 months.
The move to Azure Cloud Services for Unilever is intended to help the company “accelerate product launches,” enhance customer service,” and “improve operational efficiency.” Beyond the corporate boilerplate lingo, Unilever would like specifically take advantage of utilizing industrial metaverse technologies to power its insights and predictions, AI to help forecast and adapt to market changes, expand its automation programs and reduce its own carbon footprint in the process through a new program called Green Cloud Advisor.
The creation of an agile, high-performing digital core that delivers greater efficiency will provide Unilever with increased computing power to explore new ways of working. Unilever’s adoption of a cloud-only approach will significantly improve business resilience, strengthening security and enhancing control of the IT landscape.
Unilever joins hundreds of businesses that are leveraging Microsoft’s Azure Cloud services to build out their own end-to-end digitization platforms for automation, quick innovations, and reimagining lines of business.
We’ve tried a number of WordPress plugins to post to Twitter when we publish a new post, but always come back to WordPress Jetpack. It just works, and while the cost recently went up to $10/mo (for Jetpack Social only, you can pay more and get more Jetpack features, too), it’s been worth it for us to be able to “set it and forget it.”
However this morning WordPress and Jetpack apparently succumbed to the wrath of Elon, and Jetpack is currently blocked from accessing the Twitter APIs:
Our access to the Twitter API is currently blocked. As a result, Jetpack Social is temporarily unable to automatically share your posts directly from https://t.co/eRvNKWaolr to Twitter. We have reached out to Twitter for more information on how to get unblocked.
Twitter has been reconfiguring API access, charging up to $42,000 per month, and late last month began cutting off access for users who didn’t pay. We have no idea what Jetpack’s deal with Twitter is or has been, but we’d be very surprised if they weren’t already paying for access, as WordPress.com runs millions of sites (estimates run from ~24 million to almost 40 million), with many using Jetpack Social.
We know that many of you come to OnMSFT.com via Twitter, so we’re keeping our fingers crossed that this all gets worked out. We also suggest that you might want to follow us on Mastodon, where we are connected (via IFTTT) to publish a “toot” whenever we post.
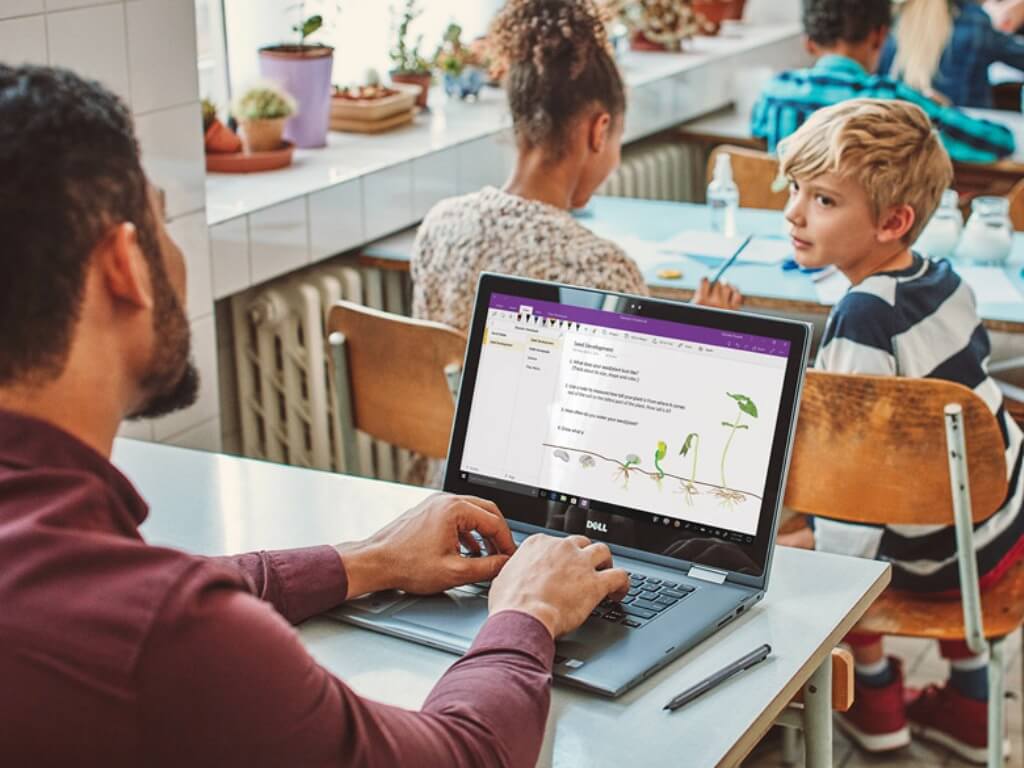
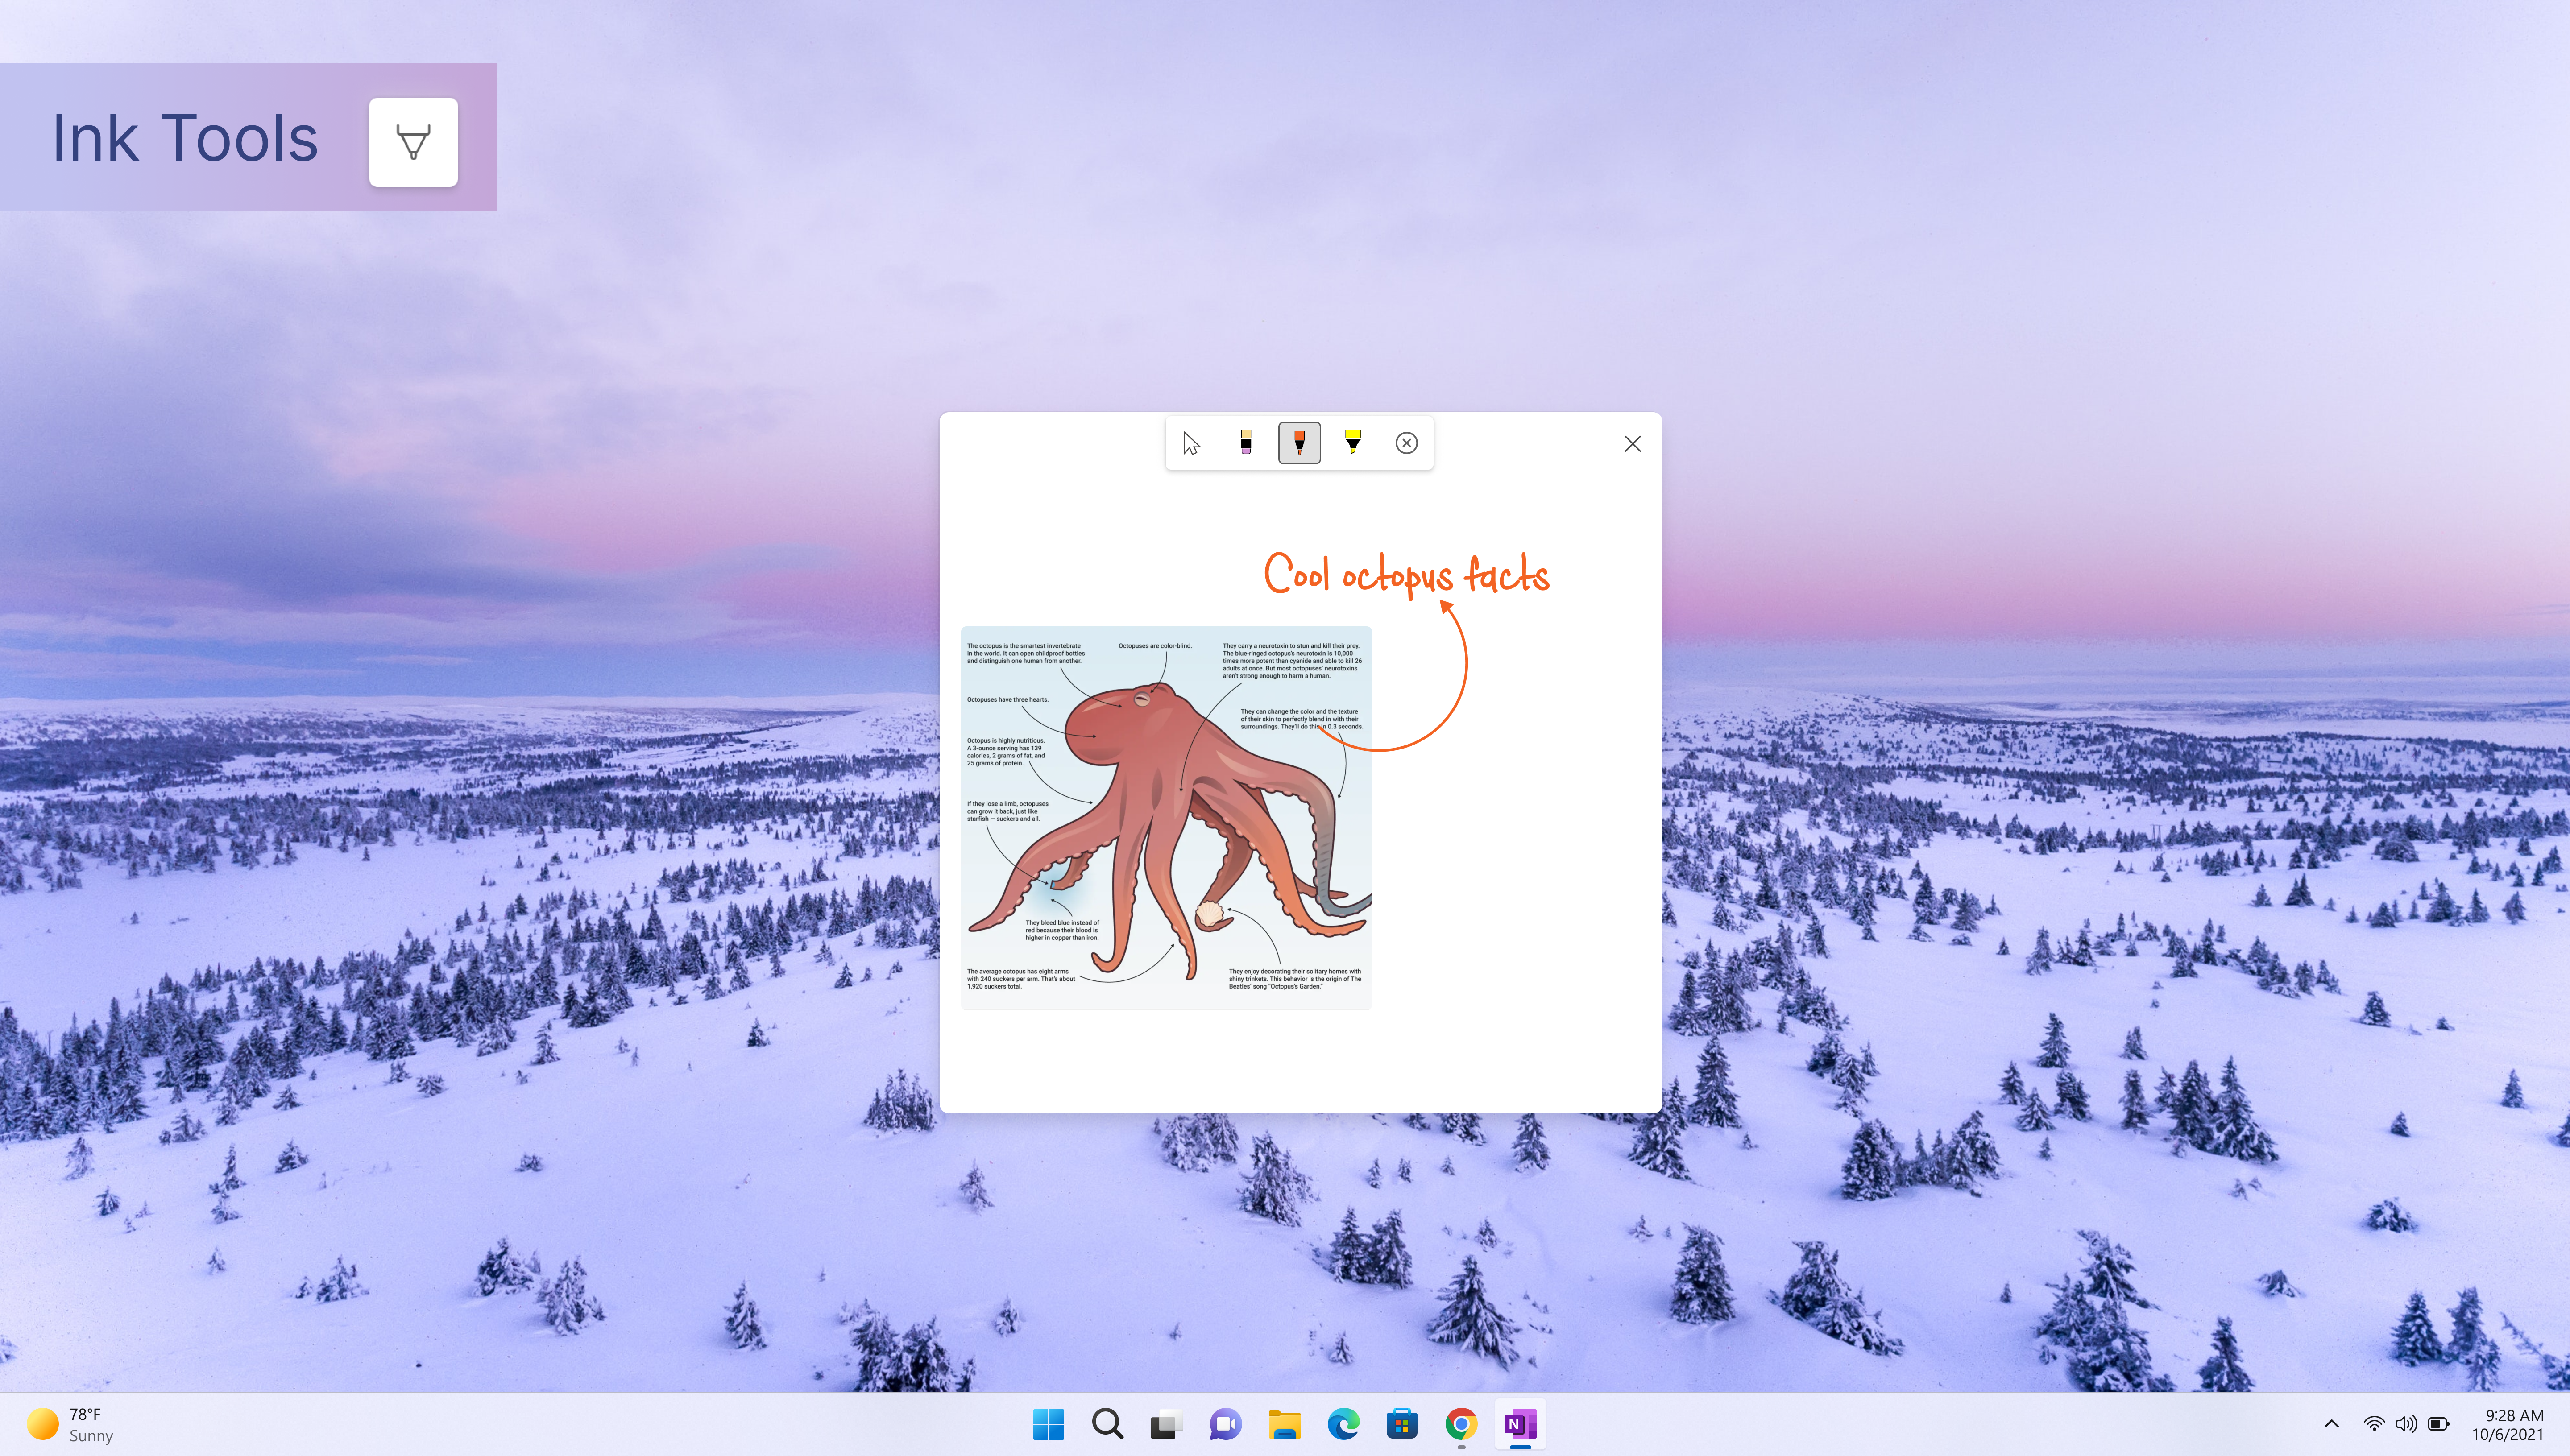
Microsoft has announced a notable number of changes coming to OneNote for Windows to enhance the note taking experience in Quick Note. The enhancements will provide users with “a more efficient and faster way to capture your thoughts, reminders, and notes.”
Here’s everything you need to know:
Incorporated a sleek new toolbar with useful text formatting options and inking capabilities.
Given you faster access to screen clipping.
Made it easier to transition to OneNote on Windows through the overflow menu.
With these new enhancements, users can now quickly insert screenshots into Quick Note using the new Screen Clipping button and make edits.
It’s worth noting that these new enhancements are exclusively rolling out to OneNote for Windows, OneNote for Windows 10 won’t have access to them.
To access these new features, you must be an Insider running Version 2302 (Build 16118.20002) or later. Microsoft hasn’t indicated when we should expect this feature to ship to general availability. Be sure to check out Microsoft’s blog post to learn how to make use of these new features.
Developer NTDEV released tiny11, a de-bloated version of Windows 11 that runs on almost every PC/computer with low-end specifications.
Based on Windows 11 Pro 22H2, tiny11 runs with just as little as 400 MB of storage, compared to Windows 11’s standard of over 20 GB. Some users even reported tiny11’s installation under 200 MB, albeit slow.
In its latest development, tiny11 can even run Windows 11 with as little as 100 MB storage with only the command prompt and some rudimentary batch files work.
The devs also stated that an even smaller version called live11 is in the work. As they call it, it is a live image of tiny11 that loads completely into RAM and fits neatly on a DVD, and we’ll keep you updated once we have more news on this.
So tiny that it can fit on a DVD. In fact, that what's I'm trying to do! Stay tuned. pic.twitter.com/hHGgvic8CF
Processor: 1 gigahertz (GHz) or faster with two or more cores on a compatible 64-bit processor
RAM: 4 gigabytes (GB) or greater.
Storage: 64 GB* or greater available storage is required to install Windows 11.
Extra storage space might be required to download updates and enable specific features.
Graphics card: Compatible with DirectX 12 or later.
A reliable internet connection is also necessary to download, but if you’re running on a slow bandwidth or the installation comes at a slower pace, we recommend you check these tricks.
Designed to bring life to old computers, tiny11 removes Windows Component Store (WinSxS) and disables installation of new features or languages. While it’s not serviceable, the system still supports .NET, drivers, and security definition updates, which can still be installed from Windows Update.
Additionally, the developer discourages installation on PCs that are powerful enough to run Windows 11 by default, as it’s done previously with tiny10 and Windows 10 in the past.
“While I can understand that installing modified versions of Windows can pose a security risk, I can assure you (and you can obviously check for yourself) that the image doesn’t have anything from external sources added to it”
Have you tried running Windows 11 on lower-end PCs? Let us know in the comment!
Microsoft just announced a set of new features that are coming to its Bing AI chatbot. One of them is the image search feature, which works just perfectly.
From now on, you’ll be able to ask the Bing AI chatbot to pull out images with input searches.
We integrated image and video search into Bing chat. You’ll see these results appear as answer cards below your chat answers, and you can click “See more” if you want to explore further in Bing image search.
As Redmond officials revealed in a blog post, the feature is currently living on the Preview Release, meaning that only a few selected waitlist users can get their hands on the feature.
Other than that, they also said that the chat limit has been revamped from 15 to 20 maximum turns per topic, and from 150 to 200 turns daily. Plus, local-related queries will see better answers from now on as Microsoft has been improving that aspect of local grounding since its release.
How to search images on Bing AI chatbot
1. Open Microsoft Edge.
2. Open Bing.com, and then go to Chat.
3 If you’re not on the waitlist yet, click on Join the waitlist.
4 If you’re already in, type “Show me images of …”
On the other hand, this feature is similar to the Bing Image Creator feature we reported earlier, but instead of AI-generated visuals, the chatbot will bring you real pictures from the real world.
What do you think about this image search feature addition to Bing AI chatbot? Let us know in the comments.
If you found a process called AI.exe running on your system, don’t panic. In this article, we’ll dig into what the file is all about, what it does, and should you remove it or not.
What is AI.exe?
AI.exe is an executable file that’s run by Microsoft in Windows 11’s ecosystem every time users open Outlook, Word, Excel, or any 365-related applications.
When you open your Task Manager, you can see that this file is described as Artificial Intelligence (AI) Host for the Microsoft® Windows® Operating System and Platform x64 with a size of a little over 710-something KBs.
As explained best by Microsoft’s Joshua Burkholder, AI.exe receives inputs for an Office app and runs it, mainly for automated corrections such as grammar, pronunciation, punctuation, etc.
ai.exe: The executable used to host ai.dll. This executable receives inputs from aitrx.dll in an Office desktop app, runs those inputs through ai.dll to get the associated outputs, and transmits those outputs back to aitrx.dll in the Office desktop app.
So, how do I know if this is safe? Read along to find out how.
How to check if AI.exe is legit?
1. When an Office app is opened (Word, Excel, Outlook, etc.), right-click on your taskbar and click Task Manager.
2. On Details, look for AI.exe.
3. Right click and click Properties
4. If the description is Artificial Intelligence (AI) Host for the Microsoft® Windows® Operating System and Platform x64., then it’s legit.
This makes more sense, especially since Microsoft has been rigorously testing its AI innovations to their limits. Not too long ago, Redmond officials announced their plans to launch an AI-powered Copilot feature for all Office 365 apps.
Let us know in the comments if you find these tips helpful!
If you have encountered NVIDIA GeForce Now error 0xc0f1103f while trying to stream your favorite games, this guide can help! We will explore the possible causes of this error and provide you with expert-recommended solutions to fix it.
What causes NVIDIA GeForce Now error 0xc0f1103f?
There could be several reasons why you face this error on Nvidia; some of the common ones are mentioned here:
Network connection issues – If your internet connection is weak or unstable, then Nvidia might not be able to establish a connection with the server, hence the error. Check your internet connection to ensure that’s not the case.
Antivirus software interference – Sometimes, antivirus software can interfere with NVIDIA GeForce Now functioning; it can’t connect to the server, hence the error.
Corrupt installation – If the NVIDIA GeForce Now’s installation files are missing or corrupted, you might see this error.
Outdated drivers – Drivers are important for the smooth functioning of your computer. If the drivers are outdated, then it might lead to this error. You need to update the graphics drivers to fix the issue.
Server overload – If the NVIDIA server is overloaded or under maintenance, you might get this error. You need to wait for some time and try again.
What can I do to fix the Nvidia GeForce Now error 0xc0f1103f?
Before engaging in advanced troubleshooting steps, you should consider performing the following checks:
Password managers are important today, where users possess multiple online and offline accounts. While there are a series of these tools online, offline versions are now gaining traction.
But choosing the ideal one might be difficult with the number of offline password managers available. Thankfully, we have prepared the best tools to help ease your selection process.
What is an offline password manager?
An offline password manager is a secure storage that saves your password away from the internet. It offers an extra layer of protection, keeping your data away from hackers.
The only disadvantage of these tools is that your password will only be available on your present device, as there is no sync option.
Are offline password managers safe?
As mentioned earlier, offline password managers save your data locally on your device. It saves your passwords in an encrypted file that is usually kept separately from the app itself.
So, even if anybody finds out the storage location, they still won’t be able to view your password in plain text.
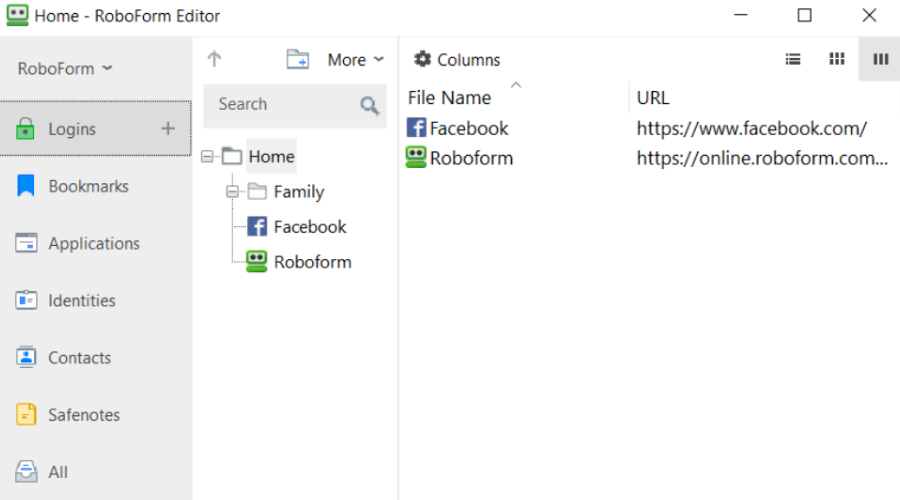
RoboForm is a flexible offline password manager wide range of features. It offers full package features for both offline and online use.
It has both a free and paid version, with a few differences between the two versions. The major difference with the paid version is the ability to sync your password across various devices.
However, there are a host of other features you get on the free version. Among the features, you can get the ability to analyze your password strength.
This allows you to know if your password is safe enough. Finally, you can save unlimited passwords and share your passwords with other users. You about get to do anything you want with your password with RoboForm.
Other features:
Multifactor authentication
Biometric authentication
Top customer service
Categories data
RoboForm
Never worry about forgetting any passwords with this useful offline password manager.
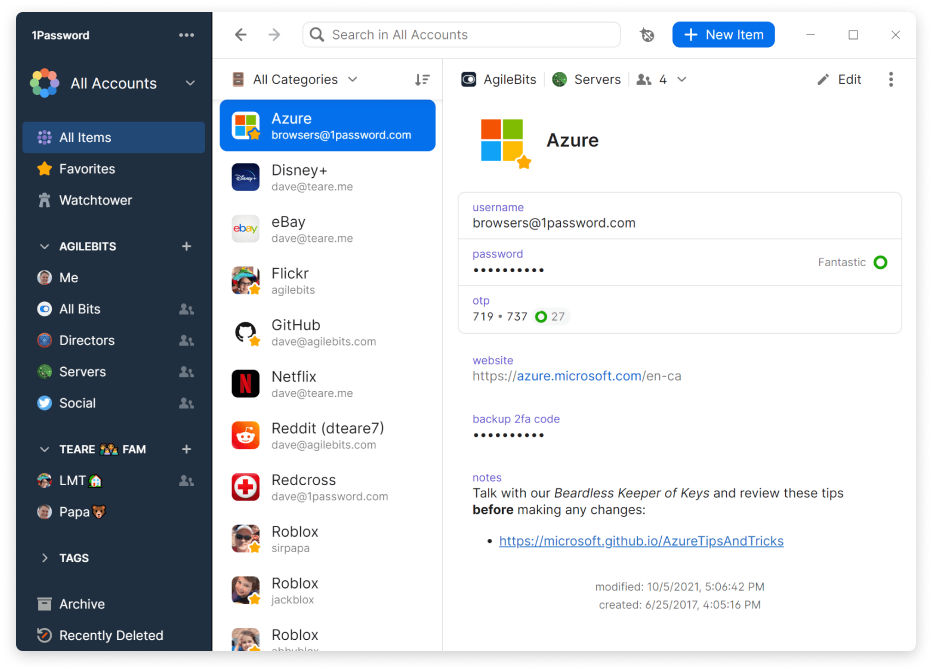
1Password is a paid password manager that offers both online and offline features. It is a family-based tool that allows you to add as many people as you want.
One of its leading features is the ability to save more than just passwords. It also allows you to save software licenses and sensitive data in a virtual vault.
Another excellent feature is that you can download all your data to your local device. You can also edit your data in this offline mode, but it will be synced once your connection is restored.
What’s more, 1Password has a dedicated extension that works with some of the major browsers. However, you need to have administrative access to make use of the extension.
Other features:
Possesses an offline vault
Multifactor authentication.
Extensions for auto-filling
Offline supporting
1Password
Fill out the password fields for any online accounts using this all-in-one password tool.
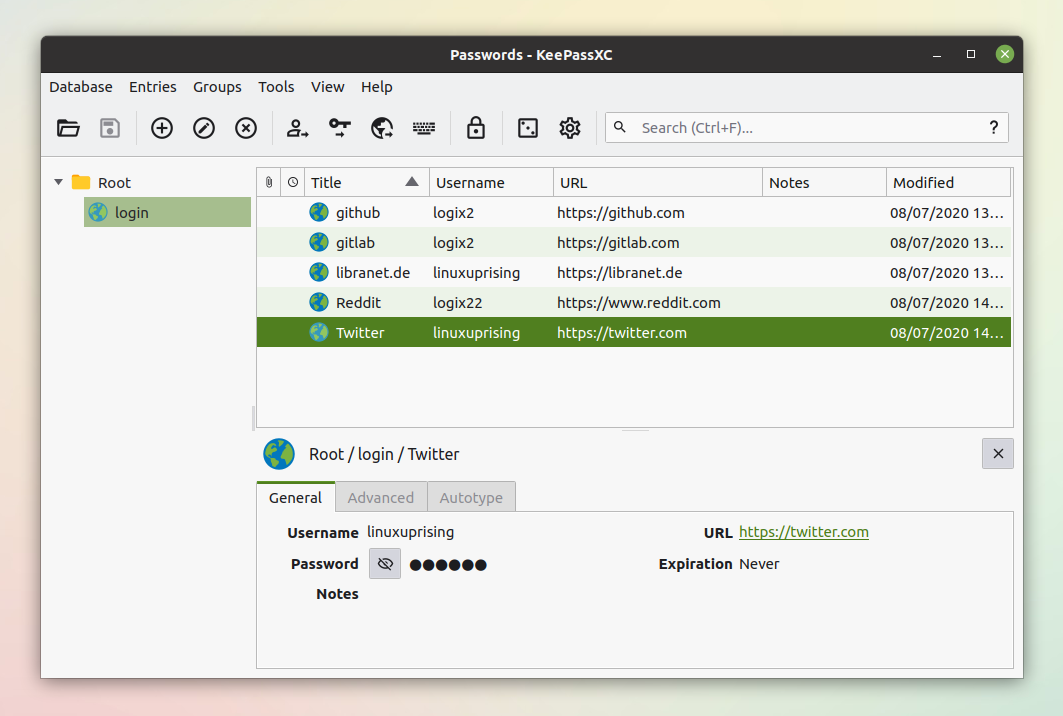
KeepassXC is a full-fledged offline password manager that boasts high security. It boasts different security options, allowing you to select your preferred option.
You can choose between AES 256-bit, Twofish, and ChaCha20 encryption, depending on your desired security strength. With this, you are sure of what you are getting before committing to it.
Another excellent feature to look forward to in KeepassXC is autofill. This saves you the stress of entering your password each time you need to access your sites and accounts.
More importantly, KeepassXC is free, and all its features are available to all users. This makes it probably the best free password manager you can use.
Other features:
Two-factor authentication (2FA)
Password generator
Command-line interface
Can use Google Drive to sync passwords across devices
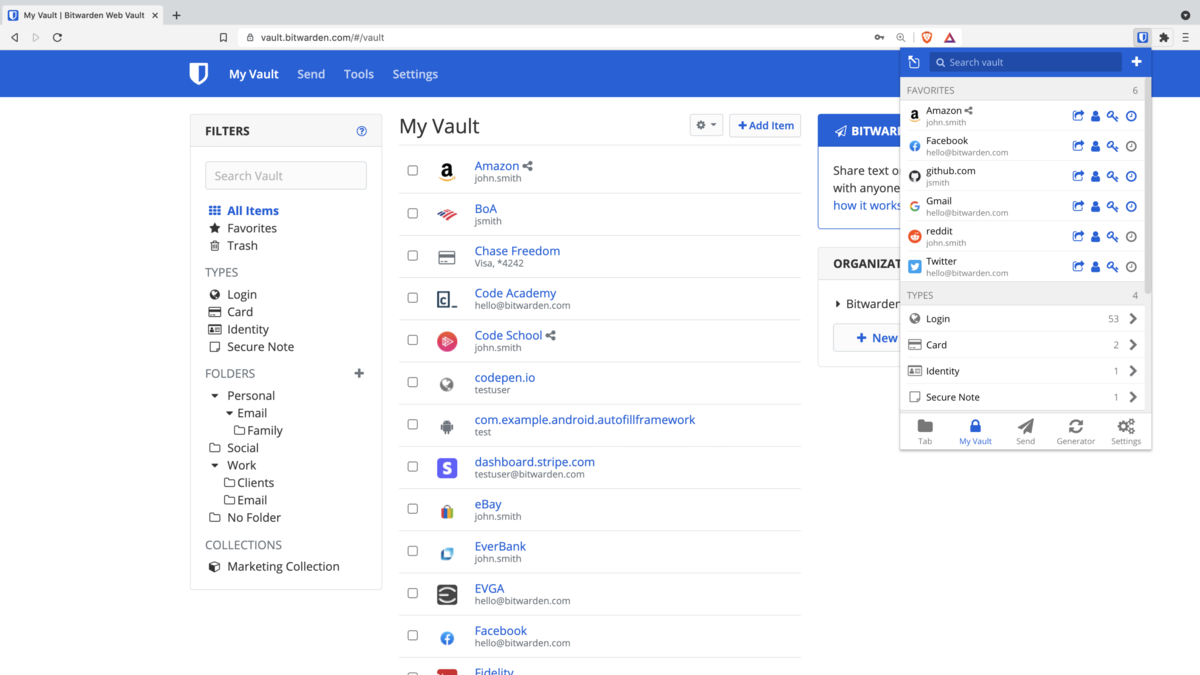
Bitwarden is a well-known online offline password manager, thanks to its high security and versatility. Unlike KeepasXC before it, this tool is not an offline-only password manager.
Among its excellent offline feature is the ability to access your vaults without the internet. This allows you to view the passwords you last synced to the cloud.
Bitwarden is not completely free, but most of its features are also available in the free version. However, the paid subscription is about 10 USD yearly, making it one of the cheapest available.
The major features in the paid version are extra security, like extra 2FA methods and emergency access. But the free version is still as secure as the best offline password manager can be.
The last on our comprehensive guide of best offline password managers is Enpass. This tool is built to provide complete offline security.
One of the excellent features you get with Enpass is the ability to create a backup of your data. With this, you can prevent total data loss and always have access to your data.
Also, it encrypts your passwords and the backup data. This encrypted file can be transferred to another PC but can only be decrypted with the verified master password.
Lastly, there is a mini server available on the desktop app. With this, you get to transfer your files over the same network.
With this, we can conclude this guide on the best offline password manager you can use. Now, you should be able to select the ideal option that suits your needs.
The Operation failed 0x00004005 is one of Windows’ most common printer errors. It occurs when users try adding a network printer to their computers, reading: Windows can’t connect to the printer; the operation failed with error 0x00004005.
In this article, we’ll show you how to fix this error and explain the main causes so you can prevent it in the future.
Alternatively, if you want to save time and schedule future driver updates, you can use an automated driver updater such as Fortect Driver Updater. It makes the whole process quicker and saves you from potential errors caused by mismatched drivers.
Press the Windows key + R, type in gpedit.msc, and hit Enter.
In the Group Policy window, navigate to this path: Computer Configuration\Windows Settings\Security Settings\Local Policies\Security Options\Network security: LAN Manager authentication level
Double-click on Network security: LAN Manager authentication level to open the Properties window.
In the Properties window, click the drop-down menu and select Send LM and NTLM – Use NTLMv2 session security if negotiated.
Click Apply and then click OK.
Close the Group Policy window and restart your PC.
6. Add the Printer Manually
Press the Windows key + I to open the Settings app.
Click on Bluetooth and devices and select Printers & Scanners.
Click Add device.
After a few seconds, you’ll see a link: The printer I want isn’t listed. Then select Add manually.
Click the link, check the box next to Add a printer using a TCP/IP address or hostname, and click Next.
On the next window, type in your local Hostname or IP Address.
Type in your Port name, click Next and follow the on-screen instructions to finish adding the printer.
Press the Windows key, type in services.msc, and hit Enter.
On the Services window, right-click on the Printer Spooler service and select Restart.
Close the Services window and check if the error persists.
8. Update Windows
Press the Windows key + I to open the Settings app.
Click on Windows Update and select Check for Updates. Wait for Windows to scan for available updates. If there are available updates, click on Download to install them.
Once the updates are installed, click the Restart now button to restart your PC.
What causes Operation Failed With Error 0x00004005?
Some of the most common causes of the Operation Failed Error 0x0004005 include:
Outdated Drivers – Printers, like most devices we connect to your computers, require specific drivers to run correctly. If the Printer drivers are outdated, you’ll run into errors like the 0x00004005 code.
Print Spooler Service – The Print Spooler service is built into Windows to temporarily store print jobs in the computer’s memory until the Printer is ready to print them. If this service stops functioning, it’ll lead to lots of printer-related errors.
Misconfigured Network Settings -The 0x00004005 usually arises when you’re trying to add a shared network printer to their PC. If there’s a misconfiguration in your PC’s network settings, it can cause the 0x00004005 error code.
Windows Update – Windows users are usually advised to update their PCs regularly. However, installing certain updates can lead to several errors on your PC. In such cases, a Windows recovery point is beneficial as you can restore your PC to an earlier state where it was completely functional.
Wrapping up
The 0x00004005 error is common among Windows users and involves little technicality. By following the steps listed above, you should get your printer up and running in no time.
However, if you’ve stumbled upon this error in the past and have alternative solutions to help resolve it, feel free to drop them in the comments.
You probably just ran into the ChatGPT message signup is currently unavailable. You are in luck because we have explored this message and will show you the best fixes.
This error should not put you back because it is only expected that as certain services and tech expand, people will experience new problems while using them. Let us get straight into some causes and the best fixes.
Why is ChatGPT Signup currently unavailable?
From what we have noticed from interactions with several users, you may be getting this message for any of the following reasons:
Limitations of the system – There are chances that there is a limit of possible signups at any given time. Even though this is unclear, it seems like a possible explanation.
Demand – Cahnaces are that when you try to access the service, there’s a surge in demand, and this temporal suspension helps manage the load.
Technical problems – Sometimes, this could be routine maintenance or specific issues the service faces when you demand to use it.
As you have seen, it will often not be in your hand when this problem occurs. This means you may consider an AI alternative; however, let us examine what you may do.
What can I do if ChatGPT signup is currently unavailable?
Here’s what you should keep in mind:
As we just said, in most cases, you will be powerless to solve this problem; hence you must contemplate waiting it out rather than digging into solutions. However, if you have waited a while and the problem persists, you may try our suggested resolutions.
1. Clear your browser cache
Press Crtl + Shift + Del (on Chrome browsers).
Select All time, tick the three checkboxes, and click Clear data.
You may need to restart your browser afterward.
These solutions should work in all browsers, even though the methods to get to the cache page may differ.
2. Disable plugins or extensions
Click the ellipses at the top right corner of the browser, select More tools, then Extensions.
Either click on the switch or select Remove for any potentially problematic extensions.
Repeat the second step for as many extensions as possible, then restart the browser.
Once again, we have carried out this step using Chrome; it may slightly differ from other browsers.
Hopefully, you should find resolutions using either solution we have suggested. If none work, you may consider using an alternative to ChatGPT, as there are a few excellent options.
You may consider using a different browser to access the service or simply upgrading to ChatGPT Plus.
That is as much as we will discuss in this guide. We hope you have found it helpful. Let us know in the comments section below.
When you reset your graphics driver, this will restore the graphics card’s settings to their default values. Resetting the graphics driver will fix any issues related to the display of the system.
In this article below, we have listed a few methods to reset the graphics driver on any Windows system.
How do I reset my GPU with a shortcut and not only?
1. Use a shortcut key/hotkey
In order to reset the GPU on your system, you simply have to press Windows, Ctrl, Shift and B keys together at a time on your keyboard.
Resetting the GPU using the keyboard shortcut mentioned above will make the system beep once.
You might see the system’s screen completely black and not responsive for some time.
Don’t worry! Everything is gonna get back to normal soon and all the apps, folders, or files that are open won’t be closed.
2. Reinstall the graphics driver
Pressthe Windows and X keys together to view the context menu of the Start button on the Taskbar.
Next, press the M key again on the keyboard which opensthe Device Manager.
In the Device Manager, you need to go to the Display Adapters option from the list.
Double-click on it to expand it.
Then right-click on the Display adapter listed and select Uninstall device from the menu.
This uninstalls the graphics driver from the system.
Now reboot the system and while the system starts, it will install the appropriate default graphics driver on the system.
You can also visit your graphics card manufacturer’s website to download and install the graphics driver.
3. Update the graphics driver
Press the Windows and R keys together on the keyboard to open the run box.
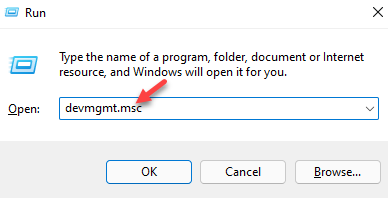
Type devmgmt.msc in the run box and press the Enter key which launchesthe Device Manager.
Go to the Display Adapters and expand it.
Then double-click on the graphics adapter which opens the Properties window.
Under the Driver tab and click Update driver.
This will pop up the update window and click Search automatically for drivers.
It will start searching for the latest version of the graphics driver online.
Once done, you can close the device manager.
Graphics card drivers are quite intricate. They adjust fan speeds, interpret CPU commands, cache data from several sources, decode and encode video, and use specific hardware such as RTX or CUDA.
Driver updates make the Graphics Card’s work routes faster by reducing needless activities or better dividing the workload.
You may rely on Outbyte Driver Updater to make such enhancements to ensure a proper update with the most recent graphics card drivers. This is an automated solution to keep your drivers always up and running without wasting time searching for them manually.
Outbyte Driver Updater
Check out this easy way to update the graphics drivers and achieve your desired result.
Several users claimed that they were able to fix most of the issues by resetting the graphics driver.
Whether your graphics card is from NVIDIA, Intel, or AMD, you can always go to their website’s downloads page and download the newest version to install it on your device.
Artificial intelligence (AI) has taken the world by storm, and even though it is still early days, the signs are clear enough to show it will shape our future.
ChatGPT is indeed the service of the moment, and as it grows in popularity, the more adoption it sees. This explains why recently we have faced some errors using the service.
ChatGPT too many signups from the same IP is just one such error, and in this guide, we walk you through steps on fixing it so that you can get back to using your favorite AI.
Why am I getting a ChatGPT too many signups from the same IP message?
The main reason is that you try to sign up using the same internet connection. You should know that you are often assigned an IP address to identify your network and device.
So, you may still get this message even if you try to sign up for the service from a different device while on the same network.
Let us show you how to fix this.
What should I do if I can not signup for ChatGPT using the same IP?
Before attempting any fix:
It would be best if you considered waiting it out. While this does not involve doing anything, it is very effective. Like many services, users have discovered that your signup attempts are time bound. So, if multiple accounts have signed up using the same IP, you should try later or the next day.
1. Use a VPN
Press Windows + I to open the Settings app.
On the right pane, click on Network & internet, then on the left, select VPN.
If you do not have a VPN already added, click the Add VPN button.
Input your VPN details and connect to it.
Now launch your browser and try signing up to ChatGPT again.
Alternatively, you could use a VPN service with many options. They will mask your IP address and help you bypass too many signups from the same IP on ChatGPT.
The ideal choice for this is a VPN that offers guaranteed online privacy and extremely fast navigation across 94 different regions all over the world.
Having that said, ExpressVPN is the ultimate pick that won’t let you down due to its high-speed servers and unrestricted content regardless of location.
ExpressVPN
Get thousands of different IP addresses to sign up on ChatGPT using this speedy VPN.
Note that this solution is only relevant if you use a dynamic IP address. This may often be the case if you use your mobile data.
If you fall into this category, you need a hard reset. This involves turning off your devices for a few seconds, maybe up to 60 seconds.
When you restart, your Internet Service Provider (ISP) may assign you a new IP. You may have to repeat this several times and probably wait longer after turning off your devices.
You may also stop creating accounts from your current network and use a different one. This is often the easiest solution if you have a readily available second option.
The ChatGPT, too many signups from the same IP, is not a severe problem. It does not also mean you are banned from using the service. Simply try any suggested solutions, and you should be well on your way.
That will be all for this article. Please let us know if you found any success using these solutions.
Excel running slow is one of the most common problems faced by users. It can vary in occurrence for different users as some can experience it when it’s opening, while some when working on files. However, this guide will discuss the reasons behind the problem and how to fix it effectively.
Some probable reasons behind Excel processing slow are:
Excessive Volatile functions – Using volatile functions such as VLOOKUP in large amounts can be why Excel is running slow and freezing on your PC. It is because the volatile functions take up more Excel data space and can be problematic if excessive in a single file.
Outdated GPU drivers – You can also experience the Excel app running slowly due to outdated graphics drivers running on your computer.
Outdated Excel program – Running an outdated Excel app means the Office app doesn’t have the necessary updates to fix bugs. So, these bugs can corrupt Excel cells, causing them to work slowly.
Too big spreadsheet in Excel – Storing several large-sized spreadsheets in your Microsoft Excel may be the culprit. Also, if you have a sheet whose cell has a value>0, it means a cell has unresolved formulas and can result in sluggish performance or freezing.
As we go further in the article, we’ll take you through some basic steps for fixing Excel if it’s running slow.
What can I do if Excel is running slow and freezing on my PC?
Before trying any advanced troubleshooting steps, go through the following:
If the issue persists, proceed with the solutions below:
1. Update your GPU driver
Press Windows + R keys to prompt the Run window, type devmgmt.msc, and click OK to open the Device Manager.
Open the Display adapter entry, right-click on the device driver, then select Update driver from the drop-down menu.
Click on Search automatically for the updated driver software option.
Restart your PC and check if Microsoft Excel runs smoothly.
Updating the graphics driver will resolve bugs affecting the game and install the latest features to your app performance.
Furthermore, specialized programs, such as Outbyte Driver Updater, can also be an efficient method of updating your graphics driver because these kinds of software will immediately find the latest versions from an extensive repository.
Recently, several users have started facing a weird History is temporarily unavailable error with ChatGPT. This error pops up when someone tries to use the ChatGPT platform. They are thrown an error message History is temporarily unavailable. We’re working to restore this feature as soon as possible.
This may be caused by a server outage, corrupt browser cache, local network issues or problems with your ChatGPT account. Before anything else, try restarting your browser or open ChatGPT on another browser, check if your network connection is working fine and, most importantly, check the ChatGPT server status.
How can I fix the History is temporarily unavailable error with ChatGPT?
1. Clear your browser cache
1.1. Google Chrome
Launch your web browser.
Click on the 3-dot menu icon at the top right.
Select Settings.
Click on Privacy and security.
Hit the Clear browsing data option.
Check the boxes for Browsing history, Cookies and other site data, and Cached images and files option.
Hit the Clear data button.
Restart your browser.
Visit the website and load ChatGPT history.
1.2. Mozilla Firefox
Click on the 3-line menu icon.
Select Settings.
Choose the Privacy & Security tab from the left.
Locate Cookies and Site data section.
Click the Clear data button.
Select both Cookies and Site Data and Cached Web Content boxes.
Click the Clear button.
Browser caches are often the main culprit when they go corrupt or are missing. Cache files store your website data to load the pages faster with your applied settings.
If they get corrupt then it can cause issues such as the History is temporarily unavailable error with ChatGPT. Clear the browser cache and check if this fixes the issue or not.
2. Open the old history link of ChatGPT
Launch your web browser.
Click on the 3-line menu icon.
Select History.
Locate the old links of your visit to the ChatGPT website.
Open the previous links in a new tab and check if this lets you load the history.
Log in with your credentials and check if this history is available or not.
There might be some issues with your ChatGPT login account. This could be the reason why you are coming across the History is temporarily unavailable error with ChatGPT.
Try logging out and re-logging back in with your credentials and check if this fixes the issue or not.
If nothing works, then as a last resort, you can contact OpenAI support for further assistance. Apparently, the error is from their end if the above solutions aren’t helping you. You can visit the website mentioned above, explain your issue, and hope to get a resolution soon.
That it is from us in this guide. We also have a guide that explains how you can fix The Conversation is Too Long ChatGPT Error.
If you are coming across the ChatGPT Bad Gateway issue, then you should apply the solutions in our guide and fix the issue at your end.
For interested readers, if you wish to understand the differences between Bing AI vs ChatGPT 4, then you can check out our guide that lists some major differences between the two.
The latest custom console giveaway is here and this time it is none other than Sony’s MLB The Show being featured. That’s right: a custom Xbox themed around a PlayStation Studios game. Which makes this particular custom Xbox all the more exciting just for the sheer irony of it.
You won’t find this MLB The Show Xbox Series S in stores. But you can enter for a chance to win just by following the official Xbox Twitter account and retweeting the sweepstakes post with the hashtag #XboxMLBSweepstakes.
When it comes to cloud storage applications, Dropbox is at the helm. However, this doesn’t exclude it from the occasional errors here and there. One such error is Dropbox error 404. It prevents you from clicking a shared link and displays the error message instead.
This can happen when you try to access a file that has been deleted or moved by another user or if the link provided in your email doesn’t work anymore. Let’s find out more about this error code and possible solutions.
What is Dropbox error 404?
If you see a 404 error when you click on a link in Dropbox, it means that the file or folder you are trying to access does not exist. This can happen for several reasons:
The file has been moved – The most common cause of this error is that the link was moved to a new location, and the user has not informed you.
Outdated app – You may have an outdated version of Dropbox installed on your computer.
You’re accessing the link from another account – If you’re accessing files on another computer or mobile device which are not connected to your account, the link may be protected.
The file or folder you’re trying to access does not exist anymore – The link was likely changed or updated.
Outdated link – Sometimes, users share timed links that expire after a certain period. If you click on the link after its expiry, you cannot access it.
You may have typed the URL incorrectly – If you copy or type the link elsewhere, it is possible you may have copied it incorrectly.
Try accessing the folder from within Dropbox’s web interface. Sometimes the problem is within the Desktop app, but the link works fine on the web version.
Clear browser cache and cookies if using a browser.
Open the link in an incognito/private tab.
Verify whether your link has been banned from the Dropbox website and the subsequent steps to resolve it.
1. Run the Windows Store Apps troubleshooter
Hit the Windows key and click on Settings.
Click on System on the left pane, then Troubleshoot on the right pane.
Select Other troubleshooters.
Scroll down, locate Windows Store Apps, and click the Run button.
2. Disable Firewall/antivirus temporarily
Hit the Start Menu icon, type Windows Security in the search bar, and click Open.
Click on Firewall & network protection, then select Public network.
Locate Microsoft Defender Firewall and toggle the off button.
3. Clear the Dropbox cache
Press the Windows + E combination to start File Explorer.
Navigate to the cache using the following or paste it to the search option: %HOMEPATH%Dropbox.dropbox.cache
Press CTRL + A to select everything in the folder.
Click on the Delete icon and click OK, to remove everything from the folder.
Press the Start Menu, search Windows Security, and click Open.
Select Virus & threat protection.
Next, press Quick scan under Current threats.
If you don’t find any threats, proceed to perform a full scan by clicking on Scan options just below Quick scan.
Click on Full scan to perform a deep scan of your PC.
Wait for the process to finish and restart your system.
5. Repair/reset the Dropbox app
Hit the Windows key and click on Settings.
Click on Apps on the left pane, then Apps & features on the right pane.
Locate the Dropbox app, click on the three vertical ellipses, and select Advanced options.
Click on Repair.
Go back and click on Reset.
6. Reinstall Dropbox
Hit the Windows key and click on Settings.
Click on Apps on the left pane, then Apps & features on the right pane.
Locate the Dropbox app, click the three vertical ellipses, and select Uninstall.
If none of these work, you may have to contact Dropbox support for further assistance. Your Dropbox app may also fail to open, but do not worry; we have curated a few steps to help you avert such crises.
Do let us know of any additional comments, suggestions, or queries you may have on this topic in the comment section below.
Excel has many features on its toolbar that allow you to perform loads of operations. The features are plenty, so some users may not notice that some are missing. However, for others, some features, such as the stock data type, may not be showing on your toolbar.
Excel is not new to errors, as the toolbar has also been known to make a disappearing act at times. Still, if you desperately need to use this function, you’ll need a quick fix, and here is how this article comes in.
Why is the Excel stock data type not showing?
If you’re wondering why your Excel stock data type is not showing, below are some possible reasons:
Older version – This can occur if you use a workbook created in an older version of Excel. You may find that data types are not in Excel 2016 but are in newer versions.
Add-ins – The problem may also occur if you have recently installed an add-in that changes how the stock data type is displayed.
App failure – Sometimes, apps are prone to failure, especially after a recent update.
Microsoft servers – Most Microsoft products need to reach the server to load all functions. If there’s a problem reaching them, your Excel stock data type may not be showing.
Expired subscription – You need a Microsoft 365 subscription to use Office products. If yours has expired, you may not have access to all features.
Interrupted connection – If your network connection is experiencing issues, Excel will have trouble connecting to the Microsoft servers and hence can’t load the files.
Incompatible data – It is also possible that the data you are trying to enter into your spreadsheet is not compatible with the Excel stock data type.
What can I do if Excel stock data type is not showing?
We advise that you check the following and ensure they are in place before trying out any advanced troubleshooting:
Ensure your Microsoft 365 subscription is current.
Ensure you are using a version of Excel that is compatible with your version of Windows.
Check that you don’t have multiple versions of Microsoft Office installed on your computer.
Finally, restart your PC to clear out any temporary files that may prevent the stock data type from showing.
1. Run Excel in Safe Mode
Click the Search button from the taskbar, type Excel, then right-click on it and select Open file location.
Press and hold the Ctrl key and double-click the Excel executable file.
Click Yes when you’re prompted if you want to open Excel in Safe Mode.
2. Use a VPN
For users who might be in geo-restricted areas, using a VPN can help you bypass internet restrictions that may be blocking your Excel from reaching Microsoft servers.
3. Disable Excel add-ins
Launch Excel, and click on the File menu.
Click on More, and then select Options from the flyout menu.
Go to the Add-ins tab, and with Excel Add-ins selected in the Manage dropdown menu, click on Go.
Now, uncheck all the add-ins listed here, and click OK to save the changes.
Again, go to the Add-ins tab, choose COM Add-ins from the dropdown menu, and click Go.
Go back and disable any remaining Add-ins.
4. Repair Microsoft Office
Right-click the Start Menu icon and click on Settings.
Type Control Panel in the search bar and click Open.
Go to Programs and select Uninstall a Program.
Now, click Microsoft Office and select Change.
Finally, click Online Repair, then select Repair.
Alternatively, you can click on Windows Settings, select Apps, then click on Apps & features.
Locate Microsoft Excel/Office, click on the three ellipses and select Advanced options.
Next, click on Repair.
Once the repair process completes, restart your computer and check whether the issue still occurs or not.
It looks like a slightly less-overpriced storage option is on the horizon for Xbox Series X|S owners. As reported by The Verge and others, a listing for a new Series X|S expansion card from Western Digital was spotted on Best Buy’s website. The listing has since been removed, but fortunately images of the card have been made available online.
As you can see above, the Western Digital 1TB card is priced at $179.99 USD, making it $40 cheaper than Seagate’s 1TB offering at $219.99.
More storage options are much needed, especially for the 512GB Series S (which only affords the user about 364GB, with the rest reserved for the system). Considering that many modern games require upwards of 50-60 or even 100GB, that 364GB proves scarcely adequate for many gamers.
With Seagate as the sole manufacturer for Series X|S expansion cards, prices have refused to budge even though the console is in its third year on the market. Maybe the arrival of a new competitor on the scene in Western Digital will change that. Note that neither Western Digital or Microsoft have commented on the listing, and there has been no official announcement regarding the new product.
Microsoft has integrated its Bing Search Engine with ChatGPT, effectively combining the strengths of both platforms. The merged version, Bing Chat, delivers accurate answers while displaying relevant search results simultaneously. One Redditor offered some tips on getting better Bing Chat results and how to leverage the platform for more effective research paper searches. Here’s what we learned:
What is Bing Chat?
Bing Chat is an artificial intelligence-enabled chatbot that comprehends the nuances of your inquiry and provides human-like responses. Microsoft has efficiently integrated this attribute into its Bing Search platform, making it a comprehensive solution for search inquiries and AI-driven responses. The rollout of Microsoft’s Bing AI is currently underway for all users, following its initial introduction as a limited beta feature. Initially, a waitlist was in place for users to access the AI-powered chatbot, comparable to the popular ChatGPT chatbot.
How to access Bing Chat?
Proper login authentication requires you to have a valid Microsoft ID. For new users, the prompt to join the wishlist might still appear. If you choose to join, logging in with your Microsoft ID will allow you to obtain fast access. It’s worth noting that some users have received access to Bing Chat roughly two weeks after joining the waitlist.
Here’s how to access the chatbot:
Open The New Bing and select Chat.
We have observed that the feature appears to function effectively on the Edge browser, here’s how:
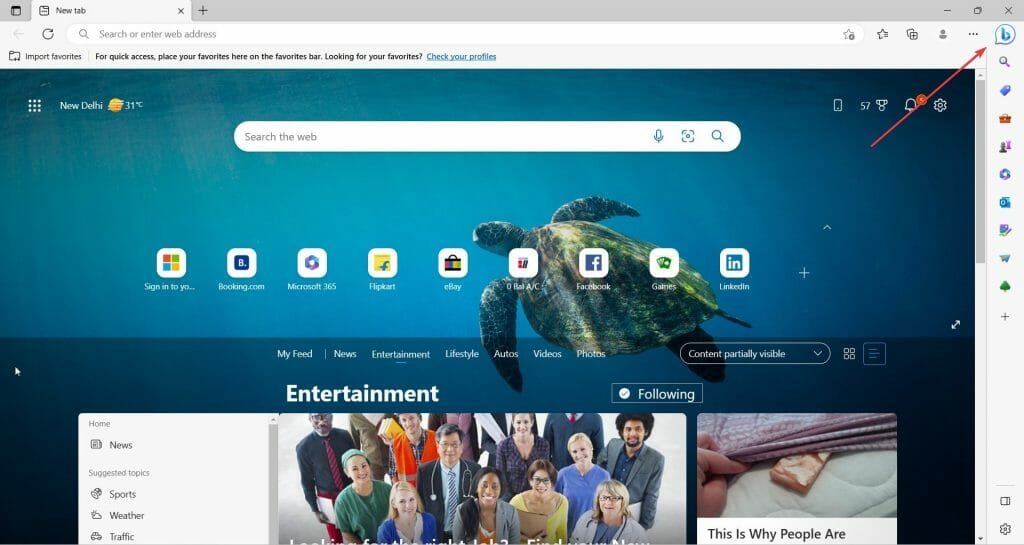
Open Microsoft Edge and navigate to the B ICON.
Select the B icon on the top left.
Upon being granted access, ChatGPT-4 can technically be used by users for free. OpenAI, the creator of ChatGPT, recently introduced GPT-4 LLM, which is currently only available to ChatGPT Plus subscribers. Concurrently, Microsoft, a fellow investor in OpenAI, has integrated GPT-4 technology with its proprietary ranking tools to enhance Bing Chat. This means that Bing users can utilize GPT-4 free of charge.
The advanced LLM technology can deliver refined and precise responses to user queries. Additionally, OpenAI has claimed that GPT-4 can effectively analyze images, which may aid users in recognizing objects or translating image texts. While this feature is still not widely accessible and is currently being tested with a single partner, OpenAI continues to pursue its development.
How to use Bing Chat to provide better research paper search results
If you want to achieve optimal results when conducting research papers using Bing Chat, it is imperative to be precise and provide intricate details. For instance, when requesting peer-reviewed studies on the correlation between ‘Sleeping Hours and Academic Performance,’ ask Bing Chat the details of three different studies, each citing the date of publication, a concise overview of the abstract and conclusion, the main author, and an MLA citation, all presented in a bullet point format. Furthermore, you must maintain a professional tone throughout the process.
Moreover, it is essential to enable the precise mode for Bing AI to avoid inaccurate results, as it may generate information that does not correspond to the available web data while attempting to answer your query.
Is there anything else that we could help you with, please let us know in the comments section below.
The month of March has officially come to an end, and just like every other month, Microsoft has highlighted all the neat features that it released to Microsoft Teams for the month of March. Here’s everything you need to know:
Teams (free) on desktop and web
Microsoft has made it easier for Teams users to keep up with everything going on in the platform. This applies to chat or channel notifications and even new features making their debut on the platform.
These kinds of notifications will be characterized by a little red dot on the taskbar. You can also check for new features under the three dots menu in the top right-hand corner as ‘What’s new’ when using Windows 11 Chat.
Additionally, Microsoft is also making it easier for users to play videos in a community. Whenever a video is shared and the user clicks play, the video will play in line with the community.
What’s more, Teams users now have the capability to invite users to meetings via SMS. All you need to do is, enter the user’s phone number as a recipient and they’ll automatically receive a text message that features a link to join the meeting.
As for Teams mobile users, Microsoft is making it easier for them to share content with communities using the native sharing options on mobile. “When you want to share something, your recent communities are shown, and you can just pick one to share the content to,” says Microsoft.
Moreover, the company is also enhancing security for communities. Communities on mobile are now protected by safeguards to shield them against malicious content.
Whenever malicious content is detected, automated mechanisms get rid of it and leave a placeholder indicating that the content was removed.
And finally, whenever a community invite is sent to you by a community owner, the invite will be featured in the mobile app. The decision is entirely up to you to decide whether or not you’ll accept the invite.
Xbox remote play is a great feature that enables gamers to play their favorite games on smartphones, laptops, and more without being in front of their console.
This feature is quite convenient; however, some users have reported experiencing sound crackling while using Remote Play. It can be a frustrating issue and spoil your gaming experience.
In this guide, we will discuss some potential causes of the problem and the steps to fix the issue so that you can enjoy playing games without disruption.
What causes the crackling audio issue on Xbox remote play?
There could be various reasons why you facing this sound-related issue; some of the common ones are:
Xbox is outdated – If your Xbox has pending updates to be installed, then you might face all sorts of issues, like this one. Install the update to prevent all the issues.
App cache – Sometimes, the Xbox app cache on your device, including tablet, laptop, or mobile, can cause such issues. To fix it, clear the app cache from your device.
Alternate Wireless MAC address – If you have selected an Alternate Wireless MAC address on your console, then it could cause sound issues. You need to clear it to fix the problem.
Weak internet connection – If your internet connection is not stable, the game you are playing might able to establish a proper connection, hence the issue. Check your internet connection to ensure that’s not the case.
How can I fix the crackling audio issue on Xbox remote play?
Before engaging in advanced troubleshooting steps, you should consider performing the following checks:
Restart your router.
Switch to an internet connection with higher bandwidth.
Power cycle your Xbox console.
1. Clear Alternate MAC address
Press and hold the Xbox button on the controller to get to the guide menu.
Go to System, then click Settings.
Click General, then select Network Settings.
Under Network, click Advanced Settings.
Choose the Alternate Wireless MAC address and click Clear.
Restart your console.
2. Restart the Console using your smartphone
Launch the Xbox app on your smartphone.
Locate the Console icon from the top right corner and tap it.
Choose your console from the list.
Tap the Open remote control option.
Locate three vertical dots from the top right corner and tap them.
If any of the services relevant to the issue is down, wait until the service is live again.
So, these are methods that you can use to fix the cracking audio issue on Xbox remote play and enjoy seamless remote play sessions on your device. Try them and let us know what worked in the comments section below.
A common problem many players complain about is the Sea of Thieves crashing on their computers. The game can go blank, close abruptly, or become unresponsive on startup or during gameplay. Fortunately, the issue isn’t fatal, and we’ll take you through the steps to fix it.
Many factors may be responsible for crashing the Sea of Thieves game on your PC. Some are:
Outdated GPU drivers – PC gaming activities use lots of graphics resources and power. So, running outdated or faulty graphics drivers can cause issues with the game, resulting in the Sea of Thieves crashing on your PC.
System requirements issues – Sea of Thieves has minimum and recommended system requirements that determine the device’s specifications that can run it. Hence, you may experience the game crashing on your computer due to your system not meeting the requirements for the game.
Interference from background apps – Running too many background processes on your PC may cause issues with your gaming activities. These background apps can consume the system resources and leave the Sea of Thieves game to use insufficient resources.
Corrupt or damaged game files – The game crashing on your computer can occur when launching or during gameplay due to its installation files being corrupted.
Moreover, these causes are liable to vary in different PCs. Regardless, you can follow the steps below to fix the issue and get your game running smoothly.
What can I do if Sea of Thieves keeps crashing on my PC?
Before trying any advanced steps, go through the following:
If the issue persists, proceed with the solutions below:
1. Run in Compatibility Mode
Press Windows + E to open File Explorer.
Go to the installed Sea of Thieves directory, right-click on it, and select properties from the drop-down.
Select the Compatibility tab and check the box for the Run this program as an administrator option. Check the box for Run this program in compatibility mode, then choose a Windows version from the drop-down.
Click OK to save the changes.
Running the game as an administrator will resolve permission and compatibility issues causing it to crash. Check what to do if running as administrator is not working on your PC.
2. Update your Graphics driver
Press Windows + R keys to prompt the Run window, type devmgmt.msc, and click OK to open the Device Manager.
Expand the Display adapter entry, right-click on the device driver, then select Update driver.
Click on Search Automatically for the driver software option.
Restart your PC and check if the game crash issue persists.
Updating the graphics driver will fix bugs affecting the game and install the latest features to improve performance. Check other steps for updating graphics drivers on Windows 11 if you have any issues.
Alternatively, you can update not only your graphics driver but all outdated ones faster and more effectively with a specialized tool.
Outbyte Driver Updater is one of the driver updaters we suggest because it analyzes your computer to find outdated or malfunctioning drivers and update them with the latest options.
Left-click the Start button and type Steam, then double-click to open it.
Select the Library tab. Right-click on Sea of Thieves from the left pane and choose Properties.
Select the Updates tab and click on Always keep this game up to date. Steam will automatically search for the available update.
Restart your PC.
Updating the Sea of Thieves games will install new patches for fixing bugs affecting its performance. Check for solutions if you are unable to update Sea of Thieves on Windows 11.
Left-click the Start button and type Steam, then double-click to open it.
Select the Library tab, right-click on Sea of Thieves, and choose Properties.
Click the Local Files tab and select the Verify Integrity of Game Files button.
Verifying the game file integrity will resolve corrupt or missing game files causing the game to crash. Read more on how to verify the integrity of game files not working for more advanced steps.
In addition, you can check our article about ways to fix games crashing on Windows 11 for more effective solutions.
If you have encountered the JavaScript heap out-of-memory error, this guide can help! This often happens if the application runs out of memory. We will cover all the available fixes right after discussing the causes of the same. Let’s start!
What causes the JavaScript heap out of memory error?
There could be various reasons why the project crashed and presented you with this error; some of the common ones are mentioned here:
Large objects present – If the code has a lot of large objects, then memory consumed by those objects collectively leads to an overload, hence the error.
Insufficient amount of memory allocated – If the default amount allocated by Node.js is insufficient to complete a command, you might encounter this error.
Memory leaks – As the app grows, it is important to delete some objects you don’t need; if not done, you might get this error.
Large data structures – If you work with large data structures such as arrays or matrices, it can consume a lot of space, causing this error. Additionally, when working with arrays, ensuring efficient use of array methods is crucial. Learn more about fixing Array.prototype.map() Expects a Return Value in JavaScript to optimize your code and prevent memory issues.
Infinite loops – Infinite loops use memory pretty fast, and it might cause this error.
What can I do to fix the JavaScript heap out of memory error?
1. Use the Control Panel
Press Windows + E to open Windows Explorer.
Go to This PC, right-click it, and select Properties.
From the next page, select Advanced system settings.
Switch to the Advanced tab, and click Environment Variables.
Click New on either System variables (changes apply to the entire computer) or User variables ( applies the changes to a user account).
On the next window, for the Variable name: enter Node_Options.
Now for Variable value: –max-old-space-size=4096
Click OK. You can change 4096 to 8192 as well to allocate more space.
On the Environment Variable window, click OK.
Now click Apply and OK to save the changes.
2. Use PowerShell
Press the Windows key, type PowerShell, and click Run as administrator.
Copy and paste the following command and press Enter: env:NODE_OPTIONS="--max-old-space-size=4096"
To temporarily solve the issue, you can type the following command and press Enter before opening the app: set NODE_OPTIONS=--max-old-space-size=4096
So, these are methods to fix the JavaScript heap out-of-memory error. To avoid this error in the future, it is advised to split your data into smaller chunks and delete the objects that are no longer needed. Try them and let us know what worked for you in the comments section below.
Security is essential and two-factor authentication (2FA) has become common to keep accounts secure. However, some Microsoft users have reported not receiving their security code. Therefore, we will examine why Microsoft is not sending security codes and how to fix the issue.
Likewise, you can read about how to set up two-factor authentication in Windows to prevent hijacking your account.
Why is Microsoft not sending a security code?
There are several reasons why Microsoft may not be sending security codes which are:
Incorrect contact information – The security code message will not be delivered if there is a mistake with the contact information linked to your Microsoft account.
Spam filter – You may not receive the security codes in your email if your email provider filters the message as spam or junk. So check your Spam or Junk folders regularly.
Service outage – In some cases, a temporary service outage or maintenance on Microsoft’s end can affect the delivery of security codes.
The factors stated above vary in different circumstances. Regardless, we will discuss how to fix Microsoft not sending security codes.
What can I do if Microsoft is not sending the security code?
Before taking any significant steps to fix the issue of Microsoft not sending security codes, try these:
Many of our readers have complained about struggling to connect their PS5 console to an internet connection like Wi-Fi or Ethernet network. They report the error indicating the PS5 console can’t obtain an IP address within the time limit. However, this article will discuss basic steps to fix the issue.
Why is my PlayStation failing to obtain an IP address?
Several factors may be responsible for the PlayStation5 not obtaining an IP address for the internet connection. Some notable ones are:
Router connection issues – The most common cause of the PS5 console failing to obtain an IP address is a faulty or unstable router. An outdated router firmware can cause your network connection to fail due to bugs and compromised components.
DNS error – The error may occur if the DNS server running on the console is not working. It can be because the DNS settings are not correctly configured, causing PS5 to fail to resolve the IP address from the server or requested resources.
Issues with PS5 console network settings – You may experience internet issues if your console’s network configuration impedes its connection to network devices like routers and Ethernet. Hence, it causes the PS5 redirect error, preventing it from obtaining any IP address.
Nonetheless, you can fix the problem by troubleshooting your network device and the PS5 console.
What can I do if my PlayStation fails to obtain IP address?
Before trying any advanced troubleshooting steps, go through the following:
Reconnect the console to the network device.
Restart the PS5 console and check if the problem persists.
Power cycle your Router or Modem.
Check for Router Firmware updates – Using the router for a long time can cause its firmware to become outdated and infected with bugs. You can read our article on router Firmware updates for more steps.
If you can’t resolve the error, proceed with the solutions below:
1. Change PS5 console DNS Settings
Launch the PlayStation Settings from the Home Menu.
Click on Network from the drop-down window.
Select Setup Internet Connection and choose the connection type like LAN or Wi-Fi.
Click on the Custom button and set the IP Address field to Automatic.
Click on the Do Not Specify for the DHCP Host Name field and select Manual for DNS under the DNS Settings.
Type in the following DNS values:
Primary DNS: 8.8.8.8
Secondary DNS: 8.8.4.4
Click the OK button.
Restart your console if the PS5 can obtain the IP address and connect smoothly.
Changing the PS5 DNS server’s configuration allows it to quickly translate the web addresses and read IP addresses.
2. Run a Network test on the PS5 console
Select Settings from the console’s Home Menu.
Click on Network from the drop-down window, then select Connection Status.
Select Test Internet Connection and wait till the test completes.
Follow the on-screen instructions and check if the IP address error persists.
Backing up your files is important, and many reported error 0x8078011e while using Windows Backup. If this issue occurs, you won’t be perform a backup at all.
In case you’re not familiar with this tool, it allows you to set up automatic backups on Windows, so it’s great for protecting your data.
However, there are several methods that you can use that will help you fix this issue once and for all, and today we’re going to show them to you.
What is error code 0x8078011e?
This is a Windows Backup error code, and the full error states the following: Windows Backup failed to get an exclusive lock on the EFI system partition (ESP). Regarding the causes, here are the most common ones:
Conflicting software – Sometimes certain applications can interfere with Windows Backup and cause this issue. To fix it, you need to remove them manually or by using uninstaller software.
Antivirus settings – In some instances, your antivirus will protect certain directories, thus causing this issue.
How can I fix the 0x8078011e error?
1. Uninstall third-party antivirus software
Press Windows key + X and choose Apps and Features.
Locate your antivirus software and click on Uninstall.
Follow the instructions on the screen to remove it.
Many users reported that Avast was responsible for this issue, so if you use it, uninstall it and check if that solves the problem. For more information, visit our how to uninstall Avast Antivirus guide.
Keep in mind that other antivirus software could cause this issue as well.
2. Remove Armoury Crate software
NOTE
This method only works if you’re using an ASUS motherboard and have Armoury Crate software installed.
Locate Armoury Crate Uninstall Tool and click the Download button.
Wait for the software to download.
Once it’s downloaded, start it and follow the instructions on the screen to complete the uninstall process.
3. Add exclusions to your third-party antivirus software
NOTE
Keep in mind that the instructions will vary depending on your antivirus of choice.
Open your antivirus software.
Open Settings and click Edit in the Exclusions section.
Now click Add and the dots icon next to thePath.
Add the following paths: \Device\HarddiskVolume1\EFI\Microsoft\Boot\BCD \Device\HarddiskVolume1\EFI\Microsoft\Boot\BCD.LOG \Device\HarddiskVolume1\EFI\Microsoft\Boot\bootmgfw.efi %WINDIR%\system32\winload.efi
WebEx and Zoom are some of the best PC conferencing software on the market, but which one is better for you? To help you decide, we’ve confronted their features in a WebEx vs Zoom comparison battle.
How do I choose the right conferencing software?
Video conferencing software is a key component to performing meetings within your organization, especially if the workforce is scattered worldwide. They can be used for business or personal purposes, but here are some of the key elements when choosing such an app:
Quality audio and video – This part mostly depends on your connection but the app itself may also influence the audio and video quality and testing them individually may be the best way to determine which one is better for your needs.
Document and file sharing – The best video conferencing tools allow you to share documents and files in real-time with your participants.
Implementation & integration – If you’re using the conferencing tool for business purposes, make sure you can integrate it with your other tools for scheduling meetings and task management.
Security – Especially if you’re using it for business, the app should encrypt all your communication, including file transfers.
Easy of use – Last but not least, the app should be simple to install and use by anyone at any time.
Now, that we know some important aspects of web conferencing tools, let’s see how WebEx and Zoom deal with them.
WebEx vs Zoom: which one is the best for you?
WebEx
Developed by Cisco, WebEx Meetings will get you very good services for corporate needs. The app allows you to add up to 100 participants in video calls.
Moreover, you can create webinars of 100 to 10.000 participants if you need to do that.
This solution goes way beyond audio-video meetings. It comes with document management tools, great screen sharing, messaging, remote control, and a lot more.
For instance, WebEx Meetigs has instant translation in over 100 languages and after the meeting, you get detailed recorded transcripts that you may use to create meeting reports with only a few clicks.
Cisco is a leader in voice and video communication so it goes without saying that WebEx Meetings applies the best possible standards in that department.
However, you can’t make something out of nothing. If you already have Cisco devices implemented in your organization, everything will work flawlessly.
But if you have a low-end webcam and mic or an unsteady internet connection, the results will shift accordingly.
The app does have an excellent denoising feature so at least the voice communication will be excellent.
Zoom – Can be laggy sometimes
You should know that Zoom also has VoIP calling services and they obviously can be integrated with the Zoom web conferencing app.
If you will go for the business plan for Zoom, with their solutions, or just use top equipment and cam, as well as a good internet connection, everything will go perfectly.
However, a lot of our readers complained about the microphone not working on Zoom laggy or freezing video, and a lot of mishaps.
But most of those problems were mainly due to an inconsistent connection so we can’t really blame the app itself.
With WebEx, you can drag-and-drop any document useful for the presentation or meeting. You can send it to everyone at the meeting or for everyone.
It sends the document instantly and it’s as easy to do so from a PC, a mobile, or a tablet, wherever you access the meeting from.
All communication is end-to-end encrypted so you don’t need to worry about any security issues.
Zoom – All sharing needs are met
With Zoom, you can’t just drag-and-drop files, but you’ve got all the file transfer option features in the Chat window.
There, you can send documents and file from your device or from any of your cloud storage accounts.
You may even make screen captions on the spot and share them as well. The feature is not as sophisticated as in WebEx, but it’s still very easy and efficient.
3. Implementation & integration
WebEx – Seamless integration within the WebEx Suite
We need to mention that WebEx Meetings is only the web conferencing tool within the WebEx Suite. You may also get the Calling, Polling, Webinars, Events, Whiteboarding, and Vidcast tools.
However, WebEx integrates with over 100 third-party apps as well. Productivity, document management, scheduling, calendars, analytics, you name it, this app can integrate it.
Zoom – The king of integrations
At the moment we wrote this article, there were 2,363 apps in the Zoom app marketplace and 2,142 of them were for Zoom Meetings.
There is no way you won’t find the integration you need in that selection. From Google Workplace to Slack, Salesforce to Zylo, and Xyte, you will find any area you might be interested in.
4. Pricing
Both WebEx and Zoom have free versions that allow up to 100 attendees and have text, audio, and video communication for 40-minute meeting sessions.
However, here are the paid plans for each:
WebEx
With $14.50/license/month, with WebEx you get up to 200 attendees, and a 24-hour meeting time. You also get 10GB of cloud storage for meeting recordings, closed captions & meeting highlights, live polling, and Q&A by Slido.
You may also join overlapping meetings at the same time. It makes sense because you can record one of them. If you need more features, you can negotiate an Enterprise license and customize your required options.
Zoom
Zoom has a $14.99 Pro account that offers 5 GB of cloud storage, 30-hour meetings with up to 100 attendees, and some premium apps for free for 1 year.
You will also get 3 whiteboards and Mail & Calendar. There are also the Business and Enterprise plans where you will find lots of other benefits.
WebEx vs Zoom conclusion
Both WebEx and Zoom are great web conferencing apps and while WebEx is clearly focused on enterprise needs, Zoom is more user-friendly oriented.
The excellent part is that both have free versions you can try them extensively to understand which is better for your needs.
For a slightly smaller price, WebEx offers professional support but Zoom obviously has a lot more integrations to its side.
We hope that our article helped you put WebEx vs Zoom in balance and decide which one is best for you.
Managing files on your Windows computer can feel like a full-time job. Nowadays, people are downloading massive files, and it can be overwhelming trying to figure out where everything is.
There are many methods you can try to clear up your hard drive, like using Recycle Bin cleaners to get rid of unnecessary files. There’s another most don’t commonly try, and that’s merging drivers.
Why would I need to merge two drives?
Before going into how to merge the C: and D: drives, let’s go over why you want to do this in the first place. Believe it or not, there are various benefits to doing so:
It frees up a lot of space on your computer – This is, by far, the biggest benefit of fusing the two drives. Sure, you can uninstall apps one by one, but merging is a faster method.
It aids in organizing your hard drive – Wiping out a hard drive using some software can be a rather extreme method. Combining drives is a more controlled method of organizing things.
Merging can create more space – At some point, you’re going to run out of space on your hard drive. Combining can solve this problem even if you can’t make a new partition.
How do I merge your C and D drive on Windows?
There are only a handful of ways to merge the two drives, which can be pretty tricky. There are no easy solutions. We will, however, recommend that you do a few things first before merging:
The first thing that you should do is update your system. Install any fixes Microsoft has recently rolled out. They can save you from dealing with corrupt files later on.
It is also strongly recommended that you back up your files. There are two ways to do it: either through the native Windows 11 feature or through some third-party software.
1. Back up files
Launch the Settings app and go to the Accounts tab.
Next, click Windows backup.
On the following page, you can allow OneDrive to save your folders and which app logins will be remembered. To configure it all, select Manage sync settings.
In the new window, select which folders you want to back up to OneDrive. Click Startbackup when ready.
Backing up your files needs to be the first thing that you do. If you make any mistakes, files become corrupt, or something goes wrong, you can restore the old files and start again.
2. Extend volume via Disk Management
Launch the Disk Management app from the Windows search bar.
Right-click the partition you want to extend.
If the entries are greyed out, there isn’t any space available. You can make space by first selecting Delete Volume.
Right-click the partition again and select Extend Volume.
Click Next in the Extend Volume Wizard.
On the following window, select how much drive space you want to use for extending volume. It’s recommended that you use all available space.
Click Next when done and then Finish on the window after that.
What can I do if the hard drive isn’t showing me its full capacity?
Some users have complained that their hard drive doesn’t show its total capacity in the Disk Management app. This serious problem could indicate faulty software or something damaged internally.
If it’s a software problem, it’s recommended that you update the hard drive driver and reformat it. But if it’s damaged, it’s best to take it back to the manufacturer or repair it somewhere.
Additionally, you should learn about the best defrag software. Fragmented files can cause all sorts of performance problems. Defragmenting reorganizes them to improve performance.
Some of the best ones include Iobit Smart Defrag and CCleaner. Note that the apps work for Windows 10 and 11, so don’t worry if the software only indicates the former.
Feel free to comment below if you had other hard drive questions. Also, leave comments below about reviews you’d like to see or information on other hard drive issues for Windows 11.
Sticky Notes is a native, note-taking app for Windows 11 that’s pretty good for quickly jotting down reminders to yourself and ensuring you don’t forget anything.
But say, you accidentally delete some notes and are looking for a way to get them back. You can check the Recycle Bin, but there’s a chance it’ll be empty. Fortunately, there’s a way to restore the notes.
What causes my Windows 11 to delete Sticky Notes?
Sticky notes can be lost for a variety of reasons. It’s not just because you deleted them. There may be something wrong with your computer that you’ll need to diagnose quickly.
Your computer is infected with malware – Malware can mess with a computer’s operation. For this, it’s recommended that you get some antivirus software to clean everything.
Files on your system are corrupt – As a result of malware, your computer’s files can become corrupted and unusable. You’ll need to run an SFC scan to clear up the corruption.
You lost the notes because of a system crash – System crashes can also corrupt files, and if it happens repeatedly, they can cause serious damage. You may have a problem with the RAM.
Your notes may be hidden – Double-check if you accidentally hid the notes. Right-click the app in the taskbar and select Show All Notes. They should be there.
A faulty Windows update erased them– Microsoft has a series of steps on how to uninstall a Windows update if you got a faulty patch.
How can I restore the Sticky Notes?
There are many ways to recover lost Sticky Notes files from third-party apps to native tools on Windows 11. If the easier solutions don’t work out, try one of the more complex fixes.
Use some data recovery software to recover the notes. Apps like Kernel Data Recovery and Disk Drill are great choices for bringing up lost or deleted files.
Double-check your notes list. With Sticky Notes open, right-click the app on the Windows 11 taskbar. Select Notes List. See if your list note is on there.
Whenever you delete something from Sticky Notes, the files may be found in the Deleted Items list on Outlook. From there, you can restore the discarded notes to the app.
Run the Windows Store Apps Troubleshooter. You can find the tool in the Troubleshooter sections of the App tab in Windows 11 Settings. Just be sure to give it enough time to finish.
Update the Sticky Notes app. New patches can be downloaded from the Microsoft Store or the Windows Update tab in the Settings menu. The latter will update other apps too.
And if all else fails, reinstall the Sticky Notes app. Head over to the Apps section of the Windows 11 Settings menu. You can uninstall the app from there and re-download it from the Microsoft Store.
1. Double-check the Sticky Notes file
Launch File Explorer and go to open your username’s main folder. It should be on the Home tab.
Open the following folder in order: AppData > Local > Packages.
In the Packages folder, locate the folder titled Microsoft.MicrosoftStickyNotes_8wekyb3d8bbwe. Open it once found.
Open the Local State folder. You should see StickyNotes.snt or plum.sqlite.
If you don’t see either one, make sure Hidden Items is enabled under View.
Click StickyNotes.snt or plum.sqlite, whichever one appears, and open it in NotePad. Your previous lost Sticky Notes should be there.
If that doesn’t work, right-click the file and select Show More Options.
In the context menu that appears, click Restore previous versions.
2. Reset the app
Launch the Settings menu. Go to the Apps, then select Installed apps.
Locate Sticky Notes under Installed Apps. Click the three dots to the right and select Advanced Options.
Scroll down in this new window. Click the Reset button once you find it.
Resetting should be enough, but if the notes don’t come back, select the Repair button.
Bring up Windows PowerShell in the search bar. Select Run as administrator to have admin-level rights.
Copy and paste the following command into PowerShell: PowerShell -ExecutionPolicy Unrestricted -Command "& {$manifest = (Get-AppxPackage *MicrosoftStickyNotes*).InstallLocation + '\AppxManifest.xml' ; Add-AppxPackage -DisableDevelopmentMode -Register $manifest}"
Press Enter on your keyboard to run the command. Give PowerShell enough time to re-register Sticky Notes.
When it’s finished, restart your computer.
4. Reset the Microsoft Store cache
Similar to the previous solution, launch the Command Prompt with admin-level permissions.
Enter the following command and run it: wsreset
Wait for the process to finish. Once it’s done, the Microsoft Store will automatically open.
5. Prevent notes from being deleted
Launch Sticky Notes and click the gear icon in the upper right-hand corner to open the Settings menu.
Toggle the switch next to Confirm before deleting in order to turn it on.
Turning on this alert will make a window appear before deleting a note warning you about what you’re about to do. It’s an extra step to make you think twice and, hopefully, save you some headaches.
What can I do if Sticky Notes continues not to work properly?
Sticky Notes can be a fickle app. The solutions listed earlier should work to solve any problem with the software, but there may be one or two that persist.
For consistent issues, there are a couple of things that you can do. First, disable the Insights feature on Sticky Notes. It’s in the Settings menu above the toggle for deletion warnings.
And the other fix is to create a new user account. The profile you’re using may be corrupt or malfunctioning in some way. Making a new one solves this problem altogether.
While we have you, be sure to check out our list of the best Sticky Notes alternatives for Windows 11. Many complain the app malfunctions, from not taking down notes to users being unable to sign in.
In case you want to get rid of this feature permanently, we have a great guide on how to remove Sticky Notes Preview, so don’t miss it.
Feel free to comment below if you have other Sticky Notes problems. Also, leave comments below about reviews you’d like to see or information on other native Windows 11 software.