5 Best Weird Browser Games to Play Solo or With Your Friends

There are all sorts of games that you can play in your web browser. From action games like the best tower defense games to racing games, among others.

However, some users prefer games that are unusual and weird. These games can be funny and can be played alone or with friends.

A wide array of games meet these criteria, and in today’s article, we’re going to show you the best of them to play.

What weird & funny games can you play with friends online?

There are numerous weird and funny games that you can play online. Some require you to download an app, while there are weird browser games you can play.

Also, some of these games are multiplayer, allowing you to share funny moments with your friends online. Lastly, there are others that you can play alone. We will discuss these games in detail in the following sections of this article.

What is the best browser for gaming?

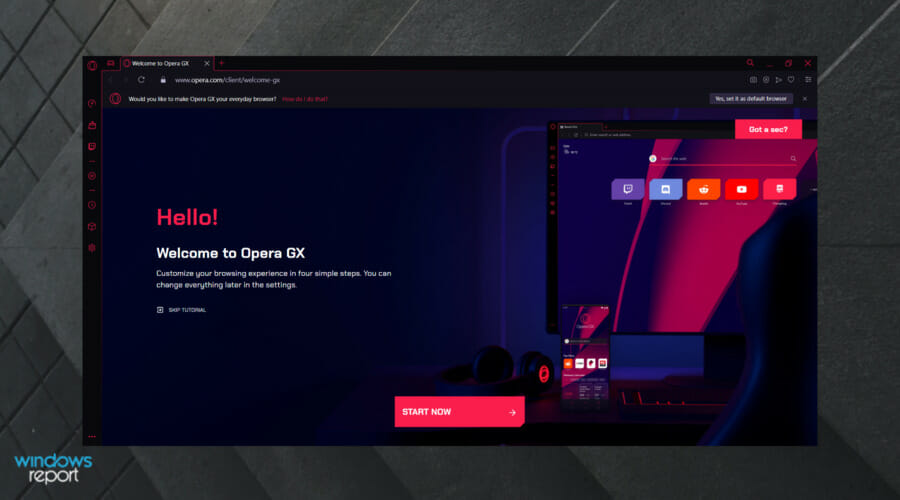
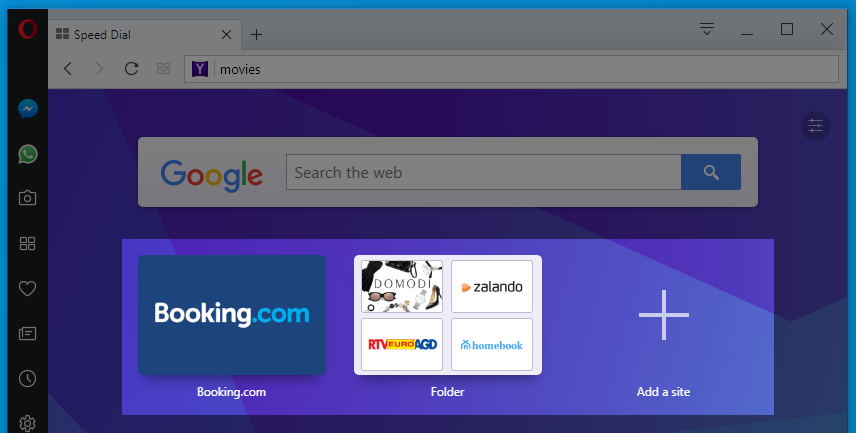
The undoubted best browser for gaming is Opera GX. This browser is specially built to give browsers the best experience.

It has many features like the GX Control that allows you to limit your browser’s resource usage. With this, you can stop your browser from using valuable resources meant for gaming.

Lastly, it packs many gaming integrations that ensure you have virtually everything you need on the same app.

Quick Tip:

For the best browser gaming experience, we advise using Opera GX. The browser has a GX Control feature that lets you easily allocate resources and enjoy smooth gameplay sessions.

Speaking of resources, there’s also a Hot tabs killer feature that can easily close any tab that uses too many hardware resources. In addition, you have full Discord and Twitch app integration.

Opera GX

To play the latest browser games smoothly and without any slowdowns, be sure to use this one.

What are some weird online browser games?

Quick, Draw – AI-powered weird drawing game

draw

The first weird browser game doesn’t have unusual aesthetics, but it’s a bit weird. The game requires you to draw an object, and the AI will guess what it is.

You have 20 seconds to draw the object; in most cases, the AI can guess what you’re drawing. And the more you play the game, the better the AI recognizes your drawings.

Quick, Draw is an interesting game, and it shows you how advanced the AI can be when recognizing patterns, so you might want to try it out.

Other great features:

  • Completely free
  • Simple to use
  • AI-powered
  • Drawing game

⇒ Play Quick, Draw

Akinator Simple game

akinator weird browser games

Akinator has been present for a while. It is one of those weird games that can guess what you think. You just need to imagine a certain character, be it fictional or real, and answer a series of questions.

Each question has five answers, and you need to answer truthfully for the Akinator to guess which character you are thinking about.

The game was able to guess almost all characters, both fictional and real, but keep in mind that it might not be able to guess lesser-known characters, especially if they are fictional.

Akinator is a fun little game, and if you want a simple game that can read your mind, then be sure to try it out.

Other great features:

  • Simple to use
  • Completely free
  • Available on iOS and Android
  • Constantly developing

⇒ Play Akinator

Hole.io – Multiplayer game

hole

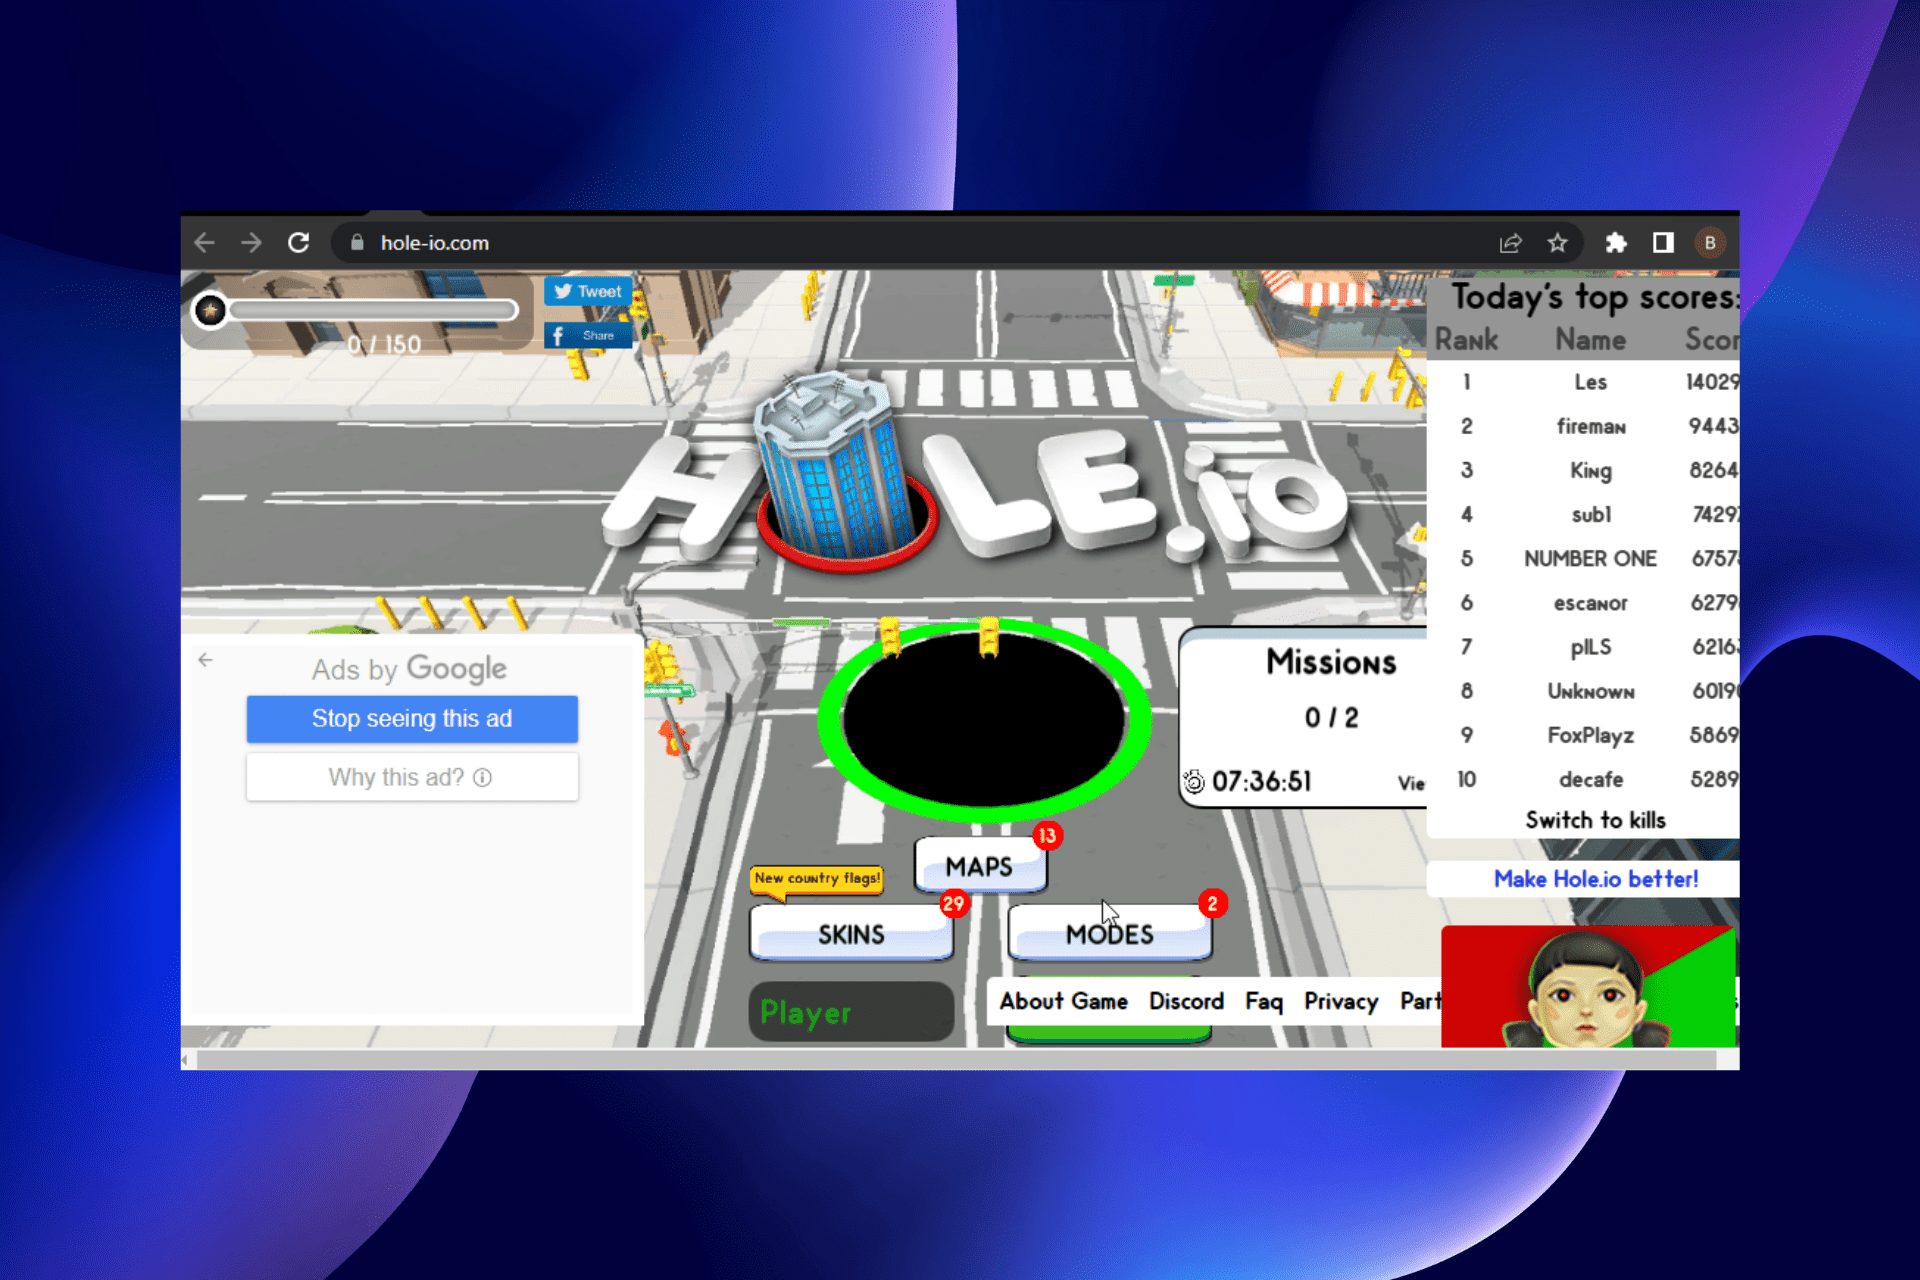
Another great weird browser game that you might want to try is Hole.io. This is a multiplayer game you play in your browser, and your goal is to be the last man standing.

You control a giant hole in the city, and you move around using the arrow keys. For the hole to grow, you must eat cars, pedestrians, trees, and other players.

The game has seven different maps available, dozens of skins, and two game modes to choose from, so if you want a fun multiplayer game, Hole.io is a perfect choice.

Other great features:

  • Free to play
  • Multiplayer
  • Multiple maps, skins, and gaming modes
  • Simple to play

⇒ Play Hole.io

Hanger – Challenging and funny game

hanger

Hanger is a unique game in which you need to swing your way through the obstacles like Spider-man. The game feels like a Flappy Bird clone, but with its own unique spin.

The game is pretty simple, you just need to press and hold the left mouse button and your character will shoot a rope and swing forward. Although this sounds simpit’sit’s a lot more challenging than you think.

While swinging, be sure not to hit any walls or obstacles, or eyou’llu’ll lose your health. You can also collect coins along the way to unlock new skins.

Hanger is a simple, small, and fun weird game, and if haven’ten’t tried it, this might be a perfect moment to do so.

Other great features:

  • Incredibly simple
  • Similar to Flappy Bird
  • Ragdoll physics
  • Unlockable skins

⇒ Play Hanger

Stickman Ragdoll – Easy to play

stickman pocker weird browser games

In Stickman Ragdoll the main objective of the game is to break as many bones on your body as a stickman while performing all sorts of stunts.

You simply select the spot where you wish to apply force and then press and hold the mouse button to set the amount of force that you want to use.

The more bones you break, the more points you get, and you can unlock new areas and vehicles by spending the earned points.

Overall, Stickman Ragdoll is a simple and weird game, and you’re looking for something to pass the time, this game might be the perfect choice for you.

Other great features:

  • Simple to play
  • Physics-based
  • Unlockable maps and vehicles
  • Fun

⇒ Play Stickman Ragdoll

There are all sorts of weird games available, and in this article, we shared a couple of our favorites. Some of the options provided are multiplayer games that allow you to share valuable moments with friends and family online.

Do you need a list of the best browser horror games? Then check our guide for the excellent ones you can play today.

What is your favorite weird browser game? Let us know in the comments section.
5 Best Browser Download Managers to Speed Up Your Downloads

Downloading files is simple and easy, but it’s even better if you’re using a download manager. These simple and light tools help you to speed your download time considerably.

Also, some browser download managers help to organize your downloaded files. Luckily, many great extensions for the best browsers for all devices work as a download manager.

In this quick guide, we’ll show you the list of the best extensions for download that you can use to download files.

Do all browsers have download managers?

Most modern browsers have built-in download managers. This feature allows for basic functionality and will enable you to download light files and interact with your downloads.

However, if you download heavy or multiple files frequently, you need to install a download manager on your browser.

Quick Tip:

For all your download needs, why not use the Opera One browser? The browser is fast, secure, and reliable, plus it has a free and unlimited VPN for an extra layer of privacy.

The browser is built on the Chromium engine, and all Chrome extensions mentioned in this article will work with Opera One, so why not give it a try?

Opera One

For fast and secure downloads, be sure to use one browser.

What are the best browser download managers to use?

Free Download Manager – Simple tool

free best browser download manager

This browser extension comes from the developers of Free Download Manager, and it’s designed to work with Free Download Manager software.

This means that you need to have the actual software installed to use it. All your downloads will be intercepted by the extension and forwarded to the Free Download Manager application.

Overall, it’s a simple download manager extension, and if you’re using Free Download Manager, this is a must-have extension.

Other great features:

  • Simple to use
  • Works with Free Download Manager software
  • Automatically intercepts all downloads
  • Available for Chrome and Firefox

⇒ Get Free Download Manager

Turbo Download Manager – Super-fast browser download manager

turbo

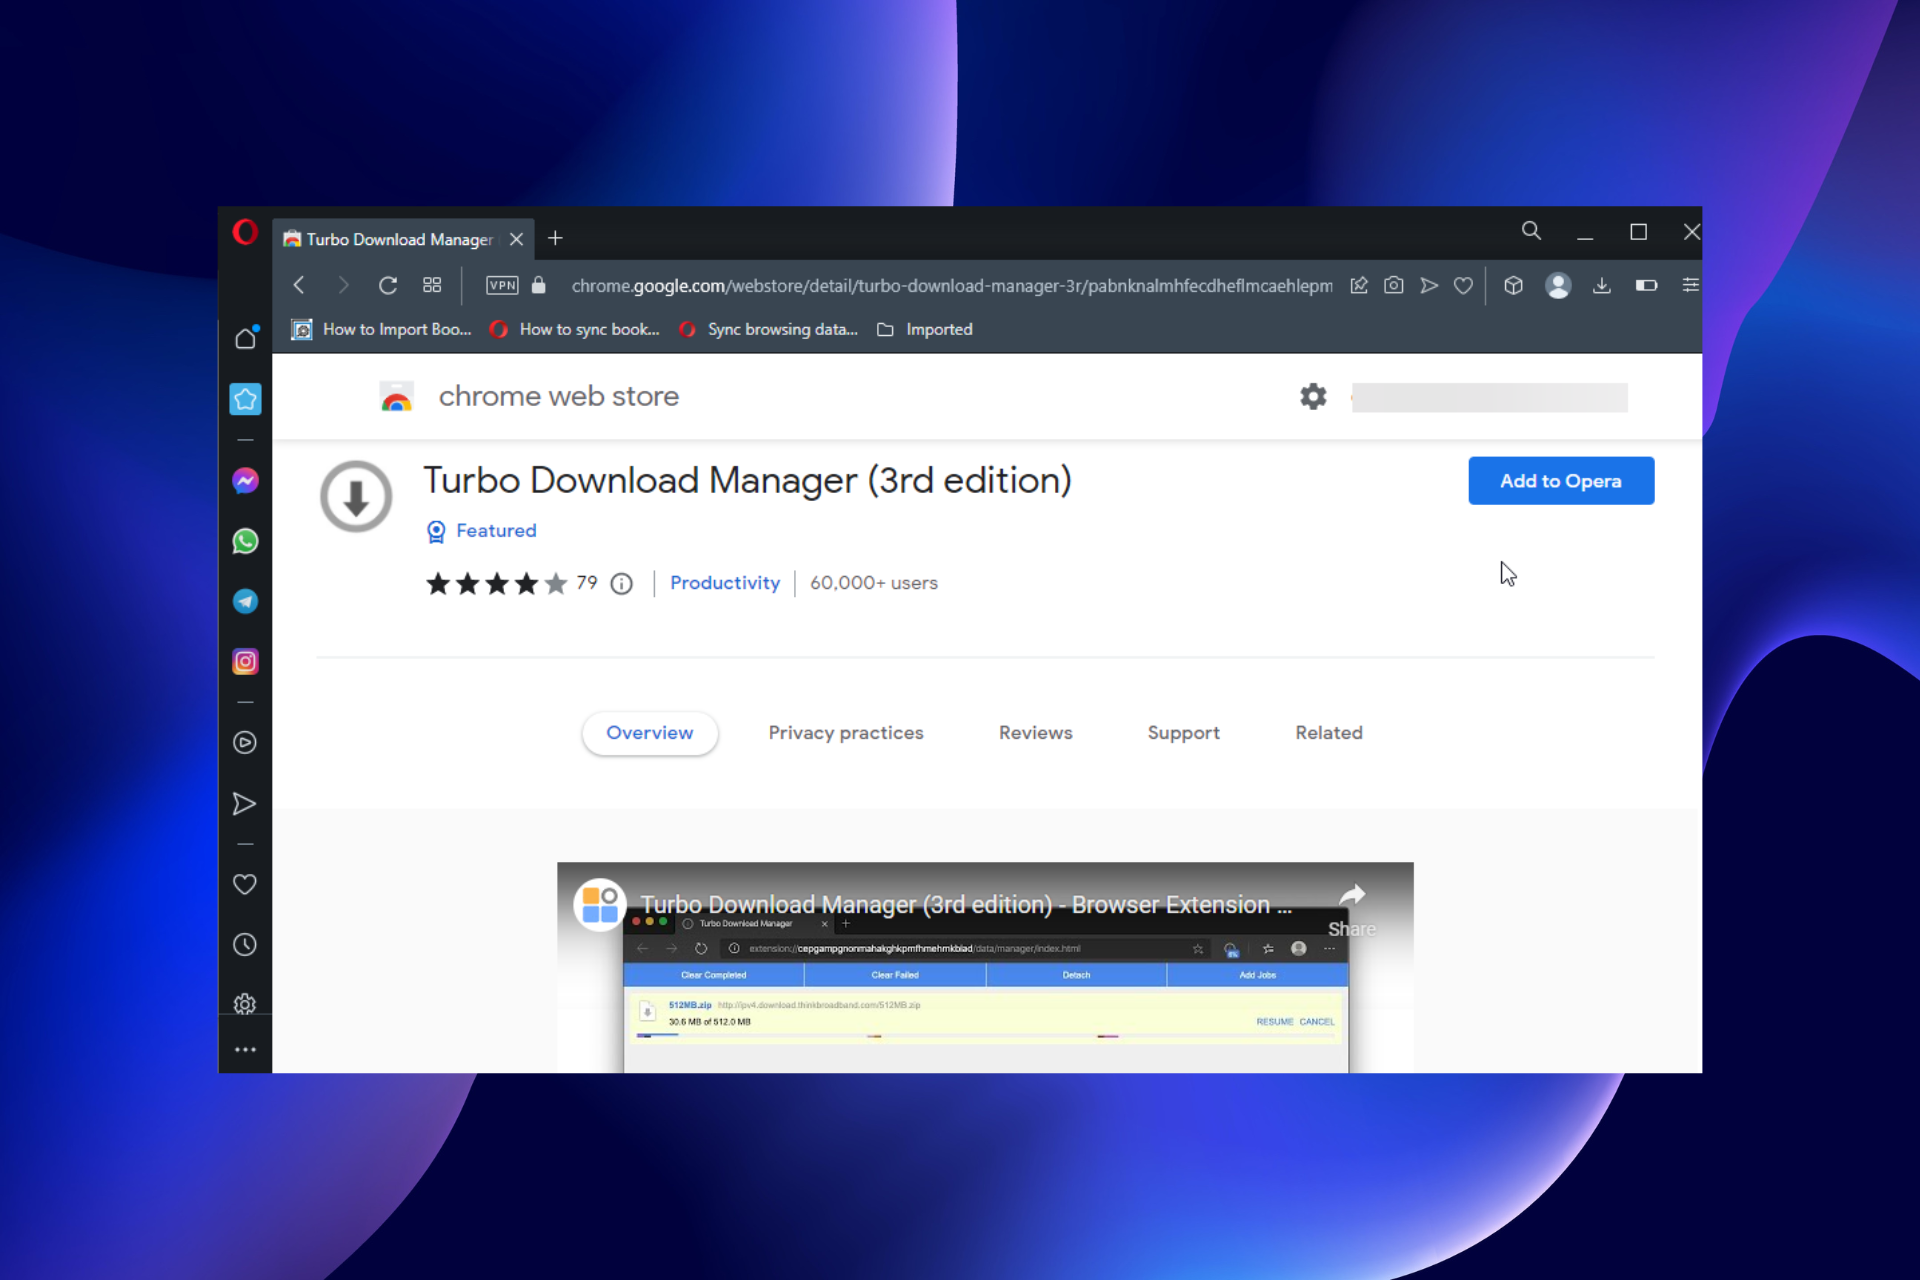
Turbo Download Manager is the right choice if you want a browser download manager. This extension is written in JavaScript, and it doesn’t require any additional software to work.

With it, you can resume broken downloads, pause downloads, and the extension will split files into sections to download them faster.

Turbo Download Manager also has enhanced audio and video file support, and it can easily detect images, videos, and audio for quick download. Overall, it’s a great download manager, so try it.

Other great features:

  • Built on JavaScript
  • Doesn’t require any additional software
  • Lets you resume and pause downloads
  • Available for Chrome and Firefox

⇒ Get Turbo Download Manager

DownThemAll – Bulk files downloader

downthemall

When it comes to downloading manager extensions, DownThemAll is a well-known extension for Firefox, Chrome, and Opera One. The extension is designed to download all links or images from a website, so it’s perfect for batch downloads.

Since this extension works with batch downloads, it also has a powerful renaming feature that can rename all your files automatically.

Of course, it boasts standard features like the ability to pause or resume downloads. Lastly, thanks to the multipart part, you can download files up to 400%, according to the developers.

Other great features:

  • Simple to use
  • Let’s you download multiple files with a single click
  • Renaming option for batch downloads
  • Support for filters
  • Available on Chrome, Firefox, and Opera One

⇒ Get DownThemAll

Chrono Download Manager – Sleek interface

chrono best browser download manager

Another browser download manager that we need to mention is Chrono Download Manager. This is a Chrome extension that will take over all Chrome’s download tasks.

The extension offers a sleek interface to see all your downloads neatly organized in a list or a table. If needed, you can manage your downloads into custom groups using filters.

Of course, the extension has a powerful renaming feature, allowing you to rename your downloaded files according to specified criteria easily.

Other great features:

  • Sleek user interface
  • Quick access to your downloads
  • Ability to organize downloads
  • Notifications
  • Available only on Chrome

⇒ Get Chrono Download Manager

Multithreaded Download Manager – Easy to use

multithreaded

This is a Firefox download manager extension and a pretty basic download manager. The extension allows you to have multithread downloads in Firefox, which may increase your download speed.

It’s worth mentioning that this extension doesn’t rely on third-party software, so you won’t have to install anything. As for the number of threads, the extension works with up to 6 threads by default.

Overall, this is a pretty simple download manager, and if you’re looking to add multithread download support to Firefox, be sure to try it out.

Other great features:

  • Simple to use
  • Available on Firefox
  • Support for multithread download
  • Can support up to six threads by default

⇒ Get Multithreaded Download Manager

Which Internet browser has the fastest download speed?

Opera One is the browser with the fastest download speed. It is one of the best browsers for downloading large files.

Also, you can install the best download managers like Turbo on it and others from its add-ons store and the Chrome Web Store.

These are some of the best browser download manager extensions that you can get, so if you want to speed up your downloads or be able to resume them, feel free to try some of these extensions.

Download managers can also help you with issues such as Interrupted network error in Opera, so don’t hesitate to use them.

If you need a list of the best privacy and security extensions for Chrome, check our detailed guide for the excellent options to download today.

Feel free to let us know which of the extensions you enjoy using on your browser in the comments below.

How to Fix YouTube Green Screen Glitches & Problems on Videos

YouTube is one of the most popular websites available, used by probably all the users who have access to the Internet.

YouTube can be accessed from touch-based devices and desktop computers, regardless of whether the devices are running on Windows, Android, iOS, or any other platform.

In most cases, the YouTube green screen issue is reported by Windows 10 users using Internet Explorer as their default browser. Unfortunately, this is not the only video playback issue affecting IE users.

This annoying error appears when watching a YouTube video, and a green screen suddenly appears. In some cases, you wouldn’t even be able to play the video because of the green screen issue.

In this article, we’re also going to cover the following issues:

  • YouTube videos green and distorted: Your drivers likely cause this, but you should be able to fix the problem by updating them.
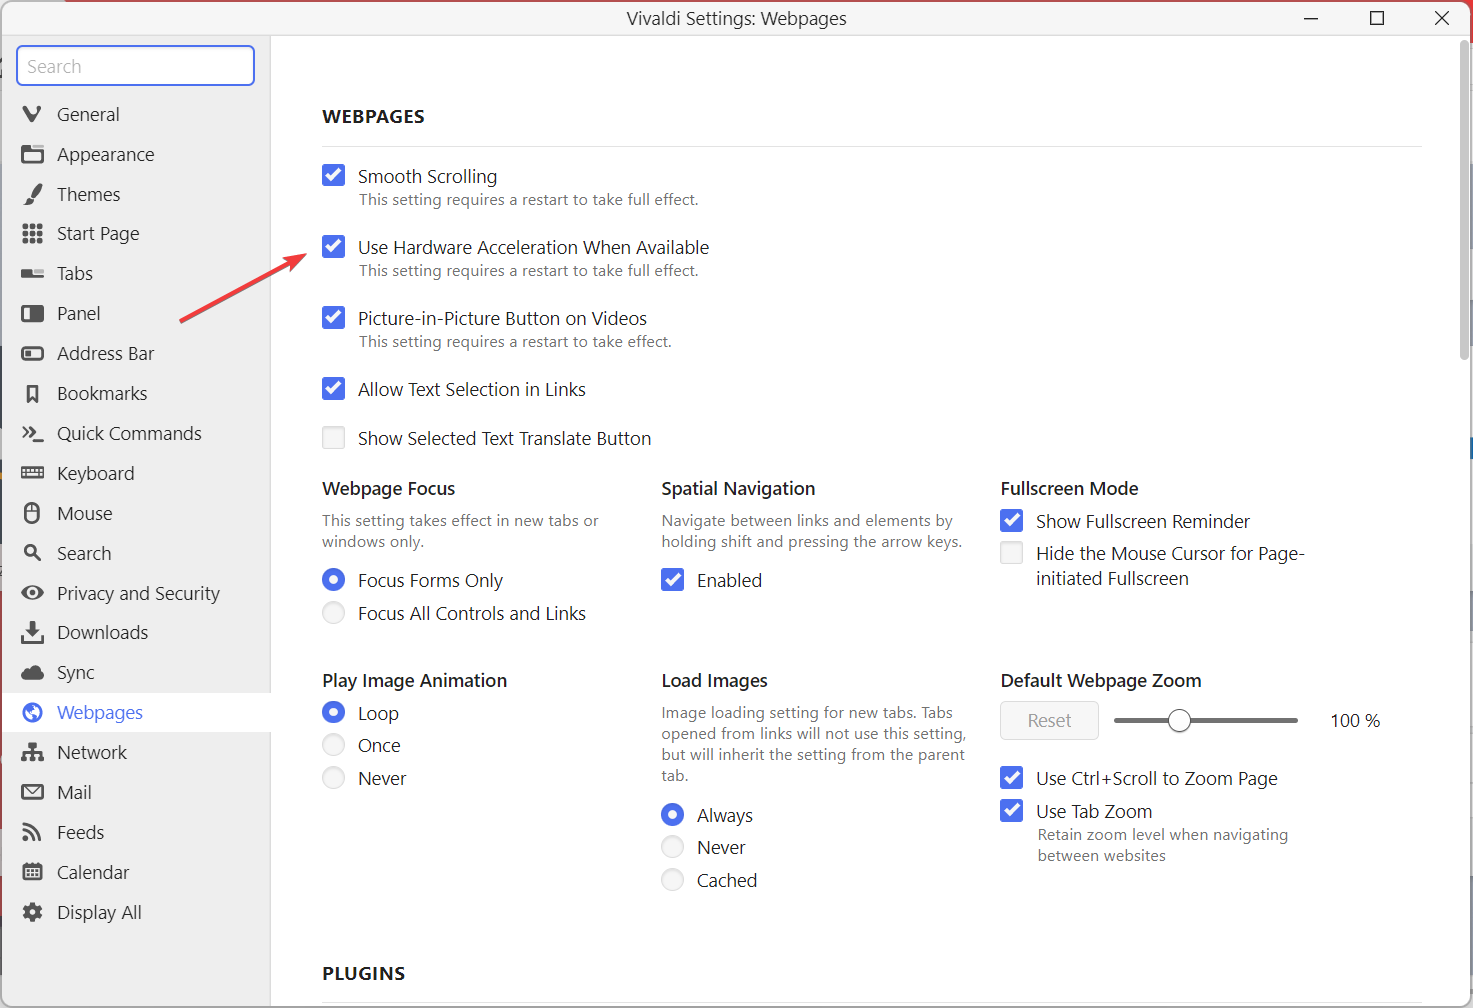
  • YouTube video green screen in Firefox, Chrome, Internet Explorer: This problem can appear on almost any web browser. However, you can fix the problem simply by disabling hardware acceleration in your browser.
  • YouTube green screen crash: Sometimes, your browser might freeze or crash after getting a green screen on YouTube. Problematic or outdated drivers most likely cause this.
  • YouTube green screen in Windows 10: This problem can affect any browser on any version of Windows. However, the solutions are almost the same for every version of Windows.
  • YouTube green screen playback, audio only, no video: The video is not working, but the audio works without any problems.
  • YouTube green screen hardware acceleration – Hardware acceleration is the most common cause of this problem, and in this article, we’ll show you how to disable it for all major browsers.

Why are YouTube videos flashing green?

The YouTube green screen glitch issue is usually due to driver problems. If your graphics driver is faulty or outdated, you will likely experience the problem.

Also, if some YouTube videos are green and distorted on your browser’s screen, it might be down to the hardware acceleration feature. The YouTube player accesses this feature to give you a smooth streaming experience.

But, it might cause an issue if your device does not have the requirement to use it.

Why does my YouTube screen keep glitching?

If you are experiencing screen glitches while watching YouTube videos, it might be down to the video quality you are streaming.

Another possible cause is the wrong browser settings. This is especially true if you start noticing the problem after making custom changes to your browser.

How do I fix the screen glitch on YouTube?

1. Disable hardware acceleration

In Internet Explorer or Microsoft Edge

  1. In the search field, type internet options, then click on the Internet Options from the menu.start internet options
  2. Navigate to the Advanced tab, and under the Accelerated Graphics section, check the Use software rendering instead of GPU rendering* box.
  3. Click on Apply and OK to save changes.
    YouTube green screen Windows 8.1

In Firefox

  1. Click the menu icon in the top right corner of Firefox and choose Settings.
    settings firefox youtube green screen glitch
  2. Go to the General section and scroll down to the Performance section.
  3. Uncheck Use recommended performance settings and Use hardware acceleration when available.
    hardware youtube green screen glitch
  4. Now close the options tab, and hardware acceleration should be disabled on Firefox.

In Google Chrome

  1. In the top right corner, click the menu icon and choose Settings from the menu.
    chrome settings
  2. Scroll down and click on System.
    system
  3. Toggle the switch for Use hardware acceleration when available backward to disable it.
    use hardware youtube green screen glitch
  4. Close the Settings tab and restart Chrome.

2. Install an older driver

2.1. Uninstall the current driver

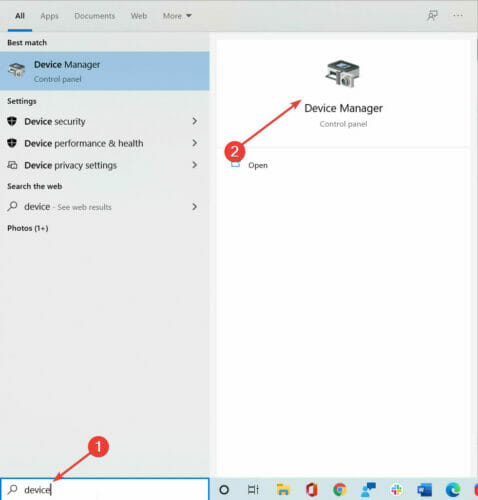
  1. Type device in Windows search and click on Device Manager from the results.
  2. Locate your graphics card, right-click it, and choose Uninstall device from the menu.
    YouTube green screen playback
  3. Check Delete the driver software for this device and click on the Uninstall device button.

Some users suggest using Display Driver Uninstaller to remove all files associated with your graphics card. Once you uninstall your driver, Windows will install the default graphics driver.

2.2. Download and install an older driver

We wrote a simple guide on updating your graphics card driver, so check it out.

If the older driver works for you, then you’ll have to prevent Windows from auto-updating it in the future.

If using an older driver doesn’t help, you might want to update your graphics card driver to the latest version and see if that solves the issue.

You can manually update your graphic card driver using Device Manager from the Display adapters section and selecting Update Driver Software from the menu.

2.3. Automatically update drivers

If updating the graphic card driver manually doesn’t work, or you want to be safe from any PC malfunction and safe time, we suggest you do it automatically.

Updated drivers for devices you’ve already connected to your computer may become available later; however, those drivers aren’t installed automatically.

You can automatically update your graphic card drivers using a dedicated tool like Outbyte Driver Updater that can scan for the last version of drivers. You have to select the drivers you need and let the tool update them for you.

Outbyte determines what computer you have and what drivers are needed. Afterward, it locates the necessary drivers and installs them on your PC. In addition, it creates a backup of your current drivers first in case something goes wrong and you need to roll back your drivers.

3. Change your display settings

  1. Press Windows key + R to launch the Run prompt.
  2. Type control in the run box and click OK.
    run
  3. Under Category, you need to select Small icons.
  4. Click on Display.control panel display
  5. Then choose Change display settings from the left side of the Control Panel.
  6. Pick Advanced Settings from the window that will be displayed.
  7. Select the Monitor tab and choose the High Color 16 bit option.monitor
  8. Click Apply and then choose Advanced settings once more.
  9. Go to the Troubleshooting tab.
  10. Select the Change settings option and move the hardware acceleration pointer to the left.
  11. Click OK and save your settings.

4. Try a different browser

Before you start more complicated fixes, you should take into consideration switching to Opera One, a safer and faster browser tailored for streaming.

Nothing will disrupt your YouTube sessions because this browser comes with a built-in Adblocker that will eliminate any distractions. Apart from that, the included VPN service will protect your privacy at all times.

If you’re unfamiliar, the Virtual Private Network conceals your identity by routing all your Internet traffic through safe servers worldwide. And this service is free and unlimited to use.

If you want to watch your YouTube video but still be aware of what’s going on on your desktop, Opera’s got you covered.

With the PIP function, your YouTube window will hover over the screen without obstructing all the other windows on your desktop.

Opera One

Only a few of the features included in Opera One for quicker, smoother, and distraction-free browsing.

5. Disable Hyper-V

  1. Type windows features in search and click on Turn Windows features on or off from the results.
  2. Locate and disable Hyper-V and all Hyper-V-related features from the list.
  3. Click on the OK button to save changes.

6. Run the troubleshooter

  1. Press Windows key + I to open the Settings app.
  2. Now navigate to the Update & Security section.
    YouTube videos green and distorted
  3. In the left pane, select Troubleshoot.
  4. In the right pane, select Hardware and Devices and click on Run the troubleshooter.
    YouTube video green screen Internet Explorer
  5. Now follow the instructions on the screen to complete the troubleshooting process.

7. Change the video quality

  1. Play any YouTube video in your browser.
  2. Click the Gear icon and click on Quality from the menu.
    ouTube green screen audio only
  3. Now choose a different video quality from the list.
    YouTube green screen hardware acceleration

Keep in mind that this is just a workaround, so you might have to repeat it for every video with this problem.

Speaking of green screen issues, this problem also affects the Windows 10 OS. If you need to fix the Green Screen of Death errors, this guide will help you fix them in no time.

So, you have it: that is how you can fix the annoying YouTube Green Screen issues. Do share your experience and results with us via the comments section below.

Black Screen on Opera GX: 5 Ways to Get Rid of it

A black screen in Opera GX will prevent you from browsing the web, and it can also make playing multimedia a lot harder, so today we’re going to show you how to fix that.

How do I get rid of the black screen on Opera GX?

Before we start, if you’re using any power saving settings on your PC, disable them.

1. Update to the latest stable version

  1. Open Opera GX. Tap the Menu button in the upper left corner.
  2. Select Update & Recovery.
    Click on updates and recovery.
  3. Click on Check for update.
    opera gx checking for updates
  4. If there’s a new version available, it will be installed right away.

2. Clear browsing data

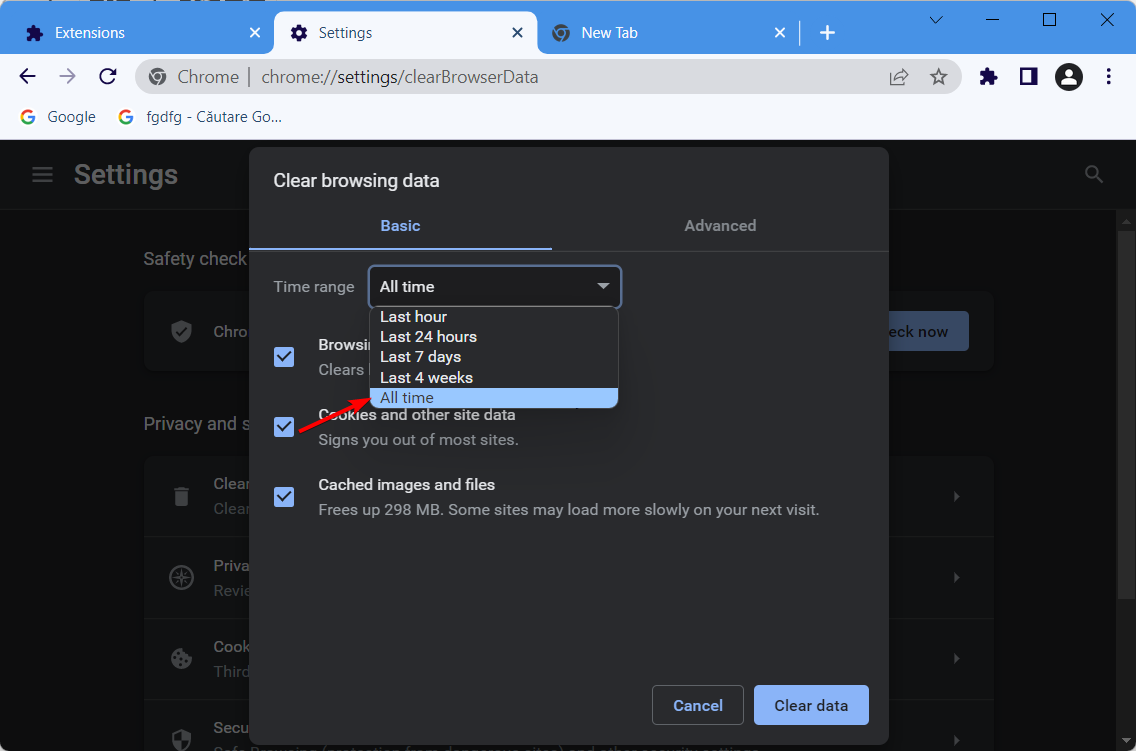
  1. In Opera, press Ctrl + Shift + Del.
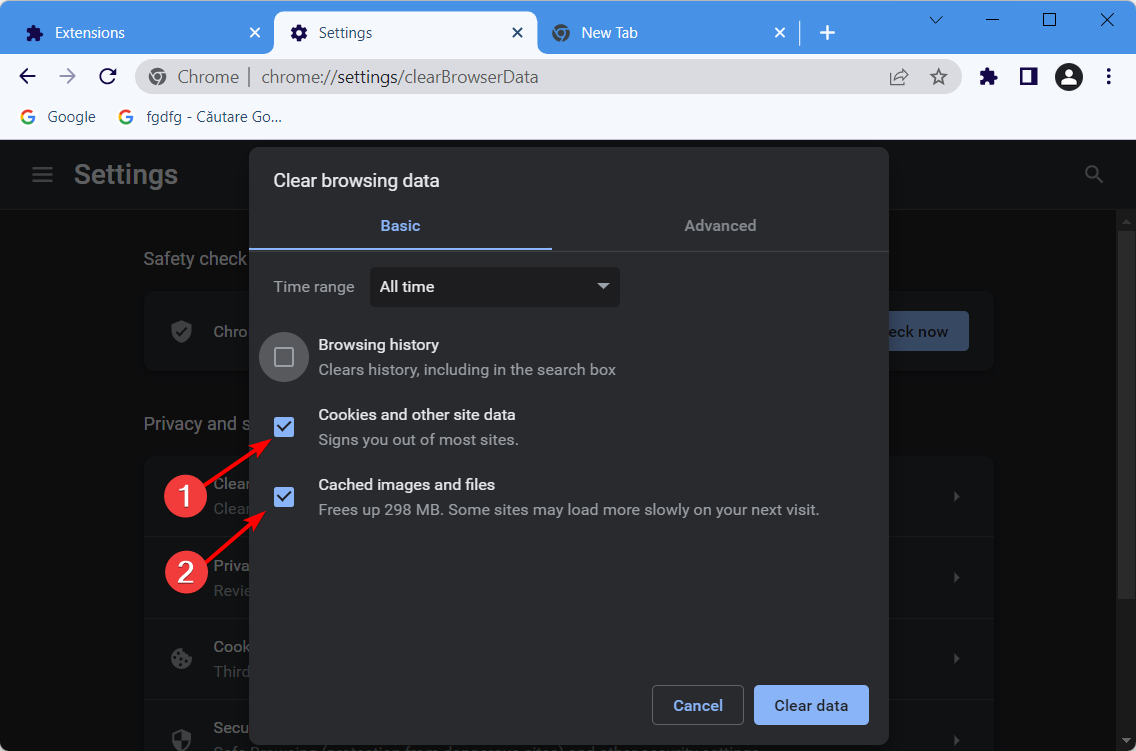
  2. Check the boxes you want to clear. Special emphasis goes to Cached images and files and Cookies.
    clear history opera gx all time
  3. Set the time range to All time and click on Clear data.

3. Disable hardware acceleration

  1. Open Opera GX. Press ALT + P to open Settings.
  2. Expand the Advanced section.opera gx settings advanced
  3. Scroll down until you see the System section, then toggle off Use hardware acceleration when available.
    use graphics acceleration when available opera GX
  4. Restart your browser and see if the issue persists.

For more information, we have a dedicated guide on how to turn off hardware acceleration on Opera GX, so don’t miss it.

4. Use the use-angle flag

  1. In Opera GX, go location using the address bar: opera://flags/#use-angle
  2. Set the ANGLE graphics backend to OpenGL or D3D9 or D3D11.
    choose angle graphics backend flag opera gx
  3. Restart the browser.

5. Update your GPU drivers

  1. Press Windows key + X.
  2. Click Device Manager.
  3. Navigate to Display Adapters.
  4. Right-click the troubled GPU device and choose Update Driver.
  5. Finally, once the driver installs, restart your PC.

If this method is too completed for you, we also have a guide on how to update graphics drivers on Windows 11, so feel free to check it out.

This issue can affect only specific services, and we covered what to do if Opera shows a black screen on Discord screen share. We also have a guide that will help you fix a black screen on YouTube in Opera GX.

As for other features, we have a great guide on how to zoom out or zoom in in Opera, so you might want to check it out.

That should wrap it up. In case you have any questions or suggestions regarding Opera, make sure to share them with us in the comments below.

How to Format USB for Xbox One and Xbox One S

If you want to know how to format a USB drive for Xbox One and Xbox One S, this article will help you.

The Xbox consoles are very reliable, stable, and fast. Microsoft’s gaming consoles are true powerhouses, but they also go down from time to time.

If your Xbox One console doesn’t install the latest updates, you can also perform an offline system update.

In order to do this, you need a flash drive already formatted to NTFS.

What format does a USB need to be for Xbox One?

The Xbox One supports both USB 2 and 3, even the USB 1. So, there should not be an issue with using any of these USB drives on this device. However, if you consider using storage, you must format it to FAT16, FAT32, exFAT, or NTFS formats.

Please note that not all file system formats will work great for all purposes. It is always recommended to use the NTFS unless you need other formats for special cases.

What format does a USB need to be for Xbox Series S?

Xbox Series S supports any USB devices compatible with USB 3. For storage, the format should be NTFS. Otherwise, it may not work.

Does USB 3.2 work with Xbox One?

USB 3.2 is backward compatible. It means this version will work with the previous version of USB products like 3.1, 3.0, or even older editions. So, any USB 3.2 device should work with Xbox One.

How do I format a USB for Xbox one?

While they’re both Microsoft-owned, PC and console work differently and execute different OS versions. Compatibility is a big deal, so one cannot help but wonder: what format does Xbox One use for USB?

NTFS should be the only choice for most purposes, even though it can read files from other formats as well. We will guide you through the formatting process step by step. Here we go.

How to format a USB drive for Xbox One on PC

  1. Plug a compatible USB storage drive into your PC.
  2. Open File Explorer by pressing Win + E on the keyboard.
  3. Go to This PC.going this pc from quick access windows 11 file explorer
  4. Right-click on the Removable storage and choose Format.choosing format removable storage windows 11
  5. Choose the format, preferably NTFS, and click on Start.formating usb storage windows 11

It may take a while to complete the process.

If you are curious about how to format USB 3.0 for Xbox One, you should know any removable storage device, whether it is USB 2.0, 3.0, 3.1, or USB-C, will need the same steps to format.

After formatting, you can start using it as you have set up the flash drive to download the latest Xbox One update files. You can then connect it to your console and install the updates.

As a quick reminder, you need a USB flash drive with a minimum of 4 GB of space to update your console.

For more information on how to perform an offline system update on your Xbox One or Xbox One S console, you can check out Microsoft’s Support page.

If you’ve encountered an error message during the update process, check out our dedicated article on how to fix frequent Xbox One S errors.

How do I change my USB from FAT32 to NTFS?

Convert directly

If you already have files on storage that were formatted for Xbox 360 and are not working with newer versions, you may consider converting the storage device directly. You can do it by using a simple command. Here are the steps:

  1. Insert the USB drive and remember its drive letter. For example, it is F.
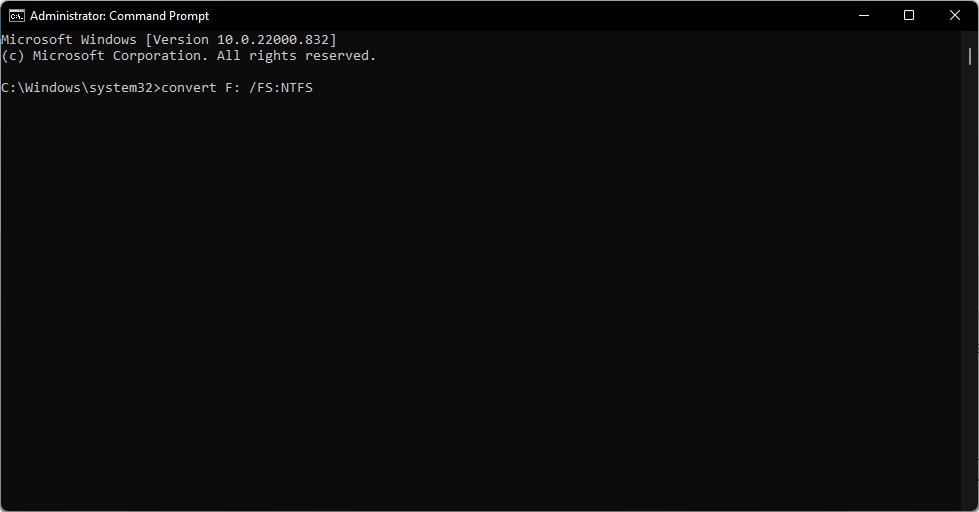
  2. Open the start menu, type cmd, right-click on Command Prompt and choose Run as Administrator.
  3. Now, run the following command by replacing the drive letter for yours: convert F: /FS:NTFSrunning convert disk format command in cmd
  4. Press Y if it asks for permission.

Make sure you have replaced the letter F with your one. If your removable storage device letter is E, the command should be like this: convert E: /FS:NTFS

It may take some time, depending on the capacity of the drive and how many files are there.

Reformat

In the above, you already have seen how to format a USB drive in NTFS for Xbox One. By following the same way, you can format to any available file systems you want.

There you have it, now you know how to format a USB for Xbox One, 360, Series X, or S for games, whether it is USB 3.0, 3.1, or any other versions. Try your hand at this guide, and feel free to reach out for any further questions that may come along.

3 Quick Ways to Fix Chrome When the Scroll Bar is Missing

If you encounter the Chrome scroll bar missing problem, you can easily get rid of it by following the methods mentioned in this article.

Google Chrome is the most popular browser out there. It is a reliable tool for surfing the Internet and has many great features.

However, nothing is perfect, and Chrome is plagued by many issues. Many users encountered an annoying problem that makes browsing almost impossible: the scroll bar is missing.

Luckily, there are some solutions available, and today we will show you how to fix this error in no time.

Why did my scroll bar disappear in Chrome?

The scroll bar on Google Chrome or any other browser may disappear for some common reasons. These are:

  • Problematic third-party extensions
  • Outdated version of browser
  • Enabling any experimental features

If any of these reasons exist, the horizontal or vertical scroll bar missing problem may appear on Chrome. However, fortunately, you can easily get rid of this problem.

Quick Tip:

To avoid this issue (and many others), you can change your browser. There are many great tools to surf the Internet out there. We recommend Opera One to navigate securely and without any worries.

Any issues with the UI elements can be easily fixed, either by using the built-in customization tool. Opera One also brings modern functions as built-in AI, VPN and Ad blocker.

Opera One

Customize the way your Internet browser looks and feels, thanks to Opera’s inherent versatility.
Free Download Visit website

How do I restore my scroll bar in Chrome?

1. Update Chrome

  1. Open Chrome.
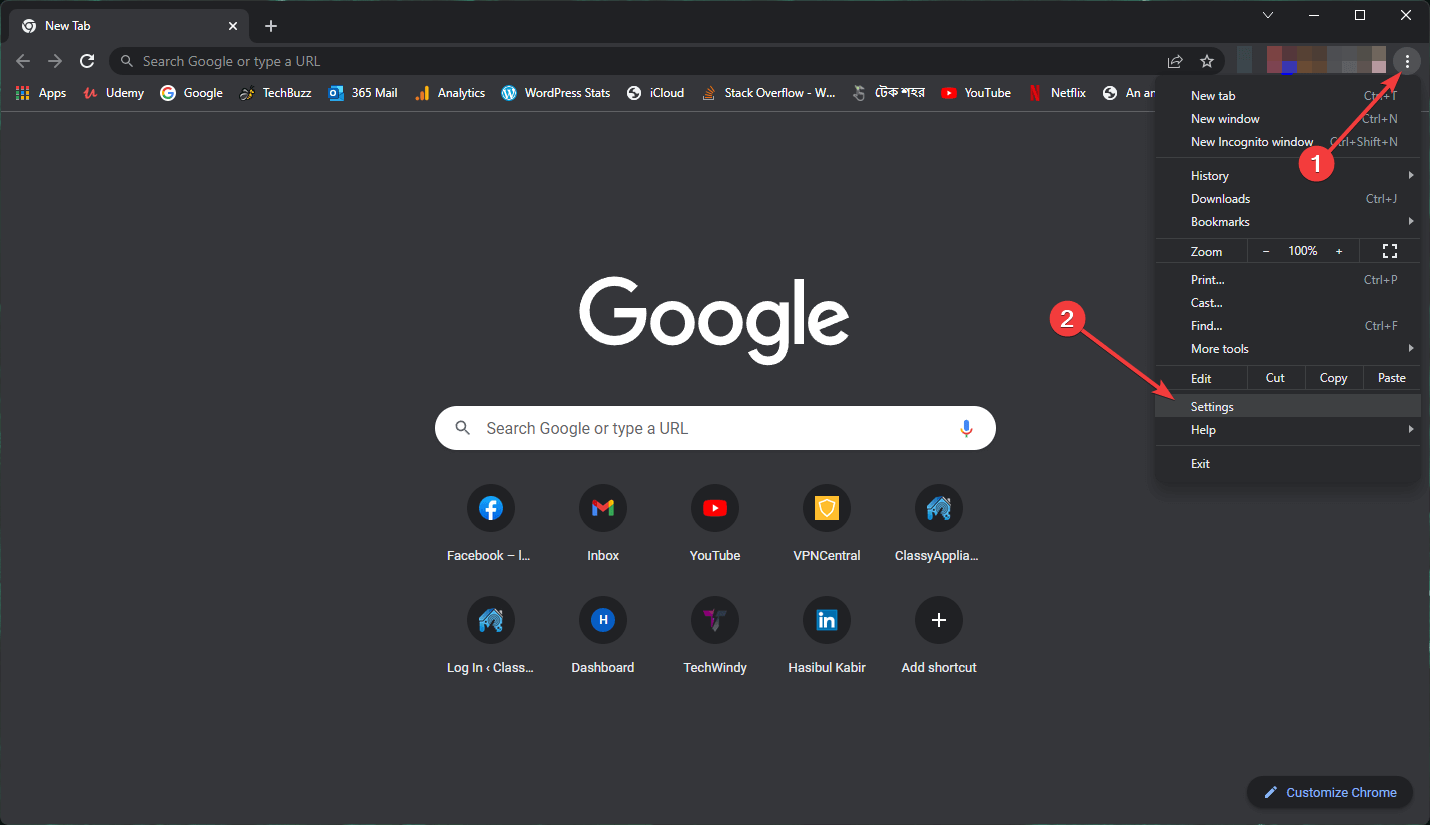
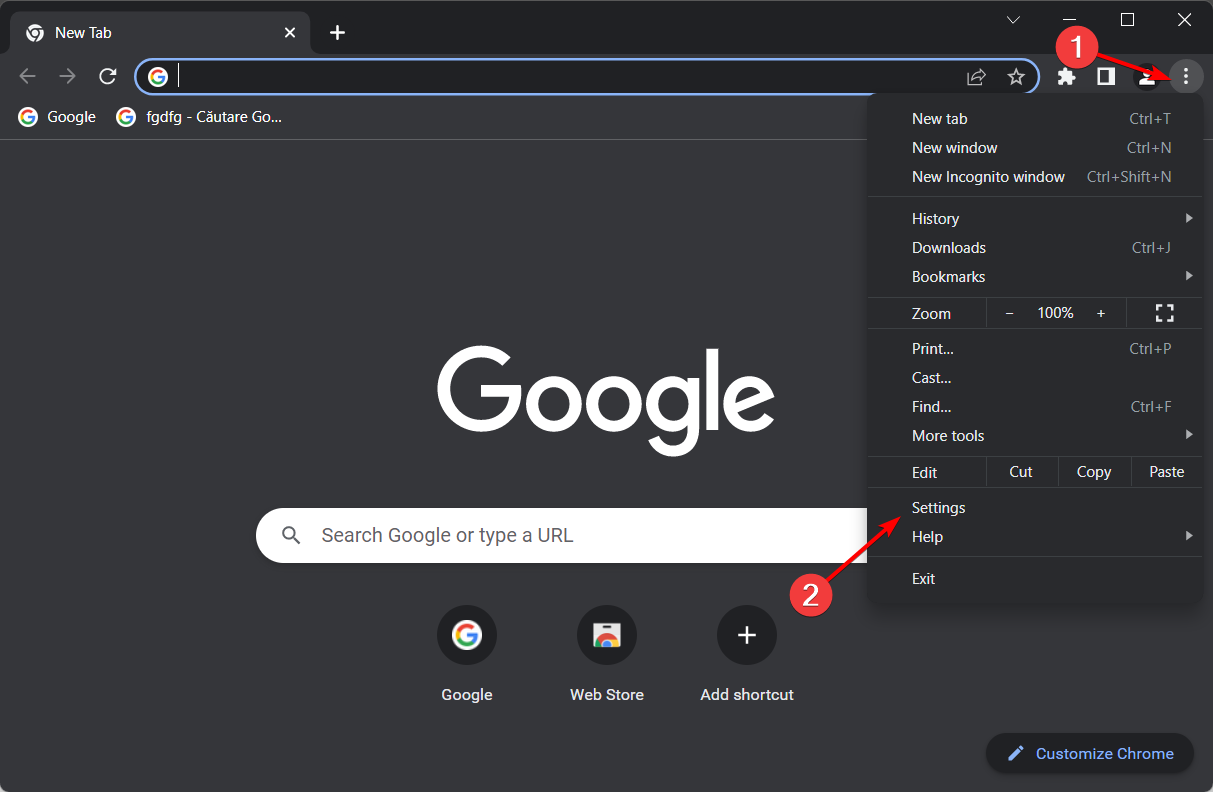
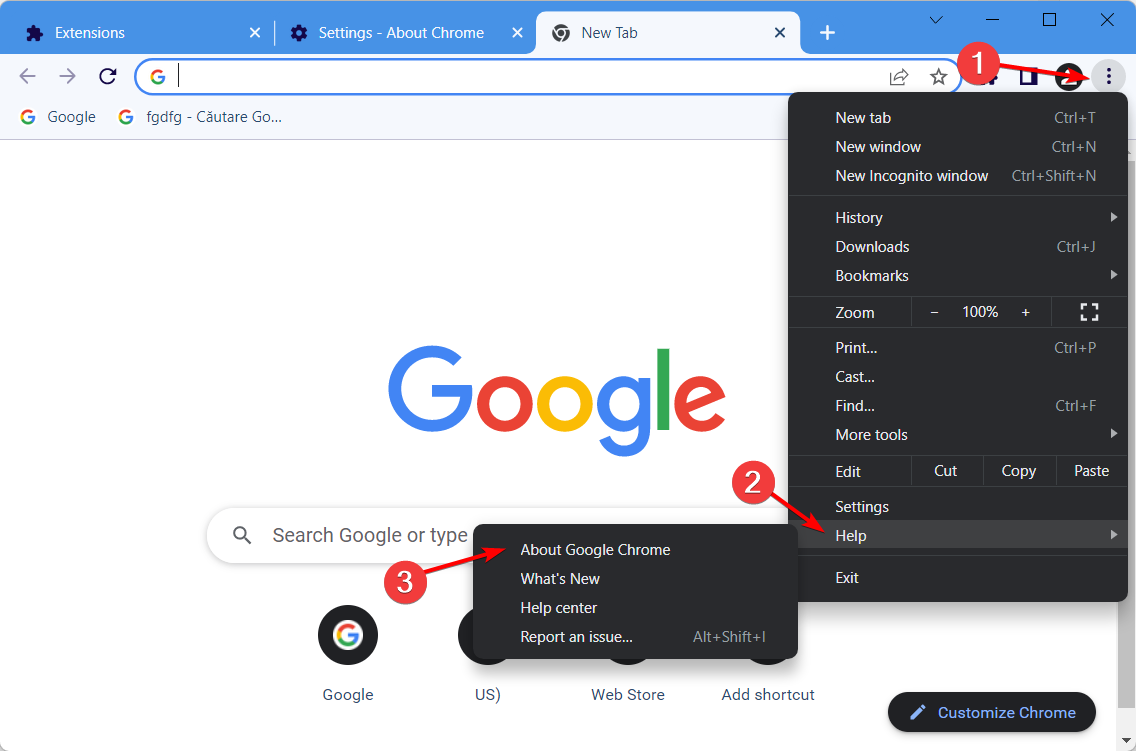
  2. Click on three vertical dots on and then go to Settings.going settings chrome
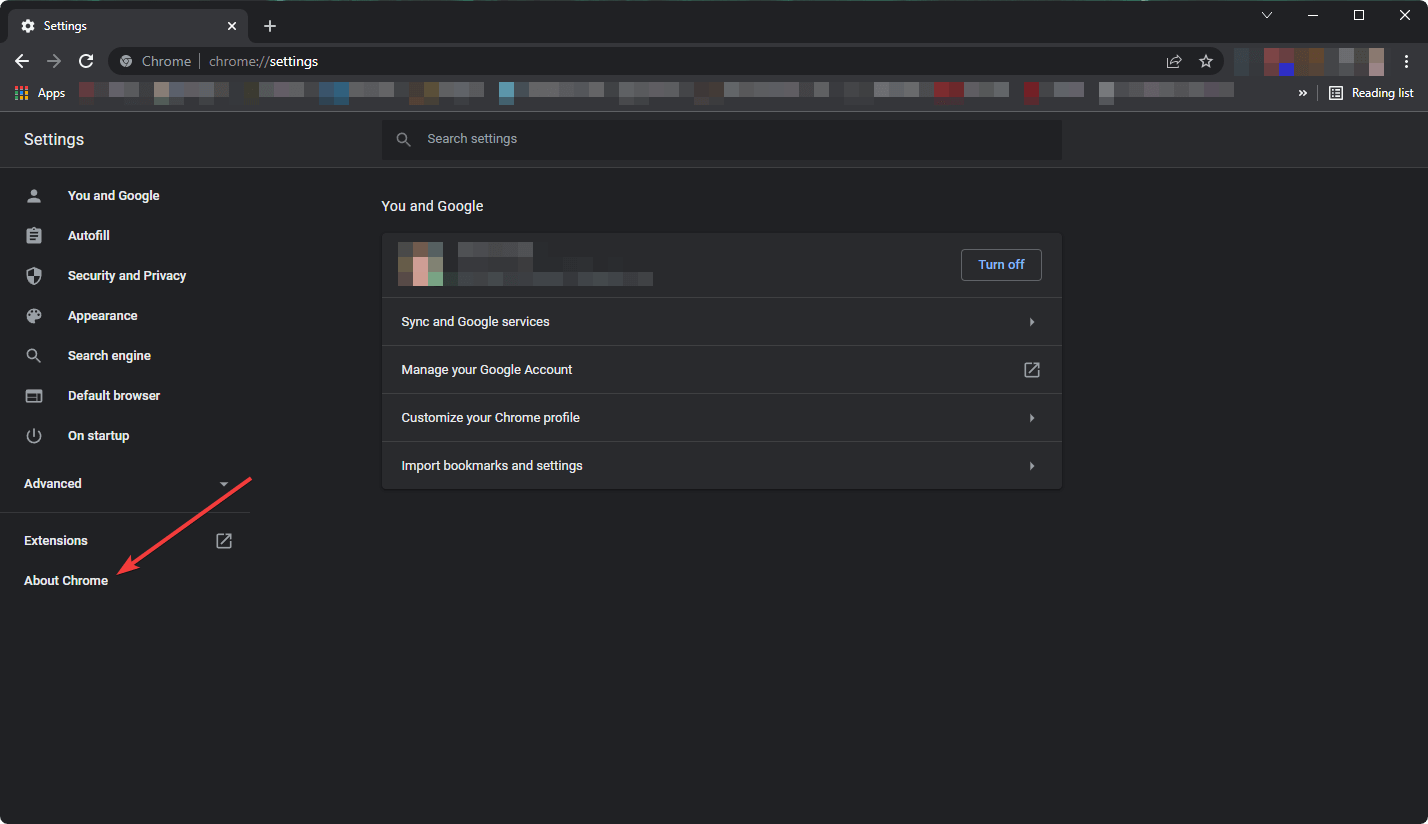
  3. Click on About Chrome.going about chrome
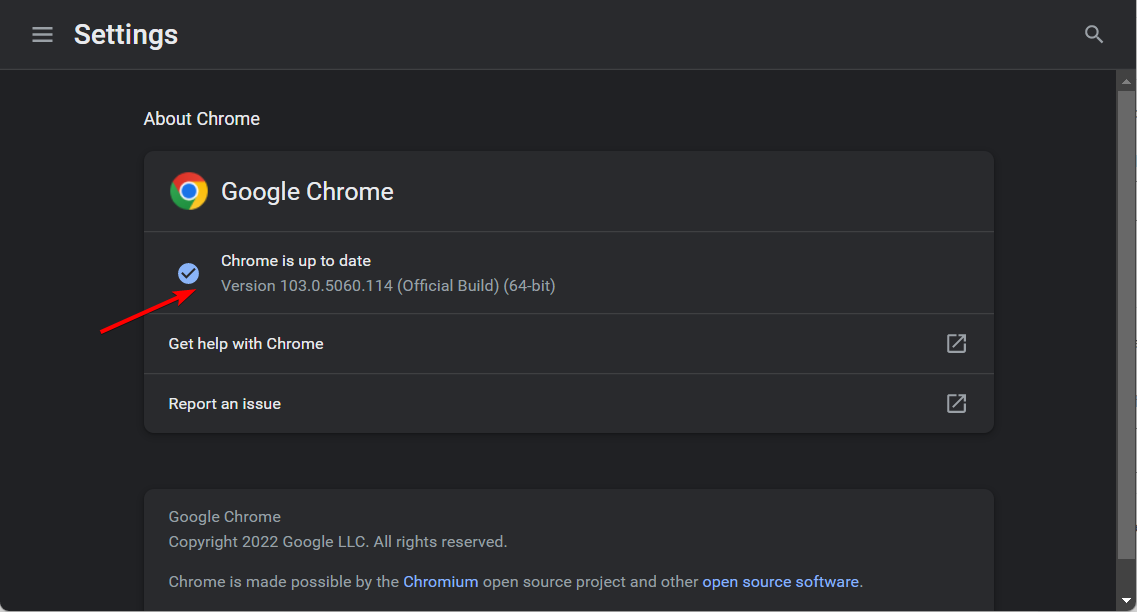
  4. Chrome will check for the update and install automatically if it finds any newer versions available.
  5. Restart Chrome.

Many users reported that this error appears on older versions and Chrome, and it is something that Google solved with an update.

Updates are an important element for keeping your system and software safe from malware and other online threats that may cause errors.

Sometimes a simple action like this, performed regularly, goes a long way when it comes to a secure and smooth internet experience.

Therefore, keep in mind to update your browser constantly to make sure Chrome will run properly and the scroll bar not showing error will not return.

2. Disable extensions

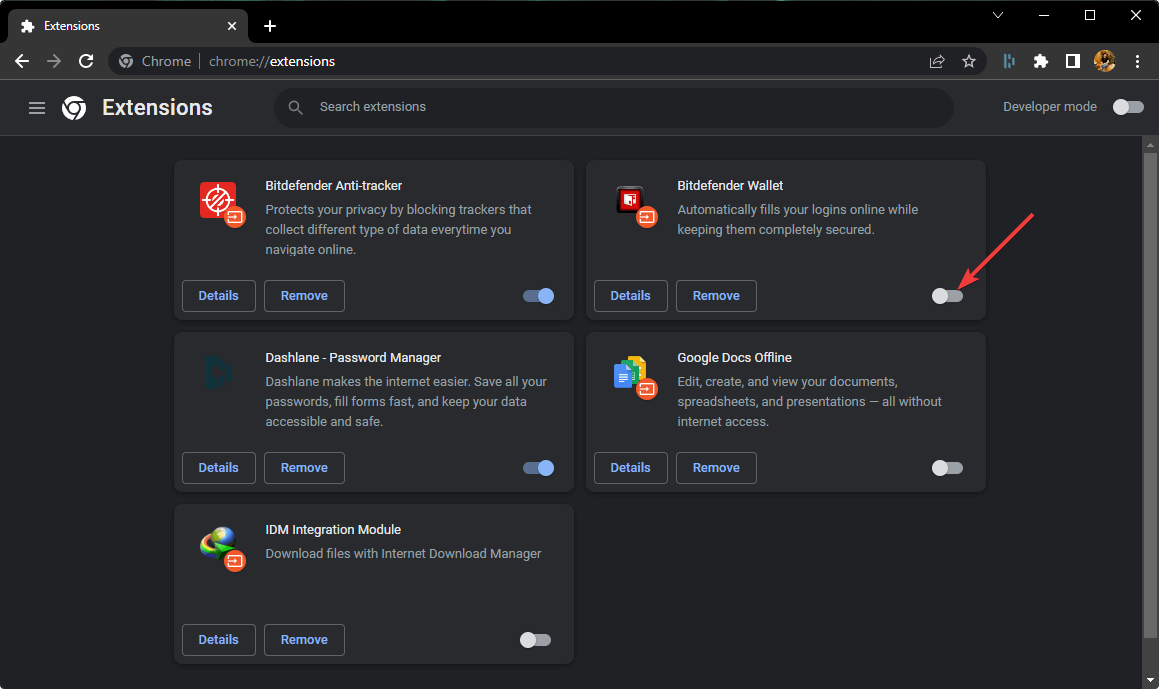
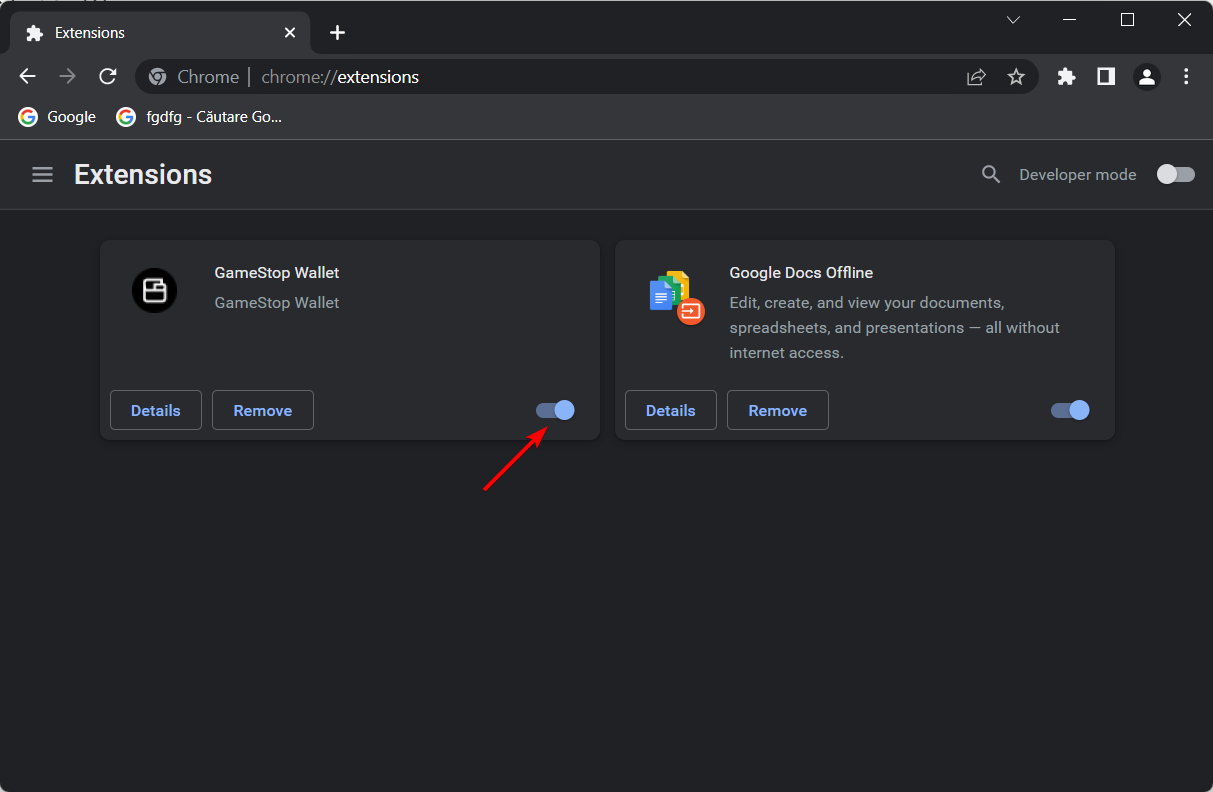
  1. Type the following address in the address bar and hit Enter: chrome://extensions/
  2. Toggle the switch off for the extensions you want to disable.disabling extension chrome

A missing scroll bar is a major issue in Chrome, but fortunately, you can solve this issue in no time with our solutions.

Update your browser constantly or install another browser. We recommend UR Browser for enhanced protection.

Also, you don’t need to worry about losing your bookmarks. You can import them with the help of one of these tools.

It is worth mentioning that some plugins might be faulty. In this case, disable the extension to solve the Chrome bottom or side scroll bar missing issue. If you need that plugin, you can install it again to see if the problem persists.

Alternatively, you can choose a similar extension with the same function to keep your browser top-notch.

3. Verify experimental function settings

  1. Go to the following location using the browser address bar: chrome://flags/#overlay-scrollbarsdisabling chrome overlay scrollbars experimental featured
  2. Disable the Overlay Scrollbars and relaunch Chrome.

Chrome doesn’t have dedicated scrollbar settings. But, you may have enabled related experimental features like Overlay Scrollbars. It may cause problems. So, Disabling it is a good idea to fix our problem.

In the above, we have shown how you can troubleshoot the Chrome scrollbar missing error. Did our solutions help you? Do let us know in the comments section below!

10 Ways to Fix Your Browser if It’s Not Working on Windows 7

While an older operating system, a lot of PC users still use Windows 7 because it’s simple and lightweight. However, users have reported that their browsers are not working on Windows 7. Keep reading to find a solution to this issue.

Since its debut in 2009, Windows 7 has become the preferred operating system for users all over the world. Even to this day, users still prefer the OS over Windows 10 or 11.

Even though Microsoft pulled support for Windows 7 in 2020, users still prefer it. If you want to keep using Windows 7 forever, then check out our guide on how to do that.

Why is my browser not working on my Windows 7?

One of the most common causes of browsers failing to respond in Windows 7 is that the browser hasn’t been updated. Check your browser’s settings to see if it’s up to date. Another common cause could be poor network connection or issues.

Do browsers still support Windows 7?

Most browsers still support Windows 7, some may not have all the features and perform as well as they do in Windows 10 or 11, but they will still work. Even though Microsoft discontinued support for Windows 7, there are still a number of big-name browsers that are still compatible.

What browsers can I use with Windows 7?

Most popular Chromium-based browsers like Opera One, Google Chrome, Vivaldi, Brave, and more are compatible with Windows 7. Opera Browsers offers a portable browser that allows users to store it on a USB device so as not to take up space on a lightweight PC like Windows 7.

Opera portable browser for Windows 7.

Internet Explorer may be discontinued, but Microsoft’s revamped browser, Microsoft Edge, will work well with Windows 7. For a more extensive list, check out our picks for the best fastest and lightest browsers for Windows 7.

Opera One

Run Opera One on your Windows 7 PC for secure and fast web surfing!
Free Download Visit website

How do I fix my browser if it doesn’t work on Windows 7?

1. Run network troubleshooter

  1. Click Start and search for Control Panel.
  2. Select System and Security. Open System and security settings in control panel.
  3. Click on Network and Internet.
  4. Click Network Sharing Center. Open Network sharing center.
  5. Under Change your networking settings, select Troubleshoot problems. Run the network troubleshooter.
  6. Check for any network issues.

One of the most common causes of a browser not working in Windows 7 is issues with network and internet. Double-check your network isn’t having any issues by running the troubleshooter then follow any steps needed to fix it.

2. Check for browser updates

  1. In your browser, open the menu located in the top right or left corner.
  2. Select Settings. Open browser settings in Windows 7.
  3. Locate the About or Update section. check for updates if browser not working in Windows 7.
  4. Check for any updates.

If your browser isn’t set to automatically update, then chances are there is an update waiting for you. Check to see in the about section and update your browser.

3. Disable extensions

  1. Open up the browser that is causing problems and open the menu located in the top right or left corner.
  2. Click on Extensions or Manage extensions. Go to browser extension settings.
  3. Go through and disable all extensions. Disable all extensions if browser is not working in Windows 7.
  4. Restart your browser.

Because extensions are from third-party developers, some might not be regularly updated or could be corrupted. Try disabling all your extensions and see if that solves the issue. You can locate a faulty addon by turning each one on and seeing if it causes problems.

4. Clear cache

  1. Open up the browser that is causing problems and open the menu located in the top right or left corner.
  2. Go to Settings. Open browser settings.
  3. Select Privacy & Security and scroll down to Cookies and Site Data, then click Clear Data. Clear browser data.
  4. Make sure both boxes are checked then click Clear. Check the boxes and click clear.
  5. Confirm by clicking Clear Now.
  6. Restart the browser.

If it’s been a while since you last cleared the cache then it may start to cause issues in your browser. Clearing will not only improve browser speed and performance, but it will also clear any corrupted files. Be sure to clear your cache regularly to avoid any problems.

5. Change default settings

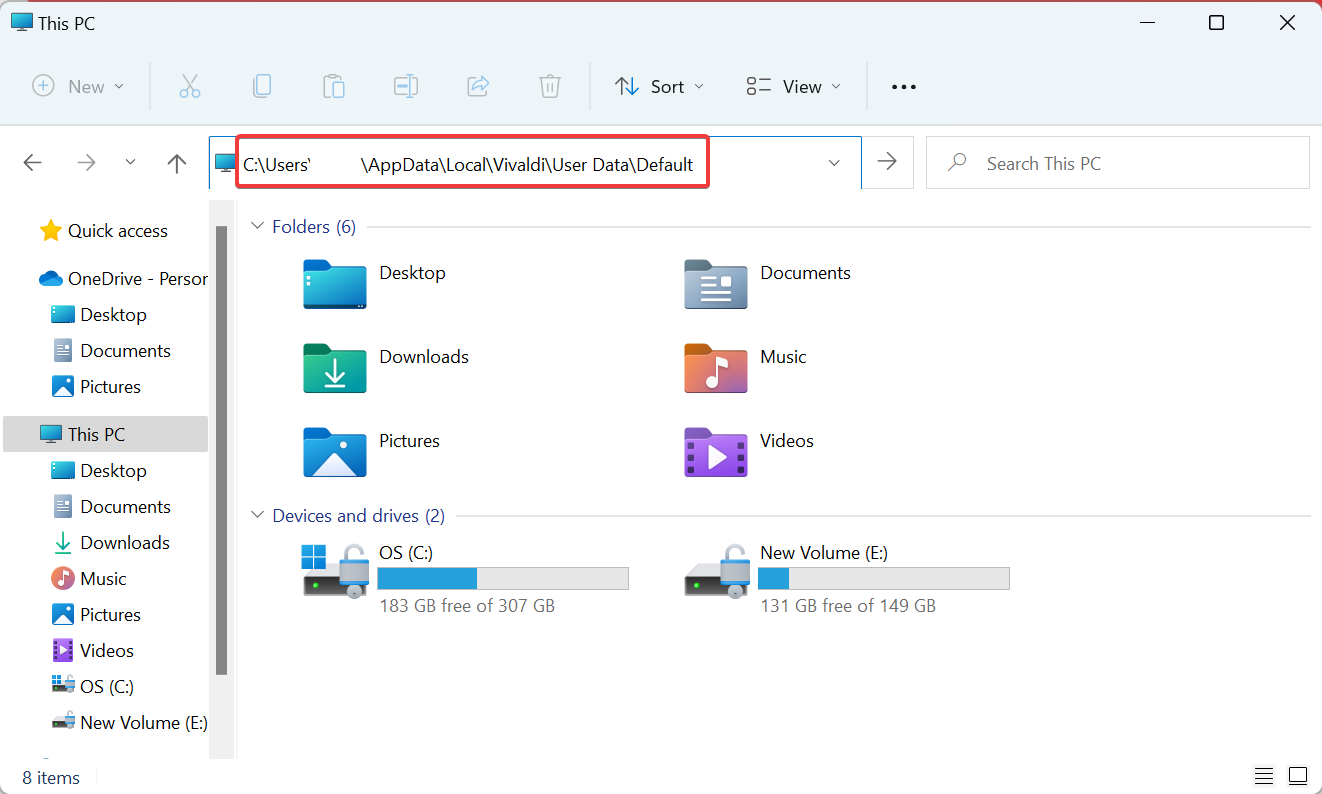
  1. Open File Explorer and select the search bar.
  2. Paste this command and hit Enter: %USERPROFILE%\AppData\Local\Google\Chrome\User Data Type the following then hit enter.
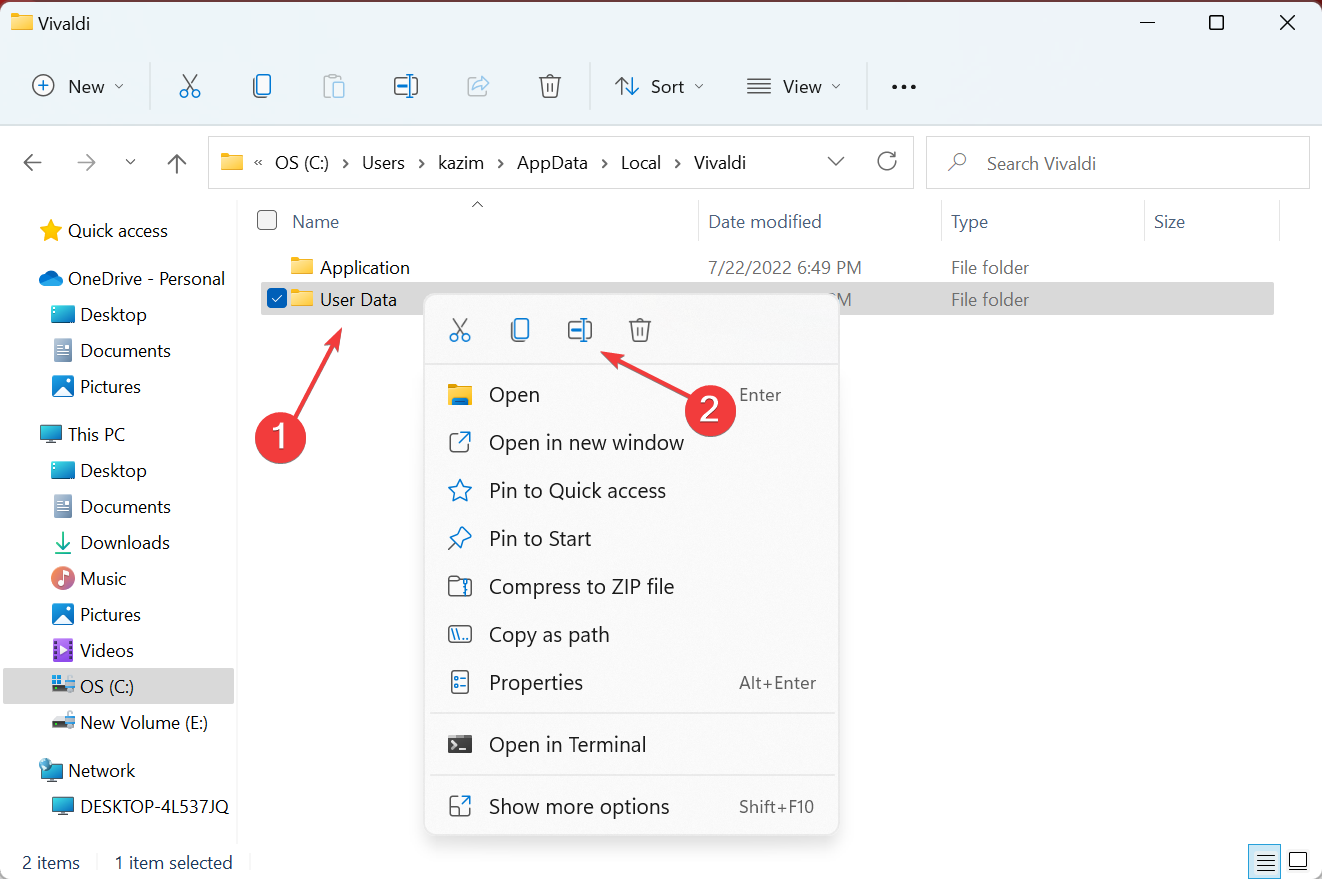
  3. Locate the Default folder and right-click it.
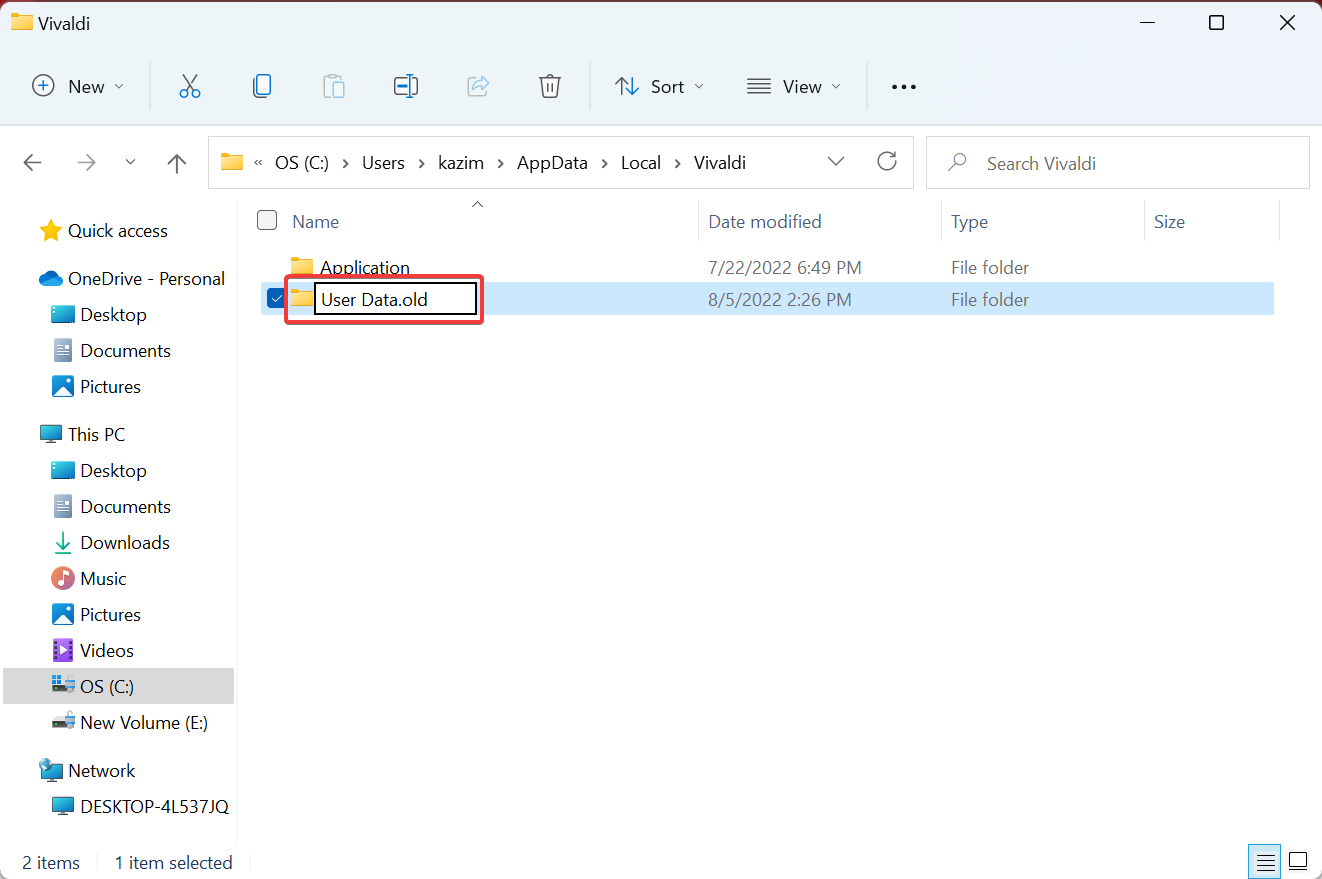
  4. Select Rename. Rename the default folder.
  5. Change it from Default to DefaultOld. Change default settings if your browser is not working in windows 7.

For this step, Chrome was used as an example, but the process is the same for other browsers. Keep in mind that this will create a new user profile. User profiles contain browser data like bookmarks, add-ons, passwords, and more.

By changing the default settings you get rid of any corrupted files in your user profile that may cause your browser to crash.

6. Restore registry settings

  1. Right-click on Start and select Run. Right-click on start and select run.
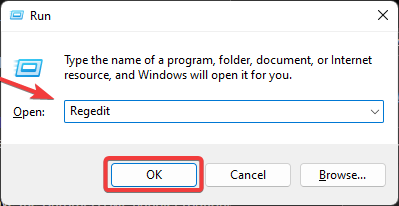
  2. Type Regedit, then click OK. Run regedit and click ok.
  3. Under HKEY_CURRENT_USER, expand the Software folder.
  4. Locate the Classes folder and expand it. Open the Classes fold under software in Windows 7.
  5. Scroll until you find .html and right-click on it.
  6. Click Export. Export browser html.
  7. Name the file HKCU_Classes_HTML_Backup.reg and click Save to create a backup in your Documents folder. Backup browser html to Windows 7 documents.
  8. With .html still selected, right-click on (Default) and click Modify. Modify default value.
  9. Under value data type htmlfile and click OK. rename default value if browser not working.

This restores registry settings to default if it’s corrupted or damaged, but the solution includes creating a backup of the registry file just in case.

7. Remove the HTML handler

  1. Right-click Start and select Run.
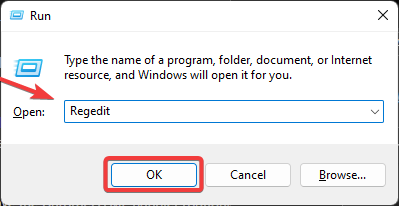
  2. Type Regedit, then click OK. Run regedit.
  3. Under HKEY_CLASSES_ROOT, locate ChromeHTML. Locate ChromeHTML.
  4. Right-click and select Export.
  5. Name the file HKCR_ChromeHTML_Backup.reg and click Save. chromehtml-backup-windows-7.
  6. Right-click on the ChromeHTML registry key and select Delete. Delete ChromeHTML if browser is not working windows 7.
  7. Click Yes to confirm.

Google Chrome was used for this example, but this process will work with other browsers that you’re having issues with.

8. Delete temporary files

  1. Open File Explorer and select the search bar.
  2. Paste and hit Enter: %USERPROFILE%\AppData\Local\GoogleSearch file explorer windows 7.
  3. Right-click on Chrome and select Delete. Delete Chrome file if browser not working in windows 7.

If there are any corrupted files in your browser, that may be causing the issue. Removing temporary files from the app data may help solve the issue. This example was for Google Chrome, but the same process applies to other browsers.

9. Uninstall and re-install

  1. Click on Start and search for Control Panel.
  2. Under Programs, select Uninstall a program. Uninstall a program.
  3. Locate the browser that is not working and select it, then click Uninstall. Uninstall a browser and then re-install on Windows 7.
  4. Click Yes to complete the uninstall process.

If changing the default settings didn’t work, then try uninstalling and re-installing the browser. You can uninstall the browser in the control panel, then use a different browser to re-install the browser.

10. Temporarily disable the firewall

  1. Click on Start and search for Control Panel.
  2. Select System and Security. Open system and security settings.
  3. Click Windows Defender Firewall. Click Windows Defender Firewall.
  4. Click Turn Windows Defender Firewall on or off. Click turn firewall on or off.
  5. Under Private network settings, select Turn off Windows Defender Firewall. Turn off the firewall for private network.

Sometimes the firewall can cause issues with loading a browser in Windows 7. Make sure you’re using a private network before turning off the firewall and remember to turn it back on later. Keep in mind that Microsoft no longer provides security updates for Windows 7, so try this step at your own risk.

Are Windows 7 updates still available?

Microsoft declared that they made a commitment to provide support for Windows 7 for ten years after its release in 2009. Since the 10-year period has passed, Microsoft ended support for Windows 7 at the beginning of 2020.

This means that there are no more security updates or technical support offered for Windows 7. As a result, Microsoft encourages users to upgrade to Windows 10 or 11 to protect their data. Windows 7 still works, but it’s more vulnerable to viruses and malware.

No more Windows 7 support.

While there are no more updates for Windows 7, there are ways to continue to use it without being forced to upgrade. Installing a good antivirus and VPN is a way to keep your Windows 7 safe if you want to keep using it after its EOL (End of Life). For recommendations on the best antiviruses for Windows 7, we have a guide for that.

How do I change my browser on Windows 7?

  1. Click on Start and search for Control Panel.
  2. Click on Programs. Open programs in Windows 7.
  3. Select Default Programs. Click default programs.
  4. Click Set your default programs. Click set default programs.
  5. From the list of installed programs, select the browser you want to make your default browser then click Set this program as default.

That’s how to make a browser your default browser in Windows 7. For a more detailed look at the defaults for the browser, click Choose defaults for this program to reveal a list of supported files and adjust the defaults for those file types.

Sometimes after installing a browser and opening it for the first time, it will ask if you want to make it your default browser. You can access this option within your browser settings.

We hope this guide helped you fix the issue if your browser is not working in Windows 7. Let us know which solution worked for you in the comments below and if you prefer to use Windows 7 over other Windows operating systems.

Also, be sure to let us know if there is a solution that worked for you that isn’t listed above.

What is GodMode in Windows 10 and How to Enable it

Windows contains a lot of hidden features, and one of them is the famous GodMode. This is a set of many advanced tools and settings thoroughly grouped that ease your search endeavor.

By enabling this feature, you’ll have access to most Windows settings right at your fingertips, so you can see how this feature can be useful to have.

You can enable both GodMode and the extended version very easily. And, in this article, we’re going to show you how to do that.

What are the most popular God Mode features in Windows 10?

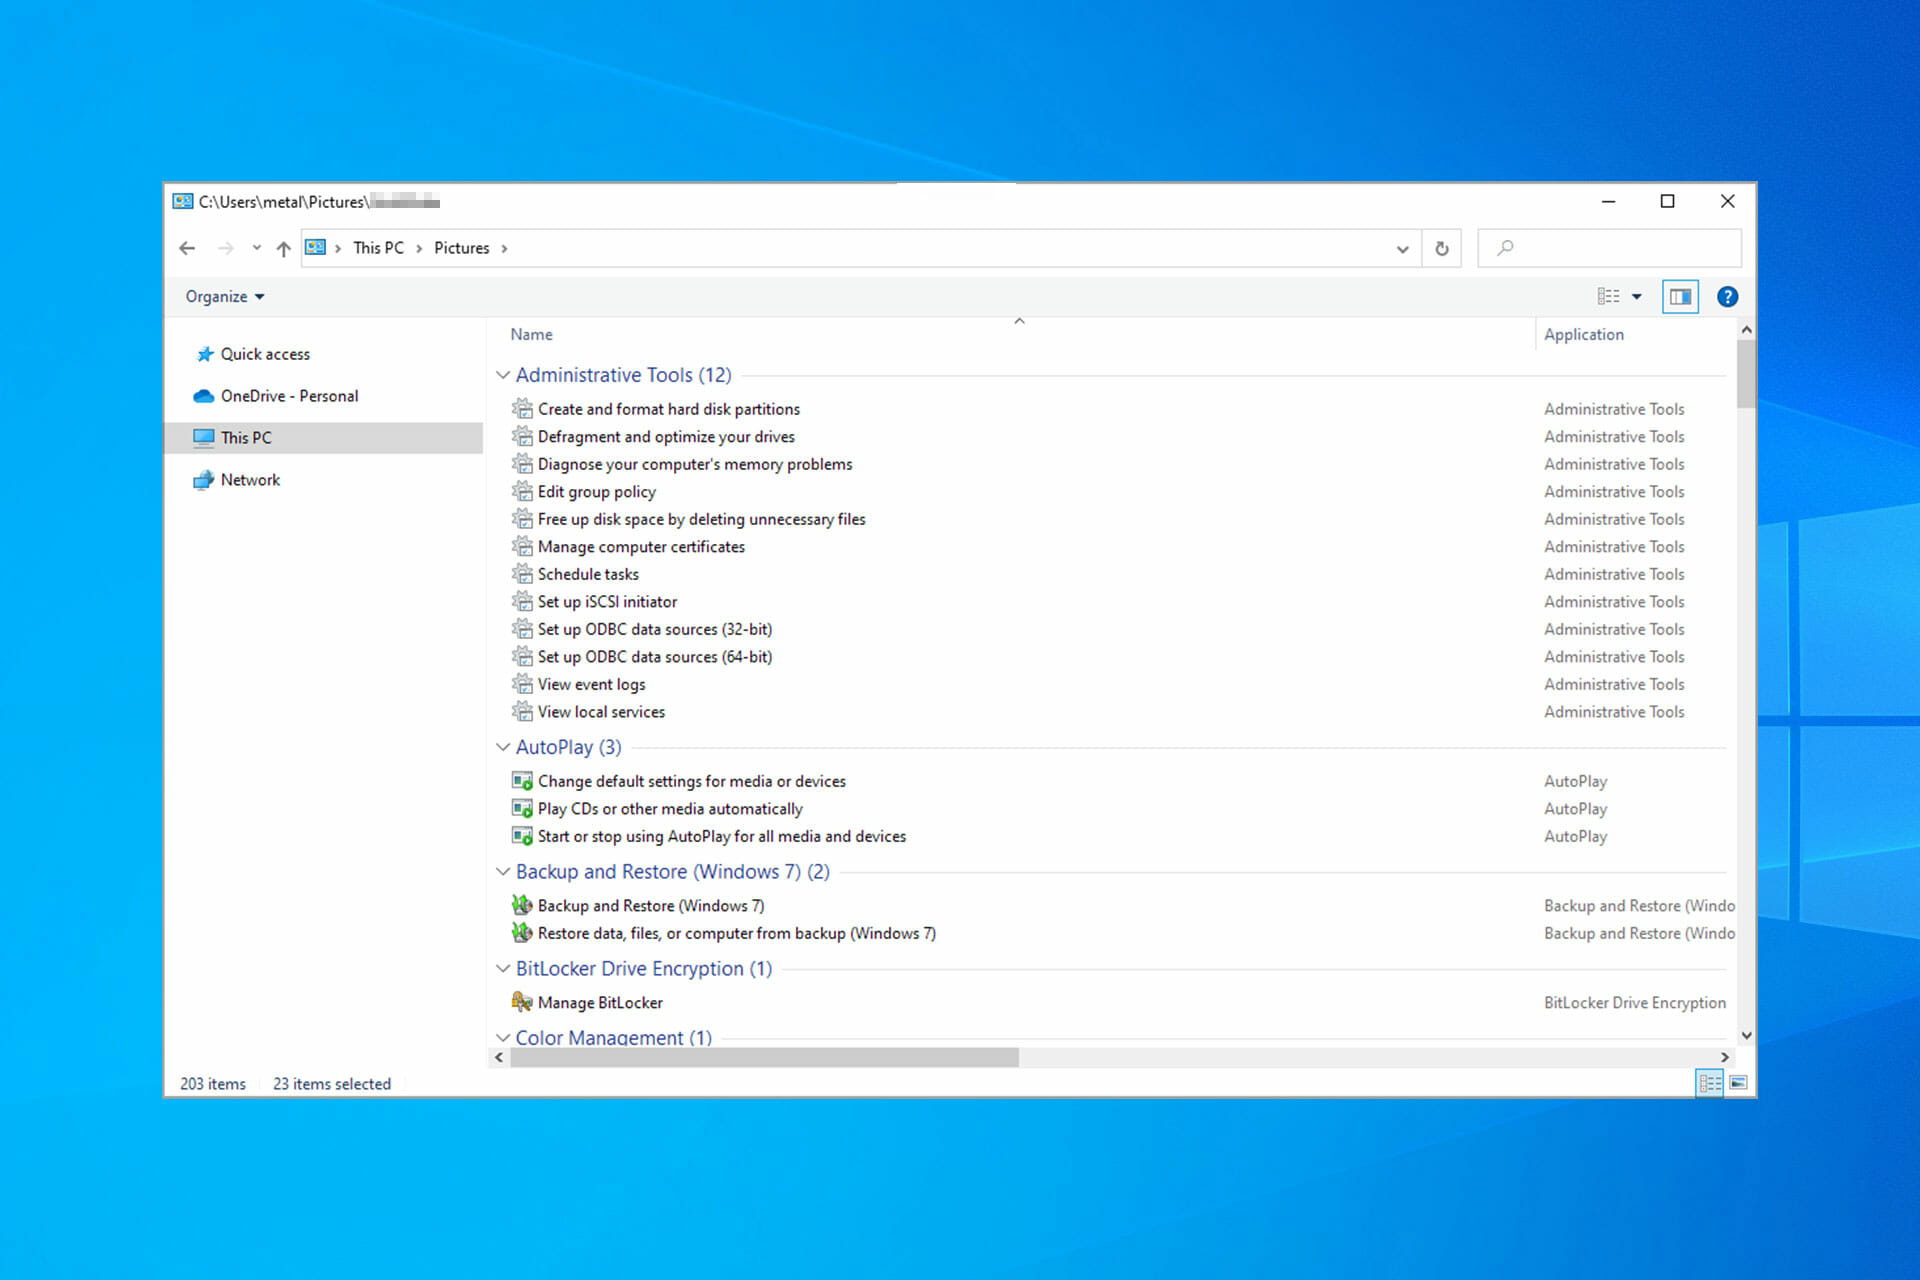
God Mode works as a shortcut hub on Windows 10 and it allows you to quickly and easily modify certain settings. Instead of manually having to open multiple windows or find a specific setting, you can quickly access it from this folder.

god mode windows 10

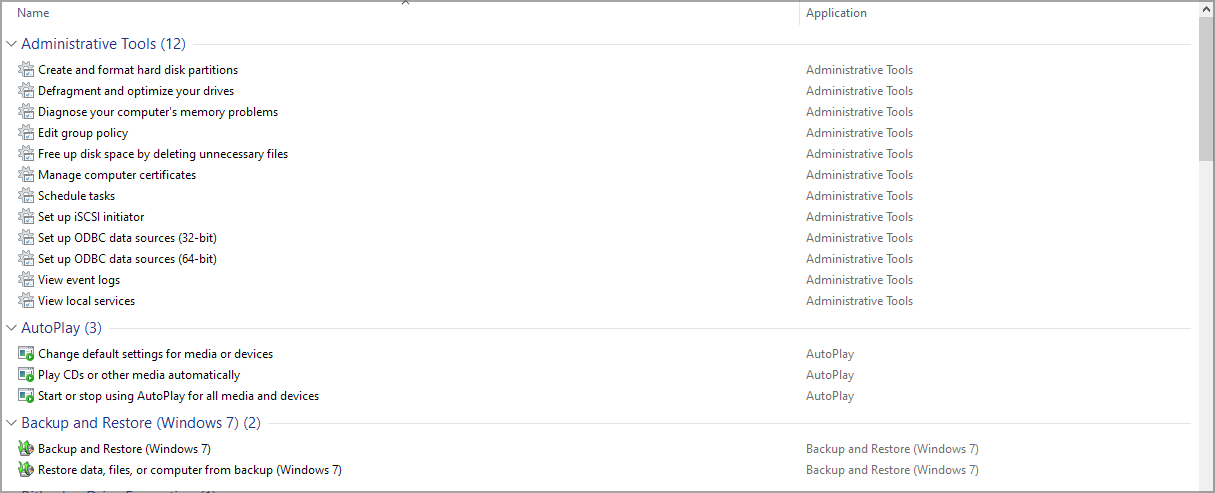
There are about 200 settings that you can access and they are sorted into the following categories:

  • Administrative tools
  • AutoPlay
  • Backup and Restore
  • BitLocker Driver Encryption
  • Color Management
  • Credential Manager
  • Date and Time
  • Devices and Printers
  • Ease of Access Center
  • File Explorer Options
  • File History
  • Fonts
  • Indexing Options
  • Internet Options
  • Keyboard
  • Mouse
  • Network and Sharing Center
  • Phone and Modem
  • Power Options
  • Programs and Features
  • Region
  • RemoteApp and Desktop Connections
  • Security and Maintenance
  • Sound
  • Speech Recognition
  • Storage Spaces
  • Sync Center
  • System
  • Taskbar and Navigation
  • Troubleshooting
  • User Accounts
  • Windows Defender Firewall
  • Work Folders

How can I enable GodMode in Windows 10?

    How to enable God Mode in Windows 10

    Enabling this feature is easy and you just have to enter God Mode code as a folder name on Windows 10 and you’re ready to use it. In other words, you need to create the God Mode directory in order to enable God Mode on your PC.

  1. 1. Open File Explorer, go to the View tab and check File name extensions.

    windows file name extensions
  2. 2. Now go to your Desktop and right-click anywhere on it.

  3. 3. Select New and then Folder.

    new folder desktop
  4. 4. Rename the new folder GodMode.{ED7BA470-8E54-465E-825C-99712043E01C}.

    god mode folder on desktop
  5. 5. The icon will change immediately and you can double-click it to access the folder.

    how to access god mode windows 10

How to use Extended God Mode on Windows 10

  1. Visit the Extended GodMode page.
  2. Click the Download button.
    extended god mode windows 10
  3. Once the software is downloaded, run it.
  4. A new window with all available settings will now appear.
how can i access extended god mode

As for the features, Extended GodMode adds the following:

  • Quick search by feature or item name
  • Access to the most recent items
  • Ability to access to the most used apps
  • Integration of Control Panel and Admin Tools elements (can be disabled)
  • Customizable view options

How to enable God Mode on Windows 11?

  1. Right-click your Desktop and choose New. Now select Folder.
    create new folder desktop
  2. Enter the following as its name: GodMode.{ED7BA470-8E54-465E-825C-99712043E01C}.
    godmode new folder name
  3. Navigate to the directory you created and that’s it.
    god mode windows 11

Accessing God Mode on Windows 11 is exactly the as on Windows 10, so you won’t have any issues accessing it. For more detailed information, visit our guide on how to enable God Mode in Windows 11.

Is GodMode safe to use?

Yes, this is just a shortcut folder with quick access to various settings on your PC, so it’s perfectly safe to use. All these settings are accessible to anyone, without even having to use the GodMode, as long as you know where to find them.

However, if you’re not familiar with these settings and you don’t know how to properly use them, maybe you should stay away from this folder.

As you can see, using God Mode on PC is incredibly simple, and it will take you less than a minute to enable this feature.

If you found this guide useful, be sure to read our guide on how to unlock secret features in Windows 10 for more information.

Have you ever used this feature on your computer? Let us know in the comments section below.

How to Set Up NordVPN with qBittorrent [Easy Settings]

If you’re using a VPN, chances are you’re also using torrenting clients, because the two of them go incredibly great together. Take NordVPN and qBittorrent, for instance, a match made in heaven.

One could get you thousands of GBs of content from the Internet at lightning-fast speeds, while the other can help you cover your traces and keep them that way. Could you figure out which is which?

If not, don’t worry, we have an entire guide ahead of us to get acquainted with the products.

Do you need a VPN while torrenting?

If you’re frequently into downloading files from the Internet, there’s a strong possibility that you perform this operation using torrenting clients. Why?

Because they’re incredibly fast, and the sheer thought of splitting files into several bits and let you retrieve the bits from several peers on the network and recombine them on your PC is a bit mindblowing.

Naturally, torrents, much like other types of data you can download, can nest malware and pirated content. ISPs and your local authorities don’t care much about you compromising your PC.

However, what they do care about is pirated content. Therefore, they make continuous efforts to stop this type of activity, such as sending you menacing letters, fining you, and even attempting arrests, if you’re a repeat offender.

Look, we don’t say piracy is good, but that’s not the only reason you’d want to use a VPN in conjunction with your torrent client. Maybe you just don’t want your ISP to see literally everything you do and/or download while you’re online.

Can VPNs hide torrenting data?

VPNs are widely known for helping you keep your online business to yourself. Whether you’re streaming video content, looking for Apple Strudel recipes or downloading Linux distros for your pen-testing lab, it’s nice to feel that nobody else knows about this, except you.

Trustworthy VPN services, much like NordVPN, can pull a nice thick veil over your online activity. All the traffic between your PC and VPN gateway will be encrypted. Thus, your ISP will end up looking at a bunch of gibberish.

If you’re wondering whether VPN can also encrypt torrenting data, then the answer is yes. If configured properly, a VPN can keep everything traffic-related on the hush, including torrenting data, download data, browsing history, and many other things.

How to install and use NordVPN with qBittorrent

Using the NordVPN client with qBittorrent is the easiest way to get the best out of both worlds. Since the VPN encrypts all your traffic, you won’t need to worry about torrent data leaking through qBittorrent.

How to download and install the VPN client

  1. Get a NordVPN subscription
  2. Download the NordVPN installer on your computer
  3. Install NordVPN on your PC
  4. Launch the VPN client
  5. Log into your NordVPN account
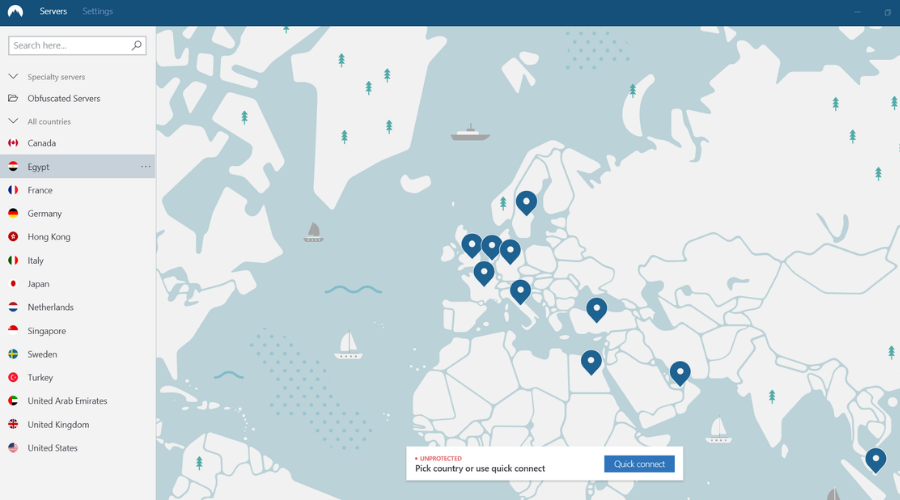
  6. Select the P2P option in the Specialty servers category
  7. Connect to a P2P server

NordVPN

Need a VPN for qBittorrent? Check out NordVPN for a change.
Check price Visit website

    How to use NordVPN with qBittorrent

    If you want to use qBittorent and stay safe while doing so, you should connect it to NordVPN. By doing so, the torrenting traffic generated through qBittorrent on your computer will be hidden by NordVPN‘s proxy server.

  1. 1. Download and install NordVPN.

  2. 2. Download and install qBittorrent.

  3. 3. Open the Tools menu and select Options.

    qbittorrent options menu tools
  4. 4. Navigate to the Connection category.

    qbittorrent navigate to connection
  5. 5. Go to the Proxy Server section and choose the proxy type.

    qbittorrent select proxy type
  6. 6. Retrieve a proxy host from the NordVPN’s website.

  7. 7. Type the port number (1080 for SOCKS5, 80 for HTTP).

  8. 8. Check the Use proxy for peer connection and Authentication tickboxes.

  9. 9. Type your NordVPN credentials in the designated fields.

  10. 10. Click OK to save the settings.

There you go, your qBittorrent client is now behind NordVPN’s proxy server.

However, you still have to be careful with other types of incoming or outgoing traffic on your PC, since the proxy only shields the qBittorrent client.

Best settings for using NordVPN with qBittorrent

If you’re using the NordVPN client, then you should be alright, considering that this service was designed to encrypt all traffic and keep it away from prying eyes.

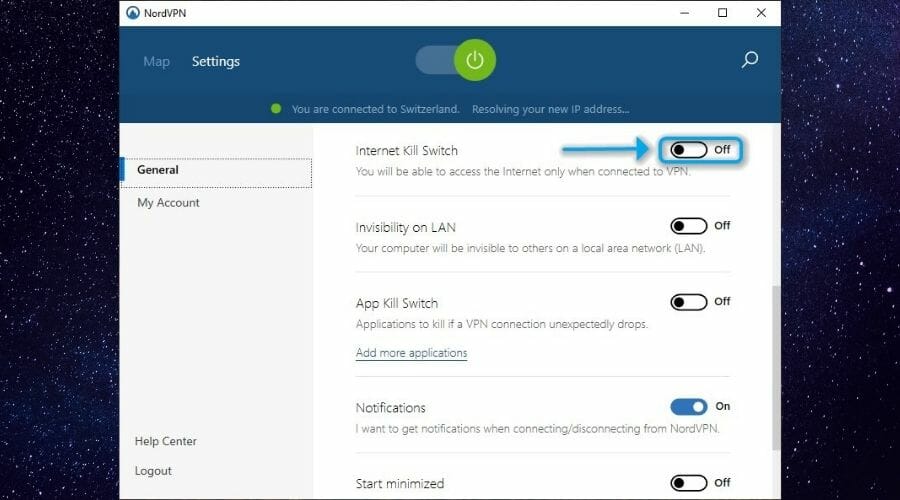
However, there’s one tiny mention we must make. If, by chance, NordVPN’s kill switch feature is not already enabled, make sure to turn it on yourself. You can find it in the General section of the Settings screen. Just flick the Internet Kill Switch on.

nordvpn best settings

The reason why we recommend you to do so is that sometimes VPN connections fail. Your PC can revert to your default, unsecured connection so fast, you wouldn’t even realize it happened. And we wouldn’t want this to happen, especially not while torrenting.

The kill switch effectively cuts your PC’s Internet access if no VPN is detected. Thus, as long as you’re not connected to NordVPN’s secure servers, your PC won’t be able to establish an Internet connection.

Final thoughts on using NordVPN with qBittorrent

All things considered, NordVPN and qBittorrent go great together, whether you prefer using the VPN client or NordVPN’s proxy server. Both methods require authentication details (premium subscription) and in our opinion using the VPN client can save you a lot of hassle.

Last, but not least, if you do decide to stick with the VPN client, make sure to enable its kill switch. It will prevent your PC from defaulting to your unsecured Internet connection in the event of a VPN failure.

Also, check out the NordVPN section to discover more about this reliable VPN service. Visit our VPN How-To Hub for more comprehensive troubleshooting guides on common issues.

Delete Software Distribution Folder: Best Way to Remove It

The Software Distribution folder is responsible for temporarily storing the important update files that Windows needs to perform an update. And we’ll show why you should and how you can delete the Software Distribution folder.

Several users have, on multiple forums, including Microsoft, shared issues with the folder and were wondering if deleting it poses any immediate or significant threat. So, let’s find out all about it.

Can I delete the Software Distribution folder?

Yes, you can clear the Software Distribution folder in Windows just like any other folder. Here are a few reasons why you might want to consider deleting it:

  • Issues with Windows Update: To fix Windows Update errors, it’s often the recommended troubleshooting method to clear the contents of the Software Distribution folder.
  • Free up storage: The folder may take up considerable space, and if you want to free up storage, then deleting it won’t be the worst choice.
  • Plan to disable automatic updates: If you plan to disable automatic Windows updates, the Software Distribution folder serves no purpose, and you can remove it.

Is it safe to delete the Software Distribution folder?

Yes, deleting the Software Distribution folder poses no significant harm. It would take a little longer the next time you check for and install Windows Updates.

Also, Windows will automatically recreate the folder and download the relevant files needed to complete the update process.

How can I delete the Software Distribution folder?

    In order to delete the Software Distribution folder, you need administrator rights. Moreover, before you delete the files in the folder, you also have to stop the Windows Update and Background Intelligent Transfer Services.  Let’s find out how!

  1. 1. Press Windows + S to open Search, type Command Prompt in the text field, and click on Run as administrator.

    command prompt
  2. 2. Click Yes in the UAC prompt.

  3. 3. Paste the following command and hit Enter to stop the Windows Update service:net stop wuauserv


    stop service
  4. 4. Next, execute the following command to terminate BITS (Background Intelligent Transfer Service):net stop bits

    stop service to delete software distribution folder
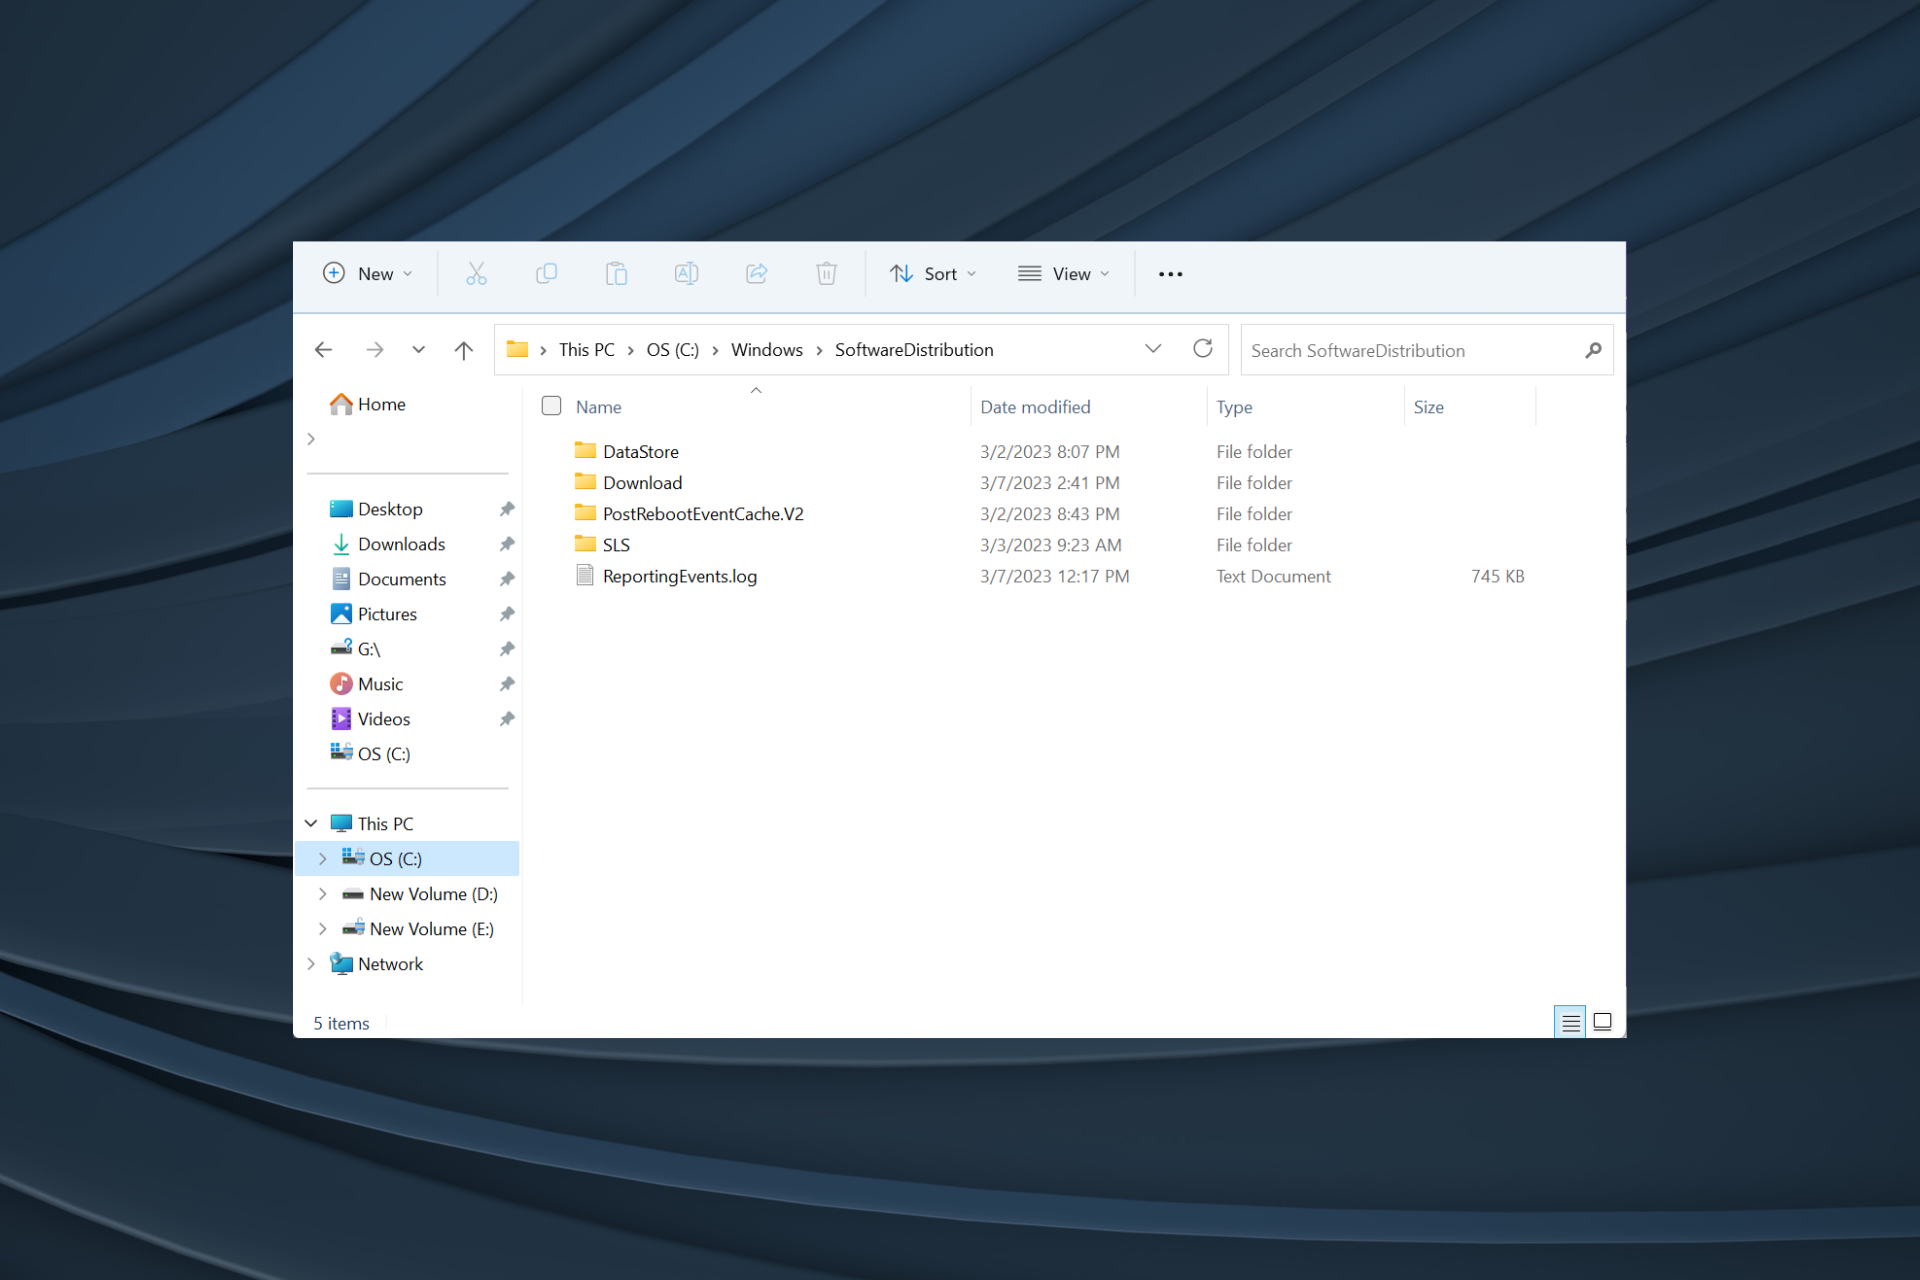
  5. 6. Once done, press Windows + E to open File Explorer, paste the following in the address bar and hit Enter: C:\Windows\SoftwareDistribution

    path
  6. 7. Press Ctrl + A to select all the folder’s contents and then hit the Delete key. If you can’t delete the Software Distribution folder or the access is denied, just restart your PC and try again.

    delete software distribution folder
  7. 8.  All the files in the Software Distribution folder should be deleted but the folder should still be there. We want to delete its contents, not the folder.

  8. 9. Go back to to Command Prompt, and execute the following commands to restart the Windows Update service and BITS: net start wuauserv net start bits

    restart services

Once you finish the process, Windows will reconfigure the folder and download the necessary files. Your Windows updates will now work as intended without any issues or errors popping up.

We also have a guide on renaming the Software Distribution folder. And since it helps identify whether the folder is causing all the trouble, we recommend you check it.

For other questions regarding the process, reach for the comments section below.

VPN For HP Laptops: Top 5 Picks for Security and Speed

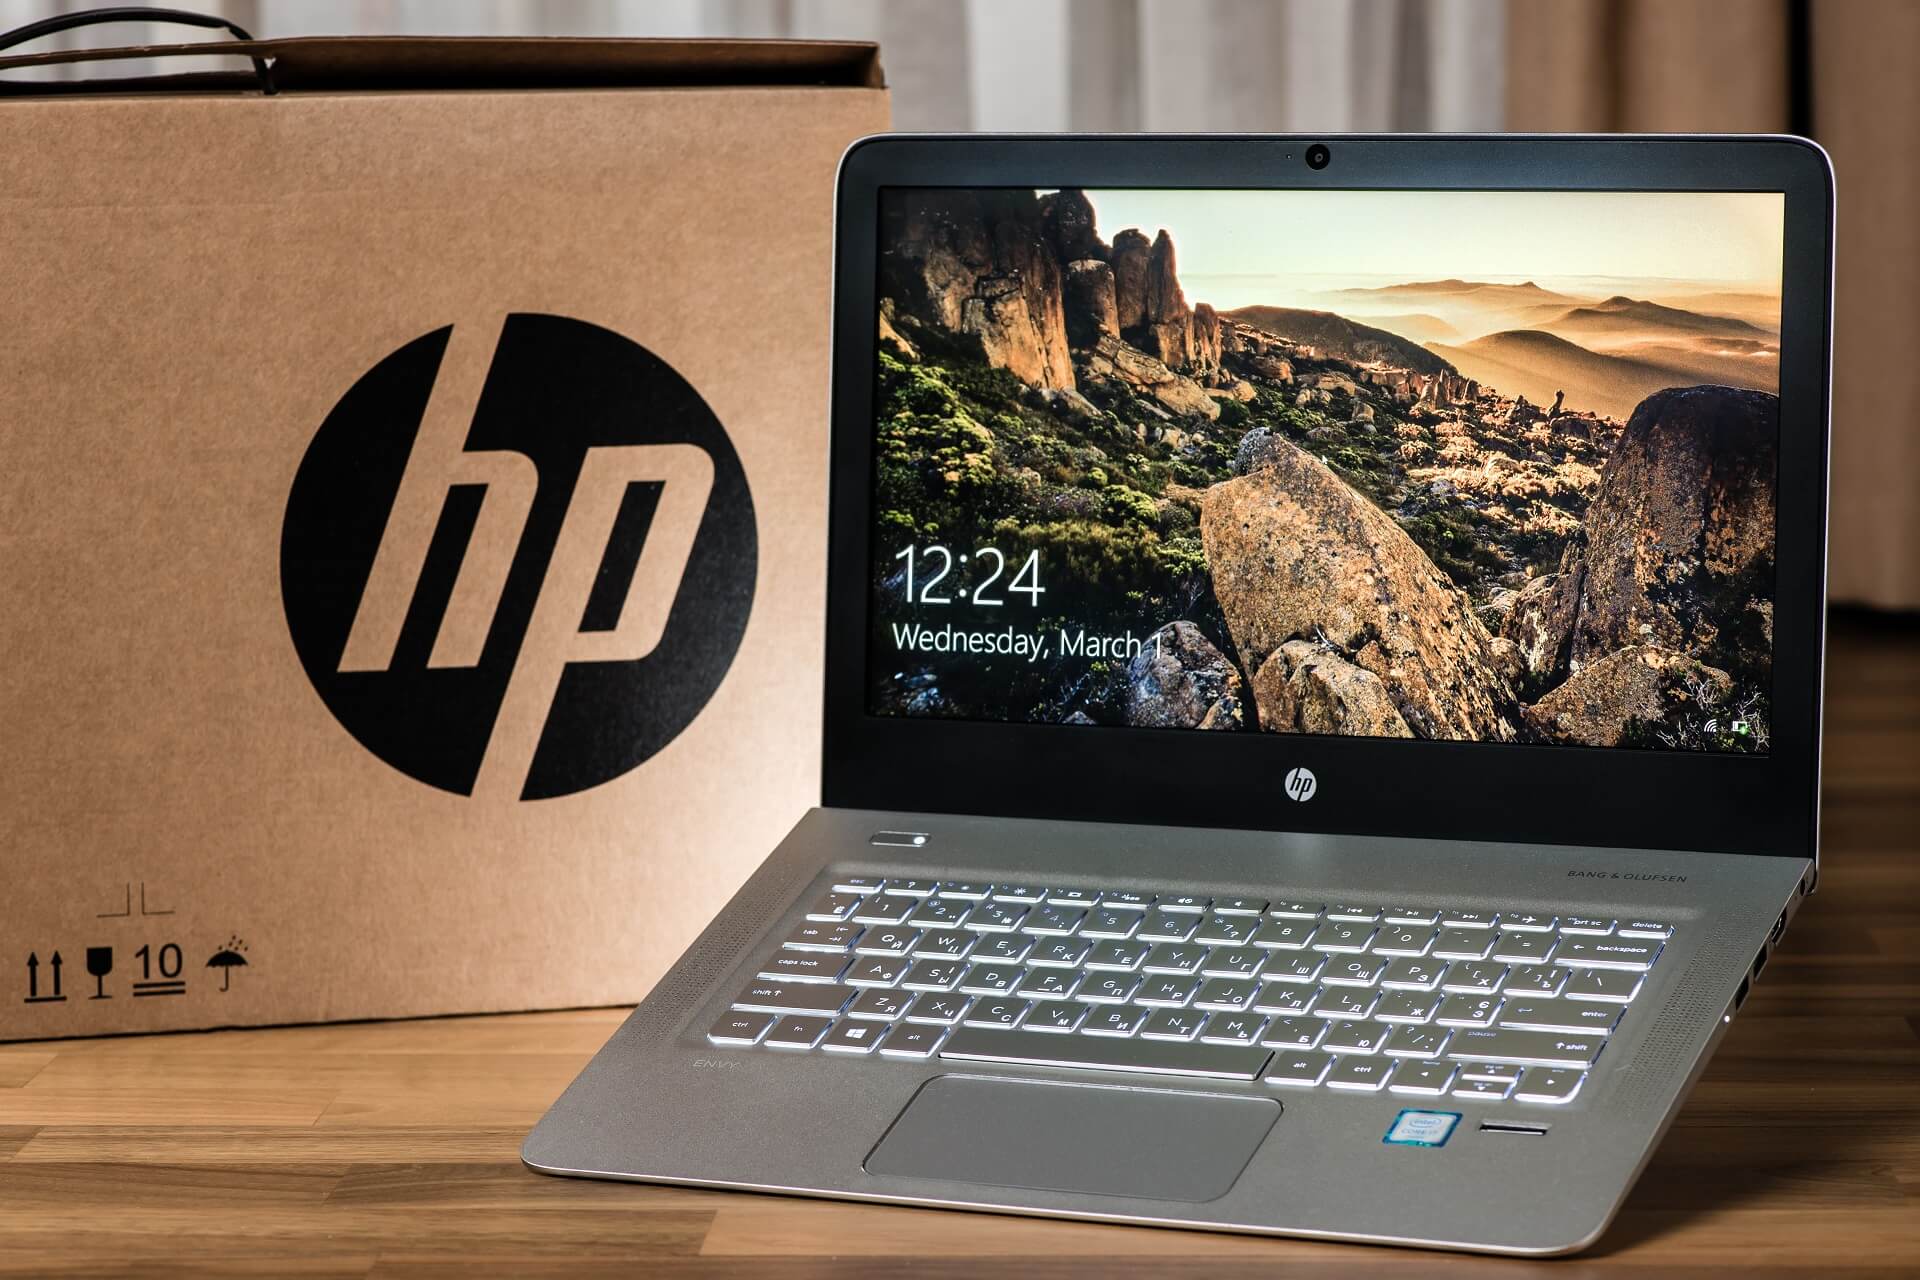
If you’re browsing for a reliable VPN for your HP laptop, you’re in the right place. Privacy, security, and the ability to bypass regional blocks and ISP restrictions make virtual private networks a must these days.

To cut your search short, we took it upon ourselves to check out and compare the VPNs that seem to be all the rage these days and only listed the very best ones below. Check them out:

Which VPN is best for your HP laptop?

ExpressVPN – fastest VPN protocol

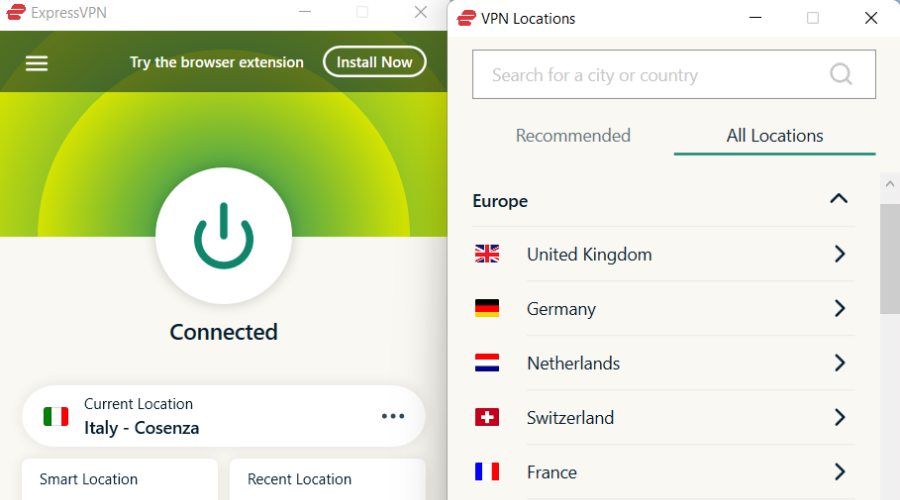
While being a trusted VPN leader, ExpressVPN still manages to bring easiness of use regardless of the platform you are using. Perfectly compatible with HP laptops and any other device, this VPN is meant to help you stay secure and anonymous.

Plus, it only takes 1 click to activate the protection. ExpressVPN hides your IP address and encrypts your network data, and it offers 160 server locations in 94 countries all over the world.

Other security-focused features include a kill switch, exclusive DNS for safer and faster connections, and best-in-class encryption.

Let’s quickly look at ExpressVPN’s key features:

  • Access to 160 server locations in 94 countries
  • IP address masking and anonymous browsing
  • Cross-platform compatibility
  • VPN split tunneling
  • Network Lock kill switch
  • Zero-knowledge DNS
  • Best-in-class AES-256 encryption
  • Strict no-logs policy
ExpressVPN

ExpressVPN

Defeat government censorship and access blocked websites on your HP laptop with this VPN.
Check price Visit website

Private Internet Access – great server network and modern Windows apps

If you’re after unbreakable online security, Private Internet Access is unmatched.

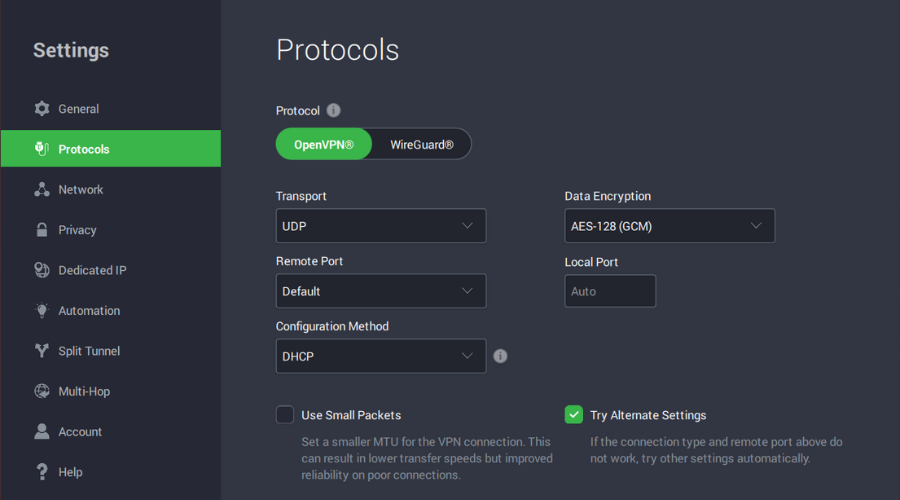
Relying on strong cryptographic algorithms, PIA brings impenetrable encryption to keep your data safe. You are guaranteed complete anonymity and extreme privacy through IP cloaking and strict no-logs policies.

The service also provides unlimited bandwidth and fast speeds that allow you to enjoy unhindered access to games, streaming, and much more.

Let’s quickly look at the PIA key features:

  • Private IP address for a
  • Strong encryption and secure protection even on public WiFi
  • Unblock streaming platforms
  • Unlimited bandwidth and fast download speeds
  • Compatible with all major desktop and mobile operating systems
  • Easy to use (you can launch the VPN connection with just 1 click)
Private Internet Access

Private Internet Access

Use one of the best VPNs for HP laptops to protect your online privacy.
Check price Visit website

NordVPN – most advanced privacy features

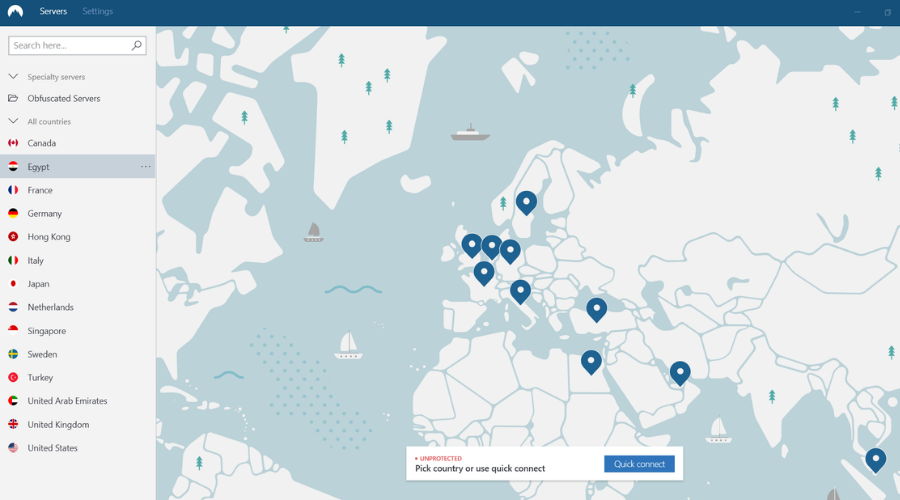
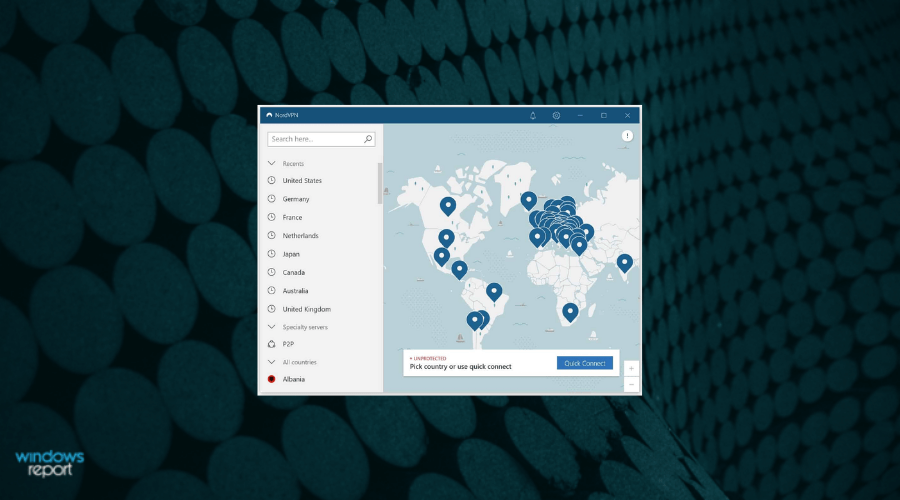
NordVPN is one of the fastest VPNs on the planet with +5500  servers located worldwide to choose from. Plus, it has unlimited bandwidth and a special Quick Connect option that allows you to pick the fastest VPN server for you with just one click.

When it comes to privacy, you will enjoy tracking-free data traffic, anonymous browsing, no logging of your online activity, and the highest level of encryption for a truly secure connection.

Between the AES 256-bit encryption and the CyberSec technology, you are completely shielded against dangerous websites that host malicious software.

Let’s quickly look at NordVPN’s key features:

  • Designed for speed (Quick Connect, P2P support, unlimited bandwidth)
  • Compatible with all major platforms and OSes
  • Strict no-logs policy
  • Top-tier, AES 256-bit encryption
  • Automatic kill switch
  • Defends you from malware using CyberSec
NordVPN

NordVPN

Surf the web fast and stay private with NordVPN’s awesome servers on your HP laptop!
Check price Visit website

Surfshark – best VPN for multi-device support

Developed by Surfshark LTD, Surfshark is a feature-packed VPN crafted for HP laptops and beyond.

You can connect to the server of your choice and you are bound to be spoiled for choice with a generous pool of +1700 servers located in +63 countries to make the most convenient pick.

Security is very important for Surfshark, thus you will benefit from the strongest encryption and additional enhancements such as an automatic kill switch among others.

Let’s quickly look at Surfshark’s key features:

  • Unblock streaming services, including 15 Netflix libraries
  • Ad and malware blocker
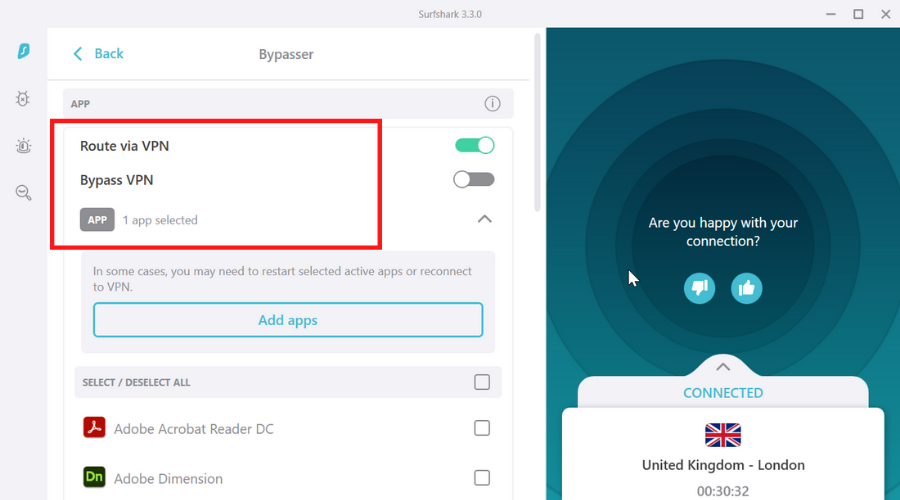
  • Whitelisting to allow certain apps outside the VPN connection
  • Strict no-logs policy
  • Integrated kill switch
Surfshark

Surfshark

Connect all your devices and unlock content easily with Surfshark VPN!
Check price Visit website

CyberGhost VPN – beginner-friendly VPN apps

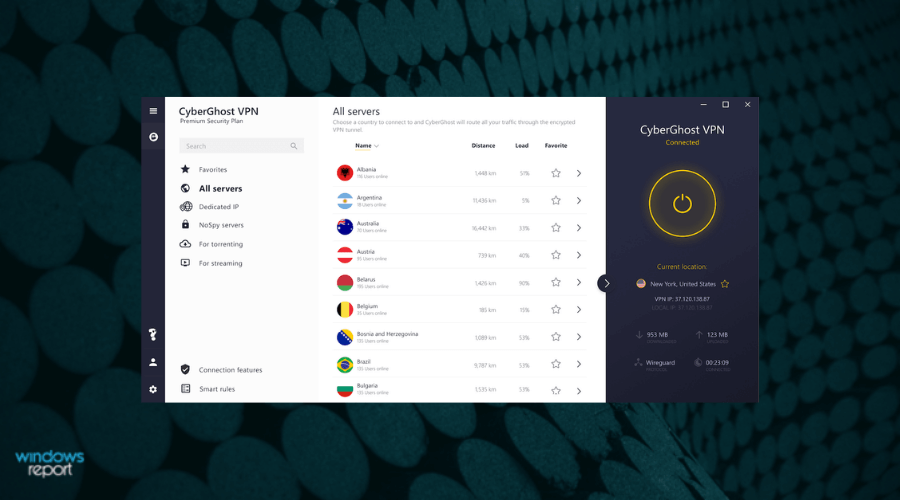
Backed-up by 15 years of expertise, CyberGhost VPN is an established VPN client that works seamlessly with HP laptops. With 9,000+ servers to choose from, you can get an IP from pretty much any place in the world

You will have no limitations as CyberGhost VPN bypasses geo-restrictions and digital censorship allowing you to stream freely, enjoy safe P2P torrenting, and access blocked websites.

The best VPN for the United States values your privacy above all things, thus it maintains a strict no-logs policy and it hides your IP address in order to keep your identity 100% anonymous.

Let’s quickly look at CyberGhost VPN’s key features:

  • Automatic kill switch
  • Unlimited bandwidth and highest possible speeds
  • DNS and IP leak protection
  • 256-bit AES encryption
  • OpenVPN, L2TP-IPsec and PPTP protocols
  • Compatible with all major OSes for desktop and mobile
CyberGhost CTA

CyberGhost

Unblock restricted sites, browse privately, and enjoy fast speeds with CyberGhost!
Check price Visit website

How to connect to VPN on HP laptops?

The recommended way to go is to get a subscription to a reputable, premium VPN service that’s capable to maintain a steady connection and secure your data.

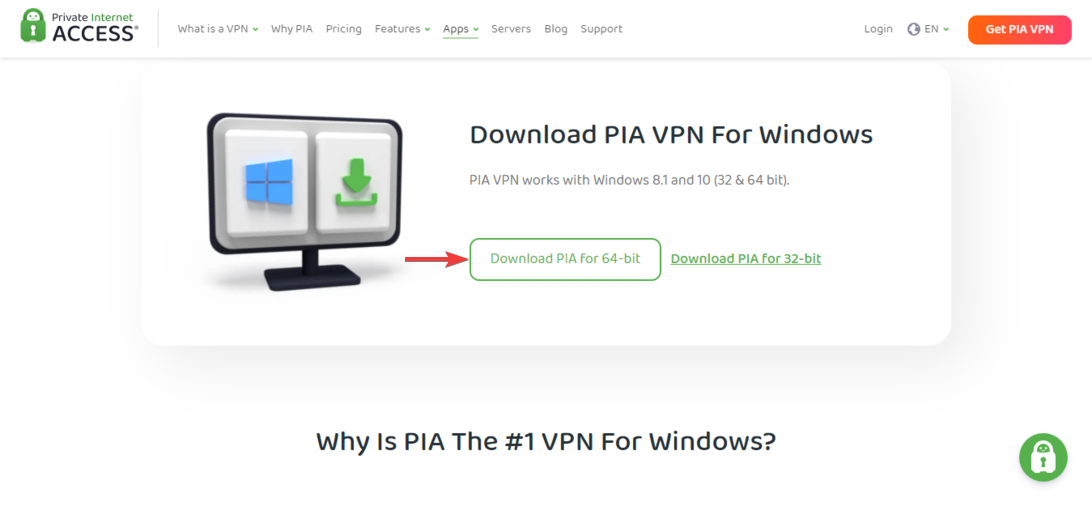
  1. On your computer, download and install the dedicated VPN app. We used Private Internet Acces thanks to its huge server network and zero logs policy.
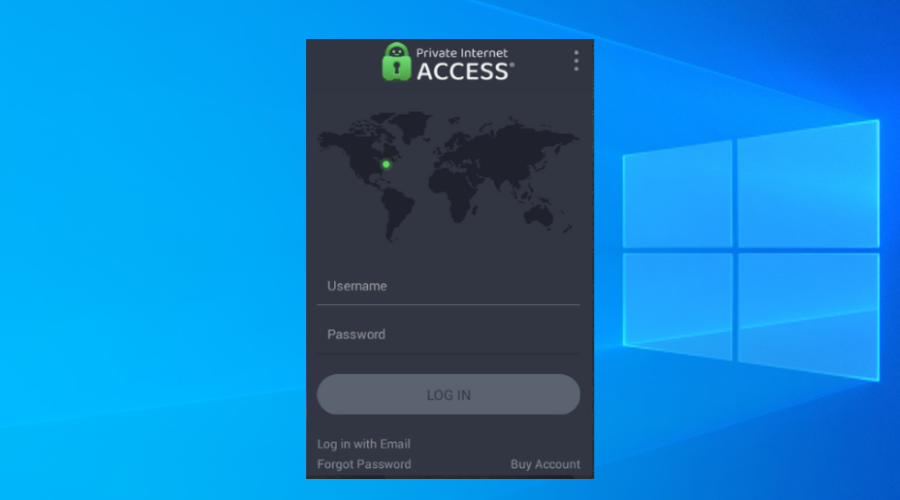
  2. Log in with your credentials.
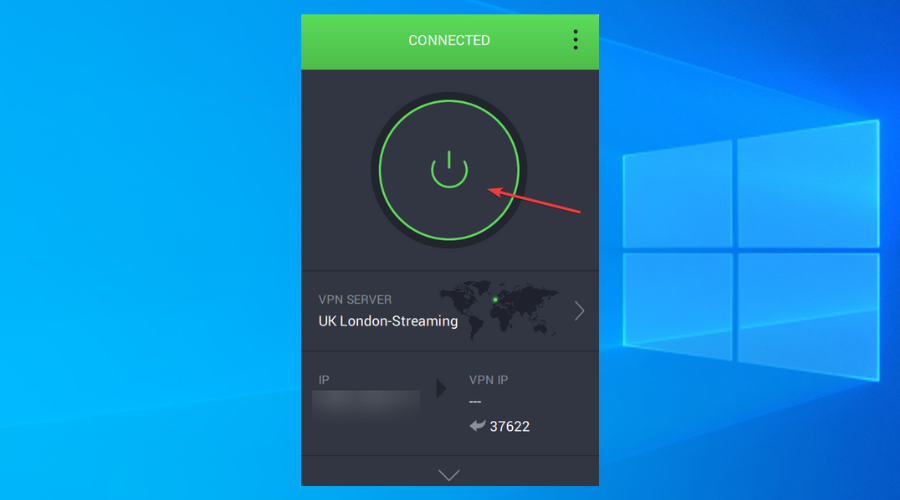
  3. Click on the power button to connect to a VPN server.

If you run Windows on your HP laptop, you can also configure the built-in VPN application. It is not as resourceful as third-party solutions, but it’s a decent option, and completely free.

We have a dedicated guide that shows you several ways you can install and configure the Windows built-in VPN. Check it out if you are interested in this option.

There you go, you now have all the information you need to make a solid choice. Compare features, compare prices, and why not, extra perks and pick out the VPN that best fits your HP laptop.

Share your selection with us in the comments section below.

Packet Loss Warzone: What Is It And How to Fix It?

Call of Duty: Warzone, also referred to as CoD: Warzone or simply Warzone, is a popular free-to-play battle royale game.

This game mode has gained huge traction in the last few years, with titles such as PUBG, Fortnite, and Apex Legends taking the market by storm.

Warzone is part of the Call of Duty: Modern Warfare game, but you don’t need to buy it if you’re only interested in Warzone.

The principle of the game is quite simple. You and the other 149 players fight each other to death on a shrinking map.

It’s possible to play solo against 149 other players, but you can also team up in teams of two, three, or four to dominate others.

Long story short, Call of Duty: Warzone is a great game that you’ll definitely have a great time playing if you enjoy battle-royale titles such as the ones we’ve briefly mentioned above.

But, like any other online game, Call of Duty: Warzone might also encounter certain connectivity issues. Jitter, high ping, or even the dreaded packet loss, you can all find them there while you’re playing.

What is packet loss in Warzone?

Regardless of where you encounter it, packet loss is more or less the same. It’s caused by packets of data being unable to reach their destination, so they get stuck somewhere along the connection.

As a result, you might experience other unfortunate problems such as high ping, sluggish movement, irresponsive menus, rubber banding, or even sudden disconnections.

Do you know how frustrating it is when you’ve definitely locked in on an enemy character, ready to take your shot, only to be suddenly yanked across the map? Or seeing enemy players teleport all around the map?

Well, that’s exactly how packet loss looks at first sight. Of course, without proper tools, there’s no way to determine whether these are actually caused by packet loss or other similar causes.

The following examples represent various cases that can be more severe compared to others and impact all platforms and seasons of Call of Duty Warzone:

  • Warzone packet loss spikes/packet burst
  • Warzone connection failed
  • FPS drop warzone
  • Warzone lag and latency
  • Constant, high packet loss warzone vs random packet loss warzone
  • Warzone packet loss after update
  • Warzone packet loss PS4, PS5, Xbox,
  • PC Warzone packet loss season 4, season 5

What causes packet loss in Call of Duty: Warzone?

The thing about packet loss is that there’s no immediate cause for it, like when there’s no Internet connection.

You immediately check if there’s any unplugged cable. You find the cable, plug it back in, and there you go, problem solved.

Packet loss is not so easy to diagnose, which makes it also difficult to get rid of. There are a lot of internal and external factors that could trigger the occurrence of packet loss in Call of Duty: Warzone.

More often than not, the culprit is network congestion. Whether it’s your ISP network or the game server that’s being overcrowded, heavy demand on limited servers can definitely lead to packet loss.

In this case, all you can do is wait it out and avoid peak hours. Or use a VPN if you blame it on your ISP, but we’ll get to that later.

However, just to clarify, network congestion isn’t the scapegoat every time you notice a fall in speed or connection drops.

Other reasons include outdated drivers, bad hardware/software, poor-quality Ethernet cables, and even using Wi-Fi instead of wired connections.

How to detect packet loss in Warzone?

First of all, you’ll need to detect the server’s IP address, to establish whether the problem is on your side, your ISPs, or on the game server’s side.

Unfortunately, the game or its website doesn’t provide you with a list of IP addresses for their servers, so you’ll have to figure out a way to identify them yourself.

Luckily for you, that’s why we’re here for. So, here’s what you can do. You’ll need a third-party tool such as LiveTcpUdpWatch from NirSoft to see live information about TCP and UDP activity on your system.

It’s quite intuitive and also displays live packet loss information. Thus, you don’t need to fetch the identified IP and run it through pathping anymore.

Usually, we use WireShark to detect servers that communicate with our computers. However, Call of Duty: Warzone’s anti-cheat system makes it impossible to run the game and WireShark at the same time.

How can I fix packet loss in Call of Duty: Warzone?

1. Use a VPN

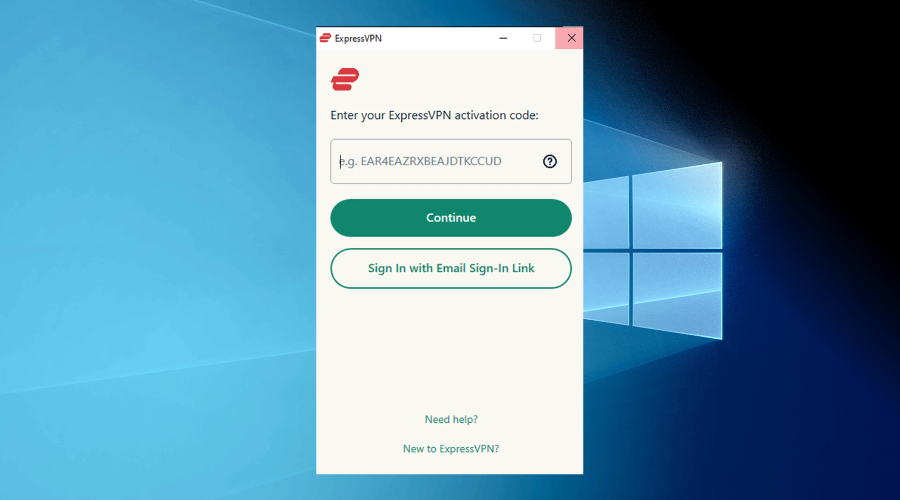
  1. Download and install ExpressVPN.
    expressvpn download page on official website
  2. Launch the VPN client.
  3. Log into your account.
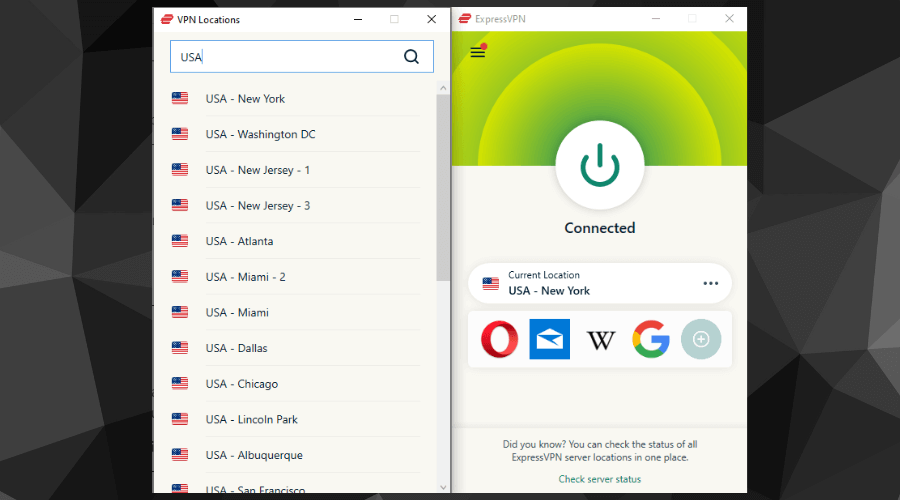
  4. Connect to a fast server (servers that are closer to you tend to be faster).
    expressvpn us server list
  5. Launch Call of Duty: Warzone.
  6. See if the problem persists.

You can easily reduce packet loss with a reliable VPN. ExpressVPN is an excellent choice because it provides many security and privacy features, helps circumvent geo-blocking, can curb packet loss, and is also used to improve in-game ping.

ExpressVPN

Improve your gaming experience by reducing packet loss with this VPN solution.
Check Price Visit Website

Note that using a VPN to fix packet loss isn’t a guaranteed win. If the packet loss occurs on your side, or the game server has some issues, using a VPN might only make matters worse.

Therefore, run a pathping test to rule out issues on your side of the connection, or problems with the game server before you invest in a VPN subscription plan.

2. Perform manual troubleshooting of the connection

  1. Check if there are any broken, unstable, or improperly configured components on your connection.
  2. Remove/replace/repair any faulty component including but not limited to cables, routers, adapters.
  3. Update your network drivers to their latest version.
  4. Make sure your router’s firmware is up-to-date.
  5. Restart your PC, modem, and router.
  6. Try to avoid peak hours, if possible, if you suspect network congestion is the culprit.
  7. Use wired connections instead of WiFi (Wi-Fi packet loss occurs more often).
  8. Contact your ISP and ask them to look into the issue, if possible.
  9. Reach out to Call of Duty: Warzone’s customer support, if there’s something wrong on their side

Although there’s no guarantee that these fixes will work 100%, keeping your network in top shape will improve your connection’s quality, even though it might not eliminate packet loss.

If you’re unsure of any procedure described here, try to read more into it. You shouldn’t risk compromising the integrity of your system just to fix a connection issue in an online game.

Call of Duty: Warzone can usually be fixed

If you’re experiencing packet loss in CoD: Warzone, you might be in luck. Packet loss is not as rare as you think, and everyone gets to experience it every now and then.

However, if it happens frequently and you notice a pattern, you might want to try fixing it yourself.

Using a VPN is often the most effective solution, but it only works if your ISP throttles your connection or has improper routing.

If using a VPN is not an option, you can try troubleshooting your connection step-by-step in an attempt to isolate and identify the cause of your packet loss issue within Call of Duty: Warzone.

If Warzone is lagging on PC, we have another guide that tackles this issue, so hesitate to visit it for more solutions.

Once you determine what causes it, it’s usually quite easy to fix. Let us know if you managed to solve the problem by using our solutions with a comment below.

How to Set Up a VPN on Arris Router & Best Compatible VPNs

If you’re wondering how to set up a VPN on an Arris router, we’re here to guide you every step of the way. All you need is an active VPN subscription and your router credentials.

We’ll also walk you through our top VPNs that support your router and what to expect from them.

Here’s how it works:

How do I set up a VPN on my Arris router?

  1. Sign up for a VPN that supports your router, such as ExpressVPN.
  2. Open your Arris router settings panel.
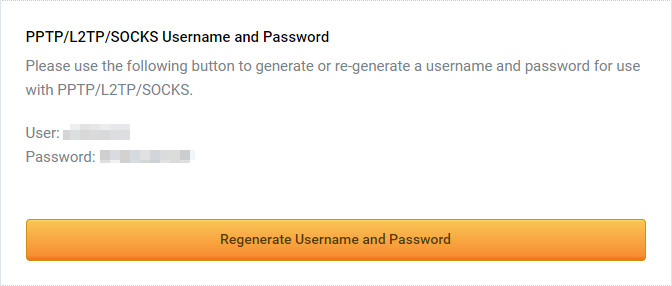
  3. Scroll down until you spot PPTP/L2TP/SOCKS Username and Password.get PIA IPsec credentials
  4. Write down your User and Password.
  5. Make sure your Arris router is connected to the modem.
  6. Visit the Arris router admin panel.
  7. Log in with your admin account.
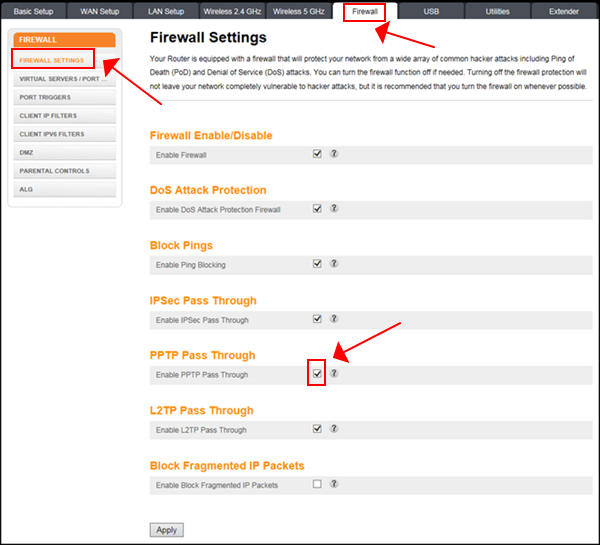
  8. Click the Firewall tab and check the Enable PPTP Pass Through box.allow PPTP passthrough on Arris router
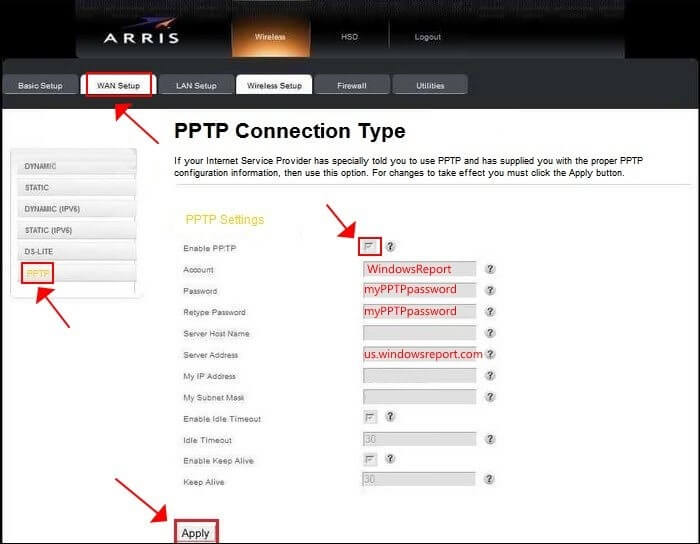
  9. Click the WAN Setup tab and select PPTP.
  10. In PPTP Settingsenable PPTP connection on Arris router
    • Check the Enable PPTP box.Set Account and Password to your VPN’s manual configuration data.
    (You can find it on the VPN’s official website)
    • At Server Address, write your VPN’s OpenVPN server address you want to use.
    • Leave the remaining settings blank.
    • Click Apply.
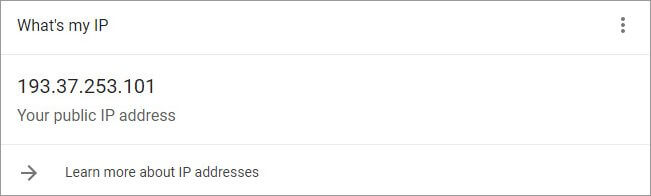
  11. Ask Google what your IP address is to see if it changed.whats my IP on Google
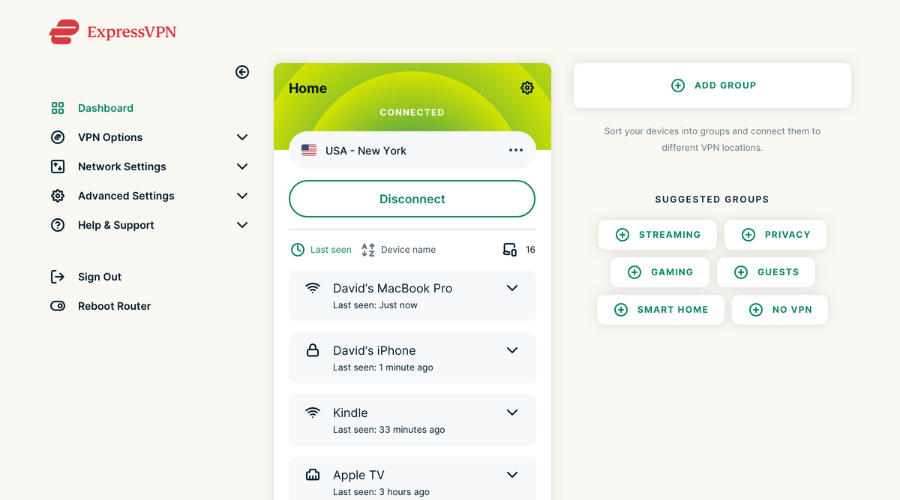
  12. Enjoy secure browsing, torrenting, streaming, and gaming!

There is a wide range of VPN clients that you can install on your router. Even if they do not specifically offer dedicated support for Arris, you can flash your router and install a service that supports OpenVPN.

What are the best VPNs compatible with Arris routers?

ExpressVPN – fastest servers

Known for its high-speed connection and ease of use, ExpressVPN is another user favorite, and for good reason.

It offers dedicated support for OpenVPN, a reliable client for Arris routers if you decide to flash your router with third-party firmware.

Along with OpenVPN, ExpressVPN also supports other protocols, including Lightway, a proprietary protocol built to provide a fast connection without compromising security.

Other key features of ExpressVPN include:

  • Server locations in 94 countries
  • IP address masking
  • 24-hour live chat support
  • VPN split tunneling
  • Trusted server technology
ExpressVPN

ExpressVPN

Protect your network with military-grade encryption and enjoy speedy, unlimited Internet!

Private Internet Access – best overall

Developed by Kape Technologies, Private Internet Access (PIA) is the best VPN overall, and that’s why we used it in our Arris router VPN setup instructions.

You can also set up OpenVPN manual configuration mode if your device supports it since it’s more secure than PPTP.

Furthermore, PIA uses military-grade encryption to protect your data from hackers. It has exclusive DNS servers to secure your DNS requests.

And, if you stumble upon technical difficulties, you can turn to the 24/7 live chat support.

More about PIA:

  • +35,000 VPN servers in 80+ countries
  • Compatible with all major platforms
  • No logs or leaks
  • 30-day money-back guarantee
Private Internet Access

Private Internet Access

Protect your entire household devices by installing PIA’s VPN configurations on your Arris router.
Check price Visit website

NordVPN – great double VPN feature

Another reliable VPN service you can install to your Aris router is NordVPN. The tool has great server coverage worldwide, with over 5000 servers.

This VPN supports OpenVPN and offers dedicated guidelines and installation packages for all its server locations. It’s a great option for those who want to create multiple VPN profiles within your router’s setup.

It can help you maintain online privacy and bypass strict geo-blocks. With its advanced AES-256-bit encryption and double VPN feature, you can rest assured that no one can track you down or even know that you use a VPN in the first place.

Other key features of NordVPN include:

  • Strict no logs policy
  • Automatic kill switch
  • DNS protection
  • Onion over VPN
NordVPN

NordVPN

Encrypt your traffic data for untraceable browsing and fast connections!
Check price Visit website

Surfshark – unlimited connections

Surfshark is a great VPN that will let you secure your entire household both by allowing direct installation to your router, but also thanks to its unlimited connections feature.

This VPN client lets you use its server on any device without placing any limit for simultaneous connections. It supports Open VPN and manual installation, so it’s a great option for Arris routers.

Surfshark offers private DNS on every server, which contributes to preventing data leaks. Moreover, it has a kill switch option that temporarily stops all traffic in case you disconnect.

Other key features of Surfshark include:

  • Camouflage mode to hide your traffic data even from your ISP
  • Generous server network
  • Powerful AES-256-bit encryption
  • Secure protocols, including IKEv2/IPSec and OpenVPN
Surfshark

Surfshark

Install Surfshark to your router and ensure all your devices are always secured!
Check price Visit website

CyberGhost – web filtering features

CyberGhost VPN can be installed on an Arris router if you flash it with DD-WRT firmware or use the FlashRouters privacy app. You can find dedicated guides on the official website.

The VPN has thousands of servers worldwide and offers downloadable OpenVPN files for all locations.

This VPN client includes dedicated adblock and malicious content-blocking features that will help you have a safe experience on the Internet.

Other key features of CyberGhost include:

  • DNS leak protection
  • Emergency killswitch
  • Dedicated IP
  • 8000+ servers
  • Public Wi-Fi protection
CyberGhost VPN

CyberGhost VPN

Protect your entire household with powerful VPN servers from any location in the world!
Check price Visit website

Why install a VPN on an Arris Router

Installing a VPN on your Arris router ensures continuous online protection for all connected devices. Here’s why it’s beneficial:

  • Always On: The VPN is active whenever your router is on, providing constant security.
  • Unlimited Connections: A router can handle multiple devices, while a VPN account may limit simultaneous connections.
  • No Leaks: The VPN’s kill switch prevents IP or DNS leaks during connection drops.
  • Automatic Reconnection: The VPN reconnects automatically if the internet goes down and comes back up.

Arris routers that don’t support VPN

Arris routers like the Arris SBG10, TG1672G and BGW210-700 do not support VPN configuration directly. To use a VPN with these models, you need to enable bridge mode and connect them to a VPN-compatible router.

For instance, if you’re using ExpressVPN, you can purchase a compatible VPN router and set it up to work with your Arris router in bridge mode, allowing you to enjoy VPN services seamlessly.

Note that sometimes, you might be unable to make the VPN work on your home connection. Rest assured that you can solve that by applying a few easy steps. And yes, free VPNs might sound like a great deal, yet keep in mind that not all of them can be trusted.

So, this is how to setup VPN on Arris routers and now you also know what are the best VPNs for it. Leave a comment below if you have any questions.

Hide IP Software for Windows: We’ve Ranked Top 8

You are probably wondering what software to use to hide your IP. We will share all you need to know.

You might need from time to time to become anonymous on the web to be able to protect your identity.

On the other hand, you may be rejected access to particular websites because of your blocked location; you might have seen this happening on YouTube or Netflix, for example.

You can overcome such issues by masking your identity, which can be done with the help of virtual private networks. There are lots of VPN software to hide your original IP address, but not all are great.

Here’s a list of the best VPN tools for Windows 10 and 11 to mask the original IP address.

Can you completely hide your IP address?

While it is impossible to conceal your IP address from everyone, it is feasible to establish an adequate degree of privacy for daily purposes. For example, with a VPN, your provider is the only party that can connect your online behavior to your IP address.

This is why picking a VPN company with a solid reputation for security and one that doesn’t maintain user activity records is crucial.

Your ISP will not know the details, but they may see the time, traffic type, and volume you transmit to the VPN server.

Since many proxies don’t encrypt communications, your ISP may still see your activities when you’re using one if it chooses. While using a VPN, all websites and services will only know the IP address of the VPN, not your own.

What happens if I hide my IP address?

IP Address is a unique address used to identify smartphones, tablets, and computers. Every computer on the internet features at least one IP address that uniquely identifies it from all the other devices.

You can hide an IP using a Trusted Proxy or Virtual Private Network. You can sign up for such services; whenever you go online, you will show a different IP address.

VPNs will keep you secure, and they’ll give you the opportunity of being anonymous. You can successfully block content such as websites, videos, and more. You will also be able to keep information private from hackers, governments, and much more.

Can VPN detect location?

A VPN can detect your location since your requests are passing through it. But it is much harder for a third party to know your location if you are connecting from a VPN.

Without further ado, let us discuss the best software to hide your IP.

What is the best app to hide IP address?

Private Internet Access – Great Internet speed

The best way to keep your IP safe from anyone is to use a VPN service, so if you’re going to be looking for a VPN service, you might as well look for the best that money can buy.

Topping off our list is a service that proved incredibly secure during testing, thanks to the encrypted connection that pretty much anyone would have a hard time breaking.

Kape Technologies developed Private Internet Access, and not only is it safe, but it is also versatile in terms of where you can connect.

This is thanks to the 3400+ servers placed worldwide, allowing you to unlock any geographic restrictions and protocol filters.

More so, your Internet speed will be unaffected, so whether you’re browsing or streaming, Private Internet Access will deliver.

Here are the best features of Private Internet Access:

  • An easy-to-use UI
  • Instant setup
  • Unlimited bandwidth
  • Multiple VPN Gateways
  • Thousands of servers spread out worldwide

PIA

Keep your browsing habits private with this great VPN at a discounted price for a limited time!
Check price Visit Website

NordVPN – Best P2P servers

NordVPN is an all-in-one VPN solution, with over 5000 fast servers optimized for your needs, available in 59 countries around the globe.

This advanced program hides your IP and replaces it with a new one based on your preferences and location. Moreover, it offers unlimited bandwidth, protecting your internet connection from throttling, making it the ideal VPN service for gaming or streaming videos.

With a single click or tap, the software will automatically connect you to the best VPN server when you use the Quick Connect button.

NordVPN has obfuscated servers, which change your data packages with additional SSL/SSH encryption and keep your IPS from seeing that you are using a VPN.

This type of server allows you to connect to a virtual private network even if you are in a heavily restrictive area. With an obfuscated server, you can easily bypass any VPN blocks.

NordVPN has secure and fast P2P servers and a cloud VPN designed to protect your business and facilitate teamwork.

 Other key features of NordVPN include:

  • Automatic Kill Switch
  • Browser extensions for Google and Firefox
  • CyberSec technology
  • Dedicated IP address is assigned only to your account
  • Split tunneling support
  • Covers 6 devices at once
  • Strong protection against DDoS attacks and DNS leaks test
  • 24/7 Professional customer support

NordVPN

Keep your IP address private and protect your data with this cutting-edge VPN program!
Check price Visit Website

Opera One – Best browser built-in VPN

Yes, we can understand your slight confusion. Opera One is not a VPN provider; it’s a browser, right? Well, you’re partly right because it is primarily a browser but offers a built-in VPN for free! It will hide your IP perfectly in Windows 10 and 11.

And it’s straightforward to activate. Open a new private window from the menu, and you will see the VPN option to the left of the address bar.

Clicking on it will open a window where you will be able t turn it on and select the preferred location of your IP. You will also see your IP address and the data transferred within that session.

We can’t stress enough that it’s a free but reliable service: no complicated settings, no unwanted commercials, no downloads, and no subscriptions.

Let’s recap the best things about using Opera One VPN:

  • Free service coming built-in with the Opera browser
  • Protects your identity online just like any other VPN
  • No extra downloads and no subscriptions required
  • No bandwidth limitations

Opera One

Download and use the built-in VPN in this browser for free, without any subscription.

ExpressVPN – Best support

hide ip software

Another user-confirmed tool that can hide your online presence is ExpressVPN. This software offers fully secure and high-speed VPN services for a connection like in a rally. It is an excellent software to hide your IP address.

With this known solution, you can choose from thousands of different servers to protect your identity in the digital environments in which you operate. Your IP is protected, and you can navigate quietly without worrying. 

As for connection protection, this tool has a trademark for speed and security, designed to provide an online activity without traces. 

Through ExpressVPN, you can also access websites or services unavailable in your area by hiding your IP. So, by generating a new IP every time you want to go online, you contribute to your healthier digital life. 

Your data remains undiscovered regardless of activity, and you can enjoy your favorite content without any digital identity issues. 

Here are the best features of this software: 

  • High-speed servers 
  • Active support by live chat 
  • Confidential browsing online 
  • Reduced limitations for content abroad

ExpressVPN

Protect your online activity and have a more secure experience every time you navigate. 
Check Price Visit Website

Surfshark – Best for poor internet connections

hide ip software

Surfshark is a system developed by Surfshark LTD that many go to when they grow tired of restricted content over the internet or grow precautions, wondering whether they are being watched or not.

With this powerful VPN system, you can be sure that no one will ever know what you are doing online, not even your network administrator, ISP, or government.

You can finally enjoy everything good that the internet has to offer, worry-free. Get instant, secured access to all the content you love on various devices, from smartphones to PCs and tablets.

Thus use Surfshark to ensure your location is private and your sensitive data is always secure.

Take a look at the main features of Surfshark:

  • Instant secured access to restricted content
  • Built-in ad-blocker
  • Disables your Internet connection if your VPN connection drops
  • Unlimited devices with one subscription

Surfshark

Make sure your location is private and your sensitive data is secure anytime.
Check price Visit website

CyberGhost VPN – Most servers

hide ip software

Cyber Ghost VPN is one of the best IP cover programs, and Kape Technologies also develop it.

It can encrypt all online traffic and ensure that information remains hidden from hackers when you’re on an open wireless network.

Although CyberGhost doesn’t offer a free version any longer, you can download and use a one-day trial. Aside from the time limitation, there’s no other restriction imposed on the program.

Cyberghost is perhaps the best VPN service on your Windows 10 computer.

The new version brings a more straightforward user interface, over 6400 servers to choose from (up from 700 servers available in 2018), and many more privacy features and options to protect your data.

Here are the main features of CyberGhost:

  • Simple and intuitive user interface
  • Over 6400 servers to choose from
  • Advanced connection features for blocking ads and pop-ups
  • Blocking malicious websites and online tracking
  • Automation possibilities

CyberGhost

Activate the highest level of encryption for your data and gain top privacy today.
Check price Visit website

Bitdefender VPN – Best antimalware and VPN combo

hide ip software

Having a VPN will protect your privacy when browsing, but if malware or a hacker manages to hijack you, then your data is compromised no matter what you do.

That is why it is always good to pair a good VPN with an equally good antivirus protection system.

That said, recommending one of the best systems on the market should come naturally, and Bitdefender fits the bill perfectly. , It is a great IP address protection software.

This global leader in cybersecurity has been protecting over 500 million systems for more than 18 years, and it continues to do a solid job even today.

It doesn’t matter if you are looking for home protection, work protection, or even if you are an Internet provider, Bitdefender has got you covered from all possible angles.

The software package will get you a complete security system for your PC, protecting you and your precious privacy without ever letting attackers access the machine in the first place.

Let’s take a look at the main features of Bitdefender:

  • Unmatched protection
  • No IP leaks found
  • Very easy to use
  • Protects your identity from anyone, even from your ISP

Bitdefender VPN

Add the Bitdefender Premium VPN to the package for the best results in protecting your online privacy.
Check price Visit website

Perimeter 81 – Best for small businesses

hide ip software

Perimeter 81 is a professional-grade VPN tailored for small businesses, so it’s primarily dedicated to office use. It is an excellent IP masking software.

It’s an excellent solution for these troubled times when many employees work from home and need to secure their communication channels.

To do that, Perimeter 81 uses a so-called Software-Defined Perimeter that allows your company to restrict network access and provide secure channels to the shared systems.

Each device will be verified before being granted access to the network, which translates to increased security and minimizing any data loss.

Perimeter 81 is also a cloud-based VPN alternative solution. This allows you to scale your network as you grow your business without investing in external hardware.

Check out these Perimeter 81 main features:

  • Secure remote access.
  • OpenVPN, L2TP, IKEv2, and PPTP security protocols.
  • Compatible with all major platforms, including Windows, Mac OS, iOS, and Android.
  • 30-day money-back guaranteed policy.

Perimeter 81

Give your IT staff a vast VPN set for their most critical networking and security needs.
Free trial Visit website

Why is hiding IP address important?

Your location is tracked each time you use the internet. However, unlike your postal address, an IP address identifies where you are online. IP addresses are distinct, similar to a digital fingerprint, making it simple to identify any online moves you make.

You may not access criminal websites or carry out illegal actions online; this doesn’t matter because once someone has your IP address, they can quickly locate your physical address. Your security and privacy depend on hiding your IP address since doing so might put you at serious risk.

Additionally, many countries limit what their citizens may access online, and some even utilize the Internet to spy on citizens’ private conversations. 

Furthermore, your ISP keeps track of your online activity. As a result, all it takes for law enforcement to discover what you’ve been up to online is for them to acquire this data.

Note that this is not an exhaustive list but reflects our top recommendations of the best IP hiding programs, and we guarantee each product’s quality and safety.

In the end, you do not need to use more than one of these products, and we advise that you pick one according to your personal preferences.

If you have additional questions or suggestions, share them in the comments section below, and we’ll be sure to check them out. Also, tell us what you think of our best options of software to hide IP.

Posted in VPN

5 Best Online Basketball Games to Play For Free [With Friends]

Online browser-based games allow you to have some fun time with casual free games. And if you are a basketball fan, what could be better than playing basketball games online.

We have already put together a list of casual online games for detective genre fans and now doing the same for basketball fans. All the games listed in the article are free to play and work on any device with the internet and preferably a larger screen.

So, get ready for our collection of top 5 online basketball games and show off your shooting skills and crazy dunks in single and co-op modes.

What is the best NBA game app?

We’re going to grow with Basketball Stars, which is a great app by the way, just in case you haven’t tried it yet. And, the best part about it, is that you can play with your most competitive friend.

This game can take rivalries to a whole new level, as it allows you to also use your favorite real-life basketball player.

Can I play online basketball games with friends?

Yes, you can, and this is the whole point of this article. ALl the games listed here are playable with your friends, so you can compete and see who scores the most points.

What are the best online basketball games?

Basketball Stars – The most popular

online basketball games

Basketball Stars is a two-player basketball game created by Madpuffers. The game allows you to play with your favorite team and players. The players’ list includes legends like LeBron Hames, James Harden, Stephen Curry, etc. You can play as many teams as you want to try both offensive and defensive skills.

You can play Basketball Stars with your friends or in solo player mode. You can score points by scoring three-pointers or through impressive dunks.

There is a quick match mode that lets you play solo matches with some random team and players. The game uses the traditional keyboard combination or WASD to move the players. You can use A + A to dash and S to pump or block.

⇒ Get Basketball Stars

Basketball.io – The most entertaining

Basketball.io is another popular online basketball game on CrazyGames. You have to work together with your team to score the ball. The game uses the standard WASD as the moving button, and your left mouse button controls the player.

As a player, all you have to do is get to the ball first and then reach the score point avoiding the opposing team players.

The game will automatically show a cinematic dunking action. If your other team players reach the ball first, then your job is to keep the opposing team players away so that your teammate can score.

The game has a trophy system where the winning team qualifies to the next stage after winning a match.

⇒ Get Basketball.io

Tap-Tap Shots – The most simple

online basketball games

If you like an endless basketball game, the Tap-Tap Shots is an awesome tapping game. You must attempt to score as many consecutive baskets as possible to beat your highest score. The game can be played on your smartphone as well as other internet-enabled devices.

Tap-Tap Shots is an addictive game and uses one point-controls mechanics. You can press the left mouse key to pitch the ball to score points as the net keeps shifting after every successful goal. Each shot requires multiple clicks to push the ball perfectly into the net. If you miss the goal, try again, but before the time runs out.

⇒ Get Tap-Tap Shots

BasketBros – The most entertaining

online basketball games

BasketBros is a fun, fast-paced one on one basketball game with lots of action. You can pick from a variety of characters and let the play begin. The game offers some of the crazy dunks and allows you to step back 3. If the opponent is too annoying, maybe even try the punch-out option.

BasketBros users very simple controls. You have the standard WASD to move your ballers. Jump by pressing the up arrow, and jump again to shoot. Use the space key for your defense.

The game offers multiple characters to choose from. You can steal the ball by karate-chopping your opponent or dunk all over them.

⇒ BasketBros

Basketball Skills – Shooting only

online basketball games

Basketball Skills, as the name suggests, is a basketball arcade game. It would help if you tried to score baskets in all the different game modes available in this game. For example, you can play the arcade, time attack, or distance mode.

Each session gives you ten balls to use. Scoring becomes challenging as you progress and make successful dunks. In Time Attack mode, you must score as many baskets as possible within the time limit. Although there is an unlimited supply of balls, you must hurry up as the time is limited.

⇒ Get Basketball Skills

Whether you want to play something during the NBA season or just trying to kill some time traveling, the online basketball games to play with friends listed in the article will keep you hooked for hours.

All the fun basketball games to play online listed in the article are browser-based, so you can play them on any internet-enabled device with a web browser.

5 Ways to Fix YouTube Errors & Problems in Vivaldi Browser

Are you trying to watch a Youtube video on your Vivaldi browser but encountering errors? Unfortunately, it’s been a common problem with the browser, and several users have experienced it in the recent past.

The errors with YouTube are limited to Vivaldi, while it works fine on other browsers. But the problem is not as complex as it seems and can be quickly resolved.

With this article, we hope to come to your aid with a few easy fixes.

Why is YouTube not working on Vivaldi?

If YouTube is not working on the Vivaldi browser, the problem may be with the settings. However, many users managed to eliminate the issue by disabling Hardware Acceleration so that you may give it a try.

Also, complex browsing data, the presence of conflicting extensions, or a corrupt user profile may just as well cause YouTube to lag on Vivaldi. Besides, many reported that YouTube is slow on Vivaldi, which can be attributed to these issues.

In addition, high GPU usage can also cause problems while opening websites, and you will have to reduce resource consumption.

Quick Tip:

This isn’t a troubleshooting step per see, but we can wholeheartedly recommend Opera One for YouTube. Video streaming works like a charm, with no need to run extensions to prevent annoying ads.

Opera One comes with a dedicated built-in adblocker along with a native VPN solution. The latter will allow you to circumvent geo-limitations imposed by specific channels, while the adblocker feature detects and blocks ad scripts the moment you request a webpage.

Opera One

Reimagine YouTube streaming with the most powerful browser: faster, better, 100% private, and ad-free.

What to do if my Vivaldi browser shows errors on YouTube?

1. Delete browsing history and cookies

  1. Press Ctrl + Shift + Del to open the Delete Browsing Data tool.
  2. Select All Time from the Delete Data for the dropdown menu.All time
  3. Now, select the All option, and click on Delete.All
  4. You may uncheck Passwords to keep the website login details saved.

Like any other web browser, Vivaldi may store certain information about its users. For example, the browser might collect information related to your download history and form data.

To keep the user data safe, use a privacy-focused search engine or install VPN software.

You should clear your browsing history and personal data regularly for privacy and performance reasons. Cleaning the cache also helps in fixing specific browser-related issues.

Or you may not bother going through all these steps and leave this to professionals – and by that, we mean specialized software to perform clean-up tasks automatically.

Use specialized cookie cleaning software.

Using a dedicated tool will save time and remove the risk of deleting vital data by mistake.

Cookie cleaners are generally very straightforward: they perform a preliminary scan of your browser and then give you a report on what can be deleted to free up some space.

You have to select what you want to remove or remove everything. Then wait for the process to complete.

2. Extensions issue

  1. Paste the following path in the address bar and hit Enter:vivaldi://extensions/
  2. Disable all the extensions here by disabling the toggle under them, and restart the browser.disable to fix vivaldi browser youtube
  3. Now, enable them one at a time, and as soon as the problem with YouTube resurfaces, you know which extension is causing it.
  4. Next, click on the Remove button under the conflict extension.remove
  5. Again, click Remove in the confirmation prompt.click remove

Removing the conflicting extension did the trick for many and is an effective fix against YouTube errors on the Vivaldi browser.

3. Clean profile

  1. Paste the following path in Vivaldi’s address bar and hit Enter:vivaldi://about/
  2. Copy the Profile path as listed here, and close Vivaldi.Profile path
  3. Press Windows + E to launch File Explorer, and navigate the following path, where Username is your active user profile: C:\Users\Username\AppData\Local\Vivaldinavigate
  4. Right-click on the User Data folder and select Rename.rename to fix vivaldi browser youtube
  5. Now, name it as User Data.old and hit Enter.User Data.old

Another simple method to fix the Vivaldi browser YouTube problem is to rename the User Data folder. This will help if the corrupt user profile is causing the error.

4. Enable hardware acceleration

  1. Launch the browser, press Ctrl + F12 or Ctrl + Fn + F12 depending on whether the Fn key is locked, and select Webpages from the left.webpages
  2. Tick the checkbox for Use Hardware Acceleration When Available.use hardware acceleration when available to fix vivaldi browser youtube
  3. Now, restart the browser for the changes to come into effect.

Hardware acceleration allows you to use additional computer resources to help your computer run specific tasks much faster. If it’s disabled, you will likely encounter errors on YouTube in Vivaldi. After enabling the feature, check if the problem is resolved.

5. Check GPU usage

  1. Paste the following path in the address bar and hit Enter:vivaldi://flags
  2. Search for the Override software rendering list flag, click on the dropdown menu next to it, and select Enabled.enable
  3. Click Relaunch for the changes to come into effect.relaunch to fix vivaldi browser youtube

Once the Vivaldi browser restarts, YouTube should start working, and you shouldn’t face any problems from now on.

How do I optimize the Vivaldi browser?

Every browser has specific settings or features enabling or disabling, improving performance. For example, for Vivaldi, you can allow the Lazy Load Restored Tabs feature to load only the active tabs during the previous session on the subsequent launch.

Also, it’s recommended that you have a minimum set of extensions installed and rely on the built-in features instead. For instance, Vivaldi offers a built-in adblocker, so do not get an extension for it.

Besides, the more the number of Web Panels added in Vivaldi, the slower the performance would be. Therefore, you should keep these to a minimum and add only the critical ones.

Also, regularly clearing the browser cache and cookies can considerably boost Vivaldi’s performance and help save storage space on the computer.

There you go! These solutions would help you fix Youtube errors on Vivaldi and enhance the browser’s performance.

Also, find out what to do if Vivaldi is not loading pages.

Let us know how it worked for you by reaching for the comments section below.

Google WiFi VPN: 5 Best to Secure Your Google Nest Router

Those of you that are fans of Google products are probably already aware of what Google Wifi is. For those of you that aren’t, they are a line of mesh-capable wireless routers developed by Google as part of the Google Nest family of products.

Well, these products now have a spiritual successor called Google Nest Wifi.

Unlike their predecessors, these devices are aimed for home use, and they aim to provide enhanced Wi-Fi coverage through the setup of multiple Nest Wifi devices.

What makes them different from regular routers is that Nest Wifi automatically switches between access points depending on signal strength, allowing you the best connection, no matter where you are in your home.

However, routers are still routers, and if you want to browse the Internet in complete privacy, you’re going to need a solid VPN solution.

That is why we’ve compiled a list of what we think are the best VPNs that you could use if you have a Google Nest Wifi network.

Does Google WiFi support VPN?

It depends. You can use a VPN connection on Google WiFi, but you can’t manually install a VPN directly on the Google Nest router.

In any case, you can still get any VPN software on your PC and obtain extra privacy and protection against risky Internet threats.

Additionally, despite the routers having no support for VPNs, there is a trick you can use to install it:

How to setup a VPN on Google WiFi

To install a VPN to Google WiFi, you need a secondary router. Google’s mesh doesn’t support VPNs, so the only way to install one on your entire network is to connect the Google Nest to the VPN-enabled router.

Here’s how to configure a VPN on Google WiFi:

  1. Install the VPN on your compatible router. For that, you’ll need to use your provider’s OpenVPN configuration files. If you go for our top choice (PIA), you can find those files here.
  2. Connect your Google WiFi router with the VPN router using an Ethernet cable.
  3. Go to your Google Home app.
  4. Select WiFi>Settings>Advanced networking.
  5. Modify the subnet in the Router LAN address to  192.168.2.1.
  6. Save your settings and enable DHCP.
  7. Restart your internet connection and check if it’s working. You can do so with a site like  whatismyipaddress.com. If your IP corresponds to your VPN configuration files, then the VPN connection is active on your Google WiFi.

Check with your provider to see which routers they support. DD-WRT models are known for being compatible with VPN.

All of the VPNs we selected below support manual configurations, so you can do this with any of them. But if you don’t want to go through all of this, you can just connect all your devices to a VPN app.

What are the best VPNs for Google Wifi?

Private Internet Access – Fastest VPN servers

Topping out our list is a VPN product developed by Kape Technologies that is not only the best solution for using Google Nest Wifi, but it is the best VPN solution on pretty much any type of router.

This VPN service is called Private Internet Access, and it offers pretty much all the advantages of using a VPN, with very few (to none) of disadvantages.

High-speed connectivity is provided thanks to the 3300 servers located in 46 countries, meaning that you can browse anything from anywhere without having to worry about latency and connectivity issues.

More so, since Google Wifi is a mesh network of routers, chances are that you’ll be having multiple devices using the network at the same time. That is where PIA shines once more, as it offers simultaneous support for up to 10 devices.

Here are some of the perks of using Private Internet Access:

  • Benefits from WireGuard®, PPTP, OpenVPN, and L2TP/IPSec technology
  • Access for 10 different devices simultaneously
  • You can encrypt your Google Wifi signal
  • 3300 servers in 46 different countries
  • Unlimited bandwidth
  • P2P support

Prive Internet Access

Secure your Google Nest Wifi network with the ultimate VPN service, now at a discounted price for a limited time only!
Check price Visit website

NordVPN – Best VPN for data encryption

Yet another resounding name that makes a great Google mesh VPN is none other than NordVPN.

This service owned by Tefincom & Co., S.A. is a world leader in terms of VPN services, boasting an astonishing 5400 servers in 59 different countries, offering near-global coverage.

What makes this VPN good for Google Nest Wifi routers is that it too offers a multi-device support policy, as a total of 6 different devices can stay connected to the network at any time.

The nigh number of servers means that there won’t be any bandwidth issues, so you don’t have to worry about connectivity spikes, regardless if you are moving around the house with your connected device.

Here are some of the perks of using NordVPN:

  • Secure and private Internet connectivity
  • Steady connectivity for smooth streaming
  • Offers encryption for mobile connectivity
  • Unlimited bandwidth
  • Integrated kill switch
  • A no-log policy

NordVPN

Choose ExpressVPN for your router and you won’t be disappointed! Enjoy a discounted price right away!
Check price Visit website

Surfshark VPN – Unlimited devices protection

Just because Surfshark VPN is the last on our list doesn’t mean that it is any less good.

This great VPN service owned by Surfshark LTD has also been on the market for quite some time now, and it continues to protect millions of users today.

This versatility is further enhanced by the fact that it can come in a wide variety of forms, starting from Chrome and Firefox extensions, iOS and Android apps, as well as Windows, macOS, Linux, and Amazon Fire Stick Apps.

What makes Surfshark exceptional is that there is no limit to how many devices can be connected to it at the same time, so everyone in your household can enjoy Google Wifi-provided connectivity in a safe and secure manner.

Here are some of the perks of using Surfshark:

  • Unlimited number of supported devices
  • Comes with whitelisting features
  • Secure connectivity
  • Stable connectivity
  • P2P support
  • Blocks Ads

Surfshark

Secure your Google Nest Wifi network with this VPN service, now at a discounted price for a limited time only!
Check price Visit website

ExpressVPN – Optimized privacy tools

The third performing software in the list is ExpressVPN, which can be the best choice for a blazing speed VPN provider 

Since this software is highly appreciated for connectivity and internet speed, it qualifies for the fastest VPN services on the market. Also, it can host 5 simultaneous devices in the same session, which is great for Google Nest routers. 

ExpressVPN offers a multitude of advantages, including maximized encryption and increased connectivity by the 3000 servers present globally. Thanks to these features you can safely use mesh routers produced by Google Nest.

In addition, it supports different platforms and devices like Windows, Android, Mac, Chromebooks, Amazon tablets, or routers. So there will be no security or connectivity issues in your home.

Here are some of the benefits of using ExpressVPN: 

  • 20+ devices support 
  • Possibility of using 5 devices at one time 
  • Constant support by live chat
  • Network lock kill switch 
  • AES-256 bit encryption. 
  • Split tunnel feature 

ExpressVPN

Give a boost to your Google Nest Wi-fi router with this software, so you can enjoy flawless connectivity and speed. 
Check price Visit website

CyberGhost – Refined digital privacy

The third entry on our list is yet another Kape Technologies product called CyberGhost, and it has a long history of providing quality VPN services to users.

It features 6300 servers in over 89 countries, making it one of the most widely spread VPN services in the world. It’s a great Nest WiFI VPN option since it can easily bypass blocks and keep you safe.

More so, if you’re fond of torrenting, you will be glad to know that CyberGhost’s servers are optimized for torrenting and P2P sharing.

Not only that, but you and your entire family can benefit from this VPN, as it will work efficiently with Windows, macOS, iOS, Android, and Linux devices, as well as Amazon Fire Sticks and Android TVs through the use of apps.

Here are some of the benefits of using CyberGhost:

  • Automatic Kill Switch
  • 6300 servers in 89 countries
  • Unlimited bandwidth and traffic
  • A 45-day money-back guarantee
  • A 45-day money-back guarantee
  • 256-bit AES encryption for added security
  • Simultaneous connections on up to 7 devices

CyberGhost

Secure your Google Nest Wifi network with this VPN service, now at a discounted price for a limited time only.
Check price Visit website

These are just some of the VPN services that we recommend for use with Google Nest Wifi.

The entries were chosen based on multiple criteria, but you are free to choose whichever you feel fits your style best.

How to Make Windows Look Like Mac [Super Easy]

If you like the Mac interface or if you used it before but you would still like to keep your Windows 10 operating system, you now have the possibility to make Windows look like Mac.

It turns out it’s actually super easy to get the best of both worlds and all it takes is mastering the right apps to help you pull this off. Don’t worry, we’re here to guide you throughout the entire process.

In this manner, you’ll make your PC look like a Mac with just a couple of clicks and a Mac theme for Windows 10.

The desktop will look exactly like a Mac but your operating system will still function under Windows 10. Also, you can have access to all the Windows 10 features as you did before.

With no changes in the functionality department, you’ll just make Windows feel like Mac.

How can I make Windows look like Mac?

Making your Windows desktop look like Mac OS can be done very easily and in just a couple of minutes of your time.

You will only have to carefully follow the tutorials posted below and you will be ready to use your new apple theme for Windows 10.

1. Make Windows look like Mac using a skin pack

    Users who wish to make their Windows OS look like mac can do this using a skin pack. A skin pack helps you change your UI to look exactly like on a mac OS.

    You can manually customize which mac features you want to import and use on your Windows.

  1. 1. First you need to create a system restore point. It is highly recommended to do this before you download the skin packs, just in case something goes wrong during the installation or if you cannot uninstall them.

  2. 2. Press and hold the Windows button and the X button to open the Power Menu.

    power menu windows
  3. 3. Select System from the options.

  4. 4. On the left side-panel, in the Find a setting search box, type restore point and click on Create a restore point.

    how to create a restore point windows
  5. 5. Now you should have a window with System properties in front of you. Left click on the Create button you are presented there and give a name to the restore session that you will create.

  6. 6. Proceed with the system restore.

  7. 7. Download a Mac theme for Windows 10. You need to choose the theme which is compatible with your OS and has the same system type (32bit or 54bit).

  8. 8. Right click on the installer for the Windows 10 Mac OS skin.

  9. 9. During the installation, you will be asked what features you want to have from the mac interface. You can choose the features as you see fit.

  10. 10. After the skin pack finishes the installation, restart your Windows 10 PC.

Note: If you have any issues after the restart of the Windows 10 PC, you can boot into Safe mode and disable any of the features that are causing the issues.

2. Make Windows look like Mac using the Mac OS Transformation Pack

You can also download and install the Mac OS transformation pack. With the help of this tool, you can make Windows feel like Mac.

The pack includes a great number of changes, but it’s easy to install and use. It brings Mac themes, wallpapers, as well as new OS X features to your Windows computer.

MAC-related features on Windows

There are other interesting MAC-related things that you can do on a Windows PC. We will show you the most popular and used MAC features on Windows PCs. Here they are:

Now that you have your Windows 10 Mac OS skin up and running on your PC,  you can start testing it and see if it fits your needs.

Don’t hesitate to write us below if you are unable to install the Mac theme for Windows on your PC, and we’ll be sure to help you succeed.

9 Ways to Fix Are You Sure You Want to Leave This Page Popup

Sometimes, when surfing the Internet, you might see Are you sure you want to leave this page? message. This message usually appears if you haven’t saved your input on a particular website and, in most cases, works as a reminder.

However, some websites use this message to advertise specific products, so today, we’ll show you how to deal with this cheap tactic.

Why does my browser ask if I want to leave the page?

Because of how a specific JavaScript option is configured, you can get this message whenever you try to dismiss a page.

Alternately, a particular add-on installed on your browser can demand that you fulfill this additional need.

This issue may be remedied by turning off the plugins in question and deleting their histories from inside the browser.

Quick tip:

For fast browsing in complete safety, you need an advanced web-like Opera One with a built-in ad blocker and free VPN.

Opera One can help you organize even further with workspaces, tab islands and built-in AI. The browser also features a modular AI-ready design for AI technologies integration.

Opera One

Make the best of your online sessions, have fun and increase productivity with this quality browser!
Free Download Visit website

How do you remove Are you sure you want to leave this page?

1. Disable JavaScript

1.1. Google Chrome

  1. Click the Menu button in the top right corner and choose Settings
    chrome-settings images not loading in chrome
  2. Select Privacy and security from the left menu followed by Site settings.privacy-chrome images not loading in chrome
  3. Scroll down until you see the JavaScript option and click it.java-script images not loading in chrome
  4. Finally, click Don’t allow sites to use Javascript.dont-allow-java are you sure you want to leave this page

After disabling this feature, check if the Are you sure you want to leave this page in Chrome error still shows up.

1.2. Firefox

  1. In the address bar in Firefox enter about:config.
  2. A warning message will appear. Next, click the I accept the risk! button.
  3. In the search bar on the top, enter javascript.enabled. The list of results will now change. Double click javascript.enabled to disable it. If the Value changes to false, JavaScript is currently disabled in Firefox.java-false are you sure you want to leave this page

Remember that this method will disable JavaScript for all websites you open in Firefox. Once you’ve followed the above steps, you will disable the JavaScript. Are you sure you want to leave this page message.

1.3. Microsoft Edge

  1. Press Windows and enter Internet options. Next, select Internet Options from the menu.
  2. Go to the Security tab and click the Custom level button.custom-level are you sure you want to leave this page
  3. Go to the Scripting section and locate Active scripting. Select Disable from the list of options. Click OK to save changes.scripting-ok are you sure you want to leave this page

If you’re constantly getting this message on a specific website, you might want to try disabling JavaScript. By disabling it, you’ll prevent the transmission from appearing.

Since JavaScript is a core component of your browser, disabling it will make many modern websites work improperly.

However, several users reported that they fixed Are you sure you want to leave this page in Internet Explorer by using the above method?

Note that Internet Explorer is not around anymore since June 2022; hence we have used Microsoft Edge, and we will use it from now on too.

2. Disable add-ons

2.1. Google Chrome

  1. If you got the Are you sure you want to leave this page pop-up message, start a new Chrome window and click on the three-dot menu followed by More tools and Extensions. extensions-chrome your connection was interrupteda network change was detected. err_network_changed
  2. Now, turn off the toggle button next to all your extensions. Do this one by one, then check if the pop-up message still appears, so you can find out which extension was the culprit.disable-ext your connection was interrupteda network change was detected. err_network_changed

2.2. Microsoft Edge

  1. Start Microsoft Edge, then click the three-dot menu followed by Extensions.edge-ext are you sure you want to leave this page
  2. Choose Manage extensions from the drop-down menu.manage-ext-edge are you sure you want to leave this page
  3. Disable one of your extensions by clicking the toggle button next to it.
  4. Restart Microsoft Edge and check if the issue is resolved. If the problem still exists, repeat the same steps, but this time is sure to disable a different add-on. Repeat this process until you find the problematic add-on.

2.3. Firefox

  1. Access Firefox, then click the hamburger menu followed by Add-ons and themes.add-ons-firefox confirm form resubmission err_cache_miss
  2. Click the toggle button next to one of your extensions to turn it off, then check whether the Are you sure you want to leave this page issue is gone. Repeat this until you find the faulty add-on.toggle-off-ext-firefox confirm form resubmission err_cache_miss

Few users reported issues with the Smiley Central add-on in Firefox. If you use this add-on, remove it and check if that solves the problem. For issues regarding Firefox installation, you can also check out our article.

Note that you can apply this solution to the Are you sure you want to leave this page message in Safari.

3. Reset your browser

3.1. Microsoft Edge

  1. Open Edge and access the Menu option followed by Settings.edge-ext are you sure you want to leave this page
  2. Click the Reset settings option from the left side, followed by Restore settings to their default values.reset-edge-option are you sure you want to leave this page
  3. Click Reset. That’s it!reset-edge-yes are you sure you want to leave this page

After resetting Microsoft Edge to default, check if the issue is resolved. If you’re using a different browser, be sure to reset it and check if that solves your problem.

3.2. Chrome

  1. Resetting Google Chrome will bring it to a default state. Open Chrome and select Menu followed by Settings.chrome-settings windows 10 blocking chrome install
  2. Select Reset and clean up from the left side.
  3. Click the Restore settings to their original defaults option.restore-settings windows 10 blocking chrome install
  4. Click Reset settings. That’s it!

3.3. Firefox

  1. Open Firefox, click the hamburger menu, and select Help, followed by More troubleshooting information.troubleshooting-info are you sure you want to leave this page
  2. Here, click the Refresh Firefox button followed by the Refresh Firefox button from the confirmation pop-up. refresh-firefox are you sure you want to leave this page

4. Clear browsing history

  1. Open Chrome and follow this shortcut to open the Clear browsing data menu: Shift + Ctrl + Delete.
  2. Select All time as the time range.all-time-chrome images not loading in chrome
  3. Select Cookies, other site data, and Cached images and files.cookies-and-cache-chrome images not loading in chrome
  4. Select Clear Data. The Are you sure you want to leave this page error will be solved.

You can clear the browsing history using a different browser by following similar steps.

In some instances, disable the Leave site dialog in Chrome by clearing the cache, so be sure to try it.

5. Disable mixed content

  1. Open Internet Options by pressing Windows, then typing its name and selecting the top result.
  2. Navigate to the Security tab and click on the Custom level button.custom-level are you sure you want to leave this page
  3. Locate Display mixed content and select Disable. Click OK to save changes.disable-mixed are you sure you want to leave this page
  4. After that, restart Internet Explorer and check if the problem is resolved.

6. Disable XXS filter

  1. Access Internet Options by pressing Windows, typing its name, and selecting the top result.
  2. Go to the Security tab and click on the Custom level button.custom-level are you sure you want to leave this page
  3. Now navigate to the Scripting section and locate Enable XSS filter. Choose the Disable option and click OK to save changes.xss-ok are you sure you want to leave this page

7. Use Developer Tools

  1. Press Windows, then type Internet Options and select the top result.
  2. Press F12 to open the Developer Tools window.
  3. In the top right corner, click an icon that has the number 11 next to it. Then, choose any number from the menu below.

This simple workaround can help with the Are you sure you want to leave this page message?

According to users, in some cases, you can fix this problem in Microsoft Edge simply by using Developer Tools and switching to an older version of Internet Explorer.

This isn’t a permanent solution, and you’ll have to repeat this solution with every website that gives you this message.

8. Disable before unlead function in Firefox

  1. Open Firefox and enter about:config in the address bar.
  2. You’ll see a warning message. Click I accept the risk button.
  3. In the search field, enter dom.disable_beforeunload. Next, locate dom.disable_beforeunload on the list and double-click it. Make sure that its Value is set to True.dom-disable are you sure you want to leave this page

If you’re using Firefox as your default web browser, you can quickly fix this problem by using this method. This message appears due to the beforeunload JavaScript function.

To stop, Are you sure you want to leave this page message from appearing? Then, you have to prevent the function above from running.

After performing these steps, the problem should be resolved entirely. However, it’s worth mentioning that you might change how certain websites work on your PC by disabling this function.

Many websites use this function, and if you notice that some websites are acting strangely, revert this option to its original value.

9. Alternative solutions in Chrome

9.1. Crash tabs in Chrome

There is another workaround that can help you. Are you sure you want to leave this page? message in Chrome. You can avoid this problem by crashing the tab you want to close.

All you need to do is to enter chrome://crash in the address bar. This should crash the tab, and you’ll be able to close it without any issues.

Alternatively, you can also try entering chrome://hang in the address bar. By doing so, you’ll freeze the tab and all its scripts, so you should be able to close it without problems.

This is a workaround, not a permanent solution, but it can help you with the Leave site pop-up- in Chrome.

If this solution works for you, you’ll have to use it whenever you want to close a website that gives you this message.

9.2. Use Tampermonkey

Tampermonkey holds a reputation of being the most popular userscript manager with over 10 million active users.

Thanks to this great extension, you can have better control of your online sessions simply by managing and editing your scripts or enabling or disabling them quickly.

Rely on Tampermonkey if you want script synchronization with Chrome Sync and cloud storage. With this extension, you can eliminate the Are you sure you want to leave this page error message.

After doing that, the Are you sure you want to leave this page error message won’t appear again. We have to mention that this is an advanced solution, so if you’re a primary user and are unfamiliar with user scripts, you might want to skip this option.

9.3. Use the Let Me Out extension

The Let Me Out extension can help whenever your browser displays an error message. In addition, this intelligent tool can block unnecessary pop-up messages when navigating away from a page.

One noticeable benefit is that it is created to handle especially those Javascript errors that result in messages like Are you sure you want to leave this page?

Some other essential characteristics reside in the fact that this extension is easy to use and doesn’t take up space on your hard drive. All you need to do is add it to the Chrome bar and let it do its job.

⇒ Download Let Me Out Extension

9.4. Update your browser

  1. Click the three-dot menu from the top right corner and select Help, followed by About Google Chrome.menu-help-about-chrome images not loading in chrome
  2. If Chrome needs to be updated, an Update button will be displayed that you need to click.chrome-update images not loading in chrome

If this issue appears in Chrome or any other browser, ensure you have the latest version installed.

Sometimes your current version might contain specific bugs, which can cause this message to appear often. Once it is updated, the Chrome leave site pop-up will be disabled.

9.5. Restart Chrome

This is another workaround that can temporarily fix this problem. According to users, you can temporarily stop this message from appearing simply by restarting Chrome.

This is a relatively simple solution, but remember that this isn’t a permanent fix. Even if you restart Chrome, the issue will appear after a while, so you’ll have to restart it again.

The Are you sure you want to leave this page? message can be rather annoying, but in this article, we presented you with a comprehensive and complex guide to all the solutions that can help you fix it.

We’d like to hear more from you on this issue, so drop us a comment in the section below.

How to Increase Volume in Windows Beyond 100%

If your laptop speakers sound too quiet, even at full volume, you’re not alone. Windows and third-party tools can help you make volume louder on a laptop safely and effectively. Here’s how to adjust volume on this computer and get additional volume without damaging your speakers or ears.

1. Enable Loudness Equalization (Built-in)

Windows includes a hidden feature called Loudness Equalization that boosts and balances sound levels.

  • Right-click the speaker icon → Sounds (or More sound settings in Windows 11).
  • Select your device → Properties → Enhancements tab.
  • Enable Loudness Equalization → Apply.

Tip: If you still struggle with quiet output, see our full guide on fixing when PC sound volume is too low for additional solutions.

2. Use the Windows Volume Mixer

Some apps run at lower levels than the system’s master volume. The Volume Mixer lets you adjust them individually.

  • Right-click the speaker icon → Open Volume Mixer.
  • Ensure all apps (browser, games, music players) are set to 100%.

For more granular control in Windows 11, use individual app volume control to fine-tune different apps separately.

Before adjusting individual app levels, make sure you know how to access the Volume Mixer. You can follow this easy guide on how to open the Sound Volume Mixer in Windows 11 or 10 to locate it quickly.

Boom 3D is one of the safest ways to raise volume beyond 100% while keeping clarity.

  • Install Boom 3D.
  • Increase volume safely beyond 100% with system-wide control.
  • Use EQ presets and 3D surround sound for richer audio.boom 3d raise laptop volume

Want alternatives? Explore the best audio enhancers for Windows to match different use cases.

Boom3 D

Boom3 D

Boost volume, preserrve crystal cler audio quality!
Try now! Visit website

4. Use VLC Media Player

VLC can amplify audio inside the player above Windows’ limits.

  • Open a file in VLC.
  • Drag the volume slider up to 125%.
  • For more: Tools → Preferences → All settings → Interface → Main interfaces → Qt → set Max volume (200%+).

This is great for movies or music files played directly in VLC.

5. Add a Chrome Volume Booster Extension

If you stream content in your browser, a Chrome extension can boost per-tab audio by several hundred percent.

  • Install a trusted extension (e.g., “Volume Booster – Increase”).
  • Click the extension while streaming and raise the level as needed.

Prefer system-wide improvements? Check our picks for the best volume booster apps for Windows 11.

6. Use Dolby Atmos for Perceived Loudness

Dolby Atmos does not push audio above 100%, but it improves clarity and spatial separation so the sound feels louder at the same setting.

  • Right-click the speaker icon → Spatial sound → Dolby Atmos for Headphones.
  • Or install the Dolby Access app from the Microsoft Store.
  • Pick profiles for movies, music, or gaming.

Using high-end cans? Pair Atmos with a capable headphone amp with optical input for even better clarity and perceived loudness.

Safety Tips When Boosting Volume

  • Avoid keeping speakers at maximum boost for long periods to prevent distortion or hardware damage.
  • Limit high amplification on headphones to protect your hearing.
  • Apps like Boom 3D or Equalizer APO provide safer, cleaner boosts than crude amplification.

Why Laptop Speakers Sound Quiet

Laptop speakers are limited by size and cabinet design. Unlike desktop speakers, they move less air, which reduces maximum volume and bass extension. Software enhancements can help, but physics still matters.

  • Bass limitations: Small drivers struggle with deep frequencies.
  • Distortion risk: Pushing above 100% can produce crackles or muffling.
  • Headphones vs. speakers: Headphones need less power and usually benefit more from software amplification.

If you need consistently higher volume, consider Bluetooth speakers or USB-powered external speakers for better projection and headroom.

Conclusion

If you feel your laptop raise volume enhancement options are not enough, these methods cover everything from built-in tweaks to pro-level tools. For quick results, start with Loudness Equalization. For the best overall experience, Boom 3D and Dolby Atmos add clarity and depth while protecting your speakers and hearing.

FAQs

Why is my laptop volume so low?

Common causes include hardware limits, reduced app levels in the mixer, outdated audio drivers, or disabled enhancements like Loudness Equalization. For step-by-step help, see when PC sound volume is too low.

Can I safely increase volume above 100%?

Yes, but increase gradually. Tools like Boom 3D or VLC can push past 100%. Prolonged high levels may damage speakers or your hearing, so use moderation.

Does Dolby Atmos make my laptop louder?

Atmos emphasizes clarity and spatial detail, which makes audio feel louder at the same setting. It does not increase raw output beyond 100% like a booster.

What’s the best way to get additional volume on a laptop?

For a quick built-in fix, enable Loudness Equalization. For maximum control and safe amplification, use Boom 3D or Equalizer APO. You can also try specialized volume booster software for Windows 11.

Should I use third-party apps or stick with Windows settings?

Windows settings work for small boosts. If you want higher headroom, richer EQ, and safer processing, third-party apps like Boom 3D or Equalizer APO are better choices.

Aol Explorer: What Is It & Why Should You Use It?

In the early 2000s, the browser market was quite different, and many more web browsers were available.

Some of them, such as AOL Browser, had short popularity and have vanished since. So today, we’re going to analyze AOL Browser and see what features it has to offer its users.

Does AOL still exist in 2022?

Here are some facts that will help you understand. As of July 2012, there were about 24 million AOL Mail users, and by 2021 the number of paying users dropped to less than 1.5 million.

On March 16, 2017, Verizon announced that it would discontinue its in-house email services for internet subscribers and migrate all customers to AOL Mail.

What is AOL Browser, and should I use it?

1. What is AOL Browser?

AOL Browser, also known as AOL Explorer, was a web browser released by AOL in 2005. The browser was based on a Trident engine, just like Internet Explorer.

AOL Browser had some exciting features, such as support for tabs and the Tab Explorer feature, which lets you view tab thumbnails on full screen.

Additional features included Desktop Widgets, Visual Themes, and Feeds Screensaver. Another useful feature was the ability to preview links without opening them.

However, AOL Browser was short-lived, and it was discontinued in 2006.

2. What are AOL Browser alternatives?

Any modern web browser is an excellent alternative to the AOL Browser, but if we had to pick one, we would choose Opera One due to its low hardware requirements.

The browser is based on Chromium, and it can work with Chrome extensions. In addition, Opera One has a built-in ad blocker, so you won’t have to deal with ads anymore.

Additional features include tracking protection and crypto mining protection. The former will block tracking scripts and cookies and make the pages load faster.

As for security, a free unlimited VPN can provide you with an extra layer of protection. Other features such as workspaces, tab islands and build in AI. Opera One also features a modular AI-Ready Design that supports the integration of current and future AI-s.

The browser also has a pop-out video player, integrated messaging and social media apps. Opera One is available on all primary desktop and mobile platforms, so try it out.

Opera One

Do you love web pages that load almost instantly? Use Opera One to access them, and you’ll never need another browser again.
Free Download Visit website

How do I download AOL to my computer?

  1. Visit the official AOL Dekstop Gold website.
  2. Press the Learn more button.AOL
  3. Click on the Try it free for 30 days button.AOL download

How do I install AOL explorer?

  1. Visit the official download site for AOL explorer.
  2. Press the Free download button.aol
  3. Run the executable and install the software.aol explorer

So, if you were searching for the AOL web browser, now you know exactly where to get it. Just make sure that your AOL browser download is made from a secure location.

You will find links for AOL browser downloads for Windows 10 in this article and AOL explorer.

AOL Browser had brief popularity in the 2000s, and since it’s no longer in development, you’ll be better off using a different web browser.

5 Ways to Permanently Fix This Site Can’t be Reached Error

Google Chrome is a popular web browser for Windows users. However, at times when you try to access any website, you may encounter the This site can’t be reached error.

The error is encountered across browsers, which points to the fact that it’s not always the individual browser settings at fault but the network settings as well.

In this article, we take a look at some troubleshooting steps to help you resolve This site can’t be reached error in Windows 10/11.

Why does my computer keep saying site can’t be reached?

First, you must identify if the problem is present across browsers or limited to one. In case all the browsers throw the This site can’t be reached error, it could be the network settings, problems with the router, or other issues to blame.

The error can be triggered by a bad DNS cache or browser cache. Also, setting the wrong DNS server is often found to be the underlying cause. Besides, the browser settings could be misconfigured, or its very installation buggy, thus leading to the error.

How do I unblock a website on Chrome in Windows 11?

To unblock a website, you first have to identify whether it’s been blocked at the system level or by the ISP. If you have a website blocking tool installed, check for the list of blocked sites, and remove the ones you don’t want to be blocked anymore.

In some cases, certain websites are blocked in a region, and the only way to bypass these restrictions is to use reliable VPN software. Also, you could use a browser like Opera One that comes with a built-in VPN and eliminate the need to install a third-party app altogether.

Quick Tip:

Before trying more technical solutions, you should know that trying Opera One can make a difference due to built-in VPN, Ad Blocker and tracking protection.

Opera One is also a smart browser, comes with a native AI, social media, messaging apps and it features a modular AI-ready design for other AI integration.

Opera One

Resolve browser connection errors once and for all with this guarding browsing.
Free Download Visit website

How do I fix This site can’t be reached?

1. Restart the DNS client to fix This site can’t be reached – Refused to connect

  1. Press Windows + S to open the Search menu, enter Terminal in the text field, right-click on the relevant search result, and then select Run as administrator.terminal
  2. Click Yes in the UAC prompt.yes
  3. Press Ctrl + Shift + 2 to open Command Prompt.
  4. Now, paste the following command and then hit Enter to stop the DNS service.net stop dnscachecommand to fix this site can’t be reached
  5. Next, execute the following command to restart the DNS service:net start dnscacherestart DNS to fix this site can’t be reached
  6. After that, reset the DNS cache by executing the following command:ipconfig /flushdnsflush dns
  7. Once done, close the Terminal app, and restart the computer for the changes to come into effect.

Restarting the DNS client helped a lot of users fix the This site can’t be reached Chrome error. If the issue persists, try changing the default DNS address to a different public one.

2. Change DNS server address to fix This site can’t be reached – The connection was reset

  1. Press Windows + R to launch Run, enter ncpa.cpl in the text field, and click OK.ncpa.cpl
  2. Right-click on your network adapter and then select Properties.Properties
  3. Next, select the Internet Protocol Version 4 (TCP/IPv4) option and click on Properties.IPv4
  4. Select Use the following DNS server addresses, and then enter these values in the field:
    • Preferred DNS server: 8.8.8.8
    • Alternate DNS server: 8.8.4.4change DNS server to fix this site can’t be reached
  5. Click OK to save the changes.OK

We have used the Google public DNS server address. However, you can use other third-party, public DNS server addresses. You can find more public DNS server addresses with a simple search on the internet.

After changing the DNS server address, relaunch Chrome and check if the This site can’t be reached in WordPress is resolved.

3. Reset TCP/IP Network Protocol to fix This site can’t be reached – DNS_PROBE_FINISHED_NXDOMAIN

  1. Press Windows + X to open the Quick Access menu and select Windows Terminal (Admin).Windows Terminal (Admin)
  2. Click Yes in the UAC prompt.click Yes
  3. Press Ctrl + Shift + 2 to open Command Prompt in a new tab.
  4. Paste the following command and then hit Enter:netsh int ip resetcommand to fix this site can’t be reached
  5. Wait for the command to execute, and then reboot your computer.

4. Clear browser cache to fix This site can’t be reached – Checking the proxy and the firewall

  1. Press Ctrl + Shift + Del to open Clear browsing data.
  2. Select All time from the Time range dropdown menu.all time
  3. Next, select Cookies and Other site data and Cached images and files, and then click on Clear data.clear data to fix this site can’t be reached

Once done, relaunch the browser and check if the This site can’t be reached error is fixed. In case it persists, try resetting the browser. Also, make sure to disable any proxy or third-party firewall installed on the computer and use the Windows Defender Firewall.

Reset Chrome settings

  1. Paste the following path in Chrome’s address bar, and hit Enter:chrome://settings/reset
  2. Click on Restore settings to their original defaults.restore settings to fix this site can’t be reached
  3. Confirm by clicking on Reset settings.reset settings

5. Reinstall Google Chrome

  1. Press the Windows + R to open Run, type appwiz.cpl, and click OK.appwiz.cpl
  2. Select Chrome from the list of installed apps, and click on Uninstall.uninstall to fix this site can’t be reached
  3. Follow the on-screen instructions to complete the process.
  4. Once uninstalled, reboot the computer.

Now, download Google Chrome from the official website, run the setup and proceed with on-screen instructions to install the browser. Once you launch it, the This site can’t be reached error will be fixed.

Also, find out what to do if there’s high CPU usage in Chrome and it affects the computer’s performance.

Tell us which fix worked for you in the comments section below.

5 Ways to Fix Discord if it’s Opening Links in Wrong Browser

Many gamers use Discord to communicate with others, but it has its share of issues. For example, some users reported that Discord opens links in the wrong browser.

This can be an issue, especially if you want to continue using just a single browser for this purpose. However, fixing this issue is simple; today, we’ll show you how to do it.

Before getting into the main subject, let’s see why this problem can occur on your PC.

Because it is essential to be aware of the reasons that explain today’s problems, we compiled a list of the most common ones.

  • Wrong settings – In this case, you must ensure you’ve correctly set the default browser, and the appropriate app. Don’t worry; we’ve compiled some easy solutions to fix this in a few seconds. 
  • Problems with your main browser – If Discord opens links in the wrong browser, it might be a problem related to your main browser. We recommend using an extremely efficient option, which won’t get you into trouble.
  • Incorrect privileges – If you want to open links in the browser, you have to ensure that the correct benefits are customized on your operating system.

To discover the best methods to solve each issue, you should verify the following information thoroughly.

How do I enable link preview in Discord?

  1. Open Discord.
  2. Press the Settings button.discord
  3. Select the Text & Images tab, then check the box next to Show website preview info from links posted in chat.discord text

Quick Tip:

If you require to easily fix Discord links issues, the workaround is to use Opera GX. This gaming browser has a Discord app integration on your homepage, so you can open links properly without trouble.

Opera GX

Chat on your favorite servers and open links on Discord in this flawless gaming browser!

1. Run Discord as an administrator

  1. Hit the Windows key, then type Discord.
  2. Choose to Run as administrator.

2. Make sure you select the appropriate browser

  1. Click on any link you want to open through Discord.
  2. Choose the application you want to use for opening links from Discord.
  3. If the app you want to use isn’t present on the list, scroll down and select More apps.
  4. Navigate to the .exe file of the browser you want to use. For example, if you wish to Discord to use Google Chrome, select the chrome.exe file found in C:Program Files (x86)GoogleChromeApplication.
  5. Make sure to tick the Always use this app option.
  6. Click OK.

Keep in mind that this is not the most reliable solution, and it works only the first time you try to open a link in Discord.

3. Check the default browser

  1. Go to the Settings app. You can open it quickly by using the Windows + I keyboard shortcut.
  2. Navigate to the Apps section.
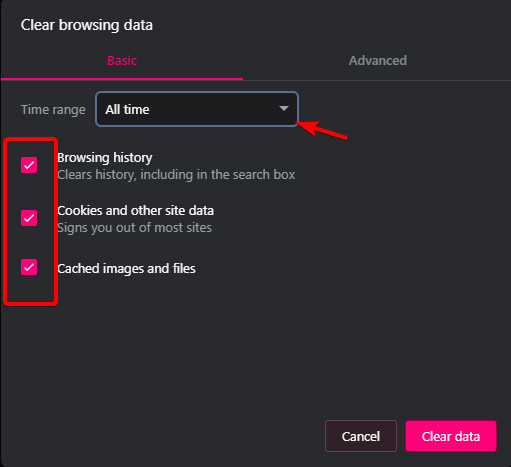
  3. Now go to the Default apps section.
  4. In the right window pane, set the default web browser.

After doing that, you’ll change the default browser for Discord for good. Remember that the default browser will also be adjusted for other applications.

4. Clear Discord Cache

  1. Use the following keyboard shortcut: Windows + R.
  2. Type %appdata%/discord/cache, then press on OK.
  3. Press Ctrl + A to select all the files.
  4. Use Shift + Del to delete the files.
  5. Restart Discord.

Remember that this solution works only if you’re using Discord, Chrome, and another browser, so it’s not the most reliable long-term solution.

5. Try running Discord from your browser

If you’re having problems with Discord and your browser, you can always try running the Discord web app in your web browser as a workaround. Even though you can do this in any web browser, Opera GX would be the best choice.

It is gaming-oriented and has Discord integration, so you can have the app running in the sidebar all the time.

Opera GX has a unique GX Control feature that allows you to allocate resources to your browser to ensure that your gaming sessions are always smooth and lag-free.

It’s important to mention that the browser has a Hot tabs killer feature that allows you to easily view the number of hardware resources each tab uses and close accounts.

Opera GX is an excellent browser for gamers, and if you’re having any issues with Discord, this browser might be the perfect alternative.

Also, remember that this option would help you if the Discord mic is not working on Windows 10. Because Opera GX offers a full Discord integration out of the box, you won’t have to worry about getting into trouble while using it.

Other great features:

  • Designed specifically for gamers
  • Twitch integration
  • Attractive and customizable UI
  • Integrated messenger and Instagram
  • Adblocker and VPN

⇒ Get Opera GX

What browsers are compatible with Discord?

If you wonder what browsers are compatible with Discord and how to change them, make sure you read the following information.

The first thing to do is verify if you already have the desired browser installed on your PC. Then, nothing is left to do other than follow the third recommended method.

You should know that there are several browsers that you can try for using Discord. However, there are limited possibilities for now.

  • Opera GX – This is the most efficient solution if you’re looking for a high-quality Discord experience.
  • Firefox 80+ – Firefox is an open-source browser, so you can rest assured that all your data is perfectly safe. So, you’ll always protect your privacy while using Discord.
  • Google Chrome – Because this is the most used browser, many people are wondering how to get Discord to open links in Chrome. Fortunately, you can do it by following the above steps.
  • Microsoft Edge 17+ – Microsoft Edge runs now on Chromium engine. This means that Edge follows the same standards as Chrome, and it can also run Chrome extensions.
Note icon NOTE
Older browsers may lack functionality with newer features, and voice chat for Firefox is only supported by versions 80 and up!

If you want to discover more about the best browsers for Discord users, do not hesitate to check our dedicated guide.

So, if you were looking for information on changing what browser Discord opens, you came to the right place.

Changing the Discord default browser is a matter of preference, and everyone should be able to use his favorite software to improve the entire process.

If you’re having issues with Discord not opening links in the correct browser, try all of our solutions, and let us know which one has solved the problem for you.

3 Quick Ways to Fix SeaMonkey if it’s not Responding

SeaMonkey, released for the first time in 2006, is an open-source browser that allows development communities to contribute to its maintenance and improvement.

The browser is based on the Firefox source code, but it differs significantly from the Mozilla Firefox browser. Some people have reported several issues when using the browser, noticing SeaMonkey is not responding.

Even though you might encounter other issues with the browser, this is one of the most common ones. Others might include SeaMonkey Java not working, SeaMonkey play flash not working, among others. Fortunately, all these errors should not call for alarm since you can solve them quickly without external help.

What is the latest version of SeaMonkey?

As discussed above, SeaMonkey was released in 2006. Since then, many versions have been released over the years to address concerns and issues affecting each of the previous versions, making it one of the most efficient browsers for office work.

In addition, technology advancement has forced SeaMonkey developers and its development community to release a version that adapts to the changing technology.

The latest version of SeaMonkey is SeaMonkey 2.53.13. This version comes with essential security features and improvements in performance compared to the previous versions.

Can I install SeaMonkey on my PC?

SeaMonkey is not just a browser but a complete suite that offers chat, email, and browsing features. Unfortunately, you need to install SeaMonkey on your PC to use these features.

The first step to installing SeaMonkey is visiting their download page and then downloading the latest version of SeaMonkey.

Once downloaded, run the installation file and then follow the on-screen instructions to complete the installation. So, yes, you can install SeaMonkey on your PC.

Quick Tip:

Try another browser that is more responsive. We recommend Opera because it gets frequent updates in order to avoid errors and offer a seamless user experience,

The browser includes all standard features like bookmarking and private browsing. It has a modern interface and lets you group tabs in workspaces, connect social media apps, and more.

Opera

Avoid errors by browsing the web with this highly responsive tool!

How do I fix SeaMonkey not responding?

1. Kill the SeaMonkey application

  1. Right-click any space on the taskbar and select Task Manager.Task bar - seamonkey not responding
  2. Choose Processes on the top and search for SeaMonkey.Task manager processes
  3. Right-click on SeaMonkey and choose End Task.End Task - seamonkey not responding

2. Restart your computer

  1. Click the Windows Start button.Windows Start Button
  2. Click on the Power button and then select Restart.restart computer - seamonkey not responding

3. Run a Check Disk

  1. Right-click on the Windows start button, press the Windows + X key combination and then select Windows Powershell (Admin).windows powershell
  2. Type chkdsk /r and press Enter.checkdisk command
  3. Type chkdsk  /f and press Enter.Checkdisk command 2
  4. Press Y if you get a message that says Chkdsk cannot run because the volume is in use by another process. Would you like to schedule this volume to be checked the next time the system restarts? (Y/N).Message - seamonkey not responding
  5. Restart your computer.

Is SeaMonkey secure?

Some of the most modern and popular secure browsers include Mozilla Firefox and Google Chrome. They come with many privacy and security features to protect users from potential online threats.

SeaMonkey comes with some level of security as well. For example, security tests have shown that SeaMonkey blocks phishing schemes, among the most common security threats on the internet.

However, the browser does not recognize dangerous web pages. In addition, it does not stop threats such as ransomware from downloading. This shows that SeaMonkey is not as secure as some of its competitors.

SeaMonkey is a good browser, especially for people looking for a complete platform to handle their browsing, emails, and chatting.

Like other software applications, you might face issues like SeaMonkey not responding when using the browser. Fortunately, as discussed above, these issues are easy to fix.

How to Play Minion Rush on Your PC [Online & Offline]

The highly popular game, Despicable Me: Minion Rush, made after the equally popular movie is available for Windows 10 users in the Microsoft Store. Below are more details about it.

Although a lot of users have gotten used to playing it on their Android devices, we’re going to show you how to download, install, and play it on your Windows PC.

All you have to do is follow our step-by-step guide in order to get Minion Rush on PC and promise to have a lot of fun with it.

Gru’s loyal yellow gibberish-speaking Minions are ready for their toughest challenge in Despicable Me: Minion Rush. Play as a Minion and compete with others in hilarious, fast-paced challenges in order to impress your boss, (former?) super-villain Gru! Jump, fly, dodge obstacles, collect bananas, be mischievous, and defeat villains to earn the title of Minion of the Year!

The game will take 140 MB of your storage which, I think, is about the same size as on other mobile platforms.

Inside the game, you can customize your Minion with unique costumes, weapons, power-ups and battle Vector, and an all-new villain that has been exclusively created for the Windows 10 version of the game.

What happened to the old Minion Rush game?

If you are talking about the old game modes such as Jelly Lab, Events, and Races, know that they have been discontinued for iOS and Android platforms.

That being said, They are still available on other platforms such as Windows and other versions of this popular game.

So, if you are looking for Minion Rush, the old version, you will find out everything you need to know in this article.

How can I play Minion Rush on my computer?

1. Despicable Me: Minion Rush download & install (how to download and install)

  1. Access the official entry on the Microsoft Store.
  2. Press the Get button.get minions
  3. Hit the Play button to start the game.play minions

2. Despicable Me: Minion Rush online game (how to play in it your browser)

  1. Visit an online gaming website and search for the game.
  2. Click on the controller icon.minions rush
  3. Press the Play Game button to start.despicable me

Long story short, here’s what you can expect to get from this game:

  • As a player, you’ll guide your minions as they run through iconic locations from the movie.
  • Discover secret areas and see if there’s any reward or prize that you can collect.
  • Unexpected Minion moments: The game is packed with pleasant surprises. For example, you may unexpectedly become a Mega Minion and ride the Fluffy Unicorn.
  • Hilarious weapons and power-ups are up for grabs
  • Compete with other players in Minion Races
  • Battle vicious villains such as Vector, El Macho, and the Villaintriloquist

How to play Minion Rush without missions?

Well, you should know that Rush Avoiding is a game setting in Minion Rush and it is now known as avoiding missions.

In the previous version of the popular title, some levels would ask a player to rush avoid with a power-up, but it’s discontinued for this current version.

That being said, remember that there is also an Avoid Missions mode, which tasks you with completing a run while a certain action is banned, such as jumping, ducking, or collecting Bananas.

Of course, you can still perform the banned action, but doing so will incur a temporary penalty, during which your actions won’t count towards Mission objectives.

So, what are you waiting for? Get your Minion Rush from the Microsoft Store, and hit the Play button now!

How to Make a Slideshow With Music on Windows 10

Slideshows are a great way to organize pictures on a Windows 11 or 10 computer.

At times, Windows users may face some kind of hardware limitation or system update and they need a way to store their files so they don’t get accidentally deleted or lost.

Plus, it makes cataloging photos and showing them off much easier than having to manually show people by scrolling through them one by one.

Slideshows are also a great way to pool together photos from different sources (camera, phone, USB drive) into one easy-to-enjoy format.

Fortunately, there are useful third-party apps that you can use to create these slideshows without having to be forced to use something like PowerPoint. These third-party apps are more advanced:

The app is fine for business presentations, but PowerPoint lacks many useful features that other apps use. Windows 11 comes with a useful app built right in.

How can I make a slideshow on Windows 11 and 10?

Aside from third-party apps, the Photos app got a robust facelift for Windows 11. Compared to the Windows 10 iteration, the Photo app is wildly different with innovative features that give it a huge leg up.

On the new Photos apps, image details can be easily viewed with the Information icon, which appears on the top of the image.

This will open the right pane that details when the picture was taken, its size, and resolution. Plus, it has great editing and organization capabilities thanks to its facial recognition technology.

windows photos app

As stated earlier, other third-party apps bring their unique style to the table.

This guide will detail how to create a slideshow on Windows 11 via the Photos app as well as other popular third-party apps, like Ice Cream Slideshow Maker.

It’s important to point out that creating a slideshow with music is more akin to creating a video. It isn’t as simple as simply clicking the menu button and selecting slideshow.

That being said, let’s go over the methods you have to make a slideshow with music on Windows 10 and 11.

1. How to create a slideshow with music via the Photos app

  1. Click on the magnifying glass icon to bring up the search bar.windows homepage
  2. Type in Photo and click on the first entry to open the Photos app.windows photo app
  3. In the Photos app, click the Video Editor tab on top.photos video editor
  4. In this new tab, click on the New video project button in the middle.photos new video project
  5. In this new window, name the slideshow. Then click OK.photos name slideshow
  6. Click the Add button in the Project library.photos project library
  7. A drop-down menu appears asking you which source you want to use. This guide will select From this PC.from this PC file
  8. Select the images you want to use.photos app windows
  9. Highlight the images in the Project library.photos app step 8
  10. Drag them down to the Storyboard section.photos app step 9
  11. You can modify how long each photo stays on the screen by clicking on the number and changing the time.photos app step 10
  12. To add music, click on Custom audio on the top.photos app step 11
  13. In this new window, click the Add audio file button at the top.photos app step 12
  14. Select the song or audio file you want to add.photos app step 13
  15. You can edit how long you want the audio file to last in the slideshow by sliding the tab at the bottom.photos app step 14
  16. Once you’ve decided how long you want the audio to last, click Done.photos app step 15
  17. You can test the slideshow by clicking the Play button in the test video in the corner.photos app step 16
  18. Once done, click Finish video in the upper right-hand corner.photos app step 17
  19. A small window will appear. Click the drop-down menu underneath Video quality to select the slideshow’s resolution.photos app step 18
  20. Select the Export button.photos app step 19
  21. Name the slideshow you created and then click Export.photos app step 20
  22. The slideshow then immediately open to allow you see and hear the whole thing in action.photos app step 21

    2. How to make a slideshow with music on Canva

    A great tool to create a slideshow with music is Canva. It is available both in a web version and as a PC application. Canva is a free and easy to use app with which you can create your perfect presentations.

  1. 1. Go to the Presentations category of Canva and click on Browse templates.

    canva presentations browse
  2. 2. If you don’t have a Canva account, this is the moment you should create one for free. If you already have one, log in to it.

  3. 3. Next, select a presentation style and theme from the left and pick a template from the hundreds of free ones from the right pane. There are also a lot more available if you decide to pay for the Pro plan.

    canva presentation selection
  4. 4. Once you’ve selected a template, hit the Customize this template button. By default, the presentation will have a 1920 x 1080 resolution but if you start a trial for Canva Pro you will be able to set any dimensions you want for 30 days.

    canva customize template
  5. 5. You will get into the edit mode and you will be able to change everything on the page, including images and text.

    canva change the content
  6. 6. To add your own photos, click on the Uploads button, then hit the Upload media button.

    canva how to upload media
  7. 7. Now, click the Plus sign to add a new page, select the new blank page and choose the photo you want to add from the Uploads.

    canva add new photo
  8. 8. Now, the photo was added and you can move it around or stretch it with your mouse, add more photos on the same page etc.

    canva move photo
  9. 9. Assuming you’ve added all your photos into the presentation, click on Music from the left pane to add a nice melodic background for your photos. There are plenty of free options on the list.

    canva add music to the presentation
  10. 10. The audio track will be added automatically from the start and it will play for the duration of the presentation. You can change its volume and even add fade in and out audio effects.

    canva add music
  11. 11. After you’ve finished, or anytime during your work, you can hit the Present button, select the presentation type and click the Present button to see how your slideshow looks like.

    canva present presentation
  12. 12. The last step, after you make sure everything is OK, hit the Share button from the top-right corner and click the Download button to save your presentation on your drive.

    canva save and share

As you will discover, you have plenty of sharing options right from the web app. You can post it on your social media, get the link and send it over any communication platform, and more.

3. How to make a slideshow with music using Promo

  1. Promo is a web-based service, so go to the website via web browser.promo step 1
  2. Click on the Try for Free! Button.promo step 2
  3. Sign up by creating your credentials.promo step 3
  4. After signing in, click on the Upload button to the far right.promo step 4
  5. Click on Photos.promo step 5
  6. Add the pictures you want to include in your slideshow.promo step 6
  7. Click on the picture to be included in the project. They will be highlighted blue.promo step 7
  8. Then click the ADD TO PROJECT button.promo step 8
  9. Next, you will be taken to the slideshow’s project page where you can customize the slideshow.
  10. To add music, click the Music tab on the left.promo step 9
  11. Click Uploads at the top.promo step 10
  12. You can either drag the files to the page or click on it to upload music tracks.promo step 11
  13. Clicking it will bring up the File Explorer. Select the music file you want to add.promo step 12
  14. It will take a few seconds to upload.  If it states Selected on the file, it has already been added to the slideshow.promo step 13
  15. You can edit the length of the song by clicking on the pencil icon in the file. You can change the volume, trim it, or add a fade-out.promo step 14
  16. Once you’re done trimming the song, click Trim Music.promo step 15
  17. Going back to the Editor, you can add text and change its font.promo step 16
  18. You can add text by double clicking on the blue bar above the timeline and then type in what you want.promo step 17
  19. Click Done when finished.promo step 18
  20. When done, click on the Save & Preview button to the left.promo step 19
  21. After some time, the video will be made ready to preview.promo step 20
  22. Watch the video to see if there are any changes to be made.
  23. After it finishes, select the Publish button at the end.promo step 21

Is there a difference when you create a slideshow with music on Windows 10?

Although Windows 11 is clearly more advanced than the old Windows 10, its core remained the same and most of the apps will run in both OSes.

That is why all the solutions and software presented above will work seamlessly on Windows 10 as well.

The Photos app is still identical and all the menus, as we presented in this guide are the same in both Windows 11 and the older system.

Icecream Slideshow Maker is a great tool and will also work on Windows 10. As for the online slideshow makers, using them in a browser makes them compatible with any system or device.

Other ways to enhance your Windows experience

As briefly touched upon in the guide, Windows 11 has a plethora of third-party apps that make photo management much more streamlined thanks to various features.

For instance, ACDSEE Photo Studio Ultimate 2022 has tons of awesome features like Media Mode which gives you access to a giant photo database, and People Mode, which allows you to categorize images by whoever is in it.

Venturing outside of photography, it’s recommended that you get yourself a migration tool. It’s an app that transfers important filers, computer settings, and even other apps to another machine.

At first, it may not seem useful, but if you ever want to the settings and files of your old computer without having to move everything one by one, it’s a great tool.

A great one is thanks to its simple user interface and the ability to restore the original system to a new PC, just the way it was.

So, this was our complete guide on how to create a slideshow with music on Windows 11 and 10 by using free, paid, and online apps.

However, for a great slideshow, you need great pictures so you might be interested in our list including the best photo editing software.

If you have any suggestions or questions, don’t hesitate to write them in the comments section below.

5 Best Browsers That Support jQuery [Different Versions]

Want to use jQuery in your projects and looking for a browser that still offers support for this JavaScript library? Then we have some recommendations for you.

The JavaScript library is compatible with a plethora of browsers. It also works with the stock browser on Android 4.0+ and Safari on iOS 7+.

However, ensure you are using the latest versions because outdated browser versions can lead to unexpected bugs.

But if you want to know how to enable or disable JavaScript in all browsers, you can refer to our post for more details.

Is jQuery built into browsers?

No, jQuery is not built into browsers. Because if it were, you would be left with no support for new features in the older/outdated browsers.

With cross-browser support in jQuery, it offers an external script that helps you obtain a new feature in its latest version. This will automatically add quality to all browsers.

So, you must add the latest version of the JavaScript library to your site, and the new feature will be automatically included in all major browsers.

Is jQuery still supported?

jQuery is still one of the most popular JavaScript libraries among web developers. Many projects, including the WordPress plugins and themes, still depend on it.

Based on statistics, jQuery still operates with over the top 1 million websites worldwide (79%). It also takes up a whopping 65% of the JavaScript library usage.

You can also use jQuery for browser support detection to check the browser’s UA (User Agent) string. It helps you identify a specific pattern assigned to a browser family or version.

In this post, we recommend the best browser that offers support for jQuery and can help you make the most of it.

What browsers does jQuery support?

Opera Browser – Load jQuery easily within the Opera userJS

brower support jquery

With built-in support for JavaScript that helps you create your script and the support for jQuery, Opera is a web developer’s delight.

Since jQuery supports the same JavaScript style coding, it gets even better working on Opera.

Moreover, you can also load jQuery within the Opera User JavaScript quickly. For example, build a custom HTML5 video player using CSS3 and jQuery.

Here are some of its other significant features:

  • Inspect changes to your CSS styles
  • Debug your script
  • Built-in VPN, ad-blocker
  • Not a resource hog
  • Battery saver mode

Opera

Try Opera today, one of the best browser with JQuery support!

Google Chrome – Capitalize on the built-in web developer tools

brower support jquery

Google Chrome is popular with the highest user base globally and its praiseworthy list of extensions.

If you are a web developer looking to work on Chrome with jQuery, you will find many valuable extensions like jQuery Debugger, All Cheat Sheets, etc.

Besides, you can also take full advantage of the Chrome Dev Tools to access advanced settings, deploy your applications, debug JavaScript, and more.

Among its other key features are:

  • Improved JavaScript features
  • Highly customizable
  • Dual screen mode, font editors, etc. with Dev Tools
  • Sync with Google services and accounts
  • High-speed browsing

⇒ Get Google Chrome

Mozilla Firefox – Excellent CSS, JavaScript debugging tools, or the Grid tools

brower support jquery

If you’re looking for a conventional browser for web development, then Mozilla Firefox exceeds your expectations.

An excellent standard browser otherwise, the developer version adds to its advantages with its range of development tools.

Also, if you want to use jQuery on Firefox, make sure that you use JQuery/JQuery-UI libraries downloaded from ajax.googleapis.com 18, jquery.com 14, or jqueryui.com 7.

Below are some of its other essential features:

  • Superb CSS, JavaScript debugging tools, or the Grid tools
  • Powerful and flexible Firefox dev tools
  • Manage passwords with Clockwise
  • Faster browsing
  • Private Browsing with Enhanced Tracking Protection
  • Save web content in Pockets

⇒ Get Mozilla Firefox

Microsoft Edge – Increased productivity with web development add-ons

brower support jquery

While the Microsoft Edge browser offers support for jQuery 3.5.1 and its precedent, it’s mostly not needed for compatibility.

This is because the Microsoft desktop and the Windows servers only support IE11 and the later (Edge) browser versions.

However, since jQuery still exists, you can make the most of it using the powerful web development platform on Edge and with its range of extensions.

Here are some of its other significant features:

  • Dynamic Edge Developer Tools
  • Useful add-ons for developers
  • Privacy control
  • Import data or sync data across devices
  • personalized gaming homepage

⇒ Get Microsoft Edge

Apple Safari

brower support jquery

Safari is another browser in the list that offers support for the jQuery 3.6 version and its precedent on Apple platforms like Mac and iOS.

Since Safari updates itself silently without any user intervention, you can use features and APIs without loading jQuery within the browser.

However, since jQuery adapts itself to both outdated and modern browser versions, you still have a choice to use it.

Among its other notable features are:

  • Blazing fast performance
  • Competitive energy efficiency
  • Advanced developer tools
  • HTML, CSS, and JavaScript based web extensions
  • Privacy protection with verification codes, Passkeys, etc.

⇒ Get Apple Safari

What versions of jQuery are supported?

jQuery version 3.0 and the latest is compatible with the current stable version of the browser (Firefox, Chrome, Opera, Safari, or Edge) and the one immediately before that.

Regarding mobile platforms, it supports iOS 7 and latest, and Android 4.0 and newer.

jQuery is versatile and flexible; this combination helps millions of users to write JavaScript and HTML quickly.

Since it also offers cross-browser support, we have listed some of the best browsers that support jQuery based on their versions.

But, if you encounter the browser not supporting JavaScript error, you can refer to the solutions in our detailed post.

Leave a message in the comments box below for other queries on JavaScript or browsers.

How to Delete Payoneer Account or Cancel It Effortlessly

Payoneer is a popular financial service company that allows freelancers as well as professionals around the world to receive and make payments.

If you already have a Payoneer account and want to know how to delete a Payoneer account, this article is for you.

One can have any reason to delete their Payoneer account. In case you have found a better alternative or maybe simply decided not to use the payment service anymore.

Or perhaps you want to delete the bank account associated with your Payoneer service.

Here’s how to manage your Payoneer account:

Deleting your account is easy and can be done with a few clicks. In this article, we walk you through the steps to cancel your Payoneer account as well as delete the associated bank accounts successfully.

    How to delete Payoneer account

    If you want to get rid of your Payoneer account, you need to delete your existing Payoneer bank account. You can do this through the Payoneer app, immediately after you log in.

  1. 1. Sign in to your Payoneer account with the account username and password that you want to delete.

  2. 2. From the top right side corner, click on Settings.

    Delete payoneer account
  3. 3. Select Bank Accounts from the options.

  4. 4. This will list all the bank accounts associated with your Payoneer account.

  5. 5. Click the More button (three dots) and click on the Delete Account option.

    delete payoneer account option
  6. 6. In the new dialogue, click on Delete Account again to confirm the action.

  7. 7. After this, your bank account will be deleted.

What if you can’t delete your Payoneer bank account?

  1. If you are based out of India, you are required to have at least one bank account associated with the Payoneer account all the time.
  2. So, to delete a bank account, make sure you have added another bank account successfully.
  3. This is due to the Reserve Bank of India not allowing the Indian Payoneer account holders to keep any funds in the Payoneer account.
    • All the funds must be withdrawn/automatically transferred to an Indian bank account within 24 hours of receiving the funds in the Payoneer account.
  4. Make sure you don’t have any pending transactions in your Payoneer account.
    • All the pending transactions must be closed and cleared to be able to delete bank accounts from Payoneer.
  5. The bank account is pending review. Once the account is approved, you can remove the account.

How do I cancel a Payoneer account?

  1. If you want to cancel your Payoneer account permanently, do the following.
  2. First, make sure all the remaining funds are withdrawn from your Payoneer account.
  3. Also, make sure there is no fund in the Payoneer card.
  4. Once done, contact Payoneer support for assistance in canceling your account.

Payoneer offers a convenient payment service for freelancers who work remotely. You can add up to three bank accounts to the standard Payoneer account.

However, in case you want to delete one of your bank accounts or simply cancel the Payoneer service altogether, follow the steps in this article to cancel the account in no time.

Try Revolut as an alternative to Payoneer

As an alternative to Payoneer, you can start using Revolut for sending and receiving funds.

It offers the same easy service with no hidden fees as well as quick and easy fund transfers between accounts and even savings accounts where you can earn interest.

Similar to traditional bank accounts, Revolut offers rewards and Perks on selected items, so you can earn money as you’re spending.

The service is free to sign up and you can do it from the mobile app in minutes. Moreover, you can link all your bank accounts and transfer funds between them with ease.

Revolut

Tired of Payoneer? Give Revolut a try and enjoy never-before-seen financial flexibility.

On top of linking all your bank accounts into one place, you can order a card that can be used abroad for withdrawals and payments, buy gold and cryptocurrencies and monitor your spending with built-in analytics.

Revolut allows you to spend in over 150 currencies at an attractive exchange rate.

You can upgrade your account for even more perks, such as medical and travel insurance, disposable virtual cards, and even a concierge service.

It’s free to sign up and it only takes a minute, so why not give Revolut a try and see all the benefits it offers?

And that’s how to delete your Payoneer account. We hope that our article helped you close it without any problems.

Let us know in the comments section if you have any questions about this topic.

Dropbox Can’t Establish Secure Connection: 4 Ways to Fix It

A large number of users have encountered the error Can’t establish secure connection on Dropbox.

Because all Dropbox connections are established using SSL (Secure Sockets Layer), any sort of issue with the SSL certificates can cause the above-mentioned error to appear.

Since we know how important it is for you to be able to connect to Dropbox, in today’s article we will explore some of the best-proven methods to solve this issue.

Why can’t Dropbox connect securely?

Your computer will check the date of your system against the date that Dropbox’s SSL certificate will no longer be valid.

In the event that the time on your system is frozen in the past or moved so far into the future that it falls outside of the validity period of Dropbox’s SSL certificate, a secure connection will not be able to be made.

Changing the clock on your system to match the current date is a simple solution to this problem that we’ll show you how to implement in the list below.

Before moving on, these are the most common errors that users reported about the Dropbox connection situation:

  • Dropbox SSL error – A secure connection will not be established if your system’s time and date exceed the SSL’s expiration date.
  • Dropbox can’t establish a secure Internet connection – Check that your computer’s firewall and antivirus software are not preventing you from using Dropbox.
  • Dropbox site can’t be reached – You can give the following a go to see if it helps fix the problems with your web browser: Make sure that your web browser is suitable for use with dropbox.com.
  • Dropbox can’t establish a secure connection because of date and time – You may simply fix this by adjusting the time on your system so that it matches the current date.
  • Windows 10/11 Dropbox cannot establish a secure connection – When anything like this occurs, you should give Dropbox’s online client a shot.

Quick Tip:

There are many browsers for fixing Dropbox issues, but if you’re looking for the most secure and reliable one, that would be Opera One.

This browser offers you customizable workspaces, messenger tabs in the sidebar, free VPN security, ad-blocker, and AI. These are just a few of them, so install it confidently for more.

Opera One

Try out this browser and resolve Dropbox connectivity errors with 1 click.
Free Download Visit website

How do I fix Dropbox can’t establish secure connection?

1. Use an alternative cloud storage program

There are a lot of cloud storage options available out there, so why not go for something new?

There are various programs you can use to back up your files safely, and never worry again about important file loss.

Hence, if you want to try out such proficient tools, you should pick from the best cloud storage for personal usage in order to avoid the Dropbox Can’t establish secure connection error.

2. Make sure your computer’s date and time are set correctly

  1. Press Windows + I to open Settings then go to Time & language.time-language dropbox can't establish secure connection
  2. Inside the newly opened window, select Date & time from the left side menu. Make sure both Set time automatically, and also the Set time zone automatically options are enabled.automatic-time dropbox can't establish secure connection

If the options are enabled but your system can’t access the Internet, deactivate the options mentioned above, then press the Change button and set the time manually.

Your computer will compare the system date with the expiration date of the SSL certificate, so it is crucial that these two settings match.

In the case that they don’t match, the error Can’t establish a secure connection will appear. The steps mentioned above should fix the issue.

3. Make sure your firewall and antivirus software is not blocking Dropbox

  1. Press Windows then type Windows Defender and choose the first option from the results.
  2. Select Allow an app or feature through Windows Defender Firewall.allow-an-app dropbox can't establish secure connection
  3. Select Dropbox from the list and allow both Private and Public access for this app by ticking the respective boxes. Click Ok to save and apply the changes.allow-access-private dropbox can't establish secure connection

We’ve exemplified this here with Windows Defender, but the process is similar for other antivirus software you might be using.

Antivirus programs are known for blocking any unauthorized Internet services, so the chances that these ports are blocked are high.  Whitelisting Dropbox and any other frequently used apps is important.

4. Make sure your default proxy settings are correct

  1. Click the Dropbox icon inside your system tray and select Preferences.
  2. Click on the Network tab and make sure your proxy settings are set correctly under the Proxy Settings section.

Some applications end up changing your default proxy settings when installed.

Because Dropbox uses standard Internet ports (80 and 443) to perform the data transfers, it is very important that those ports are open for connections.

In today’s fix article we explored the best methods to deal with the error Can’t establish secure connection on Dropbox.

We hope that these steps have proven useful. We would love to know if you have any other suggestions regarding this topic.

Please feel free to contact us via the comments section below.

5 Best Civil War Games to Play Online [Free & No Download]

Civil war games online bring you back a couple of years ago, straight into the civil war to experience the thrill of battle. As a matter of fact, civil war games are a whole game genre packed with popular titles.

Different civil war games online let you take charge of a variety of characters, but in most, you are in charge of strategy, financing, and similar military operations.

This is where most games differ. While some are turn-based, others adopt a WeGo gameplay where you prepare your squads and make needed preparations to take on a battle over which you’ll have direct control.

Can I play civil war games in my browser?

Navigating to Playclassic.games will bring you to a vast library where you may play civil war browser games.


Every single one of the classic old games is collected there. You may play the greatest vintage DOS games as well as classic console games, such as the free online civil war games with no download required.

What is the best browser for gaming?

In order to play your preferred civil war games online without any issues, we recommend that you use a stable and yet gaming-inclined browser.

Opera GX gives you unprecedented access to a variety of gaming-related features like RAM optimization, and on top of that, you get incredible browsing speeds and powerful online security.

In this post, we’ll review five of the very best civil war games online. Stopping at five games was tough because I had to leave out great civil war games like Brother against Brother, Scourge of War, etc.

Opera GX

Control resources, customize your UI, chat on Discord, and more!

If you are searching for the top civil war games online, you can’t go wrong with the five that made it to this list.

What are the best civil war games to play online?

Ultimate General: Civil War – Populat choice

Step into the shoes of America’s heroes as you command either the Union or Confederation armies in Ultimate General: Civil War. You can’t review civil war games online without including this game, as it is one of the best civil war strategy games online.

If you enjoyed Ultimate General: Gettysburg, then you may want to check out this follow-up release. In the Civil War, the player can adapt effective, effective wartime tactics that are similar to that of Total War games.

Playing Ultimate General: Civil War, you begin as a small-time captain, and you play to progress to the rank of Major General.

The game is a tricky one and detailed, as players can personalize their military by naming the units and managing their uniforms as well as training.

The thrill of equipping and training your army and following specific officers and brigades during the civil war is an experience everyone craves in a civil war game. Ultimate General: Civil War delivers this excellently.

⇒ Get Ultimate General: Civil War on Steam

HexWar Civil War: 1863 – Offers different difficulty levels

hexwar-online-games-civil-war-1863

Relive the American civil war and all of its drama with the Civil War: 1863. Starting out as a mobile game on iOS and Android devices, the Civil War: 186x series has made its way to become one of the best civil war games online on desktops.

The developers of this game, HexWar, designed it in a way that players will participate in numerous scenarios during the civil war battles taking place in the 1860s, and for this title, it’s 1863.

These battle scenarios are incredibly puzzling, and most players will have to knock a couple of hours off their time to accomplish missions.

Thankfully, you can adjust the game’s AI difficulty to make it more playable, unlike other similar civil war games online, making it one of the best civil war games online for students, kids, and even adults.

⇒ Get HexWar Civil War: 1863 on Steam

Gettysburg: The Tide Turns – Uses random turns

gettysburg-the-tide-turns-civil-war-games-online

Lovers of civil war games online who find the battle of Gettysburg thrilling would definitely fall in love with Gettysburg: The Tide Turns.

The Confederacy saw its peak in Gettysburg, and this game gives players a chance to live through these battles.

Playing The Tide Turns, the first thing you would notice is its turn system. Your army units’ turn order is selected randomly from the other units on the field.

Due to this randomness, the battles in this game are uncertain. However, one could argue that this is a perfect representation of the actual nature of Gettysburg.

⇒ Get Gettysburg: The Tide Turns on Steam

Civil War II – Play as the Commander-in-Chief or President of the USA

civil-war-ii-games-online

Moving away from the turn-based style of play prevalent in most other civil war games online, Civil War II instead brings you into the thick of the action with its WeGo gameplay.

In Civil War II, the player becomes the Commander-in-Chief or President of the USA and controls the entire war operations from behind the scenes.

Thanks to the WeGo gameplay, meeting an enemy could get tricky, but each encounter seems way different from the last one.

Also, you have to plan your attacks way ahead of time to be most effective.

Still, when it comes to the gameplay, you are able to modify the army pecking order and chain of command. With this, players can truly own the game and personalize it any way they see fit.

I must also add that you’re doing more than handing out military orders; the player also gets to manage things like money distribution.
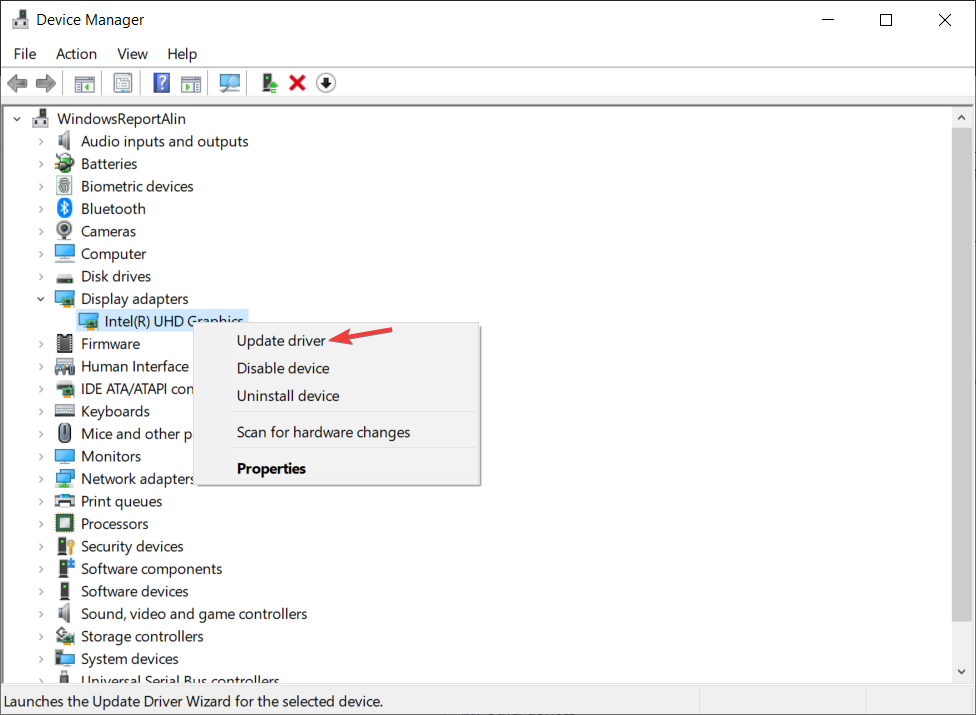
He/she will be the one to choose the amount of available printed cash. Players can also place embargos. These extra factors make for a fantastic wargame.

⇒ Get Civil War II on Steam

The Operational Art of War 4 – Offers extra war scenarios

civil-war-games-online-operational-art-of-war-4

The Operational Art of War 4 is unlike the other civil war games online on this list.

This fact is because you can’t classify the game as a typical civil war game because not all scenarios are from the civil war. However, this game features some important civil war scenarios.

Some civil war scenarios that you’ll face include Antietam and Gettysburg. These battles are sufficient to bring TOAW4 to this list of the best civil war games online.

On the other hand, if you only want to enjoy your game without these scenarios, you can download community scenarios easily or edit one to your taste.

⇒ Get The Operational Art of War 4 on Steam

Civil war games let you travel back in time and get into the mix of the various scenarios and battles of the American civil war.

If you’ve seen these games, check out what we think are the best survival horror games for PC. For now, however, you need to focus on strategy because you have a war coming.

Google’s new homepage rolls out to more people with Windows 11-like widgets under the search box

Google is now looking to redesign its interface and provide much more to its users on top of the search bar and doodles. The brand new layout termed “new Google.com” features a set of five new cards. Google is testing out these widgets widely as per the reports that have surfaced recently confirming the same. (via 9to5Google)

According to the reports by the users that have experienced this new homepage, right off the bat is a Meet the new Google.com card which prompts the user to sign in to the Google account in order to customize their experience with it based on preferences.

Once logged in, you will come across a Make the space yours button. You will be redirected to a “Hi, What are you interested in?” which in essence helps you customize the widgets based on your needs.

The available widgets range include Air Quality, Cryptocurrency, Stock Market, Your Top Stocks, Events Nearby, Weather, Trending Searches, Top Stories, Sports, and What to Watch which are quite similar to those in Windows 11 as the cards now come in an expanded square shape rather than the short rectangular shape. Here’s a glimpse of how they appear.

In another instance reported, these cards appeared at the bottom of the homepage which also featured a Hide Content button at the bottom-right corner. Google still notes your current location and curates information based on your search history. This account seems to be quite similar to the first as far as widgets are concerned. It features Weather, Trending, What to Watch, Stocks/markets, and COVID News. The number of widgets that appear on your screen at any given time is restricted to the size of your screen unless you expand the window.

It is not yet clear if and when Google will be rolling out this “new Google.com” but we will be sure to keep you posted as the story unfolds. In other Google news, there were some indications that suggested that Google was working on an easier way for Windows 11 users to set it as the default browser. And in case you missed it, Google yet again postponed the process of phasing out third-party cookies in Chrome for 2 years.

5 Best Browsers That Support Kaltura [Ranked by Compatibility]

Kaltura, a software company based in New York, was founded in 2006 and ran four different platforms. They include EVP (Enterprise Video Platform), EdVP (Education Video Platform), OVP (Online Video Platform), and Cloud TV.

You might need a browser when running these platforms, which makes the Kaltura browser support a topic of interest for Kaltura users.

Most Kaltura users include collaborators and marketers, educational institutions, brands, media companies that want to monetize and distribute content, and cloud TV operators.

Kaltura is so popular among companies and other institutions that its systems have been deployed in the UK Parliament`s online audio-video streams.

Is Kaltura compatible with all browsers?

Kaltura offers different applications and platforms accessed via a web browser. However, other services are compatible with different browsers, meaning that Kalture is not compatible with all browsers.

When using a Kalture service, you must ensure that the browser you choose is supported. It is also essential to ensure that you have updated your browser to the latest version available.

Can I save a Kaltura video to my computer?

You can download media from Kaltura. However, before doing that, you first need to enable downloading the video that you want to save on your computer. The first thing is, of course, identifying the video that you want to download.

After that, look for the edit options available for the video. Next, you will see a downloads tab that allows you to access different download options. First, select the chance that you want to download your video.

What are the best browsers that support Kaltura?

Opera One – Best for app integrations

Opera One is an innovative browser that starts its activity in 1995, so it has more than 25 years of experience and gathered about 350+ million users. This new-age browser comes with lots of security improvements and flexible navigation.
The modern browser offers practical features such as 3rd party app integrations, free VPN support, built-in AI and Ad blocker.

You can use the Kaltura video service within this browser using the latest browsing technology and organizing tools like pinboards, workspaces and tab islands.

Opera One

Obtain access to Kaltura media services on this highly secured and productive browser
Free Download Visit website

Google Chrome – The most popular choice

Chrome - Kaltura browser support

Google Chrome is one of the most popular browsers, especially when browsing the web and accessing different video content on the internet. This is because Chrome can display and play various media types without forcing users to load external applications.

Some of the file formats supported by Chrome include WMV, WebM, Ogv, Ogg, MPEG4, MPEG, MP4, MOV, Mkv, m4v, Flv, Avi, 3gpp, and 3gp. It is also important to note that audio and video are both decoded by the browser.

If you encounter any problems with your sound or video, then the file format is not supported by Chrome and might not be played anywhere else.

However, Google Chrome fully supports Kultura in Windows and macOS operating systems and Chromebooks. In addition, the option to Select Audio Output is only available on a Chrome browser, making Kaltura browser support extremely good in this browser.

⇒ Get Google Chrome

Mozilla Firefox – Best for privacy

Mozilla Firefox

Mozilla Firefox is one of the best browsers when it comes to privacy. It does not lock its users into any ecosystem. The browser supports different media formats, especially Ogg, WebM, MP3, and Wave containers.

However, it would help to be careful when using Kaltura with Firefox because its MP4 containers depend on its platform decoders for H.264 and ACC video and audio streams.

Firefox supports Kultura fully in Windows and macOS operating systems.

⇒ Get Mozilla Firefox

Microsoft Edge – Good for built-in anti-malware features

Ms Edge - kaltura browser support

Video and audio content will perform better when running on applications closer to the hardware device. Features such as protected media path and play-ready content protection perform much better in Windows 10 and 11.

Microsoft Edge, the default browser that comes with Windows operating systems, has been developed to take advantage of and optimize these features in Windows operating systems. This means that it provides one of the best video and audio experiences you will likely find in a browser.

Microsoft Edge supports Kaltura in devices running the Windows operating system.

⇒ Get Microsoft Edge

Safari – Best for iOS devices

Safari - kaltura browser support

Safari is the default browser developed for iOS devices such as iPhones, iPads, and MacBooks. The browser offers different optimization and playback options to help developers improve performance and playback controls when users deliver audio and video formats.

These are the same optimizations used by Kaltura to ensure that the platforms can be used on this browser. Unfortunately, you can use Kaltura on Safari running on iPhones and iPads as long as they run iOS 11 or later.

⇒ Get Safari

Where can I download Kaltura?

You can download Kaltura by visiting the Kaltura Application Framework (KAF) or Kaltura MediaSpace homepages and selecting Kaltura from the Add New drop-down menu. This will redirect you to a download page.

Here, you can download Kaltura and install it, following the instructions on the download page. This should not be difficult, even for those without a technical background.

You cannot use Kalture with any browser of your choice. Chances are that you will experience performance issues if you are not careful about Kaltura browser support.

The browsers discussed above are the most compatible with Kaltura. With them, you can use Kaltura without any errors or performance issues.

7 Best VPN for Windows 8 & 8.1 Users [Free & Premium]

Today we’ll walk you through the best VPNs for Windows 8 and 8.1. Third-party VPN apps offer improved security, easier server switching, and advanced privacy features.

Let’s explore the top options!

What’s the best VPN for Windows 8 and 8.1?

1. ExpressVPN – Best server connectivity

ExpressVPN has 160 server locations in 100+ countries. You can navigate smoothly without having to worry about any packet loss. 

More so, the software’s easy-to-use interface is ideal for multiple devices such as laptops, Amazon tablets, or Smart TVs.

Plus, is a tailor-made option to run on Windows 8 if you need a plain yet comprehensive VPN provider. 

What else you need to know:

  • Automatic protocol 
  • 3000 servers in 94 countries 
  • Proven no logs activity 
ExpressVPN

ExpressVPN

Still searching for your Windows 8 VPN software? You will get the most reliable results with ExpressVPN. 
Check price Visit website

2. NordVPN – Exhaustive server coverage

NordVPN has a highly intuitive interface and works with Windows 8 and Windows 8.1.

It features quic connections k, P2P, Double VPN, and obfuscated servers. It also integrates with the Tor anonymous network (Onion Over VPN).

Moreover, the Windows 8.1 VPN app has a special feature called CyberSec, which blocks malware and ads.

What else you need to know:

  • OpenVPN, IKEv2/IPse, AES-256-GCM, SHA2-384, Perfect Forward Secrecy
  • More than 5,800 servers in 59 countries
  • No logging policy
NordVPN

NordVPN

NordVPN secures your sessions, stops malware, and restores your Internet freedom, even on Windows 8.
Check price Visit website

3. Surfshark – Most convenient price and quality VPN

Surfshark can secure your Internet connection and unblock censored content. It shields you from hackers and identity theft while blocking ISP tracking and phishing attempts.

You can also bypass country-based price discrimination to get better deals with this Windows 8.1 VPN.

The VPN also supports PSP transfers on all servers, over 15 Netflix libraries, an ad blocker, kill switch, whitelisting, multi-hop connections, and private DNS for each server.

What else you need to know:

  • OpenVPN, IKEv2, AES-256-GCM
  • Over 1,700 servers in more than 63 countries
  • Strict no-logs policy
Surfshark

Surfshark

Surfshark blocks ISP tracking stops hackers and gives access to exclusive Netflix content.
Check price Visit website

4. CyberGhost VPN – Most suited to bypass geo-blocking

CyberGhost can help you access geo-restricted content and beat online censorship, as well as watch sports streaming services or Netflix shows which are otherwise unavailable to your region.

Furthermore, the Windows 8 VPN service can get you better online deals that are tailor-made for specific countries.

It allows up to 7 simultaneous connections, includes a kill switch, and performs DNS and IP leak tests.

What else you need to know:

  • OpenVPN, L2TP/IPSec, P2TP
  • More than 6,400 servers in over 90 countries
  • Strict no-logs policy
Cyberghost

Cyberghost

CyberGhost VPN bypasses Internet filters, unblocks streaming services, and keeps you safe.
Free trial Visit website

5. Private Internet Access – Highest speed server network

Using Private Internet Access, you can hide your IP address from your ISP and unprotected Wi-Fi networks, bypass Internet filters to access censored pages, and unblock streaming services like Netflix.

Private Internet Access has by far the largest server network on this list, which makes it very reliable if you want high speed and access to various different server locations around the world.

It’s a good VPN to bypass geo-blocks on platforms like Netflix UK and it can also help reduce ping and fix latency issues in online games.

What else you need to know:

  • OpenVPN, L2TP/IPSec, P2TP, SOCKS5 proxy
  • More than 35,000 servers across 45 countries
  • No traffic or request logs
Private Internet Access

Private Internet Access

Protect your privacy, remove ISP racking and get past Internet restrictions on your Windows 8 PC!
Check price Visit website

6. VyprVPN – proven zero logs policy

Another VPN client that offers dedicated support for Windows 8 is VyprVPN. It’s a pretty lightweight app that includes advanced privacy features.

Like any VPN worth mentioning, Vypr doesn’t log any user data. This means that along with protecting your info with encryption, the VPN client itself won’t be able to know what you do online.

On top of that, VyprVPN offers DNS leak protection in order to secure your data on all fronts. You can also rest assured that you won’t be tracked down even when using Public Wi-Fi.

Other key features of VyprVPN include:

  • Split tunneling
  • No-log VPN
  • 10 simultaneous collection
  • 96 worldwide server locations
  • 24/7 customer support
VyprVPN

VyprVPN

Route your traffic via a secure VyprVPN tunnel!
Check price Visit website

7. IPVanish – worldwide servers

For those of you that want an intuitive VPN app that includes all the standard features, IPVanish is a great choice. It offers dedicated apps for a wide range of operating systems, including Windows 8 and Windows 8.1.

IpVanish offers end-to-end AES-256 bit encryption on all its servers. It has worldwide coverage with 2,000+ servers in over 75 countries.

With IPVanish your identity will stay protected. The VPN client offers its users over 40 000 virtual IP addresses so you don’t have to worry about being tracked.

Other key features of IPVanish include:

  • Unlimited bandwidth 
  • Zero logs policy
  • Protection against DDoS attacks
  • 30-day money-back guarantee
  • Fast VPN connections with WireGuard protocol
IPVanish

IPVanish

Install IPVanish to your Windows 8 PC for complete online privacy.
Check price Visit website

Windows 8 VPN apps aren’t just a commodity for streaming and torrenting but are also required for secure browsing. You can freely navigate the web, access censored websites, and reclaim your Internet freedom.

Even XP users turn to VPN for Windows XP, although the OS no longer receives security patches. By getting equipped with the best VPN for Windows 8, you don’t have to worry about exposing your true identity online.

Download & Install Asphalt 9: Legends for Windows 10 & 11

Are you looking for a truly spectacular car racing game? What if we told you there is an awesome game that you can download for free on your Windows 10 computer?

The game we’re talking about is Asphalt 9: Legends.

There are over 50 dream cars that you can choose from. Get behind the steering wheel and drive across 70 gravity-defying tracks.

Can I play Asphalt 9 on PC?

Yes, you can actually play this game on your PC, even though it surfaced and gained its massive popularity as a mobile game.

All you need to do is just download the title and install it on your current setup, and you will be good to go and burn some rubber.

How many GB is Asphalt 9 on PC?

Even though the game looks pretty good, considering it’s not a blockbuster racing title like Need for Speed, or Forza Horizon, expect it to be about 1.85 GB in size.

Is 4GB RAM enough for Asphalt 9?

To answer your question, we will present the recommended system requirements for playing Asphalt 9 on your PC:

  • Requires a 64-bit processor and operating system
  • OS: Windows 10 or later
  • Processor: Core i5-4460 | AMD Ryzen 5 3400G or better
  • Memory: 8 GB RAM
  • Graphics: Intel Iris | NVIDIA GeForce GT 1030 | ATI Radeon HD 5850 or better
  • DirectX: Version 12
  • Network: Broadband Internet connection
  • Storage: 6 GB available space

With 4 GB of RAM, you only have enough for the minimum requirements to play Asphalt 9. If you want a smooth gaming experience, you will need 8 GBs.

Quick Tip:

An excellent solution for your gaming expectations and needs is included in one tool: Opera GX.

Develop your navigation using this gamer’s browser that contains GX Corner with a game release calendar or game deals. Plus, you have Network or RAM limiters for system optimization and integrations with gaming apps.

Opera GX

Get this optimized browser to enjoy fast games like Asphalt 9 on multiple devices.

How do I download & install Asphalt 9 on Windows 10 & 11?

  1. Visit the Microsoft Store listing and press the Get button.asphalt 9
  2. Asphalt 9 will start to download on your PC.asphalt 9 download
  3. Hit the Play button and have fun.play asphalt 9

How do I download Asphalt 9 without Microsoft Store?

Now, the usual answer would be to just get it from the developer itself, which in this case is Gameloft. However, visiting the official Asphalt 9 Legends entry on Gameloft will yield the same result.

You have several download sources there, but if you want it for your PC, the only solution presented on the official website is the Microsoft Store.

There are other sources where you can get this game, but we strongly recommend you get it from a safe, trustworthy, and reliable source.

Why Asphalt 9 is not opening in laptop?

This problem is mostly associated with outdated drivers, so this issue is easy to resolve, All you have to do is update your GPU and Network drivers, and you are good to go.

If doing this yourself is tedious, we have a solution that you might like.

If you want to test your skills against other players, join the multiplayer mode (which supports up to 7 gamers).

Asphalt 9: Legends impressed us through its detailed real cars, HDR techniques, and stunning visual effects.

The game also supports a car editor that allows you to select the color and materials for your car. If you’re interested in building up your career, then enter Career mode and complete over 60 seasons and 800 races.

So, we recommend not to download Asphalt 9 for PC without Microsoft Store, but if you absolutely must do it, we’re sure you’ll find a good, safe source for it.

Asphalt 9 is available for download for PCs with Windows 11, so look for the Asphalt 9 APPX, and refer to this article for instructions on how to install Asphalt 9 on your PC.

Leave a comment down below if you had any trouble installing this awesome racing game.

5 Best Browsers that Support Katalon Studio [Latest Version]

Katalon Studio is the most popular automation testing software tool developed by Katalon. This software is built using open-source automation frameworks like Selenium and Appium.

It is a specialized low code test automation solution for the web, API, mobile, and desktop apps. Katalon Studio also offers native CI/CD integrations.

For running Katalon Studio efficiently, browsers require some unique features. Keep reading this post to learn all about Katalon Studio browser support.

Is Katalon better than Selenium?

Both Katalon and Selenium are good testing tools. Selenium is good for integrating other tools and frameworks to enhance its capability. But the testing team should have strong programmers.

However, Katalon Studio integrates frameworks and features for fast execution and creation of test cases. Therefore, it’s best for testers who have limited technical knowledge.

How do you automate a web application using Katalon?

Anything could go wrong wild applying to a website. Many potential risks include broken links, difficult navigation, web security, etc.

Below are some steps to effectively test and automate a web application using Katalon:

  • Carry out cross-browser compatibility testing
  • Select key parameters for usability tests
  • Execute performance tests 
  • Apply tests to all elements, third-party, and extensions of the web app
  • Ensure load tests are incrementally performed
  • Incorporate exploratory testing into the 
  • Keep URL strings unalterable 

What browsers does Katalon Studio support?

Opera – Save and collect web content easily

katalon studio browser support

If you want something as lightweight yet speedy as your browser, Opera is the way to go. This Chrome-powered browser is considered a more sophisticated version of Google Chrome.

One of its distinguishing features is a hotlist that functions as a web directory and offers Katalon Studio browser support. It may, however, be easily removed based on the user’s preferences.

Aside from that, one of Opera’s features is keyboard and mouse controls. Many plugins are also available, including RealAudio, RealVideo, and ShockWave.

Opera

Try this new-age browser to benefit from app integration and the latest navigation tools.

Google Chrome – Sync with Google services and accounts

Chrome offers the best Katalon Studio browser support. It provides a refined and private surfing experience. Also, various add-ons and privacy settings are available.

Because Chrome is cross-platform, it is convenient to sync data across your devices. In addition, it provides a variety of add-ons to make your browsing experience more convenient.

The Chrome browser uses AES-256 encryption standards to secure local passwords and cookies. It also uses the data protection API integrated into the operating system to handle encryption sources.

⇒ Get Google Chrome

Microsoft Edge – Simple privacy controls

katalon studio browser support

The Edge browser is now offered as an alternative to Internet Explorer. It has many benefits and features that set it apart from popular browsers like Chrome and Firefox.

It offers Katalon Studio browser support because of its strength and integrated anti-phishing and virus defenses. Also, Edge meets all the Katalon studio system requirements.

Microsoft also improved the browser’s gaming capabilities by adding a customizable gaming home page. It includes exclusive Xbox features and selected content to enhance users’ gaming experience.

⇒ Get Microsoft Edge

Safari Browser – Check a Privacy Report

katalon studio browser support

Next on our list is Apple’s own Safari web browser. Safari is the fastest web browser based on a fast JavaScript engine.

It is supported only on Apple devices. But offers many robust customization options like powerful privacy protection and reduced loading.

Regarding security, Safari always encrypts information exchange with the website. Therefore, it will protect your login information, credit card numbers, addresses, and other secure data.

Firefox Browser – Enhanced Tracking Protection

The Firefox browser is the first choice among all privacy-oriented web browsers. In addition, the browser supports 128-bit SSL encryption making it one of the best browser Katalon Studio support.

Its stealth mode automatically avoids trackers without having to use the incognito mode. Some other features Firefox offers are default ad blocking and tracking, Siri shortcuts, and a clean user interface.

Mozilla Firefox is the best browser for all browsing requirements, but the lack of tabs could be frustrating sometimes.

Many users have complained about Firefox not responding in Windows 11. If you’re among those, read this post to fix this issue.

⇒ Get Firefox

Can we automate the Windows application using Katalon?

Yes, automation of Windows applications is possible using Katalon Studio. Users can automate many Windows desktop applications following a no-code, point-and-click approach.

This allows automatically recording actions on a Windows desktop and then turning manual, repetitive steps into automated workflows.

These were the browsers that support Katalon Studio’s latest version. Among the above-mentioned, Opera and Chrome are the two most recommended once you can try.

Please let us know if the guide was helpful in the comments below.

Microsoft unveils first-ever “Xbox Singing Controller” with built-in speaker

Xbox has formed a partnership with Interscope Records, songwriter benny blanco, pop sensation BTS, and legendary rapper Snoop Dogg to bring you the first-ever custom Xbox controller to feature a built-in speaker.

Called “The Xbox Singing Controller,” the item was created to celebrate the release of the single “Bad Decisions.” You can check out the song’s official video below.

The controller features a striking red color theme and custom artwork with the names of the artists. And of course, there is the speaker on the back through which you can listen to the song with the press of a button.

The best part about the controller is that you can have a chance to win it by following the Xbox Twitter account and retweeting the post below.

The controller is sure to become a hot collector’s item in the future, so it would be quite a prize of you are lucky enough to win one of the thirty giveaways.

And as you can see, Forza Horizon 5 is getting in on the action with a giveaway of its own. The game will be giving every player a car inspired by the song: the 1971 Meyers Manx. The car will feature a special “Bad Decisions” livery, and will be unveiled later today (11am PT/2pm EST) over on the Xbox Twitch Channel. Don’t miss it.

Featured image courtesy of comicbook.com.