The next featured update for Windows 10, known as Windows 10 22H2, is now out for testing in the Release Preview channel, but there’s a bit of story beyond that. As spotted by Thurrott.com, Microsoft quietly updated the original blog post for that Windows 10 22H2 news to tease some possible new features for the operating system in the future.
To be clear, Microsoft didn’t officially list or get into any new features up for testing in Windows 10 22H2. This specific 22H2 build is still only for validating servicing technology, and Microsoft specifically mentioned IT admins when talking about this Windows 10 22H2 build. Yet a note from Microsoft’s Brandon LeBlanc at the top of the page gets into the tease. Here’s what he says.
“Windows 10, version 22H2 has a scoped set of features and Microsoft will share more details on this update later this year.”
Beyond that simple quote, it is not apparent what these scoped sets of features might be. If we use Windows 11 as an example, Microsoft might enable new Windows 10 22H2 features via enablement packages. That, though, is also doubtful. Windows 11 is the future for Microsoft, getting new features like a tabbed File Explorer. Windows 10, version 22H1 was also a minor update, mainly coming with IT-centric features, so we expect more of the same. Either way, this is a story worth watching and we’ll do our best to update you on all the latest news and rumors.
If you wonder how to fix the most common following issues on Twitch, you are not the only one. A large number of users have encountered problems with their following. A common one is the Twitch follower count not updating.
Twitch became one of the most used streaming platforms in the world, with the increase in the number of users, the number of issue reports has also increased.
In today’s article, we will find out how to fix the most common following issues on Twitch. Read on to find out the details.
What are the most common follower-related issues on Twitch?
Before discovering the best solutions to solve them, it is essential to take a look at the most common issues you can encounter on Twitch:
Followers are not getting notifications – In most cases, this one appears due to some wrong Twitch settings. Fortunately, you’ll find how to enable them quickly and get notifications without any problem.
Twitch following is not working – Many users reported that this issue occurs because of Twitch servers’ glitches. In addition, keep in mind that the app can also get into trouble, so reinstalling it might be efficient.
Followers are not updating – In this situation, you’ll probably need to update your software.
Twitch followers are not showing up – Even if some people are not considering it, you should ensure that your browser isn’t zoomed in.
Why is my Twitch not updating followers?
Since this is a widespread error among users, it is good to know why you may be faced with it.
Sometimes it takes 24 to 48 hours for your achievement statistics, like your follower count, hours streamed, and average viewers, to sync with your dashboard data. So, if that hasn’t been updated yet, don’t worry!
Also, your follower count may be hidden because the browser is zoomed in.
Let’s see what you can do to solve these annoying issues in less than five minutes.
What browser can I use to avoid the most common issues on Twitch?
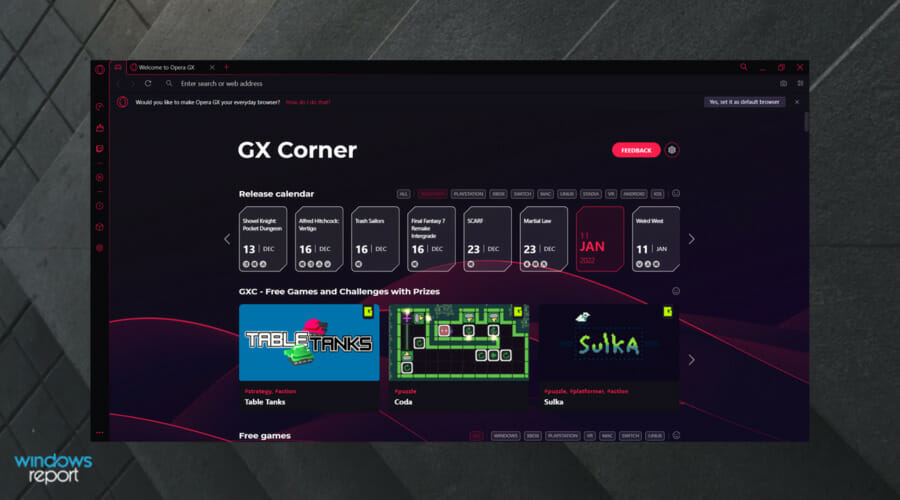
Here comes Opera GX, the world’s first gaming web browser and the best one yet. It features a fantastic-looking UI that can be customized in various ways, just like the Opera browser.
More so, it features dedicated integrations with services such as Twitch, and the homepage takes you to the best gaming deals and freebies you can get at that moment.
Thanks to this browser, you can finally enjoy your favorite gaming streams, which were meant to be error-free.
Check out these other amazing features of Opera GX:
Free VPN
Built-in AdBlocker
Easy to use and friendly user interface
Opera GX
Get quick access to Twitch and enjoy high-speed streaming with this performance-oriented browser.
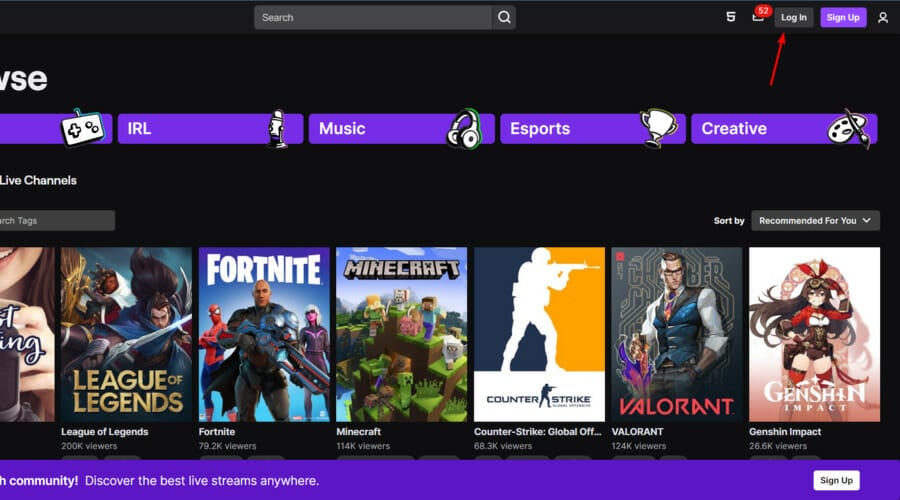
In the upper-right corner of the window, click on Log In.
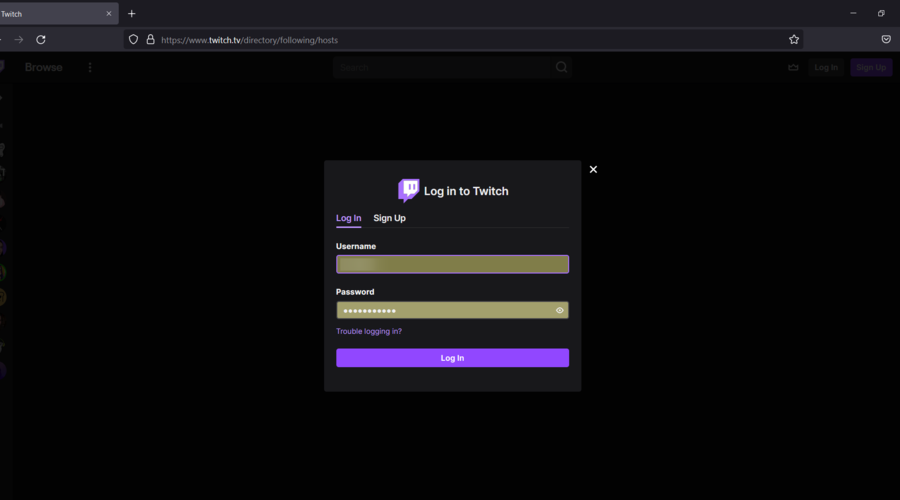
Enter your credentials, then click on Log In.
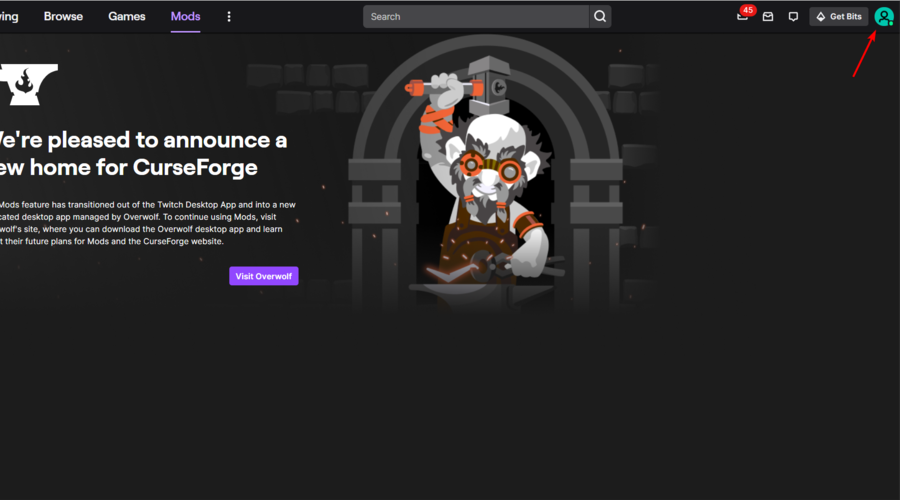
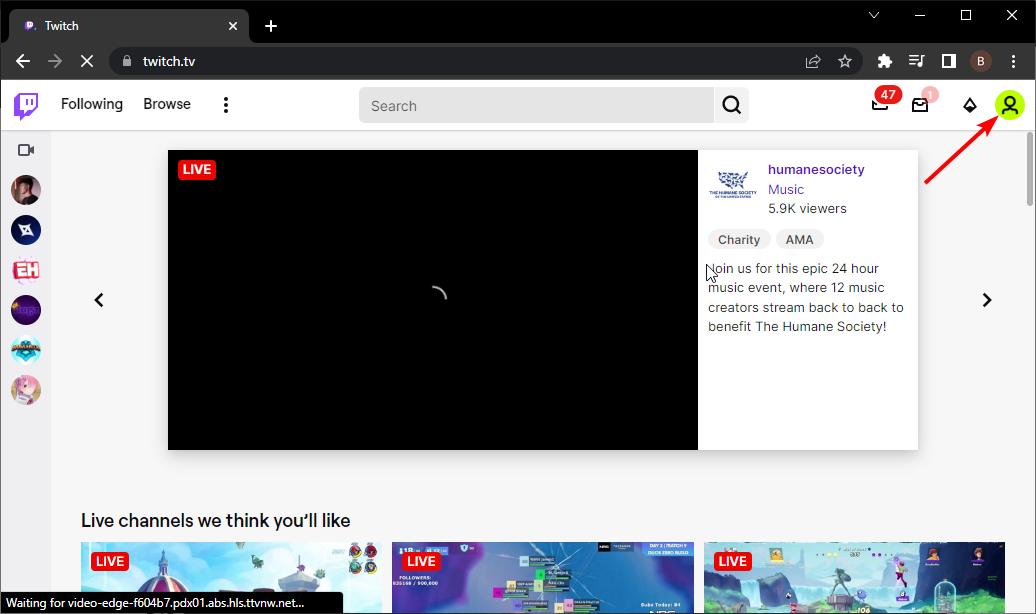
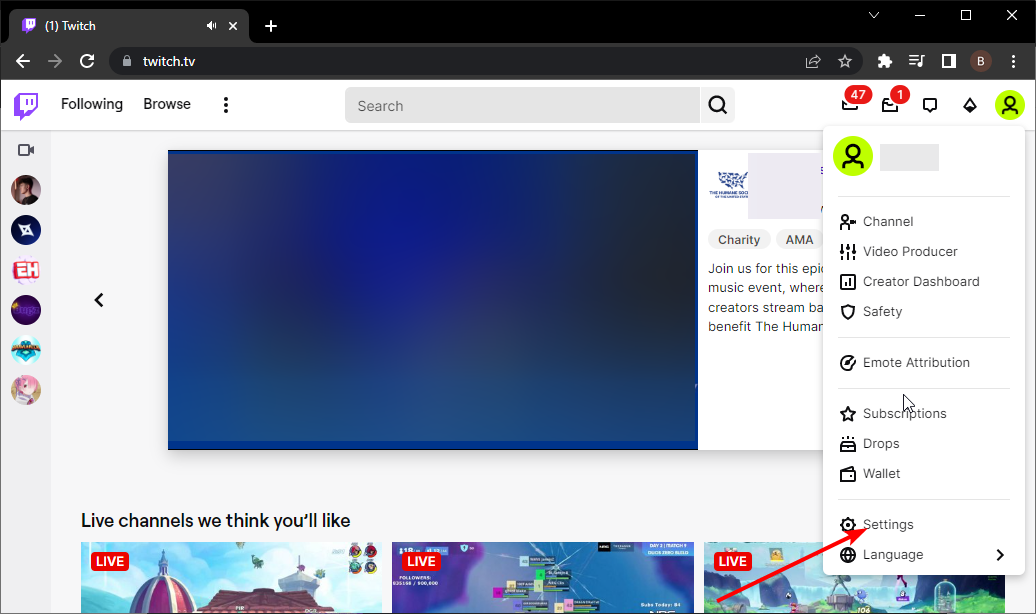
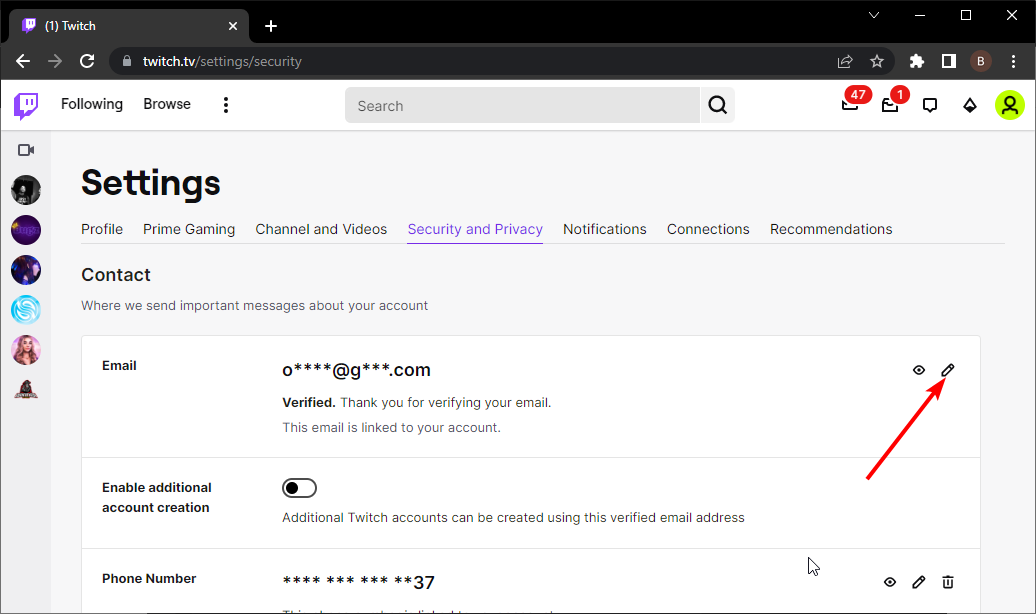
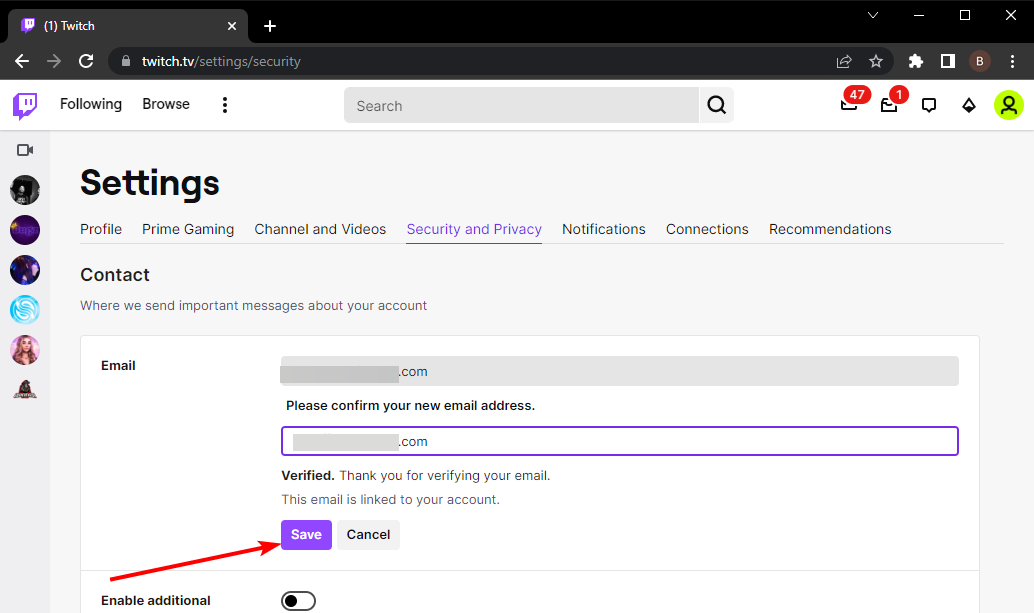
Click on your profile image.
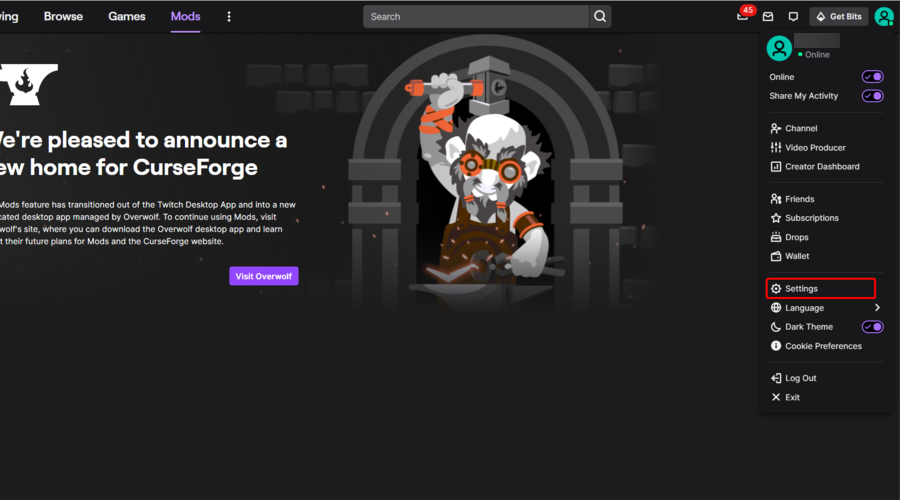
Navigate to Settings.
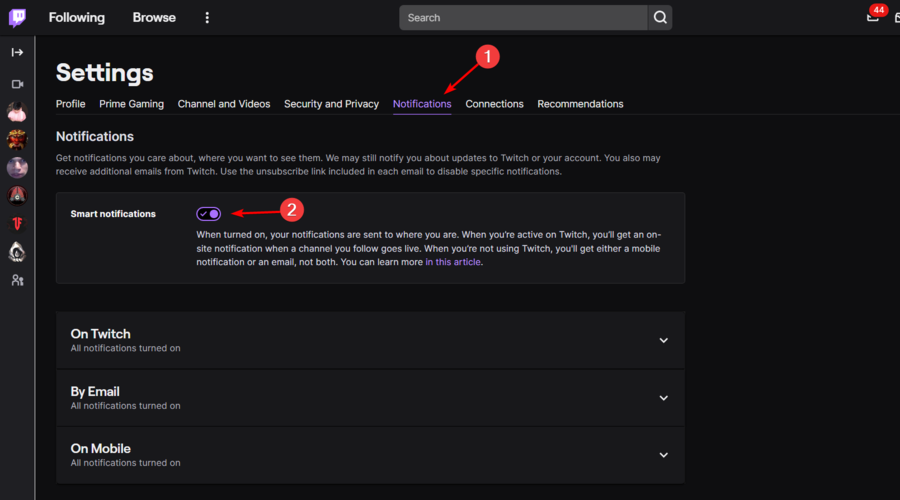
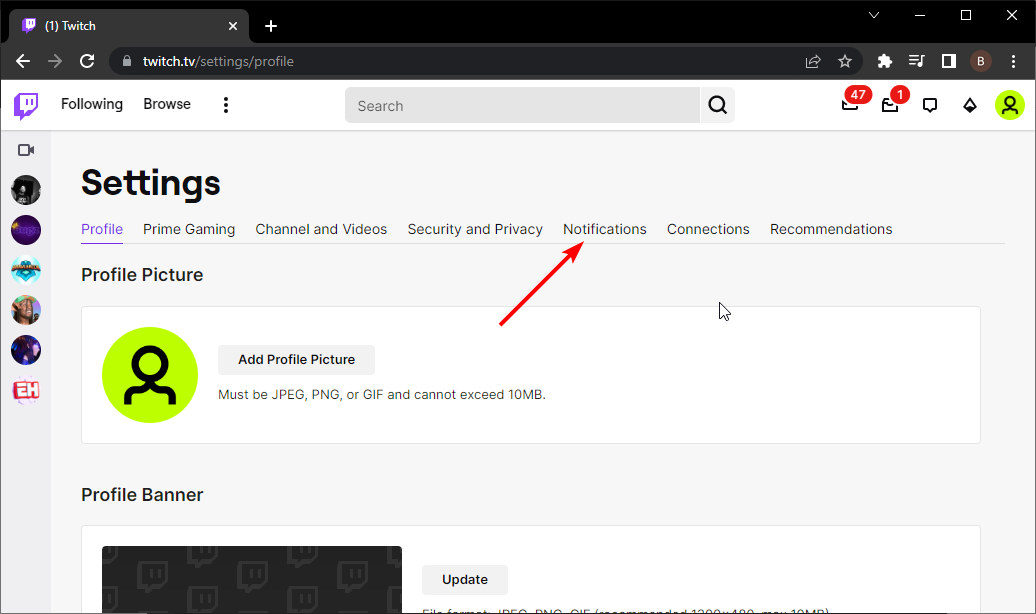
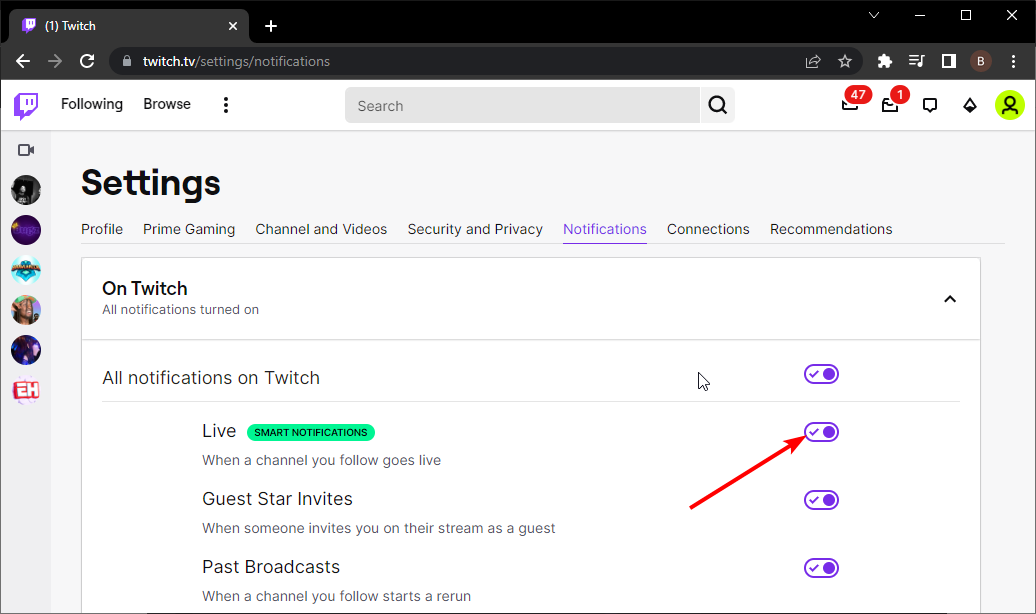
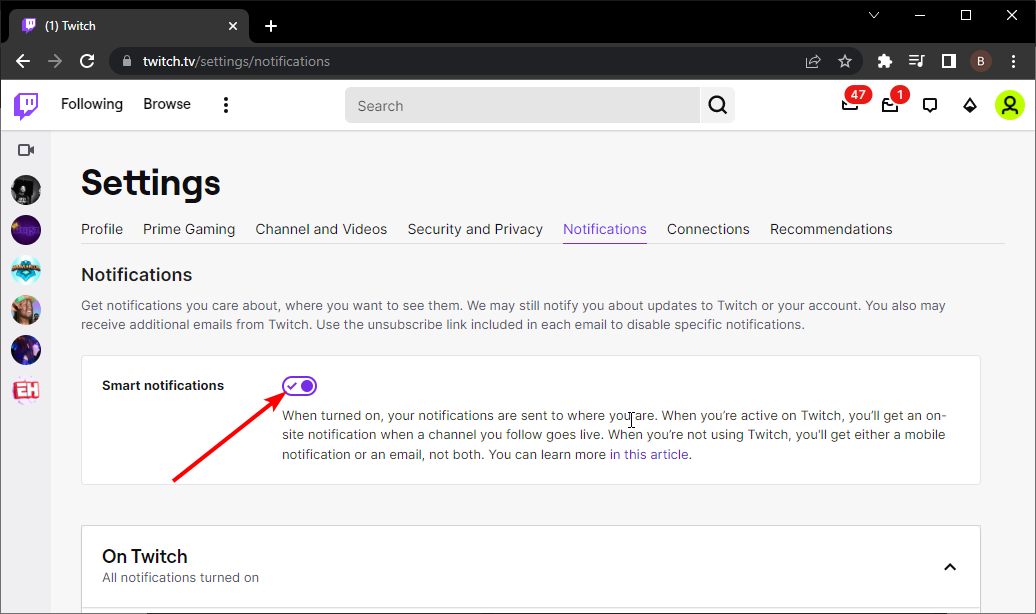
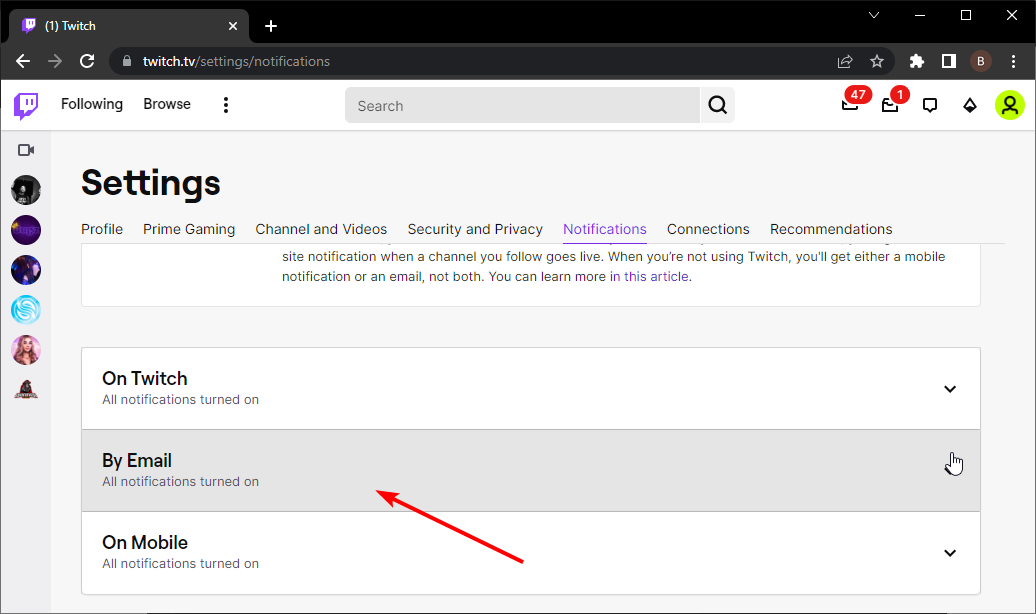
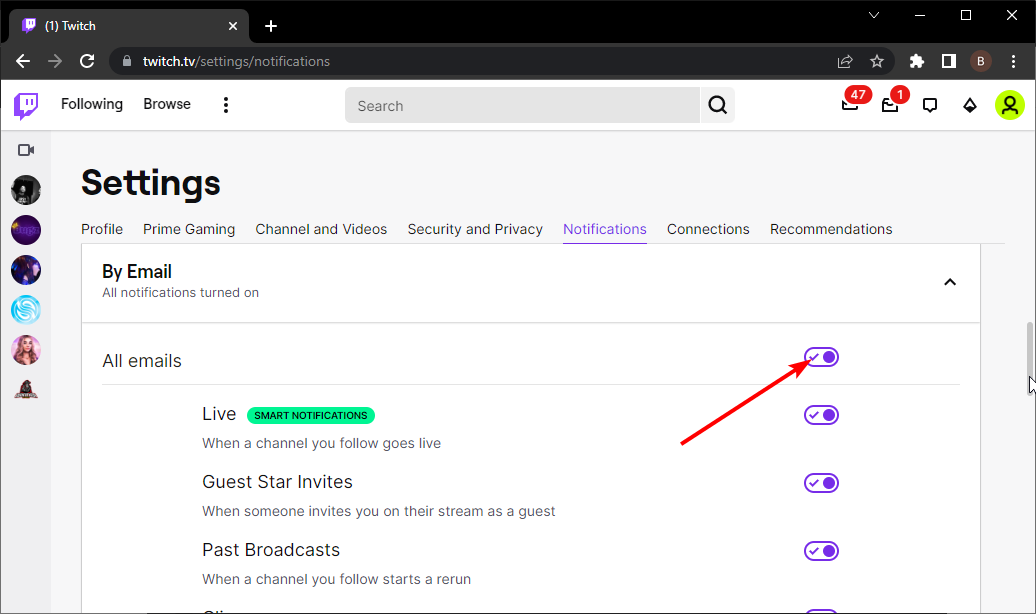
Select the Notifications tab, then enable the Smart Notifications box. This will get you notified when a channel you follow goes live.
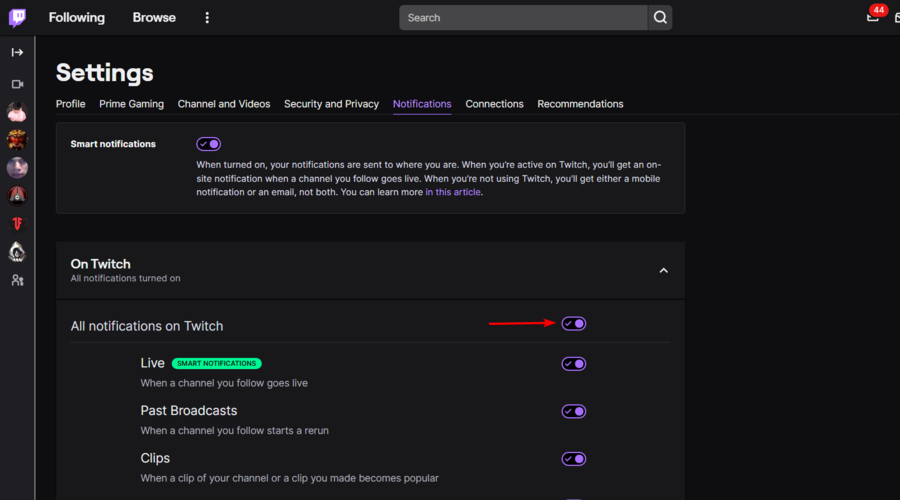
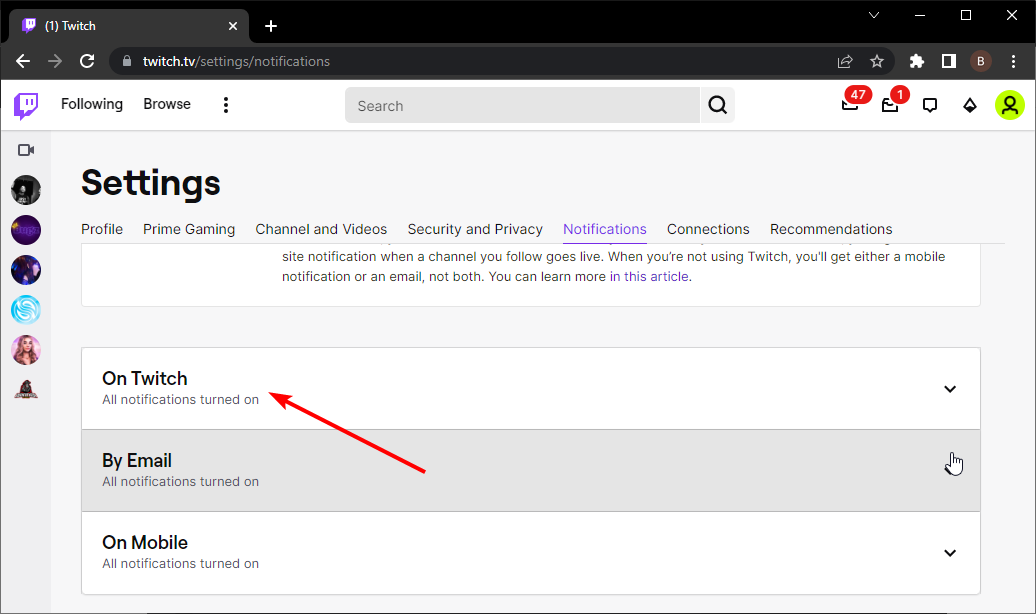
Now, expand the On Twitch section, then enable the All Notifications on Twitch option.
Relaunch your browser.
Because of a large number of users complaining that they didn’t get a notification when their favorite streamers came online, Twitch has reacted.
They created a Google Chrome and a Mozilla Firefox notification service. Once connected, it will show you all the notifications available, even if you don’t have the Twitch site or app opened on your PC.
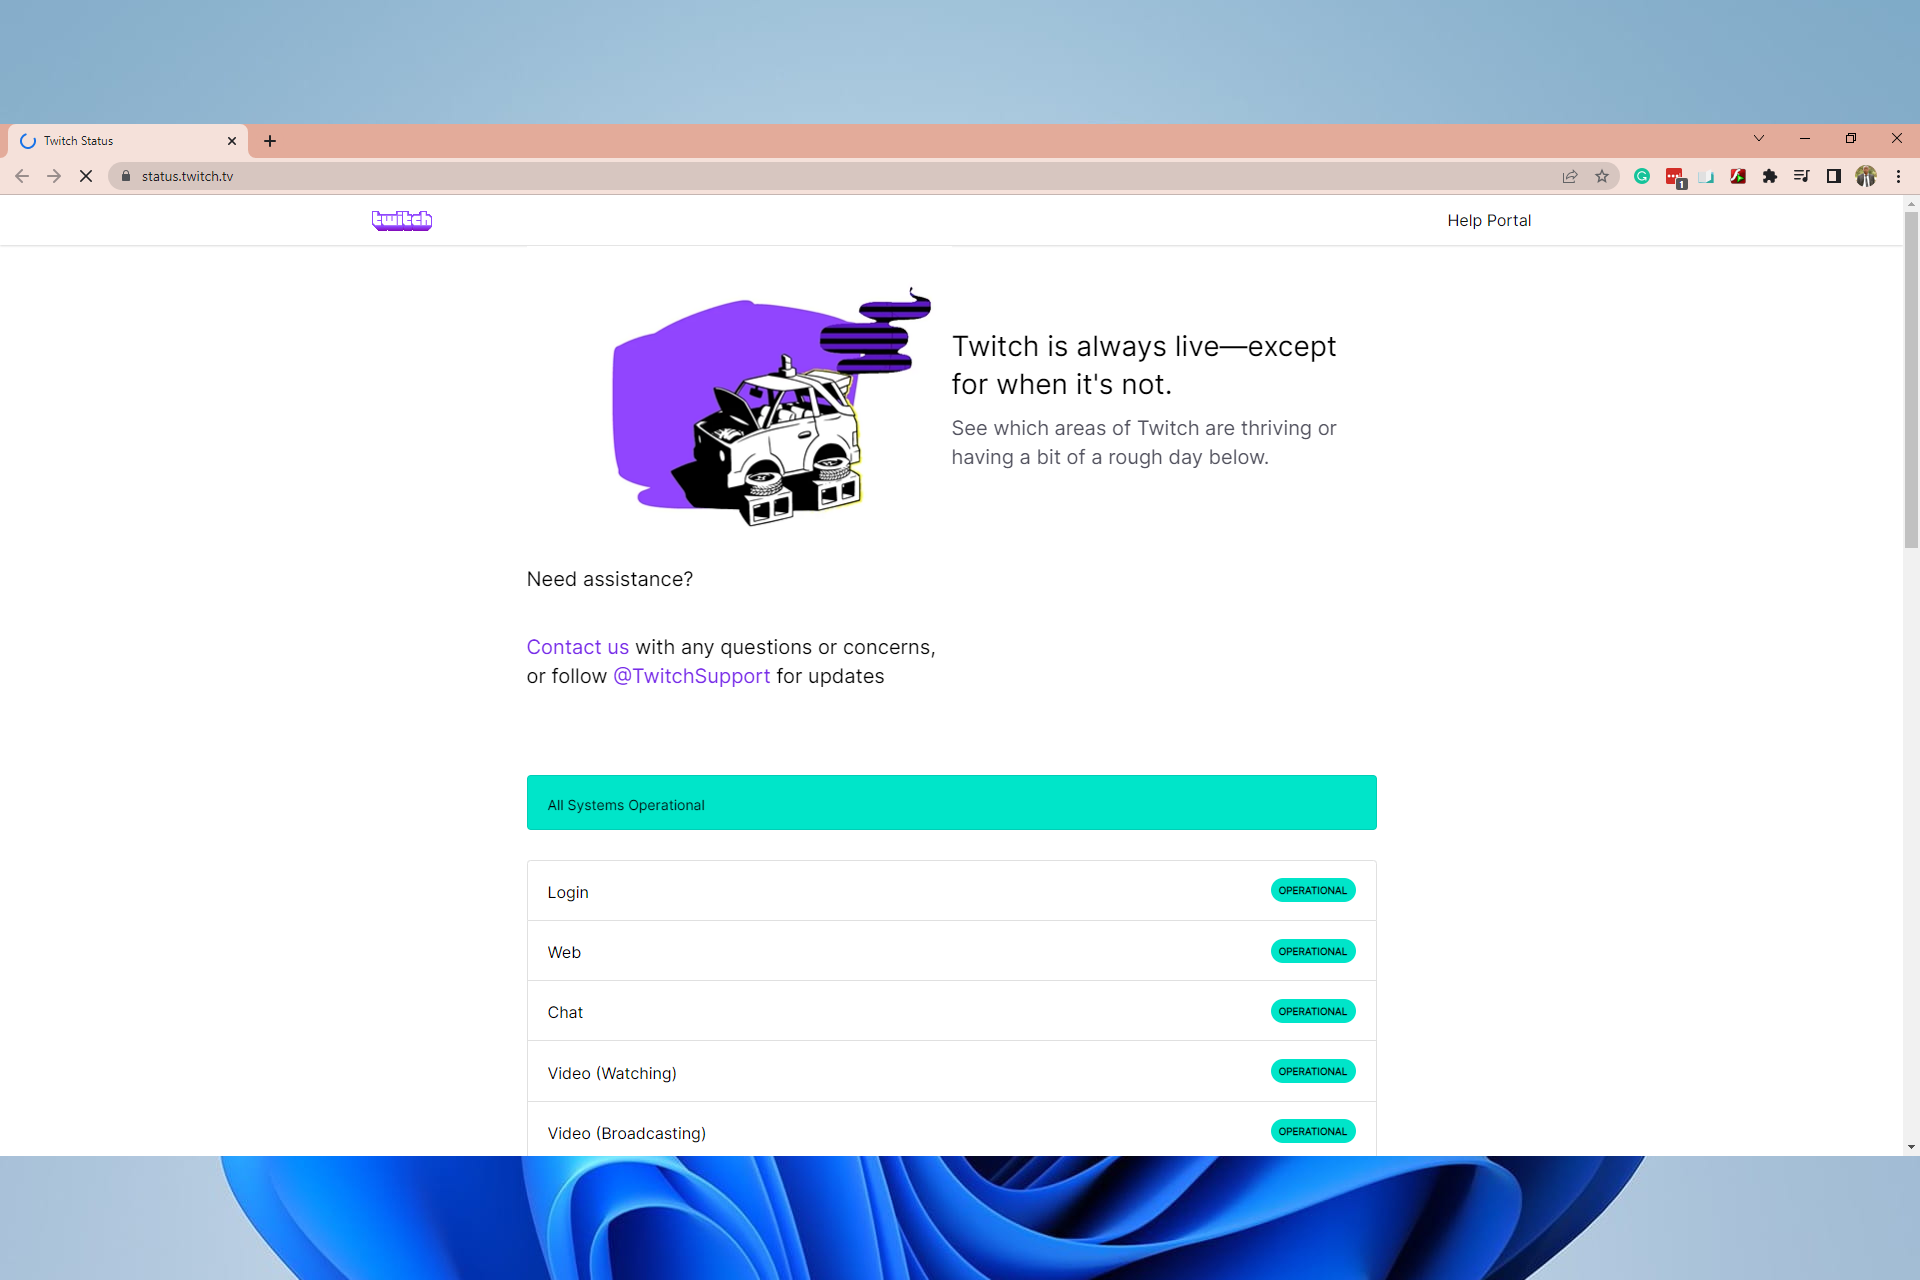
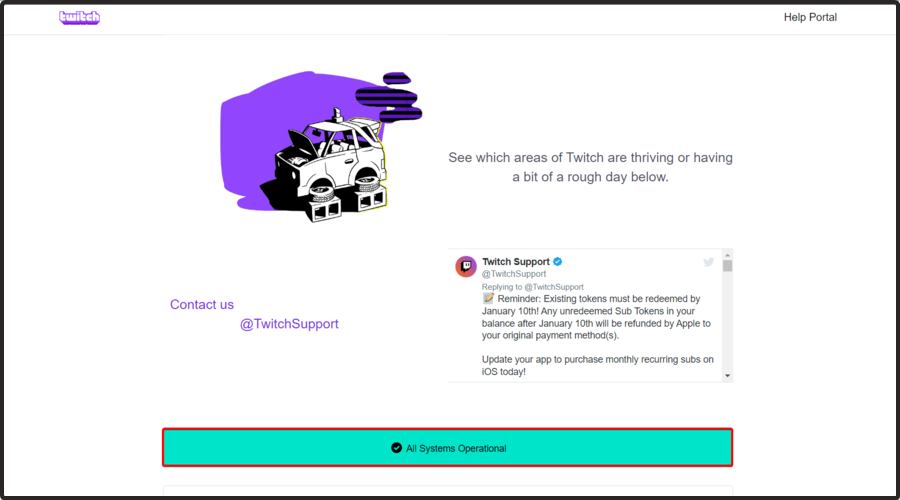
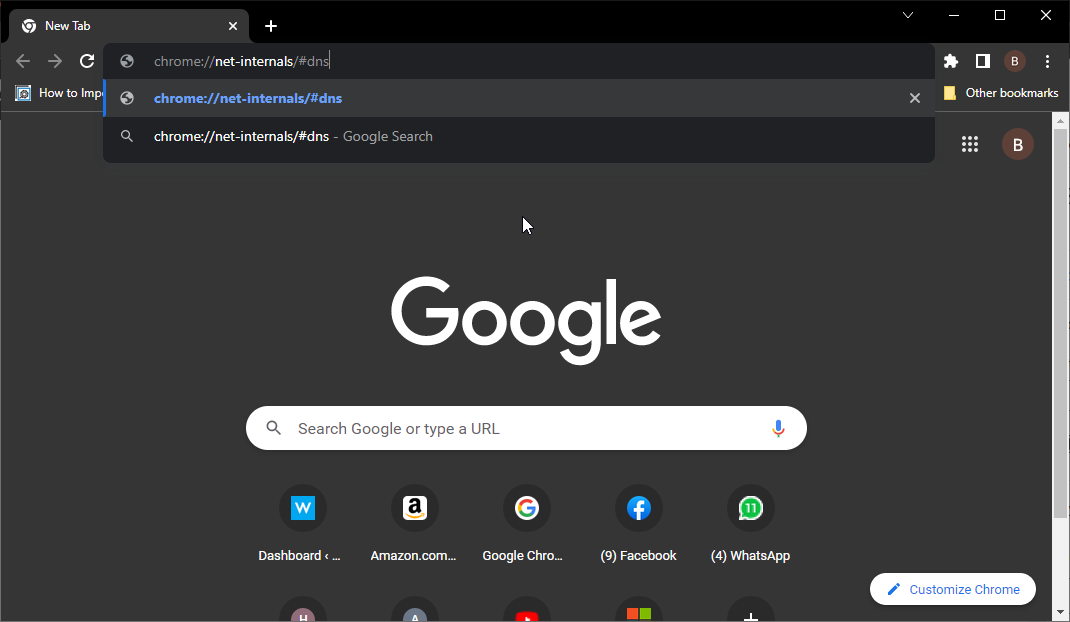
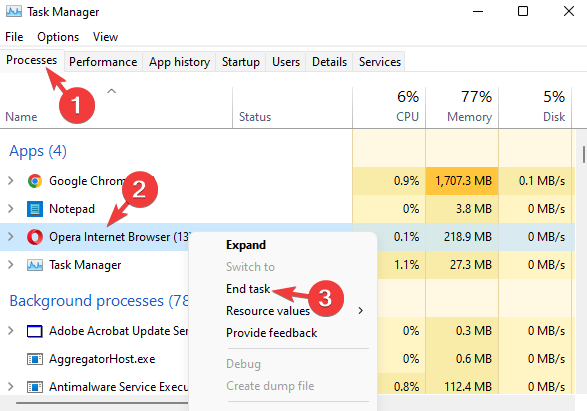
If all systems are operational as indicated in the image, you will have to wait it out.
If you can’t follow any new channels or people, it might be due to a glitch in Twitch servers. In this case, we recommend checking the Twitch servers’ status.
2.2 Reinstall Twitch
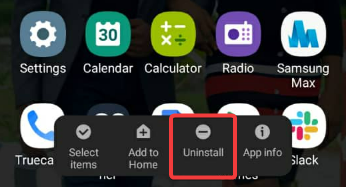
Uninstall Twitch by long tapping on the Twitch app, then selecting the Uninstall option in Android or Remove app in iOS.
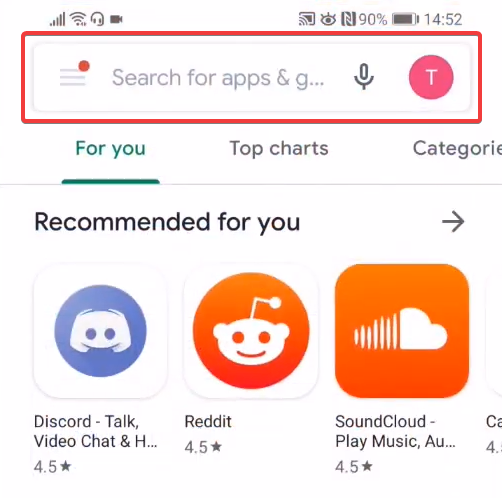
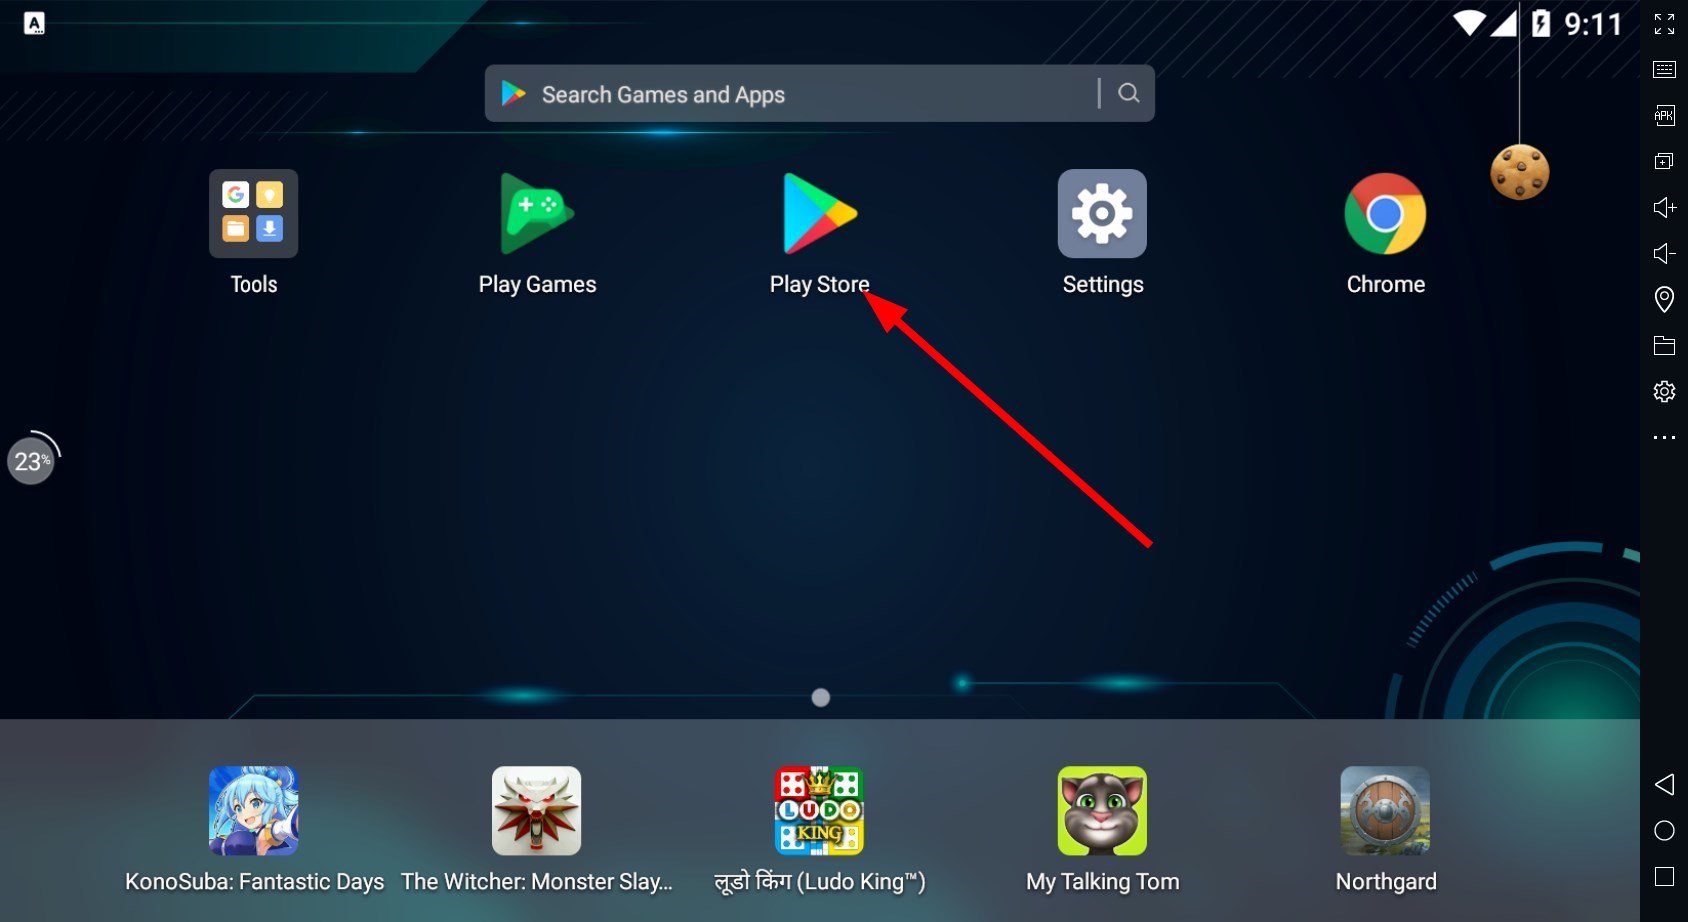
Open your Play Store.
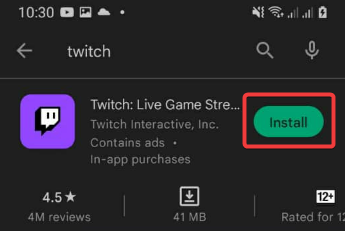
Search for Twitch in the search box.
Click the Install button.
We recommend that you uninstall your software and download the latest version. This is a valuable fix if the Twitch follow button is not working, Twitch followers are not showing up, or when your Twitch following list is gone.
Even though this is not an official fix, it helped some users solve their issues, so it is worth a try.
3. Twitch followers not updating
Open your Play Store.
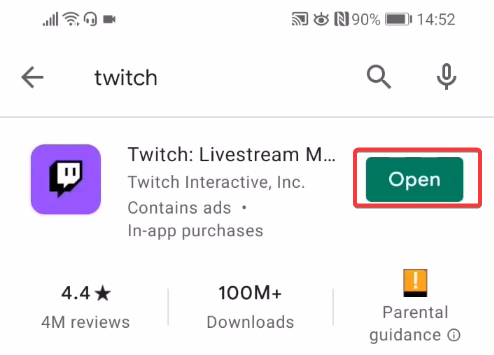
Search for Twitch in the search box.
If there is an update, you will have an Update button rather than the Open button. Click on it, and the update should start.
Even though this issue occurred relatively often in the previous years, the Twitch developers have declared that they identified the problem and solved it by releasing an update.
If your Twitch software is already updated, then it might be the case that the number of Twitch followers that you gained unfollowed your account.
Also, you should try an update if Twitch is not sending notifications to followers or Twitch can’t follow a channel.
4. Twitch follower count not updating
Launch your browser.
Navigate to the Twitch service.
Use keyboard hotkey Crtl and + to zoom out.
Several users have complained about this issue, saying that the sidebar showing followers suddenly disappeared.
This issue is caused by changes that the Twitch developers are rolling out. The update allows you to toggle on and off the sidebar and show extended details about your followers.
To work around this issue, please check that your browser is not zoomed in too much.
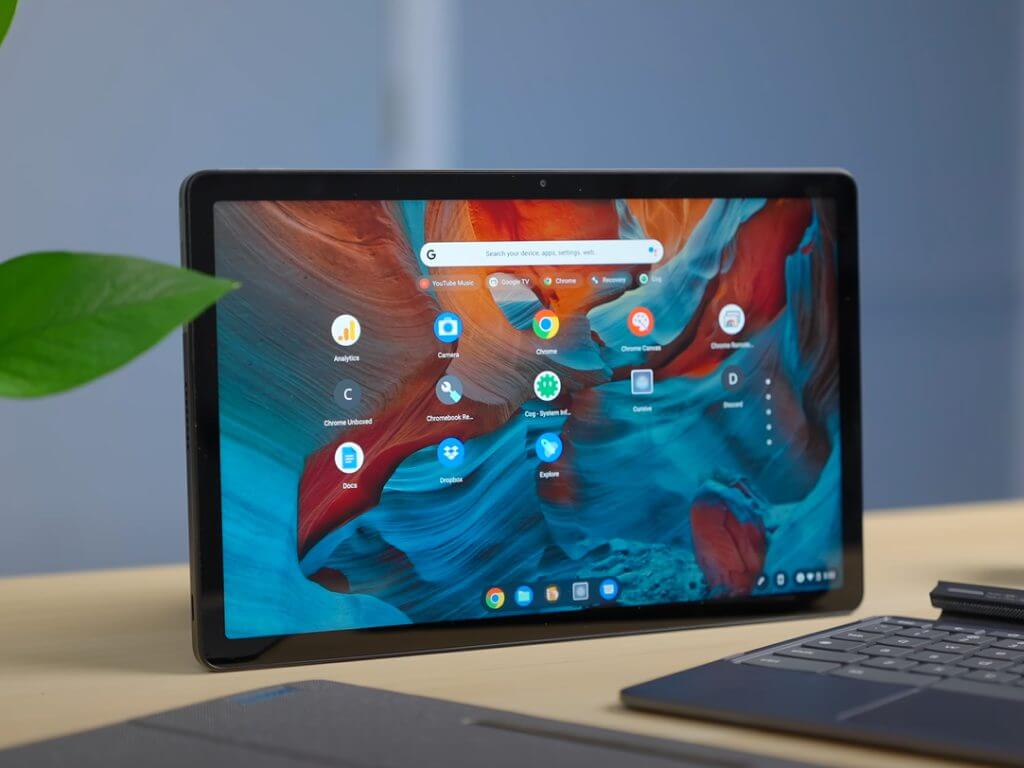
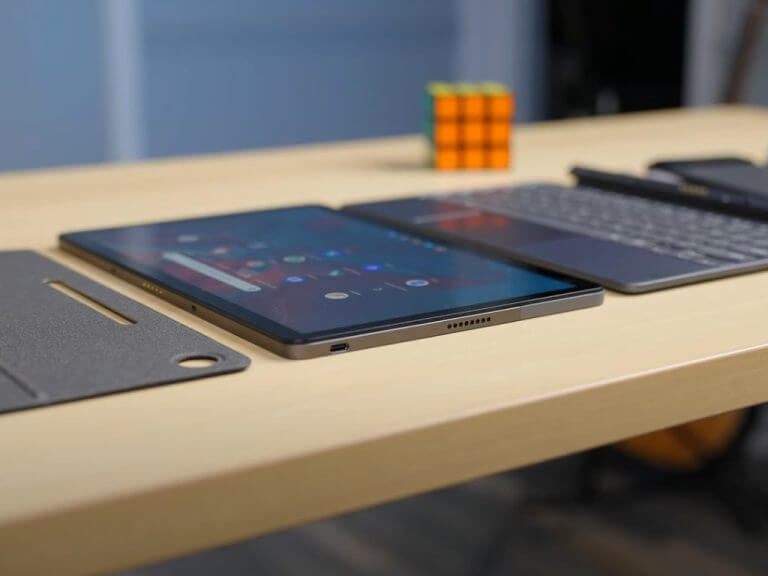
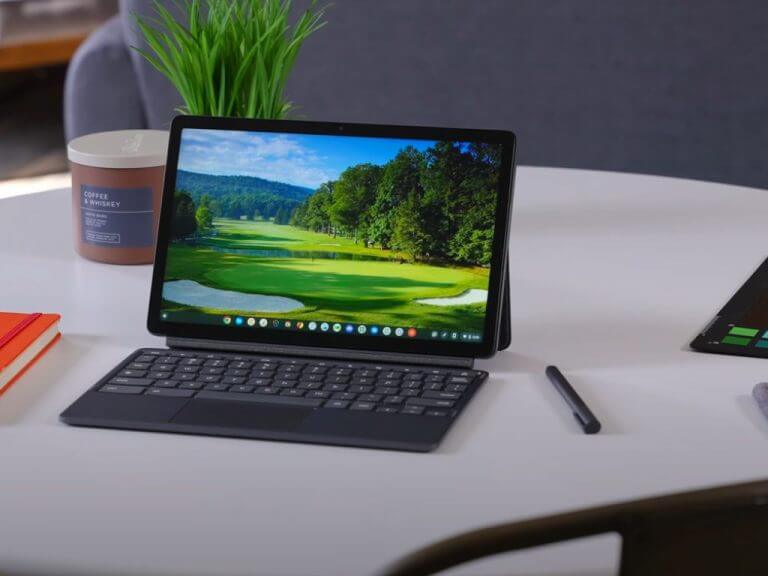
With the Lenovo Chromebook Duet 3 (2022) update, the company continues to nail the cross section between budget and value.
Representing a sequel to the Chromebook Duet 3 from 2020, the Duet 3 (2022) updates its processor, speaker placement, 2K resolution screen, thinner kickstand back, sturdier keyboard and stronger magnets, all for around $350.
With component shortages still lingering, getting the “perfect” laptop for school may be a bit of a timing issue for some students, but getting solid computing experiences are fortunately easier than ever these days thanks to devices such as the Duet 3 (2022).
For just $350, students and casual users alike can grab the Duet 3 (2022) and have versatile computing experiences that span binge watching on the couch to processing Office docs.
10.1″ FHD (1920 x 1200) IPS
Glossy touchscreen
400 nits
11.0 2K (2000 x 1200)
Glossy multi touchscreen
400 nits
TUV Rheinland low blue certification
Storage
64GB
Up to 128GB eMMC 5.1
Graphics
Qualcomm Adreno GPU
Camera
Front: 5.0mgp RGB, fixed focus
Rear: 8.0mpg RGB auto focus
Front: 5.0mgp RGB, fixed focus
Rear: 8.0mpg RGB auto focus
Memory
4GB RAM LPDDR
Up to 8GB LPDDR4x
Dimensions
258.04x 164.55x 7.90mm10.16x 6.48x 0.31inches
Audio
1W x 2Stereo Speakers, Dual Array microphone: supports Google Assistant
1W x 2Stereo Speakers, Dual Array microphone: supports Google Assistant
Weight
Starting at 0.99 lbs/ 450g
Tablet: around 516.6g(1.14 lbs)Folio: around 429.3g (0.95lbs)Total(Folio + Tablet): around 945.8g (2.09lbs)
Color
Color: MistyBlue, Storm Grey
Color: MistyBlue, Storm Grey
Ports/Slots
1 x USB-C 3.2 Gen 1 (support data transfer, Power delivery 3.0 and DisplayPort 1.4)1 x Pogo pin connector
2 x USB-C 3.2 Gen 1 (support data transfer, Power delivery 3.0 and DisplayPort 1.4)1 x Pogo pin connector
Battery
29Wh supports Rapid Charge
29Wh supports Rapid Charge
What’s in the box
Full keyboard/ Kickstand Pack included
Dock with non-backlit keyboard, anti-pry, water-resistant
Full keyboard/ Kickstand Pack included
Dock with non-backlit keyboard, anti-pry, water-resistant
Look and Feel
The Chromebook Duet 3 (2022) may look an awful lot like its predecessor but Lenovo has made some incremental but meaningful changes that evolve the feel of the overall device nicely.
This time around Duet 3 (2022) comes with a sturdier kickstand attachment which addressed my concerns from my previous review. The magnetic connection to the back of the tablet is much stronger so there is much less incidental movement of the piece during use.
Perhaps in an effort to shave off some ounces, the kickstand attachment is also a bit slimer than the one used in 2020 which has led to me leaving it attached more often than not and just incorporating it into the average weight of the tablet when in use.
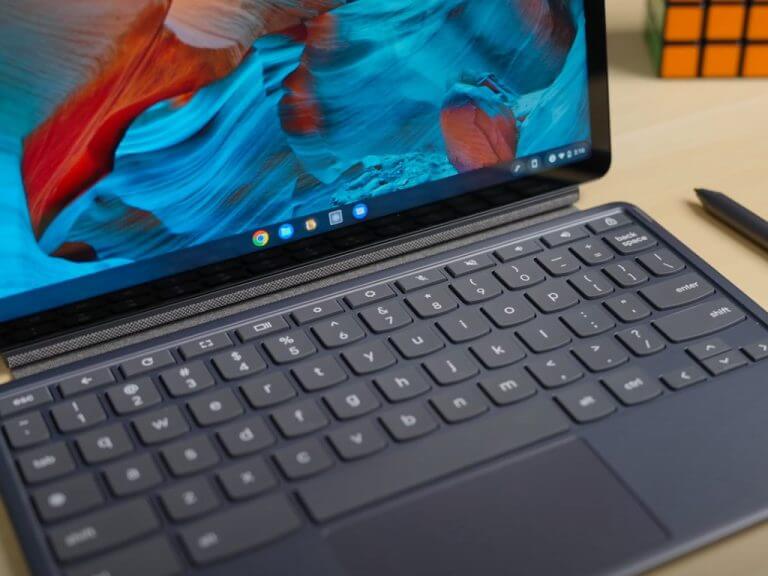
While Lenovo hasn’t added backlighting to the keyboard, it did manage to make the underneath plating feel more rigid than the 2020 model with much less flex resulting in a more solid typing experience on the lap.
Lenovo added an additional USB-C port which can now serve as a connection to a secondary monitor while also charging the device or connecting a external hard drive simultaneously.
The display on the Duet 3 (2022) got an upgrade from 10.1 at 1920 x 1200 panel from 2020 to 11.0 at (2000 x 1200) for a slightly crispier viewing experience. The bezels on Duet 2022 feel roughly the same as before and continue to glide into the rounded display aesthetic.
I’ve spoken about the keyboard experience in my previous review of the Duet (2020) as,
“…the keyboard is limited in space and the compromises Lenovo chose to accommodate the placement of keys can be felt when typing or using the trackpad for extended periods. Another nitpick is the lack of ergonomic positioning that comes with Microsoft’s magnetic Surface Type Cover connection to the bottom of the screen allowing for a raised typing experience. “
In 2022, the experience remains roughly unchanged. While the plate underneath the keyboard offers less flex and is water resistant treated, it’s still a cramped typing experience and one that’s exacerbated by the fact that the device is a pleasure to use for longer periods of time.
Everyday Use
In 2020 the overall experience of the ChromeOS felt disjointed and less cohesive than it is today. The improvements brought on by two more years of ChromesOS development have refined the user experience a great deal for me and has made my use go from the answering the occasional email and binge-watching shows to binge watching shows and writing long form articles, processing data in Excel, creating PowerPoint presentations and the occasional light image editing.
Perhaps, much of the credit in my change of opinion might stem from the switch to the Snapdragon 7c Gen Qualcomm processor over the performance throttling MediaTek one from 2020.
While it’s not a silver bullet to address various other annoyances I’ve had with ChromeOS, it is definitely a great addition on a sub $400 computer that can serve as a go to device for many people.
As for everyday use, Duet (2022) lasted about 10 hours of use on the battery for most days, and depending on the workload, I could squeeze out a day and half.
The 29-Watt hour battery paired with a 45W charging brick meant I was up and going after about 30 mins if and when the Duet (2022) happened to be on its last leg.
From a sheer performance stand point the Duet (2022) serves best as a single task device. Trying to load it up with Android games while simultaneously trying to sort through “Desks” (virtual desktops) will confuse the device at times and result in black screens while background music plays.
However, if you manage to play well in the sandbox of Chrome tabs and the occasional casual mobile game you would be hard press to identify any issues.
Summary
For $350, there are few complaints this time around from me on the Duet 3 (2022). Not that price is an overwhelming factor in my use-case scenarios, but for many budgets are a real constraint, and Lenovo has addressed many of the complaints I had with the hardware and performance of the original Duet.
Going into school season this year, Duet 3 (2022) is definitely recommended for anyone who lives and breathes Google and Android.
With the addition of a second port, users can now enable the Duet (2022) to power their home office, or dorm room setup for as little as $300.
Video conferencing is something we’re all still doing in 2022, even with the pandemic restrictions easing up. You might buy an external webcam to help boost your calls or even an external monitor, so you can multitask, but what if we told you there’s a solution you can use on your desk that does both?
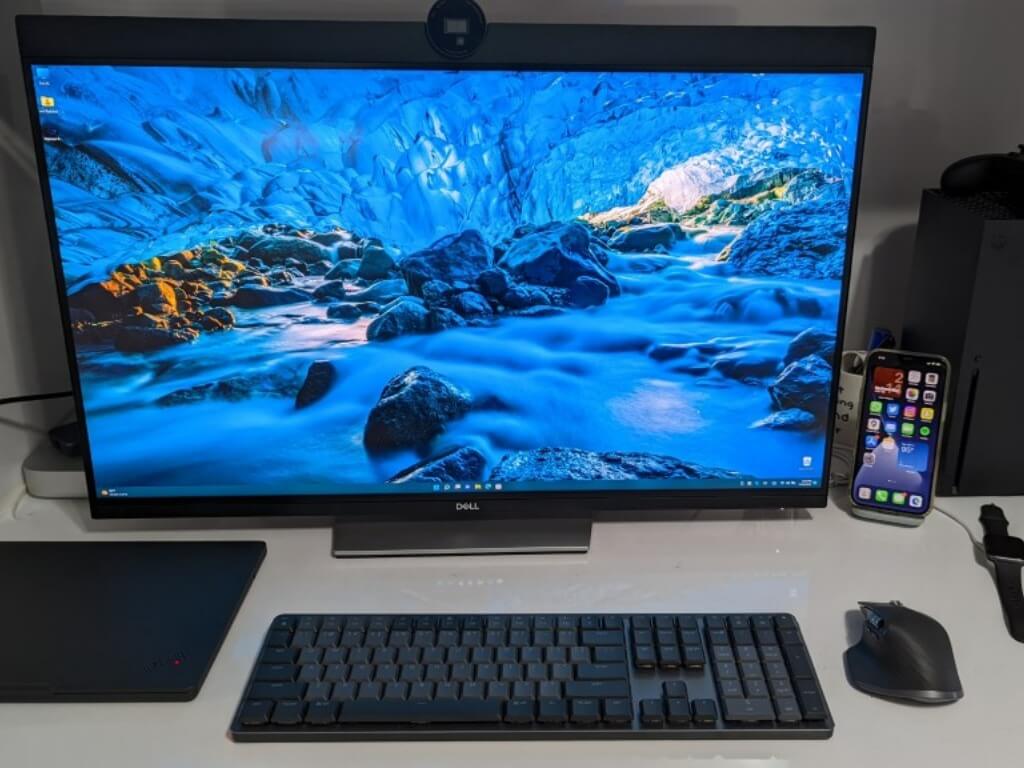
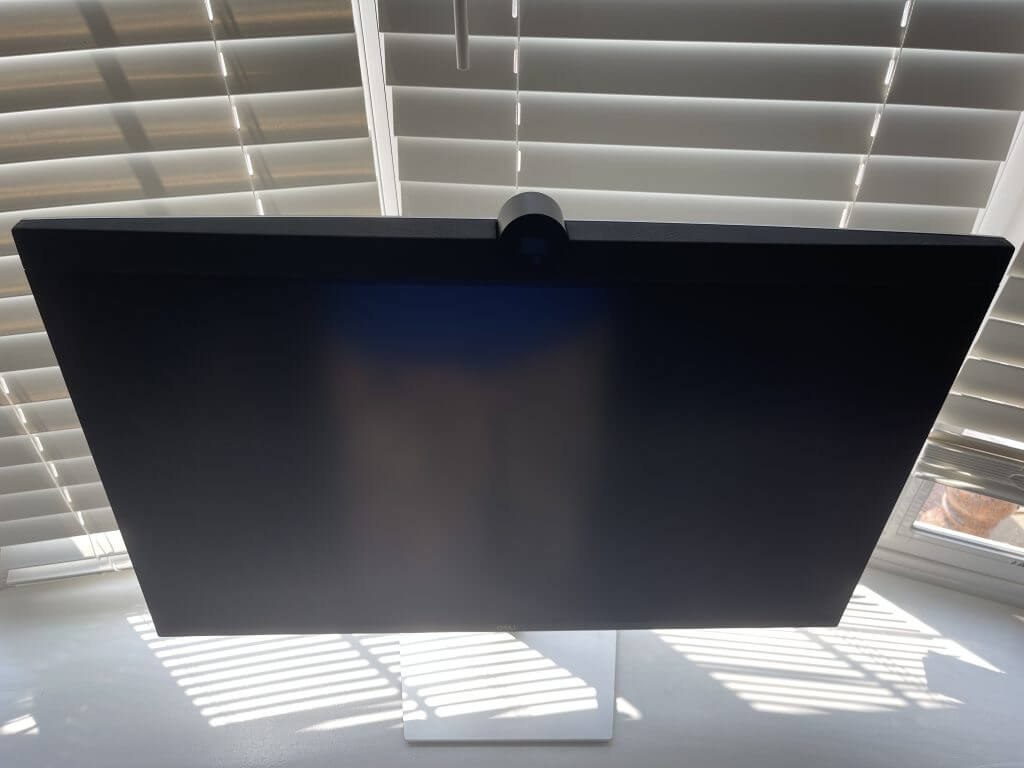
This time around it’s the Dell Ultrasharp 32 4K Video Conferencing Monitor, which was sent to me for review. After using one in my setup for two weeks, I think it’s now officially the best monitor you can use for your Teams, Zoom, or Skype Calls. It even can help you work better. Here’s a little more on why.
Specs & Price
The Dell Ultrasharp 32 4K Video Conferencing Monitor retails for $1,600 at Dell.com or around $1,280 when on sale. For that price, there are a lot of specs for your buck. Generally speaking, the screen size is 31.5 inches. The resolution comes in at 4K 3840 x 2160 at 60 hertz, and this is a 3-sided narrow bezel panel, like most of Dell’s monitors.
For the first time on one of Dell’s conferencing displays, the technology being used onboard is IPS black. It comes with a response time of 8ms under normal operation and 5ms gray-to-gray. The contrast ratio is rated at 2000:1, according to our colorimeter. Brightness is rated at 400 nits. Oh, and this is a 16:9 aspect ratio screen. You’ll also get 100% of the Rec 709 spectrum, 100% of the sRGB spectrum, and 98% DCI-P3 spectrum. Viewing angles are rated at 178 degrees.
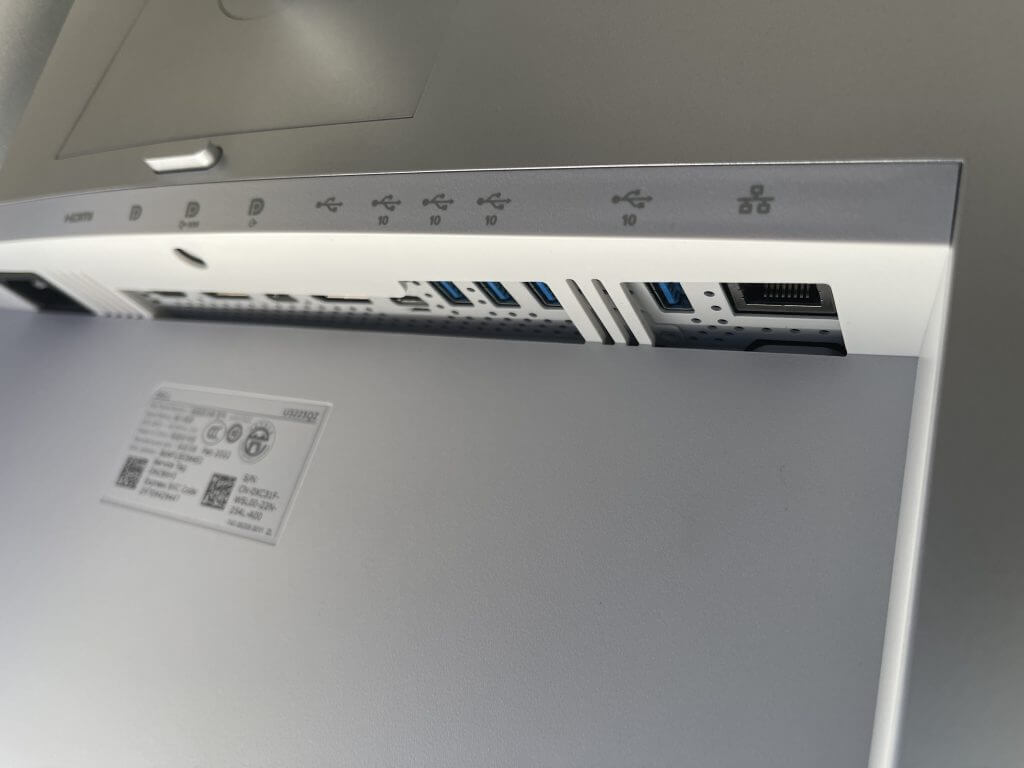
Ports include the following. HDMI (HDCP 2.2) DisplayPort 1.4 (HDCP 2.2) USB-C 3.2 Gen 2 upstream, USB-C 3.2 Gen 2 upstream/DisplayPort 1.4 Alt Mode (power up to 90W),USB 3.2 Gen 2 downstream (power up to 15W), 4 x USB 3.2 Gen 2, USB 3.2 Gen 2 downstream with Battery Charging 1.2, and DisplayPort out for daisy-chain. You’ll also get a headphone jack.
Dimensions come in at 28.1 in x 9.1 in x 19.6 in with the stand in the lowest position as we reviewed. Weight is around 26.23 lbs. Typical power consumption is 240 watts.
Design & Teams functionality
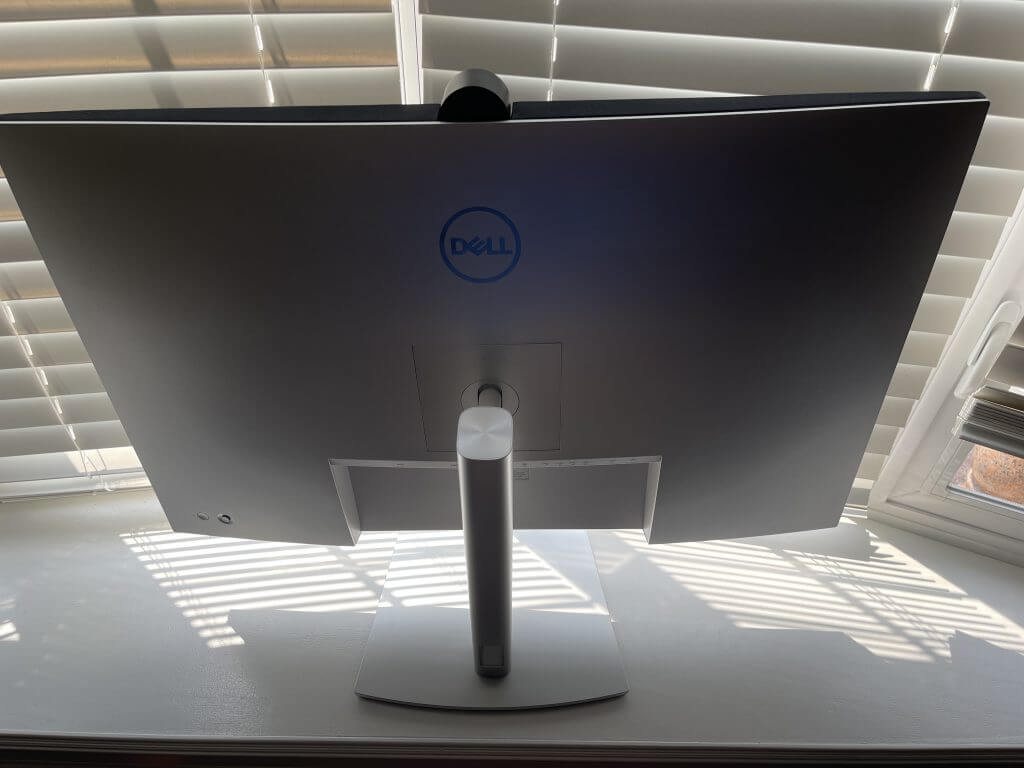
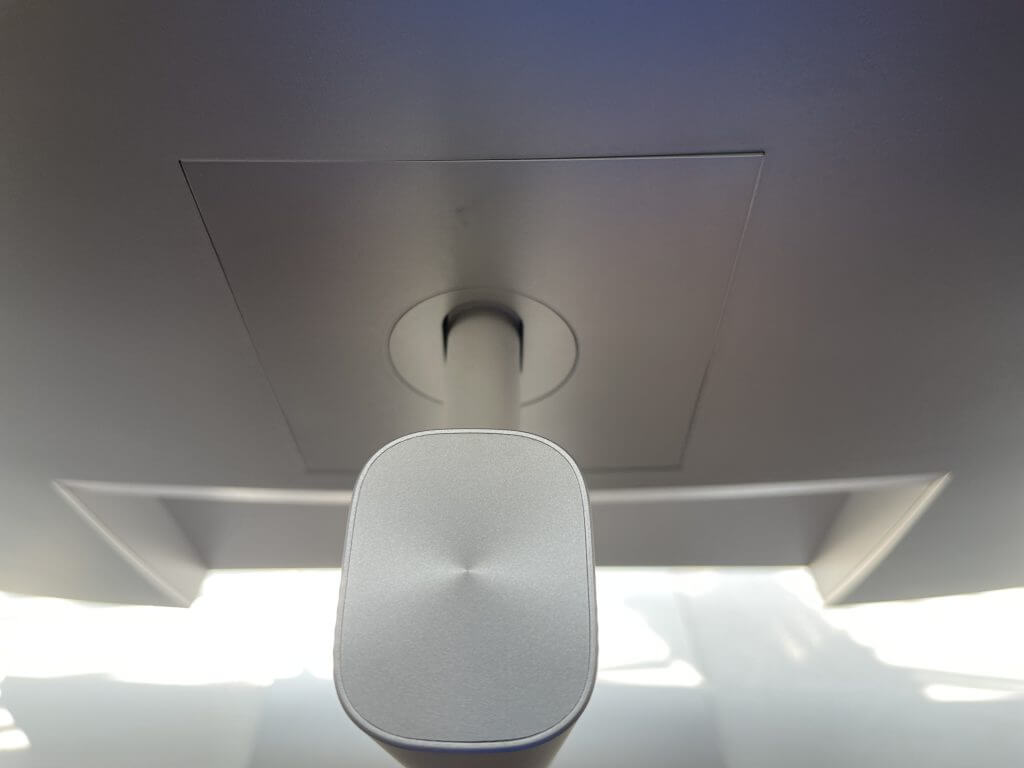
If you’ve ever seen a Dell monitor before, then the design of this monitor should feel familiar. The rear is colored in Dell’s signature silver colorway, as is the stand. As I’ve said many times before, it’s a welcome design that isn’t overly distracting and is quite welcoming for your desk when compared to black-colored displays.
Other than that, this monitor has a lot of great ways to be positioned on your setup. My desk has low clearance, and I was able to bring it down to eye level. It’s one of the things I always appreciate about Dell’s displays. You can tilt and pivot this one between -5/+21 degrees. The swivel angle is rated at 60 degrees. And, the height is rated at up to 5.9 inches. You even get compatibility with a VESA mounting interface.
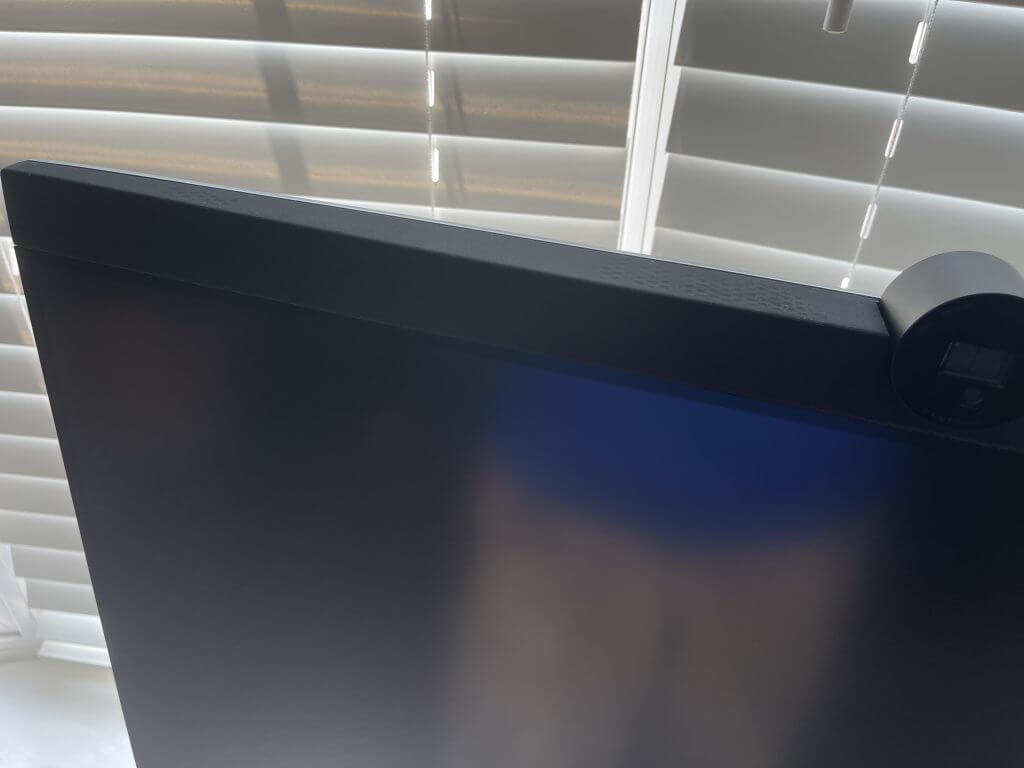
Outside of the normals, there are two signature things about this design. Unlike most monitors, this one has a speaker var up top, instead of the bottom. I’ll have more on that later, but the two speakers in the bar are rated at 14 watts. The speakers work across all inputs, too, which is huge for me, as I used this monitor with my Xbox.
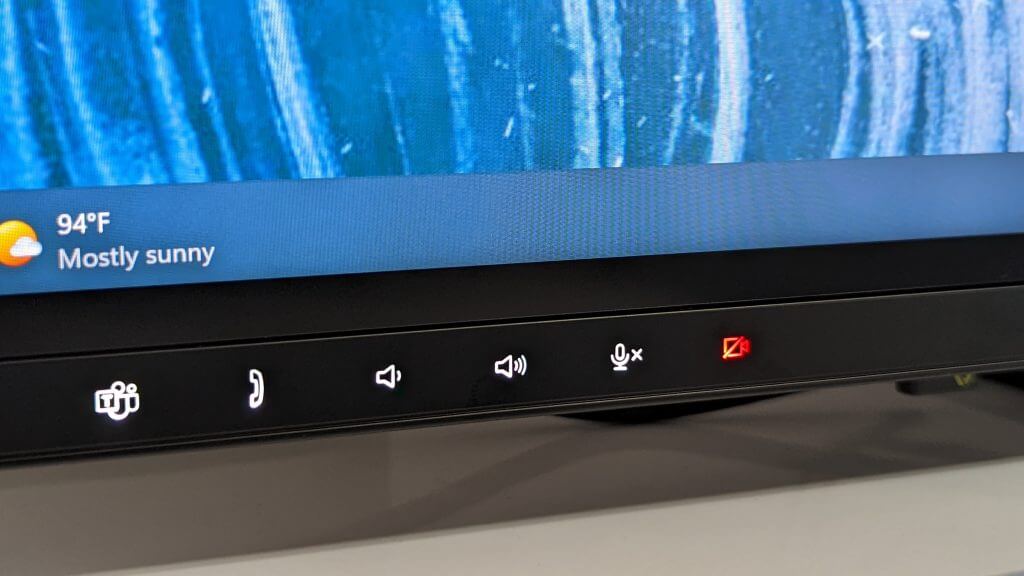
As for the second thing? It’s the Microsoft Teams buttons and controls. These touch controls are on the lower left of the display. You can click the Teams icon here with your finger to launch Microsoft Teams, You also can answer calls, too, and control the volume of your speaker. The final two buttons let you disable the monitor’s microphones and activate the electronic shutter on the webcam.
I really liked these quick controls, as it meant I spent less time touching buttons and reaching for sliders and triggers on my PC. Instead, I ended up using these buttons on the fly, right within hand reach. It’s also nice to see them lit up during a call, in red or white, knowing when your mic and webcam are off.
Ports & buttons
We touched on the ports at the top of our piece, but we’ll mention them again here in a more specific order. The spoiler, though, is that I’m very pleased with the number of ports and the types of ports. No matter which type of device you own, I think you’ll be able to connect it to this display.
From left to right on the display are the following ports. On the main ports, there’s a Kensington lock and a power connector. That’s then followed by the HDMI port, a DisplayPort In (for daisy chaining), and a USB-C upstream port. Other main ports include the DisplayPort out, and USB-C upstream. The hub of ports includes three USB-A ports, a USB-A Superspeed port, and an ethernet jack.
Under the lip of the display, you’ll find a Superspeed USB-A 10GBps port, another USB-C downstream port, and a headphone jack. These extra ports on the lip are appreciated, great for plugging in dongles for keyboards and mice. Your monitor becomes the hub, in this case.
I connected my Mac Mini up via Display Port, my Surface Laptop Studio via USB-C, as well as my Xbox Series X via HDMI. That’s three devices getting one use out of a video conferencing monitor, which is honestly not what I expected!
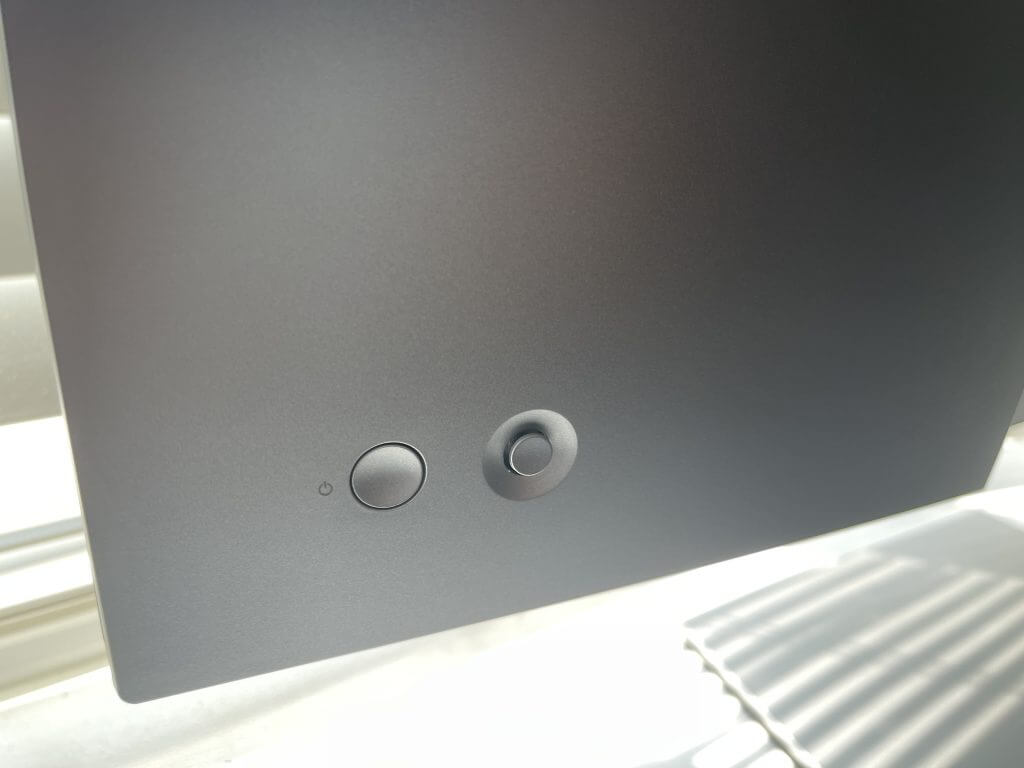
As for buttons, you’re getting joystick controls. This is my favorite part of Dell monitors as it makes menu navigation and switching inputs easy. It really needs to be a standard across all of Dell’s products.
Webcam, Speaker, Microphone performance
The signature part of this monitor is the webcam, speaker, and microphone. In these three cases, we have some really good news. All three perform excellent, making this monitor better than any typical external mic, webcam, or speaker you can buy for productivity. Check it out in the video above, where I used the monitor for my podcast.
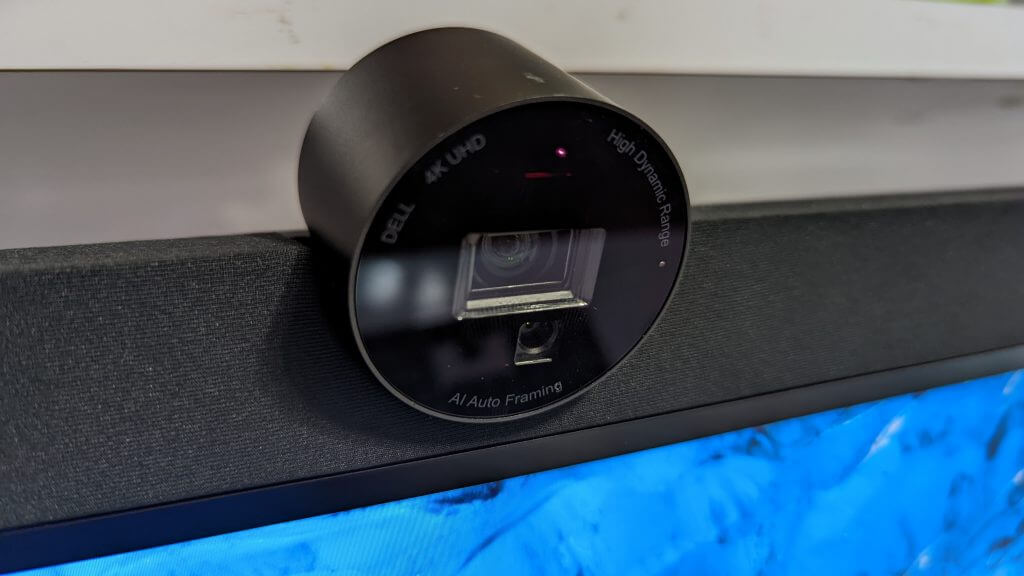
I’ll start first with the webcam. In concept, this monitor takes the Dell Ultrasharp 4K webcam and fits it into the top bezel of the display. All the same great features from that webcam, including Windows Hello, are now built into this display. You can see my full review of that webcam for more, but it boils down to a few things.
You get AI auto framing, a 4K sensor, true color, HDR, and video noise reduction. The webcam on the monitor though has an automatic shutter, that comes on when not in use, helping protect your privacy. The other difference is that you can position the tilt adjustable camera to the angle you want and customize how much you want to show your surroundings.
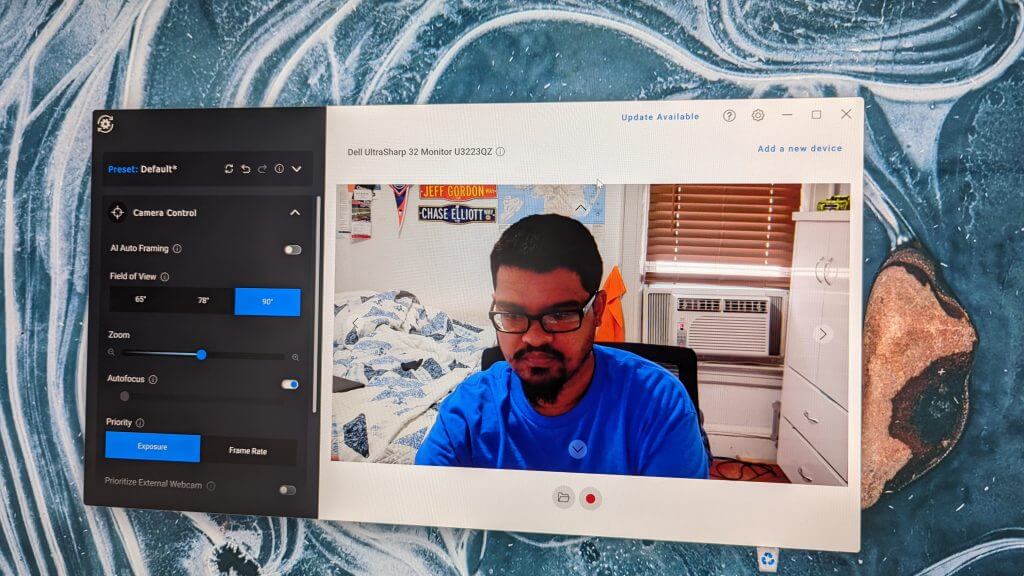
In software, you also can change the resolution, and adjust the field of view to 65°, 78°, or 90°. If you use USB-C to connect your monitor to your PC, the webcam works without extra cables. If you don’t you’ll need to use one USB-C to USB-A cable, provided in the box. Note you can’t use the webcam on MacOS, as the Dell Peripheral Manager app is Windows-only.
During my time with this monitor, my colleagues said I looked really good on calls, not grainy or blurry at all even in direct sunlight or under the LED lights from the fan in my room. During the heatwave when I was sitting in my warm room. one of my colleagues even noticed my beads of sweat. That’s how good this webcam is! It really depicts you in the most human way possible, even down to the exposure.
The audio and microphones are great, too. With the speakers being top-facing, the audio sounds much more natural, almost as if the people on the other end of the call are in the room with you. I do want to mention that most monitors have 10-watt speakers, so this is a great change to see the upgrade to 14 watts.
The microphones, meanwhile, picked up my voice quite well, though some of my colleagues felt like they heard echoes when I was speaking. Most people, though, had no issues hearing me.
Display quality
Now, for the most important part, display quality. It should be noted that this is the first time that Dell is using IPS black technology on board one of their conferencing displays. It is also in use on other products, including the Ultrasharp 4K monitors.
IPS black technology is supposed to bring a better contrast ratio and higher color accuracy than regular IPS, and I will say that this is true, as according to my colorimeter, I got nearly double the contrast than the typical 1,000:1 on other monitors I’ve previously reviewed. This puts new meaning to the term “UltraSharp.”
I shared my numbers at the top of this review, but generally speaking, this is one of the most vibrant and accurate-looking displays I’ve used, outside of OLED displays. Webpages look very bright, and in windows that use grayer or creamy or bluer colors for backgrounds (say WhatsApp and ArsTechica), the content looked a lot more alive than what I’m used to on my regular IPS display. Pair that up with the peak 400 nit brightness, and things look really alive on this display. It is part of the reason why this display is HDR 400 certified.
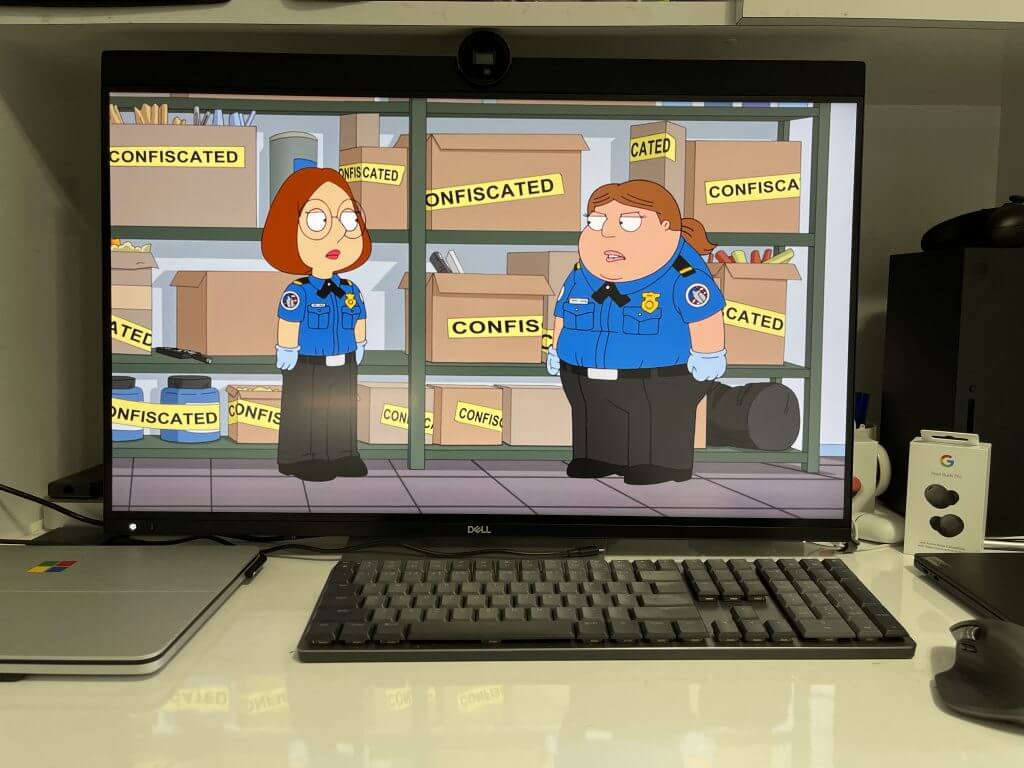
And watching TV shows like Family Guy brought all the animations to life. Peter’s dog, Byran, looked brighter than usual, and so did the orange-red outfit in Stewie’s clothes. Even in video conferencing, this display lights up people’s faces more. Everyone on my calls looked a lot less dull when compared to what I usually get on my laptop display.
And for multimedia? Well, it’s almost a TV-like performance, especially when gaming. Playing Microsoft Flight Simulator on my Xbox with this display felt life-like due to the accurate colors and contrast. Flying over Citi Field in New York, I made out the greens of the trees in Flushing Meadows Corona Park.
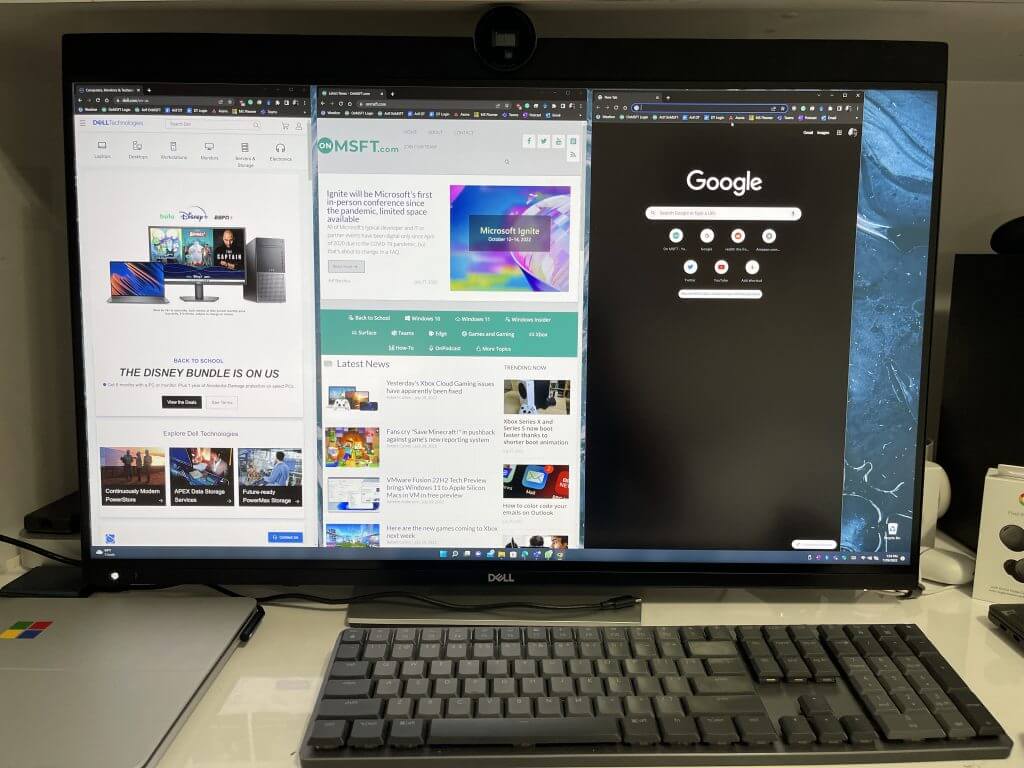
In terms of resolution, 4K is also a jump from the QHD on Dell’s other conferencing monitors, meaning more fits on the screen. I stacked 3 Microsoft Edge Windows side by side, and still had room for other apps. For this price, 4K is appreciated.
Extra features
This Dell monitor sports some extra features. The first of those is support for Dell Easy Arrange and Dell Display Manager, which lets you tile your applications in multiple ways and allows IT admins to manage displays.
There’s also support for daisy chaining monitors, or hooking up more than one PC and using it in PIP mode and PBP mode. You can connect up to two PCs, and intelligent Auto KVM detects a second PC and seamlessly switches controls over.
The final extra feature comes with Dell Peripheral Manager. This app is really sophisticated and lets you control the webcam in a lot of different ways. You can change resolution, toggle HDR, switch the field of view, autofocus zoom, image quality, use it as a recording studio, or weak other things like brightness, sharpness, contrast, and flickering. This is one of the most in-depth webcam solutions out there.
Buy it for the best video conferencing experience
The Dell Ultrasharp 32 4K Video Conferencing Monitor has everything you need to be a proper video conferencing solution. The display is bright and vibrant thanks to IPS Black technology. The display also has really amazing built-in webcam and speakers, daisy chain support, a USB hub, and even can work with game consoles.
It can be a bit tricky to find out the right browser that still offers support for RC4, a stream cipher that is no longer supported by the major browsers.
RC4 was once widely supported by all major browsers and online services for encryption.
However, in 2015, Chrome, Edge, IE 11, and Firefox dropped support for this outdated technology.
But people using legacy devices still feel the need to run RC4 and hence, they have been looking for browsers that still support the encryption technology.
The original RC4 (Rivest Cipher 4) encryption used an outdated security technology that became increasingly vulnerable to attacks.
But, even after RC4 support was stopped, there were still many people using legacy devices like the old phones (Nokia 6210 classic), or older browsers like iCab, with RC4-based requests.
Hence, despite being outdated, encryption technology still remains prominent even in the current times.
Does TLS 1.2 support RC4?
Yes, TLS 1.2 supports RC4, because enabling it along with TLS 1.1 on servers and in browsers can alleviate the risk of BEAST attack.
But, if you fail to enable TLS 1.1 and TLS 1.2, you can configure SSL to insist on RC4 ciphers than block-based ciphers.
Therefore, thanks to TLS 12. support, you can still enable the encryption in some browsers.
But, if you are wondering which browsers support RC4 ciphers, here we have a list of some of the best browsers where you can enable the feature.
When talking about secured browsing, the first name that pops into your mind is the Opera One browser.
Promising absolute privacy and security online, the browser offers one of the safest browsing experiences of all.
Therefore, when you think of enabling the RC4 encryption in Opera One, you can be assured that even with the deprecation, you can still be safe with the added browser security.
From blocking advertisements, or trackers to a free built-in VPN and easy access to privacy and security controls, the browser is a safe haven for all Opera One fans.
Its other major features include:
Sidebar shortcuts for social media like Twitter, Instagram, etc.
Allows to save web content in Pinboards
Integrated messages for social media
Floating videos on top of webpages
Battery saver, data syncing, and crypto wallet
Opera One
Get the best browsing experience with advanced support for RC4 as well as tons of modern features.
The next best browser in the list would be Microsoft Edge which can support RC4 and is known for offering improved security features.
Apart from its Super Duper Secure Mode which is an instant hit with the users, it also boasts the control-flow Enforcement Technology (CET) and Arbitrary Code Guard (ACG).
Besides, it also supports both forward and backward control-flow protection which, in combination with the other security features can prevent JIT attacks and beyond.
Moreover, it also features browser sandboxing that safeguards your PC from the after-effects of browsing by blocking websites with malicious codes.
Here are some of its other important features:
Clear privacy options (Basic, Balanced, Strict)
SmartScreen feature protects from phishing attacks
Identifies and blocks known trackers
Manage which extensions should be allowed
Stay safe online with Password Monitor, InPrivate search, and Kids Mode
If you are looking for a browser that not just offers support for RC4 encryption, but is also fast and consumes fewer resources, Firefox can be a great choice.
While it offers extensions that are useful yet fun, it also offers a smooth experience by using only as much memory as required.
At the same time, it boasts a strong password management system that helps you create strong passwords for the complete protection of your accounts.
Best of all, you can also use containers to stay organized and keep trackers off while you are surfing the web.
Below are some of its other significant features:
Blocks third-party trackers
Private browsing for smaller digital footprints
Firefox Monitor to stay protected from a data breach
Apple Safari – iCloud Keychain for secure passwords
Safari is Apple’s proprietary browser that’s only available on Mac and its M1 chip brings a shared architecture for security.
From protecting your login credentials or ensuring file-level encryption to automatically encrypting your data, Safari boasts powerful security capabilities.
Talking about enabling RC4, TLS 1.1 and TLS 1.2 are automatically enabled in Safari version 7 or beyond.
But, since RC4 is deprecated in iOS 10 and macOS 10.12, the services or apps that require RC4 should be upgraded to utilize secure cipher suites.
Here are some of its other major features:
Built-in antivirus with strong malware protection
Stay in control of your data with app permissions
Safe and secure data with FileVault 2
Intelligent Tracking Prevention to detect and block trackers
iCloud Keychain securing passwords across all devices
Instead of RC4, you can use Triple Data Encryption Standard (3DES) and the Advanced Encryption Standard (AES) which also provide built-in support for many RC4-based programs.
As an alternative to symmetric encryption, you can use a public key or asymmetric algorithm, where each user of the communicating parties has pair of keys (one private and one public key).
How do I enable RC4?
Fortunately, you can still enable the RC4 encryption technology in some of the major browsers due to the TLS 1.2 protocol and the supported cipher suites.
Here’s a list of the RC4 cipher suites that are supported in TLS 1.2 and TLS 1.3:
Supported Cipher Suites in TLS 1.2
Supported Cipher Suites in TLS 1.3
TLS_ECDHE_ECDSA_WITH_AES_128_GCM_SHA256
TLS_AES_256_GCM_SHA384
TLS_ECDHE_ECDSA_WITH_AES_256_GCM_SHA384
TLS_CHACHA20_POLY1305_SHA256
TLS_ECDHE_ECDSA_WITH_AES_128_CBC_SHA256
TLS_AES_128_GCM_SHA256
TLS_ECDHE_ECDSA_WITH_AES_256_CBC_SHA384
TLS_AES_128_CCM_8_SHA256
TLS_ECDHE_RSA_WITH_AES_128_GCM_SHA256
TLS_AES_128_CCM_SHA256
TLS_ECDHE_RSA_WITH_AES_256_GCM_SHA384
–
TLS_ECDHE_RSA_WITH_AES_128_CBC_SHA256
–
TLS_ECDHE_RSA_WITH_AES_256_CBC_SHA384
–
TLS_ECDHE_RSA_WITH_AES_128_CBC_SHA256
–
TLS_ECDHE_RSA_WITH_AES_256_CBC_SHA384
–
TLS_DHE_RSA_WITH_AES_128_GCM_SHA256
–
TLS_DHE_RSA_WITH_AES_256_GCM_SHA384
–
TLS_DHE_RSA_WITH_AES_128_CBC_SHA
–
TLS_DHE_RSA_WITH_AES_256_CBC_SHA
–
TLS_DHE_RSA_WITH_AES_128_CBC_SHA256
–
TLS_DHE_RSA_WITH_AES_256_CBC_SHA256
–
TLS_ECDHE_ECDSA_WITH_CHACHA20_POLY1305_SHA256
–
TLS_ECDHE_ECDSA_WITH_CHACHA20_POLY1305
–
TLS_ECDHE_RSA_WITH_CHACHA20_POLY1305_SHA256
–
TLS_ECDHE_RSA_WITH_CHACHA20_POLY1305
–
If you are wondering how to check if RC4 is disabled, here’s how you can:
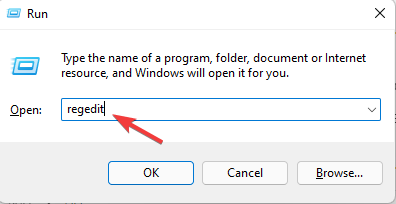
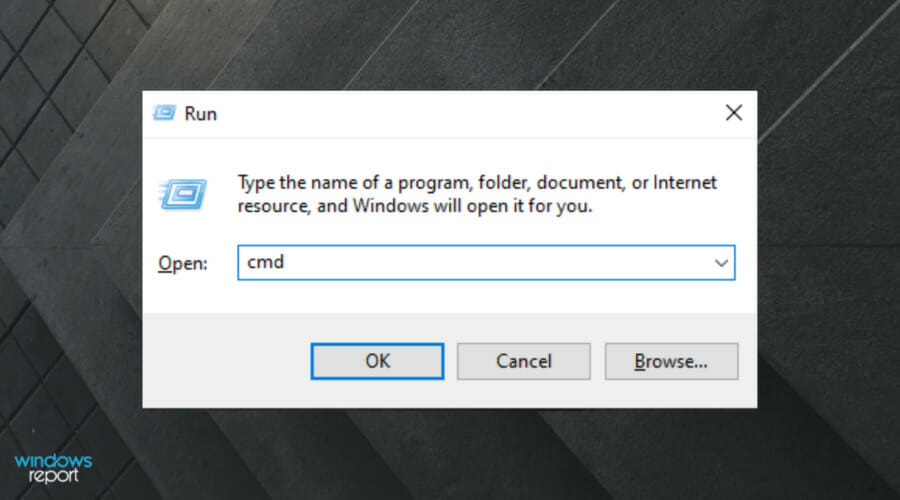
Press the Win + R keys together on your PC to launch the Run console.
Type regedit in the search bar and hit Enter.
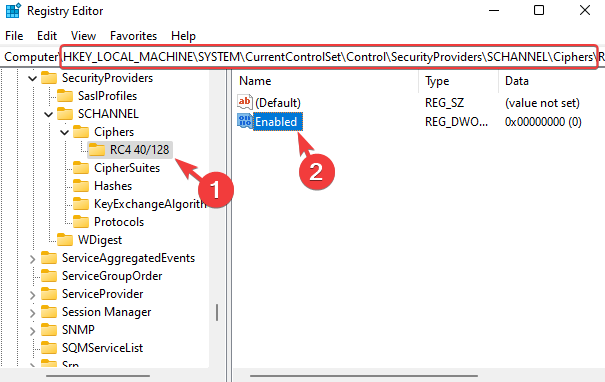
In the Registry Editor, navigate to the below path: HKLM\System\CurrentControlSet\Control\SecurityProviders\SCHANNEL\Ciphers
Now, check that the RC4 40/128 does not exist. If it does, then go to the right side, and double-click on the Enabled entry.
This will open the Edit DWORD (32-bit) Value dialog. Here, set the Value data field to 0. Press OK.
If you see other keys like RC4 56/128, RC4 64/128, and RC4 128/128 exist, then repeat steps 3 through 5 for them as well.
But if you want to enable RC4 in Chrome, Opera One
, Edge, and Firefox, you can follow the below instructions.
1. Enable RC4 in Chrome, Edge, and Opera One using Internet Options
Press the Win + R keys together to open the Run console.
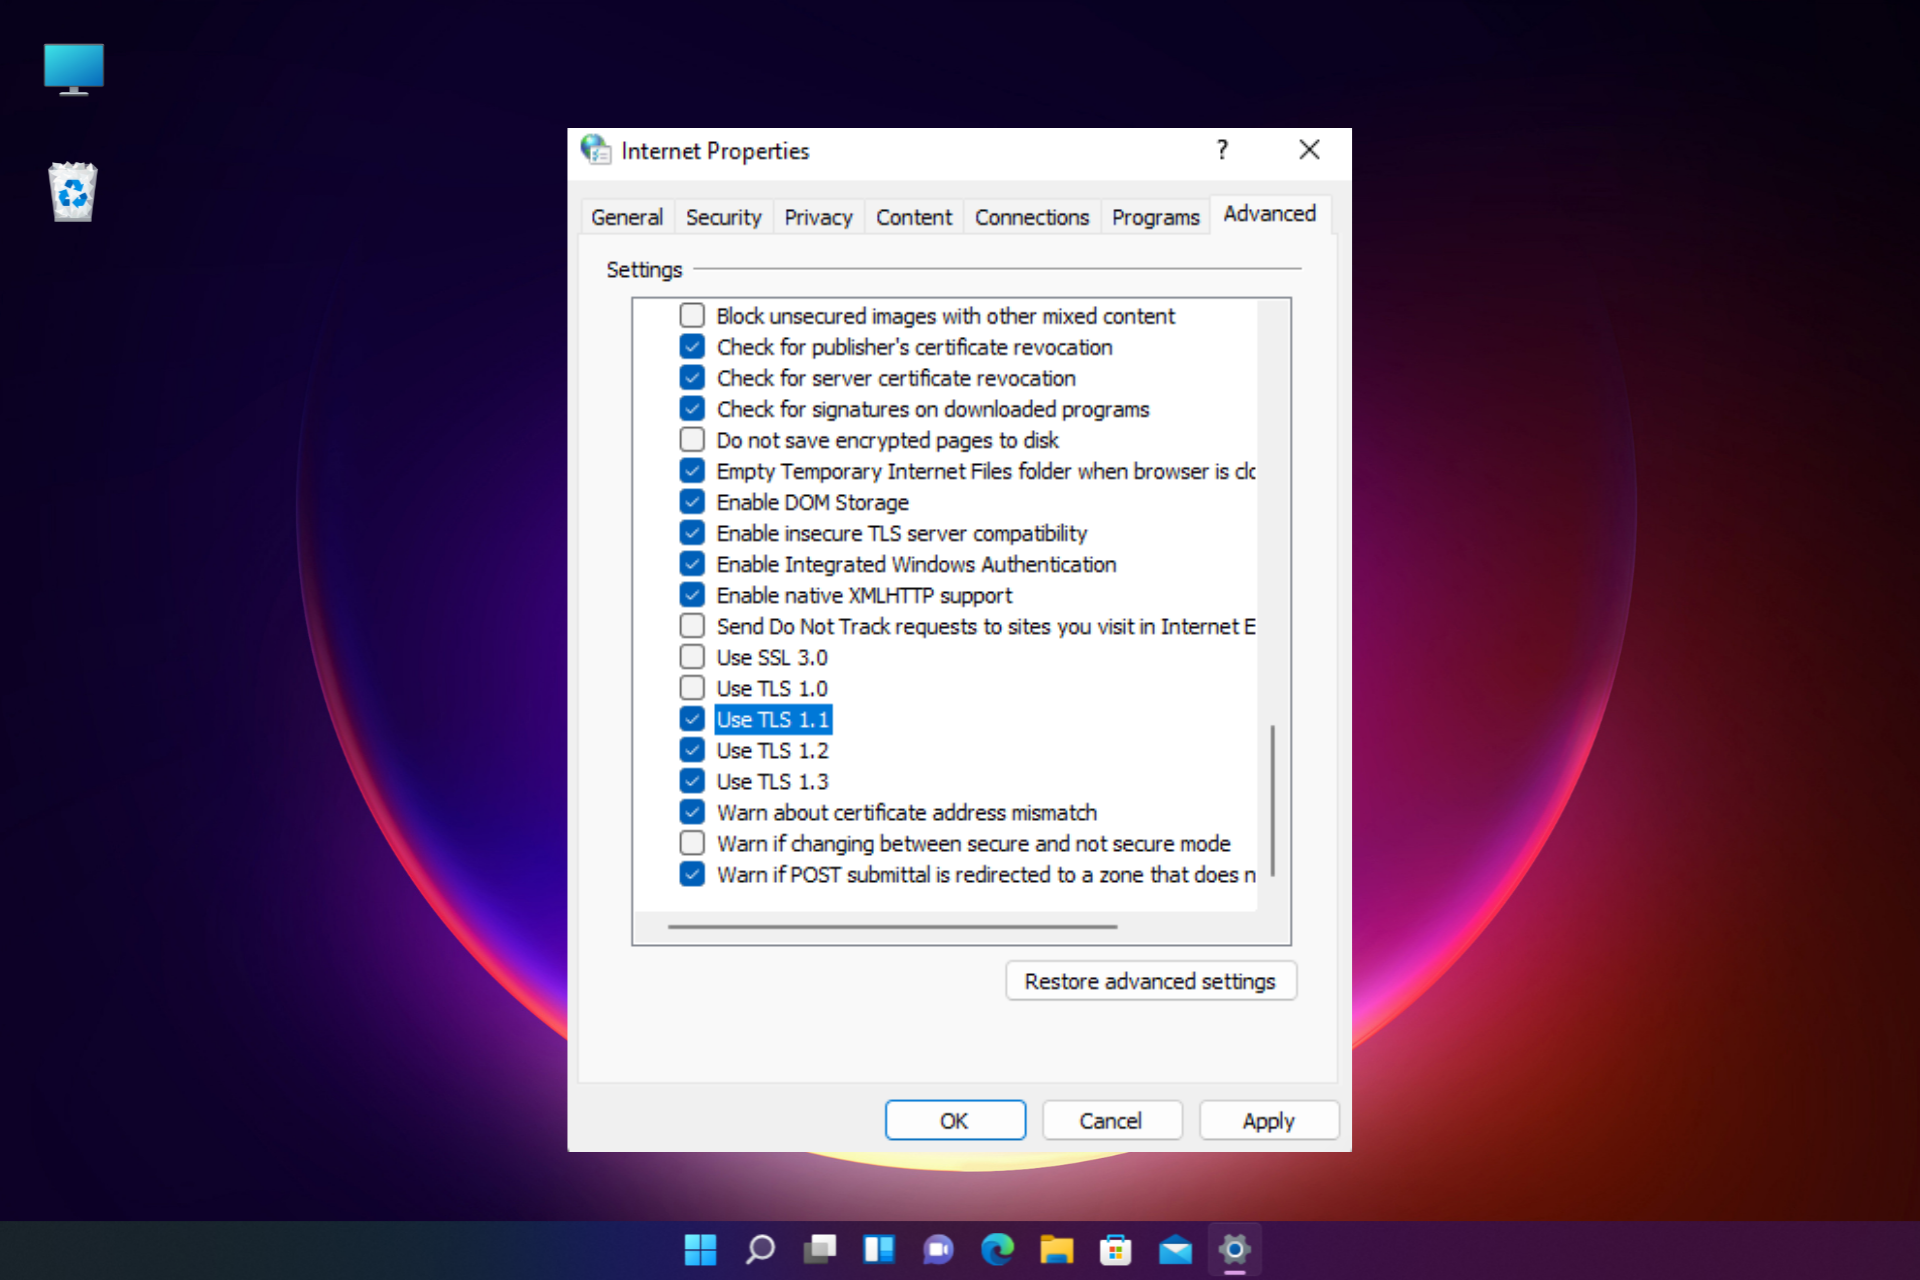
In the search bar, type inetcpl.cpl and hit Enter to open the Internet Properties dialogue.
Here, go to the Advanced tab, and under Settings, scroll down to the Security field.
Now, check the boxes next to Use TLS 1.1and Use TLS 1.2. Press Apply and then OK.
Your Chrome, Edge, or Opera One browsers are now compatible with the RC4 encryption.
NOTE
If your PC supports even the TLS 1.3 protocol, make sure to enable that as well.
2. Enable RC4 in Firefox through about:config
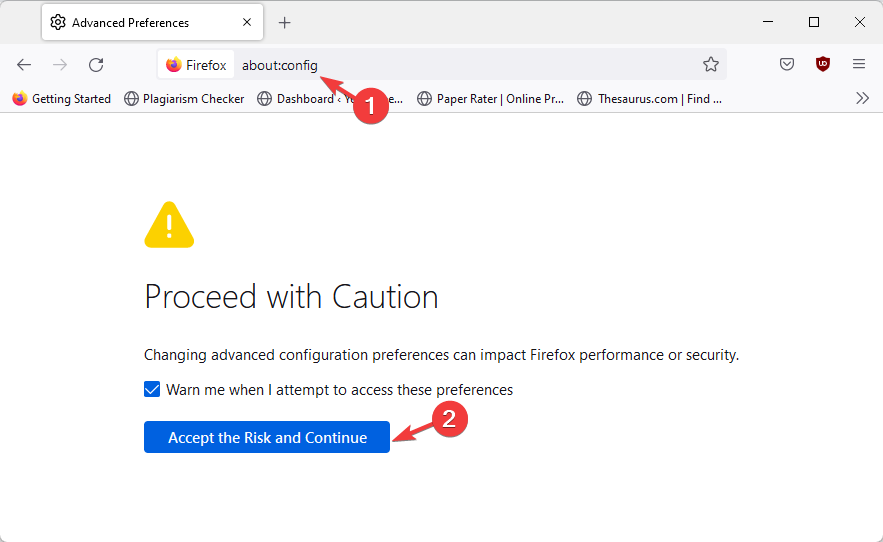
Open Firefox and navigate to the below path: about:config
Next, click on Accept the Risk and Continue.
Now, search for security.tls.version.min and change it to 0.
Next, look for security.tls.version.fallback-limit and change the value to 0.
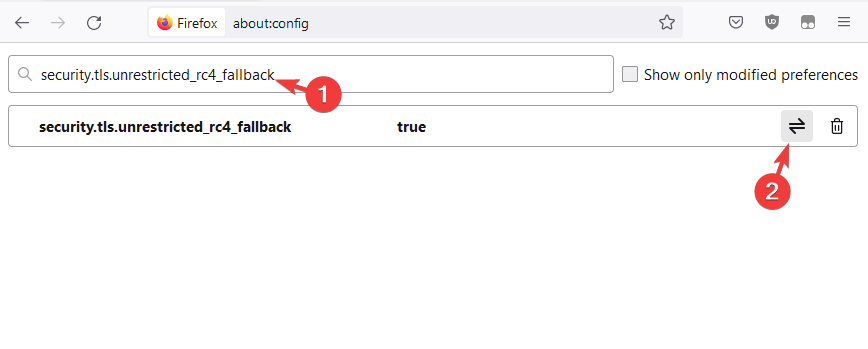
Again, search for security.tls.unrestricted_rc4_fallback and set it to true.
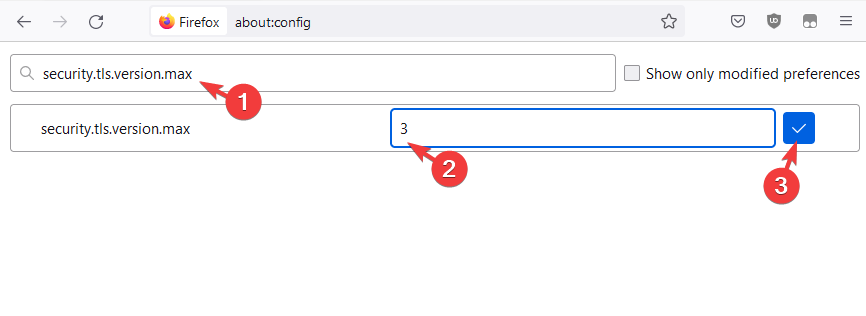
Finally, look up security.tls.version.max and set the value to 3.
Now, your Firefox browser should support RC4 encryption.
If you are using a legacy device and you are in utter need to enable RC4 cipher, you can try the above methods to turn on the TLS protocols that help a browser support the feature.
Apart from that, it’s recommended to steer clear of the deprecated cipher suite to avoid any attacks or exploits.
Microsoft uncovers group that used previously unknown zero days, spyware to target Windows
A group that used previously unknown zero day vulnerabilities and spyware to target Windows has been discovered by Microsoft. The group used the exploits to develop malware to attack banks, consultancy, agencies and law firms in European and Central American regions.
iCloud for Windows can now generate two factor authentication codes
One of the frequent questions we get from users is what browser supports ServiceNow. Since the software can be accessed over the browser, it has become easier to use.
ServiceNow deals with systems that help organizations automate, organize, manage, and improve work efficiency. Also, using the ServiceNow tool allows employees to perform their duties in any way they want. ServiceNow is a cross-browser and cross-platform tool.
Although not all browsers are perfect for using ServiceNow, there are a few that fit well into the preferences of the software.
How do I know if my browser supports ServiceNow?
Most browsers are supported by ServiceNow. However, only a few browsers like Internet Explorer (some versions) and some others are not supported.
More so, only the IE version 11 and up. Edge mode of Internet Explorer is supported. ServiceNow now has requirements it looks for in browsers before giving them the permits to run the software.
Nevertheless, you can go to the official website of ServiceNow to read more about the browsers that are supported and their requirements.
Does ServiceNow work on Mac?
ServiceNow works perfectly on Mac but not with all browsers. However, users can only access ServiceNow on their Mac computer through Firefox (24.6 and up), the latest public release of Google Chrome, and Safari (5.0 and up).
Furthermore, we recommend that users check the ServiceNow FAQ page for more details.
Opera One is one of the fastest browsers on the market, with up-to-date features that will help you browse safely. Moreover, it’s one of the browsers with the smallest system footprint, making a great candidate to carry out tasks on ServiceNow.
The browser lets you organize your tabs in customized workspaces and tab islands, it also includes advanced features like a an adblocker, battery saver and even a native AI.
Opera One
Stay on top of your work with this intuitive and performance-oriented browser!
Google Chrome – Fast and reliable browsing performance
It is a Chromium-based browser by Google. Hence, it has lots of advanced features that help users get the best browsing experience. However, it is one of the best browsers to use for ServiceNow because of its speed and reliability.
Also, there are lots of extensions users can download to improve their productivity online. These extensions are tailored to help with the smooth organization and optimization of the team’s performance.
You can even take advantage of the intuitive interface and fast browsing speed for improved workflow.
Another browser that supports ServiceNow is Mozilla Firefox. Though ServiceNow doesn’t support Firefox on all operating systems, it is one of the best and most reliable browsers for it.
Likewise, it has a great browsing speed and user privacy. These make the Firefox browser to be one of the best options that support ServiceNow.
Also, the plug-ins available are similar to the Google extensions and as such, can be utilized for improved workflow.
Safari is the default browser for Apple devices. It is a fast, secure, and reliable browser. More so, it comes with advanced features like extensions and customization.
Further, user privacy is at the forefront of Apple’s hard-centric data protection program. Hence, the Safari browser will ensure your team’s data is protected while using the browser for ServiceNow.
Microsoft Edge is a fast browser that is available across different operating systems. It is one of the best in the market. Some of its features are speed, privacy, multimedia content features, etc.
Being a Chromium-based browser, it can also support ServiceNow without hassles. From the extensions available to improve workflow to the data tracking and user data protection services, it is a good browser for your team.
Nowadays, application development companies are making different versions of their products, for instance, having a native app version and a web browser app.
However, web applications like Silverlight require a fast, stable, and reliable browser to support them. Likewise, not all browsers support Silverlight. Therefore, we have this article to help you choose the best browsers for it.
Silverlight is an application by Microsoft corporations. It is a development tool that helps you write, utilize, and run web browser apps and native applications. It is available over different operating systems like Windows, macOS, and Linux. Also, it can be used for streaming videos, viewing graphics, and media content online.
Furthermore, it is a cross-browser & cross-platform plugin. Also, Silverlight was discontinued in early May 2022. It is causing some issues with users accessing it. However, there are ways you can still use Silverlight after discontinuation.
How do I use Silverlight after June 2022?
After June 2022, the only official option that Silverlight recognizes to use is Microsoft Edge’s IE mode. The IE mode of Microsoft Edge is an integrated mode that allows you to access the services of Silverlight.
Although Silverlight has limited access to a few means through the web, browsers like Internet Explorer 10/11 and Microsoft Edge’s IE mode are authorized.
What is replacing Silverlight?
Most devices across different operating systems depend on advanced media systems that help you get the best experience. However, they don’t necessarily need Silverlight because of the fast developments in the browser app industry. After Silverlight was retired, lots of alternatives came up.
Furthermore, several alternatives can successfully replace Silverlight. Software like Blazer, Adobe AIR, React JS, and HTML5 are replacements for Silverlight after its discontinuation.
However, HTML5 is one of the most reliable technologies for web browser media. After Silverlight was retired, companies like Netflix switched to using HTML5 video, and it’s been working fine till now. Also, Adobe AIR is a good alternative for Silverlight. It is one of the best for building cross-platform applications like apps for desktops and mobile.
Opera One is one of the best browsers in the market. It has been around for a long time and has lots of users. Its major features are a customizable browsing interface, fast action, smooth internet connection, and secure browsing session.
However, it has features that make it a perfect browser that support Silverlight. Likewise, Opera One can access multimedia content easily across different operating systems.
Opera One
Access Silverlight without errors with this reliable and secure browser!
Internet Explorer is one of the best browsers in the market. It is fast and flexible to use. Also, it comes with a simple user interface that makes it accessible to every user.
Some features of Internet Explorer are browser security, fast and reliable internet access, customizable user interface, and user privacy. Also, the IE browser is one of the few browsers that support Silverlight.
Silverlight doesn’t support all versions of Chrome browser. However, old browser versions can run the software smoothly because they were certified before discontinuation.
Nevertheless, there are ways to configure your Chrome browser to support Silverlight. Likewise, Chrome has the best extensions for online streaming. It means it has the best Microsoft Silverlight plug-in for Netflix and other streaming platforms.
Mozilla Firefox is another amazing browser that supports Silverlight. As said earlier in Chrome, the latest versions of browsers don’t work smoothly with Silverlight.
So, to use Silverlight properly on your device, you need to download any version of Firefox before 2022. It’ll help you work smoothly with the software because it supports and works well with it.
Some features of Mozilla Firefox are speed, user data protection, and privacy. Also, it is Chromium-based and has a vast repository of extensions and plugins.
Edge is the default browser for Windows devices. It is available across different operating systems like macOS, Linux, etc. Likewise, it comes with lots of features that make it one of the best choices of browsers to use for Silverlight.
Also, it has a host of extensions users can download and install. Furthermore, it has a very customizable interface that permits the users to configure their browser how they want.
Silverlight requires a browser with a fast browsing speed and a high protection system to support it. Hence, Microsoft Edge fits into the preference of the browser for Silverlight. It also supports it. Officially, the IE mode of Microsoft Edge supports Silverlight, unlike other browsers that were affected after it was retired.
Silverlight is a unique software that is available across different operating systems like Windows. However, it is not accessible to all versions of Windows because of its requirements. Although Silverlight is not necessary for Windows 10/11, its need can’t be neglected.
There are some platforms and sites that require Silverlight to play multimedia content. So, it is an additional feature to have on your computer as it’ll help you enjoy more convenience in accessing different content.
Nevertheless, we recommend that users get the Silverlight that is compatible with their devices and operating systems. Also, using the browser that supports Silverlight is essential which is why we have discussed them earlier.
Likewise, installing Silverlight can be difficult for some users. Hence, we have put together a simple guide to put you through how you can install Silverlight on Windows 10.
Leave your comments and suggestions below in the comments section, we’d like to hear from you.
Starting in 1998, the Yu-Gi-Oh! the franchise released a number of online multiplayer card games based on the same name Japanese Maga series that used to be issued until 2004.
Until now, there are 56 official video games, that can be played on various gaming consoles (Playstation, Nintendo, XboxOne), and certain games were also made available for PC, iOS, and Android.
What is the best online Yu-Gi-Oh game?
Yu-Gi-Oh! Duel Links
Characters from across the entirety of the Yu-Gi-Oh! Duel Monsters anime series are included in Duel Links. Seto Kaiba developed the virtual reality platform known as Duel World with the intention of bringing together the most skilled duelists for a match.
To begin, players can choose whether they want to take on the role of Yami Yugi or Seto Kaiba. As the player continues to win duels, more playable characters, including the character they did not select at the beginning of the game, become available for selection.
Yu-Gi-Oh! Dueling Nexus
Dueling Nexus is a Yu-Gi-Oh! online game that is completely free to play. Because Dueling Nexus is automated, it is the ideal online platform for testing cards and learning the game.
Not only is it difficult to perform a move that is considered to be invalid, but it is also impossible for your opponents to cheat.
Yu-Gi-Oh! Master Duel
Yu-Gi-Oh! Master Duel is a free-to-play digital collectible card game that was developed and released by Konami for Microsoft Windows, Nintendo Switch, PlayStation 4, PlayStation 5, Xbox One, Xbox Series X/S, Android, and iOS. The game is based on the Yu-Gi-Oh! Trading Card Game.
The card game Yu-Gi-Oh! has been faithfully recreated in this video game adaptation, which keeps all of the more recent game concepts presented up to the year 2021.
The game strictly adheres to the actual OCG ban list, but with a few minor tweaks here and there owing to the fact that not every card is currently accessible.
What is the best browser for gaming?
For the best experience, we recommend using Opera GX as the main browser. Apart from the main Opera browser, Opera GX brings a couple of exclusive features to enhance the gaming experience.
Namely, it comes with a built-in panel to limit RAM and CPU usage for better performance. It also includes a free ad blocker and VPN, to secure your activity while online.
Opera GX
Take advantage of the amazing set of gaming features that this browser has to offer.
If you’re not convinced yet, maybe the fact that Opera GX was awarded for its interface and user experience design will convince you.
Yu-Gi-Oh! Duel Arena
Yu-Gi-Oh! The Duel Arena was the official Yu-Gi-Oh! Trading Card Game simulator that could be played online. It came equipped with an automated dueling system that allowed users to compete against one other via the internet.
The virtual cards in the game were regularly updated to reflect the most recent additions to the collectible card game that they were modeled after.
How can I play Yu-Gi-Oh on my computer?
The latest release is Yu-Gi-Oh! Duel Links, which was initially available for PCs and smartphones; it was also released for Nintendo and this year it’s time for Playstation 4 and Xbox One.
The game falls into the same category of strategy collectible card games as any other previous launches.
And, similarly to other versions, this one is also for free, so you can duel with players all around the world. On all available platforms, the game contains in-app purchases of card packs to allow one to advance in the game. This way, the game can continue endlessly.
The game brings newly designed, intuitive controls optimized for PC and is user-friendly enough for beginners, although some users say that one should have a little knowledge of the gameplay to enjoy it fully.
Veterans, on the other hand, have found the new game somehow nostalgic, but they appreciate the stunning 3D animations and the sound effects featuring the voices of the characters from the original shows.
You can easily download it from Steam, or search it in your Android’s Google Play app or App Store for iPhone users.
The best way to play the Yu-Gi-Oh! game online with no download is to follow a website that offers emulators for the specific game. Such are emulator games that offer a plethora of Yu-Gi-Oh! games.
There, you will find one of the best Yu-Gi-Oh browser games that have been archived and kept for fans around the world.
In Yu-Gi-Oh, players follow the speed duels card games format, starting with a 4-card hand, and playing from the main deck of 20-30 cards.
In successive duels and stages, players have to win against regular players to access the Gate where they can duel legendary characters such as Yugi, Kaiba, Joey, or Mai.
The new game also brings the possibility to build your very own deck with cards you collect in the game and take on opponents, as well as a PvP mode where players can duel in real-time with friends or take part in random matches.
Have you played this version of Yu-Gi-Oh! online yet? Leave us your feedback in the comments section below.
Settlers of Catan was originally a table-top board game invented by Klaus Teuber in 1995. Much like the Age of Empires game, it’s a strategy game where the objective is to establish a settlement that’s more prosperous than your opponent(s)’s.
Its concept and design make it prime for online play. But is there a browser-based version of the game and if so, how do you play it with your friends? In this guide, we’ll answer this question and more.
However, before you continue with the rest of this article, you need to ensure that you’re optimized to run online games.
Is there a way to play Catan online with friends?
There are indeed ways to accomplish what you want. Catan Universe is the definitive, digital, cross-platform adaptation of the classic board game CATAN.
You can play the classic board game, the card game (Rivals for CATAN), and use the most essential extensions all in one convenient app, whenever and anywhere you choose.
Moreover, you can participate in thrilling duels against other players from all around the world as you travel across the universe of CATAN. Your computer screen will feel just like a genuine game table thanks to the accurate graphics that have been faithfully recreated from the original.
How can I play Catan online with friends?
The best way to play the modern game of Catan online is through Catan Universe. It seems to have the best graphics and features.
Furthermore, browser players can compete against mobile players. Catan Universe allows up to six players.
The base multiplayer version of the game is completely free. You can create your own avatar and change the theme of the board. All you have to do is sign-up and register an account.
However, Catan Universe does allow you to test the game without registering an account. Its features a bit more limited if you decide to play account-free.
Unfortunately, like most computer games, it does come with a set of system requirements. Make sure that your PC meets them before trying to play the game.
Quick Tip: Use a gaming-optimized browser. We recommend Opera GX because it’s built primarily with gamers in mind. Like the base version of Opera, it comes with a built-in VPN and adblock.
Moreover, Opera GX lets you monitor your RAM and CPU in order to avoid performance problems. The browser has quick access to social apps for gamers like Discord and Twitch.
Opera GX
Get the best out of the Catan Universe with this fast and modern browser!
Close any dialogs that appear and wait for the game to load.
Click the Register button.
Enter your details on the next screen and accept the terms of use and privacy policy, then click the Register button.
Catan Universe will send you an activation code via email. Fish for it and enter it into the Catan Universe activation screen. This is how to play Catan online.
Once your account is successfully activated, Catan Universe will give you a virtual tour and tutorial to help you familiarize yourself with the game.
All your friends need to create accounts before you can play with them. If you find that you don’t like Catan Universe very much, there is an alternative.
Catan Universe is the best way to play Catan online, however, there is another outstanding option. Colonist.io is a less graphically taxing alternative to Catan Universe. It is by no means better than Catan in terms of design or execution but some players appreciate its simplicity.
It doesn’t require as much power to run as Catan Universe so it’s compatible with more systems. You get the settler’s board, dice, and figures. There are no fancy avatars here.
Up to four players can play at a time and chat with each other. If your friends are too busy to play with you, you can play against bots or fish for people to play against in the lobby.
In addition to this and most importantly, it’s completely free. It has a thriving community behind it. All of these points make it one of the best online games.
In this guide, we demonstrated how you can play the Catan game online. Games like Catan Universe can be resource-heavy at times, so make sure you play it using Opera GX for the best experience.
How do you prefer to play Catan, virtually or on an actual physical board? Please let us know down in the comments section. As always, thank you for reading.
It can be pretty annoying to download the WebP format when trying to download images. Although the WebP was meant to replace other image files, it hasn’t gained the support of other browsers.
The WebP image format was meant to ease compression without losing image qualities for site owners. Further, most site owners still maintain JPEG or PNG as their go-to format.
So, if you were to mistakenly download the WebP, how do you relate to them or view them? This is what this article will seek to expatiate on.
Is WebP supported on all browsers?
Primarily, Google Chrome supports the WebP format. You are more likely to download it from Chrome than other browsers. Also, you need the latest versions of Chrome for you to load them.
Furthermore, browsers like Opera One, Firefox, Edge, Safari, and brave are among the early adopters also.
These browsers also support WebP and the lossless, lossy, and animated formats. It is important to note that all these browsers require their latest versions.
Opera One is one of the best light browsers for Windows, offering an unprecedented number of features and customization tools. Together with Chrome, Opera One is the earliest adopter of the WebP.
Although its support is still limited as some parts of its versions do not support it. However, the ones that do harnesses the turbo mode for faster loading.
Also, there are extensions to help access the images easily without having decompressed or converted them. Plus, this browser comes with a built in AI.
Opera One
Check this practical browser and get into its features or integrations with WebP format.
UR Browser is a modern web browser, renowned for its flexibility, ease of use, privacy protection, and more significantly, its fast download speed.
Although not among the early adopters, the UC browser has shown support for WebP image format. You can simply download and view it as intended on the browser.
Also, its privacy protection and malware scanner features give confidence in data protection while viewing the WebP.
Its lightweight and clutter-free interface also contributes to its success in viewing WebP files.
UR Browser
Go with this high-speed browser that offers unbreakable privacy and support for WebP files.
Chrome is widely seen as the best browser today concerning its loading/download speed, interface quality, and, more importantly, its relative ease of use.
Its unmatched flexibility to support all platforms makes it one of the worthy browsers for WebP. It can decompress without affecting the original quality of the WebP images.
You can swiftly view the images without hassles once they are downloaded.
Firefox has always been the perfect alternative to Google Chrome. They share a lot of similar features and supporting WebP is one of them.
Also, Firefox is also very secure with automatic updates and protection against any malware. Hence, you cannot be afraid of downloading the WebP files.
Microsoft Edge is also among the great browsers that support WebP images. This browser has tracking protection and security that screens websites and downloads for suspicious activity.
Also, since it is chromium based, it can easily view the images in their original format.
Further, the simple and clutter-free interface makes everything else worthwhile. This helps the loading speed and image viewing as meant to be in the gallery.
Most image editors are capable of opening the WebP file. Just load the image with the editor and you can view them. Also, you can open WebP files on Windows 11 in no time.
Besides, browsers like Opera One, Google, Firefox, and others can open the WebP files. Since they are primarily web pictures, so it is easy for browsers to access them. Alternatively, Microsoft Paint and Apple preview can also be used to open the WebP files.
These are the best browsers that support WebP files. You can easily download and open the files without needing to convert them to other image formats.
Although the adoption of the WebP format is still in the early stages, it is considered the ideal go-to for the future.
Google Chrome is a great web browser, but even great browsers encounter issues from time to time. Speaking of issues, many users reported that they can’t find the Chrome menu button in Chrome.
This is a minor but inconvenient problem, and in today’s article, we’re going to show you how to fix it properly.
Where is the menu button in Google Chrome?
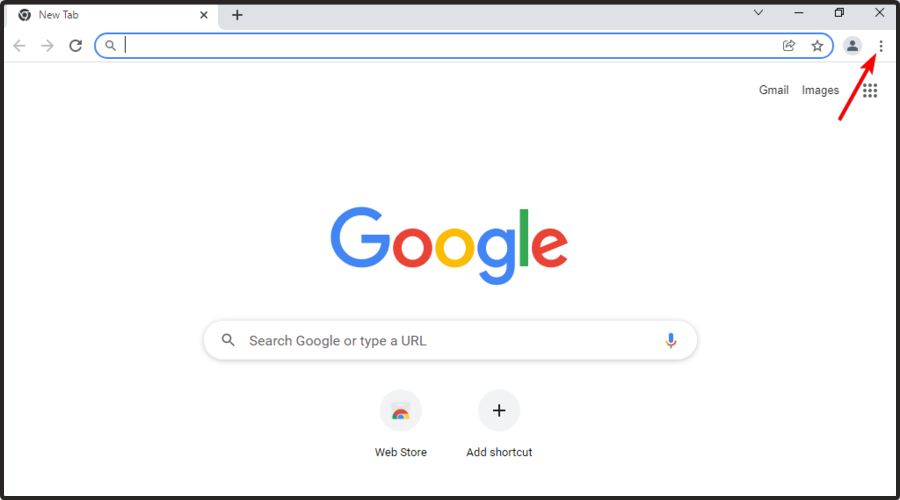
The Google Chrome menu button can be found in the top-right corner of any Chrome window. It looks like a three-dot vertical icon that you can access to get Chrome’s settings and options.
Why is the menu button missing in Google Chrome?
There is a possibility that Google Chrome may soon receive an upgrade. The user interface of Chrome does not conceal any buttons since an update is in the works; nonetheless, getting the update may resolve whatever issue is bothering users.
Just like any other software, Chrome might experience issues from time to time; however, restarting the browser can cure any issues. First ensure that all instances of the program have been terminated, and then restart your computer.
You might try turning off extension support. It is possible that you have an extension loaded that alters the user interface of Chrome to the point that the menu button is no longer visible.
Note that the solutions presented below will prove useful if you were looking for the following as well:
Chrome settings button is missing
Can’t find Chrome settings button
Chrome settings button is gone
Google Chrome buttons missing
Chrome menu button is missing
Chrome menu button is gone
Chrome menu button lost
Without further ado, let’s see how to get back the Chrome menu button and start browsing the Internet again. Follow along!
Quick Tip: Instead of using Chrome, consider a more stable browser like Opera One. With its built-in adblocker, it will certainly load pages faster. Regarding security and privacy, it has a free unlimited VPN.
As for additional features, it has a pop-up video player, built-in messengers, and social media apps as well as advanced tab management that lets you group tabs into individual workspaces.
Opera One
Improve your work efficiency with dedicated features for productivity!
Open Chrome and paste the following address in the search bar: chrome://settings/help
Wait for Chrome to check whether there are any updates available.
If you get an Update button, press it and restart your browser afterward.
This usually occurs if there’s a new update that needs to be installed, and as soon as you install the update, the button will appear and you will have access to Chrome’s menu of advanced settings.
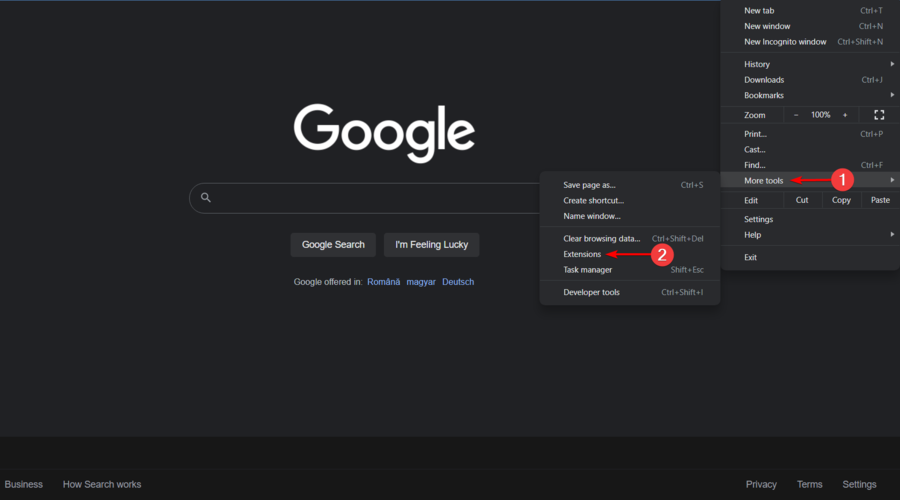
In Google’s address bar enter the following location and press Enter: chrome://extensions/
Disable your extensions by clicking the toggle button next to them. You might want to disable them one by one and check whether the button reappeared to see which one is the culprit.
The missing menu button in Chrome can be a problem, but the issue can be fixed simply by following the above three solutions.
Chrome does not have a standard menu bar; nevertheless, you may access Chrome’s menu by clicking the three vertical dots in the top-right corner of the Chrome browser.
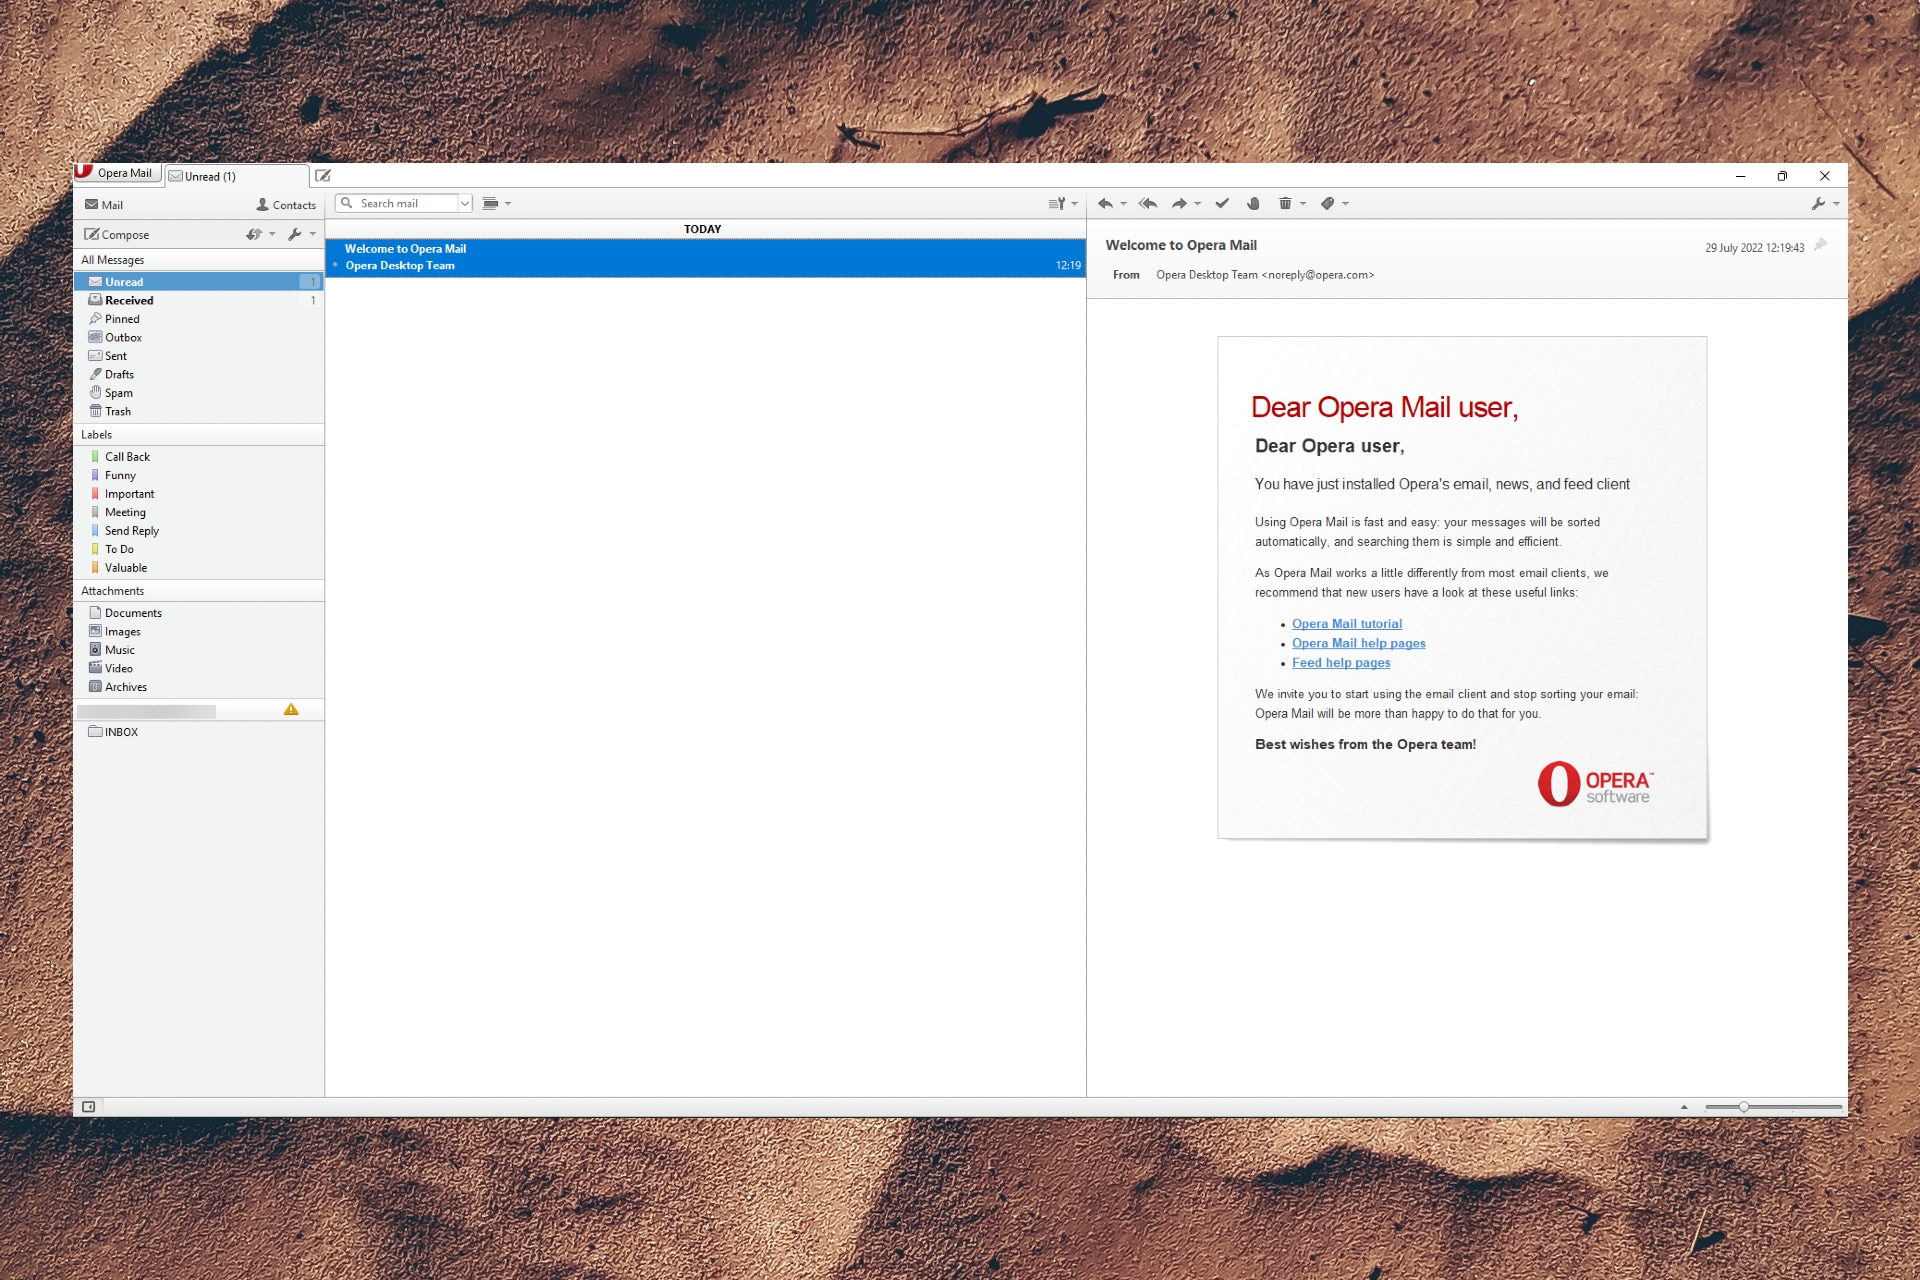
Many users remember Opera email client, and they are wondering if it’s possible to run Opera Mail in Windows 11. Today we’re going to answer this question, so let’s get started.
Is Opera Mail still available?
Both Opera Mail software and service have been discontinued. However, the client is still available for download.
There are third-party downloading websites that provide the link to install Opera Mail for Windows and macOS. However, be sure that the site you are downloading from can be 100% trusted. There are many scam websites that may seem reputable but are full of malware.
Make sure to research a site before downloading anything from it to avoid cyber-attacks. It’s recommended to get a program directly from its source if you can.
Is Opera Mail good?
Opera Mail was a decent client back in its day, but since it’s not in development for 8 years, it’s not safe to use, so we wouldn’t recommend using it on daily basis or any important work.
What is the alternative to Opera Mail?
Any other modern email client is a superior alternative to Opera Mail. If you can’t pick the one, don’t miss our guide on the best email clients for Windows 11.
We also have a great guide on Opera GX privacy error that can occur when checking emails, so don’t miss it.
If your microphone is not working in Opera GX, you won’t be able to participate in any voice calls, and this can be a major issue. However, fixing this is simpler than you think.
Why is my microphone not working on Opera?
This issue occurs if the websites don’t have the permission to access your microphone. Your privacy settings can also cause this issue.
How do I fix the Opera browser if my microphone is not working?
If you’re having this issue only when using the Discord sidebar, try removing and adding it again. Also, check if your microphone isn’t muted.
1. Grant permissions to use Microphone to the site you are accessing
Make sure that you clicked allow when accessing the site that wants to use the microphone.
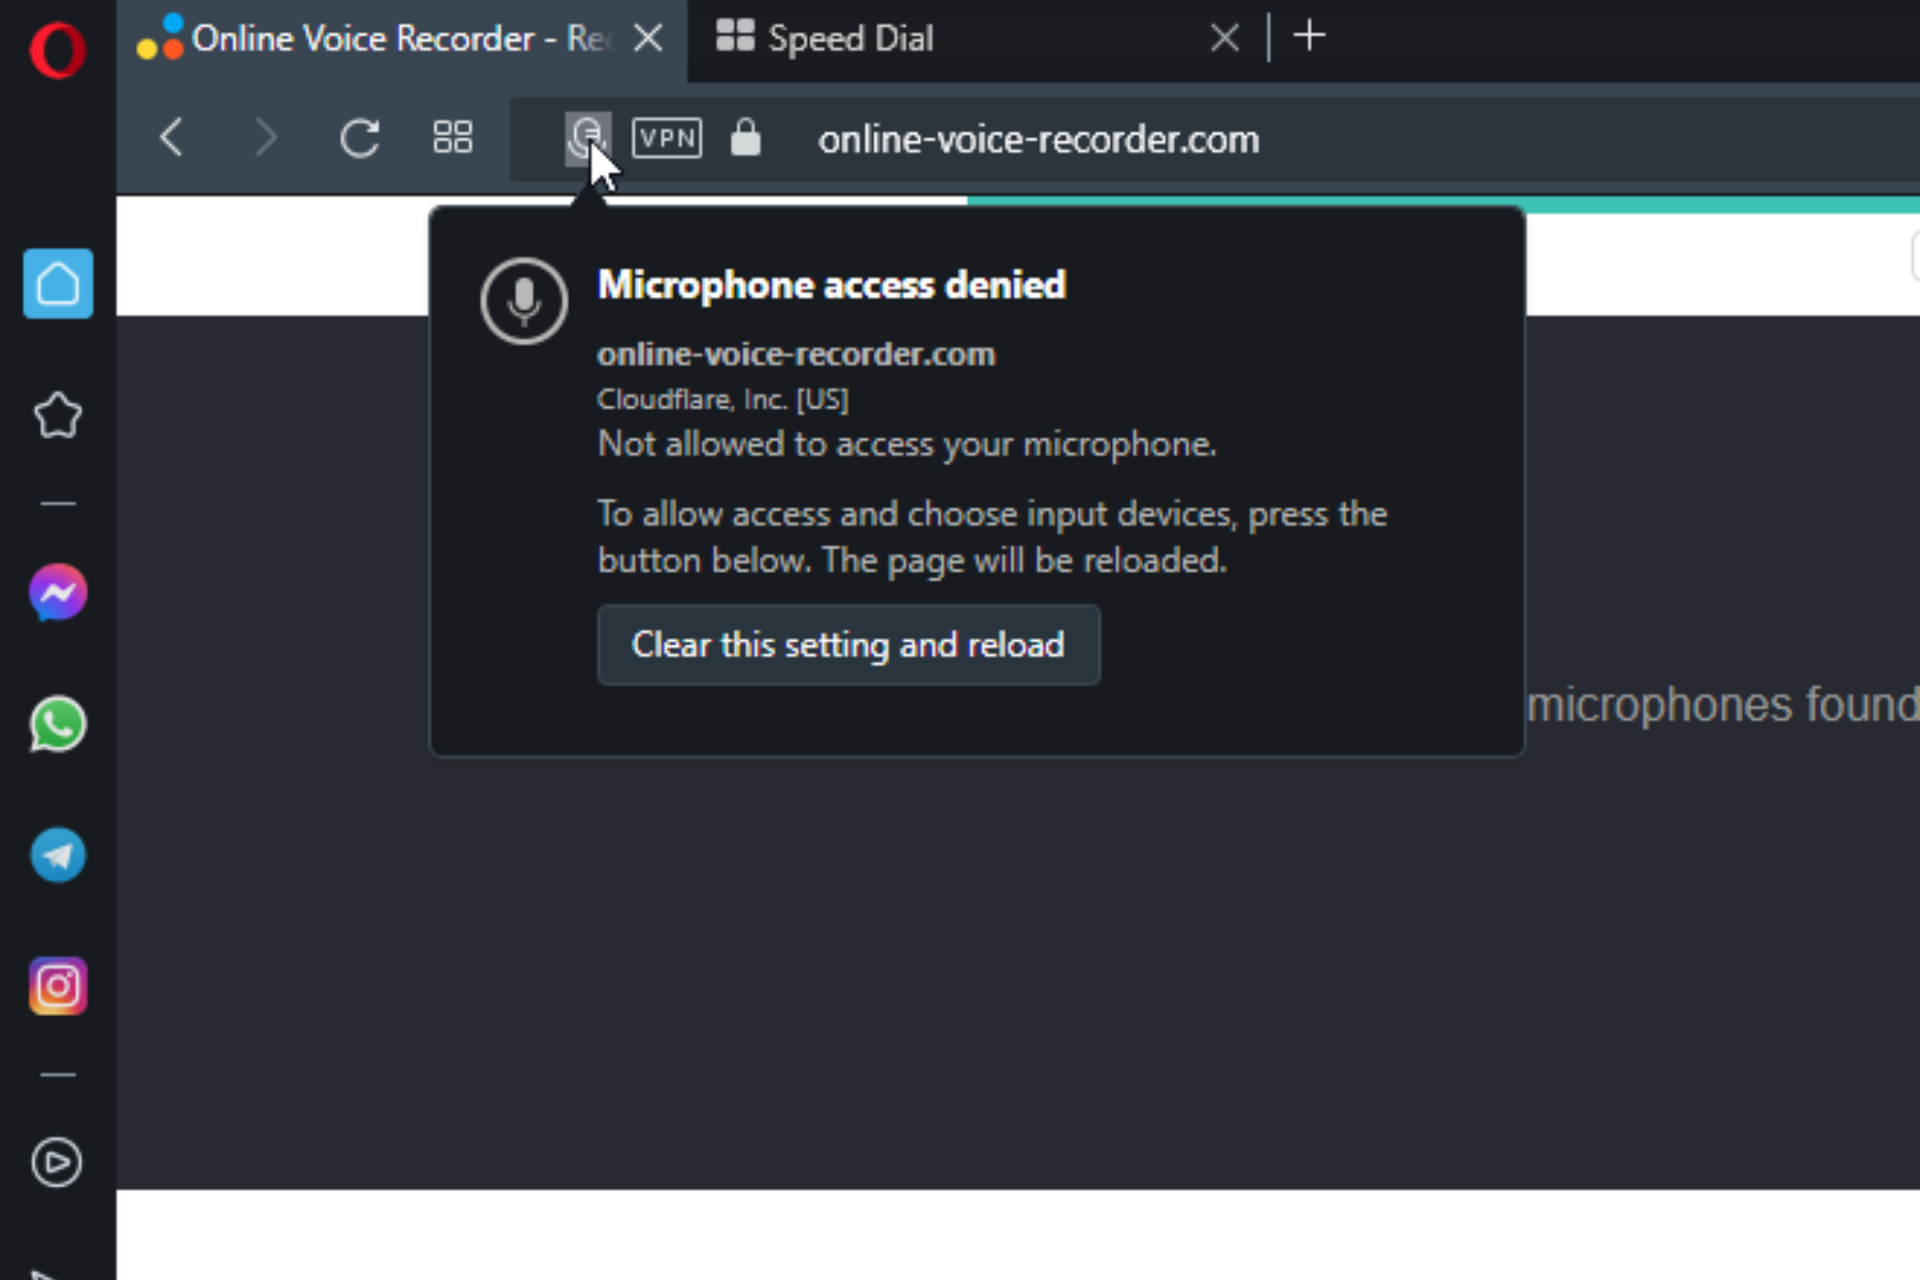
If not, click on the microphone icon on the address bar of the Opera browser.
Select Clear this setting and reload.
Click Allow when asked if the site can use your microphone, as shown above.
2. Make sure website microphone access isn’t blocked
Open Opera and navigate to: opera://settings/content/microphone
Next, make sure websites are allowed to access the microphone.
Lastly, remove all websites from the Not allowed to use your microphone section.
3. Change privacy settings
Press the Windows key + S and type microphone. Choose Microphone privacy settings.
Click Change in the Allow microphone access to this device and enable it.
Lastly, enable Allow apps to access your microphone.
Click the Windows start icon and then click on the Settings gear.
Select System on the menu icons.
Click on Sound and then scroll down to Input.
Using the dropdown button, ensure the correct input microphone is selected.
5. Set the default Microphone on Opera browser
Click the menu icon on the top right corner and then select Go to full browser settings.
Select Privacy and security on the left-hand side.
Click on Site settings.
Scroll down and click on Microphone.
Under Microphone, click on the dropdown menu and select the same microphone set on the system settings in solution 4 above.
How do I enable my mic in Opera GX?
This is pretty simple to do, and we explained how to do it in our Solution 2.
As you can see, you can easily fix the Opera browser when the microphone is not working. This isn’t the only audio problem and many reported that Opera has no sound as well as that Opera GX sound is not working.
If you found a different solution, please share it with us in the comments section below.
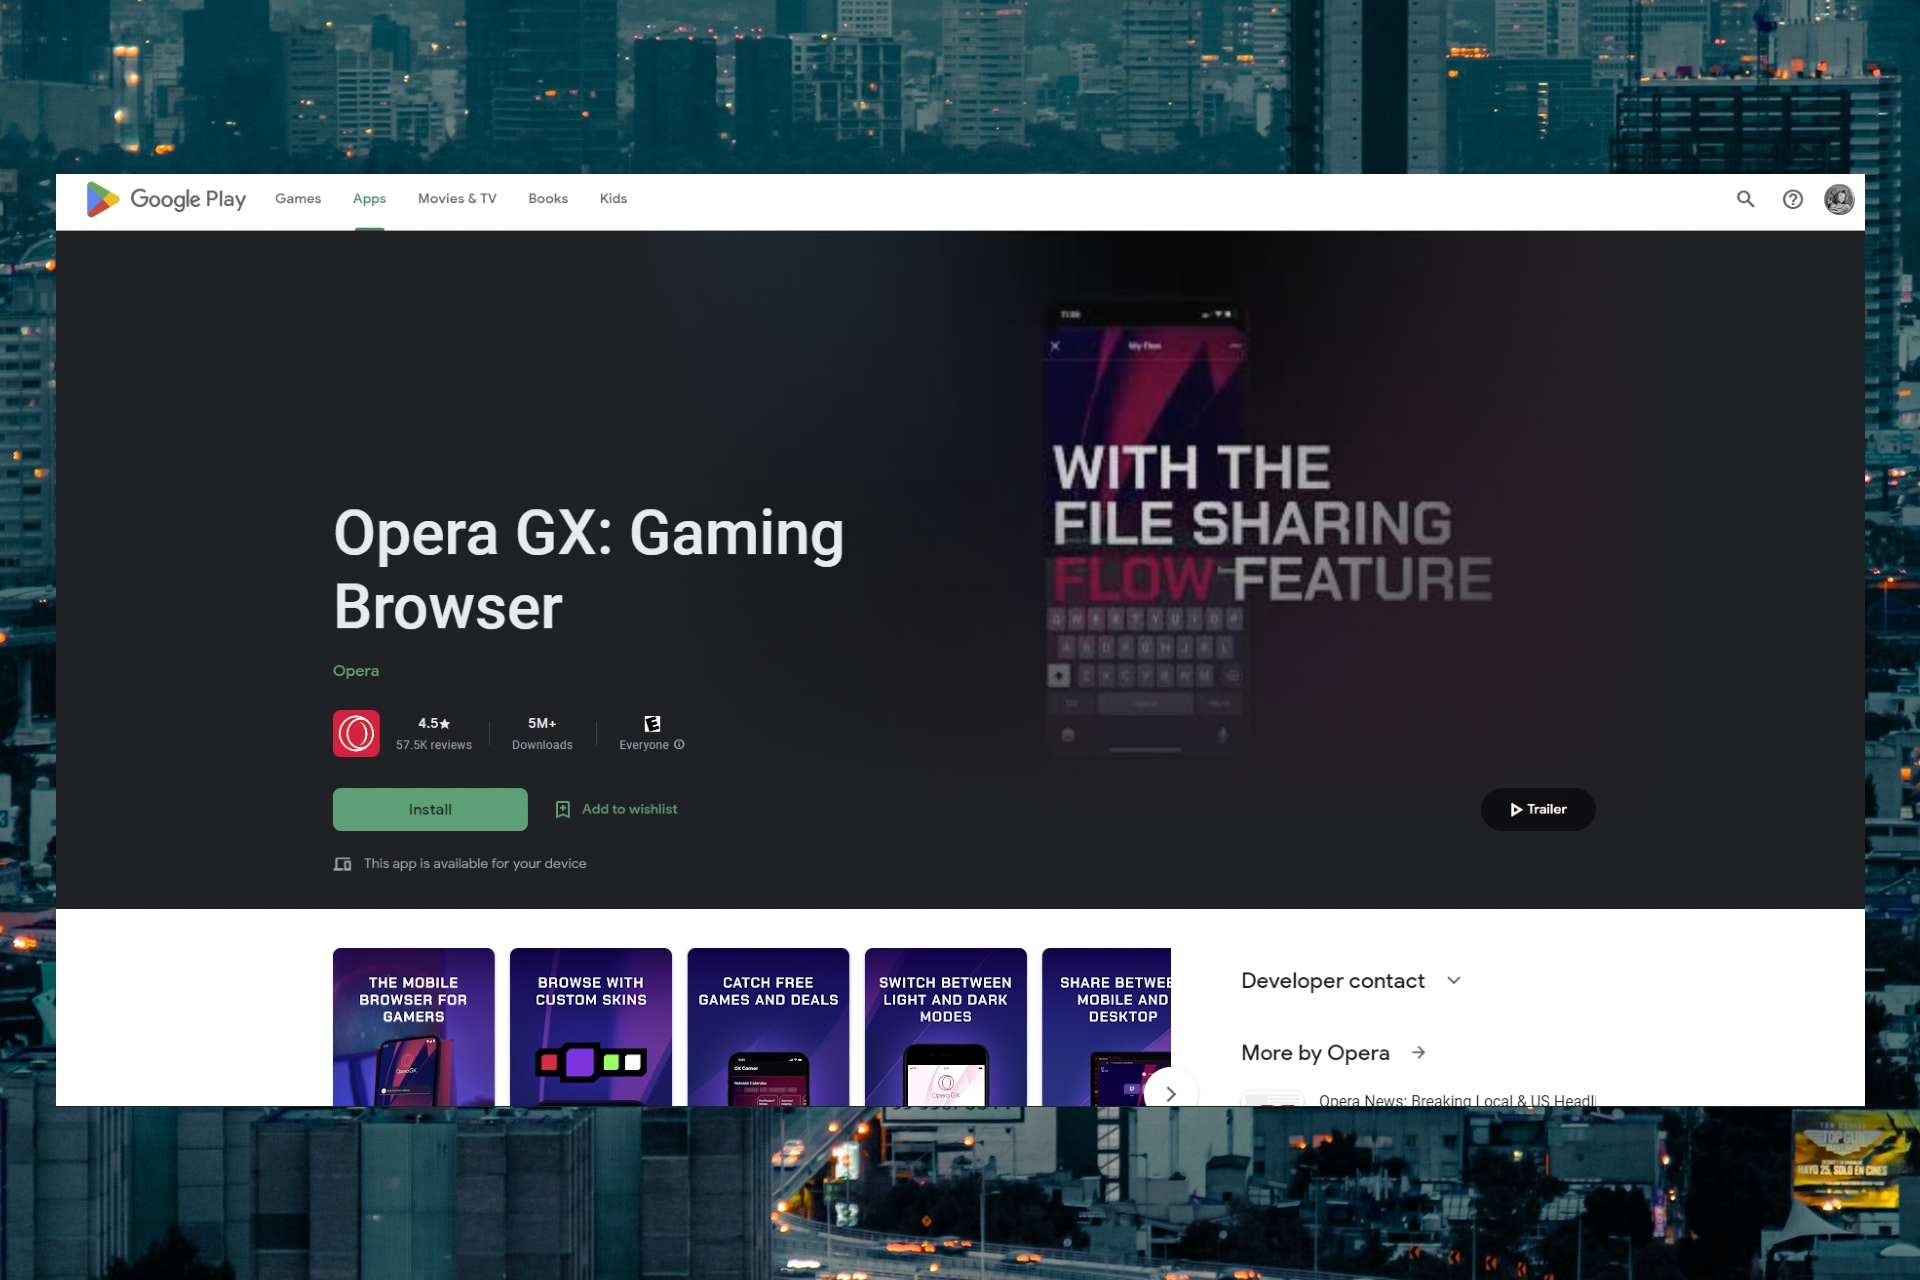
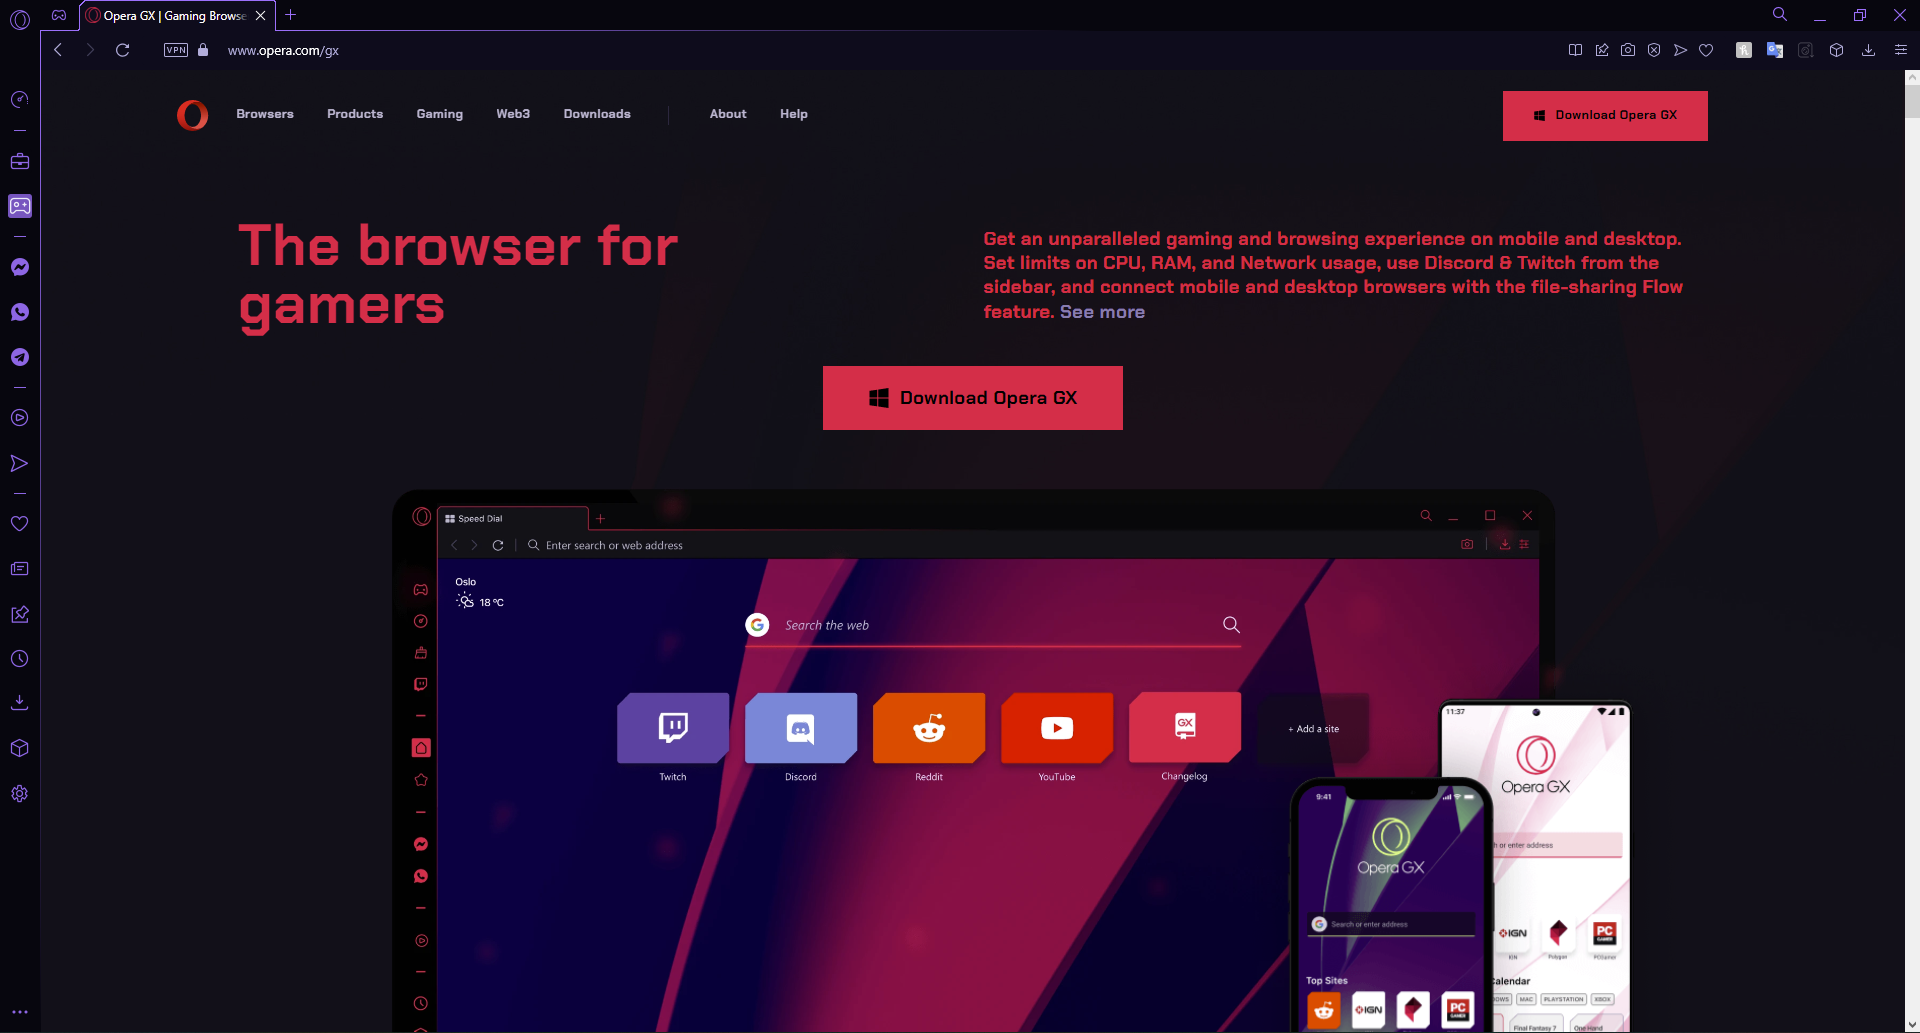
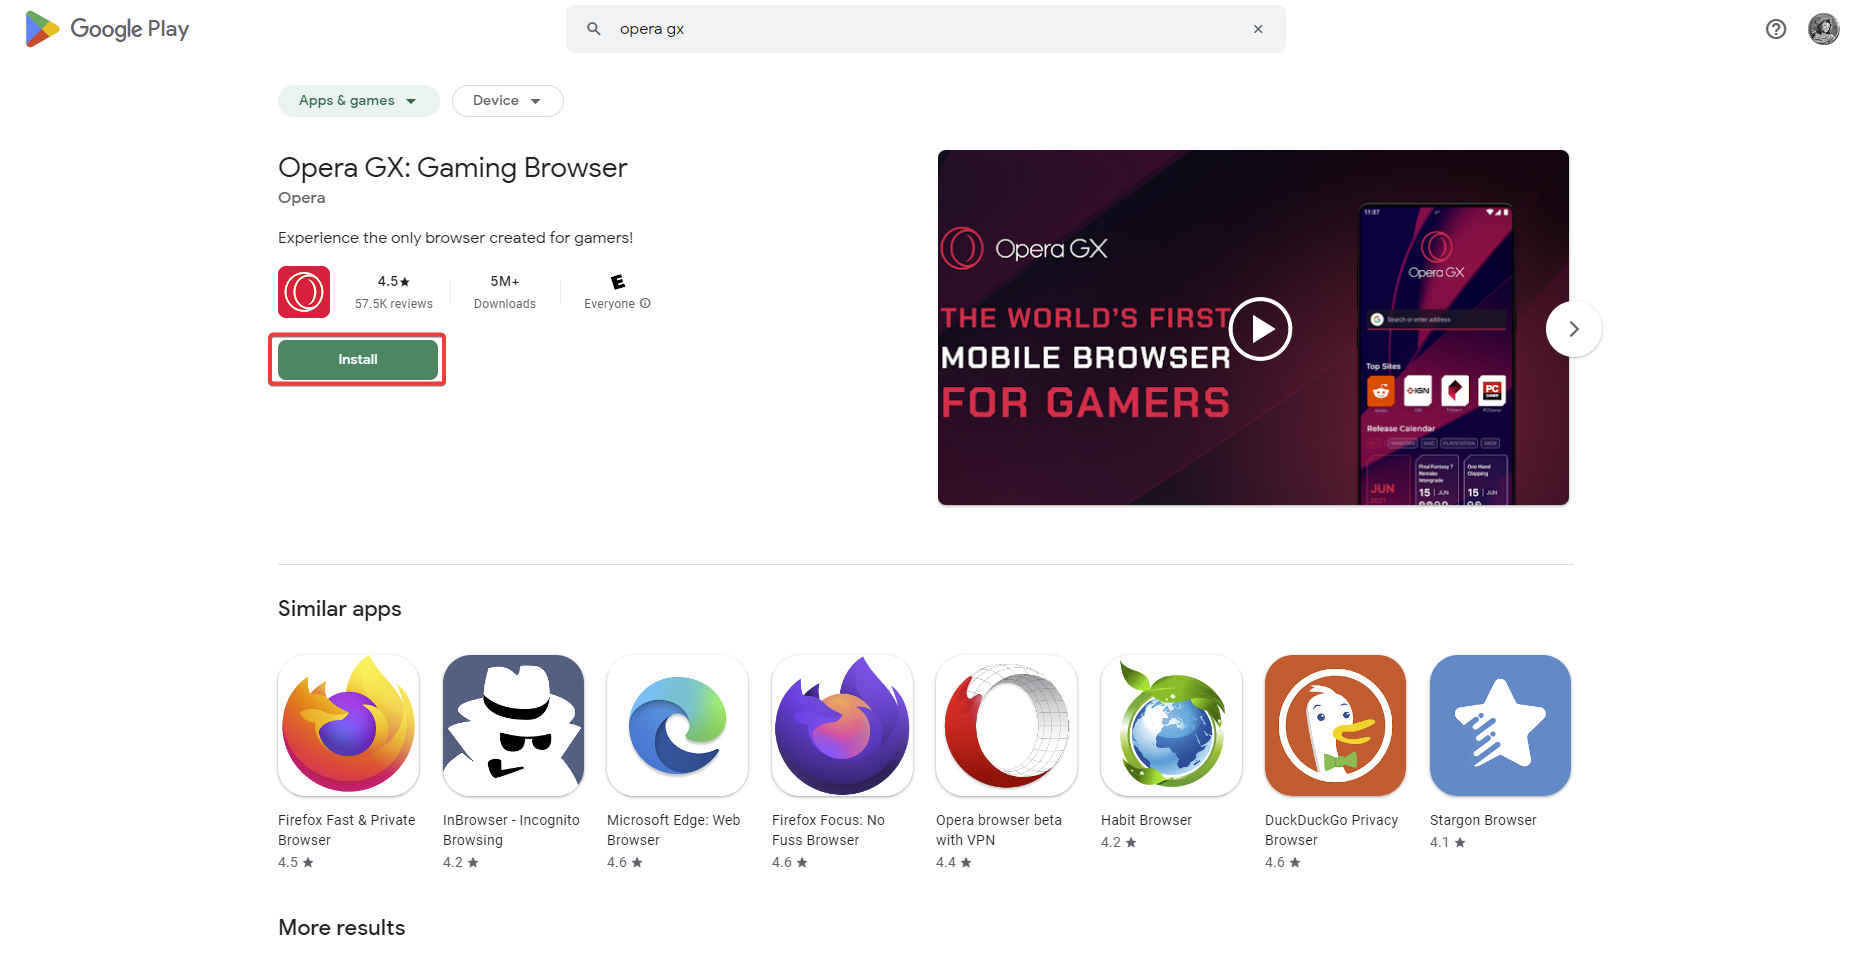
The default browser for Chromebook is Chrome, but if you’re more of a gamer, Opera GX is the browser for you. Now available in the Google Play Store, users can download Opers GX for Chromebook.
Opera GX is available for Chromebook, users can get it from the Google Play Store. If you’re interested in installing Opera Browser for Chromebook, we have a guide for that. Opera GX is great for Chromebooks because of its speed and lightweight performance.
It has all of the fantastic productivity features that the regular Opera Browser has with some added features designed specifically for gamers.
With keyboard shortcuts, quick mouse input, and integration on your laptop, Opera for Chromebook provides the finest performance on a big Chromebook screen.
Opera GX
With resource control settings and built-in privacy tools, is an excellent match for your Chromebook.
Now you can explore all the Opera GX has to offer with your Chromebook. If you want to know how to install Opera GX for Windows 11, we have a guide on that as well.
What are the best features of Opera GX for Chromebook
➡Performance
Opera GX is undoubtedly one of the best browsers for gaming. It can support in-browser gaming without compromising on speed or performance. One feature that makes it perfect for Chromebook, is the GX Control panel.
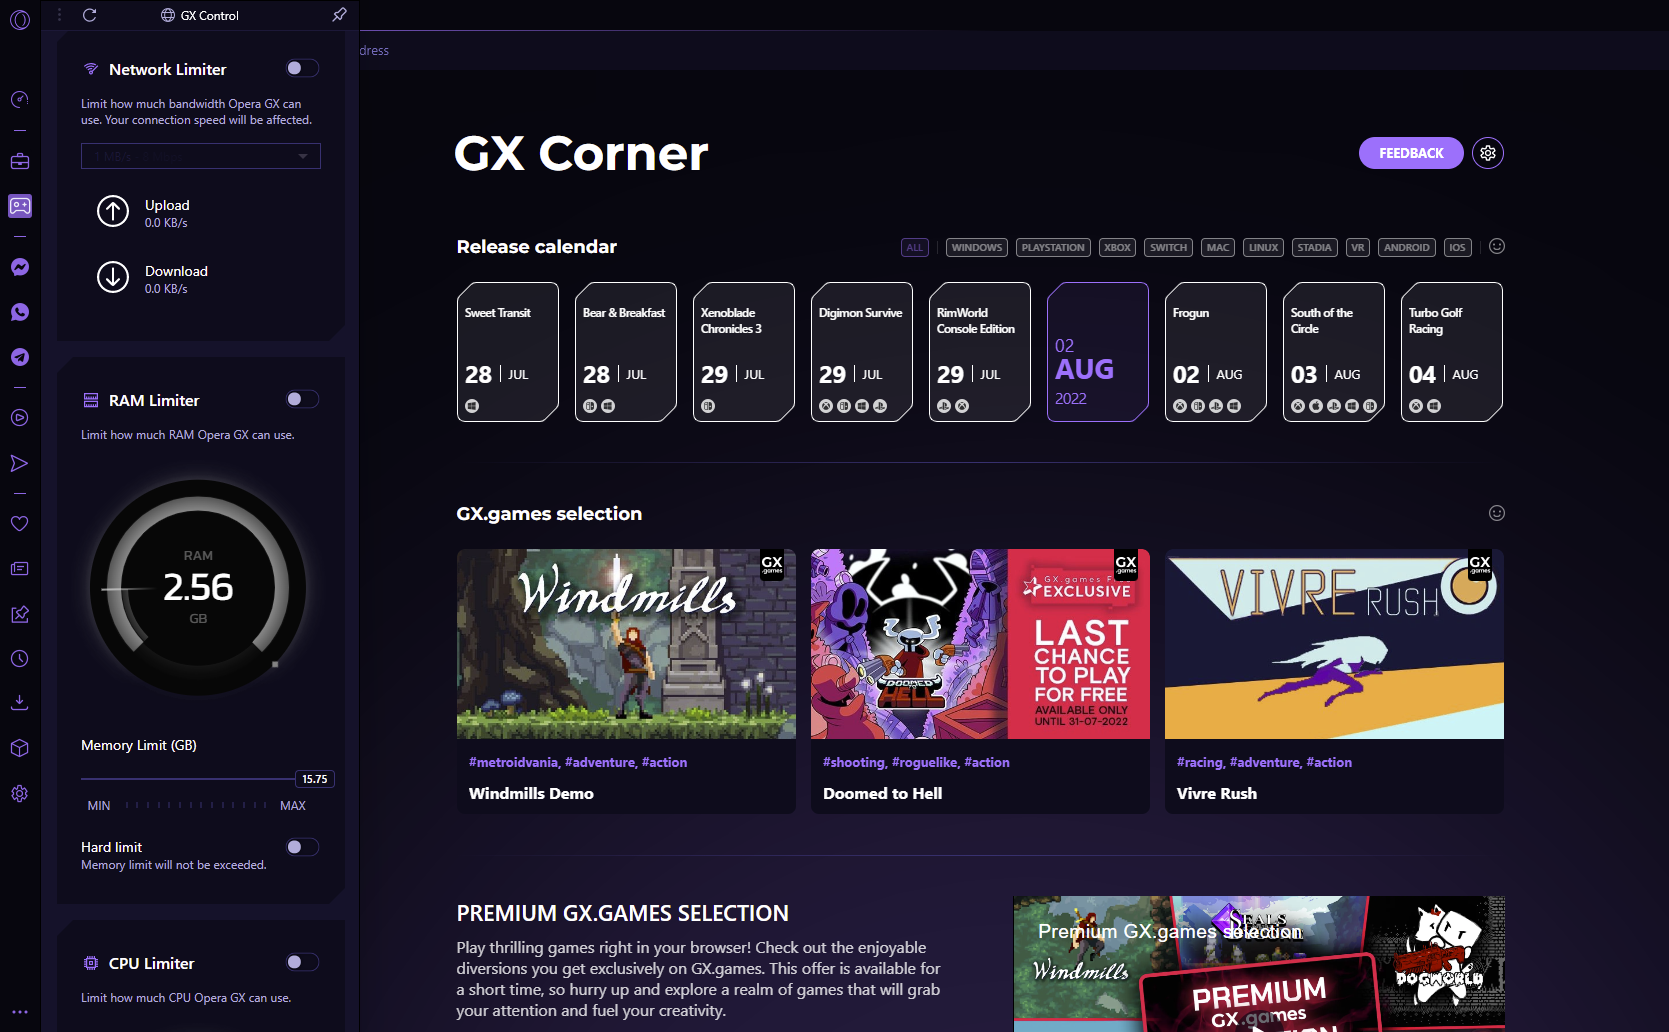
The GX Control can be accessed from the sidebar and allows users to keep an eye on how much RAM, CPU, and memory the browser is using. Users can take it a step further and limit the number of computer resources Opera GX uses. This makes it perfect for a lightweight PC like Chromebook.
In addition to the RAM and CPU Limiter, there is also the Hot Tabs Killer which will slash any tabs that are consuming high amounts of resources to make your Chromebook run faster and allows users to play games lag-free.
This is great for users who have a lot of tabs open and want to see which are stealing resources.
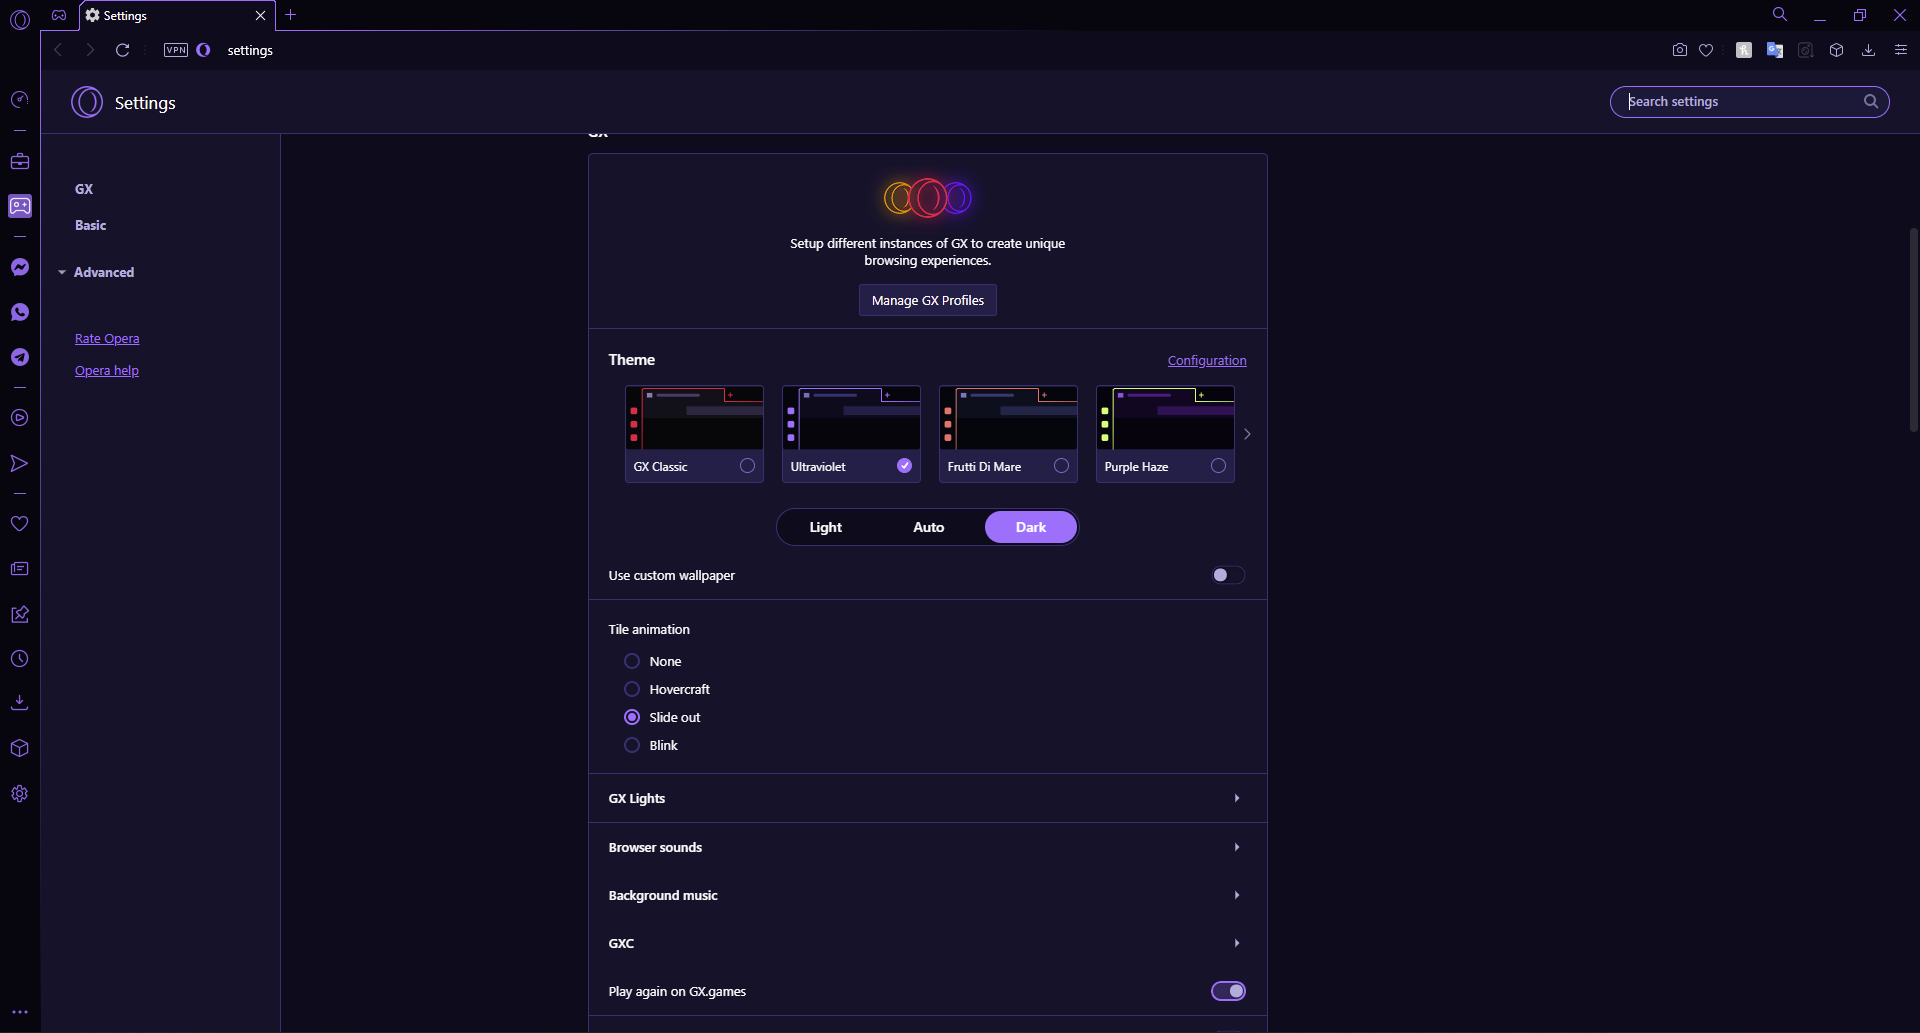
In addition to its game-enhancing speed and performance, Opera GX has an amazing gaming interface. Users can customize the browser colors to match their gaming setup or personal preference. There are a number of unique themes and wallpapers users can choose from.
Many users prefer dark mode because it is less straining on the eyes, but for those that prefer light mode, Opera GX offers it. Users can easily switch between light or dark mode from the setup panel conveniently located on the menu bar.
The GX Corner is a haven designed especially for gamers. Here, users can keep up with gaming releases and news with the gaming calendar. There are also free games for users to try and the latest deals displayed here.
If you’re a gamer, then you’re probably familiar with Twitch and Discord. Opera GX makes it easy to never miss a live stream with Twitch integration. Users can access Twitch straight from the sidebar where users can see the channels they follow and who are currently streaming.
Similarly, Discord chats are available from the sidebar so users can stay in touch with friends and communities. Opera GX also offers chats from Facebook Messenger, Telegram, WhatsApp, and more.
If you enjoy listening to music or podcasts while gaming, then the player feature is for you. Users can connect to their favorite music service from the Player and access it from the sidebar so users can switch songs without needing to leave their current tab.
➡Security
Like Opera Browser, Opera GX has a built-in ad blocker that prevents ads from weighing down pages. There is also tracking protection that prevents third-party trackers from following you around the internet and monitoring your online activity.
The free, unlimited VPN offers three regions to choose from so users can browse safely and securely. The VPN can impact speed depending on the location, choosing a region closer to your location can help the speed.
➡Productivity
Opera GX is a gaming browser first and foremost, but because it has all of the handy features from Opera, it’s also ideal for organization and productivity. Workspaces is a feature that allows users to separate tabs by subject to keep work and personal life separate.
Users can create up wot five workspaces and have as many tabs as they like in each.
With Opera Sync, users can keep all of their browser data synced up between devices. That means any bookmarks made on the desktop Opera GX will also be on the Opera GX app on your mobile device. Simply sign in to activate it.
Similarly, to Sync, Flow is a feature that allows users to send links, photos, videos, files, and more between devices. If on the go, users can send the link to whatever web page they were on to their mobile device to continue browsing without interruption.
How do I make Opera GX the default browser on Chromebook
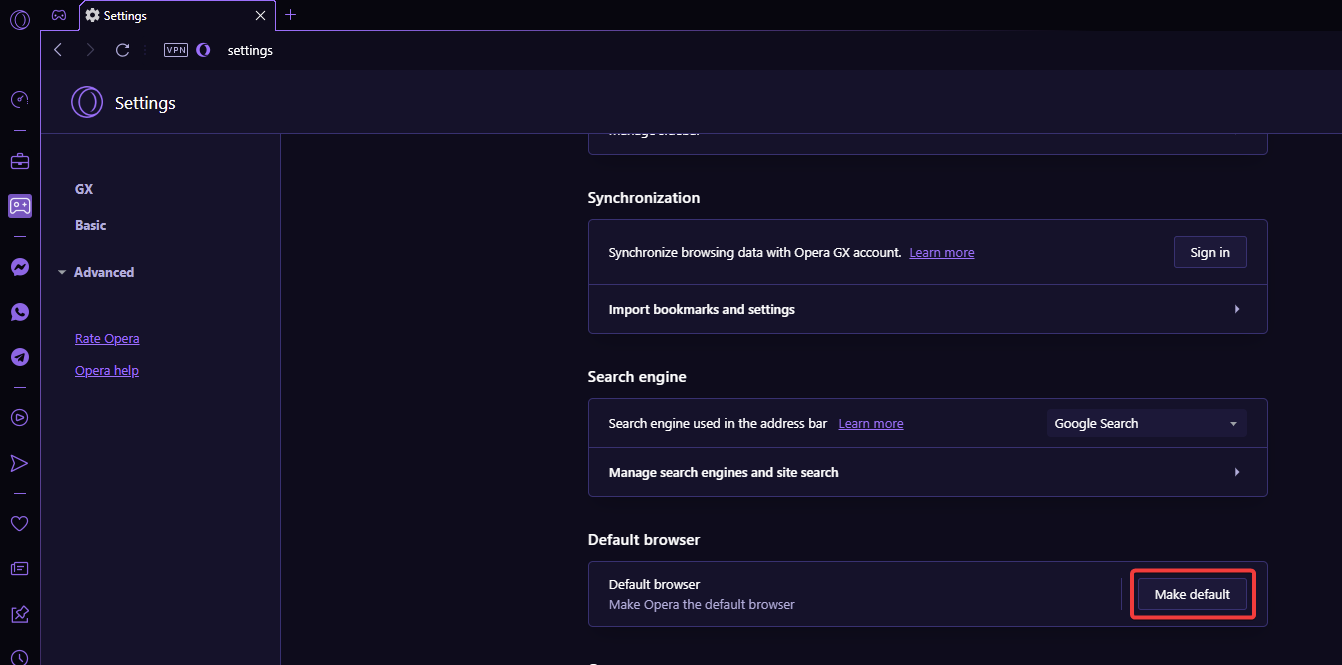
Click on the Opera GX icon in the top left corner and select Settings.
Scroll down to Default browser.
Select Make Default.
After setting Opera GX as your default browser, you can import any bookmarks and browser data from another browser under Synchronization. Opera GX makes it easy and hassle-free to switch browsers.
We hope this article helped detail the great features of Opera GX and how to download it for Chromebook. Let us know in the comments down below what you think of Opera GX or what browser you prefer to use for gaming.
Not all browsers support the same audio and video features. Some don’t work well with devices like speakers or webcams, and that can affect Dolby Atmos support.
Dolby Atmos gives you clear, rich, and layered sound. It’s designed to make audio feel more real and immersive.
This article covers the best browsers for Dolby Atmos and what to look for when picking one.
Safari browser versions from 10 upwards support and can play Dolby Atmos. Also, Safari is equipped with advanced audio features, making it a perfect browser that supports Dolby Atmos.
Furthermore, Safari allows users to download extensions and add-ons that help them get the best browsing experience.
However, not all macOS versions are compatible with this audio technology. Hence, Mac laptops were released in 2017 or later, and macOS Catalina upwards worked with Dolby Atmos. So, the Safari browser in the earlier said Mac laptops support and can play Dolby Atmos.
Another pick of the best browsers that support Dolby Atmos is the Microsoft Edge. Edge is a Chromium-based, fast browser that comes as the default browser for Windows devices.
However, during the release of Windows 10 Microsoft Edge, Windows announced that it would be able to support Dolby Atmos audio. Likewise, it’ll be able to play Dolby Atmos on websites that support HTML5, MSE, and EME audio formats. It allows users to experience the best sound production on their computers.
Other features of the Microsoft Edge are smooth & fast, and secured connection between the servers and the clients. Also, it is available across different operating systems. More so, it is a reliable browser for playing audio content like Dolby Atmos because of its improved sound system.
Google Chrome is a Chromium-based browser. It allows users to browse the internet smoothly with a good speed.
However, Google Chrome does not support surround sound formats by default. Hence, users need to get the 5.1 audio in Google Chrome to be able to play sorrowing sounds like Dolby Atmos.
Although many users complain about not being able to access this audio feature in their browser, it’s not a problem. Hence, updating your browser to the latest version or any version released in 2020 upwards will add the features you need to play advanced audio formats.
Likewise, the multichannel access in the update of Google Chrome makes it a useful option for playing Dolby Atmos sounds. However, multi-channeling allows the surround sound feature to expand its sounds across different channels.
Amazon Silk is one of the newest browsers in the market. It was developed by Amazon and launched in 2011. However, it is a browser for the Kindle Fire & Fire phone.
Likewise, it is one of the few browsers that support and is recognized by Dolby Atmos. It has many features that help users stream and play the best audio formats online.
Mozilla Firefox supports HDR and other features that make it a good pick for Dolby Atmos. It is a Chromium-based browser, and it comes with several features like a fast and reliable browsing experience.
However, updating your browser to the latest version can help you add new features to it. Furthermore, we recommend Firefox 28.0 because it has the best audio features.
Click on Target, then move your cursor to the end of the quotation mark and paste: --try-supported-channel-layouts
It allows your browser to support multiple-channel and be able to get 5.1 audio.
Does Dolby Atmos work on browsers?
Dolby Atmos comes with lots of features that were at a point not available in browsers. Recently, the company announced that users enjoy its features in their browsers. It is because of advances like high-definition and high-resolution in computer visuals.
However, to match up the visual qualities in your computer’s browser, Dolby Laboratories made a web version of Dolby Atmos. It means you can enjoy and experience Dolby Atmos sound technology on your browsers.
Although not all browsers work perfectly with Dolby Atmos, users can still enjoy it on some browsers we’ll discuss today.
Can YouTube play Dolby Atmos?
Unfortunately, YouTube does not support any surround sound audio format like Dolby Atmos. However, it is because every video uploaded on YouTube has 2.0 stereo sound. Hence, streaming on YouTube does not guarantee you can use Dolby Atmos.
Furthermore, we recommend that users learn about the easy way to install Dolby Atmos on your Windows 11 computer. It will take you through how to install the drivers for Dolby Atmos and other things that you need to do.
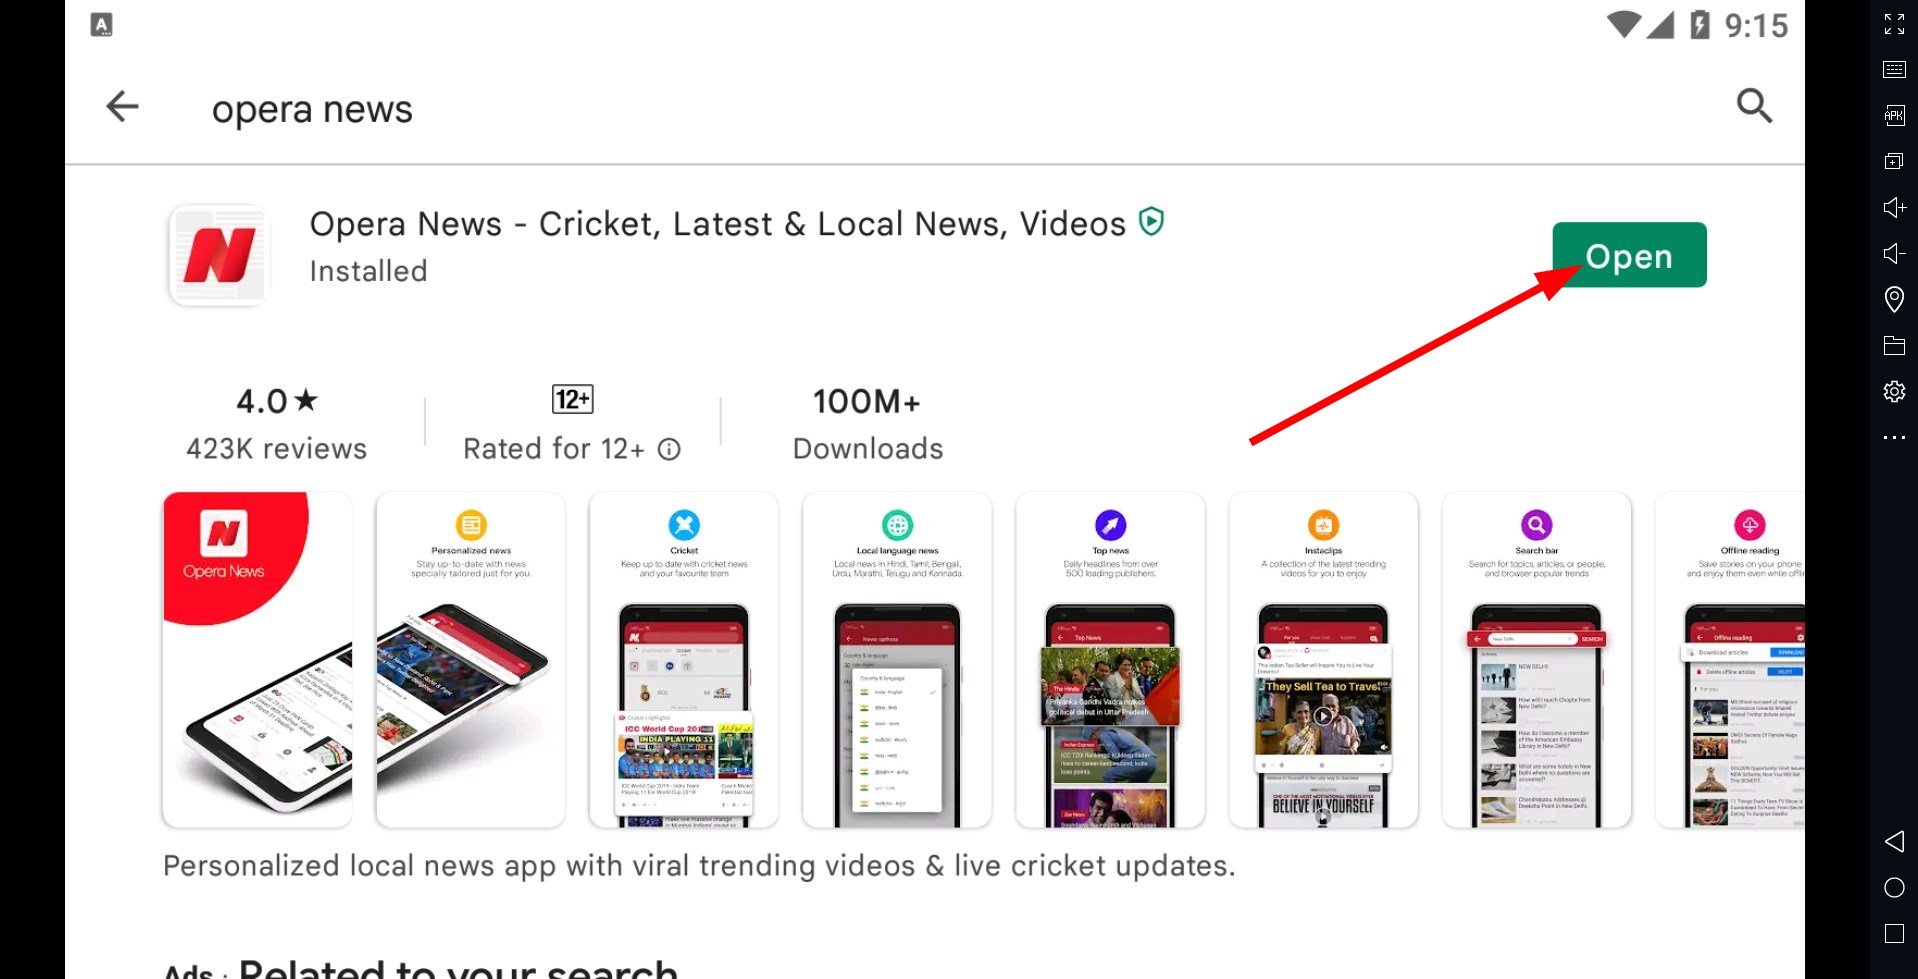
You may access Opera News and your own personalized news feed directly from the Opera browser start page. In Opera’s news reader, you may select sources from a variety of categories and languages.
Furthermore, the fast speeds and built-in VPN can give you access to geo-blocked content. Combining Opera News and the Opera browser is much more efficient than you can imagine.
Opera
Read Opera news straight in your browser and personalize the feed however you want.
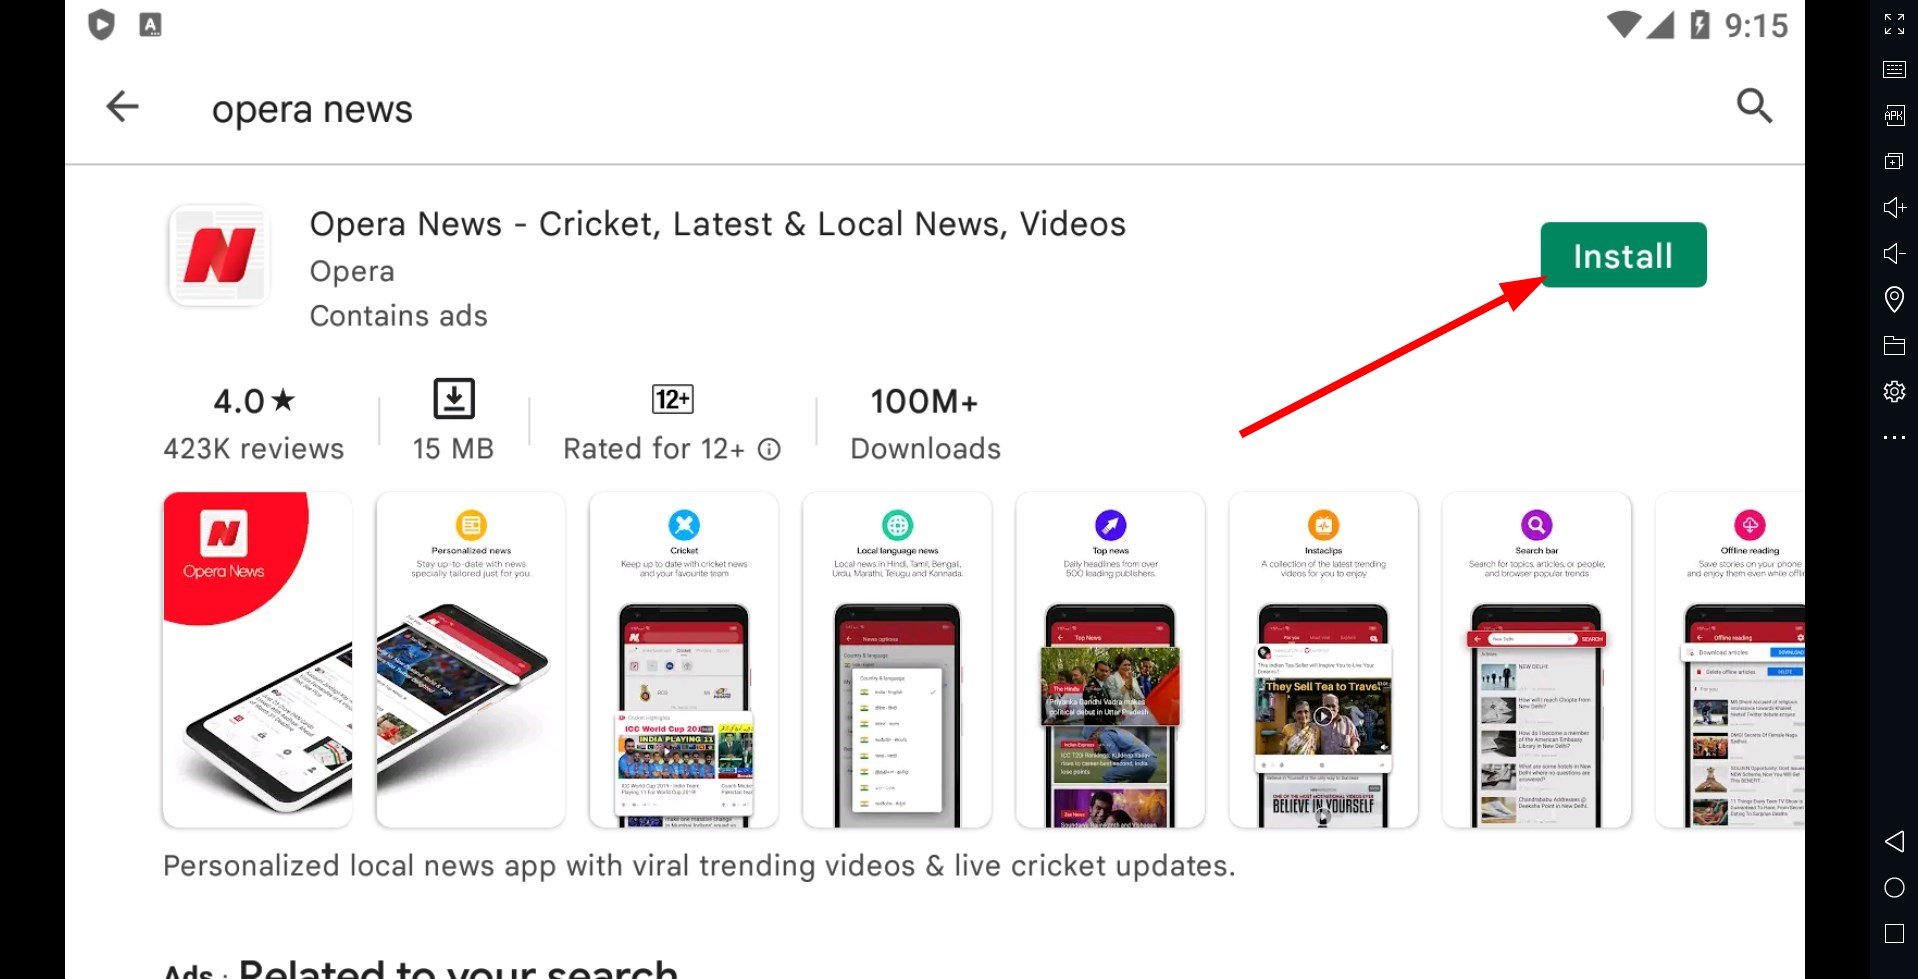
That is it from us in this guide. Let us know if you were able to run and download Opera News for Windows 10 and Windows 11. Also, do let us know which emulator you used to run Opera News.
Are you looking for a safe way to browse the Internet? Do you want to go online without worrying about the gazillion ads in your face?
Well, it’s time to stop your search because the answer to those questions and many others is UR Browser. You can download UR Browser in no time!
UR Browser: The safest browser out there
What is UR Browser, you may ask? The simple answer is that UR Browser is a cross-platform web navigator or web browser based on Chromium and created by AdaptiveBee, with security, privacy, and a friendly user interface in mind.
Another way to look at it is that UR Browser is more than a simple navigator. It won’t just help you browse the web seamlessly.
UR Browser
Navigate freely by having anti-tracking and advanced privacy tools in the most private browser.
As UR developers state: We believe in giving users back control over their online privacy. In the goal of full transparency, we believe the following points are important to highlight. Our Commitments:
We will not sell your data
We collect a small amount of data
We are very strict about who we accept as a partner
It will always be up to you what you choose to share
You can download UR Browser on the following Windows iterations:
Windows XP
Windows Vista
Windows 7
Windows 10
Windows 11
Let’s dive right in and see how this awesome browser can take your browsing experience to the next level.
A secure and powerful browser
On the security side, UR Browser has an integrated virus scanner that verifies every download you make and alerts you about potentially harmful files. Any unknown source files are flagged, but you can delete or keep them.
This applies to websites as well. If you visit websites known for phishing or malware attacks, the browser immediately triggers a warning to let you know that the security level of that site isn’t good enough.
Because the database of the suspicious files is stored on UR Browser’s servers, none of your browsing histories is collected or shared.
Another great security feature is that UR will automatically redirect you to the encrypted version of a website. Unlike HTTP, which exist since the beginning of the Internet, HTTPS is a newer, better, and more secure standard. This protocol is used to encrypt your data when browsing.
User privacy comes first
An important feature of UR is the blocking of third-party cookies and invisible trackers. This is especially useful because websites and ISPs can no longer track you and use your data without your consent.
Have you ever wondered how it would be to open a new tab, do your thing, and then when you close it, all your browsing history, searches, password, and cookies disappear along with it? Well, UR’s Ninja Mode can do that for you.
With this private browsing mode, all your data is erased as soon as you’re done navigating. Furthermore, you can use certain sites only in Ninja mode, if you choose to.
The team behind UR thought of everything, so you don’t have to worry about anything. Although UR was developed on the Chromium platform, all the built-in trackers from Google were removed. Third parties cannot keep or share your user data.
Automatic password filling, prediction text on web searches, automatic updating, and battery-level reporting are just a few of the features that UR automatically disables to protect your privacy.
Use a privacy-focused search engine for peace of mind
Search engines were also carefully selected with the best user privacy intentions in mind. The default one is Qwant, but you also have the option to change it to Lilo, Ecosia, and StartPage for a safe and satisfying experience.
Choose what ads to see or block them altogether
Along with it comes a powerful ad blocker that helps you keep things in check. Of course, you can modify the level at which the ad blocker functions. Our UR browser test showed that their ad blocker is one of the most efficient out there.
Want more? Here’s a built-in VPN
If this isn’t enough for you, if you feel the need for even more security and privacy then know that UR Browser got you covered with the implementation of a VPN. The UR browser VPN doesn’t need a review. It is everything a user needs.
Unlike other browsers that use a VPN and Proxy extension, UR’s solution comes as a powerful and multi-faceted privacy tool that combines the utility of a browser with the protection of a VPN.
OK, UR Browser is a safe browser. Your web browsing experience is as secure and private as it can be.
But what about the looks? Can you create a browser with a plethora of security options, add an ad blocker and VPN tools, and still look cool?
With UR Browser, yes, you can. The home screen is the face of a browser, so to speak. With that in mind, the development team created a unique and handy interface designed with one thing in mind: the best possible user experience.
That’s why your home screen gathers all the news, weather, searches, and other information that interests you in a single, fancy, and simple screen.
You can take it a step further and change the background wallpaper from UR’s extensive HD gallery, or even put a 3D parallax wallpaper to show off to your friends.
Of course, there is the option to upload your pictures for a unique look that you can be sure no one else has.
Absolutely zero fake news
To keep you up-to-date with the latest and greatest, the UR home screen has a news section organized strictly and with content quality in mind. That’s why only the biggest agencies like Reuters, BBC, Agence France Presse, and more will always keep you informed.
Download files 4x faster
Also included is a neat and well-organized Download Manager that’s only one click away at any time.
Unlike other browsers you may know, UR uses advanced parallel downloading technology. This means that files are split up into smaller parts and downloaded at the same time resulting in some download speeds 4x faster than usual.
All your saved sites can be accessed directly from the Homescreen. Websites are grouped together in Moods.
To better help you organize your workload, UR created some customizable profiles that you can organize to suit your own needs. Some pre-made ones include UR Home, UR Work, and UR Shopping.
UR browser vs Chrome
Chrome’s innovative approach to protecting user data has set a new standard. The whole program architecture is enclosed within a sandbox on the host computer to prevent code from the website from spreading to other parts of the system.
Just as Google is the leader in a variety of other industries, like search, online video, mapping, and more, the Chrome web browser is taking the lead in the category of software that we use for consuming information on the web.
Along with a dependable download manager and an excellent ad blocker, UR provides users with bulletproof security and privacy options that can satisfy even the most demanding users.
And compared to Chrome, it might even block more trackers that otherwise Chrome would let use your data for monetary interests.
Bottom line
Even though UR Browser is competing with giants like Google Chrome and Microsoft Edge, the fight is not as unevenly matched as it seems.
UR brings bullet-proof security and privacy settings that satisfy even the most demanding users, alongside a good ad blocker and a reliable download manager.
If you are concerned about your online footprint and want a worry-free browsing experience in a free package, then UR is the best choice.
What? You didn’t know? Yes, UR Browser is free, and you can download it from the link below.
Twitch is one of the best streaming services currently available. It is a platform that creates a strong connection between content creators and their viewers.
The live streams on Twitch depend on notifications to bring avid followers to watch certain content at a point in time. But, occasionally, Twitch notifications are not working.
Users have a variety of notification issues where they are not coming through no matter what they try.
Today, we’ll try and address all notification-related issues users encountered on Twitch. Check below for the solutions to common problems.
Why are my alerts not working on Twitch?
There are various reasons your Twitch notifications can stop working. From browser issues to wrong account settings, there are certainly many things you can point at.
Below are some of the common causes:
Corrupt browser data
Disable Twitch notification
Inactive email
Quick Tip:
Sometimes changing the browser might help you fix this problem. Try using a different browser to log in to Twitch and change your settings.
This browser is similar to Chrome but has advanced tracking, phishing, and malware protection, so if you need a reliable browser, this is the go-to solution.
Opera GX
Enjoy your gaming browser and interact with streamers and gamers on Twitch with no issues.
Alternatively, you can try and disable the Smart notifications option from the top of the same Notifications page.
2. Twitch Push notifications are not working
Visit the Twitch official website and log in to your account.
Click on your avatar in the top right corner.
Navigate to Settings.
Select Notifications.
Disable the Smart Notifications option.
While the Smart notifications is a good option, it can sometimes malfunction and lead to the Twitch notifications not working issue. And since disabling it has no effect, you have nothing to lose.
3. Twitch Sub notification not showing
3.1 Clear browser’s cache and cookies
Press on the Windows key, search for Chrome and open it.
Use the following keyboard shortcut to open the Clear browsing data window: Shift + Control + Delete.
Checkmark the Cached images and files and Cookies and other site data options.
Click on the Clear data button.
3.2 Reset your browser
Use the following keyboard shortcut to open Windows Search: Windows + S.
Search for Chrome, then open it.
Click on the three dots menu from the upper-right corner of the page.
Navigate to Settings.
Navigate to the bottom, expand Advanced, and click on Restore and clean up.
Choose to Restore settings to their original defaults.
Click Reset settings.
If Twitch Sub alerts are not working, it is usually down to issues with your browser. Resetting it to default should return all changed settings to normal.
4. Twitch Resub notification not showing
4.1 Clear browser cache and cookies
If Twitch Resub notifications are not showing or working, the first fix is to clear your browser cache and cookies. This is because the accumulation of corrupt browser data can make Twitch malfunction.
We have shown how to clear your browser data in Solution 4 above. So, make sure you follow the steps and restart your browser when you are done.
If you are still not getting the Twitch Resub notification after clearing your browser data, the issue might be beyond you. in this case, you need to contact Twitch support for help.
Click on your profile image from the upper-right corner of the page.
Choose Settings.
Select Notifications.
Scroll down, then expand the By Email section.
Toggle the All Emails option.
The email notification should be enabled by default once you are verified. But you need to reactivate the notification if the Twitch alert is not working and you are not getting any email either as the host or viewer.
5.2 Reset your email address
Log in to your account on the Twitch website.
Look at the upper-right corner of the page, then click on your avatar.
Go to Settings.
Choose Security and Privacy.
Look at the Email section, then click on the edit pen on the right.
Change your email address to an alternative address, click Save, and verify it.
Get back and re-enter your old email address and verify that.
Now, in your email client, ensure that Twitch emails aren’t under spam.
How do I set up alerts on Twitch Studio?
Select an existing scene and click the Edit Scene button.
Click the + button next to the Layers option in the left pane.
Select the Twitch alerts option under the Add Layer section.
Click the Add button.
Finally, make changes to the alerts on the right side of the app.
Depending on what you want, you can customize the Twitch Alert to your taste.
Here you are at the end of this article with a complete guide on the best solutions to try if Twitch notifications are not working. As you can see, they are diverse. Fortunately, each of them can be solved in just a few minutes.
Are you facing other issues like Twitch chat not loading? Then, go through our detailed guide for the steps to follow to solve it easily.
If you face additional questions about the Twitch app, use the comment section below.
Back in 2017, Opera announced a concept browser called Opera Neon. This browser claimed to be a different browser from any other browsers available for Windows OS.
Well, in reality as well, you will notice it right away from the homepage, as it shows you your desktop wallpaper as the background, which can be changed if you want.
There are bubbles of website shortcuts arranged at the center, and all of your saved bookmarks will appear as bubbles. These are just a few things about how different it is from other browsers. We will talk about its features and other things more in the below sections.
But if you are looking for a new browser or want to experiment, then you can give Opera Neon a try. In this guide, we will explain how you can download the latest version of Opera Neon for Windows 10 and 11. Let us get right into it.
What is Opera Neon?
As already mentioned, it is a concept browser that Opera introduced back in 2017. There is a search bar on the homepage which uses the Google search engine by default.
Below are some of the outstanding features of Opera Neon:
Split-screen mode: Let’s you browse two web pages at the same time. So, if you want to watch a YouTube video and work on Google Docs, you can use the split-screen mode and enhance your productivity.
Pop-up video player: You can watch the video player in a pop-up window and continue your other tasks in the browser.
Snap-to-gallery: You can crop, snap and save images without needing a third-party tool.
Efficient management of tabs: All of your tabs are placed on the right side, at the top, bringing a fresh take on it.
Built-in Task Manager: It comes with a built-in Task Manager, letting you know the running background processes, memory usage, CPU usage, etc.
Does Opera Neon work on Windows 10 and 11?
Yes. You can download Opera Neon for your Windows 10 and Windows 11 PCs. It works smoothly without any issues.
As of writing this post, the latest available version of Opera Neon that you can download and install on your Windows 10 and Windows 11 PC is Version 1.0.2531.0.
Double-click on the installer file and after a few seconds, you will see a web browser interface showing the wallpaper of your homescreen.
You can now enjoy a concept browser that brings a new take to the world of web browsers that we already use.
Can I use Opera Neon as my default web browser?
However, there are a few things that you should keep in mind before you think to completely switch over to Opera Neon from your default web browser.
First things first, it is a concept browser, meaning you may or may not find several features you usually find in your default web browser.
Opera Neon isn’t made to be used as an everyday browser, as you could come across multiple issues using it.
Opera Neon will not receive security updates. This puts your online data and information at risk if you are using Neon for financial transactions or social media platforms.
It cannot block ads or install extensions to expand its production. All you can use are the default features that the Opera Neon browser offers you out of the box.
Opera Neon does not feature an in-built VPN like the Opera browser.
Overall, Opera Neon is a laboratory experiment from the house of Opera and isn’t meant for everyday use. You can use it though if you do not care about the above-mentioned drawbacks of Opera Neon.
Let us know in the comments below, if you liked the Opera Neon browser or not. Also, do share your experience if you come across any issues with the browser.
Do you want to switch to Bing search engine from Google or any other ones? The primary step should be making some changes to your web browser. This article will show you how to do it.
Bing is a search engine made by Microsoft, and it was launched in 2009.
Despite the popularity of Bing, Microsoft never made a Bing browser, however, some browsers use Bing as their default search engine.
It’s worth mentioning that all web browsers fully support Bing, and today we’re going to show you how to change your default search engine to Bing in your favorite browser.
Which search engine comes as a default?
Different web browsers have different default search engines. For example, Chrome, Firefox, and most web browsers come with Google as the default search engine. Microsoft Edge comes with Bing by default.
Some web browsers use their own search engines based on Google or Bing.
What is the best-unbiased search engine?
It is not possible to tag a search engine as unbiased. It is because these work based on their algorithms. Each search engines have a different type of algorithm which give ranking to the web contents according to some criterias.
Right now, Google is the most popular search engine. Microsoft Bing is the second most popular option. It is not from Google and handles users’ data and search results differently. DuckduckGo is a privacy-focused option.
However, people who want to use something other than Google prefer Bing. And believe me, it is an awesome search engine.
How do I change my search engine to Bing?
1. Switch to Bing in Opera One
Open the Opera One browser.
Press ALT + P on the keyboard to open the Settings.
When the Settings tab opens, scroll down to the Search engine section.
Click the dropdown box and choose Bing.
After doing that, your search engine should be changed to Bing. Opera One is great for Bing due to its low hardware requirements, built-in ad blocker, and malware and tracking protection.
Speaking of protection, Opera One has a built-in VPN with unlimited bandwidth for an extra layer of security and comes with a native AI.
And if you happen to want a list of search engines, you just need to enter into Settings > Basic > Search engine and click Manage search engine.
Opera One
Search engines are essential for easily navigating the Internet. Even more, it’s so easy to switch to Bing when using Opera One!
Type edge://settings/search in the address bar and hit Enter.
Now, set Bing as your default search engine, as shown in the screenshot.
Microsoft Edge is a Bing browser. It means Bing is the default search engine here out of the box. But if you’ve changed the settings, you can use these methods to switch back to Bing from Google.
3. Switch to Bing in Mozilla Firefox
Open Firefox.
Go to the appropriate settings page by using the following address: about:preferences#search
Set Bing as the default search engine.
After doing that, your search engine will be changed to Firefox.
4. Switch to Bing in Google Chrome
Go to the following location using the address bar: chrome://settings/search
Under the Search engine section, select Bing as the default search engine.
After making these changes, your search engine in Chrome should be changed to Bing.
Bing vs. Google
Both Bing and Google are great search engines. Though Google is the most popular doesn’t mean Bing is far behind.
Bing has just a 3.2% market share, and Google has a massive 91.86%, according to the latest data. Microsoft Bing focuses on on-page optimization and social signals more to rank web content. On the other hand, Google uses links, Social Signals, E.A.T, and some other deep factors.
Both are great search engines. Bing does better in some places, and Google also does better in many places. It is just a personal choice nowadays as Bing has improved a lot.
Bing browser lost some of its popularity, but it’s still a great browser, and if you already haven’t, you might want to give it a try. Let us know if you like it in the comments area below.
Once you set Bing as your default, you can also keep your preferences, history, and favorites aligned across all platforms by following this guide on how to sync Bing across devices. To protect your privacy further, you can delete your Bing search history permanently and remove past queries from your account.
After setting Bing as your default, explore AI features like the Bing Video Creator to turn your text into short videos.
If you’re keeping Bing as your default search tool, you may also want to adjust its filters. Here’s how to turn off SafeSearch on Bing for unrestricted results.
Twitch is one of the best streaming services for watching and streaming digital video broadcasts. At first, it focused on video game streaming, but it has expanded a lot, and now it offers various live streams.
The aim is to appeal to a broader audience: streams dedicated to music, artwork creation, talk shows, and the occasional TV series.
It seems, though, that many Twitch fans are facing a black screen issue when using Google Chrome.
We’ve got you covered if you are also encountering the same struggle. In this article, we’ve put together a list of solutions you can use to solve this issue.
Why is Twitch showing a black screen?
There are various factors that can cause Twitch to give a black screen on Chrome. The major culprits are outdated browsers and wrong browser settings. Below are some of the other causes:
Corrupt browser data
Faulty extensions
Hardware acceleration activity
What can I do if Twitch is giving me a black screen?
1. Use another browser
If you constantly have issues opening Twitch in Chrome, we recommend using Opera GX. Based on these browsers’ amazing key functionalities, we believe you will not have the same problems with Twitch.
The features that Opera brings will surpass other known browsers, such as Chrome or Mozilla, in many cases. One of the key improvements that were brought to Opera GX is the video experience.
You can now continue to browse through other pages while your video will remain open and running at the bottom of the page.
The new design that Opera brings is amazing. It has many built-in packages such as creating workplaces, battery-saving functions, free VPN, managing tabs, and all in an easy-to-navigate interface.
Due to the built-in ad blocker, your pages will load faster, and your browsing experience will not be interrupted by unwanted ads or videos.
And keeping in touch with your social life cannot be any easier. Opera has integrated all social media apps, so you can send a quick message on LinkedIn or Facebook without navigating to another tab.
Moreover, you can share files between your device and phone once you download Opera Touch on your phone.
Check out the most amazing Opera GX features:
Built-in AdBlocker
Free VPN
Easy customizable
Safe and privacy-focused
Opera GX
Access your Twitch content fast without experiencing black screen troubles in this gaming browser.
Hit the Windows key, type Chrome, then open the first result.
Use the following hotkey to open a new incognito window: Ctrl + Shift + N.
3. Clear browsing data
Press on the Windows key, type Chrome, and click on the first result.
Use the following keyboard shortcut to open the Clear browsing data window: Ctrl + Shift + Delete.
In the Time range section, drop down the menu, and select All Time.
Checkmark all the boxes.
Click on Clear data.
It is a good idea to clear the Google Chrome cache every once in a while. Users have reported that doing so could help fix the black video screen issue.
The software market offers lots of options, but CCleaner is still one of the best cookie cleaners you can get. The tool is very well-optimized and up-to-date.
It scans your browser and removes all junk that takes up space and causes it to work improperly. After cleaning your browser with CCleaner, it will certainly run faster and have much fewer errors and problems.
Use the following keyboard shortcut to open the Run application:Windows + R.
Type cmd, then press the Enter key.
Type the following command, then hit the Enter key: ipconfig /release
Once the prompt returns, type the next command, and press again on Enter: ipconfig /renew
Exit Command Prompt.
5. Disable all extensions and plugins
Hit the Windows key, type Chrome, then open the browser.
From the upper-right corner, click on the 3-dots menu.
Hover the mouse over More tools, then navigate to Extensions.
In order to disable them, turn the shown button on Off.
Third-party extensions and plugins installed in your browser include firewall, antivirus, accountability tools, or ad-block services. These might block certain activities, so you might want to disable them.
If the black screen problem gets fixed after taking this action, then you can activate your extensions and plugins one by one. In this way, you will know which extension or plugin is responsible for the black screen problem.
6. Allow Flash player and JavaScript
Type chrome://settings/content and press Enter.
Locate JavaScript and Flash in the list of Content settings.
Click on JavaScript and choose Allowed by clicking the switch button.
Click on Flash to open Flash Player settings.
Change Block sites from running Flash to Ask first.
Click Add in front of Allow and add https://twitch.tv.
Restart your browser.
7. Update your browser
Hit the Windows key, type Chrome, then open the browser.
From the upper-right corner of the window, click on the 3-dots menu.
Hover the mouse over Help, then click on About Google Chrome.
Wait for Chrome to update.
Restart your browser.
You can check the status of your Chrome browser by revisiting the About Google Chrome page and looking for the Google Chrome is up-to-date message on the left side of the page.
8. Check hardware acceleration settings
Hit the Windows key, type Chrome, then open the first result.
In the address bar, type chrome://settings/system, then press Enter.
Disable Use hardware acceleration when available (make sure this is set to off).
Relaunch your browser.
The hardware acceleration helps to improve graphics processing on your browser. However, it can cause Twitch to give a black screen with sound or just a dip blank page. This happens if your graphics card does not have what it takes to use the feature.
Follow the on-screen instructions to reinstall the browser.
11. Do not use VPN or Proxy server
Sometimes, if you are using some proxy server or VPN to access Twitch, it might be possible to see the black screen on Twitch while streaming. If this is the case, we recommend you access Twitch without a proxy or VPN.
How I can fix Twitch if it’s giving a white screen on Chrome?
The Twitch white screen on Chrome issue is usually caused by your browser. The first and most effective fix is to clear your browser cache and cookies
You can also disable your extensions and restart your browser. We have shown the steps for these fixes in this article. So, ensure you apply them accordingly.
Twitch black screen on Chrome can be really frustrating, but we are sure that you will manage to fix this error after you follow one of the methods described above, as we tried to explain all possible solutions one by one.
Instagram is one of the most popular social media platforms we have today. However, just like any other software or web application, users have encountered challenges when using Instagram. One of the most common errors users is Instagram.com redirecting you too many times.
Fortunately, you do not have to worry when you get such an error. It does not mean that you have a problem with Instagram or maybe the platform is not accessible. This is a problem that you can solve easily without any problems.
What does redirected you too many times mean?
Too many redirects on a browser often mean that there might be recent changes on the website you are trying to access, wrong settings with services offered by third-party providers, or server redirects misconfigurations. However, you can fix the problem easily.
The reason for this error is basically what it says. There is an issue causing a lot of redirects, sending Instagram into an infinite redirection loop, and some users getting a err_too_many_redirects notification. This means that Instagram is stuck and cannot proceed from there.
Unfortunately, unlike other errors that resolve themselves, this error requires users to personally resolve them to continue using Instagram on a browser. Depending on the browser you are using, you might get a different variation of this error.
On some browsers, you might get a request exceeding the limit of 10 internal redirects due to a probable configuration error.
It is basically the same error, and the solutions shared below will help you resolve it.
How do I fix instagram.com redirected you too many times?
1. Delete cookies on instagram.com in Google Chrome
Launch Google Chrome, click on the three dots on the top right corner, and then select Settings.
On the left-hand panel, select Privacy and Security.
Scroll down and click on Cookies and other site data.
Scroll down again and then select See all cookies and other site data.
Search for instagram.com and then click on the delete icon on the right-hand side to delete the site’s cookies.
2. Clear browser cache
Launch Google Chrome, click on the three dots on the top right corner, and then select Settings.
On the left-hand panel, select Privacy and Security.
Select Clear browsing data.
Ensure that Cached images and files checkbox is checked and then click on the Clear data button at the bottom.
3. Visit instagram.com in incognito without extensions
Launch the Google Chrome browser.
Press Ctrl + Shift + N to open a new Incognito instance without browser extensions.
Visit instagram.com and the instagram.com redirected you too many times error will be gone.
Is redirect a virus?
Sometimes, a browser redirect is known as a browser redirect virus or a browser hijacker. This is because it redirects the link you are visiting other malicious websites. Most cybercriminals do this to generate revenue from fraudulent advertising. Others do this to collect users’ information for fraudulent use.
Hijackers can also redirect you to other links for you to click on them. Doing this will generate income for them. They can even ask you to provide some of your personal information for their use. If you are not careful, you might have to deal with impersonation.
instagram.com redirected you too many times is a very common error. As you can see above, it does not mean that there is a problem with the social media platform. Rather, it is an issue that you can fix easily by following one of the steps discussed above.
Chrome Incognito is a private browsing mode that allows users to surf the web without saving their history, cookies, and login data. This means browsing activity done in Incognito mode won’t appear in browser history.
Users have reported that their searches and websites visited in Incognito mode are remembered and show up as suggested searches in the Omnibox while browsing normally. Keep reading to find the solution to this issue.
Why is Chrome Incognito saving my search history?
The Chrome Incognito mode saves and remembers your browsing history as long as you are still in the window. But immediately you close the tab, it deletes your history and other data like cookies and login details.
However, while this history is not saved on your computer, it is still available on the Google servers and can be seen by network providers.
Also, if you have the sync feature active and visit a site you have previously used on another device, it will be suggested in Chrome incognito when you type something related.
How does private browsing work in Chrome?
The purpose of Incognito mode is to allow users to browse without others who use the same device seeing browser history and data. While in Incognito mode, cookies and data are remembered but deleted after closing the private browsing window.
Chrome clarifies that Incognito mode does not save history, cookies, permissions, and login information. However, it does not hide locations or sites visited by network providers, search engines, employers, or schools.
Any downloads or bookmarks made in Incognito mode will still be visible on the device after exiting private browsing.
Quick Tip:
If you require a more secure browsing experience, the best method is to use the Opera One browser.
This browser has a built-in VPN with a no-logs policy so users can surf the web with peace of mind. Opera One also has a private browsing mode so users can browse safely.
How can I stop Chrome Incognito from remembering the sites I visit?
1. Turn off autocomplete
Open Chrome, click on the three dots in the top right-hand corner, and select Settings.
Under You and Google, select Sync and Google services.
Under Other Google services, toggle Autocomplete searches and URLs to off.
Autocomplete is designed to make searching and filling data more convenient for users and increase browsing speed. However, this may be causing the searches made in Incognito mode to show up when browsing normally.
2. Clear browser data
Open Chrome, click on the three dots in the top right-hand corner, and select Settings.
Click Privacy and security, then Clear browsing data.
Adjust the time range, check all the boxes, and click Clear data.
Clearing browser data is a quick way to get rid of your history and cache and will remove data from the time range you select. Doing this might also speed up browsing if you haven’t cleared it in a while.
Go to Google.com, and click on Settings in the bottom right-hand corner.
Click Search history.
Select Delete and choose a time range of history to delete.
Choose which activity you want to delete. If you only wish to delete search history, then only check the box next to Search.
Click Next, then Delete.
Click OK.
If Google is your main search engine and Incognito shows previous websites, clearing your search history will remove all previous searches permanently.
If you don’t want to do this often, you can set up auto-delete in the search history settings, which will automatically delete search history every 3, 18, or 36 months.
4. Turn off Web & App Activity
Go to Google.com, and click on Settings in the bottom right-hand corner.
Click Search history.
Select Saving to Web & App Activity.
Click Turn off.
The Web & App Activity feature saves your activity on Google and associates apps to provide faster searches and recommendations. Turning this feature off may prevent Google from suggesting searches made in Incognito mode.
How do I permanently delete Incognito history from Chrome?
Open Chrome and type the command below in the address bar: chrome://net-internals/#dns
Press the Enter key.
Click the Clear host cache button.
This solution helps to clear all your browser data on Chrome on mobile and PC.
These methods offer the solution to Chrome Incognito remembering the websites you visit. The purpose of Incognito is to browse discretely, so it can be frustrating if you are seeing searches made while private browsing in Omnibox.
You shud also consider disabling incognito mode if this poses a challenge and switch to private browsers.
Surfing is one of the biggest beach sports, yet it’s still among the smallest sports game genres. There are precious few surf games on consoles and even fewer available for Windows.
Climax Studios’ announcement of the Surf World Series in 2016 was the first time a major publisher has confirmed the launch of a serious surfing game for consoles since 2002. But more have followed suit, with the genre now gaining traction.
Thankfully, there are still some top online and offline surfing games you can download on your PC. And we gathered the best of them for you in this guide as we did with the list of best games to play without downloading.
Are there any good online surfing games?
There are a series of excellent online surfing games you can play. You have the option of some free games and others that are paid.
Also, you can play many browser-surfing games online without downloading them. So, there are many superb choices available to you.
What is the best browser for gaming?
The best browser for gaming is undoubtedly Opera GX. This is the first browser of its kind specifically designed for gamers.
Everything about Opera GX is centered around giving gamers optimal satisfaction, from its design and interface to the integrations and features. It also excels in the qualities that matter in a browser, as it has all the features of the Opera browser.
Opera GX
Surf on a fully integrated browser for gaming to enjoy famous surfing games.
Kelly Slater’s Pro Surfer has been rated the best surfing game ever. It made a ‘splash’ on the Xbox, PlayStation 2, Windows XP, and GameCube in 2002/2003.
This is the best surfing game probably because world-surfing champion Kelly Slater provided his design input to make Pro Surfer the most realistic surfing gaming yet. No two waves are the same in Pro Surfer, which has fluid water waves for players to pull surf tricks.
The game features Kelly Slater’s narrative and eight other pro surfers for players to select from. It includes real-world events and various exotic locations such as Hawaii, Australia, South Africa, North America, Spain, and even Antarctica across 30 levels.
Surprisingly, Pro Surfer didn’t kick-start the genre as it’s still one of the most recent surf game titles.
Virtual Surfing offers you a realistic surf simulation created with stunning 3D graphics. Immersive elements like the real-time foam generation, breaking waves, and the water splash effects make it possible for you to experience the adrenaline of this sport.
The game allows users to customize their surfboard and characters and enter the wave at the desired position. It features medium size and big waves, so it’s easy to perform various surfing maneuvers by changing the weight distribution of your body on the board.
Moreover, you can enter competitions or admire the scenery by paddling around and changing the camera to see the surroundings.
The Virtual Surfing game is compatible with Windows 10 PC, and the minimum system requirements include a 2.5 GHz processor and 4 GB RAM.
Surfingers is an arcade game, and it was developed by the producers of the successful Timberman game.
The game allows you to surf in various environments, including snow, desert, caves, or even hell. The goal is to bypass obstacles like ships or pyramids by changing the height of the wave using up-and-down movement.
There are over 20 characters you need to unlock, and surfing sounds and charming arcade graphics enhance the progressive gameplay.
Surfingers is compatible with Windows 7/10, and it requires a processor of 1.0 GHz
This game includes five of the most iconic shorelines, from Bell’s Beach, Australia, to Waimea Bay, Hawaii, and six surfers for players to select from.
Surf World Series also has three multiplayer modes and online play that supports up to 15 players. This game has arguably the best graphics ever seen in a surfing game. It is just the joy of every serious surfer out there
There are many surfing games to play on Xbox. You have games like Surf World Series on Xbox one, Surf’s Up on Xbox 360, and Transworld Surf on Original Xbox, among other excellent options.
So you are not short of options to choose from.
Those six games bring all the thrills and spills of surfing to Windows PC. the options provided in this guide are diverse and should give different gameplay styles. o, you can try your hand at them all.
Are you looking for other gaming lists like the best offline games for Windows 10/11? Then, check our article for the compelling options to choose from.
We’re quite fond of your opinion, so tell us about your favorite titles in the comments below.
When I got my gaming PC, Need for Speed – Most Wanted was the most hyped racing game that one could play at that time.
However, with the new generation of consoles, racing games now offer life-like graphics and the ability to race all the supercars that you ever dreamed of. Well, at least in the virtual world.
While there are tons of choices when it comes to racing games for PC and consoles, what if you are a casual gamer looking for something that is lightweight and can be played on your browser?
In this article, we explore some of the best online racing games that you can play on your browser, as we did with the best online surfing games. Race through the city, desert, and snow while dodging obstacles to lead the leaderboard.
Can I play racing games in my browser?
Gone are the days when racing games were only available on expensive consoles. Now, you can play high-quality online racing games on your browser.
In the past, flash games were the order for racing games. Things are now a bit different with browsers ending support for flash. You can now enjoy HTML racing games on different gaming websites.
What is the best browser for gaming?
While most browsers can be used to play games, using a browser built for that purpose gives you an edge. And, there is no better specially built browser for gamers than Opera GX.
This is because it packs a series of features targeted at giving gamers an optimal gaming experience. One of the endearing features is the GX Control which allows you to limit the PC resources used by your browser.
With this, you can make sure your browser does not use the valuable resources meant for gaming. Add the integration of gaming-related platforms like Discord and Twitch, and you know Opera GX has the complete package for you.
Quick Tip:
While you can play games on any web browser, some web browsers such as Opera GX are tuned explicitly for gamers, offering an incredible array of game-related features and fast browsing speeds.
Opera GX comes with GX Control that allows you to access your favorite apps from the sidebar and also manage PC resources using the Network, RAM, and CPU limiter.
Opera GX
Check this browser out for high-speed web-browser gaming features that will blow your mind!
The popular die-cast toy carmaker also has some fun little racing games hosted on their website.
The Hot Wheels Race Car Rush is one of the best online racing games you can play on your browser for free. In this game, you race through the city, desert, and snow while dodging obstacles and other cars to grab power-ups & coins.
Use your coins to add upgrades and unlock more races and cars. You can earn extra coins by creating an account to use in the game. Hot Wheels Race Car Rush has three maps, with City Cruising being the first one and is unlocked.
The other two maps unlock when you reach 1000 and 2500 coins in the game. You can also choose one of the three unlocked cars in the beginning. Add more cars to your garage by advancing to the next stage.
In Double Loop Dare, you race through the Double Dare Loop, trying to break the world record.
Double Loop Dare uses the standard game controls to control the car. Use the spacebar to shift the gear or activate the booster in the Boost section.
Follow the on-screen instructions on when to shift the gears, and in the last leg, make sure to hit the spacebar to boost the car speed in the Boost section.
Madalin Stunt Cars 2 is one of the best 3D car driving games, with 34 racing cars to choose from. The game offers both single and multiplayer modes to compete with other players online.
This game’s car selection includes Huracan, LaFerrari, Pagani, and Veneno that you can drive at dazzling speed while performing breathtaking stuns.
Playing this game offers an open-world environment with realistic driving physics with tons of stunt opportunities using the props.
SocCar is a fun sports arcade game in which you control an RC car as part of a soccer team. You can play both as a guest or create an account to save your progress.
It is one of the best browser racing games as it consists of RC cars controlled by players and bots. The objective is to score the most goals within the time limit to win. The game requires you to master the controls and the mechanics.
As the speed of the gameplay is fast-paced, you need to adjust accordingly. Your RC car is fitted with a machine gun that you can use to shoot at opponents that stand in your way.
Motor Wars 2 is the sequel to the popular Motor Wars game. It is one of the fun multiplayer racing games in which you take to the battlefield against other players worldwide.
Motor Wars 2 features 3D graphics and excellent gameplay with intense motor fights. Join the game, pick a team, and enter the fray. The objective is to destroy the opposing team’s vehicles and capture their flag.
There are a series of online browser racing games you can play with friends. An example is the Motor Wars 2 game, a fun multiplayer game in the list above.
You can also play the Madalin Stunt Cars 2 game, among other options. So, nothing is stopping you from racing against your friends online.
Whether you like to take your car to the tracks in real life or are simply a racing game enthusiast, online racing games offer plenty of action even if you don’t have a gaming laptop. With our curated list, you have enough options to try your hand at.
If you are looking for other browser games like the best tower defense games, check our detailed guide for the top options available.
Check out the games in the article, and let us know your favorite online game in the comments.
In case the problem persists, you can try using a different browser temporarily, or a download manager software to handle your downloads.
Errors such as this or download error: download interrupted with reason: server_bad_content, are usually caused by issues with your browser, and keeping it up to date usually prevents them.
That’s it from us in this guide. We hope that the above solutions helped you fix the Opera download interrupted because of a network error. Let us know which one of the above tips fixed the problem at your end.
Some Google Chrome users have reported a curious issue: Google’s flagship browser keeps displaying a Download is in progress message. However, no download is in progress when they see that message.
Users who need to fix that Chrome issue will typically see the Download is in progress message every time they select to close the browser. That message includes a Quit and Continue download option.
This might sound like a relatively minor browsing issue. Yet, it’s not ideal when users must select a confirmation option to exit the browser.
A few users have found ways to fix this download error. If you must fix Chrome’s Download in progress error, try applying the tested methods below.
Why does Chrome keep trying to download?
This issue can sometimes occur because of a corrupted or failed download. In such a scenario, you might be able to fix it by discarding a failed download within Google Chrome’s Downloads tab.
However, the Chrome team has said this issue primarily arises from stuck Chrome background updates. One comment on a bug report page for this issue stated:
This behavior appears when Chrome updates items in the background, such as machine-learning models for certain features. This has likely always been the case.
Quick Tip: Try downloading files using a different browser. We recommend Opera One because it’s very responsive and less likely to cause errors due to its very low system impact.
Just like Chrome, Opera One is built on a Chromium engine and includes all standard browsing features plus some. It comes with built-in AI, Ad Blocker, VPN and also has integrated social media and messaging.
Opera One
Download files quickly, with no bugs, with this easy-to-use and light browser.
Press the Ctrl + Alt + Del key combination to select Task Manager.
Look for and select google update.exe background processes in Task Manager’s Processes tab.
Click End task to terminate background Google update processes.
Input chrome://settings/help in Chrome’s URL bar, and hit the Return button.
Press the Update Google Chrome button if that option is available.
To restart Chrome, select the Relaunch option.
4. Refresh (reset) Google Chrome
Press the Alt + F keys simultaneously.
Click Settings on Chrome’s navigation menu.
Then select Resetand clean up in Settings.
Click Restore settings to their original defaults to bring up a dialog box for that option.
Press the blue Reset settings button in the dialog box.
5. Reinstall Google Chrome
Press the Windows + S keyboard buttons at the same time, and enter Control Panel within Type here to search box.
Click Control Panel to open it up.
Select the Programs and Features applet.
Then select Google Chrome, and click its Uninstall button.
You can reinstall Google’s browser by clicking Download Chrome on its webpage. Then double-click the downloaded ChromeSetup.exe file.
Where does Chrome store downloads in progress?
Chrome stores downloads in progress within whatever folder you selected that browser to download files to. The browser will store downloads in progress in your user Downloads folder by default.
That folder will include incomplete CRDOWNLOAD file downloads. Any file there with a CRDOWNLOAD format is a download in progress.
How do I stop a download in progress?
Chrome displays a download bar at the bottom of its window when a download starts. You can stop a download in progress by clicking the down arrow and selecting Cancel. This was recently changed, and you will have to manually move the download bar to the bottom.
A lot of users have fixed Chrome’s Download is in progress error with the above resolutions. So, maybe one of them might also resolve that issue in your Chrome browser.
If you can’t download files with Chrome, you might need to fix a different issue. Our download failed: network error guide tells you how users can fix one of Chrome’s most prevalent download errors.
You can drop any questions about the Download is in progress issue in the comment box below this page. If you’ve found another method to fix that issue, feel free to tell us below.
Real Debrid is a popular unrestricted download service that you can use on various devices and platforms, including your Windows PC and Kodi.
However, as with any traffic you generate on your default insecure connection, Real Debrid traffic can be monitored. That’s why you need a good Real Debrid VPN!
Whether it’s your ISP, a government agency, or your friendly neighborhood hacker, downloading or streaming content through Real Debrid can be easily intercepted without the proper tools.
And we all know that using a VPN can rid you of these data snoopers and steer your traffic away from their prying eyes.
In that regard, we’ll try to help you understand what are the benefits of using a Real Debrid VPN. We’ll also explain whether Real Debrid is safe to use and what are the biggest risks associated with it.
Needless to say, we’ll only provide you with the best VPN for Real Debrid. But first…
What is Real Debrid?
Most of you probably don’t know it, but Real Debrid has been around for quite some time. Be it as it may, it’s still surrounded by a shroud of mystery and it’s quite difficult to find clear, concise information as to what this service really is.
To put it briefly, Real Debrid is a congregator of file hosters. So, if you were to search for a file on Real Debrid, this service would present you with a broad range of hosts from which you can download without being speed-throttled.
The list of hosts includes famous services such as RapidGator, Scribd, Mediafire, Google Docs, Upstore, ZippyShare, and VK. Note that the list might change to accommodate new ones, or remove others, so you might want to check it regularly.
However, you can also use Real Debrid to stream hosted video content or pair it with Kodi. You just search for the movie/series you want to watch, and Real Debrid will provide you with a list of high-speed hosts you can use to download/stream the content.
It also has a torrent conversion tool, which converts torrents to direct download links. You only need to upload a .torrent file from your PC or paste a Magnet link and let Real Debrid work its magic.
Best VPN for Real Debrid
Private Internet Access- large server network with the possibility to choose the fastest option for your location
NordVPN – untraceable VPN technology to make sure your ISP doesn’t block or throttle your traffic when downloading on Real Debrid
ExpressVPN – fastest VPN server for seamless downloading and streaming on any device
Surfshark – unlimited bandwidth and advanced encryption to make sure you can download as much data as you want without being tracked
CyberGhost – an impressive network of specialized servers to support fast and secure downloads and streaming
ZenMate VPN – powerful encryption with very fast servers from 74 different countries in the world
PrivateVPN- fast and secure servers with unlimited bandwidth for uninterrupted and fast downloads
Private Internet Access, or PIA if you prefer the short version, is a versatile VPN solution provided to you by Kape Technologies. It’s one of the few VPN providers that have 24/7 live chat support in store for its customers.
What makes Private Internet Access a great Real Debrid VPN is its broad network of secure, high-speed servers. Thus, even if a server seems to be a bit slow, you can easily switch to another one that will get the job done faster.
It’s quite important to pick VPN services that won’t slow down your connection too much. Real Debrid is all about providing you with lightning-fast download speeds, and a slow VPN could really ruin your experience and render the service useless.
Furthermore, PIA is absolutely airtight. Thus, your ISP, government, or any other privacy-invading agent won’t be able to see what you’re up to. Your online whereabouts are between you and your PC, the way they should be. And that is what makes PIA the best VPN for Real Debrid.
Take a look at PIA’s main features:
More than 15,500 servers in 74 countries
Strict no-logging policy enforced
Supports P2P and torrenting operations
Includes a SOCKS5 proxy for better connection security and privacy protection
Supports OpenVPN, PPTP, WireGuard, and L2TP/IPsec protocols
Block adware, trackers, and malware on your PC with PIA MACE
No speed throttling for premium PIA users and unlimited bandwidth
Lets you connect up to 10 devices at the same time, on a single account
Helps you protect your privacy by encrypting traffic on public, insecure Wi-Fi networks
Private Internet Access
Need a VPN to use with Real Debrid? Don’t settle for anything less than the best!
NordVPN is Tefincom & Co.’s solution. It’s one of the heavyweight champions in this industry, and a great Real Debrid VPN, thanks to its generous network of high-speed servers.
This VPN service grants you access to 5,400 servers situated in 59 countries all around the world. Even if you choose a server that doesn’t seem to be that fast, or has some hiccups, you can easily change it.
NordVPN also features some additional perks for its customers, including double VPN, CyberSec, and P2P-optimized server. Furthermore, it also has a selection of obfuscated servers, which means that your VPN traffic is less likely to be detected.
You can connect up to 6 devices on the same account, so you can share the secure, private experience of this best VPN for Real Debrid with your desktop, laptop, and handheld devices without significant effort.
Check out Nord VPN’s most important features:
A strict zero-logging policy that forbids data monitoring, logging, or collecting from customers
Comprises a generous list of 5,400 servers located in 59 countries
Is TOR-compatible, so you can use it in a Tor-over-VPN configuration
You can use it on up to 6 devices on the same account
The Double VPN feature routes your traffic through 2 VPN servers to increase protection
Can protect you from malware, trackers, and adware with its CyberSec feature
Its servers are optimized for streaming, so you will experience low/no buffering
Full support for P2P/torrenting activities, so you can enjoy unthrottled download speeds
NordVPN
Protect and secure your online activities with one of the world’s fastest VPNs.
Packed with great security and performance-oriented features, ExpressVPN is a great option for secure and fast downloads on Real-Debrid.
This user-favorite VPN lets you access thousands of secure servers in over 94 different countries.
It’s actually one of the best options not only to ensure a fast Internet connection but also to bypass strict geo-blocks, such as those on Netflix UK.
The tool is available on all major devices, so you can install it on any platform where you use Real Debrid. ExpressVPN has dedicated apps for Windows, Mac, iOS, Android, and Linux, as well as some routers, and game consoles.
Other key features of ExpresssVPN include:
IP address masking
Military-grade AES-256-bit encryption
A secure killswitch to avoid leaks when the connection drops
Split tunneling
Private, encrypted DNS servers
Zero logs policy
Proprietary Lightway protocol for high speed and security
ExpressVPN
Get a stable connection and secure your data for unlimited download on Real Debrid!
Surfshark – budget-friendly VPN for fast downloads
Surfshark is one of the best choices when it comes to VPNs that can be used with Real Debrid. It’s brought to you by Surfshark LTD and is one of the few VPN services that let you use it on unlimited devices on the same account.
It also provides you with a lot of privacy/security features but doesn’t sacrifice speed. Thus, you can enjoy Real Debrid content safely and without interruptions, whether you’re downloading content or streaming it to your devices.
This best VPN for Real Debrid has 1,700+ servers in more than 60 countries, making it quite easy to choose another server if you notice anything wrong with your current one.
More so, if you suspect your ISP throttles or blocks VPN traffic, Surfshark has a Camouflage mode that disguises VPN traffic as the regular one, to prevent detection or blocking.
Here are Surfshark’s key features:
S strict no-logging policy to keep customer data safe
Comprises over 3,200 servers located in over 60 countries
Allows you to connect unlimited devices
Private DNS for each VPN server to prevent DNS leaks
Connect through multiple servers at once with Multihop
Helps you block trackers, ads, malware, and phishing attempts with the CleanWeb feature
Prevents VPN traffic detection with Camouflage mode
Use the VPN with specific apps and websites with the Whitelister feature
All of Surfshark’s servers support P2P activities
Surfshark
Increase download speed with unlimited traffic and thousands of servers.
CyberGhost VPN is a great Real Debrid VPN to use if you’re concerned about your online security and privacy. It has a great array of protection features that will keep your data away from prying eyes and secure your connection.
Its generous network of VPN servers will make sure that even if you encounter a bit of slowdown while using it with Real-Debrid, you can easily fix the situation by switching the servers.
Additionally, its strictly enforced zero-logging policy will make sure that none of your data will be monitored, collected, or logged by this best VPN for Real Debrid. Thus, there’s no risk of it falling into the wrong hands.
Last, but not least, CyberGhost comprises P2P and streaming optimization. Therefore, regardless of what you use Real Debrid for, you’ll always have a great privacy/security service at your disposal.
Check out CyberGhost VPN’s main features:
Enforces a strict zero-logging policy to protect your personal data
Comes with an impressive library of specialized servers for torrenting and streaming
CyberGhost’s network counts more than 6,700 servers in 112 locations (90 countries)
Can encrypt your traffic on insecure, public Wi-Fi networks
Enables you to access geo-restricted content or services
Lets you connect up to 7 devices on the same subscription
CyberGhost VPN
Stay anonymous, stay safe. Thanks to CyberGhost, your browsing will no longer be traceable.
ZenMate VPN is an excellent service, one that’s perfectly fit for being used alongside Real Debrid. This service enables you to connect unlimited devices to a single account, so you don’t have to worry about device management.
This best VPN for Real Debrid offers you more than 3,300 VPN servers in 74 countries, making it easy to pick another server if the one you’re on seems to be slowing down your Real-Debrid downloads/streaming.
Like any other VPN on our list, this service has a zero-logging policy. Therefore, your online activity is nobody’s business other than your own, just as long as you keep connected to ZenMate’s secure VPN tunnel.
Last, but not least, if you plan on engaging in P2P activities, we recommend you check the list of servers. Some of them lack P2P support/optimization, so it would be best if you avoid them in this case.
Here is a list of ZenMate VPN’s key features:
Has a strict no-logging policy to protect its customers
Comprises military-grade encryption algorithms to secure your data and privacy
Offers more than 3,300 high-speed servers located in over 74 countries
Lets you use it on unlimited devices, as long as they’re using the same account
Can help you access many geo-restricted streaming services
Encrypts your traffic on public Wi-Fi networks
ZenMate VPN
Get the best of Real Debrid with P2P servers and keep your browsing data private.
PrivateVPN – dedicated support for P2P and fast downloads
PrivateVPN comes with a fast server network that can secure a steady connection for uninterrupted downloads.
This zero-logs VPN has over 200 servers in 63 different countries. It supports multiple simultaneous connections and has dedicated apps for all major devices.
The VPN offers unlimited bandwidth and dedicated support for P2P and torrenting, which may also interest you if you use Real-Debrid.
We must also mention that this VPN uses military-grade 2048-bit encryption to make sure no one can get ahold of your online activity.
Other key features of PrivateVPN include:
Unlock geo-restricted content
Increase Internet Speed
Protect against trackers and hackers
Great regional coverage in the Americas, Asia, Europe, and Africa
PrivateVPN
Get access to fast servers to boost download speeds on Real Debrid.
Yes, Real Debrid is legal. According to the FAQ page on its website, it doesn’t store files that you download, it just provides you with high-speed download links from other popular hosting services.
Besides, it claims not to provide links to illegal files. However, if you manage to locate such a link and decide to download it through Real Debrid, the service disclaims liability in this situation.
Therefore, Real Debrid is legal just as long as your moral compass is properly aligned.
Could you stumble upon copyrighted content while using Real Debrid? Possibly. Should you download/stream it? Absolutely not, but what you decide is entirely up to you.
Do you need a VPN with Real-Debrid?
Yes, you need a VPN with Real Debrid. Despite the site’s efforts to stay clean and legitimate, it has plenty of malicious users and sometimes illegal torrents.
You should use a VPN no matter the circumstances. As long as you’re online, you should be aware that anyone with a few hacking skills could intercept your traffic and listen to your connection.
Do you really want to leave that to chance while you’re using Real Debrid?
So it’s not that you need a Real Debrid VPN, but it definitely is the wise thing to do. Sure, your download speed could take a tiny hit, but at least your online business will remain yours and no one else’s.
Is real Debrid safe without a VPN?
A VPN encrypts traffic and routes it through a secure tunnel. As such, everything you do online, including downloading or torrenting files, gets encrypted. Not even your ISP can see it.
Therefore, it goes without saying that using the best VPN for Real Debrid will make your experience more secure. However, that strictly depends on a series of factors, such as:
Whether you share personal data with various online third parties or not
Your system wasn’t already compromised when you started using a VPN
Can I use a free VPN for Real Debrid?
No, using a free VPN for Real Debrid is not recommended. In theory, it may work, but these tools are very limited, may leak your data, and have usage caps.
The reality is that if you want a good VPN, you have to pay. Free options typically offer fewer servers, which means they easily become overcrowded, so way slower.
You don’t want that when you download from Real Debrid.
Additionally, to make money, free VPNs sell user data to third parties. This defeats the purpose of using a VPN for privacy. You shouldn’t trust them with your data.
All things considered, if you’re still on the fence about using a Real Debrid VPN, it’s time to make a choice. Not only will a VPN increase your security/privacy tenfold, but it could also increase your download speed if your ISP is throttling it.
More so, the VPNs on our list are P2P-optimized, have zero-logging policies, and comprise military-grade encryption algorithms, to make sure your connection remains airtight.
Bitcoin is the first decentralized digital currency in the world. It is a cryptocurrency and worldwide payment system that enables peer-to-peer transactions.
One of the advantages of Bitcoin is that it keeps your personal identity private. Hence, hackers, stalkers, blackmailers, and even governments cannot trace your identity through your financial transactions.
However, you can be tracked online as your IP Address and location can be acquired through your ISP. You may learn to hide your IP address when using Wi-Fi or make Bitcoin payments without hassles by using a VPN.
But, some VPN services can keep track records of your online activities and even cross-reference your allocated IP address and your real IP address.
Nevertheless, Windows Report has compiled the best VPNs for Bitcoin payments that keep no logs of your activities.
All these VPN services enable you to make transactions in the cryptocurrency world with guaranteed privacy and security.
Why should I use a VPN when mining crypto?
Cyber attackers oftentimes attempt to steal your data, especially when there’s a financial gain at stake, lie in the case of crypto mining.
As opposed to a regular online connection, when you use a VPN, your traffic data is practically unreadable, even if someone succeeds to hack your network.
There are other benefits of using a VPN for crypto:
Get access to geo-blocked platforms
Have the possibility to trade in several internationally available currencies
Hide your payment data so it can’ be traced back to you
Should I use a VPN to buy Bitcoin?
Yes, using a VPN will enhance your privacy, making you less likely to become the target of trackers and hackers.
While crypto itself is considered to be a more secure way of paying online, if you do not protect your traffic data, there’s always a chance that private information can be leaked.
What are the best VPNs for crypto trading & transactions?
ExpressVPN – fast VPN with well-encrypted servers in all the corners of the world and dedicated apps for all major devices, allowing you to trade on the go
Private Internet Access – big worldwide server coverage and high device compatibility to let you secure your crypto transactions from anywhere in the world
NordVPN– untraceable VPN technologies, with an up-to-date double VPN that ensures your actual whereabouts and identity cannot be traced when trading crypto
Surfshark – multi-platform VPN that supports unlimited connection, allowing users to leave no place for vulnerabilities, regardless of the device
CyberGhost – large server network with easy-to-install and use applications that let you connect to a secure server in just a few clicks
IPVanish – advanced VPN technologies to mask your IP and encrypt your traffic data so no information about your payment details or identity is leaked
PrivateVPN– fast VPN server network with coverage in all major locations in the world and dedicated apps for multiple platforms and devices
This VPN provider is one of the most popular VPNs on the market since 2009. ExpressVPN makes it possible to transact in Bitcoins without being stalked.
Key features of this Express VPN International Ltd. VPN service:
Access to servers in 160 locations from 94 countries
Optimized for speed
OpenVPN as standard
User-friendly interface
Mozilla Firefox, Safari, and Google Chrome web browser extension
Network Lock Kill Switch
One-click connection
Unlimited bandwidth and server switches
Live chat support
Furthermore, it is available on all operating systems as well as Windows XP, Vista, 7, 8, & 10. ExpressVPN’s best premium package is available at $99.95 per year.
ExpressVPN
Want to trade Bitcoin privately and in a secure manner? Try ExpressVPN.
Private Internet Access has been around for a long time now, so it shouldn’t come as a surprise its position of the best VPN service for crypto trading and transactions.
When privacy is clearly your main concern, Private Internet Access easily sets itself apart from other VPNs that usually keep your username, password, email, source IP address, and browsing history.
This Kape Technologies solution has you covered with a strict no-logging policy. Your privacy will remain intact, no matter what payments and transactions you intend to complete.
Additional protection is provided via the Network lock feature. For those unfamiliar, any software or website will automatically shut down if your connection to the VPN is lost.
No less important, Private Internet Access has a fairly standard range of supported platforms, with native applications for Windows, Mac OS, iOS, Android, and Linux.
In spite of that, you may install it on your Amazon Fire Stick or Nvidia Shield through the Android APK.
Check out these amazing key features that are packed in Private Internet Access:
Appealing user interface
You can connect up to 10 devices simultaneously across just about any platform
Feel free to establish a P2P on any server in PIA’s network
Number of servers: 3292 servers in 46 different countries
PIA is an extremely affordable choice, putting other VPN solutions to shame
Private Internet Access
Private Internet Access gives you unbreakable security for crypto trading & transactions. Now available at a major discount!
NordVPN has some of the fastest servers worldwide and ensures your greatest protection with powerful security features.
It employs advanced server obfuscation for complete anonymity, making it an excellent VPN for crypto mining and trading.
You can trade cryptocurrency risk-free using a dedicated IP address. The internet protocol address is assigned exclusively to your NordVPN account and no one else will be able to use it.
Moreover, when you opt for this feature, the virtual location will remain the same. A static, dedicated IP will help you avoid repetitive verification and make fast transactions.
NordVPN’s Kill Switch automated tool monitors your connection to the server in real-time and blocks your device from accessing the web in case the connection drops.
After that, it encrypts your internet traffic and sends it to a VPN tunnel until you disable the Kill Switch. This advanced feature prevents your data from being leaked while you trade online.
Other essential features of this VPN provider include:
Over 5000 servers in 59 countries
Password manager
CyberSec technology
rowser extension
Strict no-logs policy
Connect one account to six devices at once
Advanced Encryption Standard (AES)
24/7 customer care
Desktop applications for Windows, macOS, and Linux
Mobile apps for iOS and Android
NordVPN has dedicated servers for P2P activities and the myriad of security measures make it the ideal VPN provider for cryptocurrency trading.
NordVPN
Trade cryptocurrency risk-free with this award-winning VPN service!
The VPN solution offered by Surfshark is undeniably created to protect your online activities and hide sensitive financial data. Its ease of use and reliability make it a great VPN for crypto trading.
Choosing this advanced VPN software will disguise your online footprints by hiding your IP address, and therefore protect financial information about cryptocurrency tradings.
If you’re curious about the functionalities, Surfshark includes a cookie pop-up blocker, protection against trackers, ads, or phishing attacks, multihop to connect on two different servers, a bypasser, and more to go
To emphasize the utility of this VPN, you can browse privately and encrypt your internet behaviors, block malware and adware threats, and even protect your privacy on public Wi-Fi connections.
Finally, you can be settled about any Bitcoin online tradings with this resourceful VPN tool on your side.
Here are the great features of Surfshark:
Rigid no longs policy
Private DNS and leak protection
NoBorders mode for unrestricted content
Best in class AES-256-GCM encryption
Killswitch for internet falls.
Camouflage Mode for even more privacy
Secure protocols
Unlimited devices to connect from any platform
24/7 specialist support
With a singular subscription, you can benefit from full digital security regardless of the OS, and on mobile devices as well.
Surfshark
Protect your online sensitive transactions using this protective VPN tool.
This is one of the best VPN for mining because it will enable you to trade in Bitcoin as a ghost, just as its name implies. More than 8.5 million people trust Cyberghost, which stands proof of its efficiency.
It works on different Windows versions and it has a great support service. This is indeed an ideal VPN service for Bitcoin.
Here are what great features you can expect from CyberGhost VPN:
IPV6 Leak Protection: detects and closes IPv6 leaks and therefore shields effective against data espionage
DNS Leak Protection: the secure DN-Server feature circumvents censorship and prevents data phishing by faked websites
IP Sharing: for an additional layer of anonymity
4 Protocols supported: additional support of native OpenVPN, IPSec, L2TP, and PPTP
Owned by StackPath, LLC, IPVanish is one of the best VPNs for crypto trading and transactions. It literally makes your IP address disappear, ensuring your real location is not detected.
IPVanish protects your data and masks your identity online with its own encryption technology. Hence, you do not have to worry about getting tracked while trading Bitcoins.
Key features of IPVanish include:
256-bit AES encryption
1400+ VPN servers in countries all over the world
Unlimited bandwidth and P2P traffic
Zero traffic logs
Anonymous torrenting
SOCKS5 web proxy
Access to censored apps & websites
OpenVPN and L2TP/IPsec VPN protocols
Unlimited server switching
10 simultaneous connections on multiple devices
24/7 customer support
Furthermore, IPVanish has user-friendly apps for all of your devices, making it one of the best VPNs for Bitcoin transactions
IPVanish
IPVanish can help you trade Bitcoin in a safe, private environment.
PrivateVPN is a secure client that offers you a very quick installation process to start protecting your crypto trades right away.
The same goes for using the app, so if you want to secure your traffic on the go and maintain a stable VPN connection when mining crypto, it’s an excellent choice.
It has dedicated apps for all major platforms and a good worldwide server coverage with 200+ servers n 63 countries.
Other notable features of PrivateVPN include:
Remote installation support
Unlimited bandwidth to keep a secure connection at all times
10 simultaneous connection
Supports port-forwarding
Zero logs policy
Military-grade 2046-bit encryption
Supports multiple VPN protocols, including OpenVPN and L2TP/IPsec
They implemented the High-Quality Network principle, which essentially means that they get Internet capacity directly from the IP transit, without involving any third parties (which can lead to better speed).
PrivateVPN
Protect your trading data with leading VPN technologies.
Binance has piqued our curiosity as a Bitcoin trading and mining system that is safe and secure when backed by a VPN. If you’re wondering why Binance prevents US residents from accessing the platform, it’s to prevent money laundering through cryptocurrency trading.
You can, however, use a compatible VPN to access your Binance account and continue your crypto trading.
There have been no reports of the cryptocurrency exchange punishing US investors who use a VPN to trade and deposit. Most VPN services will offer several methods to secure your identity while you’re connected to ensure your safety and anonymity, so you will have extra security and trade in silence.
Star Wars Battlefront 2, initially released in 2017, is one of the most popular shooter games. It offers amazing graphics, exciting gameplay, and a thrilling experience for gamers. However, many users have reported facing mouse lag in Battlefront 2.
Whenever you encounter issues with the mouse, the instinct right away points towards a hardware problem. But, that’s not always the case. On the contrary, in most cases, it was misconfigured settings or an outdated/corrupt driver that caused the issue.
But you can’t rule out any possibility yet and will have to take a comprehensive approach to fix the Battlefront 2 mouse lag problem. To do that, execute the methods listed in the next section.
Why does my Battlefront 2 keep lagging?
There are multiple reasons why you experience lag in-game, and in most cases, it’s game corruption, so you might have to repair it.
Certain settings can also interfere with the game and cause issues to appear while playing. To fix this, you need to find and adjust those settings accordingly.
How do I fix mouse lag in Battlefront 2?
1. Some basic checks
If the PC mouse is not working in Battlefront 2, you need to check if the problem lies with the mouse or the system/game settings. To do that, use another mouse to play Battlefront 2 and check if the mouse lag issue is resolved.
In case the mouse lag problem is present, it’s the system/game settings behind the issue. However, if the game works fine with the new mouse, you may consider replacing the old one. Check out the best gaming mice to enhance the Battlefront 2 experience.
Also, you can try restarting the PC as it will eliminate any unwanted background process that might be conflicting with Battlefront 2 and leading to mouse lag. If both these checks don’t work, head to the next method.
2. Repair the game
Launch Origin, and select My Game Library from the options listed on the left.
Next, right-click on Battlefront 2, and select Repair from the context menu.
Now, wait for the repair process to complete.
Almost every platform offers built-in troubleshooting to eliminate trivial issues. Though the tool does not come in handy every time, it might help you fix Battlefront 2 mouse problem.
3. Disable mouse acceleration
Press Windows + S to launch the Search menu, enter Mouse Settings in the text field at the top, and click on the relevant search result.
Click on Additional mouse settings under Related settings near the bottom.
Now, navigate to the Pointer Options tab from the top of the Mouse Properties window.
Untick the checkbox for Enhance pointer precision and click on OK at the bottom to save the changes.
Mouse acceleration too is often found to cause limited mouse movement in Battlefront 2. Many users were able to resolve the issue by disabling it. If this doesn’t work, head to the next method.
4. Update the drivers
Press Windows + S to launch the Search menu, enter Device Manager in the text field, and click on the relevant search result.
Double-click on the Mice and other pointing devices entry to view all the mice connected to the computer.
Right-click on the mouse you are having trouble with, and select Update driver from the context menu.
Now, select the Search automatically for drivers option in the Update Drivers window.
Wait for your computer to find the best available driver on the system and install it.
Drivers are a critical piece of software that facilitate the flow of commands between the device and the OS. And, if there’s an issue with it, you are likely to encounter a bunch of issues including Battlefront 2 mouse lag.
The Device Manager method is the quickest to update the drivers in Windows, though there is a drawback to it. Here, only the drivers that have already been downloaded on the computer are scanned and not the other sources.
So, you can also try other ways to manually install the latest driver. Similarly, update the graphics driver as well, since this too is known to cause the Battlefront 2 mouse lag.
Alternatively, you can save some time and hassle with an automated option. To make sure there are no outdated, corrupt, or missing drivers on your PC, use software like Outbyte Driver Updater.
It is a driver updater that uses its own database to check against your drivers and automatically installs new versions whenever they are available. It’s light, easy to use, and completely safe.
Launch the Origin app, and click on the My Game Library option on the left.
Right-click on Battlefront 2 and select GameProperties from the context menu.
Now, untick the checkbox for Enable OriginIn Game for Battlefronts 2 and click on Save.
Once done making the changes, start the game and check if Battlefront 2 stuttering is still present. If it persists, try disabling overlay for other apps as well, such as Discord.
Launch the Discord app, and click on the Settings icon near the bottom-left corner.
Next, select Game Overlay under Activity settings from the list of options on the left.
Disable the toggle for Enable in-game overlay, and close the Discord app.
That’s it! Discord in-game overlay is now disabled and if it was responsible for Battlefront 2 mouse lag, the problem shouldn’t be present anymore. If there are other similar apps installed on the computer, make sure to disable overlay for them too.
6. Run Battlefront 2 as an administrator
Locate the folder where the launcher (.exe file) for Battlefront 2 is stored, right-click on it, and select Properties from the context menu. Alternatively, you can select the file and hit Alt + Enter.
Navigate to the Compatibility tab.
Now, tick the checkbox for Run this program as an administrator, and click on OK at the bottom to save the changes.
Oftentimes, if an app does not have the required permissions, you may face issues with it. And running it as an administrator should eliminate most of these.
These were the six most effective methods, and by now, you would have the Battlefront 2 mouse lag issue fixed on your computer.
Also, find out what to do if Battlefront 2 doesn’t work, since this requires a highly intricate approach.
Tell us which fix worked and your review of Battlefront 2, in the comments section below.
Lag spikes in COD MW can be a big problem and completely ruin your multiplayer experience. Therefore, it’s important that you fix them. Users have experienced high ping, jitter and packet loss recently.
How to fix laggy Call of Duty?
1. Check security software on your PC
If you experience lag spikes in CoD Modern Warfare, certain security software on your PC might be restricting or blocking your connection to the game server.
For that reason, we urge you to check your firewall for any signs of Modern Warfare-related restrictions.
Now do the same with your antivirus and antimalware utilities. If everything looks good, it means that your system doesn’t blacklist CoD:MW, and at least you can rule out security software messing with your game connection.
2. Make sure you update CoD:MW
Nothing goes south faster than out-of-date software. You’d think that the game and its developers have a bunch of fail safes that would keep you from running the game if it’s not the latest version.
Technically you’re right. Modern Warfare usually doesn’t run if it’s not the latest version, but hey, stranger things have happened. For that reason, make sure your game and the platform it runs on is up-to-date.
That also goes for your system and its drivers. By the way, you can use a third-party driver updater if you want to. It’s much easier than running manual updates on all devices on your system.
4. Use lower graphics settings
Although ping doesn’t affect framerate, and neither does it work the other way around, sometimes lowering your graphics settings can boost your performance.
Many users mistake high ping or lag spikes for low FPS. During the golden days when Counter-Strike 1.6 was on fire, throwing a smoke grenade would be an instant FPS killer, especially for low-end PCs.
Of course, users with high-end PCs had no trouble rendering at high FPS, and would absolutely butcher the affected parties.
Conclusion? If your system can’t afford it, crank down those ultra settings. You’ll have a smoother gaming experience, albeit not as attractive.
5. Flush your DNS
Lag spikes in CoD:Mw can also be caused by cached data build-ups on your system. One sure way to get rid of these bits of information is by flushing your DNS and resetting your winsock.
Don’t worry, we’re not here to name it and make ourselves scarce. We’ll guide you through the process. Just take these steps and you should be fine:
On your Windows PC, launch a CMD instance (with Administrator rights)
Type the following commands, one by one, in this precise order:
Once the last command has been executed successfully, it’s safe to restart your PC. After the boot sequence (fancy wording for system startup) completes, launch CoD:MW and see if you’re still experiencing lag spikes.
Furthermore, if you feel adventurous, try switching from your ISP-assigned DNS servers to public-free ones, such as Google or Cloudflare. If your ISP’s DNS is limited in any way, you’ll be way better with our alternatives.
Select a fast server (ones that are near to you are usually fast).
Launch CoD: MW and check if you still get lag spikes.
If Modern Warfare is lagging but the internet is fine, you might be able to fix the problem with a VPN. If it can outsmart geo-detection systems to unblock US Netflix for European users, then it can surely find a better route to get you rid of lag spikes in CoD: MW.
PIA
Are lag spikes ruining your CoD: MW experience? Use PIA to get rid of them.
Hey, it happens. Your favorite server might be on the frits, especially if network congestion is involved. Sadly, you can’t do anything to prevent or counter this situation.
If there are server-side issues, the best course of action is to disconnect and find another server, at least for the time being. You can come back later and see if it’s still bad.
7. Troubleshoot manually
Test the speed of your connection (there are a lot of online tools for that)
Always use a wired connection instead of wireless when possible
Update any outdated drivers on your system, your OS, and your router’s firmware
Restart the game, your PC, your modem, and your router
Avoid peak hours if you suspect network congestion to be the culprit (or use a VPN)
Try changing your wireless router’s broadcast channel (or switch from 2.4 GHz to 5 GHz)
Terminate any background apps/services that consume a lot of bandwidth (use Task Manager)
Upgrade your Ethernet cables to match your connection speed (e.g. from Cat 6 to Cat 7)
However, it’s worth mentioning that using a VPN may not actually work all the time, no matter how hard we pray. In fact, VPNs can only reduce lag spikes if your ISP is somehow throttling your connection by offering your connection a better, non-restricted route.
Which tool should I use to lower ping while gaming?
Kill Ping
Kill Ping is, as its name says, a killer of ping. If you experience lag spikes, which are nothing but intermittent high ping occurrences on your network, then this tool may be their nemesis. It’s in the name, after all.
You can install and configure Kill Ping quite easily. After installing it, you need to configure Kill Ping to run with Modern Warfare. Although the game may not be on the official list of supported games, Kill Ping works with custom titles, too.
All you have to do is choose Custom Path when you configure it and you should be good to go.
Game Fire‘s name might not be as suggestive as Kill Ping’s, but it can do some serious optimization on your system to get you rid of those pesky lag spikes in Modern Warfare.
Just install it, launch it, configure it, and let it work its magic. Game Fire has a lot of features in its toolbelt, including but not limited to:
Modern Warfare has a pretty nifty way of letting you know about various issues. Instead of just dropping your connection and making you read through indecipherable crash reports, they prompt you with discrete status icons, just like the ones below.
You may have already seen some of them while playing various EA action titles (they’re not specific to Modern Warfare). Also, they tend to change the design (slightly) from one release to another, but their meaning is quite the same.
3 orange squares Modern Warfare fix
If you’re constantly facing the dreaded 3 orange square symbol that’s like an omen of fun death, we’ve got some good news. It means that you’re losing packets, and luckily we’ve got a bunch of fixes for Modern Warfare packet loss.
To put it shortly, packet loss occurs whenever data packets that travel throughout your connection never arrive at their intended destination. The server keeps waiting for them to arrive, and if they never do, strange things happen.
For instance, you may experience rubberbanding, the menus might become unresponsive, VoIP may become impossible to use. You probably know this better than anyone at this point.
Last thoughts on fixing lag spikes in CoD: MW
All things considered, if you’re experiencing lag spikes in CoD:MW, there are a lot of things you can do about it, ranging from restarting the game or changing the server, to using a VPN or Kill Ping.
In case you need a different way to fix this issue, we suggest using a VPN with no lag for gamers. We also have a guide on Warzone lag, so feel free to check it out.
Perseverance is key, so with this in mind, if one of our suggested methods doesn’t work, just move to the next one. We’re quite confident you’ll find one that will fit your needs like a glove.
Microsoft periodically updates the public on its zero-carbon quest as it inches closer to its zero-negative timeframe of 2030, and today’s update includes some expansions in the world of hydrogen fuel cells.
As more businesses, governments, municipalities move operations to the cloud, datacenters are becoming the heartbeat to global activity and companies such as Microsoft are looking at alternative ways to power them while being eco-conscious.
Beyond windmills and solar power, Microsoft began betting on proton exchange membrane (PEM) technology back in 2013 and it looks like it may be about to pay off as a no-carbon emission power resource.
Microsoft chief environmental officer Lucas Joppa research found that the PEM cells which combine hydrogen and oxygen for chemical reaction that produces electricity, heat and water without particulate matter and zero carbon emission, could be the future for the company’s datacenter output in the future.
Joppa’s tested the PEM technology at three megawatts which is equivalent to the diesel generators Microsoft currently employees in its back up processes and enough energy to power 10,000 computers or 600 homes.
Unfortunately, PEM technology is not currently set for scale and will be something that could become a longtail project as the world works to make green hydrogen economically viable.
However, the potential upside of green hydrogen to power commercial buildings, homes, hospitals and datacenters through increasing environmental emergencies might help expedite its scale of use.
As of now, PEM fuel technology is only being explored as a backup option for Microsoft’s datacenters at the moment, but researchers are looking into ways to elongate the lifespan and have it become a viable alternative solution for commercial use.
As Microsoft director of datacenter research Sean James puts it, “I’m going to turn around when the excitement dies down and start to ask, ‘Okay, we did one, where can I get 1,000? We’ve got a commitment to be completely diesel free, and that supply chain has got to be robust – we’ve got to talk about scale across the entire hydrogen industry.”
Opera browser not closing and hogging system resources? It could be because of cookies, corrupt files, extensions, or Opera profile issues. Whatever the case, the following steps should help.
How to fix Opera not closing
1. Kill the task in Task Manager
Right-click on the Start button and select Task Manager.
This method is also applicable if you encounter a situation when your Opera GX browser is not responding.
6. Remove browser extensions
Open Opera, click on the cube icon on the top right of the toolbar and select Manage extensions.
Next, go to the problem extension, and disable it.
If it’s not the one causing the problem, try disabling the other extensions one by one to identify the culprit.
Once you have found the problem extension and disabled it, check if the Opera browser not closing issue is fixed now.
7. Disable hardware acceleration
Open the Opera browser and navigate to the below path: Opera://settings/system
On the System settings page, on the right, turn off Use hardware acceleration when available.
Next, click on Relaunch to restart the browser.
Now close the browser and check if the multiple instances of the Opera browser are closed. ARc browser may refuse to shut down too so check out our article on how to force it to close.
That’s it. If you’re still facing issues with your browser and need more help, please let us know in the comments below.
Cyberpunk 2077 had a rough start as a game, and the initial game was filled with all sorts of bugs and glitches. While most bugs were fixed, few users reported Cyberpunk 2077 mouse lag on their PC.
This can be a problem since it will make the navigation in-game a lot harder, and negatively impact your whole gameplay experience.
Sadly, there are other problems, and users reported Cyberpunk 2077 key binding failed error. Luckily, we covered this issue in a separate guide, so you can easily fix it.
However, it’s possible to fix this issue and enjoy the game once again, and in today’s guide, we’re going to show you how to fix mouse problems in Cyberpunk 2077 with ease.
Why does Cyberpunk 2077 have sluggish controls?
Even since the initial release, the game has a couple of bugs left, and this can manifest as input issues. Your graphics settings may be causing the problem, so you need to adjust them accordingly.
Outdated drivers can also cause this problem; therefore it’s advised to keep them up to date if you want to avoid any additional problems.
How can I fix Cyberpunk 2077 mouse lag?
1. Change the in-game input settings
Launch the game and navigate to Settings.
Now go to the Video tab and disable the Vsync feature.
Also, check if the game resolution is the same on your monitor and in-game.
Now locate the Resolution Scaling section and set the Static FidelityFX CAS to On.
Lower the Resolution Scaling if needed.
Optional:Disable the aim assist option in settings.
Few users also suggested usingBorderless Fullscreen instead of the fullscreen mode, so be sure to try that as well.
However, other users reported that running the game in fullscreen mode fixed the Cyberpunk 2077 mouse lag, so your results may vary.
2. Update your drivers
Type device in the taskbar and open Device Manager.
Locate the Mice and other pointing devices in the list.
Right-click your mouse device and select Update Driver.
Keeping your drivers up to date is a great way to fix Cyberpunk 2077 mouse input lag and other issues.
Keep in mind that the operating system may not always be able to identify the latest drivers. You can also check for driver updates directly on the manufacturer’s website.
Alternatively, if you want to avoid the risk of system damage caused by mismatched driver versions that may lead to frequent BSODs or your device behaving oddly, you can use an automated utility.
Mismatched drivers of the mouse can cause uneven behavior of the mouse pointer or an altogether unresponsive mouse.
We recommend you try Outbyte Driver Updater because it can detect whether you have any outdated drivers and install new versions right away. The tool is very light and requires very minimal effort on the user’s part.
Outbyte Driver Updater
For a healthy PC, automatic driver updates and backups are important for hardware.
Scroll down to the Ray Tracing section and set it to Off.
Save changes.
After disabling this feature, check if the problem is gone.
7. Disable Steam Overlay
Launch Steam and go to your Library.
Locate Cyberpunk 2077 and right-click it. Choose Properties from the menu.
Now uncheck Enable Steam Overlay while in-game and save changes.
Now start the game.
How can I fix Cyberpunk 2077 micro stutter?
Firstly, it’s important to keep the game and your drivers up to date. The developers are working hard to optimize the game, so be sure to always download the latest updates.
Disabling certain features, such as Steam Overlay or Ray Tracing can significantly improve your performance, so be sure to turn them off.
Mouse lag in Cyberpunk 2077 can be a big problem, but hopefully, you managed to fix this issue after using the solutions from this guide.
This isn’t the only problem with the game, and if you’re experiencing any slowdowns, we suggest reading our low FPS in Cyberpunk 2077 guide for more solutions.
Did you find a different way to fix this problem? If so, let us know in the comments section below.