Is Long Path Tool safe? Are there alternatives I can use?

Long Path Tool is a shareware program provided by KrojamSoft that, as its name suggests, helps you fix a dozen issues you’ll face when a file’s path is too long. Those issues include not being able to copy, cut, or delete the files in question because its path is too long. 

Is Long Path Tool safe?

This program has been in the center of a number of controversies. It has allegations against it ranging from spamming on other sites to putting a file on your computer that you’ll be unable to delete it until you buy a license for their program.

Spamming allegations

There have been a number of reports from users that the owners of Long Path Tool have been spamming their sites and promoting their own tool. Some complaints have surfaced on MyWOT (A site that checks the safety and integrity of websites).  A user by the name Victorspin has commented, “These clowns have an ongoing campaign spamming a software website. *Update*: a year later and we’re still getting spammed. So annoying.”

Is Long Path Tool harmful?

The complaints don’t end with them promoting their site by spamming. There also have been users reporting that they only let you use the trial for their program for a test. This test consists of the program creating a super long path that you can’t delete it with normal methods. You may have guessed it, the only way to delete that path is by buying a license to their program. While it may be true that it is technically not a virus or a malware, but I think that we can all agree that if the claims are true, this marketing behavior is unethical and unacceptable. At the end, the evidence isn’t conclusive to say it is a malicious software for certain. The complaints aren’t so widespread to pass judgment on it once and for all. We even contacted their customer support to get a statement concerning the allegations, but they didn’t provide any explanations, only claiming that those allegations against them were unfair. Do you think the risks are worth it? Is the price worth it? In the rest of this article, we’ll list a couple of free alternatives to Long Path Tool, so you can avoid this software if you want.

What are the best alternatives to Long Path Tool?

BitRaiser

When it comes to deleting files permanently and without a trace, then few programs are as good at that job as BitRaiser.

Not only does it securely erase sensitive files from the laptop, desktop, Mac, and servers beyond recovery, but it can also handle entire partitions, as well as smaller data like emails,  browser history, and archives.

However, the best part about this tool is that it is as easy to use as the traditional Click and Delete key combination, so anyone can pretty much make use of it.

BitRaser

BitRaser

If you're in need of an alternative program to Long Path Tool, then go ahead and give BitRaser a try, it is very good!
$35.69 Get it now

LockHunter

LockHunter is software that deletes files locked by other processes (that includes malware and harmful programs). The program is free and integrates into the Explorer menu; you only have to right-click on the desired folder or file and the program does the rest for you.

Just to contrast, on MyWOT: LockHunter has a trustworthiness of 91, while LongPathTool has 5.

⇒ Get LockHunter

FileASSASSIN

Another free program that assassinates locked files. FileASSASSIN is developed by Malwarebytes, a company that specializes in fighting malware.

They claim to fix a variety of other errors when dealing with undeletable files, ranging from Cannot delete file: Access is denied to The source or destination file may be in use. 

On what makes their program unique, they wrote it uses:

Advanced programming techniques unload modules, close remote handles, and terminate processes in order to remove the particular locked file.

⇒ Get FileASSASSIN

DeepRemove

DeepRemove is an open-source program that deletes hierarchies of folders that windows can’t deal with.

There is two versions of the program: one created with C# that has a user interface and deletes the folders by calling Kernal32, the other, created with C++, doesn’t have a user interface and deletes the folders by using the C++ standard library (STL).

The latter version must be run using the command line. You can find both versions and the source code on the project’s GitHub.

⇒ Get DeepRemove

In this article, we examined the popular Long Path Tool, and whether it is safe for use or not with a couple of testimonials. Then we provided a number of free programs to use if you felt like you couldn’t trust Long Path Tool.

Have you had any experience with the program and how it went? Did we forget a good alternative tool? Have you faced any issues none of these tools could fix? Please tell us in the comments section.


[wl_navigator]
 

Windows Terminal Preview 1.3 brings advanced tab switcher, tab colors, and more

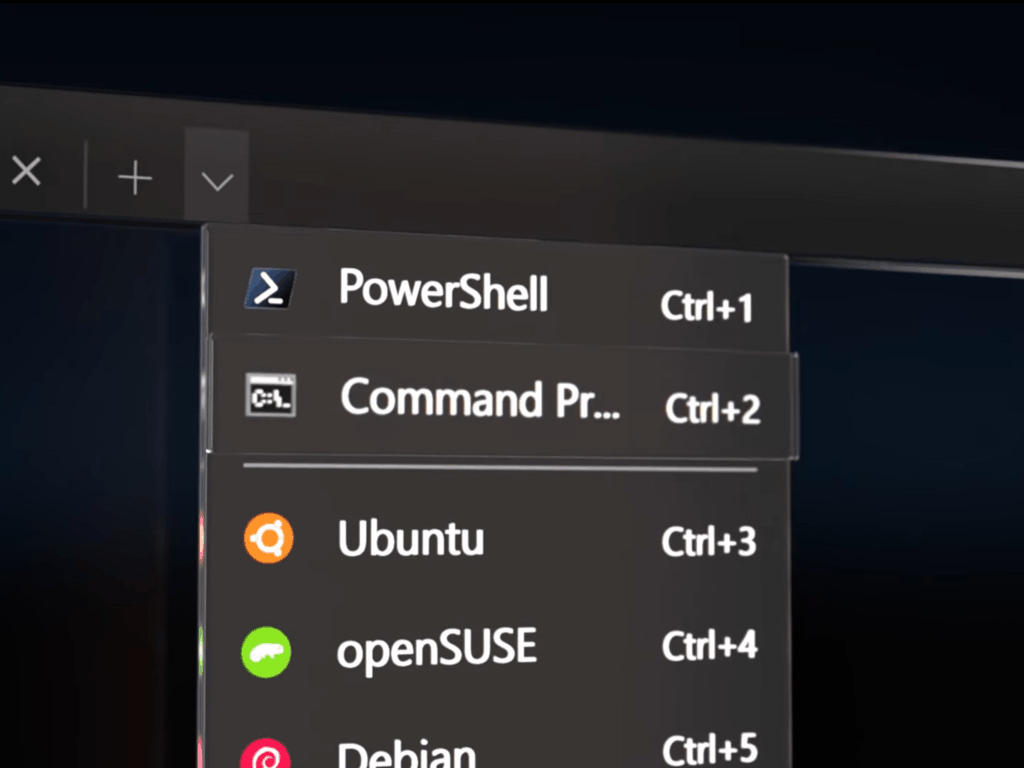
Microsoft has announced a new release for Windows Terminal and Windows Terminal Preview. The latest version of Windows Terminal is getting all the features from the 1.2 version, and beta testers with Windows Terminal Preview are getting updated to version 1.3, complete with some cool new features. From the command palette, advanced tab switcher, tab colors, and more, here’s a look at some of what’s new with Windows Terminal Preview 1.3.

First, we’ll start with a much-awaited feature, the command palette. Thanks to this feature, you’ll be able to search through all of the commands available to you in Windows Terminal, just like on Visual Studio Code. You’ll be able to open it by clicking CTRL, SHIFT, and P together. Here’s a description of the feature, from Microsoft.

The command palette has two modes: action mode and command line mode. Action mode is the mode you will enter by default and will list all of your Windows Terminal commands. Command line mode can be entered by typing > and you can then enter any wt command, which will be invoked on the current window.

Windows Terminal Preview Colors

Now, for the remainder features. Thanks to an Advanced tab switcher, you’ll be able to navigate more easily between tabs. It’s enabled by default, and the keyboard shortcuts are Ctrl+Tab and Ctrl+Shift+Tab. Additionally, you’ll also be able to specify a tab color. To do this, you can add the tabColor setting to a profile and setting. See a preview of this above.

Wrapping up these features are some new commands. These include the ability to execute wt.exe command-line arguments with key bindings. Also included is the ability to Send input to the shell and a tab search feature. Finally, you can now set the color scheme of the active window by using the setColorScheme command.

As always, these latest releases can be installed via the Microsoft Store or from GitHub. We have a guide on how you can do that.

Borderlands 3 packet loss: What is it and how to fix it?

Borderlands 3 is the fourth installment in the Borderlands series. It’s a perfect combination of role-playing and first-person shooter and combines both genres flawlessly. Oh, not to mention the tongue-in-cheek humor that greets you at every step.

If you never played Borderlands before, you’re definitely in for a real treat. There are four classes that you need to choose from when you create your character.

By playing the game, you level up your character and unblock skills, find new weapons, and grow to be one of the deadliest, most cunning characters in the Borderlands universe.

You can do quests and even side missions to gain experience and progress your character. However, killing enemies also grants you a bunch of XP points, and maybe even weapons.

On the downside, it’s not all butterflies and rainbows. If you never plan on playing Borderlands 3 online, you may as well stop reading this article here.

Taking it online with your friends, however, may subject the game to certain connectivity issues.

What is packet loss in Borderlands 3?

Much as anywhere else you may notice it in, packet loss in Borderlands 3 works the same way. It happens whenever data packets never make it to their destination.

Our Internet connections would be empty shells without packets of data. Picture it this way: your connection is made of water pipes, and data packets are the water that travels through the pipes.

Now you know that coughing sound your faucet sometimes does and water ceases to come out for a few seconds? That’s exactly what happens when you’re leaking packets.

Certain packets never make it to the destination, which can cause a bunch of other issues, such as high latency or even disconnections. In Borderlands, you may notice unresponsive menus, high latency, jitter, rubberbanding, or crashes.

What causes packet loss in Borderlands 3?

To keep it short, the most common cause of packet loss is network congestion. This phenomenon occurs whenever the connection is not wide enough to accommodate a huge number of users.

Therefore, it starts limiting the resources, in an attempt to balance things.

Network congestion can occur on your local network (for instance, your ISP’s infrastructure), or on the game server. However, in Borderlands 3 you don’t have any official servers hosted by the game company.

Instead, players host their own servers and invite their peers to join them. In other words, Borderlands 3 uses peer-to-peer technology to allow multiplayer sessions.

So game server network congestion isn’t as likely to occur, except if the host’s local network is overloaded.

Other causes for packet loss in Borderlands 3 include choosing WiFi over wired connections, poor-quality Ethernet cables, outdated drivers on your PC, old router firmware, and even running bandwidth-consuming apps.

The bottom line is, there’s no exact cause for packet loss, since it can occur anywhere between you and the host of the game server, which can be halfway across the world.

How to detect packet loss in Borderlands 3?

If you’re sensing any slowdowns that weren’t previously there while playing Borderlands 3, you may be experiencing some connectivity issues. Since not all slowdowns are caused by packet loss, you’ll need to perform a check, just to make sure.

1. Use Windows’ built-in pathping tool

  1. Ask the host for the IP address of the server
  2. Note that IP address down
  3. Launch an instance of CMD
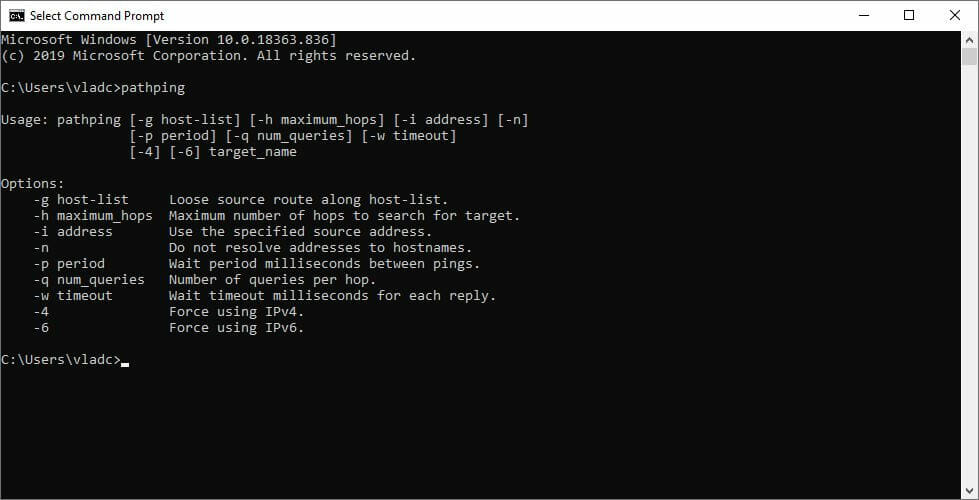
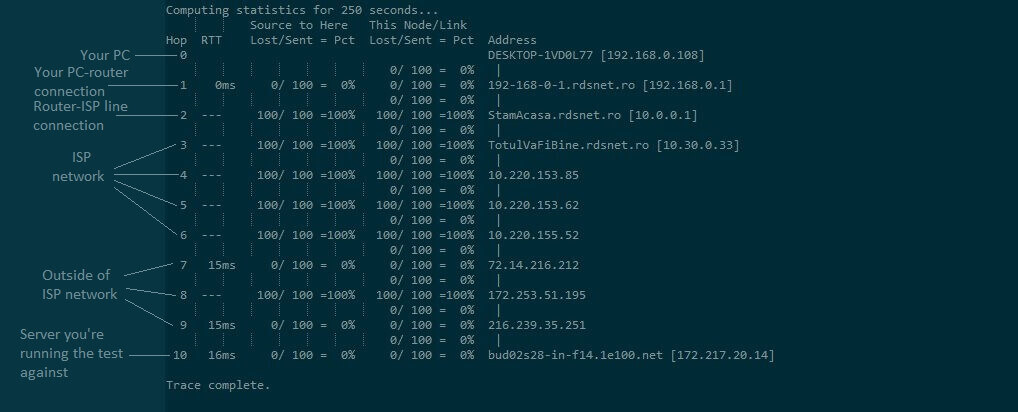
  4. In the command prompt type pathping x.x.x.x (replace x.x.x.x with the IP address you noted down)CMD pathping
  5. Wait for the test to come to an end
  6. Take a close look at each hop analyzed by pathping
  7. See if there’s any packet loss

If you can’t find any packet loss spike, then the slowdown is probably caused by another problem. If you do find packet loss, try and troubleshoot the issue accordingly.

As a rule of thumb, the first hop belongs to your computer, and the last one is associated with your host. Anything in between belongs to the servers used to bounce your connection (ISP).

2. Use specialized third-party tools

If you’re not exactly tech-savvy and the mere sight of CMD sends cold chills down your spine, you might want to try specialized, dedicated tools. One such tool is Nirsoft’s LiveTcpUdpWatch, and it requires absolutely no configuration.

You just need to deploy it on the target computer, and run it. The main screen of the application will display several clients and services that communicate with your PC, as well as a bunch of details about them.

For instance, you can see the process ID and name, the protocol being used to communicate with your machine, the local/remote addresses and remote port used, and the number of packets the program sent/received to/from your PC.

If you can’t figure out packet loss from the app alone, just use it to detect the IP of the server and run it through the pathping method above.

Of course, this program isn’t the only one you can use, as there are a lot of possible utilities you can choose from.

How to fix packet loss in Borderlands 3?

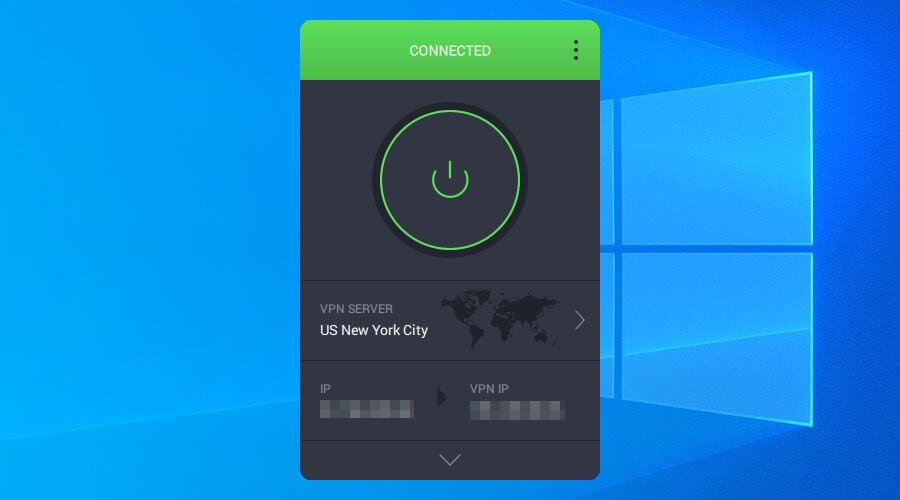
1. Use a VPN service

  1. Get a Private Internet Access subscription plan
  2. Install PIA on your computer
  3. Launch the VPN client and log into your PIA account
  4. Connect to a suitable server (servers that are closer to you tend to be faster)
  5. Launch Borderlands 3
  6. Check if the packet loss issue still persists

Private Internet Access is a great VPN service offered by Kape Technologies that comes with 24/7 customer support. It provides you with various security and privacy features but also packs additional perks.

For instance, you can use it to improve packet loss, decrease in-game ping, circumvent geo-blocking, bypass network congestion, and stop ISP bandwidth throttling.

On the downside, you should know that using a VPN won’t magically decrease packet loss unless the choke is caused by your ISP by either bandwidth limitation or improper traffic routing.

Private Internet Access

Experiencing packet loss in Borderlands 3? Why not give Private Internet Access a try?
Free Trial Visit Website

2. Troubleshoot your connection manually

  • Perform a thorough check-up of your home connection and look for anything suspicious (cables, drivers, router, adapters)
  • Replace or repair any faulty or troublesome component that you identify
  • Flush your DNS
  • Upgrade your Ethernet cables (going from Cat 5 to Cat 6 can make a huge difference)
  • Always used wired connections instead of WiFi, if possible (WiFi packet loss occurs more often)
  • Update your PC drivers to their latest version to avoid compatibility issues
  • Make sure your router’s firmware is updated to the latest version
  • Avoid peak hours if possible in order to dodge network congestion (unless you use a VPN)
  • Reach out to your ISP and ask them to take a look and even fix the issue, if possible
  • Contact the game server host and teach them how to fix packet loss on their side
  • Ask the game host if someone else in the party can take over the Borderlands 3 server

The fixes we’ve suggested above aren’t guaranteed to fix your Borderlands 3 packet loss issue 100%. However, trying them out couldn’t possibly harm your connection. In fact, performing maintenance work on your connection every now and then can do wonders.

Last, but not least, if you’re unsure about any of the steps we took, try to do a bit of research and understand them better.

Borderlands 3 packet loss can be fixed

To wrap it up, experiencing connection issues such as packet loss while playing Borderlands 3 can totally ruin your gaming experience.

Your game won’t be as smooth, menus will be unresponsive and don’t forget about rubberbanding every few seconds. Horrible.

The good news is that even packet loss can be oftentimes fixed if you’re patient enough. However, the fact that it’s difficult to pinpoint its exact cause makes it difficult to find a way to fix it, so you’ll usually have to poke in the dark.

Using a VPN seems to be a fix that works every time, but remember that it only works if the ISP causes the packet loss by means of artificially limiting your connection (bandwidth throttling, bad routing).

What to do if ISP is blocking Showbox? [Quick Guide]

Showbox is a popular video streaming application on the web and one of the best free movie apps. You can install it on Windows, iOS, and Android to watch top-rated and new movies and TV series.

It’s even possible to download video content to watch it later at a more convenient time, especially since the service adds new titles frequently. Unfortunately, many users complain that their ISP is blocking Showbox, which prevents them from taking advantage of the streaming app.

You might be tempted to drop Showbox and switch to other similar tools, such as Popcorn Time, especially since Showbox doesn’t always work. Instead of doing this, however, you can use a VPN to hide your online activity from your ISP and stop it from blocking Showbox.

How can I tell if my ISP has blocked Showbox?

Connect to another network and try to access Showbox

the WiFi symbol

If Showbox was blocked by your ISP, the best way to check this is by connecting to the Internet in some other way, in order to redirect your network traffic through another ISP or mobile carrier.

For example, if you’re home, you can temporarily use your 3G/4G mobile data plan to try and access Showbox. Otherwise, you can go out and try to connect to a public Wi-Fi hotspot to see if the streaming app works there.

Stay in touch on the Showbox subreddit

use Showbox subreddit

The Showbox subreddit currently has more than 15,000 members. And there’s a sticky post that indicates the Showbox status and gets updated as soon as its state changes.

If you suspect that your ISP is actively blocking Showbox, head over to the subreddit to check its status and read the comments made by the other Redditors.

Try accessing Showbox at different times

Even if your ISP blocked Showbox, it might not be permanent. Some Internet service providers set restrictions by taking account of the number of users who connect at the same time.

For instance, the majority of Internet users watch online streaming in the evening or during the weekends (outside of work hours). To check this theory, try accessing Showbox at different times of the day and days of the week.

What can I do if my ISP is blocking Showbox?

use PIA to access Showbox

  • Sign up for a VPN subscription plan (we recommend PIA).
  • Download and install the VPN app.
  • Connect to a VPN server*.
  • Try accessing Showbox again.

*To get the best VPN connection speed, connect to the nearest server recommended by the VPN provider. If it doesn’t work with Showbox, explore other VPN servers outside of your country.

Using a premium VPN service is the best way to watch Showbox if your ISP blocked this streaming app. We advise you against using free VPNs because they usually don’t work as expected.

That’s actually the reason why we didn’t recommend using a free VPN to check if your ISP blocked Showbox: they’re unreliable.

Made by Kape Technologies, Private Internet Access (PIA) is a top-rated VPN that you can trust to stop ISP site blocks and watch Showbox or other streaming services on your device. It’s compatible with all major platforms, including Windows, Android, iOS, Linux, and Mac.

In addition to unblocking Showbox and hiding your browsing history from your ISP, you can use PIA to stay anonymous on the web, protect your device from hackers, and watch Netflix US from anywhere in the world. It’s the best VPN for video streaming.

What else you must know about PIA:

  • Protects up to 10 devices
  • No logs or leaks
  • 24/7 live chat support
  • 30-day money-back guarantee (no free trial)
Private Internet Access

Private Internet Access

Use PIA to prevent your ISP from blocking Showbox by connecting to its high-speed VPN servers.
$2.85/mo. Buy it now

In conclusion, you can check if your ISP is blocking Showbox by using one of the solutions we provided above. And, if it did, you can use a trustworthy VPN service like PIA to fix this problem and comfortably watch movies and TV shows using this awesome streaming app.

[wl_navigator]

Windows Media Player subtitles not working

Video subtitles can come in handy when users need to keep the volume down or for translating foreign movies.

However, unlike some third-party media players, Windows Media Player doesn’t support SRT subtitle files out of the box, thus, sometimes it cannot load subtitles.

That doesn’t mean users can’t load subtitles in WMP, but that software needs an extra codec pack to play subtitles with videos.

What can I do if Windows Media Player cannot load subtitles?

1. Switch to another media player

try out GOM Player

Nothing can be more annoying than having a media player that refuses to load subtitles. That’s why it’s time to think of an alternative.

Windows Media Player was your initial choice, that’s for sure. In spite of that, GOM Player has fewer errors and bugs to worry about.

One of the capabilities that really stand out is the fact that it automatically searches and syncs subtitles for the movie being played with maximum precision.

Moreover, do take into consideration the support for numerous file formats including MP4, AVI, MKV, FLV, WMV, DVD, and MOV, while the 360-degree mode guarantees vivid playbacks.

GOM Player

GOM Player

If Windows Media Player cannot load subtitles, GOM Player certainly is up for the task. Ready to try it out?
Free trial Visit website

2. Check if the lyrics, captions, and subtitles option is enabled

  1. Users who have installed a required codec pack should check that they’ve enabled lyrics, captions, and subtitles within WMP. To do that, click Play at the top of the Windows Media Player window.The Play menu windows media player cannot load subtitles
  2. Then select Lyrics, captions, and subtitles to expand a submenu.Lyrics, captions, and subtitles submenu windows media player cannot load subtitles
  3. Select the On if available option to turn on subtitles.

3. Add DirectVobSub to Windows

add DirectVobSub

  1. Click a Download EU Main Link button for the latest DirectVobSub version (currently 2.46.4616) at the DirectVobSub codec page.
  2. Then, you just need to open the downloaded DirectVobSub installer to install that codec.

4. Check the video and subtitle file titles’ match

  1. To check that the subtitle file title matches its video, press the Windows key + E hotkey.
  2. Then, open the folder that includes the video that the subtitle is for. That folder should also include the video’s subtitle SRT file.
  3. If the SRT file is not in the same folder as its video, open the folder that includes the SRT. Then drag and drop the SRT into the video’s folder to move it.
  4. The SRT’s file title should also be the same as the video’s file name (with a different file suffix). If it isn’t, right-click the file and select the Rename option.The Rename option windows media player cannot load subtitles
  5. Edit the SRT file name so that it matches the video file title, but don’t change the SRT suffix at the end of it.

5. Convert subtitles to the SRT format

  1. Video subtitle files also need to be in Windows Media Player’s supported SRT format. If they have an alternative subtitle format, convert the required subtitles to SRT by opening the Convert Subtitles to SRT converter in a browser.The Convert Subtitles to Srt converter windows media player cannot load subtitles
  2. Click the Choose Files button.
  3. Select a subtitle file to convert, and click the Open button.
  4. Then press the Convert to SRT button.
  5. Download the converted SRT file.
  6. If Windows Media Player cannot load subtitles, consider redownloading the subtitle file or moving to an alternative player.

Were the above solutions helpful in fixing Windows Media Player subtitles issues? Let us know in the comments area below.

[wl_navigator]

Here’s everything we know about the Surface Duo Camera

Pre-orders for the Surface Duo will begin arriving on September 10, and 50 lucky press members already have review units in their hands. However, one thing that a lot of prospective buyers are concerned about is the Surface Duo’s camera.

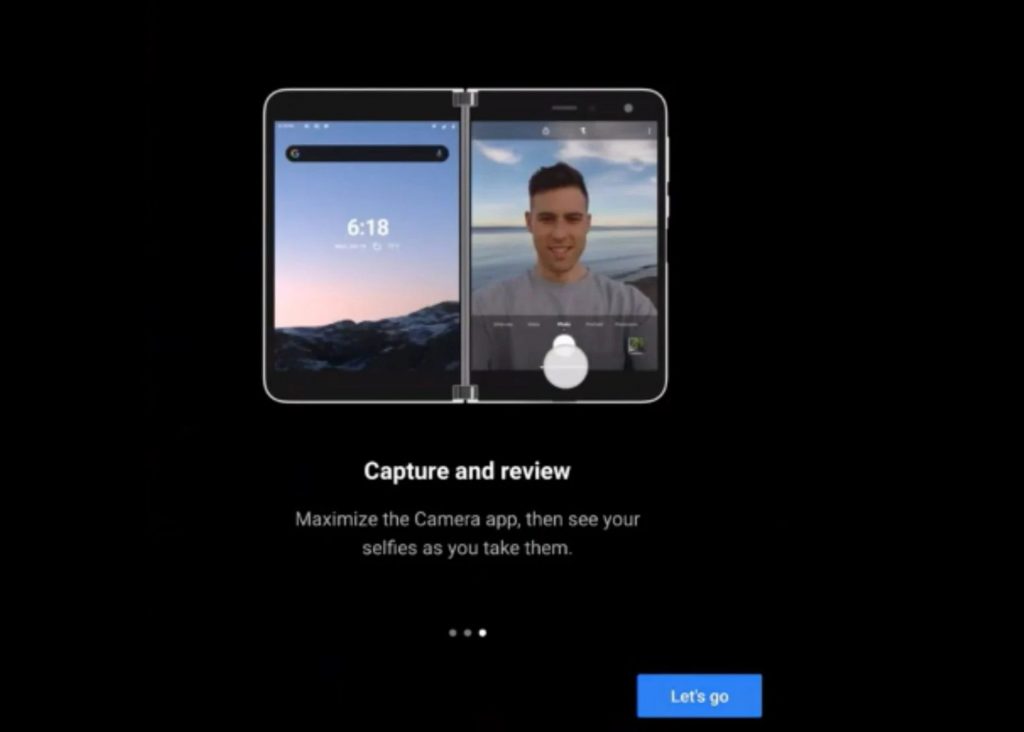
Since the Duo isn’t exactly your typical phone (Microsoft doesn’t officially call it one,) there’s a lot about the camera that is quite different. For instance, you’ll find that there’s no rear camera onboard. Taking photos will require some flipping and moving of the two screens.

Microsoft’s official specs sheets have mentioned the megapixels and the sensors inside the camera, but asides from that, it still remains very much of a mystery. We’ve done some digging, though, and here’s a look at everything we currently know about the Surface Duo camera.

The camera itself

Surface Duo

As we just said, there’s just a single camera lens on the Surface Duo. It is housed in the right corner above the right display. Specs-wise, Microsoft says that the camera lens comes in at 11 megapixels, with a 2.0 aperture, and a 1.0 µm sensor. There’s also a High CRI LED Flash next to that camera, too. And, the Duo’s camera has an 84-degree diagonal field of view. (By the way, for those unfamiliar with photography, µm refers to the size of the individual pixels.)

With those specs, the Duo’s camera is a bit different from what you’re likely used to in a 2020 phone. You won’t be getting a fancy dual, triple, or four camera lens set up as you would with on a similar $1,400 phone like the Galaxy Note 20, but that may not be a bad thing.

The reason why? Many have dubbed the main camera on the Pixel 3XL as the best on a smartphone. It shares a main camera setup just like the Duo, and at the time when most phone makers were going for dual cameras, it did what the Duo is doing now — a single camera setup.

The Pixel has a single 12-megapixel camera sensor, a 1.8 aperture, and 1.4µm. Up against the Duo, It has the upper hand in MP and µm, that’s for sure, but since they’re so close in specs, we’re hoping that the Duo’s image quality will come close to the Pixel’s. That’s in a bright light situation, at least and we will have to wait for our full review to find out.

Again, just keep in mind, there’s no multi-camera setup on the Duo, and if you want to use the camera for things other than selfies, you’ll have to flip the display around. Of course, you could carry the Duo with the screens folded outwards in your pocket, and have a rear-facing camera with the software controls on the screen facing you at the ready.

Still, the camera is also using PDAF technology for focusing on images. That’s a bit different from modern smartphones which feature laser autofocus. Laser autofocus is preferred, and we believe that the Duo might not perform well in low-light scenarios for this reason. Time will tell, however.

The software

Duo Camera 2

Next up, there’s the software inside the Duo that powers the camera. There are a couple of routine software features built into the Surface Duo camera. Most of the controls will be available by swiping at the bottom of the camera UI when the screen is folded over. We’ve listed them all for you below, and remind you that our previous post has a bit more info about how the Duo’s software looks.

  • Auto mode with low-light & HDR multi-frame photo capture and dynamic range scene detection
  • Super resolution zoom, and super zoom up to 7x
  • Portrait mode with adjustable depth control
  • Panorama mode
  • Burst mode
  • Slow motion mode
  • 4K video recording at 30 fps and 60 fps
  • 1080p video recording at 30 fps and 60 fps
  • HEVC and H.264 video recording formats
  • Gyro-based digital video stabilization

Indeed, from that list, there’s not much special about the features of the Duo’s camera. However, much like Google has done with the portrait mode on the Pixel 3XL Camera, Microsoft is using Artificial Intelligence on the Duo. Officially, the company says that this means it will be optimized for different shooting situations and scene detection. We’re looking forward to testing that out.

The image quality

Vismi Nath Duo Camera Quality

Moving to the end, there’s image quality. Since reviewers have an embargo on their units until September 10th (launch day), there aren’t many official photos posted from the Surface Duo. We’ve seen Microsoft executives like Panos Panay and Vishnu Nath send out images from the Duo, however, but all have been posted to Instagram and have been compressed.

In Pano’s original photo (the first known one posted from a Duo,) things looked a bit compressed and out of focus. However, in a more recent bright-light photo posted by Microsoft PM Vishnu Nath, we could see that the Duo takes awesome photos in daylight. The colors really pop, and there’s a lot of good contrast. We included his image above.

Asides from those two images, it’s a guessing game when it comes to image quality. However, Microsoft Bytes on Twitter has an interesting proposal. The user suggests that The Surface Pro X uses a 10MP AF f/2 lens, so that image quality might be the same as what you get with the Duo.

Of course, take that with a fine grain of salt, but his results are quite interesting. Compared to photos taken on his iPhone X, the photos from the Pro X do appear very good in lighting conditions, but the iPhone is much less washed out and does better in lighting. We hope that the Duo’s camera performs much better, but the comparison is interesting, to say the least.

What do you think?

As the Duo’s camera is one of the most important things many are considering, we’ll be keeping an eye on it for you. Ahead of the arrival of our own Surface Duo, we’ll also be hoping to demo a Duo at a BestBuy with it becomes available in stores for display on August 28. We’ll keep this article updated throughout the next few weeks as reviews appear, and as we learn more about the Duo. Keep tuned, and let us know your thoughts in the comments below.

6 Best Overclocking and Stress Testing Software [Most-Used]

Overclocking involves changing the default frequency of one of your computer’s components such as the CPU or GPU.

You can overclock your system’s elements in order to achieve the best possible performance and if you really want to perform overclocking it’s recommended that you also test your system’s GPU and CPU before or after you install a piece of overclocking software just to make sure that things are going smoothly.

Overclocking is a complex process that can improve your system’s performance, but it can also lead to overheating issues and permanently damage your CPU or GPU, that’s why it’s essential to use a tool to test overclocking.

Here are five of the best program for testing overclocking to keep your system safe and sound.

As an example, the products listed here are considered the best software to test overclocked GPUs at 1080p.

What are the best overclock testing tools?

PRTG Network Monitor 

The next entry on our list can be considered more of a monitor than a dedicated benchmarking tool, but it does that job as well just fine.

That being said, PRTG Network Monitor specializes in monitoring, not just one PC, but rather an entire network of PCs, allowing you a better overview of the hardware that is on your network.

Of course, this doesn’t include just the overclocking capabilities of your PC, but also the systems, devices, traffic, and applications in your IT infrastructure.

Given its network-oriented build, PRTG is suitable for businesses of all sizes, and since it is a powerful and easy-to-use solution, you don’t need to be part of the IT department to know how to use it.

PRTG Network Monitor

Manage the way your PC uses your bandwidth with one of the best network monitoring tools on the market today!
Free Trial Visit website

AIDA64 (recommended)

If testing your hardware and performing benchmark tests is something that you do regularly, then it goes without saying that you should choose the best software to help you.

To that end, we present AIDA64. AIDA 64 isn’t exactly just one software tool, it is in fact a suite of software tools that can be used in various scenarios, such as Network diagnostics and even mobile device benchmarking.

Another great selling point of AIDA64 is the developer’s dedication, as they release weekly updates to it so that even those of you with the latest hardware will always find support using these benchmarking tools.

All things considered, depending on what exactly you need to test for overclocking, go ahead and choose between AIDA64 Business Extreme, Engineer, and Network Audit.

You can explore detailed diagnostics and performance testing features in our AIDA64 Extreme benchmark guide.

AIDA64

If you need to test whether your PC can handle the strain of being overclocked, then go ahead and test it with AIDA64!
Check price Visit website

FurMark

When it comes to hardware, the ultimate frontier lies in taking it through a test that can be performed with a neat benchmark utility such as FurMark. This software is targeted at aiming at stressing out your CPU and GPU to the max in order to reveal the true potential of your components.

Check out the tool’s best features below:

  • The deployment of this tool on your system is performed fast, and after it’s finished, you can bring up the main window.
  • The interface comes with a simple and classic design that manages to include all the necessary features.
  • The detected GPUs are displayed in the main menu, and the software supports a maximum of four GPUs.
  • You can choose to run a few predefined tests such as Burn-in test, Burn-in benchmark with higher resolution and more.
  • You will also get the opportunity to customize the test case in order to fully stress your graphics card.
  • You can also enable fullscreen mode, a custom resolution set and the level of Anti-aliasing.
  • The software lets you enable a dynamic background or camera, burn-in, extreme burn-in and post-fx.
  • You can also toggle an option that lets you know when the GPU reached a custom temperature so that you prevent its frying.

⇒ Get FurMark

MemTest86

MemTest86 is a free standalone memory testing program, and you have to boot this one from a USB flash drive. It is able to test the RAM in your system for all kinds of faults while using a series of test patterns and comprehensive algorithms.

The test algorithms have been developed for more than 20 years.

Check out the best features that are included in this tool:

  • You will get 13 different RAM testing algorithms.
  • The program supports DDR4 RAM, DDR2, and DDR3.
  • It also comes with XMP, high-performance memory profiles.
  • It provides ECC RAM, support for error-correcting code RAM.
  • This tool comes with a graphical interface, mouse support and it logs the results to the disk.
  • MemTest86 offers foreign language support.
  • This tool allows self-booting off USB or CD.

Unreliable RAM can result in a lot of issues such as crashes, corrupted data, and unexplained behavior. With MemTest86 you will be able to diagnose faulty RAM which is one of the most frustrating computer problems that is also really hard to pin down sometimes.

⇒ Get MemTest86 

HeavyLoad

HeavyLoad is targeted at stressing all the resources of a computer including, CPU, RAM, HDD, network, OS and more just to make sure how these work under heavy load.

This is really useful for assessing essential file or database servers before being able to use them productively. The program is also helpful to check out if your new PC might get overheated when you’re using it intensively.

Check out more great features that come with this software:

  • You will get a test option for full CPU load, and this test loads the CPU up to 100%.
  • HeavyLoad also creates a temp file to which it writes data continuously during the test process.
  • The program allocates memory so that your system has less available memory and the data rate at which the memory will be allocated can be customized.
  • There’s also a test for each one of the local partitions called TreeSize that runs in a continuous loop.

⇒ Get HeavyLoad

Intel Extreme Tuning Utility

Intel Extreme Tuning Utility is a simple Windows-based performance-tuning program that can be used by both novice users and experienced enthusiasts to overclock, monitor and stress their systems.

Check out the most impressive features that are included in this software:

  • The program’s interface comes with a robust set of handy features that are available on the new Intel Application Processors and Intel motherboards as well.
  • This tool provides system information including data on CPU, memory, GPU, BIOS, OS, and motherboard.
  • You can benchmark your starting performance, overclock your processor, and measure your new performance as well.
  • It provides all controls to maximize the untapped performance of your CPU, GPU, and memory.
  • If you are interested how stable your overclock is, the included stress tests will help you test your system just to be sure.
  • You can also use the app profile pairing feature to apply the various overclocking setting to separate apps.

⇒ Get Intel Extreme Tuning Utility

These are the best five tools for testing the overclocking of your systems and no matter which one you decide to use, you’ll see that it works great.

It’s not enough to get some expensive pieces of hardware, it’s also essential to know how far you can push their limits but without having to worry about any potential risks of overheating and permanent damage.

That’s why it’s so important to use software capable of testing overclocking to monitor your system’s components.


[wl_navigator]

14 Best Shortcut Software for Windows 10 & 11

Keyboard shortcuts are extremely useful since they allow you to perform certain actions quickly. Windows has a wide range of available shortcuts, but you can also create your own custom shortcuts.

To create your own shortcuts, you need a specialized software solution. So today we’re going to show you the best shortcut software for Windows 10.

What is the best shortcut software for Windows?

Comfort Keys Pro – Text templates support

Comfort Keys Pro is a great shortcut software solution for Windows PC. It allows you to create custom keyboard shortcuts and use that same shortcuts to open certain applications or websites in your browser.

The application also has a template manager, and by using it you can create various text templates and insert them quickly by pressing a certain keyboard shortcut. The application works with system actions, so you can easily adjust the volume or turn off your PC with just a shortcut.

The application also supports macros; you can record key press sequences and assign them to desired hotkeys.  As for the hotkeys, they are all listed in the main window, and you can easily select and edit any of them.

Comfort Keys Pro also has a built-in on-screen keyboard and its own clipboard manager, allowing you to see all previously copied data and reuse it whenever you want.

This is a powerful application, and by using it, you’ll be able to create various shortcuts with ease. Comfort Keys Pro might be the right choice if you’re an advanced user and want to create custom shortcuts.

Here are the key features of Comfort Keys Pro:

  • Launch any website or application
  • Support for text templates
  • Ability to change the input language or case size
  • Support for various system actions
  • Simple to use hotkey manager
  • Onscreen keyboard and clipboard manager

Comfort Keys Pro

If you need to set key bindings to increase your productivity in a much faster manner, then Comfort Keys Pro is the tool for you!
Check Price Visit Website

ShortKeys– Wide range of symbols

If you want to create shortcuts you might be interested in the ShortKeys software solution for keyboard shortcuts. This application allows you to create simple shortcuts that can help you enter the desired text.

To use a shortcut you just need to enter one or two characters to trigger the hotkey. Using this tool you can send the replacement text to your documents or to your clipboard.

The application supports Rich Text format, and you can easily stylize the replacement text. If needed, you can set the typing speed for your replacement text.

In addition, you can pause the playback, enter the desired text manually, and resume the playback with a single keypress.

ShortKeys also supports capital letters, and if your shortkey has a first capital letter your replacement text will have the first capital letter as well. In addition, the application also supports timed delays to text playback.

If needed, you can make your shortkeys uppercase and lowercase sensitive, thus allowing you to create more combinations.

You can also change the scope of your shortcuts and allow macros to play in all programs or only in specific applications.

The application supports a wide range of symbols and international characters for text replacement. In addition to symbols, you can also enter date and time with ease.

If needed, you can add various keys to your macros, such as Page Up, Page Down, Insert, arrow keys, etc. There’s also a spell checker for American and British English so you can easily check your input.

The application supports an unlimited number of files and an unlimited number of shortkeys per file. Of course, you can easily load more than one macro file at a time.

We also have to mention that you can have up to 65,536 text characters per shortkey replacement.

If you want you can even organize your shortkeys into different categories. You can also import or export your shortkeys and there’s even an automatic file backup option.

ShortKeys is a solid application, but it might take you a few minutes to get used to it. Shortkey creation process can be a bit complicated for a first-time user, but you should be able to learn how the process works in a matter of minutes.

This application isn’t free, so if you want to use it without restrictions you’ll need to purchase a license. Of course, the 30-day trial version is available for download, but there’s also a Lite version available.

The Lite version offers support for up to 15 shortkeys and it doesn’t have network support or a spell checker. Despite these limitations, the Lite version is completely free and you can use it indefinitely.

⇒ Get ShortKeys

AutoHotkey – Flexible syntax

If you’re an advanced user and you’re looking for a free and powerful shortcut software, you might want to consider using AutoHotkey.

This application allows you to create hotkeys for both keyboard and mouse. In addition, you can also remap keys if you want to.

AutoHotkey is an open-source scripting language for Windows that allows you to create all sorts of shortcuts and macros on your PC.

The application has a flexible syntax that should be relatively simple to use.

This tool supports wide range of features, and you can open a specific website with a keyboard shortcut or copy the text and edit it automatically before pasting it.

These are some of the basic functions that you can perform, but you can also create all sorts of complex shortcuts.

According to the developer, AutoHotkey comes with built-in commands for beginners, so it will be easy for first-time users to create their own custom commands and shortcuts.

The application will allow you to automate any task so it’s perfect for any advanced user that is familiar with programming.

As we already mentioned, this is an open source (GNU GPLv2) application, so you can use it without any restrictions. We have to mention that there’s also a portable version available so you can run this tool on your PC without an installation.

AutoHotkey allows you to automate tasks and create all sorts of shortcuts. This is an extremely powerful tool, but it requires you to create all your shortcuts and functions manually.

Fortunately for you, the application comes with an extensive manual, so we encourage you to check it out.

This application might not be suitable for basic users, but if you have some programming knowledge you should be able to use AutoHotkey without any issues.

⇒ Get AutoHotkey

KeyRocket – Streamlined UI

KeyRocket is a useful application that allows you to learn keyboard shortcuts. Keyboard shortcuts can speed up your work, and if you don’t use shortcuts often this tool will allow you to learn all the necessary shortcuts.

The application has a streamlined user interface, and you’ll learn new shortcuts right from your favorite applications. Regarding the supported applications, KeyRocket works with Windows 10, Microsoft Office, and Microsoft Visual Studio.

The application will add over 40 new keyboard shortcuts that are missing from Microsoft Office. In addition, you can also assign your own keyboard shortcuts to almost any function. The application has an auto-detection feature that detects functions that you use frequently. Thanks to this feature you can assign shortcuts for those functions thus making them easier to access.

It’s worth mentioning that KeyRocket has a dashboard that keeps track of your statistics and total used shortcuts. The application doesn’t require any configuration, so it’s perfect for both basic and advanced users alike. KeyRocket is a great tool that will allow you to learn all keyboard shortcuts for the most popular Microsoft applications.

Unfortunately, KeyRocket isn’t free, but you can download and use the free evaluation version for 7 days.

⇒ Get KeyRocket

SlickRun – Simple to use

SlickRun is another great shortcut software. But, unlike other tools on our list, it doesn’t support keyboard shortcuts. SlickRun is simple to use and it allows you to launch your favorite applications or websites with ease.

Once you install the application it will create a bar in the bottom right corner. From there you can instantly launch any application or a website. Simply enter the application alias in the search bar and press the Enter key to start the application.

In addition to starting applications, this tool will also show you memory information along with the current date and time. The application comes with several available aliases, but you can also create your own in a matter of seconds.

Simply enter the magic word that you want to use to run a specific application or a website. After that enter the file location or the website address. If needed, you can set the start mode or various parameters for your applications.

Of course, you can choose to run the application as a current user or with administrator privileges. The application also allows you to test your magic word at any time and see if it works.

SlickRun is a free shortcut software that allows you to start any application or a website simply by entering its alias. This is a solid shortcut software, but it doesn’t support any keyboard shortcuts which can be a flaw for some users.

In addition, some users might not like the application’s humble user interface. Despite these minor flaws, this is still a great shortcut software, so be sure to try it out.

⇒ Get SlickRun

PS Hot Launch – Customizable

PS Hot Launch is another application that allows you to quickly launch applications and websites. The application allows you to add any application or document to PS Hot Launch and start it with just a couple of clicks.

If you want, you can organize your items into groups or even add separators to organize them better.

This tool also has the ability to assign keyboard shortcuts to all your entries. This means that you can start any application simply by pressing the hotkey that you assigned. Of course, you can also select your applications from the menu.

To make your experience more streamlined, you can also open the menu using a keyboard shortcut.

PS Hot Launch is a simple application that allows you to add your favorite applications, documents, and websites to a single menu. The menu supports a wide range of customization, and you can customize it any way you want.

Thanks to the support for keyboard shortcuts, you can also open any application or document in a matter of seconds. PS Hot Launch is a solid shortcut software, and since it’s available for free there’s no reason not to try it.

⇒ Get PS Hot Launch

HotKeyBind – Simple app

If you like using keyboard shortcuts, you might be interested in HotKeyBind. Just like many other applications on our list, HotKeyBind allows you to run specific applications by pressing a certain hotkey.

You can use this tool to start any application, directory, or file with a keyboard shortcut. In addition, you can open a specific web page or even perform a web search using this tool.

The application also allows you to control your open windows and to shut down or restart the PC simply by pressing a keyboard shortcut. In addition, you can change the volume or copy / insert a desired text.


⇒ Get HotKeyBind

HotkeyP – Changes window opacity

Another free shortcut software for Windows is HotkeyP. This is a simple application that allows you to create your own custom shortcuts. You can use your shortcuts to open any application, file, directory, or web location with ease.

In addition, you can assign various system functions to your shortcuts. For example, you can shut down or restart your PC, delete temporary files, open Control Panel items, and much more.

In addition, you can control your display with custom shortcuts, turn it off, start a screensaver, or change your wallpaper.

HotkeyP also allows you to control your open windows, and you can minimize, resize, or change their opacity. If needed, you can also terminate tasks with a simple keyboard shortcut.

The application offers some playback control, and you can easily change the volume or eject a disc with a keyboard shortcut. Lastly, you can also perform various macros using this tool.

The tool allows you to assign special parameters as well as a working directory for selected applications.

You can change window opacity and process priority with your shortcuts if needed. In addition, you can start applications with administrator privileges. You can also add your shortcuts to specific categories to organize them better.

All your shortcuts are visible from the main menu; you can organize them or edit them with a single click. The application has a simplistic interface, so even the most basic users will be able to use it.

HotkeyP offers wide range of features, and thanks to the simple user interface, the application will be suitable for both basic and advanced users alike. The application is completely free and portable, so be sure that you try it out.

⇒ Get HotkeyP

Clavier+ – Completely free

Another free application that allows you to create custom shortcuts is Clavier+. This application allows you to open any application, document, or directory with a single keyboard shortcut.

In addition to applications, you can open any website by pressing a keyboard shortcut.

In addition, you can paste the desired text using a keyboard shortcut. The application has a menu that allows you to quickly choose any installed application and assign a shortcut to it.

Of course, you can also search for applications manually if the desired application isn’t available on the list. Clavier+ also supports special characters, and you can assign them to any shortcut with ease.

We have to mention that the application can recognize both left and right Ctrl, Shift, Alt, or Windows Key, thus allowing you to create custom shortcuts easily. In addition, you can test any of your shortcuts from the application.

The application has a simple user interface, and you should be able to create custom shortcuts with ease. We have to mention that there’s no support for special functions, so you can’t control playback, turn off your PC, or control open windows.

Despite this limitation, this is still a great shortcut software, and since it’s completely free, we advise you to try it out. We have to mention that there’s also a portable version available, so you can run this tool on any PC without installation.

⇒ Get Clavier+

Shortcuts Map – Basic features

Shortcuts Map is another free shortcut software that we want to show you. Unlike other entries on our list, this application allows you to see all user-created shortcuts.

The application has a simple interface that will show you the list of installed applications and the assigned shortcuts. This makes it easier to sort your applications and find the one that has a shortcut assigned to it.

Shortcuts Map is simple to use, and in order to assign a shortcut, you just need to double-click the desired application. After doing that, the properties window will appear, and you’ll be able to assign a shortcut with ease.

Shortcuts Map is a plain application, and it doesn’t offer any advanced features. However, the application allows you to easily view and add new shortcuts, which can be useful to some users.

Regarding the flaws, the application doesn’t have the most streamlined user interface, so you might encounter some minor interface issues. The application is completely free, so feel free to try it out.

⇒ Get Shortcuts Map

FastFox – Solid software

FastFox is another shortcut software that you might find useful. Unlike some other entries on our list, this application doesn’t allow you to start other applications with a shortcut key. Instead, you can create an abbreviation and use it to enter the desired text quickly. In addition to text, this application supports pictures and rich text.

FastFox also supports macros, and you can assign keyboard shortcuts to macros in order to run them quickly. It has an autocomplete feature that will recognize the phrases you commonly use and create suggestions as you type.

We have to mention that this application supports groups, thus allowing you to easily organize your shortcuts. In addition, there’s also an ability to share your shortcuts with other users in your organization.

FastFox is a solid application, and if you do a lot of text-related work, you might want to consider it. We have to mention that this tool isn’t free, so if you want to continue using it you’ll need to purchase a license.

⇒ Get FastFox

ShortKeeper – Lightweight solution

If you need a lightweight software utility that will help efficiently create, manage, and maintain sets of keyboard shortcuts, then you can definitely rely on ShortKeeper.

Thanks to this intuitive tool, you will no longer have to worry about repetitive keystrokes and mouse clicks that make you lose time and patience.

The UI is pretty straightforward, and the entire program also includes AutoHotkey. As such, it provides a special command that accepts AutoHotkey code to create shortcuts and macros that can do anything you need.

lastly, you don’t have to worry that an increase in your own speed will mean a decrease in the computer’s since the system impact of ShortKeeper running in the background is barely noticeable.

⇒ Get ShortKeeper

AltMOUSE – Mouseless usage

AltMOUSE is a software tool designed not necessarily to allow you to create keyboard shortcuts, instead, it was made as an alternative for those that cannot use a mouse.

That being said, you can use this tool to register complex shortcuts and actions, allowing you to use a PC without even having your mousepad connected or your touchpad active.

From many points of view, this software can be viewed as a medical tool since it can help long-term sufferers of affections like carpal tunnel.

That being said, if you want to use your keyboard in a way that makes mice obsolete, either temporarily or permanently, give AltMouse a try.

⇒ AltMOUSE

WinHotKey Configuration – Straightforward usage

WinHotKey Configuration is another great software that allows you to create custom hotkeys in Windows. This tool has an incredibly simple user interface that allows you to see all your hotkeys right in the main menu.

As for the shortcut creation process, the process is quite straightforward, and you can add a short description to your shortcut to differentiate it from others. As for available functions, you can assign a hotkey to open an application, document, or directory. In addition, you can use the shortcut to control the size of the current window or to paste certain text quickly.

It’s worth mentioning that the application supports some advanced options when it comes to application launching, allowing you to set various parameters for the desired application.

Overall, WinHotKey Configuration software is incredibly simple to use, but it doesn’t offer you access to the advanced system functions, so if you want to map these to your keyboard shortcuts, you’ll have to do a bit of research and figure out how to do that on your own.

Here are the key features of WinHotKey Configuration:

  • Extremely simple to use
  • Simple and straightforward interface
  • Ability to paste predefined text with a shortcut
  • Free to use

⇒ Get WinHotKey Configuration

Shortcut software can be useful if you want to create your own shortcuts and boost your productivity. We showed you some of the best shortcut tools, so feel free to try any of them.

Before you leave, find out how to create a shortcut for Settings in Windows, including that for individual pages.

FIX: Sling TV error 10-100 in just a couple of steps

Sling TV is listed among the top ten video streaming providers in the United States, alongside the more popular Hulu, Netflix or Prime Video.

And just like all other similar services available, Sling TV is not short of streaming errors.

As such, streaming is sometimes compromised and the following message is shown on a black screen:

Please force close the app and wait for one minute. If this problem persists, please visit ‘help.sling.com’ and chat with us (10-100).


How can I fix error 10-100 on Sling TV?

1. Force stop the Sling app


1.1 For Android mobiles:

  1. Go to Settings > Recent Apps.
  2. Find the Sling TV > swipe the app windows up or down to close it depending on your device.
  3. Return to the main screen and re-launch the app.

1.2 For Android TV:

  1. From the home screen > Settings.
  2. Select Apps > Sling TV.
  3. Click on the Force Stop then re-launch the app.

1.3 For Apple TV:

  1.  Press the Home button on your remote two times consecutively.
  2. Scroll through to find the Sling TV.
  3. Navigate back to the home screen and re-launch the app.

2. Delete cached data


On devices running on Windows, iOS, or Android devices, cached data is usually found in the storage/privacy section of the Settings menu.

Alternatively, for Windows and Android, you can use CCleaner, either the free or the paid version. Scan your device with this tool and allow it to delete all unwanted files.

On Apple TV you need to uninstall and reinstall the app to clear cache and data.

Also, for Roku:

    1. Select Home in the main menu.
    2. Then, on the remote controller press Home 5 times + press Up + press Rewind 2 times + press Fast Forward 2 times.
    3. It should take a few seconds to clear the cache.

3. Check your Internet connection

  1. Turn off all devices connected to your home network.
  2. Close all background apps or other programs.
  3. Place the modem or router near your device and see if this solves the problem.
  4. Or connect your device to the Internet using an Ethernet cable.

Additionally, make sure that you meet the minimum Internet speed values so that the services work properly: 2.8 Mb/s or higher for good quality and 1.2 Mb/s for medium quality.


4. Uninstall the Sling TV app


This should be the last resort, but uninstalling the app will also delete any temporary or unsued files that might be stored in your device. A fresh re-install should also come with the latest updates.


We hope that at least one of these solutions was helpful to fix the 10-100 black screen error on your Sling TV. If otherwise, please use the comments section below to give us your feedback.

Before you go, you might be interested in our latest guide on Sling error 28-29 for more useful tips.

Windows 10/11 Mail not showing all emails

Windows 10 comes with a built-in app designed to synchronize your mail accounts with it – Windows Mail.

The app is basically a webmail system in which you cannot set any mail rules but, of course, you get the features to work by going on the mail server (which you can access via a browser) and set the features from there.

Whether you have a Hotmail, an Outlook or a Yahoo! account you can pretty much synchronize all of these with your Windows mail app.

The one big problem with the Windows Mail app is that some users are not able to view all their emails at all or they can only view the first 30.

In a couple of rows below, I will explain what we can do to fix your issue with emails not showing up in the Windows Mail app.

How can I see all my emails in the Windows Mail App?

  1. Perform a clean boot
  2. Remove all accounts
  3. Reinstall the app
  4. Try a mail client app

1. Perform a clean boot

  1. Make sure you’re logged in as administrator on your Windows PC.
  2. In the home screen search box, type msconfig.
  3. Open System Configuration as administrator.
  4. In the Services tab, click on the check box next to Hide all Microsoft services.hide all microsoft services
  5. Click on Disable All, as well.
  6. Then, go to the Startup tab and Open Task Manager.
  7. Right-click on every item in task Manager, and select Disable for all of them.
  8. Then, close Task Manager.
  9. Back to the Startup tab, press OK.
  10. Reboot your PC.
  11. After it restarts, check the Windows Mail.
  12. If it doesn’t work, in order to get your computer back to normal parameters, reopen System Configuration, go to the General tab,  click on Normal Startup, and on OK.
  13. Restart the PC again
  14. Check if the emails on your Windows mail app are showing now.

2. Remove all accounts

remove all windows mail accounts
  1. Open the Windows Mail app again.
  2. Click on Settings and choose the Manage accounts option.
  3. Select the account, click on Delete account  and on Save.

Do this for all synced accounts, then re-add them, one by one. Check if you can see all your emails now.

3. Reinstall the app

  1. Type Apps in the home screen search bar.
  2. Open  Apps & features.
  3. Look for Mail, click on it and choose Uninstall.uninstall windows mail
  4. After the app uninstalls reboot the PC.
  5. After the PC boots up, type Store in the search bar and open Microsoft Store.
  6. Look for the Windows Mail app (or Mail and Calendar).
  7. Install the app then reboot the PC.

4. Try a mail client app

We recommend that you use a third-party mail client app. They have many interesting incorporated features, including centralizing multiple mail addresses, classification, alerts, and other useful options.

Mailbird is such a client and one of the most popular on the market at this moment.

It works similarly to Windows Mail, allowing users to manage their emails from a single, unified console, but with the full features of an email account.

That is, by using Mailbird, you can customize the Inbox layout, prioritize emails, choose custom notification sounds. Plus, the tool has many handy integrations with other apps like Google Calendar, Twitter, or Asana.

Afterward,  try again to sync your email accounts on the Windows app and see if it works fine.

So these are a few steps that you can try in order to view all your emails on the Windows 10 Mail app. If you have any other questions please don’t hesitate to write us below.

eM Client Won’t Open on Windows 10 [FIX]

After Windows Live was discontinued and the Mail app proved underwhelming, users were in doubt about the next email service client.

Lots of third-party solutions were always there and they recently proved to be much better in every sense than the first-party tool. One of those is certainly the US-made eM Client service.

It dates back to Windows XP and it’s one of the best choices on Windows 10. However, some users who made this choice were unable to make eM Client work on Windows 10. It just won’t start for some of them.

Luckily, there’s a solution to every problem. So, start with the troubleshooting steps we provided below and we’ll hopefully resolve the problem at hand.

How can I fix eM Client issues on Windows 10?

1. Troubleshoot the compatibilityem client won't start on Windows 10

  1. Right-click on the eM Client‘s desktop shortcut.
  2. Open Properties.
  3. Choose the Compatibility tab.
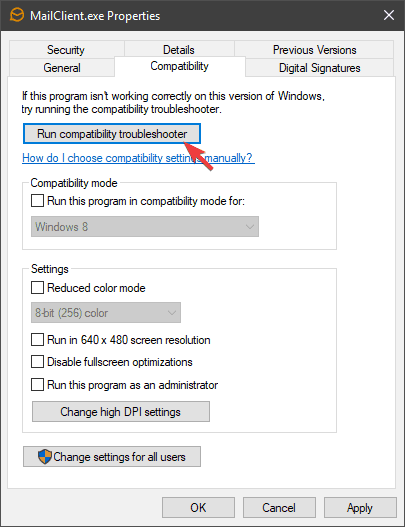
  4. Click on the Troubleshoot Compatibility and follow the instructions.

Let’s start the troubleshooting steps by checking the compatibility issues. Even though the latest iteration of eM Client is natively made for Windows 10, it’s not uncommon for it to get broken.

The research we did on the dedicated eM Client Hub leads us to a compatibility issue. To avoid this, we encourage you to run the compatibility troubleshooter.

2. Reinstall eM Clientem client won't start on Windows 10

  1. Export your data to preserve it.
  2. Open Start.
  3. Look for eM Client in the Programs list.
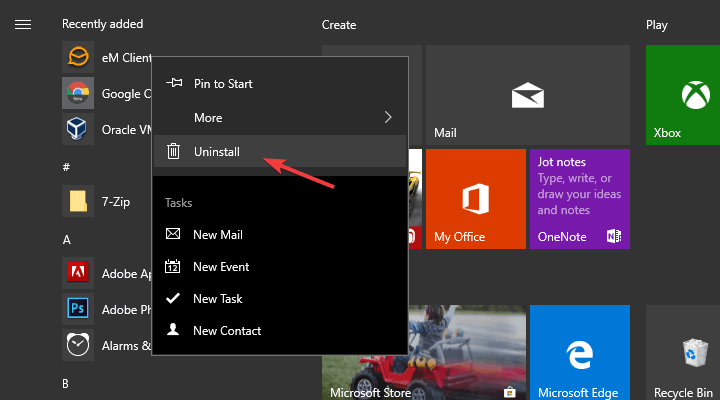
  4. Right-click on it and choose Uninstall from the contextual menu.
  5. Uninstall the program from Control Panel.
  6. Restart your PC.
  7. Download eM Client.
  8. Install the eM Client and look for changes.

Finally, if you’re still stuck with the same error, consider reinstalling eM Client. All you have to do is to follow the above steps to reinstall the eM Client on Windows 10.

Basically, this is the last resort, especially since you need to back up all of the client’s data. After you’ve done that, navigate to the official site and download eM Client.

If you’re a PRO user, you can activate the premium features later on. An additional advantage of the PRO mode is the specialized support, which will provide you with more detailed steps.

3. Set eM Client as the default email applicationem client won't start on Windows 10

  • How to make eM Client the default email app on Windows 10:
  1. Right-click on Start.
  2. Open Settings.
  3. Choose Apps.
  4. Choose Default apps under the left pane.
  5. Click on the Mail icon.
  6. Select eM Client from the drop-down list.
  • How to disable the application from starting with the system:
  1. Open eM Client.
  2. Click on the Menu, choose Tools and then Settings.
  3. Under the General tab, uncheck both Minimize application to tray and Run on system startup boxes.
  4. Save changes.
  5. Restart your PC.

Moving forward, it won’t harm to set the eM Client as the default email app. If you rather use it over the Mail app for Windows 10, then this is a no-brainer. Furthermore, make sure that the app doesn’t start with the system.

Some users were able to resolve the problem by starting the app manually instead of allowing it to start with the system automatically.

4. Update eM Client and .NET FrameworkCheck for updates eM Client won’t open on Windows 10

  1. Open Start.
  2. Look for eM Client in the Programs list.
  3. Click on Menu.
  4. Go to Help.
  5. Select Cheeck for updates and look for changes.

Now, the most prolific solution to this problem we’ve bumped into: the update. Making sure that the eM Client app is up to date is of utmost importance. Lots of affected users were able to resolve the issue with an update that, seemingly, optimized the application.

In addition, make sure to download the latest version of .NET Framework, if you already haven’t.

5. Run the application as an administratorem client won't start on Windows 10

  1. Right-click on the eM Client‘s desktop shortcut
  2. Open Properties.
  3. Choose the Compatibility tab.
  4. Check the Run this program as an administrator box.
  5. Click OK to confirm changes.

Another possible reason for the problem might lie in the limitations Windows 10 imposes to third-party email clients.

As you already know, there’s the built-in email app which is subpar when compared to some third-party solutions. That’s why we suggest running the app with administrative permission.

Also, make sure that the app isn’t already working in the background, which might have caused this issue in the first place. Open the Task Manager and kill the eM Client. After that, grant it the administrative permissions.

If Task Manager won’t end your task, be sure to follow the simple steps from this useful guide and solve the problem for sure!

6. Try an alternative email client

If you’re looking for an email client that runs smoothly on Windows 10, we recommend you Mailbird.

Mailbird is a chic email program with many customization options in terms of design and the integration of apps. Especially the integration of services like Dropbox, Google Calendar, or WhatsApp is very practical.

Mailbird consolidates all your electronic email accounts into one mailbox. You can use the control bar to select your accounts separately or use the shared inbox. Individual messages can be marked as important info, favorite or spam.

You can compose new correspondence in a pop-up window. If required, you can link the software to accounts on Facebook, Twitter, WhatsApp, Google, Dropbox, or Evernote. The respective app functions are then available in the program interface.

The selection of extensions is impressive in any case. Once you have integrated your email and other services, you can use them all in one application. You can even customize the interface to your liking, with different themes and colors.

In conclusion, considering this email service will highly improve productivity both with personal daily emails and at work.

⇒ Get Mailbird

Don’t forget to tell us whether these steps helped you deal with the problem. You can do that in the comments section below.

Comedy Central not available in Canada? Try these solutions

Comedy Central is an American television channel that’s distributed in various other countries in the world. However, it’s not available in Canada. Nevertheless, you can still watch it. If you’re looking for solutions to stay in touch with your favorite TV shows on Comedy Central when traveling to Canada or any other country, you can use a VPN or Mobdro. With the help of a virtual private network service, you can unblock not only Comedy Central but any television channels or streaming services. It changes your IP address and geo-location, making it seem like you’re watching Comedy Central from any part of the world. You just have to connect to the right VPN server. On the other hand, Mobdro is a free app for Android, and you can also make it run on Windows with an Android emulator. You don’t have to connect to any servers since you can watch Comedy Central and other TV channels directly in the app. There are advantages and disadvantages to using these two solutions, so make sure to compare them before deciding which is better for watching Comedy Central in Canada.

How can I watch Comedy Central in Canada?

Using a VPN

  • Buy a subscription plan for a premium VPN (we suggest PIA).
  • Set up the VPN app on your device.
  • Enter your account credentials and sign in.
  • Connect to a VPN server in the US.
  • Go to Comedy Central Live TV.
  • Choose your TV provider and sign in with a username and password.
  • Start watching Comedy Central.

Made by Kape Technologies, Private Internet Access (PIA) is an excellent VPN for streaming and video unblocking. You can use it to watch Netflix US and TV channels like Comedy Central without any issues.

PIA provides you with over 3,300 VPN servers in 48 countries, including the US. It’s wrapped in a user-friendly interface and features intuitive security options for all types of users, even those inexperienced with virtual private network tools.

Using OpenVPN with up to 256-bit military-grade encryption, PIA protects your data from hacker interceptions, especially when using open hotspots to get online. It also has WireGuard, Shadowsocks, SOCKS5, private DNS, and a kill switch.

What else you should know about PIA:

  • 10 simultaneous connections
  • No logs or leaks
  • 24/7 live chat support
  • 30-day money-back guarantee (no free trial)
Private Internet Access

Private Internet Access

Watch Comedy Central in Canada or anywhere else in the world by connecting to PIA's high-speed VPN servers.
$2.85/mo. Buy it now

Using Mobdro

use Mobdro

  • Download and install Mobdro.
  • Launch Mobdro and click the search button.
  • Type Comedy Central and open this TV channel.
  • Start watching Comedy Central live.

To summarize, it’s possible to watch Comedy Central if you’re living or traveling to Canada or any other part of the world by turning to a reliable VPN service like Private Internet Access, or by using the Mobdro app for Android or Windows.

If you can’t decide between these two options, we suggest going with PIA because it grants you total Internet freedom.

[wl_navigator]

7 Days to Die packet loss: What is it and how to fix it?

7 Days to Die is an open-world video game where you have to survive waves of zombies by means of crafting and building impenetrable defenses. Long story short, it’s nothing like any zombie survival game you’ve ever played.

Instead of arming yourself with deadly weapons and wreak havoc to your lifeless enemies, you’ll have to plan ahead and build a solid base that can hold against hordes of zombies.

The zombies are ruled by a day-night cycle, which affects their behavior. During the day, they’re somewhat harmless and sometimes stupid for their inability to detect you unless you’re virtually next to them.

However, when night falls, they become shockingly fast and violent, making them tenfold harder to defend against. But that’s not it. The Blood Moon occurs every 7 days.

This event makes every zombie and infected animal to attack you all at once, and here’s the thing. Unless you have a solid defense you can rely on, you won’t stand a chance to get out of it alive.

What’s packet loss in 7 Days to Die?

Now comes the less fun part. If you choose to take it online and play co-op, you might be subject to certain limitations such as connectivity issues. It’s not a must that you’ll experience them, but there’s a strong chance for it to happen.

One of the most annoying problems you can encounter in any online game, let alone 7 Days to Die, is packet loss. Others include jitter, network congestion, and high latency.

Packet loss occurs whenever data packets that are transmitted on your connection don’t make it to their destination. Consequently, the connection tries to patch things up by adding artificial delay, giving the packets a chance to arrive by waiting a bit more.

If the waiting time is too long, you’ll start to experience lag, which grows exponentially as the waiting time increases. This can cause unresponsive menus, rubberbanding, sluggish gameplay, and even disconnections if there’s a timeout limit.

How to detect 7 Days to Die packet loss?

To this moment, there are no official 7 Days to Die servers. Players can only host the game servers themselves or turn to a hosting company to keep their game up and running indefinitely.

Therefore, you’re kind of on your own when it comes to fixing packet loss issues you may identify. But in order to fix packet loss, you must first detect it and make sure it’s indeed what causes connection issues to your game.

So how does one achieve that? Quite simple, actually.

1. Use Windows’ built-in pathping tool

  1. Identify the server’s IP address
  2. Launch an instance of the CMD prompt
  3. Type pathping x.x.x.x (replace x.x.x.x with the game server address)CMD pathping
  4. Wait for the results
  5. Check if there’s any packet loss on any hop of the connection

As a rule, the lower the number of a hop is, the closer it is to you, physically. Therefore it’s worth mentioning that the first hop on the list belongs to your computer (or device running the test) and the last hop corresponds to the game server.

Private Internet Access

Private Internet Access

Leaking packets in 7 Days to Die? Private Internet Access might come in handy.
$2.85/mo. Buy it now

Thus, if you notice packet loss on the first hop, it’s because of your computer. On the same logic, packet loss on the last hop means there’s something wrong with the game server.

2. Try specialized, third-party tools

Certain software solutions such as Nirsoft’s LiveTcpUdpWatch can help you easily figure out if there’s something wrong with your connection. You just need to run it and take a look at the main window.

A few seconds after launching it, this tool displays every connection to and from your PC, including 7 Days to Die servers. You just need to scroll down until you reach the game client, and take a look at the packet loss percentage field.

The great thing about using specialized software to identify packet loss is the lack of advanced configuration. You just deploy the app, run it, and retrieve the results of the assessment.

How to fix packet loss in 7 Days to Die?

1. Turn to a VPN service

  1. Buy a Private Internet Access subscription
  2. Download the VPN client on your computer
  3. Install PIA
  4. Launch the VPN client
  5. Log into your account
  6. Connect to your server of choice (servers that are closer are generally faster)
  7. Launch 7 Days to Die
  8. Check if the packet loss still bothers you
  9. Run the test to confirm that you don’t lose packets anymore

Private Internet Access is an awesome VPN service from Kape Technologies. It’s one of the few VPN services that offer 24/7 customer support to its users.

Using a VPN such as PIA can help you curb packet loss greatly, but it will only work if your ISP limits your connection by means of improper routing or throttling your bandwidth.

Among other uses for VPN services, we remind of improving in-game ping, circumventing geo-blocking, and effectively stopping bandwidth throttling.

2. Troubleshoot your connection manually

  • Check to see if there’s any faulty component on your side of the network (PC, cables, router)
  • Fix or replace any troublesome part of your connection (change cables, replace network adapter)
  • Always choose wired over WiFi if possible (WiFi packet loss occurs more often than while using wired connections)
  • Try to avoid peak hours to bypass network congestion (or use a VPN to counter network congestion)
  • Flush your DNS
  • Restart your PC, router, and modem and see if there’s any improvement
  • Call your ISP and ask them (nicely) if they can look into the matter and maybe even fix it
  • Contact the owner of the 7 Days to Die server and inform them if you notice any issue on their side
  • Upgrade your PC drivers to their latest version (check on manufacturer website)
  • Make sure your router runs on the latest firmware version (update your router’s firmware)
  • Close any bandwidth-heavy apps running on your PC

It’s worth mentioning that packet loss doesn’t usually have a single cause. For that reason, it’s quite difficult to identify and isolate a single fix that will work every time.

Although there’s no guarantee these suggested fixes will work, they won’t do any harm to your connection. In fact, they can serve as maintenance procedures that may help you increase the quality of your connection.

You can fix 7 Days to Die packet loss

To sum it up, even if you’re experiencing packet loss in 7 Days to Die, it’s not the end of the world (although the game wouldn’t agree). Just try our suggested fixes before giving up on hope.

To this moment, using a VPN is still the most popular and efficient way to reduce packet loss. However, it only works whenever your ISP limits your connection one way or another (bad routing and/or bandwidth throttling).

If using a VPN is out of the question, make sure your side of the network is in top shape by maintaining it properly every now and then. If everything fails, you can try reaching out to your ISP or even contact the game server host.

Repair Corrupted Images Online: 5 Best To Use in 2026

Image files can get corrupted when downloaded or imported from cameras and mobile devices.

When an image is corrupted, an error message might pop up within a photo editor or picture viewer stating that the software can’t open the file.

You can fix a corrupted image online and with file repair software. If you can’t open a corrupted image with Windows software, check out some of the resolutions below.

How can I recover corrupted photos?

1. Fix the image with third-party software

  1. Install and launch Stellar Repair for Photo.
  2. Open the Stellar Repair for Photo software.
  3. Click the Add File button to select a corrupted JPEG image to repair. You can select more than one file to repair at once.
  4. Press the Repair button.
  5. Thereafter, select the JPEG file to see a preview for it.
  6. If you’re utilizing a registered version of the software, you can press Save button to save the JPEG.

Third-Party Software on 5 best online tools to repair corrupted JPEG files

If you had to recover a video, file, image or other data, you surely know about StellarInfo. This company is specialized in producing software that repairs and recovers files.

Stellar Data Recovery for Windows provides reliable file repair software. Stellar Repair for Photo is one of the publisher’s file repair utilities that users can fix JPEGs or JPGs with on Windows or Mac platforms.

Stellar Repair for Photo

Stellar Repair for Photo

Repair corrupt images and restore your treasured memories now with Stellar Repair for Photo!
Free Download Visit website

2. Open the image with alternative photo editor software

First, try opening the image with alternative photo software. An image isn’t necessarily corrupted if one photo editor doesn’t open it.

It might be the case that the software doesn’t support the image’s file format.

Most image editor software open JPEG, PNG and GIF files, but there are quite a few other image formats that aren’t so widely supported.

Thus, you can open the image with Adobe Photoshop and check if the desired image is corrupted or has the right format.

Adobe Photoshop is one of the best and most famous image editors in the world. If you want to edit pictures in high quality, it is advisable to install the market-leading program Adobe Photoshop.

Adobe Photoshop

Edit your pictures like a professional with Adobe Photoshop!
Free 7-day trial Visit website

3. Fix the image with the OfficeRecovery web tool

  1. Open the OfficeRecovery web app.
  2. Click the Choose file button to select the corrupted image to fix.
  3. Press the Secure Upload and Repair button.
  4. Then click Get the repaired file to open the page shown directly below.
  5. Click the file title to save the demo image to a folder.
  6. Click Purchase full recovery for $9.99 to order the fully fixed image.

You can easily fix corrupted pictures with the OfficeRecovery web app as above mentioned.

The app fixes corrupted JPEG, GIF, BMP, PNG, TIFF and RAW picture files. It also provides demo output, but those images include expansive watermarks that obscure most of the picture.

Note that the OfficeRecovery app has a $9.99 fee to download one fixed file.


JPG files won’t open? Don’t panic! Read our complete guide to solve the issue!


4. Repair corrupted GIF files at Ezgif

  1. Open Ezgif.com in your browser.
  2. Press the Choose file button, and select a GIF file to fix.
  3. Click the Upload button.
  4. A photo editor will then open where you can select four options on a Repair method drop-down menu.
  5. Select the Drop corrupt frames option to start with, and you can select the other options if that setting doesn’t fix the GIF.
  6. Then press the Submit button.

The ezgif.com website includes a Repair corrupted GIF file web app that provides some options for fixing GIF images.

That is a freely available web app which is worth noting, if you need to repair a corrupted GIF. You can repair GIF files with that utility as as previously mentioned.

5. Convert the image to an alternative file format

  1. Open Online-convert.com in a browser.
  2. Click Image converter on the left of the page.
  3. Then select a file format to convert the image to.
  4. Press the Choose Files button.
  5. Select the corrupted image
  6. Click the Open button.
  7. Click the Start conversion button to convert the image to new file format.
  8. Click the Download button to save the new file to a folder.

Converting corrupted images to other file formats might fix them. You can convert images to numerous formats at Online-convert.com.


Epic guide alert! Convert multiple images into a PDF file!


This solution is a lot more convenient than downloading third-party tool to do the job. However, if you didn’t back up your pictures, one of the solutions listed above should help you to fix the problem.

How to watch BT Sport outside UK online [Best Tools]

Sorry, this video is not available in your country is an error message that occurs on BT Sport when you’re trying to access the site outside of UK and Ireland. BT Sport is a pay-per-view television sports channel available in the UK and Ireland. However, if you travel abroad, you won’t be able to access it anymore due to geo-restrictions. Fortunately, there are two ways to solve this problem and watch BT sport outside of the UK online, no matter where you are: by using a VPN or Mobdro. A virtual private network service is the ideal solution because you can use it not only to unblock BT Sport but to watch any online streaming service that typically locks you out due to geographical limitations or licensing issues. However, Mobdro is a free solution that can be immediately installed on Android or Windows to watch BT Sport right away, without having to change your IP address. Here’s how you can use both.

How can I watch BT Sport from anywhere in the world?

Using a VPN

PIA is connected to a US VPN server

  • Buy a subscription plan for a premium VPN (we recommend PIA).
  • Download, install and fire up the VPN on your device.
  • Log in with your account credentials.
  • Connect to a VPN server outside of the UK and Ireland.
  • Start watching BT Sport online.

We recommended Private Internet Access (PIA) in our example above because it’s one of the top-ranked VPNs for unblocking videos, streaming services, and online television channels like BT Sport.

Created by Kape Technologies, PIA comes bundled with more than 3,300 VPN servers in 48 countries, so you can connect to multiple regions to bypass geoblocks and access any content online.

PIA supports OpenVPN and WireGuard protocols, Shadowsocks and SOCKS5 proxy servers, native port forwarding, exclusive DNS servers, an emergency kill switch, and a split-tunneling mode. It’s compatible with all major operating systems, including Windows, Mac, Linux, Android, and iOS.

More about PIA:

  • 10 simultaneous connections
  • No logs or leaks
  • No IP or DNS leak
  • 24/7 live chat support
  • 30-day money-back guarantee (no free trial)
Private Internet Access

Private Internet Access

Watch BT Sport no matter where you are by turning to this fast and secure VPN for multiple devices.
$2.85/mo. Buy it now

Using Mobdro

select the Sports category in Mobdro

  • Download and install Mobdro.
  • Fire up Mobdro, go to Categories, and select Sports.
  • Click the search button and type BT Sport.
  • Select one of the BT Sport channels and enjoy!

In conclusion, you can use a reliable VPN or Mobdro to easily watch BT Sport online outside of the UK and Ireland by bypassing the Sorry, this video is not available in your country error.

Although Mobdro is free, we suggest opting for a premium VPN because you can do more. Besides unblocking streaming services online, you can remain anonymous online, encrypt and protect your data from hackers, as well as improve your overall gaming experience with a VPN.

[wl_navigator]

Downloading is Disabled in Gmail: How to Enable it [Fix]

Many have encountered downloading is disabled message in Gmail, and if this message appears, you won’t be able to download attachments.

This can be a big problem since you won’t be able to receive files via email, but a couple of solutions can help you with this problem.

Why isn’t Gmail allowing me to download files?

This security measure prevents Gmail users from receiving harmful or malicious files. Unfortunately, the feature can sometimes block legitimate files as well.

What can I do if downloading is disabled in Gmail?

1. Save the email and open it in a different client

  1. Open Gmail client in the browser.
  2. Open the flagged mail and click on the menu and select Show Original.downloading this attachment is disabled gmail
  3. Right-click on the Download Original link and choose Save as… from the menu.downloading this attachment is disabled gmail
  4. Change the .txt extension to .eml and save it.
  5. Open the saved file with any other email client (e.g. Mailbird, as suggested above).downloading this attachment is disabled gmail
  6. Right-click on the attachment and choose Save.downloading this attachment is disabled gmail
  7. Save the archive and extract it in the preferred location.

2. Forward the email to yourself

  1. Open Gmail.
  2. Open the message that contains the attachment you can’t download.
  3. When you open the message, click three dots and choose Forward.
  4. In To field enter your email address and click on Send.

That’s it. You should be able to access files from any attachment in Google’s Gmail using these steps.

If Gmail won’t download attachments, that’s usually because email attachments are blocked for security reasons, but that can be fixed with our solutions.

This isn’t the only issue, many reported that adding Gmail attachments failed, however, we tackled that issue in a separate guide.

Finally, we hope this was a helpful read. If you’ve tried other ways to access blocked attachments in Gmail, make sure to tell us in the comments section below.

78754 Failure in Outlook: 5 Ways to fix This Gmail Issue

Outlook is one of the popular email clients with a range of additional features integrated into the program. Still, it’s not completely free of error. One such is the 78754 (Failure) error on Outlook, an IMAP glitch experienced by Gmail subscribers.

The error message reads, Your IMAP server wants to alert you to the following: Please log in via your web browser: https://support.google.com/mail/accounts/answer/78754(Failure).

The mail server forcibly shuts out clients while trying to gain access to their emails through the Microsoft Outlook platform. As a result, users can’t view the emails or shoot a reply. So, let’s find out how you can fix the Google 78754 (Failure) on Outlook error.

What is error 78754 failure in Outlook?

The 78754 (Failure) in Outlook is a login error that appears when users try to access their Gmail (Google Mail) account via Microsoft’s email client. The login error is related to IMAP (Internet Message Access Protocol), a standard electronic mail protocol that stores messages on a mail server.

Here are a few reasons users encounter the error:

  • Suspicious login detected: When you try to log in from a new device or another location, or the activity seems unfamiliar, Outlook may throw the error.
  • Incorrect password: The error also appears when the password entered for the Gmail account is incorrect.
  • Additional security measures: There may be an additional password required to sign in, or 2-FA set up on Gmail.
  • Misconfigured IMAP settings: Having IMAP disabled altogether or even a slight misconfiguration in settings could trigger the error.

How can I fix the 78754 failure in Outlook?

Before we start with the complex changes, here are a few quick checks to perform:

  • Ensure the login credentials, both the email address and password, entered for the Gmail account are correct.
  • If you haven’t updated Outlook in a while, check for any new versions and install them.
  • Try signing in after a while, say in an hour or two. This helps when a server issue is causing the error.

If none work, move to the fixes listed next.

1. Enable IMAP

  1. Open Gmail, log in with your credentials, click on the gear icon near the top right, and then select See all settings.see all settings
  2. Navigate to the Forwarding and POP/IMAP tab, select the Enable IMAP option, and click on Save Changes.enable IMAP to fix 78754 failure outlook
  3. Now, go to Google Security Settings, and turn on 2-Step Verification.two step verification
  4. Next, head to the App Passwords page, and select Other (Custom name) from the Select app dropdown menu.custom
  5. Enter Outlook in the text field, and click Generate.app password to fix 78754 failure outlook
  6. Copy the 16-digit password generated here, and then use it to sign into Outlook.password

When you are getting the 78754 (Failure) error in Outlook, the primary approach should be to verify whether IMAP is enabled.

2. Configure Microsoft Outlook

Note icon NOTE
Before you proceed, ensure IMAP is enabled for the Gmail account you are trying to link to Outlook.
  1. Launch Outlook, enter your email address, tick the checkbox for Let me set up my account manually, and click on Connect.connect
  2. Select IMAP from the options here.IMAP to fix 78754 failure outlook
  3. Enter the following configuration when asked and then follow the on-screen instructions to proceed:
    • IMAP incoming mail server:  imap.gmail.com
    • IMAP port: 993
    • IMAP SSL: Yes
    • Encryption Method: SSL/TLS
    • SMTP outgoing mail server: smtp.gmail.com
    • Requires SSL: Yes
    • Requires TLS: Yes (if available)
    • Requires Authentication: Yes
    • SMTP port for SSL: 465
    • SMTP port for TLS/STARTTLS: 587
    • POP incoming mail server: pop.gmail.com
    • POP port: 995
    • POP SSL: Yes

The 78754 (Failure) error may occur if the Outlook account is not correctly configured, and using these settings should help get things up and running.

3. Repair Office

  1. Press Windows + R to open Run, type appwiz.cpl in the text field, and hit Enter.appwiz.cpl
  2. Select Microsoft Office from the entries, and then click Change.repair to fix 78754 failure outlook
  3. Click Yes in the UAC prompt.
  4. Choose Online Repair here, and then click on Repair.online repair to fix 78754 failure outlook
  5. Again, click Repair to confirm and then wait for the process to complete.confirm

4. Upgrade to a new version of Microsoft Office

Some users pointed out that the older versions of Outlook lacked certain security features, which triggered the error. For many users, upgrading the email client to Outlook 2019 fixed things.

You can also get Microsoft Office 2021, the latest version of the suite, for additional features and a user-friendly GUI.

5. Disable 2-Step Verification on Gmail

Tip icon Tip
We don’t recommend permanently disabling 2-Step Verification on Gmail, but it could be used as a temporary measure when you can’t set up the account on Outlook.
  1. Open the 2-Step Verification settings on your web browser, and then sign in with the credentials.
  2. Click on Turn off at the top.disable 2-SV to fix 78754 failure outlook
  3. Again, click Turn off in the confirmation prompt that appears.turn off

You can always disable 2-Step Verification on Google when nothing else works as a last resort, though it should be a temporary measure. Re-enable it in a couple of days and retry the other solutions here to get rid of the 78754 (Failure) error in Outlook.

One of the solutions listed here should have helped eliminate the 78754 (Failure) error in Outlook, and you should finally be able to access the emails once again.

Also, if you are looking for other options, here are the best email clients for Windows.

Were these tips useful? Let us know of any other solutions in the comments area below.

Can’t Open Attachments in Outlook 2016/2010

Microsoft has recently issued a lot of fixes for Windows 10 owners and one of the recent updates involves some fixes for problems linked to Microsoft Outlook attachments.

However, users still describe an issue regarding opening attachments. They usually have a computer that is running Windows 10. They try to open any sort of attachment in Microsoft Outlook but in vain.

If you’re one of them too, let’s check out some quick solutions to apply.

What can I do if I can’t open attachments in Outlook?

1. Run Outlook in Cached Exchanged Mode

  1. Open Outlook, click File on the top bar of the app, and select Account settings.
  2. Select an Exchange account in the email tab and click Change.
  3. Check Use Cached Exchange Mode checkbox; it will allow your Outlook to run in cached mode.
  4. Restart Outlook.

First of all, try to run Outlook in Cached Exchanged Mode. This might open some problematic attachments, so use the above steps in that regard.

2. Update Outlook to a newer version

You can also try another simple solution – update Outlook to a more recent version. The new Outlook versions run faster and can take in charge bigger attachments and emails.

Therefore, this might just do the trick in your case as well. Leave your comment below and let us know if you have solved your issues.

Stardew Valley packet loss: What is it and how to fix it?

Stardew Valley is an awesome farming simulation video game that has huge ratings on every platform it was released on. In this game, your character inherits a farm from its grandfather in a location called Stardew Valley.

You can engage in various farming activities, ranging from raising livestock and crafting various goods to growing crops and even mining ores. The game also offers you the chance to socialize with other players.

Your character can get married and even have children thanks to the game’s awesome mechanics. The greatest part, perhaps, is that Stardew Valley allows up to four players to play on a single game server.

Although everything sounds great so far, there are some things that might take away some of the fun, especially if you’re playing online. One of the most common issues with online games (not only Stardew Valley) is packet loss.

What is packet loss in Stardew Valley?

Packet loss, also called packet leaks, or leaking packets, occurs whenever data packets that you transmit throughout your connection never reach their destination.

For instance, if your connection sends 100 packets, and only 90 reach their destination, you’re experiencing a 10% packet loss. Packet loss has more or less the same behavior, no matter where you may encounter it.

In Stardew Valley, packet loss is less severe than in other games, since you don’t need to shoot other player characters for instance or depend on accuracy very much.

However, it can still ruin your game experience by increasing the in-game latency, rendering the game menus unresponsive, and even suddenly dropping your connection.

The latter can be really off-putting, especially if you already spent a lot of time in-game farming with your buddies, only to be rudely booted out of the game.

What can cause packet loss in Stardew Valley?

One of the most common causes of packet loss, even in Stardew Valley, is network congestion. However, that doesn’t mean that there aren’t any other potential causes.

Just to clarify things, network congestion isn’t a cause of packet loss, but leaking packets can be caused by an overloaded network. This happens whenever there’s a portion of the network where there are a lot of users that the servers can’t accommodate properly.

Fortunately, Stardew Valley games can only fit up to 4 players. Therefore, you can be almost sure there are slim chances that the game server causes leaking packets.

Among other reasons why packet loss can occur, we remind of using WiFi instead of wired connections, poor quality Ethernet cables, outdated drivers, outdated router firmware, and server-side errors.

Therefore, it’s easy to understand why it’s not exactly a walk in the park to pinpoint the exact cause of a packet loss incident. There can be a lot of causes, and for this very reason, it’s not always easy to find a 100% working fix.

How to detect packet loss in Stardew Valley?

If you’re experiencing high latency and Stardew Valley seems to be slow all of a sudden, you might experience packet loss. However’ that’s not enough proof that your issue has something to do with leaking packets.

Therefore, you might need to perform some tests in order to assess the true nature of your connectivity issues. Just so you know, Stardew Valley servers run on a peer-to-peer basis.

This means that one player hosts the server, others connect to it, and as soon as the host leaves, the server goes down too.

1. Use the standard pathping procedure

  1. Ask the host to tell you the IP address of the server
  2. Launch a CMD prompt window
  3. Type in pathping x.x.x.x (replace x.x.x.x with the IP address provided by the host)CMD pathping
  4. Wait for the results
  5. Check for packet loss percentage values for each hop

It’s worth mentioning that the lower the hop number is, the closer the hop is to you physically. Therefore, the first hop is your device (PC, laptop), and the last one is the device that hosts the game server.

2. Turn to specialized third-party apps

There are several software solutions that can detect packet loss without breaking a sweat. You just download the application to your PC, let it run, and mind your business as usual.

If you need to check for packet loss values, you just switch to the app and read the values. A fit example of such a program is Nirsoft’s LiveTcpUdpWatch.

It doesn’t need any additional configuration, either. You just launch it, select the app you’re interested in (in our case Stardew Valley), and read the values from the main section of the screen.

How to fix packet loss in Stardew Valley?

1. Use a trustworthy VPN service

  1. Purchase a Private Internet Access subscription
  2. Download the VPN client to your computer
  3. Install PIA on your PC
  4. Launch the VPN client
  5. Log into your PIA account
  6. Connect to a suitable server (use a fast one for best results)
  7. Launch Stardew Valley
  8. Check if the packet loss issue still persists

Private Internet Access is a great VPN service offered by Kape Technologies. It provides you with several means to boost your privacy and increase the security of your default connection by encrypting your traffic.

Among its most popular uses, we mention bypassing geo-blocking, decreasing packet loss efficiently, reducing in-game ping, and circumventing bandwidth throttling.

Private Internet Access

Private Internet Access

Experiencing packet loss in Stardew Valley? Try Private Internet Access.
$2.85/mo. Buy it now

However, it’s worth mentioning that a VPN service such as PIA can only work if your ISP is solely responsible for your packet loss issue, whether because of using bad routing or limiting your bandwidth.

2. Perform manual troubleshooting

  • Restart your computer, router and/or modem
  • Flush your DNS
  • Try using wired connections instead of WiFi (WiFi packet loss happens more often)
  • Check your home network devices for any malfunctions
  • Replace any faulty component that you identify, including cables, adapters, routers, switches
  • Avoid network peak hours, if possible (or use a VPN to bypass network congestion)
  • Ask your ISP if they can look into the issue and probably offer you a way to fix it
  • Upgrade your Internet subscription plan if using a sub-par connection (and if you have the funds)
  • Try asking your friends if someone else could host the Stardew Valley server
  • Update your drivers to their latest version to avoid any compatibility issues
  • Make sure your router runs on the latest version of its firmware

Note that these are all potential fixes for your packet loss issue and they’re not guaranteed to work 100% of the time. On the other hand, they could definitely improve the quality of your connection, so it’s no harm in trying them out one by one.

As we’ve mentioned above, packet loss is a complex issue that has more than one potential cause. For that reason, it’s quite difficult to isolate a single fix that will work all the time. Thus, we need to adapt our troubleshooting methods accordingly.

Stardew Valley packet loss can be fixed

All things considered, detecting and fixing packet loss problems in Stardew Valley is not exactly rocket science. If there’s something wrong at a certain point of your connection, it can often be fixed, whether it’s congestion or poor-quality cables we’re talking about.

Using a VPN is still one of the most popular ways to reduce packet loss, but it will only work in certain circumstances that involve bandwidth throttling or bad routing.

Last, but not least, if you’re not comfortable with running any of our suggested fixes, make sure you understand what each step does before attempting to re-enact it.

Our potential fixes may not entirely eliminate packet loss, but they can surely help boost the quality of your default connection.

FIX: Outlook Red X instead of pictures [2003, 2007, 2010]

Oftentimes, images just don’t get displayed in Microsoft Outlook. Instead, what you get to see is an empty white space where the image should have been.

Another tell-tale sign is that there is a red X inside the box, and you know something is wrong. Missing out on the images in your mail also isn’t the most pleasurable of experience either.

However, there sure are ways to set things right here. Also, given that an effective solution here requires tinkering with the registry values, it’s always wise to create a backup of your registry prior to making any changes.

And if you aren’t well versed with that, here is how you do it. Now, before we get into ways to deal with the issue, it could be worth it knowing what causes the error in the first place.

One reason it happens is that the images might not have been embedded in the message in the first place, or maybe the below-mentioned registry value is entirely absent or is not set.

What can I do if Red X symbols replace Outlook images?

  1. Tweak your Registry
  2. Fix incorrect Outlook settings
  3. Reset Internet Explorer settings
  4. Try an alternative email app

1. Tweak your Registry

  1. Type regedit in the taskbar search box and select Registry Editor.
  2. With the options provided on the left panel, check: HKEY_CURRENT_USERSoftwareMicrosoftOfficex.oOutlookoutlook settings registry editor
  3. Go to Options > Mail.
  4. Here, the DWORD value on the right panel – Send Pictures With Document should have a value of 1.
  5. x.o refers to the specific version of Office installed on your system. For instance, with Office 2016, it should be 16.0, Office 2013 > 15.0, Office 2010 > 14.0.
  6. If the above registry value isn’t set, you either have to add Send Pictures With Document with a value of 1 or change the existing Send Pictures With Document value to 1.
  7. In Registry Editor, select: HKEY_CURRENT_USERSoftwareMicrosoftOfficex.oOutlookOptionsMail
  8. On the right panel, right-click and select New DWORD Value.
  9. Rename the DWORD value as Send Pictures With Documents.
  10. Now, under the column header Data, make sure the value is set as 1. Change it to 1 if some other value is being shown.
  11. That’s it. Close Registry Editor.
  12. Re-launch Outlook. Mails should now be showing all images that might be embedded in it. Just in case, images still are elusive, try the next step.

2. Fix incorrect Outlook settings

  1. Launch Outlook.
  2. Click on File > Options to launch the Outlook Options window.
  3. Click on Trust Center from the list of options on the left pane. Within the Trust Center window, select Automatic Download from the list of options on the left panel.
  4. There, make sure the option Don’t download pictures automatically in HTML email messages or RSS items is unchecked.
  5. Click on OK and then again OK to close all settings windows.
  6. Close Outlook and reopen it again.
  7. Select any message with embedded images and the same should now be displayed in all its glory.

Another reason for emails in Outlook to show red X instead of the actual images is that the Trust Center setting needs to be tweaked a bit. Use the above steps in that regard.

3. Reset Internet Explorer settings

  1. Launch Internet Explorer.
  2. Click on the cogwheel at the top right corner and select Internet Options.
  3. In the Internet Options window, select the Advanced tab followed by the Reset button in the Reset Internet Explorer settings section.
  4. There is going to be a confirmatory box where you will have to click on Reset again.
  5. Click on OK to close all intermediate windows.
  6. Close IE.
  7. Relaunch Outlook and all messages should now be showing the embedded images.

Resetting all of IE settings too can be effective in making images appear within email messages in Outlook. You can find above all the steps of the procedure.

4. Try an alternative email app

While your Outlook experience used to be is solid overall, more and more users have issues with the Red X markings replacing images in Outlook.

These shortcomings keep you from truly enjoying it. Therefore, give a try to a different email client. When it comes to Mailbird, you get more than stability.

The list of intuitive features just goes on and on. Get ready for snooze messages, both Dark or Lite themes, custom sounds (if you don’t want to upload your own), and 24/7 email support.

Mailbird

If you’re tired of Outlook’s Red X markings instead of pictures, Mailbird is a great alternative. Ready to try it out?
Free trial Visit website

The above steps should ensure you have your images back on your Outlook messages. Let us know if they worked for you too in the comments area below.

Package could not be registered on Windows 10

Oftentimes, when users are trying to open a .jpg file, they are getting the error message The package could not be registered.

The error might happen with just about any image file and it seems as though the reason why it appears is due to a corrupted system file.

In this article we are exploring some ways that can help you fix this error, so keep on reading.

How can I fix the package registration error message?

1. Perform SFC scan

  1. Type cmd in the Cortana search box and press enter.
  2. Right-click on Command Prompt and select Run as Administrator.
  3. Type the command sfc /scannow and press Enter.sfc scannow

It might take several minutes for the program to run completely. Post that, you will be provided with a message indicating the status of your PC. Of course, you have nothing to worry if the scan turns out fine and things are restored.

However, you might also be required to insert the Windows 10 disk to restore any files that may be missing.

2. Reset the Photos app

  1. Click on Start and select Settings.
  2. In the Apps choose Apps & features.
  3. Locate the Photos app in the list.Photos app reset option
  4. Click on Advanced options and select Reset.
  5. This will reset the app to its factory settings.
  6. Restart your PC.

3. Update Photos App

Microsoft photos app update from Store
  1. Head to Microsoft Store.
  2. Click on the three horizontal dots at the top right corner.
  3. Select Downloads and Uploads.
  4. Locate the Photos app and see if there is an update available for the app.

4. Set Photos app as default

  1. Right-click on any image file and select Properties.
  2. Select the General tab and click on Change.Changing default app to open an image
  3. Select Photos from the list of App shown.
  4. Click on OK and then Apply and
  5. Next, hit OK in the Properties dialog box.

For mobile device

  1. Click on Start and go to Settings.
  2. Next, click on Update & Security.
  3. Select For developers and enable Developer mode.Enabling developer mode for UWP app

The process is fairly similar on Windows PhoneEnabling develop mode in Win 10 Mobile

  1. Select Settings and go to Update & Security.
  2. Next, choose For developers option.
  3. Under the For developers section, select Developer mode.

This should help solve the Package could not be registered error message for good. If you have other suggestions or recommendations, let us know in the comments section below.

Microsoft Teams CVP Jeff Teper looks back on a whirlwind six months – and hints at lots more to come

Since Jeff Teper, a Corporate Vice President at Microsoft, took over as the product and engineering leader for Microsoft Teams in February, a lot has changed in the world. As the Coronavirus shifted the way people work, socialize, and do schooling, Teper and his team that runs Microsoft Teams were there to help the world through the center of it all. In a new post on LinkedIn, the CVP talks about that experience, what he has learned, and even what’s to come with Teams.

The lengthy post covers a few overall points. These include how Teams introduced features at a pace faster than anything seen at Microsoft in 28 years. Also included is how Teams worked with other groups at Microsoft, including Azure DevOps, and fostered collaboration and a growth mindset. Teper even discusses how Microsoft works to identify unmet needs and put people’s well being first. He also mentions that there is “much more to come,” in terms of new Teams features.

For Teams fans, the CVP gets into some numbers, too. he said that Microsoft saw Office 365 and SharePoint adoption levels that would have taken years. Specifically, Teams adoption went from 20 million daily active users to 75 million. Teper also noted that there were 5 billion calls and meeting minutes, which was 600% more than just months earlier.

The post is a very interesting read, to say the least. Check it out, and let us know your thoughts in the comments.

Review: Lenovo Chromebook Duet – Great hardware, mismatched OS

Lenovo’s Chromebook Duet is my first foray into the world of ChromeOS as a “daily driver.” As a primarily Windows user, venturing out to other operating systems such as macOS and Linux, there is normally a learning curve associated with the move. However, thanks to Google’s integration of the Chrome browser on Windows and my use of a Pixel 4XL, picking up the Duet was a relatively fluid experience.

Unfortunately, Google’s execution of ChromeOS on the Lenovo Duet only highlighted the shortcomings of both the OS as a replacement for a full-featured desktop experience and that Android developers still haven’t figured out apps on screens on bigger than 7 inches.

Hats off to Lenovo

The Lenovo Chromebook Duet can be easily mistaken for a 1st party Google effort, specifically designed by the company’s Pixel department. The two-tone blue-grey back panel is reminiscent of prior Pixel smartphone designs. Along with the same Pixel-esque inspiration, Lenovo opted to include a woven fabric magnet backplate protector that follows Google’s hardware philosophy combining of technology and livable design.

00100trportrait 00100 Burst20200520110333471 Cover

The Duet slate (tablet-only) portion of the combo feels solidly dense in the hand yet lightweight enough for long stretches of single and double-handed consumption use.

Screen

The screen on the Duet is obviously the stand out feature of the tablet computer and rightly so. At 10.1-inches, it’s wide enough for consumption but portable enough to hold in one hand. The LCD panel comes with a relatively modest 1,920 by 1,200-pixel resolution on a 16:10 aspect ratio. Despite being stuck ad 1080p for video playback, the brightness and color gamut make up for it at 400nits and 70% color gamut.

Lenovo streamlines buttons and I/O on the device by putting all of them on the same left-hand side distinctly broken up by the two-tone color palette that places the volume buttons in the powder blue panel portion while the power button and USB-C port with charging, data and DisplayPort connection support residing in the functional slate grey area.

00100trportrait 00100 Burst20200520110056592 Cover


Keyboard

The included keyboard has little bend or flex and performs admirably as an in the pinch desktop replacement despite being cramped due to its 10.1-inch device limitations. As one of two primary input modes, the included keyboard is a relatively solid experience and reminiscent of legendary ThinkPads with perhaps the best key travel of any detachable keyboard on the market. Lenovo also was able to cram some function keys atop the keyboard panel that help with quick switching of media controls, multitasking and screen brightness.

Img 20200520 110325

Unfortunately, due to the overall size of the Duet, the keyboard is limited in space and the compromises Lenovo chose to accommodate the placement of keys can be felt when typing or using the trackpad for extended periods. Another nitpick is the lack of ergonomic positioning that comes with Microsoft’s magnetic Surface Type Cover connection to the bottom of the screen allowing for a raised typing experience. The Duet keyboard offers a singular position that’s best used on a level or flat surface but more difficult on crossed legs or raised knees.

While Lenovo’s craftsmanship is practically unmatched for Chrome-powered tablets, it’s the company’s sub $300 price point that puts the chef’s kiss on the entire package.

For $289.99 customers get a modern take on a laptop/tablet design, detachable keyboard in the box for a 10-inch FHD IPS LCD touchscreen panel, Dolby Audio support, 10-hour battery life, and the latest ChromeOS and Android support.

But…

Despite the excellent craftmanship and market bending sales price, Lenovo’s Chromebook Duet does have some drawbacks that may not show at the first unboxing but become lingering annoyances through extended use.

Starting with the camera bump that practically begs for the protective backplate to be applied to level out the device on flat surfaces. With such a pronounced camera bump, you’d expect a fairly decent shooter but you get the same muddled images as you would from any 720p webcam and that’s for both front-facing and rear shot photography.

Img 20200520 110039

Too many detachables

Another disappointing factor of the Duet is its piecemeal magnetic assembly. While the magnetic backplate and pogo pins for the keyboard are sturdy enough, they don’t hold into place very well when moving around in a backpack or even from desk to the couch surprisingly. I found that unless I was in desperate need of typing on the couch, I would prefer to go keyboard-less than have to deal with its cumbersome assembly.

This leads into my final qualm with the Duet and that’s the software coupled with underwhelming Android specs which led to some pretty disappointing performance on the whole.

Middling performance

The 2GHz octa-core MediaTek Helio P60T chip combined with 4GB of RAM ran into performance hills quite often. Opening up an Excel doc in combination with Outlook and the browser would lock up my device, especially coming off a rest-wake cycle or closed lid.

00100trportrait 00100 Burst20200520113515636 Cover

In particular, gaming was non-existent on the device. Not that I was expecting to play Call of Duty at 60fps on the Duet but even playing the mobile app was a huge letdown. Even shifting my gaming expectations down a gear, attempting to play a turn-based RPG like Marvel Strike Force would crash the device after a few turns.

Beyond the hit and miss entertainment flow I developed on the Duet, productivity was also spotty, but at little fault to Lenovo. While the company did pack it with arguably off-the-shelf processing specs, it’s the ChromeOS and Android merger that feels convoluted and jarring when attempting to streamline work.

ChromeOS hits and misses

Off the bat, window management in ChromeOS on the Duet needs a bit of work. Perhaps, due to the spotty app development support for screen experiences beyond 7-inches, there were several times I found myself attempting to resize a window only to find out it can only shift to one size. I spent a decent amount of time testing the sizing of apps rather than just working in them. There was also a handful of times I found myself attempting to use web apps in the replacement of dedicated Android apps just to get a little more flexibility.

At the end of the day, while Adobe, Microsoft, and even Google itself has put a lot of work into their app portfolio, they are still apps and offer a shadow of their desktop or even web counterparts.

Screenshot 2020 08 12 At 9.54.35 Pm

Part of the frustration with window management on the Duet comes from the logic behind closed or crashed apps when resizing them. If you attempt to resize an app beyond its predetermined limits, it simply just disappears from the screen. Sometimes it closes, sometimes it just needs to be reopened from the multi-task window.

Updates???

The other thing I wasn’t expecting was the updates. Updates are a known quantity on Windows for better or for worse, but the daily app updates that clutter up 1/3 portion of the screen dedicated notifications can be distracting as well. It was frustrating to open up the Duet to find a ChromeOS update that requires a restart. While the update takes a matter of minutes to shut down and restart, I felt I was sold a bill of goods on ChromeOS.

Screenshot 2020 08 12 At 9.35.03 Pm

Who is Duet for?

My hat is off to Lenovo for offering compelling value proposition tablet computer regardless of operating system. The Duet is a solidly built device and perhaps the only tablet computer on the market that includes a keyboard, let alone one with laptop level travel and responsiveness. The screen on the Duet is good enough for casual consumption but if you’re looking to catch one of those Marques Brownlee 2K YouTube videos, might be a little let down.

One of the things that went understated during my testing was the battery life of the Duet, it lasted days. Well, a day and half with heavy usage, which beyond what I was expecting.

People in transition

The Duet is a solid tablet experience for people new to the paradigm. I don’t think it serves as a replacement device just yet, but it does offer a great use-case for people transitioning to ChromeOS, Android on tablets, or 2-in-1 detachable.

00100trportrait 00100 Burst20200520114105615 Cover

Recommend

I would recommend the Duet as a buy for anyone who wants to cautiously move to ChromeOS, a secondary device, an in-a-pinch substitute or a an additional screen in this new work-from-home reality. I don’t think the current Duet is ready to take on heavy workloads just yet, but if Lenovo keeps at it, the Duet 2 might be in the conversation with iPad Pro, Galaxy Tabs, and Surface Pros with just a few tweaks. Will ChromeOS keep pace? That may be another story.

FIX: Slack couldn’t upload your file

Slack checks all the boxes when it comes to team organization and collaboration. It’s one of the most popular, feature-rich applications out there.

Complete control over your workspace is guaranteed and the reliability rarely fails. However, you’ve probably run into a few rare errors which might be cumbersome.

One of those prevents users from uploading files to Slack as they’re promptly informed that Slack couldn’t upload your file. There are a few solutions for this below.

What can I do if Slack can’t upload my file?

  1. Check if Slack is down
  2. Reinstall the app
  3. Check your internet connection
  4. Clear application cache (for desktop and UWP versions)
  5. Check Firewall

1. Check if Slack is down

  • Visit IsItDownRightNow.com
  • Write Slack into the search bar
  • Check the information and see whether the service is indeed down or not.
  • Wait for it to come back online.

Before starting any troubleshooting procedure, first, make sure that the Slack services aren’t simply down for maintenance of due to server issues.

2. Reinstall the app

Finally, if none of the steps proved fruitful and you’re still stuck with the Slack couldn’t upload your file error, consider reinstalling the desktop client/UWP app.

We still can’t be sure whether this helps or not, but it’s a viable step when something goes wrong with other apps. Slack isn’t an exception.

If you need further assistance reinstalling the app on your PC, it is also advised to use third-party uninstallers and entirely remove all files associated with the program.

To do so, you should select a helpful app from the best uninstaller software for Windows 10 PCs.

Because of this, the next time you install the Slack app, it will be as if it were the first time you are doing so.

3. Check your Internet connection

  1. Navigate to Slack web-based connection-testing tool.
  2. Sign in with your account.
  3. Make sure everything is up and running.

If the test tool didn’t fix your problem, move to the next solution.

4. Clear application cache

Slack client for Desktop

  1. Open Slack.
  2. Click on the hamburger menu in the top left corner and choose Help > Troubleshooting > Clear cache and Restart.slack reset cache desktop client slack can't upload files
  3. You can repeat the action and clear app‘s data as well.

Slack UWP from Microsoft Store

  1. Open Start.
  2. Right-click on the Slack app and choose More > App settings from the contextual menu.
  3. Try firstly with the Repair and, if it doesn’t work, go for the Reset option.slack reset app cache slack can't upload files

Browser cache

  1. Press Shift + Ctrl + Delete to open the Clear browsing data menu.
  2. Select All time as the time range.
  3. Focus on deleting Cookies, Cached Images and Files, and other site data.clear browser cache slack can't upload files
  4. Click on the Clear Data button.

After doing that, check if the problem with Slack and file upload is still there.

5. Check Firewall

  1. In the Windows Search bar, type Firewall, and open Allow an app through Windows Firewall.
  2. Click Change settings.
    change firewall settings slack can't upload files
  3. Allow Slack to communicate freely by checking both boxes.
  4. Confirm changes and restart your PC.
  5. Start Slack and look for changes.

With that said, we can conclude this article. In case you have any questions or suggestions, consider sharing them with us in the comments section below.

How to add iCloud, Yahoo!, QQ account to Windows 10 Mail

The Windows 10 Mail app is a powerful email tool that allows you to use your email accounts from third-party email providers.

Nowadays, we all use several email addresses: one for work, one for personal use, maybe a third one for posting on forums, and so on.

Keeping all these emails in one place is extremely important. In this manner, you will never miss new messages. Now, the question is: how do you add a third-party email account to your Windows 10 Mail app?

In this article, we’ll show you how to add your iCloud, Yahoo!, or QQ account to Microsoft’s Mail app.

Link your iCloud, Yahoo or QQ account to Windows 10 Mail

1. Add the iCloud email address to Windows 10 Mail

First things first, if you’re using two-factor authentication, you’ll need to generate a specific password in order to link your iCloud account to the Mail app.

As a quick reminder, app-specific passwords are single-use passwords for your Apple ID that allow you to access your account and iCloud information from third-party apps.

Sign in to your Apple ID account page and then go to App-Specific Passwords. Select the ‘Generate Password’ option to get the necessary password.

Follow the on-screen instructions and then enter the newly generated password into the password field of Windows 10 Mail.

2. Add Yahoo! email address to Windows 10 Mail

Adding your Yahoo! account to Windows 10 Mail is very easy thanks to OAuth support.

The Redmond giant added OAuth support for Yahoo! in the Windows 10 Creators Update. You can install this OS version on your computer using Microsoft’s upgrade assistant.

Should you encounter any errors after installing the latest Windows 10 version, you can enable two-step verification in order to create an app password for the Windows 10 Mail app.

For more information on how to use two-step verification on Yahoo!, check out Microsoft’s Support page.

3. Add QQ email address to Windows 10 Mail

Syncing your  QQ email with the Windows Mail apps is very easy. All you need to do is enable IMAP on QQ. Keep in mind that your QQ account needs to be active for at least 15 days before you can enable IMAP.

Sign in to your QQ account and go to Settings > Account > Enable IMAP. In the Mail app, remove your QQ account and add it again. The account should sync automatically.

4. Use a third-party email client

For those of you that need more options and want their email client to double as a productivity app, we recommend trying a third-party email client.

Mailbird is among our top picks because it keeps a clean and easy-to-follow user interface while integrating advanced features that will help you easily manage multiple email addresses and contacts from one place.

To access your email in Mailbird you just have to enter your credentials. The tool will display all your incoming and outgoing messages. It allows you to create customized email folders, schedule emails, and more.

The tool includes several useful tools such as a built-in calendar, translator, spellchecker, presets for different types of emails, and powerful search features with OCR technology.

⇒ Get Mailbird

That’s pretty much it. By following these steps, you should now be able to access your iCloud, Yahoo, and QQ Mail messages all from within the Windows 10 Mail client without any issues.

Let us know if you found this article useful by leaving us a message in the comments section below.

Read your emails on multiple platforms with these cross-platform email clients

Many people use email clients on daily basis, but sometimes our favorite email clients aren’t available on multiple platforms. This means you have to switch between different email clients while using a different platform.

However, there are many great cross-platform email clients available on multiple platforms, and today we’re going to show you some of these apps.

What is the best cross-platform email client?

Maildbird

Topping off our list is an email client that has surprised us since just a  few years ago it didn’t even exist, and now it is among, if not the best on the market.

Mailbird – winner of Most popular mail alternative of 2020,  is available as both a web client and a downloadable PC client.

This means that even if you don’t want to load your PC with new software, as long as you have a stable browser taht you trust, you can use Mailbird freely.

One of the great selling points of Mailbird is how it acts as a unified hub for all of your emails and email addresses since you can manage all your emails and contacts from multiple accounts easily in one Inbox.

More so, Mailbird is highly customizable in terms of how the layout and UI is concerned, allowing it to adapt and fit pretty much anyone’s taste and needs accordingly.

It is alos highly supportive of other tools and apps, as it features built-in apps like Facebook, Twitter, Whatsapp, Dropbox, Google Calendar, Asana, Todoist, and more, all so that you can share your emails.

Since you will be most likely using Mailbird for work purposes, it features plenty of tools that can improve your workflow.

For example, you cna use it to snooze messages for later to focus only on the emails you need to at the moment, while the integrated speed reader allows you to easily go through your emails, no matter how long they are.

It also features a dark theme for those that are fans of the concept, and the shortcut-support further improves your work speed and gets you to where you need to be.

All in all, if you need to step up your email game, then Mailbird is the way to go.

Mailbird

Mailbird

The best email client that you can get, regardless of whether you are on Windows, Mac, or other platforms.
Free trial Visit website

eM Client

The next entry on our list is yet another email client that promises to boost your productivity tenfold, and it doesn’t seem that these are just empty promises.

eM Client is a fantastic cross-platform email client that can be accessed as both a web app and via the downloadable desktop client, so you can choose the way you want to connect.

It comes with all of the basic features that you would expect from a  modern-day email client including Email, calendar and tasks, contacts, notes, and live chat.

It is also compatible with all of the most popular platforms where a work email could be used, including GSuite, Office 365, Outlook, Exchange, and more.

If you do decide on migrating to eM Client, but you already have tons of previous email addresses and client, you will be happy to know that eM Client will set up everything automatically for most email services, and quickly import your data from all major email clients.

This includes Microsoft Outlook, Outlook Express, Windows Mail, Thunderbird, Incredimail, and more.

One feature that really stands out if you use eM client is the customizable sidebar that you can set to be whatever you want, from an additional chat window to a calendar or an agenda.

eM Client

eM Client

Try out this fantastic email client and set the Spam Filter settings to whatever suits your needs most so that you can avoid annoying messages.
Free trial Visit website

EssentialPIM

EssentialPIM is not a classical email client, but it can be used to send and receive emails. This is a personal information manager that allows you to manage tasks, notes, appointments, and email messages.

The application allows you to store all the necessary information in a single database so you can easily find the desired information. The database is fast and secure, so all your data will remain protected at all times.

There’s also a synchronization feature available and you can easily synchronize data with Google Calendar, Contacts, Tasks, Drive, iCloud, Toodledo, SyncML, CalDav, and many other services.

It’s worth mentioning that all entries can refer to other entries allowing you to keep track of all your data. Since you’ll be working with sensitive information it’s important to know that all your data is encrypted with AES (Rijndael) 256-bit encryption.

As for cloud synchronization, the application uses SSL protocol therefore your information will remain protected from third parties.

EssentialPIM offers some advanced features, but it can also work as an email client if needed. With a wide range of advanced features, the application is perfect for business users.

EssentialPIM also comes with a free version that features all the basic options you need in an email client. Regarding the availability, this application is available on Windows, Android, and iOS.

EssentialPIM

EssentialPIM

Get control over your schedule with the help of this essential personal Information manager, now at a discount price for a limited time!
Download Visit website

Newton

Newton is simple and modern email application and it’s available for a wide range of platforms. The application was originally designed for Mac OS, but it made it’s way to iOS, Android, and Echo.

As for Windows, beta version is available from the Windows Store, but it’s available only to the Newton subscribers.

The application has a Read Receipts feature that allows you to track your emails. Thanks to this feature you can see if your email was read by its recipient. In addition, you can also receive a notification once your email is read.

This feature works on all platforms, and even if you send your email from your PC, you can see if it’s read from your mobile device.

Another useful feature is Send Later, and thanks to it you can schedule your emails to be sent at a specific time. The application also has a snooze feature that allows you to keep your inbox clean.

Thanks to this feature you can organize your emails and read them later. This is perfect if you receive a lot of emails and you need a way to organize them better.

There’s also a useful Sender Profile feature that allows you to see extra information about your contacts. As soon as you receive a new email, you’ll see additional information about your sender including its name, organization info and links to social media websites.

The application also works with other apps, and you can save your emails to Todoist, Evernote, OneNote, Pocket, Trello, Zendesk, Salesforce, and Asana with ease.

Another great feature of Newton is Undo Send. Thanks to it, you can easily remove sent emails. Sometimes you can send an email to someone by mistake, and thanks to this feature, you can easily remove that email and avoid any unpleasant moments.

Newton is an amazing email client, it offers some unique features and it’s available on a wide array of platforms. Unfortunately, this email client isn’t free and it comes with a yearly fee. On the bright side, there’s a 14-day free trial available, so you can try Newton with ease.

⇒ Get Newton

Postbox

Another professional cross-platform email client is Postbox. The application allows you to organize all your emails and you can easily see all the important messages.

In order to better organize your messages, you can easily assign tags to them and view all messages with a specific tag. Of course, you can also set favorite contacts and easily see all their future emails.

Postbox supports cloud storage services such as Dropbox, OneDrive and Box so you can easily upload your attachments directly to those services. There’s a powerful built-in image search feature so you can easily find any attachment and use it again.

As for additional features, there’s a built-in word counter and a small timer that measures the time spent writing an email message.

As for advanced features, you can create responses and automated messages. If needed, you can also add variables and replace them with certain words. It’s also worth mentioning that this application has a built-in HTML editor so you can easily stylize your emails.

You can also forward your emails to more than 70 different services including Evernote, IFTTT, and many others. The application also has a powerful search feature so you can find specific emails almost instantly.

In addition, you can easily customize your search and search emails using various criteria. There’s also a content search option so you can easily search your attachments based on their content.

Using this tool you can also have multiple email accounts which is perfect if you want to separate your personal and business emails and contacts. Of course, the application also supports favorites, and thanks to the tabbed interface you won’t have any issues with clutter.

Another great feature is the ability to create reminders right from this tool. You can create reminders and pin them to the top of your message list and turn your email client into a to-do list.

Postbox offers an abundance of features so it’s perfect for professionals or advanced users. The application has an attractive and sleek design, so you’ll be able to manage emails with ease.

You can download the trial version, but if you want to continue using this tool, you’ll need to purchase a license. As for availability, the application is available for Mac and Windows operating systems and there’s no mobile version available.

⇒ Get Postbox

Zimbra Desktop

If you’re looking for a free cross-platform email client, you should definitely consider Zimbra Desktop. This is an open-source application and it works on Windows, Mac OS and Linux PCs.

The application supports cloud storage, so you can easily synchronize data between all your computers. Even though the synchronization feature requires an Internet connection, you can use this application even while you’re offline.

As for supported accounts, the application works with webmail, IMAP or POP services. The application offers collaboration features, and there’s also an advanced search feature available.

The interface is divided into three different panes, so you should be able to read your emails without any problems. As for additional features, there’s a built-in mini calendar that you can use to schedule appointments.

Even though Zimbra Desktop client is relatively simple to use, Zimbra also offers various services for professional and business users. However, the desktop client is free to use, so you can easily download it for all major desktop platforms.

⇒ Get Zimbra

Claws Mail

If you use both Windows and Linux, you might be interested in this application. This free email client is simple to use, and once you start it you’ll be asked to configure your email account. After doing that, you’ll be greeted with a simple user interface.

The application allows you to have multiple accounts so you can manage both personal and business email from this application.

Claws Mail uses SSL over POP3, SMTP, IMAP4rev1, and NNTP so it will encrypt your messages and protect them from third parties. In addition, there’s support for filtering, mime attachments, and unset news reading.

There’s also support for user-defined headers and color labels. The application has an external editor and there’s also message queuing and drafting feature available.

Standard features such as automatic mail checking, line-wrapping, address book, and printing are also available.

It’s worth mentioning that Claws Mail also supports various advanced features including plug-ins, actions, and templates. If you receive a lot of images, you can easily view them from this email client thanks to the built-in image viewer.

Additional features include replay-finder and fast message cache system. Of course, there’s full support for drag and drop and all your messages will be automatically saved while composing so you’ll never lose any unsaved messages.

Claws Mail also has a powerful Quick Search feature along with dynamic signatures and font configuration.

If you want to protect your privacy, you can easily hide read messages so that others can’t accidentally see them. There’s also Return-Receipt handling and message priority system so you’ll see important messages first.

Of course, there’s the Ignore thread option as well as an anti-phishing URL check feature that will protect you from malicious users.

Claws Mail allows you to configure the display of images, and you can easily hide them all if you want. There’s full support for message colorization and the ability to reply only to the parts of an email.

If you receive a lot of attachments, you’ll be pleased to hear that you’ll be able to save all attachments from an email message. You can also save multiple files to a single file if needed.

Just like many other email clients, this one also has an address book so you can easily manage your contacts.

Claws Mail is a solid email client, and even though it might look a bit simplistic, it offers a wide array of features. Speaking of which, if you want to enhance the application even further, you can do so via various plug-ins.

As for availability, the application is available for both Windows and various Linux versions.

⇒ Get Claws Mail

Opera Mail

Another solid cross-platform email client that we want to show you is Opera Mail. This application offers sleek and tabbed interface so you can easily write multiple messages from this tool.

The interface is divided into three columns so you can easily find and read the desired email without too much clutter. Speaking of emails and organization, you can also assign various labels to your emails in order to distinguish them better.

There are seven different types of labels to choose from, but you can also create your own labels with ease. Thanks to the labels feature, you can easily sort your messages automatically.

Using the tabbed interface you can also open email messages in separate tabs in order to see them better. The application also supports threads so you can easily organize your emails and keep up with the context of your messages.

In addition to emails, the application also works as a feed reader allowing you to easily keep track of your favorite websites.

Opera Mail offers a clean and modern user interface so even the most basic users will be able to use this application.

The app doesn’t offer any advanced features, but it’s a solid and user-friendly email client. As for availability, the application is free and available for all major desktop platforms.

Note: Opera ceased support and development for Opera mail for 6 years, but the client is still usable.

⇒ Get Opera Mail

Thunderbird

Probably one of the most famous email clients is Mozilla Thunderbird. The application has a simple user interface, and with support for tabs you can easily read multiple emails at the same time.

The application offers a mail account setup wizard that will help you set up your email account in a matter of minutes. To use this feature you just need to enter your name and email login information and Thunderbird will perform all the necessary configuration.

You can also create a new email address right from Thunderbird if you wish to do so. This is an optional feature, but it’s useful for users that don’t have an email account.

Thunderbird also has a simple address book and you can add new entries with just a single click. To add a new person to the address book you just need to click the star icon next to its name. Of course, you can add additional information about each contact as well.

Just like all other email clients, Thunderbird supports attachments and you can easily attach any file and send it to others. However, Thunderbird has an attachment reminder feature that will scan the context of your message and determine if the attachment is required.

If so, it will suggest to add an attachment to your message. This is a simple feature, but it can be rather useful to forgettable users.

If you prefer real-time communication, we’re happy to inform you that Thunderbird fully supports multi-channel chat. The application supports multiple chat networks, so you should be able to easily chat with your contacts.

Speaking of additional features, we have to mention that Thunderbird also allows you to search the web from it. Simply enter the desired terms in the search field and you’ll see the results from different search engines.

The application fully supports filtering allowing you to easily find the desired messages. It’s worth mentioning that Thunderbird indexes all your emails and messages so you can easily search through them.

All your search results are displayed in a separate tab so you can easily switch back to the main window or to your currently opened message.

If you want to keep your inbox neat, there’s an archive feature available that can help you with that. As for additional features, there’s an activity manager that allows you to see all interactions between the Thunderbird and your email provider.

The application also allows you to send large attachments thanks to the Filelink feature. Using this feature you can upload attachments to cloud storage services and send a link instead of your attachment.

Thunderbird also has a Smart Folders feature that will combine two or more email accounts into one. Using this feature you won’t have to switch to a different account in order to read emails received on it. Instead, all emails from multiple accounts will be available in the Inbox folder for quick access.

The application is designed to protect your privacy and it will block remote images in emails automatically. In addition, there’s also a phishing protection that will help you detect malicious links.

Of course, there’s an anti spam feature that can automatically block unwanted messages. Lastly, you can customize your email client with wide array of skins, and you can enhance its functionality with various add-ons.

Thunderbird is an open-source application and it offers a wide array of features. This is one of the most popular email clients on the market, and rightfully so. As for availability, the application is completely free and it’s available for all major desktop platforms.

⇒ Get Mozilla Thunderbird

Inbox

Inbox is a web application based on Gmail so it works on multiple desktop platforms. The application allows you to bundle similar messages in order to organize them better.

For example, promotions, shopping and travel emails will be automatically bundled, but you can also create your own categories in order to organize your emails.

The application allows you to view important information at glance without opening your email message. Inbox also has Reminders feature so you can easily create to-do lists right from the application.

If you receive a lot of emails, you’ll be pleased that there’s a Snooze feature available. Thanks to this feature you can easily organize your emails and keep your inbox neatly organized. If you’re busy, you can snooze your emails and read them later.

In addition to several snoozing presets, you can also set your custom date and time for snoozing.

Inbox is a simple web application, and it allows you to enhance your Gmail experience with some much-needed features. If you tend to use Gmail as a web app, be sure to try Inbox as well.

Even though the desktop version isn’t available, the web app should work on any desktop platform without issues. As for mobile devices, a dedicated Inbox app for iOS and Android is available for download.

⇒ Get Inbox

Outlook

Another popular email client on Windows platform is Outlook. The application has a Focus Inbox that allows you to see the most important emails first. In addition, you can also add all your travel information right to your calendar right from this app.

Thanks to this feature, you’ll be sure never to miss an important flight. The application also works with other Microsoft Office tools so you can easily edit attachments right from your inbox.

In addition, the application supports cloud storage services such as Dropbox, Box, Google Drive and OneDrive. As a result, you can easily upload your attachments to any of those services and reduce the size of your message. This is a great feature especially if you want to avoid email size restrictions.

It’s worth mentioning that Outlook app works with all popular webmail services so you can continue using them right from this application.

Outlook also works with other third-party services such as Facebook, PayPal, Skype, Evernote, etc. Speaking of Skype, the application offers Skype integration and you can have Skype chats and calls right from Outlook app. This is perfect if you want to have a quick chat or a video call with your contacts.

Outlook is one of the best email clients for Windows, and rightfully so. There’s also a web app available but it offers limited features compared to the desktop version.

The desktop version is a part of Microsoft Office, so it’s not available for free. As for cross-platform support, Outlook is available on Windows, Mac, Android, and iOS devices.

⇒ Get Outlook

Nylas Mail

If you’re looking for a free cross-platform email client, you should definitely consider Nylas Mail. The application comes with a sleek and modern user interface, so even the first-time users won’t have issues adjusting to it.

The application is divided into four columns so you can easily view the list of emails, contact information, and content of your messages. Speaking of contacts, the application will show you detailed information about them.

Thanks to this feature, you can see your contact’s bio, links to social media websites, location info, and more.

Another great feature of this application is activity tracking. Thanks to this feature, you’ll get notifications as soon as the recipient opens your email message.

The feature is incredibly useful if you send an important message and you need to be sure that it’s read by the recipient. In addition, there’s also a link tracking feature so you can easily see which links in your email message were opened.

The application works with various webmail services, and it also works with IMAP and SMTP servers as well. Nylas Mail also supports various signatures and you can create an unlimited number of signatures and add them to your emails. It’s also worth mentioning that you can use various themes and customize the look of your application with ease.

Another amazing feature is Undo Send and thanks to it you can easily remove any message that was sent by accident. With this feature available you won’t ever have to worry about sending messages to wrong contacts by accident.

The application also supports quick replay templates and you can use them to quickly respond to messages. In addition, you can also use placeholders and replace certain words with ease in your template messages.

As for additional features, the application has a built-in translator so you can easily translate your messages from several major languages. In addition, there’s also a useful spell check feature.

Nylas Mail is an amazing email client and it offers solid features and great user-friendly design. As for availability, the application is available for all major desktop platforms.

⇒ Get Nylas

Inky

There are all sorts of threats online, and if you want to protect your emails from third-parties and malicious users, you might want to consider Inky. This email client allows you to exchange encrypted and digitally-signed emails with your contacts.

There’s no need to install any additional plug-ins, the encryption is built-in right into the application and you can enable it with a single click. In addition to encryption, all your emails are digitally signed in order to prevent any man in the middle attacks.

Thanks to this feature, all your recipients can be sure your emails were sent by you and not by a third party.

Inky has an elegant design so it’s easy to use. There’s also a fast search feature, built-in calendar, and support for synchronization. Using this feature you’ll be sure all your emails and contacts are perfectly synced on all your devices.

Inky email client is focused on security, and if you’re an advanced user you can easily set up custom policies to protect your email data in case you lose any of your devices.

Inky also allows you to add various tags so you can find specific emails with ease. In addition to your custom tags, the application adds its default tags to all received, read, unread, replied, and unreplied messages.

Inky is a great cross-platform email client that prioritizes security, and thanks to encryption and digital signing all your sent emails will remain protected from malicious users and third parties.

Regarding the availability, the application is available for Windows, Mac, iOS and Android. As for the price, the Free version of Inky works with Gmail, iCloud and Outlook and it offers all the necessary features.

If you want to use Inky with Microsoft Exchange, Office 365, Google Apps, and other IMAP accounts or get access to Calendar Support for Office 365 / Exchange, you’ll need to purchase the Pro license.

⇒ Get Inky

Hiri

If you’re looking for a powerful email client that can work on multiple platforms, you should definitely consider Hiri. This application also works as a to-do list so you can easily have your tasks and emails side by side.

In addition, you can also add reminders and notes to all your tasks. If needed, you can drag and drop emails to the to-do list and turn them into tasks.

The application also allows you to separate and organize your emails. Most emails are just notifications and in most cases, you don’t need to respond to them.

Hiri allows you to move those emails to the FYI category and keep your inbox clean. There’s also an Actionable category as well so you can move there all emails that need responding to.

After organizing your emails, you can choose the course of action. You can reply to your email right away or archive it. If needed, you can also add a reminder and respond to the email later.

Hiri also has a delegate option that you can use. Thanks to this feature, you can delegate your emails and they will be automatically moved to the Actionable category once received. Keep in mind that this feature works only if both you and your recipient have Hiri installed.

Hiri also has a useful timer that prevents you from checking your email too often. Many users tend to check their email every few minutes and by doing so they are reducing their performance.

Fortunately for you, the application has a timer that will help you stay focused on your current task instead of checking email.

It’s worth mentioning that the application is fully compatible with Office 365 and Exchange so all your emails, calendars, and folders will sync with Hiri.

The application has a Replay Multiple features so you can easily choose desired recipients with ease. There’s also a built-in calendar so you can easily keep track of important dates.

All your emails are stored in the database and thanks to the powerful search feature you can easily find the desired messages.

Hiri is a solid email client and it’s available for all major desktop platforms. Unfortunately, the application isn’t free, but you can try it out for 14 days. If you want to continue using the application, you’ll need to pay annual or monthly fee.

⇒ Get Hiri

Scribe

If you’re looking for a lightweight cross-platform email client, you might want to consider Scribe. The application has an integrated calendar and it supports all the major internet mail protocols.

This is a lightweight application, but it comes with bayesian spam filter that will scan your emails and protect you from unwanted messages. The more you use the filter, the better the spam detection becomes, and it can even automatically detect and remove spam messages.

As for spam detection success rate, the spam filter is about 98.5% precise.

It’s worth mentioning that this application is rather lightweight so it won’t take too much space on your hard drive. If needed, you can also run Scribe as a portable application, so you won’t even have to install it.

This is perfect if you want to run the application from your USB flash drive or any other removable storage.

Scribe is also rather fast, and it starts almost instantly after you click its shortcut. In addition to speed, the application is also simple to use, so you won’t have any issues with it even if you’re a first-time user.

All the necessary data and settings are stored in the application directory so you can easily back up your settings and emails. We also have to mention that this is a cross-platform application, so it will work on all major desktop platforms.

Scribe is a solid email client, and unlike previous entries on our list, it’s completely portable and lightweight so it will work on any PC without an installation.

The application has a humble user interface and it might lack some features that other email clients have, but despite these limitations it’s one of the smallest and fastest email clients on our list.

⇒ Get Scribe

Polymail

Polymail is email and sales productivity platform, so it’s perfect for both small and large businesses. The application offers real-time tracking feature that allows you to keep track of important messages.

As a result, you can easily see when your messages are opened, clicked or downloaded. There’s also an Activity Feed so you can easily see all notifications regarding your sent emails.

Thanks to these features, you’ll be certain that all important messages are read by their recipients.

The application also supports campaigns and you can send them to multiple contacts at once. Each campaign allows you to see the number of sent, opened, clicked, downloaded, and replied messages.

This feature also supports placeholders so you can easily replace certain words with ease. Polymail also has followed up reminders, and thanks to this feature you’ll get a reminder if nobody responds to your email message.

You can choose between several available presets, but you can also set a custom reminder date.

This tool also supports contact profiles and you can easily see detailed information about your contacts. For example, you’ll see your contact’s picture, links to social media, job description, bio and all your previous interactions.

Polymail is a great email client and it’s perfect for smaller and larger businesses. The application is available for Mac and iOS, but Windows and Android versions are in development, so we expect to see them soon.

The application is available for a free trial, but if you want to continue using it, you’ll need to subscribe to a monthly plan.

⇒ Get Polymail

Kiwi for Gmail

If you use Gmail regularly, but you don’t want to run it from your browser every time, you might want to check out Kiwi for Gmail. This is a simple application that allows you to run Gmail in a separate window as a desktop application.

The application mimics the look of Gmail, but it also brings some new features to the application. For example, there are global shortcuts available allowing you to compose a new email simply by pressing a keyboard shortcut.

This is a global shortcut and it will work regardless of the application that is currently running.

The application also supports attachments and you can send large attachments with ease. Kiwi for Gmail fully supports Google Drive so you can easily upload any large file to cloud storage and send it as a link in your email message.

In addition to Gmail, Kiwi allows you to run other Google apps as desktop applications. For example, you can easily run Google Docs, Sheets and Slides as native Windows applications.

As previously mentioned, the application also offers some unique features and it has its own toolbar on the right that you can use to switch between different apps. In addition, you can also view all your recent documents and easily switch back to previously opened files.

Kiwi for Gmail also allows you to seamlessly switch between different accounts which is perfect for all users that use two or more Gmail accounts.

You can even open individual Google Apps for specific accounts if needs be. You can even have multiple open windows so you can preview or edit your documents while writing an email in a different window.

The application supports notifications, but you can choose to turn off all email notifications completely. Since we get all sorts of email messages on daily basis, you can only turn on notifications for important messages so you don’t miss an important email.

It’s worth mentioning that this application supports various plug-ins so you can easily enhance its functionality.

If you use Gmail as your webmail service, Kiwi is the perfect tool for you. The application works as an email client, but it also supports various Google apps.

This tool is available for both Mac and Windows, and there are two versions available. The free version doesn’t support multiple accounts and it doesn’t offer support for G Suite and other advanced features.

If you want to unlock all the features along with the ability to use multiple accounts, you’ll need to purchase the Full version.

⇒ Get Kiwi for Gmail

BlueMail

Another great email client that we want to show you is BlueMail. This email client has people-centric inbox so you’ll only see emails from actual people.

Since we receive all sorts of notifications and newsletters via email, sometimes it’s hard to find emails that come from actual people. Simply turn on People Mode to hide all notifications, newsletters and other similar messages from your inbox.

It’s worth mentioning that this application works with IMAP, Exchange or POP3 accounts, so you can easily set up your email account.

Another great feature of this app are clusters. Thanks to this feature you can easily organize your emails into groups and see all emails from that group in a single slot.

It’s worth mentioning that the application supports groups allowing you to easily send emails to multiple people with ease. There’s also a unified inbox so you can combine multiple accounts into one and view emails from multiple accounts in a single inbox.

If you get a lot of emails on daily basis, you’ll be pleased to hear that you can organize them with ease. You can add reminders for emails and turn your inbox into a to-do list.

As for additional features, BlueMail has a built-in calendar so you can keep track of important events. The application also supports aliases, various protocols, multiple accounts and it also offers offline support.

There are various filters available so you can easily sort your messages, and thanks to the dynamic smart conversations you can easily keep track of your emails. Of course, the application offers encryption so all your messages will remain protected from malicious users.

BlueMail is a solid email client and it’s available for Android, iOS, Android Wear and Apple Watch devices. Unfortunately, the desktop version isn’t available at the moment, but the developers are working on Windows and Mac version so we expect to see them available in near future.

If you want, you can sign up for desktop beta version and try it out as soon as its released.

⇒ Get BlueMail

Sylpheed

If you’re looking for a lightweight email client, you might want to consider Sylpheed. The application has a simple user interface so you should be able to use it without any problems.

In addition to simplicity, the application also offers great speed and you won’t have any performance issues while working with folders that have thousands of messages in them.

The application is optimized for storing emails so the chance of losing your messages is minimal. This means that all your emails will be preserved, even if you forcibly terminate the application.

Speaking of emails, they are managed with MH format that allows you to easily backup, migrate and open your messages with other applications. By using this format the application reduces the chance for email loss while allowing you to easily remove unwanted emails.

Sylpheed also has a powerful search feature that allows you to find a specific email in a matter of seconds. You can search for emails based on their header, message content, size, date, flag status, etc.

After you find the desired emails, you can easily move, copy, delete, set flags or perform external commands on them. It’s worth mentioning that there’s also a quick search feature that allows you to search messages by flag settings and subject strings.

Just like most other email clients, Sylpheed has an anti-spam feature that allows you to remove unwanted messages. This feature supports external commands, so advanced users can set anti-spam rules with ease.

The application supports bogofilter and bsfilter for external commands, but you can use any other application.

The application also supports various protocols including POP3, IMAP4rev1 and SMTP, but it also supports NNTP (NetNews) and IPv6. It’s worth mentioning that Sylpheed supports encryption by GnuPG, so your messages will be safe from third parties.

Of course, encryption while using POP3/IMAP4/NNTP is supported thanks to the SSL/TLSv1.

Sylpheed is a lightweight email client, and thanks to its simple user interface it will be perfect for all users. The application is completely free, and with the portable version available you don’t even have to install the application in order to use it.

As for availability, this email client is available on all major desktop platforms.

⇒ Get Sylpheed

Trojitá

Another cross-platform email client that we want to show you is Trojitá. This is a fast email client so you won’t experience any slowdowns with it. The application uses open standards, modern technologies and it offers full support for IMAP.

We also have to mention that this application is rather lightweight so it will preserve your bandwidth and keep the memory and CPU usage low.

Speaking of speed, the developers of Trojitá claim that you can access a mailbox that has thousands of emails without any slowdowns. In fact, there’s no need to wait for your messages to download meaning you can access them immediately.

Even though the application offers simple to use interface and great performance, it lacks certain features. For example, there’s no built-in calendar so you can’t keep track of events. In addition, there’s no support for POP3 protocol so you can use it only with services that use IMAP protocol.

Trojitá is a Qt5 application, which means that it offers cross-platform support. The application is completely free and available for all major desktop platforms.

This is a solid email client, and it offers simple to use interface with basic features, so it’s perfect for all basic users that just want to check their email.

⇒ Get Trojita

Redkix

Redkix is a cross-platform team messaging application, but it can also work as an email client. The application supports different types of conversations, and you can have open and closed channels or private chats with your contacts.

Using this tool you can set up different channels and even users that don’t have Redkix can participate in your channels by using their email.

The application is perfect for businesses because it allows you to have internal and external channels. Redkix supports threaded conversations so you can easily keep track on all your messages.

It’s worth mentioning that these tools support direct messages, so you can have private conversations with your clients or coworkers.

Redkix combines all your emails, channels, and direct messages into a single inbox. The application can also work as an email client so all your emails and contacts will be available in Redkix.

If you tend to receive a lot of emails, you can snooze your messages and read them later. There’s also a priority inbox ensuring that you never miss an important message.

It’s also worth mentioning that this tool has a powerful search feature so you can easily find a specific message. The application fully works with your existing email, and in order to use it you just need to sign in.

As for supported services, the application currently supports Google Apps, Microsoft Exchange, and Office 365.

Redkix is a messaging application that allows you to communicate easily with your contacts regardless of their platform. Even if your contacts don’t have Redkix installed, you’ll see all their messages in a form of an email.

This isn’t a classical email client, but it has email capabilities, so you might find it useful. As for availability, Redkix is available on Windows, iOS, and Android free of charge.

The free version has certain limitations, but if you want to remove them you need to subscribe to Teams or Enterprise monthly plan.

⇒ Get Redkix

There are many great email clients, but some of them don’t support multiple platforms. If you frequently switch between different platforms and you need an email client with cross-platform support, be sure to try some of the applications from our article.

NBA 2K20 Packet Loss: What Is It and How to Fix It?

NBA 2K20 is a popular basketball simulation video game. It’s based on the NBA (National Basketball Association) and is the 21st release in the NBA 2K series.

You can enjoy a quick practice match, a pro-difficulty tournament, and even a competitive match with your friends if you’re into online play.

If you’re not exactly keen on sharing your game experience with other players online, you have almost nothing to worry about. However, playing NBA 2K20 online is a whole nother story.

For starters, it requires you to have a sturdy Internet connection. Then, there are the connectivity issues that could drive you crazy if left untreated.

Jitter, high ping, and even the dreaded packet loss. These problems could tamper with your gaming experience and even ruin it, but not to worry. We’ve got just the solution to all your NBA 2K20 packet loss issues.

What is packet loss in NBA 2K20?

Packet loss occurs whenever packets of data that you transmit on your connection never make it to their destination. It doesn’t matter whether it’s you or the other end of the connection that never receives the packets.

If any of the packets go AWOL, you’ll likely experience other, more noticeable issues. Your game hangs, menus become unresponsive, you’ll suffer from huge ping, and your game might even drop the connection to the server.

What can cause packet loss in NBA 2K20?

There are several causes for packet loss, regardless of where you encounter it. Ranging from network congestion to even having poor-quality Ethernet cables, these can all contribute to triggering packet loss in NBA 2K20.

However, one of the most common causes of packet loss is network congestion. It’s exactly what you suspect; when one network has more users than it can comfortably host, resource allocation becomes troublesome.

As a result, users might experience slowdowns, increased latency, and even packet loss or connection drops.

How to detect packet loss in NBA 2K20?

If you play NBA 2K20 on your computer, you can use third-party software such as LiveTcpUdpWatch to detect the online NBA 2K20 server you connect to. Just launch the tool and locate the game client on the list.

The program will display more than just the server you’re connected to and its address. You’ll also see the protocol that’s being used, the local and remote addresses, the amount of data transmitted, ping, and even packet loss.

Normally, we’d use Wireshark to identify the server address and run it through pathing to assess if any packet loss is occurring.

However, using specialized, third-party software solutions such as LiveTcpUdpWatch can save you a lot of hassle. It provides you with a lot of data and requires no advanced configuration.

How can I fix packet loss in NBA 2K20?

1. Using a VPN

  1. Download and install ExpressVPN.
  2. Log into your account.
  3. Connect to the server of your choice (closer server = greater speed).
  4. Launch NBA 2K20.
  5. Check if the packet loss issue still persists (rerun the packet loss test if necessary).

A VPN can easily reduce packet loss for better connectivity and Internet speed. ExpressVPN is an excellent VPN solution because it can help you greatly reduce packet loss and improve in-game ping.

ExpressVPN

Never worry about packet loss in any of your favorite games with this powerful VPN.
Check Price Visit Website

Note that using a VPN can help you improve packet loss, but only works if your ISP limits your connection by means of throttling your bandwidth or making use of poor routing.

2. Troubleshooting the connection manually

  • Restart your PC, modem, or router
  • Check if there’s any malfunctioning component on your network
  • Upon detection, replace or repair any broken component on your network (wires, adapters, router, modem)
  • Update your drivers to their latest versions to avoid compatibility and corruption issues
  • Make sure your router runs on the latest firmware version
  • Ask your ISP to look into the situation if you notice anything wrong during the packet loss test
  • Contact NBA 2K20’s support team if the test suggests there’s something wrong on the game server’s side
  • Flush your DNS
  • Avoid peak hours, if possible, to dodge network congestion issues
  • When possible, always use wired connections instead of WiFi (WiFi packet loss occurs more frequently)

We remind you once more that there’s no 100% magic fix for packet loss that works every time. Many reasons can cause packet loss and, as a result, has more than one potential fix.

However, if you plan on trying our suggested fixes, you can’t do more harm to your connection. In fact, properly maintaining your connection might improve its overall quality, even though the packet loss issue might persist.

NBA 2K20 packet loss can be fixed

If you’re looking for a quick fix for leaking packets while playing NBA 2K20, we have some bad news: there’s no quick fix that works 100% all the time.

However, using a VPN can certainly improve packet loss if your ISP causes it by limiting your connection. Our manual troubleshooting fixes could also fix packet loss but don’t expect them to work all the time.

Truth be told, packet loss is usually caused by network congestion, and more often than not, the best way to counter network congestion is by waiting it out and avoiding peak hours.

RuneScape packet loss: What is it and how to fix it?

RuneScape is an awesome, popular, old-school game that gained a lot of popularity since its initial release in 2001. That’s almost two decades ago, and the game is still enjoyed by many players today.

The fact that the game was and still is free to play made it even more appealing to lots of fans. It was first released as a Java-based browser game, which meant you didn’t have to install it on your PC.

In 2016, the game was upgraded and received a standalone client. Guinness World Records still recognizes RuneScape as the world’s widest free MMORPG that received the most updates in the meantime.

Anyway, you got the point: it’s an online game. And like any other online game available on the market, RuneScape is subject to a wide range of technical issues, mostly regarding connectivity.

One of the most frequent connectivity issues is the (in)famous packet loss. The reason packet loss is among the most dreaded issues is that there’s no immediate fix that can solve it each time it occurs.

What is packet loss in RuneScape?

Regardless of where you may spot it, packet loss is absolutely the same. It happens whenever data packets that you transmit throughout your connection never make it to their destination.

As a result, you lose large amounts of data on the way, which your connection tries to patch up by artificially inserting delay, waiting indefinitely for data to arrive (which increases ping), or even dropping your connection.

With RuneScape, there’s absolutely no difference. Your connection leaks packets, and you start experiencing certain issues with the game, such as jitter, rubberbanding, unresponsive menus, or even sudden disconnections from the game.

What causes packet loss in RuneScape?

When it comes to packet loss, there’s a lot of possible causes. Since there’s no immediate fix for packet loss, we can justify the lack of an immediate reason on the same basis.

To be fair, there’s one reason why packet loss occurs and it almost never fails to deliver: network congestion. Whenever there’s an overloaded network on the table, packet loss is more often than not there as well.

Network congestion usually spells bad news, since it can’t be fixed right away. It involves a lot of users on one or more servers that can’t balance the resources properly, so all connections have to suffer as a result.

However, don’t fool yourself into thinking that network congestion is the sole culprit when it comes to packet loss. In fact, there are several possible causes that can trigger this unfortunate issue.

For instance, you can encounter packet loss if you have outdated network adapter drivers installed on your PC. You can also experience it because of poor-quality Ethernet cables, using WiFi instead of wired connections, or improper ISP routing.

How to detect packet loss in RuneScape?

  1. Hit the Win key on your keyboard
  2. Launch an elevated (admin rights) instance of the CMD
    1. For modern RuneScape servers
      1. Type tracert world#.runescape.com (where # is the number of the world you’re playing on)
      2. Wait for the results
    2. For old-school RuneScape servers
      1. Type tracert oldschool#.runescape.com (where # is the number of the world you want to test)
      2. Wait for the results
  3. Note down the IP address of the RuneScape server (either old-school or modern)
  4. In CMD, type pathping x.x.x.x (replace x.x.x.x with the address of the server you want to test)
  5. Take a look at the results
  6. Check if any node shows any sign of packet loss

The pathping test should help you identify the location of the packet loss issue. The test results should look similar to the screenshot below. Pay no mind to the interface, we just saved the output of the test to an external TXT file on our PC.

Results of pathping

If the packet loss occurs on the first node, then your main device is definitely the culprit. If you notice packet loss on the other end of the connection, then the issue is on the game server’s side.

If pathping is just too complicated, you can turn to third-party software. One of the most effective tools is LiveTcpUdpWatch. However, if you’re using the browser version of RuneScape, it won’t work as intended.

How to fix packet loss in RuneScape?

1. Use a trustworthy VPN service

  1. Purchase a Private Internet Access subscription planPIA RuneScape
  2. Download the VPN client on your computer
  3. Install PIA
  4. Launch the VPN client
  5. Log into your PIA account
  6. Connect to the server of your choice
  7. Launch RuneScape
  8. Check if the packet loss issue still persists

Private Internet Access is a great VPN service brought to you by Kape Technologies. It can help you secure your Internet connection and online privacy by means of spoofing your IP, using a private DNS, and encrypting your traffic.

Private Internet Access

Private Internet Access

Having packet loss in RuneScape? Private Internet Access can reduce it for you.
$2.85/mo. Buy it now

Furthermore, a VPN such as PIA can also help you reduce packet loss, improve in-game ping, and bypass geo-restriction.

However, note that VPNs can only help you reduce packet loss if your ISP limits your connection by providing you with improper routing or throttling your bandwidth.

2. Troubleshoot your connection manually

  • Restart your computer, modem, and/or router
  • Check your network for any malfunctioning components, including your PC, drivers, cables, router, or modem
  • Repair or replace any troublesome component you discover during your network assessment
  • Use wired connections instead of WiFi whenever possible (WiFi packet loss occurs more often than wired packet loss)
  • Make sure your drivers are up-to-date (using their latest version)
  • Check if your router runs on the latest firmware version and update it if it isn’t
  • Avoid peak hours to bypass network congestion as effectively as possible, if you can
  • Ask your Internet provider if they can look into the matter and maybe even fix it
  • Contact the RuneScape customer support if you notice anything wrong on their side of the connection
  • Flush your DNS

We’ve already told you that packet loss has no sure fix and for that reason, we can’t vouch that even using all the steps above will fix your issue. More often than not, packet loss comes and goes by itself, even in RuneScape.

However, the fixes we’ve suggested above are great to use for keeping your online connection healthy. If you don’t fully understand the necessity of performing a suggested fix, we advise you to perform a bit of research before doing it.

RuneScape packet loss is annoying

To sum it up, we can all agree that encountering packet loss, even in RuneScape, can be downright frustrating. However, we’ve gathered a bit of knowledge on what causes it and how to fix it and we’re sharing it with you.

Sure enough, the best and quickest fix would be using a VPN for Runescape. On the downside, if the issue isn’t caused by your ISP by either improper routing or bandwidth throttling, a VPN would be useless.

If that’s the case, you could try our manual troubleshooting suggestions, given that packet loss has no precise reason and no sure fix.

[wl_navigator]

5 best VPNs for Zoom to protect your data privacy & security

Zoom’s popularity exploded during the COVID-19 pandemic since many employers turned to this video conferencing program to organize meetings and communicate with their teams.

Unfortunately, its fame also attracted cyber-criminals who exposed Zoom’s flaws that lead to security breaches. As a result, many people dropped Zoom and replaced it with other similar tools, such as Google Meet.

If you wish to stick to Zoom, however, it’s essential to protect your data security and online privacy. Otherwise, you risk exposing sensitive information.

In addition to getting equipped with a powerful anti-malware solution, you should use a VPN for Zoom. A virtual private network solution changes your IP address and geo-location, making it more difficult for hackers to intercept your data.

Even if a cybercriminal manages to get hold of your Zoom traffic, they won’t be able to decipher the scrambled message, thanks to VPN encryption. Besides, a VPN can also help you unblock Zoom if it’s not available in your country.

However, not all VPNs are equal, so it’s important to do your homework and carefully evaluate the pros and cons of each VPN service before deciding which is the best for Zoom.

How to use a VPN for Zoom

PIA is connected to a US VPN server

  • Choose a VPN service and get a subscription plan (we recommend PIA).
  • Download and install the VPN on your device.
  • Launch the app and connect to a VPN server.
  • Start using Zoom.

What are the best VPNs for Zoom?

Private Internet Access

Private Internet Access is the best VPN for Windows 10 laptops

Created by Kape Technologies, Private Internet Access (PIA) is a top VPN for Zoom, thanks to its high-speed VPN servers and excellent security options.

Private Internet Access comes with more than 3,300 VPN servers spread across 48 countries. It uses the OpenVPN protocol to make sure that your Zoom conferences won’t get leaked.

Plus, runs exclusive DNS servers, static and dynamic IP addresses, a kill switch, split tunneling, and port forwarding mode. You can also use it to unblock Zoom if the tool isn’t available in your country.

What else you must know about PIA:

  • 10 simultaneous connections
  • No logs or leaks
  • 24/7 live chat support
  • 30-day money-back guarantee (no free trial)
Private Internet Access

Private Internet Access

Use one of the best VPNs for Zoom to ensure your data security and online privacy.
$2.85/mo. Buy it now

NordVPN

use NordVPN for Windows 10 laptops

Developed by Tefincom & Co., NordVPN is a top-ranked VPN for Zoom that you can trust with your data security and online privacy. It’s one of the safest VPNs, which comes with more than 5,100 VPN servers in 59 countries.

You can use NordVPN to unblock Zoom if the video conferencing service isn’t available in your region. It supports OpenVPN, obfuscation mode, Double VPN, Onion-over-VPN servers, and dedicated IP addresses.

The VPN client is compatible with all major operating systems and platforms. You can even set it up on your router to share your VPN account with all nearby devices.

What else you must know about NordVPN:

  • 6 simultaneous connections
  • No logs or leaks
  • 24/7 live chat support
  • 30-day money-back guarantee (no free trial)
NordVPN

NordVPN

Get this super-secure VPN for Zoom to keep your video conferences private.
$3.49/mo. Buy it now

Surfshark

use Surfshark for your Windows 10 laptop

If you’re looking for a cheaper VPN for Zoom, you can’t go wrong with Surfshark. Made by Surfshark LTD, it has the most affordable subscription plans on this list, offering more than 1,700 VPN servers in over 63 countries.

Surfshark is a great choice for bypassing firewalls and accessing blocked sites, making it ideal to use Zoom if it’s unavailable in your country. It supports OpenVPN, WireGuard, and IKEv2 protocols.

Plus, Surfshark has obfuscated VPN servers, multi-hop connections, split tunneling, and a kill switch. It’s compatible with all popular operating systems.

What else you must know about Surfshark:

  • Unlimited simultaneous connections
  • 24/7 live chat and email support
  • 30-day money-back guarantee
  • 7-day free trial for Android and iOS
Surfshark

Surfshark

Set up this budget-friendly VPN on your device to block hacker attacks.
$1.99/mo. Buy it now

CyberGhost VPN

use CyberGhost VPN for your Windows 10 laptop

Also made by Kape Technologies, CyberGhost VPN is the best free VPN for Zoom because you can test it at no cost without having to use your credit card. It boasts more than 6,500 VPN servers in 89 countries.

The virtual private network app is wrapped in a user-friendly interface and features intuitive options for all user levels. It even has special groups of servers optimized for streaming and torrenting so that you can quickly access them.

Furthermore, CyberGhost VPN operates private DNS servers. It comes with DNS leak protection, trusted Wi-Fi networks, split tunneling, and a kill switch.

What else you must know about CyberGhost VPN:

  • 7 simultaneous connections
  • No logs or leaks
  • 24/7 live chat support
  • Up to 45-day money-back guarantee
  • 1-day free trial for Windows and macOS
  • 7-day free trial for Android and iOS
CyberGhost VPN

CyberGhost VPN

Use the best free VPN for Zoom to ensure that your data won't get decrypted by hackers.
$2.75/mo. Buy it now

ExpressVPN

use ExpressVPN for multiple devices

Published by Express VPN International LTD, ExpressVPN is an excellent VPN for Zoom and one of the fastest VPNs for streaming. It provides you with over 3,000 servers spread across 94 countries.

The app uses OpenVPN with up to 256-bit encryption and zero-knowledge DNS servers to maintain your online anonymity. It has a Network Lock to cut off your Internet access in case the VPN connection drops unexpectedly, together with split-tunneling mode.

What else you must know about ExpressVPN:

  • 5 simultaneous connections
  • No logs or leaks
  • 24/7 live chat support
  • 30-day money-back guarantee
  • 7-day free trial for Android and iOS
ExpressVPN

ExpressVPN

Check out this reliable VPN for Zoom and take control of your digital security.
$8.32/mo. Buy it now

To recap, you can use a VPN for Zoom to defend your computer from security breaches and make sure that your confidential info doesn’t end up hosted on unknown servers.

Furthermore, a VPN is practical for traveling, especially if you can’t access Zoom in your country or if you typically connect to public, unprotected Wi-Fi hotspots.

[wl_navigator]

FIX: Unable to connect to the Internet in Windows 10

Watching a movie or reading your favorite everyday news on the Internet will be pretty hard to do without an Internet connection, but we will fix this in no time.

First of all, you need to know that Internet connection errors can be caused not only from the Windows 10 operating system, but from a hardware perspective as well.

If you want to fix your Internet connection in Windows 10 safely and quickly, you only need to follow the easy methods posted below in the correct order.

How can I fix Internet connection errors on Windows 10?

1. Check for a wireless network adapter

  1. First, we will have to check if the laptop or desktop device has the wireless network adapter turned on.
    Note: It is usually notified by a wireless icon near the laptop’s keyboard.
  2. After this, you should try to connect to one of the wireless networks available. If you cannot connect to any of the networks in your range, then follow the next method posted below.

2. Enable WPS on your router

  1. Turn on the Windows 10 device.
  2. Move the mouse pointer to the upper right side of the screen.
  3. Left click or tap on the Settings feature you are presented there.
  4. Left click or tap on the Network icon you have in the Settings feature.
  5. Left click or tap on the network you want to connect your device.
  6. Left click on the Connect button.
  7. Now press the WPS button on your router.
    Note: This only works for routers that have a Wi-Fi protected setup (WPS).
  8. After you pressed the WPS button on the router, it will immediately connect without having to type in the username and the password for that router.

3. Connect automatically to the wireless router

If your wireless connection interrupts every time you lock your Windows 10 device, then the next time you connect to the wireless router, you will need to check the box next to Connect Automatically on your log on window.

4. Update the network adapter driverUnable to connect to Internet in Windows 10

  1. Left click or tap on the Start button in Windows 10.
  2. Left click on the Control Panel feature.
  3. In the search box, you have there you need to write adapter.
  4. Under the Network and sharing center feature you need to left click on View network connections.
  5. Next, you will need to find the network adapter you are using and right click on it.
  6. Left click on the Properties feature you have on this adapter.
  7. Left click on the Driver tab presented on the upper side of the Properties window.
  8. Left click on Update driver.
  9. Reboot the Windows 10 device.
  10. Try again and see if your Internet is working correctly.

If you don’t want to go through the hassle of updating your drivers manually, there are specialized tools that will do that for you. Fortect Driver Updater is one of the best, so be sure to check it out below.

Windows 10 Fortect Driver Updater Repair Tool

Some users may seek the help of IT technicians to find a professional solution to fix the errors. Thus, technicians can find the problematic device drivers and compare the data found on them with the Windows 10 driver data found on various websites.

However, since any installing of setup files can carry a risk of rendering the device or operating system inoperable, users should only use special software that provides safe PC driver updates and is meant to fix device driver issues and other computer problems.

The most effective way to keep your PC up-to-date is to download the Fortect Driver Updater repair tool, launch the application, and scan for outdated and missing device drivers.

⇒ Get Fortect Driver Updater

5. Use the Network troubleshooterUse troubleshooter on unable to connect to Internet in Windows 10

  1. Left click on the Start button inside Windows 10.
  2. Left click on the Control Panel feature.
  3. Now in the search box, you will need to write troubleshooter.
  4. Left click or tap on the Troubleshooting icon after the search is finished.
  5. Left click on the link View all.
  6. Left click or tap on the Network Adapter feature.
  7. Now the troubleshooter will start and will try to fix any issues you may have with your Internet connection.
  8. After the troubleshooter is done, you need to close all the windows you opened and reboot the Windows 10 device.
  9. Try to connect to the Internet and see if it works now.

6. Use a different browser

  1. Try connecting from other web browsers than the one you are using.
    Note: For example, if you are using Internet Explorer to browse the Internet, you can try installing Mozilla Firefox or Google Chrome and connect from there.
  2. If you are having issues with only one browser, you will most likely have to uninstall the browser and install the latest version compatible with Windows 10 operating system.

There are plenty of really good browsers that offer high-speed rates and a secure connection.

The browser market offers some really good and completely free alternatives that come with easy-to-navigate UIs and plenty of integrations and add-ons to make it your own.

Many good browsers also include built-in VPNs for a private and restriction-free connection.

Of course, all noteworthy alternatives include basic options, like setting your default search engine and creating bookmarks, so you shouldn’t worry about that.

7. Check your Internet connection with your Internet service provider

  1. If all the methods above fail, you will have to plug your Ethernet cable from the Internet supplier to another Windows 10 device, if you have one.
  2. See if the Internet connection works on the other device.
  3. If the Internet connection has the same issue on the other device, you should call your Internet service provider and see if you still have a working Internet connection.

So now that you have the above methods on how to solve your wireless or wired Internet connection on Windows 10, you only need to follow them carefully for a quick and easy fix.

Please write us below if you have any other questions regarding this subject and we will see how to help you further.

What to do if Outlook is sending blank emails

Despite all criticism, Outlook is one of the quickest ways to manage your emails. Nevertheless, errors can occur even to one of the most popular email client platforms.

Many users have highlighted that Outlook 2016 is occasionally sending blank emails automatically.

This is actually an old problem for Outlook. In fact, it affected many users of previous Outlook versions. In this article, you can find a simple guide on how to identify the problem and quickly fix it in a few easy steps.

Users said this problem affects the Outlook 2016 Home and Business versions. In fact, the problem can manifest itself in two ways:

  1. The blank emails are sent randomly and occasionally. However, only the recipients can see them blank, while in the Sent Items folder they appear with the full body to the sender.
  2. The blank emails are sent occasionally to random recipients although the sender didn’t actually send these emails.

The receiver of a blank email should check if there is an email address sending the blank email. If there is no address or the address is unknown that is a junk email.

In that case, the best approach is not to open the email but eliminate it as soon as possible. The problem seems to affect Outlook 365 users as well.

Sometimes the solution could be easier than expected. We’ll list three ways to solve this problem quickly that apply to both recipients and senders.

How can I fix Outlook sending out blank emails?

1. Update your antivirus

One of the first ideas that may come to your mind when it comes to this issue is that your computer has got some viruses.

But this is not necessarily true. Actually, this could be an antivirus problem.

The first attempt to solve the problem, on the recipient’s side, consists of updating the antivirus. Sometimes, the missing emails are the result of the virus scanning process carried out on download.

Somehow, your antivirus flags particular emails as malware when it’s not the case.

Besides, you can as well consider switching your antivirus for a more lightweight and powerful one. If you want other less interfering software we kindly advise you to get the best antivirus software compatible with Windows 10.

2. Disable add-ins and update Outlook (for senders)

  1. Open Outlook and go to File.
  2. Select Office account.office account outlook mail
  3. Click on Update Options.
  4. Select Update Now.update outlook

3. Configure a new profile (for senders)

  1. Completely close Outlook.
  2. Go to Start and click to Control panel and after on User Accounts.
  3. Click on Mail (Microsoft Outlook 2016).outlook 2016 control panel
  4. Next, go to Show Profiles.
  5. Select Add.
  6. Type a new name for the new profile and click OK.outlook profile
  7. Type the email address and password.
  8. Open Outlook and go to Settings, select Manage Account and after Add Account.
  9. Select E-mail Account and enter the Name, e-mail, and password of the profile created. and
  10. Click OK.

We hope that one of the three solutions listed in this article helped you to solve this annoying problem of blank emails so that you may continue to use Outlook normally.

Were you able to fix this Outlook bug using this troubleshooting guide? Let us know in the comments section below.

To read more related articles make sure to check out our Troubleshooting page.

If you need more useful tutorials like the one below, visit our amazing Outlook Hub.

This app will not work on your device error [Solved]

One of the main features of Windows 10 is related to its apps. Even so, unfortunately, certain errors with Windows 10 apps can appear.

Users reported This app will not work on your device error message, and today we’re going to show you how to fix that problem.

How do I fix This app is not compatible with Windows 10?

  1. Delete Windows Update cache files
  2. Make sure that you have the latest updates installed
  3. Search for the application in Microsoft Store
  4. Reinstall the app
  5. Reset the Microsoft Store
  6. Reset the app
  7. Run the app troubleshooter
  8. Make sure the Application Identity service is running
  9. Disable your antivirus or firewall
  10. Perform a quick SFC scan
  11. Run DISM

1. Delete Windows Update cache files

This is a simple procedure and you can do it by following the steps below.

  1. Open Command Prompt as administrator. To do that, press Windows Key + X to open the Win + X menu and choose Command Prompt (Admin).
    this-app-will-not-work-on-your-device-cmd-1
  2. When Command Prompt opens, enter net stop wuauserv command and press Enter to execute it. By running this command you’ll stop Windows Update service from running. Minimize Command Prompt.
  3. Now, navigate to C:WindowsSoftwareDistributionDownload
  4. If you can’t access this folder, be sure to enable hidden files and folders. To do that, just click the View tab and check the Hidden items option.
    this-app-will-not-work-on-your-device-hidden-1
  5. Once you enter the Download folder, delete everything from it.
  6. Go back to Command Prompt and enter net start wuauserv command to start Windows Update service.

According to users, this problem can appear due to your Windows Update cache, and in order to fix the problem, it’s recommended that you delete it.

Another way to delete Windows Update cache files is to create a batch file and run it in order to clean Windows Update cache. To do that, follow these steps:

  1. Open Notepad and paste the following code:
    • net stop wuauserv
    • CD %Windir%
    • CD SoftwareDistribution
    • DEL /F /S /Q Download
    • net start wuauserv
  2. Click on File and choose Save As.
    this-app-will-not-work-on-your-device-notepad-1
  3. Set Save as type to All Files and enter remove.bat as the File name.
  4. Click Save to save changes.
    this-app-will-not-work-on-your-device-cmd-2
  5. Now you just need to locate the remove.bat file that you created, right-click it and choose Run as administrator from the menu.

Using a batch file is a faster and more advanced solution, but if you’re not comfortable with using batch files, you can manually disable the Windows Update service and delete the contents from the Download folder.

2. Make sure that you have the latest updates installed

This app will not work on your device error message can sometimes appear if your Windows 10 isn’t up to date. To fix that, be sure to run Windows Update and download the latest updates for your PC.

Many software problems can occur due to certain bugs in Windows 10, and in order to avoid these problems, it’s always recommended to keep your Windows 10 up to date.

Update drivers automatically

It is very important to choose the right driver versions from the manufacturer’s website. In case you choose and install the wrong one, this will not only be an issue for the GPU but may harm all your system.

Fortect Driver Updater will help you update drivers automatically and prevent PC damage caused by installing the wrong driver versions. 

After several tests, our team concluded that this is the best-automatized solution.

⇒ Get Fortect Driver Updater

3. Search for the application in Microsoft Store

  1. Press Windows Key + S keyboard shortcut and enter store. Select Store from the list of results.
  2. When Microsoft Store opens, enter the name of the application in the search field.
  3. Locate the application and try to download it manually.

Few users reported that this issue occurs if you access Microsoft Store via a link on a certain website.

To avoid this problem, you need to start Microsoft Store on your PC and search for the application manually. To start Microsoft Store, do as described above.

4. Reinstall the app

The next thing we’re going to try is reinstalling the app that gives you the error This app will not work on your device error.

As you’re probably used to resolving various software problems with reinstallation, this method might also be just as useful here.

Uninstalling Windows 10 apps is a little bit different than deleting regular win32 programs. That’s because each app has its own path and code.

Since we don’t know which app causes the problem, we compiled a detailed uninstallation guide for almost any app you can think of. Hopefully, you’ll find instructions for your app here.

Once you’ve uninstalled the app, just head over to the Store and install it again. Maybe it’ll work this time.

5. Reset the Microsoft Store

  1. Go to Search, type wsreset, and go to the WSReset.exe command.
  2. Wait for the process to finish, and restart your computer.

All the Windows 10 apps are tightly connected to the Microsoft Store. So, any problems with the Store may lead to issues with individual apps.

If that’s the case, we should resolve the problem with the Store, and theoretically, your apps will start working again.

One of the most common, but also effective, solutions to various Store problems is, you guessed it, the reset command. Use the above steps to easily reset the Microsoft Store.

6.Reset the app

  1. Go to the Settings app.
  2. Head over to Apps > Apps & Features. 
  3. Select the app you want to reset, and go to Advanced options. 
  4. Scroll down and click Reset. 
  5. A small window then opens stating This will permanently delete the app’s data on this device, including your preferences and sign-in details. Press the Reset button to confirm.

We’ll apply the same logic to the individual app. So, if none of the previous solutions get your app to work, try resetting the app itself.

7. Run the app troubleshooter

  1. Go to the Settings app.
  2. Head over to Updates & Security > Troubleshoot.
  3. Now, click Microsoft Store Apps, and go to Run the troubleshooter.
  4. Follow further instructions, and let the wizard finish the process.
  5. Restart your computer.

Windows 10 features a handy troubleshooting tool for the most common problems in Windows 10. Luckily, this tool also handles faulty apps.

Just run the troubleshooter, and your problem will either get instantly resolved, or you’ll receive further instructions on what to do next.

Or you’ll get nothing. But it won’t hurt to run the troubleshooter, anyway, so run Windows 10‘s troubleshooting tool.

8. Make sure the Application Identity service is running

  1. Go to Search, type services.msc, and open Services.
  2. When the Services window opens, find Application Identity service and double-click it.
  3. When Application Identity Properties window opens, find the Service status section.
  4. If the Service status is set to Stopped, click the Start button to start the service.
  5. Click Apply and OK to save the changes.
  6. Close Services window and restart your computer.

The Application Identity service is crucial for running Windows 10 apps. So if this service isn’t running, neither will your apps. Use the above procedure to make sure this service is on.

9. Disable your antivirus or firewall

It’s not even a secret anymore that Microsoft’s software products and third-party antivirus solutions don’t live in a harmony together.

We’ve already heard numerous stories about antiviruses messing up Windows updates or some system features.

In that manner, it’s quite possible that your antivirus software recognizes your app as a threat, and doesn’t allow it to run.

To determine if that’s indeed the case, disable your firewall and antivirus for a few minutes, and check if your app behaves differently.

If you’re able to run the app seamlessly when the antivirus is off, you have two options. Either abandon the app or change your primary antivirus solution.

If you’re looking to change the antivirus, we strongly recommend BitDefender. Sure, it may not act any differently than other antiviruses when it comes to recognizing legit Windows 10 apps as threats.

But, it’s a great antivirus, that will keep your computer safe at all times. At least until you make some notorious hacker angry enough to go after you, in that case, you’re done.

Why wait any longer? You can try BitDefender right away.

10. Perform a quick SFC scan

  1. Go to Search, type cmd, and open Command Prompt as Administrator.
  2. Type in the following line, and press Enter: sfc/scannow.
  3. Wait for the process to finish and restart your computer.

If the above-mentioned Windows 10 troubleshooter didn’t get the job done, we’ll go one step further. Maybe there’s something deep down in your system that that prevents your precious apps from working.

For that cause, we’ll use the SFC scan. This is a command-line troubleshooting tool for various system errors within Windows.

If something’s rotten in the state of Windows, this tool will expose it. scannow command has stopped before the process finished? Don’t worry, we’ve got an easy fix for you.

11. Run DISM

  1. Type cmd in the Windows search bar, right-click on the Command Prompt and run it as an administrator.
  2. In the command line, copy-paste these lines one by one and press Enter after each:

DISM /online /Cleanup-Image / ScanHealth

DISM /Online /Cleanup-Image /RestoreHealth

DISM (Deployment Image Servicing and Management) is the final troubleshooting tool we’re going to try here. It goes deeper than the SFC scan, as it deploys the system image all over again.

Hopefully, a freshly deployed system image will allow your apps to run without any problems. Just use the above steps to run DISM in Windows 10.

Then, wait until the procedure ends (it might take up to 10 minutes) and restart your PC.

This app will not work on your device can be an annoying error, but you should be able to fix it by using deleting the Windows Update cache.

If that solution doesn’t work, feel free to try any other tip from this article.

Here are some more problems and similar error messages that basically mean the same thing. And yes, app issues can be resolved with the same solutions:

  • Xbox Play Anywhere this app will not work on your device – This error is likely to appear when you’re trying to open Xbox Play Anywhere games. Use the above tricks in that regard.
  • Microsoft Store this app is not compatible with this device – This error could mean either the app is indeed incompatible with your computer, or your system recognizes it as incompatible. In the latter case, try some of the solutions listed above to resolve the problem.
  • This app can’t run on your PC old game – If you’re unsuccessfully trying to run an older game on your Windows PC, just check out this detailed article.
  • Microsoft Store does not work on this device – If you have a problem with the Store itself, follow the steps from this quick guide.

FIX: Mozilla Thunderbird won’t delete messages

Users can delete messages from the Mozilla Thunderbird email client by using the shortcut key or the menu function. However, some users have reported that Mozilla Thunderbird won’t delete messages.

According to Mozilla, this issue can occur due to the corrupted trash folder. This can be usually fixed by troubleshooting the email client.

If you are also troubled by this problem, here are a couple of troubleshooting tips to help you resolve Mozilla’s Thunderbird messages issues in Windows 10.

What can I do if Mozilla Thunderbird is not deleting messages?

1.  Delete the corrupt trash folder

  1. Launch Mozilla Thunderbird.
  2. Click on Help (top right corner).
  3. Select Troubleshooting Information option from the options. It will open the Information tab.Mozilla Thunderbird won't delete messages
  4. On the Information tab, scroll down to the Profile Folder section.
    Mozilla Thunderbird won't delete messages
  5. Click on the Open Folder button. A window with your profile files will open in the File Explorer.
  6. Close Thunderbird.
  7. On the File Explorer window, open the Mail folder.
  8. Open the folder with your incoming mail server name.
  9. It should look something like imap.googlemail.com or pop.googlemail.com.
  10. In the folder, select the Trash and Trash.msf  files and delete them.
  11. These files can also be named as Bin or Deleted.
  12. Once the files are deleted, restart Thunderbird.
  13. Upon restart, Thunderbird will automatically create a new Trash folder for IMAP accounts.
  14. If you are using a POP account, do the following.
  15. Right-click on your account name and select New folder.
  16. Name the folder as Trash and click on Create Folder button to confirm.
  17. Now try to delete the messages and check if that has resolved the issue.

By deleting and rebuilding the trash folder, you should be able to successfully delete the messages in Mozilla Thunderbird.

2. Check for add-on issues

  1. Start Mozilla Thunderbird if not already running.
  2. Click on Help and select Restart with Add-ons Disabled option.Mozilla Thunderbird won't delete messages
  3. When prompted to confirm the restart click the Restart button.
  4. Thunderbird will restart in safe mode with all the installed add-ons disabled.
    • Make sure you click on Continue in Safe Mode button.
  5. Open your email account and try to delete the messages.
  6. If you are able to delete the messages, it is possible that one of the installed add-ons is creating the issue.

In such a case here’s what you need to do:

  1. Restart Thunderbird.
  2. Click on Tools and select Add-ons.Mozilla Thunderbird won't delete messages
  3. From the left pane, select Extensions.
  4. Start with enabling add-ons one by one till you find the add-on creating issues with the client.
  5. Once found the problematic add-on, remove it and check again.

3. Install updates

Thunderbird not deleting messages
  1. Start Mozilla Thunderbird.
  2. Click on Help.
  3. Select About Mozilla Thunderbird.
  4. Thunderbird will now scan for any pending updates and download them. Wait for the updates to be installed.
  5. You may have to click on Restart to update Thunderbird button to finish updating the client.
  6. After the restart, try to delete the messages and check for any improvements.

The Mozilla Thunderbird won’t delete messages issue usually occurs due to corrupt trash folders.

If rebuilding the trash folder didn’t help, you can follow some additional steps to fix the problem with your email client.

Alternatively, there are other efficient email clients that will offer practical email features containing proficient services and user-friendly platforms.

Just let us know which of the methods listed above allowed you to fix this Thunderbird issue. You can do this by leaving your feedback in the comments section below.

Microsoft Teams to get simplified Notifications settings next month

Microsoft is working on a revamped notifications experience for the Microsoft Teams desktop and web apps, which has been rebuilt from the ground up, according to the Microsoft 365 Admin Center. The new Notification Settings page will roll out to Microsoft Teams users in “early September,” followed by general availability in mid-September.

Currently, the settings page features a bunch of customization options all on a single window. It looks like Microsoft has found a way to reduce clutter and make it simple and clean by designing a new global notification settings page.

The new view will offer different customization options, including Email, Sound, Teams and channel, Chat, Meetings, People, and Others. Apparently, the additional options will be accessible through the “Edit” button. As seen in the mock-up below, Microsoft Teams users will now choose from a couple of teams and channel notification presets: “All activity” and “Mentions & replies.” Alternatively, users will also be able to create a “Custom” preset completely from scratch if they want.

Microsoft Teams Notification Settings

The Teams notifications settings will still be accessible by clicking on the profile picture and then heading to Settings > Notifications, though. The simplified global notification settings page is a smaller but helpful addition, and it will help you better understand how to manage your channels, teams, and notification settings to fit your specific needs.

Word File Repair Tool: 6 Best to Use in 2026

There is nothing more annoying than needing to access a Word document, and not being able to do so because of some error messages.

Whenever you try to open the document, you get an error saying something along the lines of Word was unable to read this document. It may be corrupt or some other variation.

Word documents can become corrupted for a variety of reasons, the most common reason for this error is an issue with a header found in your document. But, no matter what the problem is, if you can’t access the file, you can’t modify the error.

If you are dealing with these issues, you’re in luck ! In this article, we will explore some of the best software options on the market that allow you to repair any Word document and restore it to the original format easily.

As a plus, at the end of this article you will find information regarding how to try and repair your Word document by using the built-in options. Read on to find out more.

What are the best tools to repair corrupted Word documents?

Stellar Repair for Word

This software is an incredibly powerful Word document repair tool that allows you to easily restore all the data found in your files while keeping the same format as the original version.

This software can repair Word documents without altering the content in any way. That means that all your text, images, font choices, headers/footers, will remain exactly as they were.

This feature allows you to save time and not have to read through the entire document and check for missing parts.

Stellar Repair for Word offers you 3 different preview options, allowing you to see your document with as a full document, with filtered text, and also RAW Text.

Stellar Repair for Word is also capable of performing 3 different types of repairs:

  • Simple Repair – designed for repairing .DOC and .DOCX files with minor corruption
  • Advance Repair – this option repairs corrupted .DOC files more in depth than the previous version
  • Raw Recovery – repairs very corrupted Word files in RAW text
Stellar Repair for Word

Stellar Repair for Word

Repair any type of word document and recover all the valuable information that was on it with the help of this dedicated tool.
Free trial Visit website

Kernel for Word

Kernel for Word is another great software option that allows you to solve corruption errors of your Word documents, supporting a wide range of formats such as .doc, docx, .dot, .docm, .dotx, .dotm.

This software was designed specifically to tackle all the aspects of data recovery from documents. Kernel for Word gives you quick recovery options for your documents,no matter how big the file is.

Kernel for Word is also able to keep the original content from the document like tables, formatting styles, signatures, images, etc. Kernel for Word can recover multiple documents at once, and also offers full support for Rich Text Format (RTF).

Immediately after the recovery is completed, you have the option to preview your repaired document, and then export it into a new MS Word document.

Kernel for Word was released in a trial and full version. The trial version allows you to fix errors in Word documents, and offers all the great features we presented above, but can not export the repaired files.

In order to save your files, you will need to own the full version of Kernel for Word, but, you can use the trial version to test out how much data can actually be recovered from your specific file, and if it’s worth the price, then decide if it’s worth the money or not.

Kernel for Word Repair

Kernel for Word Repair

If you have a Word document that needs fixing, this tool will take care of it no matter what the issue is or what may have caused it.
Free trial Visit website

Repair My Word

Repair My Word - repair word doc

Repair My Word is a great easy to use and free software that allows you to recover your text from a corrupted Word file (only .doc file extensions).

The text that results from this process can then be saved without any errors in a new Microsoft Word document.

Even if this software doesn’t work with Office 2007 .docx files, it is still a great solution to save your data from files with corruption issues.

It will repair Microsoft Word 6.0, Word 95, 97, 2000, XP, and 2003. If your corrupted files are not in one of the compatible file extensions, you can always use a word converter to transform your document, and then access the text inside of it.

⇒ Download Repair my Word

Recovery for Word

Recovery for Word - Word doc repair

As the name suggests, Recovery for Word is a great software option that gives you the power to recover .doc, .docx, .docm, and also .rtf text format.

It supports all Word versions starting with Microsoft Word ’97 and ending with Microsoft Word 2016 edition.

This software allows you to avoid losing important data stored in Word documents by analyzing the corrupted file, identifying the corrupt elements, and exporting every bit of important data that it can find. If the corruption level is very strong, then some of the data could be lost.

Once the recovered data is extracted from the corrupted Word document, this software stores the information in a new .rtf document, and then you can save it in a new Word document.

This software can repair text and the formatting style of your document, tables, bulleted lists, images are moved to the end of the document, charts and drawings, etc. including OLE objects and URLs.

You can try out the demo found on the Recovery for Word page in order to make sure that this software actually works. It is worth mentioning that the demo version only supports recovering a limited amount of data.

⇒ Try Recovery for Word

DocRepair

DocRepair - Word doc repair

DocRepair is another greately useful data recovery tool that was designed specifically to deal with corrupted, damaged or simply Word documents that can not be opened for some reason.

This software works perfectly with documents created in Microsoft Word 6.0, Word 95, 97, 2000, XP, 2003, 2007, 2010, 2013, and Word 2016 for Windows. This software allows you to also repair corrupted files created in Word 2007 .doc, and .docx.

Using this software gives you the power to transform almost any Word document into an openable file, and can solve issues in the event that Word will get stuck, even if the document opens.

This application can also recover document files from damaged disks, and bad sectors on your computer’s hard-drive.

Here are some other notable features:

  • Uni-code and multi-language support
  • Can help greately when your document’s structure is damaged – invalid path, permissions
  • Automatically scans for any pottential corrupted files on your HDD
  • Retrieves all aspects of data found in the Word document – text, tables, images, etc.

⇒ Download DocRepair

Built-in solutions to repair corrupted Word documents

Word corrupted files - software to repair doc files

Microsoft Word has two built-in solutions to deal with a corrupted file, and both of them can be accessed from the File Open dialogue. It allows you to choose from using ‘Open and Repair‘, and also ‘Text Recovery‘ options.

Next, we will explore the steps you need to take in order to use each one of them.

  • Open and Repair

In order to access this option, you will need to first open up a new Word Document. Then, you want to click on File > Open, and then use only one click to select the corrupted file.

Note: If you double-click it, it will try to open it in Word, and you will get the same error message.

In order to find the Open and Repair option, you will now need to click on the black arrow found on the right side of the Open button, and choose Open and Repair.

built-in Word recovery options

This will make the Word application try to repair the corrupt document, if it does, you can restore all the data and also regain access.

  • Text Recovery

This option is also found in the File Open dialogue. You can find it by clicking on the drop down box that says ”All Word Documents”, and choose Recover Text from Any File.

After you’ve completed the first step, Word will try to recover any text found in your document. The results you will get depend very much on the way the file has become corrupted, but these 2 options could be useful.


In this article, we explored some of the best strategies to recover data or repair corrupted/damaged Microsoft Word documents. The software options we listed in this article will surely help you to avoid this issue in the future. We also listed 2 built-in recovery options found in Word.

With this set of knowledge and feature list, you will never have to worry again about how to deal with errors from your important Word documents.

Some options allow you to batch process documents, others support only a specific file format, but overall, you have all the tools needed under your belt to achieve great results.

We would love to find out what software option or built-in option you used to solve your corrupted Word document issues. Feel free to let us know your opinion in the comment section below.


[wl_navigator]

5 ways to fix PDF Printer error invalidfont

When printing a PDF document through Adobe PDF viewer or other tools, you may encounter printer error invalidfont. This error can occur due to incorrect configuration, or if you are using an outdated version of the PDF viewer.

The error can also occur if a file contains an invalid font name or dictionary, a corrupted, improperly formed font dictionary.

If you are also troubled by this issue, here are a couple of troubleshooting tips to help you resolve printer error invalidfont in Windows 10.

How do I fix printer error invalidfont?

1. Check for updates

printer error invalidfont error
  1. Launch the Adobe Acrobat Reader DC. If you are using any other PDF viewer, launch it instead.
  2. Click Help from the toolbar and select Check for updates.
  3. Adobe Acorabter Reader will scan for any pending updates.
  4. If found, click on Install updates to download and install the updates.
  5. Close and restart the Adobe PDF viewer and check for any improvements.
  6. If not, you will see No updates available message.

Updating the Adobe PDF viewer can fix any bugs that may be causing the error.

2. Reset Adobe Acrobat preferences

printer error invalidfont error
  1. Open File Explorer and navigate to the following location:
    • C:\Users\[username]\AppData\Roaming\Adobe\Acrobat\[version]
  2. In Windows 10, rename the following folders: JSCache and Security .
  3. If the Preference folder is hidden, then open the View tab (in File Explorer) and check the Hidden Items box. This will show all the files in the folder.
  4. Once the Preference folder is moved, close and restart Adobe Acrobat Reader.
  5. This should reset the Adobe Acrobat Reader preferences.
  6. Adobe will recreate the necessary folders after the restart.
  7. Try to print a PDF document and check for any improvements.

3. Disable Rely on system font only

PDF printer error
  1. Start Adobe PDF Reader.
  2. Open the document you want to print and then press Ctrl + P.
  3. In the print window, select the printer and click the Properties button.
  4. Open the Adobe PDF settings.
  5. Make sure the Rely on system font only; do not use document fonts option is unchecked.
  6. Click OK to save the changes.
  7. Restart the Adobe PDF Reader and check for any improvements.

4. Print as image 

  1. Open the PDF document in Acrobat Reader.
  2. Click File and select Print.
  3. Click the Advanced button.
  4. Check the Print as Image option.
  5. Click OK to save the changes.
  6. Now try to print the document and check for any improvements.

5. Save as PDF using MS Word

PDF printer error
  1. Open your PDF document in Microsoft Word.
  2. Make sure you enable editing by clicking the Enable editing button on top.
  3. Next, click File and select Save as.
  4. Select a folder.
  5. Make sure you save the file as PDF and click Save.
  6. Now open the PDF file in your PDF viewer and try to print.

If the issue persists, try Fortect Driver Updater to update the printer drivers. Thus, it will resolve the problem automatically, but also will renew the other drivers to prevent future issues.

Windows 10 Fortect Driver Updater repair Tool

In order to keep your PC including hardware components safe and efficient, the latest drivers should always be installed, like printer drivers. Fortect Driver Updater was developed so that you do not have to worry about manually downloading and installing your drivers yourself.

The program scans your hardware, as the printer drivers, and offers to update them. To refresh all drivers it only takes a few clicks and Fortect Driver Updater does the rest automatically.

⇒ Get Fortect Driver Updater

The printer error invalidfont can occur due to multiple reasons making it difficult to diagnose and fix the issue. We have listed all the possible solutions to help you to resolve this printer error in Windows.

Follow each of these steps, and let us know which one worked best for you by leaving a message in the comments section below.