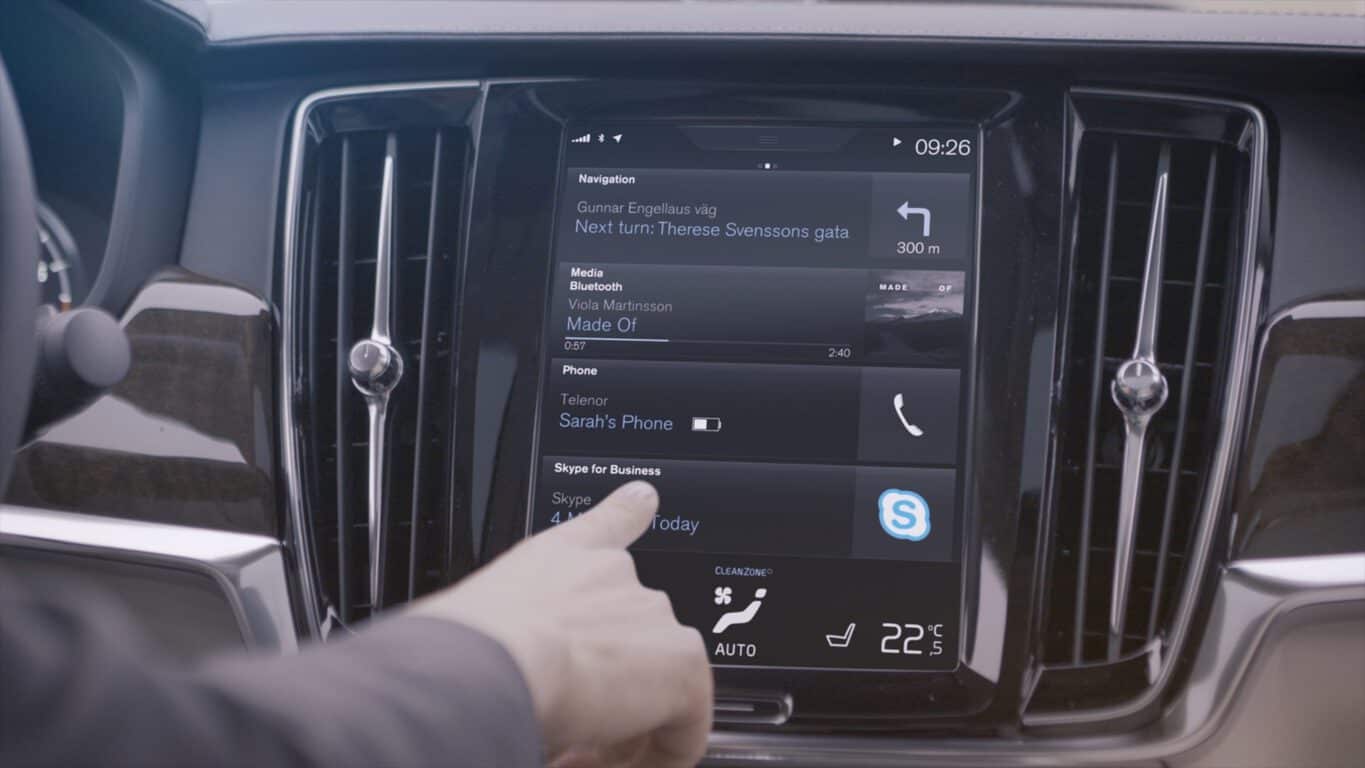
Skype is Microsoft’s instant-messaging app that’s included with Windows 10. The latest version of Skype (version 14) includes a screen share feature.
That enables users to show what’s on their desktop, laptop, or mobile device screens to contacts they call. Users can utilize screen sharing in the Windows 10 UWP (Universal Windows Platform) and desktop Skype apps.
How Can Users Screen Share in Skype?
How to Screen Share in the UWP Skype App
Some users who have never utilized Skype before might need to set up a Microsoft account. Users can set up a Microsoft account by clicking Create a Microsoft account on the MS account setup page.
Click the Start button. Then select the Skype app on the Start menu to open its window.
Sign in to a Microsoft account if required.
Click the Calls button.
Select a contact to call on the left of the Skype app.
Click Start call to open the window shown directly below.
Click the … button at the bottom of the call window.
Then select the Share screen option.
Users with multiple displays will need to select a screen to share.
Toggle the Share computer sound option on to share audio.
Press the Share screen button.
Thereafter, users should see a yellow border around the screen that highlights its being shared.
Users can stop screen sharing by clicking the … button and selecting the Stopsharing option.
So, that’s how users can share screens during calls with the Windows 10 Skype UWP app. Users can share screens much the same with the Skype desktop app.
Many gamers are excited after the release of Gears 5. The graphics and the overall gaming experience are top-notch.
So, Microsoft stepped up its game with this new release. However, not all gamers are thrilled. There’s still de crossplay controversy: PC or Xbox?
Following the release of Gears 5, this subject is hotter than ever, as one gamer reported on the official forum.
Meanwhile, I’m reading posts by Xbox players about how “unfair” it is to oppose a PC player in Gears. They use the old “mouse+keyboard” issue to defend their inferiority complex.
Several Xbox users complained that PC gamers have some advantages in this game and it is unfair to play against them. They said that the keyboard and mouse are better than the Xbox controller for playing Gears of War.
Keyboard and mouse or a controller for Gears 5?
Also, they plead for a boycott of crossplay. Still, Xbox users can use a mouse and a keyboard, so this should not be an issue. But not all Xbox users want to change their controller.
Moreover, the controller is a better option than a mouse and a keyboard when playing a first-person shooter. So, it is not a surprise that some PC gamers are using a controller to play Gears of War.
However, other Xbox players said that the mouse helps PC users to aim with better accuracy.
They complained that PC gamers can shoot them even in the spawn area. This is frustrating because you can’t enjoy the game if you die right after you respawned.
This controversy remains in Gears 5, but this is the price for crossplay. Which is little, because the vast majority of players have beckoned crossplay with a passion, as some users described.
What’s your take on Gears 5? You’re a PC or an Xbox player? Do let us know in the comments section below!
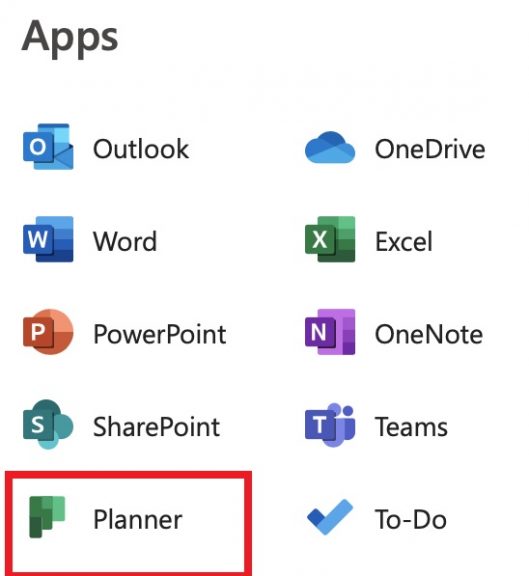
Microsoft is continuing to redesign the icons for the core Office 365 apps, and today, yet another new icon is starting to roll out to the online Office 365 dashboard. As pointed out by Aggiornamenti Lumia, Microsoft Planner has received a new icon, inspired by the designs of icons for PowerPoint, OneNote, Teams, and Yammer.
The imagery in the new Planner icon ditches old the picture of three people facing a checkmark for something more simplistic. It now features differently colored green squares, laid out to resemble a “P,” as seen below.
Obviously, Microsoft is looking to make the icons for Office 365 more consistent. While not as clear as the others, the new icon for Planner represents the “P” in the name of the product. That’s similar to the “O” in outlook, “W” in Word, “T” in Teams, and then “S” in Sharepoint. Icons for Sway, Delve, Flow in the Office 365 dashboard have yet to be updated to this new design language.
We’re currently seeing this new icon in our Office 365 dashboard, and presume the rollout could be linked to a server-side update from Microsoft. Although it is appearing in the dashboard, we’re not yet seeing it in the favorites icon for Planner, or on the loading screen for the main Planner website itself. The apps on iOS and Android also appear to not have yet been updated as yet.
Once again, the new Windows Server build brings no new features to the table, and the release notes mention the same single known issue related to App Compatibility FOD that was mentioned for the preview build 18965 of the server OS two weeks ago. As for the Preview SDK build 18975, it brings the usual API changes for developers, but the rest of the release notes are copy pasted from the previous blog post for the SDK build 18970.
Kanban originally comes from Japan and it has been developed by Toyota as early as 1947. Today, many companies use the Kanban method to improve their workflow.
In today’s article, we will talk about the best Kanban software on the market.
What’s the best Kanban software for PC?
Trello
Trello provides tools to define projects and their requirements and includes a digital dashboard in which actions can be created, organized and prioritized.
The card system allows team members to interact and collaborate on projects allowing users to add comments, links, files, and photos to project files.
Trello has three price levels. The “free” level offers cards, lists, cards, members, checklists and unlimited attachments. It also includes a power-up per card and you can attach files up to 10 MB or connect any file from your Google Drive, Dropbox, Box or OneDrive accounts.
The “Business Class” package costs $ 9.99 (£ 7.80) per month if paid annually. This has everything the ‘Free’ level has to offer in addition to unlimited power-ups, Bitbucket integration, Evernote, Google Hangouts, etc.
As for attachments, you can attach files up to 250 MB. You can also organize all your records with collections, check who can see your listings, benefit from limited subscription invitations, etc.
The “Enterprise” plan costs up to $ 20.83 (£ 16.28) if paid annually. It comes with all the features of the “Business Class” package in addition to two-factor authentication, personalized onboarding assistance, full legal contract review, enhanced SLA, file encryption at rest, intrusion detection and customized security review.
The interface of Trello is clean and fresh. It is also very easy to navigate. Your team can create tabs from the main dashboard or from the Tabs tab and each tab can be named to fit the project.
You can then add activities “To do”, “Do” and “Done”. These can be scheduled for certain dates and times.
Trello is easy to use, flexible and fun project management tool. Includes a convenient drag-and-drop feature when working on your cards.
In addition, Trello is easy to look at and simple to navigate. You can manage your team and their tasks through each table you create.
Everything is displayed in an orderly and consistent way and you will have no problem following the progress of your project through this platform.
MeisterTask comes with a user-friendly and simple interface, allowing you to quickly and easily view all your tasks. As for tasks, you can easily organize or assign them by using the drag-and-drop method.
It’s worth mentioning that this service fully supports MindMeister allowing you to brainstorm with your team in real-time. You can add additional information to each task such as due date, files, and checklists.
You can also discuss the task with your team members in real-time. The service also supports related tasks, allowing you to focus on both current and related tasks.
The service also supports automation and it works with services such as Dropbox, GitHub, Zendesk, Box, Bitbucket or Google Drive.
The service is free for users and it offers unlimited projects. For a fee of € 8.33 per user per month to have some additional features, including productivity reporting.
AllThings combines the simplicity of managing the classic to-do-lists with the Kanban-style display. A list contains a list of activities, each assigned to a resource, with a deadline, a priority, and other classification elements.
If needed, you can prioritize tasks and differentiate important tasks from less important ones. Of course, you can create repeating tasks and set deadlines for each task.
There’s also a built-in time monitor, so you can easily measure the amount of time spent on each task. As for collaboration, you can easily share documents and stay in touch with your team in real-time while working on a specific task.
As for integration, AllThings works with Evernote, Basecamp, Gmail, Google Docs, Slack, Dropbox, and many other services.
AllThings is free for unlimited users and up to 5 projects. For a fee of $ 3.99 per user/month you can expand the number of projects and get access to advanced features.
This service has an incredibly friendly user interface, and all your tasks are neatly divided into columns. In order to boost productivity, you can limit the number of tasks in a column and in order to force your team to focus on tasks at hand.
Subtasks are also available, allowing you to break down tasks into easy to manage segments.
The application also supports various filters allowing you to easily show tasks based on certain criteria.
If needed, you can set up related tasks or tasks that will occur weekly or daily. The service also allows you to share files, and the service is fully compatible with could storage services such as Dropbox, Box, and Drive.
The service is free for users and unlimited projects. Paid at $ 5 /user/month for premium features, such as forecasting, dashboard customization, and cloud-storage support.
It wasn’t too long ago that Microsoft CEO Satya Nadella jokingly told a journalist with an iPad to “get a real computer.” The timing might have been just right, but Apple then followed up with the much talked about “What’s a computer” ad for the iPad Pro, where we could see a young girl rocking the new device ask her suspicious neighbor “What’s a Computer?”
For a Microsoft fan like me, this commercial definitely ruffled some feathers. I was mad. How dare Apple make fun of the dominant Windows market.
Just two years later, I’m in somewhat of a similar situation, but my opinion has changed. I am a big Surface fan, and I really love all of Microsoft’s products. However, with Apple offering a trade-in deal on iPads, and a sweet educational discount afloat, I decided to buy a new iPad Air 3 and say goodbye to my aging iPad 4.
But why? With Apple redesigning iOS 13 to make the iPad a bit more like a laptop replacement, I was generally curious with what an iPad Air 3 running Apple’s new iPadOS, to be released on September 30, could do for me as a tech blogger.
On my mind before I headed to the Apple Store were a few questions. First off, how can a modern iPad compare to a Surface? Can it really replace a laptop with Windows 10 (or in this case my Surface) for my workflows?
Well, after using my iPad Air for a few days, I came home looking at my Surface and asking myself “What’s a computer.” I also realized that the iPad is much more than an oversized iPhone or iPod touch. Here’s more on my experience.
With iPadOS, An iPad can actually handle my workflow
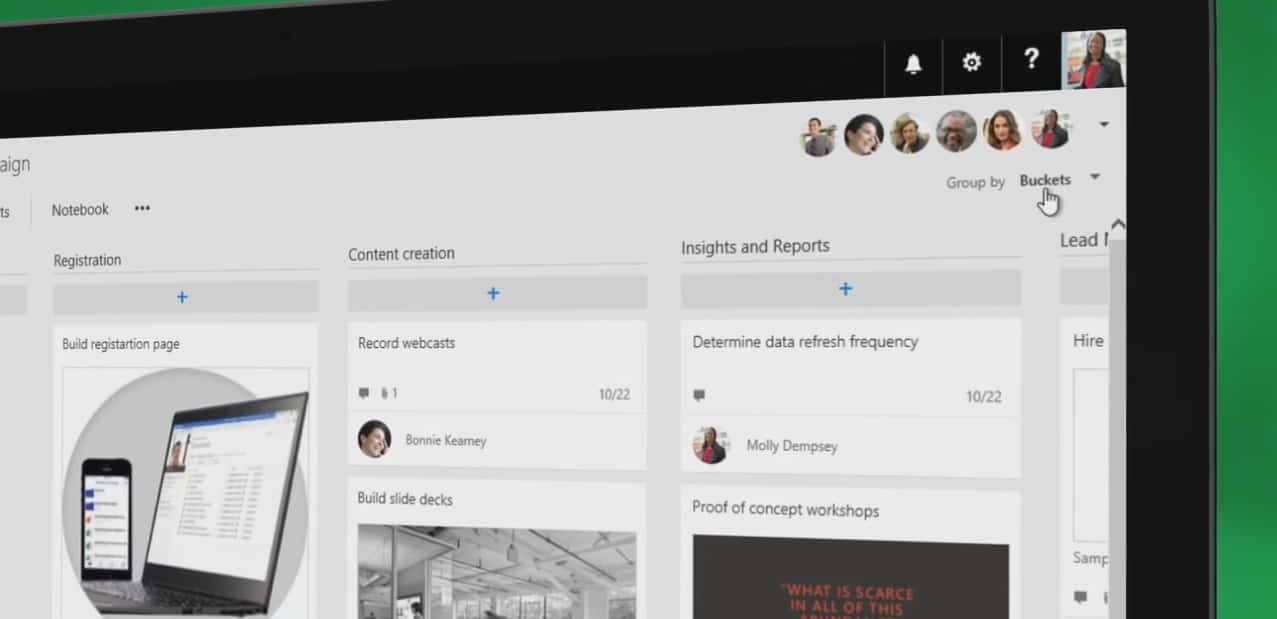
For my daily workflow as a freelance writer, I use quite the number of apps. These include any available web browser, Asana, Microsoft Teams, Slack, and Planner. On any given day, I typically access these via the web, but all are available as stand-alone apps on the iPad.
I already had these apps on my old iPad 4, too, but with iOS 10 being so dated it never had the multi-tasking capabilities and productivity potential that the new iPadOS provides. Websites would load in a horrible mobile mode, and everything was slow to load. For that reason, I never bothered using my iPad for work. It gathered dust as a Netflix and streaming machine.
That was unexpected for me, but iPadOS on the iPad Air 3 completely changed my views on iPads. Apple finally has an OS optimized for tablets, though I still had some reservations about iPad apps and the web browsing experience. Was it going to be like working on a phone?
Let’s stop there: It wasn’t bad, quite the contrary.
I quickly found that Safari on iPadOS is able to auto-render the desktop version of webpages. And, with the text zoom feature in the address bar, zooming out meant I got full versions of most webpages when I needed. Sure, text sometimes looked small on the tiny 10.5-inch screen of my iPad, but I was able to read text and write without any issues.
Also, I found out that I could use multiple tabs in Safari side by side and not use different browsers, Just as I would with Edge in Windows 10, I opened two Safari tabs. One with my WordPress dashboard, and another with the main OnMSFT website. I then dragged the OnMSFT tab out and pulled it to the right side of my screen. iPadOS picked up that I was ready to multitask, and placed my two browsing sessions side by side, with a slider in the middle to resize. Very reminiscent of Windows 8!
But that wasn’t all. Next, I opened Microsoft Teams and then opened up Planner. With both running in the background, I went back to the home screen and re-opened Teams. The dock in iPad realized I needed a Planner, and suggested it to me. I dragged it to the top of the screen, and boom! Side by side multitasking with the two apps I needed most!
iPadOS was so concise, that it remembered all the multitasking sessions I had open. Particularly, this was useful for me when I went back home to check on and open other apps. I didn’t need to go back and repeat the process to get back to my Safari tabs or Planner/ Teams combo.
I even received notifications for Slack and Teams in the background, just as I would on Windows 10. It really is reminiscent of the stacking feature in Windows, which auto-suggests open apps to “stack” when you press Windows Key and Left or Right. Sure, you’re only limited to two open and side-by-side multitasking apps with iPadOS (and can add one in flyover mode,) but did I even need Windows 10 anymore? Well, maybe not.
Some of the apps I used
With keyboard and mouse, iPadOS is just as good as Windows 10
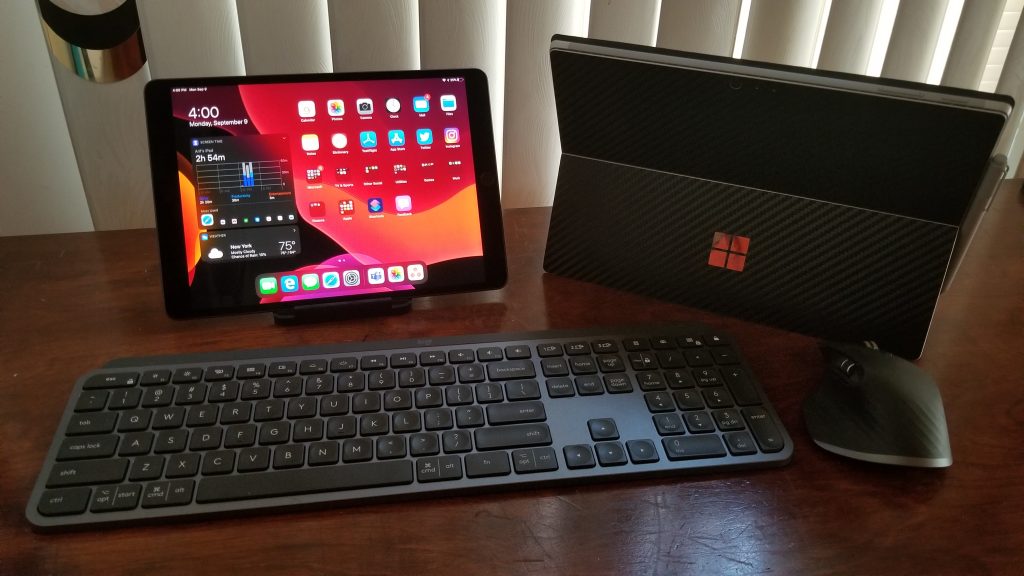
Although I mentioned my steps for multi-tasking above, I’ll specifically left out two points —- keyboard and mouse. I had actually used both with my iPad. In fact, I wrote this entire post on my iPad Air, without any issues for the most part. I used the Logitech MX Keys as a keyboard and the Logitech MX Master 3 as a mouse.
Keyboard support in iOS is not new, but with the new iPadOS, mouse support is. Hidden away in the Assistive Touch and accessibility options, the iPadOS beta features a circular round cursor, that can emulate the touch of a finger.
Similar to what I get with the mouse my Surface Pro, it means I didn’t need to constantly reach up to the iPad Screen to accomplish common tasks like scrolling or selecting text and opening apps. I also could use the mouse to click and insert images into this post. Combined with the improved iPadOS Files app, mouse support easily let me choose different locations for the files —- be it local storage, OneDrive, and more.
As a bonus, the scroll button on my Logitech MX Master 3 doubled as a home button, removing the need to reach up to the screen, It really is the killer feature that iPads really needed from the start. With its support for a mouse, the iPad moved one step closer to the Surface.
For writing, that mouse support proved to be a lifesaver. I was able to highlight text with the keyboard, then click to insert links. I regularly right-clicked on misspellings, expecting for a spelling suggestion like in Windows 10. In iPadOS, I needed to highlight the misspelling first, and then click with the mouse. There’s no right-click support, as right-click would just bring up the Assistive Touch menu. I also missed out on the Grammarly extension, which would have otherwise corrected my misspellings.
Still, at the end of the day, for my web-based work, the iPad was just as good as Windows 10 and my Surface. I didn’t see anything in Safari, or with the multitasking that Windows 10 wasn’t already doing for me.
Clean, concise, streamlined UI
Moving on, I must mention how clean and concise iPadOS is when put side by side Windows. In iPadOS, Apple slimmed down the iPad home screen and added a ”More” option for the home screen in Display Settings which could make the grid of icons smaller. Addressing other complaints, Apple also introduced a new ability to keep widgets on the home screen. Personally, I didn’t like this and turned the feature off, but for long-time iOS users, it gives iPads a fresh and useful look.
Similar to the icons on the desktop, or the taskbar on Windows 10, the redesign makes the iPadOS dock much more prevalent. In hindsight, that makes accessing apps easier. Everything you need is right there. No bulky live tiles, no-nonsense menus: Click the app you want, and it’s right there.
Then there’s dark mode. Microsoft made efforts at dark mode in Windows 10, and so has Google with Android 10, but I’ve never quite seen dark mode as efficient as iPadOS. All the apps are consistent with dark mode, and it just looks beautiful. Folder icons on the home screen turn dark, as do most of the stock apps. The notifications are also dark, with no hint of white across the OS. Compared to the dark mode file explorer in Windows 10 (which still has “light elements” to it), this puts Microsoft to shame. Just look at the Notes app for example: It’s like I’m writing on a sheet of dark leather.
Finally, there is the simplicity of the new Files app. It now sports a column view, which lets you view more about your files at quick glance. There’s also sorting options, and icons. All of these functions are familiar to me from Windows 10. I’m right at home where I want to be.
Where’s the kickstand?
Both iPad and Surface feature premium designs, but I can’t write an article that compares the iPad to Surface experience without mentioning the keyboard and kickstand. Microsoft truly revolutionized the industry when it designed the Surface tablet with an integrated kickstand and detachable keyboard. It’s really convenient and makes using the Surface so much more comfortable in almost any situation.
Now to Apple. The Microsoft rival has since picked up on what makes Surface so great by introducing a $160 keyboard case that connects via proprietary POGO connector on the iPad Air and the iPad Pro. It can fold back and let you use the iPad at two angles, but it’s not the same as an integrated kickstand. I tried it at an Apple Store, and you still need to fiddle with the case to get it set upright. The keyboard itself is also horribly uncomfortable, and setting it up for comfort is not as easy as pulling out a kickstand on a Surface.
Although a separate purchase just like with the Surface Keyboard, I didn’t buy the keyboard case for the iPad Air 3. There are plenty of cases which will give you a kickstand experience, but it just adds unnecessary weight to the device. I’m sure these cases would give the iPad a more laptop-like feel, but for me, it wasn’t needed.
I would be using the iPad on my desk. Instead, I used the cover case for my Microsoft Wedge keyboard to use as a stand to prop up my iPad in a comfortable position. It worked, and I paired up the tablet with my Logitech MX Master 3 mouse and MX Keys keyboard and set out to use my iPad Air 3 for work.
What’s a computer? But, I still need my Surface
At the end of the day, my iPad Air 3 almost ended up replacing my Surface. The multitasking abilities are excellent and just as good as what I’m familiar with in Windows 10. All the apps and services I need for work are there, and iPadOS is much more clean, efficient and concise when compared to Windows 10. I just wish the screen was bigger, and that I’d went for the almost bezel-less iPad Pro. I also wish Apple would work on support for external monitors, so I could extend my iPad screen the same way I do with my Surface in Windows 10.
For now, Apple has realized the potential of consumers using tablets as productivity devices. Maybe Microsoft and Google should be worried. With iPadOS being this competent for me, a longtime Windows user, it only can get better in the future.
However, in terms of pure computing power and versatility, I still went back to my Surface Pro, as I often write about full-on desktop apps and services like Microsoft Office 365. I can’t properly cover this on my iPad as iPad apps are still mobile software. Additionally, there’s nothing more powerful than a Windows computer for video editing, or other tasks that move beyond my web-based work.
Still, I think Apple really killed it with iPadOS, and for some, it really does turn iPads into the potential Surface killer. If you’re still not a fan of the polarizing tablet mode on Windows 10, I’d definitely recommend giving iPadOS a look as it’s probably the best touch-centric OS for tablets as of today.
Yammer is a social networking service owned by Microsoft that is aimed mainly towards enterprises.
It isn’t exactly the most popular of such programs despite being adamantly pushed and recommended by Microsoft. However, it holds its fair share of users, especially among the Office 365 subscribers.
Because of this, many of the problems that are reported are usually singular cases which are either too obscure to reproduce or happen too rarely to be worth fixing.
Admittedly, there is one prevailing issue that seems to happen more often than others, and namely opening the Yammer app itself.
Most common fixes to make Yammer open properly
1. Change your network settings:
Yammer launch issues can occur when there are problems with your office network.
To diagnose the issue follow these steps precisely:
Turn on the mobile hotspot on your smartphone.
Connect your system to mobile hotspot and try to access Yammer.
Check if you are able to connect to Yammer service.
If it works, ask your network administrator to look over the company’s network settings
Having a hard time using Yammer? Check out this list of collaboration software to improve workspace communication.
2. Your credentials are already synced with Office 365
Some users have reported that upon launching the app, they are met with a blank screen and three dots that doesn’t give off much information about the app itself:
[…] It is installed and everything but it opens to show only a blank page with 3 black dots. I guess it doesn’t ask for username as all Microsoft Apps are synchronized so it enters directly, but cannot visualize the App itself.
While this issue is not a bug itself but rather a feature, a lot of users seem troubled by it, as it makes them feel bound to their own Yammer credentials because their information is synced.
3. You’ve been inactive for too long
Information from Microsoft’s Yammer support team revealed that if you were inactive in Yammer for more than a month, your account would be suspended automatically.
If you don’t recall the last time you used Yammer, please contact your Global or Verified admin to reactivate your account:
If you are the admin, you can do this by:
Accessing Yammer
Select Network admin
Remove user
Reactivate account (only if present in suspended list)
This problem occurs when trying to install the latest Minecraft updates through the Minecraft launcher. Users end up seeing an error message labeled Unable to Update the Minecraft Native Launcher.
It would seem that the most common culprits for the Minecraft errors are either the new launcher implemented back in January or the PC’s antivirus program.
How to fix the Minecraft download and updating error
1. Repair your Minecraft game
Press Windows key + R
Type appwiz.cpl
Select EnterLocate Minecraft from the programs list
Now right-click Minecraft and select Repair.
2. Download a fresh new Minecraft client
Go to the minecraft.net’s download page and get the latest client
Select the Try an alternative download option, which should be just below the big Download button.
Download theminecraft.exefrom this page and run the file
3. Manually delete your old Minecraft-related files
Press Windows key + E to open the File Explorer
Type %Appdata% in the address bar
Press Enter
Locate theMinecraft folder and right-click it
Select Delete
Launch the downloaded file from minecraft.net
Prevent your antivirus from causing issues with your Minecraft client
1. Whitelist Minecraft in your antivirus
This method varies depending on the antivirus you are using
Enter your antivirus’s dashboard
Select the Exceptions list or any other similar menu
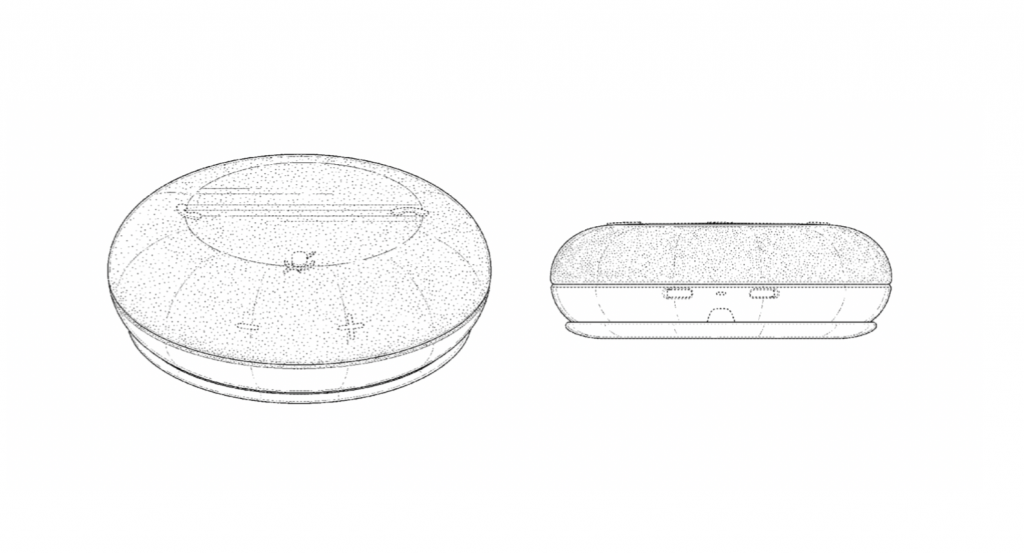
If Microsoft has pretty much ignored the connected speakers market after the launch of the Cortana-powered Harman Kardon Invoke, we’ve seen the company showcasing the meeting room of the future with a new prototype device back at Build 2018. A new Microsoft patent spotted by Windows United (via The Verge) has just revealed a different kind of portable speaker that looks more like a Google Home Mini or Amazon Echo Dot.
Unfortunately, the patent description doesn’t reveal much about the features of the device, but you can see different buttons for controlling volume, or accept, mute and reject calls. As The Verge noted, one of the patent inventors is Malek Chalabi, a principle design manager working for Microsoft Teams, which suggests that the device may have an enterprise focus.
Patents don’t always become real products, but the fact that this new patent has been published a little less than a month ahead of Microsoft’s Surface event in New York is interesting. Following the release of the Surface Dial, Surface Headphones, and Surface-branded mice and keyboards, Microsoft’s Chief Design Officer Panos Panay said last year that he was interested in creating new Surface accessories. Microsoft’s Surface event will be on October 2, so we won’t have to wait long to see if Microsoft is about to release its own portable speaker.
Sharing videos can be an essential part of any business. You can use videos to train employees, share daily and informative snippets, recordings of meetings and more. Traditionally, you might think that YouTube would be the best tool for this, but did you know that Microsoft has an enterprise video streaming service?
That’s right, included at no extra cost in most Office 365 business subscriptions is a service known as Microsoft Stream. It allows you to upload videos, securely and privately, and share them across your company with coworkers. In this guide, we’ll show you how you can get started with Microsoft Stream.
Find Stream in the Office 365 Dashboard, and create a Channel
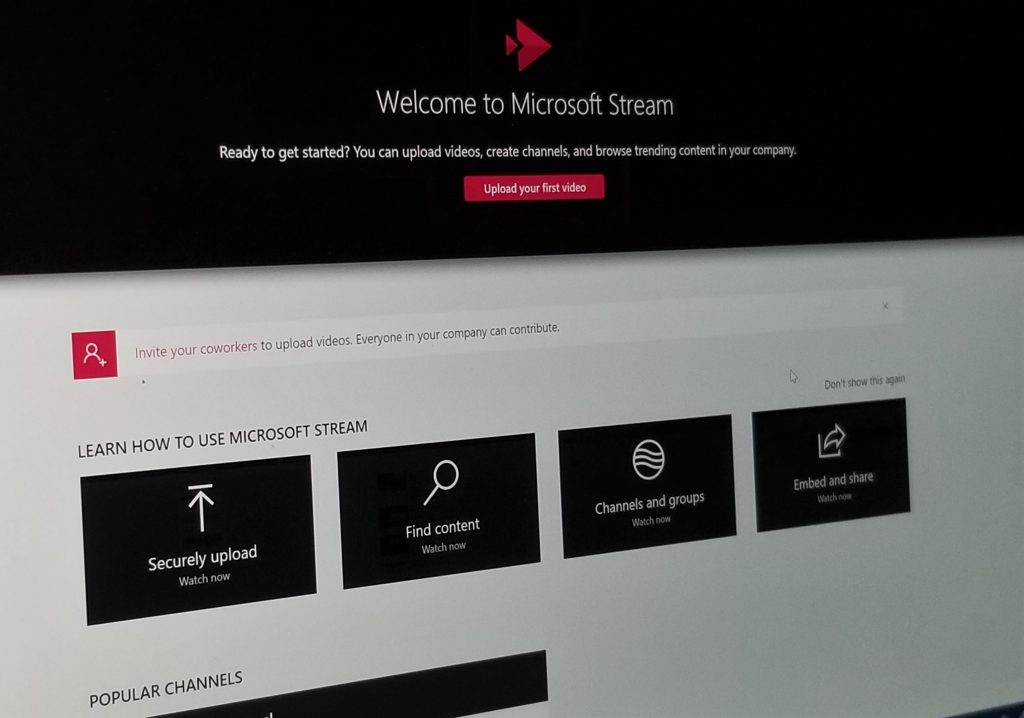
To get started with Stream, you can find it from the All Apps section of the Office 365 dashboard. Alternatively, you can launch it by clicking here. Once you’re in, you’ll notice that the main page is quite empty.
Before processing or uploading videos, it will be best to create a channel. Channels will be the home and hub for all your new content and videos. If you don’t want a channel, you can get started with uploading a video right away by clicking the upload button on the top right corner. However, you’ll also want to invite your co-workers to Stream. You can do this by clicking the people icon next to the smiley face in the top bar of the webpage. This will ensure they know they have access to the app.
To create a new channel, click on the + Create sign on the top of the webpage. Then, choose Channel. You can then fill out the information, Including a Channel name and description. If you want, you also can choose who has access to the new Channel. You can limit access to a specific group in Office 365, or you can set it to companywide, for everyone to see. You also can upload a channel image, if need be. Be sure to save the link for the channel, for future reference. You always can access it later by clicking My Content and then choosing Channels.
Selecting a group will be useful if you want to share videos and your channel with just a group of individuals. Individuals outside the group won’t have access. For example, this could be a group for videos for sales, that you don’t want other employees to see. Otherwise, selecting companywide will let everyone see the content, say, training videos.
Upload and publish your first video!
Once you’ve created a channel, you can upload a video to Stream. Simply click the + button and choose Upload Video from the list. Once you choose your file, Stream will start uploading the video to Microsoft’s servers. Be sure to choose a video language, and then press Save. As the video uploads, you’ll be able to fill out some fields. Be sure to name the video, and give it a description. You can then choose a thumbnail image.
You might also want to include timestamps in the description, as these are part of the Metadata. Additionally, you can also use hashtags to group related videos together, to make discoverability even easier for viewers. As part of upload, you’ll also want to choose a language, as this will create a file for automatic closed captions.
Next up, there’s the permissions section. You can choose the option for everyone to view the video across your company. Under Share With, you can choose to share and add to a specific channel (like the one you just created) or with a specific person. There are also additional controls for who you want to own and edit the video. You can change their permissions.
Finally, you’ll find the options section. You can click this to change the comments, or to auto-generate a caption file. Once you’re ready for upload, you can click Publish Now. You can then view the video directly from the channel you uploaded it to, or by clicking My Content along the top, and clicking the video there.
Finding, Sharing, and Managing Content
Once you’ve uploaded a video to Stream, you’ll likely want to know how you can find it, and share it. Well, you can find all content by clicking on the Discover button on the top of the main Stream Dashboard. From there, you can click options for videos, channels, people, or groups.
Right away, you’ll also see a list of videos that have been uploaded or are available for you to view or manage. You can delete or share one by clicking the … next to the video and choosing the option.
Alternatively, when you’re viewing a video, you can click the Share button in the lower-left corner and copy the link. You can also choose options on where to start the video. If you’re emailing you can type out the name of a person to add them to the group to see the video. Finally, there is embed, which lets you change the video size, Autoplay options, and more to embed in a website or blog.
For more specific searches, you can use the Search for videos bar to search for videos. You also can sort by name, relevance, trending, publish date, views, or likes.
There’s also a Channels tab, where you can see the channels that are available across your organization or channels that you’ve been invited to. Then, there’s the People Tab which lets you search for certain people who have published videos. Finally, there are Groups, which functions as we’ve previously explained.
Keep in mind, the search box is also your friend. However, Stream is not like YouTube. The search box in Stream will only limit you to the videos that have been shared internally with the company. Search results will show relevant metadata and cognitive insights from the video.
The Video Player
Whenever you click a video to launch it, you’ll see the player. There are various tabs under the video. The Details Tab will explain details of the video, and show you the description. Transcript will show you an auto-generated transcript of the video. People will list out a timeline of people mentioned in the video (if enabled) and Interactivity will show any surveys, quizzes, or forms added to the video.
On the video player itself will be an option for closed captioning. There’s also a settings icon to help you adjust playback speed, quality. Then, there’s a button for theater mode and full-screen mode.
Under the video will be a space for comments. If you post a comment, you can edit or delete it if need be. You might also notice a little heart icon, this will let you like the video.
How will you use Stream?
As you can tell, Stream is a very useful video service. Just like how Microsoft Teams is an alternative to Slack, Stream is an excellent alternate option to YouTube for internal use. You can easily share links to videos, and keep things private and within your company, internally, without having to worry about the public viewing your sensitive content. Feel free to check it out, and let us know your thoughts in the comments below.
If you find yourself in the situation in which your Mixer audio is not working on your Xbox One console, you have to know, this is a common problem.
A large number of users have complained about this issue on forums across the web, asking for an official fix.
Even though the moderators at Mixer didn’t release any official solution for this issue, our team has researched the online forums for any solutions that helped.
In this article, we compiled some of the best possible solutions for this issue. Please read on to find out more.
Here’s what to do if your Mixer audio is not working on Xbox One
1. Make sure your speakers/TV volume is not muted
This might seem like a silly solution, but in order to eliminate the possibility of this being the case, it is worth mentioning.
Make sure your speakers/TV is not muted by increasing the volume to a moderate level.
It is a known problem that for some reason your Xbox One console will not be able to prioritize the audio channel that you’re using instead of sending audio to your headset.
To fix this, you need to simply disconnect your headset, and check to see if the issue persists.
4. Turn off the Low Latency option
A good number of users have temporarily fixed this issue by clicking the cog-wheel found in the lower-right side of the video, and unchecking the Low Latency option.
Note: You will need to do this every time you encounter this issue, as the setting will not be saved automatically.
Conclusion
We hope the troubleshooting steps presented to you in this article managed to solve your audio not working issue in Mixer.
Please let us know if it did, or if you have any suggestions, by using the comment section below.
Dropbox users can move the Dropbox folder to alternative hard drive locations.
However, some users have said in forum posts that they can’t move their Dropbox folders to different partitions on their hard drives.
When they try to move their Dropbox folders, the following error message pops up: “Some files can’t be moved. Please select a new location or close some open files and try again.”
Users can’t move their Dropbox folders when that error arises.
How can Users Fix the “Some Files Can’t be Moved” Error?
1. Close Running Software
First, note that the “Some files can’t be moved” error can arise because files in the Dropbox folder might be in use. Users can close more software by right-clicking the taskbar and selecting Task Manager.
Then click the Processes tab shown directly below.
Close all software listed under Apps by selecting them and clicking their End task buttons.
In addition, close third-party software listed under Background processes by clicking their End task buttons.
2. Make Sure Drive Partitions Aren’t Short of Space
The “Some files can’t be moved” error can be due to insufficient hard drive space. So, users who are trying to move their Dropbox folders to drive partitions might need to free up storage space on the partitions.
There are lots of ways users can free up drive space, but uninstalling superfluous software is usually the best way to do it.
3. Reinstall Dropbox
Users have said they’ve fixed the “Some files can’t be moved” error by thoroughly uninstalling Dropbox and reinstalling it. To do that, open the Run accessory with its Windows key + R keyboard shortcut.
Input ‘appwiz.cpl’ in the Run text box, and select the OK option.
Then select Dropbox and click Uninstall.
Restart Windows after uninstalling Dropbox.
Open File Explorer with its Windows key + E hotkey.
Enter ‘%LOCALAPPDATA%’ in the folder path bar, and press the Return button.
Right-click the Dropbox folder in Local and select Delete.
Users should also delete the Dropbox folders at the following File Explorer folder locations: %APPDATA% %PROGRAMFILES(x86)% %PROGRAMFILES%
Then click Download Dropbox on the dropbox.com page to get the latest version.
Install Dropbox with the downloaded installer.
We recommend using professional third-party software to uninstall Dropbox in order to ensure the program will perform a complete cleanup and remove the files left behind in your system.
To completely uninstall any of your applications, you should clearly choose the best uninstaller programs available on the market now.
4. Delete the Dropbox Folder
Deleting the hidden Dropbox folder is another potential resolution. Users can do that by opening the Run accessory.
Input ‘%APPDATA%’ in Run and click OK.
Click the View tab in File Explorer.
Select the File name extensions check box.
Right-click the Dropbox folder in Roaming and select Delete to erase it.
Press the Delete button to erase.
5. Rename the Hard Drive for the Dropbox Folder
Users have also said they’ve fixed the “Some files can’t be moved” error by renaming the hard drive partitions they’re trying to move Dropbox folders to. Users can do that by opening File Explorer.
Then right-click the partition you’re trying to move Dropbox to and click Rename.
Rename the hard drive so it doesn’t include any spaces at all. Users can just delete the spaces from the original hard drive title.
6. Try Dropbox online with Opera browser
Alternatively, you can use Dropbox online by navigating to the web-based client. And, once we’re there, allow us to recommend a browser that’s the best-optimized solution these days.
This privacy-oriented browser is a reliable choice for both professional users and casual internet surfers. You have integrated apps like Messenger or Whatsapp right on your sidebar, audio player, crypto wallet, and more to go.
Plus, you can customize the homepage exactly how you prefer and have extra protection with an in-built VPN to stay safe while sending files.
If you were trying to perform a recovery of your installation of Windows 10 and see the hard drive locked error message, you should know you are not the only one experiencing this issue.
The good news is that you can do something about this issue, and beyond this, you found the right article to help you solve it.
Seeing this error message may make you believe that you lost the data stored on your PC, or that you need to reinstall Windows altogether. That is surely not the case.
Please read on to find out how to proceed in order for the recovery process to be completed without errors.
Overclocking is an art that is constantly evolving even though it’s been around for quite some time now, for Intel and AMD processors.
This process came about because computer users wanted to get the very best performance out of each component in their systems, so overclocking stepped in as the savior, and is now one of the most popular ways of getting computers to fire on all cylinders.
Previously, you would have to replace motherboard jumpers if you wanted to access some front side bus frequencies, but modern motherboards can actually generate frequencies in more numbers from the BIOS without changing the other components’ speeds.
This also means that you need not do it through the BIOS setup because there exists the best overclockingsoftware for AMD CPU to handle it for you.
Check out some of the best overclockingsoftware for AMD CPU available now that can help you get the best performance from even the smallest of elements in your system.
Best overclocking software for AMD CPU
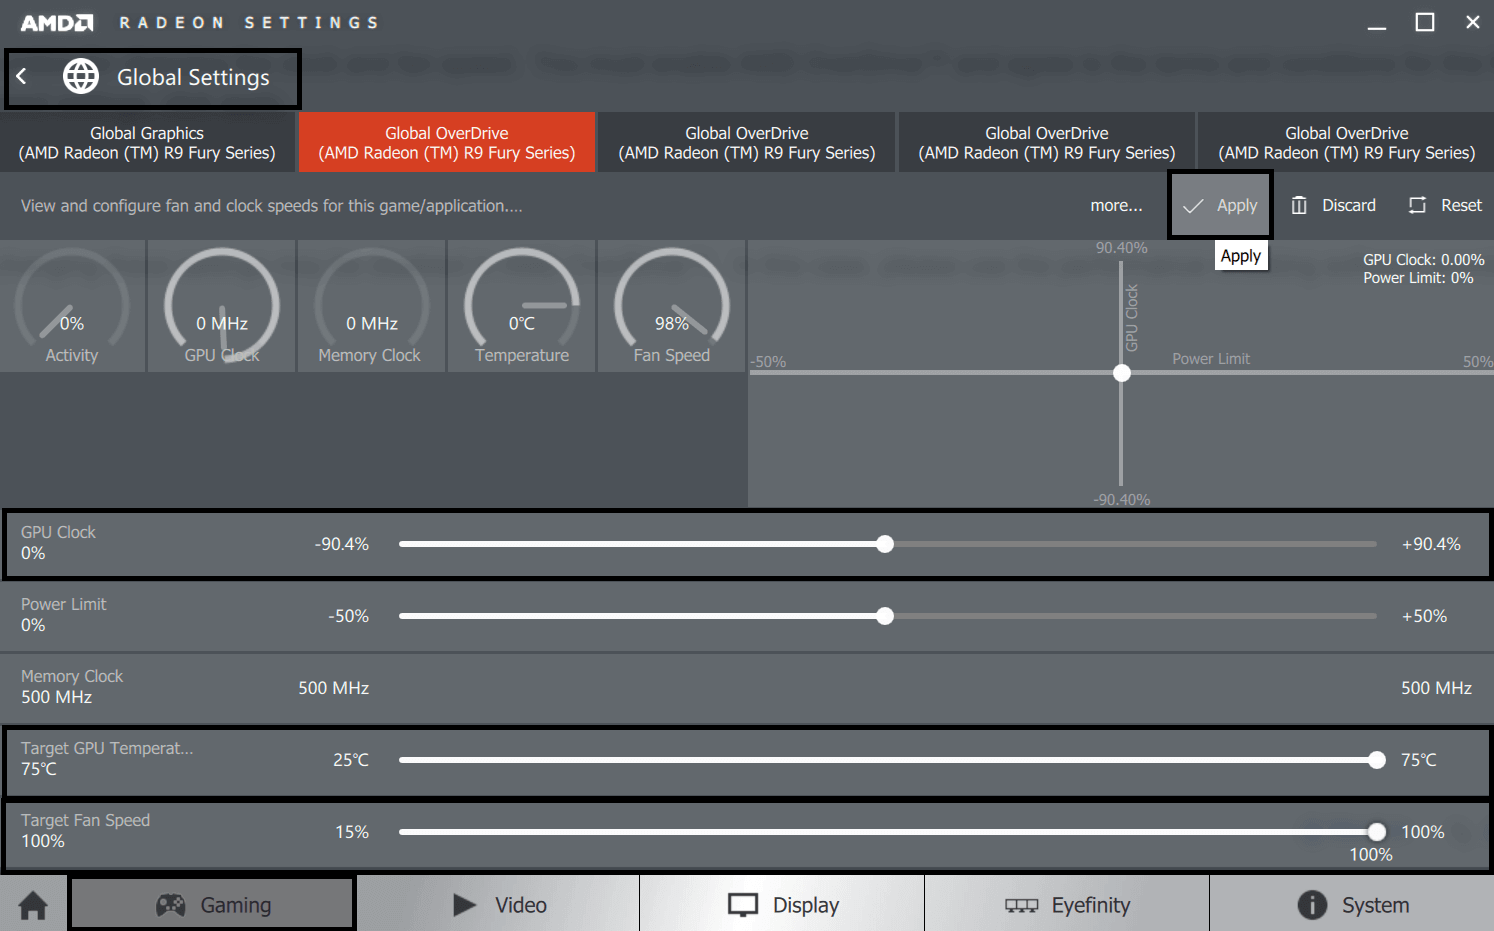
AMD Overdrive
This is an advanced and useful overclocking application designed to maximize on the capability, flexibility, and adjustability of AMD chipset elements.
It features an intuitive and modern interface, plus easy accessibility for different users from novices to pros. It is the equivalent of nTune by NVidia, which monitors motherboards that use its CPUs.
This program only works with AMD chipsets and processors, but you can overclock your AMD CPU with granular control, and it adjusts memory, HT performance and voltages, with full control and better performance.
With one-click tuning options via a simple slider, you can get ready and pre-tuned memory profiles and tweak overall performance, plus manually tweak frequency, timing and voltage.
Gamers also get all the horsepower they need for complex games.
You can also store and create unlimited profiles, so this is the only software you need for an AMD CPU.
It almost directly replaces AMD Overdrive app, but only works with the new AM4 motherboards and Windows 10 OS, so users of older AMD processors still need AMD Overdrive.
Ryzen processor is multiplier-unlocked so you can personalize the performance based on your preferences and tastes, plus you get up to four profiles to store your custom adjustments on clocks and voltage, for the CPU and DDR4 memory, while parking cores and adjusting memory timings as well.
It also covers you with real time monitoring, and a histogram of per-core clock rates and temperature, as well as average and peak readings, because accurate hardware status updates are vital.
This is free and convenient, best overclocking software for AMD CPU comes with support for up to ten custom profiles, and is one of the most popular OC tools today.
In fact, it has become a must have for gamers who want to push their gaming laptop or rig to their potential.
However, it only works with NVidia graphics cards, but to use it you need to install the GeForce GTX TITAN, 900, 700 or 600.
You can change the clock offset on your GPU, and the memory clock offset, plus you can overclock your refresh rate with up to 10 single overclocking setups, and switch between them at will, seamlessly.
It is free so it has an easy to navigate interface that won’t bog you down with many options or utilities, and as much as it is simple, it is ideal if you want to squeeze out better overall clock speeds from your machine.
The GPU-Z is a lightweight system utility that is designed to provide important information on your video or graphics card and processor, and it is used all over the world.
Features include support for NVidia, AMD, ATI and Intel graphics devices, displays adapter and GPU information, displays overclock/default clocks and 3D clocks wherever they’re available, validates results, and can create a backup of your graphics card BIOS.
The Sapphire Trixx software is the key to unlocking your processor and graphics card’s performance to the maximum while saving custom settings for your favorite games.
The interface may look deceptively simple, but you can tweak your fan speeds dynamically and discover a lot you need to know about your graphics card.
It has a cutting edge overclocking technology that a novice or a pro can use.
With Trixx, you can change you’re clock, voltage and memory clocks, and get simple visual feedback to see how the changes affect your system’s stability.
Plus you get five different custom profiles to save your tweaks, and two automatic modes for high end performance or silent running.
Whatever you need to know, Trixx will reveal it, plus it has an integrated flexible set of fan control gear into the overclocking suite, so with the click of a button, you can change the fan speeds with automatic settings, or use a fixed speed.
But there’s the option of a custom setting for power users with an adjustable curve relative to the core temperature.
Other features include color control using Nitro Glow, which makes it look as good as the games themselves, and the unique fan health check system which lets you quickly check a cooler’s status, and in case of issues, you can contact their customer support who will send out a fan replacement immediately.
There’s also a Quick Connect one-screw system that lets you replace or clean individual fans in minutes.
A large number of users have reported that their Mixer app is not letting them sign in on Windows 10.
In some cases, the message There was an error logging you in appears, but no error code is provided.
This issue has made a lot of users very angry, some of them actually saying that they will change the streaming platform with some of the competitive companies.
In today’s article, we will explore some of the best methods to try out if you find yourself in this situation.
It is worth mentioning that these are not official fixes, but they have proved helpful in the case of some of the users. Read on to find out more.
Even though this method might seem too obvious, it is recommended that before you try any of the possible solutions presented in this list, you make sure that the Mixer services are operational.
Instead of logging into Mixer with your Twitter, or Discord account, it is recommended that you log in by using your email and password.
If this doesn’t work, then please follow the next possible solution.
3. Change email address
In the case that you used a different email address when initially signing into Twitch, you might want to try logging in using those credentials.
Because of a Mixer glitch, it seems that the accounts that are connected with a Microsoft account have issues when logging in.
4. Contact Mixer support for help
If all of the above-mentioned solutions didn’t help you log in to your Mixer account, then we suggest that you contact the Mixer support (https://mixer.com/contact) and ask for assistance.
Conclusion
Even though this issue needs to be addressed directly by the Mixer developers, trying the methods mentioned above is a good workaround for some users.
We hope that this short guide managed to help you log into your Mixer account without encountering any other issues.
Please feel free to let us know if this guide helped you solve your problem, or if you have any suggestions.
To do this, you can use the comment section found below this article to share your thoughts with us.
An auto collision estimating software is a tool to estimate the level of collision repair required for an auto body. Also known as body shop estimating software, it offers advanced, and accurate estimation for a collision during a car repair.
Moreover, these programs are easy to use and suitable for even beginners, as they require no experience.
In addition, these programs help users write a detailed and accurate estimate in a fast and professional manner. The entire objective is to get rid of expensive mistakes by parts tracking, image print-outs, and itemized sums.
This, in turn, helps the auto guys to become the best professional salesperson and close a sale efficiently.
Here’s a list of the best auto collision estimating software that can make life easier for the auto technicians.
4 Auto Body estimating software for repair estimates
Web-Est
Web-Est is a powerful body shop estimating software that’s specially designed for small to mid-sized auto body shops. With its multiple rate profiles feature, estimators can have different types of rates for the customers walking in.
They can also offer multiple fleet accounts, wholesale accounts, or non-taxable accounts.
It allows users to select from a pre-fixed profile for all situations, and deploy pre-decided fees to assist their business account for other related expenses.
The software also offers the auto body shops the power to write an estimate whether working at home, from the shop, or while on the field.
The program also includes labor along with details like paint times, the price of the parts, number of parts. In addition, hood dimensions for all the existing and outdated models of the vehicles are also included.
The Data group of the company helps to add the aftermarket details for new vendors to the system. Moreover, it also allows the users to add as many images as required on their estimate.
Instant updates with no upgrades required, easy selection of parts for repair, or Mitchell full frame and opening data availability, are some of its other major features.
Price: 14-days free trial available, $119/month after the trial
For those looking for an affordable auto collision estimating software, Auto Body Estimator 33 is the best alternative. While it helps users save a lot of money each month on estimating costs, it also offers labor and paint times automatically included in the estimate.
As a bonus, you get added labor as an when required.
What’s more? The program also provides the users with the latest prices for the parts from the web using the ABF links.
In addition, the software allows users to display their custom logo on printed estimates and also on PDF files. Best of all, it keeps the estimated data for customers safe on the user’s computer.
Collision Repair Management System is an amazingly advanced software available these days. It offers a smooth navigation interface with an image list of all the vehicles in the process and their current status.
While it offers the option to scan the barcode and provide an update to the customers, it also offers the option to view the status of the parts and its latest image.
Apart from viewing the status of the parts it also helps technicians send and receive messages from the admin or estimators.
They can choose to clock in and out from jobs using their phone, and even update repair status. Ordering paint or supplies for the body shop, option to prepare supplement notes, click photos, or viewing estimates in a click, are some of its other significant features.
CCC Estimating is one of the leading body shop estimating software for collision repairs. The program associates more insurers with collision repairers in comparison to any other network.
It offers a responsive interface and seamless navigation helping users create accurate and faster estimates. Best of all, it also makes use of mobile technology and the cloud-based platform that can be used from the desk or even the car.
It’s also available in touch technology across all devices doing away with the hassles of cameras and clipboards. Automobile dealers also get relief from taking those detailed notes or re-entering the data.
Using touch technology users can create estimates at the vehicle that automatically syncs with all devices. What’s more? The customers can also participate in the estimating process helping to create an increased reliable experience.
Accidents are inevitable and may end damaging your vehicles, sometimes even to a larger extent. However, the relief is that damaged vehicles can be fixed using collision estimators.
Therefore, finding the best auto collision software is critical. So, make your pick from the list, get the best estimation for your customers and close the sale.
Windows Server is Microsoft’s server platform series, more specifically for network servers. A Windows Server OS will rarely not boot up, but some users might still need to repair a Windows Server platform that doesn’t boot.
Users can do that with a Windows Server installation DVD or USB drive, including troubleshooting utilities.
How can I repair Windows Server with an installation disc?
1. Via the Command Prompt
Users can try fixing Windows Server with Command Prompt utilities. To do that, insert the Windows Server installation DVD to boot from it.
A Windows Server setup window will then open. Press the Next button on that window.
Then click Repair your computer at the bottom left of the Windows Setup window.
Select the Troubleshoot option.
Then, choose the Command Prompt option to open the Prompt’s window.
First, enter ‘DISM.exe /Online /Cleanup-image /Restorehealth’ in the Prompt, and press the Return key.
Enter ‘sfc /scannow’ and press Return to run a System File Checker scan to fix corrupted files. That might take 30 minutes or longer to finish.
To fix the system boot record, enter the following commands in the Prompt separately: bootrec /fixmbrbootrec /fixboot
bootrec /rebuildbcd
After that, restart the desktop or laptop.
2. Restore a System Image
Users can also restore system images so long as they’ve kept system image backups with the Windows Server Backup utility. Insert the Windows Server install DVD to open the window in the snapshot below.
Click the Next button, and then select the Repair your computer option.
Select Troubleshoot on the Choose an option menu.
Select the System Image Recovery utility.
Select the Windows Server target platform. A Re-image your computer window will then open.
Select the Use the latest available system image option to recover the most recent system image.
Press the Next button.
Users can then select a Format and repartition option to reformat hard drives to match the system image layout. However, users only really need to select that if they’ve replaced a server’s hard drive.
Click the Next button.
Press the Finish button, and then select the Yes option to confirm.
When the Windows Server image has been restored, remove the Windows Setup DVD and restart.
So, that’s how users can fix Windows Server platforms with a Windows Server setup DVD. First, try fixing Windows Server with the SFC and bootrec commands, and then restore a system image if the command-line utilities don’t do the trick.
Now, a new series of reports show that those weren’t the only problems with KB4512941. Users are saying that the update is causing their screen to turn red when they take a screenshot:
My screen turns red when I capture a screenshot. How can I turn it off? I haven’t changed any settings; yesterday it was fine. I tried using different snipping tools, and the regular PrtSc button. All red. I have the night mode off, and everything else is regular.
And this isn’t the only report, as other users confirm the problem.
What can I do if my screen turns red when taking screenshots in Windows 10?
If you’re in the same boat and experience this weird bug, you’ll be happy to know that there are a couple of fixes.
1. Rollback your display driver
It seems like the problem is caused by the display driver, and the first step is to roll back the driver to a previous version. To do that, follow the steps:
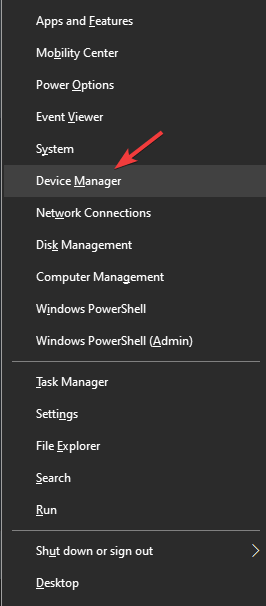
In your Windows search box type Device Manager and click on the first result. Alternatively, you can press the Windows key + X and click on Device Manager.
In Device Manager, expand Display adapters.
Right-click your display adapter and then click on Proprieties.
In the new window that appears, go to the Driver tab.
Now click on Roll Back Driver.
Restart your PC.
If the rollback option isn’t available, then go to the next solution.
Keep in mind that if the rollback works, you’ll have to prevent Windows from auto-updating the driver in the future. If you don’t know how to do that, check out this useful guide.
2. Update the display driver from the manufacturer’s website
If the rollback option is missing or if it doesn’t solve the problem, then you’ll have to update your driver to the latest version.
Just go to the website of your driver or PC manufacturer and check what’s the latest driver released for your model and OS. If there is a new driver, uninstall the old one and install the newly downloaded driver.
If you need more info on how to update your graphics card‘s driver, we’ve prepared a step-by-step guide that will help you do it with ease.
3. Use a third-party driver updater
The better way to manage all your PC drivers and update them with the latest official versions is by employing specialized driver update tools.
By choosing this alternative, you will efficiently install missing drivers or fix broken ones that can compromise your system functionality. In terms of updating, you only have to select the outdated ones and automatically update them.
Therefore, using the following third-party solution will definitely help you to update GPU drivers correctly, without affecting the system.
Microsoft is preparing to release a new set of cumulative updates, as the September Patch Tuesday is right around the corner.
The big M just release the following updates:
Windows 10 version 1507 — KB4516070 (OS Build 10240.18333)
Windows 10 version 1607 — KB4516044 (OS Build 14393.3204)
Windows 10 version 1703 — KB4516068 (OS Build 15063.2045)
Windows 10 version 1709 — KB4516066 (OS Build 16299.1387)
Windows 10 version 1803 — KB4516058 (OS Build 17134.1006)
Windows 10 version 1809 — KB4512578 (OS Build 17763.737)
Windows 10 version 1903 — KB4515384 (OS Build 18362.356)
Windows 10 September Patch Tuesday updates
These cumulative updates (CUs) aim to solve security vulnerabilities in the Windows OS, improve usability, and fix any performance issues.
Not only that, but improvements for the Office suite, .NET Framework, and others, will also be a part of the new release.
Many users are waiting for the new patches for bug fixes. The Windows 10 August Patch Tuesdayupdates had a lot of security fixes, but also some problems.
That’s why, less then a week after the rollout, the tech giant silently released a new set of CUs meant to solve non-security issues and bring some much needed improvements.
Windows 10 v1903 bug fixes
Now, the September updates will come with new bug fixes for all the Windows 10 versions that will get patched.
Of course, we expect that Microsoft will finally fix the latest update for Windows 10 v1903. KB4512941 was released for all v1903 devices and brought a series of problems.
Microsoftacknowledged these problems and is working on fixing them:
Microsoft is getting reports that a small number of users may not receive results when using Windows Desktop Search and may see high CPU usage from SearchUI.exe. This issue only occurs on devices that have disabled searching the web using Windows Desktop Search.
The September Patch Tuesday for Windows 10 v1903 will most likely solve them.
Download September 2019 Patch Tuesday updates
The upcoming updates will automatically install on your PC if you have enabled automatic updates. Of course, you’ll also be able to install them manually through the Settings app.
Keep an eye on our latest news to be the first one who gets the download links and changelogs for September Patch Tuesday.
Microsoft announced the release of the first preview and code for PowerToys.
If you didn’t know already about the PowerToys project from Windows 95, the service is a set of utilities for power users to help them improve the Windows experience and to get more out of the Windows 10 shell.
PowerToys comes with two new utilities
This first preview contains two utilities. The package from GitHub also contains info and tools to better understand PowerToys and create your own utilities.
The first two utilities are:
Windows key shortcut guide
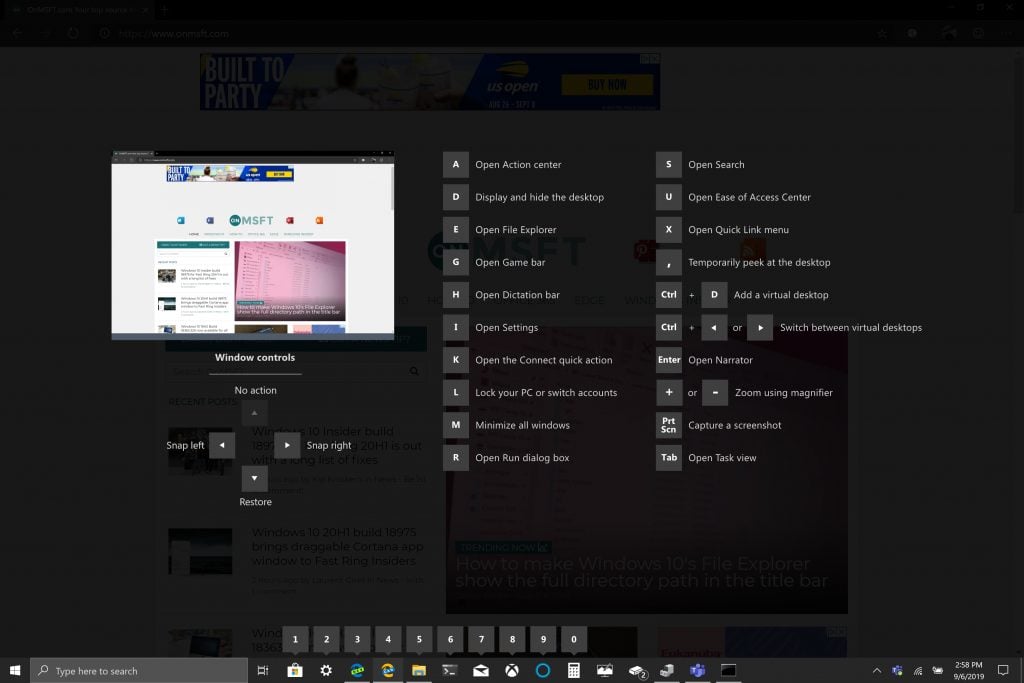
The Windows key shortcut guide is a full screen overlay utility that provides a dynamic set of Windows key shortcuts that are applicable for the given desktop and currently active window. When the Windows key is held down for one second, (this time can be tuned in settings,) an overlay appears on the desktop showing all available Windows key shortcuts and what action those shortcuts will take given the current state of the desktop and active window. If the Windows key continues to be held down after a shortcut is issued, the overlay will remain up and show the new state of the active window.
FancyZones
FancyZones is a window manager that is designed to make it easy to arrange and snap windows into efficient layouts for your workflow, and also to restore these layouts quickly. FancyZones allows the user to define a set of window locations for a desktop that are drag targets for windows. When the user drags a window into a zone, the window is resized and repositioned to fill that zone.
To get started with FancyZones, you need to enable the utility in PowerToys settings and then open it by pressing the Windows key + ~. After that, in the new window that appears, you’ll have to choose a layout.
It’s worth mentioning that you can also create custom layouts under the Custom tab in the editor. You have two options to create custom zones layouts: window layouts and table layouts.
The first starts with a blank layout and supports adding zones that can be dragged and resized. The table layout allows zones to be created by splitting and merging zones and then resizing the gutter between zones.
Microsoft announced today that was bringing the Azure platform to its new cloud datacenter regions in Germany. The software giant currently has four cloud regions in Germany which are part of 54 regions worldwide, more than any other cloud provider.
In addition to Azure, these new cloud regions in Germany will also offer Office 365, Dynamics 365, and Power platform with data residency within the country. The new regions with German-specific compliance, including Cloud Computing Compliance Controls Catalogue (C5) attestation, and will remove barriers so in-country companies “can benefit from the latest solutions such as containers, IoT, and AI,” the company explained today.
Microsoft already has some high-profile customers for its cloud services in Germany, including Deutsche Bank, Deutsche Telekom, Arvata Systems, and SAP. With these new cloud regions in the country, the company should be able to help even more local business looking for a trusted partner to accomplish their digital transformation.
Cut (CTRL + X), copy (CTRL + C), and paste (CTRL + V) are the usual keyboard shortcuts every Windows 10 PC user knows by heart. The purpose of keyboard shortcuts is to avoid the number of keystrokes to type out a phrase or execute a command in Windows. Microsoft claims to want to boost the productivity of Windows 10 users and keyboard shortcuts help you stay productive and efficient using apps like Excel.
Often overlooked are the many Windows logo key commands available in Windows 10. Microsoft posts an online drop-down menu of “Windows logo key keyboard shortcuts” on its Windows Support website. There are over 50 Windows logo key commands and they offer a number of different commands that may or may not always apply to you or your Windows 10 PC setup. For example, the Windows logo key + Y command is used to “switch input between Windows Mixed Reality and your desktop.”
The list of Windows logo key commands may also be entirely useless if you don’t even have a Windows logo key on your keyboard. If you don’t have a keyboard with the Windows logo key, some people use CTRL + Esc to simulate the Windows logo key, but you may be out of luck if your keyboard doesn’t have a Windows key.
Other Windows logo keyboard shortcuts include Windows logo key + C, which allows Cortana to listen for your voice command. As Microsoft redesigns how Cortana works in Windows 10, it appears that that command may soon be obsolete. Testing out Windows logo key commands, I thought that I discovered a new visual menu. When I held down the Windows logo key for a few seconds a new visual keyboard menu would appear, offering a quick view at what the Windows logo key can do on my desktop.
“FancyZones is a window manager that is designed to make it easy to arrange and snap windows into efficient layouts for your workflow, and also to restore these layouts quickly. FancyZones allows the user to define a set of window locations for a desktop that are drag targets for windows. When the user drags a window into a zone, the window is resized and repositioned to fill that zone.
To get started with FancyZones, you need to enable the utility in the PowerToys settings, and then invoke the FancyZones setup UI. There’s a button in settings to open this UI, or you can press Window logo key+~ to launch it. When first launched, the UI presents a list of zone layouts that can be quickly adjusted by how many windows are on the monitor. Choosing a layout shows a preview of that layout on the monitor. Pressing the save and close button sets that layout to the monitor.”
Holding down the Windows logo key is just one of PowerToys’ utilities. There is even a specific setting within PowerToys to change the time it takes to show the “Shortcut Guide” when you hold down the Windows logo key (in milliseconds).
When you have PowerToys installed and enabled, holding down the Windows logo key brings up a visual menu showing some shortcut examples the Windows logo key. PowerToys helps to provide users with a more meaningful keyboard shortcut experience in Windows 10.
For example, Windows logo key + 1 opens the first item that is pinned to my taskbar. On my Windows 10 PC, that command opens the Microsoft Store. The visual menu makes it easy to not have to remember a new list of commands to use with the Windows logo key. If you don’t have PowerToys installed, here’s what you need to do.
Microsoft focus remains on providing the most productive and efficient experience for Windows 10 users. PowerToys is a great resource and utility for Windows 10, although I wonder if it should be included as a Windows 10 feature and instead of a separate utility app. More advanced Windows 10 users would enjoy having another shortcut tool at their disposal, especially as more utilities are added to the PowerToys library.
In the always competitive job market, having an excellent resume (or resumé) can be the key to scoring a dream job. But, despite possessing excellent job skills, not everyone might understand the process of how to craft up a professional-looking resume. Luckily, Microsoft makes things easy as part of Word in Office 365. With this guide, we’ll show you how you can make a resume in Microsoft Word in a matter of minutes.
Get started with a Template
To get started, you’ll want to launch Microsoft Word. Next, on the Launch Screen, you’ll want to choose More Templates. If you’ve disabled the launch screen, you can go to File, and then New to proceed.
In the search box, you’ll then want to type in Resume to search for some pre-made templates. These templates come in a variety of styles and will allow you to replace generic text and for your own personal information. Be sure to choose one that’s right for you. There are quite a bit of designs to choose from. Some examples seen here include Blue-grey, modern chronological, polished, basic modern, or color block.
Download the template
Once you’ve decided on which resume template is right for you, click on it. If you’d like you can also click the pin icon to pin it ot the top of the templates page for future reference. To proceed, however, you’ll want to double click on the name of the template. Word might then prompt you to download, and if it does, be sure to click the Create button in the popup box. Finally, word will then generate a generic resume, allowing you to fill out your personal information.
Try the LinkedIn Resume Assistant
Next up, you might notice that a Resume Assistant popped up on the right-hand-side of Microsoft Word. This tool will help you describe your work experiences, and fill out other parts of your resume. If you’re unsure of how to proceed, this is a great way to craft up a professional-looking resume. Click the Get Started button to begin.
You’ll then fill out a bunch of fields. First of which is your role and industry. We’re using Staff Writer and Online Media as an example. You’ll then see examples of work experience, which you can tweak for your own resume. You can always click See more examples if the suggestions aren’t working out for you. While you’re there, you also can see some suggested jobs, that you can apply to once your resume is complete. Once done, you can click the X icon to exit the Assistant and complete the process of filling your resume.
Tips and Tricks for finding jobs
Once you’ve finished with your resume, you can start the process of finding jobs on websites liked Indeed, Monster, and LinkedIn. We’ve previously explained how you can find jobs on LinkedIn, so be sure to check it out. It’s an easy process and all you’ll need to do is update career interests, job application settings, and then use the LinkedIn search bar to your advantage.
Microsoft has had a bit of a rough time when it comes with patching the Windows 10 May 2019 Update. The most recent cumulative update for the operating system has caused issues with the search experience, as well as CPU spikes. Now, another annoying issue is plaguing users running the up to date version of Windows.
Of all things, this time, it’s a problem with screenshots (via MSPoweruser.) According to multiple posts in the Microsoft Answers forums, some users running the May 2019 Update who have installed the latest cumulative update (KB4512941) are receiving an orange hue when taking screenshots.
The problem persists with Night Mode turned off, and occurs across all screenshot taking software. That includes the snipping tool as well as the Print Screen button. Another user in the same forum posts also reports that the issue is a bit worse. All items on their screen turn red, even when not taking screenshots. Interestingly, a thread on Reddit also indicates that some have the same issue, but turning on Game Mode will result in normal screenshots.
The orange screenshot issue (via Wiki_768/ Microsoft Answers)
For users who are experiencing the problem, it might be best to uninstall the latest cumulative update to see if the issue goes away. Otherwise, an independent advisor in the Answers forums suggests to roll back the display driver or update the display drivers from the manufacturer’s website. Another user also suggests that turning off Bluetooth via the Action Center might solve the problem.
Microsoft has not yet added this to the list of known issues for the KB4512941 patch. However, there remains the possibility that this could just be an isolated issue. Roughly a total of 18 people have marked it as “I have the same question.” in the Microsoft Answers forum.
Expanding your computer hard drive using external drives is very common and necessary. Unfortunately, some users complain that their hard drive is not showing up in File Explorer.
This makes it difficult to access the hard drive and its contents. This guide will show you effective ways to solve this problem.
Why is my hard drive not showing up in File Explorer?
Several factors can be responsible for the hard drive not showing up in the File Explorer issue. Below are some of the notable ones:
Outdated driver: Among the notable causes of this issue is an outdated driver. Updating your hard drive driver should fix this issue.
Unassigned drive letter: If you have not assigned a drive letter to your hard drive, it might not appear in File Explorer. The solution to this is to assign a drive letter to it.
What can I do if the hard drive not showing up in File Explorer?
1. Run Hardware and Devices troubleshooter
Press the Windows key + S, type cmd, and click Run as administrator under Command Prompt.
Type the command below and hit Enter: msdt.exe -id DeviceDiagnostic
Now, click Advanced.
Finally, check the Apply repairs automatically, click Next, and apply the recommended fixes.
Sometimes, the hard drive not showing up File Explorer issue might be due to minor problems. The quickest way to clear these glitches is to run the Hardware and Device troubleshooter.
2. Update your driver
Press the Windows key + X and select Device Manager.
Click the arrow next to Disk drives to expand it, and right-click the drive.
Now, click Update driver.
Finally, select Search automatically for drivers and install the available updates.
Sometimes, your hard drive might show in Device Manager but not File Explorer. For example, an outdated driver might cause this.
The solution to this is to update your driver to the latest version. If updating your driver does not work, you can try to uninstall and reinstall the driver instead.
Alternatively, you can update your driver with a reliable tool in Fortect Driver Updater. This unique software scans your PC for missing, outdated, and faulty drivers and updates them before they can cause problems.
With Fortect Driver Updater, you have the best tool to care for your driver’s needs while focusing on other things.
Press the Windows key + X and select the Disk Management option.
Next, right-click the external drive and select Change Drive Letter and Paths.
If the drive already has a letter, click the Change button. If it does not have, click the Add button.
Lastly, choose a drive letter and click the OK button.
Drive letters make it easy to access your disks. So, if your hard drive is not showing up in File Explorer, you might need to assign or change its letter.
Open Disk Management and right-click your external hard drive.
Select the Initialize Disk option.
Finally, select the disks you want to initialize, select either MBR or GPT (preferably GPT on Windows 10 or 11) partition styles and click OK.
Initializing your hard drive is a way of activating it. This should clear any roadblocks that might be causing your hard drive not to show in File Explorer.
5. Change the drive format
Right-click the Start icon and select the Disk Management option.
Now, right-click the drive and select Format…
Finally, choose the NTFS or exFAT option, tick Quick format, and click the OK button.
You will likely face different errors if your external hard drive is in the wrong format. Changing the format to those that are accessible should eliminate these issues.
We have reached the end of this guide on fixing your hard drive if it is not showing up in File Explorer. We believe you now have everything you need to fix the issue and only need to apply it accordingly.
If you find that your VMware EXSi autostart is not working, you are in luck today. The common reason for this error appearing seems to be caused by a sudden loss of power that shuts down the VM host.
Beyond this, this issue can arise if your VM doesn’t have enough RAM memory to perform the required task. Irrespective of the cause of this issue, the solutions in this guide will help you fix it quickly.
What can I do if the VMware EXSi autostart is not working?
1. Restore your VM from backup
Open the vSphere Client, click Home, then on Solutions and Applications and select VMware Data Recovery.
Connect to the backup hardware (USB storage or hard drive).
Click on the Restore tab, and click the Restore link to launch the Virtual Machinewizard.
Inside the Source Selection page, choose a source and click Next.
On the Destination Selection page, choose how the restored machines will be configured, and click Next.
Review the overall configuration and click Finish.
Burn the image file to a CD or use an external USB hard drive to store it.
Boot the host from the CD/USB.
This will automatically start the process of checking all your RAM memory for errors.
Note: It is recommended that you run the tool for several hours at least (1-2 days recommended), to make sure that the entire set of tests have been performed.
3. Remove and re-add the Virtual Machine
Tip
It is recommended that you back up your VM before attempting this method.
To remove the VM:
Turn the VM off before starting this process.
Right-click the VM that you want to remove, choose the All vCenter Actions option, and select Remove From Inventory.
This will remove the VM from your library. Follow the next steps to add it again.
To re-add the VM:
Open the vSphere Client as administrator by right-clicking it and choosing -> Run as administrator.
Right-click an ESXi/ESX host and choose New Virtual Machine.
Select the option Custom.
Follow the on-screen instructions of the wizard until you see the Select a Disk window.
Choose the Use an existing virtual disk option and navigate to the location of your .vmdk file.
Finish the Create New Virtual Machine wizard.
With this, you should be able to fix VMware EXSi 8, 7, or VM autostart if they are not working. In the same vein, if VMware is not detecting your USB drive, check our detailed guide to fix it.
Please let us know in the comments below if this guide helped you solve your issue.
Many Xbox One owners reported an Xbox error message 0x87e1000b on their console. This issue appears when trying to run certain games, and here’s how one user described the issue on Microsoft Answers forum:
help needed please to sort out this error code which comes up any time I try to start an online game
If you’re having problems with this error, in today’s article we’ll show you how to fix it once and for all.
How can I fix Xbox error message 0x87e1000b?
1.Hard reset your console
Press and hold the Power button on your console for 10 seconds to turn it off.
Once your console turns off, disconnect it from the power outlet.
Leave your console turned off for a minute or two.
Connect it again to the power outlet and press the Power button on the console to turn it on.
Check if the issue is still there.
2. Just wait it out
Sometimes this error can be related to Microsoft or its servers.
If that’s the case, just wait out for a day or two.
After some time has passed, check if the error message is still there.
Press the Xbox button on the controller to open the Guide.
Now go to System > Settings.
Navigate to System > Console info and choose Reset console.
You’ll be presented with two options:
Reset and keep my games & apps – Select this option is you want to reset your console but save the important data such as games and apps.
Reset and remove everything – By using this option you’ll remove all games and apps from your console, so you’ll have to download them again. Use this option only if the previous one doesn’t work.
4. Contact Microsoft support
If the previous solutions didn’t work for you, contact Microsoft support and see if they can help you fix the problem.
As you can see Xboxerror message 0x87e1000b is just a temporary error, but in most cases, you can fix it simply by performing a hard reset on your console.
If you found our solution helpful, feel free to let us know by using the comments section below.
For obvious security reasons, your WindowsServer will, by default and after some time of inactivity, turn off the screen and lock the computer. And, although there’s a security risk if you are working in a crowded environment, some users do not want to lock screen on WindowsServer. If you want to disable lock screen on WindowsServer, check the steps below.
How do I stop the server from locking when idle?
1. Disable the ‘Turn off the display’ feature in Power Options
Open Control Panel from the Start Menu.
Select Power Options.
Click Change plan settings.
Under the Turn off the display, select Never.
After that, you won’t have issues with the display turning off and the server automatically logging you out of the session with the lock screen.
Alternatively, you can open the Group Policy Editor and disable the lock screen there. To do so, search for Group Policy in the Windows Search bar. Open GPE there.
Once there, navigate to Computer Configuration > Policies > Administrative Templates > System > Power Management >Video and Display Settings. Alternatively, on newer versions, you should navigate to Computer Configuration > Administrative Templates > System > Power Management >Video and Display Settings.
Once there, double-click on the Turn off the display (plugged in) feature.
Make sure that the option is disabled.
Confirm changes and reboot your WindowsServer.
After that, the lock screen on WindowsServer is disabled. If you, of course, want to do quite the opposite and enable it, follow back the steps and either change the screen-off timeout or enable the option in the Group Policy Editor.
With that said, we can wrap it up. In case you have any questions or suggestions, feel free to tell us in the comments section below. We look forward to your feedback.
If you want to find out how to block IP and IP ranges on a Windows server, you are lucky.
In this article, we will discuss precisely this subject, and you will find out what are the best solutions available.
Blocking an IP or an IP range on your Windows server will allow you to prevent access to your server from a specific country or region. This will give you the possibility to control the security of your server easily.
Please follow the steps presented here carefully to avoid any issues.
Here’s how to block an IP or an IP range on Windows server
1. Add Local Computer to Security Policies
Press Win+R to start the Run dialog box.
Type MMC -> press Enter.
Inside the console -> click File -> Add/Remove Snap in.
Select the Standalone tab -> click the Addbutton.
Choose the IP Security Policy Management option -> Add -> Local Computer -> Finish -> Close -> Ok.
2. Create IP security policy
Inside the console -> right-click the IP security policies on local computer option found in the left pane -> choose Create IP security policy.
Click the Nextbutton and name the policy Block IP.
Add a description of your choosing.
Click the Nextbutton and make sure that the box next to the Activate option is ticked.
Click Next -> tick the Edit properties option -> click the Finish button (this will open the properties window).
Inside the properties window that you previously opened -> click Add -> Next.
Make sure the This rule does not specify a tunnel option is selected -> click Next.
Leave the All network connection option selected -> click Next.
This will open the IP filter list (you will need to create a new filter, so don’t choose any of the default values).
Click Add -> type a name for your list (ex. IP block list) -> add a description (can be the same as name).
Add the option -> click Next to move to the next step.
Type IP1 as a name (orIP range) in the description box.
Make sure the Mirrored. Match packets with the exact opposite source and destination addresses option is ticked -> Next (source address needs to be the same as My IP address).
Select A specific IP address or A specific Subnet (depending on if you want to block an IP or IP range).
Copy-paste the IP address or the subnet type -> click Next -> select Protocol Type as Any -> Next -> Finish.
Conclusion
In today’s fix article we explored how to block an IP or IP range on a Windows server quickly. We hope the guide was easy to follow, and that it managed to solve your issue.
Please feel free to let us know if it did by using the comment section found below this article.
If you want to know how to fix common VMware network adapter issues, you came to the right place.
A large number of users have encountered issues with their VMware network adapter, and that can cause a lot of stress.
The entire reason for using VMware for virtualization is to be able to have a substrate of software that mediates the operations between the operating system and your PC‘s physical hardware.
Having this ability allows you to tackle a wide range of possible problems, without risking to corrupt the entire system setup.
For this reason, in today’s article, we will discuss how to solve the most common issues encountered when using VMware on your Windows 10 machine. Read on to find out more details.
Here’s how to fix common VMware network adapter issues
VMware network adapter not working
Open VMware.
Navigate to the Preferences menu -> select the Network tab.
Inside the Network tab -> uncheck the box next to the option Require Authentication.
This should solve your issue.
VMware network adapter not connected
There are a few ways to tackle this problem, depending on the details of your circumstances. To fix this issue, try these methods:
Increase the port number for your virtual switch and restart the host machine to apply the changes (it is recommended that you increase the number of ports for all hosts in a DRS cluster).
Create a new virtual switch and distribute the virtual machines and ports between them.
If you’re using the NIC teaming -> make sure that the value for the load balancing policy is the same on all the ESXi/ESX hosts.
In the case that you’re VLAN is configured -> make sure it is available on all ESXi/ESX hosts contained in the cluster.
Set the Notify Switches option found inside NIC teaming to Yes.
If your VMware network adapter is not showing up inside your Network Connections window, this issue might be caused by a power outage or a sudden shutting down of your server.
To solve this, it is recommended that you restore your system to the previous version before the issue occurred:
Click Cortana search box -> type Create a restore point -> select the top result called System Properties.
Inside the System Protection tab -> click the System Restore button.
Follow the on-screen instructions to complete the restore process.
VMware network adapter general failure
Press Win+X keys -> select PowerShell (Admin).
Type the following commands and run each of them:
ipconfig/release
ipconfig/renew
ipconfig /flushdns
netsh int ip reset c:tcp.txt
netsh winsock reset
3. Restart your PC.
Conclusion
Please feel free to let us know if this guide helped you solve your issue with the VMware network adapter, or if you have any suggestions.
You can do so by using the comment section found below this article.
Press the Power button on your console and hold it pressed for 10 seconds.
After your console turns off, disconnect it from the power outlet.
Keep it disconnected for a minute or two.
Now connect the console to the power outlet and start it again.
Check if the issue is still there.
4. Restart your modem/router
Press the Power button on your modem/router to turn it off.
Now, wait for at least 30 seconds.
Press the Power button again to start your router/modem.
Once the router boots, check if the problem is still there.
There you go, these are several quick and simple solutions that you can try in order to fix Xbox Live error 0x87DD0004. If you found our article useful, feel free to let us know in the comments section below:
If you are seeing the error Windows server does not allow clipboard redirection, you have to know, you are not the only one. A large number of Windows server users have encountered this exact issue.
This policy is put in place to protect you from any remote computers connecting to your client computer while performing the Remote Desktop Services.
Simply put, this policy prevents users from deviating any sort of clipboard data back and forth between the remote computer and the host server.
This setting is set to allow Remote Desktop Services access to the clipboard, but if the above-mentioned policy is activated, any clipboard data will not be given access.
Not having this policy enabled can be extremely dangerous, as a third-party can perform an attack on the server without any sort of warning.
For these reasons, in today’s article, we will explore the best way to deal with this issue. Please follow along to ensure that you will perform the steps correctly.
Windows server not allowing clipboard redirection
In order to prevent any third-party’s access to your Windows Server clipboard functionality, you will need to configure your server to not allow clipboard access.
The steps required for different versions of Windows server will vary, but please follow the steps presented here to enable the option easily:
Windows 2016 server
Press Win+X keys -> select PowerShell (Admin) from the menu.
Type gpedit.msc inside the elevated command prompt.
Press Enter to run the command and open the Local Group Policy utility.
Navigate to Computer Configuration -> Administrative Templates -> Windows Components -> Remote Desktop Services -> Remote Desktop Session Host.
Make sure the option Do not allow Clipboard redirection is Enabled.
Windows 2012 server
Press Win+R keys to open the Run dialog box.
Type ServerManager -> press Enter.
Click on the Remote Desktop Services -> select Collections.
Select Tasks -> choose Edit Properties.
Under the Client Settings tab -> make sure Clipboard and Drive is disabled.
Inside the Server Manager window -> click on Connections.
Right-click the connection you want to modify settings to -> select Properties.
Inside the Client Settings tab -> make sure the box next to Clipboard is checked.
Note: If you don’t want to allow copying and pasting of files either, make sure to check the box next to the Drive option.
If you want some users to have access to the clipboard function, do this:
You will need to segment the LAN connections that have Remote Desktop Servicesclipboard enabled to allow you to track the influx of information.
This will prevent any unauthorized access to your server‘s clipboard function, and if any connection is performed, you can analyze the data. This will allow you to make sure that your system will not be corrupted.
Conclusion
Please feel free to let us know if this guide helped you in any way, or if you have any suggestions.
You can do so by simply using the comment section below.
I am trying to get my Forza 6 to work again.
Got an error message 0x90072ee7. There seems to be no history of that error code listed.
Any suggestions?
This can be a big problem for some users, but in today’s article, we’re going to show you how to fix this problem once and for all.
How can I fix Xbox error 0x90072ee7?
1. Try to access a service a bit later
Sometimes this error can occur if there’s an issue with the service you’re trying to access. There might be a temporary server issue or outage that is causing this error to appear.
If that’s the case, try waiting for a couple of minutes or hours and try to access the service again.
Wait for 30 seconds and press the Power button again.
Once your router boots, check if the error 0x90072ee7 is still there.
5. Power cycle your console
Press and hold the Power button on your console for 10 seconds.
After your console is turned off, disconnect the console from the power outlet.
Wait for a few minutes and connect the Xbox to the power outlet.
Press the Power button to start your console and check if the problem is still there.
There you go, a few quick and easy solutions for error 0x90072ee7 on Xbox One. If you found our solutions helpful, feel free to let us know in the comments section below.
Microsoft’s connected vehicle platform normally is not considered in the same discussion as Google’s Android Auto or Apple’s Car Play, but according to a new report from ZDNet, it seems the company is adding yet another noteworthy feature to its collection of Azure-connected car related service bundles that could bring it closer in conversation.
Microsoft and the Dutch-based navigation software provider TomTom have partnered to create a level of integration with Azure that would allow automakers to “generate data-driven insights to deliver tailored services and to make better-informed designs and engineering decisions,” based on the press release from TomTom.
In addition to helping automotive engineering decisions, TomTom will also be providing its obvious HD mapping technology, traffic information analytics, and navigation tools to automakers to aid in autonomous software development.
“Our integration with the Microsoft Connected Vehicle Platform means that automakers can get access to precise and reliable navigation and driving behavior data easily, while of course adhering to privacy principles. This data could, for instance, be used to predict the range of an electric vehicle based on driving behavior and planned route more accurately; or to work out, based on navigation behavior, what connectivity package for online navigation would be best suited for a driver. This is a game-changer for OEMs.”
Today’s news follows a three-year-long pattern of decisions from both Microsoft and TomTom to enlist the help of one another while leveraging the benefits of cloud-based navigational developments.
Back in December 2016, TomTom began seeding its location-based services to Azure and in February 2019, Microsoft awarded TomTom the coveted spot of location data provider for mapping services across the company’s various solutions that included Bing, Cortana, Windows and Azure Maps.