Fix: Origin Application Error when Shutting Down PC

A large number of the Origin application users have complained to EA about encountering an error when the shutdown of the PC is initiated.

This error can be extremely frustrating, especially if you set up your computer to enter Sleep mode after a certain amount of time, or to automatically turn off at a specific hour. This Origin error will not allow your PC to follow the instructions. This happens by displaying the error message inside a pop-up mentioned above, which stops the process.

Even though the developers at EA didn’t release any information regarding trying to solve this issue, let alone an official fix, we will discuss the best methods today.

The methods mentioned in this article have been compiled after hours of research on different forums, and they have worked for some users. Read on to find out more.

Here’s what you can try to fix the Origin app error on PC shutdown

1. Clean your computer’s registry by using a third-party tool

The Windows registry is the core of a large number of error types. To solve the Origin app error you need to use an automated registry cleaner, which is a tool that can fix all the damaged settings inside your PC.

These types of tools are easy to use. They scan your PC for registry issues and other problems such as unnecessary files. They can remove and repair all issues they find in bulk which can significantly improve your PC’s performance.

2. Test the RAM memory on your PC

Because the error mentioned above could be caused by an issue with your PC‘s RAM memory, it is important that you check for any problems.

Follow these steps to do so:

  1. Click on Cortana search box -> type in mdsched.exe -> press Enter.mdsched executable file - Origin application error on shutdown
  2. Choose between restarting the computer now to run the tool, or schedule the tool to run when your PC will be restarted next.
  3. Windows will now run Memory Diagnostics.
  4. When the testing is completed, your PC will restart automatically.
  5. Check to see if the issue persists. If it does, try the next method.

3. Close the Origin app before shutting down your PC


Even though this is not an actual fix, but a workaround for this issue, to avoid getting the above-mentioned error message, you can close Origin before attempting to shut down your PC.

You can simply open the Origin app -> go to File -> select Exit, or use the Task Manager to close the process. To use the latter option follow these steps:

  1. Press the Ctrl+Alt+Del keys on your keyboard to launch Task Manager.
  2. Search for the Origin application -> select it -> press the End Task button to close it.

4. Reinstall the operating system


Even though this workaround is recommended only in the most extreme cases, some users have had enough of getting the Origin application error on shutdown, so they fixed it by re-installing their OS.

Visit this link for more information regarding the process of reinstalling your OS.

We hope this guide offered you a good solution to deal with the Origin application error on shutdown message.

It is recommended that after each of the methods you check to see if the issue persists. This will allow you to solve the problem without diving too deep into the guide.

Even more, fixing the Closing 1 App and Shutting Down error on Windows is possible thanks to our detailed guide.

Please feel free to let us know if this guide helped you by using the comment section found below.

Server 2012: Could Not Create SSL/TLS Secure Channel [Fix]

If you encountered The request was aborted: Could not create SSL/TLS secure channel error in Windows Server 2012 when trying to show a document in WebView, you are not the only one. A few saw it when a request was made to an https endpoint on Cloudflare.

This issue can be extremely frustrating, and it will not allow you to create an SSL/TLS secure channel, so your server setup can not be completed accordingly. So, let’s find out how you can fix Could not create SSL/TLS secure channel.

How do I fix SSL TLS secure channel error?

1. Set ServicePoint to TLS 1.2

  1. Find the global.asax file inside the root of your site.
  2. Right-click it -> select View code.
  3. You should be able to find an Application_Start method inside the file mentioned above.
  4. Add these lines to the code to force TLS 1.2:


    namespace YourApplication
    {
        public class WebApiApplication : System.Web.HttpApplication
        {
            protected void Application_Start()
            {
                //**Add these lines**
                if (ServicePointManager.SecurityProtocol.HasFlag(SecurityProtocolType.Tls12) == false)
                {
                    ServicePointManager.SecurityProtocol = ServicePointManager.SecurityProtocol | SecurityProtocolType.Tls12;
                }
                //**Add these lines**
    
                AreaRegistration.RegisterAllAreas();
                GlobalConfiguration.Configure(WebApiConfig.Register);
                FilterConfig.RegisterGlobalFilters(GlobalFilters.Filters);
                RouteConfig.RegisterRoutes(RouteTable.Routes);
                BundleConfig.RegisterBundles(BundleTable.Bundles);
            }
        }
    }

Some users reported that setting the ServicePoint to TLS 1.2 solved things when they came across could not create SSL/TLS secure channel in Windows Server 2019.

2. Download the Security Advisor update manually

  1. Visit the official Microsoft webpage, scroll down, and expand Microsoft Download Center.
  2. Download the installer that corresponds to the version of Windows you’re running.Security advisor update -windows server could not create ssl/tls secure channel
  3. Run the setup and follow the on-screen instructions to install it.

When you see The request was aborted: Could not create SSL/TLS secure channel in Windows Server 2016, installing the security advisor update should fix things!

3. Enable SSL3 and TLS and add TLS 1.1 and TLS 1.2

3.1 Enable SSL3 and TLS

  1. Access the App Server Instances, and select the server by using the left pane.
  2. Click on HTTP Server and HTTP Server Listeners on the left side.
  3. Select the required HTTP listener.
  4. Under the section SSL/TLS settings, activate the options you require.

3.2 Add TLS 1.1 and TLS 1.2

  1. Press Windows + R, type regedit, and press Enter.regedit
  2. Navigate to the following location:HKEY_LOCAL_MACHINE\SOFTWARE\Microsoft\.NETFramework\v4.0.30319.
  3. On the empty portion, right-click, select New, choose DWORD (32-bit) Value, and name it SchUseStrongCrypto.dword to fix could not create ssl/tls secure channel windows server 2012
  4. Now, double-click on the DWORD, set the Value data to 1, and click OK to save the changes.
  5. Once done, restart the computer.

We hope the methods mentioned above have helped you fix the Windows server 2012 error Could not create SSL/TLS secure channel.

Before you leave, find out the best Windows Server backup software and never worry about losing data.

We would love to know if this guide helped you. Please feel free to leave a comment.

Windows logon server isn’t available: Here’s what to do

In case you’re trying to logon your PC and see the error Windows logon server is not available, you came to the right place.

This issue can be extremely annoying, and it seems that it affects Windows 7, Windows Server 2012 Essentials and Windows 8 Pro as well.

Here is what one user from the SpiceWorks forums had to say:

When attempting to login to Windows 7 computer, receive the following message “there are currently no logon servers available to process your logon request” This only happens at the first attempt to login. able to login successfully after 2nd or 3rd attempt. How do I stop receiving the message at the first login attempt?

In today’s article, we will explore some of the best troubleshooting methods to apply to this error message. Please follow the steps presented here closely to avoid causing any other issues.


What to do if Windows logon server is not available error

1. Make sure the Local Admin option is not disabled

laptop on desk - Windows logon server not available
  1. Navigate to the Control Panel -> select Administrative tools and computer management.
  2. Click the option Local Users and Groups to expand it -> select Users.
  3. Inside the right pane -> double-click on the administrator account.
  4. Un-tick the Account is disabled option -> press Ok to save the settings.
  5. In case your Local Admin option is not disabled, please follow the next method.

2. Make sure that your PCs clocks are synched

lapto on table - Windows logon server is not available
  1. Click the Start button -> open the Control Panel.
  2. Inside the Control Panel -> select Clock, Language, and Region -> click Date and Time.
  3. Select the Internet Time tab -> click on the option Change settings.
  4. Activate the option Automatically synchronize with an Internet time server -> select the specific time server -> click Ok.

3. Connect to the Internet using an ethernet cable

network-cable - Windows logon server is not available


In some situations, using the Wi-fi to connect to the Internet can cause a conflict inside your system that can show you the error Windows logon server is not available.

To avoid the conflict mentioned above, it is recommended that you disconnect from the Wi-fi network, connect an Ethernet cable to your router, and plug it into the Network Card of your PC.

Some users have reported that this has solved their logon issue. If in your case it didn’t, please follow the next method.


Are you encountering a green screen inside Windows Media Player? Try these fixes


4. Run network troubleshooting

laptop on table front view - windows logon server is not available
  1. Click the Start button -> Select Control Panel -> Network and Internet.
  2. Select the Network and Sharing Center link.
  3. Click the Fix a Network Problem option, and follow the on-screen instructions to complete the troubleshooting steps.

Alternatively, you can use a reliable network monitoring software that has advanced capabilities of collecting statistics from designated hosts, allowing you to configure your setup efficiently.

⇒ Get PRTG


5. Remove and re-add the domain

cup of coffee with laptop - windows logon server is not available
  1. Right-click My Computer -> select Properties -> click Computer Name -> Change.
  2. Change the name of the workgroup to ABC -> use network logon ID -> click Ok.
  3. Restart your PC.
  4. Log in as an administrator.
  5. Follow step 1 of this method again.
  6. Change the domain -> select Ok -> logon with ID and click Ok.
  7. Restart PC.

Conclusion

In this article, we explored the best-proven troubleshooting methods to deal with the Windows logon server is not available error message.

Before you go, don’t miss our guide on We can’t sign you in with this credential because your domain isn’t available error.

Please let us know if this guide helped you by using the comment section below.

Microsoft’s Surface lineup still has battery drain issues

Microsoft’s Surface lineup isn’t done with battery problems.

Surface Laptop 2 and Surface Pro 4 are plagued by battery drain issues

After some battery drain problems affecting the Surface Pro 5 and 6 devices, now it seems that Surface Laptop 2 and Surface Pro 4 are plagued by the same bug.

Here’s how some affected users are describing the problem on Microsoft’s community forum:

Lately, after I shutdown (full shutdown, not sleep or hibernate) my fully charged Surface Laptop 2 at night, I turn it on in the morning and find that the battery has lost around 25% power overnight! What’s going on and how can I fix this? 

I am having the same issue.  Was plugged in at the office @ 100%.  Drove home which was about 25 minutes and powered it up and was @ 75%.  Surface Laptop 2.  This started after the last firmware update.

The cause for this battery drain bug seems to be the latest firmware updates.


If you’re having battery drain problems on Surface Pro 6, check out this guide and solve them in no time.


Microsoft might release a new update soon

Other users reached to Microsoft on Twitter. The tech giant responded to many, recommending troubleshooting steps and trying to fix the problem, with no success:

As we already mentioned, the Surface Pro 4 is also having battery drain issues. The cause isn’t sure yet, but it’s likely to be the latest cumulative updates:

Due to all these battery problems, we may see some Surface and Windows updates sooner rather than later, as Microsoft hinted in a tweet response:

Please continue to check for Surface and Windows Updates to make sure that your device has the most current firmware and software available.

If you’re having the same problem, share your experience in the comments section below.

Want to send a mass email? Here’s how to create email merges in Publisher

If you own a small business, one of the most useful things is sending mass emails out to potential customers or clients. Services like Mailchimp offer up the opportunity for mass marketing emails but at a extra price. You also can typically send out mass emails and marketing materials by using the mail merge features in Outlook, or Microsoft Word.

Microsoft Publisher, however, lets you create much more professional looking and stylish mass-email messages or newsletters. We’re still diving into features of each of the Office apps, and today, we’ll show you how you can create a professional-looking email merge with Publisher for no extra cost with your Office 365 subscription.

Launch Publisher and head to the mailings menu

To get started, you can create your own publisher file from scratch with the Blank 8.5 x 11″ option, or by using one of the templates. If you’re not sure how to begin, you can search for online templates from the new file page. A nice suggestion for starters for a mass email is the “newsletter” template, which has many areas of texts and photos that you can swap out or customize with your own company material.

Once you’ve customized your file or template with your own company information, you can head to the menu on the top. From there, you’ll want to choose the Mailings option. You should then see an option on the left for E-mail Merge. You’ll want to click on the down arrow next to that and choose Step by Step Wizard. 

Want to send a mass email? Here’s how to create email merges in Publisher

Choose your recipient options

From the wizard, you’ll see a list of options, and an explainer on how the process of an email merge works. For this first step, you’ll want to pay attention to the Create Recipient List. From there, you can either use an existing list of contacts, select your contacts from Outlook, or choose to type out a new list. Typically, it’s best to choose contacts from Outlook, which will already be home to most people you’ve want to contact. If you opt for that, you can select choose a list of contacts and choose your contacts, then skip to the next step.

Otherwise, you can choose to type out a new list. as we are here. To do so, you can head back to the Mailings Tab and click on Select Recipients and then choose Type a New List. Once the names and personal information are typed out, you can then find a location to save the Address List, and click OK, followed by Yes and then Yes to have it on hand for future reference.

Want to send a mass email? Here’s how to create email merges in Publisher

Prepare your document for the e-mail merge

Next up, you can head back to the e-mail merge wizard by clicking on it from the ribbon on top. In the wizard, you’ll want to make sure your contact list is selected. If it is not, you can go back a step and click on Edit Recipient List.  From there, you can then click under Select an existing list to upload the list you’ve previously created.

Once selected, you can head to step 2 by clicking through the wizard. You’ll need to prepare your document for the e-mail merge. As part of the process, you’ll see a list of options appear in the wizard, including names, numbers, and email addresses and other types of information. Be sure to put your cursor where these are needed in the document and then click to insert. In our case, we’re just going for the name. or address. There are options for some personalized links, as well as pictures, but we won’t touch on those.

Want to send a mass email? Here’s how to create email merges in Publisher

Get ready to send your mass email

Once you’ve finished inputting fields into the Publisher field, it’s time to send that email! You’ll see an option to preview the email, just to make sure it’s right. You’ll also notice that there will be an alert if there are potential issues. You can click this to correct. Otherwise, you can just click Send Email to procced.

From the pop-up box, be sure to click on To and scroll down and choose the Email Address option from the list. You can then type in your own subject matter. For ultimate customization, you also can click Options and choose to CC, BCC, and set the priority of the email. You also can attach files.

Once satisfied, you can press Send to send your message. Publisher will alert you to who you’re sending the email too, so you’ll want to press OK to confirm. Once you do, your mass e-mail will be sent.

Want to send a mass email? Here’s how to create email merges in Publisher

How will you leverage the power of Microsoft Publisher?

While we’ve explained how you can use Microsoft Publisher to send mass emails or newsletters, there are many other uses for it. This Office 365 application is great for creating Thank You cards, birthday cards, banners, posters, labels, business cards, and more. The possibilities are endless, and you can do almost anything with Publisher to make your business shine! Feel free let us know how you’re using Publisher by dropping us a comment below.

If you’re not a fan of Publisher, why not visit our latest guide that shows you how to mail merge from Excel to Microsoft Word?

Windows Server 2019/2022 Mount ISO not Working? 7 Easy Fixes

According to some users, it seems that the Windows Server 2019/2022 mount ISO is not working. This issue is frustrating and affects many users.

In today’s article, we’ll show you a few methods that you try in order to fix this issue for good.

What can I do if Windows Server can’t mount ISO files?

1. Make sure to open the file with Windows Explorer

  1. Locate the ISO file on your PC.
  2. Right-click the file and choose Open with > Chose another app from the menu.
  3. Select Windows Explorer from the list. Now check Always use this app to open .iso files and click OK.
    always use this app windows server can't open ISO files
  4. After doing that, just double-click the ISO file, and it should be mounted without any problems.

2. Make sure that the ISO file is completely downloaded

A corrupted download can sometimes cause this problem with ISO files. To avoid this issue, here are a few simple guidelines to follow in the future:

  1. Check if the file is completely downloaded.
  2. Check if the file size of the ISO file is correct.
  3. Try downloading the ISO file using a download manager.
  4. Check MD5 checksum if possible and check if the file is completely downloaded.

3. Switch to the administrator account

Many users reported that Windows Server can’t mount ISO files on their PC. If possible, check if this issue exists with the administrator account.

If not, it’s most likely that you don’t have the necessary privileges as a regular user, so you might want to contact your administrator.

4. Use PowerShell

  1. Start PowerShell as administrator.
  2. Enter the following command: Mount-DiskImage -ImagePath 'C:\path_to_iso_file\file.iso' -StorageType ISO -PassThru | Get-Volumemount-diskimage powershell windows server could not mount iso
  3. Press Enter.

5. Move the ISO file to another location

  1. If you’re having problems mounting ISO files, try moving the file to a different location.
  2. After doing that, double-click the file and check if it works.
  3. If it doesn’t, try moving the file to the root directory, such as C: or D:.

6. Use 7-zip

  1. Download and run 7-zip.
  2. Use the application to open the ISO file.
  3. Once you open the file, extract it to the desired location.

7. Copy the file or change the sparse flag

  1. Open Powershell as administrator.
  2. Run the following command: fsutil sparse queryflag <PathToYouISO>
  3. If the file is set as sparse, run this command: fsutil sparse setflag <PathToYouISO> 0
  4. If you don’t want to use the command line, you can just create a copy of the ISO file, and the problem will be fixed.

There you go, several simple solutions that will help you if Windows Server 2016, 2019, and 2022 cannot mount ISO.

If you want to know how to fix Windows 10 errors when mounting ISO files, check our detailed guide.

Feel free to let us know the solution that helped you fix this issue in the comments below.

How to save Mixer streams on Xbox

The Mixer has become a popular alternative to Twitch, although not at that stage, the clean user-friendly interface makes it a go-to streaming app for many beginner streamers. Streaming with Mixer is a pretty straight forward affair irrespective of whether you are broadcasting from PC or Xbox. If you are on Xbox, like other streamers you may want to save Mixer streams on Xbox.

Having your past streams saved is useful when you want to learn from your gameplay and identify the mistakes to make your gameplay better. Or if you simply want to show off your Chicken Dinner in PUBG or sick moves in Apex Legends to your friends. In any case, here is how to save mixer streams on Xbox.

How to save Xixer streams on Xbox

Enable Save Streaming Option in Mixer

The option to save your stream is built into the Mixer streaming service. However, the users need to enable it manually from the settings page to be able to download their streams for future use. Here is how to do it.

  1. Visit Mixer.com and login to your Mixer profile.
  2. Once signed in, click the User icon in the upper right corner of your screen.
  3. Now select the Broadcast dashboard from the drop-down menu.
    How to save mixer streams on Xbox
  4. In the Preferences section, toggle the switch to enable “Keep a recording of my streams“.
  5. Scroll down again and click on Save.
  6. Now launch the Mixer app on your Xbox console and start streaming.

What you should know about Mixer Stream Saves?

save mixer streams on Xbox

  • All the saved streams are available for 14 days from the date of streaming. However, in some cases, the  Mixer partner can keep their saved streams for up to 90 days. The time period is even more for some esports channels.
  • The stream must be at least 5 minutes long and under 48 hours to be saved.
  • The saved streams will be available for public view as soon as the processing is finished.
  • At times, you may not see your first few streams, but continue to stream with the option enabled and eventually it will appear in your profile.
  • Past streams with blue thumbnail mean it is still processing. So, wait for the processing to finish before you can watch it.
  • In case, Mixer is still not saving your streams even after enabling save the past stream option, contact stream support.

RELATED STORIES YOU MAY LIKE:

Fix That account is not linked with any Mixer account

Mixer is another emerging streaming platform for game streamers. Being a Microsoft service, Mixer comes integrated with Xbox console. However, some users have reported “That account is not linked with any mixer account” error when the users try to sign in or sign up for Mixer. Several users have reported similar issues in the Microsoft Community forums.

I’ve used mixer for about 2 years now and have never had any problems logging in. About a week ago I was signed out on all of my devices and can’t get back in. My password has not changed so that’s not the problem. Whenever I try to sign into mixer with my Microsoft account, it says that my account isn’t linked with a mixer account. I don’t know how all of the sudden my account could just disappear like that.

If you are also troubled by this error, here are a couple of troubleshooting tips to help you fix That account is not linked with any mixer account error in Xbox.

How to Fix that account is not linked with any mixer account

1. Sign in using a Different Device

that account is not linked with any mixer account

  1. As a workaround, you can try to fix the issue by signing into your Mixer account using a different device.
  2. Use your smartphone or tablet or PC to access the Mixer web page.
  3. Login to your Profile and try to link your account with Mixer.
  4. If the linking goes through, the error on your Xbox could be a temporary problem and should be resolved in time.

Mixer to get a Streamer Review system and new chat tools


2. Unlink and Relink your account

that account is not linked with any mixer account

  1. If you are using another account on your Xbox, you may need to unlink and relink your account.
  2. Go to Mixer.com.
  3. If you already have a Mixer account, click on Login and select Microsoft.
  4. Enter your Microsoft account credentials that you used on your Xbox console to sign in.
  5. Click the Profile in the upper-right corner and select Account > Unlink your Microsoft Account.
  6. One signed out, you need to link your preferred Mixer account to your Microsoft Account.
  7. At Mixer.com, log in with the Mixer account you want to use.
  8. Click the Profile icon in the upper-right corner and select Account > Link your Microsoft Account.
  9. Now enter your Microsoft account info and save the changes.
  10. Get back to your Xbox console and try signing into your Mixer account again and check for any improvements.

3. Contact Support

that account is not linked with any mixer account

  1. First, try to connect your Xbox to your smartphone’s hotspot if possible. Users have reported that they were able to login to their Mixer account using a mobile access point.
  2. If not, contact Mixer support. The support should be able to help you better in case the issue has only affected your account.

RELATED STORIES YOU MAY LIKE:

Windows Server AppFabric is Not Correctly Configured [Fix]

If you encountered the error message Windows Server AppFabric is not correctly configured, you are not the only user experiencing this issue.

Today, we will explore the best way to deal with this problem. Keep reading to find out how to fix an error when configuring AppFabric on Windows Server 2012.

Why do I see Windows Server AppFabric is not correctly configured?

The error occurs in the following situations:

  • No Internet access: You are not connected to the Internet and tried to install Windows Server AppFabric manually (double-clicked installer file).
  • Incorrect package installation: You have an Internet connection, and you tried installing SharePoint Server 2013 RTM on Windows Server 2012 R2.
  • Server configuration: In the case that your server is configured as a Workgroup.

How do I fix Windows Server AppFabric is not correctly configured error?

Tip icon Tip
In case you installed Windows Server AppFabric by double-clicking the installation file, you will need to navigate to the Apps and Features menu inside Windows and uninstall it. After the uninstall process, please restart your server and follow the steps mentioned below.

1. Move the AppFabric app installer and open PowerShell

  1. Navigate to the location of the WindowsServerAppFabricSetup.exe file on your server‘s drive C:/.
  2. Press Windows + X, and then select Windows PowerShell (Admin).
  3. Paste the following command and then hit Enter: .WindowsServerAppFabricSetup_x64.exe /i CacheClient,CachingService,CacheAdmin /gacPowershell admin command - Windows Server appfabric not correctly configured
  4. If you get a command-line syntax error, then run this command instead:.WindowsServerAppFabricSetup.exe/i CacheClient'',''CachingService'',''CacheAdmin /gac
  5. Wait for the AppFabric installation to complete.

When you find that the AppFabric installation failed, try the PowerShell commands to install it.

2. Install the update package for Microsoft AppFabric 1.1

  1. Install the Cumulative Update Package 1 for Microsoft AppFabric 1.1.
  2. If you’re using SharePoint 2016, install the Cumulative Update 7 (3092423) for Microsoft AppFabric 1.1.Cumulative update 7 download - Windows server appfabric not configured correctly
  3. Reboot your server, and then re-run the SharePoint installation.

Remember, SharePoint Server 2013 RTM is not supported on Windows Server 2012 R2. In order to install SharePoint 2013, try these two methods:

  • Install SharePoint Server 2013 with SP1 on Windows Server 2012 R2.
  • Install SharePoint Server 2013 RTM on Windows Server 2012.

That’s it! You know now how to fix the Windows Server AppFabric is not correctly configured error message.

Before you leave, find out how to check the last reboot time in Windows Server to identify what’s slowing the PC down.

Please feel free to let us know if this fix article helped you solve your issue.

Disable focus mode in Power BI in 3 easy steps

Focus mode is a useful feature in Power BI. Still, in a presentation, the function may pose some problems for those who view the report.

So, many people want to know if there is a way to disable focus mode. One user reported the following on the official forum:

Is there a way to turn off “Focus mode” in presentations?  I have slicers that the filter, focus mode, and more options become available after selecting something within that slicer. There is no reason for the person viewing the report to select any of these option so was wondering if these options can be hidden somehow.  

The main issue here is that some options are not hidden while presenting a report. A person viewing the presentation doesn’t need to select the options listed above by the OP.

As it happens, there is a simple solution to this. Today we will show you how to disable Focus mode in Power BI.

Steps to disable Focus mode in Power BI

  1. Go to the Format pane in Visualizations.
  2. Select Visual header.power bi visual header
  3. Turn off Focus mode icon.power bi focus mode icon

It’s worth mentioning that if you are in editor mode (in Power BI Desktop), the changes will appear after publishing, in the reading mode.

Focus mode or full-screen mode? Which one will you choose?

Choosing focus mode over full-screen mode (or the other way around) depends entirely on the context. If you want to remove all the panes around your content, then the full-screen mode is the right choice.

The full-screen mode allows you to have a broader image of your data, but the interaction is lacking. Simply put, you just read charts, diagrams, numbers, and anything relevant to your data.

However, if you want to interact with the information, then the focus mode will definitely help you. For example, it will let you expand a visual or tile to see more detail.

Conclusion

Fortunately, unlike so many cases, this issue has a very simple solution that you can find it in Power BI‘s options.

Also, if you want to go back to focus mode, you simply follow the same steps to turn on the function.

Did the solution work for you? Which mode do you use more often? Do let us know in the comments section below!

RELATED ARTICLES YOU NEED TO CHECK OUT:

How to set up a free NFS server on Windows 10

If you’ve ever wondered if you can set up a free NFS server on Windows 10, you came to the right place.

A Network File System is a file that allows the storage and gathering of data from a multiple-disk setup and directories on a shared network.

We all know that mounting an NFS (Network File System) share on a Unix-like OS is an easy task to accomplish. On a Windows 10 PC, things are not so straight-forward, but the operation can still be successful with the right guidance.

In today’s article we will discuss how to mount a free NFS share from a UNIX system, but on a Windows 10 running computer. Please follow the steps presented here carefully to avoid any issues. Read on to find out more.


Steps to set up a free NFS server on Windows 10

1. Install the NFS Client

  1. Click on the Cortana search box -> type in Control Panel -> choose the first option from the top.
  2. Click the Programs and Features option.Programs and features - windows 10 free nfs server
  3. Click the option Turn Windows features on or off from the left side menu.
  4. Inside the Windows Features window -> scroll down and check the box next to Services for NFS  -> press Ok.
  5. This will start the installation process.
  6. After the process is completed, you can Close the Windows Features window and follow the next method.

Is Bluestacks not connecting to the server on Windows 10? Try this


2. Enable Write permissions for the Anonymous User (default)

  1. Press the Win+R keys on your keyboard -> type Regedit -> press Enter.hkey local machine registry editor - windows 10 free nfs server
  2. Navigate to:
    • HKEY_LOCAL_MACHINE\SOFTWARE\Microsoft\ClientForNFS\CurrentVersion\Default
  3. Open the Default folder by double-clicking on it.
  4. Right-click the right-side pane -> create a New DWORD (32-bit) Value -> name it AnonymousUid -> assign the UID found on the UNIX directory (shared by the NFS system).
  5. Create a new NEW DWORD (32-bit) Value -> name it AnonymousGid -> assign GID found on the UNIX directory.
  6. Reboot your PC.

3. Mounting a free NFS share server on Windows 10

For the sake of this example, we will assume that your NAS device is located on the same network as your Windows 10 PC and the IP address is xx.x.x.xxx.

Follow these steps to mount the NFS share:

  1. Press Win+X and launch the PowerShell (Admin).PowerShell admin - windows 10 free nfs server
  2. Type the following command C:\Users\windows>mount -o anon xx.x.x.xxx\mnt\vms Z:
  3. Press Enter
  4. After the command is entered, your NFS share server is ready to be accessed by visiting the Z: drive.

Note: It is worth knowing that the first time you will try to write to the NAS device, the share takes a long time. Please be patient.


In today’s article, we answered the question ‘how to set up a free NFS server on Windows 10 ‘.

Please make sure to follow the steps presented in this list carefully, as modifying any registry data incorrectly can affect the overall health and performance of your PC.

We would love to know if this guide helped you set up a free NFS server on Windows 10. If it did, please let us know by using the comment section below.

[wl_navigator]

FIX: Origin error Entry point not found

Seemingly, a hefty number of Origin users are getting the Origin error Entry point not found. It happens when they try to run the client. With that said, the error mostly bothers Windows 8 and Windows 7 users. Although, there are some instances where Windows 10 users are unable to run the Origin client.

Here’s what one user said about the error on the EA support forum:

I get an error message saying”The procedure entry point_except1 could not be located in the dynamic library…”. I have uninstalled and re installed and it still is giving me this message.

If you have had a hard time with this error, learn more about the ways to solve it with the steps provided below.

How do I fix Entry point not found on Origin?

1. Install VC++ Redistributables

  1. Make sure your Origin client is closed.
  2. Navigate to Microsoft’s support page, here, and download Visual Studio 2013. Additionally, you can download Visual Studio 3-in-1 for 2015, 2017, and 2019.
  3. Install the Visual Studio redistributables.vc++ redistributables install origin error entry point not found
  4. Reboot your PC and try running the Origin client again.

2. Run the Origin client as admin

  1. Right-click on the Origin desktop shortcut and open Properties.
  2. Select the Compatibility tab.
  3. Check the Run this program as an administrator box.run Origin as admin entry not found
  4. Confirm changes and try again.

We’ve written extensively on Origin client issues. Check out these guides for more information.


3. Temporary disable antivirus

  1. The procedure, albeit similar, differs based on your antivirus solution. The usual steps are to expand the Hidden icons on the taskbar > Right-click your antivirus > click Disable.
  2. If you are running Windows Defender, here’s how to temporarily disable it.
  3. In the Windows Search bar, type Windows Defender.
  4. Open Windows Defender and then Virus & threat protection.
  5. Click on Manage settings.
  6. Disable Real-time protection.disable windows defender origin error entry point not found
  7. Try running the client again and, hopefully, the Origin error Entry point not found won’t appear. Just don’t forget to re-enable the antivirus later.

4. Reinstall the Origin client

  1. In the Windows Search bar, search for Control Panel and open Control Panel.
  2. Click Uninstall a program.
  3. Select Origin and remove it.
  4. Navigate to your system partition (usually C:).
  5. Click View in the Toolbar and check the Hidden items box.
  6. Open the ProgramData folder and delete the Origin folder.program data enable
  7. Open Program Files and delete the Origin folder. Do not delete Origin Games folder.
  8. Reboot your PC.
  9. Navigate here and download the Origin desktop client.
  10. Install it and look for improvements.

And on that note, we can wrap up this article. Hopefully, you were able to resolve the Origin error Entry point not found with these steps. In case you have any questions or suggestions, do tell in the comments section below.

RELATED STORIES YOU SHOULD CHECK OUT:

Install Docker on Windows Server 2016 or Newer [How to]

Docker is a useful tool, and many are wondering if it is possible to Install Docker on Windows Server 2016. Join us while we try to answer this question.

Is Docker supported on Windows Server?

Yes, Docker Community Edition/Moby is supported on Windows Server. You can also install containerd, or the Mirantis Container Runtime version.

How do I install Docker on Windows Server?

Install Docker Community Edition or containered

  1. Open PowerShell.
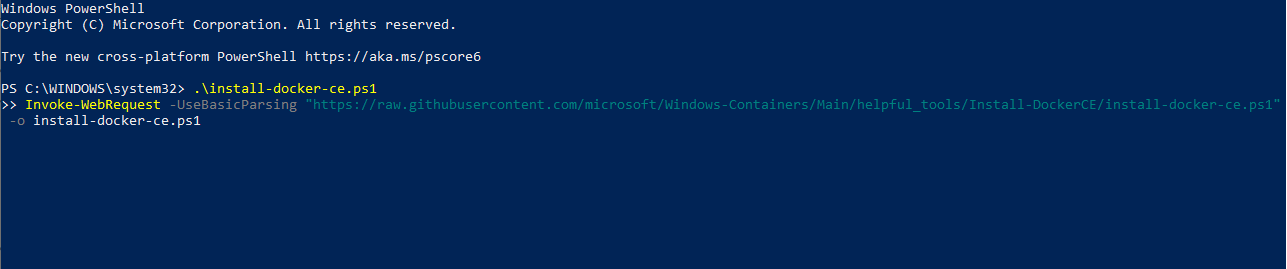
  2. Run the following commands: Invoke-WebRequest -UseBasicParsing "https://raw.githubusercontent.com/microsoft/Windows-Containers/Main/helpful_tools/Install-DockerCE/install-docker-ce.ps1" -o install-docker-ce.ps1
    .\install-docker-ce.ps1

  3. Follow the instructions on the screen to complete the process.

For containered, the steps are the same but you need to use the following commands instead:
Invoke-WebRequest -UseBasicParsing "https://raw.githubusercontent.com/microsoft/Windows-Containers/Main/helpful_tools/Install-ContainerdRuntime/install-containerd-runtime.ps1" -o install-containerd-runtime.ps1
.\install-containerd-runtime.ps1

Is Docker free for Windows Server 2016?

Yes, Docker is free on Windows Server and Docker Enterprise comes included with with Windows Server license.

As you can see, it’s pretty simple to install Docker on Windows Server 2016, but issues with it can occur, and we wrote about Docker CLR error 8000405 and Docker Desktop unexpected WSL error.

Issues can appear on Windows 11 as well, and we have a guide on what to do if the Docker Desktop is starting forever, so don’t miss it.

Did you manage to install Docker? Let us know in the comments.

Epson Printer is Skipping Lines? 3 Ways to Fix it

Epson printers are amazing, but even the greatest things are not perfect, and many reported that their Epson printer is skipping lines.

There are many printer issues you can encounter, and we already wrote about issue with printer not printing full page in a separate guide, so you might want to check it out.

Today we will show you what to do if your Epson doesn’t print all the lines.

Why is the Epson printer skipping lines?

  • Your cartridges are clogged, and they are causing the issue.
  • Dirty electrical contacts can sometimes lead to various problems.
  • Issues with the black cartridge on your printer.

How do I fix a missing line on an Epson printer?

1. Run the utility for cleaning cartridges

  1. Connect your printer to the computer.
  2. Open Control Panel.
  3. Open Devices and Printers.control panel devices and printers
  4. Select Printing preferences.printing preferences
  5. Select Service this Device from the Services tab.
  6. Click on Clean the Print Cartridge and follow the instructions.
  7. Print a test page to see the results.

2. Clean the electrical contacts

  1. Turn off the printer and disconnect it from the power source.
  2. Remove the cartridges. The nozzle plate should be facing up to avoid ink leaks.
  3. Identify electrical contacts. They’re copper-colored.
  4. Clean them with distilled water and lint-free cloth.
  5. Clean the electrical contacts from the carriage as well.
  6. Let the contacts dry for several minutes.
  7. Put the cartridges back and start the printer.
  8. Print a test page to see if the problem persists.

Keeping your contacts clean can help with Epson printer missing lines, so be sure to give it a try.

3. Remove the black ink cartridge for a few hours

  1. Turn off the printer and disconnect it from the power source.
  2. Remove the cartridge that carries the black ink.
  3. Put the component on a piece of paper with the nozzle plate facing up.
  4. Wait for a few hours.
  5. Reinstall the cartridge and check if the problem persists.

Usually, this problem appears if the ink gets stuck somewhere along the way. Also, there might be an electrical issue. This is why it is necessary to clean the contacts as well.

Moreover, keep in mind to clean your printer regularly. Even if you don’t have anything to print for several weeks, print a test page to prevent ink clogging.

For more solutions, we suggest reading our guide on printer printing blank pages in between.

Did our solutions help you? Let us know in the comments section below.

How to set your Quick Actions in the Windows 10 May 2019 Update

Windows 10’s May 2019 Update overhauled the Quick Actions area of the Action Centre notification interface. It’s now quicker and easier to customise your Quick Actions, as you no longer have to visit the Settings app. The Quick Actions themselves have also been updated, with the maligned brightness button replaced by a slider.

How to set your Quick Actions in the Windows 10 May 2019 Update

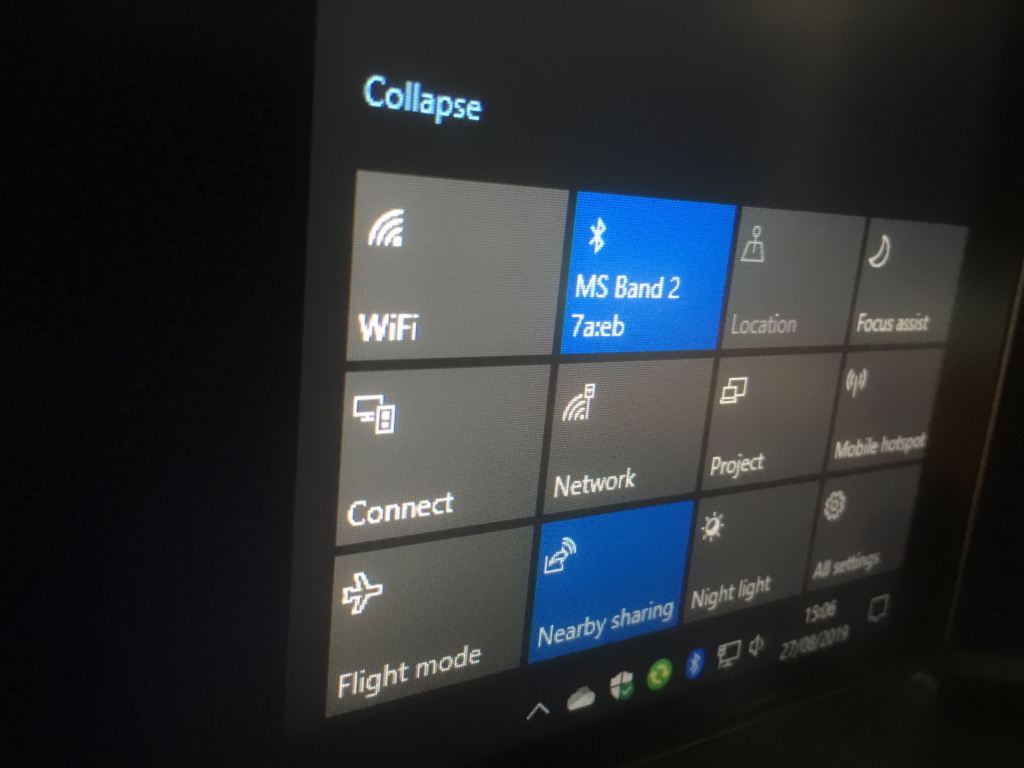
To customise your Quick Actions, open Action Centre by clicking its icon on the bottom-right of the taskbar (you can also press Win+A). Right-click any of the existing Quick Action tiles and press “Edit quick actions.”

How to set your Quick Actions in the Windows 10 May 2019 Update

You can now drag and drop your tiles into new positions to rearrange them. To remove a tile, tap or click the pin icon above it.

How to set your Quick Actions in the Windows 10 May 2019 Update

You can add a new tile by clicking the “Add” button at the bottom of the interface. A list of available tiles will appear – the selection may vary depending on the hardware features of your device. Click the tile’s name to add it to the screen. You can then drag it into position to organise your layout.

That’s all there is to it. The new editing interface is much simpler than the old one in the Settings app. You now make changes in-place so they’re more representative of the final result. Once you’ve finished tweaking your layout, click “Done” to save it and exit the editor.

4 ways to fix Xbox error code c101a3ff

Your Xbox console is more than just a gaming device as you can purchase multimedia contents like Movies from the store. While the users can watch their favorite movie on Xbox, at times the console may show an error. One such error is Xbox error code c101a3ff. This is a common error and has affected many users as seen in the Microsoft Community Forums.

I have rented a movie on my XBox360, using Xbox Live and my usual payment method.
Every time I try to play the movie I get the following message “Playback Error status code: c101a3ff”
The movie is The Accountant.
I have verified the movie has been paid for.
Also I have deleted the cache and all tv apps. I have reinstalled the Microsoft Movies & TV app. I have updated the system.

In this article, we have compiled the best solutions to fix the Xbox error code c101a3ff and help you watch your favorite movies without any issues.

How to Fix Xbox error code c101a3ff

1. Perform a Power Cycle

Xbox error code c101a3ff

  1. Before taking any other measures, make sure you perform a power cycle from the Start menu as well as using the Physical Power button.
  2. To restart from the Power Center, press the Power button on your Xbox controller. Select Restart Console > Restart.
  3. To perform a physical Power Cycle, when the Xbox is on, press and hold the Xbox power button on the console for 10 seconds and wait for the console to go off.
  4. Restart the console again by pressing the power button and check for any improvements.

Disconnect the Power Cable

  1. If the issue persists, try to disconnect and reconnect the power cable.
  2. Turn off your Xbox console.
  3. Unplug the console’s power cable and wait for a minute.
  4. Plug the console power cable back in.
  5. Press the Xbox button on the console to power on the console.

Turn your Xbox console into a home PC with this guide


2. Reset Xbox Movies and TV App

Xbox error code c101a3ff

  1. If the error is due to the Xbox Movies and TV app, you can reset the app to see if that helps.
  2. Restart your Xbox console.
  3. Open Start and select Settings.
  4. Go to Apps and Apps and Features.
  5. Scroll down and select Movies and TV app.
  6. Select Advanced Options.
  7. Click the Reset button to reset the app.
  8. Click Yes if asked to confirm the action.
  9. Wait for Xbox to reset the setting.
  10. Restart the console and check if the Xbox error code c101a3ff is fixed.

3. Check for Purchasing Issues

Xbox error code c101a3ff

  1. If nothing seems working, it could be an issue at the Xbox’s end. Earlier Xbox has updated about similar issues where the purchased items were not working.
  2. You can check Xbox’s social media profile for more updates or reach out to them with your issues.

By following the steps in this article, you should be able to fix Xbox error code c101a3ff. Do let us know which solutions worked for you in the comments.

RELATED STORIES YOU MAY LIKE:

Fix Origin error code 23 with these steps

Origin Apex Legends is one of the most popular online multiplayer game. However, recently some of the game players have reported Origin error code 23 while trying to launch the game. The error seems to have affected many users as there are multiple complaints about the same in the Reddit Community.

Error 23
I’ve been getting this error for about a week now and I’ve done everything recommended to fix it, but nothing works. I was hoping the latest patch would fix it, but nope. This is really irritating.
In this article, we take a look at the best possible solutions to fix origin error code 23 in Windows computers.

Fix Origin error code 23 with these steps

1. Check EA and Origin Account Settings

  1. If you have put two different countries on your EA account and Origin App, you may get error code 23.
  2. This is due to EA failing to match your destination in the EA account with Origin app.
  3. Simply change the region in the EA account as well as the Origin app to the same one and check for any improvements,

Apex Legends coins don’t work? We’ll show you how to solve that


2. Repair Visual C++ 2015/2017 Redistributable

  1. The origin code error 23 can also occur if the issue is with the Microsoft Visual C++ 2015 /2017  Redistributable package. Try to repair the package in the Control Panel to resolve the error.
  2. Press Windows Key + R to open Run.
  3. Type control and click OK to open the Control Panel.
  4. In the Control Panel, go to Program > Programs and Features.
    Origin error code 23
  5. Select Microsoft Visual C++ 2015 /2017 Redistributable and click on Change/Repair.
  6. Follow the on-instructions on the repair tool and apply any recommended fixes.
    Origin error code 23
  7. Reboot the computer once it is done and check for any improvements.

3. Update / Roll Back GPU Drivers

Roll Back the Driver

  1. If you have recently installed an update for your graphic card, try to roll back the driver update.
  2. Press Windows Key + R to open Run.
  3. Type devmgmt.msc and click OK to open the Device Manager.
  4. Expand the Display Adapters section.
    Origin error code 23
  5. Right-click on your graphics card and select Properties.
  6. Open the Driver tab in the Graphics Card properties window.
    Origin error code 23
  7. Click the Roll Back Driver button. Click Yes when asked to confirm the action.
  8. Reboot the computer and try to launch the Origin app. Check if the Origin error code 23 is resolved.

Update Graphics Card Driver

  1. Open the Device Manager and expand the Display Adapter section.
  2. Right-click on the GPU Adapter and select Update Driver.
    Update Intel UHD Graphic Display Adapter Driver
  3. Select “Search for update driver software automatically” option.
  4. Wait for Windows to find any pending update and install it.
  5. Reboot the computer and check for any improvements.

4. Force Close Apex Legends Process

  1. Right-click on the Taskbar and select Task Manager.
  2. In the Process tab, look for all the instances of Origins and Apex Legends and click on End Task.
  3. Next, open the Details tab.
  4. Here also look for any instances of Apex Legends and end it as well.
  5. Try to launch the game again and check for any improvements.

RELATED STORIES YOU MAY LIKE:

Use these 5 tools to limit the material that a browser fetches

For one reason or another, we often seek to control our browsing habit or more significantly, our children’s browsing habit.

To do this, special software that limits the material that a browser fetches have been developed, and we are going to be reviewing some of this software in this article.

A software that limits the material that a browser fetches is more or less a website blocker, which restricts access to certain websites and/or apps on your PC. Basically, this is often employed to establish some level of parental control on your kids’ usage of the internet.

Today, there is a myriad of website blockers in the market, many of which are specially designed to restrict internet usage and web access on PC.

However, like most digital solutions, there is quite a good number of substandard website blockers, in the midst of the few standard ones.

Therefore, in this piece, we have compiled for you a comprehensive list of five top software that limits the material that a browser fetches from the internet.

Best software that limits the material that a browser fetches

FocusMe

FocusMe software that limits the material a browser fetchesFocusMe tops our list of software that limits the material that a browser fetches. The software is a renowned website blocker, which is specially designed for Windows and macOS computers, as well as Android mobile platforms.

FocusMe allows you to eliminate distractions and focus squarely on task(s) at hand. It basically enables you to block social media sites and apps, gambling/betting sites, pornographic sites, and so on.

Essentially, you are afforded the flexibility of blocking any site you deem distractive, immoral, redundant or exploitive.


Here are the best software to block websites for good.


Some of the key features of FocusMe include: Scheduler, Break reminder, Inbuilt Pomodoro timer, Whitelists, Instant blocking, Time tracker, Multi-browser support, Technical support (email and online), Customizable UI, Forced mode, and more.

These features work in sync with one another, to keep you focused on the main job at hand, with the aim of maintaining a sustained/improved operational efficiency and productivity.

FocusMe is offered at a license rate of $2.50 per month. You can also make an outright purchase (lifetime license) at a price of $119.99. All plans are subject to an initial 14-day free trial.

Buy FocusMe

Barracuda Web Security & Filtering

Barracuda Web Security & Filtering software that limits the material a browser fetchesBarracuda is another top-rated software that limits the material that a browser fetches from the internet.

It is a dynamic web security and content filtering tool, designed to reinforce internet security and control internet usage respectively. The software is available on both Windows PC and Macbook.

Barracuda filters web contents, social media sites, malware/spyware, apps and so on. This ensures you are able to restrict access to certain apps and sites, while also ensuring you are completely safe from any form of malware or spyware attacks.


Get a taste of peace of mind when online with this super-private and secure browser. 


Essentially, contents that portray pornography, violence, immorality, hate and gory scenes among others are automatically filtered or better still, the hosting sites are simply blocked.

Other notable features of Barracuda include: apps control, SSL inspection, intuitive UI, dashboard views, activity tracking, social media regulation, web app filtering, spyware protection, network monitoring, cloud-based central management, web security, cross-platform support and more.

Barracuda offers a flexible pricing system, as all packages are offered as an all-around subscription unit, which is available by quote. However, you can enjoy the full package for free, albeit for a limited period of time.

Get Barracuda Now

InterGuard

InterGuard software that limits the material a browser fetchesInterGuard is an advanced website blocker that is equipped to filter web contents, block sites & apps, track searches, and so on. It basically provides you with every tool, needed to monitor and control internet access/usage on your PC.

InterGuard is flexibly designed to support all major computer OS and mobile platforms, including Windows, Mac, iOS, and Android.

One of the most interesting functionalities of this tool is its ability to run in the background undetected. As such, you are easily able to monitor, control and restrict third-party (especially your employees or children) internet usage/access on your PC, Macbook or mobile phone.

Other notable features of InterGuard include web filtering, web history tracking, web search tracking, 36 pre-screened websites, URL Whitelists, bandwidth utilization, data recovery, loss prevention, 24/7 customer support, multilingual support, video guide and user activity tracking among others.

InterGuard is offered at a relatively affordable license rate of $8 per month (one user). However, before full subscription, you are afforded the opportunity of using the software for free, for a limited trial period of one week.

Get InterGuard

TrueVine Online Website Blocker

TrueVine Online Website Blocker software that limits the material a browser fetches

TrueVine is another top-end website blocker, and it rounds up our list of “software that limits the material that a browser fetches”. The software hosts exclusive support for Windows, Mac, Android and iOS operating platforms.

TrueVine is a durable, Christian-oriented, web and internet filtering tool, which filters any site with porn, violence or vulgar contents.

Basically, you can easily block any site that is deemed unsafe, immoral or obscene. Essentially, this tool allows you to put safeguards in place, to gain absolute control (as a parent) over your children’s internet usage.

Other noteworthy features of TrueVine include Web filter, email scanning (virus scanning), email filtering, Mobile support, user-friendly interface, custom blocking, photo sharing, free trial and more.

TrueVine is available for Windows users at a license price of $9.95 per month (up to 3 PCs). However, you can enjoy the service on trial (for free) for 30 days.

Get TrueVine


K9 Web Protection

K9 Web Protection software that limits the material a browser fetches

K9 Web Protection is a versatile software that limits the material that a browser fetches from the internet. It can be employed to block websites or apps on Windows PC, Macbook, iOS, and Android devices.

The software is an all-inclusive content filtering and parental control package that facilitates the restriction of internet access to certain websites.

In fact, there is a special functionality that allows you to block certain search tags and keywords.

This software basically blocks websites with pornographic outlook, racist contents or views, violence, hate, phishing, drugs and many more.

In light of this, K9 Web Protection stands out as one of the most widely used tools for enforcing parental control on the internet.

Other features of K9 Web Protection include SafeSearch, custom lists, easy reports, Internet filter, cross-platform support, time restrictions, advanced anti-tampering, password override, real-time categorization, and more.

K9 Web Protection is available at absolutely no cost. And it can easily be downloaded (for free) by Windows and MacOS users.

Download K9 Web Protection (Free)

Conclusion

Today, the internet is filled with various forms of contents, most of which are deemed obscene, violent or grossly unethical, especially to children. And to control access to these contents, a software that limits the material that a browser fetches are required.

With any of the above-listed software, you can easily restrict and control internet usage on your PC, by enabling access to only web contents that are deemed appropriate or ethical.

RELATED ARTICLES YOU SHOULD CHECK OUT:

A New Launcher Update is Ready: How to Repair Minecraft

Minecraft is one of the most popular online games available on multiple platforms. However, recently some users have reported that their launcher reads, A new launcher update is ready. Restart the launcher to use the latest version.

If the Minecraft launcher update is taking forever or you keep seeing the error, the following section list some quick solutions that will help.

How do I fix my Minecraft Launcher update?

1. Check your Minecraft Launcher version

If you are still running the older launcher, you may want to update it to the latest version. The old Java-based launcher does not support many of the new features.

Make sure you download Minecraft launcher version 2.0 and above. You can download the latest launch from minecraft.net.

Although the update should not remove any of your Minecraft data, it is a good idea to take a backup of your data beforehand. Once you have the latest launcher installed, check again, and Minecraft should update itself without any errors.

2. Delete old Minecraft files

  1. Press Windows + R to open Run, type %appdata%, and click OK.%appdata%
  2. In AppData, locate .minecraft folder, select it, and hit Delete it.
  3. Now try to reinstall the Minecraft launcher, and check if the “an update to your launcher is available Minecraft” error is resolved.

If you are trying to install Minecraft or reinstall it, it is possible that the old installation folders are creating issues with the installation or update.

So, clear any existing files and check whether the A new launcher update is ready. Restart the launcher to use the latest version Minecraft launcher error is fixed.

3. Launch Minecraft Launcher manually

  1. Press Windows + E to open File Explorer and navigate to the following location:
    C:\Program Files (x86)\Minecraft\Game
  2. Inside the Game folder, locate the launcher.jar file and run it.

If the issue persists, as a workaround, you can try to launch the Minecraft launcher directly from the installation directory.

4. Repair Minecraft Launcher

  1. Press Windows + R to open Run, type appwiz.cpl, and click OK.
  2. Select the Minecraft installation and click on Repair/Change.repair launcher
  3. Follow the on-screen instructions to repair the Minecraft launcher.

If you are unable to update the Minecraft native launcher in Windows 10, try running the troubleshooter to fix the A new launcher update is ready. Restart the launcher to use the latest version error. This should repair the Minecraft launcher.

This can also help with the error 0x87e00009 when the launcher fails to start.

Before you leave, find out how to boost Minecraft’s performance on Windows.

Tell us which fix worked for you in the comments section below.

Fix: Hyper-V and Containers Features not Enabled in Windows

Docker Desktop is an application for Windows machines that allows developers to build production-ready container applications. However, some users have reported Hyper-V and container Windows features must be enabled errors while installing Docker Desktop.

If you are troubled by this error, here are a couple of troubleshooting tips to help you fix it quickly.

How do I fix the Hyper-V and containers must be enabled error?

1. Enable Virtualization in BIOS for Hyper-V

  1. If you haven’t already, you need to enable Hyper-V in BIOS before Docker can install and enable container features.
  2. Shut down your computer if it is on.
  3. Restart the computer and press F2 to open the BIOS setup. The function key can be different depending on the motherboard maker.
  4. Use the right-arrow key to navigate to the Advanced tab.
  5. Choose the Virtualization Technology and hit Enter.
  6. Select Enable and hit Enter again.
    virtualization
  7. Press F10 to save the changes and exit.
  8. Try to run Docker and check if the Hyper-v and containers features are not enabled error is resolved.

Enabling Virtualization support also helps with the Unexpected WSL error in Docker Desktop.

2. Enable Hyper-V

2.1. Use Control Panel

  1. If the issue persists, you may have to manually enable Hyper-V virtualization feature in Windows 10.
  2. Press Windows key + R to open Run.
  3. Type control and click OK.
  4. In the Control Panel, go to Programs and choose Programs and Features in the next page.
  5. From the left pane, click on Turn Windows Features on or off.
    Hyper-v and containers features are not enabled
  6. Select Hyper-V in the Windows Features window.
  7. Click OK to apply the changes.
  8. Once the installation is completed, you are prompted to restart the computer.

2.2. Use PowerShell

  1. Alternatively, you can also use DISM and PowerShell command to enable Hyper-V.
  2. Right-click on Start and select Windows PowerShell (Admin) to open the window below.Hyper-v and containers features are not enabled
  3. In the PowerShell window, type the following command and hit Enter. DISM /Online /Enable-Feature /All /FeatureName:Microsoft-Hyper-V
  4. Close the PowerShell window and launch Docker. Check for any improvements.

3. Try to Remove and Reinstall Hyper-V

  1. If you have already installed Hyper-V, it is possible that the installation may be corrupt resulting in Hyper-v and containers features are not enabled error. Try to remove and install Hyper-V manually to see if that helps.
  2. Right-click on Start and select Windows PowerShell (Admin).
  3. In the PowerShell window type the following command and hit Enter after each: Disable-WindowsOptionalFeature -FeatureName microsoft-hyper-v -online restart-computer Enable-WindowsOptionalFeature -Online -FeatureName Microsoft-Hyper-V -All restart-computer Enable-WindowsOptionalFeature -Online -FeatureName Containers -AllHyper-v and containers features are not enabled
  4. Check for any improvements.
  5. If the issue persists, try to run the following command in the PowerShell and check if it helps: MOFCOMP %SYSTEMROOT%\System32\WindowsVirtualization.V2.mof

We have reached the end of this guide on fixing the Hyper-V and containers Windows features must be enabled issue. Provided you follow the steps in this guide, the error should disappear for good.

If the Virtual Machine Management service is also missing on your PC, our comprehensive guide can help you restore it.

Do let us know the solution that helped you fix this in the comments below.

The Epson Printer Will Print but not Copy: How to Fix it

The Epson printers are very popular among users. However, many people encountered severe issues with them, with reports that the Epson printer will print but not copy a prominent one.

If you are also facing this devastating issue, the solutions in this guide will help you fix it quickly.

Why is my Epson printer not copying?

If you wonder why your Epson printer is not photocopying, you don’t need to look past your printer settings.

This is majorly down to selecting the wrong paper size, which eventually prevents copy/photocopy operation from going through.

What can I do if my Epson printer will print but not copy?

Before going into the actual tweaking, make sure you perform the following steps that may clear the problem easier:

  • Make sure that you don’t have unfinished printing jobs. If you have a stuck process, the Epson printer won’t be able to do anything else, including copying. Check the printer software and cancel any pending jobs.
  • Open the scanner lid and clean the glass with a soft, slightly damp cloth. If there is any debris, the scanner might not work.
  • Turn off your printer, disconnect it from the power supply, and wait for about 30 seconds, then plug it back in, turn it on, and try using the copier.

If none of these preliminary methods worked, try applying the solutions below.

1. Change the copy settings

  1. Place your document or photo on the bottom-right corner of the scanner glass.
  2. Press the Home button, then press the Down arrow to select Setup, and press the OK button.
    espon printer will print but not copy
  3. Press the Down arrow that will select Paper Setup, and then press the OK button.
  4. Now, press the Right arrow to select Paper Size, and choose the following:
    • Select Letter if your paper is letter size, and press the OK button.
    • Select a size from the available paper sizes if copying a photo and press the OK button.
  5. Press the Down arrow to select Paper Type, and do one of the following:
    • Select Plain Paper if your letter is the paper size and press the OK button.
    • Select the size from the available paper types listed above if you’re copying a photo, and then press the OK button.
  6. Press the Down arrow to select Paper Type, and do one of the following:
    • Select Plain Paper if your letter is the paper size, and press the OK button.
    • Select the size from the available paper types listed above if you’re copying a photo, and then press the OK button.
  7. Press the Home button, select Copy by pressing the Up arrow, and then press OK.
  8. Press OK to adjust the Copy settings.
  9. Under Settings, make the proper changes:
    • If you’re copying letter-size paper, the Layout should be set to With Border and document size to Letter.
    • If you’re copying a photo, Layout should be set to Borderless or With Border, and Document Size should be set to the size of your paper.
  10. Press the Back button.
  11. Press one of the Start buttons to make your copy in Black & White or Color.

With this, you should be able to fix the Epson l3210 printer not copying or cannot photocopy issue for good.

2. Reset your printer

2.1 Using the Reset button

  1. Turn off the Epson printer. 
  2. Locate the Reset button on your printer. Usually, you should find it somewhere on the back, close to the Ethernet port.
  3. Press and hold the button for a couple of seconds. In the printer manual, you should find the correct indications. 
  4. Keep holding the button and turn on the printer.
  5. You should see the message Epson Printer Device Is Resetting. 
  6. After that, try copying your document once again.

Not all Epson printers have a reset button on the back. If you can’t find it, move to the next solution.

2.2 Using the front buttons

  1. While your Epson printer is on, locate the Stop/Reset button marked with a reverse triangle in a circle icon.
  2. Press and hold the button until you see a light changing color. Usually, it’s about 3 seconds, but it really depends on the printer model. Some also require powering off and on the printer after this procedure.

This method will reset any printing jobs; now you should be able to copy your document.

2.3 Using the printer menu

  1. While turned on, navigate to the menu of the printer screen to Setup and press OK.
  2. Use the arrow buttons to move down the list until you reach Restore Default Settings, and press OK.
  3. Now, go to Reset Default Settings, and press the OK button.
  4. Finally, select Yes to reset your printer.

Of course, this only applies to multifunctional Epson printers that have an LCD screen and a menu.

This solution also fixes the problem if the Epson printer cannot connect to Wi-Fi, but the highlighted guide will provide more solutions.

2.4 Using Epson Connect

For some Epson printer models, you may also use the dedicated Epson Connect software to reset the printer and the ink levels. Use the highlighted link to download the software on your Windows or Mac computer.

We have reached the end of this guide on the Epson printer. It will print, but not copy issue. You should now be able to solve the problem, provided you follow the instructions carefully.

If your printer still doesn’t copy, contact the Epson support team to guide you through the fixing process. Also, if your Epson printer is not printing, check our comprehensive guide to fix it.

And for those using the dedicated tool, find out how to fix things when Epson Easy Photo Print is not working.

Did our solution work for you? Do let us know in the comments section below!

Fix: Windows service hosting WCF service is not starting

Windows Communication Foundation (WCF) is an essential part of any self-hosted server for Windows machine as it offers a framework for building service-oriented applications. At times after building a WCF project and installing the service you may encounter issues such as “Windows service hosting WCF service is not starting”.

The issue can occur due to several reasons including port error, disabled .Net Framework options and more. In this article, we take a look at the possible solutions to help you diagnose and resolve the Windows service hosting WCF service is not starting issue in Windows.

How to fix Windows service hosting WCF service is not starting

1. Enable .NET Framework Features

  1. Press Windows Key + R to open Run.
  2. Type control and click OK to open the Control Panel.
  3. From the Control Panel, go to Program > Programs and Features.
  4. From the left pane, click on Turn Windows Features On or Off.
  5. Check the “Net Framework 3.5” option. After that, enable the following option depending on the use.
    Windows service hosting WCF service is not starting
    For Web HTTP – Enable “Windows Communication Foundation HTTP Activation” option.
    For TCP, MSMQ – Enable “Windows Communication Foundation NonHTTP Activation” option.
  6. Click OK to save the changes.
  7. Reboot the computer and check if the error is resolved.

How to enable Remote Desktop on Windows Server 2019


2. Register Network Service User

  1. After creating the Windows Service, you need to register the Network Service user to listen on http port 8000 first. You can do this with the help of the following command.
  2. Type cmd in the search bar.
  3. Right-click on Command Prompt and select “Run as Administrator“.
    Windows service hosting WCF service is not starting
  4. In the Command Prompt window type, the following command and press enter.
    netsh http add urlacl url=https://+:8000/ user=”NETWORK SERVICE”
  5. It should give a success message.
  6. Check again if the Windows service is started and working again.
  7. If the issue persists, use the following command in the command Prompt.
    netsh http add urlacl url=https://+:8000/ sddl=”O:NS”
  8. Both the commands do a similar task, so try whichever works for you.

3. Check your Code Function for Error

  1. Most of the time the Windows service hosting WCF service is not starting is the result of users own mistake in the function code.
  2. For example, any issues in the OnStart function can affect the working of WCF service. Make sure you check the service for any not so obvious error and then try to restart the service again.

Conclusion

By following the steps in this article you can resolve Windows service hosting WCF service is not starting issue in Windows computer. Do note that the solutions vary depending on the individual user problem unless the issue is with the WCF or Windows features itself.

RELATED STORIES YOU MAY LIKE:

Something went Wrong that Might Make PowerPoint Unstable [Fixed]

While trying to open a PowerPoint presentation downloaded from the internet in protected view or a presentation with embedded object files (Excel/Minitab), you may encounter, we’re sorry, something went wrong that might make PowerPoint unstable error.

This seems to be a widespread issue as many users have reported similar issues. If you are also troubled by this error, here are a couple of troubleshooting tips you can try to resolve this error on Windows computers.

How can I fix PowerPoint if something made it unstable?

1. Start PowerPoint in Safe Mode

  1. Sometimes, third-party add-ons can cause problems with the functionality of the software.
  2. You can start the PowerPoint app in Safe Mode to determine if the issue is due to third-party add-ins.
  3. Press and hold the Ctrl key and then double-click on the PowerPoint app to launch it.
    Fix Something went wrong that might make powerpoint unstable
  4. Keep the Ctrl key pressed until Windows asks if you want to open the app in Safe Mode.
  5. Click Yes, and check if the error appears in Safe Mode as well.
  6. If not, you may have to disable/remove any add-ons that are causing the issue.
  7. Relaunch PowerPoint normally and start disabling add-ons one by one to find the culprit.

2. Repair Office 365 Installation

  1. Your Office application comes with a built-in troubleshooting utility to scan and fix any issues with the Office apps.
  2. Press Windows key + R to open Run.
  3. Type control and click OK to open the Control Panel.
    control sorry something went wrong that might make powerpoint unstable
  4. Click Uninstall a program under the Programs option.
    uninstall a
  5. Select the Microsoft Office application and click on Change.
  6. In the Repair window, you will see two options:
    Fix Something went wrong that might make PowerPoint unstable
    • Quick Repair – Select this option first. Quick Repair does not need the internet to perform repair and can quickly fix any minor issues with the Office apps.
    • Online Repair – If Quick Repair does not work, try Online Repair. This option requires a working internet connection to find and download the required fixes and takes longer than Quick Repair.
  7. Close the Office Troubleshooter once the repair process is over.
  8. Reboot the computer and check if the Fix Something went wrong that might make PowerPoint unstable error is resolved.

3. Check for the File Compatibility

  1. The error can also occur if the PowerPoint file you are trying to access is not supported by your version of PowerPoint.
  2. If the PowerPoint file was created on an older version of PowerPoint, save the files as PowerPoint 97-2003 Presentation.
    Fix Something went wrong that might make powerpoint unstable
  3. Next, open the file again in PowerPoint and then go to File and select Export.
  4. Now, choose Change File Type and select the Presentation (*.pptx) format.

4. Change Profile / Reinstall Office 365

Try to create a new profile in Windows 10 and log in with it. Try to access the PowerPoint file again and check if the error is resolved. If the issue persists, download Uninstall Support tool and uninstall Office 365.

Reboot the system and reinstall Office 365 from the Windows Store or the official website. Check for any improvements.

There you have everything you need to fix the we are sorry something went wrong that might make PowerPoint unstable error. You should now be able to fix the issue easily by following the steps in this guide.

If PowerPoint is not responding at all on your PC, check our detailed guide to fix it.

Feel free to let us know the solution that helped you fix this issue in the comments below.

Surface Book 2 laptop has slow performance when unplugged

More and more users have stormed the forums of different online communities searching for help regarding their Surface Book 2 laptop.

They are unsatisfied with the fact that the Surface Book 2 slows down in performance when unplugged from the wall.

Their reaction is understandable considering that a high-end laptop should by definition be a mobile computer.

Here is what one user had to say about this issue on the Microsoft Community forums:

My Surface Book 2 has been running into a problem since 2 weeks ago. Whenever it is not connected to the power charger, it runs significantly slower. It will take 5x longer to load up pages and open up programs. But, whenever I connect the charger back, processing speeds are back to normal. I’ve taken my Surface Book 2 to the Microsoft store and they’ve done an OS repair on it, but it hasn’t fixed the problem. Any suggestions on how to remedy this?

The problem is caused by the fact that the Surface Book 2 has been constructed to supply 95 watts of power.

Unfortunately, this amount of power is not enough to run all the components of the laptop at full speed.

The laptop requires around 105 watts of power to be able to run all the hardware contained. Microsoft decided to use the Nvidia chip and force it to make up for the difference in power. 


Tackle the Surface Book 2 slow performance when unplugged problem

1. Set the power settings to Best performance

  1. Inside the Cortana search box -> type in Power & sleep settings -> select the first option from the top.Power and sleep settings - Surface book 2 slow performance when unplugged
  2. Click Additional power settings -> Change plan settings.
  3. Select the Change advanced power settings option.
  4. Click the drop-down list and choose Best performance.
  5. Click Ok to save the settings.
  6. Check to see if the issue improved.

Is the Wi-Fi on your Surface Book 2 slow? Try these solutions


2. Use ThrottleStop to fix the problem temporarily (Warning: Voids warranty)

Note: It is very important that you understand that using ThrottleStop to fix this issue will cause your laptop‘s warranty to be ended. Beyond this, there are no long-term observations about how this software can affect your laptop. It is recommended that you try this method only if you’ve taken the details above into consideration.

This method has proven effective for some users. If you’ve read the note above and you want to try this method, please follow these steps:

  1. Download ThrottleStop on your PC.ThrottleStop - Surface book 2 slow performance when unplugged
  2. Double-click the downloaded file to open it.
  3. Deactivate the option BD PROCHOT.
  4. Click Save.

3. Visit a local Microsoft Store and ask for assistance

Microsoft website - Surface Book 2 slow performance when unplugged
In case you didn’t try the method mentioned above, and you still have your Surface Book 2 under warranty, it is recommended that you visit your local Microsoft Store.

They will be able to guide you in order to choose the best possible solution.


Conclusion

Please don’t hesitate to let us know if this guide helped you solve your Surface Book 2 slow performance problem.

Do you have any other fix suggestions?

Let us know by using the comment section below.

READ ALSO:

How to Fix Origin Install Errors in Windows Computer

Origin is a PC client and online gaming and digital distribution platform that allows you to access your games from anywhere. You can install the client from the official website. However, you may sometimes encounter Origin install errors on a Windows computer.

Some of the most common origin install errors include origin error code 6.0, origin error code 10.0, and Origin error code 20.2.

In this article, we look at the best possible solutions to help you resolve origin install errors in Windows computers.

How to fix Origin install errors on a Windows computer?

1. Origin Error Code 6.0

Change Installation Location 

  1. If you had recently uninstalled Origin to install the new version or due to any other reason and now get origin error code 6.0 during fresh install, try to change the installation path.
    Origin Error Code 6.0
  2. For example, if your previous installation was in C:\Programs Files (x86)\ Origin folder, try to move the new installation to any other partition.
  3. First, create a subfolder named Origin in other D:\ or E:\ drive.
  4. Run the Origin installer.
  5. Instead of selecting a default installation path, click the Browse button and select D:\Origin or E:\Origin partition to install the Origin client.
  6. After the installation has been completed, launch the client and check if it reads the game data that is saved in C:\ drive.

If the issue persists, simply create a new folder named Origin in C:\ProgramFiles (x86) and select it as the installation path during Origin client install.

Clear Origin Data Cache 

  1. Make sure you have closed any open origin installer.
  2. Open the Task Manager and close any process that is related to the Origin client.
  3. Press Windows Key + R, type %ProgramData%, and click OK.
  4. In this folder, you will find a folder called LocalContent. You need to delete all the other folders and file except LocalContent folder.
  5. If you accidentally delete the LocalContent folder, open Recycle Bin and restore it.
    Origin Error Code 6.0
  6. After that, open File Explorer and navigate to the following location:
    C:\Users\username\AppData
  7. Open the Local folder. Delete the Origin folder in there.
  8. Reboot the computer and check for any improvements.

2. Origin error code 10.0

  1. Open File Explorer and navigate to the following location:
    C:\Program Files (x86)\Origin.
  2. Now locate the OriginThinSetupInternal.exe.
  3. Right-click on the file and select Delete.
  4. Now, try to install the Origin client again and check if the Origin error code 10.0 is resolved.

Other Workarounds

  1. Enable True Color – Go to Control Panel > Appearances and Personalization > Adjust Screen Resolution > Advanced > Monitor.
  2. Lower Screen Resolution for Display Settings.
  3. Disable your Antivirus program and any other start-up apps that may be creating conflict with the installation.

3. Origin error code 20.2

Check If you have sufficient Disk Space

  1. The origin error code 20.2 usually occurs if the installation drive does not have sufficient space to install the Origin client.
  2. Check your installation drive again and ensure sufficient storage to install the software.
  3. If the issue persists, try to reinstall Origin from the official website.

Reinstalling the app can also fix issues like Origin error code 20.403; read this guide to learn about other solutions.

English US Keyboard Keeps Coming Back? 4 Ways to Fix it

If you find yourself in a situation where the English US keyboard keeps coming back, you’re not the only one affected. This issue seems to happen in all the cases after installing a Windows update.

Even though this seems like a surface issue, the way you use your computer can be drastically changed when encountering this error. You end up having to change the keyboard layout constantly just to see it changed automatically again.

Keep reading to find out how you can fix things when the English US keyboard keeps coming back in Windows 10 and 11.

What can I do if the English US keyboard keeps coming back?

Before we move to the slightly complex solutions, try these quick ones:

  • Restart the computer.
  • Check for any pending Windows updates and install them.

If none work, head to the fixes listed next.

1. Disable the Automatic Keyboard layout change option

  1. Press Windows + I to open Settings, and click on Time & Language.
  2. Go to the Language tab, and click on Keyboard near the top.
  3. Under Switching input methods, uncheck the Let me use a different input method for each app window option.advanced keyboard settings - windows keeps automatically adding en-us keyboard layout
  4. Check to see if this method solves your problem.

When the English US keyboard keeps coming back since Windows keeps adding keyboard layouts, modifying the settings would do!

2. Add and remove the automatic keyboard layout

A way to temporarily fix this issue would be to navigate to the keyboard layout settings is to add the layout, and then remove the US keyboard in Windows 10.

languages - windows keeps automatically adding en-us keyboard layout

This seems to make the automatic process not appear so often, and it allows you to work on your PC for a while.

3. Override Microsoft automatic language settings

  1. Press Windows + X, and select Windows PowerShell (Admin).PowerShell - windows keeps automatically adding en-us keyboard layout
  2. Click Yes in the UAC prompt.
  3. Now, run the following script:
    Set-WinCultureFromLanguageListOptOut -OptOut 1 Set-WinUILanguageOverride -Language en-US Set-WinDefaultInputMethodOverride -InputTip "0426:00040426" Set-Culture lv-LV 
  4. This should change the Windows 10 automatically switches the keyboard layout.

When you find that the English US keyboard keeps coming back, a quick solution is to override the automatic language settings with a quick script.

Tip icon Tip
You can run this script inside PowerShell (Admin) whenever the error happens. This script will allow you to work on your PC normally. To use it constantly, just run the script before you have work to do on your Windows 10 PC.

4. Use Registry Editor to modify values

  1. Press Windows + R, type regedit, and click OK.
  2. Inside the Registry Editor, navigate to:Computer\HKEY_LOCAL_MACHINE\SYSTEM\CurrentControlSet\Control\Keyboard Layout
  3. Right-click the empty portion, choose New, and select DWORD (32-bit) Value, and name it IgnoreRemoteKeyboardLayout.dword
  4. Set Value data to 1, and click OK to save the changes.

When the previous solutions didn’t work and the English US keyboard keeps coming back, modifying the Registry should do the trick! You shouldn’t face the problem anymore as long as the IgnoreRemoteKeyboardLayout DWORD exists.

Before you leave, discover the best software to type faster and get things done quickly!

Please feel free to let us know if this helped you solve the issue.

[FAQ] What are Outlook.live.com/files?

If you asked yourself What is Outlook.live.com/files? , you came to the right place.

Outlook is one of the most well known personal information manager created by Microsoft. A wide range of people across the globe use this application every day to manage every aspect of their career and even communicate with family and friends.

A large number of people have had an inquiry about what the Outlook.live.com files folder is about, not knowing if it could be an official release or a third-party entity hiding behind it.

In today’s FAQ article we will answer the question ‘ What is Outlook.live.com/files? ‘, and some other commonly asked questions in the online environment. Read on to find out more about this subject.


Most commonly asked questions about Outlook.live files

What is Outlook.live.com/files?

laptop on desk - What is outlook.live.com/files/?
The Outlook.live.com/files link is actually a ‘shortcut’ created by the developers that allows you to see all the attachments used with Outlook (from both sending and incoming messages) in one simple to understand page.

Having all the files easily accessible at this link allows people that have a large amount of data to process to quickly skim through hundreds of pages of attachments.

Note: The most common misconception about this link is that you can upload files to it. That is not true. If you want to upload files on a server, you could use OneDrive. This link is just a shortcut created for your convenience.


How do I find the options menu inside Outlook?

aptop on table - What is outlook.live.com/files/?
In order to find the Options menu inside Outlook, you will need to click the Settings cog-wheel found in the menu on the right side of your screen.

In that menu, you’ll be able to find some links that allow you to change options in Outlook and customize your view.


What is the best way to attach a photo to a message or calendar event?Outlook logo - What is outlook.live.com/files/?

If you want to add a photo to a message or calendar event inside Outlook, you will need to click on the Picture icon found above the message text area.

After you can simply navigate to the location of the photo you want to add, select it, and press Add to attach it.


Trying to print PDF attachments in Outlook without success? Try these methods


Why can’t I see all my folders after my Outlook account was updated?

laptop on desk - What is outlook.live.com/files/?
The official answer to this question includes the mods at Outlook saying that absolutely no data was lost during the migration to the Outlook.com Preview.

In order to find all your folders after the Outlook.com Preview update, you will need to follow these steps:

  1. Expand all folders by clicking the arrow to the left. (if you had folders within folders, you might want to expand them as well).
  2. In the case that you can’t find a folder that you need, you can search for a message or contact that was part of the folder.
  3. Still need some help? Please post a question in this Outlook Preview forum.

Conclusion

In today’s FAQ article we answered the question What is Outlook.live.com/files? , and also some other common questions people have about Outlook.

Please feel free to let us know if this guide answered your question. You can let us know what your opinion is by using the comment section below.

READ ALSO:

Microsoft releases Windows Server vNext Insider build 18965 and Windows 10 SDK Preview build 18965

Following the release of the Windows 10 20H1 build 18965 last week, Microsoft has is flighting today the Windows Server vNext Insider build 18965. This new preview build of the Server OS comes with no new features, which is a bit unusual, and Microsoft also mentioned that Insiders will need to reinstall the new App Compatibility FOD using DISM /online method after installing this build.

In addition to the new Windows Server preview build, the company has also released the Windows 10 SDK Preview build 18965 today. There’s one notable breaking change in the build with the removal of the api-ms-win-net-isolation-l1-1-0.lib from the Windows SDK. We invite you to check the rest of the API changes on the full blog post.

The new Windows Server Insider build can be downloaded from the Windows Server Insider Preview download page. As for the latest Windows 10 SDK build, it’s now available on the developer section of Microsoft’s Windows Insider website.

Change the taskbar button width in Windows 10 [EASY STEPS]

Windows 10 users rely on their taskbar daily to search for things, see apps, check the battery level and the clock, or even use the Start button to access other apps or settings.

It has been around for a long time and has evolved over time, offering more options and customization.

But one customization feature that lots of Window 10 users are missing is the ability to resize taskbar buttons:

Tabs in taskbar too wide… how to resize?


Your Windows 10 taskbar is not working? Fix it quickly by following this useful guide.


How can I change the width of my taskbar buttons?

Before we go into more advanced solutions, make sure that changing the display scaling or using small buttons doesn’t solve your issue.

To change the display scaling, follow the steps:

  1. Go to Start > Settings. change display scalling to make taskbar buttons smaller
  2. In the Settings app, navigate to System. system settings use small buttons
  3. In the left panel, click on Display.
  4. In the right section, under Scale and layout, change the scaling to fit your needs.

After doing this, your text, apps, and other items will become smaller. If that’s not what you’re looking for, let’s try to use small buttons. To do that, follow the steps:

  1. Go to Start > Settings. windows 10 settings change width of taskbar buttons
  2. In the Settings app, navigate to Personalization. windows 10 personalization taskbar button width
  3. In the left panel, click on Taskbar.
  4. In the right section, check the Use small taskbar buttons option.

Now, the taskbar buttons will be smaller.


If you’re having trouble opening the Setting app, take a look at this article to solve the issue.


However, if you want to manually adjust the width of your taskbar buttons to custom size, there are a couple of options.

Solution 1 – Use the Registry Editor

  1. In the Windows search box type regedit and click on the first result. change taskbar button width windows 10
  2. In the Registry Editor, navigate to HKEY_CURRENT_USERControl PanelDesktopWindowMetrics.
  3. Now, in the right section look for MinWidth and double-click it. If you don’t see the MinWidth string value, you’ll have to create it by right-clicking on an empty space and the click on New > String value > type MinWidth and hit Enter.
  4. After double-clicking the MinWidth string value, type a value between 38 and 500 to make the taskbar buttons narrower or wider. After that, hit OK.
  5. Close the Registry Editor and restart your PC.

Keep in mind that you’ll have to repeat the steps to get the exact size that you’re looking for. It’s a trial and error process, but after a couple of tries, you’ll surely get the right size.

If you can’t edit your Windows 10‘s registry, read this handy guide and find the quickest solutions to the issue.


Can’t access the Registry Editor? Things aren’t as scary as they seem. Check out this guide and solve the issue quickly.


Solution 2 – Use Winaero Tweaker

change taskbar button size
Winaero Tweaker is a universal tweaker software with full support for Windows 7, 8, 8.1, and Windows 10.

The tool automatically detects your OS and shows tweaks and customization options accordingly. It can also be installed as a portable app.

Winaero Tweaker has tons of customization options, but here are the main ones:

  • Information – View information about your PC hardware and OS.
  • Aero Colors – Change all Windows Aero settings including those which can’t be changed with Control Panel.
  • Alt+Tab Appearance – Change hidden secret options of the Alt+Tab dialog.
  • Colored Title Bars – Enable colors for window title bars in Windows 10.
  • Dark Color Scheme – Here you can enable the dark color scheme for Windows 10 system settings and apps.
  • Disable Driver Updates – Turn off driver updates in Windows Update.
  • Disable Web Search – Disable Web Search in taskbar and Cortana in Windows 10.
  • Disable Action Center – Disable or enable the Action Center feature in Windows 10.
  • Disable Live Tiles – Disable Live Tiles all at once for Universal(Metro) apps.
  • Activate Windows Photo Viewer – Activate Windows Photo Viewer in Windows 10.
  • Auto-update Store apps – Disable or enable auto-update of Store apps in Windows 10.
  • Disable Cortana – Disable Cortana in Windows 10.
  • Disable Windows Defender – Disable Windows Defender in Windows 10.
  • Microsoft Edge Download Folder – Change the default download folder in Microsoft Edge.
  • Windows Defender Tray Icon – Show or hide Windows Defender tray icon.
  • Charms Bar Hover Timeout – Change the Charms Bar hover timeout delay.
  • Start Screen Power Button – Show or hide the Power button on the Start screen.
  • Disable Telemetry – Prevent Windows 10 from spying on you.

Winaero Tweaker also includes a feature called Taskbar Button Width that allows you to make the buttons narrower or wider easily.

The software tool is free and you can download it from the link below.

As you can see, changing the size of your taskbar buttons isn’t that hard. If you’re not comfortable using the Registry Editor then you can use Winaero Tweaker and easily customize your button width.

If you’re aware of another method, or you just have some questions, don’t hesitate to share them in the comments section below.

READ ALSO:

Confusion reigns: what’s going on with the Windows Insider Program?

Yesterday, Microsoft further muddied the waters of Windows Insider testing with the release of Windows 10 Insider version 19H2 to the Release Preview Ring. A number of Insiders, including our own Laurent Giret and Paul Thurrott (premium content), came away more confused than ever. There’s a number of issues at play here, including that Microsoft hasn’t done a stellar job of explaining itself. Let’s take a closer look:

Issue #1: pick a name and stick to it

Can we finally just admit that Windows 10 version naming has gotten completely out of control? May 2019 Update, 1903, 19H1, blah blah blah, why do we need so many names for the same thing? Microsoft has been understandably reluctant to use a version number like 1903 (March 2019) too early and painting themselves into a corner if things get delayed (and how many versions of Windows 10 actually shipped the month denoted in the version number? not many). So why use them at all, or the “marketing name” (my term for the likes of “May 2019 Update”) that do nothing good and just confuse things. Microsoft moved to the “20H1” naming etiquette and it works: doesn’t commit too much, is descriptive, short, and to the point, and there’s basically no reason to use anything else. Isn’t it time to settle on a naming structure after 4 years of this nonsense?

Issue #2: It’s a major/minor release cycle now, can we just admit it?

Enterprise users have long been aghast at the proliferation of feature releases for Windows 10, and Microsoft finally seems to have listened, making 19H2 a minor release cycle, although they couldn’t resist sneaking some features in amongst the security and performance fixes. Yet Microsoft continues to dance around the change, never quite coming out and saying (or sticking to a regimen of “no features in the fall”) that we’ve entered a major/minor release cycle. It’s fine, we get it, just relax and admit it!

Issue #3: Now we’ve gone and messed up the Rings, too

Microsoft just can’t get out of its own way when it comes to naming. With the advent of the Insider program, a perfectly good naming scheme using a Ring analogy came about: Fast Ring for the adventurous ones (and oh wait, Skip Ahead for those who want to be faster than fast!), Slow Ring for the cautious, and Release Preview for enterprise type testers who just wanted a head start on deploying new features. Then 19H2 came along and messed everything up, comandeering the Slow Ring for its minor release cycle testing, and making a mess out of Fast and Skip Ahead Rings in the process. Again, by embracing a major/minor release cycle, H2 releases could have their own rings, leaving H1 Skip Ahead, Fast, and Slow alone, with perhaps even a new use for Skip Ahead, see below.

Issue #4: A/B testing is here to stay

The issue of A/B testing with Windows Insiders continues to frustrate testers, especially when one of the promises of the Insider program has been to get access to new stuff first. In fact, I argued that point some months ago. Yet, it’s time this time for Insiders to come to grips with the idea that A/B testing is here to stay. It’s simply too valuable a tool for Microsoft engineers. However, as I said, the Insider program is never going to be a controlled experiment, and Insiders are going to find ways to get the latest bits somehow. So why not embrace the Skip Ahead Ring, make it a sandbox for cutting edge Insiders, with access to all the latest features? There would still be plenty of Insiders left in the Fast and Slow Rings for A/B testing, and everyone would be happy.

Help!

Someone at Microsoft needs to come in and clean up this program. Like many initiatives that grow a little too big, too fast, it’s getting unwieldy, confusing, and well not quite as much fun as it used to be. We’re going to continue to be avid Insiders, and sincerely want to help, but we need more than taco hats and ninja cats. It’s time for some adult supervision.

How to Access Files in Windows Subsystem for Linux

Windows Subsystem for Linux (WSL) is a very useful tool for people who want to run Linux commands on Windows. However, many users encountered several issues with WSL.

One such example is an issue accessing files in Windows Subsystem for Linux.

A user reported the following problem on a forum:

Why, when I create a file from within Windows for example, can I not see it under the Linux sub system in Windows 10 (bash.exe)
The screenshot should explain. Folder: OMG was created from within Windows Explorer. Folder OMGBash was created from with Linux sub system bash.exe
When a folder OR file is created outside of bash.exe I can never see it, regardless of permissions and ownership.

wsl

So, the user can’t see any folder or file created outside of bash.exe. This is a major problem for anyone who uses Bash on Windows and today we will show you what to do to solve the error.

Can’t access files in Windows Subsystem for Linux? Here’s what to do

1. Update Windows

Make sure you always install the latest builds for Windows. The Windows updates fix many issues regarding the boundary between Linux and Windows.

To see if your version of Windows 10 is up to date, check out our detailed guide.

2. Store the files in the Windows filesystem

If you edit files using Windows tools, you should store them in the Windows filesystem. So, do not create or update Linux files using Windows apps.

However, you can run, build, or test Linux files using Linux tools.

Keep in mind that you can’t run all Linux apps in WSL. Windows Subsystem for Linux is used to run Bash and some basic Linux tools.

So, WSL doesn’t support Linux apps such as Gnome or KDE.

Moreover, Microsoft doesn’t recommend using Windows Subsystem for Linux to host production services. For that, you can use Azure, Hyper-V, or Docker.

Still, in this case, you should be able to access files through Windows or Linux apps. Ensure your operating system is up to date and store the files in the Windows filesystem.

Now that you know how WSL works, you might be interested in learning what is rsync in Windows and how to use it.

Did our solutions work for you? How do you use Windows Subsystem for Linux? Please let us know in the comments section below!

Lose an important file in Word? Here’s how to recover or restore it

One of the most terrifying things that can happen when writing something in Microsoft Word is having the application crash on you. Typically, that means you could possibly have lost the important document you were working on.

Long ago, this meant that your file would be gone for good, but more recent versions of the popular word processor will auto recover some of your lost work. As we continue to dive deeper into each of the Office 365 apps, we will now explain how you can recover or restore lost files in Microsoft Word.

How to turn on Autorecover

One of the easiest ways to recover lost files in Microsoft Word is with the Autorecover feature. It should be turned on by default, but if it is not, you can easily enable it. Simply head to File, then clicking on Options, and then choose Save. Youll want to make sure that the “Save AutoRecover information every x minutes” box is selected. Importantly, you will also need to make sure that the “keep the last AutoRecovered version if I close without saving” box is selected.

Keep in mind, though, that the recovered files could be different from what you were last working on when Word crashed. Saves will be made based on how long you’ve set up AutoRecover. You can tweak the minutes in the Save AutoRecover information every x minutes box just to be safe.

Lose your important file in Word? Here’s how to recover or restore it

Use the Document Recovery task pane

If something ever goes wrong with Microsoft Word, and the app crashes, you should see the Document Recovery pane appear when you re-launch. There will be files names inside the pane, along with the date and the time of the of last autosave. It will be best to pick the most recent file listed in that pane, but you can also click each file individually to open and review it.

Once you click on a file to open it, you can get back to working on the document like Word never crashed. If you happen to press on Close by accident, the files will still appear again later. You also can select options to view the file later, or remove the files, if not needed.

Lose your important file in Word? Here’s how to recover or restore it
(Image via Microsoft)

Manually recovering saved files

If you’ve previously saved a file, and Microsoft Word crashed, you can still get back into the version you were last working on. Simply open the file, and then click to File and Info. Then, under Manage Documents, click the file labeled (when I closed without saving.) In the top bar, you’ll then want to click on Restore. You also can compare different versions of the file by clicking Compare. 

Lose your important file in Word? Here’s how to recover or restore it


Manually recovering files that aren’t saved

In the event that you didn’t save a file when Microsoft Word crashed, you still might be able to recover it. Head to File and then click Info, and then head to Manage Document, and finally, click on Recovered Unsaved Documents. You’ll then be able to select the file from the explorer and click on Open. Make sure that you click Save As in the warning prompt that appears in the top ar, so you can save the file.

Lose your important file in Word? Here’s how to recover or restore it

Avoid the trouble, just OneDrive!

One of the best ways to avoid the trouble of having to deal with Autorecover and restoring Word files is to save files to OneDrive. With the power of OneDrive, your changes are saved automatically. This will allow you to use the “version history” of a file, and see all your changes, on any computer or from the web, without having to worry about manual saves. Saves with AutoSave typically happen every few seconds, which means you’ll have extra peace of mind.

Samsung Data Migration Temporary Error: 4 Ways to Fix it

After installing a new SSD in your system, it is time to clone the HDD to your SSD to take full advantage of the newly installed SSD. However, at times you may see an SSD migration error that states Samsung data migration unable to execute due to a temporary error.

This occurs during the cloning process and is most common with Samsung Data migration software and Samsung SSDs.

The SSD migration error can occur due to several reasons, including issues with the SSD and the software itself. In this article, we help you to resolve issues with your SSD migration process.

How can I fix the Samsung data migration unable to execute due to a temporary error?

Before proceeding to the fixes in this section, try the following troubleshooting steps:

  • Uninstall any unnecessary data and software that is on the source hard drive.
  • Run the Check Disk system utility to check the source hard drive and Samsung SSD for bad sectors.
  • Make sure you decrypt the source hard drive if it is BitLock Encrypted. You can encrypt the hard drive from Control Panel > System and Security > BitLocker Drive Encryption.
  • Disable all the antivirus and other security programs temporarily.

If these do not work, explore the solutions below:

1. Change the Cloning application

SSD Migration Error

If the issue is occurring while using Samsung Data Migration software, try to use a different app to do the same.

The two of the best cloning software are Macrium Reflect and Acronis Disk Cloning software. Macrium Reflect free version allows you to clone your data from the old drive to the new SSD.

Download Macrium Reflect from the official website and proceed with the cloning process. This should help you resolve the SSD migration error in Windows computers.

2. Unplug the Source Drive After Cloning

If the error is occurring after successfully cloning the drive, check if you have unplugged the source drive from the USB port.

At the end of the cloning, proceed, power off and disconnect the old drive and allow the system to try to boot from the new drive. Keeping the old drive may create issues during the boot process.

3. Disable Hibernation Mode

  1. Press the Windows key + S, type cmd, right-click on the Command Prompt option and select Run as Administrator.
    SSD Migration Error
  2. In the Command Prompt, enter the following command and press Enter: powercfg /hibernate off
  3. Close the Command Prompt window and try to clone the drive again.

4. Disable Page Files

  1. Open File Explorer.
  2. From the left pane, right-click on This PC and select Properties.SSD Migration Error
  3. From the left pane, click on the Advanced System Settings option.
  4. In the System Properties window, click the Advanced tab.
  5. Click the Settings button under the Performance section.
    SSD Migration Error
  6. Click the Advanced tab again in the Performance Options.
  7. Under the Virtual Memory section, click the Change button.
    SSD Migration Error
  8. Uncheck Automatically manage paging file size for all drives option.
  9. Click OK to save the changes.
  10. Close the System Properties window and try to clone the drive again.

The SSD migration error is usually caused by common issues like software incompatibility etc. Follow the troubleshooting tips in this article to fix migration issues with your SSD.

If your SSD is only showing the RAW file system, check our detailed guide to fix it.

Feel free to let us know the solution that helped you fix this issue in the comments below.

My printer doesn’t pull the paper [FIX]

A printer is an important part of any office routine. So, this device must always function properly.

Unfortunately, many people encounter issues with their printers. Today we will talk about what to do if your printer doesn’t pull the paper.

First of all, this issue could have various causes, from paper selection to a hardware malfunction. Therefore, you may try one (or more) of the solutions below.

What to do if your printer won’t pull the paper

1. Check the paper feed mechanism

This mechanism comes in various forms depending on the printer, but the basic principles are the same.

Many printers have adjustable sliding guides. If you don’t adjust these guides properly, they can be too tight or too loose. So, the printer won’t pull the papers.

All in all, you need to make sure the sliding mechanism works properly and is well-adjusted for the papers you use. Also, check if nothing is broken inside the mechanism.

2. Make sure you use the right paper

Not all papers are the same. Some types might not be for printing. Make sure the paper you use is printable.

A paper too thick can also affect your printer if it happens to get in your device. So, for safety, many printers might refuse to pull an improper paper.

Avoid damaged or folded paper. Use only clean and new paper to print your documents.

Some printers have software or hardware to accommodate photo paper, which is harder and thicker, but don’t use this type of media on an ordinary printer.

Also, keep in mind to choose the right settings for the type of paper you are using.


Check out this list of printer management software to optimize your performance!


3. Clean your rollers

In printers, rollers pull the paper. After many uses, these components end up very dirty. Ink, dust, and even food leftovers could end up on and between these rollers.

So, remember to clean them from time to time. Use the instructions manual from your printer to learn how to do that properly.

As a general direction, avoid solvents and brushes with a hard surface, as they might damage your printer.

Conclusion

As you can see, there could be many causes for the same issue. Generally, make sure your printer is clean and adjusted for the paper you are using.

Also, the paper needs to be new and clean.

Did our solutions work for you? Do let us know in the comments section below!

RELATED ARTICLES YOU NEED TO CHECK OUT:


Fix: Something went Wrong Initializing Creative Cloud Libraries

Creative Cloud Library makes the core design assets for your brand or personal projects available irrespective of where you want to access them.

However, sometimes while attempting to use the Creative Cloud Libraries in supported desktop applications, the panel doesn’t load and returns something went wrong initializing creative cloud libraries error.

This is a common error and can occur due to multiple reasons, including cache and temporary issues. In this article, we take a look at the best possible solutions to fix Adobe Creative Cloud something went wrong error in a Windows computer.

How can I fix the Something went wrong initializing Creative Cloud libraries error?

1. Relaunch the Creative Cloud Library

  1. One of the official recommendations to fix this error includes relaunching Creative Cloud Library.
  2. Close any open Adobe apps like Photoshop, Illustrator, InDesign, Premiere Pro, and Adobe After Effects.
  3. Open the Creative Cloud desktop application.
  4. While the CC desktop application is open, press Ctrl + Alt + R key.
  5. This relaunches Creative Cloud and all the related processes, including CC libraries.
  6. Now try to relaunch the Adobe app that was giving the Libraries error.

2. Delete and Create Creative Cloud Caches

  1. Close all the Creative Cloud apps that are open and running.
  2. Launch the Creative Cloud desktop app on your computer.
  3. Sign out of your account in the Creative Cloud app.
  4. Close the Creative Cloud app.
  5. Open File Explorer and navigate to the path below: C:/Users/ username/AppData/Roaming/Adobe
  6. Delete the Create Cloud Libraries folder.
    Something went wrong initializing creative cloud libraries
  7. Launch your Adobe Creative Cloud desktop again and sign in to your account.
  8. Open the Adobe app with something that went wrong initializing creative cloud libraries, and check if the error is resolved.

3. Check your Host File

  1. Open File Explorer from the taskbar and navigate to the following location: C:\Windows\System32\drivers\etc
  2. Right-click on the Host file, select Open With, then Notepad.
    Something went wrong initializing creative cloud libraries
  3. In the Host file make sure you don’t see any Adobe website listed. For example, 127.0.0.1 activate.adobe.com.
  4. If you see any website listed, add # at the beginning of the line to comment them out, which will look like #127.0.0.1 activate.adobe.com.
  5. Also, make sure that the file has the following line and that it is not commented out with a #: 127.0.0.1 localhost
  6. Relaunch the Adobe app with the error and check for any improvements.

4. Use the Creative Cloud Cleaner Tool

Something went wrong initializing creative cloud libraries

You can also use the Creative Cloud Cleaner tool to fix any installation issues as well as clean the Host file.

However, do note that to run the Creative Cleaner tool you may need to uninstall the Adobe Creative Suite and reinstall it after the cleaning is over.

5. Check Proxy Setting for Libraries

  1. Click on Start and select Settings.
  2. Click on Network and Internet.
  3. From the left pane, select the Proxy tab.
  4. Make sure the Don’t use the proxy server for local (intranet) addresses option is checked.
  5. Close the Settings window and check for any improvements.

We can now conclude this guide on how to fix the Something went wrong initializing Creative Cloud libraries error. You now have all the information you need to fix the error for good.

In the same vein, if the Adobe Cleaner installer fails to initialize on your PC, we have a guide that can help you fix it too.

Let us know the solution that helped you fix this error in the comments below.