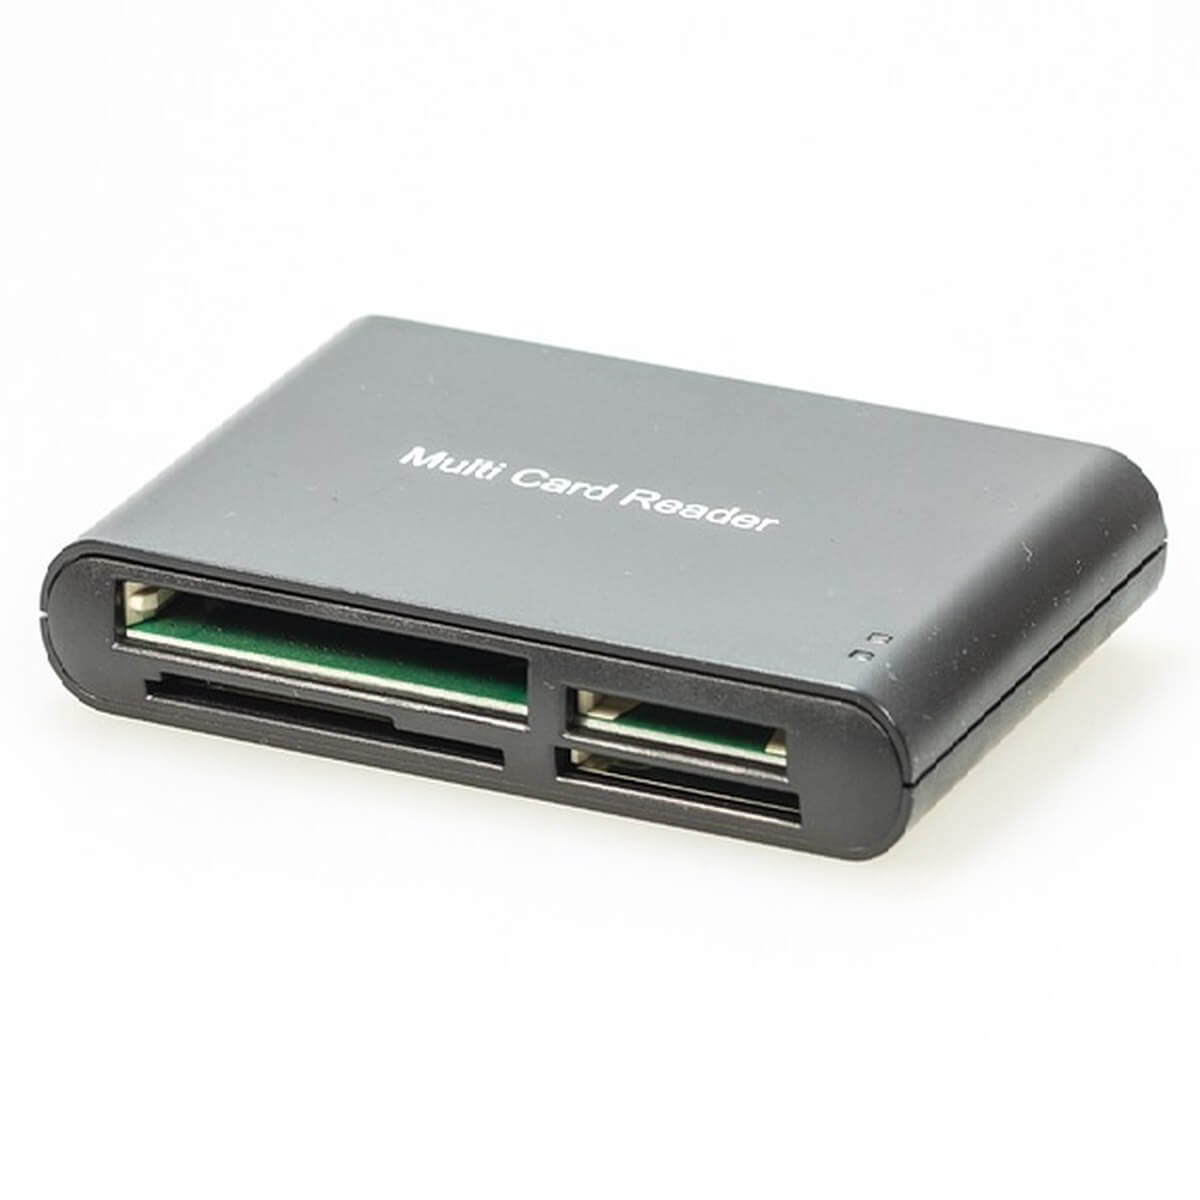
SD Card Reader not Working in Windows 10 for some Lenovo Users

Some frustrated Lenovo users have been posting lately on support forums that they are having troubles with the SD card readers on their tablets after making the upgrade to Windows 8.1
sd card reader windows 8.1
Lenovo users seem to be among the most affected users by Windows 8.1, as they have reported issues with battery drain, some touchpad problems and slow performance issues with the Yoga 13 Windows 8 hybrid device. Now, a number of users is reporting that they are having issues with the functionality of their SD card reader after upgrading to Windows 8.1.

Here’s how one Lenovo users is describing his problem:

Upgraded to Windows 8.1 and the Realtek SD drivers in the download are for the P400 Windows 8.0 does not appear to be installing…  Can’t find it in Device Manager, not being recognized when inserted.   Nothing wrong with the hardware because it works in a VM under windows 7 with no problem.  Anyone else having this problem?

Another has reported a similar issue back when Windows 8.1 wasn’t even released, and he had actually updated to Windows 8 from Windows 7. Here’s what he said at the time:

Got an issue with my card reader, bit weird, upgraded to Windows 8 from Windows 7, all worked fine before. Any how, I’ve downloaded latest drivers for my Realtek SD card for Win8. When I insert a SD card, Win8 recognises it ok and opens the folder on the card. I then “safely remove hardware” , ejecting the card. This is where the problem is. I then re-insert the SD card back in and “No response” from Win8. I go into Device Manager and everything is ok. I have to restart the laptop for it to clear. Then its fine for one time again.

I un-installed the Realtek drivers and let the Microsoft generic drivers kick in. Same again, but when i go into Device manager, there’s an exclamation mark on the card reader saying. “Windows cannot use this hardware device because it has been prepared for “safe removal”, but it has not been removed from the computer. (Code 47). My laptop is an Acer 5735z running windows 8 64bit. All was working when running windows 7 64bit

So, as we can see, Realtek seems to be the culprit, and I have researched more on this subject and, indeed, found more Windows 8.1 laptops having Realtek SD card drivers with problems. We’ll investigate more and get back to those affected when we will find more about this another annoying Windows 8.1 problem.

SD Card reader issues in Windows

Not only Lenovo users encountered SD Card reader issues. There are also many errors in Windows 8, 8.1 and 10. Multiple issues like SD card not showing up in Windows 10, Micro SD card not reading or SD card not detected on any device are giving headaches to Windows users. Happily, these errors can be fixed by trying one of our solutions from this guide.

Another fix, for Micro SD card reader errors, can help you get rid of this annoying problem.
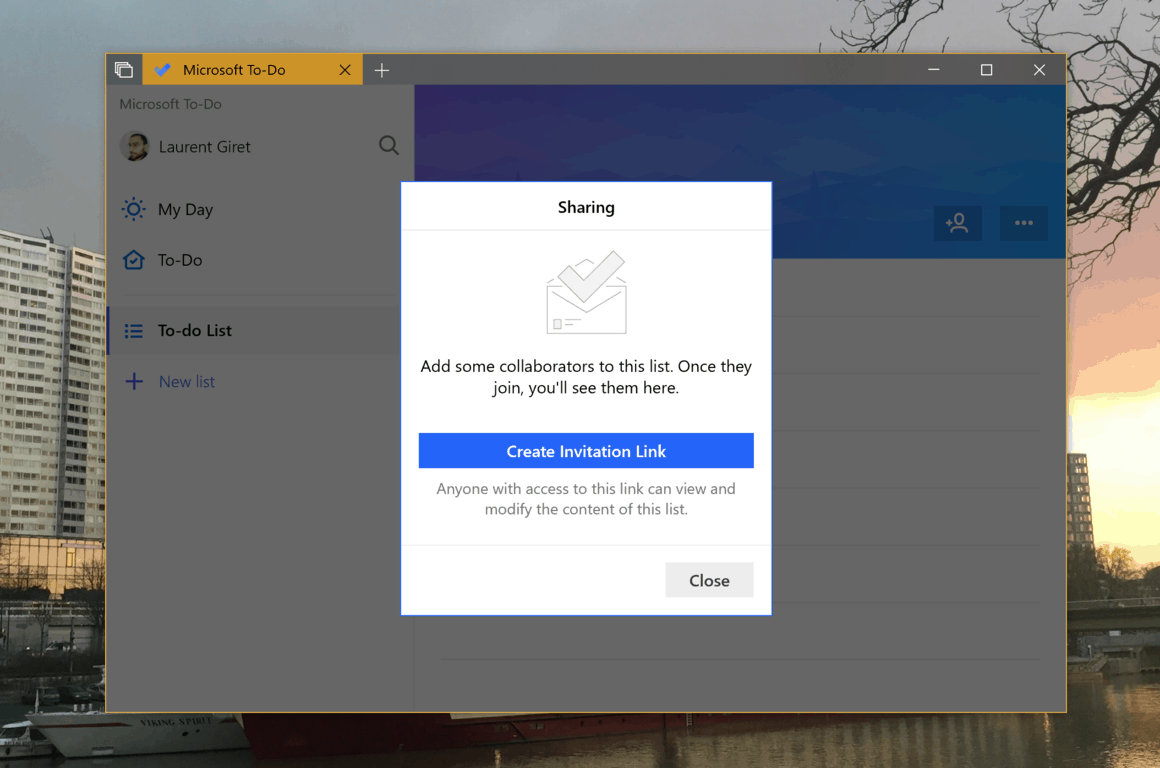
You can now share your to-do lists with others in Microsoft To-Do

After introducing sub-tasks support in Microsoft To-Do earlier this year, Microsoft has started rolling out a new list sharing feature on all platforms today. List sharing allows you to share any list with your friends and colleagues, and you’ll see the new icon in the top right of the app for creating an invitation link.

If you use Microsoft To-Do with a personal Microsoft account, you can share your lists with anyone else with a personal Microsoft account. Those with work and school accounts will only be able to share lists with people in the same organization.

After creating an invite link, To-Do users will remain in control with options for limiting access to limiting access to current members or turn List sharing off. The Redmond giant notes that shared lists should “automatically update it in seconds,” and it’s a feature that should be really handy for both personal and work-related tasks.

Microsoft says that all List Sharing should be available to everyone this week, though as of this writing we’re seeing on all platforms except Android. Is To-Do now good enough for your needs, or do you think the app still lacks some power user features? Let us know in the comments below.

Microsoft announces its biggest Xbox sale of the year, just in time for E3

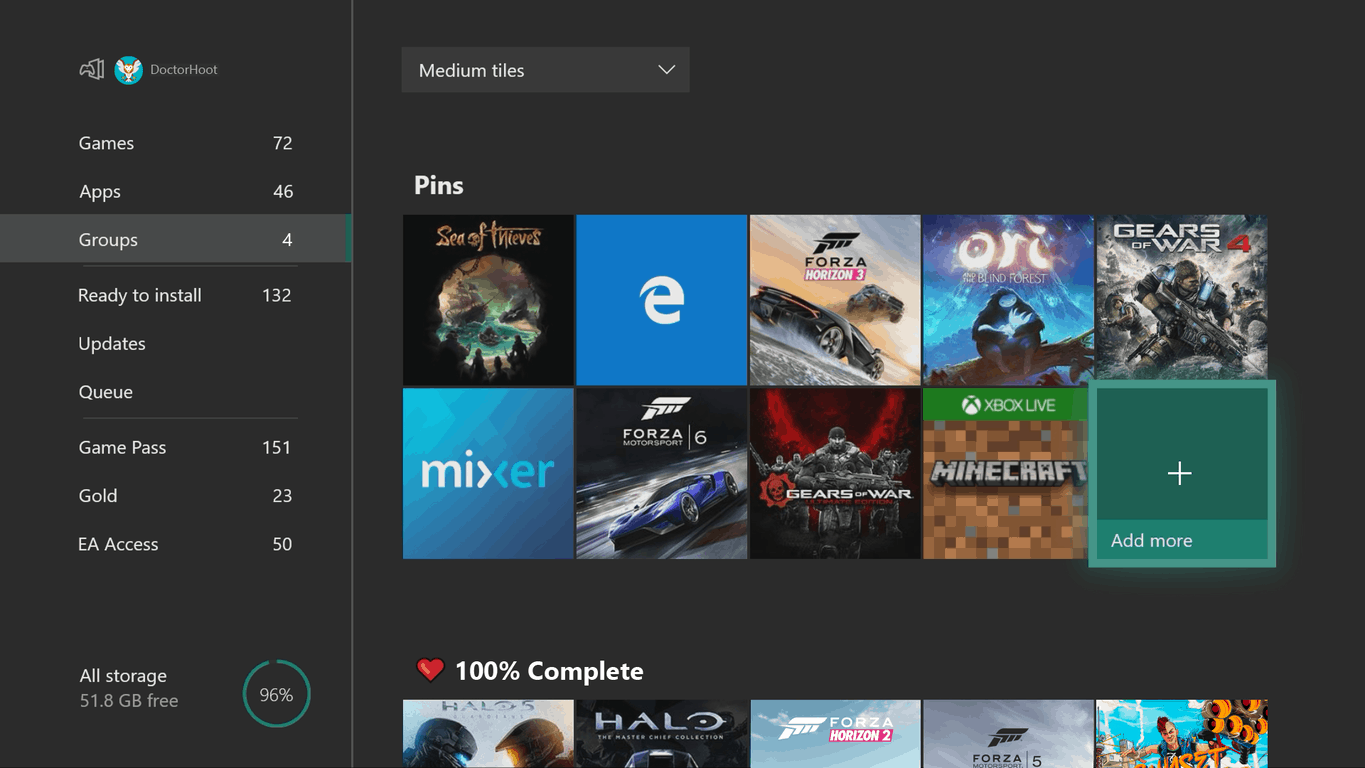
Microsoft’s E3 press briefing is now less than a week away, and this morning the company has just announced its biggest Xbox sale of the year starting on Thursday, June 7. For a limited time, you’ll be able to save big on hundreds of games and accessories, and Microsoft will also offer a $50 discount on all Xbox One consoles, including the Xbox One X.

Here are the some of the most interesting offers that will be available later this week:

  • $199 for 500GB Xbox One S console, whiles supplies last
  • $249 for 1TB Xbox One S bundles such as the the Xbox One S PlayerUnknown’s Battlegrounds Bundle, or Xbox One S Starter Bundle,
  • $449 for Xbox One X console through June 23. If you buy one before June 10, you’ll also get a free digital copy of Red Dead Redemption with your purchase
  • $10 off black, white, special edition and limited-edition Xbox Wireless Controllers
  • Up to 75% off over 300 games on FIFA 18, NBA 2K18, Assassin’s Creed Origins, Forza Motorsport 7, Destiny 2, Super Lucky’s Tale, Monster Hunter: World, PlayerUnknown’s Battlegrounds and Sea of Thieves.
  • One month of Xbox Live Gold and/or Xbox Game Pass for $1 on the Microsoft Store, or get six months of Xbox Live Gold for the price of three or save 50% off of 6 months of Xbox Games Pass at participating retailers.

We invite you to check the Microsoft Store and participating retailers on June 7 to see all the offers, which will also include discounted gaming accessories from Seagate, Turtle Beach and Hyperkin.

A Newer Version of OneDrive is Installed: 3 Fixes to Use

There are more than a few iterations of OneDrive available on Windows 10. However, using the alternatives over the pre-installed version is proving difficult, with some users getting A newer version of OneDrive is installed error.

To address this, we prepared a list of solutions. In case you’re somewhat affected by this error, make sure to check them out below.

What does A newer version of OneDrive is installed mean?

The factors that can cause a newer version of OneDrive installed error are within a close circle. Below is a couple of them:

  • Presence of the pre-installed app: The most common cause of this issue is the presence of the preinstalled OneDrive app on your PC. To fix this, you need to uninstall the app.
  • Registry issues: Sometimes, this problem might be due to some remnants of files in your registry. You need to tweak your registry to solve this.

What can I do if a newer version of OneDrive is installed?

1. Tweak the registry

  1. Press the Windows key + R, type regedit, and click OK.
    regedit a newer version of OneDrive is installed
  2. Navigate to the path below in the left pane: HKEY_CURRENT_USER\Software\Microsoft\OneDrive
  3. Now, right-click the OneDrive subfolder and select Delete.
    delete
  4. If you don’t want to delete the subfolder, you can double-click the Version DWORD in the right pane.
    version
  5. Set the Value data to 1 and click OK.
    value data a newer version of OneDrive is installed
  6. If you have a pre-installed version of the app, you should go to the path below and change the value data too: HKEY_LOCAL_MACHINE\SOFTWARE\Microsoft\OneDrive
  7. Finally, restart your PC.

If you are getting a newer version of OneDrive installed, the first thing to try is to tweak your registry. Deleting the OneDrive file in your registry removes all remnants that might prevent installation.

2. Reset OneDrive

  1. Press the Windows key + R to open the run utility.
  2. Type the path below, and click OK: %localappdata%\Microsoft\OneDrive\onedrive.exe /resetpath
  3. Now, try reinstalling the app.

If you can’t install OneDrive because a newer version is installed on your PC, you should try to reset the app. After resetting it, you can now try the installation again.

3. Uninstall the pre-installed OneDrive

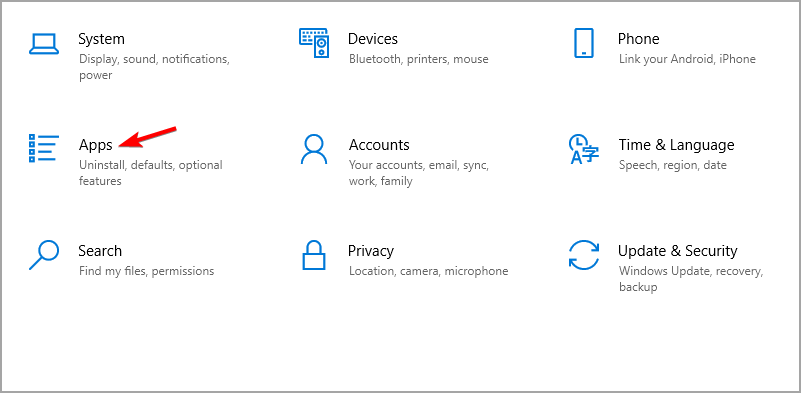
  1. Press the Windows key + I to open the Settings app and select Apps.
    apps a newer version of OneDrive is installed
  2. Now, select Microsoft OneDrive and click the Uninstall button.
    uninstall
  3. Finally, follow the onscreen instructions to complete the process.

If you are unable to fix the newer version of the OneDrive installed error, you need to remove the preinstalled app on your PC. After this, you can now install the alternative app.

On that note, we can wrap it up. After you’ve successfully removed the old OneDrive, the newer version of OneDrive is installed error should be history.

If you are getting an OneDrive.exe entry point not found error, check our detailed guide to fix it.

Lastly, don’t forget to tell us whether these steps helped you in the comments below.

Fix: Google Calendar events are gone on Windows 10/11

Google Calendar is one of the best time-planning tools out there. However, even though it works rather well on the plethora of platforms, it still has a lot of strange issues plaguing it. One of the most common issues concerns disappearance of all (or some) events from the calendar. For some users, this was the problem for ages. Until it suddenly stopped. Others are still unable to solve it and, due to its gravity, they’ve decided to switch to an alternative.

Now, since a lot of users never experienced anything similar, the issue at hand might be on your side. So, make sure to follow the steps we provided below and, hopefully, find the resolution.

How to retrieve lost events from Google Calendar

  1. Check Trash
  2. Re-sync Google Calendar
  3. Clear browser cache
  4. Remove Google Calendar from all third-party applications

1: Check Trash

There are multiple reports about Google Calendar deleting events. By default, even the oldest of your events should still be kept at all times. However, these occurrences are nothing strange for Google’s native multiplatform calendar. Luckily, none of the files will get away for good. They’re, at least most of the time, easily found in the Trash Bin, where all deleted events are stored for up to 30 days.

So, before we move to additional steps, do yourself a favor and inspect Trash Bin found in the Google Calendar. Here’s how to do it:

  1. Open Google Calendar on any browser and sign in.
  2. Click on the cog icon and select Trash from the drop-down menu.
  3. Click on deleted events and restore them.

2: Re-sync Google Calendar

If you’ve made changes or created events on another device and now can’t seem to find them on your PC, make sure to re-sync Google Calendar. Even the slightest connection issue might’ve caused failed syncing, thus you’re unable to see the events. We recommend opening Google Calendar on that alternative device while being connected to a stable network.

In addition, you can reinstall the Google Calendar app on your handheld device and install it again (most devices will restore the app to factory values). After that, wait for it to sync and open Google Calendar in a browser.

3: Clear browser cache

First of all, in order to use Google’s services within a browser, you’ll need to have cookies and JavaScript turned on. That’s just Google’s policy. In addition, we suggest removing all add-ons which can, in some manner, manipulate with Google Calendar‘s web implementation.

Finally, some users suggested using Incognito mode on your browser. This might help, but even better way to address the error at hand head-on is to clear your browsing data. Browsing data, like cache, cookies, and cached images can cause issues with various applications.

Here’s how to clear browsing data on 3 most-used browsers:

Google Chrome and Mozilla Firefox

  1. Press Shift + Ctrl + Delete to open the “Clear browsing data” menu.
  2. Select “All time” as the time range.
  3. Focus on deleting ‘Cookies’, ‘Cached Images and Files‘, and other site data.
  4. Click on the Clear Data button.google calendar events gone
  5. Restart Chrome and sign in to Google Calendar again.

Microsoft Edge

  1. Open Edge.
  2. Press Ctrl + Shift + Delete.
  3. Check all the boxes and click Clear.
  4. Restart Edge and log in to Google Calendar again.google calendar events gone

4: Remove Google Calendar from all third-party applications

Since Google discontinued Google Calendar for Windows, there were a lot of alternative ways to implement it in third-party applications. For example, you can use Windows 10‘s Calendar app to sync all Google Calendars. This seems to be a viable solution, but we can’t be certain whether the third-party app caused the disappearance of Events or the Google is at fault.

For that reason, just to be safe and avoid further justification from the responsible support team, we suggest removing Google Calendar inputs from all third-party Calendar applications.

That’s it. Don’t forget to tell us whether the issue is addressed or you’re still unable to locate your valuable events. Give us your thoughts in the comments section below.

RELATED STORIES YOU SHOULD CHECK OUT:

Why Can’t I Select Songs on Spotify? Here’s the Solution

There are many ways to stream music with Spotify nowadays, especially on Windows, where you have two separate applications (you can use only one at a time) and a web player. Since the beginning, the Microsoft Store Spotify app has had issues, while the earlier-introduced desktop version is also prone to bugs.

One of those affects the song selection, where users cannot select songs – add them to their playlists, or manipulate them in any other way.

To address this, we prepared a list of possible solutions and a few workarounds. Try them out and tell us whether they worked for you.

What to do when Spotify doesn’t allow you song selection on Windows 10?

1. Sign out and sign in again

The first step might seem obvious, but it’s still worth a try. Bugs are not rare in Spotify for Windows, but they’re, most of the time, minor inconveniences. However, by re-acquiring your library data after signing in again, this bug should be a thing of the past.

In addition, open Spotify in a web browser and look for its behavior. Another thing worth mentioning is VPN. If you live in an unsupported area, try connecting through a VPN and sign in again.

If everything works fine, restart your PC and move with the steps we provided below. Hopefully, one of them will help you select songs without further issues.

2. Disable Hardware Acceleration and remove Offline devices

There are some advanced features, like Hardware Acceleration, which might cause occasional errors. Some users addressed the issue simply by disabling Hardware Acceleration under the Advanced options. When toggled On, Hardware Acceleration will use the hardware (GPU) to speed up and optimize the performance of Spotify.

If you disable it, the performance might drop marginally, but the desktop client won’t depend on possibly misconfigured hardware.

Here’s how to disable Hardware Acceleration is the Spotify for Windows 10 desktop client:

  1. Open Spotify.
  2. Click on “∨” sign beside your Profile Title and select Settings from the drop-down menu.
  3. Scroll to the bottom and expand and click on the “Show advanced settings” button.
  4. Toggle Off Hardware Acceleration.why can't i select songs on spotify (windows10)
why can't i select songs on spotify (windows10)

In addition, some seasoned users suggested disabling all Offline devices and re-enabling them again later on. By doing so, you might fix the bug that prevents you from selecting songs in Spotify’s library. Just navigate here and disable all devices you’ve enlisted for offline use.

Disabling the hardware acceleration also helps resolve issues like Spotify not playing some songs issue; read this guide to learn more.

3. Double-check the connection

Making sure that you’re properly connected is of utmost importance. Yes, Spotify can work with relatively slow bandwidth without any issues whatsoever. Of course, this can depend on the music quality you choose in Settings.

However, it requires a stable connection. This means you’ll have the best time with a wired LAN cable instead of Wi-Fi. In addition, resetting your router and/or modem won’t hurt and certainly can help.

Furthermore, we recommend disabling bandwidth-hogging background applications as an experiment. In addition, we suggest checking Windows Firewall. Spotify needs to communicate through Windows Firewall freely, so make sure to add permission. In case you’re not sure how to do it, follow the steps we provided below:

  1. Type Allow in the Windows Search bar and open “Allow an app through Windows Firewall“.why can't i select songs on spotify (windows10)
  2. Click on the”Change settings” button.why can't i select songs on spotify (windows10)
  3. Make sure that Spotify Music is allowed to communicate to the Public and Private network.why can't i select songs on spotify (windows10)
  4. Confirm changes if needed, and look for changes within the Spotify client.

4. Reinstall Spotify

There are various things that might’ve gone awry and affected the application’s performance. Spotify is, in a general sense, not a complex application, so the convoluted troubleshooting isn’t necessary or even applicable in this case. What you can do, on the other hand, is reinstalling Spotify and hope for the best.

If you’re not sure how to reinstall Spotify in Windows 10, follow the steps we provided below:

  1. Press Windows key + I to open the Settings app.
  2. Choose Apps.
  3. Under the Apps & features, search for Spotify.
  4. Uninstall Spotify.why can't i select songs on spotify (windows10)
  5. Restart your PC.
  6. Open Microsoft Store and search for Spotify.
  7. Open the app and sign in.

5. Try standard desktop version or the Store version (and vice versa)

Finally, if your variation of Spotify for Windows doesn’t work, there’s always an alternative. If you’re using the standard Desktop version, make sure to give Microsoft Store’s version a try. Of course, if the UWP version, obtained through the Store, fails you — download the alternative from the official site.

We explained how to get the Microsoft Store version in the previous solution. This is how to get and install the standard version from the official site:

  1. Download the installer for Spotify, here. The download process should commence immediately. Don’t forget to allow it if the browser decides it’s harmful.
  2. Run the installer and follow the instructions.
  3. Run Spotify and sign in.

That’s it. Hopefully, you can resolve the issue with Spotify for Windows 10. If you’re still stuck with the bug, don’t forget to send a ticket to Spotify support. Until the issue is dealt with, try web player for Spotify. Also, don’t forget to share alternative solutions in the comments section below.

Microsoft reportedly in “serious” talks to acquire GitHub

According to a new report, Microsoft is engaging in “serious” talks to acquire source-code repository service GitHub (via Business Insider). Talks have been on-and-off for a number of years, but recently it appears that the talks have become more serious, especially as GitHub’s current CEO, Chris Wanstrath, is departing the company.

Last valued at $2 billion after a $250 million funding round in 2015, Microsoft’s suggested buying price for the platform is $5 billion. This would make it one of the company’s largest all-time acquisitions.

Microsoft’s recent push into open-source code, headed by Microsoft’s CEO Satya Nadella, may help Microsoft be a welcome buyer for the startup company, as its support for Linux has grown over the years, even to the point of directly baking in support for running Linux on Windows within Windows 10.

Microsoft and GitHub declined to comment, however, it is important to state that nothing has been confirmed as yet, and that both companies are merely at a discussion stage.

What to do if Far Cry 5 won’t update

Ubisoft has its ups and downs over the last couple of years, but the Far Cry series was and still is highly regarded. Far Cry 5 is immersive and story-driven FPS, with lots of things going for it. Now, we all know how Ubisoft’s games tend to have various issues and frequent patches are more than needed. However, it seems that there’s the widespread error which stops updating the game on 90%, regardless whether it’s Steam or uPlay in question.

This can be a grave problem, especially since some users weren’t able to access the game without updating. In order to address this, we prepared a list of solutions which should come in handy. Make sure to check out our list down below.

How to fix Far Cry 5 updating issues in Windows 10

  1. Check the storage space
  2. Check the connection
  3. Create an exception for Firewall
  4. Reinstall uPlay and run it as admin
  5. Verify the game cache
  6. Reinstall the game

1: Check the storage space

First things first. Since the error occurs mostly at the end of the update (as stated by the affected users), we recommend double-checking for available storage space. This game is huge and so are its updates. So, make sure that you have enough storage space on the installation drive.

You can check for the available space in the File Explorer. If you’re in urgent need for a few extra gigabytes of memory, follow the instructions we provided below:

  1. Open This PC or File Explorer.
  2. Right-click on the partition you want to relieve of unnecessary data and open Properties.
  3. Click on Disk Cleanup.far cry 5 won't update
  4. Select the “Clean up system files” option.far cry 5 won't update
  5. Check all the boxes and click OK.far cry 5 won't update

Windows 10 tends to preserve update files (for rolling back to previous major version), so you might get tens of gigabytes here.

2: Check the connection

Connection issues are another viable reason why an update would fail. There are various factors when it comes to connection, but the silver lining is that the bandwidth speed isn’t causing issues. Moreover, the download can take for hours and still finish successfully. However, there are other reasons why a Far Cry 5 update would fail near the end.

Make sure to check these steps and confirm that everything is as intended later on:

  • Always use a wired connection. Avoid using wireless while gaming at all cost as it’s unstable and the latency spikes are quite common.
  • Restart your modem.
  • Flash DNS.
    1. Press Windows key + R to summon the Run elevated command line.
    2. In the command line, type ipconfig /flushdns, and press Enter.far cry 5 won't update
  • Restart Steam or uPlay.
  • Check the server status. Maybe others are suffering from the same network lag.
  • Check your PING on different servers.
  • Update router/modem firmware.

3: Create an exception for Firewall

Some users addressed this issue successfully by creating an exception in Windows Firewall. In order for Steam and uPlay to freely communicate through the Firewall, you’ll need to allow it first. After doing so, restart the update process and look for changes. In addition, in case you have any third-party antivirus suite with the firewall, we recommend disabling it for the remainder of the updating process.

If you’re not sure how to allow programs to freely communicate through Windows Firewall, follow the steps we provided below:

  1. Type firewall in the Windows Search bar, and open Windows Firewall.
  2. Click on the ”Allow an app or feature through Windows Firewall” in the left pane.
  3. Choose to Change settings.
  4. Make sure that Steam (or uPlay) and Far Cry 5 are allowed to communicate through Windows Firewall.
  5. Close Settings and try updating the game again.

4: Reinstall uPlay and run it as admin

Reinstalling the uPlay client for Windows 10 seems to be another viable solution. Namely, some affected users managed to address the issue by reinstalling the uPlay client on an alternative location. Once they’ve done that, the update sequence worked just fine for Far Cry 5. This client’s default location is situated on the system partition. If you’re able, install it on an alternative partition.

You can download and install uPlay by following this link. In addition, after you remove the program, clear the associated remaining files stored in App Data and Program Files. After that, install the client, right-click on the shortcut, and run it as an administrator. After that, just sign in, and try running Far Cry 5 again.

5: Verify the game cache

It’s not uncommon for game files to get corrupted or incomplete. Especially after frequent failed updates, when the mashup of files is falsely distributed. For that reason, you can use either the Steam desktop client or uPlay client, respectively. After the utility checks and verifies that the Far Cry 5 installation is in a flawless state.

Here’s how to verify the game’s cache with Steam:

  1. Open the Steam client.
  2. Select Library.
  3. Right-click on Far Cry 5 and open Properties.far cry 5 won't update
  4. Choose the Local files tab.
  5. Click on the “Verify integrity of game files…“.far cry 5 won't update
  6. This can take some time. Once it finishes, restart Steam and Far Cry 5.

And this is how to do it with uPlay client:

  1. Open the uPlay client in Online mode.
  2. Choose Games.
  3. Right-click on Far Cry 5 and choose “Verify files“.far cry 5 won't update
  4. Once the procedure ends, restart uPlay and run Far Cry 5 again.far cry 5 won't update

6: Reinstall the game

Finally, if none of the previous solutions resolved the issue at hand, reinstalling the game might get you going. This is a long shot, since the integration check is, more or less, like the reinstallation itself. However, in these matters, you can never be too sure. The reinstallation we suggest includes clearing everything, including associated files.

Here’s how to reinstall Far Cry 5 on Windows 10:

  1. Type control in the Windows Search bar and open Control Panel.
  2. Click “Uninstall a program“.
  3. Remove Far Cry 5.
  4. Delete remaining files from App Data and Program Files folders. The associated files are stored in Ubisoft folders, so you won’t have a hard time locating them.
  5. Restart your PC.
  6. Navigate to Steam or uPlay and install the game again.

That’s a wrap-up. If you’re aware of any alternative solution or have a question to ask, we encourage you to do so in the comments section below.

RELATED STORIES YOU SHOULD CHECK OUT:

You can now play Uno Card Game on Windows 10/11, 8

Those of you who are playing the famous Uno card game with your friends should now be delighted to know that a Windows 10, 8 app has been released by Gameloft. Read this post to find out more.

Up until today, there weren’t too many professionally made UNO games in the Windows Store for Windows 10, 8 users. Gameloft, one of the biggest companies that make mobile games, has launched the UNO & Friends game for Windows 10, 8 and Windows RT users and it is available to download for free in the Windows Store (link at the end).

windows 8 uno card game

The Uno card game description for Windows 10, 8 users goes like this:

Playing UNO with friends, family, and millions of fans worldwide has never been easier! Join one of the largest free online mobile gaming communities and enjoy an all-new free multiplayer experience, competitive leaderboards and fun customization options that let you shout “UNO!” on a whole new level!

You can invite your friends and play with them or choose to challenge millions of other UNO fans from all over the world. But this isn’t an ordinary “boring” Uno card game, as it will let you make use of Boosts & Super Boosts to increase your chances of winning. You can also personalize your UNO card game by changing the backgrounds, the card deck designs and even by adding some special effects.

Weekly contests are being held where you can win rewards and increase your standing in the leaderboards. What’s also awesome about the game is that the multiplayer mode isn’t restricted to Wi-Fi, there is also the possibility to play over 3G. Install the game if you’re a true UNO fan and let us know what you think about it. If you like card games, maybe you should also check out the Bridge Cards Game for Windows 8 users that we’ve compiled.

Download UNO & Friends for Windows 10, 8

It is worth mentioning that this game is not subject to Xbox Live Family Settings.

UNO & Friends received a 4.1 user score in the Microsoft Store. This means that most players are satisfied with the game. This also indicates that UNO & Friends is a great choice if you’re looking for a fun and addictive game to play with your friends.

The only downside identified by players is related to the amount of available coins. Long story short, the game is fun to play until you run out of coins.

The real card game has been recreated very well. As an uno fan, I hoped this game would be at least half decent, and it delivers. Graphics are great, little/no lag, and an overall well done game. Only downside that I see is that it’s pay-to-play. Yes, you do get coins for free, but only enough to play about one or two games an hour unless you win every game you play. This makes it hard to play this game for very long.

If you already played UNO & Friends, tell us more about your gaming experience in the comments below.

RELATED STORIES TO CHECK OUT:


FIX: Wi-Fi and connectivity issues found in Windows 10/11

Another issue for Windows 10, 8.1 owners —  as it turns out, some of them are being plagued with Wi-Fi and connectivity problems. Check out this post to learn how you can fix these issues.

This happened to me and made me so mad – I’ve had a lot of issue with my Wi-Fi after upgrading to Windows 10 and 8.1. Everytime a new software ugprade is out in the wild, be it from Apple, Microsoft or anybody else, it is bound to be plagued with countless issues. Then everybody is desperately looking to replicate their problem and seek for solutions.

wi fi issues windows 8.1

This is the same with the users that have reported getting different Wi-Fi issues with their recently update Windows 8.1 devices. First of all, we will try to find all or at least, most of the issues you are getting with your Wi-Fi on the updated Windows 8.1 platform, so we will be able to find together solutions to these problems be it in the body of this article or in the comments section.

Most of the problems have been voiced on Microsoft’s support forums and some of them have received fixes and solution by Microsoft’s engineers. So, let’s have a look together.

Issues and problems with WiFi in Windows 10

Here’s what one of the users is saying:

I had already tried before the Windows 8.1 from MSN, got huge connectivity problems in WiFi – Intel Advanced n-6235, so i waited for the GA and expected to see some improvement/fix on this, apparently there is none.  Issues so far (IE11 looses connectivity frequently, and so programs that use IE definitions)

When i connect to my router in the right bar says “The Connection is taking longer than ususal…”, but in the bar says that  i am connected ok, after some time in the right bar says “Limited Connectivity”, yet in connection propertyes says it’s all ok. Some pages open fast sometimes is slower. Many Pages looses connectivity. It seems that by forcing Intel to always be in g mode and disabling “n” mode makes a little diference, but still there are issues. I have tried with a USB SMC wireless g pen but the issues remain

How to fix Wi-Fi issues on Windows 10, 8.1

1. Update your network drivers

Of course, as always, what we suggest to do is check for new Windows updates, as well as install the latest software drivers, which, hopefully, have been updated with Windows 8.1 support. A potential culprit to these issue might have been Intel’s Wi-Fi adapters which have been recently made available with Windows 8.1 optimization, so maybe you should try them.

2. Check your router

Maybe this problem is not software-related, but rather hardware-related. Check your router and make sure that all the cables are connected in the right ports. Also, if it’s been a while since you last power cycled your modem/router, please do so now. Turn off your modem/router, unplug the power cord and wait for five minutes. Then power up the device and check if the Wi-Fi connection is available now.

3. Run the Network Troubleshooter

Both Windows 10 and Windows 8.1 come with a build-in Internet troubleshooter that automatically scans your network in order to identify and repair any connection issues. To run the tool on Windows 10, go to Settings > Update > Update & Security > select Internet Connections and launch the scan.

internet troubleshooter

On Windows 8.1, go to Control Panel, type ‘troubleshoot’ in the search box, select and launch the Internet Troubleshooter.

If the Wi-Fi connection is still unavailable, here are some additional troubleshooting guides that you can use to fix Wi-Fi connection problems:

If this doesn’t work, let us know by leaving your comment below and we’ll research more to try and find a workaround for these Wi-Fi issues users are getting in Windows 10, 8.1


Control LEGO Mindstorms EV3 robots from Windows 10/11, 8.1

Microsoft recently announced on Channel 9 that the company is presently developing an API to control Lego Mindstorms EV3 robots from Windows 10, 8 desktop, Windows Phone 10, 8 or Windows RT. Read below to find out more.
lego mindstorms windows 8.1
The Lego Mindstorms series of robots are some awesome modern gadgets that are appealing not only to your kids, but for the developers that need to create the small, customizable and programmable tiny robots. Now, Microsoft has made available a new API that lets your LEGO Mindstorms EV3 robots be controlled from Windows 8.1.

Microsoft said the following on Channel 9 regarding this new possibility for developers:

As developers, we’re always excited to see the next generation take interest in science, technology, engineering and mathematics (STEM). That interest is shared by our friends over at LEGO Education, the people responsible for the new LEGO MINDSTORMS EV3. Inspired by their new robotics kits, we created SentryBot with MINDSTORMS, two Surface Pros and new Windows 8.1 APIs to demo at Build 2013.

Now that Windows 8.1 and the MINDSTORMS EV3 are available publically, we’re releasing an API for you to make whatever robotic future you (or your kids) can dream up. The API provides access to control the motors and read real-time data from the sensors. You can connect to and control your LEGO EV3 brick over Bluetooth, WiFi, or USB. The project provides libraries that are usable from the Windows desktop, Windows Phone 8, and WinRT (via .NET, WinJS and C++), along with full source code and samples.

Follow this link to see the Getting Started Guide on how to establish the LEGO Mindstomers EV3 API connectivity to your Windows 10, 8.1 device.

If you’re interested in learning more about how to build and program smart robots with the EV3, you can purchase this book from the Microsoft Store. As its title suggests, ‘Building Smart LEGO MINDSTORMS EV3 Robots‘ reveals all the secrets of building these robots. You will learn about various robot building techniques and well as the programming concepts used by engineers in real-life prototypes.

So, if you want to build your own object-tracking tank, all-terrainvehicle, remote control race car and other similar devices, this is the book to read.

This book will walk you through six different projects that range from intermediate to advanced level. […] You’ll see how to make the most of the EV3 robotics platform and build some awesome smart robots. The book starts by introducing some real-world examples of smart robots.

RELATED STORIES TO CHECK OUT:


Download LinkedIn HD for Windows 10/11, 8 [UPDATE]

UPDATE: Since the writing of this post, Microsoft acquired LinkedIn and released the official LinkedIn app in the Microsoft Store. With this app, you can enjoy a richer and a more engaging LinkedIn experience, including real-time notifications. Keep in mind that the app is available only on desktop PCs (download it from the Microsoft Store).

You can read the original report below.

We are still waiting for LinkedIn to release an official app for Windows 10, 8 and Windows 8.1 users. Until then, we take the third-party LinkedIn HD app for a ride to see if it can be a good solution to accessing LinkedIn on your Windows 10, 8 tablet.
linkedin windows 8
One of the biggest problems that the Windows Store still faces is the lack of important apps that are very popular with Android or iOS. It took quite a while for Facebook or Flipboard to finally land in the Windows Store, but there are thousands other apps that Windows 10, 8 users are waiting for.

LinkedIn is one such app that we still don’t have in the Store, so we have to make to with third-party apps developed by independent creators. Unfortunately, all of them work like a “cloak” interface for the web app and such is the case with LinkedIn HD. But, from what the current offer in LinkedIn Windows 8 apps is, I think it is the best to use. LinkedIn HD’s description goes like this:

Get on-the-go access to your professional network with LinkedIn HD for Windows 8. Find and connect with more than 200 million members worldwide, read the latest industry news, keep up-to-date with your groups, explore jobs you might be interested in, and share content with your network from anywhere.

Still waiting for the official LinkedIn app

By using LinkedIn HD for Windows 10, 8 you can view and save recommended jobs, follow the latest industry news and learn more about companies that interest you, as well as keep up with your favorite groups. As I’ve mentioned in the beginning of the article, all the commands inside the app will redirect you to the web app, and actually, the very first time when you will use the app, you will be asked to sign in online to your LinkedIn account like you would normally do just by opening a browser window.

Also, you will have the option of letting the app run in the background to deliver you notifications. I know it’s not the greatest LinkedIn app for Windows 8, but it’s among the best options there currently are. So, follow the link from below to download and install it on Windows 10, 8, Windows 8.1 or Windows RT

Download LinkedIn HD for Windows 8


    Download TheFreeDictionary App on your Windows 10/11, 8.1 PC

    One of the most used dictionary tools in the world, TheFreeDictionary.com, has garnered many positive reviews and ratings in the Windows Store. Now, in a recent update,the app received full Windows 10, 8.1 support.

    A dictionary app is a must-have tool for anybody who wants to enrich their vocabulary. With the creation of the Windows Store, it is now possible to search and install the best dictionary tools on your Windows 10, 8 device. TheFreeDictionary.com app by Farlex is one such app and it recently received an important updated that makes it fully compatible with Windows 10, 8.1.

    TheFreeDictionary App for Windows 10, 8.1

    windows 10 freedictionary app

    Since its launch in the Windows Store, the developers have took great care of the app and have listen to consumers. Along with a lot of bug fixes, here are some of the most important updates released by this great Windows 10, 8 dictionary app:

    • Full Windows 10, 8.1 compatibility
    • Large live tiles and new snap view support
    • Full access to Wikipedia content
    • Full access to The Free Dictionary‘s specialty dictionaries, including Medical, Legal, Financial, Acronyms, and Idioms, plus multiple encyclopedias
    • Advanced Search options, including “Starts with,” “Ends with” and “In definition.”
    • Option to remove all ads with the Ad-free Upgrade
    • New content page design with easy one-tap navigation to Definition, Thesaurus and Translations
    • Add unlimited bookmarks
    • Quickly look up the definition of any word on the page with the highlight feature
    • Search for words on the page
    • Adjust font size
    • View recent search history
    • Games! Including Spelling Bee and Match Up, plus Words Within Words and Hangman in multiple languages. Even play in Snap View
    • Customizable Weather and Horoscope, including the ability to create live tiles
    • New homepage design, with semantic zoom navigation.

    — RELATED: 5 best dictionary software for Windows 10

    The app’s description goes like this:

    Get the power of TheFreeDictionary.com, the world’s most comprehensive dictionary. Search multiple English dictionaries, all from the most trusted sources, plus specialty dictionaries, including Medical, Legal, Financial, Acronyms, and Idioms, as well as multiple encyclopedias and even Wikipedia. Access dictionaries in 13 other languages and translate words into more than 40 languages. Read daily articles, add words to Favorites, and even share your favorite content via social networks and email. Plus play word games and customize your homepage with local weather and more.

    Farlex added a series of new features and improvements to this app. For example, you can now log in with The Free Dictionary and sync your bookmarks on absolutely all your devices. You can also create separate bookmarks in order to better organize your learning strategy. If you’re into gamification techniques, you can boost your learning curve by tracking your learning with points and badges.

    If English is not your mother tongue and you need to access dictionaries in different language, TheFreeDictionary app has got you covered. You can access dictionaries in 13 other languages, including Spanish, French, German, Italian, Chinese, Portuguese, and more. Speaking of additional languages, you can also use this app to translate English words into more than 40 languages.

    If you like to learn something new every day, then TheFreeDictionary app is the right choice for you. The app brings fresh daily content, including Word of the Day, Idiom of the Day, This Day in History, Quote of the Day, Today’s Birthday and more.

    This is definitely the dictionary app to download and install on your Windows 10, 8 devices, without having any second thoughts about it. Follow the link from below to do so.

    Download The Free Dictionary for Windows 10, 8

    RELATED STORIES TO CHECK OUT:


    Yoga 13 Users Experiencing Lag and Slow Performance After Updating to Windows 8.1, 10

    Lenovo Ideapad Yoga 13 users have a new issue for them in Windows 8.1: according to some forum posts, their Yoga 13 laptops now feel slow and have lags in performance
    yoga 13 slow lag windows 8.1Not so long ago, we were telling you that Yoga 13 users have been reporting touchpad issues after installing Windows 8.1 on their laptops. Now, it seems that another category of Yoga 13 owners is affected by slow performance of their device and significant lags. A number of threads on Lenovo‘s support forums describe the issues. Here are some complaints:

    I recently updated my Yoga 13 to Windows 8.1 and am now experiencing significant lag when resuming from suspend and periodically while I work. Often I will type and not see the text on the screen for another 5+ seconds. I have run Malwarebytes and Windows Defender and found no malware. By keeping an eye on the task manager I have not been able to identify a misbehaving process. Has anyone experienced a similar isse? How might I go about troubleshooting this more thoroughly?

    When shutting down their Yoga 13 devices, some of the users are receiving the following error description

    SwUSB.exe – Application Error
    The instruction at 0x00401a8c referenced memory at 0x00000020.
    The memory could not be read.
    Click on OK to terminate the program

    One solution that seems to have solved the issue for a part of the Yoga 13 affected users is to disable the Dynamic Platform and Thermal Framework in the BIOS settings. Of course, it goes without saying that you need to update your latest drivers to get full support for Windows 8.1. An official fix for this issue hasn’t been made official by Lenovo since the company hasn’t yet event aknowledged the issue.

    Update: Lenovo Yoga 13 may also have some touchpad issues. Many users reported that after upgrading to Windows 8.1 and Windows 10. The problem might be in drivers incompatibility that will come with the new OS versions. Fortunately, we have a guide that will help you fix this problem.

    If you are searching for a good laptop, you can find the best laptops in this article. In case you think they are ‘outdated’, do not bother – since last Christmas, they have great prices right now. In case you are searching for a more powerful laptop, you might be interested in this list with best USB-C laptops.


    iTunes is Crashing: 3 Ways to Fix it if it Stops Working

    iTunes is a great app, but many reported that iTunes is crashing on their Windows PC. This can be a big problem and prevent you from enjoying in multimedia content.

    In case you haven’t tried this software, we have a great guide on how to download iTunes, so be sure to visit it. However, in this guide, we’re going to focus solely on crashes, so let’s see how to fix them.

    Why did iTunes stop working?

    • Third-party software can sometimes come into conflict with iTunes and cause it to crash.
    • Corrupted iTunes installation can cause this and many other problems.
    • Missing dll files will cause iTunes to stop working on your PC.
    • Java installation can interfere with iTunes at times.

    What do I do if iTunes is crashing?

    Before we start, there are a few basic checks you can perform:

    • Scan your PC for malware and make sure it’s not interfering with your software.
    • In some cases, removing recently installed software can help with this problem.
    • Reinstalling iTunes is also a possible workaround that you should try.

    1. Copy the QTMovieWin.dll file to iTunes

    1. Navigate to C:\Program Files (x86)\Common Files\Apple\Apple Application Support
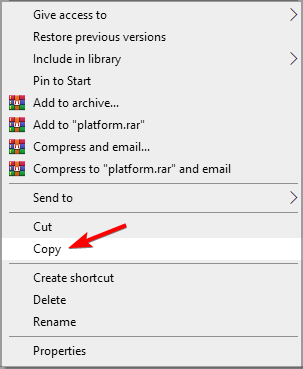
    2. Locate the QTMovieWin.dll file. Right-click it and select Copy.
    3. Paste it to C:\Program Files (x86)\iTunes

    2. Reinstall Java

    1. Open Settings and navigate to the Apps section.
    2. Locate Java and click on Uninstall.
    3. Follow the steps to remove it.
    4. Once removed, download it and install it again.

    This is a simple solution, and it can help if iTunes is crashing on your PC.

    3. Disable BTTray.exe

    1. Look for BTTray running in the background on your PC.
    2. Disable the application.
    3. After doing that, check if the problem is resolved.

    These are just some simple solutions that can help you if iTunes is crashing on your PC. In case the problem is still there, our iTunes won’t launch guide should be able to help you.

    What solution did you use to fix this problem? Do let us know in the comments section below.

    Is Miracast a Failure in Windows 8.1?

    A Microsoft pundit takes the new Wireless Display function (Miracast) in Windows 8.1 for a ride to see how it works like. Read below to find out if it’s a feature worth taking into consideration when looking to buy a Windows 8.1 device or rather a failure
    windows 8.1 miracast
    Microsoft
    guru Paul Thurrot has tried working with the Miracast feature in Windows 8.1 to see if it can be a match to Apple’s AirPlay technology. The new Wireless Display feature is the most important novelty when it comes to wireless networking in Windows 8.1 and one of the best business features as well. Thurrot is obviously let down by the performance of Miracast in Windows 8.1, saying the following:

    Miracast isn’t magic, and it’s often no more useful than an HDMI cable.

    To be able to make use of the Miracast technology, you need three pieces – a device compatible with Intel’s Wi-Di technology, an external screen, Miracast-compatible adapter. The cheapest adapter currently is $50 so that’s the first problem. The process of setting up Miracast to work can be pretty annoying, especially the part with updating the firmware on the adapter. Paul explains why using Xbox Video can be a better and a cheaper idea:

    The problem is that Miracast wireless display is as “dumb” as using an HDMI cable. When you’re streaming a movie from the PC/device to the HDTV, for example, you want to watch that content on the HDTV only, not duplicated on both screens. But Miracast is just a way to use the normal Project mechanism in Windows … wirelessly. There’s no smarts to it. And it’s more expensive and harder to use than a regular HDMI cable.

    By comparison, you can use Xbox Video with the Play on Xbox feature and use the Xbox SmartGlass app as a smart remote. So while you’re still triggering video playback from the PC/device to the HDTV, you can then use your PC/device as a smart remote control. And depending on the content, you’ll have amazing second screen functionality too.

    Ultimately, this feature will found to be simply only by those users that are a little tech savvy and will prove to be quite difficult to set up for the average users.

    Miracast in Windows 10

    Many users report that in Windows 10 Miracast has some issues and problems as well. Many Windows updates and builds give headaches to users, but hopefully, if you are one of these users, you can find a great fix-guide right here.

    In case you want to install Miracast on your Windows 10 device, we would suggest you install it properly. We have the right guide which will help you install Miracast so it will not make you any problems. Beware that you also may have an issue with your Wi-Fi adapter while streaming a video through Miracast. In that case, you can find the right solution to this problem here.

    Even if you can call it ‘a failure’ for Windows OS, Miracast is a streaming software used by many people which will not agree with this sentence.

    READ ALSO: We answer: What is Miracast and how to use it?

    Microsoft claims over 700 million Windows 10 active devices, 150 million Cortana users

    Microsoft kicked off its Insider Dev tour in London today, and the company used the first stop of this world Series event for developers to share some new data about the Windows 10 ecosystem. Two months ago, an exiting Terry Myerson revealed that we were now approaching 700 million active Windows 10 users, and Microsoft said today that this milestone has finally been crossed. These 700 million active devices include PCs, phones, Xbox consoles, HoloLens as well as Windows Mixed Reality headsets.

    As you can see in this picture tweeted by Windows Insider MVP Michael Gillett, the company also claimed over 197 billion hours spent on Windows 10 as well as over 150 million Cortana users across 13 markets. This latest number is quite interesting given that Microsoft’s digital assistant has been really struggling for mindshare compared to Google and Amazon’s offerings. The launch of the Cortana-powered Harman Kardon Invoke speaker back in October 2017 didn’t really help, as at that point in time Microsoft claimed that Cortana had 148 million active monthly users.

    You may think that Cortana being built-in on Windows 10 should lead to much higher usage, but the truth is that Cortana has always been quite limited outside of the US. Additionally, it’s still not available on iOS and Android in many of the 13 Cortana markets as of today. Despite Cortana not being a stellar success for Microsoft, Javier Soltero, Corporate Vice President of Cortana reiterated today that it’s not going away.

    It’s hard to say where the digital assistant will be a year from now, but we probably won’t see new Cortana speakers on the market. Instead, Microsoft may be looking to bring Cortana to more of its popular apps. And after adding it to its Skype messaging app last year, Outlook could be next on the list.

    Qualcomm is reportedly creating high-end Snapdragon 1000 SoC for new Windows 10 on ARM PCs

    This Spring saw the launch of the first Windows 10 on ARM PC with HP’s Envy x2, and Asus and Lenovo are expected to follow soon with their own offerings. So far, the tech press had mixed feelings towards the HP Envy x2, with most of the reviews pointing out the disappointing performance of emulated x86 apps.

    To be fair, the first generation of Windows 10 on ARM PCs are using a brand new OS and a somewhat old processor. Indeed, Qualcomm’s Snapdragon 835 processor was announced back in 2016 and is no longer top of the line. But fortunately, both ARM (which licences its SoC designs to chip makers) and Qualcomm are iterating quite fast, and future Windows 10 on ARM PCs could well offer much better perfomance than the first models released this year.

    According to a new report from Roland Quandt from German blog WinFuture, Qualcomm is currently developing a new high-end SnapDragon 1000 processor to be used on future Always Connected PCs. Asus could be the first OEM to use this new chip on a future Windows 10 on ARM device, as it’s reportedly working on a new PC codenamed “Primus.” The report says that Qualcomm’s Snapdragon 1000 SoC will have a TDP of 6.5W, which is getting closer to the thermal design power of Intel’s Core mobile processors.

    While Intel and AMD’s x86 processors will likely keep a power advantage over ARM processors in the near future, Qualcomm and other chip manufacturers such as Apple are working hard to close that gap. Qualcomm’s processors are already hugely popular on smartphones and tablets, and Windows 10 on ARM is now a good opportunity for the company to put its chips on laptops and 2-in-1s.

    We’re looking forward to seeing what the next gen Windows 10 on ARM PCs can bring to the Always Connected PCs table, but this new product category also includes PCs with Intel chips. As a matter of fact, an Intel version of the HP Envy x2 with an LTE modem is also available for purchase, at a $149 premium compared to the Snapdragon 835 version. One day, maybe consumers won’t notice any difference between a Windows 10 PC using an x86 processor and another with a Qualcomm ARM processor, but we’re clearly not there yet.

    Battlefield 4 crashes in Windows 10/11 [FIX]

    A new Windows 10, 8.1 problems have arrived — a good number of Battlefield 4 players have been reporting that the game crashes or hangs under Windows 10, 8.1, when playing in single-player or when joining a server. Problems with the Battlefield plugin have also been reported.

    Gamers seem to be among the most affected by Windows 8.1 woes, as we’ve reported in the past problems with MMORPG games like Dragon’s Prophet or GuildWars 2. Now, similar issues seem to be affected users of Battlefield 4, according to multiple forum postings. One of the users says the following:

    I have Battlefield 4 on Windows 8.1 but every time I try to join a server it just stays at joining server at the bottom with the battlelog plugin. Battlefield 4 never opens up. This is on Firefox. I am not using Internet Explorer. Battlefield 4 Beta worked fine in Windows 8.1

    Another user is reporting a different issue on the Nvidia support forums:

    I tried playing Battlefield 4 on Windows 7 64bit because that’s what I had at the time the game came out, but even with my GTX 680 SLI (2x) setup, the game would lag at times when it shouldn’t, and I would experience crashes and huge FPS drops out of nowhere. So, I decided I would try Windows 8.1, which is what everyone was saying would fix all the issues that people playing on Windows 7 were having. And man oh man, Windows 8.1 fixed the issues with BF4 and then some! Not only did it stop the lagging and crashing, but it nearly DOUBLED my average FPS! I went from playing at 1080p Ultra – 60fps, to playing at 1080p Ultra – 100fps! So I can say without a doubt, that Windows 7 IS the problem with Battlefield 4, NOT the drivers.

    How to fix Battlefield 4 crashes

    1. Reinstall Punkbuster

    What users who are experiencing this issue are advise to do is to delete the Battlefield 4 beta? and reinstall Punkbuster. For some users who had issues only with the Battlelog plugin, switching browser could also do the trick. If your problems are different, then maybe you could try to increase the FPS in Windows 8, as suggested in our guide.

    2. Update your graphics drivers

    For those Battlefield users that are experiencing flickering issues with smoke and some texture, they are advised to install the latest AMD Catalyst beta driver which is said to fix Battlefield 4 crashing issues in Windows 10, 8 and Windows 8.1. If you have problems with the Battlefield 4 Windows 10, 8.1 battlelog plugin install, follow this thread for working fixes.

    Updating drivers manually can sometimes take too long, so we recommend you use a driver updater tool to do it automatically. In this manner, you will prevent file loss and many other potential problems.

    3. Turn off SLI / Crossfire

    If the crashes continue, you can also try to temporarily disable SLI or Crossfire. This action may trigger performance drops, but it should make your game more stable and eliminate crashes.

    Disable SLI on NVIDIA:

    1. Open NVIDIA Control Panel > select 3D Settings > SLI Configuration
    2. Select the option ‘Do Not Use SLI Technology’
    3. Hit Apply to save changes.

    Disable Crossfire on AMD:

    1. Open Catalyst Control Center > go to Graphics > Crossfire
    2. Uncheck Enable Crossfire > hit OK to save the changes.

    These are only a few suggestions to fix Battlefield 4 crashes. We also published a complete guide on how to fix Battlefield 4 crashes in Windows 10. The guide features 16 solutions that you can use to fix this problem. Do check it out and tell us which solution worked for you.

    RELATED STORIES TO CHECK OUT:


    How to fix Windows 10 upside down screen issues

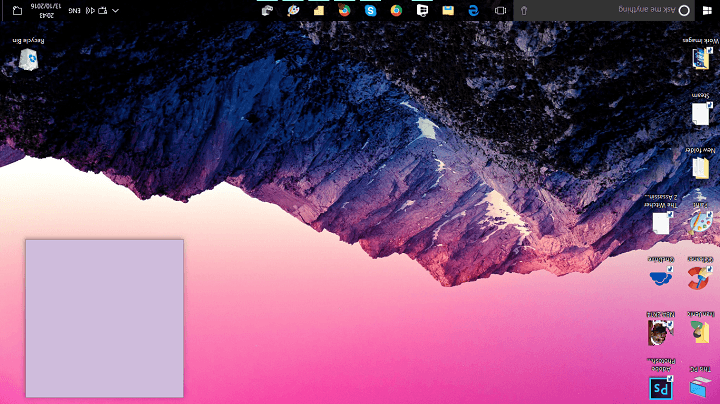
    Various graphical or screen problems are a common sight in Windows 10. Ever since Microsoft released the operating system in July 2015, users have been reporting various screen issues that prevent them from working on their computers normally.

    This time, we have one odd, but luckily not so dangerous screen issue in Windows 10. That problem is the upside-down screen that some users recently encountered. The cause of this flaw isn’t specifically determined, it can be due to an outdated graphics driver, or you even accidentally flipped it. Anyway, the outcome is the same.

    In case you have problems with the upside-down screen in Windows 10, as well, keep reading this article, because we’ve prepared a couple of solutions for you.

    How to fix the problem with a flipped screen in Windows 10

    1. Check the keyboard shortcuts
    2. Change settings
    3. Update drivers

    Fix: Upside down screen in Windows 10

    1. Check the keyboard shortcuts

    There’s a chance that you’ve, somehow, flipped the screen accidentally. Luckily, Windows 10 has a simple hotkey set to help you get your screen back to a normal position.

    All you need to do is to press these hotkeys, and hopefully, you’ll be able to rotate your screen. Each hotkey puts the screen in a different position

    Here are the hotkeys you need to press to revert your screen position back to normal:

    • CTRL + ALT + DOWN ARROW (Flip the screen)
    • CTRL + ALT + UP ARROW (Revers the flipped screen)
    • CTRL + ALT + LEFT ARROW (Rotate the screen left)
    • CTRL + ALT + RIGHT ARROW (Rotate the screen right)

    This solution should work in most cases, however, if you’re still unable to flip your screen back to normality, try some of the solutions listed below.

    2. Change settings

    If using the hotkeys didn’t get the job done, we’re going to try to revert the screen manually. To do that, we’ll need to change a few screen settings in Windows 10’s settings app.

    Warning: Since your screen is upside down, you’re going to have a really hard time getting around, and using your mouse. So, it will be tricky, and very annoying, but just keep trying, and you’ll succeed. Eventually.

    Here’s exactly what you need to do:

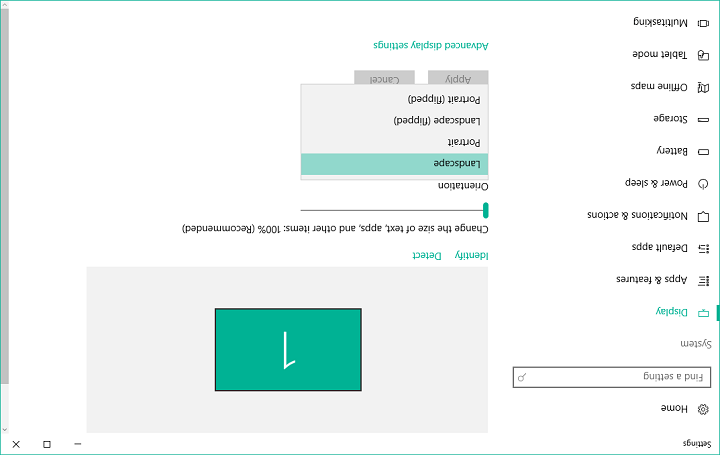
    1. Right-click on Desktop, and select Display Settings
    2. See if Orientation is set to Landscape (flipped). If that’s the case, just change it to Landscape
    3. Save changesupside down screen windows 10 1

    There you go, after changing this, you should be able to see your screen in a normal position. But if even changing the orientation doesn’t get the job done, try the final solution listed below.

    3. Update drivers

    If you’re unable to get your screen back to normality by changing settings, and orientation, there’s probably something wrong with your graphics card. In most cases, it’s an outdated driver. Windows 10 is famous for driver troubles, so it might be your case, as well.

    Maybe your driver eventually became incompatible with the system, in case you installed a major update, maybe something else messed up your driver. Anyway, the solution remains the same – you need to update your graphics card driver.

    In case you don’t know how to update your graphics driver, follow these instructions (or check out this article for more info):

    1. Go to Search, type devicemng, and open Device Manager
    2. Find your graphics card in the list of installed hardware, right-click it, and select Update driver software…upside down screen windows 10 2
    3. When the installation wizard pops up, choose Search automatically for updated driver software
    4. Let the wizard find any potential update, and finish the process
    5. Restart your computer

    If an outdated driver was indeed the problem, updating it will bring your screen back to its normal position.

    3.1. Update drivers automatically

    It is very important to choose the right driver versions from the manufacturer’s website. In case you choose and install the wrong one, this will not only be an issue for the GPU but may harm all your system.

    However, you can always choose a dedicated software that can update the correct driver version in just a few clicks safely.
    ⇒ Get Fortect Driver Updater

    That’s about it for our article about the problem with an upside-down screen in Windows 10. In case you have any comments, questions, or suggestions, just let us know in the comments below.

    Here’s why 32GB Windows 10 PCs are a “recipe for failure”

    “Don’t buy a Windows 10 PC with 32gb of storage!” – This is the title of a recent Reddit thread that seems to get users really agitated. They are asking themselves what is the reason why laptops are sold with 32GB of storage space because these are reportedly “flawed.”

    “The storage may be, emmc. Why they sell these I have no idea; the design is flawed in my opinion. Couple tight space with the frequency of large cumulative updates and we are staring at a recipe for failure,” one Redditor said, opening the Pandora’s box.

    Systems with 32GB are useless for Windows 10

    One user says that if you’re looking to buy a eMMC memory laptops, there are lots of 32GB options out there, but they turn out useless for running Windows 10. Lots of users are complaining that their PCs fail to update and this is because many Windows 10 versions will take up a significant amount of space yet systems still try to update, failing each and every time.

    In other words, you won’t even be able to block the updates because you’re running a Home version and you won’t be able to update the system either because it lacks space. Buying a cheap laptop with such little space just for the sake of it is simply not worth it.

    Avoid buying cheap systems

    The Reddit discussion goes on, and a Redditor thinks that users should definitely avoid cheap options because of the reasons mentioned above. If you’re running Windows 10, you will not be able to update your computer, and this means that you won’t get the latest security patches and more.

    It’s also important to note that there’s a massive difference between getting a good solution for a great price and just purchasing the cheapest option that you can find.

    You can check out the complete Reddit thread here.

    RELATED STORIES TO CHECK:

    Play Reckless Racing Ultimate Windows 8, 10 Game for Free

    Up until today, you could have played Reckless Racing Ultimate in Windows 8 only in trial mode or by paying five dollars to buy the app, but now a Lite version has been made available
    reckless racing ultimate lite
    I used to play the Reckless Racing Ultimate on my Windows 8 tablet and have lots of fun. It’s one of the best Windows 8 racing games around, there’s no doubt about it. But it isn’t affordable for everybody as you’ll have to get five dollars out of your pocket to buy it.

    That’s why I was gladly surprised to discover that a free version, not the trial version, has been released by Microsoft, it is called Reckless Racing Ultimate LITE. Of course, as you’d expect, it comes with some limited functions, such as not being able to participate in as many tournaments as in the paid version. Nonetheless, it’s a worthy addition to your list.

    Update: It seems that Microsoft has pulled the game down from the Windows Store, as it’s no longer available in the Windows Store. Probably Redmond has decided to keep it only for U.S. and Canadian customers.

    Reckless Racing Ultimate alternatives

    IN case you are searching for other interesting racing games, you can always choose to get a copy of Need for Speed, but it has lots of problems with Windows 8.1 and 10, so here are some great alternatives for you:

    • GT Racing 2 – a great ‘grand-touring’ racing game that will keep you entertained for hours and works perfectly with Windows 10

    gt racing 2 wallpaper

    • Asphalt 8: Airborne – one of the biggest racing releases of this year, available for free in Windows Store

    asphalt 8 airborne wallpaperYou can also check this article for more racing games or try to choose another genre game from Windows Store (free).

    Windows 8.1, 10 Battery Drain Reported by HP, Dell, Lenovo and Sony Users

    As it seems, Windows 8.1 comes with battery drain woes for a good number of HP, Dell, Lenovo and even Sony users. Read to find if you could be affected by battery issues in Windows 8.1
    windows 8.1 battery drain
    According to a couple of posting on various post forums from different manufacturers, tablet and laptop users are being struck by battery drain issues after upgrading to Windows 8.1. The first to complain is a HP users that has a Pavilion G6 laptop running Windows 8.1. According to him, his battery drain has increased incredibly since upgrading to Windows 8.1

    Another HP users has weighed in, saying his laptop battery has went from over 6 hours down to 2.5 hours. The issues seems to be present especially among Pavilion users, as somebody with a Pavilion M6 has reported the same issue.

    Windows 8.1 drains the battery for HP laptop and tablet users

    Here are some more complaints collected from frustrated HP users:

    Battery drain on a HpEnvy1000 laptop running Windows 8.1

    I experienced this problem too. My hp envy1000 operation time markedly reduced from 5 hrs to 2hrs. Hope this get fixed soon

    Battery drain on a HpEnvy M6 laptop running Windows 8.1

    I’ve noticed a very impressive battery drain on my HP Envy M6 (I owned it only five mouths ago) since I updated SO from Windows 8 to Windows 8.1. From six hours to three. Another difference I’ve noticed is that system now informs of remainig battery timein a much more stable way. In Windows 8, in periods of light use of CPU, battery remaining time increased a lot (indeed, I’ve seen once eight hours remaining!), but now it is more estable, three hours and a bit with 100% battery, and it barely increases when I don´t use PC intensely. I don’t now if this is a relevant fact, but I am suffering big battery drain, anyway.

    Battery drain on a HpEnvy M6 1155eo laptop running Windows 8.1

    Same here, using windows 8.1 on hp envy m6 1155eo. PS! Wonder if someone know how to get hp recovery manager and energy star power plan back

    Battery drain on a HpEnvy 17 T laptop running Windows 8.1

    I have the HP Envy 17T and I too am having this issue. My battery life went from 4 hours to 1.5. I am going to try reinstalling my graphics drivers and turn off my bluetooth tonight when I get home.

    As we can see, especially users of the HP Envy laptops seem to have having this issues. A potential fix suggested by a poster on the forums is to do the following:

    • Disable Bluetooth from Device Manager
    • Download and install your laptop‘s original graphic drivers from HP website.

    For Windows 8 tablets, it seems that leaving the Bluetooth on might also be seriously draining its battery, an issue that is present in Windows 8.1, a well.

    Windows 8.1 battery drain woes for Dell users

    It seems that some Dell users are affected by this, one of them saying the following:

    I recently upgraded to win 8.1 from win 8.Initially AMD card and bluetooth was not working bt after contacting dell support I updated to the new drivers and got these problems fixed.But I have another one – Decreament in battery back up. Initially my system used to show back up to be at 7:00 hrs bt nw after update it is hardly 4:20 hrs. I am using inspiron 3521 touch core i5,1 GB AMD Graphics,4GB RAM.

    A basic advice would be to update the BIOS, but that isn’t working for all Dell users; if you have a similar problem, let us know in the comments section its detailed description and we’ll try to search for an answer together.

    Sony Vaio laptop struck by Windows 8.1 battery problems

    It doesn’t end here, as it seems that some Sony Vaio Duo 13 users have been having issues with their battery after upgrading to Windows 8.1. One of them says:

    Ive upgraded to windows 8.1, Installed all new drivers and i have a battery draining problem! On Windows 8 the battery life was about 6-7 hours (Ive turned on battery care function). Now, with Windows 8.1 the battery lasts, maybe, 3-4 hours. Will there be any fix for that or should i reinstall Windows 8?

    The user was asked to try reinstalling the Fast Access application, but even until now it hasn’t worked. We have also reached out to some Microsoft MVP users and are waiting to hear from them.

    Also, a friend of mine using a ThinkPad 2 Windows 8 tablet has reported the following:

    My connected stand by was excellent in Windows 8, usually lost about 4% in about 8 hours of connected stand by. Now after upgrading to Windows 8.1, my connected stand by is really bad. At times it can lose about 12% in about 5 hours. I’m thinking of installing all the drivers from Lenovo website, just in case Win 8.1 installed drivers that is causing problems.

    We will be updating this post when we will find more information about these annoying battery drain issues in Windows 8.1

    Fixes for battery drain issue

    Once these issues occurred, lots of users started to search for solutions. We also did, and here’s a quick list of guides and ‘how-to’s in order to help you solve this annoying problem caused by various causes on different Windows devices:

    You can find more specific information by using our site’s ‘search’ bar.

    Alarm Clock HD App makes your 2-in-1 Laptop the best alarm clock

    This multimedia Windows 8, 10 and Windows RT alarm app Alarm Clock HD received yet many updates over time and maintains on top of alarm clock apps that we’ve discovered in the Windows Store.
    best alarm clock hd app in windows storeThe Windows 8, 10 Alarm Clock HD app is one of the best ways to set an alarm in Windows 8, 10 and there’s no doubt about it. With an average rating of 4 out of 5 stars from almost 1400 reviewers, it shows that it’s appreciated by Windows 8, Windows 8.1, 10 and Windows RT users. Now, it has received yet another update that we’ve discovered through the Windows Store.

    According to the release note, Alarm Clock HD is now at version number 1.2.0.9 and the most important change is that the themes for the app have been seriously updated. Besides this, the Windows 8 alarm app also comes with some minor user interface updates, but we haven’t been given more details about this.

    [UPDATE] Alarm Clock HD is a Universal App, meaning you can run the app on your Windows 10 desktop or your Windows Phone 10 device. Since it was released, Alarm Clock HD has received more updates in Windows 8.1, 10 such as:

      • Alarms can wake up your device from sleep (if your device supports it and you have set this app as the default alarm app)
      • added 5 Analog Clock Faces
      • Every feature in the app is highly customizable via the settings window
      • windows toast notification sound for alarms
      • Appbar user interface updated to match the overall look and feel of the app

    We especially noticed two features that you might like as well, or let us know in the comments below what is your favorite.

    1. Light sensor: If enabled, alarms will stop ringing automatically when you switch on the room light
    2. Sleep timer: sleep music plays for the sleep timer duration and gently fades away as you fall asleep

    By using Alarm Clock HD in Windows 8, you can do much more than just setting up an alarm: get weather reports, the exact time, currency exchange rates, create music playlists, use built-in RSS feeds, read Facebook posts and even listen to internet radio in Windows 8.1, 10

    This is truly an awesome alarm app that you need to download to your Windows 8.1 / 10 device.

    RELATED ARTICLES TO CHECK OUT NOW:

    MakerBot’s 3D Printer Driver Now Available on Windows 10 [+ bonus tools]


    MakerBot, one of the world’s most known 3D printers, has finally released the drivers that makes its system compatible with Windows 8.1. Read below to find more about this
    makerbot windows 8.1 driver
    If you have a MakerBot 3D printer, you’ll be glad to hear that printing with a MakerBot Desktop 3D Printer on Windows 8.1 is now hassle-free as the MakerBot 3D Printer Driver has been made available for the Windows 8.1 operating system. Now, you can 3D print directly from any 3D modeling application that supports the Windows 8.1 3D print pipeline directly to your MakerBot 3D printer.

    Microsoft’s Shanen Boettcher said the following regarding the announcement:

    Microsoft’s goal is to make the experience of 3D printing as easy as creating and printing a document using Microsoft Word. We’re thrilled incredible companies like MakerBot are implementing Windows 8.1 support to make 3D printing a reality for the masses.

    The 3D printing support is one of the best features for business in Windows 8.1 and MakerBot is among the most important partners that Microsoft has in this field. Redmond actually sells the MakerBot Replicator 2 3D printer in its Microsoft Retail stores. The new Windows 8.1 driver for MakerBot is ready for download right now (link at the end) or you can get it directly from the Windows Update Service. Bre Pettis, CEO of
    MakerBot, said the following with regards to the news:

    We are pretty excited to have our 3D printer driver included in this recent Windows 8.1 release. We have been working closely with Microsoft to prepare the printer driver to provide the familiar plug and play capabilities of Windows with the MakerBot Replicator 2. Having the 3D printer driver be a part of Windows 8.1 rounds out even more of the MakerBot 3D Ecosystem that is designed to make 3D design and printing super easy and accessible.

    In order to install the updated driver, current MakerWare users on Windows 8.1 will need to uninstall older MakerWare drivers. Follow the link from below to install the MakerWare for Windows 8.1 that contains the new 3D Printer Driver.

    Download MakerBot 3D driver for Windows 8.1

    Update: 3D printing tools and innovations for Windows

    Since this article has been written, many 3D tools, software, and features have been released. In order to satisfy this innovation and bring it to a large-scale practice, there is a lot of information that you could use in order to print, design and analyze 3D works. Here are some of the most interesting articles that you can read and get useful information about 3D printing in Windows:

    For more information, keep an eye on our news sections.

    Juniper Network Still not Compatible with Windows 10

    juniper networks windows 8.1

    For many users, Juniper still doesn’t work after the upgrade to Windows 8.1, so you are advised to stick with Windows 8 until support for Windows 8.1 gets released

    Juniper
    Networks provides networking equipment in the form of high-performance Internet Protocol network products and services for thousands of business consumers. Its most known routers are the T-series, M-series, E-series, MX-series, EX-series Ethernet switches and SRX-series security products. ButJuniper Network’s SSL VPN platforms and UAC platforms also run Windows 8.

    However, Microsoft has recently made available the Windows 8.1 update and many Juniper customers have probably made the switch. What they don’t know yet is that the company doesn’t have yet official support for Windows 8.1, so as a result, Juniper doesn’t work after the upgrade for many users.

    On Microsoft’s compatibility center, Juniper Network Connect 7.1 is flagged as not compatible and here are some of the most common problems users are getting in Windows 8.1:

    • Juniper VPN Network connect fails with Error code: nc.windows.app.23712
    • Juniper VPN Client will not connect in Windows 8.1

    Therefore, until official support doesn’t arrive for Windows 8.1, you are strongly advised not to upgrade to Windows 8.1 to avoid such situations.

    What to do if Juniper does not work on Windows 8/8.1/10 devices?

    As we know, the most common problems with Juniper are related to Juniper VPN service. In case you cannot make it work on your Windows device, we strongly recommend you switch to another VPN service from this list.

    We strongly recommend you to start with one of the best VPN services on the market: Cyberghost VPN. It will keep safe your network and your IP address at all costs and it also has great price plans.

    ⇒ Get CyberGhost

    Another great service, preferred by US users which offers a connection secured by over 4000 servers around the world is NordVPN. You can get it at a great price and enjoy its features and good client support.

    ⇒ Get NordVPN

    Though these services are not free (as all premium security services), they will replace Juniper if it doesn’t work on your PC and will allow you to access some premium features.

    Fix: Xbox One S error code 0x80072ee7

    Microsoft launched the Xbox One S console in August 2016 as a slimmer version of the Xbox One. Redmond proudly calls the Xbox One S “the ultimate games and 4K entertainment system” and its specs back Microsoft’s words, with 4K and HDR support, a 40% slimmer body, and up to 2TB of storage.

    However, this model is not immune to bugs, with various issues that affect the overall gaming experience on the Xbox One S. Perhaps one of the most frequent errors is the 0x80072ee7 error code.

    Xbox One S error code 0x80072ee7

    Table of contents:

    1. Check the Xbox Live service status
    2. Test the connection to Xbox Live
    3. Restart your console
    4. Check your internet connection
    5. Clear the cached data
    6. Delete the corrupt files
    7. Use DNS

    How to fix the Xbox One S 0x80072ee7 error

    Error 80072EE7 mainly occurs when users try to open content on your Xbox One S console. In most cases, this error code appears because the Xbox One S couldn’t load the resource users tried to open. Most likely, a network connection error blocks the name of the resource from resolving to an IP address.

    Solution 1 – Check the Xbox Live service status

    If there are any alerts there, you should wait until the service is up and running. Then, try again to access content on your console.

    Solution 2 – Test the connection to Xbox Live

    1. Restart your network device.
    2. Test your connection to Xbox Live:
      1. Scroll left on the Home screen to open the guide > select Settings
      2. Go to All Settings > select Network
      3. Select Network settings > Test Network connection
      4. If there’s more than 5% packet loss, use the Network Connection Troubleshooter to detect and fix the root-cause of the issue.

    xbox one S troubleshoot connection

    Solution 3 – Restart your console

    If everything’s alright with the Xbox Live services, maybe a simple restart can do the trick. Yes, it’s the most popular simple man’s universal solution for just about anything that’s powered by electricity, but you’ll be surprised how often restarting actually resolves the problem.

    Here’s how to reset your console:

    1. Hold the Xbox button on your controller for a few seconds.
    2. The power menu will show up. Select Turn off Console.
    3. Confirm by pressing the A button.
    4. Power on your console again after a few minutes.

    Solution 4 – Check your internet connection

    We already mentioned the Network Connection Troubleshooter above, but there’s another way to check your internet connection. So, if the troubleshooter failed to find and fix any problems, you can try with the manual approach.

    For doing things by yourself, you’ll need to lay down the Xbox, and turn on your computer. Check out this article for tips on how to deal with various internet connection problems.

    Solution 5 – Clear the cached data

    The next thing we’re going to try is clearing the cache on your console. Too much cached data can cause various problems, and the 0x80072ee7 error code might not be the exception. Here’s how to clear the cache on your Xbox One S:

    1. Press the Guide button on your controller.
    2. Go to Settings > System Settings > Select Storage.
    3. Select all the storage devices and press Y on your controller.
    4. Select Clear System Cache.
    5. When prompted with a confirmation, select Yes.
    6. Then turn off your console, and power it back on after 30 seconds.

    Solution 6 – Delete the corrupt files

    There’s also a good chance some of your files got corrupted and therefore causes the given error. If that’s indeed the case, all you need to do is simply delete that corrupt file. And here’s how:

    1. Press the Xbox button on your controller.
    2. Go to Settings Tab > System Settings.
    3. Select your storage device.
    4. Select Games and Apps.
    5. Look for corrupted files, and delete them if there are any.

    Solution 7 – Use DNS

    And finally, if none of the previous solutions worked, you can always go with the DNS. Changing the DNS settings is usually characteristical to resolving internet connection problems on PC, but we can use it for Xbox, as well. Here’s how to change the DNS settings on your Xbox One S:

    1. Press the Xbox button on your controller.
    2. Go to All Settings > Network > Network settings > Advanced settings.
    3. Go to DNS Settings and select Manual.
    4. Type in 8.8.8.8 for the Primary DNS.
    5. Type in 8.8.4.4 for the Secondary DNS.
    6. Restart your console.

    There are various connection error messages that may prevent you from accessing content on your console. Simply select the error message that you see on the screen and the troubleshooter will guide you by listing the actions and checks that you need to perform.

    RELATED STORIES YOU NEED TO CHECK OUT:

    Microsoft Updates Windows 10, 8 Mahjong App with Windows 8.1 Support

    Microsoft has finally updated its popular Windows 8 app Mahjong to get full Windows 8.1 support and was revamped for Windows 10
    mahjong windows 8If you are playing Mahjong on your Windows 8 device and have Microsoft’s popular game installed, then you have probably noticed that it has been updated. And it’s quite an important one since it brings full Windows 8.1 support. This doesn’t mean that the Mahjong app has been crashing in Windows 8.1, but just that it now makes use of the new features found in Windows 8.1

    The official release note includes the following details:

    • Optimized for Windows 8.1
    • General bug fixes & optimizations
    • Added the ability to reset your statistics

    We didn’t get a much more detailed explanation for the update, as many developers choose to provide scarce release notes. But what we make of it is that you can, for example, pin to the start screen of Windows 8 a different size tile. Its description remains the same:

    Microsoft Mahjong is the classic matching game updated with beautiful imagery, intuitive controls, and all the features that fans of Mahjong have come to expect. Enjoy gorgeous graphics and relaxing sounds with multiple themes to choose from. Complete E2puzzles at four levels of difficulty, perfect for mahjong beginners and experts alike. With the dynamic Undo system, you have the option of rewinding to fix mistakes.

    Mahjong revamped for Windows 10

    Mahjong and many other classic games received a fresh coat of paint after the release of Windows 8 OS. Solitaire collection and Mahjong App are now compatible with the latest Windows versions and you can enjoy them on your device.

    In late 2016, Mahjong app received a major design update for Windows 10. Here’s what’s new after the update:

    • A large variety of new themes
    • Daily challenges inserted
    • Undo feature: go back to the point where you made a mistake and fix it
    • Xbox Live Integration

    You can find more information about the update here.

    Have you been playing Mahjong on Windows 8, 8.1 or 10? What do you think of the app?

    READ ALSO: Discounted Windows 8 Apps & Games This Week #14

    GTA San Andreas, Midnight Club LA and Table Tennis to join Xbox One Backward Compatibility on June 7

    If it’s usually up to Xbox’s Major Nelson to announce new additions to the Xbox One Backward Compatibility list, Rockstar Games made an exception today to announce some exciting news. Next week on June 7, Grand Theft Auto: San Andreas, Midnight Club: Los Angeles and Rockstar Games presents Table Tennis will become playable on Xbox One, whether you own a digital copy or still have the Xbox 360 game discs.

    Be aware that both the original Xbox version and the Xbox 360 version of GTA: San Andreas will become backward compatible next week, which is really nice. “Save games from the original Xbox version will not transfer, however owners of that version will get the upgraded Xbox 360 version of the game, featuring higher resolution, enhanced draw distances, and Achievements,” explained Rockstar. It’s worth noting though that the Xbox 360 version is actually a port of the mobile game released on iOS and Android a couple of years ago, so it’s not exactly a true remaster of the original game.

    The two other games may not be as well-known as GTA: San Andreas, but Midnight Club LA is classic open world racing game, while Rockstar Games presents Table Tennis received praise for its technical and challenging gameplay. It’s a really nice surprise for Xbox One owners, but we hope to see Rockstar Games add the Max Payne series and other old classics to the Backward Compatibility list in the future.

    First Xbox One 1806 build now available for Preview Beta Insiders

    Microsoft last night released the first Xbox One 1806 build for Preview Beta Insiders. This build comes with a set of fixes and known issues, the new Groups feature, and much more. Here’s what you need to know before installing on your Xbox One console.

    New Features:

    • In this build we are enabling the Groups feature for all of the Preview BETA ring. You’ll need to take the new system update once available, and then perform a full power reboot of the console before Groups will be enabled for you.
    • Searching for content is now even easier! Now pressing the Y button anywhere in the dashboard will bring up the search dialog. This process is found in many apps, but now you can do it anywhere within the dashboard.
    • The Narrator feature on Xbox One now supports five additional languages, including Spanish, Portuguese, Polish, Swedish, and Dutch. We’re also adding an Australian version of English language for Narrator
    • Mixer Broadcasting— Users can now enable their camera to display full screen while broadcasting.

    Known Issues:

    • Groups may not appear for you on first sign in unless you do a full console reboot after taking the system update. This is being fixed in an upcoming build and should only affect having just taken this system update.
    • The Groups tab in My games & apps may not show after sign in even though you can access Groups in Guide, or you may see “This group does not exist” on Home on first sign-in for your existing Groups. Workaround: Sign in / out to refresh these pages.
    • Some changes might not be reflected when editing Groups between multiple consoles after coming out of connected standby. Sign in/out to fix.
    • Adding the Rewards app to Groups causes you to be unable to access your Groups. This is fixed for an upcoming build.
    • Using special characters in Group names (e.g. &,”) causes issues during Group creation or using the “Add more” flow. Note: emojis are fine. This is being fixed in an upcoming build.
    • You may see issues with Groups if you frequently switch between your non-Preview console and your Preview console. Workaround: Reset your Groups locally on the Preview console through “My games & apps” > Groups, then using the “Reset groups” button at the bottom of the page to resync from the service.
    • Sometimes users may encounter an incorrect Profile color when powering on the console.
    • Work continues on the stability of the Wi-Fi connectivity. If you see any issues please report the problems for investigation.
    • Some users are encountering an issue where their YouTube account is being signed out whenever they launch the app.

    Microsoft finally addressed the issue with errors in the GameDVR and Microsoft Edge in this build, so the company is clearly working on your feedback. We also remind you that select Xbox Insiders can also try out the new Microsoft Rewards app for Xbox, so be sure to check it out if you’re higher up the ring and are a Preview Alpha Xbox Insider.

    Windows Community Toolkit gets major update with new version 3.0

    Back on May 2, Microsoft announced a rebranding of the UWP Community Toolkit to the Windows Community Toolkit. As part of this, the company yesterday released what they are calling the biggest version update yet for the toolkit yet.

    Microsoft dives into the API and other changes with this version 3.0 release in their blog post, but there are several major new features. First of all, there are Fluent updates to existing controls with support for light and dark themes. There’s also new package introducing new controls to access the Microsoft Graph. You can have a look at the other new features below.

    • A new package for WPF and WinForms developers that includes the new Edge WebView
    • A new package for all XAML UWP developer to enable usage of eye gaze APIs in XAML
    • A new package for all .NET UWP developers to help in writing runtime API checks
    • New controls and APIs in existing packages
    • Updated documentation, including code examples in Visual Basic
    • Many improvements and bug fixes

    This release also comes with new controls and helpers to existing packages for the CameraHelper and CameraPreview, UniformGrid, and InfinteCanvas. These make previewing camera frames, responsive layout controls, and infinite scrolling, inking easier.

    You can check out the full list of updates included in this release by heading to this website. You also can learn more about the Windows Community Toolkit by following this tutorial.

    Edge development team, Windows client experience team get shuffled in latest Microsoft reorg

    Back in March, Microsoft shook up its leadership as part of a major internal reorganization inside the company. The creation of new internal organizations were the fruits of that initial reorg, but it looks as though there’s still some fallout left behind some months after. Indeed, Mary Jo Foley reports that more Microsoft development teams are getting shuffled up as part of a new round of reorganization. There are two major changes going on here, and it is not clear if there will be layoffs as a result.

    First of all, there is some internal movement within Edge. Per Foley’s report, Microsoft’s Edge development team is moving back to the Experiences and Devices division, now that Edge is cross-platform. Additionally, the Design team, and the Windows Insiders program are also moving from Windows engineering back to Joe Belfiore’s Windows client experience division.

    Secondly, Microsoft Corporate Vice President Kudo Tsunoda will leave his current spot at the newly created NeXT group. He was actually moved to the head of this group in March and as responsible for Microsoft’s Windows Mixed Reality initiatives, including Story Remix, and HoloLens. Tsunoda’s entire team is also apparently being disbanded, and he will be looking for a new role, perhaps within Microsoft.

    Foley also reports that Executive Vice President Rajesh Jha (head of the Experiences and Devices) will get oversight of the new teams created under the Azure and Windows engineering organization.

    The latest shakeups are definitely interesting and again hint that Microsoft is moving beyond Windows. Let us know in the comments below if you think this reorg is part of a bigger puzzle.

    Sonic & Assassin’s Creed: June’s Games With Gold titles now available on Xbox One

    The Games with Gold titles for the month of June are now available for all Xbox One users, opening up a few weeks worth of entertainment to hold you over until you pick up that shiny new AAA title at the end of the month.

    Assassin’s Creed: Chronicles will be heading up the GWG list this month, followed by the Gold SMITE bundle (including 20 gods and several cosmetic offerings). On the Xbox 360 side of things, you’ll be getting your hands on Sonic All-Stars Racing and Lego Indiana Jones 2. Both of those titles will, of course, be functional through Backward Compatibility on the Xbox One.

    Download Glary Utilities on Windows 10/11, 8 to fix your PC

    You can use Glary Utilities to fix, speed up, maintain and protect your Windows 10, Windows 8 or Windows 8.1 PC. No, Glary Utilities hasn’t released an official Windows 10, 8 app, as much as some of you wouldn’t want that. But if that happens, you know where to find the information. The good news is that Glary Utilities has been update with support for Windows 10, 8.1, so you can safely use it to optimize your Windows 10, 8.1 computer.

    glary utilities windows 10


    The official version, Glary Utilities, comes with other improvements besides Windows 10, 8.1 support, such as updated Japanese, Polish and Turkish translations; rewritten uninstaller and software update in C++, improved disk cleaning algorithm, improved Tracks Eraser tool, minor GUI improvements and some other minor bug fixes.

    Glary Utilities Windows 10 support

    The main feature of Glary Utilities for Windows 10, 8 users is that you can download it completely for free (link at the end).  Using Glary Utilities on Windows 10, 8 or on Windows 8.1 you can clean common system junk files, invalid registry entries and Internet traces. Even more, it will let you manage and delete browser add-ons, analyze disk space usage and find duplicate files. It comes with a plethora of utilities that you’d usually have to pay for. Razvan Mihai Asmanow Serea with Neowin lets us in on more details:

    View and manage installed shell extensions, encrypt your files from unauthorized access and use, split large files into smaller manageable files and then rejoin them. Furthermore, Glary Utilities includes the options to find, fix, or remove broken Windows shortcuts, manage the programs that start at Windows startup and uninstall software. All Glary Utilities tools can be accessed through an eye-pleasing and totally simplistic interface.

    The latest Glary Utilities version features over 20 tools that you can use to maximize your PC’s performance. Moreover, it scans your PC issues eight times faster than before, which means that the whole scan process should complete within minutes.

    So, if your computer is as fast as a snail, simply install this tool, run it and you’ll quickly identify and fix all the issues affecting your computer’s performance. Thanks to its one-click functionality, you’ll quickly get the hang of it even if you haven’t used a PC optimizer before.

    You can install and use Glary Utilities on Windows XP, Vista, 7, and 8. Glary Utilities has been update for Windows 10 and Windows 8.1 32- and 64-bit editions.

    Download Glary Utilities for Windows

    RELATED STORIES TO CHECK OUT:


    Adobe Flash Player Update Solves Windows 8.1 “Not Working” Issues

    The first major update for Adobe Flash Player in Windows 8.1 brings a set of improvements that should take care of “not working” reports from users
    adobe flash player windows 8.1 fixAdobe’s Flash player is one of the most used pieces of software in the world and naturally, it is present on Windows 8 and Windows 8.1, as well. However, some users have been reporting issues with it, as it was not working after installing Windows 8.1 for many of them. Now, more updates have been made available to solve most of these issues.

    This was the first major update, Adobe Flash Player 11.9.900.149 Beta, and it also took care of Windows 8 and Windows 8.1 users, as it came with the following fixes:

    • Windows 8 High DPI Displays – Corrects an issue where some content was not scaling with zoom changes
    • Windows 8.1 Internet Explorer 11 – Corrects an issue where an initial button press was ignored

    If you’re not sure what High DPI means in Windows 8 and Windows 8.1, I recommend you to read this post as it contains a short video explaining it all, especially if you are a developer. However, as you can see, this is still a beta version of Flash Player for Windows 8.1 and Windows 8, so bugs and glitches are expected. Besides the changes for Windows 8 users, here’s what else is new in the update:

    • Windows 7 – Corrects a problem introduced in 11.7.700.224 where Simple Chinese characters were  displayed as a box or question mark on the AutoUpdate dialog
    • Corrects an issue introduced in 11.8.800.94 where the layout of the AutoUpdate notification dialog was incorrect in localized languages
    • Corrects a problem introduced in 11.9.900.4 that only affected the beta, where HTTP Live Streams would not buffer after an Ad insertion
    • Corrects an issue where memory usage doubled with Trickplay mode enabled
    • Windows – Corrects an issue introduced in 11.7.700.164 where the video was not rendering on some systems when using StageVideo with WMODE set to Window
    • Multiple Stability Enhancements

    Following updates have fixed new issues

    Back in 2017 Windows fixed a security flaw which allowed some malicious software to be installed on computers. In case you didn’t download the latest version of Flash Player, we recommend you to check the log in this article and see what you can do in order to secure it.

    One of the most encountered error: ‘Error loading player: No playable sources found’ can now be easily fixed by using one of these solutions. If you use the browser most often for video purposes, and you get this error, our solutions might be very useful.

    December [2017] Patch Tuesday added an important Adobe Flash Player update and fixed the issues that could reset the global settings preferences file. KB4053577 patch covered all Windows versions so all problems with Flash Player were solved.

    Now that almost all browsers have Adobe Flash preinstalled, you can view Flash content without any problems. Check this article to see why you don’t need to Download Adobe Flash for Windows 10.

    RELATED ARTICLES TO CHECK OUT:

    FIX: Windows 10/11 update is taking a bit longer than expected

    Installing Windows updates over-the-air can be tiresome and pushy, but it’s most of the time fast and reliable experience. However, sometimes, and especially with major updates and upgrades (from Windows 7 or 8 to Windows 10), users run into various critical issues. Sometimes there are errors and sometimes issues come with never-ending loading prompts. “It’s taking a bit longer than expected” prompt is the place where lots of users got stuck.

    There are various ways to address this issue. If you’re unable to go past the screen after multiple attempts, we made sure to provide you with the solutions and instructions below.

    How to address “It’s taking a bit longer than expected” update error in Windows 10

    1. Check the storage space and connection
    2. Run Update troubleshooter
    3. Uninstall third-party antivirus and unplug peripheral devices
    4. Update the system via the Update Assistant
    5. Update the system with the external installation media
    6. Perform a clean reinstall

    1: Check the storage space and connection

    Before we move to solutions, we suggest waiting for some time. A lot of users managed to get the updates/upgrades work after some time. Needless to say that it took hours. This depends on your bandwidth and HDD speeds, respectively. Of course, if nothing happens after, say 2 hours, we recommend moving slowly through the list. Also, resetting your PC won’t break the procedure, and, in words of some affected users, it can help.

    In comparison to minor, frequent updates, major updates require a lot of space. Firstly, the updates are downloaded to a dedicated directory and then the installation can commence. Make sure that you have at least 6 to 10 GB of free space on the system partition. Furthermore, we recommend checking the connection. Even after the installation files are securely downloaded, some sequences still require the internet connection.

    After you’ve confirmed that everything is fine but the delay persists, continue with the steps below.

    2: Run Update troubleshooter

    The next obvious step is to try and run the Windows Update troubleshooter which is to be found amongst the other tools in the Troubleshoot menu. If this doesn’t resolve the error, it’ll at least give you a better insight on which is causing the problem at hand. After you run the tool, it should restart the update services, and restart the download of the update files.

    Here’s how to run the Update Troubleshooter in Windows 10:

    1. Press Windows key + I to open the Settings app.
    2. Choose Update & Security.it's taking a bit longer than expected windows 10
    3. Select Troubleshoot from the left pane.
    4. Expand Windows Update troubleshooter and click on “Run the troubleshooter“.it's taking a bit longer than expected windows 10

    In case you’re still stuck on the same screen, move with the subsequent steps.

    3: Uninstall third-party antivirus and unplug peripheral devices

    The next thing you can try concerns third-party applications which most-commonly interfere with update/upgrade processes. And those are antivirus solutions. They can block the system updates or evoke all kinds of different issues during the aforementioned procedures. The community especially regards McAfee and Norton Antivirus, but all others can cause errors, nonetheless.

    In addition, we also suggest unplugging peripheral devices, like printers, scanners, or basically anything else besides the essentials. Major system updates also tend to install drivers during the transition. This can be an issue, especially since the generic drivers are not always fitting the frame.

    4: Update the system via the Update Assistant

    Since the standard update method is far from flawless, we might look in the other direction. There are other means to update or upgrade your system to the latest major build. The first in line is a nifty tool which, for me at least, always worked well. Firstly, it allows you to get the updates faster than usual. The second and more important point — it rarely get’s you stuck. Moreover, it checks for possible compatibility inconsistencies, so you’ll know if the available storage space will make do.

    In case you’re uncertain how to download and use this tool, we provided the step-by-step instructions. Check them out below:

    1. Download the Update Assistant, here.it's taking a bit longer than expected windows 10
    2. Backup your data from the system partition.
    3. Run the Update Assistant.
    4. Click on the “Update now” button.
    5. After the tool checks the compatibility, click Next and wait until the update files are downloaded. This can take a while.
    6. Finally, click update and follow the further instructions. Your PC will restart multiple times until everything is set.

    5: Update the system with the USB installation media

    If the previous approach, for some reason, has failed you, there’s still an alternative. Besides the Update Assistant, Microsoft relies on Media Creation Tool for software distribution. You can use this utility for upgrading right away or, even better, for creating the installation media. For the latter, you can use either an ISO file and burn it onto DVD or create a bootable USB thumb stick. And then update Windows 10. This almost completely eliminates system errors since the update source is external.

    This isn’t such a drag and you get to have the installation media just in case something goes awry in future. Here’s how to create an installation media and update your system that way:

    1. Download the Media Creation Tool from here.
    2. Plug in the USB flash drive with at least 6 GB.
    3. Run Media Creation Tool and accept the License Terms.it's taking a bit longer than expected windows 10
    4. Choose ”Create installation media (USB flash drive, DVD, or ISO file) for another PC”.it's taking a bit longer than expected windows 10
    5. Choose the fitting language, architecture, and edition and click Next.it's taking a bit longer than expected windows 10
    6. Select USB flash drive and then click Next.it's taking a bit longer than expected windows 10
    7. Media Creation Tool will download the setup and copy the installation files onto the USB flash drive.
    8. Restart your PC.
    9. Open File Explorer and access the USB drive.
    10. Double-click Setup and the follow the further instructions.

    6: Perform a clean reinstall

    Finally, if none of the previous solutions brought the resolution, we’re afraid you should reconsider a clean reinstallation as your next step. This isn’t the most preferable outcome, but if there’s nothing else you can do, it should help. The majority of issues occur when Windows 10 is just an upgrade over Windows 7 or Windows 8, so starting from a scratch might do you good.

    We made sure to explain how to perform a clean reinstallation in this article. Also, don’t forget to backup your data before formatting the system drive.

    That’s a wrap-up. Don’t forget to share your experience with this error or provide alternative solutions to help the cause. You can post all your feedback in the comments section below.

    RELATED STORIES YOU SHOULD CHECK OUT: