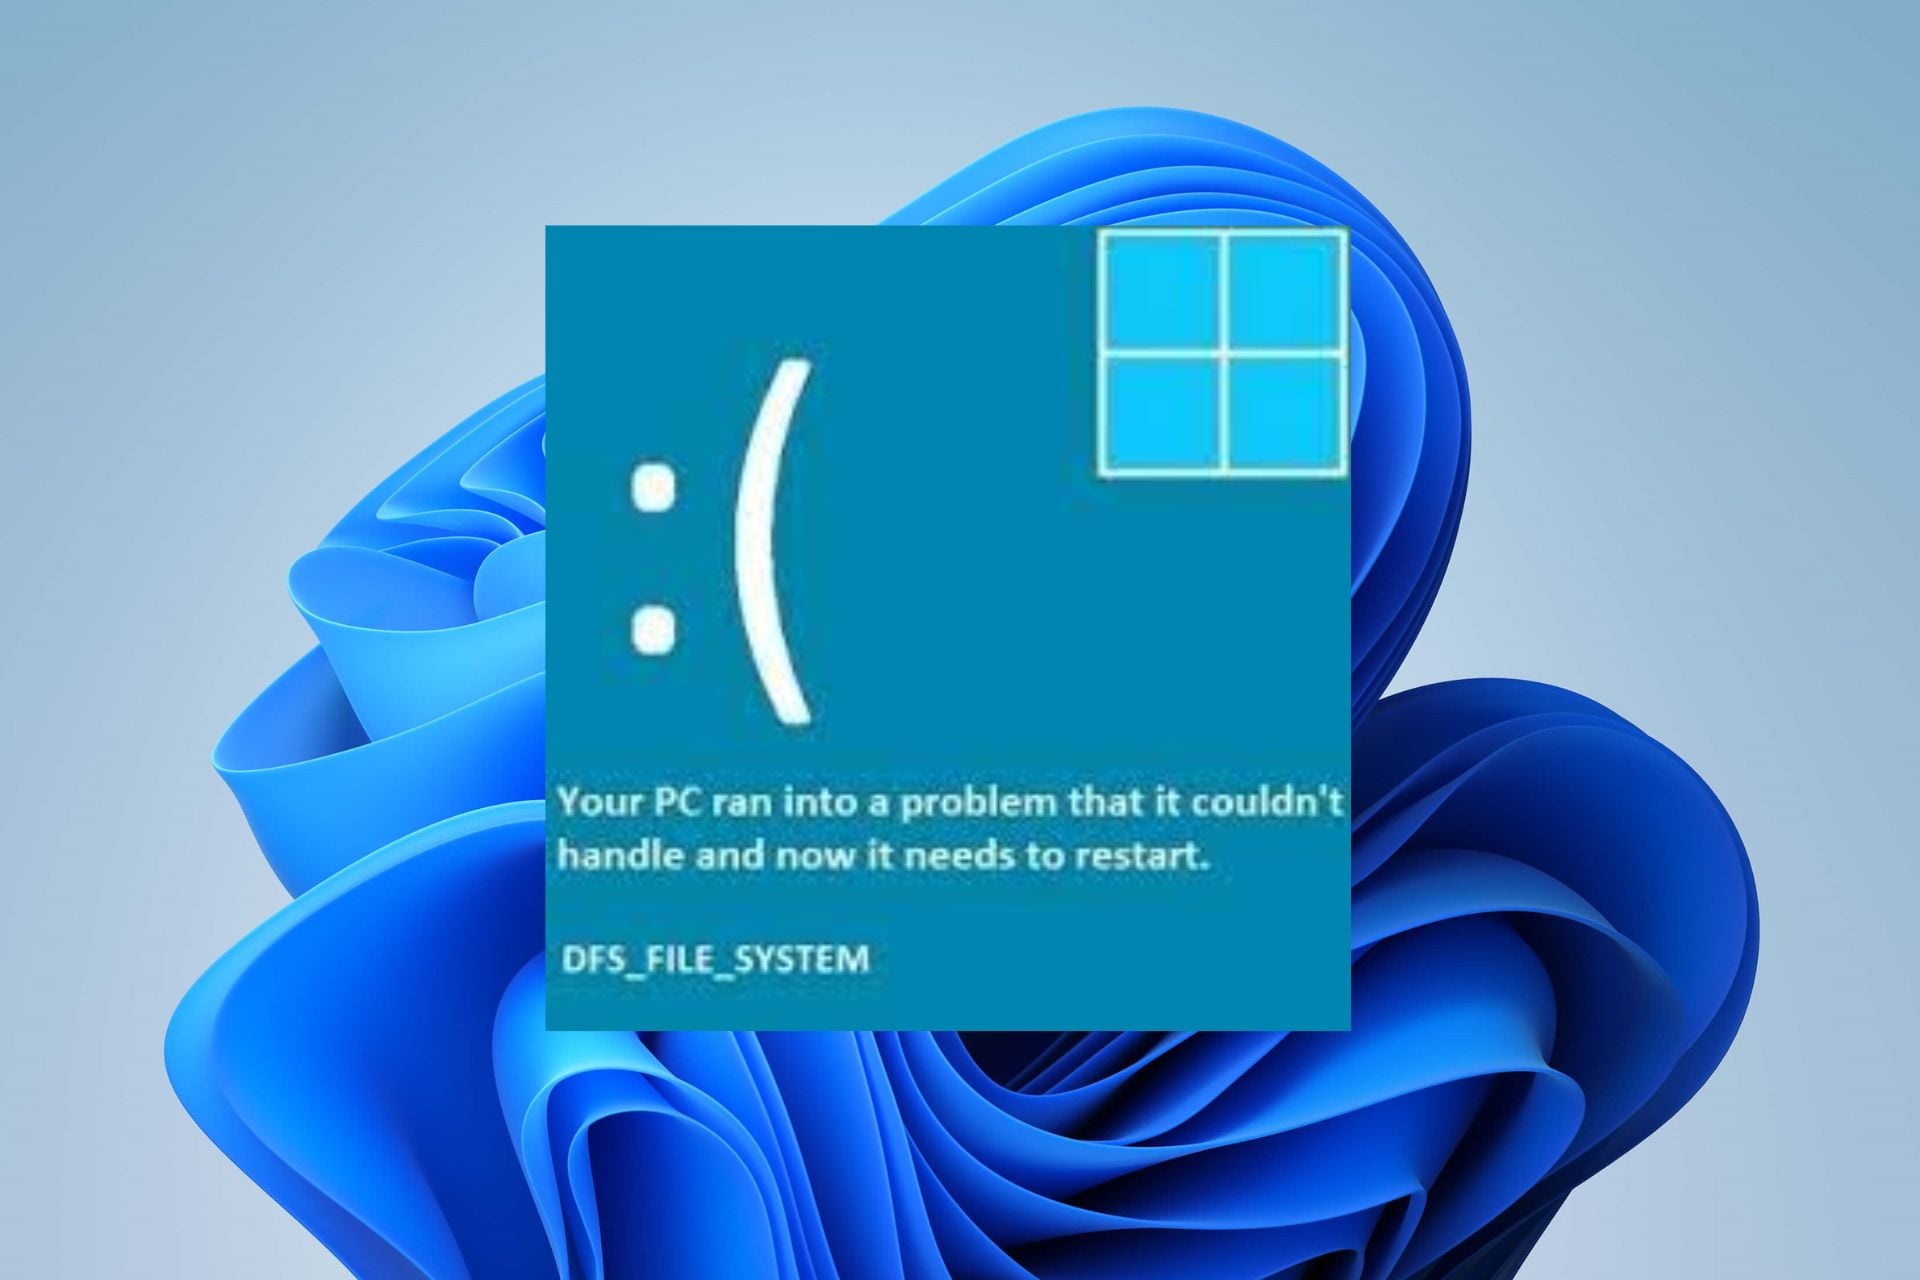
DFS_FILE_SYSTEM (0x00000082): How to Fix This BSoD

The Distributed File System (DFS) enables users to access file storage from multiple hosts through a computer network. However, this process can result in an error DFS_FILE_SYSTEM (0x00000082). Hence, this guide will take you through steps to resolve the error.

Likewise, you may be interested in our guide about DistributedCOM 10005 error and some ways to fix it.

What causes DFS FILE SYSTEM (0x00000082)?

A couple of factors can be responsible for the DFS file error on your computer. Some are:

  • System files are corrupted – If your system files are corrupt, they can prevent the Distributed File System (DFS) from allowing clients to access file storage from multiple hosts.
  • Permission issues – The error can appear when you try to access a distributed file without enough permission from the remote server. It can cause the DFS_FILE_SYSTEM error accompanied by a Blue Screen of Death.
  • Corrupt or outdated drivers – The DFS_FILE_SYSTEM errors are often caused by related hardware, software, and device drivers, that are corrupt to outdated. They impede the activities of the component accessing the distributed file system.
  • DFS_FILE_SYSTEM-related files corrupted from virus infection – The activities of viruses and malware on your computer can cause issues with the system’s performance. Important files related to DFS may be infected, causing the error.

These factors can be distinct from each other in different computers, depending on why the error occurred. Nonetheless, you can fix them by following the troubleshooting steps highlighted below.

How can I fix the DFS FILE SYSTEM (0x00000082)?

Before proceeding with any advanced troubleshooting steps, try the following:

If you can’t resolve the error, try the steps below:

1. Run SFC and DISM scans

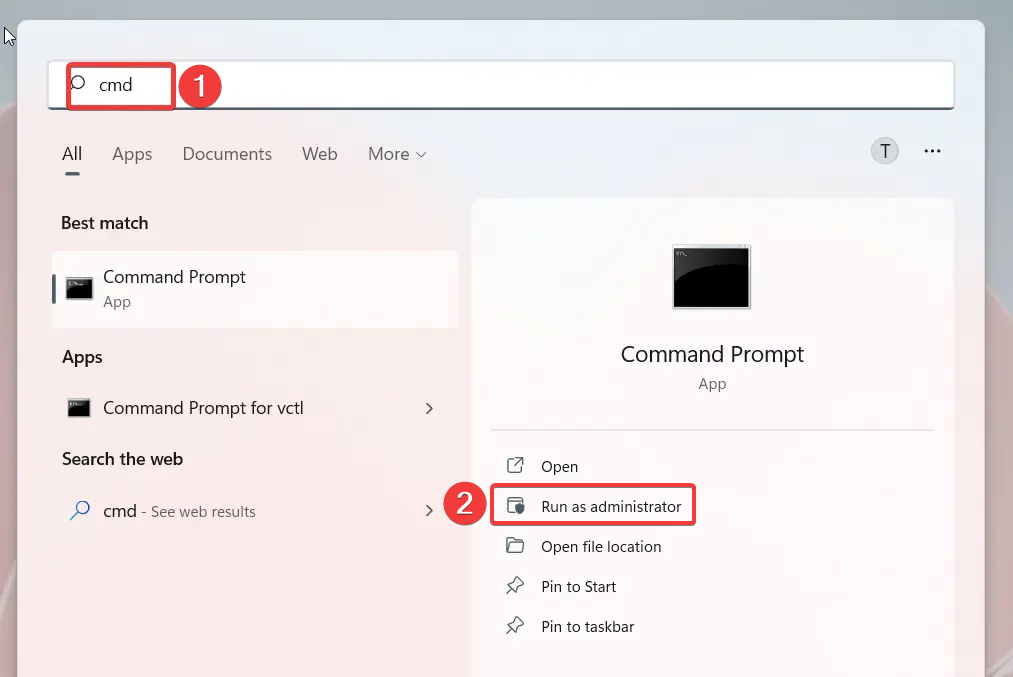
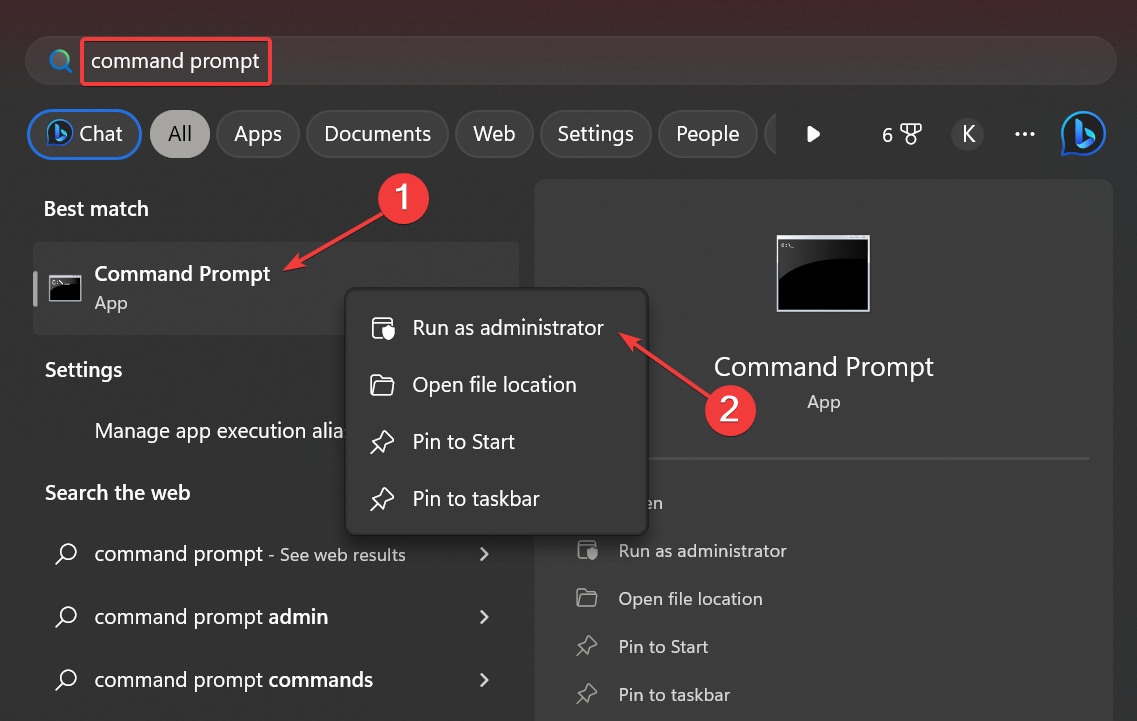
  1. Left-click the Start button, type Command Prompt, and click the Run as administrator option.
  2. Click Yes on the User Account Control (UAC) prompt.
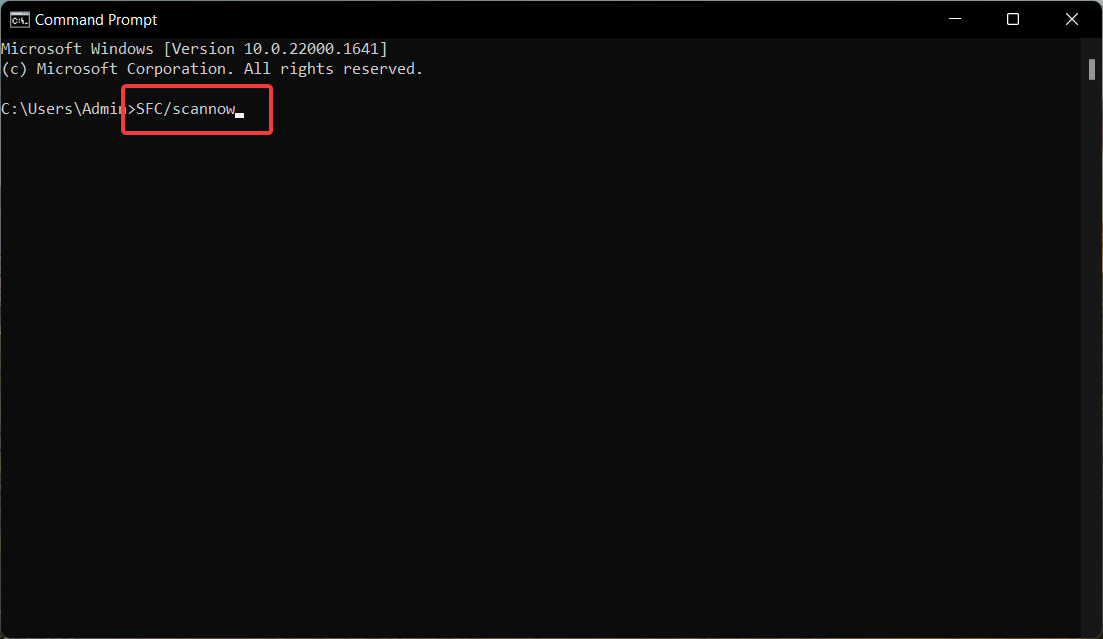
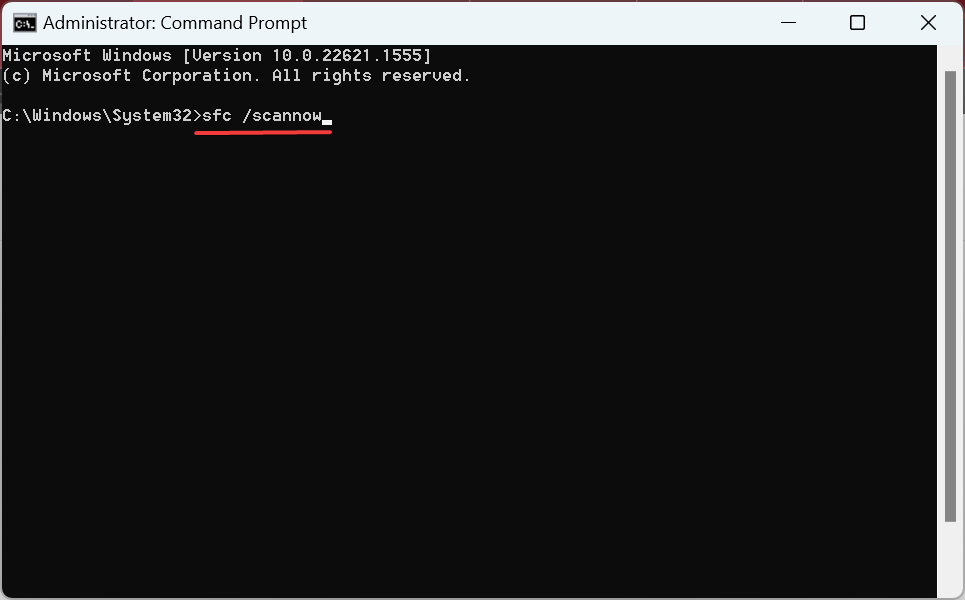
  3. Type the following and press Enter: sfc /scannow
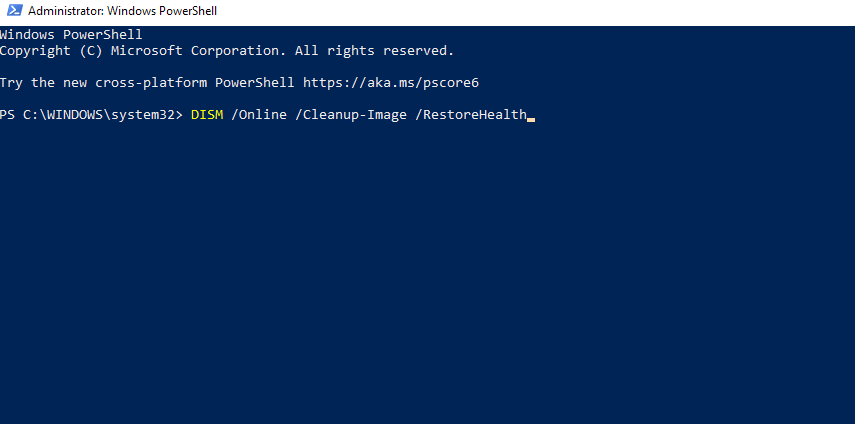
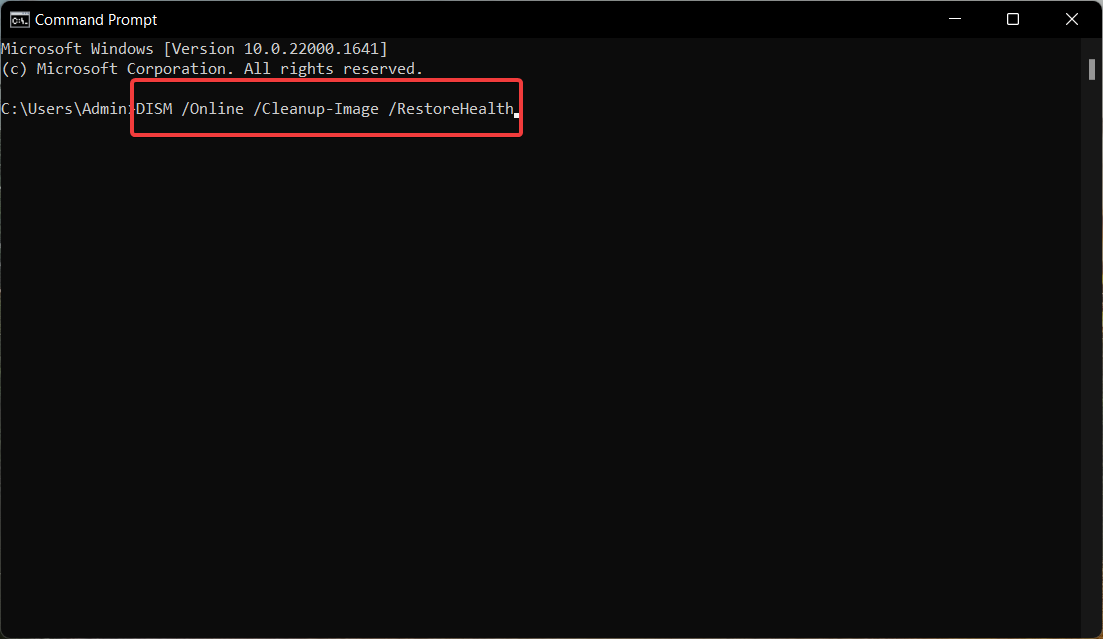
  4. Type the following commands and press Enter: DISM /Online /Cleanup-Image /RestoreHealth
  5. Restart your PC and check if the error persists.

Running an SFC scan will detect and repair corrupt system files causing the Blue Screen DFS_FILE_SYSTEM errors and restore disk health. Check how to fix the run as administrator option if it’s not working on your PC.

Anyhow, you can also consider a specialized repair solution to troubleshoot your PC and repair broken system files automatically.

2. Update device drivers

  1. Press the Windows + I key to open the Windows Settings app.
  2. Go to Windows Update and select the Advanced options.
  3. Click on the Optional Update button.
  4. Click the drop-down button on the Driver Update and checkmark the list of updates available.
  5. Select the Update and Install button and wait for the drivers to install.

Updating your device drivers via Windows update allows you to fix bugs causing them to malfunction and improve performance.

You can read about ways to diagnose and fix Windows Update if it’s not loading on your PC.

3. Run the CHKDSK command

  1. Left-click the Start button, type Command Prompt, and click the Run as administrator option.
  2. Click Yes on the User Account Control window.
  3. Type the following commands and press Enter: chkdsk C: /r chkdsk/f
  4. Restart your PC to see if the error 0x00000082 Blue Screen of Death appears.

Running the Chkdsk command scans the disk drives and fixes the STOP error (DFS_FILE_SYSTEM) from the corrupt hard disk. Check our guide on what to do if Command Prompt keeps crashing on your PC.

4. Update Windows OS

  1. Press Windows + I to open the Settings app.
  2. Click on Check for Updates on the left pane of the Windows Update screen. Wait for the Windows update result and click on Install Update if a Windows update is available.
  3. Restart your PC to see if you can access the DFS system.

The Windows update installs new updates and patches for fixing bugs affecting your PC and resolving the remote connection with other devices.

Read about ways to fix Windows updates not working if you encounter any problems during the update process.

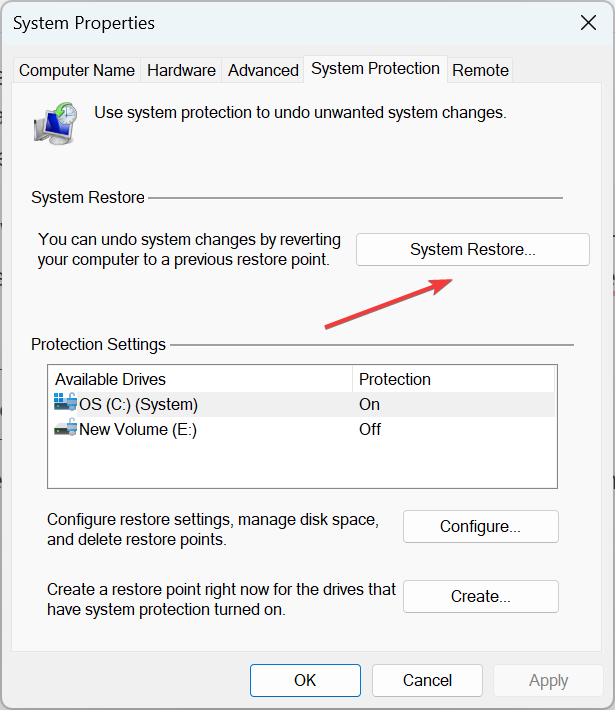
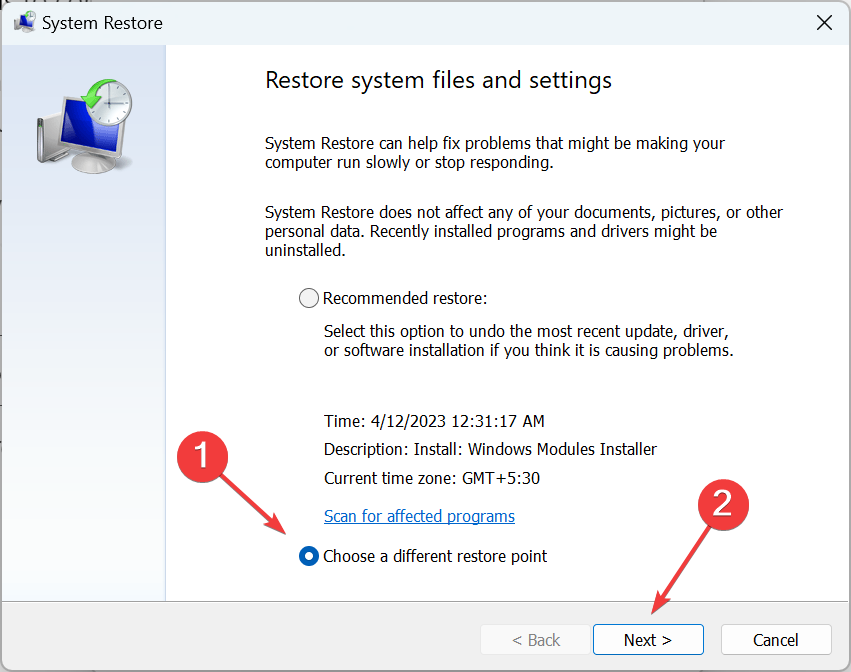
5. Run System Restore

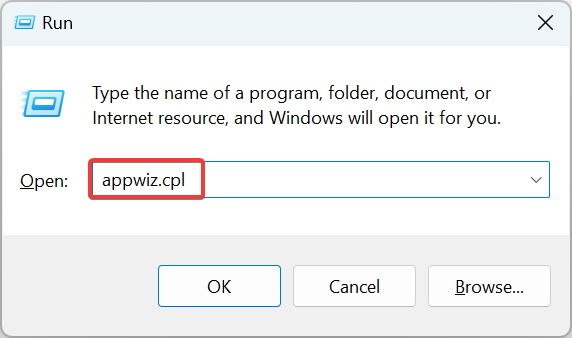
  1. Press Windows + R key to open the Run dialog box, type control, then press Enter to open the Control Panel.
  2. Type recovery in the Control Panel search bar and select Recovery.
  3. Then click Open System Restore.
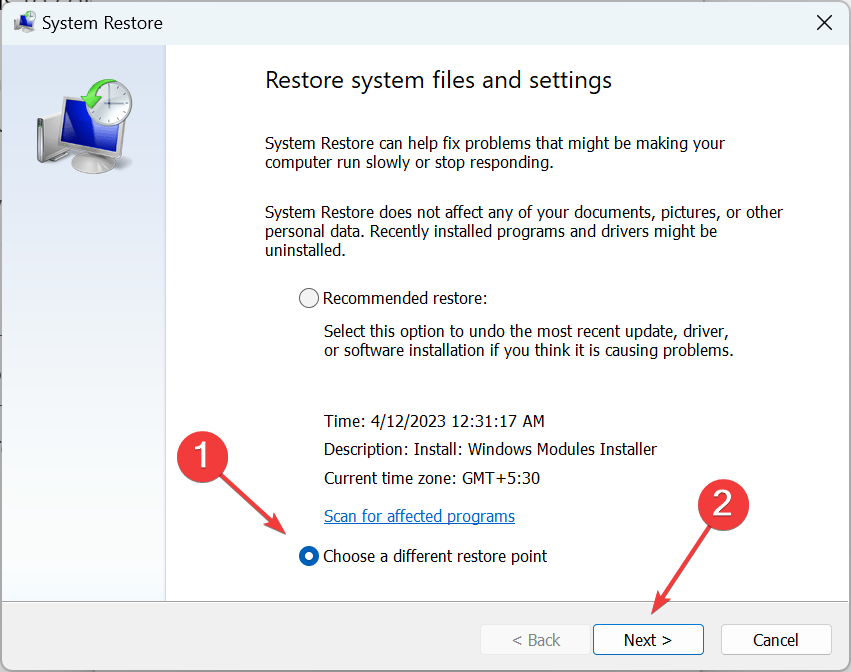
  4. Click Next in the Restore system files and Settings window.
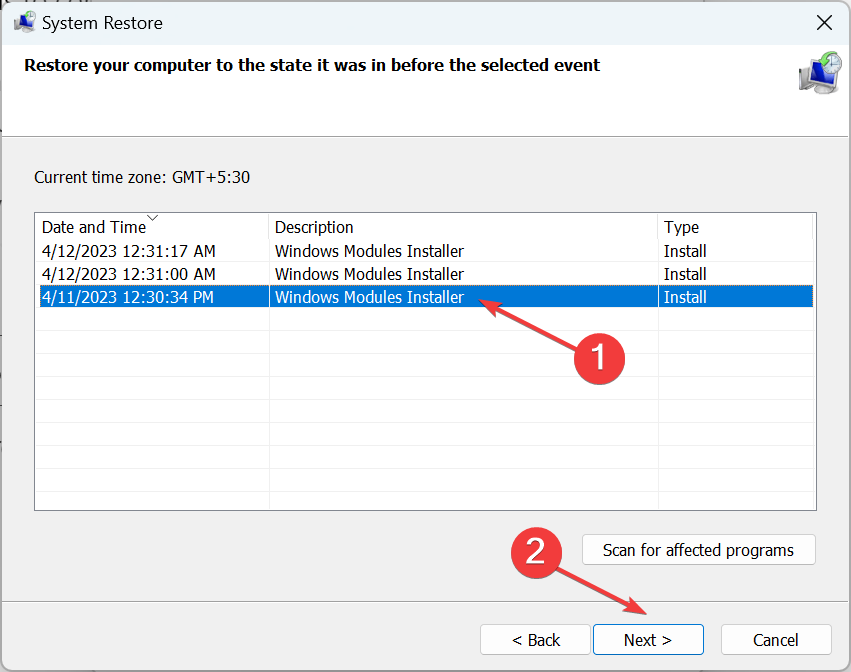
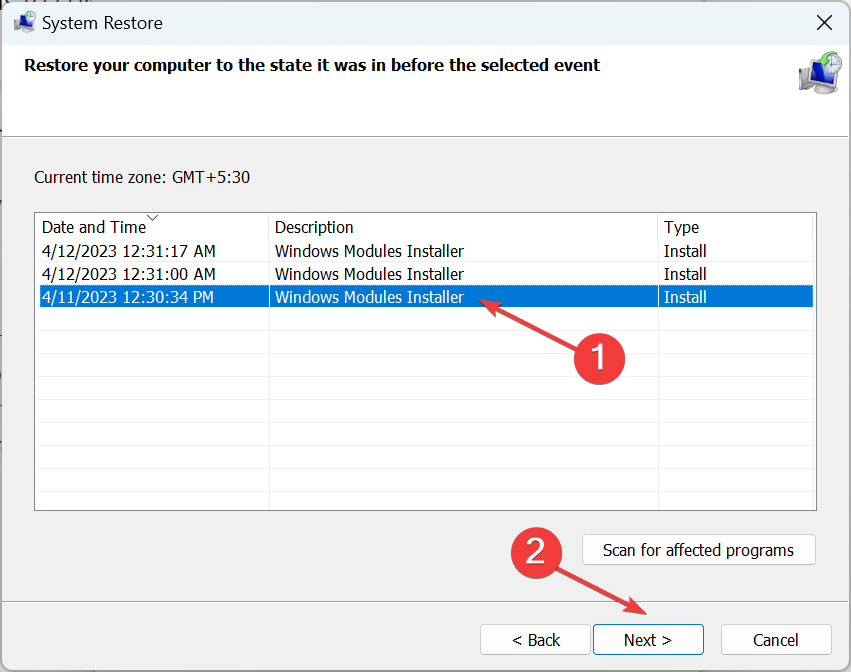
  5. Choose the restore point you want to restore from and click Next.
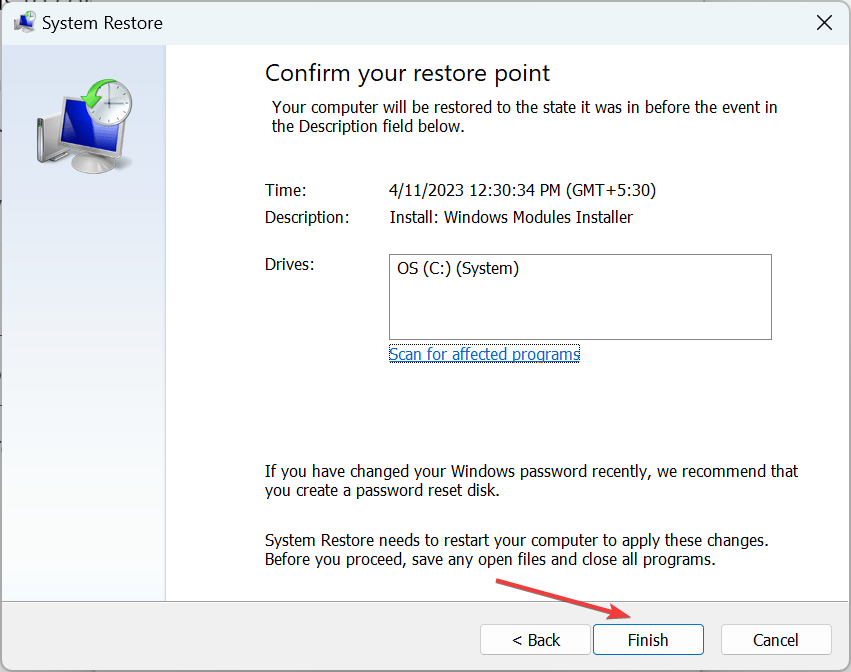
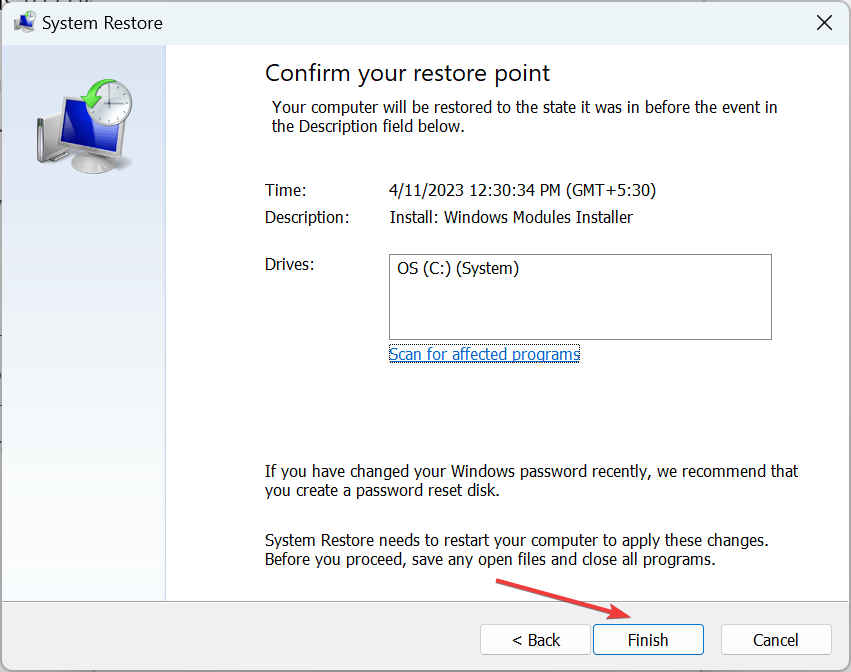
  6. Click on Finish when the process is complete.

The above steps will restore the system to the previous point with its files intact, allowing you to use the Distributed file system. Read our guide on how to fix Restore Point if it’s not working on your PC.

Alternatively, there are various causes of BSoD errors. If you encounter BSoD, check out our guide to figure out why.

Kindly drop your comments if you have any questions or suggestions regarding this guide.

0x0000004E BSoD: 7 Ways to Fix It

If you have encountered the Blue Screen of Death with stop code 0x0000004E, this guide can help! This error is also called  Stop 0x00000004 or STOP 0x4.

We will discuss some expert-recommended fixes to resolve the problem right after explaining the causes.

What causes the 0x0000004E BSoD error on Windows?

  • Corrupted or incompatible system drivers – If your device drivers are outdated or incompatible with the OS on your PC, you may see this error. Keep your drivers updated to fix the issue.
  • Malware infection – Viruses on your PC can corrupt important system files and cause various issues, including this BSoD error. To fix this, you must run a deep scan using an antivirus tool.
  • New hardware issues– Sometimes, new hardware could cause compatibility issues, leading to problems like this stop error. Remove the component and check if it resolves the issue.
  • Missing or broken system files – If your computer’s system files are corrupted, you might face this issue. You need to repair system files to fix the problem.
  • Bad Windows update – If you started facing this issue right after updating your operating system, uninstall the update or check for more updates to fix the error.

How can I fix the 0x0000004E BSoD error on Windows?

Before moving to the advanced troubleshooting methods, restart your computer, check the updates available for Windows, delete the temporary files using Disk Cleanup, uninstall any recently installed application, and remove any newly installed hardware.

1. Run a malware scan

  1. Press the Windows key, type windows security, and click Open.Windows Security open Windows key 0x0000004E
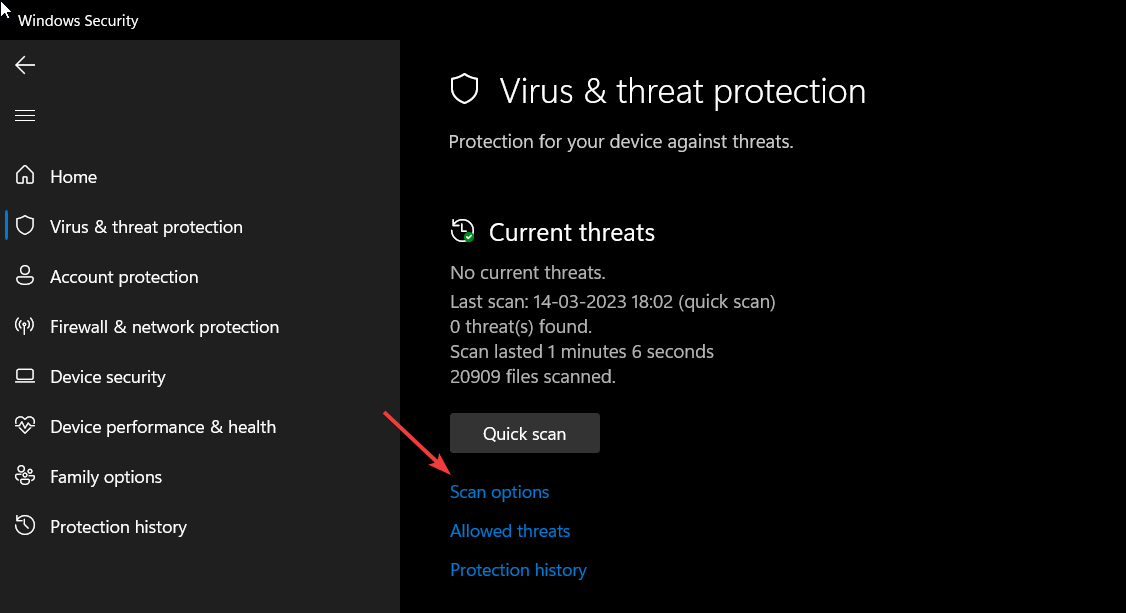
  2. Go to Virus & threat protection and click Scan options.V& T Scan options
  3. Select Full scan and click Scan now.Full scan - 0x0000004E
  4. The tool will initiate a deep scanning process to scour infected files. Once the scan is complete, you will get a list of malicious files, select and delete them to fix the issue.

For more in-depth scanning, you can always rely on third-party software such as TotalAV, this tool will provide you with more powerful scanning tools, allowing you to identify better and remove threats.

⇒ Get TotalAV

2. Run an SFC scan

  1. Press the Windows key, type cmd, and click Run as administrator.CMD elevated 0x0000004E
  2. Copy and paste the following command to repair system files and hit Enter: sfc/scannowSFCSCANNOW CMD
  3. The scan will look for corrupted files and try to restore them to fix the issue. Restart your computer to let the changes take effect.

3. Check the system memory

  1. Press the Windows key, type Windows Diagnostic tool, and click Open.Memory diagnostic tool 0x0000004E
  2. Now click Restart now and check for problems (recommended).MdSched_ restart now
  3. Your computer will restart, and the test will initiate. It will take a few minutes to complete. memory-diag-tool 0x0000004E
  4. Once done, the computer will restart, and the tool will present the results.

Performing this test is essential to check if the memory is going bad, as it is one of the significant reasons for the blue screen error.

4. Check the disk

  1. Press Windows + E to open File Explorer.
  2. Go to C drive or the drive which has Windows installed, right-click it, and select Properties.Properties  C drive  0x0000004E
  3. Switch to the Tools tab, under Error checking, and select Check.Check
  4. On the Error Checking window, click Scan drive.scan drive 0x0000004E
  5. Follow the on-screen- instructions to complete the process.

5. Update the drivers manually

  1. Press Windows + R to open the Run dialog box.Device Manager Run command
  2. Type devmgmt.msc and click OK to open Device Manager.
  3. Go to each hardware component and update them. For example: For Display adapters, double-click Display adapters to expand it. Select a graphics driver and click Uninstall driver.Graphics Driver update 0x0000004E
  4. Click Search automatically for drivers.Update driver 2
  5. Follow the on-screen prompts to complete the process.

6. Perform a System Restore

  1. Press the Windows key, type control panel, and click Open.Control Panel start menu 0x0000004E
  2. Select Large icons for View by and click Recovery.Recovery Control Panel
  3. Click Open System Restore.Open system restore 0x0000004E
  4. On the System Restore window, select Choose a different point and click Next.Next Choose a different restore point
  5. Select the restore point and click Next.Choose a point 0x0000004E
  6. Click Finish to initiate the process of restoring your Windows settings to the previous version.Finish

7. Run System Repair

  1. Press Windows + I to open the Settings app.
  2. Go to System, then click Recovery.System - Recovery Windows 11
  3. Next, locate Advanced Startup, and choose Restart now.Recovery Advanced Startup 0x0000004E
  4. On Choose an option screen, click Troubleshoot.Troubleshoot2
  5. From the Troubleshoot options, select Advanced options.Advanced options  0x0000004E
  6. From the Advanced options, select Startup Repair.Startup Repair
  7. Choose Shutdown.
  8. Now, the tool will start performing the repairs. Once done, it will restart. To check a log file of the scan and understand the issues, navigate to this path: %windir%\System32\LogFiles\Srt\Srttrail.txt

Want to discover the common causes of the dreaded Blue Screen of Death (BSoD) and gain essential knowledge to troubleshoot and prevent this frustrating error? We recommend you take a closer look at our guide. For more solutions to apply, check out this article on solving BSoD Only when gaming.

So, you can follow these methods to fix the 0x0000004E BSoD error on Windows. Try them and let us know what worked in the comments section below.

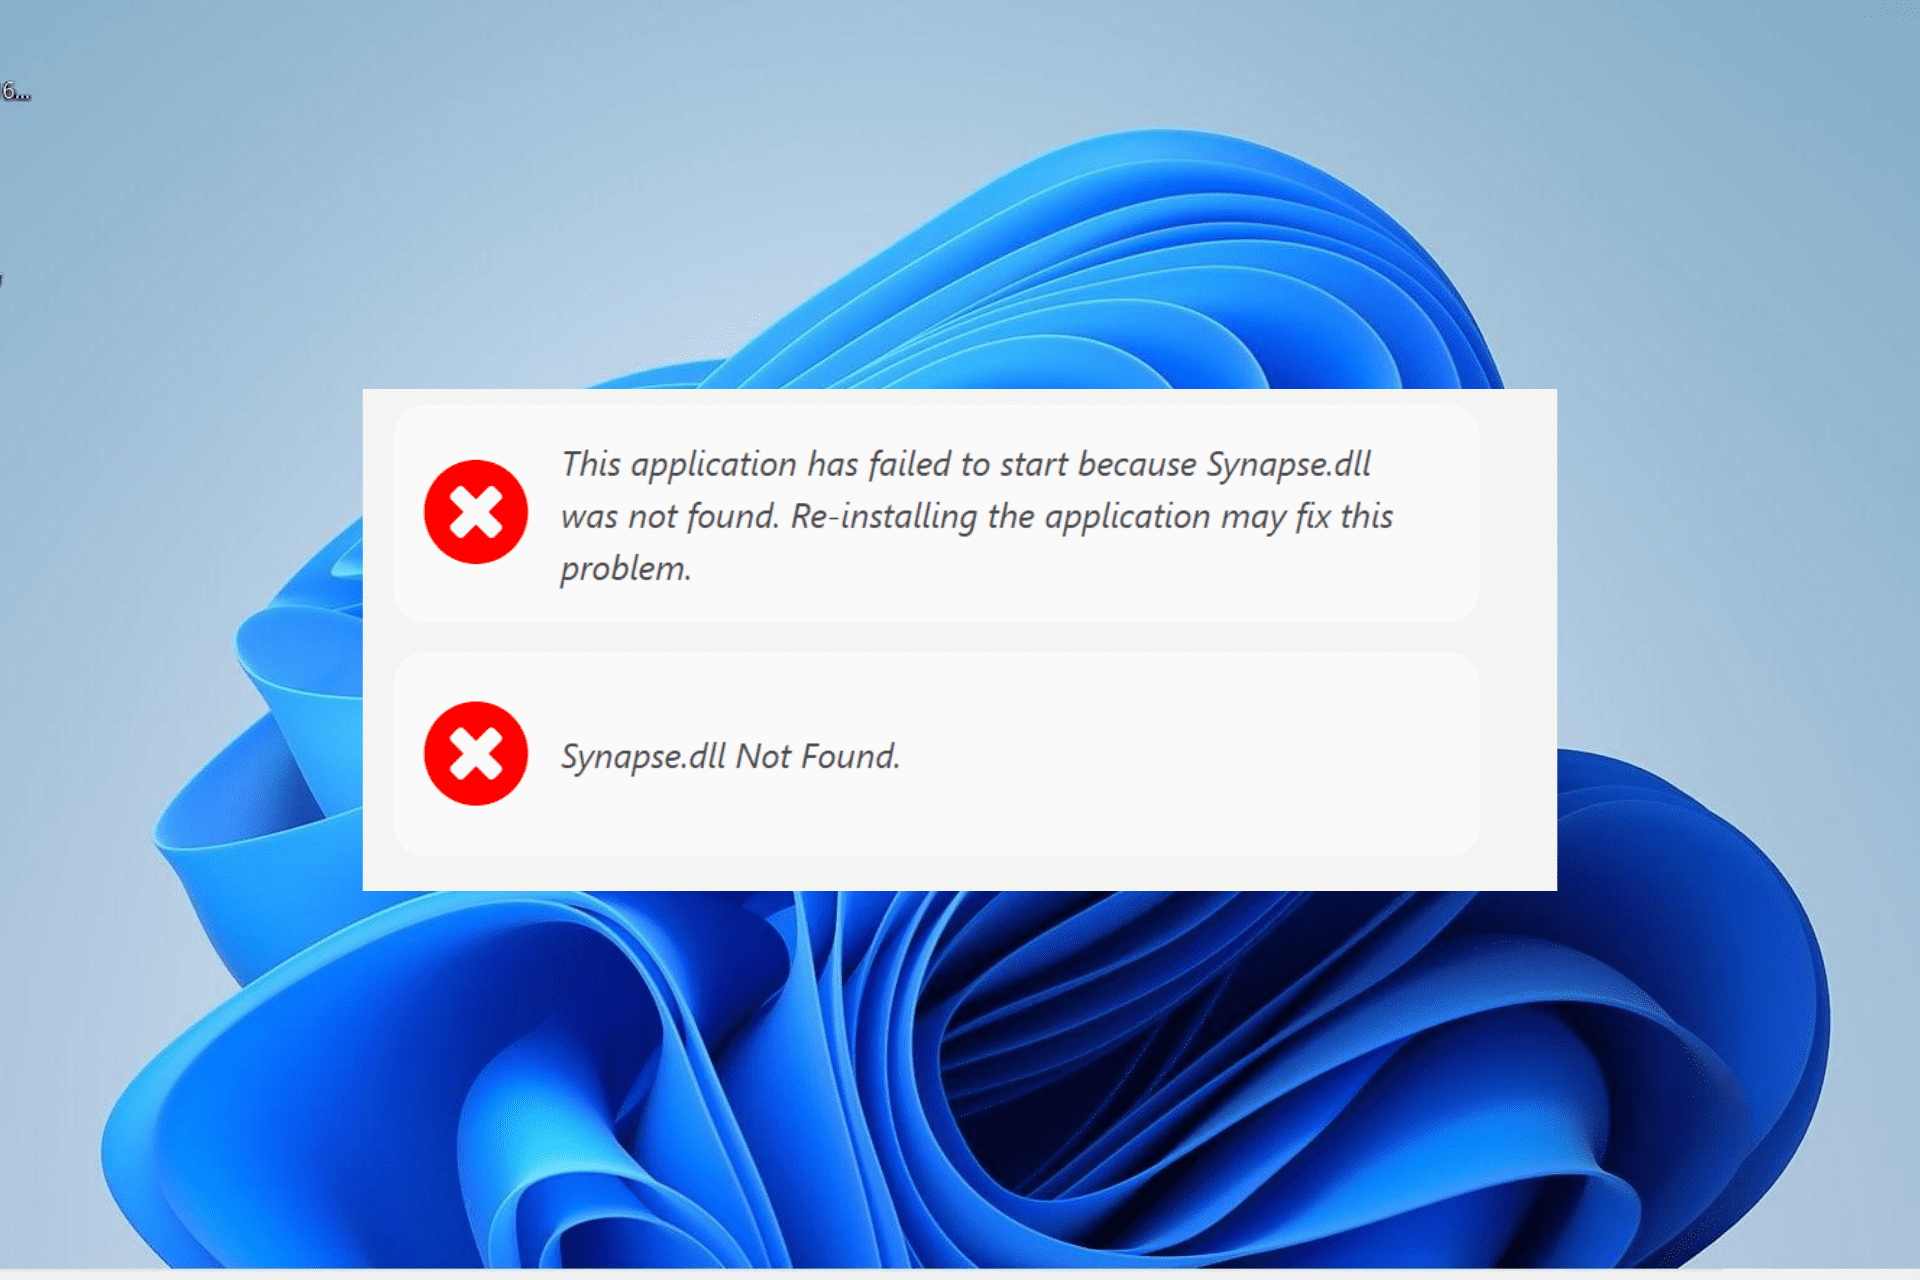
Synapse.dll: What Is It & How to Download It

DLL files play an integral part in the smooth running of Windows PC. Synapse.dll is one of these really important files, as it stores important procedures for opening apps.

However, it is one of the lesser-known DLL files, and some users are curious about it and what it does. In this guide, we will walk you through what the Synapse.dll file is and how to download it if it is missing on your PC.

What is Synapse.dll?

The Synapse.dll is a non-system DLL file installed with software or an app on your PC. It is initiated when you launch the Synapse.dll Module on your PC and is stored on your hard drive.

Synapse.dll houses machine codes, and it plays an integral role in the startup process of the Synapse.dll Module and other related software. Hence if this DLL file is missing on your Windows 10 PC, those apps will not launch.

How to download Synapse.dll

1. Use a dedicated DLL fixer

Synapse.dll is a non-system file that is from software that you installed on your PC. Hence, you are getting a Synapse.dll missing or not found error message, likely due to compatibility issues between the DLL file and your PC.

The best way to get the file working is to use a dedicated DLL repair tool. This tool fixes compatibility issues and ensures that your DLL file and PC are in sync.

2. Reinstall the faulty app

  1. Press the Windows key + R, type control, and click OK.
    control synapse.dll
  2. Choose Uninstall a program under the Programs section.
    uninstall a
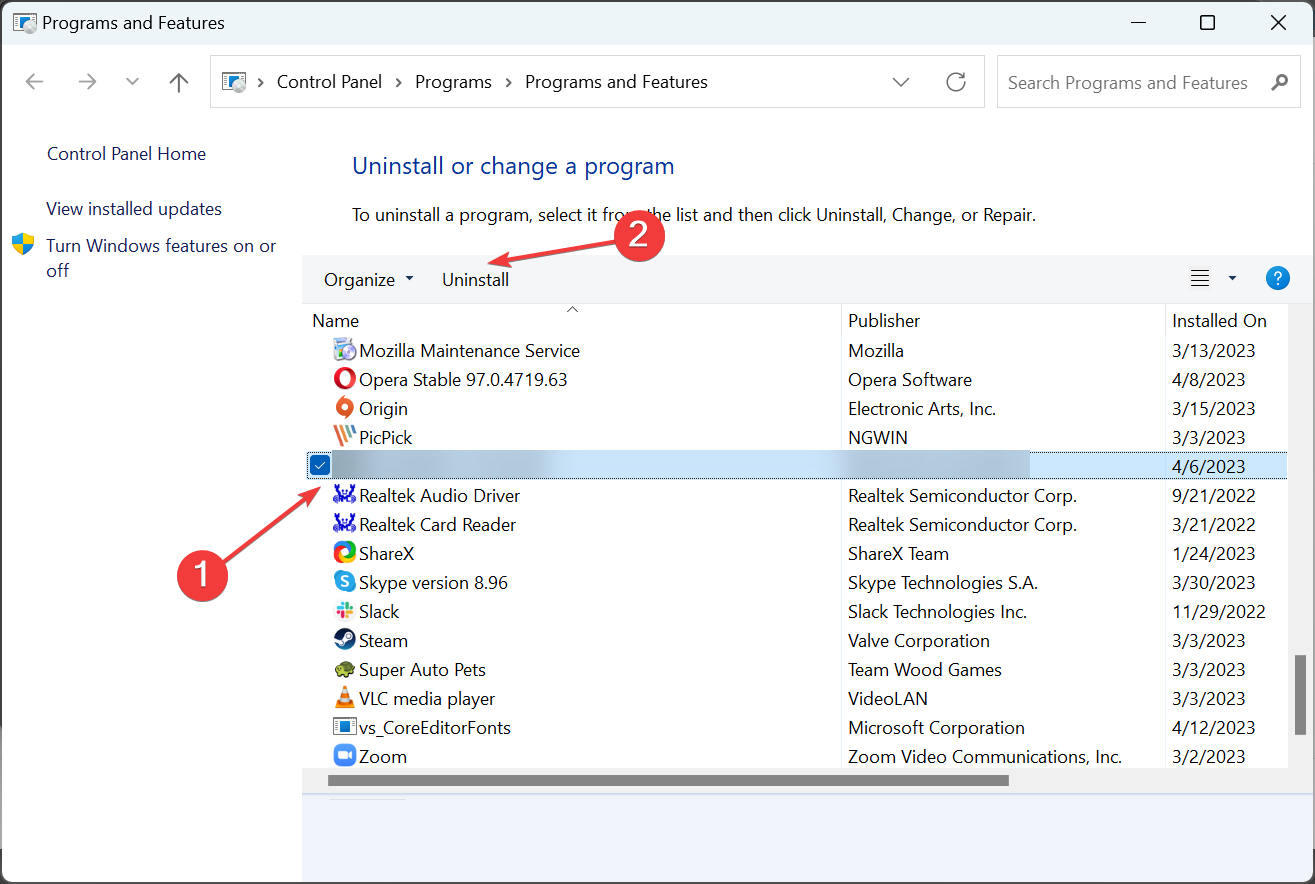
  3. Now, right-click the faulty app and choose Uninstall.
    uninstall  synapse.dll
  4. Finally, go to the official website to reinstall the program or use the original installation disk.

At times, the Synapse.dll missing or not found error message might be due to a faulty app. The quickest way to get it back is to uninstall and reinstall the app from official sources.

If you used an installation disk, reinstall the software using the original version from the developer.

3. Download from a third-party website

  1. Visit a trusted third-party website like DLL me.com.
  2. Click Download.
    download
  3. Now, unzip the downloaded file if it is zipped and move the DLL file to the path below on a 32-bit PC:C:\Windows\System32
  4. If you are on a 64-bit PC, move it to the path below instead:C:\Windows\SysWOW64
  5. Finally, restart your PC.

If none of the solutions above helped you regain your Synapse.dll file, you might need to download it from a third-party website. While this is not advisable, there are still some safe websites out there.

However, you are advised to scan any file you download to ensure its safety.

Another option is to copy the DLL file from a perfectly working PC and move it to the paths above on your device.

This is everything you need to know about the Synapse.dll DLL file. We have provided you with different options to download it; hopefully, one of them works effectively for you.

Similarly, if DLL files are missing on your Windows 11 PC, check our detailed guide to fix it.

Feel free to let us know the option that helped you get the DLL file on your PC in the comments below.

SCCM Task Sequence Error Code 0x80091007 [Fix]

The SCCM task sequence error code 0X80091007 occurs when the user selects a task sequence for a Windows deployment in Configuration Manager, but the task sequence does not start.

When translated, it can be interpreted as error 0x80091007, where the hash value is incorrect. It is possible that the SCCM client could be trying to connect to an old version of the site server, leading to this error. Let’s now delve into possible solutions.

Why does the 0x80091007 error occur?

A task sequence error is an unexpected condition that occurs during the execution of a task. It could be an app deployment or installation. The task sequence can be used to install software, configure settings, and more.

In Configuration Manager, a task sequence error is triggered when the processed content does not match the expected content. 

This error code indicates that there has been a problem with the installation source. If you try to install an application and see this error, it could be caused by:

  • Server issues – It is possible that the SCCM client could not connect to the site server because of network connectivity issues.
  • Incorrect configurations – If there is some issue with the SCCM client configuration, it may be preventing it from connecting to the site server.
  • Missing or corrupted files – If you have a package with multiple source files and one is missing, this will cause an error in your task sequence. This is because the remaining file cannot be processed correctly.
  • Inconsistent content location – If the content location specified in the task sequence doesn’t match up with where the content exists on your server or distribution points, the task may be interrupted midway.
  • Problem with distribution point – If the distribution point is unavailable, client computers will be unable to install applications or software updates and may fail any task sequence steps.

How do I fix error 0x80091007?

Before any in-depth solutions, try the following first:

  • Check network connectivity between the client and the distribution point.
  • Perform a disk check on your hard drive using the CHKDSK command.

1. Redistribute package to the distribution point

  1. Launch your SCCM console and navigate to the following location: Monitoring/Overview/Distribution Status/Content Status
  2. Navigate to the Failed column and select a package displaying the error 0x80091007.
  3. Click on the Error tab, select all distribution points under Asset details, right-click on it, and select Redistribute.

The Distribution Point is an SCCM component that stores packages and programs to be sent to client computers.

When you deploy an application, it will first be copied to the DP and then sent out to the clients. Redistribution refreshes the content and sends new updates and deployments.

2. Disable Binary differential replication

  1. Launch the Configuration Manager console and navigate to the following location: Software Library\Overview\Application Management\Packages
  2. Click on the problematic package and select Properties.
  3. Navigate to the Data Source tab and uncheck the Enable binary differential replication option.
  4. Click on Apply and OK to save the changes.

Binary differential replication is a method of deploying software updates to clients. When you use this method, SCCM sends only the changed data in an update package instead of sending the entire contents of the package. 

This feature aims to speed up the process of patching clients by only sending changes since the last update. In addition, it’s also great for bandwidth savings. 

It is particularly useful when deploying large applications but only needs to update a small portion of the binaries. The issue crops up when you have deployed a package, but there are two different versions of this package in your hierarchy.

Another solution that seemed to work for a handful of users was switching out their RAM sticks. If your memory allocation is insufficient or you somehow end up with corrupt RAM, swap out the system memory with another one and try to run the task sequence again.

Other task sequence errors you may encounter include the 0x8007000f, but we’ve already covered its fixes in our expert guide.

Share with us in the comment section which solution worked for you. We’d also love to hear of other solutions we have not pinpointed.

0x87d101f4 Intune Compliance Error: How to Fix It

When you use Microsoft Intune to manage your devices, you might notice that some devices don’t comply with the required security settings. The device compliance settings are based on your organization’s security policy requirements. 

If a device is not compliant, it needs to be rectified to meet these standards. In this article, we will walk you through how to fix the 0x87d101f4 Intune compliance error to ensure that all your devices comply with your Intune policies’ requirements.

How do I make my device Intune compliant?

Intune will automatically check your device compliance when you enroll it. If you have already enrolled a device in Intune and it is not compliant, it will be marked non-compliant in the Azure portal.

To make your device Intune compliant, you need to register the device with Intune. When you register a device, you will be asked for information about the device and its configuration.

Intune has a list of supported OSes, devices, and browsers. To use your device with Intune, you must ensure it’s compatible. That can be done by ensuring the OS is supported and the device has a valid certificate. 

If you’re not sure whether your device is Intune-compliant, check the following:

  • Is there a Microsoft Intune certificate on your device? If yes, it is Intune compliant. The Microsoft Intune certificate is a trusted, secure certificate used by the Intune service to authenticate and enroll devices.
  • Is a Mobile Device Management (MDM) profile installed on the device? If yes, it is Intune compliant. The MDM profile allows you to manage devices through the Intune console. They’re used to set up and configure devices so that they work with your organization’s policies.

How do I fix Intune non-compliant devices?

Before you settle on performing the advanced solutions, ensure you check off the following:

  • Check that the configuration of your managed devices is correct.
  • Ensure your device meets the system requirements to enroll for Intune.

1. Sync Intune policies

  1. Hit the Windows key and click on Settings.
  2. Click on Accounts on the left pane, then select Access work or school.
  3. Locate your account connected to Azure, then select Info.
  4. Select Sync under Device sync status.
  5. Consequently, you can do so via your organization’s portal from the Company Portal app.
  6. You’ll need to download the app from the Microsoft Store first.
  7. Once downloaded, open the Company Portal app and click on Settings at the bottom left.
  8. Press the Sync this device button.

Manually forcing syncing allows your policies to automatically apply the most recent settings to your users, groups, and devices. This allows Intune to enforce the policies on the device and report compliance status.

In case you encounter issues with Intune not syncing, check out our detailed article on how to navigate this issue. Still, it could take up to 24 hours for enrolled devices to show up, so you need to be patient if the synchronization process doesn’t yield immediate results.

2. Reset the non-compliant device

Resetting a device means removing it from Intune, wiping it, and then adding it back into Intune. This will remove all the settings from Intune, such as VPN profiles, MDM policies, and more. 

When the device returns online, it will automatically download the latest policies and settings from Intune again.

If you still have problems with compliance after resetting your devices, another issue may be at play that is causing the 0x87d101f4 error.

What is the grace period for Intune compliance?

Microsoft Intune has a grace period for compliance, which is the amount of time you have to fix any non-compliance issues before your device/account is considered non-compliant. The default grace period for compliance is 30 days, but your admin can change it.

When you create a new compliance policy, you can choose whether or not to enable the grace period. You can use Configuration Manager to remediate your devices against compliance violations during this grace period.

Hopefully, with these steps, you have been able to resolve the 0x87d101f4 error in Intune. While you’re still here, check out our list of network management software, especially if you’re interested in automatic policy updates.

This isn’t the only error you can encounter, and many reported error code 0x87d1fde8, but we covered that one in another guide.

For any additional thoughts on this topic, leave your comments down below.

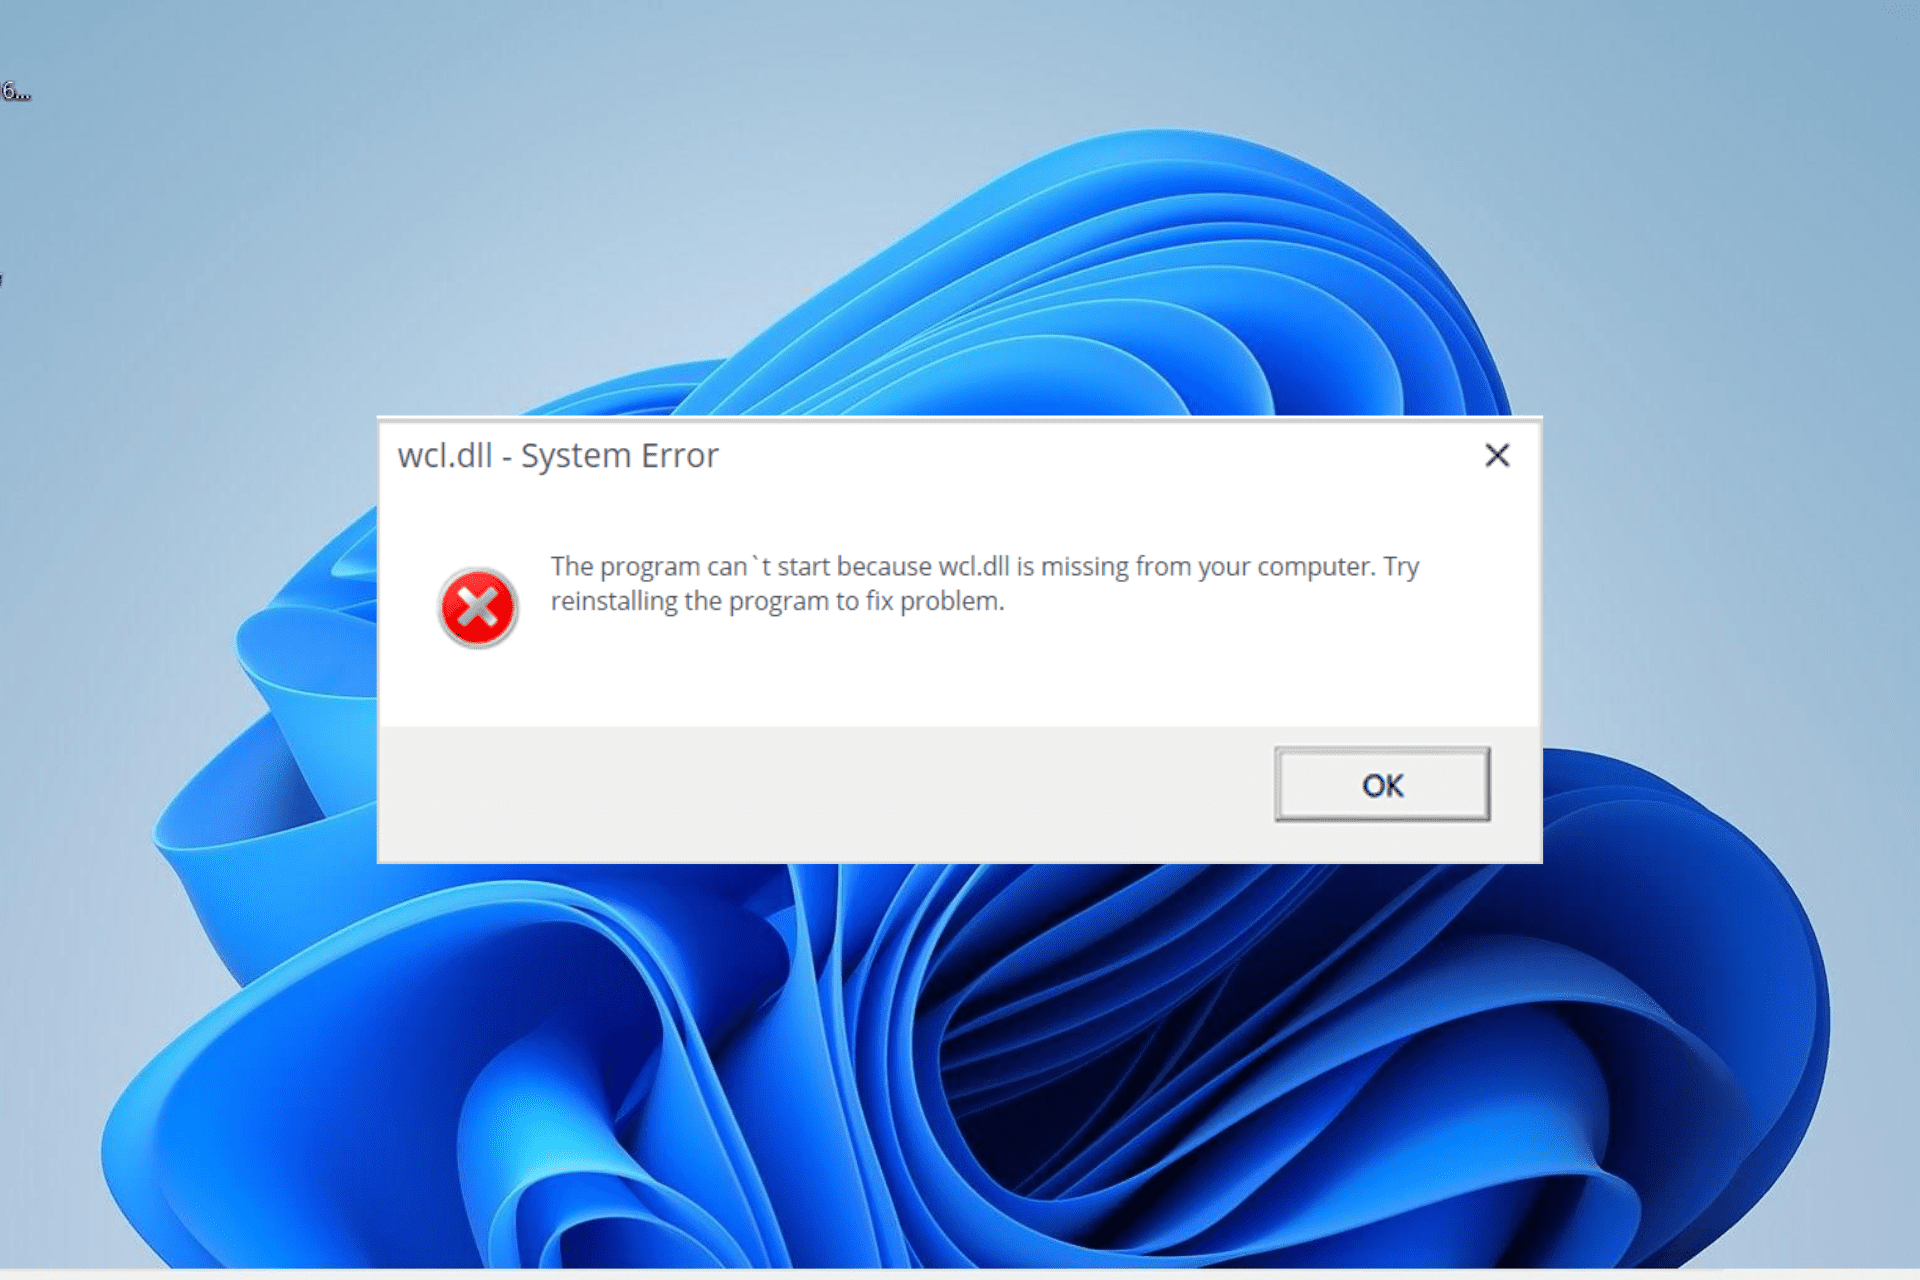
Wcl.dll Was Not Found: 5 Ways to Fix It

Wcl.dll, otherwise known as Windows Class Library, is one of the crucial system files on your PC. It houses some procedures and functions that are important to the operation of your system.

Unfortunately, some users can’t seem to fix the Wcl.dll on their PC. While there are several potential causes for this, the DLL file can be easily restored, as we will show in this guide.

Why is Wcl.dll not found?

Below are some of the reasons you are getting the Wcl.dll was not found error on your PC:

  • Outdated PC: One of the major causes of this issue is an outdated operating system. So, you need to update your PC to solve the problem.
  • Faulty system files: Sometimes, the Wcl.dll DLL file might be missing on your Windows 11 PC because of faulty system files. The solution is to repair these files using a top-notch DLL fixer.
  • Faulty app: Another potential cause of this problem is incomplete or corrupt installation. Uninstalling the app and reinstalling it from official sources should do the trick.

How can I fix Wcl.dll if it is not found?

1. Use a dedicated DLL fixer

If Wcl.dll is not found on your PC, it is likely due to DLL file corruption. Instead of manually downloading and installing the file, we recommend using a DLL fixer tool.

These tools automatically detect and replace any missing DLL files with a few mouse clicks.

2. Update your PC

  1. Press the Windows key + I and select Windows Update in the left pane.
    windows update wcl.dll
  2. Click the Check for updates button.
  3. Finally, download and install all available updates.

Sometimes, the Wcl.dll not found issue can be due to an outdated OS. You can fix this quickly by installing the latest patches on your PC.

3. Reinstall the faulty program

  1. Press the Windows key + S, type control, and select Control Panel.
    control panel wcl.dll
  2. Click Uninstall a program under the Programs option.
    uninstall a
  3. Now, right-click the faulty app and select Uninstall.
    uninstall
  4. Finally, go to the official website to reinstall the program or use the original installation disk.

Sometimes, problems with the app giving the Wcl.dll not found error might be the cause of the issue. The solution to this is to uninstall the app and reinstall it from official sources.

4. Run an SFC scan

  1. Press the Windows key, type cmd, and select Run as administrator under Command Prompt.
    cmd admin
  2. Type the command below and hit Enter: sfc /scannowsfc
  3. Finally, wait for the command to finish running and restart your PC.

Some users have found this issue to be due to corrupt, broken, or missing system files. You need to repair and restore these files to get past the error message.

5. Perform a system restore

  1. Press the Windows key + R, type rstrui.exe, and click OK.
    rstrui wcl.dll
  2. Click the Next button.
    next  wcl.dll
  3. Now, choose your preferred restore point and click Next.
    restore point wcl.dll
  4. Finally, click Finish.
    finish wcl.dll

In some cases, you might be facing this Wcl.dll issue because of some changes you made to your PC. The solution is to restore your PC to a point when everything is working perfectly.

We have reached the end of this guide on the Wcl.dll not found issue. Hopefully, you are able to solve the issue before exhausting the solutions on our list.

If you are still dealing with the issue, you might have to download the file from a trusted site like DLL file.com. Alternatively, you can copy it from another PC.

Similarly, if some DLL files are missing on your Windows 10 PC, check our detailed guide to restore them.

Feel free to let us know the solution that helped you solve the problem in the comments below.

Microsoft pulls down Swiftkey forums page after pushing AI capabilities to the platform

If you use Microsoft Swiftkey and often frequent its forums support page to ask questions, share experiences, and even learn more about new features then you might not be so lucky. It seems that Microsoft has shut down that page.

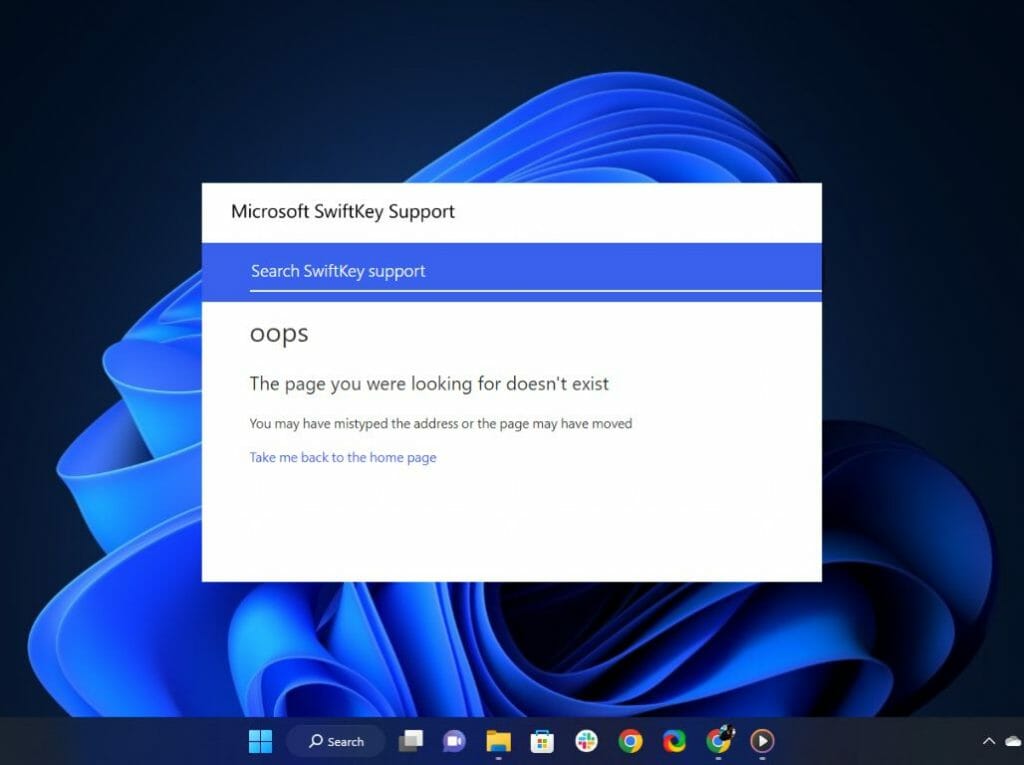
If you happen to visit the page, you’ll run into this error:

oops

The page you were looking for doesn’t exist

You may have mistyped the address or the page may have moved

Take me back to the home page

Ever since Microsoft extended its partnership with OpenAI by making a multibillion-dollar investment, we’ve seen the company integrate AI across its products. Just last week, the company announced that it was expanding AI capabilities to Swiftkey to enhance its usability through Search, Chat, and Tone.

To this end, Microsoft is yet to comment on the matter and give an explanation as to why it decided to do away with Swiftkey’s forums page. However, there’s a lot of speculation going around indicating that Microsoft sort to this change to avoid backlash from users after adding the new Bing AI button as spotted by the folks over at SamMobile.

However, the support page isn’t entirely redundant as there are still some articles linked to the page that will help users get started with the platform as well as links to their social media pages.

Microsoft has previously indicated that it has big plans for the Swiftkey keyboard moving forward, even after scrapping the iOS version from App Store and then restoring it back shortly after. The latest update for the platform shipping with AI capabilities is an indication that it could be here for the long haul but we can only wait and see.

Twitter.dll is Missing? Here’s how to Fix It

Twitter.dll is an essential DLL file that plays an important role in the effortless running of many Windows programs. It is usually associated with Twitter plugin binary components.

However, some users report that this DLL file is missing on their Windows 10 or 11 PC for some reason. If you are also facing this issue, this guide will show you quick ways to get the Twitter.dll file back.

Why is Twitter.dll missing?

Listed below are some of the factors that can cause the Twitter.dll missing issue:

  • Presence of malware: Sometimes, you can face this issue because of the activities of viruses on your PC. You need to perform a full virus scan with Microsoft Defender or a third-party antivirus to fix this.
  • Faulty app: At times, this DLL file might be missing on your Windows 11 PC because of problems with the app you are trying to open. You might need to uninstall the app and reinstall it from official sources.

How do I fix a missing Twitter.dll file?

1. Use a dedicated DLL fixer

While there are different reasons for the Twitter.dll is missing error, all hope is not lost because the file can be restored. To make things better, you don’t necessarily need to download the file to get it working again.

Instead, we recommend using a top-notch DLL fixer that can restore the file with a few mouse clicks. And with Twitter.dll being a system DLL file, rest assured that this tool will restore it successfully.

2. Scan for malware

  1. Press the Windows key, type virus, and select Virus & threat protection.
    virus twitter
  2. Click Scan options.
    scan options
  3. Now, select your preferred scan option and click the Scan now button.
    scan now

In some cases, problems with Twitter.dll occur because of system file corruption caused by viruses. The solution to this is to perform a full virus scan to eliminate malware.

Alternatively, you can also use excellent antivirus software in ESET NOD32 to eliminate even the most hidden malware on your PC.

This software takes a no-nonsense stand against malware, as it detects and removes them before they can cause problems on your PC.

3. Reinstall the faulty program

  1. Press the Windows key + R, type control, and click the OK button.
    control twitter.dll
  2. Choose Uninstall a program under the Programs option.
    uninstall a
  3. Now, right-click the faulty app and choose the Uninstall option.
    uninstall twitter.dll
  4. Finally, go to the official website to reinstall the program or use the original installation disk.

Sometimes, this problem is caused by issues with the app that is giving the Twitter.dll is missing error. What you need to do in this case is to uninstall the app and reinstall it from official sources.

4. Perform a system restore

  1. Press the Windows key + R, type rstrui.exe, and click OK.
    rstrui
  2. Click the Next button on the page that pops up.
    next twitter.dll
  3. Now, select your preferred restore point and click Next.
    restore point
  4. Finally, click the Finish button.
    finish

In some cases, you might be facing this Twitter.dll issue because of some changes you made to your PC. The solution to this is to restore your PC to a point when everything is working perfectly.

5. Download from third-party sites

If you still can’t get the Twitter.dll file back on your PC after trying the fixes above, you might need to download it from a trusted third-party site like DLL files.com.

Alternatively, you can copy the file from another PC of the same architecture and operating system. All you need to do is to move it to your Windows system directory.

With this, we can conclude this guide on restoring Twitter.dll if it is missing on your PC. All you need to do now is to follow the instructions carefully, and things should be back to normal.

If you are dealing with a similar issue in Swresample-ttv-0.dll is missing, check our detailed guide to restore it.

Feel free to let us know the solution that helped you fix this issue in the comments below.

Swresample-ttv-0.dll: How to Download It if It’s Missing

Swresample-ttv-0.dll is an important DLL file crucial to the smooth running of PC apps. However, some users complain that this vital DLL file is missing on their PC.

Thankfully, there are simple ways to download this file and get back to running your apps normally.

Why is Swresample-ttv-0.dll missing?

Below are some of the reasons the Swresample-ttv-0.dll DLL file might be missing on your PC:

  • Accidental deletion: One of the major reasons this DLL file might be missing on Windows 10 or 11 is that it was deleted accidentally deleted. The solution to this is to download and install it.
  • Faulty app: In some cases, this problem might be down to the app you are trying to run. You need to uninstall and reinstall the app from the official sources to get past this issue.
  • Broken DLL file: Sometimes, you might be getting the Swresample-ttv-0.dll DLL file missing error on your PC because the file is broken. What you need to do here is to use a top-notch DLL fixer to repair it.

How can I download Swresample-ttv-0.dll if it is missing?

1. Use a dedicated DLL fixer

DLL files are delicate, and it is usually not advisable to copy them from another PC or download them from third-party websites.

The best thing to do in this case is to use a dedicated DLL repair tool to restore the Swresample-ttv-0.dll file. And with this being a Windows DLL file, the solution below surely adds the missing file with a few clicks of the mouse.

2. Reinstall the faulty app

  1. Press the Windows key + R, type control, and click OK.
    control swresample-ttv-0.dll
  2. Select Uninstall a program under the Programs option.
    uninstall a
  3. Now, right-click the faulty app and select the Uninstall option.
    uninstall
  4. Finally, go to the official website to reinstall the program or use the original installation disk.

At times, the Swresample-ttv-0.dll missing error message might be due to a faulty app. The solution to this is to uninstall and reinstall the app from official sources.

If you used an installation disk, ensure you use the original one from the developer.

3. Download from a third-party website

  1. Visit a trusted third-party website like DLL file.com.
  2. Click the Download button.
    download swresample-ttv-0.dll
  3. Now, unzip the download file and move the DLL file to the path below on a 32-bit PC: C:\Windows\System32
  4. If you are using a 64-bit PC, move it to the path below instead: C:\Windows\SysWOW64
  5. Finally, restart your PC.

If push comes to shove, you might need to download the DLL file from a third-party website. While this is not advisable, you can still get a pretty safe file from sites like DLL file.com.

Another option is to copy the DLL file from a perfectly working PC and move it to the paths above on your device.

We have reached the end of this guide on downloading the Swresample-ttv-0.dll if it is missing. We have provided you with different options; hopefully, one restores normalcy on your PC.

If you are facing other issues like Rsaenh.dll error corrupted file, check our detailed guide to fix it.

Feel free to let us know the solution that helped you fix this issue in the comments below.

Minecraft Legends review roundup: worthy spinoff or legendary failure?

Minecraft Legends reviews are pouring in with the game releasing April 18th. An action-strategy spinoff of the best-selling video game ever, Minecraft Legends is the latest big release in a year that is going to be stacked with them.

Minecraft Legends tells the story of a great hero who saves the Overworld from an invasion by the Piglins—mobs from the Nether who seek to bring its corruption to the Overworld. Gameplay entails the player (as the great hero) directing allies in real-time strategic skirmishes against the Piglin mobs. The player must also gather resources in the game world with which to build defenses against the Piglins. Action elements will also be present in the Minecraft Legends, and the game also supports up to 4 player multiplayer, for both competitive and cooperative play.

But does Minecraft Legends live up to its namesake? Find out in our review roundup.

IGN Minecraft Legends review (7/10)

Minecraft Legends is an engaging strategy game that does a great job streamlining a notoriously complex genre without sacrificing the ever-important element of choice and consequence…The difficulty curve does have the potential to make the late game frustrating, but stellar cooperative and PVP play still make this RTS very worthwhile.

But Why Tho? Minecraft Legends review (8/10)

For long-time fans of Minecraft, Legends presents a new way to play with the familiar, simplifying the tasks of creating structures so players can focus on leading an army of old foes and new friends to save the world from the invading Piglins…At its heart, Minecraft Legends presents a fun, new adventure that shows how versatile the franchise can be. It can be enjoyed in a variety of modes, and as long as your friends are along for the ride, it’s hard to resist coming back for more.

Polygon Minecraft Legends review

Minecraft Legends is a charming portmanteau of genres that manages to simplify the RTS formula while still demanding a fair amount of concentration and strategy…Players might use its mechanics to create truly terrifying multiplayer strategies that escalate in amazing ways. Or they might just enjoy the campaign and then go back to their own realm, to tame their own wilderness away from the chimes of quest givers. Legends is a charming and colorful adventure, and it’s nice to finally befriend the humble Creeper.

Attack of the Fanboy Minecraft Legends review(3/5)

Minecraft Legends has the potential of being an innovative action RTS genre blend, but ultimately, it sets its sights a little too high. Without a multi-layered system of deep and accessible strategy, Minecraft Legends is fun to frolic in but fails to fulfill…the core of Minecraft Legends lacks flavor, depth, and purpose…those who play it will likely enjoy it for a week or two and then bounce to something else.

God is a Geek Minecraft Legends review (9/10)

Minecraft Legends is a fantastic strategy title that has more layers to it than I expected…Despite some issues controlling my mobs, or having them fall off cliffs or down chasms when I least needed it, I can’t think of a similar game in recent memory that I’ve enjoyed playing quite this much. It’s a nice reminder that Minecraft is, at its core, about being creative and having a great time doing it.

Wrap up

Overall the critical reception of Minecraft Legends is generally positive, and it’s looking like another win for the Minecraft brand. There is little doubt the game will do well in terms of sales. Of course, Minecraft fans on Xbox will have the benefit of it being a day one Xbox Game Pass release.
Will you be among the millions playing Minecraft Legends this week? Feel free to let us know what you think of the game down in the comments section.

Minecraft Legends
Minecraft Legends
Developer:
Xbox Game Studios
Price:
Free

Featured image via Steam. 

Xerces-c_3_2.dll Missing Error: How to Fix It

DLL files are essential for certain applications to work, and one of those files is xerces-c_3_2.dll. Many applications rely on this file, and if it’s unavailable, the application won’t work properly.

Missing files can cause a lot of trouble, but it’s relatively simple to restore missing files on Windows 10.

Before we show you how to get this file back, let’s look closer into it and see what it does and why it is so important.

What is xerces-c_3_2.dll?

This is a DLL of Shared Library for Xerces-C++, and it’s used as a part of software libraries for parsing, serializing, and manipulating XML.

Many applications rely on this file, and one is AMD Vivado. If there’s a problem with the DLL file, the application that uses it won’t be able to run at all.

Therefore, you must fix this issue as soon as possible, and this guide will show you how to do it.

How can I fix xerces-c_3_2.dll is missing error?

1. Use a dedicated DLL fixer

Since xerces-c_3_2.dll is a third-party DLL, and it’s used in various applications, you must repair it and fix any issues that it might’ve caused.

While it’s possible to do this by hand, it can be a tedious process, especially if you’re not technically inclined. There are also certain security risks when working with DLL files on your own.

Instead, why don’t you use a DLL repair tool? Usually, DLL issues occur because the third-party file isn’t fully compatible with the operating system.

2. Copy the file to the System32 directory

Note icon NOTE
This solution is for Vivado software. Modifying the System32 directory can cause stability issues, so keep that in mind before using this solution.
  1. Go to the Vivado installation directory. It should be: <Install path>/Vivado/2022.1/lib/win64.o
  2. Locate xerces-c_3_2.dll file and copy it.
  3. Next, navigate to the following directory: C:\Windows\System32
  4. Look for xerces-c_3_2.dll. If you find it, right-click it and choose Rename. Change its name to old_ xerces-c_3_2.dll.
  5. Now paste the new xerces-c_3_2.dll in the System32 directory.

This method can also work for other applications, so you might want to give it a try.

3. Download the file manually

Note icon NOTE
This solution is intended only for advanced users and developers.
  1. Visit the Xerces C download page.
  2. Select the version that you want to download.
  3. Follow the instruction on the page to verify the files.
  4. Add the DLL file to the required location.

As you can see, xerces-c_3_2.dll is an important DLL file, and if it’s missing, certain applications won’t work at all. Luckily, our solutions are here to help.

If you’re on Windows 11, we also have a great guide on how to fix missing DLL files on Windows 11, so be sure to check it out if you’re still having issues.

What method did you use to fix the problem with missing xerces-c_3_2.dll on your PC? Let us know in the comments below.

Docagent.dll: How to Download & Fix All Errors

DLL files, such as docagent.dll for example, are core components of the Windows operating system. As such, it’s important that aren’t corrupted or missing.

However, you can easily fix missing DLL files on Windows 10, and the process can be done by running a couple of commands on your PC.

Before we start fixing this issue, let’s familiarize ourselves with this file and see what it does on your PC.

What is docagent.dll?

Not much is known about docagent.dll, and the software seems to be associated with Microsoft Corporation, so it should be a component of Windows.

In case such a file is missing or damaged, certain Windows features won’t work properly; therefore you must repair it, and this guide will show you the right way to do it.

How can I fix docagent.dll errors?

1. Use a dedicated DLL fixer

Issues with docagent.dll can cause big problems on your PC. To fix this, you might need to repair the file or download it again. This isn’t always easy, especially if you’re not tech-savvy, plus there are potential security concerns to worry about.

To stay safe, it’s better to use DLL repair tools like the one below. This kind of software can fix 100% of issues you have with missing or corrupted Windows files.

2. Perform an SFC and DISM scan

SFC scan

  1. Press Windows key + X and choose Windows PowerShell (Admin). You can also use Command Prompt.
  2. Now type sfc /scannow and press Enter.
  3. Wait for the scan to finish.

If the scan was unsuccessful, you might need to run a DISM scan as well to fix docagent.dll file.

DISM scan

  1. Open PowerShell or Command Prompt as administrator.
  2. Run the following commands:
    DISM /Online /Cleanup-Image /ScanHealth

    DISM /Online /Cleanup-Image /RestoreHealth

After the scan is finished, check if the problem is still there. Alternatively, try running the SFC scan again.

A missing docagent.dll file can cause many problems, but fixing this issue on Windows 10 is quite simple, as you can see.

If you’re using Windows 11, we have a special guide on how to fix missing DLL files on Windows 11, so be sure to check it out for additional solutions.

How did you fix the problem with this DLL file? Share your findings in the comments section below.

Glib-2-vs11.dll Not Found: How to Fix or Download It Again

Every application requires DLL files to work properly, and one of those files is glib-2-vs11.dll. If this file isn’t present, applications that require it won’t be able to work at all.

Missing DLL files can be a major problem, but if you’re having problems with them, we have a great guide on how to repair missing DLL files on Windows 10, so we advise checking it out.

Before we start fixing this issue, let us familiarize ourselves with this DLL file and see what it does.

What is glib-2-vs11.dll?

Glib-2-vs11.dll is a third-party DLL file, and it’s usually associated with the Android Studio application, however, other software can also use it.

As a part of Android Studio, it’s mostly required for Android app developers so they can test their apps in a virtual Android environment on their PC.

If this file is missing, the Android Studio won’t be able to run and the developers won’t be able to continue working on their app.

What can I do if glib-2-vs11.dll was not found?

1. Use a dedicated DLL fixer

The loss or corruption of DLL files can cause major issues on your PC, and in this case, it can prevent Android Studio and other applications that use this DLL file from running.

To fix this issue, it’s advised to download the glib-2-vs11.dll file. However, doing so from third-party sources as this could compromise the security of your system.

Instead of taking such risks, we recommend using the DLL repair software described below. Most issues with third-party DLLs occur because of compatibility issues with the operating system.

2. Reinstall Android Studio

  1. Press Windows key + X and choose Apps and features.
  2. Locate Android Studio on the list and select it.
  3. Click on Uninstall and follow the instructions on the screen.
  4. Once the software is removed, install it again.
Note icon NOTE
To ensure this issue doesn’t reappear, install the application again along with all of the required components.

Missing Glib-2-vs11.dll errors will prevent you from running certain applications, so you must fix this problem as soon as possible.

Our solutions are universal, and they will work on both Windows 10 and 11. Speaking of which, we also have a great guide on restoring missing DLL files on Windows 11, so be sure to check it out.

What solutions did you use to fix this error? Let us know in the comments section below.

Microsoft news recap: PC Game Pass launches in 40 new countries, Bing sees improvement across Microsoft services, and more

Microsoft news recap is a weekly feature highlighting the top Microsoft news stories of the past week. Sit back, grab some coffee, and enjoy the read!

Microsoft brings major improvements to the new Bing across Swiftkey, Microsoft Start, and Skype

Improvements to the new Bing have been brought to a variety of Microsoft’s apps, including SwiftKey, Start, and Skype. The updates provide increased functionality of AI across Microsoft’s apps, whilst making it easier to access the new Bing from whichever app you’re in.

Ubisoft+ Multi Access comes to Xbox consoles, finally

After months of waiting, Ubisoft+ has arrived on Xbox, allowing players to subscribe to access Ubisoft’s library of games and add-ons. Players will need to subscribe to Ubisoft+ Multi Access and then connect their Xbox and Ubisoft+ accounts to enjoy the benefits of the subscription service on Xbox.

The Xbox April Update is coming soon with a new search experience and more

The next monthly update for Xbox consoles is on the way, and it will bring a refreshed search experience sporting a gallery-style results, as well as easy-access filter categories, and quicker access to search via the controller. Additionally, YouTube will be available to search via the Movies & TV app, and be able to set custom active hours when your console is in Sleep power mode.

PC Game Pass gets a full launch in 40 new countries today

Microsoft’s PC game subscription service, PC Game Pass, launched in an additional 40 countries this week, bringing the total supported countries to 86. From Albania to Uruguay and everything in-between, PC Game Pass is now available in a much wider range of countries.

That’s it for this week. We will be back next week with more Microsoft news.

Fde.dll Failed to Load: Best Ways to Fix It

DLL files, such as fde.dll are essential if you want to keep your operating system running smoothly. If you have missing DLL files on Windows 10, you will experience various issues.

In case your DLL files are missing, certain features might not work properly, or applications won’t be able to start at all, so it’s paramount that you fix the missing files as soon as possible.

Before we start fixing issues with the missing fde.dll file, let’s first see what it is and what it does on your PC.

What is fde.dll?

Fde.dll is one of many system files available on Windows. It’s associated with the Folder Redirection Snapin Extension process.

As such, it’s a crucial file on your operating system, and if it’s damaged or missing, you may experience various issues.

What can I do if fde.dll failed to load?

1. Use a dedicated DLL fixer

The loss or corruption of DLL files can pose a major problem on your PC, preventing applications and features from working properly.

To fix this issue, it’s advised to download the missing DLL file, but doing so from unverified third-party sources can jeopardize the security of your system.

Instead of doing that, we suggest using DLL repair software. These tools are designed to effortlessly resolve 100% of Windows DLL issues with ease with just a couple of clicks.

2. Repair your system files

Note icon NOTE
The following Group Policy Settings steps are optional and intended only for advanced users.

Adjust Group Policy Settings

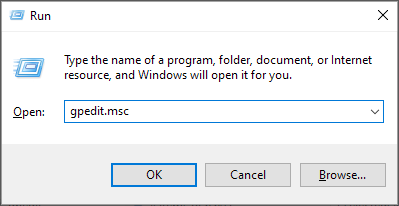
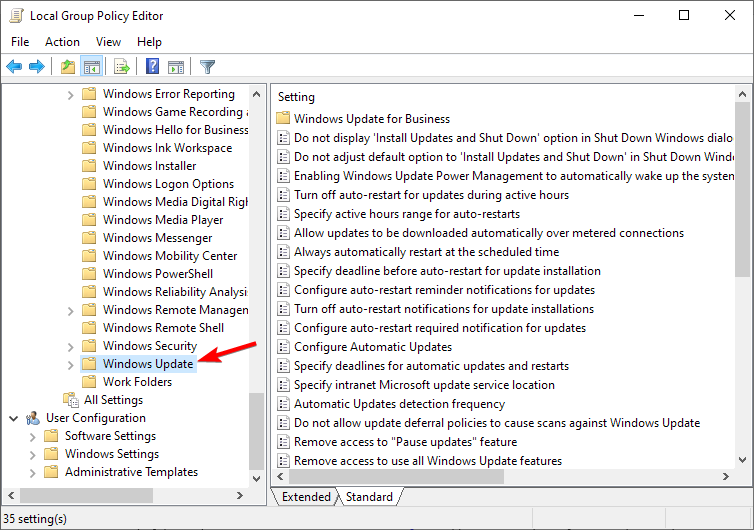
  1. Press Windows key + R and enter gpedit.msc. Click OK.
  2. Once it opens, navigate to the following path: Group Policy\Computer Configuration\Administrative Templates\Windows Components\Windows Update
  3. Locate the following settings and enable them:
    • Enable client-side targeting
    • Allow Automatic Updates immediate installation
    • Automatic updates for Windows Update (from WSUS)

Make sure that necessary tasks and services are running

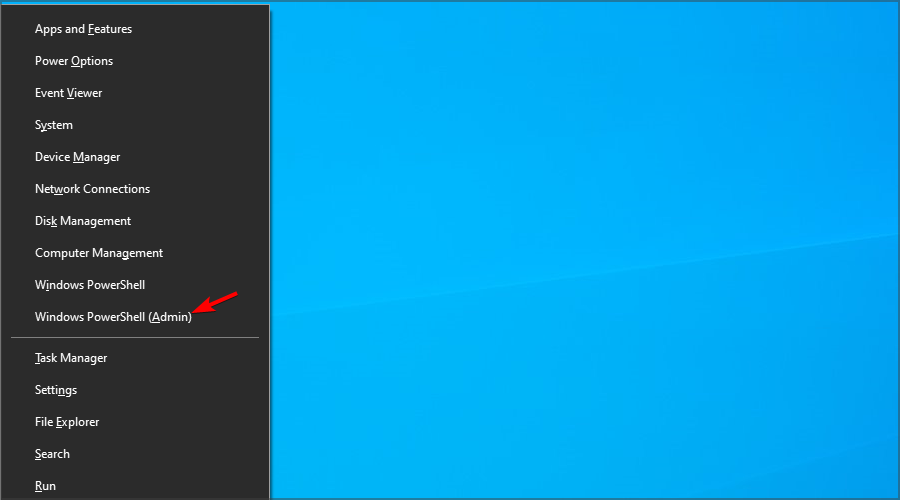
  1. Press Windows key + X and choose Windows PowerShell (Admin).
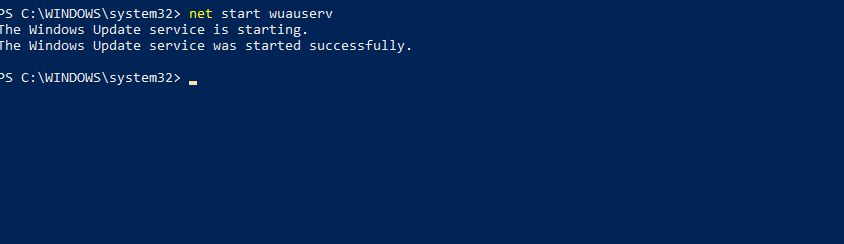
  2. Enter the following commands:
    net start wuauserv
    schtasks.exe /Run /TN "\Microsoft\Windows\Servicing\StartComponentCleanup"

These steps aren’t mandatory if you want to fix the fde.dll file, but they will ensure that the following commands will work.

Run DISM and SFC scans

  1. Open Windows PowerShell or Command Prompt as administrator.
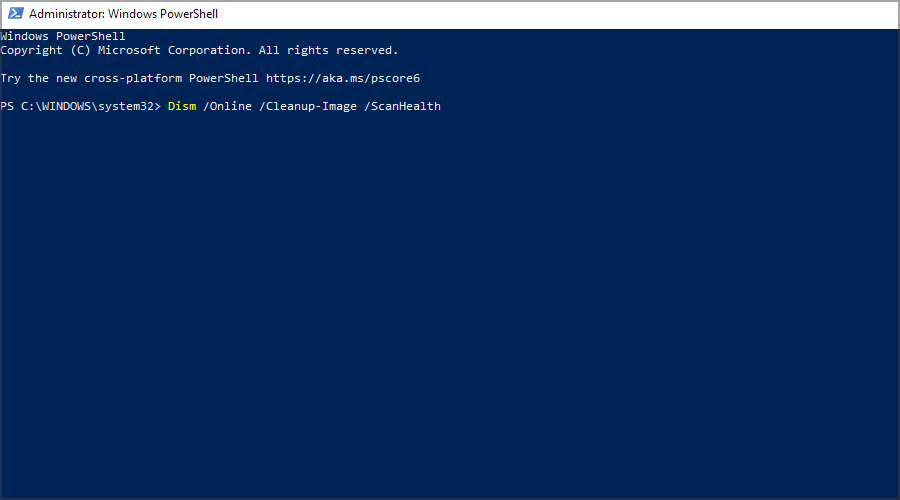
  2. The following commands might take a bit to complete, so don’t interrupt them. Run the following commands one by one:
    Dism /Online /Cleanup-Image /ScanHealth
    DISM /Online /Cleanup-Image /RestoreHealth
    sfc /scannow

Once the scan is finished, check if the problem is resolved. Keep in mind that not all steps are mandatory, except for the DISM and SFC scan.

As you can see, fixing issues with fde.dll is pretty simple. Although these steps are for Windows 10, you can use them to repair missing DLL files on Windows 11 as well.

In most cases, a system scan will help you restore the necessary files without too much hassle. If you’re looking for a more straightforward solution, there is always specialized software you can use.

Have you ever had issues with fde.dll and how did you fix them? Let us know in the comments section.

Aires.dll Missing or Not Found: How to Fix This Error

Aires.dll, also called Adobe Illustrator 11.0 Resource is a part of Adobe Illustrator software. If Aires.dll is missing or not found, the Adobe app won’t start because it can’t access its resources. Missing DLL files can be cumbersome, but our solution below will help you fix the problem.

Why is aires.dll missing from my PC?

There are several reasons why the aires.dll file is missing or not found, but we will highlight the most important ones:

  • Malware or virus infection – If you do not have an antivirus installed, a virus can infect the DLL files such that they can no longer be recognized.
  • Incompatible apps – Installing major updates on your PC leaves several Adobe apps, including Illustrator incompatible, and they may essentially require the aires.dll to run on your computer.
  • Modified or accidentally deleted – Windows can no longer find the DLL files because they may have been accidentally deleted when you tried to free up the disk space.
  • Corrupt Windows Registry – Damaged or corrupt Windows registry can create havoc on your system and can be a possible cause of why the aires.dll file can no longer be found.

Fortunately, you can fix the missing aires.dll error by implementing the proven solutions in this guide.

How to fix the aires.dll missing or not found issue?

Before you proceed toward the complex solutions discussed in this guide, make sure to perform the following actions:

1. Use a DLL Fixer

The missing or not found aires.dll error surfaces due to the incompatibility between Adobe Illustrator and the Windows operating system.

Resolving this by yourself may do more harm to your system, especially if you are new to the Windows ecosystem or do not have experience repairing system-level files.

Interestingly, several DLL fixer tools in the market offer to resolve system file-related issues.

2. Repair the System Files

  1. Press the Start icon on the taskbar, type cmd in the search box, and choose Run as Administrator.aires.dll
  2. Choose Yes on the UAC prompt to launch Command Prompt with administrative privileges.
  3. Type or paste the following command and press the Enter key to initiate the SFC scan. sfc/scannowaires.dll
  4. After the SFC scan gets completed, type or paste the following command to scan the PC with the DISM tool DISM.exe /Online /Cleanup-Image /RestorehealthAires.dll
  5. After the DISM scan is complete, restart your computer and see if the missing aires.dll error persists upon launching the Adobe app.

The SFC and DISM tool will scan your PC to diagnose the damaged or corrupt protected system files and images and replaces them with the cached copy stored in the compressed folder, hence fixing the missing DLL file issue.

3. Scan for viruses and malware

  1. Bring up the Settings app using the Windows + I keyboard shortcut.
  2. Choose the Privacy & Security option from the left sidebar and click Windows Security located in the right section.Aires.dll
  3. Choose the Virus & threat protection option listed under Protection areas.
  4. Click the Scan options located on the right of the Windows Security app.
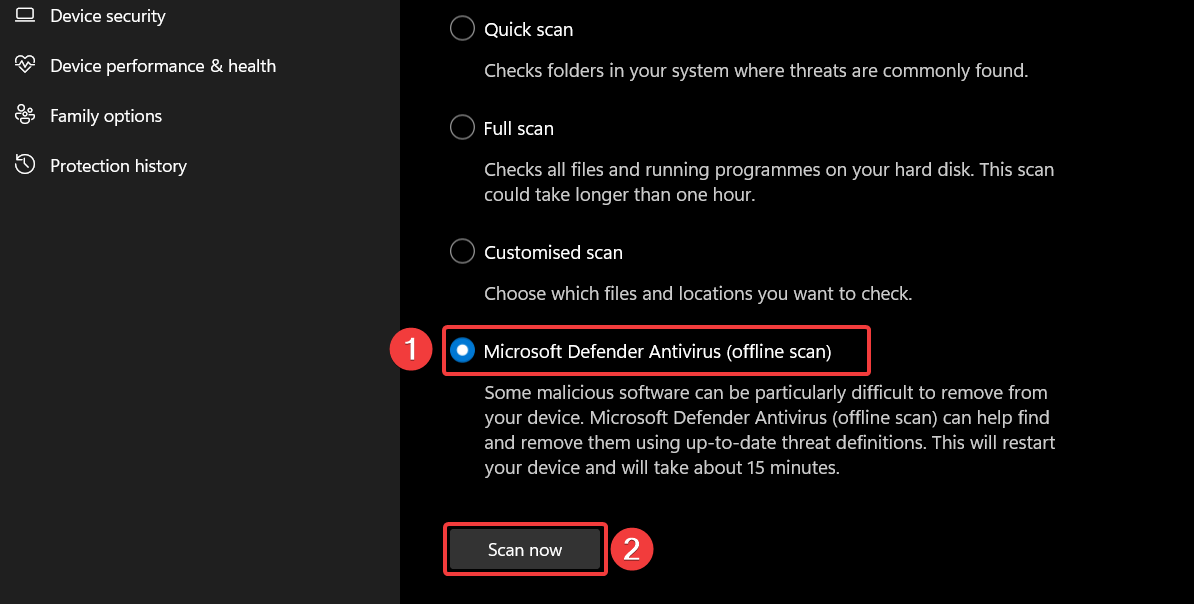
  5. Select the Microsoft Defender Antivirus (offline scan) option and press the Scan now button.Aires.dll

The Windows Defender program will now begin to scan your PC and will remove all the viruses and malware it finds. If you have a thirty-party antivirus installed, you can run a full scan on it to purge viruses or malicious codes.

So it’s more reliable to utilize a multi-layered software that includes malware protection, ransomware, or phishing attacks shield. TotalAV is the solution that will remove any threats in seconds.

4. Manually restore the DLL file

We always discourage downloading apps and files from untrusted websites on the internet to keep your computer protected from online threats that masquerade as the files you looking for.

However, there is no harm in downloading and installing the DLLs from reliable websites such as dll-files.com, which provide different versions of DLL files compatible with your OS and system architecture.

Before initiating the download, you can scan the download link with an online virus scan tool to ensure it is not infected.

After the DLL gets downloaded on your PC, paste it in the following location. C:\Windows\System32

Now, restart your PC to let Windows automatically recognize the restored DLL file.

So that’s pretty much it! We hope you could get around the aires.dll not found error by employing these easy fixes.

In case the Mfc140u.dll is not found on your system, follow this guide to troubleshoot this problem. We also have a new guide on acroiefavclient.dll, so feel free to visit it.

Which of the methods mentioned above worked in your case? Do let us know in the comments section.

Comcat.dll: What Is It & How to Fix It When It’s Missing

Developed by Microsoft Corporation, Comcat.dll is a crucial Component Categories DLL (Dynamic Link Library) that hosts the COM’s Component Categories Manager.

This DLL is required by several Windows services and apps to operate properly, and if the file is not found, an error stating that the app could not be opened will appear.

Why is the comcat.dll missing from my system?

If the comcat.dll file is missing from your system, one or more of the following are the possible reasons:

  • Faulty installation files – If the missing DLL file error occurs during the installation process, it’s probably because the app installation has been restricted.
  • Virus infections – The presence of viruses and malicious software on your computer messes up the system’s performance and damages essential system files, including DLLs.
  • Corrupt or damaged – If the comcat.dll has been damaged, modified, or overwritten during a system update, you will get the missing DLL file error on Windows.
  • Corrupt registry – In some cases, corrupt registry files also prevent the system programs to access the files and folder.

If you are also struggling with the missing comcat.dll file, we will show you effective ways to solve the problem.

What can I do if comcat.dll is missing in Windows?

Before you try the software-related remedies discussed later, make sure you perform the actions mentioned below:

If these prerequisite methods didn’t help you fix the problem, perform the solutions below.

1. Use a dedicated DLL-fixer

Resolving the missing DLL files issues can damage the integrity of your computer, especially if you do not have enough experience to repair corrupt files and execute commands. In such a scenario, authentic DLL fixer software should be preferred.

This authorized solution assists Windows users repair a slew of system-level problems, including missing DLLs, incompatible or virus-infected DLLs, and corrupt system files. The software diagnoses the underlying problems at a button click and automatically tackles them without your intervention.

2. Run SFC and DISM scans

  1. Press the Windows key, type cmd in the search bar, and select the Run as administrator option from the result section.comcat.dll
  2. Now, type or copy-paste the following command and press Enter to initiate the SFC scan. sfc /scannowcomcat.dll
  3. Wait patiently until the SFC scan diagnoses the problem. Then type or paste the following command and press the Enter key to run the DISM scan: DISM.exe /Online /Cleanup-Image /Restorehealthcomcat.dll

When the scanning process is complete, reboot your PC and see if the missing comcat.dll issue persists.

Performing the SFC and DISM scans will repair and replace the protected system files, and as a result, the comcat.dll file should now be available.

3. Manually download the DLL

Downloading DLLs from unreliable internet sources means exposing your computer to various internet threats.

However, you can manually download the comcat.dll from trusted websites such as dll-files.com, having legitimate DLL files.

Before initiating the download, ensure that you have selected the current OS version and system architecture. You can scan the downloaded file with antivirus software to ensure that it is not malicious code masquerading as the DLL file.

Once the DLL file is downloaded, move it to the installation folder of the application that could not be opened because of missing comcat.dll or paste it into the following folder. C:\Windows\System32
After performing the steps, restart your PC as you normally do and see if the missing DLL error is resolved.

4. Perform System Restore

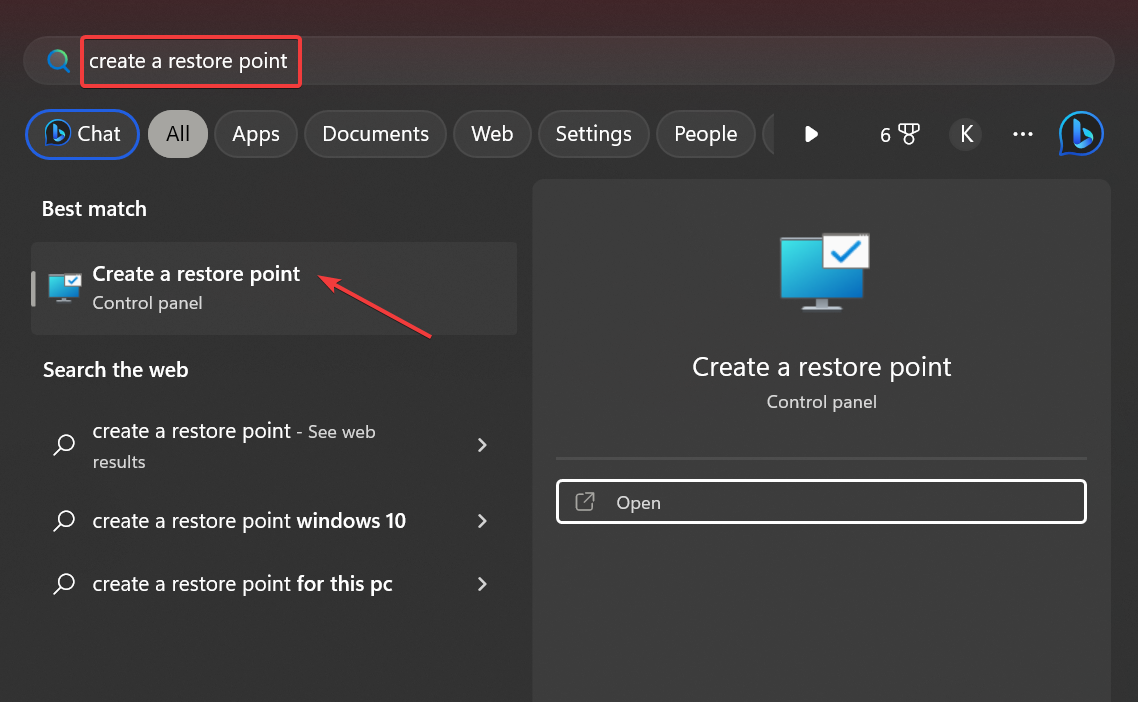
  1. Press the Windows key to launch the Start menu, type create a restore point in the search box, and select the relevant search result.comcat.dll
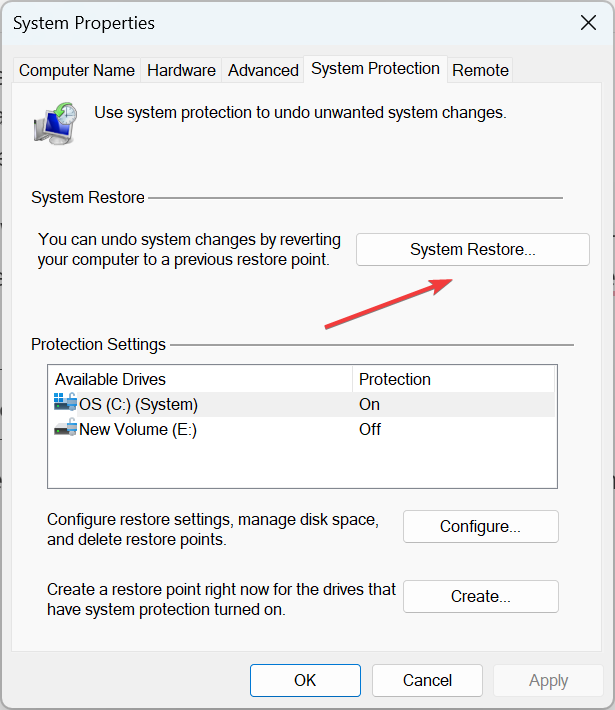
  2. In the System Properties window, click the System Restore button located under the System Protection tab.comcat.dll
  3. Press the Next button.
  4. Choose the suitable restore point where the programs were functioning properly and press the Next button.
  5. Click Finish on the Confirm your restore point window to initiate the system restoration process.

Restoring your system to an earlier point in time will roll back all the changes made in your computer that may have damaged the comcat.dll file.

That’s it! Implement these workarounds in the same sequence as mentioned to fix the missing comcat.dll file and restore the system performance.

Also, you may want to restore the Emp.dll file on your computer if Windows does not find it.

Which of the methods suggested in this guide worked to fix the missing comcat.dll error? Do let us know in the comments section.

Ck2.dll Missing or Not Found: How to Fix It

Ck2.dll, a DLL (Dynamic Link Library) file developed by Virtools SA, is an essential system-level file that ensures the Windows OS functions properly. This DLL file contains a set of procedures, and driver functions that Windows utilizes to perform the tasks.

If the ck2 msvcp100.dll goes missing or gets corrupt, the programs that require this DLL file won’t function on your computer.

Why is the ck2.dll file missing?

Windows cannot find the DLL files for several reasons; however, the notable ones are as follows:

  • Accidental deletion – The DLL file could get deleted unknowingly if you recently uninstalled program a program or deleted files to free up disk space.
  • Corrupt or damaged – Unreliable third-party software can overwrite the DLL file, which cannot be used by the operating system anymore.
  • Malware attack – The presence of malware or virus leads to a series of problems, and that’s why you should have a third-party antivirus installed on your computer and stay protected.
  • App incompatibility – Installing a major Windows update can make the software incompatible with your PC, and you will get the missing DLL file error.

Regardless of why the ck2.dll file is missing, the solutions in this guide will help restore the DLL so that your system can function flawlessly.

How can I fix the missing ck2.dll error?

Before moving on to the advanced fixes, you should try these steps on your PC:

If you still run into the ck2.dll not found error, perform the following tasks.

1. Use a DLL fixer

Ck2.dll is a system-level DLL file on your computer hence restoring it should be performed with extreme caution. To avoid messing up your system, you can utilize a DLL fixer as a perfect solution for novice users to repair the missing, corrupted, and overwritten DLL files on your computer.

2. Run SFC and DISM scans

  1. Bring up the Start menu by pressing the Windows key, type cmd in the Search bar, and select Run as administrator from the right section of the results.ck2.dll
  2. Press the Yes button on the User Account Control window to grant administrative privileges.
  3. Type or paste the following command and press the Enter key to let SFC scan your PC. SFC/scannowck2.dll
  4. Once the SFC scan is completed, type or copy-paste the following command and press Enter key to execute it. DISM /Online /Cleanup-Image /RestoreHealthck2.dll

The SFC scan analyzes your system to identify damaged or corrupt protected files, and the DISM tool scans and repairs the faulty files of the Windows system image. This will resolve all the system-related issues why the ck2.dll file could not be found.

3. Download the DLL from a reliable source

Downloading and installing the DLL files from the internet is not a good idea as there is always a fear of virus and malware infection. However, you can download the missing DLL file from a trusted website that scans your download to ensure it is safe to download and install on your computer.

You can visit dll-files.com and verify the correct version before initiating the download. After the file is successfully downloaded, you can copy and paste it into the install directory of the application missing the DLL file. Alternatively, you can also paste the file into the following directory on your Windows computer. C:\Windows\System32

Once done, reboot your computer, and the DLL file will be recognized upon startup.

4. Manually update display drivers

  1. Right-click the Windows icon on the taskbar and choose the Device Manager option from the Quick Links menu.ck2.dll
  2. In the Device Manager window, double-click the Display adapters category to expand the list of devices.
  3. Right-click the graphics card and select the Update driver option from the context menu.ck2.dll
  4. Choose the Search automatically for drivers option on the Update Drivers window that pops up.

Windows will now search for the latest driver update for your graphics card and if available, will automatically download and install them without your intervention.

ck2.dll file contains the essential driver functions and if the driver is obsolete, the DLL will no longer be compatible with the OS.

Anyhow, you could use standalone software that can automatically detect outdated drivers and install the latest version from its manufacturer.

⇒ Get Outbyte Driver Updater

5. Scan the PC using Microsoft Defender

  1. Use the Windows + I shortcut to open the Settings app.
  2. Choose Privacy & Security from the left navigation pane and then Windows Security from the right.ck2.dll
  3. Next, select Virus & threat protection option.
  4. Click the Scan options located on the right.ck2.dll
  5. Select the Microsoft Defender Antivirus (offline scan) option and press the Scan now button at the bottom.ck2.dll

The Windows Defender program will scan your PC to find and remove viruses and malware if it finds any. If you have a thirty-party antivirus, you can run a full scan on your system to eliminate the malware and viruses.

The troubleshooting methods listed here can resolve the missing ck2.dll error in Windows.

If several DLL files are missing on your Windows PC, you can check out our comprehensive guide offering expert guidance to resolve the issue.

Also, if you have more queries or suggestions for us, feel free to drop them down in the comments section below.

What is Error Code 80180002 & How to Fix It

When trying to join a domain such as Azure AD, you must fulfill various requirements before your account can be successfully created. Things don’t seem to be going as planned because users are met with the error 80180002 when doing so.

Further, the error code is accompanied by a message that says The Mobile Device Management (MDM) server failed to authenticate the user. Stay with us as we unpack what this error means and how to resolve it.

What is error code 80180002?

The error code 80180002 is what happens to users who try to create or add a Microsoft work account on their personal PCs. You may be wondering why this is happening, and below are some possible reasons:

  • Insufficient permissions – Your organization manages most work Microsoft 365 accounts. This is usually because of some security settings. So while the account may belong to you, you are somewhat restricted in how you manage it.
  • Wrong configurations – If your device or account does not meet the prerequisites to join Azure AD, your account may be denied access.
  • Network change – If the user’s account is linked with a Microsoft account, it’s possible that the user has changed their network, and you need to link them with the correct Azure AD tenant again.
  • Device not on MDM – MDM is a security policy that determines the devices that can access Azure. If your device is not enrolled in Mobile Device Management (MDM), you might get the error 80180002.

How do I fix error 80180002?

Before any advanced troubleshooting, check the following:

  • Ensure you have administrative privileges.
  • Check your network again and ensure it reflects your location.

1. Add the account to your device

  1. Hit the Windows key and click on Settings.settings windows 11
  2. Click on Accounts on the left pane, then select Access work or school.access workor school option
  3. Locate the account you’re trying to log in using, then disconnect it.
  4. Wait for a few moments, then add the account again.

2. Disable conditional access

  1. Sign in to your Azure account.
  2. Click on the Menu at the top left corner and select Azure Active Directory.
  3. Select Protect & secure on the left pane, then click on Conditional Access.
  4. Under the Access policy option, toggle it off.

Azure AD conditional access allows you to control access to your applications and data based on the location of your users, their identity, and their device. When you disable this option, you allow users to join with any device without restrictions.

3. Remove the account credentials 

  1. Hit the Windows Search icon, type Credential Manager in the search bar, then click Open.
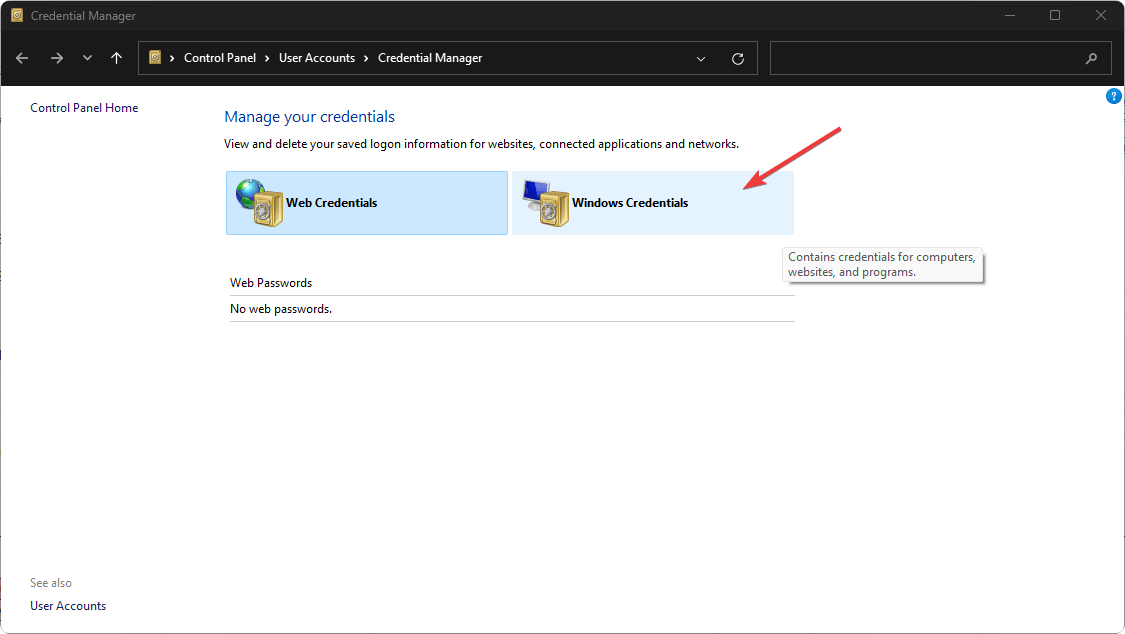
  2. Click on Windows Credentials.going windows credentials windows 11
  3. Select MicrosoftAccount, click on it to expand, then hit Remove.
  4. You’ll get a command prompt asking you to confirm whether you want to remove the credentials, so click Yes.

4. Change MDM and MAM settings

  1. Sign in to your Azure account.
  2. Click on Azure Active Directory under Azure services.
  3. Select Mobility (MDM and MAM) on the left pane.
  4. Click on Microsoft Intune under Mobility (MDM and MAM).
  5. Find MDM user scope and MAM user scope options, set them to None then, click on Save.

MDM stands for mobile device management, and MAM stands for mobile application management. They are two ways to manage your company’s mobile devices. MDM is a more comprehensive solution that allows you to manage all aspects of the device. 

MDM and MAM are two security features that can be used to provide a secure workspace for employees. However, they also have some drawbacks. MDM allows you to control the devices that can connect to your network.

When enabled, they can restrict the devices trying to add user access. Once disabled, you can get rid of the 80180002 error.

Elsewhere, you may get an error where your Microsoft account doesn’t exist, but we have answers on how to fix this issue.

For any additional thoughts don’t his topic, leave a comment down below.

Realtek Semiconductor Corp Extension Install Error [Fix]

For most people, updating Windows is a smooth process. Nobody expects errors, but users are now getting the Realtek semiconductor corp extension install error. From the error, it is already clear that this is related to Realtek drivers.

When you update Windows, your drivers may also get an update so that they are compatible with your OS. You might get such errors if there’s a mismatch in the versions. Now, let’s explore the various reasons why this happens and how to resolve it.

What is Realtek Semiconductor Corp update install error?

Realtek Semiconductor Corp update install error is a common error that usually occurs when trying to install the latest Windows updates.

Some of the triggers for this error include:

  • Outdated OS – Most drivers are created for a specific version of Windows. You may encounter this error if there’s a mismatch between the driver and your Windows version.
  • Driver errors – If you’re experiencing driver issues, it may be because it is incompatible, outdated, or corrupt.
  • Incomplete installation – This error can also occur if the update process was interrupted either by a slow or unstable internet connection.

How do I fix Realtek Semiconductor Corp extension install error?

Before you begin troubleshooting, please perform the following preliminary steps:

If all these things are fine, then it’s time to troubleshoot the Realtek Semiconductor Corp Extension Install error on your own by following these steps.

1. Check for Windows updates 

  1. Hit the Windows key and click on Settings.settings windows 11
  2. Click on Windows Update, then select Check for updates.check-updates-w11 windows 11 blue screen
  3. If available, Download & install.download and install option in the settings

2. Run the Windows update troubleshooter 

  1. Hit the Windows key and click on Settings.settings windows 11
  2. Click on System and select Troubleshoot.Open system troubleshooter
  3. Navigate to Other troubleshooters.other troubleshooters
  4. Click the Run option for the Windows Update troubleshooter.windows-update-run-troubleshooter runtimebroker.exe error

3. Rollback driver version

  1. Hit the Windows key, type Device Manager in the search bar, and click Open.device manager w11
  2. Navigate to your Realtek driver, right-click, and select Properties.properties
  3. Switch to the Driver tab and select the Roll Back Driver option.
  4. Select a reason for rolling back, then click Yes.
  5. Restart your PC.

4. Download the Realtek drivers from the Manufacturer 

The drivers for your Realtek sound card can be downloaded directly from Realtek’s website. The process of downloading drivers can be a little confusing and time-consuming, but it is necessary if you want to use your computer or any of its components.

The first step in installing a new driver is finding out what version of Windows you are running. Once you know which version of Windows you have installed on your computer, download the drivers from Realtek’s website by selecting your operating system.

5. Hide the updates

  1. If you had already installed the update, you first need to rollback the update before hiding it.
  2. Navigate to your browser and go to the Microsoft Download Center page to download the Show/hide troubleshooter file.
  3. Open the file after it has finished downloading and click on Next.
  4. The wizard will start running to detect any problems.
  5. Now, select the Hide updates option.
  6. A list of updates will appear. Select the one with the Realtek semiconductor corp extension install error and hit the Next button.
  7. Close the wizard and go back to the Windows update page.
  8. You’ll realize that the update has been omitted from the list.

It should be noted that this is only a temporary solution. Microsoft releases regular updates, so they will be automatically installed when the next updates become available. Hopefully, it will have resolved this issue.

Windows update errors are common, so you need a cheat sheet on dealing with them whenever they appear. If they happen often enough, consider installing one of the Windows update repair programs to help you easily sail through such hiccups.

That brings us to the close of this article, but don’t let the conversation end here. We’d love to hear of any additional solutions that may have helped you out of this situation but missing from our list. Share with us in the comment section below.

Dell.SupportAssist.Client.Plugin.IDiags.dll [Download & Fix]

Dell.SupportAssist.Client.Plugin.IDiags.dll is an important component of Dell software that works in sync with the Dell Update app to ensure that the system recovery environment is up to date.

If your computer is unable to find this DLL in the system folder, it will fail to diagnose, fix the system issues and recover your system.

Why is the Dell.SupportAssist.Client.Plugin.IDiags.dll missing?

The DLL file in question might go missing because of one or more reasons discussed below:

  • Incomplete app installation – If the program installation process was interrupted or the app was not installed successfully, the Dell.SupportAssist.Client.Plugin.IDiags.dll file can go missing.
  • Malware infection – A malware and virus infection on your computer creates many weird problems on your system, including the missing DLL files.
  • Compatibility issues – If you installed the latest version of Windows or recently upgraded the app, the old DLL files may not be compatible anymore.
  • Accidental modification or deletion – There are chances that the DLL file accidentally got deleted or gets modified by a third-party app.
  • DLL file is corrupt or damaged – If the DLL file gets broken or corrupt, it will no longer be traceable, hence the Dell.SupportAssist.Client.Plugin.IDiags.dll not found error.

If you are looking for ways to restore the Dell.SupportAssist.Client.Plugin.IDiags.dll file, employ the methods mentioned in this guide.

How can I fix the Dell.SupportAssist.Client.Plugin.IDiags.dll error?

Before proceeding to the complex solutions, we recommend you try these basic workarounds:

  • Restart your computer to resolve the trivial bugs and restore things to normal.
  • Ensure that the latest available Windows updates are installed on your PC.
  • Scan your computer with Windows Defender or any other third-party antivirus to eliminate the malware.
  • Install the pending updates of the malfunctioning app.

If the DLL error still persists, implement the troubleshooting methods mentioned below.

1. Use a dedicated DLL fixer

The Dell.SupportAssist.Client.Plugin.IDiags.dll file can go missing because of the incompatibility between the DLLs of the third-party apps and the operating system. Fortunately, you can use a reliable DLL fixer tool to fix broken or missing file problems on your Dell computer.

These tools come in handy for resolving various issues, such as missing or corrupt system images, corrupt or incompatible damaged DLLs, malware-affected DLL files, and so much more.

2. Repair system files

  1. Press the Windows icon on the taskbar to launch the Start menu, type cmd in the search bar and choose Run as administrator to launch Command Prompt with elevated permissions.
  2. Type or paste the following command and press the Enter key to run the System File Checker scan. sfc /scannowDell.SupportAssist.Client.Plugin.IDiags.dll
  3. After the SFC scan is complete, type or copy-paste the following command and press the Enter key. DISM /Online /Cleanup-Image /RestoreHealthDell.SupportAssist.Client.Plugin.IDiags.dll

The SFC and DISM tools will scan all the protected system files to replace the corrupt or modified system files and images with the cached version. This will ensure that your system can successfully locate the Dell.SupportAssist.Client.Plugin.IDiags.dll file so that the application can work flawlessly.

3. Run the System Maintenance tool

  1. Press the Windows key, type control panel in the search bar, and choose the first search result to launch the Control Panel on your system.Dell.SupportAssist.Client.Plugin.IDiags.dll
  2. Choose Small icons in the View by drop-down and then click Security and Maintenance.Dell.SupportAssist.Client.Plugin.IDiags.dll
  3. Expand the Maintenance section to view the related settings and press the Start Maintenance button located here.Dell.SupportAssist.Client.Plugin.IDiags.dll

System Maintenance is a troubleshooting tool in-built into Windows that optimizes the system performance to ensure there are no underlying issues with your system.

After the maintenance task is complete, you can launch the concerned app again to check whether or not you received the missing DLL error.

4. Manually install the missing DLL

Generally, manually installing the DLL files is discouraged owing to the risks involved on untrusted websites, but you can download and install the missing DLL file from a reliable source available online.

For this, you need to visit this website and press the download button next to the DLL file version compatible with your computer. Extract the DLL file from the ZIP or RAR archive, and then make sure to install it in the following location: C:\Windows\System32

You can also install the DLL file in the same folder that contains the application you are facing issues with. After you download and install the DLL file successfully, attempt to launch the application, and hopefully, the Dell.SupportAssist.Client.Plugin.IDiags.dll not found error will no longer bother you.

Those are the proven fixes that can help restore the missing Dell.SupportAssist.Client.Plugin.IDiags.dll file so that you no longer run into an error when launching different apps on your PC.

Also, if the Obs.dll file is missing from your computer, refer to the exhaustive guide to fix the problem. We also have a new guide on how to uninstall Dell SupportAssist, so feel free to check it out for more information.

Which solutions helped resolve the missing DLL error, let us know in the comments section below.

MSVCP71.dll Not Found: How to Fix This Error

DLL files, be they the ones published by Microsoft or third-party developers, play a vital role in running the apps. And when a DLL is missing, you would encounter critical issues with the programs that use it. One such is the MSVCP71.dll file that often throws the error.

For those trying to figure out what is MSVCP71.dll, it’s a system library file that was extensively used earlier but now finds application in only a few programs that rely on Visual C or C++. When it’s missing, these programs fail to launch. So, let’s find out how you can fix things.

Why is MSVCP71.dll missing in Windows?

Here are a few reasons MSVCP71.dll is not found:

  • Corrupt system files: In most cases, when a DLL file is missing or can’t be located by the app at the time of launch, it’s the corrupt system files to blame.
  • Improper app installation: Since the MSVCP71.dll in Windows 10 is used only by a handful of applications and comes bundled with them, there’s a high chance that the program wasn’t installed properly if the DLL can’t be found.
  • DLL got deleted: There have also been cases where one of the applications using the DLL, or even the end user, deleted the file.

What can I do when MSVCP71.dll is missing?

1. Use a dedicated DLL repair tool

When a third-party DLL can’t be found on the PC, it’s either an inadvertent removal or incompatibility between the OS and the file to blame. And in this case, an effective DLL repair tool can help you.

2. Copy the DLL from another PC

A quick solution that worked for many was to copy the DLL from another PC running the same operating system. The MSVCP71.dll can be found in either of the two paths:C:\Windows\System32 C:\Windows\SysWOW64

Simply head to the folder, locate the DLL, copy it to a USB drive, and then move the file to the computer where it’s missing.

Remember, there’s also a chance the other PC might not have the DLL file you are looking for. In this case, you can try the repair tool recommended earlier or move to the fixes listed next.

3. Run the DISM and SFC scan

  1. Press Windows + S to open Search, type Command Prompt, right-click on the relevant result, and select Run as administrator.command prompt
  2. Click Yes in the UAC prompt.
  3. Paste the following commands individually and hit Enter after each:DISM /Online /Cleanup-Image /CheckHealth DISM /Online /Cleanup-Image /ScanHealth DISM /Online /Cleanup-Image /RestoreHealth
  4. Now, execute this command to run the SFC scan:sfc /scannowsfc scan to fix missing msvcp71.dll
  5. Once done, restart the computer for the changes to come into effect.

4. Reinstall the affected application

  1. Press Windows + R to open Run, type appwiz.cpl in the text field, and hit Enter.appwiz.cpl
  2. Select the application from the list that’s throwing the DLL not found error, and click Uninstall.uninstall to fix msvcp71.dll
  3. Follow the on-screen instructions to complete the process.

As discussed earlier, programs that require a DLL usually have these bundled as a package and store them on the PC during the initial installation. So, when MSVCP71.dll is missing from your computer, reinstall the affected program, and you will get the file if it wasn’t added the first time around.

Also, you could use a reliable uninstaller software to get rid of any leftover files for a clean reinstall.

5. Repair Visual C++ Redistributables

  1. Press Windows + R, type appwiz.cpl, and click OK.appwiz.cpl
  2. Select a Microsoft Visual C++ Redistributable entry here and click Change.change to fix missing msvcp71.dll
  3. Now, click on Repair.repair to fix msvcp71.dll
  4. Wait for the repair to complete.repair
  5. Similarly, repair the other Visual C++ Redistributables listed here one at a time.

Repairing the redistributable packages can sometimes help get the missing MSVCP71.dll. Also, you could download Microsoft Visual C++ Redistributables from the official website.

Before you leave, check the best DLL repair tools to keep such errors at bay in the future.

For any queries or to share a solution with us, use the comment section below.

d3dx9_30.dll Not Found: How to Fix this Error

DLLs are critical to apps running on the computer, and multiple programs often share these files, making changes to them simultaneously. As a result, you are more likely to encounter problems with them. One such file that has troubled quite a few users is d3dx9_30.dll.

Several users who face the issue need to download d3dx9_30.dll for Resident Evil 4 or PES 13 when the DLL is missing. The process is not always as complex as one would imagine, and you can easily fix the d3dx9_30.dll not found error in Windows. Let’s find out how!

What is the d3dx9_30.dll?

The d3dx9_30.dll file, as is somewhat evident from the name, is linked to Microsoft DirectX, a collection of APIs to handle multimedia, gaming, and other graphic-intensive tasks. And issues with this DLL arise due to running an outdated DirectX, removal of the DLL file, or problems with the application.

The error usually appears when running games. NFS Carbon, League of Legends, and Flatout 2 are the prominent ones that often throw the d3dx9_30.dll is missing error.

How do I fix the d3dx9_30.dll error?

1. Use a dedicated DLL repair tool

Be it the DLLs published by Microsoft or the ones from third-party developers, a dedicated repair tool always works. And in the case of the latter, it’s usually incompatibility with the OS to blame for the problem.

So, we suggest you use one of the best DLL repair tools and a d3dx9_30.dll fixer, to seamlessly download the file and get rid of the error message in no time.

2. Manually move the DLL

Another solution that worked for many was to move the missing DLL file from a healthy computer to the affected one. The d3dx9_30.dll location is:C:\Windows\System32

So, if you were wondering where to put d3dx9_30 dll, head to the System32 folder, and move the DLL you copied from the same folder on the other PC.

3. Update DirectX

  1. Press Windows + I to open Settings, navigate to the Windows Update tab from the left, and click on Check for updates.check for updates
  2. Now, if an update is available for DirectX, wait for it to download & install.
  3. Finally, restart the computer for the changes to come into effect.

While users could manually update DirectX and download d3dx9_30.dll earlier, the newer versions are now released via Windows Update. So, it’s all the more simple to get the latest version.

4. Download the DirectX End-User Runtime Web Installer

  1. Go to Microsoft’s official website, choose English from the Select Language dropdown menu, and click Download.directx to fix d3dx9_30.dll
  2. Once done, run the setup and follow the on-screen instructions to complete the process.setup

Several users managed to fix things when d3dx9_30.dll was missing by downloading the DirectX End-User Runtime Web Installer. Even Microsoft recommends the solution in its official blog on the missing DLL error.

5. Reinstall the application

  1. Press Windows + R to open Run, type appwiz.cpl in the text field, and hit Enter.appwiz.cpl
  2. Locate the application throwing the error, select it, and click on Uninstall.uninstall to fix missing d3dx9_30.dll
  3. Follow the on-screen instructions and choose the appropriate response when prompted to complete the process.

In most cases, simply uninstalling the application throwing the error, and downloading it all over again will help if the DLL file is not found. This especially works when d3dx9_30.dll is missing in Windows 10 and the latest iteration.

Once you have managed to get rid of the problem, choose one from the list of the best DLL repair tools to keep such errors at bay in the future.

For any queries or to share a solution that worked for you, drop a comment below. Also, don’t miss our latest guide that shows you what to do if d3dx9_25.dll is missing.

d3dx11_43.dll Not Found: Fix It in 5 Steps

Most Windows users who don’t understand the intricacies often encounter an error and find themselves in a tricky spot. But most of these are easily fixable, especially when a DLL file is not found. And d3dx11_43.dll is one such file that usually throws an error.

Part of the DirectX library, the DLL is used by particularly graphic-intensive apps, for instance, games. Users generally find d3dx11_43.dll missing on Need for Speed: The Run and GTA 5. Let’s learn about the problem and the solutions that worked for others!

Why is d3dx11_43.dll not found?

Here are a few reasons the DLL file is missing:

  • Improper installation of the program: The most common reason the DLL is not found is when the program that requires it was not installed properly, and the file is not located in its directory.
  • Issues with the graphics driver: Oftentimes, a corrupt or outdated driver is responsible for the error, and a quick reinstall does the trick.
  • DLL files are not readable: In some cases, it is the corrupt state of the file that triggered the d3dx11_43.dll is either not designed to run on Windows or it contains an error message.

What can I do when d3dx11_43.dll is missing?

1. Use a dedicated DLL repair tool

When it comes to missing DLL files, there is no better way to fix things than using a dedicated repair tool. It works seamlessly, even when the DLL files are from third-party apps, and incompatibility is to be blamed for the error.

2. Reinstall the graphics driver

  1. Press Windows + X to open the Power User menu, and choose Device Manager.device manager
  2. Expand the Display adapters entry, right-click on the graphics adapter, and select Uninstall device.uninstall to fix d3dx11_43.dll
  3. Tick the checkbox for Attempt to remove the driver for this device, and then click Uninstall.uninstall
  4. Once done, restart the computer, and Windows will automatically install a fresh copy of the driver.

Some users reported that when d3dx11_43.dll was missing in Windows 10, the issue was linked to the graphics driver, and reinstalling it worked. Also, you could try updating the graphics driver.

In order to update the graphics drivers correctly, without causing system incompatibility, it’s better to use a dedicated driver tool to automatically get the latest version for all drivers.

⇒ Get Outbyte Driver Updater

3. Download DirectX End-User Runtime Web Installer

  1. Press Windows + E to open File Explorer, paste the following path in the address bar, and hit Enter:C:\Windows\System32path
  2. Locate the d3dx11_43.dll file, select it, and hit Delete.delete to fix missing d3dx11_43.dll
  3. Similarly, delete the file from the following path:C:\Windows\SysWOW64
  4. Once done, go to Microsoft’s official website, pick English from the Select Language menu, and click on Download.directx to fix missing d3dx11_43.dll
  5. After you have the setup, run it and follow the on-screen instructions to go through with the installation.setup

Deleting the d3dx11_43.dll file and then running the DirectX End-User Runtime Web Installer helps when the DLL is corrupt and can’t be read by the application. So, while it appears to be there and things seem in order, you still need to replace it to get things running.

4. Reinstall the game

  1. Press Windows + R to open Run, type appwiz.cpl in the text field, and hit Enter.appwiz.cpl
  2. Select the app that’s throwing the missing DLL file error, and click Uninstall.uninstall program to fix d3dx11_43.dll
  3. Follow the instructions and choose the appropriate options to complete the uninstallation process.
  4. Now, head to its official website or a reliable source, and download the program’s setup, to install it all over again.

5. Perform a System Restore

  1. Press Windows + R to open Run, type rstrui.exe, and click OK.system restore to fix d3dx11_43.dll
  2. Select the Choose a different restore point option, if available, and click Next.restore to fix d3dx11_43.dll
  3. Now, pick another restore point from the list, one created before the error first appeared, and click Next.restore point
  4. Verify the details, and click Finish to start the restore.system restore to fix d3dx11_43.dll

In case recent system changes are to blame when d3dx11_43.dll is not found in Windows 10, going for a system restore with the correct restore point should help. The process is simple and shouldn’t take much time.

Before you leave, check the best DLL repair tools and get one today to prevent such errors from reappearing!

For any other queries or to share more solutions with us, drop a comment below.

RiotGamesApi.dll Was Not Found: 5 Ways to Fix It

An error reading The program can’t start because RiotGamesApi.dll is missing from your computer. Try reinstalling the game to fix this problem stops Windows users from launching the Riot gaming client.

As a result, you won’t be able to launch League of Legends as well as other titles belonging to this client. In today’s guide, we’ll explain how to fix this in just a few simple steps.

What can I do if RiotGamesApi.dll is missing?

Before making any drastic changes, try restarting your PC and relaunch Riot, and install any pending game or client updates.

1. Use a dedicated DLL repair tool

When faced with the problem, your primary approach should be to use an effective DLL repair tool. Problems with DLL files linked to third-party apps arise due to incompatibility and are often complex in nature. So, dedicated software will help get things running in no time.

2. Repair the corrupt system files

  1. Press Windows + S to open Search, type Command Prompt, right-click on the relevant result, and then select Run as administrator.cmd
  2. Click Yes in the UAC prompt.
  3. Paste the following commands individually and hit Enter after each to run DISM:DISM /Online /Cleanup-Image /CheckHealth DISM /Online /Cleanup-Image /ScanHealth DISM /Online /Cleanup-Image /RestoreHealth
  4. Next, run the following command for the SFC scan:sfc /scannowsfc scan to fix riotgamesapi.dll
  5. Once done, restart the computer for the changes to come into effect and relaunch the game that earlier threw the error.

3. Reinstall the game

  1. Press Windows + R to open Run, type appwiz.cpl, and click OK.appwiz.cpl
  2. Select the affected game, and click on Uninstall.uninstall to fix riotgamesapi.dll
  3. Follow the on-screen instructions to complete the process.
  4. Once done, download the game from the official website or the client, and the error won’t appear anymore.

A quick fix when RiotGamesApi.dll is missing in Windows is reinstalling the game. If that doesn’t work, you can completely uninstall the Riot Games client and then download it again. Just make sure to use the default installation settings this time around.

4. Perform a system restore

  1. Press Windows + S to open Search, type Create a restore point, and click on the relevant result.system restore
  2. Click the System Restore button.system restore
  3. Select Choose a different restore point and click Next.restore point to fix riotgamesapi.dll
  4. Pick a restore point created before the error first appeared, and click Next.restore point
  5. Finally, verify the details, and click on Finish to start the process.restore to fix riotgamesapi.dll

Once the restore is complete, you might notice minor changes to the system, but the Riot client and the installed games should work fine without throwing an error about the missing RiotGamesApi.dll file.

5. Update graphics card drivers

  1. Open Device Manager.
  2. Locate the Display adapters section and click on the downward arrow to expand it.
  3. Right-click on your graphics card and select Update driver.choose update driver for NVIDIA graphics card device manager
  4. Pick Search automatically for drivers and wait for the process to complete. automatic driver search

Why is RiotGamesApi.dll missing?

Here are a few reasons you can’t launch LoL due to a missing RiotGamesApi.dll file:

  • Improper game or client installation: critical DLL file is missing due to an improper installation.
  • Recent changes made to the PC: changes like installing a game optimization software or manually changing the file path
  • The DLL file is corrupt: The DLL file might be corrupt and, as a result, is not readable anymore.

For those wondering is DLL files legit, the answer is yes. These are critical files, sometimes offered by Microsoft and on other occasions by third-party developers, for their programs to run effectively. So, you must replace a missing DLL file ASAP. And you could always use a reliable DLL repair tool.

For a better experience, check some quick tips to boost gaming performance.

Tell us which fix worked in the comments section below.

rbxfpsunlocker.dll: What Is It & How to Download It

Each program or even an add-on carries several DLL files to run effectively, and when a DLL file is missing, the app does not launch. In the case of Roblox FPS Unblocker, it’s usually the rbxfpsunlocker.dll file to blame.

The program is specifically designed for Roblox after several players got banned for using an FPS booster. But when Roblox FPS Unlocker is not working due to a missing rbxfpsunlocker.dll file, things are easy to troubleshoot. Here’s everything you need to know about it.

Why is the rbxfpsunlocker.dll file missing?

Here are a few reasons rbxfpsunlocker.dll is not working or cannot be found:

  • Improper app installation: One of the primary reasons Roblox FPS launcher can’t locate the DLL file is issues with the installation itself, and these are evident right away in one form or the other.
  • Major changes post-installation: When you launch a program, it looks for the DLL file in the directory or the System32 folder, and sometimes, the file can’t be found. This happens when files are moved post-installation, either by a user or a third-party program.
  • Inadvertent deletion of DLL: In rare cases, the file can be deleted by the app or even the end user, and, as a result, you come across the rbxfpsunlocker.dll DLL not found error.

What can I do if rbxfpsunlocker.dll is missing?

Tip icon Tip
When the concerned DLL file is not found, your primary approach should be to move it to the affected device from another computer running the program and the same OS. Also, we recommend you check with the Roblox support team whether the software and the DLL go against their policies.

1. Use a dedicated DLL repair tool

When it comes to DLL files linked with third-party apps, the problem usually arises due to incompatibility, and the built-in Windows methods don’t work. This is where a dedicated DLL repair tool comes into the picture and gets the missing rbxfpsunlocker.dll file in no time.

2. Reinstall the program linked to the DLL

  1. Press Windows + R to open Run, type appwiz.cpl in the text field, and hit Enter.appwiz.cpl
  2. Locate Roblox FPS Unlocker, select the program, and click Uninstall.uninstall program to fix rbxfpsunlocker.dll
  3. Select the appropriate response and follow the on-screen instructions to complete the process.
  4. Once done, you can head to the official website from where you downloaded the software earlier, and proceed with the installation. Also, make sure to go with the default installation settings to avoid encountering similar issues later.

Another simple, though not that quick, fix is reinstalling the program the DLL file comes bundled with. And this is generally the solution recommended by Windows in the error box. So, try it for the missing rbxfpsunlocker.dll file.

Besides, if things don’t work out, you could employ a reliable uninstaller software to remove all traces of the program before reinstalling it.

3. Perform a system restore

  1. Press Windows + R to open Run, type rstrui.exe, and click OK.rstrui.exe
  2. Select the Choose a different restore point option and click Next.restore point to fix rbxfpsunlocker.dll
  3. Pick a restore point from the list created before the error first appeared, and click Next.restore point
  4. Verify the restore details, and click Finish.restore to fix rbxfpsunlocker.dll
  5. Wait for the process to complete and verify whether the missing rbxfpsunlocker.dll now appears.

Sometimes, due to recent changes to the PC, a DLL could go missing, or the program relying on it can’t find the file. In such cases, it’s best that you perform a system restore to get rid of the error.

After you download the missing rbxfpsunlocker.dll and have the program running fine, check some quick tips to optimize Windows for gaming. Besides, discover the best DLL repair tools, get one, and never worry about such errors.

For any queries or to share a solution that worked for you, use the comments section below.

qqmail.dll is Missing? How to Fix or Download It Again

QQmail, developed by Tencent, a company based in China, is an excellent free email service and works the same way as other popular ones, like Gmail or Yahoo. QQmail also contains a qqmail.dll file which is required for the basic functioning of the program.

As with others, when the DLL file is missing, users report issues opening the related program. So, if you are, too, getting errors due to a missing qqmail.dll file, here’s all you need to know!

Why is the qqmail.dll missing?

Here are a few reasons the file is missing:

  • Improper installation of QQmail: The most common reason you face issues with the DLL files linked to third-party apps is improper installation. You may also find Npqqmailwebkit.dll missing in some cases, and the solutions below work.
  • The DLL file was deleted: More often than not, the DLL file is deleted by QQmail itself or the user, and thus an error appears each time the program is launched.
  • Antivirus is blocking access to the DLL: Though rare, Tencent’s programs are often classified as adware or malware by several third-party antiviruses, and that’s why the file is not accessible, and you may have a missing DLL file.

What can I do if qqmail.dll is missing?

Before we proceed to the complex ones, try these quick solutions first:

  • Disable any third-party antivirus installed on the PC and check whether you get rid of the error message. If this works, we recommend you switch to a Windows and app-friendly antivirus.
  • In case there’s another computer with the program installed, check its directory, copy the DLL file to a USB drive, and move it to the PC where the file is missing. This a better solution than downloading qqmail.dll.

If these don’t work, move to the fixes listed next.

1. Use a dedicated DLL repair tool

When you face issues with a DLL file linked to a third-party program, it’s generally due to incompatibility. And on such occasions, you have dedicated software to take care of it.

2. Reinstall the program

  1. Press Windows + R to open Run, type appwiz.cpl in the text field, and hit Enter.appwiz.cpl
  2. Select QQmail from the list of programs, and click Uninstall.uninstall to fix missing qqmail.dll
  3. Follow the on-screen instructions to complete the process.
  4. Once done, restart the computer for the changes to come into effect.
  5. Now, download QQmail from the official source, like you did earlier.
  6. Finally, you should be able to launch the program without it throwing any errors.

When you come across missing DLLs, Windows recommends reinstalling the program itself to quickly resolve the problem, as it’s considered a sure-shot fix. And this works just as well in the case of qqmail.dll.

3. Perform a system restore

  1. Press Windows + S to open Search, type Create a restore point in the text field, and click on the relevant search result.create a restore point
  2. Click on the System Restore button.system restore to fix qqmail.dll
  3. Select the Choose a different restore point option and click Next.choose a different restore point
  4. Now, select a restore point from the list that was created before the DLL error first appeared, and then click Next.restore to fix missing qqmail.dll
  5. Verify the restore details and click Finish.finish
  6. Wait for the restore process to complete. It will take some time, depending on the changes to be made.

When other solutions fail to work, and you still can’t get the missing qqmail.dll file, a quick solution would be to perform a system restore. That’s why it’s recommended that you regularly create restore points or configure things such that these are created automatically.

Before you leave, take a quick look at the best DLL repair tools and download one to prevent such errors from reappearing.

Tell us which fix worked for you in the comments section below.

pholder.dll: What Is It & How to Download if It’s Missing

Every DLL (Dynamic-link library) file in Windows is critical and is shared by several applications simultaneously. The same is the case for pholder.dll, a DLL file linked to Microsoft Visual Studio.

Developed by Microsoft, this DLL is not a critical Windows file and usually involves third-party programs. If you are running any that rely on it, and the DLL file is missing, the application won’t launch. Let’s find out more about the program.

Why is pholder.dll missing?

Here are a few reasons the DLL is missing in Windows 10 and other iterations:

  • Improper app installation: A common reason for the problem is when the app isn’t installed properly. Maybe the setup crashed, or security software blocked the installation of certain components.
  • The DLL file got deleted: On some occasions, the DLL file might get deleted by the program using it or due to an inadvertent error on the user’s part.
  • Malware or virus infection: A malware or virus is known to make changes to the PC, delete files and even download more harmful ones. This might also affect the pholder.dll file in Windows.

What can I do if pholder.dll is missing?

Tip icon Tip
When it comes to DLL files, you can always replace them with a copy stored on another PC running the same operating system. It’s quick and completely safe. Also, we don’t recommend downloading DLL files from untrusted sources, especially websites that don’t appear reliable.

1. Use a dedicated DLL repair tool

When it comes to using programs, especially the ones that will download files to the computer, you must choose only the best one. And for DLL files, there’s nothing better than an expert-recommended repair tool that is effective at quickly identifying and replacing the missing program-linked DLL because the problem often arises due to incompatibility between the app and the OS.

These will fix things in no time and require minimum intervention from the user’s end. Hence, you will get rid of all DLL-related errors for good.

2. Scan for malware

  1. Press Windows + S to open Search, type Windows Security in the text field, and click on the relevant result.windows security
  2. Click on Virus & threat protection.virus & threat protection
  3. Click Scan options.scan options
  4. Now, select Full scan and click the Scan now button.full scan to fix pholder.dll
  5. Wait for the full system scan to complete.

A full scan using the built-in Windows Security does a deep check of all the files stored on the PC and successfully identifies the malware most of the time. On the occasions when it doesn’t, you can rely on some of the best antiviruses for Windows.

3. Reinstall Visual Studio

  1. Press Windows + R to open Run, type appwiz.cpl in the text field, and hit Enter.appwiz.cpl
  2. Locate and select Visual Studio, and then click the Uninstall button at the top.uninstall to fix pholder.dll
  3. Click OK in the confirmation prompt to proceed.confirm to fix pholder.dll
  4. Now, wait for the uninstall process to complete, and then restart the computer for the changes to come into effect.
  5. Finally, head to Visual Studio’s official website, download the setup, and then run it to reinstall the program.

That’s it! When the DLL file linked to a program is missing, experts recommend reinstalling the program. And this also works in the case of missing pholder.dll. If things don’t work out on the first attempt, you can always use an effective uninstaller software to get rid of any leftover files.

Besides, before you leave, check the best DLL repair tools and download one today to keep such errors at bay.

For any queries or to share a solution that we might have missed, drop a comment below.

Social Club Error Code 1002: How to Quickly Fix It

If you’re a gamer, you must be aware of the Social Club gaming platform that guarantees you an unmatched experience when playing your favorite games. This fun may, however, be short-lived as you may run into an error saying the social club failed to load due to an incomplete installation.

While this is not an unusual experience, it doesn’t make it any less frustrating. You can expect such issues with most gaming platforms, as sometimes Steam fails to launch games too. If you’re in a similar fix, you’ll find this article extremely helpful in navigating the error code 1002.

What does error code 1002 mean?

The Social Club error code 1002 often occurs when trying to launch the game. Instead of the game opening, you’ll get a message directing you to exit the game and reinstall the Social Club app. Below are some possible reasons why this happens:

  • Antivirus software – Antivirus software could be blocking the Social Club launcher from running.
  • Proxy server – Your computer may be using a proxy server to connect to the internet instead of directly connecting with an IP address. This can cause proxy errors and limit access to certain websites.
  • Incorrect installation – It is possible that you don’t have the correct version of the game installed.
  • Conflicting app – Another app may be preventing you from launching your games.
  • Outdated game – If your game is not compatible with the latest version of Social Club, then Social Club will not allow you to launch your game.
  • You’re using a VPN – A VPN is used to encrypt your internet traffic and hide your IP address from prying eyes. However, with this added layer of security, some games will block users who use these services. 
  • Incorrect folder location – If you launched the game from another location other than its original folder, you may come across the Social Club error code 1002.
  • Missing files – When you launch a game, it has to access the game files to open. If some files are missing from the folder, the game won’t open.

How do I fix error 1002 on Social Club?

A few workarounds that may help eliminate the Social Club error code 1002 include:

1. Restore the default Documents folder 

  1. Hit the Windows + E keys to open File Explorer.
  2. Locate the Documents folder, right-click on it, and select Properties.
  3. Navigate to the Location tab and click on Restore Default.
  4. Next, click on Apply and OK to save the changes.

2. Remove the VPN 

  1. Press the Windows key and select Settings.settings windows 11
  2. Next, select Network & internet and click on VPN in the right-side menu.
  3. Select the VPN connection you want to disable, click on the drop-down, and select Remove.

3. Disable the proxy server

  1. Press the Start Menu icon and select Settings.settings windows 11
  2. Click on Network & internet on the left pane, then scroll down and click Proxy on the right pane.Network proxy settings
  3. Select Edit next to Use a proxy server option in the Manual proxy setup section.
  4. Next, toggle off Use a proxy server and click on Save.Disable proxy server

4. Allow the app through firewall

  1. Hit the Start menu icon, type Windows Security in the search bar, and click Open.
  2. Click on Firewall & network protection.
  3. Select Allow an app through firewall.allow an app through firewall
  4. In the drop-down menu, check Rockstar Games Social Club and Rockstar Games Launcher, then click OK to save changes.

5. Reinstall the Rockstar Games Launcher 

  1. Hit the Windows key, type Control Panel in the search bar, and click Open.control-panel-search fallout new vegas runtime error
  2. Select Uninstall a program under Programs.going uninstall program control panel
  3. Locate the Rockstar Games Launcher and Rockstar Games Social Club, then click Uninstall for each.
  4. Hit the Windows + E keys to open File Explorer.
  5. Locate the following folder locations and delete them. Alternatively, you can also remove software leftovers using special software: C\Users\[USERNAME]\Documents\Rockstar Games\Social Club C:\Users\[USERNAME]\Documents\Rockstar Games\Launcher C:\Program Files\Rockstar Games\Launcher C:\Program Files\Rockstar Games\Social Club C:\Program Files (x86)\Rockstar Games\Social Club
  6. Launch your preferred browser and download the Rockstar Games Launcher.
  7. Follow the on-screen instructions to install, then try launching your games again and see if the issue persists.

Aside from errors, we also share tips on getting the most out of your games. For instance, we have a list of the best graphic settings to help you avoid choppy games. You may also be interested in how to boost your FPS and take your gaming to the next level.

Should you have any thoughts on this issue, feel free to leave us a comment below.

onex.dll Missing: How to Fix or Download It Again

The DLL files are an integral part of Windows and help both the built-in and third-party applications run on the PC. When a DLL file is missing, the apps relying on it fail to launch. The situation becomes all the more intricate when onex.dll is missing.

A large number of DLLs come preinstalled in Windows, while there are a few that are bundled with applications and are stored in the relevant directory at the time of installation. Let’s find out which category onex.dll falls under and the solutions to try when it’s missing.

What is OneX DLL?

The onex.dll file is a Windows system file developed by Microsoft and is sometimes referred to as IEEE 802.1X Supplicant Library. The file is stored in the System32 folder along with the other DLLs.

Here are a few reasons onex.dll is missing in Windows:

  • Presence of malware: One of the common reasons a DLL file is not found on the PC is due to malware or virus infection. Running an antivirus scan usually works in this case.
  • Corrupt system files: Since DLLs are a part of it, corrupt system files also have an effect here, but the problem is easily resolved with a few quick scans.
  • The DLL file got deleted: Because multiple programs access and make changes to the DLL file, there’s a good chance that one might delete it or change the storage location. In some cases, even a user might inadvertently delete the DLL file.

What can I do if onex.dll is missing?

Tip icon Tip
For users with another PC running the same OS, head to the System32 folder on the other device, copy the DLL to a USB drive, and move it to the same path on the computer where the DLL is missing.

1. Use a dedicated DLL repair tool

While most perceive DLL issues as trivial and download the missing DLL from the web, this poses a major risk, and there is a high possibility of your system being infected with malware. That’s where a dedicated DLL repair tool comes into the picture.

2. Repair corrupt system files

  1. Press Windows + S to open the Search menu, type Command Prompt, and click on Run as administrator.command prompt
  2. Now, click Yes in the UAC prompt.
  3. Paste the following commands one at a time, and hit Enter after each for the DISM tool:DISM /Online /Cleanup-Image /CheckHealth DISM /Online /Cleanup-Image /ScanHealth DISM /Online /Cleanup-Image /RestoreHealth
  4. Now, run the SFC scan using the following command:sfc /scannowsfc scan to fix onex.dll missing

3. Scan for malware

  1. Press Windows + S to open Search, type Windows Security in the text field, and click on the relevant search result.windows security
  2. Click on Virus & threat protection.virus & threat protection to fix onex.dll missing
  3. Click Scan options to view the available types of scans.scan options
  4. Now, choose Full scan and click on Scan now.full scan to fix onex.dll missing
  5. Wait for the scan to complete. The scan’s progress will be displayed here.

In case it’s malware or virus that led to a missing onex.dll file in Windows 11, the best option is to perform a full scan using the built-in Windows Security. In case it’s unable to locate the malware, try an effective third-party antivirus to run a deeper scan for enhanced protection.

4. Perform an in-place upgrade

  1. Head to Microsoft’s official website, select the currently installed edition of Windows 11, and then click Download.download to fix onex.dll missing
  2. Choose the preferred product language from the dropdown menu, and click Confirm.language
  3. Click on the displayed link to start the download.download
  4. Once downloaded, double-click on the ISO and click Open in the confirmation prompt.open
  5. Now, run the setup.exe file.setup.exe to fix onex.dll missing
  6. Click Yes in the UAC prompt that appears.
  7. Click on Next to proceed.next
  8. Now, click Accept to agree to the license terms.accept
  9. Finally, verify the upgrade details, make sure the setup reads, Keep personal files and apps, and then click Install.in-place upgrade to fix onex.dll missing
  10. Wait for the process to complete. Remember, it will take a few hours.

When all else fails to replace the missing onex.dll, an in-place upgrade appears to be the most viable solution in case of software-related problems. We recommend you use reliable DLL repair tools as a last resort because, with these tools, there’s no DLL error you can’t fix.

Tell us which fix worked for you in the comments section below.

Wdfilter.sys Blue Screen Error: How to Fix it

Many reported wdfilter.sys blue screen error on their PC, and in today’s guide we’re going to show you a few methods that can fix it, so let’s get started.

How do I fix wdfilter.sys blue screen error?

1. Update the Windows Defender definitions and Windows

  1. Press the Windows button to open Windows Search, type Windows Defender, and select the Windows Security or Windows Defender app from the result.Open Windows Security
  2. In the Windows Defender app, navigate to the Virus & threat protection tab, and select the Protection updates option.Protection updates
  3. On the following screen, click the Check for updates button to update the virus definition. Check for update
  4. Windows Defender will download and install any available security definitions.
  5. Now, press Windows + I to open Windows Settings.
  6. In the Windows Settings, go to the Windows Update tab and click on Check for Updates.Update Windows
  7. After the updates are installed, restart your PC, and scan your computer for malware with the Windows Defender.

2. Run SFC and DISM scans

  1. Press Windows + R to open the Run command box, type cmd, hold the Ctrl + Shift key, and click OK to run Command Prompt as Administrator.
  2. Click Yes on the User Account Control (UAC) prompt window.
  3. Type the following command and press Enter: sfc /scannow
  4. After the SFC scan is complete, type the following commands and press Enter after each: DISM /Online /Cleanup-Image /ScanHealth DISM /Online /Cleanup-Image /RestoreHealth DISM scan
  5. After the scanning process finishes, restart your computer and verify whether the WdFilter.sys BSoD error has been resolved.

3. Update or reinstall the graphics card drivers

  1. Click the Start menu button, type device manager, and click on the Device Manager control panel from the search result.Device Manager open
  2. Click on the Display adapters to expand it and then right-click on the video card driver and select Update driver.Update driver
  3. On the following screen, select Search automatically for drivers.Automatic Update
  4. If there is an updated driver available, follow the on-screen instructions to install it
  5. Then, restart your computer.

If the Device Manager fails to update the driver, completely uninstall the driver (Choose Uninstall device option in Step 2). Then manually download the latest driver from the manufacturer’s website. Install the downloaded driver and reboot the computer.

4. Run Driver Verifier

  1. Press Windows + R to open the Run command box, type verifier, and click OK or press Enter to launch the Driver Verifier Manager. open Verifier
  2. On the Driver Verifier Manager window, select the Create standard settings radio button and click Next.Create Standard Settings
  3. Now, select Automatically select all drivers installed on this computer and click Finish.select all drivers
  4. Restart your computer and use your computer as you normally would.
  5. Wait for your computer to crash, or if there were specific actions that caused the blue screen before, you could try repeating them to trigger the error again.
  6. When the system crashes, you will be presented with the buggy driver’s name and the error code. You can use it to fix the issue.

To stop the Driver Verifier app, follow the steps above, but choose the Delete existing settings option in step 2.

5. Boot into Safe Mode with Networking or low-resolution video mode

  1. Click the Power button on the login screen and then, press and hold the Shift key while clicking on the Restart option.Shift+Restart
  2. In the Windows Recovery Environment, select the Troubleshoot option to continue. Troubleshoot
  3. Next, select Advanced options.Advanced options
  4. On the following screen, choose Startup Settings.select startup settings
  5. Click the Restart button to reboot your computer and open the start-up-up settings.restart
  6. Windows will reboot into Startup Settings with multiple numbered options. Press number 3 on your keyboard for low-resolution mode or press 5 for Safe Mode with Networking.
  7. Windows will finally boot into Safe Mode or low-resolution mode, depending upon your selection.

The Safe Mode loads only the essential drivers and services needed for the system to run. Once you are in Safe Mode, you can try various troubleshooting steps such as removing recently installed programs, updating drivers, performing system scans for malware, or others.

6. Disable Real-time protection

  1. Click the Show Hidden Icons button on the taskbar to view hidden icons, and click on the Windows Security icon.open from taskbar
  2. Navigate to Virus & threat protection on the left-side pane and click Manage settings underneath Virus & threat protection settings on the right pane.Virus & threat protection
  3. Then, turn off the toggle under Real-time protection.Real time protection Off

7. Restore the Default Startup Configuration for Windows Defender Antivirus Mini-Filter driver

  1. Press Windows + R to open the Run dialog, type cmd, hold the Ctrl + Shift key, and click OK to run Command Prompt as Administrator.
  2. Click Yes on the User Account Control (UAC) prompt window.
  3. Type the following commands one after the other and press Enter after each one: sc config WdFilter start= boot
    sc start WdFilter reset Win Defender
  4. After that, close the Command Prompt and reboot your computer.

If the above methods were not effective in fixing the WdFilter.sys BSoD error on your computer, you could try resetting your PC or take a closer look at our guide on cldft.sys BSOD.

There are many files that can cause these types of errors, and we wrote a guide on how to fix hidparse.sys BSOD, so don’t miss it.

Feel free to use the comments section below if you have any additional questions or suggestions.

Evr.dll is Missing? How to Fix or Download It Again

Every operating system needs DLL files, such as evr.dll, to run properly, and if your DLL files are damaged or missing, you might get an error message.

This can be a problem and cause certain features to stop working on your PC. Therefore, it’s important to fix missing DLL files on Windows 10 as soon as possible.

In today’s guide, we will focus on evr.dll, explain to you what it does, and how to get it back if it’s missing on your PC.

What is the EVR DLL file?

Evr.dll is a Windows DLL file used alongside the Enhanced Video Renderer feature. In case you’re unfamiliar, this feature is used to display a video on desktop applications.

There are two versions of EVR:

  • EVR media sink – For Media Foundation applications
  • EVR filter – For DirectShow applications

As you can see, this is a system DLL file, and issues with it will affect your operating system and data rendering, so it’s important to fix it.

What can I do if evr.dll is missing?

Before we start fixing this issue, there’s a quick workaround that might help you:

  • Install an older version of the software – This error can appear when installing certain software. You can avoid the issue by trying to install the older version instead.

1. Use a dedicated DLL fixer

Missing DLL files can be a big issue, and manually downloading DLL files, especially from third-party sources, is a major security risk.

Alternatively, you should use specialized DLL repair software. These apps are simple to use, and they can fix 100% of the issues that you have with Windows DLL files.

2. Install the Media Feature Pack

  1. Press Windows key + S and type optional. Select Add an optional feature.
     
  2. Once a new window opens, click the Add a feature button.
  3. Search for Media Feature Pack. Once you find it, select it and click the Install button.
  4. Wait for the installation to complete. Restart your PC if asked.

3. Download a Windows 8 version of Viber

Note icon NOTE
This issue only applies if you’re using Viber on a PC. If you’re not using it, skip this solution.
  1. Visit the Viber download page.
  2. Select Download Viber for Windows 8 and lower.
  3. Wait for the file to download and then run the setup file.

How can I perform evr.dll download?

Since this is a system file, we recommend against downloading it manually from third-party sources. While many websites offer you to download this file, the file may have been tampered with.

This can result in stability issues, and in the worst-case scenario, a malware infection. Therefore, we strongly suggest that you download this file using the solutions outlined in this article.

As you can see, fixing this issue is pretty simple, and in most cases, you can fix it by installing the latest Windows components.

If you’re having this problem on a new version of Windows, we suggest reading our missing DLL files Windows 11 guide for more solutions.

What solution did you use to fix this problem? Share it with us in the comments section below.

Msvcp140.dll Is Missing? How to Fix the Error

You must have gotten an error message notifying you that msvcp140.dll is missing. Let us guide you through the process of correcting this error.

Dynamic Link Libraries, or DLLs, are important files containing data and essential resources that several programs may use concurrently. They help connected applications or processes work better and more efficiently. Hence the missing DLL presents a real challenge.

What does msvcp140 DLL mean?

Msvcp140.dll is a native Microsoft file. It is a part of the Visual C++ Redistributable package. All programs that have C++ code are required to interact with this DLL file to run successfully on any Windows operating system.

It contains vital functions supporting operations like input and output, string, and memory management. If this file is missing on your OS, it could be because of any of the following reasons:

  • Corrupted applications – If you install any app with corrupt files or if it is incompatible with your OS, it may trigger the missing DLL error.
  • Driver issues – Corrupt or outdated drivers also are an element that may trigger this issue.
  • Problems with MS Visual C++ Redistributable package – These errors may be due to a missing package or corruption of the redistributable.
  • Malware infection – Malware is a massive trigger of computing problems, and it can corrupt vital files, which may trigger this error.

Regardless of what triggers the missing DLL problem, the solutions we recommend below should help resolve it.

How do I fix the missing msvcp140 DLL?

1. Use a dedicated DLL fixing tool

Missing DLL issues are common, but luckily, a few tools are often effective in fixing the problem. This option is preferred since downloading a DLL from random sites may introduce malware to your computer.

However, for files like the msvcp140.dll native to Microsoft, the best recommendation will be to use the system repair tool. You will get an effective resolution of the missing file with a single click.

2. Install Microsoft Visual C++ 2015 Redistributable Update 3

  1. Visit the official Microsoft Visual C++ 2015 Redistributable download page.
  2. Click on the Download button.
    msvcp140.dll
  3. Tick vc_redist.x64.exe or vc_redist.x86.exe, depending on your system architecture, and click the Next button.
    msvcp140.dll
  4. Click on the downloaded file and follow the wizard to complete the installation.
    msvcp140.dll
  5. Once the installation is complete, restart the computer and verify that the missing msvcp140.dll issues is resolved.

Since this DLL is part of the Microsoft Visual C++ 2015 Redistributable, you probably have it on your computer. So, the problem is that it may be corrupted, and reinstallation of this redistributable would be an easy fix.

3. Redownload msvcp140.dll

  1. Navigate to dll-files.com.
  2. To topmost entries are the most updated versions. Click the Download link for one matching your system architecture.
  3. Right-click on the downloaded ZIP file and select Extract All.
  4. Copy the extracted msvcp140.dll file and add it to the program’s installation folder that triggered the error.
  5. Reinstall the program.

4. Reinstall the problematic program

  1. Press Windows + R, type appwiz.cpl, and hit Enter.
    msvcp140.dll
  2. From the list of programs, click on the problematic one and select the Uninstall button.
  3. Follow the prompts from the wizard to complete the uninstallation.
  4. Download a fresh copy of the uninstalled program, and reinstall it.

A reinstallation is often effective if the original install file is corrupt. So you must perform the installation using a freshly downloaded copy.

The solutions we have explored should suffice to fix your msvcp140.dll problems; however, if they do not work, as a last option, you may contact Microsoft Support. They may be able to troubleshoot the problem, and in rare situations, you may need to reinstall the OS.

We also covered what to do if Msvcp120d.dll is missing, so don’t hesitate to check it out for more information.

But that is as far as we go in this guide. We are optimistic you have fixed the error and are curious about what worked for you. Please reach out to us using the comments below.

ncsi.dll: What Is It & How to Fix It When It’s Missing

DLL (Dynamic-link library) files are critical ones shared by multiple apps (both built-in and third-party) on the computer. But users often reported that certain DLL files are missing, and ncsi.dll, too, featured in the list.

Problems with DLL files are easy to fix since these can simply be replaced with a copy of the file, either from the web or another computer running the same OS. So, let’s find out about it!

What is NCSI DLL?

NCSI stands for Network Connectivity Status Indicator and is a Windows DLL file published by Microsoft, pertaining to network-related tasks. The ncsi.dll file is stored in:C:\Windows\System32

ncsi.dll file in the System32 folder

The file is used by multiple programs, including a few games, and if the DLL file is missing or corrupt, you will encounter an error when launching the app that relies on it.

How do I fix a missing ncsi.dll file?

Tip icon Tip
If you have another PC running the same version and architecture of the OS, locate and copy the DLL file to the affected computer. This is, by far, the easiest solution. Besides, avoid downloading DLL files from unreliable sources on the web since these could be malware or virus disguised as legitimate files.

1. Use a dedicated DLL repair tool

When it comes to missing Windows DLL files, you can always use a reliable DLL repair tool to get things up and running. These identify and replace the missing DLL with a fresh copy within seconds.

2. Run the DISM and SFC scan

  1. Press Windows + R to open Run, type cmd, and hit Ctrl + Shift + Enter.cmd
  2. Click Yes in the UAC prompt.
  3. Paste the following commands individually and hit Enter after each to run DISM:DISM /Online /Cleanup-Image /CheckHealth DISM /Online /Cleanup-Image /ScanHealth DISM /Online /Cleanup-Image /RestoreHealth
  4. Once done, execute the following command to run the SFC scan:sfc /scannowsfc scan to fix missing ncsi.dll
  5. After running the scans, check whether the corrupt/missing DLL file is available.

Running the DISM tool and SFC (System File Checker) scan are two easy ways to fix corrupt system files on Windows and get back the missing DLLs, including the ncsi.dll file.

3. Perform an in-place upgrade

  1. Go to Microsoft’s official website, select your edition of Windows 11 from the dropdown menu, and click Download.download
  2. Choose the preferred language and click Confirm.language
  3. Click on the provided link to start the download.64-bit
  4. Once done, double-click the ISO file, and click Open in the confirmation prompt.open to fix missing ncsi.dll
  5. Launch the setup.exe file.setup.exe to fix ncsi.dll
  6. Now, click on Next in the Windows 11 Setup to proceed.next
  7. Click Accept to agree to Microsoft’s license terms.agree
  8. Finally, verify that the setup reads Keep personal files and apps, and click Install to start the in-place upgrade.install to fix ncsi.dll

When it comes to troubleshooting issues with Windows, an in-place upgrade helps eliminate all kinds of software-related problems. Though the process may take a few hours, you won’t lose any apps or personal files. Besides, generally, the PC performs faster after an in-place upgrade.

These are all the ways you can get the missing ncsi.dll file in Windows, be it any iteration. Also, to troubleshoot things seamlessly, check our curated list of the best DLL repair tools.

Before you leave, we have a similar guide that explains what is NcsiUwpApp, so don’t miss it.

For any queries or to share the solution that worked for you, use the comments section below.

Xbox Error E102: Main Causes & How to Fix

Multiple Xbox users have reported the Xbox error E102. They are getting an error message that reads System Error: E102. This Xbox error E102 pops up mainly when you are trying to start up the console or installing an update.

Thankfully in this guide, we have a bunch of solutions that will help you resolve the error and enjoy playing games on your Xbox console. It is a pretty serious issue. However, you will be able to fix it easily with our solutions. Let us get right into it.

What is causing the Xbox error E102?

After going through several forums, we have deduced a list of the most common reasons that could trigger the Xbox error E102 on your console.

  • Bad network connection: If your Internet connection is unstable or jumpy, then you will come across multiple issues, including the Xbox error E102.
  • Corrupt data: Some users have also reported getting this error because of some underlying corrupt Xbox system data.
  • The update is faulty: Chances are that the update that you are trying to install on your Xbox is at fault itself.
  • Previous files interference: Files of the previous version of the update might be conflicting with the latest update on your Xbox console.

Let us now take a look at the solutions that will help you resolve the Xbox error E102.

How can I fix the Xbox error E102?

Before you go ahead with the advanced solutions, you should first try the below-mentioned solutions:

  • Check your Internet connection and make sure that it is working properly.
  • Try restarting your modem and see if that helps.
  • You can also try to restart your Xbox console, as it might be a temporary glitch.

1. Run the Xbox startup troubleshooter

  1. Turn off your Xbox console.
  2. Unplug the main cable from the socket.
  3. Plug the cable back in after 30 seconds.
  4. Power on your console.
  5. Press the Xbox and Pair buttons on your console.
  6. You will hear two power-up tones, after which you can release the buttons.
  7. The console will boot and take you to the Xbox startup troubleshooter.
  8. Choose Reset this Xbox option.
  9. Select the Remove everything option.
  10. Your console will restart and reset.

When you restart your Xbox console, you are resetting all the system files that might be causing the Xbox error E102 in the first place.

Resetting replaces all the corrupt or missing system files with new ones that will work without any issues and possibly resolve the problem as well.

2. Re-sign with your Xbox account

  1. Press the Xbox button on your controller.
  2. Select Profile & system.
  3. Select Sign out.sign out account xbox
  4. Press the Xbox button again on your controller.
  5. Head to Profile & system.
  6. Click on Add or Switch.Profile & System
  7. Select your account.
  8. Sign in with it.

Often corrupt profile can cause several issues and prevent you from installing the latest updates. In such a case, we would suggest you sign out of your account, then resign back in and check if this fixes the Xbox error E102 or not.

3. Perform an offline update

  1. Insert the USB drive with at least 7GB size on your PC.
  2. Perform a quick format to NTFS.
  3. Download the Offline System Update File (OSUF).
  4. Extract the content of the OSUF file.
  5. Copy the $SystemUpdate file into the flash drive.
  6. Power off your console.
  7. Unplug the mains for 30 seconds and replug it back again.
  8. Press the Pair and the Xbox button on the console together for 10-15 seconds.
  9. You will hear two power-up tones.
  10. Release the buttons when you hear the tones.
  11. It will take you to the Xbox Start-up Troubleshooter.
  12. Insert the USB drive on your Xbox console.
  13. Select the Offline system update option.
  14. Wait until the process is complete.

The above process will help you perform an offline update. You can use this because you are getting the Xbox error E102 when performing the online update.

4. Use the Device Service and Repair option

  1. Open the Microsoft account sign-in page for Device service and repair.
  2. Sign in with your credentials.
  3. Select your device to repair.
  4. Follow the on-screen process.
  5. Submit your request.

That is it from us in this guide. We hope that the above solutions helped you resolve the Xbox error E102 on your console.
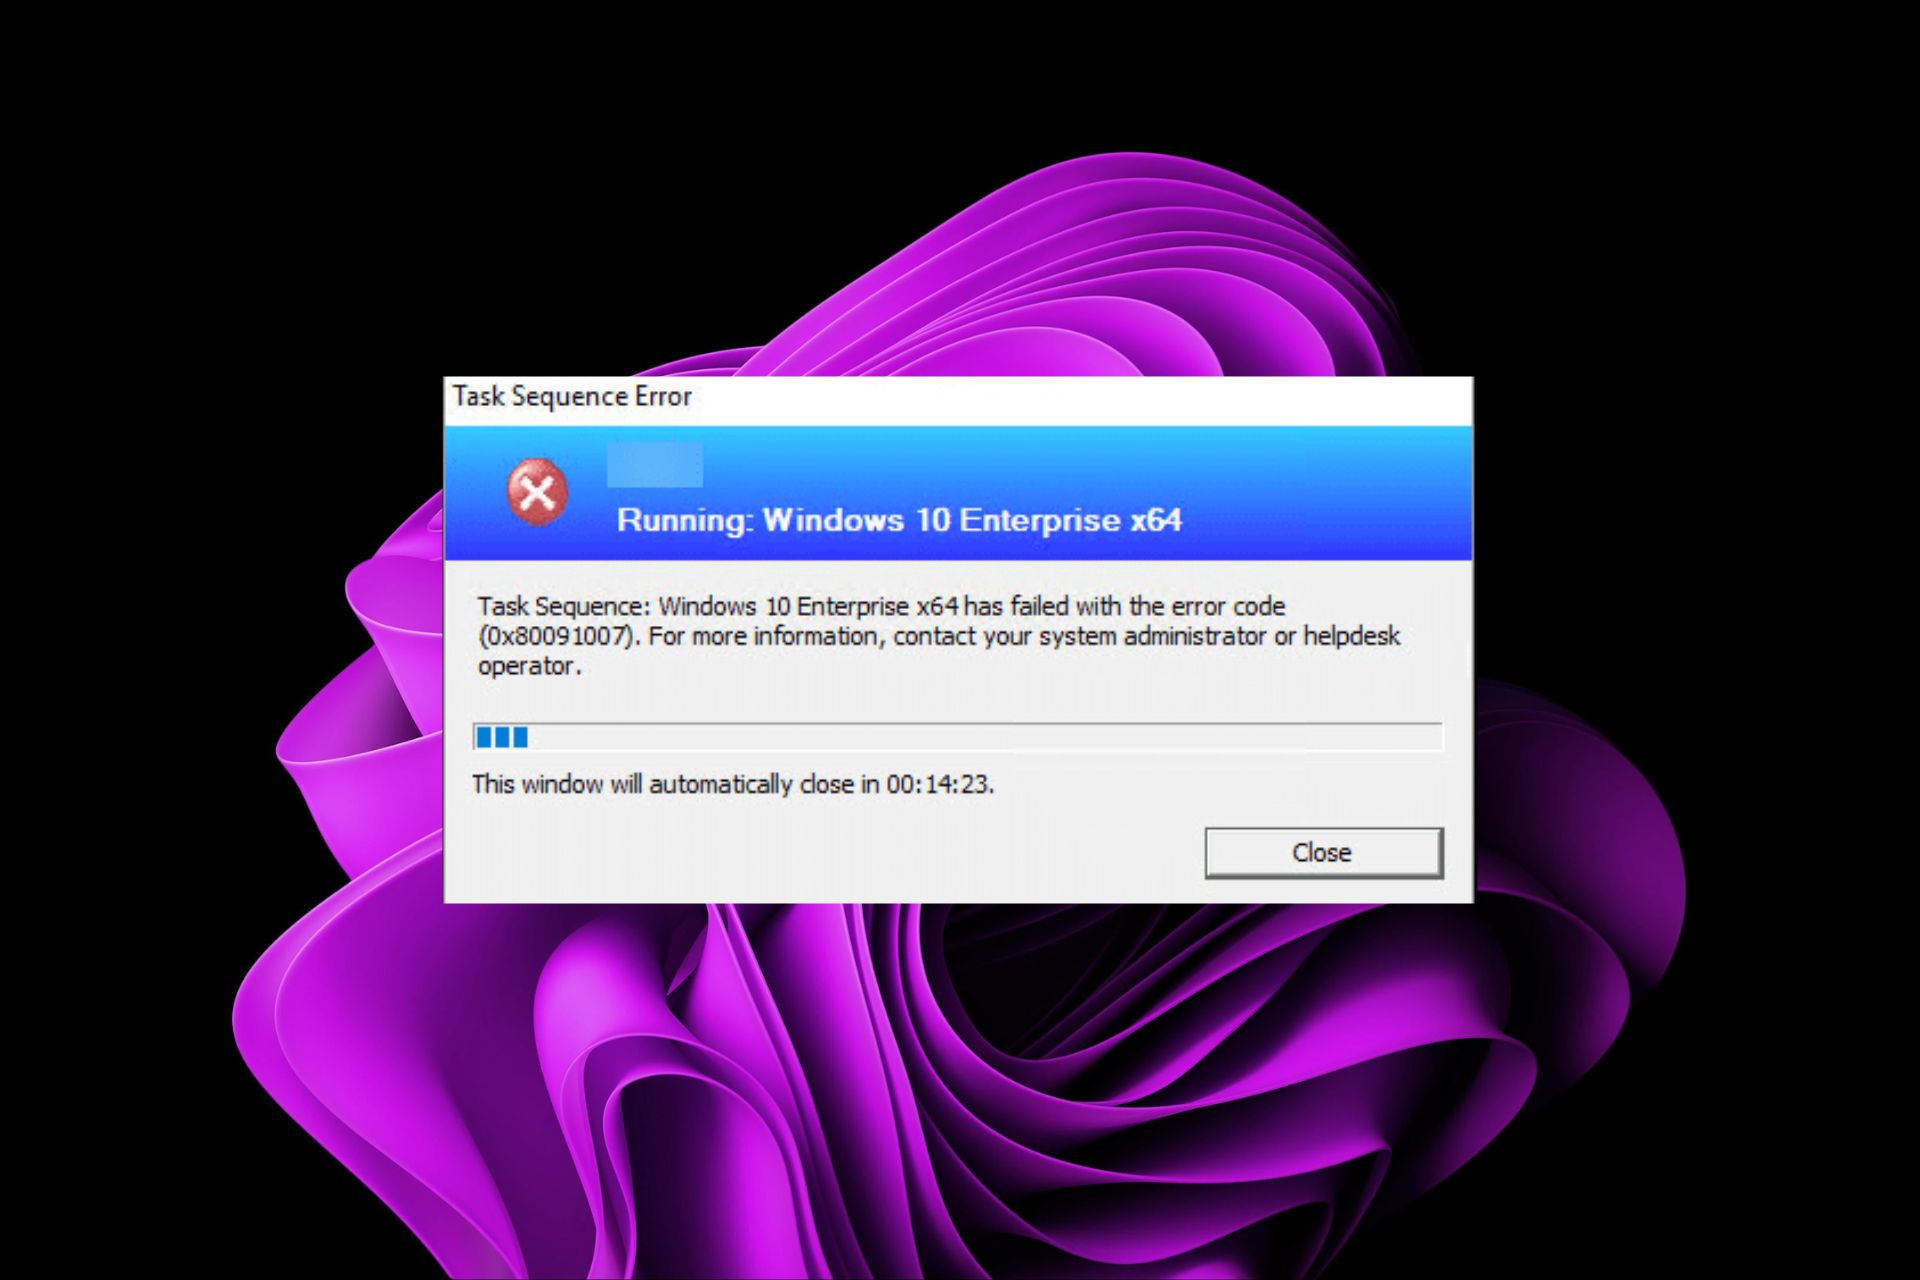
If you are getting an Xbox error code 0x800701c4, then you can check out the solutions in our guide to resolve the problem at your end.

For users coming across the Temporary network problem error code 0x80832003 on their Xbox console, they can refer to our guide for a quick resolution.

Several users have reported coming across the Xbox error code 0x87e107df. You can easily fix it by applying the solutions from our guide.

If you are coming across the Xbox error code 0x80073cfc, you can resolve it quickly by following the solutions from our guide.

Feel free to let us know in the comments below which one of the above solutions resolved the Xbox error code E102 for you.

How to Download and Install the ASIO Driver on Your Windows PC

In this article, you’ll learn how to quickly download and install the ASIO driver on Windows 10. Having the right ASIO driver is key for smooth, low-latency audio performance and avoiding errors like asio.sys issues.

Let’s get started.

How can I install the ASIO driver on Windows 10?

1. Download ASIO4All driver

  1. Visit the ASIO4All page.
  2. Locate the version that you want to use and click to download it.
     
  3. Run the setup file.
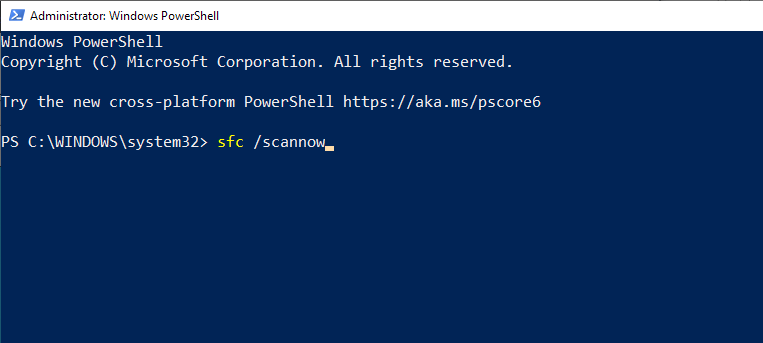
  4. When the setup file opens, click on Next.
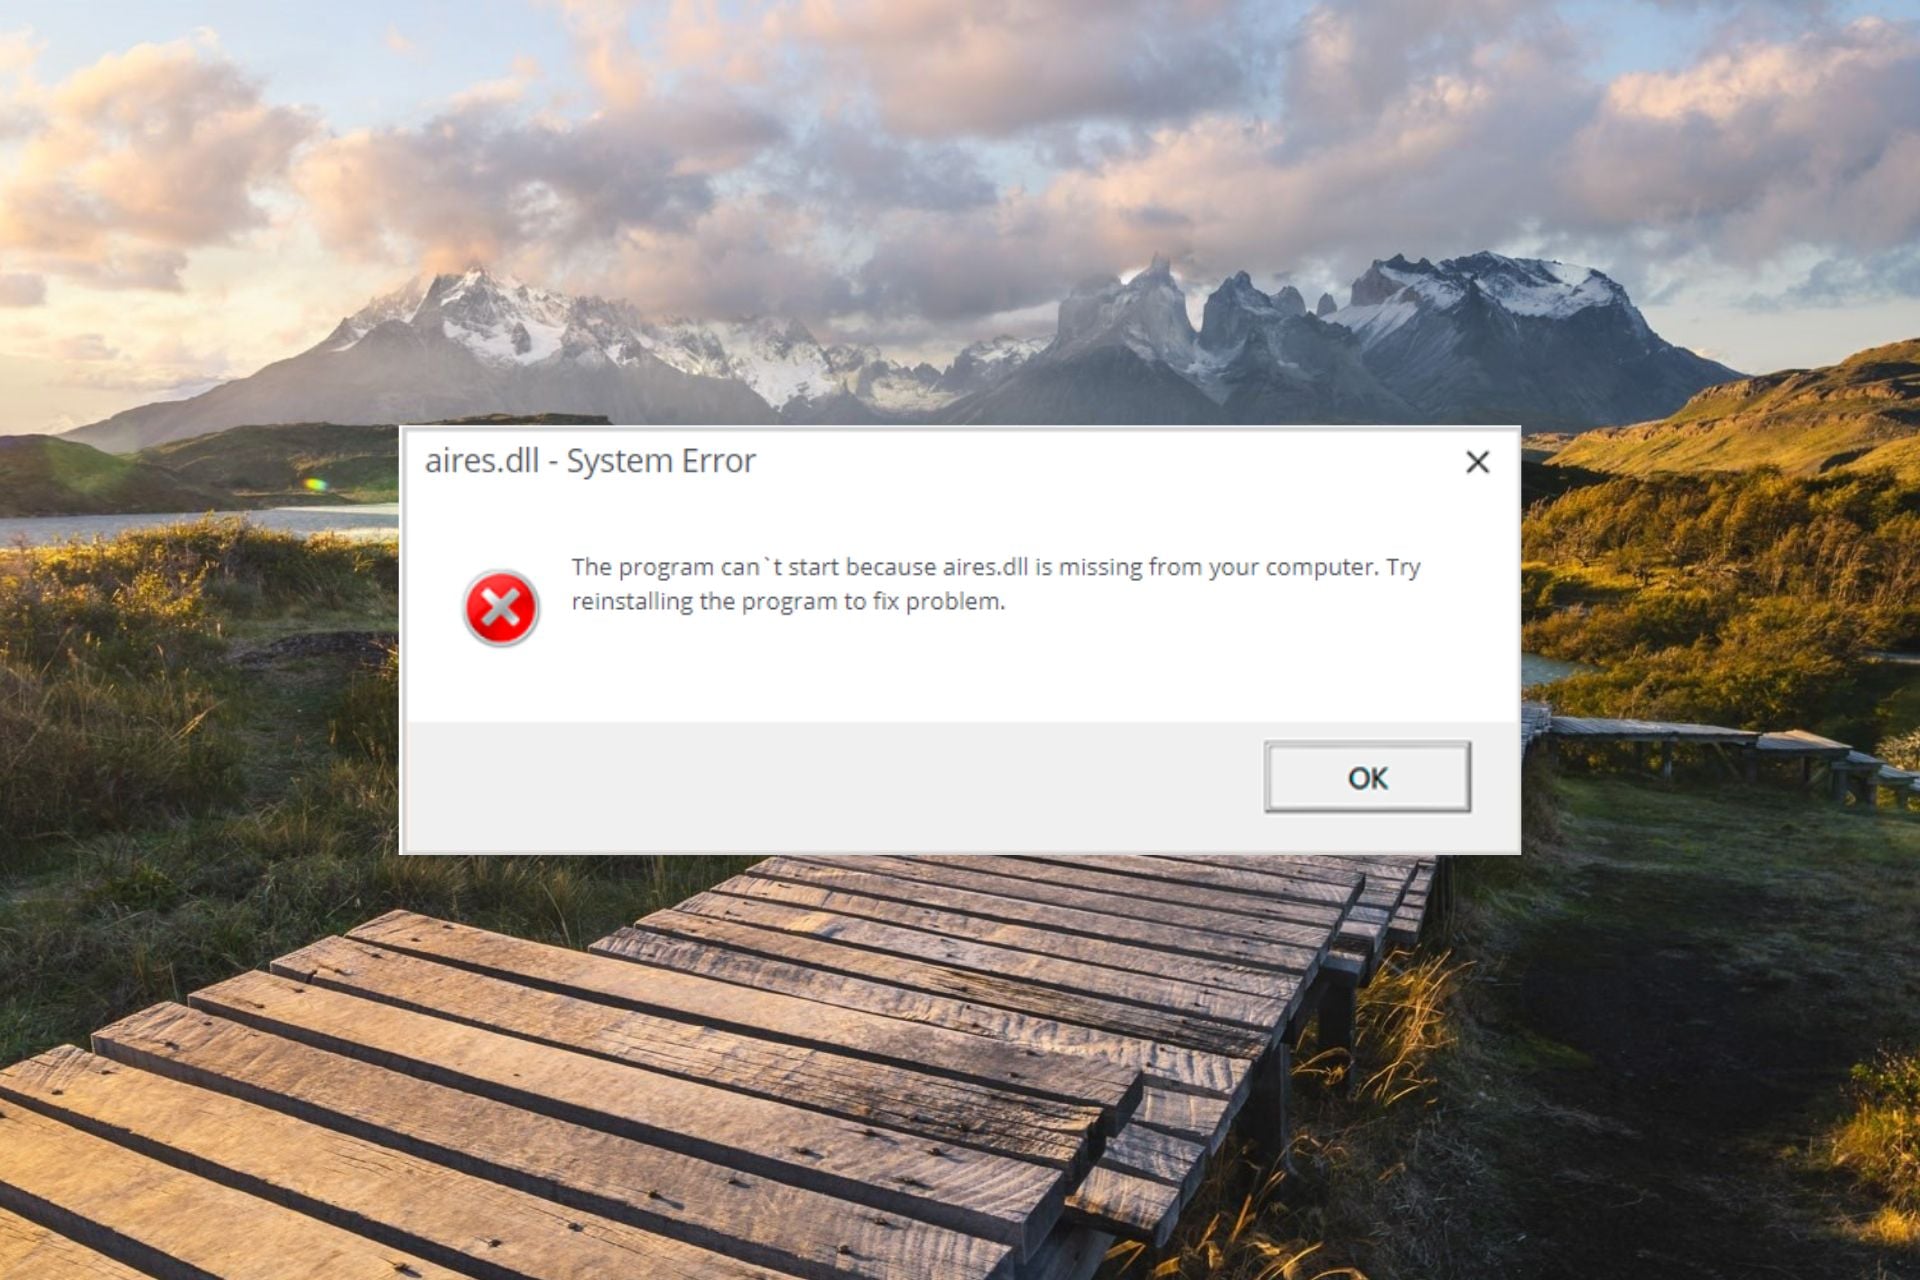
  5. Accept the terms of service and click Next.
  6. Select the install location and click Install.
  7. Wait for the process to finish.

2. Use FlexASIO

  1. Visit the FlexASIO GitHub page.
  2. Now select AlexASIO-1.9.exe to download it.
     
  3. Once the file is downloaded, run it.
  4. Choose the installation location and click Next.
  5. Check if the installation path is correct and click on Install.
  6. Follow the instructions on the screen.

3. Use ASIO2WASAPI

Note icon NOTE
Keep in mind that this project hasn’t been updated in several years, so it might have certain compatibility issues.
  1. Visit the ASIO2WASAPI GitHub page.
  2. Next, go to Code and choose Download ZIP.
     
  3. Once the ZIP file is downloaded, open it and run the Install file.
  4. You’ll get a message saying that the driver was installed successfully.

As you can see, downloading and installing ASIO drivers is pretty simple, and you can install them just like any other application.

If you found this guide useful, we also have a special guide on how to download and install the ASIO driver on Windows 11, so be sure to check it out.

And if you run into any issues, you might want to read our troubleshooting tips for ASIO.sys errors and how to fix asio3.sys problems.

Have you ever used an ASIO driver before? Let us know in the comments below.