Several of our readers report getting the following error while installing software: An error occurred during the installation of assembly Microsoft.vc80.crt.
This error frequently occurs on all Windows versions when users try to install third-party apps, programs, and games. This article will provide you with simplified fixes, so you don’t have to worry.
What is Microsoft.vc80.crt?
Microsoft.vc.80.crt is a component of the Visual C++ Redistributable, which is in turn required by a lot of other software to function properly.
The majority of Windows 7, Windows 8.1, and Windows 10 are affected by this problem, according to affected individuals.
It has been reported that this same error happens when installing Microsoft SQL Server for the first time as well as with iTunes, inLab, WIDCOMM Bluetooth, and in iTunes.
A similar error related to the one caused by this component is Error 1935.
What causes an error to occur during the installation assembly Microsoft vc80?
Some users claim the error occurs occasionally, and the cure can be simple for some people. Some of the factors responsible for Microsoft. VC80.crt errors are:
The Microsoft Visual C++ Redistributable package is damaged or missing –As we stressed above, if the software needing the Visual C++ package can’t find the Microsoft.vc80.crt component, you receive this error.
The newest version of iTunes won’t run on the video card since it’s too old –The VC80.CRT error also occurs because the latest iTunes version cannot be installed on older dedicated GPU models.
Pending Windows Updates –If the Windows Updates is not working, the problem could arise during the installation of particular applications. After installing every pending security update, our readers reported that the problem has been fixed.
Outdated/missingsound drivers –Some users have reported that they were able to fix the error by installing missing sound drivers. Try these ways to update drivers on your Windows PC.
Now that you know some of the potential reasons why an error occurred during the installation of assembly Microsoft.vc80.crt, let’s proceed to how you can fix this problem.
How do I fix an error occurred during the installation of assembly?
1. Reinstall Microsoft Visual C++ Redistributables
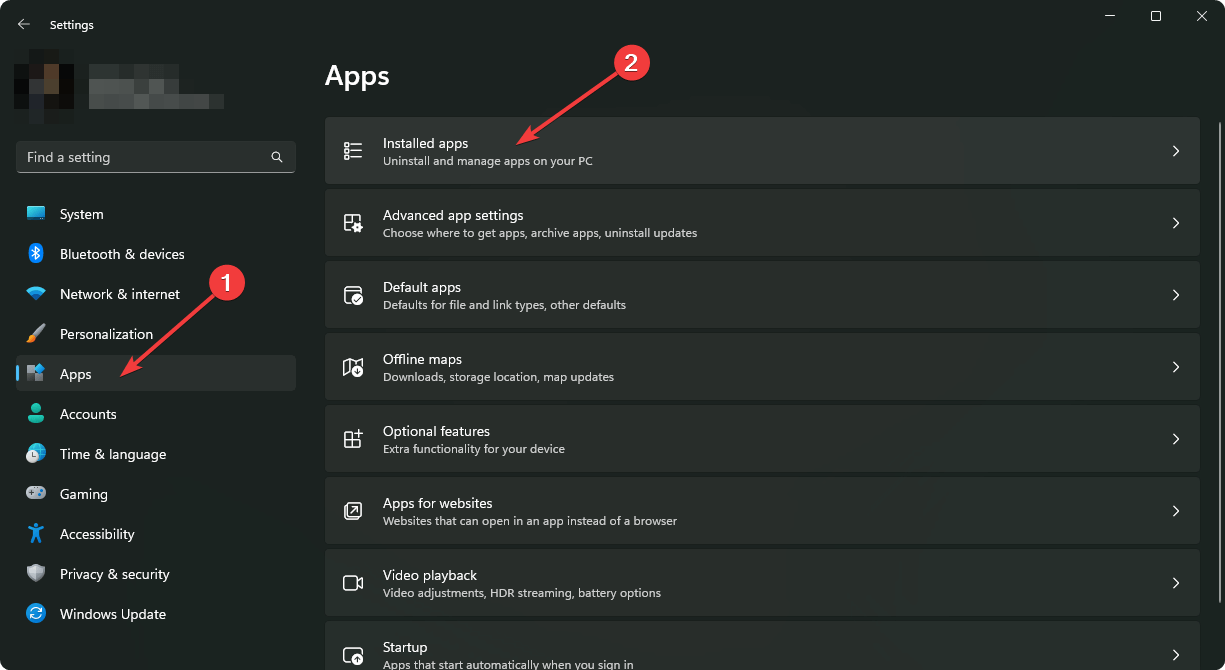
Bring up the Run dialog box by pressing the Windows key + R, type appwiz.cpl in the text field and press Enter to launch Programs and Features.
Right-click on each Visual C++ 2005 Redistributable and Visual C++ 2010 Redistributable and choose Uninstall.
Then follow the on-screen prompts to remove it from your system and restart your PC.
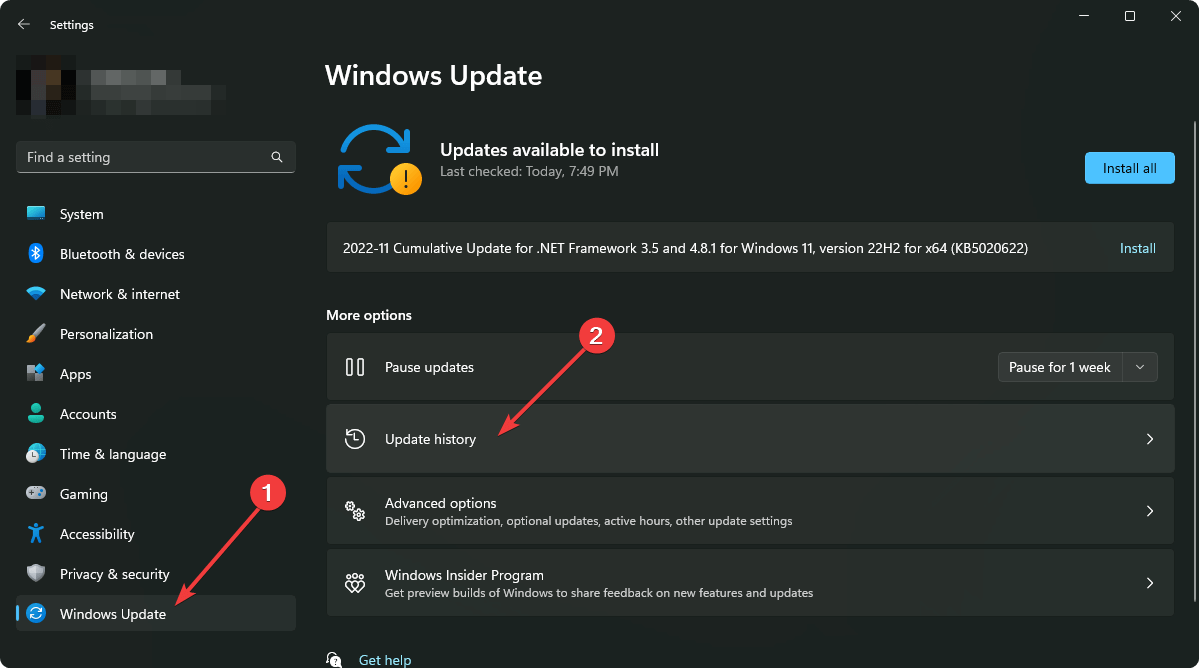
Navigate to the Windows Updatessection and click on the Check for updates button.
If there are new updates, they will be downloaded in the background automatically and installed as soon as you restart your PC. Now, check if the error is fixed.
3. Perform SFC and DISM scans
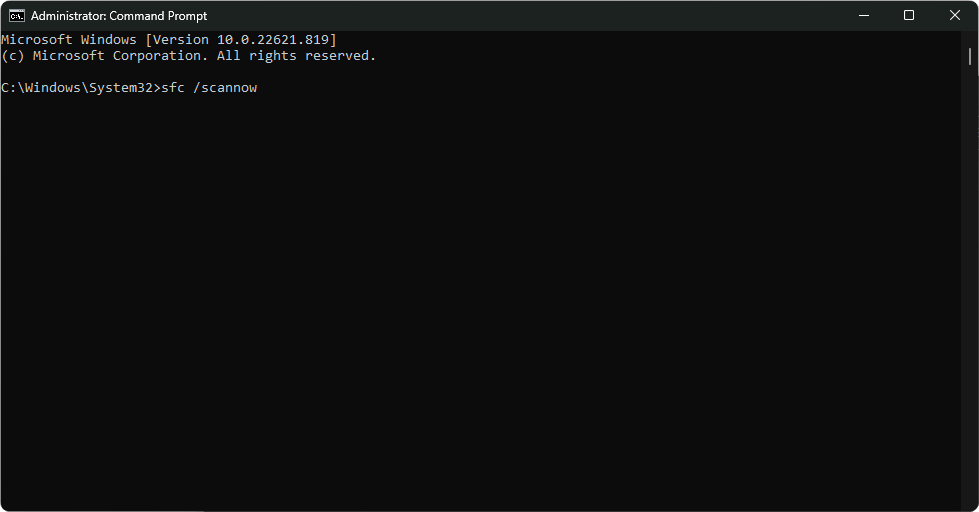
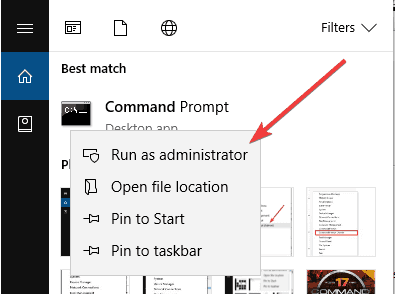
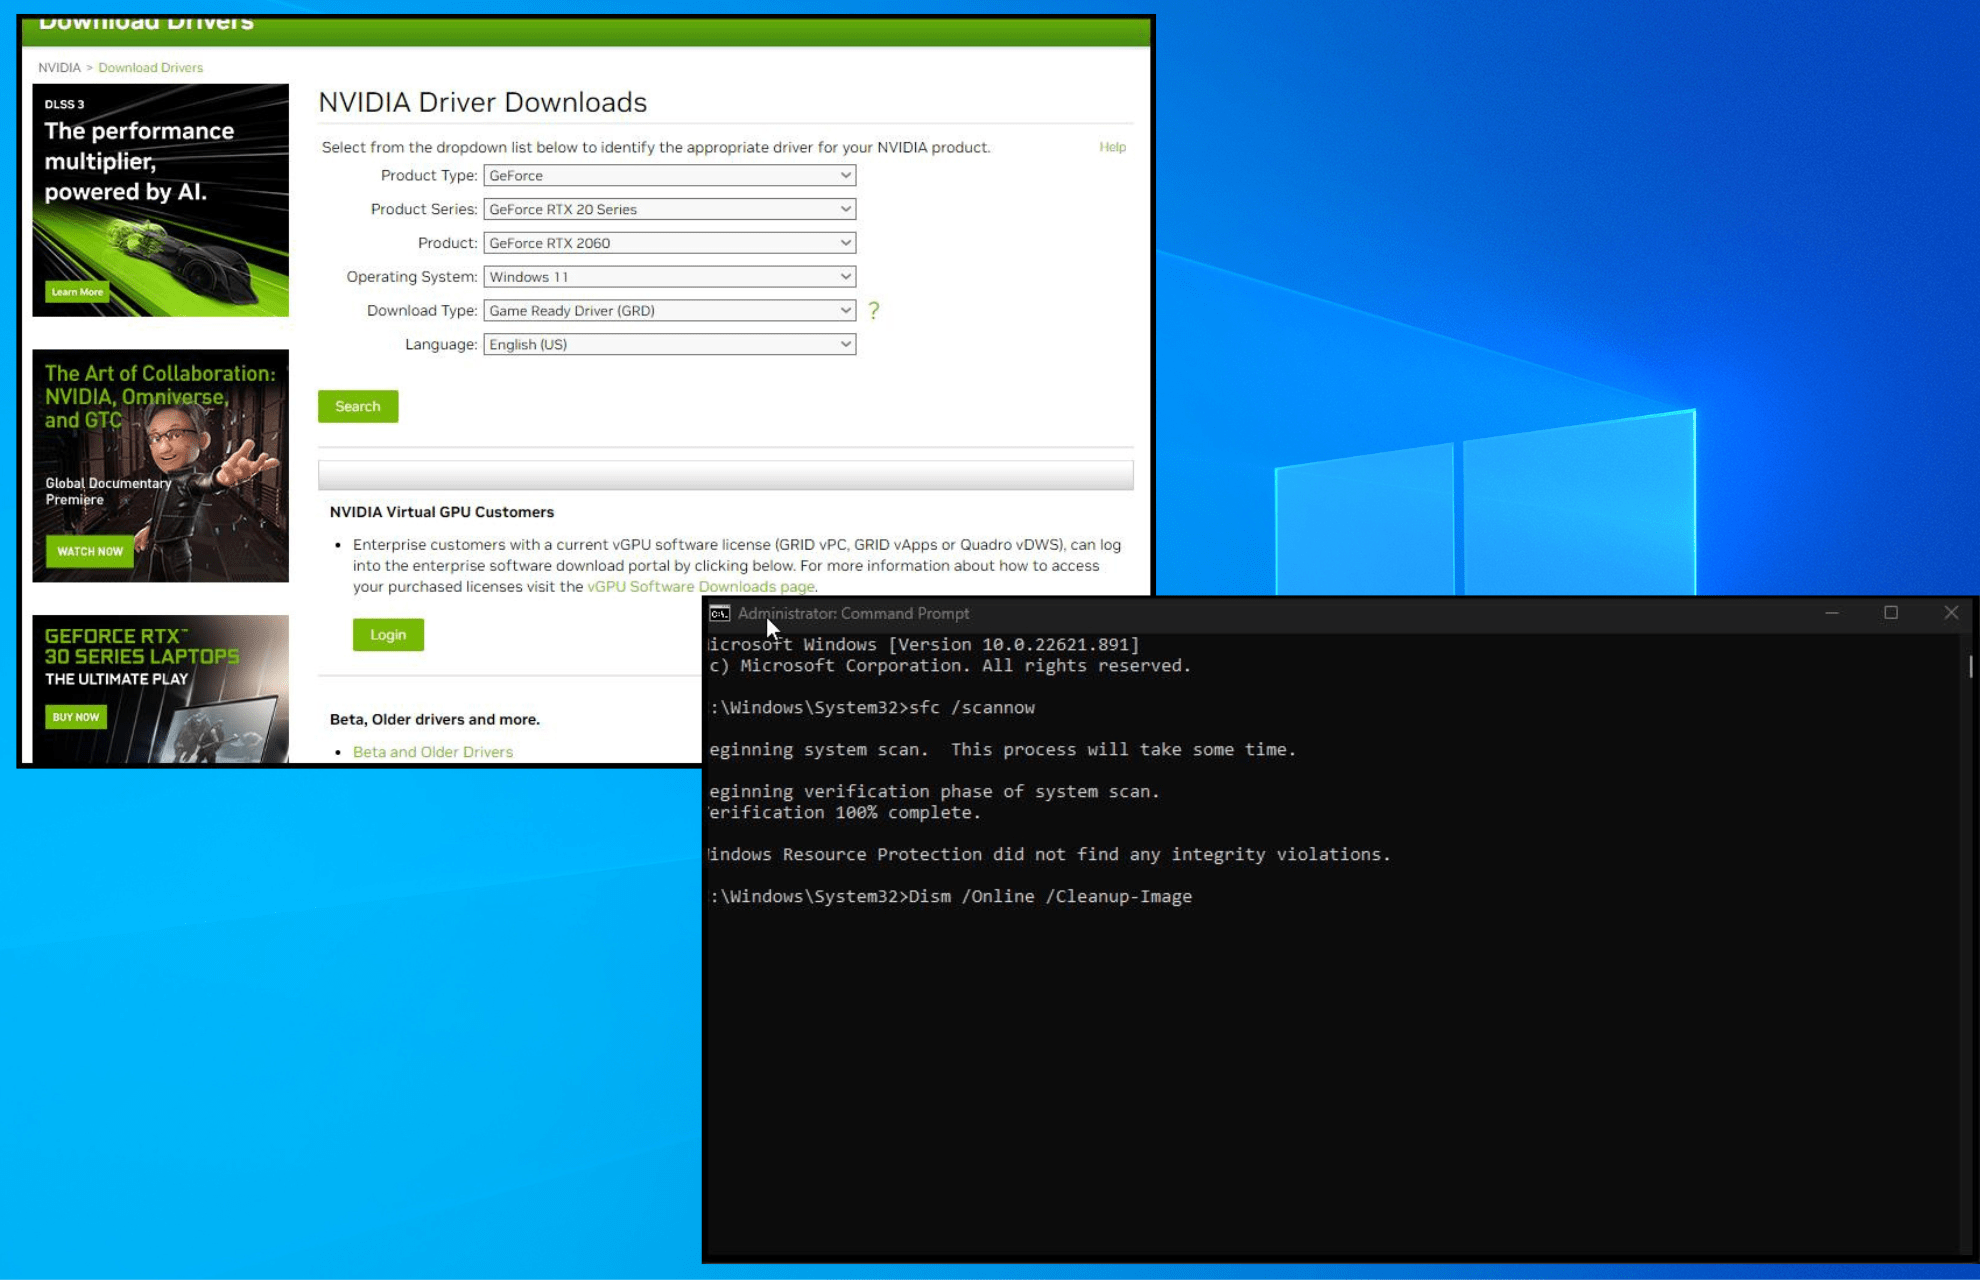
Press the Windows key and enter cmd, and click Run as an administrator.
When Command Prompt starts, run this command and press Enter: sfc /scannow
The SFC scan will start and wait for a successful prompt.
Then, run the following and press Enter: DISM /Online /Cleanup-Image /RestoreHealth
DISM scan will start and take about 20 minutes or more to complete.
Once the DISM scan is complete, check if the problem is fixed. If it’s not, you can repeat the SFC scan.
Yet again, Microsoft has identified a bug that is affecting users that have installed the Windows 11 2022 Update. The company has stated that if you use keyboard shortcuts to turn on/off or change IME (Input Method Editor) input modes, some apps may become unresponsive.
If you aren’t familiar with the IME, it is a tool that allows users to input text in a language that is difficult to represent on a standard QWERTY keyboard. Microsoft has further provided instances that can cause this issue to occur:
For Japanese:
Using the Hankaku/Zenkaku (半角 / 全角) key on a Japanese keyboard
Using the default keyboard shortcut: holding down the Alt key and pressing ~ (tilde)
For Chinese:
Using the default keyboard shortcut: holding down the Control key and pressing Space
For Korean:
Using the default keyboard shortcut: pressing down the right Alt key
Microsoft has indicated that the issue can occur silently, even without displaying any error message. It has narrowed down the issue to apps that load certain components of the Text Services Framework (TSF). However, not all apps will encounter this issue, especially those that don’t load these components.
As a workaround, Microsoft recommends changing the input mode by clicking the IME mode icon in the taskbar rather than using keyboard shortcuts. However, the issue has since been resolved through an update. “This issue was resolved in updates released November 29, 2022 ( KB5020044) and later. We recommend you install the latest security update for your device,” stated Microsoft via the Windows 11 Health Dashboard.
Has any of your apps become unresponsive after using keyboard shortcuts to turn on or change IME? Did installing the latest security update help you resolve the issue? Let us know in the comment section.
Now is the perfect time to decorate your Windows 10/11 desktop with beautiful Christmas wallpaper for your computer.
Many PC users have already set their favorite Christmas wallpapers on their computers, and we’ve also prepared a list with the best Christmas wallpaper resources you can use to decorate your desktop.
What are the best Christmas wallpapers for your Windows PC?
If you prefer to download this year’s Christmas wallpapers from the Microsoft Store, the free Microsoft Christmas wallpaper collection is your best pick.
You can install these wallpapers on PC, HoloLens, and smartphones. There is a wide variety of wallpapers that you can choose from, from Christmas ornament wallpapers to beautiful winter scenery images.
Look no further if you happen to have in mind the idea of a huge collection of Christmas wallpapers in HD quality from GetWallpapers.
There are tons of Christmas Love wallpapers to choose from, and you can save them to an SD card for later use.
If you don’t like to keep things for yourself, feel free to share all images with others or set them as a Lock Screen and enjoy them as much as possible.
Another interesting wallpaper repository is The Holiday Spot. This website offers tens of Christmas wallpapers that you can customize to your screen size.
Whether you own a widescreen, laptop, tablet, or other Windows 10 device, you’ll find the right wallpaper for it. Just browse the available wallpapers and download the ones that you like.
If you want to add crystal-clear Christmas wallpapers on your Windows 10 PC screen, we recommend going for the best 4K wallpapers. Follow this guide to set up wallpapers on Windows 11, if you have already upgraded to the new version.
These cheerful wallpapers will put a smile on your face and they’ll look really nice on your desktop. Browse through the collection of wallpapers and download a few of them or even all on your PC.
This website is perhaps the most generous Christmas wallpaper resource currently available. There are more than 2500 Christmas wallpapers you can choose from to embellish your desktop.
As a result, choosing a single wallpaper is a very difficult task. All the included Christmas desktop backgrounds for Windows 10 and Windows 11 are extremely beautiful and creative.
Actually, the best solution is to use a different image every day. If you don’t believe us, it’s time to see that for yourself.
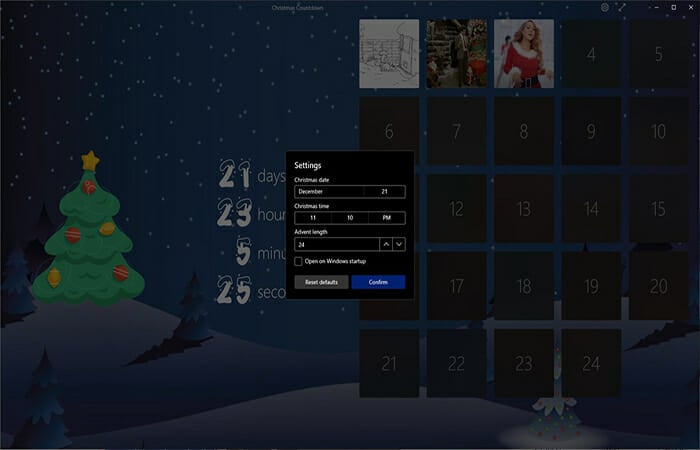
Counting down the days until Christmas is in itself a Winter tradition. You can now participate in it directly from your Windows PC.
You will be able to set the timer as a wallpaper or screensaver. It counts the days, hours, minutes, and seconds that are left until Christmas day. You will always have a real-time reminder
The app is very lightweight and will surely put you in the Christmas spirit. You can choose between several countdown templates, and you can also find several wallpapers that are specific to the winter holidays.
Christmas Countdown Wallpaper is completely free and it also provides tons of beautiful Christmas images as background.
This package offers a nice set of holiday wallpapers that you can use to create your own personalized Christmas theme. It includes this beautiful Christmas tree setting that perfectly conveys the warmth these holidays bring to the cold season.
The set also contains winter scenery wallpapers, Christmas cookies and gifts pictures, Santa Claus wallpapers, and many more.
To create your own Christmas theme, you just have to download the package and select which pictures you want to use from the Windows customization settings.
This is a great, classic choice that fits perfectly with any setting. It is professional enough to use it on your work computer, but it can also be a good background for your personal device.
It offers hundreds of Christmas and winter-related backgrounds that you can use to customize your PC exactly the way you want it.
You can build a color-themed slideshow where you only use backgrounds that are predominately blue. This will create a lovely and cohesive winter theme that will most likely set the mood for the holidays.
This is the perfect combination of elegant and minimalistic. The wallpaper puts you in the holiday spirit with its glowy tones, while still being very clean.
The collection has magical snow landscapes as well as cheerful backgrounds of magical Christmas creatures and characters.
It is another good resource that you can use to mix and match multiple wallpapers and create a charming personalized slideshow.
If you want to get a background image of the highest quality, Unsplash is one of your best bets. It may not have as many options as other resources on the list, but it only provides the finest backgrounds so you won’t have to scroll endlessly to find your favorite.
The Christmas wallpaper gallery is curated to provide only the best pictures available. You will see that each image in this collection is of the highest standard both in terms of composition and resolution.
This is another good resource both for mobile and PC. The wallpapers fit various holiday sub-themes such as Christmas in family, Christmas decoration macros, Christmas trees, and more.
Moving on to a bolder choice that screams ’tis the season, this 1000×750 Wallpaperhouse background doesn’t hold back. You get the full package: a decorated Christmas tree in a snow-covered fairy tale land.
This is another curated collection of holiday backgrounds for your desktop. The wallpapers that you can find here match a more classic Christmas aesthetic, with very vibrant, colorful, and sparkling images.
The images in this gallery are of two primary categories: cozy Christmas indoor pictures and breathtaking winter sceneries. In terms of style, you will find both realistic wallpapers as well as some background that lean more on the traditional painting style.
Here’s another good example that encompasses how the holiday spirit brings people together and inspires them to offer warmth to one another in the midst of the freezing winter.
In the Wallpapercave gallery, you can also find an all-inclusive collection of different styles of backgrounds, from extremely bold and colorful images to more minimalistic Christmas backgrounds.
The website has other holiday-related collections as well and you can also use the built-in search feature to find a more specific background using keywords.
A setting that will put anyone, of any age into the Christmas spirit is that of a warm and welcoming holiday-decorated home.
Colorful fairy lights and the view of beautifully packed gifts waiting to be opened can instantly take you back to your childhood.
This is a timeless type of image that fits perfectly as a holiday season background. It is classic and complex and can be a good choice if you keep your desktop organized and don’t have too many icons. Otherwise, it may be a little too much.
Walppaperflare offers another large collection of high-quality Christmas backgrounds. Along with the above-mentioned scene, you will also find various Santa backgrounds and winter landscapes.
If you are a Disney fan, you will most certainly love the Mickey Mouse Christmas wallpapers available for free on Wallpaper Mania.
The magical Disney castle surrounded by angels, elves, snowmen will certainly put you in a nostalgic holiday mood. There are several similar backgrounds available in the Wallpaper Mania gallery.
In this gallery, you will be able to find even more iconic characters living the Christmas spirit. Most of the images available convey a colorful and playful atmosphere.
The jingle bell is probably one of the most iconic and recognizable instruments that will automatically make you think of Christmas.
This minimalistic background with its cozy red and golden tones will remind you of your favorite Christmas songs and carols. It is yet another great choice for those of you that want to keep it simple
Wallpaperbat has a wide range of 4K and HD Christmas wallpapers of various sizes. Make sure to check the description of each image and see if it fits your screen.
Peanuts is another beloved show that gave us one of the greatest duos of all time: Snoopy and Charlie Brown. Put these two into the Christmas spirit and you get an adorable background for children of all ages.
Wallpaper dog has a large gallery of Christmas wallpapers for PC. They have backgrounds of various styles and sizes that you can use to dress your desktop for the holiday season.
You can find other variations of Peanuts Christmas backgrounds, as well as other cartoon and fairy tale characters. If you have the time to browse around, you should certainly give it a try.
There you go, we’re sure these wallpaper resources will make your Christmas even more cheerful. Tell us in the comments section below which Christmas wallpaper for PC you selected.
Microsoft Office is and always will be the go-to office suite for the majority of Microsoft users. It’s reliable and the interface used in the Office defined how text processors and spreadsheet editors look today.
However, even the most sturdy native applications have had certain issues in the Windows platform. One of the most peculiar concerns is high CPU usage in Excel.
We made sure to enlist some applicable solutions below and help you address this as soon as possible.
? Why is Excel using so much CPU?
High CPU usage in Excel doesn’t have a single cause and can occur in different actions.
Generally, an app uses more resources if it’s out of date or it has been in use for a very long time. Consider updating Excel and restarting your device.
Some users complain that Excel is not responding when it has high CPU usage, others noticed high CPU usage when copying or saving, or even when Excel is idle.
So you depending on what exactly you’re experiencing, you may have to tackle the issue differently, but we got plenty of options for you.
⛔How do I limit CPU usage in Excel?
The app seems to respond badly and to use a higher CPU on certain tasks, so you can consider limiting the simultaneous tasks and disabling unnecessary add-ons.
If you’re encountering high CPU usage on a specific Excel file, but others work fine, it’s possible that it’s corrupted.
Learn below how to fix it, plus other nifty methods that will help you fix Excel’s high CPU usage when idle or working.
How can I Fix the high CPU usage caused by Microsoft Excel?
1. Update Office
Open Settings.
Choose Update & Security.
Select Windows Update.
Check for updates.
Let’s start by updating the Office suite. As you probably know, all updates for Office come via Windows Updates.
Most of them are security patches and minor fixes, but Microsoft usually addresses a major issue when it occurs. And this high CPU usage caused by Excel is certainly a widespread problem.
Also, try running the application as admin. Here’s how to grant administrative permissions to Excel:
Right-click on the Excel shortcut and open Properties.
Choose the Compatibility tab.
Check the Run this program as an administrator box and confirm changes.
2. Try using Excel in Safe mode and disable Add-ins
➡️ Here’s how to run Safe mode in Excel:
Press and hold the CTRL and double-click on the Excel shortcut to run it in Safe mode.
If there are performance improvements, remove Add-ins to fix the error.
Also, try removing recent formulas.
Another way to troubleshoot high CPU usage caused by Excel is to run it in Safe mode. With that, you’ll learn about the possible impact certain add-in or COM has on the application execution.
If the CPU usage drops while in Safe mode, we suggest disabling Add-ins one by one with the system of elimination until you find out which one is causing the issue.
3. Delete local files
Make sure Excel is fully closed.
Navigate to
C:UsersYour UsernameAppDataRoamingMicrosoftExcel.
Open the Excel folder and copy the whole content of the folder. Paste it somewhere else to back it up.
Delete everything from the Excel folder.
Restart your PC and try using Excel again.
Besides the repair, which should resolve the high CPU usage in Excel on its own, a manual approach might be a better choice.
If there’s a problem with Excel formulas or configuration, deleting configuration files might plummet the high CPU usage. After you delete them, everything should return to normal.
4. Repair damaged Excel file
A high CPU usage might tell you that there are certain errors that will eventually lead to a damaged or corrupt spreadsheet.
A symptom of this issue is that the Excel sheet freezes and the task has high CPU usage.
This means that eventually, you will not be able to open the file and read the contents anymore. Luckily, there are 3rd party utilities to assist with the repair process.
Tip
A clean, un-damaged file shouldn’t cause high CPU usage. What’s our recommendation?Stellar Repair for Excel.
This highly praised tool works with all versions of Windows starting from the latest version of Windows 10 and up until the very old Windows XP.
It is also compatible with Microsoft Excel 2019, 2016, and all the way down to Excel 2000 version. If it’s compatible it means it can perform the necessary operations to repair one or more files and fix Excel causing high CPU usage.
All you need to do is close all Excel files and quit the app. Start the Stellar program, select the file that is causing you trouble, and hit the Repair button.
When the process is finished, a summary screen will be shown, and also a preview of the content will be available. You will then be able to choose where to save the new, repaired file.
Proceed to open this new file with Excel and check if the CPU problem is gone.
5. Repair Excel
In the Windows Search bar, type Control and open Control Panel.
Open Uninstall a program under the Programs section.
Locate Office, right-click on it, and choose Repair.
Wait until the installation is repaired and restart your PC.
Another viable solution in case the Excel installation got corrupt is to repair it. This precedes the reinstallation since you at least get to do it with the system resources.
After you repair the installation, the problem should be resolved. Have in mind that this isn’t as successful as the clean reinstall is, but it’s still worth a try.
The steps that show you how to repair Excel are shown above.
If this wasn’t helpful, we suggest moving onwards with the steps below.
6. Disable third-party applications
In the Windows Search bar, type msconfig and open System Configuration.
Under the Services tab, check the Hide all Microsoft services box.
Click Disable all to disable all active third-party services.
Now, select theStartup tab and go toTask Manager.
Prevent all programs from starting with the system and confirm changes.
Restart your PC.
Another possible reason for this kind of unusual behavior might be found in the background activity of certain third-party apps.
Some of them won’t affect the execution of Excel, while others can. The most common issues occur due to a third-party antivirus, but there are some other third-party apps that might slow down Excel.
Finally, if none of the solutions worked for you, a clean reinstall should address this. Of course, there are some other things that might affect this, but they’re out of our grasp. In addition, we suggest a clean reinstallation which includes deleting all Excel-associated locally-stored files.
Go to the start menu, and type Control panel in the search bar
Click on Control Panel and go to Programs
A list with all of your apps will be displayed
Right Click on Excel and press Uninstall
Restart the PC
Go to the official Microsoft Office website and install Excel once again.
With that said, we can conclude this article. Hopefully, it was an informative read and we helped you resolve high-CPU issues in Excel. And, just in case you have some questions or suggestions, feel free to tell us in the comments section below.
Windows 11 Christmas desktop themes are a great way to bring a pinch of the holiday spirit to your PC. To cut your time in half, we scoured the web and found the best options.
Find below everything you need, even animated Christmas themes for Windows 10/11. Check them out.
As you can guess, The Christmas Countdown will show you a countdown clock to Christmas, to help you keep track of all days remaining until the big day that you have in mind.
This app is perfect for adults and kids alike. To make things more dynamic, make sure to switch between all those amazing Christmas background themes.
The best part is that all settings are automatically applied across all your devices. Moreover, get ready to enjoy a funny, heartwarming video every day! That’s a unique way to celebrate these special days, right?
Fireworks is a joyful desktop theme for your PC that offers the most amazing fireworks landscapes captured in impressive cities.
With this festive pack theme, you can set the mood perfectly for the New Year’s celebration right from your cozy home. You have crystal-clear fireworks background images that can be switched at a given time, showing spectacular sky lighting.
If you’re already excited for the year’s passage and love to see the magic moment when the sky is full of colors, then such a Windows theme really hits home.
Hence, to completely get into the holiday spirit and enjoy colorful HD pictures, you should simply install this wonderful desktop theme available on Windows 11, 10, 8, or 7.
Another beautiful Windows 10/11 theme with season-specific images is given by Ninja Cat Holiday Escape.
With this animated theme, you follow the Ninja Cat on different adventures related to the holiday of course. You sure need to escape sometimes from everyday life, and a festive background that brings back childhood fits perfectly.
You can have personalized Christmas images that create the holiday mood, with various scenes including the Ninja Cat in a dogsled or just wandering in a candy and gingerbread universe.
The main idea is the imagination you have as a child transposed in a holiday setting, and with this 14-set of images, you can enjoy creative, meaningful desktop themes anytime.
If you want to transform the whole interface of your computer and you like the idea of a Windows 11 Christmas desktop theme is for you. This custom-made theme completely changes the system’s user interface.
Start Menu, File Explorer, dialog boxes, and more are included. The theme even changes some icons. Even more, ReGe uses a combination of red and green colors.
These colors are typical for the Christmas tree and Santa’s helper elves. So, if you want to feel like Santa’s apprentice, you should definitely try this theme.
It is entirely compatible with Windows 11, so all you need to do is download and install it as soon as possible.
This Windows holiday theme is a creative drawing set of images that illustrates the Christmas and winter season just right.
There is no better way to celebrate the holiday season than decorative lights, trees, globes, or other Christmas elements. Still, an important touch is your desktop theme.
Using it every day, you can see imaginative art illustrating happy children in the snow, snowflakes, decorated trees, Santa Claus, and even more.
This desktop theme is also great for people who don’t have the chance to see snow in real life, as it portrays little flakes in every image to set the mood.
In addition, such wallpapers are free, and it give you the perfect chance to celebrate the winter holidays especially. Then, you only have to install it and personalize your desktop as you prefer.
The theme presented as Holiday Lights respects its name due to the colorful Christmas lights and other decorative elements you see in December.
If you want to personalize your desktop with various wallpapers, each with holiday vibes, it is ideal to use this festive theme.
Honestly, it’s hard to miss Christmas-related photos with this theme. You have backgrounds that showcase sparkling trees on the side, white snow on trees, illuminated globes, candles, fireplaces, and anything else you can think of.
Thus, it couldn’t be easier to choose a celebration desktop that brings the spirits in your family and sets the mood for this Christmas.
A perfect winter desktop theme like Snowy Night is the final touch to get ready to share gifts, stay with loved ones, or drink hot chocolate beside the tree.
Using such magical-looking photos, you get astonishing holiday landscapes that express the most heartwarming feelings.
Plus, you have available 13 images pack and one custom color to benefit from, also don’t have to worry about mouse cursor or sound changes in your PC.
It is most likely to stay amazed all month by the magic of these images, giving lively energy for the best time of the year.
Therefore, it’s the perfect moment to feel the joy of the winter holidays and set up your surroundings with colorful lights and warm decorations.
The Panoramic Snow Theme is undoubtedly for you if you’re a fan of panoramic images with snow mountains or winter landscapes.
With such a photo-rich 23-image theme, you will never get tired of impressive snowy qualitative images on your own desktop. The panoramic view for every photo of the snowy mountains adds extra value.
More so, this theme offers the simplicity of winter panoramic views without too much clutter that fills the frame. Even though you don’t have Christmas elements, you can feel the season and holiday coming at your door.
Then, if you enjoy pure winter imagery that sets the mood for ski vacations, you’re good to go with this panoramic view theme.
This particular Windows theme is created by professional photographer Hayley Elizabeth, showing its artwork about winter and holidays.
The 8-set image included in this artistic theme shows the real nature of winter, with its crystal-clear snow and ice and a calm stillness that can bring you peace.
Like other themes, Winter Garden focuses especially on the small details of winter and tries to express the magic of this season as naturally as possible.
You will not have conventional holiday photos, yet this special theme includes detailed nature frames covered in crystal snow. So, if you prefer simplicity, go for this one, trustfully.
This desktop theme goes without saying from the title and brings the most essential symbol of Christmas, namely the tree.
Everybody loves this holiday because partly, they can decorate the tree and put colorful lights with the star at its peak. So every year you can cherish the season with the tree in your home, and on the home desktop as well.
The tree is recognized by the entire world as the symbol of Christmas together with Santa. You should thus get in the holiday spirit with this 16 HD wallpapers theme on your Windows screen.
In addition, this last touch to get ready for upcoming holidays can be displayed on Windows 11, 8, and 7. So regardless of the Windows version, you can run this free theme.
Same as Christmas Desktop Theme Pack, this Christmas Tree Theme Pack is a collection of beautiful Christmas trees for your desktop.
It actually consists of 16 images of beautiful, well-decorated Christmas trees for your desktop. So, if you want one of the biggest symbols of this holiday on your desktop, download this wallpaper pack.
The Christmas Tree Theme Pack is available for free, so don’t hesitate to enjoy it as well.
Christmas Desktop Theme is a collection of 16 HD Christmas-themed wallpapers. Although this wallpaper pack doesn’t change the looks of your interface, it contains some beautiful images for your desktop.
So, if you don’t want to bother with finding a perfect Christmas wallpaper for your desktop, you can download this pack, and have the theme pack do the job for you.
The Christmas Desktop Theme Pack is available for free, so you can easily grab it right away.
Of course, if you don’t want to download any third-party theme on your computer, there is an easy thing to do.
Go to Microsoft’s Holiday & Seasons theme list mentioned above, and some attractive Windows 11 Christmasthemes free download options will be waiting for you.
There are plenty of Windows 10/11 holiday themes to choose from, such as Snowy Night, Sugar and Spice, Twinkle Wish, and more.
FAQs
What are Christmas desktop themes?
Christmas desktop themes are visual enhancements for your computer, featuring holiday-themed wallpapers, icons, and sounds to create a festive atmosphere on your desktop.
How can I apply a Christmas theme to my Windows desktop?
You can apply a Christmas theme by downloading it from the Windows Store or a trusted website, then going to Settings > Personalization > Themes, and selecting the theme you want.
Are there free Christmas desktop themes available?
Yes, many websites and the Microsoft Store offer free downloadable Christmas themes that include wallpapers, icons, and system sounds.
Can I create my own Christmas desktop theme?
Yes, you can create your custom theme by choosing a Christmas wallpaper, changing icons, and adjusting system sounds, then saving it as a theme in Settings > Personalization > Themes.
There you go! We hope these themes will help you to bring the holiday spirit to your computer. What do you think of our choices for this Christmas? Let us know in the comments area below.
Christmas is just around the corner, and so is winter. If you want to personalize your computer to accommodate the festive season, then you need to download these new Windows themes for winter.
Now, if you’ve installed all of the above apps, then it’s time to talk about some awesome, free winter themes for your Windows 10, and Windows 11 customization.
You will also find quite a few in our previous collection of more than 150 free Windows 10 themes and wallpapers. Follow the links below to download awesome winter themes for your PC.
These panoramic images showcase the pristine beauty of snow-covered landscapes from around the world. This free theme for Windows 10 is designed to span dual monitors for twice the majesty.
These beautiful images capture the many ways that snow can transform a landscape, from the hushed grandeur of the forest to the beckoning warmth of a cozy cottage and the magic of snow-covered city streets. Welcome winter with this snowy night theme for Windows 10
Giving your PC a complete winter look isn’t possible if you just change the theme and the wallpaper. If you want to give your PC a total wintery overhaul, you should try Stardock’s Object Desktop.
It will provide you with themes, live wallpapers, screensavers, new UI options, and even customized sound packs, allowing you to give your Windows 10 desktop a truly unique feel.
Object Desktop
Give your desktop a complete makeover with the help of this fantastic customization suite!
Explore the landmarks, coastline, and serene natural beauty of the Isle of Man in this free Windows theme featuring images from photographer Mark Wallace.
This winter theme features 8 snowmen images that will bring back childhood memories. Install this theme on your Windows 10 computer, and when the first snow falls, you’ll definitely want to go outside and build your own snowman.
Your Christmas and Winter wishes will come true with the help of this Windows 10 theme. This is another beautifully designed winter theme for Windows PCs that will bring you back to childhood.
Who doesn’t love Christmas cookies? How about setting Christmas cookie pictures as your wallpaper? If you like this idea, then all you need to do is download this theme.
Looking for a cool Christmas-themed game to enter the holiday spirit? You’re in the right place. We’ll show you some of the best games to play these holidays.
We also picked a few options that aren’t exactly Christmasy but are a sure way to keep boredom away during the Holidays.
Well, Roman’s Christmas is about to change all that, thanks to the fact, and take you on a journey of mystery and crime solving.
The art style is amazing, the puzzles are intriguing, the dialogue is funny, and the system requirements are low, all 4 being perfect ingredients for a game that will surely keep you glued to your chair during the Christmas Holidays.
Hidden Object Games (HOGs) are second place after puzzles when it comes to game genres that delivers a lot of entertainment with minimal programming and design.
Wrap all those intriguing puzzles in a Christmas theme and you have the recipe for a fantastic title like Hidden Objects Magical Christmas Wonderland.
Explore enchanted homes decked out with Christmas decorations, and celebrate with Santa in his humble home full of festive Christmas trees, ornaments, toys, and more
If you haven’t heard of Christmas Wonderland, go to Microsoft Store and get the game.
This is a must-have game in the Holiday season. We played it and we really liked the Mini Puzzles. They’re really addictive and fun to play. The best part is that Christmas Wonderland 6 is suitable for players of all ages.
As a player, some of your tasks include finding presents, getting rewards, flying with Santa on Christmas Eve and more.
Grab a cup of cocoa, put on your favorite Yuletide music, and play Holly: A Christmas Tale, a wonderful new hidden object game guaranteed to fill you with the spirit of the season!
If you’re the type of person that likes to feel a bit of adventure while sitting at home during Christmas, playing as Agent 47 will surely make you happy.
Hitman 2 Gold Edition is available to play, and with it you’ll have another chance at saving the world and eliminating your opponents.
Use stealth, skill, or raw firepower to overthrow your enemies and turn your Christmas holiday into a mission of International proportions.
Skyring is definitely the snowiest game of the franchise. Add to that an enormous world for exploring, and you get perfect winter fun for all you wanderers out there.
You can associate Minecraftwith, well, just about anything. This sandbox building game allows you to build anything that comes to your mind using blocks. So, why not build your own Christmas tree, or if you have more time during the holiday days, the whole winter wonderland?
As Minecraft also has a multiplayer mode, you can team up with your friends to design your own Christmas-themed world. Since Microsoft took over, it made the game cross-platform compatible.
So, all you need is an idea, and you can start building amazing holiday-inspired creations right away. Whether working in a team or all by yourself, fun is guaranteed.
Featuring breathtaking visuals and amazing character customization, Baldur’s Gate 3 is a true testament to the Dungeons & Dragons games, allowing players to participate in an amazing story spanning several chapters where they can interact with a large roster of champions.
With so much content at your disposal, your Christmas holiday will feel incredibly fulfilling, so try Baldur’s gate!
Sports simulation games are a fantastic way to enjoy the holidays with friends and family. Titles like FIFA and NBA 2K offer fun, competitive gameplay perfect for bonding during visits.
Feeling nostalgic? Dive into older editions from major franchises like FIFA, NFL, and PES to relive past seasons.
Most modern sports games include multiplayer modes, allowing you to challenge loved ones or play online.
FIFA 23 stands out with its updated graphics, expanded teams, and cross-platform play, making it an exciting choice for holiday gaming fun.
Online multiplayer games, like MOBAs and MMOs, often receive festive updates during the holiday season, introducing Christmas-themed content, updated interfaces, and special features.
These updates bring a sense of seasonal cheer to the virtual world, making gameplay more engaging and fun.
For those already immersed in these games, the anticipation of holiday additions is hard to resist.
Playing online multiplayer games also provides an opportunity to connect with friends, even during winter breaks, combining the joy of gaming with the festive spirit of the season.
The Long Dark earns its spot on this list alongside Skyrim for its immersive winter adventure. This open-world survival game places you in a frozen wilderness where the only goal is survival.
Unlike Skyrim, there are no magical creatures—nature is your sole adversary. You’ll scavenge for tools, hunt for resources, and craft to endure the harsh environment.
With three game modes, you can adjust the challenge, including facing aggressive wildlife like wolves. It’s a must-play for fans of snowy survival adventures.
PlayerUnknown’s Battlegrounds, also known by all gamers as PUBG is not the latest game you could play but it’s still one of the most popular games out there.
If you haven’t played it already, take advantage of the Christmas offer and grab this awesome game.
Have you got what it takes to survive the harsh environment that this game throws you in? The motto to guide your actions is survival of the fittest — kill or be killed
Every year, Gear on War has Christmas-themed game content to players’ delight. Gearsmas lets players enjoy fierce snowball fights and equip their favorite characters with some merry Christmas-theme shotguns.
We still don’t know what the Gearmas will bring, but we’ll keep an eye on TC’s official website, and we’ll update this guide as soon as new information is available.
Our list is now completed. We hope you now have a better idea of what you’re going to play these holidays. Be it a Christmas-related game with Santa and elves, or the game that just feels right to play around Christmas. We’ll leave the choice to you.
It’s Christmas, you can play whatever you like, we just gave you a couple of suggestions. Speaking of that, do you agree with our list, or you feel we should have put some other games here? Let us know in the comments below.
If you’re tired of managing your lights manually, we’ve prepared a list of the best app-controlled Christmas lights to make your holidays brighter and more convenient.
These smart options let you adjust colors, modes, and schedules effortlessly from your phone, ensuring a festive setup with minimal hassle.
What are the best computer-controlled Christmas tree lights?
Twinkly TWS600STP are one of the best app-controlled Christmas tree lights.
It can be managed from a free mobile app for iOS and Android devices. The app is designed to let you fully manage the multicolor lights. Furthermore, you can create effects, apply timer, and switch the strings on or off.
Twinkly TWS600STP features the newest RGB 4.3mm diffused lens. LEDs are designed with a flat head to intensify light effects. You can also download great free effects from the online gallery.
ELlight Outdoor String Lights are another great option to buy if you are looking for computer-controlled lights.
This one can be used outdoor if you have a tree in your yard, but also inside. It comes with a waterproof cord, power supply, and controller box, making it perfect even for outdoor use.
You can have more modes to switch to by using the app instead of the traditional remote. Thus, using the app LED Hue, you can choose an option from up to 120 dynamic color modes and various static solid colors.
DreamColor String Lights are an ideal device that offers you multiple ways to control the lights.
It works with both Bluetooth and Wi-Fi so it can be controlled in several ways. You can manage the modes traditionally, with the 40-keys IR remote. From the 3-button controller box, you can change static, dynamic, and MIC modes.
Additionally, with the Bluetooth POPOTAN app installed on your smartphone, you can control what the led lights can do. You can turn them on or off, set a timer, choose a scene, or change color and brightness.
The Indoor String Lights from POPOTAN are an excellent option for cheap smart Christmas lights with many features.
It is a small string of only 33 feet long that features multiple control methods. It works with Alexa Echo and Google Assistant, allowing you to manage the lights simply using your voice. Moreover, you can use the POPOTAN or Smart Life app.
In addition, it has a built-in high-sensitivity microphone, LED light bar beating with ambient sound. Whether you want to use it for a party or computer games, you can sync the lights to the beat of any song.
If you like to control your lights from Alexa or Google Home, Brizled Pro Smart Christmas Lights is the best choice for smart Christmas tree lights.
You’ve got a 66 feet long string with no less than 200 LEDs to play with and that can cover even the tallest Christmas tree that can fit in a house.
You can safely use it indoors or outdoors, as you wish.
Bring some automation to your home by buying these perfect computer-controlled Christmas lights. The lights are the best part of the holidays; manage them comfortably from your phone or tablet.
You know the famous Santa controversy, right? How can he deliver the presents so fast?! Well, we uncovered one possible way: he has a big sling and he is jettisoning them right down the chimneys with pinpoint accuracy.
That will be your exact job in this first-person VR game called Santa Sling. You will be doing the most wonderful and rewarding job ever, delivering presents to the nice kids directly from Santa’s sleigh in a Christmas-themed town.
Don’t worry because the slingshot is also magical so your targeting will also be helped in a certain amount, but be aware, you need to finish the job before Christmas Eve ends!
Batman Arkham Origins is the only Arkham game, and one of just a few major titles that take place during Christmas Eve. The whole city of Gotham is covered in snow and decorated with Christmas lights and ornaments.
At the end of the day, Batman Arkham Origins is not as bad as some people label it. It even has a few recognizable Batman moments.
So, it’s worth considering this game as a pick for this Christmas, especially if you haven’t played any game from the franchise yet.
Contrary to the majority of Christmas-related games, Santa’s Sweatshop doesn’t show Santa Claus as such a delightful creature.
If you’re familiar with the original game, you know it’s one of the best prison break simulators. Well, you do the same thing in Santa’s Sweatshop, only playing as elves trying to escape cruel Santa’s workshop.
As this is a DLC, all the elements from the standalone game stay. You’ll still have to find your way out crafting various tools and finding security holes in Santa’s factory.
Santa’s Sweatshop is available for free on Steam, but to play it, you need to own the original game.
Castaway Paradise is a delightful life simulation game perfect for the holidays, catering to a variety of tastes.
Set on a tropical island, it offers an escape from winter’s chill, letting players enjoy sunny, vibrant gameplay. Prefer snowy adventures? No problem—there’s a DLC that transforms the island into a magical winter wonderland, complete with Christmas vibes.
The game lets you build structures, craft items, and interact with quirky villagers, offering more activities than a real tropical getaway.
If you’re a fan of Candy Crush Saga, then you’re going to love Christmas Puzzle. As a player, your task is to collect Santa’s coins and prepare your house for Christmas with beautiful ornaments and illuminations.
When the situation gets complicated, you can use incredible power-ups to blast through the puzzles.
The game’s soundtrack is seasonal and relaxing, and collecting the coins to decorate your house is really fun. If you’re looking to get into the Christmas spirit, grab this game and hit the play button.
Christmas Adventure: Candy Storm is a funny hidden object game with puzzles and a series of mini-games.
Lisa’s grandfather, Santa Claus, has asked for her help delivering Christmas presents to a remote town. Trying to shorten her way, she drives through an old forest when suddenly her car turns into candies!!
Moreover, everything around is scattered with candies and covered with other sweets! Help Lisa investigate what’s happened and help fix her car so she can make it to town in time to save Christmas!
Santa’s Workshop – As a player, your task is to help Santa by finding the right presents and packing them to the right sledge.
Our list of the best Christmas games you can find on Steam is now finished. We hope it helped you to choose the right game to play during these holidays. What’s your favorite
What’s your favorite game to play during Christmas? Is it on the list? Let us know in the comments below.
You must have received the notification that the app didn’t start in time. This affects some apps that you need to launch. Let us tell you all about this problem.
Apps are an integral part of Windows 10, and we all use many apps on our PCs. This error is not specific to any app, and even though they may be triggered more with some apps, they cut across the board.
This sounds like a significant problem, but fortunately, there are solutions. But first, let us consider some common triggers of this error.
Why does The app didn’t start in the required time message appear?
From user experience, we gather that there are a few triggers, and at the top of this list are the following:
Outdated programs – If you are trying to run an outdated app, it may take too long to launch and may trigger this error.
Permissions issues – Most of the time, the error will be triggered if necessary file permissions for running an app are omitted.
OS update issues – If you have pending updates on Windows, they may affect how applications are launched.
Let us now explore the most powerful solutions for the error The app didn’t start in the required time.
How do I fix The app didn’t start in the required time error message?
It’s worth mentioning that The app didn’t start in the required time error message can affect almost any application, so make sure that all of your applications are up to date.
2. Allow the app through the firewall
Press Windows + R, type control panel, and hit Enter.
Select System & Security.
Click Allow and app through Windows Firewall.
Select the Change settings button to adjust the options.
Click the Allow another app button and select the app you need to let through.
Try rerunning the app to see if the problem is restored. If you get an error message the app didn’t start in the required time, move to a different solution.
3. Make sure your internet settings are correct
Press Windows Key + S, type Network and Sharing, then choose View network connections from the results list.
Double-click your connection and select Properties.
Select Internet Protocol Version 4 (TCP/IPv4) from the list and click the Properties button.
Tick Use the following DNS server addresses checkbox and enter 8.8.8.8 as a Preferred DNS server and 8.8.8.4 as an Alternate DNS server.
Click OK to save changes.
After changing your DNS, the issues with The app didn’t start in the required time error should be resolved.
4. Change your file permissions
Open File Explorer using Windows + E, and navigate to the C partition.
Right-click on Windows and choose Properties.
Navigate to the Security tab. In Group or user names section, select ALL APPLICATION PACKAGES. Check the permissions for the selected group. Read & execute, List folder contents, and Read should be enabled by default.
Click the Advanced button and then click the Change permissions button.
When the Advanced Security Settings for Windows window opens, you need to check the Owner. By default, it should be TrustedInstaller. If the owner is set to TrustedInstaller, you’ll have to change it. If the owner isn’t set to TrustedInstaller, navigate to Step 10.
Click the Change link next to the owner’s name, and select the Advanced button.
Click the Find now button. A list of users should appear. If you’re using an administrator account, select Administrators from the list and click OK.
Now, click OK again to add the Administrators group.
Click Apply and OK to change the owner. After you’ve changed the owner, you’ll need to repeat Step 3.
Select Add.
Click on Select a principal.
In the Enter the object name to select section, enter ALL APPLICATION PACKAGES and click Check Names and OK.
Set Type to Allow. Set the Applies to value to This folder, subfolders and files. Tick Read & execute, List folder contents, andRead in the Basic permissions section, and finally click OK.
Tick Replace all child object permission entries and click Apply and OK.
Lastly, repeat all these steps for Users, Program Files, and Program Files (x86) folders.
Check if the issue of the app didn’t start in the required time is fixed.
5. Change registry permissions
Press Windows Key + R, type regedit, and hit Enter.
Once Registry Editor starts, locate HKEY_USERS, right-click it and choose Permissions.
Select ALL APPLICATION PACKAGES from the list and ensure that permission to Read is set to Allow.
Repeat the same process for the HKEY_CLASSES_ROOT key.
Navigate to the HKEY_LOCAL_MACHINE key and check HARDWARE, SAM, SOFTWARE, and SYSTEM permissions, just like in Step 3.
After doing that, check if The app didn’t start in the required time error is still there.
6. Install the latest OS and Windows Store updates
Press Windows + I to open the Settings app.
Navigate to Update & Security.
Click Windows Update, and select the Check for updates button.
7. Run the Windows Store Apps Troubleshooter
Press Windows + I to open the Settings app.
Navigate to Update & Security.
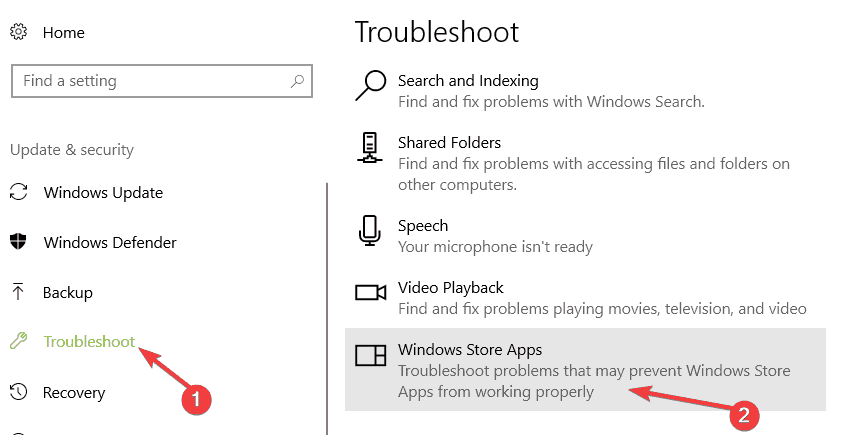
Select Troubleshoot, scroll down, and select Windows Store Apps.
Launch the troubleshooter and wait until it completes the scan.
The app didn’t start in the required time error message can be somewhat inconvenient, but fortunately, this issue can be quickly resolved by using one of our solutions.
Note that we have not written these in any particular order. Instead, we recommend using what seems the most appropriate for you.
As Christmas comes, we want to gather our family and enjoy the best time with them. But what about our friends and family members who are not able to spend Christmas with us?
Of course, we’re not going to forget them. It’s a tradition in many countries all around the world to send Christmas cards to our loved ones. And with the advancement of technology, it has never been easier to create warm holiday cards using greeting card software.
So, if you have a relative or friend you can’t spend Christmas with, it’s a great idea to send him/her a Christmas card.
In that manner, we’ve prepared a list of the most beautiful digital Christmas cards you can send this holiday season.
Canva is a popular graphics design editor that both amateurs and professionals can use. The only mandatory detail is to have an account.
For the winter holiday season, Canva offers a lot of free templates that you can work on embellishing as you prefer by adding text or other photos, images, or objects.
Furthermore, there’s the option to resize the card or, more recently, to add music.
At the end, you will download the card in jpeg, pdf, or other available formats and prepare it for sending.
Canva Christmas cards
Easy-to-use graphic editor to create stunning Christmas cards with just a few clicks.
123Greetings offers free, beautiful Christmas-themed online cards that you can customize as you wish.
Basically, the website offers the template, and you add your warm wishes using the fonts of your liking and add background music. When you consider the card is done, you fill in the recipient’s email and send it off.
You can choose from plain postcards to GIF cards or themed videos.
Jacquie Lawson has been offering Christmas cards since 2001. The website provides a wide array of Christmas cards you can choose from beautiful, ethereal Christmas cards and even humorous ones.
If you prefer classic cards depicting Christmas’s magic alongside snowy Winter scenes, this is the right place for you.
That was our list of the best online Christmas cards for these holidays. We hope it will help you to spread joy and the Christmas spirit with your loved ones.
If you want to send a few cards after Christmas, make sure to check out our list of the best online cards for the New Year.
A few days before the New Year arrives, all gaming platforms are offering huge discounts on thousands of games, and Steam, Microsoft, and EA are just a few to offer the most interesting game discounts
EA Origin lets you save up to 75% on popular games as well as on older classics. So, if you held off during this year’s Black Friday sales, you’ll be happy to click the buy button on EA Origin’s Holiday Sale. Without further ado, let’s see what the most interesting EA Origin discounts are.
What are the best EA Origin winter game discounts?
Get into your starfighter and join the fight in Star Wars: Squadrons for a realistic piloting experience. Squadrons is a first-person multiplayer space dogfighting game that will get your adrenaline level to its peak.
You will step into the cockpits of starfighters from the New Republic or the Imperial fleets and play in strategic 5 vs. 5 space battles. The strategy also involves modifying your vessel and changing the squadron to suit different missions and requirements.
Get to feel the sounds and technical details of X-wings and TIE fighters, personalize their design, and switch the power between the different weapons, shields, and engines in a completely immersive environment. Talking about immersion, you can also play in VR on your PC.
It’s hard to write about Fifa 23 because everybody knows this game and its unique graphics. Each year, this awesome game gets better and better and the players are perfectly reproduced in the game.
The gameplay realism was raised to a whole new level and now it rewards you for your creativity. You can also play in UEFA Champions League and CONMEBOL Libertadores competitions.
The sound, the music, the cheering fans, and the player movements, all contribute to an unrivaled immersion in a true-to-life experience.
With a Sci-Fi storyline, Mass Effect is a game trilogy that brings you military combat and spaceship elements to immerse you in the alien civilization universe.
This sleek gameplay comes with an enhanced 4K resolution with cinematic graphics to give you memorable times inside this fantastic world.
In addition to that, you can get all three Mass Effect games in one launcher, plus over 40 DLC including promo weapons, player customization, new armor and packs, and much more.
Battlefield is also a big title. Everyone knows all about it and there’s a pretty big online community around it that is ready to welcome you into the battle zone.
Battlefield 4 is much more than a game because the package includes the China Rising DLC, which means a character storyline that offers you the immersive experience of campaigns with the evacuation of American VIPs from Shanghai.
There are ten new vehicles that you can drive, new weapons, and lots of items that you can experience.
Rocket Arena is, as you would guess, all about rockets and this is a real explosive 3 vs 3 shooter where things get hot in no time. All the struggle in this game is to choose your hero to your liking and master its rockets and abilities to become the best.
It’s not enough to shoot your way. You will have to strategize in order to counter the opponents’ power and take advantage of their weaknesses by using your growing roster smartly.
You have a wide variety of dynamic maps to explore and endless combinations to master.
Some users might encounter issues when they burn ISO files to DVDs or CDs on Windows 10. That’s especially the case when users try burning discs with the Windows Image Burner.
The error code 0xc0aa0301 is primarily one that users have been facing during a disc image-burning process. This guide will show you how to fix this error effectively.
What causes error 0xc0aa0301?
Below are some of the causes of the 0xc0aa0301 while trying to burn a DVD:
Outdated chipset driver: If the attempt to burn a disc failed because of error code 0xc0aa0301, it might be because your chipset driver is obsolete. Updating the driver from the manufacturer’s website should do the trick.
Incompatible disk: Sometimes, this problem might be because the disc is incompatible with the disc drive. The solution is to use a compatible disk.
How can I fix error 0xc0aa0301?
Before are some prerequisite checks you need to perform below applying the fix below:
Use the DVD-R format instead of DVD+R
Ensure to use a compatible disc
Try burning disc with Windows Media Player
If these do not resolve the issue, you can now follow the steps below:
Press the Windows key + X and select the Device Manager option.
Click the arrow next to the System devices option and double-click the chipset device you want to update.
Click the Driver tab at the top and note the Driver version.
From here, go to your PC manufacturer’s website to download the latest version of the driver.
Finally, run the installer and follow the onscreen instruction to complete the installation.
The known solution for the 0xc0aa0301 error code is updating your chipset drivers. Also, updating the firmware for the drive has fixed the issue for others.
Alternatively, you can update the drivers automatically using a reliable tool in Outbyte Driver Updater. This is because you might need to update more than one chipset driver, and it might not be easy to download them manually.
This software can quickly scan the device drivers on your PC. Outbyte Driver Updater will show you if there are any outdated, missing, or corrupted drivers.
Users utilizing Outbyte Driver Updater Pro can quickly update or replace outdated or corrupted drivers for DVD/CD-ROM drives.
Outbyte Driver Updater Pro includes an Automatically Install option to install downloaded drivers quickly.
The error code 0xc0aa0301 can be frustrating as it prevents you from burning quickly. But with the fix in this guide, you should be able to fix it for good.
A lot of people rely on computers to perform their everyday tasks and the least bit of inconvenience can be frustrating especially when you encounter problems during startup.
Unfortunately, you cannot always predict when a Windows error will occur and when it does, you will need to be adequately prepared to handle it.
A BCD error is one of the most frequent Windows errors that can prevent you from booting your device and needs to be fixed immediately. Today we will be discussing the Windows error code 0xc0000098.
The error message reads: Your PC/DEVICE needs to be repaired. The Boot Configuration data doesn’t contain valid information for an operating system. File: \BCD. Error Code: 0xc0000098.
Why is BCD important?
Boot Configuration Data (BCD) is a component that helps you boot your Windows device. When the BCD goes missing or corrupt, you won’t be able to access your computer or hard disk drive and might get stuck on the loading screen.
A BCD error may occur because of several reasons but the most common one is the failure of the hard disk drive or the wrong installation of a program.
An unexpected shutdown, malicious software, and the Blue Screen of Death (BSOD) are also leading causes of the BCD error.
Is the BCD error related to the BSOD error?
The BCD error can be linked to the BSOD error since it also causes the device to crash. When a Blue Screen of Death occurs in Windows 11, the computer can sometimes fail to boot. The failure to boot can be caused by a variety of reasons.
It is not uncommon to be worried that a boot can lead to the loss of important files. However, when you perform a BCD rebuild using any of the BCD commands, you are only repairing the boot files and all your files will remain intact.
The Windows 11 BCD repair helps does not in any way affect your personal files but rather helps you gain access since the error prevented your device from starting.
Connect a USB drive with at least 8GB storage and above.
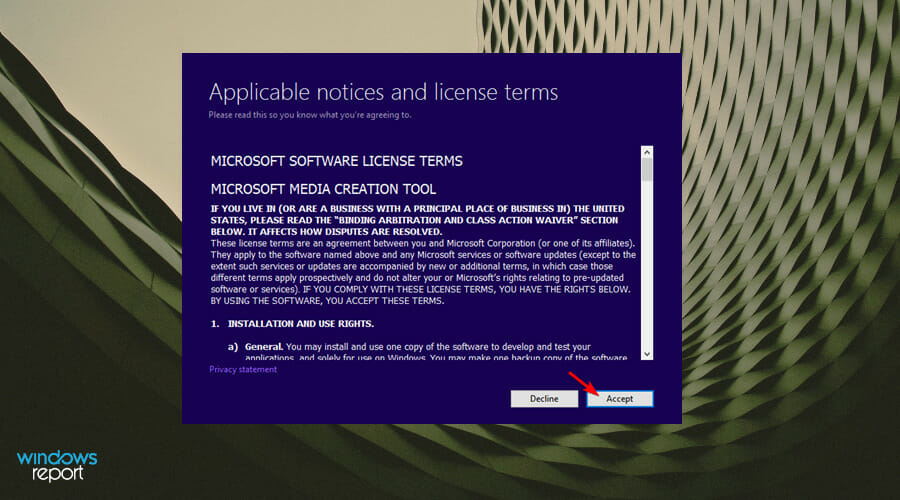
Run the Media Creation Tool and click on Accept for the terms and agreement, then proceed.
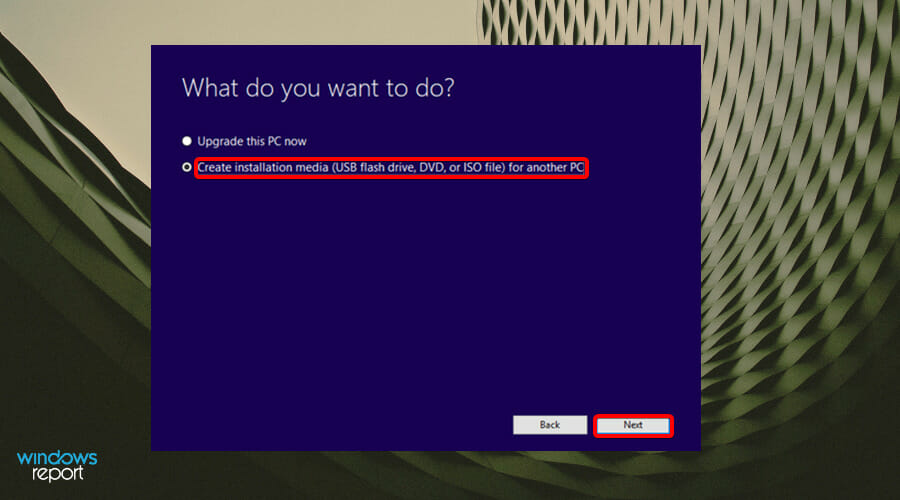
Choose the Create installation media (USB flash drive, DVD, or ISO File) option and click Next to proceed.
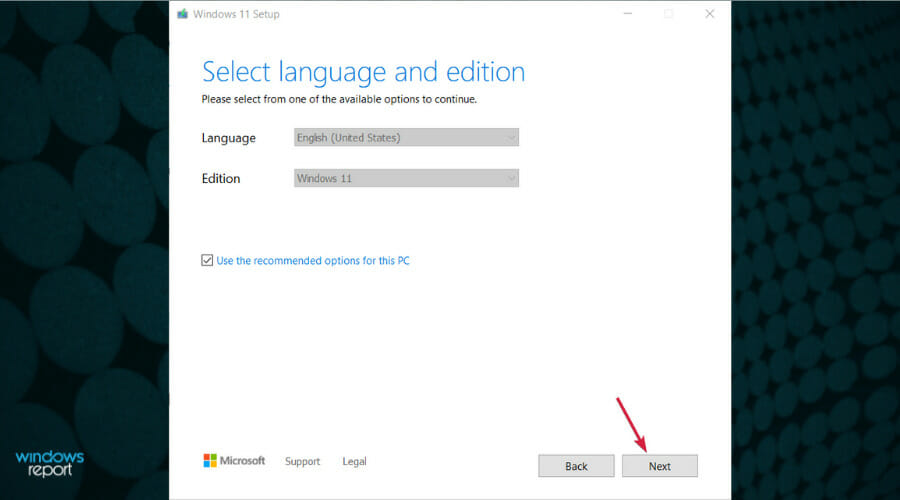
Select language, architecture, and edition from the drop-down menus then click Next.
Choose USB flash drive as the media to use.
Wait for the process to be completed.
1.2 Rebuild BCD
Connect the bootable USB to one of the available ports.
Select the Windows key and press the Power button, then click on Restartto start the troubleshooting via the Advanced Startup option.
A new window will appear with a set of options. SelectTroubleshoot.
Select Advanced options.
Next, select Command Prompt.
In the command window, type the following command prompt and press Enterwhen done: bootrec /rebuildbcd
After typing the command prompt, one of two screens will appear.
If this screen appears, type the following command prompts pressing Enterafter each one: attrib c:\boot\bcd -s -h -rren c:\boot\bcd bcd.oldbootrec /rebuildbcd
If this screen appears, you will have to restart your PC.
This Windows 11 rebuild BCD procedure will restore things to normal and you will be able to use your OS normally. The 0xc0000098 error should be gone now. If not, jump to the next solution.
2. Reset Windows
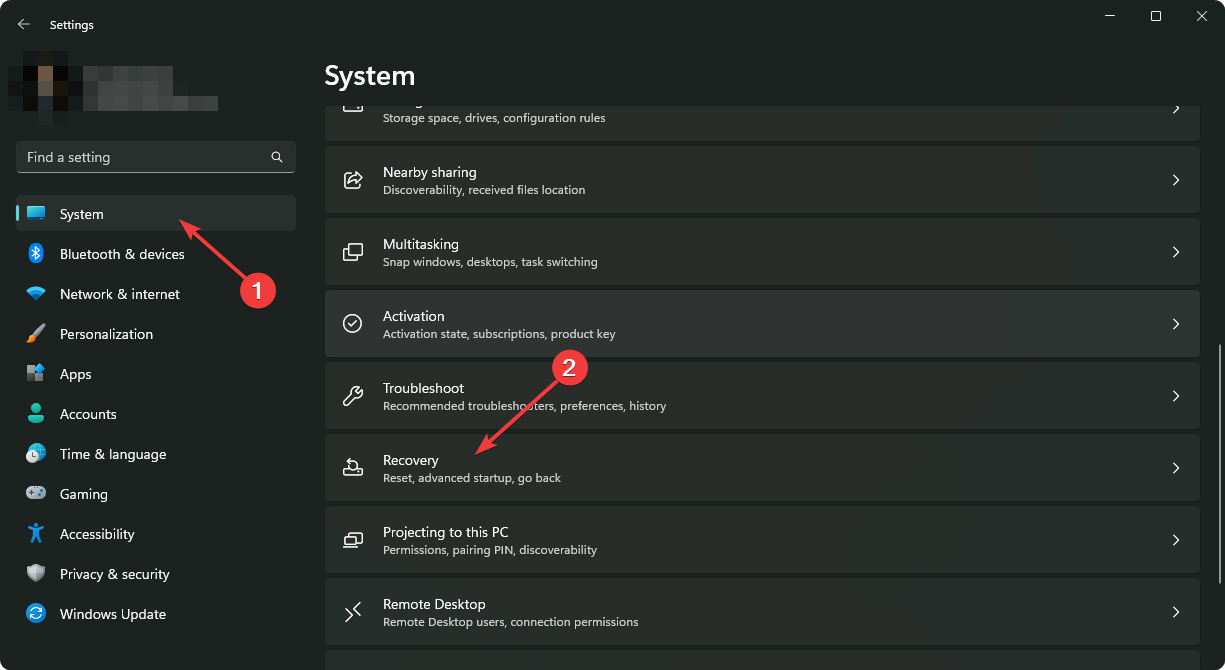
Press the Windowskey+ Sthen type recovery options.
Select Restart now in the next window and click Enter.
Select Keep my files if you don’t want to lose your files.
Wait for the process to complete.
3. Perform a system restore
Press the Windowskey + S, then type system restore and hit Enter.
Select the restore point you want to revert to and click Next.
Follow the on-screen instructions to finish the procedure.
Alternatively, if none of the above solutions have helped, we recommend using a specialized system file repair software. These tools will scan your PC for missing DLLs, corrupted system files, or missing registry entries and prompt you to fix them.
How can I prevent future BCD errors?
It is always important to take precautions and avoid such errors if you can. One such method is by protecting your device from malicious software.
Additionally, it is advisable to perform regular scans on your device to keep viruses at arm’s length. To perform regular scans:
Press the Windows key and search for Windows Security tool.
Select Virus and threat protection option.
Click on Quick scan.
This quick scan will allow you to assess your device and take the necessary steps. However, if you would like a more in-depth scan, you can click on Scan options and select afull scan.
It will take longer but will review all your operating programs and files. If malware is detected after the scan, you can start the process of eliminating the virus from your device.
We hope this guide is what you were looking for when you encountered the BCD error and that now you can successfully start up your device again with no glitches.
Windows errors are common especially when you have not taken the steps to protect yourself from malware and viruses.
It is why you should always have a reliable anti-malware solution and run regular scan checks to ensure your device is healthy.
Samsung is well-known for its devices, and Samsung’s SSDs are one of the best on the market. Unfortunately, many users reported that their Samsung portable T5 SSD is not showing up on their computers.
This can be a big problem, especially if you just purchased a new SSD, and in today’s article, we’re going to show you how to fix this problem once and for all.
Why is my Samsung Portable SSD not showing up?
There are a few reasons your Samsung portable SSD T5 is not showing up on Windows 10. Below are some of the popular ones:
Wrong power management setting: Your computer can disable certain features when it needs to save power. If this is enabled for your USB controller adapters, it can lead to the Samsung SSD T5 not working issue.
Unassigned drive letter: You need to assign a letter to your drive to make it discoverable on your PC. This is especially common with new external drives. The solution here is to add or change the drive letter of the Samsung SSD.
Unformatted drive: Another cause of this issue is an unformatted drive. Formatting the drive is the quick way of fixing this and some other Samsung portable SSD T5 issues.
What can I do if my Samsung portable SSD T5 is not showing up?
Listed below are some preliminary fixes you need to try before proceeding to the solutions in this section:
Use USB-C and connect it to a USB 3.1 or 3.0 port
Check the hard drive on another PC
Connect the drive to a Samsung android phone and check if it shows up
1. Disable the power management feature
Press the Windows key + X and select the Device Manager option.
Double-click the USB Serial Bus controllers option to expand it, and right-click each driver there.
Now, select the Properties option.
Click the Power Management tab at the top.
Finally, uncheck the box for Allow this device to turn this device to save power and click OK.
In most cases, if the Samsung portable SSD T5 is not showing up on your PC, it might be because it is temporarily disabled. This is because the USB port is set to turn off when your PC needs to save power.
The solution here is to deactivate this feature and reconnect your hard drive.
Another cause might be because of some faulty drivers. One of the fastest ways to update and repair all your drivers is Outbyte Driver Updater, a specialized tool for repairing and installing driver updates.
Make sure your SSD is connected to your PC, press the Windows key + X, and choose Disk Management.
Locate your drive, right-click it, and choose Change Drive Letter and Paths.
Now, click the Add button if the drive does not have a letter. If it already has, click the Change button instead.
Finally, select the letter you want to assign to the drive and click OK.
If disabling the power management feature does not fix the Samsung portable SSD T5 not showing up the issue, it might be because the drive does not have a drive letter. After assigning the letter, the drive should appear on your PC.
Open Disk Management with the drive connected to your PC.
Locate your SSD, right-click, and choose Format.
Enter a Volume label, select a suitable File system (it’s advised to use NTFS), and click OK.
After the drive is formatted, check if the Samsung portable SSD T5 is still not showing up. Knowing that this solution will delete all files from your drive is essential.
So, if you have important files on it, you might want to get data recovery software ready before applying this fix.
If your Samsung portable T5 SSD is not showing up on your PC, it can lead to the loss of essential data. We hope you can prevent this by following the solutions in this guide.
Similarly, if you are facing the Kingston SSD not detected issue, you can fix it quickly by applying the steps in the linked guide.
Feel free to let us know the solution that helped you fix this issue in the comments below.
Christmas is coming and we’re all going to offer and receive many presents. However, choosing the right present for your loved ones or for coworkers can sometimes be quite difficult.
When dealing with a small group, you can just work with some names in a hat to make the Secret Santa draw but if you have over 20+ party, things get complicated.
If you want to find out what your loved ones wish for Christmas and better manage your gift list, we suggest you use one of the Secret Santa websites listed below.
How can a Secret Santa organizer help?
For those of you who don’t know about this tradition, we will explain how it works and how to make the process easier.
Secret Santa is a game created originally for enterprises where the people in a group are randomly assigned a person to whom they offer a gift on Christmas.
The person you are assigned was traditionally made by putting all the names on pieces of paper and drawing from a hat.
This way, you don’t know who is your Secret Santa partner and everyone gets a surprise gift they wouldn’t think about.
With some of the web apps below, you can even tell your partner about your desired gift anonymously so the chances are you will get it.
Add a wishlist so that your Secret Santa partner knows what to get for you
Another condition for this game is to set up a budget limit for the gifts like 20$ or 50$ so that everybody gets similar value gifts and everyone stays happy.
The services we listed below automatize this process so that you can avoid direct contact and do the whole draw a lot faster and easier.
Secret Santa Organizer is a free online Secret Santa gift exchange organizer that will definitely make your work easier. You can use it to better plan your Secret Santa party with friends, family, and co-workers.
First, create your wishlist to let Santa know what you want for Christmas. Then, it is sent to your Secret Santa.
Secret Santa Organizer randomly assigns persons to each other to give a present to one another.
In this manner, you can keep track of the number of persons taking part in this year’s Secret Santa party and you’re sure that the recipients will all love their presents.
Draw Names is a simple platform that allows you to submit the names and email addresses of your friends and organize a Secret Santa gift exchange.
You can also use your group from the last year or add new friends to the list.
Each group chooses one person to be their organizer. The Organizer adds the name and email address of all the group members and sends an email regarding the gift exchange.
The secret Santa randomizer then draws names for all the participants and emails them their drawn names.
Members can submit their own wish list and send questions to their Secret Santa, if need be, for more details.
Elfster’s Secret Santa generator guides you through the whole Secret Santa process.
First of all, you create a wish list, then you start a Secret Santa event by inviting your friends, family, or co-workers. In the end, you simply go shopping using Elfster’s gift guides.
It’s interesting that you can enter your birthday and if all the members of the group do that too, you will be able to use Elfster to know when it’s time to send them a gift.
As you can see, you can find all the Secret Santa resources that you need in one place. The only trick is that you need to sign up first to use the service.
Picking the right gift for your loved ones is never an easy task. But this is where Giftster comes in. This platform offers you all the tools you need to get gifts right.
The Gifter process includes five steps but they are pretty easy to go through. First, create a wish list and add all the items that would make for perfect presents.
Next, enter additional information such as preferences (color, size, etc.) for the gifts. Then, create a private Secret Santa group by sending invites to people.
Giftster will draw the names and as an organizer, you will even be able to see if someone bought the gift because they can check a box on their side of the app.
Picking the names for Secret Santa can sometimes be quite time-consuming but with My Wishlist, you can easily organize your Secret Santa party.
This web app has four steps to go through and the process is pretty simple and straightforward, so you won’t need too much time to complete it.
First, you need to enter your name and email, then the other participants’ names. Next, you can add exclusions for any participants.
For instance, you can block a participant to draw your name or somebody else’s name from the hat.
Next, you need to enter the event name and date and review the list so that you make sure you didn’t leave anybody out.
The last step is to send the Secret Santa drawing by mail or WhatsApp. You can also use your corporate email to send a link that was generated automatically.
The My Wishlist web app is free and easy to use and although the design is not so full of Christmas cheer, it will do the job just fine.
Another interesting choice for an online Secret Santa generator is Pikkado.
The tool allows you to create a dedicated group, launch the invitations by email to make sure that all the people want to participate at your Secret Santa event, draw the names, and then send the Secret Santa names to your friends.
Pikkado also allows you to simulate and perform the virtual draw, reuse your groups year after year (this is a very handy feature), manage your exchange rules, and more.
The tool is perfect for organizing corporate Secret Santa events.
If you really want to impress your loved ones with an original present you can send them a personalized Christmas video. They’re fun and will surely spark laughter and festive cheer.
Indeed, there are not many resources for personalized Christmas videos, but we found a few websites that give you the opportunity to create your own videos.
What are the best personalized Christmas video tools?
1. ElfiSanta – Personalized Christmas Video From Santa Claus
If you want to offer your child a personalized video from Santa Claus, this is the right tool for you. Moreover, you can also use this tool to surprise other members of your family, as well as colleagues.
The video messages from Santa Claus contain a uniquely personalized message, addressed directly to your children, friends, or colleagues.
A personalized video is a thoughtful and remarkably different present that you can offer this Christmas.
JibJab offers you plenty of Christmas-themed videos you can personalize. First, choose how many people you want in your video and then upload your photo(s). You can upload a photo already stored on your Windows computer, use your Facebook photo, or simply take a new photo using your webcam.
Choosing your favorite personalized Christmas video is not an easy task. There are many very funny videos you can star in: Santa’s Twerk Shop, Rocking around the Christmas tree, Hawaiian Christmas, Elffun Factory, Chippendale’s, Tree Slaughter, Gangnam Style Christmas Edition and more.
Portable North Pole lets you create special Santa Videos for your loved ones. Surprise them with a personalized Christmas video and let them know how much they mean to you.
PNP’s videos are high-quality and will definitely make recipients laugh. For a small price, you can unlock and create unlimited Santa videos. Take your loved ones on a visit to an elf’s house, visit secret Christmas places, explore Santa’s village, and more.
This is a website where you can place an order for a personalized video greeting from Santa himself. All you need to do is provide Santa with the information required and confirm your order.
You’ll be asked a series of questions about the receiver of the video to create a personalized experience. You should receive the download link by email in a few hours after you place your order.
Binance is an established cryptocurrency exchange used by numerous investors and traders worldwide.
Unfortunately, customers in the US no longer have access to it and are not entirely satisfied with its local alternative.
However, a VPN can resolve the Binance IP address issue you get when trying to visit the website from the US. Let us show you how!
Why is Binance banned in the US?
Binance was founded by Changpeng Zhao and was initially based in China but moved to the Cayman Islands because of China’s strict regulations and ban on cryptocurrencies.
In the US, it didn’t have a brighter future either, now being investigated by the US Justice Department and the Internal Revenue Service on suspicions of illegal activities such as tax offenses and money laundering.
The company’s issues with US federal law enforcement authorities came amid growing regulatory measures on the crypto market whose lack of oversight made government officials become suspicious about whether the digital assets were used for unlawful activities.
The blockchain forensics firm Chainalysis which works with federal agencies stated that Binance was the primary crypto exchange for illicit cryptocurrency and criminal activities while dodging government oversight.
Binance is also a member of the crypto crime cartel which is known for manipulating markets and money laundering and this is why it has been prohibited from operating in some countries, including the United States.
Those living in the USA are no longer permitted to trade on Binance.com but on Binance.US instead; however, it has fewer trading options, so many are looking for ways to get around this ban.
Why should I use a VPN with Binance?
Those currently located in the USA can bypass Binance’s geo-blocking by using a VPN. That will allow you to use the cryptocurrency exchange as you normally would.
Moreover, we also encourage those of you living outside the US to use such a service – preferably a premium one – while trading on Binance. It will offer many other great benefits and keep your online experience safe and private.
By using a VPN service with Binance you can benefit from the following:
Bypass geo-blocking. A VPN replaces your current IP address with one in another country (e.g. Italy) where Binance is available and thus, you’ll trick the platform into thinking you’re located elsewhere.
Online anonymity. Usually, many of your online activities can be tracked by other parties – crypto trading and transactions are no exception. Since a VPN masks your real IP address, your transactions won’t be linked back to your real address anymore.
Enhanced security. A VPN service provides strong encryption, by routing your Internet traffic through a secure tunnel. Therefore, your online financial activities will be secure and you’ll be far less susceptible to fraud and cyber-attacks.
Avoid bandwidth throttling. Your ISP may throttle your bandwidth based on your specific online behavior or activities. Given that a VPN encrypts your traffic and shields it from your ISP, you shouldn’t worry about slower internet speeds anymore.
Is there a free VPN for Binance?
Yes, there are some free VPNs that might work for Binance. You could keep in mind that free plans don’t have those essential features compared to a premium VPN plan.
Is it illegal to use a VPN with Binance?
Certainly, it’s not illegal to use a VPN service in general except for a few countries that have strict censorship laws and criminalize its use.
So, in countries where using a VPN is not illegal, you shouldn’t worry at all about any legal repercussions neither in general nor in this particular case with Binance.
For example, there have not been any reports of US investors getting penalized when they traded and deposited with a VPN on the Binance cryptocurrency exchange platform.
Nonetheless, if you do use a VPN to resolve the Binance IP address issue or just want to use a specific one for other reasons, you should proceed with caution, as you will be penalized otherwise.
Their terms of use strictly ban those outside of Binance’s supported areas from using the crypto exchange, so you can immediately be denied service, including losing your funds if caught.
? What is the best VPN location for Binance?
Binance used to be supported worldwide, but as of recent changes, that is no longer the case. They dropped the US and several other countries.
The platform does not offer official information about all the countries it supports, but according to Binance users across the globe, the crypto app is available in the following locations:
Many VPN applications can assess the speed rates of their server location. You can choose the location where your VPN provider has the largest number of servers as that promises a lower number of users per server, thus a better connection.
Should I use Binance or Binance.US?
When it comes to choosing between Binance or Binance.US, this certainly depends on where you’re living (except if you choose to use a VPN to bypass geo-blocking) as well as the trading options available.
While Binance is currently available in many countries worldwide, Binance.US is only available in 43 US states across the country; although they bear the same name and logo, they are actually operated by different companies.
As previously discussed, the only way you can use Binance in the USA would be by connecting to a VPN server in a country where the service is available; the same is true if you want to use Binance.US outside of the US – which is less probable.
Now that we already dealt with the Binance IP address issue, let’s take a look at how the two platforms compare in terms of what they have to offer – which will help you make up your mind.
Binance platforms comparison
Binance.com is user-friendly and offers three levels organized according to trading experience; on the other hand,
As far as the number of cryptocurrencies is concerned, Binance.com is the clear winner here with more than 150 supported cryptocurrencies, while Binance.US only supports 52 coins.
The standard Binance.com trading fees are 0.1%, but you can get a discount of 25% if you pay your fees in the BNB native token instead of paying them in the coin you are buying.
Binance.US uses the same fee structure, with trading fees starting at 0.1% but it offers fees as low as 0% to those who invest millions of dollars
Binance.US is less robust and has limited options and higher trading fees.
Also, if you hold BNB in your account, you will have a 25% discount, and your trading fees automatically be deducted.
➡ Limitations
Binance.com
The company allows buying crypto with fiat (e.g. debit or credit cards) and uses the Simplex service which charges 3.5% of a transaction with a $10 minimum (flat fee). The daily limit is $20,000, while the monthly maximum is $50,000 per user.
For crypto-to-crypto transactions, there is no buying limit; however, there is a withdrawal limit of 2 BTC for those with unverified accounts, but this can be lifted if you verify your identity through the KYC process.
Binance.US
This platform also imposes limits on trading but these are high enough, so you probably shouldn’t care that much about them. For example, BTC/USD orders can’t be larger than 3200 BTC, although these limits can vary.
With Binance.US, users can withdraw or deposit up to $1 million via bank wire or can deposit up to $30,000 via ACH bank transfers. Also, you can purchase cryptocurrencies with a debit card.
➡ Location
Given the information presented above, you can either use Binance.com or Binance.US based on your location and without the use of a VPN. If you want to access any platform no matter where you live, use the one that best fits your needs.
In conclusion, you can use a VPN to access Binance.com even if you’re outside of the US. You just have to connect to a non-US server – you can easily choose one from Europe, for example.
However, you need to take into account a few considerations before deciding to use the platform while connected to a VPN service.
First off, keep in mind that you will be doing this at your own risk – which may include losing access to your funds – since the Binance terms and conditions strictly prohibit US residents to use the website.
Secondly, there are limitations as far as the trading volume and transfers are concerned, so if you want to bypass them, you’ll have to verify your account, which will imply uploading a non-US ID regardless of your IP address geolocation.
If you just want to send a few hundred dollars, you should be ok with a VPN; however, you shouldn’t expect to set up a US payment method for evident reasons.
On the upside, you do have a 2 BTC per day withdrawal limit with an unverified account. That’s certainly a lot of money without having to fill out you know your customer (KYC) information.
Best VPNs to Fix the Binance IP address issue
There are many options in the VPN market, so picking the right service can be rather challenging.
Here are our top three recommendations to securely and consistently unblock Binance from the US:
ExpressVPN — With its wide distribution of over 3000 servers worldwide, this provider offers the coverage you need. Furthermore, it’s the best VPN for Argentina and has advanced features that will grant you access to any geo-blocked site.
ExpressVPN
Protect your online identity on the crypto market with this premium service.
NordVPN — Among its numerous benefits, you’ll particularly enjoy unlimited bandwidth for trading crypto. Additionally, it has strong encryption tools and obfuscated mode that will ensure your online anonymity and safety.
NordVPN
Bypass all geo-restrictions with this provider’s advanced features.
Private Internet Access — With PIA, you’ll maintain excellent Internet speeds and have the biggest choice of server locations. It provides military-grade encryption and some unique tools you’ll find invaluable.
Private Internet Access
Enjoy extra security features and a wide-ranging option of servers with PIA
Binance is a leader in the cryptocurrency exchange market, but users in the US have been denied access.
If you’re looking for a way to fix the Binance IP address issue, a premium VPN is your safest bet. It’ll bypass all restrictions and let you trade freely with people worldwide.
For a wider range of VPN options specifically tailored for Binance users, rest assured that we have a dedicated guide. Therefore, do not hesitate to discover the best VPNs for Binance users worldwide right away.
Christmas is coming and if you want to get into the holiday mood, start by playing some fun Santa Claus games. In this article, we’re going to list the best Santa games currently available — all you need to do is hit the play button.
Christmas Carol is a hidden objects game that is packed with gorgeous scenes and catchy mini-puzzles for guaranteed fun and a very nice story.
You will have to help a mother to find her children by exploring the Victorian age London. During your exciting adventure, you will meet the characters from the famous Charles Dickens’ novel and will even be talking to the Christmas Spirits.
You will finally change the future and turn it to your advantage by going through time portals and magical experiences.
How can Santa Claus deliver presents so fast?! It’s a highly discussed dilemma but one way is by using a big, magical sling and he’s aming for the chimneys.
In the Santa Sling VR game, you will be the great slinger of Santa and you will do the job of delivering presents right from Santa’s sleigh during its flight over a Christmas-themed town.
Unfortunately, this game is only for those who own a pretty powerful computer, and the HTCVive Headset and Controllers.
The computer requirements start from a configuration with an Intel i5-4590 equivalent or better CPU, 8 GB of memory, Windows 7 SP1 or later OS, Nvidia GeForce GTX 970, AMD Radeon R9 290 or equivalent graphics cards and 1 GB of free space.
I hate Santa is a very cool VR snowball fight game that you can play with your VR goggles and a controller. Get ready for epic fights while you dodge, shoot against a lot of opponents from the winter realm.
We know you’re the best snowball fighter so you will definitely finish the game and then…you will finally discover Santa’s darkest secret.
The game also has a PVP mode so you can also compete with your friends. Let’s see who is going to own the leader board!
If you like rock music, then Santa Rockstar is the right game for you. Guide Santa around the world and help him slay rock and metal versions of classic Christmas carols together with a reindeer always ready to lend you a helping hand.
In this game, you’ll play Christmas songs such as: Jingle Bells, Carol of the Bells, March of the Nutcracker, Silent Night, God Rest ye Gentlemen, We Wish You A Merry Christmas, Joy to the World, Santa is in Trouble, Little Bells for You, Hark the Herald, Snowball Fight, Three Wise Men, and Santa’s Journey Begins.
You can use your keyboard as a guitar or use a guitar controller to play this budget Guitar Hero for Christmas.
In this title, you’ll track those who have been naughty or nice. As expected, good boys and girls get gifts but bad boys and girls get poop from Santa. Yes, this game may not be appropriate for all ages, but it’s quite fun to play.
The gameplay is quite simple: You can take control of Santa’s sleigh and steer the twelve exploding reindeer to deliver Christmas presents. In each city, there’s someone who has been so naughty that the only gift they deserve is a load of poop down their chimney.
Secret Santa allows you to sneak into people’s houses to deliver Christmas presents. Your task is to complete the list of deliveries and snatch some cookies. This sounds like a pretty easy job to do, right?
The catch is that, paradoxically, everybody’s out to get you so you need to avoid being seen. If they see you, they’ll shot, chop, or blow you up.
You are Santa’s last hope. Find his missing reindeer to avoid Christmas being cancelled before Christmas eve. Your task is to guide the heroes and a band of elves to complete the tasks that appear on the screen.
Manage your time and resources and plan well because you also need to defend your ground when evil Snowmen and Ice Witches attack.
If you’re a Solitaire fan, you’ll definitely enjoy playing Santa’s Christmas Solitaire. In this title, you’ll help Santa solve some strange mysteries. You will visit many locations at the North Pole and Santa’s Village as you collect Santa hats to complete levels and earn Santa coins to progress through the game.
Santa’s Christmas Solitaire is actually a basic Solitaire game with a Christmas user interface.
If you love playing Bingo, here’s a nice Santa-themed game that you can play this winter: Christmas Bingo Santa’s Gifts.
You can play bingo tournaments and enjoy hours of fun with classic bingo rules. There are also multiplayer bingo challenges available and many Santa gifts waiting to be unwrapped.
The game also features impressive Xmas animations, Christmas-themed bingo cards, gifts, Xmas holiday music and many skins and themes like Biker Santa, Shiny nose Rudolph that are available as soon as you’ve unlocked particular levels.
Are audio services not responding on Windows 11? You are not the only person who is encountering this problem.
If you face some audio issues, you may run the Windows sound troubleshooter. But, if it fails by showing the message that the audio services are not responding, this can be an annoying thing. Don’t worry. This article contains the solutions. Before that, let’s know about the reasons.
What causes audio services not to respond on Windows 11?
Luckily there are some specific reasons that cause this problem. As these are easily assumable, you also can troubleshoot the problem quickly. The reasons include the followings:
Outdated Windows: A PC where Windows is not up to date can go through various bugs.
Missing or corrupted system components: System Components are necessary to deliver all functionalities correctly. If not, problems like audio services issues may appear.
Required services are not active: There are some services required to output audio properly on Windows.
Faulty Windows update: Some Windows updates are known to break certain functionalities on certain computers.
How do I fix audio services not responding on Windows 11?
You can easily solve this problem. But before that, you must do these things:
Update Windows to the latest version.
Make sure the output device/speaker is OK.
Doing the above things may save you time, and you may not need to follow the actual ways. However, if you still get the problem, follow these methods:
1. Uninstall audio software
Go to Windows Settings by pressing Win + I on the keyboard.
Go to Apps and click on Installed apps.
Click on the three horizontal dots next to the audio software you want to uninstall and click on Uninstall.
Now, restart your PC and see if it has fixed the unresponsive audio services problem or not.
2. Update the audio driver
Open the Start Menu.
Type Device Manager and press Enter to open Windows Device Manager.
Expand Sound, video & game controllers.
Right-click on the audio driver like Realtek Audio and choose Update.
Choose the preferred method to update.
If necessary, expand Audio inputs and outputs and update some drivers.
After updating, restart your computer.
Please keep in mind that the above steps may fail to detect the latest driver. So, we recommend you use an automated tool that can identify outdated drivers and update them with a single click automatically.
3. Re-install the audio driver
3.1 Uninstall the audio driver
Open the Device Manager like before.
Find the audio driver, right-click on it and choose Uninstall device.
Check Attempt to remove the driver for this device and click on Uninstall.
Restart your PC.
3.2 Install the driver again
Go to your motherboard manufacturer’s website.
Download the appropriate driver and install it on Windows 11.
Restart Windows if necessary.
If you can’t do it, restart your PC. In most cases, Windows may install the default audio driver, and it may work without a problem. If not, use software to install the audio driver[check solution 2].
Click on Uninstall next to the update you want to remove.
Restart your PC after completing the process.
Now, try to play any audio. The sound should be OK on your PC, and you will no longer face audio services not responding error.
5. Start/Restart audio services
On the Start Menu, search for services.msc and press Enter.
Find the Windows Audio, right-click on it and choose Restart.
Do the same for Windows Audio Endpoint Builder, DCOM Server Process Launcher, RPC Endpoint Mapper, and Remote Procedure Call (RPC).
Now, try to play any audio file. It should solve Windows 11 audio services not responding problem. If the restart option is not available, choose start.
6. System Restore
On the Start Menu, search for Create a restore point, and click on System Properties.
Go to System Restore.
Check the Choose a different restore point and click on Next.
Select the restore point and click on Next.
Click on Finish.
Follow the onscreen steps to complete the process.
Right-click on the Command Prompt and choose Run as administrator.
Type the following command and press Enter to execute it: sfc /scannow
Restart Windows after finishing the process.
For more steps, learn how to repair corrupted system files on Windows. After that, verify if it has solved the audio services not responding issue on Windows 11 or not.
8. Reset Windows
Open the Windows Settings.
Go to System and then Recovery.
Click on Reset PC.
Choose your preferred way to reset.
Go ahead and finish the process.
Following the above methods will indeed help. However, you also should make sure no software is interfering with your audio services. If appropriate, you also can try to disable the antivirus for a while to see if it improves the situation. Also, consider the clean installation of Windows if required.
This article has mentioned how to fix if audio services are not responding on Windows 11. If you know of any other methods, feel free to let us know in the comment box.
Activating Microsoft operating system is basically impossible without having the associated product key. Finding it is easy in general and many are using Command Prompt for that.
Unfortunately, it seems that there are some users for which the product key is not showing in Command Prompt which is creating a lot of trouble.
We will explore in this article the best workarounds for this problem so that you will gain access to the product key, so make sure to keep on reading.
What to do if product key isn’t showing in Command Prompt?
1. Use PowerShell
Go to the Search bar and type in PowerShell.
Right-click on it and select Run as administrator.
Next, type in the following command and press Enter powershell “(Get-WmiObject -query ‘select * from SoftwareLicensingService’).OA3xOriginalProductKey
Finally, your product key will be displayed so make sure to copy it to a safe place.
2. Run as administrator
Go to the Search bar and type in Command Prompt.
Right-click on it and select Run as administrator.
Now type the following in the cmd and hit Enter: slmgr.vbs /dlv
3. Use a dedicated third-party tool
In case none of the above solutions helped you or if you are looking for a less time-consuming way of finding the product key, then using a dedicated tool is recommended.
We are talking about efficient and easy-to-use recovery applications for Windows that will help you find and keep safe all the activation keys that you will have on your device.
Moreover, these tools can recover lost keys for over 10.000 products. These may be from Windows, Office, Adobe, Electronic Arts, Acronis, WinRar, Nero, and other important utilities.
Additionally, you will be able to backup your activation keys in different document formats so you can save them in one place and never lose them again.
Another alternative to finding the activation product key is by directly contacting your manufacturer through their support page.
If you have bought a device that came with a preinstalled Windows 10, then the product key is preinstalled and you can contact your manufacturer in order to get additional information.
This is about all, and with this last recommendation we will conclude our list and we hope that one of the presented solutions here helped you find the product key.
If you are one of the Windows 10 users who are trying to install the operating system and you get the message:
That key can’t be used to activate this version of Windows
If that’s the case, then this is the tutorial made especially for you. For more details on the matter as well as how you can fix the Windows activation feature in the operating system you can continue reading the lines below.
The message That key can’t be used to activate this version of Windows usually appears in Windows after using the Windows Recovery tool or simply when you install the operating system. So with the help of some useful registry tweaks inside the operating system as well as some additional steps you will be able to fix this issue in the shortest time possible.
However, That key can’t be used to activate this version of Windows is not the only activation error message you can encounter, here are some more error messages that you can resolve with the same solutions:
That key cannot be used to activate this edition of Windows Server 2012 R2
That key can’t be used to activate this edition of Windows. Please try a different key
That key cannot be used to activate Windows on this PC
Product key cannot be used to activate Windows on this computer
The product key you entered cannot be used to activate this edition of Windows
How do I fix a Windows 10 activation key that doesn’t work?
Navigate to the Processes tab. Find Windows Explorer, right click it and choose Restart.
Click on File and choose New Task.
Type explorer.exe and press Enter or click OK. Your Windows UI will be displayed once more.
The first thing we’re going to try is restarting the Windows Explorer proces. According to some users, this process can sometimes block the Windows activation procedure. So, resetting it could solve the problem.
Now you just need to run a single command from Command Prompt to finish the process:
Go to Search, type cmd, and open Command Prompt as Administrator.
In the Command Prompt type the following command and press Enter: slmgr –rearm
Reboot your computer.
Note: Several users reported they fixed the problem by running slmgr /upk command so you might want to try that instead.
2. Use a Digital License
Go to the Settings app.
Open Update & Security > Activation.
Under Add a Microsoft Account, click Add an Account.
Enter your email and password and log in.
Now your Windows 10 copy should be activated.
If you received the That key can’t be used to activate this version of Windows error upon munually inserting the product key, there’s a chance a typo occured. So, it’s advisable to use the digital license tied to your Microsoft account.
If your license key is not associated to your Microsoft account, try some of the following solutions.
3. Use slui.exe
Slui.exe is Windows’ built-in command that allows you to manually activate your version of Windows. So, if you couldn’t activate Windows using previous methods, you may as well try this one:
Go to Search, type slui.exe 3 and press Enter.
Enter your product key and check if you’re able to activate Windows now.
If that doesn’t work, you can try another slui.exe command:
Go to Search, type slui.exe 4 and press Enter.
Enter your product key and check if you’re able to activate Windows now.
4. Disable your antivirus
Windows 10 and third-party antivirus programs don’t go along very well. Although third-party antiviruses usually cause problems with installing Windows updates, they can also block the activation process.
So, try disabling your third-party antivirus temporairly, and see if you’re able to activate your copy of Windows now. If you still can’t activate Windows, move on to the last solution in this article.
If none of the solutions from above solved the problem for you, try forcing the activation of your Windows 10 copy:
Go to Search, type cmd, and open Command Prompt as Administrator.
In the command line, type the following command and press Enter:
SLMGR.VBS –REARM
Now, restart your computer, insert your Activation key (Settings > Update & Security > Activation) and open Command Prompt (Admin) again.
In the command line, type the following command and press Enter:
SLMGR.VBS –ATO
Restart your PC again. That should resolve your issue.
However, if you’re unable to insert your license key in a standard way, you can use the Command Prompt to force the process even further:
Open the Command Prompt (Admin).
Type the following command in the command line and press Enter:
SLMGR.VBS -IPK XXXX-XXXX-XXXX-XXXX
Instead of XXXX-XXXX-XXXX-XXXX insert your license key
Restart your PC and check if the procedure has resolved your issues.
This is pretty much all you need to do in order to fix the That key can’t be used to activate this version of Windows message you get while trying to activate Windows.
If you do run into more issues along the way you can always write to us in the comments section of the page situated below and I will help you further as soon as possible.
Windows 10 has been released for some time, but that doesn’t mean that there aren’t some minor issues from time to time. Speaking of issues, users report that they can’t change Windows 10 product key, so let’s see if we can somehow fix this issue.
According to the users, it seems that when they try to change product key the Settings app freezes and they are unable to change their Windows 10 product key. This sounds like an unusual problem, but fortunately for you, there are few solutions that you can try.
What to do if you’re Unable to Change Windows 10 Product Key
Apparently there’s a bug with User Account Control Settings that prevents you from changing Windows 10 product key but you can try and fix it by following these steps:
Open Settings and search for UAC. From the list of results select User Account Control.
Change the User Account Control settings to Always Notify.
Try to change the product key again. You should get UAC prompt and you should be able to change your product key now.
After you’re finished you can navigate to User Account Control settings and change it from Always Notify to the one you were using before.
Solution 2 – Reinstall Windows 10 upgrade
Some users claim that only way to change your Windows 10 product key if you’re having this issue is to go back to the previous version of Windows that you have activated and then perform the upgrade again.
This might not be the best solution, but even Microsoft suggests it, so if you’re having any issues with changing the product key you might want to try this.
Solution 3 – Restart Windows Explorer process
The next thing we’re going to try is restarting the Windows Explorer process. Apparently, this can affect the the product key settings.
Here’s how to do that:
Right-click the taskbar and select Task Manager.
Navigate to the Processes tab. Find Windows Explorer, right-click it and choose Restart.
Click on File and choose New Task.
Type explorer.exe and press Enter or click OK. Your Windows UI will be displayed once more.
Now you just need to run a single command from Command Prompt to finish the process:
Go to Search, type cmd, and open Command Prompt as Administrator.
In the Command Prompt type the following command and press Enter:slmgr /upk
Reboot your computer.
Solution 4 –Use a Digital License
If you can’t manually insert the license key, use the one associated with your Microsoft Account. Here’s what you need to do:
Go to the Settings app.
Open Update & Security > Activation.
Under Add a Microsoft Account, click Add an Account.
Enter your email and password and log in.
Now your Windows 10 copy should be activated.
Solution 5 – Use slui.exe
Using the slui.exe is one of the most common alternative ways of activating Windows 10. Here’s how to execute this command:
Go to Search, type slui.exe 3 and press Enter.
Enter your product key and check if you’re able to activate Windows now.
If that doesn’t work, you can try another slui.exe command:
Go to Search, type slui.exe 4 and press Enter.
An activation prompt to take over your PC – here you have to select your country and click Next.
Once you have selected your country, you simply have to call one of the listed numbers and follow the instructions given by Microsoft Support.
Solution 6 – Check your internet connection
If your internet connection is not stable, you won’t be able to activate Windows 10. So, if none of the previous solutions resolved the problem, make sure you’re properly connected to the internet.
If there was a problem during the activation process, you can always reset the license status. If you don’t know how, just follow these instructions:
Go to Search, type command prompt, and open the Command Prompt as Administrator.
Enter the following commandand press Enter to run it: slmgr.vbs -rearm
Solution 8 – Force the activation
And finally, if none of the previous solutions managed to resolve the activation problem, you can always force the activation. Here’s what you need to do:
Go to Search, type cmd, and open Command Prompt as Administrator.
In the command line, type the following command and press Enter:
SLMGR.VBS –REARM
Now, restart your computer, insert your Activation key (Settings > Update & Security > Activation) and open Command Prompt (Admin) again.
In the command line, type the following command and press Enter:
SLMGR.VBS –ATO
Restart your PC again. That should resolve your issue.
However, if you’re unable to insert your license key in a standard way, you can use the Command Prompt to force the process even further:
Open the Command Prompt (Admin).
Type the following command in the command line and press Enter: SLMGR.VBS -IPK XXXX-XXXX-XXXX-XXXX (instead of XXXX-XXXX-XXXX-XXXX insert your license key)
Restart your PC and check if the procedure has resolved your issues.
Not being able to change your Windows 10 product key can be a big problem, but as you can see there are few solutions that you can try. We hope that these solutions were helpful to you and that you’ve managed to change your Windows 10 product key.
So you’ve got a machine running WindowsXP. It might be a legacy machine, or maybe you’re keeping it for functionality. Suddenly you are getting a Windows XP needs to be activated before logging in message.
This type of message usually appears only when Windows has not been activated within 30 days since the first installation. Alternately, if you activated Windows recently, then it means that some software or malware has changed your Windows activation information. But we’ve got some solutions for you.
How can I fix Windows XP needs to be activated before logging in error?
You can fix Windows XP needs to be activated before logging in message simply by booting to Safe Mode and running a few commands:
Turn on your machine and press F8 before Windows begins to load.
Go into Safe Mode by selecting the Safe Mode option.
Once you are at the Desktop in Safe Mode, Click Start then click Run.
Type rundll32.exe syssetup,SetupOobeBnk, then click OK.
Wait a few seconds – the screen may blink a few times or so.
This will reset Windows Activation for 30 days.
Reboot the PC into normal mode, login and re-activate Windows.
2. Install Internet Explorer 8
Another way to fix Windows XP needs to be activated before logging in error message is to install Internet Explorer 8.
Restart the PC, and boot it with the Safe Mode with Command Prompt option.
On a separate PC, download Internet Explorer 8 for Windows XP and put it on a memory drive.
Connect the USB drive into the problematic machine.
In Command Prompt install Internet Explorer 8, by selecting the USB drive.
Type the letter of your drive and press Enter.
Select ie8install.exe and press Enter.
Complete the install, restart the PC, and you should be good to go.
Quick Note
You may only do this for a maximum of 120 days after installing any Service Pack for WindowsXP. Also, it’s strongly recommended that you back up your files before the 120 days are up, then reinstall your Service Pack.
Make sure you delete the entire directory from your old Internet Explorer before installing Internet Explorer 8. And keep in mind, for compatibility reasons, you should remove any residual files from your previous Internet Explorer.
3. Use Windows Key Finder
This solution is pretty straightforward. Download Winkey Finder from the official website, and install this software. Once you’ve installed it, simply open it, this should immediately display your current Windows Key. Always remember to write it down, or save it somewhere, just to be safe.
4. Restore your wpa.dbl and wpa.bak files
It the event that any of the solutions above didn’t help, there’s another solution. If you have a backup for all your Windows XP files, go to My Computer > The Drive you have Windows installed > Windows/System32 folder. The next step should be restoring both wpa.dbl and wpa.bak to that folder.
We hope these solutions helped you fix Windows XP needs to be activated before logging in error. In the meantime, let us know in the comment section down below what other solutions you found helpful.
If Windows 10 won’t activate after a reinstall of the operating system, it depends on how it was originally installed on your device.
If you activated a free upgrade or bought from Microsoft Store and activated it, you have a digital license, which means you can reinstall without a product key as Windows automatically activates it online after the process is complete. Before trying to reinstall, ensure you check that it is activated on your device.
However, there are concerns by users that Windows 10 won’t active after reinstall of the operating system. If you share the same concern, then try the solutions below to resolve it.
However you got your copy, the activation can either be done via a digital license or a product key, without which activation is impossible and you cannot substitute the two.
A digital license, also known as a digital entitlement is given instead of a product key and if you have it, you need not enter a product key.
When installing Windows 10, you may either be asked for a product key or if you have the digital license, you can continue without entering a key, and the latter can be bought after installation by going to: Start > Settings > Update & Security >Activation > Go to Store and purchase the license.
Before you resolve the Windows 10 won’t activate after reinstall problem, it is important to note the following:
Give it a few days and Windows 10 should automatically activate itself
If prompted to enter a product key after reinstalling Windows 10, select Do this later and Windows will reactivate in a few days, automatically
Reinstall a valid license that you have either for Windows 7/8.0/8.1 and ensure it is activated, then upgrade to Windows 10
Try a different network connection if possible, so switch from Wi-Fi to Ethernet or vice versa
Update Windows 10 to the latest version using the Windows Update option in Settings > Update & security > Windows Update
2. Reset your license status
Type CMD in the search bar, and right click Command Prompt
Select Run as Administrator
Type the command: slmgr.vbs -rearm
Press enter and exit the command prompt
Restart your computer
Enter the product key using the instructions
3. Force activation
Type CMD in the search bar, and right click Command Prompt
Select Run as Administrator
Type the command: slmgr.vbs -ato
Press enter and exit the command prompt
Restart your computer
4. Replace the product key
This may resolve any problems preventing Windows 10 product activation. To do this:
Type CMD in the search bar, and right click Command Prompt
Select Run as Administrator
Type the command: slmgr.vbs -ipk xxxx-xxxx-xxxx-xxxx (to replace the current product key with the specified) xxxx-xxxx-xxxx-xxxx – represents your product key
If Windows 10 won’t active after reinstall, you may have been running a copy of Windows that isn’t genuine. This could have been bought from an auction website like eBay or Amazon, or a counterfeit copy. You can check the Product ID (PID) to determine the level of support. To do this:
Click Start
Right click Computer
Click Properties
Go to Windows Activation and look at the PID (it has about 20 characters), check the three-digits if they match with the key.
NOTE
You can confirm if it is genuine by checking the Microsoft site, and clicking Validate Windows. If it fails, click Get Genuine button to get a WGA Kit.
6. Check your hardware
If Windows 10 won’t activate after reinstall, and previously it activated, you could have changed some hardware, like your motherboard or processor, which to Windows seems like a totally different PC.
Were you able to resolve the Windows 10 won’t activate after reinstall issue using any of the above solutions? Share your experience in the comments section below.
Update – And as we promised you, Microsoft delivered the ability to activate Windows 10 with a key from older versions of Windows with the November update.
This addition will make activation a lot easier for users who have yet to upgrade their systems to Windows 10.
Namely, you don’t have to upgrade from previous versions of Windows first to get a product key, as Microsoft will now recognize your system license, and provide you with a “digital entitlement,” which will make your installation of Windows 10 fully legitimate.
How can I activate Windows 10 with Windows 7 or Windows 8.1 key?
Activate Windows 10 from the Settings app
The new build for Windows 10 has been released recently, and it brought some changes, both visual and system related.
Besides other additions like Skype Messaging and Video apps, the new build also brought a highly-requested ability to activate your Windows 10 with a product key from your previous Windows 7, Windows 8 or Windows 8.1.
“We have received a lot of feedback from Insiders on making it easier to activate Windows 10 on devices that take advantage of the free upgrade offer to genuine Windows by using existing Windows 7, Windows 8 or Windows 8.1 product keys,” wrote Gabriel Aul, engineering general manager for Microsoft’s OS group, in a blog post.
And Microsoft indeed received ‘a ton of feedback’ on its support pages dedicated to Windows 10 activation errors. There were a lot of threads and more than a thousand messages about it.
People were wondering why they’re not able to manually activate Windows 10, if the automatic activation fails, like they could in previous version of Windows.
Besides using your valid Windows 7 or Windows 8.1 product key for activating Windows 10, if you install Windows 10 on a computer that has integrated product key as a part of its firmware, Windows 10 installer will locate it, and it will install fully-activated version of Windows 10 on your computer.
“If you install this build of the Windows 10 Insider Preview on a PC and it doesn’t automatically activate, you can enter the product key from Windows 7, Windows 8 or Windows 8.1 used to activate the prior Windows version on the same device to activate Windows 10,” said Aul.
Activating your version of Windows 10 with a prior-Windows 10 product key isn’t different than activation with a regular product key.
In order to activate Windows 10 with a Windows 7 or Windows 8 key, you just need to do the following:
Find your Windows 7/8 activation key.
Open the Settings app. You can do that quickly by pressing Windows Key + I shortcut.
Once the Settings app opens, navigate to the Update & Security section.
Now select Activation.
Click on Change Product key and enter your Windows 7 or 8 key.
After doing that, your Windows 10 should be activated and ready to use.
This is a great addition, but it still remains just a promise, as Microsoft still didn’t release the ISO file for build 10565, so we’re unable to check if activation with product key of prior-Windows 10 version of Windows works.
Microsoft will deliver this update update to non-Insider users on Windows 10‘s Current Branch (CD) by the end of the year.
Microsoft already told us that it will release CB updates on every four months, which means that it will arrive sometime in November (four months after July 29th).
But for those of you who are in the Insider Program, you can download the latest build 10565 with this feature from Windows Update now, but only if you’re on the Fast Ring.
A Timeout Period error occurs whenever a third-party service fails to respond to your computer’s request. It can happen to various Windows apps, but this guide will focus on Nvidia’s GeForce Experience.
Although rare, the Timeout Period error for GeForce Experience should be addressed quickly. It can put a real damper on playing video games as the problem stops you from connecting to servers.
What is causing Nvidia GeForce Experience to timeout?
There is a multitude of reasons why your certain operations are timing out. Below is a list of the most common culprits, but are by no means, the only ones:
Computer drivers may be out of date: Conversely, your computer’s NVIDIA drivers may be too old and you need to get new drivers. Fortunately, fixing this is pretty easy to do.
Corrupted system files can mess with other computer functions: Corrupt files can affect more than your video games. Vital systems can shut down and not work.
Apps or processes running in the background: Not all software is perfectly optimized to run with everyone.
Your computer is lacking in RAM: Without an adequate amount of RAM, your computer will experience performance issues.
How can I fix the Nvidia Timeout error?
Before going into the more complicated solutions, it’s important to shout out the easy ones first. These can be done in just a few minutes of your time:
Restart your computer. This is a tried and true method that will solve the vast majority of computer problems.
Increase the amount of RAM available to your computer. This can be done very easily by closing unnecessary apps and windows. It will also free up your CPU thereby improving device performance.
Check the integrity of your game files. It’s possible the problem lies with the games themselves. Verifying files cleans up any corruption found (assuming it works).
Conversely, we also recommend reinstalling the games. Similarly, reinstallation can clean up any and all corrupt files found in a title.
1. Disable automatic driver updates via Search
Start by opening the Windows Search bar and typing the following in: change device installation settings.
Select No (your device might not work as expected in the window that appears.
Click the Save Changes button and close the window.
2. Disable automatic driver updates via the Registry Editor
Bring up the Search bar and type in regedit. Click the first entry that appears.
Select Yes if a User Account Control asks if you want to make changes.
In the address bar at the top, copy and paste the following after Computer\: HKEY_LOCAL_MACHINE\SOFTWARE\Policies\Microsoft\Windows\DriverSearching
Hit Enteron your keyboard to locate the registry file.
Double-click the file that reads DriverUpdateWizardWuSearchEnabled and set its value to 0.
If there’s nothing there, then you don’t have to do anything else.
Search for the Command Prompt on your Windows computer and click Run as Administrator.
In Command Prompt, type in this command and hit Enteron your keyboard: sfc /scannow
Give your computer time to finish the process.
Once that’s done, type in the following and hit Enter: Dism /Online /Cleanup-Image /CheckHealth
Give your computer ample time to finish the previous and following commands.
Now type in: Dism /Online /Cleanup-Image /ScanHealth
Next, type in: Dism /Online /Cleanup-Image /RestoreHealth
Reboot your computer after you’ve done each of the commands.
Another effective method is to use an automated tool that is specialized in checking the system files.
4. Manually install drivers under a clean boot
First, go to Nvidia’s driver website and locate the latest drivers for your computer. The image below is one example.
Next, bring up the search bar and locate System Configuration.
Select the Services tab.
Click the box next to Hide all Microsoft services and the Disable All button in Services.
Now go to the Startup tab and click Open Task Manager.
Highlight each of the apps you see open and Disable them. We recommend making note of what they are.
Close the window to return to the Startup tab.
Here, click Apply then OK.
Next, restart your computer to perform a clean boot.
After your computer turns back on, log back in and bring up the Device Manager.
Expand Display Adapters, right-click the Nvidia entry, and select Uninstall device.
Click the Uninstall button when a small window appears.
Go to the location of the drivers you downloaded from Nvidia in File Explorer.
Right-click it and select Run as administrator
Go through the installation wizard to install the Nvidia drivers.
Restart your computer to finish the process.
If this seems too complicated, you should use an automated tool to safely install the right updates. Outbyte Driver Updaterwill find and install all the driver updates your computer needs.
5. Check the manufacturer’s website
If you have a Dell computer, you can go to the company’s support page and have the manufacturer search for the correct drivers for you. Click Check for Updates.
Give Dell some time to finish the process.
Click the Download And Install button when complete to automatically install any missing drivers.
Lenovo owners can do the same thing by going to the company’s support page and clicking Detect Product except the driver will automatically be installed.
HP owners can go to the manufacturer’s support page and click Let HP detect your product to quickly locate drivers.
The reason why we’re specifically showing these support pages is that sometimes manually installing the Nvidia driver doesn’t always. There may be some crucial pieces missing.
So instead of having to dig through your computer’s files, it’s best to go to your computer’s manufacturer support page and download it there. These are only a few examples of possible support pages.
How can I improve my gaming experience on Windows?
First, be sure to learn about 10 of the best mouse settings for gaming sessions on Windows 11 and enjoy a more immersive experience. You’ll learn how to disable mouse acceleration and angle snapping.
Other users have reported certain gaming features suddenly not working. Nonfunctioning features are usually due to an outdated machine or certain media files having gone missing.
Feel free to comment below if you have questions about other video game problems. And please tell us if there’s a specific guide for any specific gaming or error you’d like to see.
Teachers, students, and faculty members with a school email account, you will qualify to get not only Excel for free, but the whole Microsoft 365 package.
With Microsoft’s automated verification process, most students get verified right away. However, it could take a month to validate your eligibility if you attend a verification-required college.
3. Use the newly created account credentials to sign in.
4. Click on the next button at the lower right side of the window.
5. Under theselect a way to paytab, select your payment method and input your payment credentials. This is required even though the first month is free, and you can cancel it anytime before the payment is triggered.
6. Next, review your information and you will be able to get Microsoft 365 which includes a free month of excel.
You may be wondering why you should pay for Excel if you can use the free version. This is because the tool’s functionality is limited on the free version. Excel will only work in the web browser and only with an internet connection. It also comes with decreased functionality than the full versions of Microsoft 365.
Scroll down to the plans, locate Microsoft Excel Free, and hit the Sign up for free button.
Sign in to your Microsoft account or get a new one.
Once logged in, you’ll be redirected to the Excel online page and you can start working on spreadsheets right away.
Another way to get Excel for free is to sign up for the online version of Excel. You get 5GB of cloud storage and all the baseline features for spreadsheets.
However, there are certain benefits only available in the paid version, such as the ability to exchange links to your work and communicate in real-time, which is comparable to what G Suite offers.
There you have it – if you want to download Microsoft Excel for free on Windows 11, you have 3 options. Check if you qualify for them and pick the one that best suits your needs.
You should also know that there are several free alternatives to Excel that include comparable features. Some of the most notable ones are WPS Office’s Spreadsheets and Libre Office. And yes, google also has a free version for a spreadsheet app called Google Sheets, as part of Google Workspace.
Want an easier way to create or edit spreadsheets without installing anything? Take a look at our guide on free spreadsheet services with no login and start working online instantly.
Let us know in the comments below if you manage to get Microsoft Excel for free by using the methods on our guide.
The console platforms have passed a long way past solely being gaming machines. These days you can enjoy your favorite multimedia content, be that music, TV shows, or movies on a big screen. One of the streaming services with some stellar exclusives is HBO with its HBO Max streaming client.
The app usually works well on Xbox One but it’s far from being perfect. And, it usually suffers from a variety of issues. Starting with HBO Max not Working on Xbox One, slow buffering or failure to load, or crashes followed by errors.
We made sure to inspect this and provide you with some common solutions for the HBO Max not working on Xbox One. Check them below.
How to fix HBO Max not working on Xbox One
1. Power cycle the console
Many issues on Xbox One are easily resolved with a simple power cycle (hard reset). The cached data, especially in apps like HBO Max can result in loading issues.
Users who experienced issues said that only some content wasn’t working, as they were able to stream the majority of content successfully.
So, if we eliminate the possibility of a wide range of issues (certain popular TV show premiers might be unavailable), the power cycle should be enough to resolve this.
Here’s how to power cycle Xbox One:
Press and hold thePower button for 10 secondsor so.
Wait until the console shuts down.
After a minute, turn on the console again and look for changes.
2. Update the app and the console
If the previous step failed you and you’re still having issues with the HBO Max app on Xbox One, consider updating both the console and the app itself.
Issues will emerge sooner or later, but it’s in HBO’s best interest to deal with them as soon as possible, or massive subscription cancelations will occur.
Also, while we’re there, check for the console update as well. Here’s how to manually check for updates for Xbox One and HBO Max:
Under the My games & apps section, highlight the HBO Max app and then press the Menu button on your controller.
Choose Manage app.
Install updates if available under the Updates section.
Now, open Settings.
Choose System and then Updates.
Select Update Console to see if there are any available updates.
3. Check the connection
Now, we mentioned that this isn’t exactly a general issue completely disrupting this streaming service. The app is far from good and the streaming quality is subpar in comparison to some other services.
However, your connection might be the reason why the app underperforms.
That’s why we’ll need you to run some built-in diagnostics in order to determine whether your connection is sufficing.
Here are some steps you can take to diagnose and troubleshoot possible connection issues on Xbox One:
Here’s what you can try to fix connectivity issues on an Xbox:
Make sure you use a wired connection instead of wireless.
Reboot your router and console.
Run diagnostics
Press theXbox buttonto open the guide.
Choose Settings.
Tap All Settings.
Choose Network.
SelectNetwork settings.
Select “Test network connection“.
Set a static IP address
Open Settings and thenAll Settings.
Choose Network.
OpenNetwork settings >Advanced settings.
Write down yourIP and DNS values (IP, Subnet mask, and Gateway).
Under the Advanced settings, openIP settings.
SelectManual.
Once here, openDNS and write downDNS input.
Enter the values you wrote and confirm changes in theAdvanced settings.
Restart Xbox
4. Sign out and sign in again
This is a far-fetched solution but, by signing out and in again with your credentials, the app might just start working.
Miraculous or not, this is commonly recommended by a variety of services with their apps available on the Xbox One platform. So, before we finally move to reinstall the app, give the said sequence a go.
In addition, you can sign out and completely power off the console before signing in again. Some recommend unplugging the power cord for a minute or so. After you turn on the console, sign in and try streaming the HBO content again.
5. Reinstall the HBO Max app
So, if the problem is persistent and you’re unable to wrap your head around it while HBO support doesn’t exactly do customers justice, we can only suggest reinstallation.
With console troubleshooting, users are rather limited. Especially when it comes to third-party apps.
Therefore, we can only recommend reinstalling the app and moving from there.
If you’re not sure how to reinstall the HBO Now app, follow these steps:
Open My games & apps.
Highlight HBO Max and press the Menu button on your controller.
Choose Uninstall.
Power cycle your console.
Go to Apps and install the HBO Max app.
With that said, we can conclude this article. In case you have any questions or suggestions, feel free to tell us in the comments section below. In addition, don’t forget to send your ticket to HBO support until they deal with it.
Many readers have reported receiving the System in Setup Mode! Secure Boot can be enabled when System in User Mode. Repeat operation after enrolling Platform Key(PK) error message. It is an error message that usually comes after trying to enable Secure Boot through your MSI motherboard.
If your system uses the old boot framework and secure boot is not enabled, the Secure Boot state will be unsupported. This happens even if your motherboard includes the Secure Boot option. The solutions work perfectly on Secure Boot unsupported issues for all devices, including HP, Dell and Lenovo laptops or ASRock and Gigabyte motherboards.
How can I fix the Secure boot can be enabled when System in User Mode issue?
To begin, check to see if your PC is supporting Secure Boot without entering BIOS before trying to proceed with other steps to power it in user mode. This should help you if there would be a requirement issue.
You may enable Secure Boot for Windows 11 in user mode from BIOS after verifying its reliability. When you get the Secure Boot can be enabled when System in User Mode error, go to the BIOS screen to enroll platform keys, then repeat the start-up in Secure Boot.
1. Check the UEFI firmware settings
Click on the Start button, go to the Power icon and hold the Shift button on your keyboard while you select Restart.
Select Troubleshoot from the Advanced Startup window.
Click on Advanced Options.
Choose UEFIFirmware setting.
Click the Restart button to restart your PC and open the BIOS settings.
With firmware updates, many manufacturers update their device’s UEFI support and the system settings menu options.
Furthermore, it’s important to have the latest updates from the manufacturer installed on your Windows 11 PC, for a good overall performance.
After your PC reboots, continue with the next solution to change the BIOS settings.
Enter BIOS Setup with the corresponding key on the screen.
Look for the Secure Boot option. In most situations, it will be under the Boot or Security tabs, though the location will change based on your PC.
Change BIOS from Legacyto UEFI.
Enable Secure Boot in user mode (UEFI).
Press the Save & Exit corespondent key on the screen, and you are done.
It’s important to change the PC’s boot mode from Legacy BIOS (also known as CSM Mode) to UEFI BIOS.
After making changes to the settings, restart your computer. This will re-enable Secure Boot on your PC, and the supported value should appear in System Information.
Secure Boot is now enabled on your computer. Use PC Health Check to determine whether your PC meets the Windows 11 system requirements to make an upgrade or a new installation.
3. Convert your partition to GPT, if supported
NOTE
Windows 11 only boots on a GPT partitioning system so if it isn’t already, you need to change the partition from MBR to GPT. This is an advanced procedure so we advise you to create a backup of all the data before starting.
Right-click the Start button and select Disk Management.
Now, right-click your drive and select Properties.
Next, click on the Volumes tab and look at Partition style. If it shows GPT all is well and you can end here. If it shows MBR instead, continue with this solution to change it.
Close the window, click on the Search icon, type cmd, and select Run as administrator.
Type the following command and press Enter to run it: mbr2gpt.exe /convert /allowfullos
After the conversion process completes, check the partition style in Disk Management as instructed above and it should now read GUID Partition Table (GPT).
Why should I enable Secure Boot on Windows 11?
Secure Boot is a function that activates on the latest PC models. This is a UEFI platform feature that replaces the traditional PC BIOS.
Enabling Secure Boot increases the security of your computer and protects it from virus attacks. It would merely protect your computer and have no negative impact on performance.
Secure Boot ensures that a desktop or laptop only opens trusted software, firmware, and apps. Thus, it is perfectly safe to enable Secure Boot on a Windows 11 PC.
Why is certain software enforcing TPM and Secure Boot?
Following these steps to ensure Secure Boot is enabled in Windows 11 in user mode, will also define if you can install and run certain apps that enforce the usage of this feature.
The main reason that apps require TPM 2.0 is for security and safety on the players’ ID. The TPM control assists in preventing hijackers from using cheat codes. TPM is all about security and protocols.
When TPM is applied and they receive a ban, the entire device or hardware ID is blocked. This prevents scammers from spoofing their device to act as another device with a different ID.
To resolve the TPM problem on Windows, simply enable secure boot and then enable TPM on your device.
You may also check Windows 11 ready-laptop choices to help you better understand the compatibility between a computer and how Windows 11 works on it.
Hopefully, we cleared out how to enable Secure Boot. If you encounter other issues, please let us know in the comment area below.
Encountering an error message is the worst thing that can happen when all you want to do is hit the play button on your Xbox One. Error code: (0x80070102) is a complex error code that prevents players from signing in to their accounts and using their consoles. This error is specific to the Xbox One and Xbox One S consoles.
Xbox forced update, now everything throws an error 0x80070102. Literally EVERYTHING throws this error. Xbox starts up fine, but when I try anything, this. Then I can’t chose close or any other choices. From the main menu if I hold down the Xbox button on my controller the screen dims end thats it. If I try pressing it once or navigating left to get to settings, same thing. The update bricked my console.
How to fix the error code: (0x80070102)
Perform a hard reset: hold the power button for 5-10 seconds.
Connect your console to your network via a wired connection.
Disconnect additional peripherals.
Go to My apps & games > go to Apps > load the Avatar app.
Press the center X button on the controller > wait. Two things may happen: the Home menu will pop out after a while, or you’ll get an error. Should you get an error message, press the Xbox button again to make the window go away.
When the Home menu appears on the screen, immediately go all the way up to your Icon > go to the right > sign out.
Go to Settings > check and fix your Internet connection issues.
Sign back in < wait a few minutes for the whole process to complete and then reboot your console.
Are you having issues with your Xbox One S not turning on or off? Well, this concern has been raised before by many Xbox users, not just for the S model, but also for the original, and subsequent models
The most probable cause when the Xbox One S won’t turn on is power supply which may be either faulty or not properly connected. There could be other reasons, but this is the main one.
If you have issues with your Xbox One S not turning on or off, try the solutions below.
FIX: Xbox One S not turning on or off
Note: Try all the solutions below as the issue could be mistaken for a new power supply, while it’s your Xbox One S console that could be in need of repair.
If it won’t turn on
1. Reset your power supply
The Xbox One S console has an internal power supply which works across all regions in the world. If it is not turning on, you may have to do a simple power reset. Usually, power issues are a result of power supply resetting after a power surge experience. To do this:
Unplug the power cord from the Xbox One S console.
Wait for about ten seconds
Plug the power cord back into the Xbox One S console
Press the Xbox button on the front of the console.
If the console turns on, then the power reset solution worked. You can do this if the problem recurs in future.
If it still won’t turn on, try the steps below:
Check if the power outlet you are using works with other devices.
Confirm that the power cable is connected firmly to the wall (power) outlet and to your Xbox One S console.
Make sure you are using the power cable that came with your Xbox One S console, and that it’s the correct cable for your location
If your console still will not turn on, it will need to be serviced, in which case request for service by signing in to the Device support page and submit a service order.
If the LED light on the power supply is on, plug the power supply unit back into your console, without turning on the console, and check if it is on or off. Turn on the console and see if it powers up successfully. If the LED on your power supply unit is off, then it needs to be replaced.
If the power supply unit is still blinking, it needs to be replaced.
2. Check that the console is positioned correctly
The Xbox One S console has two fans so ensure there’s nothing blocking them. Place the console on a flat and stable surface. When the fans or ventilation airways are blocked, the console may overheat and fail to turn on.
The console isn’t meant to operate in a vertical position as this affects disc drive performance. A proper stand is also needed if you want to place it vertically.
Ensure the surface is stable, don’t place it on speakers or subwoofers, and check that the space is well-ventilated, uncluttered, cool, and away from direct heat sources.
3. Turn off background downloads
This keeps the Xbox One S console on to download things off of Xbox Live and can keep the console on even when not downloading, for about ten minutes. To turn it off, do this:
Press Xbox button to open the guide
Select System
Click Settings
Then choose Console Settings
Select Startup and shutdown
Select Background downloads and turn it off
4. Check if you have Guitar Hero
One cause could be that you have Guitar Hero in your played games list, and the guitar is tucked away, it can keep the guide button constantly pressed in, or the batteries could be going flat.
If it won’t turn off
If you’ve tried to turn off the Xbox One S console the right way, and nothing changes, do the following:
From Settings:
Press Xbox button to open the guide
Select System
Open Settings
Then click Power & Startup
Select Power mode and startup
Then chosoe Turn off or restart
Select Full Shutdown or Restart now
You can also use your voice if you have Kinect and the command is in your language (or supports it). To do this, say ‘Xbox turn off’, or, if you have Cortana, say “Hey Cortana, turn off.”
If nothing happens and the Xbox One S console won’t turn off, hold down the power button to force the console to shut down, then unplug the console as a last resort. This may affect any current activity like losing a game or corrupting of the game.
Note: Do not unplug the console while system updates are being installed.
Did any of these solutions fix the Xbox One S not turning on or off problem? Let us know in the comments section below.
If you’ve chosen to upgrade your operating system to Windows 11, you may have encountered a few glitches here and there. Thankfully, they are not very important, but they still affect your capability to use the OS efficiently.
One of the recent issues users are complaining about is that Windows 11 Taskbar is not working. This can be frustrating, but it is not the most challenging issue to fix.
This guide will show quick solutions to restore your Taskbar and get back the ease of access it offers.
Why is my Taskbar not working on Windows 11?
Even though the reasons are present in a significant number of possibilities, the Windows 11 Taskbar not working issue has some common triggers:
System file corruption: If the Windows 11 Taskbar is not working after sleep, on a second monitor, or in other circumstances, it might be down to some broken system files. The easy solution is to restore these files using a top-notch system repair tool.
Issues with the explorer.exe process: The Windows explorer process sometimes makes the Windows 11 Taskbar encounter a glitch. To resolve this, you need to restart the explorer.exe task.
Faulty updates: Some users have reported noticing this issue after installing an update. You need to uninstall this update to get past the issue.
User profile issues: For some reason, problems with user profiles have caused this problem for some users. Creating a new user with administrative rights has effectively fixed it for them.
How can I fix Windows 11 Taskbar if it’s not working?
1. Reinstall the Universal Windows Platform (UWP)
Hit the Windows key + X keys and click Windows Terminal (Admin) from the list.
Click the dropdown at the top and select the Windows PowerShell option.
Copy then paste the command below and hit Enter: Get-AppxPackage -AllUsers | Foreach {Add-AppxPackage -DisableDevelopmentMode -Register “$ ($ _. InstallLocation) \ AppXManifest.xml”}
Finally, restart your PC.
Issues with the Universal Windows Platform can also cause the Windows 11 Taskbar not working issue. Running the command above will help reinstall the platform and fix the issue
2. Restart Windows Explorer
1. Right-click the Startbutton or press the Windows + X keys to open the WinX menu.
Hit the Windows + X buttons and choose Windows Terminal (Admin).
Now, type these commands and hit Enterafter each: Dism /Online /Cleanup-Image /ScanHealthDism /Online /Cleanup-Image /RestoreHealthsfc /scannow
Restart your PC.
If you still can’t fix the Windows 11 Taskbar not working issue, the problem might be with your system files. Running the DISM and SFC commands should do justice to that quickly.
Additionally, we suggest using an automated repair solution to fix the corrupted files from your PC. It will scan the entire system and replace broken system files with other functional ones.
4. Uninstall updates
Press the Windows+ X keys and choose Task Manager.
Click File, then Run new task.
Inside the pop-up, type control.exe, then click OK.
In the Control panel window, click Programs.
Below Programs and Features, click View installed updates.
Right-click the Security Update for Microsoft Windows (KB5006050), then uninstall it.
Restart the computer. The Taskbar should work okay after the reboot.
If you notice that the Windows 11 Taskbar is not working correctly after an update, you need to uninstall the update. Some users have primarily found the Security Update for Microsoft Windows (KB5006050) to cause the issue.
Thus, if you have it, you need to remove it to get your Taskbar back.
Press the Windows+ I keys to open the Settings app and choose Accounts in the left pane.
Choose the Family & other users option.
Select the Add account button in the Other users section.
Choose I don’t have this person’s sign-in information.
Now, click Add a user without a Microsoft account.
Enter the username, password, and security questions, and click Next.
Now, click the dropdown before the account you created and click the Change account type button.
From here, click the dropdown under Account type, select the Administrator option and click OK.
Finally, log in to the account and check if your Taskbar is working.
Some problems with your user profile might be causing the Windows 11 Taskbar not working issue. Creating a new profile has fixed the situation for many users, and you should try it too. And this will also when you can’t dock the language bar in the taskbar.
As you can see, the Windows 11 Taskbar not working issue is not impossible to fix. You only need to follow the steps carefully, and things will return to normal.
Your Xbox One allows you to access all sorts of content online, but sometimes certain errors can occur. Users reported Something went wrong error on their Xbox One, and today we’re going to explain to you how to fix this error.
Xbox One error “Something went wrong”, how to fix it?
1. Redeem your code at a later time
Many users tend to use prepaid codes on their Xbox One to purchase online content, but sometimes certain errors can occur while doing so. If that happens, it means that there’s a temporary issue with the Xbox service, and in order to fix this problem, you should wait for an hour or two and try to redeem the code again.
In order to redeem a prepaid code Xbox Live services need to be running, but if one service isn’t running you’ll encounter this problem. To check the status of Xbox Live services, simply visit the Xbox website. If there’s a problem with Xbox Live services, you can only wait until Microsoft resolves the issue.
In addition, you need to be positive that you’re trying to redeem a prepaid code for an Xbox game or app. If you’re trying to redeem a code for a Windows game or app, you won’t be able to complete the process on your Xbox One.
2. Check your region settings
According to users, Something went wrong error message can appear while redeeming prepaid codes if your region isn’t properly set. To fix this problem, you might have to change your region settings on Xbox One by following these steps:
Make sure that you’re signed in to Xbox One.
Scroll left on the Home screen to open the Guide.
Choose Settings > All Settings.
Now choose System.
Select Language & location.
Select a new location and choose Restart now.
Changing the region on Xbox One is simple, but there are a few limitations that you should know about. Firstly, you can change your region once every three months, so keep that in mind. In addition, you won’t be able to change your region if your account is suspended or if you have a balance due on your Xbox subscription.
Keep in mind that certain services might not be available if you change your region, so choose your new region carefully. In addition, the money on your Microsoft account won’t be moved when you change the region, so be sure to spend it before you decide to change your region.
3. Check your billing information
If you’re getting Something went wrong error message it might be because your billing information isn’t correct. This can occur if your credit card is expired or if you moved recently, so be sure to check the billing information by following these steps:
On the Home screen scroll left to open the Guide.
Select Settings > All Settings.
In the Account section select Payment & billing.
Select Change billing address.
Review and edit your billing information. If you need to skip certain information, press B on the controller and choose Next.
Once you’re done, select Save info to save changes.
You can also change your billing information from your browser. This is a faster solution for some users, and in order to do it you need to follow these steps:
Log in to your Microsoft account with any web browser.
Go to Payment & billing section and choose Billing info.
Select Edit profile and follow the instructions on the screen.
After reviewing and updating the billing information, try to redeem the code again.
4. Redeem the code on the Xbox website
Something went wrong error message can appear when you try to redeem a code on your Xbox One, but a few users reported that they managed to redeem their code simply by using Xbox website.
There’s an option to redeem codes on the Xbox website, so if you can’t redeem the code on your console due to this error, be sure to try redeeming it on the Xbox website.
5. Disable the Instant-on feature
You can fix this error on your Xbox One simply by disabling the Instant-on feature. This feature works as a sleep mode for your Xbox and allows you to put your Xbox One in standby mode quickly.
This is a great feature, but it has its flaws, and sometimes, this feature can lead to certain errors. To fix Something went wrong error you need to disable Instant-on feature by following these steps:
Go to Settings and navigate to Power & startup.
In Power Option section select Power mode and press the A button on the controller.
Select Energy-saving option.
After selecting the Energy-saving option, your Xbox One will turn off completely when you press the power button. This means that it will use less power when it’s turned off, but it will also start a bit slower when you turn it on. After disabling Instant-on feature, check if the error is resolved.
6. Sign out and sign back into your account
According to users, you might be able to fix Something went wrong error message simply by signing out of your account and signing back in. To do that, follow these steps:
Press the Xbox button on your controller to go back to Home screen.
Highlight your account picture in the top left corner.
Select your account, press the A button on the controller, and choose the Sign Out option.
After signing out you just need to log back in again and check if the problem is resolved.
Xbox One “Something went wrong” when trying to play a game
1. Restart the router
According to users, you might be able to fix this error message simply by restarting your router / modem. To do that, you need to follow these steps:
Press the power button on your modem to turn it off.
After the modem turns off wait for 30 seconds or more.
Press the power button again to turn it on.
Wait until the modem starts completely and check if the problem is resolved.
If you use both modem and wireless router, you’ll have to restart both devices in order to fix this problem.
2. Reinstall the game
Sometimes Something went wrong error message can appear if your installation is corrupted, and one way to fix the problem is to reinstall the problematic game. To do that, follow these steps:
Go to the My Games & Apps section.
Highlight the game that you want to remove and press the Menu button on the controller.
Select Manage Game option from the menu.
You should now see relevant game information such as the storage space that it takes and its saved games.
Choose the Uninstall option and wait until the game is removed from your system.
After the game is deleted, you need to install it again by doing the following:
Open Games & Apps section.
Scroll all the way right and you’ll see Ready to install list. This list consists of games that you own but you don’t have currently installed on your console.
To install a game, simply select it and wait for it to install. Keep in mind that installation process can take a while depending on your Internet connection.
Some users are recommending to disable your Internet connection before reinstalling the game from a disc. According to them, an update might be downloading during the installation process and that can cause problems with installation, therefore it’s advised that you go offline and install the game from the disc. To go offline, follow these steps:
Scroll left on the Home screen to open the Guide.
Select Settings > All Settings.
Choose Network > Network settings.
Now select Go offline.
After the game is reinstalled, try to start it again and check if the problem is resolved.
3. Clear the cache
Xbox One stores all sorts of temporary files in its cache, but sometimes those files can get corrupted and cause this and many other errors to occur. The simplest way to deal with corrupted cache is to clear it by following these steps:
Press and hold the power button on your console to turn it off.
After the console turns off, unplug the power cable.
While the power cable is unplugged keep pressing the power button to drain the battery completely.
Now reconnect the power cable and wait until the light on power brick changes from white to orange.
Press the power button again to turn on your console.
After the console turns on the cache will be cleared and the problem will hopefully be resolved. Some users are also suggesting to start your game without signing in to your Xbox account. After the game starts, you’ll be asked to sign in to your Xbox account, so be sure to do that.
Clearing the cache can also help you avoid similar issues like Something went wrong error while playing a game; read this guide to learn more.
4. Restore your Xbox to factory settings
If you’re getting Something went wrong error message when you try to play a game on your Xbox One, you might be able to fix the problem by performing a factory reset. Sometimes certain game files can get corrupted, and the only way to fix the problem is to perform a factory reset. Keep in mind that factory reset might delete all your installed games and apps, therefore be sure to back them up. To restore your Xbox One to factory settings, follow these steps:
Scroll left on the Home screen to open the Guide.
Select Settings > All Settings.
Now choose System.
Navigate to Console info & updates and choose Reset console option.
You’ll see two options available, Reset and remove everything and Reset and keep my games and apps. Select the latter option to keep your downloaded games and apps. If this option doesn’t work you’ll have to use Reset and remove everything option. This option will delete all your installed games so you’ll have to download them again.
Since the download process can take a while, we strongly suggest that you move all your installed games to external hard drive before performing the factory reset.
5. Check the status of your subscriptions
Certain games require subscriptions in order to work properly, and if your subscription is expired you’ll need to renew it. To do that, follow these steps:
Log in to your Microsoft account with any web browser.
Navigate to Services & subscriptions section.
Find the subscription that is expired and select the Renew option. If this option isn’t available, you’ll have to buy the subscription again.
After your subscription is renewed, the error should be completely resolved.
6. Try restarting the game
Few users reported that they managed to fix this problem simply by restarting the game. To do that you need to follow these steps:
Press the Xbox button on your controller to return to the Home screen.
Highlight the game title and press the Menu button on the controller.
Select Quit from the menu.
Wait for 10 seconds or more and then try to launch the game again.
Fix – Xbox One “Something went wrong” update
1. Install the update using a USB flash drive
Sometimes there might be an issue with online update that prevents you from installing certain updates. When that happens you’ll see Something went wrong error message on the screen. To fix this error you can try installing the update offline by following these steps:
Connect NTFS USB flash drive to your PC. Keep in mind that USB flash drive needs to be empty in order to install offline update.
Download the offline system update.
The file will be stored in a zip archive so be sure to extract it.
Locate $SystemUpdate file that you extracted and move it to the root directory of the USB flash drive.
After moving the update file to the USB flash drive you need to install it by following these steps:
If possible, disconnect the network cable from your console. Alternatively, you can turn off your modem.
Turn off your console by holding the power button on the front.
Unplug the power cable and reconnect it after 30 seconds.
Press and hold the Bind button on the left side and the Eject button, and press the Xbox button on the console.
Hold Bind and Eject buttons for 15 seconds.
If you performed the process properly, you’ll hear two power-up sounds. Release the Bind and Eject buttons.
Connect the USB flash drive to your console.
Select Offline system update option from the menu and press the A button to start the process.
Wait until the update process is complete.
After the update is installed, the problem should be completely resolved.
2. Select the Turn off Xbox option
If you’re getting Something went wrong error message after trying to install the update, be sure to try using the Turn off Xbox option. After that, simply turn on your console, and the issue should be resolved. Few users reported that this method worked for them, so be sure to try it out.
3. Go offline and back online
If you receive this error message after installing a new update, you might be able to fix it by going offline and back online. A few users reported that this method helped them fix the problem, so be sure to try it.
Fix – Xbox One “Something went wrong” startup
1. Reset your console to factory defaults
Users reported that this error occurs when they start their console, and if you have the same issue, you might want to reset your console to factory defaults. Resetting your Xbox One to factory defaults will delete all your files from your console so you’ll have to download them again. Your saved games will remain if they are synced with Xbox Live. To reset Xbox One, do the following:
On the Troubleshoot screen choose the Reset this Xbox option and press the A button.
Choose Keep games and apps option.
This option will restore your Xbox to factory defaults without affecting your games and apps. Unfortunately, this option doesn’t always work, so sometimes you might have to use Remove everything option and remove all downloaded apps and games from your system.
After resetting your Xbox One to factory defaults, this error should be completely resolved.
Fix – Xbox One error “Something went wrong” party chat
1. Make sure that your NAT is set to Open
To use party chat on Xbox One your NAT needs to be set to Open. There are many ways to do that, but it’s usually achieved by forwarding your ports or by using DMZ or UPnP feature. We already explained in detail how to do that in “Your network is behind a port-restricted NAT” article, so be sure to check it out.
Something went wrong Xbox One error can create many problems for you, but we hope that you managed to fix it after using one of our solutions.
The Xbox One S is a console that brings a significant performance boost to all your games. This console is 40% slimmer than its predecessor, the Xbox One, and supports 4K and HDR for a better gaming experience.
But all electronic devices are subject to various technical issues and the Xbox One S is no exception, with many error messages that can break your game when you’re in the middle of a decisive moment mid-game. Other errors prevent you from signing in or saving your game.
In this article, we’re going to list the most common Xbox One S errors that affect this console, as well as some quick workarounds to fix them.
How do I fix the most common Xbox One S error codes?
1. Fix Xbox One S error code E200
This error message usually appears when you’re using your Xbox One S console during a system update or a game. It can be a simple E200 error or a more complex E200 XXXXXXXX XXXXXXXX code, where the X digits vary. Follow the steps listed above to fix error E200:
Select I am getting an error message or an error code
Select I am getting an error code
Scroll down > select E200 XXXXXXXX XXXXXXXX
Power cycle your console. If the error occurred during a system update, you should try to install update again.
2. Fix Xbox One S errors codes E102 and E101
Usually, these errors occur upon startup or during OS updates. Basically, these two error messages indicate there is an issue with your Xbox One S system update process. To fix the E101 and E102 errors, you need to update your console offline.
The Xbox One Offline System Update lets you download the update file to a USB flash drive and then install it onto your Xbox One S console. To update your Xbox One S console offline, you need a Windows PC with an internet connection and a USB port, as well as an NTFS-formatted USB flash drive with a minimum 4GB of space.
2. Plug your USB flash drive into your computer’s USB port > open the Offline System Update file OSU1
3. Save the console update .zip file to your computer
4. Unzip the file > select Extract all from the pop-up menu
5. Delete your all the files from your flash drive.
6. Copy the $SystemUpdate file from the .zip file to your flash drive. Don’t forget that the files should be copied to the root directory.
7. Bring up the Xbox Startup Troubleshooter. Here’s how to do this:
Power off your console > unplug the power cord > wait for 30 seconds > plug the power cord back in
Press and hold the BIND button and the EJECT button > then press the Xbox button
Continue holding the BIND and EJECT buttons for 10-15 seconds
Release the BIND and EJECT buttons after the second power-up tone
The console will power up and activate the Xbox Startup Troubleshooter.
8. Plug the USB flash drive into your Xbox One S USB port. The Xbox Startup Troubleshooter will enable the Offline System Update option.
9. Select Offline System Update by using the D-pad and A buttons > the update process will start
10. Once the update has been installed, the console will restart.
11. Remove the flash drive from the USB port of your console.
3. Fix Xbox One S error code E305
The error message E305 or E305 xxxxxxxx xxxxxxxx (the X digits vary) occurs when updating your Xbox One S console. The only solution to fix it is to perform an offline system update. Simply follow the troubleshooting steps listed above for errors E101 and E102.
4. Fix Xbox One S error codes E200, E204, E206, E207
These three errors mainly occur on startup and during the update process. To fix them, you need to restart your console. Use the D-pad and A button on your controller and select Restart this Xbox. You can also press and hold the Xbox button on the front of the console for 10 seconds. Then, turn on the console and check if the update has installed. If not, launch the update process again.
5. Fix Xbox One S error code 0x803f9007
When your game won’t load on the Xbox One S, it’s likely that error 0x803f9007 will appear on the screen. There are three possible explanations as to why this error occurs:
The game disc isn’t in the console
You aren’t signed in and connected to Xbox Live
The game trial period has expired.
As a result, to fix error 0x803f9007, make sure that the game disc is inserted and that you are signed in to your Xbox Live account. Of course, don’t forget to purchase the game if the trial period has expired.
6. Fix Xbox One S error code 0x80bd0009
The 0x80bd0009 error usually occurs when users set up their Xbox One S console and the error indicates there’s no sound available. More specifically, the TV is not sending its EDID properly when there’s a surround sound system attached. Although there is no permanent fix available to solve this problem, you can use the following workaround:
1. Press the Menu button > go to Settings > Display & Sound > select HDTV, not “auto” > this will reset your display and audio output options.
2. You should now be able to select HDMI audio for 5.1 and DTS.
7. Fix Xbox One S error code 0x87e00005
This is another common error message that occurs when users set up their Xbox One S console or when they’re installing a game. If error 0x87e00005 occurs when you try to install a game to an external hard drive, here’s what to do:
Go to My games and apps > press the menu button on the game> go to the Manage game option
Select Move > and then select the hard drive you want to install the game on.
8. Fix Xbox One S error code 0x91d7000a
Error 0x91d7000a occurs when the Xbox One S can’t play 4K Blu-Ray. More specifically, the Blu-Ray app will load for minutes on end, and then display an error message informing users that the HDMI input is not HDCP compliant. Here’s how to fix this:
Go to the Home screen to open the guide > select Settings > All Settings > System > Console info & updates > select Reset console.
That’s about it for our list of common Xbox One S errors. If you’ve encountered other error messages that we didn’t list in this article, use the comment section below to tell us more about your experience.
We’ll try to find a fix for your particular error messages and publish it as soon as possible.
A good number of users have reported encountering the error message 0x80370102 when trying to install Linux Distro for Windows Subsystem for Linux 2 (WSL2).
The WSLRegisterDistribution Failed With Error: 0x80370102 is quite common, since WSL2 was released with the Windows build 18917, and it doesn’t only apply to Linux distros. This error has also been encountered when trying to install the Debian distro as well.
The full error message reads: Error: 0x80370102 The virtual machine could not be started because a required feature is not installed.
This annoying error stops you from finishing the virtual device installation on your PC, so you can’t access the new features contained in the update.
In this article, we will explore some of the best solutions available. Please make sure to follow the steps presented in this list closely, in order to avoid causing any other issues.
How can I fix the WSLRegisterDistribution Failed With Error: 0x80370102 issue?
1. Check if your PC supports hardware virtualization
Right-click on your Windows taskbar -> select Task Manager.
Inside the Task Manager, select the Performance tab, and check to see if the Virtualization and Hyper-V support are enabled.
Close Task Manager and follow the next method to activate any/both of the disabled options.
2. Activate hardware virtualization from BIOS
Reboot your PC.
Depending on your BIOS manufacturer, the key to log into BIOS will vary. Press Del, Esc, F1, F2, or F4 key on your keyboard as soon as the screen goes black. (If you don’t get in the first time, restart your PC and try another key).
Find the CPU configuration section (Menu can be called Processor, CPU config, Chipset, etc.)
Find the virtualization setting and enable it (Intel Virtualization Technology, AMD-V, Hyper-V, VT-X, Vanderpool, or SVM).
Choose the option Save & Exit.
The computer will reboot with hardware virtualization enabled.
Check to see if the issue persists. If it does, follow the next method.
3. Activate Nested Virtualization for VMs using PowerShell (Admin)
On the host machine (with target machine powered off) -> press Win+X and choose PowerShell (Admin) from the list.
Inside the PowerShell window -> paste this command changing the values to your VM processor and name: Set-VMProcessor <VMName> -ExposeVirtualizationExtensions $true
Press Enter to run it.
In case you want to enable this service on all VM’s installed on your PC that is currently turned off, paste this command inside PowerShell: Get-VM | ? State -eq ‘Off’ | Set-VMProcessor -ExposeVirtualizationExtensions $true
In this article, we explored some of the best methods to solve the error code 0x80370102 when trying to install the Linux or Debian Distro for Windows Subsystem for Linux 2 (WSL2).
We hope these steps helped you solve your issue with the WSL error 0x80370102. Please feel free to let us know if this guide helped you by using the comment section below.