A superset of JavaScript, TypeScript is developed mainly by Microsoft and has a single open-source compiler.
With a type system, TypeScript aims to speed up JavaScript development and aid in the early detection of errors.
Since you can convert TypeScript to JavaScript, which is supported by most browsers, TypeScript is theoretically supported by all of them.
Now, what matters most is which browsers are best to use TypeScript.
Do browsers ever support TypeScript?
There are no plans for browsers to implement browser-native TypeScript support, but it can be converted to JavaScript so that browsers can read it.
However, HTML supports TypeScript. TypeScript Compile, a JavaScript library that enables TypeScript to be integrated into HTML, was previously created for this purpose.
Another developer-friendly browser, Blisk, enables you to arrange many viewports in a single app. The URL synchronization and scrolling make it simple to test interactions and animations.
Blisk provides a fantastic sample of a responsive design. Additionally, it supports most programming languages, giving you the necessary tools that you need to develop your intended website.
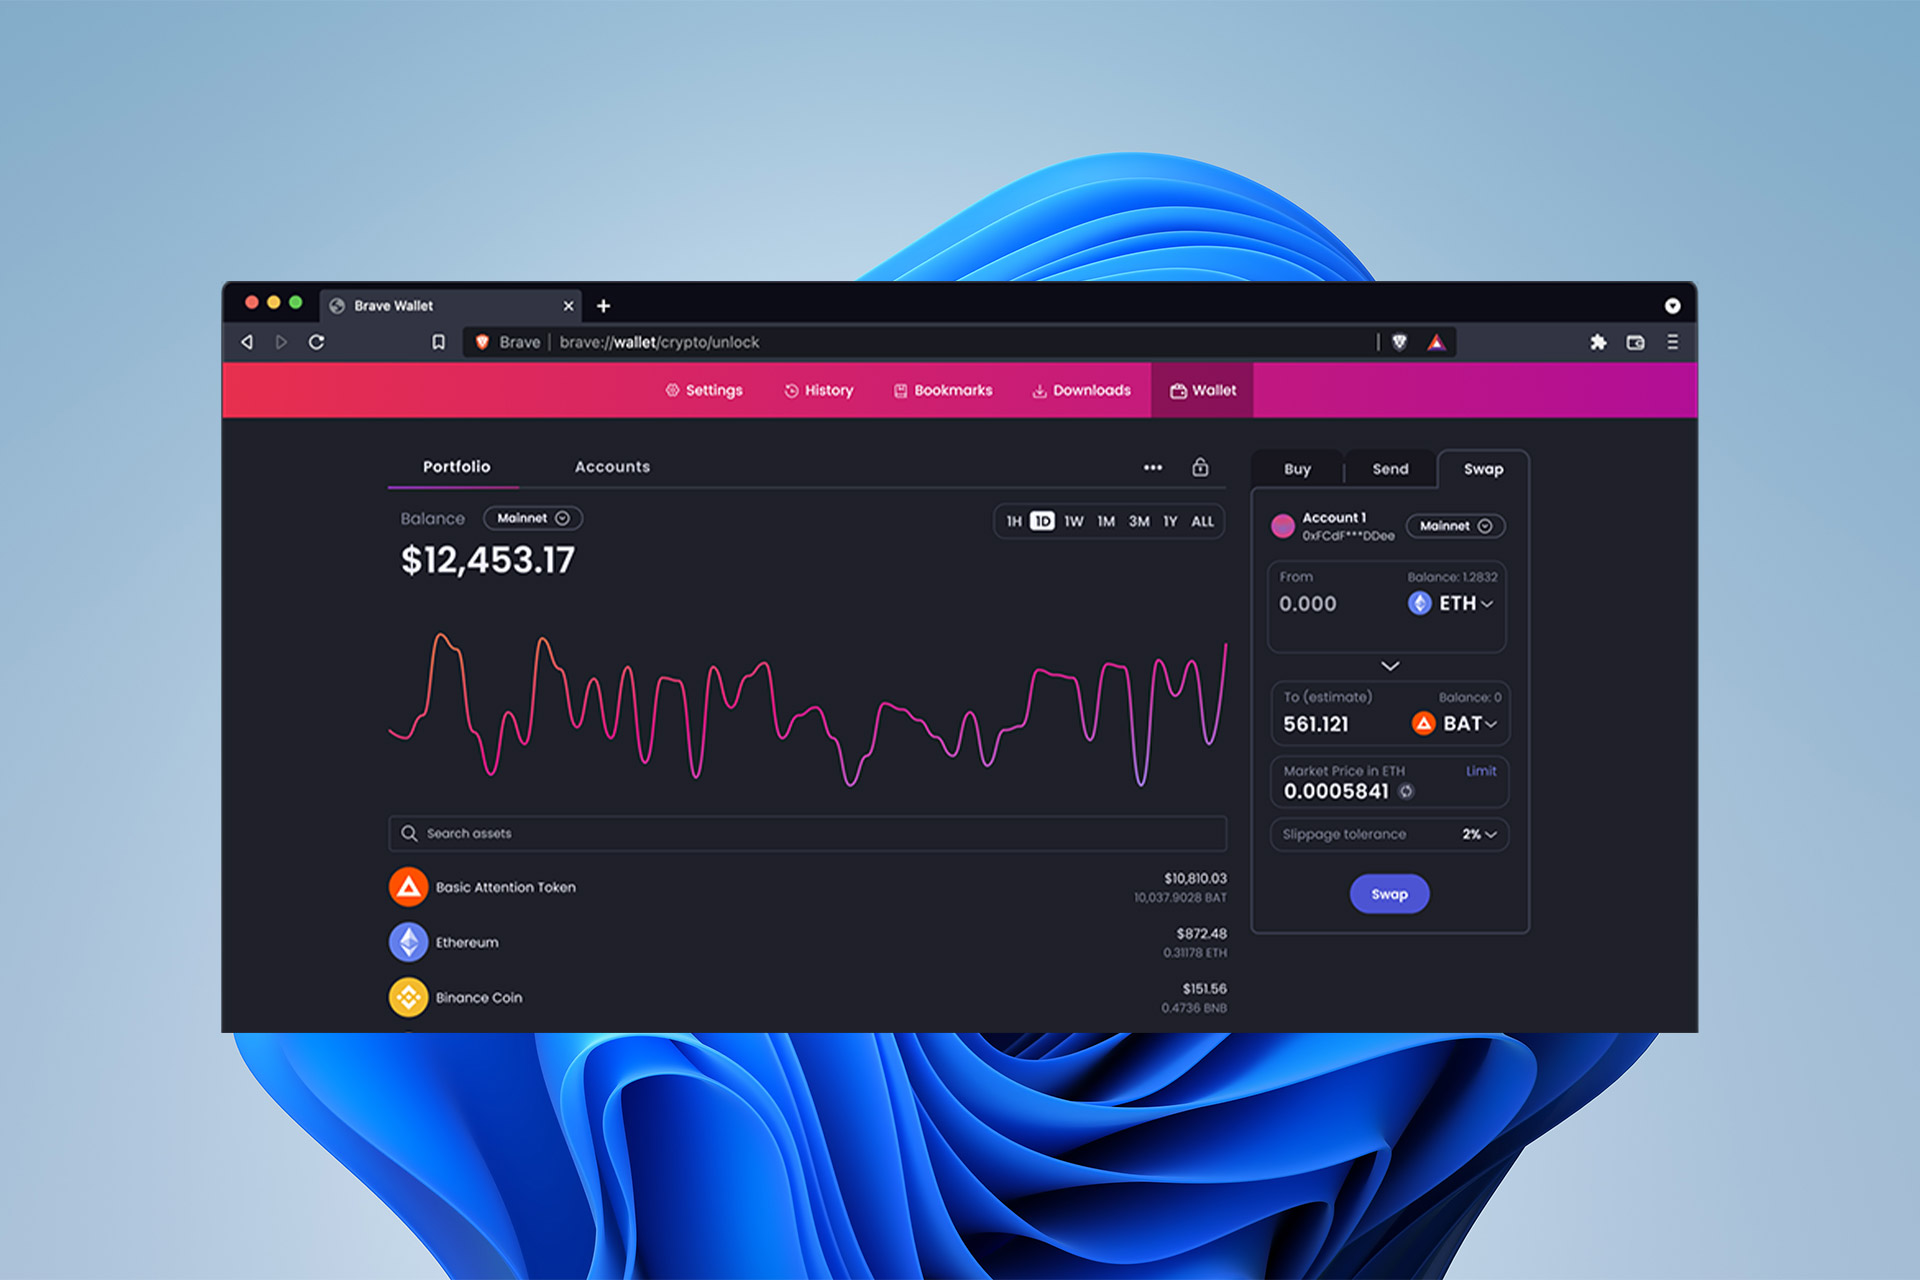
A browser that prioritizes privacy called Brave is up to three times quicker than Chrome.
The most significant advantage of Brave for developers is that it allows Chrome extensions while keeping privacy.
This means that you can use the TypeScript compiler to work much faster and efficiently. There are several helpful Chrome extensions, but if privacy worries prevent you from using Chrome, Brave is the answer.
Even if Chrome is dull, it continues to be the most widely used browser worldwide. Any website you create must function effectively on Chrome.
Chrome developer tools are not only the gold standard for page rendering, but They also make it easy to access your Lighthouse scores, which may help you identify problems that might be preventing you from ranking well in Google’s search results.
Sizzy – Features an innovative synchronized inspect tool
Another software that lets you view many viewports simultaneously is Sizzy. This browser offers synced interactions, and like many rival applications, it enables you to screenshot various perspectives.
Sizzy also comes with an innovative synchronized inspect tool that allows you to concentrate on some aspects across several viewports.
It’s a tremendous debugging alternative, especially if you look over someone else’s codes.
To use typescripts in the browser console, you need to convert typescripts to native languages such as JavaScript.
However, developers that wish to test their TypeScript code immediately in the browser without needing to compile after each change can use the TS-Console extension.
Embed TypeScript into your website
Because most browsers cannot understand TypeScript, you must first translate it to JavaScript to be recognized by browsers.
Additionally, because they support JavaScript, traditional browsers may also use TypeScript.
Aside from this, the recommended programs and browsers are ideal for developers to review and use their scripts in the appropriate language.
An iFrame or inline frame is an HTML element that lets the website load another HTML page within the document. In simple words, an extra page gets loaded on the parent page.
You can understand this with a few examples, such as advertisements, embedded videos, web analytics, and other interactive content that you see on a web page. Basically, a parent page lets all these page layers appear on top of it.
The iFrame is supported by all major web browsers. Notably, when a browser encounters an iFrame, it creates a new HTML document to load it within the web page.
The name Inline Frame comes from the fact that to the user, all content is available on a single page. Moreover, the iFrame loads its own JavaScript and CSS separate from the parent frame.
This means that you can interact with the child iFrame, refresh it, or even change the size and position of the child iFrame within the parent iFrame.
However, web page administrators are advised not to use more than one iFrame because they require additional memory and processing power, which may cause the website to crash or load pages very slowly.
In this guide, we will give a list of browsers that support iFrame. Let us get right into it.
Do iFrames work on all browsers?
Yes, all modern web browsers support iFrame since it’s included in the latest HTML5. Google Chrome being the father of Chromium browsers support iFrame.
Other Chromium browsers also support iFrame. The ability is called lazy loading of iFrame content in Chrome and other Chromium-based browsers.
This new feature lets you properly balance the loading speed of the web page by scheduling the loading of web content.
A web browser that supports iFrame will let you embed a YouTube video or Google Maps content on a web page. Web analytics tools also make use of the iframes that are hidden to monitor the user without them noticing.
In short, all modern desktop and smartphone browsers support iFrame, but not all of them are capable of responding to the new attributes from HTML5.
Does HTML5 support iFrame?
Yes. HTML5 supports iFrame or inline frame. In fact, the iFrame is the only type of frame allowed in HTML5. The <iframe> element is still valid in HTML5.
HTML uses the <iframe> tag to specify an inline frame, or as referred to in HTML5, a nested browsing context. Let us go through the list of the best browsers that support iFrame. </p>
Opera One hasn’t been around for long time but Opera has, and it has evolved to be one of the best-packaged and well-rounded web browsers.
There are tons of features, both security and functionality wise that will make you switch over to it and enjoy them.
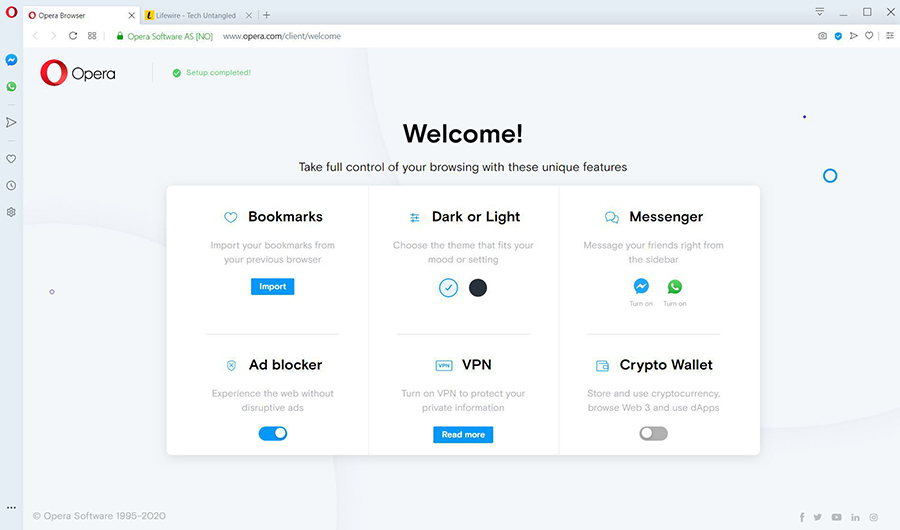
For instance, you get a built-in VPN, ad blocker, a sidebar with pinned Facebook, Instagram, WhatsApp, and Twitter, several customization options, paste protection, currency converter, battery saver, pop-out video player, and even a built-in AI.
In this guide’s context, yes Opera One browser supports iFrame. It in fact comes with lazy loading of iFrames, which saves data when an iFrame loads on a web page.
Opera One
Arguably the best web browser that comes with plenty of good-to-have features.
Well, the father of all Chromium-based browsers, Google Chrome, which also happens to be the most used web browser across the globe does support iFrame.
It supports the lazy loading of iFrame, that not only saves data while opening embedded content but also speeds up the loading of the web page.
Although Google Chrome, does not offer a wide variety of features as compared to other modern browsers, you can expand its features by adding an extension from the Chrome web store, which is just a few clicks away.
While Chrome supports iFrame, if you are experiencing issues, where iFrame isn’t working on Google Chrome, then you can check out our dedicated guide that lists five working solutions.
The next browser choice offers great versatility and it’s compatible with multiple platforms like Mac, Android, or Windows.
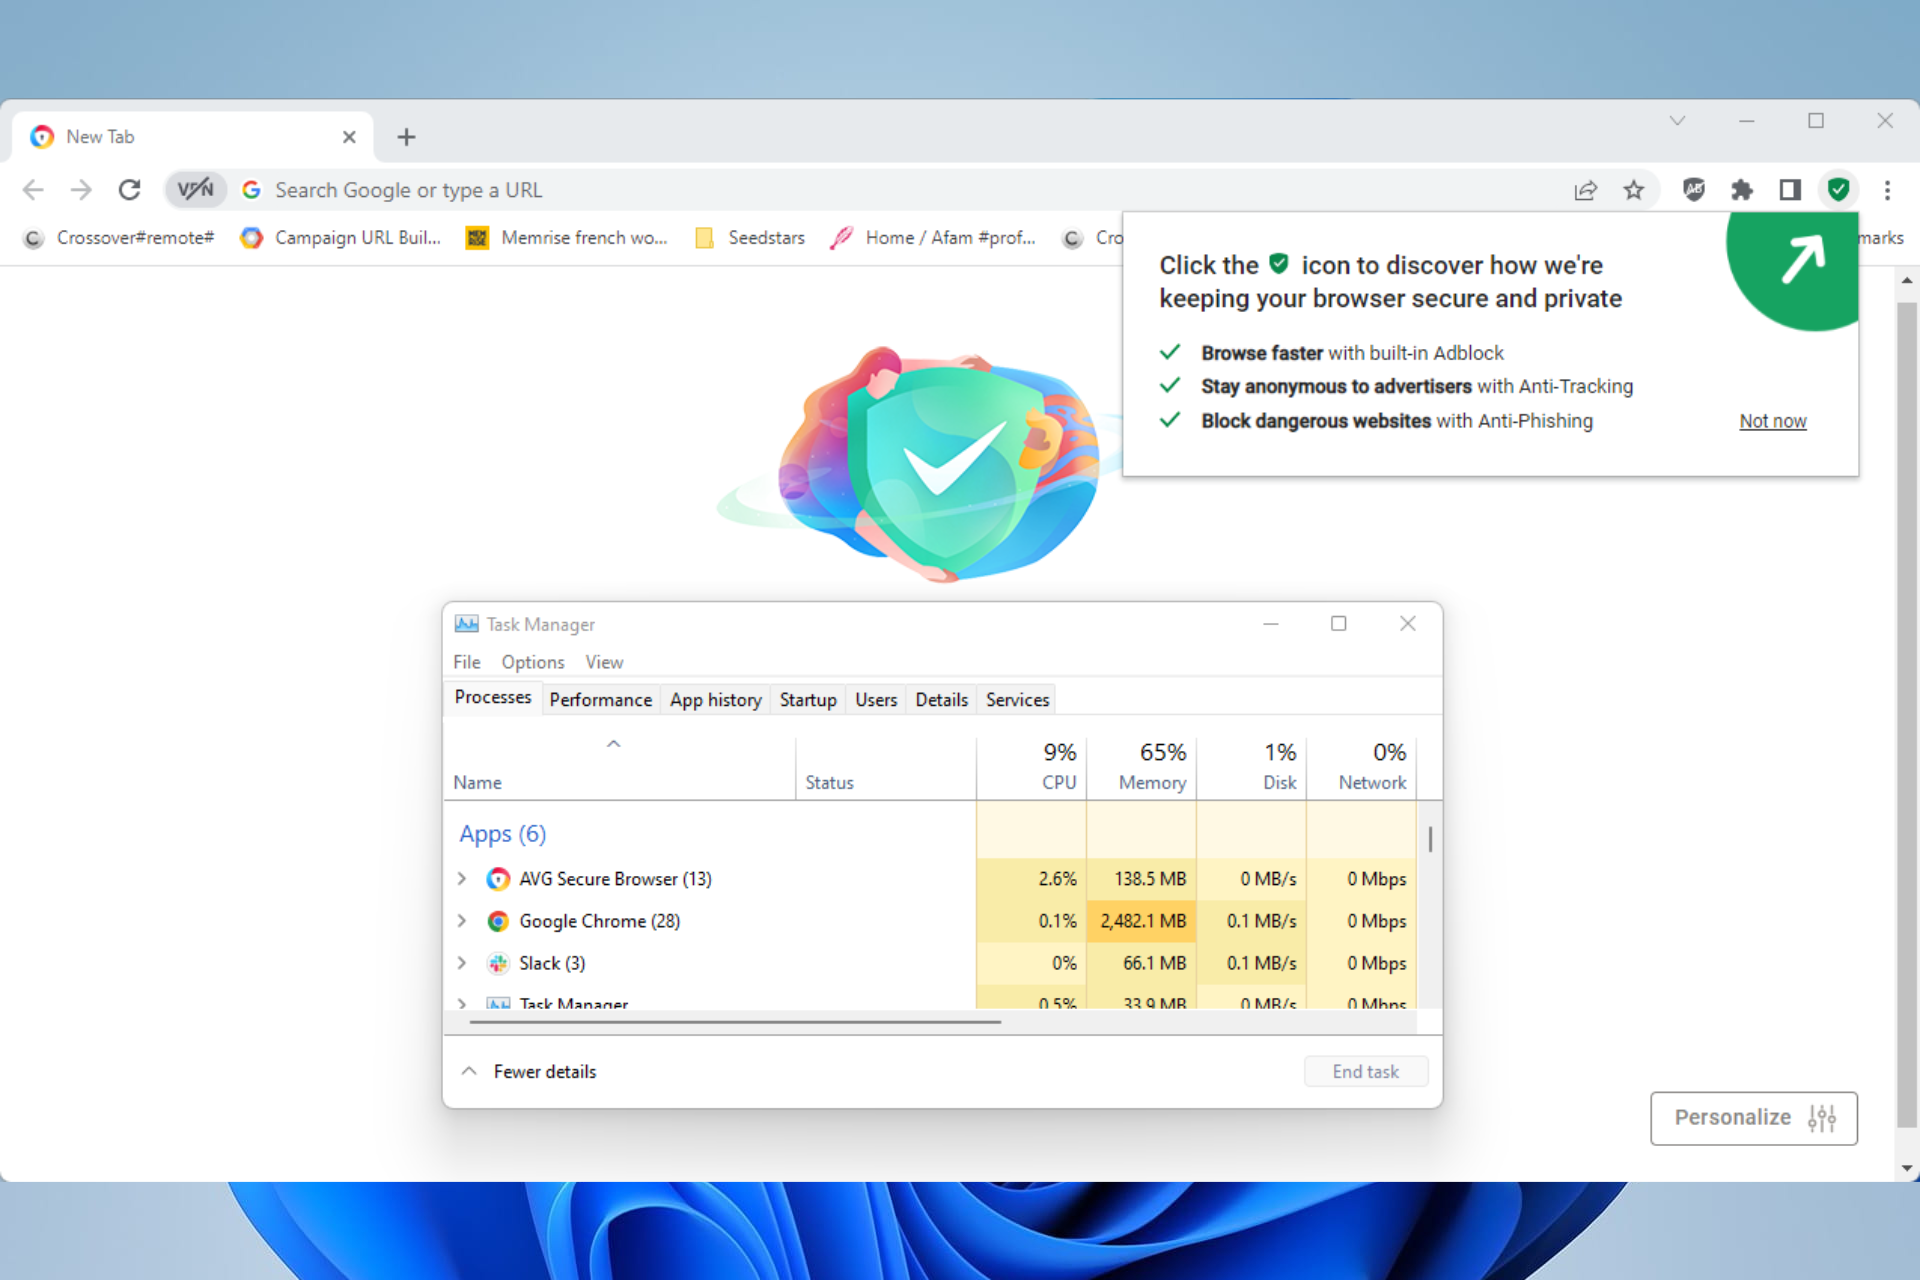
You can use AVG Browser to choose from various themes or wallpapers in order to customize it according to your browsing needs.
This solution can deliver useful web page customization and privacy settings to easily navigate the web without encountering threats.
All in all, it’s likely to use this browser for iFrame customization and personalize your browser while being secured against risky cyber threats or tracking scripts.
AVG Secure Browser
Have a go with this cross-platform browser with maximized web privacy.
If you are looking for the best compatibility with the Windows OS, and where you don’t have to go through the hassle of installing, then you would be happy to know that the Microsoft Edge browser supports iFrame.
Since the overall base of the Microsoft Edge browser has been changed and is a Chromium browser, you can install Chrome extensions on it, and get others from the Microsoft Edge Store.
Microsoft Edge comes with lazy loading of iFrame natively, without needing to install an extra add-on.
Brave browser is a Chromium-based browser that supports iFrame. There are a ton of features that Google Chrome does not offer.
For instance, it loads web pages faster than other browsers, imports settings from your old browser, ad blocker, fingerprint prevention, built-in password manager, custom backgrounds, etc.
Just like Google Chrome, Brave browser also supports lazy loading of iFrame to save data, and also gives you a snappy browsing experience.
The feature is supported natively, and you do not need to turn on any toggle or a flag in order to enable the iFrame in the Brave browser.
Mozilla Firefox is one of the best alternatives to Google Chrome and Opera One if you are looking for a powerful web browser.
It has been the choice of many power users for years, and it has evolved from being a barebones browser to being a browser that offers great customization options and a plethora of add-ons.
Firefox is not a Chromium-based browser and but it supports iframe content. Some of the best features of Firefox include the usage of DNS instead of HTTPS for more secure browsing, loads pages faster, picture in picture feature, available in more than 90 languages, and much more.
Well, there is no straight answer to this question. Notably, if you are using an iFrame on a properly developed site, then that is a bad practice. However, sometimes, you can get away with it.
The reason for considering it as a bad practice is the fact that iFrames are now getting abused as well. It shouldn’t be used as an integral part of the website, but just as a piece of content within a site.
Moreover, using iFrame content doesn’t make your website more or less secure than other websites. So, web admins should be very careful in selecting an iFrame that is trusted and reliable.
What disadvantages does using iFrames involves?
Some of the disadvantages of iFrames are:
It is memory and processor extensive
There is no control over third-party websites
Impacts SEO
iFrame could phish your user’s data without your knowledge, by adding a submittable form.
Could run a malicious plug-in
Change the source of the URL
Often breaks the browser’s back button
May suddenly open an iFrame content in a new browser window
Navigation of websites stops because of malicious iFrame
One of the major impacts that iFrames could cause is SEO problems. Besides, Google has clearly stated at their Webmasters Help Forum:
IFrames are sometimes used to display content on web pages. Content displayed via iFrames may not be indexed and available to appear in Google’s search results. We recommend that you avoid the use of iFrames to display content. If you do include iFrames, make sure to provide additional text-based links to the content they display, so that Googlebot can crawl and index this content.
What replaced iFrames?
You can use embed tag as an alternative to iFrames. Because of the fact that embed tag is used for the same purpose as the iFrame, and has some advantages over it such as letting you embed various external resources in a web page, embed media like PDF, image, audio, video, etc. embed tag is widely used in place of iFrames.
Moreover, embed tag is supported by all major browsers including Google Chrome, Internet Explorer, Microsoft Edge, Mozilla Firefox, Apple Safari, and Opera One browser.
What can I use instead of iFrames in HTML5?
The list mentions all the alternatives that you can use instead of iFrames in HTML5:
Object tag: Lets you embed multimedia components and even set the height and width of the container.
Embed tag: Lets you embed media like PDF, image, audio, video, and web pages. It can also set the height and width attributes of the container like the Object tag.
That is it from us in this guide. We hope that you learned in detail about what iFrame is in HTML and what are the browsers that support iFrame.
XPS (XML Paper Specification) files are Microsoft’s competitor to Adobe’s PDF files. Maybe this format isn’t as popular as PDF, but it could be useful to know something about XPS and the way they work.
Since the XPS format retains the layout of electronic documents down to the finest details be it for printing, editing, or simply viewing, using the right tool is essential.
While Adobe allows you to tweak your PDF documents independently from its software, things are a bit different when it comes to the XPS document management software.
How can I open XPS files in Windows 10?
In this article, we’re going to show you how to handle XPS files in Windows 10 using 2 different methods. The first one obviously involves Adobe.
While the program does not support opening XPS files, it offers a nifty feature, allowing you to convert your first into a more digestible format with great ease.
1. How to convert XPS to PDF with Adobe Acrobat DC Pro
XPS files are one of the many formats supported for direct file conversion in Adobe AcrobatDC Pro. Simply use this path to convert XPS documents into fully-editable PDFs: File > Create PDF > From File.
Even if the option is disabled by default, you can still create a registry key on your Windows 10 PC that will allow you to convert XPS files to PDFs.
Simply open the Registry Editor.
Make sure to right-click it and select Run as Administrator.
Then type in the following command: HKEY_LOCAL_MACHINE\SOFTWARE\Wow6432Node\Adobe\Adobe Acrobat\DC\Feature\State
Finally, close the registry editor, and you’re all set.
2. How to open XPS file using XPS Viewer
XPS Viewer used to be Microsoft’s default app for opening and managing XPS files, and it offered some basic functions like reading XPS files, zooming, printing, searching, etc.
You can still use it nowadays to open XPS files, but you need to manually download and install it.
1. Press the Windows Key and type Settings. Click on the result.
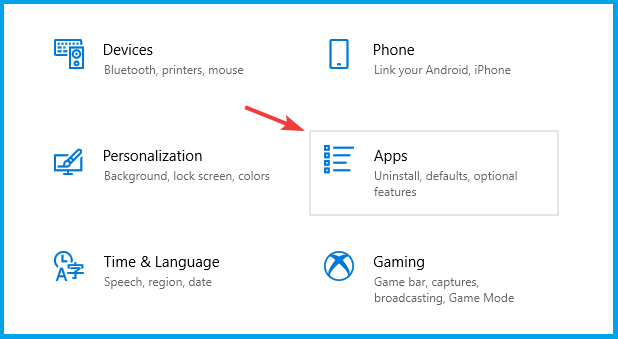
2. Select Apps from the options.
3. Click on Optional features.
4. ChooseAdd a feature.
5. SelectXPS Viewerfrom the list. You can use the search box to find it.
6. Click theInstallbutton.
7. After the installation is complete, open your XPS file. It will automatically open with XPS Viewer.
Microsoft changed the way you get XPS Viewer. In Windows 10, version 1709, and earlier versions, the app was included in the installation image and this is no longer the case.
Thus, you will need to install/reinstall XPS Viewer in the following instances:
If you install Windows 10, version 1803, on a new device
Install Windows 10 as a clean installation
If you had XPS Viewer in Windows 10, version 1709, but manually removed it before updating
The quickest way is from Apps and Features in the Settings app or through Features on Demand.
There you go, these are the most common methods of viewing XPS files. What software are you using for the job?
Share your experience with the rest of the Windows community via the comments section below.
Keeping your passwords saved is great if you want to log in quickly, but many users reported that Google Chrome is not saving passwords at all.
Keeping your passwords saved is the fastest way to log in to a website, and with issues arising, it becomes imperative that you fix things at the earliest.
Regarding Chrome not asking to save passwords, here are some problems that users also reported:
Chrome asks to save password but doesn’t – Sometimes, this problem can occur if your user account is corrupted. To fix the issue, simply create a new user account, and the problem should be resolved.
Chrome won’t remember password for site – According to users, this problem can occur if the password saving feature is disabled. To fix the problem, check your settings and make sure password saving is enabled.
Google Chrome won’t offer to save password, ask to save password, save my passwords anymore, let me save passwords – These are various issues that can occur in Chrome, but you should be able to solve most of them by using our solutions.
Chrome not saving passwords for Gmail– In some cases, users found that Chrome was not saving passwords only on Gmail, while the feature worked fine on other websites.
Chrome offer to save passwords greyed out – Many found the option to save passwords available but greyed out. Resetting Chrome did the trick for most users.
Chrome not saving passwords after update– Several users started encountering the problem after updating the browser.
Why are my passwords not saving on Chrome?
There are various reasons why Chrome is not saving passwords in Windows 10/11, but it’s mostly the case when you have disabled the feature itself.
Also, the browser version installed on the computer may be outdated, and as a result, some of its features are not functioning. Besides, issues with the browser profile or conflicting extensions can lead to Chrome not saving passwords.
How do I turn on Autofill in Chrome?
Launch Chrome, paste the following path in the address bar, and hit Enter:chrome://settings/autofill
You will now be presented with three Autofill options. Choose the relevant category to proceed. We choose Payments.
Now, enable the Save and fill payment methods option.
That’s how you can easily enable Autofill for Passwords, Payment methods, and Addresses.
Tip
A good solution is to try another browser. This is the fastest way to solve password management problems. We recommend OperaOne, another Chrome-based browser. Secure and private, will store all your passwords securely.
How do I force Chrome to remember a password?
1. Create a new user account
Press Windows + I to open the Settingsapp, and head over to the Accounts section.
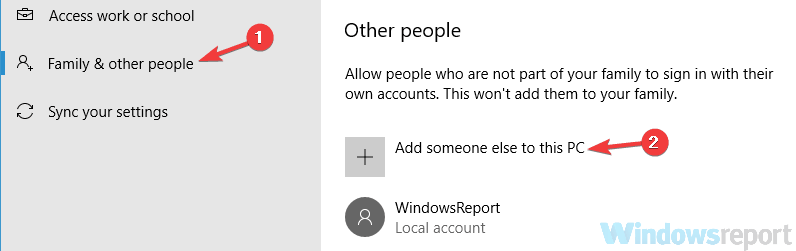
Select Family & other people from the menu on the left. In the right pane click Add someone else to this PC button.
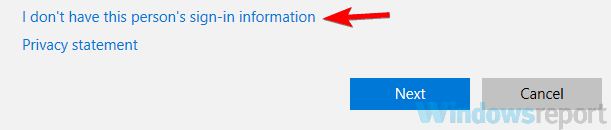
Pick I don’t have this person’s sign-in information.
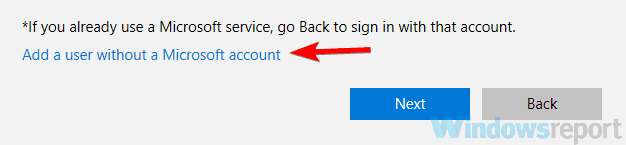
Now choose to Add a user without a Microsoft account.
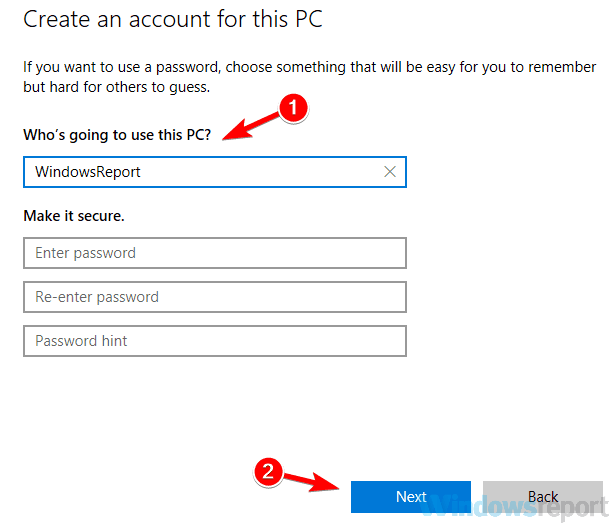
Set the username and password for the new account and click Next.
Now you’ll have a new user account ready. Keep in mind that your new account doesn’t have administrative privileges, but we can easily fix that by doing the following:
Go to the Family & other people setting as you did earlier.
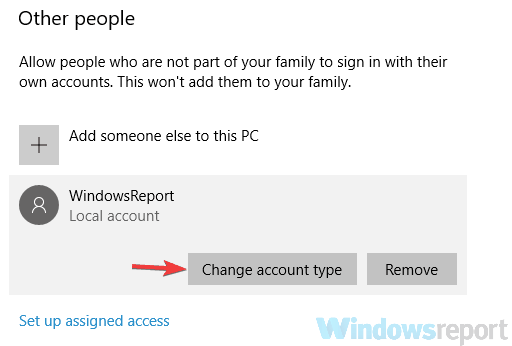
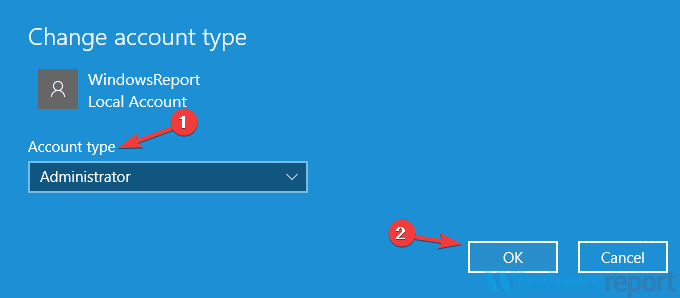
Now locate your newly created account, select it, and click the Change account type button.
Set Account type to Administrator and click OK.
After doing that, you’ll have a new administrative account ready. Now simply switch to the new account and check if Chrome is still not saving passwords on some sites.
If the issue doesn’t appear, you should move your personal files to the new account and start using it instead of your old account.
2. Try a password manager
Password managers are useful tools since they allow you to generate strong and hard-to-guess passwords automatically.
If Google Chrome isn’t saving your passwords, it might be time to consider a password manager. It’s also best practice that you do not store passwords directly in your browser.
We recommend a password manager that focuses on security and features for its users. RoboForm makes it all easy with an intuitive interface that you’ll get used to in minutes.
RoboForm
A powerful tool that will help you keep all your passwords safe and secure.
3. Make sure that Google Chrome is allowed to save passwords
Paste the following path in Chrome’s address bar and hit Enter:chrome://settings/passwords
Make sure that Offer to save passwords feature is enabled.
After enabling this feature, Google Chrome should ask you automatically to save passwords, and the problem should be resolved.
4. Sign out of your Google Account and sign back in
Click on your Profile icon near the top-right corner and select Manage your Google Account.
Again, click on the Profile icon, and select Sign out.
Now, restart the browser, click on the Profile, and select Sign in again.
Enter your login credentials to sign in.
This is a simple solution, and it might not always work, but it’s still worth checking out.
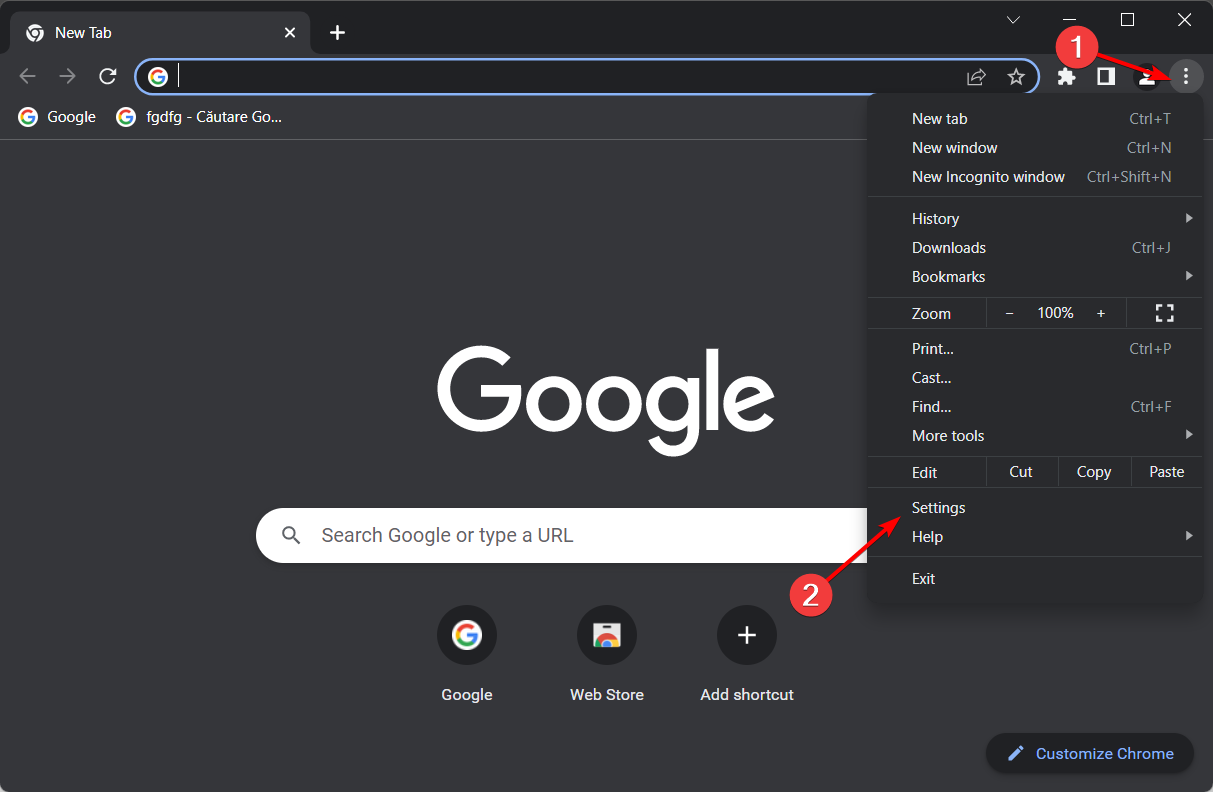
5. Reset Google Chrome to default
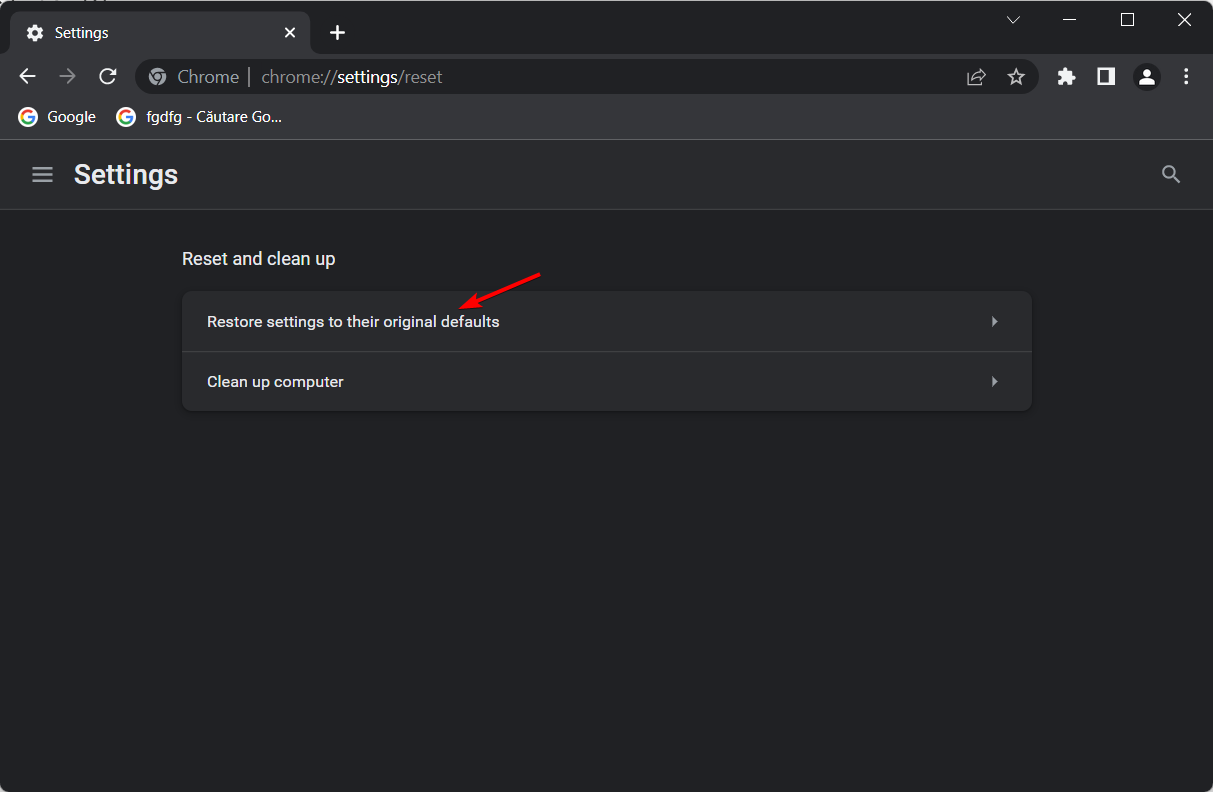
Open Chrome, paste the following path in the address bar, and hit Enter:chrome://settings/reset
Click on Reset settings to their original defaults.
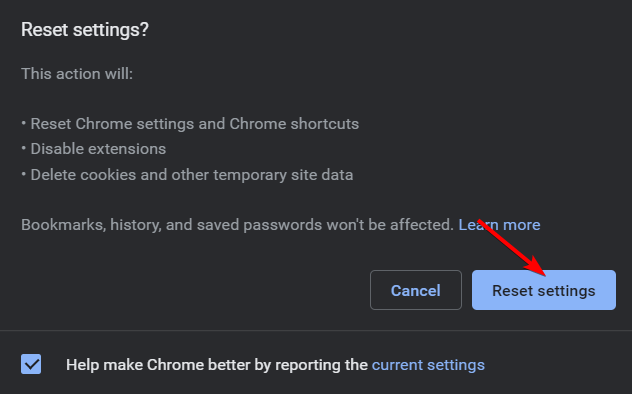
Now click the Reset settings in the confirmation prompt that appears.
After resetting the browser to the default, check if Chrome not saving passwords for LocalHost problem is still there.
6. Disable problematic extensions
Click the ellipsis near the top-right corner, hover the cursor over More tools, and select Extensions.
List of installed extensions will now appear. Click the little switch next to the extension’s name to disable that extension. Do this for all extensions on the list.
After you disable all extensions, restart Chrome and check if the issue is still there.
If the issue doesn’t appear, you might want to enable extensions one by one until you find the cause of the problem.
Once you find the problematic extension, remove it and the problem should be completely resolved.
7. Update Chrome to the latest version
Paste the following path in Chrome’s address bar and hit Enter:chrome://settings/help
You’ll see the current version of Chrome you’re using and the browser will check for updates. If any updates are available, they’ll be installed automatically.
Once the browser is up to date, check if the Chrome not saving passwords problem is still there. In case it is, head to the last method.
8. Reinstall Chrome
If Google Chrome won’t save passwords, the issue might be your installation. Sometimes your installation can get corrupted, and that can lead to this and many other problems.
To fix this issue, it’s advised that you reinstall Chrome completely. This is relatively simple to do, and you can do it using several different methods.
You can uninstall Chrome like any other application, but that will leave certain leftover files that might still interfere with Chrome after you install it again.
To completely remove Chrome, we recommend that you use uninstaller software. By using uninstaller tools you’ll completely remove Chrome from your PC, along with all of its files, traces and leftovers.
The important difference when using this tool is that after the default uninstallation, it will also look for other leftover files and delete them as well.
This means that if you decide to reinstall Chrome, you will benefit from a completely fresh install. This reduces the chance of having the same issues reappearing.
Now, you just have to install Chrome again, and the issue should be resolved. If you want, you can try the Beta or the experimental Canary version since they have the latest updates and fixes available.
What do I do if Chrome is not saving passwords on Mac?
The solutions listed here should work just as well on Mac, and would help you resolve the problem in no time.
If these don’t work, you can try clearing the browser cache or creating a new user profile on Chrome, in case it’s the corrupt data leading to the problem.
That’s it! You now know how to fix things when Chrome is not saving passwords in Windows 10/11 or Mac.
Getting a This page has been blocked by Chrome message with an error code ERR_BLOCKED_BY_CLIENT? We’ll show you how to fix it.
It is mostly caused due to an extension that is incompatible with the web browser. Other reasons can be outdated Chrome version and too many bookmarks in the Bookmark Manager.
Let’s see how you can fix it.
How to get rid of “This page has been blocked by Chrome” errors
1. Disable and delete the problematic extension
Open Google Chrome and click on Menu.
Go to More Tools > Extensions.
Here you need to disable the most recently installed extension first. Disable the extension and restart Chrome. Check if the error occurs again.
If the issue persists and if you don’t have any recently installed extensions, start disabling all the extensions one by one.
Start with VPN, security, online service, or account-based extension.
Restart the browser and check for improvements after disabling each extension.
Once you have confirmed the issue is with one of the Google Chrome extensions, you need to disable it.
2. Update Google Chrome
Open Google Chrome.
Click on the Menu (three horizontal bars) icon.
Go to Help and select About Google Chrome.
Check if you are running the latest version of Chrome. If not, click on the Update now button and wait for the installation to complete.
Relaunch the browser and that should fix the webpage blocked by extension error.
An outdated version of Google Chrome may be incompatible with the extensions as well as the web pages. Try updating Google Chrome and check for any improvements.
3. Open the webpage in Incognito Mode
Open Chrome and press Ctrl + Shift + N to open the Incognito Mode.
Open the webpage that was giving the error. If the error does not occur in Incognito Mode, it is possible that the issue is with one of the Google Chrome extensions.
Google Chrome extensions don’t work in Incognito Mode. By opening the webpage in Incognito Mode, you can check if the issue is due to an extension.
4. Remove unnecessary bookmarks
Open Google Chrome.
Click on the Menu.
Select Bookmarks > Bookmark Manager.
Browser through the bookmarks and start deleting unnecessary bookmarks.
Restart Chrome and check for any improvements.
Bookmarking web pages is common with most internet users. What’s more common is not cleaning the bookmarks. If you have more than 1000 bookmarks in the Bookmark Manager, try to clean some of them to fix this error.
5. Use a different browser
If the issue persists, use an alternate browser. The issue with Chrome is that it occasionally generates false positives. So, if you need better stability and fewer errors, consider switching to another browser.
A good alternative to Chrome that’s not only easy to adjust to (because it’s built on Chromium), but also less likely to display site errors is Opera.
It has some of the best privacy features: built-in VPN, adblock, and tracker blocker. And, as opposed to Chrome, when it detects a potentially harmful site, it doesn’t completely stop you from accessing it.
It tells you it might not be safe, and gives you the possibility to continue.
Opera
Uses certificates to verify the identity of the site owners and if websites are legitimate.
So, in case this page has been blocked by an extension, Google is blocked by an extension, or this page has been blocked by chrome err_blocked_by_client, now you have a better understanding of the issue.
Remember that there is a solution for everything and, most of the time, that solution will be found here. Share with us any further issues you came across in the comments section below.
Many people tend to take pictures in order to keep their favorite memories, and in most cases, they store these pictures on their PCs.
Photos app is a default app for photo viewing on Windows 10 and speaking of which, Photos app will get new features with the upcoming Windows updates in the future.
Microsoft is working to improve the Photos app and released updated versions for Windows Insiders. Meanwhile, it still is a rather simple photo viewing application, therefore it lacks some key features that advanced users might miss.
If you’re not pleased with Photos app and you’re looking for an alternative, today we’re going to show you the best photo viewers for Windows 10.
What happened to Windows Photo Viewer?
Firstly, you should know that Windows Photo Viewer it’s still available on Windows 10. Yes, it’s possible to restore the previous version and use this photo viewer as a default on your PC.
Microsoft upgraded the Windows Photo Viewer with the launch of Windows 10 OS, replacing the old photo viewing app with the in-built app, Photos.
It’s also stated that Microsoft Photos comes with many improvements and features like editing, sharing, and even photo saving.
Besides all that, you can find different ways to get back the photo viewer and manage your image files much easier.
Why can’t I open a JPG file?
In case you are unable to see JPG format images on your PC, you should look for some reasons that generate the issue.
For instance, it might be due to an outdated Photos or Photo Viewer application version. So, be sure you have the latest version of your app, and if not, upgrade it from the Windows settings.
If you’re using Windows Photo Viewer, another reason can be that you don’t have the app set as a default program.
For sure multiple reasons are causing this issue, but you can resolve it quite efficiently. However, many skilled photo viewers are in the following list for you to use on Windows 10 devices.
You would usually have to use multiple applications to manage all your photos, documents, and archives. It’s convenient to choose one that can handle at least most of the formats you are going to need opening.
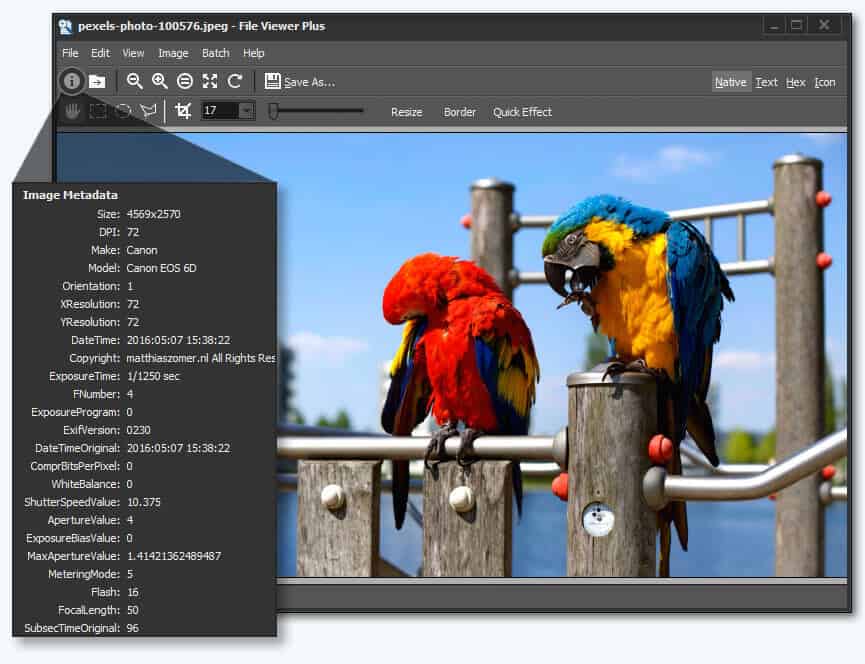
File Viewer Plus is a universal file viewer for Windows that can open and display over 300 different file types.
The new version brings extra features and focuses on support for viewing and converting over 50 new file formats, including over 25 additional image, audio, and video formats.
The new batch conversion feature works at great speed, and you can save settings to use it again for different jobs.
Raw files are well supported with this program, and you can open photos from 600 different camera models. You can also view EXIF data for digital photos and camera raw files.
The application has a simple, smart layout and is as easy as drag-and-drop files. You can download a fully-functional free trial or buy it at an affordable price.
File Viewer Plus 4
If you need to open a file, not just an image, but any format, then your need File Viewer Plus 4!
Movavi Picverse is an ideal photo management software that permits you to organize, view, and edit your images with one glance.
This complete photo solution certainly covers your need for organizing the entire collection of photos. No matter the photo format, you can view RAW, JPEG, or PNG files in seconds.
You can thus manage your digital shots with a simple-to-use interface that displays all the images in one panel. In this way, you have every picture organized and labeled to find specific ones with 1 click.
More so, there are advanced features you can use for better optimization and user experience. To organize it smart, you have to make use of the facial recognition option, geolocation, or automatic album.
These functionalities are a life-saver for photographs or simple users who need to sort the images based on different filters like faces or locations.
Movavi Photo Editor can also organize your images by the GPS address or date so you stay on top of any album size or project.
If that’s still not enough, you have creative editing tools. You can remove unwanted objects, modify color palettes, and many other AI technologies.
Movavi Picverse Photo Editor
Choose this image management software for intuitive yet advanced photo organizing and editing results.
Adobe Lightroom is an advanced photo editing software, that includes a photo viewing feature with support for a wide range of image editing tools. Its interactive interface makes it a friendly user for beginners as well.
Speaking of the image editing process, you can change the color properties of your photo by adding tones and color mixers. As well you can add more creativity to your photos by cropping, resizing, adding more texture, or removing elements from your picture to have an outstanding result.
Adobe Lightroom offers more possibilities to manage, view, compare, and sort photos with the Library panel. You can view your photos using more tabs like Grid View, Loupe View, Compare View, and survey View.
Grid view allows you to manage, organize, and sort your pictures and view the images in different size formats.
You can view a single photo or zoom photos up to 11:1 using the Loupe panel.
For the option of displaying photos separately so you can compare and evaluate you can go for Compare view tab.
The survey view is a perfect choice if you want to evaluate more photos at the same time by displaying the selected active images.
As you can see, Adobe Lightroom gives the opportunity from where to choose the perfect way of viewing the images. Moreover, if you have a second monitor, you can view the picture due to the Library module in your second window.
As well, Adobe Lightroom is adapted to collaboration and Teamwork, so it can be great to use it when you want to invite your friends to see your images and to download them from bowser or directly from Lightroom We assure you that this software provides confidentiality for the displayed content.
Adobe Lightroom
Manage your image stock using this market-leading photo managing and editing software.
This one comes in different types for different users, such as the home user or professional as it is like a full photo studio suite for use in viewing, editing, and creating unique images.
It supports more than 60 image formats including GIFs, Plus, you not only get to view crisp quality images on a super platform, but you also can edit, organize, manage, and even share your digital photos with your loved ones or friends, or workmates from your desktop.
Many photo viewer software can be slow regarding scrolling, listing, and selecting. ACDSee is optimized so well that all its features cannot slow down your user experience.
You will feel real pleasure scrolling through your photo collections. Even if it comes at a $59.99 price, a trial version is available with all you need for photo viewing.
Install it on your computer and give it a try.
ACDSee Photo Studio
Photography has evolved to the point of becoming art. use ACDSee Photo Studio to be an artist!
PhotoStage makes photo viewing on Windows 10 incredibly easy. Well, it has everything you hope to get packed in just one simple program. Whether you are looking to make slideshows from photos and videos, or you need to add music tracks or narration, PhotoStage might be perfect for you.
You don’t need to be a pro to use it. Simply drag and drop images to arrange the slides as you please or turn a folder of images into a slideshow from the very start.
PhotoStage also specializes in being a stylish photo viewer since it’s a storehouse of valuable effects. It includes panning and zoom, fade for a professional touch, crop, Ken Burns effect, and a wide range of transitions.
Besides the fact that it has more editing capabilities than many similar programs, you may always preview the effects in real time.
Finally, use the app to share photos with friends, family, or followers. Waste no more time and upload them directly to Vimeo, Flickr, or YouTube and share them online or save them for other portable devices. Burning slideshows to DVD and watching them on your TV is another option.
If this is a photo viewing and editing tool that seems to meet your needs, don’t hesitate to install it.
PhotoStage
View your photos with ease and edit them with the PhotoStage software.
WildBit Viewer is another lightweight photo viewing solution for Windows 10 that supports over 70 image formats.
One of the main features of this application is its speed, and thanks to the shell toolbar, you can drag and drop your picture folder into WildBit Viewer and use it as an organizer.
As for additional features, WildBit Viewer allows you to compare two images side by side.
If you are a fan of slideshows, you’ll be pleased to know that you can create custom slideshows with 176 different transition effects by using this application.
If you’re looking for an image viewer for Windows 10 that supports a wide range of formats, XnView is what you need.
This application supports more than 500 file formats, therefore it will open almost any type of image that you have on your computer.
XnView allows you to view images in several ways, such as standard Thumbnail view or FullScreen view, but there’s also a FileStrip view and SlideShow with FX option as well. In addition, there’s support for image comparison and basic image editing.
One feature we must mention is the Duplicate File Finder, which searches your hard drive for duplicated images.
Additional features include metadata support, batch processing, and batch renaming. We also have to mention that this tool comes with eleven resampling algorithms, allowing you to make RGB color adjustments. There’s also support for special effects such as shadows, framing, sketching, oil painting, and lens effects.
As for editing options, there’s an advanced Red-Eye removal tool and the ability to add text, annotations, or callout objects to images. If you’re not pleased with your edits, a multi-level Undo/Redo option is available.
XnView has an option to acquire images directly from a scanner along with support for batch scanning and PDF, TIFF, JPEG, and PNG formats.
A side-by-side image comparison is available that allows you to compare up to 4 images at a time.
If you’re a fan of slideshows, you’ll be pleased to know that XnView allows you to create slideshows using 150 different transition effects.
In addition to transitions, you can even add music to your slideshows with XnView.
IrfanView is another lightweight photo viewer for Windows 10 that supports a wide array of image formats along with digital camera RAW formats.
Like many other tools on our list, this program supports batch conversion and advanced image processing. In addition to viewing images, this application can also work as a simple multimedia player.
IrfanView comes with basic editing features, so you can crop or rotate your images, draw lines, circles, and arrows on them.
This photo viewer supports Adobe Photoshop Filters and it comes with a wide range of effects such as Blur, Sharpen, etc. In addition to photo viewing, IrfanView comes with a screen-capturing feature which you can use to create screenshots.
Another feature that we would like to mention is the ability to save your slideshows in EXE or SCR format in order to share them easily with others.
Unlike other tools, IrfanView doesn’t make changes to your registry without your permission, and if you wish to enhance the functionality of this tool, you can do so by using many available plug-ins.
Pictomio Image Management works as a photo viewer/image organizer, and like many other tools on our list, it allows you to create and view slideshows.
This tool allows you to manage both pictures and videos, and with the EXIF editor included, you can easily edit and save the metadata of your images.
Thanks to the advanced Library feature, you can easily sort your pictures by date taken, camera, or any other EXIF value.
Pictomio Image Management might not have all the advanced features of other tools on our list, but it makes up for its visually appealing UI.
One of the features that sets it apart from other photo viewers is the visually engaging 3D Carousel and straightforward drag-and-drop slideshow editor.
The APNG or animated png format provides reduced file sizes, richer color depth, 24-bit transparency, and compatibility for browser support APNG, with a static first frame fallback for those that don’t.
GIF and APNG are lossless, but APNG is smaller and of higher quality. Unfortunately, this format is mainly unsupported. However, this may change in the future.
Most popular browsers, such as Chrome and Firefox, support this format. You may need extensions to open APNG files from your computer via browsers.
With that explained, let us get back to the question: What are the top 5 browsers that support APNG?
Do browsers support APNG?
Most browsers natively allow viewing APNG images on webpages.
To open a file with this format, right-click any APNG file, select Open with, and then Choose another app. Choose Chrome and tick the box that says Always use this app to open *.APNG files.
What are the best browsers that support APNG?
Opera – Offers speed, privacy, and user experience
Opera was one of the best browsers in 2020 and is keeping pace. No other browser offers the same combination of speed, privacy, and user experience.
Considering the Animated PNG (APNG) options, you should know that the functionality has been fully supported since Opera 75.
Additional features:
Social Media Side Bar
Snapshot Tools
Ad Blockers and Protective Measures
Opera
View APNG formats with no errors using this reliable and secure browser!
Firefox – One of the earliest browsers to support APNG
Firefox was one of the first browsers to identify the necessity for APNG support, and the compatibility capabilities have been included in the software from the 3.6 version.
It also has a sizable development community and offers a variety of developer tools and assistance.
Since Chrome 59, the browser has supported APNG files. The developers were the first to disclose Chrome support for APNG.
They also underlined the need for alternative file types, which Google welcomed. Google added support for APNG and other file formats to the browser in version 59.
Microsoft Edge Dev tweeted in 2015: We have no plans to add any other image formats in Microsoft Edge at this time. The post received negative feedback from people, and they were dismayed to learn that they would not add APNG support.
However, the 79th version of the app included support for APNG files, and you can now use Edge to interact with this file type.
Safari is a good choice for working with APNG files. Since version 8, it has supported APNG files. It has a good appearance, typical surfing capabilities, and useful toolbar functionality.
If you want a clean web browser that allows you to navigate across tabs seamlessly, choose Apple Safari.
APNG files were designed to be viewed on the web rather than stored. You may save them as GIF files, which will be animated if your photo viewer application supports GIFs.
EZGIF is a fantastic website that provides free conversions. You put the APNG file address into the relevant field, and the website will convert it to GIF for you to save.
Apple made the APNG format the preferred format for animated stickers in iOS 10 iMessage applications in 2016.
This was the first step toward PNG file extension widespread recognition.
Following this, Chromium browsers were convinced that users required APNG browser support since more people would be utilizing this file type.
As a result, most browsers now accept APNG without needing third-party plugins or other apps.
Keeping your documents safe is important, but what if you forget your password? If that happens, you’ll need to use the password recovery tool for Microsoft Word.
Microsoft Word has a Document Protect feature that allows you to protect your document or restrict access with read-only and digital signature options.
So, you wrote an exceptional piece of article or story and proceeded to secure it with a super-secure password. However, it happens that, by trying to make the password extra secure, you forget it.
Microsoft Word doesn’t have any built-in feature that can help you to recover the password. Fortunately, there are third-party programs that can remove the password from a protected Word document.
In this article, we take a look at the best software to recover Microsoft Word passwords in no time.
Can you open a Word document if you forgot the password?
No, if you forget the password you won’t be able to open the Word document. However, there are tools that can help you with that.
In today’s guide, we’re going to take a look at some of the best software to recover Word passwords, so be sure to keep on reading.
What’s the best software to recover your Word password?
Stellar Password Recovery is one of the best software in the industry when it comes to password recovery for Microsoft Word.
This tool is compatible with almost all Windows OS versions, starting with Windows 2003 up to Windows 10. It can also be used on Windows Server OS 2000 up to 2008.
The password finder feature of this software includes Microsoft Office products such as Word. Thus, it is great for recovering important documents where you’ve lost the password.
Additionally, you can reset your Windows login password and all other user’s accounts with the Admin/User Password option. Basically, the password is set to blank and you can log in without the password.
Stellar Password Recovery
Recover your Word documents and Windows password, with one of the greatest software you can find.
Passware Kit Basic is a multi-purpose tool that can help you to recover passwords for over 50+ file types including MS Excel, MS Word, Windows administrators, email accounts, and websites.
The tool is perfect if you need to unlock password-protected Word 2010 documents or any other file type.
It uses different types of attack modes to recover the forgotten password for your word document. You can begin with the most common Dictionary attack and then proceed to Xieve, Brute-force, and Known and Previous Password and their combinations.
To recover the Windows administrator password, Password Kit Basic needs to be installed on a bootable flash drive or CD using the ISO. You can read more about creating a bootable flash drive and multiboot flash drive here.
Once the password is recovered, the software will save them in a separate file to be used again to open locked documents.
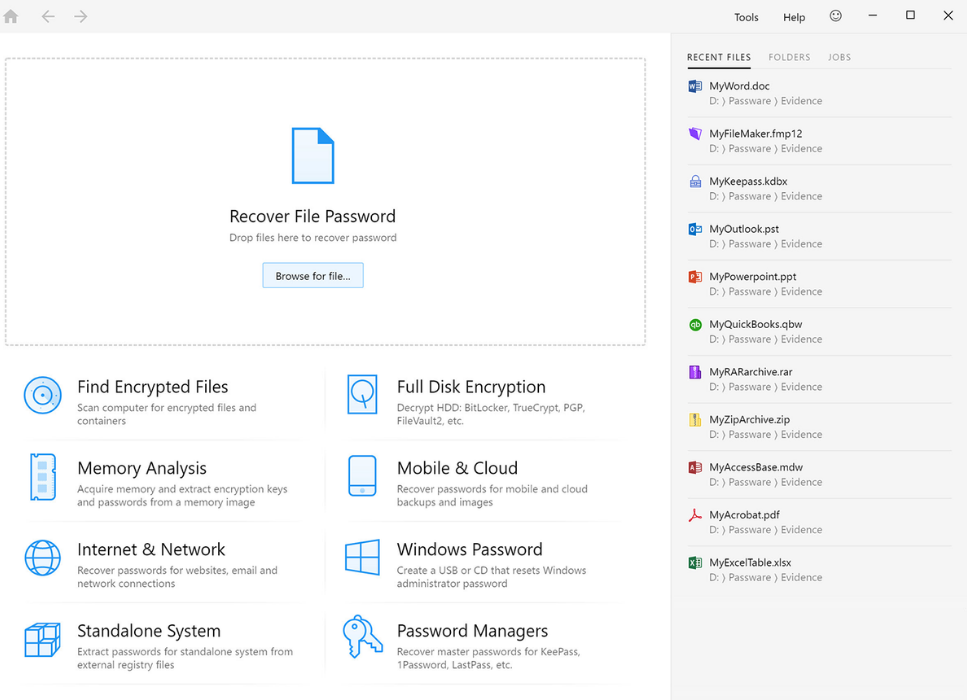
The user interface is simple and easy to use. Once installed, launch the Passware Kit Basic and click on Recover File Password option. Now you need to select the Word document that is password locked.
There are three modes to recover the password that includes Run Wizard, User Predefined Settings, and Advanced Customized Settings.
Begin with User Predefined settings recovery mode option. The tool will start the recovery process and will show the result in a few minutes depending on the complexity of the password.
Passware Windows Kit Basic is an effective solution and can recover from administrator to encrypted file passwords with some user help.
Passware Windows Kit
Recover your Word document password with one of the best password recovery tools.
PassFab for Microsoft Office is an excellent solution that helps you with Microsoft Word password recovery.
The tool will recover your password without losing, damaging, or modifying your data. As per the attack methods, there are three available to ensure complete Office document deciphering.
Based on your own access, you can select one of the right attack types. The Dictionary attack will find the password from frequently-used ones. If you have some clues about the password you can use the Brute-force with Mask Attack option.
Furthermore, if none of the above types helps you, there is Brute-force Attack method that will try all possible password combinations.
PassFab Toolkit
Manage your documents safely using passwords without the forgetting issue. Check out PassFab for more.
The Office Password Rescuer from IseePassword is another option you can consider. It is a great tool that can help you with password recovery in Microsoft Word.
However, as of now, it is only compatible with MS office 2.0 to 2015. So, if you are on a newer version of Office, you probably have a hard time cracking the password with this tool.
The password cracking method is identical to other recovery programs as it comes with 3 Attack modes Brute-force, dictionary, Mask, and Smart attack. The user interface is not the most modern we have seen but it is simple and gets the job done.
To decrypt the Word document, launch the program. Click on the Open button and select the encrypted Word document. You can customize the attack with multiple options like changing length, range, dictionary, etc. Click on the Start button to proceed.
The process may take some time depending on the complexity of the password. The recovery password is displayed on the result page.
This software supports multiple Office suites and not just the latest version of Microsoft Office. This means that it works with documents created in OpenOffice or LibreOffice.
Compatibility with older versions is also there, and you can work with Word 97-2003 files. The application uses three different methods including brute force, mask, and dictionary.
As such, it’s a great tool if you need to break Word file passwords. The software offers great performance and it uses GPU technology to recover passwords.
There’s also a micro language for adding password mutation rules to dictionary attacks. As for supported apps, you can use this software with Access, Excel, and PowerPoint files, so it’s worth checking out.
Another interesting program to recover MS Word document passwords is Word Password Recovery Lastic. It works with Word 97 to 2013 formats.
The tool can automatically find all the encrypted documents in your local hard drive and also enables you to copy the recovered password to the clipboard.
It has a very basic user interface. Click the Open button to load the Word document, or you can let the program search for it automatically. Next, click on the Crack button to begin the recovery process.
The process does take some time and if found the password is displayed on the screen.
Word Password Recovery Lastic is a paid program and does not offer too many features to crack the password.
Unlocking files that are encrypted with the latest AES-128 key can be hard to crack for free password recovery programs. However, the premium tools are usually compatible with the latest version of Microsoft Word and you have better chances of recovering the password.
Although it is important for you to protect your documents due to their confidentiality or plagiarism issues, it is advised to use a password manager to store all of your account passwords in a single place.
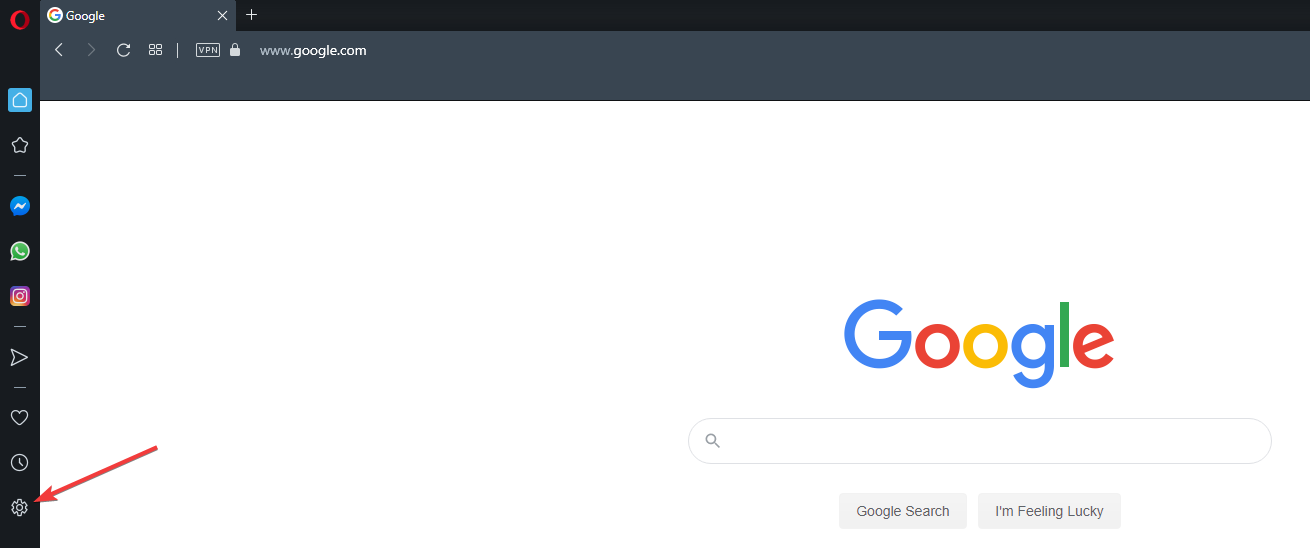
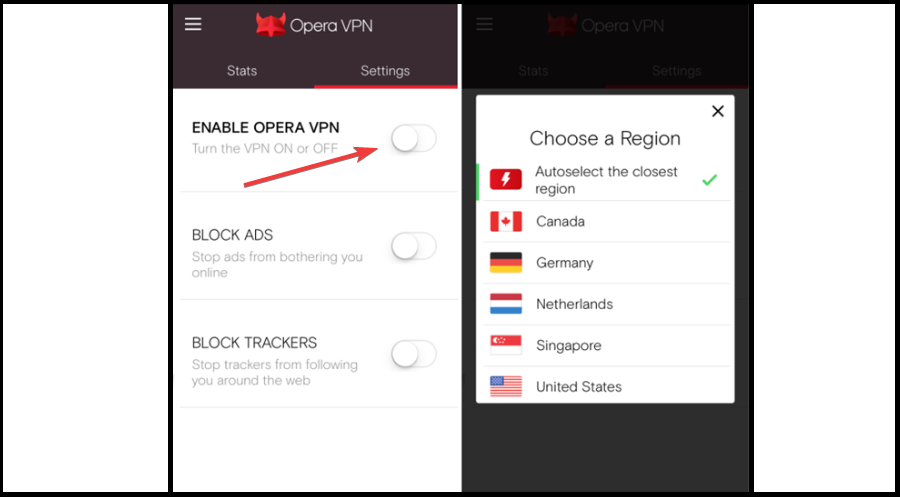
Press the Settings button on the left of the screen.
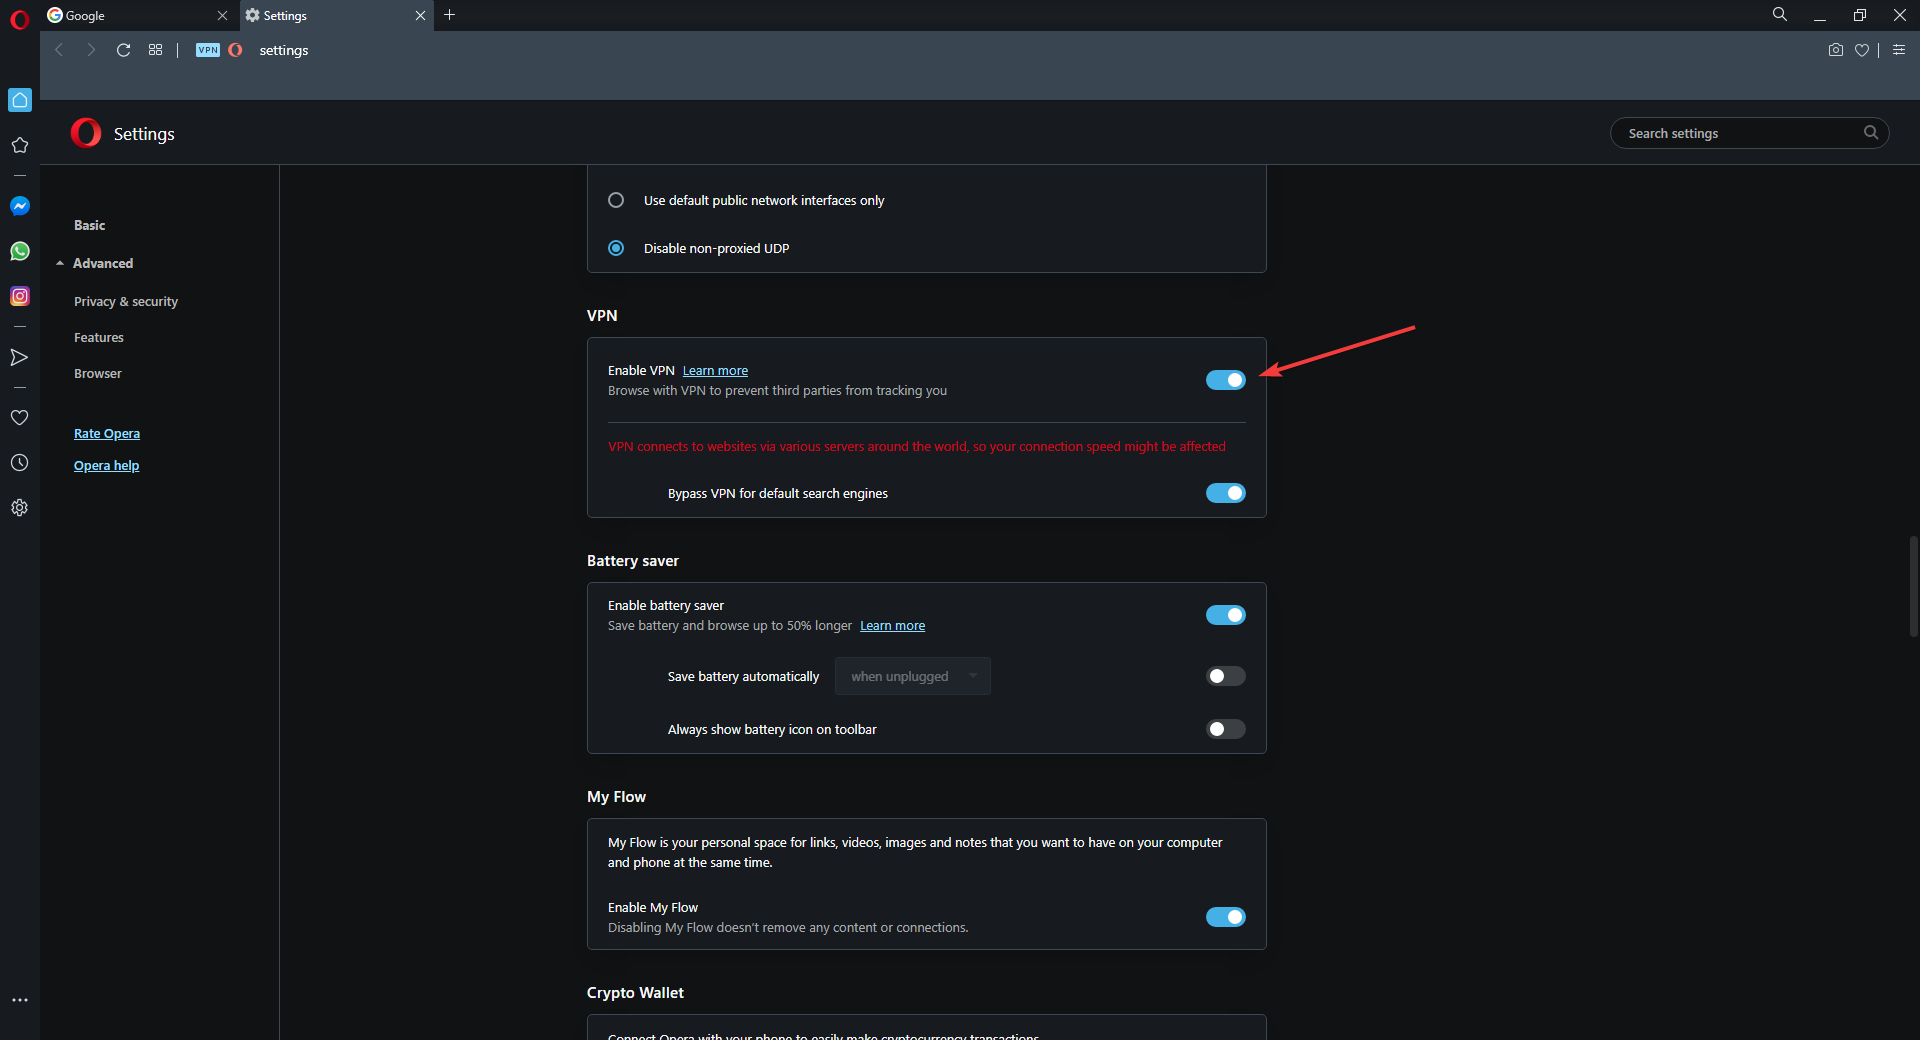
On the Opera Settings page, scroll down until you find VPN settings.
Move the slider next to Enable VPN to activate it.
Restart your browser.
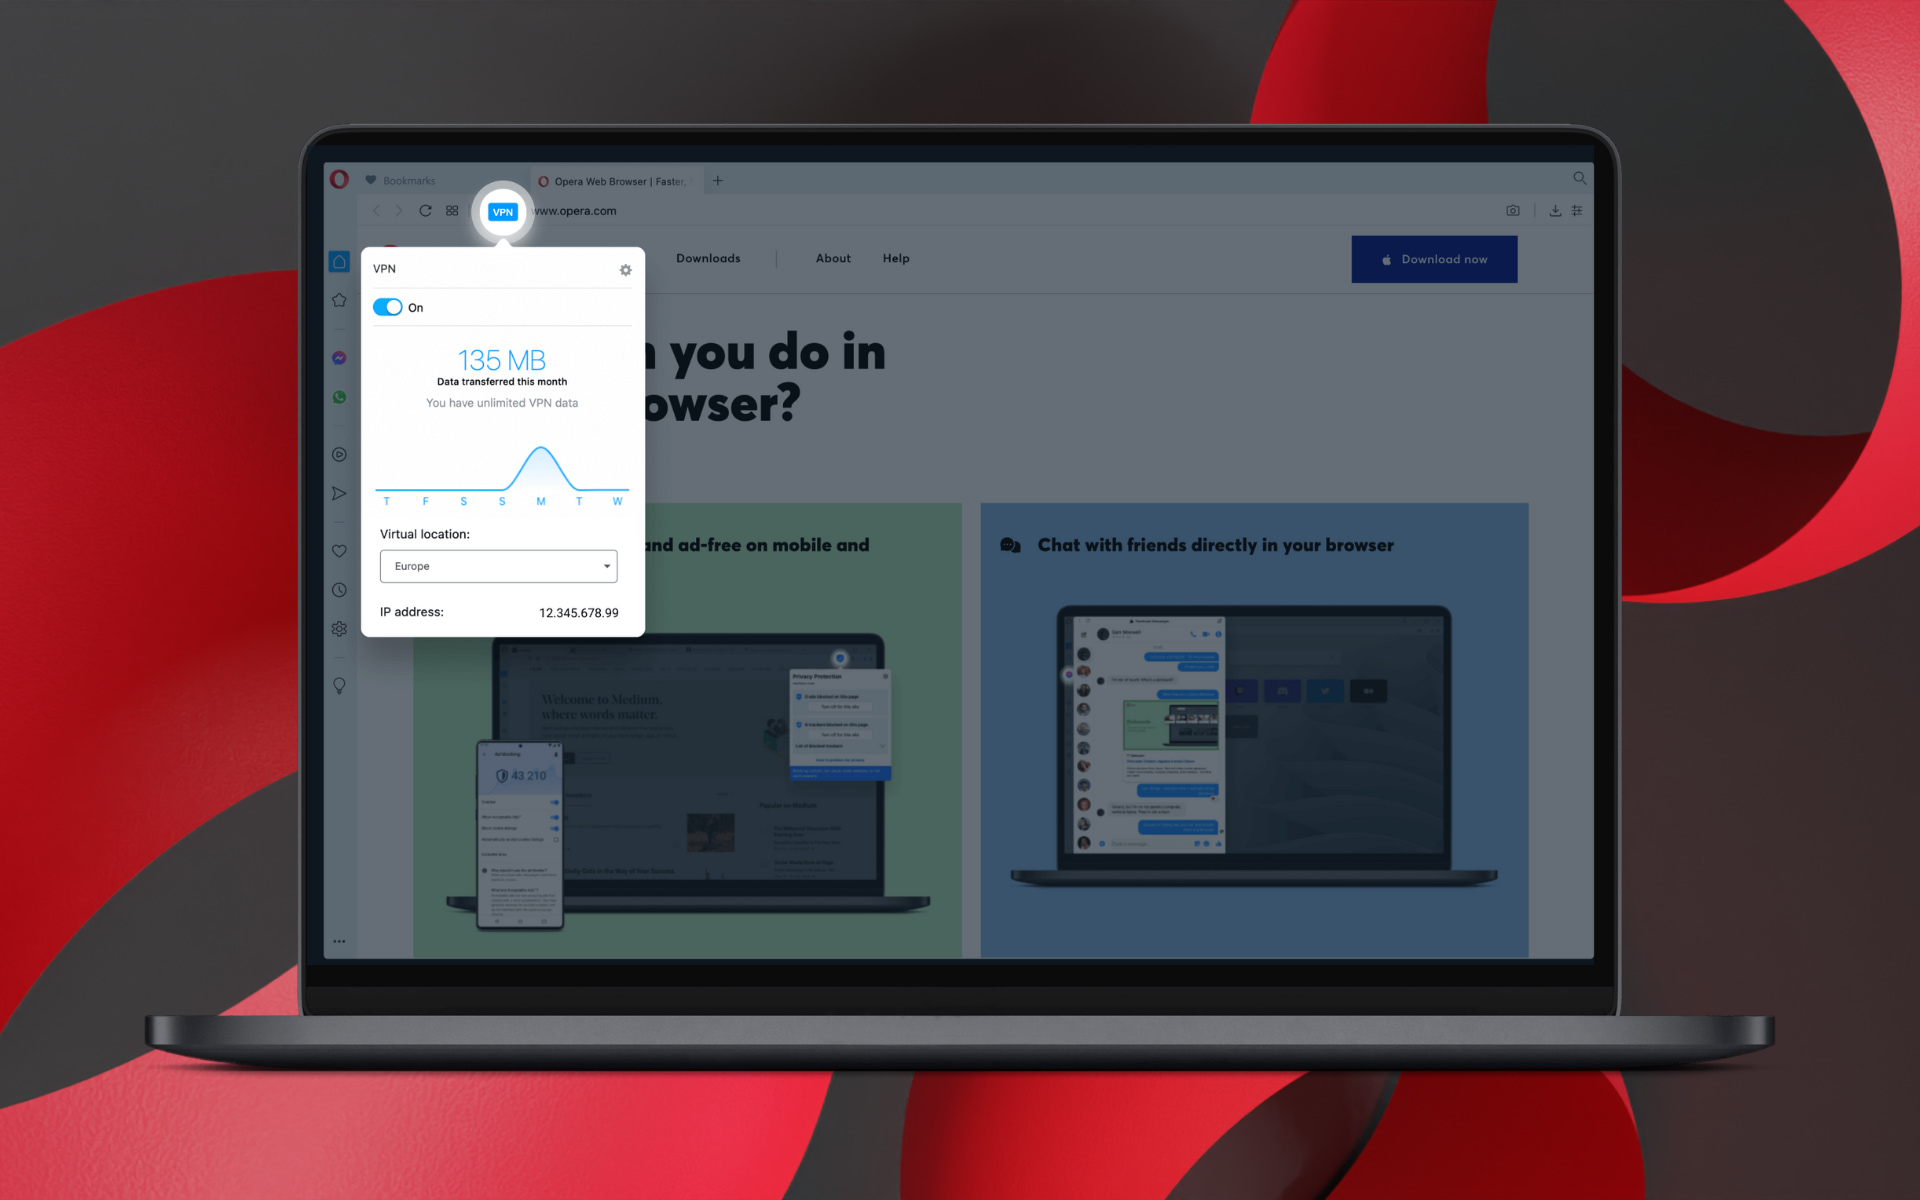
Now that you’ve performed these changes, you should be able to see an extra utility button called VPN appear next to the URL search box whenever you open a new tab.
Whenever you want to access an otherwise restricted location, simply toggle on that button and select a location:
Optimal location
Europe
Americas
Asia
After choosing the continent you can go ahead and be more specific with your actual location.
Once you’re done, just refresh the page. You should be able to browse using the VPN’s IP and bypass any potential blocks or geo-restrictions.
Remember that you have unlimited traffic when using Opera’s VPN, so don’t worry about the traffic log that it features, it is just there to inform you how much data was used, nothing else.
Access Opera’s in-app settings by tapping the Opera icon located in the bottom-right corner.
From the menu that pops up, select Settings.
Toggle the VPN on and off by tapping the VPN slider.
3. How to use Opera VPN on Android?
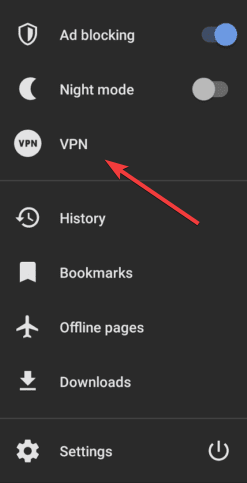
Access Opera’s in-app settings by tapping the Opera icon located in the bottom-right corner.
From the menu that pops up, select Settings.
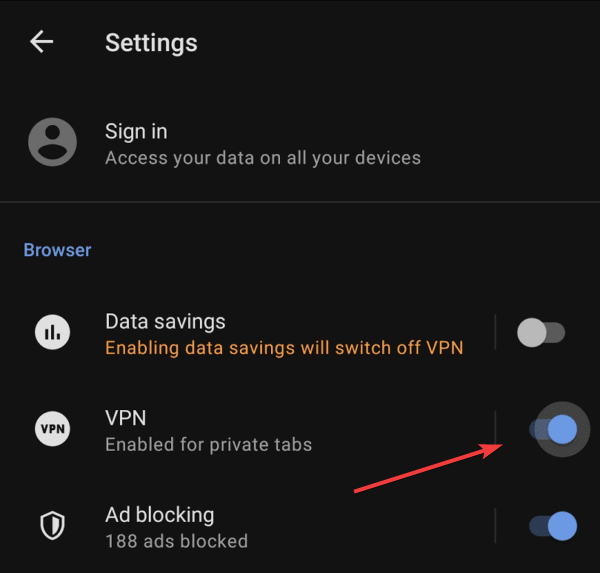
Select VPN.
Turn it on by tapping the VPN slider.
Does Opera VPN hide my IP address?
Yes Opera VPN is a highly secure proxy service that actually spoofs your location by hiding your IP address. In our experience, it’s better than most free proxies, thanks to the fact that it also uses encryption.
To put it to the test, we connected to a European server and ran an IP test. Here are the results:
As you can see, the VPN successfully hid our IP address and replaced it with one from the selected location.
Is Opera VPN free?
Yes, Opera’s built-in VPN is completely free. However, the company also offers a paid VPN as a standalone app. The paid version features enhanced encryption and provides access to more servers. It also tends to offer faster speeds, particularly during peak usage hours.
Opera’s built-in VPN is one of the best free options out there. Now you should be able to know how to use it on your device for better data privacy and fewer online restrictions.
Let us know what you think about this VPN and don’t hesitate to ask if you have any questions about it.
Like most popular browsers, Microsoft Edge also comes with built-in PDF tools that allow Windows users to access PDF files without using third-party software. But, several users reported receiving the Something’s keeping this PDF from opening error.
You can find a variety of reports on the matter online.
I can’t figure out how to get it to force this PDF to open. I have to use a database system that was built for use with IE9. To pull some of the data, I have to have this database generate a PDF report. When I tell the database to generate that report using Microsoft Edge, it gives me the error message I have used as a title here.
If you’re stuck with a severe case of PDF not opening in Edge, here’s all you need to know about the problem and the most effective solutions for it.
Why can’t I open a PDF in Microsoft Edge?
A few years ago, several users reported encountering the Something’s keeping this PDF from opening error when opening a file with an apostrophe (‘) in its name. But, it was fixed in the subsequent version of Edge.
Also, installed extensions are often found to conflict with the functioning of the browser and lead to Microsoft Edge PDF issues. Disabling or removing them did the trick for many.
Besides, corrupt browsing data or misconfigured Edge settings too can lead to the Something’s keeping this PDF from opening error.
Quick Tip:
If you’re tired of Microsoft Edge causing issues with opening PDF files, consider switching to Opera One. The browser has all the best traits: workspaces and tab islands that help you easily organize your work.
You can easily open PDFs with your Opera One browser and can also use the snapshot tool to save important bits and pieces of your documents. Moreover, you get free, VPN, adblock, and AI.
Opera One
Easily read your PDFs with this responsive and modern browser!
How do I fix Something’s keeping this pdf from opening in Edge?
1. Install Adobe Reader from the official source
Before blaming your browser for the Something’s keeping this PDF from opening on Edge error, remember that you need to download a reliable PDF tool.
Adobe Reader is a feature-reach PDF tool known for its comprehensive set of tools that let you easily edit PDFs, create and convert PDFs, annotate them, and more.
The software can convert and ready pretty much any type of document. It even has an advanced OCR feature that converts scans into editable text.
Adobe Acrobat Reader
Get the best PDF experience with Adobe’s fully-featured editing tools.
Launch Microsoft Edge and press Ctrl + Shift + Del to open the Clear browsing data tool.
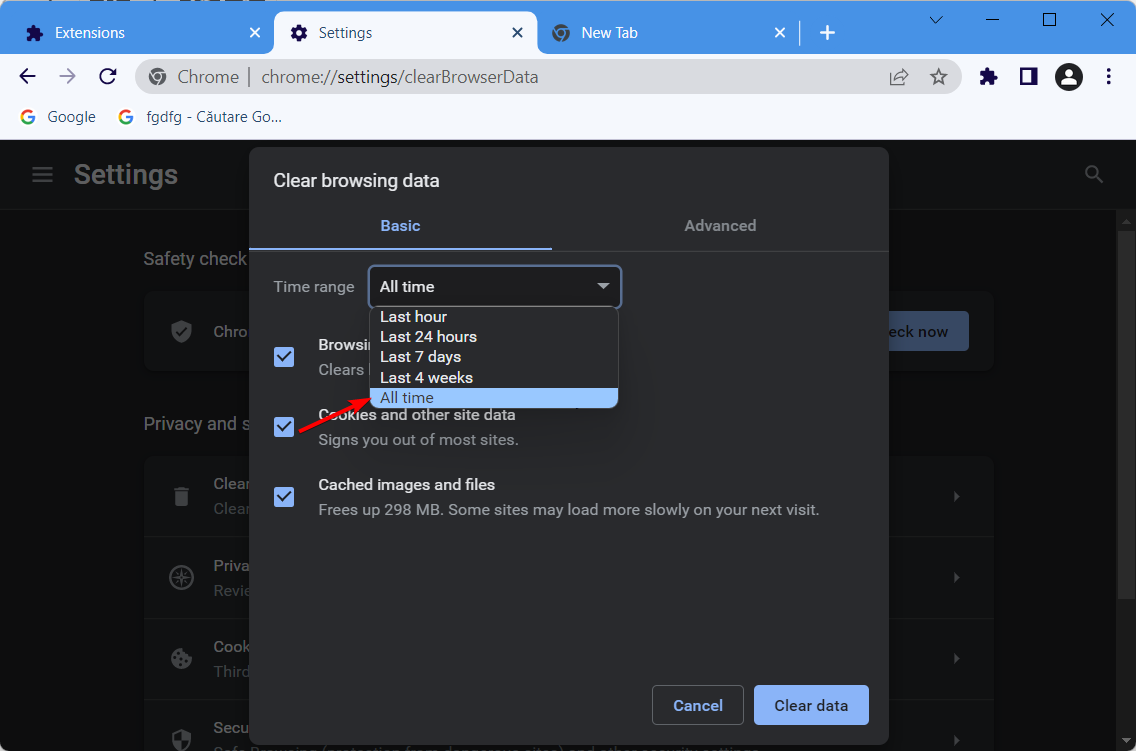
Select All time from the Time range dropdown menu.
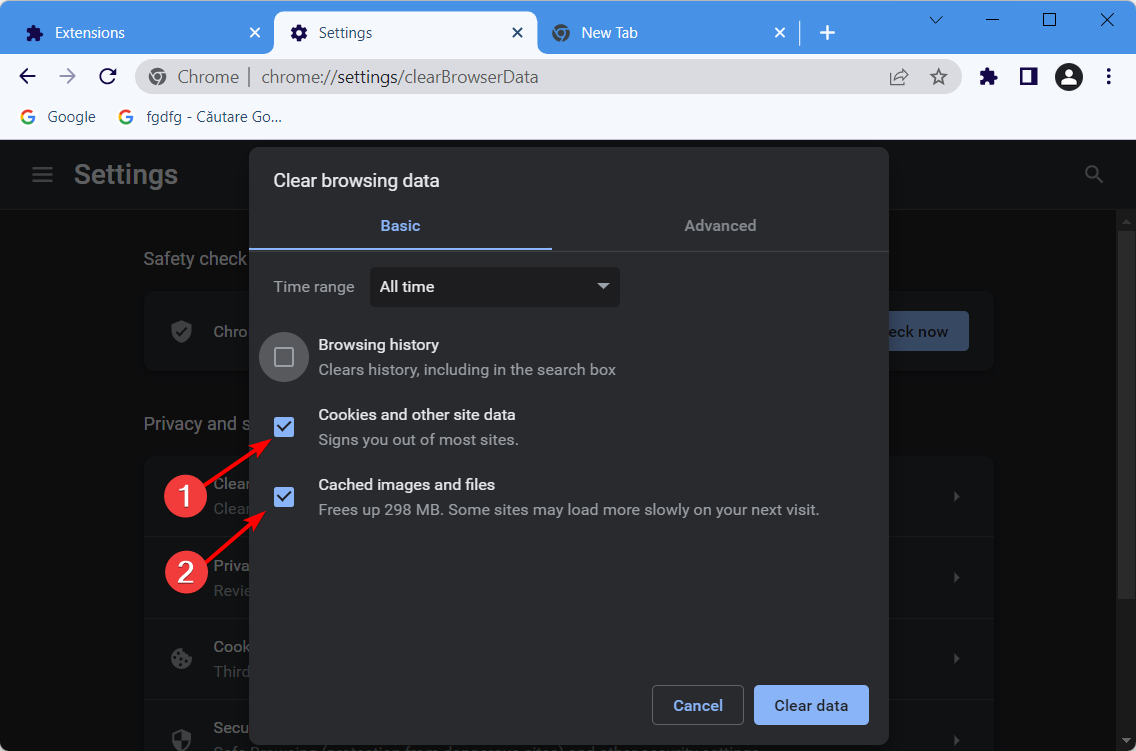
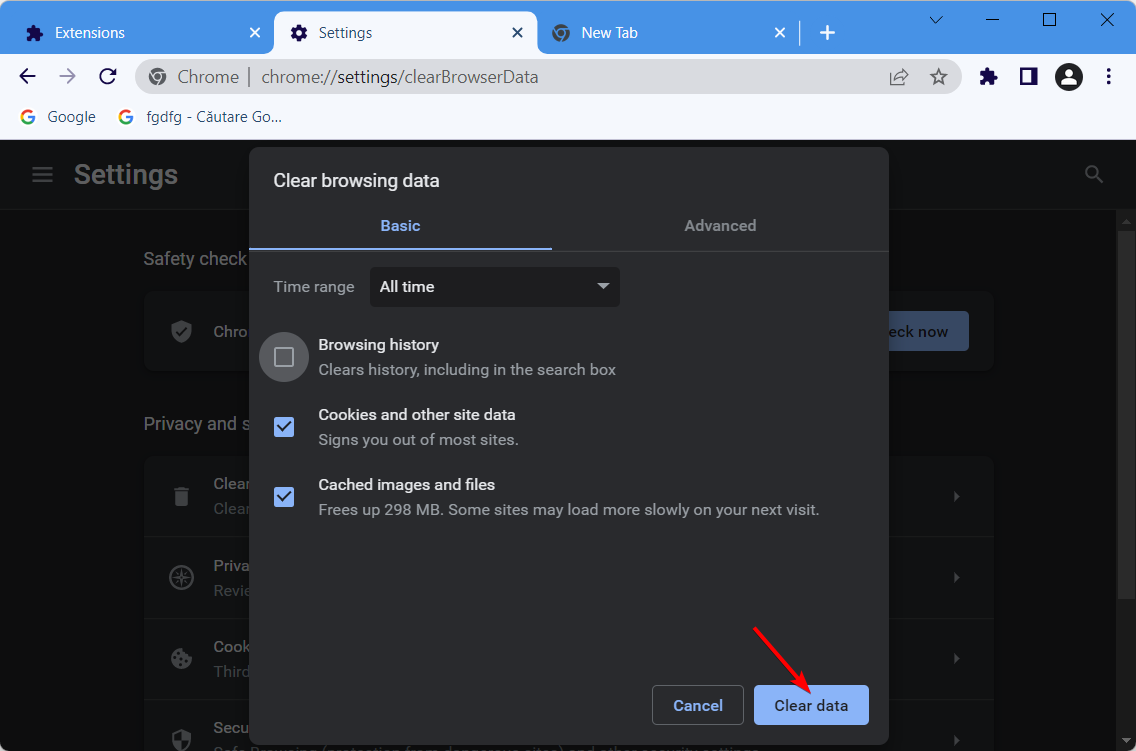
Now, select all the options here, and then click on the Clear data button.
You can use the above procedure to clear Microsoft’s Edge cache or give a try to a dedicated cookie cleaner tool for quick and accurate results.
Once done, check if the We can’t open this file. Something went wrong error with PDF on Edge is fixed.
3. Check for Windows Updates
Press Windows + I to launch Settings, and select Windows Update from the tabs on the left.
Click on Check for updates.
If an update is listed after the scan, click on Download & install to get it.
Once done installing the latest version of the OS, check if the Something’s keeping this PDF from opening error is fixed.
4. Activate UAC
Press Windows + S to launch the Search menu, enter Change user account control settings, and click on the relevant search result.
Now move the slider for Choose when to be notified about changes to your computer to the bottom, and click OK to save the changes.
Click Yes in the UAC prompt that appears.
Relaunch Microsoft Edge and try to open the PDF document. It should open without any error. In case you still see the Something’s keeping this PDF from opening error, head to the last method.
Press Windows + S to launch the Search menu, enter Terminal in the text field, right-click on the relevant search result, and select Run as administrator.
Click Yes in the UAC prompt.
In the PowerShell window, paste the following command and hit Enter: Get-AppXPackage -AllUsers -Name Microsoft.MicrosoftEdge | Foreach {Add-AppxPackage -DisableDevelopmentMode -Register “$($_.InstallLocation)AppXManifest.xml” -Verbose}
Close the Windows PowerShell window and relaunch Edge. This should fix things if the Edge PDF plugin is not working. Try to access the PDF document again, and it should open without throwing any errors.
There you go! These are some simple methods to fix the Something’s keeping this PDF from opening error. Also, find out what to do if PDFs are not opening in Chrome.
Which fix worked for you? Let us know in the comments section below.
Also known as High-Efficiency Video Coding or HEVC, H265 is a video compression standard that is a follow-up to H264. What’s special about H265 is that it offers high-quality video at a lower bit rate than the lower standard.
With the advent of 4K video, there needed to be a new standard that could more efficiently compress video while keeping the high quality. From that need rose H265.
On the surface, a new encoding standard sounds really good and it should be widespread but unfortunately, it really isn’t. You only really see H265 on 4K Blu-Ray where it’s the main codec for those devices.
It’s possible to play it on your PC, but you’ll need a special playback app like VLC.
Is H265 supported in all browsers?
H265 is not supported by all browsers. In fact, the majority of browsers don’t support the compression standard and you’d be hard pressed to find one that actually does.
If you look through Mozilla’s web video codec guide, it states that [Firefox] will not support HEVC while it is encumbered by patents. It’s possible that someday Firefox will support the standard, but don’t hold your breath.
Some video platforms do support H265. YouTube is one of those websites. If you look at the supported file formats on YouTube Help, HEVC (H265) is listed there alongside WebM, ProRes, and MP4 files.
That said, there are a few browsers that do support the standard.
Starting off the list is Microsoft Edge, but there are some caveats to this support. You need to have a specific version of Edge to watch H265 video.
Currently, the latest version is Edge 103 and H265 support is only available on devices with the right hardware. The same goes for older versions of Edge from 2020 and 2015: the support is only available on certain hardware.
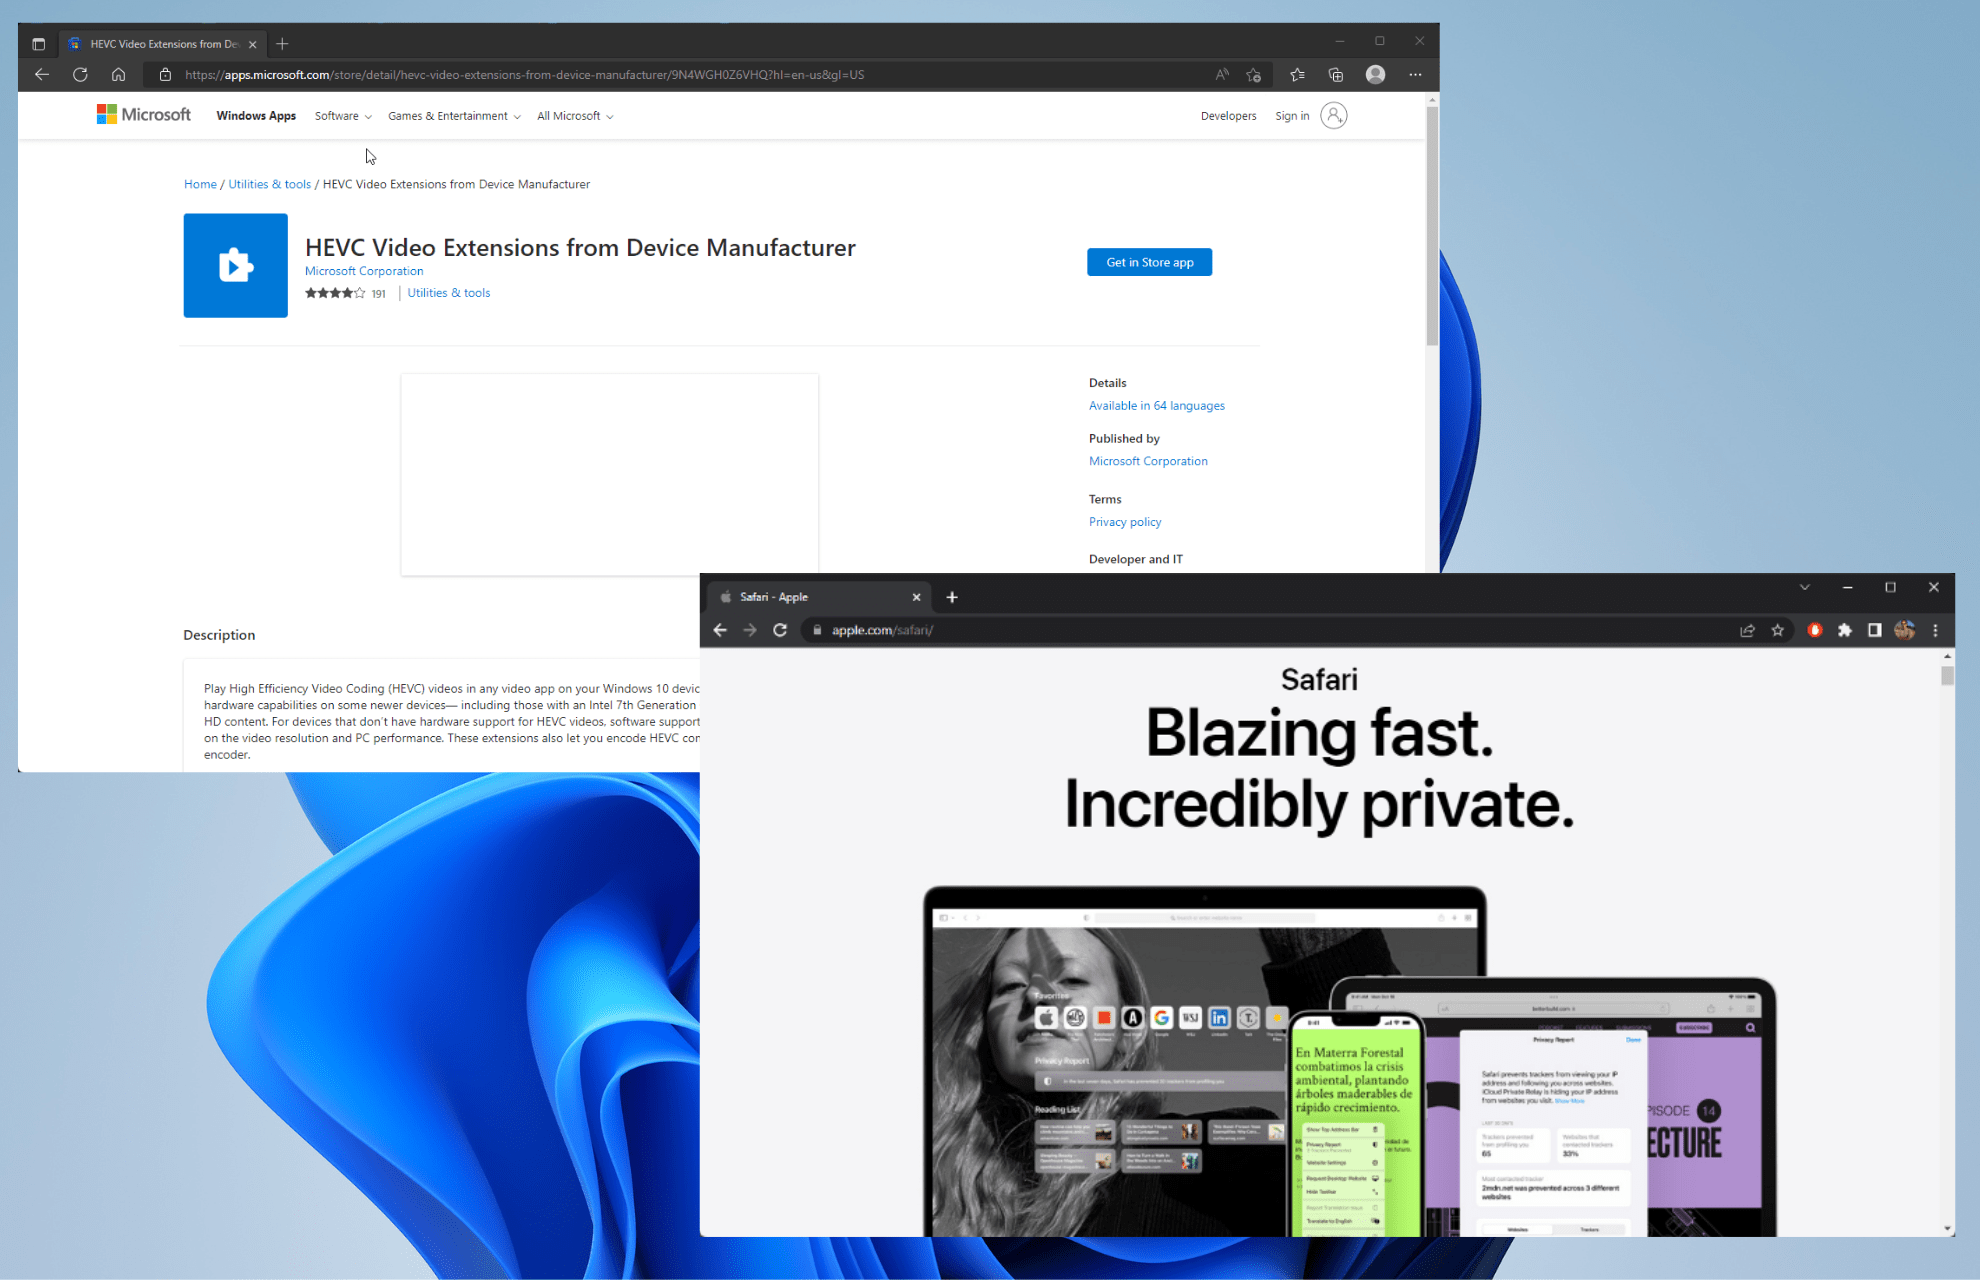
On Windows 10, you can download the HEVC Video Extension to your Edge browser to watch content in the H265 format. But be careful which extension you download because Microsoft has two.
They’re the same but are available in different countries. You’ll have to pay for the US one, but the international version is totally free. Save your money and get the free version.
Internet Explorer – Ideal for those who still prefer this browser
Yes, we know that Internet Explorer has been discontinued and will no longer see official support, but hear us out. The fact is that there are still many people around the world who strongly prefer to use Internet Explorer.
In fact, it’s a bit of a crisis in certain nations like Japan which still heavily rely on using Internet Explorer and the advent of losing support. Regardless of business problems, the latest version of Internet Explorer has partial support for H265.
Like Edge prior, it’s only available on certain hardware with the right support. Looking through old Microsoft forum posts, an employee confirms that hardware like the Nvidia GTX 960 graphics card.
That is out of date GPU, so if you have something more recent, there’s a good chance it supports H265.
Now we have Apple’s Safari browser which happens to be the only desktop browser that fully supports the H265 standard. The full system support first started on Safari 13 back in 2019.
Before that, support was similar to Microsoft Edge; only available on supporting hardware. Now you will need to have a Mac computer that runs on macOS High Sierra which is the fourteenth major release of the operating system.
Macs were and still are ahead of their time in terms of H265 support. Because of this, Safari’s video playback is notably high quality. Support will continue in Safari 16 whenever that releases. Currently, it’s in beta which you can try out.
As for the final entry, we have the only mobile browser that supports the H265 standard with Safari on iOS. There are reports on the internet that claim Google Chrome on iOS supports H265 but we were unable to verify if this is true or not.
But looking at Google forum posts, it doesn’t look like Chrome will support it in the near future. Regardless of whether or not Chrome can display the standard, Safari has been able to do that for much longer than the desktop browser.
Support goes as far back as later 2017 on iOS 11 and continues to this day. The highly anticipated iOS 16 is slated to continue the trend. Fortunately, you don’t need any special features or do anything to watch H265 videos.
If the website can run the standard, it’ll display natively on Safari.
Both of the standards are good in their own way. It ultimately comes down to what’s more important: quality or quantity. H265 is the superior of the two in terms of quality thanks to its better compression tech.
You can get higher-quality videos with a smaller filer size than with H264. However, H265 isn’t very widespread as evidenced for the small number of browsers that support it.
H264 is better because of how widespread it is. Every single browser supports this particular standard even if the quality isn’t as good. So if there has to be a winner, it’s H264 solely because of the support it has.
Feel free to comment below if you have any questions on H265 or other video standards. Also, leave comments about guides you’d like to see or information on other Windows features.
Tabletop games have always been popular, but with the development of technology, many tabletop games are moving online.
In today’s article, we’re going to show you the best virtual tabletop services that you can use to play tabletop games with your friends.
Is virtual tabletop free?
Roll 20 is a quick and easy way to generate characters, roll dice, and manage any kind of game. It is completely free to use and can be accessed through any web browser. Playing tabletop roleplaying games online on Roll20 is by far the most popular way to do it.
Astral is yet another free virtual tabletop service that has built-in support for well-known gaming systems like Pathfinder, Call of Cthulhu, and Vampire: The Masquerade, amongst a great many more.
So yes, there are free virtual tabletop games that you can play, as well as paid ones.
Quick Tip:
When it comes to browser games, some search engines handle them better than others. If you want a tested solution for this type of gaming, be sure to try Opera GX.
Opera GX allows you to allocate your system resources and easily close tabs that are slowing down your PC. Also, the browser has full Twitch and Discord integration, which is perfect for gamers.
Opera GX
Play virtual tabletop games online without any slowdowns using the Opera GX gaming browser.
If you’re a fan of tabletop games, you’ve most likely heard about Roll20. This service allows you to play Dungeons & Dragons, Pathfinder, Call of Cthulhu, and other games with your friends. It is the best online tabletop RPG platform that you can use.
The service runs completely in your browser, and you just need to create a free account and join a game, or you can create your own game and invite your friends.
Moreover, it is quite customizable allowing you to create your artwork or purchase it from the Marketplace. There are also character sheets available and there’s even scripting support.
Overall, Roll20 is one of the most popular virtual tabletops on the market, with the best virtual tabletop games and if you haven’t tried it already, you should do so.
Other great features include that it can run in any web browser, is available for iPad and Android, and has many popular tabletop games available.
Astral is another virtual tabletop service that has built-in support for popular game systems such as Pathfinder, Call of Cthulhu, Vampire The Masquerade, and many others. It is another best virtual tabletop option for Pathfinder fans.
The service is available in your browser, and you can easily create your adventures from scratch. To make this process faster, the service offers over 16,000 assets to choose from.
Of course, the service is available in your browser, and you can easily access it from any browser. There are also tools available for your phone, tablet, or desktop computer.
Astral is a solid virtual tabletop service, and you can use it for free in any web browser, so there’s no reason not to try it out.
Some key features you may like include the built-in support for various gaming systems, over 16,000 assets that you can use, and many more, making it another best virtual tabletop software.
Foundry Virtual Tabletop is a virtual tabletop service that allows you to create your adventures, and play them with others through the web browser. Moreover, it is the best virtual tabletop for D&D players.
Unlike other entries on the list, Foundry Virtual Tabletop requires you to purchase a one-time license, but once you do, you own the application and all your created content.
The service relies on the latest modern web technology, and there’s a large community of developers available, as well as support for home brewing.
Foundry Virtual Tabletop has its advantages, but if you’re not a developer, then this service might not be for you. This smart tool uses modern web technologies and you own all created content.
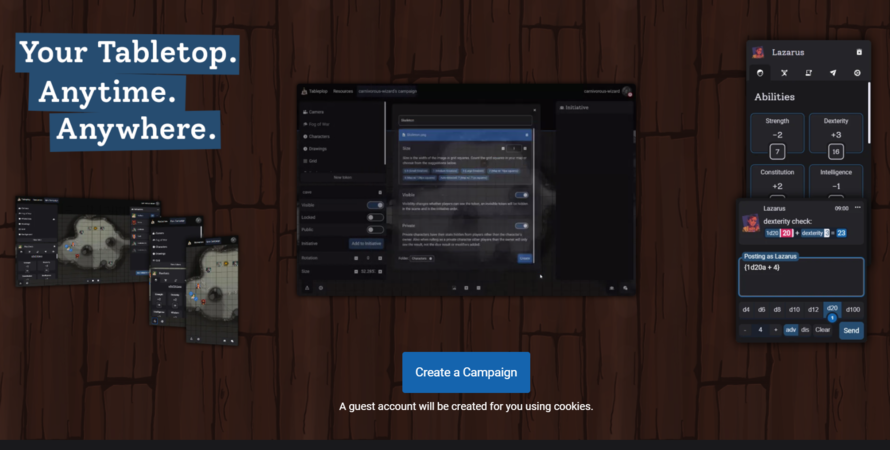
Another interesting virtual tabletop service is Tableplop. Just like other entries on our list, this is a browser-based virtual tabletop that allows you to create your adventures.
The service can work in any browser, but you can also access it through your phone or tablet. Tableplop offers its own tools and built-in tokens, but you can also upload your artwork if you want.
We have to mention that Tableplop is free and still under development, but it doesn’t come with ads or any other limitations except for 100MB of storage space for uploaded art.
Tableplop looks promising, and although it might not be as extensive as our previous entries, it’s still worth checking out.
Other great features include that is browser-based, available on phones and tablets, and has no annoying ads.
If you’re looking for a virtual tabletop service, then Let’s Role might be just what you need. The service is browser-based and free, so you can use it without any restrictions.
While there are no locked features, certain cosmetics are locked and you can purchase them with microtransactions, but that doesn’t affect the core features in any way.
The interface is simple to use, and you can easily create your adventures from scratch and enjoy them with your friends.
Let’s Role is designed for beginners and professionals alike, so if you’re looking for a virtual tabletop, you might want to try it out.
Among the key features is that this app is browser-based, incorporates a simple-to-use interface, and is good for both beginners and older players.
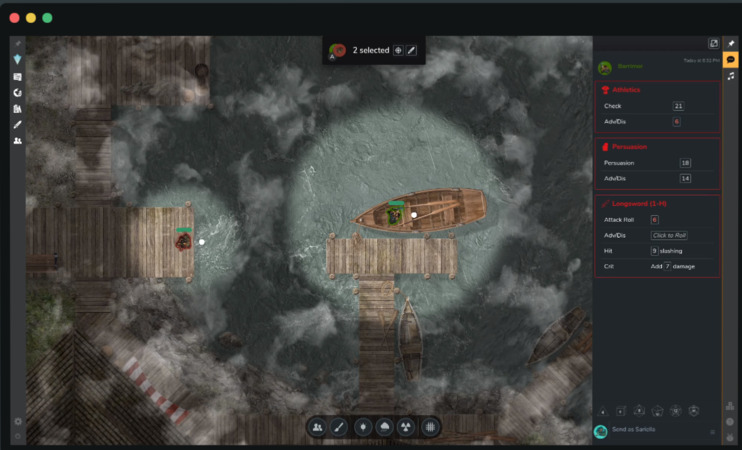
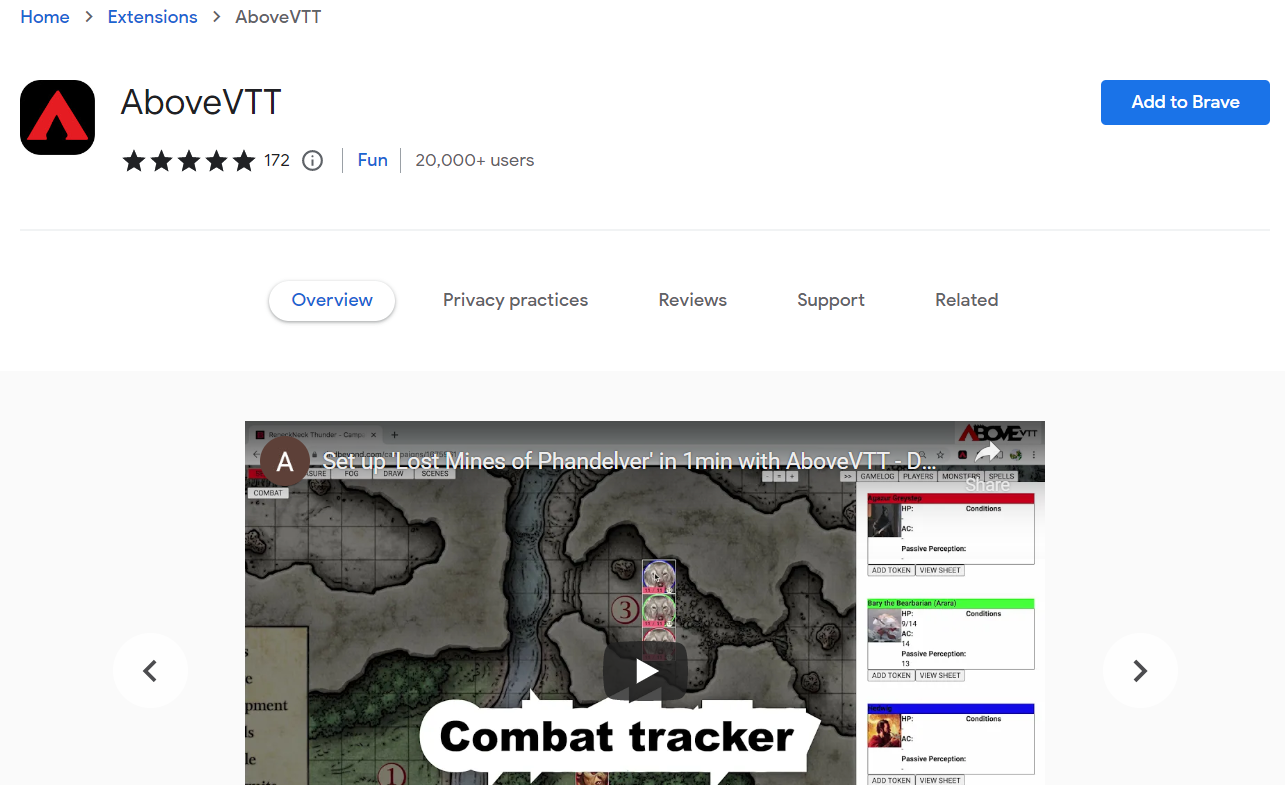
AboveVTT is an add-on for Google Chrome that can transform D&D Beyond into a digital tabletop. When the extension has been successfully installed on your browser, it will provide virtual tabletop facilities by utilizing the DnDBeyond.com website.
It provides over 500 different battle maps drawn out by Dice Grimorium and Neutral Party, in addition to hundreds of animated VIDEO maps.
Finding the best virtual tabletop service isn’t an easy task, but we hope that our guide has helped you pick the right service for your future quests.
We’d like to hear more from you on this subject so drop us a comment in the dedicated section below.
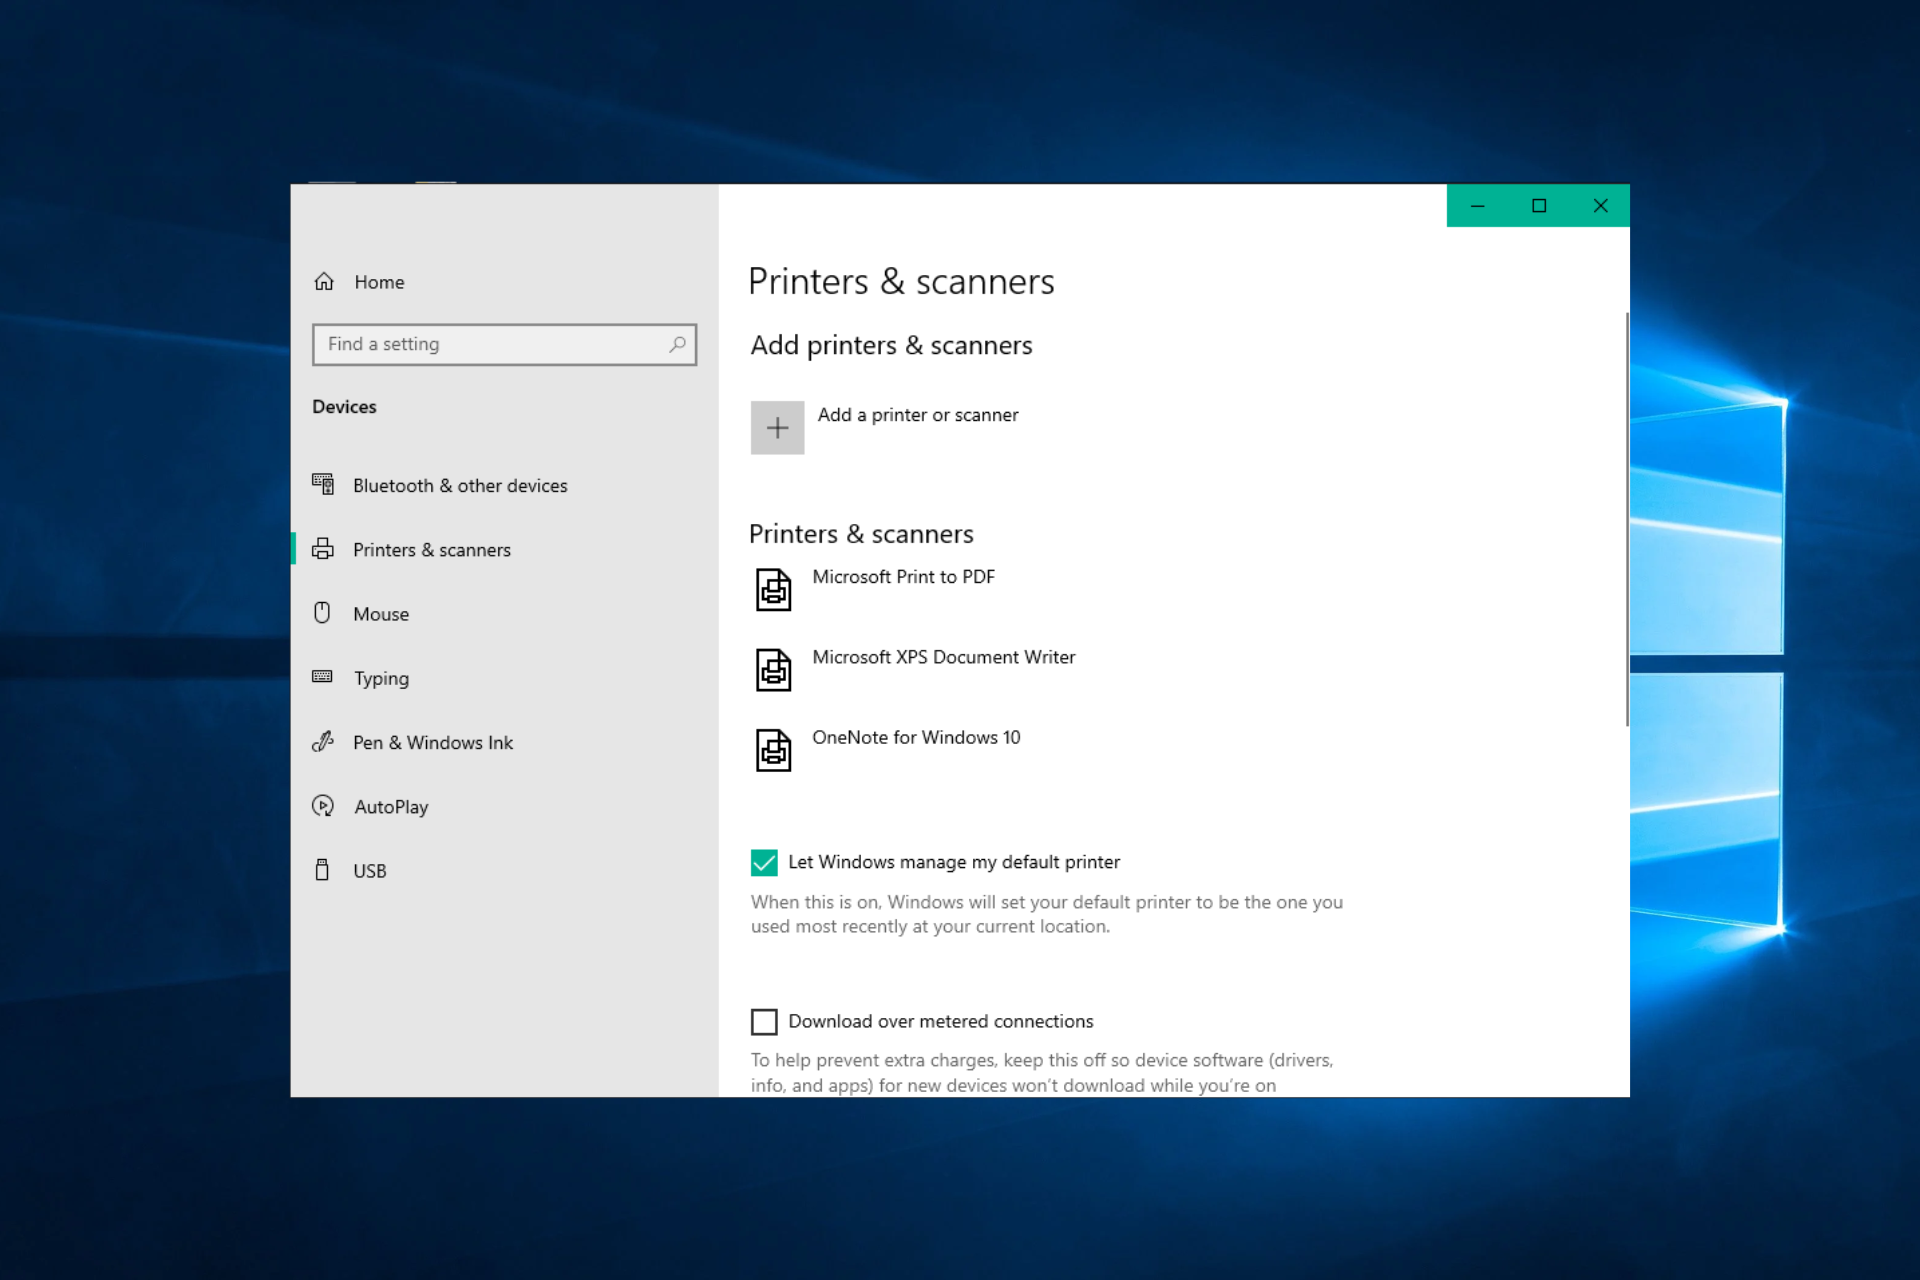
Some Windows users have encountered The printer requires your attention error when printing in Windows 10. The error dialog window states: Printer requires your attention. Go to desktop to take care of it.
If you are also troubled by this issue, here are a couple of troubleshooting tips to help you resolve the printer attention error in Windows 10.
Why does my printer always say attention is required?
When you notice the message that reads The printer requires your attention, you should understand several factors may trigger it.
The following are the most common causes:
Paper jams – Once a paper is stuck, the printer cannot continue functioning and will display the attention message.
Low toner or ink – Here is another reason the printer may call your attention. It does this because subsequent prints may appear faded or empty.
Connectivity issues – In the case of a network printer, it may not be connected to the network; in other cases, it may not be connected to your PC.
Driver – You may be working with corrupt or outdated drivers, and this will trigger the message.
Here are some common problems that users reported along with The printer requires your attention:
Epson printer attention required – This issue can affect almost any printer brand, and most of our solutions are universal, so they will work with nearly any printer brand.
User intervention required printer Windows 10 – This message is common on Windows 10; if you encounter it, ensure your drivers are up to date.
Attention required printer Lexmark – This issue can appear with Lexmark printers, and if you encounter this problem, you might want to try reinstalling your printer.
Printer needs user intervention – Another way to fix this problem is to check the ink levels on your printer. If the ink levels are low, replace the cartridges and check if that solves the problem.
HP printer attention required – This problem can occur with virtually any printer brand; however, most of our solutions are universal, meaning they will function properly with almost every printer brand.
HP DeskJet attention required – You will need to restart the service if you are using an HP printer and see the warning attention needed.
Ricoh printer attention required – The Ricoh printer is no exception from this error. Follow the solutions below to fix it.
Without further ado, let’s see how you can fix The printer requires your attention error message and go back to printing your papers. Follow along!
What can I do if the printer requires attention?
Before jumping into solutions, you may consider using an alternative browser if you are trying to print from the web. Some have found this workaround very time-saving.
In addition to Firefox, Google Chrome, and IE, another browser solution is often forgotten, with which you can print pages without any error:OperaOne offers comfort functions like no other program.
To further improve your printing experience in Opera One, you can also install a dedicated Print addon that offers you additional printing options, and you can print webpages with only one click.
If you don’t want to install add-ons, you can set a custom keyboard shortcut to print without a preview.
Apart from that, Opera One offers all the essential functions of a modern browser and enhances them with valuable extras, such as native AI and modular AI-ready design.
Opera One
Opera One is a great web browser that helps you to save and print your favorite web pages with only one click.
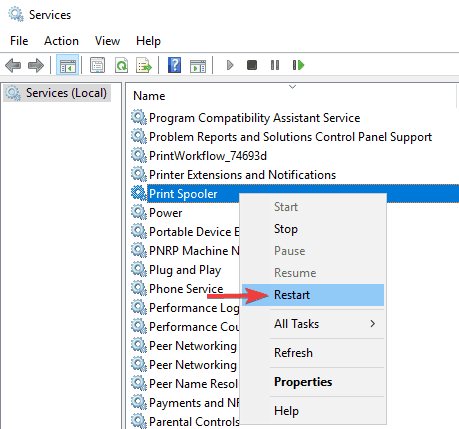
Press Windows + R, then type services.msc. and click OK.
Locate the Print Spooler service, right-click it, and choose Restart.
This service spools print jobs and handles interaction with the printer. Unfortunately, sometimes it no longer works correctly, and you have to restart it.
2. Update the drivers
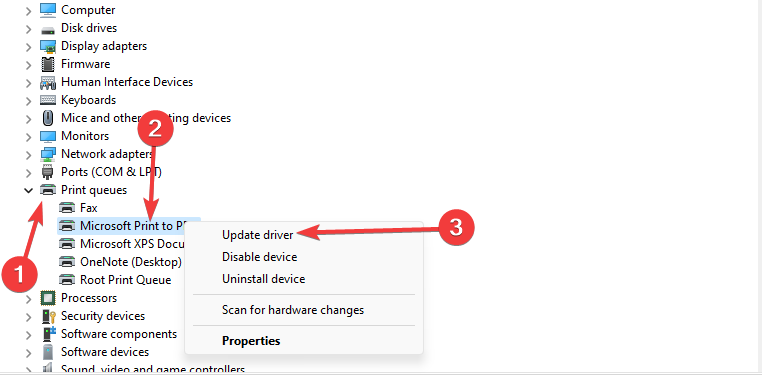
Press Windows + R, type dev, and hit Enter.
Expand Print queues, right-click on your browser, and select Update driver.
Select Search automatically for drivers.
Sometimes the driver can be outdated, leading to this and many other issues. However, you can fix the problem simply by updating your drivers.
There are several ways to do that, but the best method is to visit your printer manufacturer’s website and download the driver for your printer model.
Although this is the best method, some users might want a more straightforward solution.
If you want to update drivers automatically, you might want to use a third-party tool such as Outbyte Driver Updater. This tool is simple to use, and you should be able to update your drivers with just a single click.
To keep your PC, including hardware components, safe and efficient, the latest drivers should permanently be installed, like printer drivers.
The tool was developed so you do not have to download and install your drivers manually.
The program scans your hardware, such as the printer drivers, and offers to update them. Refresh all drivers only take a few clicks, and the tool does the rest automatically.
Open the Settings app by pressing the Windows + I keys and go to the Update & Security section.
Click the Check for updates button, then restart your computer once the process is completed.
Windows 10 updates can bring new features to your system or solve numerous bugs or security leaches. That is why it is essential to have your OS up to date.
5. Check the ink levels
In several instances, users reported that The printer requires a low ink level caused your attention.
If you suspect your ink levels are the problem, remove and shake the ink cartridges.
After doing that, the issue should be at least temporarily resolved. However, you might want to replace your cartridges if you want a permanent solution.
6. Properly install the printer
Sometimes The printer requires your attention message can appear if you do not correctly install the printer.
To make sure that everything is working correctly, be sure to reinstall your printer properly and follow every step.
Even using a wireless printer, follow the most basic steps, such as connecting the printer to your PC. However, sometimes the minor steps can make a difference, so follow them all.
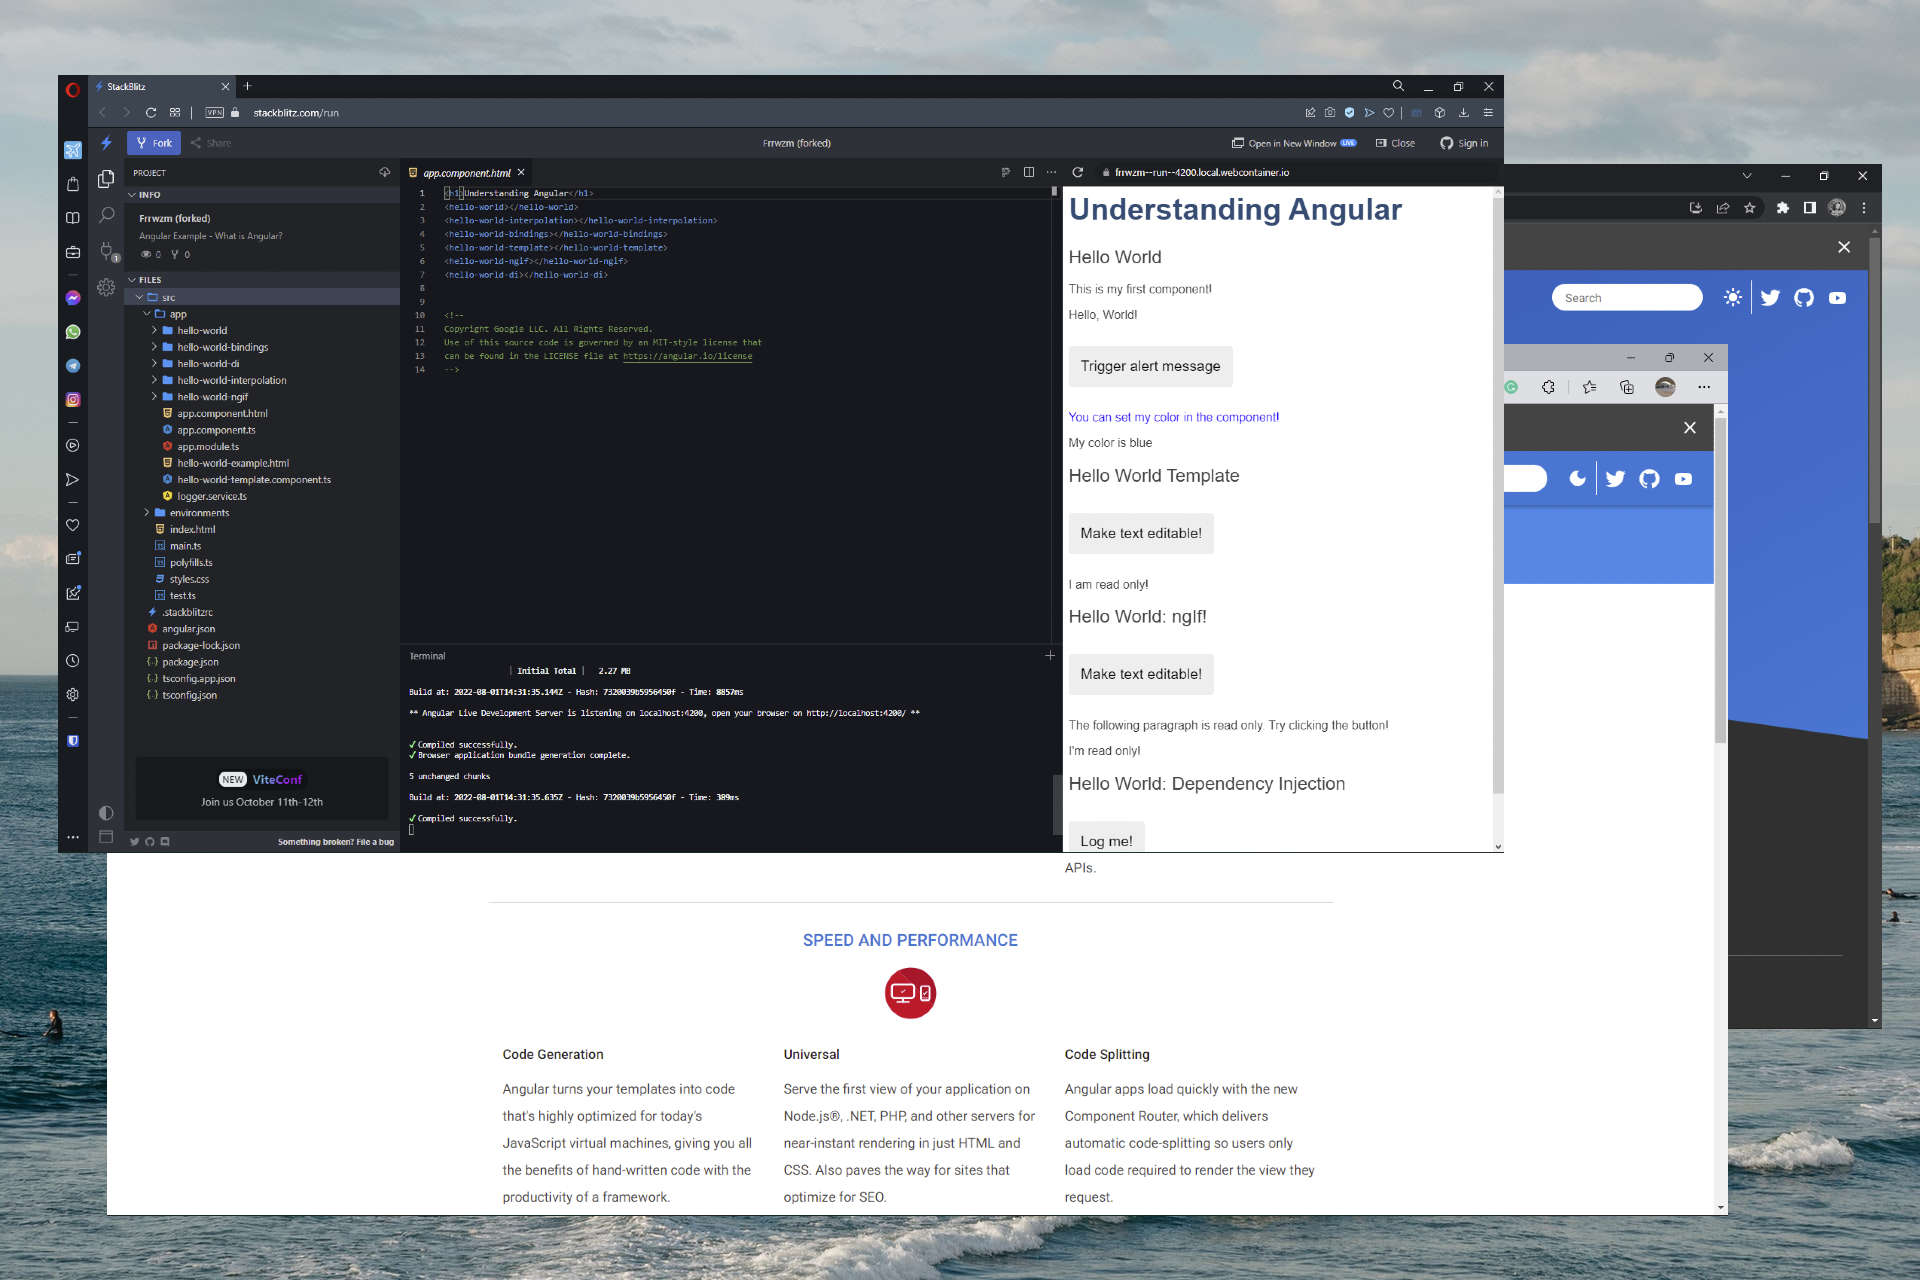
Angular is a component-based framework development program that’s built on TypeScript that allows users to create scalable web apps. Here are our picks for the best browsers that support Angular.
Users can scale apps from single-developer to business-level projects. Angular uses a JavaScript framework and allows users to create and deploy web apps and native mobile apps.
Does Angular support mobile browsers?
Angular does support browsers on the two most recent versions of iOS and Android. For Android, Angular supports OS 12 and OS 11. For Apple devices, the latest versions supported are iOS 15 and iOS 14.
However, browsers compatible with the latest versions of Android and iOS will be compatible with Angular.
Is Angular supported by Google?
Angular is supported by Google Developers and was originally created by a couple of Google engineers prior to its release in 2010. Today, Angular is the re-written version of AngularJS. As of December 2021, Angular JS is no longer by Google, but Angular is.
Opera One is the leading alternative browser and for a good reason. It’s loaded with unique features that set it apart from other browsers, like the sidebar function where users can access their bookmarks, news, messaging, and more.
Because Opera One is a Chromium-based browser, it has access to the Chrome Web Store in addition to the Opera One library of add-ons. This means that the Angular DevTools add-on will work with Opera One. The useful built-in features for Opera One make it so users don’t need to resort to third-party addons to improve the browser’s functionality.
Opera One offers synching across devices so users can have all their browser data on their mobile device and PC. The My Flow feature allows users to send links, files, photos, videos, and more between their linked devices seamlessly.
Key features of Opera One:
Access to Chrome Web Store
Cross-device compatibility
My Flow, Workspaces and Tab Islands
Built-in AI and modular AI-ready design
Opera One
Maintain all your browser data across multiple devices using Opera One Browser.
Since Google supports Angular, it’s only fitting that it works seamlessly with Google Chrome. Chrome is a highly convenient and easy-to-use browser with simple developer tools like the Google lighthouse tool that points out any bugs.
With constant maintenance and updates, Chrome is one of the smoothest and best-performing browsers for web or app development. It also provides easy access to the Google ecosystem and offers cross-device support.
Mozilla released Firefox Developer Edition to provide more features and functions to web and app developers. One of these features is the Web IDE which allows users to develop and debug web apps right from the browser. There is also a JavaScript Debugger.
Firefox Developer Edition includes Firefox Hello, which is a tool that allows users to call or chat with others from within the browser. This makes it convenient to collaborate with others without needing to exit the browser.
Internet Exploders’ successor, Microsoft Edge, has built-in web development tools, known as Microsoft Edge DevTools. Users can use the DevTools features for many things including debugging JavaScript and fixing accessibility issues.
Angular supports the latest two versions of Microsoft Edge and users can access the Angular DevTools extension from the Chrome Web Store because Edge is a Chromium-based browser.
For many Apple users, Safari is the default browser because of its speed and sleek design. It also has web developer tools WebKit integration and is compatible with Angular. Safari is not a Chromium-based browser but it does have access to its own library of extensions.
Safari also claims to have the fastest browser with an optimized JavaScript engine. Apple also states that Safari doesn’t consume as much battery power as other browsers and will last up to three hours longer than its competitors.
With syncing across Apple products, users can access their browser data and tabs across their devices. However, the latest version of Safari is only compatible with macOS and iOS devices.
Users have reported cross-browser compatibility issues in Angular, and even more so with Angular JS. This could be occurring if using browsers that are outdated or not supported by Angular. Users report issues with CSS reset and files not rendering completely.
Depending on the browser, some do not support newer CSS functionalities. One way to fix this issue is by manually entering styles in CSS records instead of using a bootstrap style tag. With new CSS functionalities, prefixes should be used to avoid issues in cross-browser compatibility.
We hope you enjoyed our picks for the best browsers supported in Angular. If you’re interested in our recommendations for the best front-end development software, we have a list for that as well. Let us know in the comments which browser you prefer to use for Angular.
DuckDuckGo not working in Chrome leaves those of us who are privacy-conscious with a tough choice -do I go on Google or do I try to fix it?
Well, we suggest you go with the latter because it’s not a difficult thing to do. Fixing interfering cookies, DNS cache issues, and interfering security software usually does the trick.
How do I fix DuckDuckGo if it’s not working?
1. Check if DuckDuckGo is down
Go to the DuckDuckGo DownDetector webpage. If there’s mention of a current outage, you’ll just have to wait it out. In the meantime, you can try using another private search engine such as Qwant or Start Page.
2. Clear Chrome’s browser data
Open Chrome.
Access the Clear browsing data menu by pressing the following shortcut:Shift + Ctrl + Delete then select All time as the time range.
Select the Cookies other site data and Cached images and files options.
Lastly, click Clear Data. This is another effective way in troubleshooting DuckDuckGo if it’s not working.
Bring up the search utility by pressing the Windows key type firewall in the search text box. Click Windows Defender Firewall.
Next, click Turn Windows Defender Firewall on or off to open those options.
Select both the Turn off Windows Defender Firewall public & private network options.
Press the OK button to confirm options.
Thereafter, try opening DuckDuckGo in Google Chrome with the firewall off.
If this method fixed the issue, there is probably a firewall rule blocking the connection. You’ll need to disable that rule if you turn the firewall back on.
4. Disable any third-party antivirus software
Right-click your antivirus icon from the Windows Taskbar and select Disable for 10 minutes. In the case of Avast, select Avast shields control followed by Disable for 10 minutes.
No matter what antivirus software you use, the steps should be similar in disabling your antivirus.
Resetting Google Chrome will turn off all its extensions, which might fix the DuckDuckGocan’t load this page error. Users can reset the browser by clicking on the three-dot menu followed by Settings.
From the left side menu select Reset and clean up.
Next, click the Restore settings to their original defaults option.
Finally, click Reset settings. The DuckDuckGo is not working in Safari, or Tor issue will be resolved.
6. Flush the DNS cache
Press Windows to open Search then enter cmd and select Command Prompt.
Once the extension is installed, you will see the DuckDuckGo icon (a small, round icon with a duck) in the top-right corner of your browser, next to the address bar.
Click on it and type your search query in the Search DuckDuckGo bar.
Now, you should be able to use the search engine through the extension, even though duckduckgo.com won’t work in the browser.
⚠️ Keep in mind that this is a temporary fix. It won’t address the underlying causes that made the error happen, but if you need to access DuckDuckGo no matter what, it’ is one of the quickest fixes that you can do in about 3 minutes.
8. Use another browser
Ultimately, if all else fails, consider switching to another web browser that won’t interfere with DuckDuckGo.
If you care about privacy, we suggest you take a look at Opera. It has built-in adblockers and a free VPN so it should be right up your alley.
Opera
Use DuckDuckGo hitch-free on this privacy-concious browser!
To begin, it’s possible that an issue within DuckDuckGo’s system is preventing its servers from working properly. There is also the possibility that the data stored in your browser or the DNS cache will conflict with the search engine.
It’s also possible that the problem is caused by your antivirus software or the Windows Firewall, both of which have the potential to disrupt the operation of DuckDuckGo.
Is DuckDuckGo better than Google?
If your main concern is privacy, then yes, DuckDuckGo is better than Google. The latter keeps track of your searches but it also uses various trackers to follow you on other websites.
Another advantage lies in results filtering, so even if other search engines remove certain results, you’ll still be able to find them on DuckDuckGo.
Lastly, Google’s search results are filled with ads that tack you, so if you’re not using a browser with a built-in adblocker, you’re probably going to see them.
Wrapping up
DuckDuckGo is a great privacy-oriented search engine, but as you can see, sometimes you can’t access it. If that happens, we encourage you to try all the solutions from this guide.
In most cases, clearing the cache in the browser helps, but if that fails, make sure that you check your antivirus and firewall settings.
Did you find a solution to this problem on your own? Share it with us in the comments section below.
I’m the only one with access to my phone and PC and my Google account isn’t on any other devices. I changed my password and the problem is still occuring. Also, it doesn’t appear in my browsing history – just the search history. Generally my searches will have a location saved to them but all the searches in the image below are not mine.
We know from here that the OP is the only one with access to his phone, PC, and Google account. Therefore, is not possible that another person made those searches from the user’s devices.
So, other aspects are involved, and today, we will show what to do if your Google search history is not yours.
Why am I seeing someone else’s Google searches?
When people share their devices with one another, one of the most typical side effects is that the user’s Google searches display on the other device.
Despite the fact that you may not have been aware of it at the time, you put yourself in jeopardy every time another person registers into a Google account on your device, or whenever you enter into another device yourself, since doing any of those things exposes you to this conundrum.
If you sync your browsers across several devices, the history of your Google searches as well as your browsing history and bookmarks will display on those additional devices.
Does Google still keep track of your Search history even if you’re not logged into your account?
Google does not record your browsing history if you are not logged in to any of Google’s services. However, even if you turn off this function, Google will still log all your search queries and link each to your IP address. This is something you should keep in mind.
Without further ado, let’s see how you can fix the My Google search history is not mine issue in four simple ways. Follow along!
How do I fix Google’s history if it’s showing searches I didn’t do?
1. Sign out from other devices
You can solve that quite easily:
Navigate to the Google Account page and log in with your account in case you aren’t already.
Next, go to Security followed by Manage all devices from down the page.
Now click on each session besides the top one which is the current one, and select Sign out.
It is possible that you forgot to log out from a device that’s not yours. So, now another person is using that device with your account logged on. The above solution is one of the best ways to fix the Google activity history showing searches I didn’t do situation.
2. Disable extensions
Click the three-dot menu then go to More tools followed by Extensions.
Disable the extensions, especially those who look less trustworthy. Also, use the process of elimination to find out which one causes the problem.
The OP added that, for an unknown reason, a VPN extension caused this issue. So, by disabling it, the Google search history went back to normal and fixed the Random searches in my Google issue.
For other browsers, the steps may vary, but the solution remains the same: disable the problematic extensions.
This issue can arise when your browser stores advertisements or pop-ups in your search history. But it can also be caused by more serious problems, such as a data breach that compromised your account.
This can happen due to phishing or malware, and we recommend you immediately change your passwords. If your Google account is linked to your bank, medical information, or other sensitive data, it’s very important to check and secure these as well.
Don’t log back into your account until you are sure your browser is secure and virus-free. To ensure there’s no malicious script or security risk within your browser, we recommend using a dedicated utility such as Guardio.
It’s a lightweight browser extension uses cloud-based technologies to detect and block day-one online threats. It’s easy to use, you just have to install it from their official website or your browser’s extension library. Enable it in one click, and you are done.
This tool can be a useful addition and may act quicker than some antiviruses. It blocks harmful sites, secures your emails, and protects your social media, all while being accessible with the same subscription across Windows, Android, and iOS.
If you visit a website with an embedded video and you view even one second of that video, the website will be recorded in your history. This is true even if you only watch one second.
When you browse to a spam page that contains a YouTube video that automatically plays, you will encounter this issue rather regularly.
It might be the case that you gave your login information to a trusted friend, relative, or other people to watch videos on YouTube. If this is the case, then videos that you have not seen will be added to the history list due to the shared account.
To find unknown searches in your Google history is definitely not a pleasant surprise. Still, things are not as serious as they seem in many cases. You can solve this problem with one of the solutions described above. Besides, for a seamless experience, consider disabling trending searches.
Most people don’t like ads, and 9ANIME has plenty of them hence the need for an Adblocker. There are many different types of Adblockers, but the most effective ones block ads at the browser level.
These work by filtering out content as it comes from the internet and preventing it from reaching your browser. Ad-blockers also have a wide range of other uses beyond just blocking ads. They can also protect your privacy by preventing tracking cookies from following you around the internet.
This makes them incredibly valuable for anyone who wants to keep their browsing habits private from advertisers and others who may want to track them. You can also opt for browsers with built-in Adblockers if you don’t want to install extensions.
Quick Tip:
Instead of having to install third-party apps or plug-ins, try using a browser with an integrated adblock feature. For 9ANIME, Opera One is a great option because it’s capable to block pop-ups and ads with no effort.
It gets regular updates making it a secure option to watch anime online. Moreover, it has a very small system footprint as opposed to other browsers so your videos may load a bit faster too.
Opera One
Enjoy your favorite anime buffer-free, without being interrupted by annoying ads or pop-ups!
There are many ways to watch 9ANIME without ads. The most popular way is to download the episodes from torrents or streaming websites and watch them offline. You can find a reliable torrent client from our expert list.
If you don’t have enough storage space, downloading may not be an option, so you need to consider using an Adblocker. Ad-blockers allow you to block ads and other content on streaming sites.
With all these praises, it begs the question: Is AdBlock safe? AdBlock is a browser extension that removes advertisements from websites. There are no ads in AdBlock that can attack your device or steal your personal information. You can use it and not have anything to worry about.
The downside is that many websites rely heavily on advertising revenue; when you block their ads, they lose money and might decide to block you in return or even ban your IP address entirely. It is why you need an effective VPN to mask your identity while browsing.
AdBlock is one of the most popular ad blocking extensions for Google Chrome, Firefox, and Opera Onebrowsers. It blocks ads on web pages and also disables third-party cookies.
It uses a filter list to identify and block video ads. With AdBlock installed, you can enjoy a faster and safer browsing experience.
uBlock Origin is another free Adblocker that works on 9ANIME to block all kinds of ads, including banners and pop-ups. This extension also blocks trackers, which means it will remove any web bugs or cookies placed on your computer by advertisers.
It is also easy to use because it doesn’t require any configuration and is compatible with most popular browsers like Chrome or Firefox.
AdGuard is another great ad blocker that works well with 9ANIME and other streaming sites. It is also lightweight, so you don’t have to worry about it consuming too much memory.
The difference between AdGuard and other ad blockers is that it doesn’t just block ads — it also blocks malware and malicious scripts from infecting your computer or mobile device when you visit these sites.
Ghostery is one of the most popular web privacy tools out there, and it has many features that make it great for watching anime on 9ANIME.
It blocks trackers from tracking your activity across the web, which means less time spent loading ads or waiting for videos to buffer. The extension also blocks third-party cookies, so you don’t get bombarded with annoying targeted ads while browsing the internet.
Additional features:
Has a smart blocking feature to speed up page loading
Disconnect is another free Adblocker that works on 9ANIME to block all kinds of ads, including video ads, banners, and pop-ups.
This extension also blocks trackers, so you don’t have to worry about web bugs or cookies being placed on your computer by advertisers anymore. One great feature about this extension is that it allows you to whitelist sites where you want to see ads.
However, sometimes it does not work as expected, and users face issues like 9ANIME Adblock not working or 9ANIME Adblock not loading.
If you experience any of these issues, here are some tips that might help:
Clear your browser cache and cookies – This is the simplest thing to do, so it’s worth trying before anything else.
Update your ad blocker – It is possible that you are using a very old version of 9ANIME Adblock. You need to update it to the latest version or uninstall and reinstall it.
Update your browser – If you have an older version of a browser, it may be because there is a new version available that fixes bugs and adds features. Make sure you’re up-to-date.
Disable similar extensions – Sometimes, when extensions get into arguments with each other, they can stop working properly. To fix this problem, try uninstalling any extensions that could cause problems for 9ANIME Adblock and see if that helps.
You may also encounter an error where 9ANIME is not working in Chrome, so don’t hesitate to check out our expert guide on the same.
Let us know your favorite Adblocker for 9ANIME in the comments section below.
World of Tanks (WoT) is a popular online multiplayer team tank game developed by Wargaming. With millions of players worldwide, the game is free-to-play but certain features can be unlocked by paying a fee.
In addition, the focus is on player vs. player gameplay with each opponent controlling an armored vehicle, which may be a light, medium, or heavy tank, tank destroyer, or self-propelled gun.
However, due to the online nature of World of Tanks, issues like DDoS attacks, slow connection, geographical limitations, etc; it is recommended that you use a VPN.
VPNs will change your IP location and if you pick an IP close to the server you are playing on, then you will have a faster connection.
Moreover, you can pick starting tanks from countries such as China, Japan, USSR, France, Germany, UK, and the USA. Hence, selecting a server location from any of these regions will give you more edge in World of Tanks.
Can I play World of Tanks with a VPN?
It is definitely possible to use a VPN when you’re playing this famous multiplayer game, WoT. This addition should also be helpful to connect to other servers or play from restricted countries.
A VPN is the right tool to access World of Tanks, especially if you are in one of the banned locations for this game.
Some users state that you can utilize different VPNs to increase the game performance and speed depending on the server location.
If you’re into serious tank action, and hard-earned victory, World of Tanks is for sure part of your world.
Get the most of each WoT session by teaming up with PIA, a VPN designed to support gamers’ needs.
This secure VPN will take all your worries when it comes to the usual buffering and latencies and will give you a lag-free WoT experience instead so that you can crush your opponents.
With PIA quietly running in the background, you will also be pleased to notice that your ping gets lower and lower, thus giving you leverage over your rivals.
With over 3000 servers spread across the globe, you can also count on your trusted VPN to choose the one nearest to you, thus enhancing your already ultra-fast speeds even more.
For what is worth, when it comes to privacy, there is no standard too high as PIA protects your identity through IP cloaking, encrypts your traffic data by rerouting it through secure VPN tunnels, and hides your location.
Moreover, it has a strict no-logs policy that truly embodies the principle of privacy: there are no records of your online activity whatsoever. Not for your ISP and not even for them.
Let’s quickly look at its key features:
Optimized for gaming
Bypass censorship and unblock websites and content
Secure protection on public Wi-Fi
Unlimited bandwidth and fast download speeds
Compatible with all major operating systems
Easy to use (connect in 1 click or tap )
Secure VPN Protocols (PPTP, OpenVPN and L2TP/IPSec)
Supports up to 10 devices simultaneously
Private Internet Access
Team up with PIA VPN to enjoy lag-free action and slay your opponents in WoT!
NordVPN is an award-winning VPN service provider renowned for its fast servers and strong security tools. Millions of users across the world use it, especially for their gaming needs.
With this software, you won’t experience any buffering or slow connection issues when you play World of Tanks, thanks to its impressive number of 5000+ servers. Using a NordVPN obfuscated server, you can hide your internet traffic data and bypass any VPN-blocking firewall.
Moreover, you can strengthen your data encryption with the double VPN security feature, which routes your traffic through two servers instead of one. This extra layer of protection mixes the connection between UDP and TCP protocols, allowing you to play World of Tanks online in complete privacy.
Other essential functions of NordVPN include:
CyberSec technology against malware
No-logs policy
Unlimited bandwidth
Masked IP address
DDoS and DNS leak protection
Unblocks geo-location restrictions
Static IP addresses
NordLynx protocol
NordVPN has a fast installation procedure and it offers in-build Chrome and Firefox extensions.
NordVPN
Play online games using this Premium VPN service trusted by millions of users!
Owned by Express VPN International Ltd, this VPN is widely known for offering high speeds and secure encryption. With ExpressVPN, you will get reliability and have the premium speed to access World of Tanks.
The VPN possesses over 2000 servers in 94 countries which enables you to access WoT from any location in the world.
Meanwhile, connections on their servers are encrypted with state-of-the-art protocols; this keeps your information safe while allowing an optimum gaming experience.
ExpressVPN comes with a 30-day money-back guarantee with a basic plan starting at a slightly higher price per month billed annually.
Other essential functions of Express VPN include:
Leading data encryption
Network lock and split tunneling tools
Secured TrustedServer technology
Private DNS addresses for each server
No activity logs policy
ExpressVPN
Tired of connection problems on World of Tanks? ExpressVPN could help you fix them.
Developed by Golden Frog GmbH, VyprVPN gives a good VPN package for gaming as it supports gaming server protocols and it delivers a fast connection.
VyprVPN is cross-platform meaning it supports Windows, Linux, and MacBook devices. The Chameleon technology feature allows for user IP to bypass firewalls and trackers while hiding your location.
Hence, the VPN also reroutes all connections through their servers giving you a better experience for World of Tanks gameplay as your connection is reliable and faster.
Other essential functions of VyprVPN include:
Chameleon protection to fight censorship
VyprDNS security
30 simultaneous connections
Highly VPN connection
70+ server locations globally
VyprVPN
VyprVPN is powered by the Chameleon technology to hide your IP and unleash World of Tanks!
IPVanish is a respected VPN provider developed by StackPath, LLC with a huge user base due to its quality of service. Plus, they have servers in over 50 countries.
You get an amazing World of Tank gaming experience with IPVanish as their self-owned servers come with amazing speed, unlike other competitors that rent servers.
This allows you to have better control as you can select any server without fear of downtime, plus you are secured at all times.
The IPVanish software comes with a clean and easy-to-use interface and they also offer a limited 7-day refund on plans.
Other essential functions of IPVanish include:
Complete online freedom
2,000 servers in 70+ locations
Access for media or gaming content
Highly encrypted browsing
No metered connections
IPVanish
IPVanish can help you bring your best World of Tanks game to the table by lowering ping and improving packet loss.
ZenMate VPN is the top secret privacy software that can provide secured servers that ensure better game results in the World of Tanks universe.
This productive VPN tool is suitable for many purposes that involve privacy and accessing your digital websites without beings tracked.
So you’re guarded with the latest data encryption for safer navigation, unblocking local content from games or productions in other regions, or a strict no-log data policy.
At the same time, this software is a winner in terms of Internet speed and restrictions in different countries.
You benefit from stable VPN servers in 81+ locations and an unbreakable connection to browse on any web pages or play your game without low performance.
In addition, there are more advanced functionalities like the kill switch option to save precious data.
Other essential functions of ZenMate VPN:
Anonymous VPN connection
Kill switch functionality
Powerful defense for geo-blocking
4,700 servers in 81+ different regions
Support for all platforms and gadgets
ZenMate VPN
Enjoy every bit of the World of Tanks gameplay using this fast VPN server network
Mozilla Firefox is an open-source browser praised for its speed and security. The browser offers enhanced tracking protection and thus blocks third-party cookies by default.
However, users have reported receiving the error message Firefox has encountered an unexpected problem with Windows or a variation of the error.
While this error may be frustrating, it is not uncommon for Firefox and other browsers to face a few bugs and glitches from time to time.
Microsoft Edge is the only browser that natively works with Windows, hence it is expected that it is the most compatible with Microsoft.
With that said, many other browsers work great on Microsoft devices, and Firefox is one of them. It was even one of the first browsers to be available on the Microsoft Store.
You, however, can expect a few errors here and there on Microsoft devices, but Microsoft does not actively interfere with Edge.
Is Microsoft Edge blocking Firefox?
Following a recent move by Edge, the competition for internet browser dominance seems to have reached another significant turn, and some users have reported that Edge itself has stopped their attempts to download the Firefox installation software. Thus, this is a severe issue.
Let’s now discuss what to do if Firefox is not working on Windows 10/11 because it has encountered some problems.
Quick Tip:
If this issue has been happening consistently, perhaps you should try Opera One. It has a user-friendly interface and offers built-in security features such as a built-in unlimited VPN, ad-blocker and AI.
Opera One has integrated messaging services from Facebook Messenger, WhatsApp, and more. With workspaces and tab islands users organize their tabs by topic.
Opera One
Keep your tabs organized using workspaces in this organizer browser.
How do I fix Firefox encountered a problem with Windows?
1. Check for updates
Launch your Firefox browser.
Click on the Menu and click Settings.
Scroll down to Firefox Updates and click Check for Updates.
Firefox regularly releases updates for maintenance and improvements. Check that your Firefox browser is up to date in browser settings. Using an outdated version of Firefox or one that hasn’t been updated in a while might lead to performance issues and errors.
2. Disable add-ons
Open Firefox and click the three lines in the top right corner to open the menu.
Click Add-ons and themes.
Select Extensions.
Disable each add-on.
Users have reported the problem being solved after disabling their add-ons. So, if you’re using an extension that hasn’t been updated in a while or is faulty, then it’s recommended that you remove any unnecessary extensions.
3. Start Firefox in Troubleshoot Mode
In Firefox, click the three lines in the top right corner to open the menu and select Help.
Click Troubleshoot Mode.
Selecting Open will start Firefox in its default form and temporarily disable all add-ons. Clicking Refresh Firefox will reset the browser to its default state and remove all customization features and extensions.
After choosing between Open and Refresh Firefox, test Firefox by visiting the site that was causing the issue.
If the problem is solved, then it was caused by one of your extensions or customization features. If the issue persists, the error may be due to Firefox preference settings.
4. Reset Firefox preferences
In Firefox, click the three dots in the top right corner to open the menu and select Help.
Select More Troubleshooting Information.
Under Application Basics, locate Profile Folder and click Open Folder.
Close Firefox.
Launch your File Explorer, navigate the path below and locate the file prefs.js and delete it. If you want to keep it as a backup, you can rename it to prefsOLD.js. (Substitute afamo for your username). C:\Users\afamo\AppData\Roaming\Mozilla\Firefox\Profiles\n5jvdaep.default-release-1-1658753075439
If you have the error, Firefox has encountered an unexpected problem while in Troubleshoot Mode; this is an excellent solution.
In Firefox click the three lines in the top right corner to open the menu and select Settings.
Under General, scroll down to Performance.
Uncheck Use recommended performance settings to reveal more options.
Uncheck Use hardware acceleration when available.
Restart Firefox.
Firefox may have difficulties with certain websites when using the hardware acceleration. If the problem is solved after turning off the hardware acceleration, then try updating the graphics drivers or continue to use Firefox without it.
With these solutions, you should have successfully resolved your browser error. As a last resort, you may reinstall the browser, but you should note that you will lose all your current settings.
We hope these solutions solved the error Firefox has encountered an unexpected problem with Windows. If you’re having issues with your Firefox getting stuck in Windows, we also have solutions for that.
Comment down below what solution worked for you. If there is a solution not listed above, be sure to let us know.
Microsoft wants Windows 10 users to enjoy smooth gaming experiences on their computers.
For this reason, the company has optimized the operating system so as to find the perfect balance between users’ hardware configurations and the system requirements of the games they’re running.
There’s a Windows gaming-oriented feature that’s still pretty controversial among users.
It’s called Fullscreen Optimizations and its role is to boost gaming performance and deliver a borderless full screen for you to enjoy your games.
Unfortunately, many reports suggest that, paradoxically, this feature triggers FPS drops.
Windows 10 Full-screen Optimizations: ON or OFF? Googling around and reading other posts on this sub, it seems like this is a very controversial subject. […] I’ve seen posts saying to most definitely disable it on games like Overwatch and CS:GO. On the other hand, I’ve seen posts from MSFT engineers and comments expressing how great the feature is and how it’s actually supposed to improve performance slightly.
Should you use full-screen optimizations?
Judging by user reports, it seems that the best solution is to simply disable full-screen optimizations.
Many gamers described this option as a strange hybrid Fullscreen Exclusive/Borderless display mode that’s not as great as Microsoft says.
Moreover, certain games are particularly affected by low FPS issues when players enable full-screen optimizations.
If you often play Overwatch, CS:GO, Sundered, and other CPU-demanding games, turning this feature off may actually improve your gaming experience.
Needless to say that a low FPS on a game startup will severely hinder your experience, so don’t procrastinate and address such issues on the spot. Disabling fullscreen optimizations in Windows is a good place to start.
How to disable fullscreen optimizations Windows 10
You can quickly disable fullscreen optimization for games by changing their Compatibility settings.
This is a manual process which you must do separately for every game where you experience FPS drops, but it only takes a minute.
1. Right-click on the .exe file of your game.
2. Go to Properties.
3. Go to the Compatibility option.
4. Check the Disable fullscreen optimizations box.
5. Hit Apply and then OK to save the changes.
For more information on how to fix frequent Windows 10 and 11 gaming issues, check out the troubleshooting guides listed below.
Finally, you can also uncheck the option Show game bar when I play full screen games Microsoft has verified from the gaming section of the Settings app.
This is bound to produce a positive effect on your gameplay as well. That’s pretty much it. Easy, right?
If you have additional questions or maybe some suggestions, feel free to leave them in the comments section below and we’ll surely check them out.
You have found this article because the download cannot be saved. After all, an unknown error occurred on Firefox.
Firefox is one of the top recommended browsers, but is not without issues. And just like all tech, from time to time, you may be faced with some bugs.
This download error is one such bug, and we will explore this issue and give you all the best fixes to help you download your files again.
Why are my downloads failing on Firefox?
While users have complained about failed downloads, there are a few reasons why you may experience this.
From our experience, here are the common culprits:
Bad or interrupted internet connections
Windows security settings
Outdated or corrupt network drivers
Permission issues
You ran out of space on the download target drive
The Browser is clogged with downloaded files
This is not an exhaustive list, but they are the most rampant reasons your Firefox downloads may fail. However, whatever the reason, the solutions discussed in this article should help resolve the issue.
How can I fix file could not be saved because an unknown error occurred error?
1. Reset the download folder settings via the about:config page
Open the Firefox browser.
Enter the path below in your Address bar and click Enter. about:config
Click on the Accept the Risk and Continue button.
Click the Show All button.
Then search for these five preferences in about:config: – browser.download.downloadDir – browser.download.folderList – browser.download.dir – browser.download.useDownloadDir – browser.download.lastDir
If some of those Firefox preferences are modified, right-click each one and select Reset to restore it to the default status.
2. Clear the Firefox Downloads folder
Open Firefox, click on the Downloads icon (the arrow pointing down in the top right corner), and select Show all downloads.
In the new window, click on the Clear Downloads option from the top.
This will not delete the actual files on your PC but only erase them from Firefox history. One of our readers suggested this solution because his browser was clogged with downloaded files, which unblocked the Firefox download feature.
Click the menu button at the top right of Firefox’s window and select Settings.
Scroll to Files and Applications and click the Browser button of the Downloads option.
Choose another download directory, and click the Select Folder button.
4. Switch off Firefox extensions
To disable Firefox extensions, click the menu button.
Click Add-ons and themes.
Click on the switch in front of every extension to disable them individually.
You can enable them one after the other while trying to download. That way, you may discover which of the extensions is problematic.
5. Disable Firefox download plug-ins
Launch the browser.
Enter the path below in your Address bar and click Enter. about:addons
Click on plugins.
On the right pane, click on the ellipses for individual plugins and select Never Activate.
6. Temporarily disable antivirus software
Launch your antivirus software.
Click on Menu.
Select the Settings option.
Click on Protection, then select Core Shields.
Scroll down to Configure shield settings and uncheck Enable File Shield.
Select a duration.
Repeat steps 5 and 6 for Behavior Shield, Web Shield, and Mail Shield.
Third-party antivirus software might be blocking Firefox downloads. So, temporarily disabling antivirus utilities might help fix this issue.
These steps work for Avast antivirus. However, you can temporarily switch most antivirus utilities off by right-clicking their system tray icons and selecting a disable or turn-off option.
If you remove your third-party firewall apps using their uninstaller wizards or with the help of the Add or remove programs utility within Windows, there are high chances that some files will be left behind.
Not only will these take up precious memory space, but they may also prevent you from safely reinstalling the firewall. For example, your installation wizard may detect that the app is already on your PC and stop.
Uninstaller software can detect and remove all leftover files, so there is not any trace of the app you want to remove.
They are easy to use and pretty similar to the Add or Remove programs utility. They display a list of all apps on your PC, and you select what you want to uninstall.
Wait for the process to end, and then you can download the installer wizard and rerun it.
Restart your PC and see if the problem persists.
8. Refresh the Firefox browser to its default settings
Launch your browser.
In the Address bar, enter the path below then click Enter. about:support
Press the Refresh Firefox button.
A Refresh Firefox dialog box window will then open. Click Refresh Firefox on that window to confirm your selected option.
When the download cannot be saved because an unknown error occurred, at least one of these fixes should resolve the issue so that you can download software and documents in the Firefox browser again.
Additionally, you may consider opening the browser in Safe Mode. This launches your browser with only the basic functionality. Once you do this, the browser can download, even though some other functions may be cut off.
We hope that our solutions were helpful to you. However, if you’re having additional Firefox issues on Windows 10 and 11, our guide provides further troubleshooting tips.
Employees’ Provident Fund Organization (EPFO) is a part of India’s Ministry of Labor and Employment. EPFO is one of the largest social security organizations which manages provident funds.
EPFO introduced the Universal Account Number (UAN). This feature links member ID numbers into one. Employees can use their UAN to register with the service portals.
The website hosts several services, including the Employees Portal and the Pensioners’ Portal. Therefore, it is essential to have a secure browser when accessing these portals.
What are the browser requirements for using DSC?
Users reported issues with uploading Digital Signature Certificate (DSC). To upload DSC, you must have the latest version of Java installed on your PC.
Thus, users also need to use a browser that supports Java; the browsers listed below will all work with Java. EPFO recommends using Mozilla Firefox or Google Chrome.
Now let us discuss which browser is best for the EPFO site.
Which browser is compatible for EPFO digital signature?
Opera One is one of the most secure browsers on the market, with reliable and advanced features that make browsing the internet more intuitive.
One of the biggest perks of Opera One is its built-in protection features that allow for secure browsing. Thus, when entering personal information on EPFO and its portals, security is vital. Use a browser that will protect against phishing and malware.
Opera One is also compatible with any operating system; users can browse on Windows, Mac OS, and Linux. With cross-device adaptability, Opera One can be used on smartphones and tablets.
It offers a Speed Dial start page with which users can quickly access frequent websites they visit with just one click.
Moreover, Opera One has a rebranded user interface with a satisfying chromatic and modular design to help users browse easier and much faster.
Key features of Opera One:
Redesigned interface
Privacy protection features
Compatible with any OS
Speed Dial start page for easy access to pages
Opera One
Browse the EPFO website with Opera One while protecting your online safety and privacy.
Google Chrome has become the default browser for many users and is one of the fastest browsers available. Chrome is also highly secure, making it one of the best browsers for EPFO.
Chrome alerts users of suspicious websites that might want to steal your information. With the latest technology, Chrome protects its users from malicious attacks.
Incognito mode allows users to keep their browsing data private. This feature is beneficial for users that use a shared computer and don’t want any of their information shared.
With password management and sync, users can customize their browsing experience across all devices.
Mozilla Firefox is one of the recommended browsers for EPFO. Not only is it fast, but it’s also secure. The browser offers DSC support for EPFO.
Firefox has a private browsing mode that doesn’t retain any of your information so that you can browse worry-free. With the Smooth Scrolling feature, users can quickly navigate websites with ease.
This browser also translates websites from more than 100 languages offering an inclusive experience. Firefox also has an in-browser screenshot tool so users can save helpful information from EPFO.
Users have reported that Firefox is the best way to upload DSC without any errors.
Microsoft Edge is another browser that gives users full transparency, meets the EPFO browser requirements, and takes extra measures to protect data.
It’s easy to stay organized with Microsoft Edge’s multitasking features. Users can collapse or group tabs into a collection for a clean browsing experience.
Users can feel secure when entering personal information on EPFO. With adjustable levels of tracking prevention, users can change their level of security while browsing.
Microsoft Edge also makes it easy to switch to the browser by importing user information from another browser. So, users can easily switch over to Microsoft Edge without the hassle of re-entering login info.
This is another compatible browser for EPFO digital signature. UR Browser is designed for user privacy and security, making it one of the best browsers for EPFO.
This browser has anti-tracking and profiling functions. These features protect users from third-party cookies and data miners.
Ninja Mode can be enabled for advanced private browsing. With this mode, no user information or data are stored, so there’s no need to clear your history.
UR Browser also has a built-in VPN for secure browsing. This feature guards user data from suspicious cyber-attacks. A VPN also allows users to browse from anywhere in the world.
What to do if your current browser version no longer supports Java in EPFO?
This is an error message a few users have encountered. This usually means Java is not installed on your computer, or you have Java but not the 32 bits version.
You have to verify that Java is correctly installed and install it if it is not. However, if that is not the case, you should update your browser to the latest version and check if this resolves the error.
We hope this list helped you decide what browser to use for EPFO. These browsers offer top-notch security and speed with a clean user interface. They are also compatible with the latest version of Java, so you can upload DSC with ease.
The portals and services on EPFO require users to provide personal information. With a browser that puts security first, you can be worry-free while filling out forms.
Microsoft PowerToys users will surely rejoice in knowing that the tech giant has acknowledged their needs and has put out a brand new build loaded with goodies.
The Redmond tech colossus has just released PowerToys 0.61.0 for all users today. The project remains in public preview, but the latest version adds several notable changes and improvements.
Microsoft officials responsible for this company software have stated that release 0.61 focuses on stability and improvements.
What’s new with PowerToys 0.61.0?
We’re about to take a more in-depth dive and go over the changelog together, spotting all of the improvements and changes and the known issues that came with this build.
Just by taking a look at the Highlights section, we can observe that it says Quality of life improvements for Always on Top, FancyZones, and PowerToys Run.
General
Upgraded the Windows App SDK runtimes to 1.1.2.
The new Windows 11 context menu entries are now correctly added to Windows 11 dev channel insider builds. (This was a hotfix for 0.60)
The old context menu entries are shown alongside the new Windows 11 context menu entries to be compatible with software that overrides the Windows 11 context menu behavior. (This was a hotfix for 0.60)
Consolidated C# language version across the solution.
Removed deprecated Segoe icon glyph codes and replaced them with the correct ones.
Fixed an issue that caused a random accent key to be pressed on certain keyboard layouts when enabling some modules.
Always on Top
Fixed border flickering when activating.
Fixed a bug causing Always on Top to activate and hang when exiting PowerToys.
Fixed black edges appearing on rounded corners.
Fixed a bug that was causing 100% CPU consumption.
FancyZones
Fixed a bug that caused layouts not to be applied correctly when many monitors reported having the same serial number. (This was a hotfix for 0.60)
Fixed a bug that caused layouts not to be applied correctly on some virtual monitor setups (This was a hotfix for 0.60)
A “Rows” default layout is now applied to vertical monitors instead of a “Columns” layout.
Image Resizer
Screen reader now announces the size name instead of the class name.
File explorer add-ons
Fixed an issue when creating thumbnails for SVG files created using Inkscape.
Keyboard Manager
Adjusted wording on the editor when keys are orphaned.
Mouse utility
Fixed a bug that caused the current Find My Mouse spotlight to hang when activated in the top left corner of the screen. (This was a hotfix for 0.60)
PowerRename
The PowerRename window reacts to current dpi when created.
PowerToys Run
Fixed a typo in the WindowWalker plugin UI.
Improved performance by saving the search history files only on exit.
PowerToys Run no longer shows results for some plugins when querying for empty spaces in a global query.
Added support for showing localized names for some Win32 programs in the program’s plugin.
The program plugin will now consider settings changed directly in ProgramPluginSettings.json.
Settings
PowerToys Run settings page properly greys out the score adjustment setting when a plugin is not global.
PowerToys Run plugins score adjustment field accepts only numeric characters.
Will not run if started directly from its executable, as it was before the WinUI 3 upgrade.
Fixed a typo in a PowerToys Run settings page description.
Installer
Removed the dead code to make a msix installer.
Updated the .NET dependency to 6.0.7.
Won’t create a new PowerToys shortcut on update if it’s been removed manually by the user.
Development
The Windows Store Package submission script was updated to show less UI while installing PowerToys. (This was a hotfix for 0.60)
Added more functionality to the Monitor Report Tool.
The release CI now includes the version number in the symbols artifacts.
GitHub should now show .vsconfig as a JSON file. !
Centralized the configurations for NetAnalyzers and StyleCop.
Check spelling has been upgraded to version 0.0.20.
There are reports of users who are unable to open the Settings window. This is being caused by incompatibilities with some applications (RTSS RivaTuner Statistics Server and MSI AfterBurner are known examples of this). If you’re affected by this, please check the linked issue to verify if any of the presented solutions works for you.
HTML5 audio is a fairly new standard for playing audio on the web and is supported by all major browsers. It solves most problems by making audio files small enough to stream and making them work on mobile devices and desktops.
Today’s most important HTML5 technology is audio playback without the need for Flash. There are many advantages to using HTML5 audio over Flash, including better performance, faster load times, and an improved user experience on mobile devices.
While most people enjoy browser audio players, there’s no harm in trying out a new technology that comes with such perks and goes easy on your RAM.
What browsers fully support HTML5?
Many browsers support HTML5 audio, but some have not implemented it completely. The HTML5 specification includes elements that allow you to embed audio in your web pages.
The good news is that there are other options if your browser doesn’t support HTML5 audio. You can download Silverlight to deliver content or a media player to serve the same purpose.
How do I know if my browser supports HTML5?
You can find out if your browser supports HTML5 and other web standards by visiting an HTML5 test website.
This site provides information about browser compatibility with HTML5 audio, which features are available in different browsers, and what features are under development.
What are the best browsers that support HTML5 audio?
What makes Opera One a good player for HTML5 audio? Opera One has always been ahead of the curve when it comes to new web standards.
It also supports all major codecs used in HTML5 audio, including MP3, Opus, AAC, and WAV. This means developers can use their preferred formats without worrying about compatibility issues with Opera One.
Additional features:
Support for the source format Ogg Vorbis
Native AI and modular AI-ready design
Custom controls using simple CSS rules or JavaScript APIs
Workspaces and tab islands
Opera One
Load your favorite playlist fast and enjoy high-quality HTML5 audio formats!
Chrome is one of the best browsers available to date. It’s fast, secure, and has a ton of useful features. With that said, it also supports some HTML5 features that other browsers don’t.
It also supports WebRTC, a technology that enables real-time communication over the web without the need for plugins like Flash or Java.
The Edge Browser is an improved version of Internet Explorer and is available as a standalone browser. It supports all the latest web standards and technologies and provides unique features not available in other browsers.
One of the most important features that make Edge good for HTML5 audio is its support for the Media Source Extensions (MSE).
This allows you to play audio from a variety of sources, including MP4 files, MP3 files, and OGG files. The MSE also lets you use JavaScript to manipulate the audio stream being played by your app or game.
Safari, Apple’s browser for Macs and iOS devices, is popular among web developers because of its HTML5 compliance. It’s also one of the best browsers for HTML5 audio.
One reason it is good for HTML5 audio because it supports WebGL and WebRTC, two cutting-edge technologies that are essential for modern web apps.
Safari supports most HTML5 audio specifications and other related technologies, including JavaScript APIs, media events, and CSS3 effects.
The browser is not up-to-date – In such a case, you need to update your browser to the latest version and try again.
Bugs in the browser – Sometimes, browsers have their own problems, so try using another browser. You’ll find that some browsers are better than others at supporting HTML5 Audio.
Incorrect file extension – The first thing to do is check the file extension. HTML5 audio files have a .ogg or .mp3 extension. If you are trying to play a file with an incorrect extension, this will cause your browser not to recognize it as HTML5 audio.
Corrupt extension – Check to see if your browser has an add-on or extension that can be uninstalled. Add-ons and extensions are often installed by accident, so disable any suspicious add-ons and check again.
Hopefully, you have been able to secure a browser compatible with HTML5 audio from our list above and can play audio with no hiccups.
A Windows 10 clone might be required if you’re planning on upgrading a hard drive. Alternatively, you can set up a backup copy of Windows 10 for a system recovery disc or USB drive.
Speaking of which, there are numerous software packages that you can use to set up a Windows 10 ISO.
A Windows 10 ISO is an image, or exact copy, of the platform. In other words, it’s a clone of the Windows 10 system disk. When you have set up a Win 10 ISO, you can then save it to a USB drive or CD/DVD recovery disc.
These are some of the best software packages to clone Windows 10.
If the reason you’re looking to clone your Windows 10 OS is to project and deploy it on multiple PCs in a given network, then you’ll need to shift to a different variety of software that has nothing to do with actual OS cloning.
In the case at hand, OS Deployer is an excellent tool for large-scale companies that need to automate PC imaging and OS deployment for many PCs within a given network.
Thanks to OS deployers, administrators can save the disk image of different OS versions and customize them to fit specific needs within a large organization.
These captured images can be deployed to PCs within a network, all thanks to the latest imaging and deployment technologies.
The program also automates several features that would otherwise fall under the support team’s jurisdiction, thus taking an extra load off their shoulders and significantly reducing maintenance costs.
In the context of remote work, this tool proves to be especially useful since, with this tool you can essentially deploy OSs to all your remote office PCs from one centralized console.
OS Deployer
Capture, customize, and deploy OSes on your company PCs with the help of this amazing tool!
Up next we have a software tool that manages to prove with each yearly iteration that it is the best choice for the job.
Acronis Cyber Protect Home Office, former Acronis True Image, is a go-to solution for anyone that wants to create a complete and identical copy of their current Windows 10, which they can use for future rollbacks and backups.
Of course, what makes this tool exceptional is that it doesn’t simply create a copy, it manages to filter out any elements that may have forced you to create copies in the first place.
For example, Acronis comes with proven anti-malware technology, allowing for efficient safeguarding of all of your data, apps, and systems.
These include AI to stop ransomware and crypto-jacking in real time, as well as blockchain data notarization.
As for the backup component, Acronis Cyber Protect Home Office provides users with an intuitive and comfortable UI, so creating copies and backups isn’t give you any headaches.
Here are some of the perks of using Acronis Cyber Protect Home Office:
Intuitive UI
Constantly updated
Provides you with cloud backup and recovery
Combines state-of-the-art anti-malware and backup technology
Supports mirror imaging, disk cloning, and all‑in‑one recovery drives
Now available at a special discount price through our website for a limited time.
Acronis Cyber Protect Home Office
Create a 1:1 copy of your Windows 10 in a fast and secure manner with this amazing backup tool.
Another great tool that you can use to clone Windows 10 is AOMEI Partition Assistant. The tool allows you to resize or move your partitions, but you can also merge them.
The application allows you to clone disks and partitions, but you can also migrate your OS to an SSD drive.
Other partition management features such as partition creation, formatting, and deletion are also supported. Of course, you can also split, extend, and recover your partition.
As for additional features, the application also allows you to convert your GPT or MBR disk. There’s also a bad sector and partition check available. If you want, you can also wipe the entire disk or partition using this tool.
AOMEI Partition Assistant is a great tool, and it’s available in the Free and Pro versions.
The Free version offers all aforementioned features, but if you want to get access to all features, you might want to consider purchasing the Pro version.
Aomei Partition Assistant
Clone or migrate your OS with this user-friendly utility that takes care of everything partition-related.
TopTenReviews rates Paragon Hard Disk Manager Advanced the best disk imaging software for Windows.
This has a freeware edition that you can add to Windows 10, and other platforms, from the Paragon website, but it also has a payable version.
The utility includes a variety of options for complete disk backups.
One of the more unique options Paragon Hard Disk Manager™ Advanced has is its Backup Capsule. This enables users to sets up a reserved partition managed by the software for easy recovery.
Its backup wizard also enables you to set up filters to exclude temp, log, .exe, and other file types from the ISO.
As such, with those filters, you can compress the ISO. In addition, it also supports differential backups for ISO images.
Paragon Hard Disk Manager Advanced
A complete hard disk manager for backups, rollbacks, restores, and more, all within a single intuitive UI.
In the true style of AOMEI, the Backupper stays faithful to the company’s commitment to fighting data loss.
What’s more, just like other AOMEI products, our software of choice is easy to use, effective, and fast.
The UI design is entirely built having the end-user in mind, making the navigation as easy as a breeze and as productive as they get.
What’s more, the Backupper does more than provide a backup solution. This is an all-in-one software that you can use to backup, recover, sync, and clone data in a secure and reliable manner.
The tool uses 256-bit AES encryption which is the highest possible standard when it comes to data security and confidentiality.
You can use it to create bootable drives and rapidly deploy system images to multiple computers or clone multiple computers over the network.
Aomei Backupper Standard
Clone, migrate, and backup your operating system in just a few simple steps with this pro-level back upper.
This is one software that simplifies all your backup and recovery needs by centralizing all the major features in one single location.
With O&O DiskImage you can forget about data leaks or data loss. Choose to backup your entire PC (yes, it is possible to do so!) or specific files on a local level.
The tool also supports SSD drives and the latest UEFI System.
But there is more to it than backup, you can use O&O to restore your system and clone an entire PC or hard drive even when Windows is no longer responding/is unbootable.
O&O DiskImage
Create a backup of your entire PC and use it to clone your current OS!
EaseUS Todo Backup is a great cloning software because it can create a backup on any file, disk, or partition on your PC or on external drives.
And if you don’t want to do any repetitive tasks yourself, you can schedule backups for your data. And as a storage source, you can even use FTP or cloud solutions, or NAS.
However, the backup is only a side dish to the cloning function that you can even use to transfer your whole system to another PC.
The tool will help you create a portable Windows USB drive with just a few clicks.
EaseUS Todo Backup
Transfer your OS with all its data with this safe and easy-to-use backup utility.
CloningWindows 10isn’t that hard, especially if you have the proper software to do it. Speaking of cloning, in this article we’re going to cover the following topics:
Clone Windows harddrive to SSD, to the new harddrive, to a new computer
CloningWindows 10 harddrive to a newSSD or hard driveis rather simple, and you should be able to do that by using one of thetoolsfrom our list.
Windows 10 bootable clone
Many users want to create a bootable clone of theirWindows 10 drive.
This is possible and rather simple to do as long as you have the proper software for it.
Migrate Windows10 to new harddrive
If you purchase a new harddrive, you don’t have to install Windows 10and all your applications again.
Instead, you can migrate Windows 10and all yourfilesto a new hard drive using one of these applications.
CloneWindows 10hard disk, image,partition, system drive
Creating ahard disk image is simple and straightforward, as long as you have the propertool.
Using thesetoolsyou can easily clone your system drive, any otherpartition,or your entire hard drive.
CloneWindows 10 MBR to GPT
In one of our previous articles, we explainedhow to convert MBR to GPT disk, but you can also do that using one of thesetools.
These software packages have some of the best options for cloningWindows 10. They’ll give you a fullWindows 10 ISO that you can add to CD/DVD or set up a bootable USB key with.
DLSS is a relatively new image upscaling technology for NVIDIA graphics cards that stands for Deep Learning Super Sampling.
That image upscaling technology utilizes AI algorithms to boost frame rates for games at high resolutions by rendering graphics at lower resolutions.
NVIDIA released the first DLSS version in 2019. Since then, DLSS game support has expanded.
However, DLSS only works for GPUs of the NVIDIA RTX 20 and 30 series. This is how you can enable DLSS for supported games.
Can you enable DLSS in any game?
Unfortunately, DLSS isn’t available for every game. However, the list of games with DLSS support is constantly growing, and odds are pretty good that you already have a game in your library with support.
For the time being, Deep Learning Super Sampling (DLSS) is only available on Nvidia RTX graphics cards, including both the 20-Series, 30-Series, and up.
Should I turn on Nvidia DLSS?
Let’s put it this way: DLSS could pretty much end up being the most impactful feature of Nvidia’s RTX GPUs from this point forward.
Ray-tracing effects are pretty but tend to have a sizable impact on performance, so DLSS gives us the best of both worlds, with better-looking games that perform better, as well.
In fact, this feature quickly became so popular, that if you search for a guide on how to enable it on Google, these are the results you’ll get:
How to enable DLSS Nvidia
How to enable DLSS Nvidia Control Panel
How to enable DLSS for Fortnite
How to enable DLSS for Minecraft
How to enable DLSS on RTX 3050
How to enable DLSS for Warzone
How to enable on GTX 1650
How to enable DLSS for Forza Horizon 5
How to enable DLSS for Apex Legends
Update your NVIDIA graphics card driver
Before you enable DLSS in games, make sure your GPU has the latest NVIDIA driver (the latest Game Ready Driver is required). To do so, run a scan with a driver updater utility.
Driver updater software will scan your PC’s drivers and list devices with outdated ones. Then you select to download and automatically install the latest drivers.
How to install the latest Windows 10 build version?
Open Settings by pressing its Windows and I hotkey.
Click Update & Security to open the options shown directly below.
Then click the Download and install option if there’s a Windows 10 feature update available.
When your RTX GPU’s driver and Windows 10 platform are up-to-date, you should be able to select DLSS options for supported games via their graphical settings.
How exactly you select those in-game options varies between games. Below are some examples of how to enable DLSS in games.
How to enable DLSS in games?
1. Open the game’s Settings menu
The first thing you need to do is to open the game you want to enable DLSS in and access its Settings menu.
2. Open Graphics to adjust the graphics settings
Once you are in the general menu, click on Graphics to access the graphics settings menu.
3. Toggle the DLSS option on
Lastly, scroll down to the DLSS option and toggle it on.
How exactly you select those in-game options varies between games. Below are some examples of how to enable DLSS in games.
How to enable DLSS in Battlefield 5?
Open the Graphics Setting menu within the Battlefield 5 game.
If Direct 12 is not already enabled, you’ll need to enable that setting and restart Battlefield 5.
Click the Advanced tab.
Toggle the DXR option on if it’s not enabled, and restart the game.
Then you can toggle the NVIDIA DLSS setting on.
Finally, choose a level of detail with the DXR Reflections Quality option.
When you’ve enabled DLSS for Battlefield V, you might notice a notable performance boost. Battlefield will run at higher framerates with greater graphical detail.
The NVIDIA video below shows us a side-by-side comparison of that game with and without DLSS enabled.
How enable DLSS in Cyberpunk 2077?
Click Settings in Cyberpunk 2077.
Select Graphics to open graphical settings.
Scroll down to the DLSS option.
Then click the arrow for the DLSS setting to select a Balanced option. Alternatively, you can select Performance or Ultra Performance settings to enable DLSS.
Press Escto exit settings.
How to enable DLSS in PUBG?
If you were also looking for a way to turn this feature on for PUBG, you should know that is not a supported DLSS game title at the moment.
However, Bluehole confirmed that PUBG will get DLSS in the near future. PlayerUnknown’s Battlegrounds is just one title in a list of games scheduled to incorporate DLSS, which includes the following:
Dauntless
Fractured Lands
Scum
Justice Online
JX Online 3
Hitman 2
It is expected that PUBG, and those other games, will support DLSS in the foreseeable future.
When they add support for DLSS, you’ll probably be able to enable image upscaling for them via their graphical settings much the same as Cyberpunk and Battlefield 5.
Does DLSS improve performance?
If you don’t really know that much about DLSS, that’s all about to change right now. To help you better understand, DLSS is a real-time version of Nvidia’s screenshot-enhancing Ansel technology.
That means it renders the image at a lower resolution in order to provide a performance boost, then applies various effects to deliver a relatively comparable overall effect to raising the resolution.
The result of this happening can be a mixed bag, but usually, it leads to higher frame rates without a substantial loss in visual fidelity.
So, what are you waiting for? If you’ve got a game that supports DLSS and PC with a suitable RTX graphics card, you can enable NVIDIA’s cutting-edge upscaling technology as outlined above to see how it raises the bar for Windows gaming.
There’s no denying that Xbox Cloud gaming has been making huge progress since it was first released by the tech giant.
This popular gaming service has grown by a staggering 1800% in the past year, which is what Kevin LaChapelle, Vice President of the xCloud platform at Microsoft, stated in a recent interview.
If you’re an Xbox gamer, you should know that the official Xbox channel on YouTube posted a video where the biggest updates and enhancements of the Xbox Cloud Gaming platform were discussed.
Xbox Cloud Gaming to massively extend its boundaries
The above-mentioned Xbox official, Kevin LaChapelle, revealed that Microsoft is actively engaged in adding multiple new servers across the globe to meet the rising demand of gamers.
Among other things that were said, LaChapelle also mentioned that the Xbox Cloud Gaming’s server cluster is expected to double in the coming year.
it goes without saying that the future of Microsoft’s gaming business is deeply rooted in the Xbox, just in case there were any doubts.
That being said, the next phase of growth will increasingly come from beyond the high-end, dedicated gaming console.
The Redmond-based tech giant is actually looking beyond the console and exploring expansion through smartphones, tablets, and PCs.
But wait, because it gets even better. We’ve come to a point where none of these devices will need to run the Windows operating system.
The catch is that, as long as these devices have a reliable internet connection, and support a secure browser, they can help Microsoft’s gaming business grow.
And speaking of gaming browsers, know that the most reliable and gaming-oriented browser out there is definitely Opera GX.
Opera GX
Discover all the benefits of a real gaming browser, made especially for gamers and all the needs that they have.
So it should go without saying that gadgets such as the Steam Deck, Android and iOS smartphones and tablets, and Smart TVs would play a huge role in driving up adoption.
If you are an Xbox Cloud Gaming platform user, you also know that the service has shot up in adoption quite noticeably due to Fortnite.
The popular battle royale game is available for free to play via Xbox.com/play, where you don’t even need an Xbox Game Pass Ultimate subscription to access Fortnite.
Through the above-mentioned video, Redmond officials have urged users of the Xbox Cloud Gaming service to offer their feedback on the Xbox Cloud Gaming Feedback portal.
For a large number of users, the Xbox Game Pass subscription has proven to be very attractive in terms of pricing and access to game titles.
And, with Microsoft continuously tweaking and improving the service, xCloud might just beat GeForce Now, Google Stadia, PlayStation Now, and other rival cloud gaming services.
This can only be good, as a large extension of something that brings so many people together should be welcomed with open arms.
Also, remember that Microsoft is working on a much shorter boot time for the Xbox consoles, and has already managed to shave 5 seconds off the cold boot.
What are your thoughts on the matter? Be sure to share all of your honest opinions with us in the dedicated comments section located below.
The Dark Mode option has become popular lately, and thanks to that, you can now see it through most platforms and apps, including Messenger.
The Messenger desktop app can be used for quick and efficient messaging on the desktop and due to its utility, turning on the Dark Mode, especially at night, is of great use.
The following article will show you the exact steps you need to follow to activate it on your browser.
What version of Facebook has Dark Mode?
As of January 2022, you will be able to enable light mode in most Facebook apps, including Dark Mode. If for some reason, your version does not have it, you need to update or download the latest version, and you will be able to use Dark Mode.
Can you make Facebook Messenger web app dark?
This will depend on the OS you use it on, as the web app does not have a Dark Mode setting. In Windows 11, for example, you can force every browser to display in Dark Mode.
Quick Tip:
Opera One is a browser that allows you to easily choose between Dark Mode, Light Mode, and Grey Mode straight from your current page.
Moreover, having the Messenger Dark Mode in this browser is more straightforward than it may seem, thanks to the integration sidebar that allows customization with the add-ons available.
Opera One
Get the dark mode enabled on Messengers or on the pages you visit.
How can I enable Messenger Dark Mode in my browser?
1. Use browser in Dark Mode
1.1 Opera One
Click on the Easy Setup icon at the top right.
Select Dark under the Theme menu.
Restart your browser to force the change to take effect.
This should be your go-to for using Messenger Dark Mode on PC in Opera One.
1.2 Firefox
Click on the menu icon and click Settings.
Scroll to Language and Appearance and select the Dark option.
Restart your browser to force the change to take effect.
This should be your go-to for using Messenger Dark Mode on PC in Firefox. You can apply similar steps to get the Dark Mode for Messenger on Microsoft Edge.
2. Change Messenger app settings
Open the Facebook Messenger desktop app and log in.
Click on your profile icon and select Preferences.
Go to theAppearance option and click on Theme, then from the drop-down list, select Darktheme.
3. Enable Force Dark Mode
Open the Google Chrome browser.
In the address bar, type the following: chrome://flags/#enable-force-dark
Select the Enable option from the Auto Dark Mode for Web Contents drop-down menu.
Once you have enabled the Dark Mode, when you open Facebook Messenger in the browser, you will see that the display will also be dark. This flag is your go-to for Messenger Dark Mode on PC for Chrome users.
4. Change the Windows theme
Click on the Start menu, then open the Settings App.
On the left pane, click on Personalization, then click Colors on the right.
Make sure Choose your default Windows mode and Choose your default app mode options are set to Dark.
Following these steps will force the Facebook Messenger web app to display in Dark Mode.
Next time you will open Facebook Messenger in the browser, you will see that the Dark Mode is also on.
5.2 Edge
If you are using Edge, the easiest way to activate the Dark Mode on your Messenger is to download from the Edge add-ons list the Dark & Night Theme for Facebook.
With this extension, once you change the Facebook theme to dark, this will also apply each time you open Facebook Messenger.
Moreover, you have five built-in Dark Modes to choose from, and if you want, there is also the option to build your dark theme.
Since 2020, Facebook users on iOS, desktop, and Android have had the choice to switch to Dark Mode; however, some users are reporting that they are now unable to do so.
This may be because of updates in the app, in which case they may need to go and re-enable the settings.
On some rare occasions, it could be a sign that the user has malware on the device, and a strong antivirus may be needed to resolve this.
Facebook Messenger is used by so many to keep in touch with family and friends, and activating the Dark Mode, especially at night, is a game-changer. You may not be able to enable the Messenger Dark Mode on a browser, so you should download the app.
We have detailed in this article the steps you can follow to use Dark Mode Messenger in your browser, and as you can see, all you have to do are a few simple steps.
Those of you who are both Xbox fans and basketball fans, and who happen to be in New York this week are in for a real treat at the Barclays Center.
The Brooklyn arena – which is home to both the NBA’s Brooklyn Nets and the New York Liberty of the WNBA – is hosting an Xbox/Roblox themed court during this week’s New York Liberty home games against the Los Angeles Sparks. The two games will take place on August 2 and August 3.
NEW YORK – August 2nd, 2022 – The New York Liberty in collaboration with @Xbox has unveiled the @WNBA’s first-ever gaming inspired basketball court for the team’s August 2nd and August 3rd home games versus the Los Angeles Sparks at Barclays Center. 1/2 pic.twitter.com/VfAQDaFuyx
Those who can’t make it to the Barclay Center can still experience the Xbox court in the Roblox game Infinite Canvas’ Dunking Simulator. And unlike its real-life counterpart, the Roblox experience will feature pyrotechnics, fan chants, and 11-year-old sports journalist Pepper Persley as host. Access the Infinite Canvas’ Dunking Simulator experience here, just create a Roblox account if you don’t already have one.
Fans can also visit Power her Dreams to share their experiences. Microsoft will donate $10 for every submission to either the Mamba & Mambacita Sports Foundation or Girls Who Code, with a maximum $50,000 to each nonprofit organization.
It is nearly back-to-school time. And while that may not seem like the most joyous of news to some, the silver lining is that it is also the time to stock up on the most important study essentials: back-to-school gaming accessories. And we’ve got the best already picked out for you. You’re welcome. Now let’s have a look at the best back to school gaming accessories 2022.
Game-changing audio is yours with this wireless Bluetooth® headset designed for Xbox Series X|S and mobile Xbox gaming.
Heading back to school usually means you’ll be making new friends. And what is the point of having friends if you can’t invite them to join you in some online gaming? That’s why you will need a good gaming headset. And when it comes to hurling good-natured insults over a tense round of deathmatch, only the best will do. That’s why you need the Razer Kaira Pro for Xbox Series X|S. Check out these tech specs:
Meet Razer’s first wireless keyboard and mouse designed for Xbox One (and Series X|S). Get incredible precision on a tenkeyless keyboard with an inbuilt mouse mat, paired with a mouse featuring the acclaimed Razer 5G Advanced Optical Sensor. It’s the one-device solution for advanced gaming – on the couch.
Only PC gamers can really appreciate how much a great keyboard and mouse can enhance the gaming experience. With the Razer Turret Mechanical Gaming Keyboard and Mouse – compatible with Xbox One and Xbox Series X|S consoles – you now have access to a keyboard/mouse combo that will feel like an extension of you. Not to mention it looks snazzy as all get out, and will add a ton of flair to your setup.
Introducing the XBOX Series S Game Traveler System Case by RDS Industries. This sleek Game Traveler XBOX Series S Case holds and protects your complete XBOX Series S system, controllers, along with cables/power cords. The case has a padded divider with elastic straps to securely hold 2 controllers. A mesh pocket holds the HDMI cable and power cord with inner pocket for Seagate Storage Expansion Cards. The hard shell case with comfortable carry handle provides maximum protection. Take your XBOX Series S system anywhere you need to with ease and confidence.
If you often find yourself taking your Xbox Series S console on the go, say to a friend’s house, then you no doubt can already appreciate just how much a good carrying case – particularly one specially-designed for the Series S – can simplify your life. And this here is the perfect solution: the RDS Industries Xbox Series S Game Traveler System Case. It stores and protects all your Series S gear – console, two controllers, cables and power cords.
In celebration of Xbox’s 20th Anniversary, Microsoft and adidas have teamed up to release a special edition of the Forum Tech Boost. These sleek shoes update an iconic style with modern adidas technologies and some serious Xbox-inspired flair.
You are going to need a little personal swag to go with all that gaming goodness. What better way to add some flair to your everyday look than with these sick kicks? Celebrate 20 years of Xbox and look cool doing it.
Inspired by the look and feel of the PS DualSense™ wireless controller, the Backbone One gives users tactile controls to enhance their gaming experience on iPhone®. Pair with the PS Remote Play App and you can play your PlayStation® games anywhere* with ease. Simply plug your iPhone® into the Backbone One and start playing.
Though Sony’s Remote Play for PlayStation isn’t anywhere near as robust as Xbox Cloud Gaming, the news is that Sony is looking to drastically expand its mobile game streaming offerings over the next few years. And that’s why you are going to need this latest, PlayStation-oriented controller from Backbone.
Charge or display your Xbox Wireless Controllers with this officially licensed Dual Charging Station that eliminates the cost of replacement batteries. Included are four battery doors (two for Xbox Series X|S / two for Xbox One) plus two 1100 mAh rechargeable batteries for up to 40 hours of gameplay*. To charge, simply click controller down on the Charging Station and monitor for LED color change from amber to white. When fully charged, click up to store. Focus on the game and not on your battery life.
Say goodbye to those AA batteries with the PowerA Dual Charging Station for Xbox One and Series X|S consoles. This will save you money in the long run. Not to mention it will help tidy up your gaming space. An essential item for any Xbox fan.
Wrap up
There you have it: the best back to school gaming accessories 2022. Which items featured here are you most excited about? Will you be purchasing any of the back to school gaming accessories? Let us know down in the comments. And happy gaming – um, we mean studying.
Sniper Elite 5: Landing Force Mission and Weapon Pack – Available now
Sea of Thieves: Season Seven – August 4
Game Pass Ultimate Perks
Fall Guys: Coconut Milk Costume – Available now
Skate 3: Upgrade Bundle – August 11
The Elder Scrolls Online: Noweyr Pack – August 16
Games leaving Game Pass on August 15
There are also some games set to leave Game Pass at the midpoint of August. Be sure to dive back into these games while they are available to Game Pass subscribers.
No doubt there will be more announcements coming throughout the month, so consider this just a preview of what Game Pass subscribers have to look forward to in August. If you don’t already have an Xbox Game Pass subscription, you can sign up here. New members can currently get their first month for only $1. To find out more about Game Pass, head on over to its FAQ page.
You can open PDF documents and put them in a spreadsheet in Microsoft Excel, but most of the time, the result is not going to be satisfactory.
You can also try to save a PDF document as an Excel file using Acrobat DC but it’s merely something rather than nothing.
That’s why we got pretty excited when we found out that Microsoft introduced a PDF data connector in Microsoft Excel that allows you to import data from PDF files.
The new PDF connector feature is available if you have an Office 365 subscription.
How can I import data from PDF to Microsoft Excel?
In the guide below, we will show you how to easily import data from PDF to Excel in just a few minutes.
You can use the PDF Data Connector to identify and retrieve relevant data and have it ready for transfer in a spreadsheet-optimized format in no time.
Check out this quick, yet comprehensive guide and quickly overcome any file format limitations to make the most of your data.
Quick Tip:
If you don’t know about an intuitive way to import multiple data from PDF to Excel or open PDFs in Excel then you haven’t heard about SodaPDF.
This efficient PDF tool has the Convert and extract utility that lets you import any data to Excel files. Plus, it’s possible to go wild and edit your PDF files with thousands of options.
SodaPDF
Quickly import your data from any PDF files into Excel databases with this best PDF editor.
League of Legends is probably the most popular online multiplayer game today with more than 100 million players monthly.
With immersive play and vivid graphics, this MOBA has changed the way we experience PvP gaming.
However, there’s never been complex software without technical issues. That is the case with League of Legends, too.
Most of the reported issues have a specific set of solutions and fixes. Some of them are widespread while others are less so.
Nevertheless, there is a last resort to every technical issue and it’s called a reinstall. You can fix your errors with the game if you reinstall League of Legends.
How can I reinstall League of Legends?
We prepared a walkthrough for you with a step-by-step explanation of the reinstallation process using 2 different methods.
1. Reinstall League of Legends using Hextech Repair Tool
The developer of the League of Legends, Riot Games, launched an interesting software solution to fix common technical issues related to the game. It is called Hextech Repair Tool and its main features are:
Easy reinstallation or repatch
Firewall management
Restores the health of nearby turrets.
Display the known issues in your region.
Hextech Repair Tool can perform a clean reinstall of your client in a few simple steps. All you need is to follow the instructions on the screen.
If you encountered errors with your League Client and the game does not work properly, you can perform a manual game reinstallation.
In doing so, you need to uninstall the game from Control Panel, then download and install the newest version from the official League of Legends website.
1. Open the Start menu on your computer by pressing the Windows key.
2. Select Control Panel from the list of results.
3. Click on Programs and Features.
4. Scroll down until you find League of Legends in the list. Click on it.
5. SelectUninstall/Remove.
6. The uninstall process will begin. Follow the instruction until the process is finished.
7. Navigate to the directory where League of Legends was installed (the C: drive by default).
8. Delete the old setup files you used to install the game and any unnecessary registry files.
9. Restart the PC.
After you finished the entire uninstallation process, the next step is downloading and installing the game’s client.
11. RunLeagueofLegends.exeto download the setup files. These will be placed in a new League of Legendsfolder on your desktop by default.
12. After the setup finishes downloading, the installation process will begin automatically. If possible, install League of Legends to the default C: drive. Though, you can change it in custom install.
13. When the installation process finishes, the game’s launcher will open automatically.
14. If the game does not automatically start, you can manually open it by double-clicking theLeague of Legends desktop shortcut, or by runninglol.launcher.exein the directory to which you installed League of Legends.
If you’re looking to reinstall League of Legends to fix persistent issues, follow the steps in our League of Legends uninstall guide for a complete and clean reinstallation process.
There are also reported cases of registry issues that impact fresh installs. Our advice is to use a specialized registry cleaner such as CCleaner and get rid of unnecessary registry entries related to LoL.
This was our walkthrough of the reinstallation process. We hope you managed to reinstall the game and start from scratch.
Keep in mind that this is just a game client, so none of your in-game statistics are affected in any way.
If you’re someone that takes a lot of Uber rides and uses Outlook on Windows to file and print receipts, then we have a fair warning for you. Noted by Bleeping Computer, there is an ongoing issue with Outlook where the client on Windows might crash when you try to open emails with complex tables.
Microsoft actually has a support page for this, first published on July 29, and mentions that the issue started in the Current Channel version 2206 Build 15330.20196 and higher. The same issue also happens in current builds of Beta and Current Channel Preview. It even applies to Word, where similar table contents might cause Word to stop responding.
Officially, Microsoft is working on a fix that should come out on Patch Tuesday, timed for August 9, 2022. The fix is from the Word Team, and will be released to the Beta channel first. In the meantime, you can workaround any issues you have by reverting the Outlook build to a previous version. Here’s how.
Open a Command Prompt in Administrator context
Type or paste the two commands into the Command Prompt window and press Enter after each.
cd %programfiles%\Common Files\Microsoft Shared\ClickToRun
officec2rclient.exe /update user updatetoversion=16.0.15225.20288
It has been a rough patch for Outlook as of recent. As you might recall, Outlook had issues where there were issues with search, and even Outlook.com going down. We’ll be following this story closely and will have an update once Microsoft has a fix.
Microsoft has announced two new products under the Microsoft Defender lineup. Designed for businesses, and powered by their acquisition of cyber security company RiskIQ, Microsoft hopes the new Defender Threat Intelligence, and Defender External Attack Surface Management can aim to help companies reduce their chances of getting hit by cyber-attacks.
We’ll begin by getting into the details of Microsoft Defender Threat Intelligence. This new product is all about offering real-time data from Microsoft’s security signals. It builds on the real-time detections of Microsoft Sentinel. and lets organizations hunt for threats more broadly, and helps them uncover more adversaries. According to Microsoft:
Microsoft Defender Threat Intelligence maps the internet every day, providing security teams with the necessary information to understand adversaries and their attack techniques. Customers can access a library of raw threat intelligence detailing adversaries by name, correlating their tools, tactics, and procedures (TTPs), and can see active updates within the portal as new information is distilled from Microsoft’s security signals and experts. Defender Threat Intelligence lifts the veil on the attacker and threat family behavior and helps security teams find, remove, and block hidden adversary tools within their organization.
Now, for Microsoft Defender External Attack Surface Management. This second product under the Microsoft Defender offering is all about helping businesses see their operations the way an attacker can. More specifically, security teams can use this product to see and discover unmanaged resources that are visible from the internet, which is what an attacker might usually see. In Microsoft’s words:
Microsoft Defender External Attack Surface Management scans the internet and its connections every day. This builds a complete catalog of a customer’s environment, discovering internet-facing resources—even the agentless and unmanaged assets. Continuous monitoring, without the need for agents or credentials, prioritizes new vulnerabilities.
Microsoft says these new offerings come at a time when ransomware losses are hitting businesses hard. The company is citing an FBI report which found that these types of losses totaled more than $50 million, with total cybercrimes costing 6.9 billion. Defender Threat Intelligence and Defender External Attack Surface Management should help reduce these threats.
Back in 2014, they made encryption free for all customers, and a few years ago, they made DDoS mitigation free and unmetered across all of their plans.
It all culminated with the launch of an alternative cooperate VPN.
What is DNS service 1.1.1.1 and how to use it?
You might have read in our articles that your ISP can also sell your browsing data. And this is legal in many parts of the world. Now, you can secure your connection from the directory of the Internet.
Heading to take on Google’s 8.8.8.8 alternate DNS provider, Cloudflare’s set its focus on privacy.
They’ve stated to never log your IP address (the way other companies identify you). And have retained KPMG to audit their systems annually to ensure that they’re doing what they promise.
The independent DNS monitor performance and analytics places 1.1.1.1 to be the Internet’s fastest DNS directory in the world as you can see below.
DNS server is a crucial component of the Internet. If you want to access any website on the Internet, you need to access the DNS server first.
After the DNS server receives your request, you’ll be directed to the desired website. Thus, choosing the fastest DNS directory across all your devices will increase the speed of your access online.
How to change DNS to 1.1.1.1 on Windows 10
Changing your DNS to 1.1.1.1 is very easy and does not require technical expertise. You can configure your IPv4 and IPV6 DNS server settings through the Network and Sharing Center in Control Panel.
1. OpenControl Panelfrom theStart menu.
2. Go to Network and Internet.
3. Go to Network and Sharing Center > Change Adapter Settings.
4. Right-click your Wi-Fi network and go to Properties.
5. Navigate to Internet Protocol Version 4 or Version 6 depending on your network configuration.
6. Go to Properties.
7. Write down the existing DNS server settings in a document.
8. Replace those addresses with the 1.1.1.1 DNS addresses:
For IPv4: 1.1.1.1 and 1.0.0.1
For IPv6: 2606:4700:4700::1111 and 2606:4700:4700::1001
9. Click OK and restart thebrowser to apply and save the new DNS settings.
If you set it up on your router, all your devices connected will use the new DNS from Cloudfare. Should the IPv4 proprieties not work as intended on your Windows 10 PC, don’t worry. We’ve got the right solution for you.
The configuration is equally straightforward (or even more so) on Windows 11. You will be able to adjust the DNS settings from the Network Properties. Now, errors may occur and Windows 11 is by no means perfect.
If you’re not able to change the DNS server on Win 11 from the first go, you can always rely on native Windows tools such as Powershell or the Command Prompt to get it to comply.
Needless to say, we will make sure you won’t get stuck with the DNS and static IP provided by your ISP, so make sure you keep our guide at hand.
The main concern in the digital world still is privacy and security.
We can see improvements along. The fast-approaching release of new Windows updates always brings new privacy settings, but we have to keep our eyes open and stay informed.
If you’re not satisfied with this DNS, we have a guide on the fastest DNS servers and how to find them, so don’t miss it.
As always, for more questions and suggestions, reach for the comments section below.