Many Windows 7 users reported that fai.music.metaservices.microsoft is not working on their machines.
As a quick reminder, back in January, Microsoft decided to discontinue support for Windows Media Player and Windows Media Center on Windows 8.1 and Windows 7 PCs.
This explains why many users are now experiencing this problem.
Microsoft says that users can’t view metadata such as title, genre, and artists for songs simply because the metadata hasn’t been updated:
Going forward, you may be unable to view information (metadata) such as the title, genre, and artist for songs, and the director, actors, and cover art for movies in Windows Media Center and Windows Media Player. […] Microsoft decided to discontinue this service. This means that new metadata won’t be updated on media players that are installed on your Windows device. However, any information that’s already been downloaded will still be available.
The good news is that, as Microsoft confirms, this change doesn’t affect the media player’s main functionalities such as playback, navigating collections, and media streaming. Only the features that require downloading new metadata are affected.
Is this a way to force users to update to Windows 10?
Microsoft announced that Windows 7 users would not be able to view metadata on Windows Media Player back in January.
The fact that these features became unavailable shortly after the May Update was rolled out made many users wonder if Microsoft did that on purpose so as to force them to upgrade to Windows 10.
This is just to push everyone to win10.
The service works only on win10 so this decision by microsoft falls in line with groove music and the only way to rip an audio cd is with wmp on win10 or add the information manually.
What will be next, not supporting lan, wifi, sound devices, video cards and other new hardware to force us to by only win10 certified devices from MC?
The rage over discontinuing fai.music.metaservices.microsoft.com is understandable. Windows 7 is still a very popular operating system and limiting its features could mean what users say: forcing everyone to update to Windows 10.
A great number of Minecraft players have reported that when they try to redeem their Minecraft code in Windows 10, an error message appears whcih reads, This code has already been redeemed.
This issue has caused a lot of frustration amongst Minecraft players, with endless forum page discussions about how to fix this issue once and for all.
In case you find yourself in the same situation after downloading Minecraft, keep reading to find out the solutions that worked for others!
Why is my Microsoft Minecraft code not working?
Here are a few reasons you are getting the error:
Incorrect code: Often, the problem arises when users enter the wrong code. So your primary approach should be to verify that the code is entered correctly.
Using another account: Several users reported the error when using a code purchased for another account.
Issues with the server: In some cases, it could be a problem with the server that triggered the error or Minecraft server issues at the user’s end.
How do I fix This code has already been redeemed error in Minecraft?
1. Redeem your via Microsoft Store
Login to Windows with the Microsoft account you used to buy Minecraft.
Press Windows + S to open Search, type Microsoft Store, and click on the relevant search result.
Search for the Minecraft edition forWindows 10, and click the Get this app button.
Now, click on Buy.
Type in the email address and password that you used to buy Minecraft.
Windows Store will recognize that you already own this game and will start downloading.
After the download and installation process are completed, you can start playing again.
A quick way to fix things when you get This code has already been redeemed on Minecraft in Windows 10 is to download the game using the Microsoft account the purchase was first made on.
If the game is listed, it means that you redeemed your code with a Microsoft account. When you redeemed the code, you used a specific account that has the code connected to it.
In this article, we explored some of the best ways to fix the Minecraft code has already been redeemed error. And if you’ve redeemed it but your purple heart cape is not showing up, we have a detailed article on what to do.
Before you leave, do check some quick tips to make Minecraft use GPU and boost the game’s performance.
We hope this guide helped you solve this issue. Please let us know if it did by using the comment section below.
If you’ve been thinking about subscribing to Office 365 to get access to the Microsoft Office suite of applications for an affordable yearly or monthly price, there are two options you can to choose from. Currently, for general consumers, Microsoft offers both Office 365 Home and Office 365 Personal.
While both of these subscription tiers give you similar access to Word, Excel, PowerPoint, Outlook, Publisher, and Access, there are some subtle differences for what you can get for your money. In this guide, we dive a bit deeper and will help you choose the subscription plan that is right for your home.
So, what’s included in both subscriptions?
Before diving into the differences, it is best to look at the software and services you get with both subscriptions. Covered under Office 365 Home and Personal is access to full versions of Word, Excel, PowerPoint, Outlook, and Skype. These all receive monthly updates from Microsoft, and you can install on PCs, Macs, tablets, and phones. If installing on just a PC, you’ll get bonus access to Microsoft Access and Publisher.
As a bonus, both subscriptions also include 1TB of cloud storage on Microsoft OneDrive per user (with paid options for more storage, if needed) and 60 minutes of calling on Skype per month. There are some exclusions and exceptions with who you can call on Skype, however. If you’re using OneNote, you will also gain access to some special features. These include Ink replay, Researcher, Math Assistant, Stickers, and more.
The Office 365 Icons
Office 365 Personal — For one person only
Now, it’s time to look at the differences. We’ll start first with Office 365 personal. For the price of $6.99 a month, or $69.99 a year, Office 365 Personal is the cheapest way to get Office on your devices. We’d recommend it if you’re just buying a subscription for one person, with no plans to add users to your plan.
While the subscription does grant you access to PowerPoint, Word, Excel, Outlook, Access, Publisher, and Skype, there is an important limit. If opting for this base plan, you only will be able to use the Office applications with one Microsoft account (meaning one user with one license) across multiple PCs, Macs, or tablets. You’ll also only get 1TB of OneDrive cloud storage with that single account.
Keep in mind, however, that while it may seem as though you may be able to install Office on as many computers as you want using this subscription, there are some technical limits. According to Microsoft, you only can stay signed in to Office 365 Personal with five devices at the same time. That means, that if you sign in to a sixth device, you’ll be forced to sign out of one of your other devices via the Microsoft Account page.
You might be able to install Office without signing in on that sixth device, but as Office 365 is activated using a Microsoft Account, you’ll also lose some subscription features and Office might only run in read-only mode.
Office 365 Personal in the Microsoft Store
Office 365 Home — For up to six people, best for families
Priced at $99.99 a year, or $9.99 a month, Office 365 Home is a subscription that we’d recommend for families. Compared to Office 365 Personal, for the extra $30, this version of Office 365 lets you pay one price to enjoy Office with multiple users, under one paid plan. There’s even a free 30-day trial available if you’re not sure if the subscription is right for you.
With this subscription, six different people can use PowerPoint, Word, Excel, Outlook, Access, Publisher, and Skype across multiple devices. In technical terms, this means you can link up to six Microsoft accounts with a single Office 365 Home subscription. Each person will be able to install Office on all their devices, with their own personal accounts, but only can stay signed in to five devices at the same time.
This means that each person will continue to get all the benefits, including full versions of Word, Excel, and PowerPoint, plus the 1TB of OneDrive cloud storage and more. There’s plenty of value here for families, as adding things up across the six users, you can get up to 360 total minutes of Skype calls, and 6TB of storage on Microsoft OneDrive.
Office 365 Home in the Microsoft Store
For most, Office 365 Home and Personal is the way to go
At the end of the day, both Office 365 Home and Personal are excellent ways to save money and get Office for an affordable price. The alternative to these options would be to buy Office Home and Student 2019, which comes at a one-time cost of $149. However, by going that route, you’ll only be able to install Office on 1 PC or Mac, and you won’t have the ability to update to the next major version of Office for free when it’s available. You’ll own the software forever, and won’t have to worry about paying a yearly subscription fee, but you’ll end up paying more if you want to enjoy Office on multiple PCs or Macs with multiple users.
You can buy Office 365 Personal today from Microsoft by heading to this link here. Stay tuned for more as we continue to dive deeper into the world of Office 365.
Remedy Entertainment, the game developer behind Quantum Break, Max Payne, and Alan Wake is now in control of the publishing rights for the latter. In a message for investors (via Eurogamer), the Finnish company explained today that it would earn “approximately 2.5 million euros of royalties from previously released games” for its first half-year period of 2019, adding that “the publishing rights of Alan Wake games are reverted to Remedy.”
Alan Wake was initially released back in 2010 on Xbox 360, with Microsoft acting as a publisher. A Windows version was released two years later, and despite the game gaining cult following over the years, Remedy cancelled a sequel to work with Microsoft on Quantum Break.
Speaking with Eurogamer, a Remedy spokesperson explained that the game developer remains entirely focused on its next multiplatform game named Control, but owning the IP for Alan Wake means that releasing the game on more platforms is now a possibility.
“The only thing we want to clarify, now that Remedy owns the publishing rights, is that we could bring Alan Wake to different platforms if we so choose,” the Remedy spokesperson said. “We have nothing to announce for now. We are fully focused on Control releasing on 27th August.”
A DHCPServer is a crucial network component but many reported that DHCP server stopped working on their PC.
This can be a problem and if this happens, you won’t be able to access the Internet properly, so it’s important to fix this issue, and today we’re going to show you how to do it.
What causes DHCP server failure?
Temporary glitches or missing updates can cause this issue.
Incorrect date and time or DNS problems can lead to DHCP issues.
Connectivity issues and network failure.
How do I fix my DHCP server if it goes down?
1. Update your Windows version to the latest release
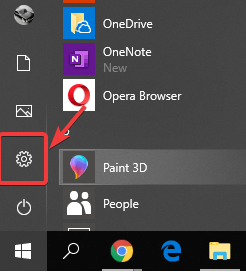
Click on Start button and choose the Settings button.
Click on Update and Security.
Click on the Check for updates button, and install any available updates.
2. Flush the DNS
Press Win + X keys on your keyboard, and choose Windows PowerShell (Admin).
Inside the PowerShell window, type in the following command: ipconfig /flushdns
When the process is completed, you should receive the following message: Windows IP ConfigurationSuccessfully flushed the DNSResolver Cache
3. Reboot DHCP Server
Save any work you’re currently performing on the computer.
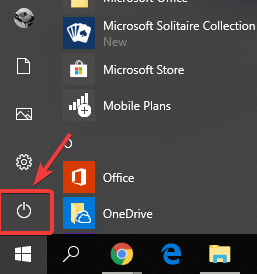
Click on Start button and click the Power button.
Select the Restart option.
4. Sync time settings
Make sure that the time settings on your DHCPServer are the same as with the clients terminal.
Any difference in this area can cause issues with the IP packages your DHCPServer can distribute over the network and may cause the DHCP service to stop entirely.
After adjusting the date and time, check if the problem is gone.
5. Fix any connectivity issues between DHCP Server and domain controller
Log into your DHCPserver. Next, press Win + R keys to open the Run window.
Enter cmd and press Enter.
Inside the Command Prompt, type the following but be sure to replace server_FQDN with the full domain name of the domain controller: ping server_FQDN
Press Enter.
If the ping is successful, you will see a reply similar to this : Reply from IP_address: bytes=32 time=3ms TTL=59
Follow these steps to ping the IP address of the domain controller:
Inside the Command Prompt window enter the following but be sure to replace IP_address with the actual address of the domain controller: ping IP_address
Press Enter.
You should now see the server response time.
If you successfully managed to ping the FQDN but not the domain controller IP address, this means that you might have a problem with the DNS host name resolution.
In case you can not ping the domain controller by IP address, this means that there are possible issues with your DHCPservers firewall configuration, network connectivity, or IPsec configuration.
Star Wars Battlefront 2 is a popular game available for both the Xbox as well as Windows platform including others. The Xbox and Windows users have reported a string of errors while playing the Star Wars Battlefront 2 game on their devices.
The error can occur when trying to connect online or while trying to search something in the game. Some of the most common Star Wars Battlefront 2 errors with their numerical codes are listed below.
721
1017
2593
524
201
In case you are looking for a way to fix one of these Star Wars Battlefront 2 errors, here is an article with the best possible solutions to fix the error.
The first thing you should do is check if the EA server for the Battlefront 2 is down. If it is a widespread issue and the if the EA servers down, then you cannot do much to resolve this error but only wait for the servers to be working again.
Visit the DownDetector link for Star Wars BattleFront 2 and check the status.
2. Switch Profile
From the main menu, select Switch Profile.
Log out and log in to your profile again.
Try to launch the Star Wars Battlefront. This should help you resolve 2593 error code.
Making sure that the Xbox console is up and running, do the following.
Press and hold the Xbox power button (on the console) until the console powers off.
Unplug the console’s power cable from and wait for a minute.
Plug the power cord back and start the Xbox by pressing the Power button again.
After the restart, launch Star War Battlefront 2 and check for any improvements.
4. Reinstall Star Wars Battlefront 2 (PC)
Press Windows Key + R to open Run.
Type control and press OK to open the Control Panel.
Go to Programs > Programs and Features.
Select Star Wars Battlefront 2 and click on Uninstall.
Re-download the game from the developer and proceed with the installation.
5. Release and Renew IP Configuration (PC only)
Press Windows Key + R to open Run.
Type cmd and press Ctrl + Shift + Enter to open the Command Prompt as administrator.
In the command prompt, type the following command and hit enter. ipconfig/release
Now you need to renew the IP, so enter the following command and hit enter. ipconfig/renew
Close the command prompt window and launch Star Wars Battlefront 2.
Check if the error is resolved and you are able to connect to EA servers.
6. Change Default DNS on Xbox
From the Xbox menu, go to Settings.
Select Network and then go to Advanced Settings.
Select “DNS settings” > “Manual“.
Now, you need to enter the custom DNS server for the primary and secondary DNS. Enter the following address. Primary DNS: 8.8.8.8 secondary DNS: 8.8.4.4
Go back to the home screen and launch Star Wars Battlefront 2 and check for any improvements.
If you have recently bought the Xbox Live subscription, Xbox will ask you till the billing information. While filling the billing information, users have reported that they are getting postal code error after entering the Zip code. The error reads Enter a valid postal code before continuing.
I just bought xbox live, and the xbox want’s me to fill in billing information. and so i did. i live in norway, and my postal code. but it wont except my postal code. it says “enter a valid postal code before continuing”
Resolve the problem by following the steps we provided below.
Login to your Microsoft account (Associated with the Xbox Live accounts).
Click on Payment and Billing.
If prompted, sign in again with your Microsoft Account details.
Proceed with adding more details to your Billing Info. Enter the postal code and check if the error is resolved.
Once the billing info is set, log out of your account from Xbox and log in again. You should be able to access the Xbox Live account without any issues now.
It is important that your Billing info and the postal code used by your credit company matches. Irrespective of where you are using the credit card, it is necessary that your bolling info matches your credit card company details as well.
For example, let’ say you have created a UK account but are using the credit from a UAE then you won’t be able to complete the setup without using a credit card from the UK or creating an account from UAE.
3. Check if you Postal Code has Changed
If your postal code has changed recently ( 2-5 years ago) it is possible that Microsoft account is still looking for the old postal code. A user reported that after entering the old postal code, he was able to create the account successfully. So, do check if your postal code has received additional numbers recently and try it to fill the billing info.
The Xbox postal code error is a common error that usually occurs if the details on your payment card and account info mismatches. Follow the troubleshooting tips in this article to fix the error.
Backtracker is Asus’s own backup disk software that comes pre-installed with the Asus laptops. However, many reported various Asus Backtracker Windows 10 issues.
This can be a problem since you won’t be able to create backups, so you risk permanent file loss. Luckily, you can fix this issue by following the instructions from this guide.
What is ASUS Backtracker?
Asus Backtracker is an official ASUS software that allows you to back up the Windows OS image to a USB drive.
You can use it to reinstall the Windows OS using the recovery USB drive after replacing the hard drive due to corruption.
The software can delete the recovery partition in case HDD runs out of space.
How can I fix ASUS Backtracker Windows 10 issues?
Use Windows Recovery instead
Insert the USB drive into the computer.
Type Recovery Drive in the search and click Create a recovery drive option.
In the Recovery Drive window, select “Back up system files to the recovery drive” option and click on Next. Selecting this option will take more time to create the Recovery Drive, but can help you recover your system faster.
Select the USB drive from the list and click Next.
Click on the Create button to begin the process. Note that, any data in the USB drive will be deleted, so create a backup of the USB drive data before creating a recovery drive.
When done, click on Finish.
Create a System Repair Disc
If you prefer a DVD recovery drive, you can do this using the System Repair Disk.
Insert the DVD into the drive.
Open the Control Panel and go to Backup and Restore (Windows 7).
Click on Create a System repair disc.
Select the drive and click on Create Disc.
Once done, click on Close.
ASUS Backtracker is incompatible with Windows 10, so you’ll have to use a different solution.
SQL Server is among the most used relational database management systems out there. Still, sometimes, when trying to use SQL Server you might get Your operating system is not supported by SQL Server error.
This can be a big problem, and we’ll show you how to fix it in today’s article.
What to do if SQL Server does not support your operating system?
1. Run in Compatibility mode
Open the folder containing the files for SQL Server.
Right click on the setup file and select Properties.
In the Setup Properties windows, select the Compatibility tab.
Select the checkbox for Run the program in compatibility mode for
From the drop-down box just below it, select the Windows version where you know SQL Server runs smoothly. As a safe bet, select Windows Vista Service Pack 2.
Click on Apply, OK.
Double click on the Set-up file to let the installation process to begin.
In the SQL Server Installation Center window that opens, select the first option, that of – New SQL Server stand-alone installation or add features to an existing installation.
Follow on-screen instructions that show up.
2. Make sure that the SQL Server is compatible with your version of Windows
Windows 10 – the most widely used version of Windows, SQL Server 2008 and SQL Server 2008 R2 is not supported.
For SQL Server 2012, you will need to install at least SQL Server 2012 Service Pack 2 for the installation to be complete.
Similarly, for SQL Server 2014, the minimum requirement is SQL Server 2014 Service Pack 1 for a successful installation.
SQL Server 2016, SQL Server 2017 and SQL Server 2019 are compatible with Windows 10.
A large number of users have encountered this error message Your network administrator has applied group policy that prevents installation when trying to download a file on their PC or installing a new application. This error occurs despite the fact that users have administrator privileges.
This issue can become extremely frustrating, as you are not able to modify the content from your hard-drive in any way. You can not save any projects you’re working on, can not even download any files. This issue occurs in the case that there is a corrupted registry key on your system.
For this reason, in this article, we will explore a quick fix that will surely help you with this issue. Please follow the steps presented in this guide in the order that they were written.
What to do if group policy that prevents installation error?
1. Run the installer package as an administrator
Navigate to the location of your installation file.
Right-click on it.
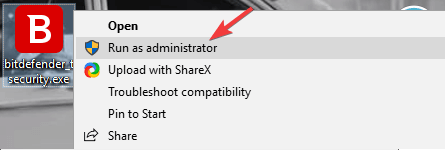
Select ‘Run as administrator‘.
Check to see if this solves your issue and if you can perform the installation. If not, follow the next step.
2. Modify System Registry files
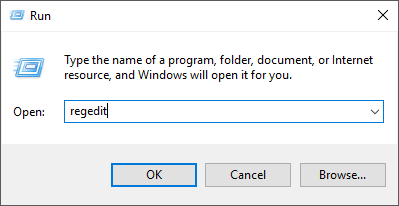
Press ‘Win + R’ keys on your keyboard, type in ‘Regedit‘ (without quotes), and click Ok.
Inside the regedit window, navigate to: Computer\HKEY_LOCAL_MACHINE.
And continue to Software\Policies\Microsoft\Windows\Installer.
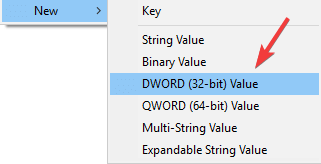
Right-click on the right part of Registry Editor window, select New -> DWORD (32 bit) Value.
Name the new value ‘DisableMSI’.
Right-click DisableMSI, and select Modify.
In the pop-up window, set the value to 1.
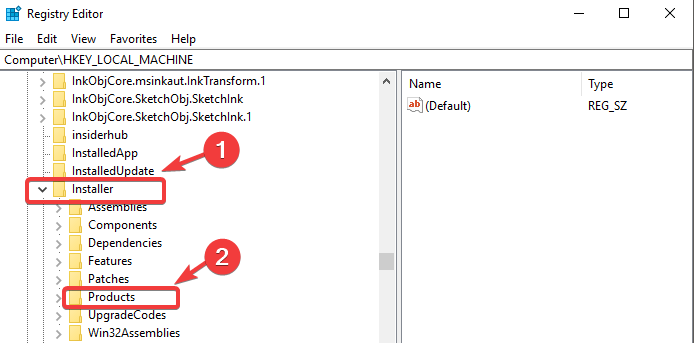
Next, navigate to this location in the System Registry: HKEY_CLASSES_ROOT\Installer\Products.
Search through the list and find the specific application that you have trouble installing.
Select the folder, right-click on it, and select Delete.
Try installing the software that had issues before.
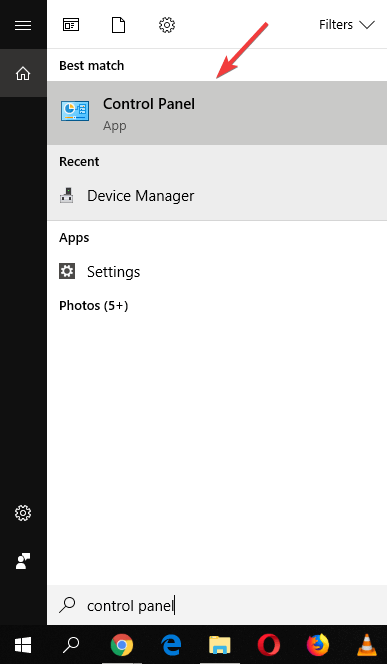
Click on Cortana search bar, type in ‘Control Panel’, and choose the first option.
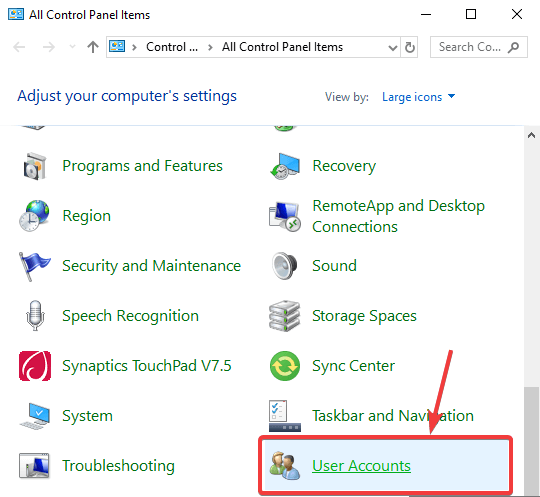
Select the ‘View by’ option to ‘Large Icons’ -> click ‘User Accounts’.
Click on ‘Change User Account Control Settings’ and move the slider down by one, then try to see if the issue is fixed. (Note:Repeat this process until you reach complete deactivation of UAC, and try to see if this solves your problem after each movement of the slider)
In this article, we explored the best-proven methods to deal with the error message ‘Your network administrator has applied a group policy that prevents installation‘.
Please make sure to follow the steps we presented closely and in the order that they were presented. This will make sure that you won’t encounter or create any new issues by following this guide.
Please feel free to let us know if this guide helped you, by using the comment section below.
Modifying System Configuration Utility is fairly simple, but some users reported You do not have sufficient privileges to run system configuration msconfig error, so today we’re going to show you how to fix it.
What to do if you don’t have privileges to run System Configuration Utility?
1. Check if you have Admin status
Click on Start > Settings > Accounts.
In the Your info page, check if your account has Administrator status.
If it does not have Admin rights, follow the steps here:
In the Accounts page, click on Family & other users from the options on the left.
Click on Add a family member or Add someone else to this PC according to how you wish to add yourself to the PC.
Follow on-screen instructions. Make sure to check the box where it asks if the person is to be accorded Administrator rights.
You might also have to get in touch with the Admin if you wish to get added to a PC that is accessed by several users, like say in an office environment.
2. Do an anti-virus scan
One way you can do this is to launch the anti-virus program installed on your device and do a scan of your PC.
Or, you can launch Windows Security center from the Taskbar on the right.
In the Windows Securitywindow, click on Virus & threat protection from the options on the left.
Click on the Quick Scan button, or better still, click on Scan options and opt for Full scan from the options given.
Click on the Scan now button at the bottom for the scan to begin.
Also, ensure you have the latest virus definition files on-board for the scan to be more effective.
For that, launch Windows Security > Virus & threat protection > Virus & threat protection updates.
Click on the Check for updates link.
Preferably, update the virus definition files before going for a full virus scan.
Launch Command prompt. For this, type Command prompt (or just cmd) in the Cortana search box.
Right-click on the Command prompt app and select Run as administrator.
Type sfc /scannow and press Enter.
This will start the scanning process.
Windows will detect if any system file is corrupt or is missing entirely and the fix too will be applied automatically if so needed.
4. System file errors
Click on Start > File Explorer > This PC.
Right click on Local Disk (C:) > Properties.
In the Properties window, click on the Tools tab.
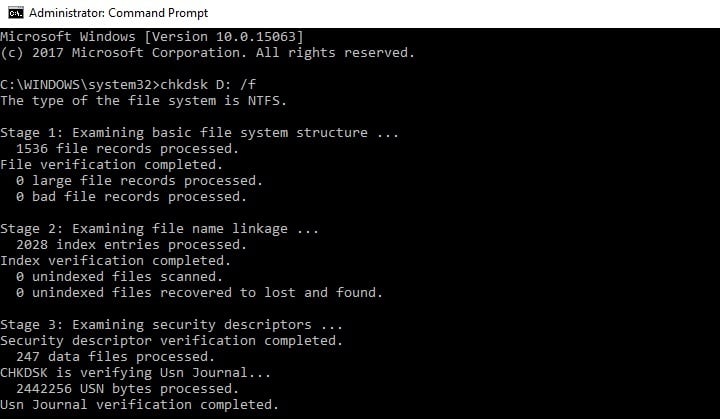
Under Error checking, click on Check.
This will launch the procedure that checks the drive for file system errors.
Follow on-screen instructions.
This should help you deal with the situation where you are faced with the ‘you do not have sufficient privileges to run system configuration msconfig error.
Notepad in Windows is a handy little utility that can be used for many things, from taking notes to creating batch files as well as registry entries. However, the text files created on Notepad or other text editing programs like NotePad++ are prone to file corruption in case of system crashes or freezing.
Users have reported that their notepad files have become corrupted and showing Null characters after their system crashed or froze resulting in a forced restart.
If you have a corrupted file that you want to recover, here are a few troubleshooting tips that you can try to recover the text file.
How do I repair corrupted Notepad files?
1. Restore the Previous Version
Open “File Explorer” from the taskbar.
Now navigate to the location where the text file stored.
Right-click on the stored file and select Restore Previous Version.
Select the Previous Version and click on Restore.
If successfully restored, open the Text file in Notepad to see if the corrupted text file is repaired.
Note: Restore Previous version option will be mostly available for old files. However, do give this method a try to see if your text file has a previous version that can be restored.
Windows OS comes with its own apps store, Microsoft Store. However, users can download and install third-party software just as easily. At times, the third-party apps, like Plex, may create an issue with the system resulting in Mf Media Engine Err Src Not Supported.
The Mf Media Engine Err Src Not Supported error can occur with any third-party app including media and server apps. This error occurs due to incorrect system settings which can be fixed easily.
In this article, we have listed all the possible fixes to help you resolve this error.
How to fix Mf Media Engine Err Src Not Supported BSOD error?
1. Run the Apps Troubleshooter
Download the Microsoft Apps Troubleshooter from here.
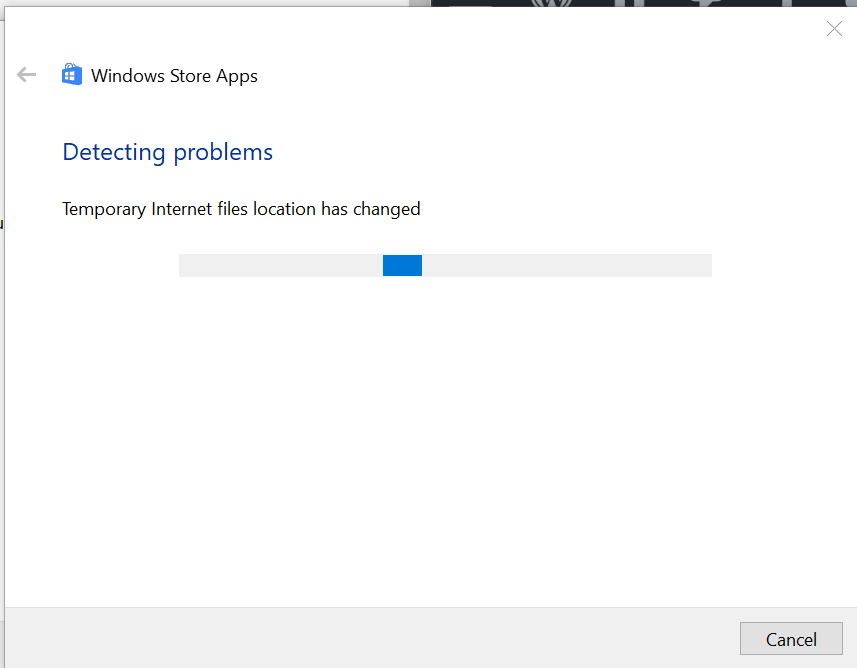
Run the troubleshooter and wait for the Windows Store Apps window to pop-up.
Click on Next button.
The Troubleshooter will scan the system for apps related issues.
If you are on Windows 10, the troubleshooter will ask you to “Run the Windows 10 Apps Troubleshooter“.
Run the Troubleshooter and click on Next.
After the changes have been applied, restart the PC and check for any improvements.
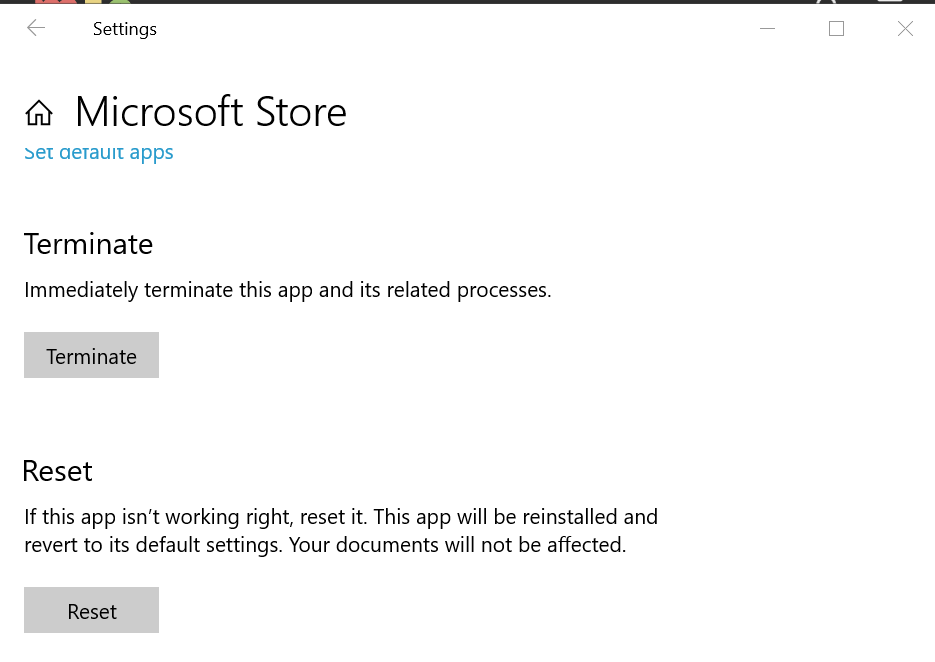
2. Reset the App
Click on Start and select Settings.
Open Apps > Apps and Features.
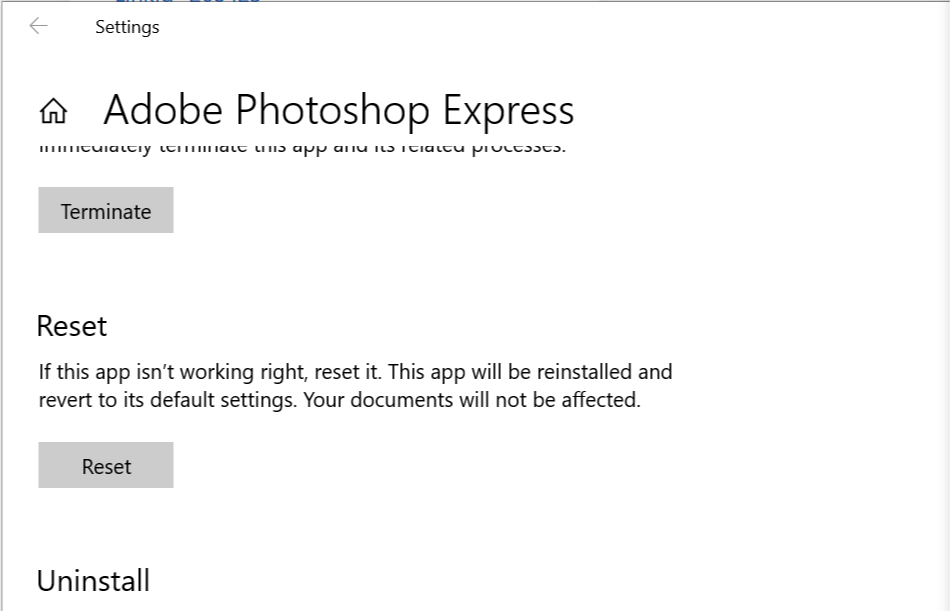
Click on the problematic app and click Advanced Options.
Click on the Reset button. Confirm the reset by clicking on Reset again.
Close the Settings and reboot the system.
After the restart, open the app and check if the error is resolved.
Call of Duty players on Xbox is reporting an error while trying to launch the game. The error says the server is down, gives an error code and stops the launcher stopping the user from playing the game. The error reads Code Negative 345 Silver Wolf.
Follow this guide to resolve this error on the Xbox console.
How do I solve Call of Duty Black Ops 4 error code 345 Silver Wolf?
1. Port Forward Call of Duty
Get Xbox IP Address
Restart your Xbox and login to your account if you haven’t already.
Press the Menu button on your Xbox controllers.
Select Settings.
Highlight and select Network.
Select Advanced Settings under Network Settings.
In the IP settings section, locate the IP Address.
Note down the IP Address that should look like 192.168.0.5.
Port forward on your Router
Open the web browser and log in to your router (through your computer).
Locate your routers port forwarding sections. Different routers have different settings, so check your router’s user manual.
Now put the Xbox IP address in the IP address box.
Now Put the TCP and UDP ports as shown below in the corresponding boxes in your router. TCP: 3074 UDP: 88,500,3074-3075,3544,4500
Save the changes and reboot your router.
Hard Reset Xbox Console
Make sure that your Xbox console is turned on.
Press and hold the Xbox button on the console for 10 seconds until the console completely shuts down.
Once the Console is shut down. Remove the power cord from the wall outlet and also unplug from your console.
Wait for a minute and then replug the power cord to the wall outlet. Wait for the power brick to show the LED light and then connect the power cord to your console.
Restart the console and launch the Call of Duty game. Check if you are able to resolve the error.
Connect your Xbox console to your phone’s hotspot.
Launch the game and wait till you are connected to the network.
Now enter the multiplayer screen.
Close the game again.
Disconnect your Xbox from the Hotspot and connect to your regular WiFi connection.
Relaunch the game and it should work without any error.
This error can also occur if you have two consoles at home and both the players have Call of Duty game installed. Seems like CoD cannot handle two consoles playing the same game on one WiFi connection resulting in this error.
3. Use VPN
Several users have reported that using a VPN with their Xbox have helped them resolve the error. Setting up a VPN for Xbox is not as straightforward as PC.
The amazing people at Codemasters have just made history with the recent release of their new game in the Formula 1 franchise: F1 2019 Anniversary Edition.
Being able to start your career in Formula 2 and raise through the ranks, or play with classics like Ayrton Senna or Alain Prost is a dream for all racing fans out there.
However, not even the latest establishment of the F1 franchise managed to escape and go to the bug-free zone that is Nirvana.
The good news is that for most of the issues, workarounds are available, as you can find by reading this article further.
Most common bug out there, here’s what you have to do depending on the DX and the drivers used:
DX12 – AMD RX – You may experience crashes when using DX12 while Geometry Culling is Enabled. Please either make sure that Geometry Culling is either not enabled or run the game in DX11.
DX12 – Nvidia 970 – You may experience crashes while in DX12 if you have an Nvidia 970. Please be sure to run the game in DX11 if you do have that card.
Nvidia 430.86 drivers and Steam Overlay will cause a crash. Please be sure to remove the Steam Overlay if you have that driver.
DX12 – MSI Afterburner – The game may crash if you go from Windowed mode to Fullscreen or vice versa. Either close MSI Afterburner or run DX11, close the game and then relaunch the game in DX12.
To disable the Steam Overlay, Go to your Library > Right Click F1 2019 > Under the General tab uncheck “Enable the Steam Overlay while in-game.”
To use DX11, open your library. right-click F1 2019. Play F1 2019 (DX 11).
2. Players can’t use their radio output device
Gamers are also mentioning that they are unable to talk with Jeff while on the track while using different headsets.
Go to the F1 2019 directory
Look in the ‘installers’ directory
Install the x64_speechplatformruntime.msi installer (if installed then do a repair)
Run the msspeech_sr_en-in_tele.msi
3. Game doesn’t recognize the steering wheel
Go to Steam Settings > Controller > General Controller Settings >disable the configuration support.
4. Audio stutter when driving
This seems to be an issue encountered with DX 11 only, so make sure to always keep your drivers up to date.
5. Xbox One controller trigger rumble does not work
Change the in game settings from trigger rumble from “Auto” to “On”
Increase the vibration strength for rumble up to 150
Quit the game
Unplug the Xbox One controller USB Wifi adaptor and then plug it back in
As the developers are looking into releasing patches and fixing some of these issues, make sure to always keep your game and drivers up to date for an enhanced playing experience.
How has your experience playing F1 2019 been so far?
In case you’ve found other workarounds for the issues mentioned above (or any other issues), you can list the troubleshooting steps in the comment section below.
Sedlauncher.exe is part of the Windows 10 update package and was designed to improve the speeds of the Windows Update Service on the computer. But for many, sedlauncher.exe has high CPU usage.
As part of the Windows Remediation Service, the element was created with speed optimization in mind. But ever since issues appeared, many asked about what sedlauncher.exe is and ways to fix the high CPU usage caused by this process. Keep reading to find out!
How can I fix high CPU usage by sedlauncher.exe?
1. Disable the Windows Remediation Service
Press Windows + R, type services.msc, and press Enter.
Scroll down in the list of services, and look for Windows Remediation Service.
Double-click it to open up the Properties window.
Under Startup type, select Disabled from the dropdown menu.
Click Apply and OK to save the changes, and then restart the computer.
2. Completely remove Windows Setup Remediations
Press Windows + I to open Settings, and click on Apps.
Inside the Apps and Features list, scroll down until you find Windows Setup Remediations (x64) (KB4023057) or Update for Windows 10 for x64-based Systems (KB4023057).
Select the entry, and then click on the Uninstall button.
Since this particular update triggered high CPU usage by sedlauncher.exe, uninstalling it should do the trick!
3. Disable the REMPL task
Press Windows + R, type taskschd.msc in the text field, and press Enter.
Click on the arrow next to Task Scheduler Library to expand it.
Select Microsoft, then double-click on Windows, and choose the rempl folder.
Select the shell task on the right, press the Delete key, then click Yes to confirm.
Once done with the changes, restart the computer and verify whether the high CPU and disk usage by sedlauncher.exe is fixed.
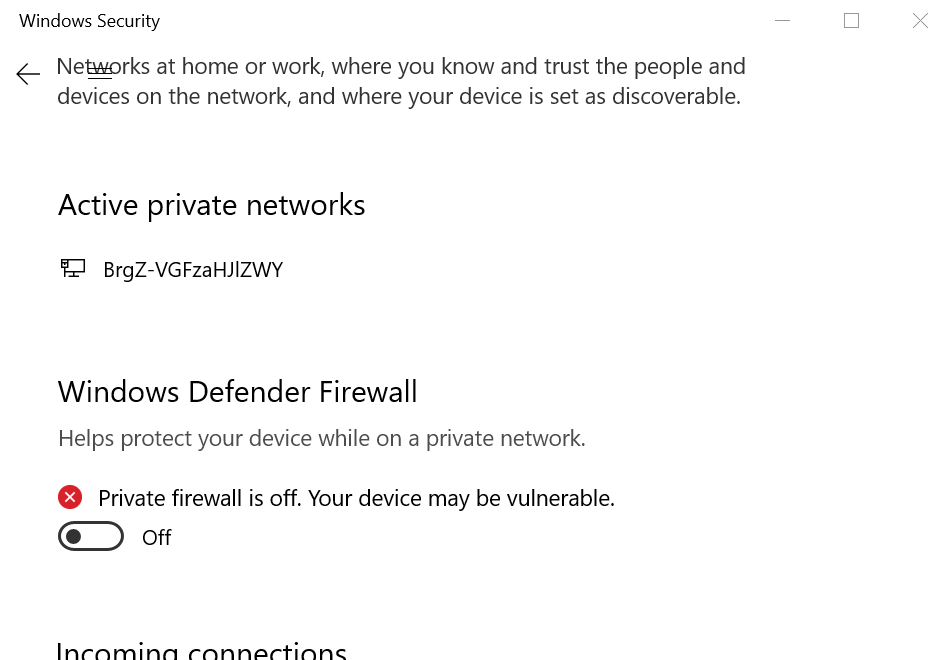
4. Block Windows Remediation service using the firewall
Press Windows + S to open Search, Windows Defender Firewall, and then open it.
Click on Advanced Settings in the left-side menu.
Select Outbound Rules, and then click on New Rule.
Inside the pop-up window, select Program,and then click on Next.
Navigate to the location of the Windows Remediation Service on your hard drive:C:\Program Files\rempl
Select the sedsvc.exe file,and click Next to finish the process.
Enter a name for your new rule, and click Finish.
That’s it! If the previous solutions didn’t work, blocking the service using the Windows Defender Firewall should prevent high CPU usage by sedlauncher.exe.
Bluetooth music pedal allows you to turn to the next and previous page on your Windows devices hands-free. However, some users have reported that their Bluetooth music pedal won’t connect to the computer and get the We didn’t get any response from the device. try connecting again message.
If you are also troubled by this error, here is how to troubleshoot this error on Windows devices.
Why Bluetooth music pedal won’t connect to my PC?
1. Run the Bluetooth Troubleshooter
Click on Start and select Settings.
Go to System and Security.
From the left pane click on Troubleshoot.
Under “Find and fix other problems” section, click on Bluetooth.
Click on “Run the troubleshooter“.
The troubleshooter will scan the system for any Bluetooth related issues and recommend fixes.
2. Check these Settings
Make sure Airplane mode is off. Click on the Action Center icon in the taskbar and turn off Airplane mode if it is On.
Try to enable and disable Bluetooth on your Windows computer. Go to Start > Settings > Devices.
Click on Bluetooth and other devices and turn off Bluetooth. Wait for a few seconds and then it back on.
Remove and re-add the Bluetooth device. Go to Start > Settings > Devices > Bluetooth and other devices.
Under Bluetooth, select the device you are having problems with and click on Remove Device.
Click Yes. Re-add the Bluetooth device and see if that resolves the error.
In the Device Manager, click on View and select “Show hidden devices“.
Expand Bluetooth.
Now find all the greyed out devices and remove them one by them. To remove the device, right-click on the device and select Uninstall Device.
After removing all the greyed out devices, reboot the system.
Make sure you also remove your Bluetooth pedal from the device managerBluetooth section and pair it again with your computer.
4. Manually Install the Bluetooth Driver
First, go to your PC manufacturer’s website and download the latest driver available for PC then follow the steps below.
In the search bar on the taskbar, type Device Manager. Select Device Manager from the list of results.
In the Device Manager, expand Bluetooth.
Right-click on your Bluetooth adapter and click on Update Driver.
Click on “Browser my computer from driver software”.
Click on the Browse button, select the location where the driver files are stored and then select OK.
Click Next and follow the steps to install the driver. After the installation is complete, click Close.
Now you need to restart the computer and check for any improvement.
Note: If the issue persists even after installing the latest driver, try to roll back the driver to the previous version. Download an older version driver and manually install it. Check if that helps.
XAMPP is a popular Apache distribution for Windows and other platforms. The software is easy is to install on a Windows computer as it has tons of resources on how to install the software.
However, some users have reported that they are getting some errors during the XAMPP installation. The full error reads Because of an activated user account Control on your system some functions of XAMPP are possibly restricted.
This is a common error and you can fix it by following the troubleshooting tips given in this article.
How to fix XAMPP Installation Error
1. Install XAMPP Outside of C: > Program Files
Launch the XAMPP installer as admin.
When the warning message appears, click OK.
Now select the programs you want to install and click Next.
XAMPP will now ask you to select the Installation folder. So, by default XAMPP will try to install the files in C:>Programs Files (x86) folder. You need to change it.
So click on the Browse button and select C: as the installation folder. Or create a new folder (C:>XAMPP_Installation )and select it as the destination. Note that the folder should not be in inside the C:>Program Files (x86) folder.
Click on Next to proceed with the installation. Now you should be able to install XAMPP without any error.
The issue here is that installing XAMPP in the program files folder will require UAC permission to run each time. So, by installing it outside the folder, you are avoiding the UAC issues with the software.
Note: If you are creating a custom folder, make sure that you don’t include any spaces between the name of the folder.
2. Disable UAC (User Account Control) ( Less Safe)
Press Windows Key + R to open Run.
In the Run dialog box, type control, and press OK to open the Control Panel.
Click on System and Security.
Next, click on Security and Maintenance.
From the left pane, click on “Change User Account Control settings”.
In the UAC window, drag the slider to Never Notify and click OK to save the changes.
If the UAC prompts you to allow changes, click Yes.
Now try to run the XAMPP software installer and check if the error is resolved.
Note: Disabling UAC is not recommended by Microsoft as it exposes your computer to external threats. Only disable UAC if the other fixes did not resolve the issue.
3. Remove Old XAMPP Installation
Press Windows Key + R to open Run.
Type control and press OK.
In the Control Panel, go to Programs > Programs and Features.
Select the XAMPP installation and click on Uninstall.
Restart the system and run the XAMPP installer.
Follow the fixes given in this article and you should be able to install XAMPP without any errors. To avoid any issues, try to always download XAMPP for Windows 11 from the official source.
The preview builds of Windows 10 April 2018 Update introduced the immersive search bar feature for the first time. Microsoft is now improving the search experience in the form of a search app.
Starting with the Windows 10 May 2019 Update, Microsoft revamped the search experience. The Immersive search bar has been restyled and now sports rounded corners.
Many people don’t have any idea that this feature is disabled by default in Windows 10.
However, your device should be running Windows 10 version 1903 (May 2019) in order to enable the hidden Immersive search bar.
This article lists some simple steps that you need to follow in order to get the new search experience ahead of its official release.
Before moving forward, it is recommended that you should back up your system. Remember, you can always use the backup to restore your system in case of any issues.
Steps to enable Immersive search with rounded corners in Windows 10
Open Registry Editor and search for the following key:
HKEY_CURRENT_USER\Software\
Microsoft\Windows\CurrentVersion\Search
Now at this step, you need to create a new DWORD 32-bit Value. Navigate to the right pane and follow these steps: Right-click >> New >> DWORD Value (32-Bit). Set the name as ImmersiveSearch.
Double-click the newly created DWORD and set its value to 1.
Navigate to the following location in the Registry Editor:
HKEY_CURRENT_USER\Software\Microsoft\
Windows\CurrentVersion\Search\Flighting
Now right-click the Flighting folder and select New to create a subkey. Name the key “Override“. While creating new keys every time, you should make sure there are no blank spaces in the name of the key.
In the end, select the new Override key and navigate to the right pane. Right-click and select New>> DWORD (32-bit) named “ImmersiveSearchFull“. Now change its default value to 1.
Repeat the same process to create a new 32-bit DWORD named “CenterScreenRoundedCornerRadius“. Double-click CenterScreenRoundedCornerRadius to set its value to 9.
Finally, you should restart File Explorer from the Task Manager to activate the new feature.
Alternatively, you can also reboot your system. Once the reboot is done, you can navigate to the taskbar and click the search icon to activate search window.
If you observe closely, the new window does not include Cortana and features rounded corners.
It is worth mentioning that the UI makeover is a work in progress. Microsoft may take some time to completely make it available to production devices.
Do you find the new search experience useful? Share your thoughts in the comments section below.
Almost every Windows 10 user is a fan of the Calculator app. It is pretty simple and straight forward to use.
Have you ever wished to get the same experience on your smartphones? Uno Platform has got you covered. The platform recently announced that Windows 10 calculator app is now available on iOS and Android.
Windows 10 Calculator on iOS
The company used the Uno Platform to offer the corresponding versions. The platform basically allows developers to publish their UWP apps on iOS, Android and more platforms.
We decided to port it to C# and the Uno Platform, so that iOS and Android users could use it, but also use it from the Web using WebAssembly. Why – well that’s what we at Uno Platform do ? – enable the same C# and XAML code to run on the Web, Mobile and Desktop.
The functionality of the Uno Calculator is nothing different than the Windows 10 app. You can easily turn it into a Scientific calculator when needed.
The app can be used to convert different measurement units such as speed, energy, mass, weight, area, etc. You can select two dates to calculate the number of days between them.
Furthermore, the History feature displays the record of your past calculations. It also allows the users to convert currencies with a single click.
Windows 10 Calculator on Android
As far as the Android version is concerned, it sports an appealing user interface. You can find different calculator modes such as Scientific, Standard, and Programming mode hidden under the left menu option.
The currency conversion feature is also available in the Android version. Additionally, the developer also published a web version of Uno Calculator application.
This version eliminates the need to download the app and it can be accessed from your browser.
Download Android/iOS app
You can now visit the Google Play Store to download the app on your Android phone. The original version is published by the developer “nventive” and named as Uno Calculator.
Once you attempt to download the app, the system displays a warning about the unstable version.
However, the iPhone version of the app is currently in TestFlight. Therefore, you need to download the TestFlight on your phone to get the download link.
Many Redditors liked the fact that the Android version works surprisingly well compared to the built-in calculator.
This error is not a complicated one to handle. Follow this guide carefully and you should be able to fix this problem in just a few minutes.
After reading this guide, you will know what causes this error and how to handle it.
Document printing errors can occur after you update your Windows 10 computer.
You may have performed a system check and found that nothing is wrong with your printer. So, what should you do now?
Also, this problem can occur when printing from a PaperPort desktop without using other programs to print files, such as Microsoft Word.
When you upgrade to the latest PaperPort version, it is possible you may encounter the error message ‘An error occurred while printing’. The same error message may occur when trying to print Adobe documents.
Whatever the case may be, one of these solutions will surely fix the problem for you.
An error occurred while printing: This is how you can fix this error
1. Run the printer troubleshooter
Click on the Start button
Go to the Control panel
Locate the search box, type troubleshooter and then click Troubleshooting > View All
Locate and launch the Printer troubleshooter.
If this doesn’t work, follow the second solution below.
Make sure you installed the latest printer drivers compatible with your printer model.
Launch Device Manager.
Go to Printer > right-click the driver
Select Update Driver.
Select Search automatically for updated driver software.
If Windows doesn’t find a new driver, you can navigate to your printer manufacturer’s website and download the drivers from there.
If you want to reinstall your printer drivers, launch Device Manager, go to Printer but this time, select Uninstall and then restart your PC. Upon reboot, Windows 10 will automatically install the latest drivers.
Installing a trustworthy program that scans your PC and updates or fixes the drivers in need of assistance can prevent this type of error. A fully functioning system that benefits from the latest updates will also protect your device against security lapses and data breaches.
Moreover, an optimal OS can significantly improve your computer’s overall performance and enhance the storage capacities.
We hope these quick solutions helped you fix the problem.
Microsoft just rolled out new cumulative updates for Windows 10. KB4509477, KB4509478 and KB4509479 address existing issues in Windows 10, v1709, Windows 10 v1803, and Windows 10v1809 respectively.
If we look at the changelogs, all of these updates include a single change. Previous updates introduced an Event Viewer bug in Windows 10. Microsoft fixed this issue in the recent releases.
At the time of writing this article, there are no reports of installation issues. We will keep you updated once more details are available.
KB4509477, KB4509478, KB4509479 major features and improvements
Event Viewer bug fix
Microsoft rolled out KB4509477, KB4509478, KB4509479 to resolve a bug affecting Event Viewer.
Previously, some devices were unable to connect to some Storage Area Network (SAN) devices that used iSCSI. This issue triggers the following bug “Target failed to respond in time for a login request”.
Thankfully, the bug has been fixed for all users now. If you are experiencing the same issue, you need to update your system as soon as possible.
Known issues
Although the updates fixed the Event Viewer bug in Windows 10. However, recent releases bring their own issues.
Microsoft warns that you may experience issues while performing some specific operations on folders or files. Microsoft says that the operations may fail with the error STATUS_BAD_IMPERSONATION_LEVEL (0xC00000A5).
This issue is caused after the installation of KB4509477, KB4509478, KB4509479.
Secondly, Microsoft acknowledged that users who installed kb4509478 may see a black screen at startup.
Microsoft is currently working on fixinf these issues. We expect to receive a patch on July Patch Tuesday.
Download KB4509479, KB4509478, KB4509477
These updates should be available automatically on your system. You can install latest updates fromSettings > Update & Security > Windows Update and select Check for updates.
If the update is not available via Windows Update, you can visit the Microsoft Update Catalogue to download the update manually on your system.
I have quite a few machines where after launching Outlook and trying to authenticate, they get a Keyset does not exist error.
In today’s guide, we will tackle this error and show you the best ways to fix it.
What does Keyset does not exist mean?
This error affects Outlook and Office 365, and it’s caused by the following:
Issues with Internet Information Services.
Corrupted Cryptographic service files often cause this issue.
Problems with the TPM can be responsible for this error.
In some instances, Hyper-V feature can cause this issue.
Firewall can sometimes block your connection.
In rare instances, drivers can cause this issue.
How can I fix Keyset does not exist error?
1. Perform an IISREST
From your Start Menu, open Command Prompt with Administrator rights.
Now type iisreset and then press Enter.
After the process is successful you may close this window.
Keyset does not exist and can be associated with IIS, but after resetting it, the issue should be gone.
2. Remove Cryptographic Services files
Firstly, end the Cryptographic Services process from your Task Manager.
From your Control Panel look for Folder Options, and in the View tab select Show hidden files, and click OK.
Proceed to the following path:C:\Users\<Username>\AppData\Roaming\Microsoft\Crypto\RSA folder, and delete all files there.
Now you can restart the Cryptographic Services.
3. Switch TPM on or off
In your Start Menu, type Run and select it.
Now type tpm.msc in the box and press Enter.
In the Action panel, select Turn TPM Off.
Restart your machine.
4. Update your network drivers
In the search box on the taskbar, select Device Manager.
Select a category to see the names of devices, then right-click on the one you’d like to update.
Select Update Driver.
Now click on Search automatically for updated driver software.
Once it’s done updating you’re all set.
The manual process may find the required drivers to update. However, the chances are you will get the message they are already installed.
In that case, you need a professional driver solution to detect all the outdated drivers on your PC and update them with their official version, all with one click.
Users of Gmail on Windows have reported that for some reason, their email alias is not displayed correctly. If the Gmailemail alias is wrong, then people can become confused. This can cause issues when sending emails to new contacts, as the alias is used to identify who you are.
This issue, even if it seems of small importance, can have a great impact on the way people perceive you, especially if you’re using a Gmail account to send promotional material for your brand/company.
In this article, we will explore a quick way to edit your alias information on Gmail, so that everybody will know who you are, and also help you with presenting yourself professionally through email.
What to do if Gmail alias is wrong?
Change your Gmail account settings
Log into your Gmail account.
Click the Gear in the top right corner of your screen -> select Settings.
Inside the Settings window, click on the Accounts and Import tab.
Scroll down to the ‘Send mail as’ option, and click on ‘Edit info’.
The month of June is coming to a close, meaning it is now once again time to recap what was new across Microsoft 365. It was quite busy, and Microsoft added several updates across the product lineup. The list includes Cloud App Security, Azure Active Directory, Teams, Yammer, changes to PowerPoint Designer, and more. Here’s everything that you need to know.
Branded templates in PowerPoint, Recommended Documents
Leading the list of changes in Microsoft 365 in June are several enhancements to PowerPoint, and Outlook. The first brings custom branded templates to designer in PowerPoint, which, in part, can now recommend high quality images and backgrounds that are licensed for commercial use in presentations. A second change brings support for recommended documents on all Microsoft Office desktop apps, which, as the name suggests, shows you recommended and curated lists of documents so you can jump back into your work.
Branded templates with Designer in PowerPoint can keep your presentations consistent
Inking in Outlook, Sharing recent files in Outlook for iOS
Next up, with Inking in Outlook, you will be able to digitally ink and make notes on images and photos in your email. The feature can be found on the Draw tab in the Outlook ribbon. Finally, there is the new ability to share recently used files in Outlook for iOS. Thanks to this feature, you can see all your Office 365 files from SharePoint and iCloud, and local storage front and center. You’ll still be able to share files via links from email from through OneDrive for Business, OneDrive, Google Drive, Box, and Dropbox cloud storage.
Inking in Outlook
Cloud App Security, Azure AD Conditional Access, Identify Secure Score
Also on the list of new to Microsoft 365 in June are three new functions that all about protecting your companies data, monitoring who has access to your resources, and identities. First up, there’s Cloud App Security, which allows you to see which apps and services are running on top of all your existing cloud services subscriptions. With this new feature, you can see all transactions, IP addresses, and web traffic. Next, with Azure AD Conditional Access policies in Microsoft 365 Business, you’re in even more control of your Office 365 environment and all of its resources. Finally, with Identity Secure Score, security administrators can implement the right policies for creating the best identity security within an organization.
Cloud App Security
Other updates to Teams, Yammer, and Office 365
In June, Microsoft made some compliance changes to Teams, Yammer, and Office 365. Teams picked up a new user policy ability to restrict communications between certain groups of users with information barriers. Next up, with Yammer, users in the European Union now have a local data residency. Finally, the minimum seat requirementfor Multi-Geo Capabilities in Office 365 was reduced from 2,500 seats to 500 seats.
HP Inc. has introduced its new lineup of OMEN and HP Pavilion Gaming innovations in India with an aim to transform gaming as a lifestyle in the country.
While the OMEN X 2S is world’s first dual-screen gaming laptop, the OMEN 15 laptops bring exceptional power in their thinnest forms yet and HP Pavilion Gaming 15 laptop offers a combination of versatility and mobility for gamers and creatives alike.
“Gaming it is not just a hobby but a fast-evolving lifestyle and, in select cases, a profession. At HP, we share our users’ passion and love for the game – be it beginners, enthusiasts or professionals. We have engineered the best experiences based on user insights to enable a holistic and exciting gaming ecosystem for the modern gamers in India.”
– Sumeer Chandra, Managing Director, HP Inc. India
HP OMEN X 2S and HP OMEN 15
The HP OMEN X 2S packs in tremendous multitasking capabilities with support for dedicated hotkeys. The OMEN X 2S is 20 mm thin with a full metal chassis and is the first 15-inch diagonal gaming laptop in the world to come with an applied liquid metal compound to the thermal system.
The HP Omen 15 follows the smaller, cooler, and more powerful path with a 20 percent reduction in thickness over previous versions, sitting at a slim 20 mm.
Powered by the latest 9th Generation Intel Core i9 high-performance mobile processor and up to 16 GB of RAM, the laptops pack in support for up to NVIDIA GeForce RTX 2080 featuring Max-Q7 design for the OMEN X 2S and OMEN 15. There’s the new Intel Wi-Fi 6 (802.11ax) designed to support gigabit speeds up the wireless game with up to 3X faster file transfer speeds than Wi-Fi 5(802.11ac).
Both laptops feature OMEN Tempest, an overhauled advanced thermal solution powered by a 12V fan, which utilizes three-sided venting to enable five-way airflow to keep things cool. The existing OMEN Command Center has evolved as the software solution for managing and enhancing gaming hardware. The new Performance Control cranks up fan RPM to either maximize cooling or performance, based on the chosen setting and the new OMEN Dynamic Power feature manages CPU and GPU wattage based on what a game is utilizing at a given moment to maximize FPS.
The HP OMEN X 2S is expected to be available on July 1 via HP.com and other retailers from a starting price of ₹209,990 and the HP OMEN 15 is available now via HP.com and other retailers from a starting price of ₹124,990.
HP Pavilion Gaming 15
The HP Pavilion Gaming 15 laptop sports an eight percent decrease in height over the previous model. There are technological improvements across the board with options up to the latest 9th Gen Intel Core i5/i7 high-performance mobile CPUs and up to the recently announced NVIDIA GeForce GTX 1660 Ti with Max-Q design.
HP Pavilion Gaming 15 Laptop is available now from a starting price of ₹70,990.
A rather industrious Twitter user by the name of Jane Manchun Wong (via MSPU) has uncovered some new settings within the Twitter Progressive Web App (PWA) that add options for app text size, color theme, and brightness.
Interestingly, this is the first sign we’ve seen of colored themes beyond the Dark Mode variants on the Twitter apps. Judging by the icons underneath each color, these themes appear to be called Cherry Blossom (or Sakura), Avocado, Fire, Star, and Octopus.
Twitter is testing "Customize your view" UI, allowing users to change theme color, shades of dark mode and font size!
These new settings are apparently being tested internally for now but the chances of them eventually rolling out to users is incredibly likely.
The Twitter PWA code is what’s used to run the web version of Twitter in addition to the official Windows 10 Twitter app so Windows 10 users will be able to get their hands on these options one way or another.
How do you use Twitter on your Windows device? Let us know in the comments below and then follow us on Twitter for more Twitter news about Twitter in your Twitter timeline on Twitter.
We had recently published a fix article to resolve the Silver Wolf error on Xbox consoles that was causing some issues with the Call of Duty Black OPS 4 game on the Xbox. Another error that has been bugging the Call of Duty Black Ops 4 users is the bravo code 381 Orange Wolf.
The error code bravo 381 orange wolf appears whenever the Xbox users try to launch Black OP4 on their console. The game simply kicks the user out and shows the error. If you are also troubled this error, you are not alone. Here’s what one user said about it on the official subreddit.
Please help! Error code: Bravo 381 Orange wolf. Tried to contact support and cannot get through to anyone. Saw a lot of people having issues. Just bought the game today (11-23-18) and got everything downloaded. Was able to play blackout for a short while and now everything is locked?
Read below to find out how to solve this.
How to fix the Xbox error code Orange Wolf on Xbox
1. Check Xbox Live Status
Before applying any of the fixes listed in this article, make sure all the services and apps are running correctly at the Xbox end. You can check the Xbox Live Status on the Official page. If everything is in green, it means the error is not at the Xbox Live end.
2. Reset Console Factory Default
On the Xbox home screen, press the Xbox button to open the guide.
Now go to System and select Settings.
Select System and then Console Info.
Select Reset Console option.
On the Reset Console? Screen, you have two options. Reset and remove everything – This option resets the console to factory settings. But also remove all the user data, saved games, settings, home Xbox associations, and all games and apps. You should only use this as a last resort and if the second option doesn’t work.
Reset and keep my games and apps – This is the first option you should select to resolve the orange wolf error. This option will reset the OS and delete all the corrupted data but keeps all the game data, personal files and installed games and apps intact.
Select “Reset and Keep my games and apps” and confirm the action if asked.
Now the Xbox will start resetting the console to factory default.
After the reset is over, follow the wizard to complete the Xbox setup.
Log in with your Xbox Live account and you should be able to able to play the game without any error.
While resetting the Console is the last recommended option, many users have reported that resetting the console has resolved the issue on their Xbox and the error orange wolf for Call of Duty Black Ops.
Close the Call of Duty screen if running on your Xbox.
Turn on the mobile hotspot on your Smartphone.
Connect your Xbox to the hotspot.
Launch Call of Duty Black OPs4 and open the Multiscreen window.
Quit the game.
Now disconnect and connect to your regular WiFi / Wired network.
Relaunch the game and check if the error is resolved.
3. Check for Update / Reinstall Game
If you haven’t already, check if the game has a new update available. In case this is a widespread issue, developers may release an update to fix the issue.
If no updates are available, you can try uninstalling and installing the game again. For some users, reinstalling the game has resolved the error.
Contact the Game developers via twitter. When asked, make sure you tell, you have more than 5Mbps connection and have cleared the cache but the issue persists.
Windows 10 comes in multiple versions, namely Windows 10 Home, Professional, Education, and Enterprise. Windows 10 Home is the standard version while the other three versions come with more features targetted at different users.
Now if you are a student who was provided with a Windows 10Education key and wondering if you will be able to play some games in your free time or if you should go with any other version, we made sure to give you some insight.
While you can play video games on any Windows 10 version, there are some differences between these Windows 10 version. Let’s find out which Windows version should you choose for gaming.
Can I play games on Windows 10 Education?
The short answer is yes. There is no restriction on what consumer grade software you can install on Windows 10Education. The Education version offers all the features of the Windows 10 Home and some additional features that the student may require access to including Active Directory access for Windows domain network.
No. In fact, if you are not interested in using any of the advanced features provided by the Windows 10Education version, you are better of installing the Windows 10 Home version.
Windows 10Education has more process running in the background which has no benefit for a common user.
On the flip side, Windows 10 Home users miss out on the Microsft’s encryption software BitLocker Encryption. So, if Encryption is something you want to for your laptop or desktop, you can opt for Windows 10 Pro or Education.
Difference Between Windows 10 Education and other Windows 10 Versions?
The Windows 10 Home is for the normal users who don’t need to use the business features of the Windows OS. However, not having the BitLocker feature is something that put the Home user at a disadvantage. Below is a chart explaining the major differences between the different Windows 10 versions.
Windows 10 Features
Home
Pro
Enterprise
Education
Device Encryption
Yes
Yes
Yes
Yes
Domain Join
–
Yes
Yes
Yes
Group Policy Management
–
Yes
Yes
Yes
BitLocker
–
Yes
Yes
Yes
Enterprise Mode Internet Explorer
–
Yes
Yes
Yes
Assigned Access 8.1
–
Yes
Yes
Yes
Remote Desktop
–
Yes
Yes
Yes
Direct Access
–
–
Yes
Yes
Windows To Go Creator
–
–
Yes
Yes
AppLocker
–
–
Yes
Yes
BranchCache
–
–
Yes
Yes
Which version of Windows 10 do you use as your daily driver? Let us know in the comments below.
Many Windows 10 users are asking themselves what’s the difference between the Sleep and Hibernate.
Although they have similar purposes, these two functions are different.
In this article, we’ll tell you everything you need to know about the two power saving functions in order to have a better understanding of their differences.
What is the difference between Sleep Mode and Hibernate Mode?
1. Sleep
In sleep mode, all the processes on the computer are stopped.
Applications and documents are kept in the computer memory, while many PC functions are turned off. This allows the computer to save more power.
Turning the computer back on is done very quickly, as there is no need for the booting operation to take place.
After exiting sleep mode, apps and documents are exactly as you left them before entering sleep mode.
Therefore, picking up the tasks from where you left them off is done easily.
Sleep mode is frequently used for short periods of time. Although it does save energy, the function still requires a bit of power in order to run.
Microsoft announced some changes for its popular cloud storage service OneDrive. New security options and a new storage plan is now available to Office 365 subscribers.
According to Microsoft, OneDrive is getting a new OneDrive Personal Vault feature. Furthermore, the company will offer new subscription plans for Office 365 and OneDrive customers.
Get more storage space without paying more
Previously, Microsoft offered 50 GB of storage for a monthly fee of $1.99. You can now enjoy 100 GB of storage for the same price tag.
Microsoft confirmed that the extra 50 GB storage will be added to your account very soon without any user intervention.
Likewise, Microsoft is also upgrading the subscription plan for Office 365 subscribers. Office 365 Personal and Home subscribers currently get 1TB of cloud storage.
Now you can purchase 200 GB storage by paying a negligible price of $1.99 per month. However, what if you are looking for additional storage at a minimum price? Don’t worry! Office 365 price plans got you covered.
You can get up to 1TB of extra storage on a monthly basis only for $9.99.
Microsoft says that you can subscribe to the additional storage plans within the next few months. However, there is a catch for multiple account holders who fall under the Office 365 Home subscription.
According to Microsoft, the extra storage space will be available to just the primary account holder.
The additional storage comes to the rescue in those situations when you need to delete some old files to free up some memory.
OneDrive mobile app allows users to directly record videos, grab pictures and scan documents in separate folders. In other words, Personal Vault is a secured place to store your insurance, identification, travel, vehicle or personal documents.
Personal Vault can minimize the chances of security threats and ransomware attacks. OneDrive Personal Vault will be available to Windows 10, mobile and Web users later this year.
Initially, the access will be limited to New Zealand, Australia and Canada.
Microsoft decided to end its partnership with Intel and switch to AMD to power upcoming Surface Go, Surface Laptop, and Surface Pro devices.
Intel and AMD are considered to be two major competitors in the industry. Microsoft used Intel to power its Surface range for the past 5 years.
This move came after the notorious Spectre and Meltdown attacks affected many of Intel’s chips. These vulnerabilities had a major impact on the reputation of Microsoft devices.
Therefore,this decision may be a major setback for Intel. According to some recent reports, Microsoft’s relationship with Intel is not at all perfect. This might be the reason why the tech giant is looking for alternatives.
Microsoft already developed some prototype Surface devices. Currently, the company is testing ARM and AMD chips that can run on those prototypes.
The big M also used Qualcomm Snapdragon chips to power some of the Surface Pro prototype.
Microsoft’s very own chip coming soon
Microsoft is reportedly working on its own 8cx chip codenamed Excaliburin collaboration with Qualcomm.
This customized chip is specifically developed to provide excellent performance on Windows 10. However, there is no official confirmation from Microsoft at the moment.
Meanwhile, the next generation Xbox Scarlett consoles are powered by AMD chips. So, Microsoft has an extra reason to switch to AMD for its Surface devices CPUs as well.
In terms of performance, Qualcomm-powered devices are comparatively less powerful than Intel-based laptops.
However, these devices do bring some advantages of their own. They offer integrated LTE connectivity, extended battery life, and lightweight and slim design lines.
Microsoft does not plan to completely end its relationship with Intel. Some of its upcoming devices may feature Core i5 or i7 processors.
It will be interesting to see how Microsoft goes ahead with these plans. We do expect to see some major changes in the upcoming dual-screen foldable Surface devices next year.
Microsoft finally decided to make the install process of Visual C++ Redistributable packages much simpler. The tech giant released an updated version of its Universal C Runtime installer to resolve the issue.
We have many applications in our systems that often install Microsoft Visible C++ Redistributable packages on our Windows 10 Home systems.
It is because these applications are developed in a way that they need these packages to run on our systems. Therefore, we see multiple copies of Microsoft Visible C++ Redistributables installed.
These packages are automatically installed alongside with Windows Updates. However, sometimes we need to install them manually. And that can turn into a hassle.
Microsoft made some changes to its system with the release of Visible Studio 2015, Visible Studio 2017 and Visible Studio 2019.
This means you don’t need the previous Redistributable versions to run Visible C++ 2019. Keep in mind that you still need to download redistributables for Visual C++ 2017 and 2019 with the installation of Visual C++ 2015.
Microsoft released a Universal C Runtime installer for Windows administrators. You can simply install the 32-bit or 64-bit packages on your PC.
Apparently, this situation might create problems for the gaming community. One of the users took it to the AMD community forum to discuss the issue.
Still going to have a “problem” when installing older games as they will want to install VCRest by default, even if they have “modern” installers from GoG, Steam, or what have you.
What do you think about this change? Let us know in the comments section below.
Don’t forget to bookmark these pages in case you’re getting Visual C++ errors:
Have you ever encountered This program is blocked by Group Policy error on your PC? Fortunately for you, this error is relatively simple to fix, and today we’ll show you how to fix it for good.
How do I unblock a program that is blocked by the administrator?
1. Disable the Software Restriction Policy
Press the Windows key + S, type cmd, and click Run as administrator under Command Prompt.
Run the following command in the Command Prompt: REG ADD HKLM\SOFTWARE\Policies\Microsoft\Windows\Safer\Codeldentifiers\ /v DefaultLevel /t REG_DWORD /d 0x00040000 /f
After the message appears that it is OK, you can reboot your computer to save the changes, and hopefully, the issue will be fixed.
The first solution to apply if you are getting this program is blocked by group policy. For more information, contact your system administrator error is to disable the software restriction policy.
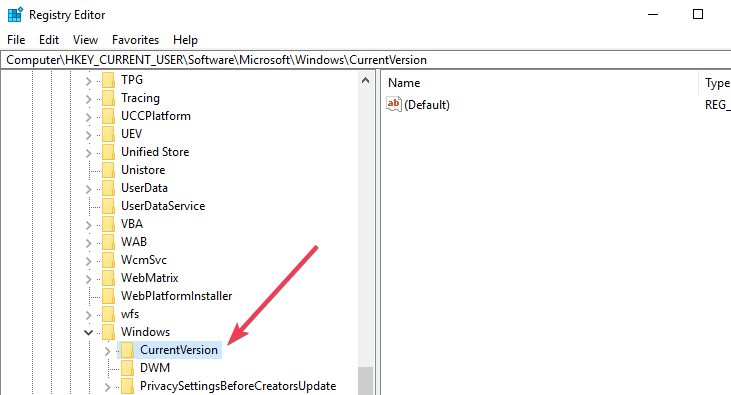
Press Windows key + R, type regedit, and press Enter to open Registry Editor.
Go to the next registry key: HKEY_CURRENT_USER\Software\Microsoft\Windows
Then navigate to: CurrentVersion\Policies\Explorer\DisallowRun
Now, select DisallowRun, and if appears at Data: msseces.exe, right-click on it (msseces.exe) and Delete.
To save changes, you have to reboot your computer and see if the error message still appears.
3. Create a New User Account
Press the Windows key + I to open Settings and select Accounts.
Select Family & other people (you can find it in the left-hand menu) -> Add someone else o this PC.
Click I don’t have this person’s sign-in information.
Now, click on Add a user without a Microsoft Account.
Create the new username and password for the new account and press Next.
Next, you have to Sign In with this new user account.
Finally, check if the problem is still there.
If you are getting this program blocked by group policy on apps like Microsoft Store, PowerShell, Visual Studio, and Event Viewer, you can create a new user account and check if the issue persists there.
With this, we can conclude this guide on fixing this program is blocked by group policy error on Windows 11 and other versions of Windows. You should now be able to fix the issue for good on your PC.
There’s nothing more annoying than being unable to load your hard-earned in-game progress and getting the We couldn’t get your latest saved data error on the Xbox One.
Is there a fix to this issue? It’s been happening to me for a few days now and it’s starting to get a little frustrating. I’ve mostly been playing Fallout so it hasn’t effected me that bad because I can just play offline, but I’m about to hit level 50 and I want the achievement. Most of the other post I’ve seen about this issue just say that it’s an MS issue that will be fixed, but they’re usually from a while ago, so I don’t know how reliable they are. Any info would be appreciated.
However, there’s a way to fix this issue.
How can I fix Unable to get your latest saved data Xbox One error?
1. Check your Internet connection
Press the Xbox button to open the guide.
Select Settings.
Select AllSettings.
Select Network.
Select Network Settings.
On the right side of the Network Settings screen, select Test network connection. The test will run automatically and let you know if there’s a problem with your connection.
If that doesn’t work, restart your modem.
2. Turn off your console and unplug the power cable
Press and hold the power button on your Xbox One to turn it off.
After your Xbox One turns off, unplug the power cable.
Keep the cable disconnected for a minute or two.
Connect the power cable to your console and press the power button.
3. Check the DNS settings
Press the Menu button on your controller and choose Settings. Alternatively, you can just select Settings from the Home screen.
Select Network > Advanced settings.
Choose DNS settings and set them to Automatic.
Press the B button to save changes.
Start Netflix and check if the error appears again.
If one of the services is having problems, wait for Microsoft to fix the issue.
5. Delete and redownload your profile
Press the Guide button on your controller.
Go to Settings and select System Settings.
Go to Storage >All Devices >Gamer Profiles.
Select your gamertag that you want to delete.
Select Delete.
Select Delete Profile Only. (This deletes the profile but leaves saved games and achievements.)
6. Clear the system cache
Press the Guide button on your controller.
Go to Settings and select System Settings.
Select Storage or Memory.
Highlight any storage device, and then press Y on your controller (you can select any storage device, because the system will clear the cache for all of them).
Select Clear System Cache.
Confirm the action.
Restart your console
7. Power cycle your console
Open the guide by scrolling left on the Home screen.
Select Settings and go to All Settings.
Choose System > Console info & updates.
Select Reset console.
You should see two options available: Reset and keep my games & apps and Reset and remove everything. Select the first option.
If the problem is still there, try using the second option, but keep in mind that this option will delete all your games and files.
That’s about it, we certainly hope at least one of these solutions helped you resolve the We couldn’t get your latest saved data error on the Xbox One. In case you have any additional questions, or some more solutions to this problem, don’t hesitate to let us know in the comments below.