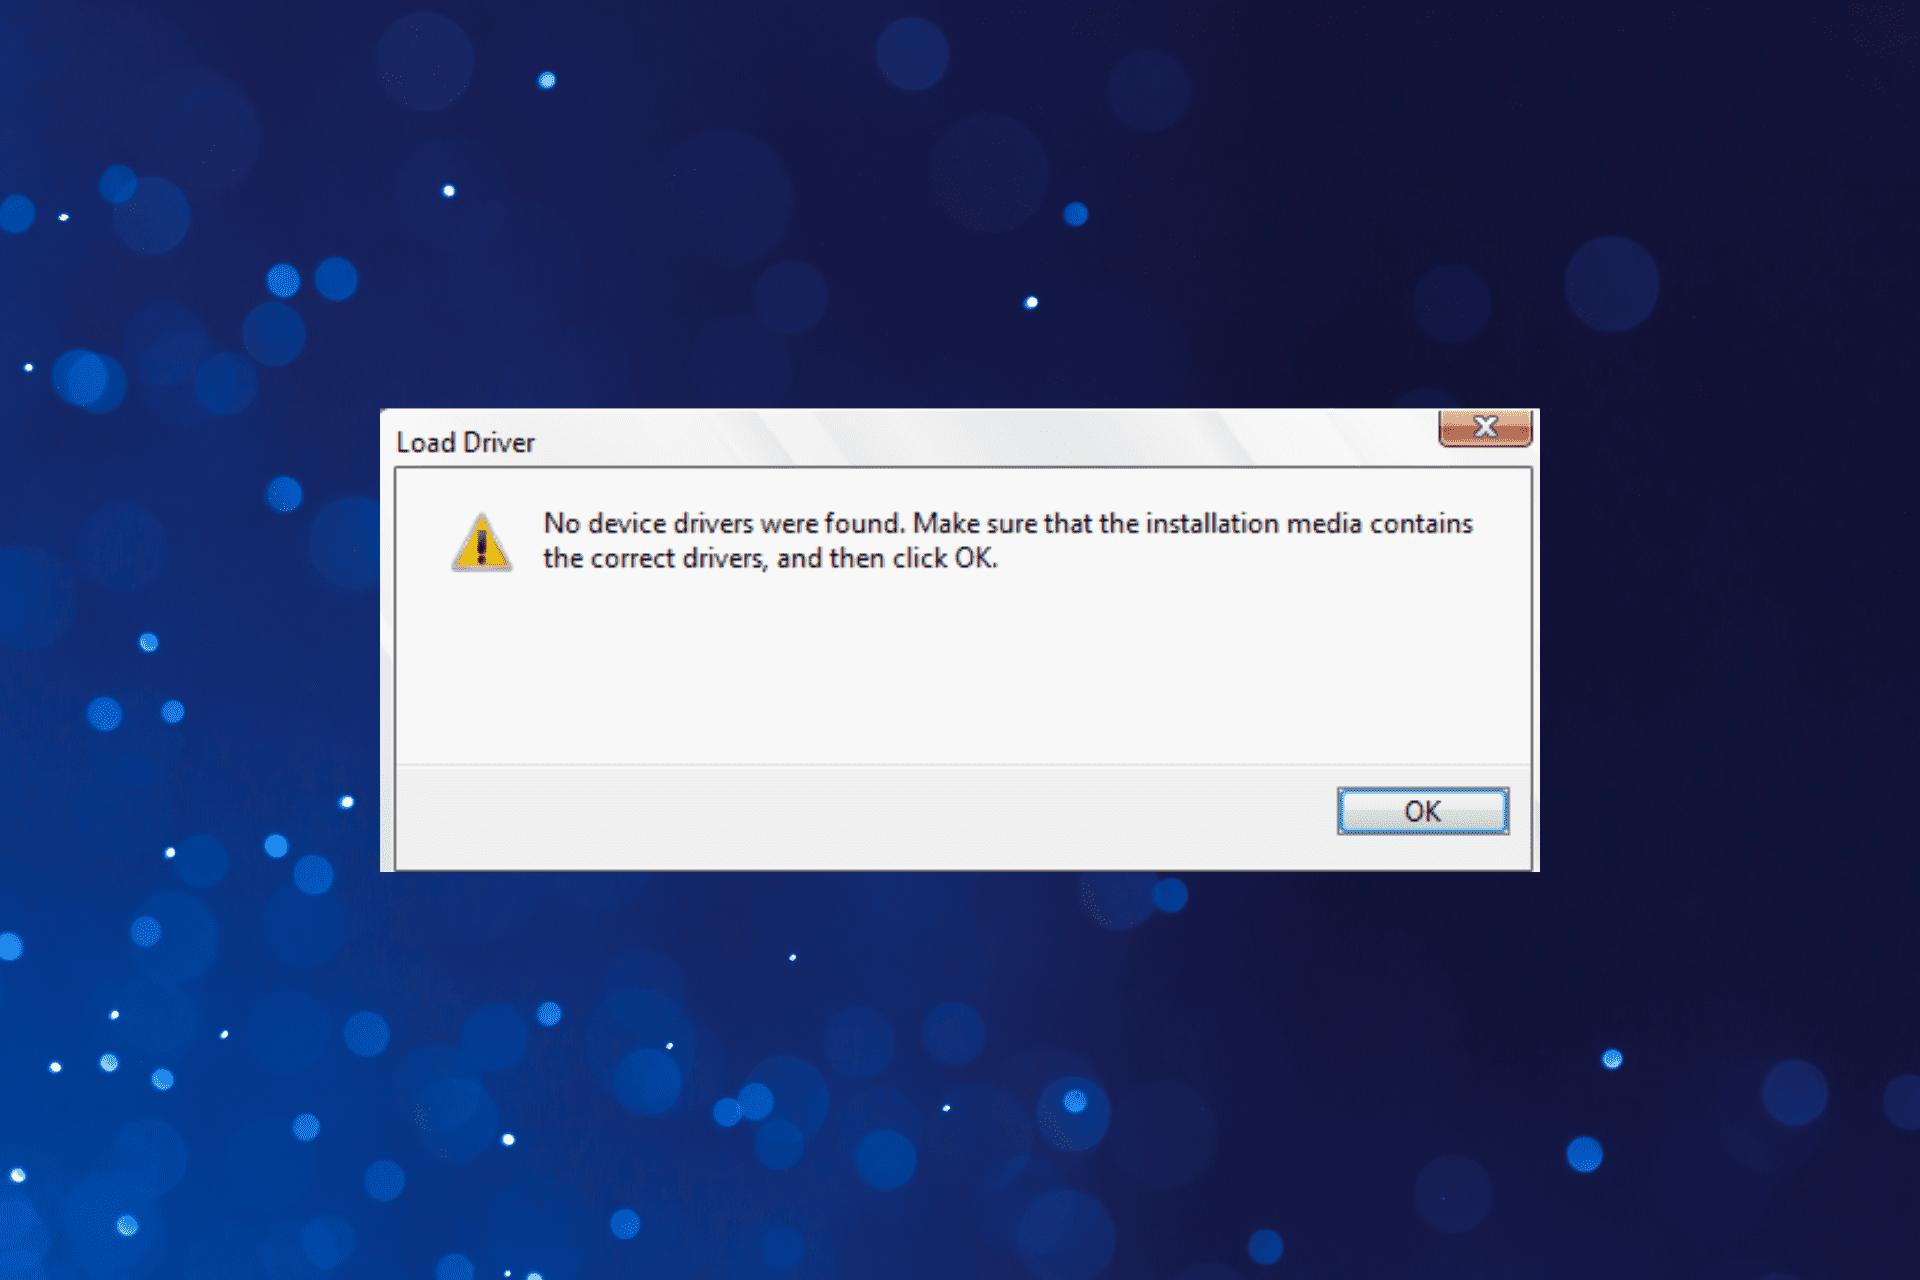
0x00000044 BSoD Error: Causes & How to Fix It

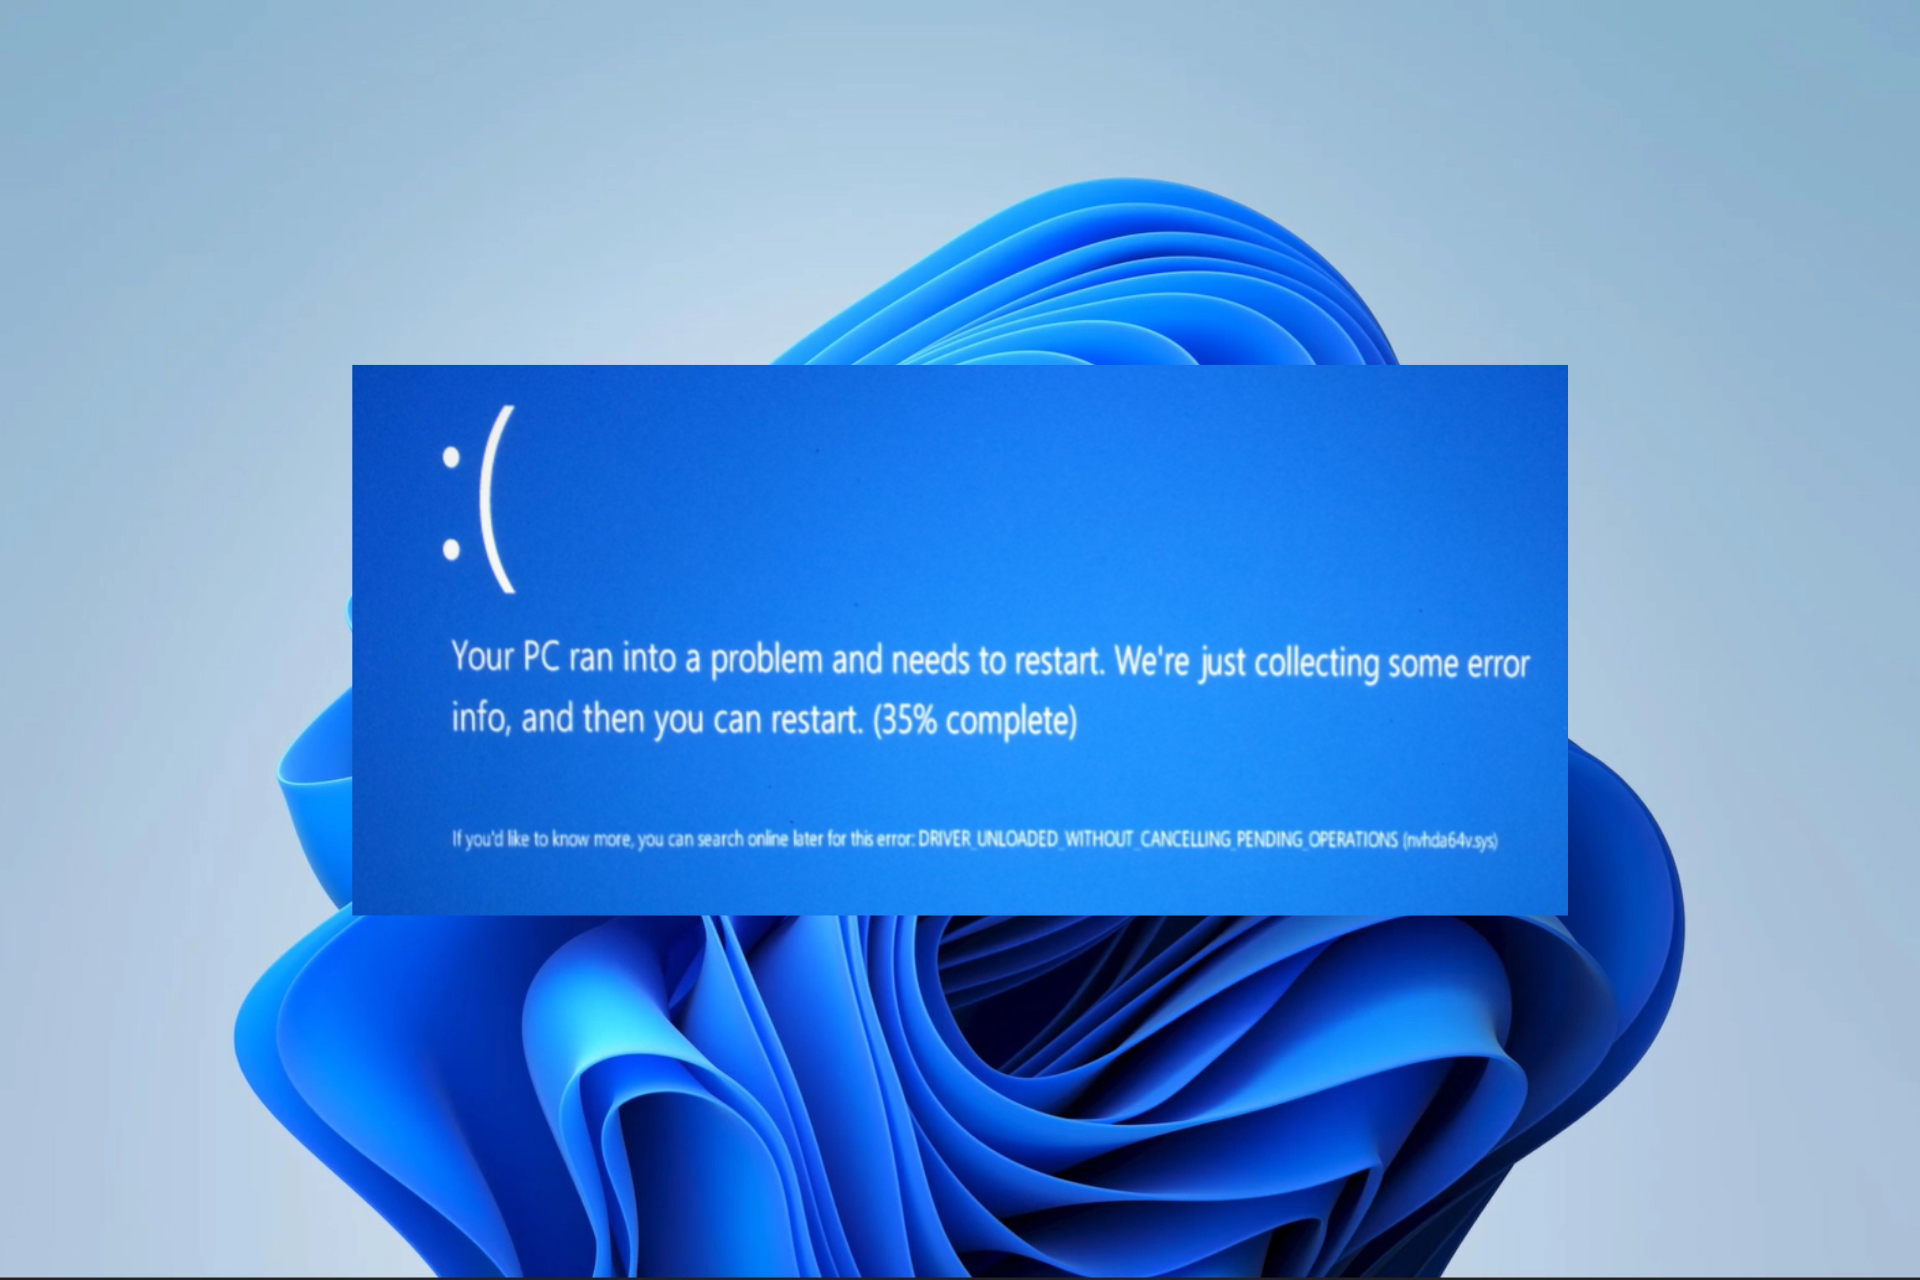
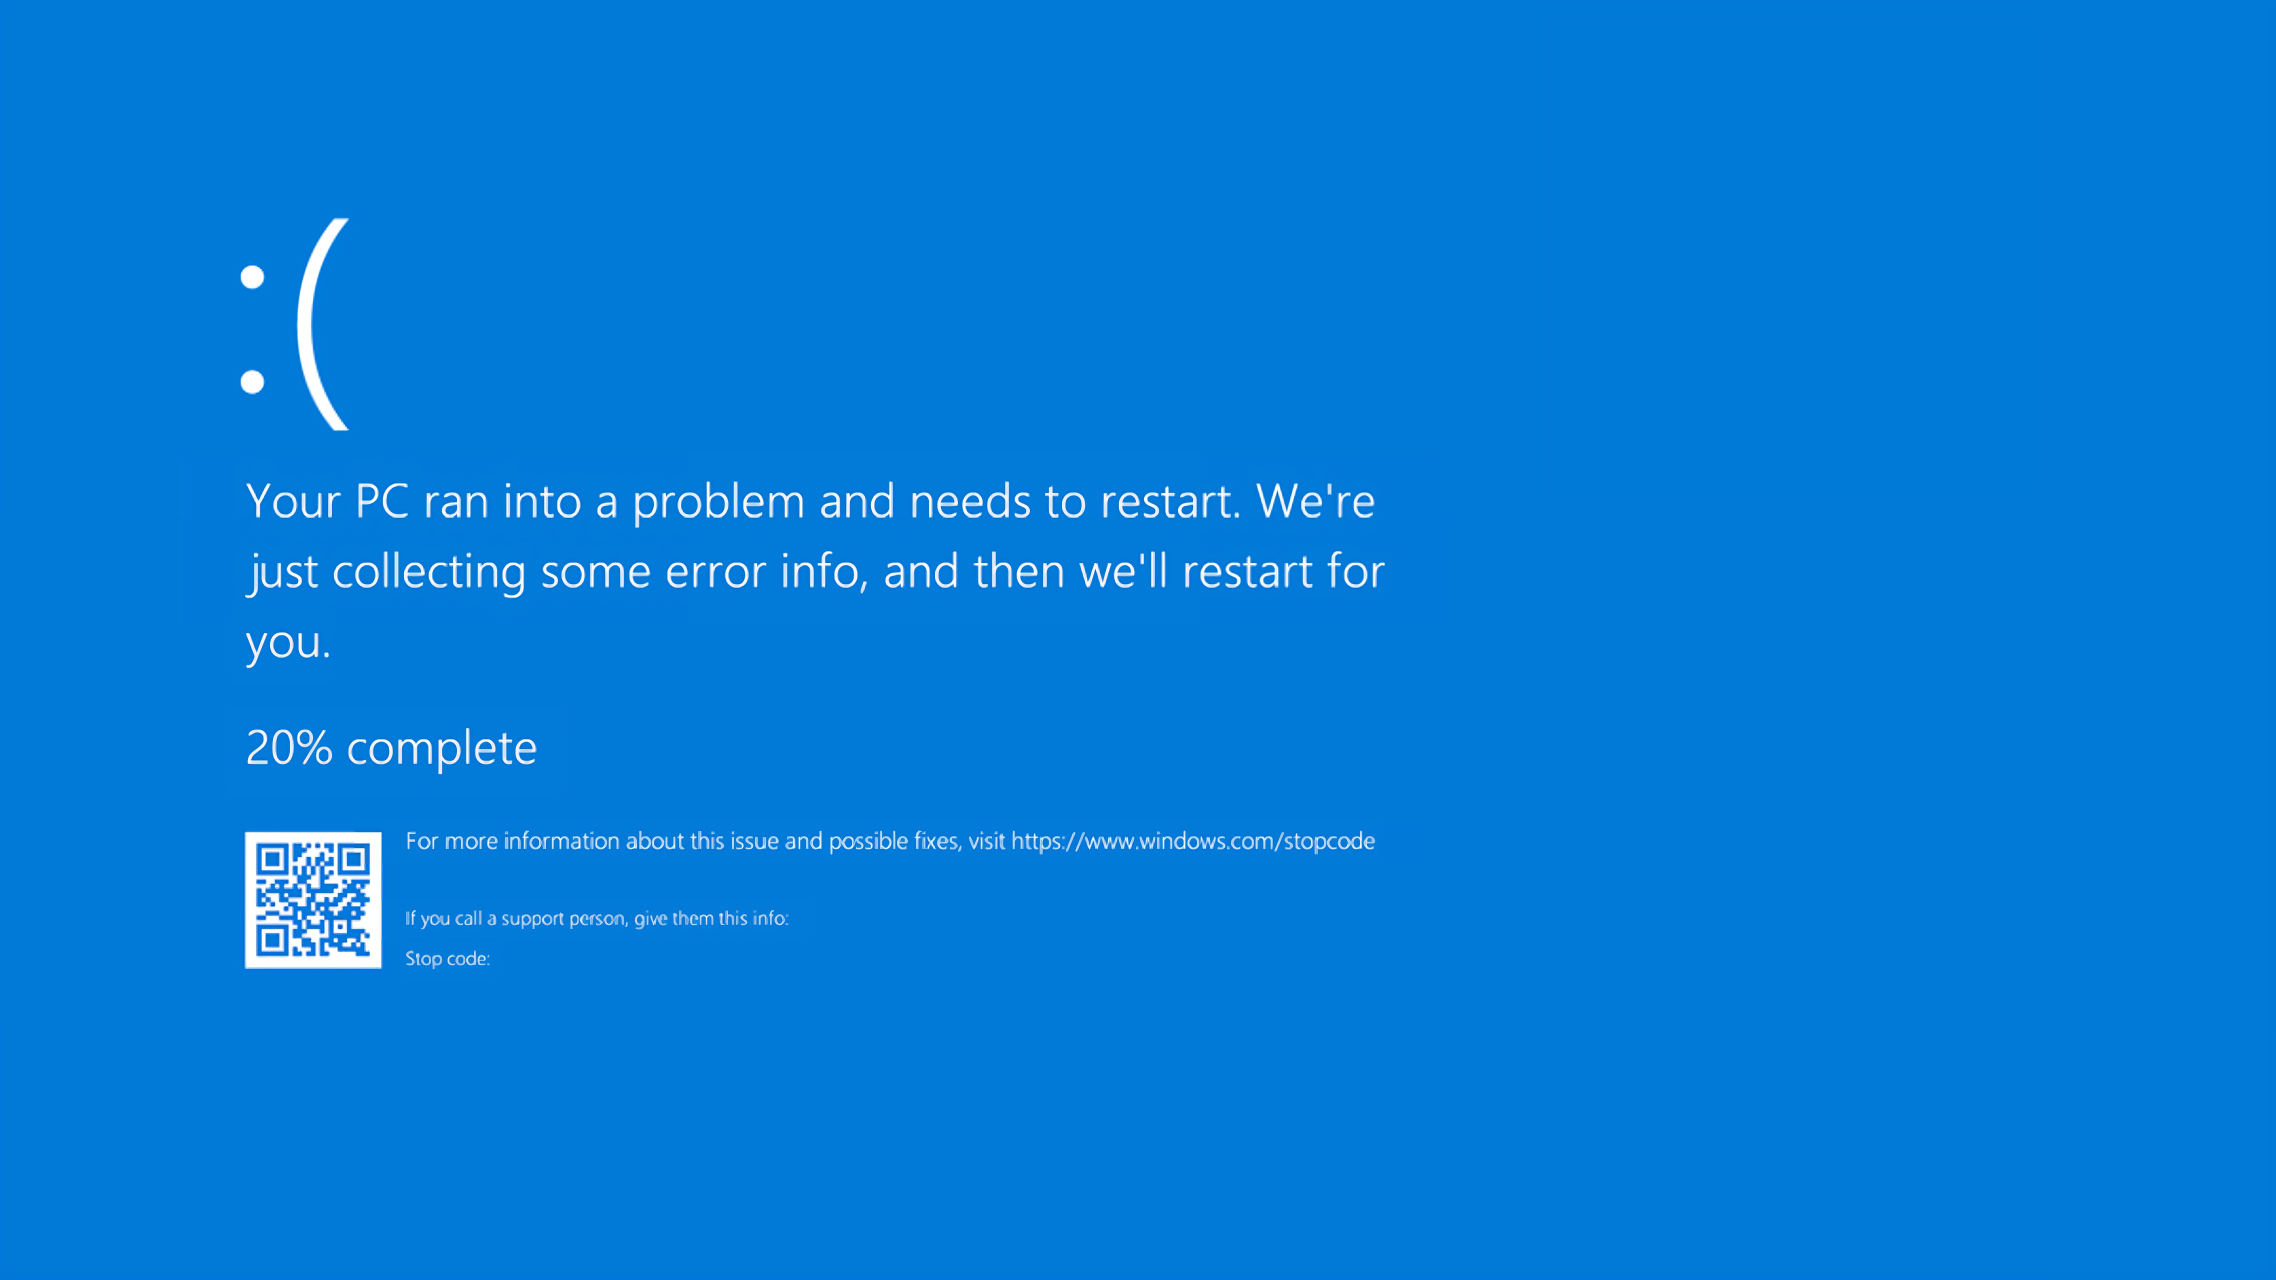
Encountering a BSoD error can be a daunting experience for computer users. The abrupt system crash often leads to panic, and in this article, we will delve into the specifics of one such issue, the 0x00000044 error.

The error often comes with a message: MULTIPLE_IRP_COMPLETE_REQUESTS, and it may include additional information specific to your operating system or computer.

What causes the 0x00000044 BSoD error?

Any of the following factors may lead to the BSoD error:

  • Compatibility issues – If a certain software on your computer is not compatible with the OS, you may run into the error.
  • Failing hardware components – If you’re experiencing the 0x00000044 error, it’s possible that your hardware components, like your hard drive, RAM, or motherboard, are faulty.
  • Overclocking – If you overclock your system, it can result in stability problems that might cause BSoD errors.
  • Corrupted system files – If your system files are corrupted or damaged, it can result in various problems, such as BSoD errors.
  • Device driver issues – Your system may experience conflicts and errors due to outdated or corrupted device drivers that control various hardware components.

How can I fix the 0x00000044 BSoD error?

1. Resolve drive errors

  1. Press and hold the Power button for 10 seconds, and once the manufacturer logo appears, press the Power button once more to force a complete shutdown. You may need to repeat this process a few times before the repair screen appears.
  2. Choose Troubleshoot then Advanced options.
    0x00000044
  3. Select Startup Repair.
    0x00000044
  4. Click on the Restart button.
  5. Press F5 for Safe Mode with Networking.
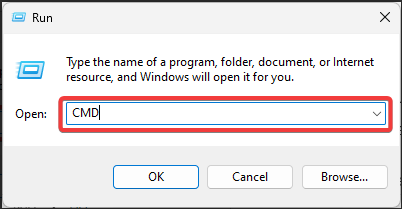
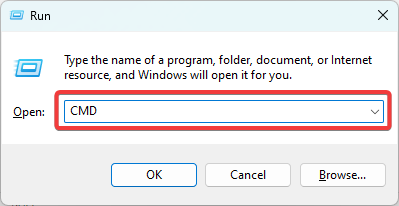
  6. Press Windows + R, type cmd, and hit Ctrl + Shift + Enter.
    0x00000044
  7. In the Command Prompt, type the script below and hit Enter.
    chkdsk c: /f
    0x00000044
  8. You may need to hit Y for the check to run at the next system restart.
  9. The script will check for bad sectors and repair them.
  10. You can now verify if it resolves the 0x00000044 BSoD.

2. Repair damaged files

  1. Boot into safe mode using the same process in solution 1.
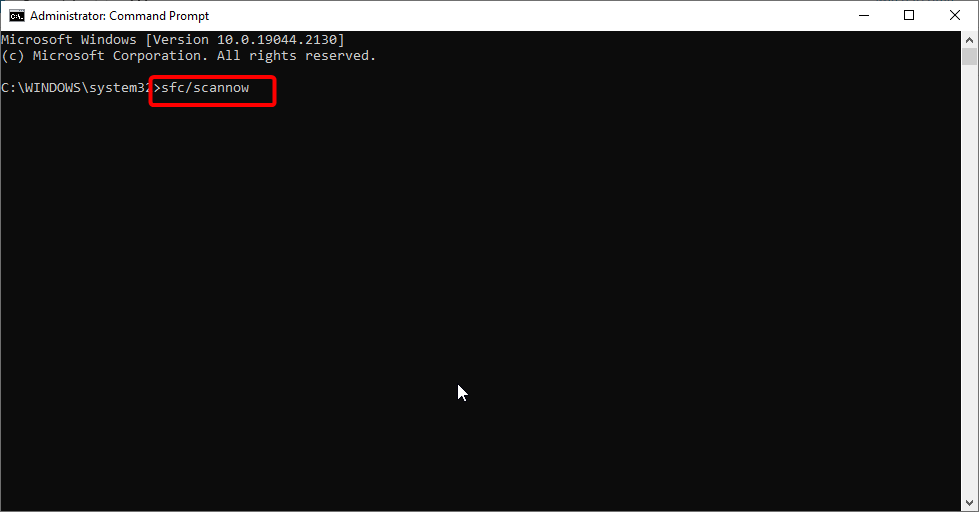
  2. Press Windows + R, type cmd, and hit Ctrl + Shift + Enter.0x00000044
  3. In the Command Prompt, type the script below and hit Enter.
    sfc /scannow
    0x00000044
  4. The script will search for bad system files and attempt to fix them.
  5. At the end of execution, restart your computer and verify the BSoD is fixed.

3. Update device drivers

  1. To boot into safe mode, follow the same process mentioned in solution 1.
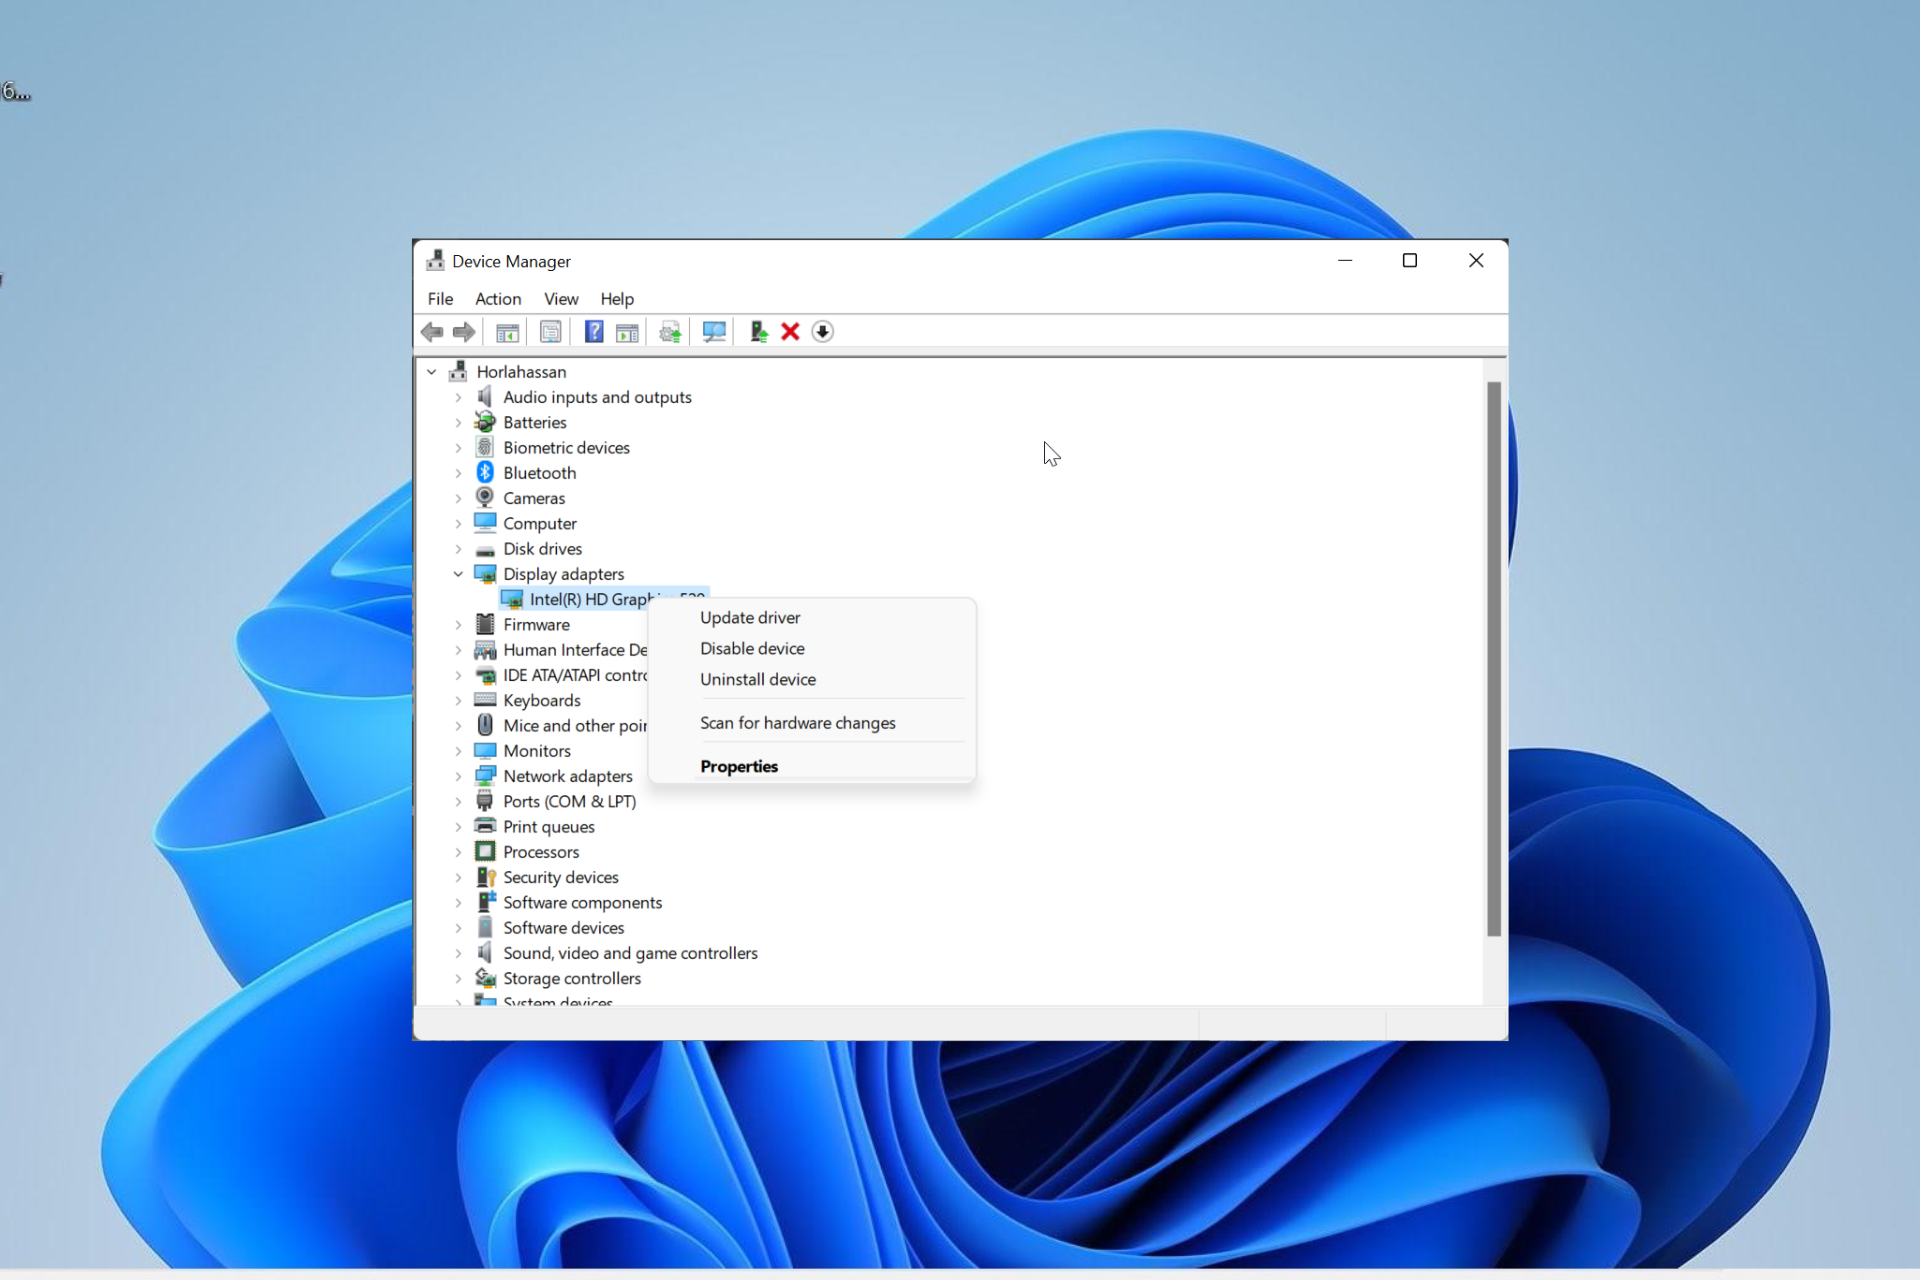
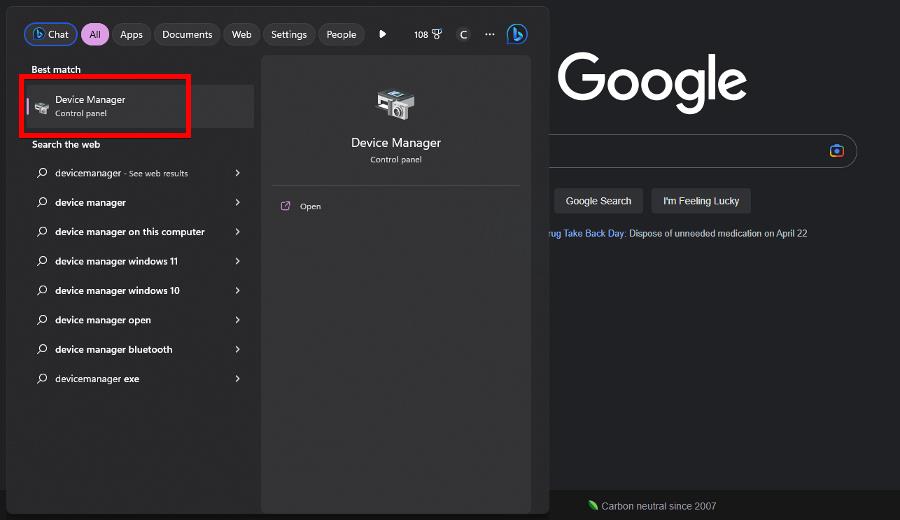
  2. Right-click on the Start menu and select Device Manager.
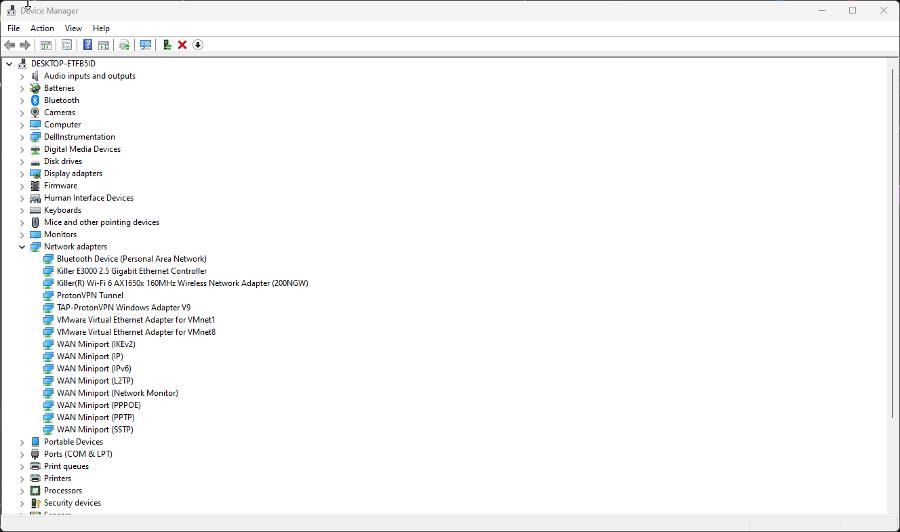
  3. Outdated drivers would typically have a yellow badge. Expand any category with this badge, right-click the driver, and select Update driver.
    0x00000044
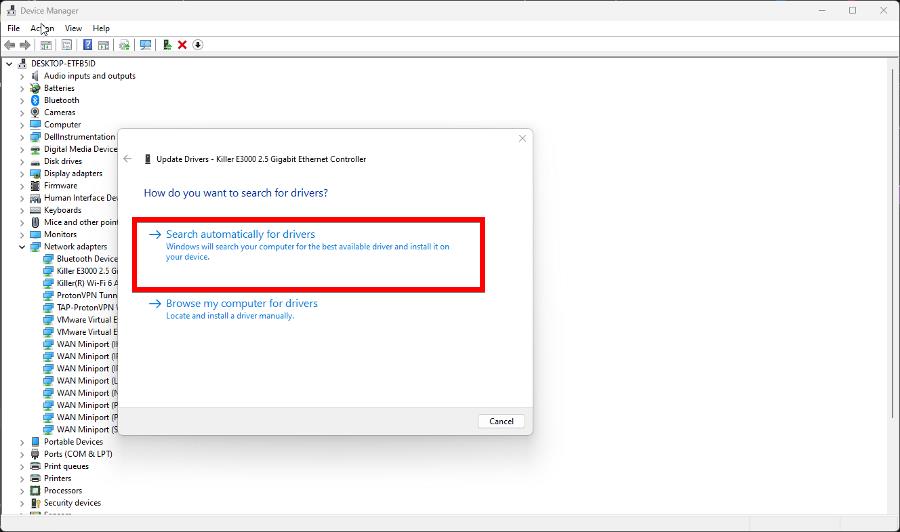
  4. Select Search automatically for drivers.
    0x00000044
  5. Repeat the process for all outdated drivers.

In case the steps above don’t seem efficient or simply did not fix the issue, you may need another method.

It’s suggested to utilize task-oriented tools like Outbyte Driver Updater to automatically update or repair any drivers on your device and potentially resolve this BSoD issue.

⇒ Get Outbyte Driver Updater

4. Run the compatibility troubleshooter

  1. Right-click on the executable file of a program suspected to trigger the BSoD and select Show more options.
  2. Click on Troubleshoot compatibility.
    0x00000044
  3. Select Try recommended settings.
  4. Click Test the program. Then verify if it still triggers the 0x00000044 BSoD.

5. Scan for malware

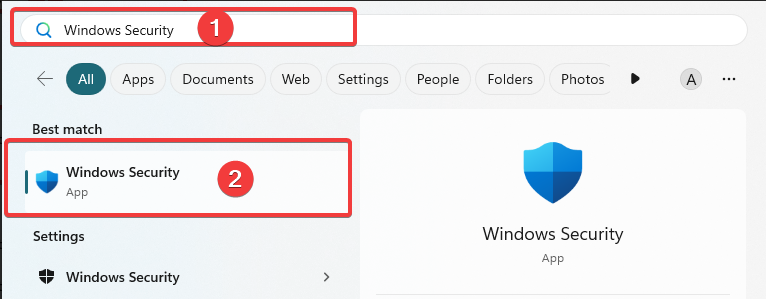
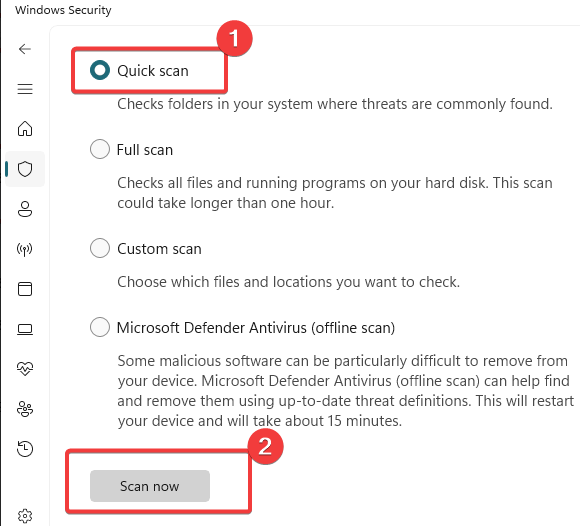
  1. Type Windows Security in the Search bar, and click on the relevant search result.
    0x00000044
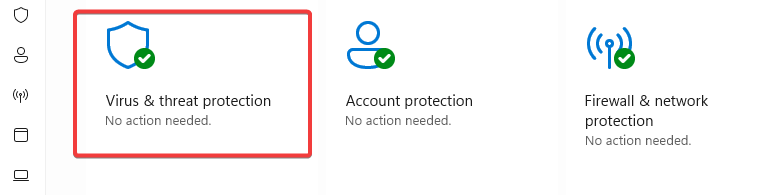
  2. Now, click on Virus & threat protection.
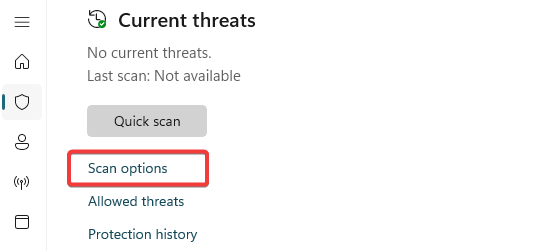
  3. Click on Scan options.
  4. Select Full scan and click the Scan now button at the bottom.

6. Update the OS

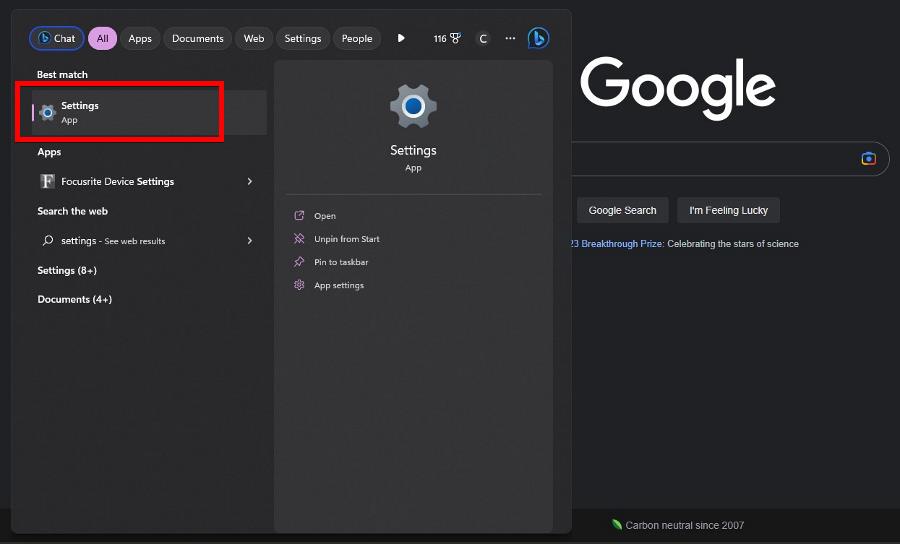
  1. Press Windows + I to open the Settings app.
  2. Click on Update & Security.
    0x00000044
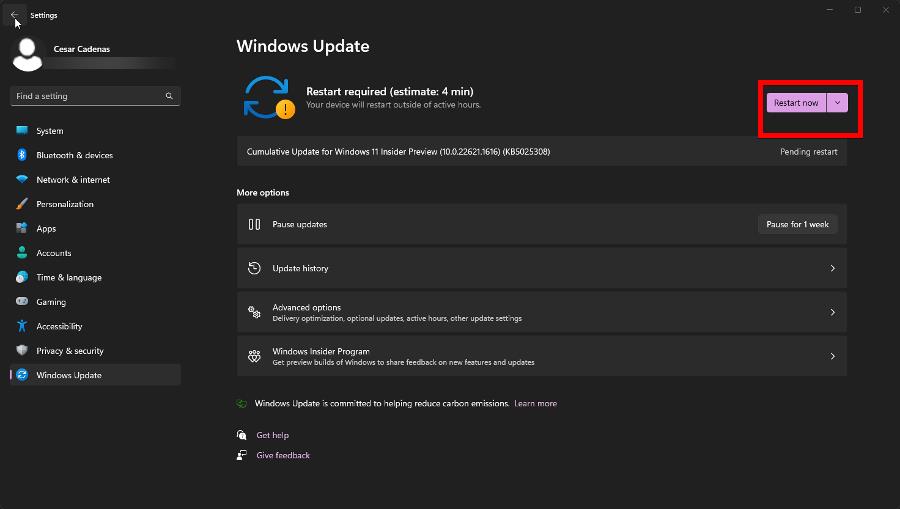
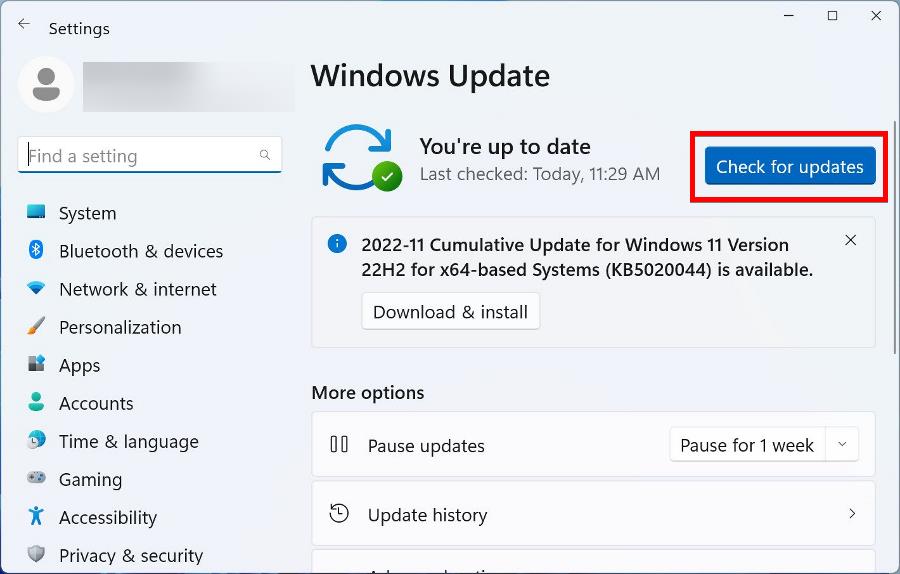
  3. On the right pane, select Windows update, and on the left, click the Check for updates button.

Any of these solutions discussed would be effective enough to stop the 0x00000044 error.

It’s important to note that multiple factors could cause the error, so utilizing more than one solution from this guide may be necessary. For instance, a combination of virus scanning and file repair may be needed to fix the issue.

Lastly, please tell us in the comments section below which of the fixes was most effective.

GitHub Copilot X: Features & Availability

GitHub Copilot X is an AI software designed to help improve efficiency and productivity while programming. It is a new and upgraded version of GitHub Copilot released in 2022.

This article will briefly discuss the GitHub Copilot X, its features, availability, and potential price predictions.

What are the new features of GitHub Copilot X?

1. AI Support for Pull Requests

GitHub Copilot X leverages the AI capabilities of Open AI’s GPT-4 model to provide developers with AI-generated pull requests on GitHub. This simplifies the process for Pull Requests and streamlines collaboration between developers.

AI-generated tags are automatically created based on the changes made to the code base. Copilot X eliminates the need for manually creating tags for each code change while also ensuring that pull requests are accurate and well informative.

2. GitHub Voice to Code

GitHub Voice is one of Copilot X’s groundbreaking features that allows developers to harness the full power of voice-to-code AI technology, providing them with a natural and more intuitive means of interacting with their code and tools.

Developers can issue verbal commands to the software using the natural language, and the command will get executed by Copilot X.  Also, this feature eliminates the need for manual typing, thereby increasing the speed and efficiency of the development process.

3. GitHub Copilot Chat

Copilot X aims to revolutionize AI-assisted software development, offering a ChatGPT-like experience directly within a developer’s code editor. 

Hence, this chat feature provides developers with vast resources, clear explanations, potential bug fixes, in-depth analysis, and many more.

4. AI-Generated Documentation Answers

One of the major problems developers face is finding the right information on a tool or feature using the documentation.

However, GitHub Copilot for Docs is an experimental tool to help developers find the information they need more quickly and efficiently.

Further, developers can utilize the chat interface to access responses to questions about documentation.

5. Copilot for Command Line(CLI)

GitHub Copilot CLI will improve the efficiency of developers by simplifying the process of composing commands and loops in the command line.

With the help of AI, developers save time by eliminating the need to manually search for the correct syntax. By just interacting with the inbuilt chat interface of Copilot X, you’ll get access to a complete list of all the correct commands and syntaxes you can use on the command line.

If you want to install and add GitHub Copilot to your favorite editor, Visual Studio, then follow this guide.

What are the pricing predictions?

When GitHub Copilot launched in 2022, Microsoft put the software price at $10 per month and $100 annually. However, as of writing this article, Microsoft hasn’t declared the price of the new and improved GitHub Copilot X.

While some users have speculated that they’ll get access to Copilot X if they have existing GitHub Copilot accounts, Microsoft has said otherwise.

An active or trial subscription to GitHub Copilot for Individuals or GitHub Copilot for Business does not guarantee access to the technical preview features introduced with GitHub Copilot X.

According to GitHub

This means users will have to purchase a brand new subscription plan to access GitHub Copilot X after its release.

When will the GitHub Copilot X be available?

GitHub Copilot was launched in 2022 and has overtaken the development world. However, GitHub has not provided a specific release date for the new and improved GitHub Copilot X.

As of writing this article, there is no information on the software’s release date. Github considers this a representation of their vision for the future rather than an available product offering of GitHub Copilot.

While there might be a release date yet, we expect to see some features available to the public over soon. To get early access to the features, you must sign up for the Copilot X waitlist.

With each passing day, developers are coming up with new and more efficient methods of learning and writing codes. GitHub’s Copilot X is about to take that to the next level.

Another great AI assistant available in the preview for Microsoft Security Copilot, explains Microsoft is all about adapting the latest technology to help people and enterprises.

Although GitHub hasn’t declared an official release date for the software, a couple of cool features will likely be available for those on the waitlist.

Sign up for the waitlist to access the Copilot X features early. Till you can always try using Copilot’s variant for organizations and enterprises, GitHub Copilot for Business; to know more, read this guide.

0x80d03801 Microsoft Store Error: How to Fix It

The Microsoft Store is a very useful part of the Windows ecosystem because it gives access to thousands of applications. However, issues like the 0x80d03801 error make it hard to use.

In this guide, we walk you through some of the most practical fixes for the Microsoft Store error and show you likely triggers so that you can avoid a future occurrence.

What is the 0x80d03801 Microsoft Store error?

This error may happen on the Windows 11 Store app, and it is often associated with app updates and downloads. Any of the following elements may lead to the error:

  • Cache issues – If the Windows Store cache is old or corrupted, users may face the challenge.
  • Internet connection – Some users have observed the problem when they have network connectivity issues.
  • Corrupt system files – System files are essential for the proper functioning of some processes, so when these files are corrupted, you may expect an update error.

You should be able to resolve it using any of the solutions we suggest below.

How can I fix the 0x80d03801 Store error?

Before we introduce the main solutions, you may want to try these quick workarounds:

  • Change your internet connection – If you are on a slow connection, consider changing the ISP or moving to a wired connection.
  • Log out and in – A simple re-login on the Xbox app and Microsoft Store is often good enough to clear minor glitches associated with the user account.
  • Restart the device – This is general but often effective since a restart may stop problematic processes that trigger the error.

After trying the above steps, if you do not succeed, proceed to some more elaborate fixes below.

1. Terminate and repair apps

  1. Press Windows + I to open the Settings app.
  2. On the left pane, click on Apps, then on the right, click on Installed apps.
    0x80d03801
  3. Scroll down, click the 3 dots in front of the Microsoft Store, and select Advanced Options.
  4. Scroll down, then one after the other, click on the buttons for Terminate, Repair, and Reset.
    0x80d03801
  5. Verify if this worked, or perform the same steps for the Xbox app.

2. Clear the Microsoft Store cache

  1. Press Windows + R, type cmd, and hit Ctrl + Shift + Enter to open the elevated Command Prompt.
  2. Input the script below and hit Enter.
    wsreset.exe
    0x80d03801
  3. This will briefly pop up a blank Command Prompt; then, you can verify if the error is fixed.

3. Update the app

  1. Launch the Microsoft Store app.
  2. Click on the More icon at the bottom left, then click the Get updates button at the top right.
  3. Once it is updated, verify if the 0x80d03801 error is resolved.

The above are the best solutions for the Windows Store error. We have not written them in any particular update, and we encourage you to try the most relevant fixes.

Lastly, keep in touch with us in the comments section and let us know what worked.

Fix: 0x80073d13 Xbox Game Pass Error

Microsoft’s Xbox Game Pass is a video game subscription service that gives players access to a changing selection of games from various publishers and other premium services. Users who report the 0x80073d13 error are not able to use this service.

We explore the error in this guide, offering possible causes and the most practical solution.

What does error code 0x80073d13 mean?

You may encounter this error when installing games or making simple Windows 11 Xbox Game Pass app updates. Any of the following elements often causes it:

  • Low storage – We have noticed that many users with insufficient disk space on the system drive may run into the error.
  • Disk format issues – Since Game Pass does not support exFAT or FAT32 disk formats, you will get the error if your disk is in these formats.
  • Installation issues – A user may face many installation issues, but when any of these happen on the Xbox Game Pass app, you may get the error.

How do I fix error code 0x80073d13?

Before you advance to some of the elaborate solutions we will offer, you may consider the following:

  • Restart the device – If a minor glitch causes the error, a reboot is often strong enough to stop the problematic process and resolve the error.
  • Reinstall the Xbox app – In most cases, this will work and save you the stress of further troubleshooting.

If these are inefficient in fixing the error, move on to more advanced fixes below.

1. Create a new partition

  1. Right-click the Start icon and select Disk Management.
    0x80073d13
  2. If you have an unallocated space, right-click on it and select New Simple Volume.
    0x80073d13
  3. Click Next on the pop-up, and click Next on the following pop up as well.
    0x80073d13
  4. Under Format this volume with the following settings, set File system to NTFS, set Allocation unit size to 4096, and click the Next button.
  5. Launch your Xbox app, and click your user icon and select the Settings option.
  6. Select the General tab, and under Change where this app installs games by default, use the dropdown to select the newly created drive volume.
    0x80073d13
  7. Install games to this new volume and see if the 0x80073d13 Xbox Game Pass error is resolved.

2. Clean up the disk

  1. Press Windows + R, type cleanmgr, and hit Enter.
    0x80073d13
  2. Select the drive with your Xbox Game Pass installation and click OK.
    0x80073d13
  3. Select all the items to be cleaned and click the Cleanup system files button.
    0x80073d13
  4. Pick the drive you selected for cleanup and hit OK.
    0x80073d13
  5. Check all the items to clean and hit OK.
    0x80073d13

3. Reset Microsoft Store

  1. Press Windows + R, type cmd, and hit Ctrl + Shift + Enter to open the elevated Command Prompt.
    0x80073d13
  2. Input the script below and hit Enter.
    wsreset.exe
  3. This will briefly pop up a blank Command Prompt; then, you can verify if the error is fixed.

4. Make C the default game drive

  1. Press Windows + I to open the Settings app.
  2. On the right pane, click on Storage.
  3. Expand Advanced storage settings, and click on Where new content is saved.
  4. Set C as the default for saving new apps.
    0x80073d13
  5. Now verify that the 0x80073d13 error is solved.

That is all we will cover in this guide. Any solutions should be effective enough, so please try what seems the most applicable to you.

Read our guide for assistance if the Xbox app is not opening games on your Windows 11 devices.

Also, let us know what fix was the most effective using the comments section.

What is Prelanding? File Downloaded by Itself [PC & Mac]

While some errors have been encountered for a long time, others are usually new, and a patch is released quickly to get things running. One such problem users recently reported is that a prelanding file downloaded by itself in Safari on Mac.

The problem appears when opening the Microsoft Office website and has been widely reported on business accounts.

For personal accounts, there have just been a few instances. Besides, users found the prelanding file downloaded by itself only on Safari. Let’s find out all about the problem!

What is prelanding?

From the technical viewpoint, prelanding is a one-page website that leads to the main or landing page. The primary factor to identify prelanding is its link to the main page.

The prelanding file downloading on Safari is 0 KB in size, and the source is listed as https://login.microsoftonline.com/https://admin.microsoft.com/prelanding, which points to Microsoft somewhere being linked to the whole situation.

What can I do if the Prelanding file is downloaded by itself in Safari?

1. Switch to another browser

As per available reports, the prelanding file is downloaded by itself only on Safari and no other browsers. So, we recommend you switch to Chrome or Firefox on your Mac device. Or you could check our recommendation for the best browsers for Mac and pick one from the list.

This is the simplest solution available, given the problem is still prevalent and a patch hasn’t been released yet.

2. Use the Personal Microsoft account

So far, we haven’t encountered many cases of users finding that the prelanding file downloaded automatically on personal accounts. It appears Microsoft Office business users more frequently encounter the problem.

So, if you have both business and personal accounts, switching to the latter may help.

3. Log out of the office account

If you find the prelanding file downloaded by itself simply by opening Safari, logging out of the Microsoft account should do the trick.

Microsoft Office online

This will at least prevent the problem from appearing while browsing the web and won’t allow the bug to hamper your experience. Here, we recommend you log in to Microsoft Office only when absolutely necessary until the problem is resolved.

4. Contact the support team

If you are fed up and want a quick resolution or an update on when things will run fine, it’s best to contact Microsoft support.

They could provide a timeline and any other relevant information required in this case. And since the problem is widely reported, it’s likely that the team is already working on it and will soon get things in order.

Can a file download without permission?

Yes, a website can download data to the user’s PC without explicit permission as long as the browser is not secure or the settings are misconfigured. That’s why experts recommend you always use a reliable and secure browser.

This usually happens on unreliable and shady websites where an action like closing an ad or popup can be construed as permission to download files. Though both browsers and operating systems offer protection against it, playing it safe is usually the best approach.

Before you leave, find the best security settings to keep your PC safe from malware and threats.

For any queries or to share what worked for you when the prelanding file was downloaded by itself, drop a comment below.

How to Fix View BitLocker Keys Stuck in Loading Cycle

While Bitlocker is essential from a security point of view and encrypts data, most users don’t remember enabling the feature. And there are times when one may be required to enter the recovery key. Many users recently reported that the View BitLocker Keys option is stuck in a loading cycle.

The problem has been widespread, affecting users across the globe, and they are unable to boot Windows. Forums are filled with reports, with no viable solution in sight. Fret not! We did the hard work for you and found fixes that did the trick for others. Let’s find out!

Why is the BitLocker key not loading?

Here are the primary reasons the BitLocker key is not loading:

  • Issues with the Microsoft server: The most likely problem is an issue with the Microsoft server and its inability to retrieve the key. Remember, the issue is new and hasn’t been encountered previously by anyone.
  • Misconfigured account: Another possibility here is that the account is not configured properly, and, as a result, users are stuck in a loading cycle when clicking on the View BitLocker key option.
  • Problems with the Internet connection: Though rare, there’s also the possibility that the Internet connection is slow, leading to a prolonged loading cycle.

How do I fix View BitLocker Keys stuck in loading cycle?

Tip icon Tip
We are continuously searching for more solutions and will keep updating the guide as they are found. If you are facing the error, bookmark the page and keep checking it every few days for recent developments.

Before we head to the slightly complex solutions, here are a few quick ones to try:

  • Try signing into the Microsoft servers using another browser.
  • If you have a VPN configured, make sure to disable it. In case your work entails using one, choose a reliable VPN for Windows.
  • Check the Internet speed and make sure you have fast Internet on the PC.
  • For users who had the PC set up by an administrator, try checking with them for the BitLocker key. Though it’s stored by default in the Microsoft account, there’s also the option to print a physical copy.

In case none of these work, move to the solutions listed next.

1. Check the Azure portal

A simple solution for computers linked to an organization would be to look for the key in the Azure portal. If you have ever logged into the Active Directory domain, there’s a chance that the key might be stored there.

When you join the Active Directory domain, a copy of the key is automatically saved on the portal and can be accessed with administrative rights. Even if you don’t have the rights, get the administrator to check if you have View BitLocker Keys stuck in a loading cycle.

2. Try the Microsoft account

  1. Open any web browser, and head to Microsoft’s recovery key page for BitLocker.
  2. Input the correct credentials and sign in.sign in
  3. Check if the BitLocker recovery key is listed here.View BitLocker Keys stuck in loading cycle

When signing into the organization’s account doesn’t work, you can try logging in via the link provided here and check the BitLocker recovery key for all devices linked to that account.

3. Reinstall Windows

In case there are no important files stored on the PC, a quick solution to BitLocker errors is to reinstall Windows. All you need to do is create a bootable USB drive, change the boot order in the BIOS to the USB drive, and then follow the instructions to reinstall Windows.

Remember, you will lose all the data stored on the computer, and since it’s currently inaccessible, there’s no way to recover the files.

But before you proceed with the reinstall, we suggest waiting for a few days because Microsoft has acknowledged the problem, which should be rectified soon. If it’s not urgent, waiting it out is the best way, with no other possible solutions.

And to prevent the View BitLocker Keys stuck in loading cycle error from arising in the future, there’s always the option to disable BitLocker in Windows.

For any queries or to share what worked for you, drop a comment below.

Nvhda64v.sys BSoD: 4 Quick Ways to Fix It

A blue screen of death is very scary for a Windows user. It is a sudden crash that happens without warning. Some of these crashes come with the nvhda64v.sys error code.

In this article, we explore this NVIDIA-related error code, investigate the causes, and offer the most practical solutions.

What causes the nvhda64v.sys BSoD?

Varying elements, especially surrounding your drivers, may contribute to this computer issue. Below we introduce some of the top factors:

  • Incompatible or outdated NVIDIA audio driver – This is a primary reason for most users since the device will develop compatibility issues with these bad drivers.
  • Damaged or corrupted or nvhda64v.sys file – If this file associated with the NVIDIA High Definition Audio driver is bad, you may experience the error.
  • Conflicts with other drivers or software – It may also trigger the error if you have conflicting drivers on your computer.

How do I fix the Nvhda64v.sys BSoD?

1. Roll back updated Nvidia drivers

  1. Press the Power button for 10 seconds; when it shows the manufacturer logo, press it again to force a shutdown. Repeat this a couple of times, and finally, let it enter the repair screen.
  2. Choose Troubleshoot, then Advanced options.
    nvhda64v.sys
  3. Select Startup Repair.
    nvhda64v.sys
  4. Click on the Restart button.
    nvhda64v.sys
  5.  Press F5 for Safe Mode with Networking.
  6. When the computer boots into Safe Mode, right-click on the Start menu and select Device Manager.
    nvhda64v.sys
  7. Expand the Display adapters, right-click on the Nvidia driver, and select Properties.
    nvhda64v.sys
  8. Go to the Driver tab, then click the Roll Back Driver button.
    nvhda64v.sys
  9. Select a reason for rolling back and confirm your choice.
  10. When the roll back is complete, restart the computer.

2. Reinstall Nvidia drivers

  1. Boot into Safe Mode using the same steps from solution 1.
  2. Navigate to the Nvidia driver download page.
  3. Input the details that correspond to your device and click Search.
  4. Click on the Download button.
    nvhda64v.sys
  5. Double-click the downloaded file to install the new drivers.

3. Run a files scan

  1. Boot into Safe Mode using the same steps from solution 1.
  2. Press Windows + R, type CMD, and hit Ctrl + Shift + Enter.
    nvhda64v.sys
  3. Type the script below and hit Enter to begin execution.
    nvhda64v.sys
  4. Follow the instructions to repair any file errors found, and verify that the nvhda64v.sys BSoD is resolved.

4. Update the OS

  1. Boot into Safe Mode using the same steps from solution 1.
  2. Press Windows + I to open Settings.
  3. On the left pane, click Windows update, then click the Check for updates button on the right.
  4. If there are any updates, click Download & Install.
    nvhda64v.sys
  5. After the update, you may need to restart your computer and verify that it has fixed the nvhda64v.sys BSoD.

This blue screen of death should not scare you; as long as you can boot into Safe Mode with our shared steps, any of the solutions should resolve the problem.

As an extra help, here is a comprehensive guide on starting Windows 11 in Safe Mode from BIOS.

Please let us know in the comments section if these steps have been helpful.

Enhance your Microsoft Edge browsing experience with these 7 ChatGPT extensions on GitHub

Are you tired of your mundane and outdated Microsoft Edge browsing experience? Do you feel like there’s something missing from your browser that could make your life easier and more productive? Well, look no further! With the help of Awesome ChatGPT on GitHub, a curated list of awesome tools, demos, docs for ChatGPT, these Microsoft Edge extensions will undoubtedly enhance your browsing experience. These extensions, all available on GitHub, will make your life easier, faster, and more efficient. So, what are you waiting for? Follow this guide to enhance your Microsoft Edge browsing experience with these ChatGPT extensions on GitHub.

Enhance Microsoft Edge browsing experience with ChatGPT

microsoft edge browsingMicrosoft Edge is a powerful browser that has undergone significant changes in recent years. With the introduction of new extensions, the Edge browser is now more customizable than ever before. We have scoured the internet and found some Microsoft Edge extensions that will enhance your browsing experience. All of these extensions are available on GitHub, and they’re all free to download and use. The following extensions are user-friendly and easy to install, so you don’t have to worry about a complicated setup process.

  1. Edge extension to access ChatGPT as a popup on any page
  2. Extension to display ChatGPT response alongside Google Search results
  3. Extension to add share abilities to ChatGPT (PDF, PNG or a sharable link)
  4. Edge extension to add input history, copy, and counters to ChatGPT
  5. ChassistantGPT – embeds ChatGPT as a hands-free voice assistant in the background
  6. WebChatGPT – augment your prompts to ChatGPT with web search results
  7. Talk to ChatGPT (voice interface)

Enhancing your Microsoft Edge browsing experience has never been easier, thanks to the power of ChatGPT and these seven extensions available on GitHub. Whether you want to block ads, improve your writing, or save articles for later, there’s an extension on this list that will help you achieve your goals. All of these extensions are easy to use, safe, and best of all, free. So what are you waiting for? Enhance your Microsoft Edge browsing experience by using these ChatGPT extensions on GitHub right now!

You can now vote for your favourite app in the Microsoft Store App Awards 2023

Earlier this year, Microsoft announced that it will be holding its annual Microsoft Store App Awards later this year and invited users to nominate their favorite apps to feature in the ceremony between March 15 and March 29.

We’re now well past that period and the company has announced that it has since selected nominees that met the set standard in terms of user experience, design, quality, and most of all, customer value.

Microsoft has also indicated that voting is now open to all Microsoft Store on Windows customers on Windows 10 and 11  across the globe but for a limited period.

The voting will be open to users from May 1 to May 5, 2023, 8:00pm Pacific time. Microsoft split the nominees that met its criteria into five different categories, that is, Utilities & Tools, Productivity, Audio & Video, Creativity, and Personalization.

Every user is limited to one vote, any additional votes or bot votes cast will be disqualified. Microsoft further added that “We may remove an app if we detect unfair or unusual voting patterns.”

We invite you to visit Microsoft’s Forms to check out if your favorite app is part of the nominees selected. You’ll also get the chance to cast your vote before the process is closed.

What’s your favorite app in the Microsoft Store? Let us know in the comments.

Navagio.sys BSOD Error: 5 Ways to Quickly Fix It

The navagio.sys Blue Screen of Death error is an issue users encounter after playing PBUG on their PC. This started happening since users were asked to provide administrative privileges to install an anti-cheat upon launching the game.

After playing closing PBUG, this dread error, accompanied by the equally scary blue screen, shows up. If you are also facing the navagio.sys BSOD issue, we will show you fix it for good in this guide.

What causes the navagio.sys blue screen on PC?

Various factors can be responsible for the navagio.sys error. Below are some of the prominent ones:

  • Outdated PC: An outdated PC is one of the leading causes of this error message. Hence, you need to update your PC at all times to get rid of it.
  • Faulty game files: Faulty or corrupt game files can cause you to get this error after closing your game. The solution to this is to delete some of these files.
  • Faulty Windows update: If you started noticing this issue after updating your PC, it might be down to problems with the update. The solution to this is to delete the update.

How do I fix the navagio.sys BSOD error?

1. Delete the navagio.sys file

  1. Press the Windows key + R, type the path (you can change the path if you installed the game to another path) below in the run box, and click OK: C:/Program Data/Common Files/PBUGpath navagio.sys
  2. Double-click the unistall.exe file to launch it.
  3. Now, wait for the opened CMD black window to close and restart your PC.
  4. Next, repeat step 1 to go to the game path again.
  5. Right-click the navagio.sys file and select Delete.
    delete
  6. Finally, launch the game and click the No button when asked for disk access. Note that you will have to do this anytime you want to play the game from now on.

Frequently, this issue is caused by problems with the navagio.sys file. Many users were able to fix it by deleting the file and could still play the game. So, you should try it too.

2. Update your PC

  1. Press the Windows key + I to open the Settings app and click the Windows Update option in the left pane.
    windows update
  2. Click the Check for updates button.
  3. Now, download and install all available updates.

If your PC is outdated, it is prone to all sorts of issues, including the BSOD error. The quickest way around this is to update your operating system, as shown above.

3. Uninstall the last update

  1. Press the Windows key + I and select Windows Update.
  2. Click the Update history option.
    update history navagio.sys
  3. Now, scroll down and click Uninstall updates.
    uninstall updates
  4. Finally, right-click the last update, select Uninstall, and follow the onscreen instructions to complete the process.
    uninstall

Some users reported facing the navagio.sys error after updating their PC. Some compatibility issues between the game and your PC can cause this. So, you need to uninstall the latest update to get past the error.

4. Disable Kernel-mode Hardware-enforced Stack Protection

  1. Press the Windows key, type security, and select the Windows Security option.
    security navagio.sys
  2. Now, click the Device security option in the left pane.
    device security
  3. Choose the Core isolation details option in the right pane.
  4. Finally, toggle the switch for Kernel-mode Hardware-enforced Stack Protection to disable it.

In some cases, this navagio.sys problem can be caused by your PC’s security feature. The solution to this is to disable the responsible feature.

5. Reinstall Windows

If everything else fails to fix this navagio.sys Blue Screen of Death error, you might need to reinstall your operating system completely. You have the option of performing an in-place upgrade or a clean install.

If you have some important files on your PC, you can perform an in-place upgrade. However, if you have backed up your data, you can perform a clean install instead.

The navagio.sys issue is one of the many frustrating Blue Screen of Death issues users encounter. And just like we have done with others before it, we have provided the solutions to it in this guide.

Similarly, if you are facing other issues like the netwbw02.sys BSOD error, check our detailed guide to fix it.

Feel free to let us know the solutions that helped you fix this issue in the comments below.

IOMap64.sys BSOD Error: How to Fix It in 6 Steps

The IOMap64.sys BSOD error mostly shows up during the first boot-up of the day for some reason. The error then disappears after restarting the PC for some users.

While this can look manageable, it can lead to more serious issues if left unattended. In this guide, we will show you how to fix this issue for good.

Why am I getting the IOMap64.sys error?

Below are some of the causes of the IOMap64.sys Blue Screen of Death error:

  • Faulty ASUS software: The most prominent cause of this issue is problems with the ASUS AI software. You can fix this by uninstalling the program.
  • Outdated PC: At times, this error message can be caused by an outdated operating system. The solution to this is to update your PC to the latest version.
  • Corrupt GPU drivers: If your graphics driver is outdated or faulty, you can get the IOMap64.sys error. You need to reinstall or update your driver to get past the error.
  • Faulty system files: Some users have also found this error message to be due to broken or missing system files. Repairing these files should do the trick here.

How can I fix the IOMap64.sys BSOD error?

1. Uninstall ASUS AI Suite

  1. Press the Windows key + R, type appwiz.cpl, and click OK.
    appwiz iomap64.sys
  2. Select the ASUS AI Suite software and click Uninstall at the top.
    uninstall program
  3. Finally, follow the onscreen instructions to complete the process.

Problems with the ASUS AI Suite software majorly cause the IOMap64.sys blue screen error. While this software is quite useful, there is nothing it can do that other system tools cannot.

So, you need to uninstall the software and restart your PC to fix this BSOD error.

2. Reinstall GPU drivers

  1. Press the Windows key + R, type devmgmt.msc, and click OK.
    devmgmt
  2. Double-click the Display adapters option to expand it and right-click the device there.
  3. Now, select the Uninstall device option.
    uninstall device iomap64.sys
  4. Check the box for Attempt to remove the driver for this device and click the Uninstall button.
    uninstall button
  5. Finally, click the Scan for hardware changes icon and restart your PC.

In some cases, you can get the IOMap64.sys BSOD error because of problems with your graphics driver. The solution to this is to reinstall the driver.

3. Update your PC

  1. Press the Windows key + I to open the Settings app and click Windows Update in the left pane.
    windows update iomap64.sys
  2. Click the Check for updates button.
  3. Finally, download and install the available updates and restart your PC.

An outdated PC is prone to various issues with the IOMap64.sys error one of them. So, you always need to update your operating system.

4. Run the Memory Diagnostics tool

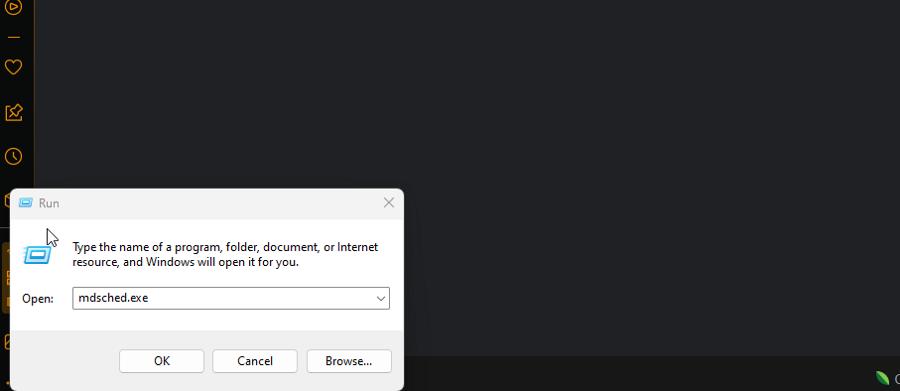
  1. Press the Windows key + R, type mdsched.exe, and click OK.
    mssched
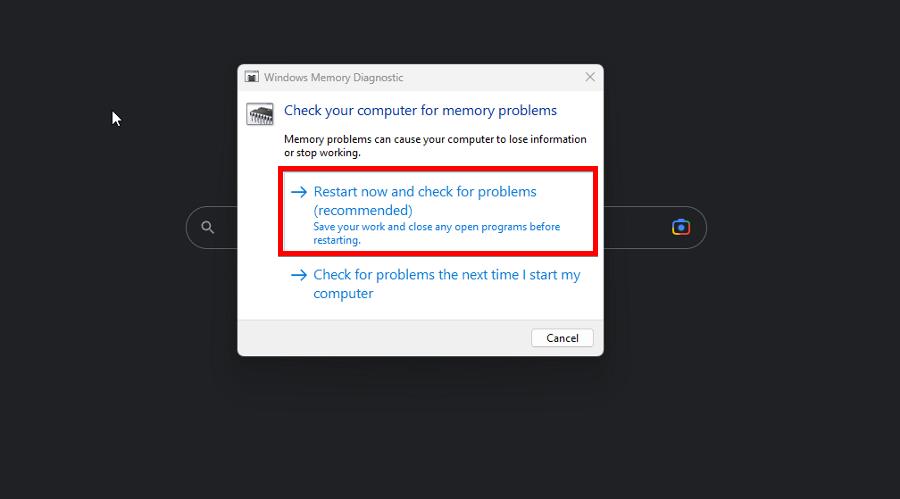
  2. Click the Restart now and check for problems (recommended) option.
    restart now
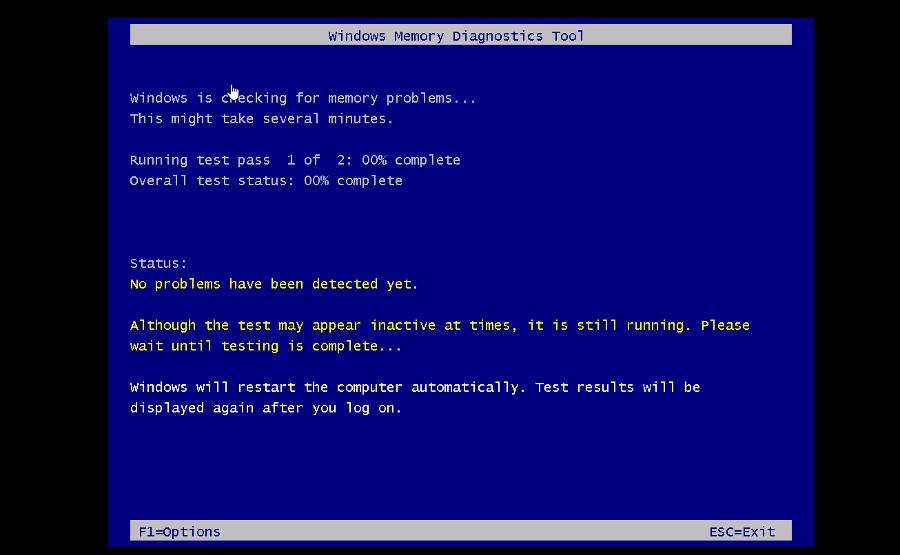
  3. Finally, wait for your PC to restart, and the tool will check for and fix memory errors.

Memory issues can cause the IOMap64.sys error on your PC. Fortunately, Windows has a built-in tool to fix memory problems.

5. Change the paging file size

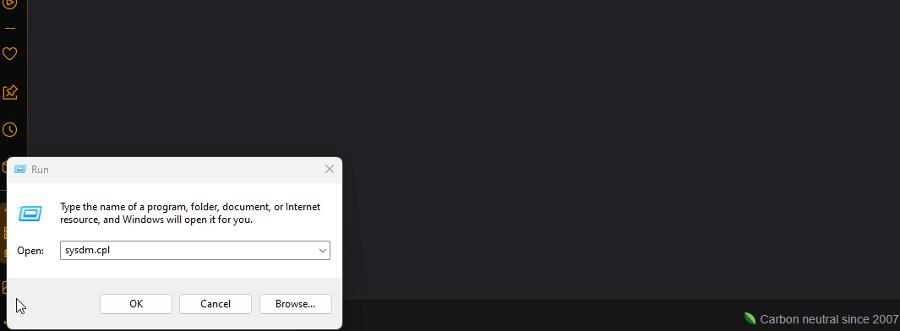
  1. Press the Windows key + R, type sysdm.cpl, and click OK.
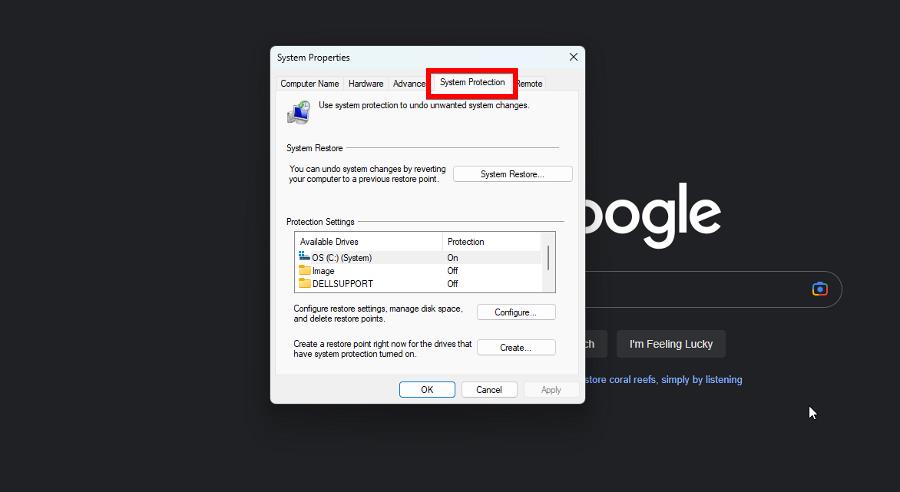
  2. Click the Advanced tab at the top.
  3. Now, click the Settings button under the Performance section.
    advanced settings iomap64.sys
  4. Click the Advanced tab at the top and click the Change button.
    change
  5. Next, uncheck the Automatically manage paging file size for all drives box.
  6. Now, tick the radio button for Custom size.
    automatically iomap64.sys
  7. Finally, set the Initial and Maximum size and click the OK button.
    initial

Your PC’s paging file size can sometimes cause the IOMap64.sys issue. The solution to this is to increase the page file size accordingly.

6. Repair system files

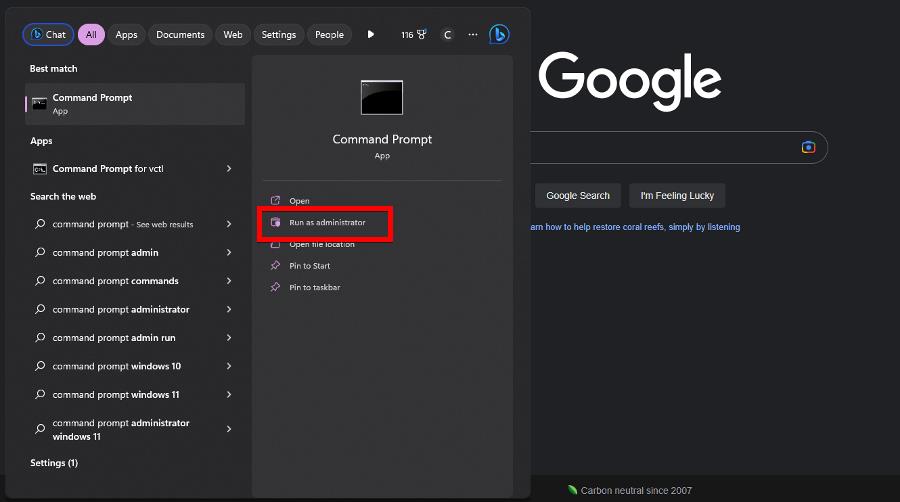
  1. Press the Windows key, type cmd, and select Run as administrator under Command Prompt.
    cmd
  2. Type the command below and hit Enter to run it: DISM /online /cleanup-image /restorehealthdism
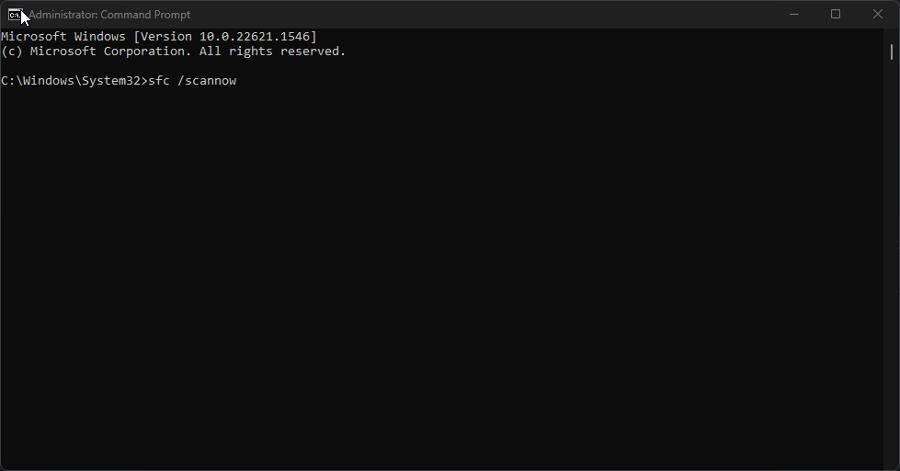
  3. Wait for the command to finish running. Now, run the command below: sfc /scannowsfc scan iomap64.sys
  4. Finally, wait for the command to finish running and restart your PC.

If your system files are faulty, you might encounter the IOMap64.sys error. You can fix this by running the DISM and SFC scans.

There you have it: everything you need to fix the IOMap64.sys Blue Screen of Death error. You should now be able to fix this by following the solutions in this guide.

If you are facing a similar issue in navagio.sys BSOD error, check our comprehensive guide to fix it.

Feel free to let us know the solution that helped you solve this problem in the comments below.

Netwbw02.sys BSOD Error: How to Fix It on Windows 10 & 11

Blue Screen of Death errors are pretty dreadful and can lead to serious problems if not dealt with. One such error is the netwbw02.sys issue that is related to network drivers.

This frustrating error can be caused by several factors, but it is not an issue without a solution. In this guide, we will show you how to solve the problem easily.

What is the netwbw02.sys blue screen error?

The netwbw02.sys is an integral component of the Intel wireless WiFi link driver or Intel wireless adapter driver. When you get a blue screen error from this component, it most likely means there is an issue with your Intel driver.

Below are some of the causes of this issue:

  • Outdated driver: The first thing you need to check if you are dealing with this issue is if you have the latest network drivers. If not, you need to update your drivers to the latest version.
  • Presence of malware: Sometimes, viruses can cause issues with your device, leading to this error. What you have to do here is to perform a deep malware scan.
  • Outdated PC: In some cases, the netwbw02 error might be down to an outdated operating system. Updating your PC to the latest version should do the trick here.

How can I fix the netwbw02.sys BSOD error on Windows 10?

1. Update network drivers

  1. Press the Windows key + X and select the Device Manager option.
    device manager netwbw02.sys
  2. Double-click the Network adapters section and right-click the Intel wireless device under it.
  3. Now, select the Update driver option.
    update driver
  4. Finally, choose Search automatically for drivers and install any available updates.
    search auto

The major cause of the netwbw02.sys BSOD error is an outdated network driver. So, you need to install the latest drivers versions to solve the problem.

If the Windows updater could not get the latest driver, you need to go to Intel’s official website to download and install the driver.

Another effective option is to use an automatic driver updater in Outbyte Driver Updater to complete this task. This saves you the stress of searching for and installing the drivers yourself.

Also, it eliminates the risk of downloading the wrong driver, which can lead to further problems.

⇒ Get Outbyte Driver Updater

2. Uninstall network drivers

  1. Press the Windows key + R, type devmgmt.msc, and click OK.
    devmgmt netwbw02.sys
  2. Expand the Network adapters option and right-click the Intel wireless adapter there.
  3. Now, select the Uninstall device option.
    uninstall device
  4. Check the Delete driver software for this device box and click the Uninstall button.
    uninstall button
  5. Finally, restart your PC.

If updating your network drivers do not fix the netwbw02.sys issue, you might need to uninstall it. After restarting your PC, you can download the latest driver to the official Intel website.

3. Update your PC

  1. Press the Windows key + I and select Update & Security.
    update netwbw02.sys
  2. Click the Check for updates button.
    check for
  3. Finally, download and install the available updates and restart your PC.

Sometimes, the netwbw02.an outdated PC might cause sys blue screen issue. To fix this, you must update your operating system to the latest version.

4. Run an SFC scan

  1. Press the Windows key, type cmd, and choose Run as administrator under Command Prompt.
    cmd admin
  2. Type the command below and hit Enter to run it:sfc /scannowsfc scan netwbw02.sys
  3. Wait for this command to finish running. If this does not work, type the command below and hit Enter: DISM /online /cleanup-image /restorehealthdism restore
  4. Finally, wait for the command to finish running and restart your PC.

Faulty or corrupt system files can sometimes be the cause of the netwbw02.sys BSOD. The solution is to repair these system files by running the SFC and DISM scans.

5. Uninstall your antivirus

  1. Press the Windows key + R, type appwiz.cpl, and click OK.
    appwiz
  2. Right-click your third-party antivirus and select Uninstall.
    uninstall
  3. Finally, follow the onscreen instructions to complete the removal process.

Some users have found the netwbw02.sys BSOD to sometimes be down to issues with their third-party antivirus software. So, if you have one on your PC, you need to uninstall it and check if the issue persists.

How can I fix netwbw02.sys BSOD on Windows 11?

  1. Press the Windows key + S, type virus, and choose Virus & threat protection.
    virus netwbw02.sys
  2. Click the Scan options link on the next page.
    scan options
  3. Finally, select your preferred scan option and click the Scan now button.
    scan now

Viruses can cause different types of issues, including this netwbw02.sys BSOD on Windows 11. Fortunately, you can eliminate them by performing a full scan with Windows Defender.

Note that the solutions listed for Windows 10 also work perfectly on Windows 11 and vice versa. So be free to apply them all, irrespective of your OS.

We can now conclude this detailed guide on solving this dreadful Blue Screen of Death issue. While the error can be frustrating, you should be able to fix it with the solutions above.

Similarly, if you are dealing with the BSoD error 0x00000154 on Windows 11, check our detailed guide to fix it.

Feel free to let us know the solution that helped you fix this issue in the comments below.

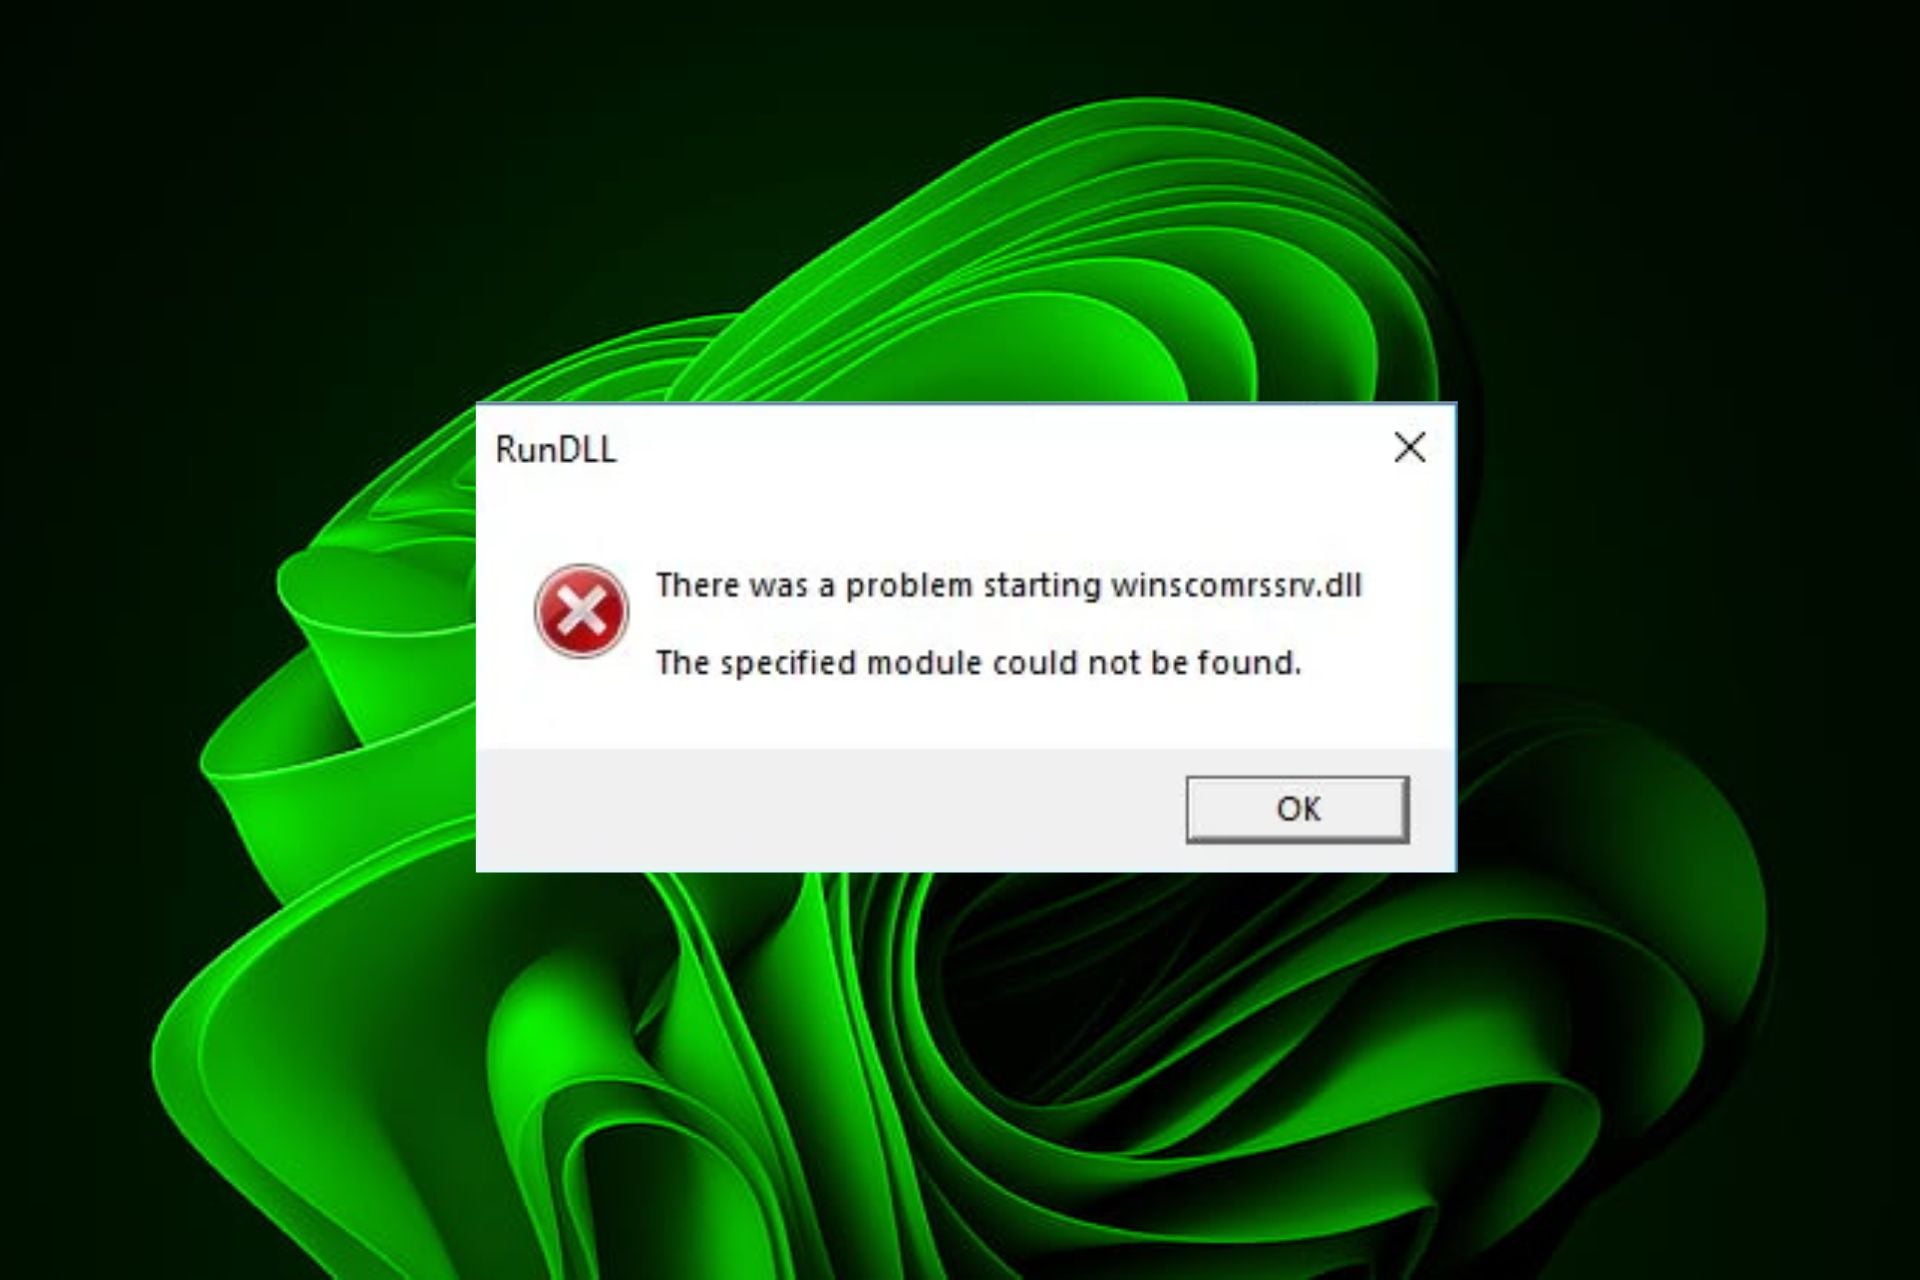
Winscomrssrv.dll Error: How to Fix This Startup Issue

Startup programs are essential in your PC as they save you the time to open individual apps whenever you want to boot up. However, Winscomrssrv.dll seems to be popping up when you startup.

Although most DLL files are legitimate and probably just missing or corrupted, some can disguise themselves but are indeed malware. Let’s delve into this startup error and find ways to fix this issue.

What is the Winscomrssrv.dll Error?

DLL files are required for the smooth running of your PC, but some disguised as malware can cause extensive damage to your PC. The Winscomrssrv.dll is one of those files.

According to users, when they fire up their PCs, they’re hit with this error. After close examination, it appears that it is a leftover file after performing a virus scan on your system.

Virus scans may get rid of malware, but sometimes they leave residual files. These files, if not properly removed, can cause damage to your PC.

How do I fix the Winscomrssrv.dll error?

As always, a few preliminary steps before the main solutions include:

1. Use a DLL Fixer tool

DLL files can get corrupted for various reasons, including virus attacks and software installation errors. When this happens, your computer cannot access the data in these files and crashes when you try to run an application that needs them.

Since Winscomrssrv.dll is a non-system file, it is most likely due to incompatibility hence the best way to fix such DLL errors is by using a DLL repair tool.

Such tools scan your system for damaged or missing DLL files and replace them with working copies from its database.

2. Use Autoruns to remove the file

  1. Navigate to your browser and download Microsoft Autoruns.
  2. Locate the downloaded file and unzip it.
  3. Right-click on the autorun.exe file and select Run as administrator.
  4. Click on Agree to accept the license terms.
  5. Type and Enter srvhost in the Filterbox entry.
  6. Locate the following entry, right-click on it, and select Delete: \Microsoft\Windows\WDI\SrvHost

Autoruns is a utility that shows you what programs are configured to run during system boot up or login. It also shows you the full list of Registry and file locations used to start a program automatically.

Once you have the full list, you can disable or delete them. It’s an excellent tool for cleaning up and optimizing your startup process.

3. Run DISM and SFC scans

  1. Hit the Start Menu icon, type cmd in the search bar, and click Run as administrator.cmd-run-admin-w11 unexpected kernel mode trap windows 11
  2. Type the following commands and press Enter after each one:DISM.exe /Online /Cleanup-Image /Restorehealth sfc /scannow

4. Scan for viruses

  1. Press the Windows key, search Windows Security, and click Open.
  2. Select Virus & threat protection.
  3. Next, press Quick scan under Current threats.
  4. If you don’t find any threats, proceed to perform a full scan by clicking on Scan options just below Quick scan.Scan options
  5. Click on Full scan, then Scan now to perform a deep scan of your PC.Full Scan Scan Now
  6. Wait for the process to finish and restart your system.

Since the Winscomrssrv.dll file is considered a virus, it is possible that you might have missed it if you performed the basic scan at first. A deeper scan could reveal more issues but even so, Windows Defender cannot be compared to third-party antivirus programs.

Some viruses are very good at camouflaging, so you will need equally good software to fish out such viruses. TotalAV has to be the best in the game.

Not only is it comprehensive, but also proactive in a high level of detection and removal efficiency. This is achieved by using the most current technology in virus research.

⇒ Get TotalAV

5. Perform a System Restore

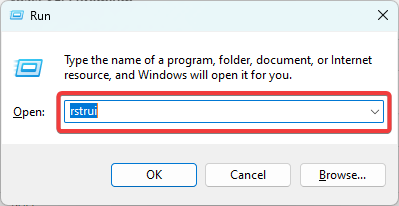
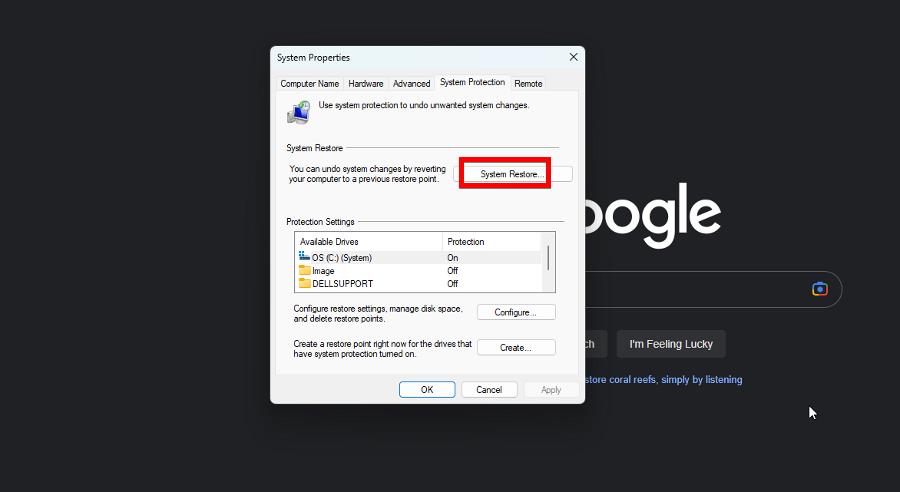
  1. Press the Windows + R keys, type rstui, and hit Enter.
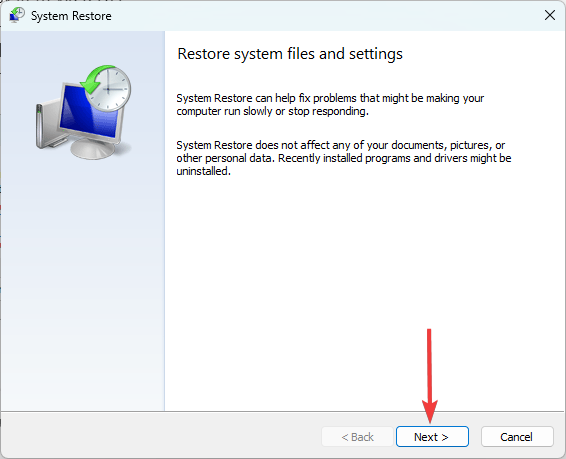
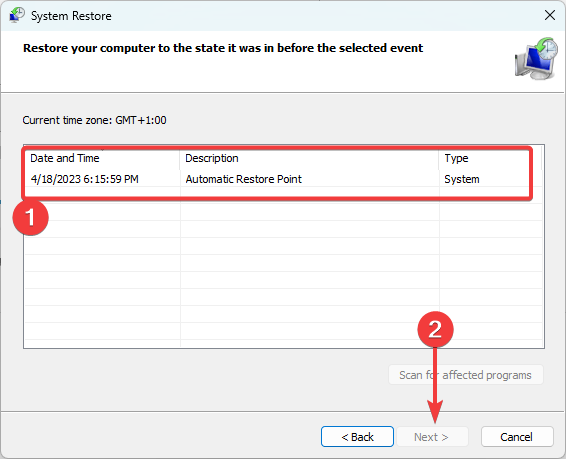
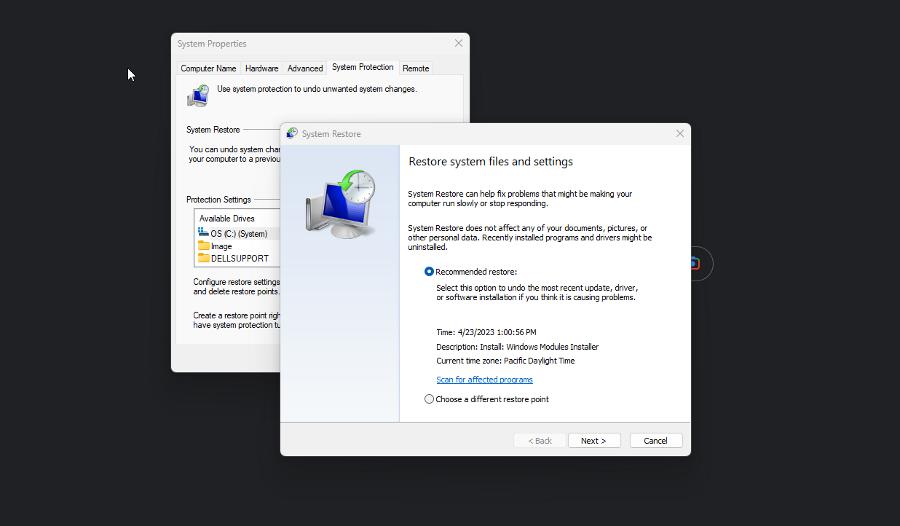
  2. The System Restore window will open. Click on Next.
  3. Select the restore point you wish to revert to and click on Next.
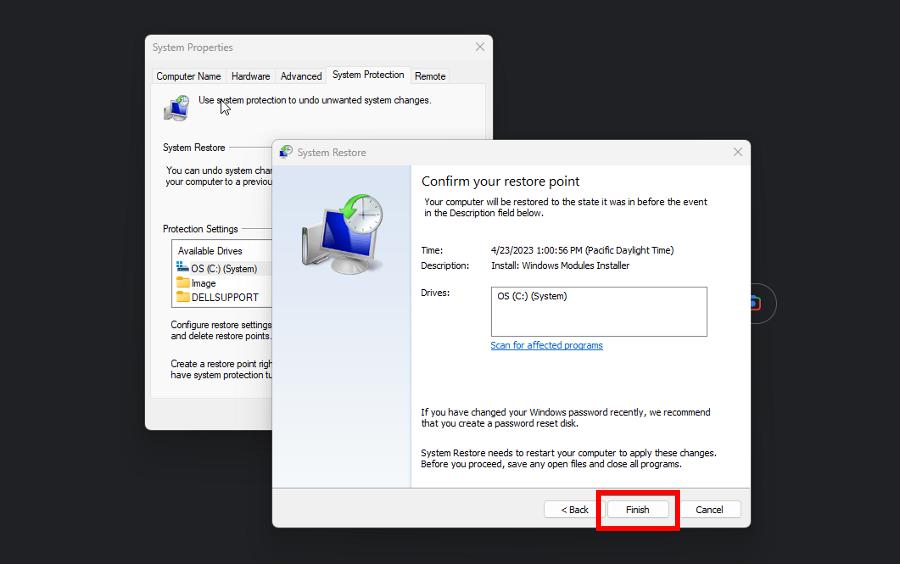
  4. Now click on Finish.

Hopefully, one of the above solutions has helped you get rid of this startup error. More on missing DLL files in Windows 10 if you should come across this error.

Let us know of any additional thoughts you may have on this topic below.

How to Fix 0x8007000A – 0X2000D Installation Error

The 0x8007000A – 0X2000D error may occur while installing or upgrading an operating system. It may come with the error message: The installation failed in the SAFE_OS phase with an error during MIGRATE_DATA operation.

This Windows upgrade error interrupts the installation or upgrade process, but with the solutions we offer in this guide, you should be able to fix it.

What causes the 0x8007000A – 0X2000D Windows error?

This error may occur while migrating user data during an upgrade. A few elements cause the error, but the following are the more common causes:

  • Corrupted installation files – This is the primary cause for most cases, as bad system files will mean that information to complete an upgrade may be missing on the device.
  • Issues with disk space or the system’s partition – If you have bad partitions or insufficient disk space, you may expect errors such as the upgrade issue.
  • Incompatible or outdated hardware – For some users, it is triggered because the hardware is incapable of the upgrade, and in these cases, you often need a change of hardware.

How do I fix the 0x8007000A – 0X2000D Windows error?

Before you try the solutions we suggest in this guide, you should try these pre-solution procedures:

  • Restart the computer – A restart fixes some minor glitches since it may force problematic processes to shut down.
  • Remove peripherals – Some connected hardware devices may spark compatibility issues during an upgrade and trigger the error.

If the above methods do not resolve the problem, you should proceed to the more complex solutions below.

1. Clean system files

  1. Press Windows + R, type cleanmgr, and hit Enter.
    0x8007000A – 0X2000D
  2. Select the drive with your installation and click OK.
    0x8007000A – 0X2000D
  3. Select all the items to be cleaned and click the Cleanup system files button.
    0x8007000A – 0X2000D
  4. Pick the drive you selected for cleanup and hit OK.
    0x8007000A – 0X2000D
  5. Check all the items to clean and hit OK.
    0x8007000A – 0X2000D

2. Repair corrupt system files

  1. Press Windows + R, type cmd, and hit Ctrl + Shift + Enter.
  2. Input the script below and hit Enter:
    sfc /scannow
  3. The process may take a while. Follow the sunscreen instructions if any repair is needed, then verify it fixed the 0x8007000A – 0X2000D error.

3. Restart essential update components

  1. Press Windows + R, type cmd, and hit Ctrl + Shift + Enter.
  2. Stop vital update components by entering the scripts below and hitting Enter after each one.
    net stop wuauserv
    net stop bits
    net stop cryptsvc
    net stop msiserver
    0x8007000A – 0X2000D
  3. Delete the content of the directories by entering the scripts below and hitting Enter after each one.
    rd /s /q c:\Windows\SoftwareDistribution
    rd /s /q %temp%
    rd /s /q c:\Windows\temp
    rd /s /q c:\Windows\System32\catroot2
  4. Restart vital update components by entering the scripts below and hitting Enter after each one.
    net start wuauserv
    sc config wuauserv start=auto
    net start bits

    sc config bits start=auto
    net start cryptsvc
    sc config cryptsvc start=auto
    net start msiserver
    0x8007000A – 0X2000D
    sc config msiserver start=auto
  5. Retry the installation or upgrade and see if the 0x8007000A – 0X2000D error is fixed.

There you go. One of these solutions should fix the problem. Feel free to try what seems most applicable since we have not written them in any particular order.

You may want to read our guide on opening a problematic Command Prompt since the terminal is key in resolving the upgrade error.

Also, don’t forget to reach out to us in the comments and tell us what was most effective.

0x8007012F Windows Update Error: How to Fix It

Updating Windows is essential as it helps your computer’s security, stability, and performance. However, errors like 0x8007012F will interrupt the process, leading to a failed update.

It often comes with the notification failed to install. We have researched the error, and in this guide, we introduce the most effective solutions in this article.

What causes the 0x8007012F Windows update error?

We gather that the elements below are the primary causes:

  • Update interruption – This may happen when some vital update services are not running or are poorly configured.
  • Cache-related issues – A few people will experience the error if they have old or corrupted cache files.
  • Old installer files – If you have old download files on your computer, it may cause conflicts when installing new files and trigger the error.
  • Bad system files – For many users, corrupt system files will interfere with the update process and may trigger an error.

The solutions below would come in handy.

How do I fix the 0x8007012f error?

1. Run the Update troubleshooter

  1. Press Windows + I to open the Settings app.
  2. Click on Troubleshoot.
    0x8007012f
  3. Select Other troubleshooters.
    0x8007012f
  4. Search for Windows Update and click Run.
  5. Retry the update and verify the error is fixed.

The manual process of troubleshooting your Windows may take longer or don’t fix the issue at all.

However, you have the alternative of using a dedicated system repair tool and entirely restoring corrupted PC files.

2. Reset BITS and other Windows update components

  1. Press Windows + R, type cmd, and hit Ctrl + Shift + Enter.
    0x8007012f
  2. Type the scripts below and hit Enter after each one to stop vital update components:
    net start wuauserv
    net stop cryptSvc
    net stop bits
    net stop msiserver
    0x8007012f
  3. Rename the SoftwareDistribution and Catroot2 folders by typing the scripts below and hitting Enter after each one.
    ren C:\Windows\SoftwareDistribution SoftwareDistribution.old
    ren C:\Windows\System32\catroot2 Catroot2.old
    0x8007012f
  4. Restart the stopped services by running the scripts below:
    net start wauserv
    net start cryptSvc
    net start bits
    net start msiserver
    0x8007012f

3. Fix system files with a file scan

  1. Press Windows + R, type cmd, and hit Ctrl + Shift + Enter.0x8007012f
  2. Input the script below and hit Enter:
    sfc /scannow
  3. The process may take a while. Follow the sunscreen instructions if any repair is needed, then verify it fixed the 0x8007012f error.

4. Clean the cache folder

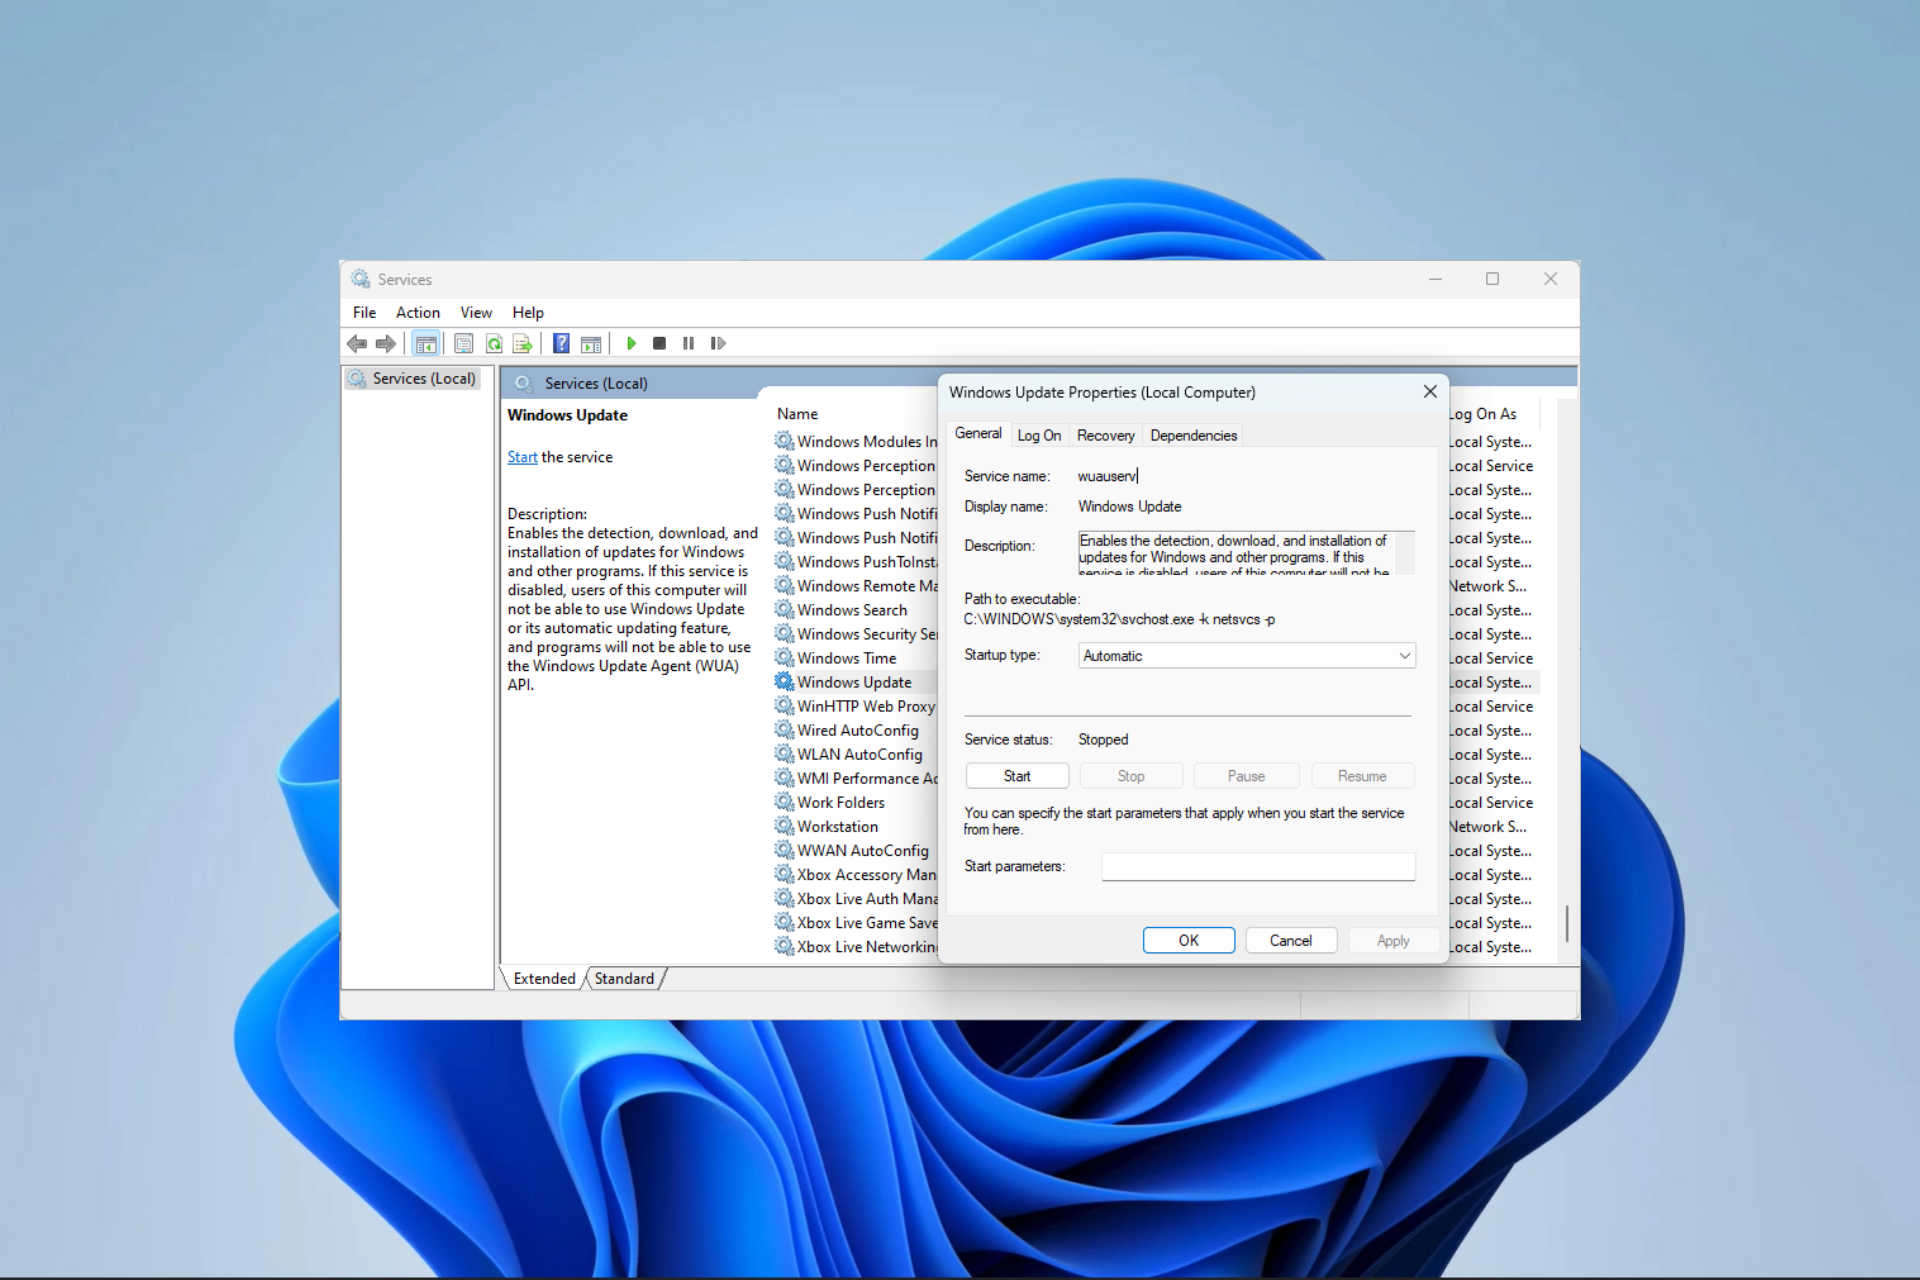
  1. Press Windows + R, type services.msc, and hit Enter.
  2. Search for the Windows Update service, double-click on it, and hit Stop if it is running.
  3. Don’t close the Services Windows since you will need to restart the stopped service.
  4. Press Windows + E, then navigate to the path below, select all the items, and delete them.
    C:\Windows\SoftwareDistribution
  5. Repeat the process, deleting all the content in the path below:
    C:\Windows\System32\catroot2
  6. Return to the open services Windows and restart the stopped Windows Update service.
    0x8007012f

5. Remove the residual Pending.xml files

  1. Press Windows + R, type cmd, and hit Ctrl + Shift + Enter.0x8007012f
  2. Type the code below and hit Enter:
    Ren c:\windows\winsxs\pending.xml pending.old
  3. Restart the update and confirm the 0x8007012f error is fixed.

Old updates in this file may stop you from getting new security patches. So, renaming the file forces the computer to create a new Pending.xml file.

Any of the solutions above should fix the update problem. It would be best to try what feels most applicable since they have not been written in any particular order.

Lastly, please update us on the fix that worked using the comments section below.

0x800F082F Error: 2 Ways to Permanently Fix It

The unknown error 0x800F082F is one of the scariest for computer users because it has a long history of persistence even after troubleshooting.

The error usually occurs when running DISM and installing vital components to the operating system, and we will take you through the most effective troubleshooting techniques.

What is the 0x800F082F error on Windows?

The error is associated with the Deployment Image Servicing and Management (DISM). It often comes with the notifications 0x800f082f DISM remove-package or Revert pending actions 0x800f082f and is usually triggered by any of the following:

  • Driver issues – Corrupted or outdated drivers may trigger the error, especially when deploying DISM.
  • Missing or corrupted system files – Some system files are integral to successful updates; when these files are corrupt, they may trigger the error.
  • Internet-related issues – The most prevalent is a slow or bad network that may not permit some processes to run smoothly.
  • Software conflicts – Some of our readers have also observed that this error may occur just after software installation.

How do I fix error code 0x800F082F?

You may take a few preliminary measures if you get the error.

  • Uninstall apps – Uninstalling an app if the error starts right after it was installed may be a valid workaround.
  • Check for network issues – Consider switching to a wired connection or changing to a faster ISP.

If the error persists after the above pre-fixes, you should proceed to more elaborate solutions below.

1. Edit the SessionsPending registry value

  1. Press Windows + R, type regedit, and hit Enter.
    0x800f082f
  2. Navigate to the path below:
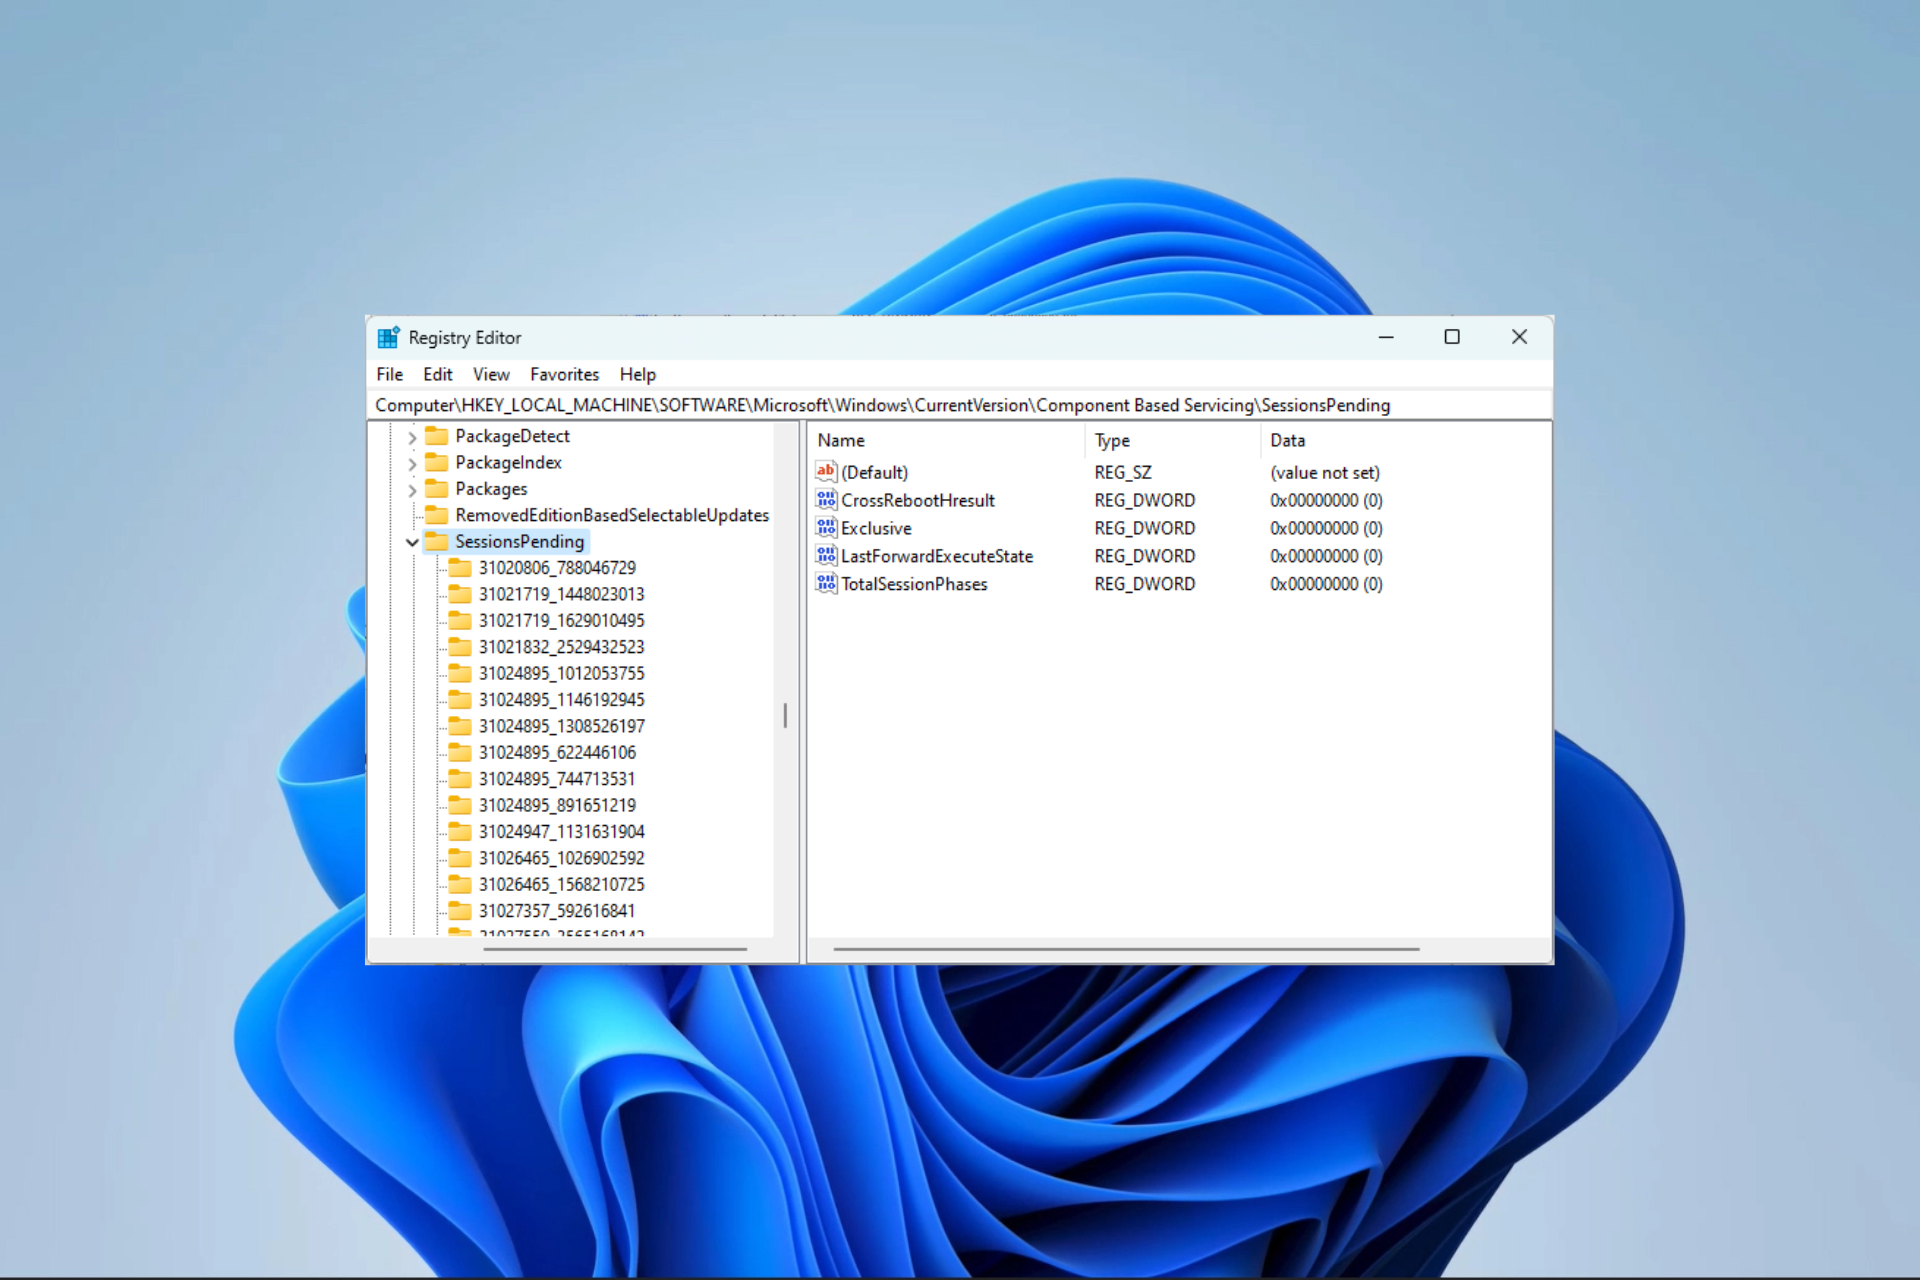
    Computer\HKEY_LOCAL_MACHINE\SOFTWARE\Microsoft\Windows\CurrentVersion\Component Based Servicing\SessionsPending
    0x800f082f
  3. On the right pane, double-click Exclusive.
  4. Update the Value data to 00000000 and click OK.
  5. Repeat steps 3 and 4 TotalSessionPhases.
  6. Finally, restart your device.

This method has worked for most readers and is the most effective fix, but if it fails, you can continue to the solution below.

In any case, you can also perform Windows registry tasks automatically using a specialized repair tool that can scan and fix this issue.

2. Scan and repair bad system files

  1. Press Windows + R, type cmd, and hit Ctrl + Shift + Enter.
    0x800f082f
  2. Type the script below and hit Enter:
    sfc /scannow
  3. This scan will verify your system files and may proceed to repairs if integrity violations are found.

The two solutions above are the most likely to resolve the error. In rare situations, you may consider reinstalling the operating system, but this will mean you lose the data on the device.

You may refer to our guide if you can not open the Registry Editor or an administrator locks it.

Lastly, reach out to us in the comments below and tell us which fixes worked.

0xc1900131 Windows Update Error: 5 Ways to Fix It

We all know how important updates are for the Windows OS, they can provide fixes, patches, and more importantly increased security for your devices.

Many users, including myself, have encountered the 0xc1900131 update error, which makes it impossible to update and install these patches. Sometimes you get the notification the install cannot continue because the instance hash does not match.

In this article, I will show you a few ways that you can work around this error and have your system up to date in no time.

What is the 0xc1900131 Windows update error?

This is a common Windows error that indicates there was an installation failure or an interruption during an update, it can be caused by several factors:

  • Corrupted system files – Corruption may ruin an update’s integrity and stop the process from completely executing.
  • Insufficient disk space – Sometimes, low disk space has triggered this error, so we recommend getting additional storage before the update.
  • Invalid registry entries – A few registry files are tied to the update process. If these files have a problem, you may experience the 0xc1900131 error.
  • Driver issues – Outdated, incompatible, or corrupted drivers also cause the update error on Windows 11.

While this is not an exhaustive list, it would help you determine which solutions below are most applicable.

How do I fix error 0xc1900131?

Before going into any detailed fixes, the following workarounds may be helpful:

  • Free up disk space – We recommend removing temporal or unnecessary files or getting additional storage.
  • Restart your computer – A reboot may fix minor glitches that trigger the error, so the first step may be to reboot and retry.
  • Use a fast internet connection – Changing your ISP may help since a slow internet connection may lead to update failure.

If you fail to fix error 0xc1900131 with the above steps, proceed to the more detailed solutions below.

1. Run a file scan

  1. Press Windows + R, type cmd, and hit Ctrl + Shift + Enter.
    0xc1900131
  2. Type the script below and hit Enter.
    sfc /scannow
    0xc1900131
  3. Now run the following scripts to fix the error spotted by the scan:
    DISM /Online /Cleanup-Image /CheckHealth
    DISM /Online /Cleanup-Image /ScanHealth
    DISM /Online /Cleanup-Image /RestoreHealth
  4. These scripts may take a while to execute, but once completed, restart your device and verify if the update error still exists.

You can easily automate the scan process by using specialized Windows repair software. These tools will greatly simplify the repair process of any system file.

2. Run Windows Update troubleshooter

  1. Press Windows + I to open the Settings app.
  2. On the right pane, click on Troubleshoot.
    0xc1900131
  3. Select Other troubleshooters.
  4. Click the Run button in front of Windows Update.
    0xc1900131
  5. Wait while the process executes, then apply the recommended changes.

3. Restart Windows services

  1. Press Windows + R, type services.msc, and hit Ctrl + Shift + Enter.
    0xc1900131
  2. Search for the Background Intelligent Transfer Service and double-click on it.
  3. If it is not running, click on Start.
    0xc1900131
  4. Start the Windows Update service using the same steps, then verify that the 0xc1900131 error is fixed.

4. Run the Check Disk utility

  1. Press Windows + R, type cmd, and hit Ctrl + Shift + Enter.0xc1900131
  2. If you use a HDD, type the script below and hit Enter:
    chkdsk c: /f
    0xc1900131
  3. If you use an SDD, type the script below and hit Enter:
    chkdsk c: /f /r /x
  4. When there are hard drive errors, hit Y to complete the process, then restart your computer.

5. Reset update components

  1. Press Windows + R, type cmd, and hit Ctrl + Shift + Enter.0xc1900131
  2. Stop vital services by running the scripts below (You may have to confirm the actions by hitting Y or N):
    net stop bits
    net stop wuauserv
    net stop appidsvc
    net stop cryptsvc
  3. Restart the services by inputting the scripts below, hitting Enter after each one:
    net start bits
    net start wuauserv
    net start appidsvc
    net start cryptsvc
  4. Restart the computer.

There you go. Most of the time, you can fix this error by running scripts on an elevated command prompt. Read this guide if the Terminal is not launching.

We want to hear from you, so tell us in the comments below which solutions were effective for you.

iaStorAC.sys BSoD Error: 6 Ways to Easily Fix It

BSoD on Windows is scary for many users. While several elements can trigger it, the iaStorAC.sys is one that readers have complained of recently.

Sometimes the crash comes with the notification DRIVER_IRQL_NOT_LESS_OR_EQUAL, Kmode_exception_not_handled. So we explored it and will show you some practical solutions.

What causes the iaStorAC.sys BSoD error?

From our interaction with readers, we gather that any of the following may trigger the BSoD:

  • Corrupted system files – This is one of the primary causes for most users, and repairing the affected files comes in handy.
  • Driver-related issues – We have outdated or corrupted device drivers at the top of this list. These trigger multiple issues, including iaStorAC.sys-related BSoD errors.
  • Hardware issues – Hardware failure, such as a failing hard drive, may also cause this BSoD; in most cases, only a replacement will fix it.
  • Memory issues – If you have faulty or insufficient RAM, there are chances that you will encounter this BSoD. We recommend using the optimal RAMs for Windows.

How do I fix the iaStorAC.sys BSoD error?

1. Run the Windows Memory Diagnostic tool

  1. Press the Windows key, type memory, and select the Windows Memory Diagnostic tool.
    iaStorAC.sys
  2. Click on Restart now and check for problems.
  3. Wait for the check to be over. It may take several minutes.

2. Restore the computer

  1. Press Windows + R, type rstrui, and hit Enter.
    iaStorAC.sys
  2. Select Choose a different restore point and click Next.
    iaStorAC.sys
  3. Choose a restore point from the options, then hit Next.
    iaStorAC.sys
  4. Finally, wait for the process to complete. Your computer will restart along the way.

Now you may verify if the iaStorAC.sys BSoD has successfully been resolved.

3. Run a file scan

  1. Press Windows + R, type cmd, and hit Ctrl + Shift + Enter.
    iaStorAC.sys
  2. Type the script below and hit Enter.
    sfc /scannow
  3. Wait for the scan to complete and restart the computer.

4. Uninstall the IRST drivers

  1. Right-click the Start menu and select Device Manager.
    iaStorAC.sys
  2. Expand IDE ATA/ATAPI controllers, right-click the driver, and select Uninstall device.
  3. Confirm your choice and restart the computer.

After your computer boots, confirm if the iaStorAC.sys has been successfully fixed.

5. Update IRST drivers

  1. Right-click the Start menu and select Device Manager.iaStorAC.sys
  2. Expand IDE ATA/ATAPI controllers, right-click the driver, and select Update driver.
  3. Select Search automatically for drivers.
  4. Let the computer search for the best driver, then see if the error repeats.

6. Delete the old Windows folder

  1. Press Windows + R, type cmd, and hit Ctrl + Shift + Enter.iaStorAC.sys
  2. Input the scripts below in the elevated Command Prompt and hit Enter after each to delete the Windows.old folder.
    attrib -r -a -s -h C:Windows.old /S /D
    RD /S /Q %SystemDrive%windows.old
  3. Restart your computer.

That is all there is to know. You should pick any solutions that seem the most appropriate to your situation.

In extreme cases, you may have to reinstall the operating system, but you must note that a reinstallation may make you lose important data.

Tell us if you have been able to fix the iaStorAC.sys crashes, and also mention the fixes that worked for you.

0x800f080a: How to Quickly Fix This Windows Update Error

There are various ways to upgrade to Windows 11 if you haven’t already. Most users opt to do so from settings, but it seems some cumulative updates are failing. An error code 0x800f080a may pop up on your screen, putting things at a standstill.

While Windows 11 is dubbed the greatest OS yet, it comes with some stringent requirements. You must check via the PC Health Check app before installing the OS. However, if you meet all conditions and still get the error, here’s how to resolve it.

What is error code 0x800f080a?

The error 0x800f080a is a Windows update error that appears on your screen when you try to update the latest cumulative updates. 

Normally, this process should proceed seamlessly with no hiccups, but once you encounter this error, there may be other underlying issues.

Of course, users have been able to continue using Windows 11 while having disabled updates permanently, but this exposes your system to vulnerabilities, and you may miss out on some critical features.

Back to the 0x800f080a error, why does it happen? Some possible causes include:

  • System requirements – Windows 11 requires your PC to meet some system and hardware requirements. If it doesn’t, at a certain stage, the installation is bound to fail.
  • Firewall restrictions – Since Windows update requires you to download some files, your firewall or antivirus may block the update. This is because it has marked the files as suspicious and could put your system at risk.
  • Corrupt system files – It is possible that there are already some corrupt system files in your PC before the installation.
  • Conflicting application – If you have recently installed any program, try disabling or uninstalling it. Sometimes third-party apps trigger errors such as 0x800f080a.

How do I fix error 0x800f080a?

We recommend you try the following first before proceeding to the more complex solutions:

  • Ensure your PC meets the system requirements for running Windows 11.
  • Disconnect all peripherals from your PC and only connect those necessary for the Windows update process.
  • Ensure your PC has up-to-date drivers.
  • Check for any viruses that may be present on your PC. These can easily halt the update process.
  • Verify that your time and date settings are correct. Sometimes, updates may fail because of location issues.
  • Free up space for Windows updates, as sometimes they fail if there’s insufficient storage.
  • Finally, try restarting your PC to reset any temporary settings that could hinder the update process.

1. Run the Windows Update troubleshooter

  1. Hit the Windows key and click on Settings.settings windows 11
  2. Click on System and select Troubleshoot.Open system troubleshooter
  3. Navigate to Other troubleshooters.other troubleshooters
  4. Click the Run option for the Windows Update troubleshooter.windows-update-run-troubleshooter runtimebroker.exe error

2. Run DISM and SFC scans 

  1. Hit the Start Menu icon, type cmd in the search bar, and click Run as administrator.cmd-run-admin-w11 unexpected kernel mode trap windows 11
  2. Type the following commands and press Enter after each one: DISM.exe /Online /Cleanup-Image /Restorehealth sfc /scannow
  3. Restart your PC.

3. Disable your firewall/antivirus 

  1. Hit the Windows button, type Windows Security in the search bar, and click Open.
  2. Click on Firewall & network protection, then select Public network.league of legends black screen after champion select
  3. Locate Microsoft Defender Firewall and toggle the off button.turning off Microsoft Defender Firewall Windows

4. Reset Windows update components

  1. Hit the Windows key, type cmd in the search bar, and click Run as administrator.cmd-run-admin-w11 unexpected kernel mode trap windows 11
  2. Type the following commands and press Enter after each one: net stop bits net stop wuauserv net stop appidsvc net stop cryptsvc Del "%ALLUSERSPROFILE%\Application Data\Microsoft\Network\Downloader\*.*" rmdir %systemroot%\SoftwareDistribution /S /Q rmdir %systemroot%\system32\catroot2 /S /Q regsvr32.exe /s atl.dll regsvr32.exe /s urlmon.dll regsvr32.exe /s mshtml.dll netsh winsock reset netsh winsock reset proxy net start bits net start wuauserv net start appidsvc net start cryptsv

5. Perform a clean boot

  1. Hit the Windows key, type msconfig, and open System Configuration.
  2. Switch to the Services tab and select Hide all Microsoft services.
  3. Click on the Disable all button, then hit the Apply button to save the changes.
  4. Go back and click on the Startup tab, select Open Task Manager then click OK.
  5. In the Startup tab of the Task Manager, Disable all the Enabled startup items.
  6. Close Task Manager and restart your PC.

If none of these work, try other alternatives, such as downloading the update manually from the Microsoft Update Catalog. Other Windows update errors you may encounter include error 80244018, which we unpacked in our extensive guide.

Feel free to share any more solutions that may have assisted you in this error below.

Aepic.dll: What Is It & How to Fix or Download It

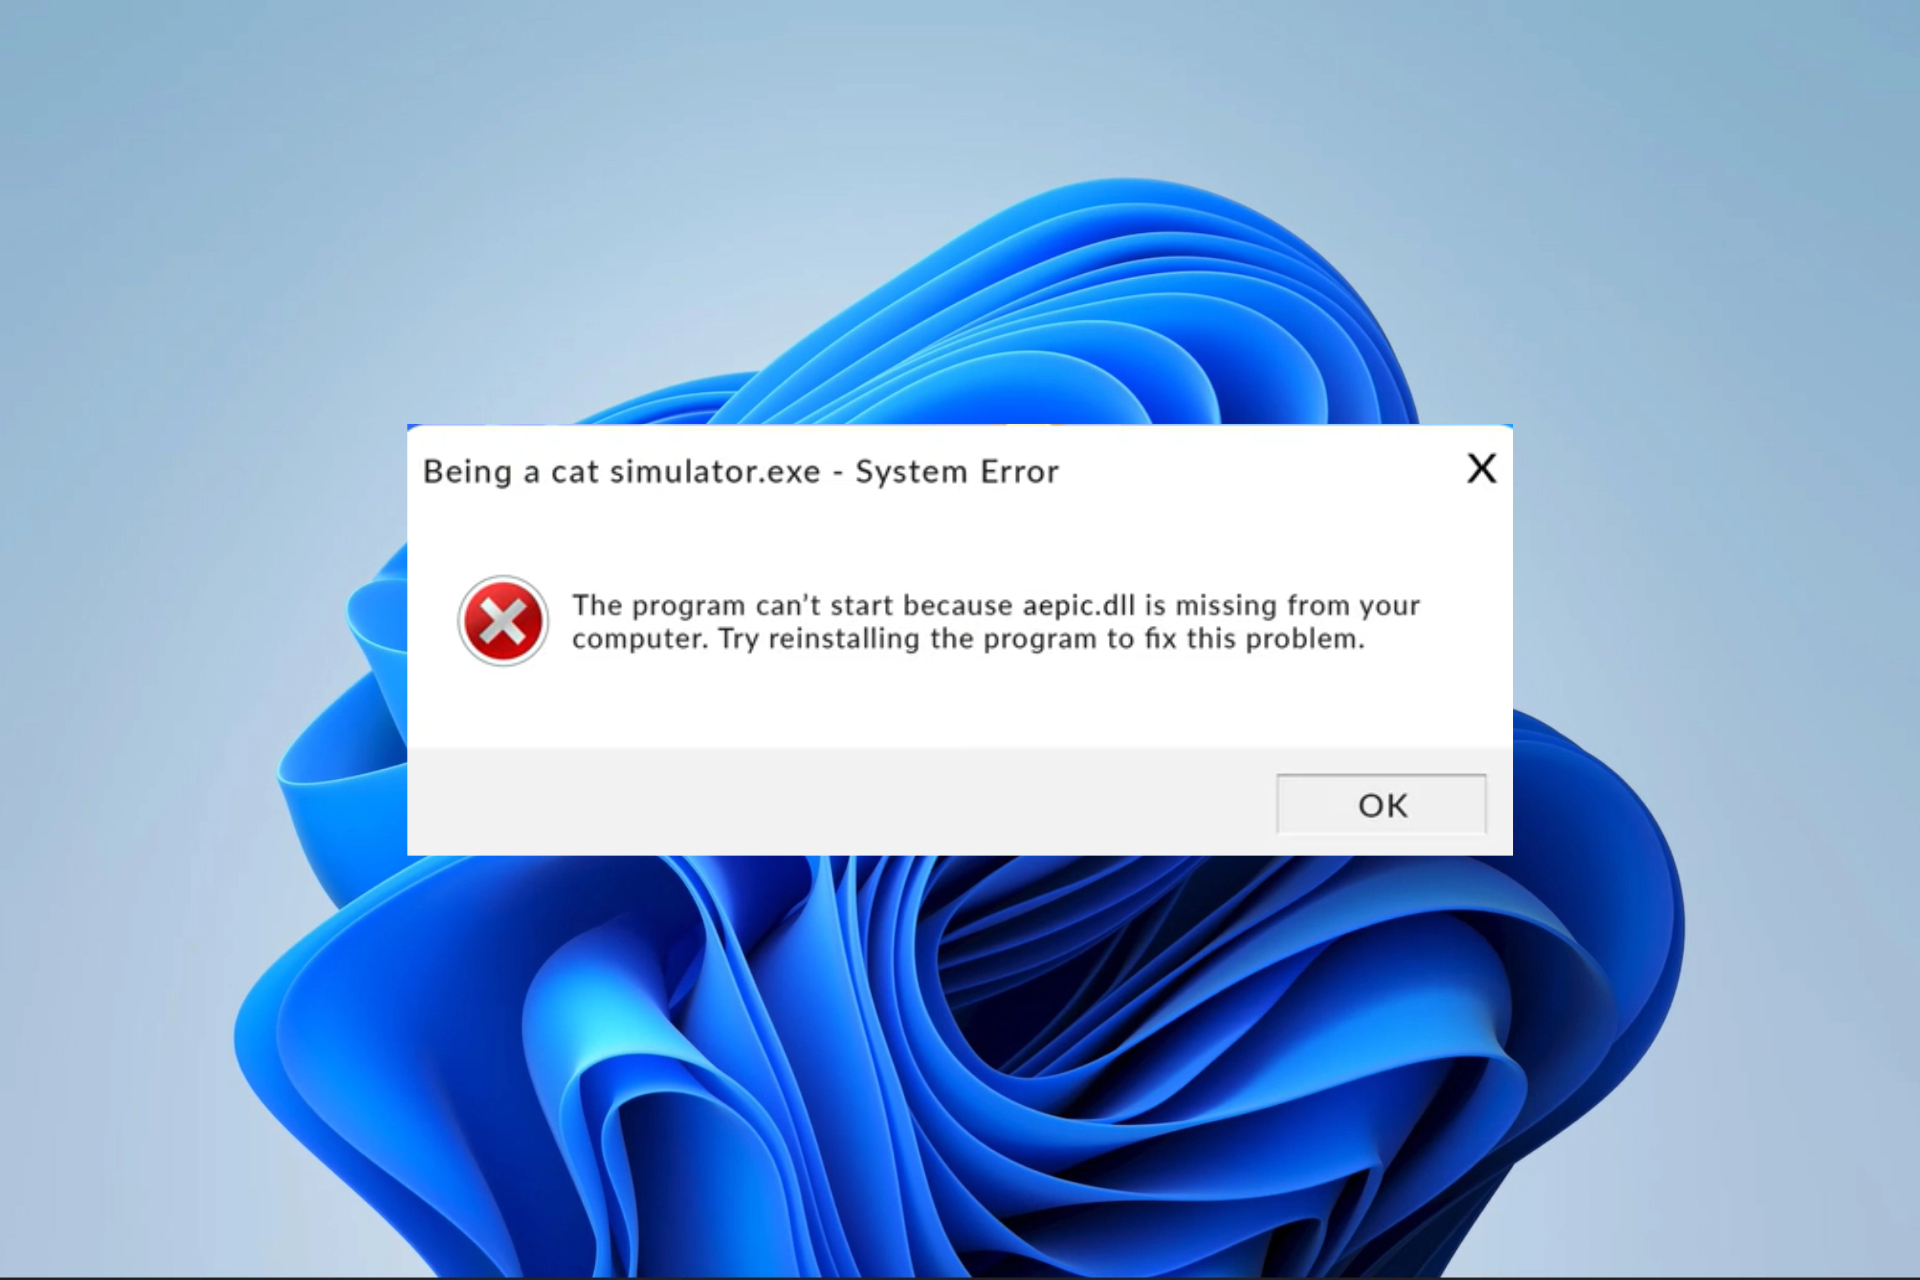
A Dynamic Link Library is a file containing valuable code that helps other programs to run seamlessly. Aepic.dll is one such file, and when missing, it may stop some programs from launching.

In this guide, we explore this DLL and give practical solutions for errors around it or if it is missing on your device.

What is aepic.dll

This file contains code controlling the application experience programs cache. It is a third-party DLL and is often used by gaming applications. When missing, you may get the notification, The code execution cannot proceed because aepic.dll was not found, and a few causes are:

  • Corrupted by virus – Malware infection can potentially damage essential system files, including DLLs.
  • Damaged Windows registry – This leading trigger causes poor code execution on your computer.

The fixes below will work for missing DLLs and other aepic.dll-related errors.

How do I fix aepic.dll errors?

We recommend the following prerequisite solutions before attempting anything more complex:

  • Reinstall the app – If a specific app causes the error, you should uninstall the app and reinstall it with a fresh copy of the setup.
  • Reboot the device – A restart can fix minor glitches that may trigger DLL errors.

If you do not succeed with either of them, please proceed with more definite fixes below.

1. Use dedicated DLL repairers

These DLL repairer tools can fix the majority of errors related to the libraries. They are a top recommendation because they require very minimal user input.

2. Download the file manually

A manual download is very effective if the file has been deleted or your copy is corrupted.

You must pay proper attention to downloading aepic.dll from a trusted resource. This is because DLLs are often used as a medium to introduce malware that compromises your devices.

Once downloaded, place the extracted file in the same directory with the application that triggered the error or the system path below.

C:\Windows\System32

3. Run a file scan

  1. Press Windows + R, type CMD, and hit Ctrl + Shift + Enter.
    aepic.dll
  2. Type the script below and hit Enter:
    sfc /scannow
  3. Wait for the process to complete, then verify that the aepic.dll error is resolved.

4. Scan for viruses

  1. Type Windows Security in the Search bar, then open the security app.
    aepic.dll
  2. Select the Virus & threat protection option.
    aepic.dll
  3. Click on Scan options.
    aepic.dll
  4. Select Full scan and click the Scan now button at the bottom.

Of all the fixes mentioned, we recommend using specialized DLL repair tools. However, you could solve missing aepic.dll errors using any of the solutions above.

Please get in touch with us using the comments section and let us know which fixes worked for you.

Nvwgf2umx.dll is Crashing Games: How to Easily Fix it

PC gaming has kept increasing in popularity, but the experience is not always seamless. Some readers have complained about nvwgf2umx.dll crashing games.

If you have experienced this problem, this guide will walk you through some practical solutions so that you can enjoy hitch-free gaming again.

Why is nvwgf2umx.Dll crashing games?

Nvwgf2umx.dll is associated with the Nvidia graphics card driver. This DLL would not crash games as it is a vital component for videos, but some factors may trigger crashes around the library. A few include the following:

  • Driver-related problems – These are mostly outdated and corrupted drivers that become incompatible with the DLL.
  • A bad nvwgf2umx.dll – If the DLL is corrupt or missing, it may stop games from loading or randomly cause the games to crash during gameplay.
  • Bad hardware – If you use faulty hardware, you should expect random problems, including crashes due to nvwgf2umx.dll.

Let us now show you some practical solutions.

How do I fix nvwgf2umx.dll game crashes?

Before trying out any complex solutions, you should do the following:

  • Reinstall the game – A quick uninstallation and reinstallation using freshly downloaded copies will fix it if corrupt game files trigger it.
  • Reboot your PC – A restart will force bad processes to end and may save you the stress of more complex troubleshooting.

1. Use specialized DLL tools

Our top recommendation is to use dedicated DLL repair tools. These tools will fix and replace damaged files. They make the process seamless with minimal user input.

2. Run a file scan

  1. Press Windows + R, type CMD and hit Ctrl + Shift + Enter.
    nvwgf2umx.dll
  2. Type the script below and hit Enter:
    sfc /scannow
  3. Wait for the process to complete, then verify that the nvwgf2umx.dll crashes are resolved.

3. Reinstall the NVIDIA driver

  1. Visit the Nvidia driver site.
  2. Use matching details of your product to fill out the form, then click Search.
    nvwgf2umx.dll
  3. Click Download to get the driver.
  4. Double-click the downloaded file and follow the wizard prompts to install it.

4. Update the game

You should check for game updates and patches often. This is essential because the game often triggers the error, and the developers will be able to resolve it using updates.

The availability of updates and the process of updating the game will vary between games, so you should visit the official game website for more information.

5. Manually download the DLL

There are chances that the DLL no longer exists on your computer. Downloading nvwgf2umx.dll from a trusted resource will come in handy.

Note that it is essential to save the downloaded file in the same directory as the crashing game so that it is recognized and used by the game during launch and gameplay.

6. Verify game files

  1. Launch your gaming platform (we use Steam in this example).
  2. Click Library.
  3. Right-click on the problematic game and select the Properties option.
  4. Select Local Files and click Verify integrity of game files.
    nvwgf2umx.dll

After running through the solutions in this guide, crashes due to nvwgf2umx.dll should be fixed. We have also a guide on what to do if nvtt.dll is missing, so don’t hesitate to check it out for more information.

Before you leave, don’t miss our latest guide on the gfsdk_txaa_alpharesolve.win64.dll error for more information.

We have not listed these fixes in any particular order, so you should try what feels most applicable. Please let us know what worked for you in the comments section below.

Microsoft debuts new Payments app to help small businesses receive funds within Teams

Microsoft has announced the launch of a new Payment app within Teams in public preview for users based in the US and Canada. The app is designed to help small businesses earn money from webinars, appointments, and more.

Ever since the COVID-19 pandemic hit, a lot of organizations shifted to hybrid work and with that, the need for a communication tool arose that would allow them to share ideas, collaborate on projects, and even provide a platform for where they could conduct virtual meetings.

Now, with the launch of the in-app payments system in Microsoft Teams, users will be able to receive payments while in meetings. While on an Interview with The Verge, the general manager of Microsoft 365 small and medium businesses Brenna Robinson said:

The pandemic changed the game. I think a lot of the SMBs have now pivoted where they’re now more tech savvy and they’re not just corner shops.

As such, this necessitated the launch of the in-app payments system in Teams. Microsoft has teamed up with third-party payment platforms, that is, GoDaddy, PayPal, and Stripe to ensure that it’s possible for small businesses to conduct virtual meetings and receive funds for the services rendered within Microsoft Teams. What’s more, the company has also indicated that it will be accessible to all Teams business users for free.

Unavailable thumbnail

The Payments app in Teams will change how things are done. For instance, if you need a service rendered, you’ll no longer have to meet with clients face to face. You can conduct the meeting virtually, reach an agreement, and make payments within Teams. Ultimately, this makes it easier for businesses to run effectively and efficiently.

Brenna Robinson highlighted how this new entry will change her interaction with her accountant. She says she’ll no longer have to meet up with the service provider ever again.

I’m not sure I’m ever going to meet my accountant in-person ever again. I think we’ve learned that we maybe didn’t need to be in-person for all of these things.

It is worth noting that users can use the new app to track their payments, that is, the money that has been sent as well as any pending payments. Microsoft has also indicated that the app also provides users with an avenue to make payments at any point during a meeting.

And while the app is shipping to users in the US and Canada exclusively in public preview, it’s not yet possible to make payments using GoDaddy just yet. However, both Stripe and PayPal are already available.

Microsoft has also cited that users have the capability to link more than one platform to their payments app in Teams, especially if they receive money from different third-party payment platforms.

It’s also worth noting that, mobile support is limited to meetings between the organizer and one other attendee. You’ll also be required to set up the app on a desktop computer before proceeding to send a payment request via a mobile device.

via The Verge

Startmenuexperiencehost.exe: What Is It & How to Disable It

This article explores the StartMenuExperienceHost.exe and details its use and ways to disable it if intended.

Before we dive into it, you should note that this process is an integral part of the Windows operating system, and disabling it will mean some processes may not function as intended.

What is the Start menu experience host?

The StartMenuExperienceHost.exe was associated with the Windows 10 Start menu and has been carried over to the latest edition of the OS.

This process manages the GUI, animations, and other visual elements of the Windows Start menu, such as search functionality, tiles, and customization options.

It runs in the background and is automatically launched when users log into a user account. Also, it has been integrated with the ShellExperienceHost.exe (Shell Experience Host) framework, which is responsible for the graphical user interface.

Stopping or disabling the StartMenuExperienceHost.exe process will remove the Start menu functionality and result to live tiles not updating, as well as other UI issues. However, if you must disable this process, we show you the best options below.

How do I disable the StartMenuExperienceHost exe?

1. Using the Task Manager

  1. Press Ctrl + Shift + Esc to open the Task Manager.
  2. Click on the Details menu on the left pane.
    StartMenuExperienceHost.exe
  3. Scroll down to StartMenuExperienceHost.exe, click it, and click the End task button.
    StartMenuExperienceHost.exe

Using this method, StartMenuExperienceHost.exe will be shut down until you switch user account or restart your computer.

2. Using the Group Policy

  1. Press Windows + R, type cmd, and hit Ctrl + Shift + Enter.
    StartMenuExperienceHost.exe
  2. Once the terminal is open, type the script below and hit Enter.
    taskkill /f /im StartMenuExperienceHost.exe

Note that this will only end StartMenuExperienceHost.exe until the next restart or till you switch user accounts.

3. Change the file extension

  1. Press Ctrl + Shift + Esc to open the Task Manager.
  2. Click on the Details menu on the left pane.
    StartMenuExperienceHost.exe
  3. Scroll down to StartMenuExperienceHost.exe, right-click it, and select Open folder location.
  4. Right-click on StartMenuExperienceHost.exe and select the rename icon.
    StartMenuExperienceHost.exe
  5. Add an extension like .bat to the name and save the file.
  6. This way, the system will no longer be able to access the file, and you would have permanently shut it down.

There you go. The StartMenuExperienceHost.exe is an important process on your computer, but using any of the solutions we recommend in this article, you may turn it off.

Importantly, you should read our guide if you can not open the Task Manager. To learn about other processes, you might want to check our What is TextInputHost.exe article.

To learn more about similar files, we have a guide on Aggregator Host, so don’t miss it.

Contact us in the comments section below and tell us if you know any other ways to end this process.

0xc10100be Error Code: How to Fix This Video Playback Issue

Video problems like the 0xc10100be playback error make it impossible for players to process the information on specific video files.

This error happens in even the best video software like VLC Media Player and may need some advanced video repair fixing technique. So, let us explore your best line of action.

What causes the 0xc10100be playback error?

From our interactions with users, we gather that any of the following may cause the error:

  • Media file issues – Many readers have noted that this usually refers to corrupted or damaged media files.
  • Driver issues – Outdated or faulty audio drivers have also been connected with the error, so it is recommended to keep drivers updated.
  • File formats – Incompatible media file formats make it impossible for video players to process a file successfully. Hence, triggering the error.
  • Virus or malware infection – Viruses may ruin the integrity of files on your device, including video files, and lead to the 0xc10100be playback error.

Below are the most practical solutions to adopt.

How do I fix error code 0xc10100be?

Before you go into the main solutions, you may consider the following:

  • Using a different video player – This workaround saves you time troubleshooting an error that may be isolated to a specific player, and there are many highly recommended video players.
  • Restart your computer – A few problematic processes may lead to the error, and a restart will sometimes be strong enough to shut down these processes.

If non of the above applies to you, you should continue with the more elaborate fixes we offer below.

1. Use specialized video repair tools

The 0xc10100be error is often triggered because the video file you try to access is corrupt. So, we recommend using the best video repair tools to fix the problem.

These tools can process files from different storage, like hard drives, cameras, SD cards, and USB drives. They are versatile enough to repair FLV, MKV, MTS, MOV, MP4, M2TS, 3GP, AVI, and M4V files.

2. Repair the files using VLC

  1. Make a copy of the bad video file, right-click on the copy, select Rename, and add the .avi extension.
    0xc10100be
  2. Launch the VLC player (Download and install VLC if you don’t have it).
  3. Click the Tools tab and select Preferences from the drop-down menu.
    0xc10100be
  4. Select the Input / Codecs, then click Always fix in the Damaged or incomplete AVI file menu.
    0xc10100be
  5. Save your changes and verify it fixed the error.

3. Update device drivers

  1. Right-click on the Start menu and select Device Manager.
    0xc10100be
  2. Expand Display adapters, right-click on your driver, and click Update device.
  3. Click Search automatically for updates.
  4. Repeat the process for the Audio inputs and outputs category, then verify that the 0xc10100be error is resolved.

There is an alternative to the manual process of updating any drivers on your PC. Namely, there is a specialized driver manager that can do it for you.

Outbyte Driver Updater is the go-to solution to scan your PC for obsolete device drivers and update them automatically in a few minutes.

⇒ Get Outbyte Driver Updater

4. Scan your PC for malware

  1. Type Windows Security in the Search bar, and click on the relevant search result.
  2. Now, click on Virus & threat protection.
    0xc10100be
  3. Click on Scan options.
  4. Select Full scan and click the Scan now button at the bottom.

The solutions above should successfully resolve the 0xc10100be video playback issue.

Using dedicated repair tools is our preferred option; however, you should try what seems most applicable to your situation.

Lastly, tell us in the comments section below what proved most effective.

0x80004002 Windows Update Error: 5 Ways to Fix It

Windows updates are a vital operating system process as they introduce features and patches to keep the OS running correctly. However, as we all know they are not always running smoothly.

I have encountered lots of different errors when updating the operating system or when upgrading to a new one, as I’m sure many of you have as well.

One of the most common errors I stumbled upon is 0x80004002, this error can be very frustrating because it will force you to interrupt the process and you’ll have to start it all over again.

This error code is associated with a few messages like Failed to be changed to the installed state status 0x80004002, and download error – 0x80004002 Windows 11. Here are a few of my takes on how you might fix it.

What is the Windows update error 0x80004002?

This is a standard error code indicating that there is a problem with the update process. From interaction with readers, we gather that any of the following often triggers it:

  • File corruption – Windows users with corrupt or incomplete Windows update files will likely experience the error.
  • Network connectivity issues – Bad internet connections will result in issues during updates and trigger a few errors.
  • Registry issues – For some users of the OS, it results from a bad or corrupt registry.
  • Malware or virus infections – Computer viruses are known to alter the regular running of processes and will often lead to update errors.

Let us now explore your best solutions if you encounter an update problem.

How do I fix Windows update error 0x80004002?

Before going into our main solutions, we suggest the following workarounds:

  • Disable your antivirus – Antivirus is essential for safety, especially online, but if you use third-party solutions, they may be very restrictive and trigger the error, so disable it temporarily.
  • Restart your device – A reboot effectively resolves micro glitches, so you should try this option.
  • Check your internet connection – If you have a slow internet connection, change to a wired or faster solution.

If the above pre-fixes do not work, move on to the more elaborate solutions below.

1. Run Windows Update troubleshooter

  1. Press Windows + I to open the Settings app.
  2. On the left pane, click on System, then scroll down and click on Troubleshoot on the right pane.
    0x80004002
  3. Select Other troubleshooters.
    0x80004002
  4. Click on Run in front of Windows Update.
    0x80004002
  5. Verify that it fixed error 0x80004002.

2. Update your drivers

  1. Right-click on the Start menu and select Device Manager.
    0x80004002
  2. Expand any category with outdated apps (usually, it will have a yellow badge), right-click on your driver, and click Update device.
  3. Click Search automatically for updates.
  4. Wait for the driver to update automatically and repeat the steps for any outdated driver.
  5. Retry the update process.

In addition, it is more efficient to perform driver updating tasks using dedicated support from an effective tool.

Using a third-party driver updater will allow you not only to replace or update your drivers more efficiently but also to monitor their health and status, so you will not have to go through the same issues all over again.

3. Reset Windows Update components

  1. Press Windows + R, type cmd, and hit Ctrl + Shift + Enter to open an elevated Command Prompt.
  2. Input the scripts below, hitting Enter after each one.
    net stop wuauserv
    net stop cryptSvc
    net stop bits
    net stop msiserver
  3. Press Windows + E, navigate to the paths below, and delete the content of all the folders.
    C:\Windows\System32\catroot2
    C:\Windows\SoftwareDistribution
  4. Open an elevated Command Prompt again and restart the stopped services by inputting the scripts below and hitting Enter after each one.
    net start wuauserv
    net start cryptSvc
    net start bits
    net start msiserver
  5. Restart your computer and verify the 0x80004002 error is solved.

4. Repair damaged files

  1. Press Windows + R, type cmd, and hit Ctrl + Shift + Enter to open an elevated Command Prompt.
  2. Type the script below and hit Enter.
    sfc /scannow
  3. Wait for the scan to complete, then input the scripts below, hitting Enter after each one.
    DISM /Online /Cleanup-Image /CheckHealth
    DISM /Online /Cleanup-Image /ScanHealth
    DISM /Online /Cleanup-Image /RestoreHealth
  4. Restart your computer.

That is all for this article. Most of our readers have found success using the solutions that we recommend. Note that while all fixes may not work for you, you should try what seems the most applicable to your situation.

Reach out to us in the comments section below and tell us what worked for you.

Socket Error 10060: How to Quickly Fix It

The internet has become one of our most invaluable tools, but problems like the socket error 10060 take away from its importance.

You may get the message Socket error # 10060 connection timed out or Unable to connect to the server Socket error 10060. It cuts across services, as some readers have reported the error on MDaemon, Bitvise, and Gmail, among others.

What is socket error 10060?

This is one of the more common errors you may face in TCP/IP sockets if you use a proxy server to connect to the internet. The error is often associated with a timeout showing that a remote service is not responding. Any of the following may lead to the error:

  • Network connectivity issues – A slow or bad internet connection is one of the leading triggers.
  • Firewall or antivirus restrictions – Excessive restrictions by your firewall may make it challenging to access some internet resources.
  • Server issues – Users have encountered the error when accessing an unresponsive remote server.
  • Poor network configuration – The connection error is often triggered in cases where you have incorrectly configured your network.

You may try the solutions below to resolve it.

How do I fix socket error 10060?

Before going into our main solutions, you may try these quick fixes:

  • Check your internet connection – If you use a slow internet connection, it is the likely trigger, and we recommend changing to a wired or faster connection.
  • Restart your computer – It is not uncommon for minor bugs to be fixed after a reboot, so it will be wise to attempt this.
  • Disable the antivirus – You may want to lead with this because a very restrictive antivirus or firewall may block out important internet resources.

After trying these pre-fixes, you may proceed to elaborate solutions below.

1. Disable proxy connections

  1. Press Windows + R, type inetcpl.cpl, and hit Enter.
    Error 10060
  2. Click the Connections tab, then select LAN Settings.
    Error 10060
  3. Deselect Use a proxy server for your LAN and hit OK.
    Error 10060
  4. Try accessing the resources that triggered the error in the first place.

2. Edit the Tcpip registry value

  1. Press Windows + R, type Regedit, and hit Enter.
    Error 10060
  2. Navigate to the path below:
    Computer\HKEY_LOCAL_MACHINE\SYSTEM\CurrentControlSet\Services\Tcpip\Parameters
  3. Right-click on the right pane, select New, then Multi-String Value.
    Error 10060
  4. Copy the value below, paste it into the text field, and click OK.
    Value Name: TcpMaxDataRetransmissions
    Value Type: REG_DWORD - Number
    Valid Range: 0 - 0xFFFFFFFF
    Default Value: 5 Decimal
    New Value: 10 Decimal

  5. Restart your computer.

Modifying your registry is risky, so we recommend creating a registry backup before starting the process.

If you have read this far, we are confident you should have resolved error 10060. So, please tell us which of the solutions was most effective.

Socket errors can affect web browsers and wrote about ERR_SOCKET_NOT_CONNECTED in one of our previous guides, so don’t miss it.

Lastly, note that we have not written these fixes in any particular order, and we encourage you to try what seems most applicable.

3 Ways to Make Someone a Presenter in Microsoft Teams

A meeting organizer or a co-organizer may want to assign the presenter role to some attendees. This role allows them to share their content and facilitate the meeting even if they are not the host.

If you wish to make someone a presenter in Teams to make the meeting interactive, below are the different ways of doing so. 

How can I make someone a presenter in Microsoft Teams?

1. Before joining a meeting 

  1. Launch the Teams app on your computer and select Calender option from the left navigation pane.  Make someone a presenter in Microsoft Teams
  2. Press the New meeting button located on the top right to set up a new meeting. make someone a presenter in Microsoft Teams
  3. Provide the essential details and add emails of attendees, and press the Send button on the top right to send out the meeting invites. make someone a presenter in Microsoft Teams
  4. Once the meeting is successfully created, choose Calender from the left navigation panel and double-click to edit the meeting you’ve just created. 
  5. Now click the Meeting options located on the menu bar on top. make someone a presenter in Microsoft Teams
  6. On the new page, expand the drop-down next to the Who can present? option and choose one from amongst the choices – Everyone, People in my organization, Specific people, and Only Me.  make someone a presenter in Microsoft Teams
  7. If you choose Specific people, choose or specify the list of presenters in the Select presenters for this meeting drop-down that gets revealed. make someone a presenter in Microsoft Teams
  8. Press the Save button once you are done. 

Note: In the case of channel meetings, you can only choose between the Everyone and Only Me options currently, as the ability to individually select presenters is not yet available. 

2. During the Meeting 

2.1 Via Settings

  1. While the meeting is in progress, click the Menu icon (three dots) on the menu bar to access more options. make someone a presenter in Microsoft Teams
  2. Choose Settings from the drop-down menu followed by Meeting options from the sub-menu. make someone a presenter in Microsoft Teams
  3. The Meeting options pane will open on the right side. Set the relevant option in the Who can present? drop-down and press the Save button to apply the changes. make someone a presenter in Microsoft Teams

As soon as you make someone a presenter, they will receive a notification that they can share their content in the meeting.

Note: If the current meeting schedule is recurrent, the changes made here will prevail in all the meeting occurrences. 

2.2 From the participants’ list 

  1. Switch to the People tab from the top menu bar of the meeting window to view see a list of all the people currently attending the meeting.make someone a presenter in Microsoft Teams
  2. From the participant list on the right sidebar, hover over the name of the participant you want to make the presenter in the ongoing meeting. 
  3. Click the Menu icon (three dots) to reveal the list of settings, and choose the Make a presenter option. make someone a presenter in Microsoft Teams
  4. A confirmation pop-up asking whether you want to change the role of the attendee will appear on the screen. Press the Change button for confirmation.  

As soon as you make someone a presenter, they will be notified that they are now a presenter and can share their content and facilitate the meeting. 

What are the capabilities of a presenter in Microsoft Teams? 

A presenter has access to a range of capabilities in Microsoft Teams; the significant ones are listed here: 

  • Presenters have the ability to share the screen, and individual applications with other meeting attendees, making it easy to present a slideshow, documents, and similar content. 
  • They can enable live subtitles during their presentations to make participants with hearing disabilities feel valued. 
  • Presenters can grant or restrict the ability of other meeting participants to view, edit or collaborate on the shared content.
  • A presenter can create breakout rooms and manage participants in the breakout rooms during the ongoing meeting.
  • A meeting presenter can remove meeting participants and admit people from the lobby. Also, they can change the role of the meeting attendees. 
  • They have the authority to record meetings in Teams for future reference.  

So, these are ways Microsoft Teams enables the organizer and co-organizer to make someone a presenter in the meeting. 

While here, you may want to explore interesting backgrounds for meetings in Microsoft Teams.

If you have a suggestion or want assistance with some issue in Microsoft Teams app, you can reach out to us in the comments section below.

How to Find Process Start Time in Windows

Windows is a user-friendly operating system offering a wide range of information to help optimize the system’s performance. And the process start time in Windows is one such parameter.

There are various methods to check the Windows process start time, some straightforward while others require a certain level of technical acumen. And we are here to provide this vital information. Keep reading to find out!

What is the Windows process start?

The technical definition of it is beyond the understanding of a regular user. But in simple words, this happens in the background when a process is started in Windows. All the linking, finding the relevant supporting DLLs and other files, and associating the resource.

All this happens in the background and within a few seconds. But we often need this information to identify the problems, get insights into the performance, and see how long a process has been running in Windows. Sometimes, you will also need the app’s process ID for troubleshooting.

How do I get the process start time in Windows?

1. Via PowerShell

  1. Press Windows + R to open Run, type powershell, and hit Ctrl + Shift + Enter.powershell
  2. Click Yes in the UAC prompt that appears.
  3. Now, paste the following command and hit Enter to get a list of the start time for all running processes:Get-Process | select name, starttimecommand to find Process Start Time in Windows
  4. You can now view the start time.start time
  5. To get the start time of an individual process and service, run the following command while replacing ProcessName with the actual name:Get-Process ProcessName | select Name, StartTimeindividual app Process Start Time in Windows
  6. For instance, to get the start time of Chrome processes, the command becomes:Get-Process Chrome | select Name, StartTimeapp process

That’s it! That’s how to Get-Process start time in PowerShell on Windows from the command line. The list provides just the process start time in Windows, making it easy for users to decipher the data.

2. Use a dedicated tool

  1. Go to Microsoft’s website, and download the Process Explorer tool.process explorer to view Process Start Time in Windows
  2. Right-click on the downloaded file and click Extract All.extract
  3. Go with the default path or choose another one, and click Extract.extract
  4. Launch the procexp.exe file.procexp
  5. Click Agree to accept the license terms.license terms
  6. Once Process Explorer opens, click the View menu, and choose Select Columns.select columns
  7. Now, go to the Process Performance tab, tick the checkbox for Start Time, and click OK to save the changes.Process Start Time in Windows
  8. You now have the process start time for each of the programs running in Windows.column for Process Start Time in Windows
  9. Drag and reposition the column towards the left if your focus is only on the start time.start time column

Process Explorer is a useful tool for viewing the process start time in Windows. It offers a simple user interface and doesn’t require installation. Just download the tool, extract the files, and you can run it immediately.

Besides, it provides other critical information about processes running on the computer, including CPU, PID (Program ID), and process description.

How long does a process run on Windows?

  1. Press Ctrl + Shift + Esc to open the Task Manager, and navigate to the Performance tab.performance
  2. You can now view the Up time listed towards the right.up time

You can easily view the PC up time in Windows from the Task Manager, and combining this information with the process start time will help find out how low a process has been running in Windows.

Remember, most critical processes start as soon as you boot the OS, so they would have been running for the same period as the uptime.

That’s all! You should now understand the concept fairly and know how to find the process start time in Windows.

If you find the PC running slow, check some quick tips to improve Windows performance and make it run faster. Speaking of which, be sure to check Windows 11 uptime, since keeping your PC running for a long time can cause performance issues.

For any queries or to share your preferred method, drop a comment below.

No Signed Device Drivers Were Found: How to Fix This Error

While Microsoft has, over time, made installing Windows a lot easier, especially with Windows 11 upgrade available in the update section, users still come across errors. The most complex of these is the No signed device drivers were found message.

The error message reads, No signed device drivers were found. Make sure that the installation media contains the correct drivers, and then click OK. And clicking OK does not resolve things. So why does the error appear, and how can you fix it? Let’s find out!

Why does it say No signed device drivers were found?

The error No signed device drivers were found on USB during Windows installation indicates that the disk or storage drivers are missing from the bootable USB, and as a result, you can’t proceed with the installation. It can appear on all iterations of the OS, from Windows 7 to Windows 11.

Here are the primary reasons you are getting the error:

  • Improper media creation: In most cases, the media creation tool or the application used to create the bootable USB didn’t do its job efficiently, and certain critical files are missing, which triggers the error.
  • Issues with the USB drive: Often, a defective or malfunctioning USB drive used to install Windows is the reason you get No signed device drivers were found while installing Windows 10.
  • Problems with the port: Many users found the port to be the underlying cause here, and using another one did the trick.
  • Misconfigured UEFI/BIOS settings: The BIOS settings are just as critical, and any misconfiguration there can lead to errors installing Windows.

How do I fix No signed device drivers were found?

Before we start with the complex ones, here are a few quick tricks to try:

  • Plug in the USB to another port. If it’s USB 3.0, go with a USB 2.0 port.
  • In case the partitions are not listed, and you get No signed device drivers were found in Windows 11, make sure the disk is plugged in properly. Remove and connect it again.

If none work, move to the solutions listed next.

1. Manually add the driver to the bootable USB

  1. Go to the manufacturer’s official website, and locate the Drivers section.
  2. Now, download the relevant drivers, both disk and motherboard, from the website. Make sure to get the .zip version.drivers
  3. Next, extract the folder you downloaded earlier. You could use a reliable software for the job.extract driver to fix No signed device drivers were found
  4. Plug in the bootable USB, then open its content, and create a folder titled drivers.drivers
  5. Move the files you extracted earlier to the drivers folder.
  6. Next, boot the computer from the flash drive.
  7. Click Browse when the error message appears.browse
  8. Head to the drivers folder, select the relevant one, and then follow the on-screen instructions to complete the installation.

A quick fix when you get the No signed device drivers were found error is to copy the missing driver to the flash drive and then add it directly during the Windows installation.

2. Create another bootable USB drive

  1. Go to Microsoft’s official website and download the Media Creation Tool (Installation Media) for Windows. Here are the links for each iteration:
  2. Now, run the setup you got earlier, and click Yes in the UAC prompt.
  3. Click Accept to agree to Microsoft’s license terms.accept
  4. Go with the recommended settings and click Next.language
  5. Select USB flash drive and click Next to proceed.usb flash drive to fix No signed device drivers were found
  6. Now, pick the connected USB drive and click Next.usb drive
  7. Wait for the setup to download Windows and create the bootable USB.installation
  8. Click Finish when done.
  9. Now use this flash drive to install Windows on the affected computer.

3. Make sure the partition is active

  1. Plug in the USB drive, boot the PC from it, run the setup, and click on Repair the computer.repair the computer
  2. Click on Troubleshoot.troubleshoot
  3. Then, click Advanced options.advanced options
  4. Select Command Prompt from the options listed.command prompt
  5. Now, run the following command: diskpartdiskpart to fix No signed device drivers were found
  6. Execute the following to view the available disks:list disklist disk
  7. Then, select a disk with the following command by replacing X with the disk number:select disk Xselect disk
  8. Use the following command to list the partitions:list partitionlist partition to fix No signed device drivers were found
  9. Choose one by replacing X in the command with the number allotted to the partition:select parition Xpartition
  10. Finally, execute the following command:activeactive to fix No signed device drivers were found
  11. After doing this, restart the computer and try installing Windows again.

If the partition you are accessing is not active, that could be the reason you are seeing No signed device drivers were found on Asus. After using the diskpart utility and setting the partition to active, you will have things up and running in no time.

4. Clear and format the disk

Note icon NOTE
This method will clear all files and folders on the disk. So we recommend you either use an effective backup tool or copy the data to an external storage device.
  1. Access Recovery Mode in Windows and choose Command Prompt in the Advanced options.command prompt
  2. Run the following command:diskpartdiskpart
  3. Execute this to list the available disks:list disklist disk to fix No signed device drivers were found
  4. Use the following command while replacing X with the disk number you want to install Windows on: select disk Xselect disk
  5. Run this command to delete the contents of the disk:cleanclean to fix No signed device drivers were found
  6. Now, use this command to create a primary partition:create partition primary
  7. Finally, the following command will set format it into NTFS: format fs=ntfs quick

When the previous solutions failed to fix No signed device drivers were found in Windows 7, it could be a problem with the disk to blame. Formatting the disk should help in this case. Remember to copy any critical files on the disk before you proceed.

5. Reset the BIOS

Tip icon Tip
When accessing the BIOS, do not make any changes other than what’s listed here to ensure optimal system functionality.
  1. Turn on the PC, and press F1, F10, F12, Esc or Del, depending on the system manufacturer, to open the BIOS.
  2. Select the Defaults option or one that looks similar. It could be on the main screen or under a sub-menu.reset bios to fix No signed device drivers were found
  3. Choose the appropriate response to confirm.ok

That’s it! If none of the fixes listed earlier worked, resetting the BIOS should get rid of the No signed device drivers were found on Lenovo devices.

And after you have installed the new iteration, do not forget to check some quick tips to boost Windows performance.

For any queries or to share what worked for you, drop a comment below.

DNS_probe_possible Error: What Is It & How to Fix It

A few of our readers have gotten the DNS_probe_possible error. As you may guess, this error is associated with the Domain Name System and affects the resolution of web resources.

The error message may read DNS address could not be found. diagnosing the problem. DNS_probe_possible. We explore it and show you the best solutions in this guide.

What is DNS probe possible?

This error shows a problem with resolving the DNS when apps or your web browser can’t reach a requested domain. Any of the following often triggers it:

  • Network connectivity issues – These are often problems with your internet connection, especially a weak or unstable network.
  • DNS server issues – If you connect to a server that is down and nonresponsive, you may experience the error.
  • Incorrect DNS settings – If you have a poorly set up DNS on your system, errors in contacting the DNS are common.
  • Firewall or antivirus – An overly restrictive firewall will stop some legitimate processes from running. We only recommend the most compatible antivirus software for your devices.

Once you can point out the cause, it is easy to know which recommended solutions we now present will work.

How can I fix the DNS_probe_possible on Windows?

Before jumping into the fixes we will recommend, you may try these pre-solutions:

  • Restart your device – If a minor bug causes the error, a restart is often powerful enough to fix it and get you back on track.
  • Check your internet connection – You may need to switch ISPs since a bad network can trigger the error. This easy step may save you further troubleshooting.
  • Disable your antivirus – Since you may be using a very restrictive antivirus, temporarily disabling it may be the perfect workaround.
  • Disable your VPN – Using a VPN, especially third-party solutions, may cause the DNS_probe_possible error if there is an excessive load on your selected server, so disable it.

If none of the above works, please proceed to our main solutions below.

1. Allow the app through the firewall

  1. Press the Windows key, type firewall, and select Firewall & network protection.
    dns_probe_possible
  2. Click on Allow an app through firewall.
    dns_probe_possible
  3. Select the Change settings button on the new window to activate the Allow another app button.
  4. Click Allow another app, then Browse the selected app or browser where you get the error.
    dns_probe_possible

2. Modify the DNS settings

  1. Press the Windows key, type network, and select View network connections.
    dns_probe_possible
  2. Right-click on your adapter and select Properties.
    dns_probe_possible
  3. Double-click Internet Protocol Version 4 (TCP/IPv4). Select Use the following DNS server address, and for Preferred DNS server and Alternate DNS server, use the values below respectively:
    8.8.8.8
    8.8.8.9
  4. When you are done, press OK, and the DNS_probe_possible error should be resolved.

3. Reset the internet connection

  1. Press Windows + R, type cmd, and hit Ctrl + Shift + Enter.
  2. Type the scripts below, hitting Enter after each one:
    ipconfig /flushdns
    ipconfig /registerdns
    ipconfig /release
    ipconfig /renew
    netsh winsock reset
  3. Wait for the command to execute, then close your Command Prompt and verify DNS_probe_possible is fixed.

That will be all for this guide. While all solutions will not work for every reader, you should use what you think is the most relevant to your situation.

Also, tell us what worked for you in the comments section below.

Psapi.dll Missing Error: How to Quickly Fix It

Psapi.dll, or the Process Status API, is a part of Microsoft’s Windows operating system. The DLL is integral to the proper functioning of several applications.

A few of our readers have mentioned that the library is missing on their computers, so we have divided to explore some of the best fixes in this guide.

What is the Psapi dll?

The Process Status API holds vital functions to retrieve information about system and application processes. Some of this information includes data performance counters, enumeration processes, and specific module information.

It is a vital library for software developers who may need to know how their applications will interact with the operating system and other third-party applications.

Note that this API is legitimate and resides in the System32 directory. If your DLL is missing, the solutions below would be helpful.

What do I do when psapi.dll is not found?

1. Use specialized DLL tools

Using DLL repair tools should be your first call if there are issues with missing DLLs. They take the burden of complex troubleshooting and will replace or repair bad files.

2. Restore the computer

  1. Press Windows + R, type rstrui, and hit Enter.
    psapi.dll
  2. Click the Next button.
    psapi.dll
  3. Select a restore point and hit Next.
    psapi.dll
  4. Wait while your computer is restored.

A System Restore is a valid fix for native DLL errors like psapi.dll because it returns the computer to a state where it worked properly.

3. Manually download the DLL

Go to a trusted DLL file website and download psapi.dll. Download the most current version from the lot available.

Once you place the DLL in the program’s directory that triggers the missing error, you can launch it successfully.

A manual download is not our most recommended option because a few third-party DLL websites hold malware that may compromise your computer. So you have to pay proper attention before applying this solution.

4. Update the OS

  1. Press Windows + I to open the Settings app.
  2. Click on Update & Security.
    psapi.dll
  3. On the right pane, select Windows update, and on the left, click the Check for updates button.

5. Run a file scan

  1. Press Windows + R, type cmd, and hit Ctrl + Shift + Enter.
  2. Type the script below and hit Enter.
    sfc /scannow
  3. Wait while the scan executes; it may sometimes take several minutes.

6. Run a virus scan

  1. Type Windows Security in the Search bar, and click on the relevant search result.
    psapi.dll
  2. Now, click on Virus & threat protection.
    psapi.dll
  3. Click on Scan options.
  4. Select Full scan and click the Scan now button at the bottom.

We recommend a scan because malware is often a significant reason system files may become corrupted. We have used the built-in Windows security, but any robust antivirus will do.

If you have followed this far, you should have been able to resolve the missing DLL error. Even though using a specialized tool will be our top recommendation, whatever appeals to you from these solutions will be fine.

To learn more about DLL files, don’t miss our What is gcapi.dll article.

We like to hear from you, so please tell us in the comments section below what solved the error for you.

Api-ms-win-crt-runtime-l1-1-0.dll Missing: How to Fix It

A few readers have complained of an api-ms-win-crt-runtime-l1-1-0.dll not found error. This error means they are not able to launch some affected applications.

Dynamic Link Libraries hold code and information connecting different programs, and in this guide, we will help you get the missing file back and restore proper functioning to your apps.

Why is api-ms-win-crt-runtime-l1-1-0.dll missing?

The following elements are the most common reasons for the missing DLL:

  • Accidental deletes – A few users have deleted DLL files when trying to create space on their computers.
  • File corruption – There are a few factors that may corrupt system files. If the DLL is affected, you will get an error message.
  • Installation errors – If apps that require this DLL are not correctly installed, they may trigger the error when launched.

How do I fix a missing api-ms-win-crt-runtime-l1-1-0.dll?

1. Use specialized repair tools

Using specialized DLL repair tools is our recommended solution because these tools do all the heavy lifting for you.

Fortect is our favorite tool for fixing a missing api-ms-win-crt-runtime-l1-1-0.dll because the DLL is part of the Microsoft redistributable, and Fortect offers a 100% fix for native DLLs.

2. Run an SFC scan

  1. Press Windows + R, type cmd, and hit Enter.
    api-ms-win-crt-runtime-l1-1-0.dll
  2. Type the script below and hit Enter to run it.
    sfc /scannow
  3. The execution may take a while. Once it is complete, restart your computer.

This scan is efficient if the DLL file is corrupted because it scans and repairs bad files on the computer.

3. Manually download the file

A manual download is effective when the DLL is not on your computer. You need to ensure that you download api-ms-win-crt-runtime-l1-1-0.dll from a trusted website.

The correct source is critical because many DLLs may come bundled with malware, compromising your device.

You should also ensure the downloaded file is placed in the same directory as the program that triggers the error.

4. Install the Microsoft Visual C++ Redistributable for Visual Studio

  1. Visit the Microsoft redistributable download page.
  2. Click on the Download button.
    api-ms-win-crt-runtime-l1-1-0.dll
  3. Choose a version that fits your system architecture and hit the Next button.
    api-ms-win-crt-runtime-l1-1-0.dll
  4. Save and run the downloaded file, then launch the problematic application to verify it is fixed.

Since api-ms-win-crt-runtime-l1-1-0.dll comes bundled with the runtime, you would probably restore the missing file by getting a fresh redistributable copy.

5. Restore your computer

  1. Press Windows + R, type rstrui, and hit Enter.
  2. Click the Next button.
  3. Select a restore point and hit Next.
  4. Wait while your computer is restored.

A system restore comes in handy because api-ms-win-crt-runtime-l1-1-0.dll is native to the OS, and a restore would take the computer to a time it had all the files needed to run correctly.

There you go. Any of the above solutions should be effective enough to restore the missing DLL file. It would be best to try whichever seems best suited to your situation.

Also, tell us in the comments what worked for you.

D3dx9_43.Dll Missing or Not Found: How to Fix It

There are reports of a d3dx9_43.dll not found error often triggered when you need to launch specific programs.

DLL files are essential for many processes on a computer because they include vital code that helps these functions run correctly. This guide enables you to navigate the missing DLL issue with the best solution.

Why is d3dx9_43.dll missing?

The d3dx9_43.dll is a vital component of the DirectX 9 application, a set of multimedia APIs for the Microsoft Windows OS. It may be missing for the following reasons:

  • Corruption – If the file is corrupted, it will cease to function correctly, and applications that depend on it will no longer launch.
  • DirectX 9-related issues – Of these issues, the most common trigger is a bad program installation. This may be because the installation is incomplete or done from a corrupt file.
  • OS compatibility – Users have also noticed compatibility issues with the operating system or hardware may trigger the error.
  • Malware or virus infection – These infections on your device can delete or damage the DLL file, triggering the missing error. That is why a solid antivirus is recommended.

How do I fix the missing d3dx9_43 dll error?

1. Use repair tools

Our top suggestion is to use an effective DLL repair tool. These are equipped with powerful features that will allow you to quickly scan your computer, identify corrupted or missing files, and replace them with a fresh one.

2. Install DirectX

  1. Navigate to the DirectX Windows download center.
  2. Click on the Download button.
    d3dx9_43.dll
  3. Double-click the downloaded setup and follow the installation wizard.
    d3dx9_43.dll
  4. Restart your computer and verify the DLL error is resolved.

3. Manually download the missing file

Navigate to a trusted website to download the missing file. Once you download it, extract it and place it in the same directory as the problematic file.

This solution works, especially if the old DLL is deleted from your computer. However, downloading DLLs may introduce malware into your computer, so you should only get them from trusted websites like DLL Files, where they are scanned for viruses.

4. Run a file scan

  1. Press Windows + R, type CMD, then hit Crtl + Shift + Enter to open an elevated command prompt.
  2. Type the script below and hit Enter.
    sfc /scannow
  3. Wait a while for the scan to complete, then restart your computer.

The SFC is an essential scan on the Windows OS that will detect problems with your files and repair them when possible. Hence, if a corrupt file triggers the d3dx9_43.dll issue, this scan may fix it.

5. Run a virus scan

  1. Press the Start menu, type Windows Security, and click the top result.
    d3dx9_43.dll
  2. Select the Virus & threat protection option.
  3. Click Scan options.
  4. Finally, select Full scan and click the Scan now button.

Using Windows Security is just one way to scan for viruses. So many third-party antimalware tools will detect and protect your device from viruses. However, the scanning steps will differ for each brand.

That is all for this article. You should review the solutions and try the ones you feel are more related to your specific case of the missing DLL.

Let us know in the comments section below what worked for you.

rt640x64.sys BSoD Error: 6 Ways to Fix It

The infamous Blue Screen of Death (BSoD) can be caused a lot of things, so Windows always points to exactly what failed on your computer, or you can look at the crash files.

In this scenario, the BSoD was caused by rt640x64.sys, a system file for Realtek network drivers that usually handles the ethernet port. Fortunately, it’s easy to fix.

What causes rt640x64.sys failure?

Before discussing the solutions, it’s important to review what causes the error first to learn how to avoid it:

  • Malware has infected your system drivers – By far the most common cause, antivirus apps can quickly get rid of malware on your computer.
  • The computer’s drivers have corruption – A consequence of malware, installing and running some cleaning software can get rid of corrupt files.
  • You have hardware conflicts – If you’re someone who built your computer, hardware conflicts can be caused by recently installed, unrecognized parts.
  • Your RAM is malfunctioning – To fix this, you may need to adjust the Registry Editor and upgrade your BIOS.

How do I fix the rt640x64.sys error?

1. Update Windows 11

  1. In the Windows 11 search bar, type in settings and click Settings when it appears.
  2. Go to the Windows Update section.
  3. Any new updates should be automatically downloaded. Select Restart now when it appears.
  4. If nothing is ready, click Check for updates.

2. Update drivers via Device Manager

  1. In the Windows 11 search bar, type device manager. Select Device Manager when it appears.
  2. Expand Network adapters.
  3. Right-click your ethernet adapter and select Update drivers.
  4. Click Search automatically for drivers to instantly install drivers.
  5. Now expand Sound, video, and game controllers and update the drivers of your computer’s sound card. In this example, that will be Intel Display Audio.

Another alternative you can try, surely much faster, is a dependable third-party tool that detects all outdated drivers and replaces them with brand-new driver versions, keeping your PC always healthy.

⇒ Get Fortect Driver Updater

3. Run system scans

  1. Type cmd into the Windows search bar. When the Command Prompt appears, click Run as administrator.
  2. Run the following command in Command Prompt: sfc /scannow
  3. Give your computer enough time to finish up.
  4. Run the following commands one after the other: DISM /Online /Cleanup-Image /RestoreHealth DISM /Online /Cleanup-Image /ScanHealth DISM /Online /Cleanup-Image /RestoreHealth
  5. Restart your computer.

4. Restore Windows 11

  1. Press the Windows and R keys at the same time to launch the Run box.
  2. Enter sysdm.cpl. Click OK.
  3. In System Properties, go to System Protection.
  4. Click System Restore.
  5. A System Restore will appear displaying a recommended restore point. Click Next.
  6. Confirm the restore point and click Finish.

5. Disable Realtek LightWeight Filter

  1. In the Windows 11 search bar, type control panel and click Control Panel when it appears.
  2. Select Network and Sharing Center.
  3. Click Change adapter settings.
  4. Right-click your ethernet adapter and choose Properties.
  5. Scroll down and locate Realtek LightWeight Filter (NDIS6.40). Click the box next to it to disable it.
  6. Click OK to close the window.

6. Run Windows Memory Diagnostic Tool

  1. Press the Windows and R keys to launch the Run box.
  2. Type mdsched.exe, then click OK.
  3. Click Restart now and check for problems in the new window that appears.
  4. Your computer will immediately restart. Allow the Windows Memory Diagnostic Tools enough time to complete its process.
  5. Once it’s done checking, your computer will reboot as normal.

Some third-party websites online may recommend downloading a fresh copy of rt640x64.sys. Don’t do this, as it may be malware. And be sure to check out our library of other BSoD solutions.

There are also some quick steps you may try:

  • Restart your computer.
  • Contact your computer’s manufacturer.
  • Make sure Windows Defender is active.

It may interest you to know what to do if you get Error 777 caused by malfunctioning registry files. You can fix this by running the CHKDSK command and then Windows Memory Diagnostic.

We also have a guide that focuses on solving L1c63x64.sys BSoD with effective methods, so don’t miss it.

If you have any suggestions or guides you’d like to see, comment below.

Mfc42.dll Missing: How to Fix Or Download It Again

Mfc42.dll is a Dynamic link library developed by Microsoft Corporation and is Microsoft Foundation Class Library’s base file.

If you see the mfc42.dll missing error on your computer, this guide can help! We will discuss some of the expert-recommended methods to restore the missing DLL easily.

What causes the mfc42.dll missing error?

There could be various reasons for the DLL missing error; some of the common ones are:

  • Registry issues – If your computer has broken registry entries, then you may encounter various errors, including this one. Run a registry cleaner to fix the issue.
  • DLL file is corrupted – If the DLL file is been deleted or corrupted, the app related will not be able to find it, hence the error. You need to restore the DLL file to get rid of the problem.
  • Faulty or outdated app – The app, if using the DLL file, is outdated or corrupted; you could encounter this error. Try reinstalling the app to get rid of the error.
  • Virus infection – A virus can damage system files, including DLL files on your computer, leading to this error. Run a malware scan using antivirus software to remove the infection.

Now that you know the causes, let us check out the solutions to fix it.

What can I do to fix the mfc42.dll missing error?

Before engaging in advanced troubleshooting steps, you should consider performing the following checks:

  • Try reinstalling the app, which is throwing the error.
  • Restart your computer.
  • Make sure there are no pending Windows updates.

If these tweaks didn’t work for you, move to the methods mentioned below.

1. Use a third-party DLL fixer

Fixing DLL missing errors manually could be tricky and harm your computer if not done correctly. Therefore it is advised to use a third-party DLL fixer tool to get the job done.

These tools can scan your computer for corrupted DLL files and repair or replace all Windows-related DLL files. Thereby improving performance and bringing stability to your computer.

2. Run SFC & DISM scans

  1. Press the Windows key, type cmd, and click Run as administrator.CMD elevated Mfc42.dll
  2. Type the following command to repair system files and press Enter: sfc/scannow
  3. Wait for the scan to complete, then copy & paste the following command to repair the Windows OS image: Dism /Online /Cleanup-Image /RestoreHealthRestore health
  4. Restart your computer once the scan is completed.

3. Run a deep scan using a security tool

  1. Press the Windows key, type windows security, and click Open.Windows Security open Windows key Mfc42.dll
  2. Navigate to Virus & threat protection and click Scan options.V& T Scan options Mfc42.dll
  3. Choose Full scan and click Scan now.Full scan -Mfc42.dll
  4. The tool will scan all sectors of your computer for viruses and list them. Delete them to remove the infection.

4. Perform a System Restore

  1. Press Windows + R to open the Run dialog box.System Properties Mfc42.dll
  2. Type sysdm.cpl and click OK to open System Properties.
  3. On the System Protection tab, locate System Restore and click System Restore button.SystemPropertiesComputerName
  4. Now, select the Choose a different restore point option and click Next.Next Choose a different restore point Mfc42.dll
  5. Choose the restore point and click Next.Choose a point  Mfc42.dll
  6. Click Finish to initiate the process.Finish Mfc42.dll

If the System Restore button is greyed out for you, we recommend you follow this guide to find the solution for the issue.

5. Download the DLL file manually

Note icon NOTE
Using an unreliable website to install DLL files is not advisable. However, If you know a trusted source, like DLL-FILES, that has been tested and verified, you can follow the steps below to restore the file.
  1. Go to the DLL-FILES website, search mfc42.dll, select the appropriate option, and click Download.Mfc42.dll download manually
  2. Double-click the downloaded folder, locate and copy the .dll file from it.
  3. Navigate to this path and paste the file: C:\Windows\SysWOW64\
  4. Restart your computer to let the changes take effect.

6. Run the Windows Memory Diagnostic tool

  1. Press the Windows key, type windows memory, select Windows Memory Diagnostic and click Open.Memory diagnostic tool Mfc42.dll
  2. Click Restart now and check for problems (recommended).memory-diag-tool 3  Mfc42.dll
  3. Your computer will restart and scan your computer memory for errors.memory-diag-tool

Once the test is completed, your computer will boot up, and the results will be displayed.

If you’re experiencing missing the DLL files issue on your Windows 10, we suggest referring to our informative article that provides solutions for resolving this common problem.

So, these are methods you can follow to fix the mfc42.dll missing issue. If nothing worked for you, you must reinstall Windows to get rid of the problem.

If you have any questions or suggestions, feel free to mention them in the comments section below.

Wfplwfs.sys BSoD Error: 5 Ways to Fix It

Many of our readers and other Windows OS users have reported coming across the wfplwfs.sys blue screen of death error on their PCs. This issue is more commonly found on Windows 11 users, but other OSs aren’t immune to it.

If you are also coming across the wfplwfs.sys crash or wfplwfs.sys error, and are looking for solutions to resolve it, then we have a bunch of solutions that will help you fix the wfplwfs.sys blue screen of death error. Let us get right into it.

What causes the wfplwfs.sys error?

We did some research and found many reasons that trigger the wfplwfs.sys crash or wfplwfs.sys error on your PC.

  • Problematic app: Several users have reported coming across the wfplwfs.sys crash error when opening different programs on their PCs. The problematic apps could be the reason behind the error.
  • Outdated program: You should ensure you are running the program’s latest version on your PC to avoid incompatibility issues.
  • Conflicting apps: If you have installed two or more apps of the same kind, you will face various issues, such as the wfplwfs.sys blue screen of death error.
  • Corrupt system files: If your PC has missing or corrupt system files, it won’t work properly and throw multiple errors, including the one at hand.
  • Outdated drivers: Along with the updated apps, your PC should also have the latest drivers installed to avoid any issues.
  • Problematic Windows updates: Windows updates, often in place of improving user experience, can cause multiple issues within the system.

How can I fix the wfplwfs.sys blue screen error?

1. Update the problematic program

  1. Open the Start menu by pressing the Win key.
  2. Open Control Panel.
  3. Click on Programs and Features.
  4. Select the program (for example ESET Smart Security) and hit the Uninstall button.
  5. Follow the on-screen steps to remove the program from your PC.
  6. Visit the official website.
  7. Download the latest version of the program.
  8. Install it and check if this resolves the issue or not.

One user on the official Microsoft forum pointed out that he was experiencing the wfplwfs.sys blue screen error with the ESET HOME Security Premium software. He was coming across the error message while running an old version of the software.

A simple uninstall of the old software and installing the latest version fixed the wfplwfs.sys crash on the user’s PC. You can also try this with the program you are experiencing the issue with and check if this resolves the issue.

2. Fix corrupt system files

  1. Press the Win key to open the Start menu.
  2. Run the command prompt as an admin.
  3. Type the below command and press Enter.sfc /scannow
  4. The SFC scan tool will diagnose and fix corrupt files.
  5. Type the below commands and press Enter after each one.DISM.exe /Online /Cleanup-image /Scanhealth DISM.exe /Online /Cleanup-image /Restorehealth DISM.exe /online /cleanup-image /startcomponentcleanup
  6. Restart your PC.

You can use the Windows built-in tool, i.e., SFC Scan and DISM, to fix the corrupt system files on your PC and resolve several issues, including the wfplwfs.sys error.

To ease the process, we would suggest you make use of a dedicated repair tool. Using these tools, you will be able to fix corrupt system files, system crashes, remove malware, clean out junk files, and much more.

3. Check for software conflicts

  1. Press the Win + R keys to open the Run dialogue.
  2. Type msconfig and press Enter.
  3. Switch to the Services tab.
  4. Check the Hide all Microsoft services option and select Disable all.
  5. Switch to the Startup tab.
  6. Click Open Task Manager option.
  7. Right-click each item in the task manager and disable them.
  8. Close Task Manager.
  9. Go to the Boot tab.
  10. Check the box for Safe Boot.
  11. Click Apply and OK.
  12. Restart your PC.

You should boot your PC in a clean environment, i.e., safe boot, to see if any other program conflicts with the program throwing the error message.

4. Uninstall the latest Windows update

  1. Press the Win + I keys to open the Settings menu.
  2. Click on Windows Update on the left.
  3. Select Update history.
  4. Scroll down and click on Uninstall updates under Related settings.
  5. Select the recently installed update and hit the Uninstall button.
  6. Restart your PC.

Often latest Windows update can bring in bugs that could conflict with the smooth performance of the programs installed on your PC. You should try uninstalling the latest Windows update and check if this fixes the issue.

5. Update drivers

  1. Open the Start menu by pressing the Win key.
  2. Open Device Manager.
  3. Expand each section and update the drivers one by one.

That is it from us in this guide. Several readers have also reported coming across the Wdfilter.sys BSOD error, which you can easily fix by applying the solutions mentioned in our guide.

If you are getting the ClipSp.sys error, you should try out the solutions we have mentioned in our guide to resolve it easily.

Feel free to drop a comment below and let us know which of the above solutions fixed the wfplwfs.sys blue screen error.