The browser industry is a very competitive one. Aside from the well-known browsers for all devices, like Opera One, Chrome, and Firefox, there are still many excellent browsers.
In the heat of the competition, some browsers could not be continued. Among the many excellent browsers that were discontinued is the Flock browser.
This browser was well-known for its unique features and overall performance. Despite its unavailability, some users still want to know how it works.
This guide will take a closer look into how the Flock browser works, what makes it unique, and every other vital information about it.
What is the Flock Browser app used for?
Flock browser was first released in 2005, bringing many Web 2.0 features to the user interface.
The early versions were based on the Gecko rendering engine. But in 2011, the browser switched to the WebKit engine.
The browser was popular because it had a social media integration. With this, you could easily keep track of social networks or your webmail at any time.
Additional features included native sharing of content, the ability to preview online videos, a built-in RSS reader, a built-in blog editor and reader, and synchronization with web-based email.
The browser was available on all desktop platforms but was discontinued in 2011.
Who founded Flock?
The Flock browser was co-founded by Bart Decrem and Geoffry Arone in 2005. The browser was built on the Mozilla Firefox architecture focusing on social media and network integration.
Also, the founders hoped that Flock would improve the user experience. Hence, it packed many unique features.
Quick Tip:
Although the Flock browser was great due to its social media integration, other browsers, such as Opera One, can provide the same functionality.
Opera One has Instagram integration, allowing you to browse your feed and send messages while browsing other websites. It also features integrated messaging apps and a native AI.
Opera One
Get instant social media integration but with the added security layers of a VPN, thanks to Opera One’s clever build.
Immediately you download and install the Flock browser as a new user, it opens a page to log in and activate your favorite social media accounts.
If you have been using Flock for some time, you only need to close and reopen the browser, it will display the page. From here, you can log in and manage your social media accounts.
Is Flock Safe to use?
When it was active, the Flock Browser was very safe to use. It packed some excellent security features that protect users online.
However, with the ever-evolving internet and hackers finding new ways to attack, the same cannot be said about the browser since it was discontinued. This is because it is no more receiving security updates.
So you will be better off trying an alternative browser.
Is Flock Expensive?
The Flock browser is a free browser that costs absolutely nothing. Although it is no more available via official sources, you can still get the Flock browser apk and installer from third-party sites for Mac and Windows 10 PC.
How do you delete a Flock chat?
To delete your social media chats on the Flock Browser, you only need to follow the steps you use for the app’s web version. Flock does not have any special for the apps.
Instead, it only makes it easier to access and manage them.
The flock Browser was excellent in its time. But now, you might need to consider other frequently updated browsers with similar features for security reasons.
There is no doubt about it, Vivaldi is one of the best customizable browsers. Vivaldi themes offer many flexible customization options, along with many powerful features, and the browser has become even more versatile with the latest updates.
You can use the theme scheduling feature to make your browser change your favorite themes according to your needs.
Theme scheduling is exactly what it sounds like. It allows you to choose a few themes for your browser, which will automatically change when you’ve set them.
Joining our myriad of features and functionality, theme scheduling gives you the power to set your favorite theme to your preferred time as no other browser has ever done. After enabling a theme in the Settings, you can set its scheduling.
You can switch a theme whenever you want to match your current mood or time of the day.
So, for example, while you’re at work, you can set a bright theme or choose a dark theme when browsing the internet at home, with lights off.
Quick Tip:
Vivaldi browser has a lot of users who deem it better than Chrome or Firefox due to its great UI design and low resource usage.
However, what if we told you there’s a browser with a variety of customization options that’s also safer and tends to your privacy more than any other browser?
We’re talking about Opera One, of course. But this isn’t your regular, standard version of Opera One browser.
We are suggesting the gaming edition called Opera GX. While even the classic Opera One has personalization options, Opera GX takes things to the next level.
Yes, you can change your colors, wallpaper, and themes. Yes, you can even add multiple wallpapers at the same time. But you can also adjust things like transition animation and sound effects!
Opera
Ultimate control of your PC resources and the look and feel of your browser with Opera GX
How do I set up theme scheduling in the Vivaldi browser?
Open the browser, and go to Settings (a small gear icon in the lower-left part of the window).
Go to the Themes tab.
Scroll down to the THEME SCHEDULE section.
Tick the radio for the Manual Schedule.
Click the Add button.
Select two or more themes to schedule and move the timer as necessary.
There you go. Once you schedule your themes, the browser will automatically switch from one to another when the time comes.
You can choose between themes like Light, Subtle, Redmond, Dark, Human, Olive, and more. So basically, there’s a theme for everyone’s taste.
Where are Vivaldi themes stored?
The background images on Vivaldi are stored in the application. The steps to get to them depends on your operating system.
If you download any theme, it will be stored in Chrome storage in the browser folder. However, if you are wondering how to move them, there is no official way to do it. But you can use developer tools to do it.
Steam users report the Error joining multiplayer session message when trying to play certain games, such as Sid Meier’s Civilization V (Civ 5), Sid Meier’s Civilization VI (Civ 6), and Grand Theft Auto V (GTA 5).
If you’re one of these unfortunate gamers, here’s what you need to do to get rid of this error message.
Quick Tip:
Errors while joining a game can also be created by online browsing. We recommend using a browser that can limit the network usage so you encounter no such issues in your multiplayer experience.
In Opera GX not only you can limit network consumption of the browser, but you can also limit CPU and RAM usage. These features and more others serve only one purpose, to create an enticing gaming experience
Opera GX
Leave joining errors in the past with a new engaging gaming browser.
How can I fix the multiplayer session error in Steam?
1. Repair .NET Framework
Download the Microsoft .NET Framework repair tool, from the Microsoft Store.
Select the NetFXRepairTool.exe and download it
Open the downloaded file and follow the instructions on the screen (you need admin rights)
Once this is done, restart your computer
Launch Steam, your game, and try to join a multiplayer session
Some Steam games require .NET Framework to work properly. If you don’t have this software package installed, it could be the reason why you can’t join online sessions with other gamers on Steam.
However, the Microsoft .NET Framework repair tool should solve any problems related to this dependency, including missing libraries, failure to launch, or an outdated version.
2. Remove the Steam and game cache
Using your file explorer, visit the following address:
C:UsersYOURUSERAppDataLocal
Replace YOURUSER with your PC username
Select and delete the Steam folder
Also, select and delete your game folder in this location
Clearing Steam and game cache is a good way to fix multiplayer issues. If you know the other players, get in touch with them and ask them to do the same on their devices.
3. Use a premium VPN solution
If you want to use a VPN to not only avoid Steam multiplayer issues but also improve your ping by connecting to VPN servers closer to the host, consider investing in a premium VPN service.
The best VPNs for Windows 10 are services that have a large number of servers across the whole world.
This means that they are able to cover any type of connection and let you connect to your game with no issues, regardless of where you are.
Some VPNs have specific gaming features that help you connect to the best possible service for the game you are playing.
You can manually connect as well if there is a server you prefer, but the VPNs are able to detect the best configuration for you.
Just make sure to get a VPN with a strong privacy policy and additional secure network features such as a killswitch.
4. Disable your free VPN service
If you’re using a free VPN while playing on Steam, it could be the reason why you’re experiencing an error when trying to join multiplayer sessions: your IP address changed.
VPN servers might occasionally go down at random or become unreliable, causing you to get kicked out of your game or experience data loss.
It is difficult to tell how well a VPN paid service performs when it comes to gaming until you join up and try it for yourself, most of the providers offer money-back guarantee options or trials.
So, because it’s a free VPN service, you may experience data tracking from whoever controls the VPN and has the ability to see what you’re doing.
You can resolve this problem by turning off your free VPN before firing up Steam, and for good. It doesn’t seem healthy for your activity and private data to use a free VPN service nonetheless.
5. Deny folder permission
Go to Documents > My Games folder
Select any folders that resemble: packageddumps, moduserdat, logs, dumpgs
Right-click each folder and select Properties
Go to the Security tab and select your group of usernames
Click the Edit button
Select the first group or username and check the Deny box
Repeat the previous step for other user groups
Save changes
Restart your Steam games
The instructions above prevent Steam from creating game cache files in those folders, in order to fix the error when you’re trying to join multiplayer sessions.
To recap, if you’re encountering a Steam error message when trying to join your online friends in a multiplayer session, make sure to repair .NET Framework, remove the Steam and game cache, as well as manage permissions for cache folders.
You should also disable any free VPN you’re using. Instead, we recommend opting for a premium VPN service like Private Internet Access.
Our Steam area is dedicated to more awesome guides about this gaming platform, and you can also join our VPN Hub to find out how a VPN can make your digital life better!
You have received the Verify integrity of game files not working message. Let us walk you through all you should know. Steam is a popular online platform where users can play, create, and discuss games. Sometimes you may encounter errors when playing certain Steam games, such as random crashing.
This guide will show you how simple it is to follow a series of steps and solve the situation quickly. When this error occurs, some users see purple checkerboards; often, the weapon or the world models are missing, and sometimes they experience crashes when the game is loading.
If you are no stranger to this issue, don’t hesitate to apply the solutions we will suggest in this article.
Why won’t Steam verify the integrity of game files?
There could be several reasons why Steam needs to verify the integrity of game files. Here are some possible explanations:
Outdated game files – If Steam detects that the game files are not up-to-date, it will not verify the integrity of the files.
Game files in wrong directory – If the game files are not located in the correct directory, Steam may be unable to find them and, therefore, cannot verify their integrity.
Technical issues – Sometimes, Steam may experience technical problems that prevent it from verifying the integrity of game files.
PC requirements – If your computer does not meet the minimum requirements for the game, Steam may encounter this problem.
Corrupted game files – In some cases, the game files may be so corrupted that Steam cannot repair them.
Quick Tip:
Opera GX is a web browser outside the Steam desktop app. However, since Steam’s built-in browser works in the Steam overlay, Opera GX is easier to access and use its perks while playing.
In-game purchases and market functions, game invites through integrated Discord will perform better outside of the Steam client using Opera GX, as it will not get overloaded with cached files.
Opera GX
Avoid cache overload in the Steam client; use Opera GX for other actions you need to perform.
What can I do if verifying the integrity of game files is not working?
1. Clear download cache
Open Steam and select Run as administrator.
Next, click Steam at the top of the window to expand the menu.
Select Settings.
Click Downloads on the left of the Settings window.
Then, press the Clear Download Cache button.
A confirmation window will open, so don’t hesitate to click OK.
Select OK on the Settings window as well.
Restart Steam to keep the changes.
This is an easy way to restore functionality when you receive the Steam verify the integrity of game files not working message.
Regardless of the integrity of game files, you can let Steam check into the problem. The cause of this type of issue is usually a bad cache, so follow the steps described above.
2. Reinstall the affected game
Press Windows + E to open your Windows Explorer, navigate to the common folder using the path below, and rename the game folder. C:\Program Files (x86)\Steam\steamapps\common
Open the Steam application.
Visit the Library section.
Verify your game list and choose the one that has issues.
Right-click on the game, click on Manage, then Uninstall.
Return to step 1 and revert the folder name to its original name.
Finally, find the game on Steam and click on Install.
This solution allows you to set the Steam mechanism to search into your steam-apps folder for any game that displays different errors. Its purpose is to check if there are any missing or corrupted files.
Whenever Steam finds any missing file, the application will automatically download that specific file and complete the game.
Open your browser and enter this line in the address bar: steam://flushconfig/
Then, in the new pop-up dialogue, click on Open Steam.
You will get another pop-up warning from Steam saying that the action will delete the download cache, and you will need to log in again, so click OK.
This will also restart Steam; you must enter your password.
Clearing the download cache will hopefully resolve the problem of verifying the file integrity of your games.
How to verify the integrity of game files without Steam?
You cannot verify the integrity of Steam game files without using Steam. Steam is the distribution platform for the game, and the only reliable way to verify the integrity of the game files is through the Steam client.
When you use Steam to verify the integrity of a game’s files, it compares the files on your computer to those on the Steam servers. If files are missing or corrupted, Steam will automatically download the missing or corrupted files and replace them with the correct ones. This ensures that you have a complete and functioning version of the game.
And that is as much as we will cover. So follow these simple steps and learn how easy and fast you can let Steam analyze the game that gives you errors and fix those issues.
Also, remember that Steam confronts them with an online source to verify the game files. That means you should have a steady and consistent Internet connection.
More often than naught, we uncover a website or a specific page of a website that we like all by mistake, and then we leave it after we are finished with it.
After some time, we can’t backtrack our steps to get to that website or page again.
Thus begins the arduous journey of looking through your history or bookmarks if you’re conscientious. However, if you’re the type with many bookmarks, you’re in for a search.
That is why bookmark managers exist; the best are available for multiple browsers. Because they are many, we’ve decided to compile a list of the ones we think are the best.
Chrome has a decent free bookmark manager; however, you may be tempted to improve on this. On the Web Store, you will find many options that are unique to what the native one offers.
In some ways, many of these are better than Chrome’s built-in Bookmark Manager, and we shall share the very best of them with you, including great open-source bookmark manager options and options for other browsers like Edge.
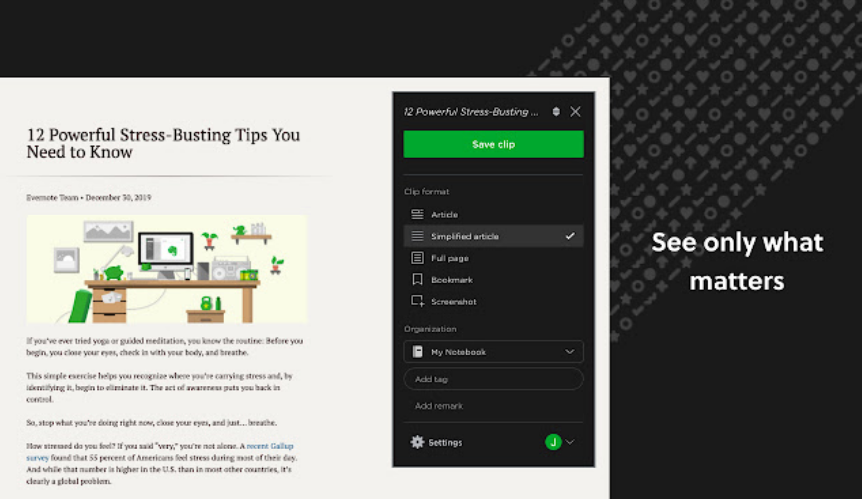
Evernote Web Clipper is the program you need if you’re looking for a bookmark manager that can be used in almost any imaginable form.
With it, you can save bookmarks through a Web browser extension, mobile apps, email, and desktop applications, access and manage bookmarks through a web-based interface, and more.
This tool is available as a browser extension, mobile app, desktop application, and more. In addition, it is compatible with multiple platforms and devices.
The bookmarks are saved on the cloud or the account, and if you get the premium version, you can benefit from a few extra tools.
If you are interested in just plain old efficiency, then Diigo is the bookmark manager that you need.
One of its key features is that it can collect articles and text snaps from the web and PDFs, which can be useful.
This app allows you to save and tag your online resources for easy access anytime, anywhere. In addition, all of your bookmarks are stored on the cloud, and you can add labels to bookmarks.
If you’re looking to revisit a long-lost website that you may have visited long ago, then Memex is an excellent extension and the best Firefox bookmark manager out there.
It brings new tools to your browser by enhancing the way you bookmark a page and search for entries in your browser history, and it improves the search speed for anything you are searching for.
The sidebar feature enhances how you add and manage bookmarks in your browser. Another perk is that it’s available for Google Chrome and Firefox.
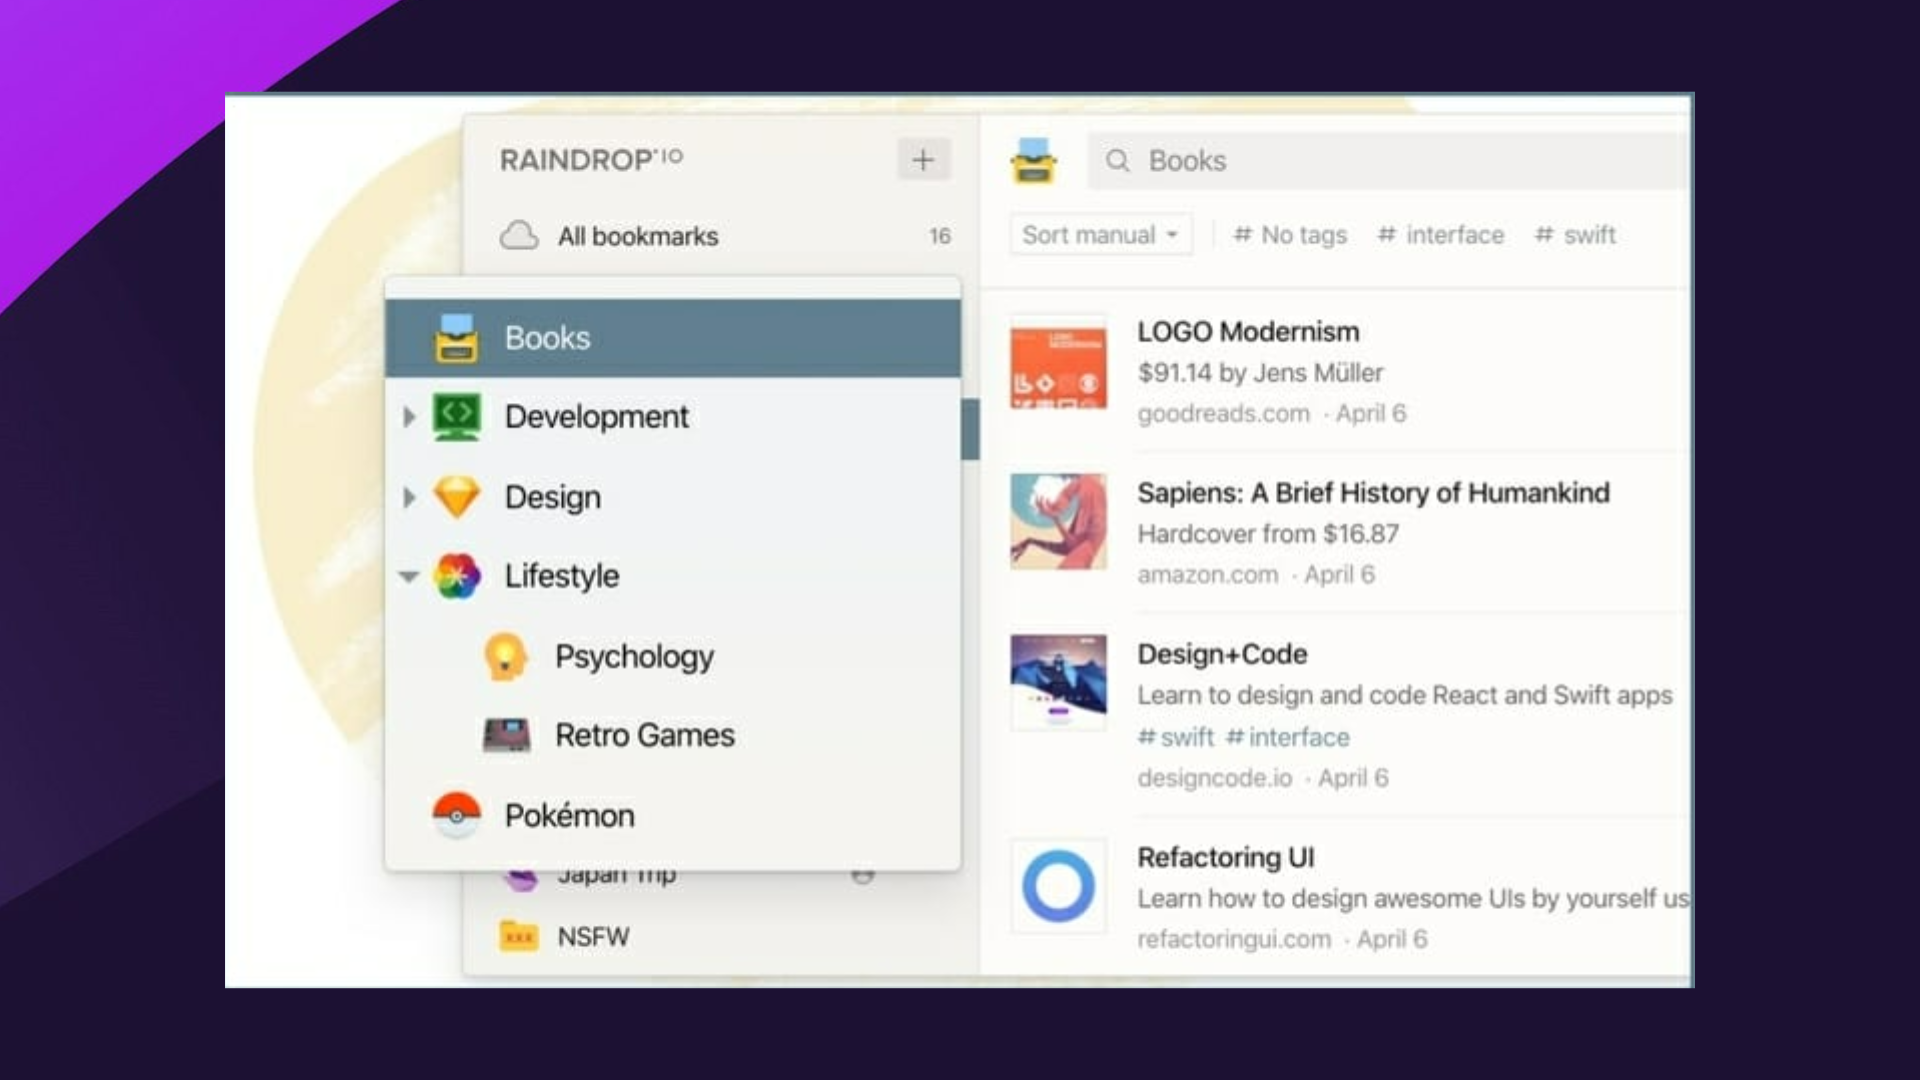
Raindrop.io – Great organization and labeling features
If you’re the type with many bookmarks, finding something in them will still feel like finding a needle in a haystack.
That’s why a bookmark manager extension like Raindrop.io can be handy. It enhances your sidebar with tools that let you better organize and label your bookmarks with icons and tags.
Raindrop.io can be considered, in our opinion, the best Chrome bookmark extension, and you should try it.
This tool will make finding one entry among 500 others feel like a piece of cake. It is also available for Firefox, Opera One, and Microsoft Edge and is highly customizable.
Bookmark Ninja – Great support for PC and mobile browsers
Bookmark Ninja is a more peculiar entry in our list since it is a web app and not a browser extension, but it does offer support for all browsers you may have on your PC or mobile device.
You can also consider it a perfect alternative to a Chrome bookmark manager extension.
This web app is easy to use and offers support for handling and organizing many bookmarks with advanced tag management and an overall dashboard view.
Additionally, the UI is extremely clean, so using it isn’t confusing if you already have many bookmarks to organize.
With the help of this tool, you can share your bookmarks between all your devices, and it also features a Dark Mode to help you save energy.
You can use it for free; afterward, you need to pay a fee for a subscription.
We have discussed bookmark managers, which are the best way to organize your links. However, here are some other options you may want to try.
Pocket on Android/iOS – It helps you conveniently save anything from the internet in one place.
Emailthis – The tool will email all your links to you, giving you a choice to manage them using an email client.
Google Keep – A cross-platform note-taker on the web and also available as a standalone app.
Evernote – Offers a web clipper that makes you copy and save entire web pages.
In addition to that, we tested and managed bookmarks with AVG Secure Browser. Hence, we advise you to organize your web bookmarks and keep track of all your web pages efficiently.
We as humans love having keepsakes of everything we do and all the things we like, even when it comes to digital items.
That’s why the bookmark feature was probably implemented in browsers so that we can quickly revisit our pages of interest.
However, these bookmarks can pile up over time, so having a way of efficiently searching through them seems like something inevitable.
From our recommendations, choose the best bookmark manager that suits your needs. We’d like to hear more from you on this subject, so give us your opinion in the comments section below.
Wait for the download to complete, then launch the app and play.
Note that there are a few paid options, but with this app, you can play Tetris for free on your PC.
We will now show you how to play Tetris on a browser online.
Quick Tip:
Playing games online is simple, but do you have the proper browser for the job? For gaming, it would be best to use a gaming-oriented browser such as Opera GX.
Opera GX offers a GX Control feature that allows you to allocate your resources to your browser and ensure that other processes on your PC can run smoothly.
Opera GX
Play Tetris in an ultra-modern web browser created for gamers.
Once the game loads, press the Play game button to start the game.
Does Tetris have an end?
The player only finishes as many lines as they can before suffering an unavoidable loss; the game will not end with your triumph.
Since 1996, Tetris has established internal standards and requirements that publishers must follow to get a Tetris license.
You can now play away using any of the three recommended websites. Of course, these are not the only places to play the game online, but they are our favorite go-to’s.
You may also try out Tetris browser multiplayer on websites like Tetr. Note that using any of the best gaming browsers will enhance your Tetris experience.
As you can see, playing Tetris in your browser is incredibly simple. If you found this article helpful, let us know by leaving a comment below.
Let us explore Firefox dynamic themes and share all we know with you.
Mozilla Firefox is and will always be a grand adversary to Google Chrome. Its privacy-oriented focus, simplicity, and fantastic personalization features have slowly become a viable choice for the daily driver web browser.
As the cherry on top of the Mozilla Firefox revival, we offer you three excellent themes to improve the experience.
The dynamic theme is, by definition, a theme that vibrates with various colors and patterns instead of sticking with a single solid color or motif.
It’s a great way to enrich your browsing experience without losing focus on what’s important. The only issue is that these are still relatively scarce for Firefox.
Nonetheless, we found our way around the Add-on Store and brought out the three themes (they’re Add-ons) which should serve you justice. So make sure to check them out below.
Quick Tip:
Firefox is not the only browser familiar with dynamic themes. Opera GX does an excellent job on customizability that exceeds the basics and goes for esthetic like no other browser.
With an award-winning design, it gives the user complete control over looks. With plenty of colorful and dark themes already preinstalled, it comes with a great setting that forces web pages to go into dark mode for better night browsing.
Opera GX
Avoid eye strain with this great fully customizable browser.
The best way to make Firefox more appealing to the eye is by using add-ons. There are a lot of them. While we discuss some of the best Firefox dynamic themes in this article, you must note that many other fantastic classes of themes exist.
Browse through the add-ons store to have a feel of the many options you may try out.
Are Firefox themes safe?
Generally speaking, Firefox themes are safe. However, some of them may be engineered to serve malicious purposes. Therefore, we recommend installing only themes you trust in your browser.
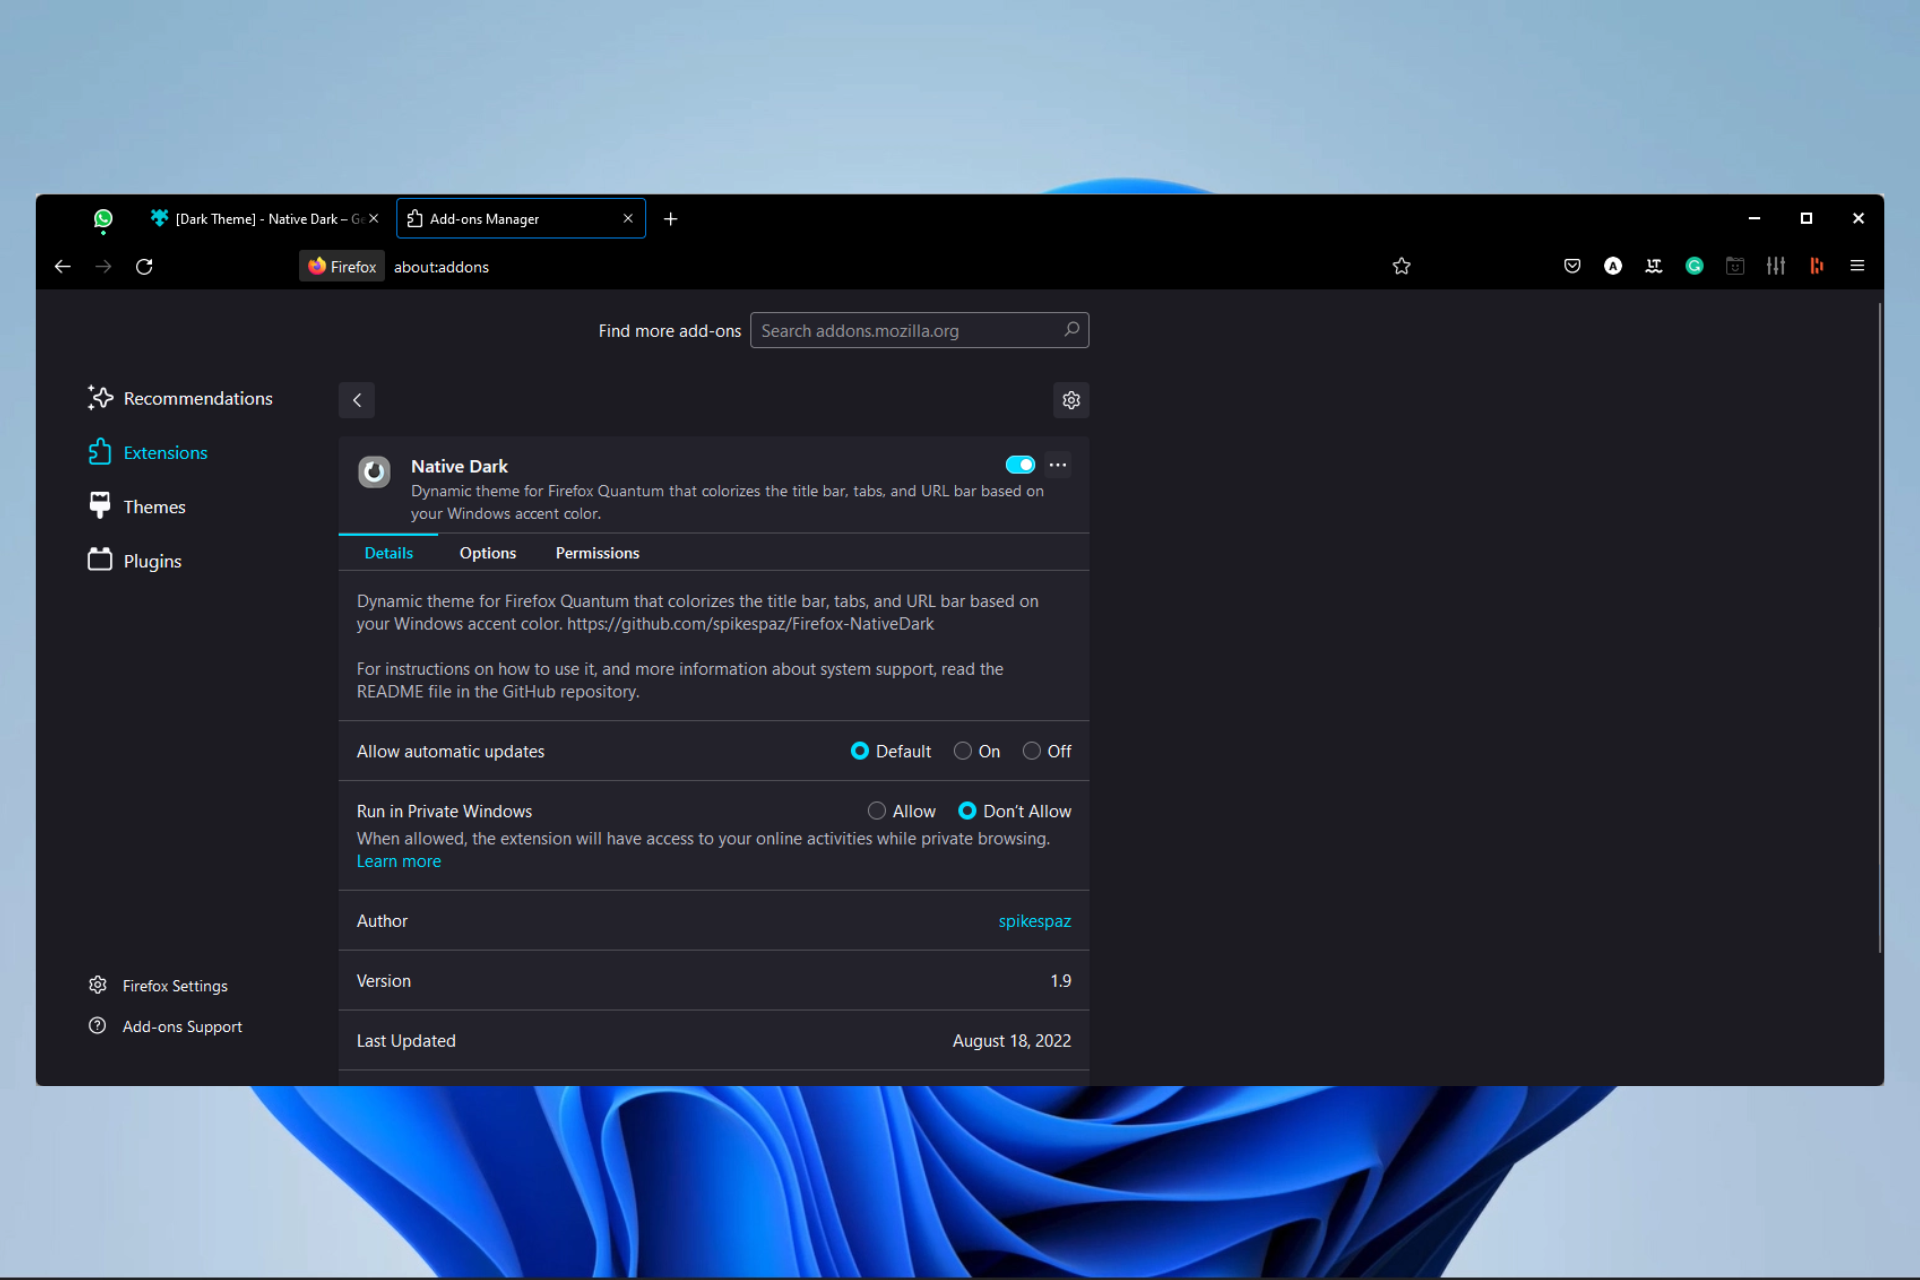
This belongs to the group of Firefox dark themes and mimics the color of your Windows system theme. It works great with the latest Firefox release and is a unique little piece of software.
This theme is, of course, dynamic. It’ll change color on Address and Title bars and Tabs, too. So basically, most of your workspace in Firefox will resemble the accent color of a Windows theme.
It sits so well with the Windows background that one might assume that Firefox is the native Windows 10 browser and not Edge. But, of course, these are only aesthetic changes.
But as far as we tested Native Dark, the accent colors are relatively fine, and our only issue is with the vividly light accent color. The font is barely seen if your theme of choice is relatively bright.
Feature-wise, there are multiple tweaks you can take advantage of. For example, you can set a static mode with only one color or change the nuance between the Address bar and the rest of the interface.
This nifty theme for Mozilla Firefox takes the step up and changes the coloring of the browser following the site color.
It primarily focuses on website icons. If you open YouTube, the theme will switch to reddish color. For Twitter, it’ll turn blue, resembling the tweety bird icon. Facebook – dark blue. You catch the drift. Every site has a different color for the Title bar and tabs.
Sometimes it’ll have difficulty determining which color to use, so it’ll stick with the default theme pattern. However, it’ll work most of the time without any issues.
We liked the transition between the tabs; this is our go-to theme. It fits great if you’re multitasking to break the monotonous single-colored user interface.
Keep in mind that this theme is still developing, so it’s far from perfect. This means it’s sometimes slow to load or misses the saturation and hue of the website’s icon. But, of course, this shouldn’t be the dealbreaker.
The browser must be adequately themed for work or play as we spend an increasing amount of our lives on computers, and this extension does a superb job of that.
The gorgeous Solarized Theme, converted to Firefox utilizing its most recent APIs, is used by ZenFox. The overflow, download, and hamburger menus of a browser are examples of menus that follow the theme of the rest of your browser.
The Solarized Dark & Light Themes may be switched using four distinct techniques.
These include Time (change themes automatically at times of your choosing), Manual (toolbar button to alter themes upon pressing), System (automatically changes the themes around the OS light/dark theme), and Weather.
You may also select the accent color applied to the colors of the tab loading, tab line, and icon attention.
Zen Fox doesn’t ask for pointless permissions; all the code is available as open source on GitHub.
League of Legend, most commonly known by its acronym, LoL, is a free-to-play MOBA game that is as contagious as it’s competitive.
There are not many reported issues, but the login problems are quite frequent. Especially since there are a lot of phishing websites creeping on the inattentive players.
Users reported that League of Legends won’t accept their password after several tries.
Why is my Riot client not launching?
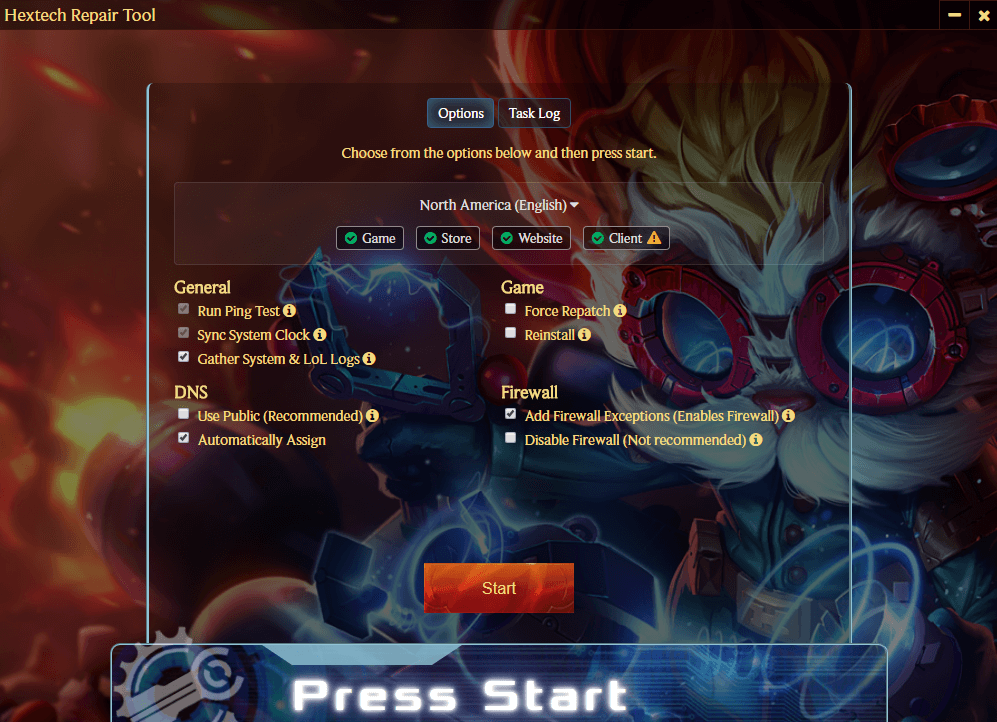
There can be many potential reasons for the Riot client for LoL not to start but among the top ones, we need to list the graphics card driver.
Try to update its software too before going into any other troubleshooting steps. Also, check if Windows Firewall is blocking the app for some reason.
Coming back to our problem, if you can’t seem to login into your LoL account, check the steps below and resolve the problem with ease.
How do I fix the Riot client not logging in?
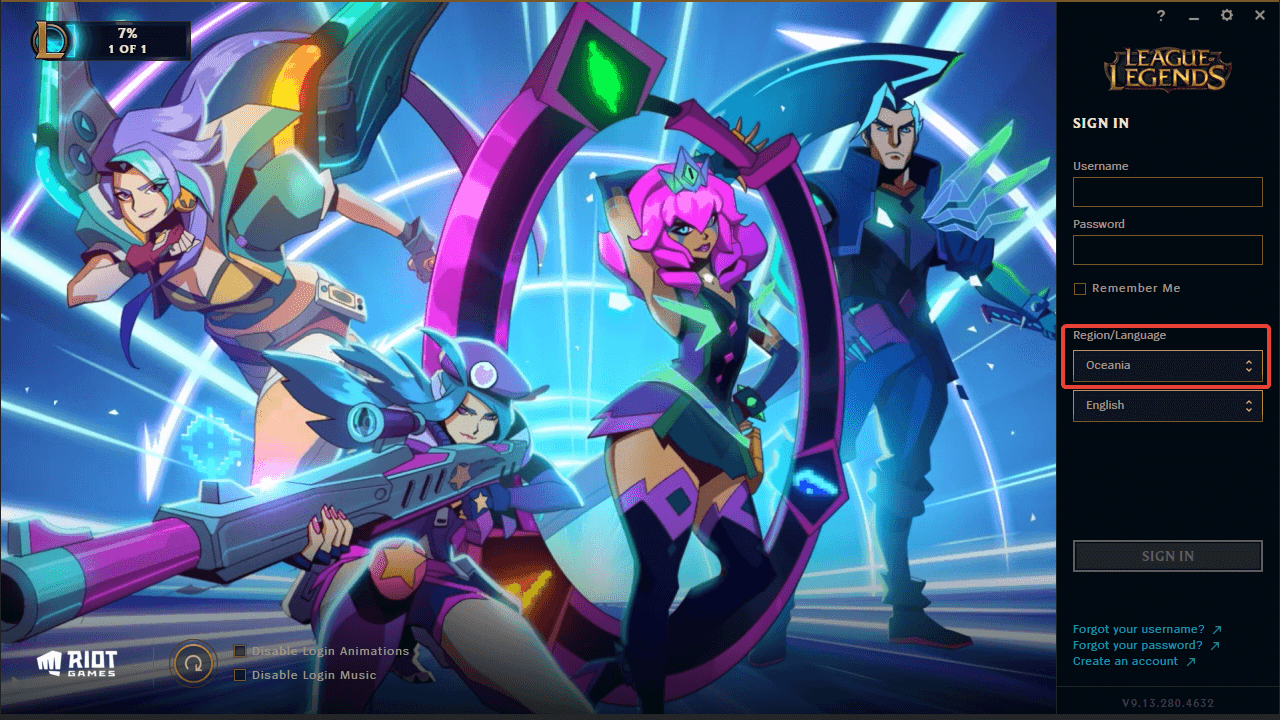
1. Check region settings and the server status
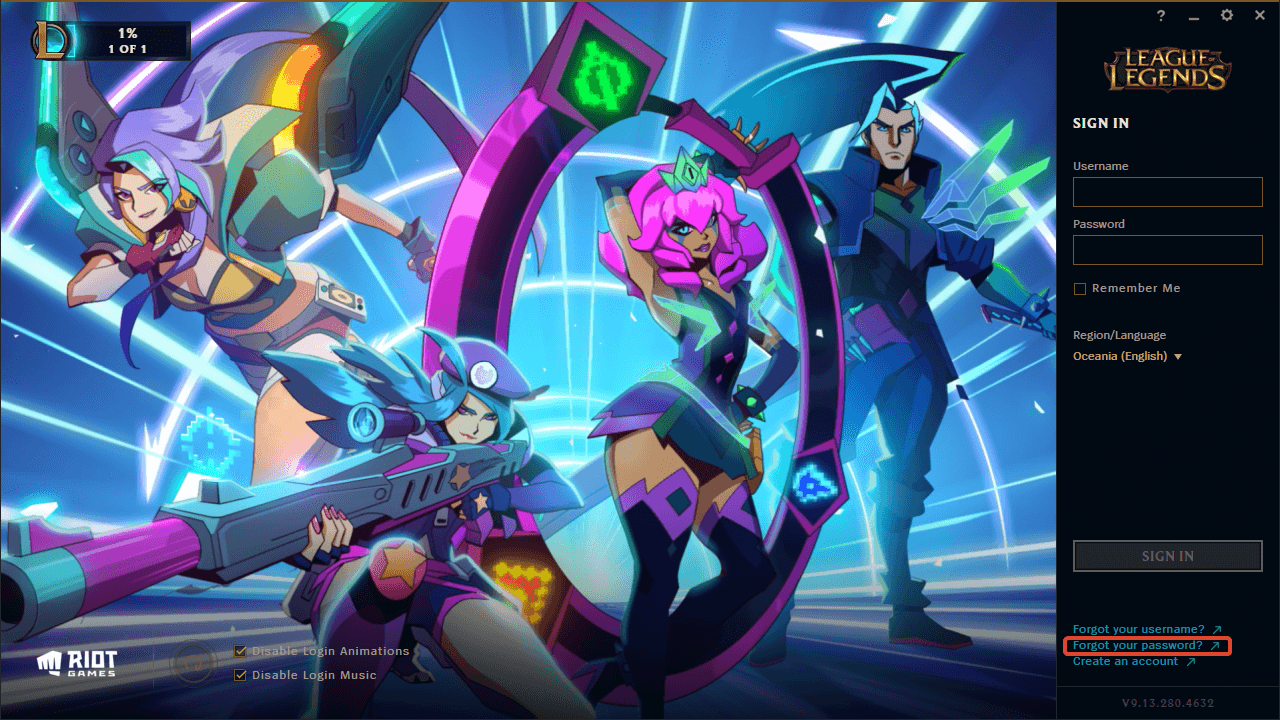
Open the League of Legends client.
Under the Region/Language section, choose your native region server.
How do I know if I got banned from League of Legends?
When the publisher suspects any foul play or there has been any unaccepted activity on your account, you may get banned for a certain period of time.
If you try entering a match, the timer will still be ticking as the pop-up would show. So, you literally can’t join any games within the shown timeframe.
Of course, there are also permanent bans and if this happens you won’t be able to access your account at all.
Can the LoL account be unbanned?
If there’s a permanent ban, you can’t sign in to League of Legends and there is little you can do but for a temporary ban, you can contact Riot support for the login issues.
Basically, you need to access your LoL account and click on the Submit a Ticket button. Then, select the Discuss a personal suspension or restriction option from the drop-down menu.
The only thing left to do is explain and demonstrate your alleged innocence in a compelling way.
These steps, hopefully, addressed the League of Legends not logging in problem and you are ready to storm the Summoner’s Rift. Share the results with us in the comments section below.
As you might know, there are all sorts of great games available in web browsers, but today we’re going to focus on a specific genre of games.
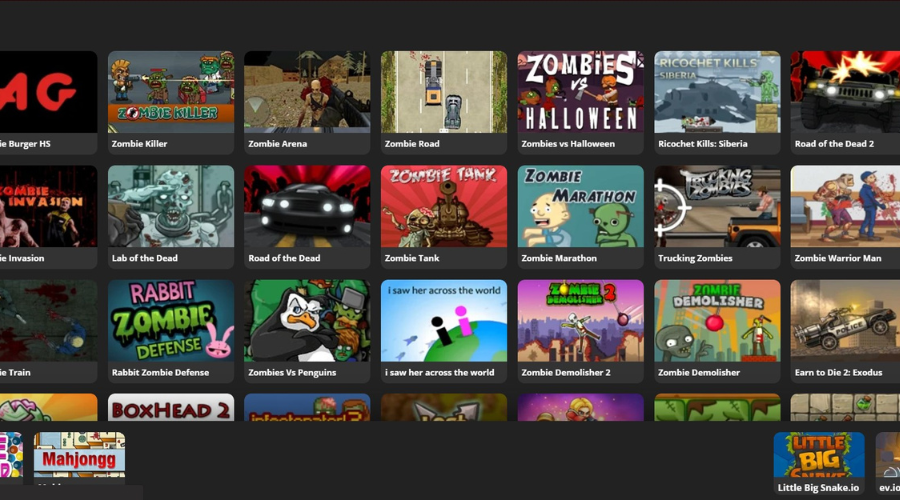
Zombie games have gained massive popularity over the years, and today we’re going to show you the best zombie games that you can play in your web browser.
Quick Tip:
Playing zombie games online is incredibly simple, but for best performance, it’s advised that you use a gaming browser such as Opera GX.
The browser has a built-in ad blocker, so you’ll be sure not to see any ads while playing online games. In addition, by blocking ad scripts, your web pages will load faster than before.
Twitch integration is available as well, so you can keep track of your favorite streamers with ease. In addition, you can view videos in a pop-out window which is perfect for multitasking.
Opera GX
Defend yourself in the zombie apocalypse faster and better by using the world’s first web browser dedicated specifically to gamers.
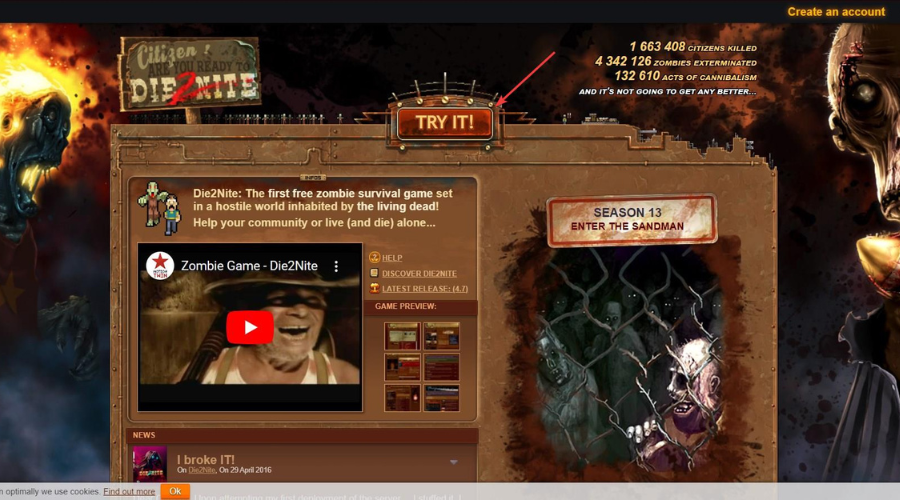
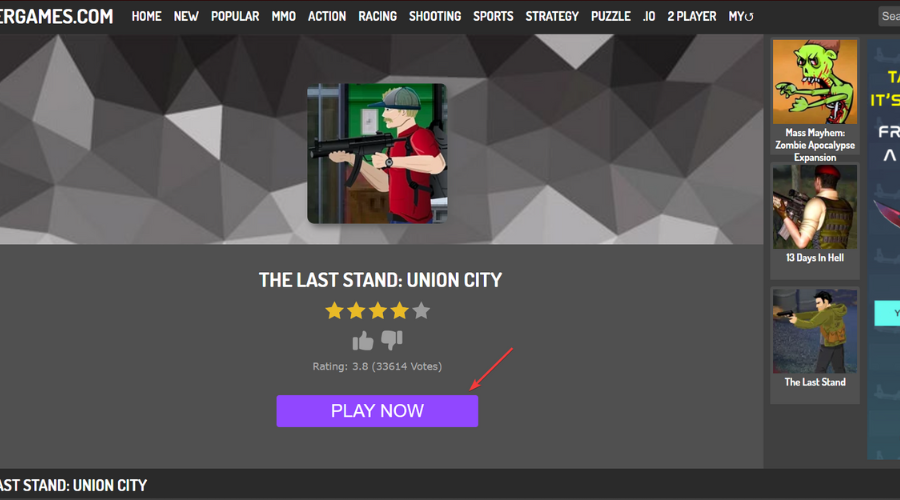
Whether you decide to go for The Last Stand: Union City or any other online zombie browser games, we’re sure you will find what you need right here.
The best free zombie browser games are small, interactive titles that will give you the adrenaline boost you need, but don’t expect them to look like Days Gone graphics-wise.
There are a lot of FPS zombie browser games to choose from if you got bored of Call of Duty, or your rig won’t support large games.
You can choose between hundreds of 2D zombie browser games, among which is also Apocalypse Z Survival.
And, if you don’t want to play by yourself, we’re sure that there are plenty of zombie browser games in multiplayer that you and your friends will like.
Playing zombie browser games is simple, and you’ll be able to do it by using the methods that we showed you in this article. What is your favorite zombie game? Let us know in the comments section below.
The Nintendo Entertainment System, otherwise the NES, was one of the big N’s first home game consoles. It was the biggest game console of the 1980s for which Nintendo introduced game series that continue to go strong today, such as Mario, Zelda, and Metroid.
The big N even re-released the game console in 2016 with NES Classic Edition. However, you don’t need NES Classic Edition to play its retro games. You don’t even need to install an NES emulator on Windows.
You can play a multitude of classic NES games in your web browser at retro game emulator websites! This is where you can play NES games online.
Playing NES games online free is something we all want to do, especially if you grew up in the ’80s and ’90s, so buckle up and find out where you can play the best SNES games online.
Can I play Nintendo games online?
You should know that, before the Switch Online service launched, the Nintendo company offered free online multiplayer for games like Splatoon 2 and Mario Kart 8 Deluxe.
However, now, you have to have a subscription to use the online features of first-party Nintendo games and most third-party games.
Keep in mind that Nintendo Switch Online members can download and play the online mode of the game at no extra cost.
Stick with us to the end and discover all viable options for NES emulators unblocked online, as well as NES games online for multiplayer.
And, if you aren’t using a PC or a laptop and prefer mobile devices such as phones or tablets, you can also search for NES emulators that are online for mobile.
Quick Tip:
Replaying games from the 80s or 90s makes us want to go through that memory lane once again. That’s why we use a gaming browser like Opera GX.
Opera GX comes with one purpose, to make the gaming experience more enticing. With GX Corner, you can play games right in from the browser and it facilitates finding old titles with ease. It also provides limiters for CPU and RAM usage plus a hot tab killer for the browser.
Opera GX
Experience an amazing gaming session with Opera GX features.
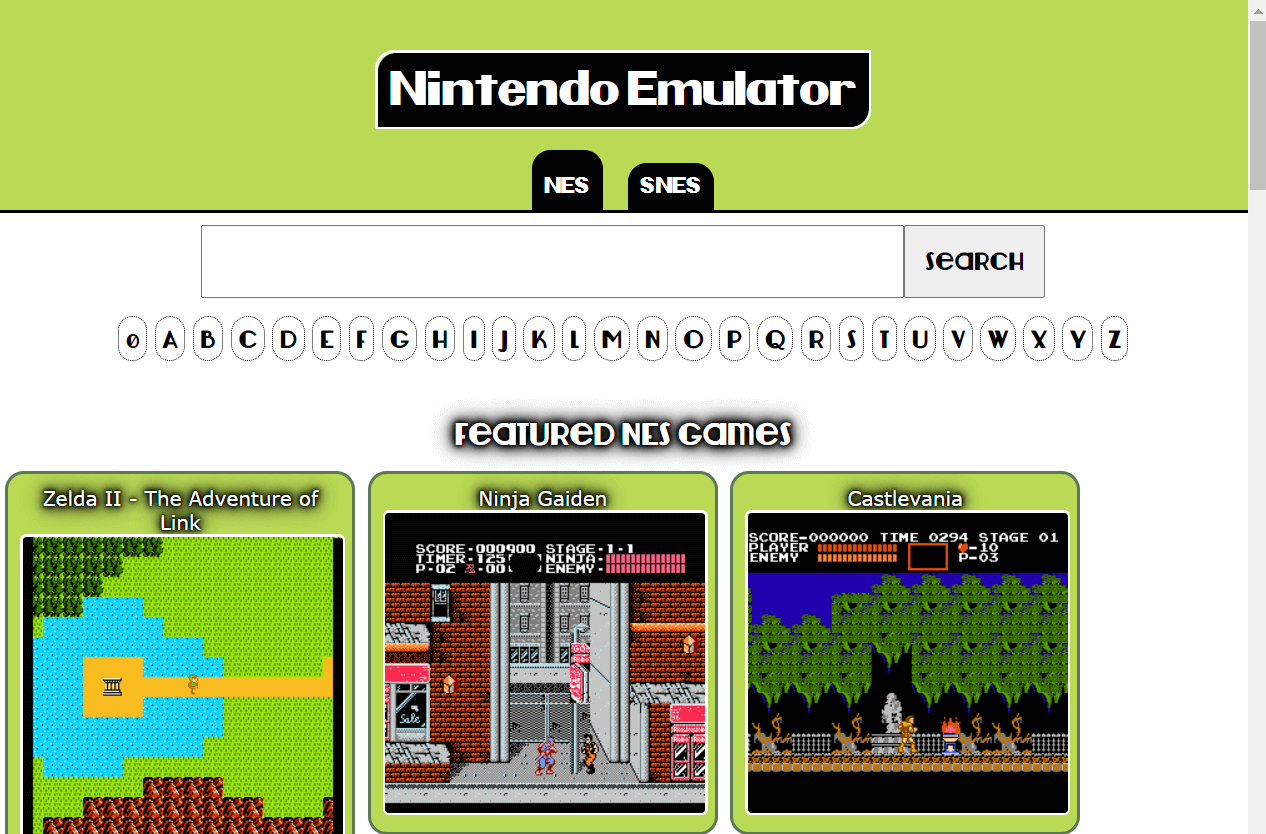
Nintendo Emulator is a website dedicated to NES and SNES games. So, this website has a big collection of NES games you can browse through on its A-Z index.
This site’s emulator includes options for keyboard customization and a full-screen mode. With its Setup Gamepad option, you you can play NES games with a gamepad.
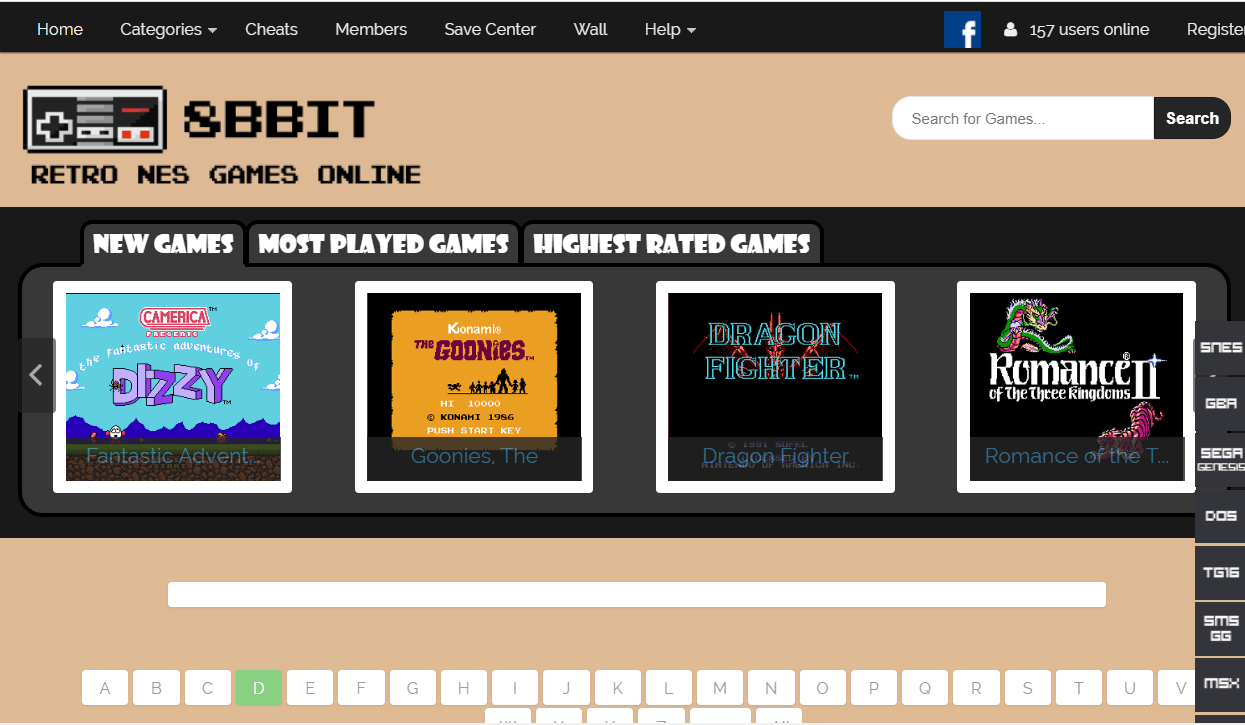
88BBit is an emulator site exclusively for NES games. Here you can play the vast majority of games released for NES. Players can select to play its games with Javascript or Flash Emulator. 88BBit NET provides cheat codes for some of its games.
This website has a novel multiplayer feature for its NES games, which isn’t something many alternative sites include. Registered users on this site can also leave comments under games and gain access to more exclusive parts of the website.
The MyEmulator.Online website includes NES, SNES, Nintendo DS, N64, Game Boy Advance, Neo Geo, and Genesis games on it. It has a very decent catalog of NES games amounting to 139 titles in total.
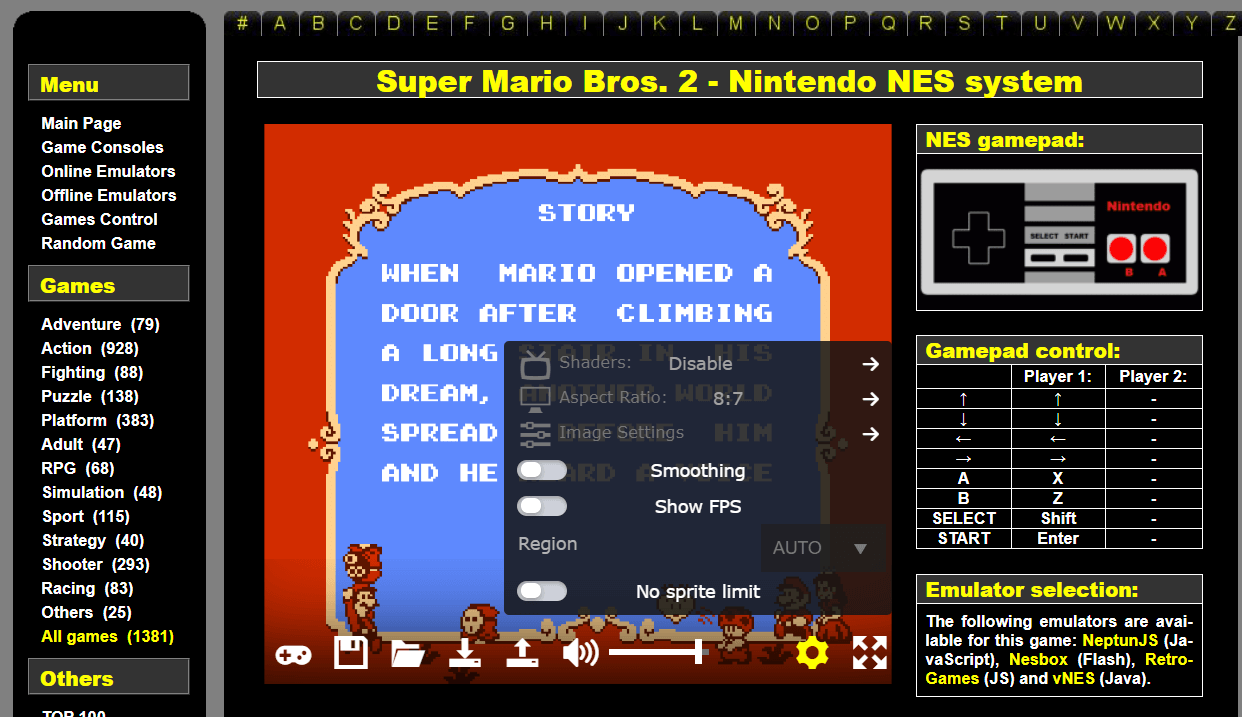
The good thing about MyEmulator.Online is the additional configuration options its emulator includes. Players can adjust shader, aspect ratio, sound, and image settings for games. In addition, this site’s emulator includes a Save Manager you can save multiple games too.
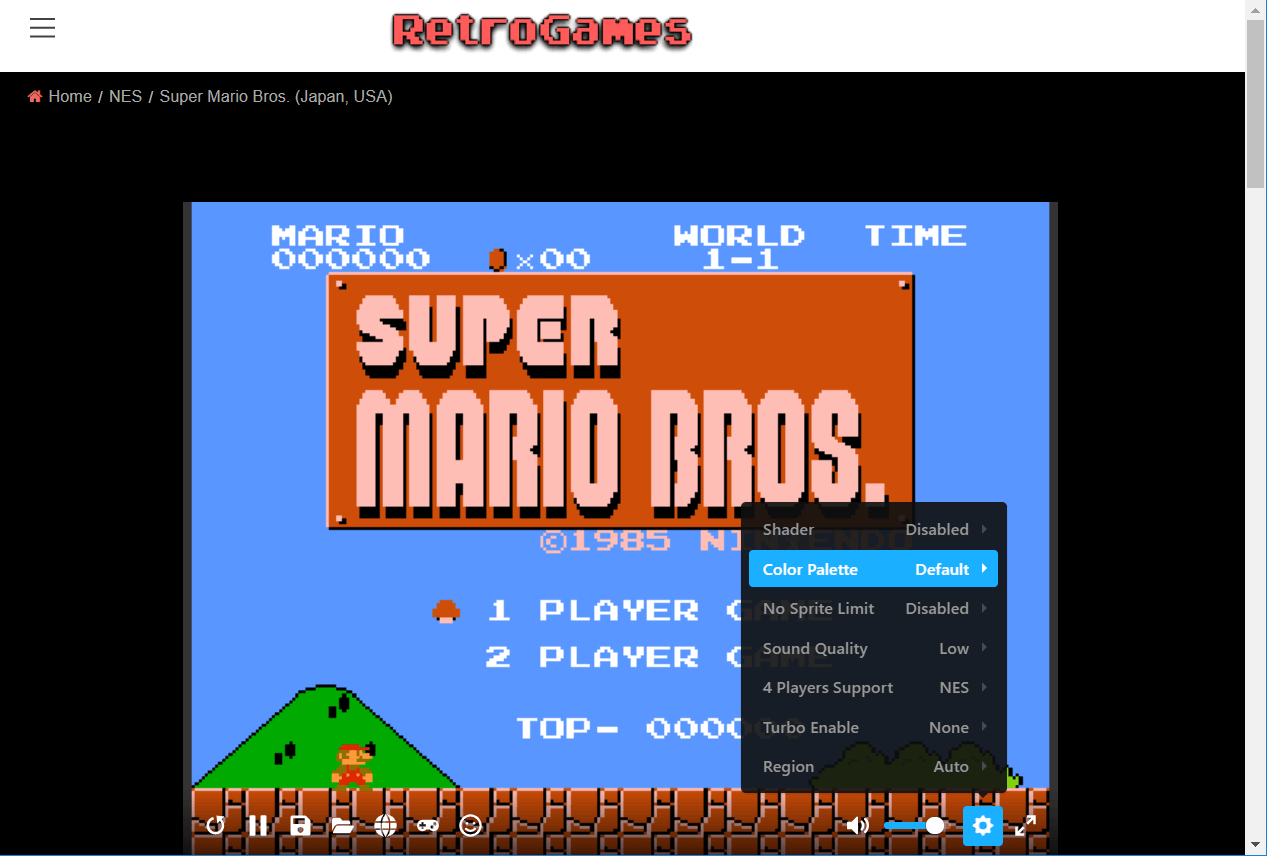
RetroGames has a massive collection of online NES games. This website’s A-Z index of NES games amounts to 57 pages, which is very big considering there are more than 30 titles on each page.
This site includes different national release versions for its game titles, which inflates the size of its collection.
Aside from its massive A-Z index of NES titles, RetroGames is also based on a good emulator to boot. RetroGames’ emulator includes Shader, Color Palette, Sound Quality, Turbo Enable, 4 Players Support, and Region settings.
Furthermore, the emulator provides a heat option players can click to open cheat lists for games.
Here’s another NES game emulator that many of you will like to try, just to bring back the sentiment of nostalgia and enjoy some of your favorite childhood games.
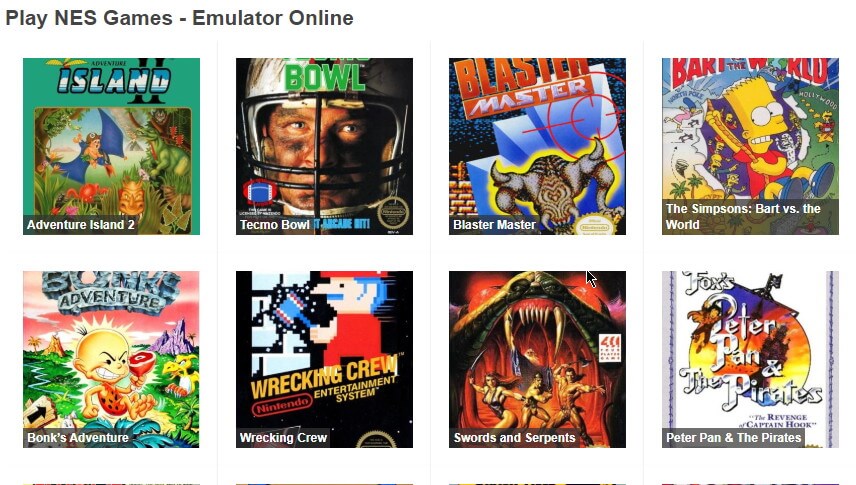
PlayEmulator is one of the best websites for online retro games generally. It includes emulators for 26 alternative consoles/platforms. Its NES game index amounts to 15 pages, most of which include 39 titles each.
So, this website is packed to the rafters with online NES games and those for other consoles.
Legendary videogames ONLINE is a website museum of retro games. This website includes online game emulators for various retro consoles.
It includes a pretty long list of NES titles for you to play in your browser with an emulator that’s seemingly exactly the same as the one at MyEmulator.Online.
This site also provides more extensive additional details for its retro games from Wikipedia. In addition, Legendary videogames include a collection of offline emulators for players to download.
That being said, if you were on the lookout for NES emulators for online multiplayer, you have everything you need right here.
There are so many entertaining games to play through an NES online emulator, so it’s only natural you want to explore all options.
NES online emulators that are unblocked aren’t that easy but also not that hard to find. This article, however, will filter the best options for you.
These are some of the great websites to play NESgames online on. There, you can play a plethora of 8-bit NES games from a golden era of console gaming.
Firefox 77 brought a whole bunch of functional features and fixes. Chances are you want to find out more about it as well.
Notably, this version pushes WebRender to more users of Firefox for Windows 10. Mozilla is developing the feature to improve browser stability and performance.
What is Firefox’s current version?
We’re glad you asked that and, as always, we have the exact answer for you. Below you will find the current version of Mozilla’s Firefox browser:
Release Edition
Platform
Version
Release Date
Firefox Standard Release
Desktop
103.0.2
2022-08-09
Firefox Extended Support Release
Desktop
102.1.0
2022-07-26
Firefox iOS
Mobile
103.1
2022-08-09
Firefox Android
Mobile
103.0
2022-07-26
How do I download an older version of Firefox?
Before you think about that, know that the latest Firefox version includes security updates so downgrading to an older version leaves you more vulnerable to attacks and most likely doesn’t fix the problem.
Downgrading and using older versions can make the browser insecure and more vulnerable to attacks and scams.
That being said, if you are looking for a Firefox 77 download link, all the information you need is right below.
Quick Tip:
The Opera One browser meets user expectations by maintaining peak accuracy while still supporting earlier versions for Windows XP PCs, for example. This makes it flexible and easy to install and navigate.
It has a different architecture than Firefox, but it is versatile and resourceful. There is no doubt that Opera One is a feature-rich browser. It even comes with a built-in AI.
Opera One
Depending on your PC’s specs, you’ll need a stable and performant browser for personal or business use.
With WebRender, Firefox should offer superior frame rates. In turn, the feature lets applications run smoothly on the browser.
The tech is a work in progress, however, and to date, it’s still not available to all Firefox users.
According to the release notes for Firefox 77, the feature is on by default on Windows 10 laptops with certain models of Nvidia Graphics hardware.
WebRender continues its roll out to more Firefox for Windows users, now available by default on Windows 10 laptops running on Nvidia GPUs with medium (<= 3440×1440) and large screens (> 3440×1440).
Other interesting features
Starting today, Firefox users in the UK will be receiving Pocket’s recommendations for stories and articles. This service is already available in regions and countries like the U.S, Canada, and Germany.
Also, Firefox now offers you a better way to access and manage web certificates. Simply go to the newly created about:certificate page to do that.
Fixes
This stable version of Firefox sports a couple of accessibility updates. While it’s a shame that some visually impaired users couldn’t access the Firefox Options application list via screen readers, the bug is no more.
The update also fixes a problem where certain live regions didn’t register text changes for JAWS screen reader users.
Additionally, for accessibility tools users, date and time entries won’t be missing labels any more.
What are the different versions of Firefox?
You should know that there are five different versions of Mozilla Firefox, as you are about to see below.
First, we will start with the standard version of Firefox, the one that most people use, and you can also see referred to as Firefox Quantum.
The second version is Firefox Nightly, which is for active users who volunteer to test and report bugs. This version is for accessing all the cutting-edge features in development, long before they hit mainstream.
There is also Firefox Beta, the version that allows you to test all of the new about-to-be-released features for the browser.
The fourth one is Firefox Developer Edition, which is pretty much aimed at developers, as you probably noticed from the name.
And, finally, there is Firefox ESR (Extended Support Release), a version that is for organizations that control their client’s desktops, such as businesses, schools, governments, and so on.
You should know that this version doesn’t have the latest features but still gets important security patches.
If you are in need of a Mozilla Firefox 77 offline installer, in order to restore the Firefox browser’s old version, you now know where to get one.
On the official support page for Mozilla’s browser, the one we provided above, you will also find the Firefox 77 32-bit version, as well as Firefox 77 for Mac.
What are your thoughts about Firefox 77? Feel free to let us know in the comments section below.
It is worth mentioning that both The Elder Scrolls Online and Outriders are currently in the Xbox Game Pass library which means that those with an active Xbox Game Pass subscription are able to play these two for free already right now and well after this weekend is over.
Basically, if you have an Xbox Game Pass subscription, it’s recommended that you take advantage of Just Die Already’s Free Play Day promotion this weekend instead of Outriders and Elder Scrolls Online.
Here’s the official description for each title:
Outriders
OUTRIDERS is a 1-3 player co-op RPG shooter set in an original, dark and desperate sci-fi universe. As mankind bleeds out in the trenches of Enoch, you’ll create your own Outrider and embark on a journey across the hostile planet.
With rich storytelling spanning a diverse world, you’ll leave behind the slums and shanty towns of the First City and traverse forests, mountains and desert in the pursuit of a mysterious signal. Combining intense gunplay with violent powers and an arsenal of increasingly twisted weaponry and gear-sets, OUTRIDERS offers countless hours of gameplay from one of the finest shooter developers in the industry – People Can Fly.
The Elder Scrolls Online
Includes The Elder Scrolls Online base game and the Morrowind Chapter. Join over 18 million players in the award-winning online multiplayer RPG and experience an ever-expanding story in a persistent Elder Scrolls world.
ESO COMES TO Xbox Series X|S – Experience the award-winning RPG like never before with game-changing features/enhancements such as 60-fps performance mode, advanced lighting and shadows, improved reflections, shorter loading times and more!
BEGIN YOUR ADVENTURE – Discover Tamriel’s Second Era and enjoy all the epic quests, memorable characters, and dangerous enemies you expect in an Elder Scrolls game.
PLAY YOUR WAY – Battle, craft, steal, siege, or explore. Combine different types of weapons, armor, and abilities to create your own style of play.
TELL YOUR OWN STORY – Experience any story in any part of the world, in whichever order you choose – alone or with friends.
INCLUDES THE MORROWIND CHAPTER – Journey to the iconic island of Vvardenfell and stop a meteor from crashing into Vivec City
Just Die Already
Just Die Already is an old people mayhem sandbox game created by the designers of Goat Simulator. You are an old retired person in a near future where people aren’t having any children. There isn’t anyone to pay for pensions due to those ungrateful millennials who prefer playing video games instead of doing actual work. With no one to cover your living costs, you – just like all other old people in this world – have no other choice but to survive on your own.
How will you survive in a world that wants you to Just Die Already? To make things worse, you’ve just been kicked out of your retirement home, and your only option now is to perform dangerous challenges and explore the world for retirement tickets to qualify for free retirement care. So with society wishing you dead, isn’t it finally time to live a little?
Google Maps is an Android app you can view online that lists the routes and provides accurate directions. It’s gained massive popularity recently, with many wanting to download Google Maps on Windows 10.
The process is not as simple as on Android or iOS devices since the app is unavailable for Windows OS. But one of the best parts of the OS is the ability to install a range of otherwise incompatible apps through emulators.
So, let’s find out how you can download the Google Maps 64-bit full version for free on Windows 10.
Can you download Google Maps on Windows 10?
Yes, you can download Google Maps on Windows 10 desktop. The app’s standalone version is not available on the Windows OS.
Here, you have to either download it through other means or use a reliable and effective substitute for it. Microsoft itself offers Windows Maps, a similar option for users who want to quickly install and get a maps app up and running.
How can I download Google Maps on Windows 10?
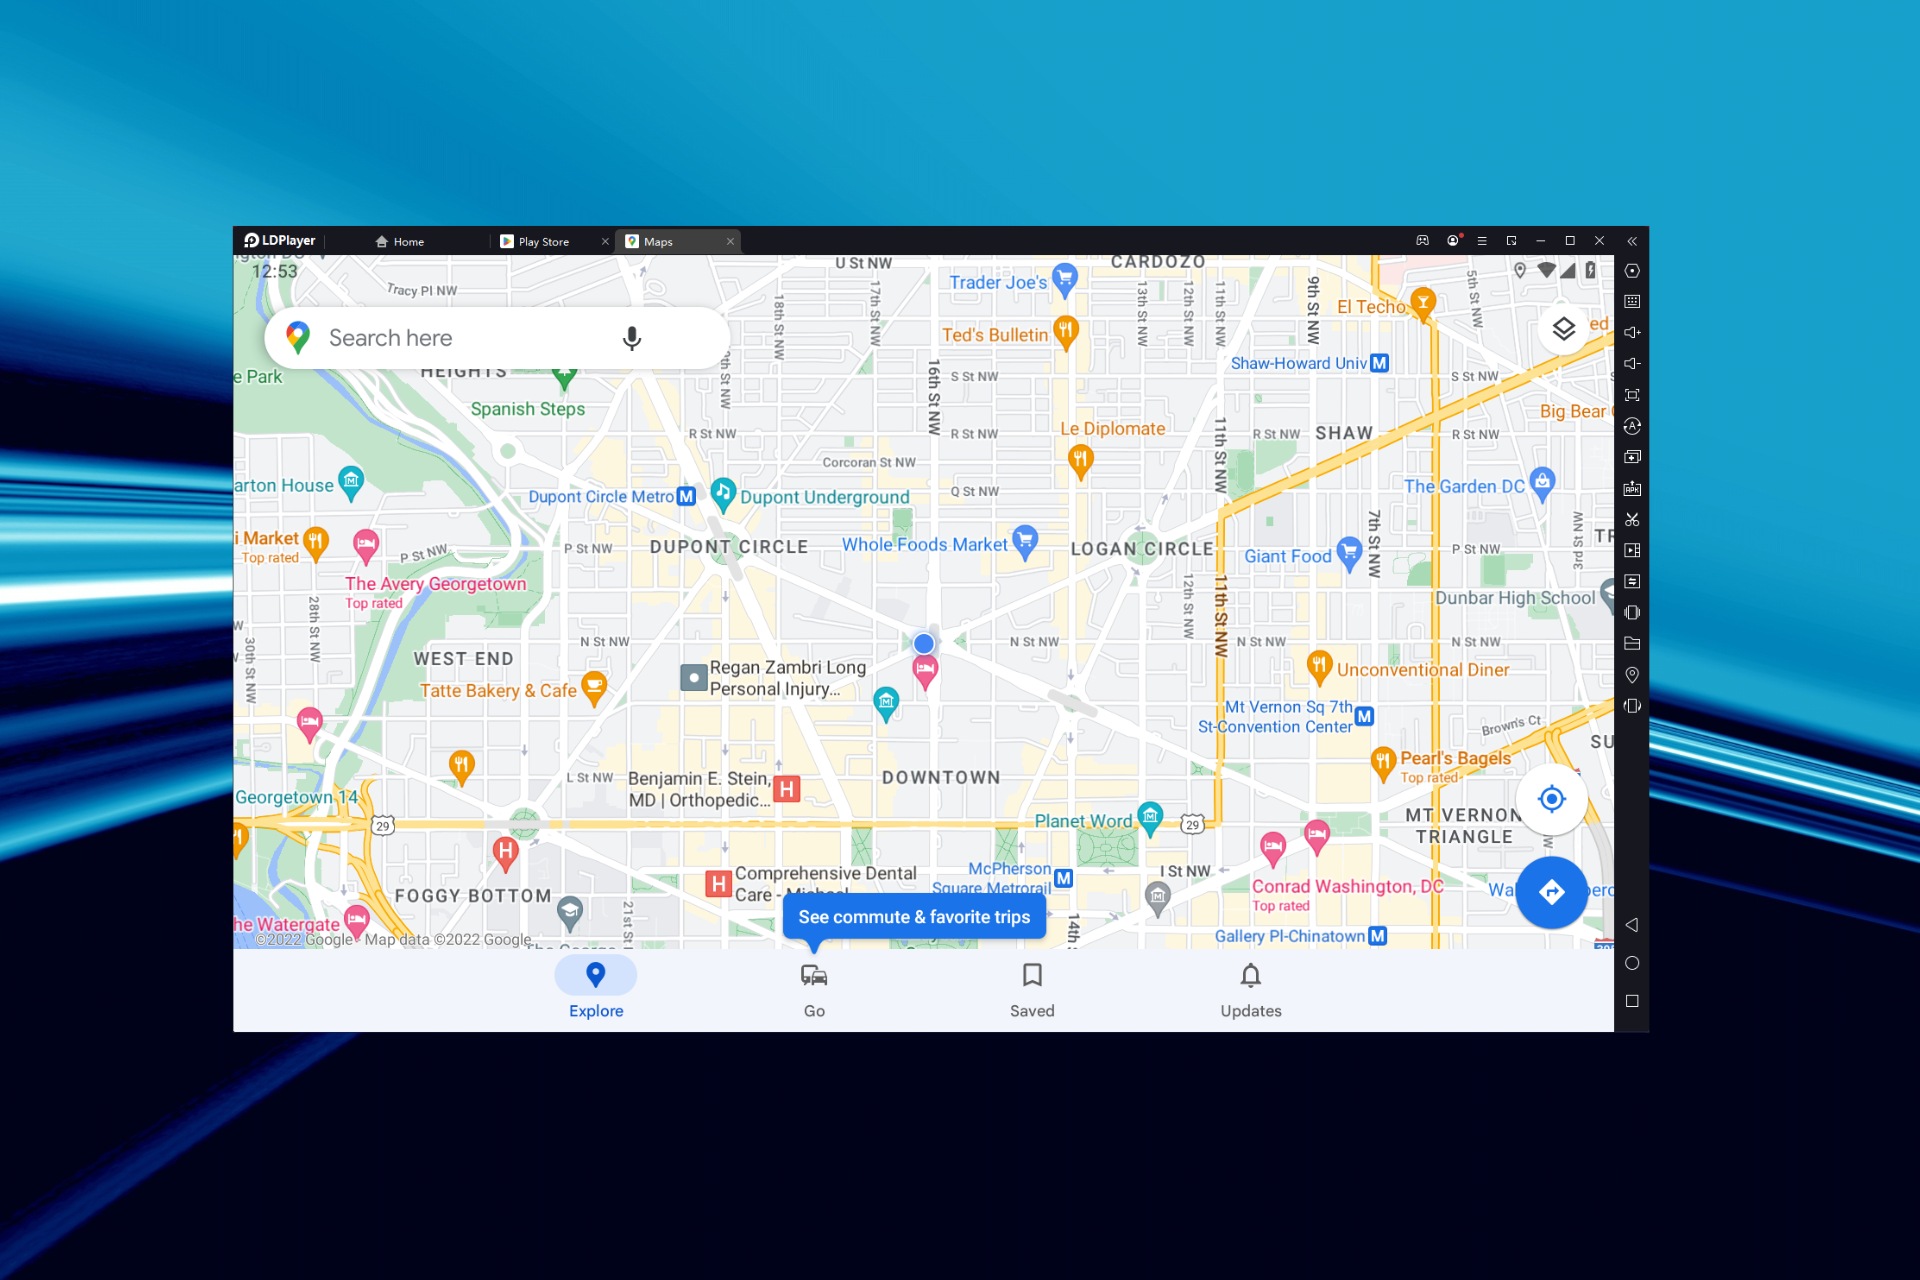
1. Download Google Maps within LDPlayer
Open the LDPlayer website in a browser, and download the latest version of it.
Open the LDPlayer setup wizard to install the emulator and follow the on-screen instructions to complete the process.
Once done, launch the emulator, and click on System Apps.
Click on Play Store in LDPlayer.
Sign in with your Google Account. If you don’t have one, set up an account and then sign into it.
Search for Google Maps, and click on the Install button next to the relevant search result.
Once installed, you can open and access the app from the LDPlayer emulator’s home screen.
Now, you can utilize Google Maps within the emulator’s window.
That’s it! This is how you can download Google Maps for Windows 11 and the previous iterations of the OS. Also, if you are wondering how to update Google Maps on PC, check for a newer version on the emulator itself.
2. Add Maps App Discovery to Windows 10
Maps App Discovery is a Windows 10 app that utilizes the Google Maps API. It is also based on the Google Material Design language. So, Maps App Discovery is the closest thing to a native Google Mapsapp for Windows.
You can download Maps App Discovery from its MS Store page. Click the Get button there to add it to Windows 10. Then you can open the app from the Start menu.
3. What’s the Windows alternative?
The alternative to Google Maps is Windows Maps. That’s Microsoft’s alternative to Google Maps which has its own UWP app. Windows Maps has many features comparable to G Maps, such as its Streetside and 3D Cities views.
Click the Get in Store app button on the Windows Maps app page to download it. Once done, you can launch the app and look for the desired locations in it.
How do I set Google Maps as my default in Windows 10?
Unfortunately, there’s no way you can set Google Maps as the default app in Windows 10 or other iterations. Still, you can always add Google Maps or any other website to the Taskbar in Windows for easy access.
Or, you could download Google Earth Pro and set it as the default application for launching map files on the computer. These are the only two options available to users right now. We will update the article accordingly if and when more methods are available.
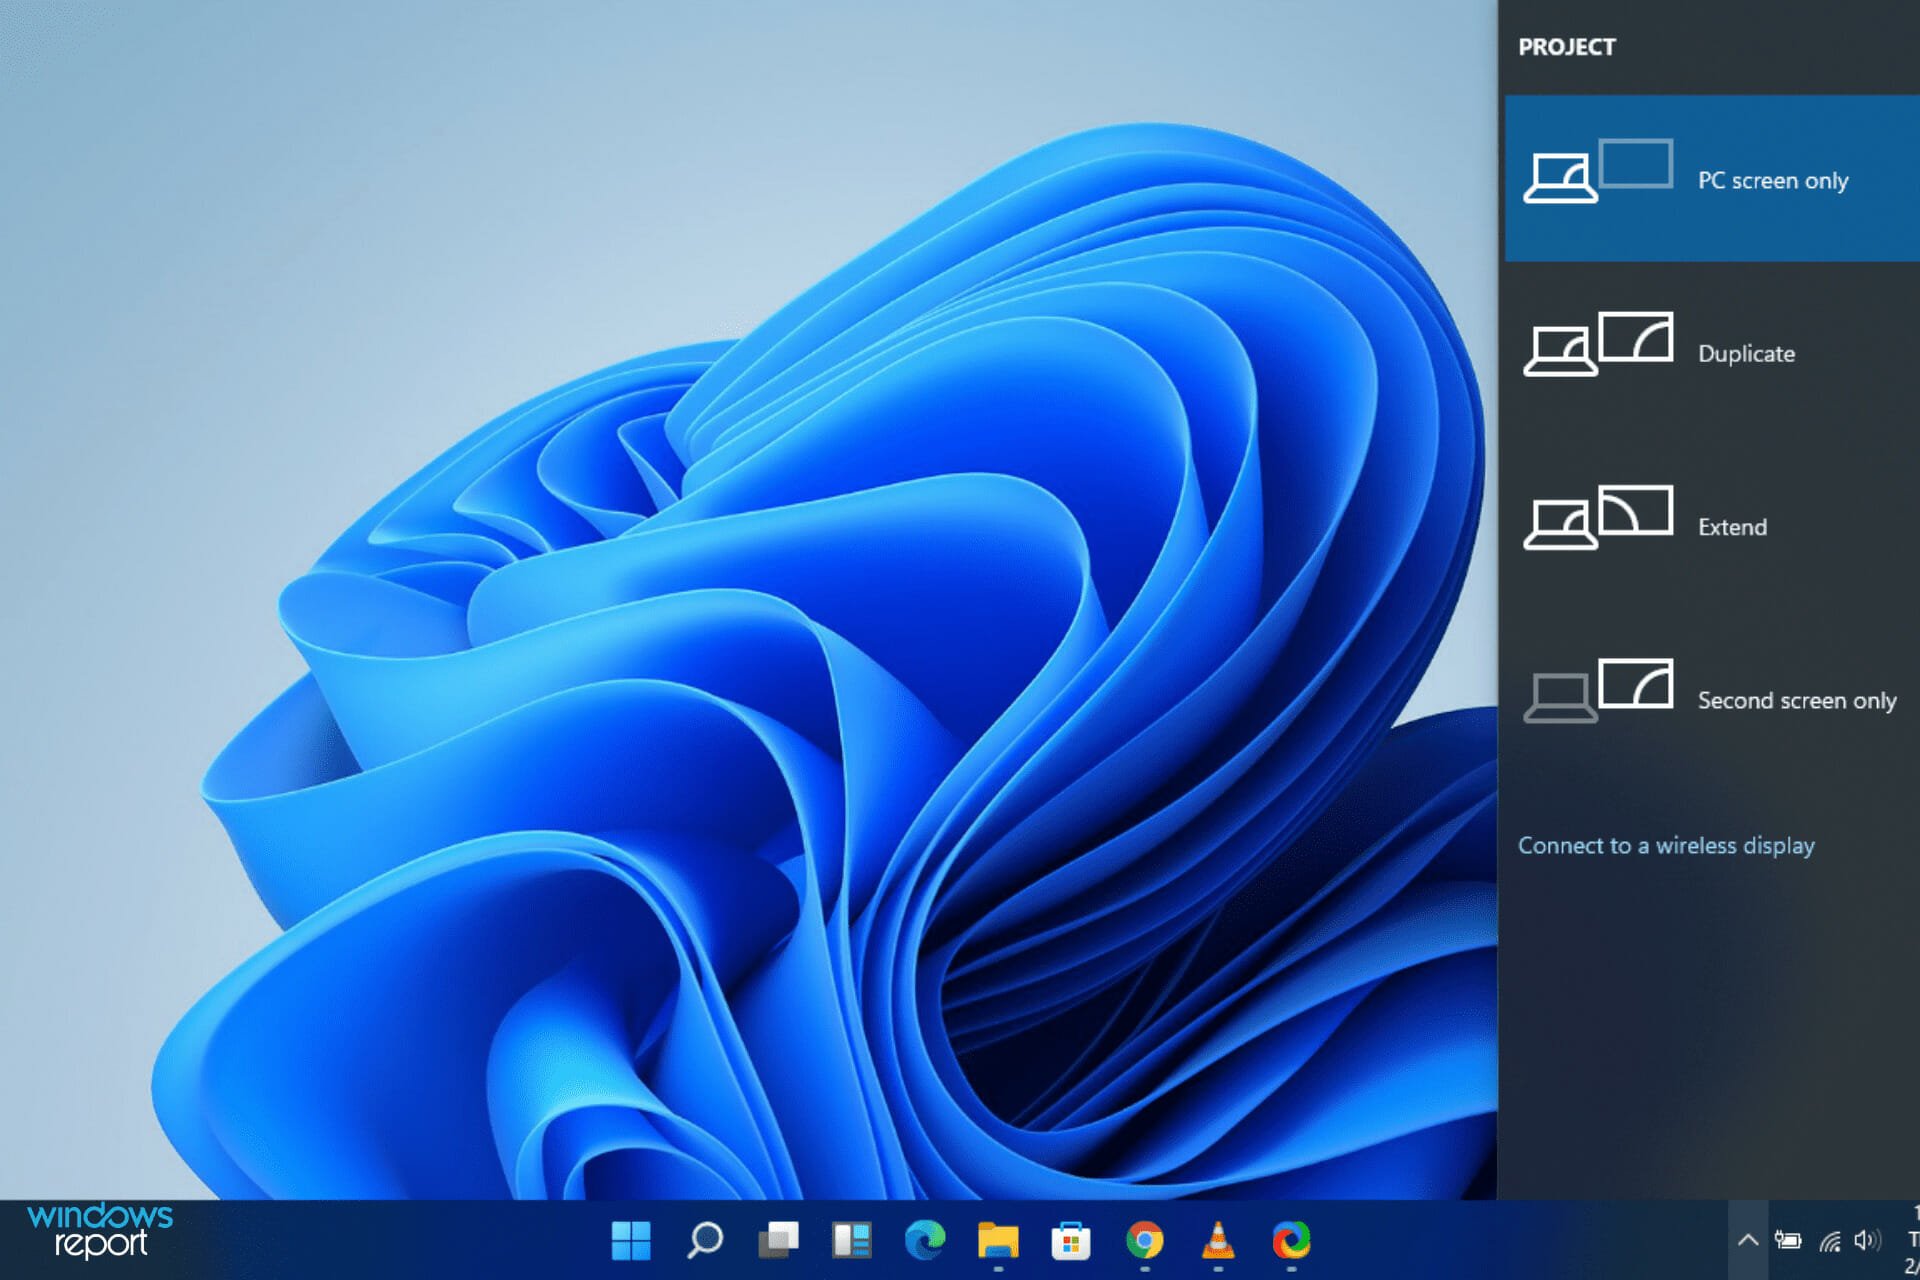
Users understand how multiple displays make your life easier. One benefit of using multiple displays is that it improves the viewing experience and increases your work efficiency. This is why it can be frustrating when one faces issues with Windows 11‘s second monitor flickering or being blurry.
The good news is that there are ways that you can deal with this frustration. We will be providing you with different fixes that you can apply to your Windows 11 PC.
Your first step might be to double-check the second display connection. If this doesn’t work, you can restart your computer and retry connecting the second monitor. If the problem persists, read on to find different fixes that you can try.
What could go wrong when using two monitors?
Aside from the flickering issue that has been noted with the second monitor in Windows 11, other errors relating to the second monitor have been observed by our users.
Fortunately, we have addressed all of them today, with a list of solutions provided in the section below. But first, let’s take a look at the problems that are associated with it:
Windows 11 second monitor blurry –Like its counterpart, blurrness can occur due to driver issues to which we provided a solution below.
Windows 11 second monitor not detected –When an external device, including monitors, aren’t being detected, it can be solved by either performing a detecting scan or by changing the port that you had plugged the monitor in.
Windows 11 second monitor not working –This broad mention reported by our users will be fixed by updating the drivers and/or operating system.
Windows 11 second monitor taskbar icons missing –When you set your native monitor as primary, the second one will not be occupied by taskbar icons, nor desktop ones.
Windows 11 second monitor lag– Lag can occur due to CPU overload, viruses or incompatibility. To adress this, you need to also google your computer’s performance and see if it’s sustainable for a second monitor.
Windows 11 second monitor issues – This is another general complaint that we have heard from the crowd and that will certainly not pass by without any attention from us.
Before we dive into the list of solutions, let’s have a look at why you should utilize multiple monitors, who they are intended for, and what advantages they provide. Follow along!
Why use multiple monitors?
Multiple monitors are used for one simple reason: additional screen space. More space allows you to run multiple programs at once without switching between windows or making endless mouse clicks.
If you need to engage with an application, you can effortlessly move your mouse between the displays, or simply leave them open for reference–tremendous assistance when writing an essay or an article. You might even watch a movie or a TV show while working on the main screen from time to time.
Assume you’re the company’s social media manager. You can monitor what’s going on on Twitter with Tweetdeck open on one display.
Meanwhile, on your primary screen, you can be working on a report with a web browser open to your company’s analytics dashboard on one side and Microsoft Word open on the other.
If you’re a writer, you may use half of one monitor for a text editor, the other half for notes, and the secondary monitor for research.
Having all of these programs open at the same time demands that your PC has sufficient processing capacity, but most mid-range PCs with a Core i5 CPU or higher should suffice.
However, if you want to run a video editing tool like Photoshop alongside some other apps, you’ll need a lot of RAM to avoid the system stalling.
Multiple displays aren’t the only option. For example, you could buy a massive 4K panel and then utilize Windows Snap to divide your screen into quarters, thus generating four smaller 1080p places.
However, as compared to using numerous monitors with greater window widths, this can be a little uncomfortable.
What can I do if Windows 11’s second monitor is flickering?
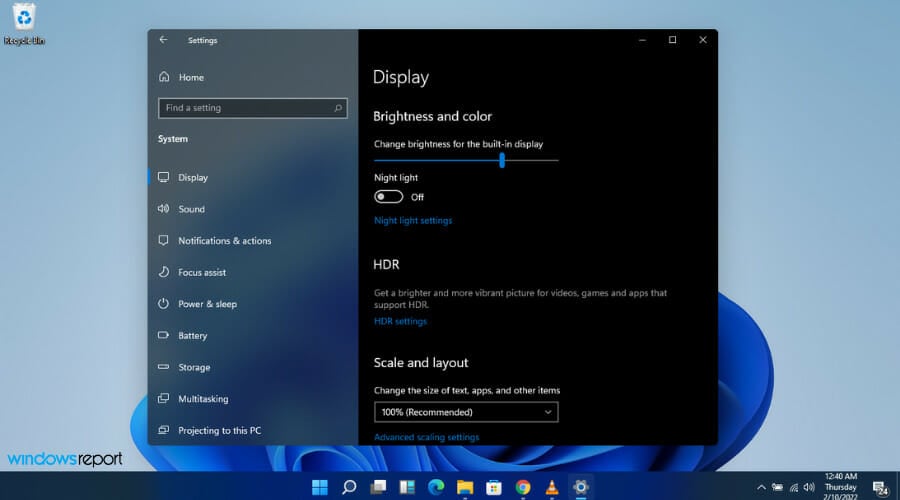
1. Find the missing display
Click on Windows and type settings.
Select System.
Choose Display under System.
Scroll down to Multiple displays.
Click Detect under the Detect Other Displays section.
It will recognize the second monitor in your setup.
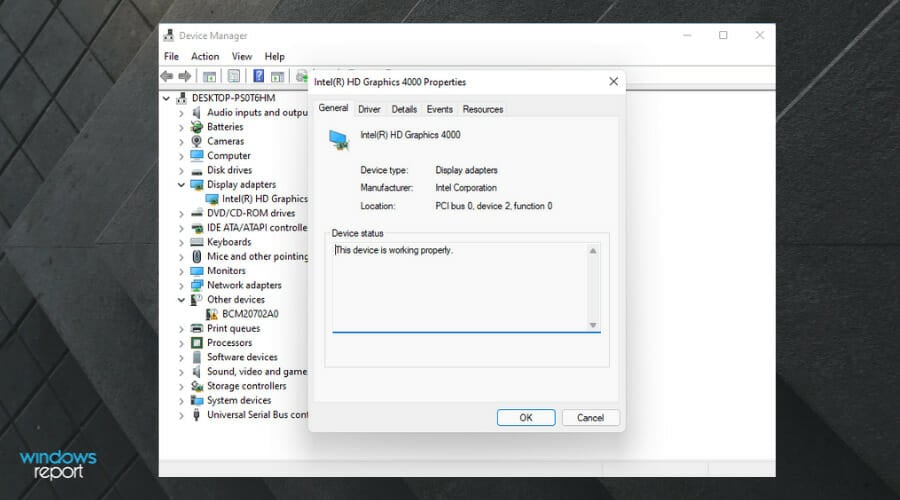
2. Update the display driver
If your monitor is flickering, then updating your display drivers is very likely to solve the problem. Most display-related issues are caused by faulty or outdated drivers.
1. Press Windows + R together to open the Run dialog.
2. Type devmgmt.msc and hit Enter.
3. Navigate to the Display adapters section and click on it.
4. Right-click on the display driver and click on Update driver.
5. Chose the Search automatically for drivers option.
6. Allow Windows to install the appropriate driver for your computer.
7. Check if the issue persists.
Updating your drivers will solve 99.99% of your computer issues. We cannot stress enough how important it is to bring your drivers up-to-date. To make the task easier, for now, you should try using software that performs automatic updates to your drivers such as Outbyte Driver Updater.
3. Rollback the display driver
Click Windows and type Device Manager.
Click on the Display adapters section to expand it.
Double-click on the display driver to modify it.
Head to the Drivers tab.
Click on the Rollback driver option.
Your computer will restart automatically.
Is there an HDMI splitter for dual monitors?
An HDMI splitter splits a device’s HDMI video output, such as a Roku for instance, into two distinct audio and video streams. After that, you can send each video feed to a different display.
Unfortunately, the majority of splitters are terrible. Due to a built-in anti-piracy feature called High-Bandwidth Digital Content Protection, many don’t work (HDCP).
HDCP is an anti-piracy feature that can be found in streaming devices, televisions, and cables. It safeguards content by enforcing a verification step between the video player and the display.
This anti-piracy feature encrypts the signal when it creates a confirmed connection to prevent unauthorized recording of the content. This approach also makes it impossible for content owners to see their own work.
The video won’t play if it’s HDCP-protected yet one aspect of your setup isn’t HDCP-compliant (sometimes with an error message). As a result, many users with older equipment will be unable to view legally purchased content.
If the equipment isn’t HDCP-compliant, HDCP-compliant video will fall back to a lower resolution (typically 720p) if it isn’t HDCP-compliant. Devices other than a splitter rarely cause fallback mode, which is why splitters are such a good solution to this problem.
By accident, some low-cost splitters completely avoid HDCP. They shouldn’t be able to play protected video at all because cheap splitter makers didn’t bother paying for an HDCP license.
Because they activate Fallback mode, however, the content is lowered to a lesser resolution and continues to play normally. At least most of the time.
Alternatively, if the split screen is not working in Windows 11 and you need it urgently, take a look at the article linked in order to learn how to solve the issue.
Feel free to leave us a message in the comments on how these solutions have worked for you. You can also share opinions on a different method that you think might work.
Xbox is one of the most popular gaming consoles, and it’s been around for a while. However, playing Xbox games in the comfort of your home is very interesting but can’t be compared to having one or two other players to play.
Nonetheless, some players complain about encountering issues while trying to play with other users. This error is known as the “you do not have permission to play with other users.”
Furthermore, several reasons can be responsible for this error ranging from privacy issues, network connection issues, banned account issues, etc.
Nonetheless, we’ll discuss the cause and some easy ways to fix the multiplayer issues on your Xbox.
Why does my Xbox say I don’t have permission to play multiplayer?
Multiplayer is blocked in Settings: The other player’s privacy settings may be intercepted, resulting in the “you don’t have permission to play multiplayer” error. However, this error may erupt in your or the recipient’s settings. Therefore, your friend needs to toggle settings.
Network connection issues: Though the multiplayer problem seems complicated to get by, it can be a network connection issue that poor or unstable internet connections may cause. When your network is wrong, it can make some game features inaccessible.
Account set up as a Minor issue: Another reason you may encounter the “this Microsoft account does not have permission to play multiplayer” problem is the account settings. Some features like multiplayer won’t be available if your console is a minor account because of the age restrictions.
How do I fix you do not have permission to play with other users’ errors?
1. Toggle your game settings to allow multiplayer games
Select the child’s account profile and click on the Xbox Series X|S, Xbox One, and Windows 10 devices Online Safety option.
Tap on Allow for the “You can create and join clubs” and “You can join multiplayer games” options.
Doing this only affects your console and doesn’t affect your friend’s settings. Hence, ask your friends to follow the steps above to allow multiplayer features for their console.
2. Check your network connection
Using a wired router that requires a cable connection to your computer can affect your network and make it slow. Hence, we recommend that you switch to a wireless network connection. It will help you connect to the internet faster and more smoothly. Furthermore, performing a power cycle of your router can fix some issues.
3. Banned/suspended account
If your live performance is banned or suspended for something, it can prevent you from accessing some features like multiplayer. However, the Microsoft service agreement violation can result in your account being stopped by the Xbox Live Policy & Enforcement Team.
Nonetheless, users can check their account status to know if they are suspended and understand why.
The new Windows 11 operating system that Microsoft announced towards the end of the year has made big waves in the IT world and especially among Windows users.
Although you need to meet certain requirements to enjoy the new OS, it already brings many functional and aesthetic changes designed to make your work more efficient and your life easier.
If you download the Windows 11 Insider Preview Build 22000.51 update on your Windows 10 PC, you can already notice one of the features that stands out as soon as you start the new interface -Snap layouts.
While most users are usually happy with the change, well, some of them are not only indifferent to the new feature, but perhaps even it gets in their way.
As a result, there is already interest among users to disable Snap layouts because it is a feature they will probably never use, even if the American giant wanted to help them get organized more easily.
This is by no means a problem, because Microsoft is certainly making something available to every tech-savvy user through the new operating system.
How can I turn off the Snap layouts feature on Windows 11?
If you do not enjoy using the Snap layouts feature, you can easily remove it using the system’s built-in settings. All you need to do is navigate to the Multitasking menu and manually turn the feature off.
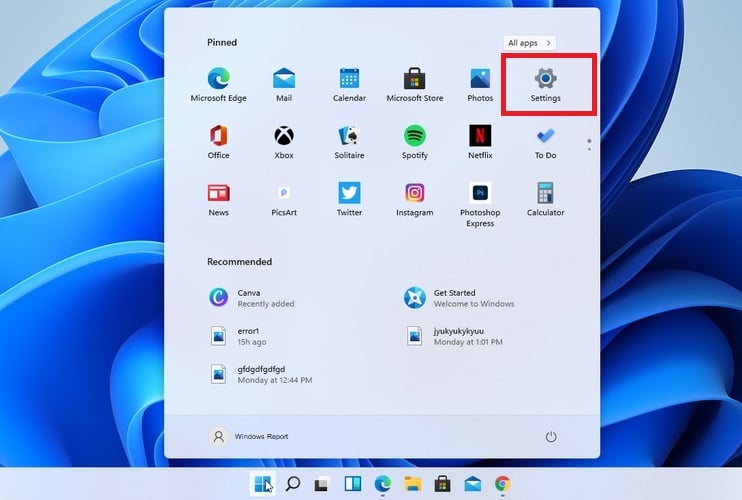
1. Click on the Start button to open the Settings app.
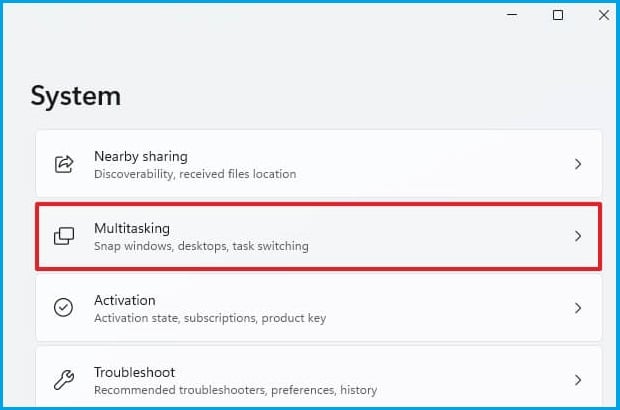
2. Select the System category.
3. Click on the Multitasking tab.
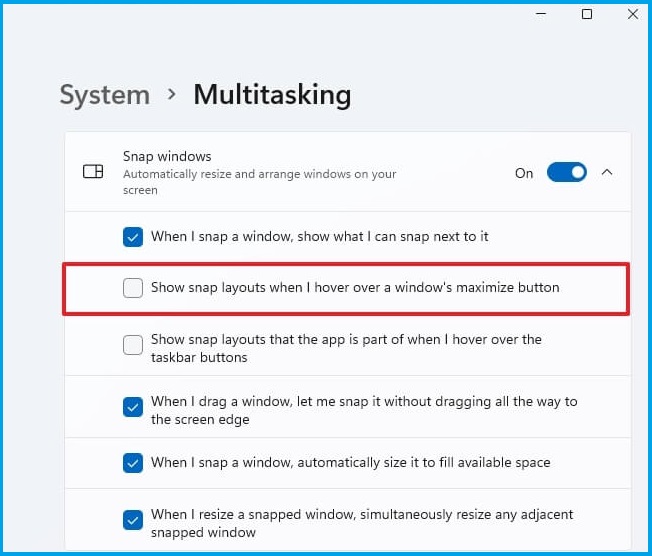
4. Uncheck the box next to the Show snap layouts when I hover over a window’s maximize button option.
5. Close the Settings app.
6. The Snap layouts feature is now disabled on your device.
By following the above steps, you will no longer see the Snap layouts feature on your new Windows 11 operating system.
But if you change your mind and want to enable the Snap layouts feature again, you can follow the full steps in our detailed guide to make sure you don’t do anything wrong.
If you have second thoughts and want to give this useful feature a chance, it’s also good to know that older monitors with a resolution lower than 1920 pixels don’t allow you to take full advantage of it.
But once you activate it and start creating layouts to your liking, you can save and access them later in Snap Groups in the taskbar.
With this move featuring the new operating system, Microsoft will offer users significant enhancements in terms of security, design, and performance.
If you want to make sure you get a holistic view of Windows 11 compared to Windows 10, take a closer look at our comprehensive guide and stay informed.
For more suggestions or other questions about the new operating system that Microsoft is rolling out soon, visit the comments section below.
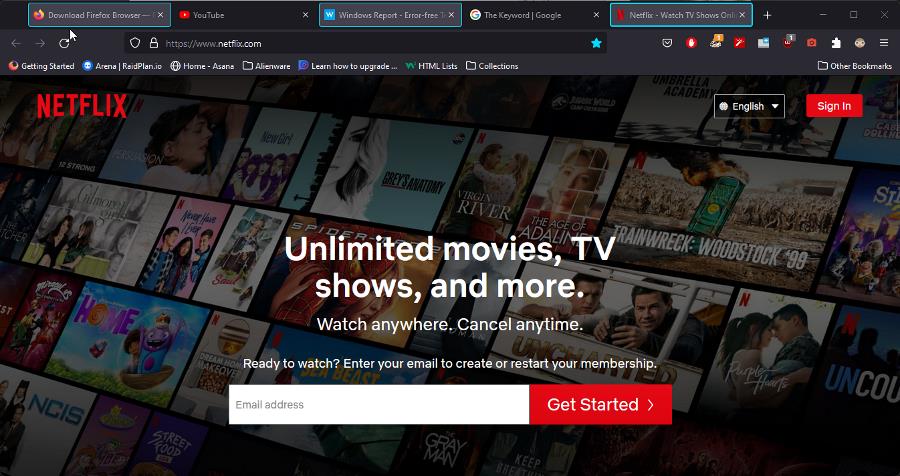
It’s not uncommon to have a whole mess of tabs open on Firefox whenever you’re researching something or stumbled upon a really interesting topic. And in midst of this information binge, you find that you don’t want to lose the information that you found.
So you wonder if there is a way to save all of these tabs at once so you can get back to them at a later date. On Firefox, there is certainly a way to do to this by bookmarking all these tabs.
This guide will show how you can save all of your tabs on Firefox at the same time. We’ll also show you how you can restore them all at once.
How do I bookmark all tabs at once?
1. Bookmarking all tabs and then restoring them
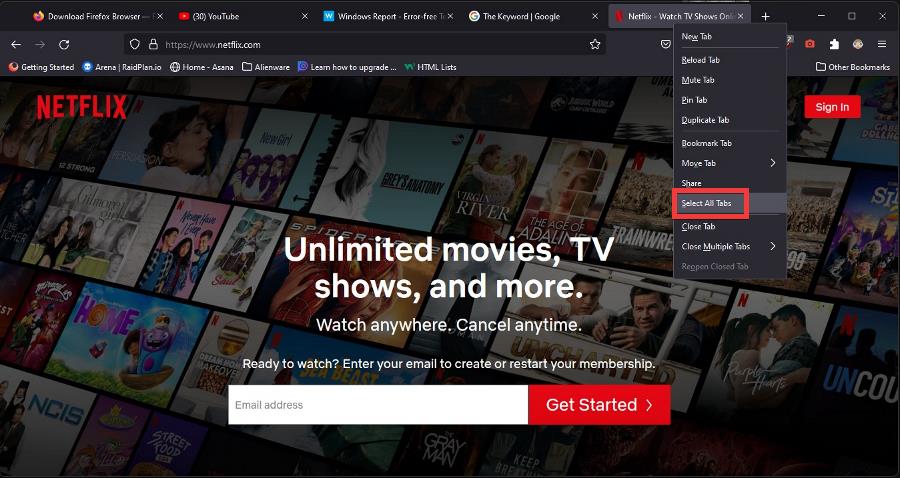
Right-click one of the tab and a context menu will appear.
Choose Select all tabs.
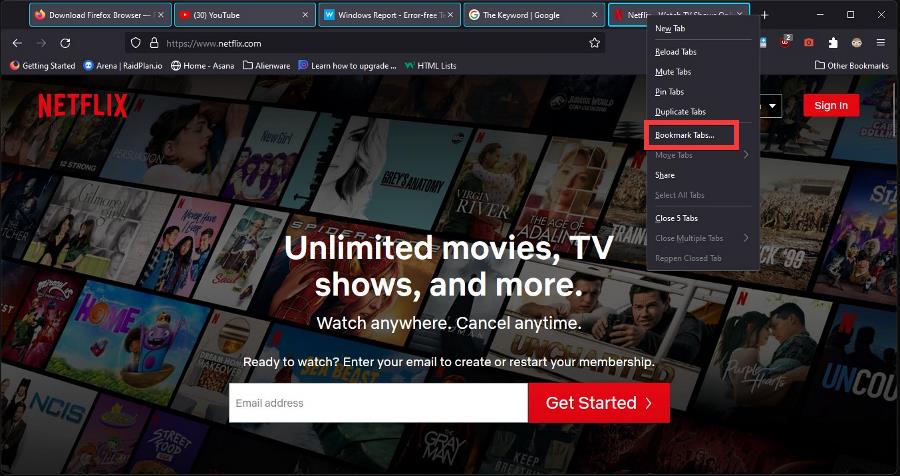
Once highlighted, right-click the tabs again and select Bookmark tabs.
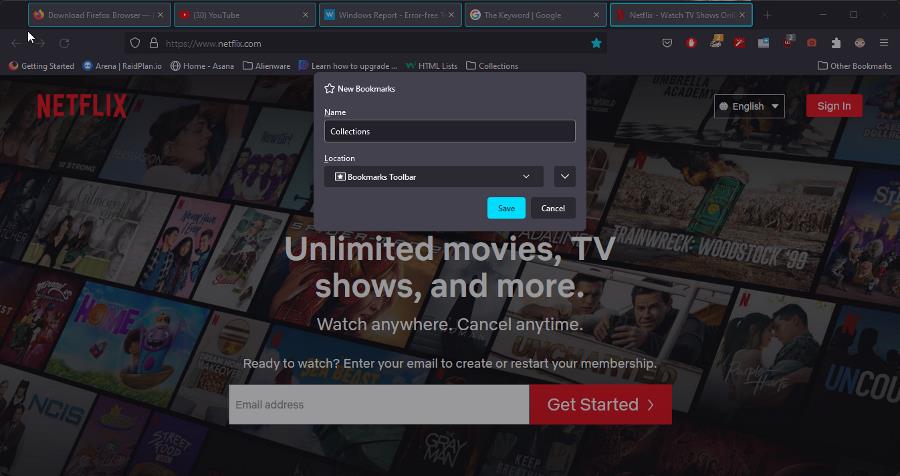
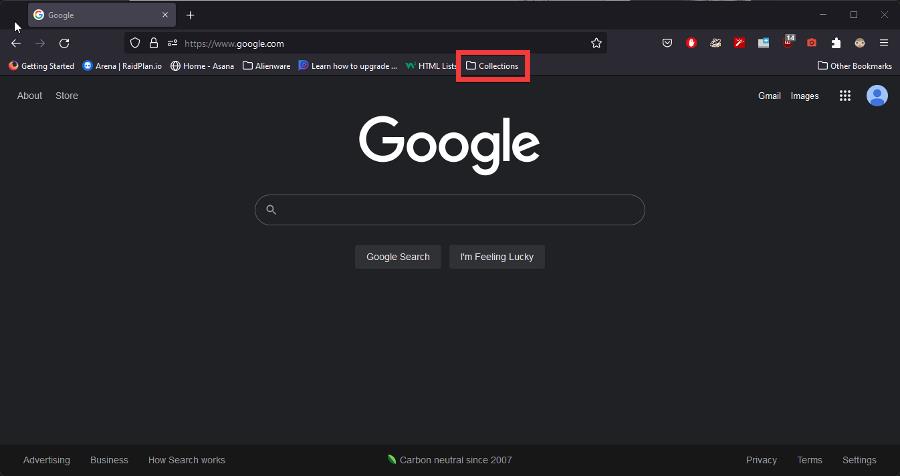
Name the folder and choose a location in the Location drop-down menu. This guide will stay on Bookmarks Toolbar.
Click Save to finish.
If you want to only bookmark specific tabs, hold the Ctrl key on your keyboard and then click on the tabs you don’t want. Then repeat the earlier steps to save the bookmarks.
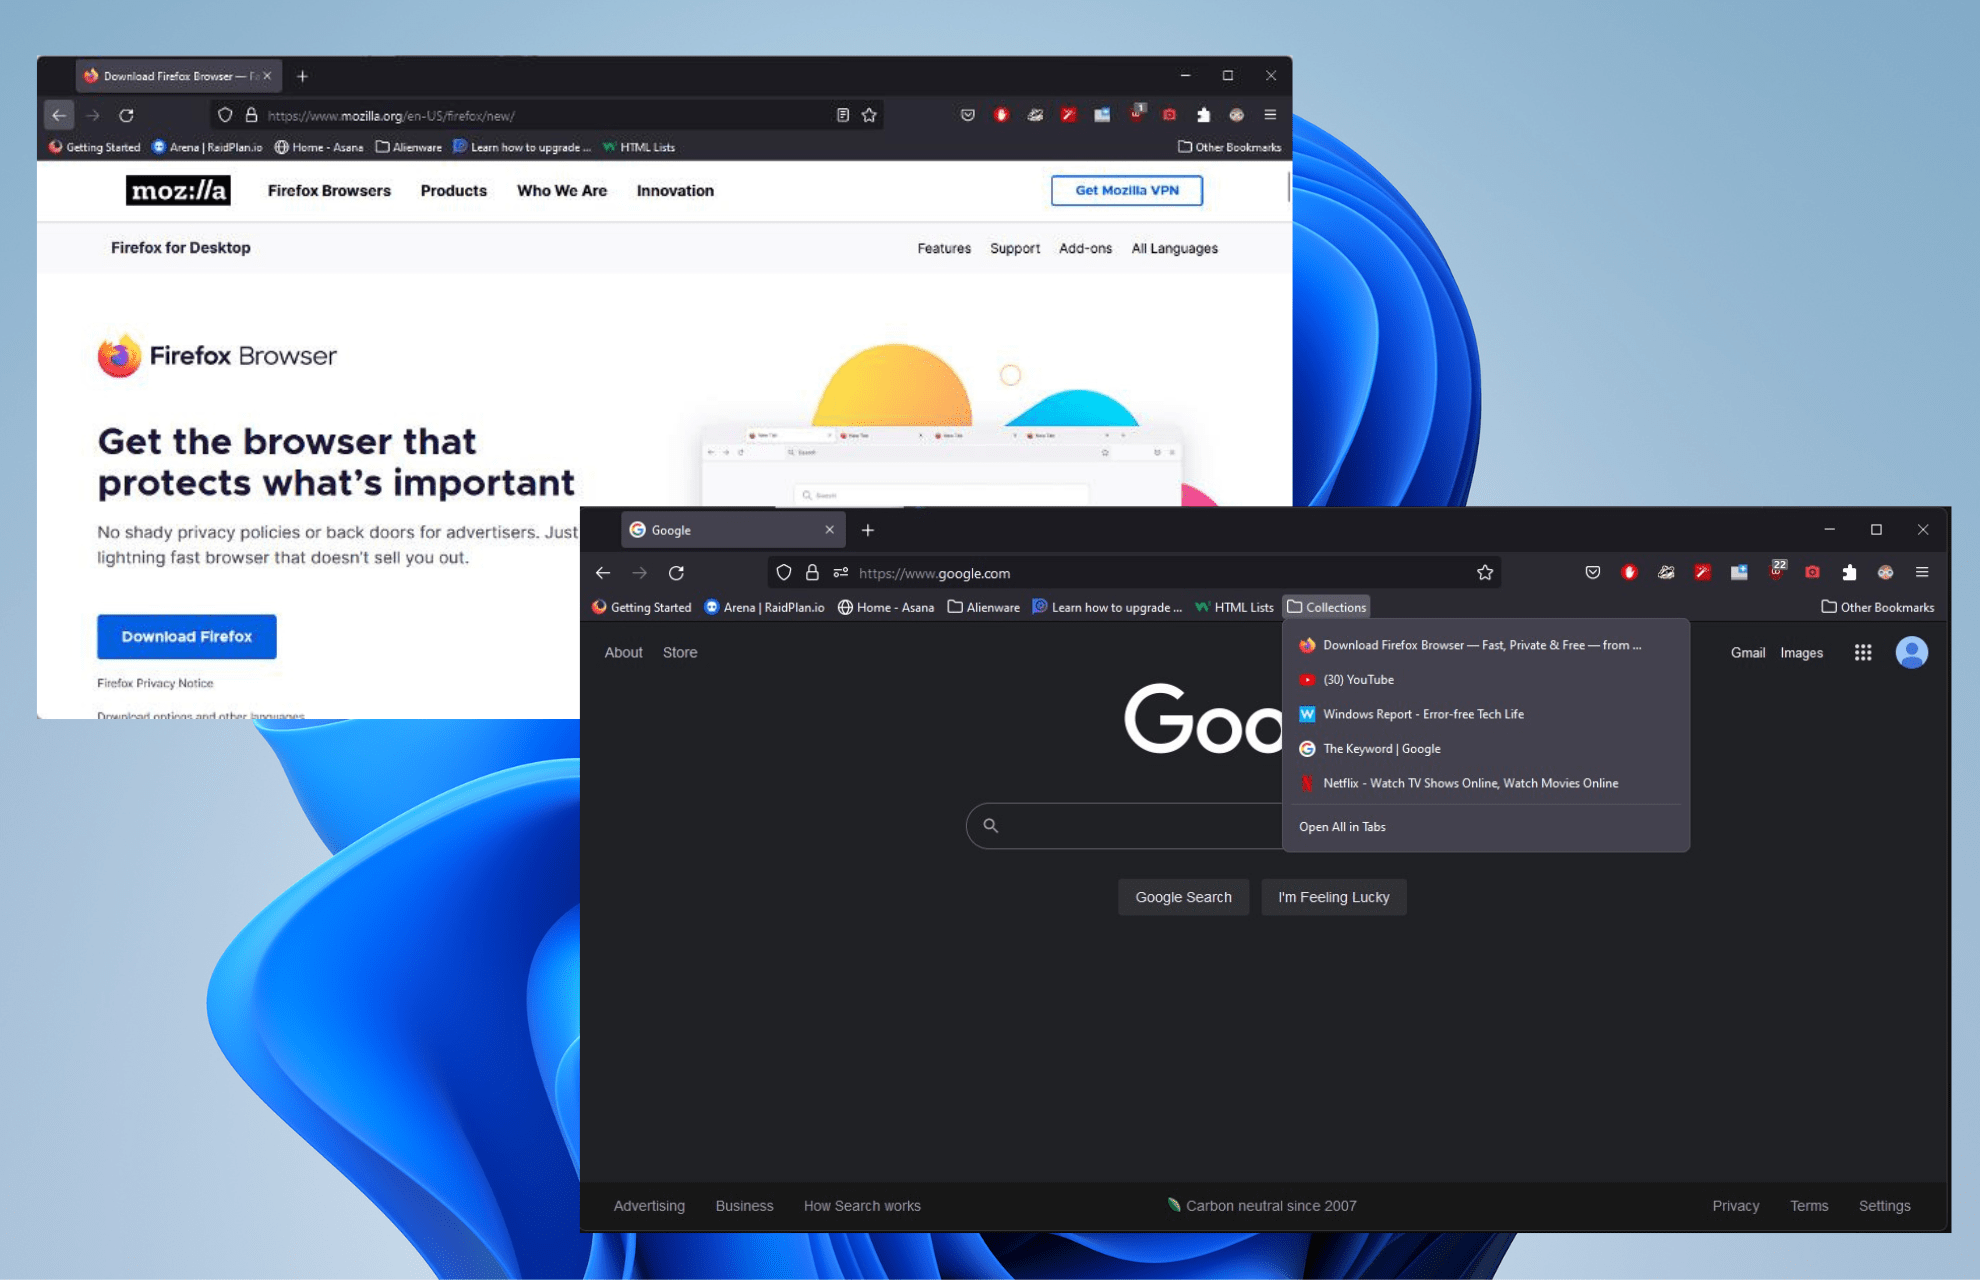
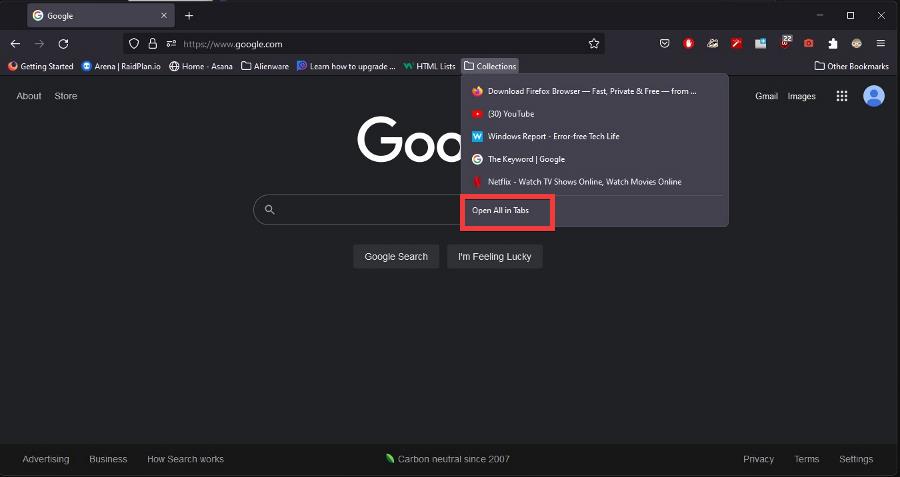
To restore the tabs, click the folder you created. On this guide, it’s on the Bookmarks bar.
Click Open All in Tabs to restore the session.
Feel free to leave a comment below if you have any questions on other apps or if you have some that you recommend. Also, feel free to leave comments about guides you’d like to see or information on other web browsers.
Online escape room games can be as much fun as real ones, despite the fact that one is missing the team spirit and adrenaline sharing.
You have a lot of virtual escape rooms, which offer as many challenging ways to feel like you’re breaking free – from a confined room, from a prison, from the office, from all sorts of rooms, from a castle, and so on.
The rooms usually consist of a locked door, different objects to manipulate as well as hidden clues or secret compartments. The player must solve several rooms until he reaches the end.
Most of the games are played just using the mouse. And, of course, your brain.
Can you play an escape room online free?
Of course, you can play escape room games online free but for that, we recommend a browser that is both reliable and distraction-free.
Opera GX was designed especially for gaming and aside from its cool integrations like Twitch, it blocks all unwanted ads and trackers.
But most of all, with Opera GX, you can prioritize the resources of your PC on your game so it will run very smoothly.
So here’s a list of some of the best online games that you can find online. All these titles are escape room games online without Flash because, as you know, it’s not supported anymore.
Opera GX
Play free online escape room games right from the browser with Opera GX.
You will be surprised but yes, you can actually play virtual escape room games on Zoom. It’s a new type of online escape room multiplayer game.
All you need to do is to visit The Escape Game website. There, you can choose a location from the U.S., and then you and up to 7 other friends can play virtually in one of the 7 available escape rooms.
On the screen, you will actually see each other’s cams but also the room, the indications, and everything you need to solve the puzzle.
There are several other websites that offer virtual escape rooms but you should know that none of them are free for obvious reasons.
We hope that this guide has helped you choose the perfect escape room games online unblocked for you, but if you have any interesting suggestions, don’t hesitate to leave us a comment.
There are a lot of developers out on the internet working on the next great web browser. You have more generalist browsers like Chrome and Edge that most people use for browsing the internet.
But some people want browsers with more specific uses; specialized tools. Opera GX, for example, is great for gamers with its many video game tools and features. Brave is great for those who value privacy.
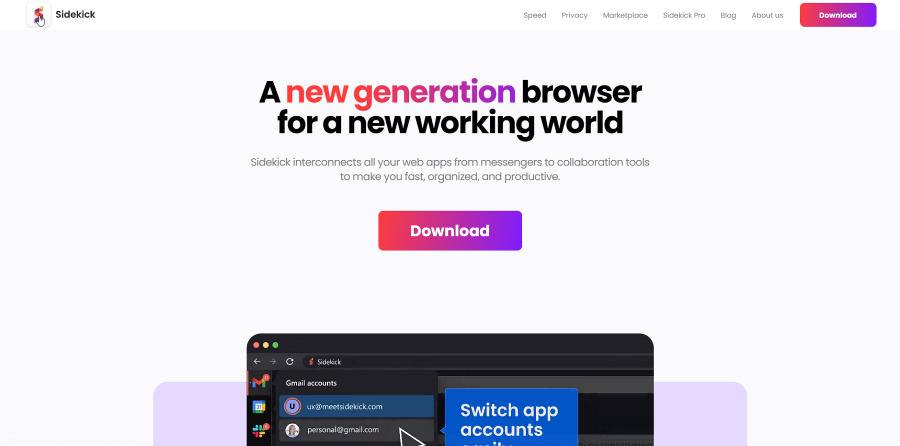
And now we have the likes of Sidekick, which has been specifically designed for enhancing productivity.
What is the Sidekick browser used for?
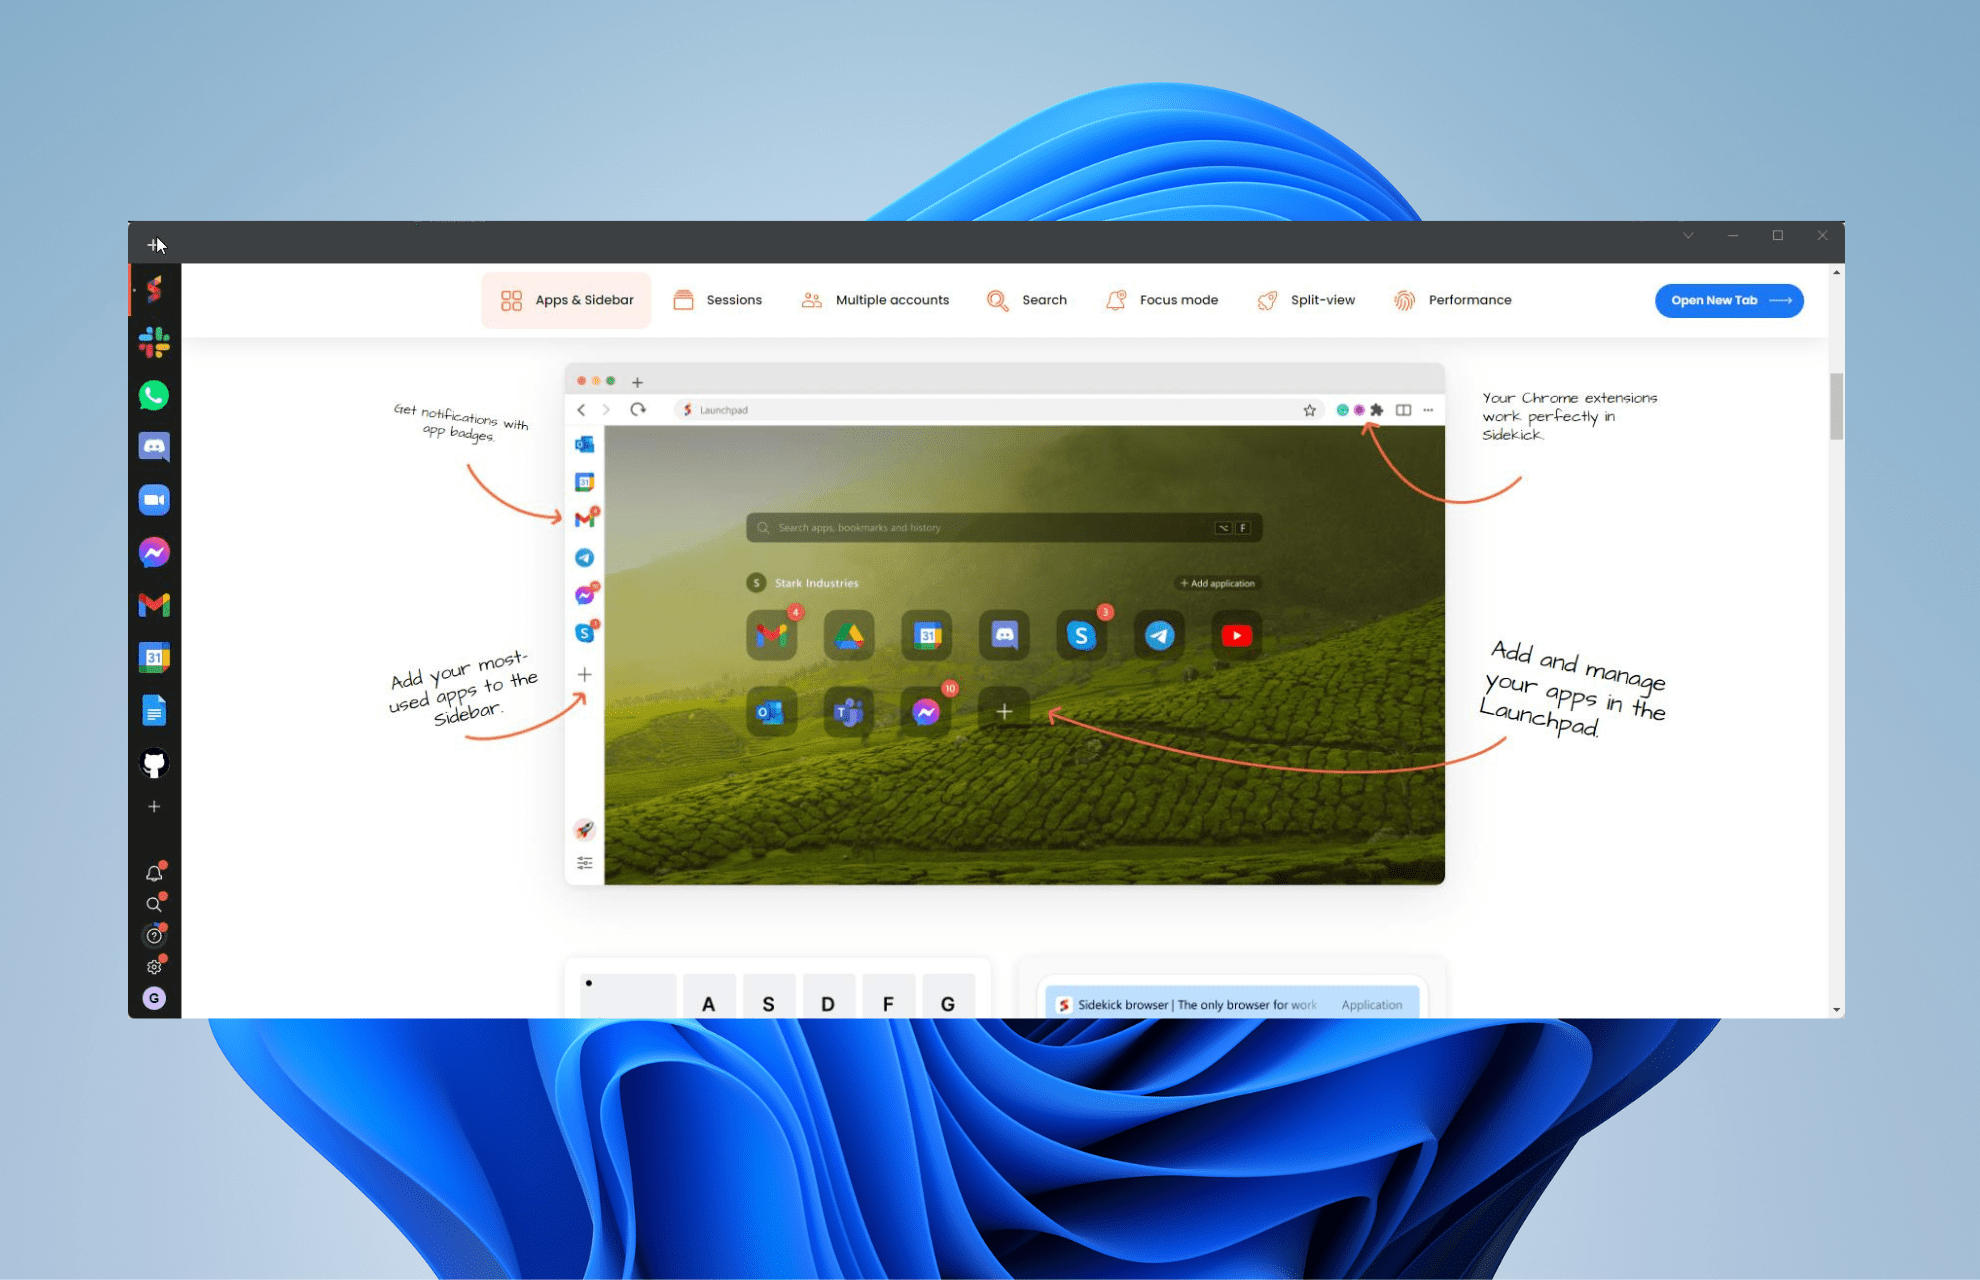
To be honest, the best way to think of Sidekick is to consider the work version of Opera GX. It’s a highly specialized web browser with a sidebar filled with easy access to productivity and messaging apps.
On the left-hand side, you will see the likes of Slack, Skype, and even WhatsApp. Sidekick also offers an Opera-like feature in Sessions which lets you save the tabs in groups.
That way you won’t lose your spot if you decide to open a new window. It even has a built-in search feature to browse through your tabs.
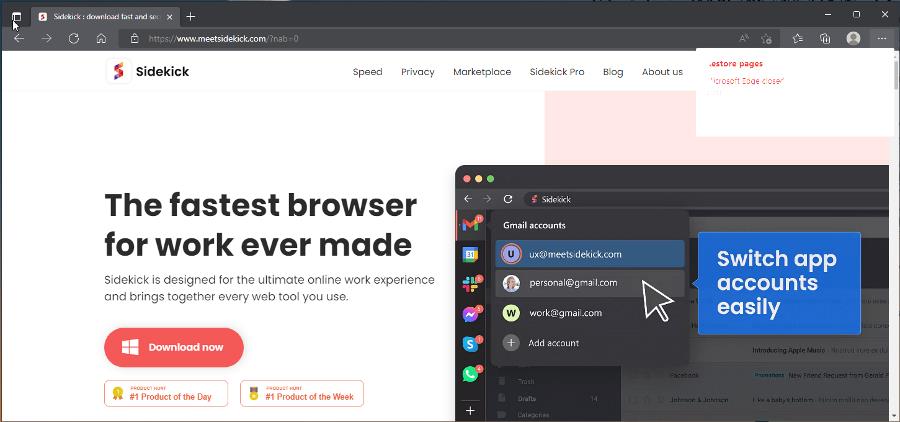
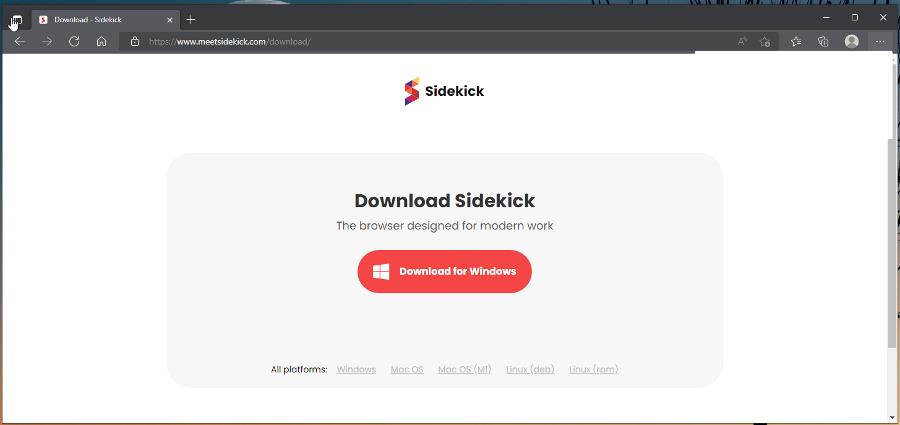
It should come as no surprise that Sidekick is built on the Chromium browser engine, just like Opera One. This guide will show you how to download Sidekick on Windows 11 and Windows 10.
Quick Tip:
If you prefer a robust and organized web app for organized workspaces, the sophisticated version of the Sidekick browser is Opera One. The difference is that Opera One has a built-in proxy VPN and ad-blocker.
You can establish user accounts and leverage Messenger, WhatsApp, Instagram feed, Telegram, and VK chat integrations, as well as a Video-Pop out for meetings and calls. You can also stay more organized with workspaces, tab islands and built-in AI
Opera One
Always up-to-date, stable, and organized workflow with built-in chats and Video Pop-out.
Save the application and go to the downloaded file’s location.
Double click the file and it will immediately install. You don’t have to go through an installation wizard asking you where you want to save the app.
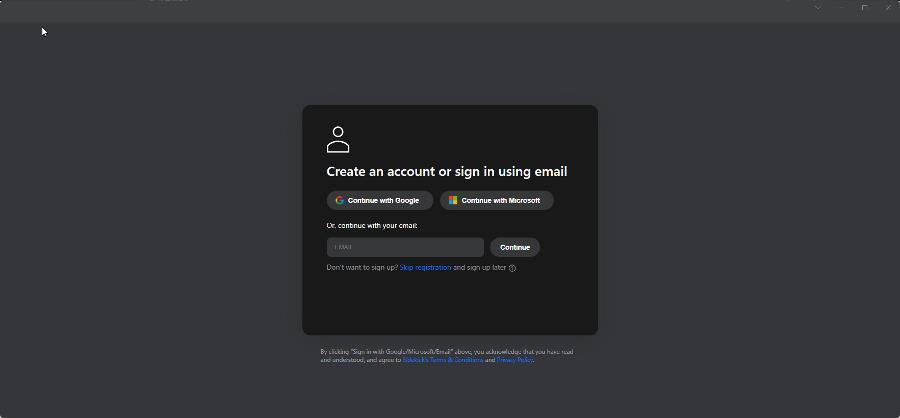
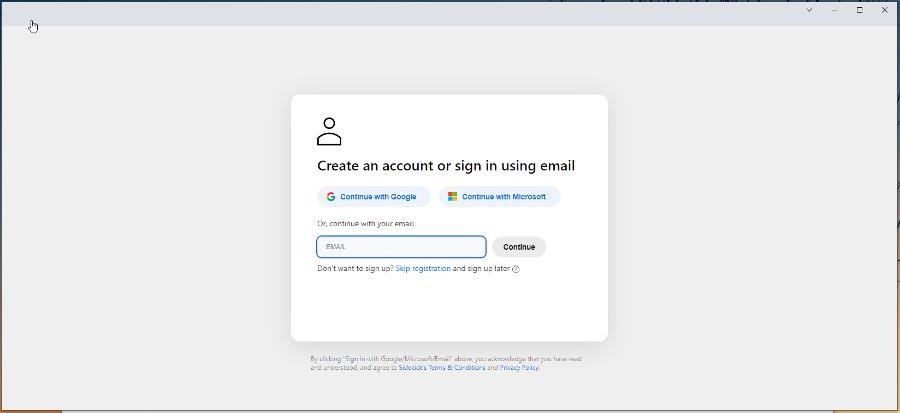
Once Sidekick finishes installing, it will open up and ask you to register by adding your email. Or you can click Skip registration below the email input.
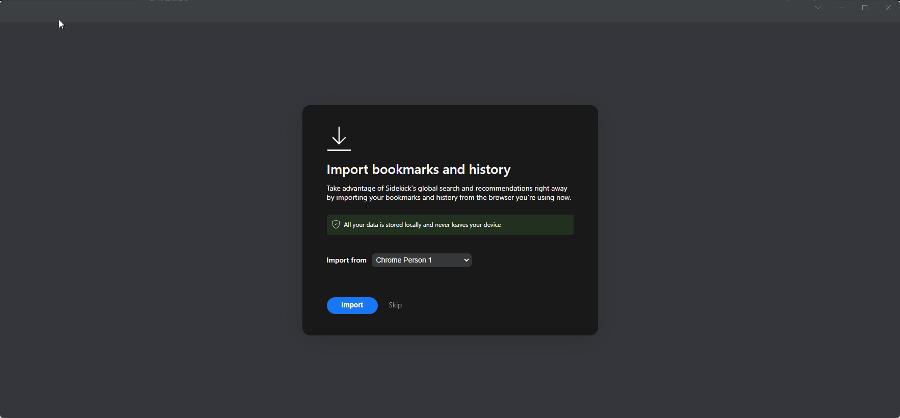
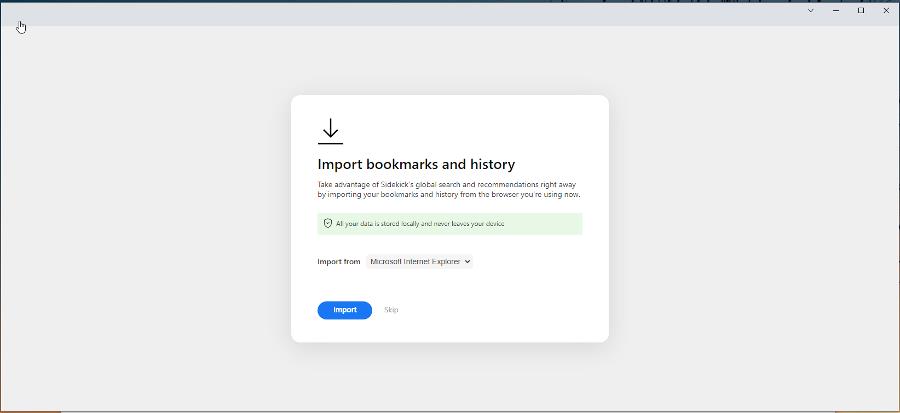
If you do decide to register, you will be asked if you want to import bookmarks and browsing history. Click Import to migrate bookmarks over or hit Skip.
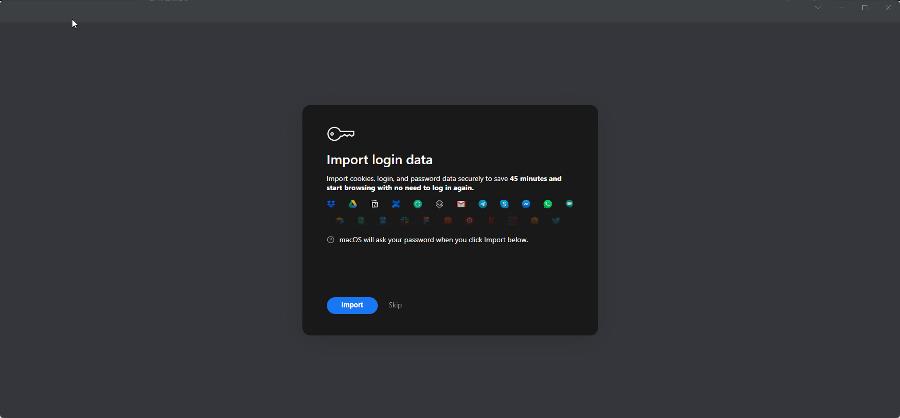
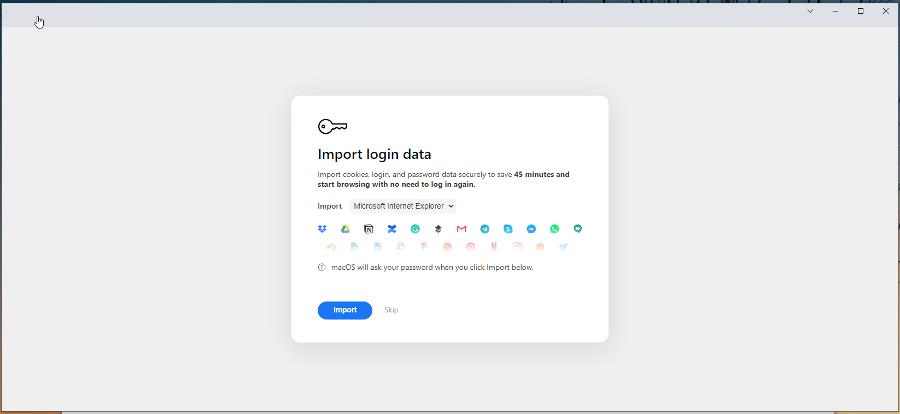
Next, you can choose to import login data.
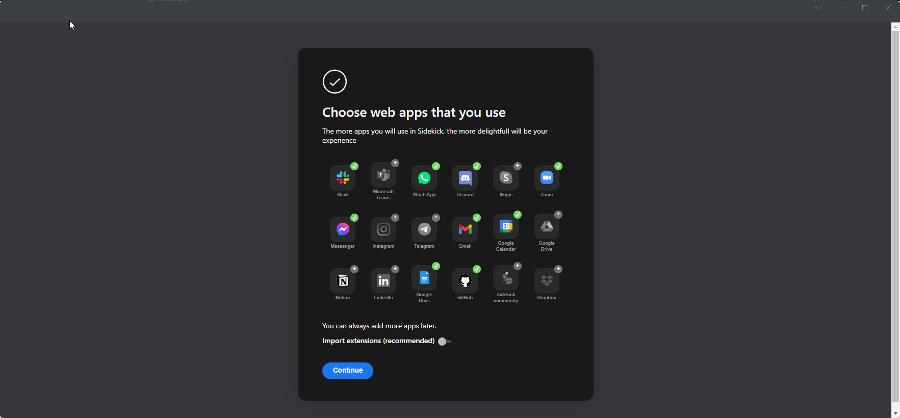
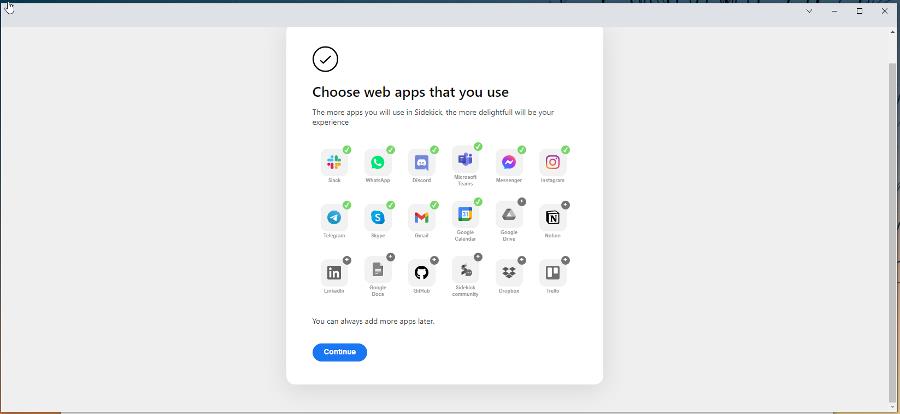
Now you can select which web apps you use. These will appear on the left side bar. You can also import extensions from a previously selected browser.
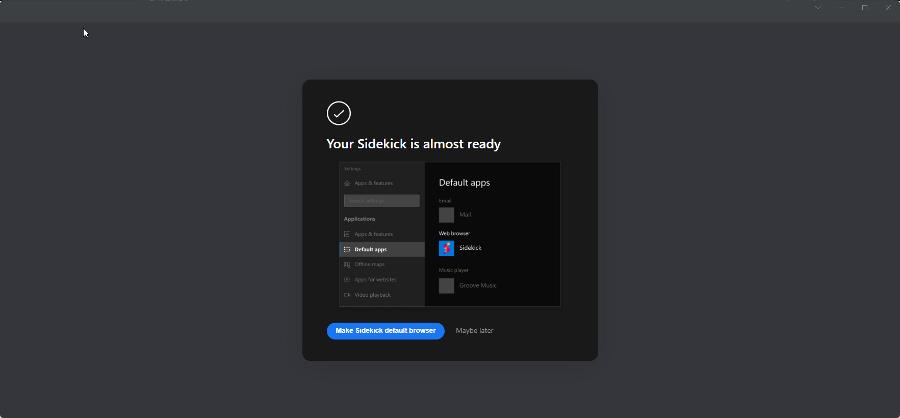
Now you can make Sidekick your default browser or do it later.
Enter your credentials for that messaging app and you’re in. You use it like you would the desktop app. Sidekick also has an ad blocker to stop annoying advertisements on web pages.
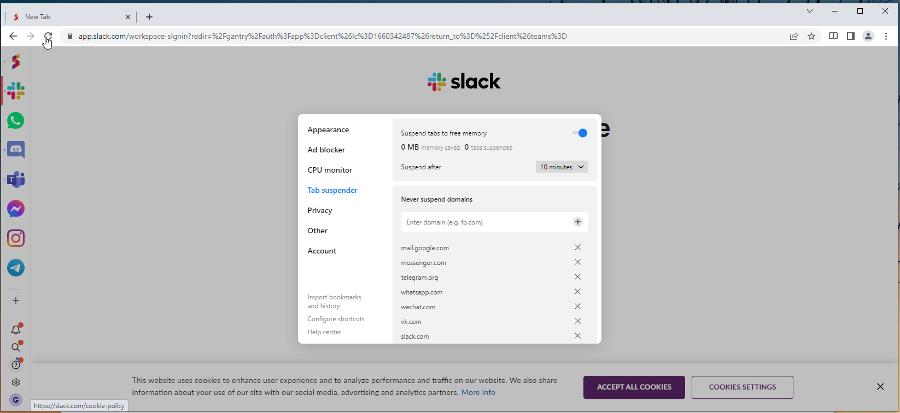
Plus the browser has a CPU monitor and tab suspender so you can keep an eye on how much of the processor Sidekick uses. If one tab is using too much, you can suspend it.
Feel free to leave a comment below if you have any questions on other apps or if you have some that you recommend. Also, feel free to leave comments about guides you’d like to see or information on other web browsers.
Conan Exiles is one of the best role-playing games that challenges players to stay alive in a harsh environment where only the strongest live.
At the same time, the game has also tested player patience since its launch. Many gamers have reported server connection issues, but the good news is that Funcom recently fixed most of these bugs.
Conan Exiles has a limited number of public servers, but fans can create their own to spend time with just the people they want to play with. If you’re interested in creating your own Conan Exiles server, follow the steps listed in this guide.
Can you make private servers on Conan Exiles?
As mentioned earlier, Conan Exiles’ public servers are limited. Hence, it will be difficult for all gamers to play in multiplayer mode.
Thankfully, gamers can create their private servers and play with a specific number of people. With this, you can enjoy the game with other players online.
How do I run the dedicated Conan Exiles server?
To run a dedicated private Conan Exiles server, you need to set it up from the settings. After the setup, you need to configure the server before you can run it.
All these will be detailed in the next section of this guide.
How do I set up my own dedicated Conan Exiles server?
1. Set up Conan Exiles private server with SteamCMD
3. Open a terminal window on the folder you chose.
4. Create a different folder to install the server into, for example, C:Exiles.
5. To create the server, run these commands: login anonymous force_install_dir C:YOURFOLDERNAMEHERE app_update 443030 quit
1.2. Running the server
Make sure you do not have a Steam client running.
If you do, you’ll see some errors regarding Steam DLLs that you can ignore.
From C:Exiles, run the ConanSandboxServer.exe file.
By default, it will listen on UDP ports 27015 and 7777.
Add an exception in your firewall to get the server to appear in the Steam server browser.
Use the following command line parameters: ConanSandboxServer.exe -log -MaxPlayers=16 -log MaxPlayers=70 ServerName=ConanExilesServer MULTIHOME=aaa.bbb.ccc.ddd (select network interface by ip) QueryPort=27015 (steam queryport)
Specify the following settings in the Engine.ini file located at this address: ConanSandboxSavedConfigWindowsServerEngine.ini[/script/onlinesubsystemutils.ipnetdriver] NetServerMaxTickRate=30 [OnlineSubsystemSteam] ServerName=YOUR_SERVER_NAME_HERE ServerPassword=YOUR_DESIRED_PASSWORD_HERE
You can also add other server settings in the Game.ini file (ConanSandboxSavedConfigWindowsServerGame.ini): [/script/engine.gamesession] MaxPlayers=70
2. Set up your Conan Exiles server with Host Havoc
You can easily set up your Conan Exiles game server using Host Havoc with a custom control panel where you can change maps and install further modifications to your server in seconds.
We suggest you try this high-performance server with excellent 24/7 technical support that helps you fix any issue easily. You can follow their tutorial about creating your server to do great installing.
Here are some of its main features:
Instant Server Setup
Complete Control of Your Server
Easy Configuration
24/7 Customer Support
Full FTP Access
Daily Backups Available
Switch Games Any Time
Free DDoS Protection
With a powerful control suite, unique features, and installers, this server hosting is quite simple for novice and advanced users.
Host Havoc
High-performance hosting services with DDoS protected networks and 24/7 support.
The cost of owning a private server for Conan Exiles on PC depends on the host. Also, it depends on the number of players you want to allow on the server.
So, there is no general price to look forward to. However, you can choose a budget-friendly host like Host Havoc.
When you set up your Conan Exiles private server, it removes the limitation of playing the single-player mode alone. With this, you can compete with your friends on the highest level in multiplayer mode.
As Microsoft continues to figure out its development and release cycles for Windows 11 and the inevitable OS that follows, it seems the company is putting Windows 10 and its related projects further in the rearview as it shuts down Olympia Corp.
According to a report from journalist Mary Jo Foley over at ZDNet, Microsoft is shutting down the Olympia program in a month’s time and thus signaling the end of Windows 10 testing for Enterprise users.
In 2017, when Microsoft originally launched the Olympia project which later evolved into the Olympia Corp, it intended to host a separate enterprise-oriented Insider program to test the release of business-related features and patches for Window 10.
As Windows 10 development and support wind down to its end-of-life (EOL) deadline in 2025, it now seems the Olympia program, designed to test the release of Windows 10 enterprise features is no longer needed.
Windows Insider MVP Chris Gahlsdor shared an email issued from Microsoft about Olympia Corp being shuttered via Twitter.
Hi Olympia participant,
We are sending this email to notify you that we will formally be shutting down the Olympia program in a month. We will be unassigning Olympia licenses and deleting the Olympia feedback path.
Action Required: Take a backup of any data if you are using the provided Olympia licenses in the next 30 days, by September 12, 2022.
Thank you for your participation and feedback ? Let us know if you have any questions!
Thanks, Olympia Team
As of now, Microsoft isn’t not sharing any details officially as to why the Olympia project is no more, but it seems reasonable to wager that as Microsoft further streamlines the development and release cycles of its operating systems by moving to a 3-year cadence and prioritizing enterprise and consumers separately, related Insider programs such as Olympia and others, will either evolve or die off.
A VPN is, without a doubt, one of the most valuable tools you can have under your belt if you’re constantly online.
Even if you’re an occasional web surfer it wouldn’t be such a bad idea to invest in a good VPN.
These times we live in, many want to get their hands on your private data for various reasons. Monitoring your every step, targeting you with ads, stealing your data, and even locking your files behind a ransom wall.
VPNs aren’t universal when it comes to protecting your devices against cyberattacks, but they’re a vital addition. Essentially, they route your data through private tunnels and encrypt it.
Therefore, even if someone were to intercept your Internet traffic, it would all be for nothing.
However, what happens if you have more than one device you’d like to use a VPN on? Do you have to purchase multiple licenses or can you use several devices on the same account?
We discuss below whether it’s safe to share a VPN account and if providers allow it.
Can VPN be used on multiple devices?
Generally speaking, the answer is yes. Every VPN provider allows you to share your account between multiple devices so that you won’t need to purchase additional subscription plans.
However, the maximum number of devices you can use on the same VPN account greatly depends on the provider. Some of them are more generous than others.
So, it’s a matter of who you choose to go with in the long run. As long as you keep the number of devices under the maximum number accepted by your service, things should be good.
Even if you accidentally exceed that number, you’ll most likely be asked to remove one of the previous devices to make room for the new one.
Quick Tip:
In order to share your VPN connection with family or other people in your social network, you should rely on flexible software.
PIA (Private Internet Access) is that one when it comes to VPN sharing because it supports 10 connections at once for any major platforms like Windows, macOS, Apple, or Android.
Private Internet Access
Share your VPN connection with your peers using this exhaustive privacy software.
Many VPN providers are OK with this, especially ones who offer router VPN solutions.
Therefore, you don’t even need to use a VPN on each device. It’s enough to install the VPN on the router (or routers, depending on your setup) that your family members have access to.
More so, some VPN services even provide you with safety instructions on how to use VPN on multiple devices on the same account so that your account won’t be compromised.
Can I share my VPN with another household?
If your household accommodates more than just one member, you might want to protect your loved ones with a VPN. But what if you need to share it with a different household?
This can be possible as well depending on your VPN subscription. The majority of providers offer multiple or even unlimited connections using one account.
You may benefit from 5 simultaneous connections or more within one subscription. So multiple people can benefit from a shared VPN account.
In any case, you should be aware of the VPN terms of use before sharing it with numerous households to avoid account restrictions.
Can you share a VPN with someone else?
You probably considered purchasing a VPN subscription plan and splitting the bill with others, who are not necessarily strangers, but they’re not family members, either.
While that’s a great way to cut costs, since you can split the bill with a bunch of people, it’s worth mentioning that this practice is kind of frowned upon.
Actually, scratch that. VPN providers have nothing against sharing plans with your peers, otherwise, they wouldn’t allow multiple devices on the same account (and so many of them, too).
However, what they do have something against is denying responsibility. So you should know that the person who makes the purchase must claim 100% responsibility for everything that happens on the account.
Thus, if you purchase a plan, split it with your friends, and one of your peers decides to go ahead and engage in unlawful behavior, you’d be responsible.
However, most VPN providers passively monitor some of the traffic and can terminate your account if they detect something fishy on your account, even if it’s not you who did it.
Don’t believe us? Try reading the Privacy Policy and Terms of Use documentation for once. You’ll find it all there.
How many devices can I use with one VPN account?
As we’ve briefly mentioned above, that greatly depends on the generosity of the provider.
Below you can find some of the best VPNs for multiple devices, including the number of maximum devices you can use on the same account.
Sign up for a VPN that allows multiple connections. ❗To protect your data, don’t use your primary email address or a password you have on other accounts.
Then, once your account is up, you can share your VPN credentials.
Optional: Use a password manager that allows sharing. This way, your password is safely stored in a vault protected by encryption. Sharing via social media or text may not be as secure.
You can check your VPN admin panel to keep track of which devices are connected.
But what if you don’t have a VPN that supports multiple connections? Can you still share your VPN with your family and friends? Well, yes, but you have to be on the same network.
You can share a VPN account, but be cautious about it
So, can you share a VPN account safely? We believe so, yes, but you should be extra cautious about it, especially if you don’t plan on sharing it exclusively with your family members.
While some VPN providers will even encourage you to share your VPN account, most of them advise against it and hold you solely responsible for whatever happens on your account.
We strongly advise you to choose a VPN service and give its privacy policy and terms of service documentation a thorough read before attempting to share your account.
You might even end up with your account suspended if you’re not careful enough.
Finally, you have our best VPNs that can protect your online privacy. Plus, visit our VPN Hub to discover more guides and tools to help you protect your online identity.
When building a PC, one of the most important parts is the central processing unit, better known as the CPU. This is the piece of hardware that controls all of the different parts of a computer by sending out instructions.
The full capability of a computer is directly tied to how good your CPU is. So if you ever wonder why whenever Intel or whoever releases a new CPU it’s such a big deal, it’s because companies like that have set the standard. Intel creates some of the best CPUs on the market today.
A CPU is made up of several different components such as a control unit and an arithmetic logic unit. Certain CPU models come with a fan attached to them to keep them from overheating.
You place the CPU unit directly onto the motherboard. But as you look down, you may see some writing on the motherboard header that reads CPU OPT and CPU FAN.
CPU FAN is self-explanatory; this is where you hook up the fan to, but what about CPU OPT? What does that mean and is it at all like the CPU FAN attachment?
Are CPU FAN and CPU OPT the same?
No, but they are similar in function. CPU FAN is the header where the main cooling fan will go, some may call this the heatsink. Without a cooling fan attached to the CPU, your computer will not boot.
CPU OPT stands for CPU Optional. As the name suggests, it’s an optional header for a second heatsink. This could be a second fan or a liquid cooling system.
Either way, it’s not necessary to connect something there. Your computer will still boot up as normal and won’t shut down if it detects something wrong with the optional heatsink.
What are the differences between CPU OPT vs CPU FAN?
There are a few differences between the two. As stated earlier, it is mandatory to have a fan connected to the CPU FAN header. On CPU OPT, it’s totally optional to have something there and your computer will turn on as normal.
Source: tookapic/Pixabay
The second difference also mentioned earlier, is how your computer reacts. Your computer will not boot if there isn’t a fan connected to the CPU FAN. It also shut down if the machine detects high temperatures.
And the final difference relates to what kind of devices can be connected. Yes, you can connect a liquid cooling system to CPU FAN, but it’s recommended that you don’t.
It’s better that you connect a fan to CPU FAN to serve as the primary heatsink. A cooling fan doesn’t have as much power and certain motherboards may have a limit on how much amps a header can take.
Source: axonite/Pixabay
Some motherboard fan headers have a limit of 1 amp. A typically cooling fan consumes around 0.20 amps of power whereas most liquid coolers take around 2 amps. If you connect something that exceeds the motherboard’s limit, you can damage the motherboard.
There are exceptions, so it’s best to double-check with the manufacturer or any documents you have for the motherboard and check its amp limit.
When should I use CPU OPT and when should I use CPU FAN?
When it comes to the CPU FAN, it’s not a matter of whether you should or shouldn’t connect a cooling fan there. You must connect something to the CPU FAN header in order for your computer to boot.
CPU OPT can be used if you want that extra cooling system, but most of the time, it’s really necessary. A single cooling fan is enough to get the job done on most computers.
Source: Dave Morgan/Pexels
But if you plan on overclocking your computer or pushing its hardware, then it’s recommended that you do get an additional fan.
How many fans do you need for one header?
You just need one. You can connect multiple fans to one header using a fan splitter cable, but you have to be careful to not connect too many.
Too many fans on one header can exceed the amp limit on a motherboard which can damage it. We recommend checking what the amp limit is on your motherboard.
CPU OPT vs CPU fan vs AIO pump
AIO stands for All In One and it refers to a liquid cooling system that’s easy to install. All you have to do is plug it into a header and it’ll work, but the question is which one?
Source: Nathan B. Caldeira/Pexels
It’s best to connect an AIO pump to the CPU OPT header and connect a fan to the CPU FAN. That way if it fails, you still have a fan working for you. Plus as stated earlier, connecting an AIO pump may exceed the amp limit on CPU FAN.
Feel free to leave a comment below if you have any questions on other pieces of hardware or if you have some that you recommend. Also, feel free to leave comments about guides you’d like to see or information on other computer parts.
Users can’t update Windows 10 when their hard drives lack sufficient storage space for the updates. As such, Windows 10 version 1903 will include new reserved storage when the 19H1 update rolls out.
That is storage that is automatically reserved to ensure there’s enough space for Windows updates. And you can later disable or enable Reserved Storage at your own volition.
Microsoft announced reserved storage within its Windows 10 Insider Preview Build 18312 blog post. The new 18312 preview build is the first to showcase reserved storage. However, Windows Insiders need to modify the registry to enable reserved storage.
The new feature is currently available for those users running build versions from18298 to the latest one This is how users can activate reserved storage in those Windows 10 preview build versions.
How to enable Reserved Storage in Windows 10?
1. Use the DISM command in Command Prompt
Reserved Storage can be easily enabled through the usage of the built-in Command Prompt. The DISM command can toggle Reserved Storage on and off in just one line.
1. Press the Windows + X hotkey to open the WinX menu.
2. Select Command Prompt (Admin) from the list. Users need to be logged in with an admin account to enable reserved storage.
3. Input the following command: dism /Online /Set-ReservedStorageState /State:Enabled
4. Press Enter to run the command.
5. Reserved Storage is now enabled on your device.
2. Use the Registry Editor
Run cmd as an admin. Those users who aren’t logged in to administrator accounts can activate the built-in Windows 10 admin account by pressing the Windows key + X hotkey and selecting Command Prompt (Admin).
Then input ‘net user administrator /active:yes’ in the Command Prompt and press Enter.
Restart Windows 10, and select to log in with the new admin account.
Launch Run with its Windows key + R keyboard shortcut.
Enter ‘regedit’ in the Run accessory, and click the OK button.
Then go to this registry path within the Registry Editor: HKEY_LOCAL_MACHINE\SOFTWARE\Microsoft\Windows\CurrentVersion\ReserveManager. Users can copy and paste that registry path into the Registry Editor’s address bar with the Ctrl + C and Ctrl + V hotkeys.
Click the ReserveManager key on the left of the window.
Then double-click the ShippedWithReserves DWORD.
Enter ‘1’ in the Value data text box.
Press the OK button to close the Edit DWORD window.
Restart Windows after editing the registry.
Thereafter, users can see what the reserved storage amounts within the Settings app. Click Cortana’s Type here to search button, and then enter the keyword ‘storage’ in the search box.
Select Storage to open the Settings app.
Then click Show more categories, System & reserves and Reserved storage within the Settings app to open the reserved storage details shown in the snapshot directly below. That’s one way to enable Reserved Storage.
Uninstall Options Features to Reduce Reserved Storage
In the snapshot above, reserved storage amounts to about seven GB. The amount of reserved storage partly depends on the number of optional featuresWindows 10. Thus, removing optional features might reduce the reserved storage value. Users can uninstall optional features as follows.
Open the Cortana search box.
Enter ‘optional features’ in the search box.
Then select Manage optional features to open the window shown directly below.
Select a listed feature, and click the Uninstall button.
So reserved storage might come in handy for users with small hard drives. The 19H1 update will introduce reserved storage to most users when it rolls out during spring 2019. This read should help you disable, allocate space, or enable Reserved Storage.
Services.msc is a built-in tool in Windows that allows you to access and modify various services running on your computer. Some services are native to the OS, while others are installed by third-party applications.
Today, we’ll show you a few different ways to open it and give you some tips on the best ways to use it and what for.
How can I open services.msc (Windows Service Manager)?
6. How to open services.msc through the Control Panel
Press Windows + S, then enter control, and selectControl Panel from the list of results.
Go to the Administrative tools section.
Now selectServices from the list of results.
7. Use Computer Management to open Services
Open Computer Management. You can do that by using the search option or any other method.
Now expand Services and Applications from the navigation pane, and select Services under it.
This method can be useful if you’re using the Computer Management window frequently. If that’s not the case, then our previous methods might prove better.
8. Create a Desktop shortcut for Windows Services Manager
Right-click your desktop and expand the New menu. Now selectShortcut.
Enter services.msc in the input field and click Next.
Now enter the name that you want to use for the shortcut and click on Finish.
There are several different ways to access services.msc on your PC, and we encourage you to try them all. But once you are aware, choose one that seems the most convenient and quick.
How can I run services.msc as admin?
Press Windows + E to open File Explorer, paste the following path in the address bar, and hit Enter:C:\WINDOWS\System32
Right-click on the services.msc file, and select Run as administrator.
What is Services MSC used for?
Here are a few key features of Services.msc:
Lists all services in one place: With the built-in tool, you can view all the services in one place, that, too, in alphabetical or reverse-alphabetical order.
Allows starting or stopping a service: Several need to be run while other services are to be disabled for specific operations to complete, and the tool provides an easy way to do that.
Lets users change the startup type: Configuring the startup type comes in handy, as it allows you to choose whether a service starts running automatically at boot or has to be manually triggered.
Provides insights on dependencies: Services are often interlinked with each other in the sense that stopping one will stop the others that depend on it. And you can easily verify this through the built-in Services.msc.
What is services.msc file location?
Like any other tool and application, Services, too, has the relevant launcher files stored in the C: drive. Both the services.exe and services.msc files can be found in the System32 folder found in the following location:C:\WINDOWS\System32
System32 Folder
Besides the other methods listed here, you can always navigate the path and easily open Services.msc.
You should see the covers for the selected category. If needed, you can zoom in and view the cover up close.
Cover browsers are great if you’re a comic book or a book fan. Most covers have amazing artwork, and now you can view them from your browser with ease.
Quick TIp:
Although Cover Browser will work in almost any web browser, for the best results we suggest using Opera.
The browser is built on Chromium, it’s similar to Chrome, and it will work with Chrome extensions without any issues.
The browser also has an ad blocker, so you won’t have to deal with ads ever again. There are also tracking protection that will block tracking scripts and cookies.
Opera
Discover Opera’s features with free VPN, Ad Blocker and Battery Saver, offering real solutions for the way we all use the internet.
Black and white photos have their own particular flavor, however, sometimes they might seem lifeless and impersonal. On the other hand, colored photos look natural, more familiar, or more relatable.
You might have come across a lot of posts or articles with comparisons between before and after colorizing certain images, especially family or city life photos.
Nowadays, one can find a bunch of useful tools that can be used to turn a black and white photo into a colored image. Some use AI and perform the action within seconds; Some of the options are more laborious; some are free, and some are paid.
In this article, we’re going to explore some methods to convert black and white photos to color.
How can I use to turn black and white photos into color online?
Adobe Photoshop is probably the best-known photo editor out there, and one of the most powerful ones.
This software features a multitude of tools that you can alternate to edit your photos and get the best results.
Because of the many options, Photoshop is perhaps harder to master, and the photo processing takes longer. Even if that’s the case, the results are top-notch.
That’s why Photoshop is among the most preferred photo editors both among professionals and amateurs.
Some of the most commonly used features are cropping, removing small imperfections such as lens dust or red eyes, adding watermarks, replacing objects or people, changing the background, or adding filters.
However, Photoshop also includes certain particular features such as personalized brushes, brush symmetry mode, or live blend mode preview.
Adobe Photoshop
Add color to your black and white photos with Adobe's professional tool and get the best results.
1.1 How to colorize a black and white photo in Photoshop
Converting a black and white photo to color in Photoshop can be easily done using the app’s built-in tools. You can choose what color you want to use on your photo, as well as where exactly to use it.
1. Open the image in Photoshop.
2. Look for the Quick Selection tool in the menu.
3. Use the tool to select a large area of the image that will have the same color.
4. Make a solid color fill layer by using the specific tool and clicking on the solid color option.
5. Choose your desired color.
6. Select the fill layer from the Layers tab.
7. Open the dropdown menu next to Opacity and choose overlay.
8. Use the brush tool to correct the edges where the color got overlayed with the subject.
9. Save the file to your device.
You can undo your actions as many times as you want until you get the desired results.
This is a very simple tool that you can use in your browser to colorize your photos. There’s no need for a subscription or any download.
As you can imagine, the tool can be used for free. The only disadvantage is that you’ll get a watermark on the final photo, but you can remove it using another photo editing tool.
Adding color to your black and white photos with Algorithmia is very easy. Just copy/paste the photo URL from your PC or upload the photo in the tool.
You’ll get a half-colored photo just so you can have an idea of the final result. But on downloading it, you’ll see that it is fully colored.
Color Surprise AI Pixbim is another easy-to-use tool that does not require any photo editing knowledge.
Adding color to your black and white photos can be done in just a few simple steps.
In order to start, you will first need to download the tool and install it on your PC. After you can simply open the software and it will automatically generate a preview and show both variants side by side.
If you’re happy with the result, click on Start-Process Full Image and Save. The whole process takes only a few minutes.
MyHeritage In Color™ is a tool designed specifically to bring your black and white family photos to life by adding color to them.
Although using the tool is free, you’ll have to create an account to be able to use it and get access to all its features.
Once you are logged in, you can simply upload a photo in the browser or drag & drop a photo in the frame. Wait for a few seconds until you get the result.
Once the tool returns the colorized photo, you also get a few options for the next action: you can save the photo on your PC, share it on social media, or continue by uploading another photo.
The advantage of creating an account is that you can upload full family photo albums and colorize them in your own time, then build a family tree.
Each edited photo will get a colored icon at the bottom so that you can keep track of them. If you choose to delete an edited photo, the original will remain. But if you delete an original photo, the colored one will be deleted as well.
More similar tools can be found in our thorough Software section.
If you encounter issues constantly, you’ll find that our How-to Hub is quite useful.
So these are a few tools that you can use to convert a black and white photo into a colored one. It’s important to know that all o them preserve the resolution of the original photo.
If you’ve come across another tool that you find worth mentioning for this particular process, please share your opinion in the comments section below.
3. Check your code for mistakes to fix VBA error 400
Make sure to always check your code for any mistakes. Additionally, checking for any macros corruption is necessary as well.
That’s about it. We hope that doing these confirmed solutions will fix your VBA 400 Error. In case you have other confirmed suggestions please let us know in a comment below.
EPS is a graphics file saved in the Encapsulated PostScript format. EPS files are usually used to save pictures of art such as drawings, logos, or objects.
In addition, it is also the standard file format for transferring image data between different operating systems. These files are used by different graphic and design editing applications that support the format.
However, supported graphics software is then used to convert these EPS files into PDF, JPG, and PNG file formats.
This guide highlights the best EPS software that not only supports this file type, but can be used to modify, edit and tweak EPS on Windows 10.
Open EPS files without Illustrator – Is it possible?
This is a special format that cannot be simply opened in your OS.
In order to open EPS files on Windows 10 PC, you will need standalone graphics design software. To good news is that you are, in fact, spoiled for choice.
While it’s certainly the most famous name, Illustrator is far from being the only available option as far as EPS software is concerned.
So, without further ado, here are the best graphic design software which can be used to open EPS files in Windows 10.
Adobe Illustrator is a popular and widely used drawing program used by designers to create and edit vector graphics. It is a powerful software that can edit EPS files.
This software uses image maps instead of bitmaps to make images, allowing for the drawing to be modified and reshaped without losing quality. Illustrator is the industry standard for creating logos, digital art, and drawings.
In addition, Adobe illustrator supports numerous graphics file formats such as SVG, DWG, PDF, FXG, and most especially EPS.
The feature-rich graphic software is a must-have for Windows 10 users who interact with EPS files on a daily basis, thereby producing neat, professional-quality graphic content.
Let’s quickly look at its key features:
Extensive type toolkit for stunning typography
Full vector support for limitless scalability
100X canvas to create large-format projects
Design previews available for real-time rendering
Step-by-step, in-app tutorials and more inspirational content to get you started
Adobe Illustrator
Open and edit EPS files effortlessly with the world’s most cherished vector graphics software.
Adobe Photoshop is the most popular graphics editing program used across the world. This industry-standard software is primarily used to edit graphical and digital images. Photoshop can be used on Windows to open an EPS file.
Photoshop possesses a unique patch tool that removes blemishes from designs automatically and a content-aware feature that matches your work background with surrounding areas while removing unwanted pictures from your work project.
Furthermore, the tool also supports various document and image formats such as SVG, DWG, PDF, and most especially EPS files.
This tool enables easy editing and modification of EPS files by allowing you to customize the image, color, size, and other numerous enhancements.
Let’s quickly look at its key features:
Professional photo editing tools (crop, remove, resize, add colors, effects and more)
Unlimited layers and masks and a diverse range of available brushes
Automatically save your work in the cloud to access it anywhere, at any time
Create fast and precise selections with the Object Selection Tool
Adobe Camera Raw improvements
Adobe Photoshop
Dealing with EPS files? Not a problem for the world’s best imaging and graphic design software!
The Reader is practically synonymous with PDF – the link between these two is so deeply rooted that you simply cannot conceive one without the other.
However, this powerful PDF tool supports a plethora of file formats including the not-so-common EPS files which you can easily open with the Reader by converting them into another format. Automatically, of course.
Adobe Acrobat Reader is a collaboration and productivity-oriented software that you can access from anywhere, across all your devices, and always achieve crisp-looking documents, fast.
Let’s quickly look at its key features:
Conversion tools to transform any file (EPS, JPG, PPT, XLS, DOC, even web pages and more) into a PDF
Compression tools to reduce the size of your files and clear precious hard disk space without losing quality
PDF editing toolkit (split, merge, rotate, delete, crop, rearrange, compare and more)
Scan to PDF, Print to PDF, unlock PDF, export PDF into other file formats, and even edit text within PDFs
Powerful collaboration features (share, review, annotate, fill and sign across devices)
Set and remove passwords and permissions
Adobe Acrobat
Open EPS files in less than one minute with the most famous PDF tool on the globe!
Adobe Acrobat Reader can help you easily open your EPS files on your computer. All you need to do is download and install the app, then convert the files into a portable document format.
CorelDraw is a graphics suite developed by Corel. This graphic suite consists of various tools such as CorelDraw which is a vector illustrator tool. CorelDraw is a good alternative to Adobe Illustrator if you want to open EPS files.
In addition, CorelDraw is used to create and modify vector graphics with the software comprising of a huge library of fonts, templates, and images which can be used to enhance your design.
The software supports over 120 file formats including popular formats such as word documents and camera files.
This is a great software to edit EPS files so it’s definitely worth checking out.
If you intend to open EPS files in Windows 10, alongside advanced image editing and digital photos; PaintShop Pro excels with numerous features.
The tool includes advanced editing features for, batch image processing, HD video generation, web publishing, and layer-based editing.
PaintShop Pro allows you to take images from your system and convert them into uniquely digitally altered images with excellent quality. Plus, it supports over 100 file formats including the EPS format.
In addition, this tool also enables you to create image thumbnails and store metadata and custom tags. Hence, PaintShop Pro is a powerful graphics tool that gives amazing features for photo editing.
To speed up Windows 10 you have to get rid of useless apps and processes that slow down your computer. Unnecessary design elements that might interfere with performance can also be minimized.
Let’s check out all the ways you can reduce PC sluggishness for better overall performance.
How can I speed up the computer in Windows 10?
1. Disable startup programs
Press Ctrl + Shift + Esc to launch Task Manager.
Pick the Startup tab, look over the Startup Impact section, and disable the processes that contain the high startup impact.
Some apps start automatically when you boot your PC. Most of these apps are non-essential, but they strain your PC’s speed. Disabling them could lead to faster startup and fewer useless background apps.
2. Disable animations, shadows, and other special effects
1. Press the Windows + R keys at the same time to open the Run dialog.
2. Type sysdm.cpl and then press Enter.
3. The System Properties menu will open. Navigate to the Advanced tab.
4. Go to the Performance section and click on Settings.
5. Choose Visual Effects from the list of options.
6. In the Custom section, uncheck Animate windows when minimizing and maximizing, Fade or slide menus into view and Fade or slide ToolTips into view.
7. Save your changes and close the System Properties window.
Windows 10’s animations could hinder PC performance. Reduce or disable special animations and special effects for better speed on Windows 10.
3. Enable your antivirus
Open the Start menu and select Settings.
Go to Update & Security and then Windows Security.
Click Virus & Threat Protection.
Select Manage Settings.
Ensure that Real-time protectionis turned on. If it’s off, toggle the switch to turn it on.
If you don’t like Windows Security, choose a reputable third-party antivirus. Most options nowadays are made to use as few system resources as possible while keeping your system protected in real-time.
Just make sure to always keep it enabled to prevent any infections that could slow down your Windows 10 PC.
4. Choose the High Performance Power plan
PressWindows + S to open the search bar, type Control Panel, and press Enter.
Select System and Security, then click on Power Options.
Click on Show additional plans, then select High performance.
For maximum speed, select the High Performance mode on Windows 10, which runs the CPU at full power.
6. Clean your registry
Open the Start menu.
Type Create a restore point and select Create option under System Protection.
Once created, press Windows + R to open the Run dialog box.
Type regedit and press Enter to open the Registry Editor.
Navigate to sections of the registry (e.g., HKEY_LOCAL_MACHINE\Software).
Carefully delete obsolete entries to improve performance, but avoid deleting important system entries.
Installing and running various programs will eventually have an direct impact on Windows Registry database.
6. Optimize hard drive performance
Go to your Home Screen and from there access your Charm bar.
In the Search box type defragand press enter in the end.
Within the search results choose Defragment and optimize your drives and the Optimize Drivers windows will be then displayed on your computer.
First, for each driver pick Analyze in order to see if a defragment operation is being required or not.
If you need to repair your hard drive just pick the Optimize option.
We all know that if there are problems with the hard drive your computer will run slower, with lags and with various errors.
Well, that’s why you should periodically check the performance of your hard drive in order to optimize it and, of course, for ensuring much power and better performances.
7. Check for bad sectors on your hard drives
Right-click on the drive you want to analyze.
Choose Properties.
Select the Tools tab and just pick Check in order to see if there are any errors.
Your Windows OS will check for issues on your drive and also it will prompt you with the proper results (then you will be able to see if there are bad sectors or not).
Another problem that might be related to your hard drives is the bad sectors issue. Well, in order to make things better and for bumping the speeds on your Windows 10 powered device, you should check for bad sectors.
If there are bad sectors, the Windows OS will separate the same from the rest of your hard drive – if you will experience relevant bad sector issues, then the best will be to replace your hard drive with a new one.
8. Uninstall apps and programs that you don’t need
If you don’t regularly use particular apps and software, it’s easy to forget you installed them on your computer. Some of these apps may even run in the background thus using your computer’s resources.
The best solution is to simply go through the list of apps and programs installed on your machine and uninstall those that you no longer need.
9. Clean temporary files
In Start, type Disk Cleanup.
Open the utility and select a hard drive (usually C, but you can pick each of them one by one).
The utility will show you categories of temporary files that are safe to remove. Select the ones you want to delete and click ok.
These are the main optimization tips and tricks that you can apply to improve the speed of your Windows 10-based device.
If you are interested in acquiring some of the best PC optimization software, check out our article to find our recommendations.
All the operations from above can be easily completed even by a newbie so don’t hesitate and test the same in order to check the results.
Of course, in the end, don’t forget to provide us with feedback about your experience.
Owned by Rogers Communications, Rogers is an Internet service provider that operates in Canada.
Unfortunately, many users have reported that they can’t access specific sites and suspect that the Rogers ISP is blocking them.
If you’re one of them, you might be tempted to drop this ISP and find a more reliable Internet service provider.
Before doing that, however, check out our simple instructions below to bypass Rogers blocks and access any website on your computer.
Why is Rogers blocking my website?
You can have website blocking from Rogers ISP due to your DNS server configuration or parental control in some cases.
One of the most recurrent cases is with Rogers blocking IPTV. This situation arises when your Internet provider is blocking you.
As a consequence, you can use a VPN to bypass the problem or contact Rogers ISP for other solutions.
In addition, this issue may appear due to content restrictions for the UK or Canadian users to stop illegal services linked with copyright breaking or even child exploitation crimes.
How do I unblock a website on Rogers?
1. Use a premium VPN
Get a subscription plan for a premium VPN (we suggest PIA).
Download and install the VPN app on your PC.
Launch the app and sign in with your VPN credentials.
Connect to a VPN server.
Try accessing the blocked website.
Using a dependable VPN is one of the best ways to access blocked websites by bypassing ISP blocks, even if your ISP is Rogers.
The reason why we recommended PIA in our example above is that it’s the best VPN overall.
Created by Kape Technologies, you can use Private Internet Access (PIA) to avoid geoblocks, bypass firewalls, and view restricted content on the web.
It hides your IP address and encrypts your data, thus concealing your browsing activity from your ISP.
If Rogers can’t see what websites you access, it can no longer block them. PIA uses OpenVPN with up to 256-bit military-grade encryption, exclusive DNS servers to protect your DNS queries, and a kill switch.
More about PIA:
Protects up to 10 devices
A zero-logging policy
No IP or DNS leaks
24/7 live chat support
30-day money-back guarantee
Private Internet Access
Hide your browsing activity from your ISP to access websites blocked by Rogers right now.
A lot of websites don’t load properly (or at all) if you have an ad blocker enabled. Similarly, you might face functionality issues caused by your web browser’s extensions.
Before pointing a finger at Rogers ISP because you can’t access a certain website, try disabling your ad blocker and any other browser add-ons. It might just do the trick.
3. Verify and change your DNS settings
3.1 Check your DNS settings
By default, your ISP is responsible for processing your DNS requests. However, if its DNS servers are not working properly, this might be the reason why websites get blocked.
Fortunately, you can change the DNS servers of your computer and set up custom DNS servers.
If you have a reliable VPN like Private Internet Access installed, you can use its exclusive DNS servers to unblock websites on the web.
Otherwise, you can set free, public, safe, and fast DNS servers using services provided by Google Public DNS, Cloudflare, OpenDNS, and others.
3.2 Flush your DNS and reset Winsock
Launch Command Prompt as admin by searching for cmd and clicking on Run as administrator.
Type the following code and press Enter after each command:
If you can’t access a specific website, it might not be Rogers ISP’s fault but your web browser’s. To put this theory to the test, consider using a different web browser. It’s free, after all.
If you want our advice, go with Opera One. It’s a high-speed web browser that puts great emphasis on online privacy and security.
Besides, it has an integrated VPN service that you can use for free, so it’s like killing two birds with one stone. And it comes with a built-in AI.
On the other hand, if you want to maximize your online privacy, you can use Tor Browser.
It works differently from a VPN because it redirects your network traffic through multiple servers to make sure you can’t be traced. It’s an excellent choice for accessing websites blocked by your government.
All modern routers have a parental control feature to prevent children from accessing websites with inappropriate content, like the ones promoting violence, drugs, or pornography.
6. Use a proxy server or Internet circumvention tool
Using a proxy server or Internet circumvention tool doesn’t offer the same level of privacy and security as VPNs, but it should be enough to access websites blocked by ISPs like Rogers.
For instance, you can try HMA’s proxy, Hidester proxy, Psiphon, or Lantern. All of them are completely free to use, so you can experiment with multiple options.
More solutions
➡️ Temporarily disable your antivirus or firewall
➡️ Access the blocked website by IP address instead of URL
➡️ Check the system Hosts file for blocked domains
In conclusion, if you can’t access specific websites because they were blocked by Rogers ISP, you can use the methods above to get around this issue and view restricted content on the web.
If you managed to get past the Roger ISP block by using one of our solutions, leave us a comment below.
If you’re still using Internet Explorer to access the web, it might be the time to export favorites from Internet Explorer and move to the better browser version, Microsoft Edge.
Microsoft browsers offer a built-in bookmark manager for saving and organizing frequently visited pages like Chrome, Firefox, and other browsers.
Here’s how to export your bookmarks from your current browser and import them into Microsoft Edge, the upgraded version of Internet Explorer.
Where are the favorites stored in Internet Explorer 11?
Microsoft stores the information about your bookmarked pages in a folder on your computer. It can be accessed to assess your favorites or to extract them from the folder to move them.
You can find your Internet Explorer favorites in the following place: C:\Users\Favorites\
If you altered the browser’s storage location, the location might have changed, so try looking in different folders.
Quick Tip:
Even though Internet Explorer is still usable, it lost all support from Microsoft. If you want a browser that is faster and gets regular updates you should try Opera One. It also comes with a great deal of bonus features.
Opera One is a browser that incorporates speed and customizability into an award-winning design. The browser comes with unique features, such as built-in VPN, native AI and an Ad blocker.
Opera One
Highly customizable, user friendly and all the integrated features to create an amazing browser.
How do I export and import favorites from Internet Explorer 11?
1. Export process
Click Favorites(the star icon) in Internet Explorer, click the down arrow next to Add to Favorites, and select Import and Export.
Click Next after selecting Export to a file.
After checking the Favorites checkbox, click Next.
You should now be able to choose where to save the HTML file containing your favorites.
The exporting process differs between versions of Internet Explorer; however, this method is exclusive to version 11.
2. Import process
Microsoft Edge:
Find the HTML file that Internet Explorer exported.
Choose Favorites, More options, then Import favorites.
Select the file from your PC, and Edge will import your favorites.
Go to Favorites in Microsoft Edge to see your imported favorites.
Because Microsoft Edge is a superior and enhanced version of Internet Explorer, you should export favorites from Internet Explorer to Edge to browse the Internet faster.
Chrome:
Open Chrome.
At the top right, click More, select Bookmarks, and then Import Bookmarks and Settings.
Select the file that contains the bookmarks you’d like to import.
Click Import and then Done.
To export favorites from Internet Explorer to Chrome, follow the steps above. As you can see, the procedure refers to favorites as bookmarks. They are the same item but are referred to differently in different browsers.
Select the Import and Backup option and then click Import Bookmarks from HTML.
Navigate to the bookmarks HTML file you want to import and select it.
Select the Open option. The Import Bookmarks File window will close.
Close the Library tab.
Many people prefer to export favorites from Internet Explorer to Firefox since Firefox is easier to work with and is much more secure.
How do I export and import bookmarks from Internet Explorer?
The above-mentioned exporting process can be used to export both favorites and bookmarks. You don’t need an add-on or to know where your bookmarks are kept exporting your Internet Explorer bookmarks.
Following the exporting process, the file containing favorites and bookmarks should be an HTML file that can be used to transfer your favorite websites to other browsers.
While you must initially learn how to use the new browser, you will undoubtedly want to move everything you had saved in your former browser to the new one.
Learning the basics of a browser may take time, but attempting to export favorites from Internet Explorer to another computer or browser may take just a few minutes.
Using the abovementioned techniques, you can move your Internet Explorer favorites or even bookmarks to your new computer or browser.
You should also remember that each browser has its user interface, so locating the correct settings to transfer your favorites or bookmarks may be difficult if you do not follow our instructions.
Use bootable media created within the Stellar tool.
Choose your account and click the Reset Password button.
Wait for the password to be changed and click on Reboot to finish.
Stellar Password Recovery is a password recovery tool developed to reset Admin or user passwords on Windows 7, 8, 8.1, and 10.
This suitable method will help you recover any login password using the bootable media drive. So, you have support for both BIOS and UEFI systems to reset your password without login in on your PC.
In addition, this solution comes with great compatibility for Windows devices, multiple languages support, or extremely effective and simple UI.
Stellar Password Recovery
Forget about complicated steps to reset your password on Windows 7, this software does it in seconds.
Boot your PC using the Windows 7 installation disk. Once the Install Windows screen appears, press Shift + F10.
In the Command Prompt, type in the commands below, hitting Enterafter each line. If you did not install Windows 7 in the C drive, then replace C with the location where Windows 7 was installed.
C:
cd windows\system32
ren Utilman.exe Utilman.exe.bak
copy cmd.exe Utilman.exe
Close Command Prompt and click Yesin the Install Windows pop-up.
Allow Windows 7 to boot normally then click on Ease of Access at the login screen.
In the Command Prompt window type net user username new_password. Replace username with your account name and new_password with your new password.
8. Adjust sethc.exe
Power up Windows 7, while it’s turning on, press and hold the power button to force shut down the PC.
Turn the computer back on to reveal the Windows error recovery screen. Click Launch Startup Repair (recommended).
Click Cancel when it asks to restore the PC. Allow the analyzing process to run its course.
In the dialogue box, click View Problem Details and scroll to the bottom of the report. Click on the last link beginning with X:\windows\system32\.
The notepad will appear with the online privacy statement. Select File then click on Open.
Next to Files of type, set it toAll Files. Under the System32 folder, locate and select sethcand rename it to anything.
Still in the System32 folder, locate and select cmd.exe and rename it to sethc.exe.
Close all dialogue boxes and restart Windows 7. While the PC is powering on press Shift five times.
The Command Prompt will appear at the login screen, type net user username new_password. Replace username with your account name and new_password with your new password.
Close Command Prompt and log in with the new credentials.
9. Reset using System Restore
Restart Windows 7 and press and hold F8.
In the Advanced Boot Options, select Safe Mode with Command Prompt and press Enter.
Enter the command: cd restore and press enter then type the command: rstrui.exe and press Enter.
In the System Restore pop-up, click on Next.
Choosea restore point then click on Next, then Yes to confirm.
The System Restore feature does not affect documents, photos, or other data, however, it may uninstall recently installed applications.
10. Reset to factory settings
This is a last-resort solution. If none of the above solutions worked for you, then you may have no choice but to completely reset your PC. Performing a factory reset will wipe all data from your Windows 7 which is why this solution is a last-case scenario.
How do I bypass the login screen on Windows 7?
Press the Windows key + Ron your keyboard.
Type this command: netplwiz and press Enter.
Click your account name.
Uncheckthe box that requires users to enter a password then click OK.
Enteryour password when prompted and click OK.
Where does Windows 7 store passwords?
Passwords are stored in the Security Account Manager (SAM) database file on Windows 7. Stored passwords use a one-way hash format and are not accessible by non-administrative users.
Performing this action will bypass the login screen every time you start up your Windows 7 and will log you in automatically.
We hope one of the above solutions helped show you how to reset your Windows 7 password without logging in.
Let us know in the comments which method worked for you or if you have a suggestion for a solution not listed in this guide.
Microsoft Office is one of the most popular and widely used applications for office work. Millions of students, professionals, and small businesses use it to create documents, spreadsheets, and presentations. The easiest way to get Microsoft Office is by buying it online.
You can also get it on your PC or Mac by installing the software directly from Microsoft’s website. This method works well if you already have a copy of Windows or macOS installed on your computer. You must also have an internet connection to download the software from Microsoft’s site.
While this may seem like the easiest route, it is not always possible. The subscription-based software comes at a price and not everyone can afford to purchase the software.
Microsoft Office for Students is a free version of the popular office suite that comes with some limitations. The app can be installed on up to five PCs or Macs and the user must be enrolled in an eligible academic program.
Do you get Microsoft Office free as a student?
There are many different ways to get Microsoft Office for free. The most common way is through a student discount. If you are a student, you can download and install Microsoft Office for free. This includes Word, Excel, and PowerPoint applications as well as the Outlook email client.
It’s a stripped-down version of the full Office experience that doesn’t include all the features and functions of the paid versions, but it’s still more than enough to get work done.
To qualify for the Office 365 for students plan, you must be an active student enrolled in a qualifying college or university and be 18 years of age or older. You’ll need your valid university email address alongside other system requirements to get this offer.
The Microsoft Office for Students program is designed for students, teachers, and schools to get the latest version of Office for free. You can use your Microsoft account to log in and access your documents from all your devices at any time and allows up to five devices.
How do I download Microsoft Office for free as a student?
Office 365 Education is free for faculty and students at qualifying institutions. To qualify for Office 365 for Students plans, your school must be an accredited university or college.
As a student, you can take advantage of Microsoft’s Office 365 free plan for as long as your student email is valid and verifiable.
However, it does have some limitations. Microsoft may ask you to verify that you are a student at any time and revoke some functionalities if they find you are no longer eligible.
How long can I use Office 365 student?
You can use Office 365 for students for as long as you’re a student, whether it’s for 4 years or 10 years. If you leave your school, or if Microsoft confirms that you are no longer attending, they will deactivate your account and shut down its features.
This means that you’ll no longer be able to sign in to any of the services associated with your account. You can create a new one with a valid email address and continue enjoying the features.
Once you are fully set up with the software, you may find the need to use a VPN especially if your work is highly confidential. We have recommended the best VPNs to use alongside Office 365.
After using it for a while, you may come across some common Office 365 issues and errors but we also have a fix guide to address all these problems.
If you are an Office 365 user for the free version, we’d like to hear from you. Let us know of all the features that make it a smooth ride.
Taking good photos is only half of the job done. Post-processing or editing is the other half that photographers rely on to really make the images pop.
With multiple image editing software available on the market, it is really confusing which one to go for. However, professionals opt for only a handful of tools, like Photoshop or GIMP.
Photoshop is arguably the most popular professional photo editing tool. It is so popular that when you want to say someone to edit the photos, you would simply say Photoshop the photo.
GIMP on the other hand is an open-source and free photo editing tool. It is compatible with all operating systems and comes with multiple third-party plugins to enhance its features.
Now if you are a photo editor, or just starting out, there might be some questions related to GIMP vs Photoshop, in your head. Which one should you go for? Which is more beneficial? Which one is simple to understand? etc.
Well, this guide will give you all the answers to your questions, as we will compare GIMP vs Photoshop in this guide. Let us check it out.
GIMP vs Photoshop similarities
Before we check out the similarities between GIMP and Photoshop (yes, there are a few) let us get ourselves an overview of both these image editing software.
GNU Image Manipulation Program, in short GIMP, is a free and open-source photo editing program. It is compatible with all available operating systems, except for smartphones. GIMP is a very light program, making it more portable than Photoshop.
You can open PSD or Photoshop Document format, which is a native of Photoshop in GIMP as well, and continue with your editing. It has super fast batch processing.
GIMP cannot open RAW files by default, you need to install a plugin in order to do so. Beginners would love GIMP because it is available free of cost, and is a nice tool to know about the workarounds of professional editing.
Adobe Photoshop is the one-stop shop for all of your image editing needs. It is the most popular image editing software.
There are different types of Photoshop programs, such as Photoshop Lightroom, Photoshop Express, etc., but you get everything with the Photoshop program.
Photoshop lets you retouch your images, damage photo restoration, and apply multiple filters. Basically, you can do almost whatever you want to do to an image and get the desired output.
Photoshop support every operating system and even has a mobile or smartphone version of it. Since Photoshop isn’t just for editing, it also facilitates designing, illustrating, and many other disciplines, the learning curve can be a bit overwhelming, especially if you are a beginner.
Photoshop
Transforms your digital creative world into a canvas and brings it to life.
First, both are powerful tools that can be used by professional photographers and graphic designers. Here are some of the similarities between GIMP and Photoshop:
Both can open and edit images.
GIMP can also open and edit PSD (Photoshop Document) files same as Photoshop.
GIMP comes with the same set of brushes and options (sometimes more) as Photoshop.
Photoshop support all major operating systems, just like GIMP.
Can GIMP do everything that Photoshop can?
The simple answer to whether GIMP can do everything that Photoshop does is NO. However, there are certain areas where GIMP and Photoshop have similar features, which we have listed above.
There are certain areas where GIMP offers more as compared to Photoshop, and there are times when you will feel limited options when editing an image in GIMP. So, it really depends on what you are looking to do with this software.
If you are deep into professional photography and graphic designing, etc. then you would opt for Photoshop because of its versatility. Otherwise, GIMP is a capable product.
What are the differences between GIMP and Photoshop?
We are not going to do the same old table-style comparison between GIMP and Photoshop, instead will give you an interesting comparison between the two photo editing software, which will help you decide which is the one for you.
1. Selection tools – Photoshop does it in a blink
Manual selection in GIMP and Photoshop offers the same experience. But when it comes to automatic image selection, Photoshop is the clear winner here.
GIMP takes a tab bit too long to understand what the user is trying to select in the image, especially when the background is not a solid color. On the other hand, Photoshop does it quickly, in fact, as soon as you finish clicking.
Moreover, Photoshop offers a wide variety of selection tools such as feather, expand/shrink, and automatic mask, whereas GIMP has only a limited set of selection tools on offer.
2. Automatic corrections – Photoshop does a clean sweep
Thanks to the addition of the Neural Filter with Photoshop version 22.0, when it comes to automatic adjustments such as brightness, contrasts, and colors, Photoshop is a clear winner
With advanced AI and machine learning, Photoshop better understands and applies the best possible automatic corrections to your images, which GIMP, unfortunately still struggles with.
There are other filters on offer by Photoshop that instantly perfects your skin, changes your facial features, and give you a range of effects that you won’t find in GIMP.
3. Learning curve – GIMP wins it here
If you are a beginner and just starting out in the world of photo editing or graphic designing, and have no prior experience in using a professional editing tool, then GIMP is a good choice.
Since Photoshop serves a wider audience, GIMP is made especially with digital photography in mind. So, you will find GIMP cutting down the chase and offering you the tools that you would need the most.
4. Price – GIMP is FREE
Hands down this section belong to GIMP if you are looking for photo editing software that is available for free.
Photoshop is available from Adobe monthly subscription cost of $9.99. It used to be available for a staggering $700 price where once you paid the fee, Photoshop was yours forever, but the deal is now long gone.
For $9.99 not only do you get Photoshop, but you also get Adobe Lightroom CC, Adobe Lightroom Classic CC, Photoshop for iPad, and 20GB of cloud storage space. Overall, GIMP is the best choice if you want to try your hands at editing and don’t want to spend a million to do that.
5. Editing on the go – Photoshop wins
GIMP does not have a smartphone app that you could easily open on your phone and carry on with your editing.
On the other hand, Photoshop has a smartphone app, that brings Lightroom presets to your phone, Photoshop Fix and Photoshop Mix feature, and access to Adobe Cloud, making it the best on-the-go tool to edit photos.
GIMP comes with a full suite of painting tools including a brush, pencil, airbrush, etc.
It supports sub-pixel sampling
You can create your own custom brushes and patterns
It is very lightweight, making it super portable
Comes with superior batch processing
Offers advanced manipulation tools
Third-party plugins to enhance its functionalities
Supports multiple file formats including bmp, gif, jpeg, mng, pcx, pdf, png, ps, psd, svg, tiff, tga, xpm, and many others
It is available for free
What are the main features of Photoshop?
Here are the main standout features of Photoshop:
Photoshop is available for both Android and iOS
It has a wide range of tools compared to GIMP
Offers support for more color profiles than GIMP
Natively supports RAW and other complex formats
The interface and functions feel polished
Advanced selection tools
Filters are pinpoint and accurate
Overlays and warp features are absolutely spot on
What are the advantages of GIMP?
Check out the advantages of GIMP software:
It is best for beginners since it is available for free
GIMP is light in weight. So, it does not eat a lot of your storage space
The interface is not overwhelming and can be understood easily
The interface is also very customizable
You can re-assign keyboard shortcuts
Gets support from an active community giving you access to new plugins
Comes with superior batch processing
What are the advantages of Photoshop?
Check out the advantages of Adobe Photoshop software:
You can edit your images on the go with the mobile app
You can redeem the subscription cost as a business expense
Not only Photoshop is suitable for image editing but it also serves as a powerful tool for graphics design, illustrations, and other disciplines
It has superior compatibility with other Adobe programs such as Adobe Lightroom, Adobe Cloud, etc.
Photoshop supports CMYK mode for high-quality prints
Receives critical updates very often
Conclusion
In our conclusion, we will keep it short. If you are a professional and very deep into your profession, then there is no doubt that you should opt for Adobe Photoshop. Because of its professional set of tools, regular feature updates, and a suite of curated plugins, make Photoshop the best choice for you.
However, if you are on a budget, then there is no better alternative to Photoshop than GIMP. With GIMP, you will be sorted to accomplish all of your tasks. Though there will be some limitations, remember that you get GIMP absolutely for free.
GIMP is best for image editing, adding filters, and animation.
Photoshop serves a wider purpose including design, illustrations, and other professional disciplines.
Krita can be used for illustrations and comic books.
GIMP offers a basic set of brushes, which can be expanded by downloading third-party brushes.
Photoshop offers an extensive range of brushes.
Krita offers a basic set of brushes, which can be expanded by downloading third-party brushes.
GIMP isn’t available for smartphones.
Photoshop is available on smartphones, both Android and iOS.
Krita isn’t available for smartphones.
GIMP is also available on Linux, alongside Windows and Mac.
Photoshop is available for Windows and Mac.
Krita is available for Linux, Windows, and Mac.
GIMP is small in size.
Photoshop, being a professional tool, is bigger in size.
Krita is small in size.
That is it from us in this guide. We hope that this guide made everything clear in terms of GIMS vs Photoshop and gave you a clear idea of which software you should go for.
Today, we will give you 5 of the best solutions to help you fix the high CPU usage problem of the Microsoft Office Click-to-Run service. Let us take a look at the solutions.
How do I fix the Microsoft Office click to run high CPU usage?
1. Repair Microsoft Office client
Open the Start menu.
Search for the control panel and open it.
Select Programs and Features.
Click on Microsoft Office.
Select Change.
Click on Quick Repair and hit Repair to start the repairing process.
Restart your PC and check if this fixes the error.
Since Microsoft Office Click to Run is an installer component, there are chances that because of some missing files or bugs, the process is eating up your CPU memory.
You can easily fix that by running the repair of the program following the above steps.
2. Scan your PC for malware
Open the Start menu.
Search for Windows Security and open it.
Select Virus & threat protection.
Hit the Quick Scan button to begin the virus scan.
A virus can not only make your PC slow or freeze, but it will trigger multiple other issues.
Download Microsoft Office and check if this resolves the issue or not.
Reinstalling not only fixes the Microsoft Office issues caused by corrupt or missing important files, but it also installs the latest available version of the program.
Type the below command and press Enter. services.msc
Locate Microsoft Office Click-to-Run service.
Right-click on it and select Properties.
Under the General tab, go to Startup type and select Disabled.
Click OK.
Restart your PC.
Disabling this process isn’t recommended. But if you are still experiencing lag and high CPU usage issues with this service, then you can go ahead and disable the process.
5. Uninstall Click to Run
Open the Control Panel.
Select Programs and Features.
Click on Microsoft Office Click to Run and select Uninstall from the top.
If you have Microsoft Office Click to Run installed on your PC, then you can uninstall it from the Control Panel.
How to check if you have Microsoft Office Click to Run
Microsoft Office Click to Run is a background service that uses streaming and virtualization technology to keep the Office apps up-to-date and allows users to run multiple instances of the Office apps.
You can also check if you have the Click to Run installed for Microsoft Office or not by following the below steps:
Via Office app
Open any of the Microsoft Office apps such as Excel, Word, or Outlook 2013 or 2016.
Navigate to File > Office Account > About Outlook (or any other app).
On the right side, you will see About Microsoft.
If the installed version is the Click to Run version, then you will see the text Click to Run.
Via Control Panel
Open the Start menu.
Search for the control panel and open it.
Select Programs and Features.
Click on Microsoft Office.
Right-click on Microsoft Office, and then click on Change.
If it shows How would you like to repair your Office programs? and has two options to do Quick Repair or Online Repair, then you can understand that it is the Click-to-Run version.
What happens if I disable Microsoft Office Click to Run?
Once you disable or remove the Microsoft Office Click to Run, your Microsoft Office apps won’t get automated services. That is, they will not be automatically updated or installed with the most recent feature or security patches.