How to fix Camera App bugs after Windows 10/11 Update

Microsoft finally released Windows 10 May 2019 Update to the general public. The company listed some known issues that come along with this update.

Apart from the known issues, Windows 10 users also reported a series of additional issues on Microsoft’s forums.

Many Windows 10 users who installed the May 2019 Update reported Camera app launching issues. Microsoft acknowledged the bug and stated that it affects Intel RealSense series. Microsoft says that:

After updating to the Windows 10 May 2019 Update and launching the Camera app, you may get an error message stating: ‘Close other apps, error code: 0XA00F4243.

Microsoft placed an upgrade block for Intel RealSense S200 and Intel RealSense SR300. There are various workarounds that you can try to temporarily fix the issue.

Let’s have a look at some of the recommended solutions that can fix the bug.

Quick workarounds for Camera App issues

1. Reconnect the camera

It is one of the easiest workarounds that you can try. Microsoft suggests that you should unplug and reconnect the camera to your device. This technique is going to resolve the issue by establishing a new connection.

This should technically reset the connection to your Windows 10 May 2019 Update device. So, if you’re lucky enough, everything should then work normally.

Move on to the second option if the issue is not resolved.

2. Restart RealSense service

Microsoft recommends its users to visit Task Manager in order to restart the RealSense service.

  1. You need to Right click on the taskba
  2. Navigate to Task Manager > Services
  3. Right-click RealSense > Restart.restart RealSense driver

You should not experience any issues when launching the Camera application. You may need to restart the service in case you reboot your system.  

3. Disable camera in Device Manager

If the above two solutions did not work, you can simply try this third method. You can navigate to the Device Manager to disable your camera. Try the following steps to fix the issue:

  1. Right click on the Start Menu and navigate to Device Manager 
  2. Expand Cameras
  3. Right-click RealSense disable the camera.

RELATED ARTICLES YOU NEED TO CHECK OUT:

How to fix Direct 3D full screen issues in Windows 10/11

We already know that every Windows 10 update brings a new series of bugs that frustrates users. The same is valid for the May 2019 Update.

Microsoft recently confirmed that some ‘Direct3D (D3D) applications and games may fail to enter full-screen mode on displays where the display orientation has been changed from the default (e.g., a landscape display in portrait mode’.

Microsoft says that its engineers are working on a fix which should be available in June. However, Microsoft recommended users to resort to some temporary solutions to fix the issue.

Steps to fix D3D full-screen issues on Windows 10

1. Run the apps/ games in windowed mode

The first solution is pretty handy and it can quickly solve the issue for you. You can try to run your apps in windowed mode.

However, this feature is not available on some high power games. Luckily, there is also a workaround for those games.

You should use a secondary display to launch such games. Keep in mind that this display should not be rotated before launching the game.

This solution may not help too many users because of two obvious reasons. First, you must have a secondary display. Secondly, the method does not work on a previously rotated display.

2. Disable full-screen optimizations

If the above-mentioned solution does not work, you can try a second option. You need to disable Full-Screen optimizations by updating the application’s compatibility settings. Try the following steps to change the settings:

Open the application’s or the game‘s root folder and look for the main executable file. Now, right click on the .exe file and navigate to Properties >> Compatibility tab >> Settings >> Disable fullscreen optimizations >> Apply. disable full screen optimizations PC

You don’t need to restart your PC now because the settings will be immediately applied.

3. Reboot your system

A third option, that’s not recommended by Microsoft, but which could do the trick is a simple system reboot. Microsoft says the bug only happens on a device where the screen orientation was previously adjusted.

So, if you reboot the computer and don’t make any changes in this regard, the games should launch normally in full screen with no issue whatsoever.

RELATED ARTICLES YOU NEED TO CHECK OUT:

There was a problem acquiring personal certificate Skype issue [FIX]

Some Windows 10 users reported experiencing an issue when trying to sign-in using Skype for Business (Office 365). The error message There was a problem acquiring a personal certificate required to sign in. If the problem continues, please contact your support team pops-up, blocking access to their Skype for Business accounts.

Here’s how one user describes this problem:

I have worked with a user on a problem with skype for business online for quite a long time now and i can’t seem to figure it out. […]
Case: User is not able to sign in to skype for business, with the following error message: “There was a problem acquiring a personal certificate required to sign in. If the problem continues, please contact your support team.”

This issue could be caused by software or certificate conflicts.

In order to fix this sign-in issue, we managed to come up with a series of fixes.

Solutions to fix Skype sign-in certificate problems

1. Delete the sign-in info

  1. On the Skype for Business sign-in window, click Delete my-sign in informationdelete skype sign-in info windows 10
  2. This deletes your saved password, certificates, and connection settings
  3. Next, you have to input the account info and see if you can log in.

2. Flush DNS cache

  1. Open Command Prompt (Run as Administrator) > type the following command and press Enter:
    ipconfig
    /flushdns
  2. Wait until the process completes and then close CMD.


Windows 10 Firewall might be blocking Skype as well. Learn how to unblock it here.


3. Make changes through the Registry Editor

  1. Press the Windows logo key + R on your keyboard > type regedit and hit Enter to open the Registry Editor
  2. Find the following registry path: HKEY_LOCAL_MACHINESOFTWAREMicrosoftCryptographyMachineGuidThere was a problem acquiring personal certificate Skype
  3. Double click on MachineGuid > if the value contains a list of numbers and letters in brackets – e.g. {c1cbd94c-0d35-414c-89ef-dd092b984883} – delete itThere was a problem acquiring personal certificate Skype
  4. Close the Registry Editor > restart Lync and try signing-in to Skype for Business.

4. Perform some troubleshooting steps for Lync 2010 and Lync 2013

If you’re still using Lync, here is how you can fix this problem:

  1. Locate the app data folder: %LOCALAPPDATA%MicrosoftCommunicator<[email protected]
  2. Delete the folder containing information associated with your email address
  3. Restart Lync and try to sign-in using Skype for Business

If you’re using Lync 2010, delete the personal certificate following these steps:

  1. Press the Windows logo key + R on your keyboard > type certmgr.msc and hit Enter
  2. In the Certificates Manager, click to expand Personal > CertificatesThere was a problem acquiring personal certificate Skype
  3. Click to sort by Issued By column > locate the certificate issues by Communications Server
  4. Check to see if the certificate exists and isn’t expired
  5. Delete the certificate > try to sign-in to Skype for Business.

If nothing seems to help, try reaching the Support Center on the official Microsoft web page and let them know about the issue.

Let us know in the comment section if you found this article helpful and you were able to fix the There was a problem acquiring personal certificate Skype error.

READ ALSO:

Intel 10th-Gen Ice Lake CPUs enable 3x faster wireless speeds

Intel recently announced its new Ice Lake (10th gen Core processors) CPU lineup at Computex 2019.

The company plans to introduce these processors for 2-in-1 PCs and laptops. These processors will be available in three different variants Core i3, i5 and i7.

Furthermore, Ice Lake CPUs will feature 8 threads and 4 cores. The graphics frequency is set up at 1.1 GHz and the turbo frequency can reach up to 4.1.

The company says that users will enjoy their favorite games at 1080 with the new Iris Plus graphics. The graphics are based on Intel’s Gen11 graphics architecture.

The power graphics support other activities such as 4K video editing, 4K HDR video streaming, and high-resolutionphoto processing.

Support for Wi-Fi 6 and Thunderbolt 3 is also included. Windows 10 users will enjoy wireless speeds 3x higher than the current standard.

For more information about the tech details, you can check out Intel’s press release post.

Intel’s highly integrated 10th Gen Intel Core processors give OEM partners the freedom to innovate on design and aesthetic by reducing the silicon footprint while still delivering the latest and greatest standards and world-class performance.

First batch lands next month

intel 10th-generation CPU windows 10

The first batch of Intel’s 10th-gen chips is expected to arrive next month. The company announced that the 10th Gen Ice Lake processors with 30 or more designs will hit the stores during the holiday season.

It all depends on Intel’s supply, but Intel believes that it is capable to meet the demand. Finally, Intel wants PC manufacturers to come up with innovative features such as extended battery life and others.

The chip maker confirmed it’s currently working on the first version of 10th-Gen Ice Lake CPU laptops. Intel wants PC manufacturers to meet specific targets such as a battery life of 9 hours.

We can’t wait to get out hands on these 10th-Gen Ice Lake CPU machines.

RELATED POSTS:

FIFA 17 stuck on loading screen [UPDATED FIXES]

Fifa is one of the most played online soccer game nowadays, with millions of players worldwide. Although Fifa 17 launched a few years ago, many Xbox users still enjoy playing it pretty consistently.

The game certainly is an improvement compared to its predecessor with more realistic gameplay and better online features. And there is no better way to experience FIFA 17 online matches than on Xbox One.

However, there are reports about a loading screen issue, according to active Xbox One players in the community. On some occasions, the game won’t load past the Marco Reus initial screen.

Additionally, some users reported a black screen that follows. The problem has been present since the release of the game and is quite unpredictable.

What can I do if FIFA 17 is stuck on the loading screen? The simplest solution is to clear the network settings. In most cases, game crashes on Xbox are caused by network issues or corrupted files. If that doesn’t work, clear your consoles cache and then reinstall the game.

Check the steps below to learn how to do that.

How to get past the FIFA 17’s loading screen on Xbox One:

  1. Clear the Mac address
  2. Try disconnecting unused controller
  3. Clear console cache
  4. Reinstall the game
  5. Reset your console to factory default settings

Solution 1 – Clear the Mac address

This solution is confirmed as working by the majority of users, and that’s why you should try it first. To clear your network settings, follow the steps:

  1. Go to Settings.fifa 17 stuck on loading screen
  2. Choose Network Settings.advanced wi-fi settings xbox one fifa 17 stuck
  3. Navigate to Advanced Networks and then Alternete MAC address.
  4. Hit Clear.
  5. Restart your Xbox.
  6. Unplug the power cord and plug it back in.
  7. Now start your console.

After this, the issue should be gone and your Fifa 17 should get pass the Reus screen.

  • READ ALSO: Fix: FIFA 17 won’t update on Xbox One

Solution 2 – Try disconnecting unused controller

Some users managed to fix this issue by disconnecting unused controllers or other USB peripheral devices. It seems that some bug inflicts the game when all of them are connected.

Additionally, you’ll probably want to assign your controller to your profile. To do so, follow these steps:

  1. Return to your Xbox dashboard.
  2. Go to Settings.
  3. Open All Settings.
  4. Choose Kinect and Devices.
  5. Open Devices and Accessories.
  6. Choose the controller you use while playing FIFA 17.
  7. Select Assign to someone.
  8. Assign controller to your profile.
  9. Save and exit.

This can be an easy workaround for your issue. On the other hand, if the problem is persistent, try other solutions below.

  • READ ALSO: Grab this cool Phantom White Special Edition Xbox One controller now

Solution 3 – Clear console cache

Clearing your Xbox One cache may work. On some occasions, corrupted files stored in your cache can invoke freezing issues. In addition, this will give you an insight on the game‘s state.

So, if the game is still unresponsive, a reinstall would be the next step. To clear the cache from your console, do as follows:

  1. Go to System Settings.
  2. Select Storage.
  3. Choose hard drive device.
  4. Press Y for additional options.
  5. Choose Clear System Cache.
  6. After it is done, reboot your console.

-READ ALSO: How to fix Your network is behind a port-restricted NAT error on Xbox One

Solution 4 – Reinstall the game

If you completed the previous steps and all you still see is Marco Reus followed by an unwelcoming black screen, reinstalling the game is the next logical solution.

One thing to remember is to back up your in-game data to the cloud. To reinstall the game, follow these instructions:

  1. Go to Xbox dashboard.fifa 17 stuck at first screen xbox dashboard
  2. Select My games and apps.
  3. Highlight FIFA 17 and press Menu button.
  4. Choose Manage game from the pop-up menu.
  5. Use the Saved data option from the left side to save your in-game data.
  6. When you are ready, select Uninstall all and wait until the process is finished.

Next step would be reinstalling the game. You can do so by following these instructions:

  1. If you own the physical copy of FIFA, the install process will start as soon you insert the disc in the console. Just choose Install when prompted.
  2. For the digital copy, go to the My games and apps.
  3.  You should see FIFA 17 in Ready to Install.install fifa 17 online xbox one
  4. Select Install and wait until the process is done.

Have in mind that on some occasions, the game is not shown in Ready To Install section. This is a common bug related to a Xbox Game Store. You should wait for some time, and the game will appear in the list.

Solution 5 – Reset your console to factory default settings

In the end, if all of the previous troubleshooting options are unsuccessful, you should move on to resetting your console. This proved as a valid solution for many users.

It seems that some of the settings interfere with the FIFA 17 and prevent the game from starting. We don’t want you to rush things and lose achievements, so follow the next steps closely:

  1. Go to the Settings.
  2. Choose All settings.
  3. Select System.
  4. Select Console info and updates.
  5. Choose Reset console.
  6. Choose Reset and keep my games and apps.
  7. The resetting process will start and finish after few minutes.

This is our best bet for overcoming stuck loading screen issue.

If you follow the steps in each solution properly, you’ll most certainly get the job done. Afterwards, you can return to your game and enjoy competing with the rest of the world.

If you’re interested in bugs affecting the newer versions of the game on Xbox and how to solve them, check out this awesome guide.

If you managed to fix the game with some other solutions, please share your method. Also, if you have any more questions, don’t hesitate to leave them in the comments section below.

[wl_navigator]

FIFA 17 Not Launching or Opening: 4 Ways to Fix it

Many reported that FIFA 17 is not launching for them, and if this happens, you won’t be able to play the game at all. Luckily, there are a few methods you can use to fix this issue.

Why is my FIFA 17 not working?

The most common problem is damaged Visual C++ Redistributable packages. Corrupted game installation can also cause this problem.

How do I fix FIFA 17 not launching?

1. Repair the VC++ packages

  1. In the Windows search box, type Control Panel and hit Enter.
  2. In the Control Panel, under Programs, click on Uninstall a program.fifa 2017 doesn't start
  3. In the new window that appears, search for all Microsoft C++ Redistributable packages.
  4. Right-click on each and select Change.
    change repair
  5. When Microsoft C++ Redistributable Setup appears, click on Repair.
  6. Hit Close once the setup completes.
  7. Repeat the step for every C++ package you have.

2. Run the game as Administrator

  1. Right-click on the FIFA 17 desktop shortcut.
  2. Select Properties.
  3. Click on the Compatibility tab, and check the box at the bottom under Privilege Level where it says Run this Program as an administrator.
    run this program as administrator
  4. Click OK.

After setting the game to run in this compatibility mode, check if FIFA 17 is still not opening. If the problem still persists, move on to another solution.

3. Update your drivers

  1. Go to Search, type devicemng, and open Device Manager.
  2. Find your graphics card drive in the list of installed hardware.
  3. Right-click the driver, and select Update driver software.
  4. If the update is available, it will automatically update the driver, so just follow along.

There may be some other hardware in your computer that needs to be updated. In that case, check out our article about updating drivers in Windows 10, for additional info.

If you want to go for other methods than the one mentioned above, we suggest you try a reliable updater tool to update your drivers automatically with the latest versions from a large database with a single click.

⇒ Get Fortect Driver Updater

4. Repair the game

  1. Open Origin.
  2. Go to your library.
  3. Next, locate FIFA 17, right-click it, and choose Repair.
    repair sims 4 origin
  4. Wait for the process to finish.

This isn’t the only issue, and many reported that FIFA 17 stops working on PC or that FIFA 17 won’t connect to EA servers, but we already covered those issues in other guides.

If you have any other problems, visit our dedicated FIFA 17 issues article to learn how to fix them.

How to Fix Frequent Dota 2 Issues, Bugs and Crashes

We’ve prepared a list of the Dota 2 most common issues, with crashes and launching failures. Of course, with detailed explanations on how to fix them. Most problems can be fixed in the Steam client. Usually, they are triggered by faulty internet connection or corrupted files. After that, change some router settings and verify the integrity of the game cache.

Solve Dota 2 common issues, start failures, and crashes

1. Unable to download install file from Steam

  1. In order to download the game, Steam needs the HTTP connection. Disable any VPN or web proxy software on your PC, so the platform can function unrestricted.
  2. Check your system’s date and time. This is being overseen quite often, but it seems that wrong time and date can prevent Steam from downloading the game. Set it right!
  3. Try changing the Download Region. The reason for this is because your current region might be faulty at the time.
  4. Corrupted files in Steam installation folder can inflict this issue. To get rid of an interfering file, exit the Steam client, go to the Steam folder (default location is C:\Program Files), and then to userdata<your accountID>config. There, you should find the localconfig.vdf file. Delete it and restart the Steam client.

2. Common connectivity issues and troubleshooting

  1. Connect your PC with a router trough wired connection. Wireless is not best option when it comes to online gaming.
  2. Some providers include multiple additional features in the router setup. The risky ones are Stateful inspection, Dynamic packet filtering, QoS (Quality of Service) and UPnP (Universal Plug and Play). Disable these features within your router.
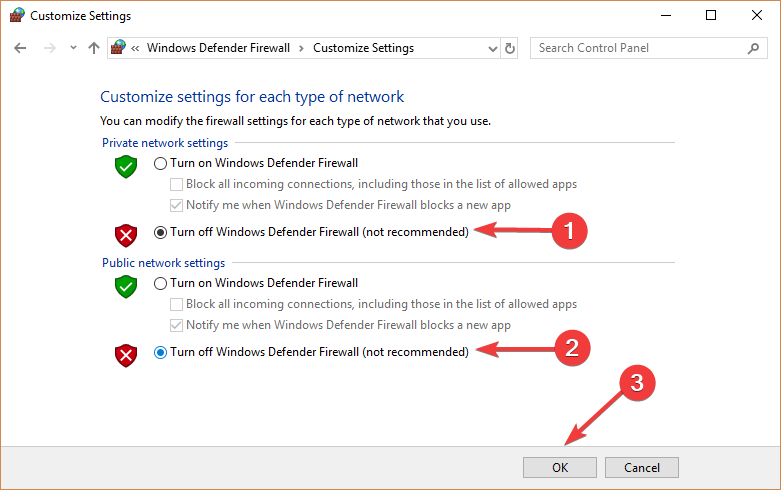
  3. Look out for Firewall exception for Steam, Dota 2, and related processes. The firewall can block Steam features and prevent the connection with servers. Turning off the firewall is not advisable, but you can give it a try, as well.dota 2 crashes on win 10
  4. Check the Steam Server status to be sure it is not being maintained or down.
  5. Next, check the Dota 2 latency to see if the servers are not overcrowded.
  6. Disable any background applications that may interfere with the client. Most of the programs that use the internet connection can prevent login or disturb in-game performances. This is especially the case with antivirus/antimalware/antispyware programs.
  7. Scan your PC for viruses. System infections can corrupt the Steam client.
  8. Make sure your router ports are opened.

What is the core of technical issues in online multiplayer games? Yes, PC components may lose power, or software may go astray. But, the ruler of MMO’s misbehaving is the faulty internet connection.

3. Incomplete Installation error

Some users reported that after the installation process is finished, they get prompted with the ‘Incomplete Installation’ error. There are multiple reasons for this issue and we are presenting them bellow.

We’ve already explored the most common Incomplete Installation’ error codes, so if this is your problem, click the highlighted link.

4. Unable to achieve multiple connections to server from the same router

There is a probability that your router can’t manage multiple PCs at one remote address. This obstruction does have a workaround and we found some possible solutions.

In order for multiple clients to function on a single router you have to follow these guidelines:

  • Each PC must have a different client port settings.
  • All respective PCs must have a unique MAC address.
  • Different PCs must have a unique Steam account with different game licenses registered to the account.
  • The router must be updated.

Additionally, you should change the Client Port in userconfig.cfg file. To do so, follow these steps:

  1. Go to C:Program FilesSteamsteamapps< your user name>Dota 2dotacfg.
  2. If you already have userconfig.cfg in that location, open it with Notepad.
  3. In case you don’t, create New Document with Notepad and name it userconfig.cfg.
  4. Open userconfig.cfg and type this: client port 27XX. Here XX are the last two digits of the client port number. Acceptable values include 05 – 19 and 21 – 32.
  5. Save the document.

5. Files unable to read/Files corrupted error

  1. Restart PC and open Steam client.
  2. Open Library.
  3. Right-click Dota 2.
  4. Click Properties.
  5. Select Local Files tab.
  6. Choose Verify integrity of game cache.
  7. The process execution time is proportional to the game size.
  8. If there is a corrupted file, Steam will highlight it.

Sometimes due to viruses or other unwanted content, game files can get incomplete or corrupted. Steam implemented a great solution for this, with a built-in tool that checks for file integrity.

6. Laptop with dual GPU malfunction

  1. Use AMD Catalyst or nVidia Control Panel.
  2. Find Manage 3D settings.
  3. In global settings set dedicated GPU as Preferred Graphic Processor.dota 2 bugs in windows 10

There are plenty of laptop configurations with two GPUs. Most of the time one is integrated Intel’s GPU with many variations. Other is probably a punchy AMD or nVidia.

On-board Intel is for standard use, while the other one is activated when some high graphical processes are involved. Like playing Dota 2, for example. The problem occurs when your SLI isn’t reaching to dedicated graphics when the game starts.

However, sometimes AMD graphics can’t resolve the issue even after you change the settings. If the primary solution couldn’t settle your issue with AMD GPU, you should try out the modded driver.

You can find it here. Have in mind that these are not official drivers.

7. Dota 2 crashes after pressing Start Game

  1. Go to Steam client > Library.
  2. Right-click the Dota 2 and choose Properties.
  3. In the General tab open Set Launch Options.
  4. Type -nod3d9ex.
  5. Save and start Dota 2.

Dota 2 crashes while in the matchmaking queue

In some cases, the screen ratio (yeah, you wouldn’t expect that) can cause game crashes. To fix this, go to in-game Graphic Settings and change the screen ratio. Keep switching them until you find a working one.

This was our list of the most common issues in Dota 2. We gave our best to help you overcome your problems and enjoy the game and all of its features undisturbed.

If you’re interested in more nifty guides to solve different Dota 2 problems, check out these articles:

Have you encountered some other issues related to the game? Please share them with us in the comments section below.

Void Bastards and Outer Wilds launch on Xbox One and jump straight to Xbox Game Pass

Outer Wilds and Void Bastards are both now playable on Microsoft’s family of Xbox One video game consoles and both are also playable for free for Xbox Game Pass subscribers.

Here’s the official game descriptions, trailers, and shopping links for each title.

Outer Wilds

Outer Wilds is an open world mystery about a solar system trapped in an endless time loop. Welcome to the Space Program! You’re the newest recruit of Outer Wilds Ventures, a fledgling space program searching for answers in a strange, constantly evolving solar system. Mysteries of the Solar System… What lurks in the heart of the ominous Dark Bramble? Who built the alien ruins on the Moon? Can the endless time loop be stopped? Answers await you in the most dangerous reaches of space.

A World That Changes Over Time. The planets of Outer Wilds are packed with hidden locations that change with the passage of time. Visit an underground city of before it’s swallowed by sand, or explore the surface of a planet as it crumbles beneath your feet. Every secret is guarded by hazardous environments and natural catastrophes.

Void Bastards

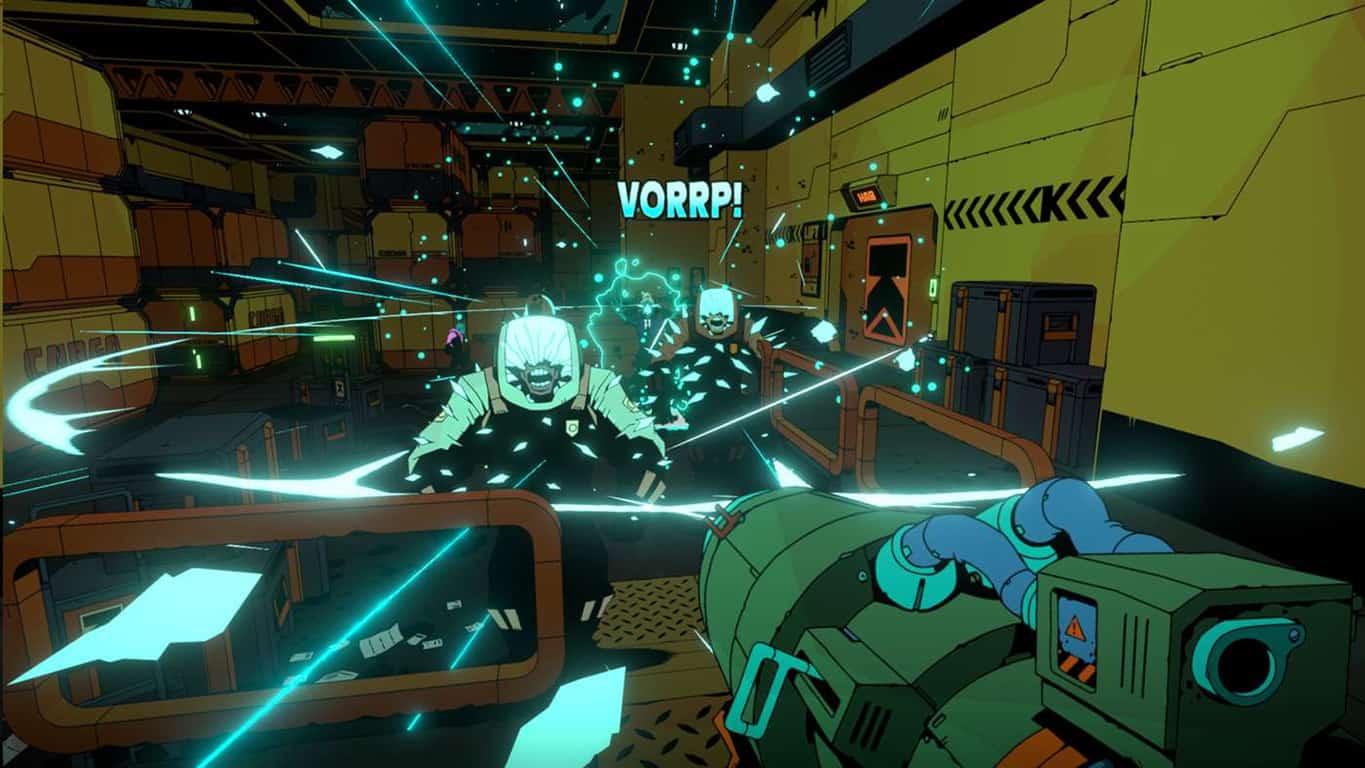
Forget everything you know about first-person shooters: Void Bastards asks you to take charge, not just point your gun and fire. Your task is to lead the rag-tag Void Bastards out of the Sargasso Nebula. You make the decisions: where to go, what to do and who to fight. And then you must carry out that strategy in the face of strange and terrible enemies.

On board derelict spaceships you’ll plan your mission, taking note of the ship layout, what hazards and enemies you might encounter and what terminals and other ship systems you can use to your advantage… Move carefully through the dangerous ships, searching for supplies and manipulating control systems. React to what you find – will you detour to the generator to bring the power back online or will you fight your way into the security module to disable the ship’s defenses? Choose carefully when to fight, when to run and when just to be a bastard.

Xbox Game Pass is a monthly subscription service that gives users access to around 100 Xbox video games. Most titles in the Game Pass library are available on Xbox One for a while before they’re added to Xbox Game Pass but some are also added on the same day that they launch to increase the player base and increase brand awareness.

Are you planning to buy either of these titles or are you just going to play them with Xbox Game Pass? Let us know which option you’ll choose in the comments below and then follow us on Pinterest for more Xbox gaming content.

Outer Wilds
Outer Wilds
Price:
$24.99


Void Bastards
Void Bastards
Developer:
Humble Games
Price:
$29.99

Get free Xbox video game DLC by watching E3 on Microsoft’s Mixer streaming service

As is now tradition, Mixer will once again be gifting those who view E3 livestreams on their platform with free digital content for Xbox video games.

The specifics of the free digital content has yet to be revealed but the official Mixer E3 web page does specify that the awards will only be given to those who watch the Xbox E3 Briefing on June 9th and/or the Sea of Thieves: Mixer Invitational on June 10th.

The gifting will also only work for those that have linked their Mixer account to their Microsoft/Xbox account as the codes for the content will be sent to viewers via an Xbox DM.

With Sony taking a break from conferences this year, Microsoft’s Xbox E3 Briefing is thought by many to be the big event of this year’s E3. In addition to the announcement of new and upcoming video games for the Xbox One, Microsoft is also expected to properly unveil their next generation Xbox console.

We’ll be covering all of the latest Xbox and Microsoft news coming out of E3 next month so make sure to check back here for all of the latest, bookmark our E3 2019 hub, and follow us on Twitter for news as it breaks.

Fix keyboard file building issues in Microsoft Keyboard Layout Creator

Microsoft Keyboard Layout Creator is an application allowing Windows users to create keyboard layouts containing different symbols.

It seems that there is an issue bugging many users.

After editing the new keyboard layout, MSKLC fails to build the keyboard file. This makes it impossible for users to actually use their needed keyboard layout.

Usually this error occurs due to a conflict generated by the path containing the Microsoft Keyboard Layout Creator.

Follow the instructions below to fix this issue.

Steps to fix keyboard file building issues

It seems that systems with 8.3 file names (or short file names) trigger this specific issue.

Because the installation folder is located in Program files and contains spaces in the app directory, MSKLC converts short file names in order to successfully compile the required data.

Having the short names disabled makes the system fail when building the keyboard file.

Fixing this issue requires you to move or install MSKLC to another folder that does not contain short names.

In order to solve the keyboard file building issue, you should have MSKLC located in a path similar to C:\msklc.

We hope that our simple guide on fixing the keyboard file building issue helped you out. If you liked this article, let us know in the comment section below.

READ ALSO:

Surface Pro intermittent pen accuracy issue [FIXED by EXPERTS]

If the form factor wasn’t enough, the other big plus with the Surface Pro is its compatibility with the Surface Pen which only adds to the tablet’s functionality. Unfortunately, things often aren’t the way they should be with the Surface Pen. And the one issue that is known to be have been causing considerable headache to its users is the Surface Pro intermittent pen accuracy.

How do I improve my Surface Pen accuracy? Firstly, you probably want to update Windows 10 on your Surface Pro as updates bring fixes and calibrate the pen. After the update, the problem should be gone. In addition, try disconnecting peripherals or resetting the Pen.

Check below for the detailed instructions.

How to deal with the Surface Pro intermittent pen accuracy issue

  1. Update Windows 10
  2. Disconnect peripherals
  3. Reset the Pen
  4. Test with another Surface Pen

1. Update Windows 10

check for windows updates

Surface Pro has often been diagnosed with the intermittent Surface Pen accuracy issue. Recognizing the shortcoming, Microsoft has issued a fix for the same which after undergoing the requisite tests has also been released for users to download on their devices. So, for those who have been facing this problem are requested to go on and update their Surface Pro devices to the latest build of Windows 10.

The steps should already be known though we mention it here again for convenience or for the first- time users.

  1. To update the Surface Pro, go to Start > Settings > Update & Security.
  2. There should be a Check for Update button shown. Click on it to see if there are any updates available.
  3. Click on Download if prompted to download the update.
  4. Follow on-screen instructions that might appear.

Alternately, you might also get to see a list of updates that have already been downloaded if you had opted for the automatic download option for the requisite updates. In that, you only have to click on the Install button to install those on your device.

2. Disconnect peripherals

One way to be sure there aren’t any peripherals interfering with the Surface Pen’s behavior is to disconnect them and see if normalcy returns. The best thing for you to do will be to disconnect all the accessories and such followed by restarting your Surface Pro device. See if the Pen is performing as desired.

3. Reset the Pen

Alternatively, you can reset the Surface Pen within settings. In order to do so, follow the steps below:

  1. Go to settings, select Devices, then Bluetooth & other devices.
  2. Click on Surface pen and select “Remove device”.
  3. Press and hold your pen’s top button for up to 7 seconds and only stop when a green light flash in the middle.

The Pen should reconnect and, hopefully, the intermittent pen accuracy issue will be resolved.

4. Test with another Surface Pen

surface pen and keyboard

There also are chances the Surface Pen itself is at fault. To rule out such a possibility, test with another Pen and see if the accuracy issue is still there. If no, you have other ways to deal with the issue (as has been outlined above), or else, you need to seek help from the service department to help remedy the problem. In the worst-case scenario, you might be needed to buy a new Pen altogether.

So, that should sum up almost all the scenarios on how to deal with the situation when the Surface Pen works intermittently.

Bye-bye Windows: Huawei announces its own OS for laptops

Huawei recently faced a major set back due to the latest US-imposed ban. Microsoft stopped selling Windows licences to Huawei. The Chinese telecom company is now looking for alternative ways to keep its devices alive.

Huawei’s very own OS code named Hongmeng recently came under the spotlight. Now the company made a major move, as it registered the trademark for the much-awaited OS.

The telecom giant submitted the trademark application on August 24, 2018. The trademark will remain valid from May 14, 2019 to May 13, 2029.

The head of Huawei’s consumer business branch, Richard Yu Chengdong confirmed that the operating system may be available in Spring next year.

Huawei first announced Hongmeng OS back in 2012. It looks like the company is now speeding up the development process. This decision was made after the US banned the sale of American hardware and software to Huawei.

Hongmeng coming to multiple platforms

The company registered the application under different categories such as Computer Operating Program, Operating System Program, and Computer Operating Software.

Richard Yu shared Huawei’s plans to use the new OS for various platforms such as smartphones, cars, tablets, TVs, computers and wearable devices.

The company further revealed the upcoming OS would offer compatibility with Web apps and Android apps.

The telecom giant acknowledged some challenges that may come in the way of the OS. Huawei says that it is easy to develop an operating system but building an ecosystem for Hongmeng is a challenging task.

Huawei confirmed it would launch two versions of the OS. The first one will target the global market and the second will be available to the domestic market. We will have to wait for a few more months to get some additional details from the company.

RELATED POSTS:

Windows needs to check one of your disks for consistency [EXPERT FIX]

It isn’t uncommon to have come across the Windows needs to check disk for consistency error message. You are more likely to encounter the error if your PC went for an improper shutdown, such as due to a sudden power outage or such.

An error with a system file that is preventing Windows to boot up could also be another reason for the error to crop up. An incomplete file change or the disk itself getting corrupted are among the other reasons for the error to appear. In the worst-case scenario, the frequent sighting of the error can also be the early signs of your disk likely to fail completely sometime soon.

Why Does My Computer Run Chkdsk at Startup? In order to fix this, perform the Chdsk scan and let it finalize. Once done, hopefully without errors found, it won’t reappear again. Alternatively, you can clear Check Disk entry from the Registry or deal with dirty bit status.

Read about solutions in detail below.

Why does my computer run chkdsk at startup?

  1. Perform the CHKDSK scan
  2. Clear Check Disk entry via Registry Editor
  3. Deal with dirty bit status

1. Perform the CHKDSK scan

A good first step to deal with the error is to not see it as an error in the first place. In other words, there might be valid reasons after all for Windows to flash the message Windows needs to check disk for inconsistency error during start-up. That makes it extremely important to perform the CHKDSK scan to rule out chances of your disk having any issues.

So, if your PC is opting for the scan during start-up, let it complete by not pressing any key while it’s in progress. Or you can also invoke the scan manually. Here are the steps.

  1. Open the Command Prompt For that, simply type cmd in the Cortana search box and press enter.
  2. In the Command Prompt window, type CHKDSK and press enter.CHKDSK cmd windows needs to check disk for consistency
  3. The process may take some time to complete. Please don’t interrupt during the process for an effective scan of your disk.

If the error no longer shows, your problem has been resolved. If not, try out the other methods listed below.


2. Clear Check disk entry via Registry Editor

If you are getting the Windows needs to check the disk for consistency error every time the windows boots up and even after successful completion of the CHKDSK process, here is something else you need to do – clear CHKDSK scans from the registry editor.

  1. Open Registry Editor by typing regedit in the Cortana search box.
  2. In Registry Editor, on the left-hand column, navigate to the following location.
    HKEY_LOCAL_MACHINE\SYSTEM\CurrentControlSet\
    Control\Session Manager
    .
  3. On the right panel, you should get to see BootExecute. Double click on it.
  4. See if its value is set as autocheck autochk *.
  5. If its set to anything else, like autocheck autochk * /r\DosDevice\C: , change it back to autocheck autochk *.
  6. HKEY_LOCAL_MACHINE -> SYSTEM -> CurrentControlSet -> Control -> Session Manager
  7. Close Registry Editor and restart your PC.

The error should be gone by now. If not, there is something else you can try.


3. Deal with dirty bit status

Yet another reason to be faced with the Windows needs to check the disk for consistency error is that it is the dirty bit of the disk that is set. Here is what you need to do to rule out such a scenario.

  1. Open Command Prompt. To do so, simply type cmd in the Cortana search box and select from the results shown.
  2. In the Command Prompt, type the following command and press enter – fsutil dirty query X:fsutil dirty query X: cmd windows needs to check disk for consistency
  3. Here X refers to the problematic drive letter.
  4. If the drive is shown to be dirty, run the following command and press enter – chkdsk D: /f /x
  5. However, if the drive is shown to be NOT Dirty, you can simply exit the Command Prompt.

So, this makes for quite a comprehensive method of dealing with the Windows needs to check disk for consistency error.

RELATED STORIES YOU SHOULD CHECK OUT:

We Couldn’t Save the List of Folders in OneDrive [Fix]

Syncing issues are among the most common with cloud accounts. Needless to say, the same applies to OneDrive as well, which makes it quite common to have the We couldn’t save the list of folders you chose to sync error once in a while, if not too frequently.

The error message often disappears automatically and then re-appears out of the blue. It could be linked to a server-related issue or problems with how OneDrive links to the PC. Keep reading to find the solutions!

How do I fix We couldn’t save the list of folders OneDrive error?

1. Unlink and then link your PC again

1.1 Unlink

  1. Right-click on the OneDrive icon. It should be on the lower right corner of your taskbar.
  2. From the options that show up, select Settings.
  3. In the Microsoft OneDrive window that shows up, select the Account tab if it isn’t showing by default.
  4. There, under OneDrive, click on Unlink this PC.unlink this PC
  5. There is going to be a confirmation box that shows up. Click on Unlink account for your PC to be de-linked from your OneDrive cloud account.

1.2 Re-link

  1. Click on the OneDrive icon located in the taskbar as before. This will launch the Set up OneDrive window.
  2. Enter your Microsoft email ID in the space provided and click on Sign in.
  3. Enter the login password in the next window that opens, and click on Sign in.
  4. Depending on whether you have enabled the two-step verification process for the Microsoft account, select how you wish to receive your security code.
  5. Follow on-screen instructions and enter the code where applicable.
  6. Once the verification process is over and you have been successfully signed in, you will be shown the OneDriver folder located on your PC.
  7. You can choose this location or opt for a new one. Follow the instructions accordingly.
  8. Once you are done, you can close the Microsoft OneDrive window.
  9. You should now be able to sync the desired folders to OneDrive.

Often unlinking and re-linking the accounts helps when you get the We couldn’t save the list of folders error box in Windows.

2. Select the folders you want to sync

  1. Right click on the OneDrive icon on the taskbar as before.
  2. Select Settings.
  3. Under the Account tab in the Microsoft OneDrive window that opens, click on Choose folders.
  4. Select the folders that you wish to sync and click on OK.sync folders to fix We couldn't save the list of folders

That’s it. You should not be able to sync to your OneDrive account with ease. On the other hand, if the issue persists, move to the last solution.

3. Reinstall the OneDrive client

3.1 Desktop client OneDrive for Windows 10

  1. Open the Control Panel and click on Uninstall a program.uninstall a program
  2. Select OneDrive from the list of applications, and click Uninstall.
  3. Go to the official site and download the OneDrive desktop client installation.
  4. Install OneDrive and log in with your credentials.

3.2 UWP OneDrive

  1. Search for white-cloud-icon for OneDrive in the Start Menu, right-click on it, and select Uninstall it.uninstall onedrive
  2. Open Microsoft Store and search for OneDrive.onedrive
  3. Install the app again and sign in with your credentials.
  4. Check whether the error is resolved.

Finally, if none of the aforementioned steps helped you fix the We couldn’t save the list of folders error, reinstalling the OneDrive client on Windows should resolve it.

Huawei banned from using Windows licenses, but we expected that

Previously, we reported that Google stopped working with the Chinese firm Huawei. Microsoft is now following suite.

The big M announced it would no longer provide Windows licences to the Chinese tech giant. Microsoft’s services team has already left Huawei’s headquarters based in Shenzhen.

As we reported earlier, the US added Huawei to its recent trade blacklist and imposed sanctions on the company. The government restrictions prevented the company from buying technology from American sellers. Microsoft suspended services for upcoming Huawei products.

No official statement so far

Both the concerned parties (Huawei and Microsoft) remained unavailable for comment. Furthermore, some other US companies that stopped supplies to Huawei include Qualcomm, Broadcom, Intel, and Xilinx.

The Chinese company received a major blow from Google. The search engine giant stopped future updates on Huawei’s Android smartphones. This clearly means that Google apps won’t be available on Huawei smartphones in the future.

Huawei managed to establish itself as the second largest smartphone vendor around the world. The company recently entered into the business of personal computers.

Huawei decided to target the US market in January this year. The company launched new laptops aiming to expand its business operations.

Hongmeng OS coming soon

Microsoft already started to remove Huawei products from its Store. Now, Huawei is working on releasing its own OS.

The upcoming in-house OS codenamed Hongmeng will support various products manufactured under Huawei’s banner. Hongmeng will replace Windows and Android operating systems on Huawei’s devices. 

Luckily, updates for existing Huawei machines running Windows 10 won’t be blocked. There are some reports that Microsoft may resume its collaboration with Huawei at some point later based on future conditions.

Hongmeng is expected to be available for Chinese users in the Fall of 2019. Moreover, the OS will go live internationally next year.

RELATED ARTICLES YOU NEED TO CHECK OUT:

Fix: SugarSync quits unexpectedly on Windows 10/11

In today’s world, living without decent cloud storage services is like living without a smartphone. Nowadays, there are a lot of different cloud services, but many of them are complicated and require a lot of time to setup.

Luckily, SugarSync makes it easy for you to sync your files between computers.

It has desktop and mobile apps that are intuitive and easy to use, and its online cloud storage and syncing service constantly monitors the folders on your computer and synchronizes changes whenever you add, edit, or delete a file.

However, SugarSync is not perfect and you will encounter errors from time to time. In this roundup, we are going to show you some workarounds to try if SugarSync quits unexpectedly.

What can I do if SugarSync keeps on quitting unexpectedly on Windows 10? The simplest fix is to reset the SugarSync Manager. The most common cause of the problem is data conflicts between the PC and SugarSync servers. If that doesn’t work, uninstall and reinstall the desktop app.

For more info on how to do that, check the guide below.SugarSync quits unexpectedly

How to fix SugarSync crashing on start:

  1. Reset the SugarSync Manager
  2. Uninstall and Reinstall the desktop app

Solution 1 – Reset the SugarSync Manager

While data conflicts between SugarSync servers and your computer is one of the major causes of syncing issues, it was singled out as a possible cause of the app quitting unexpectedly.

To fix the problem, force a resync by resetting the SugarSync manager app on your PC. To do so, follow the steps below:

  1. Open the SugarSync Manager application.
  2. Press and hold the CTRL + SHIFT + R keys on your computer’s keyboard to initiate the reset procedure.
  3. When the reset confirmation dialogue box pops up, click ‘Yes’. SugarSync will reset itself and shut down.
  4. Open the SugarSync Manager app again and enter your login credentials in the respective fields. Ensure the box asking whether you want to restore the sync folders is ticked, although it should be checked by default. This will enable SugarSync to synchronize the data between its online folders and your computer.

Solution 2 – Uninstall and Reinstall the desktop app

If the application keeps on crashing or quitting unexpectedly, there is no much you can do beyond uninstalling and reinstalling the app. After uninstalling the app, be sure to download and install the latest version.

Later versions come with bug fixes and also addresses issues with the previous versions. If the desktop app continues to misbehave even after a reinstall, then the issue might be with your account.

If that happens, send your log files to SugarSync’s customer support through a ticket for expert review. To do so, follow the steps below:

  1. Launch the SugarSync desktop app.
  2. Locate and click the menu icon with 3 horizontal lines (see the GIF video below). Then go to the help section.
  3. A dialogue box will pop up. Enter the error you are receiving along with the description of the problem. Also, include any ticket number you may have received.
  4. Click ‘Send’.

If your desktop app is not running and you need to send the log files, click here for a guideline on how you can send the files manually.

To keep things running smoothly, SugarSync recommends you avoid using characters such as backslashes, asterisks, colons, and others that are incompatible with the Windows file system.

Also keep in mind that any file name with more than 255 characters (file path included) will cause syncing problems.

Hope that these solutions helped you solve the problem. If you have any more questions or maybe you’re aware of another fix for the issue, don’t hesitate to share in the comments section below.

[wl_navigator]

Download KB4499147, KB4499162 to fix looping redirects in browsers

Microsoft brought two new cumulative updates to users running older versions of Windows 10. These updates are KB4499147 for Windows 10 Fall Creators Update (version 1709) and KB4499162 for Windows 10 Creators Update (version 1703).

It is worth mentioning that Microsoft supports these versions of Windows 10 only in Enterprise, Education and IoT Enterprise editions. The Home and Pro editions won’t get these recent updates because they are no longer supported by Microsoft.

In Windows 10 version 1703, this update was preceded by KB4505055 and in Windows 10 version 1709, the recent update was preceded by KB4505062.

What’s new in KB4499147 and KB4499162?

KB4499147 increases OS Build number to 16299.1182 for Windows 10 version 1709 and KB4499162 increases OS Build number to 15063.1839 for Windows 10 version 1703.

Both updates fix an issue regarding looping redirects between Microsoft Edge and Internet Explorer 11.

Also, they fix a plethora of problems such as an “Incorrect Username or password” login error when using an empty or null password and Windows Defender Credential Guard is enabled.

KB4499147 and KB4499162 are similar, but not the same

Taken separately, KB4499147 also solves a DNS issue in Windows 10 version 1709, as it is described on Microsoft official website:

Addresses an issue that may cause event 7600 in the Domain Name System (DNS) server event log to contain an unreadable server name.

For further details about this recent update, check out Microsoft’s website.

KB4499162 brings a major improvement for Windows 10 version 1703 as Microsoft explains on the official website:

Improves performance related to case-insensitive string comparison functions such as_stricmp()in the Universal C Runtime.

To learn more about this update, go to Microsoft’s website.

Do you still use Windows 10 version 1709 or 1709? Let us know what you think about these updates in the comments section below.

In May, Microsoft 365 updated Microsoft Search, and more – here’s what’s new

Microsoft continues to be hard at work on its Microsoft 365 service targeted towards businesses, enhancing many of its core services including Microsoft Search, Graph, OneNote, Excel, Planner, and others. The company’s blog post is rather hefty, so we’ll just touch the highlights.

As we have already reported, the Redmond giant has rolled out its Microsoft Search solution to all Microsoft 365 and Office 365 customers. It’s powered by AI and Microsoft Graph and brings a unified search box across multiple Microsoft’s services and allows users to search for business documents, contacts, web results and more.

Microsoft has also introduced its new Windows Terminal application at this year’s Microsoft Build, which brings a tabbed interface and combines access to Powershell, Cmd, and the Windows Subsystem for Linux all in one application.

Screenshot of Windows Terminal used on a tablet.

To those who use Microsoft Planner and To-Do in their workflows, the two apps now feature integration with each other to those who enable it. Tasks assigned to a user in Planner will now show up in the Assigned to Me tab, allowing them to complete the tasks in a simple list view.

Animated screenshot of Microsoft To-Do and Planner integration.

For iOS users, Microsoft has also brought a feature that allows users to scan charts from within physical documents and convert them into digital Excel speadsheets. The feature was first introduced in Android, and works in 21 languages.

Animated screenshot of Insert Data from Picture in Excel.

Dark theme lovers will also surely be pleased to know that the app for Window 10 devices will soon be able to support dark mode. The feature is currently limited to Office Insiders for now, who can set the theme to either light, dark, or automatic depending on the system theme. Additionally, to those who use OneNote, Microsoft has also added differential sync support to all file types, plus many other useful features.

Animated screenshot of Dark Mode used in OneNote.

And if you’re big on security, Windows Hello has also received FIDO2 certification, which uses cryptographic keys for enhance security. To take advantage of these, you’ll need to be running the Windows 10 May 2019 update.

Microsoft has also brought many other new features to the table, including Microsoft Graph data connect for deep insights about effective working patterns; numerous additions to Sharepoint; Forms integration in Stream for adding quizzes and polls, and many others can can be read more in-depth on the Microsoft 365 blog.

Fast Ring Windows 10 preview 18908 is out, fixes & known issues include new OneDrive icons and ‘Home edition’ update problems

Fresh off the US Memorial Day holiday weekend, the Windows team is releasing a new Insider preview, build 18908, to devices opting into the Fast Ring release cycle.

Build 18908 brings a plethora of new features centered around Your Phone functionality but it also has its fair share of regular fixes and known issues.

Here is the list of general fixes for build 18908:

  • We fixed an issue where on certain devices with fast startup enabled night light wouldn’t turn on until after a restart.
  • We fixed an issue where on certain devices with fast startup enabled color profiles/gamma wouldn’t turn on until after a restart.
  • We fixed an issue resulting in some features on Start Menu and in All apps were not localized in languages such as FR-FR, RU-RU, and ZH-CN.
  • We fixed an issue where the WMA lossless decoder was outputting junk if it was in 24-bit mode, which affected some music players.
  • We fixed an issue where the battery options dropdown under Video Playback Settings was unexpectedly blank.
  • We fixed an issue where the Power button in Start sometimes might not show a dot indicating updates are available, despite “update and restart” being listed in the Power button menu.
  • We fixed an issue resulting in MS Paint selection moving in unexpectedly large steps per keypress when using the arrow keys.
  • We’ve updated the Japanese IME context menu, replacing “User Dictionary” with “Add word”, so that you can now add words to your user dictionary in less clicks.
  • We fixed an issue that was causing Narrator to stutter during the reading of progress bars.
  • We fixed an issue in Narrator that was causing Firefox to crash when navigating by heading.
  • As some Insiders have already noticed, we’re currently rolling out a new OneDrive icon to Insiders that supports both dark and light theme as part of OneDrive version 19.086.0502 – thanks to everyone who shared feedback about this!
  • Note: We’ve temporarily terminated the rollouts of both the Settings header and the new File Explorer search experience while we address issues you’ve reported to us. They’ll be back online soon – appreciate your patience.

And here are the things Fast Ring Insiders and developers should also be on the lookout for:

  • For Home editions, some devices might not see the “update installed” on the update history page.
  • For Home editions, some devices might not be able to see the “download progress %” change on the Windows Update page.
  • There has been an issue with older versions of anti-cheat software used with games where after updating to the latest 19H1 Insider Preview builds may cause PCs to experience crashes. We are working with partners on getting their software updated with a fix, and most games have released patches to prevent PCs from experiencing this issue. To minimize the chance of running into this issue, please make sure you are running the latest version of your games before attempting to update the operating system. We are also working with anti-cheat and game developers to resolve similar issues that may arise with the 20H1 Insider Preview builds and will work to minimize the likelihood of these issues in the future.
  • Some Realtek SD card readers are not functioning properly. We are investigating the issue.
  • If you use remote desktop to connect to an enhanced session VM, taskbar search results will not be visible (just a dark area) until you restart searchui.exe.
  • There’s a noticeable lag when dragging the emoji and dictation panels.
  • Tamper Protection may be turned off in Windows Security after updating to this build. You can turn it back on.
  • In the Ease of Access settings, selecting a color filter may not take effect right away unless the color filters option is turned off and back on again.
  • Users navigating to the Graphics Settings page in the Settings application may experience Settings application crashes.
  • The IME candidate window for East Asian IMEs (Simplified Chinese, Traditional Chinese, and the Japanese IME) may not open sometimes. We are investigating the issue. In the meantime, going to Task Manager and ending the “WindowsInternal.ComposableShell.Experiences.TextInput.InputApp.exe” task from the Details tab should unblock you if you experience this issue.
  • We are aware of an issue with the Bopomofo IME where the character width is suddenly changed to Full width from Halfwidth and are investigating.

Known issues for Developers

  • If you install builds from the Fast ring and switch to either the Slow ring or the Release Preview ring, optional content such as enabling developer mode will fail. You will have to remain in the Fast ring to add/install/enable optional content. This is because optional content will only install on builds approved for specific rings.

There you have it, check for the new  OneDrive icons in the taskbar as well as keep an eye out for missing progression prompts while updating to this build.

Happy downloading, Insiders!

Xbox Digital Games on sale this week on the Microsoft Store, save up to 60% on FIFA 19

Microsoft is offering a digital host of video game titles on steep discounts, some of them as much as 75 percent off their usual list price, and many of them are part of the Deals with Gold program. Right now, Xbox Live Gold members can get 39 Days to Mars for just $11.99 (20% off), Dark Souls: Remastered is just $27.99 ($12 off), and Tekken 7 is also half off at just $25 right now (via Major Nelson).

Additionally, tomorrow you’ll also be able to purchase EA’s iconic FIFA 19 for a whopping 60% off, which will bring the game which normally costs $59.99 to only about $24. Such a hefty price cut is hard to beat especially when it comes with with a batch of free goodies for new FIFA Ultimate Team game mode players, including:

  • Player Pick Loan Item: Neymar Jr., Kevin De Bruyne or Paulo Dybala for 10 FUT Matches
  • 4 UEFA Champions League Kits
  • 5 UEFA Champions League Player Items (up to 85 overall rating)

Additionally, if you’ve been enjoying the free-to-play SMITE game, you’ll also be able to purchase Gems for a savings between 10 and 35 percent depending on how many you want to buy. You’ll be able to order between 400 and 8,000, with the highest quantity yielding the most savings.

You’ll have until Monday, June 3 if you want to save on any of the Deals with Gold titles, and FIFA 19 and the SMITE Gems will be discounted until Wednesday, June 5. So you’ll want to act fast if you’ve been looking to up your games library without spending a lot of money.

Samsung’s Galaxy Fold continues to meet roadblocks before launch

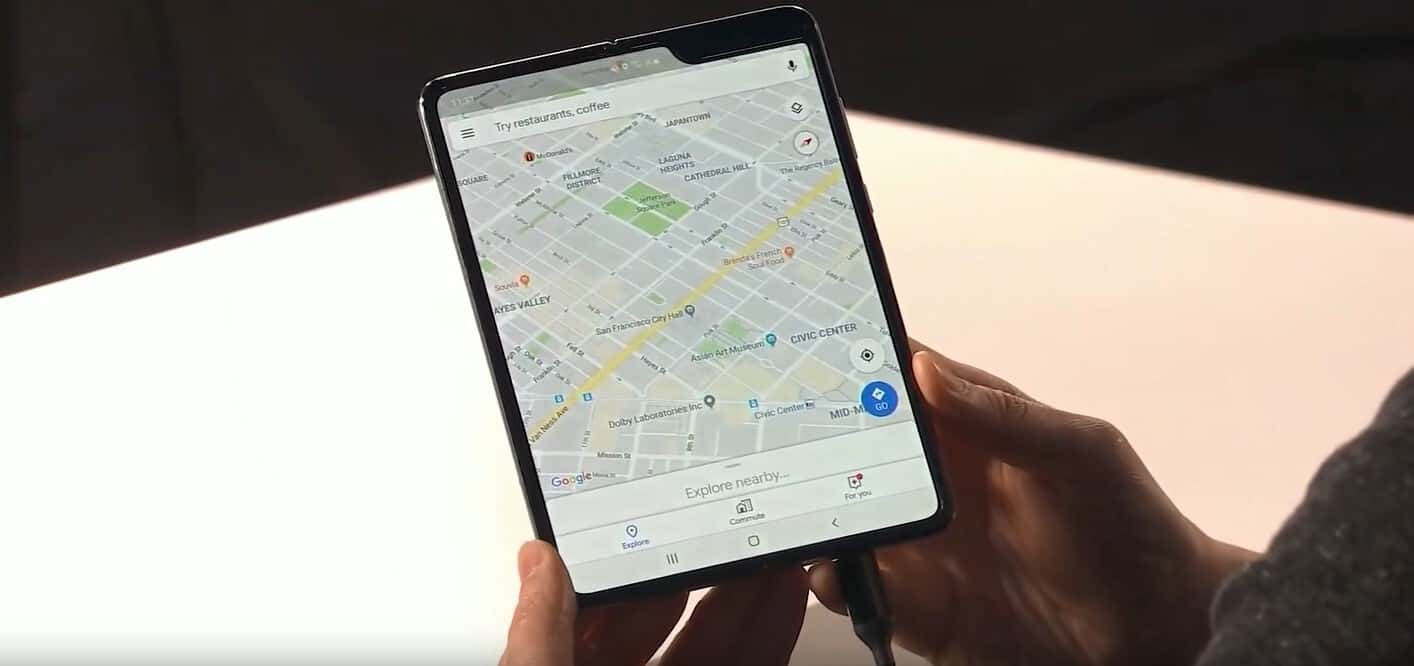
While Samsung was quick to showcase its new folding technology for smartphones back during the unveiling of its 2019 flagship Galaxy series lineup, the company has been equally quick to publically undergo the difficulties of real-world use of said foldable technology. Since seeding its Galaxy Fold smartphone back in April 2019, Samsung has been on a PR clean up tour attempting to assuage fears and dissuade critics of its foldable phone after units began failing due to what appeared to be a manufacturing issue.

The exact cause of the increased failure rate in the Galaxy Fold design has not been disclosed by Samsung just yet, but reviewers, who are the only audience to get some hands-on time with the device, speculate that its seams issue that is caused by the very nature of folding the device, allowing dust and other particulates to creep under the screen of the device through the folding mechanism.

Whatever the exact reason, Samsung has wisely chosen to delay its seemingly truncated release window to ensure a better experience through a revised manufacturing process. The only problem is that the company has remained relatively mum on when customers who had already pre-purchased the device from carriers or the company directly, will see their devices. Back in April 2019, when the devices first began failing, many speculated that Samsung could have the issue dealt with and handled by May and would reissue a new release date.

However, news out of Korea is putting a wet cloth on that idea and positioning Samsungs new potential release window to sometime in June, if then.

According to a report from Mashable, “another Korean outlet, Yonhap, says that while Samsung does plan to launch the Fold in June, this is unlikely to happen due to time-consuming hardware stabilization issues.”

Fortunately, for Samsung, its ‘foldable’ competitor Huawei is being hamstrung by an ongoing trade war and security sanctions between China and the US and is expected hold up the company’s launch windows which was also set for June. Samsung will seemingly have all of June to reintroduce its Galaxy Fold without having to look over its shoulder at a Huawei implementation that could be arguably better than its own.

The news may come as a bittersweet pill to swallow for fans and pre-owners of the device as it means the company is looking to avoid another rushed release with additional unforeseen hardware issues, but for those who shelled out $1,980 for the device are currently sitting in limbo until Samsung confirms that pre-ordered purchase will be refunded until the actual release of the Galaxy Fold.

Either way, Samsung will ideally, like to avoid another Galaxy Note 7 debacle by making sure the units that get into the hands of actual paying customers is a premium experience and the first glance into what the company could be mainstreamed in the not-too-distant future.

Microsoft talks about new “modern OS” designed for the PCs of tomorrow

We already saw many of Microsoft’s OEM partners introduce new PCs at the Computex annual trade show this week, and it’s clear this year that the traditional clamshell form-factor is about to evolve. Some manufacturers like HP are experimenting with new materials such as wood, but we’ve also seen Asus introducing several new laptops with secondary screens above or below the keyboard.

Microsoft didn’t announce new PC hardware this week, but the company shared its commitment to build a “modern OS” for the PCs of tomorrow. Nick Parker, Corporate Vice President, Consumer and Device Sales at Microsoft described this new modern OS in a blog post that never explicitly mentions Windows.

“These new modern PCs and innovative devices the ecosystem will continue to build and bring to market in the future require a modern operating system, explained Parker. “An OS  that provides a set of enablers that deliver the foundational experiences customers expect from their devices, and includes a set of delighters that deliver innovative human centric experiences.”

Parker went on to emphasize the main “enablers” that this modern OS should include:

  • Seamless updates that are all done in the background, without interrupting users’ workflows.
  • Security by default to keep users protected against malicious attacks
  • Always-on connectivity, with built-in support for LTE and 5G networks
  • Sustained performance over time
  • Cloud-connected experiences powered by AI to help users be more productive throughout the day
  • Support for multiple input methods (pen, voice, touch, gaze) and form factors.

“These enablers and delighters underpin our vision for a Modern OS, they will provide the foundational elements for an evolution of the PC ecosystem and enable partners  to deliver the more human-centric experiences of tomorrow. Microsoft is investing to enable these modern OS experiences, and to deliver new ones that take advantage of silicon advancements, powerful PCs, the cloud and power of AI,” explained Parker.

Again, the exec never mentioned Windows once in his “modern OS” talk, but it’s clear that some features he described such as seamless updates are clearly not a reality in Windows 10 yet. Actually, seamless updates, security by default, and sustained performance over time are probably three killer features already found in Chromebooks. For those unfamiliar, Chrome OS gets new updates every six weeks just like Google’s Chrome web browser, and it’s a lightweight OS designed to stay fast and secure.

A Chromebook.

It’s easy to assume that Parker’s “modern OS” is actually Windows Lite, a new OS that Microsoft is rumored to be developing for Chromebook-like devices and new form factors. Microsoft has yet to acknowledge the existence of Windows Lite, but Parker’s blog post made it pretty clear that Windows 10, even with a bi-annual release cycle, isn’t evolving fast enough. Even Windows 10 on ARM, a necessary step to free PC OEMs from their Intel and AMD dependency, remains overburdened by too many legacy components that most Windows users probably don’t need anymore.

As Microsoft has just started rolling out the Windows 10 May 2019 Update, we’re still wondering why the company didn’t discuss its “modern OS” plans at its Build developer conference earlier this month. According to recent reports, the software giant may not officially announce Windows Lite until 2020, but all this recent “modern OS” talk suggests that the company may finally be getting ready to share more soon.

How to tell if your printer has been hacked [PRO GUIDE]

You may not know, but your printer is vulnerable just as your PC. Having a hacked printer can be a problem, and in this article, we’ll show you how to analyze your printer and determine whether the printer has been hacked.

How can I know if my printer was hacked? The first sign of hacked printer are unauthorized printing jobs or various printer-related error messages. If you encounter these issues, change the printer‘s login information and block ports 515, 721-731, and 9100.

How can I tell if my printer has been hacked?


Unauthorized printing

unauthorized printing how to tell if your printer has been hacked

Sometimes hackers can hack your printer and use it to print documents remotely. The hacker can gain access via 515, 721-731 or 9100 ports on the printer once the printer is connected to the Internet. If you notice that your printer is printing unknown documents on its own, it’s a telltale sign that your printer is hacked.


Error messages

Another sign of hacked printer are various error messages. Sometimes these messages can appear on the printed documents. In some instances, your printer can even print the error message instead of the requested document.

If you notice any unusual error messages related to your printer, it might be because your printer is hacked.


What to do if my printer is hacked?

how to tell if your printer has been hacked

Here are several quick tips that you can apply to your PC if you suspect that your printer is hacked:

  1. Change the login credentials for the printer network from printer settings. With a new username and password, you’ll automatically block other users from accessing your printer remotely.
  2. Locate details on how to close printer router ports from the user manual and then disable ports 515, 721-731 and 9100.
  3. Always disconnect or switch off printer once inactive.
  4. Disable Internet connection from printer settings once not in use.
  5. Ensure the printer software is always updated.
  6. Connect to the network using a VPN.
  7. Use another printing protocol for printing.

VPN is one of the best ways to protect your PC and network devices, including printers. If you want to secure your network and all of its devices, we suggest to use a reliable VPN such as CyberGhost VPN and protect your PC from future attacks.

We hope that you found our guide helpful and that you managed to fix the problem with your hacked printer.

RELATED ARTICLES:

Fix: User Account Doesn’t Have Permission to Disable Task

The Windows Task Scheduler is an incredibly useful utility, but many users reported The user account you are operating under does not have permission to disable this task error while using it.

This is a permission issue, and it’s similar to You need permission to perform this action error we covered earlier.

But before we start, let’s take a closer look at why this issue appears.

Why is my computer saying I don’t have permission?

  • You lack administrative privileges to perform an action.
  • Your account doesn’t have full access to the necessary folder.

How can I fix The user account you are operating under does not have permission to disable this task?

1. Run the task as an Administrator

  1. Click on the Start button.
  2. Type task scheduler, then right-click on the Task Scheduler, then select Run as administrator.task scheduler the user account does not have permission to disable this task
  3. Check if this solves the problem.

This adds more rights to your already privileged administrative account and could help you fix this error.

2. Use PsTools to disable the stubborn task

  1. Download the updated PsTools version.
  2. Now extract it to the folder you select on your desktop.
  3. Click on the Start button and type cmd.
  4. Right-click on cmd and press Run as administrator.command prompt task scheduler the user account does not have permission to modify this task
  5. Now navigate to the PSTools directory. In our example, we used this command: cd C:\Users\Username\Desktop\Pstoolscd command prompt The user account doesn't have permission to disable this task
  6. Next run this command: exe -i -s %windir%system32mmc.exe /s taskschd.mspsexec.exe command prompt task scheduler permissions
  7. Now head over to the task which has been causing this error, Right-click it the choose Disable.

3. Grant full access to the task file

  1. Navigate to this location: C:\Windows\System32\TasksTasks The user account doesn't have permission
  2. Look for the file with the same name with the adamant task (occasionally it’s going to be inside one of the subfolders found here so search further).
  3. Right-click the file, and go to the Properties tab then choose Security.
  4. Click on the Advanced tab then select Edit under Permissions. Choose Full control then apply the changes and close.full control task scheduler cannot apply your changes
  5. Reopen the Task Scheduler and check if the error message is gone.

After doing this, check if The user account you are operating under does not have permission to disable this task message is gone.

4. Restart Task Scheduler

  1. Click on your PC’s Start button.
  2. In the Windows 10 search field, type services.msc.
  3. Right-click on Services.services search The user account doesn't have permission to disable this task
  4. Select Run as Administrator.
  5. Enter your Administrator’s password (if asked).
  6. Right-click on the Task Scheduler.
  7. Choose Restart.

5. Create and use a new administrative account

  1. Click on the Start button.
  2. Choose Settings.settings start menu The user account you are using does not have permission to disable this task
  1. Click Accounts.accounts The user account does not have permission to disable this task
  2. Select Add someone else to this PC.
    add someone else to this PC The user account you are using does not have permission to disable this task
  3. Fill in the requisite username and password. Your new account is now ready.
  4. Now click on Change account type.change account type The user account you are using does not have permission to disable this task
  5. In the next window, click Administrator to assign administrative permissions.
  6. Restart your machine and log in using the new account.

If you no longer face the permissions trouble, it means your previous administrator profile had been corrupted.

There you go; these solutions can help you fix The user account you are operating under does not have permission to disable this task error, so be sure to try them all.

To learn more about the differences between a standard user and an administrator, we suggest reading our dedicated guide.

Did you find a different solution for this problem? If so, share it with us in the comments section below.

You just gotta download these 4K themes for Windows 10/11

Microsoft is in a mood to celebrate the release of Windows 10 May 2019 Update. The company rolled out new free wallpaper packs for Windows 10 in 4K resolution.

Unfortunately, Microsoft launched one of these themes as a paid version about a month ago. Many users who wanted to get that theme were disappointed with this move. Maybe that was the reason behind this free release.

Each of these wallpaper packs is available with 10 photos. Moreover, Indian users are lucky enough to get a total of 18 photos.

Microsoft describes the fabrics of India theme as:

Feast your eyes on the rich textures and intricate embroidery of these vibrant textiles. This 18-image set is free for Windows 10 Themes. These images are to be used as desktop wallpaper only.

All of these photos rotate based on your preferences. We can choose between a range of 1 minute to 1 day. Some users said that Microsoft needs to add a new option that allows them to keep their favorite wallpapers more than a day. In this way, they will have more time to enjoy their favorite themes.

Devices running Windows 10 Creators Update and later are eligible for these 4K themes. This means that you can also install them on your Windows 10 v1903 computer.

The theme packs are named as River Deltas, Fabrics of India, Panoramic Train Views, and Light Trails. You can easily install your favourite themes from Microsoft Store.

Theme Pack Installation

Now, wait patiently until your system finishes the downloading and installation process. Once the theme is installed, you can select your favorite theme by following this path.

Start > Settings > Personalization > Themes and select your favorite theme.

Generally, every new theme appears at the bottom of installed themes.

RELATED POSTS:

Get KB4499178 and KB4499182 to fix May Patch Tuesday bugs

Microsoft released the preview versions for Windows 7 and Windows 8.1 PCs monthly roll-ups. The tech giant rolled out KB4499178 for systems running Windows Server 2008 R2 SP1 and Windows 7 SP1.

Moreover, Windows Server 2012 R2 and Windows 8.1 are receiving KB4499182. The previews should be automatically available on your system.

Microsoft aims to fix some issues introduced by this month’s patch-day updates. However, you should not expect any security improvements.

We have examined the change logs of both updates. Let’s have a look at the major improvements and fixes included in KB4499178 and KB4499182.

KB4499178/KB4499182 major fixes and improvements

Japanese Short Date format bug fixed

Microsoft fixed a bug affecting the Japanese Short Date format. The bug was initially introduced by KB4469068 and triggered date separator settings issues. Thankfully, KB4499178 and KB4499182 fixed the problem.

Performance improvements

KB4499178 and KB4499182 improved the performance of string comparison functions.

Unreadable server name bug fix

Previously, the domain name system server had a bug in its event log that was triggering event 7600. Users reported an unreadable server name in the event due to this issue. Microsoft fixed the issue in KB4499178 and KB4499182.

Universal CRT apps bug fix

The tech giant also resolved an issue with UCRT applications in KB4499178 and KB4499182. These applications previously triggered the missing export message.

Morocco and Palestinian Authority Update

KB4499178 and KB4499182 updated the time zone information for Morocco and the Palestinian Authority. 

fmod () return issue resolved

Some previous releases introduced a rare bug in Windows 10 OS. There was a bug in the fmod () that was preventing the function from returning “-0”. The recent releases (KB4499178 and KB4499182) resolved the issue.

KB4499182 known issues

As far as the known issues are concerned, Microsoft acknowledged three bugs in KB4499182 update released for Windows 8.1.

Almost all of these issues existed in previous monthly releases. The tech giant is currently working to resolve these issues and an update is expected to be available in the upcoming releases.

However, the timeline is not defined yet. Most probably, the company will roll out the patches on June Patch Tuesday falling on June 11.

RELATED ARTICLES YOU NEED TO CHECK OUT:

Windows Installer needs to be upgraded error [SOLVED]

The Microsoft Windows Installer is a crucial component tending to the installation of applications. Users have reported a wide range of issues with this service that includes the error codes like Windows installer needs to be upgraded when upgrading to Windows 10 or installing any software later.

Why Windows Installer won’t work and needs to be upgraded? Fix this by, primarily, identifying the issues with Windows Installer. From there, you can move to further troubleshooting. You should confirm that the Windows Installer service is not disabled or, alternatively, download and run the MSI Repair Tool.

Read about the suggested solutions in detail below.

What to do if Windows Installer needs to be upgraded

  1. Identify the issues Windows Installer has
  2. Make sure your Windows Installer service is not disabled
  3. Download and run the MSI Repair Tool

1. Identify the issues Windows Installer has

  1. Click on the Cortana search box in your taskbar, and type ‘cmd’ (without quotes)
  2. Run Command Prompt by clicking on the top resultopen command prompt
  3. Inside the Command prompt window, type ‘MSIExec’ (without quotes), and press Enter
  4. This will open up a window that will contain the results of the scan. It should look like this.windows installer

Note: If you notice an error message after the scan, copy the error, and then do a specific search on Google to find a fix for it. If you don’t get an error message, please follow the next method.


2. Make sure your Windows Installer service is not disabled

  1. Click on Cortana search box, and type in ‘services.msc’ (without quotes) > press Enter.services
  2. Inside the Services window, search for the Windows Installer in the list, and make sure it is set to Manual (If it’s not set to manual, right-click on it, and change it from Properties).windows installer service
  3. Click OK to close Properties.
  4. Right-click on the service, and click Start.
  5. Re-try installing or uninstalling any software you want to in order to test if the problem is fixed.

3. Download and run the MSI Repair Tool

  1. Download the official MSI Repair Tool, here.download msi fix
  2. Run it and follow the on-screen instructions in order to scan and fix any possible issues.

In this article, we explored some of the best troubleshooting methods that can help you solve a varied array of errors produces by the Windows Installer Service.

Please feel free to let us know if this guide helped you solve your issue, by using the comment section below.

RELATED STORIES YOU SHOULD CHECK OUT:

KB4497935 fixes some major Windows 10 May Update bugs

Microsoft recently released another cumulative update for Windows 10 version 1903. KB4497935 is now available to Slow and Release Preview Ring Insiders. This release bumps the existing version of the build to 18362.145.

Just like the previous releases, this update brings a bundle of improvements and fixes for Windows 10 users. This article briefly discusses some major changes.

Update KB4497935 is currently being tested by Insiders and it should be available to the general publish this week. Windows 10 May Update users have complained about a long list of bugs and we’re sure Microsoft wants to fix these issues as soon as possible.

KB4497935 major fixes and improvements

Night light mode bug fix

Microsoft released KB4497935 to fix Night light mode issues introduced by the previous releases. Previously some users reported that some display mode changes turned off Night light mode.

Full-screen mode rendering issues resolved

An annoying bug created some issues for the gaming community when using full-screen mode. Microsoft confirmed that the issue was caused when the Game bar was visible during the gaming session. Thankfully, Microsoft released KB4497935 to resolve the issue.

Bluetooth devices bug fix

KB4497935 resolved another issue for some PCs with Bluetooth radios. The issue was preventing users from removing Bluetooth peripherals from those PCs.

Guest DPI issue resolved

KB4497935 addressed an issue that where there was a conflict between the dots per inch of the host and the guest.

External USB devices bug fixed

An issue prevented users from installing the latest Windows 10 Updates on their systems. Microsoft confirmed that during the installation of the update, Windows 10 PCs with an external SD card or USB device got an incorrect drive.

The affected systems triggered a message This PC can’t be upgraded to Windows 10. KB4497935 fixed the issue.

Direct3D apps issues resolved

Some gamers who changed the default display orientation experienced issues while entering full-screen mode in some Direct3D apps or games.

Surprisingly, Microsoft didn’t list any known issues for this release. However, it remains to be seen if Windows 10 users report any issues on the company’s forums.

RELATED ARTICLES YOU NEED TO CHECK OUT:

How to fix Windows Defender update error 0x800704e8 [QUICK GUIDE]

Updating Windows Defender is not an easy task. There are various errors and technical issues that may prevent users from updating their antivirus program.

According to recent reports, Windows Defender can’t install the latest definition updates due to error 0x800704e8. Here’s how one user describes this update issue:

I never used to have problems downloading the latest Windows Defender definition updates, but for some reason just lately there seems to have been an issue with this. […]

While trying to download the latest definitions in Windows Defender, the instillation part of the process apparently failed after the download, then a message came up saying “Virus and Spyware definitions couldn’t be updated. Error Code 0x800704e8” (see picture below)

Windows Defender error 0x800704e8

What can I do to get rid of the 0x800704e8 update error in Windows Defender? The easiest solution is to update Windows Defender manually. In some cases, the error is triggered by network connection problems. If that doesn’t solve your problem, remove the Windows Defender Signature file.

To see how you can do that, check the steps below.

Steps to solve Windows Defender error 0x800704e8:

  1. Manually update Windows Defender through CMD
  2. Remove the Windows Defender Signature file

Users also confirm that the Windows Update Troubleshooter doesn’t identify any problems related to this error message. As a result, it can’t fix the problem.

At the same time, users report that some Windows Defender updates download successfully, and the error message 0x800704e8 doesn’t always come up.

Solution 1 – Manually update Windows Defender through CMD

To fix error message 0x800704e8, follow these troubleshooting steps:

  1. Remove any third-party antivirus program that you may have installed on your computer. Make sure that you have completely removed all antivirus leftovers by using dedicated third-party apps and manually deleting the remaining folders.
  2. Manually update Windows Defender‘s definitions via the Check for updates button in Settings > Update & Security > Windows Security. Perform a full scan to delete or quarantine anything detected.
  3. Run the Windows Update Troubleshooter from Settings > Update & Security > Troubleshoot.
  4. In the Windows search box type cmd, right-click the first result and select Run an Administrator.Windows Defender update error 0x800704e8 windows 10
  5. Then, type the following commands:

    %PROGRAMFILES%Windows DefenderMPCMDRUN.exe – removes all Windows Defender definitions %PROGRAMFILES%Windows DefenderMPCMDRUN.exe – updates the antivirus

  6. Launch Windows Defender and press the Update button. It may take a few minutes for the update process to complete. Should you see a “failed connection” error message, simply close the window. The latest Windows Defender updates should already be installed.

-READ ALSO: Fix: Windows Defender won’t turn on in Windows 10

Solution 2 – Remove the Windows Defender Signature file

Another way to get rid of the 0x800704e8 error is to remove Windows Defender Signature file. To do that, follow the steps:

  1. Make sure Windows Defender is turned off.
  2. Press Windows key + R to open Run, type Msiexec /x {A5CC2A09-E9D3-49EC-923D-03874BBD4C2C} and hit Enter.Windows Defender error 0x800704e8
  3. Now, while the command is executed, open Windows Defender and click the Update button.
  4. Wait for the process to finish.
  5. Restart your PC.

-READ ALSO: How to keep Windows Defender definitions up to date in Windows 10, 8.1

As you can see, solving the 0x800704e8 error using these methods is fairly easy. Just make sure that you don’t have any third-party antivirus programs on you PC, as this could easily compromise the entire process.

If you’ve come across other workarounds to fix the Windows Defender error message 0x800704e8, list the troubleshooting steps in the comment section below.

[wl_navigator]

SMTP Port Problems on Windows 10/11 [Step-By-Step Guide]

Email clients often use the SMTP port to download your emails from the server, but sometimes issues with the SMTP port can occur.

These issues will prevent you from receiving emails, so today we’re going to show you how to fix problems with the SMTP port on Windows 10.

What can I do if I have SMTP port problems? The simplest fix is to add a port number during the configuration. Usually, the issue is triggered by a faulty configuration. If that doesn’t work, then uncheck SSL encryption and add :1 after the port number.

For more info on how you can do that, check the guide below.

How can I fix SMTP port problems on Windows 10?

1. Add a port number during the configuration

Many users reported that Windows Mail app isn’t working for them because they can’t configure SMTP port. This can be a big problem, especially if your email provider requires that you use a specific port for SMTP or POP.

However, there’s a way to deal with this issue. To fix the problem, you just need to add your email account again along with the required port.

This is rather simple, and you can do it by following these steps:

  1. Open the Mail app. You can do that by pressing Windows Key + S and typing mail. Now choose Mail from the list of results.
    smtp-port-problems-mail-1
  2. Click the Settings icon.
    smtp-port-problems-mail-2
  3. Choose Manage Accounts from the Settings pane.
    smtp-port-problems-mail-3
  4. Now click Add account.
    smtp-port-problems-mail-4
  5. Scroll down and select Advanced setup.
    smtp-port-problems-mail-5
  6. Choose Internet email option.
    smtp-port-problems-mail-6
  7. Enter the required data. If you need to use a specific port, be sure to add the port number. For example :211, at the end of the SMTP server address. Keep in mind that we used 211 as an example, so be sure to use the port number that is given to you by your email provider.
  8. Optional: If required, turn on SSL for incoming and outgoing email.
  9. Save changes.

After adding your account again and entering the port number manually, the problem with the SMTP port will be completely resolved.

2. Uncheck SSL encryption

SSL encryption is useful if you need to protect your data from malicious users, so it’s no wonder that many websites use this feature.

However, some issues with SSL can occur and to fix the problem with the SMTP port, you need to disable SSL for your account.

To do that, follow these steps:

  1. Add your account to the Mail app like we showed you in the previous solution.
  2. When the account configuration window appears, scroll all the way down and uncheck Require SSL for incoming email and Require SSL for outgoing email options.
    smtp-port-problems-ssl-1
  3. Save changes and you should be able to send and receive emails without any problems.

Disabling SSL can be a security risk, so use this solution only as a temporary workaround. As we already mentioned, SSL protects your data from malicious users, so it’s always recommended to use it.

3. Change the port address

In Solution 1 we showed you how to add a new email account with a specific port, but sometimes you need to change the SMTP port to fix the problem.

Users reported that the issue was resolved after using :465 or :2525 as a SMTP port. Although these ports work for some users, it’s recommended to use the ports that were given to you by your email provider.

4. Add :1 after the port number

A few users reported that you can fix the problem with SMTP port on your PC simply by adding :1 after the port number. By doing so, your SMTP address will look like smtp.example.com:2525:1.

Of course, be sure to use the SMTP address and port number assigned to you by your email provider. By adding :1 after the port number, you’ll force the client to use an SSL connection.

As we already mentioned, SSL connection will encrypt your data and keep it safe from malicious users.

5. Remove your email account and add it again

According to users, issues with the SMTP port are fixed in one of the updates. If you still have the problem, you need to remove your account and add it again.

This is rather simple, and in order to do it, you need to follow these steps:

  1. Right-click your email account in the Accounts section.
  2. Choose Account settings from the menu.
    smtp-port-problems-remove-1
  3. Choose Delete account from the menu.
    smtp-port-problems-remove-2
  4. Confirmation message will now appear. Select the Delete button to delete your account.
    smtp-port-problems-remove-3

After deleting your account, you need to add it again by following the similar steps to the ones we used in Solution 1. After your account is added again, issues with the SMTP port should be resolved completely.

Problems with the SMTP port will prevent you from receiving emails, but you should be able to fix these issues by using one of our solutions. You can also enable SMTP server for Office 365 for your organization.

If you bumped into another viable solution that helped you solve the SMPT port problems on Windows 10, please leave it in the comments section below along with any other questions you may have.

Final Fantasy XV Bugs and Glitches: Easy Ways to Fix

Final Fantasy XV is an excellent game that allows you to put your stealth and fighting skills to good use. The game features heavy combat, innovative gameplay, and immersive graphics.

At the same time, FFXV often tests your patience. The game is affected by quite a significant number of technical issues, as gamers report.

Fortunately, there are ways to fix these issues, and we have detailed them in this guide.

How can I fix Final Fantasy XV bugs and glitches on Xbox?

1. Fix HUD issues

  1. Check if your TV runs the latest firmware.
  2. Reinstall the game, as well as the latest updates.
  3. Check if the Overscan or Aspect Ratio features are available on your TV settings.
  4. Check and modify the screen settings on your Xbox.

The HUD problem is one of the most annoying issues affecting Final Fantasy 15 gamers, alongside the fishing bug. Square Enix will address the HUD and TV screen size issues via an upcoming patch.

2. Fix FFXV graphics issues

  1. Reinstall the game and the latest updates.
  2. If you happen to see ghost Gladio/Ignis/Prompto/Noctis, reloading the game save should fix the problem.

3. Cid upgrade quest stuck

  1. Perform one or two mob hunts and then rest. You should receive a call from Cid the next morning, telling you that you can pick up your weapon.
  2. Cid can only upgrade one weapon at a time.
  3. The weapon upgrade may be in progress. Check the quest mentioning that you should wait for Cid.

4. Long loading screen

  1. Avoid using fast travel if possible. This issue is pretty well-known at this moment.
  2. The only solution is to wait for the game to load the next chapters.

5. Fix Chocobo issues

  1. As a quick reminder, you can’t summon Chocobos in battle, in cities, or in dungeons.
  2. If you lost your ability to summon Chocobos, return to Wiz Chocobo Post. Head south to the Chocobo race track and enter a race. You should be able to summon Chocobos after that.
  3. Reinstall the game’s latest update.

6. Last boss glitch

Most likely, this issue is caused by calling Umbra. Reload the game save and avoid calling Umbra. Don’t forget to manually save the game before calling Umbra.

7. FFXV chapters got stuck

This bug is prevalent when you fast-travel outside the Vesperpool area and cannot go back in. You should stick to the main quest and avoid doing side quests. Manually save the game before proceeding to the main quest.

8. Camera angle stuck to near

If this case, save and reload the game.

9. Daurell Cavern glitch

The glitch occurs when the boss doesn’t re-spawn after you leave the dungeon before killing him.

  1. Save the game before entering the dungeon, and don’t leave until you have finished the quest.
  2. If this issue occurs, your only option is to reload the game save, and restart exploring the dungeon.

10. Enemy Whistle won’t work

This may happen if you reload the game halfway through after you obtain the Enemy Whistle.

  1. You can buy the Enemy Whistle from the Regalia shop.
  2. Manually save the game after you get your hands on the Whistle to reload the save if something goes wrong.

Some bugs and glitches have been addressed already, and they have been or will be solved through future patches.

If you are dealing with a rare issue like Final Fantasy XV fish not bitting, check our detailed guide to fix it.

If you’ve encountered other workarounds for Final Fantasy XV issues, list the troubleshooting steps in the comments section below.

Unable to join Skype Meeting? Here are 4 fixes that really work

While Skype for Business is extremely useful if you need to make conference calls, but many users reported that they are unable to join a Skype meeting on their PC. To resolve this, you can try out any of the workarounds we mentioned below.

I’m unable to join Skype meeting, what should I do? Firstly, check your network connection. To do that, run the Network troubleshooter and check if that solves the problem. Alternatively, you can try removing Skype credentials from the Credential Manager.

What to do if you’re unable to join Skype meeting?

  1. Troubleshoot Network Connectivity
  2. Use Credential Manager
  3. Repair File Association Issues
  4. Join Skype Meeting via Web App

1. Troubleshoot Network Connectivity

If you are unable to join a Skype meeting, the most probable cause is a network connectivity issue. To resolve this, you can run the network troubleshooter.

Before running the troubleshooter, try and access another site (using the same browser), and see if it goes through. If you encounter the same problem, the network is probably the issue. You can then proceed with the troubleshooting.

To troubleshoot the network in Windows 10, follow the guidelines below:

  1. Enable Internet/Wi-Fi connection.
  2. Navigate to your desktop window and open the Start Menu. Click on Settings.settings unable to join skype meeting
  3. Select Network & Internet.network and internet unable to join skype meeting
  4. Click on Status.
  5. In the Find a setting search field, type Network troubleshooter and click on it.network troubleshooter search unable to join skype meeting
  6. Follow on-screen instructions to finish the process.network diagnostics unable to join skype meeting

Once this is done, check if the network issue is resolved. To do this, simply try and access the link again. If you are able to do so, you are all good; otherwise, the problem is probably not associated with network connectivity. Hence, you can try the next solution.


2. Use Credential Manager

If you’re unable to join Skype meeting, try to update your Skype login details using Credential Manager. To do that follow the steps below:

  1. Open Control Panel.control panel unable to join skype meeting
  2. Locate and click on Credential Manager.credential manager unable to join skype meeting
  3. Find the batch of credentials associated with the Skype for Business Online platform; click on it to expand the options.
  4. Select Remove from Vault.remove skype credential unable to join skype meeting
  5. Close program.
  6. Log back into the platform and input the new credentials.

Once this is done, check if the issue is resolved: try accessing the link again. If you are still unable to join the Skype meeting, you can proceed to the next solution.


3. Repair File Association Issues

If there is an issue with the .ocsmeet (file association) files, you might be unable to join Skype meeting. Basically, the Skype for Business Online program should be configured as the default application for opening the .ocsmeet files.

To check and set the Business Online program as the default application for opening the association files, follow the steps below:

  1. Open Control Panel and select Default Programs.default programs unable to join skype meeting
  2. Locate and click on Associate a file type or protocol with a program.associate a file type or protocol unable to join skype meeting
  3. Locate .ocsmeet and check if Business Online or Lync Online is configured as the default program. If not, simply reconfigure the setting as appropriate.
  4. Close program.

Check if the issue is resolved. If not, try the next method.


4. Join Skype Meeting via Web App

In the event that the conventional Lync/Business Online program is unable to provide you access to the Skype meeting, you can use the Business Web App instead.

To use this program, follow the steps outlined below:

  1. Navigate to the location of the meeting invite link.
  2. Right-click on it and copy the link’s address.
  3. Launch your web browser and paste the link in the address bar.
  4. Type “?sl=1” at the back of the pasted URL address and hit the Enter key.
  5. You should now be able to join the Skype meeting.

Note: The Web App is not equipped with the VoIP feature; hence, you would be more of a viewer than a participant in the meeting.

There you go, these are several quick and simple solutions that might help you if you’re unable to join a Skype meeting. Be sure to try all of our solutions and let us know in the comment box which solution worked for you.

READ ALSO:

Windows 10 Version 1511

Windows 10 version 1511 is also named Windows 10 November Update. It was released by Microsoft on November 2015 and it was codenamed Threshold 2. Find out more about Windows 10 version history.

Latest builds in Windows 10 v1511

KB numberVersion (OS Build)Release dateNotes
KB409310910586.1540April 10, 2018Cumulative update
KB408877910586.1478March 13, 2018Cumulative update
KB407459110586.1417February 13, 2018Cumulative update
KB407520010586.1358January 18, 2018Cumulative update
KB405688810586.1356January 3, 2018Security updates to several Microsoft products
KB405357810586.1295December 12, 2017Cumulative update
KB404895210586.1232November 14, 2017Cumulative update
KB405223210586.1177November 2, 2017Addresses an issue with several apps
KB404168910586.1176October 10, 2017Cumulative update
KB403878310586.1106September 12, 2017Cumulative update
KB403466010586.1045August 8, 2017Cumulative update
KB402534410586.1007July 11, 2017Cumulative update
KB403269310586.965June 27, 2017Addresses a reliability issue in Windows Search
KB402271410586.962June 13, 2017Cumulative update
KB4019473 10586.916May 9, 2017Cumulative update

Windows 10 November Update was the first feature update where Microsoft implemented “as-a-service” concept, so this update arrived automatically.

The new version focused mainly on fixing issues and bugs present in the Windows 10 initial version. Still, Windows 10 November Update brought new some interesting features.

The support for this version of Windows 10 was ended on October 2017.

Windows 10 version 1511 features

As we previously said, the new version solved many issues but also improved the user’s experience by adding new features.

Microsoft improved Cortana and the major releases of apps were Mail, Calendar and Photos.

What else Windows 10 November Update brings new?

  • Apps can be installed to external drives.
  • A better Skype experience, integrated into Windows.
  • Many features for Microsoft Edge, including supporting cross-device favourites and history sync.
  • More option to personalize your computer.
  • Lockscreen hero image can be disabled.

[wl_faceted_search title=”Find out more about Windows 10 November Update”]
Windows 10 Version 1507

Windows 10 version 1507 was the initial release provided by Microsoft at the beginning of this operating system, and was codenamed “Threshold 1”.

Find out more about Windows 10 version history.

Windows 10 v1507 was launched on July 2015 and had the shortest life of any Windows 10 version. After just 4 months, the Windows 10 November update arrived.

Latest builds in Windows 10 v1507

KB numberVersion (OS Build)Release dateNotes
KB5003172OS Build 10240.18932May 11, 2021Security Update
KB5001340OS Build 10240.18906April 13, 2021Security Update
KB5000807OS Build 10240.18874March 9, 2021Security Updates
KB4601331OS Build 10240.18842February 9, 2021Security Updates
KB4598231OS Build 10240.18818January 12, 2021Security Updates
KB4592464OS Build 10240.18782December 8, 2020Security Updates
KB4586787OS Build 10240.18756November 10, 2020Cumulative update
KB4580327OS Build 10240.18725
October 13, 2020Cumulative update
KB4577049OS Build 19041.508September 8, 2020Cumulative update
KB4571692OS Build 10240.18666
August 11, 2020Cumulative update
KB4565513OS Build 10240.18638
July 14, 2020Cumulative update
KB4561649OS Build 10240.18608
June 9, 2020Cumulative update
KB4556826OS Build 10240.18575
May 12, 2020Cumulative update
KB4550930OS Build 10240.18545April 14, 2020Cumulative update
KB4540693OS Build 10240.18519March 10, 2020Cumulative update
KB4537776OS Build 10240.18486February 11, 2020Cumulative update
KB450505110240.18218May 19, 2019Fixes uk.gov website issues
KB449915410240.18215May 14, 2019Cumulative update
KB449837510240.18187April 25, 2019Cumulative update
KB449347510240.18186April 9, 2019Cumulative update
KB448987210240.18158March 12, 2019Cumulative update
KB449110110240.18135February 21, 2019Solves an Internet Explorer issue
KB448701810240.18132February 12, 2019Cumulative update
KB448096210240.18094January 8, 2019Cumulative update
KB448322810240.18064December 19, 2018Security update to Internet Explorer
KB447132310240.18063December 11, 2018Cumulative update
KB446768010240.18036November 13, 2018Cumulative update
KB446292210240.18005October 9, 2018Cumulative update
KB445713210240.17976September 11, 2018Security updates to several Microsoft products
KB434389210240.17946August 14, 2018Cumulative update
KB433882910240.17914July 10, 2018Cumulative update

Best Windows 10 version 1507 features

From the beginning, users saw that Microsoft brought a lot of notable changes with this operating system, compared to Windows 7, 8.1 and others.

The start menu was updated and improved, offering a better Windows experience and Windows 10 brought the introduction of Cortana, the Microsoft Windows virtual assistant.

Other notable features for Windows 10 (initial release)

  • Windows 10 version 1507 brought “Action Center”, where users can see notifications and have quick access to settings.
  • A new web browser named Microsoft Edge was developed and replaced Internet Explorer as the default browser for Windows.
  • Users can easily switch between desktop mode and tablet mode.

[wl_faceted_search title=”Find out more on Windows 10 version 1507″]


Ubisoft could soon launch its own game subscription service called Ubisoft Pass

The age of the subscription continues on as each television network, tech hardware/software company and even gaming studio explore the worlds of recurring revenue streams.

Soon the studio behind FarCry, Watch Dogs, Rainbow Six Siege, and The Division could soon be offering those titles under a possible subscription service.

According to VG24/7, forum members of ResetEra caught a glance of a new placeholder for what could eventually be Ubisoft’s subscription service dubbed Ubisoft Pass Premium.

Without context, it seems that not only is Ubisoft preparing to offer subscription services in the form of a ‘Pass” but also tier them with Premium being one of the highest tiers to obtain.

As it stands now, Ubisoft holds a spot under its Ubisoft Store for a subscription category with the understanding that the developer does not offer any games or titles in that category.

Nothing has been confirmed and Ubisoft as quickly removed the spotted placeholder.

With E3 2019 just around the corner, the company may shed some light on its intentions in the subscription services game.

Microsoft targets gamers with new Pro IntelliMouse

After Microsoft brought us a modern version of its classic IntelliMouse two years ago, the company is continuing to capitalize on this popular brand by announcing today a new Microsoft Pro IntelliMouse. The new mouse is targeted at gamers, with Microsoft promising “increased performance, modern gaming features and more customization for work and play.”

As noted by The Verge, this new Pro IntelliMouse actually launched first in China last year, but Microsoft is now making it available in more markets starting with the US and Canada. Features include a faster tracking sensor that supports up to 16,000 DPI and a 12,000 FPS refresh rate, improved key actuation, more responsive buttons, as well as textured finish and a braided cable.

The Pro IntelliMouse will be available in Dark Shadow and Light Shadow, and Microsoft also brought back taillight from the original IntelliMouse, but this time users will be able to customize its color in the Windows Mouse and Keyboard Center.

The Microsoft Pro IntelliMouse will be available in Canada and the US in late May, where it will be priced at $39.99. Microsoft plans to bring it to additional markets including Europe and Asia in July.