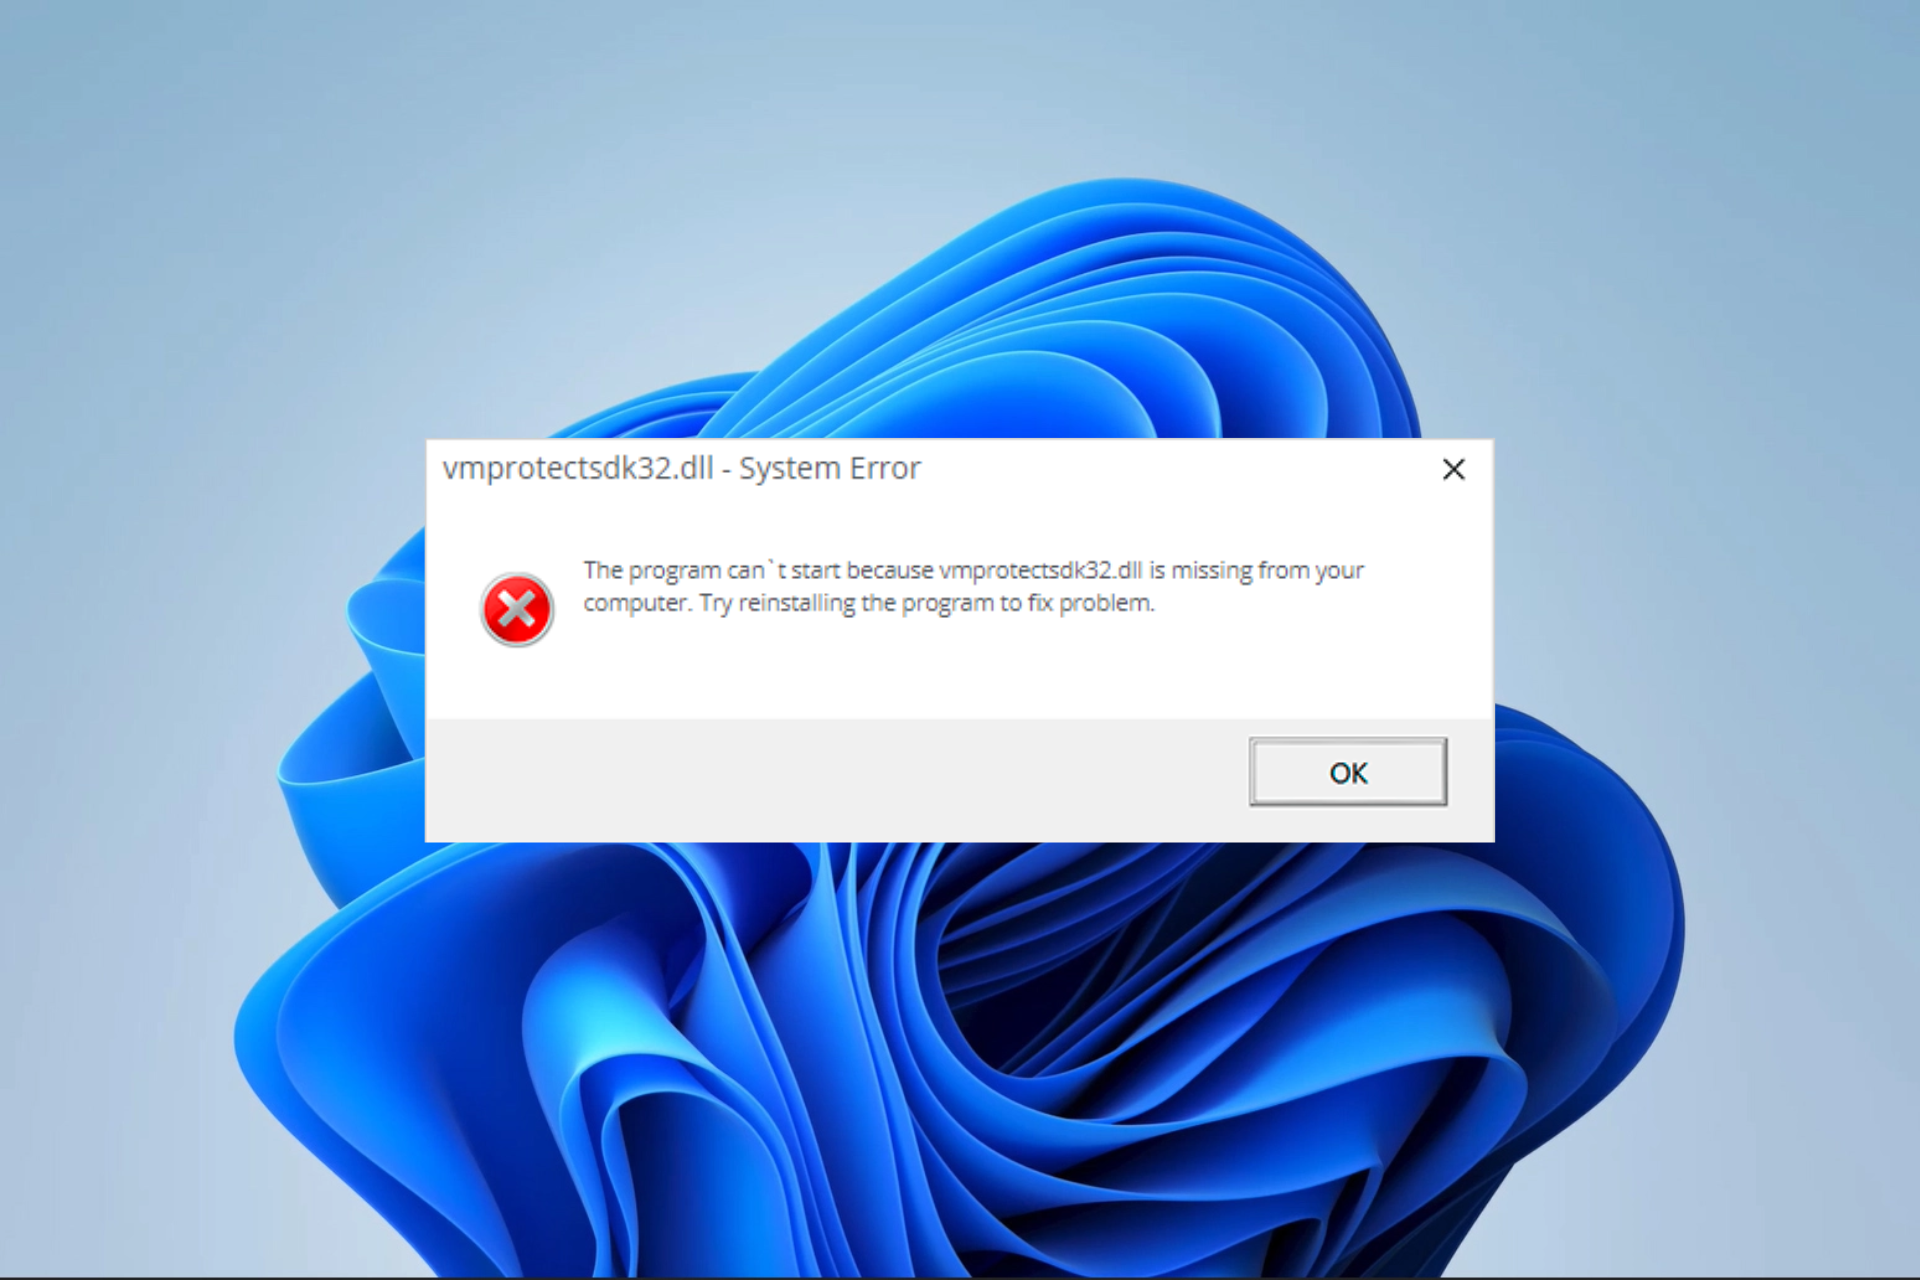
Dynamic Link Libraries are essential files that carry code useful for the proper running of specific applications on a computer. VMProtectSDK32.dll is not an exception.
This guide walks you through basic troubleshooting and download steps if the DLL file is missing on your computer.
What does the VMProtectSDK32.dll missing error mean?
This error means your computer can not find the file, and any of the following may trigger it:
Corrupted or deleted DLL file – It’s possible that the DLL file got lost or damaged because of a software installation mistake, unintentional removal, or a malware attack.
Incompatible software version – If the VMProtectSDK32.dll file used by the software is outdated or differs from the required version, an error might occur since the software is designed to work with a specific file version.
Incorrect file path – Sometimes, the software searches for the DLL file in an incorrect directory or location.
Note that missing errors may come in the following forms, and our solutions below should still be effective; VMProtectSDK32.dll is missing, VMProtectSDK32.dll was not found, or VMProtectSDK32.dll could not be located.
What do I do if VMProtectSDK32.dll is not found on my computer?
Before venturing into any complex solutions, you may employ these workarounds:
Scan for viruses – A virus scan with a robust antivirus may be vital if malware infection is causing the missing file.
Reinstall apps – Try to uninstall the app triggering the issues and reinstall a freshly downloaded copy since the old copy may be corrupted.
Restart your computer – Sometimes, the problem is caused by minor glitches, and a system reboot may be powerful enough to resolve these bugs.
If the above workarounds are unsuccessful, please continue to the more detailed solutions below.
1. Use specialized repair tools
Using specialized DLL repair tools is our recommended solution because these tools do all the heavy lifting for you.
2. Run a file scan
Press Windows + R, type CMD, and hit Ctrl + Shift + Enter.
Type the script below and hit Enter: sfc /scannow
Follow any prompts on the terminal, wait for the process to complete, and verify that it fixes the missing VMProtectSDK32.dll problem.
A manual download can be an effective solution when the DLL is not on your computer. However, you must download VMProtectSDK32.dll from a trusted website.
It’s important to ensure that the source of DLLs is reliable, as some may contain malware that can harm your device.
To avoid triggering an error, place the file in the path below or in the same directory as the problematic program.
C:\Windows\System32
Any of the above solutions should fix the missing DLL error. Using the specialized DLL tools is often very easy, but note that we have not made these solutions in any particular order, and we encourage you to start with whatever seems most convenient.
That is as much as we cover in this guide. Finally, please remember to leave us a comment and let us know what fixed the missing DLL error.
Microsoft has just released an update for PowerToys upping it to version 0.70. The update ships with a couple of new features, as well as the usual fixes and enhancements.
Here’s everything you need to know about this update:
First up, the new update ships with the Mouse Without Borders feature that’s designed to let users interact and engage with multiple PCs using the same keyboard and mouse. What’s more, the feature lets users share clipboards and files between the machines.
It’s also been upgraded to .NET 7 on top of some small adjustments to fit inside the PowerToys model. The new utility further builds on the Mouse Jump utility and enhances navigation across multiple and large screens.
Next up, the update also comes with Peek. A new utility that’s in place to provide users with a quick preview of files selected in File Explorer when you press a shortcut (Ctrl+Space by default).
Additionally, the Registry preview, Awake, and Mouse Jump utilities have all received quality of life improvements to further enhance the tool’s user experience. We invite you to check out the full changelog over at GitHub’s repository for more information pertaining to the fixes.
If you already have PowerToys running on your device, it should automatically notify you of this update. Alternatively, you can get this update today by launching your app, then clicking on General followed by the Check for Updates, and then the Install Now button.
Looking to bring life & restore old photos? You’re in the right place.
Today we’ll walk you through the best tools that can help you remove stains, improve clarity, colorize, and offer other similar features that can turn back the clock on your pictures.
What is the best software for restoring old photos?
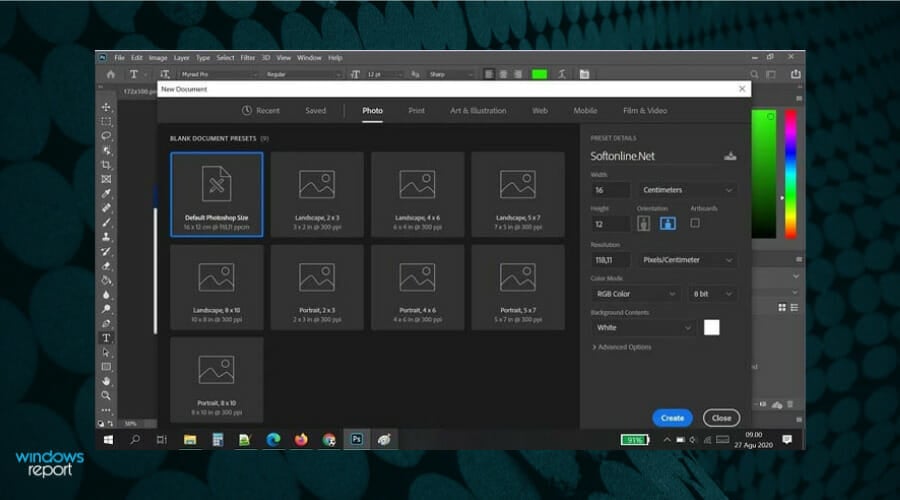
Adobe Photoshop CC is a well-acknowledged photo editing software that is used both by beginners and professionals.
It is one of the most suitable software tools to restore old images that are damaged by either scratch, color degradation, or come with the well-known sepia hue.
The main reason why we chose Photoshop CC as the best option is the ability to work on multiple layers, adjust highlights, and shadows, and change RGB colors down to the pixel level.
Apart from restoring old images, you can also work on improving the quality of images by changing skin tone, applying filters, or removing backgrounds.
Let’s quickly look at its key features:
Professional photo editing toolkit (crop, retouch, restore, repair, and combine photos)
Unlimited layers, masks, and effects for stunning imagery
Cross-platform compatibility and full support for stylus or touch technology
Your projects are automatically saved to the cloud
Interactive in-app tutorials and inspirational content available
Adobe Photoshop
Restore your most precious memories to their former glory with this great photo restoration software!
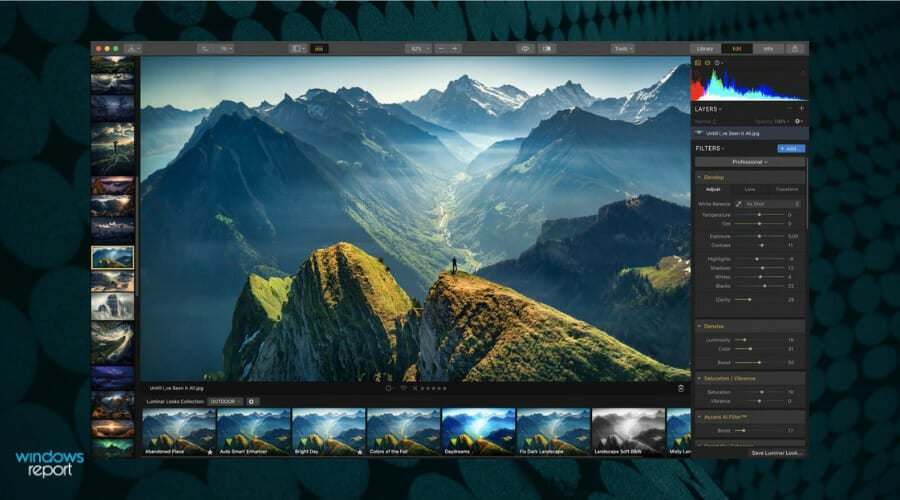
Restoring old photos is no easy task… or is it? It can be with the right tools and Luminar delivers everything you need to remove noise, retouch black-and-white pictures, and adjust tones, clarity, and contrast.
Using AI-based image processing and powerful noise reduction tools, Luminar helps you bring your old photos back to their sharp and crisp state.
This software comes with a full set of old photo restoration tools to remove stains, scratches, splotches, and dirt.
Let’s quickly look at its key features:
Automated AI-based photo editor
Professional-grade noise reduction tools
Erase tool to cover problematic areas with similar-looking textures
Enhance faded photos by fixing contrast, tone, exposure, and color
Color Temperature filter to cool down the temperature of your photos
Luminar
An AI-based app that offers you a full set of features to edit your old photos.
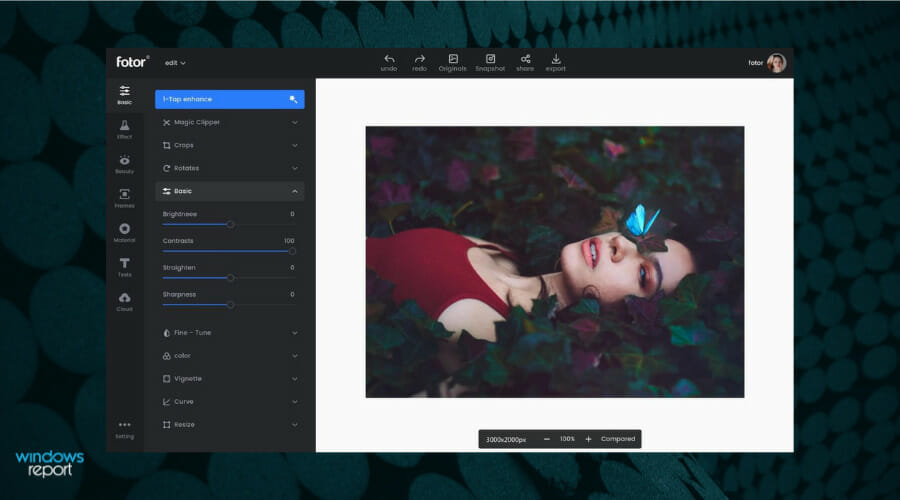
While it is not as feature-rich a software as Adobe Photoshop, for instance, Fotor does a pretty good job at photo restoration.
What’s more, it delivers a complete photo editing toolkit for free.
Fotor’s main focuses are on color correction and RAW image editing, which makes it perfectly suited to adjust balance and enhance faded colors and shades in old photos.
Let’s quickly look at its key features:
Supports all popular graphic file formats
In-built photo restoration feature
Photo editing tools (crop, add or remove objects, bur, adjust contrast, correct color and shade, and more)
Intuitive, easy-to-use interface
Fotor
Restore your old photos and benefit from all of Fotor’s amazing features.
Corel Paintshop Pro is another great tool to restore photos.
With the Fade correction feature, you can adjust the percentage of tint and fade to your liking without the need for complex photo editing skills.
One of the other advantages it has is the scratch remover that can easily handle scratches on damaged photos. It allows you to select a damaged area and then apply a layer of paint over it.
With the Cutout Lab feature, you can easily remove the background of the photo while preserving the quality on the edges.
Let’s quickly look at its key features:
Customizable interface
Stylus and tablet support
360 photo editing
HDR photo manipulation
Creative content integration
Corel PaintShop Pro
Breathe life into your old photos and enjoy forever-lasting memories with Corel PaintShop Pro right away!
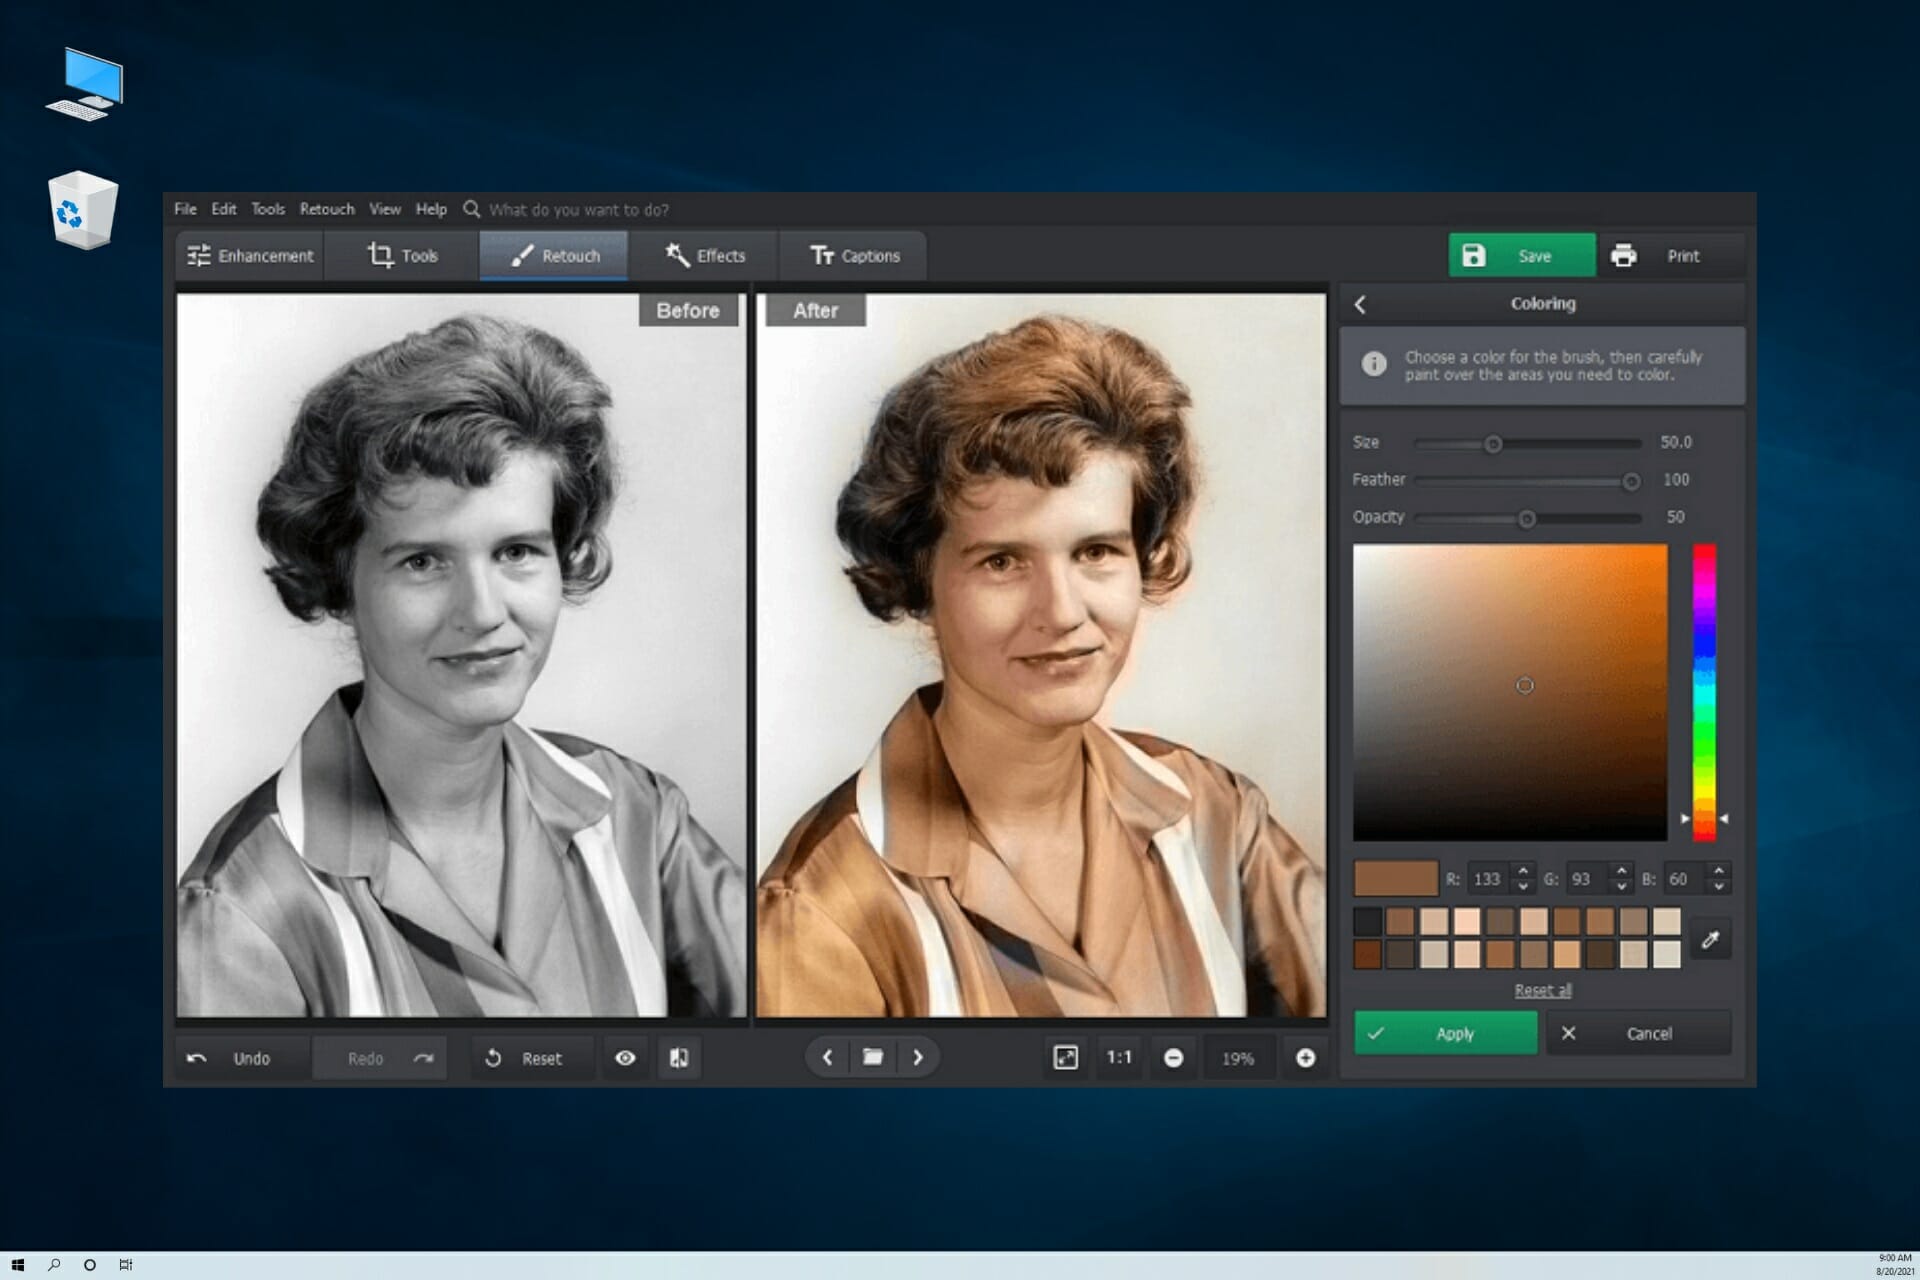
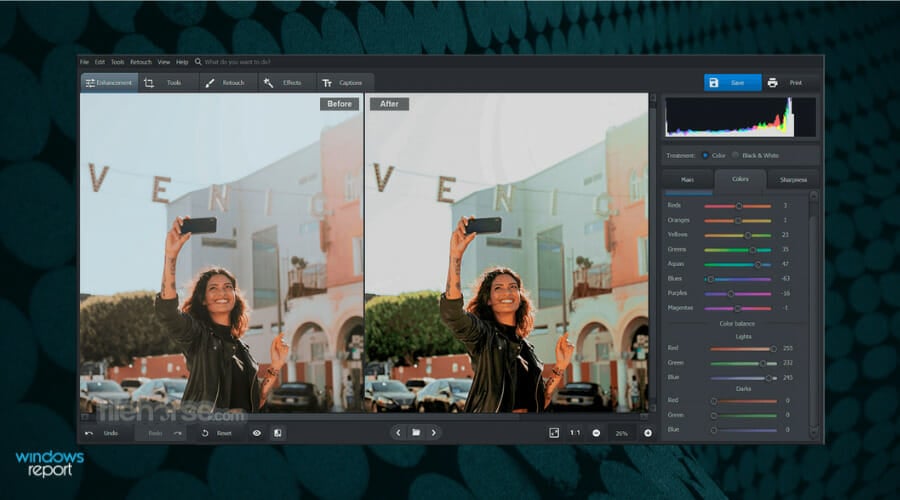
Another great entry in our list of reliable photo-restoring tools is PhotoWorks, a user-friendly software solution that will soon become your most trusted photo assistant.
The Healing Brush that you will find in the Retouch tab will help you get rid of small cracks from old photos.
If you choose the right brush size, they will disappear like magic. After you adjust the Feather and Opacity settings for softening the areas that have been touched and the rest of the photo, you are done.
Of course, you can still work on the details and enliven the colors or even replace the background if it’s too damaged, but everything is extremely easy to work with.
Let’s quickly look at its key features:
Impressive AI features
Remove glare and smooth textural inconsistencies with Portrait Magic
Photo quality enhancements
Work with each color on the photo one by one
One-click effects
PhotoWorks
Revive your old photos with this great tool that helps you preserve your memories and heritage.
If you want a powerful photo restoration software tool, PhotoGlory is worthy of your full attention. There is no other option on the market to remove scratches, tears, and stains so easily.
Moreover, when your mission is to bring life to old photos, another useful trick is to colorize them. Don’t even think that you need to find a different tool for that.
A click is all that stays between you and achieving this goal as well. You can even modify the colors manually in order to make the results more personal.
Thanks to the latest built-in technology, all your edits will be precise, smooth, and will look natural even with automatic effects.
Key features that PhotoGlory brings to the table:
Restores colors to faded photos
Ads stylized text labels and date stamps
Removes scratches, stains, and creases
Assembles photos ripped in half
Turns a negative picture into positive
PhotoGlory
Give a new life to your old photos with PhotoGlory! Your loved ones will most likely be surprised.
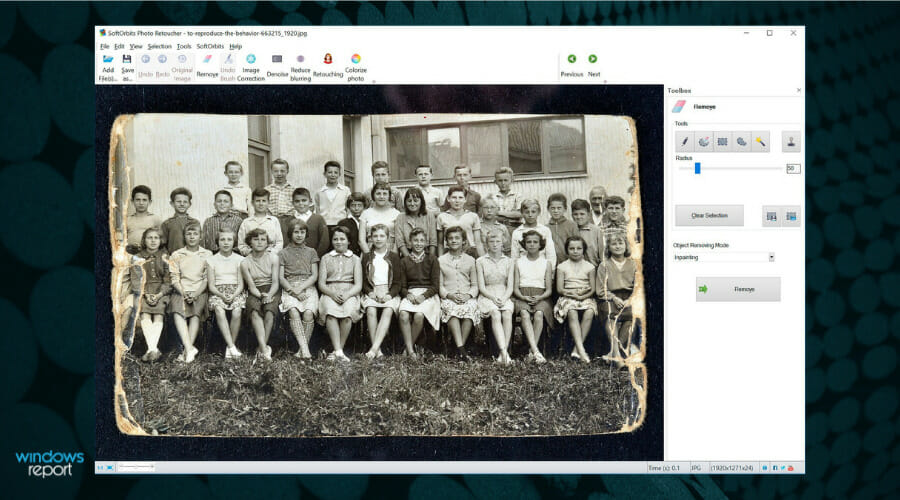
AKVIS Retoucher is a photo restoration software that helps to remove dust, scratches, and other unwanted objects as well as restructure missing parts.
By removing unwanted details, this software helps to improve photo composition. Since it’s a Photoshop-compatible plugin, it works well with a selection of your Photoshop image editors.
Besides the plugin version, AKVIS Retoucher is available as an independent program (standalone) with a trial version.
There is no registration required to try all the features of the software during the free 10-day evaluation period.
Let’s quickly look at its key features:
Intelligent cloning techniques to cover the selected areas and yield amazing results in removing photo defects
Resolves the problem of extending the borders of a layout that does not have space for cropping
Photo restoration tools
It also removes the date stamp, and distracting details, and increases the image canvas using the image patterns to fill blank areas
Akvis Retoucher
AKVIS Retoucher will help you give a new life to your old, dusty photos by also improving their composition.
Old color photos often fade due to unreliable dyes. To restore them, use dedicated photo restoration software, which repairs damage and revives colors. These apps can remove scratches, creases, and sun damage without altering the originals.
Black-and-white photo restoration tools are particularly useful for rejuvenating faded photos, making them look new again by removing stains and other imperfections.
Summary
We’ve listed some of the renowned old photo restoration software that can assist you in cleaning up all your old photos.
However, don’t hesitate to take a look at our free photo editing apps list and you will also find more interesting tools to try.
We hope you found this article useful and informative. Feel free to comment and share.
And today, at Microsoft’s annual conference for developers, Panos Panay shared a short video on his Twitter account to introduce Windows Copilot alongside the Dev Home.
But the video did more than just debt the new entries, it also confirmed that Microsoft was indeed working towards redesigning and modernizing the File Explorer app in Windows 11. Towards the end of the video, you’ll be able to catch a glimpse of the new app briefly.
Right off the bat, aside from the new look and feel which is very apparent, you can also spot the new address and search bar which has been pushed close to the tabs in the app. You’ll also notice that all actions have been moved down below the address bar, closer to the navigation pane.
Additionally, the redesigned File Explorer also features rounded interfaces as well as blur effects which aligns with Windows 11’s Fluent design. To this end, Microsoft is yet to make the official redesign announcement though we already know that the new app will adopt WinUI 3.
As we speak, it’s already possible for some Insiders to test a version of the File Explorer running on WinUI 3, though it doesn’t feature the changes highlighted above.
Alongside the redesigned File Explorer app, we also got to glance at the new gallery feature which is in preview and should start rolling out to roll out to more users soon. The feature is designed to make it easier for users to access their photo collection.
These advancements get Microsoft one step closer to modernizing some of its legacy apps that have remained untouched and haven’t received any significant updates for a long time.
Gmpopenh264.dll is a Dynamic Link Library file associated with Mozilla Firefox 70.0b13 and was first developed in 2019. It is specifically used for video decoding purposes.
If you are facing any errors related to this DLL file, such as it is missing or corrupted, then this guide can help!
What causes the gmpopenh264.dll missing error?
There could be various reasons for DLL missing errors; some of the common ones are mentioned here:
Missing or corrupted DLL file – The error may appear if the DLL file is missing or has been deleted accidentally. You need to restore the file to fix it.
Malware infection – Viruses on your computer can damage or modify the system files, including DLL files, causing this error. Try running a deep scan using an antivirus tool.
Registry issues – If there are invalid or corrupted registry entries on your computer, it may trigger issues like these. Try using a registry cleaner to fix broken registries.
Third-party software interference – Some programs on your computer may conflict with the DLL file, leading to this error. Try uninstalling unwanted software.
Incorrect installation – If the app related to the DLL file is incorrectly installed or uninstalled, you can see this message.
So, now that you know the causes of the issue, let’s move to the solutions to eliminate the problem.
How can I fix the gmpopenh264.dll not found error?
Before engaging in advanced troubleshooting steps, you should consider performing the following checks:
Restart your computer.
Try reinstalling the affected app.
Make sure there are no pending Windows updates.
If these minor tweaks don’t work for you, check out the detailed solutions below.
1. Use a third-party DLL fixer
Managing and resolving DLL-related issues can be tricky; therefore, using DLL fixer tools is recommended, as they can execute the repair process automatically.
2. Use the SFC & DISM scans
Press the Windows key, type cmd and click Run as administrator.
Type the following command to repair system files and press Enter: sfc/scannow
Wait for the scan to complete, and copy & paste the following command to restore the Windows OS image and hit Enter: Dism /Online /Cleanup-Image /RestoreHealth
Once done, reboot your computer to complete the process.
3. Run a malware scan
Press the Windows key, type windows security and click Open.
Go to Virus & threat protection and click Scan options.
Select Full scan and click Scan now.
The tool will scan the computer for all types of malware threats and list them. Delete them to fix the problem.
Performing a malware scan is critical because if the DLL missing error is a result of malware and not an actual missing DLL, running a scan will eliminate it, effectively resolving the issue.
Press the Windows key, type control panel, and click Open.
Select View by as Large icons and click Recovery.
Click Open System Restore.
On the System Restore window, select Choose a different restore point and click Next.
Select the restore point before the DLL missing error and click Next.
Click Finish to initiate the process.
Windows will restart and take your PC back to an earlier point in time. If System Restore did not complete successfully, we suggest you read this informative guide to find solutions.
5. Download the file manually
NOTE
Using an untrusted website to install DLL files is not advised. However, if you know a trusted source, like DLL-Files, which has been tested and verified, you can follow the steps mentioned to restore the file.
Go to the DLL-FILES website, search gmpopenh264.dll, select the suitable option, and click Download.
Double-click the downloaded folder to open it, and locate and copy the .dll file.
Navigate to this path and paste the file:C:\Windows\System32\
So, you can follow these methods to fix the missing gmpopenh264.dll issue. If you have any questions or suggestions, feel free to mention them in the comments section below.
Windows Security is one of the best anti-virus apps out there, and on its own, it does a wonderful job of keeping your computer safe. However, sometimes it can scan the wrong files and it can flag them as corrupt, thus rendering them unusable.
Apparently, since the last Windows update, this user has lost a save file to corruption, at least once per session. That’s because Windows Security is scanning the file at the same time the user is trying to save it.
Now, there are multiple ways to deal with this issue. One solution is to whitelist the files and the folders. You can even whitelist your gaming platforms, such as Steam. In case you deal with this issue when you’re gaming, you can also add the game to the Defender allowed list. That way Windows Security will not go through it. Another solution is to simply turn Windows Defender off.
But let’s say you already did these things, and Windows Security is still deleting your files, or corrupting them. What to do then? In this case, you still need to do one more thing, and your files should be safe.
Here’s how to stop Windows Security from deleting your files
Press Windows + I to open Settings.
Go to Privacy & Security and click on it.
Go to Windows Security and click on the tab.
Select Virus & threat protection and click on it.
Go to Virus & threat protection settings and click on Manage settings.
Go to Tamper protection and turn it off.
Restart your PC and check the Windows Security app to see whether real-time protection re-activates or not.
Tamper Protection is a Windows feature that makes sure you are protected against malware at any time. For example, if you disable real-time protection, this feature will enable it back after a while. That’s why you need to disable this feature too.
You also need to know that Tamper Protection is automatically enabled after each important Windows update you install to your PC. If you encounter this issue, right after you installed Windows updates, then turning Tamper Protection off should fix it.
Just remember it, next time you update.
Have you encountered this issue? What’s your experience with it? Let us know in the comments section below.
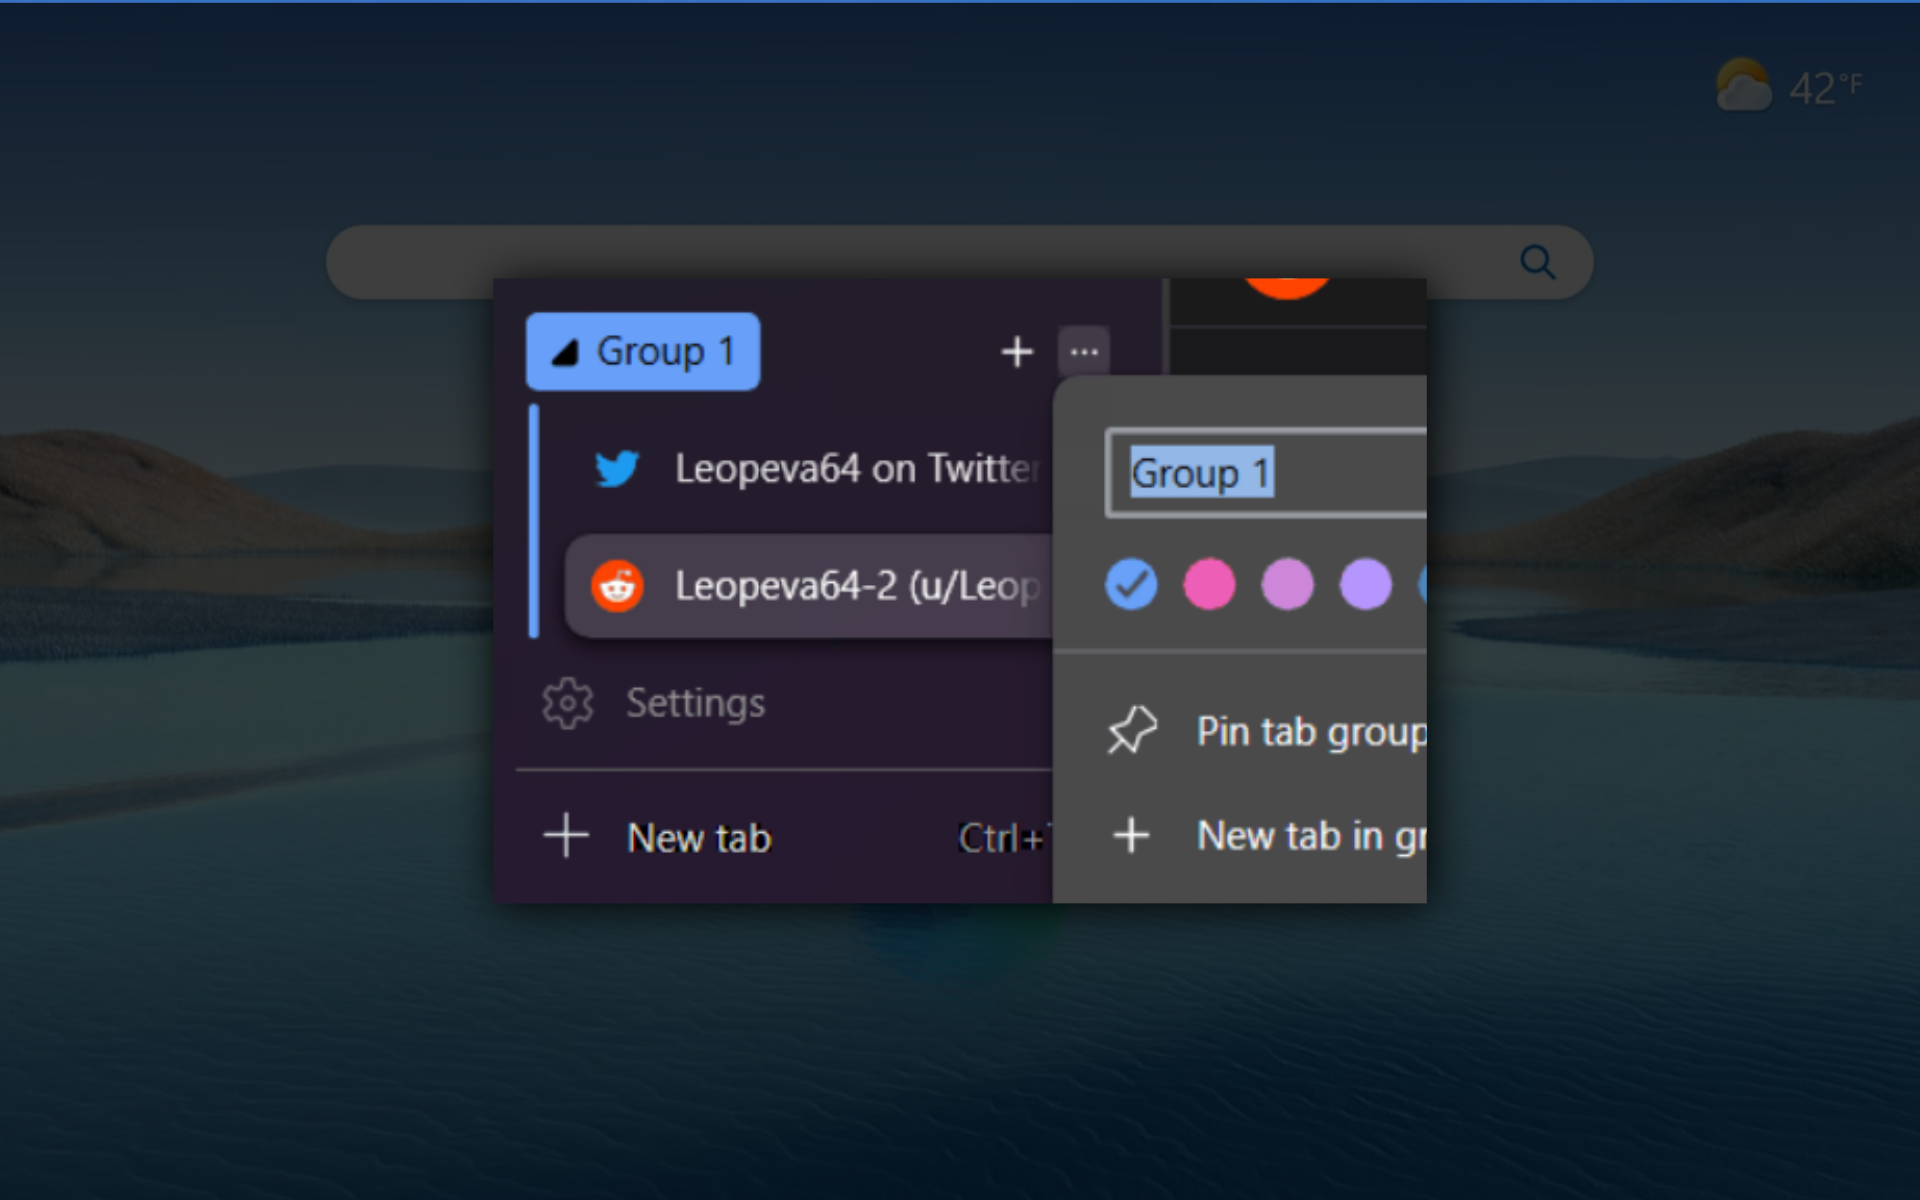
Microsoft is currently testing a visual enhancement for the tab grouping feature in its popular web browser, Microsoft Edge. The feature, which automatically groups tabs when users drag and drop them, is being refined to make it more evident to users that tabs will be grouped.
As spotted by Windows enthusiast @Leopeva64, this change is most noticeable when using the Vertical Tabs feature.
There's a feature in Edge that automatically groups tabs when you drag and drop them, Microsoft is now testing a change to make it more obvious that tabs will be grouped, the change is most noticeable on Vertical Tabs. Before:https://t.co/NIsoljEe32
Tab grouping is a handy feature that allows users to organize their browsing experience by grouping related tabs.
However, some users have expressed the desire to have more visual cues indicating when tabs will be grouped, as it can sometimes be unclear during the drag-and-drop process.
In response to this feedback, Microsoft has been working on a change that will make tab grouping more obvious and intuitive.
While the specifics of the visual enhancement have not been disclosed, it is expected to provide clearer indications when tabs are being grouped for a smoother and more user-friendly browsing experience.
Despite the demand from users, Microsoft has not yet added a toggle option to disable the tab grouping feature. Many users have requested this option to have more control over their tab management.
What does the introduction of tab groups on Edge mean?
The tab grouping feature, along with other enhancements and innovations, has been well-received by Microsoft Edge users. It offers an efficient way to keep related tabs organized and reduces clutter, making it easier to navigate and switch between different web pages.
As Microsoft continues to refine and improve Microsoft Edge based on user feedback, the ongoing testing of the visual enhancement for tab grouping demonstrates the company’s commitment to delivering a browser that meets the needs and preferences of its users.
Not too long ago, we also reported that the tech giant will offer 5 GB of free data on Edge’s built-in VPN.
Although they did offer 15 GB in the past it didn’t work out quite well so Microsoft planned to permanently resort to 5 GB.
What do you think about Microsoft bringing tab groups to Edge? Let us know in the comments!
Many games use a binkw32.dll file, and if this file is missing or damaged, the game won’t start and you’ll be greeted with an error message.
Missing DLL files on Windows 11 are fairly common, and we covered this issue in the past extensively, so if you’re having problems, we suggest that you check some of our older guides.
Before we can fix this issue, let’s take a closer look and see what does this file do.
What is the binkw32 dll?
This file is associated with Bink video codec and is used in many video games. The file is used to compress and decompress videos in games.
If there’s an issue with this file, then the video game that uses it won’t be able to start.
Why is binkw32 dll missing?
This file can go missing for several reasons.
Corrupted installation – If your game installation is damaged or corrupted, the file will be reported as missing.
File not in the right location – In case this DLL file is not in the right location, you’ll get a message saying it’s missing.
What can I do if binkw32.dll is missing?
1. Use a dedicated DLL fixer
Many games use Binkw32.dll, and downloading it manually can be a tedious and sometimes dangerous task.
Instead of downloading files from untrusted websites, why not use a DLL repair software?
This kind of application is straightforward to use. You just need to download it and let it do the job for you.
2. Verify the game files
Open the Steam library and select the game that is giving you this error.
Right-click it and choose Properties.
Next, go to Local Files and click on Verify integrity of game files.
Wait for the process to complete.
If binkw32.dll or any other files are missing or damaged, they will be repaired by this process. If you’re using a different distribution platform, the steps might differ.
Open Windows Explorer and navigate to these locations: C:\Windows\System32 C:\Windows\SysWOW64
Look for the binkw32.dll file in both of these directories.
Once you locate it, right-click it and choose Cut.
Next, go to the game’s directory that reports the missing file, right-click the empty space and choose Paste.
In some cases, it might be better to move it to a random directory on your PC, but before moving the file, we suggest you try copying it to the game directory and see if that solves the issue.
Missing binkw32.dll file can appear on any operating system, and if you’re on Windows 10, we have a great guide on how to fix missing DLL files on Windows 10.
Before you go, don’t miss our guide on missing bink2w32.dll for more potential solutions.
Did you use a different solution? Let us know in the comments section below.
Microsoft announces Insider Preview Build 25295 to the Dev Channel, and users can now anticipate integrated RGB controller on Windows 11 and say goodbye to third-party apps.
“New settings for device lighting make an appearance in build 25295. Is this the beginning of the end for low-quality RGB gamer gear apps? The spec for this is from 2018 and references to the feature have been around for years. Not cancelled after all,”
From there, you can see options to enable ambient lighting and your lighting hardware. Each device has options to match your Windows accent color or tweak it manually.
In the latest Windows 11 Insider Preview Build 25370 from May 2023, Microsoft has seemingly reintroduced the ambient device lighting settings to the Canary Channel – again. However, this feature remains hidden and is still considered somewhat incomplete, as spotted by Windows enthusiast @PhantomOfEarth.
Can I access the integrated RGB controller on Windows 11?
The short answer is no, as it’s still in the insider built. That means, several select devices of insiders in the Dev Channel is currently testing out the unified RGB controlling feature and is not out yet for the public.
It may even take a while for Microsoft to release it to the public, but you can activate it via the third-party app ViveTool.
You can now see a quick copy button for two-factor authentification (2FA) codes in the notification, just like we often see on smartphones.
It also revamps the Search feature on the taskbar, which came in Build 25252 back in November 2022, by adding the feature to change the treatment of search on it.
Are you excited about this feature rollout? Let us know in the comments!
The narrator is a handy feature since it can help users navigate on their console, but many reported that the Xbox Narrator won’t turn off.
Issues with your console can appear; sadly, this isn’t the only one. Many users reported that their Xbox audio is stuttering; we already fixed that in a separate guide.
Before we start fixing this issue, let’s see what causes this issue to appear.
Why won’t the narrator turn off my Xbox?
There is usually a single reason for this problem:
Glitches with your console – In some cases, you might experience glitches on your console that can prevent this feature from turning off.
Game settings –This feature might be enabled in one of your games, so you need to manually disable it.
What can I do if the Xbox Narrator won’t turn off?
Before we proceed, there is a quick check that you need to perform:
Check the game settings – If this issue appears only in certain games, check the game settings and disable Narrator from there. We already have a great guide on how to turn off Narrator in Minecraft, so be sure to check it out.
1. Use the shortcut
Press the Power button on the controller until it starts vibrating.
Next, press the Menu button on your controller.
The Narrator will now be disabled.
This is a quick and easy method, so we encourage you to try it.
2. Chagne Narrator settings
Press the Xbox button on your controller.
Next, go to Profile & system and then Settings. Lastly, select Accessibility.
After that, go to Narrator.
Turn the Narrator off.
Optional: If turning off the Narrator doesn’t work, lower its volume to the lowest value.
Chromebooks are great for education because they’re affordable and secure by design. However, if you’re looking for more flexibility, alternative browsers for a school Chromebook are worth taking a closer look at.
Chromebooks are computers that run on a lightweight operating system called Chrome OS. It’s based on the open-source Chromium project and uses the Google Chrome browser as its main user interface.
One of the main reasons why Chromebooks are popular in schools is because they are easy to manage and maintain. However, not everyone wants to use the default browser that comes with it. Does that ring any bells? If so, we’ll be showing you exactly how to get another browser on your school Chromebook.
But first things first – what browsers work on a school Chromebook? Check out our top picks:
Opera – best alternative browser for school Chromebook
Chrome – free default Chromebook browser
Firefox for Chromebook – unblocked browser for school Chromebook (+adblock)
Microsoft Edge – Best for syncing accounts
Brave – private browser for school Chromebook (highly customizable)
How do I change my browser on my Chromebook for school?
There are several ways to install another browser on your device and yes, that implies bypassing and/or removing school restrictions from your Chromebook by enabling developers’ mode or visiting specialized unblocking websites such as goguardian.com, among others.
But for the sake of it, let’s take the clean path and agree that you cannot download another browser for Chromebook unless authorized by your administrator. Once approved, follow the steps below:
Use the URL bar in your current browser and go to Opera’s homepage.
Select browsers, then click Opera for Chromebook.
Press Get it on Google Play.
Hit the Install button.
Another way is to use a browser package. A browser package is a file that contains the entire source code of a web browser, including its rendering engine and other files needed to run it.
These can be installed on any Chromebook but will not be updated automatically.
What browser can I use on my school Chromebook?
1. Opera – best alternative browser for school Chromebook
When it comes to what browsers work on Chromebook, Opera is a fast, free, and secure choice. It’s designed to be simple and easy to use while offering features that power users will appreciate.
Two versions of Opera are available for Chromebooks: Opera and Opera Beta. The main difference is that the beta version includes new features before they’re released to all users.
Additional features:
Speed Dial with personal images and sound themes
Tabs Organizer with tab grouping and group cloning options
Private browsing mode with an ad blocker, password manager, and download manager
Google Chrome is the default browser on Chrome OS, and it’s also available for Windows, Mac, Linux, and Android devices.
Chrome is fast, reliable, and secure. It has a clean user interface that’s easy to learn and use and offers all the features you need to browse the web, including bookmarks and extensions.
Additional features:
Easy-to-use interface
It comes with a set of pre-installed apps, including Gmail, YouTube, and Google Search
It also supports thousands more available from the Chrome Web Store
Can Chromebook run Firefox? You asked and we’re here to serve – Not only does it run it, but Mozilla Firefox is also one of the best browsers for Chromebooks.
It’s free and can be used to surf the web, download files, chat with friends, and watch movies. Now, its adblocking capabilities may be famous but even this privacy-loving browser can encounter occasional issues in this department.
The best thing about Microsoft Edge is its extensive support for extensions, including many that are useful for Chromebook users.
Microsoft Edge has many features that make it a good choice for Chromebook users. It supports tabbed browsing and has features like Cortana integration, privacy feature, and other collaboration-focused options that recommend it as an excellent browser for Zoom meetings, for instance.
Additional features:
Ability to sync passwords, history, and others across multiple devices
It has a grammar check tool to enhance your writing
It comes with a sleeping tab feature to minimize the wastage of resources
If you have a Microsoft account, you can sync your favorites, passwords, history, and open tabs across all your devices running Windows 10 or 11. This is great if you use multiple devices at home or work.
Brave for Chromebook is an excellent choice for your Chromebook. It has a lot of features that make it easy to use, and it’s compatible with most web apps.
It has a built-in ad blocker, so you don’t have to download extensions to block web ads. The Brave browser also provides faster loading times because it doesn’t load ads when you visit websites that have them enabled.
Additional features
It has an in-built VPN
3 to 6 times faster than other browsers
Ability to import bookmarks and other saved items from your old one to your new browser
Many Google Chrome users have reported ERR_SOCKET_NOT_CONNECTED error, and this error will prevent you from accessing certain websites. However, you can fix it with these steps.
Why am I getting the ERR_SOCKET_NOT_CONNECTED error?
Issues with your DNS or browser can lead to this problem. Your firewall or LAN settings can also cause interference. Lastly, socket pools can also be responsible for this issue.
How can I fix the ERR_SOCKET_NOT_CONNECTED error?
1. Flush the socket pools
Launch Google Chrome.
In the address bar, type the below and press Enter. chrome://net-internals/
Select Sockets from the left pane.
Hit the Flush socket pools.
Restart the browser.
2. Change the DNS server
Open the Start menu by pressing the Win key.
Open Control Panel.
Click on Network and Sharing Center.
Click on the Change Adapter Settings option.
Right-click on your connection and select Properties.
Choose the Internet Protocol 4 (TCP/IPv4) option and click on the Properties button.
Check the radio button for Use the following DNS server addresses and enter the below details.
WhatsApp is among the most popular messaging applications widely used on Android and iOS. You can get an app on Windows 11 and send messages, make voice & video calls, share files, & stay connected with your friends, family, and colleagues.
In this guide, we will discuss step-by-step instructions to download and install WhatsApp on Windows 11.
How can I download and install WhatsApp on Windows 11?
Before proceeding with any steps for installing the program, go through the following preliminary checks:
Must have an active Microsoft account. If you don’t have an account, create one.
A stable internet connection.
A smartphone with WhatsApp installed and active.
Need to provide camera access.
Once these prerequisites are met, let us move on to downloading and installing WhatsApp. If interested, check out this guide to know how to share screen on WhatsApp video calls.
1. Use Microsoft Store to download & install
Press the Windows key, type microsoft store and click Open.
In the search bar present at the top of the window, type WhatsApp and select the appropriate result.
Click Install to initiate the download and install process.
Generally, the process takes 3-4 minutes. However, depending on your internet connection speed, it may take longer.
WhatsApp app will launch; click Get Started to initiate the setup.
You will see a screen with a QR code.
2.2 On your mobile device
Now open WhatsApp on your Android or iOS device and tap Settings.
Tap the QR code next to your name.
Point your phone to the QR code shown on your Windows device.
Once scanned, click Continue on your mobile device.
Click Link a Device and point your phone again to a Windows device to rescan.
FAQ
Can I use WhatsApp on Windows 11 without a phone?
No, WhatsApp for Windows 11 requires your phone to be linked. First, set up WhatsApp on your mobile, scan the QR code on the Windows app, and keep your phone connected to the internet.
Is WhatsApp for Windows 11 free?
Yes, WhatsApp for Windows 11 is completely free, just like the mobile version.
Why is WhatsApp not syncing messages on Windows 11?
If WhatsApp isn’t syncing, ensure your phone has an active internet connection. You can also check for updates for the WhatsApp app on both your mobile and Windows devices.
Can I back up my WhatsApp data on Windows 11?
WhatsApp for Windows 11 doesn’t support direct backups. To back up your chats, use WhatsApp on your phone and sync with Google Drive (for Android) or iCloud (for iPhone).
For users who want to know how to install WhatsApp on older versions of Windows, including Windows 7, you can check out this detailed guide on WhatsApp for Windows 7.
Your WhatsApp will download the messages present on your Windows computer. Once done, you can enjoy seamless communication with your contacts from your desktop.
Realtek Audio Console helps you customize and control your audio settings on Realtek audio hardware devices. It lets you adjust parameters like volume levels, equalizer settings, and sound effects. Let’s explore the Realtek Audio Console download for your Windows devices.
How do I download Realtek Audio Console on Windows 11?
Under the Windows section, click the download icon for any that matches your computer OS and architecture and save the downloaded file.
Right-click on the Start menu and select Device Manager.
Expand the Sound, video, and game controllers category, right-click on your Realtek driver, and click Update driver.
Select the option that reads Browse my computer for driver software in the following window.
Input the path where you saved the downloaded driver and hit Next.
Finally, follow the on-screen instruction set to complete the update.
Getting the update is a valid solution since it often gets preinstalled on your Windows installation. If you have issues with it, all you may need is to get the latest version.
Keeping drivers up to date, including the Realtek ones, is much easier done with the help of specialized software.
On the left pane, click Windows update, then select Check for updates on the right.
If there are updates, click Download & Install.
Wait for all updates to be installed, and if required, finally restart your computer, you should have your Realtek Audio Console downloaded and installed with the latest updates.
How do I download Realtek Audio Console on Windows 10?
All the above approaches on a Windows 11 device will still work in downloading Realtek Audio Console on a Windows 10 device.
However, you must note that on Windows 10, there will be a minor UI difference when updating the OS, and you will need to click Update & Security after opening the Settings app.
And there you have it. Any of the above solutions will be easy ways to get Realtek Audio. Remember, we have not written this guide in any particular order, so you should use the most applicable solution.
If you’re looking for more ways to access or restore full Realtek sound controls on your PC, check out our complete guide on how to download Realtek HD Audio Manager in Windows 11. It covers OEM driver methods, Microsoft Store access, and third-party tools.
Amidst the electrifying atmosphere of Build 2023, Microsoft has made a groundbreaking announcement that is set to redefine the way we work and interact with technology. The integration of Microsoft 365 Copilot into Microsoft Edge, the AI-powered web browser, has taken center stage, showcasing the immense potential of combining advanced language models and data integration. This innovative development promises to empower users with unparalleled capabilities, providing seamless assistance and transforming the work experience.
Microsoft 365 Copilot Arriving on Microsoft Edge
Microsoft is set to integrate Microsoft 365 Copilot, currently in a private preview phase, directly into Microsoft Edge, the AI-driven web browser. This integration aims to bring enhanced work-related functionalities to the Edge sidebar, allowing users to access powerful tools for answering questions, completing tasks, and more.
The introduction of Microsoft 365 Copilot will introduce novel features that harness the capabilities of large language models (LLMs), leveraging data from Microsoft Graph and the Microsoft 365 suite of applications. Users will have the ability to input natural language requests such as, “Inform my team about the updates we made to the product strategy today.” In response, Copilot will generate a status update based on the morning’s meetings, emails, and chat conversations. By seamlessly integrating with Edge, Copilot becomes even more intuitive as it follows the context of users’ browsing activities, providing more accurate answers. For instance, when viewing a file shared by a colleague, a user can simply inquire, “What are the key insights from this document?”
Previously, Copilot was announced to be available on Microsoft Teams, Microsoft365.com, and Bing for users signed into their work accounts. With the inclusion of Edge, Microsoft reiterates its commitment to delivering these capabilities while ensuring data security and privacy within enterprise settings. To utilize Microsoft 365 Copilot, users must be signed into their Azure Active Directory (Azure AD) account.
Conclusion
As Build 2023 continues, the unveiling of Microsoft 365 Copilot’s integration into Microsoft Edge marks a significant milestone in the realm of productivity tools. Microsoft’s commitment to delivering cutting-edge solutions that prioritize data security and privacy remains unwavering. With the ability to generate comprehensive updates, answer complex queries, and provide valuable insights, Microsoft 365 Copilot revolutionizes the way we navigate and engage with our work. Embrace this transformative technology and unlock a new era of efficiency and productivity.
If the Windows Update service is missing from services.msc, Windows can’t check for or install updates normally. This usually means the wuauserv registry entry was damaged, removed, or hidden by Group Policy, malware, or system corruption.
Microsoft embraces the concept of Build 2023 digital swag to enhance the attendee experience. With its commitment to innovation, Build 2023 digital swag offers a range of exciting rewards and exclusive content to participants. Build 2023 brings together developers, technology enthusiasts, and industry leaders from around the world. Apart from insightful sessions and keynotes, Microsoft also offers a range of digital swag items that you can download and enjoy.
Not attending Build 2023? Good news, both event attendees and the public can download the Build 2023 digital swag, which includes:
Microsoft Teams backgrounds: Celebrate your developer pride with two Teams backgrounds to use to join your calls and meetings that are branded with the official Build 2023 logo.
Event Badges: Make a statement on social media by flaunting your official event badge (two different color options) with the hashtag #MSBuild.
Wallpapers: Create a captivating atmosphere for your upcoming event with an official Microsoft Build wallpaper; two wallpapers available for both desktop and mobile devices.
Animated GIFs: Prepare yourself to elevate your social media presence with these captivating GIFs that will truly make your posts shine.
I just registered: Inform your friends and followers that you will be honing your skills at Microsoft Build with a unique and shareable post designed by Microsoft to share specifically for your social media accounts.
How to download Microsoft Build 2023 digital swag?
To get started, you need to visit the official Microsoft Build 2023 website. Once you’re on the website, access the “digital swag” section by going to Support > Digital swag. Once you are on Microsoft’s Build 2023 Digital swag page, you can download all digital swag at once or pick the ones that interest you the most.
Even if you’re unable to attend Build 2023 in person, the good news is that both event attendees and the public can still enjoy the rewards of digital swag. From the official Spotify playlist to Microsoft Teams backgrounds, event badges, wallpapers, animated GIFs, and unique social media posts, there is something for everyone to enhance their digital presence and highlight their enthusiasm for the event. To access the Build 2023 digital swag, simply visit the official Microsoft Build 2023 website and navigate to the “digital swag” section. Choose your favorites, download them, and let the excitement of Build 2023 continue even after the event concludes. Let your passion for technology shine with Build 2023 digital swag!
Corporate Vice President of Xbox Sarah Bond recently sat down for an interview with Rolling Stone in which she discusses the possibility of introducing new revenue models for Xbox game developers. Bond mentioned that the Xbox team has considered the possibility of in-game advertising,
We’ve talked about how we’re experimenting with other models, like what does it mean for advertising in games which is more prevalent in mobile – are there models of that that work well in PC and console?
I guess my Xbox will be a paper weight. No one will want too buy it then. I won't even play games on my phone that have ads. I'm sure not going to deal with it on xbox.
Last year there were rumors circulating that Xbox could introduce a more affordable Xbox Game Pass tier that would be ad-supported. This came in the wake of video streaming platforms Netflix and Disney+ doing the same. A lower-cost, ad-supported Game Pass tier for those that want it would be one thing, but apparently having ads displayed in-game would be a bridge too far for some gamers.
It’s important to note that Microsoft in no way has said anything about bringing ads to Xbox games, and Bond only said it was something they were “experimenting with.” With that said, what’s your take on in-game advertising? It’s something that has mostly been restricted to mobile gaming, but how would you feel if it did come to Xbox games and other platforms? Share your thoughts in the comments.
A few of our readers have complained of the RAM spiking at as much as 99%. This often leads to reduced performance and harms the computer’s health.
We have investigated this issue, and in this guide, we come out with some probable causes and our top recommended practical solutions.
Why is my RAM spiking at 99%?
From research, we discovered this could be because of any of the following reasons:
Insufficient RAM – If may signify your computer has a relatively small amount of RAM compared to the demands of the applications and processes running on it.
Memory-leaking programs – It’s possible that certain programs may experience memory leaks, causing them to hold onto memory even after use.
Resource-intensive applications – Some programs, like video editing software, virtual machines, and games, require a significant amount of RAM to operate smoothly.
Malware or viruses – High usage of RAM can also be caused by malicious software, which can run hidden processes. We recommend using a robust antivirus.
Background processes – Various running background processes and services may use your system’s RAM.
Is it bad for RAM to be at 100%?
When your computer’s memory usage reaches nearly 100%, it can significantly slow down its performance. At this point, your computer will perform a memory swap using the hard disk as temporary storage.
What do I do if my RAM spiking to 99%?
There are a few workarounds we recommend before any major troubleshooting:
Run a virus scan – Since a computer virus may trigger this error, you should run a scan using any robust antivirus.
Restart your computer – Sometimes, a simple restart can help free up system resources and resolve temporary memory spikes.
Close unused programs – If there are applications you are not using, they should be closed to conserve RAM usage. These may include dormant browser tabs.
However, if none of these pre-solutions work, proceed to the more detailed fixes below.
1. End running processes
Press Ctrl + Shift + Esc to open the Task Manager.
Click on any process using a lot of memory and hit the End task button.
Repeat step 2 for as many processes as possible, and verify that it fixes your RAM spiking at 99%.
2. Adjust the virtual memory
Press Windows + E to open File Explorer.
Right-click on This PC or My Computer and select Properties.
Go to the Advanced system settings.
Under the Performance section, click on Settings.
Go to the Advanced tab and click Change under the Virtual Memory section.
Uncheck the Automatically manage paging file size for all drives option, select the drive where your operating system is installed, choose the Custom size option, and set the Initial and Maximum size to a value higher than the current allocation.
Click Set and OK to save the changes and see if your RAM still spikes at 99%.
If you often experience high memory usage, upgrading your computer’s RAM might be worth upgrading. This will allow your system to handle multiple tasks simultaneously by providing more memory.
Some computers may have an extra empty RAM slot. You need to buy RAM that matches your computer specifications to fill the slot or replace old RAM with a larger unit.
4. Disable Startup applications
Press Ctrl + Shift + Esc to open the Task Manager.
On the left pane, click Startup apps, then on the right, click on an app and hit the Disable button.
Repeat this for as many startup apps as possible.
RAM spiking at 99% should not be an alarming occurrence. It is not always a sign that something is wrong with your computer, but it may indicate you have a lot of running processes.
However, you can always address the issue with any solutions in this guide. If you have issues opening the Task Manager, you may read our other comprehensive guide.
Let us know in the comments section what worked for you.
ChatGPT has shown how AI can help you write long essays or anything and can be a conversational tool as if you are talking to a human. There are multiple AI competitors to ChatGPT, one of which is Jasper.ai.
Many of our readers have reported that for them the Jasper.ai is not working. Well, this could be because of a temporary glitch or something related to your browser, which we will be discussing in this guide.
What is Jasper.ai?
Jasper.ai is a writing tool that infuses the powers of AI to generate marketing copy, and captions for your social media posts, blog posts, company bios, and whatnot.
The main highlight of Jasper.ai is that the content that you get from this AI tool will be free from plagiarism flags and appears as if a human actually writes it.
Jasper.ai also provides pre-written templates for various categories. It makes use of the NLG (Natural Languages Generation) that helps the AI tool automatically convert raw data into something meaningful.
You also get to change the tone of the writing and select among cheeky, formal, bold, or pirate and you can further train Jasper.ai to have a consistent voice of your brand.
How do I resolve Jasper.ai not working problem?
Here are a few things that you can do before heading ahead with the advanced solutions to resolve Jasper.ai not working problem.
Hit the Try Jasper Free purple button at the top right corner.
Enter different detail, and email address and click the Start your 7-day Free Trial button.
There might be some issues with the account that you are using with Jasper.ai. Try using a different account and check if this resolves the Jasper.ai not working problem.
2. Clear the browser cache
Launch the browser.
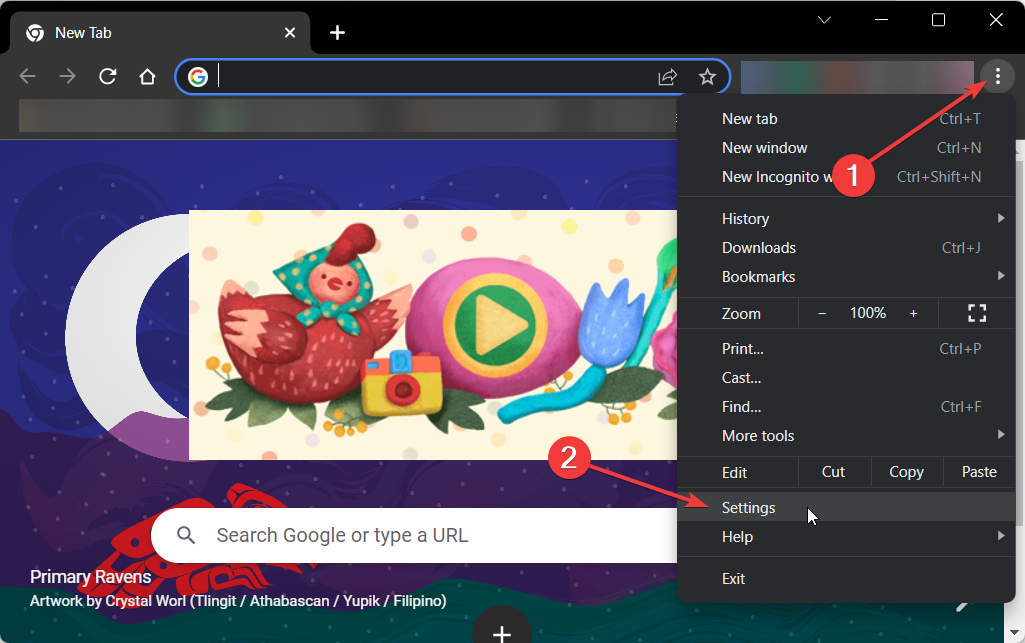
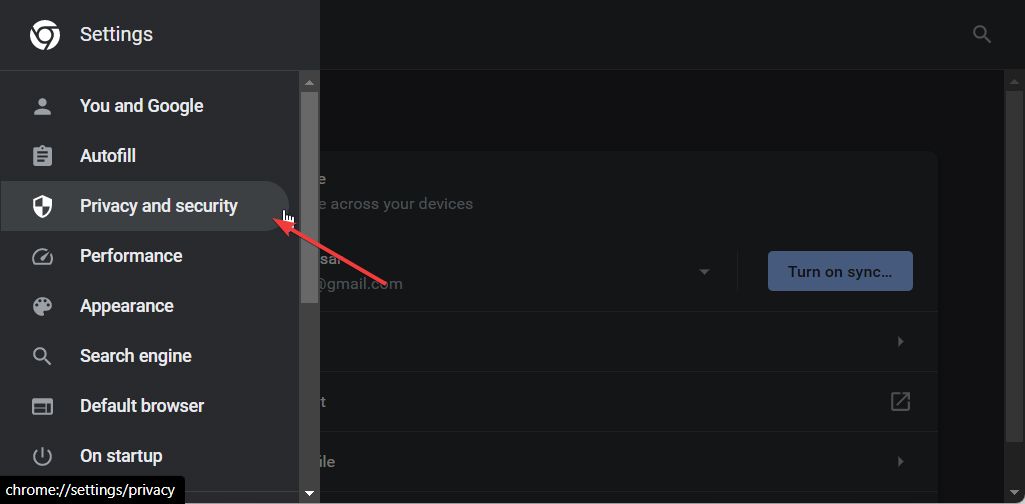
Click on the Menu icon located at the top-right and select Settings.
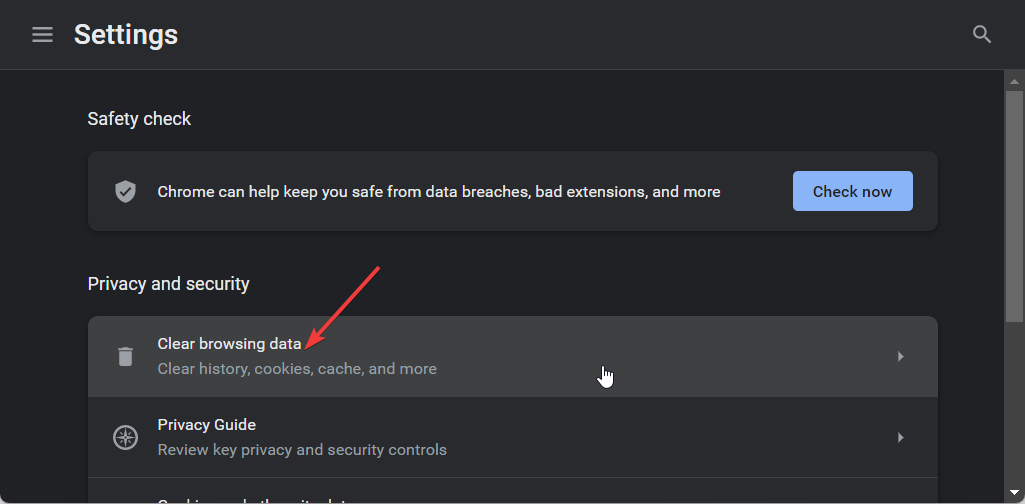
Click on Privacy and Security from the left.
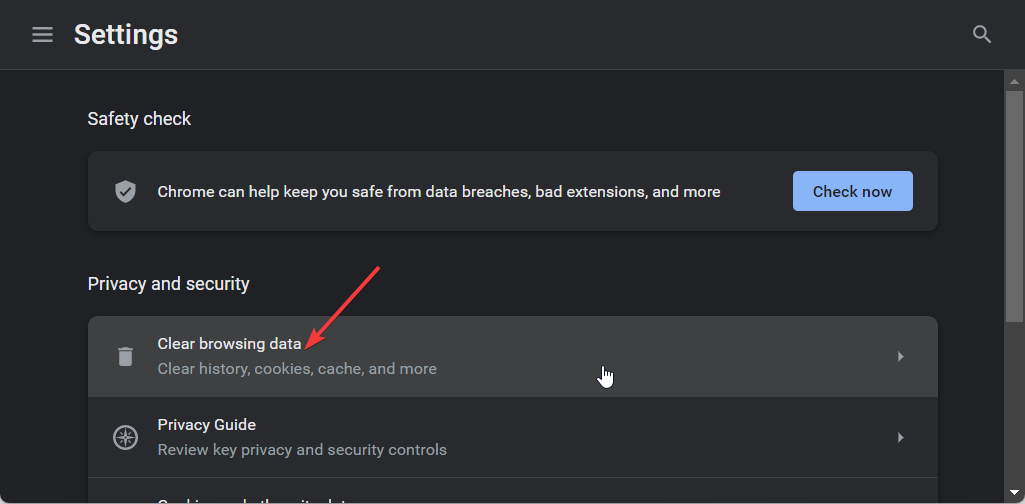
Select Clear browsing data from the right.
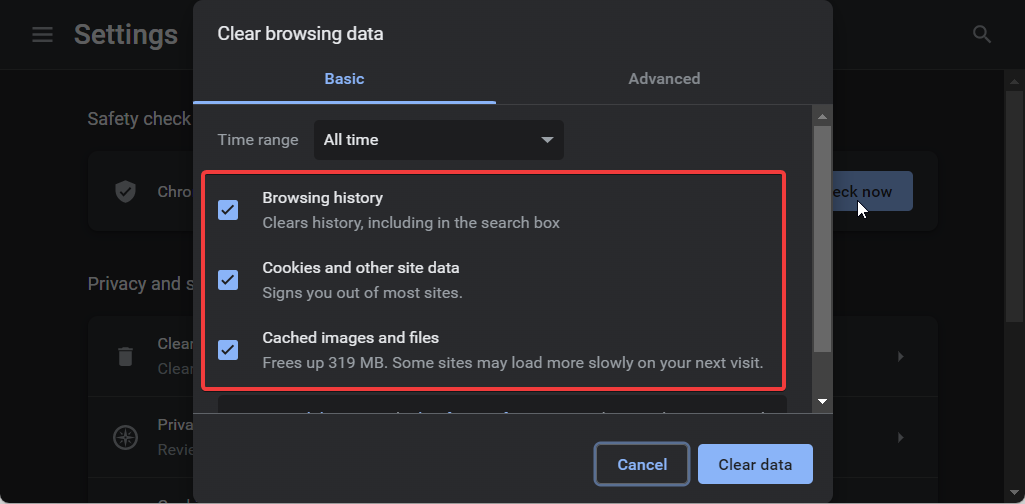
Check the boxes for Cookies and other site data and Cached images and files options along with Browser history.
Click Clear data.
Corrupt browser cache files can cause multiple issues with the websites that you visit as they store your personal data for that website.
Simply clear the cache for your browser and see if this resolves Jasper.ai not working problem or not.
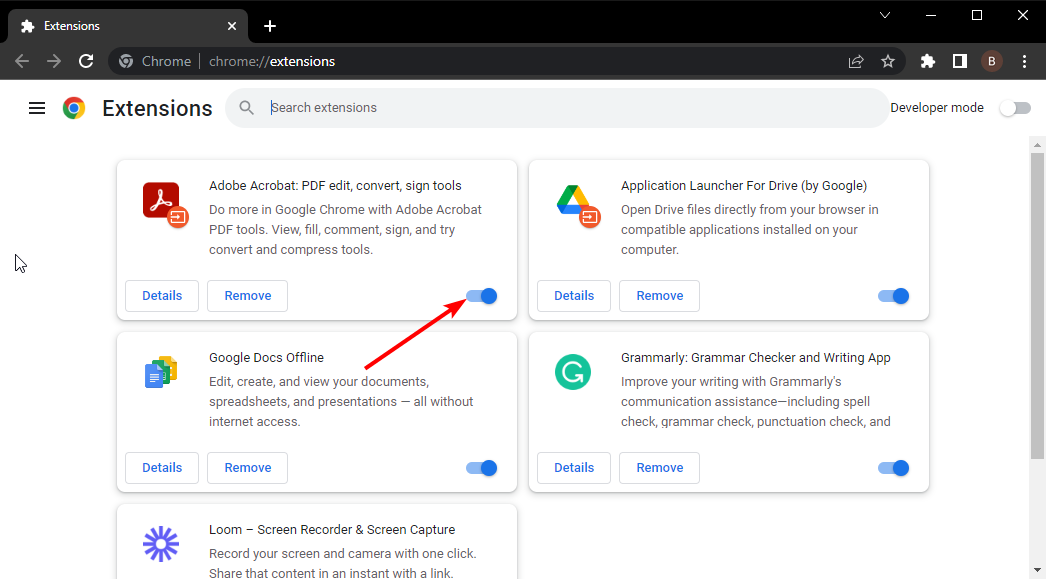
Toggle off each extension and restart the browser.
Visit the Jasper.ai website and check if this fixes the issue.
Disable all the extensions, especially pop-up blockers as they are known to create a sort of hindrance for the Jasper.ai website. We have shown you an example on how to do that on Chrome but the procedure is similar to all major browsers.
4. Turn off VPN or change the VPN server
When you use a VPN, you can access websites or content that geo-restricted. This could be helpful for many users but can also interfere with the smooth functioning of different websites such as Jasper.ai.
Simply turn off the VPN and check if this resolves the issue. Else, you can try changing the VPN server and visit Jasper.ai and check if this fixes the Jasper.ai not working problem.
5. Clear Jasper.ai cookies
Open your web browser. In our case, Google Chrome.
Click on the Menu button and select Settings.
Choose Privacy and security from the left pane and select Cookies and other site data.
Click See all site data and permissions.
Search for Jasper.ai in the search field, and click the Delete icon.
Hit the Clear button to confirm the action.
The cookies that are saved for the Jasper.ai website might be problematic and cause problems with the website. You should clear the cookies for the Jasper AI page and check if this fixes the issue or not.
In this guide, we’ll show you how to reinstall the Bluetooth driver on your Windows 10 PC. This helps if you’re experiencing driver errors or your Bluetooth isn’t working as expected.
Usually, Windows automatically reinstalls the Bluetooth driver if you remove it and restart your PC, but this method does not always work.
That’s why we looked into the issue and found 7 different ways in which you can reinstall it. Check them out below.
How to reinstall Bluetooth drives in Windows 10
1. Use Device Manager
Press Windows + R to open the Run dialog box.
Type devmgmt.msc and click OK to open the Device Manager.
Locate and expand Bluetooth, right-click the driver, and choose Uninstall device.
Click Uninstall.
Go to Action and click Scan for hardware changes. Windows will download and install the appropriate version of the driver for your computer.
You can also restart your computer after the driver is uninstalled. Upon restart, Windows will reinstall the Bluetooth driver automatically.
Alternatively, if Device Manager can’t find the right drivers or keeps installing generic ones, Fortect Driver Updater can help.
It scans your system, identifies outdated or missing drivers, and installs the correct versions from trusted sources. It’s a straightforward way to avoid hardware issues and save time on manual updates.
Fortect Driver Updater
Bring back your Bluetooth in seconds with a smart driver fix.<br><br>
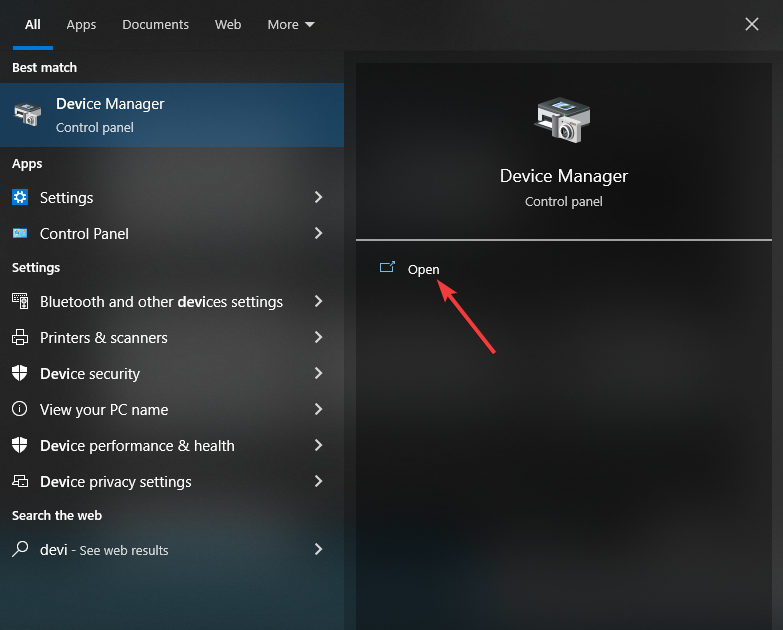
Press the Windows key, type device manager, and click Open.
Expand Bluetooth, right-click the driver, and click Uninstall device.
Press Windows + I to open the Settings app.
Go to Update & Security.
Click the Check for updates button.
Click the View optional updates option.
Go to the Drivers tab and select any update available for the Bluetooth driver.
Now click Download & Install. Your computer may restart to complete the process, so save your work before it prompts you to restart.
3. Use HP Support Assistant
NOTE
This solution is dedicated to HP machine owners. Look for any similar tools for your manufacturer device or skip it otherwise.
Press the Windows key, type device manager, and click Open.
Expand Bluetooth, right-click the driver, and click Uninstall device.
Press the Windows key, type hp support assistant, and click Open.
Click Updates.
The tool will scan and show you the updates available. If you see any update for the Bluetooth driver, Click Download & Install.
With the latest machines, manufacturers are including an app to help users manage drivers and fix issues related to network, audio, performance, and more. For HP machines, it is called HP Support Assistant.
So, these are different methods to reinstall the Bluetooth driver in Windows 10. If you have any questions or concerns, please let us know in the comments section below.
Just like what Microsoft did with in-app 3D avatars on Teams, the app now offers the Shuffle feature for breakout rooms in its Public Preview, providing meeting organizers, co-organizers, and breakout room managers with enhanced flexibility in assigning participants.
With the Shuffle capabilities, you can easily randomize participant assignments or evenly redistribute participants to existing rooms. Here’s a step-by-step guide on how to use this feature:
With that being said, however, to access the Shuffle feature, you need to be a member of the Teams Public Preview and use the Windows or macOS Teams client. Other users are not required to be members of the Teams Public Preview.
If you’ve already joined the Public Preview channel of Teams, here’s how you can try the Shuffle feature.
How to shuffle participants in Teams meetings breakout rooms.
Before the meeting:
1. Go to the Breakout Rooms tab in the meeting calendar view.
2. Click on Assign participants to open the Assign people to breakout rooms window.
3. In the window, you will find the Shuffle dropdown menu. Click on it to reveal the available options.
4. Choose either Shuffle ➜ Everyone or Shuffle ➜ Only unassigned participants based on your needs.
5. Assign participants to rooms as necessary.
6. Click the Save button to apply the changes.
During a meeting:
1. Click on the Rooms button located in the meeting controls.
2. From the dropdown menu, select Assign Participants.
3. In the Assign people to breakout rooms window, click on the Shuffle dropdown menu.
4. Choose the desired shuffle option: Shuffle ➜ Everyone or Shuffle ➜ Only unassigned participants.
5. Assign participants to rooms as needed.
6. Click the Save button to finalize the changes.
Remember, as we’ve mentioned, this feature is currently available in the Microsoft Teams Public Preview. To enable the Public Preview in your Teams client, IT admins should set an updated policy that turns on the “Show preview features” option. By following the appropriate steps, users will gain access to the Teams Public Preview features.
What do you think about the enhanced flexibility of shuffling participants in your Teams meetings with the new breakout rooms Shuffle feature? Let us know in the comments!
Are you facing issues when trying to make calls to Mainland China? If so, you are not alone! Several of our readers have reported that they are unable to reach people on a phone number using Skype; an error message stating Your connection is too weak, please try again later appears instead.
However, no such issues arise upon receiving calls from China. This issue can create a great deal of inconvenience. However, the workarounds provided in this guide should help you.
Why am I unable to make calls to China using Skype?
According to the latest reports, the issue that you are currently facing while making calls to China is because of the restrictions imposed by the China government mandate.
Microsoft is discreetly working to fix the connectivity issues that arise while dialing the numbers to China from its telephone and messaging application. Although it is not actually clear when is the China government looking to relax these restrictions so that the services can be restored.
How do I fix Skype cannot make calls to China issue?
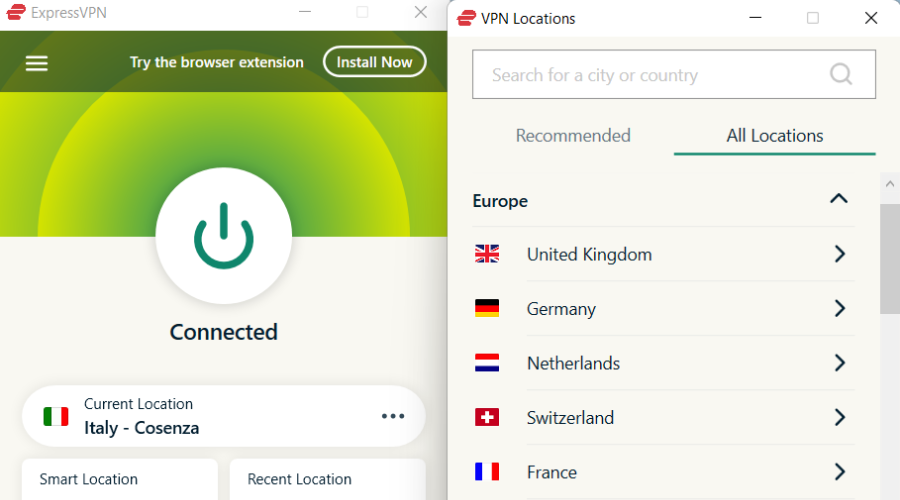
1. Use a VPN
There is not much you can do to resolve the problem from your end. However, we recommend you use VPN software to bypass the geographically imposed outgoing call restrictions. You can also check out the list of the best VPNs for China to bypass strict government censorship.
One of our top choices is Private Internet Access because of unlimited bandwidth, no logs, and blazing-fast speeds at an affordable pricing plan which is why it makes it a popular choice in the VPN industry.
With this app, you are able to create your own configuration file for any region, including China, and connect using a special IP address.
The configuration implies a totally different username and password than your Private Internet Access account credentials.
Private Internet Access
Unblock Skype calls to China easily by using this excellent VPN service.
If you are unable to make Skype calls successfully despite using a VPN service, there is a possibility that you are facing connectivity issues. Try the following workarounds to successfully place outgoing calls to Mainland China.
Head to the Skype Status page to verify that the servers are up and running at the moment. If the servers are down for maintenance purposes, you should wait for some time and try again.
Restart your Windows PC and re-launch the Skype app to resolve the temporary glitches and connectivity issues.
Make sure your internet connection is stable, and there is no connectivity problem at the moment. You can use an online tool to run the internet speed test and analyze if it’s strong enough to support Skype calls.
You can use login into the web based version of Skype using your preferred web browser to see if the problem is resolved.
Some Skype users have reported that they are unable to call mobile numbers in China, while others are facing issues specifically with phone numbers. Try placing calls to mobile numbers or phone numbers to see which is working for you.
Re-configure your antivirus and firewall settings to ensure it does not block Skype from connecting to the internet. You can add Skype to the exception list of your third-party antivirus software.
Switch to a different network source, such as a mobile hotspot, and check if it helps.
Use a network repair tool to fix the network-related issues with establishing calls on Skype.
Despite implementing all the suggested solutions, if you are still unable to call someone in China using Skype for Web, you should report the problem directly to Skype Support and provide a detailed description of this ongoing issue.
The games will be available to the Boosteroid users in the Ukraine, the United Kingdom, countries across the European Union, and the United States.
We’re continuing to deliver on our promise to bring high-quality, immersive PC games from Xbox Game Studios and Bethesda to more people in more ways. Today, we’re announcing that Deathloop, Gears 5, Grounded and Pentiment will be available to play for Boosteroid members beginning June 1.
Xbox
What are the first 4 PC games going from Xbox to Boosteroid
For starters, 4 games are coming on June 1st, on Boosteroid. These are Gears 5, Grounded, Deathloop, and Pentiment.
Gears 5 is a 2019 third person shooter from the Gears of War franchise. It follows Kait Diaz, who goes on a journey to find out more about Locust Horde, the main antagonist. The video game has enjoyed success, and its gameplay and campaign have been praised.
Grounded is a survival-horror adventure game that follow four teenagers in the ’90 who are experiencing a string of weird situations. One day, they find themselves shrunk to the size of an insect. From there they have to discover what’s happening. The game has enjoyed success too, and it was a critical darling.
Deathloop is a first person shooter that takes you in an alternate ’60 world. You’re experiencing a single day in a loop circle. The video game was praised for its science fiction elements and original art.
Pentiment is an adventure video game that takes you in a fictional European town in the 1500s. The story centers upon Andreas, who must uncover the secrets of a mysterious crime. This game also enjoyed commercial and critical success as well, especially for its historical details.
These are the first 4 PC games coming to Boosteroid, but more will come on the platform.
With that being said, those who subscribe to Boosteroid will be able to play PC games from Xbox on many platforms, including Windows, Linux, Android, Android TV, and macOS.
We will keep you updated with all the video games that are coming to Boosteroid.
What’s your favorite one from these four? Let us know in the comments section below.
There are many rarely-seen processes and services on Windows PC, and ose.exe is one of them. While this process is system related, some users still worry about its use.
If you are also wondering what the use of this process is, this guide contains all the information you need and extra.
What is OSE exe used for?
The ose.exe process is part of the Microsoft Office Suite. It helps during the installation and update of Microsoft Office apps.
It is pretty important for the smooth running and updating of Office apps. However, it is not an important system process and can be terminated if you do not need the related app.
Is ose.exe a virus?
Ose.exe is completely safe, and it is not considered harmful by any means. It does not pose any harm to your PC unless there is a virus disguising as the process.
Originally, the ose.exe should be located in the path below on your PC: C:\Program Files\Common Files\Microsoft Shared\Source Engine
If it is found in another location, then it might be a virus, and you need to perform a malware scan to be sure.
Another important characteristic of this process is that it is not resource intensive. It does not hog your CPU and takes up little space.
So, if you find the process using excessive resources, it might be a virus or some kind of issue with it.
Since ose.exe is not a crucial system process, you can stop it if you don’t need the Microsoft Office Suite. To stop the process, follow the steps below:
Press the Windows key + X and select the Task Manager option.
Click the Services tab at the top.
Right-click the ose service.
Finally, select the Stop option.
With this, you will be able to stop the process temporarily. But if you need to remove it completely, follow the steps below to remove the Microsoft Office Suite:
Press the Windows key + R, type appwiz.cpl, and click OK.
Right-click your Office suite and select Uninstall.
Finally, follow the onscreen instructions to complete the removal process.
You can now rest assured that you have gotten rid of the process with Microsoft Office Suite removed.
How to fix common ose.exe errors
1. Update your PC
Press the Windows key + I and select Windows Update in the left pane.
Click the Check for updates button in the right pane.
Finally, download and install all available updates, including the optional ones.
The ose.exe process is majorly focused on aiding the update process of the Microsoft Office Suite. So, to keep it functional, you need to ensure your PC is updated.
2. Perform a malware scan
Press the Windows key, type virus, and select the Virus & threat protection option.
Select Scan options.
Finally, choose the Full Scan option and click the Scan now button.
Viruses can mess with your PC by disguising as the ose.exe process. You might notice that the process is located in a different location than the default or, sometimes, causing high CPU usage.
In this case, you need to perform a full system scan to eliminate the virus.
To perform an even deeper scan, use a third-party antivirus in TotalAV. This tool will eliminate even the most hidden viruses and eliminate them before they can cause issues.
Press the Windows key + R, type rstrui.exe, and press Enter.
Click the Next button on the page that pops up.
Now, select your preferred restore point and click the Next button.
Finally, click the Finish button and follow the onscreen instructions to complete the process.
Sometimes, it might be hard to trace the cause of the ose.exe issue. Your best bet here is to perform a system restore to a point before you start experiencing this issue.
With this, we can end this comprehensive guide on everything you need to know about the ose.exe process. The process is generally safe but not an important system process.
So you can always disable it if you feel like doing so. If you want to know about the TextInputHost.exe process, check our detailed guide.
Feel free to share your experience with this process with us in the comments below.
The 0xc0000094 error is an issue due to changes made to your system by third-party apps. This might be due to the incomplete removal of an app or alterations made to your system data.
Irrespective of the cause of this issue, the solutions in this guide will help you fix it convincingly.
Why am I getting error 0xc0000094?
Below are some of the reasons the error 0xc0000094 might appear on your PC:
Wrong date & time: Some users have noticed this issue to be due to the wrong date and time. The solution to this is to change the date and time accordingly.
Presence of malware: Viruses can lead to various issues, including the 0xc0000094 error. Running a deep virus scan should sort this out pretty quickly.
Faulty system files: Sometimes, the accumulation of corrupt or missing system files can be why you get this error. You can rectify this by repairing these files with a few commands.
How can I fix the error 0xc0000094 on Windows 10 & 11?
1. Change date & time
Press the Windows key + I and select Time & language in the left pane.
Click the Date & time option.
Now, toggle the switch for Set time automatically backward to disable it.
Next, click the Change button before Set the date and time manually.
Set the time and date appropriately and click the Change button.
Finally, toggle the switch for Set time automatically forward to enable it.
Wrong date and time are one of the leading causes of the 0xc0000094 error, as reported by users. Fortunately, this is pretty easy to rectify.
2. Restore the registry
Press the Windows key + R, type regedit, and click OK.
Click the File tab at the top.
Now, select the Import.. option.
Finally, choose your registry backup file and click the Open button.
In some cases, the error 0xc0000094 might show up because an app or process has made changes to your registry. In this case, you need to restore your registry.
The only caveat here is that you need to have created a backup of your registry in the past.
Press the Windows key, type cmd, and select Run as administrator under Command Prompt.
Type the command below and hit Enter to run it: DISM /online /cleanup-image /restorehealth
Wait for the command to finish running, type the command below, and hit Enter: sfc /scannow
Finally, wait for the command to finish running and restart your PC.
Accumulation of corrupt system files can cause the 0xc0000094 error. Using the built-in tools that are meant for repairing system files should rectify this.
Of course, there is also a more effective method for repairing Registry errors and other system issues, and that is a dedicated Registry repair tool.
4. Scan for malware
Press the Windows key + S, type virus, and select Virus & threat protection.
Click the Scan options link.
Finally, choose the Full Scan option and click the Scan now button.
The presence of malware on your PC can mess with your registry and make unwanted changes to your PC. Performing a full and thorough virus scan should solve the problem.
Alternatively, you can use a third-party antivirus in TotalAV to check and eliminate the most hidden virus on your PC. The advantage of this tool is that it will scan even system files that Microsoft Defender might not touch.
5. Perform a system restore
Press the Windows key + R, type rstrui.exe, and press Enter.
Click the Next button on the page that pops up.
Now, select your preferred restore point and click the Next button.
Finally, click the Finish button and follow the onscreen instructions to complete the process.
If you still can’t reverse the changes made to your PC causing the 0xc0000094 error, you have no choice but to perform a system restore. This will restore your PC to a point before you start experiencing this issue.
There you have it: everything you need to resolve the 0xc0000094 error. Provided you follow the instructions in this guide carefully, this issue should be history on your PC.
If ChatGPT isn’t working or you want to try out an alternative, then Chatsonic is the tool that you should opt for. It is incredibly powerful and comes with some extra features over ChatGPT.
However, many of our readers have complained about Chatsonic not working problem. In this guide, we have listed some of the best solutions that will help you fix the issue. Let us check them out.
What is Chatsonic?
Chatsonic is developed by Writesonic and is a conversational chatbot just like ChatGPT. It can help you automate your text and image generation processes.
You can use voice commands in Chatsonic to enter the prompt. ChatGPT on the one hand can only generate texts, but the AI bot can generate images and lets you get the latest information when you enable the include latest Google data option.
Chatsonic lets you translate text from one to 20+ other languages allowing you to publish your content in different languages. The app offers Q&A but can remember your previous chat if you enable the memory option.
Overall, Chatsonic is a good alternative to the ever-evolving ChatGPT. One thing that will annoy you with this bot is the word limit in the free version.
How do I fix Chatsonic if it is not working?
Here are a few things that you can apply before jumping ahead with the advanced solutions.
Reload the web page as it will help get rid of any temporary glitches.
Check your login credentials as the wrong details won’t let you use Chatsonic.
Restart your PC and launch Chatsonic again and see if this helps.
Check your internet connection and make sure it is stable.
Let us now apply the advanced solutions and check if this resolves the Chatsonic not working problem or not.
1. Clear the browser cache
Open your browser.
Click on the Menu icon placed at the top-right and select Settings.
Select Privacy and Security from the left.
Click Clear browsing data.
Check the boxes for Cookies and other site data and Cached images and files options along with Browser history.
Click on the Clear data button.
We have shown the process of clearing the cache and browser data for Google Chrome just to show you the idea. Check if clearing the cache files helps fix Chatsonic not working problem.
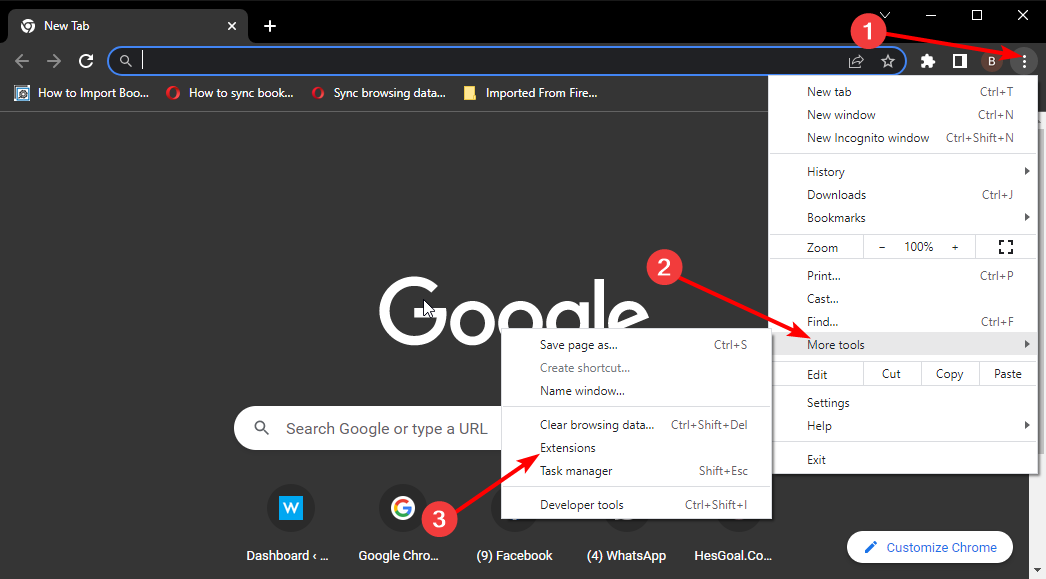
2. Disable browser extensions
Open Google Chrome.
Click on the Menu icon at the top right.
Select More tools and click on Extensions.
Disable each extension by toggling them off, one by one, and restart the browser.
Visit Chatsonic on your browser.
Login with your account and check if this fixes the issue.
If you have connected a VPN then should disconnect the VPN and then try to open the Chatsonic website. VPNs can be helpful in letting you access geo-restricted content, however, can also interfere with the smooth performance of normal websites.
Also, if you wish to continue using VPN, try changing the server, as the one to which you are connected might be having some issues with Chatsonic.
4. Clear Chatsonic cookies
Click on the Menu button at the top-right corner and select Settings.
Select Privacy and security from the left pane and click on Cookies and other site data.
Choose See all site data and permissions.
Search for Chatsonic in the text field and click on the Delete icon for the website.
Click Clear to confirm the action.
Relaunch the browser and visit the Chatsonic website.
Chances are the cookies that your browser has saved for the Chatsonic website is problematic and it is causing the Chatsonic not working problem. You can easily clear it by following the above steps and checking if this helps.
Enter the asked information and describe your problem.
Hit Send message button and wait for a resolution.
Chatsonic offers 24×7 online chat support. So, if you have trouble using the AI tool, you can reach out to customer support and describe them your problem and hopefully resolve it.
That is it from us in this guide. If you are getting ChatGPT click failed error message, then apply the solutions in our guide.
The file has properties that can’t be copied to a new location error usually occurs when users try to copy files from one drive to another destination.
This error is prominent if your drive is in the FAT format instead of NTFS. Irrespective of the cause of the error, we have curated simple and direct solutions that will help you fix it in this guide.
What does it mean that properties can’t be copied to the new location?
The file has properties that can’t be copied to a new location error means that the format of the source drive and the destination are different. This usually happens if the source drive is in NTFS format while the destination is in FAT.
The NTFS format supports some properties related to ADS and file encryption. The FAT format, on the other hand, cannot store these properties, which leads to the error message.
This leads to losing these properties during the transfer if you go on with it. Fortunately, the original files will work normally on the destination drive.
How can I fix the file has properties that can’t be copied to a new location error?
1. Ignore the message
The best solution to this problem is often to ignore the message and proceed with the file transfer. This is because the properties that can’t be copied to the new location are not crucial to the functionality of your files.
So, more often than not, when you get this error message, ignore it. Your files will work as they should without issues.
2. Format drive
Tip
Note that this solution will wipe all the files on the drive. So, make sure you back up your files before proceeding.
Press the Windows key + R, type diskmgmt.msc, and click OK.
Right-click the FAT drive and select Format.
Now, click the dropdown in front of File System and select NTFS.
Enter any name of choice in the Volume label box.
Finally, check the box for Perform a quick format and click OK.
If the file has properties that can’t be copied to a new location error proves problematic for you, you need to format the drive to NTFS. This will permanently eliminate the format difference and get rid of this error.
Right-click the file you are trying to transfer and select Properties.
Now, click the Security tab at the top.
Next, choose your user account and click the Edit button.
Finally, tick all the boxes under the Allow section and click OK.
If you are getting the file has properties that can’t be copied error despite the source and destination being of the same format, you can get past the error by allowing all permissions for the files.
4. Compress the file
Press the Windows key + E and right-click the file you want to send.
Select the Send to option.
Now, choose the Compressed (zipped) folder option.
Finally, wait for the compression to complete and transfer the compressed file instead.
A quick way to bypass the file has properties that can’t be copied to a new location error is to compress the file before sending. This will help you complete the transfer without issues.
The file has properties that can’t be copied to a new location error is one of the least worrying issues users encounter on Windows PCs. Most times, you only need to ignore the message.
But if you still want to get rid of it, the solutions in this guide should help you do it. In the same vein, if you are dealing with a similar issue, like an unexpected error is keeping you from copying the file, check our detailed guide to fix it.
If the Bard AI is not working for you, it can be frustrating, as it may prevent to use it to explore things and get information.
In this guide, we will discuss the common causes behind the issue and provide solutions to help you resolve it.
Why is Bard AI not working?
There can be several reasons for the problem; some of the common ones are mentioned here:
Internet connectivity – The platform requires a stable internet connection to function; if your internet connection is weak, it can affect the performance of Bard AI or may prevent it from working.
Server issues – The service may have temporary server problems or be under maintenance, resulting in unavailability or reduced functionality. Wait for a while, then try again.
Browser compatibility – If your browser is outdated or has a lot of cache and cookies, it may slow the functioning of the browser, affecting any website you visit, including Bard AI.
High demand – It is a popular service, and during high demands, the servers may experience a heavy load, resulting in slower response times or unavailability.
Technical glitch – If the platform encounters bugs or technical glitches, it can impact its performance, causing the issue.
Now that you know the causes of the issue, let us check out the solutions.
How can I fix the Bard AI not working issue?
Before engaging in advanced troubleshooting steps, you should consider performing the following checks:
Wait for a while, then refresh the page.
Restart your computer and launch your browser.
Verify if you have an active internet connection.
Ensure your Windows and browser is up to date.
Check the server status; if it is down, wait for it to come online.
If none of these tweaks worked for you, move to the troubleshooting methods mentioned below.
1. Clear the browser cache
Launch your browser. Here we are demonstrating the steps using Google Chrome. Click the three horizontal dots and select Settings.
Go to Privacy and security and click Clear browsing data.
Select Browsing history, Cookies and other site data, & Cached images and files, then click Clear data.
2. Run a malware scan
Press the Windows key, type windows security, and click Open.
Go to Virus & threat protection and click Scan options.
Select Full scan and click Scan now.
If your computer has viruses, it may hinder the normal functioning of your browser and the machine. Therefore scanning your computer with a reliable antivirus can also help.
Alternatively, you can try a reliable third-party tool like TotalAV, launch it, and run a deep scan to resolve the issue and prevent other digital threats from entering your device.
3. Disable browser extensions
Launch the browser and click three horizontal dots.
Select More tools, then click Extensions.
On the Extensions page, go to the extension and toggle off the switch beside it to temporarily disable all of the active ones.
Click Remove to delete the ones that you don’t use.
PC performance monitoring tools are essential for your computer’s health. However a high-end PC might be, it’s pretty common for Windows users to start complaining about the sluggishness of the system at some point.
If you want to regularly inspect your computer functionality, which is ideal, you can use PC health monitor tools. For this purpose, it’s advised to employ the best HDD health check tools and resolve hardware issues.
In some cases, the problem might be due to low-spec hardware. But more often, it turns out to be something else. Like most things in this world, Windows needs to be taken good care of and serviced regularly.
We strongly recommend giving the following diagnostics tools and software for monitoring system performance a chance first. You might be surprised by how much you will be able to resolve using them!
If you’re a gamer, you should pay closer attention to your system so this list also includes the best PC monitoring software for gaming.
How can I monitor my PC performance?
It’s comforting to know that everything is operating as it should, whether you’re a seasoned professional who fixes computers or a novice who just plays games on them.
In the event that a problem does arise, having the ability to rapidly identify the source of the issue directly from your desktop may help you save both time and, in some instances, money.
We have compiled a list of some of the most helpful and user-friendly digital tools that can be used to monitor the operation of your personal computer and, if necessary, diagnose problems.
If you have more endpoints or PCs to manage, we recommend using a professional tool such as ManageEngine OpManager.
This solution comes with many performance metric monitors out of the box, leaving no stone unturned on your network.
Not only that, but you will be able to see the graphical representation of the performance monitor’s output for each component in real-time.
You don’t need to struggle because OpManager automatically discovers new devices and adds them to your network.
The tool will apply a template to every discovered machine according to its category. This template is packed with a list of performance monitors for that category, but you can customize it for your particular needs.
Just to get an idea of the complexity that OpManager is capable of, the solution comes with more than 9,500 device templates out-of-the-box and it supports over 53,000 vendor templates.
And if something gets wrong with the metrics you monitor, you instantly get an alert message.
Although this is clearly a professional-grade tool, you can scale it down to monitor just a few computers.
Let’s review some of its key features:
Intuitive dashboard with easy-to-use UI
Monitors all key performance metrics such as CPU and memory utilization, lowest resource-consuming devices, and more
Drag-and-drop workflow creator to create and execute simple programs
Virtual system monitoring
Comes with 9,500 device templates and support for over 53,000 vendor templates
ManageEngine OpManager
Monitor the performance of each computer on your network with this professional-grade solution!
PRTG Network Monitor is an all-in-one 24/7 PC resource monitor software that surveys your entire system and is quick to notify you of any potential issues, thus allowing you to take appropriate measures.
By automatically collecting data essential to your system’s health, such as RAM and CPU usage, temperature, bandwidth, and more, this fantastic tool proactively checks and takes precautionary measures to increase the reliability of your system.
Let’s quickly look at its key features:
Spot damaged hard disks, malware infections, connection failures, and more through the central monitoring
Global proactive detection and health-check tasks
Monitor CPU temperature, performance, and utilization to identify potential issues from an early stage
Has a PC Performance Monitor widget
WMI Memory, SNMP Memory, and SSH Meminfo Sensors to monitor your memory usage
Real-time bandwidth monitoring to prevent network bottlenecks and overloads
Monitor disk space to identify failing operations and boost performances
PC monitoring software for gaming
PRTG Network Monitor
Keep your PC safe and healthy with this advanced software!
AIDA64 Extreme is an advanced PC performance monitoring software with a free version that has real-time diagnostic utilities, in-depth information on both hardware and software as well as overclocking support.
By closely monitoring sensors, AIDA64 is able to collect precise readings for quintessential parameters such as memory and CPU usage, temperature, and much more.
Once issues are detected, the diagnostic utility comes into play to prevent critical failures and damages. What’s more, the tool also provides a set of benchmarks to measure the performance of your entire system.
Let’s quickly look at its key features:
Best-in-class hardware detection module and accurate diagnostic tools
Multi-threaded stress testing module
Benchmarking option to measure your overall system’s performances
Software audit capacities with extensive coverage for DLL files, software licenses, startup programs, and more
Fully customizable SensorPanel to monitor all the various sensors, including temperature, cooling system, voltages, fan speeds, etc.
AIDA64 Extreme
An industry-leading system information tool gives very precise information on hardware as well as criteria for high computer performance.
Speccy is one of the best tools available for letting you know about CPU and GPU temperature and more, for free. Of course, if you choose to go premium, so will the features you can enjoy.
Despite being advertised as a lightweight solution, Speccy is as powerful a program as they get, delivering all the tools you need to measure your PC’s performance.
And it does so through an advanced system information tool that closely monitors all the sensors attached to your computer.
As far as we see it, this software focuses on simplicity and delivering results. Accurately. And isn’t that what you would expect from a health check and monitoring software?
Let’s quickly look at its key features:
Quick or in-depth scanning functions to analyze all your HDD components
Detailed reports or quick summaries are available with detailed status for every item measured
Collects data from all the sensors integrated into your PC, including temperature, GPU, CPU,
RAM, motherboard, and much more
Real-time monitoring to spot failures and proactively solve them before they occur
In-built snapshot tool to capture scan results and share them later on for diagnostic purposes
Speccy
Get advanced insights on your system’s performance and take preventive measures with the fastest detection software on the market!
If you’re after a tool to improve the overall performance of your system, then Advanced SystemCare is a sure choice.
This is an all-in-one PC optimization utility that carefully monitors your system’s health and acts without hesitation to block malicious links and websites hidden in your email, automatically update obsolete software, optimize your Startup sequence, and block untrusted programs.
What’s more, it wipes junk files and navigation traces clean, thus increasing your Internet speed, all with just one click. Easy, right?
Let’s quickly look at its key features:
Professional PC Clean-up suite to prevent junk file cluttering and free precious resources such as disk space
Internet Booster feature to maximize network bandwidth and increase your Internet speed
Enhanced privacy and data protection
Startup optimization (end useless startup processes and reduce boot time)
Turbo Boost feature to improve your PC’s performance and response time by releasing RAM
Software Updater (with 60% more new programs included)
IOBit Advanced System Care
Intelligently clean and speed up your PC based on your optimization habits, automatically monitor your PC performance conditions, and release additional RAM storage.
System Mechanic delivers the ultimate suite to monitor and improve your PC’s performances with as many as seven powerful products crafted to speed up, repair, and secure your entire system. It comes as a PC performance monitor overlay that is easy to use from the first steps.
Boasting a neatly organized interface with a Navigation bar and Content pane for convenient, intuitive, and quick access, you have all the tools to monitor your system’s performances at your fingertips. Even if it is not a tool that will show you data the way professional ones do, you will have an Idea about what’s happening on your PC.
The System Mechanic is an all-in-one PC optimization software with professional clean-up utilities that can remove junk files and repair broken key registries with a single click.
Let’s quickly look at its key features:
End-to-end PC health check and resources monitoring through Quick Scan or Deep Scan, as per your convenience (scan the entire system or choose specific files)
Prevent bloatware and startup bottlenecks
Eliminate useless, resources-consuming apps that run in the background to speed up your PC’s response time
PC Cleanup toolbox to remove unwanted junk files, broken shortcuts, temp files, and useless registry entries
In-built System Troubleshooter and automatic monitor and repair set-up
Real-Time Boost feature to automatically optimize CPU, RAM, and storage drives and improve overall PC performance
Iolo System Mechanic
Improve computer performance and enhance security with this professional software.
Real User Monitoring (RUM) from Datadog gives a glimpse into the frontend effectiveness of your business from the perspective of user proficiency.
Each user experience is connected with synthetic tests, back-end metrics, traces, logs, and network performance data. These help you discover bad user experiences and fix context issues throughout the network.
The monitoring/graphing interface is versatile, allowing you to show complicated graphs without scripting.
Here are the main features of Datadog:
When analyzing issues, swing from RUM data to request traces and logs for full information
View overall frontend performance data or break and split them by country, device, application, and more
With Error Tracking, you can intelligently combine high-volume application problems into a small number of issues
Visualizations such as time series, top lists, and tables may be used to better understand the user experience.
Use characteristics like user ID, email, and name to contextualize user sessions in your apps.
Combine full-stack monitoring in a single platform for frontend and backend development teams.
Using a platform that reveals concerns in a social setting while encouraging cooperation and providing all of the data in one place stimulates more engagement around instrumentation and root causes analysis and raises the visibility of possible problems before they become significant issues.
LogicMonitor – Intelligent insights for cutting-edge applications
LogicMonitor monitors hybrid environments if you also have on-premise devices, which means you’ll have everything organized in one tool. It is SaaS-based and very customizable, with amazing dashboards as well.
It comes with predefined templates, so you can just enter an IP address, and it will detect everything and begin monitoring/alerting/graphing without the need for any coding.
Every aspect of the LogicMonitor experience, from technological architecture to day-to-day business operations, incorporates security best practices.
These are the key features of LogicMonitor:
A formal security software development lifecycle includes many stages of threat modeling and security testing
Based on secure Linux servers with perimeter and host-based intrusion prevention system
Intelligence monitoring for sophisticated IT architectures
Finds containers, microservices, and underlying resources automatically
Intelligent insights for cutting-edge applications – contextually combine traces, logs, and metrics
Monitor key database metrics including throughput, query execution performance, the number of active connections, buffer pool utilization, threads operating, and more.
Dashboards, intelligent alerting, forecasting, and thorough reporting from LogicMonitor provide insight into database performance and application health. Identify deadlocks, bottlenecks, error rates, and other issues quickly.
A PC hardware monitoring software investigates every aspect of the hardware and looks for issues with it. For instance, it will identify the CPU temperature, the power delivered to various components, and whether all of it falls under the optimal range.
The data is then plotted in the form of graphs or listed. If the software identifies an issue, it will highlight the same so that necessary corrective measures can be undertaken and the problem resolved as soon as possible.
Some of these work as PC performance monitor widgets, while others use the more intuitive PC performance monitor overlay concept.
Is there a free PC monitoring software?
Many great applications can help you monitor your PC, and many users are using CPU monitoring software to keep a close eye on their computer temperature.
Monitoring your network usage is also possible with bandwidth monitoring applications, so you can see which apps are using most of your bandwidth.
Users are also advised to keep a close eye on their power supply, and for that purpose, we suggest using specialized software for testing the power supply. Many of these applications are free, and they can be used with few restrictions, so they are worth checking out.
Some programs can provide precise details regarding your CPU utilization or temperature, RAM consumption, or hard disk memory. This is useful if you need complete data for the performance and activities of your system.
We hope that you find all these monitoring tools useful. You probably will not need all of them, so pick the one that seems the most valuable for maintaining your Windows PC.
FAQs
What does PC performance monitoring software do?
PC monitoring tools track CPU, GPU, RAM, disk health, and network usage in real time. They help detect overheating, bottlenecks, or failing components before they cause major issues.
What is the best free PC monitoring software?
Speccy and BitMeter OS are excellent free options. They provide quick insights into CPU/GPU temperatures, memory usage, and disk health without requiring advanced setup.
How do I check my CPU and GPU performance on Windows 10/11?
You can use Windows Task Manager and Performance Monitor to view CPU and GPU activity. For more detailed stats, tools like AIDA64 Extreme or PRTG offer in-depth monitoring.
Do gamers need PC performance monitoring tools?
Yes. Gamers benefit from monitoring software because it helps track temperatures, frame stability, and resource usage. This prevents overheating, lag, and performance drops during gameplay.
Windows Hello is one of the most secure sign-in options on Windows 10 and 11. Unfortunately, even this feature encounter issues at times, with users complaining of a we could not find a camera compatible with Windows Hello Face error.
This can be pretty frustrating, as you have to use another sign-in option to get into your PC. Fortunately, the fixes to this issue are not complicated, requiring a few tweaks here and there.
Why does Hello Windows 11 not recognize my camera?
Several factors can be responsible for the could not find a camera compatible with the Windows Hello Face error. Below are some of them:
Outdated camera driver: If your Windows 11 camera is compatible with Hello Face and you are still getting this error, it might be a driver issue. What you need to do here is to update your driver.
Disabled service: At times, this issue might be because the Hello Face feature is disabled. You need to enable the feature to get it working again.
Faulty system files: Sometimes, this problem might be down to broken or missing system files. Repairing and restoring these files will do wonders here.
How do I fix my camera if it is incompatible with Hello Face?
1. Update the camera driver
Press the Windows key + X and select Device Manager.
Double-click the Cameras option to expand it, and right-click the device there.
Now, select Update driver.
Finally, select the Search automatically for drivers option and install the available updates.
An outdated camera driver can be the reason for the could not find a camera compatible with Windows Hello Face error. You can fix it by updating your IR camera drivers to the latest version.
If Windows cannot find the latest drivers, you can go to the manufacturer’s website to download them. Alternatively, you can employ a specialized driver updating tool to get the job done for you.
This special tool will automatically scan for all defaulting drivers and fix them. All these without much input from you.
2. Install the FaceDriver file
Press the Windows key + E to open File Explorer and navigate to the path below: C:\Windows\System32\WinBioPlugIns\FaceDriver
Right-click the HelloFace.inf file and select Install.
Finally, follow the onscreen instructions and restart your PC.
If you are still getting the could not find a camera compatible with Windows Hello Face error, you need to install the Hello Face inf file.
Press the Windows key, type cmd, and select Run as administrator under Command Prompt.
Type the command below and hit Enter to run it: DISM /online /cleanup-image /restorehealth
After the command finish running, type the command below and hit Enter: sfc /scannow
Finally, wait for the command to finish running and restart your PC.
Corrupt system files can cause the could not find a camera compatible with Windows Hello Face error. You can fix this by running the SFC and DISM commands on an elevated Command Prompt.
Furthermore, to ensure a thorough Windows repair, we suggest you try a dedicated repair tool to do the job for you.
4. Enable the Windows Hello feature
Press the Windows key + I and select Apps in the left pane.
Choose the Optional features option.
Finally, select Windows Hello Face and click the Install button.
At times, the simplest fix might be the most effective, and this has proved true for some users. Hence, you need to make sure the Windows 11 Hello Face feature is enabled.
5. Restart Biometric services
Press the Windows key + R, type services.msc, and click OK.
Now, right-click the Windows Biometric Service option and select Stop.
Press the Windows key + E to open File Explorer and navigate to the path below: C:\Windows\System32\WinBioDatabase
Next, copy the content of the folder to another location and delete the original.
Finally, go back to the Services window, right-click Windows Biometric Service, and select Start.
In some cases, issues with the Biometric services might be the reason for the could not find a camera compatible with Windows Hello Face error. Restarting this service should rectify the problem.
6. Use the Get Help app
Press the Windows key, type help, and select Get Help.
Now, type your issue and follow the guidance of the virtual agent.
There you have everything you need to fix the we could not find a camera compatible with Windows Hello Face error. All that is left for you to do is to follow the instructions above carefully, and things should be back to normal.
Roblox is one of the most used platforms by gamers. However, things are not always smooth with the platform, as some users are complaining that Roblox is stuck on an endless configuring loop.
This renders the app useless, as you won’t able to get into it. If you are also dealing with this issue, the solutions in this guide will help you force the configuration through.
Why is Roblox stuck on configuring?
Listed below are some of the potential reasons Roblox might be stuck on configuring on your PC:
Antivirus interference: Oftentimes, this occurs because your antivirus software is blocking the configuration. You can push the process through by disabling or uninstalling the antivirus.
Location issues: You might be experiencing this issue because of problems with your present location. What you need to do here is to use a trusted VPN.
Corrupt app cache: If the Roblox cache is corrupt, it might cause configuration issues. Clearing the app cache should do the trick here.
How can I fix Roblox if it is stuck on configuring?
Below are some of the basic troubleshooting steps to attempt before making changes to your PC in a bid to fix this issue:
Restart your PC.
Check your internet connection.
1. Disable/uninstall antivirus
Press the Windows key, type virus, and select Virus & threat protection.
Click the Manage settings link.
Now, toggle the switch for Real-time protection backward to disable it.
If you use a third-party antivirus, right-click its icon on the Taskbar, and select Disable.
Next, if disabling the third-party does not work, press the Windows key + R, type appwiz.cpl, and click OK.
Right-click the app and select the Uninstall option.
Finally, follow the onscreen instructions to complete the process.
The first thing to try if Roblox is stuck on configuring is to check if your antivirus is not blocking it. To be sure, you can disable the security software temporarily.
If this does not work, you need to uninstall your third-party antivirus and relaunch Roblox.
Location issues are one of the major reasons Roblox might get stuck in an endless configuring loop. Fortunately, you can circumvent this by using a top VPN service.
ExpressVPN is an excellent software that allows you to switch between locations with just a few clicks of the mouse.
It can also let you bypass any location restriction without getting detected and can solve most of your location-related issues without fuss.
Moreover, ExpressVPN has lightning-fast speeds, DDoS protection, and unlimited bandwidth to get the most out of your gaming experience.
ExpressVPN
Play Roblox with blazing-fast speeds, strong security, and no bandwidth throttling at all.
Press the Windows key + R, type %appdata%, and click OK.
Click the AppData link at the top.
Now, double-click the Local folder to open it.
Finally, right-click the Roblox folder and select Delete.
If Roblox is stuck on configuring while you are trying to update it, it might because of issues with your app cache.
So, you need to clear Roblox cache and restart the update process.
4. Reinstall Roblox
Press the Windows key, type control, and select Control Panel.
Now, click Uninstall a program under the Programs option.
Next, click the Roblox option and select Uninstall at the top.
Follow the onscreen instructions to complete the uninstallation process.
Finally, go to the official website to download the latest app version.
If Roblox remains stuck on configuring, you need to uninstall the app. This should eliminate the problems that prevent the updating process from going through.
After the removal process is complete, you need to go to the official website to download the latest version of the app.
We have reached the end of this guide on fixing the Roblox stuck on configuring issue. We believe you should now be able to fix the issue, provided you follow the steps carefully.
And it’s here. Bing Search finally gets the dark mode feature for PC and it looks pretty great. After a period of important updates from Microsoft, the Redmond tech giant has apparently added this feature to Bing Search.
As spotted by this Reddit user, the dark mode looks elegant and spacious on Bing, which is why so many users have requested it.
As you may know, Bing has been getting a lot of good features lately. It has an AI-based technology that helps you in your searches. It also comes with suggestions, and all sorts of recommendations based on what you are looking for.
Microsoft also said that the mobile and desktop versions of Bing will benefit from videos, Knowledge Cards, graphs, improved formatting, and social sharing capabilities within the chat, according to their blog post.
How to enable Bing Search dark mode
Open Edge and search for something with Bing
Once you’re on the search page, go to Settings
Head over to Appearance and select Dark
You should be all set now
SwiftKey, which is an AI-powered keyboard, is also coming to Bing, as one of its features. Not only that, but the Redmond tech giant also allows you to add a Bing Chat widget to your home screen, so you can have easy access to the feature.
On the other hand, Skype benefits from AI-powered Bing in group chats, so you can easily look for information and suggestions while you’re talking to your friends or workmates.
This is all part of Microsoft’s intention to make increase the popularity of Edge and Bing, and so far it works. The new Bing mobile app continues to enjoy popularity, as it is downloaded by millions of users. It has been reported that the app’s daily download increased by a staggering 8x since its launch.
With that in mind, Microsoft is trying to listen to the feedback and implement it as soon as possible. Bing Search dark mode is one of these features that have been long requested by users.
What do you think about it? Do you like how it looks? Let us know in the comments section below.
The GeForce Experience app is one of the many apps that start with your PC b by default. However, some users are complaining that the NVIDIA GeForce Experience is not starting with Windows 10 and 11 for some reason.
This takes away the ease of managing your graphics card settings. If you are also troubled by this issue, the solutions in this guide will help you resolve it quickly.
Why is NVIDIA GeForce Experience not starting on Windows?
There are various reasons NVIDIA GeForce Experience might not be starting on your Windows PC. Below are some of the prominent ones:
Faulty driver: In some cases, GeForce Experience might not be opening because of issues with your graphics driver. The solution to this is to reinstall or update your driver to the latest version.
Antivirus interference: Your third-party antivirus software might be blocking the GeForce Experience software from starting on startup. You can fix this by disabling your antivirus temporarily.
Faulty software installation: At times, the issue can be due to faulty software installation. You need to reinstall the app from official sources to resolve it.
How do I get my NVIDIA GeForce Experience to start on Startup on Windows?
1. Restart the required services
Press the Windows key + R, type services.msc, and click OK.
Double-click the NVIDIA GeForce Experience Service to open its properties.
Now, set the Startup type to Automatic and click the Start button.
Click the Apply button followed by OK.
Next, locate the following and repeat Steps 2 to 4:
Nvidia Telemetry Container
Nvidia Geforce Experience Backend Service
Finally, close the Services window and restart your PC.
Oftentimes, NVIDIA GeForce Experience might not be starting with Windows because some of its important services are disabled. Enabling or restarting these services should restore normalcy in this case.
2. Disable antivirus temporarily
Press the Windows key, type virus, and select Virus & threat protection.
Click the Manage settings link.
Now, toggle the switch for Real-time protection backward to disable it.
Finally, if you use a third-party antivirus, right-click its icon on the Taskbar, and select Disable or any corresponding option.
Sometimes, NVIDIA GeForce Experience might not be starting on startup on Windows 10 or 11 because your security software is blocking it. The solution to this is to disable it temporarily.
Press the Windows key + X and select the Task Manager option.
Right-click the NVIDIA GeForce Experience option and select the End task option.
Now, click the Services tab at the top.
Next, right-click the Cryptographic Service (or CryptSvc) option and select Stop.
Finally, relaunch GeForce Experience.
Some users have found the NVIDIA GeForce Experience not starting on Windows issues to be problems with the Cryptographic service. Restarting this service and the GeForce Experience process fixed this issue for them.
4. Update your driver
Press the Windows key + X and select Device Manager.
Double-click the Display adapters option to expand it, and right-click the GeForce adapter there.
Now, select the Update driver option.
Choose the Search automatically for drivers option and install the available updates.
If updating the driver does not work, choose Uninstall device in Step 2 instead.
Finally, click the Uninstall button and restart your PC.
An outdated driver can cause the NVIDIA GeForce Experience app not to start with Windows. Hence, you need to update your driver to the latest version. If updating does not work, you should try to reinstall the driver completely.
Alternatively, you can use a dedicated driver solution to update your driver. Also, if the driver is broken, this automatic tool will replace it with the original version from its extensive database.
Press the Windows key + R, type appwiz.cpl, and click OK.
Right-click the NVIDIA GeForce Experience option and select the Uninstall option.
Now, follow the onscreen instructions to complete the process.
Finally, go to the official website to download and install the software.
In some cases, you might have no choice but to uninstall NVIDIA GeForce Experience if it’s not starting on Windows 11 or 10. Reinstalling it from official sources should help clear the potential glitches that might be causing the issue.
If NVIDIA GeForce Experience is not starting on Windows PC, it reduces the ease of accessing the software. However, you can fix the issue by following the solutions in this guide.
Windows backup is a great tool to safeguard your data against failures and disasters. However, sometimes you may find yourself stuck with an error message indicating that Windows backup failed to get an exclusive lock on the EFI system partition.
Windows 11 backup errors are not new, so let’s have a closer look at what this one means and how you can get back to smooth backups again.
What does the Windows backup failed to get an exclusive lock error mean?
If you get the Windows backup failed to get an exclusive lock on the EFI system partition message when backing up your PC, another application is using the drive, and the backup process cannot be completed.
This can happen because of one or more of the following reasons:
The disk was not partitioned correctly – If you have two partitions on a hard disk, Windows Backup cannot create a backup image of the entire disk if one is formatted with the wrong partition style.
Another program or user account locks the file – This can happen if another program or user account is writing to or reading from this file while Windows Backup backs it up. It, therefore, cannot access the file to avoid data corruption.
Incorrect settings – Some incorrect backup settings on your computer may be causing this issue.
Antivirus settings – Antivirus software can interfere with the backup process, especially if it’s set to scan files before they’re backed up.
Network connection issue – In some cases, Windows backup failed to get an exclusive lock error message can also be caused by a network connection issue between your computer and the storage device where backups are stored.
Windows backup service – The Windows backup service may be having a glitch and hence can’t perform its normal operations.
How can I fix the Windows backup failed to get an exclusive lock error?
Here are some preliminary steps that may help you resolve this issue:
Hit the Start menu icon, type Windows Security in the search bar and click Open.
Click on Firewall & network protection, then select Public network.
Locate Microsoft Defender Firewall and toggle the off button.
2. Perform a System File Checker scan
Hit the Start Menu icon, type cmd in the search bar, and click Run as administrator.
Type the following command and press Enter: sfc /scannow
Alternatively, you can save time and effort and perform this action more in-depth by using a dedicated repair program.
3. Run a virus scan
Press the Windows key, search Windows Security, and click Open.
Select Virus & threat protection.
Next, press Quick scan under Current threats.
If you don’t find any threats, proceed to perform a full scan by clicking on Scan options just below Quick scan.
Click on Full scan, then Scan now to perform a deep scan of your PC.
Wait for the process to finish and restart your system.
4. Uninstall recently installed programs
Hit the Windows key, type Control Panel in the search bar, and click Open.
Navigate to Uninstall a program under programs.
Find the most recently installed program, click on it, and select Uninstall.
5. Reformat your backup drive
Hit the Start Menu icon, type cmd in the search bar, and click Run as administrator.
Type the following command and press Enter:diskpart
Next, type listdisk to display the number of available drives in your system.
Check the number listed against the drive you want to format and Enter the following command. Remember to replace X with the corresponding number of the drive:selectdisk X
Next, type in clean to clear everything from the drive.
Type in convert gptand press Enter.
Wait for the process to finish, and type in the following command:create partition primary
Next, Enter the following commands to format and assign the drive a letter:select partition xformat quick fs=NTFS assign letter C
Restart your PC.
6. Perform a clean boot
Hit the Windows key, type msconfig, and open System Configuration.
Switch to the Services tab and select Hide all Microsoft services.
Click on the Disable all button, then hit the Apply button to save the changes.
Go back and click on the Startup tab, select Open Task Manager then click OK.
In the Startup tab of the Task Manager, Disable all the Enabled startup items.
Close Task Manager and restart your PC.
7. Change the logon user
Hit the Windows + R keys to open the Run command.
Type services.msc in the dialog box and hit Enter.
Locate the Block Level Backup Engine Service, right-click on it, and select Properties.
Navigate to the Log On tab, check the This Account box and click on Browse.
In the new Window, click on Advanced.
Next, click on Find Now. A list of available users will be displayed.
Select a user account and enter credentials where necessary, then click on Apply and OK to save the changes.
8. Use an alternative backup solution
If you’re still facing the Windows backup failed to get an exclusive lock on the EFI system partition error, it may be time to try other avenues.
There are a lot of Windows 11 backup options available that you can choose from as you wait for this issue to be resolved.
That’s it from our end, but leave us a comment below if you could address this issue using a solution not mentioned here.
A section of users is getting the secure_pci_config_space_access_violation stop code with an array of errors mostly related to drivers.
What stands out is that these errors occur when they are trying to launch games. Valorant appears trending at the top of the list, causing the blue screen. If you’re familiar with this BSoD error, most users recommend a few solutions, as shown below.
What causes the SECURE_PCI_CONFIG_SPACE_ACCESS_VIOLATION error?
The secure_pci_config_space_access_violation is a BSoD error that occurs under different circumstances. As reported by users, some started seeing it after installing new updates, and a majority when launching games.
When the Blue screen occurs, you may experience frequent crashes and freezes on your PC. The error is usually accompanied by a message, and the most common ones include:
wnpdriver.sys
Vgk.sys
Amdryzenmasterdriver.sys
These errors may be caused by:
Hardware change – It’s likely that this error will occur if you have recently upgraded or changed your hardware components such as motherboard, processor, or memory. This means that your system may not be able to detect all of its components properly, and it will give you this error.
Malware infection – Malware can use up valuable system resources, leaving little for other programs to work with.
Outdated drivers – Outdated video drivers can cause crashes and other strange behavior on your PC.
Memory leak – The secure_pci_config_space_access_violation error can also occur when there is a security violation when a driver attempts to access memory in the secure PCI configuration space, which is protected by the operating system.
How can I fix the SECURE_PCI_CONFIG_SPACE_ACCESS_VIOLATION error?
A few checks to perform before moving on to the more advanced solutions include:
Click on Windows Update then click on Check for updates.
Download and install if available.
2. Turn off memory integrity
Open the Start Menu, type Windows Security, and press Enter.
Click on three vertical lines in the top left corner to expand the menu items.
Go to Device security.
Click on Core isolation details under Core isolation.
Toggle the switch to turn it off.
Turning off memory integrity can be beneficial if the secure_pci_config_space_access_violation error occurred when your PC tried to access a space in memory without permission.
The secure memory region can only be accessed by programs granted access by the operating system. Keep in mind that turning off this feature exposes your system to risk. Find out more about whether you should keep memory integrity on or off in our article.
3. Uninstall AMD software
Hit the Windows key and click on Settings.
Navigate to Apps on the left pane, then click on Apps & features on the right pane.
Search for AMD software from the list, click on the three ellipses, and select Uninstall.
Press the Windows + I keys simultaneously to open Settings.
Navigate to Windows Updates and click on Update history.
Click on Uninstall updates.
Select the most recent update, then click Uninstall.
6. Perform a clean boot
Hit the Windows key, type msconfig, and open System Configuration.
Switch to the Services tab and select Hide all Microsoft services.
Click on the Disable all button, then hit the Apply button to save the changes.
Go back and click on the Startup tab, select Open Task Manager then click OK.
In the Startup tab of the Task Manager, Disable all the Enabled startup items.
Close Task Manager and restart your PC.
7. Perform a System Restore
Press the Windows + R keys, type rstui, and hit Enter.
The System Restore window will open. Click on Next.
Select the restore point you wish to revert to and click on Next.
Now click on Finish.
And that’s how to fix the secure_pci_config_space_access_violation error. Hopefully, this issue is a thing of the past after trying our recommended fixes.
We’d also suggest you familiarize yourself with one of our BSoD fixers to help you address such issues automatically.