5 Best Google Drive Alternatives to Back Up Your Data

Google Drive is a great service, and many people use it for backup. But what if you’re not a fan of Google Drive or if it doesn’t work well for you?

In today’s article, we’ll show you to best Google Drive alternatives that you can use to back up your data with ease.

What is the best Google Drive alternative for backup?

Acronis True Image – Simple and reliable

Acronis Cyber Backup Backup for Google Drive

Acronis True Image is well-known backup software, but in addition to backing up your files, the software also offers cloud storage to users with Advanced and Premium subscriptions.

All users get 500GB of storage with their subscription, but you can upgrade it up to 5TB. It’s important to mention that software will automatically back up files to the cloud, so you’ll have two backups available.

Acronis True Image supports active disk cloning, so you can create a backup while using your PC. The application will perform continuous backups, without interfering with your system.

Using this software, you can restore your PC directly from the cloud, which can be quite convenient, and thanks to end-to-end encryption, your backups will remain perfectly safe from third parties.

Acronis True Image is great backup software with advanced features, and thanks to built-in cloud support, it’s a great backup alternative to Google Drive.

Acronis True Image features:

  • 500GB cloud storage for users with Advanced or Premium Subscription
  • Expandable cloud storage up to 5TB
  • Dual protection will automatically upload your backup to the cloud
  • Cloud restoration feature
  • Support for full, incremental, and differential backups

pCloud – Best free solution

If you’re looking for a backup solution instead of Google Drive, then pCloud might be the right choice for you. The service is available on all platforms, in your web browser, and on Android and iOS devices.

pCloud is based in Switzerland, and as such, it has to comply with strict user privacy laws, meaning that your files and your personal data is fully protected.

The company also has a zero-knowledge policy, and since your files are encrypted, pCloud officials or anyone else can’t have access to your files.

The service uses TLS/SSL encryption while transferring files, but if you need more security, you can subscribe to client-side pCloud Crypto and encrypt your files.

pCloud is great cloud storage, and with its focus on user privacy, it’s a great alternative to Google Drive.

pCloud Crypto features:

  • Available on all desktop and mobile platforms
  • Strict zero-knowledge policy
  • Based in Switzerland
  • TLS/SSL encryption
  • Optional client-side pCloud Crypto encryption

Zoolz – Backup from any platform

Another Google Drive alternative for data backup is Zoolz. The service is available on PC, Windows, Android, and iOS, so you should be able to access your files at all times on any platform.

The service offers 1GB of storage for free, but if you need more space, you should consider using a subscription plan. The service is simple to use, and it will automatically back up your files.

If you’re backing up photos, you’ll be pleased to hear that Zoolz has a built-in facial recognition feature, so you can easily organize and tag photos according to people that appear in them.

The service also allows you to stream your videos directly from the cloud, without any buffering. Zoolz runs on Amazon Web Services, and it comes with strong encryption so your files will remain safe.

Overall, Zoozl is a solid backup alternative to Google Drive, and if you’re looking for a way to back up files to the cloud automatically, then consider using Zoozl.

Zoozl features:

  • Automatic backup
  • 1GB of storage in Free plan
  • Built-in face recognition feature
  • Ability to stream content from the cloud
  • Strong encryption thanks to the Amazon Web Services

Sync – Great free features

Sync is a cloud storage service, and by signing up for it, you’ll get 5GB of storage for free. However, you can expand the storage up to 4TB with one of several subscription plans.

You can access this service from your web browser, but there are also Sync apps available for Windows, Mac, iOS, and Android, so you can access your files easily on any platform.

The service supports collaboration, so you can easily use it with other members of your team or household. Of course, you can protect all your links with passwords for extra security.

Speaking of collaboration, you can easily restrict access to certain files or folders for specific users. The service offers end-to-end encryption and no third-party tracking, so your data should remain secure.

Sync offers great features, and we barely mentioned the most important ones. If you’re looking for good cloud storage for backup, be sure to consider Sync.

Sync features:

  • Offers from 5GB to 4TB depending on your subscription plan
  • Available in a web browser and as a dedicated app on Mac, Windows, iOS, Android
  • Collaboration support
  • Ability to lock links with password
  • End-to-end encryption

IDrive – Good for optimized backup

IDrive Backup for Google Drive

IDrive is a cloud storage service optimized for backup that lets you back up data from PCs, Mac, iOS, and Android devices to a single account.

The service offers 5GB of storage for free, but you can get up to 10TB with a Personal subscription. IDrive comes with a web-based console, so you can remotely check the status of your backups.

Regarding the backups, the service can perform a sector-level backup or file-level backup, and thanks to the real-time sync, you should be able to backup and restore your files with ease.

Regarding the security, there’s 256-bit AES encryption, and thanks to the incremental and compressed backups, you’ll use less bandwidth while saving storage space on the cloud.

IDrive is a great backup service, and if you’re looking for an advanced backup alternative to Google Drive, you should check out IDrive.

IDrive features:

  • Ability to back up data from PC, Mac, iOS, and Android to a single account
  • Web-based console that lets you monitor backups remotely
  • 256-bit AES encryption
  • Online real-time syncing
  • Ability to perform sector-level or file-level backup

Google Drive is a great cloud service, but if you’re looking for Google Drive alternatives that are optimized for backup, be sure to try some of the services that we mentioned.

We also recommend consulting our list of the best automatic backup software for Windows 10/11.

If you have any other suggestions, feel free to mention them in the comments section below.

How to Check Listening Ports With Netstat

Do you want to learn about Windows netstat listening ports? This article will discuss all the vital elements you need to be aware of.

Knowing which ports are open can help troubleshoot network connections and identify potential security vulnerabilities.

We will go through the basic usage of netstat and explain some standard options and flags. These can be useful to display specific information about listening ports.

What is the usefulness of the netstat utility?

The netstat utility is a command-line tool that can display various network-related information, including open ports and active connections. Some of the valuable features of netstat include the following:

  • Displaying active network connections – Netstat can display all active network connections, including the protocol (UDP or TCP), the local and remote addresses, and the connection state. This information can help troubleshoot network issues and identify potential security threats.
  • Showing listening ports – Netstat can also display all listening ports on a computer, along with the associated process or program. Hence, it helps identify which programs or services use specific ports and detect any unusual activity on a system.
  • Identifying routing table information – Additionally. netstat can display the contents of the routing table. Including the destination IP address, the gateway, and the interface through which the traffic passes. This information can help troubleshoot network routing issues.
  • Displaying statistics – Netstat can also display various statistics about network activity, such as the number of packets sent out and received, collisions, and errors. This information can help monitor network performance and detect potential issues.
  • Monitoring the state of a network connection – The netstat command will monitor the state of a network connection. It uses the options -a, -b, -n, -o, -p, and -r to know the state of the connection, the process ID, the number of packets and bytes sent/received, and more.

Now let us explore checking listening ports with this utility.

How can I see all listening ports using netstat?

  1. Press Windows + X and select Command Prompt (Admin) or Terminal (Admin).
  2. To discover all listening and created connections on your computer, run the script below. Netstat shows established and listening connections when the -a parameter is used.
    netstat -a
    windows netstat listening ports
  3. Next, run the -an command to turn all names in your output into IP addresses.
    netstat -an
    windows netstat listening ports
  4. You will be able to see the PID using the command below:
    netstat -an -o
  5. And lastly, if you need to refresh to see if there are any changes, use the command below.
    netstat -an /r

In conclusion, netstat is a powerful command line tool that can check a Windows computer’s listening ports.

You can explore more detailed Netstat commands and advanced port checking techniques in this guide on how to use the Netstat command in Windows.

So, by understanding the primary usage and standard options, you can quickly and easily gather information about open ports on your system.

Finally, regularly checking listening ports on your computer is a good practice for maintaining the security of your network and identifying any unusual activity on your system.

How To Remove The Sort Arrow In Power BI [Step-By-Step]

We all know sorting your data is great and extremely necessary. In Power BI, the sorting function is complex and you can sort your data using different criteria.

Nevertheless, sometimes you need to do quite the opposite and to disable sorting for your information.

Unfortunately, disabling sorting in Power BI is not so obvious as it should have been, but do not worry! We have some workarounds just for you!

Also, you’re not the only one with this problem. Actually, many users complained that they can’t disable sorting in Power BI.

One user said the following on the official forum:

Hi, how it possible cancel ordered column in table in Power BI? Once I sort the column, I can’t cancel it anymore.

So, this user said that he can’t cancel a sorting once it’s enabled for columns in a table in Power BI. Today we will show you how to disable sorting in a few easy steps.

How can I remove the sort arrow in Power BI?

1. Disable sorting from Data visual

  1. Select the Data visual box from the left side of the window.power bi select data visual
  2. Click on the little box with the arrow.
  3. Click on Clear sort.power bi click on clear sorting

You can do this only for the second column. For the first one, even if you clear sorting, the ordering will remain the same.

2. Disable sorting from Table visual

If you want to sort in Table visual, then you need to click Sort again.

power bi sort again

3. Create another column

You can create a calc column to enable the desired ranking. This is not an actual random order, but it is a workaround that quite a few people use.

Remember that these are only workarounds, and Power BI doesn’t have an option to disable the ordering. So, the methods described above might not work for everyone.

This is not a major issue, but still, it is annoying to see that you can’t sort your data like you want to. Although Power BI is great in many ways, the tool has some limits.

Did you find our workarounds useful? how to you sort your data in Power BI? Do let us know in the comments section below!

PC Goes to Desktop While Gaming: 4 Easy Ways to Fix it

Let us explore possible solutions if your PC goes to the desktop while gaming.

Many Windows 10 users reported encountering a frustrating issue while playing games. The users get kicked to the desktop without the game crashing.

The game does minimize and usually gets paused. Most players reported that they could toggle back to the game, but it could kill meaningful progress, especially when playing online.

We devised a series of solutions to help you fix this issue.

Why do games go to the Desktop randomly?

There are a few reasons behind this random desktop problem. On top of the list are the following:

  • Computer malware – Your computer may have been infected with malware, which interferes with running games and causes sporadic interruptions. This is common if you do not use good antivirus software.
  • Third-party apps – Some apps do not interact well with the OS or other applications and may cause this problem.
  • Background programs – These are a group of apps that run without taking control of your screen. Some essential functions may cause them to interrupt other applications.

Now let us show you what to do if games go to the desktop randomly.

What do I do if my PC goes to the desktop while gaming?

1. Update GPU drivers

  1. Press the Windows logo key + R on your keyboard, type devmgmt.msc in the Run box to open the Device Manager, and hit Enter.
  2. Expand the Display Adapters section, right-click on each available driver, and select Update driver.update gpu drivers pc goes to desktop while gaming
  3. Select Search automatically for updated driver software.
  4. Wait for the process to find and install the new driver, then restart your PC and see if it has any effect.

If the steps above seem like too much of a hassle, and you want to maintain your drivers up-to-date at all times, we recommend you try dedicated updater software.

This utility will automatically find missing, damaged, or outdated drivers and install the latest versions available.

We suggest you try Outbyte Driver Updater because it is straightforward to use and has always proven to find the best driver for your hardware.

It is lightweight software that can be used on any device. You can set it up to do regular scans and update your drivers automatically.

Outbyte Driver Updater

Update your GPU drivers to their latest version so everything can run optimally.
Free Trial Download Now

2. Scan for malware

  1. Type windows security in the Search tab and click on the app from the results.
  2. Select Virus & threat protection.
  3. Now, if you have a third-party antivirus installed, it will override the default Microsoft Defender protection, and you can click on the Open app option. That will take you to the main menu of the antivirus, and you will be able to perform the scan.
  4. Lastly, opt for the Microsoft Defender Full or Offline scan options if you don’t have one, and verify that the ethernet not working issue is fixed.

We recommend you try an advanced virus removal tool with all the features necessary to keep your PC fully protected.

Thankfully, many Windows 10 compatible antivirus software tools have excellent Internet security and can detect network threats immediately.

3. Turn off applications working in the background

  1. Right-click the Windows Taskbar and select Task Manager.task manager pc goes to desktop while gaming
  2. In the Task Manager, open the Processes tab, identify unnecessary open apps, and press End task.
  3. After closing most of the background running apps, close the Task Manager and see if this had any effect.

4. Disable Game Mode

  1. Press the Windows logo key + G while in a game.
  2. Find the Game Mode icon on the right side of the Game Bar that’s opened, and click on the Game Mode icon to disable it.disable Game Mode pc goes to desktop while gaming
  3. Click the game and press Esc on your keyboard to hide the game bar, then check to see if this change had any impact.

The solutions above work for many games, including League of Legends and Sims 4, if they keep going back to the desktop or even if Steam games go back to the desktop.

If your pc goes to a desktop while gaming, we hope that you can find at least one fix from the list of solutions we provided.

If you found this article helpful, feel free to share your thoughts in the comment section below.

VMware Not Detecting USB Device: 2 Quick Fixes

VMware not detecting USB devices isn’t too uncommon, not to say downright frustrating. With the USB port remaining out of bounds, this seriously limits the all-round experience that the workstation can otherwise provide for.

Fortunately, getting around the issue isn’t too big of a deal either. It is just a few tweaks and you should be able to get full access to your USB devices via the VMware workstation as in the ideal scenario.

What to do if VMware is not detecting USB device?

1. Make appropriate settings changes in Windows Administrative Tools

  1. Click on Start > Windows Administrative Tools > Services. Alternately, you can also type Windows Administrative Tools in the Cortana box and select from the search result shown.
  2. In the Services window, locate and right click on VMware USB Arbitration Service.
  3. From the short-cut menu that appears, click on Properties.
  4. In the BMware USB Arbitration Service Properties (Local Computer) window that appears, click on the drop-down box associated with Startup type and select Automatic.
  5. Click on Apply for the change to take effect.
  6. Next, make sure the Service status is shown as Running.
  7. If that isn’t the case, click on the Start Wait for the service to start.
  8. Click on OK to close the Properties
  9. Close the Services window as well.

2. Ensure the VMware is configured with a USB controller

  1. For that, select VM > Settings.
  2. In the Settings window, click on the Hardware tab followed by clicking on USB Controller.
  3. Follow on-screen instruction.
  4. Worth mentioning, you can configure VMware Workstation to add both USB 2.0 and USB 3.0.
  5. With the VMware configured with a USB controller, you should have no issues connecting a USB device to the virtual machine.

This should be all you will ever need to do to ensure you are able to access USB devices such as speakers, webcams or just about anything with an USB interface via the VMware workstation.

We hope you managed to fix the issue of VMware not detecting USB device on your computer. Let us know your thoughts in the comments section.

Notepad++ Not Responding On Windows: Fix

Notepad++ is a free text and source code editor for Windows systems. Additional plugin support from third-party developers has made it a popular code editor for programmers. That said, several users have reported the Notepad++ not responding issue when using the code editor.

Your Notepad++ may stop responding if a third-party plugin is causing an issue. However, the issue can also be due to previous sessions.

Notepad++ developers recommend using the two-line argument that allows you to start Notepad++ without loading the previous session or plugins, making it easier to determine the cause of the problem with Notepad++.

In this article, we take a look at the best solutions to fix the Notepad++ not responding issue on Windows.


What to do if Notepad++ is not responding?

1. Start Notepad++ without plugin and previous sessions

Notepad++ not responding

Add line argument to Notepad++ shortcut

  1. Right-click on the Notepad++ shortcut on your desktop.
  2. Select Properties.
  3. Open the Shortcut tab in the Properties window.
  4. In the Target field, add the following line arguments:
    -nosession
    -noPlugins
  5. Click Apply and OK to save the changes.

-Nosession – This command-line argument starts Notepad++ without loading the previous session. So, if you think Notepad++ is crashing due to the previous session, try loading the tool without the previous sessions.

-noplugins – This command-line argument will start Notepad++ without loading any plugins. If the code editor is crashing due to a corrupt plugin, you can uninstall the plugin by loading without plugins.

Add command-line arguments via the Run dialogue box

Notepad++ not responding
  1. Press Windows Key + R to open Run.
  2. Type the path of the program that looks something like this:
    C:Program FilesNotepad++notepad++.exe
  3. Next, add one of the following command-line arguments:
    -nosession
    -noPlugins
  4. After adding the path and command-line argument, it should look something like this:
    C:Program FilesNotepad++notepad++.exe -nosession
  5. Click OK to start Notepad++ without the plugins or loading previous sessions.

You can remove the command line argument from the shortcut once you have resolved the issue with Notepad++.

Using the command line arguments can also help you determine the cause of Notepad++ crashing quickly. Simply use one of the above-given line argument to start Notepad++.

If the code editor does not crash when using -nosession command-line argument, it means a previous session is causing the tool to crash. If not, try -noplugins to see if there is third-party plugins conflict.


2. Notepad++ not responding on startup

Notepad++ not responding

Check Debug info

  1. Open Notepad++.
  2. Click on the Question? mark icon.
  3. Select Debug info.
  4. A pop-up window will appear showing the Notepad++ details.

Before deleting the plugins, check Notepad++ debug info to see if you find any hints to work with the plugins. Begin with deactivating or deleting the plugins shown on the Debug Info page.

Delete Notepad++ plugins

If you discover the crashes to have occurred due to a plugin conflict, consider deleting the plugin to see if that helps you resolve the issue.

Notepad++ not responding
  1. Open Notepad++.
  2. Click on Plugins.
  3. Select Plugins Admins.
  4. Open the Installed tab.
  5. If you know which plugin is causing the error, select it from the list.
  6. Click Remove.
  7. If you are not sure which plugin is causing the issue, select the most recently installed plugin and then click Remove.
  8. Relaunch Notepad++ with plugins enabled and check for any improvements.
  9. You may have to repeat the steps until you find the corrupt plugin.

3. Delete session.xml file

Notepad++ not responding
  1. Open File Explorer.
  2. Navigate to the following location:
    C:Usersyour usernameAppDataRoamingNotepad++
  3. Locate the session.xml file.
  4. Right-click on the session.xml file and select Delete.
  5. Close File Explorer and relaunch Notepad++ to see if the error is resolved.

Run in compatibility mode

Troubleshoot Notepad++
  1. Right-click on your Notepad++ shortcut.
  2. Select Properties.
  3. Open the Compatibility tab.
  4. Check the “Run this program in compatible for” box.
  5. Select Windows 7.
  6. Click Apply and OK to save the changes.
  7. Relaunch Notepad++ and check for any improvements.

4. Notepad++ not responding when opening or save

Troubleshoot Notepad++
  1. Download the older zipped version of Notepad++.
  2. Extract the zip file to where you like to run it.
  3. Run the Notepad++.exe file.
  4. Do not install any plugins for this version of Notepad++.
  5. Open the file that is causing Notepad++ to crash or freeze.

If the file opens without any issues, it is an incompatible third-party plugin causing the issue.  Make sure to remove the incompatible plugin to see if that helps you resolve the issue.


6. Notepad++ not responding large files

Notepad++ not responding
  1. Open Notepad++.
  2. Click on Plugins.
  3. Select Plugin admins.
  4. Open the Installed tab.
  5. Check if you have installed the Location Navigate plugin.
  6. Select Location Navigate.
  7. Click on Remove.
  8. Relaunch Notepad++ and check for any improvements.

The Notepad++ not responding issue usually occurs due to incompatible or corrupt plugins. Try deleting the plugins to see if that helps resolve the issue.

If the problem persists, try installing the older version of Notepad++ or reinstall the latest version.


Windows 10 Sleep Shortcut: How to Create & Use Easily Use It

Creating a Windows 10 sleep shortcut can be very useful, and in this guide, we will cover all aspects of this topic.

Working with your Windows 10 devices can often be a pleasure, and this process becomes more seamless when you can shut down or sleep your computer at will.

Creating and using special shortcuts for this purpose is often a great way to go, and it increases your efficiency and becomes a quick workaround when you have problems navigating your Start menu.

In this article, we shall look at some of the most exciting ways to sleep the PC using easy shortcuts, and we will go through some of its benefits for a user.

Is there a keyboard shortcut for sleep?

Yes, on all Windows 10 devices, there is a default sleep keyboard shortcut. However, you could improvise and personalize this sequence.

There are a few advantages to using keyboard shortcuts, including the following:

  • Time-saving – Using keyboard shortcuts could save you the time of opening different menus to complete a function on your device.
  • Productivity boosting -Because these shortcuts are time savers, you probably will get more done once you are used to using them.
  • Easy switching of views – In addition to locking your screen, they will help you seamlessly switch between screens and applications on your device.

Now, let us explore the process of creating and using shortcuts to sleep the PC.

How do I put Windows 10 to sleep using shortcuts?

1. Creating a sleep shortcut

1.1 How to create the shortcut

  1. Right-click on any empty desktop space, navigate to New, then Shortcut.
    Windows 10 sleep shortcut
  2. In the text field, paste the script below and click on Next (You should have Hibernation turned off. If not, the computer hibernates rather than sleeps).
    rundll32.exe powrprof.dll,SetSuspendState 0,1,0
    Windows 10 sleep shortcut
  3. Input a name and click the Finish button.

1.2 Assigning the shortcut a hotkey

  1. Right-click on the newly created shortcut and select the Properties option.
  2. Select the Shortcut tab, input the hotkey you want to use in the Shortcut key text field, then click Apply and OK.
    Windows 10 sleep shortcut

Now you should have successfully created your sleep shortcut, and you should be able to control it using the newly created hotkey.

2. Using the default Sleep Mode shortcut

  1. Press the Windows + D hotkeys to reveal the desktop. Ensure all critical apps are closed.
  2. Press Alt + F4 to open up Windows’ shutdown dialog box.
  3. Expand the dropdown menu, select Sleep hit Enter, or click OK.

Once this process is completed, you should have your computer put to sleep.

3. Using a key sequence

  1. Press Windows + X to open the Win + X menu. On each menu item, you will see an underlined alphabet representing the shortcut for the process.
  2. Press U on the keyboard.
  3. Finally, press S on the keyboard.

Creating a Windows 10 sleep shortcut gives you the most significant flexibility. You could choose the same hotkeys you want to work with.

Note that we have not created these solutions in any particular order, and you should use what seems the most appropriate to you.

Let us know which of the above methods works for you in the comment section below.

How To Remove Black Bars On Netflix On Windows PC

The 21:9 VDUs are supposed to eliminate black bars from movies and other videos. Yet, streamed Netflix movies playing on 21:9 VDUs still include black bars at the top, bottom and on sides when in full-screen mode.

This is due to Netflix encoding their videos with a 16:9 aspect ratio, resulting in the black borders being actually encoded in the movie streams themselves.

Here are a few tips on how to remove black bars around Netflix movies more specifically for 21:9 VDUs.

How can I get rid of black bars in Netflix?

1. Fix Black Bars With Windows Tablet Mode

  1. Windows tablet mode provides one resolution for the black bars found in Netflix movies. First, open a movie on Netflix and pause its playback.
  2. Next, press the Windows key + A hotkey to open the sidebar shown directly below.action center windows 10
  3. Press the Tablet mode button on the sidebar.
  4. Return to the Netflix movie which will now include a zoom screen button at the bottom right corner. Pressing that zoom button will expand the film to full screen and cut out the black borders around it.
  5. Press the Windows key + A hotkey and press the Tablet mode button again. That will now switch off the tablet mode.
  6. Play the Netflix movie.

Note that this trick doesn’t work with multiple VDUs. The Tablet mode option will be grayed out if you have multiple VDUs connected. If you have multiple monitors, you’ll need to select a specific display first.


2. Add the Ultrawide Display Aspect Ratio for Netflix Extension to Chrome

There are a few browser extensions that can eliminate black bars around Netflix films. Ultrawide Display Aspect Ratio for Netflix is one Chrome extension that rids black borders from Netflix movies with its aspect ratio fill modes. You can install that add-on by pressing the + Add to Chrome button on this website page.

When you’ve added the extension to Chrome, load up a Netflix movie in that browser. Then, you can press the Ultrawide Display Fill Mode button shown in the snapshot directly below. Alternatively, press the – or = keyboard keys to switch to the cover mode.

Ultrawide Display Aspect Ratio for Chrome

3. Add the UltraWide Video Extension to Chrome

UltraWide Video is a Chrome extension designed to remove borders from online video content played on ultrawide VDUs. Click the + Add to Chrome button on this page to add UltraWide Video to the browser. Play a Netflix film and press the extension’s Ctrl + Alt + C hotkey to eliminate the black borders.

UltraWide Video Extension for Chrome

4. Add Black Bars Begone to Chrome

Black Bars Begone is another extension that removes black bars from Netflix movies playing on VDUs with 21:9 aspect ratios. You can add the extension to Google Chrome from this website page. Then, press the Black Bars Begone button on the browser‘s toolbar to expand the source material when watching Netflix films. Note that this extension only works for Netflix content.

Black Bars Begone for Chrome

So you can get rid of black bars around Netflix movies by switching to tablet mode in Windows or by adding the Black Bars Begone, UltraWide Video or the UltraWide Display Aspect Ratio extensions to Google Chrome. They are straightforward add-ons that enable you to get the most from your 21:9 VDU’s cinematic display when playing Netflix movies.

In case you have any alternative ways of removing the black bars from the Netflix playback, feel free to tell us in the comments section below.

The System Cannot Find The Path Specified uTorrent: Fix

uTorrent is one of the most popular applications for downloading torrents on Windows 10.

Despite its massive popularity, many users complained about the “System cannot find path” error message while using uTorrent.

How can I fix the System cannot find the path specified uTorrent error?

1. Make sure that the file path is less than 256 characters

Windows has a limitation for file paths of 256 characters, and if you exceed this limit you’ll usually get a “System cannot find path” error. To fix this problem, be sure that a file name and download location of your torrent don’t exceed 256 characters. Bear in mind that file path includes both the location of the download folder and the name of the torrent file, so be sure that path doesn’t exceed 256 character limit.

If you’re having this problem, we suggest that you download your torrents to a root directory on your hard drive such as D: for example, or use shorter names for torrent files.

2. Check for space or dot characters

Sometimes uTorrent can change the download path of your torrents by adding a dot or an empty space. Usually the dot character will be added at the beginning or at the end of a folder or a torrent file thus making it unreadable. To fix this error be sure that the path to your torrent file doesn’t contain any dots before or after the folder or file name.

Sometimes space character can be added at the end of the destination folder as well, so be sure to check the file path for any unexpected space characters.

  • Read also: Fix Blue Screen of Death errors with these 4 software solutions

3. Delete the torrent file and all files associated with it

Sometimes in order to fix “System cannot find path” error on uTorrent you have to delete all files associated with that torrent. After deleting all the files, be sure to download the same torrent again and check if the problem is fixed. According to users, this error occurs due to incorrectly downloaded torrent file, so deleting the torrent and downloading it again usually fixes this issue.

4. Restart uTorrent

Sometimes the simplest solution is usually the best, and users reported that they managed to fix “System cannot find path” error on uTorrent simply by turning off the application and staring it again. This might not be the permanent solution, but it’s worth checking out.

5. Make sure that the destination folder isn’t set to Read-only

If your destination folder is set to Read-only you won’t be able to make any changes and create any new files in it, so we strongly suggest that you check the folder’s properties. To do that, do the following:

  1. Find your download folder, right click it and choose Properties from the menu.
    system-path-utorrent-open-properties
  2. Once the Properties window opens, go to the Attributes section and make sure that Read-only option isn’t checked.
    system-path-utorrent-read-only
  3. Click Apply and OK to save changes.

6. Manually set the download path

According to users, you can easily fix this problem by setting the download location for each individual torrent. To do that follow these simple steps:

  1. In uTorrent find the torrent that is giving you this error.
  2. Right-click the problematic torrent and choose Advanced > Set Download Location. Select the download folder.
  3. Repeat these steps for all problematic torrents.

Alternatively, you can just set a global download folder for all torrents by following these steps:

  1. Select Options > Preferences.
  2. Go to Directories tab and check Put new downloads in and select the desired directory.

7. Revert to the older version

Few users reported that this issue only occurs in the latest version of uTorrent, and according to them, after switching to the older version the issue was permanently fixed. This is one of the simplest solutions, so be sure to try it first.

8. Check for drive letter changes

According to users, sometimes the drive letter can change in the destination path in uTorrent so before starting the download be sure to double check it. If the letter is changed to nonexistent drive letter you won’t be able to store your torrent to that location.

“System cannot find path” error message in uTorrent can be quite frustrating, but as you can see this problem can be easily fixed by using one of our solutions.

How to Back Up MySQL Database Automatically

MySQL is a popular open-source database management system for the development of websites. If you have sensitive data stored in your database, you can back up the MySQL database automatically using third-party automation solutions.

Being able to automate the MySQL database backup process allows you to simplify the backup process without relying on your team to create backups every day manually.

In this article, we explore multiple ways to back up the MySQL database automatically.

How do I back up the MySQL database automatically?

1. Backup automatically on Linux

  1. Launch Cron on your Linux machine.
  2. Type or paste the following command and press Enter: 15 2 * * * root mysqldump -u root -pPASSWORD --all-databases | gzip > /mnt/disk2/database_`data '+%m-%d-%Y'`.sql.gz
  3. In the above command, 15 2 *** stands for the time when you want the backup to start. In this instance, it will run every day at 15:20.

If you are using Linux, you can use cron to back up your MySQL database automatically. Cron is a scheduling utility in the Linux operating system that can-do tasks like performing automatic backups or even renewing your SSL certificate.

The command will generate a compressed backup file every day named ‘database_MM_DD_YY.’ This will help you to organize the backup better.

2. Backup MySQL Database with phpMyAdmin

backup mysql database automatically
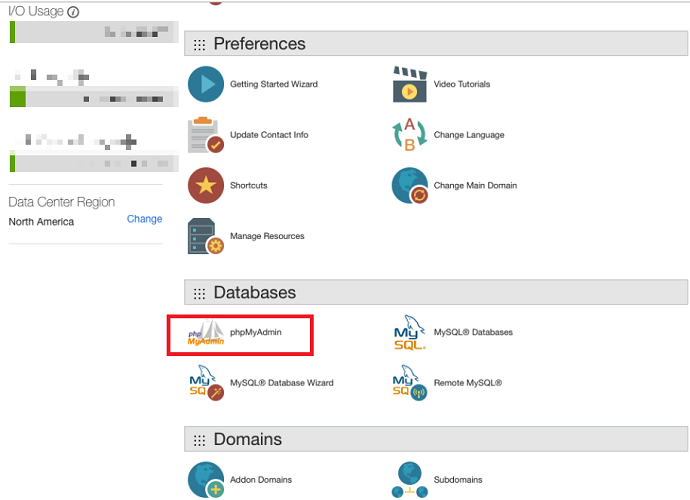
  1. Open phpMyAdmin from your hosting control panel.
  2. From the sidebar navigation panel of the phpMyAdmin, select Database.
  3. Click the g>Export link (top navigation bar).

This is a manual method of downloading your MySQL database file to your local drive for backup purposes.

You can back up the MySQL database automatically using the best SQL server backup tools. By backing up your database, you can easily fix MySQL Fatal error and other database issues.

Alternatively, you can also create a cron job to perform the backups automatically on a VPS server.

If you have any other suggestions or ideas, let us know about them in the comments section below.

Fix: Another Instance of The Application is Already Running

Computer errors will occur sooner or later, and while some computer errors are relatively harmless, others can prevent you from starting your applications.

One of these errors is Another instance is running error, and today we’ll show you how to fix it on Windows 10 & Windows 11.

How to fix the Another instance is running error?

1. Uninstall Ad-Aware Web Companion

According to users, this issue occurs every time Windows 10 starts, and it seems that the culprit is Ad-Aware. This is a solid anti-spyware tool, but like many other security tools it comes with Web Companion.

Users reported that Web Companion causes Another instance is running error to appear, and the only way to fix this problem is to uninstall the application.

To do that, follow these simple steps:

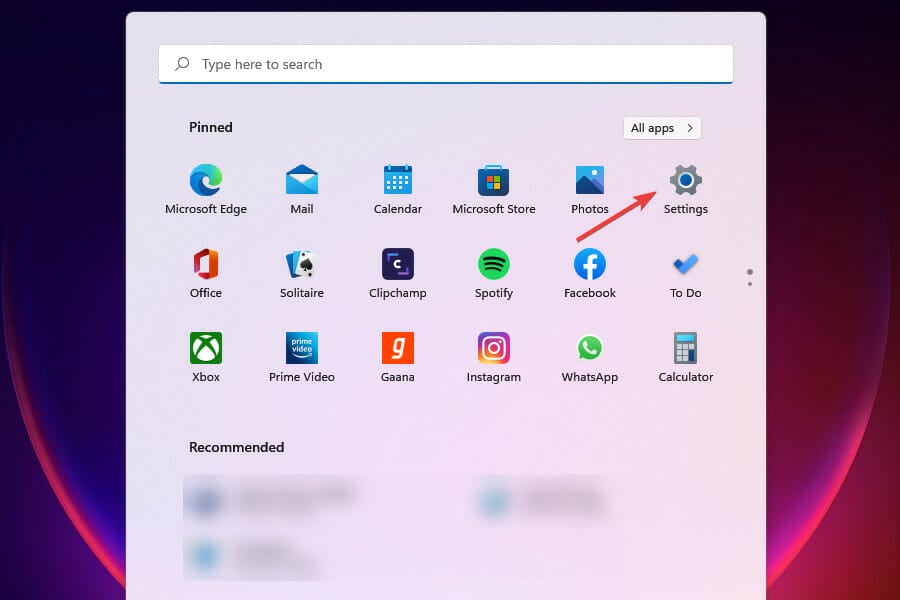
  1. Press Windows Key + I to open the Settings app.
  2. Go to System section and then choose Apps & features.
  3. List of all installed applications will appear. Select Web Companion app and click the Uninstall button to remove it. If you can’t find this application, you might have to remove Ad-Aware in order to fix the problem.

Users reported that removing Ad-Aware Web Companion fixes the problem, but we have to mention that almost any other tool can cause this error to appear.

If the issue still persists, or if you don’t use Ad-Aware at all, you might have to find the problematic application on your own and remove it.


2. Create a new user account

As we previously mentioned, almost any application can cause Another instance is running error to appear.

If you can’t find the problematic application, you might want to try creating a new Windows 10 user account.

To do that, you need to follow these simple steps:

  1. Open the Settings app and go to Accounts section.
  2. Navigate to Family & other people tab. In Other people section click on Add someone else to this PC button.

  3. Select I don’t have this person’s sign-in information.
  4. Now click on Add a user without a Microsoft account.
  5. Enter the desired user name and password for the new user and click the Next button once you’re done.

After creating a new user account you need to log off and switch to it.

If the problem doesn’t appear on your new user account, you might want to consider switching to it and using it as your primary account.

3. Download the latest updates

Microsoft is working hard to address Windows 10 hardware and software issues, and most issues are fixed with Windows updates.

According to users, this issue can be fixed simply by installing the latest updates. Windows 10 installs updates automatically, but you can also check for updates manually if you want.

To do that, follow these simple steps:

  1. Open the Settings app and go to Update & security section.
  2. Click the Check for updates button and wait while Windows 10 downloads the available updates.

After downloading and installing the latest updates, check if the problem is resolved.


4. Stop the problematic processes

Users reported that this issues occurs while trying to install AutoCAD software. It seems that this problem is caused by another AutoCAD process running in the background, so to fix the problem you need to close that process.

This is a simple procedure, and you can do it by using Task Manager. To close the problematic process, do the following:

  1. Press Ctrl + Shift + Esc to open Task Manager.
  2. When Task Manager starts, go to Processes tab and look for any AutoCAD process. Right click it and choose End Task from the menu. Repeat this for all AutoCAD processes.
  3. After ending all problematic processes, close Task Manager and check if the problem is resolved.

Keep in mind that this problem can affect almost any application and not just AutoCAD. Therefore be sure to close multiple instances of the problematic application and check if that solves the problem.

5. Reinstall the problematic application

According to users, Another instance is running error appears when they try to run a specific application. Many users reported that the error appears while trying to run a specific game on their PC.

If you’re having this error with any game or application, we recommend that you reinstall it completely. After reinstalling the problematic software, check if the problem is resolved.


6. Change the Startup type of Workstation service

Users reported that Another instance is running error appears while trying to install updates for certain Adobe products.

It seems that this error is related to Workstation service in Windows 10, and to fix it you need to change that service’s settings. To do that, follow these steps:

  1. Press Windows Key + R to open the Run dialog. Enter services.msc and press Enter or click OK.
  2. Services window will now appear. Locate Workstation service and double click it to open its properties.
  3. Make sure that Startup type is set to Automatic.
  4. Check the Service status. If it isn’t set to Running, start the service by clicking the Start button.
  5. After changing the Startup type and starting the service, click Apply and OK to save changes.
  6. Close Services window and try to install the application again.

How can I fix the another instance is running error in League of Legends?

1. Close lolpatcher processes

Users reported Another instance is running error while trying to start League of Legends. According to them, the issue appears because lolpatcher application starts simultaneously with the game.

To fix this problem, you need to find and end all running lolpatcher processes. To do this, you’ll need to use Task Manager and find the problematic process in the Process tab.

We already explained how to end a process using Task Manager in one of our previous solutions, so be sure to check it for detailed instructions.

Few users reported that they had multiple League of Legends clients running, but after ending their processes the issue was completely resolved.

2. Run netsh command

If you’re getting Another instance is running error while trying to start League of Legends, you might be able to fix the problem by using Command Prompt.

Users reported that they fixed the issue simply by running netsh winsock reset command. To do that, follow these steps:

  1. Press Windows Key + X to open Win + X menu. Select Command Prompt (Admin) from the list of results.
  2. When Command Prompt starts, enter netsh winsock reset and press Enter.
  3. Wait for the command to execute and then close Command Prompt.
  4. Restart your PC.

After your PC restarts, try running LoL and check if the problem still persists.


3. Pin the League of Legends icon to your Taskbar

According to users, one potential solution is to pin League of Legends icon to your Taskbar and try to start it from there.

Users reported that two League of Legends icons appear in their Taskbar when they want to start it. According to them, you need to pin the new icon to your Taskbar and close the other one.

After doing that, go to Task Manager and close all processes related to the League of Legends. Lastly, start the game by using the pinned Taskbar icon.

Users also reported that you might have to click the icon couple of times before the game starts, so keep that in mind. This isn’t the best solution, but it’s a potential workaround, so you might want to try it out.

4. Run the game as administrator

If you’re getting Another instance is running error while trying to run League of Legends, you might want to try running it as administrator.

This is quite simple, and to do so you’ll need to find the application, right click it and choose Run as administrator from the menu.

If running the application as an administrator fixes the problem, you’ll have to repeat this process every time you want to start the game.

If none of the previous solutions work, you might have to reinstall League of Legends to fix the problem.


Another instance is running error will prevent your applications from starting, but you can fix the problem by ending the problematic application.

If that doesn’t work, feel free to try any other solution from this article.

How to Change CPU Fan Speed Without BIOS

Are you trying to change your CPU fan speed without BIOS? Here is everything you should know.

The CPU fan is an essential component of a computer that helps to keep the processor cool and prevent overheating.

However, sometimes the fan speed may need to be adjusted to better suit the system’s specific needs.

While most motherboards allow for fan speed control through the BIOS, there may be instances where access to the BIOS is impossible.

This guide explores changing the CPU fan speed without using the BIOS.

Can you manually control the fan speed?

Yes, it is possible to control the fan speed manually. There are many ways to do this, depending on the type of fan and the computer’s hardware and software.

There are several benefits to manually controlling the fan speed. A few of these include:

  • Improved cooling – By increasing the fan speed, you can improve the cooling of the CPU and prevent overheating. This is especially useful when you are running demanding applications or when you are overclocking the CPU.
  • Reduced noise – Lowering the fan speed can reduce the fan’s noise level, which can be beneficial if you use your computer in a quiet environment.
  • Power efficiency – By adjusting the fan speed, you can optimize the power consumption of your computer. Lowering the fan speed can reduce the power consumption of your computer, which can be beneficial if you are using a laptop or running your computer on battery power.
  • Increased lifespan of the components – By keeping the temperature of the CPU and other components in check, you can increase the lifespan of the parts.

So, let us now explore how to modify your fan speed on Windows PCs.

How can I modify my fan speed without accessing the BIOS?

1. Using third-party Software

  1. Download and install SpeedFan on your computer.
  2. Open SpeedFan and go to the Configure tab.
    Change CPU Fan Speed Without BIOS
  3. Under the Fan Control section, you will see a list of all the fans connected to your computer. You can select the fan you want to control in the drop-down menus.
  4. Select the fan that corresponds to your CPU fan and use the Minimum and Maximum sliders to adjust the fan speed.
  5. Click on the Apply button to save the changes.

2. Using the Control Panel

  1. Install third-party software that allows you to control the fan speed, such as SpeedFan or Argus Monitor.
  2. Press Windows + X and select Command Prompt (Admin).
    Change CPU Fan Speed Without BIOS
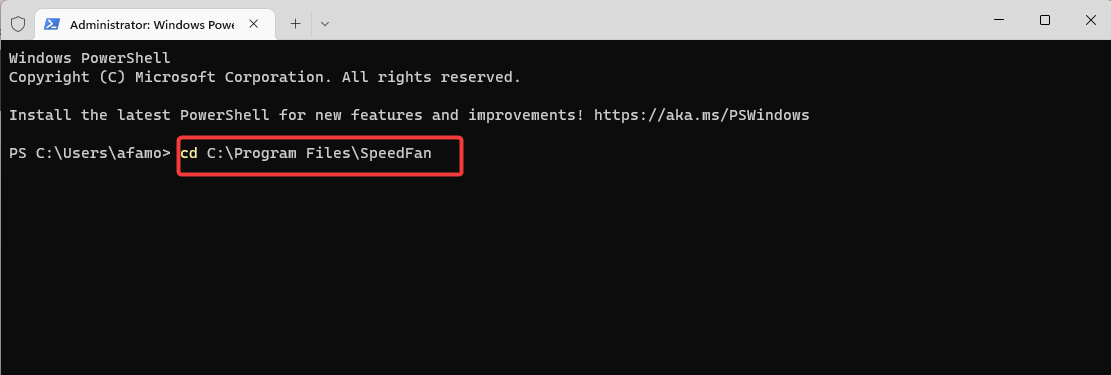
  3. Use the cd command to navigate the folder where the third-party software is installed. For example, if you have installed SpeedFan in the C:\Program Files\SpeedFan folder, you would type the script below and hit Enter:
    cd C:\Program Files\SpeedFan
    Change CPU Fan Speed Without BIOS
  4. Once in the correct folder, you can use the software’s command-line options to control the fan speed. For example, in SpeedFan, you can use the following command to set the fan speed to 50%:
    SpeedFan.exe /fan:1 50

In the last script above, 1 is the fan number, and 50 is the fan speed in percentage.

Changing the CPU fan speed without using the BIOS is a straightforward process that can be accomplished using software-based fan control tools.

Following the steps outlined in this guide, you can easily adjust the fan speed to keep your computer running at optimal temperatures.

It’s important to remember that keeping your computer cool is crucial for maintaining the longevity of the internal components.

5 Best SQL Server Backup Software [Free & Paid]

SQL servers are currently the de facto method of managing large amounts of data. Companies use them all the time, and even common users can find them extremely handy for personal use.

The main purpose of SQL Server is to store and retrieve information from the local or remote computer.

Why do I need a tool to back up my SQL Server?

Given that they act as both management systems and storage locations for your data, it goes without saying that backing them up from time to time is a vital process.

However, in the likely event that the data that you are managing is of vital importance, it is obvious that you cannot use just any backup software.

That is precisely why we’ve decided to create a list of the best SQL server backup software on the market. The entries have been ranked based on their toolset, how easy they are to use, their backup efficiency, and their price.

Speaking of which, we’ve also decided to include both paid and free products, to fit anyone’s budget.

What are the best SQL server backup software?

Acronis Cyber Backup – Enhanced backup validation

Topping out our list is a software tool that is trusted by over 500.000 companies around the world.

In case you are wondering what makes this tool so desirable, the answer is just how simple it is to use so that you don’t have to waste any time, and focus on what’s really important.

In fact, all you need is just 3 clicks to proceed with a backup, and depending on the amount of data that needs backing up, and how fast your hardware is, it takes around 15 seconds for the process to complete.

It features enhanced backup validation and blockchain-based authentication of your backups.

Meanwhile, thanks to Acronis Notary, Acronis Backup is the most reliable backup solution for your SQL servers on the market today.

Here are some of its key features:

  • Minimalist UI
  • 3-click backup process
  • Blockchain-based authentication
  • Reliable data protection and backup
  • Now available at a special discount price

Handy Backup – Easy to use

The next entry on our list is yet another reliable tool used for SQL backups for both personal and enterprise use. Handy Backup is focused on providing quality backup services.

What makes it stand out among other similar tools is that Unlike SQL Server backup software utilizing ODBC drivers, Handy Backup works with the DBMS directly via the MSSQL backup plug-in.

Because of this, it lets you save SQL databases along with all of the views, indexes, stored procedures, and more.

More so, it is also very versatile in terms of what versions of SQL it supports, since it provides support to the following versions: Backup SQL Server 2005, 2008, 2012, 2014, and 2016.

Those of you that are also very busy might be happy to know that Handy Backup also comes with a backup scheduling feature so that they can be performed even when you are away.

Some of its main features include:

  • Supports all versions of SQL server
  • Can schedule backups
  • Greate backup fidelity
  • Easy-to-use
  • Frequently updated

NovaBackup – Great storage options

Last, but not least, is yet another server backup service that shows great promise both in terms of efficiency and price.

NovaBackup is not only a good server backup tool, but it also has great potential as a generic backup tool as well. You can use it to backup data on your PC and laptop.

The backups can then be stored on Local Disk, NAS, Single Tape, and RDX. More so, you can rest assured that an extra copy will also be stored on the NovaBACKUP Cloud.

The backup process is really simple. You just have to open the NovaBackup software, select the server you want to backup and the location you want to store it in.

You can also create a schedule for regular backups. The process automatically starts at a pre-established time that works best for you.

Check out some of its key features:

  • Backup and restore SQL Server in the cloud
  • Comes with a free trial
  • Supports VMware and Hyper-V
  • You get Free Upgrades
NovaBackup

NovaBackup

Your SQL databases will now be safer thanks to this software that provides constant backups.
Check priceVisit website

Iperius Backup – Secure data encryption

Iperius is yet another reliable tool for anyone that needs to focus on other duties while keeping their SQL server databases constantly updated.

With a rich array of tools, Iperius allows anyone to back up any type of data, ranging from Drive Image, VMware ESXi, Hyper-V, or even Exchange.

More so, the backup process is extremely handy as far as storage location goes, since you can back up to NAS, USB drives, FTP, Cloud, S3, and more.

Last, but not least, you also know that your data is safe since the system comes with both Ransomware protection, as well as AES 256-bit secure encryption.

Take a look at some of its best features:

  • Supports Windows Server 2019, 2016, 2008, and 2012
  • Capable of hard disk cloning and recovery drive creation
  • Open file backup (VSS)
  • Now available at a discount price

⇒ Get Iperius Backup

Idera SQL Safe Backup – Great for compression and encryption

Idera SQL Safe Backup showcases great accessibility when it comes to how you can use it. The interface is pretty straightforward, and if you know what an SQL server is, then knowing how to use this tool will be second nature.

It works fast and allows you to save space thanks to the dynamic compression with encryption, and when it comes time to recover from a backup, you can choose from multiple options for recovery.

Temporary network failures will be a thing of the past since the program ensures that failures will happen far less often, and managing your SQL server will be much easier thanks to the dashboard, built-in alert system, and more.

Let’s review a few of its key features:

  • Backup and restore SQL Server in the cloud
  • Comes with a free trial
  • Fast and efficient
  • Can be used by users of all levels

⇒ Get Idera SQL Safe Backup

That pretty much wraps up our list of the best 5 SQL server backup tools that you can get. We hope that you find the list useful and that you will find a tool that suits your needs entirely.

You might also be interested to read our guide on how to repair a corrupted database in SQL Server.

If you want to learn more about such tools, leave us a message in the comments section below.

5 Best Pixel Painting Software for Windows 10/11

The resurgence of pixel art among popular artists have given this art concept a much-required boost.

Apart from digital artists, pixel art is still a popular choice amongst the game developers.

If you are a budding digital artist or game developer looking to create stunning pixel art pieces, a crucial tool you need is a painting program to compliment your painting and drawing skills.

That said, choosing a tool to get started with pixel painting can be challenge.

This is why we have put together the best pixel painting software to help you decide the best program that offers a perfect balance between features and price to get your pixel painting journey started.

What are the best pixel painting software?

Adobe Photoshop – Best portrait features

photoshop problems windows 10

When it comes to image manipulation, Adobe Photoshop is the industry standard. From photo editing and compositing to digital painting, animation and graphic design,

Photoshop can do it all on your desktop and portable devices like iPad.

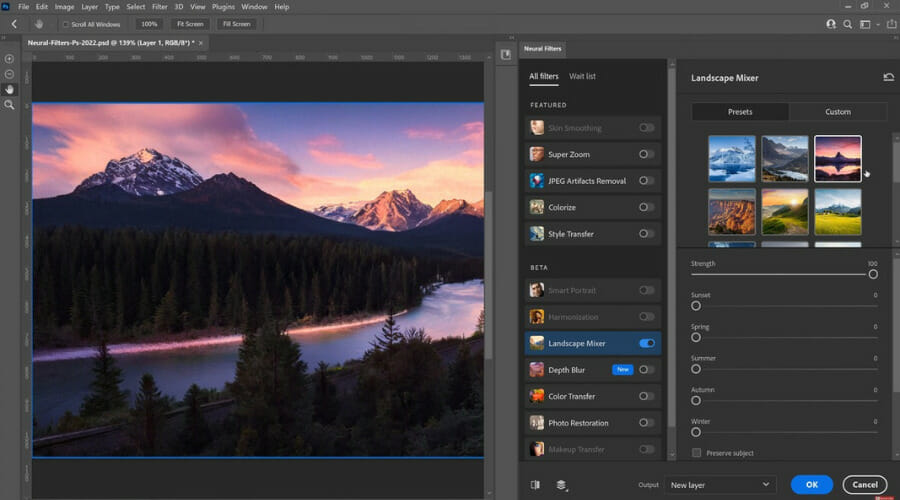
Latest Photoshop version comes with improved AI technology that helps you colourize a scene, zoom in on parts of an image, remove scratches from the object and even change expression, age or pose with little effort.

Apart from easy masking and portrait editing features, Photoshop offers thousands of brushes in different style and texture. You can also create custom brushes using the built-in tool kit.

Key features of Adobe Photoshop:

  • Excellent set of image manipulation tools
  • Adobe Sensei and improved AI
  • Easy to use and lots of tutorials
  • Cross-platform compatibility and cloud storage

Adobe Photoshop

Pixel art, manga, sketches, pretty much everything can be done with Photoshop and the right plugins installed!
Check price Visit website

Clip Studio Paint – Easy tool for beginners

ClipStudio Paint best drawing apps for Windows 11

If you are on a budget or just getting started with pixel painting and don’t want splurge on a painting program, Clip Studio Paint is an excellent choice. It offers plenty of vectors and brush tools to help you create a professional-looking drawing without breaking your bank.

If you have invested in a drawing tablet, you will feel home as Clip Studio Paint supports drawing tablets and can detect up to 8192 levels of pen pressure helping you feel every nuances of the design.

Clip Studio Paint also offers over 1000 new materials every month on its Assets section. You can also customize every aspect of your brushes for a limitless supply of tools.

Key features of Clip Studio Paint:

  • Excellent value for money
  • Powerful editing tools for the price
  • Easy to use and intuitive controls
  • Customizable brushes

Clip Studio Paint

Art is not something everyone can get into, but with Clip Studio Paint, creating art will no longer be so exclusive.
Free trial Visit website

CorelDRAW

Professional graphic design software for Windows, CorelDRAW is an excellent vector illustration, layout, and photo editing tool.

It features over 25+ new features and enhancements. With the subscription plan, you can collaborate with clients and colleagues to review work and submit feedback online.

The latest version of CorelDRAW features cutting edge typography enhancements to showcase text beautifully by formatting paragraphs and more.

From creating blueprints, maps & schematics, to creating signage and large-format print to apparel design, CorelDRAW comes with required tools to create artwork for a variety of industries.

Key features of CorelDRAW:

  • Fun and easy to use for beginners and professionals
  • Highly customizable interface
  • A good collection of editing tools
  • Both subscription and non-subscription plan

CorelDRAW

Pixel art is supposed to be fun and whimsical, so you need a tool that can make things easy for you when you design things.
Free trial Visit website

Autodesk Maya

Create expansive worlds, complex characters, and dazzling effects with Autodesk Maya.

If you are a game developer, it allows to you create realistic effects, bring believable characters to life with engaging and animation tools and shape 3D objects and scenes with intuitive modeling.

The new version of the Autodesk Maya sees a host of new features and improved performances and some most requested Remesh and Retopology tools.

Autodesk Maya comes with Arnold 6, allowing you to switch seamlessly between CPU and GPU rendering, manage complex characters, scenery and light challenges, and see high-quality previews.

Key features of Autodesk Maya:

  • Improved artists friendly UI intuitive controls
  • Switch between GPU and CPU rendering with Arnold 6
  • New matrix-driven rigging tools
  • Improved Remesh and Retopology tools

Autodesk Maya

While many may not associate Autodesk’s Maya with pixel art, this graphics editor can easily do that as well.
Free trial Visit website

Krita

Krita is an open-source desktop painting application designed for illustrators, concept artists, illustrators, comic book creator and texture artists.

While it is an open-source program, you can support the developer by purchasing it from Microsoft Store.

Similar to Clip Studio Paint, Krita also features support for Wacom drawing tablet with accurate pen pressure. It also comes with some great brush engines for sketching and painting.

Additionally, Krita also offers features like stabilizers for freehand inking, assistants for constructing a complex scene, a distraction-free canvas-only mode for painting without distraction, clone layer, filter and transform masks non-destructive editing.

Key features of Krita:

  • Excellent value
  • Excellent brush engines and painting tools
  • Distraction-free canvas-only mode
  • Clean user interface

Krita

This open-source product is also available as a Windows 10 app with auto-update features.
Check price Visit website

With the increase in the users of pixel art as a method of creating digital art for game developments, stills and even animations, spotting the right tools for pixel painting can be difficult at times.

Explore the tools listed in this article to see what these programs can offer. Many of these tools also offer a free limited trial so that you can try them out before making a purchase.

Expression.Error: Access to the Resource is Forbidden: Fix

Power BI enables users to set up charts and visualizations from external data sources. First, they need to connect Power BI with their external data.

However, some users have stated that an Expression.Error: Access to the resource is forbidden error message pops up when they try to connect Power BI with data resources.

Consequently, users can’t connect the data resource with Power BI, so let’s see how this can be solved.

How can I fix the Expression.Error: Access to the resource is forbidden error?

1. Reset the data connection to re-enter credentials

  1. To do that, click the File tab at the top left of Power BI.
  2. Then, click Options and settings on the menu.
  3. Select Data Source Settings to open the window shown directly below.Data source settings window power bi error access to the resource is forbidden
  4. Select the data source the Access to the resource is forbidden error arises for.
  5. Then select the Clear Permissions option on the drop-down menu.
  6. Press the Close button.
  7. Thereafter, users can re-enter their credentials when they try to connect the required data sources.

Some users have confirmed that resetting the data connections for data sources fixed the Access to the resource forbidden error.

Assuming you need help as well, don’t hesitate to apply the above procedure.


2. Select an alternative log-in option to connect to data

The Access to the resource is forbidden error can also arise when users select the wrong log-in options to connect their data sources with on the Access a window.

For example, users trying to connect SharePoint Online via Power BI Desktop might need to select the Organizational account log-in option instead of Windows on the window shown directly below.

Access on options power bi error access to the resource is forbidden


So, try selecting an alternative log-in option through which to enter the log-in credentials.

Those are a few of the confirmed resolutions users have fixed the Expression.Error: Access to the resource is forbidden error with. Let us know if you’ve tried any other solutions in the comments area below.

Quick Access Missing From File Explorer: 3 Quick Fixes

The Quick Access feature in Windows 10 provides a convenient way to access your frequently opened folders and recently opened files.

While some may find it distracting, it is a handy feature for many. However, some users have reported that their Quick Access section is deleted or files missing from their Quick Access section in the Microsoft Community Forums.

I accidentally removed a file used daily from the Recent Files section of Quick Access. I’d like to have it back in the Recent Files section to make it easily accessible, but opening and closing it does not return it there. Is there a way to allow this file back in Quick Access or is it forever banished?

Here are a couple of ways to restore the missing Quick Access folder in Windows 10.

What do I do if Quick Access is Missing?

1. Restore the Quick Access Folder

  1. Open the File Explorer from the Taskbar.
  2. In the File Explorer, click on the View tab.
  3. Click the Options drop-down menu and select “Change folder and search options“. It will open the Folder Options window.
    Folder Options - File Explorer
  4. In the General tab, make sure “Open File Explorer To:” to is set to Quick Access.
  5. In the Privacy Section, check “Show recently used files in Quick Access” and “Show frequently used folders in Quick Access” options.
  6. Click Apply and OK to save the changes.
  7. Close the Folder Options window and the File Explorer.
  8. Open “File Explorer” again and check if the Quick Access folder is visible.

2. Reset Folders

  1. Open the File Explorer app from the taskbar.
  2. Click the View tab in the ribbon menu and then click on Options.
  3. Select “Change folder and search options“. This will open the Folder Options window.
  4. Go to the View tab.
  5. Under “Folder Views” click on the Reset Folders button
  6. Click Yes when asked to confirm.
  7. Close the Folder Options and File Explorer window.
  8. Relaunch File Explorer and check if the issues related to your Quick Access menu is resolved.

3. Reset File Explorer from the Command Prompt

  1. Type cmd in the search. Right-click on Command Prompt and click on Run as Administrator.
  2. In the Command Prompt type the following command and hit enter.
    del /F /Q %APPDATA%\Microsoft\Windows\Recent\AutomaticDestinations\*
  3. Open the File Explorer and check again.

We hope you managed to fix the Quick Access missing issue on your PC and can use it properly now. If a folder is still missing, check the attributes.

Let us know how it went in the comments section below.

7 Best Drawing Software for Beginners in 2026

As most artists are learning how to use and integrate digital services into their work, there is no wonder the interest in drawing apps has increased lately.

There are many advantages to using drawing software but is also known that most of the programs can consume so much time in learning how to use which makes many artists feel reluctant in giving it a try.

Luckily, there are software designed for beginners also and in this article, we will show you some of the best apps to use, so keep on reading.

What is the easiest drawing for beginners?

The key to drawing as a beginner is to draw items that interest you because it is more presumably to stick with them, hence you will practice more.

The easiest drawing can be pictures like trees, flowers, leaves, faces and expressions, food, and other simple objects which you can design with the help of specialized tools like Adobe Photoshop, Clip Studio Paint, and Rebelle.

These kinds of tools offer various helpful features such as customizable brushes, complete color palettes, color and luminance range masking, and many more.

Adobe Photoshop – Fantastic brush features

best software for calligraphy

Adobe Photoshop has made a name for itself and artists widely use it. No wonder why since it is continuously improved and the fantastic features it comes with do make it our number one choice also.

You can add new features constantly and use the basic text pencil with one of the many textures and colors available.

Adobe Photoshop is perfect for beginners also using the brushes to draw or paint is fairly easy and you’ll be able to create the masterpiece you always envisioned.

Let’s have a look at some of its best features:

  • Fantastic brush features
  • Color and luminance range masking
  • Digital painting tools: create, use and edit layers
  • Cloud storage

Adobe Photoshop

Create masterpiece art with this amazing app that is suitable for both professionals and beginners.
Free Trial Visit Website

Clip Studio Paint – Unlimited painting styles

Clip Studio Paint is another one of our recommendations for a perfect drawing app to use as a beginner user.

This app has been created for artists that love to draw and is offering a natural brush feel that will help you envision and create the work art in the way you want it.

Thanks to the 8192 levels of pen pressure you will be able to create every stroke on your drawing exactly as you imagine it and won’t have to compromise at all the final result.

Moreover, Clip Studio Paint brings 1000 new materials monthly, allowing you to customize the brushes as needed and it offers a limitless supply of tools.

Here are some other best features of Clip Studio Paint:

  • Unlimited painting styles
  • Easy color selection
  • AI colorization
  • Hundreds of decoration brushes

Clip Studio Paint

Software designed to bring your envisioned work of art to life with a great set of features.
Free Trial Visit Website

Corel Painter – Amazing brush control

There is no better app to use in order to immerse yourself in the fascinating world of digital drawing than Corel Painter.

If you are looking for natural, professional results in less time and with a smooth transition, make sure to give this app a try.

You can use papers, flow maps, patterns, and even textures. The artificial intelligence available will easily transform any photo you want into a painting.

If the composition was your concern or the customization pallet available, you will have the possibility to customize your painter using the UI, custom pallets, brushes, and media content.

Other best features of Corel Painter you might want to know:

  • Brush control
  • Composition tools
  • Lightning and surface textures
  • Color mixing

Corel Painter

Discover natural and professional results with this fantastic app.
Free Trial Visit Website

Rebelle 6 – Dripping effects

Rebelle 6 is an award-winning painting software with unique oils, acrylics, watercolors, and other wet and dry forms.

It has NanoPixel technology, watercolor diffusion, and paint pigments that help you make your drawing into a hyper-realistic painting.

Rebelle 6 is created not only for professionals but for everyone who wants to explore its passion for drawing using digital technology.

You can create beautiful artwork by choosing how the light impacts your drawing with watercolors, macro-zoom into your canvas, and sharpen your details.

Take a look at other best features of Rebelle 6:

  • Dripping effects
  • Customizable paper texture
  • Masking tools
  • Brush line stabilization

Rebelle 6

Create amazing artwork with customizable paper texture and brush line control features.
Check price Visit Website

Adobe Fresco – Essential illustration tools

Adobe Fresco is an outstanding drawing and painting program with the largest collection of vector and raster brushes to offer you the best digital painting experience.

You can work with blendable watercolors and oils, an advanced selection of brushes, and live brushes that can mimic life-like paintings.

You can customize the application interface and draw in full-screen mode to keep a distraction-free experience.

Furthermore, Adobe Fresco offers a full set of features including liquifying effects, a magic wand color tool, multicolor swatches, and motion path effects.

Other best features of Adobe Fresco include:

  • Distortion effects
  • Cloud integration
  • Customizable UI
  • 3D effects

Adobe Fresco

Get the most out of your digital painting experience and try Adobe Fresco.
Free Trial Visit Website

Artrage Vitae – Collaborative painting option

Artrage Vitae is a great digital artwork program with a complete range of painting tools like delicate watercolors, thick oils, and full sets of pencils.

You can sketch and work with guides, grids, and perspective layout tools and blend oils to create natural-looking color gradients.

Artrage Vitae offers a collaborative painting option so you can create artwork with your friends where you can see their changes and vice-versa.

Moreover, you can enable the horizontal or vertical view that lets you paint across your canvas edges without any effort.

You might want to see these other best features of Artrage Vitae:

  • Paintlink messaging
  • Realistic painting tools
  • Custom brush paint with depth
  • Easy to use

Artrage Vitae

You can now create beautiful paintings with your friends by using Artrage Vitae’s features.
Check Price Visit Website

Krita – Clean and flexible interface

The last but certainly not the least drawing app that we recommend using if you are a beginner is Krita.

This app offers multiple features, most of the innovative, that are designed to make painting fun as well as productive.

You can choose great brushes for sketching and painting, stabilizers for inking, assistants for constructing complex scenes, and clone layers. Basically, all you can think of, you already have in this app.

All in all, Krita is a fantastic and innovative app, constantly improved by a team of enthusiastic artists that want to make this the best digital painting application.

Other best features of Krita:

  • Great brush engines
  • Clean and flexible interface
  • Customizable layout
  • Dark and light color themes

Krita

A digital drawing app created by artists with innovative features and fully customizable tools.

We hope that all the details offered in our list will help you make the best decision on which drawing app to use.

If you have other recommendations or suggestions, we would love to hear them in the comments section below.

How to Show File Extensions in Windows 10: Step-by-Step

Windows 10, by default, hides the file extension from the user view in File Explorer to keep the directory clean. However, you may sometimes need it to show file extensions in Windows 10.

It also helps you find the right program to open a file if Windows cannot recognize the right program to run the file. This article has put together multiple methods to show file extensions in Windows 10.

How can I see file extensions in Windows 10?

1. Use Windows File Explorer

  1. Press the Windows key + E to open File Explorer.
  2. Make sure the Ribbon (top) is maximized, and you can see the File, Home, Share, and View tabs.
  3. Click on the View tab.
  4. Check the File name extensions box under the Show/Hide section.
    File Explorer - View - Show Hide - file Extension
  5. Now, if you open any folder, you should be able to view the file name, followed by the extension for all the files.

    2. Show File Extensions using Control Panel

    Using Control Panel settings, you can easily configure Windows to show file extensions so you know the exact type of each file.

  1. 1. Press the Windows key + R

  2. 2. Type control and press OK.

    control show file extensions windows 10
  3. 3. Click on the Appearance and Personalization tab.

    Control Panel - Personalization and appearances
  4. 4. Click on  File Explorer Options.

    File Explorer Options
  5. 5. In the File Explorer Options window, click on the View tab.

  6. 6. Under Advanced Settings, scroll down and uncheck the box Hide extensions for known file types.

    File Explorer Options - View tab- Show Extension
  7. 7. Click Apply and click OK to save the changes. Windows 10 should show file extensions in File Explorer now.

3. Use the Registry Editor

  1. Press the Windows key + R, type regedit, and click OK.
    regedit
  2. In the Registry Editor, navigate to the following path in the left pane: Computer\HKEY_CURRENT_USER\Software\Microsoft\Windows\CurrentVersion\Explorer\Advanced
  3. In the right pane, look for the HideFileExt DWORD value.HideFileExt- Registry Editor
  4. Right-click on HideFileExt DWORD and select Modify.
  5. In the value data, type 0 and click OK.
    Edit HideFuleExt - value 0
  6. Close the registry editor and check if Windows 10 shows file extensions.

Another method to show your file extensions is to use the Registry Editor. This changes the DWORD responsible for showing your file extension on Windows 10.

We hope that our solutions helped you be able to show file types and extensions in Windows 10. You can also show your file extensions on Windows using CMD, PowerShell, and Group Policy Editor (GPO).

But the solutions here are the simplest to apply. Ensure you follow the steps carefully and that things are back to normal.

If you want to know how to change file type on Windows 10, check our detailed guide to do it quickly.

In case you want to open the SDR format files or ADOC files on your Windows 11 computer, we have separate guides for you.

Feel free to let us know in the comments below the solution that helped you fix this issue.

Resetting This PC Stuck [Factory Reset]: 4 Quick Fixes

Windows 10 has been around for quite some time, and if the statistics are to be believed, Windows 10 has been installed on over 200 million devices since its launch.

Now, no system in this world is perfect, right? The same is the case with Windows 10.

Even Windows 10 has some bugs that make users run into problems that are hard to solve, but thanks to Microsoft, these bugs are being worked on as soon as they are found.

Why is my PC stuck on Resetting this PC screen?

Some users have been stuck while performing a reset. Here are a few known causes:

  • Corrupted files – Important Windows 10 system files that have been lost or deleted may prevent your PC from being reset.
  • Hardware failure – If you have issues with your hard disk, RAM, etc., you may get this reset error.
  • Outdated or bad drivers – Drivers link software and hardware components. Once they are outdated, you may expect varying problems, including the factory reset stuck.
  • A bad installation – In this case, you should note that your downloaded installation may be bad, and you will need a fresh download.

What does factory reset mean and what kind of problems do users encounter?

The factory reset feature allows you to save your data from deletion while retaining the same OS and license you had so far. Therefore, this is a great way to fix many problems on your PC, but sometimes the reset process can get stuck.

Here are some common variations that users reported:

  • HP laptop, Dell, ASUS factory reset stuck – This issue can occur on various laptops, and if you encounter it, remove your laptop battery and insert it back again.
  • Resetting this PC stuck at 35 – The reset process can get stuck at any time, and if the reset is stuck, you might just have to wait for a couple of hours for the reset to finish.
  • Surface Pro 4 factory reset stuck – This issue can happen on Surface Pro 4, but you can fix that by using the solutions from this article.
  • Factory reset computer stuck – If this happens, you might be able to fix the problem simply by using the Startup Repair feature.
  • Factory reset stuck boot loop – In some cases, the only way to fix this problem is to perform a clean install. If you decide to do that, be sure to back up your files beforehand.

One of the many bugs that Windows 10 is plagued by is that some users seem to get stuck while resetting Windows 10. In this post, we will see below how to fix this issue.

How do I fix a PC stuck on resetting this pc screen?

Before starting this with any of the solutions, Here are a few things you must note:

  • There are cases where you will need to wait it out. A factory reset can sometimes take a while, so patience is key.
  • Disconnecting your internet may help because your computer may appear stuck after the reset if it can not successfully download certain updates.

1. Repair the computer

  1. Open the Start menu, press down Shift, and hit the Restart button.
    factory reset stuck
  2. When the options screen comes up, select Troubleshoot.
    factory reset stuck
  3. Click Advanced options.
  4. Choose Startup Repair, and select Restart.

This repair may take a while, so you should patiently wait it out and try the reset afterward.

2. Run your File Checker

  1. Click on Windows search and type command prompt. Now right-click on the Command Prompt and select Run as administrator.
    factory reset stuck
  2. Type the script below and hit Enter:
    sfc /scannow
  3. Await the scan’s completion at 100%. During this procedure, avoid closing the Command Prompt or turning off your computer because doing so could cause the progression to be reset.
  4. Try resetting your computer after restarting it.

If for some reason these manual steps don’t help you, we suggest you try using a specialized tool to do the job for you.

3. Restore the computer

  1. Click on the Windows Start menu, type restore and select Create a restore point.
  2. Click the System Restore button.
    factory reset stuck
  3. Select Next when prompted.
  4. Pick a time you wish to return to (after updates and software installations, your system could automatically generate restore points). Then click Next after deciding on an appropriate starting point.
  5. Retry the factory reset and see if it is still stuck.

4. Reinstall Windows 10

If nothing else works, and your PC is still stuck during a factory reset, your only option might be to perform a clean install of Windows 10.

To do that, we advise you to back up your files from the C drive just to be safe.

It would be best if you did this as a last resort because, in most cases, the above-mentioned solutions would be effective enough.

These solutions have been very useful for many users. You should, however, pick the most appropriate solution and work your way from there.

Lastly, if you have any other suggestions or questions, feel free to leave them in the comments section below, and we’ll be sure to check them out.

Shorted Out Motherboard: Why It Happens & How Can You Fix It

Wondering how to fix a shorted-out motherboard? This article includes everything you need to know on this topic.

A shorted-out motherboard can be a frustrating and costly problem for any computer user.

A short circuit on the motherboard can cause damage to other components and can even lead to a complete failure of the system.

So, in this article, we will explore the causes of a shorted-out motherboard and discuss some ways you can fix it.

What causes a shorted motherboard?

There are a few elements that will trigger a shorted motherboard, some of which include the following factors:

  • Overheating of components – If the components on the motherboard, such as the CPU or GPU, become too hot, they can cause a short circuit. This can happen if the cooling system needs fixing or has so much workload.
  • Power surge – A sudden increase in voltage can cause a short circuit on the motherboard, damaging the components. This can happen if there is a power outage or you connect your device to a faulty power source.
  • Water damage – If the motherboard is exposed to water or moisture, it can cause a short circuit. This can happen if the system is in a humid environment or if there is a leak in the case.
  • Physical damage – If the motherboard is damaged due to impact or other physical means, it can cause a short circuit. This can happen due to a dropping or a manufacturing defect in the motherboard.
  • Corrosion  The motherboard will short circuit if exposed to corrosive materials, such as chemicals or salt. This can happen if you use the system in a harsh industrial environment or if there is a leak in the cooling system.
  • Bad capacitors – If the capacitors on the motherboard are faulty or damaged, they can cause a short circuit. This can happen if the capacitors are of poor quality or have reached the end of their lifespan.

Now let us explore some crucial solutions if you face this problem.

What should I do if I have a shorted-out motherboard?

1. Determine the source of the short 

The first step in fixing a shorted-out motherboard is to identify the source of the problem. This can be done by visually inspecting the board for any obvious signs of damage, such as burned or melted components.

fix Shorted Out Motherboard

If there is no visible damage, you can use a multimeter to test for continuity between various parts of the board, such as the power connectors and the ground.

2. Isolate the problem area 

Once you have identified the source of the short, you need to isolate the problem by disconnecting any connected components, such as the CPU, RAM, and power supply.

This will help you to access the problem area better and make it easier to repair.

3. Replace damaged components

If you find any damaged components, such as a burned-out capacitor or a shorted diode, you will need to replace them. For example, purchasing replacement components from an electronics store or online after a Google search.

Be sure to use the correct replacement components, as using the wrong parts can cause further damage to the motherboard.

4. Clean the motherboard 

Once you have replaced any damaged components, you should clean the motherboard with a soft brush or compressed air to remove any dust or debris that may have accumulated.

This will help to ensure that the board is free of any contaminants that may have contributed to the short.

5. Test the motherboard

After cleaning, reassemble the components and test the motherboard to ensure it functions correctly. If the board is still not working, you may need to repeat the above steps or seek professional help.

Moving forward, keep your computer in a cool and dry place and avoid using the computer in a dusty environment. Also, properly ground the internal components to prevent static electricity from building up.

In conclusion, a shorted-out motherboard can be caused by various elements, including physical damage, voltage surges, and even humidity.

If you suspect that your motherboard may be shorted out, taking action as soon as possible is essential to prevent further damage.

Remember that it may be best to seek professional assistance if you are not comfortable working with the inner components of your computer. However, with proper care and maintenance, you can prevent a shorted-out motherboard and keep your computer running smoothly for years to come.

Windows 10 Just A Moment Blue Screen: Fix

Microsoft, not surprisingly, is pushing hard to see higher uptake of its latest Windows 10 versions. Fortunately for most, the upgrade process too has been largely hassle free. However, there are also those for whom things haven’t just played out in a copybook manner, with a common grouse being things getting stuck during the closing stages of Windows 10 installation.

The error has come to be referred as the ‘Just a moment‘ error, and is characterised by the dreaded Windows 10 blue screen displaying the above message. Sure there is the spinning ball animation that you can keep yourself engaged with though things easily becomes frustrating after a while, more so if this continues for hours on end.

Fortunately, like with most other things, there is a fix to the above situation. Read on to find out.

How can I fix the Windows 10 Just a Moment blue screen?

The first preliminary solution to try out before using more advanced methods of troubleshooting this issue is performing a hard shutdown on your PC. Basically, you need to press on the Power button for a couple of seconds until the PC shuts down, and then restart it.

If this doesn’t work, you can simply disconnect your PC from the power source instead to force it to close.

1. Check if your computer has locked up and is not responding

The first thing for you to do will be to ensure your computer has indeed stopped working. For this, see if your PC is making any noise, which should be a clear sign your processor is at work. A flickering light is another tell-tale sign of your processor being hard at work.

If that be the case, try not to tinker with the installation process. There are several factors like the speed of your internet connection, available disk space, processor speed or memory size that can have a direct bearing on your installation time.

However, if you are sure your PC has fallen silent and has indeed got stuck at the seemingly infinite loop displaying the ‘Just a moment’ message, there are a few things you can do to set things back on track.

Unplug all USB devices attached to the PC, which should include even the keyboard and mouse along with the printer or any USB drive.

Disable all network connection, which means turning off Wi-Fi along with disconnecting any internet cable attached to the PC.

Reconnect the mouse and keyboard and see if you can gain control of the PC. If it does, establish internet connectivity again and see if the installation process gets started.

However, in case none of the above works than you might have to perform a hard reboot (press and hold on to the power button until your system shuts down or restarts on its own). In most cases, this should fix the issue and for the rest of the installation to proceed normally.

2. Go for a fresh installation of Windows 10

If the above steps have yielded a null, opt for installing Window 10 again. This should rewrite all the files again and hopefully, avoid the situation that led it to freeze at the ‘Just a moment’ screen. So if you have the bootable Windows 10 installation either in a disk or a USB, insert/attach it to the PC and restart.

In case you are attempting a new installation using a bootable USB drive, you might have to change the boot order from BIOS to prioritise loading from the USB drive above all else. To get into BIOS, press F2 when the computer restarts and change boot order to ensure USB drive appears first. However, the computer restarts several times during installation. Change the boot order subsequently to allow hard drive being at the top.

3. Boot into Audit Mode

It is not unusual for your installation to freeze at the ‘Just a moment’ screen when you are attempting loading from a syspreped image of Windows 10.

In such a scenario a proven way to prevent the above error to creep in will be to boot into Audit Mode right at the start when your system boots and before you select ‘Use Express Setting’. Press Ctrl+Shift+F3 to get into Audit Mode. Thereafter, add / remove software and then sysprep OOBE.

So that is it. This should serve as a comprehensive guide to prevent the Windows 10 Just a Moment blue screen.

Windows 11 is Stuck in Tablet Mode: 5 Ways to Get Out [Fix]

Sometimes Windows 11 can get stuck on Tablet Mode and this can be a problem since your interface will change to adapt to touchscreen input.

This can be a problem and affect your productivity, especially if you prefer using your device in desktop mode, so today we’re going to show you how to fix it.

Why is Windows 11 in Tablet Mode?

  • The tablet keyboard isn’t detected or working properly thus causing Windows to enter Tablet Mode.
  • Temporary glitches or missing firmware or driver updates can cause this problem.
  • Preinstalled software can sometimes cause this issue on Lenovo devices.

What do I do if my Windows 11 laptop is stuck in Tablet Mode?

Before we start, be sure to perform the following checks, and see if they work for you:

  • Make sure that the tablet keyboard is connected and working properly. You can also try connecting a USB keyboard and unplugging it as a temporary workaround.
  • Try rotating your device. It should automatically switch to Desktop mode if you use the landscape orientation.
  • Perform a soft reset on the Surface device by pressing and holding the Power button for 30 seconds. Release the button, wait for 10 seconds, and start your device again.

1. Update Windows 11

  1. Click on the Start button in the Taskbar to launch the Start menu.
  2. Select Settings from the apps listed at the top.Launch Settings
  3. Next, select Windows Update from the tabs listed in the navigation pane on the left.Update Windows to fix stuck in tablet mode issue
  4. Click on Windows Update on the right.Windows Update
  5. Click on Check for updates to let Windows scan for any available newer version.Check for updates
  6. If any are found, download and install them.
  7. Also, download Optional updates to update all your drivers.

2. Update the firmware on Surface devices

Note icon NOTE
Installing the wrong firmware can cause issues with your device, so ensure that you download and install the correct version.
  1. Make you know the exact model and firmware version of your device. You can check that from the Surface app on your PC.
  2. Next, go to the Surface firmware download page.
  3. Locate your model on the list and select it.
     
  4. Click the Download button.
  5. Once the firmware is downloaded, run the setup file and follow the instructions on the screen.

3. Disable the Lenovo Yoga Mode Control service

  1. Press the Windows key + R enter services.msc and then click OK.
    SERVICES
  2. Locate the Lenovo Yoga Mode Control service and double-click it.
  3. Locate the Startup type and set it to Disabled. Next, click on Stop and then go to Apply and OK.
  4. Restart your PC.

4. Run an SFC scan

  1. Launch the Power User/Quick Access menu, and select Windows Terminal (Admin) from the list of options that appear.Launch Windows Terminal to fix when stuck on tablet mode
  2. Click Yes on the UAC (User Account Control) prompt that appears.
  3. Click on the downward arrow at the top and select Command Prompt from the list of options. Alternatively, you can press Ctrl + Shift + 2 to directly launch the Command Prompt tab.Command prompt
  4. Next, type/paste the following command, and hit Enter to run the SFC scan:sfc /scannowRun SFC scan
  5. After the scan is complete, restart the computer, and check if the Windows 11 stuck in Tablet Mode issue is resolved.

If you’re looking for an effort-free alternative, you can try a dedicated repair tool because it can run an in-depth scan of your PC system and automatically find and repair all malfunctioning or missing files.

5. Perform a system restore

  1. Click on the Start button in the Taskbar to launch the Start menu.
  2. Enter create a restore point in the text field at the top, and click on the relevant search result that appears.System Restore to fix windows 11 stuck in tablet mode
  3. Next, click on the System Restore button.System restore
  4. Now, you can either proceed with the Recommended restore point or tick the option for Choose a different restore point to manually select one, and then click on Next. We choose the latter to help you get acquainted with the process.Choose a restore point
  5. Now, select a restore point from the ones listed here, and click on Next.Select restore point
  6. Finally, review the restore settings and click on Finish to start the process.Start restore process to fix stuck on tablet mode issue in Windows 11

What is the difference between Windows 10 and Windows 11 Tablet Mode?

  • In Windows 10, this feature can be enabled manually at any time, while on Windows 11 it is activated automatically.
  • Windows 10 Tablet Mode forces users to use apps in full screen and brings back the full-screen Start Menu.
  • Windows is more intuitive and it doesn’t change user experience as much, but it makes icons larger and easier to tap on a touchscreen.

To learn more about the differences between the two systems check our comparison of Windows 10 and Windows 11.

How do I change to desktop mode in Windows 11?

Due to the nature of Windows 11, the only way to switch back to desktop mode is to set your device in landscape mode or to attach a keyboard or keyboard dock.

To learn more, we suggest reading our guide on Windows 11 Tablet Mode.

You can apply these methods when Windows 11 is stuck in Tablet Mode. In case these tips don’t work, you can always reset the system to its factory settings, a sure-shot fix for almost all issues with the software.

This isn’t the only issue you can encounter and many reported that the touchscreen is not working in Tablet Mode, but there’s a way to fix it.

Tell us which fix worked for you and the experience with Tablet Mode in Windows 11 in the comments section below.

Windows 10 Backup Not Working/ System Image Fails [FIXED]

Having a system backup is always useful, especially if your system gets corrupt or damaged.

Although the system Backup tool in Windows 10 is a great feature, it can sometimes fail to work on Windows 10, so let’s see how to fix it.

Why is Windows 10 Backup not working?

There are a lot of reasons why the Windows 10 Backup might not work. Here are some of the most common causes:

  • Corrupt system image – If something damaged the backup image, the system will not be able to finish the backup.
  • Not enough space on disk – If you’re performing a local backup, you must ensure you have enough space on the designated drive for the backup.
  • Older backup files are preventing backup – The WindowsImageBackup folder holds older backup files that are interfering with the new one. Try deleting the folder using one of the solutions below.
  • The source drive is not suitable for backup – If you’re using an external drive for backup and it’s a brand new disk, it needs to be formatted before proceeding with the backup.
  • Bad connection with the network drive – In case you’re making a backup on a network drive, make sure you have a good connection with it. A poor connection will result in the backup failing.

Our readers have reported other instances of this error including Windows 10 backup error 0x807800c5, Windows 10 backup fails to complete, Windows 10 backup did not complete successfully, Windows 10 backup to network drive fails, and more.

Rest assured that by using the solutions below, you will be able to fix all these problems.

How to fix system backup problems in Windows 10

Before going through the more complex solutions, let’s crosscheck some quick methods to fix this issue:

  • Disable third-party disk tools – It was reported that certain disk tools can cause problems with system backup, therefore if you’re using any disk optimizers or disk cleaning tools make sure to disable them before trying to create a system backup.
  • Use a USB 3.0 hub – Few users reported that using USB 3.0 external hard drives can cause problems due to USB 3.0 drivers. In order to avoid these issues, it’s advised to use a USB 3.0 hub in order to connect your external drive.
  • Set your background to solid color – It might seem unusual, but a few users reported that system backup issues can be caused if your background is set to Slideshow. You can change that setting from the Personalization menu.

If none of the above tweaks worked, start performing the solutions below in this exact order.

1. Delete the WindowsImageBackup folder

  1. Press the Windows key + E to launch Windows File Explorer.
  2. Navigate to the following location on your system drive: C:/System Volume Information
  3. Now, select the folder and delete it.

Sometimes you won’t be able to create system backup due to previous backup files, and in order to fix this problem, you need to delete those files.

To do that, locate and delete WindowsImageBackup folder. If you want to save your previous backups, you can also move them from WindowsImageBackup to a different folder.

Note that by default, you will not have access to this folder. You will need to change the ownership of the folder first.

2. Format your external hard drive

  1. Open This PC and locate your external hard drive. Right-click it and choose Format.
    format-hard-drive
  2. When the Format window opens, check Quick Format option and click the Start button. This process might take a minute or two, so be patient.

This is a prerequisite before creating a system backup image on an external hard drive. Also, before formatting your external hard drive make sure to move any files from it to a safe location.

After your external hard drive has been formatted, try creating the system backup on it again.

3. Delete EFI System Partition and Recovery Partition

  1. Press Windows key + X and select Disk Management from the menu.
    disk-management
  2. When Disk Management opens, locate the hard drive on which you wish to store your system backup.
  3. You should see EFI System Partition and Recovery Partition for that hard drive in Disk Manager. Delete them both.

In some cases, when you upgrade to Windows 10 or install it on a new hard drive, certain partitions from previous versions of Windows might still be present on your computer causing System Backup to fail.

In order to fix this, it’s advised that you remove EFI System Partition and Recovery Partition.

After deleting these two partitions, you should be able to successfully create a system backup on that hard drive.

4. Turn on System Protection

  1. Press Windows key + S and type system restore and choose Create a restore point from the list of options.
  2. Click the System Protection tab and select Configure below.
  3. Select Turn on system protection and click Apply and OK to save changes.

We have listed this solution because some users claim that in order to create System Backup, System Protection must be enabled on your PC.

Also, in the Disk Space Usage section move the Max Usage slider to the left to about 10-15%.

A few of our readers reported that Max usage was set to 100% on their computer by default and that was the main culprit for system backup failure.

5. Turn off System Protection and delete restore points

  1. Press Windows key + S and type system restore and select Create a restore point from the results.
  2. Click the System Protection tab and select Configure below.
  3. Make sure to select Disable system protection, then click the Delete button to delete previous restore points.
  4. Repeat these steps for all your hard drivers.

Some of our readers managed to fix the problem by disabling the System Protection and deleting all the restore points, as shown in the solution above.

After you’ve disabled system protection and deleted previous restore points you should be able to create a system backup.

6. Use chkdsk command

  1. Press the Start button, type cmd, and select Run as administrator from the results.
  2. When Command Prompt opens, type the following command where D: is the drive partition (change it accordingly to your own letter) and press Enter to run it: chkdsk /r D:
    chkdsk-cmd
  3. Wait for the process to complete and repeat the same process for all hard drive partitions.

We have to mention that you might be unable to run chkdsk command on drive C, and you’ll be asked whether you want to scan drive C the next time your system restarts.

Press Y (Yes) and restart your computer in order to scan and check drive C.

If your hard drive contains corrupted files, a system backup will fail. This is why using the chkdsk command should repair them.

7. Use diskpart to remove the EFI partition

Note icon NOTE
We advise you to be extremely careful while using this method because you can permanently delete your important files.
  1. Click the Windows button, type cmd, and select Run as administrator from the results.
  2. When Command Prompt opens, type diskpart and press Enter.
  3. Type list disk and press Enter. You should see several hard drives available.
  4. Find your hard drive on the list and type the following command and press Enter (make sure that you use the correct number that matches your hard drive): select Disk 0
  5. Now type the following command and press Enter: list partition
  6. Locate the system partition and type the following command (make sure that the number matches your EFI partition): select Partition 1
  7. At this point, we recommend backing up all files from that partition because they will get deleted.
  8. Type the following command and press Enter (this will delete the partition and all files on it): del partition override
  9. Now, you may add the newly created free space to any other disk partition by using the Disk Management tool.

If you install an additional hard drive and install new Windows on it, your previous EFI partition from the old hard disk can remain on your old hard drive and cause you problems with system restore.

Once again, be extremely careful while doing this because you can permanently delete your system files if you’re not careful. Use this solution at your own risk.

System backup is rather important, and if you can’t create a system backup on Windows 10, make sure to try some of our solutions.

We also recommend checking our selection of the best automatic backup tools for Windows 10.

And, if you’ve already tried, do let us know which one worked for you in the comments section below.

How to Open ICA files on Windows 10, Chrome & Edge

Are you in a dilemma about opening ICA files on your Windows 10 PC? While the process might seem tricky, it becomes easy if you have the required know-how.

This post gives detailed information about ICA files and how to open them on your Windows 10 computer.

What is an ICA file?

ICA file is an Independent Computing Architecture file format used by specialized Citrix application servers; this file format contains all the relevant data required for connecting various servers together.

It could also have configuration information linking an application or a desktop server location.

In addition, an ICA file enables you to access virtual desktop servers; hence, ensuring that you bypass the application installation process before use.

Moreover, this helps small business administrators to link various users to access their enterprise software from different locations.

Open ICA files on Windows 10 with these tools

Notepad++

best software to open csv files

Notepad++ is a text-based editor which can be used to open ICA files. This tool is primarily used for source code editing because it supports many programming languages. However, it can open these types of files on Windows 10 computers.

This software gives extra functionality, flexibility, and efficiency. Although, it is a powerful text editor which surpasses other text editors in terms of coding and support for multiple file formats.

On the other hand, the Notepad++ editing tool utilizes the drag-and-drop function and a tabbed document interface for opening multiple files simultaneously. Also, it supports third-party plugins for increased performance.

If you intend to modify ICA files on Windows 10 computers, Notepad++ is the best software for this purpose.

⇒ Get Notepad++

Citrix XenApp

how to open ica files in windows 10

Citrix XenApp can also open ICA files on Windows 10 computers. On the other hand, this program enables simplified management of servers and virtual applications.

Also, it enables unified communications in business for virtual apps.

Citrix XenApp supports ICA file format.  Using this program, you can modify these files on Windows 10 computers.

Also, you can manipulate configuration details on servers and virtual desktops easily using this software. Lastly, the software gives an excellent solution for accessing the ICA file format.

⇒ Get Citrix XenApp

Citrix Receiver

how to open ica files in windows 10

Citrix Receiver is an excellent tool for opening ICA files on Windows 10 computers. The software is very lightweight and easy to install.

In addition, this program enables you to configure, manage, and update contents within the ICA file. Also, it supports all types of ICA file formats.

Meanwhile, this software is recommended for use as it offers flexible and easy setup options. Also, this software has different versions for smartphones, tablets, and Windows desktop versions.

However, to use the program, you must input your email and server address to authenticate the connection with your Citrix Receiver.

⇒ Get Citrix Receiver

Citrix XenClient

how to open ica files in windows 10

Citrix XenClient is software that enables users to manage virtual servers. This software enables you to create ICA files and save and export them.

In addition, Citrix XenClient makes it easy to open ICA files on Windows 10 computers. Also, you gain access to modify and update already-existing ICA files. However, this program has limited features, but it can be used to open ICA files on Windows 10 PC.

⇒ Get Citrix XenClient

All the programs listed above would enable you to open ICA files in Windows 10. However, we do appreciate it if you would share your experience with us by commenting below.

Forza Horizon 4 0x89232001 Error: 3 Quick Ways to Fix It

Forza Horizon 4 is one of the popular racing games, first released in 2018. Though it has had its share of success, users face quite a few issues on Forza Horizon 4, including the IPSEC 0x89232001 error.

The error is encountered when users try to connect to an online lobby. Also, a few users reported the IPSEC 0x89232000 error as well. But there are a few quick fixes that will help you get things up and running.

Why am I getting IPSEC 0x89232001 error in Forza Horizon 4?

Here are a few reasons you might be getting the Forza Horizon 4 0x89232001 error:

  • Forza Horizon servers are down: If the Forza Horizon servers are down, you will have trouble connecting to the game and will encounter the error instead.
  • Outdated firmware: An outdated Xbox firmware can also trigger various issues and affect the console’s performance.
  • Misconfigured network settings: Optimal network settings and a stable connection are required to connect to the game’s server, so check if these are properly configured.

How do I fix the Forza Horizon IPSEC 0x89232001 error?

Before we head to the solutions that require making complex changes, here are a few tricks that might work:

  • Restart the Xbox console and the modem/router it’s connected to.
  • Check if Forza Horizon is down using a reliable platform like Downdetector. In case it is, wait for a while until the servers are up and running.
  • Ensure there are no security settings configured on the router that might conflict with the connection.

If these don’t work, the solutions listed next should.

1. Modify the network settings

  1. Open the Settings on your Xbox, head to the General tab, and choose Network settings from the right.network settings
  2. Select Advanced settings.advanced settings to fix forza horizon 4 0x89232001
  3. Now, choose the Alternate MAC address option.alternate mac address
  4. Select the Clear button.clear
  5. Once done, choose Restart for the changes to come into effect.restart to fix forza horizon 4 0x89232001
  6. After the Xbox restarts, head to Advanced settings, and then choose IP settings.ip settings
  7. Now, choose Automatic here.change IP settings to forza horizon 4 0x89232001
  8. Similarly, go to DNS settings, and set it to Automatic as well.
  9. Finally, choose Automatic for Alternate port selection.
  10. Now, relaunch the game.

Once done, you shouldn’t encounter the Forza Horizon 4 IPSEC 0x89232001 error anymore. This solution has worked for several users. In case the problem persists, head to the next solution.

2. Change the DNS server

  1. In your Xbox settings, head to Network settings under the General tab.network settings to fix forza horizon 4 0x89232001
  2. Choose the Advanced settings option here.advanced settings
  3. Select DNS settings.DNS settings
  4. Next, choose Manual.Manual DNS to fix forza horizon 4 0x89232001
  5. Now enter the following DNS addresses:
    • Primary DNS: 8.8.8.8
    • Secondary DNS: 8.8.4.4

Once done, save the changes, and you should be able to play Forza Horizon 4 without encountering the 0x89232001 network error on Xbox.

3. Update the Xbox firmware

  1. Launch the Xbox Settings, head to System, and then select Updates.updates
  2. Choose the Update console option.update console to fix forza horizon 4 0x89232001
  3. If an update is available, click on the Start Update button.start update

After the update is installed, things should be up and running, and the Forza Horizon 4 error 0x89232001 should disappear.

Now that you have fixed the error, also check the best Xbox games and try your favorite one from the list today.

For any other queries or to share a solution that’s not listed here, drop a comment in the section below.

Can’t Set up Pin on Windows 10: Why & How to Fix

PIN sign-in is a convenient way to log in to your computer through a four-digit code that is easy to remember and use as the primary sign-in option on your Windows computer.

However, there are times when Windows 10 won’t let you add a PIN, or it is just not working anymore, as this user reports:

For the past few days, the login with PIN on Windows 10 Pro is not available anymore on my laptop.  On the sign-in options screen I can only add a PIN but not remove or change it. When try to add a PIN after Password confirmation it asks to confirm my identity with a PIN and then nothing happens anymore.  […] If I instead enter a PIN select forget PIN it only open the dialog to go to sign-in option screen to reset my PIN.  

Similar situations include:

  • The inability to add or update your PIN
  • Adding a PIN but not being offered the sign in option on the login screen
  • PIN sign in option is offered, but the system rejects your PIN
  • PIN sign in is stuck, and you need to reboot or use a different login option
  • The PIN was added, but after an update, it was broken

If one of these issues applies to your case, you can try the solutions listed below to resolve it.

What can I do if Windows won’t let me add a PIN?

1. Set up PIN log in

  1. Go to the search box and type CMD, then press Enter.
  2. Pick Command Prompt, right-click it, and select Run as administrator.
  3. In the Command Prompt (Admin) black screen, type gpedit.msc and press Enter.
  4. Double-click on Computer configuration.
  5. Click Administrative Templates.
  6. Double click System.
  7. Double-click Logon.
  8. Double-click Turn on convenience PIN sign in.
  9. Select Enable.

2. Alter Permissions

  1. Click Start and select File Explorer.
  2. Click View.
  3. Click Show/Hide and check Hidden Items.
  4. Go to the following folder: C:\Windows\ServiceProfiles
  5. Double-click LocalService.
  6. Follow the path below: AppData\Local\Microsoft
  7. Right-click on the NGC folder.
  8. Select Properties.
  9. Go to the Security tab.
  10. Click Advanced.
  11. Click the Change link against Owner under Advanced Security Settings for NGC window.
  12. Take ownership of the NGC folder.
  13. Check Replace owner on sub-containers and objects, and replace all child object permission entries with inheritable permission entries from this object.
  14. Click Change permissions.
  15. Click Add.
  16. In the permission entry for NGC, click Select a principal.
  17. Enter SYSTEM as the object name.
  18. Click Check Names and click OK.
  19. Check Full Control under Basic Permissions and click OK.

Check if you can add a PIN after following these steps.

3. Disable or change your security software

Sometimes Windows 10 won’t let you add a PIN when your security software (antivirus or firewall) is blocking the powershell.exe after a Windows update.

Allow the program/unblock it via your antivirus program setting, and see if you can go straight to your account settings and add a PIN.

Not every security software behaves restrictively, though. While most such programs are designed to have minimal impact, some are more successful than others.

One such software is the ever-reliable ESET NOD32 antivirus. ESET NOD32 is a top-notch tool that offers complete online and offline security without messing with your PC.

It employs uses the latest technology to dig out the most stubborn virus on your PC. What’s more, this software can detect even the most hidden virus before it can harm your PC.

If you are looking for a lightweight antivirus that takes a no-nonsense stand against viruses without affecting your activities, you should give ESET NOD32 a try.

4. Reset ACLs on NGC folder

  1. Go to the search box and type CMD, then press Enter.
  2. Pick Command Prompt, right-click it, and select Run as administrator.
  3. In the Command Prompt (Admin) black screen, type this command: icacls C:\Windows\ServiceProfiles\LocalService\AppData\Local\Microsoft\Ngc /T /Q /C /RESET
  4. Press Enter.
  5. Close Command Prompt.
  6. You might need to add a new PIN now, which should work as expected.

5. Use a local account

  1. On the login screen, click on the Sign-in options.
  2. Try to login to Windows with your Microsoft account or local account Password.
  3. Click on the Windows icon in the bottom-right corner.
  4. At the top of the Start Menu, click on your account
  5. Select Change account settings
  6. On the left-side panel of Accounts settings, select Sign-in options
  7. Under the PIN option, click on Remove.
  8. Click Remove when you get Are you sure you want to remove your PIN prompt.
  9. A Log-in Box will open for you to re-enter your password. Enter your password, then click OK.
  10. You will be returned to the Sign-in options page, where you can add a PIN code again.
  11. Enter your new PIN and confirm it.
  12. Click OK to reset your new PIN.
  13. Restart your PC and sign in with your new PIN to confirm.

6. Login using another user account

  1. Right-click on Start.
  2. Select Run.
  3. Type control userpasswords2 and press Enter.
  4. Select your account.
  5. Click Reset Password.
  6. Enter a new password, then click OK. Try logging into the account.

For computers connected to a Domain, contact your Network Administrator. There might be an issue with Kerberos authentication, or the version of Windows Server is not compatible.

Restart your computer a few times to see if you can log in. There might be a small delay also, so wait a few seconds, then try again. Use the preview button to make sure you entered the right characters.

7. Clear TPM

  1. In the search box, type tpm.msc, and press Enter.
  2. Click Clear TPM. (It will reboot you to a part of the system’s UEFI/BIOS).
  3. Press F1 to clear TPM.
  4. Click Start and select Settings.
  5. Click Accounts.
  6. Go to the Add PIN function and select it to see if it works.

8. Run an SFC scan

  1. Go to Start and type CMD.
  2. Right-click Command Prompt and select Run as Administrator (elevated command prompt).
  3. Type the command below and hit Enter: sfc /scannow
  4. Wait for the process to finish.

The result should show one of these three things:

  • Windows did not find any integrity violations (a good thing)
  • Windows Resource Protection found corrupt files and repaired them (a good thing)
  • Windows Resource Protection found corrupt files but could not fix some (or all) of them (not a good thing). If you get this message, run DISM as described below

9. Run the DISM tool

fix won’t accept a PIN at log in
  1. Click Start.
  2. In the search field box, type CMD.
  3. Click Command Prompt in the search results list.
  4. Type the following commands and press Enter after each: Dism /Online /Cleanup-Image /ScanHealth Dism /Online /Cleanup-Image /CheckHealth Dism /Online /Cleanup-Image /RestoreHealth

These commands will scan for missing components, check for missing or broken files and correct any causes of the Windows 10 desktop being slow to load issue respectively.

Note: The DISM tool usually takes 15 minutes to complete. However, sometimes it may take longer. Do not cancel when it is running. You may want to re-run SFC to check if the repair is successful.

The Deployment Image Servicing and Management (DISM) tool helps fix Windows corruption errors when Windows Updates and service packs fail to install due to corruption errors.

Before you leave, verify if you using an organization-based account and get rid of the Your organization requires you to change your PIN message.

Did any of these solutions help you add a PIN again? Let us know in the comments section below.
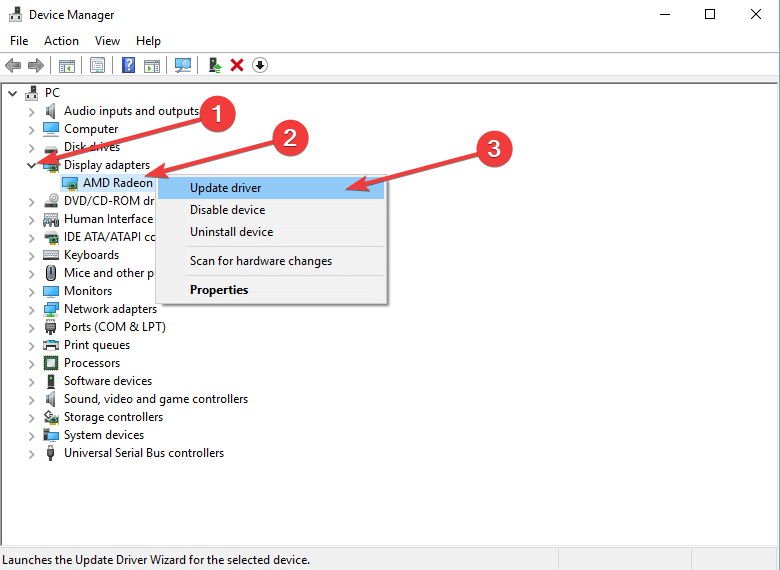
Microsoft 365: Account Temporarily Locked to Prevent Unauthorized Use

Getting a Your account is temporarily locked to prevent unauthorized use. try again later, and if you still have trouble, contact your admin error? We got you.

In some cases, your Microsoft account can get blocked for no reason. In today’s guide, we’ll show you how to get it reinstated.

How can users fix blocked Office 365 accounts?

Before we start fixing this issue, be sure to try the following:

  • Wait for 15 minutes – When administrator makes changes to your account, it takes about 15 minutes for the changes to apply properly. It’s possible that some changes were made and that they aren’t applied yet to your account.

1. Unblock account as an administrator

Note icon NOTE
This solution only applies to Office 365 administrators.
  1. Open Admin Center.
    Admin center microsoft office account blocked
  2. Once you open it, expand Users and choose Active users on the left.
  3. Then select the blocked user in the list of users.
  4. After that, from the top, choose Block sign-in.
  5. Once the Block sign-in screen appears, select Block this user from signing in and save changes.
  6. Lastly, in the Unblock sign-in screen, uncheck Block this user from signing in and save changes.

Alternatively, you can just choose Unblock sign-in feature and unblock the user, but sometimes blocking and unblocking can also help if your Microsoft Office account is blocked.

If you’re getting Your account is temporarily locked to prevent unauthorized use try again later, and if you still have trouble, contact your admin message, unblocking the user from admin panel usually works.

2. Fill Out the MS account services reset form

  1. First, open the MS Account services form.
  2. Next, fill in the form properly.
  3. After that, click Submit once you’re done.

If you get Your account is temporarily locked to prevent unauthorized use message, perhaps reinstating your Microsoft account is the best course of action.

3. Reset user password

Note icon NOTE
These steps apply on to Office 365 administrators.
  1. Open the Admin panel.
  2. Expand the Users section and select Active Users.
  3. Locate the affected user and click the key icon next to its name.
  4. Lastly, enter the new password od generate a random one and choose Reset.

Resetting the user password can also help with if your Microsoft Office account is blocked, so be sure to try it.

So, that is how users can unblock Office 365 accounts. If you have more issues, our guide on how to fix Office account errors can offer more assistance.

Did you find a different solution for this problem? Share it with us in the comments below.

How to set up IFTTT on Microsoft Teams in 6 easy steps

IFTTT (If This Then That) is a service that enables users to create simple conditional statements, called applets, that trigger actions based on events. You can use IFTTT to automate tasks and connect different services and devices together. Microsoft Teams is a collaboration platform allowing users to communicate and work together.

With the IFTTT on Microsoft Teams integration, you can set up applets that trigger actions in Teams based on events from other services such as weather, social media, and more.

IFTTT on Microsoft Teams

To do this, you will need to create an IFTTT account and then set up “applets” (IFTTT’s name for its automation recipes) that connect Microsoft Teams (or another service) to the other apps and services you want to use.

  1. Go to the IFTTT website (ifttt.com) and create an account if you don’t already have one.
  2. Once you’re logged in, click the Create button to create a new IFTTT applet. Alternatively, you can find the applet (or service) you want to use by typing in the search box or picking one of the IFTTT on Microsoft Teams applets already provided.ifttt on microsoft teams
  3. In the “If This” section, click the Add button to add a trigger.  ifttt on microsoft teams
  4. Search for and find the trigger you want to use with IFTTT on Microsoft Teams. For example, you could use the “Weather” service to set the trigger to send the daily forecast weather report. Fill in the details for the trigger and click Create trigger to create the trigger. ifttt on microsoft teams
  5. In the “Then That” section, click the Add button to choose the action you want to take. For this example, and pick the Microsoft Teams service, configure the Teams action you want to take, or suggest a new one, then click Create action when you are finished. ifttt on microsoft teams
  6. Customize the settings for the Microsoft Teams applet and give it a name, then click the Finish button to create it.

That’s it! Your applet is now set up and will run automatically in the background, triggering the event you specified whenever the conditions are met.

At the time of this guide, there are no IFTTT triggers available for Microsoft Teams. However, there are plenty of Teams triggers available to use in Power Automate.

If you want to customize the settings of your applet, you can go back to the “My Applets” tab in the top menu and select the applet you just created. From there, you can edit the settings, turn the applet on or off, or delete it entirely.

Windows 11 Backup Error: Causes & How to Fix it

The Windows 11 backup error is quite common, but it isn’t the end of the world. Like any software, Windows 11 built-in backup feature is not perfect, and may sometimes encounter different kinds of problems. 

For example, the backup may be stuck at 99% without moving forward; the backup fails with an error code or Windows 11 starts backup automatically without your consent.

What causes the Windows 11 backup error?

The Windows 11 backup error can be caused by a number of reasons. Some of the common reasons include:

  • Insufficient disk space – If you are encountering this problem, try checking the available disk space on your target drive. You can resolve the issue by either clearing out some of the existing files on your target drive or by using a larger drive.
  • Windows update-related error – A recent Windows update may be causing problems with your backup. If it was working fine before, then you should uninstall the update.
  • Corrupt system files – This issue can occur if you are trying to back up files that are corrupted. If this is the case, you will need to find a way to repair those files.
  • Issues with the driver or device – If you are using an external drive to perform the backup procedure, try using another one to see if it resolves the issue.
  • Missing or corrupt registry keys or files – If a registry key or file is missing or corrupt, the backup will fail with an error message. Make sure all the automatic updates have been completed and check for any software that may have been installed.

If you experience any of the above errors, proceed to our advanced troubleshooting techniques and attempt to remedy the situation.

How can I fix Windows 11 backup errors?

1. Run the DISM command

  1. Press the Windows key, type cmd on the search bar, and click Run as administrator.
  2. Type in the following command and press Enter: DISM /Online /Cleanup-Image /ScanHealth

2. Run System file checker

  1. Press the Windows key, type cmd on the search bar, and click Run as administrator.
  2. Type in the following command then press Enter: chkdsk:/f
  3. Next, type in the following command and press Enter: sfc /scannow
    sfc-scannow windows 11 error system thread exception not handled

3. Update outdated drivers

  1. Press the Windows key, search Check for updates, and click Open.
  2. Select Advanced options.
  3. Go to Optional updates.
  4. Select Driver updates and proceed to Download & install then restart your system.

You can also opt for an automatic driver update tool, created to help you solve problems with your computer and save you a lot of time. Outbyte Driver Updater will automatically download and install outdated drivers for all your hardware devices.

4. Enable sync on Windows backup

  1. Press the Windows key and click on Settings.
    open settings
  2. Navigate to Accounts and select Windows backup.
  3. Select Manage sync settings.

After completing the above steps, do not hesitate to check if the problem is finally solved.

5. Delete the WindowsImageBackup folder

  1. Press the Windows key + E to start File Explorer and navigate to the following location: C:\System Volume Information\
  2. Locate the WindowsImageBackup folder and delete it.

6. Uninstall recent system updates

  1. Press the Windows + I keys simultaneously to open Settings.
    open settings
  2. Navigate to Windows Updates then select Update history.
  3. Click on Uninstall updates.
  4. Select the most recent update then click Uninstall.

If Windows backup has failed, it could be caused by a new update of the operating system or your antivirus. You will need to disable your firewall temporarily or uninstall the recent update and see if the problem persists.

Some of our readers rightfully asked us: Is Windows 11 Backup any good?

Windows Backup is the most basic backup solution available to Windows users but it’s definitely better than nothing. It’s free, it’s easy to use, and it works well.

It works great for backing up documents, music, videos, and photos both locally (hard drive) and externally (USB). It also will back up system files which allows you to restore from scratch in the event of a catastrophe or if you upgrade or replace your hard drive.

However, it does have some limitations. First of all, you need some space where the backup can be stored, and it needs to be accessible from the PC that you want to backup.

Secondly, the program has very limited functionality when it comes to scheduling backups or backing up network drives and libraries.

If you are looking for advanced backup software, check out our comprehensive guide on the same.

Also, feel free to refer to our guide on how to fix Windows backup errors if you run into any additional problems.

We’d love to hear from you so share your thoughts and any other suggestions in our comments section below.

100% Disk Usage Error in Windows 10: 6 Easy Fixes to Use

Regulating your disk usage is one of the ways to keep your PC running optimally. However, apps can sometimes record 100% disk usage on Windows 10 due to their activities or the registry.

While this is not advisable, it is still not out of the norm if it is for some time. However, users complain that the registry and system processes register high usage for prolonged periods.

These processes typically use little resources and are essential to the PC. So, this high disk usage denotes a problem. This guide will help you fix this abnormal registry 100 percent disk usage on your PC.

What causes 100% disk usage?

The possible reasons for the registry’s high disk usage issue are so many that it might be hard to pinpoint them all. But these are some of the common ones:

  • Background app activities: Some background apps and processes can cause the registry and system to use 100% disk. This can be because they use the system resources to run resource-intensive processes.
  • System services: Some critical system services like Windows Search, Prefetch, and Superfetch have also been found to cause this problem.
  • Faulty hard disk: If your hard disk is defective, it might misbehave and give a false alarm.
  • Issues with OS installation: In some cases, the cause of this problem can be hard to trace. To be on the safe side of things and rescue your PC from damage, you must perform a clean install of Windows 10.

How can I fix 100% disk usage on Windows 10?

1. Disable some system services

  1. Press the Windows key, type cmd, and select Run as administrator under Command Prompt.
    cmd admin registry high disk usage
  2. Type the command below and hit Enter: net stop Windows Searchnet windows
  3. Now, press Windows + R, type services.msc, and click OK.
    service.msc
  4. Double-click on the Windows Search service to open its properties.
    windows search
  5. Set the Startup type to Disabled, click the Stop button, followed by OK.
    disabled registry high disk usage
  6. Similarly, disable the following services:
    • SysMain (previously named Superfetch)
    • Windows Update

While most Windows services are there to help improve your user experience, they can sometimes lead to the registry registering high disk usage. To help curtail their effects, you need to disable them.

2. Clean boot your computer

  1. Press Windows + R, type msconfig, and click OK.
    msconfig registry high disk usage
  2. Select the Services tab, check the Hide all Microsoft services check box and click Disable all.
    hide services
  3. Go to the Startup tab and click Open Task Manager.
    startup
  4. Right-click each startup item, and select Disable.
    disable
  5. Return to the System Configuration window, click Apply, then OK, and restart your PC.
    apply registry high disk usage

The registry can register 100 percent disk usage on Startup due to the activities of the startup apps and processes. A clean boot disables these apps and leaves only the needed Microsoft services.

Should this fix the issue, you can now start enabling the apps and processes in batches to know the problematic one

3. Delete pending or failed problem reports

  1. Press the Windows key, type problem report, and select View all problem reports.
    problem registry
  2. Right-click any pending report and choose the Delete option.
    delete report
  3. Now, restart your PC.

Your PC sends reports of crashes and issues to the report center. However, too many reports in the queue to be sent can cause the registry or system to register high disk usage.

Thus, you need to delete these reports to relieve the registry and system of the task.

4. Run Disk Check

  1. Press Windows + R to open Run, type cmd, and hit Ctrl + Shift + Enter.command prompt
  2. Paste the following and hit Enter: chkdsk /f /rchkdsk registry high disk usage
  3. Wait for your computer to process the command

The Registry high disk usage might not just be a software issue. It can also be due to problems with your hard disk. Running the Check Disk utility will check the disk for possible problems and try to fix them.

5. Run Disk Cleanup

  1. Press Windows + S, type Disk, and select the Disk Cleanup option.
    disk registry high disk usage
  2. Now, select a drive from the dropdown menu and click on OK.drive
  3. Check the boxes for Downloaded Program Files, Temporary Internet Files, Temporary Files, Recycle Bin, and Thumbnails, and click on OK to clean them up.choose files
  4. Choose Delete Files in the confirmation prompt that appears.delete files
  5. Once done, again open Disk Cleanup, and this time, click on Clean up system files.
    clean up
  6. Again, choose a drive to proceed.system files
  7. Now, select the files that you want to remove and click on OK.delete system files

Too many junk files on your hard disk might lead to unnecessary issues like the registry high disk usage. Using the Disk Cleanup tool helps to remove these files and optimize the memory.

6. Perform an in-place upgrade

  1. Go to the Windows 10 page, and click on Download Now to get the Windows 10 installation media.
    download now
  2. Run the downloaded file.
  3. Tick the radio for the Upgrade this PC now option and click the Next button.
    upgrade
  4. Check that the Keep personal files and apps box is marked on the Ready to Install page. If not, click the Change what to keep option, choose to Keep personal files and app, and finally click on Install.
    change registry high disk usage

If all the fixes above fail to solve the registry high disk usage issue, it might be best to reinstall Windows 10. Performing an in-place upgrade installs the latest OS on your PC without losing your files.

This should eliminate all processes that can be causing this problem.

And this signals the end of this guide. We hope our detailed solutions helped you stop the registry and system from registering high disk usage.

Are you facing a similar issue to the Service Host Sysmain’s high disk usage on Windows 10? Then, check our excellent guide to fix it for good.

If you have any comments or questions, feel free to write them down in the comments below.

Xbox Free Play Days: Assetto Corsa Competizione and more

Xbox Free Play Days returns for another weekend of games for subscribers of Xbox Live Gold and Xbox Game Pass Ultimate to play for free. This week’s Xbox Free Play Days lineup features three games. They will be available from Thursday, January 26th through Sunday, January 29th. Check them out below.

Assetto Corsa Competizione

Born from KUNOS Simulazioni’s long-term experience in recreating top-grade driving simulations, Assetto Corsa Competizione allows you to feel the real atmosphere of the GT3 championship, competing against official drivers, teams, cars & circuits reproduced in-game with the highest level of accuracy ever achieved on console.

Lawn Mowing Simulator

Experience the beauty and detail of mowing the Great British countryside in Lawn Mowing Simulator, the only simulator that allows you to ride an authentic and expansive roster of real-world licensed lawn mowers from prestigious manufacturers; Toro, SCAG and STIGA as you manage your mowing business.

Train Sim World 3 – Deluxe Edition

Master more machines with Train Sim World 3: Deluxe Edition

Wrap up

As part of the Xbox Free Play Days event these games are discounted, so if you try a game you’d like to own this would be the time to buy. Assetto Corsa Competizione is currently 65% off, and Train Sim World 3: Deluxe Edition is 40% off.

Visit the Xbox Free Play Days FAQ page to learn more about the program.

Featured image via GT World Challenge Europe.

Internet is Not Working After a Power Outage: 6 Easy Fixes

Power outages are a common occurrence, and you may end up with a PC that won’t turn on. Another annoying problem is your Internet not working after a power outage. When the power goes out, it’s important to ensure that all of your devices are still connected to the Internet.

If you have been experiencing issues with your Wi-Fi not working after a power outage, then you should follow these steps to get things back up and running as soon as possible.

Why does my router not work after a power outage? 

There are several different reasons why a router is not working after a power outage. Here are some of the most common ones:

  • The router has been disconnected – It takes time for devices to reconnect after an interruption in power because they need to be powered up before they can connect to their network again. 
  • Internet wiring has been damaged – If your Internet is not working after a power outage, your home’s wiring may have gotten damaged. It will need repair by a technician before being restored.
  • Electrical fault – The router may have been disconnected from its main electrical outlet. This could happen if the power at the main breaker or fuse box has been cut off or if there is something wrong with the electrical outlet itself.
  • Faulty cables – The Ethernet cable may not be working because it’s damaged and hence not receiving an IP address from your ISP. That’s why the Internet is not working after a power outage. 
  • Modem/router firmware – If you’re experiencing problems with your modem not working after a power outage, it’s likely that there’s a problem with the firmware.
  • Router has lost its configuration settings – Your router won’t connect to the Internet if it has lost its configuration settings. It will not be able to send out an IP address or other information needed. 
  • Outdated routers – If you have an old router that doesn’t support USB or Ethernet ports, it may take some time before the Internet is restored. You can still use wireless if you have an older model, but if you want to connect wired devices, you need to upgrade your router.

How do I fix my Internet after a power out?

A power outage may not be a serious matter so try the following before escalating to the slightly advanced solutions:

  • Check for any abnormal flashing lights on your router.
  • Verify if the cable is attached properly to both ends of the wire, especially at the outlet where you plug into a power source. 
  • Unplug all cables attached to your computer and router, including network cables and USB devices then plug them in one by one.
  • Test each of the router’s ports with an Ethernet cable and see if you can access the Internet from those ports.
  • Try to update your router firmware.
  • Restart your router.
  • Reboot your connecting devices. Sometimes your laptop can not detect Wi-Fi but your phone can.

1. Check for Internet connection issues

  1. Press Windows + I to launch Settings.settings windows 11
  2. Select System then click on Troubleshoot.Open system troubleshooter
  3. Navigate to Other troubleshooters.
  4. Click the Run button next to Internet Connections.
  5. Select Troubleshoot my connection to the Internet in the pop-up window and wait for Windows to identify the problem and recommend a fix.

2. Run the Network Adapter troubleshooter

  1. Press Windows + I to launch Settings.settings windows 11
  2. Click on Troubleshoot on the right in the System tab.Open system troubleshooter
  3. Select Other troubleshooters.
  4. Locate the Network Adapter troubleshooter and click on the Run button next to it.

3. Forget the Network

  1. Hit the Windows key and click on Settings.settings windows 11
  2. Navigate to Network & internet and click on Wi-Fi.
  3. Scroll down and click on Manage known networks.
  4. Locate the problematic network and click on Forget.
  5. Restart your PC and check if the issue persists.

4. Update your Network drivers

  1. Hit the Windows + I keys to open Settings.settings windows 11
  2. Type Device Manager in the search bar and click Open.
  3. Navigate to your Network adapter, right-click and select Update driver.
  4. Select Search automatically for updated drivers.Search automatically for drivers

If you don’t fancy going through multiple steps to update your drivers, you’ll be happy to know that there exists a driver updater tool that can do all that for you in one click. 

Outbyte Driver Updater is a powerful and easy-to-use tool designed to update all device drivers in your computer, including network drivers. It is one of the most comprehensive driver updating programs available, with a wide range of features to help you get the most out of your system.

Outbyte Driver Updater will scan and download all the drivers that are compatible with your system. It will select the best match and install them for you.

⇒ Get Outbyte Driver Updater

5. Reinstall your Network drivers

  1. Hit the Windows + I keys to open Settings.settings windows 11
  2. Type Device Manager in the search bar and click Open.
  3. Navigate to your  Network adapter, right-click and select Uninstall device.
  4. Confirm Uninstall in the next confirmation dialog.
  5. Restart your PC and your drivers will be automatically reinstalled.

6. Perform a Network reset

  1. Hit the Windows key and click on Settings.settings windows 11
  2. Navigate to Network & internet and select Advanced network settings.going advanced network settings win11
  3. Click on Network reset.clicking network reset win11 settings
  4. Next, hit the Reset now button. clicking reset now for network reset win11 settings

If none of the above methods work, it may be an issue with your ISP provider. In this case, try contacting them for further guidance. You may also experience issues with your Internet not connecting after a Windows update but worry not as we got you covered in our expert article.

We’d love to hear from you if you have managed to restore your Internet connection after a power outage especially if it was not working. Leave a comment down below.

Chrome Sound Is Not Working: 7 Tested Ways to Fix It for Good

Google Chrome is one of the most popular browsers, but that does not make it immune to problems. And one of the common problems many are facing is with Chrome sound not working.

That might sound too trifle an issue, but it also can be most frustrating when all other apps on your device playback sound except Chrome.

Some users were unlucky enough to have the same sound issue when using the Incognito Mode on Chrome.

However, the solution is equally straightforward to deal with. Here is what you need to do when Chrome has no sound on your computer.

Why can’t I hear anything on Google Chrome?

There are a few reasons why sound on Chrome may not work. While this may be specific to the Chrome browser, it may also be caused by broader factors like muted apps or devices, or problems with your computer’s hardware.

Many users quickly discover that the specific tab has been muted; in such cases, a simple unmute will suffice. Whatever the case is, we will share solutions that could help you be well on your way in no time.

Where are the Google Chrome settings?

You will be able to find all your Chrome settings by navigating to the Settings page using this path:

chrome://settings/

Additionally, you can enable sound for individual websites by navigating to the address below:

chrome://settings/content/sound

Quick Tip:

Are you looking for a fast and easy workaround? Why not try our Opera One browser? It is also based on Chromium which means they share many things in common. So it has the same standard features plus a bunch of others.

It’s faster than Chrome and doesn’t hog as much RAM. Switching to Opera One will still work if your Chrome has no sound on a Mac computer because it is an efficient MacOS browser alternative.

Opera One

Improved speed and a bunch of free extra features make it a better browser than Chrome. Make the switch today.

How do I fix no sound on Google Chrome?

Before heading to the slightly complex solutions, try these quick ones:

  • Restart the computer.
  • If you have the QuickHeal antivirus installed, disable the Browser Sandbox settings or lower the level since it has been found to conflict with the functioning of browsers.

In case these don’t work, the ones listed next would.

1. Check speaker volume and mixer

  1. Right-click on the speaker icon on the system tray at the bottom right of your taskbar.
    no sound in chrome
  2. Select the Open volume mixer option.
  3. Make sure that your Volume under the System section is not muted by sliding it right to 100% to be on the safe side.
    no sound in chrome
  4. Under the Apps section, make sure that the Google Chrome option is not muted by sliding it to 100% to be on the safe side.

Note that this solution will work for Chrome if there is no sound on Windows 10/11. First, check if Chrome can playback sound. If not, proceed to the next step.

2. Remove malicious or other unwanted software

  1. Paste the address below in your URL bar and click Enter to open Chrome Settings.
    chrome://settings/
  2. On the left pane, click on Reset and clean up.
    no sound in chrome
  3. Select the Clean up computer option.
    no sound in chrome
  4. Click Find.
  5. If Chrome asks to remove unwanted software, click Remove. You may be asked to reboot your computer.

Check to see if the issue has been resolved.

3. Disable extensions

  1. Copy and paste the extensions page into your URL bar and press Enter.
    chrome://extensions
    no sound in chrome
  2. You will be provided with a list of extensions embedded inside your Chrome browser.
    no sound in chrome
  3. If you installed any extension before you noticed the sound issue, toggle the switch to disable it. For example, the Pepper Flash extension has been a common reason for the sound loss in Chrome.

It would be a good idea to delete all other extensions and reinstall them while checking if you are getting sound after each installation.

To ensure that some extension is causing the problem, open Chrome in Incognito Mode. To do that, press Ctrl + Shift + N on Chrome or click on the ellipsis and select New Incognito Window from the menu provided.

Check to see if you are getting sound. If yes, then there might be an extension causing the issue.

4. Clear cache and cookies

  1. On your Chrome browser, click on the three vertical dots in the top right corner.
  2. Select More tools, then Clear browsing data.
    no sound in chrome
  3. In the Clear browsing data window that appears, you have the option to set a timeline against which the data will be cleared. Select All time for a thorough clean-up job.
    no sound in chrome
  4. Click on Clear Data.
  5. There is an Advanced tab as well that you can check for additional options.
  6. Restart your PC, check if the sound issue has been resolved, or read on for other steps.

This should work for most sound issues on the browsers. For example, users who have experienced Chrome no sound issues on YouTube or while playing other videos or streams have found clearing the cache to be a helpful fix.

5. Reset Chrome settings

  1. Click on the three vertical dots in the top right corner of your Chrome browser.
  2. Select Settings.
    no sound in chrome
  3. On the left pane, click on Reset and clean up.
    no sound in chrome
  4. Click on Reset settings to their original default.
  5. Click the Reset settings at the bottom.
  6. There will be a confirmation box. Click on the Reset tab for the process to begin.

6. Update Chrome

  1. Click the three vertical dots in the top right corner of your Chrome browser, hover the cursor over Help, and then choose About Google Chrome.
    no sound in chrome
  2. Chrome will automatically check, download and install any update available.
  3. Relaunch when prompted to complete the installation process.

7. Uninstall and reinstall Chrome

Uninstalling Chrome:

  1. Start by closing all instances of Chrome already running on your device.
  2. Next, click on the Start menu and select the Settings app.
  3. On the left pane, choose Apps, then select Apps & features on the right pane.
  4. Scroll down to Google Chrome, click the three vertical dots, then click Uninstall.
  5. Click Uninstall again for the process to begin.
  6. Next, open another browser, head to Chrome’s official website, and click the Download Chrome button.
  7. Click on the downloaded file and follow the wizard to reinstall Chrome.

We suggest you check our Chrome installation guide to see how to install the browser properly.

That’s all. There will be a new Chrome window shown after the installation is complete. This should eliminate all Chrome issues, including sound not working.

What can I do if Chrome has no sound after the first video?

A few users have complained about this variation to the sound problem on Chrome. In this case, you may try simply restarting your Chrome browser.

If that does not help, you should clear the browser cache, and if the problem persists, reinstall the browser.

There you have it. If you have issues with Chrome not playing sound, any of the above solutions should help fix it.

And in case you are looking for an alternate option, check our curated list of the best browsers that work on all devices.

Let us know which of these solutions has been most influential in restoring your sound.

5 Best Metronome Software [2026 Guide]

If you’re learning to play an instrument, metronome software is a must-have. By using it, you can learn how to properly follow a beat while playing.

Speaking of instruments, if you don’t have one, you can always use digital instrument software and play on your PC.

As for metronome apps, this guide will show you some of the best picks that are currently available for download.

What are the best metronome software tools?

Adobe Audition – For music professionals

adobe audition

You can’t go wrong with any Adobe product, that fact also holds true for Adobe Audition. It comes with a full suite of features and tools usually available in digital audio workstations.

Adobe Audition allows you to customize meters and gauge tempo based on your personal preference.

Although for a beginner the editing process can be overwhelming, don’t worry, there are plenty of guides that will help you set the perfect tempo.

With the ability to stop and pause the metronome, you can spot if you are rushing or dragging, which makes it perfect for drummers.

You can also set the tempo to gradually increase so you don’t need to set it every time you need it.

Other reasons to consider it as your go-to option for any audio editing needs:

  • Supports a large number of audio file types
  • Available as a standalone option or as a part of Creative Cloud
  • Media Browser guarantees effective session management
  • Comes with an extensive stock audio files
  • Intuitive interface when compared to other Adobe products
  • Has a 7-day free trial

Adobe Audition

Train your musical skills to perfection using Adobe Audition and its metronome feature.
Free trial Visit website

Piano 10 – Great for learning

The reason why Piano 10 is among the best metronome software might be a bit confusing, but it’s actually really simple.

It encompasses a metronome that lets you adjust the BPM value, and you can use the app for other music-related reasons, as well, such as tuning your instrument or learning piano.

If you own a Windows 10 PC, it’s pretty simple to install Piano 10 on your device, since all you have to do is reach the product’s page in the Store App or in your browser, click a couple of buttons and you’re set.

If you want the app exclusively for its metronome feature, you might want to know how to reach it, to begin with.

First things first: launch the app, then choose a piano type (doesn’t matter which one), click the metronome-shaped button, adjust the BPM setting, and there you have it.

You might need to turn the volume a little up to hear the metronome clearly.

Other great features:

  • Comes with a digital piano
  • Incredibly simple user interface
  • Perfect for students
  • Comes with a metronome feature

⇒ Get Piano 10

Metronome + – Incredibly simple to use

Metronome + is one of the best (and most stylish, we might add) metronome apps that you can have on your Windows 10 PC.

What makes it really attractive even for beginners, aside from its easy two-click setup, is the sleek interface it comes with and the fact that it somehow acts as a real metronome, if you ever got close to one.

Controlling Metronome + can be done almost exclusively using your mouse, dragging and clicking until you reach a profile you’re satisfied with.

You can adjust the tempo by dragging the sliding weight on the pendulum until the BPM value matches your needs.

In a similar fashion, you can start the metronome by clicking its counterweight (the part that looks like a ball at the end of the pendulum).

Metronome + allows you to customize its presets by choosing your favorite measure and adjusting the way it sounds.

So instead of the traditional “puck-click-click-click”, you can have various sounds including beeps, a bass drum, a djembe, a shaker, a tambourine, or even a triangle.

Overall, it’s a solid metronome software, so it’s worth checking out.

Other great features:

  • Simple user interface
  • Animated metronome
  • Available in 40+ languages
  • Easy to configure

⇒ Get Metronome +

Metronome 10 – Highly customizable

Metronome 10 is another free metronome software tool that you can install on your Windows 10 computer and use for free.

Considering that Metronome 10 is actually a Windows 10 Store app, installing it on the target computer shouldn’t take longer than a few moments.

Metronome 10 comes with several parameters that you can configure, such as the virtual device’s beats (the first beat can be different than the rest, depending on what time signature you plan on using)

The program also comes with an adjustable time signature and customizable BPM which are excellent for learning.

If you can’t quite put your finger on what BPM setting should the metronome play its beats back to you, you can just tap the rhythm on the designated button and it will convert it to a BPM value.

Unfortunately, you can’t create your own tempo with pauses and breaks, but Metronome 10 can still be of great help, especially if you’re struggling to train your rhythm.

Other great features:

  • Tempo range from 40 to 220bpm
  • Highly configurable
  • Multiple sounds to choose from
  • Easy to use

⇒ Get Metronome 10

Pulse Metronome – Perfect for basic users

Pulse Metronome is another great app that you can use to train your timing directly from your Windows 10 computer, without having to buy a traditional metronome.

However, this one’s interface doesn’t even attempt to emulate any traditional metronome you’ve ever seen so far. Its controls might seem a bit cryptic at first, but after you’ll realize how simple it is to use, you’ll forget all about it.

You can adjust the BPM by performing a click-and-hold on the small circle inside the bigger one, then dragging it in a concentric motion. Watch out, because breaking the circle will cancel the adjustment action.

Pulse Metronome also lets you adjust the way you hear the metronome’s beats by offering you three different pitches for each beat, or the possibility to mute it altogether, depending on your needs.

Other great features:

  • Simple user interface
  • Ability to create presets
  • Tempo indicator
  • All information is always available

⇒ Get Pulse Metronome

To wrap it up, if you need a handy assistant that can help you train your timing, regardless of what instrument you play, you can always count on metronome software solutions.

Pulse Metronome, Piano 10, and Metronome + are all great choices if you’re looking for metronome software for your Windows 10 computer, and the best part about them is that they’re entirely free to use.

Now that you have metronome software, you should consider getting free audio recording software to record your sessions.

What is your metronome software of choice? Let us know in the comments below.

What are the Signs of CPU Failure & What Can You Do?

The CPU is often likened to the human brain in terms of the work it does on your PC. As such, it’s a very important component that should be kept healthy at all times. While good maintenance will extend the lifespan of your CPU, you cannot escape from the inevitable wear and tear. 

At some point, your CPU will show failure symptoms, especially if you get high CPU usage messages from time to time. In this article, we let you in on some of the symptoms to look out for so that you can be prepared.

How do I know if my CPU is failing?

CPU failure is a very serious situation. It can be caused by many factors, but the most common is overheating.

If you have a dead CPU, there are many things that can go wrong in your computer system –  from slow performance to total system failure. If you suspect that your CPU is on the brink of collapsing, try the following steps to help determine whether or not it’s time for a new one:

  • CPU temperature – This is a classic CPU failure symptom. If the temperature is abnormal, you need to check the CPU temperature just to be sure.
  • Warning messages – If you keep getting notified that your CPU is overheating or advised to shut down while working on your PC, your CPU doesn’t have much time.
  • Dust and corrosion – Dust is a major factor in overheating because it gets inside the computer and prevents heat from dissipating out through the vents. It can make your fan extremely loud.
  • Physical damage – Corrosion is visible and builds up over time, so if there has been no use for the CPU for a while, it probably has some corrosion built up inside which is interfering with its operation.
  • Software corruption/crash/failure – This is a common cause of CPU failures as software bugs and errors can cause a lot of damage to your computer’s hardware components including the motherboard and even your whole computer system.

What happens when the CPU fails?

CPU failures are usually caused by overheating, dust and corrosion. Overheating is the most common cause of CPU failure. The CPU is designed to operate within certain temperature limits. When the temperature reaches a certain point, it causes the CPU to fail. 

The first thing that happens when the CPU fails is that it crashes. While you can take steps to lower high CPU temperatures, sometimes, your CPU is beyond help. Your PC will make a short series of sounds and then shut down. It’s a pretty dramatic way to go, but it happens fast.

Most modern computers are designed to be tolerant of crashes. They can be restarted, and they will continue running without missing a beat. But there’s a limit to how much they can tolerate before they start breaking down.

If it happens often enough, your operating system may have been scrambled by whatever happened. Some signs such as apps freezing, random shutdowns, slow boot time, and a generally deteriorated performance indicate that you may need a new CPU.

What are the signs of a dead CPU?

1. High CPU temperature

A high CPU temperature is not always due to overheating problems but could also be caused by other issues such as bad cooling or defective fans. When the CPU heats up too much, it will have an impact on system performance and cause errors.

The first sign of a dead CPU is high CPU temperature. You can install CPU monitoring software to ensure the temperatures don’t go beyond the recommended limit and keep your PC healthy.

2. It won’t boot up

If the computer continues to boot, but then shuts down again, this could be a CPU failure symptom. For laptops, even when fully charged, it may be slow in booting.

You may have to hold down the power button for a few seconds before your computer will turn on. This could be due to a bad keyboard cable or faulty battery, but it could also be a dead CPU symptom and needs to be replaced immediately.

3. Random shutdowns

When a computer’s CPU is dying, it can cause various problems with the system. This can include random shutdowns caused by overheating. Random PC shutdowns can be very annoying because they often occur at inopportune times.

You may be working on a project and need your computer to stay online but it just shuts down. You may also get the Windows didn’t load properly during boot. If you’re experiencing this problem, your CPU might just be on its death bed and you need to start thinking of getting a new one.

4. Abnormal behavior from the CPU fan 

When you notice your CPU fan isn’t spinning as fast as it used to, it’s a good sign that your CPU is dead. If your CPU fan slows down, then the heat generated by your CPU can’t escape through the heat sink and dissipate. 

This can eventually lead to severe overheating and damage to the motherboard or other components. If the fan doesn’t spin at all, it may have burned out, or it could be something more serious like a faulty power supply. Always check your fan speed to ensure it is at optimum levels.

5. Inability to use several applications simultaneously

When you open multiple applications or programs at once, your CPU may overload with all the data. This often causes the system to slow down and eventually crash. If this happens frequently, it could be an indication that something is wrong with your CPU or motherboard.

You’ll find that you can’t play games or use several applications at once without experiencing lag time or slow-down issues. 

This is because your computer will not be able to handle its full potential when using multiple applications simultaneously. It will usually freeze up when using certain applications and eventually shut down.

Can I fix a CPU failure?

CPU failure is a common issue with computers and laptops, especially if you use the computer for long hours. When a CPU fails, it can be hard to tell if it’s actually broken or if the problem is somewhere else. 

If you want to salvage whatever little life is remaining from your CPU, proceed to do the following:

  • Clean your CPU – You can use a vacuum cleaner to blow out dust from inside the CPU.
  • Disable overclocking – If you have a CPU that is overheating, then it might be time to disable overclocking. Overclocking can cause your CPU to overheat, or it could also damage your processor.
  • Replace your CPU fan – If your PC is overheating, then you need to replace its fan or get a CPU cooler. You should also check whether there are any cracks in the fan casing. These can cause the fan to stop working completely.
  • Upgrade your CPU –  A healthy computer is one that has all its components working together properly and in order. If your CPU has reached its end of life, you need to get a new CPU.

Also, CPU cleaners can help you with the efficient resource management of your CPU so that it isn’t overworked. Hopefully, you now know what signs indicate CPU failure and take the necessary steps to ensure you keep yours for as long as possible.

Let us know what tips you use to keep your CPU in good shape in the comment section below.