7 Best Windows 11 Laptops Under $500 to Buy Today

The best Windows 11 laptops do not have to be expensive. There are a series of budget-friendly laptops with incredible features if you know your way around the market.

Companies are now making Windows 11 PCs with high-speed CPUs and memory. Also, some have extraordinary battery lives found in the most expensive laptops.

Most importantly, these devices can use hardware like external GPUs and other sophisticated tools. 

In this guide, we have selected seven budget Windows 11 laptops available for under $500 that you can purchase today.

How do we choose the best budget-friendly Windows 11 laptops?

Before adding any of these devices to this list, our team of experts tested them rigorously at various stages, including in-depth analysis of computer requirements and market research.

The team, aided by over 15 years of experience testing hardware, checked these devices on single-unit capabilities and head-to-head with alternative devices. Let’s explore some critical elements when choosing a budget-friendly Windows 11 laptop.

Tip icon Tip
Editor’s tip:

The following are some of the factors you need to consider in a budget-friendly Windows 11 laptop to make sure you pick the best one:

➡ CPU type and speed
➡ RAM capacity and speed
➡ Hard disk capacity
➡ Battery life
➡ Design

Below we will discuss these elements in detail, so check that section out.

This list of reliable Windows 11 laptops was born to ease your selection.

What to consider when choosing a Windows 11 laptop under $500?

➡ CPU type and speed

Intel or Ryzen

The two most popular processors today are Intel and Ryzen. The Ryzen processors are cheaper and more efficient than their Intel counterparts.

However, the Intel can have a clock speed that reaches and exceeds 5.0GHz, while the AMD Ryzen starts to heat up when it reaches that threshold.

As you would expect from the two major players, the difference in quality is not far. So, anyone you find on your laptop is fine.

➡ Processing speed

The minimum acceptable processing speed in budget Windows 11 laptops is 2.3GHz. However, this should be good enough to handle your daily tasks.

However, to be on the safer side of the spectrum, you can get a PC with a 2.6GHz processor speed and above.

➡ RAM and Hard disk

RAM is important in the ability of a laptop to multitask. Therefore, the minimum you should settle for on Windows 11 laptops under $500 is 4GB.

But, if you can get a PC with 8GB RAM or above, that will be better.

The Hard disk, on the other hand, is essential for the boot speed and file transfer. So you either get an SSD or HDD hard disk.

SSD is faster and better but more expensive. So, if you get a laptop with 128 GB hard disk SSD upward, you should be ready. 

➡ Battery life

Your PC’s battery life depends on the activity you use it for. A Windows 11 budget laptop with 7 hours of battery life after full charge, irrespective of the task, is considered ideal.

To be assured of your battery life, however, you can go for a device with 9 hours and above.

➡ Design

– Backlit keyboard 

This is one of the modern designs in laptops. Unfortunately, while it makes it easy to use your keyboard at night, it is not the most important.

– Display

It would be best if you always went for a modern laptop with an HD display, regardless of price. Also, the resolution is another thing you should consider depending on what you need the computer for.

– Connectivity

Your laptop should at least have a USB 3.0 and below port for connectivity. The high-end ones have USB 3.2 (Type-C).

Also, it would be best if you were looking for a device with an HDMI port. This makes sure you do not lack any connection method.

Tip icon Tip
Buyer’s Tip:

➡ To ensure you get the maximum return on your investment, the Acer Aspire and HP Pavilion stand out in our review of the best Windows 11 under $500 laptops.
These two devices tick all the right boxes and the essential features well.
➡ All the products on this list are reliable and offer good value.
➡ If it comes down to the RAM size, the HP Pavilion offers the highest.

After considering all these factors, let’s look at the laptops that made a list despite the rigorous testing by our experts.

HP Pavilion Laptop (2022 Model)

  • 2.6 GHz processor speed
  • 2666 MHz memory speed
  • Up to 10.5 hours battery life
  • Built-in HD webcam
  • Multiple data transfer ports
  • No backlit keyboard

The HP Pavilion Laptop is a stunning PC by all definitions. It is one of the top-notch laptops with 16 GB RAM, which is enough to perform any task.

This budget-friendly laptop also comes with a 1TB SSD memory. With this, you can perform file transfer at unmatched speed and have a fast boot time.

Also, this HP Pavilion laptop comes with the impressive Intel Celeron Quad-Core Processor. Add its superb Intel UHD Graphics, and you see why it is considered one of the best laptops at under $500.


Acer Aspire 5 A515-45-R74Z Slim

  • 4 GHz CPU speed
  • Backlit keyboard
  • Up to 11 hours of battery life
  • Multiple USB ports and an HDMI 2.0 port
  • Lacks some UK characters like the pound sign
  • Backlights off automatically after a few seconds

It will be hard to look past this product if you are looking for a budget Windows 11 laptop under $500 with high productivity. Acer Aspire 5 A515-45-R74Z is a slip laptop with a powerful AMD Ryzen 5 5500U Hexa-Core Mobile Processor.

It is speedy and can carry out multiple tasks with ease. It also boasts an 8 GB RAM, the minimum requirement for productivity on Windows 11 these days.

What’s more, Acer Aspire 5 is enhanced with a fast 256 GB NVMe SSD. This allows you to carry out file transfer and other activities at searing speed. 


Lenovo IdeaPad 3 Laptop

  • 256 GB PCle Solid State Drive
  • Intel UHD Graphics
  • 15.6 HD Touchscreen display
  • DDR4 SDRAM RAM type
  • Trackpad is super sensitive
  • No keyboard light

If you have been searching for a top-notch touchscreen Windows 11 laptop at a budget price, this might be the best product you will ever come across. It is an excellent device with a high-bandwidth 8GB RAM.

This allows you to multitask without worrying about your PC slowing down. What’s more, Lenovo IdeaPad 3 boasts an 11th Gen Intel Core i3-1115G4 Dual-Core processor.

This processor has an incredible 3.0GHz processor speed. Lastly, the CPU has an intelligent cache of about 6MB.


HP 14 Laptop

  • 256 GB SSD Hard disk
  • AMD Ryzen 5 5500U processor
  • Nine hours 45 minutes battery life
  • AMD Radeon Graphics display
  • The touchpad could do with an upgrade
  • The screen factory black color is set too dark

This is another highly-rated budget-friendly Windows 11 laptop from HP. It boasts a 14-inch HD display with an anti-glare and micro-edge bezel screen.

This gives you an unparalleled view, whether watching a video or surfing the web. Also, it has a built-in HD webcam coupled with a dual array microphone.

Finally, HP 14 Laptop has an 8GB system memory that can run multiple programs smoothly.


Lenovo IdeaPad Flex 5i

  • 256GB PCle SSD Hard disk
  • 6MB processor cache
  • Intel UHD Graphics
  • 4.10 GHz CPU speed
  • No backlit keyboard
  • A little heavy

The impressive Lenovo IdeaPad Flex 5i 2-in-1 laptop is to cap off this list. This superb device comes with a 14-inch Full HD IPS touchscreen display.

It is also endowed with a fast 11th Generation Core i3-1115G4 Processor. This allows you to carry out multiple tasks on your PC simultaneously without a noticeable drop in performance.

Finally, it has a high-bandwidth 4GB RAM, which helps you run programs smoothly. 


Bottom runners

Aside from the products in our top list, other superb Windows 11 laptops are still available for under $500. While they are inferior to the options listed earlier, they are still perfect PCs you can find helpful.

➡ Lenovo IdeaPad Laptop 1

This lovely laptop didn’t reach our top five because of its incredibly low 64 GB hard disk. However, it still has some incredible features that make it worth considering.

Lenovo IdeaPad Laptop 1 has 4GB DDR4 RAM that can easily handle enough tasks. Also, it is pretty slim and light if you want a portable budget laptop.

➡ HP Stream 11 Laptop 

This is another excellent laptop that would have otherwise made our top 4 list if not for its low memory. HP Stream 11 is stylish with a design sure to catch the eye.

Also, while its processor is not as powerful as the top products on this list, it still does well for itself. Therefore, it will be worth considering if you need a pocket-friendly Windows 11 laptop to carry out basic day-to-day activities.

There you have it: the list of the best Windows 11 laptops and 2-in-1s under $500. The laptops in this guide are typical modern devices worth the investment.

If you are looking for the best gaming laptops you can buy, check our guide for the cost-effective options available.

From here, we can only wish you a happy shopping. 

Best Printers Compatible With Windows 11 [Home Office]

This guide will list the best Windows 11 printers you can purchase now. These printers run perfectly well with Windows 11.

Having a printer takes away the need to go to a shop to get a printout of your important documents for school, work, or to print your holiday pictures.

Whether you are a professional looking for a printer at your disposal to print photos for framing, scan documents, copy or fax, or want it for personal use, there is a printer for every need.

Different needs may require other printers, and some might be looking for an all-in-one inkjet or a black-and-white laser printer.

If you are confused about which one is the latest and the best Windows 11 printer to buy right now as per your need, do not worry.

Because this guide lists down some of the best Windows 11 printers you can buy, more importantly, the one that best fits your needs, let us check out the guide.

How do we choose the best Windows 11 printers?

Our team of expert testers, with a combined experience of over 15 years, carry out a variety of testing tasks for almost every technology device that comes their way.

Their experience and day-to-day use of these devices are vital in determining the products we include in this guide. Also, some other crucial factors have been taken into consideration.

The device we have included in this list offers excellent quality and covers a wide range of price ranges, making this guide suitable for users looking for the best printer compatible with their Windows 11 PC.

Tip icon Tip
Editor’s tip:
To ensure that you choose the best Windows 11 printer, you should keep in mind some aspects before going ahead with your purchase:
➡ Compatibility
➡ Functions
➡ Easy to use
➡ Fast printing speed
➡ Support for different papers

This list of the best Windows 11 printers will ensure that no matter whichever printer you choose, you get the best one at a price that fits your needs along with all the essentials you require out of a printer.

What to consider when choosing a Windows 11 printer?

Compatibility

Before going on printer shopping, the first criteria are to look at the specifications and compatibility list. Notably, in our case, the printer should support Windows 11 OS.

But that shouldn’t be a problem since Windows 11 is built on the solid foundation of Windows 10; any printer working or compatible with Windows 10 will work with no issues on a Windows 11 PC.

This opens up a wide window of printers to choose from, which might make selection a bit confusing for some. However, do not worry, as this guide lists down the best seven printers.

Functions

What are the functions you are looking for from a printer? For example, are you looking for a printer that can scan, fax, color print, black and white print, or all of the above?

Depending on your answer, you can choose the printers from this list. Some people are looking for a specific type of printer. For instance, some may want a laser printer, while others wish for an inkjet printer.

Easy to use

Another critical thing to look out for when purchasing a printer is its ease of use. Modern-day printers are simple and easy to use as most are plug-n-play.

But you should also check if the printer is compatible to connect with an Android or an iOS device, whether the printer requires some additional software every time it is used, etc.

Fast printing speed

Printing speed may not be a criterion for an average user but could be very important for a person looking to use the printer for their professional use.

A person running a print shop may want the printer to print fast so he can offer his services to more people.

Support for different papers

The printer that you are choosing should be versatile. By versatile, we mean that it should be able to print on different paper sizes.

For example, it should support paper sizes such as A, A+, Legal, Letter, A4, Executive, 8×10″, 5×7″, 4×6″, 3.5×5″, A6, Half Letter, envelope, user-defined (2.2×3.4″ to 8.5×78.7″), and more.

Inkjet vs. Laser printers

Notably, two types of printers are available in the market, i.e., Inkjet and Laser printers. If you know the difference between these two, you can easily pick up the best printer based on your needs.

However, if you don’t know the difference between inkjet and laser printers, then you should check out our comparison table below to better understand printers.

Inkjet printersLaser printers
Printing processThe heat vaporizes ink droplets onto a paperA laser beam is passed through a paper
AvailabilityCommonly availableIt is now commonly available
SizeCompactBigger than inkjet printers
PriceIt depends on the model, but cheaper than laser printersQuite expensive than inkjet printers
QualityLow qualityHigh quality
FunctionsCan come with scan, print, or faxIncludes scan and fax functions by default, along with print
Printing SpeedSlowFast
MaintenanceLowHigh
UsageGoogle for daily useFor office and professional use
Tip icon Tip
Buyer’s tips:
➡ If you are looking for the best Windows 11 monochrome laser printer, then Brother MFC-L2750DW is our pick.
➡ However, taking the top spot is the Canon Pixma TR8620, thanks to its capability of scanning/copy/fax and excellent quality printing.
➡ The Epson EcoTank ET-2800 is another decent printer option, as it will save a lot of money over a long time.
➡ This list includes some other Windows 11 compatible printer options that you can opt for. They are well capable and are available in different price ranges.

Keeping the above things in mind, let’s check out what our experts concluded after rigorously testing a variety of printers available currently in the market.

Canon Pixma TR8620

  • Great printing quality
  • Connects wirelessly
  • Offers a 4.3" LCD Touchscreen
  • Convenient mobile printing
  • None

Our top pick among the lot is the Canon Pixma TR8620 inkjet printer. It has been chosen as the ultimate product because it provides excellent printing quality with some good features.

The features include easy print and scan from mobile phones, fast printing speed, auto 2-sided printing, wireless connectivity, etc.

The Canon Pixma TR8620 printer is compatible with Windows 11 and can color print a 4800 x 1200 dpi resolution for more fantastic detailed prints.

This printer is suitable for a home, office, or any work you do. It will get your job of print, scanning, copying, or faxing, done in a breeze.


Brother MFC-L2750DW

  • Offers fast printing speeds
  • Fast monochrome scan to PDF
  • Pocket friendly
  • Average print quality for mixed text and graphics files

If color printing is not your need, then you can opt for the Brother MFC-L2750DW XL monochrome laser printer, which is good for so many reasons.

Thanks to its 36 pages per minute printing speed, it is a nice companion for a busy home or a small office setup. The toner included with the printer can run you up to two years.

You can also print or scan directly from popular cloud services. There are other features such as wireless connectivity, color touchscreen for input, NFC support, and automatic 2-sided printing to save some extra bucks.

Overall, the Brother MFC-L2750DW XL is easy to use and one of the best monochrome laser printers available on the market.


Epson EcoTank ET-2800

  • Price per print is low
  • Voice activated printing
  • Comes with Wi-Fi connectivity
  • Print quality is at the best decent
  • Does not offer 2-sided printing option

If your work involves printing in color, just enough so that you are in the market for a color printer, then Epson EcoTank ET-2800 should be an excellent choice.

The maintenance and price per print are deficient, making it an excellent option for a small setup. It also offers a two-year cost of ownership, which is the best in class.

While you shouldn’t expect the best print quality, the Epson EcoTank ET-2800’s print quality is decent enough and can be good enough for regular home or small office use.

This printer comes with a built-in scanner and copier and offers other features such as wireless connectivity, voice-activated printing, a color display, and a 2-year warranty.


HP Color LaserJet Pro MFP M479fdw

  • Best laser printer
  • 28 prints per minute speed
  • HP WOLF PRO security
  • Comes with built-in Wi-Fi Direct for offline printing
  • Maintenance cost is high
  • Photo prints aren't of great quality

The HP Color LaserJet Pro MFP M479fdw is the best laser printer that can be suitable for your office or if your work involves high-quality color printing.
This printer is feature-rich, and you get the option to scan documents, high-speed printing, and high page yield. In addition, it has pro-grade security features that can help you safeguard your company data from cyberattacks.

You can apply a saved setting to save you a ton of time. In addition, the HP Color LaserJet Pro MFP M479fdw can work with or without the internet, thanks to the built-in Wi-Fi direct feature.

Do note that using the HP Color LaserJet Pro MFP M479fdw comes with a high maintenance cost as the replacement toner is expensive. Also, we won’t advise you to go for this printer if your requirements involve photo printing as the output isn’t the best.


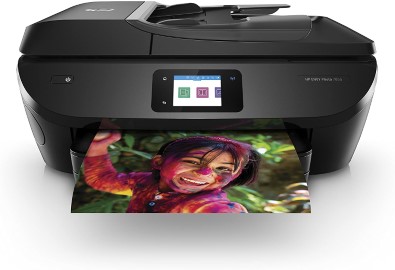
HP Envy 7855

  • Best budget photo printing option
  • Can print up to borderless 8 x 10s
  • Comes with wireless printing and SD card slot
  • Wide range of paper size support
  • Printing speed is slow
  • Np physical function buttons

Unlike the HP Color LaserJet Pro MFP M479fdw laser printer, if your work involves printing photos in volume, we recommend you go for HP Envy 7855.

It produces one of the best photo print qualities at a reasonable price per photo. Though the printing speed isn’t that exciting, the photo samples it makes offer well-rounded colors, saturation, and details.

Other features that the HP Envy 7855 comes equipped with include printing documents, scanning, copying on the flatbed scanner, faxing, printing directly from an SD card or USB, wireless connectivity, etc.

If you opt for HP’s Instant Ink subscription service, you can lower the cost of printing photos; however, you should be printing many of them.


Bottom runners

Apart from the printers listed on this list of best Windows 11 printers, a few printers have proved their capabilities during testing.

However, note that they may not be directly comparable to the abovementioned options. But they can come in handy in a scenario one may find perfect.

➡ Canon imagePROGRAF PRO-300

Though not a direct alternative to the Canon PIXMA TR8620, the Canon imagePROGRAF PRO-300 is a fantastic option if you are looking for a printer that can produce great-quality photo prints.

Speaking of price, this printer is a bit on the higher side but would cover up when you print out detailed, sharp, and color-accurate photos, ready to be framed.

➡ Brother MFC-J6945DW

Another printer that could be a good option for buyers looking for low operating costs is the Brother MFC-J6945DW.

It has a built-in ADF scanner that can help you scan larger formats. The Brother MFC-J6945DW is a comprehensive format model, letting you print more pages at a low cost. However, paper jams could be a problem you could encounter while using this printer.

➡ HP OfficeJet Pro 9025

The HP OfficeJet Pro 9025 is an excellent all-rounder printer that would work flawlessly with your Windows 11 PC.

It comes with fast printing speeds, a large automatic document reader (ADF), good paper handling capacity, and sports a design that looks nice.

Will all printers work with Windows 11?

Printers that work great with Windows 10 will work on Windows 11 without hiccups. The only thing that you should keep in mind for the wired printers is whether your laptop or PC has the necessary ports to connect or not.

So, all you need to get is a cable that would help you connect both. You can also check in with your manufacturer by going to the official website and downloading the latest drivers that support Windows 11, although Windows 10 drivers will work fine.

These are some of the best Windows 11 printers. Let us know down in the comments which printer you liked or are already using with your Windows 11 PC.

Opera GX: Can it run on Windows 7 & How Much RAM Does it use?

Opera GX is a particular version of the traditional Opera browser. Only this time, it’s designed for gaming. It has exclusive features like CPU, RAM, and Network limiters to help you get huge benefits out of both gaming and browsing.

This award-winning gaming browser gives you speed, privacy, theme customization, a built-in ad blocker, Twitch, and Discord integration.

The browser is based on Chromium and supports languages like English, Chinese (Simplified and Traditional), Swedish, Danish, Thai, Dutch, Finnish, and so on. Please read below to learn more about this app and how well it works on Windows 7.

What are the system requirements for Opera GX?

For Opera GX to run seamlessly on a Windows PC, it must have a minimum OS of version 7. Anything less will be incompatible. It would be best if you also had up to 2GB of RAM and a processor speed of 2Ghz.

If you want to check out more useful information, feel free to explore our in-depth Opera GX guide.

Is Opera GX good for low-end PCs?

The app generally consumes up to 2GB of RAM, which puts it out of the reach of many low-end PCs. However, the RAM limiter helps users to restrict just how much memory it consumes.

Thus, RAM consumption goes down to about 1.5GB, about the range of other browsers like Chrome and Firefox.

How much RAM does Opera GX use?

Opera GX can take up anywhere between1.6GB to 2GB of Random Access Memory. Users can set the amount of RAM the browser can use because the application has a limiter.

Does Windows 7 support Opera?

The Opera browser works on Windows 7 or higher. It’s also one of the top browsers for the OS.

How do I download Opera GX on Windows 7?

  1. Launch your browser.
  2. Go to the download page.
  3. Select download Opera GX.
  4. Right-click on the downloaded file
  5. Select install.

The app enhances the browsing experience and has an interface specially created for gaming. It also offers a great deal of customizability, with the ability to alter the UI and tweak system settings. Users can also benefit from attributes like the Battery Saver, Instant Search Bar, and page screenshot utility.
As a PC gamer, you’ll want an all-in-one platform to play free games and be updated on the best deals in the community. You can check out this comprehensive list of gaming browsers for more information.

If you’re interested in the regular version, we have a great guide on how to download Opera for Windows 7, so don’t miss it.

Thank you for reading! Please share your comments in the section below.

5 Best Browsers for ADP that are Fully Compatible & Optimized

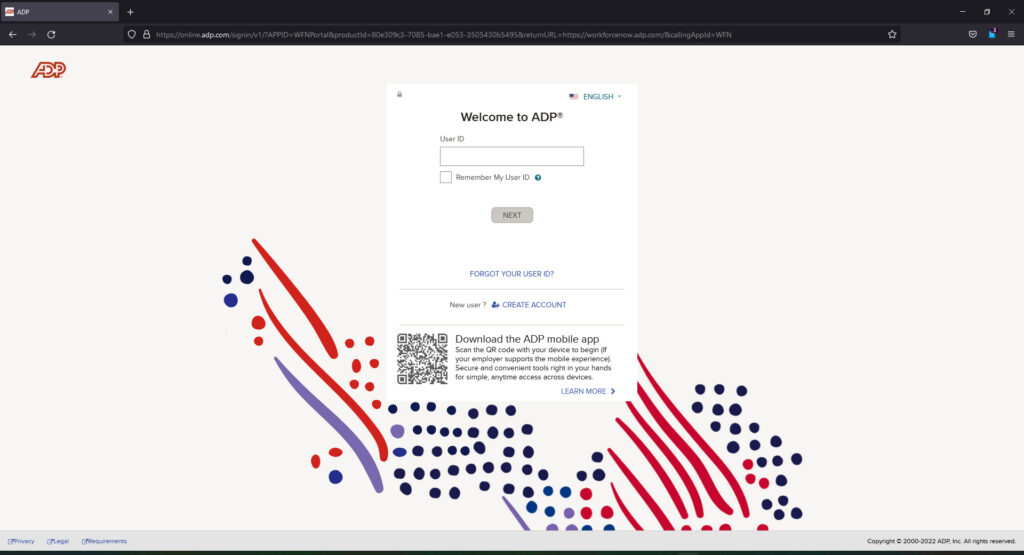
ADP is the largest HR firm in the world and hundreds of thousands of companies rely on its services for employee payrolls and taxes. ADP isn’t compatible with every browser, so here are our picks for the best five browsers for ADP.

While most browsers offer security protection features, a VPN is the best way to ensure total privacy. Check out our recommendations for the best VPNs for laptops for an added layer of protection.

What browser works with ADP?

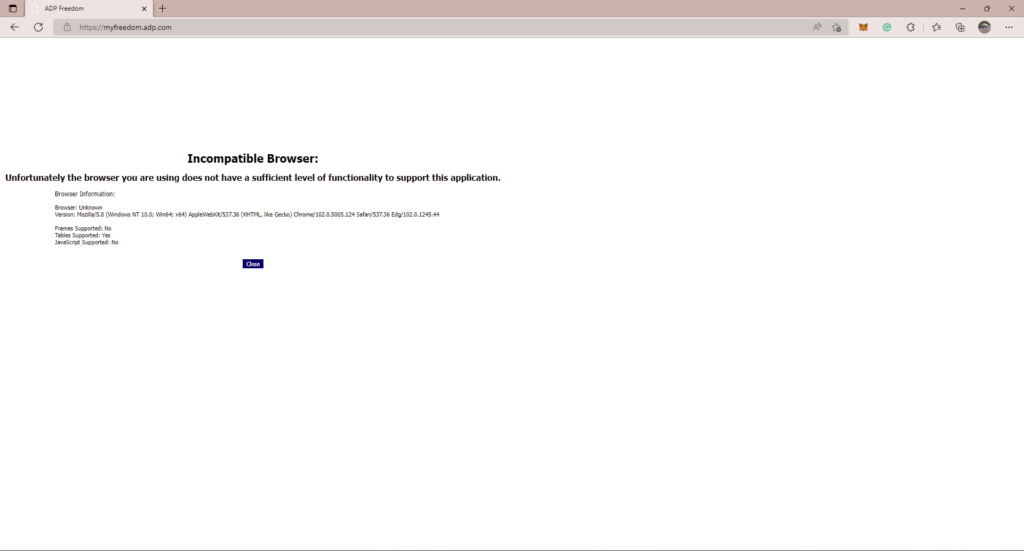
ADP supports the latest versions of Chrome, Firefox, Microsoft Edge, Opera, and Safari, all of which tested and approved for key functionality. The latest versions of Firefox, Chrome, and Safari are the browser requirements for ADP Freedom.

Only Firefox, Chrome, and Safari are compatible with ADP Freedom.

Does ADP work with Internet Explorer?

ADP does work with Internet Explorer Version 11 on Windows 7, 8.1, and 10. However, to print checks on blank check stock, users must enable Microsoft ActiveX. Support for Internet Explorer will end in June 2022.

Does ADP use Flash?

Adobe no longer supports Flash, however, ADP will still function with Flash Version 17 or higher. Users need Adobe Reader DC for printing reports, pay statements and other PDF documents with ADP.

What browser should I use for ADP?

1. Opera – Ideal for quick and secure browsing

Opera best browser for ADP.

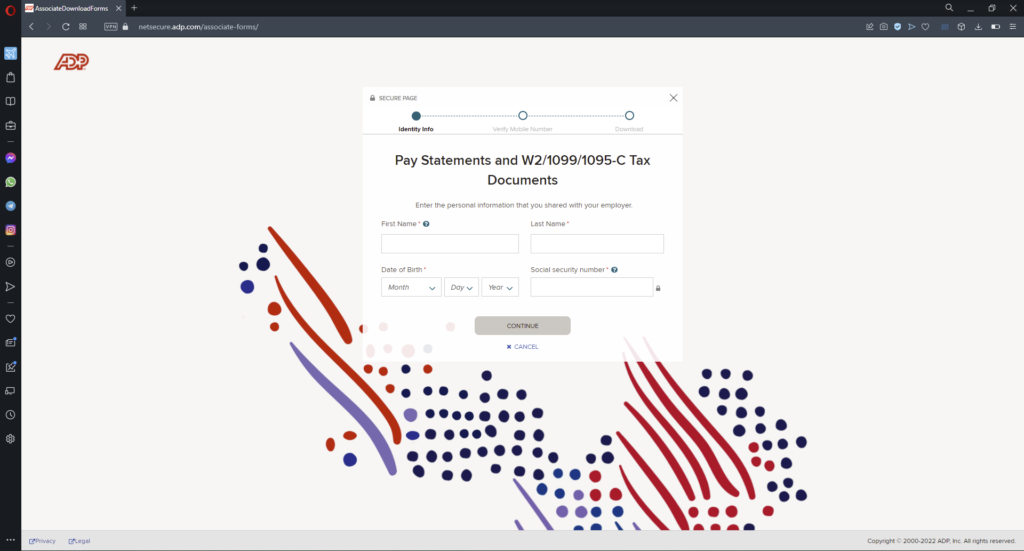
Opera Browser makes the top of our list as the best browser for ADP because of its privacy and security measures. The built-in VPN provides an extra layer of security for users, which is essential for websites like ADP where sensitive information is handled.

With a built-in ad blocker that is easily accessed from the address bar, users can browse quickly and securely. Users can also create a whitelist for websites, like ADP, that need the ad blocker disabled to function.

Key features of Opera:

  • Built-in free VPN
  • Ad blocker whitelist
  • Accessible security features from the sidebar
 Opera

Opera

Keep your sensitive information protected at all times with Opera’s free VPN.

2. Mozilla Firefox – Most secure password manager

Mozilla Firefox.

Firefox is the default browser for many users because of its compatibility with websites like ADP and simple user interface. With the extensive add-on library, users can customize Firefox as much as they like.

The password manager helps users create strong passwords and encrypts them on your hard drive so you don’t have to worry about remembering complex logins.

Key features of Firefox:

  • Simple user interface
  • Extensive add-on library
  • The password manager encrypts login data

⇒ Get Mozilla Firefox

3. Google Chrome – Most efficient tab management

Google Chrome for ADP.

Chrome allows users to have separate accounts on one browser which is great for users with shared computers or those who want to keep their work and personal life separate. The password manager also works with separate profiles and remembers login information.

Users can stay organized with its efficient tab management system by grouping tabs or pinning them for easy access.

Key features of Chrome:

  • Separate profiles
  • Password manager
  • Tab management system

⇒ Get Google Chrome

4. Microsoft Edge – Best PDF support

Microsoft Edge for ADP.

Edge is a popular browser among employees and businesses because of its usability and productivity features. In addition to its usability, Edge provides business-grade PDF support which allows users to access PDFs from the browser with features like information protection and digital signatures.

With malware protection and an HTTPS security indicator, which will let users know if they are browsing on a secure website.

Key features of Edge:

  • User-friendly interface
  • Enterprise-grade PDF support
  • HTTPS security indicator

⇒ Get Microsoft Edge

5. Safari – Optimized for macOS

Safari browser for ADP.

Safari is the default browser for Apple users and is optimized to work on Macs, claiming to be the fastest browser for Apple products. Moreover, with Apply Pay integration, users can complete online transactions with Touch ID or Face ID for safe finance management.

However, the latest version of Safari that is required for ADP is only available for Apple devices and will not work on other operating systems.

Key features of Safari:

  • Password protection system
  • Apply Pay integration
  • Optimized for Apple devices

⇒ Get Safari

Has ADP ever been hacked?

Unfortunately, APD has fallen victim to hacking attacks. With the internet growing and evolving, cyberattacks and hacking are also getting more sophisticated. In recent years, ADP has taken extra steps to enhance its fraud protection program to keep user information safe.

Does ADP have 2-factor authentication?

ADP does have a two-factor authentication process, where users are asked to confirm their identity at login by verifying a code via phone or email.

Does ADP sell data?

ADP does not sell user data to third-party companies and only shares data with ADP Group Companies, business partners, and service providers that are bound by law to protect personal data.

By using these browsers, you’ll avoid ADP error code 100 and other potential issues, so don’t hesitate to try them.

We hope you enjoyed our list of the best browsers for ADP. Comment below which browser you prefer to use for ADP.

5 Best Web Browsers For Airplay To Use

Airplay is a proprietary wireless communication system developed by Apple. It allows users to wirelessly cast audio or video from their iPhone, iPad, or Mac to an Apple TV or an AirPlay-compatible smart TV.

You should use this feature to connect your device to the same Wi-Fi as the TV. Since Airplay was introduced in the Apple TV, a significant amount of increase has been observed in its popularity.

However, there’s a minor issue with the Apple TV. It doesn’t seem to have a web browser, making it challenging to browse the web.

Well, we’ve got you covered. Using Airplay, you can use a web browser on your Apple TV or AirPlay-compatible smart TV. Keep reading this post to learn the best browser for Airplay.

Can you AirPlay from a browser?

Yes, you can Airplay from a browser. You’ll have to navigate to the web video you want to play on your Apple device.

All compatible web videos will have an AirPlay icon in the video controls at the bottom of the video window. Click the AirPlay icon and choose your Apple TV.

Is there a Web browser for Apple TV?

No, Apple TV doesn’t have any web browser. You cannot use Safari or Google Chrome on the Apple TV because there isn’t one available on the device. However, you can use Airplay to mirror a web browser from an iOS or Mac device.

Several users complain about the fact that AirPlay is not working on full screen. Rest assured that our guide shows you what to do if that happens.

Why doesn’t Apple TV have a web browser?

The most straightforward explanation is that the Apple TV isn’t designed to work with a browser. Apple TV can efficiently run a web browser, but Apple wants its users to use their phones to connect and stream content to the device.

The main idea is to make users use their phone as a remote, and they can pick and choose content to cast to their Apple TV device. But, of course, Apple wants you to use the native apps that come with the device itself.

What web browser works best with AirPlay?

Opera One – Built-in VPN

Opera One is the best browser for Airplay if you want something lightweight but speedy. This Chromium-powered web browser is frequently referred to as a more polished version of Google Chrome.

Regarding bugs, Opera One as a web browser performs an excellent job. Furthermore, it is incredibly privacy-conscious, keeping all of your data safe and secure.

Furthermore, when it comes to features, Opera One will not disappoint you. This web browser contains a variety of functionality for modern users. It includes a VPN service, an ad blocker, a native chat app, and other features.

Other key features of Opera One include:

  • Ad blocker
  • Tracker blocker
  • VPN
  • Paste Protection
  • Video pop-up

Opera One

A perfect combo between AirPlay and a browser, to watch videos anywhere and anytime.

Google Chrome – Best in cross-browser syncing

best browser for airplay

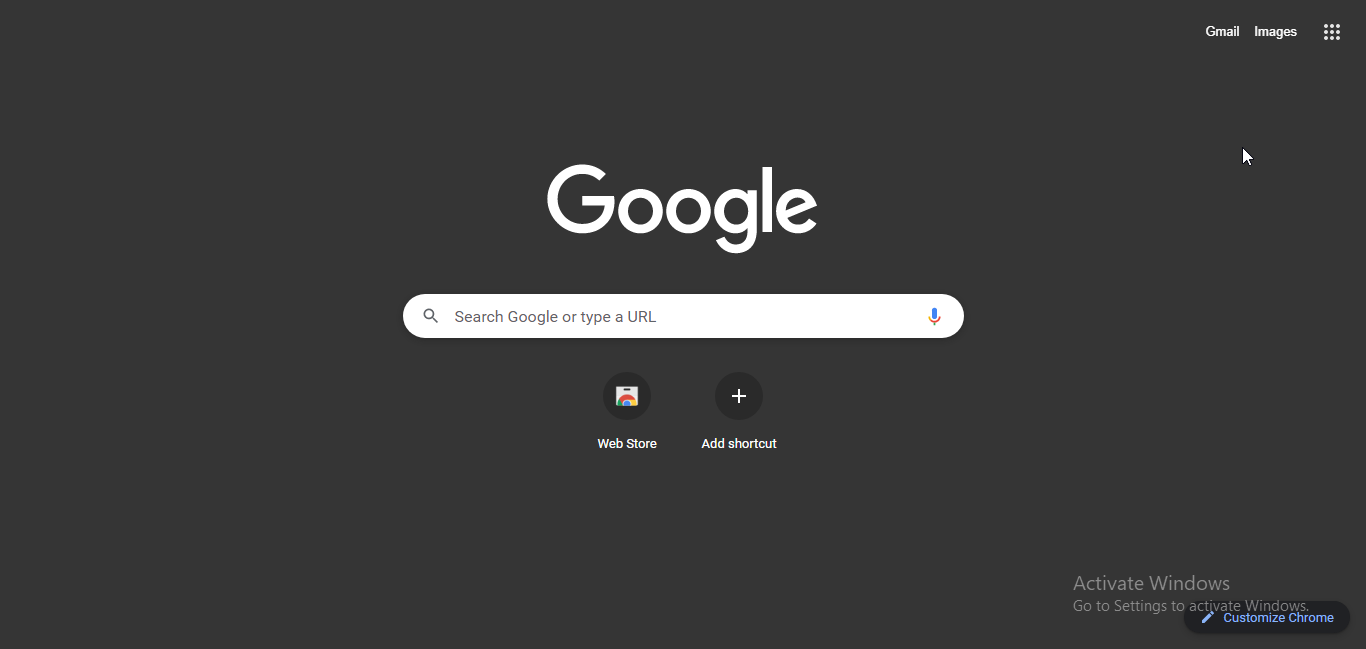
Google Chrome is one of the best browsers available for Airplay. As we know, Chrome’s browsing experience isn’t most privacy-oriented; it is refined. It also offers a number of extensions, privacy controls, and a simple user interface.


The cross-platform availability on the Apple TV Chrome browser makes it easy to sync data across all your devices. Some other features it offers are a website task manager, visual browser history, and media controls.


It is one of the best browsers to use on your Apple TV via Airplay. Chrome is extremely fast, especially when loading websites owned by Google, such as Gmail and YouTube. While other browsers may take a while to load a video on YouTube, Chrome starts playing the video immediately when on a good internet connection.

Other key features of Google Chrome include:

  • High-speed browsing
  • Easy, stylish interface
  • Wide range of extensions
  • Sync across devices
  • Customizable

⇒ Get Google Chrome

Firefox – Your chance to browse anonymously

Firefox Home

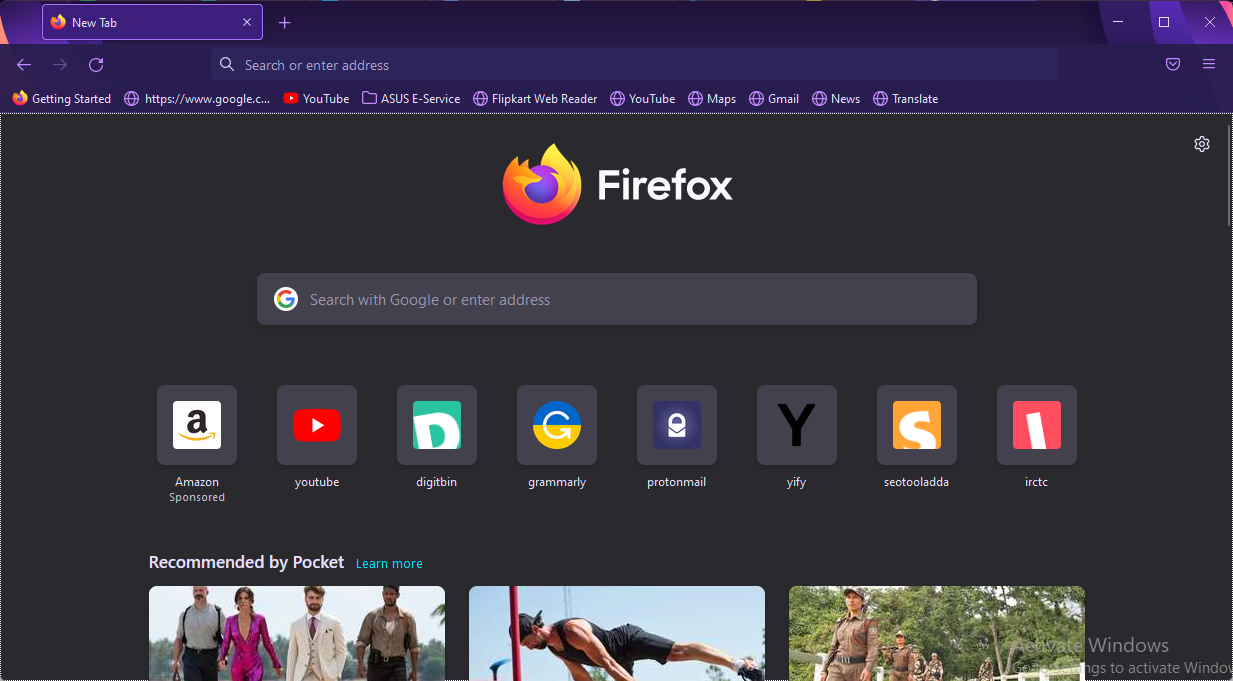
Firefox is among the best privacy-oriented browsers for Airplay to use in 2022. While using this, you don’t need to turn any incognito mode to escape trackers; the stealth mode is turned on by default in the browser. It blocks ads and trackers, making your browsing experience clean and tracking-free.


Some of the basic features Firefox offers are default ad blocking and tracking, a clean user interface, and Siri shortcuts to clear history with voice commands.


Firefox is the best browser by Mozilla that caters to all your browsing needs. Its advanced privacy protection features make it among the best Web browser for Apple TV 4K. The lack of tabs can sometimes be annoying, but otherwise, it is a decent browser app.

Other key features of Firefox include:

  • Cross-platform support
  • Security
  • Tabbed Browsing
  • Pop-up blocking
  • Private browsing

⇒ Get Firefox

Brave Browser – Built-in Ad-blocker

best browser for airplay

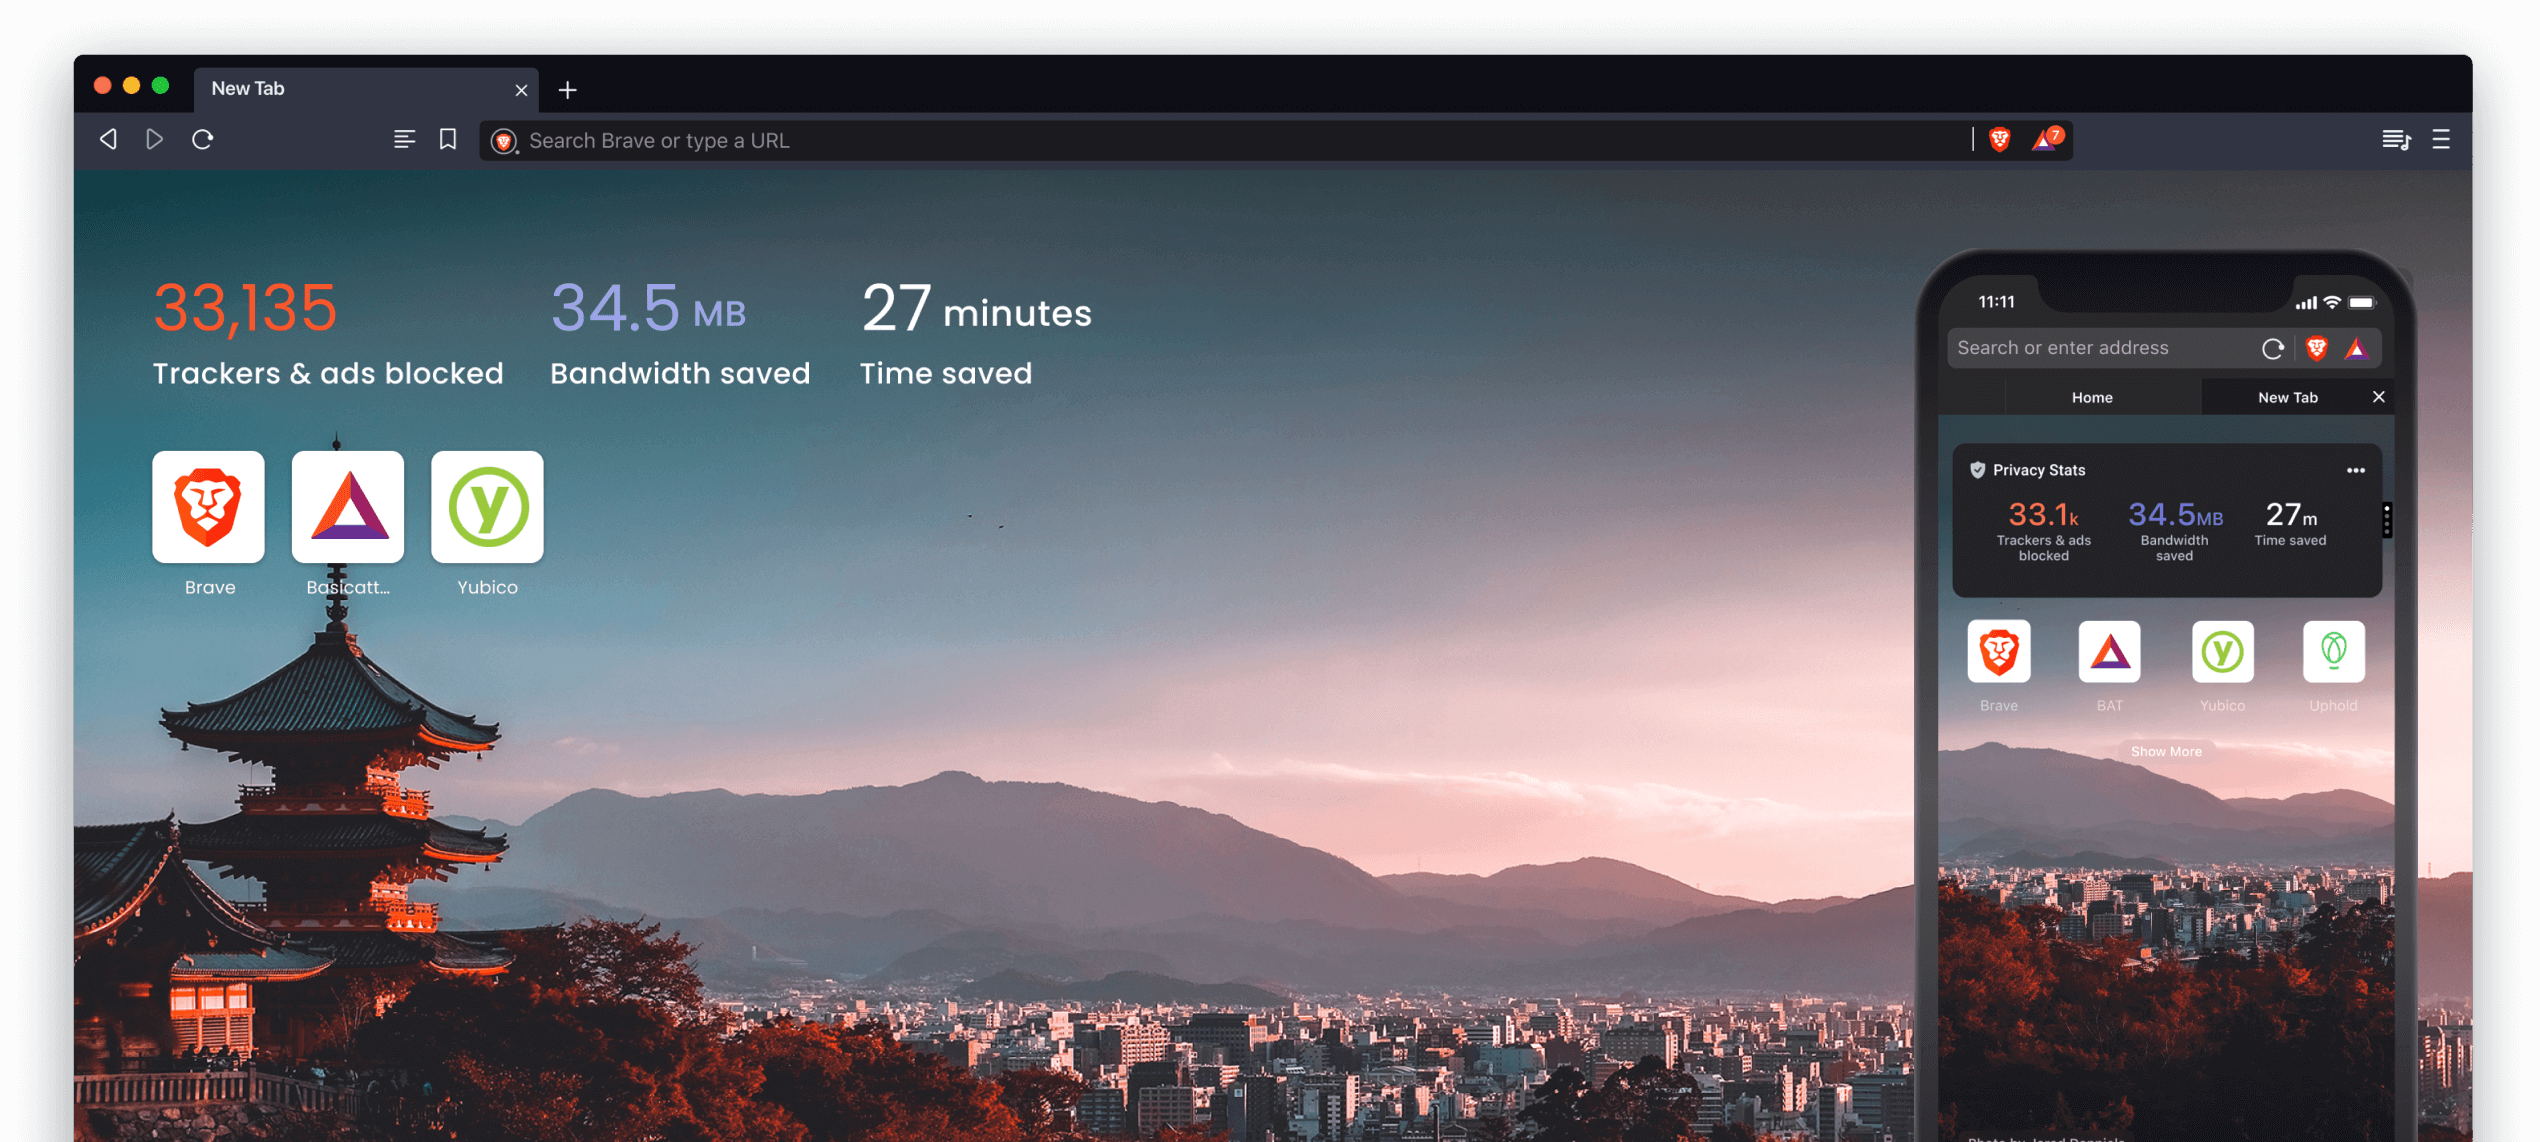
Brave Browser is an idle choice that may fix numerous problems at once. First and foremost, it maintains an easy-to-use and straightforward interface. It also prioritizes removing those pesky adverts that crop up everywhere when you’re browsing the internet.


The intriguing thing is that you may choose any search engine as your default in Brave. As a result, this browser on Airplay will not hamper your surfing experience but rather make it better.


Aside from that, it once again distinguishes out in terms of privacy protection. It not only protects your data but also hides your IP address to prevent others from following you. Brave browser is frequently regarded as the best Apple TV web browser app in terms of overall performance.

Other key features of Brave include:

  • Ad blocking
  • Fingerprinting prevention
  • Cookie control
  • HTTPS upgrading
  • Block scripts
  • Per-site shield settings

⇒ Get Brave

Vivaldi – User-friendly interface

best browser for airplay

Vivaldi is another web browser from the same family as Chrome. However, unlike Google Chrome or Firefox, Vivaldi lacks in terms of functionality and privacy. However, its easy-to-use interface makes it one of the best browsers for Airplay.


It enables you to personalize every aspect of the web browser, giving it whatever shape you like. Furthermore, it has some very decent features that may be useful while browsing. It can be considered among the best Apple TV web browser app.


You can also install this web browser on Apple TV without Mac.

Other key features of Vivaldi include:

  • Fast & Refined Control
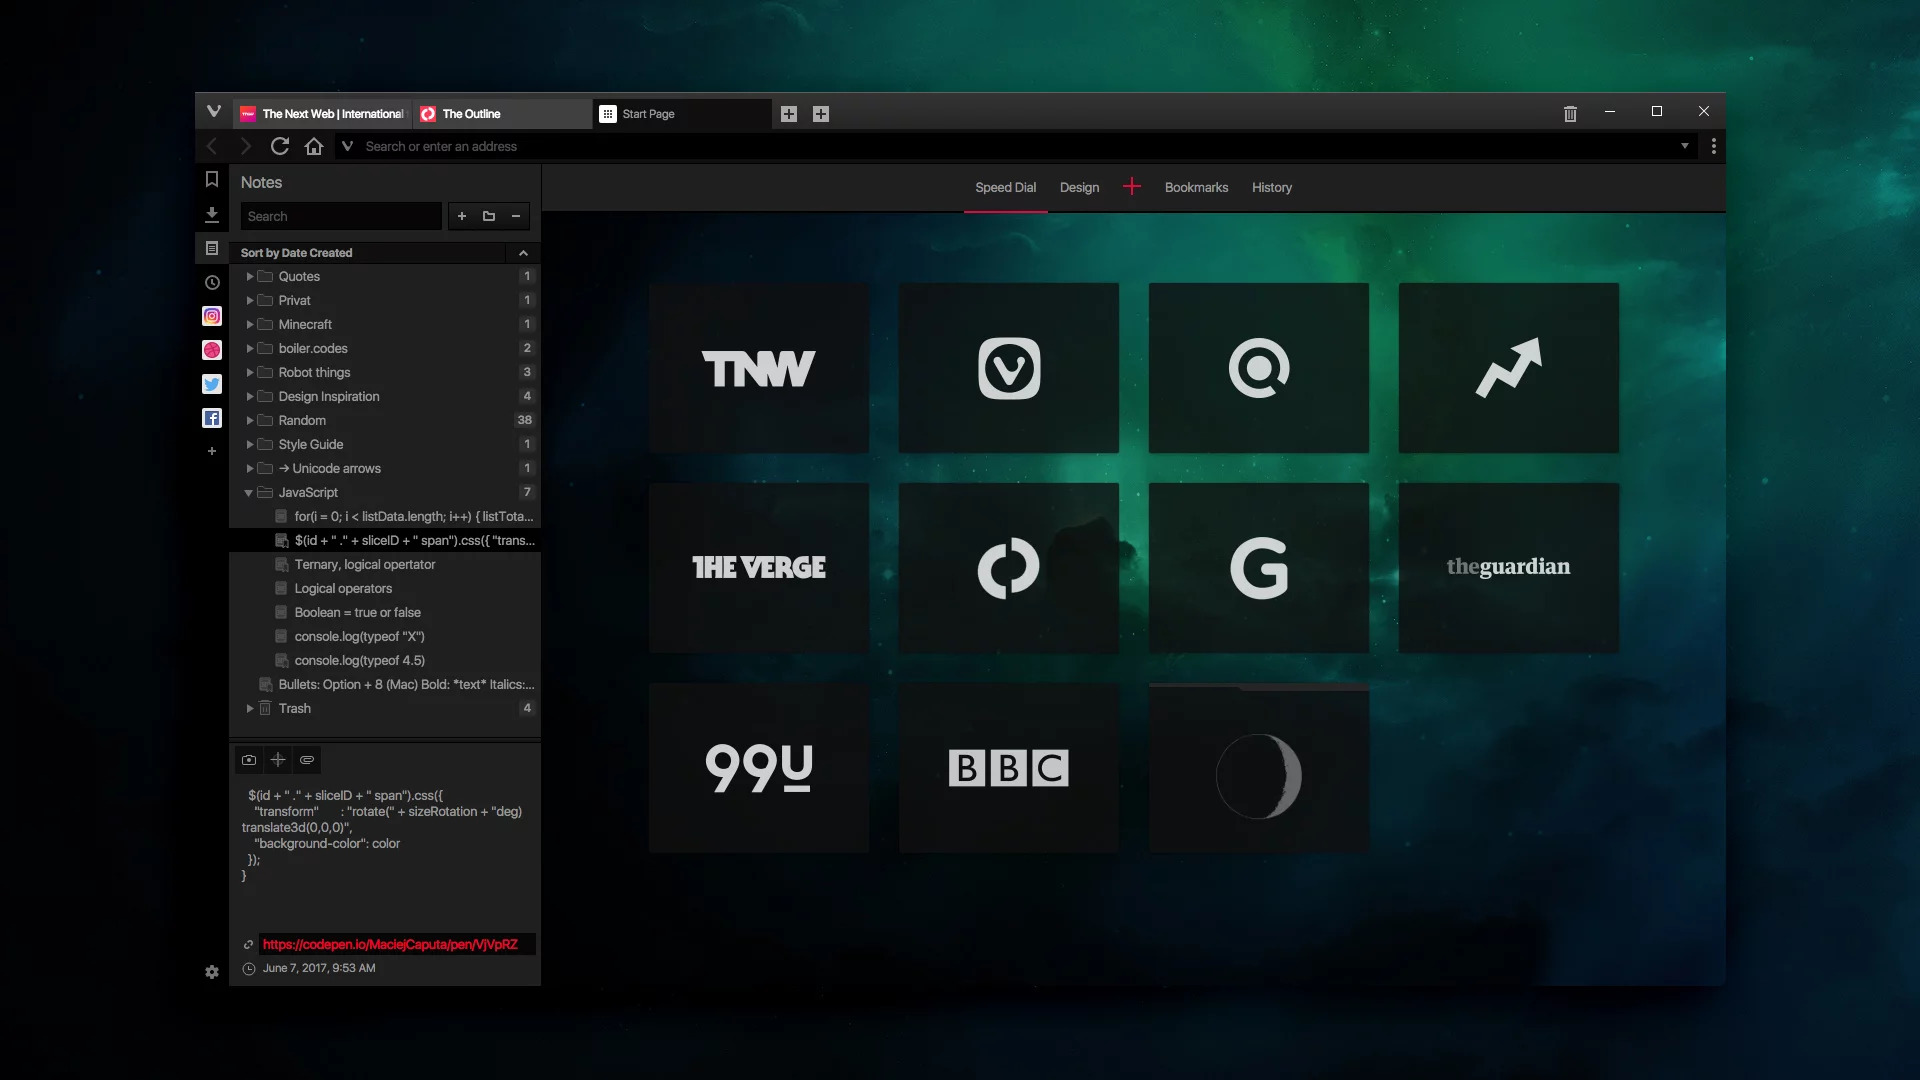
  • Speed Dial
  • Speedy Navigation
  • Session Management
  • Restore closed pages

⇒ Get Vivaldi

How do I AirPlay my browser to my TV?

  1. Connect your iPhone, iPad, or iPod touch to the same Wi-Fi network as your Apple TV or AirPlay-compatible smart TV.
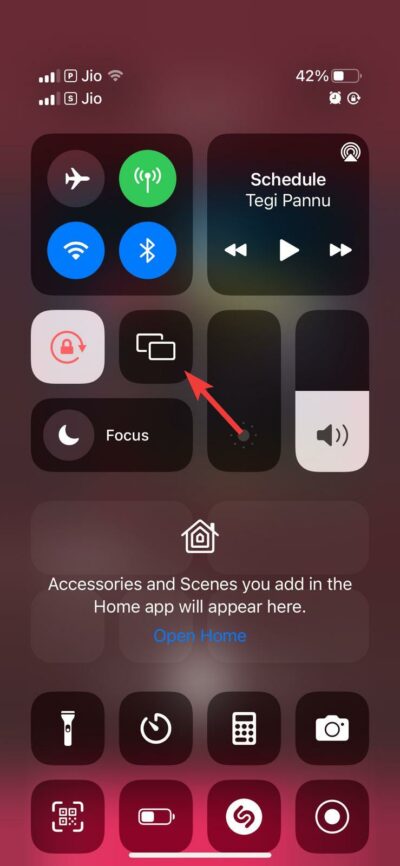
  2. Open Control Center:
    • On iPhone X or later or iPad with iPadOS 13 or later: Swipe down from the screen’s upper-right corner.
    • On iPhone 8 or earlier or iOS 11 or earlier: Swipe up from the bottom edge of the screen. 
      Screen Mirror iPhone
  3. Tap Screen Mirroring and select your Apple TV or AirPlay-compatible smart TV from the list.
  4. If an AirPlay passcode appears on your TV screen or Mac, enter the passcode on your Apple device.

To stop mirroring your iOS or iPadOS device, open Control Center, select Screen Mirroring, then tap Stop Mirroring. Or press the Menu button on your Apple TV Remote.

Want to project your iPhone & iPad to your PC? Read our post to learn how you can do it.

These were the five best browsers for Airplay to use today. Among the above-mentioned, Opera One and Firefox are the two most recommended ones you can try.

If this guide was helpful, do let us know in the comments below.

Opera GX vs Opera: Key Differences & Speed Test

The Opera browser has been present on the market for more than two decades, and over the years it went through various changes.

It is now available on almost all desktop and mobile platforms, and a couple of years ago, Opera has introduced a new member of its browser family called Opera GX.

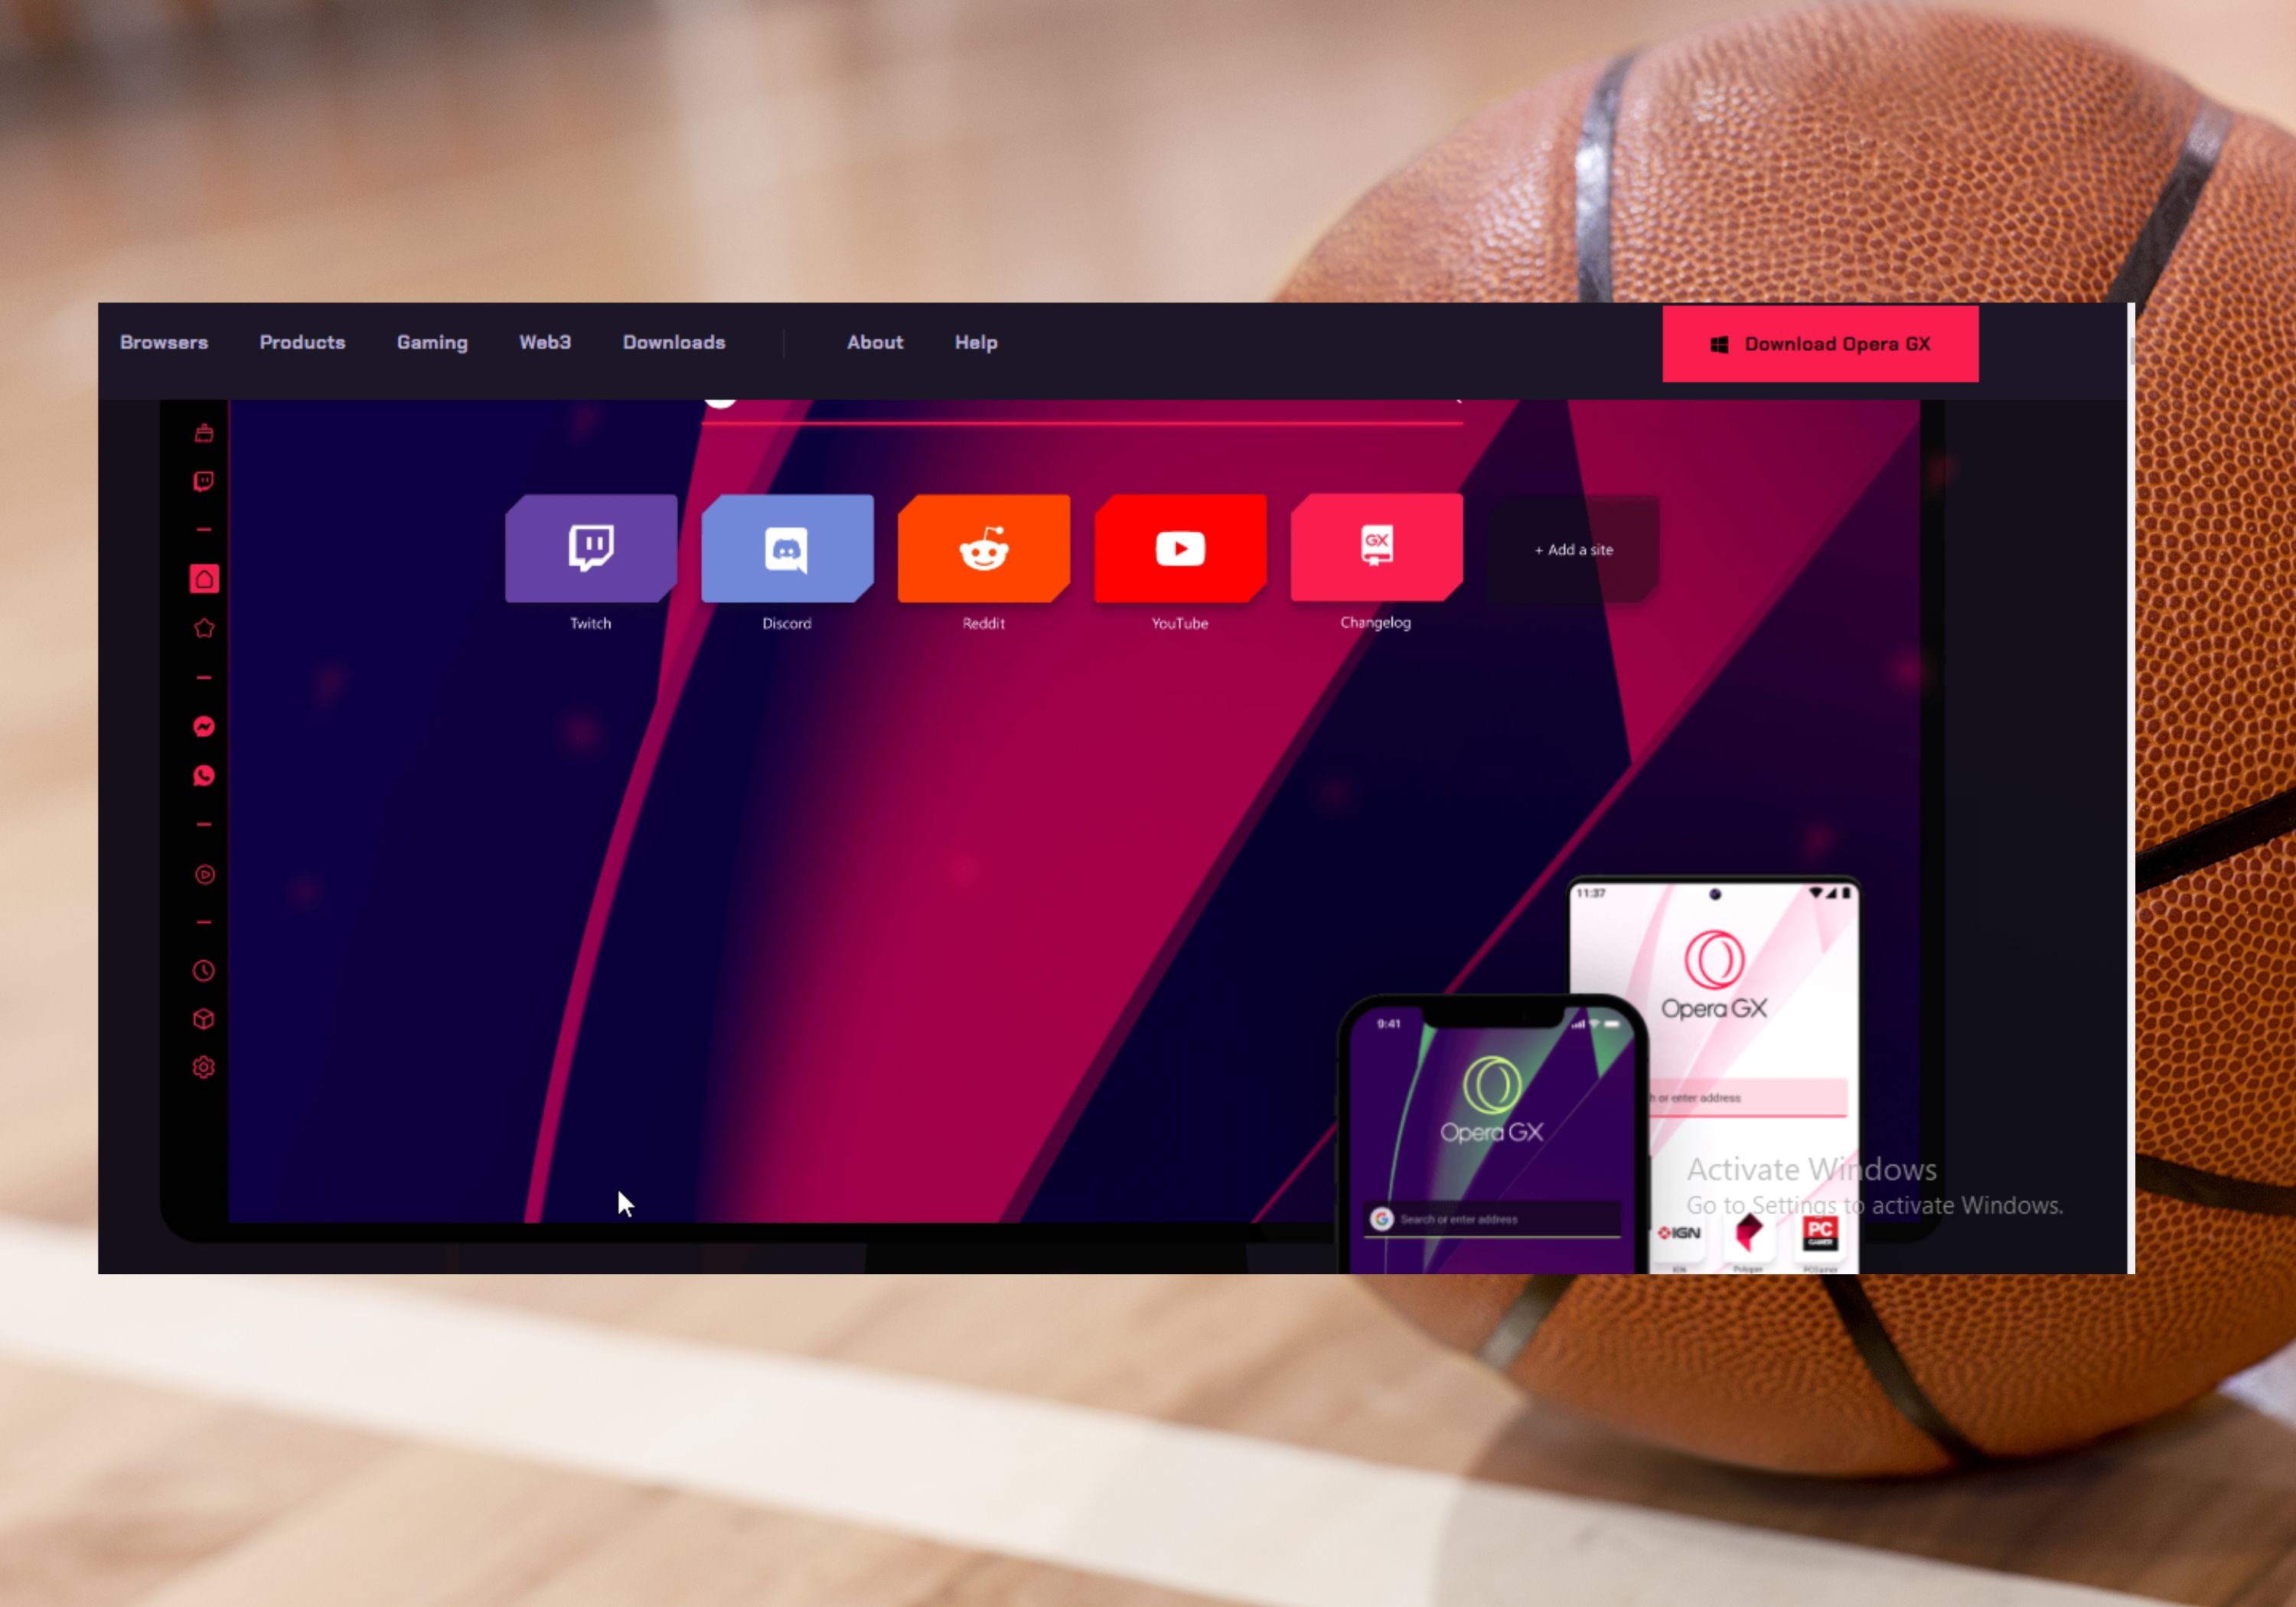
Opera GX is similar to the regular version of Opera, but with some unique features that gamers would like. In today’s guide, we’re going to compare the two and see how Opera GX compares to Opera, but you can also explore our in-depth review of Opera GX.

Opera GX

Browse your gaming world using this optimized homepage with awesome features.

Are Opera and Opera GX the same?

According to the company that made the Opera browser that we all know and love, their Opera GX browser is an improved or specialized version of Opera.

Some enthusiasts see network, CPU, and GPU limiters as critical necessities, while others believe them to be superfluous frills.

The web browsers Opera and Opera GX are created by the same company but target different user groups.

On the other hand, there are numerous similarities between the two, which is to be expected considering that the same company makes them. Both are based on Chromium and use privacy standards that are similar to one another.

Opera

Navigate smarter, faster, and more securely on this user-oriented browser.

Opera GX vs Opera, what are the differences?

Opera: stable, fast, and reliable browsing for everyone

Interface

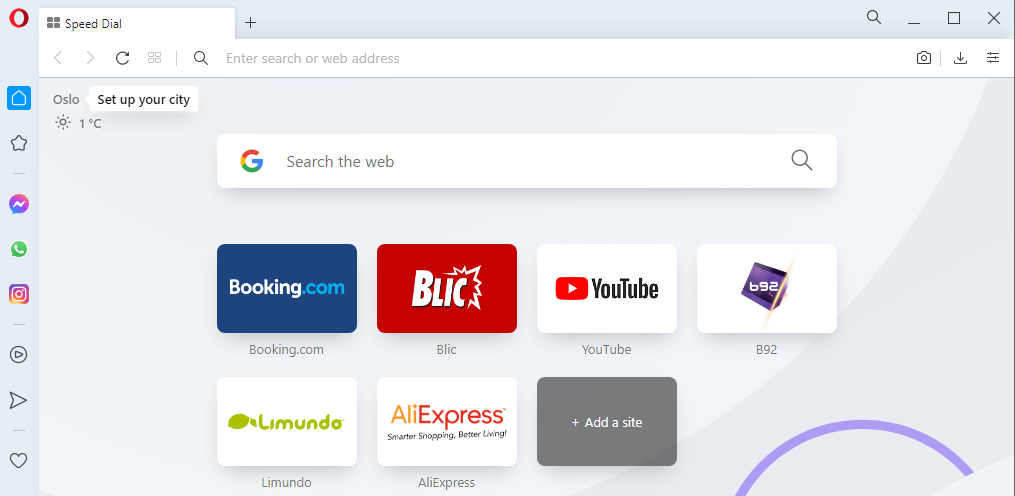
As soon as you start Opera you’ll notice its clean and friendly user interface. The application is divided into two parts, the main window you use for browsing and the sidebar.

The sidebar allows you to quickly access certain features, including bookmarks, history, and integrations from other services.

The interface is customizable, and you can hide the sidebar if you don’t plan on using it. There are also several wallpapers to choose from to spice up your Speed Dial page.

If you’re not happy with the choice of wallpapers, you can download additional ones from Opera’s website, or you can use your own.

Workspaces

The first feature that caught our eye was the Workspaces feature. Well, it allows you to organize your tabs, which is handy if you want to keep your work and personal tabs separated.

By default, there are two workspaces available in the sidebar, and you can switch between them with a single click. Of course, you can add more workspaces if you need to.

Search in tabs

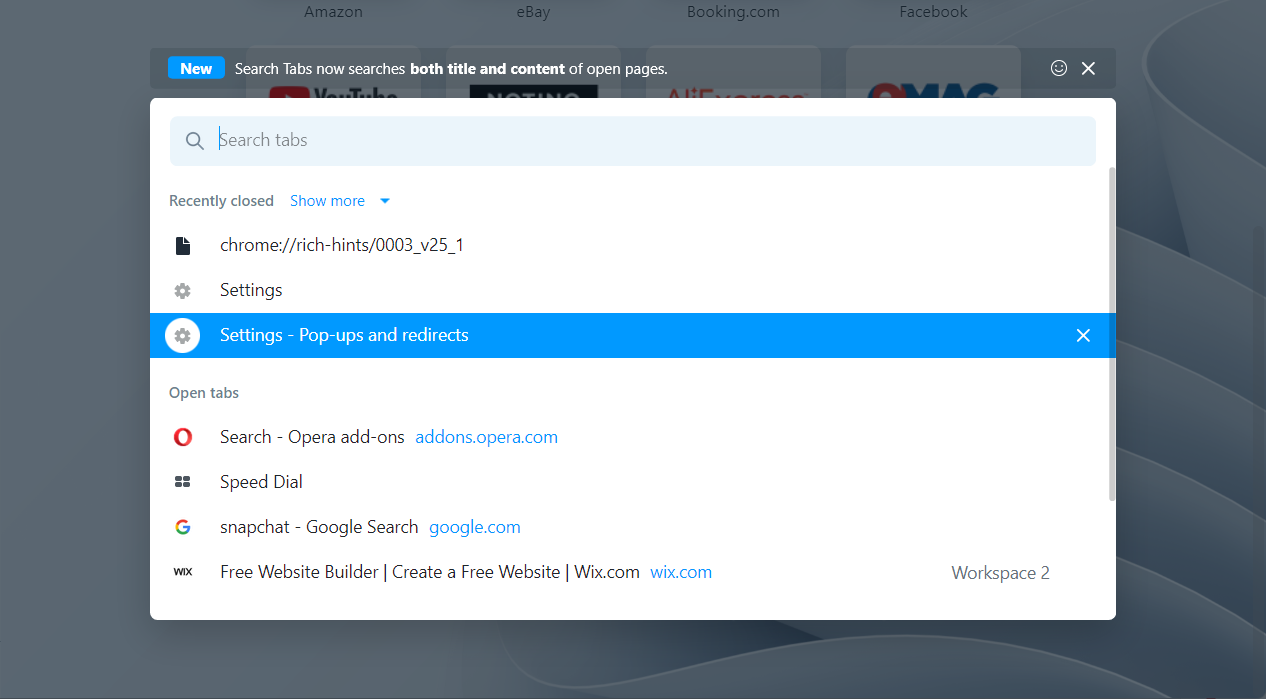
A feature that will go along nicely with Workspaces and multitasking is the Search in tabs one. With this feature, you can search for open tabs on all workspaces and switch instantly to the desired tab.

You enter the tab’s title to search for it, but the feature will also scan the content of open pages and find the desired tab based on its content.

To access it, you can use the search icon in the title bar or hold Ctrl + Space together to enter it quickly.

Privacy Protection  

Opera comes with its ad blocker, so if you don’t want to deal with ads anymore, be sure to enable this feature.

Tracking protection is another feature that you can use to finally say goodbye to tracking cookies that some websites tend to use.

Snapshots

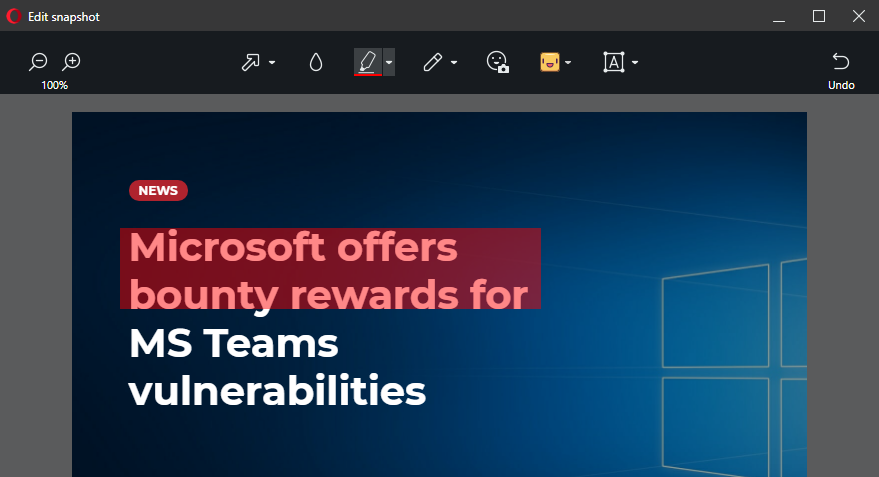
Opera has a built-in snapshot tool that allows you to capture parts of a page and save it. The process is straightforward, and there’s even a simple editor that lets you add highlights and annotations.

Flow

If you use Opera on multiple devices, as you should, there’s a handy Flow feature that lets you share pages, links, and files seamlessly.

Simply pair your phone, access the Flow feature from the sidebar, and share any content that you want with ease.

Music player

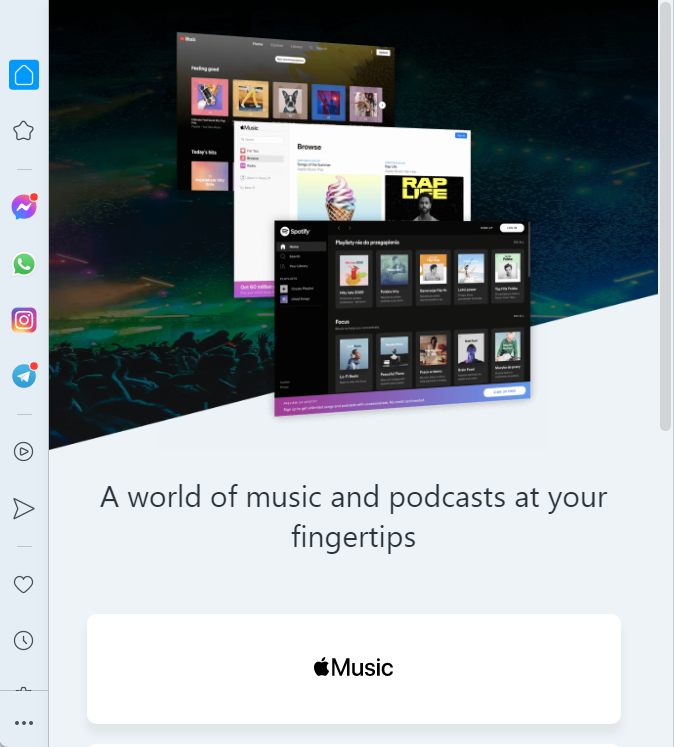
Moreover, Opera has support for various audio streaming services, such as Spotify, YouTube Music, and Apple Music, so you can listen to your favorite tunes while browsing the web.

Social media and messenger

If you want to keep in touch with your friends, Opera has support for Facebook Messenger, Telegram, and WhatsApp, and you can have the messenger open in the sidebar while browsing the web.

The same goes for social networks; currently supported networks include Twitter, Instagram, and VK. More might be added in the future.

VPN

Opera focuses on user privacy, and therefore it comes with a built-in VPN. It is completely free with unlimited bandwidth, but it only offers three different locations to choose from.

Sadly, this feature isn’t available out of the box, except in Private Mode, so you’ll need to enable it from the settings page first.

Opera GX: Opera, but with a gaming twist

Opera GX is based on the regular version of Opera but with a gaming twist and a couple of unique features.

All the features that we mentioned above are available in Opera GX, so we’ll focus only on the features that are unique to Opera GX.

Interface

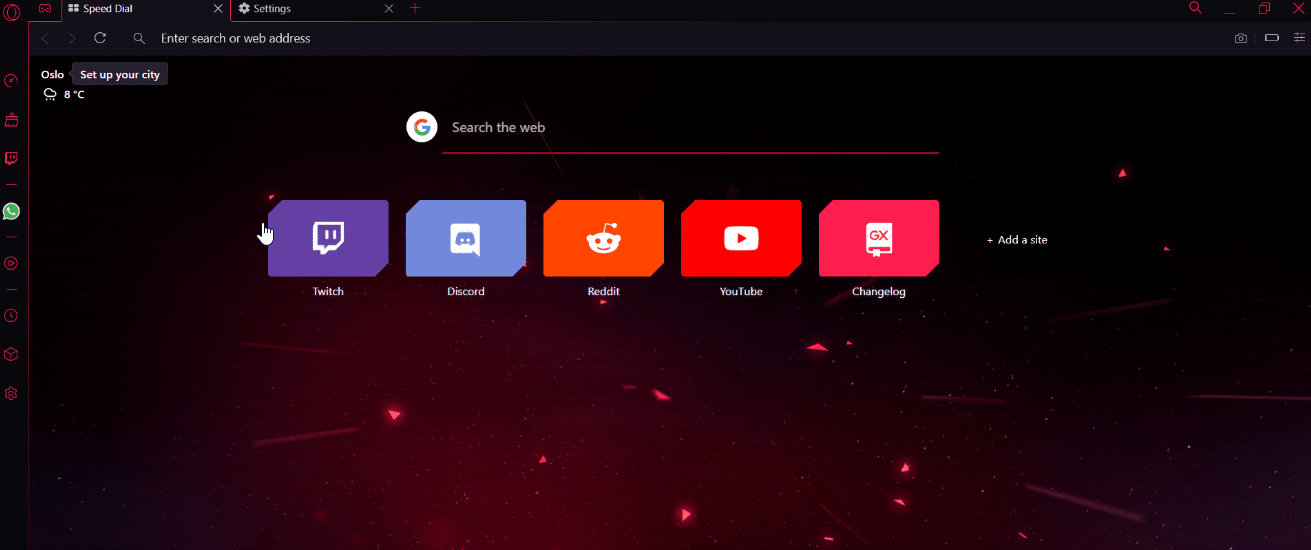
The first thing you’ll notice about Opera GX is its dark theme with a red neon glow that has a cyberpunk feel to it.

The theme is customizable, and you can change both the primary and secondary colors to any value, or you can use one of many available themes if you don’t feel like experimenting.

GX Corner

The GX Corner feature is designed to bring you the latest gaming information at a glance. Using this feature you can view the release dates of the upcoming games on a specialized calendar.

You can also find major discounts as well as free games on all digital distribution platforms. The latest trailers and gaming news are also available, so you can keep up with the world of gaming.

GX Control

GX Control is one of those features that make Opera GX stand out from other browsers on the market. With this feature, you can limit network, RAM, and CPU usage.

This is useful if you’re on a low-end PC, or if you’re gaming and your browser is using more resources than it should, thus affecting your performance.

Another feature that is worth mentioning is Hot Tabs Killer. This feature lets you see both CPU and RAM usage of all your open tabs at a glance.

Is some open tab using more RAM than it should or slowing down your browser? End it instantly right from the Hot Tabs Killer section.

GX Cleaner

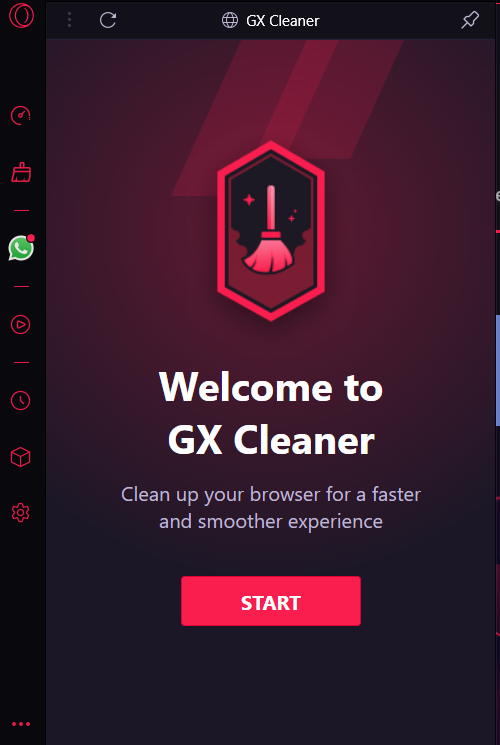
GX Cleaner is nothing revolutionary since it’s just a quick way to clean your browsing data. Nonetheless, it is easy to access, thus incentivizing users to use it more often.

Moreover, the feature allows you to see how much data and files your browser has stored. This is useful if you are the curious type like us.

Integrations

The software offers all the same integrations as the regular version of Opera, but Opera GX comes with both Twitch and Discord integration.

Want to follow your favorite streamers or watch streams while browsing? Just open Twitch from the sidebar, and that’s it.

The same goes for Discord, enable it, sign in, and you can stay in touch with your friends over at Discord at all times.

⇒ Get Opera GX

Since these browsers are almost the same, we decided to give you a short overview of the available features that both have in the list below.

OperaOpera GX
Built on Chromium✅✅
Support for Chrome extensions✅✅
Workspaces✅✅
Ad blocker✅✅
Tab searching✅✅
Snapshot tool✅✅
Opera Flow✅✅
Video pop-out✅✅
Music player✅✅
Free VPN✅✅
Twitter integration✅✅
Instagram integration✅✅
VK integration✅✅
Facebook Messenger✅✅
WhatsApp✅✅
Telegram✅✅
Twitch❌✅
Discord❌✅
GX Corner❌✅
GX Control❌✅
GX Cleaner❌✅

Is Opera GX safer than Opera?

Regarding the security of your browsing experience, we can confidently claim it is quite secure. The web browser utilizes the Chromium engine, just like Opera, so their security is similar. In addition, Chromium itself is a highly protected online environment.

But, if you want to be safe, check out the 15 best security settings you need to enable in Windows 11.

Opera vs Opera GX, which is faster?

The Opera GX browser is a speedy one that opens new tabs in a very short amount of time. It’s about as fast as other popular browsers like Opera, Chrome, or Firefox, which is to say it’s pretty fast.

When you have many tabs open in the browser, it utilizes somewhat more RAM than Chrome does. Nonetheless, these variations should not impact the overall speed of the browser.

Don’t miss out on our guide on how to make browser games run faster since they are becoming more and more popular.

Opera GX vs Opera RAM usage

You may pick how much RAM to use when surfing the Internet thanks to Opera GX’s RAM control function.

As a result, it may use less RAM than any other browser on the market. If you do not change those options, it will utilize a similar amount as Opera.

Additionally, you may opt for a RAM cleaner or optimizer that works with Windows 10/11 to optimize your PC’s storage and speed.

Opera GX vs Opera, our final thoughts

As you’ve seen already, Opera GX offers all the great features that regular Opera has. Plus a few ones that gamers might like.

Features such as GX Control, Twitch, and Discord integrations are more than welcome. Some users might not like the aesthetics of it, but in our opinion, the design looks sleek and minimalistic.

Should you use Opera GX? If you’re a gamer or you use Twitch and Discord frequently, then it will be perfect for your needs.

Even if you’re not a gamer, the Control GX feature can be useful for everyday users. Especially if you want to stop your browser from using all your resources.

We recommend that you also look at our full comparison between Opera GX vs Chrome and decide whether you should ditch Chrome altogether.

Alternatively, for a more detailed description of Opera GX, check out our post with an in-depth review of Opera GX.

If you’re not into gaming and you want something that is less gaming-oriented, then the regular version of Opera will provide you with all the features that you need.

Was this guide useful to you? Don’t hesitate to share your thoughts in the comments section below.

How to Download Snapchat Without the App Store [PC Guide]

Snapchat is on the rise and its popularity lures more and more users on a daily basis. What’s so unique about it and why should you know how to download Snapchat without the App Store?

It’s the ephemeral nature of the items you share that aims to replicate the natural interaction flow. It’s all about instant communication whether we’re talking about chats, photos, live videos, stories, memories, and so on – the recipient can only hold on to it temporarily before it vanishes forever.

Yet another characteristic that distinguishes Snapchat from conventional social networks and messaging apps is its mobile-based architecture.

By default, Snapchat caters to smartphone users and is only available for download via the Google Play store on Android, respectively the Apple App Store on iOS.

Can I open Snapchat on my computer? You can only download Snapchat for iOS or Android as of now, but we’re glad to confirm that desktop users are no longer to be deprived of this perk.

Can I get on Snapchat without the app?

The short answer is yes. Thanks to Opera One, you can use Snapchat inside your browser without having to download the app on your device.

In case Snapchat is not downloading from the App Store or Play Store, this is the most common workaround to start enjoying the software again.

Moreover, some of you asked how to download Snapchat without a password. Unfortunately, there is no workaround for that specific issue. You will have to hit the Forgot your password button in order to retrieve access to your account.

Without further a do, let’s see how to use Snapchat without the app and note that the solutions below also work if you’re wondering how to download Snapchat without the App Store on iPhone. Keep on reading!

How can I download Snapchat without the app?

1. Use Snapchat in your browser

  1. Open the official Opera One download page, press the Download Opera button, and choose the location on your PC before hitting Save.
  2. Click the executable file and feel free to use the Options checkbox to further customize the installation if you want to. Then press Install.
  3. Your freshly installed browser should launch automatically. Use the URL address bar to search for the Snapchat website and open it.
  4. In the top left corner, you will see the Menu button. Click on it.
    snapchat-menu how to download snapchat without app store
  5. Select Accounts from the list in order to sign in.
    accounts how to download snapchat without app store
  6. Note that if you’re new to Snapchat, you’ll still have to create your account by using your phone.
    login how to download snapchat without app store

Snapchat works on a browser too, both on mobile and on your PC. We recommend you log in using Opera One because it’s fast and light, so it supports the multimedia content in Snapchat with no effort.

Can I use Snapchat on the web?

You can use Snapchat online directly in your browser, even though the process is mainly designed for mobile users.

In fact, you can use it on Opera One, Chrome, or any other modern browser you fancy with the same effectiveness. However, the experience will be slightly limited.

While you will be able to use Snapchat on the web to view stories, chat, and explore the news feed, you won’t be able to upload content or take selfies.

2. Use an Android emulator to download Snapchat on your PC

  1. Open the official BlueStacks website in your browser.
  2. Next, click on the Download BlueStacks button and define the download location for the installation package.
    download-bluestacks how to download snapchat without app store
  3. Press Save and then click the .EXE file to launch the installation process. Once the emulator is installed, open it and select the Play Store icon.
    playstore how to download snapchat without app store
  4. Sign in with your Google account to sync the information.
    sing-in google how to download snapchat without app store
  5. Open the store’s library and search for Snapchat.
  6. Click Install and wait for the magic to happen.

Now, we must stress that the latest versions of BlueStacks do not support Snapchat, so you might want to check out more options just to be on the safe side.

The first thing you can try is to search for an older version of BlueStacks that is compatible with the popular messaging app.

Can I use Snapchat on a laptop without Bluestacks? If you no longer wish to deal with BlueStacks, you can give LD Player a chance or explore more popular Android emulator alternatives for Windows 11 and 10.

If you manage to install Snapchat but run into camera issues, here’s how to fix the back camera not working on Snapchat quickly.

Note icon NOTE
On the other hand, Snapchat seems to have started its own crusade against emulators and it’s slowly blocking their app from working with them.

Is Snapchat coming to Windows?

You might have heard or even seen it already – Windows 11 allows you to install and run Android apps and games on a computer alongside other Windows apps.

While this is an extremely appealing ability, the Windows Subsystem for Android works in collaboration with the Amazon App Store, not the Google Play Store.

In short, you can technically install the Amazon Appstore on Windows 11 (even outside the US) and download Android apps as APK files. However, (at least for now) the Amazon App Store does not have all the apps.

Such is the case with Snapchat which is not officially available in the Amazon Store and consequently not ready for Windows 11 out of the box.

Instead, there are other tempting Android apps that you can use on Windows 11 and they are available right now.

When it comes to how to get Snapchat without App Store or Play Store, the two best options remain the ones listed above.

Don’t hesitate to share your thoughts with us in the comments section below.

Java Application Not Found in Control Panel [Fix]

While trying to look for the Java application in the Windows Control Panel, all of a sudden you realize that it’s not found.

If the problem occurs with your browser, here’s a detailed post on the best browsers that support Java and how to enable them to run your favorite Java applets.

Below we have explained the situation in detail and a few solutions to help you get back the missing Java control panel settings.

Why is Java not showing up in Control Panel?

There could be different reasons why the Java control panel is not found on Windows 10/11, such as:

  • Due to a bug
  • Change in installation directory after a recent Java update
  • Running an outdated version
  • Java is not installed

In such cases, you can first check if Java is enabled in the Control Panel, as shown below.

How do I enable Java in the Control Panel?

Follow the below instructions to enable Java in the Control Panel:

  1. Press the Win + R shortcut keys simultaneously to launch the Run console.
  2. Type control in the search bar and hit Enter to open the Control Panel window. Run command to open control panel
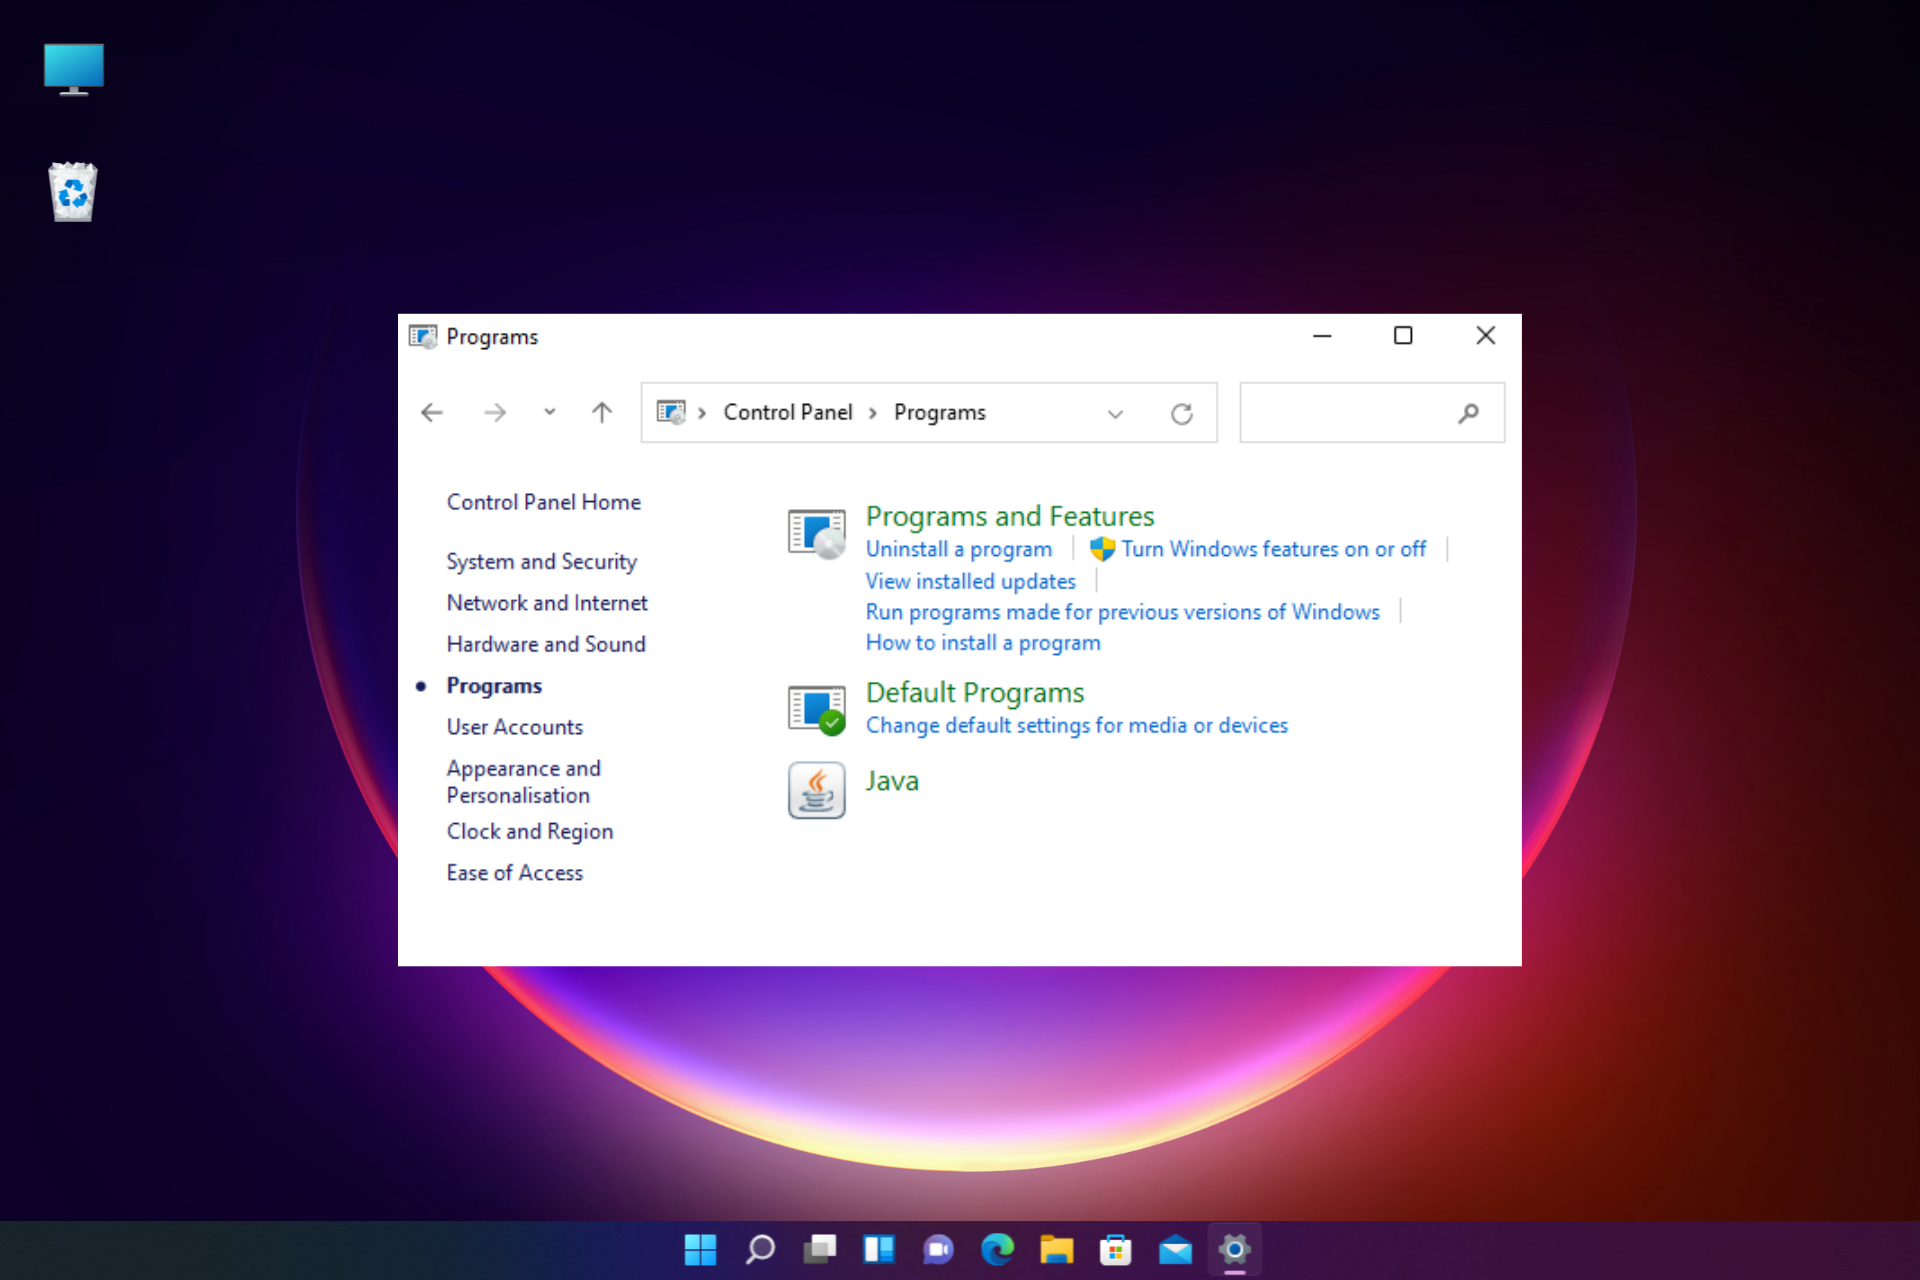
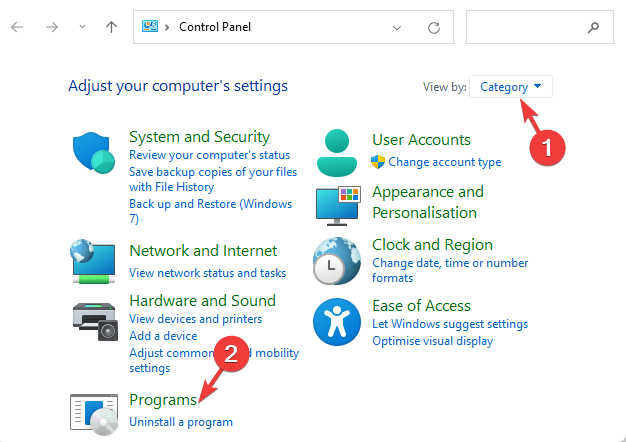
  3. Now, set the View by field to Category and click on Programs. open programs in windows control panel
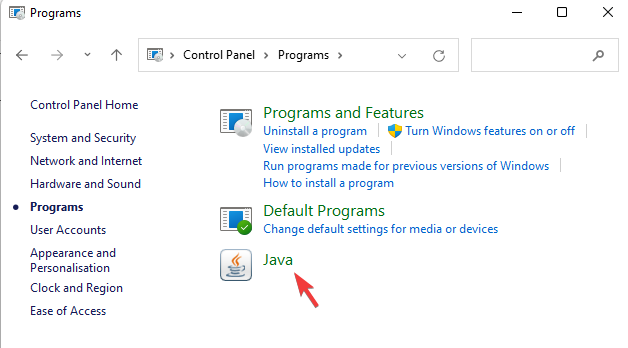
  4. Click on the Java icon to open the Java Control Panel. click on Java in programs to open Java settings
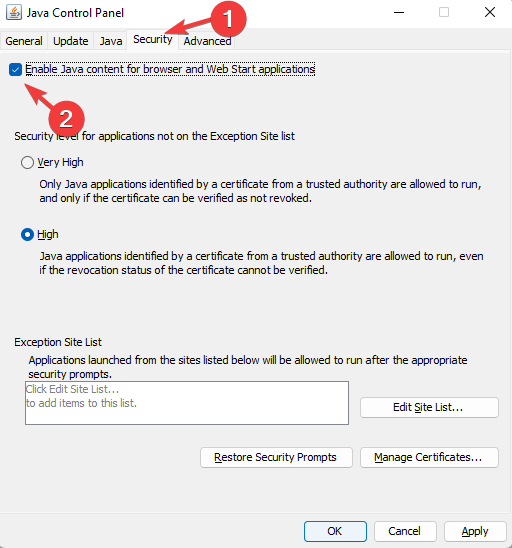
  5. Navigate to the Security tab and select Enable Java content for browser and Web Start applications.enable Java in control panel
  6. Press Apply and then OK to apply the changes and exit.
  7. Relaunch your browser for the changes to be effective and run the Java-based applets.

But, if Java application is still not found in the Windows Control Panel, you can follow the below methods to fix the issue.

What can I do if the Java applet is missing from Control Panel?

1. Re-install the Java applet

  1. Press the Win + R keys together to open the Run console.
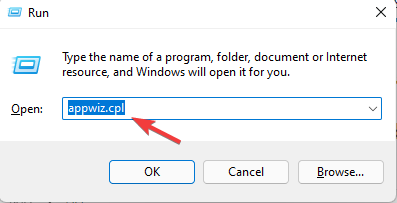
  2. Type appwiz.cpl in the search box and hit Enter. Type appwiz.cpl in the Run console and hit Enter
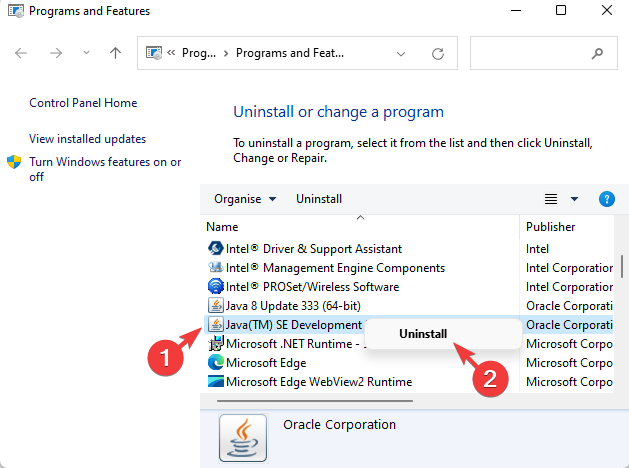
  3. Under Uninstall or change program, look for the Java programs, right-click and select Uninstall. uninstall java programs
  4. Next, press the Win + E keys simultaneously to launch the File Explorer.
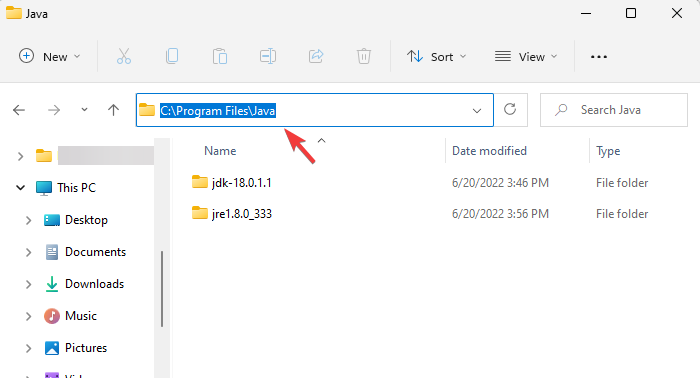
  5. Now, navigate to either C:\Program Files (x86)\Java or to C:\Program Files\Java. go to Java folder
  6. Check for any leftover data and delete them manually.
  7. Now, visit the official Java web page to re-install the Java application.

Once you have re-installed the applet, check if the Java control panel is not found issue is fixed.

2. Launch the Java console via the Run console

  1. Press the shortcut key combination Win + R to launch the Run console.
  2. In the search bar, type either of the below paths and hit Enter: C:\Program Files\Java\jreJAVA_VERSION\bin\javacpl.exe OR C:\Program Files (x86)\Java\jreJAVA_VERSION\bin\javacpl.exeopen Java control panel through run command
  3. Replace jreJAVA_VERSION with the Java version installed on your PC.

How to open the Java control panel from CMD?

If the above methods fail to get back the missing Java applet, then you can follow the below steps:

  1. Open the Run console by pressing the Win + R keys simultaneously.
  2. In the search box, type cmd and hit Enter. Type cmd in Run and press Ctrl + Shift + Enter to open Command Prompt (admin)
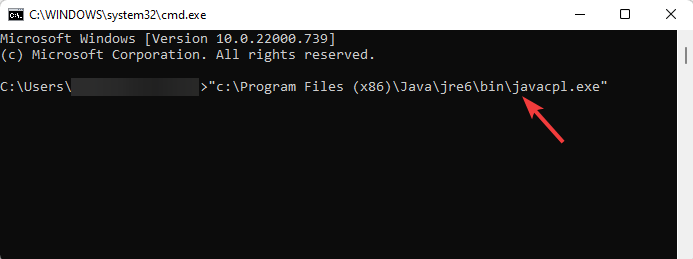
  3. Now, run the below command in the Command Prompt window and hit Enter: “c:\Program Files (x86)\Java\jre6\bin\javacpl.exe”run command to open Java control panel
  4. Make sure to run the command with the quotes, but replace the Java version with the one installed on your PC.

However, if you are installing Java for the first time, this detailed guide on our website will help you to download Java on your Windows 10/11 PC.

If you found any other workaround to get back the missing Java icon in the Control Panel, you can let us know in the comments box below.

How to Enable Redirects in Your Browser [Chrome, Safari, Opera]

If your browser is not allowing redirects and you wish to change it, you’ve come to the right place. Pop-ups and redirects can be helpful, but they can also be annoying and raise suspicions about the website’s integrity.

Therefore, the level of authorization granted to pop-ups and redirects will change depending on the requirements of the users.

Pop-up windows and redirection were utilized on websites belonging to merchants and payment providers. This would enable retailers to collect payments without having to close current sessions in the browser, which would be a huge time saver.

The merchant site was able to detect payment completions and revenue attribution in the most straightforward manner possible using this method.

These two main features—pop-ups and redirect—were, however, frequently exploited in order to spam the user or compromise their credentials due to a large number of spammers and phishing sites on the internet. This results in cons and frauds being committed online.

As a consequence of this, merchant and eCommerce websites are now collecting payments through the use of payment gateway redirection.

Following the same procedure, you input the card data in the same window inside the merchant sites, and the banking websites are simply used for the authentication component of the transaction.

It is acceptable to employ redirection for the purpose of payment gateways. Nevertheless, several websites abuse this capability in order to trick their consumers.

Why are my redirects not working?

The blocker for pop-up windows and redirection is a useful tool that, by default, prevents certain types of interruptions from occurring.

Additionally, Chrome, as well as other browsers, have the option to add the URL of a particular website, which can then be set to either deliver pop-up windows or be prohibited from doing so.

After enabling the pop-ups and redirection blocker on your machine, you will be able to navigate between websites without having to worry about accidentally landing on a malicious website while doing so.

However, this option won’t allow benign redirects from occurring either. This is the primary cause of the redirects not working.

In a similar manner, you have the option to either block or enable pop-ups while using the Chrome browser on Android. Moreover, you have the option to whitelist specific websites so that they are allowed to transmit pop-ups on mobile devices.

If, on the other hand, you require the website to deliver pop-ups, you may disable the pop-up blocker that is included in the web browsers. Follow along as we will show you how to achieve that!

How do I enable redirects?

1. In Chrome

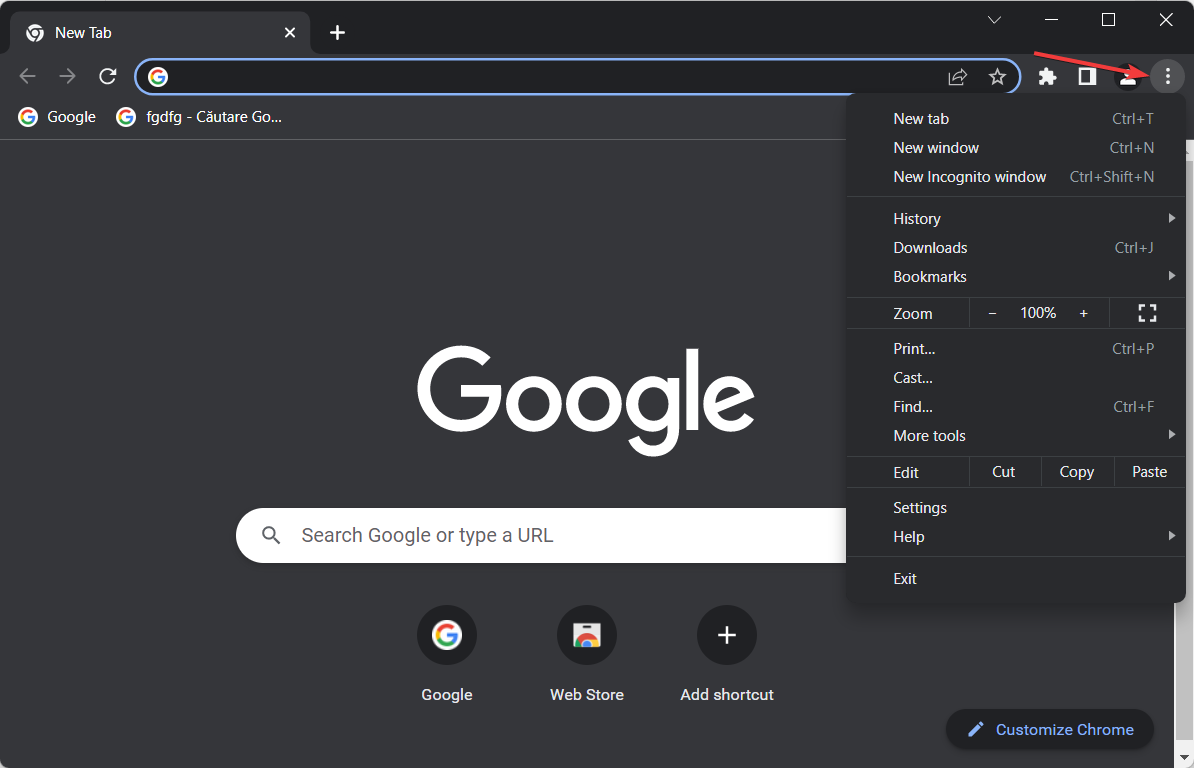
  1. Open Google Chrome and click on the three-dot menu from the top right corner.three-dot-chrome browser not allowing redirects
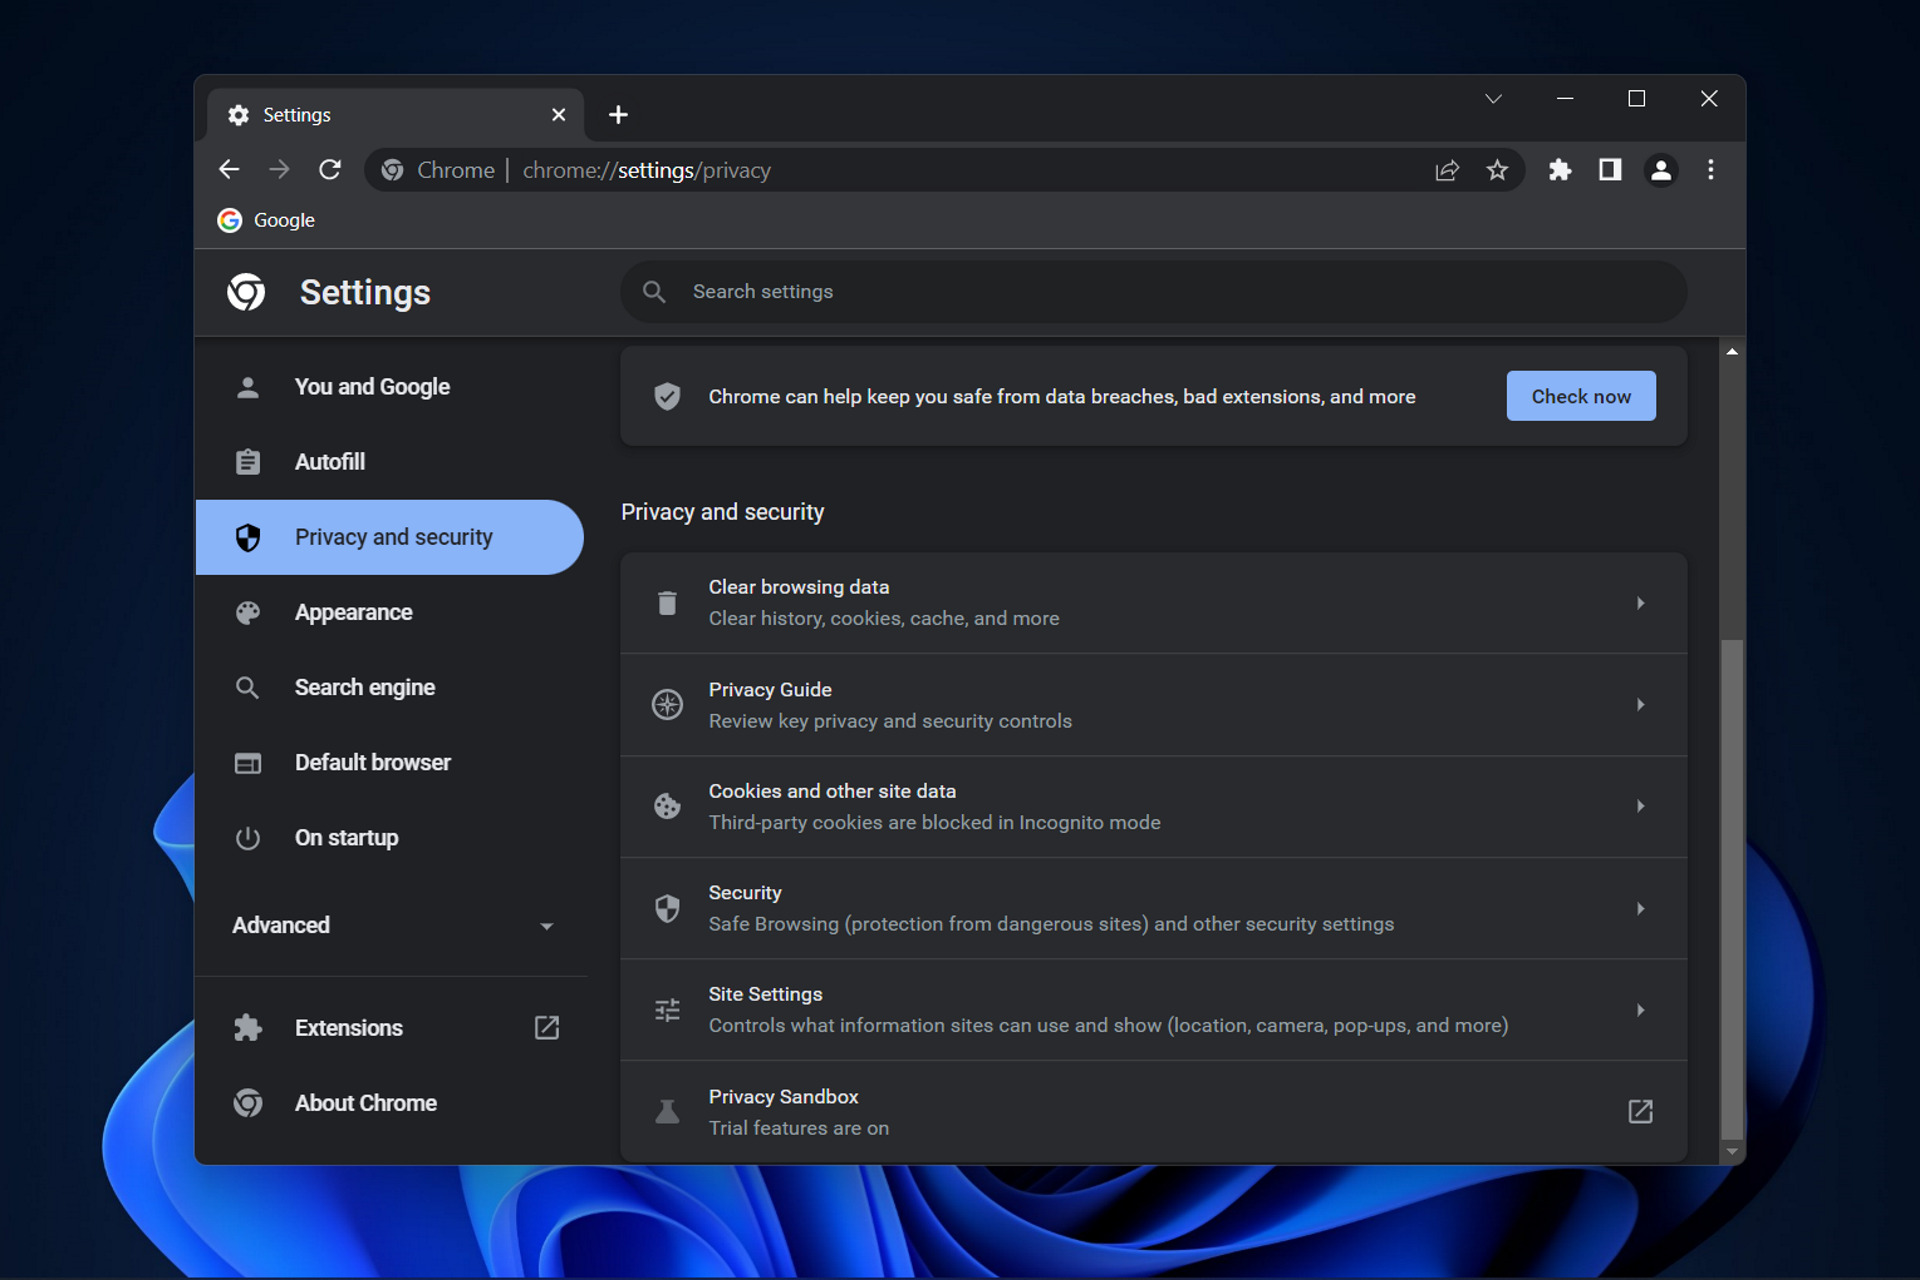
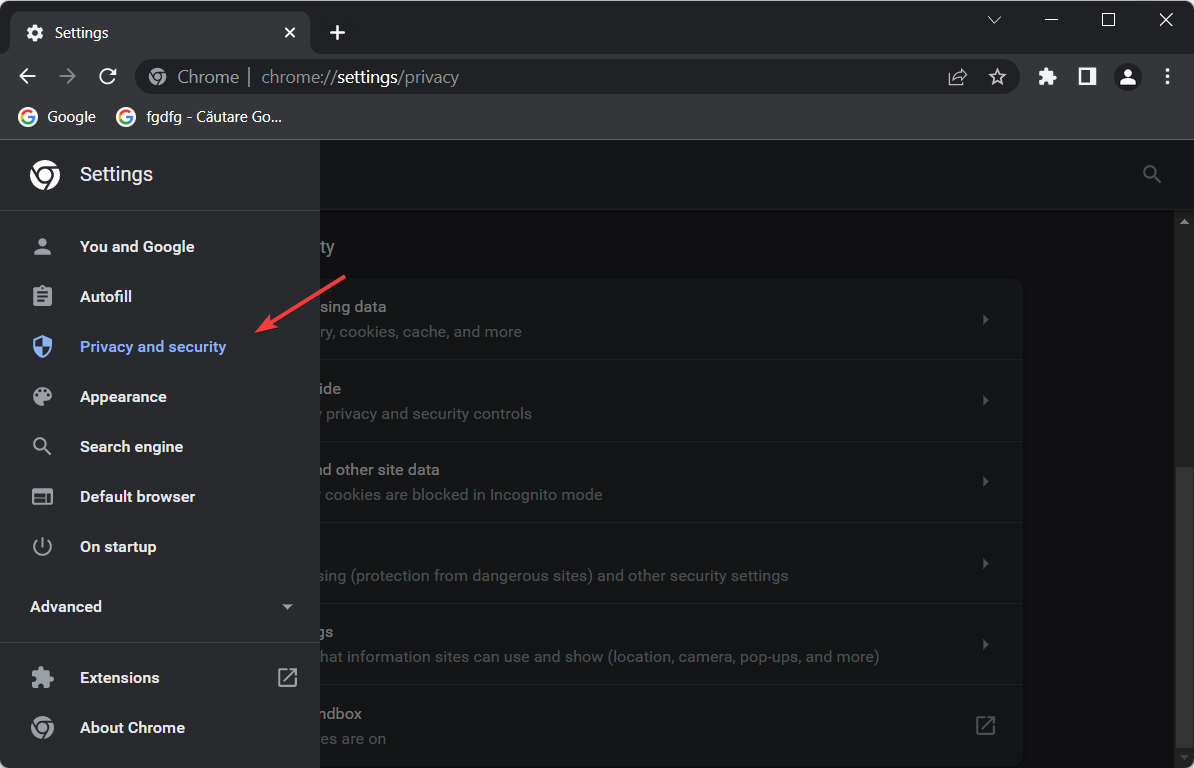
  2. Select Settings and scroll down to the Privacy and Security section to select the Site settings option.privacy-sett-chrome browser not allowing redirects
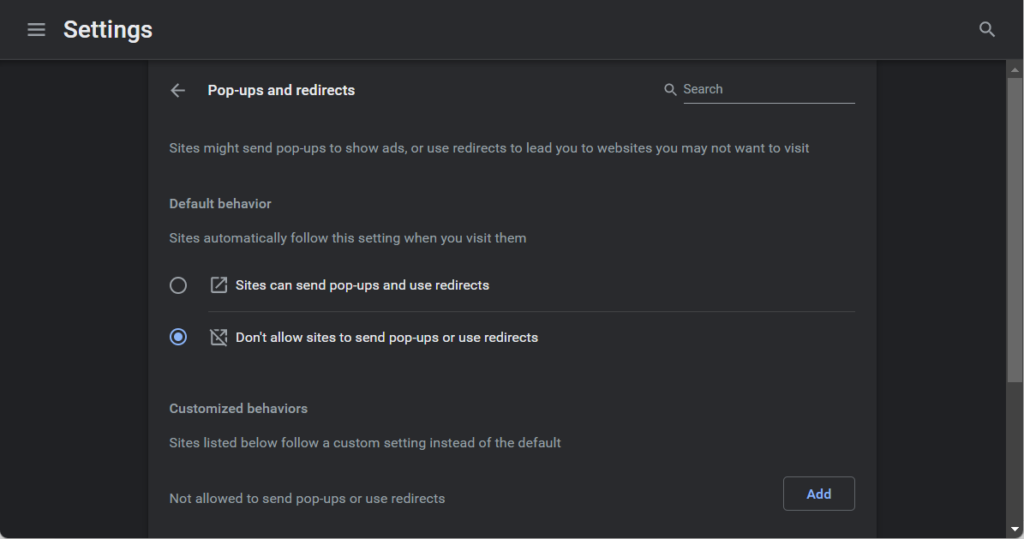
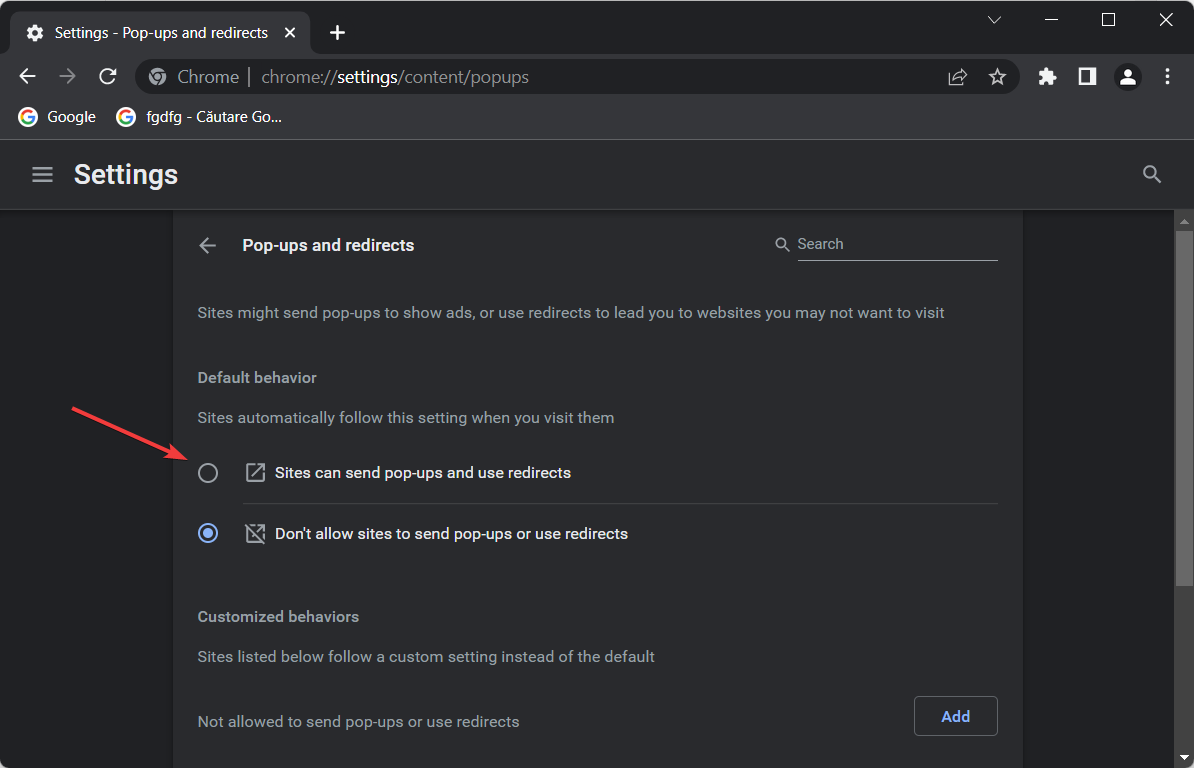
  3. Scroll down and check the box next to the Sites can send pop-ups and use redirects option. The Chrome not allowing redirects issue will now be resolved.sites-redirect-chrome browser not allowing redirects

2. In Safari

  1. Open the Safari browser app on a Mac computer and select Safari from the menubar options.
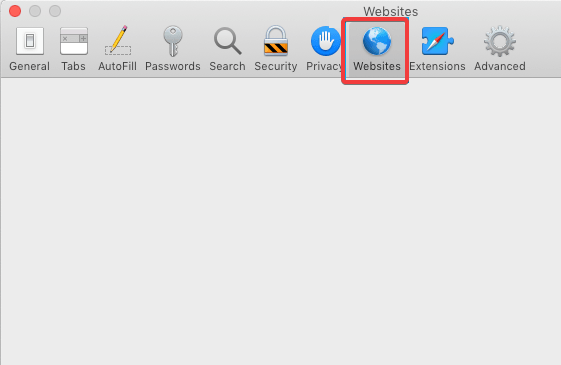
  2. Select the Preferences… option under the Safari menu and switch to the Websites tab.websites-tab-safari browser not allowing redirects
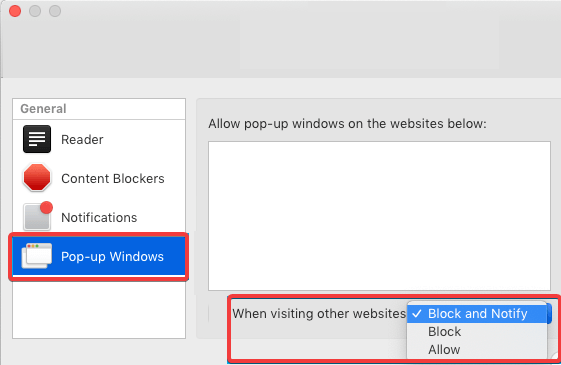
  3. Select the Pop-up Windows in the sidebar and select Allow next to When visiting other websites select Allow. The browser not allowing redirects issue will be now fixed.allow-pop-safari browser not allowing redirects

3. In Opera

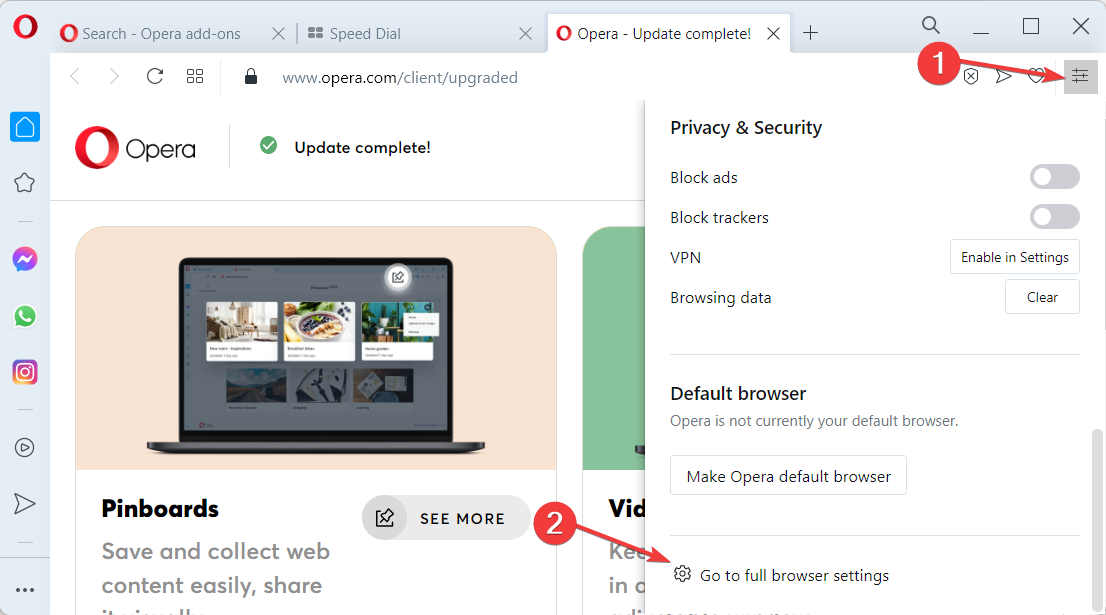
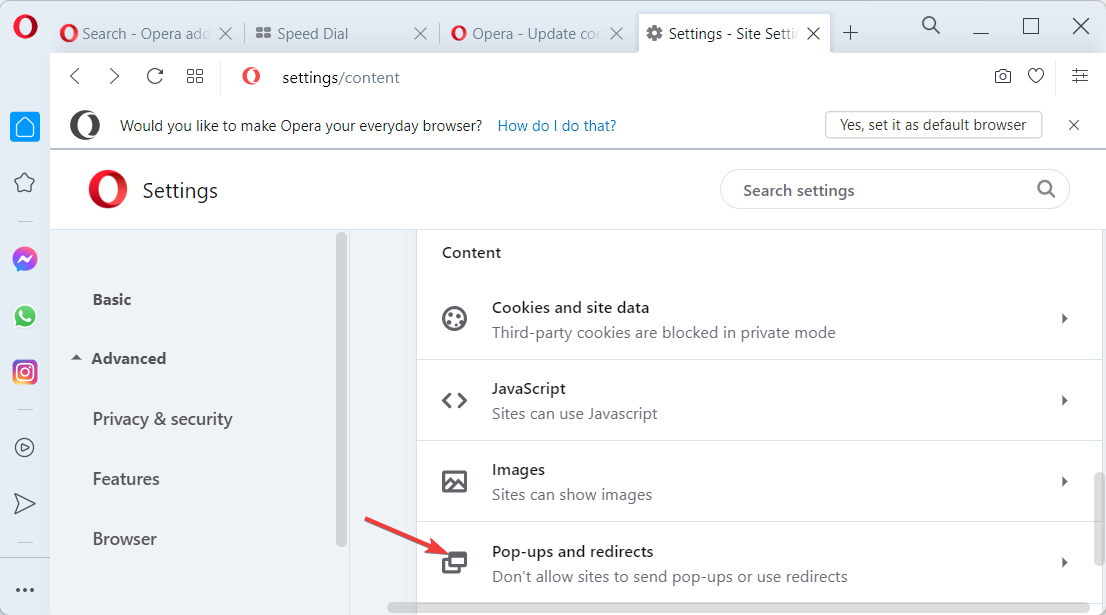
  1. Open Opera Browser and click on the Settings option from the sidebar.opera-settings browser not allowing redirects
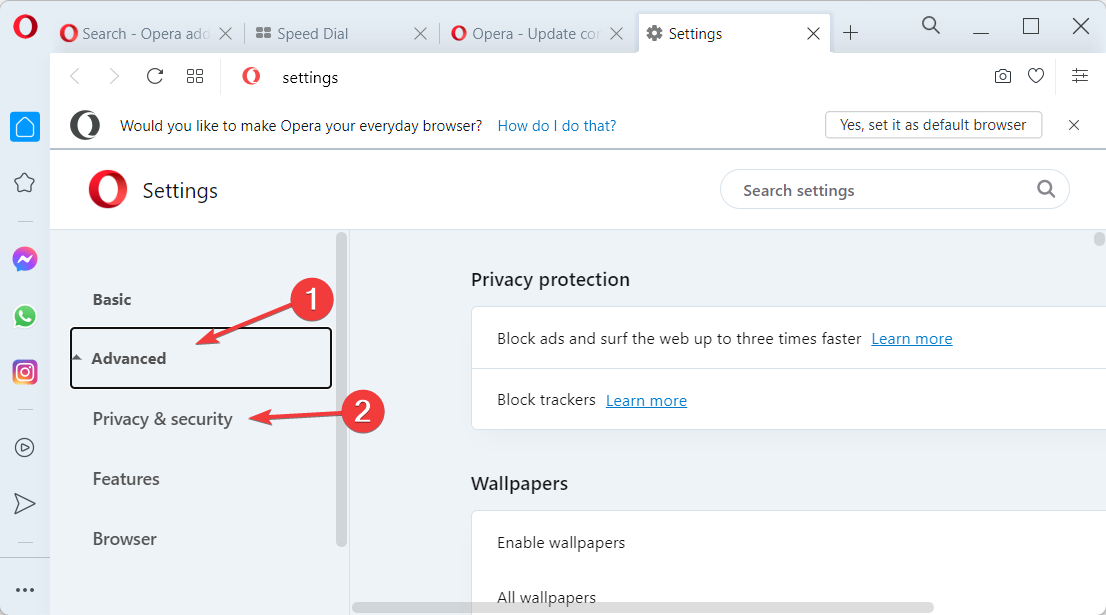
  2. Scroll down until you find the Advanced Settings section and go to the Privacy and Security section.advanced-privacy browser not allowing redirects
  3. Tap to open the Site Settings tab and scroll down to the Content section.
  4. Next, click on Pop-ups and redirects options.pop-ups-opera browser not allowing redirects
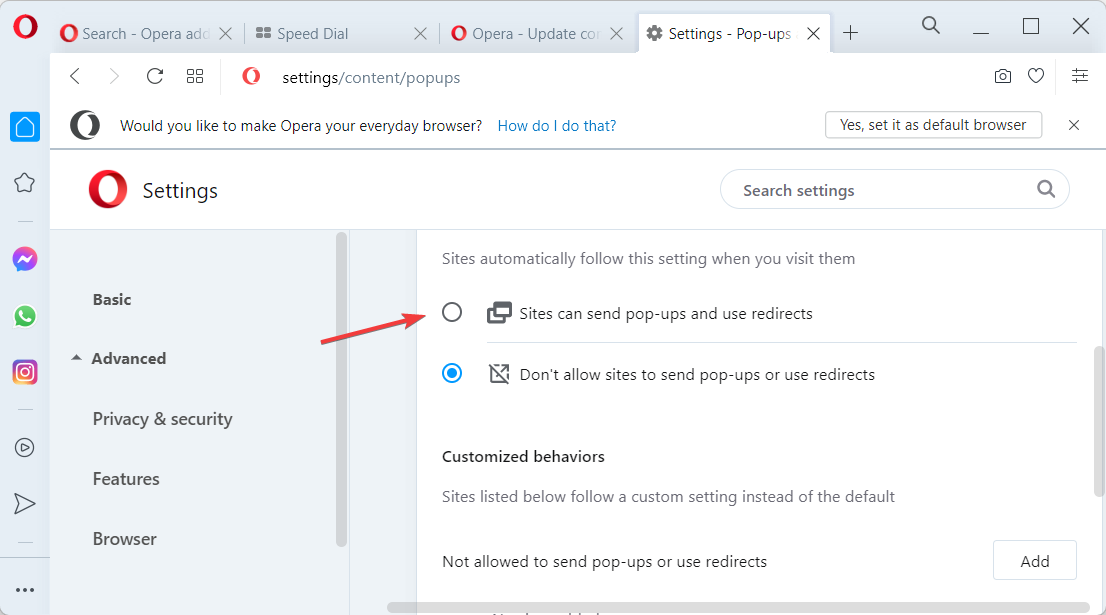
  5. Enable the toggle button to allow pop-ups and redirects on the Opera browser. This way the browser not allowing redirects problem will be resolved.send-popups-opera browser not allowing redirects

4. In Firefox

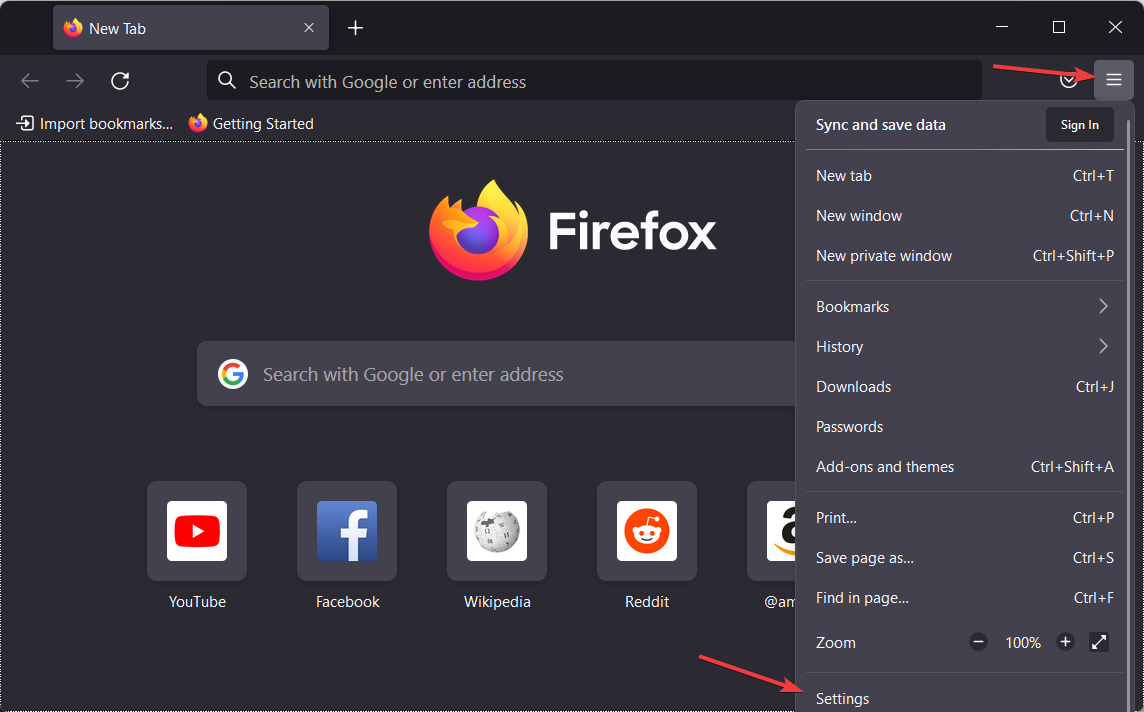
  1. Open Firefox and click on the burger menu on the top right corner to choose Settings.settings-firefox browser not allowing redirects
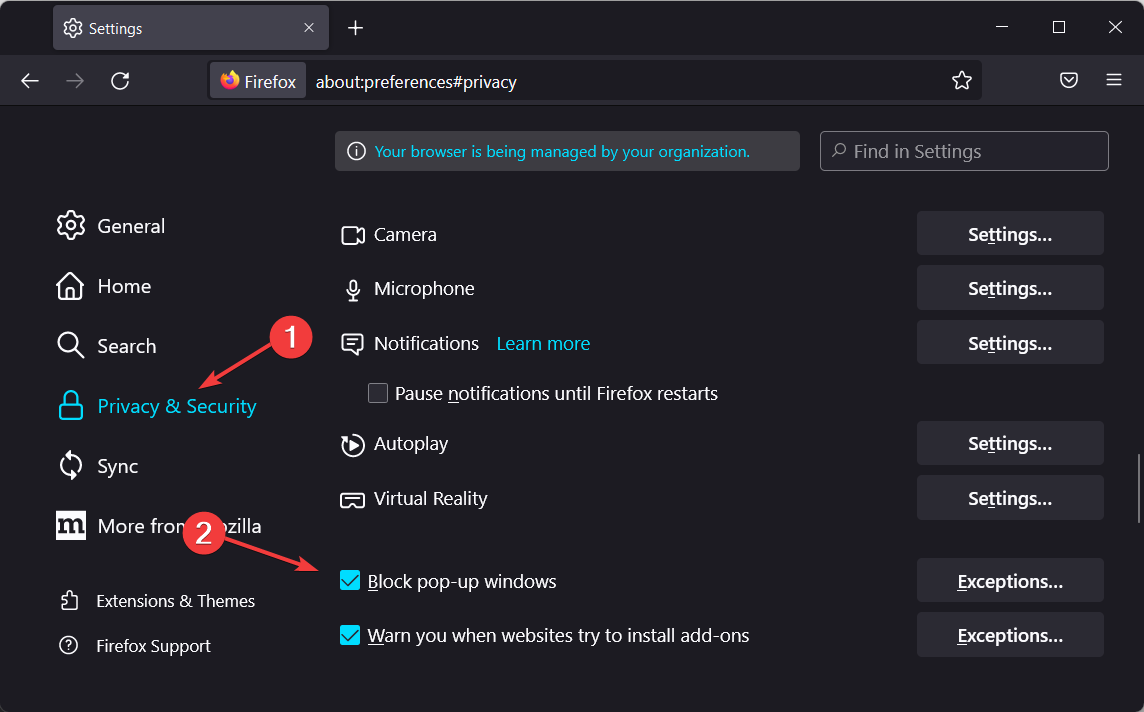
  2. Next, go to Privacy and Security, scroll down until you meet the Block pop-up windows, and uncheck it.privacy-allow-popups-firefox browser not allowing redirects

5. In Edge

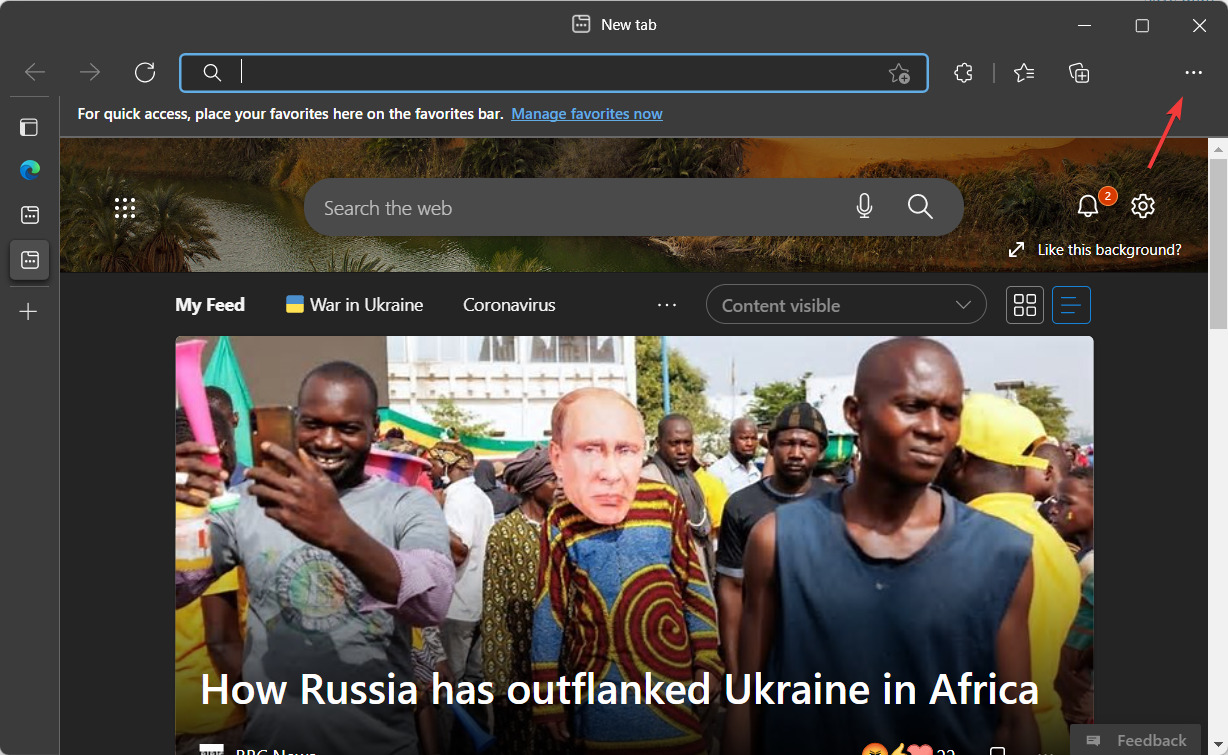
  1. Open Microsoft Edge and click on the three-dot menu option to select Settings.three-dot-edge browser not allowing redirects
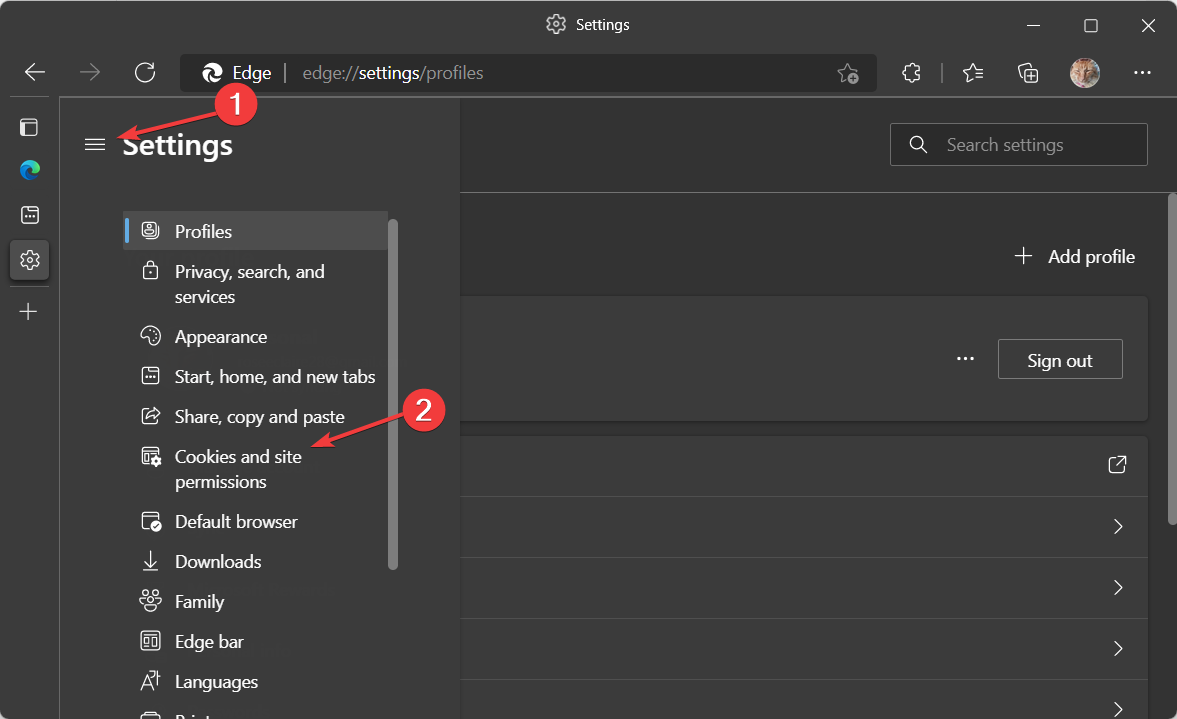
  2. Select the Cookies and Site Permissions option from the sidebar menu.cookies-perm-edge browser not allowing redirects
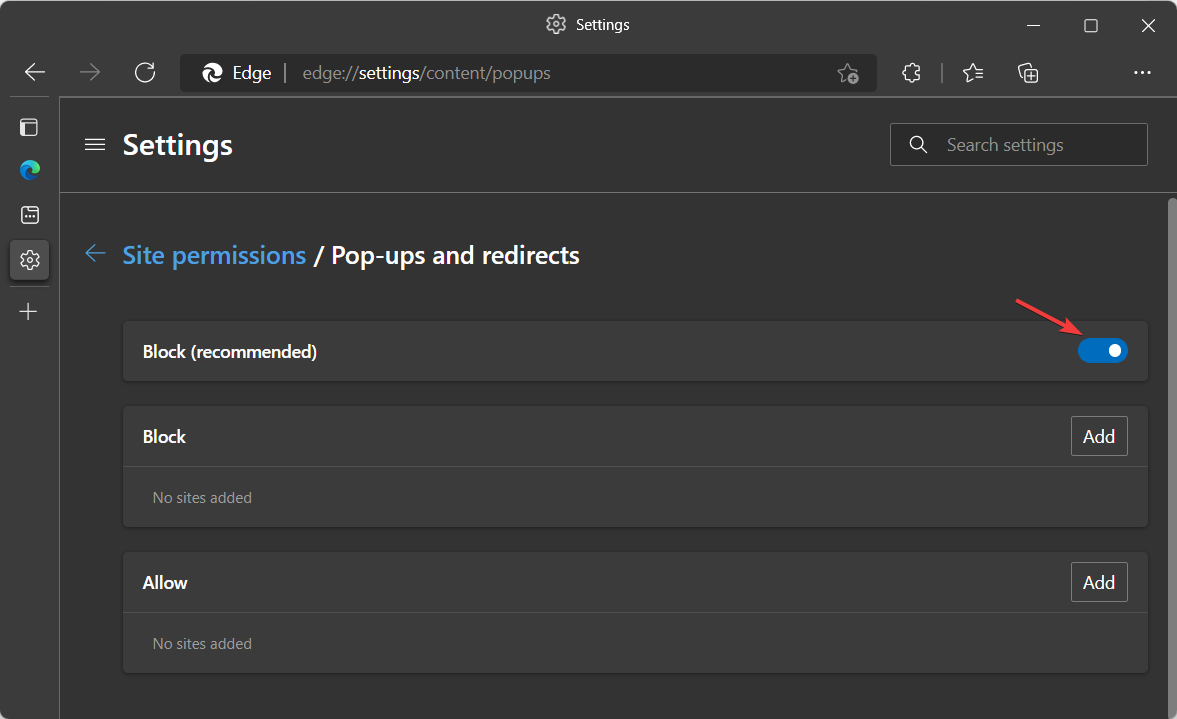
  3. Select the Pop-ups and redirects option within Site permissions.
  4. Toggle the button to allow the pop-ups and redirects. This is how to fix the browser not allowing redirects issue.unblock-pop-ups-edge browser not allowing redirects

How do I fix browser redirect problems?

The process of resolving an existing URL to a different URL is known as redirecting URLs. This successfully communicates to both your website visitors and Google Search that a page has moved to a new address. The following are some examples of situations in which redirects are very helpful:

  • You have decided to transfer your website to a new domain, and now you want to ensure that the change goes through without a hitch.
  • People can go to your website through a variety of different URLs.
  • You are in the process of combining two websites and want to ensure that any connections to obsolete URLs are moved to the appropriate pages before you do so.
  • You’ve decided to delete a page and direct readers to a different one instead.

The browser redirects not working issue may be fixed on your computer by either installing the most recent version of your browser or deleting it and then reinstalling it.

For more information check out our post on what to do if you get too many redirects on Chrome in order to fix them.

The activation process of pop-up blocker for Internet Explorer 11 is typically difficult for users. When you use this option, your online browsing experience will be less disrupted by the appearance of brief pop-up windows.

Take a look at how to enable or disable the pop-up blocker on IE 11 in order to achieve your desired result when browsing the Internet.

Don’t hesitate to leave a comment in the section below and tell us what you think. Thanks for reading!

How to Enable Redirects in Your Browser [Chrome, Safari, Opera]

If your browser is not allowing redirects and you wish to change it, you’ve come to the right place. Pop-ups and redirects can be helpful, but they can also be annoying and raise suspicions about the website’s integrity.

Therefore, the level of authorization granted to pop-ups and redirects will change depending on the requirements of the users.

Pop-up windows and redirection were utilized on websites belonging to merchants and payment providers. This would enable retailers to collect payments without having to close current sessions in the browser, which would be a huge time saver.

The merchant site was able to detect payment completions and revenue attribution in the most straightforward manner possible using this method.

These two main features—pop-ups and redirect—were, however, frequently exploited in order to spam the user or compromise their credentials due to a large number of spammers and phishing sites on the internet. This results in cons and frauds being committed online.

As a consequence of this, merchant and eCommerce websites are now collecting payments through the use of payment gateway redirection.

Following the same procedure, you input the card data in the same window inside the merchant sites, and the banking websites are simply used for the authentication component of the transaction.

It is acceptable to employ redirection for the purpose of payment gateways. Nevertheless, several websites abuse this capability in order to trick their consumers.

Why are my redirects not working?

The blocker for pop-up windows and redirection is a useful tool that, by default, prevents certain types of interruptions from occurring.

Additionally, Chrome, as well as other browsers, have the option to add the URL of a particular website, which can then be set to either deliver pop-up windows or be prohibited from doing so.

After enabling the pop-ups and redirection blocker on your machine, you will be able to navigate between websites without having to worry about accidentally landing on a malicious website while doing so.

However, this option won’t allow benign redirects from occurring either. This is the primary cause of the redirects not working.

In a similar manner, you have the option to either block or enable pop-ups while using the Chrome browser on Android. Moreover, you have the option to whitelist specific websites so that they are allowed to transmit pop-ups on mobile devices.

If, on the other hand, you require the website to deliver pop-ups, you may disable the pop-up blocker that is included in the web browsers. Follow along as we will show you how to achieve that!

How do I enable redirects?

1. In Chrome

  1. Open Google Chrome and click on the three-dot menu from the top right corner.three-dot-chrome browser not allowing redirects
  2. Select Settings and scroll down to the Privacy and Security section to select the Site settings option.privacy-sett-chrome browser not allowing redirects
  3. Scroll down and check the box next to the Sites can send pop-ups and use redirects option. The Chrome not allowing redirects issue will now be resolved.sites-redirect-chrome browser not allowing redirects

2. In Safari

  1. Open the Safari browser app on a Mac computer and select Safari from the menubar options.
  2. Select the Preferences… option under the Safari menu and switch to the Websites tab.websites-tab-safari browser not allowing redirects
  3. Select the Pop-up Windows in the sidebar and select Allow next to When visiting other websites select Allow. The browser not allowing redirects issue will be now fixed.allow-pop-safari browser not allowing redirects

3. In Opera

  1. Open Opera Browser and click on the Settings option from the sidebar.opera-settings browser not allowing redirects
  2. Scroll down until you find the Advanced Settings section and go to the Privacy and Security section.advanced-privacy browser not allowing redirects
  3. Tap to open the Site Settings tab and scroll down to the Content section.
  4. Next, click on Pop-ups and redirects options.pop-ups-opera browser not allowing redirects
  5. Enable the toggle button to allow pop-ups and redirects on the Opera browser. This way the browser not allowing redirects problem will be resolved.send-popups-opera browser not allowing redirects

4. In Firefox

  1. Open Firefox and click on the burger menu on the top right corner to choose Settings.settings-firefox browser not allowing redirects
  2. Next, go to Privacy and Security, scroll down until you meet the Block pop-up windows, and uncheck it.privacy-allow-popups-firefox browser not allowing redirects

5. In Edge

  1. Open Microsoft Edge and click on the three-dot menu option to select Settings.three-dot-edge browser not allowing redirects
  2. Select the Cookies and Site Permissions option from the sidebar menu.cookies-perm-edge browser not allowing redirects
  3. Select the Pop-ups and redirects option within Site permissions.
  4. Toggle the button to allow the pop-ups and redirects. This is how to fix the browser not allowing redirects issue.unblock-pop-ups-edge browser not allowing redirects

How do I fix browser redirect problems?

The process of resolving an existing URL to a different URL is known as redirecting URLs. This successfully communicates to both your website visitors and Google Search that a page has moved to a new address. The following are some examples of situations in which redirects are very helpful:

  • You have decided to transfer your website to a new domain, and now you want to ensure that the change goes through without a hitch.
  • People can go to your website through a variety of different URLs.
  • You are in the process of combining two websites and want to ensure that any connections to obsolete URLs are moved to the appropriate pages before you do so.
  • You’ve decided to delete a page and direct readers to a different one instead.

The browser redirects not working issue may be fixed on your computer by either installing the most recent version of your browser or deleting it and then reinstalling it.

For more information check out our post on what to do if you get too many redirects on Chrome in order to fix them.

The activation process of pop-up blocker for Internet Explorer 11 is typically difficult for users. When you use this option, your online browsing experience will be less disrupted by the appearance of brief pop-up windows.

Take a look at how to enable or disable the pop-up blocker on IE 11 in order to achieve your desired result when browsing the Internet.

Don’t hesitate to leave a comment in the section below and tell us what you think. Thanks for reading!

Opera GX Mini Player is Not Working? How to Enable it Again

If you’re struggling with the Opera GX Mini Player not working, keep reading. The picture-in-picture feature may face issues when you use an outdated version of the browser or due to DRM.

Luckily, it’s fairly easy to fix. We’ll guide you through the steps so you can get back to watching videos or streaming music in no time.

What can I do if the Opera GX mini player is not working?

1. Update Opera

  1. Click the Menu icon in the top left corner.
     menu icon opera
  2. Choose Update & Recovery.
    update and recovery opera gx
  3. Opera will check for available updates and download them automatically.
    opera gx update

In most cases, this happens when you integrated and dedicated GPU, but updating Opera fixes the issue.

2. Change Opera’s flags

  1. Enter the following in the address bar: opera://flags
     opera://flags address bar
  2. Look for Override software rendering and set it to Enabled.
    override software rendering list enabled opera GX
  3. Restart the browser to apply changes.

3. Disable interfering extensions

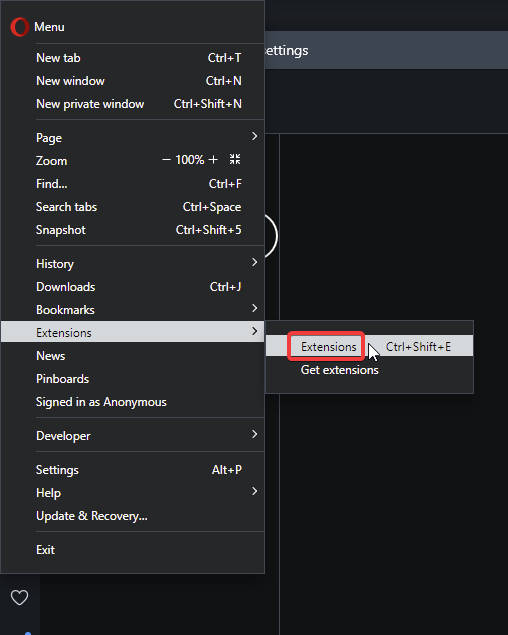
  1. Open Opera GX and hit the Opera icon in the upper left corner.
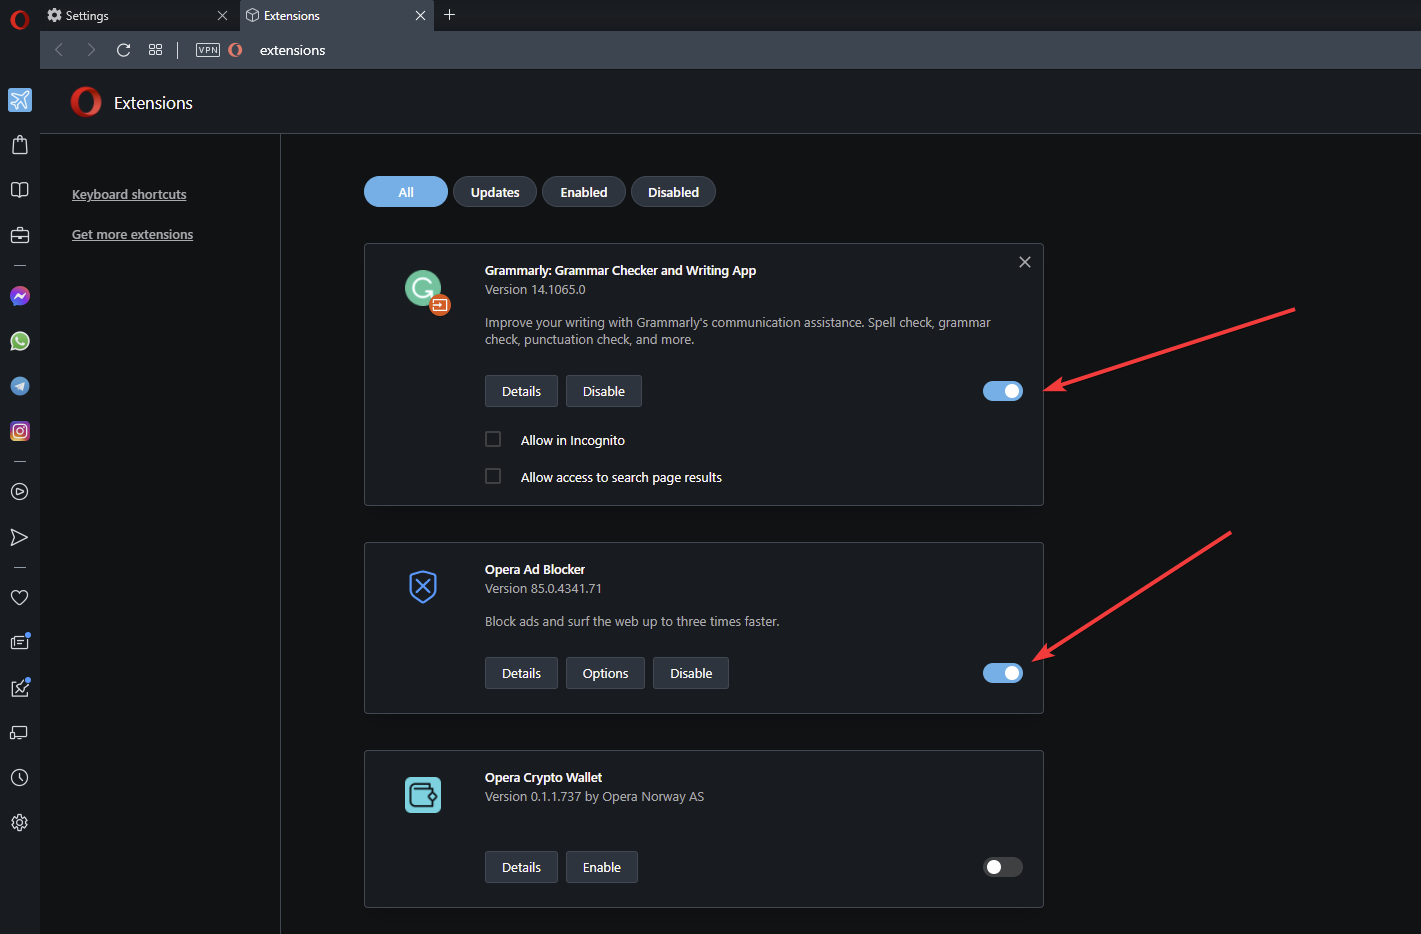
  2. Select Extensions and then Extensions.opera gx extensions
  3. Toggle off the button for all extensions to disable them.opera gx disable extension
  4. Go back to the Mini player and see if it’s working.

If this fixes the problem, go back to the extensions settings and re-enable them one by one. Check each time if the Mini player is still working to identify the one that’s interfering.

Consider removing it and finding a more stable replacement.

How do I enable mini player on Opera GX?

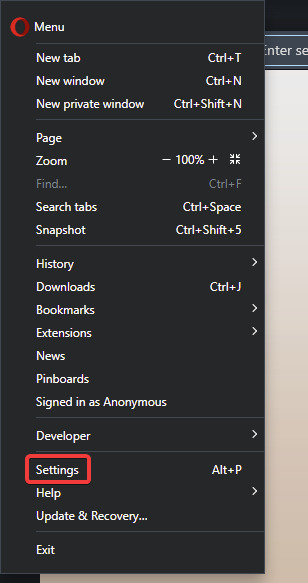
  1. Click the Menu button and go to Settings.
    opera gx menu settings
  2. Scroll all the way down and click Advanced.
    opera gx settings advanced
  3. Locate the Enable video pop out and enable it.
    disable video popup opera gx

Keep in mind that this feature might not work with videos that are protected by DRM, such as Disney+, Netflix, etc.

If you never used this feature, we have a handy guide on how to pop out YouTube videos in various browsers.

Some users reported that Opera One isn’t playing videos, but that can be fixed with the steps from our dedicated guide.

Tell us which fix worked for you in the comments section below.

How to Bypass the Upgrade your Browser to use Dropbox Popup

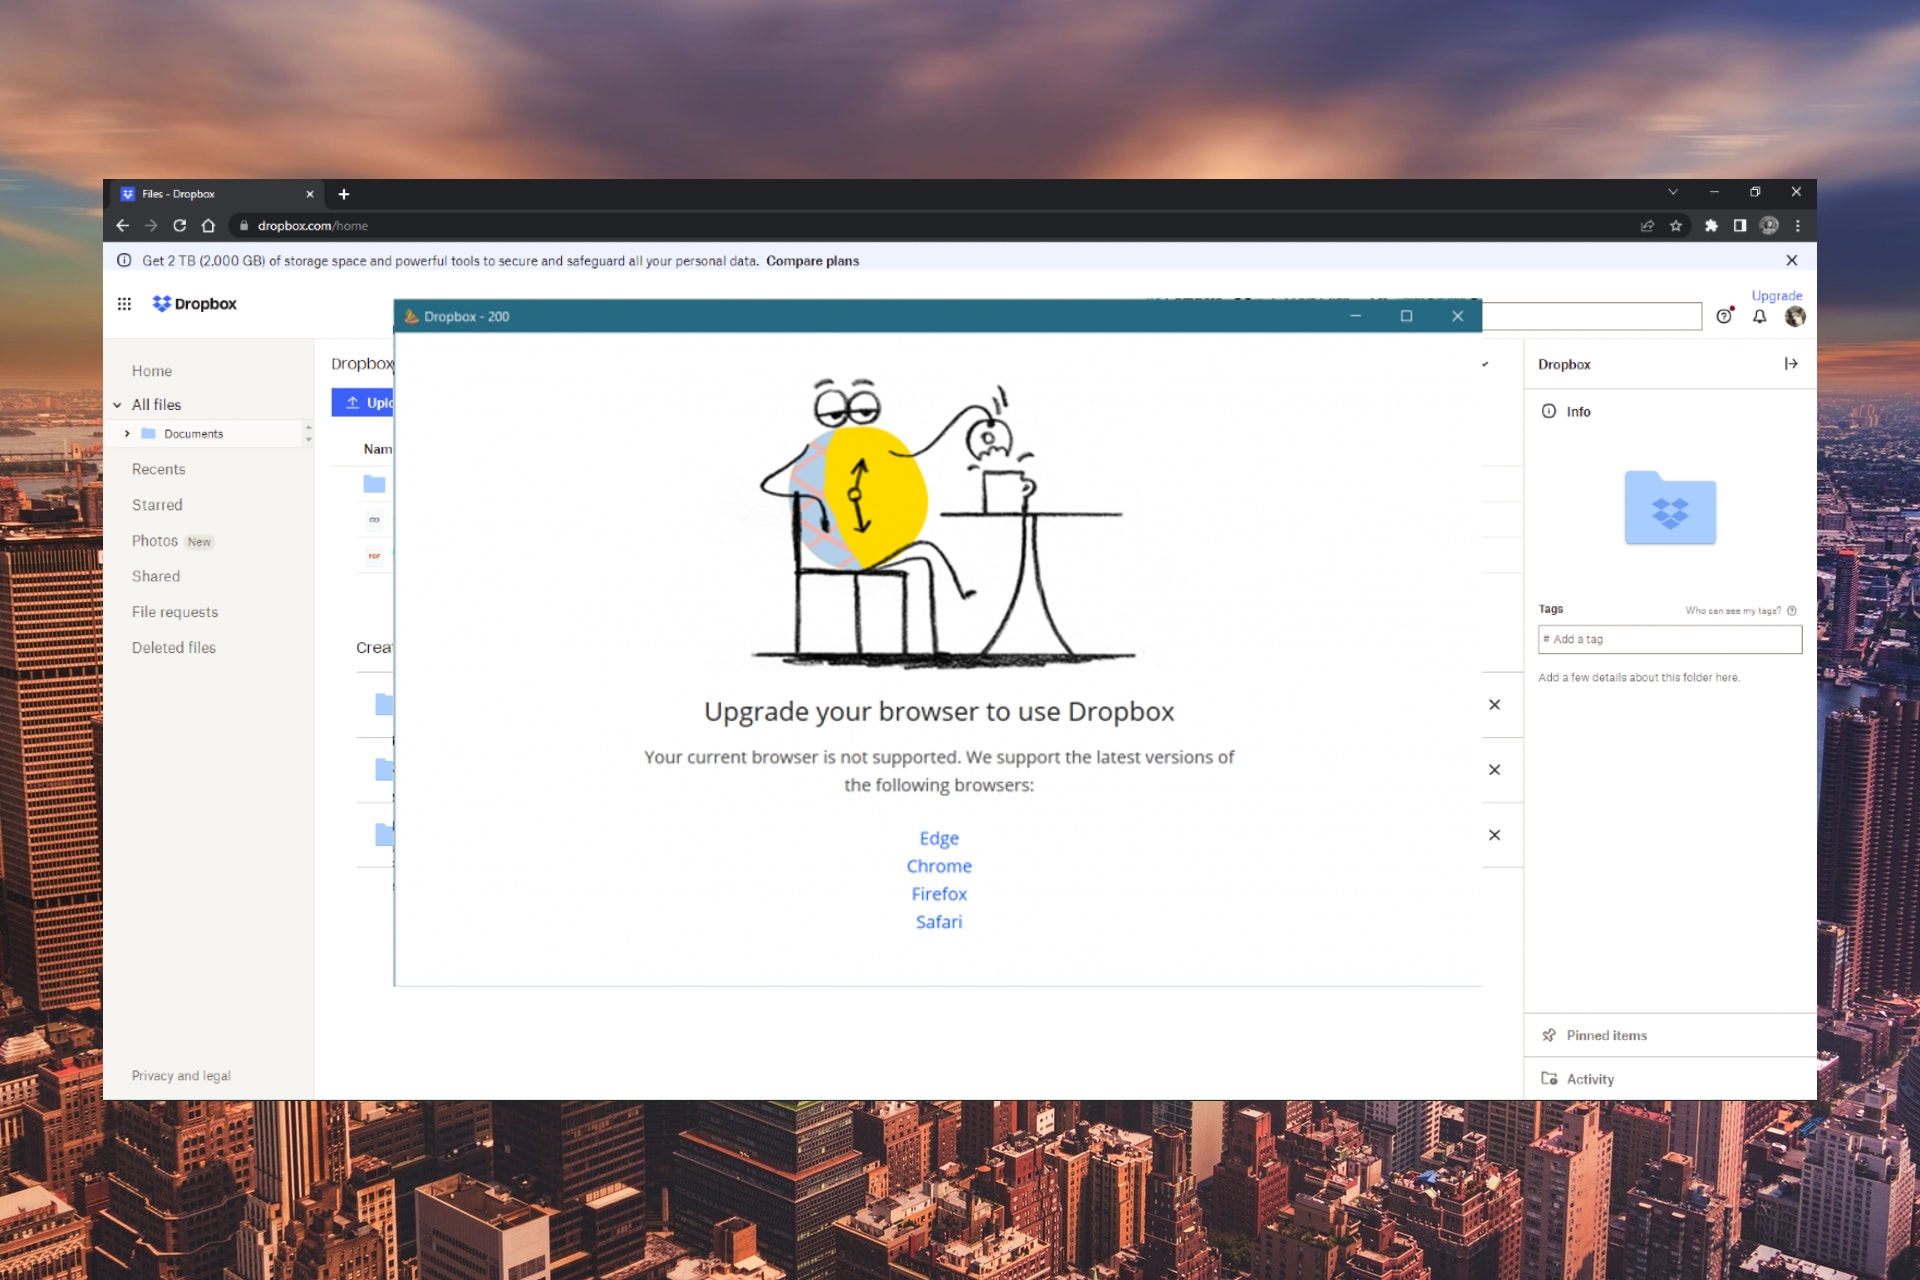
Dropbox is one of the most popular tools for cloud and file storage. Users can use Dropbox from their browser or download the app. However, users have reported receiving the error: upgrade your browser to use Dropbox. Follow the tips below to solve this issue.

What browser does Dropbox use?

Users can download and transfer files using Dropbox on most browsers, but it works best on Google Chrome, Firefox, Microsoft Edge, or Safari.

Meet Dropbox requirements to get rid of the message upgrade your browser to use Dropbox.

What does it mean when Dropbox says your browser is no longer supported?

Because Dropbox is constantly improving, it may no longer be compatible with older operating systems or outdated browsers.

Dropbox will stop syncing changes and not work properly if used on a non-supported or outdated browser, however, your files will still be protected and remain on your Dropbox account.

How can I get rid of the upgrade your browser to use Dropbox message?

1. Use a different browser

If you’re not already, try using one of the browsers recommended by Dropbox for compatibility and optimization. Also, ensure you’re using the latest version of the browser.

Switch to a recommended browser to get rid of the error: upgrade your browser to use Dropbox.

If you want a professional browser that works with your Dropbox sharing tool, most likely that you need to pick Opera.

This browser is constantly upgraded and it can offer integrated apps like My Flow to share files between your mobile and PC in a second. So you have high compatibility with any online services or apps right on the homepage.

Opera

Opera

Use the Dropbox service with no errors with this improved and customizable browser

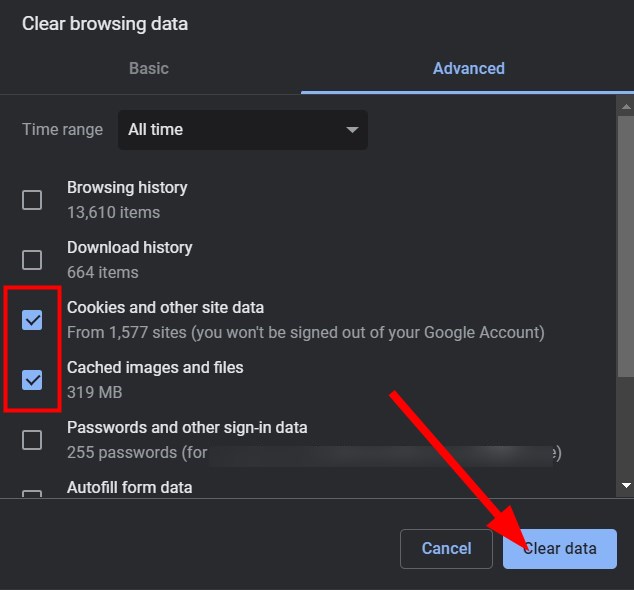
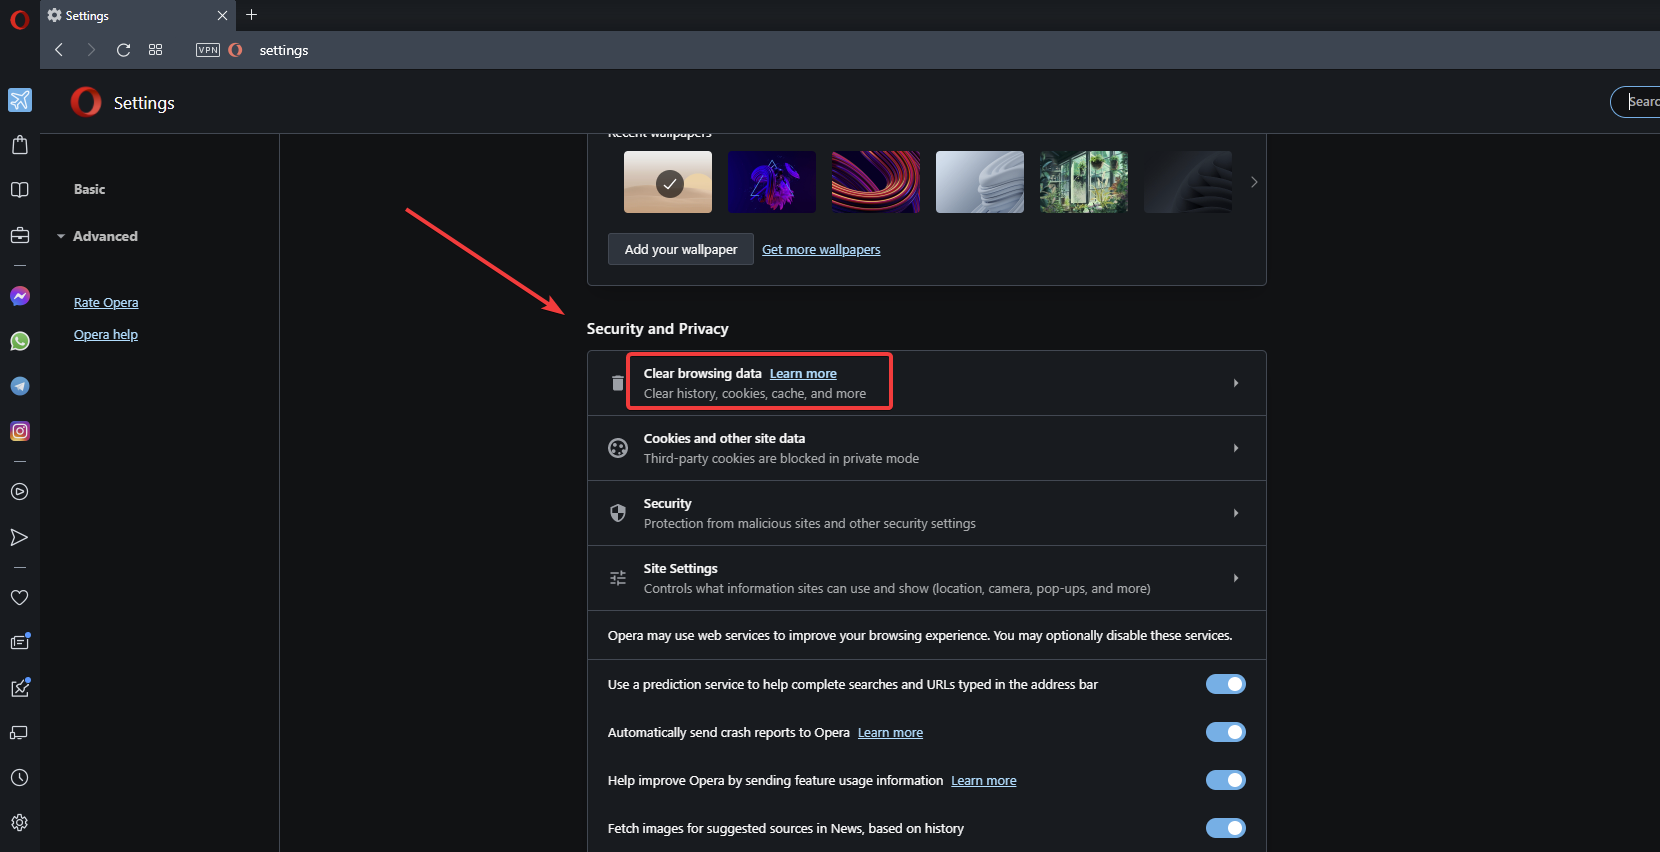
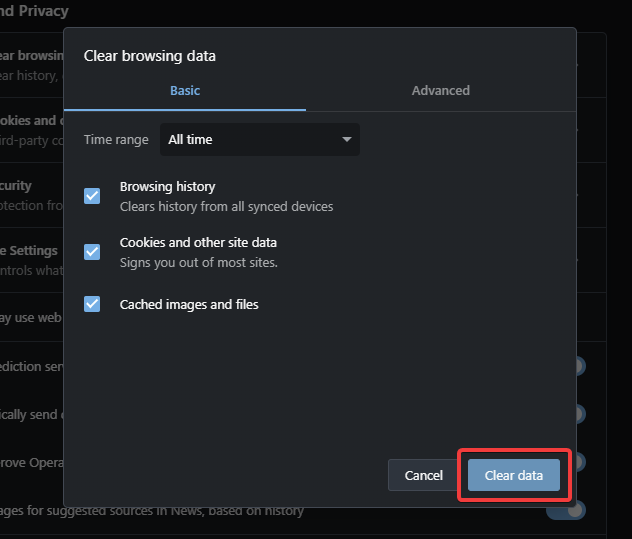
2. Clear browser cache

  1. In your preferred browser, click on the menu button located in either the top corner.
  2. Click on Settings. Open your browser's menu and click settings.
  3. Under privacy and security settings, select clear browsing data. Under security and privacy settings click on clear browsing data.
  4. Click Clear data. Select clear data.

If you haven’t cleared your browser data in some time, it may be affecting the performance, and this can include Dropbox functions. Clearing your cache and data regularly can help speed up your browser.

In addition, clearing your cache and cookie data can be done more efficiently and less manually using the most-used cleanup software CCleaner.

3. Disable addons and blockers

  1. In your preferred browser, click on the menu button located in either the top corner.
  2. Click on Settings.
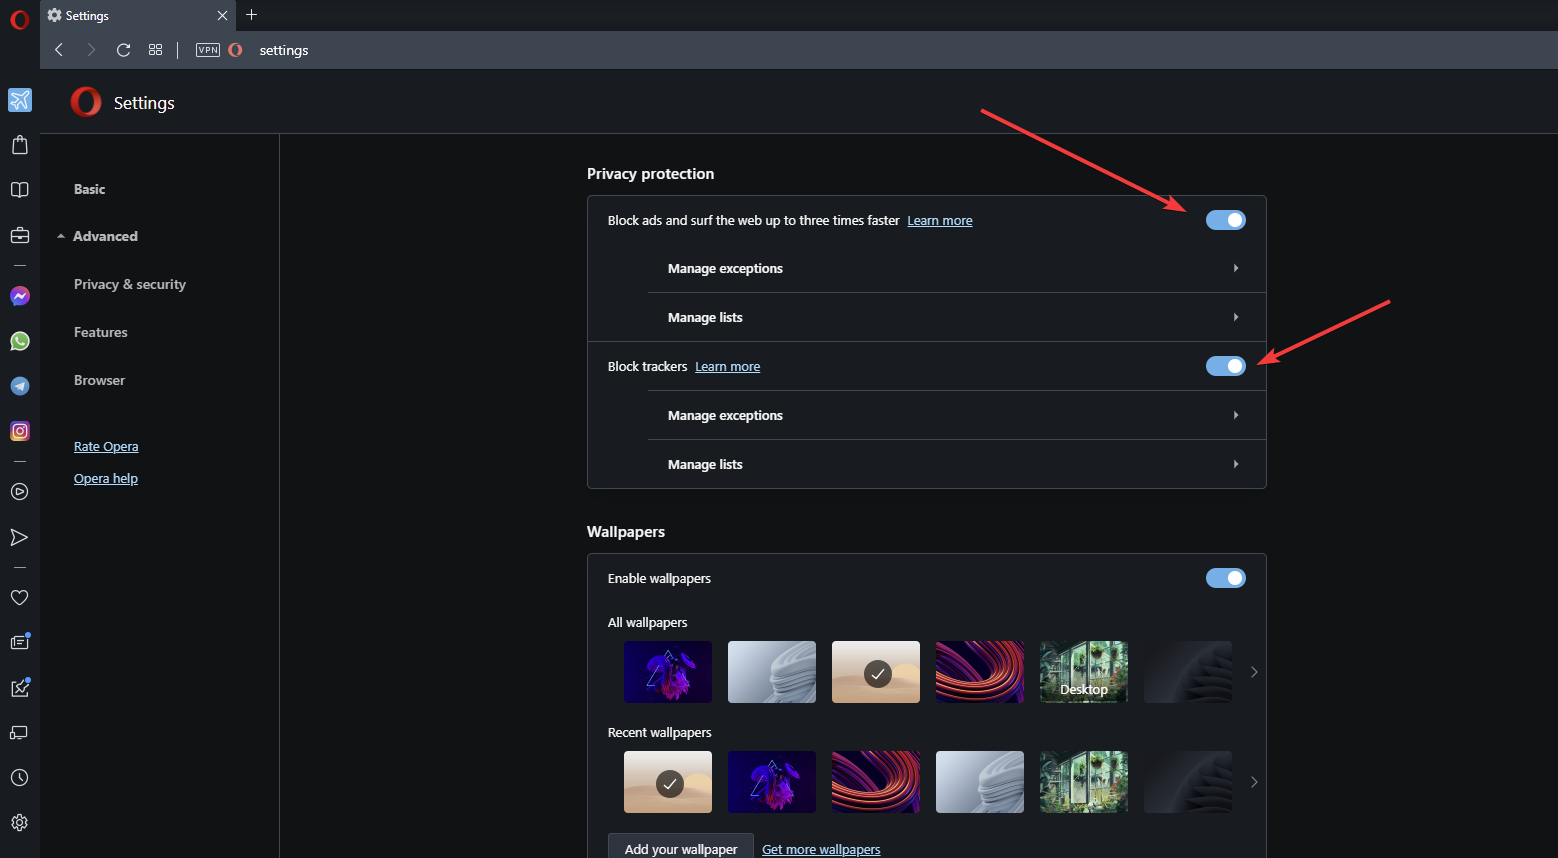
  3. Under privacy protection toggle any blockers to off. Disable any ad, cookie, and tracker blockers.
  4. Click on the browser menu and select Extensions. Open browser extensions settings.
  5. Disable all extensions. Disable all extensions to get rid of the error upgrade your browser to use Dropbox.

Sometimes blockers for ads and trackers can prevent Dropbox from working properly. Any extensions and add-ons may also interfere with Dropbox and cause the error.

For users receiving this error with the KeeAnywhere plugin, there is a new build to try that fixes this issue.

Hopefully, the above solutions helped get rid of the error: upgrade your browser to use Dropbox. If you’re having other issues, like the Dropbox app not opening in Windows 11, we have fixes for that as well.

Do not hesitate to let us know in the comments if a different solution that is not listed worked.

3 Ways to Fix ImportError: The Specified Module Could not be Found

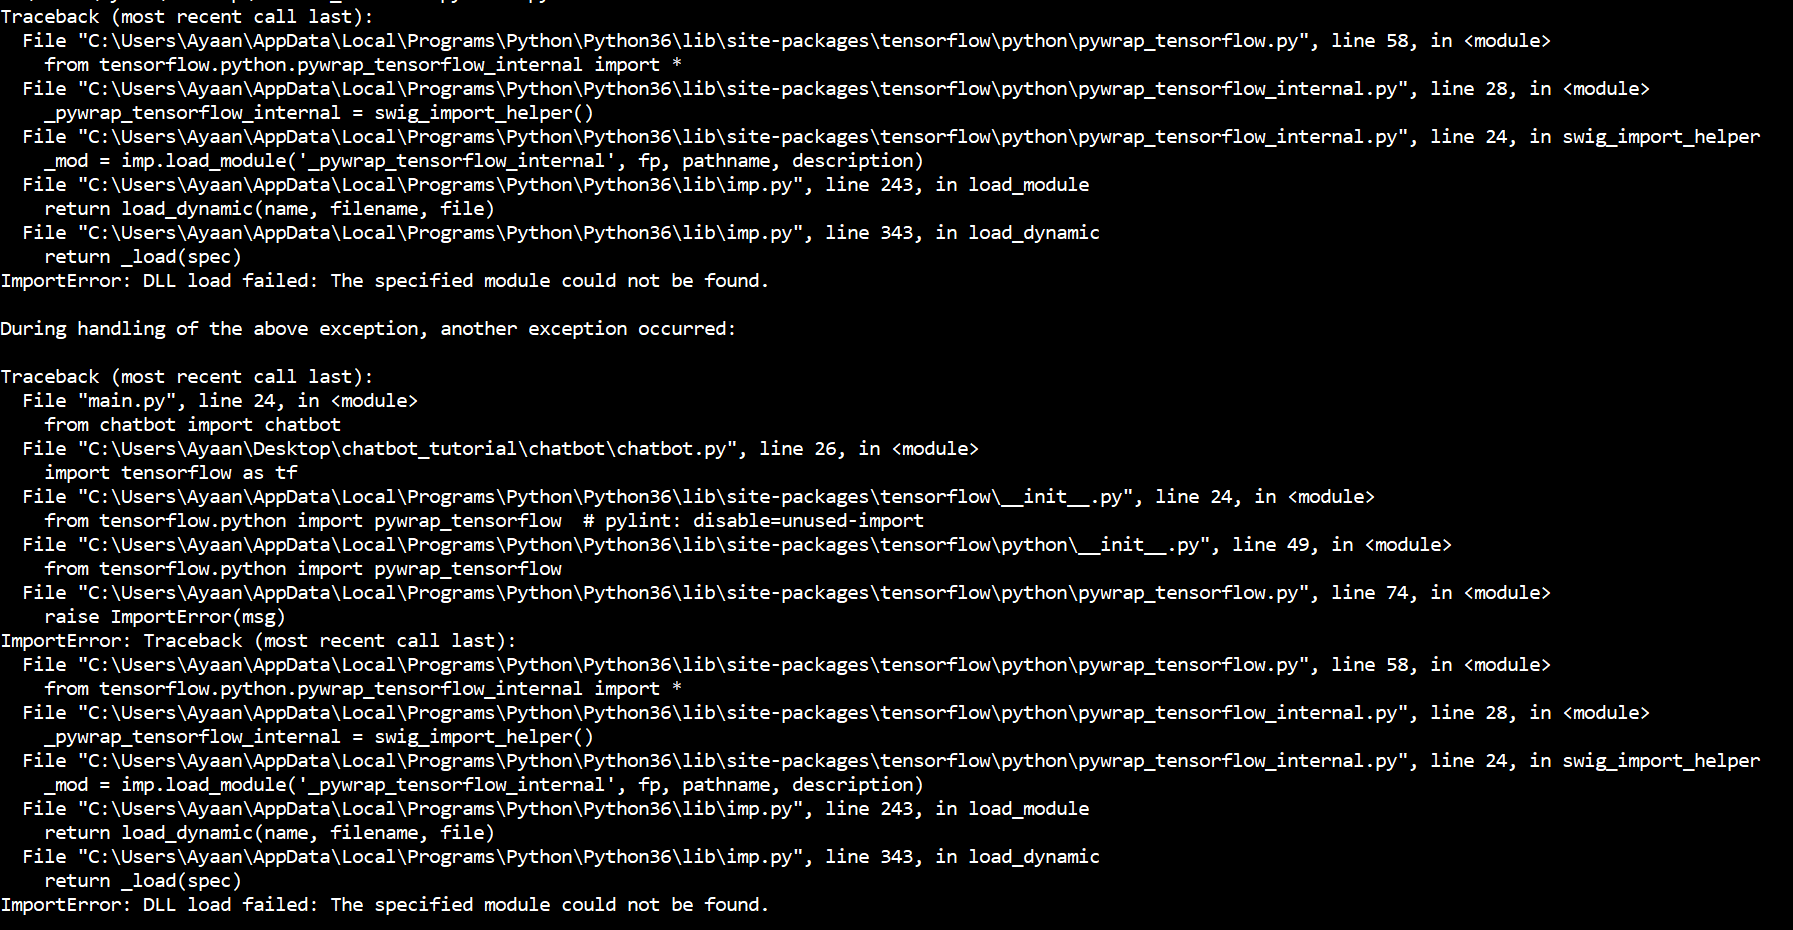
Python is an interpretable, high-level, and general-purpose programming language that has widespread adoption. However, users still encounter errors when using it, such as the ImportError: DLL load failed: The specified module could not be found error.

It is the successor of the ABC programming language. In addition to replacing the Unix shell and the C programming language for system administration, it is also in charge of exception handling and the interface with the Amoeba operating system.

Follow along as we will see why this error occurs, what it means, and how to fix it. Keep on reading!

What is Specified module could not be found?

ImportError: DLL load failed: The specified module that could not be found is a RunDLL error, which means the DLL files connected to the Windows Registry and used to perform tasks can’t be found.

RunDLL failures are most common when a program does not have permission to access a particular code. For example, this issue might arise due to using incorrect or out-of-date device drivers, which tweaked certain DLL files.

Damaged entries in the Windows registry are another factor contributing to the occurrence of the error.

The following are some of the Python libraries in which the ImportError: DLL load failed: The specified module could not be found error had shown:

  • TensorFlow
  • NumPy
  • PyCharm
  • PyQt5
  • Cv2 DLL
  • SciPy
  • Sklearn
  • Matplotlib

How do you fix DLL load failed the specified module could not be found?

1. Reinstall the Python library

  1. Find the library that causes the error. It can be found in the output lines above the error inside your Terminal.terminal-python ImportError: DLL load failed: The specified module could not be found
  2. Use the following commands to uninstall and reinstall the library. Make sure to replace lib_name with the library’s name: pip uninstall lib_name pip install lib_namepip ImportError: DLL load failed: The specified module could not be found

Check out what to do if PIP is not recognized inside your PyCharm terminal and how to install its library on your computer to fix the ImportError: DLL load failed: The specified module could not be found issue.

2. Use a third-party software

It’s possible for Dynamic Link Library files, commonly known as DLLs, to get corrupted or disappear for a variety of reasons. They are critical to the operation of your computer system, even though they are vulnerable to corruption.

A dedicated tool will resolve the issues with the software, crashes in memory, and even broken registry files.

These troubleshooters have an extensive collection of DLL files that have been brought up to date and will be of great assistance, serving to replace any files that need to be refreshed. Thus, fixing DLL-related errors such as ImportError: DLL load failed: The specified module could not be found.

3. Run an SFC scan

  1. Click on the magnifying glass icon from your Taskbar and type cmd. Right-click on the top result to choose Run as administrator.cmd-run ImportError: DLL load failed: The specified module could not be found
  2. Type or copy-paste the following command into the interface and press Enter to fix the ImportError: DLL load failed: The specified module could not be found error: sfc /scannowsfc-scannow ImportError: DLL load failed: The specified module could not be found

We recommend you look at our post on how to fix the specified module that could not be found USB error to find more solutions. To learn more about errors and how to deal with them, use the try-except-print command in Python.

Was this guide useful to you? Don’t hesitate to share your thoughts in the comments below. Thanks for reading!

How to Download Windows 11 LTSC & What to Use It for

Windows 11 LTSC refers to the Long-Term Servicing Channel, a version of Windows that supports and upgrades the operating system over an extended time.

Instead of getting feature updates every two years as we did with Windows 10, the new operating system will only receive one update each year. Unfortunately, that also implies the timescale for support won’t be the same.

How to download Windows LTS

  1. In a web browser, go to Go to admin.microsoft.com.
  2. In the Admin Center, look for Subscriptions on the left menu.
  3. Navigate to Software.
  4. Search for Windows 10 Enterprise LTSC 2021.
  5. Pick a download option, open the installation file, and follow the on-screen prompts to install it.download windows 10 enterprise ltsc

What is Windows LTSC?

The Long-Term Servicing Channel and the Semi-Annual Channel were the principal release channels accessible with previous versions of Windows Server, including Windows Server 2016 and Windows Server 2019.

Long-Term Servicing Channel, also known as LTSC, is an option available for a more extended period and emphasizes stability.

In contrast, Semi-Annual Channel, also known as SAC, offered more frequent releases, making it possible for customers to take advantage of innovation more quickly.

Source: Docs Microsoft

LTSC will be the sole primary release channel supported, beginning with Windows Server 2022. Containers and microservices were the primary focus of development for earlier versions of Windows Server’s Semi-Annual Channel. This line of innovation will continue with Azure Stack HCI.

A new major version of Windows Server is typically released once every two to three years when using the Long-Term Servicing Channel. Users have a right to get five years of mainstream support and five years of extended support.

This channel offers a lengthy servicing option for computers and functional stability. It may be deployed with either the Server Core or the Server with Desktop Experience installation choices.

The Semi-Annual Channel releases do not impact the deployments of the Long-Term Servicing Channel of Windows Server. LTSC users will continue to get security and non-security upgrades, but they won’t get any new features or functionality added to their accounts.

How long is LTSC supported?

For Windows 10, the autumn update receives 30 months of support for commercial organizations or enterprises, but the spring update only gets 18 months of support for individual users.

The Home, Pro, Pro for Workstations, and Pro Education editions of Windows 11 will receive 24 months of support, while the Education, Enterprise, and Education editions will receive 36.

Source: Docs Microsoft

It is expected that Windows 11 will continue to provide extra time and flexibility for the validation and at-scale deployments that are common in those editions.

Windows 11 LTSC will only receive support for five years, when before it was supported for ten years.

Microsoft has confirmed that Windows 11 will include long-term support and servicing version valid for five years, as stated in an AMA (ask me anything) thread connected to the lifetime and servicing of Windows 10 and Windows 11.

Does LTSC have Edge?

Beginning with Windows 10 Enterprise 2021 LTSC and Windows 10 IoT Enterprise 2021 LTSC, the kiosk mode for Microsoft Edge will be available for LTSC versions.

Is there a Windows 11 LTSC?

As Microsoft announced, Windows 11 LTSC’s release date will be around 2025.

We announced the next Windows LTSC would be built on Windows 10, version 21H2, and yes it will be a 5-year support lifecycle. We can expect that the next LTSC *after* Windows 10 Enterprise LTSC 2021 will be built on Windows 11. And it will also keep the 5-year support. However, that’s expected in 3 years or so, so anything can happen in that timeframe. If you need to use LTSC for a longer period, we recommend moving to Windows 10 IoT LTSC.

Until then, we recommend that you install Windows 11 on your computer and rely on it until further editions are released.

Alternatively, please take a look at our performance comparison between Windows 10 and 11 to decide whether you want to switch to the latter or not.

Is Windows 11 Enterprise ready?

October of 2021 saw Microsoft’s introduction of Windows 11 Enterprise, along with the other editions of the OS.

Although the revised operating system features a new appearance and feel, it also comes with increased hardware requirements, which may prevent certain companies from adopting it.

The basic codebase for Windows 11 Enterprise is identical to that of Windows 10. Despite this, the operating system provides several new features. That is geared toward end-users who significantly rely on their desktop computers to perform their work.

Even though most of these capabilities are included in all editions of Windows 11, Enterprise edition customers may use some of the most important additions.

For more details, take a look at our post on the best Windows 11 edition for teachers that are free and affordable.

Was this guide useful to you? Let us know in the comments section below whether you are waiting for the LTSC version to come out. Thanks for reading!

8 Best Browsers with Workspaces to Improve Daily Browsing

Navigating and surfing the internet is a massive part of our lives. From doing simple research to entertainment, there are no limits to what we will find on the internet.

However, it is easy to get things muddled up since modern browsers permit you to open as many tabs as possible.

Hence we recommend using browsers that have or allow workspaces or tab groupings. This way, you do not have to mix up your tabs and can always know where to find what.

If you need a browser with workspaces, stick around because we share all you need to know and our recommendations in this article.

For Windows users, you may opt for any of the most secure browsers for Windows 11.

What is Opera One browser workspace?

Opera One Workspaces transform a disorganized browser into a valuable and productive instrument. You may use this capability to create several workplaces for various activities.

For instance, you might make workspaces for networking, sports, commerce, and business.

Does Vivaldi have workspaces?

While Vivaldi does not call it workspaces, it has similar features. We will discuss this later.

Does Firefox have workspaces?

You may not have workspaces on Firefox, but it has extensions for this functionality.

What are the best browsers with workspaces?

Opera One – Comes with an elegant design

Let us start by saying this is the king of workspaces. By right-clicking on the tabs you can shift them into whatever workspaces you desire. It is straightforward and efficient.

Other than that, the Opera One browser comes with an elegant design and is appealing and feature-rich. At the left pane, you can integrate messenger, Twitch, and other functionality.

It is our favorite to use and will allow you to create an Opera One workspace shortcut.

Additional features:

  • Built-in adblocker and VPN
  • Import Bookmarks
  • Up to date AI
  • Modular AI-ready design
  • Tab Islands

Opera One

Organize tabs and integrate every tool you need for a fully functional workspace!
Free Download Visit website

Chrome – Robust functionality

The Chrome browser, owned by Google and is the most used globally. We love it because it has a vast extension library that you can add to its already robust functionality. Unfortunately, the downside is that it is resource-intensive.

However, with the Chromes Workspaces extension, you may designate a workspace for a specific academic topic, personal project, holiday wish list, or vacation itinerary.

Additional features:

  • Media controls
  • A very private Incognito mode
  • Account profiles

⇒ Get Chrome

AVG Secure Browser – Improved productivity

If you search for one browser with both tabs management and high privacy, you found it here.

AVG browser is open-source built and it offers work optimization tools with reliable security to always be safe against tracking parties.

Even though it doesn’t include multiple workspaces, you can customize everything from UI to privacy settings as we speak.

In addition, you have tabs grouping and customization, mandatory HTTPS encryption, Stealth Mode against tracking cookies, or adware protection.

Additional features:

  • Hack-check feature
  • Privacy Guard
  • Webshield protection utility
  • Antivirus integration

AVG Secure Browser

Switch between tasks easily using AVG productivity and security tools.

Firefox – Enhanced tracking protection

Here is another robust browser. Off the box, you may lack the functionality of the workspace, but it has several alternatives in the form of extensions.

Tab Workspaces is one we love. To display the Palette, which lets you browse for tabs independent of the workspace or windows they are in, click the extension icon and select a workspace.

Lastly, Firefox is a privacy-conscious browser that offers a private mode browsing option for elevated privacy.

Additional features:

  • Enhanced tracking protection
  • Private browsing
  • Page actions menu

⇒ Get Firefox

Edge – Tracking prevention

Microsoft Edge was introduced in Windows 10 and 11 and has since started gaining popularity.

In addition to its many functions, it also has added the Workspaces functionality. It was created to streamline the user’s surfing experience by using different windows for various unrelated activities.

The best part of this browser is that users will now be able to use the extensive Chromium extension library.

Additional features:

  • Enhanced InPrivate mode
  • Tracking prevention
  • Vertical tabs

⇒ Get Edge

Vivaldi – Custom Search Engines

browser with workspaces

While Vivaldi does not offer Worsspaces per se, it has two great features that fulfill the role. First is the Web Panels that allow you to create different web browser windows.

Secondly, it has an already integrated tab management system called tab stacks. You can create stacks by grouping them according to themes.

Additional features:

  • Split-screen tabs
  • Custom Search Engines
  • Tracking Protection

⇒ Get Vivaldi

Brave – Enjoy Brave rewards

browser with workspaces

Like Vivaldi, the Brave browser does not have the same Workspaces feature as Opera, but it offers an excellent tab grouping function.

You will be able to separate tab groups based on the themes you need. Other than this, we love the browser, because it is great for privacy.

Additional features:

  • Settings import
  • 3X page load speeds
  • Brave rewards

⇒ Get Brave

Ghost Browser

browser with workspaces

This is the browser explicitly made for Workspaces and dubbed the browser for tech pros.

With Ghost browser, assigning a unique proxy to every tab or group of tabs in a flexible manner is possible with color-coded sessions because they contain independent cookie jars that allow you to connect to many accounts at once.

Additional features:

  • Chrome extensions
  • Fight tab bloat
  • Multiple identity types

⇒ Get Ghost Browser

How do I create a workspace in Firefox?

  1. Navigate to the Tab Workspaces extension page.
  2. Click on Add to Firefox.
  3. Tick the Allow this extension to run in Private Windows checkbox, and click the Okay button.
    browser with workspaces
  4. Click on the tab Workspaces icon and then click the plus icon.
  5. Any new tab you open will fall under this new workspace.

And there it is, the best browser options that use workspaces. So while some of them have the feature out of the box, you will need a browser extension in others.

Let us know which browsers are your favorites to use with workspaces.

Our Pick of the 15 Best Browsers for Zoom Video Conferencing

Zoom is a video conferencing platform. It allows users to organize meetings and join a meeting. However, the meeting activities are available via two modes, the application and web browser.

Since the Zooms web app was released, users have always joined their meetings through their browsers. All that you need to use the web app is a browser.

Another advantage is that you don’t necessarily have to create an account before joining a meeting. However, all you need to do is click a link, then go straight to the meeting page.

Despite the accolades about the Zoom web app, not all browsers work well with it. It means that to use Zoom video conferencing on your browser, it must be compatible with Zoom.

Nonetheless, you must keep some features in mind when choosing a browser for Zoom conferencing. Some features are oriented towards browser security, picture quality, and WebRTC capabilities in the browser environment.

Nevertheless, this article will examine the best browsers for Zoom video conferencing for a great user experience.

Can Zoom be used on all browsers?

Zoom video conferencing requires a stable, fast, and strong browser to function well. However, not all browsers can provide such quality support for Zoom. Thus, not all browsers can smoothly run the Zoom web app for video conferencing.

Does it matter which browser I use?

It matters which browser you use for Zoom video conferencing. It is because of some vulnerabilities and threats you can encounter with an unreliable browser. So, to ensure that your connection to the meeting link is safe, you need a browser with a vibrant security system.

Likewise, some browsers’ WebRTC (Web Real-Time Communication) is not stable, resulting in media leaks. Hence, consider how secure the browser is. However, we have put together some best picks of browsers for you to select.

Does Zoom work better with Chrome or Firefox?             

Zoom works better on Google Chrome than it does on Firefox. It is a browser with rich features that makes it reliable for web apps like the one you are using.

It works better with Zoom because of inbuilt features like an advanced mobile app suite and WebRTC support. Also, it gains more credit for its security and privacy system, which is essential for Zoom. How fast a browser determines how smoothly it works with Zoom.

Which browser is better for Zoom?

Opera One – Best for privacy and security

Opera One is a browser that is similar to Google Chrome. They both function on the Chromium code and enable them to be fast and resourceful to use. It has a lot of functionality that allows it to give its user the best browser experience.

Opera One has stable browser security that keeps it safe from foreign intruders. It allows you to join Zoom links without threats from hijackers due to built-in tracking blocker, VPN and Ad Blocker.

Opera One also has great built-in features for work organization such as workspaces, tab islands and a native AI.

Opera One

Enjoy crystal-clear video conferencing with this fast and secure browser with minimal system impact.
Free Download Visit website

Google Chrome – Overall best for call quality

Chrome is a fast and secure web browser. It is one of the best browsers you can use for surfing the internet. It has extensions that you can download for different purposes. Chrome has features that help keep your browser activities safe from hijackers or malware.

One of its main features is data syncing. It helps store information about your activities on the internet and allows you to access it on another device.

The browser uses a stable web app suite that helps it run browser apps like Zoom smoothly. It supports WebRTC, which allows you to make conference video calls like Zoom video conferencing.

⇒ Get Chrome

Firefox – Best speed enhancement add-ons

Firefox is a browser that supports different operating systems. It comes with lots of plug-ins and extensions that allow users to access features in the browser. It is simple to use and flexible to customize. It lets the user configure the browser to suit their needs.

Zoom video conferencing can work on Mozilla Firefox because it has WebRTC as an inbuilt feature. It has a privacy system that protects your data from intruders. Also, it uses a high graphic performance to give a clear media quality.

⇒ Get Firefox

Microsoft Edge – Ideal for Windows users

Edge browser is by Microsoft which is the default browser for Microsoft devices. It is available on different operating systems. Also, it has features that support video conferencing apps like Zoom and is fast to use.

However, a popular feature of Edge is security. It uses high-standard security tools to protect your online activities from web attachments. Also, Edge supports WebRTC, which makes it a perfect browser for Zoom video conferencing.

Microsoft Edge uses the Chromium code, making it faster and accessible to more features like add-ons and ad blockers.

⇒ Get Edge

Safari – Ideal for MacOS

Safari is a browser by Apple. It comes as the default browser for Apple devices. Considering how the Apple system works, Safari uses tools with features. It is a compatible browser for Zoom because it supports WebRTC.

Also, using an older version of Safari can be a problem. However, keeping your safari browser up to date can help it run Zoom video conferencing smoothly. Another feature of Safari is security. It protects your internet data from external agents.

It works well with syncing your data with other browsers across the Apple server. It works when you have multiple Apple devices. Another amazing about the Safari browser is that it can store your browser data in iCloud. It allows you to access your browser information on another Apple device.

⇒ Get Safari

Vivaldi – Good for average users

Vivaldi is one of the best apps that work with Zoom video conferencing. Zoom is a browser that requires a stable network and a browser that is fast with loading pages.

Thus, Vivaldi helps you access Internet pages fast and ease the stress of bothering about online hijackers. It comes with customizable features that allow you to configure your browser how you want.

Vivaldi supports peer-to-peer networking, which is a good feature for video conferencing, as in the case of Zoom. Likewise, you can add chrome extensions to Vivaldi by downloading them from Chrome’s repository.

⇒ Get Vivaldi

Brave browser – Best for privacy overall

Another browser that works well with Zoom is the Brave browser. It works across different platforms and operating systems.

However, one dominant feature of the Brave browser is security. It protects your browser data from hijackers and doesn’t sell or share it.

It supports features that help it work perfectly with Zoom video conferencing.

⇒ Get Brave

Avast Secure Browser – Ideal for antivirus security

Avast is an antivirus program that works for securing your devices from any form of threat. It is a Chromium code browser with lots of features that help you get the best of the internet. It works smoothly with Zoom and keeps your connection with others secure.

Some notable features of Avast’s secure browser are webcam protection, ads blocker, and others. These features keep the browser safe and fast for better performance.

⇒ Get Avast Secure

Tor Browser – Best HTTPS-Everywhere integration

Tor is a browser that combines an open network, which allows you to surf the internet invisibly. This is possible because it routes your connection traffics through anonymous servers.

So, when you want to browse the internet or certain websites privately, Tor gives a safe route. It allows you to join Zoom meetings as anonymous and keeps your connection safe. It is resourceful for ensuring speed and safety at the same time.

⇒ Get Tor

DuckDuckGo – Ideal for anonymity protection

This is another browser that keeps your Internet activities off record and prevents attacks from hijackers.

It is best for security reasons and it allows you to get information about potential threats. It works fine for Zoom video conferencing because of its good screen settings.

⇒ Get DuckDuckGo

Dolphin – Ideal for Android/Tablet users

Dolphin is a browser with lots of customizable features that allow users to choose how it functions. The best part of this browser is the gesture options.

These gesture options allow you to set gestures for a different part of the browser. It is fast, reliable, and easy to use. It is a perfect browser for Zoom video conferencing.

Likewise, it allows multiple tabs, and you can also browse the internet while on Zoom calls without interruption.

⇒ Get Dolphin

Puffin – Best cross-platform access

Puffin Browser is a fast web browser with features that makes it safe for surfing the internet. It has a stable connection speed and protects you from malware and viruses.

Sometimes, hackers infiltrate links like that of Zoom and try to find a loophole in your devices. However, Puffin uses a security system that blocks away threats like this.

Also, note that it works with a standard graphic display and peer-to-peer connection.

⇒ Get Puffin

Freenet – Packed with great features

Freenet is a simple browser that allows people to connect and share files and data. It uses end-to-end encryption code to protect the information it sends across the servers.

Freenet uses advanced network settings that allow it to surf the internet without slacking. It works well with a workload like multiple tabs, unlike other browsers. The browser runs the Zoom web app perfectly without affecting its parts. It lets you configure your browser setting to your taste and need.

⇒ Get Freenet

Waterfox – Best no telemetry browser

Waterfox is a browser that uses open-source code from Firefox. It comes with lots of features that give it an edge over Firefox. For instance, it explores 64-bit Windows computers, while Firefox explores 32-bit.

It focuses on how to secure your internet connections from external threats. It blocks any tracking agents with links like Zoom invite links for meetings.

Another good thing about Waterfox is that it works across different operating systems like Linux, macOS, Windows, and Android.

⇒ Get Waterfox

Epic Browser – For Windows/Mac/Linux/Android

An important feature of Epic is security and privacy. It ensures that your internet activities are safe and intruders can’t infiltrate them. Its configuration keeps threats away and allows you to use Zoom video conferencing safely.

Epic Browser is more focused on securing your browser data, but it works well for Zoom.

⇒ Get Epic Browser

Why is Zoom not working on my browser?

You should consider the following:

  • Using an outdated version of your browser can cause issues.
  • Connection issues: if your network connection is weak or you have a router problem, it can lead to Zoom not working on your browser.
  • If your browser is having issues with another app on your device, it can lead to concerns.

What do you think about our list? Let us know your browser pick in the comments area below.

5 Best Browsers To Play Agar.io 5 Without Any Lag

In recent years, gaming on browsers has become more in vogue. This is because browsers have become much more sophisticated in playing games. However, selecting the best browser for Agar.io and others can make or mar your gaming experience.

Agar.io is a massively multiplayer online action game created by Brazilian developer Matheus Valadares.

The game is simple, and you’ll notice little circles in the backdrop connecting the various colored dots.

This article will take you through some of the best browsers to play agar.io 5 without lag.

How do you run Agar.io smoothly?

If you consider yourself a victim of consistently occurring lag, here is a list of practical strategies that may enable you to combat it.

  • Play on your continent’s server.
  • Turn off skins: In the game menu, go to settings (the blue cog button located to the left of play) and turn off skins.
  • Restart your modem or router/check your Internet connection.
  • Close all other programs: The less multitasking your computer has to perform, the better.
  • Change the screen resolution of your monitor to minimal.

Why is Agar so Laggy?

Whether ping or FPS, lag is a massive killer in Agar.io. There are several factors responsible for this. First, when Agar is laggy, it is purely because of all the people playing it, meaning you won’t be able to do much about lag.

What are the best browsers for Agar.io?

Opera GX – Best optimized for gaming

Opera GX is the topper for the best browser for Agar.io. The browser greets users with a gamey feel and its customizable cyberpunk interface.

Built specifically for gamers, Opera GX ensures games perform seamlessly with the GX Control function. This feature allows users to adjust RAM and CPU usage to provide a lag-free gaming experience.

Key features:

  • Customizable gamey interface
  • Adjust RAM and CPU usage with GX Control
  • Keep up with new releases with the release calendar
  • Twitch and Discord integration

Opera GX

With the built-in ad blocker, you’ll have fewer hassles and Agar.io will load quicker.

Google Chrome – Most popular

Google Chrome is one of the most popular browsers because of its speed and performance. Both are vital features when it comes to cloud gaming.

Chrome also appeals to gamers because of its customizable user interface. Hence, an excellent browser for Agar.io.

However, Chrome is notorious for consuming large amounts of RAM and CPU, especially with multiple tabs open. Over time, this can lead to Chrome slowing down or lagging during gameplay.

Key features:

  • Auto-blocks ads for faster page loads
  • Customizable user interface
  • Fast, much less resource-hungry than before
  • Wide variety of add-ons
  • Google Apps integration

⇒ Get Google Chrome

Mozilla Firefox – Packed with extensions

The main focus of Firefox is user privacy and transparency; the browser can also handle multimedia and games.

It’s worth mentioning that Firefox is available on all primary desktop and mobile platforms, and thanks to the sync feature, all your browsing information will stay with you.

Key features:

  • Open-source
  • Created by a non-profit organization
  • Enhanced privacy protection
  • Hundreds of available extensions
  • Available on all major platforms

⇒ Get Mozilla Firefox

Microsoft Edge – Friendly user interface

With the Edge redesign, there’s a new sleek user interface, and the entire browser now runs on the Chromium engine.

This means that Edge now follows the same web standards as Chrome and supports its extensions.

Even though Microsoft Edge isn’t a gaming browser, it offers excellent features, so it’s worth considering among the best browsers for Agar.io.

Key features:

  • Improved tracking protection
  • 4K streaming support on Netflix
  • Available on macOS, Windows, iOS, and Android
  • Ability to customize your start page

⇒ Get Microsoft Edge

Brave – Best for privacy

Brave browser is another tremendous Chromium-based browser for gaming and was the first browser featured on the Epic Games Store. Thus, it makes our list one of the best browsers for Agar.io.

Brave also uses less energy and is more memory efficient than its competitors. As a result, gamers can play their favorite games and not worry about Brave hogging up PC resources.

Key features:

  • Built-in tracking protection
  • Uses the Tor browsing engine
  • Brave Shields blocks unwanted ads and cookies
  • Consumes less energy and resources

⇒ Get Brave

What is the fastest browser?

Having tested the desktop versions of all the major internet browsers, including those provided above, and compiled their results, we’ve concluded that Google Chrome and Opera GX were nearly tied for first place.

Speed can come at the cost of other essential factors in a browser, such as security and features.

These are the best browsers for Agar.io. However, if you want to play other browser games, check out our guide on the best Safari games to play.

Also, we have an article on the best snake games for PC, should you be a fan of snake games.

3 Ways to Fix Trying to Install Helper Tool Error on Slack

Slack is a popular application used by professionals for project management and communication. In addition, it is majorly used in workplaces as a communication platform.

If you have used Slack for some time, especially on Mac, chances are very high that you have come across a Slack trying to install helper tool message as a pop-up on your screen.

This pop-up message is not an error. You should not be worried about it because all you need to do is allow the installation. However, you might get this message often, making it difficult for you to use Slack effectively.

What is Slack helper?

The Slack helper tool is a Scrum assistant that plays a vital role for co-located and distributed teams using Slack for communication and project management.

In addition, it is used by groups that want to integrate Slack with other applications. This reduces meeting times and overheads while at the same time increasing the efficiency of Slack.

Quick Tip:

As a workaround, you can consider a fully integrated browser to help you with Slack right on your homepage. We are talking about Opera One

You won’t even need to install Slack on your desktop because it offers fast navigation to access Slack without problems in your browser. Plus, it comes with built-in AI, VPN and an Ad blocker.

Opera One

Pick this experienced browser to communicate on Slack without any functionality problems.
Free Download Visit website

How do I fix the helper tool on my PC?

1. Uninstall and reinstall Slack

  1. Press the Windows + R key combination, then type control panel.
  2. Press Enter.Launch control panel
  3. Locate and click on Programs and Features.control panel programs and features
  4. Click on Slack, then the Uninstall button at the top.
  5. Wait for the uninstallation to complete.
  6. Download Slack from the official Slack website.
  7. Navigate to your downloads folder and then run the downloaded file. Follow the on-screen prompts to complete installation and sign in to your Slack account. The Slack helper will be fixed.

2. Change the Slack application owner

  1. Press the Windows + R combination, then type cmd.
  2. Press Enter.launch cmd
  3. Enter the following command to change the ownership of Slack.  chown YourUsername PathToSlackInstallation
  4. Make sure to replace YourUsername with the name you use on your computer, and then use the right path to the Slack installation folder.command change owner
  5. Press Enter.

3. Move the Slack app to the Applications folder (Mac users)

  1. Open Finder from the dock.finder on dock
  2. In the search button at the top, type Slack to locate where it is installed.search for slack
  3. Move the Slack application to the Applications folder.slack in applications

How do I remove Slack helper from my PC?

You can also remove the Slack helper tool from your PC. To do that, you need to find the installation location of the Helperbot. Once you find it, you can right-click on it and delete it.

Of course, there is a workable solution for thoroughly uninstalling Slack from your PC, including any remaining files and registries. When it comes to removing apps that can’t be uninstalled from your PC, a third-party uninstaller like CCleaner comes in handy.

When you install something, a component of your computer known as the registry keeps track of where everything is and sets flags on your hard drive. When this occurs, you have a slew of floating strings.
Ccleaner performs an excellent job of removing these floating strings.

⇒ Get CCleaner

This will make it easy for you to do almost everything you want, from editing, deleting, or archiving a Slack channel to making VoIP calls on Slack, among others, without any problems. This also solves the problem with Slack trying to install a helper tool.

4 Best Browsers For Artists: Upgrade Your Creative Process

With many art web apps available, artists now prefer to use their browsers for designs. You can easily access the web for creative ideas and other fun features like playing drawing games online without needing to change apps.

The best browser for artists should have enabled features like a clean and customizable interface, art extensions, and other tools. But with the number of browsers available, choosing one that fits the bill might be challenging.

This guide has selected four exceptional options you can always use across various devices.

What are the best browsers for artists?

Opera One – Overall best

Opera One is the undisputed number one browser for artists. It is designed with ease of use as the focus on bringing out your creative best.

Opera One has a series of art extensions in its addons store, giving you increased functionality. These add-ons include the Clip Art Search, which provides you access to millions of images online.

Also, you can install Chrome extensions on Opera One, allowing you to take advantage of the numerous art addons on the Web Store. Moreover, this browser has social integrations like Instagram and others, making it the best browser for artists on these social media platforms.

Other features: 

  • Easy to customize
  • Intuitive interface
  • Fast and secure with built-in VPN and Ad blocker
  • Easy access to social media platforms and messaging apps
  • Native AI and modular AI-ready design

⇒ Get Opera One

Chrome – Browser with highest art extensions

chrome

Google Chrome is a browser grounded in many aspects and thrives in the art sector. It is an ideal browser for artists, thanks to the enormous art extensions in the Chrome Web Store.

There are extensions like Google Arts and Culture that shows you different arts from its endless database whenever you open a new tab. Also, you can install extensions like Muzli 2.

This extension displays the most relevant designs, arts, and photographs daily to match your taste for art. These addons, plus Chrome’s compatibility with most web apps, provide you with the tools needed to thrive in your craft.

Other features:

  • Secure and fast
  • Works well with art web apps
  • Lots of organizational features

⇒ Get Chrome

Firefox – Clean interface

firefox best browser for artists

This is another browser that is smooth and easily customizable. Firefox has a series of organizational features that allows you to keep your tabs and projects arranged.

Also, it works well with the best browser apps for artists like Procreate and Adobe Photoshop Sketch. This allows you to express yourself to the fullest without any problems.

What’s more, Firefox has a series of addons in the Mozilla store that can enhance your creativity. For example, with extensions like Art Up Your Tab and Art Saver, you can download the best artworks from top gallery websites and organize them well for future use.

Other features:

  • Clean interface to support art web apps
  • High customizability
  • Secure and easy to use

⇒ Get Firefox

Safari – Best browser for artists on Mac

safari

Safari is the default browser for Mac users, and it is not surprising that it is the best to use on the device. It is a fast browser with a simple design that can be easily customized.

Safari has numerous art plugins that every artist will surely appreciate. In addition, you have extensions like Image Search that allow setting the parameters for images to find on the Google Image Search engine.

Lastly, you can use most of the art web apps on Safari and play drawing games on it.

Other features:

  • Simplistic design
  • It can be customized
  • Easy to use

⇒ Get Safari 

Which browser is best for Canvas?

Although all the browsers above work well for Canvas, the recommended browsers are Chrome, Firefox, and Safari.

The pick of the bunch will be Chrome, thanks to users’ highest recommendation. However, the latest versions of most modern browsers should work well with Canvas.

Having the ideal browser for artists helps to increase your creativity on the web and gives you unrestricted access to art web apps and tools. With the browsers on this list, there should be no end to what you can achieve online creatively.

Are you looking for the best drawing software to use as a beginner? Then check our detailed guide apps that will let you express yourself well.

Feel free to let us know the browser that provides you with the necessary art tools to get going in the comments below.

3 Ways to fix Your Google Calendar if it’s not Loading in Firefox

If your Google Calendar is not loading in Firefox, likely, it’s not due to the speed of your internet connection. Google Calendar was created to help with time management and scheduling. 

If you work in a group or with a large number of clients, this can make your life a lot easier. With Google Calendar, it is possible to avoid over or underbooking and identify which team members are not that busy and which are more occupied.

Once your team members have permission, you may look at their schedules and decide how things are going.

When organizing your schedule, Google Calendar is the best option. You can create a unique schedule for your private, professional, or holiday calendars with Google Calendar if you want to set a reminder for any of these things at any time.

People can use Google Calendar to create events, reminders, and add goals. The app can be used on Android and IOS devices. There is also a desktop version available. And best of all, Google Calendar can be synced across devices if you have multiple devices. 

How do I access my Google Calendar from my browser?

First, you must visit the official Google Calendar website using a web browser on your PC. As with all other tools in the Google Suite, you need to have a Google account to enjoy the services. So, if you don’t have one (unlikely as it is), ensure to create one first before you proceed.

If you have an existing account that’s already logged in, you’ll be redirected to Google Calendar as soon as you sign in.

If you want to alter any options, click on the gear icon in the upper right corner of the page to access the settings.

Although Google Calendar is more common on mobile devices, it’s also available as a desktop app. The desktop app is sleek and is available for Windows devices. And the interface is similar to the web-based version, so you can easily navigate it. So, it’s a matter of convenience and choice for you.

Quick Tip:

If you keep having problems, try installing the dedicated Google Calendar extension for Opera One. You may have better luck with this browser, users praise it for its speeds and responsiveness.

Opera One is Chromium-based and supports pretty much all Google services without any problems along the way. It’s easy to use, and secure, with built-in Ad blocker, VPN and AI.

Opera One

Access Google Calendar in seconds with one of the fastest and most performance-oriented browsers on the market!
Free Download Visit website

Why is my Google Calendar not loading on Firefox?

1. Go through your extensions

  1. Launch the Firefox browser.
  2. Click on the menu icon at the top-right-hand corner of the interface.
  3. From the list of options, select Addons and Themes.
  4. Look to the left-hand side of the page and select Extensions.

To make the best of this step, you must first switch to incognito mode to see if there are any recently installed, conflicting Firefox calendar extensions and remove them. Afterward, go back and launch the Google Calendar website to ensure that it’s working normally again.

2. Fix your DNS

Using your ISP’s Internet Protocol (IP) address, the Domain Name System (DNS) connects your IP address to a server. 

To use the internet efficiently, you must clean the cache of your DNS server. To do so, type ipconfig into the Command Prompt and press Enter.

Then, you can search for potential issues with your service’s connection. Finally, you can use several free DNS services to get around this problem.

3. Clear your browser’s cache and cookies

  1. Launch your Firefox browser.
  2. Click on the menu icon and select Settings.
  3. Click on Privacy and Security.
  4. Scroll down until you see the Cookies and Site Data section.
  5. Select Clear data.
  6. Check the Cookies and Site Data box and select Clear.

Having your Google Calendar fail to load is a significant issue experienced by users of the tool. Unfortunately, this makes it difficult to enjoy the several benefits. The leading causes of the problems include:

  • An outdated browser
  • Poor internet connection
  • Conflicting extensions

It’s possible to ruin your Calendar with some extensions. However, to test this theory, you should use the incognito mode since extensions will not function in this mode. Then, see if your Google Calendar is functional.

This cloud-based and calendaring program is a must-have tool for keeping track of personal appointments, professional chores, or school projects on the go. 

With Google Calendar, you’ll be able to keep track of everything that’s going on and receive reminder notifications every time. In addition, using the tool, you can share actual dates with friends and family. 

The excitement of Google Calendar is that every calendar in your master Calendar may be customized with its color and style. So you can always know what events are scheduled on each calendar.

If you like to organize your things weekly and stay up to date with priority tasks, you can check out this comprehensive list of planning software. Also, here’s a list of excellent calendar apps for Windows that you might be interested in.

We hope that you found this helpful guide! Please share your thoughts in the section below.

Fix: MSI Mystic Light not Showing up in Dragon Center

MSI Afterburner is among the most used apps for controlling your PC’s RGB settings and personalization. 

However, during regular use or while playing games, the program may encounter issues like the MSI mystic light not showing up or opening in the Dragon Center.

These issues can become problematic for you. Fortunately, these issues are easy to fix. Read on to find out how you can fix these issues. 

How do I add MSI mystic light to dragon center? 

To add MSI mystic light to dragon center, your PC must meet the software and hardware requirements. For the hardware, you need an MSI graphics card with DYNAMIC DASHBOARD, such as the GeForce RTX™ 2080 Ti Lightning Z and GeForce RTX™ 2080 Ti Lightning.

In addition, you must have Windows 10 or above installed on your PC per software requirements. Anything less will have compatibility problems.

To add MSI mystic light to the Dragon Center, you have to, first of all, install the Dragon Center.

  1. Open the download page.
  2. Scroll down and click on download.
  3. Reboot your PC and relaunch the app.
  4. Click on the live update icon and scan to find out what program you need to download.
  5. Select Mystic Light.
  6. Install the program and restart your PC.

Is Mystic light compatible with iCUE?

Yes, Mystic Light is compatible with iCUE. iCUE allows users to customize the lighting and thematic gaming experience fully.

How do I fix mystic light not showing in Dragon Center? 

1. Uninstall any apps that cause conflict

  1. Press WIN + R keys to access the Run window.
  2. To open the control panel, type control and press OK.
  3. Tap on Programs.
  4. When you find the conflicting apps, delete them.

Windows allows apps to co-exist and work cooperatively. MSI Mystic Light can, however, be adversely affected by other applications that are incompatible with it.

2. Install the most recent version of Dragon Center

  1. Open the download page and install the Dragon Center app.
  2. Reboot your PC and relaunch the app.

Alternatively, you can open the app and search for updates with the live scan tool.

The most up-to-date Dragon Center version is always available on the MSI website, so make sure that the file you’re installing is the official one.

The new software has a revamped interface that’s quite different from older, problematic versions. Additional features include snap streaming, a real-time assistant, and system tuning.

Thank you for reading! Please share your thoughts in the section below.

How to Access & Use the File History in Control Panel

The Windows File History is used to automatically backup locally stored files to your preferred drive and can be accessed from the Control Panel.

You can choose to save the File History data in an internal or an external drive, however, you must connect the drive to use the feature.

However, not all users are aware of the File History feature in Windows 10/11.

In this post, we will show you how to access & use the File History through Control Panel in Windows 10.

In the meanwhile, if you want to know how to activate and deactivate File History in Windows 11, you can refer to our post.

How do I see all items in Control Panel?

In Windows 10, you can access the most common settings from the Windows Settings. But, some settings still exist in the Control Panel.

However, you can switch to the classic mode to view all the features of the Control Panel as explained below.

How do I get to the old Windows Control Panel?

Follow the below instructions to get to the old Windows Control Panel easily:

  1. Press the Win + R keys together to launch the Run console.
  2. Type control in the search bar and hit Enter to open the Control Panel window.Run command control to open Control Panel
  3. Now, navigate to the upper right side, and next to View by, select Small icons from the drop-down. window control panel history

This method will not just help you to open the Control Panel in classic view, but also help you to see all items in it.

What does File History in Windows do?

File History in Windows works to automatically backup all your recently used folders. Additionally, you can also use it to add, delete, and exclude folders for backup.

However, the File History will only back up files and folders inside the C:\Users\<username> location.

How can I use File History in Windows 10/11?

  1. Press the Win + R keys simultaneously to open the Run console.
  2. In the search box, type control and hit Enter to open the Control Panel window. windows control panel history
  3. Now, set the Control Panel view to Category, and click on Save backup copies of your files with File History. windows control panel history
  4. To use the File History feature, you must connect an external drive, and click on Turn on to enable the feature.
  5. You should then see the backup details in the File History window. windows control panel history
  6. If there’s no usable drive detected, you will see File History is off and No usable drives were found on the right. File history turned off
Note icon NOTE
To disable the File History feature temporarily, follow steps 1 to 3 and then click on Turn off.

Does Windows 11 support file history?

Yes, the File History feature is present in the Windows 11 Control Panel.

Once you navigate to the old Control Panel, you can access and use the File History in the same manner as explained above.

Where are Control Panel items stored?

Control Panel is a virtual folder created by the system software and not an actual folder.

Each applet/tool in the Control Panel has the .cpl file extension and is found in the Windows\System folder

For more details on the Control Panel files on your computer, you can refer to the official Microsoft support page.

To know more about the Windows Control Panel and how to tweak system settings, you can read our detailed post here.

For any other queries related to the control panel or any issue, do leave a comment in the comments box below.

5 Best Browsers With AV1 Video Decoding Support

Nowadays, having technology you can rely on is a must, especially if most of the time you spend is in front of a computer screen.

The Internet provides endless opportunities and it’s up to us to take advantage of each and every one of those and strive to be better and get better results.

Thus, the tools that we use need to be fast, simple, and efficient. Now, since we mentioned the Internet, we’re also going to need a good browser to properly navigate it.

Do browsers support AV1?

People use browsers for a lot of things, but today we’re going to focus on the ones that offer the best video-watching experience, as we know that a lot of you are looking for that.

And, we cant talk about watching videos on browsers without mentioning the AV1 format. What is AV1 support, you ask?

Looking for a quick Windows guide to enable smooth playback? Check out how to play AV1 files using the right codecs and players.

Well, you should know that it is an open, royalty-free, next-generation video coding format from the Alliance of Open Media Video.

Now let’s take a closer look at the top five browsers that have AV1 support, so you can make an educated guess and choose the one you like best.

What are the best browsers with AV1 support?

1. Opera

We’re going to start this list with Opera, a browser that is available on multiple platforms, so it’s no wonder it also has AV1 support.

Opera has the ability to block ads out of the box so you can enjoy the ad-free browsing experience, and it can also compress videos and save your bandwidth and even make videos load faster.

You should also know that this AV1-compatible browser comes with a sleek user interface, and since it’s lightweight it should handle any website without any slowdowns.

Opera features:

  • Sleek user interface
  • Ability to block ads out of the box
  • Video compression feature
  • Smart news feeds
  • Ability to zoom on any page
  Opera

Opera

Opera is a lightweight, add-free browser that is totally AV1 compatible and will offer you the best experience.

2. Google Chrome

Most of you are already familiar with the browser located in our second position, so there’s not really much that can still be said about Google’s browser.

As you already know, the Chrome Web browser is based on the open-source Chromium project and will offer you a pretty safe and stable experience.

It is known to be a pretty power-hungry browser, but it functions extremely well, it will keep you safe, and it is also AV1 compatible.

Google Chrome features:

  • Customizable start page
  • Native support for Chromecast devices
  • Built-in adblocker
  • Thousands of available extensions
  • Built-in malware scanner that can detect malicious websites

⇒ Get Google Chrome

3. Mozilla Firefox

Here’s another great, popular browser with AV1 decoding support. Again, just as in the case of Chrome, we’re sure that many of you have heard of or even used Firefox so far.

The main focus of Firefox is user privacy and transparency, but know that the browser can handle multimedia and games as well.

Thanks to the pop-out video feature, you can watch your favorite streams in a separate mini window while focusing on other tasks.

Firefox features:

  • Open-source
  • Created by a non-profit organization
  • Enhanced privacy protection
  • Hundreds of available extensions
  • Available on all major platforms

⇒ Get Mozilla Firefox

4. Microsoft Edge

Windows users have undoubtedly used the Microsoft Edge browser at least once since installing the OS. Even the people that decided to go with a different one had to use it in order to download it.

Edge has gone through some massive changes over the years, and Microsoft has completely revamped the browser recently.

With the redesign, there’s a new sleek user interface, and the entire browser now also runs on the Chromium engine, in case you were wondering.

This browser is, just as the ones mentioned above, AV1 compatible, so you should include Edge in your query because you might just end up liking it.

Edge features:

  • Improved tracking protection
  • 4K streaming support on Netflix
  • SmartScreen feature that will warn you about malicious websites
  • Available on macOS, Windows, iOS, and Android
  • Ability to customize your start page

⇒ Get Microsoft Edge

5. Safari

We’re going to show you a browser that is pretty light on your resources, and according to Apple, it’s 1.6x faster than other web browsers.

Yes, we are talking about Safari, which offers tracking protection, and thanks to the sandboxing feature, your computer will keep the malicious threats contained in the web browser.

If you are going to use it, you have to keep in mind that the browser is optimized for Mac, so it lets you browse up to 3 hours longer and stream up to 4 hours longer on your MacBook.

Safari features:

  • Available on all Apple devices
  • Faster than other browsers
  • Protection against malicious websites
  • Sandboxing
  • Tracking protection

⇒ Get Safari

Is AV1 better than HEVC?

That is a very good question you asked there and we, as always, will provide the answer for you. AV1 was specifically designed to replace Google’s VP9 and compete with H.265/HEVC.

Note that AV1 is targeting an expected improvement of about 30% over VP9/HEVC with only reasonable increases in encoding and playback complexity.

So, if you are looking for a new browser and the number one condition is that it must be AV1 compatible, you now have five great choices to pick from.

Has this guide been helpful to you? Let us know in the comments section below.

How to Fix MSI Afterburner if it’s Not Showing FPS

If the Afterburner is not showing the FPS counter, it’s most likely because the app was not updated or you didn’t install the RivaTuner Statistics Server. It might also be because the framerate option is not selected under the Monitoring tab, or the On-Screen Display support is not enabled in the Riva Tuner.

Although it’s unlikely, the game you’re playing might not support a FPS counter. Here’s how to fix the MSI Afterburner FPS counter.

How do I turn on my MSI Afterburner FPS counter?

1. Reinstall MSI Afterburner

  1. Press the Win + R keys together to launch the Run console.
  2. In the search bar, type appwiz.cpl and hit Enter to open the Uninstall or change a program window. Type appwiz.cpl in the Run console and hit Enter
  3. Go to the right side of the Control Panel window, right-click on MSI Afterburner and select Uninstall.uninstall MSI afterburner
  4. Once the program is uninstalled completely, visit the official Afterburner website.
  5. Here, download and install MSI Afterburner again. MSI afterburner not showing FPS
  6. Make sure to check the required box during the setup process to download and install the Riva Tuner at the same time.

2. Enable Framerate from the Monitoring tab

  1. Open MSI Afterburner and click on Settings (gear icon) on the left. MSI afterburner settings
  2. This will open the MSI Afterburner Properties window.
  3. Here, navigate to the Monitoring tab and select Framerate Avg under Active hardware monitoring graphs. select Framerate Avg in afterburner
  4. Next, select Show in On-Screen Display under GPU usage graph properties. select Show in On-Screen Display
  5. Now, go to Graph limits, select Override graph name, and type a name next to it, for example, FPS Avg. select override graph name
  6. Go to Show in On-Screen Display again and click on the three dots next to it. MSI after burner not showing FPS counter
  7. In the On-Screen Display layout dialog, go Active layout properties. edit on screen display layout
  8. Here, under the Sizes library, double-click on Size 0. double click on size 0
  9. Edit size to 100 in the Size (in percents) field. edit size 0
  10. Repeat steps 8 and 9 for Size 1 as well. Press Apply and OK to save the changes.

3. Change the settings under the Benchmark tab

  1. Now, in the Afterburner settings window, select the Benchmark tab.
  2. Go to the Global Benchmark Hotkeys section and in the Begin Recording field, type Num 1.set benchmark in afterburner
  3. Next, type Num 2 in the End recording field. Press Apply and then OK to save the changes.

This will also fix the Riva Tuner not showing the FPS issue. Now, open your game and check if the FPS counter is working in your game.

How do I show my Afterburner in-game?

Follow the below instructions to set the hotkeys that you can press even during the game to show or hide the overlay quickly:

  1. Launch MSI Afterburner and click on the gear icon (Settings) on the left. MSI afterburner settings
  2. Next, navigate to the On-Screen Display tab.
  3. Here, go to the Toggle On-Screen Display and click on the box to change the hotkey. set toggle keys in afterburner
  4. As you press the desired key combination, it will appear in the box.
  5. Now, click on Apply and OK to save the changes.

Your Afterburner tool should now show the FPS in-game.

Besides, if you are looking for alternatives to the MSI Afterburner, here’s a quick list of some of the best FPS counter software for Windows 10/11.

For an issue like MSI Afterburner not working in Windows 11, you can refer to our detailed post for the workarounds.

But if you are still facing any issues with the MSI Afterburner overlay, leave your thoughts below in the comments section.

Unable to Sync With Pi Network? 3 Ways to Fix It Now

Pi Network is the first platform in the blockchain industry that allows investors to mine the native Pi token using the mobile app. But, many users reported receiving the Unable to Sync with Pi Network error.

The Pi Network is a revolutionary idea considering the high-energy consumption in mining and verifying transactions for other cryptocurrencies, particularly Bitcoin and Ethereum. On the other hand, Pi can be mined using a mobile app and doesn’t drain the battery.

Now, let’s find out why you encounter the Unable to Sync with Pi Network error and the most effective solutions for it.

Why do I receive the Unable to sync with Pi Network error?

One of the common observations made by a majority of users is that the Pi Network app often identifies Wi-Fi networks as public ones, even if it’s set up for home use and has all the security protocols in place. Generally, it’s the network connection to blame.

Other than that, corrupt app data too has been found to lead to the Unable to Sync with Pi Network error. A problem with Pi’s server could also be a probable cause, but in this case, the error should disappear within a few hours, or at max, a few days.

How do I fix the Unable to sync with Pi Network error?

1. Use mobile data instead of Wi-Fi

If you are connected to a Wi-Fi network, even if it’s the one set up at your home, switch to mobile data. Most users were able to eliminate the Unable to Sync with Pi Network error by simply switching to 4G or 5G.

If it still doesn’t work, make sure to check that the mobile data works fine on other apps. In case the problem persists, head to the next method.

2. Clear the app data

Note icon NOTE
The steps listed here are for an Android device. In case, you are using an iOS device, head to the Support section on Apple’s official website for more help.
  1. Hold the Pi app on your mobile, and tap on the App info option.App info to fix unable to sync with pi network
  2. Tap on Internal storage.Internal storage
  3. Next, tap on Clear data.Clear data to fix unable to sync with pi network
  4. Finally, tap OK in the confirmation prompt that pops up.OK

Oftentimes, it is corrupt app data that causes the error, and clearing the it should do the trick here.

3. Disable the VPN

If you are using a VPN to establish a connection, disable it. This is because altering the connection parameters can affect the functioning of the Pi app, and lead to several errors.

Once done, the Unable to Sync with Pi Network error should be fixed for good. If it persists, you should first wait for at least 24 hours in case the servers are down, and then contact the dedicated support team for resolution.

Also, find out what to do if the Pi browser is not working. Our simple solutions will help you.

Tell us which fix worked for you in the comments section below.

7 Quick Ways to Make Chrome’s Spell Check Work Again

A spell checker is a great utility to automatically identify and rectify spelling errors, and most of us employ it in some form or the other. But, several users reported that Google Chrome’s spell check is not working.

A spell checker will highlight all misspelled words by comparing them with the correct spellings listed in its database. Though if you want to go ahead with the spelling used, simply ignore the warning.

Several browsers, including Mozilla Firefox and Safari, offer built-in spell checkers while those that don’t generally have an extension for it. So no matter which browser you use, it wouldn’t be difficult to get your hands on spell-check.

But, in the guide, we will focus on spell check in Chrome, and go through the solutions in case it’s not working.

Quick Tip:

Too much trouble with Chrome errors? It’s possible to avoid it by simply changing your browser to a more stable one. With Opera One, you have integrated third-party apps and plenty of spelling add-ons you can install and use.

After installing this new-age browser, you’re secured from typos or grammar mistakes using smart spelling tools. Also if you still aren’t sure, you could also use the built-in AI.

➡️ Get Opera One

How do I turn on spell check in Google Chrome?

  1. Launch Google Chrome, click on the ellipsis on the top-right corner, and select Settings.Settings
  2. Click on Advanced on the left.Advanced
  3. Now, select Languages.Languages
  4. Enable the toggle for Spell check on the right.Spell check
  5. You can now choose the language that’s generally used, or even add certain words so that these are not identified as misspelled.Customizations

Enabling spell check in Google Chrome is simple and it should start working right away after you turn on the toggle. If not, relaunch the browser once.

What can I do if Chrome’s spell check isn’t working?

1. Check the selected language

  1. Right-click on the text field where you are typing, hover the cursor over Spell check, and either select the desired language or the All your languages option.check language if chrome spell check not working
  2. Now, verify if spell check works.

In many cases, Chrome’s spell check was not working when the input language was different from the one configured for Spell check. So, verify that and make the necessary corrections.

2. Delete cache and cookies

  1. Press Ctrl + H to launch the Browser history.
  2. Click on Clear browsing data on the left.Clear browsing data to fix chrome spell check not working
  3. Tick the checkboxes for Cookies and other site data and Cached images and files, and then click on Clear data at the bottom.Tick checkboxes

A corrupt cache is found to lead to several issues with Google Chrome, including causing the spell check to stop working in Windows 11. If that’s the case, this method should get the feature up and running.

3. Remove conflicting extensions

  1. Click on the ellipsis near the top-right corner, hover the cursor over More tools, and select Extensions from the flyout menu.extensions
  2. Now, locate the conflicting extension, and click on the Remove button for it.Remove extension to fix chrome spell check not working
  3. Again, click Remove in the confirmation prompt.remove extension
  4. Once done, restart the browser for the changes to come into effect.

If Chrome’s spell check is not working ever since you installed an extension, it’s likely that the extension is conflicting with the feature.

Also, there’s a chance that two extensions are conflicting and affecting the performance of Chrome, in which case, you will have to identify and remove both.

4. Verify if websites or online platforms have a built-in spell checker

In many cases, platforms or websites that you visit have a built-in spell checker, for instance, Outlook. As a result, many users reported that Chrome’s spell check is not working in Outlook.

Spell check feature on Outlook

So, make sure to disable the platform’s built-in spell checker via the settings. If you can’t find the exact steps, head to the FAQ section on their website.

5. Update Google Chrome

  1. Click on the ellipsis near the top-right corner, hover the cursor over Help, and select About Google Chrome.About google chrome
  2. If an update is available, it will be automatically installed.Update to fix chrome spell check not working
  3. Once done, relaunch the browser for the changes to come into effect.

6. Scan for malware

  1. Click on the ellipsis near the top-right, and select Settings.Settings
  2. Now, click on Advanced from the left.Advanced
  3. Select Reset and clean up from the options that appear.Reset and clean up to fix chrome spell check not working
  4. Click on Clean up computer.Clean up computer to fix chrome spell check not working
  5. Click on Find to start the scan and look for harmful software.Find

Oftentimes, a system infected with malware will witness Chrome’s spell check not working in Windows 10 and the latest iteration.

Running a malware scan will do the trick in this case. Also, you can use an effective third-party antivirus to run the scan.

7. Reset Chrome

  1. Click on the ellipsis and select Settings from the flyout menu.Settings
  2. Click on Advanced and then on Reset and clean up from the options that appear under it.Reset and clean up to fix chrome spell check not working
  3. Next, click on Restore settings to their original defaults.Restore settings to their original default
  4. Click on Reset settings in the confirmation prompt.Reset settings to fix chrome spell check not working

If nothing else has worked, you are left with no option but to reset the Chrome settings. It will disable any extensions, restore the browser settings to their default state, and delete cookies. Once done, Chrome’s spell check would now start working.

If you want to know how to turn on spell check on Outlook, take a look at this quick guide.

How do I reset spell check in Chrome?

To reset the spell check in Google Chrome, you would have to go with the Restore settings to their original defaults option, as discussed in the last method of the previous section. Chrome does not offer a built-in way just to reset spell check.

But, things generally shouldn’t come down to resetting the browser, and the other methods should, in all likelihood, eliminate the underlying cause.

There are all the ways you can fix things if Chrome’s spell check is not working on your computer, either on a particular website or all of them.

Also, if Chrome’s built-in spell check doesn’t work too well, try other effective online and offline grammar checkers for Windows 11/10.

If you have any other queries or know of a method not listed here, drop a comment below.

3 Quick Ways to Fix Sling Error 6-9 & Sling Error 22-30

Sling TV is a streaming television service based in the United States that offers over 40 channels.

This streaming service is only available in the United States and offers three subscription options. Sling Orange, Sling Blue, and Sling Orange + Blue are all variations of the subscription plans.

Users, regardless of their subscription plan, have reported that they are facing some problems with this streaming service, such as Sling errors 6-9 and 22-30.

The error codes of this streaming service point to a specific problem that can be solved.

What are the most common Sling error codes?

Take a closer look at the error codes below:

  • Error 10-101/10-100: This error will appear if you type your credentials incorrectly or if there is an issue with login authentication for any reason
  • Error 21-20/ 24-1: When there is a video playback issue, you may get this error code
  • Error code 4-310: This problem occurs when streaming content is not available
  • Error code 9-803: You may encounter this error when there are loading problems
  • Error 2-5/2-6: This error is mainly because of connectivity issues
  • Error code 8-xxx: When there is an authorization problem, this error code will appear
  • Error code 9-xxx: This problem is related to the account personalization issues
  • Error code 16-xxx: If there is an issue with AirTV, you will encounter this error code

All of these problems have their respective solution and we are here to help you.

How do I fix the error 6-9 on Sling TV?

1. Power cycle your router

  1. Unplug your modem or router’s power cable.removing router wire
  2. Let your device stay unplugged for 30 seconds.
  3. Reconnect the modem’s ethernet cable and power cord.
  4. To see if the problem has been resolved, connect your device to the internet.

Rebooting your router or wireless gateway once a month to clean its memory and renew your wired and wireless connections may help you to fix some issues such as the 6-9 on Sling TV.

2. Try a different network

  1. Visit the Settings app on the device you are getting the error message.
  2. Then, look for Network settings or Network configuration.
  3. In the Wi-Fi, section change the network.Changing Network

You can also try to connect your device with an Ethernet cable to the router. An unstable network may cause Sling TV to disfunction and display error messages.

3. Disable VPN

Windows:

  1. First, search Setting in the search bar of the Start menu and open Settings.search setting sin the search box of start menu
  2. After that, click Network & Internet and select VPN in the left bar.VP section in network and internet
  3. Choose the VPN connection you wish to disable.
  4. Click the Disconnect button.

Android:

  1. Go to Settings.
  2. Next, tap Connections.
  3. Select More connection settings.Android More Connections
  4. Then, choose the VPN icon that is currently connected.Tap on VPN option
  5. Tap the Disconnect button.

iOS:

  1. Go to Settings.
  2. Tap the VPN tab and disconnect it.iOS VPN

Amazon Fire:

  1. Select your installed VPN using the remote control.
  2. Next, launch the app.
  3. Look for an Off button.
  4. After that, click it to disable your VPN.

Because Sling TV is only available in the US and VPN changes the IP, the application will block foreign IPs and refuse to provide service.

If you can’t find a VPN setting, try disabling it from within the VPN application.

How do I fix errors 22-30 on Sling TV?

1. Reset your device

  • If you are using a mobile device, holding the power button should bring up the reset option.Turn off iPhone
  • On TVs, turn the device off and on, then relaunch the app.
  • On computers, Reset the machine from the Start Menu.

2. Reinstall the Sling TV app

Windows:

  1. Select Apps and Features from the Start menu by right-clicking it.
  2. After that, look for the Sling TV app by scrolling down or using the search feature. Once you’ve found it, click the Sling symbol and choose Uninstall.sling tv uninstallation from settings
  3. Follow any on-screen prompts to delete the program.
  4. Finally, visit the Microsoft Store and download the newest version of the app.

iOS:

  1. Close the Sling TV app, then tap and hold the app icon until it begins to shake.
  2. Then, to uninstall the program, tap Remove App. Deleting App
  3. After that, launch the App Store after the app has been deleted.
  4. Select GET to download the Sling TV app after you’ve found it.Sling TV
  5. After the installation is complete, open the Sling TV app you just installed.

tvOS:

  1. Select the Sling TV app from the device’s home screen.
  2. Press and hold the touchpad’s center button until the Sling TV icon starts to shake.
  3. Then, to remove, press the play/pause button and confirm when requested.
  4. After you’ve deleted the app, go to the App Store and scroll to the right to search. Sling TV may be found by typing the word or using the Siri voice command, then clicking the Sling TV symbol.Sling TV
  5. Finally, choose the Cloud icon located above the Install.

Android:

  1. First, open the Google Play Store app.
  2. Choose My Apps & Games from the menu icon in the top-left corner of the screen.App Store
  3. Select the Sling TV app, then Uninstall, then OK to confirm the action.
  4. Return to the Google Play Store’s main page and search for Sling TV.
  5. Select Install, and then accept the Google Play Store’s terms.
  6. When the application download is complete, it will be installed on your device automatically.

Amazon Fire:

  1. Select Settings from the home menu.
  2. Then, choose Applications. 
  3. Locate the Sling TV app under Manage Installed Applications.
  4. Next, select Sling TV, then Uninstall from the drop-down menu.
  5. Click on Search and put in Sling TV. Search apps on Amazon Fire
  6. Finally, download the Sling TV application after selecting it.

Roku:

  1. First, highlight Sling TV on the device’s home screen, then push the * button.
  2. Then, select Remove Channel from the drop-down menu, then OK to confirm.
  3. Scroll down and select Search to reinstall. 
  4. Finally, look for Sling TV on the internet.

Samsung TV:

  1. On your Samsung remote, press the Smart Hub button, then select the Apps icon.
  2. Go to the My App.Samsung TV Apps
  3. After that, press and hold the center of the navigation pad until the app information menu opens, then highlight the Sling TV app.
  4. Select Delete with the arrows on your remote. To continue, select Yes when the confirmation pop-up opens.Deleting apps on Samsung TV
  5. Select Apps from the Samsung home screen.
  6. Then, choose the magnifying glass icon, then use the available keyboard to input Sling TV and select Download.

3. Contact Sling Customer support

You can call these customer support numbers to get professional help on how to fix any problem with the Sling TV streaming service:

  • (888) 308-0784 (English)
  • (855) 402-3981 (Arabic)
  • (855) 390-4686 (Cantonese)
  • (888) 368-2017 (Hindi)
  • (855) 411-8947 (Mandarin)
  • (855) 411-8932 (Brazilian & Portuguese)
  • (888) 360-6947 (Polish)

They provide customer service in a variety of languages for the convenience of their users.

Why is Sling giving me an error message?

As previously stated, any type of interference with the service can result in an error message being displayed by the program.

The problem could be caused by system flaws, bugs impacting your device, or an out-of-date app.

There is not much to worry about when seeing the Sling error 22-30 / Sling error 6-9 on the screen. If the service is down in your area, you can only wait for the technicians to take care of it.

However, if the problem remains after attempting the following fixes, don’t hesitate to contact customer support, as their job is to assist consumers who are having difficulty utilizing the service.

Please let us know whether you were able to resolve the Sling error 6-9 & Sling error 22-30 problem in the comments section below.

5 Easy Fixes to Apply if Raptoreum Wallet is not Syncing

Is Raptoreum wallet not syncing on your end? This article will show you how to solve this problem easily.

Raptoreum is a very secure cryptocurrency that allows asset creation and many more things. It has a core wallet application for desktop platforms like Windows, Linux, and Mac. But, sometimes, you may face problems with this wallet.

One of the most common issues is the Raptoreum wallet not syncing. When this problem appears, you may notice that the syncing header is stuck at a certain state, like 36% or even 99%.

Raptoreum Core wallet out of sync not syncing screenshot

Recently, many users have reported this issue. Fortunately, you can quickly solve this problem by yourself. Before that, let’s know about the possible reasons behind this problem.

What causes Raptoreum wallet out of sync problem?

There are several common things that can cause Raptoreum wallet sync problems. We have featured the most common one. These are:

  • Incorrect date and time on your device
  • Outdated wallet client
  • Network issues
  • Firewall issues
  • Corrupted data

How can I fix the Raptoreum wallet not syncing issue?

1. Fix time and date

  1. Press Win + I on the keyboard to open Windows Settings.
  2. Go to Time & language and click on Date & time.going date and time settings win11
  3. Click on Change next to the Set the date and time manually.click set date time manually win11 settings
  4. Correct your time and click on change.changing time win11

Note: If the Change button is grayed out, toggle off the switch next to the Set time automatically.

2. Clean the temporary data

  1. Close the wallet.
  2. Press Win + R to open Run.
  3. Type the following command and hit Enter: %appdata%run appdata windows command
  4. Go to the RaptoreumCore folder.going RaptoreumCore folder
  5. Delete everything except the wallet.dat file.
  6. Re-open the wallet app.

After clearing the data, open the application again. It may solve wallet not syncing or out-of-sync error.

3. Update the core wallet app

3.1 Back up the wallet.dat

  1. Go to the RaptoreumCore folder like before.
  2. Copy the wallet.dat file and store it somewhere safe.copying wallet.dat file reptoreum

3.2 Uninstall the wallet.

  1. Open Windows Settings.
  2. Go to Apps and click on Apps & features.going apps & features Microsoft windows 11
  3. Search for the Raptoreum Core app.
  4. Click on the three vertical dots next to the Raptoreum Core and choose Uninstall.uninstalling raptoreum core

3.3 Install the latest version

  1. Go to this page to download the wallet.downloading raptoreum wallet for windows
  2. Install the wallet.

3.4 Restore the wallet.dat

  1. Go to the RaptoreumCore folder as shown before.
  2. Paste the wallet.dat file.wallet.dat file raptoreum core wallet
  3. Open the wallet app.

This method has worked for a lot of users, particularly for syncing issues and sync stuck issues with Raptoreum wallet. Hopefully, it will work for you too.

4. Set exception in the firewall

  1. Open the start menu, type Windows Security and hit enter to open it.
  2. Go to Firewall & network protection.going firewall and network protection windows security
  3. Go to Allow an app through firewall.clicking allow app through firewall windows security
  4. Click on Change settings and then allow RaptoreumCore wallet for both public and private networks.allowing raptoreum core windows firewall
  5. Click on OK to save the settings.

Now, open the wallet app. It should fix the RaptoreumCore wallet not syncing issue.

5. Use a VPN

If the above methods don’t solve your problem, it can be because of a network-related problem. So, to sync the RaptoreumCore wallet smoothly, you can consider using a VPN.

For this purpose, we recommend Private Internet Access (PIA). This VPN has a massive global network consisting of 35000+ servers with a port-forwarding facility. That makes PIA an ideal choice for any wallet and mining application.

⇒ Get Private Internet Access

These are the best methods to fix the Raptoreum wallet not syncing issue. You may have solved your problem in a different way. If yes, feel free to let us know in the comment box.

14 Best Blazing Fast Browsers For YouTube Upload & Studio

You are probably wondering what the best browser for YouTube upload & Studio is. Well, we’ve got you covered in this guide.

Speed is a significant criterion in browser choice for content creators or streamers. Therefore, streaming is resource-intensive, so you would not want your browser to be the weak link.

Also, with many high-quality videos, you can expect the files to be large and heavy. A great internet connection goes a long way in delivering quick uploads, but the browser used for the process is just as important.

So, what browsers are your fellow content creators or streamers using to get the best out of YouTube Upload & Studio? We will give you our top picks in this guide.

To stay protected, you may also consider uploading with any of the best browsers to enhance online security.

What browser do YouTubers use?

We will discuss a few browsers that YouTubers have used with great success. At the top of your head, you may feel Google Chrome is the only option since Google owns it, just like YouTube, but this is not true.

While it is recommended, other excellent options also make our list today.

Does YouTube work better on Chrome?

Chrome is resource-intensive, so while it is an excellent option for work, it may not be a great choice on older computers. That said, if you have a modern computer with enough processing power and storage, you can work very efficiently using Chrome.

Which browser is the fastest?

We will discuss many browsers in this article, but if you are interested in the fastest, we suggest you stick to Opera One. Besides its speed, it is feature-rich and integrates many options for popular platforms.

Which browser is best for uploading YouTube videos & Studio?

Opera One – Fastest browser option

Opera One is the quickest and most effective browser currently in use. It uses the Chromium engine to perform rapidly while using less system memory.

You won’t have to worry about severely taxing the system CPU while using YouTube Studio or uploading large video files.

If that wasn’t convincing enough, Opera One also has an inbuilt ad blocker to prevent those annoying advertisements. It is one of the best browsers for YouTube that you can use without the distraction of ads.

Additional features:

  • Improved battery optimization
  • Fast loading speeds
  • Modular navigation

Opera One

Upload and edit videos at high speeds with this lightweight, highly responsive browser.

UR browser – Most lightweight

The UR browser remains one of the finest browsers for video uploads and YouTube Studio.

UR browser has received positive reviews and ranks well on audio, HTML5 video, and streaming benchmarks.

Although it is not as robust as some major browsers, it makes up for this with speed and low resource use.

Because it uses the Chromium engine like Edge and Chrome, this browser is excellent for streaming videos on websites. Chrome video extensions give you many options for YouTube and video upload.

Additional features:

  • Invisible tracker blocker
  • Ad blocker
  • Virus scanner

UR Browser

Take care of your video content with this secure browser with minimal resource usage.

Microsoft Edge – Best for Windows

Most people choose different browsers than Microsoft Edge, the default browser for Windows 11. However, Edge is undoubtedly one of the finest web browsers for YouTube Studio and video uploads.

Edge presently supports all HTML 5 audio and video and codecs. Thanks to PlayReady DRM technology, it is excellent for streaming and one of the few browsers that can play Netflix video at a 4K resolution.

Since working with videos is resource-intensive, you should consider Edge since it offers the best battery-efficient video playbacks. Additionally, since Edge uses a Chromium engine, you may now install Chrome YouTube extensions.

Additional features:

  • Anti-phishing and malware
  • Tracking prevention
  • Password monitor

⇒ Get Microsoft Edge

Safari – Best for Mac

Only Apple users have access to the proprietary WebKit from Apple. The wonderful streaming experience is mainly derived from Apple OS and hardware. The browser makes the most of the mighty Apple CPUs.

Do you have as many as 20 tabs open when using YouTube Studio or streaming a YouTube video? The JavaScript engine in Safari processes it without fuss. It was 1.3 times quicker than Microsoft Edge in a Speedometer evaluation of this capability.

When viewing channels with numerous video thumbnails, tab scrolling and shutting are fluid.

Additional features:

  • Text copying and sharing
  • Download manager
  • Private browsing

⇒ Get Safari

Chrome – Most robust Chromium choice

The user base of Google Chrome is enormous. To offer the finest video playback, it often gives the most comprehensive HTML5 support and combines the most recent web technologies.

For uploading and streaming videos, Chrome is one of the quickest browsers. Turn Off the Lights, Magic Actions, YouTube Plus, and many more excellent YouTube video extensions may be installed on Chrome.

Additionally, due to its robustness, you will have many options for plugins to aid with procedures like video uploads.

However, it is a resource-intensive browser, so using powerful devices will help you get the most out of it.

Additional features:

  • Visual browser history
  • Website Task Manager
  • Start menu website launching

⇒ Get Chrome

Vivaldi – Best for customization

Vivaldi’s UI is similar to Opera’s but offers more customization options and tab management capabilities than other web browsers.

With customizing choices for the Start Page, visual elements, windows, and hotkeys, Vivaldi is fantastic for power users.

You will find the browser seamless for use with YouTube Studio and video uploads, as it does not hug processing power.

Lastly, you may install Chrome browser extensions, a significant bonus.

Additional features:

  • Fast forward and rewind
  • Visual tabs
  • Web panels

⇒ Get Vivaldi

Firefox – Best for security

The browser’s stability is crucial, and its customizability features make it seem like it was created with you in mind.

You can run more programs at once thanks to Firefox’s resource-saving advantages over Edge, Safari, and Chrome. This also makes it the ideal uploading browser for YouTube videos and YouTube Studio.

Lastly, Firefox offers a wide variety of add-on possibilities, from feature upgrades to performance advantages, and most users will come across something that will help them become more creative.

Additional features:

  • Fast processing
  • Extensive add-ons
  • Tab Containers

⇒ Get Firefox

Tor – Best for privacy

best browser for youtube upload & Studio

Firefox is the foundation of the Tor Browser, offering additional built-in privacy and security measures.

It offers built-in security and privacy, allowing you to download, publish, and watch movies without a virtual private network.

Tor supports Linux, Windows, and macOS. Additionally, it has an Android smartphone version, and you may use onion services off the box on Tor.

Because it is built on Firefox, including the capabilities you want using Firefox add-ons is simple.

Additional features:

  • Complex Data encryption
  • Anonymous server and website
  • Automatic data decryption

⇒ Get Tor

Pale Moon – Best for Video playback

best browser for youtube upload & Studio

Pale Moon is a browser that is optimized for video upload and playback.

It works with some technology that has lost support on many other browsers, including Adobe Flash and Microsoft Silverlight.

It is very lightweight and secure, making it an excellent option for working on YouTube Studio since you will not overclock your device even if you have many open tabs or large files uploading on YouTube.

Additional features:

  • Unity Web Player
  • Adobe Flash
  • Java applet

⇒ Get Pale Moon

Brave – Most private Chromium option

best browser for youtube upload & Studio

The open-source Brave browser is based on the Chromium Engine.

It’s a browser that prioritizes privacy by blocking online advertising and other tracking technologies, and it’s also the best browser for YouTube without ads.

Additionally, the browser is distinctive because it lets you utilize Tor, the most secure and private search engine, from inside its tabs.

Lastly, it uses less memory and resources than other browsers on this list, including Chrome. Hence, it’s an excellent resource-saving solution for uploading to YouTube.

Additional features:

  • Settings import
  • 3X page load speeds
  • Brave rewards

⇒ Get Brave

Waterfox – Best for Linux

best browser for youtube upload & Studio

Based on Mozilla Firefox, the browser uses Firefox’s engine. You can stream and upload videos using the browser on Linux, Windows, Android, and macOS devices since it is compatible with all these operating systems.

The browser successfully balances usefulness and privacy. It’s sufficiently light for fluid video uploads and safe to safeguard your online data.

In particular, Waterfox doesn’t transmit or collect information about your online surfing to unaffiliated websites.

Additional features:

  • No startup profiling
  • Support for 64-bit NPAPI plugins
  • Option for encrypted Media extensions

⇒ Get Waterfox

Lunascape Orion – Best browser combo

Not sure whether to use Safari, Chrome, Firefox, or IE? What if you could get all four in a single software?

Having WebKit (Safari and previously Chrome), Gecko (Firefox), or Trident (Internet Explorer) all combined into one browser is precisely what Lunascape Orion entails.

It does not end there but also taps into the features of these browsers. Hence, while it may not be your first choice for working in a YouTube studio, it is one to consider. 

The drawback is that it may not operate at its best on certain PCs.

Additional features:

  • Multi-line tabs
  • Customizable mouse movements
  • Automatic settings backup

⇒ Get Lunascape Orion

UC Browser – Best for smartphones

best browser for youtube upload & Studio

The UC Browser is among the finest browsers for sharing and downloading big files.

It is recognized for being simple to use and, more importantly, for having an unmatched upload and download speed on both smartphones and PCs.

UC Browser is available on desktop operating systems, albeit Android is where it performs best.

It provides a broad variety of cutting-edge features in addition to its quick load and download times, such as cloud sync, ad-free browsing, low data use, Video-Bar, auto-close, malware prevention, and more.

Additional features:

  • Multi-file format downloading
  • Cloud acceleration
  • Fast download

⇒ Get UC Browser

Maxthon – Most versatile

best browser for youtube upload & Studio

Without including Maxthon, our browsers for YouTube Studio and uploads would be incomplete.

It’s a private and lightweight web browser. Maxthon provides an extensive range of tools and features and the typical functionality available in other decent web browsers, making it stand out.

Maxthon utilizes its cloud services to sync your data across devices, another fantastic feature.

Even though the more prominent browsers often do this, few minor players have this capability. As a result, you can pick up where you left off, regardless of the device.

Additional features:

  • Built-in Flash
  • Programmable mouse gestures
  • ActiveX blocking capability

⇒ Get Maxthon

With any of these browsers, you will get the best out of your creative process on YouTube.

Note that this list is in no particular order, and we have only shown the best options. Therefore, we expect you to decide on a browser based on your preferences.

Lastly, any of the fastest and most secure Windows 11 browsers will be a better choice for users of the Windows OS.

Download & Install Opera Browser for Windows 7 [How to]

Opera is a popular browser but many are wondering if they can download Opera for Windows 7. This guide is going to answer this question and more, so let’s get started.

Can you download Opera on Windows 7?

In simple words, Yes. You can download Opera on your Windows 7 PC, however, you can’t run the latest version. Instead, you’ll have to use version 95 since this is the only one available for Windows 7.

How do I download Opera for Windows 7 32/64 bit?

  1. Visit the Opera download page.
  2. Scroll down locate Opera 95 and click the Plus icon on the right.
     opera 95 expand
  3. Next, select the version of Opera that matches your version of Windows 7.
    download opera 95 offline installer
  4. Wait for the download to finish.

How to install Opera on Windows 7?

  1. Open the location where you have downloaded the Opera Windows 7 installer file.
  2. Launch the program.
  3. On this home page, you can click the Options button to change a few settings.
  4. After selecting your preferred options, click on Accept and Install.
  5. Follow the onscreen instructions and wait for the installation to complete.

Is Opera a good browser for Windows 7?

Opera offers great functionality, and overall it’s one of the better browsers for Windows 7. However, you can only use version 95, which is out of date, so it might not be the most stable one.

⇒ Get Opera

Let us know in the comments below if you were successful in downloading the Opera browser on your Windows 7 32-bit or 64-bit PC using this guide or not.

For those looking for Opera GX, we have a great guide that explains if you can run Opera GX on Windows 7, so don’t miss it.

If you’re looking for a different browser, you might be interested in other browsers for Windows 7.

MetaMask not Connecting to Ganache? 5 Effective Fixes

Is your MetaMask not connecting to Ganache? If this is the case, and you are looking for solutions then you are in the right place.

Because in this guide, we have listed down the tried and tested solutions that have helped users fix the MetaMask not connecting to Ganache issue.

Ganache, for those who do not know, is a part of the Truffle Suite ecosystem, which is a high-end tool meant to run your own local blockchain for both Ethereum and dApps development.

There are two different versions of Ganache, Ganache UI which is the desktop application and the second is the command-line tool called Ganache-CLI. The main two reasons for using Ganache are to save time and save money by saving the gas fee.

So, in simple words, MetaMask goes well with Ganache to deploy contracts, develop dApps, and run tests. And if MetaMask isn’t connecting to Ganache then all these processes become problematic. You will find solutions in this guide, to fix the problem and connect MetaMask to Ganache. Let us check it out.

Why is MetaMask not connecting to Ganache?

For several users who are running MetaMask on their browser and running Ganache-CLI, the browser just keeps saying Oops! Something went wrong.

Users have also reported that they did not change a single setting, and this problem started showing up out of nowhere.

Well, after careful research, we were able to list down some of the possible reasons you could come across MetaMask not connecting to Ganache issue, which you can find below:

  • Incompatible browser
  • The MetaMask server is down
  • Browsing data is conflicting
  • The browser is not updated
  • Internet connection issues
  • MetaMask account is problematic

Moreover, there can be other technical issues that can cause certain issues with MetaMask. Fortunately, this guide possibly would help you to resolve the problem at hand.

Quick Tip:

Several users have reported that Google Chrome is the culprit here. Notably, for many users switching over from Google Chrome to Opera One browser solved the MetaMask not connecting to Ganache issue.

Opera One encompasses everything you need in a browser, including smart solutions for bookmarking, customized workspaces, a Crypto Wallet, and even a native AI.

Opera One

Try the Crypto Wallet in this browser and see if you can connect to Ganache.
Free Download Visit website

What can I do if MetaMask is not connecting to Ganache?

1. Restart your browser

The first thing that you can do before trying out some complex solutions is to restart the browser and see if this fixes the issue or not.

There are chances that there is a browser bug that is causing the MetaMask not to connect to Ganache. In such a case, you can simply restart your browser and see if that helps.

2. MetaMask server is down

If the official servers of the MetaMask are facing some technical difficulties, then not only you will come across MetaMask not connecting to Ganache issue, but several other problems as well. Often the problem isn’t from your end but from MetaMask’s end.

You can visit the MetaMask status page. Here, if you find that any of the services are down, you should wait for the service availability.

3. Clear browser cache

  1. Launch the web browser.
  2. Click on the 3-dot menu icon.
  3. Head over to More > Clear browsing data. Alternatively, you can also click Ctrl + Shift + Del buttons on your keyboard to open the Clear browsing data window.metamask not connecting to ganache
  4. Under the Clear browsing data window, ensure to check the boxes next to Cookies and other site data and Cached images and files options.
  5. Press the Clear data button.

Cached files are temporary files that app stores to remember certain settings related to it. However, over a period of time, if this cache data is not deleted then it can cause a malfunction of the app, in our case the web browser.

This will give rise to multiple issues such as MetaMask not connecting to Ganache. So, simply follow the above steps to clear the browsing data from your web browser and check if this fixes the issue or not.

4. Change the Ganache private key

  1. Open the Ganache blockchain desktop app or Ganache-CLI command line on your PC.
  2. Double click on any of the adress shown in the Ganache UI.
  3. Copy the private key of the desired account.
  4. Open MetaMask.
  5. Go to Settings > Network.
  6. Click on Add network.
  7. Give any name to the network.
  8. In the RPC URL box, copy the RPC URL link shown in Ganache.
  9. Enter the Chain ID as 1337.
  10. Enter ETH as the currency symbol.
  11. Click on Save.
  12. Create a new account.
  13. In the Select Type drop-down menu, choose Private Key.
  14. Paste the private key that you copied from Ganache. You can check if the MetaMask has successfully connected to Ganache or not.

If this doesn’t work, then you can try using a different private key and follow the same steps mentioned above, and possibly fix the problem at hand.

5. Relogin to MetaMask

  1. Open MetaMask on your web browser.
  2. Click on your profile icon.
  3. Press the Lock button.
  4. Wait for some time and then login back again to MetaMask and see if this resolves the issue or not.

During your previous browsing session, chances are that some important files related to MetaMask extension did not load, which is why you are experiencing issues such as MetaMask not connecting to Ganache problem.

In such a scenario, we would suggest you log out of your current session, relaunch the browser, and log back in again to see if this resolves the problem or not.

However, if you still wish to use Google Chrome to use MetaMask, then we advise that you uninstall it and reinstall it again.

Is there something else I can try to fix MetaMask not connecting to Ganache issue?

If none of the above solutions did the job in fixing the MetaMask not connecting to Ganache problem, then we have a few additional tips in our arsenal that you can try.

➡ Reset MetaMask account

  1. Open your web browser.
  2. Click on the MetaMask extension icon.
  3. Select Settings.
  4. Head to Advanced.
  5. Scroll down and click on Reset Account.reset metamask account
  6. Relaunch your browser.

➡ Contact MetaMask Support

You can also try contacting MetaMask support for help. MetaMask is a reliable cryptocurrency wallet and is known for good customer support. If you are facing this or any other problem with the wallet, then you can reach out to them by visiting the MetaMask support page.

You can get in touch with the team, tell them your query, and possibly get a solution to fix the problem at hand.

➡ Check your internet connection

Internet is the most crucial aspect of using MetaMask. If for any reason, your internet connection is experiencing any issues, then you need to reboot your router and connect it back again to see if this fixes the issue.

Even after doing so, if that doesn’t help, you can contact your ISP and get your internet connection checked to get it working.

There you have it from us in this guide. Let us know in the comments below which one of the above solutions helped you resolve the MetaMask not connecting to Ganache problem.

5 Best Browsers that Are Compatible with Google Workspace

Google Workspace is a set of communication and collaboration apps built for people in organizations. Workspace allows different configurations to be applied to different groups of people — or, in Workspace terms, different organizational units.

Hence, to work as an efficient Google Workspace administrator, you need to know the onions of your browser. Browsers come with different sets of customization options, privacy protection options, web-page loading speeds, etc.

For these reasons, you need to use the best browsers for your Google Workspace.

Is Google Workspace browser-based?

Google’s excellent Workspace office suite is nearly as powerful and flexible as Microsoft 365, despite only offering online apps. This browser-based approach means its apps are available for and work the same on any platform.

The Google Workspace can also be operated via mobile applications, especially the Google Workspace apps built specifically for Android, iPhone, and iPad devices. You can as well check for supported versions of mobile apps.

Which browser works best with Google Workspace?

Opera One – Best for privacy and security

There are two main reasons that we recommend Opera One as the best browser for accessing the Google Workspace: fast webpage loading speeds and excellent security and privacy features.

For quick and easy access to Google Workspace, Opera One will connect you to your Google account within milliseconds. The built-in ad blocker helps to reduce the webpage loading time.

Opera One

Employ this browser and get access to the Google Workspace account with sound navigation between your tasks.
Free Download Visit website

UR Browser – Best for Speed and Online Threat Filter

UR Browser is a very powerful software that was built with speed and privacy in mind, and it’s one of our top picks for the best browser to use with Google Workspace.

It also has very powerful filters for ads, trackers, and other online threats. It blocks access to any malicious third-party entity that would be able to get access to your private information and files.

⇒ Get UR Browser

Google Chrome – Known for Google Supports

Google Chrome is the most used browser software option on the market, and for a good reason.

The wide range of customization options available allows you to tailor the way it looks, and also to choose from an incredibly wide range of extensions.

Moreover, Google Chrome Supports all Google Workspace features and functionality.

⇒ Get Google Chrome

Mozilla Firefox – Best in tracking protection

Firefox works well with Google Workspace and is known majorly for how it reacts to different online threats.

The built-in privacy settings are not as extensive as the ones found in Chrome or UR Browser. However, you can still browse the Internet securely if you add some extensions.

⇒ Get Mozilla Firefox

 Safari – Best known for Speed

Safari’s memory use is very low. The browser is lightweight, responsive, and runs well in all circumstances, hence enabling you to access Google Workspace with speed.

Moreover, it is known for its decent privacy. This is less of a concern than with Chrome and Edge, as Apple’s business model is hardware-centric, rather than data-monetizing, at present.

⇒ Get Safari

How do I improve Google Workspace?

Check out these tips to improve Google Workspace:

  • Use subject-specific headlines so your messages are easier to locate and group.
  • Hide irrelevant email conversations so they skip your inbox and are automatically archived.
  • Discuss over video or chat instead of email using Google Meet or other video calling apps
  • Attach drive files and links in discussion items to email rather than lengthy messages.
  • Save time by messaging large groups at once.

What are the disadvantages of Google Workspace?

These are some major disadvantages:

  • No desktop tools for productivity
  • Google can be perceived negatively since it’s primarily an advertising company.
  • Gmail labels can be hard to understand for new users.

In this article, we explored some of the best browser options that work well with Google Workspace. Our top pick is Opera One because of the amazing set of privacy features and unchallenged loading speeds.

You can also check out our article on the best browsers for Windows 10/11 users, should you need them.

Please feel free to let us know about your experience with these browsers by using the comment section below.

5 Best Browsers that You Should Use for Turbotax

The Turbotax software is a top-level tool that makes tax filing and preparation easy. However, there are times when you might not be able to use the app.

In the case of devices like Chromebooks, you might not be able to install the software due to a lack of optical drives. This is where the best browsers for all devices come in.

They allow you to easily access the Turbotax website to take advantage of the tool. But there are only a handful of browsers compatible with the website.

This guide will show you the five browsers you can use with the online version of the popular tax software. Irrespective of your device, you will surely find a suitable app here.

Does Turbotax work with Google Chrome? 

The online version of Turbotax works with the Chrome browser version 74 or higher. In fact, it is only via the Chrome browser that you can file your tax with Turbotax on Chromebook.

It is also supported on Windows and some Mac devices. Hence, rest assured that Turbotax works great on Chrome.

Is Turbotax compatible with Firefox? 

Firefox is one of the browsers that are compatible with Turbotax. You can use it to prepare your tax on Windows and Mac PC.

However, it does not work on Android and Chromebook. So, it all depends on your device.

What browsers are best for Turbotax?

Opera One – Overall best browser for Turbotax

opera

Opera One is one of the few browsers compatible with Turbotax. It meets all Turbotax system requirements on all the major devices except Chromebook and iOS.

Opera One is reliable and aids your tax preparation process with its searing browsing speed. Also, it assures your privacy and security. With this, you can ensure that all the information entered in your browser is safe.

What’s more, you can always find a use for Opera One beyond using tax preparation. It just packs so many that put it ahead of the pack on many fronts.

Other features:

  • Built-in VPN and ad blocker
  • Anti-tracking feature
  • Social media and messaging
  • Native AI and Tab Islands

Opera One

Handle your taxes securely and protect your data when using Turbotax with Opera One’s antitracking and free VPN!
Free Download Visit website

Chrome – Fast Browser

chrome best browser for turbotax

Google is one of the big players in the browser industry, and it is not surprising that it is compatible with Turbotax. It works on virtually all mobile and desktop devices with few exceptions.

A plus is that it has no competition for Turbox on Chromebook. Chrome is known for its speed, which is handy when running a high-level website like this.

Also, it has a minimalistic and clean interface. This makes it easily accessible to anybody.

Other features:

  • Standard security feature
  • High compatibility
  • Large extension store

⇒ Get Chrome

Microsoft Edge – Best browser for Turbotax on Windows 11 & 10

microsoft edge

Microsoft Edge is an impressive browser for preparing your taxes on Windows PC. Though it meets Turbotax system requirements for some Mac devices, it is best used on all versions of Windows from 7 upward.

Now a Chromium-based browser, Edge is one of the fastest apps you can use today. Also, unlike the boring Internet Explorer, this browser can use extensions from the Chrome Web Store to extend its features.

Additionally, Edge offers standard privacy and security. Hence, there is no risk of data leakage.

Other features:

  • Clean and sleek interface.
  • Highly customizable.
  • Built-in anti-tracking feature.

⇒ Get Microsoft Edge

Safari – Browser for Turbotax on Mac and iOS devices

safari browser

Safari needs no introduction, as it is the default browser for Mac and iOS devices. This is why it is not surprising that it is the best browser for Turbotax on both operating systems.

One benefit of using this Safari browser is its incredible speed. Also, you can sync your data across iOS and Mac devices for easy access.

When it comes to privacy, this browser is no slouch. It provides you with a clear tracking report of your browsing activity. 

Other features:

  • Incredible browsing speed
  • Simple interface that can be customized
  • Works with extensions

⇒ Get Safari

Firefox – Low resource browser

firefox best browser for turbotax

Mozilla’s browser is a stunning app that delivers irrespective of the website. It is one of the listed browsers that work with Turbotax on different devices.

Firefox is suitable for this top-level website, thanks to its low resource usage. Also, it has an incredible page load speed that is on par with some of the best browsers.

Furthermore, Firefox has an anti-tracking feature. With this, nobody can follow you on the internet. Lastly, your data is secure with this browser.

Other features:

  • Fast browsing speed
  • Elegant and smooth interface
  • Works with extensions

⇒ Get Firefox

The best browser for Turbotax needs to be a high-level app that can handle the top-notch website. This guide contains modern-day browsers officially supported across all devices. 

Are you looking for a list of the best browsers that won’t save your personal data? Then, check out our guide for superb options available to you.

Feel free to let us know which browser you use to prepare your tax on the popular software in the comments below.

Browsers for Mac 10.10.5 – Top 6 Options That Still Support Yosemite

Apple doesn’t support macOS Yosemite anymore, but many people still use it, and in this guide, we’ll show you the best browser for Mac 10.10.5. Let’s check out which options you can still download and install on your OS:

What browser works on Yosemite?

Note icon NOTE
Using macOS Yosemite online in 2024 poses security risks due to a lack of updates. There are some browsers that still support this OS, and others that provide access to older versions that do, but these tools aren’t as well equipped as up-to-date counterparts to prevent and fight off security risks and performance issues. Keep that in mind and consider upgrading your OS to one that supports the latest security and performance requirements.

Opera – Best for speed on older Macs (legacy version)

opera

Despite the fact that the latest version isn’t offering Yosemite support, Opera is still one of the greatest options.

Installing and running an older version (up to Opera 64, released in 2023) will work great even on your older Mac computer.

This browser will give you access to security features like VPN, built-in adblock, and a reliable anti-tracking tool.

Plus, it’s highly customizable, allowing you to organize tabs, integrate social media and productivity apps, change themes, and more.

Key features:

  • Fast browsing speed
  • Secure with built-in VPN
  • Ad blocker included
  • Battery saver feature
  • Cross-platform compatibility
  • Customizable user interface

Opera

Enjoy modern features on your vintage Mac with Opera’s fast, secure, customizable browser!

Chromium Legacy – Closest option to Google Chrome

chromium legacy

Chromium Legacy brings support for older macOS versions starting with 10.7. This version has the same features as its Chromium counterpart with some minor limitations.

On older versions of macOS, the application uses a classical title bar. In addition, there are no shadows, and this might not look visually appealing. Also, scrollbars won’t disappear when scrolling.

This version also has some issues with Widevine DRM, so you can get resolution and compatibility issues. In fact, this feature needs to be installed manually to use it.

Despite a few missing features and glitches, Chromium Legacy is one the best options for older Macs that are still running Yosemite, so don’t hesitate to try it.

Other features:

  • It has almost all the features that Chrome has.
  • Works on older macOS versions, starting from 10.7
  • In active development

⇒ Get Chromium Legacy

Pale Moon – Based on Firefox

Pale Moon is forked from Firefox, and it’s frequently updated with security patches. The browser is optimized for modern processors, but it works on macOS 10.7 and later, so you won’t have any issues.

For rendering, the browser uses its engine called Goanna. Extension support is available, and there are a number of XUL browser extensions.

The software also works with legacy NPAPI plugins, and since it’s privacy-focused, it doesn’t collect any of your information or show ads.

Overall, this is a great browser for older operating systems, so be sure to consider it.

Other features:

  • Works on macOS 10.7 and newer
  • Based on Firefox, uses the Goanna engine
  • Open-source

⇒ Get Pale Moon

Artic Fox – A rebrand of Pale Moon

If you’re a fan of Pale Moon, you might be interested in Artic Fox. The browser is intended for older computers, and it can run on macOS 10.6 and newer.

The browser has ARM, JIT, and MIPS support, as well as WebRTC. Compared to Firefox, it does have a few features missing such as EME and translation services, but that shouldn’t be a big problem.

Extensions support is somewhat limited, and the application works only with ported add-ons from Pale Moon repository. Overall, it’s a solid browser, but it does have a few missing features.

Other features:

  • Based on Pale Moon
  • Works with macOS 10.6 and newer
  • Has ARM, JIT, MIPS, and WebRTC support

⇒ Get Artic Fox

Maxthon – High compatibility with old devices

maxthon browser best for yosemite

This is a strong browser for Yosemite, thanks to its independence on PC operating systems. Most of Maxthon’s functional resources are cloud-based.

With this, you can be sure that it uses minimal resources. This is why it is considered one of the best browsers for low-end devices.

Another interesting feature of Maxthon 5 is its internet connection speed boost. This feature helps load web pages faster than normal when your network is slow.

Other features: 

  • Keeps the PC optimized
  • Easy sync option
  • Built-in password manager

⇒ Get Maxthon

Safari – Built-in browser for Yosemite 

safari

Nobody knows a house better than the owner, and this has proved true with the Safari browser on Yosemite. As expected, it is the recommended browser by Apple to use on one of its most popular operating systems.

Although it used to lag in the past, that has been corrected since the release of Speedy Safari 8. What’s more, this browser boasts a clean and smooth interface that you can customize.

Lastly, you should know that some security features might be lacking in this browser. This is because Apple has stopped providing security updates for Yosemite OS.

Other features:

  • Can use extensions
  • Can be customized
  • Excellent page load speed

Is Yosemite still supported by Apple?

No, Yosemite isn’t supported by Apple and many other app developers. For your security, it’s advised to update to a newer version.

Does Firefox still support Yosemite?

No, Firefox hasn’t worked on Yosemite since version 78. It was possible to run Firefox in the past, but the Firefox Extended Support Release (ESR) support has expired and the software no longer works.

How do I update Safari in Yosemite?

This isn’t possible since Safari comes preinstalled with macOS. The only way to get a new version of Safari is to update to a newer version of macOS.

Wrapping up

Finding a browser for Mac 10.10.5 is no easy task since this is an older version with limited support, and only several still support it.

If you need additional suggestions, maybe visit our guide on the best lightweight browsers for Mac. We also have a great guide on the best browsers for Mac that won’t affect battery life, so don’t miss it.

What is your browser of choice for Yosemite? Let us know in the comments section!       

6 Best Browsers for Udemy to Use Today [Desktop & Mobile]

In this guide, let’s discuss your options for the best browser for Udemy. On the Udemy platform, educators may publish PDFs, PowerPoint presentations, audio, videos, ZIP files, and live classrooms to build courses using Udemy’s course construction tools.

You can use Mac and PC desktops or laptops or iOS and Android mobile devices to access any Udemy course.

On these devices, you will either use the Udemy mobile application or a browser to access any of your courses. So, let us explore with you the best browser options for Udemy.

Note that if your favorite browser does not support Udemy, you may opt for any other educational software tool.

What browser does Udemy use?

Udemy generally can be accessed using any of the following browsers:

  • Firefox
  • Opera One
  • Chrome
  • Edge
  • Safari

This doesn’t mean it will not work on other browsers like the Brave browser, but you may have reduced functionality using any browser that is not on this list.

Is there any PC app for Udemy?

Udemy has an official mobile app but no official desktop application.

What are the best browsers for Udemy?

Opera One – Best all-round

The browser includes a unique sidebar that enables users to bookmark all their preferred websites to access them quickly.

Opera One is not as well-known as Chrome or Safari browser, although it has been around for a while.

It is a great streaming website, and you should anticipate no slowdown while watching your Udemy videos.

Lastly, we must point out that you can follow Udemy courses on Opera One using a Desktop, but it will not be the best option for mobile devices.

Additional features:

  • VPN and Ad Blocker
  • Native AI
  • Workspaces and Tab Islands
  • Messaging and social media integration

Opera One

Build the perfect learning workspace and bookmark your Udemy classes, take quick snapshots of vital info, and add everything to your pinboards.
Free Download Visit website

AVG Secure Browser – Highly secure for studying

AVG browser is the right choice for any Udemy student that needs a safe space to evolve both professionally and personally.

What makes this browser different you wonder? The simple UI and enhanced privacy tools, confidential browsing, and mandatory HTTPS websites, to name a few.

There are practical functionalities such as the Stealth mode and privacy cleaner tool that can secure your navigation altogether.

More so, you get an extension guard feature to use any extensions and avoid digital threats. Be aware of the password manager as well to keep your credentials secured.

Additional features:

  • Digital fingerprint protection
  • Tracking scripts security
  • Easy integration with AVG antivirus and VPN

AVG Secure Browser

Attend your Udemy courses from the most privacy-oriented browser.

Firefox – Most Private

Firefox is a well-developed, robust web browser that is capable of handling different kinds of operations.

Your gadget will be safe since Firefox is excellent at protecting your privacy and helping you remain secure online.

It navigates the web swiftly and has a neat, polished interface. Furthermore, this browser shouldn’t cause any device lag unless a bad internet connection is to blame.

Additionally, by utilizing Firefox on a PC, Mac, or Linux OS, you can follow Udemy classes; however, it may not work fully on mobile devices.

Additional features:

  • Private browsing
  • Enhanced tracking protection
  • Page actions menu

⇒ Get Firefox

Chrome – Best for cross-platform compatibility

best browser for udemy

Chrome is arguably the most used browser globally and has risen to popularity with good reason.

First, it is cross-platform compatible, so there will be a working Chrome edition regardless of the device you use.

It also has the most extensive extension library, which means you will not be limited to the functions you get right out of the box.

For Udemy users, it is the best option if you need to enjoy following your courses on a desktop or mobile device. It is believed to be the best browser for Udemy on Android.

Additional features:

  • Media controls
  • Account profiles
  • A very private Incognito mode

⇒ Get Chrome

Edge – Best for Windows OS

best browser for udemy

Although it is a more recent browser, Microsoft Edge is not feature-lacking. It has received recognition for being among the most battery-efficient browsers and is compatible with macOS, Windows, iOS, and Android.

If you attempt to use this browser on an earlier Windows OS edition, it may not work optimally.

Similar to a few other browsers on our list, it works wonderfully for Udemy on desktop computers, but we advise using a different browser or the Udemy app on mobile devices.

Generally speaking, Edge has received a massive overhaul and is an excellent browser option by all standards.

Additional features:

  • Tracking prevention
  • Enhanced InPrivate mode
  • Vertical tabs

⇒ Get Edge

Safari – Best browser for Udemy on iOS

best browser for udemy

Expect Safari to be incompatible with Windows and Android smartphones since it was created uniquely for Apple devices.

Apple designed the Safari browser with ease of use in mind; consequently, it performs well.

One of the main advantages is that Apple provides telephone help for its customers, allowing for quick resolution of any problems that may develop. 

Voice control does not function on the desktop editions of Safari, even though several browsers are providing them along with other valuable features.

The good news is that you will have a seamless Udemy experience for Safari desktop and mobile.

Additional features:

  • Private browsing
  • Bookmark management
  • Download manager

⇒ Get Safari

How do I play Udemy videos on Firefox?

  1. Navigate to the Udemy website and log in.
  2. Click on your profile icon in the top right corner and select the My learning option.
    best browser for udemy
  3. From the list of courses, click on any you want to follow.
  4. Finally, click the Play icon to start a video.
    best browser for udemy

It is essential to stick to the browsers discussed in this list. Remember that for the best mobile experience, you must use the Chrome browser on Androids and the Safari browser on iOS.

In the comment section, we would love to hear all about your experience using these browsers.

How to Easily Fix Facebook Black Screen/Page Issues on Chrome

Google Chrome users have been posting their concerns over Facebook displaying a black screen while using the web browser.

This black semi-transparent overlay seems to appear more frequently on the Chrome desktop browser when compared to mobile devices, and it can be pretty annoying. Other browsers don’t seem to be affected by this problem.

The Facebook black screen issue may arise due to a bunch of reasons, but they are all easily fixable, and it shouldn’t take you more than a few minutes.

Why has my Facebook screen gone black?

One of the main problems that lead to a Facebook black screen on Chrome (usually in Incognito mode) is when Facebook tries to display a notification message asking whether you would like to turn on desktop verifications and Chrome’s Incognito Mode doesn’t support push notifications.

Other than that, problematic extensions or corrupt browser data are just as likely to cause the problem. Several users also reported that it was the Hardware Acceleration feature that lead to the Facebook black screen issue.

Let’s now head to the most effective solutions for the problem.

How do I fix a Facebook black screen on Chrome?

1. Log in to Facebook from another browser

Those of you that spend a lot of time on Facebook are probably well aware of how important it can be to stay updated at all times with everything that is happening.

So, if your Facebook black screen post persists on the default browser then we suggest you replace it and use Opera One instead.

It is fast, reliable, highly customizable, and has native integration with the Facebook Messenger app, so even if you’re not on Facebook, you can still chat with your friends.

All in all, after using it a bit, you might end up making Opera One your new default browser.

Opera One

Enjoy liking pictures and chatting with friends with this amazing browser with built-in social media.

2. Switch to incognito mode

Use Incognito Mode. If this resolves the issue, then the problem is caused by one of your extensions. In addition, don’t forget to clear the browser cache and cookies.

If you have security software like firewalls or antivirus software, check that Chrome is trusted or allowed by these programs. You can temporarily disable your security software and check if it helps.

If the issue persists, download and run Chrome Canary, a developer version of Chrome.

3. Remove problematic extensions

  1. Launch Chrome, paste the following path in the address bar at the top, and hit Enter:chrome://extensionsExtensions to fix facebook black screen
  2. Locate the problematic extension from the ones listed here, and click on the Remove button under it.Remove
  3. Again, click Remove in the confirmation prompt.Confirm
  4. With the extensions still open, open a new tab, and log in to your Facebook account.Login to fix facebook black screen
  5. Refresh the Facebook page a couple of times to check if the black screen overlay is gone
  6. If it’s not, head back to the Extensions tab and remove other extensions one by one until the issue is resolved.

Some extensions installed on Google Chrome can bring about the Facebook black screen issue in Chrome on Android and Windows.

To fix this, recall when you first encountered the problem and the extensions that were installed around the same time. Now, start removing these one at a time until the black screen on Facebook issue while watching videos is fixed.

4. Disable Hardware Acceleration

  1. Open Google Chrome, click on the ellipsis (three dots) near the top-right, and select Settings from the flyout menu.Settings
  2. Select System from the tabs listed on the left.System
  3. Now, turn off the toggle for Use hardware acceleration when available, and then click on the Relaunch button for the changes to come into effect.Disable hardware acceleration to fix facebook black screen

Google Chrome uses Hardware Acceleration by default to deliver better performance, which, sometimes, may not augur well with your hardware, hence the Facebook black screen on Chrome issue.

Disabling hardware acceleration from the Chrome settings may do the trick.

5. Delete the browsing data

  1. Press Ctrl + H to launch the browser history, and select Clear browsing data from the left.Clear browser data to fix facebook black screen
  2. Click on the Time range dropdown menu and select All time from the list of options.All time
  3. Tick the checkboxes for all three, Browsing history, Cookies and other site data, and Cached images and files, and click on Clear data at the bottom.Clear data

Once done, restart Chrome and check if the Facebook black screen issue is resolved. Oftentimes, it’s the corrupt cache or saved browser data that could cause it to malfunction.

6. Disable Windows Firewall

  1. Press Windows + S to launch the Search menu, enter Control Panel in the text field, and click on the relevant search result.Control Panel
  2. Click on System and Security.System and Security
  3. Click on Windows Defender Firewall.Windows Defender Firewall
  4. Select Turn Windows Defender Firewall on or off from the options on the left.Disable firewall to fix facebook black screen
  5. Now, select the Turn off Windows Defender Firewall (not recommended) under both Private and Public network settings, and then click on OK to save the changes.Disable firewall

The Windows Firewall can also be blocking your connection with Facebook, thereby leading to a black screen. Usually, such problems resolve by themselves, but you may consider disabling the Firewall for a while to fix things right away.

7. Reset Chrome settings

  1. Click on the ellipsis and select Settings.Settings
  2. Select Reset and clean up from the left.Reset and cleanup to fix facebook black screen
  3. Click on Reset settings to their original defaults.Restore settings
  4. Click Reset settings in the confirmation box.Reset settings to fix facebook black screen

You can restore Chrome browser settings at any time if apps or extensions changed the settings without your knowledge. This doesn’t delete, clear, or change your saved bookmarks and passwords.

When you reset Chrome settings, it changes the default search engine back to Google, changes your homepage and tabs, pinned tabs, content settings, cookies, and site data, as well as extensions, back to default.

Remember that only the settings for the logged-in Chrome profile will be reset, and the changes will apply across devices you’re signed into with the current profile.

8. Create a new user profile in Chrome

  1. Click on your Profile icon near the top-right in the Toolbar, and select Add from the menu.Add to fix facebook black screen
  2. Now, choose whether you want to link your new profile with a Google Account, or go ahead without one (we choose the second option).link account or not
  3. Now, enter a name, choose a theme, upload a picture, select whether to create a desktop shortcut for the profile, and then click on Done.enter name
  4. Once the new profile is created, check if you can log in to Facebook without any issues.check if facebook black screen fixed

If you get the Facebook black screen on Chrome, chances are your user profile is corrupted. Create a new one and see if it makes any difference. When you do that, it will also fix Facebook video black screen on your iPhone if the same Chrome profile is used there.

9. Remove unwanted ads, popups, and malware

  1. Launch Chrome, paste the following path in the address bar, and hit Enter:chrome://settings/cleanupCleanup tool to fix facebook black screen
  2. Click on the Find button.Find to fix facebook black screen
  3. Wait for Chrome to find and remove any malware or harmful software on the computer.wait

If you get a Facebook black screen on Chrome, there might be unwanted software or malware installed on your computer which usually takes the form of pop-up ads and new tabs that won’t disappear.

In this case, you might see Chrome’s homepage or search engine changing, unwanted extensions keep coming back, or your browser is hijacked and keeps redirecting to unfamiliar pages or ads.

After running the scan, remove any harmful software that are found, to fix the problem.

10. Change the default graphic processor

You can also try and change the default graphic processor from Intel to Nvidia or AMD dedicated processor by right-clicking the context menu, or from Nvidia and AMD Control Panels.

Many users who reported the Facebook black screen issue have used this method to get rid of the problem and it worked like a charm.

Some users who installed Facebook Gameroom may also come across the black screen issue, but the steps listed above should do the trick. Also, while the article is focused on Google Chrome, applying the same concept will help fix the Facebook black screen issue on Safari as well.

Also, find out what to do if Facebook videos are not playing in Chrome.

Did any of these solutions fix the Facebook black screen on Chrome problem? Let us know in the comments section below.