New Steam vulnerability might put your personal data at risk

Steam is one of the biggest gaming platforms in the world, and it’s used by a lot of Windows 10 users for their daily gaming sessions.

Now, millions of Windows 10 gamers could be at risk because of a “zero-day” security vulnerability that affects Steam.

Steam’s security might be compromised

The issue was found by a security researcher, Vasily Kravets, who stated that the vulnerability could open the affected PCs to malware attacks, data and password stealing, and more.

Here’s what the security researcher said in his public disclosure:

45 days have gone since the initial report, so I want to publicly disclose the vulnerability. I hope this will bring Steam developers to make some security improvements. So, now we have a primitive to take control on almost every key in the registry, and it is easy to convert it into a complete EoP (Escalation of Privileges). After taking control, it is only necessary to change ImagePath value of the HKLMSYSTEMControlSet001Servicesmsiserver key and start “Windows Installer” service. The program from ImagePath will be started as NT AUTHORITYSYSTEM.

Escalation of Privileges in Steam may lead to data and password loss

This is a privilege escalation vulnerability that allows an attacker with minimal access permissions to get system admin permissions. This means that malware with these raised privileges could affect your privacy and personal data:

Some of the threats will remain even being run without administrator rights. […] the high rights of malicious programs can significantly increase risks, programs could disable antivirus, use deep and dark places to hide and change almost any file of any user, even steal private data.

This issue with the Steam Client Service is pretty big and could lead to many unwanted problems.

Share your thoughts about Steam‘s “zero-day” security vulnerability in the comments section below and we’ll continue the talk.

Xbox Live doesn’t think I have Gold membership

A large number of users have reported that their Xbox consoles don’t recognize their Gold accounts even if they have one.

This issue varies a lot when it comes to the way this affects your gaming experience, but in most of the cases, the Gold subscriptions are still available, and also the content that comes with the Gold account.

In this article, we will explore some of the best troubleshooting steps that you can try to fix this issue once and for all.


What to do if Xbox One Gold membership isn’t recognized?

1. Check the Xbox Live Status web-page

Xbox live status webpage - xbox live doesn't think i have gold

  1. The first step you will need to take when encountering this error message is to check if the Xbox Live servers are up and running.
  2. In order to do so, you can simply click this link to visit the official Xbox Live page. If the servers are marked with a green checkmark then it means that the servers are running normally.
  3. Follow the next method to solve the issue mentioned above.

2. Try the ‘unplug’ method

socket - xbox live doesn't think i have gold

  1. Unplug the power cord from your Xbox.
  2. Hold the power button pressed for 30 seconds.
  3. Plug all the cables back in and try to see if the issue is resolved.

Multiplayer won’t work on your Xbox One? Get back into action with this simple guide!


3. Reset your Xbox Live profile and re-sync the data

Xbox live webpage - xbox live doesn't think i have gold

To reset your profile follow these steps:

  1. Press the Xbox button on your gamepad.
  2. Select Settings -> All Settings.
  3. Under the Account tab -> select Remove accounts.
  4. Choose the account that you want to remove.
  5. Select Remove to confirm your decision.
  6. After the process is finished -> select Close.
  7. Restart your Xbox.

To re-sync your data follow these steps:

  1. Press the Xbox button on your gamepad again.
  2. Inside the Sign in tab -> scroll down and select the Add & manage option.
  3. Log into your Microsoft account and check to see if the issue persists.

4. Reset your console to factory defaults

xbox gamepad - xbox live doesn't think i have gold

  1. Press the Xbox button on your gamepad.
  2. Select System -> Settings -> System -> Console info.
  3. Select Reset console.
  4. On the Reset console screen -> choose Reset and keep my games & apps.
  5. After the console is reset -> log into your account normally (the process of erasing the data will take some time but should solve your problem).

In this guide, we discussed the best methods to solve the Xbox Live Gold membership issue. Please feel free to let us know if this guide helped you by commenting below.

READ ALSO:

Disable Skype Spell Check: 3 Ways to Do it

Skype is, without a doubt, the most popular messaging service, and although millions of users use it daily, some aren’t pleased with some of its features. One feature that users are complaining about is spell check, and they want to disable it in Skype.

Today we’re going to show you how to disable Skype autocorrect in Windows 10 and other iterations of the OS.

Should I disable spell check in Skype?

Autocorrect is a useful feature if you sometimes misspell certain words. With autocorrect turned on, all your words will be automatically corrected if they aren’t properly spelled.

This can be useful, but sometimes autocorrect might be wrong and replace the misspelled word with some completely different word, thus making you enter the same word again. This applies to both the standard version of Skype and Skype for Business.

If English is not your native language, say using Skype in Spanish or French, autocorrect can sometimes change the words from your native language to English, causing even more problems. These are just some minor inconveniences that can occur with autocorrect, so it’s no wonder many want to disable spell check in Skype.

How do I turn off Skype spelling check?

1. Change typing settings

  1. Click the Start button and choose Settings app.
  2. Go to Devices, and choose Typing.
  3. Turn off Autocorrect misspelled words and Highlight misspelled words options.
    autocorrect disable turn off autocorrect skype

According to users, the simplest way to turn off Skype autocorrect is to change the Typing settings in the Settings app.

Remember that the autocorrect feature is based on your keyboard input language, so keep a close eye on which keyboard input language you are using.

2. Uncheck Autocorrect in Skype

Tip icon Tip
The option is only available in the earlier version of Skype. For those running the latest versions, move to the next method.
  1. Open Skype.
  2. Go to the Tools menu, and select Options.
  3. Go to IM & SMS, select IM Settings, and click on Show advanced options.
    advanced settings skype disable autocorrect skype
  4. Uncheck Auto correct and highlight misspelled words.
    auto correct misspelled words turn off autocorrect in Skype
  5. After unchecking this option, click the Save button to apply the changes.

3. Edit the registry

  1. Press Windows + R, type regedit, and click OK.
    regedit run window turn off autocorrect in Skype
  2. Navigate to the following path: Computer\HKEY_USERS\S-1-5-21-2072414048-1790450332-1544196057-1001\Software\Microsoft\TabletTip\1.7
  3. In the right pane, double-click EnableAutocorrection DWORD, set its Value data to 0, and click OK to save the changes.
    EnableAutocorrection DWORD turn off autocorrect in Skype
  4. Repeat the same steps for EnableSpellchecking DWORD.
  5. After you’re done, close Registry Editor and check if the problem is resolved.

According to users, for some unknown reason, the Typing tab in settings might not be visible, but you can circumvent this limitation by editing the Registry.

Autocorrect is a useful feature, but sometimes it can be a hindrance, so you might want to disable spell check in Skype. It’s simple and easy!

Before you leave, find out how to get rid of delayed messages in Skype.

If you are still unable to turn off autocorrect in Skype, give us a shout, and we’ll help you out.

Malware attacks to affect Windows PCs through faulty drivers

Security researchers found new vulnerabilities in more than 40 drivers that have been certified by Microsoft.

The problem is in the driver code that enables communication between the OS kernel and the hardware, providing a higher permission level than a normal user or an administrator.

The driver vulnerabilities could affect millions

The list of hardware manufacturers affected include huge companies like Intel, Nvidia, Huawei, Toshiba, and Asus. Here’s how the cybersecurity team at Eclypsium, who found the vulnerabilities, describe them:

All these vulnerabilities allow the driver to act as a proxy to perform highly privileged access to the hardware resources, such as read and write access to processor and chipset I/O space, Model Specific Registers (MSR), Control Registers (CR), Debug Registers (DR), physical memory and kernel virtual memory. This is a privilege escalation as it can move an attacker from user mode (Ring 3) to OS kernel mode (Ring 0). The concept of protection rings is summarized in the image below, where each inward ring is granted progressively more privilege. It is important to note that even Administrators operate at Ring 3 (and no deeper), alongside other users. Access to the kernel can not only give an attacker the most privileged access available to the operating system, it can also grant access to the hardware and firmware interfaces with even higher privileges such as the system BIOS firmware.

40 drivers vulnerable windows This means that the faulty drivers could allow malicious apps gain kernel privileges, affecting directly the firmware and the hardware. Furthermore, reinstalling the OS won’t solve the problem.

This is the case with BIOS and UEFI firmware that once affected, can’t be repaired by a OS reinstall.

All versions of Windows are affected

It’s worth mentioning that over 40 drivers were affected, and the issue applies to all versions of Windows, not just Windows 10.

Microsoft is strongly advising its customers to use Windows Defender Application Control to block unknown software and to turn on memory integrity for capable devices in Windows Security.

Here’s the full list of affected vendors:

  • ASRock
  • ASUSTeK Computer
  • ATI Technologies (AMD)
  • Biostar
  • EVGA
  • Getac
  • GIGABYTE
  • Huawei
  • Insyde
  • Intel
  • Micro-Star International (MSI)
  • NVIDIA
  • Phoenix Technologies
  • Realtek Semiconductor
  • SuperMicro
  • Toshiba

Some of them have already deployed fixes, but others are still under embargo.

To keep your system safe, be sure to regularly scan for outdated drivers and install the latest driver fixes from the aforementioned manufacturers.

To help you, we’ve prepared a guide on how to update outdated drivers, so be sure to check it out.

READ ALSO:

Descenders’ Xbox sales quadrupled during launch month thanks to Xbox Game Pass exposure

If Xbox execs said many times that they were seeing increased sales of Xbox games that joined the company’s Xbox Game Pass subscription service, the founder of Descenders publisher Mike Rose has just offered another confirmation. Speaking to Gamesindustry.biz (via Windows Central), the video games industry veteran explained that Xbox sales of the extreme downhill biking game quadrupled during the game’s launch month (Descenders joined the Xbox Game Pass on its launch day).

According to Rose, indie games like Descenders really benefit from all the exposure that Xbox Game Pass games on the Xbox One dashboard:

“Being on Game Pass means that you basically have constant featuring on Xbox. You’re game is on the dashboard all the time… People are seeing our game every day.

“And because of that, during launch month, our Xbox sales — we didn’t do any discounts on it or anything — quadrupled, and have now settled to about three times as much as before. It’s essentially an advert; a straight up advert.

“And now Xbox is asking, ‘Oh, can we feature Descenders in more of the Game Pass advertising?’ Yes, you can. Of course you fucking can.”

Despite the fact Xbox Game Pass really helped Descenders to reach 600,000 players since launch, Rose still isn’t totally convinced that game subscription services are the future of digital distribution. “What happens is it peaks and then it dips, because at that point the saturation kicks in,” Rose explained. “You’d imagine, in a year’s time all these people with subscription models will be offering less money to join them. Because why do they need to pay as much? You’d imagine the numbers will go down, which makes it less worth it to people, but then at that point everyone’s on it, so you have to be on it.”

It’s worth reminding that Descenders launched first in early access on Steam and Xbox One, but having the game launch on Xbox Game Pass on its release day certainly helped to bring a lot of new players. We’re seeing more and more indie developers embracing Game Pass as part of their go to market strategy, though others continue to stay away. Cuphead, one of the biggest indie successes in recent years which also received a big marketing push from Microsoft has yet to come to Xbox Game Pass. It probably won’t happen anytime soon as the game crossed 4 million copies sold earlier this month.

Do you think it makes sense for indie devs to put their games on Xbox Game Pass to get increased exposure, or do you understand other devs who are more worried about protecting their work? Let us know below.

Descenders
Descenders
Developer:
No More Robots
Price:
Free

5 best iPhone mouse apps to turn your phone into a PC mouse

iPhone PC mouse apps are extremely useful tools that allow the users to use their iPhones as mice on PCs running Windows. This is obviously handy when you don’t have a mouse and are in desperate need for one.

There are various iPhone PC mouse apps on the market these days but we want to make your choice easier, and that’s why we narrowed your options to the best five tools that allow you to use your iPhone as a mouse with a multi-touch function on your PC running Windows.

Check out these tools and their sets of features and after that decided which one is the best for your needs and preferences.

What’s the best remote mouse app for PC?

Remote Mouse

remote mouse Is there a mouse app for iPhone?

If you ever wondered if there is a mouse app for iPhone, you probably haven’t heard about Remote Mouse. If you have to perform a presentation, or if you plan to watch an online movie or transfer photos in just a few seconds, this can be easily done via an app that allows you to use iPhone as a mouse for a PC.

Remote Mouse is one of the greatest apps that will enable you to turn your iPhone, Apple Watch, or iPad into a wireless user-friendly remote control for your PC running Windows. This app is so easy to use that even the newbie users will get the hang of it in no time.

You will be more than surprised by a fully simulated touchpad, keyboard, and featured remote panels that will definitely make your remote experience as efficient and as simple as possible.

Check out the best features that are included in this tool that lets you control your PC:

  • Using the Remote Mouse app, you will be able to enjoy a fully simulated mouse.
  • Other great features include the Magic Trackpad, Multi-Touch Gestures, Function Keyboard in Landscape Mode, Key Combination Input and more.
  • This tool supports Windows Media Player, Windows Photo Viewer, PowerPoint and iTunes for Windows.
  • The physical volume buttons offer control to adjust the computer’s volume and also to change the presentation slides.
  • You can shut down, sleep, restarts and loge off remotely from your computer using this app.
  • You will also get the chance to type with your voice remotely.
  • The app provides password protection, a customizable interface, customizable wallpapers.
  • Remote Mouse works under Wi-Fi and 3G/4G networks.

In order to get started with the app, you have to make sure that your mobile device is connected to the very same Wi-Fi or 3G hotspot as your computer running Windows.

This high-quality app is sometimes better than a real mouse, considering its tons of features. You can find out more useful data on this app and download Remote Mouse from App Store for free.

For a complete setup tutorial and connection steps, you can read how to use Remote Mouse on Windows.

⇒ Get Remote Mouse

Air Keyboard Lite

air keyboard lite Can I use iPhone as mouse for PC?

If you want to use your iPhone as a mouse for a PC, you might want to consider Air Keyboard Lite. This application works primarily as a remote keyboard, but it also has a touchpad functionality.

Here are some of the features that Air Keyboard Lite offers:

  • 9 different keyboard layouts
  • Customizable keyboard layout designer that allows you to create custom keyboard layouts with ease.
  • Support for macros – using this feature you can create various sequences that include key presses, mouse movement, scrolling, etc.
  • Touchpad with multi-touch support.
  • Scroll gestures.
  • Compatible with both Mac and Windows computers.

⇒ Get Air Keyboard Lite

Mobile Mouse

mobile mouse iphone How can I control my computer without a mouse?

Mobile Mouse is a mouse app for iPhone, iPad, and Apple Watch, and it will transform your device into a wireless trackpad, keyboard, remote, and even more for your PC running Windows.

This is a full-featured tool, and you can use it to do anything that you are normally able to do with a keyboard and mouse.

Check out more exciting features that are included in this app:

  • You can use the built-in keyboard to type, and the app’s switcher is also a great addition.
  • You will not have to navigate to the taskbar or dock your PC anymore because Mobile Mouse supports multitouch gestures and it also comes with a special mode for using it as a Keynote and a PowerPoint remote.
  • This app is ideal for anyone who is looking for a multimedia remote because it packs a multimedia mode and assignable hotkeys.
  • It works exceptionally smoothly, and it also has a quick response time.

This app works on all Windows versions, and the software is available for free.

⇒ Get Mobile Mouse

Remote : Mouse/Keyboard/Presentation/Trackpad

remote mouse/keyboard iPhone as mouse for PC

If you need to control your computer without a mouse, then you might want to consider Remote: Mouse/Keyboard/Presentation/Trackpad. Some of the features that this app offers are the following:

  • Application launcher and switcher
  • Siri support
  • Virtual keyboard, mouse, and trackpad
  • Compatible with Windows and Mac devices
  • Support for iOS7 dark and light keyboard
  • Ability to emulate Mac function keys
  • Support for Apple gestures
  • Easy to connect with a single press of a button. Fast connect and auto-reconnect features are also available.

⇒ Get Remote Mouse/Keyboard/Presentation/Trackpad

Ultimate Control

ultimate control Can I use iPhone as mouse for PC?

Ultimate Control allows you to use iPhone as a mouse for PC. This software is available for PCs running Windows, and it packs a few useful features.

Here are some of the best functionalities that you will be able to enjoy while using this app:

  • You can connect your mobile device seamlessly via Wi-Fi or Bluetooth.
  • This tool is straightforward to use, and its interface is intuitive enough even for beginners.
  • You will be able to turn your iPhone into a wireless mouse, keyboard, remote control, and gamepad as well.
  • First of all, you will need to install the Ultimate Control Receiver on your PC running Windows, and this lightweight server program will allow the mobile app to find your computer and connect to it.
  • Ultimate Control also includes a security mechanism, and it’s highly recommended that you enable authentication in order to be able to control your computer.
  • The encryption system makes the communication anonymous, and this enhances security.
  • The built-in gestures will allow the user to perform common actions much easier.

Check out more features that are packed in this app and download Ultimate Control from its official website.

⇒ Get Ultimate Control

These five apps allow you to use iPhone as a mouse for PC, so be sure to try them out.

Make sure to have a look at them before you decide which app is the best for you.

Game Pass Ultimate doesn’t work? Check these solutions

Xbox Gamepass ultimate is a new subscription-based offering from the software giant Microsoft that allows the Xbox and PC users to enjoy unlimited access to over 100 high-quality games along with Xbox Live Gold access. The pass allows you to access games on both your PC and Xbox without having to purchase the game separately.

Nevertheless, recently some users are reporting that their Game Pass subscription is not working. Xbox community forums and Reddit forums. Your Game Pass can stop working due to many reasons including a temporary glitch. In this article, we take a look at the possible fixes to resolve Game pass ultimate doesn’t work issue.

Why isn’t Game Pass Ultimate working?

1.  Temporary Issue

Xbox Game Pass Ultimate TEmpora game pass ultimate doesn't work

  1. First thing you should do if your Game Pass Ultimate subscription is not working is to check the Xbox community forums and Reddit Forums to see if other users also affected by the issue.
  2. If other users also affected by the problem, then the problem could be at the Xbox end and the developers are probably working on a fix.
  3. In this situation, you can do nothing but wait for the problem to resolve itself.  Make sure you reach out to the Xbox developers with the issue to resolve the issue ASAP.

We’ve written extensively on Xbox Live issues. Check out these guides for more information.


2. Contact the Seller

Contact Game Pass seller game pass ultimate doesn't work

  1. If you bought the Game Pass Ultimate subscription from an online store like Bestbuy and getting an error while redeeming the subscription code, then you should contact the seller on their official support forum.
  2. The support staff will ask you for your contact and purchase information and should be able to help with the error in a better way.

3. Perform a Power Cycle or Physical Power Cycle

  1. On your Xbox One / Xbox 360 screen, press and hold the Xbox button on the Controller to open the Power Center.
  2. From the Power Center, select Restart Console option.Perform Xbox Power Cycle game pass ultimate doesn't work
  3. Select the Restart option and wait for the console to restart.
  4. After the restart, check if you are able to access your Game Pass Ultimate account. If the issue persists, do the following.
  5. When your Xbox is turned on, press and hold the power button on the Xbox console for a few seconds until the console shuts down completely.
  6. Leave the console idle for a few minutes and then press the Power button again to restart it.
  7. After the restart, check for any improvements.

RELATED STORIES YOU MAY LIKE:

How to get the most out of PDF with Microsoft Office

Microsoft Office Word documents are commonly used in business and schools, but not everyone might have an Office 365 subscription, or the software to view .Docx files on a computer. There’s no need to worry though as it is easy to convert Word documents into PDFs for a more universal file sharing and viewing experience. In this guide, we’ll take a look at how you can do just that, on both Windows, macOS, and though other software.

With Word on Windows 10

If you’re already using Microsoft Word on Windows 10, converting the file to a PDF just takes a few simple steps. To get started, open your word document. Then, click on the File tab. Next, select Save As from the list on the left. You’ll then want to select where you’ll be saving your file, and then navigate over to the Save as Type box. Click the arrow next to the Save button and then scroll through the drop down list and select PDF (*.pdf). The file should then automatically open up.

With Word On MacOS

Granted you’re running Microsoft Word on MacOS, converting files to PDF is a similar process. Once the file is open, you’ll want to click the File button in the top menu-bar. After that, click on Save As. Name your file, and then choose its location to be saved. Finally, in the File Format box choose PDF. You’ll then want to click the Export button to end.

With Google Drive

If you don’t have Office on Windows 10 or MacOS, and just received a word document and want to convert it to PDF for viewing or sharing, Google Drive will make your life easier. Simply visit the website here, login, and then click on the New button on the side. Then, click File Upload and select the document you want to convert.

Once it is uploaded to Google Drive, you’ll see a pop up on the lower right telling you that it is complete. Next, double-click that notification to open. Along the top, click on Open With, an choose Google Docs. In the new tab, visit the File tab and click Download As and then choose PDF from the list. Your browser will then save a copy of the word Doc as a PDF to your computer for sharing.

With Online Tools

The inbuilt save feature in Word might be the best way to go, but there are many other tools that you can use to convert Office documents to PDFs as well. Some good examples include online tools like freepdfconvert.com, pdf2doc.com, as well as smallpdf.com. Let us know which method you find best in the comments below.

Microsoft announces a long-term alliance with Jio to accelerate digital transformation in India

Microsoft has announced a long-term alliance with Jio to accelerate India’s digital transformation. The announcement was made at the Annual General Meeting of Reliance Industries by Mukesh Ambani, the company’s Chairman and Managing Director.

Reliance Jio, a subsidiary of Reliance Industries Limited (RIL), is India’s leading carrier with over 340 million users and has transformed the country’s telecom landscape with affordable data connectivity.

The 10-year comprehensive commitment combines the world-class capabilities of both companies to offer a detailed set of solutions comprising connectivity, computing, storage solutions, and other technology services for Indian businesses. The strategic effort will aim to enhance the adoption of data analytics, AI, cognitive services, blockchain, Internet of Things, and edge computing among small and medium enterprises.

As part of this new agreement, Jio will move its internal workforce to productivity and collaboration tools available with Microsoft 365 and will migrate its non-network applications to the Microsoft Azure cloud platform.

Jio’s connectivity infrastructure will promote the adoption of the Microsoft Azure cloud platform within its growing ecosystem of startups, as part of Jio’s cloud-first strategy. The company will build new custom solutions on Microsoft Azure for large enterprises and leverage Microsoft’s speech and language cognitive services for its device ecosystem, providing support in 13 Indian languages, with the flexibility to add other languages.

The company will also set up datacenters in locations across India, consisting of next-generation compute, storage, and networking capabilities. Microsoft will deploy its Azure platform in these datacenters to support Jio’s offerings. The initial two datacenters are being set up in the states of Gujarat and Maharashtra and are targeted to be fully operational in 2020.

In a blog post, Anant Maheshwari, President, Microsoft India, said that this joint effort is likely to unlock and accelerate digital innovation in India at an unprecedented scale.

Error response from daemon drive sharing is blocked by a firewall

A large number of users have reported encountering the error message saying Windows 10 error response from daemon drive sharing seems blocked by a firewall.

This means that you can not use Docker like you normally would. Having this issue can be extremely annoying, especially because of the entire access restriction caused in this case.

One of the most common causes for this error is the Norton Antivirus Firewall, and in today’s article, we’ll show you how to fix the issue.


How to fix Error response from daemon drive sharing is blocked by a firewall?

1. Update Docker to the latest version

Docker website - windows 10 error response from daemon drive sharing seems blocked by a firewall

  1. Click here to download the latest Docker version.
  2. Run the installer software on your PC and follow the on-screen instructions in order to complete the setup.
  3. Check to see if this fixed your issue.
  4. If the issue persists, please follow the next method.

2. Change the Network Interface Card properties

  1. Press Windows Key+X keys on your keyboard -> click on Settings.
  2. Inside the Settings window -> select Network and Internet.
  3. Choose the option Network and Sharing Center. Network and Sharing center - windows 10 error response from daemon drive sharing seems blocked by a firewall
  4. Click on Change adapter settings.
  5. Right-click the Network Interface Card connection -> select Properties.
  6. Uninstall and reinstall the service File and Printer Sharing for Microsoft Network.
  7. Check to see if this method fixes your problem.

File Sharing is blocked by Windows Firewall? Fix that with this simple guide!


3. Use PowerShell (Admin) to set the DockerNAT service to private

  1. Press Windows Key+X keys on your keyboard -> select PowerShell (Admin).
  2. Inside the PowerShell window -> type in the following command and press Enter: Set-NetConnectionProfile -interfacealias "vEthernet (DockerNAT)" -NetworkCategory Private PowerShell admin with command - windows 10 error response from daemon drive sharing seems blocked by a firewall
  3. Open Docker and navigate to the Settings window.
  4. Enable drives C and D for sharing.

4. Reset the Norton Antivirus firewall service

security on screen - windows 10 error response from daemon drive sharing seems blocked by a firewall

  1. Open Norton Antivirus software -> click on Settings.
  2. Inside the Settings window -> click Firewall.
  3. In the General Settings tab -> click Reset in the Firewall Reset row.
  4. Check to see if this solved your issue.

5. Allow DockerNAT executable through the firewall

computer on desk with user - windows 10 error response from daemon drive sharing seems blocked by a firewall

  1. Click on the Cortana search box -> type firewall -> select the first option in the list.
  2. In the Firewall settings -> select the option Allow an app or feature through Windows Defender Firewall.
  3. Search for DockerNAT on the list and make sure to permit connections (incoming and outgoing).
  4. Save the settings and check if the issue is resolved.

In this guide, we explored the best methods to deal with the issue caused by the error Response from daemon drive sharing seems blocked by a firewall on Windows 10.

Please feel free to let us know if this guide helped you by commenting below.

[wl_navigator]

Can’t export to Power BI Desktop format? We have the solution

Power BI allows the users to explore their reports and other data to Power BI desktop format for better accessibility. While the export features work most of the time, sometimes you may face issues with the export. The full error Can’t export to Power BI Desktop format We couldn’t export to .pbix format is reported by the users in the Power BI community.

Follow the steps given in this article to fix can’t export to Power BI desktop format.

How do I export a PBIX file from Power BI?

1. Update Power BI Desktop

  1. The Power BI Desktop Client before November 2016 did not support Download Report.
  2. So, if the Download Report Menu option in Power BI service is greyed out, it means you need to update the client before attempting to export any report to desktop format.
  3. Once you have the latest version installed, follow the next set of steps to download the .pbix file.

Download the Report as a .pbix File

  1. Launch Power BI Service and open the file that you want to download.
  2. Click on File in the Menu and select Download Report.
    can't export to power bi desktop format
  3. The file will now be downloaded to your computer.
  4. When you open the file, you may see “report layout differences might exists” message showing some features may not be available in Power BI Desktop.
  5. If the issue persists, check the associated limitation for exporting a file from Power BI Service below.

Looking for the best business plan software? Here are the best options.


2. Considerations and Limitations

can't export to power bi desktop format

  1. To download any file, the user must have edit access to the report.
  2. The report must have been created using Power BI Desktop and since been published to the Power BI Service.
  3. Reports older than November 2016  are not downloadable.
  4. You won’t be able to download the report if it was originally created in the Power BI Service.
  5. Make sure you have the latest version of Power BI Desktop installed before opening .obix files, as older version may not support the current file format.
  6. If you don’t see download/export feature in the dashboard, ask the administrator to turn it on.
  7. You cannot download Dataset with incremental refresh as a .pbix file.

3. Server Issues at Power BI

can't export to power bi desktop format

  1. If the issue is at the Microsoft Power BI end, wait for a few hours before attempting any other solution.
  2. In this situation, the issue will resolve once the Power BI team fixes the issues on their end.
  3. Try to export the file after a few hours or in the meantime try to contact the Power BI support for more information.

RELATED STORIES YOU MAY LIKE:

We’re currently experiencing high demand in this region on Azure

Sorry we are currently experiencing high demand in this region on Azure in the error message a lot of people have encountered.

Even though this error message doesn’t make sense considering that it is being used as a local emulator, this issue is more common than you might think.

This error message seems to appear whenever the user wants to add a new collection to their database. Even if no limitations for the number of collections is specified prior to using this software, there seems to be one.

In today’s article, we will discuss the reasons for encountering this issue, and also a quick guide about how to fix it in a few steps. Read on to find out how to do it.


How can I fix Experiencing high demand in this region Azure error?

Azure website screenshot - sorry we are currently experiencing high demand in this region azure

This issue is caused by the number of partitions set when creating the emulator server. Depending on the version of Microsoft Azure that you’re using, there is an actual limit of partitions available.

If you use Azure Cosmos DB SDKs you will be able to create up to 25 fixed size containers, and in the case of Azure Cosmos Emulator, you can create 5 unlimited containers.

This operation can be performed by modifying the PartitionCount value when setting up the emulator.

This value can be set to any number that doesn’t exceed 250 fixed size containers or 50 unlimited containers. (one unlimited container = 5 fixed size containers.

Although this is the top limit, it is not recommended that you create more than 200 fixed size containers. Doing this will allow you peace of mind regarding the speed at which your emulator can work at.

The error mentioned above appears when you’ve already exceeded the current partition limit set.


Getting Something went front in Azure while using AD Join? Fix that with these solutions!


Delete emulator data and change the PartitionCount value

computer on desk with user - sorry we are currently experiencing high demand in this region azure

  1. Right-click the Azure Cosmos DB Emulator in your system tray -> click Reset Data…
  2. Press Win+R keys on your keyboard to run the Run dialog.
  3. Inside the Run window -> type in: %LOCALAPPDATA%CosmosDBEmulator -> press Enter.
  4. Delete all the emulator data from the newly opened folder.
  5. Right-click your Azure Cosmos DB Emulator icon near your computer clock -> click Exit. (it may take some time for all instances to be closed)
  6. Download and install the latest Azure Cosmos Emulator.
  7. Launch your emulator by setting the value to the PartitionCount flag <= 250. (Ex. C:\Program Files\Azure Cosmos DB Emulator\CosmosDB.Emulator.Exe\PartitionCount=100).

In this guide we discussed the reasons for the Sorry we are currently experiencing high demand in this region error when trying to use Azure, and also mentioned a method to fix it.

Please feel free to let us know if this guide helped you by commenting below.

[wl_navigator]

Can’t find conditional formatting in Power BI? Check our fix

Power BI allows the users to access conditional formatting for tables. It allows you to specify customized cell colors based on cell values and other values or fields. However, some users have reported that that can’t find conditional formatting in Power BI services and Desktop client in the PowerBI community forums.

Hi All
As far as I’m aware, conditional formatting finally appeared in the May update of PBI Desktop. I now have the June update and I can’t see it anywhere ! I’ve got some data with some averages that I’d like to apply conditional formatting to, but when I select the down arrow beside the measure I want to format (or right click the field), there is no Conditional Formatting option.

Follow the troubleshooting tips in this article to fix Power BI Conditional formatting issues.

Why there’s no conditional formatting option in Power BI?

1. Only Tables Support Conditional Formatting

  1. Conditional formatting is only supported by tables with columns of the whole numbers or decimals only.
  2. Making sure that you are using numbers with the tables, click the Drop-down menu and you should see Conditional Formatting option.
    can't find conditional formatting Power bi
  3. If you don’t see the conditional formatting option, make sure that the data type for the selected column is in decimals.
  4. Also, make sure that you create a table visual or matrix visual, as other visual chart does not support conditional formatting.

If you want to apply conditional coloring for Visual Type do the following.

  1. Open the Visual document that you want to apply conditional coloring.
  2. Click the Paintbrush icon.
    can't find conditional formatting Power bi
  3. Under Data Colors, you can apply conditional coloring.

Looking for the best diagram and flowchart software for Windows? Here are the best options.


2. Update Power BI Desktop Client

can't find conditional formatting Power bi

  1. Go to Microsoft Power BI Download Center.
  2. Scroll down to Microsft Power BI DEsktop and select the Language.
  3. Click the Download button.
  4. Run the installer and update the Power BI desktop client.
  5. Launch Power BI desktop after the update and check for any improvements.
  6. Microsoft adds new functionality to the Power BI client every now and then.

If the issue persists, try to reinstall the Power BI Desktop client.

can't find conditional formatting Power bi

  1. Press Windows Key + R to open Run.
  2. Type control and press OK to open the Control panel.
  3. Click on Programs > Programs and Features.
  4. Select and uninstall Power BI Desktop.
  5. Now follow the earlier steps to download and install the latest version of Power BI Desktop client.
  6. Restart the computer and check for any improvements.

Note: To install Power BI Desktop you need to have administrator access.

If you still can’t find conditional formatting in Power BI, consider contacting support.

RELATED STORIES YOU MAY LIKE:

Zoom Room isn’t configured for this account error message

A wide range of people using Zoom Room have reported that all of a sudden, the software shows an error message saying Zoom Room is not configured for this account.

This error message can be extremely annoying, and it can also stop you from accessing the full list of features this service has to offer. You will not be able to make calls or participate in any kind of meeting.

For these reasons, in this article, we will explore some of the best troubleshooting methods to deal with this issue.


What to do if Zoom Room is not configured for this account?

1. Check Windows Defender Firewall/ antivirus firewall

  1. Click on Cortana search button -> type Windows Defender -> select the first option.Windows Defender - Zoom Room is not configured for this account
  2. Click on Allow an app or feature through Windows Defender Firewall.
  3. Search for the Zoom Room app inside the list -> activate both incoming and outgoing connections.
  4. Click Save -> close the window.

Looking for multi-platform antivirus? Here’s why Bitdefender is best for this job!


For checking the firewall in third-party antivirus software you will need to allow all connections. These settings will vary depending on the software you’re using, but here are the steps for BitDefender:

  1. Double-click the BitDefender icon found in your taskbar.
  2. Choose Protection -> click on Settings under the Firewall tab.BitDefender firewall - Zoom Room is not configured for this account
  3. Find Zoom Room in the list and allow both incoming and outgoing connections.
  4. Close the BitDefender app and try to see if the issue persists.

2. Edit permissions for specific accounts from Zoom Room dashboard

Zoom Room screenshot - Zoom Room is not configured for this account

  1. Login to zoom.us and go to User Mangement -> Role Management.
  2. Select the account that you’re having issues with -> select Edit.
  3. Make sure that the permissions of this account allow you access to the Zoom Room features you need.
  4. Check to see if the Room Name is identical with the one you’re trying to use. (if not, change it).
  5. Click on Save.
  6. Try to log into your Zoom Room software again and check to see if the issue persists.

In this article, we explored some of the best troubleshooting methods to solve the issue caused by your Zoom Room account not being allowed access.

We hope this guide helped you solve your issue. Please feel free to let us know if this guide helped you in any way by using the comment section below.

READ ALSO:

Projector is Not Showing Full Screen: 3 Ways to Enlarge it

All the projectors allow the users to customize the screen size. However, at times you may notice that the projector is not showing full screen.

This can be a problem since you won’t be able to see your whole presentation. The issue is somewhat related to a duplicate screen not working problem that we covered not long ago, so you might want to check it as well.

Fixing this problem is simple, and in this guide, we’re going to show you how to fix it.

Why is my projector only showing part of the screen?

  • The aspect ratio of your PC or projector isn’t fully supported.
  • Your projector can’t fully handle your PC resolution thus causing the error.
  • Your projector might not be zoomed in properly.
  • The projector isn’t properly placed thus causing this issue.

How do I get my projector to show full screen?

1. Check source device display and project screen ratio

  1. Your projector screen and the source display aspect ratio should match before you can fill the whole screen.
  2. First, check the aspect ratio of your system display/monitor. Most modern displays come with 16:9 aspect ratio.
  3. If the projector is not fitting the whole screen, it means it is set to a 16:10 aspect ratio.
  4. You can easily change the aspect ratio of the screen using the Projector’s remote control.
  5. First, turn on the projector and switch to the image source (connect to your laptop or mobile device).projector won't fit whole screen
  6. Press the Aspect button on the remote control until you find the perfect aspect ratio.

2. Try to duplicate the screen from Windows system

  1. Connect your projector to your computer and turn on the projector
  2. Open the Action Center from the taskbar.
  3. Click on the Project option.
  4. Click on Duplicate option.
    projector won't fit whole screen
  5. Follow the on-screen instructions if prompted.
  6. This should send the full screen to the projector.

If the issue persists, verify the screen resolution settings.

  1. Click on Start and select Settings.
  2. Go to System and click on Display.
  3. Click on Advanced Display Settings.
  4. Set the resolution to your native display resolution.
    projector won't fit whole screen
  5. If not, change the Resolution from the Display section.

Changing the resolution should help you with the projector not showing full screen, so be sure to try it.

3. Other solutions to try

  1. HDMI connection will automatically select the correct resolution. However, if you use a VGA connection, you may require to set up the resolution manually.
  2. Make sure that the projector is fully zoomed out using the remove. In case the projector zoom is inadvertently adjusted, it will create issues with the screen ratio.
  3. Check if the projector placement is right. Turn on the projector and note the blue screen that appears during the startup. This should give you a brief idea about the projector placement. If the blue screen is not filled, you may need to move the projector forward / backward depending on the placement.

These are just a couple of solutions that you can use if the projector is not showing full screen. In case you’re having further issues, our Something went wrong with the projection error guide might be able to help.

Did you find a different solution to this problem? If so, share it with us in the comments section below.

Power BI value errors? Fix them with our solutions

Power BI is a great tool for many people who want to organize and visualize their data efficiently. However, the program is plagued by many problems

Some of the most well-known issues are value errors. There are different types of value errors in Power BI and today we will show you how to fix them.

One user reported the following on the official forum:

there is some UI error in PBI Desktop. I am connected to internal analysis services. Whenever I want to create New Measure and don’t select the dimension where to put the new measure and start creating the new measure, I immediately get this error:

power bi error
Also, you cannot delete the new measure created, nor you can create a new measure until you remove the faulty one.

power bi faulty measure
Another error encountered by quite a few users refers to “the value is not a cube” message. A user described the issue in this way:

I created a report based on local CSV-files and SAP BW queries. When I refresh data in Desktop, it works totally fine. However, when I schedule a data refresh in the Service, I get notified that ‘The value is not a cube’ and it relates to a table (“Lijst met afnemers”) that is based on a SAP query. This is the error:

power bi value not a cube message
So, this is an issue that appeared only in Power BI Service while refreshing data. However, the error did not appear in Power BI Desktop.

Many people encountered a problem with duplicate values as well, as one user said on the official forum:

I’m having an issue refreshing my data and get the following error: “…..contains a duplicate value….and this is not allowed for columns on the one side of a many-to-one relationship or for columns that are used as the primary key of a table.”

The data does contain duplicate reference numbers, but this issue shouldn’t appear.

Today, we will show you how to get rid of these problems permanently.

Here’s how to fix Power BI value errors

1. Unexpected error value cannot be null

The “Unexpected error value cannot be null” is a message that appears on older versions of Power BI Desktop. Update your program to get rid of this issue for good.

2. The value is not a cube

If you encounter “The value is not a cube” error message, then your Power BI is outdated. Update the app to the latest version to solve the issue.


Install the latest version and learn everything there is to know about Power BI from our detailed guide!


3. Duplicate value error

To fix this issue, you need to manage the relationships.

  1. Go to Manage Relationships from the Home tab.power bi manage relationships
  2. Change Cardinality to Many to one.

Conclusion

As you can see, these issues can be severe, but there are simple ways to avoid them. Keep Power Bi updated to the latest version and choose the right settings for your project.

Did our solutions help you? Do let us know in the comments section below!

RELATED ARTICLES YOU NEED TO CHECK OUT:

Fix Power Bi We can’t finish signing you up error with these steps

Microsoft Power BI is a collection of software services, apps, and it connects data from multiple sources to present visually immersive and interactive insights. However, some users have reported “power bi we can’t finish signing you up, Your IT department has turned off signup for Microsoft BI. Contact them to complete the signup.” error while trying to sign up for the service.

Following the steps given in this article to troubleshoot the Power Bi, we can’t finish the signing you up error.

Why can’t I sign up for Microsoft Power BI?

1. Contact the Administrator

  1. As the error states, seems like your Office administrator has closed the sign up for Power BI.
  2. The best thing you can do here is to contact your office 365 administrator.
  3. The administrator needs to provide a license in Office 365 Admin center for you to be able to access Power BI.
  4. If the Office administrator has already done their part, follow other troubleshooting tips below.

2. Force Logout from the Microsoft Account

  1. If the issue persists, try to log out and log in to your Microsoft again to fix the issue.
  2. If you are unable to log out from the Microsoft Account, try the following URL to do the same.
    Log out from Microsoft Account
  3. Once you are logged out from the Microsoft account, relaunch the browser and log in again.

3. Use the Organization’s Email Account

  1. Power BI doesn’t work with the personal email address of the user.
  2. If you have received access to Power BI, your organization may have also given you the email address that uses their custom email account alias.
  3. Use the email address provided by your School or Organization such as @companyname.com.uk or @schoolname.co.edu to login.
  4. If you don’t have access to any such email address it is time to contact your office administrator again.

4.  Use PowerShell Command

  1. If you are the administrator, use the following PowerShell command to allow your existing users to sign up for Power BI.
  2. Right-click on the Start button and select PowerShell (Admin).
  3. In the PowerShell command prompt enter, the following command and press enter to execute.
    Set-MsolCompanySettings -AllowAdHocSubscriptions $truepower bi we can't finish signing you up
  4. Wait for the command to execute and now ask the users to log in and again check for any improvements.

As a side note, if you prefer working in the web-based environment we highly suggest using the safest and the most private browser there is. We at WindowsReport thoroughly tested it over a span of a few months and can say only good things about Opera One Browser.

In terms of performance, Opera One also has a unique Turbo feature that can be used when you have an extremely slow connection, such as airport wifi.

When turned on, it can load pages much faster on a slower connection by using an algorithm that removes images and other heavy content, allowing you to see the basics of the page.

Opera One also offers data savings through compression technologies that are not seen in other browsers. Plus, this browser comes with built-in AI, VPN and Ad blocker.

⇒ Get Opera One Browser

The difficulty to sign in to Power BI is not an unsolvable challenge. How did you deal with it and resolve it? Share your thoughts in the comments section below.

Sorry we’re having trouble verifying your account inside Office 365

A wide range of users encountered the Sorry we’re having trouble verifying your account error inside Office 365. This error can be extremely annoying, and because of it, you will not be able to use the software normally.

This issue can happen either because the computer you are using lost its connection to the software, or if the login credentials (password and email address) have changed or have not been able to synchronize.

In this article, we will explore some of the best methods to try and troubleshoot this error. Please follow the steps mentioned in this article closely in order to avoid causing any other issues. Read on to find out how to do it.


How to fix Sorry we’re having trouble verifying your account Office 365 error?

1. Remove cache from every browser on your PC with a dedicated tool

CCleaner - Sorry we're having trouble verifying your account Office 365

  1. Open CCleaner or download it to your hard-drive.
  2. Click on the Custom Clean option from the menu on the right side of your window.
  3. Check the Windows and also the Applications tabs -> tick the boxes next to Internet Cache for all the browsers found on your hard-drive.
  4. Click the Analyze button.
  5. Check the results list -> click on Run Cleaner.
  6. Wait for the process to complete, restart your PC, then check to see if the issue persists.

Tired of Microsoft Office? Here are 5 great alternatives to consider!


2. Verify the account details used in your Office 365 software

Laptop on desk with graphics - sorry we're having trouble verifying your account office 365

  1. Open up any Office 365 software (Word, Excel, etc.).
  2. Click on the File button found in the top taskbar menu.
  3. Select Account to open up the settings and check the name of the account that is being used inside Office.
  4. If the account that you want to use with Office 365 has changed, or the password has been reset, select Sign Out or Switch User.
  5. Sign back in using the correct credentials.
  6. If the account has the right license connected to it, then this should solve your issue.
  7. If the issue persists, please follow the next method.

3. Verify that your Office 365 account has the correct license

Office 365 website screenshot - sorry we're having trouble verifying your account office 365If you are not the Office 365 administrator, you will need to contact the person that deals with this department inside your company and ask about the licensing of your software.

If you are the Office 365 administrator, you will need to check the licensing of all the Office 365 software that are having issues identifying the account.

You can update the license with the right username and password, and the error Sorry we’re having trouble verifying your account inside Office 365 will disappear.

Please feel free to let us know if this guide helped you solve your issue by using the comment section below.

READ ALSO:

Volume OSD is Missing on Windows 10: How to Get it Back

Many Windows 10 users reported that volume OSD is missing on their PC. This isn’t a major issue, but some users prefer having a visual volume indicator on their screen that shows them the current volume level.

Since this is such a widespread issue, in today’s article, we’ll show you what to do if the volume popup is gone.

How do I make the volume OSD show on Windows 10?

1. Uninstall virtual sounds card software from your PC

  1. If you have any virtual sound card or any other software that modifies the sound output on your PC, remove it before proceeding.
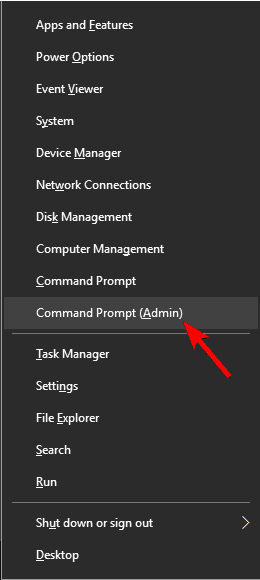
  2. Press Windows key + X and choose Device Manager from the list.
    device manager win+x menu windows 10 volume osd missing
  3. Now locate the virtual sound card in Device Manager, right-click it, and choose Uninstall device from the menu.
    uninstall device device manager windows 10 volume osd missing
  4. Once you remove it, restart your PC and check if the issue is resolved.

Users reported that SRS Audio Sandbox/SRS HD Lab software and Audio Filter driver caused the issue, but bear in mind that other software can also cause the issue to appear.

2. Disable and enable all audio devices

  1. Open Device Manager.
  2. Locate your audio device, right-click it and choose Disable device.
    disable device device manager windows 10 volume osd missing
  3. Wait for a couple of moments, and enable the device by right-clicking it and choosing Enable from the menu.
  4. Leave other audio devices disabled and check if that solves the problem.

Users reported that this issue was caused by Nvidia drivers and Nvidia’s sound card driver, so be sure to disable it along with your sound card.

There you go, two quick and easy methods you can use to deal with the missing volume OSD on Windows 10. Be sure to try all of our solutions and let us know if they worked for you in the comments section below.

Browser Keeps Refreshing? 3 Ways to Stop it

We surf the Internet through our browsers, and sometimes issues can appear. Speaking of which, many reported that their browser keeps refreshing.

This can cause various issues, such as Chrome not loading pages, among many others, so it’s important to fix this issue.

In today’s guide, we’re going to show you the best methods that you can use to fix this issue, so be sure to give them a try.

Why do my browser tabs keep refreshing?

  • A stuck F5 key can make your tabs refresh automatically.
  • Certain features such as tab discarding can force the tabs to refresh.

How do I stop my browser from refreshing?

1. Check if F5 key works properly

  1. Locate F5 on your keyboard.
  2. Check if it works properly.
  3. Make sure that it’s not stuck.

If a website keeps refreshing itself, it’s possible that the refresh key is stuck on your keyboard.

2. Check the RAM management

  1. Input this into URL: chrome://flags/#automatic-tab-discardingurl chrome
  2. Disable Automatic Tab Discarding.
  3. Save changes.

Once this feature is disabled, you should stop auto refresh in Chrome.

3. Run SFC scan 

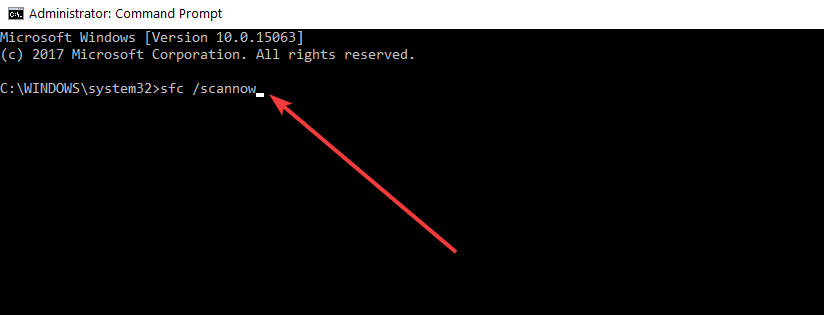
  1. Open the Windows search bar and select Command Prompt. command prompt sfc
  2. Type the following command: sfc /scannow
  3. Wait until the process is complete. It doesn’t take long.
  4. Check to see if this solved the issue. If not, restart your computer. 

So, it is important to keep your computer clean (inside and out) if you want your browser to run smoothly.

If the solutions didn’t work, maybe the problem is more serious, such as a malware infection, so scan your PC with anti-malware software.

Did you find our solutions helpful? Let us know in the comments section below.

4 Cross-platform Fitness Apps to Track Your Activity Anywhere You Go

Today, we will look at the best cross-platform fitness apps in the market. So, if you want to maintain a disciplined fitness schedule/routine, follow this article with rapt attention.

Keeping fit is highly essential to maintaining a healthy lifestyle. However, maintaining a good fitness level requires a certain degree of discipline, which, unfortunately, is lacking in many individuals.

A unique set of tools have been developed to make fitness practice (exercise) much more convenient, which are colloquially known as “fitness apps“.

These apps vary in terms of quality, functionality, and, more significantly, compatibility. Most available fitness apps are developed for mobility; hence, they only support mobile platforms, specifically iOS and Android.

Nevertheless, in the midst of these unilateral apps, a handful of fitness apps are flexibly designed to support more than one OS and thus can be deployed on more than one desktop or mobile platform.

In the next section, we will outline four of the best cross-platform fitness apps, which have been developed to run on multiple OS platforms.

What are the best cross-platform fitness apps for PC, Mac, and handheld device?

Jefit

Jefit best cross platform fitness app

Jefit is a popular fitness app with a huge global client base of over 7 million users. As an online fitness software, it can be accessed via any standard web browser on any device.

Also, there are designated mobile apps for iOS and Android designed to facilitate ease of usage during active workout sessions.

Jefit hosts 70+ preset workout routines, any of which can easily be customized to fit your schedule and suit your needs.

Furthermore, there is a regulated tracking log, which you can adapt to keep track of your training schedule and rest time.

Essentially, Jefit analyzes all logged data (workout schedule and rest time) and presents you with a comprehensive view of your progress and the key areas that need improvement.

Other notable features of the Jefit cross-platform fitness app include a central dashboard, cloud backup, workout log tracker, workout library (1300+ exercises), body statistics tracking, training analytics and reports, 2-way sync (mobile app + PC), routine planner, progress charts, rest timer, workout tips, online support, and more.

You can create an account or download Jefit for free. However, the premium package (Jefit Elite) requires a subscription, which is offered at $3.33 per month (billed annually).

⇒ Get Jefit Now

MyFitnessPal

MyFitnessPal best cross platform fitness app

MyFitnessPal is an online fitness and diet control tool, designed to help you gain control over your eating and workout habits. This service can be accessed via any web-enabled desktop or mobile platform.

There is also designated support for mobile devices (mobile apps for iOS and Android).

MyFitnessPal is an all-around fitness app, which can be employed to tone down (lose weight), tone up (build muscle), lower BMI (Body Mass Index), jack up endurance and so on.

Essentially, it is an app that can be employed to improve the general well-being of the mind, body, and soul.

Key features of MyFitnessPal include a food diary, workout tips, diet tracking, calorie counter, exercise database, simple interface, fitness community, simplified logging, customer support, fitness tracking, free trial, mobile apps, and more.

MyFitnessPal is available on a free trial (to new users). To enjoy the services on offer, you must create an account (for free), and you are good to go.

⇒ Get MyFitnessPal Now

Runtastic

Runtastic best cross platform fitness app

Runtastic is arguably the best fitness app out there, with designated support for iOS and Android mobile app, as well as a web-based solution for PC and Macbook.

The tool, though specially designed for runners, can be adopted as an all-around fitness or workout planner.

Runtastic is a great tool for building stamina, improving body flexibility, improving running techniques, shedding off fat, building muscle and more.

The tool offers a set of comprehensive workout guides, which have been developed by world-class fitness experts.

Furthermore, Runtastic hosts a tracking system that allows you to track, analyze and manage your progress/performance in real time.

The fitness app offers six basic training plans, which have been categorized based on the specific needs of users.

These training plans include:

  • Beginners
  • Summer Body
  • 10 Kilometers run
  • Half Marathon
  • Marathon
  • Weight Loss

Each of the above-listed plans has its unique set of tips and guidelines, which are offered independently.

Other notable features of Runtastic include video guides, online support, intuitive UI, customizable settings, strength training, location (GPS) tracking, progress tracking, integrated live coach, and more.

Signing up and creating a user account on Runtastic is free. However, the premium edition (premium membership) is offered at a starting price of $2.99 per month (billed annually.

⇒ Get Runtastic Premium

Runkeeper

Runkeeper best cross platform fitness app

This app is very much like Runtastic, in terms of functionality and outlook (interface). Runkeeper is an online running app and fitness tracker, which is designed to help you achieve your fitness goals.

More often than not, fitness goals could entail adding/losing weight, building muscle, improving agility and/or building strength.

Runkeeper offers you a set of personalized training routines, which can be tailored to suit your needs and goals. Also, it provides you a clear picture of your workout schedule vis-à-vis progress made.

With this, you are able to monitor your training routines in real-time, and adjust them as appropriate (where and when needed). Essentially, Runkeeper helps you set fitness goals, and ensures you are properly guided and motivated toward achieving the goals.

Key features of Runkeeper include pre-built workout routines, reminders, virtual races, progress tracking, tailored motivation, workout comparison, challenges, activity tracking and logging, playlists connect, GPS tracking, goal coaching, running routes, audio cues, weather insights, charts and analytics, mobile apps, customer support, online resources and more.

Runkeeper, as an online fitness app, requires you to register and create an account on its platform, and this is absolutely free. However, to enjoy the full package, you have to upgrade to the premium version – Runkeeper Go – which is offered at a subscription rate of $9.99 (per month) or $39.99 (per year).

Sign up on Runkeeper here (for free).

⇒ Get Runkeeper Go

They say health is wealth, and one of the ultimate means of living a healthy life is by maintaining a reasonable level of physical and mental fitness.

Attaining such a fitness level requires discipline and, sometimes, professional assistance, which could be costly. Hence, to make these services accessible and affordable, fitness apps were developed.

In this post, we have reviewed four of the best cross-platform fitness apps available, but there are more like iFit. So, if you are looking for a reliable cross-platform fitness solution, the above-listed apps are your recommended options.

Status Bad Impersonation Level in Edge: How to Fix it

A wide number of users have reported seeing the error message STATUS_BAD_IMPERSONATION_LEVEL on Microsoft Edge and while performing operations in Windows 10 after installing the latest OS updates.

This error seems to affect users of Windows 7, Windows 8, Windows Server 2008 R2, and Windows Server 2012 as well. In these cases, the error stops Windows from booting up normally.

It seems that the issue might be caused by a conflict between Windows’ latest patches and some antivirus software installed on their PC. So, let’s head directly to the solutions!

How can I fix the STATUS_BAD_IMPERSONATION_LEVEL error?

1. Check Windows Update for any new patches

  1. Click on the Start button, type in Update, and select the Check for updates option.Windows update - Status bad impersonation level
  2. If any updates are available, they’ll be downloaded automatically.
  3. Once the updates are downloaded, restart your PC to install them.

A quick fix for STATUS_BAD_IMPERSONATION_LEVEL in Edge is to install the latest updates. Since the problem was triggered by a bug, a patch for it will be released in the later versions.

2. Restore your PC back to the version before installing the April patch

  1. Click on the Start button, type System Restore, and press Enter.
  2. Click on System Restore.System restore - Status bad impersonation level
  3. Select Choose a different restore point, and click Next.choose a different restore point
  4. Find a restore point created before the latest patch update, select it, and then follow the on-screen instructions to restore your PC to the previous backup.

If you keep getting the Status_Bad_Impersonation_Level (0xc00000a5) error in Windows, performing a system restore works best. And it doesn’t affect the personal files stored on the PC.

3. Uninstall the conflicting antivirus software

  1. Press Windows + X to open the Power User menu, and select Apps & Features.
  2. Select your antivirus and click Uninstall.uninstalling antivirus software - status bad impersonation level
  3. Follow the on-screen instructions and delete the software.
  4. Restart your PC.
  5. Check to see if the issue is resolved.

Users reported this problem with Sophos, Avast, or ArcaBit, so if you’re using any of these, be sure to uninstall the application.

In this article, we explored some of the best methods to try and solve the STATUS_BAD_IMPERSONATION_LEVEL error. And you should have Microsoft Edge up and running now!

Before you leave, do check some quick tips to increase the Internet speed in Windows.

Feel free to let us know if this guide helped you solve your issue by using the comment section below.

Windows 10 news recap: Microsoft aims to make Chrome and Edge more battery efficient, designer imagines a “Modern OS” from Microsoft on a Lumia X, and more

Welcome back to our Windows 10 news recap, where we go over the top stories of the past week in the world of Microsoft’s flagship operating system.

Recent Chromium contribution from Microsoft aims to make Edge and Chrome more battery efficient

Microsoft has been working on some contributions to Chromium that aim to make both Microsoft Edge and Google Chrome more battery efficient.

Some Surface devices are experiencing WiFi connectivity issues after installing latest firmware updates

The latest firmware update for some Surface devices appears to be wreaking havoc after users reportedly begin experiencing issues with WiFi connectivity.

Designer imagines what a “Modern OS” from Microsoft would look like on a Lumia X flagship phone

A designer has had a stab at imagining what a ‘Modern OS’ from Microsoft could look like if it was toc reate a flagship phone, a Lumia X.

Windows Terminal Preview v0.3 is now available on the Microsoft Store

The latest update to the Windows Terminal Preview app, version 0.3, is now available to download on the Microsoft Store. The update brings a number of UI improvements to the app.

That’s it for this week. We’ll be back next week with more Windows 10 news

Here’s how to change language in Paint 3D

Paint 3D can be a very useful tool when it comes to 3D modeling. However, many users encountered an issue with the language setting of the app. Simply put, the option to set the desired language is nowhere to be found.

For quite a few people, this is a major problem as one user said on the official Microsoft forum:

I have windows 10 on my Sony Vaio Laptop and it’s got upgraded and now I see new App that is Paint 3D but it is in Arabic and My Windows 10 is in English then why it is in Arabic?? Is there ant way to change the Language?

So, even if Windows 10 is in English, Paint 3D comes in Arabic. This is a major issue for those who want to show other people something on Paint 3D. In this case, a screenshot will not help someone who doesn’t know Arabic.

Set up your language in Paint 3D

1. Change the language from Control Panel

  1. Press Windows Key and write Control Panel. Open the program.
  2. Go to Clock and Region.clock and region control panel
  3. Select Region.region control panel
  4. Click on Language preferences.region settings control panel
  5. Select United States (or another English speaking country) under Country or region and Languages.language us

2. Repair corrupt system files

If the solution above doesn’t work, the culprit is probably a system file corruption in Windows 10 that could appear during an update.

To fix the issue, use System File Checker.

  1. Press Windows Key to open Start Menu and write Command Prompt.
  2. Right-click on Command Prompt and select Run as administrator.command prompt administrator
  3. In Administrator: Command Prompt, enter sfc /scannow and press Enter.
  4. The repair process will now start. Don’t close Command Prompt or interrupt the repair process. The repair process can take several minutes.

Epic guide alert! Learn how to repair the corrupt system files like a real technician!


Conclusion

As you can see, a different language in Paint 3D could mean a little twitch in the settings. However, this issue could be a symptom of a corrupt system file.

Luckily, this problem can be solved quickly with our solutions presented above.

Did our solutions work for you? Did you find another method to change the language in Paint 3D? Do let us know in the comments section below!

RELATED ARTICLES YOU NEED TO CHECK OUT:

Epson Printer Keeps Jamming? 3 Ways to Fix it

Epson manufactures some of the best printers for users across the globe and is focused on developing advanced devices for the benefit of its users. Despite incorporating the most advanced technology, many found that the Epson printer keeps jamming.

Due to this, the Epson printer keeps stopping mid print and it presents a major problem. So, let’s find out what you can do when the Epson printer keeps saying paper jam!

How do I fix my Epson printer jam?

Tip icon Tip
Before you proceed, make sure to first restart the printer in case the problem is simply a false alarm and there’s no actual paper jam.

1. Clear the paper jam

Firstly, you will be required to cancel the ongoing printing. Lift the scanning unit of your printer, then remove the block paper in it without touching the flat white cable inside the machine.

Close the scanning unit, and follow the prompts available on your LCD screen to clear any error messages that keep appearing related to the Epson printer jamming.

2. Clear paper jam in cassette and auto-duplexer

  1. Cancel the ongoing printing job if required.
  2. Take out both of the paper cassettes from your scanner, then carefully remove the jammed paper, and load the paper under the edge guide.
  3. Insert the cassettes back in a flat position. Keep inserting cassette number 1 until the arrows toward the right side are lined up properly.
  4. Now, release the auto-duplexer, then remove the duplexer from the scanner, and carefully take out the jammed paper from inside the unit.
  5. Open the duplexer unit and remove jammed paper from the duplexer if required and reattach it.
  6. Finally, follow the given prompts on your screen to clear any error messages.

When the Epson printer keeps jamming paper, verify that everything is in order. Removing the jammed sheet from the cassette and duplexer should do the trick.

3. Unload the trays and clean dirty rollers

  1. Open the drawer-style trays, release them, and slide them all the way out.
  2. Set them aside, and look for the jammed paper inside. Then pull out the papers that were lifted but were never fed all the way through.
  3. Make sure the trays are not overloaded, and put the trays back inside the scanning device.
  4. Look for the reduced roller grip in your printer. And if you find any dust accumulation, clean the rollers with the cleaning sheet provided by the manufacturer. Alternatively, you can remove the dust with the help of sticky paper.
  5. Remove all dirt with care and insert the rollers again.
  6. Finally, restart your scanning device.

That’s it! When nothing else helps fix things, and the Epson printer keeps jamming, cleaning it inside out and getting rid of any dust accumulation should get things up and running.

Before you leave, do check the best printer management software and get one today for seamless operations.

For any queries or to share what worked for you, drop a comment below.

Important Updates Are Pending: How to Disable The Pop up

“I keep getting the prompt: “Important updates are pending”,  Why am I getting this prompt instead of the computer automatically installing it outside of active hours?”

Windows Update provides important service packs, patches, and other pertinent updates necessary for the Windows operating system and other software to function as they should.

The feature can also be used to update drivers for commonly used hardware devices, and all these are routinely released on Patch Tuesday, usually the second Tuesday of each month. However, Microsoft can also release urgent fixes on other days as they arise.

If you cannot use the automatic updating feature, you can check for new updates every week, most of which are installed automatically.

However, Windows Update needs input occasionally, so you’ll get a notification icon on the taskbar in such cases.

When you get the Important Updates are Pending popup screen regularly, it could be that the update process was slow either due to the internet speed or a slow system, so the process will remain under ‘pending.’ Each time you log in, you’ll get the ‘Important Updates are Pending’ popup as an automatic prompt.

Microsoft has configured Windows Updates in such a way that you can now disable updates, but it is mandatory to install them.

You can pause these updates temporarily, but most users find it annoying to restart the system, leaving their work unattended while they wait for the whole update process to complete.

If not properly configured, Windows will restart your computer at its own time, sometimes without notifying you, and after a reboot, it can take so much time to update your system, whether you’re in a hurry or not.

When you get the Important Updates are Pending popup screen, try the solutions below to resolve the issue in Windows 10.

How can I fix Important Updates are Pending pop-up screen?

1. Reset the reboot flag

The first thing to do in this case is to reboot your computer. If you haven’t done so, then reset the reboot flag. To do this:

  1. Right-click Start and select Run
  2. Type regedit and press enter
  3. In the registry editor, find ComputerHKEY_LOCAL_MACHINESOFTWAREMicrosoftUpdatesImportant updates are pending
  4. Double click UpdateExeVolatile key
  5. Configure the key with a value of 0

Can’t access Registry Editor? Things aren’t as scary as they seem. Check out this guide and solve the issue quickly.

2. Download and run the latest System Update Readiness Tool

There are two parts to installing an update: running in the context of the WUA or at shutdown/startup. In the WUA context, the installation finishes successfully, and the WUA logs it as successful.

However, the update is not installed if that process remains or fails at shutdown/startup. The WUA doesn’t report this failure because it doesn’t understand it.

This happens as a defect in the patching mechanism when the servicing stack and agent are written and/or maintained by two different groups, so none of them know what the other does.

In this case, download and run the System Update Readiness Tool to see what it says about the computer.

This System Update Readiness Tool is used because inconsistencies are found in the Windows servicing store, which may prevent the successful installation of future updates, service packs, and software.

It checks your computer for such inconsistencies and tries to resolve issues if found.

  1. Download the System Update Readiness tool by clicking the download link that corresponds to the version of Windows running on your computer. Always download the latest version and check if your computer runs 32/64-bit of Windows.
  2. Click Download on the Download Center webpage
  3. Click Open or Run and follow the installation instructions
  4. In Windows Update Standalone Installer dialog box, click Yes. Wait until it completes the installation. It may take up to 15 or so minutes
  5. Click Close once it says Installation Complete
  6. Reinstall the update or service pack you wanted to install previously

3. Run System restore

The Important Updates are Pending popup screen can be caused by a security app block or corrupted system files.

Run System restore to get your computer back to the point before the issue began. To do this:

  1. Click Start and go to the search field box and type System Restore
  2. Click Create a Restore Point in the list of search resultsImportant updates are pending
  3. Enter your administrator account password or grant permissions if prompted to
  4. In the System Restore dialog box, click Choose a different restore point
  5. Click Next
  6. Select a restore point created before you experienced the problem
  7. Click Next and then Finish

4. Run an SFC scan

This will fix any file system corruption it finds during the scan.

  1. Click Start, type CMD in the search box
  2. Right-click Command Prompt and select Run as AdministratorImportant updates are pending
  3. Type sfc/scannowSFC scan
  4. Press Enter

5. Reset Windows Update components

The steps here are part of modifying the registry. Ensure you follow these steps correctly and carefully.  Back up the registry before you modify it, then restore it if a problem occurs.

  1. Click Start and type CMD in the search box
  2. Right-click Command Prompt and select Run as administrator
  3. Click Yes when asked for permissions
  4. Stop the BITS, Cryptographic, MSI Installer, and Windows Update Services by typing the following commands at a command prompt:

    net stop wuauserv
    net stop cryptSvc

    net stop bits
    net stop msiserver 
  5. Press Enter after each command you type
  6. Rename the SoftwareDistribution and Catroot2 folder by typing the commands below in the Command Prompt then press Enter after each command you type:

    ren C:WindowsSoftwareDistribution SoftwareDistribution.old

    ren C:WindowsSystem32catroot2 Catroot2.old
  7. Restart the BITS, Cryptographic, MSI Installer, and Windows Update Services by typing the following commands in the command prompt:

    net stop wuauserv
    net stop cryptSvc

    net stop bits
    net stop msiserver

  8. Type Exit in the Command Prompt to close it

6. Install pending updates

Disable any security apps or software installed on your computer temporarily, and check for updates via Windows Updates on your Settings.

Install the pending updates again, and restart your computer to see if the ‘Important Updates are Pending’ popup screen disappears.

7. Schedule an update

Instead of ignoring the Important Updates are Pending pop-up screen, you can schedule the updates later when you’re more accessible to let the computer update automatically.

Usually, Windows gives you the option to Restart now, Pick a time, or Snooze to get the update reminder later in about three days. So schedule the time you feel works for you and let it update.

8. Check Group Policy Editor Options

The Group Policy Editor Options for Windows Updates can be configured in this way:

  1. Go to the search bar and type Group Policy Editor
  2. Select Edit Group Policy from search resultsImportant updates are pending
  3. Click Computer ConfigurationImportant updates are pending
  4. Click Administrative TemplatesImportant updates are pending
  5. Click Windows ComponentsImportant updates are pending
  6. Click Windows Update folderimportant updates are pending
  7. Set Configure Automatic Updates to enable the Allow non-Administrator to receive update notifications settings for you
Important updates are pending

9. Turn off notification balloons

  1. Go to the search bar and type Group Policy Editor
  2. Select Edit Group Policy from search results
  3. Choose Computer Configuration
  4. Click Administrative TemplatesImportant updates are pending
  5. Select Start Menu and Taskbar
  6. Click Turn off all balloon notifications

10. Check Event Viewer

If you get the ‘Important Updates are Pending’ popup screen, something may prevent it from restarting. Check Event Viewer for any clues.

Confirm if the update was successfully installed by checking Settings>Update & Security>View.

11. Stop Windows Update completely

  1. Right-click Start and select Run
  2. Type services.msc and press EnterImportant updates are pending
  3. Search for Windows Installer and Windows UpdateImportant updates are pending
  4. Stop both services to stop all pending Windows installations

12. Disable update on restart using Group Policy

Enable the Do not display ‘Install Updates and Shut Down’ option in the Shut Down Windows dialog box in Group Policy to make install updates and shut down options disappear. The standard shutdown-only option will be displayed.

Disabling update and shutdown option in Group Policy is a permanent option, which means the shutdown and update/restart and update options won’t be shown in the shutdown dialog box.

Go to Settings>Windows Update select Install Updates, and restart your computer from here.

  1. Go to the search bar and type Group Policy Editor
  2. Select Edit Group Policy from the search results
  3. Click Computer Configuration
  4. Select Administrative Templates
  5. Click Windows ComponentsImportant updates are pending
  6. Click Windows Update
Important updates are pending

13. Bypass updates using the command line

You can do this temporarily to bypass updates on restart/shutdown by stopping Windows Update service before restarting or shutting down your computer. To do this:

  1. Right-click Start and select Run
  2. Type net stop wuauserv to stop the Windows Update service
  3. Type shutdown –s –t 0 to shut down the system at once

To restart the system, type shutdown –r –t 0. You can also run all commands simultaneously by typing: net stop wuauserv && shutdown –r –t 0 so you can shut down or restart your system without installing updates.

Let us know if you managed to fix the Important updates are pending issue on your computer by leaving a comment in the section below.


Steam error bad session: Fix it with these 4 solutions

A very large number of users have encountered the error Steam error bad session message when trying to share any pictures within the Steam Client Beta chat.

The problem arises inside private chats, and also in chat rooms. Beyond this, the size and format of the picture you’re trying to send doesn’t make any difference.

This issue can become frustrating considering the fact that the chat service will be used for sending pictures as well. This issue has not been yet resolved by the developers at Valve, but in today’s article, we will explore some of the best methods to deal with it.

Even though this article will not give you specific techniques to fix this issue, after hours of online research our team has found and selected some of the best methods. Read on to find out how you can deal with the Steam error bad session message.


How can I fix Bad session Steam error?

1. Give the server some time to load

hourglass - Steam error bad session

  1. After you’ve inserted the picture inside the chat session, wait for a minute until you press the send button. This method has helped some users surpass this issue.
  2. This method can work, as the servers might be over-loaded with picture sending requests. Waiting for a bit of time before sending the picture will help the server analyze and upload the pic data before sending.

2. Try sending the picture 3 times in a row

Steam screenshot - Steam error bad session

  1. Even though this might sound like a made up solution, some users have reported that this has helped them send pictures through the Steam Client Beta chat sessions.
  2. Please follow the guidance from the first method mentioned in this article to avoid causing an overload on the Valve servers.

Slow download speed in Steam? Fix it with this simple guide!


3. Update your version of Steam

  1. Open Steam by double-clicking the icon on your Desktop.
  2. Log in.
  3. Select File from the top menu -> select Check for Steam client updates.update Steam CLient - Steam error bad session
  4. Follow the on-screen instructions to install the latest updates -> choose Restart if asked to do so.

4. Use an image sharing website

computer - Steam error bad session

  1. If all of the above methods failed, you can use an image hosting website like Imgur, or ImageShack to upload your picture.
  2. After the upload process is completed, you will be able to share images in Steam chat by sharing the link from the image hosting website used.

In this article, we explored the best way to bypass the Steam error bad session when trying to send any picture inside Steam Client Beta.

Please feel free to let us know if this guide helped you send images, by using the comment section below.

READ ALSO:

Windows Explorer Groups by Date: How to Disable Grouping

The File Explorer in Windows 10 allows users to group the files by date, file size, or none. However, after the recent Windows update, users have reported that Windows Explorer groups by date, and they can’t set the option to none.

This can happen due to the bug in the latest Window update or if the user preference was set to default after the update. Keep reading to find out how to stop grouping by date in File Explorer on Windows.

How do I stop Windows Explorer from grouping by date?

1. Change Group By setting in Save as dialog box

  1. Download any file or right-click on any file in the browser and select Save as.
  2. Now navigate to the folder where you want to save the file.
  3. Right-click on the empty space, select Group by, choose how you want to group the files by (name, date, file size, etc), and finally save it.group by
  4. Next time you want to save the file again, you will see that the Group by preference is now intact.

If you only want to change the Group by option for the download folder, which also is visible in the Save as dialog box, reconfiguring the setting would do the trick! Remember, changing the Group by preference in the download folder does not affect any other folder.

2. Disable File Grouping for all folders

  1. Press Windows + E to open File Explorer and open any folder.
  2. Right-click on an empty space and select Group by, and choose None.
  3. Go to the View tab, choose Options, and click on Change folder and search options.
  4. In the Folder Options window, go to the View tab, and click the Apply to Folders button. This will apply your Group by preference to all the folders you create in the future.
    Files in Downloads folder are grouped by date in Windows 10
  5. To enable file grouping again, open the Folder Options, and click on Reset Folders.
    Files in Downloads folder are grouped by date in Windows 10

If you want to disable file and folder grouping in Windows 10 and Windows 11 at once, you can do it from the Folder Options. This will help get rid of the issue where Windows Explorer automatically groups by date.

Before you leave, find out some quick tips to speed up File Explorer when it’s running slow. And do check the steps to remove the Home tab in File Explorer on Windows 11. It’s bothering many, as per reports.

Tell us which fix worked for you in the comments section below.

Power BI can’t find a gateway? Here’s what you need to do

A Power BI gateway establishes a connection between the BI could technology for data analysis and a user’s data source. However, some users can’t find data gateways when they to configure scheduled refreshes. This error message appears for some users: Publishing succeeded, but the published report cannot connect to the data source because we were unable to find a gateway. Please install and configure an enterprise gateway.

Consequently, users can’t publish reports to Power BI when the BI service can’t find a gateway. The gateway is missing, and that’s often due to a user not adding data sources for their gateway. Here are a couple of resolutions for fixing missing Power BI gateways.

How do I add a gateway in Power BI?

1. Configure the Data Source for Gateway

  1. Users can usually fix missing Power BI gateways by adding sources to them. To add a data source to a gateway, click the gear button in the Power BI service.
  2. Click Manage gateways on the gear button’s menu.
  3. Then click the Add Data Source button to open the Data Source Settings shown directly below.Date Source Settings drop-down menu power bi can't find gateway
  4. Enter a data source in the Data Source Name box.
  5. Select a data source type on the Data Source Type drop-down menu.
  6. Then fill out the Server and Database boxes, along with the other details required for the data source.
  7. Click the Add button.
  8. After clicking Add, don’t forget to fill out the Users tab. Click Users and enter the email addresses of anybody who will need to utilize the gateway.

Looking for the best software to collect user data with depth and reliability? Here are the best options.


2. Check the Server and Database Names Match in Power BI Service and Desktop

Note that the server and database details users enter in Data Source Settings within the BI service must exactly match the server and database details entered within Power BI Desktop. For example, if users enter an IP address for the server within BI Desktop and a server name within the Data Source Settings for the BI service, users won’t find the gateway listed when they try to schedule a refresh. So, make sure the server and database details for a gateway match up within Power BI service and the BI Desktop software.

The Data Source Settings tab power bi can't find gateway
So, Power BI users need to remember to configure all data sources for a BI file with the gateway to ensure Power BI can find the gateway and lists it in Scheduled Refresh. If further resolutions are required, users can file a support ticket at the Power BI support page by clicking Create Support Ticket.

RELATED ARTICLES TO CHECK OUT: 

Latest Edge Dev build still plagued by bugs, to users’ dispair

Microsoft recently released Edge Dev Channel build 77.0.235.4 as the final build based on Chromium 77.

The build brought some changes already known from the Canary build, but also a lot of fixes.

Edge Dev build 77.0.235.4 fixed some bugs, but brought new ones

Well, it seems like there weren’t enough fixes, because many Chromium Edge users are reporting all sorts of problems after the update.

One of the new problems involves the Task Manager. After the update to Edge, the text on Task Manager isn’t visible when the dark theme is activated in the browser:

Not sure if this a recent regression or not. Texts onn task manager (shift+esc) on dark theme invisible or dont have enough contrast.

A similar issue previously encountered was already fixed with this build, but as reports show, not for all user.

Another problem that affects the new build is that IE mode is broken. This is a pretty annoying one, and here’s how a user describes it:

IE mode seems to be broken in this build (was working previously). I constantly receive the message saying I have to re-install with administrator permissions or I have to restart Edge to use IE mode. My install path *is* Program Files and not my user directory. I’ve re-installed, though, just to be safe, and I am still getting the error.

Other users are complaining about sign-in pop-ups. This is a known issue from the previous build that has been fixed by Microsoft, but some users are still reporting it.

This is a particularly problematic bug, as it prevents you from signing in on some websites.

After the previous update sign-in pop ups on some sites just close immediately on their own making it impossible to sign in. The fixes around sign-in popups in this update did not resolve that issue

Address and Password Sync still not available for many

Finally, the most common problem is that the new feature that allows users to Sync Addresses and Passwords is still not available for a lot of users:

The note about this release on .microsoftedgeinsider.com whats-new says it includes the ability to sync form fill data and passwords, but in Settings>Profiles>Sync the options to Sync Addresses and Passwords are still not available.

But how can I enable password sync? It is included on the “what’s new” page but it is not listed here.

If that’s on Microsoft and their A/B testing or if it’s a real bug, it remains to be seen in the future.

Hope that the new builds on Chromium 78 will be more stable and bug free.

Have you encountered any of these bugs in the Edge Dev Channel build 77.0.235.4?

Unable to Save Scanned Files: 3 Easy Solutions to try

Scanning a document should be a simple and intuitive process, but things tend to be complicated for no apparent reason. So, you may be unable to save scanned files.

To mitigate this, we encourage you to try a tool on the Microsoft Store and set the folder where scanned files are saved manually.

Read below to find out what you need to fix the issue once and for all.

Why can’t I save a scanned document as a PDF?

There are several reasons why you can not save a scanned document as a PDF:

  • Software compatibility – The scanning software you are using may not be able to save scans as PDFs. Check the software’s documentation to see if it supports PDF output.
  • Scanner settings – The scanner may not be set up to save scans as PDFs.
  • File permissions – Where you are trying to save the PDF may not have sufficient write permissions. Try saving the file to a different location, or check the file’s permissions to ensure you have the necessary rights to save the file.
  • Large file size – The scanned document may be too large to be saved as a single PDF file. Try reducing the file size by lowering the resolution or color depth of the scan.
  • Disk space – Your computer may not have enough disk space to save the scanned document as a PDF. Check the available disk space and free up some space if necessary.

What can I do if I’m unable to save scanned files?

Before going through any of these solutions, ensure you have the appropriate permission to save files in the selected location.

Also, depending on your scanner, you may need to check the scanner’s settings and ensure that the appropriate output format is selected.

1. Use Windows Scan

  1. Install the Windows Scan app from Microsoft Store. printer won't save scan file
  2. Place the item you want to scan and select Scanner, Source, and File type.
  3. Click show and then Save file to in the app settings, then select the location where you want your scan files to be saved.
  4. Complete the scanning process, and your scanned files will automatically be saved in the location of your choice.

2. Disable antivirus software

  1. Click on the hidden access arrow in the Taskbar.
    unable to save scanned files
  2. Click on your antivirus icon, hover over Avast shields Control and select Disable for 10 minutes (This step varies for different antivirus software).
    unable to save scanned files
  3. Try saving the files again.

3. Run the SFC utility

  1. Press Windows + X and select Command Prompt (Admin).
  2. Type the below script and hit Enter.
    sfc /scannow
  3. Wait for the script to execute, then restart the computer.

These three easy solutions can help you fix the problem and get back to saving your scanned documents with ease.

If none of these solutions work for you, it may be worth considering seeking assistance from your scanner manufacturer or contacting a professional technician.

Use Skype for Business multiple chat windows with this guide

Microsoft is seemingly doing a great job with enterprise software solutions, with Teams replacing a bit outdated Skype for Business. However, there are still users that favor this iteration of enterprise collaboration software by Microsoft.  And they want to know how to use Skype for Bussines in multiple chat windows. Short answer? Switch to Teams.

Microsoft received a huge backlash for forcibly replacing old Skype with the new metro-design Skype for Desktop and Skype for Windows 10 (UWP from Microsoft Store, comes preinstalled). A lot of features that made Skype great are missing now and we can’t be sure whether we’ll see them on new versions.

Old classic Skype and Skype for Business allowed for multi-windows chat, but nowadays you can get that only on Skype for Windows 10. Microsoft Teams allow for this nifty feature, but you’ll need to upgrade to Office 365.


Looking for the best collaboration software to replace Skype for Business? Here are the best options.


So, what can you do if you don’t want to move from Skype for Business to Microsoft Teams? Read the instructions below.

Can I run Skype for Business in multiple chat windows?

The only native way to use Skype for Business (iteration from Microsoft Office 2016) is with a tabbed view. You can enable multi-tab conversations in Settings, which isn’t exactly a multi-window, but it should do the trick for some.

Skype for Business Multiple Chat Windows

Here’s how to do it:

  1. Open Skype for Business 2016 and log in with your credentials.
  2. Open Settings and select General options.
  3. Check the Enable tabbed conversations box.
  4. Confirm changes.

Alternatively, you can use a third-party solution called Multi Skype Launcher that allows for the running of the same version of Skype in multiple instances. With it, you can regain the old feature that’s evidently missing from the revamped Skype these days. You can check it out here, but have in mind that the application isn’t free.

RELATED STORIES YOU SHOULD CHECK OUT:

How to split armies in Age of Wonders: Planetfall

Age of Wonders: Planetfall is the fifth game released by Triumph Studio and is one of the best in the Age of Wonders series.

The strategy game brings tactical turn-based combat and in-depth empire building o space in an new, sci-fi setting.

Having six unique factions from the start, you’ll have to progress through missions, explore ruins, find other survivors, build, negotiate and fight in a single player campaign or against friends in multiplayer.

But sometimes, other players use advanced tactics and think ahead to master the game. One of these tactics is splitting your armies.

How can I split armies in Age of Wonders: Planetfall?

There are multiple ways to split armies in AoW: Planetfall.

Method 1

The simplest way to do it is by clicking on the foot icon. More specifically, when you select a stack, above each unit there’s a foot icon. Clicking it will allow you to select that specific unit.

You can then assign different tasks/orders to that specific unit.


Improve your gameplay in AoW: Planetfall on a Windows 10 PC by following this simple guide.


Method 2

Another way to split armies in Planetfall is by using your army list.

At the bottom of your screen you have listed all the units in your army. Click on a individual unit and you can move it to a different hex. You can also make multiple choices, by clicking multiple units.


AoW: Planetfall is running a little slow? Optimize game performance on Windows 10 with these software tools.


Method 3

A third method to split armies is by clicking on your army and then on the grey box that shows movement points.

When you highlight all the units you want to split, left-click on where you want them to go. They will separate of the army and move to the new location that you selected.


Split your armies easier in Age of Wonders: Planetfall by using one of these amazing gaming mice!


That’s it. You now have three easy methods to split your armies in Age of Wonders: Planetfall. Use them to create new strategies and surprise your friends in complex multiplayer battles.

If you have any more questions, don’t hesitate to leave them in the comments section below and we’ll be sure to check them out.

READ ALSO:

How to fix common Age of Wonders: Planetfall bugs

Age of Wonders: Planetfall is one of the best new strategy games out there.

With some amazing graphics, well-thought gameplay, great tactical turn-based combat, and a lot of other interesting features, Triumph Studio hit the jackpot with this one.

Planetfall is the fifth iteration of the Age of Wonders series and it is available for Windows 10, PlayStation 4, and Xbox One.

Despite being fairly new, the game has a lot of bugs and issues. Many AoW players reported visual bugs, problems with launching the game, and crashes.

Today, we’re going to take a look at hot to solve the most common bugs in Age of Wonders: Planetfall on Windows 10.

How can i fix common AoW: Planetfall issues on Windows 10?

First, just to make sure that your bug can’t be fixed easily, restart your PC/Steam/AoW: Planetfall and check if the issue still exists. Many players fixed the game just by restarting.

If that doesn’t do anything, and the problem is persisting, follow the solutions below.

1. Startup hangs/crashes

One of the most reported problems in Planetfall is the inability to launch the game on Windows 10. It seems like a lot of players can’t start the game because the launcher hangs, freezes, or crashes.

In some cases, the AoW startup problem led to Steam crashing or even Windows 10 freezing.

Because the development team behind the game is aware of the problem, a fix has been issued in the Open Beta branch. To switch into the open_beta, follow the steps:

  1. Open Steam and go to your Steam Library.
  2. Right-click Age of Wonders: Planetfall and select Proprieties.
  3. Now click on the BETAS tab.
  4. Set the combobox to open_beta.
  5. Close the Proprieties windows and start the game to force an update.

Another confirmed workaround for this issues is to start the game from the installation folder. Just go to AoW: Planetfall install location and double-click on AowPF.exe.

After that, the game should start without any issues.

2. Update your graphics driver

  1. Access the website of the manufacturer of your driver’s company
  2. Download the driver for your graphics card
  3. Go to Device manager and click on Display adapters
  4. Select your graphics card and choose Update driver
  5. Click on browse my computer for driver software
  6. Follow the instructions  to complete the process
  7. Reboot your PC

Follow the above steps to update your graphics driver manually.

A faster and easier solution would be to use third-party software that performs the update process automatically.

3. Dowser.exe problems – game not launching

Another closely related problem is that the game doesn’t start because the executable is missing. This is a known issue and the development team released a patch to fix it.

To get the patch, completely close Steam and wait a couple of seconds. Then, restart your steam client and you should be prompted to update.

If that doesn’t happen, go to Steam > Library > Proprieties > click on Local files tab > and then click on Verify integrity of game files. Keep in mind that this could take a couple of minutes.

After that, your AoW should update just fine and the launch problem should be gone.

4. bootstrapper-v2.exe not found

Many Planetfall players reported the “bootstrapper-v2.exe not found” error. This error is caused by an antivirus solution or Windows Defender.

It seems like antiviruses see bootstrapper-v2.exe as a virus and deletes the file.

To fix the problem, first go to your antivirus’s quarantine interface and restore the file, and then add it to the whitelist.

After you make sure that AoW: Planetfall isn’t blocked by your antivirus or Windows Defender, it should work without any problems.

5. Steam Error: Application load error 3:0000065432

This is another error that prevents the game from starting.

To fix it, go to Steam > Library > Proprieties > click on Local files tab > and then click on Verify integrity of game files. You also need to temporarily disable your antivirus.

After carefully following these simple solutions, Age of Wonders: Planetfall should work without any problems.

If you encountered other bugs with the game or you’re aware of another solution to any of the issues, feel free to share them in the comments section below and we will check them out.

READ MORE:

Power BI won’t refresh? Here’s what you need to do

Power BI users often need to refresh data to ensure their visualizations and charts are based on recent data. Users can select a Refresh Now option to refresh data. However, some Power BI users might encounter refresh errors when they try to update data.

Learn how to fix this by following the instructions below.

What to do if scheduled refresh fails in Power BI?

1. Update Power BI Desktop

  1. If a “Processing error” message pops up, users might need to update their Power BI Desktop versions. Press the Windows key + X hotkey.
  2. Select Run on the menu that opens.
  3. Input ‘appwiz.cpl’ in Run and click OK to open the window in the snapshot directly below.The uninstaller Power BI won't refresh
  4. Then select Power BI Desktop, and click the Uninstall option.
  5. Press the Yes button to confirm.
  6. Restart Windows after uninstalling Power BI Desktop.
  7. Next, click Advanced Download Options on the Power BI Desktop page.Power BI Desktop download page Power BI won't refresh
  8. Click the Download button.
  9. Select the .PBIDesktop.msi (32-bit installer) or PBIDesktop_x64.msi (64-bit installer) option, and click the Next button.
  10. Thereafter, open the Power BI Desktop installer to install the latest version of the software.

2. Reduce the Amount of Data Imported

Power BI data refresh errors can arise when users try to import too much data. Note that the maximum size for imported data sets within the Power BI service is 1 GB. So, reduce the dataset size to import if it eclipses the 1 GB mark.

Power BI Desktop software Power BI won't refresh

3. Clear Internet Browser Cache

  1. An “Access to the resource is forbidden” data refresh error might arise when cached credentials have expired. Users can clear a browser cache by logging in to the Power BI service.
  2. Then open this link. That link will update a user’s credentials.
Power BI service's sign in page Power BI won't refresh

If that doesn’t help, you can always try using a different browser.

Opera Browser is a privacy-based browser built on Chromium engine, so it’s quite similar to Chrome in terms of functionality.

This browser has some unique features such as tracking and phishing protection. For extra security, there’s a built-in VPN and malware scanner. It’s a considerably lighter package than Chrome and using add-ons like the VPN and built-in ad-blocker offers a quicker and more responsive internet experience, as well as battery savings.

These items, together with streamlined shortcuts and a variety of other features, can help you navigate the internet quicker. In terms of performance, Opera also has a unique Turbo option that may be used when your internet connection is really sluggish.

If you haven’t already, be sure to try out Opera Browser.

⇒ Get Opera Browser

4. Install the Latest Gateway

  1. “GatewayNotReachable” data refresh errors can be due to antiquated gateways. To fix the “GatewayNotReachable” error, try installing the latest gateway by clicking the Download Gateway button on the Power BI gateway page.
  2. Open the gateway’s installer.The gateway installer Power BI won't refresh
  3. Click the Next button.
  4. Select the On-premises data gateway (recommended) option, and click the Next button.
  5. Click the Next button again.
  6. Then click the … button to choose an installation path for the gateway.The Install to box Power BI won't refresh
  7. Press the Install button.
  8. After that, users will need to enter an email address to utilize with the gateway. Enter an email address for an Office 365 organization account in the text box.
  9. Then press the Sign in button.
  10. Thereafter, users will need to register a new gateway.

Those troubleshooting tips can potentially fix numerous Power BI refresh errors. We covered a similar problem in our scheduled refresh is greyed out on the Power BI article, so don’t miss it.

For further fixes, users can also click the Create Support Ticket button on Power BI’s Support page to send a support ticket.

How to make periods bigger on Google Docs

If you wonder how to make periods bigger in Google Docs, then you came to the right place. As a number of users have reported that the size of the period on Google Docs is not as obvious as needed, our team did the required research to sort this issue.

This is a really annoying issue to encounter, and it affects you even more if you’re using Google Docs to write your project or essay for school or work. Not having an obvious period at the end of every sentence in the above-mentioned situations can cause difficulty to the reader.

For these reasons, in today’s article, we will explore the best ways to deal with this issue. After reading these methods, you will have all the tools you need to avoid this issue in the future. Read on to find out more.


How do I make periods bigger in Google Docs?

1. Manually change the font size for each of the periods

Note: In order to apply this method, you will have two options – edit every period as it is written, or to edit all periods after you’ve finished writing the content.

The first option will require you to change the font size to the text size after every period, so in my opinion, it is better to perform the entire range of Font size changes after finishing the text.

This method only applies if you don’t have a very big text to deal with. In order to do so, follow the next steps:

  1. Inside your Google Docs page -> select each of the periods you want to modify.
  2. After the selection is done -> click on Font size button -> choose a value that suits your text.Font size edit - How to make periods bigger on Google Docs
  3. If your text is too big for this method, please follow the next one.

Want to create amazing borders in Google Docs? It’s super simple with this guide!


2. Change the font style inside your Google Docs

Note: Even though this method will make the periods of your text bigger, this method only applies in the case that you don’t have a set requirement regarding the font used in your text.

  1. Select the text you want to change the font style to.Font style edit - How to make periods bigger Google Docs
  2. Click on the Font style button and choose an option from the list.

3. Use keyboard command to automatically select all periods

  1. Inside your Google Docs text -> press Ctrl+F keys on your keyboard to open up the search box.
  2. Type a period inside the search box.
  3. Press the three dots options of the search box -> change the size of your Font to a bigger size -> type a period in the Replace with box -> click Replace all.search keyboard shortcut - How to make periods bigger on Google Docs

In this article, we explored some of the best methods to make periods bigger on Google Docs. Please feel free to let us know if this guide helped you, by using the comment section below.

READ ALSO: