Shpafact.dll, also known as the Windows Shell LUA/PA Elevation Factory DLL file, was created by Microsoft for Windows Operating System.
If you are facing an issue related to shpafact.dll on your computer, this guide can help you recover the DLL file with ease.
Why is the shpafact.dll file corrupted?
There could be various reasons for issues related to shpafact.dll; some of the common ones are mentioned here:
Viruses infection – Malware can damage your critical system files, including DLL files, causing errors when the file is called. Run a deep scan using an antivirus tool.
Software interference – Conflicts between different applications or incompatible software versions can cause corruption in DLL files. Remove unwanted applications to avoid these errors.
Registry issues – Problems with the Windows registry, such as invalid or missing entries, can impact the functioning of DLL files and potentially cause corruption. Run a registry cleaner to fix it.
Damaged system files – If important system files become corrupted due to disk errors, improper shutdowns, or other system issues, it can cause the issue.
Now that you know the causes, let us move to the troubleshooting errors.
How can I fix the shpafact.dll corruption errors?
Before engaging in advanced troubleshooting steps, you should consider performing the following checks:
Restart your computer.
Try reinstalling the affected app.
Make sure there are no pending Windows updates.
If these minor tweaks don’t work for you, check out to the detailed solutions below.
1. Use a third-party DLL fixer
Recovering a DLL file manually can be tricky if you don’t know your way around a computer. Therefore, it is advised to use a third-party DLL fixer tool.
Such a tool can recover or restore all Windows DLL files like shpafact.dll without a miss. Thereby resolving the conflicts between third-party apps & the operating system and improving PC performance.
2. Reregister the DLL file
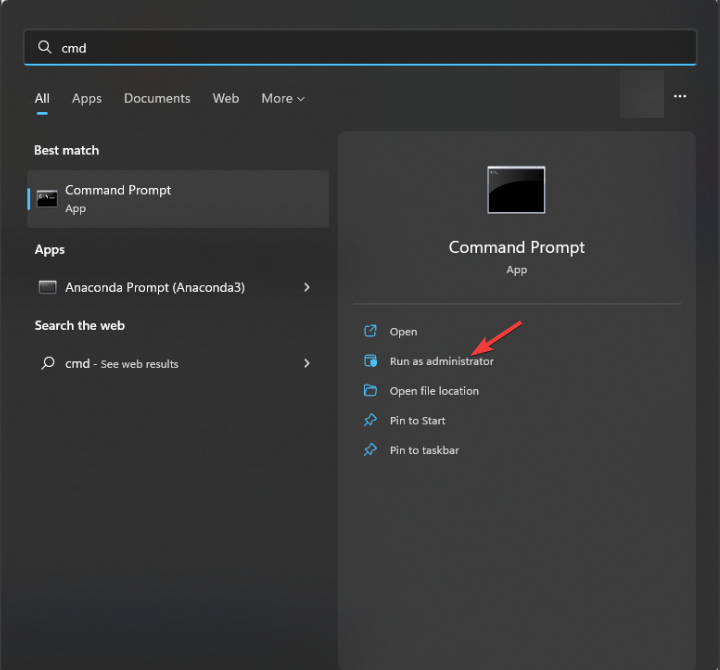
Press the Windows key, type cmd and click Run as administrator.
Type the following commands to register the shpafact.dll and hit Enter: regsvr32 shpafact.dll
Select OK if prompted and reboot your computer.
3. Run SFC & DISM scans
Press the Windows key, type cmd, and click Run as administrator.
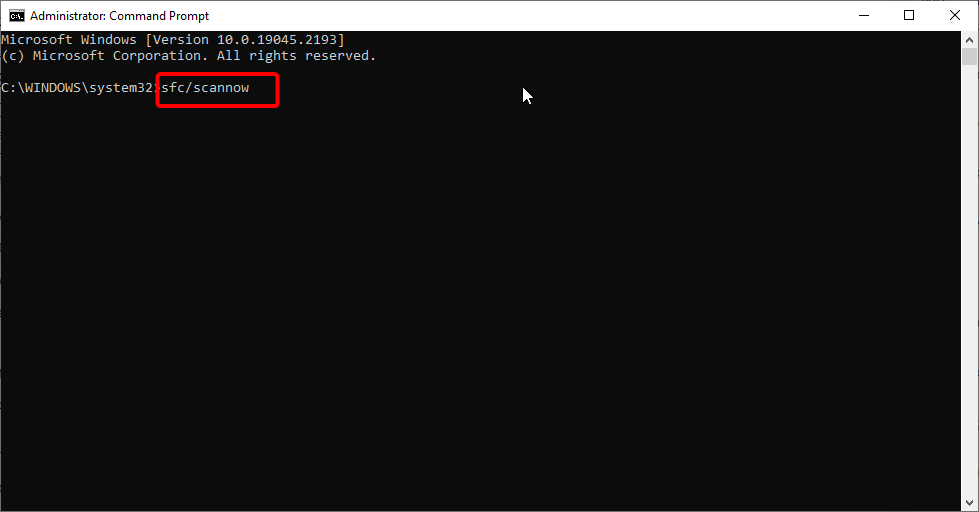
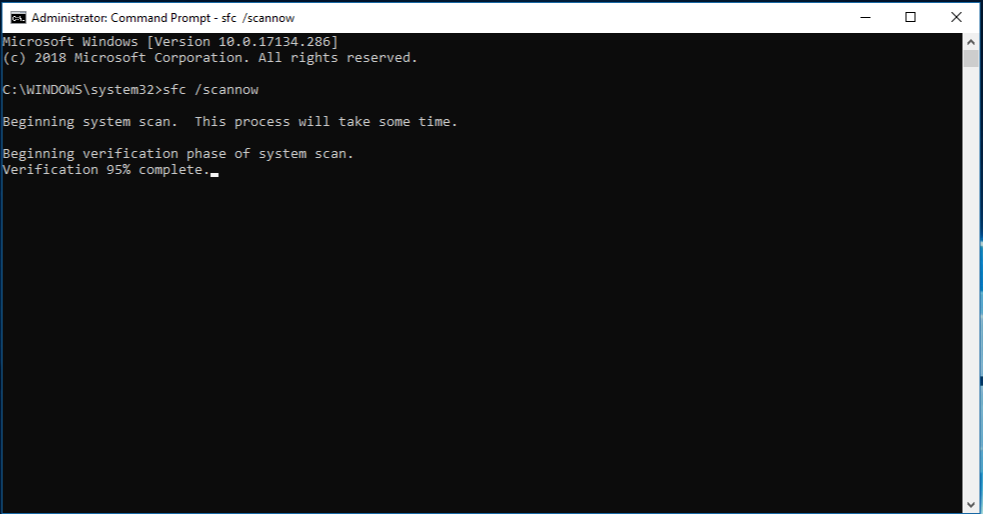
Type the following command to repair system files and hit Enter: sfc/scannow
Wait for the scan to complete, copy & paste the following command to restore Windows OS image files, and press Enter: Dism /Online /Cleanup-Image /RestoreHealth
Once the scan is complete, your computer will automatically connect to the Windows Update service to repair the corrupt files. Restart your PC to let the changes take effect.
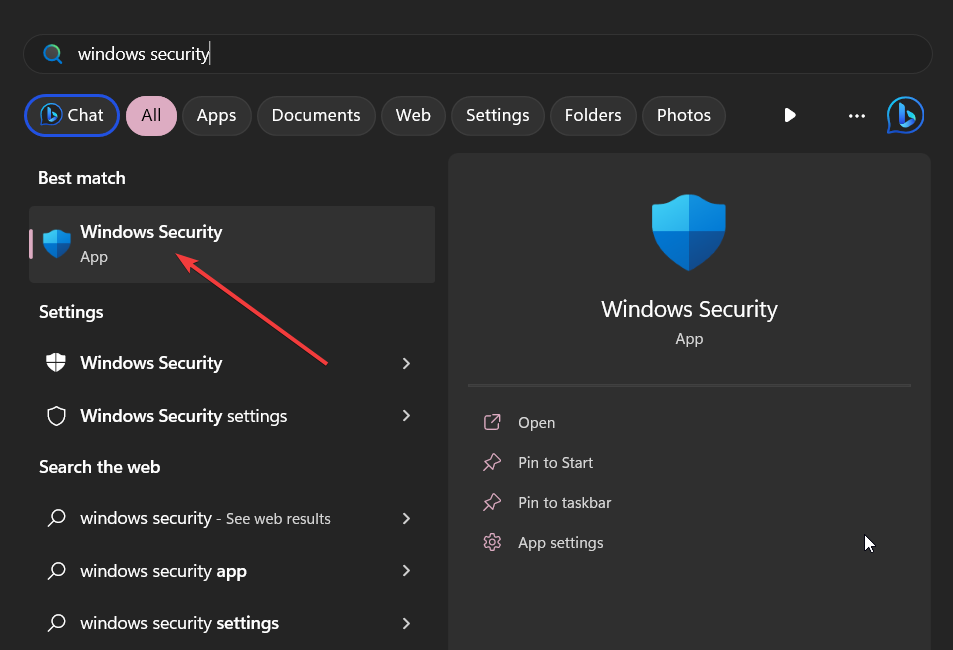
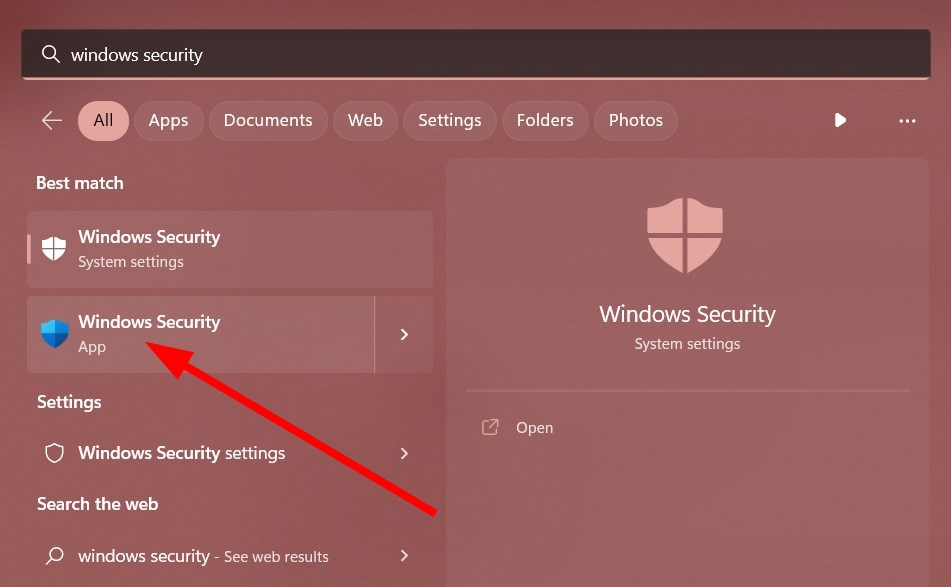
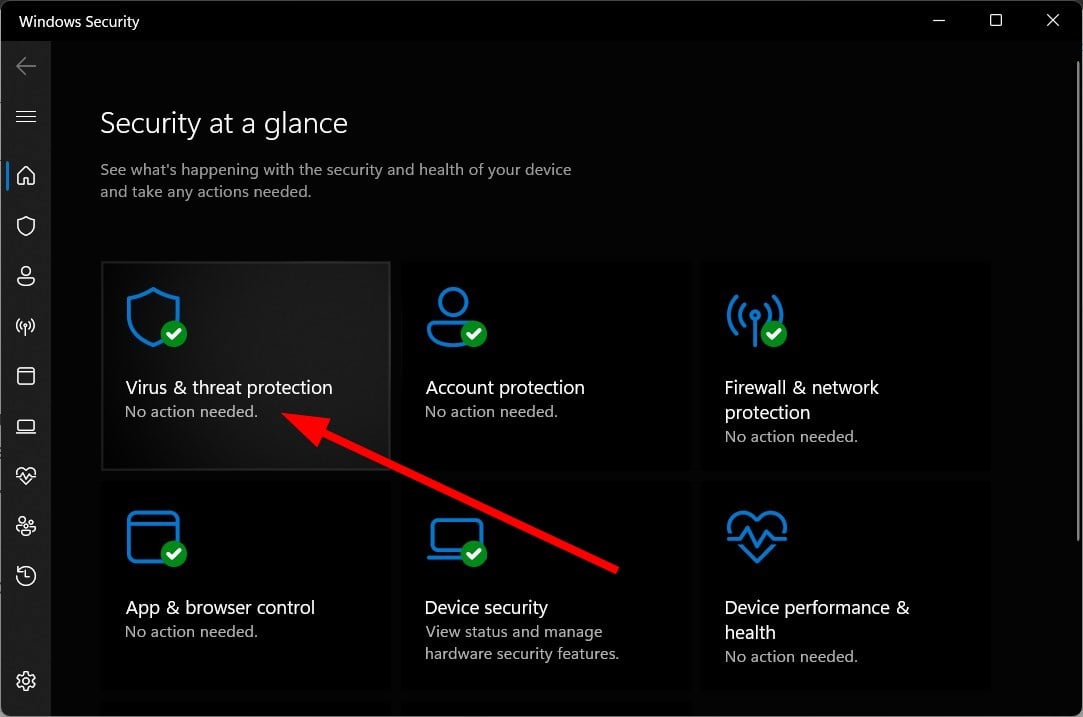
Press the Windows key, type windows security, and click Open.
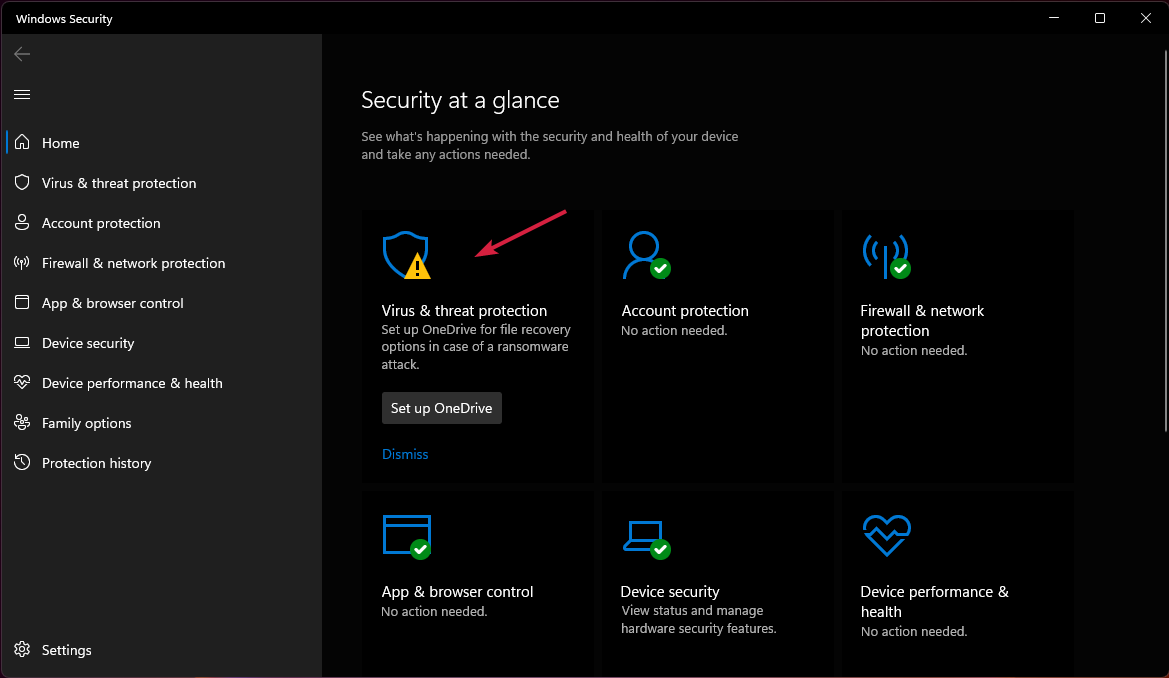
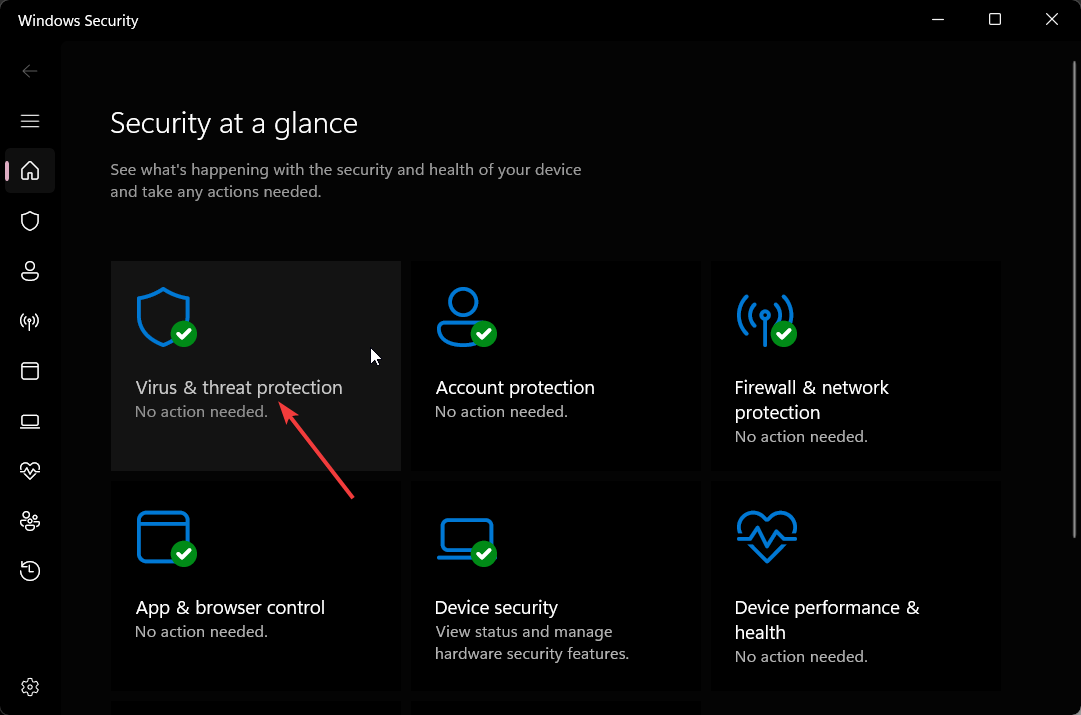
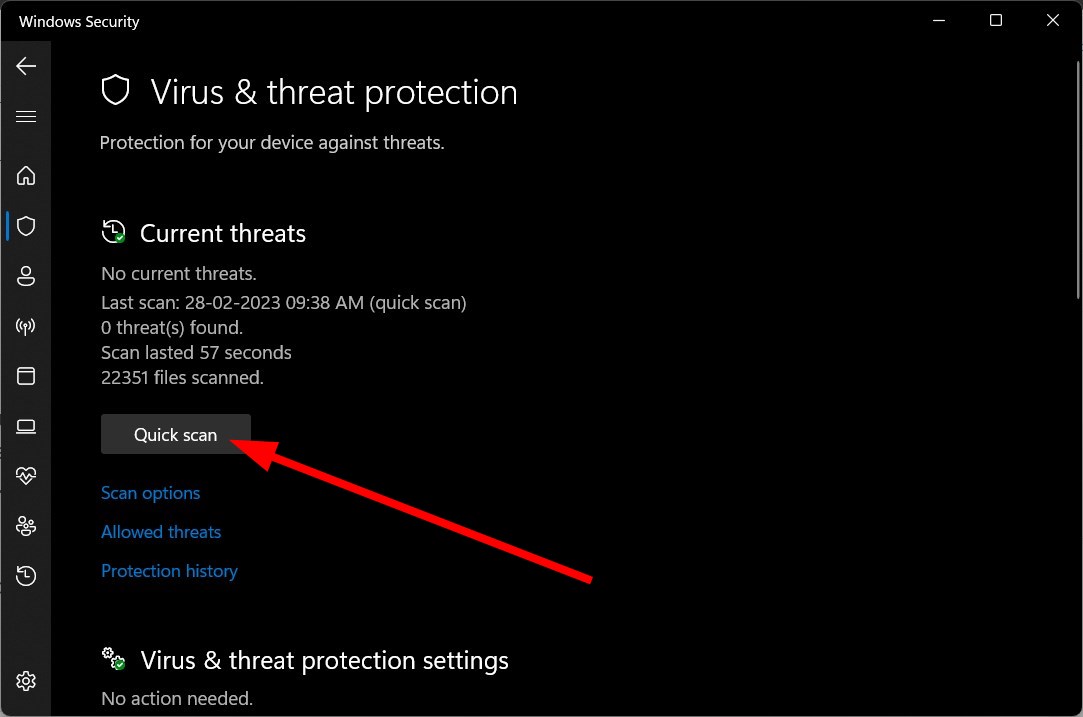
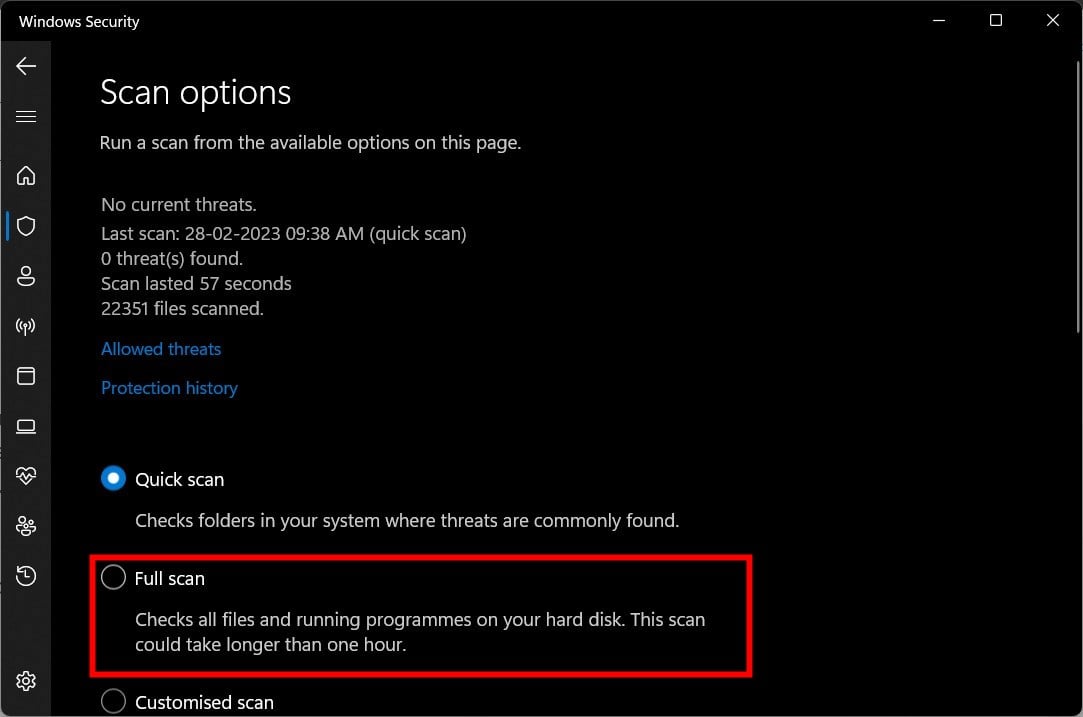
Go to Virus & threat protection and click Scan options.
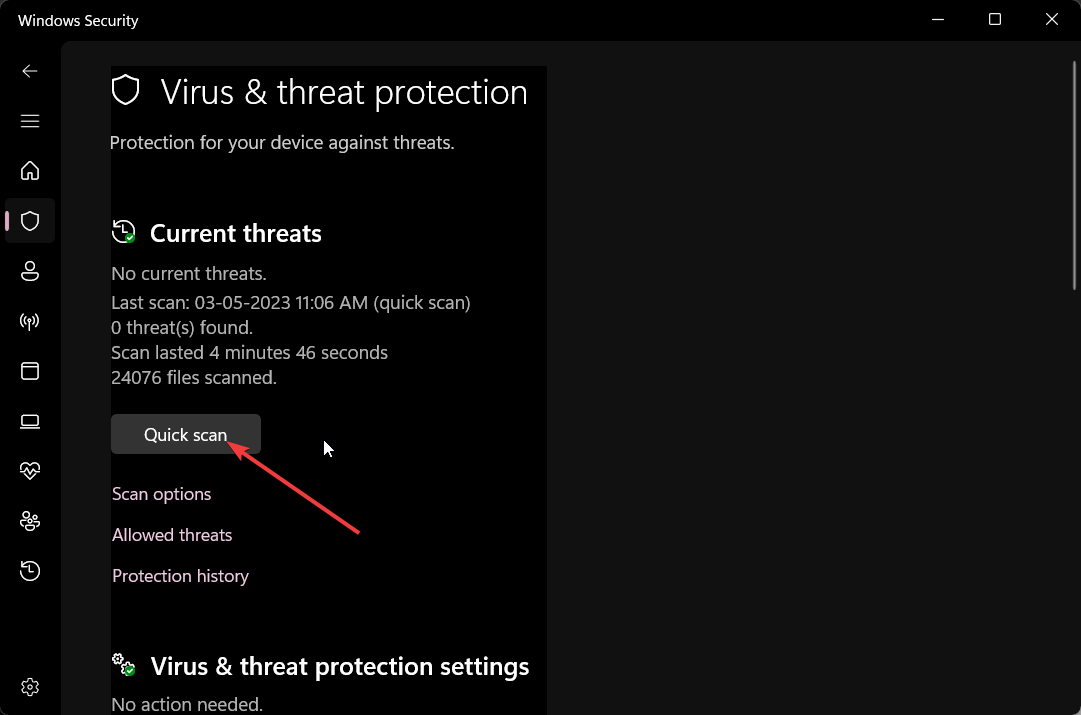
Select Full scan and click Scan now.
The tool will scan your computer for all malicious files and list them. Delete them to fix the problem.
Running the scan is important because if the DLL issues are caused by malware, this action will remove it, thereby eliminating the issue. Of course, you may also use third-party antivirus software for this task.
5. Perform a System Restore
Press the Windows key, type control panel, and click Open.
Select Large icons as View by and click Recovery.
Click Open System Restore.
On the System Restore window, select Choose a different restore point and click Next.
Choose the point you want your Windows to be restored to and click Next.
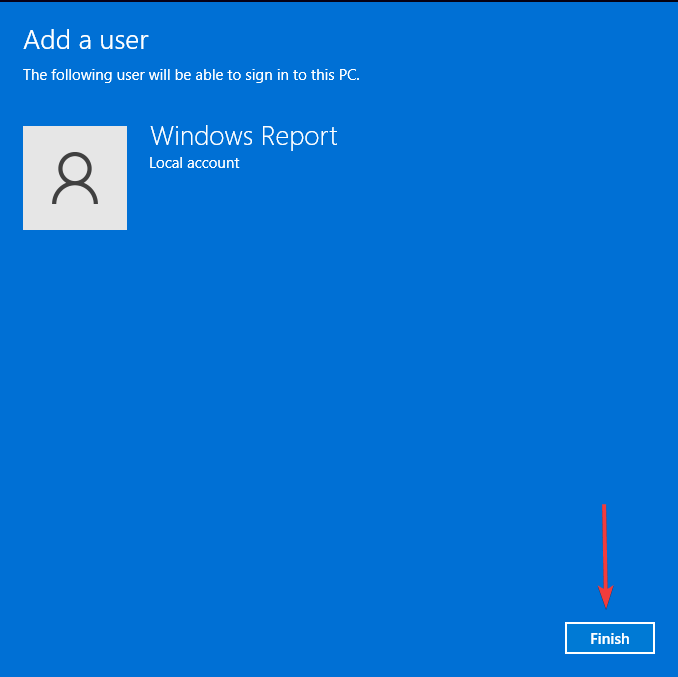
Click Finish to initiate the process.
Windows will restart and restore to the selected version. If the System Restore didn’t complete successfully, we advise you to check out this informative guide for solutions.
6. Download the DLL file manually
NOTE
Using an unreliable website to install DLL files can be harmful and is never recommended. However, you may use a trusted source, like DLL Files, which has been verified and trusted. You can follow the steps mentioned to restore the file manually.
Go to the DLL Files website, search shpafact.dll, select an appropriate option, and click Download.
Double-click the downloaded folder to open it and locate and copy the .dll file.
Go to this path and paste the file: C:\Windows\System32\
Reboot your computer to save the changes.
So, these are methods you can follow to fix the issues related to shpafact.dl. If you are facing missing the DLL files issue on your Windows 10, we suggest you read our informative guide to know solutions for this common problem.
Before you leave, you might be interested in our latest guide and learn what to do if lua5.1.dll is missing.
Please feel free to give us any information, tips, and your experience with the subject in the comments section below.
As one of many arbiters of artificial intelligent powered consumer products lately, Microsoft is looking to assuage public concerns regarding abuse and harm that could result from unfettered AI use, with its transparency tenants of Customer Commitments.
In a press authored by Microsoft’s corporate vp and deputy general counsel Anthony Cook, the company offers up three new AI Customer Commitments intended to offer additional levels of “guardrails” and transparency for its customers as they go about using AI today and in the future.
First, we will share what we are learning about developing and deploying AI responsibly and assist you in learning how to do the same. Microsoft has been on a responsible AI journey since 2017, harnessing the skills of nearly 350 engineers, lawyers and policy experts dedicated to implementing a robust governance process that guides the design, development and deployment of AI in safe, secure and transparent ways.
Second, we are creating an AI Assurance Program to help you ensure that the AI applications you deploy on our platforms meet the legal and regulatory requirements for responsible AI.
The program includes regulatory engagement support, risk framework implementation, customer councils, and regulatory advocacy.
Third, we will support you as you implement your own AI systems responsibly, and we will develop responsible AI programs for our partner ecosystem.
Microsoft intends to offer dedicated resources in the form of AI legal and regulatory experts around the world as well as a comprehensive partner network to aid in launching and leveraging new AI platforms.
Admittedly, Microsoft understands that its proposed AI Customer Commitments are only the start of what could be a long AI journey for some businesses but at this moment in time, these commitments need to be considered and adopted by the sector at large.
The Xbox Free Play Days event will run through Sunday, June 11. Remedy Entertainment’s action-adventure game was featured in one of our Xbox Classics Revisited posts, and was generally well-received upon release. It currently has a Metacritic score of 84 for both the Xbox One and PC versions.
After a secretive agency in New York is invaded by an otherworldly threat, you become the new Director struggling to regain Control.
From developer Remedy Entertainment, this supernatural 3rd person action-adventure will challenge you to master the combination of supernatural abilities, modifiable loadouts and reactive environments while fighting through a deep and unpredictable world.
Control is Jesse Faden’s story and her personal search for answers as she grows into the role of the Director. The world of Control has its own story, as do the allies Jesse meets along the way. Jesse works with other Bureau agents and discovers strange experiments and secrets.—Xbox Store Description.
Note that it is the (backward compatible) Xbox One version offered with Xbox Free Play Days this weekend. That version is currently on sale with a 70% discount as part of the Deals Unlocked Sale. The Xbox Series X|S version, Control Ultimate Edition, featured the next–gen upgrades, although that edition is not currently on sale.
A bootable USB media with the ISO file comes in handy if you plan to clean install Windows on your PC. In most cases, it does its job very well; however, sometimes, it may fail to boot your Windows PC or perform a clean install.
To avoid such unfortunate circumstances, it is recommended to check if your USB is bootable before restarting your PC to initiate the clean install.
How do I test if the USB is bootable is not?
1. Perform a booting test
NOTE
Save and back up all your work before proceeding with this method.
Hold down the Shift key and choose Restart from the Power menu.
On the boot menu that appears, select Use a device option to boot Windows from.
From the list of bootable devices, choose the USB Drive plugged into your Windows PC.
Now wait and see if your PC successfully boots from a USB device. If the boot is successful, that means the USB device is bootable.
If the USB drive follows the FAT32 file system and includes an EFI\boot directory, your PC will boot successfully in a UEFI system.
However, booting from a USB drive may fail due to an incompatible file system even if the USB drive is bootable.
Hence, to confirm that the USB is not bootable, you should follow the different USB booting test methods listed below.
2. Use the Disk Management tool
Right-click the Windows icon on the taskbar and choose the Disk Management option from the Quick Links menu.
Locate and right-click the USB drive for which you wish to check the bootable status and choose the Properties option from the context menu.
Switch to the Hardware tab, select the USB drive in question, and click the Properties button present under the Device Properties section.
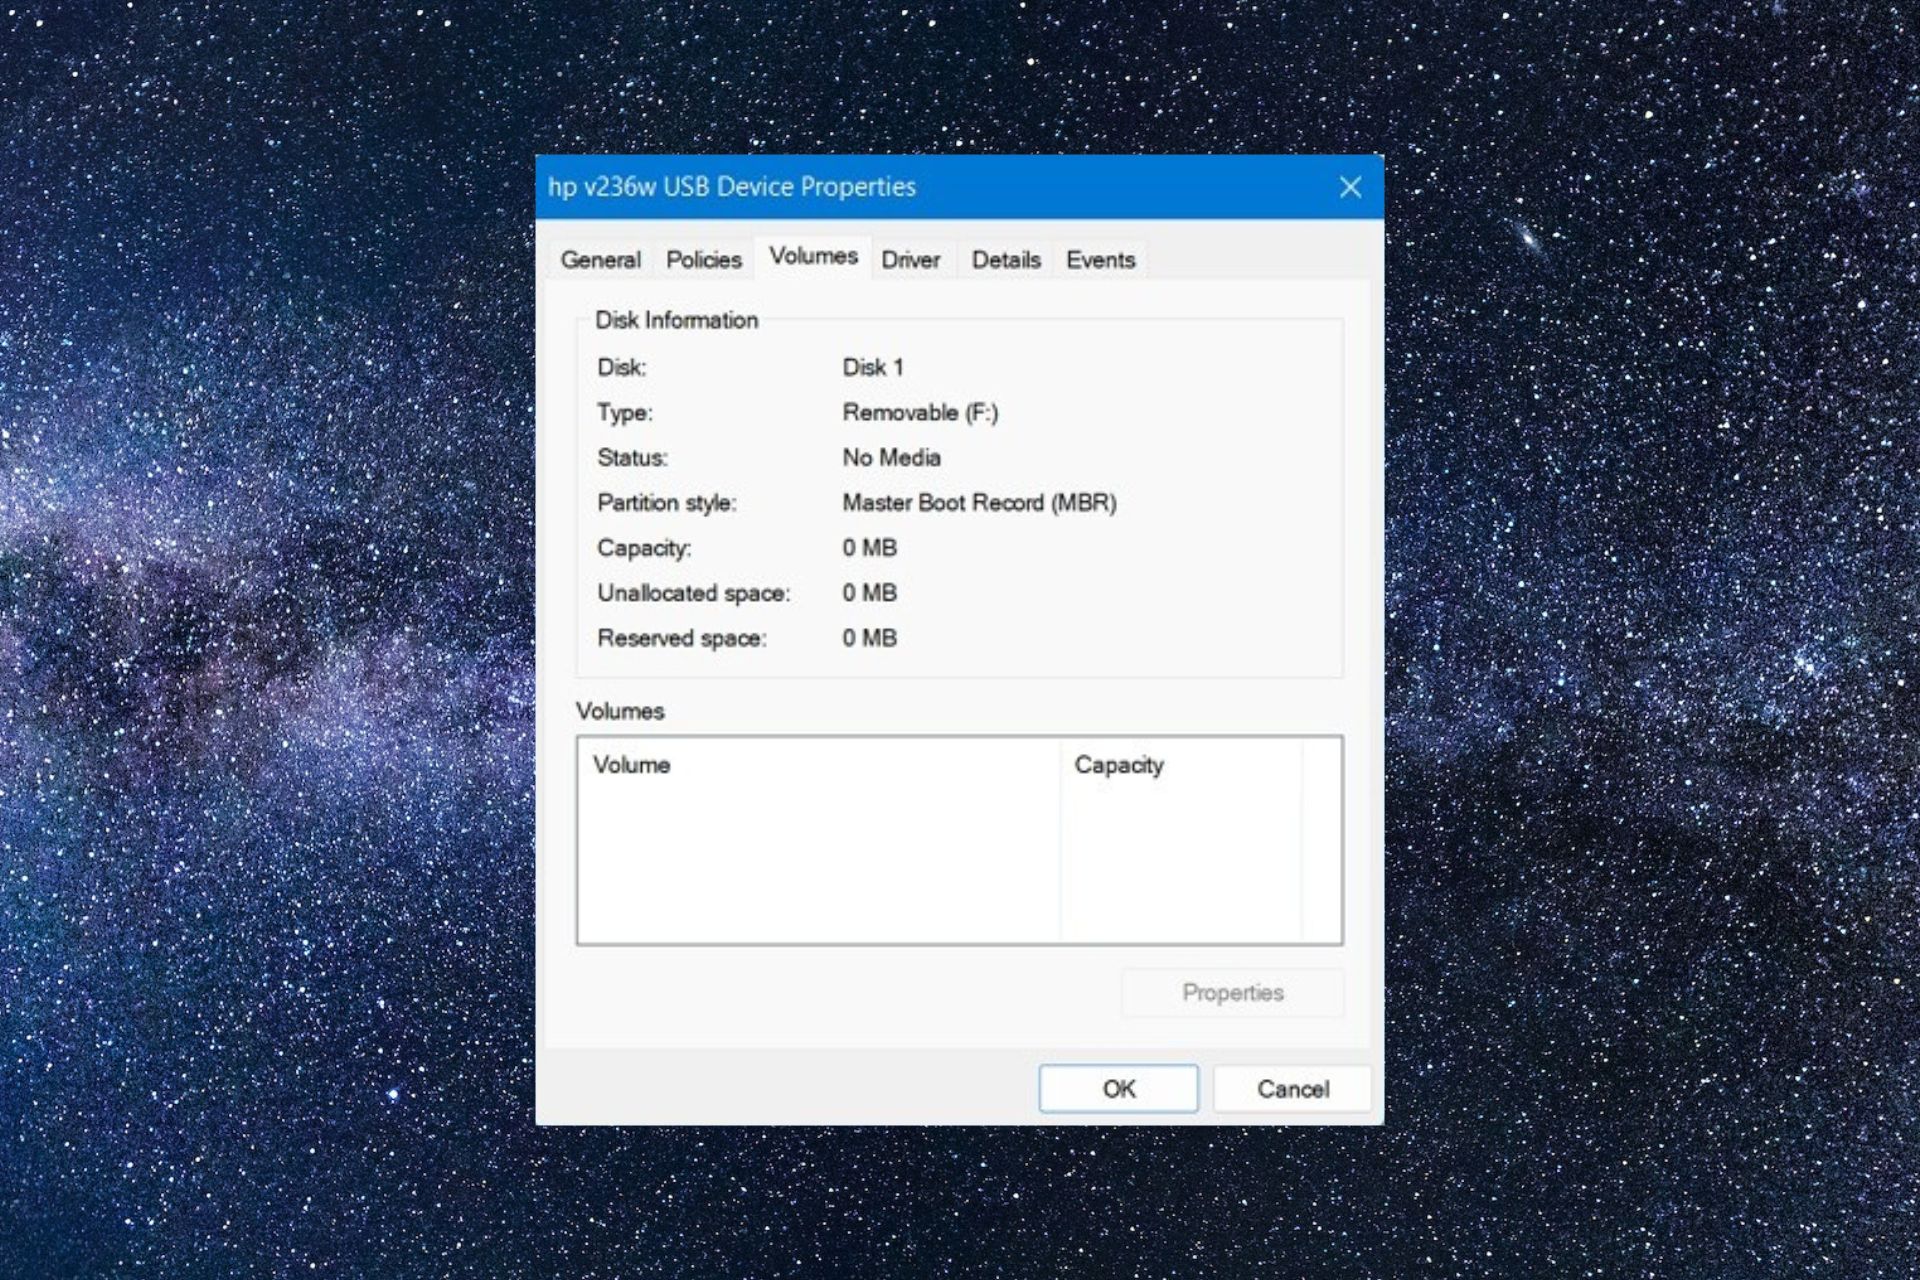
Next, switch to the Volumes tab of the USB device properties box. Look for the value of the Partition Style entry. If the USB drive is bootable, boot flag markers such as Master Boot Record (MBR) or GUID Partition Table will be listed next to it.
Apart from this, a bootable USB drive may display the Status entry as No Volume/No Media, and Unallocated space and Reserved space will be 0 capacity each.
If the Disk Information is not already displayed in the Volumes tab, press the Populate button on the bottom left to force Windows to display the disk information.
As you will see, the Disk Management tool does not categorize a USB derive to be bootable, but the values of the properties tab help you identify a bootable USB drive.
Once you’ve confirmed that your USB drive is not bootable, you may want to create a bootable USB drive. Learn how to use Win32 Disk Imager to create a bootable USB that works perfectly for a clean Windows installation.
3. Use Command Prompt
Press the Windows key to launch the Start menu. Type cmd in the search bar on top ad choose Run as administrator from the search results.
Type or paste the following command in the command prompt and press the Enter key to access the Diskpart command line tool. Diskpart
Next, type the following command and press the Enter key to view the disk information. List disk
Locate your USB drive in the disk list displayed below and check its Status column. A USB drive will the ISO file will display No Media/No Volume identifying itself to be bootable.
The Diskpart command line tool lets you examine the USB drive properties, which helps you identify a bootable USB.
4. Use Windows Powershell
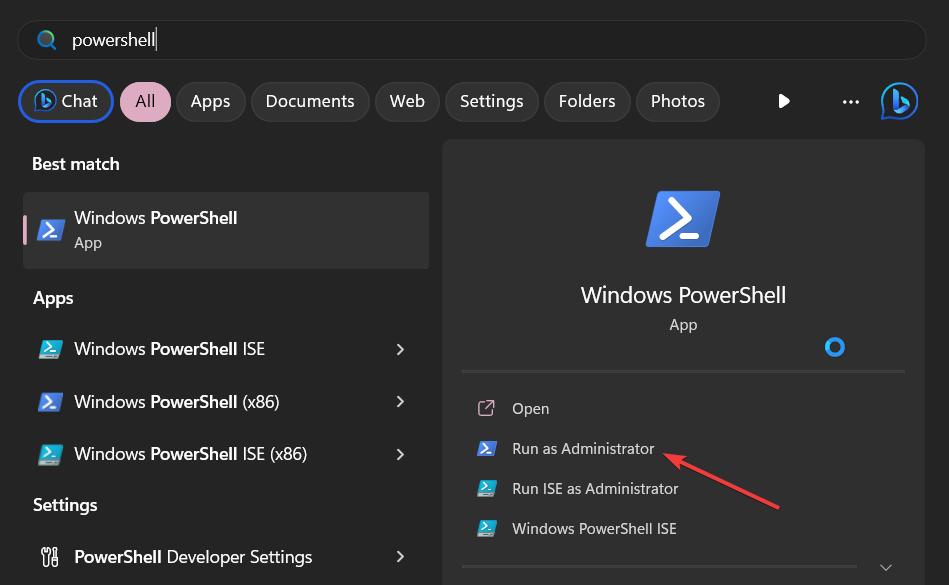
Use the Windows key to launch the Start menu, type powershell in the search bar on top and select Run as administrator from the right search results.
In the Powershell window, type the following command and press Enter to view the disk-related information: get-disk
Now, verify that the PartitionStyle is displayed as MBR.
Apart from this, the HealthStatus column may display Healthy, and OperationalStatus column displays No Media. If these conditions are fulfilled, it will be safe to say that the USB drive is bootable.
So that’s how simple it is to check if the USB drive is bootable so that you begin the fresh installation of the Windows operating system.
Remember these methods may sometimes give unreliable results depending on how the bootable USB drive is created.
Hence, execute each of the methods listed here to be sure about the bootable status of your USB drive.
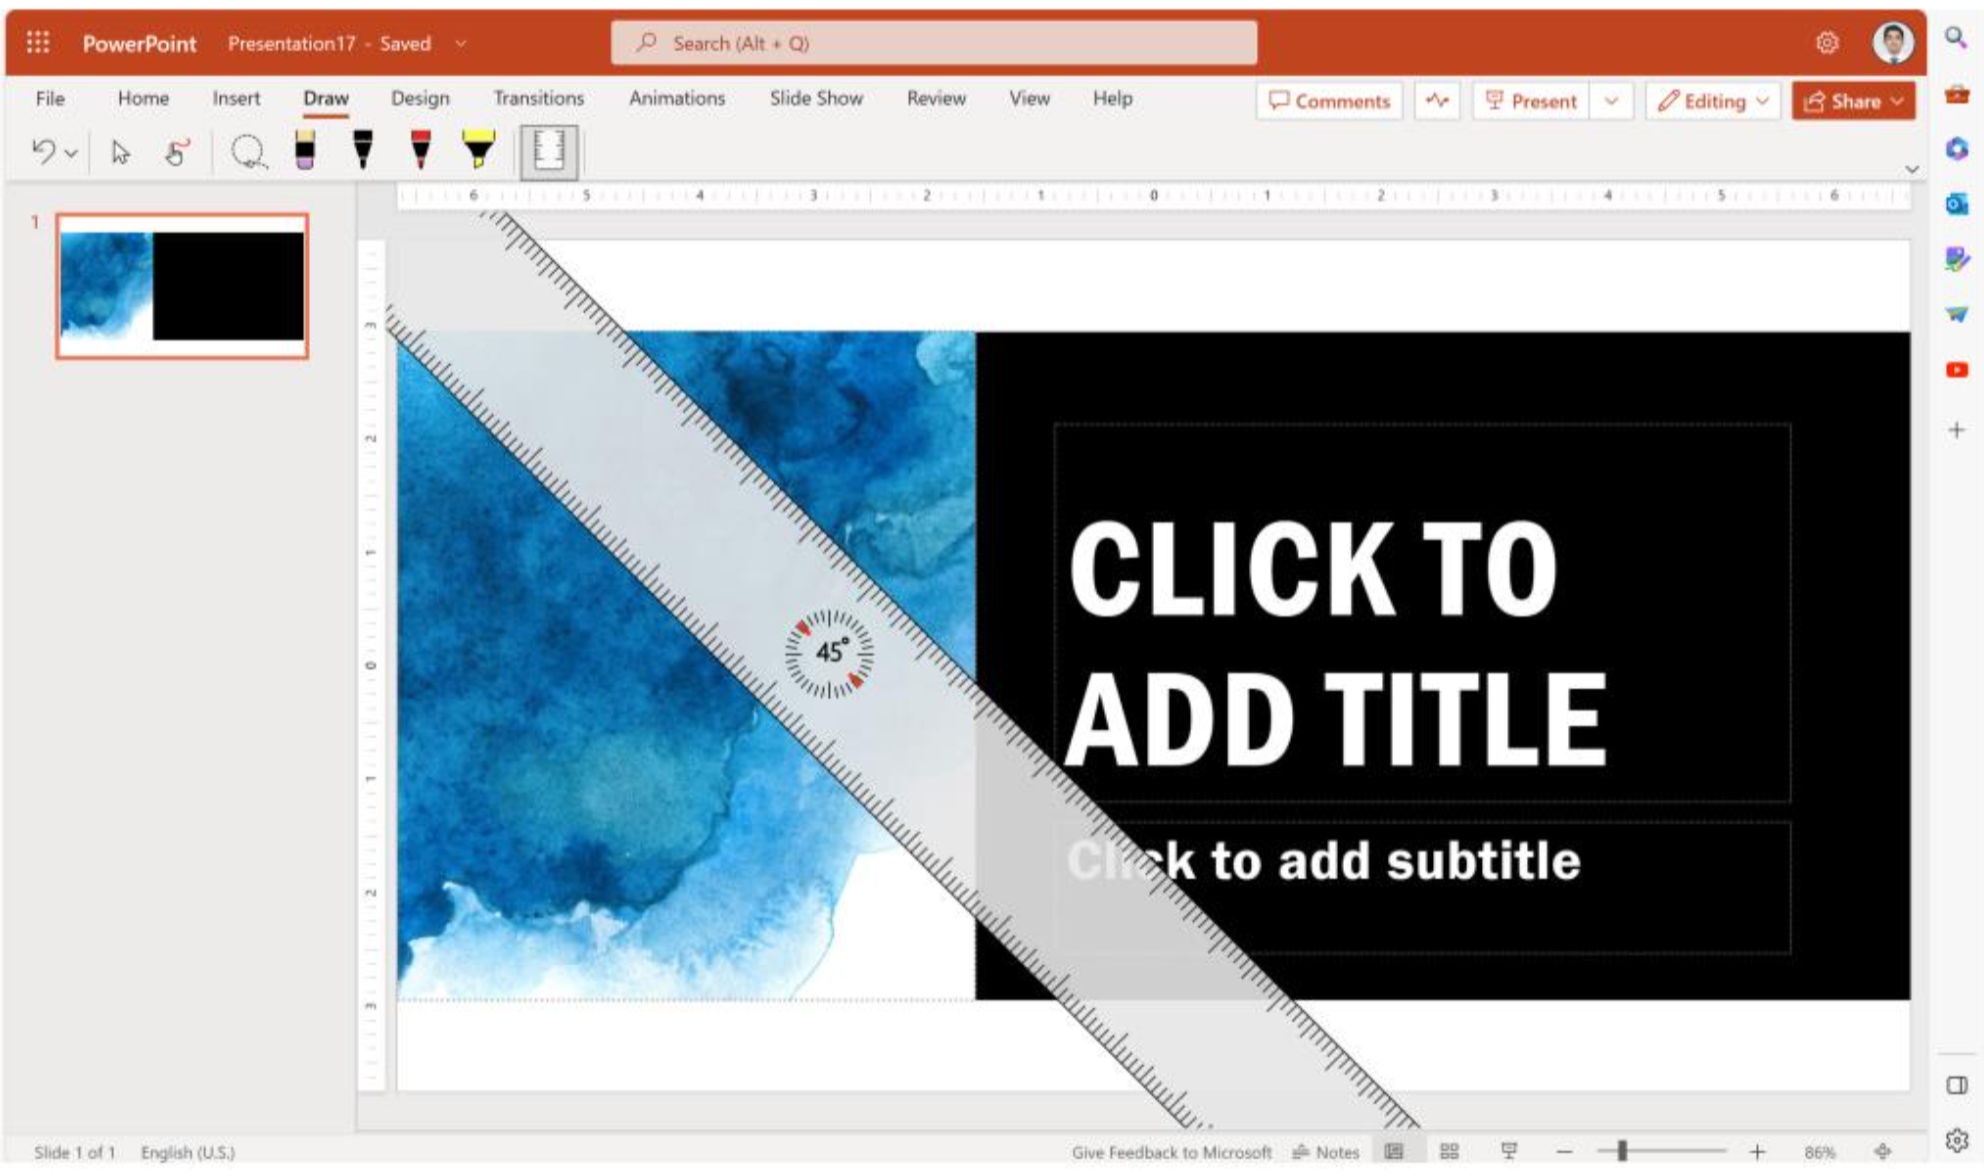
First, the Draw tab has been refreshed and now features a new capability that will allow users to undo and redo ink strokes directly from the Draw tab. Previously, users were forced to navigate through the Home tab to access these capabilities, which was a major deterrent to the user’s productivity.
Additionally, Microsoft has also added a new digital ruler that’s designed to help users create and insert straight lines accurately into their presentations. “You can also use the built-in angular display to create accurate angles between lines,” says the company.
And now, it will be easier for users to draw focus during presentations using the laser pointer on the slideshow. Through the feature, you can temporarily ink on slides to highlight important elements in a particular slide. What’s more, you’ll not need to erase the markings, after a few seconds, they’ll automatically disappear, leaving your presentation in its original state.
Finally, Powerpoint for web users will now be able to draw straight lines using their digital pen and mouse easily. You only need to press the Shift key while inking or highlighting your content.
Microsoft has also indicated that users should be able to partially erase strokes using the Point Eraser tool on the Draw tab soon. Let us know which feature you’re excited most about in the comments.
Microsoft has made a significant announcement regarding the expansion of its Microsoft Store Ads platform to over 150 regions worldwide. This global expansion was unveiled during the company’s annual Microsoft Build 2023 conference, where several updates to the Store Ads platform were showcased. Alongside the expansion, Microsoft also introduced new features and enhancements to simplify the advertising process and expand reach.
The introduction of Microsoft Store Ads in 2022 was a major step in assisting developers in enhancing the visibility of their apps and games. Building on that momentum, Microsoft revealed during Build that the reach of Microsoft Store Ads would extend beyond the United States, encompassing more than 150 regions worldwide starting from June.
This expansion will provide advertisers with an opportunity to reach a wider customer base through Premium Search Ads within the Microsoft Store and Bing search results. Leveraging the vast global monthly searches generated by Bing, which amounts to 14.5 billion, Microsoft Store Ads will now extend beyond the Microsoft Store on Windows, enabling advertisers to trigger their ads on Bing’s Search Engine Results Page (SERP), effectively expanding their reach.
To further streamline the advertising process and save time for advertisers, Microsoft introduced enhanced onboarding experiences for Microsoft Store Ads. These experiences enable advertisers to conveniently set up eye-catching ad placements, with one tool called Premium Search Ads specifically designed to assist advertisers in connecting with customers by providing visual and prominent ad placement. Advertisers can now highlight their apps for download within the Microsoft Store using this feature.
Microsoft also announced several features aimed at enhancing the user experience and simplifying processes. The integration of Partner Center allows for seamless registration for Microsoft Store Ads, enabling advertisers to link their apps with just one click. Searching for app information is now easier, as advertisers can use various parameters such as app name, store I.D., publisher name, or seller I.D.
Moreover, advertisers can now track and analyze app installations, in-app purchases, and customer engagement within the app, offering valuable insights into the effectiveness of their advertising campaigns. Additionally, the Microsoft Advertising Software Development Kit (SDK) empowers advertisers to re-target audiences on the Microsoft Network, providing further control and targeting options.
In summary, the updates announced at Microsoft Build 2023 demonstrate a dynamic shift in digital advertising strategies, with Microsoft Store Ads emerging as a pivotal platform. As the platform expands its reach beyond the United States to over 150 regions and introduces new features, advertisers gain more opportunities to connect with their target audiences. These updates offer a glimpse into the future of advertising, where technology and innovation will continue to reshape how businesses connect, engage, and thrive in the digital landscape.
Encountering errors while using iTunes can be frustrating, and one such error is the 0x80090302 iTunes error. When it occurs, you may not be able to access the iTunes Store.
In this guide, we will walk you through various troubleshooting steps to help you fix this iTunes error to regain seamless access to the features and content within iTunes
What causes the 0x80090302 iTunes error?
There could be various reasons for this iTunes error; some of the common ones are mentioned here:
Firewall or security software interference – A firewall on your PC may block iTunes’ access to the internet or interfere with the communication between iTunes and the Apple servers.
Outdated iTunes version – An outdated version of iTunes can lead to compatibility issues with the Apple servers; it can cause the 0x80090302 error. Update your iTunes app.
Proxy settings – If your computer is configured to use a proxy server, it may interfere with iTunes’ connection to the Apple servers.
Issues with the hosts’ file – The hosts’ file on your computer may contain incorrect or outdated entries that interfere with iTunes’ ability to connect to the Apple servers.
So, now that you know the causes, move to the troubleshooting solutions to fix the problem.
How can I fix the 0x80090302 iTunes error?
Before engaging in advanced troubleshooting steps, you should consider performing the following checks:
Make sure you have a reliable internet connection.
Ensure that you have administrative privileges on your computer.
Check the cable connecting your PC and iPhone for any damage.
Press Windows + I to open the Windows Settings app.
Go to System, then click Troubleshoot.
Select Other troubleshooters.
Now go to Windows Store Apps and click Run.
Follow the onscreen instructions to complete the process.
5. Reset the iTunes Store cache
Launch the iTunes app.
Go to Edit, then click Preferences.
Click Advanced, then Reset Cache button. Now restart iTunes.
6. Verify the network settings
Press Windows + I to open the Settings app.
Go to Network & Internet, and click Proxy.
Under Manual proxy setup, for Use a proxy server, click Set up.
On the Edit proxy server window, toggle off the switch for Use a proxy server.
Click Save.
So, these are the general troubleshooting methods that can help you resolve the 0x80090302 iTunes error. If nothing worked for you so far, we suggest you contact Apple Support.
Besides the hotly-anticipated Teams 2.0 and its bunch of improvements, Microsoft is reportedly working on a UI enhancement for the call delegation feature on the app. So, if you often delegate a call on Teams, you’re in for some good news.
As we’ve spotted from Microsoft 365 Roadmap site under Feature ID 123753, Redmond officials are working to bring a feature that allows delegates to seamlessly switch between different delegator lines they manage.
The updated UI will also provide delegates with access to the call history for the delegator’s line, offering valuable insights into previous conversations and ensuring continuity in communication. Delegates will also have a comprehensive overview of past interactions (history) to keep up with everything.
But, when will this feature start rolling out? And what does “delegate a call” mean on Microsoft Teams?
What is the call delegation feature on Microsoft Teams?
To delegate a call on Teams means to make someone else answer or make calls on your behalf on Teams.
Delegates are granted specific permissions to manage calls on behalf of the delegator. These permissions can include making outbound calls, answering incoming calls, transferring calls, and accessing call history.
To do so, you’d have to set the delegates manually through Teams’ settings – in General, you’ll find an option called Manage Delegates if you’re eligible.
The rollout of these feature enhancements is scheduled to begin in August 2023, with availability across different platforms, including desktop and Android devices. This release is part of the General Availability phase, ensuring a stable and accessible feature for all Teams users.
What do you think about the feature that lets you delegate a call on Teams much easier? Have you taken it for a spin? Let us know in the comments!
A fresh Windows 11 installation can do wonders for your PC, and there are many ways to do it, especially with a USB flash drive. But what if you don’t have a USB flash drive available, and you urgently need to reinstall your Windows?
It might sound like a very improbable scenario, but just in case it happens, and it could, you should know that there is a solution to it.
You can actually install Windows 11 using your Android phone as a bootable USB. Yes, that’s right.
Some users, especially on Quora, have been wondering if you can use your phone to install Windows with it.
And the answer is yes. You can use your phone to install Windows 11. The best part? It’s actually very easy to create a Windows 11 bootable USB using your Android phone.
Here’s how you can create a Windows 11 bootable USB using your Android phone
Before we show you how to do it, you need to take into account three important points:
Make sure your phone has at least 8GB or more of free space. If your phone has an SD card, even better. See if there is space on it, and format it.
Go to the Play Store, search for Ventoy, and download it.
Open it, allow it to access your phone.
Select the MBR or GPT option and enable Secure Boot Support.
Select the Install button to install Ventoy.
Click on the Copy button and choose the path to the ISO file.
Wait for Ventoy to copy it.
And that’s all! You can now connect your phone to your PC and install Windows 11.
Again, make sure the battery is charged when you connect it to your PC. Since the process takes time, it going to put a lot of effort into your phone’s battery, so better make sure nothing interrupts the process.
Installing Windows 11 on your PC should be a really straight line, especially if you’ve done it before. But if you’re not sure, you can always check this guide and everything should be alright.
As you can see, creating a Windows 11 bootable USB on your Android Phone is not hard, and actually, it can be very useful when you don’t have any other means and tools available.
Have you ever tried to install Windows 11 this way? Share your experience with us in the comments section below.
And engaging is living up to its meaning here. Org charts in Visio are more than just a chart to read and follow. You can actually organize your entire organization there, with all the members. You can be specific about their role, their tasks, and overall performance.
So, naturally, the Visio app is coming to Microsoft Teams, as a personal or professional workspace. Inside Teams, you’ll be able to use Visio to create, edit, and view Visio files without leaving Teams.
This way, Microsoft Teams becomes the central hub for all your work-related activities. You can start and finish a project in Teams, without ever closing the application.
So, how can you use the Visio App on Microsoft Teams now that it’s here, you may ask? Well, if you have used Visio before, this integration is not going to be hard to understand. On the contrary, it comes with its own set of exciting features that you should know about.
How to set up and use the Visio app on your Microsoft Teams
First things first, Microsoft announced the integration, but the Visio app is not yet fully available in the new Teams experience, but it is coming over the next months.
Next, for you to use Visio, you need a Microsoft 365 subscription. If you’re a Visio 1 or Visio 2 plan subscriber, you need a Microsoft Teams license to use the app.
Now that we got those out of the way, let’s see how we can set up and use the Visio App on Microsoft Teams.
Add the Visio app to your Microsoft Teams
In your Microsoft Teams, go to Apps and select More added apps.
You’ll get a list of apps, go to the Visio icon and click it to open it.
Here you are on the Visio’s menu, which has a lot of other sections that might interest you.
For easy access, pin/unpin or pop out the Visio app
You can also choose to pin the Visio app to access it on your Microsoft Teams homepage. And, if you’re not a fan of using it inside Teams, you can choose to pop it out. Here’s how.
To pin it, right-click on the Visio app and select Pin.
To unpin it, do the same thing and select Unpin.
To pop it out, just right-click on the Visio app again and select Pop out app.
This is how it looks when the Visio app is popped out as a separate window in Microsoft Teams.
You can add a Visio file as a tab
If you use a Visio file often, you can choose to add it as a tab, so you can access it even more quicker. Here’s how you can do it.
Select the (+) button at the top of your channel.
Go to the Visio icon, select it, and from there add your Visio file as a tab.
In the end, it should look like this.
As you can see, this tab also has a lot of options: you can pop it out, expand it, reload it, rename it, or even remove it.
One more thing you need to know before using Visio in Microsoft Teams is that you can share a Visio file in a chat, but it will also open Visio by default.
You can choose to open it elsewhere if you want to. Specifically, you can open it in Teams, the Visio desktop app, or the Visio web app.
This is all you need to know about setting up and using the Visio app in Microsoft Teams. Make sure to follow this article, as we will update it when new features come out.
What do you think about it? Do you use Visio? What about using it in Microsoft Teams? Let us know in the comments section below.
Understanding the significance of Windows security event logs is crucial for maintaining a secure and stable computing environment. One such event, Event ID 5145, denotes a change in the security settings of a file or folder on a Windows system.
In this guide, we will delve into this event ID, exploring its meaning and implications. We will also provide you with valuable insights into the reasons behind its occurrence and the potential risks it may signify.
What is Event ID 5145?
Event ID 5145 is a security event logged when modifications are made to the permissions, auditing settings, or other security attributes of a specific file or folder on a Windows system.
It provides detailed information about the change, including the affected file or folder, the user account that was modified, the type of modification (such as adding or removing permissions), and the specific security attributes that were altered.
It can be valuable for detecting unauthorized access attempts, tracking changes to file permissions, or ensuring compliance with security policies.
Why the Event ID 5145 appears?
Event ID 5145 occurs due to various reasons; some of the common ones are mentioned here:
User actions – The event ID is triggered when a user intentionally modifies the security settings of a file or folder, including adding/removing permissions, changing auditing, or other security attributes.
Administrative tasks – If system administrators perform administrative tasks, like adjusting permissions for security purposes, & granting access to specific users/groups, it triggers event ID.
Malicious activity – Event ID 5145 may indicate that an intruder is attempting to gain unauthorized access to sensitive files or folders, modifying permissions for malicious purposes.
Software or system process – Certain software or system processes can also trigger Event ID 5145 if they change file or folder security settings as part of their functionality.
Now that you know the reasons, let’s check out the methods to deal with the issue.
How can I fix the Event ID 5145 issues?
1. Review the event details & verify the legitimacy
Press the Windows key, type event viewer, and click Open.
Go to Windows Logs, then Security.
On the right pane, you will get the list of events logged.
Locate Event ID 5145, select, and go to General. Check the security change and other modifications made for the file or folder.
If you think the change was legit, you don’t have to take an action. However, if you feel the alteration was unauthorized or malicious, you must move to the next step.
If you have a backup and multiple files were modified, then the shortest way is to restore the data from it. However, if the change was made on a single file, locate the file, right-click it, and select Properties.
Go to the Previous Versions tab, select the version from the box, and click Restore.
Click Apply, then OK to save the changes.
In the future, to prevent unauthorized modifications and maintain the integrity of file and folder security settings, ensure you follow security best practices.
That includes limiting the user access to sensitive files and folders based on the principle of least privilege, regularly reviewing and updating security permissions, implementing strong password policies, and using encryption where necessary.
You must remember that the specific resolution for Event ID 5145 will depend on the context and circumstances surrounding the event.
To monitor all events on the computer, you must know all about Event Viewer and its use. And lastly, an understanding of the Status 50 error will help troubleshoot things with the PC.
Please feel free to give us any information, tips, and your experience with the subject in the comments section below.
Ignorance is one of the biggest reasons people are victims of malicious attacks. Not being aware or motivated enough to protect your information. There is a need for improved public awareness of what they could be vulnerable to and how to prevent them from coming to fruition.
While Microsoft has done a good job of patching vulnerabilities with each new release, many organizations are still running older versions of Windows which have already reached their end of support.
Because of their widespread use, Windows systems are at the top of the vulnerability list. When writing this article, Windows 10 adoption stands at a whopping 71%. This is more than half of the market share.
A single exploited vulnerability can lead to multiple infected machines and data loss, which can seriously threaten individual users and the entire organization they belong to.
This doesn’t have to be you. You can take charge now and prevent becoming another statistic of a compromised system. In this article, we bring expert opinions to shed more light on this matter.
What are the risks of using unsupported Windows versions?
Cyber threats are increasing in frequency and severity. They are also becoming more sophisticated and targeted. This is evidenced by the recent spate of ransomware attacks that have hit large organizations and small businesses. Most notably, DEV-0586.
The geographic distribution of customers notified of all nation-state threat activity
In the world of computers and software, there are two main types of users: those who are tech-savvy and those who aren’t.
The former group, they know that Windows is a great OS. It isn’t perfect, but as long as you’re happy with its performance, your version doesn’t matter.
For the latter group, it can be difficult to understand why anyone would choose not to use the latest version of Windows.
If you have been following the news for the past few years, you may have heard about several major security breaches that have affected millions worldwide.
What these breaches have in common is that they were all caused by computers running an unsupported version of Windows.
And while hackers have carried out some of these hacks, others were caused by human error. Businesses should not be running an unsupported operating system. This is especially true if they want to protect their data and keep customers’ information safe.
As the expert Igal Flegmann, Co-Founder & CEO at Keytos reiterates:
Having security education in your organization is also very important so users do not click phishing emails and report attacks to your security team.
Suppose you’re not conversant with the severity of the risk associated with running a version of Windows that has already reached its end of support, especially for a business. In that case, we break it down for you.
Security risks
It’s been reiterated over and over how running an unsupported OS is detrimental to your security. But just how dire are the risks?
The most important reason you should upgrade from an unsupported version is that Microsoft will no longer release security updates for these versions.
Unsupported software leaves your sensitive data vulnerable to attack by hackers. They can easily search for vulnerable systems that have not been patched.
According to experts, phishing is the most common entry point. Therefore, setting up Windows 11 MFA will go a long way in thwarting these attempts.
This is just the start. You will need more security solutions such that if one fails, your system will still be secure. Depending on one is suicidal because you risk losing your data if it is compromised.
In Joe Stocker’s expert opinion, Founder and CEO of Patriot Consulting and Microsoft MVP:
No security solution is perfect. It is important to have a layered security approach that includes a combination of technical and non-technical controls.
You also need to stay vigilant and have the ability to decipher an attack from miles away.
Otherwise, it’s just like having strong metal gates for protection but forgetting to lock them.
But this is not the only worry when it comes to obsolete OSes.
System failures
If your company is running an unsupported OS, you risk experiencing a system failure when a new vulnerability is discovered.
This could result in loss of data or downtime for your business operations. If you cannot quickly remedy the situation by patching the affected systems, new malware will proliferate throughout your network.
According to Joe Stocker:
Keeping devices patched, and using AV and EDR will reduce the exposure and risk for malware to run on an endpoint.Windows ASR, Applocker, WDAC, or Windows 11 22H2 “Smart App Control” can further reduce the risk of malware.
As seen from the effects of the DEV-0586 security vulnerability, it resides in the system drive and has the power to overwrite the Master Boot Record.
The MBR is the first sector of a hard drive, and it contains information about how to launch and run the operating system. When an MBR-based attack occurs, the bootloader’s ability to load the OS will be compromised, and the computer might not be able to start up normally.
This is why Chris Karel, Security Operations Manager for Infinite Campus recommends that you:
Have consistent backups that can’t easily be deleted or destroyed. And regularly test them to make sure they work, and cover what you need.
The performance of older versions of Windows becomes worse over time. This is because newer hardware requires more resources from an operating system than older hardware.
For example, if you install a new graphics card in your PC that supports DirectX but you’re still running an old version of Windows that doesn’t support these new APIs yet, games may run much slower than they would if you were running a newer version of Windows.
Many applications require specific versions of Windows to run properly, so if an application isn’t compatible with your current version, it may not work properly or at all. This could cause issues for users and IT administrators, who must find workarounds for these compatibility issues.
Chris believes that the only solution is:
Keeping systems patched and up to date. Both the operating systems (Windows, Linux) and the software that runs on it. (Exchange, web browsers, firewalls, etc) Especially with anything exposed to the Internet.
Essential Windows hardening techniques
Hardening refers to the process of making systems more secure. It’s an important step in the overall security process because it helps prevent unauthorized access, unapproved modification, and other attacks on systems and data.
Some of the hardening techniques you can employ include:
System configuration
The standard system configuration is often not secure enough to withstand a determined attacker. You can configure your system to be more secure by changing default configurations, setting up firewalls, and installing antivirus software.
The following are some important steps that can be taken to configure your system:
Changing default passwords – By default many operating systems have a default password. If someone gets hold of your computer, they can log into it using this default password.
Disabling unneeded services/applications – This reduces resource usage (memory and CPU), thus improving the performance of your machine.
Setting up system policies – Policies help in configuring an organization’s systems according to specific requirements. The main objective behind using these policies is to ensure that all systems are set up so that they can be accessed by authorized personnel only.
After all, Igal reiterates that:
The best way to protect organizations in this zero-trust world is by reducing the surface area and removing the security responsibility from the average end user.
User access controls
User access controls are the first line of defense against attacks and should be implemented to prevent unauthorized access to systems.
The idea behind UAC is simple. Before running an application downloaded from the Internet or received in an email, Windows asks the user if this action should be allowed.
This means that if someone tries to install malicious software on your computer, they will need physical access to your PC and must manually approve each installation step. It makes it much more difficult for them to infect your computer without your knowledge.
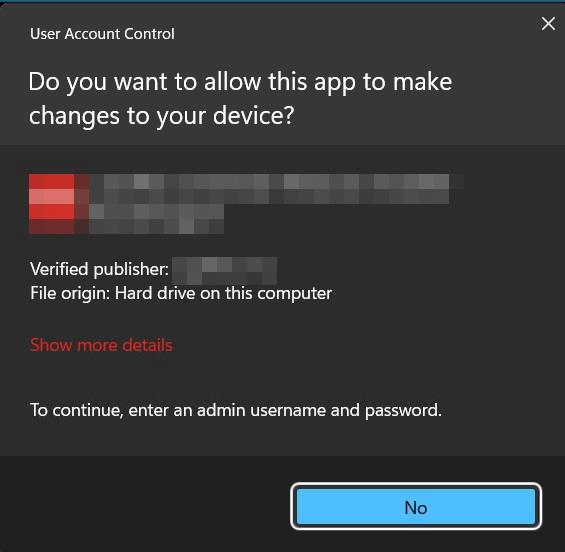
We’ve seen some users disabling the UAC prompt because it is invasive every time you try to run an app, but it is obvious they haven’t thought about its repercussions. The good news is that Microsoft has made strides in ensuring this is something you can control.
You can use Windows’ built-in User Account Control (UAC) feature to help keep malware and other malicious programs from running on your computer. It is enabled by default, but you can adjust its settings to customize how it works.
Network security
The security of all systems within an organization is of paramount importance. However, network security is critical as it provides the mechanisms to protect other systems from attack.
This broad term encompasses a collection of techniques, processes, and technologies used to secure computer networks and their systems and devices.
Network security aims to protect information from unauthorized access or disclosure. This is done by using a combination of hardware and software to enforce rules that users, administrators, and programs on the network must follow.
These rules typically include authentication, authorization, encryption, and audit trail. To start off, you’ll need to install a firewall. Firewalls are one of the most important network security tools.
They can be software or hardware devices that control access to a network or a computer, providing a layer of protection from the Internet or other untrusted networks.
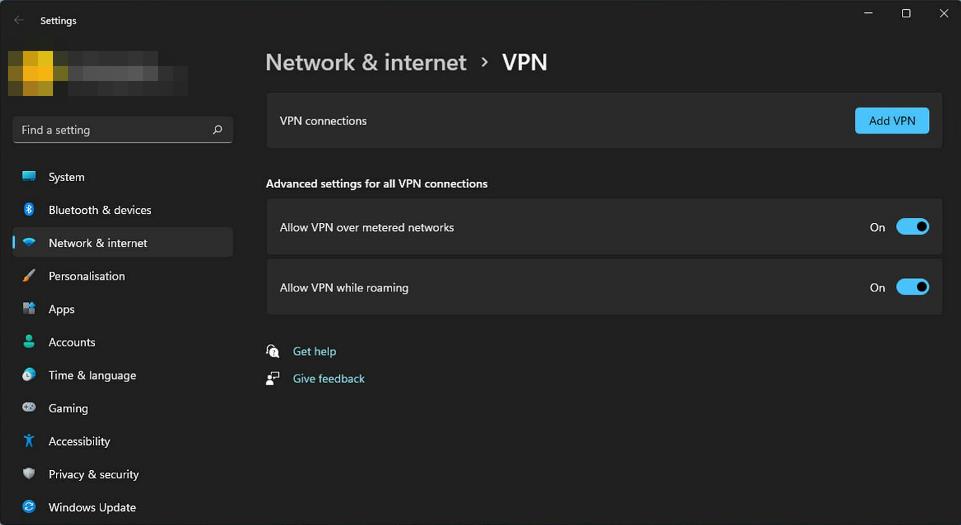
Another tool you’ll need is a VPN (virtual private network). This encrypted connection allows you to connect securely to an external server for remote access to your internal network.
The main reason why VPNs are considered a Windows hardening technique is that they can provide additional security when combined with other technologies like firewalls and intrusion detection systems.
They use encryption and authentication techniques to ensure that all traffic is secure. This makes it much more difficult for an attacker to gain access to your system to steal or damage information.
In addition to the traditional network security mechanisms, several new technologies that extend beyond traditional network security measures are emerging today. These include cloud computing and virtualization software.
Your network security system needs to be comprehensive, diverse, and flexible to adequately respond to the dynamic needs of today’s technology trends.
Application hardening
Application hardening is a set of best practices that improve the security of your applications. It’s not just about ensuring your system is secure but also that the services that run on it are secure.
It involves systematic processes and procedures to ensure that applications are secure and resilient to attacks. This is one of the most effective ways of reducing the surface area for vulnerabilities in your applications.
Shiva Shantar, Co-Founder and CTO for ConnectSecure believes that:
Weak passwords, outdated protocols, and unpatched systems in combination with untrained staff that click on malicious links are the reason for the vulnerability to spread.
While you can implement all the Windows hardening techniques possible, recovery is critical to the security process. A recovery plan ensures the company can bounce back from a breach quickly and efficiently.
As a safety net, ensure you also run tests periodically on this plan to ensure it works as needed.
Igal emphasizes the importance of a recovery plan:
While prevention is paramount, having a strong recovery plan that gets tested periodically is also a key component of any cybersecurity plan.
Continuous vulnerability management
Continuous vulnerability management is a proactive approach to security that helps organizations avoid security breaches by proactively monitoring for emerging threats. The goal of continuous vulnerability management is to prevent cyberattacks before they occur.
Vulnerabilities can occur anywhere in your network, from your firewall to your web server. Since there exist many different types of vulnerabilities, you should also employ different systems to detect them.
As the threat landscape continues to evolve, so must your security strategy. It’s not a question of if your organization will be breached, it’s a matter of when.
The basic components of a vulnerability management program include:
Identification – Gathering information about potential threats and weaknesses in an organization’s systems or networks that could be exploited by those threats.
Analysis – Examining technical details about each identified threat to determine whether it represents a real risk to an organization or not.
Prioritization – Ranking identified threats according to their severity or likelihood of occurrence. This is done to allocate scarce resources to those that pose the greatest risk to the organization.
Remediation – Implementing controls to eliminate or reduce risks posed by identified vulnerabilities.
Igal raises awareness on cybersecurity:
Cybersecurity is unfortunately expensive in both time and money. But it’s important, so I’d also recommend that companies take it seriously and employ staff focused on security.
Vulnerability scanning
This is a process in which the security of a system or network is checked for any loopholes or vulnerabilities. Vulnerability scanning helps identify any flaws in the system and advises on how to fix them.
Organizations can ensure that their systems remain secure from malicious attacks by having a vulnerability scanner in place.
This is another process that is important for maintaining a secure environment. It involves installing patches for known bugs and vulnerabilities in software applications or operating systems.
It ensures that all systems remain up-to-date with the latest technology updates and that any vulnerabilities are resolved before hackers exploit them.
Incident response
This refers to responding to and recovering from cyber attacks within an organization’s network or system.
Incident response is essential because it helps organizations recover from cyberattacks quickly and efficiently. All this is done while preventing further damage to their systems by hackers, such as ransomware outbreaks or data breaches that could potentially lead to financial losses due to data theft.
Secure Coding Practices
Secure coding practices are a set of coding guidelines that help programmers write more secure code. It is important to note that secure coding is not about preventing all vulnerabilities.
Instead, it focuses on reducing the risk of introducing new vulnerabilities and the impact when vulnerabilities are exploited.
Here are some ways in which secure coding practices can mitigate Windows vulnerabilities:
Secure code review – A secure code review involves reviewing source code for potential security issues before the product is released into production. This helps identify potential problems before they become an issue, thus reducing the likelihood of future attacks against these products.
Test-driven development – Test-driven development (TDD) is a software development process that ensures each unit has been tested thoroughly before being integrated with others and deployed into production environments, thereby minimizing errors due to integration issues at later stages.
Adhering to coding standards is not just about making your code more readable for others; it also helps you write fewer bugs and spend less time maintaining your codebase over time.
Shiva’s sentiments on the issue remains:
Secure coding is not a good practice but a mandatory one.
Cybersecurity education and awareness
Cybersecurity has become a top concern for all organizations — from small businesses to large enterprises — in recent years.
Cyberattacks are increasing in frequency and sophistication, making it more important than ever for companies to have good cyber security tools in place. And while most businesses recognize this need, many don’t know where to begin when it comes to addressing it.
A comprehensive cybersecurity education program can help solve this problem by providing employees with the knowledge they need to identify potential threats, understand how these threats could impact them and their company, and know how best to respond when an attack occurs.
This type of education also helps align employee behavior with company policies related to cybersecurity compliance and risk management.
In addition, cybersecurity education helps reduce costs associated with breaches by increasing the likelihood of identifying and containing them early in their lifecycle.
One of the most effective ways to mitigate risk and prevent security incidents is by promoting a culture of security awareness. This involves empowering your employees to proactively identify and report potential security threats promptly.
There are different ways you can go about achieving this:
Reporting mechanisms – Create a dedicated internal network for reporting suspected incidents. This should be separate from your corporate network so it doesn’t create a single point of failure for the organization.
Employee empowerment – Train employees on identifying suspicious emails or websites and reporting them if they notice anything unusual.
Security training cannot be a one-off event – Security training has to be repeated regularly so that people keep up with new threats and risks that emerge over time.
Conclusion
As more and more organizations downplay the significance of Windows end support, their network and technology risk exposure increases. Fierce attacks that abuse security features in unsupported devices or operating systems have become a high probability.
What is clear from the various risk scenarios here is that the only sure way to safeguard your organization from increasing digital risks is to migrate from legacy Windows OS, critical applications, and systems to supported Microsoft solutions now rather than later.
One thing is for sure. If you’re running a business, you need to take heed of the computing and security changes happening right now. We’ve discussed how upgrading an operating system can pose hidden dangers and the significant costs of neglecting to upgrade.
The rest is up to you to ensure you implement them. Regarding using unsupported OS, taking them off the network is best for you. If it’s absolutely necessary to use them, ensure they’re safely tucked away from online risks.
That was quite a mouthful, but we hope it has been an insightful session and you now understand the implications of stagnating on unsupported Windows versions.
Is your organization up-to-date with your OS? What steps have you picked up from this article that could steer you in the right direction of securing your systems? Let us know in the comment section.
However, Teams Chat still is a big part of Microsoft Teams, so this feature will allow for faster and more efficient communication between workmates.
How will you be able to stream videos in Teams chats
Microsoft makes it pretty easy for you to stream videos in Teams chats and channels. For starters, your videos or those of your organization should be in OneDrive or Sharepoint.
From there, these videos will automatically be embedded in Teams chats and channels. You will be able to preview and play them directly there, in Teams.
Probably one of the most exciting things about this new feature is that it won’t open any browser windows to play the videos. The videos will play in Teams, in a seamless and immersive way.
That’s more than enough to keep everything organized and accessible.
With this being said, Microsoft Teams has what it takes to be the best app for working. The new AI features look very promising. And exciting, too. Any working meeting will automatically benefit from intelligent recap and task suggestions.
If you’re a manager, AI will help you sort out tasks to give to your team. If you’re on the operational side of things, these features will make it very easy for you to follow along.
What do you think about the current state of Microsoft Teams? Do you use it? Let us know in the comment section below.
You will come across the Runtime error 57121 when you are trying to open the Early Power Estimator (EME) in MS Excel 2007 or later.
In this guide, we will show you a list of solutions that will resolve the Runtime error 57121 related to MS Excel permanently. Let us check out the solutions.
What causes the Runtime error 57121 in MS Excel?
As already mentioned, the Runtime error 57121 in MS Excel will arise when you run the Early Power Estimator (EME) in MS Excel 2007 or later. There are some other reasons that could trigger this problem, which are listed below:
ActiveX settings – If the ActiveX settings are disabled in MS Excel then, you will come across the Runtime error 57121.
Problem with MS Excel – If MS Excel is itself facing some underlying issues, then you will get multiple errors including one at hand.
Let us now apply the solutions that will help resolve the Runtime error 57121 in MS Excel.
How can I fix the Runtime error 57121?
1. Disable the proxy
Press the Win key to open the Start menu.
Type command prompt and run it as an admin.
Type the below command and press Enter: netsh winhttp import proxy source=ie
Reboot your PC.
This solution applies to the Runtime error 57121 associated with the message Application-Defined or Object-Defined. You can easily disable the proxy and check if this resolves the issue or not.
2. Use a dedicated DLL fixer
DLL or Dynamic Link Library-related errors can be a bit difficult to fix even though the problem is often mentioned in the error message.
Fixing the DLL error is important as you won’t be able to use the associated program without interruptions. In such a case, we would suggest you download one of the best DLL fixers.
Reinstalling a program such as MS Office allows you to remove the problematic version of the program and get the latest version without performing an update. So, simply reinstall the MS Office program and check if this resolves the Runtime error 57121.
Today, we’ll show you how to update your graphics driver in Windows 11 and get the best out of it.
You must update your graphics frequently to have the most optimal performance possible. Not only for gaming and graphic design, but also for day-to-day simple PC tasks.
Check out the 5 methods explained below.
How do I update my graphics drivers?
Here’s a quick video summary. Much more details and step by step instructions, below.
1. Using a third-party driver updater
To update your display driver in Windows 11, you can always rely on specialized driver updating software. These tools allow you to run a scan and quickly identify the driver you need.
Hence, this solution is safe and can guarantee increased system performance and up-to-date drivers without causing system malfunctions.
2. Using built-in tools
2.1 Check what graphics drivers you already have
Click on the magnifying glass icon to bring up the search bar.
Type in System Information and click on the first entry you see to open the System Information app.
Under System Summary, click on Components.
Then click on Display.
Locate the Adapter Type and Adapter Description to see your graphics card model. In this example, the graphics card comes from the virtual machine used, whereas you typically see an Intel card.
2.2 Update the graphics drivers via Settings
Updating the graphics drivers though Settings it’s easier with the following step-by-step guide:
Bring up the Startmenu and click on the Settings icon.
2. Click on the Windows Updatetab on the left side of the Settingsmenu.
3. Select Advanced options.
4. ClickOptional updates.
5. Click on the top drop-down menu to see if any driver updates are available.
6. If there are any updates, click the update to highlight them.
7. Then click the Download & installbutton.
8. The driver will begin downloading and will finish after a few minutes.
9. Press the Restart now button to finish the installation.
3. Update the graphics driver using Device Manager
You can easily update the graphics driver Windows 11 using the built-in Device Manager. This tool can automatically search for drivers for your GPU, to ensure you are always up to date with the newest updates.
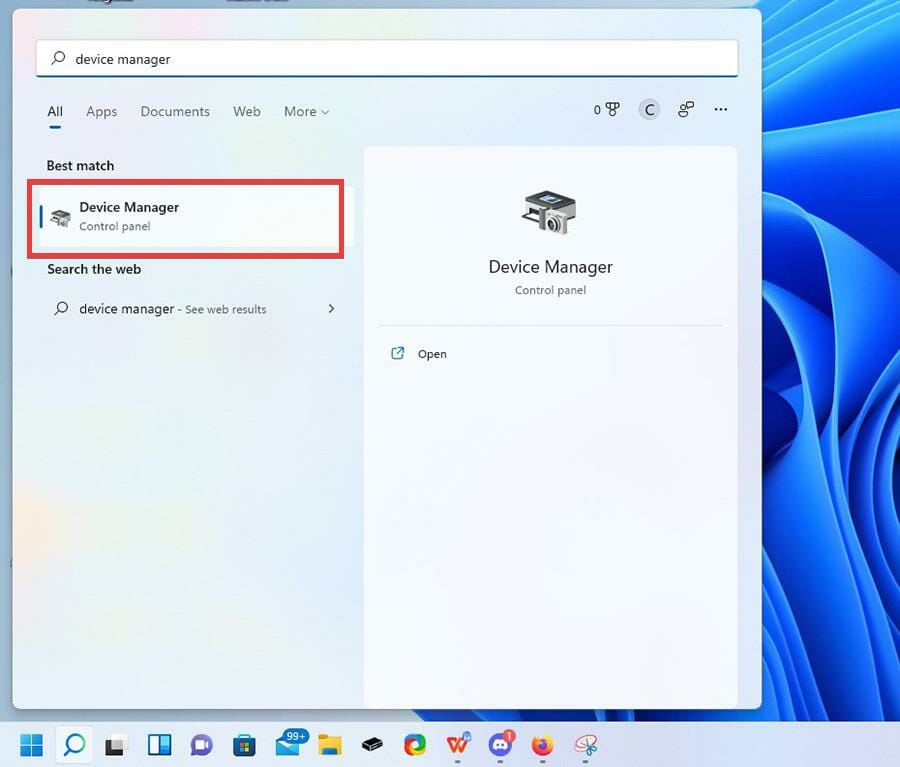
1. Open up the search bar in the lower left side of your screen and type device manager.
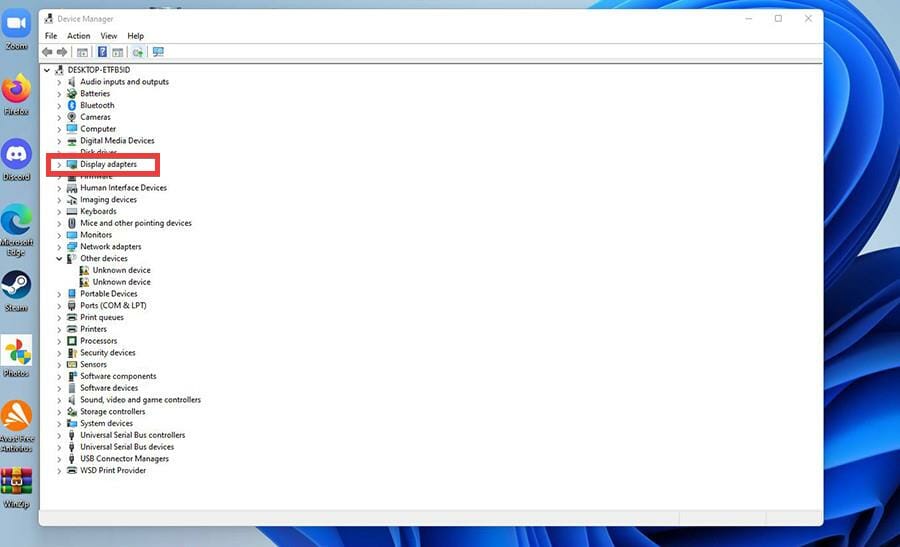
2. In the Device Manager, click on Display adapters.
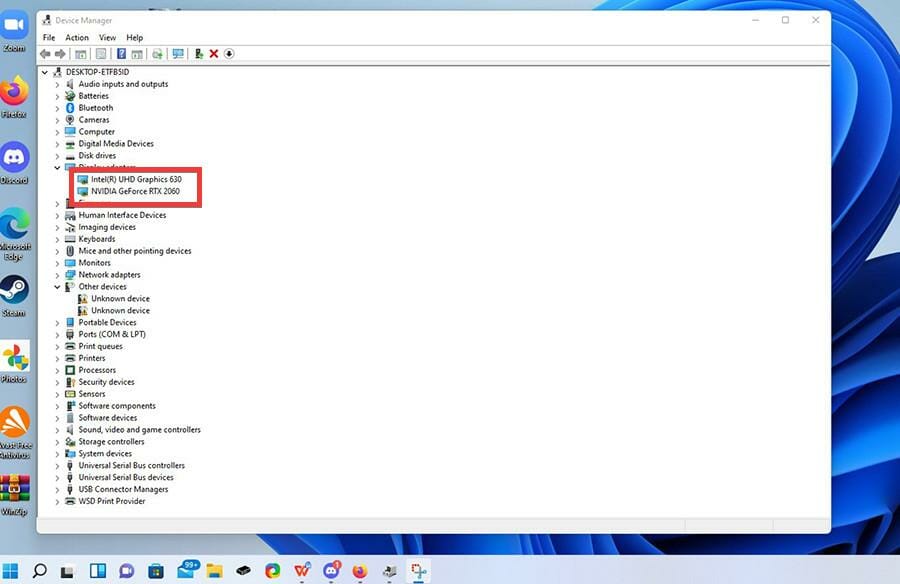
3. Here you will find your Windows 11 computer’s graphics card or cards.
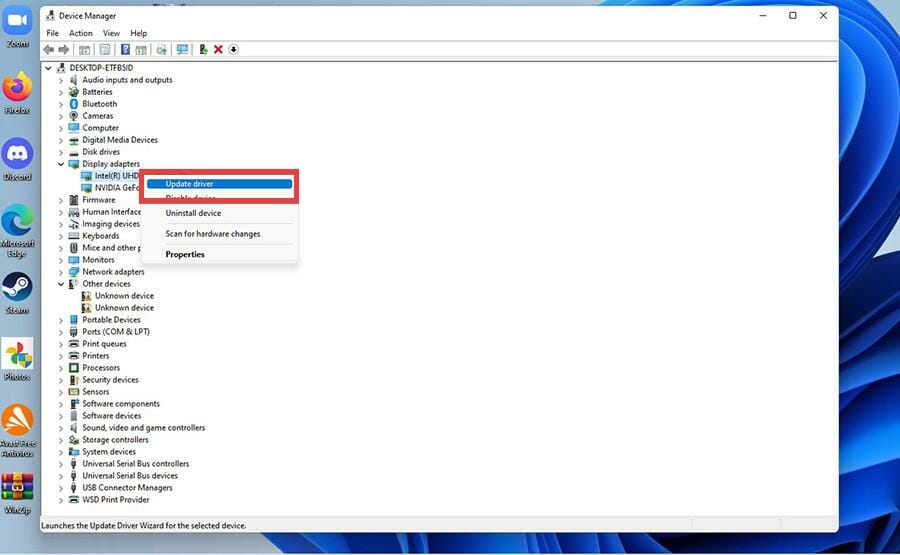
4. To update a graphic card from the list, right-click on it and select Update driver.
5. A window will appear asking how you want to search for available drivers.
6. Select Search automatically for driver to make it easy.
7. At that point, the Device Manager will automatically download and install the drivers.
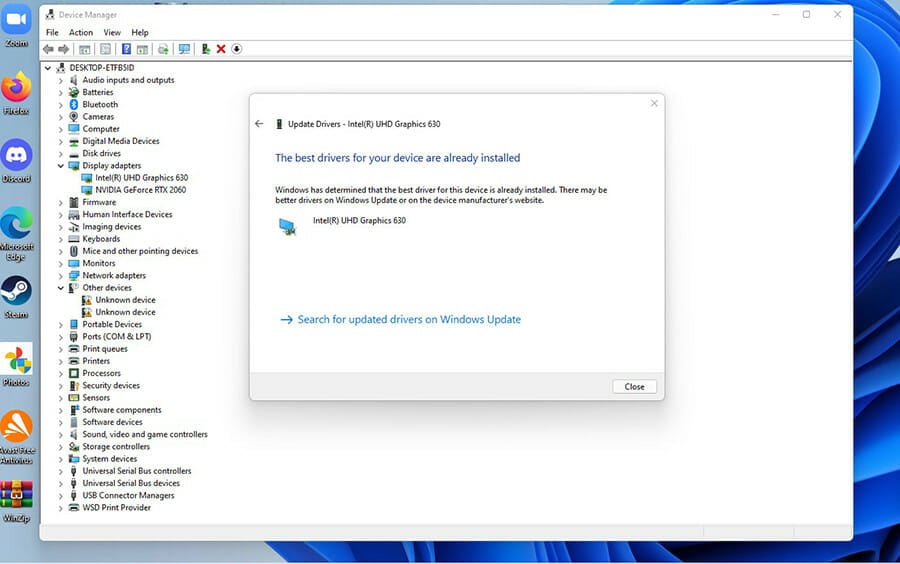
8. The window may tell you that the best drivers are already installed. In that case, just close the window.
The built-in Device Manager can easily update the graphics driver Windows 11. This tool can automatically search for drivers for your GPU to ensure you are always up to date with the newest updates.
Click Download now to download the Intel Driver & Support Assistant.
Click Save File in the small window that appears.
Go to the location of the downloaded app and double-click it.
Click Install and run through the installation wizard.
After installation, click Restart to finish.
Open the Intel Driver and Support Assistant app.
In the app, select Support on the left-hand side.
Select Download Graphics Driver to download the latest drivers.
You will go back to the Drivers and Software page. Select Get started again.
Here you will now see all the drivers available for download. You can choose which ones you want or select Download all, which is what this guide will select.
Give it a few minutes to download.
Click Install on a driver.
A small window will appear, asking you if you want to upgrade. Click Yes.
Run through the installation wizard.
It may ask you to choose a setup type. Select Typically,or you can customize the installation.
You can learn more about the full Intel GPU update process by reading the detailed guide on updating Intel graphics drivers.
5. Reinstalling the graphics driver
Return to the Device Manager and click on Display adapters. In this example, the guide will reinstall Intel UHD Graphics 630, but the instructions are the same for all drivers.
Right-click on the graphics card and select Uninstall device.
A small window will appear. Click the box next to Attempt to remove the driver for this device.
If you want to manage the driver separately, click Device by the driver in the small window.
Click the Uninstall button.
Now head over to the official download page of the driver’s respective manufacturer. This guide will go to Intel’s page, but there’s also AMD and NVIDIA.
Locate the drivers you uninstalled. In this case, it’s Intel UHD Graphics 630.
Locate the drivers and click Download.
Click Save File when the small window appears.
After downloading, go to where the file is located and double-click it.
In the small window that appears, click Run.
A graphic driver installer will appear. Begin the installation.
Run through the installation wizard and the instructions of your respective driver.
After installing, restart your computer.
You can check if the installation was successful by going back to the Device Manager and seeing if the Windows 11 graphics driver problem is solved.
That’s about it. Now your graphics card show work seamlessly with your up to date drivers. If you want your audio hardware to work well too, consider updating your audio drivers too.
Windows 10 may be out of style, but Windows 11 computers are expensive so you may be holding onto that old laptop. Until the day arrives when you buy a Windows 11 machine, we recommend learning how to update drivers on a Windows 10 computer.
Before you go, check our GetMyDrivers review to learn how to update all your drivers quickly and automatically.
Feel free to comment below if you have any questions about other Windows 11 apps. Also, leave comments about what reviews you’d like to see or information on other Windows 11 features.
Understanding Event ID 4724 and its implications are crucial for maintaining the security and integrity of user accounts within a Windows environment.
In this guide, we will explore the Event ID in detail, shedding light on its meaning and significance. We will investigate the reasons behind its occurrence and recommend actions to address the problem.
What is Event ID 4724?
Event ID 4724 is an information event that indicates a user’s attempt to reset an account password for another account.
This entry provides detailed information about the account reset, including the account name, the user performing the reset, and the date and time of the reset attempt.
It can help administrators identify who initiated the account reset, which can be useful for compliance, security auditing, and troubleshooting.
Why the Event ID 4724 occurs?
There could be several factors causing the event ID 4724; some of the common ones are:
Routine password maintenance – The Event ID may appear due to system administrators or IT personnel conducting standard password maintenance activities.
User account compromise – It indicates an attempt to reset an account that has been compromised or is suspected of being compromised.
User account lockout – An administrator may initiate a password reset to restore account access when a user’s account becomes locked due to multiple failed login attempts.
Privileged user actions – When a privileged user, such as a system administrator, resets the password for another user account as part of their role and responsibilities, it can trigger the error.
Now that you know the causes of the Event ID, let’s dive into the solutions to fix it.
What can I do if Event ID 4724 appears?
1. Verify the legitimacy
Press the Windows key, type event viewer, and click Open.
Go to Windows Logs, then Security.
On the right pane, you will get the list of events logged.
Locate Event ID 4724, select, and go to General. Check the account name and the user performing the reset with your organization’s records or policies.
If the account reset looks suspicious, you can conduct a thorough investigation to determine if any security breaches or compromises have occurred.
With the solution above, you may check if the account reset attempt was authorized and performed by an administrator or privileged user. It’s the first step in dealing with Event ID 4724.
2. Assess the account activity & take immediate action
Press Windows + I to open the Settings app.
Go to Accounts, and click Sign-in options.
Click Password and then Change.
Now enter the current password and click Next.
Enter the new password and confirm the password, then click Next.
Click Finish to complete.
To understand more about the account, check the recent login history and activity logs to identify any unusual or suspicious behavior. If you see signs of unauthorized access, changes to account settings, or unusual login patterns, the account has been compromised.
If the account belongs to a user, you must promptly inform them about it. You need to ask them to change the password of their user account; follow the steps above to change the password of the account.
So, these are the things you can do if you see Event ID 4724 in the Event Viewer. If the account reset attempt indicates a potential security breach or compromise, report the incident to the appropriate IT or security teams and escalate it for further investigation and remediation.
To monitor all events happening on the computer, you must know all about Event Viewer and how to use it.
Feel free to provide any information, tips, and your experience with the subject in the comments section below.
Want to draw on a PowerPoint slide? We’ve got some good news: Microsoft has responded to extensive user feedback by enhancing the drawing functionality within the app. Now, users of the web version can enjoy an improved drawing experience, offering features such as the ability to undo and redo actions, access to a digital ruler, and the availability of temporary ink for temporary markings on slides.
As we’ve noted from Microsoft’s official release note, Redmond officials are also working to bring the ability to partially erase strokes using the Point Eraser tool, which will be available in the second half of 2023 to everyone, and many more.
Drawing on PowerPoint slides allows you to enhance your presentations with visually engaging elements. Whether you want to highlight important points, create diagrams, or add a few artistic flairs here and there, drawing on PowerPoint makes your presentation a lot easier.
So, would you like to take this feature for a spin? Not all users have this feature opted by default, so you’d need to manually activate it from the settings. Here’s how.
How to enable the feature to draw on a PowerPoint slide
1. Open a PowerPoint file (.pptx)
2. Double-click on Home, then click Customize the ribbon.
3. Select All Tabs.
4. Scroll down until you find Ink. Click on it, then Add, then OK.
5. Click on Pen to start drawing with your mouse or your stylus pen.
In the meantime, we’ve also reported that the web version of the app just welcomed a new feature that lets users insert a video in their presentation, so it’s worth checking out.
We all know about the competition between Microsoft and Google, so there’s no need in going into that any further.
Even though Googe’s Chrome browser is a lot more popular than Edge, the tech giant is constantly looking for new ways to make users jump ship.
Even though, in February, Microsoft pushed out full-sized ads for its Edge web browser when people used Edge to download Google’s Chrome browser, it was apparently not enough.
Using Edge to search for Chrome will not yield any results
We don’t know if you heard yet, but there are online reports that indicate a new Microsoft campaign to get users to stop using Chrom and switch to Edge.
Apparently, when you now type Chrome in the Edge search bar, the browser will generate what looks like a Bing Chat AI answer.
Yes, instead of being taken to the Chrome download page, you will now be given a lecture on why Edge is actually better at its job.
These reports indicate that this answer was received by both people in different parts of the US, as well as outside the US.
So, now the question isn’t about the scale of the operation, but about the audacity and the lengths Microsoft is willing to go sabotage the competition.
Thus, the search didn’t provide an answer about Chrome, as it was an ad about Bing search, with the headline Bing: The Search Engine That Does More Than Just Search.
Clearly, Microsoft decided to put in an ad for Bing as an AI search answer instead of giving an honest search result when using Edge to find info about Chrome.
As you would have imagined, the Redmond company was asked about this blatant ad masquerading as an AI chat search result.
And, Microsoft’s product marketing director Jason Fischel offered a response that really didn’t please a lot of people, to say the least.
We often experiment with new features, UX, and behaviors to test, learn, and improve experiences for our customers. These tests are often brief and do not necessarily represent what is ultimately or broadly provided to customers.
The issue has been solved, apparently, and you will no longer receive that embarrassing ad when searching for Chrome from your Edge browser.
It seems that the tech giant continues to try to push out ads for Bing in ways that look and feel like the company is desperate to promote Bing search in any way possible.
What are your thoughts on the matter? You can leave your opinions in the comments section located right below.
Multiple users have reported getting the Runtime error 62 with an error message that reads Input past end of file. This issue basically happens when Windows fails to load or crashes while running.
In this guide, we will share with you all the details about what the Runtime error 62 is and what causes this problem along with the solutions. Let us check out the fixes.
What is Runtime error 62?
The Runtime error 62 Input past end of file error can appear almost randomly. The main two reasons for this issue are because of a virus infection or the deletion of important system files. This will pop up when the Windows OS is running.
Do note that there are various common reasons that could trigger this error, some of which are listed below:
Corrupt or missing system files – The Runtime error 62 can pop up when an important Windows system file is corrupt or missing from your PC.
Your PC is infected with a virus – Virus or malware infection can duplicate or delete many of the important files on your PC.
Program glitches – The issue could also arise from a bug or glitch in the recently installed application or updated program.
Bad graphics driver – Outdated or corrupt graphics drivers are also responsible for the Runtime error 62 on a Windows PC.
Let us now check out the solutions that will help you resolve the Runtime error 62 Input past end of file error.
How can I fix the Runtime error 62?
1. Re-install the program
Press the Win key to open the Start menu.
Open Control Panel.
Select Programs and Features.
Click on the program and hit the Uninstall button.
Click OK to confirm your actions.
Restart your PC.
Visit the official website of the program you just uninstalled.
Download the file and install it on your PC.
Re-installing the problematic software brings two benefits. First, you are getting rid of the program that might be missing some important files, thus, giving you Runtime error 62.
And second, when you install the program from the official website, you will be installing the latest version of the program, which might have fixed the underlying bug causing the issue.
2. Scan your PC for viruses
To open the Start menu press the Win key.
Type security and open Windows Security.
Click on Virus & threat protection.
Click on Quick Scan.
You can also select Scan options and click on Full scan for a deep scan.
Apply the prompted fixes and restart your PC.
You should make sure that the Windows Security tool is enabled on your PC to protect your PC from viruses. Also, run a scan using the tool and remove any found viruses.
Often it is proven to be not as effective as dedicated antivirus software. You can take a look at our guide which lists a compilation of the best antivirus software to safeguard your PC.
Type Command Prompt and run it as an administrator.
Type the below command and press Enter: sfc /scannow
Let the process fix the corrupt system files.
Type the below commands and press Enter after each one: Dism /Online /Cleanup-Image /CheckHealthDism /Online /Cleanup-Image /ScanHealthDism /Online /Cleanup-Image /RestoreHealth
Reboot your PC.
Fixing the corrupt system files will help you resolve the Runtime error 62. Also, this will make sure that you do not come across any such problem in the future.
In any case, this command requires some technical knowledge and it doesn’t guarantee the results. Thus, we suggest you utilize a leading PC repair tool to detect and fix corrupted files on Windows PCs.
4. Reinstall the graphics driver
To open the Start menu, press the Win key.
Type Device Manager and open it.
Expand the Display adapters section.
Double-click on your GPU.
Select the Driver tab.
Click on the Update driver option.
Select Search automatically for drivers option.
Many users have reported that they were able to resolve the Runtime error 62 on their Windows 11 PCs by simply updating the graphics driver on their PCs. You should also try out this solution and check if this helps or not.
5. Reinstall Runtime Libraries
Press the Win key to open the Start menu.
Open Control Panel.
Select Programs and Features.
Click on the Microsoft Redistributable Package and hit the Uninstall button.
You should also make sure to install the latest Windows update as in Windows 11, the redistributable packages are bundled as a part of the Windows update.
That is it from us in this guide. Let us know in the comments below, which one of the above solutions fixed the Runtime error 62 on your Windows 11 computer.
OneNote is a powerful and flexible resource that allows you to quickly gather information and create notes.
However, the OneNote app greatly annoys Windows users as it automatically starts upon system reboot and consumes valuable system resources required for essential programs.
If you do not want OneNote to interfere with other programs and load automatically, you can disable the startup process of the OneNote program in different ways discussed in this guide.
How do I disable OneNote on Startup?
1. Disable OneNote from Task Manager
Right-click the Windows icon on the taskbar and select Task Manager from the Quick Links menu.
Switch to the Startup tab in the Task Manager window.
Select the Send to OneNote Tool process and click the Disable button located on the bottom right.
Exit the Task Manager and reboot your Windows PC to apply the changes.
You can disable OneNote from the Task Manager window to prevent it from automatically launching upon startup.
2. Delete the OneNote shortcut from the startup folder
Launch the Run dialog box using the Windows + R shortcut.
Type the following command in the startup and press the OK key to directly access the Startup folder of your user account. Shell:startup
Locate and right-click the Send to OneNote shortcut in the list of shortcuts and click the Trash icon in the context menu.
Now reboot your Windows PC to apply the changes and upon startup, OneNote will not launch automatically anymore.
Deleting the OneNote shortcut from the startup folder of the user account you’re currently logged into will disable OneNote on Startup.
Click the Up arrow icon on your Windows PC’s bottom right to reveal the system tray.
Right-click the OneNote icon in your System Tray and choose the Open OneNote option.
Click the File option located on the top ribbon of the OneNote app.
Select Options located at the bottom of the left sidebar.
Next, switch to the Display option from the left menu bar of the OneNote Options window and uncheck the box for the Place OneNote icon in the notification area of the taskbar option located in the right section.
Press OK to save the changes.
Removing the OneNote icon from the notification area ensures that the tool does not make an appearance every time you reboot your Windows computer.
4. Repair Microsoft Office
Make sure your PC has access to a stable internet connection.
Launch the Settings app using the Windows + I shortcut key combination.
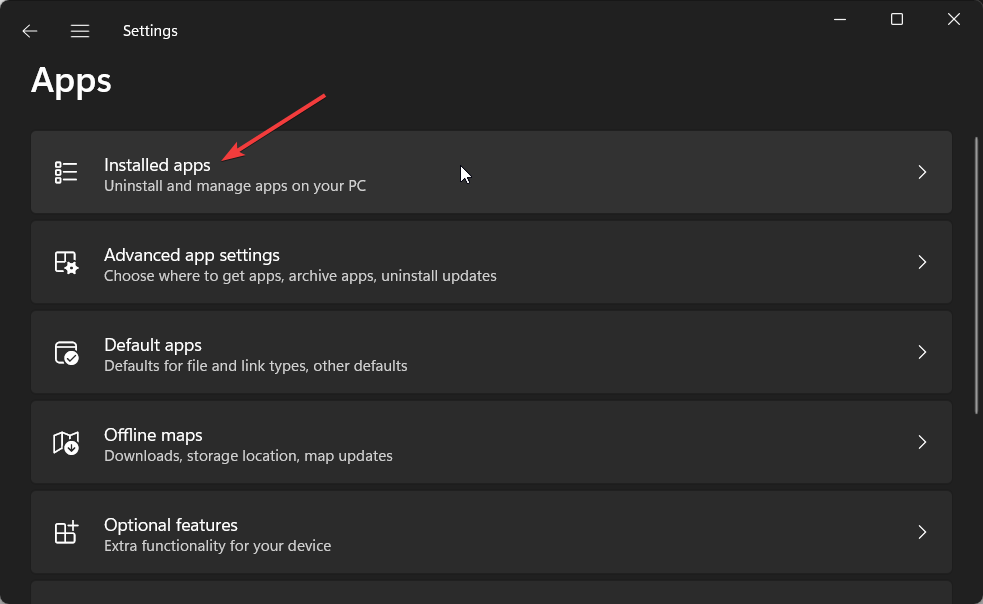
Switch to the Apps settings from the left sidebar and then select Installed apps from the right section.
Scroll down the installed apps and look for Microsoft 365 app.
Click the Menu icon (three dots) located next to it, and select Modify option from the sub-menu.
Press Yes on the User Action Control panel that appears.
On the next window that pops up, select the Online Repair option and press the Repair button on the button right.
Wait patiently for the online repair process to get completed. Once done, restart your Windows PC and you will no longer see OneNote on startup.
If OneNote still appears despite having disabled the automatic startup of the OneNote app, there could be some issues with the Microsoft Office suite. Performing online repair of Microsoft Office should resolve the underlying problem.
That’s all in this guide! You can implement these methods in the given order to disable OneNote from starting up automatically upon restart.
Apps are the most essential part of a computer. They make it possible to carry out numerous functions. However, a few things may cause you to uninstall specific applications. If done incorrectly, you may wonder how to recover uninstalled programs on your Windows 10 devices.
So, we break it down in this article and show you all the practical ways to get back applications after a delete.
What happens when I uninstall a program on Windows 10?
Removal of program files – The program’s files are deleted from your computer’s hard disk by the uninstaller. This comprises all program-related files, such as libraries, configuration, executables, and other related files.
Deletion of shortcuts – The program’s taskbar icons, desktop shortcuts, and Start menu entries are usually eliminated. As a result of the uninstalled program’s references being removed, this keeps your system orderly.
Registry modifications – The Windows Registry, a centralized database that the uninstaller may alter houses settings and configuration data for the operating system and installed apps.
Removal of additional components – Some applications could set up extras like system services, plugins, or device drivers. The uninstaller could eliminate these components if they are no longer needed.
Reversal of settings and configurations – The uninstaller can sometimes reverse any modifications made to the system during the installation of the software. By doing this, you may be confident that your system will reset to how it was before the software was installed.
How do I recover uninstalled programs on Windows 10?
Remember, you may get help from the application’s publisher if System Restore or a data recovery tool doesn’t work to restore the removed program.
Also, create a system restore point regularly. This will allow you to restore your computer to a previous point if you accidentally uninstall a program. Note that if you use the System Recovery option, you may not have access to applications before the drive was formatted.
And that is how to recover uninstalled programs on Windows 10. So, you can now recover files no matter how long ago they were deleted or uninstalled as long as you still have access to the drive.
Lastly, let us know in the comments if other ways exist to restore your uninstalled applications.
Bing Chat’s share feature has been temporarily disabled by Microsoft, preventing users from sharing their conversations with friends via email and social media platforms. The details of the issues that led to the removal of the feature remain uncertain.
When asked about the absence of the share button on Bing Chat yesterday, CEO Mikhail Parakhin stated via Twitter that some technical difficulties have already been addressed and assured users that the feature will be back shortly.
There were some issues with it, temporarily disabled, coming back soon.
Meanwhile, towards the end of last week, Bing Chat underwent a few significant enhancements. The chatbot employs Artificial intelligence and is now equipped to accommodate a maximum of 30 turns for every conversation, in distinction to its former cap of 20. Additionally, Bing Image Creator is currently supported in Precise and Balanced modes, unlike before when it was confined to Creative mode. Also, travel-related inquiries will demonstrate more visual outcomes.
Last month, Microsoft announced significant updates to Bing Chat, some of which have already been implemented. Alongside these updates, the company has introduced minor improvements to enhance the overall chatbot experience. Among these improvements is the ability to copy entire answers for sharing and download messages as PDF, text, or Word documents.
The esteemed technology corporation unveiled other notable updates to Bing Chat, including a chat history feature and the ability to utilize plug-ins. Additionally, the company has publicized that users are no longer required to have a Microsoft account to engage with the chatbot. It is essential to note, however, that conversations without authentication are limited to a maximum of five turns per session.
Microsoft is expanding its Azure Government cloud computing service by incorporating the advanced AI language models that power ChatGPT. This move follows the release of the commercial version of Azure OpenAI offering.
The tech giant is slated to unveil a new feature on Wednesday that will allow Azure Government customers to leverage the prowess of two of OpenAI’s expansive language models, namely, GPT-4, the start-up’s latest and most advanced model, and GPT-3, an earlier variant.
The forthcoming release is likely to refrain from explicitly mentioning the US government agencies that are anticipated to adopt the technology, however, Bloomberg suggests that the US Defense Department, the Energy Department, and NASA could potentially be included, given that they are federal government clients that have utilized Microsoft’s Azure Government solution.
The move provides government entities access to two of OpenAI’s large language models, namely the most recent and potent GPT-4 and its antecedent GPT-3, through Microsoft’s Azure OpenAI service. It has been confirmed that the Defense Technical Information Center (DTIC), an arm of the Defense Department that specializes in assembling and distributing military discoveries, will conduct trials employing the GPT models via Microsoft’s latest offering.
According to a recent blog post reviewed by Bloomberg, Microsoft’s government clients can leverage OpenAI’s LLMs for a vast array of tasks such as answering crucial research queries, computer code generation, and field report summarization. Azure Global CTO William Chappell revealed this information in the post. Nevertheless, the company’s representative noted that these agencies could not access ChatGPT directly, though they could utilize OpenAI’s models through a chat-like interface.
Microsoft has designated a segregated commercial cloud computing space to accommodate the OpenAI models. The area is distinct from the cloud utilized by Azure Government customers, which strictly observes various security and data compliance regulations. As per Chappell’s statement, the data transmitted to the models remains within the Azure OpenAI service since Microsoft hosts them in its Azure infrastructure. Moreover, it was also mentioned that the AI models won’t be trained using data from Azure Government customers.
Users can run into the diskpart failed to clear disk attributes when using the Diskpart utility. The error means the disk is write-protected, and you cannot write any data on it. However, we’ll discuss the basic steps for fixing the error.
The Diskpart failed to clear disk attributes error can occur due to various reasons. Here are a few possible causes:
Disk or hardware issues – The disk itself may have physical or hardware issues that prevent DiskPart from clearing the disk attributes, including problems like bad sectors, disk corruption, or a failing disk.
Disk Write potection – Write protection is often enabled through physical switches or settings on the disk itself or via software settings. Removing write protection can fix the issue.
Disk in use or locked – If another process or program currently uses the disk, it may be locked, preventing DiskPart from changing its attributes.
Insufficient permissions – DiskPart must be run with administrative privileges to perform certain operations, including clearing disk attributes. So, insufficient permissions can cause an error.
Incompatible disk or format – DiskPart may fail to clear attributes if the disk is formatted in an incompatible file system that DiskPart cannot handle.
File system errors – If the disk has file system errors or inconsistencies, DiskPart may encounter difficulties in clearing disk attributes and prompt the Diskpart failed to clear disk attributes error to appear.
These causes may vary depending on the circumstances. Fortunately, we’ll take you through some effective fixes for the error in the next section of this article.
What can I do if diskpart failed to clear disk attributes?
Observe the following preliminary checks before trying any advanced troubleshooting steps:
Ensure the disk is not locked – Some USB devices and SD card readers have a write-protected physical switch that disables the writable options on the storage device. Check the drive and turn off the toggle to make the disk writable.
Turn off background apps – It will close any applications or background processes using the disk, allowing it to clear the disk attributes.
If the above checks can fix the issue, proceed with the solutions below:
1. Run diskpart as an administrator
Left-click the Start button, type Command Prompt, and select the Run as administrator option.
Click Yes on the User Account Control (UAC) prompt.
Type the following in the command bar and press Enter: diskpart
Try performing the task that prompted the diskpart failed to clear the disk attributes error and check if it persists.
The above steps will run Diskpart with administrative privileges and allow you to modify the disks and volumes.
2. Run the CHKDSK command
Left-click the Start button, type Command Prompt, and click the Run as administrator option.
Click Yes on the User Account Control prompt.
Type the following commands and press Enter: chkdsk X: /f
Replace X with the drive letter of the disk.
The CHKDSK (Check Disk) command will check the disk for errors causing the diskpart issues and attempt to fix them. Check our guide on what to do if Command Prompt keeps crashing on your PC.
3. Modifying WriteProtected key in Registry Editor
Press the Windows + R keys to open the Run dialog box, type regedit, and press Enter to open the Registry Editor.
Navigate to the following file path: HKEY_LOCAL_MACHINE\SYSTEM\CurrentControlSet\Control\StorageDevicePolicies
Locate the WriteProtect entry on the left side of the screen, double-click on it and change its Value data to 0, then click OK to save changes.
Restart your computer and check if the error appears on the disk.
Tweaking the registry entry allows you to disable the WriteProtect key to modify the disk.
Winsock error 10038 is a socket connection problem you may encounter when connecting to a remote server. Sockets are a way to send and receive data over a network. They can be used for many things, from sending emails to viewing web pages.
In this article, we’ll go over some of the most common causes and solutions for the socket connection error. We’ll also cover additional tips and tricks to help prevent this issue.
What is Winsock error 10038?
Winsock error 10038 is caused by problems with the Windows Sockets API, which is a part of the TCP/IP protocol suite. This is a set of communications protocols that send data between applications on a computer network.
If you are getting a socket connection error, it can be because of one of the following reasons.
Firewall or antivirus is blocking the connection – The most common reason for this error is if one of your third-party firewall or antivirus products has been updated recently. When this happens, they sometimes reset TCP/IP settings to default.
Wrong credentials – You might have entered the wrong password in the connection settings, especially if it is case-sensitive.
Incorrect or corrupt IP address – This can happen if you have recently changed your DNS settings or there is no connection between your local area network and the Internet.
Proxy server – If you’re using a proxy server, your connection may be interrupted because it limits access to certain sites.
How do I fix a socket connection error?
Attempt the following basic workarounds before the advanced steps:
Check if your firewall is enabled and allow an exception for the program you are trying to run.
Ensure your antivirus software is up-to-date.
Restart your router, modem, and PC again, if necessary.
1. Disable your antivirus temporarily
Hit the Start menu icon, type Windows Security in the search bar, and click Open.
Click on Firewall & network protection, then select Public network.
Locate Microsoft Defender Firewall and toggle the off button.
2. Update your network drivers
Hit the Windows key, type Device Manager in the search bar, and click Open.
Navigate to Network adapters and click to expand. Right-click on the driver, then click Update driver from the drop-down.
Select the Search automatically for drivers option and wait till the update finishes.
Restart your PC and check if the error persists.
Another way to get things done faster and more accurately is to use a third-party driver updater utility. This is one sure way of ensuring you’re getting the correct drivers for your PC.
Even better, you don’t have to move a finger because Outbyte Driver Updater will automatically do the job for you. It will scan, detect, download, and install the driver from its wide database in a matter of seconds.
Click on the Start Menu icon, type cmd in the search bar, and click Open.
Type in the following commands and press Enter after each one:netsh winsock reset catalognetsh int ipv4 reset reset.lognetsh int ipv6 reset reset.log
Now restart your PC and see if the error is still there.
Resetting TCP/IP removes your computer’s network settings and forces it to re-establish them from scratch. This includes everything from your IP address to your proxy settings.
It can resolve problems such as an unresponsive connection to the Internet or unexpected loss of connectivity.
In conclusion, if you are facing the problem of Winsock error 10038 and want to fix it, you only need to follow the steps we have listed above. Hopefully, one of the above methods will work for you.
Unfortunately, Winsock errors are common, so we try our best to come up with solutions for most of them. To that effect, we’d like to direct you to another wholesome article on the Winsock error 10051 and see our recommended fixes.
These types of errors will affect Chrome and other browsers, and we have a guide on ERR_SOCKET_NOT_CONNECTED error that addresses this issue.
And with that, we sign out but keep it interactive in the comment section below with more tips and tricks.
However, as spotted on Reddit, there are some other great apps out there that you can use, especially on Windows + Android combinations. This Reddit user wanted such a combination, and the answers are beneficial, at least.
Turns out, there are a lot of possibilities when thinking about a universal file-sharing system for Windows + Android. And if PhoneLink lets you take and make calls and generally keep up with the conversations on your phone, some great apps allow for a seamless file transfer.
How to wirelessly transfer files from PC to Android with LocalSend?
Naturally, other Reddit users came up with a lot of answers. But one, in particular, seems to be a good option. LocalSend is a free, open-source, and cross-platform that allows you to transfer files wirelessly.
And you have a lot of options. You can transfer them from Windows to Android, Linux, or iOS and vice-versa with just a few clicks.
Go to GoogleStore or Appstore and download and install LocalSend on your mobile device.
Open LocalSend on your desktop and on your phone.
Your desktop should now automatically detect your phone.
That’s it, you’ve done it. Enjoy the file transferring.
As you can see, you have the option to wirelessly transfer your files from your PC to your mobile and vice-versa through the Send and Receive options.
However, both devices must be on the same wifi network, so consider this when using LocalSend. This is much better compared to USB transfer because it is often plagued by errors such as the please update your device settings to accept media files.
The app is small, so it won’t occupy much space on your mobile devices and desktop. It also has a community where you can ask or look for answers. And if you want, you can also contribute to the project.
So here you go. Until Microsoft comes with a proper built-in app to allow you wirelessly to transfer files, LocalSend can be a very good alternative.
What do you think about it? Will you use it? Let us know in the comment section below.
Another good news for Teams users. Besides the new Apple augmented reality headset that lets you control the app through your very own eyes, those on Android devices are having a little treat, too, as Teams’ Shared Device licenses feature is coming to the ecosystem.
As spotted on Microsoft 365 Roadmap site under Feature ID 126706, this exciting development allows Android phones to be utilized as shared devices, enhancing collaboration and communication within teams.
With this license, Android users will have access to a range of features and functionalities previously available only on common area phones. This includes popular capabilities such as Walkie Talkie, call queues, auto attendants, cloud voicemail, call park, and all other calling features currently supported by Teams.
The inclusion of the Shared Device license on the Teams mobile app for Android opens up new possibilities for organizations and teams that rely on mobile devices for their day-to-day operations. It enables seamless integration and synchronization across different devices, ensuring a consistent and efficient experience regardless of the device being used.
When the feature was first launched back in 2022, Teams’ Shared Device licenses are priced at $8 per device/month across all licensing channels.
When does Teams shared device license come to Android devices?
This exciting update was added to the Microsoft Teams roadmap on June 6, 2023, and is set to enter the General Availability release phase. Rollout is scheduled to commence in August 2023, allowing Android users to take advantage of the Teams Shared Device license and its associated features.
The availability of this feature on the Teams mobile app for Android represents Microsoft’s commitment to empowering teams with the tools and capabilities they need to collaborate effectively, regardless of their location or the devices they use. It further enhances the flexibility and versatility of Teams as a comprehensive collaboration platform.
Have you had a Teams’ Shared Device license? What do you think about its addition to Android devices? Let us know in the comments!
Microsoft’s latest innovation in the AI world integrates the power of ChatGPT into its Bing service, and it’s safe to say that it brings life to the often-overlooked search engine.
The technology lets you perform complex searches and commands like no other before. With this, you can create short stories, and poems, plan holidays or even develop codes to help you in your next project—exclusive on Microsoft Edge.
The waitlist program has been rolling out for a while and some users have gotten their hands on the technology. Although the public’s reception has been somewhat polarizing, it doesn’t phase Microsoft at all. Matter of fact, they rolled out the new Bing for Edge and Skype users on mobile devices (both iOS and Android users) and introduced a voice input feature in it.
While giving out Bing AI chat to another browser would be commercial suicide for Microsoft, it seems like the AI chatbot is heading toward non-Edge browsers. As recently confirmed by Mikhail Parakhin, Microsoft’s head of Advertising and Web Services, Redmond officials are experimenting with bringing Bing to other browsers and will be rolling out gradually.
We are experimenting, will be rolling out gradually.
Until then, in the meantime, here’s how you can try Bing AI chatbot on other browsers, courtesy of a few registry tweaks.
How to add Bing AI search/chat on another browser
1. Open your browser and access Bing, but you’d need to be enrolled in the waitlist first. If you’re not already, join the waitlist. In this case, we’re using Google Chrome.
3. Click the three buttons on your upper right screen ➜ More tools ➜ Developer tools.
4. Click the three buttons (a different one) ➜ More tools ➜ Network condition. Remember: do not close this screen throughout this process!
5. On the Network condition tab, scroll down until you find the User agent. Untick Use browser default.
6 Choose Microsoft Edge (Chromium)—Windows on the dropdown (or choose Mac if you’re on Mac, etc.)
7. Reload the page without closing the screen.
The search, however, doesn’t come without any limitations and isn’t ready for primetime yet. Some users have reported that they’ve been verbally assaulted, or even guided to illegal searches. It still can not hold up the conversation for a longer period, prompting a response from its competitor Google that Microsoft is rushing on things just to get a head start.
What do you think about the new Bing? Let us know in the comments!
Want more good news besides the new Apple device that lets you control Microsoft Word through your eyes? Well, a small little feature that lets you drop a like on a comment on Word has just arrived. Now, those in the web app, the Beta channel, and the Preview channel can take this little addition for a spin.
Now, rather than spamming out “+1” or a similar response to express agreement, you can now simply click the “upvote” button / drop a like to show your support or acknowledge a collaborator’s feedback. This feature aligns Word with other platforms such as Word for the Web, Teams, and social media apps, where reacting to comments is already commonplace.
With that said, you’d need to be a part of the Beta or Preview insider channel to access this feature so far or be on the web version. If you already are, here’s how you can like a comment on Microsoft Word.
How to like a comment on Microsoft Word
1. Open a Word document that already contains comments or, alternatively, generate a new comment and submit it.
2. To react to a comment, click the Like button in the top right corner of the comment box.
3. To remove your reaction, simply click the Like button again.
4. To see who has reacted to a comment, hover over the Like button.
With that said, however, this still comes with a few limitations. If your document is still in read-only mode or is quite old, the button may not be visible. And, if you’re on iOS or Android devices, you may still not be able to see the comment reactions.
What do you think about the like-a-comment feature on Word? Have you tried it? Let us know in the comments!
Last week, Microsoft released an important feature in Windows 11 Insider Preview Build 25381: SMB (Server Message Block) signing will be required by default for all connections.
If Windows 10 and 11 required SMB signing only in certain situations, now the feature will automatically enable it on these operating systems.
SMB signing is a process that makes sure every message you send has a signature-session key. Basically, you put a hash on the signature field of your messages. Every time someone tries to change the message, SMB will know. And both you and the receiver must confirm your identity, thus protecting you from hacking attacks.
The Redmond-based tech giant says that signing is a critical defensive tactic. Even more, the feature is part of a campaign to improve the security of Windows for the modern landscape.
But let’s say you want to disable SMB signing for certain reasons. A third-party app or software that you use might not support it. What to do then?
Here’s how to disable SMB signing by default on Windows 11
In the Search taskbar type in Windows PowerShell and run it as an administrator
Check your current SMB settings by typing in the following command
Select Y to make the changes and you should be all set.
You should also know that all versions of Windows support SMB signing. And when you’ll try to connect to a remote share third-party server that does now allow SMB signing, you’ll get the following error:
0xc000a000
-1073700864
STATUS_INVALID_SIGNATURE
The cryptographic signature is invalid.
In order for you to solve this error, you must configure your third-party server to support SMB signing. You can disable the SMB signing on your Windows 11 device, however, Microsoft does not recommend it. A third-party server that does now allow SMB signing is very vulnerable to attacks from malicious parties.
Before making changes, review possible legacy compatibility issues. Learn how to fix SMBv1 file sharing broken over NetBIOS to avoid connectivity problems when adjusting SMB signing settings.
Currently, this feature is only in Windows Insider, but the default change for SMB signing will come to other Windows versions as well. It will also appear in major Windows releases over the next months, depending on how it goes in Windows Insider.
What do you think about this new feature? Is it useful or could it cause more compatibility issues? Let us know what you think below.
Many of our readers have reported that the Spotify app is getting automatically installed on their PCs after installing the latest Windows update.
Being frustrated by this, users are looking at how to uninstall Spotify on Windows 11. In this guide, we will show you exactly how that can be done. Let us check out the solutions.
How can I uninstall Spotify on Windows 11?
1. Use Windows Settings
Press the Win + I keys to open Settings.
Click on Apps from the left pane.
Select Installed apps.
Locate Spotify Music, click on the 3-dot menu icon, and select Uninstall.
Follow the on-screen steps to uninstall Spotify.
Restart your PC.
Press Win + E keys to open File Explorer.
Navigate to C:\Program Files.
Click on the View tab, select Show, and then Hidden items.
Right-click on the WindowsApps folder and select Properties.
Switch to the Security tab.
Click on Advanced.
Click on Change next to Owner.
In the Enter the object name… field type Administrators and click OK.
Once the ownership is taken, open the WindowsApps folder.
Delete the SpotifyAB.SpotifyMusic_1.138.558.0_x86__zpdnekdrzrea0 folder.
Restart your PC.
Following the above steps, users were able to remove the Spotify app from their PCs for good and it never got automatically installed again.
You should also try following each step carefully without skipping any to successfully accomplish the task of how to uninstall Spotify on Windows 11.
2. Uninstall Spotify from the Start menu
Open the Start menu by pressing the Win key.
Click on All apps.
Locate Spotify, right-click on it, and select Uninstall.
Click on Uninstall on the prompt that appears.
This is another simple way of uninstalling Spotify from your Windows 11 PC. You should follow the steps and get rid of the music streaming app from your PC.
Type Windows PowerShell and run it as an administrator.
Type the below command and press Enter to fetch the list of all installed apps on your Windows 11 PC. Get-AppxPackage
Right-click on the Windows PowerShell title bar, select Edit and click on Find. Alternatively, you can press the Ctrl + F keys.
Type Spotify in the Find What field and click on the Find Next button.
Locate the Spotify app.
Select and copy the text next to PackageFullName.
Execute the below command in PowerShell: Remove-AppxPackage AppName (In place of AppName in the above command, you have to paste the PackageFullName that you have copied in step 7)
The above method will help you to resolve your query on how to uninstall Spotify on Windows 11. It will completely remove the Spotify app and its remains from your Windows 11 computer.
4. Uninstall Spotify using Control Panel
Press the Win key to open the Start menu.
Open Control Panel.
Click on Programs and Features.
Select Spotify and hit the Uninstall button.
Click OK to confirm your actions.
Restart your PC.
We have shown the steps to remove a different application just to give you an example of how to uninstall Spotify on your Windows 11 PC. You can apply the same steps to remove the Spotify app from your PC.
How to remove leftover Spotify files from your computer?
1. Use the Run dialogue
Press the Win + R keys to open the Run dialogue.
Type %temp% and hit Enter.
Select all files by pressing the Ctrl + A keys.
Hit the Del button to delete all the leftover Spotify files.
This is the basic way to not only delete all the leftover Spotify files but all the other program-related temporary files. This also helps create more storage space and also helps run your PC a bit smoother.
2. Delete Spotify paths from Registry Editor
Press the Win + R keys to open the Run dialogue.
Type regedit and press Enter.
Press Ctrl + F to open the Find utility.
Type Spotify in the Find what field and click Find next.
Right-click on the highlighted entry and click on Delete.
Select Yes in the UAC prompt that appears.
Be sure to delete only the Spotify-associated registry entries, as deleting any other important registry entry could hamper your device.
That is it from us in this guide. If you are getting the Spotify installation error code 53, then you can apply the solutions from our guide and resolve the problem.
Let us know in the comments below, which one of the above solutions helped you resolve your query on how to uninstall Spotify on Windows 11.
Here’s some good news for you. Apple has unveiled an incredible new invention called Vision Pro, an augmented reality headset that enables you to access apps simply by using your eyes, straight out of futuristic movies. Microsoft has also joined the fray by introducing productivity applications such as Word, Excel, and Teams for this advanced headset.
As shown by Apple during the product’s demo event at WWDC 2023, the tech giant showcased the productivity apps with a simplified ribbon interface reminiscent of Excel and Word web apps. These apps can now be controlled using eye movements. Additionally, Teams on this device will offer support for 3D avatars.
In terms of design, Vision Pro combines advanced materials with a compact and wearable form factor. The device’s battery life allows for two hours of continuous use, and its unrivaled hardware includes an ultra-high-resolution display system, advanced audio capabilities, and a high-performance eye-tracking system.
The question is, how much is a Vision Pro augmented reality headset by Apple and when will it hit the stores?
How can I get Apple Vision Pro augmented reality headset & what’s the price?
As we’ve noted from Apple’s release note, a Vision Pro augmented reality headset is priced at $3,499. It will be available starting in early 2024 in several select Apple Stores in the US before rolling out in other countries. In the meantime, you can also sign up for the waitlist on Apple’s website to get notified.
Besides those Office apps, the device also offers a wide range of applications, including enhanced productivity with an infinite canvas for apps, engaging entertainment experiences with a personal movie theater feel, and immersive environments that extend beyond physical boundaries.
This isn’t the first time a Microsoft app comes to an Apple device. Earlier this year, we’ve reported that Outlook users on Mac, which supports Apple Focus, has arrived for free on the system.
Are you excited about Apple Vision Pro augmented reality headset? What do you think about the price? Let us know in the comments!
WinINet stands for Windows Internet and is a library that provides applications with Internet functionality. It is included with Microsoft Windows and can be used by any application written in native code.
If a DLL file is missing from your system, especially the Wininet.dll, accessing the Internet can be hard or impossible. We now explore how to restore this crucial DLL file in your system to keep things running smoothly on your PC.
What is Wininet DLL?
WinINet DLL is a file that contains a set of functions that enable Windows applications to communicate over the Internet. You can find the file in the following location: C:\Windows\System32
It is designed primarily for use by Microsoft Internet Explorer, but it can also be used by other applications that need to access types of data normally found on the Internet.
WinINet is a layered API that consists of several subsystems:
Internet protocol stack – This component provides basic networking capabilities, such as sending and receiving data over a network connection.
Authentication – This component allows your application to authenticate itself with network servers when necessary.
Networking library – This component provides generalized sockets support for various network protocols, including TCP/IP and UDP/IP.
Being a critical component of Windows, you may have trouble opening some programs or accessing the Internet if it is missing. Some of the major causes of the wininet.dll not found error include a corrupt user profile, broken registry entries, and a virus attack on your system.
How can I fix the Wininet.dll file if it is missing?
Try your luck with the following basic steps first before any advanced troubleshooting:
The Wininet.dll file is a Windows file, making it easier for a third-party DLL fixer to do the repair job. Such programs have a comprehensive database of DLL files that can replace the missing ones instantly. The repair is 100% guaranteed with this file since is a system file.
2. Run the DISM and SFC scans
Hit the Start Menu icon, type cmd in the search bar, and click Run as administrator.
Type the following commands and press Enter after each one:DISM.exe /Online /Cleanup-Image /Restorehealthsfc /scannow
3. Run a virus scan
Press the Windows key, search Windows Security, and click Open.
Select Virus & threat protection.
Next, press Quick scan under Current threats.
If you don’t find any threats, proceed to perform a full scan by clicking on Scan options just below Quick scan.
Click on Full scan, then Scan now to perform a deep scan of your PC.
Wait for the process to finish and restart your system.
Press Windows + R to launch the Run console, enter netplwiz in the text field, and click OK.
Click Add in the User Accounts window.
Select Sign in without a Microsoft account (not recommended).
Click on Local account button.
Enter a username and password (optional) for the new user account, and a hint, in case you set a password. Once done, click on Next.
Click on Finish to create the Local account.
Whereas this step won’t help you fix the Wininet.dll not found error, it will be a step closer to checking off the list whether you have a corrupt user profile. If it works, you can take the necessary steps to repair your profile.
5. Download the file manually
You may have accidentally deleted the file, or if you had a virus infection, it made some changes to your PC. An easy way would be to download the Wininet.dll file from a reliable third-party site such as DLL-files.
Even if it is a trusted site, always ensure you have a backup with a dependable antivirus that will scan any files before they find your way into your system.
Select the language, then click the Confirm button. You will receive a download link and you will be able to click on the 64-bit Download button to get the Windows 11 ISO.
You will see a virtual drive in the File Explorer window. Just click on it and then double-click the setup.exe file to start the installation process.
Wait for the installation process to begin. At some point, you’ll be prompted to either keep all your files or install Windows only. Select keep your files, then proceed.
Users who went with this solution also recommended performing a Disk Cleanup after the repair upgrade.
An issue Windows users complain about is that the Recycle Bin is grayed out. It prevents users from accessing the recycle bin, restoring deleted files, and accessing the Recycle Bin settings. However, this article will discuss what causes the issue and ways to fix it.
Likewise, you can go through our guide about what to do if the Recycle Bin goes missing in Windows 11.
Why is the Recycle Bin greyed out?
Many factors can cause the Recycle Bin to be greyed out on your computer. Some notable ones are below:
User account permission issues – The Recycle Bin activities like opening, emptying, restoring, etc., can sometimes require administrative rights because it is a part of system alterations. So, the option can be greyed out and inaccessible if you’re not running an account with administrator privileges.
Corrupted Recycle Bin – You can also encounter the issue when the Recycle Bin is corrupted or compromised by malware and virus attacks or other malicious activities. It affects its functionality and can cause it to malfunction. Read more about fixing corrupt Recycle Bin in Windows 11.
These causes may differ on various devices. Nonetheless, you can fix the problem by trying the steps to be discussed in the next section.
What can I do if the Recycle Bin is greyed out?
Observe the following preliminary checks before proceeding with any advanced troubleshooting steps:
Restart your computer – Restarting the PC is the quickest way to fix temporary performance issues and refresh its components.
Perform a clean boot – A clean boot will boot the PC with minimal drivers and programs, preventing the interference of a third-party program that can cause the computer to malfunction.
Empty the Recycle Bin for all users – It will delete the corrupt files or folders, causing the Recycle Bin to grey out. You can check our guide for steps to empty the Recycle Bin for all users on Windows 11.
Fix corrupted Recycle Bin – Fixing the Recycle Bin if it is corrupt will resolve any problems with the Windows component. Read about how you can fix the corrupt Recycle Bin on your PC.
If you can get around the problem, go ahead with the fixes outlined below:
1. Re-add the Recycle Bin icon
Press Windows + I key to open Windows Settings.
Select the Personalization option and select Themes.
Then, click the Desktop icon settings in the right pane.
Now, uncheck the box for Recycle Bin and click OK to apply your changes.
Repeat steps 1 to 4 and check the box for Recycle Bin, then click OK to apply your changes.
Re-adding the Recycle Bin icon will help trigger it to come up.
2. Use the Group Policy Editor
Press Windows + R key to open the Run dialog box, type gpedit.msc in the text box, and press Enter to open Local Group Policy Editor.
Now, navigate to this location: User Configuration\Administrative Templates\Desktop
In the right pane of the screen, find Remove Recycle Bin icon from the desktop file. Double-click on the file to open it, and click the radio button for the Not Configured option.
Then, click the OK button to save your settings.
Restart the computer.
The above steps allow you to configure and modify the option for removing the Recycle Bin icon from the desktop and restoring it.
After doing that, check if Recycle Bin is still grayed out.
Press Windows + R key to open the Run dialog box, type regedit in the text box, and press Enter to open Registry Editor.
Copy and paste the following location to the address bar and press Enter: Computer\HKEY_LOCAL_MACHINE\SOFTWARE\Microsoft\Windows\CurrentVersion\Policies\NonEnum
Then, double-click the DWORD value named {645FF040-5081-101B-9F08-00AA002F954E} in the right pane and set its value data to 0.
If you can find the above value, right-click any blank area in the right pane and select New from the drop-down, then DWORD (32-bit) Value.
Now, input {645FF040-5081-101B-9F08-00AA002F954E} as the file name.
Double-click on the DWORD value and set its value data to 0. Click the OK button to save your changes.
Tweaking the above registry will hopefully fix Recycle Bin is grayed out issue on your PC.
Runtime error 7 out of memory is a common error every programmer faces at least once in a lifetime. Other computer users are also not exempt from this error, as it appeared when using Microsoft Excel.
You might get this error if you’re working on large projects using too much memory. A run repair tool should suffice, but even such requires memory to be installed, which is a memory issue. If a repair tool is out of the picture, find other ways to deal with this error.
What is the run time error 7 in Excel?
Run time error 7 is common in Excel. It occurs when the program runs out of memory. This can happen if you work with a large spreadsheet or have many spreadsheets open simultaneously.
It may also occur when you try to run a macro you have written, but when you execute it, it fails because your system lacks sufficient resources.
Other reasons you may encounter the runtime error 7 out of memory include:
Corrupt file – Sometimes, when you open an Excel file, it may not open properly because it has become corrupt for some reason.
Insufficient memory – Your computer needs enough space to store files and ensure that all applications run smoothly without interruptions or crashes due to insufficient memory resources.
Compatibility issues – Another common cause of this error is an incompatibility between the version of Excel you are using and the version of the file you are trying to open.
Unexpected closure of a workbook – You may also get this error if you close an Excel workbook without saving changes. When this happens, Excel tries to run the macro using objects that no longer exist.
Memory leak – A memory leak occurs when a program allocates memory from the system and fails to free or reuse it. If you have an Excel file with a large number of formulas and functions, it’s possible that there is a memory leak.
Hardware failure – The problem may also be caused by an issue with your computer’s hardware. Your CPU might be failing and causing this error.
Strangely enough, one of our readers encountered this error when one of the cells in the spreadsheet had an apostrophe (King’s Lynn). Removing the character returned everything to normal.
How can I fix the runtime error 7 out of memory?
Start off with these basic workarounds before jumping onto the heavy hitters:
Perform this step only if you have an HDD. For SSD, this procedure is simply useless.
Right-click on the Start Menu to bring up the shortcut menu, then select Windows Terminal (Admin).
Type the following command, then hit Enter to analyze your drive. Remember to replace X with the letter of your drive: defrag X: /a
After the scan is finished, you’ll see information about your hard drive, including the fragmentation level and a note saying whether you need to defragment your drive or not.
Now enter the following command to defrag that drive: defrag X:
Wait for the process to finish.
2. Increase Virtual Memory
Hit the Search icon on the Taskbar, type View advanced system settings in the text field at the top, and click on the relevant search result that appears.
In the Advanced tab, click on the Settings button under Performance.
Navigate to the Advanced tab in the Performance Options window.
Next, click on Change underVirtual memory.
Untick the checkbox for Automatically manage paging file size for all drives.
If Windows was managing the virtual memory earlier, it’s best to clear the previously set value and then increase it.
To do that, click on the drive with System managed listed, select No paging file, and click on Set.
Click Yes on the confirmation prompt that pops up.
Now, choose a drive or partition from the list, select the Custom size option and enter the same value under Initial size and Maximum size fields in MB (1GB=1024MB), taking cue from the previous section.
Once done, click on Set and then on OK at the bottom to save the changes.
Next, restart the computer for the changes to come into effect.
As we’ve mentioned, a version of the Like button is going to appear in Microsoft’s Word app after you download and install the latest update.
In a recent blog post, the company said that it is rolling out the new Like icon for user comments in Word for Windows.
As Microsoft stated, this modern comment experience in Word sets the stage for richer collaboration by your team and aligns the commenting experience across the Office suite.
Using modern comments, you can leave thoughts or questions in the document for others, review and edit your comments before committing them, and mention someone.
Before, you had to improvise by typing replies like +1 to let others know that you agree or would like to participate in a certain event.
However, now, you can simply click a button to upvote a response, agree with a sentiment, or acknowledge that you’ve read a collaborator’s feedback.
Customer feedback suggested that users wanted to be able to quickly and easily convey their reaction to a comment like you can do on Word for the web, Teams, or other social media apps.
Thus, the Like icon button will now appear on any comment that’s created for a Word document in the top right corner.
That means that you can just click on it to show that you approve of the comment. You can also hover the cursor over the button to see who else has liked it.
And, if you didn’t mean to like something, know that you can also take back your reaction by clicking on the button again.
Please note that Microsoft says the Like icon will not be available if a Word document is in read-only mode.
Furthermore, you can also react to a comment below the top comment by pressing the Down arrow. This will allow you to move through the list of comments.
Keep in mind that this new feature is only available for Word for Windows beta testers for now, along with Word users on the web.
It’s now rolling out for Current Channel (Preview) users running Version 2305 (Build 16501.20152) or later, so remember that.
Also, the Like icon comment feature will be added to the Mac version of Word in the next few weeks, so keep an eye out for that as well.
For the time being, iOS and Android Word users won’t be able to see the Like reactions. Older Word documents with comments may not show the button but any new comments added will support it.
Be sure to share your thoughts, ideas, and suggestions with us in the dedicated comments section located right below.

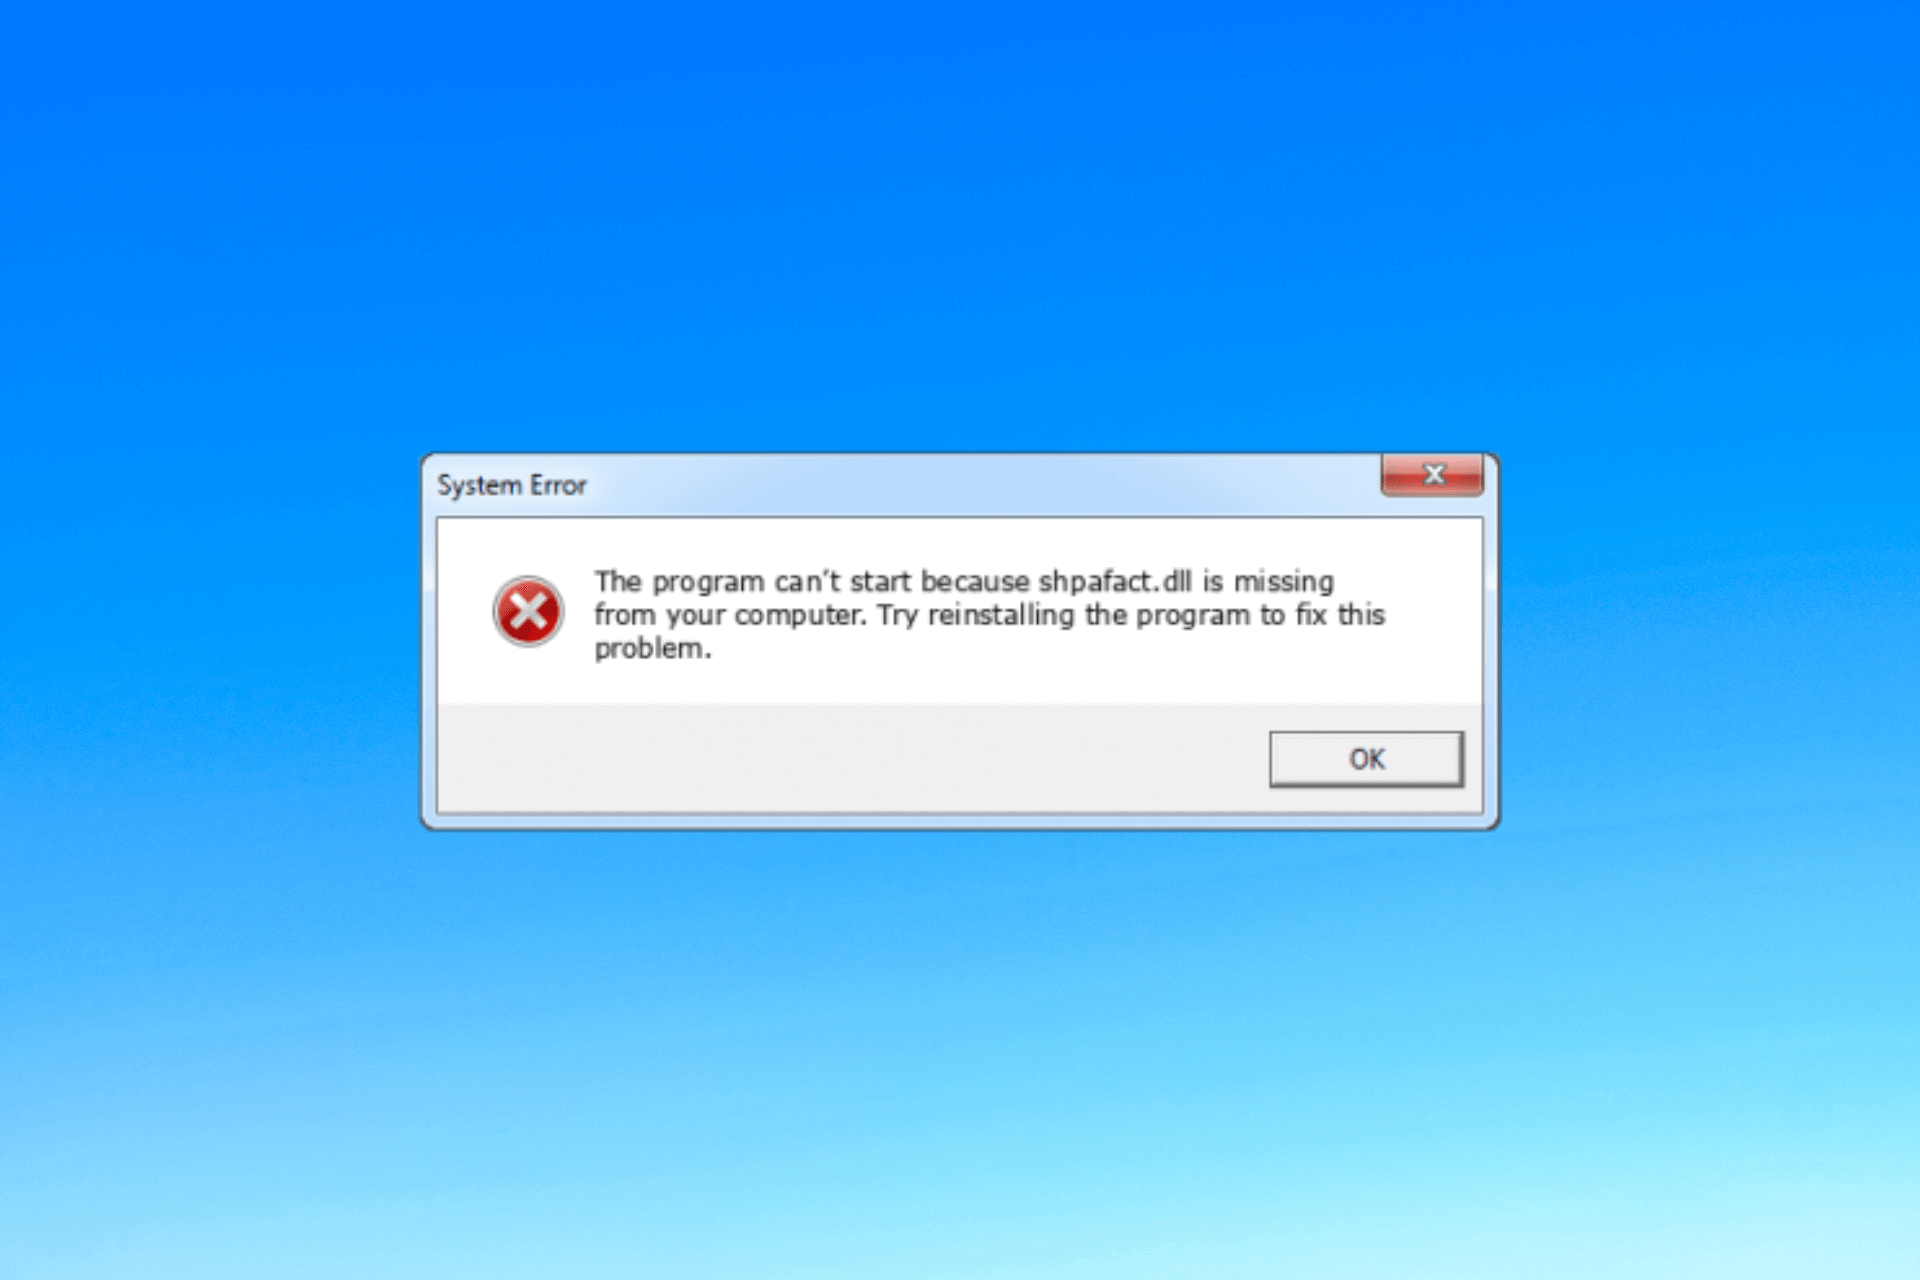


 NOTE