League of Legends Packet Loss: 3 Ways to Reduce it

League of Legends packet loss will negatively impact your game and you might experience lag or high ping, so it’s important to fix this issue, and this guide will show you how to do it.

How can I fix packet loss in League of Legends?

1. Use a VPN to fix packet loss in LoL

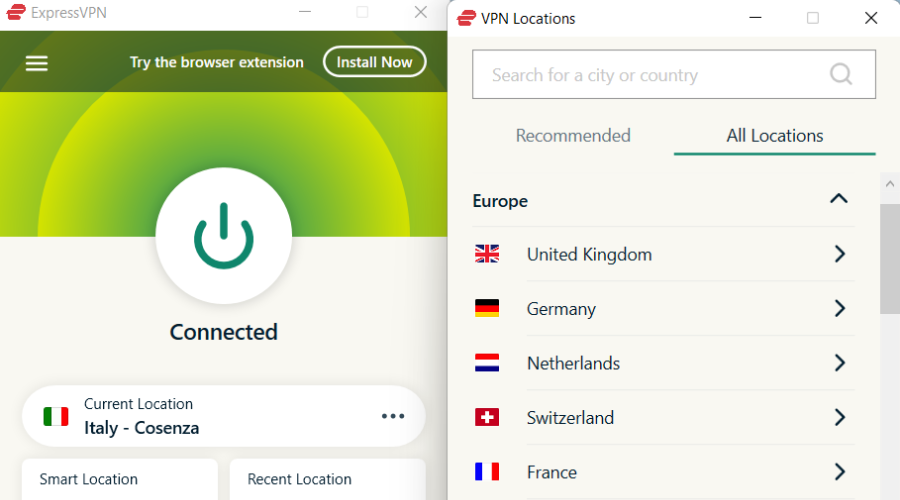
  1. Download and install ExpressVPN.
  2. Launch it and connect to a server.
  3. Run League of Legends.
  4. Check if the packet loss issue persists.

Using a VPN can increase your odds of fixing packet loss issues. ExpressVPN is a great VPN tool with thousands of servers. It comes with an excellent all-round service; you can use it for more than just packet loss. For instance, it can secure your connection, protect your privacy, and even unlock geo-restricted content.

ExpressVPN

Enjoy your League of Legends matches more with an improved connection from this powerful VPN.
Check Price Visit Website

2. Troubleshoot your connection to get rid of packet loss in League of Legends

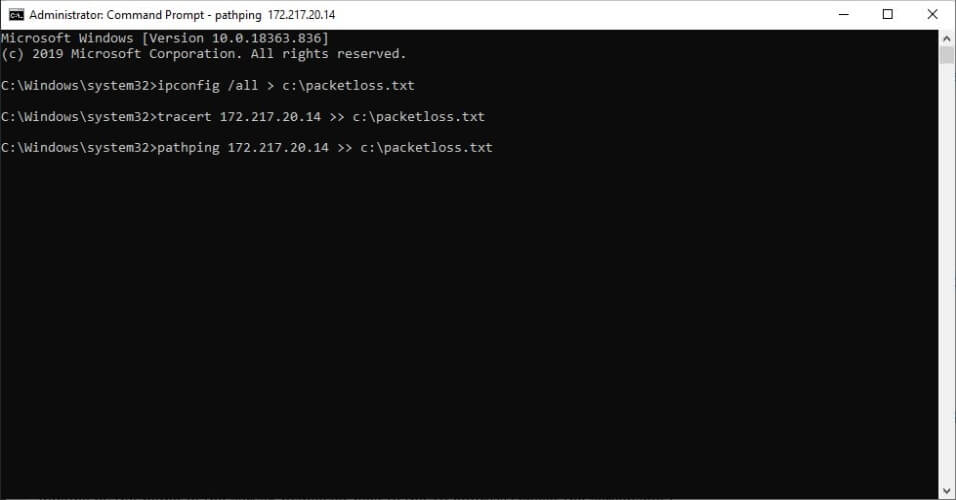
  1. Follow our packet loss guide to run a complete test
  2. Locate the troublesome hops on your connectionPacket loss analysis Windows with tracert and pathping
  3. Take the appropriate action depending on the location of the leak

The packet loss can occur in one of the following locations:

  • Your home network (PC, router, cable, home line)
  • ISP’s network
  • Network distribution company (above the ISP)
  • League of Legends server

Depending on the location of the leak, you can perform the following actions:

  • Test League of Legends latency for further troubleshooting
  • Check your home network and its devices for faults and update/repair/replace them accordingly
  • Contact your ISP if the issue is on their side of the connection
  • Ask your ISP to contact the network distribution company
  • Contact League of Legends‘ support team

3. Use the Hextech Repair Tool

  1. 1. Download and install Hextech Repair Tool.

  2. 2. Launch it. You will see a menu with possible tasks you can assign to it. First, run a ping test.

    hextech repair tool options
  3. 3. Change your DNS settings to public or automatic.

  4. 4. Add firewall exceptions or disable firewall altogether.

  5. 5. Hit the Start button so that the tool performs the task you assigned to it.

  6. The easiest method to fix packet loss in League of Legends is to use Hextech Repair Tool. With it, you can perform a ping test, change your DNS settings, as well as configure firewall exceptions.

All in all, even if you experience packet loss in League of Legends, it’s not as bad as it sounds. More often than not, the situation fixes itself. However, if it happens on a regular basis, you can use our suggested fixes above to get rid of it.

Just remember that using a VPN is not a guaranteed win for packet loss. It will only work if the packet loss occurs on your ISP’s side.

If packets leak on your network or on the League of Legends server, using a VPN won’t work.

We hope that you managed to fix the packet loss in your game. Let us know in the comments section below if you have any questions or encounter any problems following our solutions.

No Healthy Upstream Error: What it is & How to Fix it

Many of our readers reported getting the no healthy upstream error. This error will occur when trying to visit various websites, so today we’ll show you how to fix it.

What does it mean by no healthy upstream?

This error means that no additional data is sent to the source of the software. This can cause the entire application to not work properly.

How can I fix the No healthy upstream error?

If you’re getting this error while trying to run a specific app, log out and log back in and check if that helps. For developers that are using Kubernetes, check for incorrect route rule configuration.

Check for expired certificates

  1. Start vCenter Appliance.
  2. Run the following command: for store in $(/usr/lib/vmware-vmafd/bin/vecs-cli store list | grep -v TRUSTED_ROOT_CRLS); do echo "[*] Store :" $store; /usr/lib/vmware-vmafd/bin/vecs-cli entry list --store $store --text | grep -ie "Alias" -ie "Not After";done;
  3. Check if Machine_SSL and the Solution User certificates are expired. If they are, replace them.
    vCenter Appliance expired certificates

You can also use vCenter Windows or PowerShell with the following command:

$VCInstallHome = [System.Environment]::ExpandEnvironmentVariables("%VMWARE_CIS_HOME%");foreach ($STORE in & "$VCInstallHome\vmafdd\vecs-cli" store list){Write-host STORE: $STORE;& "$VCInstallHome\vmafdd\vecs-cli" entry list --store $STORE --text | findstr /C:"Alias" /C:"Not After"}

If you can’t even log in, try resetting the root password and try again.

What is the No Health Upstream error

The No Healthy Upstream error occurs when no data is being sent from the server or software source. As a result, the application may fail to work correctly or may become unresponsive.

This error can be encountered in various scenarios, such as while browsing websites or using applications that rely on server communication.

This is a server-side issue, and the solution from this guide applies only if you’re a server administrator. If you’re getting this error as a user in any web app, contact the administrator and let them know about this issue.

This issue can also be associated with The remote session was disconnected and Remote Desktop doesn’t belong to specified network errors, so don’t hesitate to check them out.

If you encounter connection issues, remember this is not the only error users report. We also covered fixes for the upstream connect error or disconnect/reset before headers in detail in our How to Fix Upstream Connect Error Before Headers guide.

Here’s to hoping that you’ve found some enlightenment with this piece. Please share your thoughts in the comments section below.

How to Open ZIPX Files on Windows 10

Those of you that work frequently with archive files such as RAR or ZIP have certainly stumbled at one point or another on a ZIPX file.

For those of you that don’t know, ZIPX files are a proprietary file format created using advanced compression methods developed by WinZip.

In simple terms, ZIPX files are the zip types with the highest compression rates currently available without the data suffering any quality loss.

Given how promising it is to use ZIPX files on a daily basis, we’ve decided to create this step-by-step guide to show you exactly what needs to be done if you want to open a ZIPX file.

What can I use to open ZIPX files in Windows 10?

Since the file format was originally developed by WinZip, it goes without saying that they are the go-to solution in this case at hand.

Of course, this isn’t the only reason why WinZip is a top choice since this tool is, for all intents and purposes, the best archiving and unzipping tool available on the market today.

Besides the fact that it can unzip all major file formats, it can zip them back in even better compression formats to reduce email attachment size.

Not only that but your compressed files can also be protected using banking-level encryption, so your data is not only compact but private as well.

Lastly, your data will now be more readily available for others to use, thanks to the product’s ability to access and manage files on your PC, network, and clouds, as well as its ability to connect to Dropbox, Google Drive, and OneDrive.

Perks of using WinZip

  • Best compression among archiving tools
  • Better management of files
  • Makes it easy to share your files via the cloud or social media
  • Can be used to convert files or watermark PDFs or images
  • Ensures data privacy via banking-level encryption

”WinZip”

”WinZip”

”Extract
”Get
&aff_sub2=Native” current_url=”true” button_text=”Get it now” image=”https://windowsreport.com/wp-content/uploads/2017/11/WinZip-button-210×160.png”]

Extract ZIPX files using WinZip

    You can easily unzip your ZIPX files using the WinZip application. All you need to do is download and install it, then configure it to extract your files wherever you want.

  1. 1. Download and install WinZip on your computer.

  2. 2. Navigate to the file location of your ZIPX file that you want to open.

  3. 3. Right-click the ZIPX file.

  4. 4. Move your cursor over WinZip in the context menu. This will open a large selection of options you can choose from.

    open zipxfiles using winzip
  5. 5. Select one of the available options depending on what you want to do with the ZIPX file. You can unzip it to the same location or choose another location on your PC.

All these methods are simple to use, and we chose WinZip as our pick due to its popularity and the number of features that it supports.

Since the ZIPX file format is recently introduced by WinZip, there are but a few utilities that support it. However, we hope that you now understand what ZIPX file format is and how to work with it.

The steps mentioned above, as well as the software tool recommended, can also be used if you’re interested in the following:

  • ZIPX file opener – WinZip is the best tool that you can use to open ZIPX files since WinZip is the one that created the ZIPX format.
  • Software to open ZIPX files – WinZip is a dedicated archive and unzip tool that can also handle ZIPX files.

If you want us to write many more useful tutorials like this one, let us know by leaving us a message in the comments section below.

How to Duplicate 3 Monitors on Windows 10 PCs

Cloning a screen allows users to duplicate the picture on one screen and have the same picture display on other connected monitors.

On the other hand, extending a screen allows users to have more information spread out on different monitors.

Knowing how to clone or extend a screen with multiple monitors in Windows 10 can be highly useful for a number of situations such as gaming, coding, writing, movie streaming, and more.

If you want to know how to manage multiple monitors in Windows 10 on a PC, or a laptop with an attached screen, then the below information will help you.

How do I duplicate my screen on multiple monitors?

1. Use the Windows 10 hotkey

  1. Connect your monitors to your PC with the DVI, HDMI, or VGA ports that they have.
  2. It is advised to close all other programs for a quicker, smoother experience.
  3. Hold the Windows key + P together to open the Project dialogue box.
  4. Choose one of the options:
  • Second screen only: This option is mostly used by laptop users who want to use a larger, better monitor instead of the one that is on their laptop.
  • Extend: It will enlarge your desktop to fit on your additional monitors. Basically, it gives users more screen space to work with. It is highly useful for gamers who want to view more of the game’s graphics, coders who need multiple screens to work more efficiently, writers who need to research projects while writing, and more. The possibilities with this feature are endless.
  • Duplicate: It will clone the image from your primary monitor to show the same image on your additional displays. This feature can be used for giving presentations, watching movies, or giving a class.
  • PC screen only: This feature only allows information to go to your primary or default display. All other additional displays will show a black screen, regardless of whether they are connected or not.

2. Duplicate monitors using Settings

  1. 1. Press the Windows key and choose Settings from the list of options.

    settings windows 10 taskbar
  2. 2. Go to System, then to Display.

  3. 3. Now you should see all your monitors. If you can’t find all of them, then you will need to click on the Detect button.

    settings duplicate desktop multiple monitors
  4. 4. Once your computer detects your other monitors, you will have several customization options available to you.

  5. 5. Select the duplicate monitors option from the list and choose how many duplicates you want to have.

  6. 6. Close the window to apply the changes.

  7. A handy method to duplicate monitors Windows 10 is through the Display Settings. You will have multiple options to configure the way you want your desktop to be displayed on your additional monitors.

    Furthermore, some monitors will not be automatically detected by your PC, which will require you to manually identify them before you can customize them.

After setting up screen duplication, you can take it further by learning how to connect 3 monitors to a laptop for a more immersive and productive display experience.

If your monitors are of different sizes, and models, then you may want to select each one and choose an appropriate scaling level.

This may also be necessary if your monitors have different levels of DPI. Other features include orientations, which allow users to flip the screen.

Similar to the hotkey function, you will also be able to choose how you will like to use your extra monitors. In other words, you can choose options like extend, duplicate, use one screen only, etc.

3. Use a third-party program

You can always use a different program to clone or extend the screen with multiple monitors in Windows 10.

The best dual monitor software for Windows 10 are specifically designed to be easy to use and are packed with handy and fun features.

We recommend looking for software that includes a taskbar extension feature, an option to maximize the desktop, background settings for individual and multiple monitors, and desktop divider features.

However, if you are looking for a quick and easy way to manage your multiple screens, then the built-in features in Windows 10 are ideal for you.

Let us know if this article helped you set up duplicate screens on your monitors.

6 Best Free Cloud-Based Tax Software for Small Business

Cloud accounting is an online service you can use to get reporting in real-time, as well as visibility in your business or company.

This differs from traditional accounting because it is flexible.

You can access your accounting data from anywhere and any device instead of on-premise computers alone, plus the information is updated automatically for real time financial reporting.

Therefore, unlike the manual or traditional ways of keeping your books fresh, cloud accounting ensures your account balances are accurate.

And with fewer instances of errors from data entry, plus it can handle more transactions and currencies better.

Cloud accounting software thus steps in to make cloud accounting happen, and successfully at that.

What is the cloud accounting software infrastructure?

The software is hosted on remote servers and accounting data is sent to the cloud for processing, then returned to you, the user.

All applications and functions are done off-site, compared to traditional accounting which is done on your desktop.

And the software is accessed remotely, free from installations, and software maintenance hassles. Your team members can also access the same accounting data and software from wherever they are.

In addition to this, regardless of how big you expand your business, you don’t incur additional costs on maintenance and license control or management.

It is secure and comes with sharing options, plus you can access your accounting data even when other servers are down, as this is hosted in the cloud.

A good, yet free cloud accounting software will offer functions such as reporting, inventory, invoicing, payroll, sales tax, job costing, fixed asset tracking, banking, and other basic accounting features.

Here are our top picks for the best free cloud accounting software for 2020.

What are the best free cloud accounting tools for Windows PCs?

FreshBooks – Detailed bookkeeping

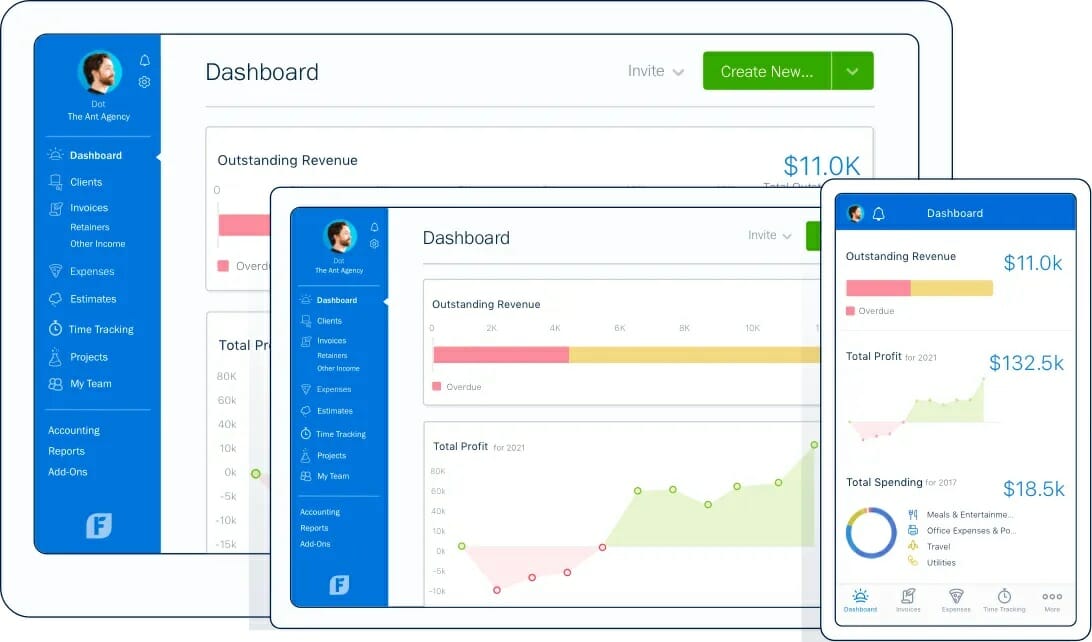
FreshBooks is the cloud accounting software you’re looking for when you plan to put your business on autopilot. It offers business owners an intuitive double-entry accounting experience that is integrated with the rest of its rich tools.

Be sure that you’re one hundred percent involved in the procedure of creating professional invoices, organizing expenses, and receiving payments.

To simplify the FreshBooks features:

  • A solid Framework that provides detailed bookkeeping and effortless insights into your finances.
  • A huge database that allows attaching receipts as well as the possibility to import expenses right from your bank accounts.
  • Invoice creation in a few seconds with detailed reports on expenses, billed hours, and projects.
  • The possibility to add billed hours automatically to invoices and send them right away, with the option to send reminders about late payments.
  • Faster payments to you and your clients with its automatic deposit feature.
  • A database where you have all your conversations, files, and work status, that also provides reports about anything with ease.

Thanks to its flexibility, it helps you save time from chasing your clients or worrying about numbers and dedicate it to growing your business instead.

FreshBooks

FreshBooks

Cover everything from invoices to bookkeeping and save precious time with this accounting tool.
Free trial Visit Website

Zoho Books – Payment reminders

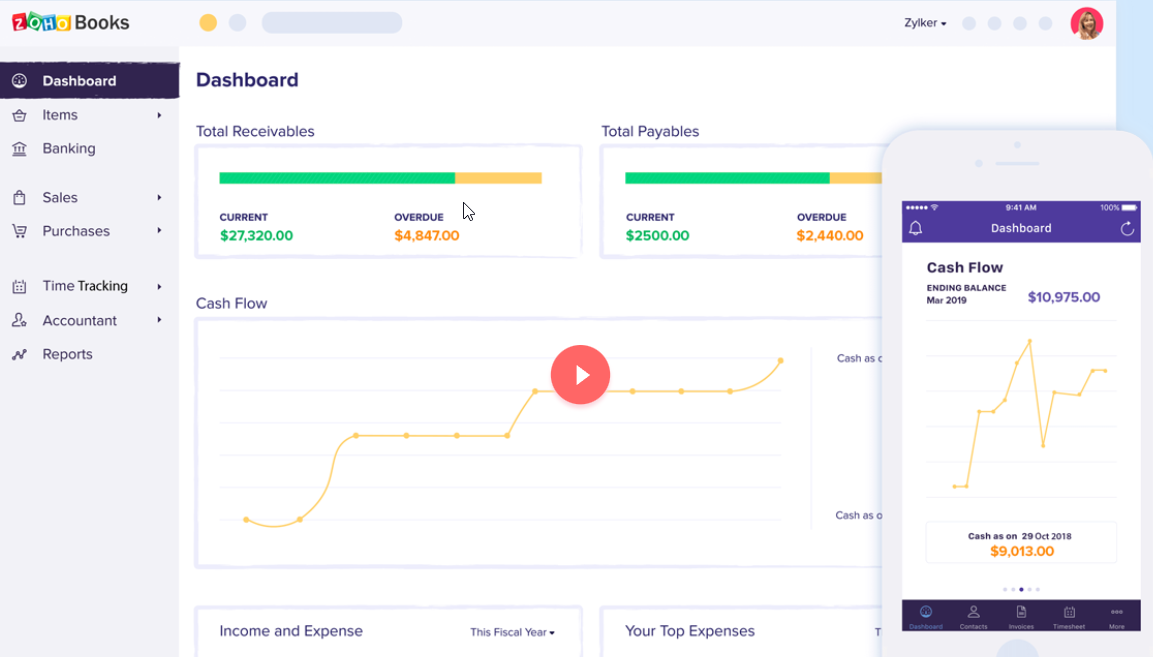
Zoho Books is a free-to-use cloud-based software that offers a full package when it comes to taxing, accounting and invoices. Offering a smart way to save and keep track of every cent, this software allows you to upload every receipt and import expenses right from bank accounts.

With an amazing overview of all expenses, you can easily create custom reports about any data you need, time management, billed hours, upcoming payments, expenses, and many others.

As your clients and employees are your main focus, ZoHo provides a client portal as well as a secure way to store client payment information. As for employees, keep them close to Slack integration and never miss a beat.

What are the pros and cons of Zoho Books?

Pros:

  • Wide range of features for every type of business
  • High-security measures for its features
  • Time tracker for tasks and projects
  • Payment reminders
  • Integrations with Slack, Office, and DropBox
  • Scaling possibilities for freelancers and companies
  • Free with affordable upgrade options

Cons:

  • No fixed asset management
  • Annual invoice limit of 5000

Created to offer everything a business needs to reach the top results in no time. Productivity and efficiency are the top priority for Zoho Books.

QuickBooks – Easy to use

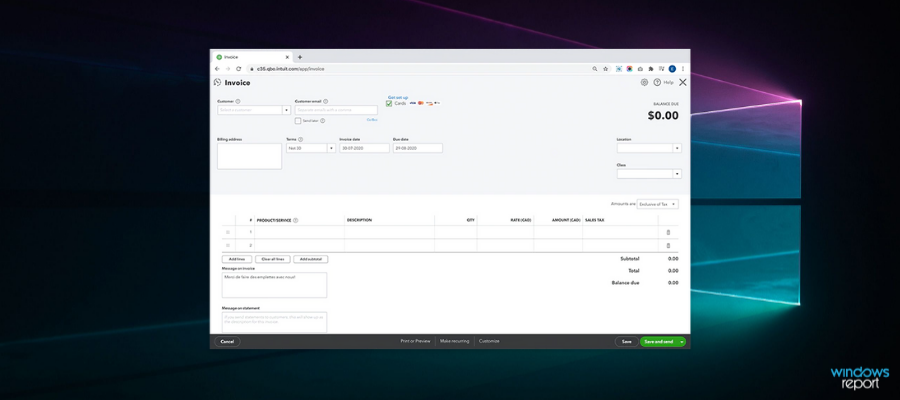
QuickBooks is an exceptionally robust cloud accounting software that manages small business finances and ensures all your decisions are based on actual business data and accurate insights.

To help you manage your business finances in a smart way, QuickBooks assures that your data is stored in the cloud.

You may enjoy easy remote access to your account data from any location and keep the workflow going from PC, Mac, phone, or tablet. This isn’t the only advantage you should expect to get from QuickBooks.

A set of comprehensive financial tools walk you through all processes starting from importing your data all the way to sending custom quotes and invoices to get paid faster than ever before or calculating project profitability.

What are the pros and cons of QuickBooks?

Pros:

  • Easy to use and learn
  • Amazing accounting reports
  • Multilingual invoicing featuring receipt tracking
  • Can be accessed from any device
  • Easy to look up customer information
  • Affordable

Cons:

  • Created for small businesses, using limitations on users/number of transactions
  • Lacks reports outside of accounting

QuickBooks makes sure you always know where your business stands, yet it’s both intuitive and easy to operate. All these make it appealing to small businesses, so choose the plan that works better for your business right away.

Pandle – Great customer support

If you want free cloud accounting software that will last with you until the end of time, Pandle is your best bet because it is free forever!

Pandle provides full VAT management with support for cash accounting and FRS, cash flow forecasting, multiple currency control, and access to your accounts from the mobile app.

It also includes an interactive help center filled with guides and videos plus an FAQ section for all your queries, daily backups, bulk transaction editing, tax estimations, and reminders.

What are the pros and cons of Pandle?

Pros:

  • Simple, intuitive, easy to use, yet very sophisticated
  • Automatically pull transactions from your bank account
  • Premium templates for invoice sending
  • Payment reminders with multiple currencies
  • Great customer support

Cons:

  • No PDF support
  • No customizable invoices

When it comes to security, it offers data encryption with 128-bit SSL just like what is used by banks. Pandle comes as a simple and quick cloud-based software for all small businesses.

⇒ Get Pandle

Wave – High Security

This is one of the best free cloud accounting software and online resources for small businesses.

Some of the benefits you can enjoy by using Wave include a professional image, faster payments, better organization of your transactions and books of account, easy payroll processing with guaranteed accuracy, and it is 100% free of charge.

You can use the invoicing, accounting, receipt scanning, payroll, and other tools all for free, with zero limits, and zero charges, for as long as you want.

It is easy, intuitive, and can be used by anyone, not just accountants, and you can start in seconds as soon as you sign up.

The platform is organized and customizes software instantly so no need for technical configurations, plus you can work from any computer or device, at any time.

What are the pros and cons of Wave?

Pros:

  • Unlimited income and expense tracking
  • No invoice limit with customizable templates and payment terms
  • Unlimited numbers of users
  • Live chat support for all software
  • High security with 256-bit SSL encryption

Cons:

  • No Upgrade plans for better functionalities
  • No phone support

Other features include double-entry accounting software, automatic reports, and simple and instant collaboration with other people you trust to manage your books with controlled access.

Get all your invoicing, receipt scanning, payroll, and other accounting needs in one place on the cloud with professional, customizable, easy, unlimited, and free cloud accounting software.

⇒ Get Wave

TaxSlayer – Smart document managament

Tax Slayer is a service that provides expert-level assistance in tax refunds. They gear towards different types of customers, from individuals that need help with their personal taxes, to big and small businesses. They even offer support for tuition fees.

Getting started with Tax Slayer is easy. It has highly responsive agent customer support via email and phone. They take you through the whole process and explain everything along the way.

You can upload your W-2 form and Tax Slayer automatically uses all necessary information for incoming forms and documents.

What are the pros and cons of Tax Slayer?

Pros:

  • User-friendly interface
  • Supports both federal taxes and state taxes
  • Smart document management and e-filing support
  • Easy to use right from your phone

Cons:

  • Professional support is limited
  • Free package is not recommended for high earners

Tax Slayer promises high accuracy in helping with your taxes. They ensure that their team carefully calculates and researches credits and deductions. They promise reimbursement for any federal or state penalties.

Tax Slayer targets all types of tax-paying customers, so they have various subscription plans that offer specific services depending on your needs.

⇒ Get Tax Slayer

Why do you need a cloud accounting software?

Each of these free cloud accounting software tools comes with distinct features but there are a few things they all have in common including:

  • User-friendly interface compared to traditional accounting software.
  • Free subscription and longevity
  • Simple accounting language
  • Ease of use for both accountants and non-accountants
  • Built for mobile so you can access it from your smartphone or tablet
  • Interactive pages and dashboards

If you want to know which free cloud accounting software is suitable for you, or your business, you may not find one that exactly matches your specs.

But you can tell from the software’s interface, navigation, abilities to import your data, do actual bookkeeping tasks, support for data access, your team size, plus whether the software is customizable and scalable.

User support is also important because you may have questions or troubleshooting issues so you need assistance.

Does any of these six free cloud accounting software match your needs?

Tell us which one you like the most, or if you have used any of these before, share with us your experience in the comments section below.

If you want to learn more about accounting software, don’t be surprised to find more information in our Accounting Software section. 

If you’re in for a more broad approach, check out our Business Software Hub.

Windows 11 Printer Drivers: How to Download the Latest

When you switch to Windows 11, you may discover that you need to reinstall your printer. You must also do that if you crossed to the new OS and bought a new printer.

Either way, we will show you how to install the latest Windows 11 printer driver on your PC with detailed steps.

Even though it’s a simple procedure, if you don’t have the correct driver, your printer may become useless, so follow our exact instructions to get it right on the first try.

However, first, ensure your printer is ready to run and follow the instructions from the manufacturer to set it up correctly.

Get ready for the installation procedure

Before installing the printer driver on your Windows 11 PC, there are a few things to do. We will outline the most critical steps to prepare your device.

➡ Make sure your printer has all the needed accessories

Usually, the printer doesn’t have the ink cartridge installed. Use the indications from the manufacturer to insert it properly.

ink cartridges windows 11
Set the cartridges properly in their slots

Most ink-jet cartridges have click-on caps so make sure that they are in place before starting the printer. Otherwise, you will not be able to use it.

Also, ensure you have all the cables needed to connect the printer. Some printers don’t come with a USB or COM cable so you will have to buy your own.

➡ Connect your printer

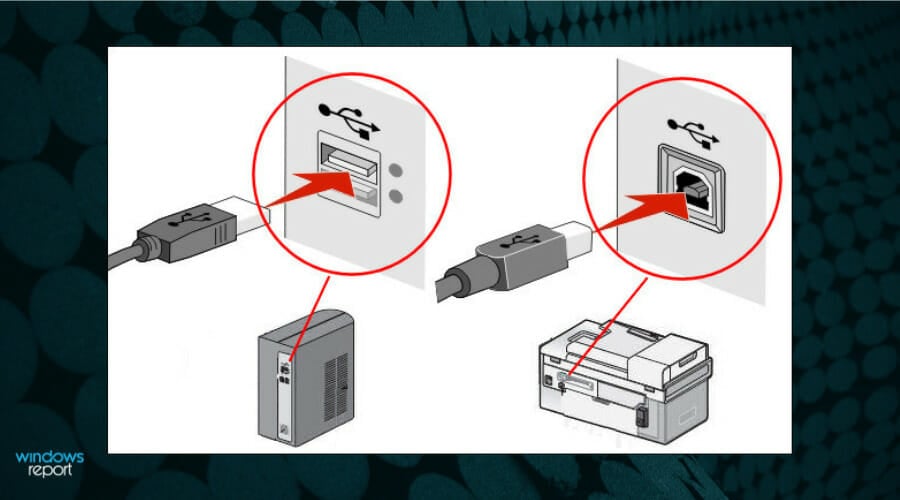
Start by connecting your printer to the outlet and then plug in the data cable. Most of today’s printers have a USB connection.

connect printer cable windows 11
Connect the USB cable to your printer and PC

Ensure that the cable is connected firmly at both ends. If you also want to use it as a network printer, you need to connect it to your router with a LAN cable.

In case of having a wireless printer, consult the manual that came with your printer and follow the required steps to connect it to your PC.

➡ Check if the printer is on

After all the cables are attached, turn on the printer. If the printer is not started, you won’t be able to check the drivers or install the printer.

Most printers have a first-use set-up routine so wait until yours finishes the warm-up procedure before taking any other steps.

How can I install the latest printer driver in Windows 11?

1. Use Windows Update to install drivers automatically

  1. Click the Start button and select Settings.windows settings install printer
  2. Select Windows Updates from the left pane and hit the Check for updates button from the right.windows 11 check for updates
  3. If the system finds new ones, it will download and install them. Next, click on Advanced options.updates advanced options windows
  4. Select Optional updates. If you look closely, the tab will already show you if you have any such updates.optional updates windows 11
  5. In our example, we don’t have any optional updates to install but if you do, check if any of them is a printer-related update and install it.windows no optional updates

Checking for drivers in Windows Update is the most simple procedure to get the latest drivers but if you have an older printer it’s less probably to find it there.

You can handle driver maintenance with specialized tools, such as Fortect Driver Updater. Such software will allow you to scan for, identify, and download new drivers within just a few minutes. Not only that but this software can also be used for long-term monitoring so you can be sure you never run into any driver issues.

2. Remove the printer and get the latest driver

2.1 Remove the printer

If you installed the printer and it’s not working, this step is for you because the first thing you should do is remove it.

  1. Click the Start button and choose Settings.windows 11 start settings
  2. Next, select the Bluetooth & devices from the left pane and click on Printers & scanners from the right.windows 11 printers and scanners
  3. Now click on your printer and select Remove.windows 11 remove printer

The printer should be uninstalled now and we can get back to installing the drivers properly.

2.2 Get the latest driver from the manufacturer

Visit the printer’s manufacturer support website. For instance, we went to the HP printers support website so we can get the latest drivers.windows hp support website

After we entered the product model and number, we were redirected to a page where we found the download link for the printer software. download hp printer driver

You will get a self-installing file that you will be able to run right away. To download Dymo printer drivers in Windows 11, the manufacturer’s website is the best option.

3. Install Windows 11 printer drivers manually

  1. 1. Select the Start button, then click on Settings.

    windows settings w11
  2. 2. Now navigate to the Bluetooth & devices section from the left and choose the Printers & scanners menu.

    w11 printers and scanners
  3. 3. Click on the Print server properties.

    print properties w11
  4. 4. Select the Drivers tab from the top, look at the list, and if you can’t find your printer driver, click on the Add button.

    windows 11 add printer driver manually
  5. 5. This will start the Add Printer Driver Wizard, on which you need to click Next.

    printer wizard windows 22
  6. 6. Select the processor type and hit the Next button.

    windows 11 wizard install driver
  7. 7. Now identify your printer brand, model and hit Next. If you don’t see it, click the Windows Update button and in a few seconds, the list will be populated with a lot of other printer brands and models.

    You can also select the Have Disk button if you already have the drivers.

    w11 select printer driver
  8. 8. Just click the Finish button after you’re done installing it.

    install printer driver windows 11 finish setup
  9. You can perform a manual installation for your new printer device using the built-in Bluetooth & devices menu on your PC. It allows you to search for and install the most recent driver for your printer’s model.

How to set your default printer in Windows 11?

Usually, when you install a new printer, you will be asked if you want to set it as the default one. If you missed that step, you need to perform the quick steps below.

  1. Click the Search icon from the Taskbar, type control panel and select the app from the results.windows 11 control panel
  2. Select View devices and printers from the Hardware and Sound section.windows 11 view devices and printers
  3. Look for the printer you installed, right-click on it and select Set as default printer from the menu.windows 11 set default printer

How can I install a wireless printer on Windows 11?

Many mini photo printers come with a Bluetooth connection so you can start printing from your mobile device or your laptop so we’re going to show you how to install it on your PC.

  1. Click the Start button and select Settings.windows 11 start settings menu
  2. Choose Bluetooth & devices from the left, then click on Printers & scanners from the right.windows 11 printers and scanners menu
  3. Select the Add a device.windows 11 add a printer device
  4. Now click on the Add manually button.manually add a printer to windows 11
  5. On the next window, check the Add a Bluetooth, wireless or network discoverable printer box and hit Next.windows 11 add a wireless printer
  6. At this point, make sure that your printer has Bluetooth or Wi-Fi turned on, and for the Wi-Fi printer, make sure that your PC is also connected to the same local network. Then, select the printer from the list and click Next.choose device or printer windows 11
  7. The system will complete the installation, and you will be able to use it properly.

That’s it! Now you know how to set up your printer, download and install its latest drivers, and set it as the default printing device on Windows 11.

It’s practically all you need to use your printer on your PC, and we hope that the information will help you along the way.

Since Windows 11 is pretty new if you have an older printer, you may have problems finding the new driver for the new OS, but reinstalling it will at least load a generic one to use its basic features.

And if you’re wondering: Can you download Brother printer drivers? rest assured that our guide can help.

We also have a guide on how to download Canon LBP2900B driver, so don’t miss it.

If you have any questions or need any other information, you can address them in the comments section below.

3 Ways to Fix There’s a Problem With This Formula Excel

Some Windows 10 users encountered an unexpected issue with Microsoft Excel. When using a formula to make different calculations, the error message There’s a problem with this formula disallows the formula function.

This is how one user describes this bug:

I have a simple formula that I have been using for years. Actually, worked until a couple of days ago.  =round((a2/0.25),0)*0.25. This is used to round our retail price to the nearest quarter. When I tried to execute this formula now, I get an error window: There’s a problem with this formula.

If you’re looking for a way around this issue, follow the solutions below.

How to fix the Excel’s There’s a problem with this formula error?

1. Check your system’s regional settings

  1. Open the Control Panel
  2. Under Clock and Region, click Change date, time, and number formatschange date and time control panel
  3. In the Formats section, click Additional settings…additional settings windows
  4. Under the Numbers tab, make sure that the List separator is set to comma(,), if not, set it solist
  5. If the issue persists, change the List separator with a semicolon (;) and use it in your formula to replace the comma.

2. Change correct spelling settings

  1. Open Microsoft Excel
  2. Select File > Optionsexcel formula issues
  3. Go to the Proofing section > make sure to have the box next to Ignore words that contain numbers tickedexcel ignore words that contain numbers

Checking the spelling and modifying the correct spelling setting can also help you fix the #NAME errors in Excel; read this to learn more.

3. Enable system separators

  1. 1. Open Microsoft Excel.

  2. 2. Select File > Options.

    excel formula issues
  3. 3. Navigate to the Advanced options.

    excel advanced settings
  4. 4. Tick the box next to Use system separators.

  5. 5.  Click OK to apply and save the changes.

  6. If you encountered the Excel there is a problem with this formula error, you can get rid of it by enabling system separators in the app’s built-in settings.

If you face the # Value error, check the formulas, look for blank spaces and special characters, and remove them; read this guide to learn more about it.

Let us know if our guide helped you fix the Excel issue in the comment section below. Likewise, if you have any questions, don’t refrain from writing them down.

How to Easily Change the IP Address of Your QNAP NAS

QNAP’s Network Attached Storage (NAS) is a system that connects hard drives to your internet to provide extra storage for files and media. Here’s how to easily change the IP address of your QNAP NAS.

What is the IP address of my QNAP NAS?

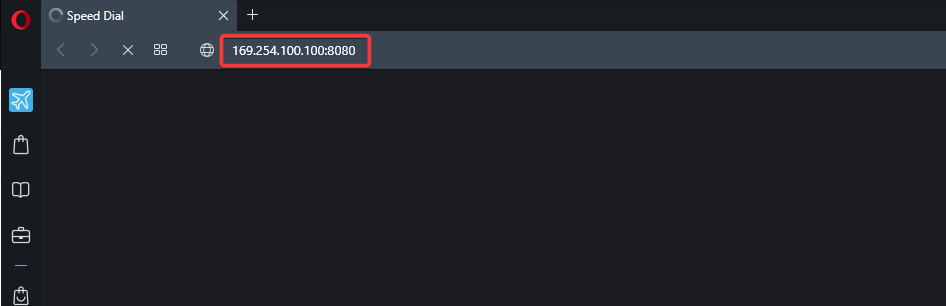
Users can locate the IP address of all devices connected to your network using Command Prompt. However, the default NAS IP address is 169.254.100.100:8080. If your NAS uses DHCP network protocol, the IP address may be different.

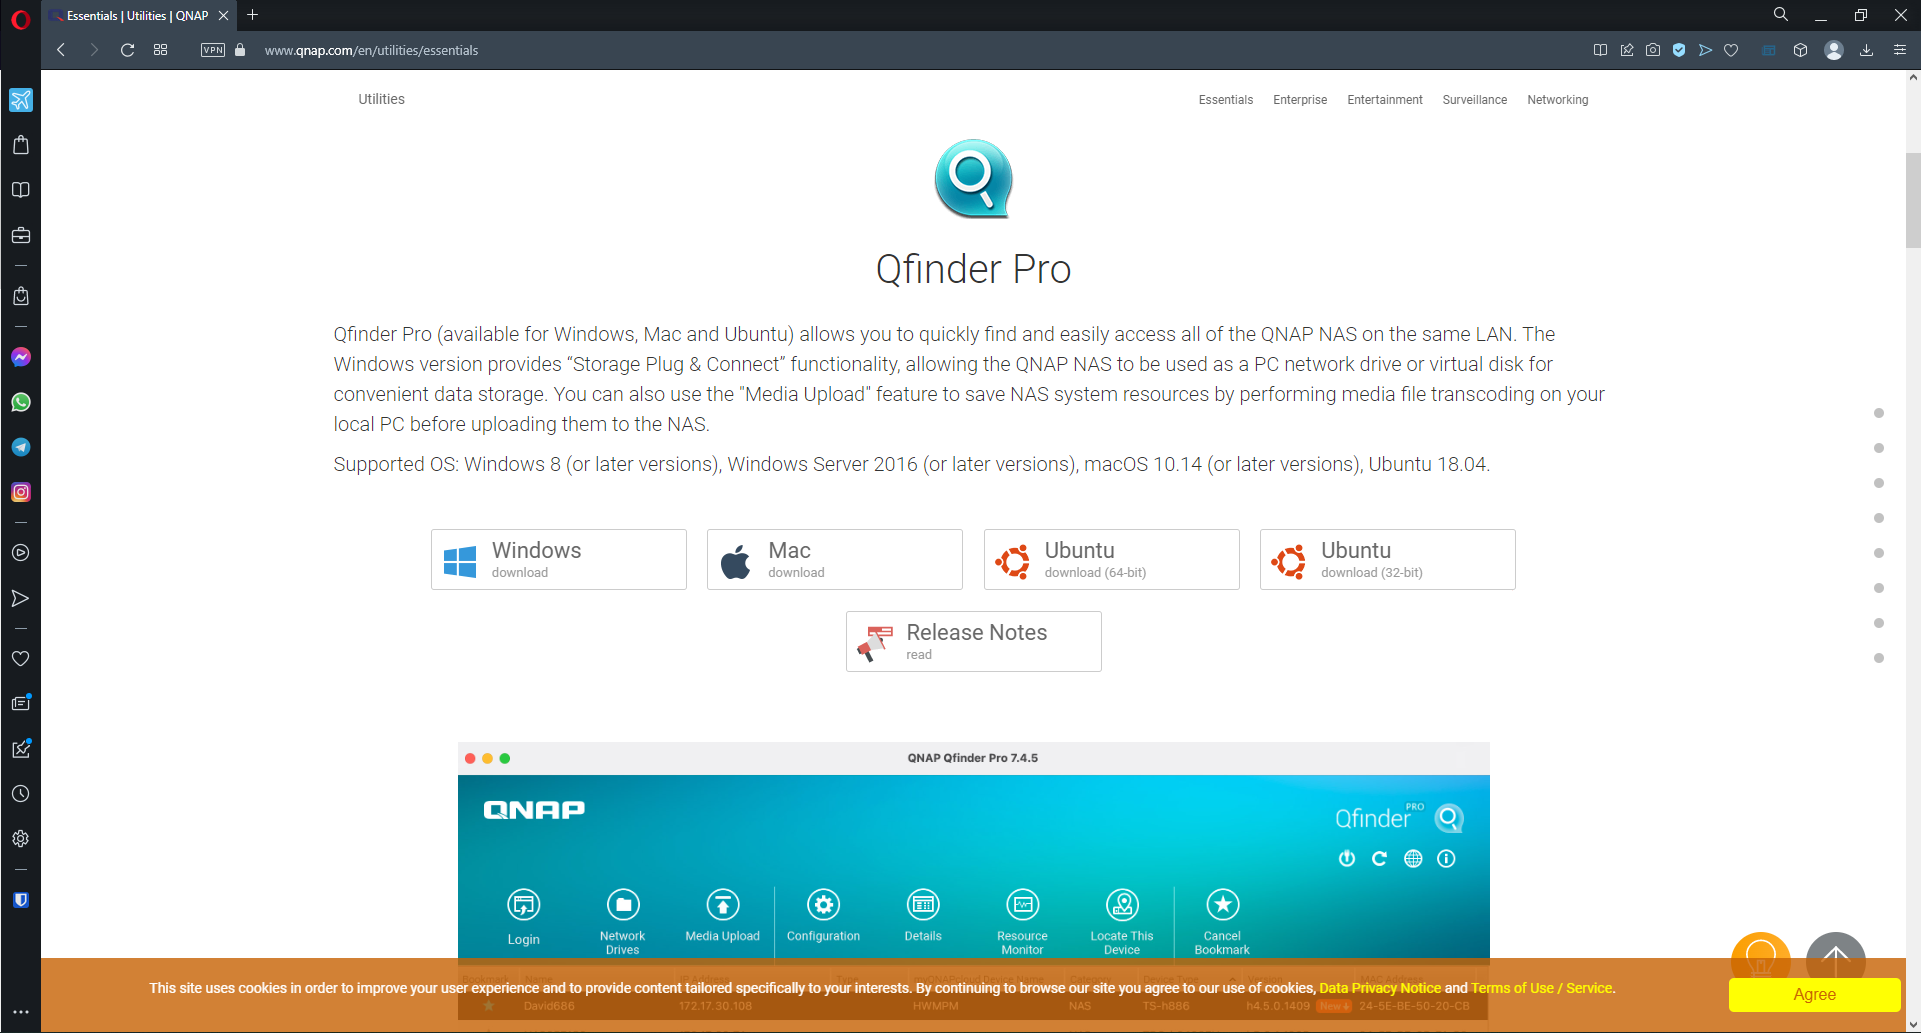
The QNAP Qfinder is also a quick way to find the IP address of your NAS.

QNAP Qfinder.

Does my NAS need a static IP?

It’s not required for your NAS to have a static IP address, however, having a static IP makes it easier to manage internet traffic and firewalls. A static IP will give users a fixed IP address regardless of the network they are connected to.

How do I change the IP address of my NAS?

1. Set a static IP address

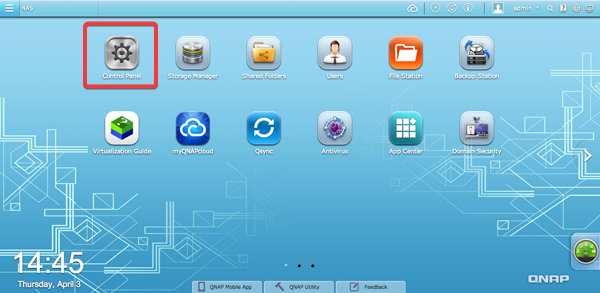
  1. Open the QNAP GUI and click on Control Panel. QNAP control panel.
  2. Under System, select General Settings.
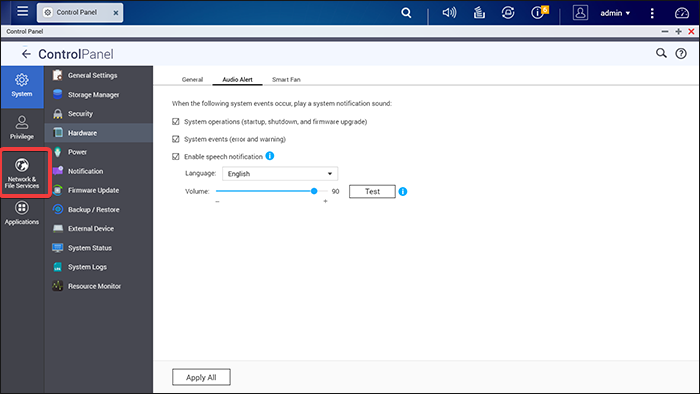
  3. Select Network & File Services and click Network & Virtual Switch. Click QNAP network and file sharing.
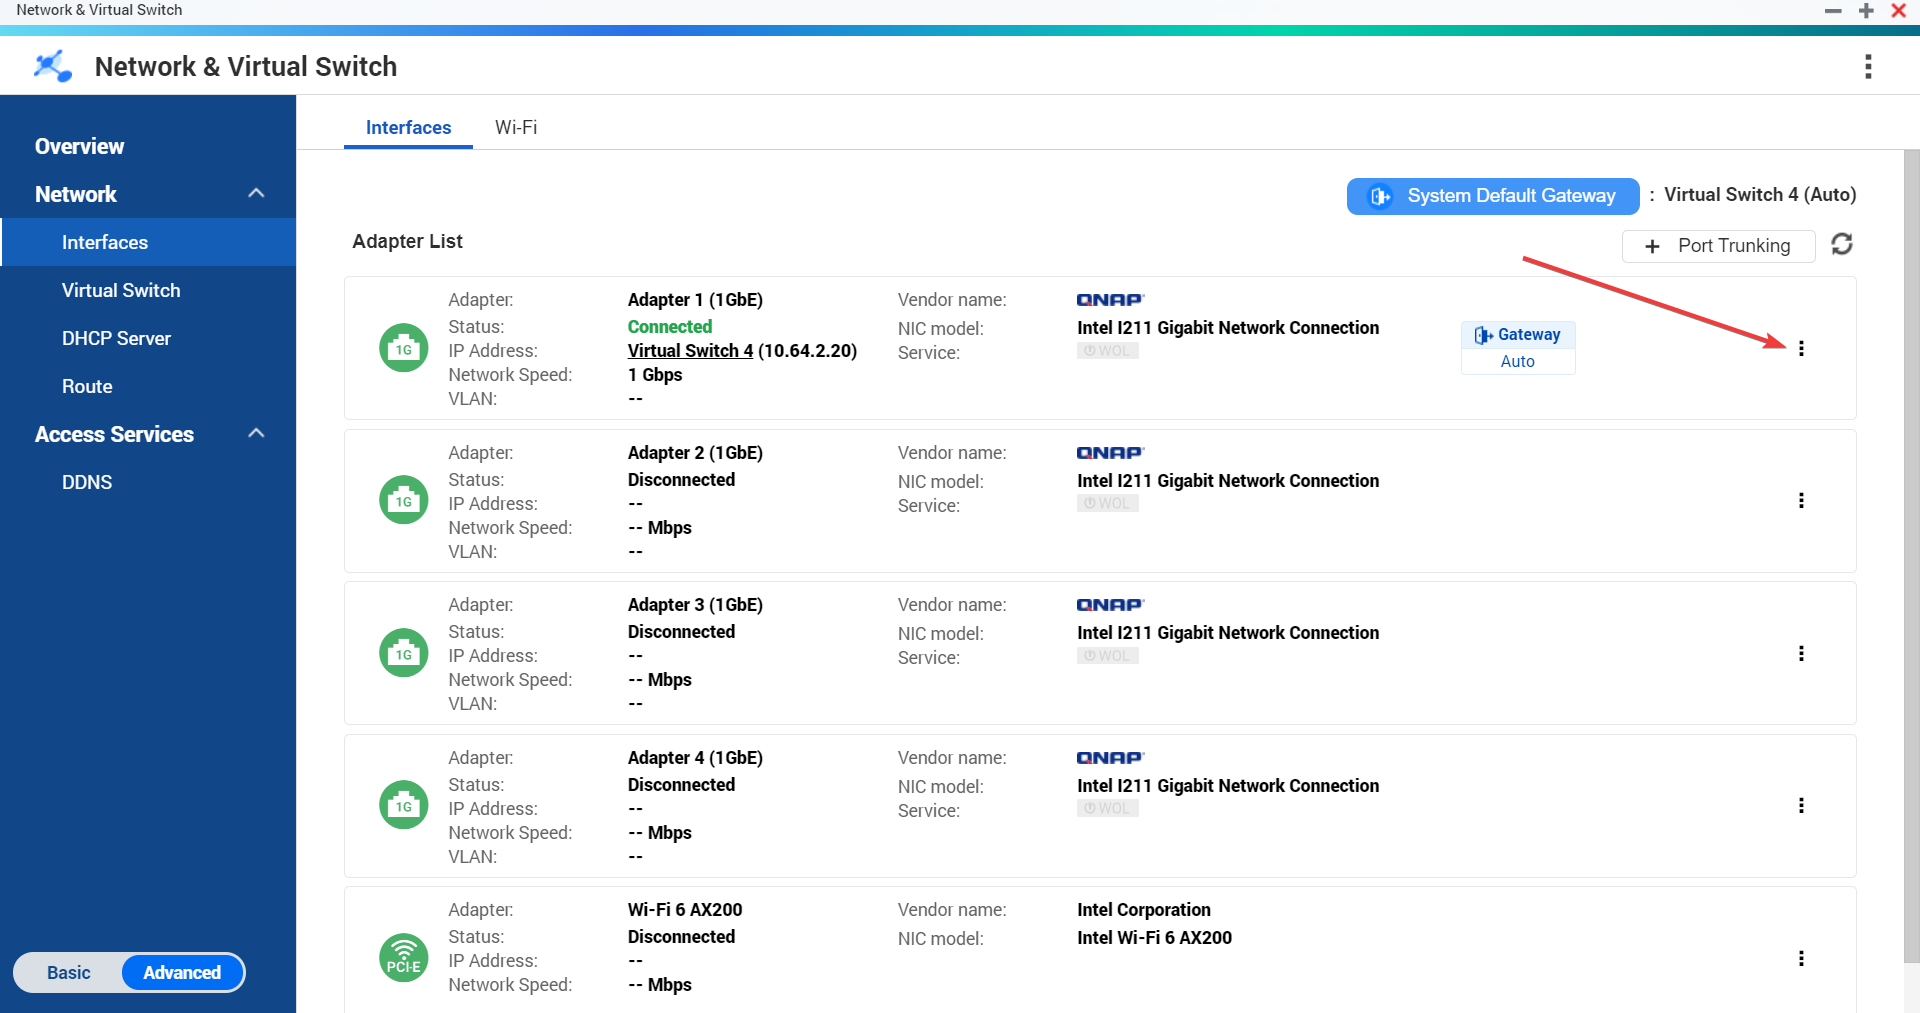
  4. Under Adapter List, locate the adapter with the IP address you wish to change and click on the three dots next to it. Click on the three dots to change the qnap nas static ip address.
  5. Select Configure and input your static IP address, then click Apply.

This is how to set or change a static IP address for your QNAP NAS.

2. Change IP address

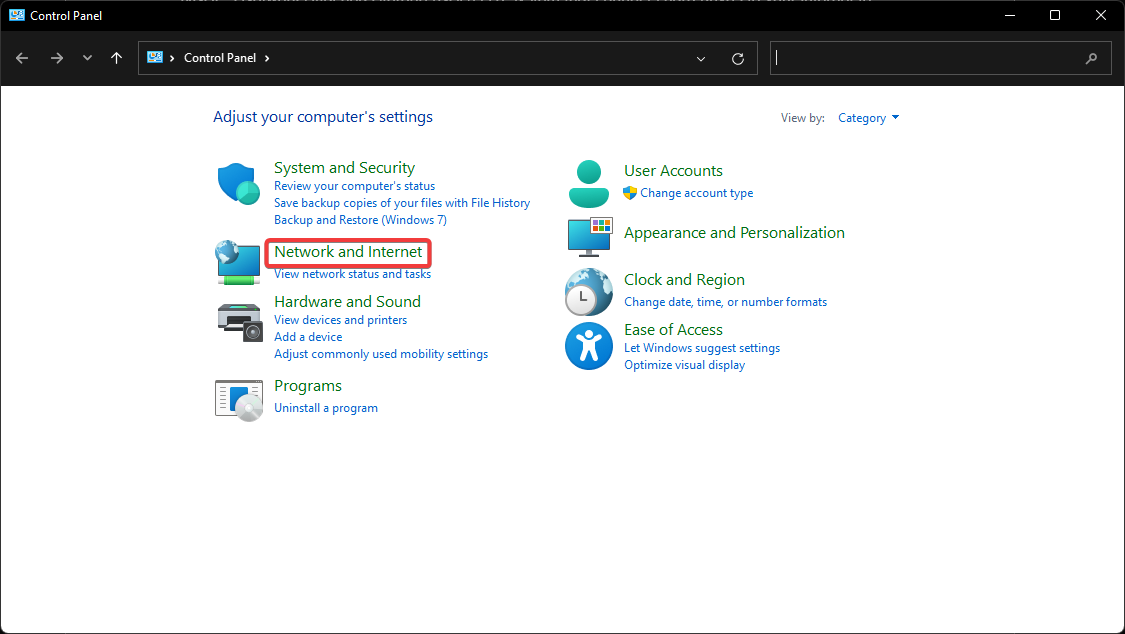
  1. Click on Start, search for Control Panel, and hit Enter.
  2. Select Network and Internet. Click on network and internet in control panel.
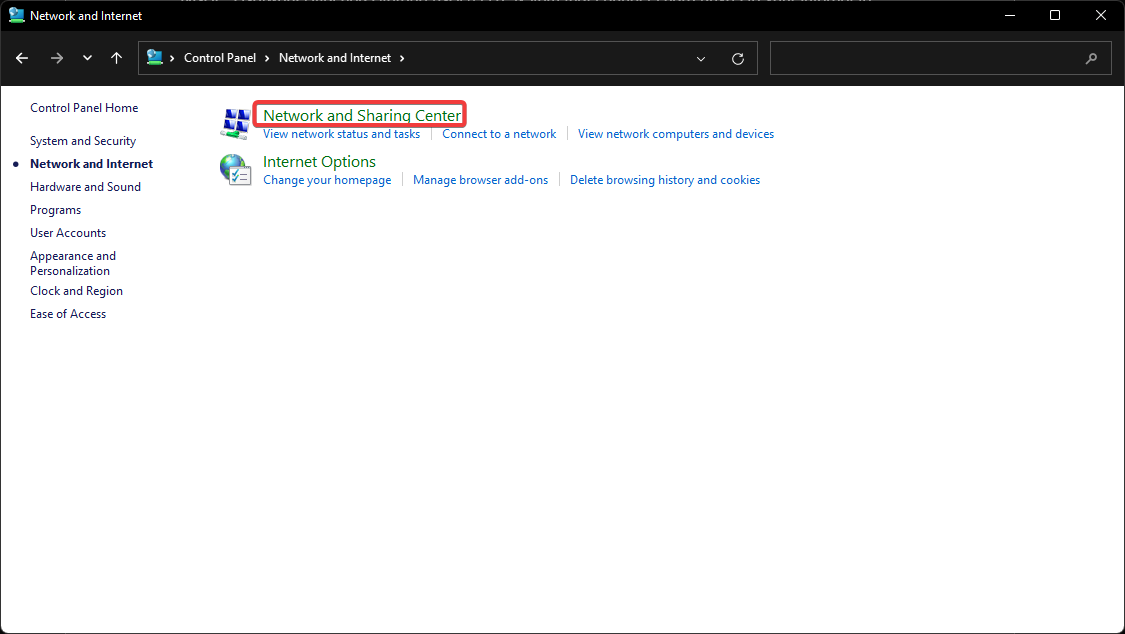
  3. Click Network and Sharing Center. Network and sharing center to change ip address for qnap nas.
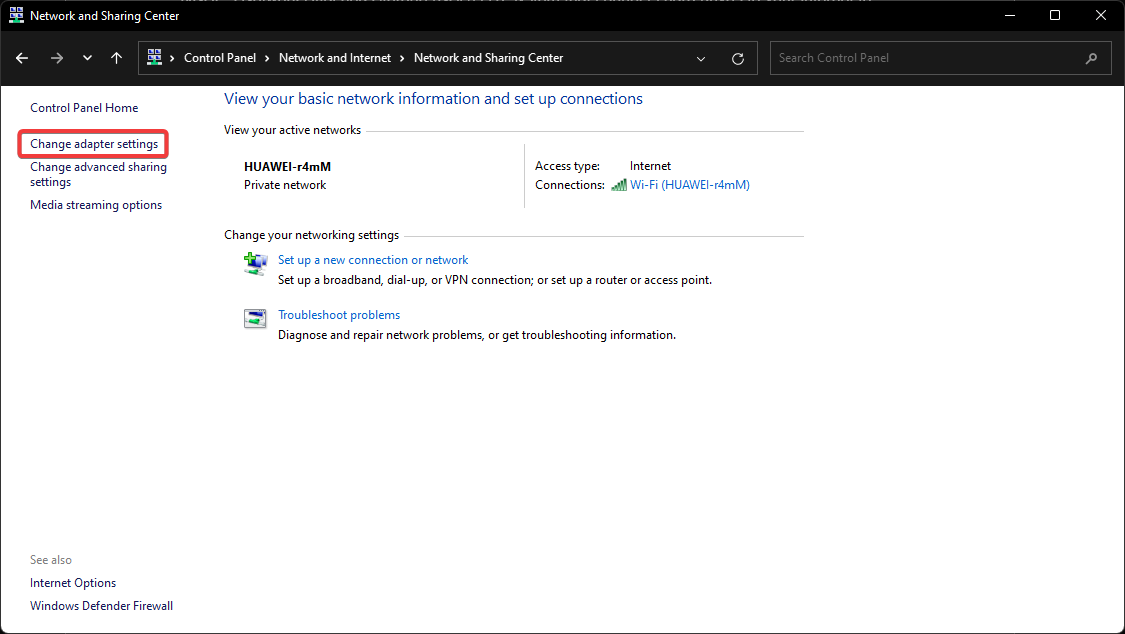
  4. Select Change adapter settings then right-click on your NAS and select Properties. Click change adapter settings to access qnap nas ip address.
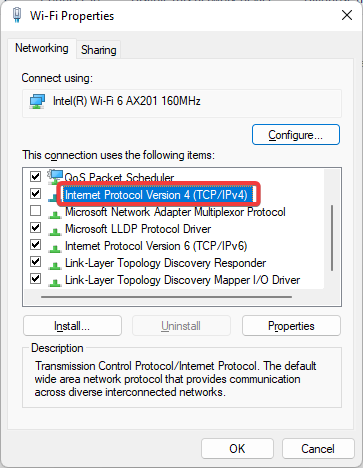
  5. Under This connection uses the following items, double-click Internet Protocol Version 4 (TCP/IPv4). double-click on internet protocol version 4 to change ip address qnap nas.
  6. Select Use the following IP address and input your IP address then click OK.

This can also be done from the QNAP GUI in the Control Panel.

How do I access QNAP NAS locally?

  1. Connect your PC to the same network as your NAS.
  2. Open any web browser and type in the IP address of your NAS in the address bar and hit Enter. enter ip address in your web browser.
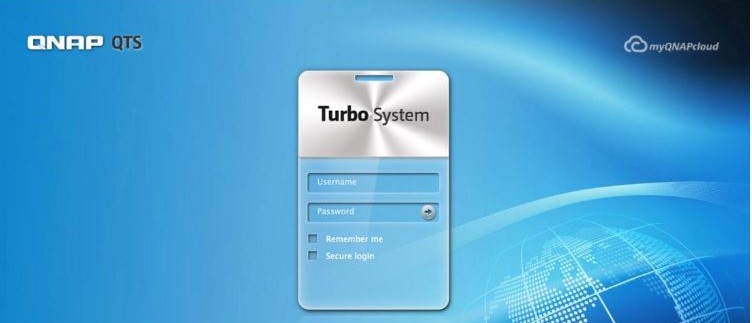
  3. Enter your QTS username and password (if you don’t have one, the default username and password is admin). Enter QNAP QTS login info.
  4. Click Login.

You can access your NAS locally if your NAS and PC are connected to the same network.

We hope you were able to change your IP address for your QNAP NAS by following one of the above solutions. For recommendations on the best QNAP NAS backup software, we have a guide for that. Let us know in the comments which step worked for you.

How to Stop CCleaner Popups on Windows 10

CCleaner is a great system optimization application that can save you a lot of hard drive space. You can erase Windows and third-party software junk files with CCleaner‘s cleaner tool.

CCleaner even provides alerts, or notifications, that tell you when the software can free up more than 500 megabytes of hard drive space.

Those alerts pop up just above the system tray and include a Click here to clean (or download) button.

CCleaner‘s system and active monitoring are both enabled by default. However, the alerts are hardly essential as you can always initiate a file scan manually.

Furthermore, active and system monitoring also requires some extra system resources.

If you don’t need CCleaner‘s alerts, this is how you can stop them from popping up.

How can I turn off CCleaner notifications on my Windows 10 PC?

1. Adjust the Monitoring Settings in CCleaner Pro

CCleaner PRO includes extra system monitoring options and a browser monitoring setting, which are grayed out in the freeware version. PRO users can further configure the notifications with those settings.

For instance, you can enter a higher value in the If cleaning saves more than text box to reduce the number of alerts.

Alternatively, select Automatically clean on closing without notification from the then drop-down menu to remove the alerts but keep system monitoring on.

Enable browser monitoring is an extra option that can expand the software‘s notifications. PRO users might need to uncheck that check box if it’s selected.

However, you can also configure that setting by selecting Automatically clean on closing without notification from one of the browser drop-down menus. CCleaner will then automatically erase temporary browser files without any notifications.


2. With Windows Settings

Alternatively, you can also stop CCleaner‘s, and other app’s notifications by configuring Windows settings.

  1. To do that in Windows 10, press the Cortana button to open that app’s search box.
  2. Enter the keyword ‘notification’ in the search box.
  3. Select Notifications & actions settings to open the window in the snapshot directly below.notifications & actions windows 10
  4. Scroll to the Get notifications from apps and other senders option, and switch that setting off.

3. Close CCleaner’s Notification Area Icon

Alternatively, you could close CCleaner‘s notification area icon when you need to stop the software‘s alerts. Then you can keep the monitoring on and temporarily turn it off when required.

The CCleaner icon will be on the Windows 10 system tray unless you’ve switched the Always show all icons in the notification area option off.

disable CCleaner taskbar notifications icon

To temporarily stop CCleaner‘s alerts, right-click its notification area icon and select Exit. That will turn CCleaner‘s monitoring off until you restart the software.

If the Always show all icons option is off, click the small arrow to open the icons that would otherwise be on the system tray as shown directly below.

remove CCleaner from notifications area windows 10

4. Via Settings

  1. 1. Launch Ccleaner.

  2. 2. Select Options from the menu to open further settings.

    how to stop ccleaner popups menu
  3. 3. Then click on Monitoring to open the options shown directly below.

    ccleaner notifications menu
  4. 4. Now uncheck the Enable system monitoring check box.

  5. 5. In addition, deselect the Enable Active Monitoring option to switch off program update notifications.

    stop ccleaner popups disable active monitoring
  6. 6. A dialog box window will open requesting further confirmation to turn off active monitoring. Press the Yes button to further confirm you don’t need the notifications.

  7. The freeware CCleaner version has two built-in monitoring settings that you can turn the popup notifications off with. By disabling system monitoring and active monitoring, you can stop CCleaner from sending any more notifications in the future.

So, there are a few ways that you can stop CCleaner‘s alerts. You can switch them off entirely, configure the alerts in the PRO version so that they pop up with less regularity, or temporarily switch off CCleaner‘s monitoring via the notification area or Task Manager in Windows.

We hope that our article helped you disable CCleaner popup alerts on your device. If you have any questions, let us know in the comments section below.

Billable Hours Software: 8 Best to Use in 2026

Time-tracking software allows users to track billable hours, and such tools will turn out ideal for HR consulting businesses for instance, by pairing it with a good CRM for HR, project and task management can be brought to another level. In the consulting business and not only, but clients are also billed on an hourly basis, and sometimes you don’t know how to track your time accurately. This is where billable time-tracking software comes in handy.

The ideal software for tracking billable hours will offer at least one free integration with a popular tool; it will provide a project management feature, a billing system, and maybe even a mobile solution.

We picked out five of the best tools for tracking billable hours that are also compatible with systems running Windows, so make sure to check their features and functionalities.

Track billable hours with these programs on Windows 10

TimeCamp

Time camp

Another great software that can help you track billable hours is TimeCamp. This tool supports visual time tracking so you can easily see all activities and their durations on a calendar. Thanks to this feature, you can easily add subtasks and notes, and with the support for both mobile and desktop apps, you can always keep track of billable hours.

Another great feature of TimeCamp is the ability to calculate income and create detailed reports. To make sure that all your activities are perfectly logged, there’s an automatic time-tracking feature available as well.

The application also supports invoicing, so you can easily create professional invoices for your clients. The automatic invoicing feature is available, and it allows you to create invoices based on the number of billable hours easily. This feature also has an integrated payment gateway, and it even supports notifications, so you’ll know as soon as your client views the invoice.

The Time Management feature is also available, so you can easily see what your employees are doing. Thanks to this feature, you can see the most time-consuming websites and applications and track offline activity with ease. There’s also automatic usage tracking, so you can easily see how each employee spends their day in order to ensure maximum productivity.

Another feature that’s worth mentioning is Attendance tracking, and thanks to it, you can easily see who’s in and who’s out at any time. In addition, you can easily track the attendance, absence, and holidays of your employees. You should also know that TimeCamp is compatible with 70+ different online services, ensuring maximum productivity.

Overall, TimeCamp is an amazing service for tracking billable hours, so feel free to try it out.

Overview:

  • Visual time tracking
  • Income calculator, detailed reports
  • Automatic time tracking
  • Automatic invoicing, integrated payment gateway, invoice notifications
  • Time management
  • Attendance tracking
  • Compatible with over 70+ online services

Get TimeCamp today

FreshBooks – Most professional

FreshBooks is an accounting software for individuals/businesses that focuses on professional time-tracking for both employees and projects. With a simple feature, everyone can bill their own time into important projects so no work time is missed. Also, it can automatically add billed time to invoices for improved efficiency.

This soft was created for anyone to use, from freelancers, self-employed professionals or businesses of any kind. Following, FreshBooks features:

  • Professional invoicing to impress your clients, show them clearly the costs and the project’s time management from the time-tracking option
  • Plenty of payment options to satisfy every client, as well as automated reminders for every unpaid invoice
  • A simple database of your every expense with attachable receipts and option to import them right from your bank account.
  • A smart management of all the sides, contractors, teams and clients where they can update each other with ease about any change in the project, about any reached milestone and so on.
  • Dashboards and reports about every area of your business right from the database, progress on each project, billable hours and whatever data you need to have a better overview.
  • Business Health reports created by the data you provided to see how healthy the cash flow is, the profitability and detailed reports of spending.
  • Mobile compatibility, keep your business connected with clients from anywhere in the world, send invoices, check projects and track expenses at the touch of the screen.

FreshBooks is going for a professional take on every features that it provides. Having a tool that makes sure that all your clients are satisfied, all the invoices are sent in time, and no payment is late is the perfect way to boost the image of your work.

Fresh Books

Fresh Books

A professional approach to every detail of your work.
Free Trial Visit Website

ZoHo Books – Best overall

While it’s easy to track each employee’s billable hours with this tool, ZoHo Books also provides the ability to track how much time was spent on a project, on a task or even turn that time into money. On top of the amazing time-billing system, it centralizes all data from your business into one single app.

ZoHo provides a full package of features that will boost your business’s productivity. These features allow you to:

  • Boost the time efficiency of your business with a time-tracker for individuals, projects and tasks with easy logging right from the clock widget.
  • Save time by assigning tasks and checking their progress right from the tool, also track unbilled hours and expenses.
  • Create invoices in seconds, directly from projects with online payment options for clients as well as the choice to send reminders directly to them.
  • Know where every cent is going by having all your expenses packed into one database, and also have the ability to upload receipts to keep track of all the payments you’ve made.
  • Keep your employees connected with integrations through Slack, share and save important documents through Office or DropBox and secure all your payments with Stripe and PayPal.
  • Get a smart overview of your business with customizable dashboards, data filtering and easy access to the report for better insights.
  • Keep inventory levels at a glance if you are based on palpable products, also keep track and set reminders to replenish when it gets low

As every company needs a tool to keep track of billable hours, accounting, inventory, etc, ZoHo Books compiles all these features into one software, so any business can reach the top.

ZoHo Books comes with a free version, but for unparalleled results and features, it comes with a few upgrade options.

ToDo

ToDo is a simple software that is able to pack a bunch of amazing features that will support the organization of your business stuff. It is easy to implement and use, and the tool requires no training at all. This makes it also suitable for beginners who have never used a time-tracking tool before.

Check out some of its great features and functionalities:

  • This program allows organizations to centralize their tasks, to offer them to the right personnel, and to organize assignments easy and fast.
  • The tool comes with a user-friendly interface, and the system is backed by 16 years of experience in the business management software industry.
  • This tool offers impressive solutions for smaller teams, start-ups, and also for larger enterprises as well.
  • You will be able to decide what you need to get to work and how to keep track on the progress.
  • This program also allows you to share files and integrate your account on Dropbox, Google Drive and more.
  • You will be able to keep track of the billable hours of your employees in order to enhance productivity.
  • ToDo is a scalable tool that allows users to grow and it will adapt to your needs.

There are three pricing plans that are offered by this program, and it’s best to head over to ToDo’s official website to check them out: Basic, Pro, and Plus.

Get started with ToDo

Check out more of its useful functionalities on the program’s website and see if it suits your needs.

All these tools for keeping track of billable hours are compatible with Windows systems, and they all come with their unique sets of features.

Make sure to visit their official websites in order to be able to analyze more in-depth functionalities and make the right choice for your needs and skills.

Harvest

Harvest just happens to be one of the best time tracking tools out there. This is a web-based business management tool that has been created to provide individuals and businesses with very useful time monitoring features.

Take a look at some of the most interesting ones below:

  • Aside from monitoring personnel time, this software is also able to generate professional-looking invoices straight to your clients.
  • This software comes with a brilliant interface which is also user-friendly and fast.
  • There are other exciting features included in this tool such as powerful reporting tools that offer users real-time access to information regarding budget, projects and time.
  • You will be able to get reliable and actionable insights in order to make intelligent business decisions, enhance your profitability and estimate various projects.
  • Using this tool, you will be in control of billable time tracking with a single click of a button.
  • Automated notifications are sent to the staff to show them their time reports and to help them with productivity management.
  • You will also be able to generate and send invoices in order to speed up the sales process and boost revenues as well.

This tool works on Windows systems and more, and you can check out more of its great features and functionalities on Harvest’s official webpage.

You will get the chance to try the program for free, so its’ best to start with the 30-days trial just to see how this software works for your business.

ClockShark

ClockShark is another robust program that is also easy to use and that will successfully track time.

Using this tool, construction and field service providers, for instance, will no longer have to monitor the crew’s billable hours manually. This is because this software offers them the opportunity to track the employee’s hours automatically through their mobile devices including systems running Windows.

Check out the most exciting functionalities and advantages that come packed into this tool:

  • Using ClockShark, the companies will no longer have to hand out paper timesheets to their crew and manually count their billable hours.
  • The program works on desktops and mobile devices as well; of course, this includes Windows phones.
  • This tool allows the companies to save lots of money because they will not have to purchase dedicated hardware in order to be able to monitor the employees.
  • ClockShark also offers you all the necessary tools that you need to manage your workers.
  • The program lets you drag-and-drop the employees’ names to a calendar and set the work schedule while the staff receives notifications that will let them know where they’re expected for a job.
  • The real-time reporting features let employers keep tabs on their workers at all times.
  • The clock punch locator feature uses the GPSTrack technology that monitors workers.
  • Because of this tool’s integration with QuickBooks, ClockShark makes it easy to transfer payroll information.

Using this program, businesses will be able to rest assures that the employees are paid the right amount of money, and the clients are billed flawlessly.

You can start tracking time for free, and all you have to do is to head over to ClockShark’s official website.

Replicon

This is a useful suite that packs versatile business management and workforce solutions. All the features that are included in Replicon make this software a popular choice among companies. The program offers user lots of choices that they can implement in their organizations.

Take a look at some of the best and the most useful functionalities that are included in this tool:

  • To use Replicon, you will not have to perform complicated setups or to go through sophisticated training.
  • There’s no need for installing any additional hardware at your workplace on your systems.
  • This tool will help you manage your employees in the most efficient way possible using the flexible client management and its amazing billing features.
  • It’s not important what size your business is because Replicon can serve both start-ups and enterprises.
  • This tool has received a lot of recognition and award for its capabilities, and this is one of the reasons for which it’s getting more and more popular.
  • The Professional Service Automation feature offers users lots of customization options for tracking time.
  • You will be able to track your employees, projects, clients and all kinds of tasks.
  • Using Replicon, you can manage your customer and your portfolios effortlessly.
  • There are various reporting options that come with user-friendly interfaces.
  • It’s also essential that real-time data can be exported anytime in order to reduce the need for manually entering the errors.
  • Payroll management lets managers handle employee statistics regarding leaves, absences and more.

You can check out more features that are packed into this useful tool and sign up for a free trial on Replicon’s official website just to get the hang of how everything works.

Trigger

TriggerApp is another program that is extremely useful to keep tabs on billable hours for your employees. You can adopt this solution in order to improve your business tracking, collaboration, invoice related work processes and more.

You will be able to add tasks, projects, and companies to organize the office tabs efficiently. You can also check the allocated budget precisely.

Take a look at more useful functionalities included in Trigger:

  • Using this tool, you can monitor the deadlines, allocated hours, and the budgets for all of your projects.
  • This program was created to enhance the productivity of your business.
  • It mixes a variety of functionalities into a single working place.
  • Trigger comes with a beautifully designed workflow that lets your team discuss with customers and among themselves, and they can also share files, manage projects and more.
  • This tool lets you accurately track time, and this will definitely boost your business’ productivity.
  • You can invoice customers for projects with just a single click.
  • Trigger allows you to set and monitor your work budget and you can integrate the program with the platforms that you are using including Google Apps, Xero and more.

You will be able to access this tool anytime from any browser, and this will make it really easy to stay updated on your projects, deadlines and more.

The program is compatible with systems running Windows, and you can find more about Trigger by heading to its official website.

How to Use Firestick Without a Remote

Amazon’s popular streaming device Firestick TV comes with its own Alexa-enabled remote helping with voice commands and navigation.

However, what if you have to use Amazon Firestick without remote?

It happens that we misplace the TV remote more often than not. Thankfully, Amazon allows you to use your iOS and Android smartphones as a replacement for most of the functions.

In this article, we walk you through a step-by-step guide to help you use the Fire stick without a remote, by using your smartphone.

Control Fire Stick without remote

  1. 1. Download and install the Amazon Fire TV app for Android or iOS.

    use Amazon Firestick without remote
  2. 2. Open the app once the installation is complete.

    use Amazon Firestick without remote
  3. 3. Make sure your Firestick TV and the phone with the app are connected to the same network.

    control fire stick without remote smartphone
  4. 4. Select your Amazon Fire TV from the list of available devices.

    use Amazon Firestick without remote
  5. 5. Enter the code displayed on your TV on your smarthphone to pair it to the TV.

  6. 6. You can now use your smartphone as a Firestick remote.

  7. If you cannot find your TV remote or simply want an alternative, you can use your smartphone as a replacement for the Firestick remote. All you need to do is download and install the Amazon Fire TV app on your phone, then pair it to your TV.

    Using the app is fairly simple. To navigate across the device, use the touchpad on the app and swipe left/right/up/down. To select an item, simply tap once after highlighting the item.

    The app also offers voice search, playback controls, a keyboard for text input, and quick access to your apps and games. You can play casual games just like you used to do with the Amazon Firestick TV remote.

    However, according to Amazon, not all the games are supported or playable using the remote app. To play games, you are better off purchasing the official game controller from Amazon.

That’s it about how to use Amazon Firestick TV without a remote. This will save you an additional $30 in buying a new remote in case you have lost it.

While all the features of the remote may not be available, the remote app works perfectly fine for the most frequently used features of Firestick TV.

After setting up control through your smartphone, you can also activate the History Channel on your Firestick TV to start streaming documentaries, shows, and exclusive content directly on your screen.

Let us know in the comments section below if you succeeded in using your Firestick without a remote. If you encountered any difficulties, let us know in the comments section below.

Edit your PDF Documents with UPDF Software Across all Platforms

PDFs are the most popular type of document used by businesses and organizations. And here, we’re going to talk about an editor that makes it all a lot simpler: UPDF across all platforms.

Everyone is using PDF documents because they have a modern design, they can be standardized and, most of all, they are secure.

Besides being supported on all platforms, UPDF is free and comes with a simple interface that makes creating and editing PDFs easier.

What are the best features of UPDF?

1. Edit text and image in PDF

With UPDF, editing the text and images in a PDF is as easy as clicking the paragraph and starting to write.

Of course, for text, you may also choose a font from the hundreds available, the alignment, the style, and even the color.

Adding or deleting images is now restricted to the Mac version of UPDF only, but image editing is coming also for the Windows version very soon.

With this feature, you will even be able to crop, extract, replace and rotate the images.

2. Convert PDF to other formats

Another important feature of UPDF is that you can save the PDF in PDF/A format or export it in many other formats.

You will be able to save it as Word, Excel, CVS, RTF, TXT, image, XHL, or HTML formats. And for the image option, you can choose from BMP, JPG, PNG, TIFF, and GIF formats.

The real advantage of UPDF is that when you’re saving a PDF in another format, you can turn on the OCR feature.

That will help tremendously when you have a PDF that was scanned because this way you will have a perfectly readable and editable document at the end of the conversion.

3. Annotate PDF

UPDF also has some excellent collaboration features because you can annotate a PDF in a lot of ways.

After you click on the annotation feature from the top-right, you can strikethrough, underline and highlight any portion of the text.

But there is also an option to enter text or text boxes and our favorite, the sticky note. It’s like a text box only that it’s invisible until you double-click its icon to see its content.

This way, you will be able to leave longer text modifications without messing up the document too much.

3. Organize Pages

As you’ve guessed, with UPDF, you may also organize the pages within a PDF document very easily.

After you click on the Organize Pages icon from the left menu, just select the pages you want and use the simple upper menu.

That’s how you can insert a new page, replace, delete, extract or split a page or even rotate it clockwise or counterclockwise.

Also, double-clicking a page will get you straight to that page for editing or reading.

4. Share PDF

After you’re done editing or annotating a document, you don’t need to look all over your PC for it.

Just hit the envelope icon from the top right, select the email client and click OK. The document will be uploaded automatically into your email.

There is also the option to create a link for your PDF and only send that for the recipient to view the document directly from his or her browser.

4. UPDF’s best mobile features

Above, we have outlined the best features for the desktop versions but the ones for Android and especially for iOS are even more solid.

For instance, you may add signatures to PDF documents on your iPhone and iPad straight with your pen or finger.

Scan photos, receipts, invoices, business cards, and other documents on the go right from your smartphone. Then, save the scanned files in PDF format to go fully digital.

To top that, it supports Face ID and password to access your UPDF iOS app and inner Security Space to keep your files privately protected against unauthorized access.

On iPhone and iPad, you even benefit from a document management feature. You can use it to open, view, search, copy & paste, delete, rename, compress, move, share and secure PDF documents.

You can even create PDFs from scratch or compress files to zip archives so you can keep or send them easier.

What are the pros of UPDF across all platforms?

As we’ve mentioned above, UPDF is free, but it’s limited to saving changes to one file per day and converting 5 files.

However, for only $29.99 a year, you eliminate all the limitations on any platform, and you will get free updates and upgrades and top customer support.

UPDF also features a nice, modern and simple UI that it’s easy to use by anyone from any device.

And if you encounter any issues, the responsive customer service will help you at any moment.

⇒ Get UPDF

Giveaway

If you find this article helpful, share it on any social media with #UPDFgiveaway, the publishers will randomly select 5 winners to give away a yearly plan of UPDF for free.

Contact [email protected] to claim the license!

You might also be interested in our list of the best PDF reader software for Windows 11 and get other suggestions. We also have a new guide on the best fill & sign PDF tools you can use, so feel free to check it out.

Have you tried UPDF yet? If so, share your experience and thoughts in the comments section below.

How to Add Multiple Accounts to Outlook

Microsoft Outlook is being used by millions of people across the globe, so it’s natural that people will want to add multiple accounts.

Even though the main purpose of Outlook is to send and receive emails, this app also contains a task manager, contact manager, and other useful features.

Because Microsoft Outlook is such a versatile application, people want to connect all email accounts they use.

This will allow you to be able to manage all aspects of your email services from one hub. This method also allows you to save time and browse your emails fast.

For these reasons, in this article, we will explore some of the best ways to add multiple email accounts to Outlook.

How can I add multiple email accounts to Outlook?

    It is very simple to add multiple emails to your Outlook account. You can do this through the app’s built-in Info tab. Form there, you can connect as many emails as you want to your account.

  1. 1. Open Microsoft Outlook.

  2. 2. From the top part of your screen, select the File menu and enter the Backstage view.

  3. 3. Inside the Info tab, under Account Information, click Add Account.

    add account outlook info
  4. 4. Type your email address inside the dialogue box and then click Connect.

  5. 5. Follow the on-screen instructions.

  6. 6. After this process is completed, you’ll see your account listed in the Navigation Pane.

  7. 7. Repeat the steps above for each of the emails you want to connect to Microsoft Outlook.


In this article, we explored the fastest and easiest way to add multiple accounts to your Microsoft Outlook application.

This will allow you to see an overview of all your emails, no matter what email provider you’re using.

The emails that are attached to Microsoft Outlook will be listed inside the Navigation Panel to the right of your screen.

You can select to see the entire list of incoming/outgoing emails or select each of the emails to separate them by the email provider. To enhance this feature, you can even open multiple Outlook windows and have each account in a separate window.

We would love to know if this guide helped you add multiple accounts to your Microsoft Outlook software. Please feel free to let us know by using the comment section found below this article.

Classic Start Menu for Windows 10: Download and Use Guide

Understandably, you may be looking to change the Windows 10 Start menu to classic. Some consider the Windows 7 and XP Start menu more valuable than Windows 10.

When Windows 8 dropped, there was an uproar from users regarding the fullscreen Start menu.

Despite Microsoft responding by modifying the Start menu in Windows 8.1 and later, fans took things into their own hands and devised ways to get back the classic Start menu. This guide explores everything you should know about the classic menu.

Can I get the classic Start Menu for Windows 10?

Yes, you can get the classic menu on Windows 10. However, it does not ship with the OS natively since its Start menu is redesigned to shift away from the look and feel of XP and Windows 7.

However, a few free tools will help you customize and change the Windows 10 Start menu. We will go through this as we discuss some cool customization options.

How do I get my classic Start Menu back on Windows 10?

The top solution to change the Windows 10 Start menu is employing third-party applications. We love to recommend a tool called Classic Shell. The program is created to change the operating system’s look and feel, making it more like previous editions.

The tool offers a Start menu and Windows Explorer customization. It also offers skins and styles, and keyboard shortcuts to aid easy navigation of the OS.

How do I download classic Start Menu for Windows 10?

    You can easily change Windows 10’s Start menu to classic if you use the third-party app called Classic Shell. It is a specially designed program that allows users to change their UI’s to previous versions of other Oss.

  1. 1. Download and install Classic Shell.

    download and install classic shell
  2. 2. Launch the application.

  3. 3. Select the Start menu view between Classic, Classic with two columns and Windows 7 style.

  4. 4. Hit the OK button.

  5. 5. Back up the selected styles as XML.

  6. 6. Apply the settings.

How can I use classic Start Menu on Windows 10?

  1. After downloading a third-party application like Classic Shell, right-click on the Start menu and select Settings if you need more customization.
  2. Select any of the styles displayed.
    windows 10 classic start menu
  3. Press the Windows key. You should have your most used apps displayed on the left-hand side. Type the name of the app you need in the search box.
    windows 10 classic start menu

How to remove the classic Start Menu in Windows 10?

  1. Press Windows + R, type appwiz.cpl, and hit Enter.
    windows 10 classic start menu
  2. Locate the installed Start menu application.
  3. Click on it and select Uninstall.
  4. Follow the wizard to complete the uninstallation.

We hope this guide has proven helpful in your case and that you now have the Start Menu and icons in the exact way you wanted. If the apps become too much, you can remove program groups to take more control of your Start Menu.

You can also customize your Windows 11 Start menu layout as per your preferences. To know more, read this guide.

Let us know if this guide has helped by using the comment section below.

How to Show Hidden Files on Windows 10: 5 Quick and Tested Ways

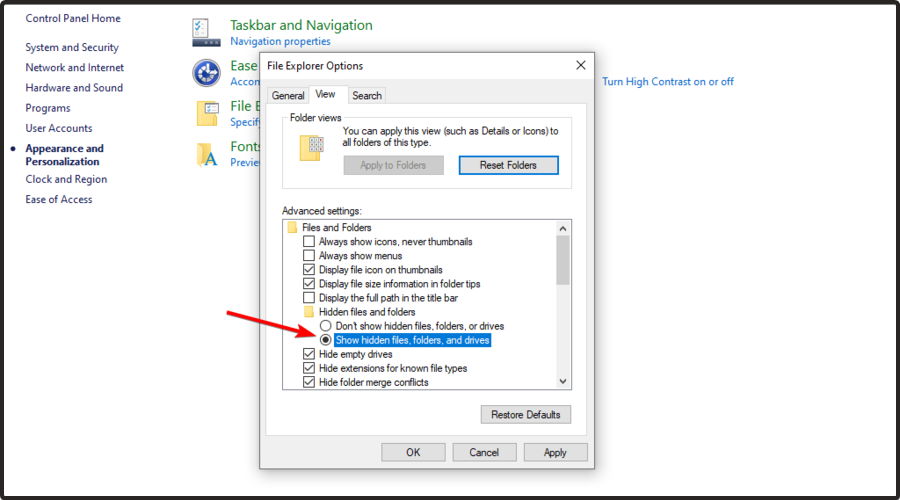
Some files are marked hidden automatically, to prevent being modified by changing, deleting, or even moving them from their location. The easiest way to see hidden files in Windows 10 is to open File Explorer, and go to View > Options > Change folder and search options. Here, go to the View tab and check Show hidden files, folders, and drives and hit OK.

How can I show hidden files on Windows 10?

1. Use Windows Settings to show hidden files

  1. Hit the Windows key, then type Show hidden files, and open the first result.windows key taskbar
  2. On the right side of the opened window, under the File Explorer section, look at the Change settings to show hidden and system files, and click on Show settings.show settings windows
  3. Make sure that the Show hidden files, folders, and drives is checked.show hidden files check
  4. Scroll down to the Hide protected operating system files (Recommended) option, then uncheck the box.uncheck protected view
  5. Confirm by clicking on Yes.

2. Use Command Prompt to show hidden files on Windows 10

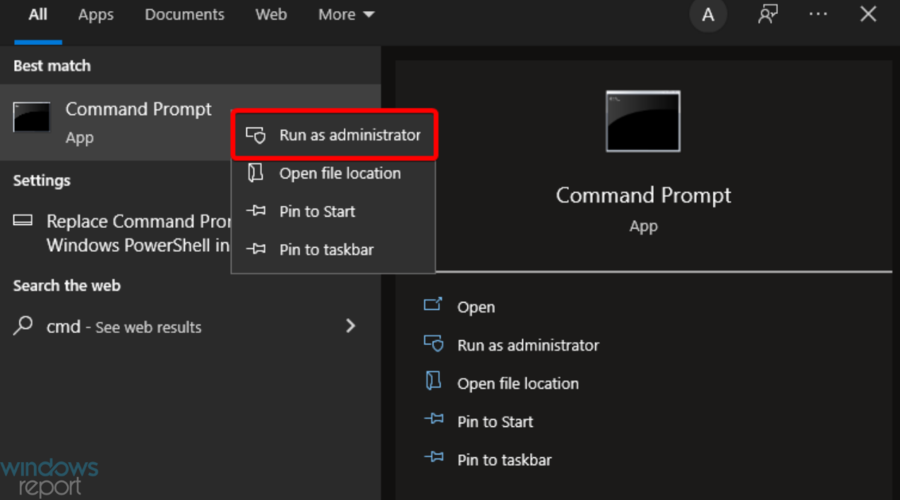
  1. Press on the Windows key, type cmd, then right-click on the first result and choose to Run as administrator.run as admin cmd
  2. In the opened window, type the following command, then hit the Enter key: dir/ ah
  3. In case you’re not sure what folder includes the hidden files you need, just run a hidden file scan on a parent folder.
  4. To do this, in the Command Prompt window, type cd, then hit the Space key, input the full path of the folder, and press Enter.press enter cmd
  5. Then, run the following command: dir /ah /s

3. Show hidden files by accessing PowerShell

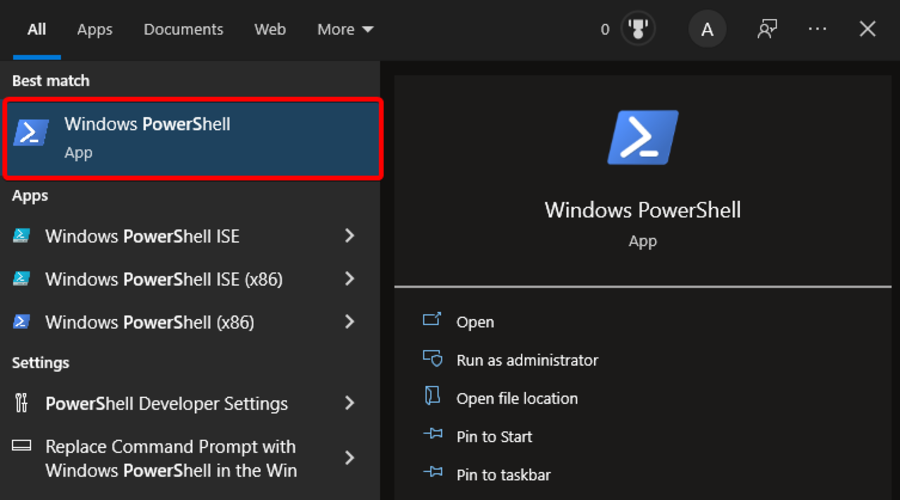
  1. Hit the Windows key, then type PowerShell, and open Windows PowerShell.powershell windows
  2. In the opened window, use the following command, then press Enter: cd C:\Users\USER\Desktop\MyDocuments
  3. When you run the above command, make sure that instead of C:\Users\USER\Desktop\MyDocuments you input your specific full path of the folder.
  4. Now, to reveal your hidden files and folders, input this, and hit the Enter key: dir -force

4. Use a file search tool to open hidden files on Windows 10

A safe way to open hidden files in Windows 10 is by using a search tool. With this type of tool, you need not make any changes to your Windows settings, but this doesn’t mean you’ll be able to see the hidden files in the usual File Explorer view.

Glarysoft Quick Search is a free file search utility, which quickly indexes your files thanks to its features. This software has an extremely intuitive and easy-to-use interface. So, if you’re a beginner, it won’t give you headaches.

It displays search results on a small screen and you can press CTRL to show or hide the search bar or open Quick Search to filter your options to show shortcuts, folders, documents, pictures, and other media files.

Glarysoft Quick Search

Quick Search is the best free file search tool, so make sure you try it to open hidden folders.
Free Trial Visit Website

5. Show hidden files using Control Panel

1. Hit the Windows key to open the search box.

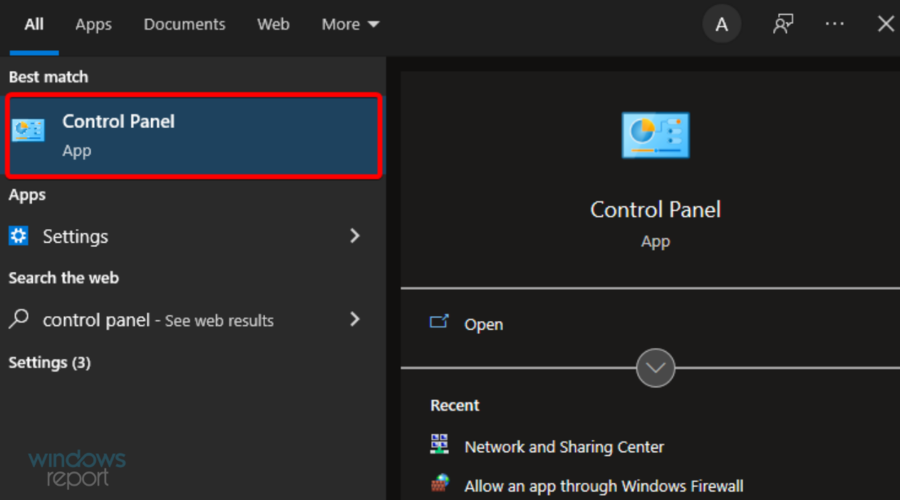
2. Type Control, then click on the result for Control Panel.

fix-bluetooth-not-finding-devices-windows-10

3. Navigate to Appearance and Personalization.

windows appearance and personalization

4. Click on File Explorer Options.

file explorer windows options

5. Select the View tab in the File Explorer options window, then navigate to the Hidden files and folders category.

view hidden files and folders windows 10

6. You will now see two options: Don’t show hidden files, folders, or drives or Show hidden files, folders, and drives.

7. If you select not to show the file, it will hide the files, folders and drives with hidden attributes.

show hidden files on windows 10 settings

8. In the case you choose to show them, it will allow you to see and open the hidden files.

hidden files windows 10 open

9. Click OK after you make your selection.

10. Test your hidden files to see if they’re still hidden. If you don’t see the ProgramData folder, then the hidden files/folders are still hidden from view.

It is possible to configure your operating system to show or hide hidden files in easy steps anyone can get done, through Control Panel.

Among the common hidden files and folders are included ProgramData or pagefile.sys, and in older versions, you can find boot.ini, io.sys, or msdos.sys as hidden files.

Why are my files hidden on Windows 10?

If it’s still not clear to you why Windows would hide certain files, make sure you read what we’re about to say. The first and most important reason for this is to reduce the probability of accidentally deleting or modifying folders.

Plus, your OS also wants to prevent casual snoopers from getting into your files, which are probably private and crucial for you and your network.

Another reason you should consider is reducing visual clutter in the file directories. Thus, it helps you locate content in an easy and convenient way.

In case you’ve already upgraded your OS to the new and improved design, make sure you check how to view Hidden Folders and Files in Windows 11.

Are there other ways you use to open hidden files in Windows 10? Share with us in the comments section below.

8 Best PDF to JPG Converters for Windows [Free & Paid]

While the PDF (Portable Document File) is a popular document-sharing format, at times you may want to convert the PDF files to JPG and then share them on web pages or social media.

In this article, we’re going to talk about all the characteristics of a great PDF to JPG converter for Windows 10 & 11.

Unlike images, PDF files are arguably more difficult to integrate into web pages. On the other hand, only dragging & dropping an image does the job very quickly. That is one of many reasons why you want to have a PDF to JPG converter for Windows.

What is the best PDF to JPG converter?

UPDF – Great PDF conversion

If you’re looking for a fast tool to convert your PDF into images, such as JPG, BMP, PNG, TIFF, and GIF, UPDF is perfect for that job.

Not only that, but you can select exactly the pages or the range of pages you want to convert so you don’t fill up your drive with unnecessary images.

The PDF to image conversion is only one of the features of this smart tool. You can use it to edit the text, rearrange the pages, rotate, extract, and insert new ones.

There’s also the option to convert your PDF into other document files and if the pages come from scanned images, there is a built-in OCR feature that will restore the text to its digital form.

UPDF has collaboration features because you may annotate the text with a variety of markup tools including highlighter, underline, shapes, stamps, and more.

Take a look at its best features:

  • Lowest price to enjoy UPDF across all platforms
  • Converts PDF to JPG, BMP, PNG, TIFF, and GIF
  • Beautiful, modern design
  • Responsive customer service
  • Simple to use, fast

UPDF

Edit your PDF documents and save them JPG, BMP, PNG, TIFF, or GIF quickly and safely!
Free Trial Visit Website

Soda PDF – 3D page-flipping technology

Soda PDF comes second on our list, as it’s the best free pdf to jpg converter thanks to its online conversion tools.

It is very easy to use, all you have to do is drop your document, convert it, and after that, the file will automatically download.

With Soda PDF, you can also merge, compress, and edit your files so you’ll be able to manage them however you need.

It has advanced features, such as OCR tools to recognize and edit texts within all kinds of scanned documents and images.

Moreover, you can sign your PDFs electronically and track and manage e-signatures while protecting your files with 256-AES password encryption.

Other best features of Soda PDF include:

  • Batch-conversion
  • Add sticker notes and comments
  • Create fillable PDF forms
  • 3D page-flipping technology
  • Reduce file size without affecting file quality

Soda PDF

Convert PDFs to JPG with ease by using Soda PDF’s online converter tool.
Free Trial Visit Website

Adobe Acrobat – Best native converter

Adobe Acrobat is one of the best tools for PDF manipulation and sharing. The two of them are so deeply connected that PDF has practically become synonymous with Acrobat in the collective perception of users.

And there’s a good reason for that. With just a couple of clicks, you will be able to convert your PDF into JPG in no time.

Furthermore, you can batch convert multiple files to save time (and we all know how valuable a resource that is especially these days).

To convert a PDF you will need to use the Export option on the right panel and just choose your format as JPG.

Besides that, Acrobat is great for enhancing scans to become more visible, passing e-signatures, combining PDFs, adding bookmarks, editing documents, converting PDF/A to PDF, and a whole lot of other useful features.

Let’s review some of its key features:

  • PDF batch converting
  • Native PDF support
  • Export document to TIFF, JPG, or PNG
  • Easy to use
  • Secure documents and sign

Adobe Acrobat

Enjoy the most complex PDF editing, converting, and sharing tools all wrapped in the friendliest UI!
Free trial Visit Website

Icecream PDF Converter – Intuitive interface

If you’re looking to convert PDF to JPG in Windows 10 then this tool is a great high-quality solution that will help you get work done with professional results.

It comes in both free and premium versions, but the free version is sufficient to convert PDF to JPG.

One of the unique features of the Icecream PDF converter is that it allows you to merge all files in one PDF document. It also has an inbuilt PDF reader and supports password-protected files.

Icecream PDF Converter supports conversion from PDF to JPG, DOC, ODT, BMP, TIFF, PNG GIF, and even conversion of password-protected PDF documents.

The bulk conversion feature works as a batch converter allowing the users to add multiple files to the queue of the PDF converter and convert with a single click.

Here are some of its best features:

  • Wide variety of PDF to image conversion
  • Batch conversion
  • Convert PDF to JPG for free
  • Built-in OCR feature
  • Convert PDF to Word document

Icecream PDF Converter

Convert your PDF documents to all popular image formats for easy file reading and management.
Free trial Visit Website

Wondershare PDFelement – Great integration

The PDFelement by Wondershare is one of the best PDF to JPG lightweight converter tools that works flawlessly on both Windows and Mac infrastructures.

This PDF editor may be as easy as it gets in terms of usability and interface, but its powerful features will not fail to impress you.

It is a robust PDF editing toolkit that also provides review, comment, and sign functionalities.

Conversion is particularly speedy thanks to a powerful and accurate conversion engine which is why you can obtain sleek-looking results upon converting to JPG, Word, PPT, and many more.

It offers full cross-platform compatibility and is designed for both Windows and Mac, in addition, it also offers seamless integration with iOS and Android devices allowing you to perform your tasks on the go.

Let’s see some of its key features:

  • Very light on your system
  • iOS and Android integration
  • Review, comment, and sign functionalities
  • Seamless PDF to JPG conversion
  • Combine and convert PDF to various formats

Wondershare PDFelement

Discover excellent PDF software with a user-friendly interface that provides a multitude of functions!
Free trial Visit Website

SwifDoo PDF – Excellent PDF compressor

SwifDoo is a great help when it comes to converting your PDF file to JPG format. This software offers an online converter to make file conversions effortless.

This flexible PDF program allows you to edit, merge, split PDFs, and convert PDF files to JPG images on Windows 10, 8, 7, and XP. It supports converting PDF to JPG, BMP, TIF and PNG with distinct resolution options available.

What’s important is that it can convert a multi-page PDF into one JPG image or individual image files and group convert multiple PDFs to JPG images at once.

When you convert PDF files to JPG images, it doesn’t change the font or image quality. But, when it is needed, it lets you edit the text easily.

If your PDF is full of images and you want to convert it to smaller images, you can compress the PDF file or split the PDF into smaller files before using the conversion tool.

Other great features:

  • Convert PDF with digital signatures to JPG images
  • Identify and recognize text within unsearchable scanned PDFs
  • Batch convert PDF files
  • Intuitive design

SwifDoo PDF

Create, compress, and convert PDF documents to JPG images in a blink of an eye.
Free Trial Visit Website

iSkysoft PDFelement – Great OCR scanner

Iskysoft hit the spot with the PDFelement, a feature-rich PDF solution that allows you to edit, convert, share, and sign your files effortlessly.

And we do mean hassle-free as this editor even supports OCR technology, thus allowing you to integrate scanned documents into your workflow without any other additional arrangements or third-party tools required.

Furthermore, the software also acts as a powerful file converter allowing you to convert PDFs to JPG and practically any other format with top-notch results, which is why this is a PDF to JPG high-quality software

From now on you can edit PDFs like a pro, modify watermarks, images, texts, extract, crop, replace, split pages, and more.

Annotate with important info by adding comments, and sticky notes, and enjoy customizable drawing features.

This great software provides OCR support to identify scanned text, extract it from images, and more.

Here are some of its core features:

  • Built-in OCR scanning
  • Powerful file conversion features
  • Modify watermarks, images, texts, extract, crop, replace, split pages, and more
  • Edit, split, and merge PDFs

iSkysoft PDF Editor

Get your hands on this great PDF editor that comes with advanced functions and tool!
Free trial Visit Website

Movavi PDFChef – Good for PDF editing

Movavi PDF Editor is another strong tool that performs beautifully on Windows and Mac both.

This tool takes PDF editing to a whole new dimension allowing you to update old presentations with fresh tables, images, and charts and even import files extracted from different apps such as AutoCAD, Excel, and more to perfect your project.

Conversion is seamless and you are to expect nothing less than professionally looking results (PDF to JPG including) every time.

Feel free to edit PDF documents, remove, reorder, or rotate pages, format text, insert and scale images, and you can even apply your digital signature and password to protect your document.

Take advantage of a native PDF reader with customizable settings, merge files in different formats, and import files from different apps.

Convert Files to and from PDF (DOC, TXT, HTML, JPG, PNG, BMP, EPUB, and more)

Let’s review some of its top features:

  • Store and access files in the cloud
  • Shared access to documents and projects
  • Add and edit text, insert and resize images
  • Rearrange, delete, and rotate pages
  • Convert PDFs to and from HTML, EPUB, JPEG, TXT, and other formats

Movavi PDf Editor

Enhance your PDF files with high-quality elements by using this excellent software!
Free Trial Visit Website

All the desktop apps and online tools listed in this article allow you to convert PDF files to JPG almost instantly, with crisp-looking results, that’s why they are the most efficient PDF to JPG converter tools for Windows 10.

Besides, you get to enjoy a plethora of bonus features to facilitate your workflows – so what’s not to like?

How can a PDF to JPG converter help me?

There are lots of PDF editor software out there that can help you convert documents into images.

However, if you have a high volume of documents to transform, you should look for tools that perform batch conversion.

Also, most of the software below lets you choose the exact pages you want to convert into JPG. Otherwise, you will have to delete the unwanted images afterward.

So, without further ado, here are the best products to convert PDF to JPG in Windows 10:

  1. UPDF – Great PDF conversion
  2. Soda PDF – 3D page-flipping technology
  3. Adobe Acrobat – Best native converter
  4. Icecream PDF Converter– Intuitive interface
  5. Wondershare PDFelement – Great integration
  6. SwifDoo PDF – Excellent PDF compressor
  7. iSkysoft PDFelement – Great OCR scanner
  8. Movavi PDFChef – Good for PDF editing
ProductConversion formatsPDF Editor
UPDFJPG, BMP, PNG, TIFF, GIF, DOCX, XLSX, PPTX✅
Soda PDFDOCX, XLSX, PPTX, HTML, TXT, JPG, PNG, GIF✅
Adobe AcrobatDOCX, XLSX, PPTX, HTML, TXT, JPG, PNG, TIFF✅
Icecream PDF ConverterDOC, DOCX, ODT, XLS, HTML, BMP, JPG, PNG✅
Wondershare PDFelementDOCX, XLSX, PPTX, HTML, TXT, JPG, PNG, TIFF, BMP✅

You should also take a look at our list including the best PDF editors for Windows 11. They also work in Windows 10 without any issues.

We also have a special guide that will help you get insights into the top-rated Kanji image translator tools, so don’t miss it.

Have you used any of the products from our selection? Share your experience in the comments section below.

How to Clear Clipboard on Windows 11 [3 Different Ways]

Due to security and privacy-related concerns, many people that use Windows 11 want to know how to delete their clipboard data and history. 

A computer’s clipboard is a particular location in the memory of a computer system, where you can keep whatever information you want to copy. 

Anything that has been copied can be pasted into any application that supports copy/paste, irrespective of the nature of the content.

If you don’t power down your computer or copy something to replace the present data, it will remain there.

For your peace of mind and the safety of other people and programs, you should periodically clear your clipboard. 

At the end of this article, you’d have learned how to clear the clipboard history on your Windows 11 quickly. 

Check out our guide on how to clear the clipboard on Windows 10 for more information.

Does Windows 11 have a clipboard history?

Windows 11 does have a Clipboard history. It works over the cloud and can be synced between your other devices. The Clipboard History component in Windows 11 enhances the standard Clipboard functionality. 

First introduced in Windows 8, the actions are accomplished by introducing a UI that keeps track of what you copied, which can be text or graphics so that the content can be opened and pasted as needed. 

Organization of the things copied might help you find what you need quickly. 

How do you open the clipboard on Windows 11?

To open your clipboard, all you have to do is to press Windows + V. You can also choose to pin items you use frequently. When you pin an item, the clipboard history is automatically cleared to have enough space for any new item you copy. 

When something is saved to the clipboard, where does it go?

Anything copied to the clipboard in Windows 11 is saved in the system RAM. Clipboard information will be deleted once the system shuts down.

?️  Quick Tip:

To get the job done quicker, you can use an automated tool to clean your Windows Clipboard History. It gives you a quick report on all the data stored on your clipboard.

This includes the number and type of files, plus how much space they take up. You can select which you want to delete in just a few clicks.

⇒ Try CCleaner

How do you empty the clipboard in Windows 11?

1. Clear clipboard from Settings

  1. Press Windows + S to open Settings.
  2. Click on System.
  3. From the dashboard to the left of the new window, click on clipboard.
  4. Click on clear clipboard data.

2. Clear clipboard in-app

  1. Open the clipboard by pressing Windows + V.
  2. Click on Clear all.

3. Clear clipboard via Command Prompt

  1. 1.  Press Windows + R.

  2. 2. The Run dialog box will now be open.

    launch run
  3. 3. In the box, enter the following command: cmd /c echo.|clip

  4. 4. Press OK.

  5. 5. Your clipboard is now clear.

  6. A quick and easy method to clear the clipboard on your device is to use Command Prompt. All you need to do is open the Run dialog and input the command for cmd to clear your clipboard.

Why is my clipboard history not working?

A malfunctioning clipboard history in Windows 11 prevents users from using the panel for viewing past copies of their work. Most times, clipboard history does not work because it is not enabled. 

If it is enabled and it still isn’t working, a quick remedy may be as simple as having to download new updates for your operating system.

Another option for resolving clipboard history issues is removing or deleting conflicting apps from the system launch.

How do I fix Copy and Paste on Windows 11?

If you’re having trouble copying and pasting, the quickest solution is to clear all unnecessary tasks from the Task Manager. It could just be that some programs are taking up more RAM than they should. You can also use the System File Checker to repair broken registry files.

Finally, you can always update your device drivers, just to be sure.

You can also read our article for more information on how the copy and paste feature works.

Most Windows users who have just upgraded to the latest version of the operating system can benefit from this simple and fast function.

We hope our solutions helped you clear your clipboard on Windows 11. If you have any questions, write them in the comments section below.

How to Share the Google Drive Folder with Non-Gmail Users

Google Drive is one of the world’s foremost cloud storage services. Its users will sometimes need to share folders or single files in their GD cloud storage.

Therefore, Google Drive includes a Share option you can select to share folders via links or email attachments with other users.

Can I share Google Drive with non-Gmail users?

Some users might assume they can only share GD folders and files with Gmail users who have Google accounts.

However, you can also share GD folders with users who don’t utilize Gmail or any other Google apps for that matter.

When you do so, non-Gmail users will be able to view shared files without signing in to Google.

How do I share a Google Drive folder with someone who doesn’t have Gmail?

1. Select the Anyone with link option for link sharing

  1. To share a link with a non-Gmail user, right-click a folder or file to share in your Google Drive storage.
  2. Click Share on the item’s context menu.
  3. Click the Get link option.
    Copy link button share google drive folder with non gmail users
  4. Then select the Anyone with the link option.
    Anyone with the link option share google drive folder with non gmail users
  5. Press the Copy link button.
  6. Open Gmail, or whatever email you use, and click the Compose button there.
  7. Enter a non-Gmail email address to share the link within the To box.
  8. Type in an email title in the Subject box.
  9. Press the Ctrl + V hotkey to paste the copied link into the message.
    Gmail message text editor share google drive folder with non gmail users
  10. Click the Send option to share the link with the user.

Thereafter, the user who receives the link for the shared file will be able to view it without signing into a Google Gmail account.

However, bear in mind that selecting the Anyone with the link option for non-Gmail users will make the file available to users outside your domain.

If you want to customize your Windows 10 context menu, check out our dedicated article.

2. Share a Google Drive folder via email

  1. 1. First, open your Google Drive page.

  2. 2. Right-click a folder or file to share to open the context menu shown directly below.

    share context menu google drive
  3. 3. Select the Share option on the context menu, which will open the sharing options directly below.

    share with options google drive
  4. 4. Next, enter the non-Gmail email address of a user to share the file with in the Add people box.

  5. 5. Enter some text in the Message box to tell the other user you’ve attached a shared file.

  6. 6. Click the Send button when you finish writing the message.

    share google drive folder with non gmail users popup
  7. 7. Click the Share anyway option to confirm.

  8. 8. Thereafter, the user you sent the attachment to will receive an email like the one shown in the shot directly below.

    The email says that it grants access to the attached item without a login required. So, the user can click the Open button to view the folder’s files without needing to sign in to Google.

    how to share google drive folder with non gmail users email
  9. If you are looking to share a Google Drive folder with someone who doesn’t have Gmail, you can send the folder or file as an email attachment. The recipient will receive a link with which he will be able to access the Google Drive folder without having to log in to a Gmail account.

We also have an article to help you import old emails to your Gmail account, if you need the information.

So, you don’t need to ask non-Gmail users to set up Google accounts before sharing GD folders or files with them.

Instead, share your files with non-Gmail users with either of the quick and straightforward methods above.

Twitch Dark Mode: How to Easily Enable it

Lately, dark mode has become very popular on various websites, Twitch included, and many users are wondering How to enable Twitch dark mode in their browser.

If you are using Twitch, you should know that you can enable the dark mode easily and we’ll show you the exact steps you need to make in this article.

Why would I activate the Twitch dark mode?

Switching to dark mode can be a really beneficial change. Why is that? Because it can reduce eye strain, plus it often just looks better than the standard viewing mode.

It is preferred by users not only on Twitch, but also on other apps, sites, and even on their own operating system.

How can I enable Twitch dark mode on my browser?

Now, let’s see how you can easily activate Dark Mode on Twitch using different methods, according to your preferences.

1. Via Settings

    The easiest and fastest method to enable dark mode on Twitch is through its built-in settings. All you need to do is turn on the dark theme using the app’s browser settings.

  1. 1. Navigate to the Twitch web version, known as Twitch.tv.

  2. 2. Locate the profile icon from the top-right and click on it.

    twitch dark mode settings
  3. 3. Now, you will see a menu.

  4. 4. Navigate to the Dark Theme section.

    How to make twitch dark mode dark theme
  5. 5. Toggle Dark Theme on by pressing on the button.

  6. 6. Your Twitch tab now runs in dark mode.

2. Activate the dark mode extension

Another quick way of accessing Twitch in dark mode is to simply activate an extension on your browser that will do the job for you.

2.1 For Chrome

If you are using Chrome, then the Dark Theme for Twitch extension will work just great. Once you added the extension to your browser, make sure to turn it on, and that’s all.

twitch dark mode extension chrome

2.2 For Mozilla Firefox

Mozilla browser also offers a dark mode extension that you can add to the browser.

twitch dark mode extension mozilla

After enabling it, you will see that Twitch will be in dark mode and you can also use these settings for other websites if needed.

3. Use a browser with a built-in dark theme

Opera GX is a versatile and reliable browser that comes with a dark option theme incorporated that you can simply activate from settings.

opera gx corner

After doing this, the entire Twitch website will be in dark mode and, of course, you can disable it anytime you want to.

Moreover, you also have the option to activate a Dark mode extension in the browser and achieve the same result.

The software also has Twitch and Discord integration, so you can keep up with your favorite streamers at all times.

Check out these other Opera GX amazing features:

  • Easy to use and user-friendly interface
  • Free VPN
  • Built-in AdBlocker

Opera GX

Customize your Twitch website aspect exactly how you prefer with this browser built for gamers.

Can I change back to Light mode in Twitch?

Many users are wondering if changing to Dark mode on Twitch is permanent. If it’s happening to be in the same boat, you should know that you can easily switch back to the Light mode on Twitch.

The process is the one presented in method one. You’ll only have to access the Twitch menu and deactivate the Dark Theme.

We hope that you found all the information needed to enable Twitch dark mode in your browser in this short guide.

As you could see, there are several ways of doing that, and each of the presented solutions takes just a moment to implement.

Please let us know in the comments section below if you have additional recommendations or suggestions.

Check out the latest changes Microsoft brought to the cloud

We know that a lot of you use cloud services, so we’re going to focus on this for a little bit and see what changes will impact this environment.

Now, Microsoft is altering its licensing agreements in the European Union (EU), and the company will try to make it easier for smaller cloud service providers to compete with the big players.

Let’s get right into it and discover everything that the Redmond tech giant plans to deliver to its customers in the future.

Microsoft to make European Cloud Providers more competitive

Just so you know, these changes will in fact make it simpler for customers of rival cloud-service companies in Europe to move their existing software to these other networks.

Thus, the new terms will also ensure that cloud partners have access to the products necessary to sell cost-effective solutions that customers want.

So, as a response to a three-year-old complaint, Microsoft has assured it would address its licensing terms in the European Union.

The revised licensing terms, which are applicable to partners and customers in the EU, as well as Microsoft’s customers around the world, will begin on October 1st, 2022.

The tech giant said the licensing terms have been modified in order to help these partners to be more competitive and grow their businesses.

As you would have imagined, these policies will also provide more flexibility for their customers, as the company stated.

In order to further explain what we are in store for, the three primary changes Microsoft is making to its licensing terms are:

  • Make it easier for customers to bring their software to the partner’s cloud
  • Ensure partners have access to the products necessary to sell cost-effective solutions that customers want
  • Empower partners to build hosted solutions with speed and scale

As we mentioned, these major revisions and upgrades to its outsourcing and hosting terms have been brought on majorly by complaints from Microsoft customers in Europe.

All the complaints collectively alleged Microsoft was making it prohibitively expensive to run Windows and Office workloads on non-Azure cloud platforms like AWS and Google Cloud.

Also worth mentioning is that the tech giant also quickly admitted the complaints were valid. That being said, Microsoft seemed to drag its feet when it came to actually amend the situation in any way.

Earlier this year, Microsoft said it would make it less expensive for customers to run Microsoft software like Windows, Windows Server, Office, and SQL Server on non-Microsoft cloud platforms in the EU.

And, since we’re talking about Microsoft, be sure to also read up on the SEABORGIUM phishing campaign going on right now.

If you are into gaming, catch up with what’s happening in the gaming market, and remember that Windows 12 is allegedly already on the way.

What is your opinion on this situation? Share your thoughts and opinions with us in the comments section below.

How to Sync Folders Between PCs on Windows 10

Those who work on a PC probably know what’s it like to switch between computers and set up a new laptop from scratch or use two computers: your main desktop and a travel laptop in order to work on the road or remotely.

You’re also probably familiar with the frustration caused by realizing that you don’t have the exact same data and software on both PC, especially when you work on one device more on the other.

That’s precisely why we’ve written this detailed article where we show how you can sync your data between multiple Windows PCs and even move all your software and settings in a quick and easy way.

How can I sync folders between computers in Windows 10?

    1. Sync folders over the network

    An easy method to sync a folder between two different computers that run the Windows 10 OS is to do it via the network. For this, you need a good internet connection.

  1. 1. Locate the folder that you want to sync.

  2. 2. Right-click it and select Properties from the list of options.

  3. 3. Navigate to the Sharing tab, then select Advanced sharing.

  4. 4. Check the box next to Share this folder.

    share folders between computer network
  5. 5. Click on permissions so that you can set up your share permissions.

    share folders between computer network
  6. 6. Press on OK to confirm the changes.

  7. 7. Open your other computer.

  8. 8. Press Windows + R to open the Run console.

  9. 9. Type in the following, but replace the computername with the name of the computer where you have created the shared folder:\computername

    You can also simply type in the internal IP address of the computer.

    computer name run

While this method is great for quick updates and syncs between folders, it doesn’t work for data such as user customizations and settings.

It also can’t help you if you want to copy your installed software from one Windows computer to another. For that, you’ll need third-party software.

2. Sync folders and migrate data with FastMove

If syncing folders isn’t the only thing you have on your mind and you also need a fast and efficient way of migrating the entire contents of a PC in one simple move, then we recommend trying out a data migration tool.

There are a few of them on the market, which makes choosing the absolute best quite difficult, especially if you don’t know exactly what criteria to take in mind.

We’ve decided to help you make the right choice by recommending FastMove – an excellent all-in-one data migration program. What makes FastMove special is that it’s the only software of the kind that includes a folder sync feature that works both online and offline.

With FastMove you can move installed programs, and complete user profiles with all their settings and customizations, files, folders, and even device drivers. You can do all that over a network, offline using a local folder, or offline with the help of a data cable.

Syncing folders with FastMove can be done far faster than using Windows native method thanks to the dedicated Sync Folders tool designed specifically for this particular job.

Here’s how you can use FastMove to keep your data folders in sync between PCs:

  1. Select two locations.
    • They can be on two different computers, on the same computer, on your PC, and your external HDD, etc.windows welcome
  2. Let FastMove scan them and find which files are different or missing from one location.sync folders windows 10
  3. Select the files you want to copy between the two folders and launch the sync.
sync folders in progress windows 10

The process is really simple and works fast. If you’re using online sync, the actual speed will depend on your network speed and stability. You can also sync folders in an offline mode using a data cable.

As we’ve mentioned above, FastMove is not just a folder sync app. It’s a great program for those who need to move all kinds of data between Windows 7, Windows 8, and Windows 10 PCs in one go.

windows companion disposable logo

FastMove

The folders you have on your secondary Pc will be the same as the ones on your primary one. Get FastMove today!
Check price Visit website

3. Sync folders using cloud services

While not specifically designed for this particular task, cloud storage services can all be used as a workaround method for syncing data between multiple PCs.

In fact, it doesn’t even matter if the cloud service that you are using has a downloadable client or not.

Here’s what you need to do in order to sync folders:

  1. Log into both PCs using the same cloud account.
  2. If the service has a downloadable client, add whatever folders you need to share in the client’s shared space on your primary PC.
  3. Access the shared space from the secondary PC.

If you’re looking for efficient cloud service tools to try out, know that there are plenty to choose from, and many even offer free plans.

These future-oriented cloud storage apps will offer a positive impact on keeping data safe, backup essential files, or encrypting important information.

This concludes our list of methods through which you can sync folders between computers.

If you know of any other method that we may have missed out on, let us know by leaving a reply in the comments section below, and we’ll update the article accordingly.

Microsoft launches Adoption Score to help customers optimize Microsoft 365 subscriptions

Microsoft has released Adoption Score, a tool designed to assist both Microsoft 365 admins and IT leaders enhance their productivity with Microsoft 365. The tool replaces the Productivity Score dashboards and unpacks a ton of features and controls that will in turn enhance effectiveness and efficiency.

According to Microsoft:

The anonymized metrics in Adoption Score help IT admins understand and optimize Microsoft 365 usage patterns in support of their digital transformation journey. The new name reflects the new product truth and provides clearer differentiation from other solutions that offer insights for business leaders and managers.

Microsoft further indicated that they will be rolling out additional new functionality to the tool with the aim of ensuring that organizations make the most out of their Microsoft 365, simultaneously ensuring that they do not break their commitment to user-level privacy. We saw Microsoft make some privacy changes to its Productivity Score software amid the COVID-19 pandemic because of the rising concerns that termed the tool “a full-fledged workplace surveillance tool”.

Time Trends will also be part of the Adoption Score Tool, which will help admins decipher admins understand historical insights data across the organization. “Time Trends is added to each people experience category across Content Collaboration, Meetings, Teamwork, Mobility and Communication, and extends organizational trend data from 28 days up to 180 days”. “IT admins can now understand how a particular behavior or insight, such as the response rate for new emails with @mentions, has evolved over the last 30, 90 or 180 days”. By monitoring @mentions, admins will be able to analyze and understand trends, ultimately helping them see whether they are close to achieving set goals or not.

The Adoption Score tool is available as part of users’ existing commercial Microsoft 365 subscriptions. As for Global admins, they can access the new tool via the Microsoft 365 admin center. They will also need to approve both Adoption Score and the people experiences category to access Time trend data.


How to Disable Cortana’s Web Search in Windows 10

Cortana mixes its web search with its file search. Thus, when you enter a keyword in the search box, Cortana will throw up both matching files and Bing web search suggestions.

Some users preferred to disable Cortana‘s Bing web search with the Group Policy Editor settings in Windows 10 Pro and Enterprise.

However, the April 2018 Update broke the Do not allow web search Group Policy setting for Windows 10 Pro uses.

Although that option still works for Enterprise users, selecting Do not allow web search in Windows 10 Pro doesn’t switch off Cortana‘s Bing search after the April 2018 Update.

This is how you can still block the Cortana web searches in Windows 10 Pro and other editions that don’t include the Group Policy Editor.

How can I disable Cortana web searches on Windows 10?

  1. Edit the Registry
  2. Turn Off Bing Web Searches With WinAero Tweaker

1. Edit the Registry

    Managing Cortana web searches in the Registry Editor is very easy and can be done by anyone. Firstly, you need to create BingSearchEnabled, CortanaConsent, and AllowSearchToUseLocation DWORDs in your Registry.

    After, enter 1 in both their Value data boxes to enable the Cortana web search, while a 0 data value for the BingSearchEnabled and the AllowSearchToUseLocation DWORDs turns off the Cortana web search.

  1. 1. Open Run by pressing the Windows key + X hotkey and selecting Run.

  2. 2. Enter regedit in Run to open the Registry Editor.

    registry editor window
  3. 3. Then open this key path in the Registry Editor: HKEY_CURRENT_USER\Software\Microsoft\Windows\CurrentVersion\Search.

    registry editor current version search
  4. 4. Right-click an empty space on the right of the window and select New > DWORD (32-bit) Value. Then enter BingSearchEnabled for the DWORD name.

    registry editor web search disable
  5. 5. Select DWORD (32-bit) Value on the context menu again to set up a new AllowSearchToUseLocation DWORD.

  6. 6. Choose a DWORD (32-bit) Value to set up a CortanaConsent DWORD if the registry does not already include that DWORD value.

  7. 7. Then you should have two or three new DWORD values in the Search key as shown directly below.

    disable cortana web search regedit
  8. 8. Double-click those DWORDs one by one to open their Edit DWORD windows. 

  9. 9. The BingSearchEnabled and AllowSearchToUseLocation DWORDs turn off Cortana‘s web search when you configure their value data to 0 (which is the default value).

    disable cortana web search value zero
  10. 10. If you ever want to enable Cortana’s web search back on, enter 1 in their Value data boxes.


2. Turn Off Bing Web Searches With WinAero Tweaker

WinAero Tweaker is a great freeware customization program for Windows 10, 8 and 7. That program includes a Disable web search in taskbar and Cortana option that you can select to turn off the Bing web search. So instead of editing the registry as outlined above, you can select that WinAero Tweaker option as follows.

  1. Navigate to the WinAero Tweaker download page to save the software’s ZIP to Windows.
  2. Open the WinAero Tweaker ZIP in File Explorer.
  3. Press the Extract all button to open the window shown below.
  4. Press the Browse button to choose a folder path to extract WinAero Tweaker to.
  5. Then press the Extract button.
  6. Open the WinAero Tweaker setup wizard from the extracted folder to install the software.
  7. Open the WinAero Tweaker window.
  8. Expand the Desktop and Taskbar categories in the WinAero Tweaker window.
  9. Click Disable Web Search on the left of the window to open the option below.
  10. Then select the Disable web search in the taskbar and Cortana option.

Microsoft might bring out an update sometime that fixes the Do not allow web search Group Policy option in Windows 10 Pro. However, for now, you can block Cortana‘s web searches with WinAero Tweaker or by manually editing the registry.

We hope that this article helped you. If you have any questions, write them in the comments section below.

Microsoft applies for US Trademark for XCLOUD

Microsoft has applied for a US trademark for XCLOUD, the former code name for what’s now known as Xbox Cloud Gaming. As spotted by @ALumia_Italia, Microsoft filed for the trademark last week:

For those who don’t know, Xbox Cloud Gaming is Microsoft’s Netflix-like video gaming streaming platform that incorporates Xbox game pass ultimate. The service allows users to play dozens of games on smart devices like smartphones using a gamepad for a subscription price of $15 per month.

Will Microsoft use the XCLOUD name in the future?

Microsoft registers XCLOUD name

When you compare the XCLOUD and Xbox Cloud gaming keywords in google trends software, you see that the searches for the XCLOUD are still very high but there is already a gap compared to Xbox Cloud Gaming. While it’s possible that the company may want to go back to using XCloud, what’s more likely is that this is a defensive move, protecting the mark while continuing to build on the marketing that’s accompanied the use of Xbox Cloud Gaming.

For more latest and exclusive tech news updates follow us on Google News.

How to Fix Your Laptop Wi-Fi Adapter if It’s Disabled & Hidden

Encountering the issue of a disabled laptop Wi-Fi adapter can be pretty infuriating, just like it was for other users.

This issue is more prominent amongst Windows 10 users, and many have complained about the same problems. However, the Wi-Fi adapter can be disabled automatically on Windows 11 also.

Most users complain that the issue began shortly after updating their Windows, and they find it challenging to use their Wi-Fi.

Since the Wi-Fi adapter houses the drivers that help the Wi-Fi function effectively, this issue can prevent your access to the internet, especially for users who rely on a wireless connection for their daily activities.

Hence, this guide will explain the causes and possible solutions to fix the problem.

Why is my Wi-Fi adapter disabled on my laptop?

  • Outdated/missing drivers: If the network adapter driver is obsolete, it could easily malfunction, leading to this issue. Often, an outdated driver will alter the performance of the Wi-Fi. So, apart from missing, it could also cause a problem with the Wi-Fi not connecting or working.
  • Hidden in Device Manager: It isn’t uncommon for drivers to be hidden in Device Manager. Once there is a mix-up in the settings, your Wi-Fi Adapter could be hiding in the Device Manager. Hence, you won’t be able to access it until it is made visible.
  • Power management issues: Your laptop follows a strict power management approach to save backup for longer. This could have turned off or disabled the Wi-Fi Network Adapter. Hence, the reason you couldn’t access it.
  • Damaged NIC card hardware: If the NIC card hardware is damaged or faulty, this can cause the laptop Wi-Fi adapter to be disabled.

How do I fix my Wi-Fi adapter if disabled?

1. Update the Wireless Adapter driver

  1. Press the Windows + R keys, input the devmgmt.msc, and click OK.
  2. Locate the Network Adapters and expand them.
  3. Select your driver and right-click on it, then choose Update driver.
  4. Choose Search automatically for drivers.
  5. Restart your PC to take effect.

2. Unhide devices and drivers

  1. Press the Windows + R keys, input the devmgmt.msc, and click OK.
  2. Click the View tab and select show hidden devices.
  3. Click the Network Adapter option.
  4. Choose the Action tab and scan for hardware changes.
  5. Expand the Network Adapters and locate your wireless driver.

If the cause of the problem is the hidden drivers in the Device Manager, by doing this, it should be fixed. Also, you can check the device status under the general tab.

3. Reset Winsock from CMD

  1. Press the Windows + R keys, input CMD, and launch it.
  2. Input the following command and press Enter: nets win sock reset
  3. Close the Command Prompt and restart your PC.

Using commands to fix the issue might be a worthy alternative forcefully. Unfortunately, since Winsock defines how Windows networks interact with network services, its data can be wrong.

4. Adjust Power Management settings

  1. Press the Windows + R keys, input devmgmt.msc, and launch it.
  2. Right-click the Network Adapter and select Properties.
  3. Choose the Power Management tab.
  4. Uncheck the Allow the computer to turn off this device to save power.

Hence, the laptop will stop distracting the Network adapter’s performance when there are power issues.

5. Run the Network Troubleshooter

  1. Click the Start button, input the Control Panel, and launch it.
  2. Choose Network and Internet and select Network and Sharing Center.
  3. Hit the Change adapter settings on the left pane.
  4. Select your Wireless Adapter, right-click on it and choose Diagnose.
  5. If there are issues, follow the prompts to fix them.

This Is an effective solution for Dell/HP/Lenovo/Surface/Asus laptops’ Wi-Fi adapter disabled problem. It will help diagnose and fix it in no time.

6. Reset the Network

  1. Press the Windows + I keys to launch the Settings app.
  2. Choose the Network & Internet option.
  3. Select Network reset on the right pane and click on Reset now.
  4. Your PC will be restarted automatically after this.

7. Repair NIC card

If none of the options above have worked for you, there is an issue with the NIC card hardware. Hence, you may need to repair or buy a new one to replace it.

What does it mean when a Wi-Fi network is disabled?

When the Wi-Fi network is disabled, you cannot use it. The issue could be that the device is turned off and unavailable. Also, the device won’t be able to connect via a wireless connection to any network.

Hence, you cannot use the Wi-Fi network until it is enabled. As earlier stated, the causes of this can be down to multiple reasons.

These are the most effective troubleshooting fixes if the Wi-Fi adapter is disabled automatically on Windows 10/11. Hence, ensure to follow the steps precisely for optimal results.

Further, if Wi-Fi is not working on your laptop but your phone, check out our guide to fix it. Also, our article on setting slow Wi-Fi connections on your computer can be pretty helpful if your Wi-Fi is slow.

In conclusion, if your Windows 10/11 device can not find a Wi-Fi network, it might be best to consider our step-by-step guide.

If this guide has been helpful to you, kindly leave your comments and suggestions below. We’d like to hear feedback from you.

How to Link your Arc Games Account to your Xbox One or PS4

If you want to link your Arc Games account to your Xbox One or PS4 account, you have found the right guide.

Being able to have your accounts connected across platforms can help make the entire process of keeping the settings up to date a lot easier.

It is worth noting that even though this enables easier management of settings, the characters you were using on your Arc Games account will not be ported to your Xbox One or PS4 platform.

If you don’t find this to be problematic, then read on to find out how you can link your Arc Games account to your Xbox One or PS4 accounts.

Note: If you perform the link between your console and Arc accounts by using the Neverwinter game, you will also get a bonus and exclusive companion named Renegade Illusionist as a reward.


How can I link my Arc Games account to Xbox or PS4 consoles?

  1. 1. Open a game for the first time on your Xbox One/PS4 console. In case you skipped the initial linking window, you can still choose to do it later by clicking Link Account inside the game’s Options menu.

  2. 2. A splash screen will appear that will ask if you would like to link your Arc account to your Xbox Live/PSN accounts.

  3. 3. Press the Y button (Xbox) or the Green Triangle button (PS4) to open the browser.

  4. 4. This webpage will allow you to log into your Arc account, or create a new account.

  5. 5. Once your account is registered, and you’ve signed in successfully, tick the box next to the option Link your Arc Account to your Xbox Live Gamertag or PSN user name.

  6. 6. Once this process is completed, your accounts are linked and you can enjoy the benefits of this.

  7. It is very easy to link your Arc Games account to your gaming console account, no matter whether it is an Xbox or a PS4 one. All you need to do is open one of the games you have on them and click on the option that allows you to link the accounts. After, all that remains is for you to follow the on-screen instructions.

    Some of the perks of having your accounts linked is receiving exclusive content in-game, that cannot be obtained in any other way.

    For example, in Neverwinter, once this process is completed, you will be able to claim the Renegade Illusionist from the Rewards Agent in the Protectors Encvale after completing the quest Rags to Riches. This quest comes immediately after the tutorial.


In today’s guide, we explored the best and fastest way of connecting your Arc Games account to your Xbox One or PS4 console.

You need to understand that your character from the Arc Games or any of the console accounts will not be ported once you connect the profiles.

Please feel free to let us know if this guide has proven useful to you. You can do so by using the comment section below this article.

How to Change the Scrollbar Width and Height in Windows 10

Changing the scrollbar width or height in Windows 10 can be done very quickly without requiring somebody to have a lot of tech knowledge.

If you increase the width or height of the scrollbar, then every time you scroll with your Windows 10 tablet or Laptop through the content of a folder or web page, it will appear on the right side of the screen or on the left and will show a bigger or smaller scrollbar depending on what changes you apply.

Increasing the scrollbar width/height on Windows 10 PCs or tablets has been an issue for many Windows 10 users.

Although you can do it very quickly, this feature is a bit tricky to get to, but we will see below in a short and very easy-to-do tutorial on how we can change the width/height of the scrollbar in Windows 10.

How can I change the width and height of the scrollbar in Windows 10?

  1. 1. Press and hold the Windows and the R buttons at the same time on your keyboard. This is a shortcut for opening the Run dialog.

  2. 2. When the Run window pops up, type in the command regedit and press Enter to run it.

  3. 3. If you get a message from UAC (User Account Controls), then click on Yes.

  4. 4. Now you should have in front of you the Registry Editor window.

  5. 5. Click on HKEY_CURRENT_USER, which is situated on the right side of the window.

  6. 6. Under the HKEY_CURRENT_USER folder, click on Control Panel.

  7. 7. Under the Control Panel folder,  click on Desktop.

  8. 8. Under the Desktop folder, click on WindowsMetrics.

  9. 9. The full path above should look like this : HKEY_CURRENT_USERControl PanelDesktopWindowMetrics.

  10. 10. Now, in the right panel, you should have there ScrollHeight. Double-click on it.

    Change Scrollbar width and height in Windows 10
  11. 11. A window named Edit DWORD should appear.

  12. 12. In the field that says Value Data, there should be the value -255. This is the default value.

  13. 13. Change this value so that the height of the scrollbar increases or decreases. The values that you can enter can go up to 1500, this will increase the height of the scrollbar to the maximum. What you input depends on you as how much you want to increase the height of the scrollbar on your device.

    If you enter for example in that field 600, it will increase your height of the scrollbar to about double its current size.

  14. 14. For increasing the width of the scrollbar double click on ScrollWidth, which is on the right side panel in WindowMetrics.

    change scrollbar width windows 10 regedit
  15. 15. Now in the EDIT DWORD window, put the same data value you entered in the ScrollHeight and click on OK when you finish.

  16. 16. In order for the changes to take effect in Windows 10, you will have to reboot and sign in again into your user account.

  17. The scrollbar’s width and height on Windows 10 PCs can be easily modified via the Registry Editor. After you access it through the Run dialog, all you need to do is navigate to the DWORDs that are responsible for modifying the scrollbar’s size, and tailor them to your liking.

If you managed to change these parameters without any problem, you may want to do more things with your scrollbars, and we have just the proper guides for you. Your primary approach should be to have the Windows 11 scrollbar always show up.

You may be one of the users that want to reverse its direction as it is known that many people are used to scrolling down in order to get to the top of the page.

If you are interested in this particular manipulation, we have a complete step-by-step guide to help you reverse the scrolling direction on Windows 10.

This is it, now you can see how easy it is to change the height and width of the scrollbar in Windows 10, please write us below for any input on the subject, and best of luck with using it.

Microsoft To Do rolls out to Outlook for Windows

Microsoft has just announced that it is rolling out Microsoft To Do to Outlook for Windows. This means that users can get more productive by staying on top of their To Do tasks and planning your day right from Outlook for Windows. For those not familiar with Microsoft To Do, you can check out our insightful piece that will help you get started.

Here’s a glimpse of the Microsoft To Do and Outlook for Windows for the Current Channel users (starting with Current Channel version 2207) integration.

This integration adds a new feature that lets users view their flagged emails in Outlook in the Flagged email list of the To-Do app directly.

You will be able to get a snippet of the email, but if you want the full details you will have to open it in Outlook. The feature should be on by default, but if it is not available navigate through To Do Settings > Connected Apps > Turn on Flagged email to enable it.

Besides all this, the integration will allow users to find all the assigned tasks from Planner as well as shared lists, right in the Assigned to me list. It also comes with a dark theme to enhance readability that can easily be set by changing your Outlook theme to dark. Microsoft To Do is available to Microsoft 365 Current Channel users running the following versions of Outlook for Windows:

  • Current Channel Version 2201 (Build 14827.20000) or later: Available by turning on the Coming Soon toggle.
  • Current Channel Version 2207 (Build 15427.20000) or later: Available by default. (Feature rollout is still in progress. Some users may still need to turn on the Coming Soon toggle until the feature has fully rolled out).

However, if you have an eligible Microsoft 365 subscription and user license for the Microsoft To Do app, “you will be able to easily access To Do alongside the main Outlook functions such as email and calendar which are now displayed vertically to the left of the folder pane.,” explains Microsoft.

In other related news, Microsoft To Do on Android recently got a new rich text editor as well as new ways to customize the widget. And finally, Marvel’s She-Hulk theme is now available for both Android and iOS users.


Microsoft addresses anti-competitive cloud licensing, but only in certain regions

European Union cloud users are getting a bit of reprieve from Microsoft’s draconian-like licensing terms that many have claim tether the line of anti-competitive practices.

Earlier this week, Microsoft announced the changes to its EU cloud licensing structure via a blog post titled Making European Cloud Providers More Competitive, wherein the company lays out its three primary goals to assist customers in their flexibility of choice for cloud service products, and presumably, avoiding another anti-competitive strike from the EU in the process.

According to Microsoft, on October 1, 2022, EU partners and their customers should see the following:

  • Make it easier for customers to bring their software to the partner’s cloud
  • Ensure partners have access to the products necessary to sell cost-effective solutions that customers want
  • Empower partners to build hosted solutions with speed and scale

Microsoft gets into the nitty gritty of the licensing terms on another post via its Licensing blog that includes information regarding new flexible virtualization, options for Software Assurance or subscription licenses to license Windows Server on virtual core basis and one- and three-year subscription choices for several products.

  • We’ll introduce a new Flexible Virtualization benefit for customers that will greatly expand customer choice when outsourcing. Under this benefit, customers with Software Assurance or subscription licenses will be able to use their own licensed software to build and/or install solutions and run them on any cloud provider’s1 infrastructure—dedicated or shared. This will give customers more flexibility to run their software on multitenant clouds. This benefit will be available beginning October 1.
  • We’re adding the option for customers with Software Assurance or subscription licenses to license Windows Server on a virtual core basis. Under this model, customers can buy licenses for only the virtual cores they need (subject to a per VM minimum), without being tied to a physical number of cores on the server. With the virtual core licensing option, customers can license Windows Server by the number of virtual cores they are using in virtual machines, making Windows Server easier to license when virtualizing or outsourcing.
  • We’re making it easier to virtualize Windows 10 or Windows 11 by eliminating the Virtual Desktop Application (VDA) add-on license requirement for Microsoft 365 F3, Microsoft 365 E3, and Microsoft 365 E5 users who want to virtualize Windows 10 or Windows 11 on servers and don’t have a primary Windows Pro device.
  • Under the new Flexible Virtualization benefit, customers can work with partners in the Cloud Solution Provider program to get pre-built hosted desktop and server solutions and either bring their own license or get the license from the partner. A Microsoft Customer Agreement with the participating partner and proof of license will be required to run these hosted solutions.
  • Customers will have the choice of one- and three-year subscriptions for many products including Windows Server, Remote Desktop Services (RDS), and SQL Server, through partners in the Cloud Solution Provider program, to offer price stability with long-term subscriptions.

The changes come as three years of disgruntled customer experiences began to boil over after Microsoft’s 2019 license overhaul that raised prices across its cloud services portfolio while simultaneously building in discounts for first party integrations.

For the past three years, many partners and customers have complained that the 2019 licensing overhaul was a thinly veiled shift towards “tying” and thus ultimately an anti-competitive decision that heavily disincentives users in choosing AWS or Google Cloud while also running Office or Windows workloads.

Brad Smith Congress Cropped

In April 2022, Microsoft President and vice chair Brad Smith finally acknowledge the growing concerns over the company’s erratic and prohibitive licensing by saying, “there definitely are some valid concerns, it’s very important for us to learn more and then make some changes.”

Over the next two months leading up to the official licensing changes proposed by Microsoft, the company will also be addressing its outsourcing and hosting terms to more fairly compete with competing cloud platform pricing and services.

It should be noted that the October 1, 2022 due date for licensing changes only apply to the EU and do not address the concerns raised by US-based partners and customers who have raised similar alarms as the EU over the past three years.

Valorant is Not Working on Windows 11: Why & How to Fix it

Is Valorant not opening on your Windows 11 device? Then, this might be the result of a Valorant bug attacking your operating system.

Several people have also tried to install the game onto their devices. This is despite the game developers categorically indicating that you need the TPM 2.0 feature to play the game on Windows 11. 

Remember that gamers cannot enjoy Valorant on unsupported Windows 11 devices, especially if they do not meet the set system requirements. Therefore, the absence of either one of these features might prevent Valorant from opening.

This article will address this problem in-depth and give you the best solution.

Why can’t I play Valorant on Windows 11?

Valorant is a relatively new game in the market. Therefore, there is no clear explanation for why some people face challenges while trying to open it.

However, the issue might occur because some of its main features are still in beta. As a result, gamers experience some glitches, ultimately disrupting gameplay.

There might be instances where your device cannot launch Valorant despite meeting Windows 11’s system requirements. Here are some of the most important:

  • Minor bug during game launch – This includes using a device that is not eligible to play the game, software glitches such as using outdated graphics drivers, and incorrect installation practices. It often leads to Valorant Error code 59.
  • Secure boot is off – The Valorant anti-cheating system depends on Secure boot and it can cause additional problems. We have a guide on how to resolve VAN9003 error in Valorant on Windows 11, so don’t miss it.
  • Overclocking graphics card – Pushing the system to the limit can trigger many unexpected events and even prevent Valorant from opening.
  • Logging into multiple devices with the same account – This issue can occur with any game, not Valorant, so you should check the devices you use.
  • Background apps – Some apps running in the background might block Valorant from opening.

We have solutions for all the problems above, so you can proceed and use the methods listed below to fix the issue.

How do I fix Valorant not working in Windows 11?

1. Run the game in compatibility mode

    In the following guide, we’ll show you how to run the game in compatibility mode and quickly fix Valorant not working on Windows 11 devices.

  1. 1. Right-click Valorant and choose Properties.

    windows-11-valorant-not-opening
  2. 2. Under the Compatibility tab, tick the box of Run this program in compatibility mode, then choose an older OS.

    windows-11-valorant-not-opening
  3. 3. Click the drop-down list and choose an older version of Windows.

    windows-11-valorant-not-opening
  4. 4. Click on OK to save the changes.

    windows-11-valorant-not-opening

Updating Windows can prevent you from running Valorant on your system or even cause a compatibility error, ultimately derailing your efforts to play the game.

In such a situation, try to run the game in compatibility mode and check whether you can resolve the issue. 

2. Update your graphics card driver

  1. Launch Device Manager by searching for it on the search bar.
  2. Expand Display adapters by clicking the toggle.
  3. Right-click the GPU driver, and choose Scan for hardware changes.
  4. Let Windows automatically search for the latest driver for GPU and install it on your PC.

If your device operates on an outdated graphics card driver, it may prevent the Valorant game from launching. Therefore you will need to update your graphics card driver. 

Keeping your graphics drivers up to date can also help you prevent other game issues like a critical error that has occurred in Valorant; read this guide to learn more about it.

To ensure a faster resolution when it comes to drivers, you can use a dedicated tool such as Outbyte Driver Updater to keep your drivers updated automatically.

⇒ Get Outbyte Driver Updater

3. Run the game as an administrator

3.1 Try running the game with administrator rights

  1. Right-click the Valorant icon and choose Run as administrator.
  2. See if the game runs with this option activated. If it does, close it and set admin settings permanently by following the next step.

3.2 Set permanent administrator settings for this game

  1. Right-click the executable file and choose Properties.
  2. Click the Compatibility tab.
  3. Check the box of Run this program as an administrator.
  4. Press OK.

Another workaround would be trying to run the game with administrator privileges, and then attempting to open the game once more. 

Note icon NOTE
If this method works for you, you must set up Valorant, which always runs with administrative rights.

4. Close all Riot-related processes

  1. Launch Task Manager in Windows 11 by typing Task Manager into the search box and clicking the result.
  2. Under the Processes tab, find Riot processes (usually have a Valorant or Riot logo), click one and choose End task.

If one of the Riot processes is not working correctly, then that may be why Valorant is not opening. However, closing the processes might help you resolve the issue. 

5. Update your OS

  1. Press the Win + X key combination, and choose Settings.
  2. Choose the Windows Update button from the left pane.
  3. Click the Check for updates button and wait for Windows to check/install them.

Now open the game and verify that the problem of Valorant not opening in Windows 11 is resolved.

6. Reinstall Valorant

  1. Click the Search button, type in control, and open the Control Panel.
  2. Click on Programs.
  3. Then, click on Programs and Features.
  4. Select the game and click on Uninstall. 

In case you are not able to uninstall the game, try using the methods mentioned in this guide to fix the Valorant not working issue.

If you have tried the above methods and none have worked, you can try installing the game on your device again. An error could have possibly occurred while you were establishing the game initially. 

Once uninstalling the game, visit its official website and download its latest version. Then, reinstall the game on your device and check whether you can now open the game successfully. 

Riot Games updated their Vanguard anti-cheat system, heavily dependent on the Secure Boot and TPM 2.0 features exclusively available on Windows 11.

This move ensures that gamers do not try to cheat the hardware or device ID if they have already been banned from accessing this game.

Besides, Trusted Platform Module 2 (TPM 2) and Secure Boot are all about security. This means they cannot use a new device ID instead of its original identification that was already banned from accessing the game. 

However, the ban does not apply to Windows 10 users, who can still run Valorant on their devices despite the absence of Secure Boot and the TPM 2.0 feature. 

How do I fix Valorant crashes on Windows 11?

When you receive the Unable to Start Correctly error, it simply means that Valorant cannot start properly.

One of the most straightforward fixes you could implement in such a situation would be to restart the device. After applying this solution, then check whether the issue has been remedied.

Users should try this several times and let the game start from scratch. Ideally, this is supposed to let you open the game properly. Moreover, it could also present another error leading to a proper fix.

This will allow all your programs to get a fresh start, install any pending updates, and even remove any potential blocks preventing Valorant from running correctly. Furthermore, it will help you clear any issues with the Vanguard anti-cheat software.

We suggest running the games as an administrator and in compatibility mode.

Now let us see detailed solutions to Valorant not opening in Windows 11.

Why is Valorant not responding?

If the game is not responding, it could be because of any of the following:

  • Conflicts between Windows and Valorant
  • An old OS and outdated graphics card driver
  • Secure boot is disabled
  • Faulty game installation or damaged game files
  • Apps running in the background

It will most likely respond after using the solutions mentioned in this guide. However, you must note that Valorant heavily depends on Windows 11’s system requirements, specifically the TPM 2.0 feature, because of the hardware and security-related actions. 

By complying with the system requirements, you can avoid errors, including the Windows 11 Valorant TPM error.

The feature in Windows 11 provides users with an extra layer of security. For more information about the TPM 2.0 feature, look at our TPM 1.2 vs. 2.0 guide.

Also, check out these great VPNs for Valorant to fix lag and reduce ping. Our top suggestions won’t disappoint you since they can automatically detect the best server to decrease latency.

Before you leave, don’t miss our guide on VAN error 1067 in Valorant on Windows 11, since it can provide you with more useful information.

We hope you were finally able to fix the issue of Valorant not opening in Windows 11. Which of the above methods helped you resolve the problem? Please share your thoughts with us in the comments section.

Windows Defender Firewall Can’t Change Some of Your Settings

You probably got a message that reads Windows defender firewall can’t change some of your settings. So let us show you all you must know.

Along with Windows Defender, the built-in Microsoft security solution, the Windows Firewall is an essential feature that can protect your computer against malware or virus attacks.

Thus, you have all the reasons for being worried when receiving error messages related to the Windows Firewall functionality.

However, it would help if you didn’t panic, as you can always fix system errors by applying the right troubleshooting solutions.

So, in our case, we will detail the methods that should be applied when the Windows Firewall can’t change some of your settings.

The reasons why this message appears can vary from one situation to another. Therefore, the guidelines below will try to find a fix for each situation.

Why can’t the Windows Defender firewall change settings error appear?

There are a few reasons why a user may experience this error in Windows OS. First, this error could occur if Windows does not have one of its necessary services operating.

Conversely, this problem may also be brought on by a deactivated BITS (Background Intelligent Transfer Service). Therefore, the Background Intelligent Transfer Service must be in a functional condition.

Other common reasons include:

  • Firewall managed by third-party software
  • Corrupted Windows Files
  • Zero access rootkit infection

Most common variations of this error

This error could come in any of the following forms:

  • Windows firewall can’t change some of your settings 0x800706d9 – Simply said, it indicates that Windows Firewall must be enabled.
  • Your Windows firewall can’t change some of your settings 0x80070422 – A corrupt user profile might be the issue. Your profile may get damaged for various reasons, but you may create a fresh profile.
  • Windows defender firewall can’t change some of your settings group policy – It is most likely because the domain controller’s Group Policy Object has made it impossible to alter these settings.
  • Windows could not start the windows defender firewall service on the local computer – The likelihood is that your Firewall is contaminated. However, it might only indicate that you terminated the Firewall services and that you must restart them to make changes to their settings.

Now let us look at some of the best resolutions for these errors.

How do you fix Windows Defender Firewall can’t change some of your settings?

1. Enable Windows Firewall services

  1. Click on the Cortana icon (it will launch the Windows search engine).
  2. In the Search field, type services, right-click on the first result with the same name, then pick Run as administrator.
    windows defender firewall can't change some of your settings
  3. From Services, scroll down and find the Windows Firewall entry.
  4. Go to the General tab and change the Startup type to Automatic.
    windows defender firewall can't change some of your settings
  5. Save these changes.
  6. Then, right-click on the Windows Firewall service and choose Start.
    windows defender firewall can't change some of your settings
  7. Close the Services window and reboot your computer.

If the Windows firewall fails to launch at start-up, you will receive the Windows Firewall can’t change some of your settings error message.

2. Apply any pending updates

  1. Press the Win + I keyboard hotkeys.windows defender firewall can't change some of your settings
  2. From System, Settings, choose Update & Security.
  3. From the left side of the main window, go to Windows update.apply updates windows 10
  4. If there is an update patch waiting for your approval, apply it.
  5. Then, reboot your computer and check if the Windows Firewall can’t change some of your setting’s error message is still there or not.

If your Windows system is not updated correctly, you might experience Windows Firewall problems. You may want to explore the Microsoft list of updates and ensure you are current.

3. Reset Windows Update Components

  1. Right-click on the Windows Start button.
  2. From the list, choose Command Prompt (Admin).
  3. Now type in the commands below, hitting Enter after each one.
    netsh advfirewall reset
    net start mpsdrv
    net start bfe
    net start mpssvc
    regsvr32 firewallapi.dll

When done, close the cmd window and restart your computer.

4. Configure Background Intelligence Transfer Service

  1. Click on the Cortana icon (it will launch the Windows search engine).
  2. In the Search field, type services, right-click on the first result with the same name, then pick Run as administrator.
    windows defender firewall can't change some of your settings
  3. Scroll down and find the Background Intelligent Transfer Service entry.
  4. If this feature is disabled, double-click on it, and modify the Startup type to Manual.
  5. Then, click on the Start button beneath Service Status.
  6. Restart your Windows 10 system.

5. Disable third-party antivirus software

In some situations, Windows Defender might not run properly if another third-party antivirus program is on the computer. In addition, conflicts between built-in and third-party programs might cause the Windows Firewall to malfunction.

So, to eliminate the Windows Firewall that can’t change some of your setting’s error messages, you should disable this third-party antivirus software.

You can choose to disable them or to uninstall the programs entirely temporarily. If afterward Firewall works correctly, it means that you found the problem.

If not, you should disable Windows Defender and reinstall your third-party antivirus program, as your Windows 10 system might have viruses or malware.

Keep in mind that not all antivirus software is compatible with Windows. Check out this list of the best antivirus tools compatible with Windows 10.

6. Run a security scan and remove the infected files

  1. Press the Win + R keyboard hotkeys.
  2. In the Run box, type msconfig and press Enter.
  3. From System Configuration, switch to the Boot tab; under Boot Options, select the Safe Boot checkbox and the Network option from beneath.windows defender firewall can't change some of your settings
  4. Save your changes when done, and reboot your computer.
  5. In safe mode, launch the antivirus program and initiate a full scan.
  6. In the end, complete the removal process – reinitiate a scan to ensure all infected files were successfully deleted.

If you cannot fix the issue with the help of the already explained guidelines, you should consider initiating a security scan on your Windows 10 device.

It would help if you did that because your computer might have a virus or malware. And that should be the reason for the Windows Firewall can’t change some of your settings error message.

First, make sure you use a trustful antivirus or antimalware program. In a dedicated review, we already discussed the best antivirus programs on the Windows OS as an alternative to the built-in Windows Defender solution.

However, if you are still using Microsoft’s default security features, the troubleshooting solutions explained above should help you fix the Windows Firewall can’t change some of your settings error message.

If you have questions or if you need our further assistance, don’t hesitate and get in touch with our team. Then, based on the info you provide, we will try to find the perfect solutions for your problems.

How to archive Outlook mails

Archiving your emails helps you save your emails and their data for later use. It also makes it easy to quickly look up your files when you need to find them. Additionally, it can also come in handy in abrupt data losses where you might otherwise end up losing your critical information.

It makes sense, then, to archive your emails regularly. This article looks at how you can do that without any hassles. So let’s dive right in.

How to archive Outlook emails

Before you begin to archive your Outlook emails, it’s essential to understand that moving your Outlook emails to archived emails is different for different Outlook setups. 

For instance, if you’re using Outlook Web you’ll simply move your emails from your inbox to the Archive mailbox. On the other hand, if you’re on the Outlook desktop app, archiving your emails can also be about moving your emails from the mail inbox folder to the Archive folder. So let’s look at both procedures. 

How to archive emails on Outlook desktop

To archive your emails on Outlook desktop, you can use the AutoArchive feature in the Outlook app. Made available for free from Outlook, when you’ve enabled this feature, your emails will be archived automatically after a specified period of time. Pretty handy, right? Here’s how you can set up this feature:

  1. Open the Outlook app and select the File option. 
  2. Click on Options > Advanced.
  3. Look up the AutoArchive feature and click on the AutoArchive Settings feature when you find it.     
  4. Select the Run AutoArchive every radio box and choose how often the AutoArchive feature should run. 
  5. From the Default folder settings for archiving section, choose when your Outlook emails should be archived.
  6. Click on Browse and choose a destination for archiving your folder. 
  7. Click on OK to save your changes.  

That’s it — your Outlook emails will be archived as per your specified settings. If you want to disable the Outlook feature in the future, all you’ve to do is uncheck the Run AutoArchive every radio box again and save your settings—the archive feature will be disabled.

How to archive email on Outlook Web

Archiving your emails on Outlook web is a straightforward affair; much simpler than for Outlook desktop surely. To get started with it, follow the steps below:

  • Head to Outlook.com account, log in, and go to Inbox. 
  • Select all the emails you’d like to archive and select Archive.
archiving your outlook mails

All the selected emails will be archived instantly. If you want to unarchive them later on, head to the Archive folder and select the email. Then click on Move from the top, and choose the location where you want to move your emails.  

Archiving your Outlook emails with ease

So that was all about archiving your emails on Outlook, folks. Archiving your files can be super helpful to keep your files protected against accidental data losses and help you pull up your emails instantly. I hope you were able to archive your email successfully after this.

To learn more, we have a great guide on how to apply AutoArchive settings to subfolders in Outlook, so don’t miss it.

Ventoy vs Rufus: Safety, Speed & Functionality Comparison

Creating a bootable USB drive is a convenient way to install an operating system on a PC. There are many tools that can help you with this, and today we’ll take a look at two of the best on the market: Rufus and Ventoy.

Both programs have their strengths and weaknesses. Let’s take a closer look.

What are Ventoy and Rufus? 

Rufus and Ventoy are utilities that can create bootable USB drives. They are both open-source, portable, and free to use. This means that you can easily use either to copy your favorite operating system on a USB stick or external drive and run it directly from there.

Is there anything better than Rufus? 

Rufus isn’t perfect. It features a very simple interface and you can use it to format any type of USB flash drive to either FAT32 or NTFS file system. 

But the most useful feature of this tool is that it allows you to create bootable USB flash drives.  What makes this app so popular? Well, besides being completely free, it supports a wide range of ISO file formats. 

It also allows you to create bootable USB drives for all versions of Windows. The best thing about this app is that it can make installing Windows on Mac computers easier as well. The portable version of this program can be run from any location and doesn’t need to be installed.

Most utilities like Rufus need to be downloaded and extracted. A majority of them also don’t allow multiboot which makes Rufus a top contender among others. 

Is Ventoy safe to use?

Yes. Ventoy is a 100% free and open-source application. The source code is available for anyone to download, modify, and redistribute. This allows users to verify that Ventoy does not contain any malicious code.

What are the differences between Ventoy and Rufus? 

Both Rufus and Ventoy share similarities but they also have their own differences. The bottom line is that either can create bootable USB drives.

Rufus has a very easy-to-use and minimal interface, but it also has some advanced options for those who need them. Ventoy has its users singing praises as the best one yet since you can create multiboot USB drives.

Do Rufus and Ventoy support Windows 10/11?

Rufus and Ventoy both support Windows 11 in 32-bit and 64-bit versions. This is a great advantage because it means that you can use either application to create bootable USB drives for the latest version of Windows.

With Ventoy, some Windows 11 system requirements may show up during installation but you can easily bypass them.

Both Rufus and Ventoy work with BIOS and UEFI. Booting from a USB drive requires having BIOS or UEFI firmware support for it. UEFI is newer than BIOS, but not all computers have it yet. 

If you’re having trouble booting from a USB drive, the most likely cause is that you haven’t set your BIOS or UEFI firmware to support booting from USB drives. 

Users with older systems that use BIOS, should look up whether their motherboard supports booting from a USB drive. If not, then you’ll need to upgrade to a newer model with UEFI support (which most modern systems have).

User interface 

Rufus is popular because it’s simple to use and supports many different types of file systems (NTFS, FAT32, etc.). 

Both programs are very easy to use; however, Ventoy has a simpler interface compared to Rufus. Rufus may make it harder for beginners to use this program effectively. Without any prior knowledge about how these programs work, they can be difficult to navigate.

Also with Ventoy, you do not have to extract any files and you can directly copy and paste like regular files.

Performance and speed

Both Rufus and Ventoy are very fast when compared to other similar tools. However, there are some minor differences between them in terms of performance.

Rufus has a slightly faster benchmarking time than Ventoy. This difference may not be noticeable for most users but it can be an important factor if you need to create multiple bootable drives at once.

The most important feature of Ventoy is that it creates bootable USB flash drives without having to go through a complicated process that normally requires a command prompt or third-party software.

It also allows you to create multiple partitions on your hard drive, each one with its own operating system so that you can use more than one OS at the same time.

If you need more control over what happens when your computer boots from a disc or flash drive, try Ventoy instead of Rufus. 

Ventoy vs Yumi vs Rufus 

There are several tools that can create bootable USB drives, but not all of them are created equal.

VentoyYumi Rufus
Support UEFI and BIOSSupport UEFI and BIOSSupport UEFI and BIOS
Supports drive partitioning MBR/GPTSupports MBR partitioningSupports drive partitioning MBR/GPT
No extraction necessaryExtraction necessaryExtraction necessary

Conclusion

Creating a bootable USB drive is a very simple task. All you have to do is download the ISO of the operating system and then use the right tool to create a bootable USB drive. 

When selecting a utility, it should have support for multiple operating systems, can create multiple partitions on the drive, and supports UEFI and BIOS systems.

You can also check out other software to create multiboot USB drives if you are looking for more options.

Don’t forget to install an antivirus program whenever you are using multiboot tools to ensure your system is protected at all times.

If you’re a fan of Rufus, don’t miss our guide on the best Rufus settings for Windows 11. If you’re using legacy systems, we have a fresh guide on how to run Rufus on Windows 7 that you might want to check out.

If you have gotten a chance to use any or all of these tools mentioned here, be sure to let us know what your experience was like.

Xiaomi Notebook Pro 120G with 12th Gen Intel processor launched in India

Xiaomi officially unveiled its new Xiaomi Notebook Pro 120G and Xiaomi Notebook Pro 120 laptops in India. The Notebook Pro 120 and Pro 120G are the successors to the Xiaomi Mi Notebook Pro, which was launched last year. The latest Notebook Pro 120G comes with a bunch of improvements compared to the last generation devices.

Xiaomi Notebook Pro 120G features a 2.5k resolution 120Hz display, 12th Gen Intel processors, dedicated Nvidia GeForce MX series GPU and much more. The base variant Notebook Pro 120 comes with the integrated GPU, and the rest of the specifications are the same as the 120G variant.

Take a closer look at the detailed specifications, features, price, and availability of the Notebook Pro 120G laptop.

Xiaomi Notebook Pro 120G Specifications

Xiaomi Notebook Pro 120G with 12th Gen Intel processor launched in India

The newly launched Xiaomi Notebook Pro 120G flaunts a 14-inches 2.5k resolution display that offers a 120Hz refresh rate, a 16:10 aspect ratio, 100 percent sRGB color gamut, and DC Dimming. The panel of the machine is TUV Rheinland certified.

The Notebook Pro 120G laptop is powered by a 12th Gen Intel Core i5-12450H series processor coupled with an Nvidia GeForce MX550 dedicated GPU. The machine comes with up to 16GB of LPDDR5 RAM and 512GB of PCle Gen4 SSD storage and it runs on Windows 11 Home out of the box.

Xiaomi Notebook Pro 120G with 12th Gen Intel processor launched in India

The machine has a full-sized 3-level backlit scissor mechanism keyboard that offers 1.3mm deep key travel. The laptop has WiFi 6 and Bluetooth v5.2 support.

Xiaomi Notebook Pro 120G draws power from a 56Wh battery. To recharge that big battery, it has 100W fast-charging support. Xiaomi claims that the laptop charges 0 to 50 percent just in 35 minutes. (Via Xiaomi.com)

Talking about the design of the laptop, it has an Aerospace Grade Aluminum alloy build, and a thin and lightweight design (weighs just 1.4kg). It has thick top and bottom display bezels.

As for the port options, the Notebook Pro 120G comes with

  • 1x Type-C USB 3.2 Gen 2
  • 1x Type-A USB 3.1 Gen 1
  • 1x Thunderbolt 4 ( for data transfer and Charging)
  • 1x HDMI 2.0 Port
  • 1x 3.5mm Headphone Jack

Xiaomi Notebook Pro 120G with 12th Gen Intel processor launched in India

Other features of the Xiaomi Notebook Pro include dual stereo speakers with DTS audio, a 720p HD webcam, a fingerprint sensor integrated with the power button, a hurricane dual cooling system, and an in-built microphone.

The base variant i.e The Xiaomi Notebook Pro 120 laptop follows similar specifications as the Pro 120G variant. The only difference between Notebook Pro 120 and the Notebook Pro 120G is that the former ships with integrated Intel UHD graphics.

Xiaomi Notebook Pro 120G Price & Availability

The latest Xiaomi Notebook Pro 120G retails at ₹74,999 (roughly $942) while the Xiaomi Notebook Pro 120 is priced at ₹69,999 (roughly $880).

The laptops will be available for sale from 20th September in India via Amazon, Mi India’s official website, and Mi stores across India.

For more latest and exclusive tech news updates follow us on Google News.

Images Credit~ Xiaomi.com

Killer Network Service: What is it & do You Need it?

Many users noted Killer Network Service on Windows 11 and other versions of Windows, and they are concerned about it.

In today’s guide we’re going to take a closer look at this service, and see what exactly it does.

What is Killer Network Service and do I need it?

With this service, you can prioritize your online gaming, streaming, and downloading activities on the network by giving them higher priority over other things.

It works by prioritizing your most important tasks so that they get more bandwidth than other tasks.

Why is Killer Network Service on my computer?

The Killer Network Service is a Windows service that allows programs to send and receive network data.

If you have recently installed any network drivers from the Internet, it is possible that Killer Network Service was part of the installation package. 

Is Killer Network Service needed? 

The service is optional so you get to choose whether you really need it. It has been designed to improve the performance of your computer in games by prioritizing traffic.

If these programs aren’t given priority, they may suffer from lag or buffering issues during peak usage times.

Can I turn off Killer Network Service?

Note icon NOTE
To avoid any inconvenience, we suggest to always performing scanning of any file or program you are downloading. To do so, you can rely on a trustworthy antivirus, such as ESET HOME Security Essential, to scan, detect and remove the malware.
  1. Hit the Windows + R keys simultaneously to open the Run dialog box. 
  2. Type services.msc and press Enter.
  3. Navigate to Killer Network Service and double-click on it.  
  4. Click on the Stop button under Service status then press OK.

As an alternative, you can opt for bandwidth optimization software to manage your bandwidth usage and allocate it accordingly.

There are other lesser-known services, and we already wrote about NetworkCap.exe in one of our previous guides, so don’t miss it.

Now that you are aware of the Killer Network Service in Windows 11, we’d love to know your experience with it. Have you encountered any performance issues? Start us off in the comments section below.

Network Adapter Driver for Windows 11 [Download/Update]

Network drivers in Windows 11 are required for the computer’s network adapters. Your PC’s network adapter is the device needed for Internet connectivity. Wireless network adapters’ drivers are also known as Wi-Fi drivers.

Drivers facilitate communication between Windows 11 (or any other OS) and internal and external hardware devices. Companies regularly update drivers for their hardware devices.

Therefore, the original drivers that came with your PC will get outdated.

Windows 11 doesn’t include any new utility for updating device drivers. Therefore, there isn’t any new way you can update network drivers in the latest OS.

However, you can still easily update adapter drivers in Windows 11. In our article today, we will teach you how to update the network drivers.

Do I really need to update my PC’s network driver?

Updating the driver for the network adapter can enhance both its performance and reliability. For example, an antiquated network driver might reduce the download speed on your desktop or laptop.

For the sake of faster download speed, it’s worth updating a network adapter’s driver. Furthermore, connectivity issues will more likely arise on a PC with an outdated network adapter driver.

If you can’t connect to the Internet, you won’t be able to download a new driver to fix that issue. So, it’s best to update your computer’s network driver when you can do so to forestall connection inconveniences.

How to install network adapter driver Windows 11 without Internet?

Without a doubt, our computer and operating system will not function normally if we do not have the appropriate drivers installed.

Before we go any further, you need to be aware that the installation of drivers on Windows 11 may be performed with or without an Internet connection.

It is essential to have up-to-date drivers because, in the event that they become corrupted or otherwise inoperable, hardware may become unresponsive or malfunction.

In addition to this, they conceal the fundamental workings of your hardware devices, so enabling you to make use of an incredibly user-friendly interface.

We prepared a dedicated article on how to manually install your drivers, which we recommend you check out as the first two solutions do not require an Internet connection.

How can I update my PC’s network driver in Windows 11?

1. Use Device Manager

  1. Press the Windows key and X simultaneously to open a menu that includes some handy shortcuts.
  2. Click the Device Manager shortcut to open that utility in Windows 11.
    Device Manager windows 11 network driver
  3. Double-click Network adapters to expand the device list for that category.
  4. Then right-click your Internet network adapter there and select the Update driver context menu option for it. You can do this for any Ethernet driver in Windows 11 as well.
    Update driver option windows 11 network driver
  5. Select the Search automatically for drivers option to initiate a Windows search.
    Search automatically for drivers option windows 11 network driver
  6. If the updater utility detects a better driver, wait for Windows to install it.

2. Use the Windows Update Service

  1. 1. Open the Start menu by clicking on the Start button on the taskbar.

  2. 2. Click on the Settings app pinned to the Start menu.

    windows settings app
  3. 3. Next, click the Windows Update tab on the left of Settings.

  4. 4. Select Advanced options on the Windows Update tab.

    windows update advanced options
  5. 5. Click Optional updates within Advanced options.

    optional updates windows update
  6. 6. If a network adapter driver is listed within the optional updates, select its checkbox.

  7. 7. After, press the Download & install button.

  8. If you are not fan of using Device Manager to update your network adapter drivers, you can instead use the Windows Update Service. It is also a built-in tool, and it is responsible for keeping your device up to date.

    From the Windows Update Service menu, you can scan for, download and install new updates for your network adapter driver at any time.

Note icon NOTE
To check for new updates, you’ll need to press the Check for updates button in Settings.

3. Manually update your PC’s network adapter driver

  1. Open a web browser in Windows 11 and search for your network adapter’s driver provider website, which will be the manufacturer’s site. For example, Intel provides the drivers for Intel network adapters.
  2. Then open the manufacturer’s website and click the link for the driver download section of the website. It is usually found under Support.support-intel network driver windows 11
  3. Select the network adapter (or wireless) product category.
  4. Then enter the name of your network adapter, as specified within Device Manager, in the website’s device search box.
  5. Click the Download option for your network adapter’s latest driver package listed on the website, which must be compatible with your Windows 11 platform.
    Intel network driver download page windows 11 network driver
  6. Thereafter, select a folder to download the driver package to and click the Save button.
  7. When you’ve downloaded the driver package, click File Explorer’s taskbar button.
    The File Explorer button windows 11 network driver
  8. Open the folder you saved the driver package in.
  9. Double-click the driver package’s EXE file to open its installer window.
  10. Then go through the installer window’s instructions to install the network driver. You can do this for any network controller in Windows 11 that you need to be updated.
Note icon NOTE
Some driver packages have a CAB format. If you download a driver with a CAB format, you’ll need to extract its ZIP archive first. Then select the Browse my computer for drivers option in Device Manager’s Update Drivers utility to install it.

If you are looking for a quicker and easier solution, using a specialized tool is what you need. You can update any of your PC’s drivers by selecting the download and install options within the driver updater.

How do I reinstall network drivers in Windows 11?

  1. Right-click the Start icon and select Device Manager.device-man-w11 network driver windows 11
  2. Expand the Network Adapters section, right-click on your network drivers, and select Uninstall device.unisntall-driver network driver windows 11
  3. Reboot your PC to reinstall the drivers automatically. That’s it!

How can I enable (or disable) automatic driver updates in Windows 11?

Windows 11 will automatically download and install some device drivers if configured to do so. You can enable automatic driver downloads with device installation settings. This is how you can do that in Windows 11.

  1. Press Windows then type device installation settings within the search box. Click Change device installation settings to open that window.change-device network driver windows 11
  2. Select the Yes option on the Device installation window if it’s not already selected. Or you can select No if the opposite is true.
    Device installation settings windows 11 network driver
  3. Press the Save changes button to confirm.

Bear in mind that enabling automatic updates doesn’t mean Windows Update will update all device drivers on your PC. However, it will at least update the more essential device drivers.

So, there are numerous ways you can update your computer’s network driver. Choose whatever method you prefer for updating the network adapter and other device drivers.

Connectivity issues will less likely arise on your PC if you keep its network adapter driver up-to-date with the above methods. It’s best to update network drivers to prevent connection issues from arising in the first place instead of waiting for them to happen.

Even more, driver problems occur while playing games such as Minecraft and BattleField. Check out this dedicated guide on solving outdated drivers’ errors on Windows 11.

Have the above procedures worked for you as well? Let us know in the comments area below.