Keycode Browser: 5 Picks That Still Support it

Browsers differ from each other based on the kind of features they offer. These features determine what kind of services the browsers are available.

However, browsers can be categorized based on their uses. For instance, some browsers are best for developers, while some are good for regular daily use. Hence, we’ll discuss the Keycode browser support.

Nonetheless, after the deprecation of Keycode, it became unsupported on several platforms. However, there are ways you can still use it on some selected browsers. Unfortunately, not all browsers supported Keycode after it was deprecated.

There are some specific features that browsers are expected to have before being able to use KeyCode. Features like JavaScript accessibility, fast browsing speed, and security are essential for Keycode browser support.

Is KeyCode deprecated?

KeyCode was deprecated a while ago and thus, making the feature unavailable for mobile browsers. The reason for its deprecation was that it was inconsistent across platforms.

Also, the same implementation can be noticed on different operating systems or using different localizations.

Although KeyCode is deprecated, you can still use it on some browsers.

What are the best browsers that still support KeyCode?

Opera One – Best for KeyCode

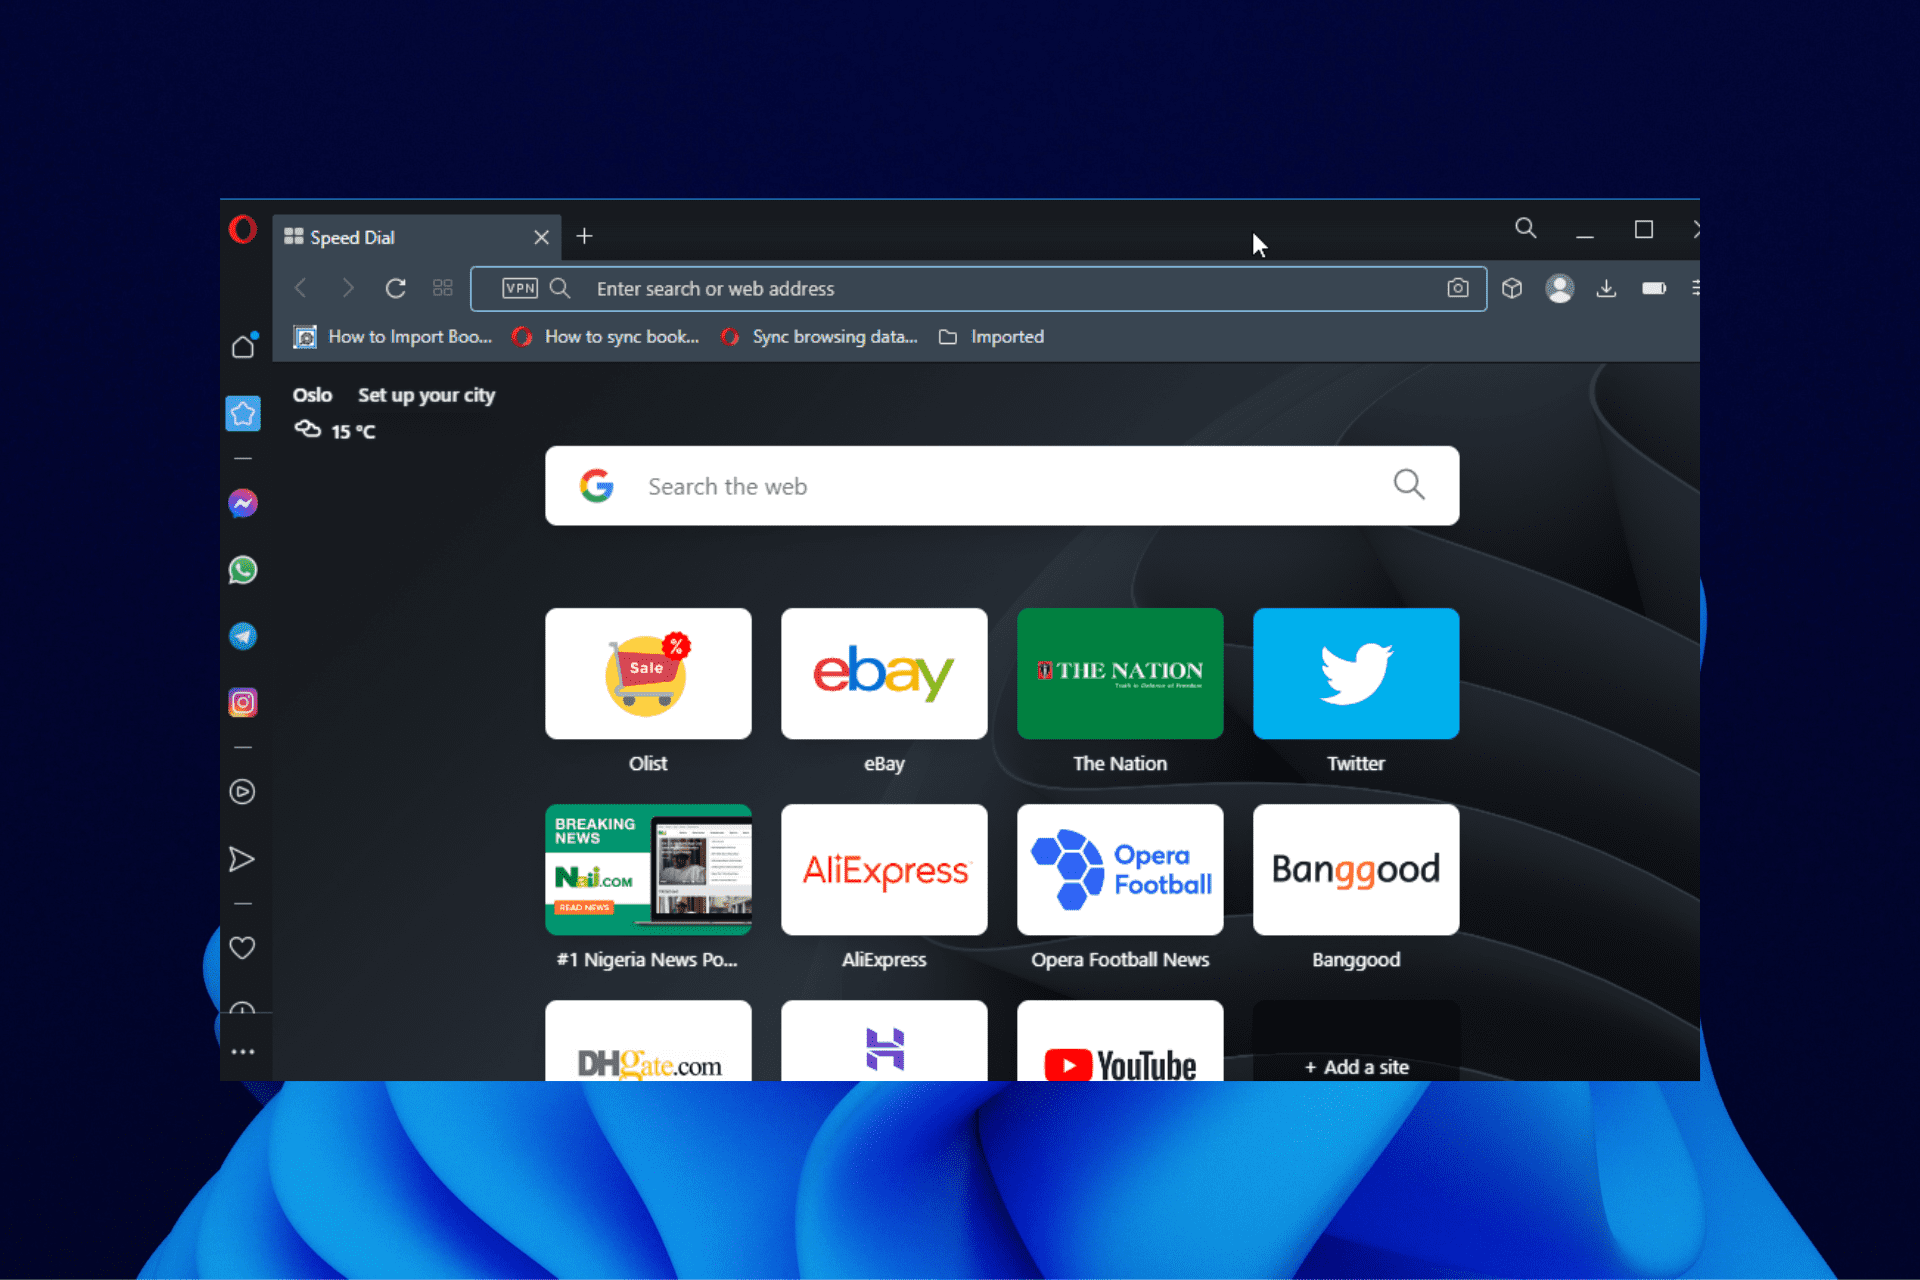
Opera One is the best browser for JavaScript. The Opera One browser has many developer tools you can use for debugging and testing. However, it is one of the few browsers that still support KeyCode. Also, the browser has a customizable interface that allows you to adjust your screen sizes and resolutions.

Furthermore, the Opera One browser has an inbuilt editor for editing CCS on your browser without needing any external apps. Also, it has an inbuilt Ad Blocker that blocks ads from interrupting your browsing sessions.

Moreover, Opera One has a repository where you can download and add plugins and extensions to your browser. Extensions help you improve your browser features and make it easier to work with them.

We recommend that users update their Opera One browser to the latest version. It will fix any bug that may cause difficulties when using KeyCode on your browser.

Opera One

Run JavaScript KeyCode with zero issues with this versatile and secure browser!
Free Download Visit website

Mozilla Firefox – Fast and built for developers

Mozilla Firefox is one of the oldest browsers in the market. Over the years, it has undergone several improvements that help it perform better than other browsers.

Firefox has a developer’s version embedded with developers’ features like JavaScript inspection. However, despite KeyCode deprecation, Mozilla Firefox is one of the browsers supporting it.

Some features are an advanced user interface for easy navigation and a vast store for add-ons and extensions. Likewise, it has an excellent tan management style that allows you to arrange your tabs.

However, not all versions of Mozilla Firefox support KeyCode. Hence, users need to download the Firefox Developers Edition to utilize KeyCode smoothly on their devices. The Firefox Developer’s edition is the most developed browser for KeyCode and similar JavaScript-related platforms.

⇒ Get Mozilla Firefox (Developer’s Edition)

Google Chrome – Ideal for Java-related platforms

Google Chrome is a Chromium-based browser. It is a reliable browser for Java-related platforms like KeyCode. There are several features that users can enjoy on the Chrome browser.

Some benefits are an advanced user interface that helps keep track of your activities online, security and privacy, and a fast browser speed. However, its features give it the KeyCode browser support. It means it is one of the few browsers that still works with KeyCode.

Furthermore, Google Chrome is one of the fastest browsers in the market. It helps users load sites quickly without encountering any difficulties. Also, it comes with developer tools like HTML inspection and modifications for CSS or JavaScript on any website. Likewise, Chrome has inbuilt components like Adblocker, VPN service, and syncing features.

Nevertheless, KeyCode only supports the latest version of Google Chrome. It is because the older versions don’t have the features that can work with KeyCode.

⇒ Get Google Chrome

Brave browser – Best for data protection

Brave is a secure browser. It is a new-generation browser with many features that make it better than some old browsers. However, it is the best browser for user privacy and security.

Also, developers have features that make the browser suitable for products like KeyCode. Hence, it is a browser that supports KeyCode.

Moreover, it is a browser built on Chromium code that helps with web development. Likewise, Brave browser features inspect elements that allow you to read and modify JavaScript code on your browser. The browser is strong enough to run and debug JavaScript components.

Furthermore, Brave browsers feature some inbuilt tools like HTML support, CSS and JavaScript coding, and lots more. Likewise, it has an inbuilt code editor that allows users to highlight syntax for more than 20 languages.

⇒ Get Brave Browser

Vivaldi – Packed with great features

Vivaldi is one of the browsers that supports KeyCode. It has features like an advanced customizable browser interface, an inbuilt HTML5 inspector, and lots more.

However, Vivaldi helps you to debug JavaScript on your browser in real-time. Likewise, users can easily navigate the browser.

The browser has an inbuilt VPN that allows you to surf the internet without being detected.

⇒ Get Vivaldi

What can I use instead of KeyCode?

Since the KeyCode property is deprecated, the feature is no longer available. So, the need to get an alternative is essential.

The best alternative for KeyCode is the ‘.key‘ property. Using the ‘.key‘ property helps to set the value for the key pressed that can have single or multiple characters.

Furthermore, we recommend that users download the latest versions of the browsers discussed. It will help prevent issues like the KeyCode by working.

There are other difficulties users can encounter online. Hence, we recommend you check our article about the best browsers that natively support WebP.

Let us know your pick in the comments area below.
5 Best Whatsapp Extensions & Add-Ons for Mozilla Firefox

Let us share with you our top recommendations of Whatsapp extension options for Firefox.

WhatsApp extensions can extend even further the features and options that the chat offers in its original form. There are plenty of extensions to choose from, depending on your particular needs.

We will explore in this article one of the most useful WhatsApp extensions for Mozilla Firefox, so keep reading.

How do I add WhatsApp Web to Firefox?

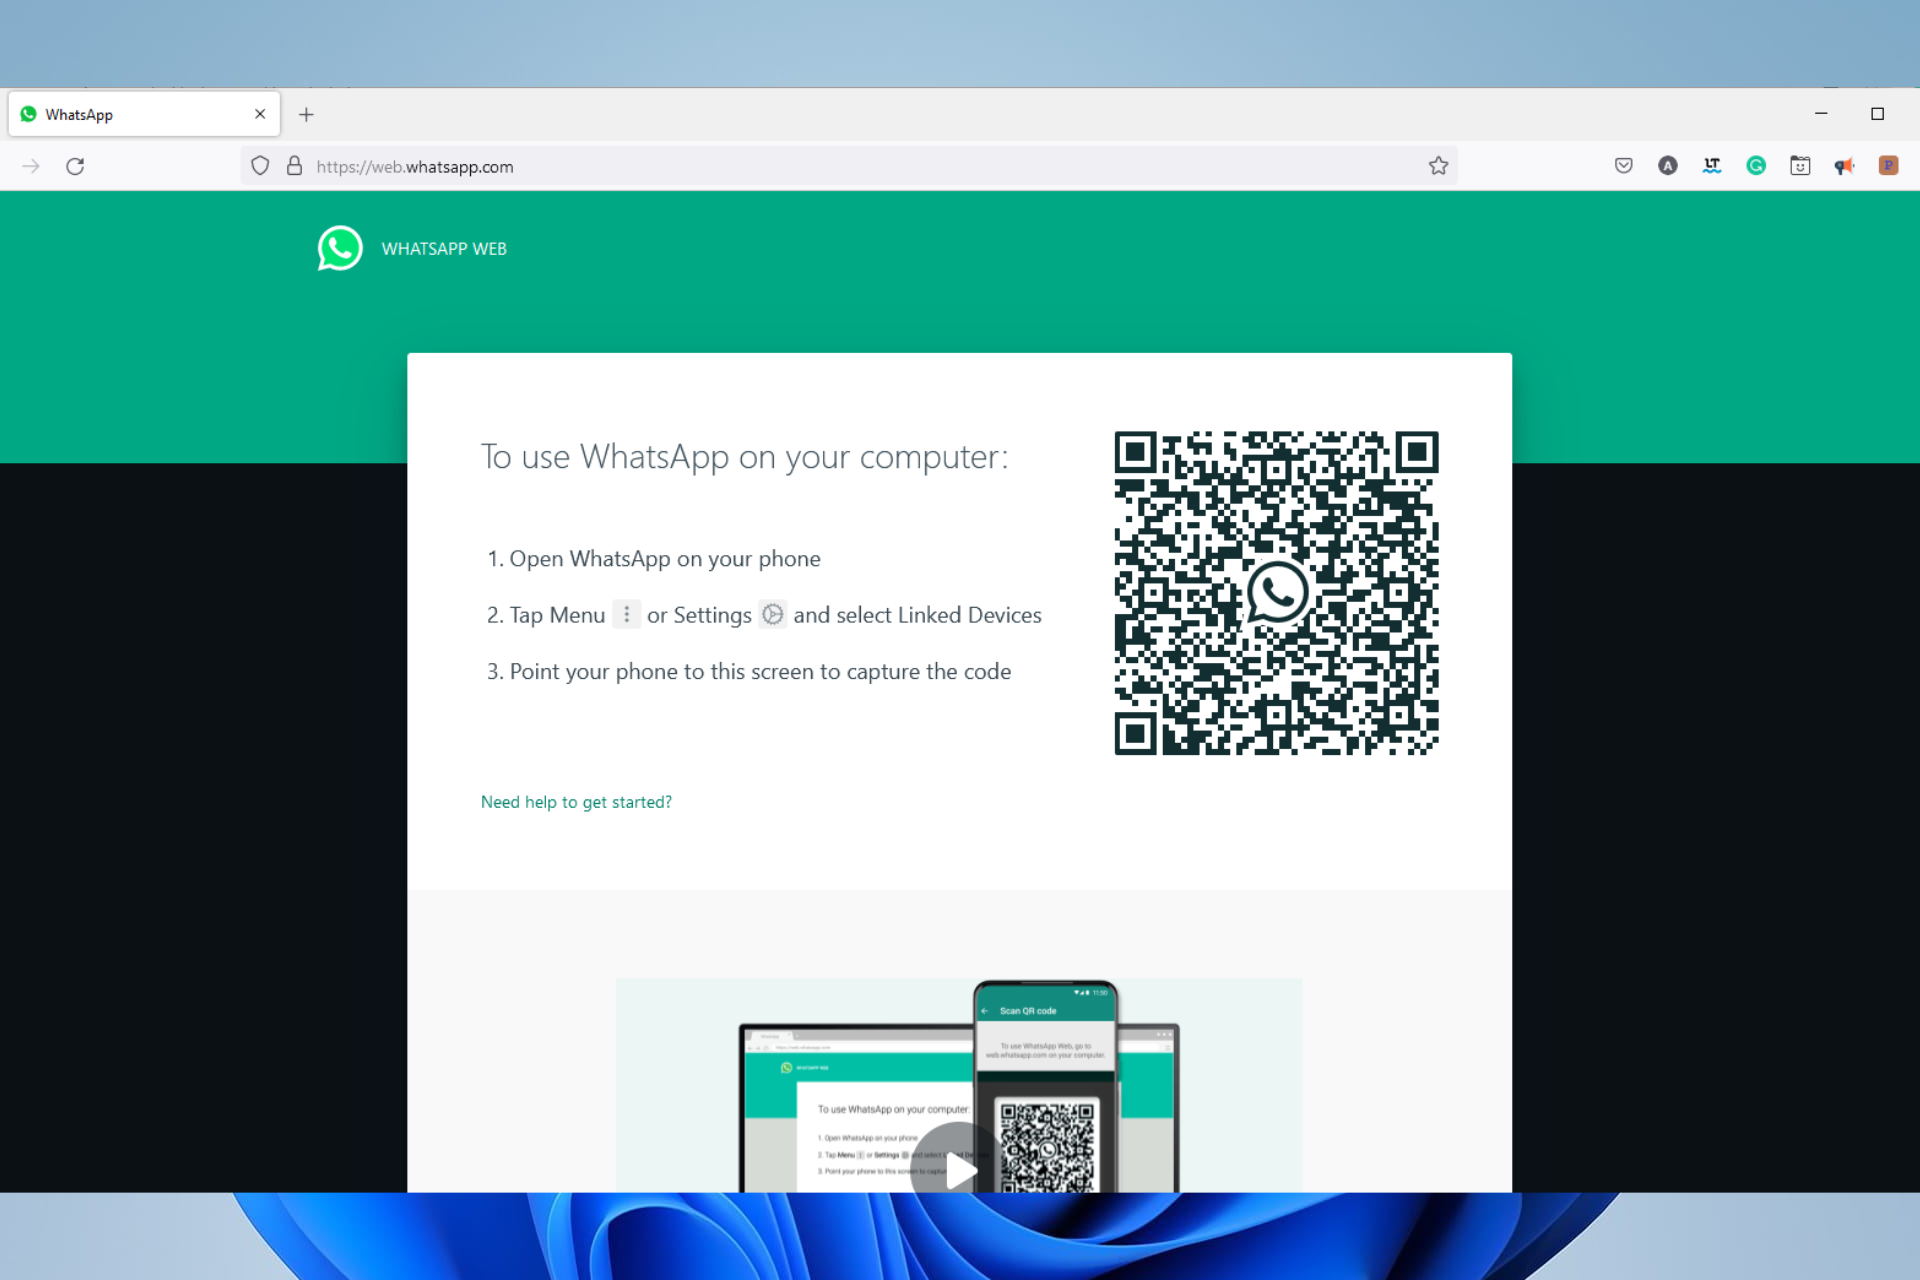
  1. Navigate to the WhatsApp web site on your PC web browser.
  2. On your mobile, navigate Settings, then click on Linked devices.
  3. Click on Link a Device.
    whatsapp extension firefox
  4. Capture the bar code on your PC browser, and WhatsApp web should load on Firefox.

Quick Tip:

Opera One is one of the most used browsers out there and, without a doubt, is perfect for tab management. Thanks to the incorporated features, you will already have the WhatsApp icon on the left.

You will never miss a message, and most importantly, the chat window will not interfere with other tabs you already have opened.

Opera One

Ensure great productivity and simple access to all social media channels, including WhatsApp.

What are the best Whatsapp Web extensions I can use in Firefox?

Messenger for WhatsApp – Unofficial WhatsApp add on

This WhatsApp extension will load the app in the toolbar popup UI, and the received messages are displayed in the badge icon.

This icon is located on the right side of the toolbar, and by simply clicking on it, the WhatsApp Web chat will open.

Using this extension, you can close the usual tab you used to keep open for WhatsApp and open it from the badge icon once you receive a message.

Important features:

  • Toolbar popup
  • Bug report
  • Easy and clean UI

⇒ Get Messenger for WhatsApp

Pinned Tab for WhatsApp – WhatsApp helper tool

Are you tired of opening a tab and then navigating to the WhatsApp website? If you do, then this is the add-on for you.

It saves you all this stress by coding all the functionality you need to navigate WhatsApp web into a single icon.

Once the extension is installed, click on the icon on your extensions tray, and you will have the web service opened up. Note that you will have to link your device the first time you use it.

Important features:

  • Configurable
  • Keyboard shortcuts
  • Easy-to-use

⇒ Get Pinned Tab for WhatsApp

Web Messenger for WhatsApp – Great WhatsApp sidebar

If you have experienced browsing WhatsApp on the sidebar of the Opera browser, then you may start to imagine how useful this tool is.

All you need to do is install the add-on, and you will have a WhatsApp sidebar on your browser. Now you can go ahead and chat without leaving your current browser tab.

How cool is this? Go ahead and install it right away. It’s a cool WhatsApp message sender extension for Firefox.

Important features:

  • Easy installation
  • Proper WhatsApp web features
  • Icon tray chat popup

⇒ Get Web Messenger for WhatsApp

Panel for WhatsApp – Panel view chat

With the help of this extension, your browser will now have a button next to the address bar that you can use to open WhatsApp Web in a different panel without pausing your work.

A banner on the button lets you know how many messages are unread even when the panel closes since it is constantly visible without requiring you to move tabs.

Start by logging into WhatsApp Web the way you usually would. It’s a great WhatsApp add-on for Firefox.

Important features:

  • Hidden chats
  • Popup chats
  • Unread message count

⇒ Get Panel for WhatsApp

Privacy Extension For WhatsApp – Great message security

This add-on masks your messages and other material to improve privacy in public areas, only revealing one when the mouse hovers over it.

Additionally, you may easily toggle each effect by selecting the toggle in the extension menu or by applying its keyboard shortcut.

By allowing you to choose the components you wish to obscure, it adjusts to your requirements. It is a great WhatsApp privacy extension for Firefox.

Important features:

  • Media preview
  • Last messages preview
  • All messages in chat

⇒ Get Privacy Extension For WhatsApp

Why does WhatsApp web not work on Firefox?

The service should be run almost all the time, but for rare occasions when it does not work, it is usually because you have a faulty internet connection.

With bad internet, it could take forever to load, and constant refreshing of the page may not be so helpful.

Also, chances are that the web servers are down. If this is the case, you will have to wait it out.

Depending on your specific needs, you can use several great WhatsApp extensions for Firefox.

We hope that you will explore the ones presented in this article, and we would love to hear which one worked best for you in the comments section below.

5 Best Online Spiderman Games to Play in Your Browser

Time to get into your Spider-Man costume and save the world. This popular character has constantly jolted the minds of kids and adults alike. So, join me as I walk you through the best SpiderMan games available online.

Yes, you heard it right ONLINE. Since web browser tech has evolved, most of your favorite games are now readily available once you have a browser and a good internet connection.

Playing Spider-Man games in your browser would also make for a great surprise for kids who are fans of the franchise, and you will get the best out of the game using any of the best browsers for gaming.

What Spider-Man game is free?

There are a host of free Spider-Man games. But of course, not all are worth your time. Some games we will discuss in this article are free to play.

But if you are specifically looking for free Spiderman games, you should try these:

As you know already, no two SpiderMan games online are similar. Nevertheless, the excitement and pleasure are remotely the same as you’ll get from playing any of these games.

What is the best browser for gaming?

To enjoy the options presented in this guide, we recommend you use the Opera GX browser. It is the best browser for gaming.

This high-speed and easy-to-use browser offers incredible gaming features that enable you to customize your online gaming experience without being bothered by issues.

It features excellent sound effects that put you in the gaming mood right from the browser launch. Also, it is light on system resources and gives you the best experience even when playing games with high-resolution graphics.

Lastly, we love it because it inherits all the great qualities of the Opera browser.

Opera GX

Enjoy the most seamless gameplay experience ever on this fast, for-gaming browser.

What are the best online Spiderman games?

Masked Missions into the Spider-Verse – For play as Miles or Gwen

Get into the Spider-Verse by choosing any of the two Spider-Man characters in the Spider-verse. Miles or Gwen will do just fine for any mission of your choice.

To get the best of the Spider-Verse, follow all instructions, collect all-stars, and face unwanted obstacles like flying objects and fireballs around you.

Get those yellow stars and get a high score. In the game, you will explore a wide range of different missions and landscapes to win the game!

Important features:

  • Multiple missions
  • Nice graphics
  • Great accompanying soundtracks

⇒ Play Masked Missions Into The Spider-Verse

Spider-Man Mysterio Rush – Easy controls

It’s the Mysterio Rush! It is pretty simple to handle Spider-Man by using your mouse. You will jump over a variety of obstacles while also collecting objects in your run.

When you collect enough points and meet the three requirements, you can become one of the champions and receive one of the multiple trophies available.

Important features:

  • Multiple trophies
  • Leaderboard
  • Great graphics

⇒ Get Spider-Man Mysterio Rush

Spider-Man Epic Battles – Memory combats

Spider-Man Epic Battles is a fantastic mashup of memory games and combat games. 

The opportunity to defeat some of Spiderman’s greatest adversaries throughout the character’s history enhances this experience. You’ll utilize your fantastic memory to assist Spider-Man in winning his epic battles!

You will need to perform things like recall a set of icons and click on them in that order, connect two identical tiles to take them out and attack, and exchange icons to assault your adversary.

The two crucial decisions you must make are memory and matching. If you are successful at these, you will attack Venom or other bad guys. However, if you are not, you will be attacked. 

Your health bar must not get depleted; if not, it is game over.

Important features:

  • Multiple adversaries
  • Difficulty levels
  • Cool graphics

⇒ Play Spider-Man Epic Battles

Spiderman Green Goblin Havoc – Spiderman speed ability game

This is a brand-new Spiderman online abilities game where you’ll need to move quickly and make sure you and your pals get a lot of points.

The Green Goblin will attempt to bomb Spiderman; therefore, you and your buddies will have to leap up and down the walls, which won’t be easy at all.

To protect Spiderman from these Green Goblin explosives, you must ensure that you can go as far as possible and do it promptly.

Important features:

  • Multiplayer
  • Increasing speed levels
  • Nice soundtracks and effects

⇒ Spiderman Green Goblin Havoc

SuperHero Fighters – Awesome 1v1

SuperHero Fighters is a fantastic game of one-on-one combat. It even gets better because this game is for two players since the characters you battle with are based on well-known superheroes like Spiderman.

Punch, kick, strike, and utilize unique techniques on your adversaries to drain their health bar, as is common in these fighting Spiderman online free 3D games.

It is a kill or get killed game, so you must inflict deadly blows to your opponents before they get to you. This is one of the best free online Spiderman game options.

Important features:

  • Multiple adversaries
  • Easy controls
  • Nice graphics

⇒ Play SuperHero Fighters

There you have it. This guide compiled the best Spider-Man games online on your newly downloaded gaming browser, Opera GX.

If you’re playing Spiderman 2 on your console and Galvanize is not working, check this guide to fix it.

Make sure to share your experience with us by using the comment section below, and we are also curious to know if you have played any online unblocked Spider-man games.

What to play on Game Pass: story driven games

Don’t know what to play on Game Pass? With well over 100 titles to choose from across just about every genre out there, it can be tough to know where to start. Thankfully, we have you covered with these Game Pass recommendations for those who want to be told a great story when they play a game. These story driven games remind us that video games are indeed an art form, no matter what anyone says. So without further ado let’s have a look at the best story driven games on Game Pass right now.

A Memoir Blue

From Annapurna Interactive (the same publisher behind The Outer Wilds, What Remains of Edith Finch? and most recently Stray) A Memoir Blue has been described as “an interactive poem about a superstar athlete and the all-encompassing love between mother and daughter.” It is the debut effort for developer Cloisters Interactive.

The game features gorgeous visuals employing a unique combination of 3D and hand-drawn art. Its heartfelt story spans 6 vignette-like chapters.


As Dusk Falls

Watch the trailer on YouTube

One of the more recent Game Pass additions, As Dusk falls is an interactive drama that spans the lives of two families across thirty years, starting with a 1998 robbery-gone-wrong in a small town in Arizona. Every choice the player makes in the game will have an impact on how the characters’ fates play out.

Every family has secrets. Every secret has a price.


Firewatch

Watch the trailer on YouTube

This narrative-driven indie classic follows the story of a fire lookout working the Shoshone National Forest in the late 1980s. The first-person adventure game has made a lasting impression with a vibrant low poly visual style that is nothing short of stunning. This in addition to suspenseful story filled with twists and surprises as the player explores the Shoshone wilderness and uncovers clues in a plot that grows stranger by the minute.


Sea of Solitude

A poignant game that delves into themes seldom explored within the medium, Sea of Solitude was described by one reviewer as “a dazzling and cathartic exploration of mental health, and a rare and audacious game that tackles depression and its causes head-on.”

Sea of Solitude is partly inspired by creative director Cornelia Geppert’s past experiences enduring an emotionally abusive relationship.


Tell Me Why Chapters 1-3

Watch the trailer on YouTube

As the title suggests, this a collection of all three chapters of the episodic adventure game Tell Me Why from Xbox Game Studios. The game’s story follows twins Tyler and Alyson (who share the ability to communicate telepathically) as they come back home to rural Alaska after 10 years away to investigate their mother’s untimely death.


The Walking Dead: The Complete First Season

Watch the trailer on YouTube

From the adventure game legends at Telltale games, The Walking Dead The Complete First Season takes more inspiration from the comic than the television series. The game features original characters, and it focuses on story and character development. The game is a bonafide classic, having enjoyed widespread critical acclaim – particularly for its storytelling – including several Game of the Year awards. Even if you don’t count yourself as a fan of the franchise, as a gamer you owe it to yourself to experience this.


Also check out on Game Pass:

  • The Walking Dead Season 2
  • The Walking Dead Michonne Complete Season
  • The Walking Dead A New Frontier Complete Season


What Remains of Edith Finch

Watch the trailer on YouTube

We round things out with another entry from Annapurna Interactive. Created by indie developer Giant Sparrow (also known for The Unfinished Swan) What Remains of Edith Finch is one of the shining examples of videogames as art.

A winner of multiple game awards including the British Academy Games Award for Best Game 2017, it is a first-person adventure game in which the player, as the eponymous Edith Finch, re-explores her childhood home as the last surviving member of her supposedly cursed family. Along the journey the player encounters a series of memorials to the deceased relatives, where they experience vignettes of the relative’s deaths.


Wrap up

So what did you think of our list? What story driven games have made a lasting impression on you as a gamer? Are any of them featured here? Tell us about your experiences in the comments section below.

And if you don’t already have a Game Pass subscription, you can sign up here. Right now new members can get their first month for only $1. Learn more about Game Pass over on its FAQ page. And don’t forget to check out our other “What to play on Game Pass” posts for other Game Pass recommendations.

Featured image courtesy of xbox.com. 


4 Quick Ways to Fix Tumblr When Your Images Are Not Loading

Follow the steps below to fix Tumblr not loading images. Templates that use tiny images, faulty browser settings, internet issues, and extension compatibility problems can contribute to this.

Let’s address all underlying causes so you can load Tumblr pictures error-free:

How do I fix images that are not loading on Tumblr?

1. Reinitialize your Internet router

  1. First and foremost, unplug your internet router from the power supply.
  2. Hold the power button for around 30 seconds.
  3. Plug in your router again and wait for the internet connection.
  4. Connect and check if Tumlr is loading.

You can also perform a speed test and contact your ISP if the results show below-average rates.

2. Disable the U-Block extension

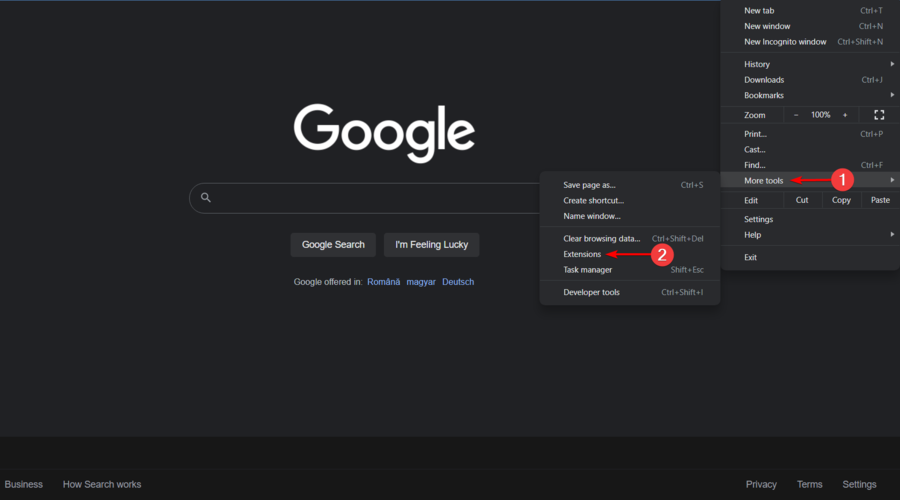
2.1. Disable the U-Block extension on Chrome

  1. Launch the browser.
  2. On the Address bar, paste the path below and click Enter:
    chrome://extensions/
  3. Search for the U-Block extension from the list of extensions.
    tumblr images not loading
  4. Toggle off the extension switch to disable it.
    tumblr images not loading
  5. Relaunch your browser to apply the new settings.

2.2. Disable the U-Block extension on Firefox

  1. Launch the Firefox browser.
  2. On the Address bar, paste the path below and click Enter:
    about:addons
  3. If you have U-Block on the list of extensions, toggle off its switch to disable it.
    tumblr images not loading
  4. Restart your browser.

2.3. Disable the U-Block extension on Edge

  1. Launch the Microsoft Edge browser.
  2. On the Address bar, paste the path below and click Enter:
    edge://extensions/
  3. If you have U-Block on the list of extensions, toggle off its switch to disable it.
    tumblr images not loading
  4. Restart your browser and check if the problem is resolved.

Please note that when your Tumblr archive is not loading, it may also be caused by the U-Block extension. However, for cases of Tumblr pictures not loading in the app, you should try updating the application.

3. Use a VPN

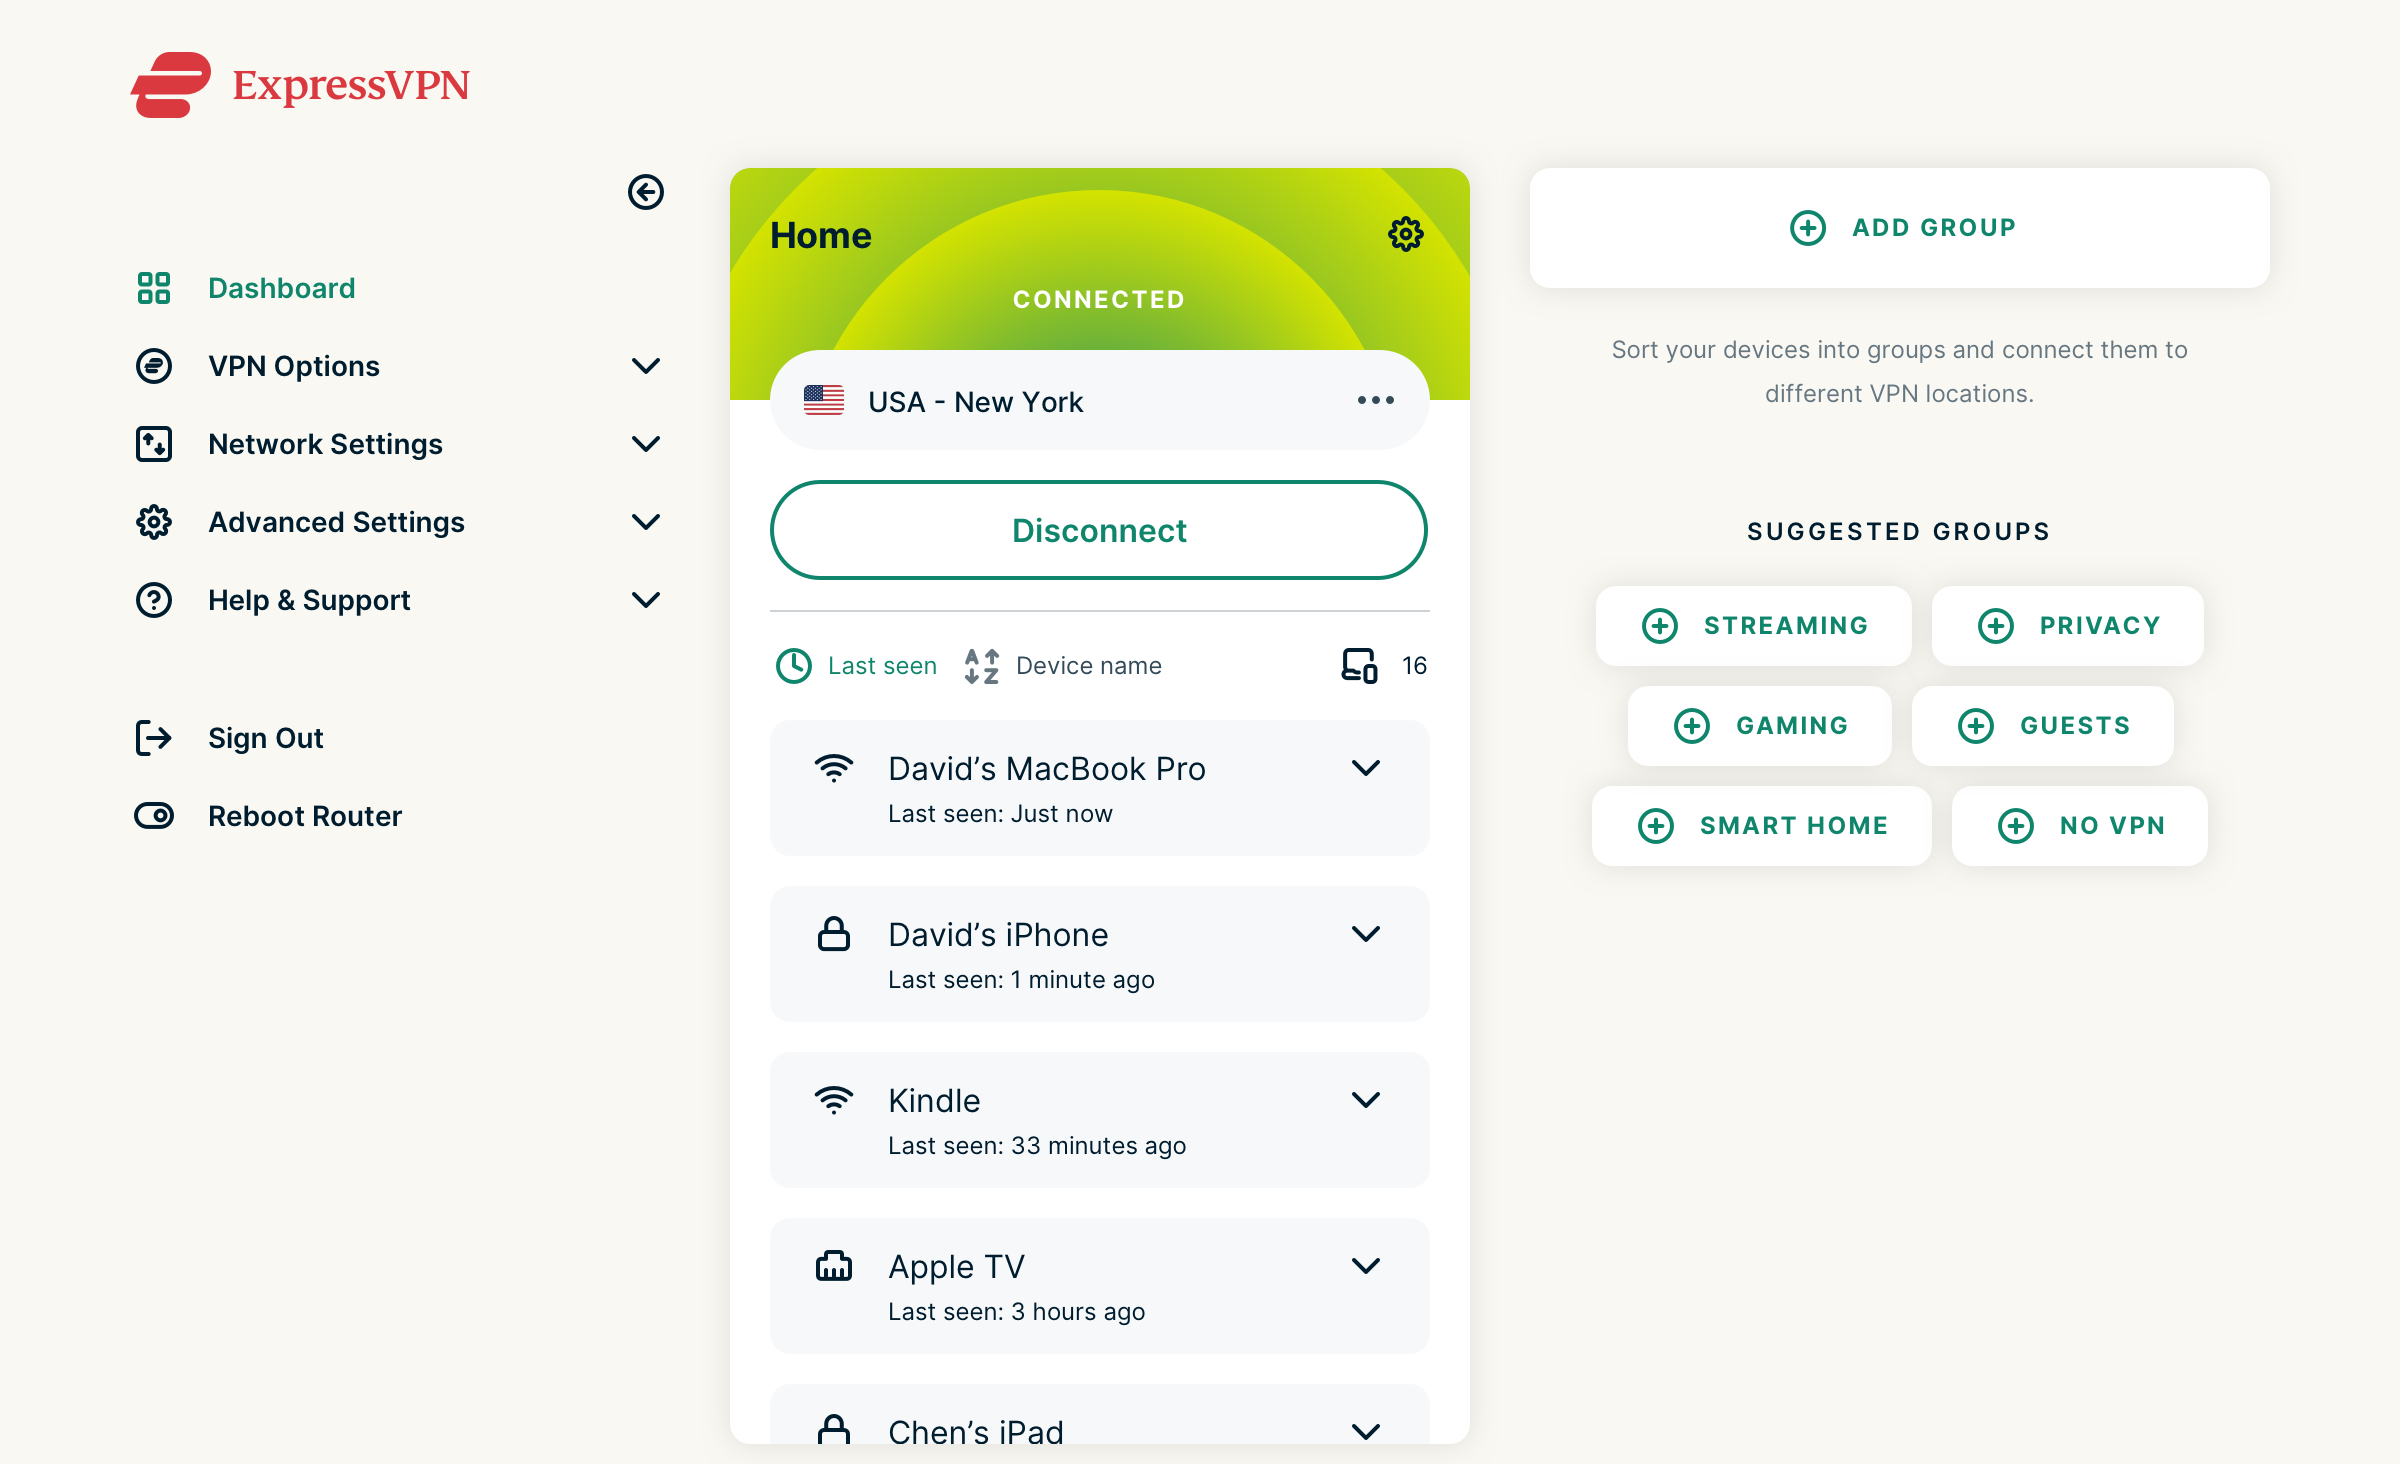
  1. Pick a reliable VPN with good speed. We recommend ExpressVPN.
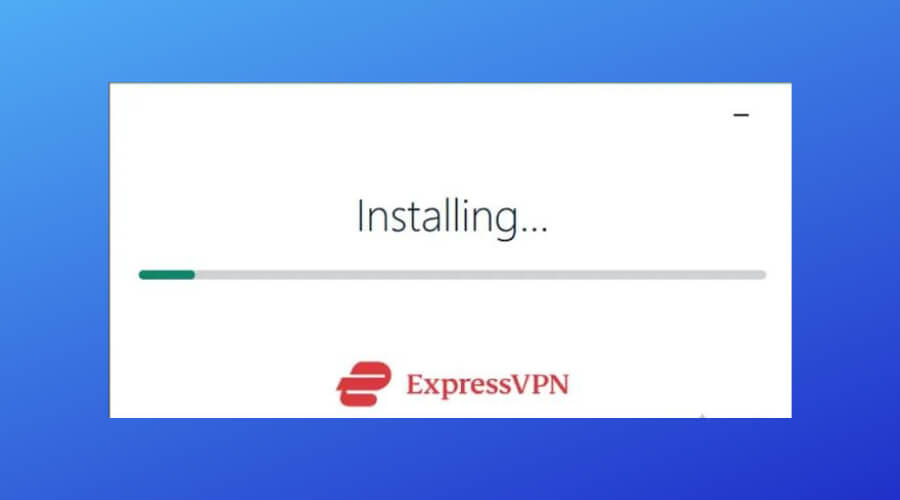
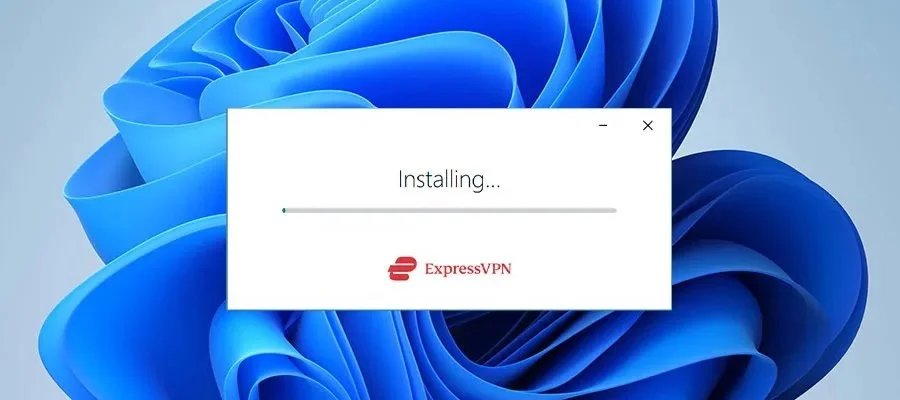
  2. Download and install the VPN on your device.installing expressvpn
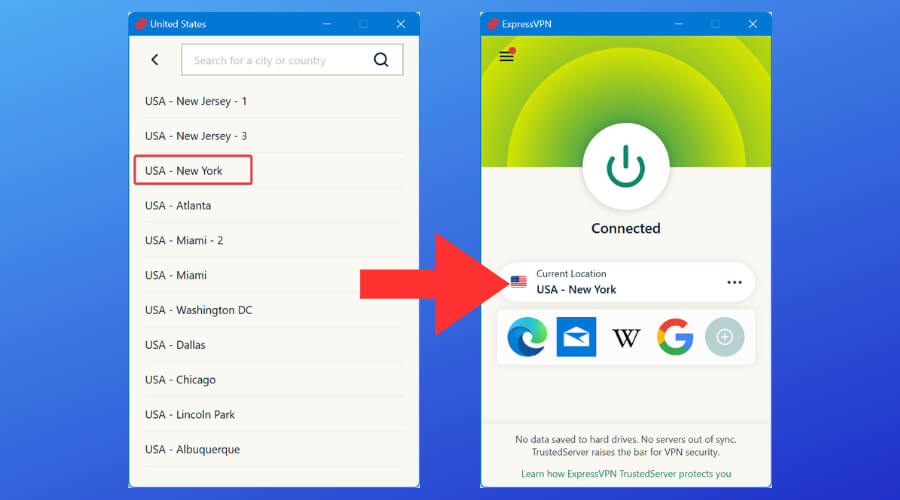
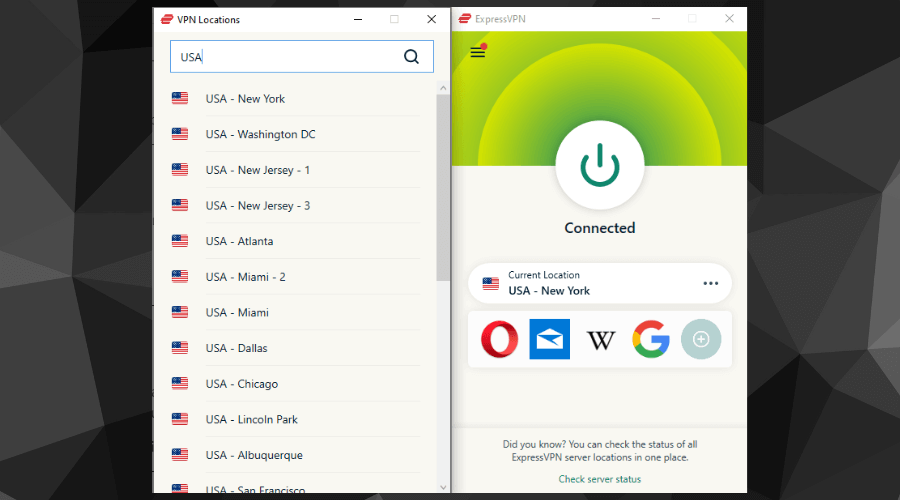
  3. Connect to a server. This will hide your IP address and stop network admins and ISPs from monitoring your connection.expressvpn connect to us server
  4. Go back to Tumblr and check if images are loading.

When Tumblr images aren’t loading, a VPN can help in 2 ways. First, it can hide your traffic and get past network restrictions. So if you’re on a WiFi connection that blocks Tumblr, it will bypass it.

Next, it can boost your speed, allowing images to load properly.

4. Try another browser

If you’re still facing issues, consider switching to another browser. A performance-oriented tool like Opera comes with a built-in ad blocker that removes ads and scripts that can slow down page loading.

At the same time, the free VPN hides your IP address and can bypass network restrictions.

How do I stop Tumblr from compressing my photos?

  1. Log into your Tumblr dashboard.
  2. Click on your blog name.
  3. Click on the Blog Settings button.
    tumblr images not loading
  4. On the settings page, click Edit theme.
  5. On the left pane, click on Edit HTML.
    tumblr images not loading
  6. Use hotkeys Crtl + F to open the find dialog, then paste the code below.
    {PhotoURL-500}
  7. Convert every instance of the code above to:
    {PhotoURL-HiRes}
  8. Click on the Update Preview button.

While following these steps, if the Tumblr dashboard is not loading, you should try the solutions we have shared to get it working so that you can stop Tumblr from compressing your photos.

Although it was a minor issue, we hope our solutions helped you fix it. Now you know what to do when Tumblr images are not loading. You will also be able to use some of these solutions if Tumbex is not working.

In extreme cases, you may have to reset the browser or reinstall it, but we do not recommend this because you may lose valuable data like your history and other stored credentials.

Which one of these methods worked for you? Let us know in the comments section below.

Posted in Fix

DuckDuckGo will now block Microsoft scripts in their browsers too, after controversy

In May, we saw DuckDuckGo receive backlash from some users over its syndication agreement with Microsoft because it did not block Microsoft data flows, for LinkedIn or Bing. DuckDuckGo’s CEO, Gabriel Weinberg addressed the issues and indicated that they blocked most third-party trackers, however, their partnership with Microsoft limited their reach as far as Microsoft-owned properties were concerned.

But as it now appears, DuckDuckGo will now start blocking Microsoft tracking scripts on third-party websites too. This will expand its 3rd-Party Tracker Loading Protection, which already blocks identified tracking scripts from Facebook, Google, and other companies from loading on third-party websites.

With this system in place, users will be able to have some level of control as DuckDuckGo’s 3rd-Party Tracker Loading Protection will prevent 3rd-party trackers from launching completely. In turn, this reduces your susceptibility to security breaches where attackers are able to establish your IP address as well as other identifiers that come with loading requests that generally expose you to profiling. Ultimately enhancing your security.

Gabriel Weinberg further indicated in the blog post that, “we were limited in how we could apply our 3rd-Party Tracker Loading Protection on Microsoft tracking scripts due to a policy requirement related to our use of Bing as a source for our private search results. We’re glad this is no longer the case. We have not had, and do not have, any similar limitation with any other company”. He further indicated that Microsoft scripts were not embedded in the user’s search engine or applications and that they did not receive any personal information regarding users from this premise.

But as spotted by The Verge, DuckDuckGo will not block scripts for bat.bing.com that load directly after a user clicks on ad (this is not applicable in other cases) because they are used on advertisers’ sites to measure the level of ad effectiveness. However, you can opt out of this arrangement by choosing to disable ads via the browser’s search settings.

Despite its partnership with Microsoft when it comes to advertising, viewing of the ads will remain anonymous and Microsoft has further ascertained that users will not be profiled based on the ad clicks they make. The information gathered will be strictly restricted to accounting:

Advertising on DuckDuckGo is done in partnership with Microsoft. Viewing ads on DuckDuckGo is anonymous, and Microsoft has committed to not profile our users on ad clicks: “when you click on a Microsoft-provided ad that appears on DuckDuckGo, Microsoft Advertising does not associate your ad-click behavior with a user profile. It also does not store or share that information other than for accounting purposes.”

DuckDuckGo is also working on “an architecture for private ad conversions” which will help sever its ties and dependence on bat.bing.com when it comes to establishing the effectiveness of ads, instead, have it externally validated as non-profiling.

The browser strives to raise the standard of trust online by maximizing the user’s privacy. As such, they have publicized their browser extensions and non-beta apps and the tracker protection list as well as their Tracker Radar. This is an attempt to establish openness where users should be able to lodge complaints whenever they are faced with an issue, what’s more, they have introduced a new web page where you can learn more about web tracking protection.


How to Fix An Error Occurred on YouTube Permanently

Most of us visit YouTube daily, but some users have reported an error message that says An error occurred, please try again later.

This error will prevent you from watching videos, but fortunately for you, today, we’ll show you how to fix this error on Windows 10 and 11.

Note that you may even have a similar error watching YouTube on the TV where it says an error occurred please try again later.

Additionally, another common error message encountered by users is something went wrong error on YouTube. Some of the solutions in this article will help you resolve it as well.

What is an error occurred please try again later?

An error occurred, please try again later message will prevent you from watching YouTube videos. It has been observed in Firefox as well as some other browsers.

Speaking of issues with YouTube, users reported the following variants:

  • YouTube An error occurred when searching – Users reported this error on YouTube while searching for videos. This is most likely a glitch that you can resolve by restarting your browser.
  • An error occurred when watching YouTube – According to users, this error usually occurs while trying to watch YouTube videos. However, you might be able to fix it by clearing the cache or by changing the video quality.
  • YouTube An error occurred while performing this operation – This is just a variation of this problem, and you can fix it using one of our solutions.
  • An error occurred YouTube Firefox, Chrome, Edge, Internet Explorer, Opera – This error can appear in any web browser, and if you encounter it, be sure to try one of our solutions.
  • YouTube videos not playing – There are many reasons why YouTube videos aren’t playing, and if you have this problem, we suggest you try some of our solutions.
  • An error occurred YouTube Flash Player – Sometimes, this issue might be caused by Flash player, and to fix it, you need to uninstall Flash from your PC.
  • An error occurred while attempting to create a youtube account, please try again later – In many cases, you will need to clear your cache and retry creating the account.

Why does my YouTube say an error occurred?

Several things may trigger this error, but many users have attributed it to errors in the DNS settings on your computer. However, it is not limited to this and also may be caused by the following:

  • Third-party extensions
  • Corrupted browser
  • Problems with site cookies
  • Video streaming quality
  • Old cache data

Whichever group you belong to, we will proffer a solution to help resolve the error.

How do you fix YouTube error occurred please try again later?

1. Change or update your DNS Settings

  1. Click on the Start menu and type control panel, then select the Network and Sharing Center option.
    an error occurred please try again later youtube
  2. From the left pane, click on Change adapter settings.
    an error occurred please try again later youtube
  3. A new window will now appear. Locate your network connection and right-click it. Choose Properties from the menu.
    An error occurred when watching YouTube
  4. Select Internet Protocol Version 4 (TCP/IPv4) from the list and click on the Properties button.
    An error occurred YouTube Firefox
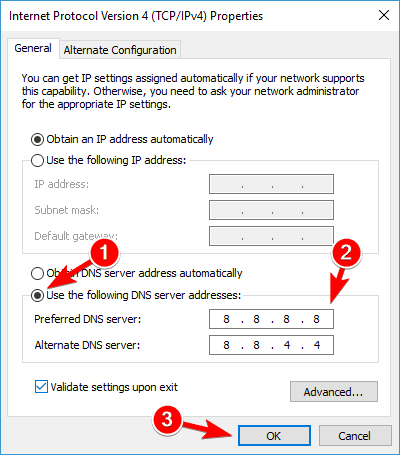
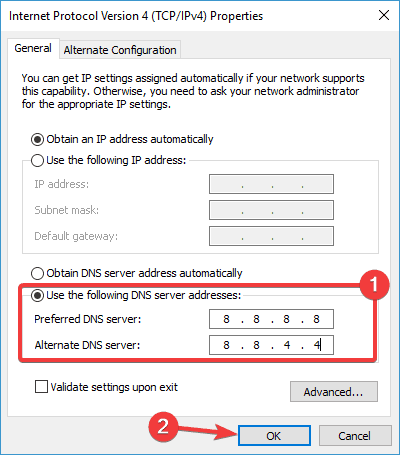
  5. Check Use the following DNS server addresses and set the Preferred DNS server to 8.8.8.8 and the Alternate DNS server to 8.8.4.4. Click OK to save the changes.
    An error occurred YouTube Flash Player

If you’re frequently getting an error occurred please try again later while trying to watch YouTube videos, the problem might be your DNS.

By default, your PC uses your ISP’s DNS, but sometimes you might have problems with it, and you can change your DNS by performing the steps above.

After doing that, check if the problem is resolved. Changing these settings will force your Internet connection to use Google’s DNS instead of your default one.

A few users reported that this solution worked for them, so feel free to try it out. If Google’s DNS doesn’t work for you, change the settings to the default values, and you’ll be back to your default DNS.

An even better idea is to download and install a VPN. One added benefit to this is that you can circumvent various geographic restrictions from YouTube. Secondly, you will increase your security and privacy in doing so.

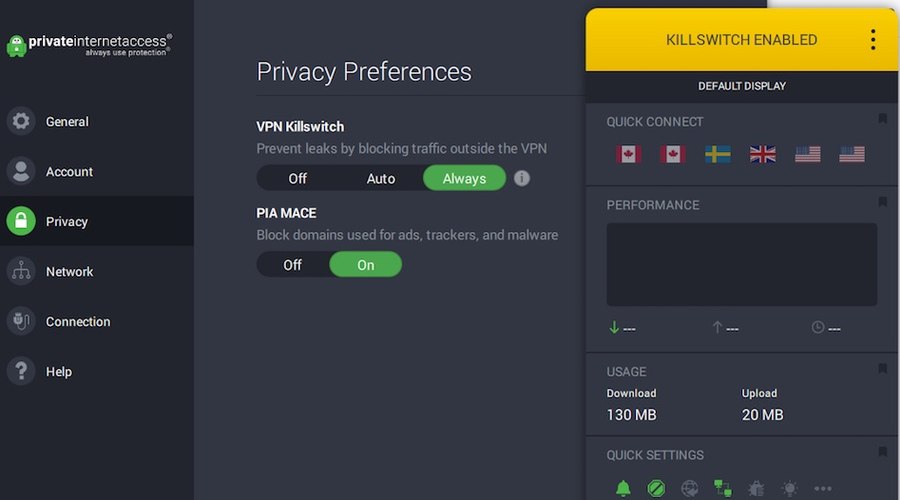
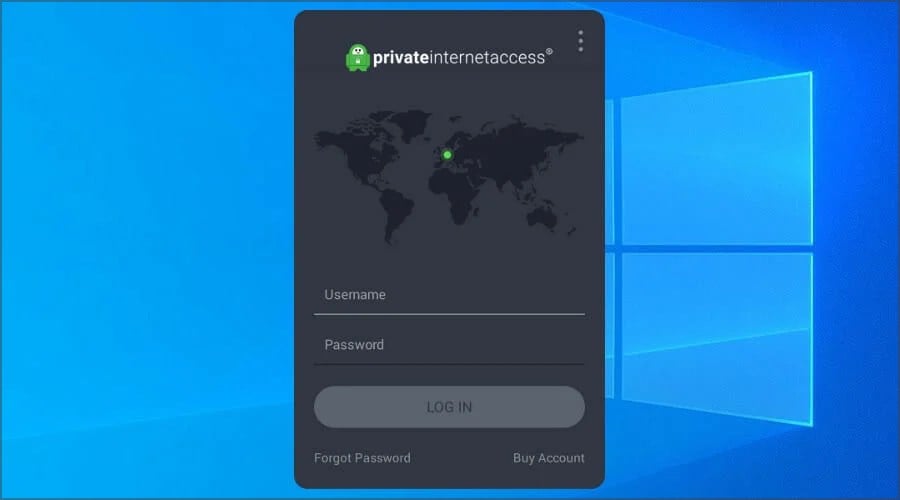
We recommend installing PIA – private internet access. It offers better connection speeds than most services and top servers in various locations around the world.

⇒ Get Private Internet Access

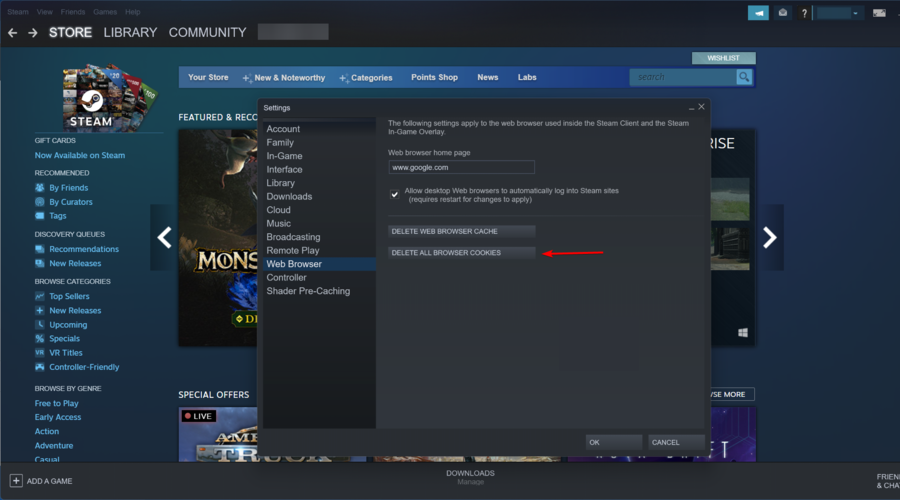
2. Use Forget About This Site option

  1. Launch your Firefox browser.
  2. Use hotkeys Crtl + H to open your browser history.
  3. Now search your browsing history and find any YouTube link.
  4. Right-click it and choose the Forget About This Site option.
    YouTube videos not playing
  5. Restart Firefox and try playing any YouTube video.

Forget About This Site is a useful Firefox feature that allows you to remove cookies, saved passwords, and cache files for a specific website.

This is a simple trick that might help you with An error occurred, please try again later error, so feel free to try it out.

3. Update your audio drivers

  1. Right-click on the Start menu and select Device Manager.
    an error occurred please try again later youtube
  2. Expand Audios inputs and outputs, right-click on your audio driver, and select Update driver.
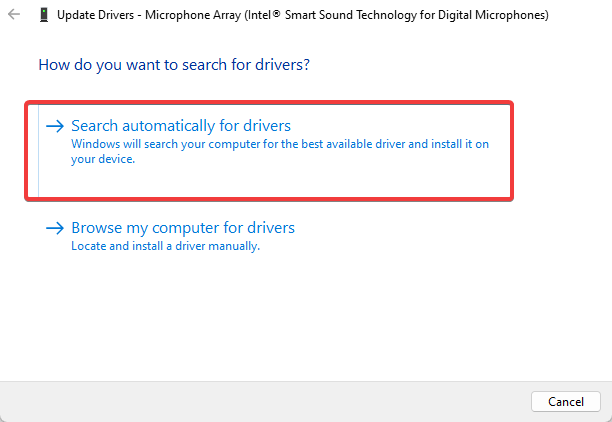
  3. Select Search automatically for drivers and wait for it to get updated.

Some users claim that after updating their audio drivers, the issue was resolved for them, so you might want to try and find the latest audio drivers for your sound card.

You can try to visit your motherboard or sound card manufacturer’s website and locate and download the latest Windows 10 and 11 drivers.

However, manually updating the drivers can be tedious and time-consuming, so we recommend using dedicated software to download all the outdated drivers on your PC automatically.

It would help if you thus considered updating your drivers securely by employing a solution from the best driver update software.

4. Clear cookies and cache and update your plugins

  1. Launch the browser.
  2. Click the menu button in the top right corner and choose Library.
    YouTube An error occurred while performing this operation
  3. Next, click on History.
    An error occurred when watching YouTube
  4. Now click on Clear recent history.
    An error occurred YouTube Chrome
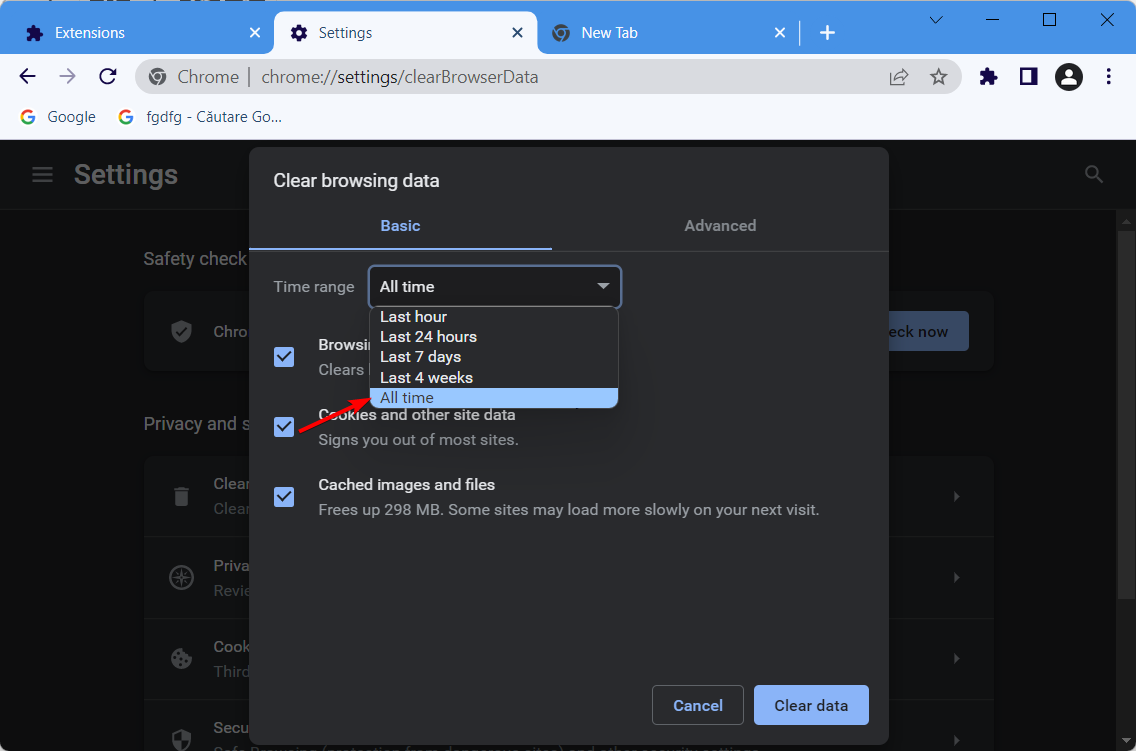
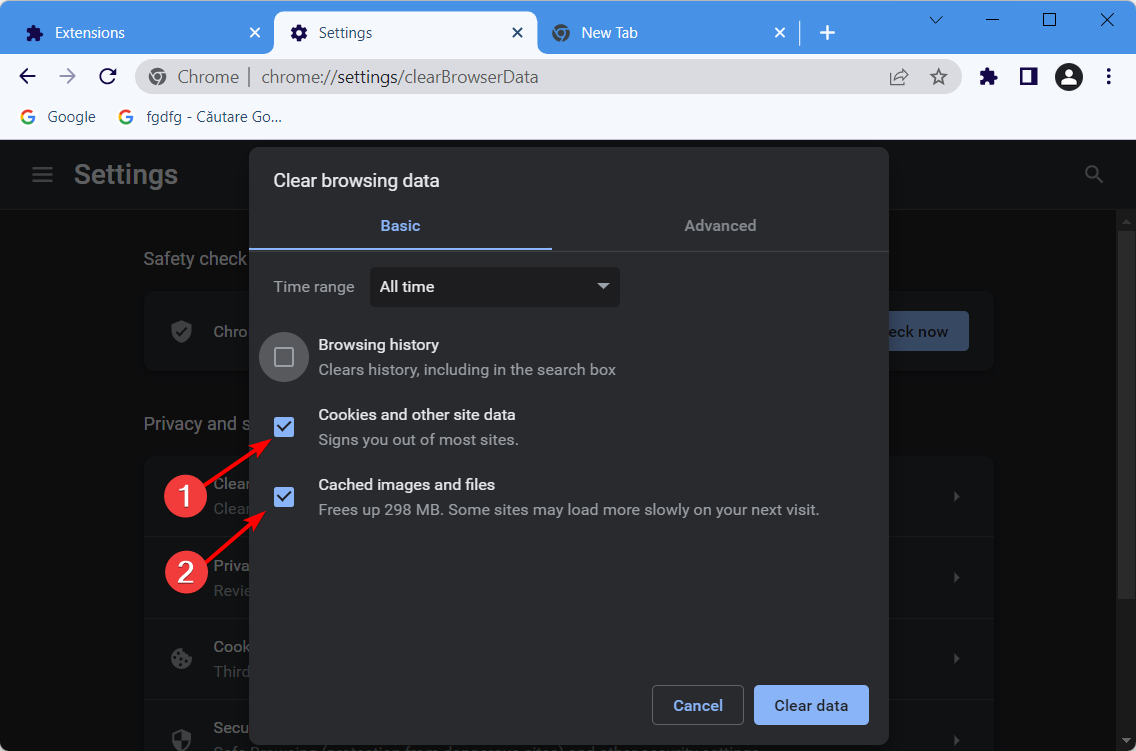
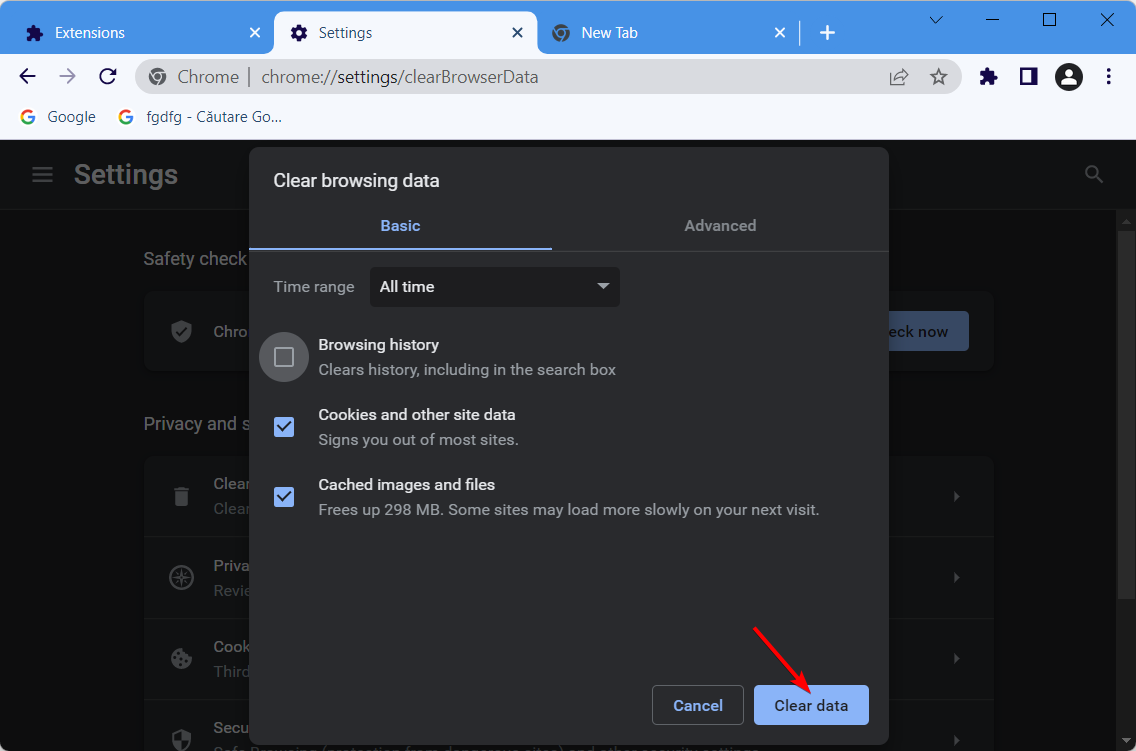
  5. Select what type of data you wish to remove. In our case, we have selected cache and cookies, but you can choose other types of data if you want. Select the desired time range and click on the Clear now button.
    An error occurred YouTube Flash Player
  6. When cookies and cache are deleted, restart Firefox.

To fix an error occurred please try again later error, you might want to clear cookies and cache.

Although we’ve shown you how to delete cache and cookies in Firefox, similar steps apply to most other modern browsers.

If you use any browser plugins, especially Shockwave Flash, you might want to update them to the latest version to fix possible incompatibility issues.

You can also make your task easier by installing a tool to clear cache and cookies. These tools cannot only clear your cached files and cookies but also help you clean junk files, repair your registry, update your drivers, and more.

5. Disable Shockwave Flash

  1. launch the Firefox browser.
  2. Type the path below in the address bar and hit Enter:
    about:addons
  3. Go to the Plugins section and find Shockwave Flash. From the dropdown menu, choose Never Activate.
    YouTube videos not playing

Sometimes Shockwave Flash can cause an error occurred, please try again later to appear while watching YouTube videos, so make sure that it’s disabled.

If you don’t use Firefox, make sure that you disable Shockwave Flash on the browser that you’re currently using.

The process of disabling Shockwave Flash is similar for all modern browsers.

6. Disable hardware acceleration and try changing the video resolution

  1. Start the Firefox browser.
  2. In the address bar, paste the path below, then hit Enter:
    about:preferences
  3. Scroll to the Performance section and uncheck both Use recommended performance settings and Use hardware acceleration when available.
    YouTube An error occurred when searching
  4. Restart Firefox and try playing any YouTube video.

Some users have reported that hardware acceleration can cause issues with YouTube.

If you use a different browser, you should know that you can similarly disable hardware acceleration in any other browser.

Hardware acceleration can cause various issues, but after disabling it, the problems with YouTube videos should be resolved.

7. Plug in your headphones or speakers to your computer

This sounds like an unusual solution, but users have reported that plugging in your headphones or speakers to the audio jack while playing YouTube videos fixes this problem.

So if you’re using built-in speakers, try connecting headphones or speakers to fix this issue.

Usually, there is a red cross sign on the volume control icon in Taskbar, and if you notice it, reconnect your speakers or headphones and try playing YouTube videos again.

If your volume control is not working, we have got you covered with some quick tips to solve the issue.

8. Uninstall/repair Bitdefender

  1. Click on the Start menu, type control panel, and select the Uninstall a program option.
    an error occurred please try again later youtube
  2. If you have Bitdefender installed, click on it from the list of programs, then click on the Uninstall option.
  3. Follow the prompts from the uninstallation wizard to remove the app.

According to some users, it seems that Bitdefender can also cause this YouTube error, and to fix it, you’ll need to remove or repair Bitdefender.

It has been reported that repairing Bitdefender fixes the YouTube issue, but if repairing Bitdefender doesn’t work for you, you might want to uninstall it.

Several users reported that they fixed the issue simply by updating to the latest version of Bitdefender, so be sure to try that.

If you don’t use Bitdefender, try disabling or temporarily uninstalling your antivirus software to fix this issue.

Sometimes switching to a different antivirus solution can fix the problem, and if you’re looking for a new antivirus, be sure to try some of our updated best antivirus selections.

9. Change the quality of your videos

  1. Log on to YouTube and play a video.
  2. Click on the gear icon on the video.
  3. Click on Quality and select any video quality.
  4. Replay the video.

An error occurred please try again later error message will prevent you from watching YouTube videos, but according to users, you can fix this problem simply by changing the video quality of the video.

Keep in mind that this is just a workaround, so you’ll have to repeat it for every YouTube video that you try to watch.

10. Update the browser

  1. Open your browser.
  2. Click the Menu icon in the top right corner and choose Help from the menu.
  3. Click on About Firefox.
    an error occurred please try again later youtube
  4. The browser will check for updates and allow you to install the latest updates if there are any.

11. Reinstall your browser

  1. Uninstall Firefox using the same steps in solution 9.
  2. Visit the Firefox website and click the Download Firefox button to get a new installation file.
  3. Click on the downloaded file and follow the installation wizard to reinstall Firefox.

If you’re getting An error occurred please try again later error message while watching YouTube videos; you might want to try reinstalling your web browser.

Users reported this issue in Firefox, but after reinstalling it, the problem was resolved. This solution also applies to other web browsers such as Chrome.

Keep in mind that uninstalling your browser will remove your cookies, history, and saved passwords, so you might want to export them before you reinstall.

There you go. Any of these fixes should work just fine. Please note that not all of them will work, and we expect you to pick solutions based on your specific situation.

If you still have problems playing videos on YouTube, we also have another great guide on how to fix YouTube on Windows.

If the message persists, keep in mind that YouTube errors can also trigger the FreeTube API error. For clear steps to fix it, see our FreeTube API error troubleshooting guide, which covers network checks, cache resets, switching API backends, and clean reinstalls.

An error occurred please try again later error will prevent you from watching YouTube videos, but you should be able to fix this annoying problem using one of our solutions.

Let us know in the comments what solutions worked for you.

3 Quick Ways to Fix Pale Moon When it’s Not Playing Videos

Pale Moon is a cross-platform and open-source browser that is based on the Firefox and Mozilla engines. However, it is completely different from Firefox.

It is lightweight and provides users with a good browsing experience. It is also easy to install and use. Eceb so, some users have reported issues with Pale moon not playing videos.

Just like any other software application, you might encounter problems with this browser. Apart from the issue with Pale moon not playing videos, you might also experience crashes, the browser not starting, or even the browser not being responsive.

Fortunately, the issue with the browser not playing videos is easy to fix and you will not need any help getting rid of the problem.

Why are my videos not working in a browser?

Different browsers come with different features and capabilities aimed at improving the experience of their users. However, you can experience issues with your videos not working, no matter the browser that you are using.

Some of the most common reasons for this on different browsers include conflicts with extensions, plugins, or data stored in your browser cache or even browser data. Data accumulated in the form of cookies and cache can prevent videos from playing in different browsers. 

You, therefore, need to remove any corrupted cookies, passwords, history, and all the browsing data that might be unnecessary. This frees up space for your videos to play.

Is Pale Moon still supported?

The Pale Moon browser is still supported. The browser’s developers recently released the latest version of the browser, Pale Moon 30.0 for all the operating systems that they support. This release comes with important updates to improve the performance of the browser.

However, in early 2021, support for macOS was discontinued. This was because there was no consistency among community developers on the Mac platform. 

Quick Tip:

Use another browser. For multimedia content, we recommend Opera One. It’s an up-to-date and fast browser that supports all major video formats and is capable to support uninterrupted streaming.

Moreover, Opera One has a built-in adblocker that will remove annoying ads and popups while watching videos. It also has a free VPN that can help you access geo-locked video content. Plus, it has it’s own built-in AI.

Opera One

Play videos with no errors with this modern and fast browser!
Free Download Visit website

How do I fix Pale Moon if videos are not working?

1. Turn off Pale Moon extensions

  1. Launch Pale Moon browser and then press Ctrl + Shift + A key combination.
  2. On the left-hand side, select extensions.pale moon extensions
  3. Click on each of the extensions at a time selecting and then click on the Disable button alongside each one of them.Disable Pale Moon Extensions
  4. Restart Pale Moon.

2. Use a different Pale Moon profile

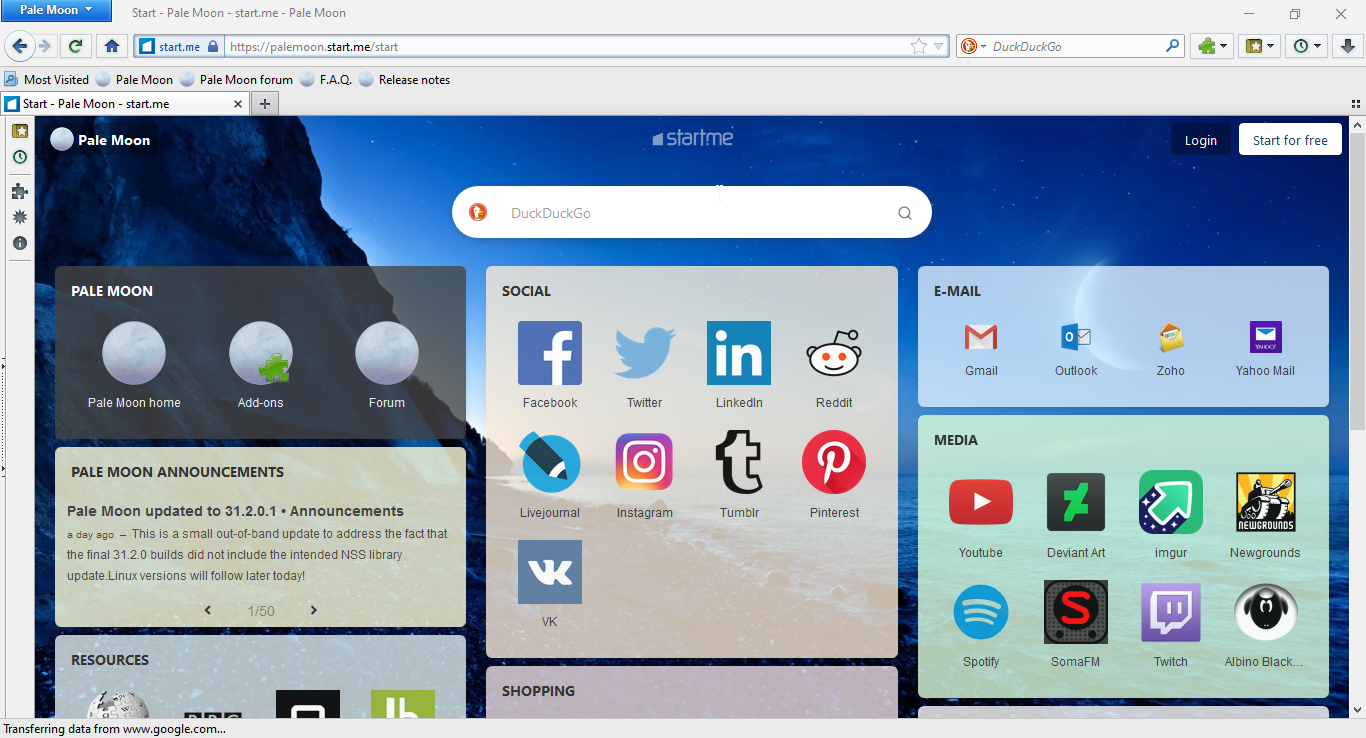
  1. Launch Pale Moon and navigate to the browser’s homepage.Pale Moon - pale moon not playing videos
  2. Click on your profile picture or its holder in the top right corner.Profile Picture - pale moon not playing videos
  3. Select Sign out.Sign Out - pale moon not playing videos
  4. Click on the Start for free button on the top right corner and create a new account following the on-screen instructions.pale moon start for free

3. Uninstall and Reinstall Pale Moon

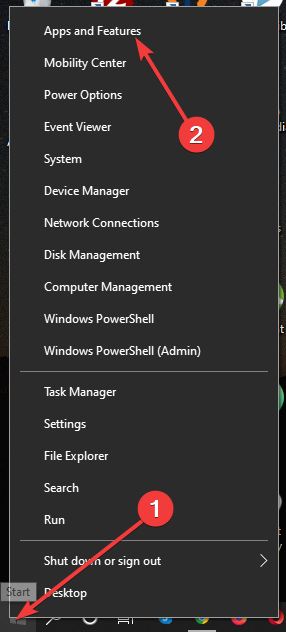
  1. Right-click the Windows Start button and then select Apps and Features.Apps and Features - pale moon not playing videos
  2. On the search box, start typing Pale Moon.pale moon not playing videos
  3. Click on Pale Moon and then select Uninstall.Uninstall Pale Moon - pale moon not playing videos
  4. Follow the on-screen instructions to uninstall Pale Moon.
  5. Download the Pale Moon browser, run the installation file to complete the installation, and then launch the browser.

How good is the Pale Moon browser?

As discussed above, the Pale Moon browser is based on the Mozilla engine. Apart from being lightweight, it comes with a host of features that make it a good browser. One of the things that make this browser stand out is its active support from developers as well as its community.

This means that whenever there are problems with a particular release, the issues are worked on before the release of the next version. This is the browser of choice for you if you do want to give a lot of work to your processor.

As you can see, it is easy to fix issues with Pale Moon not playing videos. You do not even need all the solutions shared above because one of them with solve the issue for you. In addition, you can do all this on your own without seeking external support.

Developers can now use more memory on new Xbox Series S development kit

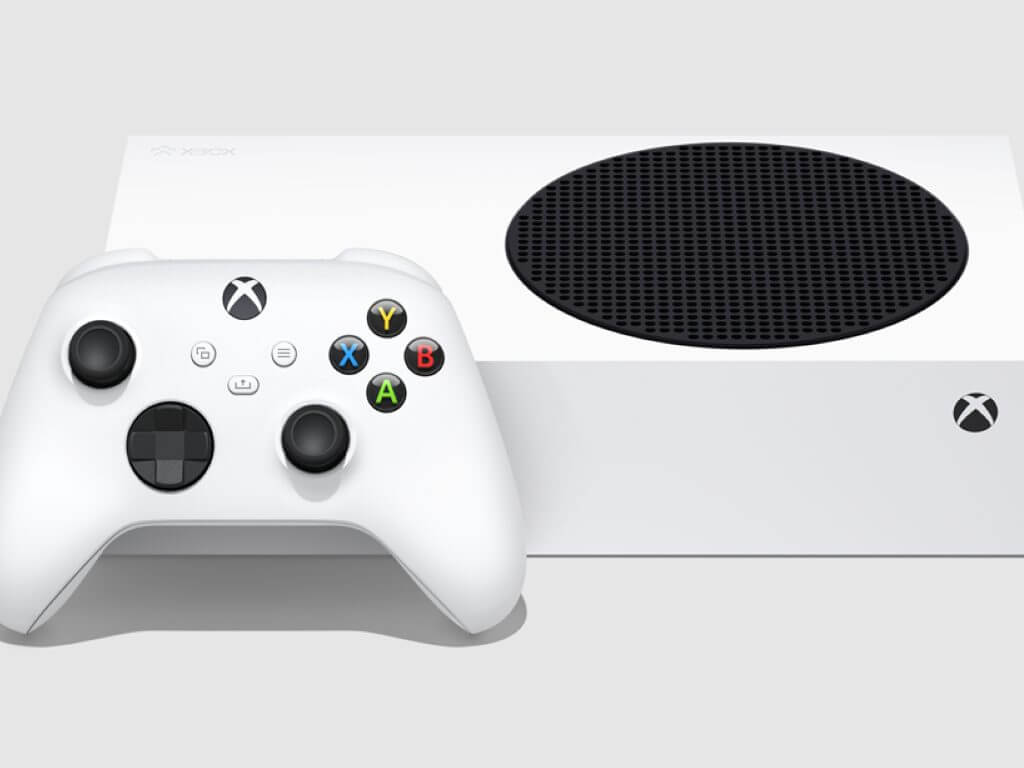
Xbox Series S games will be seeing a performance boost in the near future thanks to a new software development kit for Xbox.

The June 2022 Game Development Kit (GDK) will give developers access to more memory when optimizing games for Series S. How much more memory? “Hundreds of additional megabytes of memory are now available to Xbox Series S developers,” according to the “What’s new for 2022 GDK” video published on YouTube on August 4.

The additional memory will allow developers to better optimize games for the less powerful next-gen Xbox, which has 10 GB of RAM compared to the 16 GB of the Series X. The Series S also utilizes far less GPU power than its sibling, though the two systems have the same CPU.

Hopefully these and possible future enhancements will allow the Series S to keep up as the new console generation evolves and games become more and more demanding of resources.

Move Uplay Games to Another Drive/Computer in Two Easy Steps

If you want to move Ubisoft games to another drive, this article is for you. Go through it for accurate instructions.

With Uplay or Ubisoft Connect, you can access your favorite games at any time and enjoy a relaxing gaming session on your Windows PC.

But sometimes, if you need additional space on your hard drive, you have to move your games to another drive. Or maybe you bought a new Windows 11 PC or a Windows 10 PC and want to move your games on it.

If you have an SSD, it’s a great idea to move the games there, as it will make them snappier, and the loading times will improve significantly.

But to get any performance gains, you’ll first have to move them. Keep reading to find out how you can easily move your games to another drive or PC.

Where does Ubisoft Connect install Games?

By default, Ubisoft Connect will install games in the following location:

C:/Program Files (x86)/Ubisoft/Ubisoft Game Launcher/games/

However, you can change it from the settings and set it to a different folder. Some games are installed via Steam as well. In this case, you can find these games in the Steam game folder. It is usually: C:\Program Files (x86)\Steam\steamapps\common

Can I move my Games from one drive to another?

Yes. You can move games from one drive to another one. In this article, we will show how to move the Ubisoft game folder to another drive or PC. For detailed instructions, go through the next part of this article.

How do you move game install in Ubisoft Connect?

1. Manually move the game files

  1. Open Windows Task Manager by pressing CTRL + ALT + Del.
  2. Select Ubisoft process and click on End task.ending ubisoft connect process task manager
  3. Go to your Ubisoft connect installation folder and copy the folder where games are installed.
  4. Paste it to your desired drive.
  5. Launch Ubisoft Connect and go to its Settings.going Ubisoft connect settings
  6. Go to the Downloads tab.
  7. Then, change the game installation folder location to the new drive where you have pasted the games.changing ubisoft connect game installation folder
  8. Close Ubisoft and relaunch it.
  9. Go to Games and then My Games.going my games ubisoft connect
  10. Go to a Game that you had installed.
  11. You will get an option something like Locate installed game.
  12. Click on it and point it to the new location.
  13. Ubisoft will verify the installation files and show you a message like: All game files have been successfully validated.

If you have multiple games, you’ll have to repeat the process for each one. This method works well if you want to move the Ubisoft game location to a different folder or to a different drive.

2. Move Ubisoft Connect games to another PC by reinstalling the client

  1. Download Ubisoft Connect.downloading ubisoft connect pc
  2. After that, run the installer with Administrator rights.
  3. Follow the on-screen steps from the installation wizard and after it finishes, restart your PC.
  4. Now you’ll have to manually back up Ubisoft save files. On the old PC, go to Ubisoft Connect’s default installation directory and locate the savegames folder.
  5. Right-click the savegames folder and select Copy.
  6. Paste the folder on a flash drive to move it to the new PC.
  7. Insert the flash drive into the new PC and copy the savegames folder into the Ubisoft Game Launcher folder.

And that’s it. As you can see, it’s not that hard to move your games to a new drive/partition or even on a new Windows 10/11 PC. Just follow the mentioned steps carefully, and you’ll be done in no time.

Remember to always create backups of your files, just in case something goes wrong.

If you have any other suggestions or questions, feel free to reach for the comments section below.
5 Ways to Fix This Website is Not Accessible Error

Accessing a particular website can sometimes become impossible, while others can be quite easy to view. This inability may be attributed to a variety of technical issues.

If the site is down due to routine maintenance or other reasons, you only need to wait patiently.

However, this issue, like this website is not available error, may be associated with your device or computer, provided you can load the site on other devices.

To fix this error, you may require an anti-malware program or an antivirus to run a thorough scan. Additionally, checking your Internet connectivity settings to ensure everything is right could be the simple fix you require.

Read on to learn more tips, from basic troubleshooting to technical remedies.

What does it mean when a web page is unavailable?

There are various reasons a website might show the web page not available error on your browser. Below are some of the popular causes:

  • Server issues
  • Browser problems
  • Weak or inactive network
  • Presence of malware
  • Antivirus interference

Quick Tip:

A quick workaround to identify the page is inaccessible problem is to open the same website in another browser. This way, you will know if the problem lies with the search engine or elsewhere.

Try using the Opera One browser because it loads faster and offers many built-in quick-access tools that you can add to the sidebar to have handy.

Opera One

Don’t want to waste time fixing your rusty browser? The new-age choice is here.

How do I fix The website is not accessible error?

1. Disable your antivirus temporarily

An antivirus web inspection plugin may likely be responsible for your inability to access a particular site. Therefore, disable the software and try loading the website again.

You should only use this solution should temporarily. Or, better yet, use an antivirus with minimal impact on other programs, including your browsing activity.

Suppose you trust a file, file type, folder, or website that your antivirus has identified as potentially harmful. In that case, you can prevent your antivirus from warning you or banning the site by adding it to the exceptions list.

Antivirus webpage whitelisting is generally provided to users who want to reduce the possibility of false-positive detections.

Any non-harmful website that has been detected as malicious is considered a false positive. Any malware-free pages that meet the conditions for website transparency can be whitelisted by any antivirus that provides this feature.

2. Check Internet connectivity and browser settings

2.1 Fix browser connection settings:

On Firefox

  1. Click the menu button on Firefox.
  2. Select the Settings option.
    settings this browser is not accessible
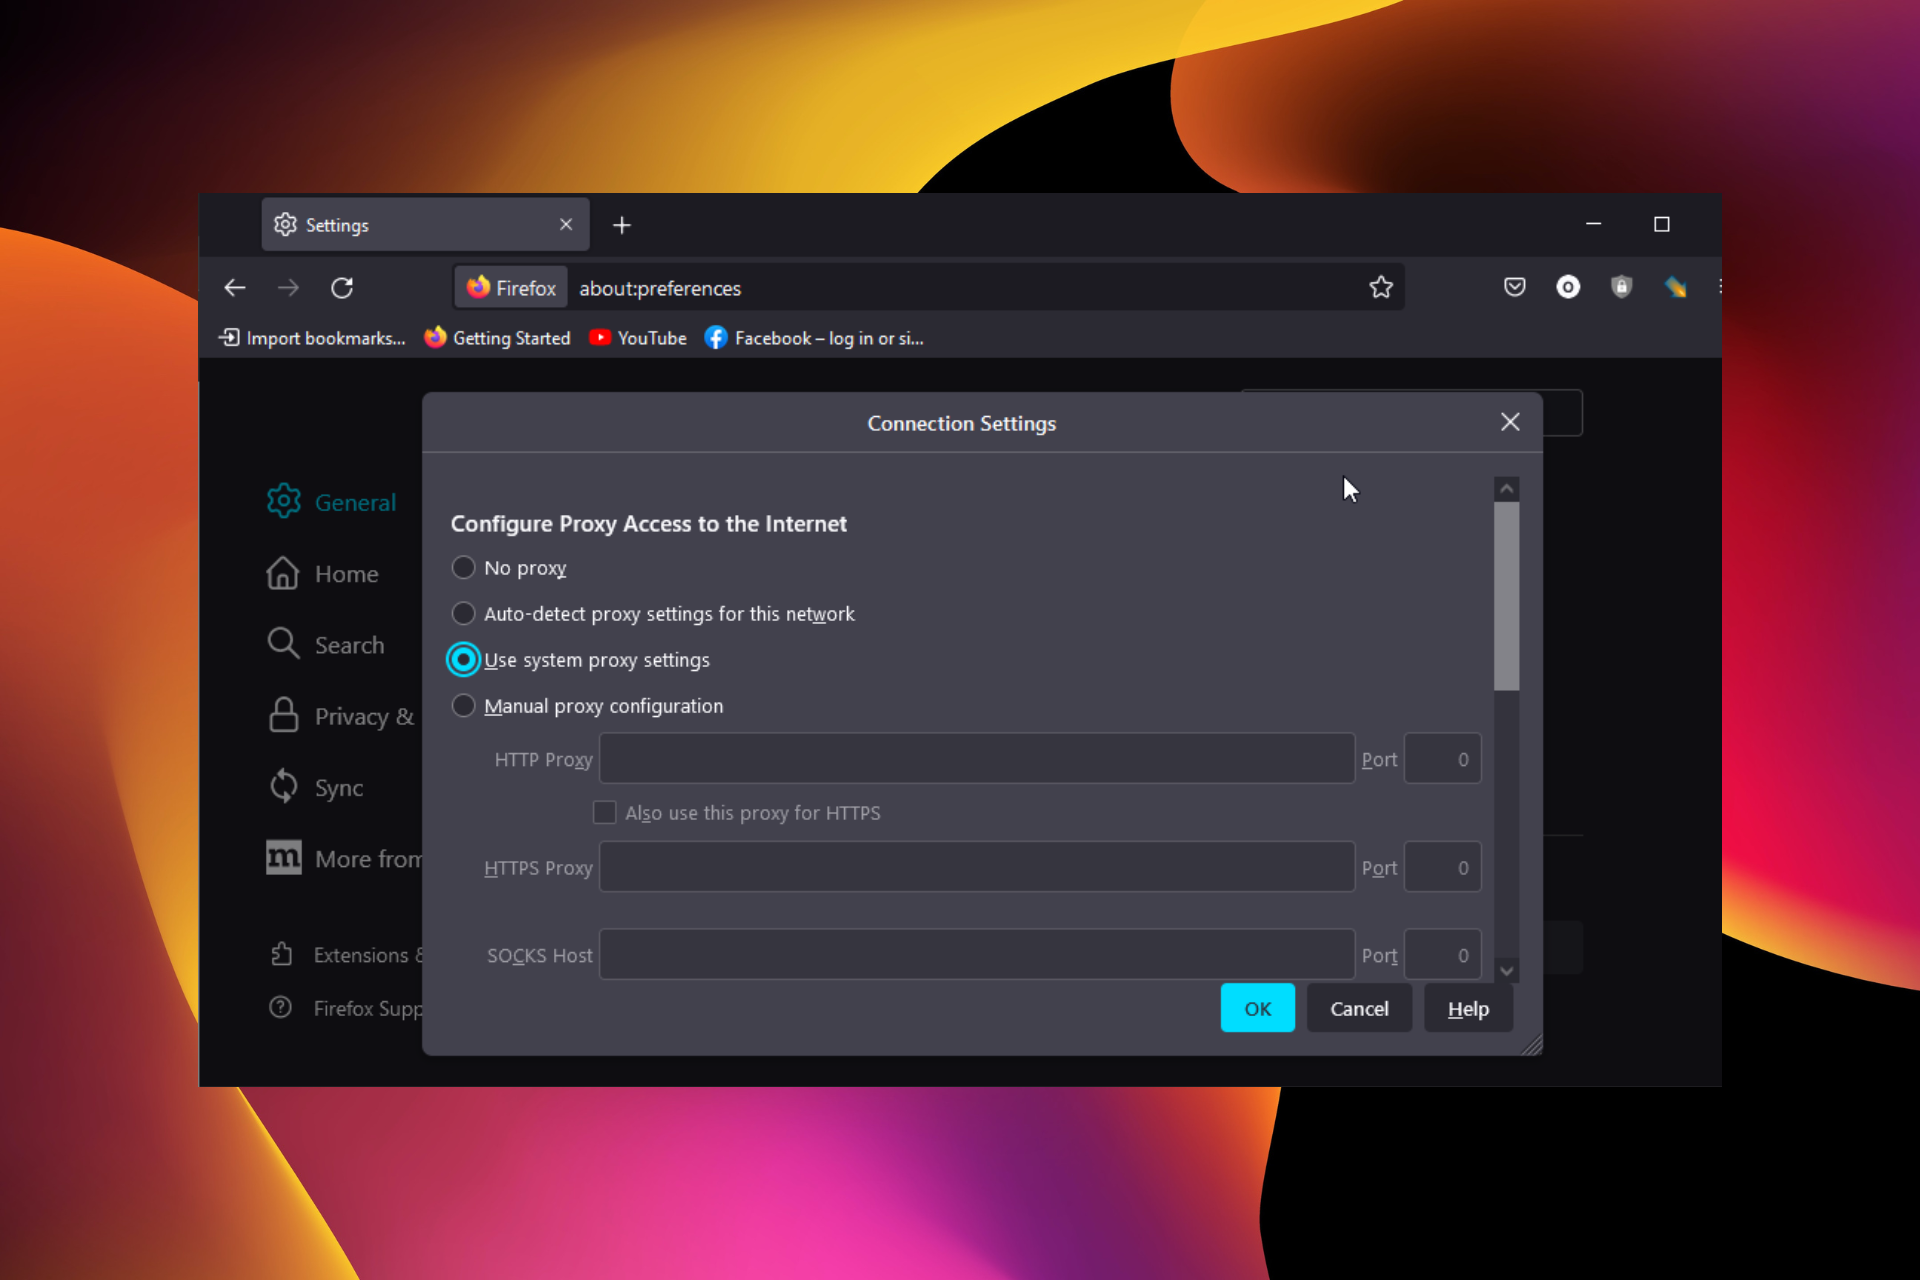
  3. Scroll down and click the Settings… button under the Network Settings section.
    settings
  4. Select Use system proxy setting or No proxy.
  5. Finally, click the OK button.
    no proxy

That should fix the please surf safely this website is not accessible error on Firefox.

On Internet Explorer

  1. Click the Tools menu or press the Alt + X keys.
  2. Go to Internet Options, then to Connections.
  3. Pick LAN settings and uncheck Use a proxy server for LAN.
  4. Check Automatically detect settings.

On Safari

  1. Click the Edit menu and go to Preferences.
  2. Select Advanced.
  3. Now, select Change Settings, and uncheck any active proxy.

On Chrome

  1. Click the Chrome menu and go to Settings.

    chrome settings
  2. Click the System option in the left pane.
    system this browser is not accessible
  3. Select Open your computer’s proxy settings.
    computer proxy
  4. Toggle the button for Automatically detect settings forward to enable it.
    automatic
  5. After you’ve checked your browser connection, try loading the website again.

2.2. Enable JavaScript:

On Firefox

  1. Type about:config into the URL bar and press Enter.
    about  this browser is not accessible
  2. Click the Accept the Risk and Continue button when prompted.
    accept risk
  3. Type javascript into the search bar.
  4. Double-click on the javascript.enabled preference to set the value to true.
    set true this browser is not accessible

With this, you have enabled Javascript on your browser. Note that if the value is set to true already, you don’t need to alter it.

On Internet Explorer

  1. Click the Tools menu.
  2. Go to Internet Options, then to Security.
  3. Select Custom level.
  4. Scroll to the Scripting section and enable Active scripting.

On Safari

  1. Click the Edit menu and pick Preferences
  2. Select Security and check Enable JavaScript.

Chrome

  1. Click the Chrome menu, then Settings.
    chrome settings
  2. Select Privacy and security in the left pane.
    privacy
  3. Choose Site Settings.
    site settings this browser is not accessible
  4. Select JavaScript under the Content section.
    javascript
  5. Tick the radio for Sites can use Javascript.
    sites can use

2.3. Reset router/modem:

  1. Disconnect the modem/router from the power source and wait for some moments.
  2. Connect back to a power source and wait for initialization.
  3. After successful initialization, retry loading the site again.

Disabled JavaScript, incorrect browser connection settings, and traffic to or from a particular site may prevent access to certain websites. You may need to reset your router/modem or check your browser connection settings.

Resetting the router might also help if you get the message saying The network you are using may require you to visit its login page.

3. Use a different device or network

If the fixes above do not work, you might have to try another network entirely. This is because a slow or inactive network can make your browser display the web page is not accessible error.

But, if you are sure the network is not the problem, you can check the site’s server availability on a website status checker like Down Detector. This will let you know if the problem is with the page you are trying to visit.

4. Scan your device for malware

  1. Press the Windows key + I to open the Settings app.
  2. Select Update & Security.
    security this browser is not accessible
  3. Choose the Windows Security option on the left pane.
    windows security
  4. Select Virus & threat protection.
    virus
  5. Click on Scan options.
    scan options
  6. Choose your preferred scan option and click the Scan now button.
    scan now

Malware can also prevent some particular websites from loading. A malicious website may also contain links to other internet sites, which, in some cases, may infect a computer with unwanted spyware, malware, viruses, Trojans, and even rogue anti-spyware applications.

This is why it is important to do a malware scan with a trusted anti-malware utility before proceeding with any other browsing, simply to ensure that the page is completely secure.

If you prefer to use a third-party tool instead of the Windows Defender, TotalAV is one of the most trustworthy anti-malware solutions regarding cybersecurity.

It has a Host-based Intrusion Prevention System, a ransomware shield, removable media scanning, email scanning, web access protection, anti-phishing protection, and password security.

5. Troubleshoot DNS settings

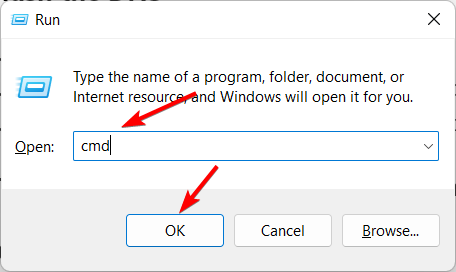
  1. Press Windows + R and type cmd in the box.
  2. Click the OK button.
    cmd
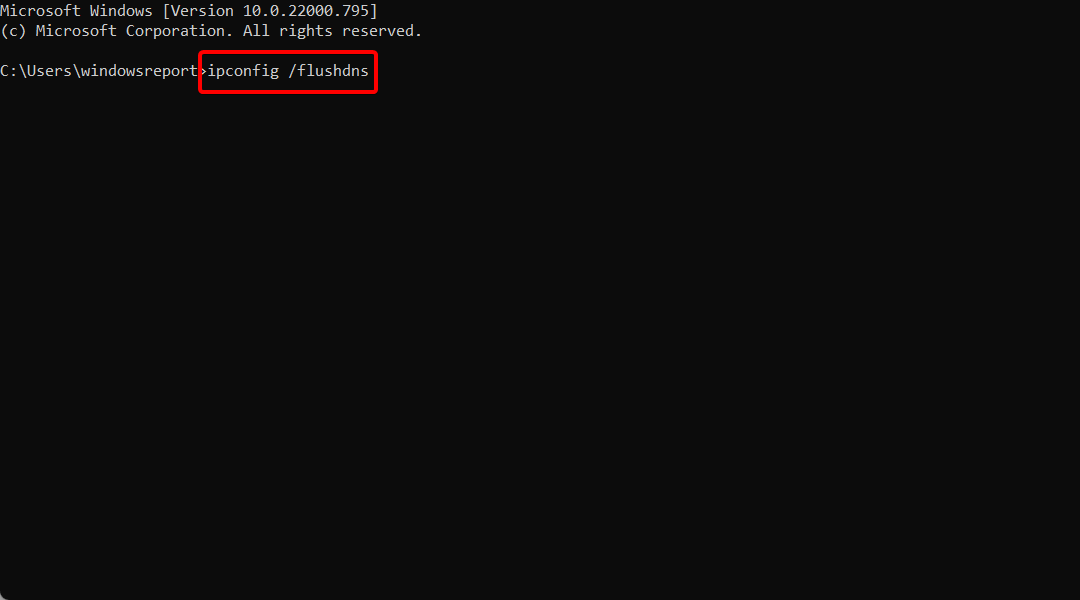
  3. Type ipconfig/flushdns and press Enter.
  4. Wait for a confirmation message, then exit.flushdns command
  5.  You will be required to input the administrator’s password.
  6. Having flushed your previous DNS information, you will need to find a new one.
  7. Search for free DNS lists from providers on the web.

Note that the primary and secondary DNS will be required and it is recommended that you make use of an OpenDNS of GoogleDNS for better accessibility.

To connect to a new Domain Name System, follow these procedures:

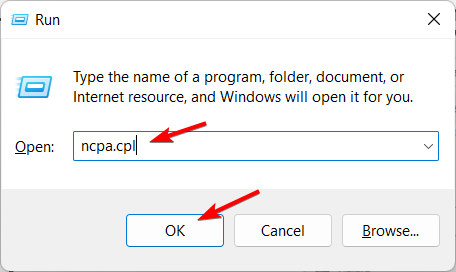
  1. Press Windows key + R and input ncpa.cpl to open the Network Connections Panel.
    ncpa
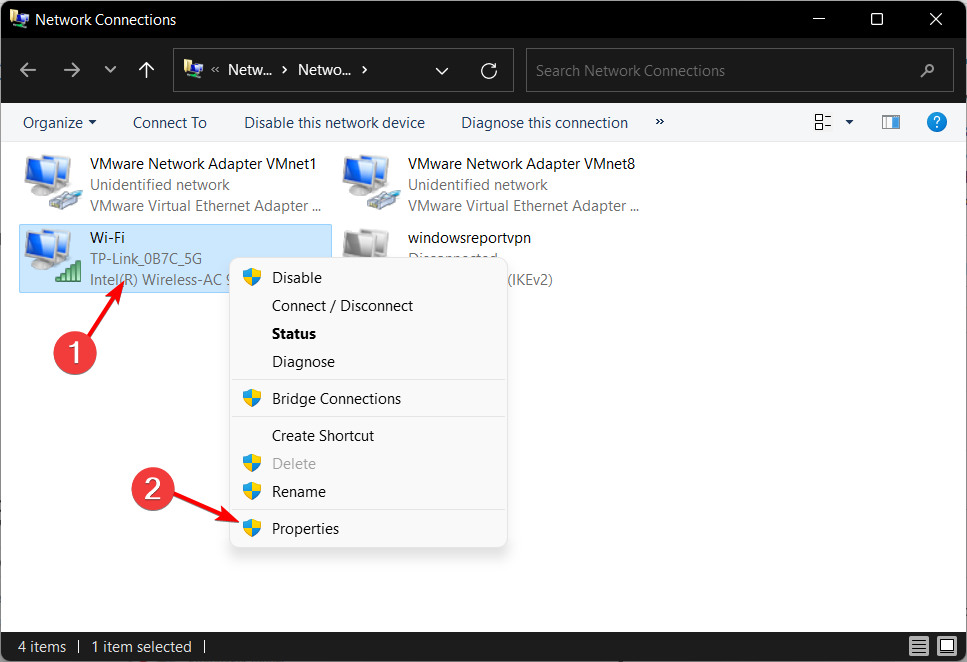
  2. Right-click on the appropriate network adapter and choose Properties. 
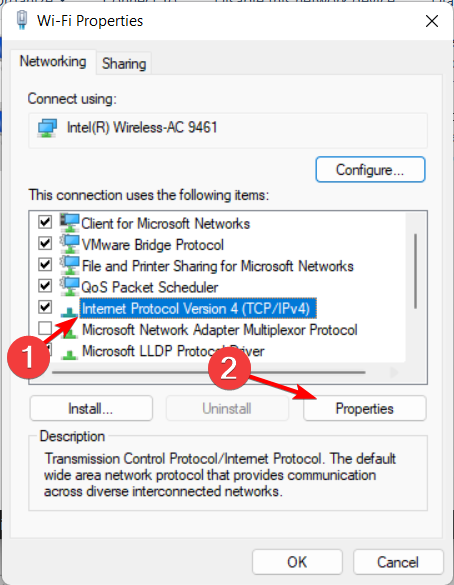
  3. Select TCP/IPv4.
  4. Click Properties.
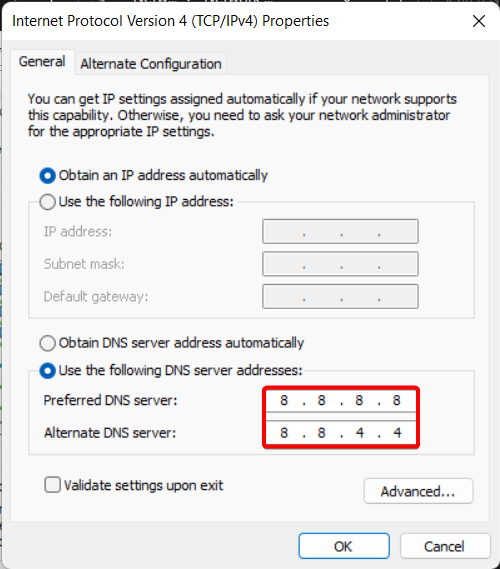
  5. Check Use the following DNS server addresses.dns-settings
  6. Enter the DNS of your choice and click OK.

The website(s) should now be accessible.

The website is not accessible error on browsers can be time-wasting and tiring. Fortunately, it is not the most difficult error to fix, as shown in this guide.

If you are facing other issues, like you don’t have permission to access this server, check our guide for the effective fixes to apply.

This issue can occur on any page, and many reported that Target website isn’t working, so be sure to check our guide on that issue.

Let us know in the comments if any of these steps were useful. If you have other suggestions on this topic, feel free to share them with us.

6 Best Hearts and Spades Games to Play on Windows 10 & 11

Hearts is one of those popular games we have been playing since Windows 95 came out. It is traditionally played with four people. The basic rule of the game? Don’t take cards.

The opponent who played the highest card of the hand takes all four cards. This rotation continues until the players are out of cards.

Most importantly, be careful not to take the Queen of Spades, as this is an important negative card you will want to avoid when playing Hearts.

Even if your Windows 10 & 11 don’t come with Hearts as an embedded game, users have a few options that will certainly fill the void successfully.

Let’s look at some of the best Windows 10 & 11 Hearts and Spades games.

Can you play Hearts online?

A series of apps allow you to play Hearts online on Windows 10 & 11. You only need to download these apps, register, and connect to other players worldwide.

Aside from apps, there are also browser games that allow you to play Hearts without downloading any files. So, you are not short of interesting options.

Is there an app to play Hearts with friends?

There are many multiplayer Hearts game apps that you can download. Most of the apps are available for free.

You and your friends only need to download the app and connect to play the game. We have some of these apps listed in this guide.

What are the Best Hearts and Spades games for Windows 10 & 11

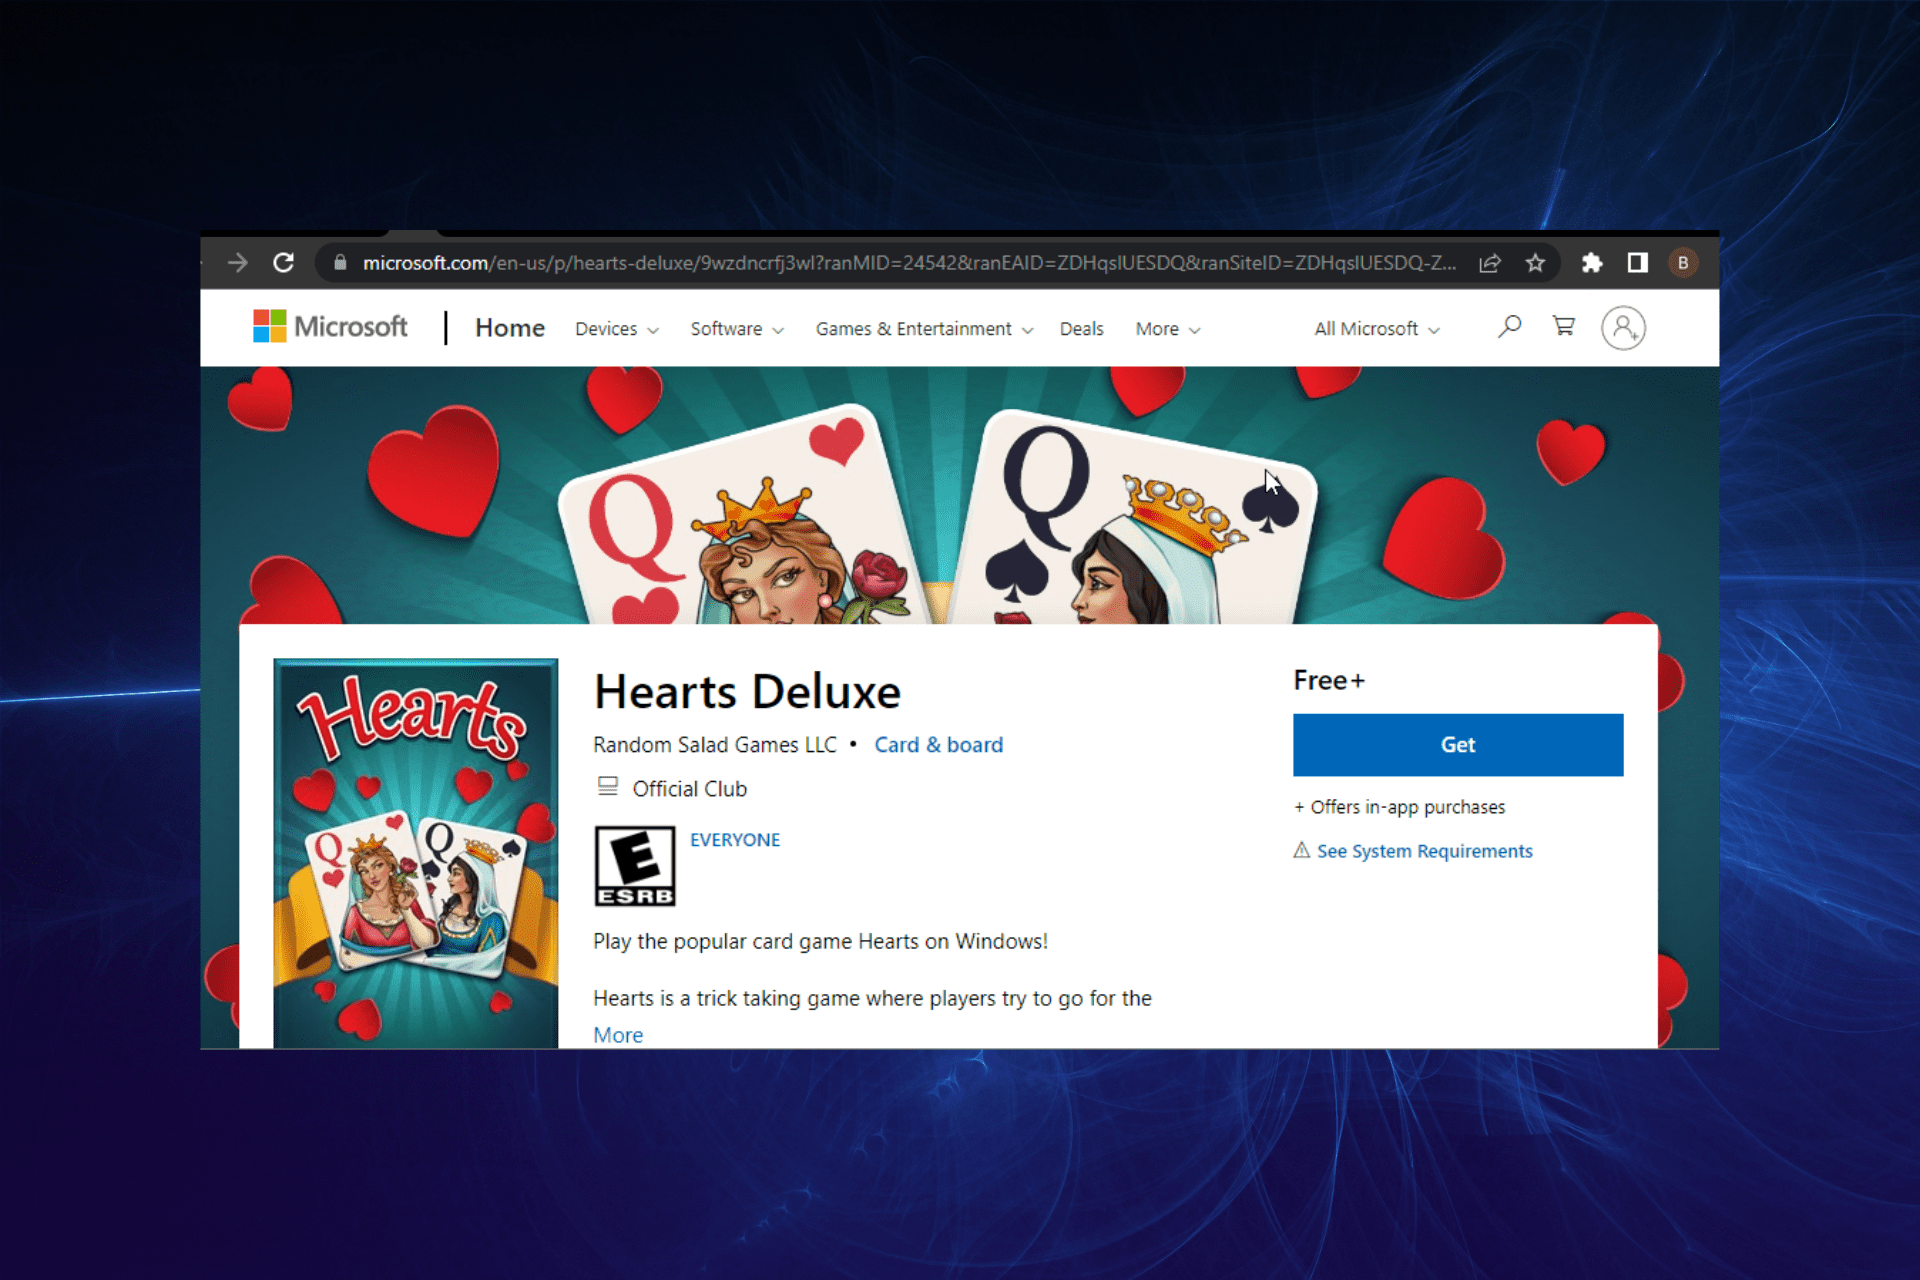
Hearts Deluxe – Stunning graphics for Windows 10

hearts deluxe windows 10

With this app, we see an improvement in graphics, as they remind us of Alice in Wonderland. After all, maybe the Queen was playing Hearts before Alice interrupted her.

Hearts Deluxe also brings a lot more variation to the table. For example, you can control the difficulty of the game (plus other Omnibus and Hooligan modes) and get detailed statistics.

If you are a beginner at Hearts, you can read the Instruction section and get an idea of how to start playing. Controls are optimized for a touch environment.

⇒ Get Hearts Deluxe

Hearts Free! – Trick-taking card game for Windows 10 & 11

hearts free

There’s not much when graphics is concerned with this game, as it provides gamers with a boring background you can’t change and some standard graphics.

Nevertheless, you can play a quick game of Hearts without problems.

This particular game of hearts is scored like this: Spade Q will give the player -100, Diamond J increases to 100, while Club 10 can double the score.

With this simple gameplay in mind, this app guarantees many hours of fun.

⇒ Get Hearts Free!

Hearts Online – Best free online Hearts game

Hearts Online best hearts games for Windows 10

Hearts Online offers the classic game of Hearts with real live players.

You have to press Play, and you’ll be immediately matched up with other players worldwide.

Additionally, you can create custom games to play with your friends. To keep the gameplay alive, there are multiple scoring modes and rule sets for you to choose from.

⇒ Get Hearts Online

Spades – Competitive game

spades

Spades is a variety of card games similar to Hearts, consisting of the same player and card arrangement.

It’s just the rules which are a little different.

Here, a hand containing a spade is won by the highest spade played. If no spade is played, the hand is won by the highest card of the suit led.

So unlike Hearts, you need to take as many cards as possible in this game.

The app features the possibility of setting the preferred mode (Standard or Suicide) or difficulty (easy or hard).

Players can track their progress by checking out the app’s detailed statistics.

⇒ Get Spades

Spades Free! – Dynamic game

spades free best hearts game for windows 10

This amusing-looking Spades app features a wide range of games gamers can choose. Unlike the previous app we saw, here you have some variety – gameplay-wise.

Choose between Standard Spades, Whiz, Homicide, Reflection, and others. The difficulty can be selected from Easy, Normal, Hard, and Very Hard.

Other than that, here we have your pretty standard Spades app. Play against three opponents and win by collecting as many cards as you can.

⇒ Get Spades Free

The Spades – Excellent sound effects

the spades best microsoft store games for windows 10

The Spades brings this classic 4-player contract trick-taking card game to the Microsoft Store.

It has highly scalable difficulty, fairly smooth graphics, and gameplay, and it also has background music and sound effects.

You can choose from 18 CPU players provided by the game, and the game will track your wins and losses against each of them.

You can download the Spades for free from the Microsoft Store.

⇒ Get The Spades

This is our round-up of Hearts and Spades games that you can play on your PC. They are free and can be downloaded from the Microsoft Store, so check them out.

If you have any other questions or suggestions, don’t hesitate to reach for the comments section below.

Opera Tablet Mode: Does it Exist And How to Use it

Many applications are optimized to work on touchscreen devices, and many are wondering if there is a Tablet mode in Opera. In today’s guide, we’re going to answer this question.

How can I use the Opera Tablet Mode?

Opera doesn’t have a Tablet Mode feature, so you can’t enable it when using a touchscreen device. The application will optimize itself for touchscreen displays if you enable tablet mode on your PC.

How do I switch to desktop mode on Opera?

Opera doesn’t have a separate desktop mode on PCs, so there’s no ability to switch back to it, since there’s only one mode available.

Does Opera have a reading mode?

Yes, Opera does have a reading mode, but this feature is only available on Android and iOS devices.

How to get Opera out of full screen mode?

You can get out of full-screen mode in Opera by pressing F11 or Esc. In case you’re having any trouble, we also have an in-depth guide on what to do if Opera GX is stuck in fullscreen mode.

How do I change my desktop to tablet mode?

On Windows 11, you’ll automatically enter the Tablet mode when you disconnect your keyboard.

For Windows 10 you need to do the following:

  1. Open the Action Center.
  2. Click the Tablet Mode icon.
    tablet mode button action center
  3. Tablet Mode will now be activated.

As you can see, Tablet Mode doesn’t exist for Opera, but if you would like to use Opera on a tablet, we have a great guide on how to install Opera on Kindle, so don’t miss it.

Would you like to see this feature available on Windows? If so, let us know in the comments.

3 Quick Ways to Fix Chrome When the Language is Not Changing

Google Chrome is one of the most popular browsers in the world. People seldom encounter issues with it. Still, nothing is perfect, and the browser is no exception. Several users have reported that the language is not changing in Chrome.

Though the browser intends to be accessible to a maximum number of users, the Google Chrome language problems can be a major barrier. And the problem is particularly tricky to resolve since there isn’t much help available online.

Fortunately, there are several solutions to this problem, and today we will show all the ways to fix things when the Display Google Chrome in this language option is greyed out, or Chrome language is not changing.

Why is my Google Chrome in another language?

Here are the reasons you see Chrome in another language:

  • Misconfigured Chrome settings: In many cases, users inadvertently changed the language in Chrome while reconfiguring the settings.
  • Corrupt browser data: A corrupt cache and cookies can affect how your browser behaves, lead to problems loading websites, and even reduce browser performance.
  • Third-party program triggered the change: A third-party program can also trigger the change, so check any installed around the same time the problem first appeared. In this case, simply uninstalling the program should do the trick.

Before we move to the solutions, remember that they are as useful when facing any of these issues:

  • Chrome won’t change language – If that’s your problem, try to quickly add and remove the language, change the language in your Google account, or add a command line.
  • Display Google Chrome in this language is not showing – When this happens, you can choose to use another browser. We recommend Opera One for an error-free online experience.
  • Google Chrome can’t change language – It’s frustrating to discover that Google Chrome can’t change the language. Assuming that’s your case as well, refer to the above tips.
  • Can’t add language to Chrome – When adding a new language to Chrome becomes impossible, try to do so in Opera One. If all your information is on Google Chrome and you don’t want to lose it, we have good news for you. After installing Opera One, you’ll automatically be prompted to import whatever data you want from the old browser.

Quick Tip:

If you keep having problems with Chrome, try another browser. Opera One is a great alternative that’s much lighter and more responsive than Chrome.

It doesn’t require much getting used to, offering all the standard browsing tools you need. Moreover, you can quickly change the user interface language in just a few clicks.

Opera One

If Google Chrome doesn’t change language, consider using this beneficial browser.

How do I permanently change Google Chrome’s language?

1. Add a command line

  1. Press Ctrl + Shift + Esc to open Task Manager.
  2. Locate all Chrome processes here, select them one at a time, and click the End task button to terminate them.end task chrome to fix language not changing
  3. Next, right-click on Chrome’s desktop icon, and select Properties from the context menu.properties
  4. Insert the following at the end of the target field after a single space:--lang=engadd CLS to fix chrome language not changing
  5. Click Apply and then OK to save the changes.click apply

This is a simple workaround to set the language to English and might help if the Chrome language is not changing.

2. Add and remove language

  1. Paste the following path in the address bar and hit Enter:chrome://settings/languages
  2. Click on the Add languages button.Add languages
  3. Select the language you do not want from the list and then click Add.select language
  4. As soon as it’s added, click on the ellipsis next to the language.ellipsis
  5. Now, select Remove from the menu.remove to fix chrome language not changing

This workaround should do the trick when the Chrome language is not changing. Make sure to remove the added language as quickly as possible for the method to work.

3. Change the language in your Google account

  1. Click on the Profile icon at the top-right corner of Chrome and select Manage your Google Account.manage your google account
  2. Select Personal info from the left.personal info
  3. Scroll down and click on Language under General preferences for the web.language
  4. Click on Add another language.Add another language
  5. Choose the desired language from the list, and click on Select.select to fix chrome language not changing
  6. Finally, click on the arrow next to the one you just added to make it the preferred language in Chrome.arrow

If nothing else has worked, selecting the preferred language in your Google account and then on the browser may fix things if Chrome is not changing the language.

Besides, you can use a Chrome language switcher extension. A bunch of them are available in the Web Store, and you can easily find one that offers your preferred language.

That’s it! You now know how to fix the problem, and it should be resolved by the time you reach this part of the article.

Also, find out how to stop high CPU usage in Chrome in case your computer runs slow when the browser is open.

Did you find another method to change the language in Google Chrome? Do let us know in the comments section below!

8 Best Anti-Exploit Software to Protect Your Browser

Are you worried about penetration attacks from malicious software even though you have an antivirus? What you probably need is anti-exploit software.

An anti-exploit program shields your web browser and programs from vulnerabilities, hence, boosting your computer security options.

This provides a good defense against exploiting techniques and tools from hijacking your web browsers. You can get an additional security layer that prevents attacks on your web browser and plugins.

Meanwhile, the Windows Report team has compiled this list of anti-exploit software that you can use on your Windows PC.

However, we have also included in this article, antiviruses software that comes with built-in protection for your browser and online activities.

What is anti-exploit protection?

Protecting against malware that infects devices and spreads by exploiting vulnerabilities is made easier by anti-exploit technology. The mitigations that makeup exploit prevention can be implemented on either the operating system as a whole or on specific applications on their own.

Even though vulnerability prevention is enabled by default in Windows 10 and Windows 11, you may still make use of third-party applications.

What is an example of an exploit?

An exploit is a piece of software, a bit of data, or a series of commands that takes advantage of a defect or vulnerability to make computer software, hardware, or other electronic devices behave in an undesired or unexpected way.

One such example is a computer virus that enters your computer without your notice and starts modifying or stealing data. With the help of anti-hacking software, you will prevent unnecessary suffering.

Quick Tip:

Use a browser with built-in security. Being secure while browsing should be the top priority for millions of Internet users. But, instead of relying on a tool, this browser relies on its own protective measures.

Besides features such as a built-in VPN, Ad blocker and AI, it is rather fast and packs an intuitive design based on the Chromium platform. Also, it features a modular AI-ready design.

Opera One

Use one of the most secure and fast browsers, that also includes plenty of security features.
Free Download Visit website

What are the best anti-exploit software tools for browsers?

TotalAV

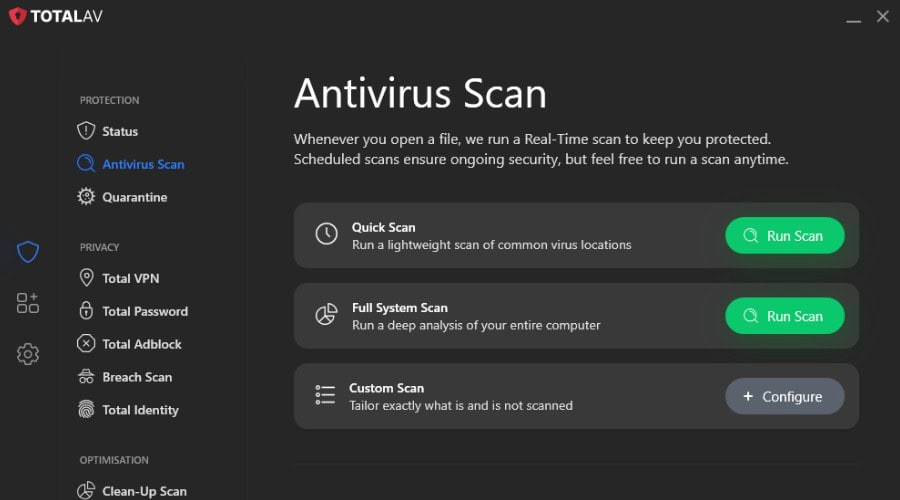
TotalAV antivirus scan

TotalAV’s WebShield is the part that matters for browser exploits: it blocks known malicious and phishing URLs before the page loads, so drive-by downloads never get the chance to run. Real-time protection catches anything that arrives as a file, and downloads are scanned before they open.

The browser cleanup tool removes leftover trackers and cache, and the ad blocker in the higher plans strips out the ad networks that malicious scripts often ride in on. It is a simpler product than TotalAV, with no secure-browser mode or keyboard encryption, but for stopping exploit pages it does the essential job.

  • WebShield blocks malicious and phishing URLs
  • Downloads scanned before they open
  • Browser cleanup for trackers and cache
  • Ad blocker in the higher plans
TotalAV

TotalAV

Protect your browser and your computer from online threats such as keyloggers, and malware.
Free Trial Visit Website

Guardio

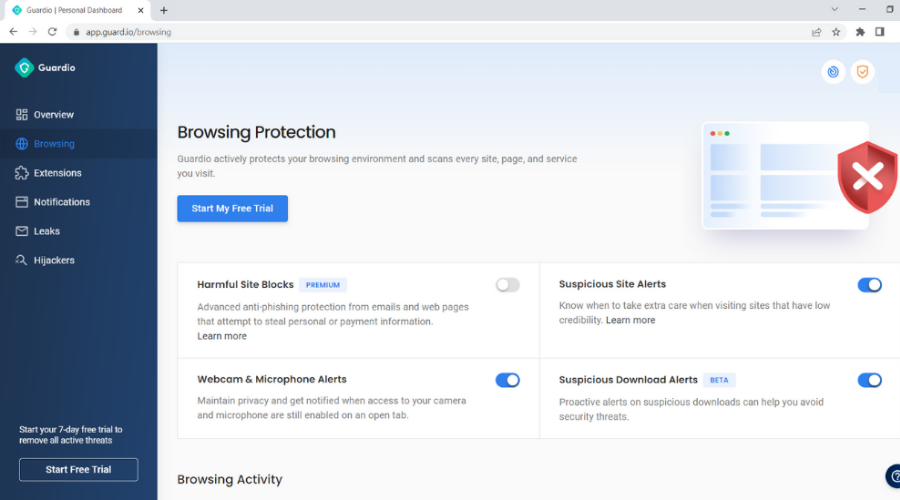
Guardio browser security can guard all your private online tasks and avoid harmful websites and exploit attacks.

This protection tool has a 1,000,000 user base and works as a browser extension and is capable to detect various cyber threats or personal information leaks from your browser.

You can get reliable threat protection functionality that will guard you against malicious web pages or phishing email attacks.

That means you can gain advanced protection for your browsing behaviors and perform financial activities with no risks of data theft. Plus it is now available with the same subscription on Android and iOS systems.

Another essential aspect of browser security is exactly browser extensions. Monitoring browser extensions will help you detect corrupted plugins that may affect your browser settings.

In addition, you have identity and information leak monitoring tools, social media account protection, and 24/7 customer support.

Guardio

Benefit from exhaustive browser security and protect online private data with effective antivirus or anti-phishing tools.
Check price Visit website

Malwarebytes

This software is the perfect Internet security system that shields your personal computer from vulnerabilities.

Malwarebytes Anti-Exploit program is capable of detecting bugs on your system as well as removing them from your PC.

It shields applications such as Microsoft Office, VLC Media Player, Adobe PDF Reader, and many more.

This program works by wrapping security layers around web browsers and applications; hence, preventing compromising exploits from taking over your PC.

The best feature of this tool? It is known for detecting and removing threats that traditional antivirus solutions can’t handle. It does this using the power of artificial intelligence.

Trojans, spyware, ransomware, worms, or viruses don’t stand a chance of entering your system thanks to the real-time protection offered by Malwarebytes.

Malwarebytes

Top anti-exploit software that offers total protection for your browser and device with Malwarebytes Premium.
Free trial Visit website

Avira

Avira

Avira is another freeware antivirus that you can use to protect yourself from all sort of online exploits, malware, and threats.

Its core technology will block any online threats, including malicious websites, ransomware, and spyware. Thus, you can browse the Internet without worries.

Additionally, Avira can keep you safe from phishing attacks on social networks, including your inbox, or email scams.

Not enough? It also includes a free VPN tool, that will secure your online activities, and make your searches anonymous.

Avira

Stay safe from exploits with a free antivirus that will block any malicious websites.

IObit Malware Fighter

IObit Malware Fighter is anti-exploit software that is designed to shield your personal computer from any online attacks.

In addition, you also get protection against malware, Trojans, and viruses that may intrude on your PC while surfing the web.

It features an Anti-ransomware Engine. This is a useful tool since ransomware attacks are getting more popular.

Malicious links that are sent via email are blocked by IObit. It even blocks exploits that try to get access to your web camera.

Finally, viruses are a thing of the past with two different scanning and cleaning engines. One from IObit and the other one from Bitdefender.

IObit Malware Fighter

Protect your personal data and guard all browser activity with IObit Malware Fighter.
Check price Visit website

Avast Free Antivirus

Avast Free Antivirus protects your computer against viruses and malware, and it helps you protect your home network against intruders.

Moreover, you can add the Avast plugin to your browser. It will check each website you visit and warn you if it’s unsafe or if it simply has a bad reputation. 

Additionally, this will stop websites from collecting data on you and tracking your browsing history via cookies. Thus, you can surf the web knowing you are safe.

Avast is packed with the largest threat-detection network, machine-learning, and browser protection. All these security features won’t slow down your PC.

Avast Free Antivirus

Keep your computer safe from exploits with one free and comprehensive antivirus solution.
Free download Visit website

Microsoft EMET

Microsoft EMET otherwise known as Enhanced Mitigation Experience Toolkit is one of the oldest anti-exploit software around.

This free program targets system administrators who can implement this software on multiple PCs on a large computer network.

This software uses application hardening which prevents exploitation of various software application vulnerabilities.

In addition, EMET uses 12 different security mitigations to protect other software applications and running processes on the PC.

However, Microsoft EMET is no longer available for Windows 10 OS because Windows 10 contains protections such as AppLocker, Control Flow Guard (CFG), and Device Guard

⇒ Get Microsoft EMET

HitmanPro

hitmanpro

This premium software is an ideal anti-exploit tool for your PC. There are two software options from which you can choose, depending on your needs.

HitmanPro Cleans malware, viruses, trojans, worms, keyloggers, rootkits, trackers, spyware, and more.

HitmanPro.Alert version, includes the previous one and stops complex attacks and exploits in real time while increasing privacy.

If you want to protect your web browsers from exploits, you should give this program a try. HitmanPro.Alert blocks hacking attempts and impedes ransomware on your PC.

However, you should use an antivirus along with the anti-exploit program; but not two anti-exploit programs at the same time to prevent overlapping.

⇒ Get HitmanPro

However, we do recommend any of this anti-exploit software for you to shield your Windows PC from any techniques and tools used by hijackers.

Also, you can use an antivirus that includes anti-exploit solutions. If you want to discover even more security tools, check our guide, including the best antivirus for Windows 10.

Do share with us your experience after using any of the programs we mentioned. Feel free to comment below.

Steam Error Code 105: 4 Solutions That can Fix it

Steam is one of the largest gaming distribution channels in the world. However, several gamers have posted about the Steam error code 105 on several forums.

If you also face this problem, remember that it arises when trying to open a Store from Steam. Consequently, users can’t access Steam’s Store in the browser.

You’re in the right place for those looking for an expert guide to fix this annoying issue! We’ve compiled a list of troubleshooting solutions that will support you no matter what.

What does error code 105 mean?

When you receive this error, it implies that the system cannot resolve the server’s DNS address, so the DNS lookup has failed. If we refer to the particular case of Steam, the full message appears as follows:

Unable to connect to server. The server may be offline or you may not be connected to the Internet.

According to many users, this error arises when accessing the official website via the web browser or the game client itself. Any of the following often triggers this error:

  • Network connection – This may be triggered by your router or may be a connection error from your ISP.
  • Browser error – Several things may trigger DNS issues on a browser leading to this error.
  • Firewall settings – Sometimes, the user’s firewall may block the Steam connection, leading to this error.
  • Cache issues – An old cache has been a critical trigger for some users. This may be the browser or the operating system cache.

Now, let’s see what you can do to fix Steam library error 105 in a matter of time. Check this guide completely to discover more about the annoying Steam error codes.

Quick Tip:

Add your games to Opera GX. If you keep having problems with Steam, you can try to add your game library to this gamer’s browser.

Several games on Steam can be accessed using Opera GX, and you can use the GX Corner feature to download and manage your games and access the latest news in the industry.

Opera GX

Organize your games and enjoy error-free sessions with Opera GX.

How do I fix Steam error code 105?

Before exploring our solutions, try a simple restart of your router. Unplug the router (from the socket) for about five minutes. Then plug the router back in. Wait about five minutes, then open Steam to see if error 105 persists.

1. Flush the DNS

  1. Use the following keyboard shortcut: Windows + R, then type cmd and click OK.cmd-ok steam error code 105
  2. In the opened window, input the following command, then press Enter: ipconfig /flushdnsipconfig-cmd steam error code 105
  3. Now, launch Steam and check if Error Code 105 persists.

2. Turn off ad blocker browser extensions

2.1 Google Chrome

  1. Press the Windows key, type Chrome, then open the browser.
  2. Now, from the window’s top-right corner, click on the 3 dots menu, head over to More tools, then click Extensions.chrome-extensions=button salesforce not loading in chrome
  3. Turn off the blue toggle switches at the bottom right of all ad blocker extensions.

2.2 Mozilla Firefox

  1. In your Windows search bar, type Firefox, then click on the first result.
  2. Use the following keyboard shortcut to open the Firefox Addons page: Ctrl + Shift + A.
  3. Turn off the shown button for any ad blocker add-on.

2.3 Opera

  1. Press the Windows key, type Opera, then open the browser.
  2. Use the following keyboard shortcut to open the extensions page: Ctrl + Shift + E.
  3. Now, click on the Disable button to turn off Opera AdBlockers.

3. Change your DNS Address

  1. Press simultaneously on the following keys to open the Windows Run dialog box: Windows + R.
  2. Type ncpa.cpl, then click the OK option. It will open the Network Connections Control Panel applet.ncpa steam error code 105
  3. There, right-click your Internet connection and select Properties.wifi-prop steam error code 105
  4. Select Internet Protocol Version 4, then select the Properties button.inp4-prop steam error code 105
  5. Choose to Use the following DNS server addresses radio button.
  6. Next, input 8.8.8.8 in the Preferred DNS server box and 8.8.4.4 in the Alternate DNS section.dns-88 steam error code 105
  7. Press the OK button on the Internet Protocol Version 4 window.

4. Delete browser data from Steam’s Settings window

  1. Hit the Windows key, type for Steam, and open the desktop client.
  2. From the top-left corner of the window, select Steam.
  3. Navigate to Settings.
  4. Go to the Web Browser tab.
  5. Choose to Delete Web Browser Cache.
  6. Select the OK button to confirm.
  7. Now, choose to Delete All Browser Cookies option.
  8. Select the OK option to provide further confirmation.
  9. After that, close Steam to restart it.

You will find easy resolution using any of the solutions in this article. Note that they are not listed in any particular order, and you must try the most appropriate.

In case you face additional related questions, make sure you leave a comment in the section below. Thanks for reading!

How to Stop Verizon Throttling (6 Best VPNs to Use)

Verizon is an American telecom company that provides Internet access to more than 154 million subscribers. However, it’s a well-known fact that Verizon throttles the bandwidth after a certain capacity is reached, depending on the data plan.

Needless to say, ISP throttling is a nuisance for all types of users, whether you’re trying to watch Netflix, download a torrent, or play online.

Fortunately, you can stop Verizon throttling with a VPN. You just need to get equipped with the right tool for the job.

Is Verizon throttling my unlimited data?

Verizon company will not throttle your unlimited data plan due to their package, and it should increase your Internet speed as well.

If this issue occurs on your PC, it must be due to other factors such as network congestion or exceeding your prioritized data.

Hence, using this data package from Verizon should offer you a faster network connection and speeds of 4G LTE or 5G.

However, users have reported that Verizon does throttle data on other packages.

What are the best VPNs to stop Verizon from throttling my Internet?

Private Internet Access – Most reliable VPN speed

Made by Kape Technologies, Private Internet Access (PIA) is the best VPN to stop Verizon throttling, and that’s why we used it in our example above. It comes with high-speed VPN servers from all over the world, together with tons of security features.

You can connect to the automatic PIA server to ensure the fastest Internet connection, use exclusive DNS servers, choose from static and dynamic IP addresses, as well as set up port forwarding without configuring your router.

PIA can be installed on all major platforms, including routers to share VPN access with all connected devices. Its client permits up to 10 simultaneous connections. Plus, if you need assistance, you can resort to 24/7 live chat support.

More about PIA:

  • +3,300 VPN servers in 48 countries
  • No identifying logs
  • Best all-around VPN
  • 30-day money-back guarantee (no free trial)

Private Internet Access

Stop Verizon from throttling your Internet using this fast and secure VPN.
Check price Visit website

NordVPN – Most extensive server network

Developed by Tefincom & Co., NordVPN puts emphasis on online security and privacy, thanks to a bunch of security features that most virtual private network solutions lack. You can use it to make sure that Verizon can’t detect your traffic to throttle the bandwidth.

For instance, NordVPN supports obfuscation mode to conceal the fact that you’re using a VPN. It’s a security measure if the ISP decides to block VPN traffic. You can use private and custom DNS servers, together with a malware and ad blocker called CyberSec.

If you want to increase your level of security, you can connect to the Tor network through the VPN directly, thanks to its Onion-over-VPN servers. NordVPN supports 6 simultaneous connections and all major operating systems.

More about NordVPN:

  • +5,100 VPN servers in 59 countries
  • A zero-logging policy
  • Best security VPN
  • 30-day money-back guarantee (no free trial)

NordVPN

Use the top-notch security features of this VPN to stop Verizon throttling.
Check price Visit website

Surfshark – VPN privacy for unlimited devices

Surfshark is one of the best VPN apps for Windows 8 and 8.1

If you’re looking for a budget-friendly solution to encrypt your data traffic and stop Verizon throttling, look no further than Surfshark. It’s a fast and safe VPN created by Surfshark LTD.

Moreover, Surfshark has exclusive DNS on each VPN server. It comes with an ad and malware blocker, a kill switch, obfuscated VPN servers, and split tunneling to isolate VPN traffic from other applications so that you can better manage your network resources.

The tool can be installed on all popular platforms. Another cool feature is that it doesn’t restrict the number of connections used by the same Surfshark account, which means that you can share your VPN account with all your devices.

More about Surfshark:

  • +1,700 VPN servers in +63 countries
  • A strict no-logging policy
  • Best budget VPN and unlimited connections
  • 30-day money-back guarantee (no free trial)

Surfshark

Turn to this powerful VPN to bypass Verizon throttling and make your Internet connection faster.
Check price Visit website

CyberGhost VPN – Complex privacy tools

Also a product of Kape Technologies, CyberGhost VPN is capable of encrypting your Internet traffic to make sure that Verizon can’t throttle your bandwidth based on your activities.

CyberGhost VPN is one of the most user-friendly virtual private network solutions, thanks to an intuitive interface and options. Its only downside is that it doesn’t have too many customizable options for advanced users.

On the bright side, CyberGhost VPN supports private DNS servers, split-tunneling mode, and up to 7 connections at the same time. It’s compatible with all major operating systems. Plus, it’s the only free VPN on this list.

More about CyberGhost VPN:

  • +6,500 VPN servers in 89 countries
  • No traffic logs
  • Best network of VPN servers
  • Up to 45-day money-back guarantee (1-day free trial)

CyberGhost VPN

Use this intuitive VPN to stop Verizon throttling and take control of your Internet speed.
Check price Visit website

ExpressVPN – Highest connection speed

Developed and owned by ExpressVPN International Ltd., ExpressVPN is considered to be one of the best software of its kind. It has great security and a wide range of up-to-date features which ensure a whole user experience.

ExpressVPN can help with throttling as it has unlimited bandwidth. You can download as much as you want without limitations. 

In terms of speed and coverage, ExpressVPN has 160 server locations in 94 countries and makes sure to always connect you to the best server for your network by performing an automatic scan.

ExpressVPN values privacy and data protection which is why it doesn’t store any browsing information that could be used to identify you. Moreover, it has its own encrypted DNS which makes connections both safer and faster.

More about ExpressVPN:

  • Compatible with all devices and operating systems
  • 24/7 live chat support
  • AES-256, expert-approved encryption
  • VPN split tunneling- which allows part of your traffic to connect to VPN and the rest to connect directly to your home server
  • IP address masking
  • Public Wi-Fi protection
  • Allows simultaneous use on up to 5 devices

ExpressVPN is a subscription-based service with a 30-day free trial.

ExpressVPN

Stream and browse unlimited content with ExpressVPN.
Check Price Visit Website

TunnelBear – Most trusted for IP protection

A VPN tool like TunnelBear secures your internet connection without throttling and with much faster network results.

By choosing this trusted security tool, you can keep all your online data private using verified servers to hide your IP address instantly.

Hence, you have unlimited bandwidth to navigate online without exposing your ISP to other parties and switching to other servers from different regions.

Specifically, there are multiple servers from 46+ regions you can choose from to safeguard sensitive data and avoid network problems.

More about TunnelBear:

  • Secure your online traces abroad
  • No content censorship
  • Privacy for public WiFi
  • Block cyber attacks, viruses or adware
  • AES 256-bit encryption

TunnelBear

Resolve Verizon network issues and access your browser privately without annoying ISP throttling issues.
Check price Visit website

How do I bypass Verizon Hotspot throttling?

PIA is connected to a US VPN server

In the following step-by-step guide, we use the paid subscription for PIA in order to have a high-quality server connection and hack Verizon data throttling in no time.

  1. Run a speed test to determine your current Internet speed.
  2. Sign up for a PIA subscription plan.
  3. Download and install PIA on your PC.
    download-pia
  4. Launch PIA and click its icon in the systray.
  5. Click VPN Server and select Choose automatically.
  6. Press the big power button to connect.
  7. Run the speed test again using the same service.
  8. Compare speed test results.

You can run the preliminary speed test even after downloading and installing the VPN. Just make sure to disconnect from the VPN server so that you won’t skew the results.

By comparing data before and after connecting to the VPN, you can know for sure that Verizon is actually throttling your bandwidth.

Using a VPN is the best way to stop Verizon throttling in 2022. Normally, your ISP sees everything you do online, whether you’re visiting a website, downloading a file, or accessing a streaming service.

And, if the Verizon is throttling your bandwidth due to high-consuming tasks like streaming or torrenting, you can fix this problem with a VPN. How it works is that the VPN service encrypts your data and stops Verizon from seeing what you do online.

Although it can tell that you’re using a VPN, it won’t be able to set bandwidth restrictions by filtering your data anymore.

Conclusion

In conclusion, if you’re one of the Verizon customers affected by ISP throttling, you can use a VPN to fix this problem. By encrypting your Internet connection, Verizon will no longer be able to set bandwidth limitations based on content filtering.

However, you should keep in mind that a VPN won’t work if Verizon restricts your network traffic because you reached your monthly data cap, regardless of what you do online. That’s because a VPN can’t hide your total data usage from the ISP.

If you frequently watch Netflix or use other streaming services, you might consider the Streaming VPN section.

Plus, visit our VPN Troubleshooting Hub to find out everything you need to know about VPNs.

Why Can’t I Access VPN Websites? Here are 6 Simple Solutions

It’s a common practice for some institutions to restrict users from accessing VPN websites. For instance, if you’re in a country that promotes censorship and citizen monitoring, you might be unable to open VPN websites.

The same applies to schools, where the staff has become aware that VPN can circumvent many limitations. Thus, the only obvious solution to this issue would be blocking VPN websites altogether.

No matter the cause, blocked websites are quite annoying, especially when it happens to the websites of the tools that can unblock other websites.

As a result, users flagged as impossible to access the next VPN websites:

  • NordVPN: Can’t access a website
  • ExpressVPN: Website blocked
  • Surfshark VPN: Can’t access website

Why can’t I access VPN websites?

If you’re not able to access any VPN websites then most probably your IP address was restricted from accessing them.

The main reason for VPN website censorship should be your Internet provider, as it can manage your network connection and restrict what content you’re seeing.

Issues like this one are frequent in different regions due to government laws or institutions’ limitations on Internet access.

Hence, if you’re unable to access VPN websites for some reason, it’s most likely due to your ISP actively blocking access to them.

Reportedly, various ISPs have flagged VPNs as adult content, which makes it tenfold easier to block them since adult content restrictions have been around for quite a while.

Can VPN be blocked?

As VPNs got smarter and smarter, so did network administrators. Just as VPNs have the power to bypass blocked websites, so do network administrators that can block VPN services.

However, the process is meticulous and requires advanced firewalls to detect VPN traffic. Just so you know, VPN traffic is quite easy to spot since it’s all encrypted.

Some VPNs offer obfuscation capabilities, which cleverly disguise VPN traffic as regular, unencrypted traffic. This makes it extremely difficult for ISPs and their fancy firewalls to detect and block VPNs.

Check out our list of VPN services that offer obfuscation features:

Product NameObfuscationCompany Name
ExpressVPNStealth serversExpress VPN International Ltd.
Private Internet AccessWireGuard VPN protocolKape Technologies.
NordVPNObfuscated ServersTefincom & Co., S.A.
Surfshark VPNCamouflage ModeSurfshark LTD
VyprVPNChameleon protocolGolden Frog GmbH
IPVanishScramble OpenVPN trafficStackPath, LLC
TunnelBearStealth VPNMcAfee, LLC
Windscribe VPNStealth VPNWindscribe Limited
VPN UnlimitedKeepSolid WiseKeepSolid Inc.

How can I access blocked VPN websites?

1. Try changing your DNS

ISPs may assign a specific DNS to you when you sign up for their services. The bad news is that this DNS is, more often than not, restricted in a wide variety of ways.

For instance, using an ISP-assigned DNS could yield lower speeds and higher ping or prevent you from accessing certain websites or online content.

Using a free DNS service such as Google’s free DNS, Cloudflare, or OpenDNS can boost the quality of your connection in terms of both speed and accessibility.

2. Ask a friend to purchase a VPN subscription

Even though the VPN website is blocked, that doesn’t mean you can’t use VPN services on your computer. You just need to have the client installation package and a valid subscription.

A blocked VPN website usually means there’s no way for you to purchase a subscription. That’s why we suggested you ask a friend, preferably one you trust and is outside the restricted network, to buy a subscription for you and hand you the credentials and setup files.

After you retrieve the installation executable and credentials, you can install the VPN on your computer and use it normally. However, please make sure you’re using an obfuscation-enabled VPN.

Remember that your ISP could still block VPNs that don’t obfuscate traffic.

3. Use VPN mirror websites

Some VPN services such as ExpressVPN offer mirror websites that can be accessed by users who can’t access the main website. For obvious reasons, we can’t post them here (your ISP could see and block them).
However, a simple query on your favorite search engine could help you locate them quickly. VPN mirror websites allow you to purchase a subscription and download the installation package.

Thus, you won’t have to ask your friends for any favor in this case.

4. Use Tor to circumvent website restrictions

If your ISP didn’t already think of blocking Tor, you could use it to access VPN websites. For this to work, you’ll need to download the Tor bundle and use its network to bypass your ISP’s VPN website blocking.

Note that you’ll probably need patience, as Tor generally runs very slowly. Even without ISP throttling, Tor is still quite lazy.

Certain VPN providers, such as ExpressVPN, offer onion websites you can access with Tor. These are hidden services and aren’t usually picked up by your ISP.

5. Use a proxy server

Although proxies have somewhat decreased in popularity since the uprising of VPNs, they are still quite capable of letting you reach restricted content.

Furthermore, proxy servers are perpetually changing, so there’s a good chance that servers you can find today won’t be there tomorrow. This usually means that your ISP needs to be extra thorough when blocking them.

The great news is that you can find many free proxy servers online. Thus, you may not even have to pay for using such a service.

6. Use specialized tools like Proxychains

If you’re really stubborn, you can probably find a huge selection of privacy-focused third-party tools on the Internet. Such a program is Proxychains, which is free to use and not difficult to configure.

The bad news is that you’ll probably have to find one that runs on Windows since Proxychains has been designed to run on Unix systems.

Can VPN unblock websites?

Yes. Generally speaking, if a website is restricted to a certain region, you can use a VPN to circumvent this geographical limitation. You launch the VPN, connect to a server located in the country where the service is available, and things should be a-ok.

The same goes for websites that are blocked in narrow organizations such as school or company networks. You use a VPN, select a server outside the restrictive network, and you should be able to access the websites. It’s quite simple, actually.

Thus, it’s safe to conclude that a VPN could help you access blocked websites without too much effort.

VPN websites can eventually be unblocked

To wrap it up, even if you discover that you can’t access any VPN websites on your network, things probably aren’t so grim. There are a bunch of workarounds that can help you reap all the benefits of having a VPN.

For instance, you can ask a friend to purchase a VPN subscription, use specialized third-party apps, and even change your ISP-assigned DNS.

That being said, check out our best VPNs that can help you protect your online privacy. Visit our guide on how to unblock VPN in schools, universities, and hotels to learn more about unblocking various services by using a VPN.

And if you can’t make a VPN work on your home connection, rest assured that it can often be fixed by applying a few easy steps.

In the comments section below, let us know whether the guide proved to be helpful to you.

Hola VPN not working? Unblock it With a Few Easy Steps

Hola VPN is touted as the first community-powered, or peer-to-peer virtual private network in which users assist each other to make information accessible for everyone on the internet.

Just like with VPN providers that advertise lifetime subscriptions, you should be careful when using free VPNs like Hola. The service has come under intense criticism after being discovered that the service sold its users’ bandwidth and acted as a botnet.

With this in mind, we highly recommend that you stop using the service and go with a legitimate and well-established VPN provider. But if you are willing to take the risk and keep using Hola, the following steps will show you how to fix Hola VPN not working on Chrome and other platforms.

In order to use Hola VPN, you have to install it then go to a website you want to visit, click the Hola extension icon on your browser, then select a country, and Hola VPN will switch your IP address to that country so you’re virtually browsing from there.

However, because of geo-restrictions and country censorships, VPNs have been blocked at one point or another, for example, when using Netflix and you find Hola VPN blocked.

If this is your situation, try the solutions below to unblock Hola VPN and continue enjoying anonymous browsing and internet usage on your computer.

Why is Hola VPN not working?

There are numerous reasons why Hola VPN might not work on your PC. The causes can be in relation to your VPN software or browser settings.

Another reason for this issue can be your firewall or antivirus that blocks the VPN connection because it detects unsecured activity.

That said, you should consider removing this VPN client from your system because it may be harmful as a security program.

You can as well find out how to use Hola VPN for Netflix to bypass local restrictions and watch your favorite movies.

What to do if Hola VPN is not working?

1. Preliminary checks

  • If you cannot access even when disconnected from the VPN, check your internet connection.
  • Check that you entered the correct user credentials – username and password for logins
  • Check your IP address for information such as your city or region (country) next to the location you selected. If it shows a location near you, it means you’re not connected to a server location associated with your VPN, so try connecting again.
  • Open the website you want to access, and click the Hola extension icon, then select the flag of the country you want to view the website from
  • Try forcing the site to reload by pressing CTRL and F5 (or SHIFT + REFRESH)
  • Clear your browser’s cache, including the cookies (typically under ‘Settings’ > ‘Privacy’ or press CTRL+SHIFT+DELETE on your keyboard
  • Close the browser, then open and try again
  • Disable other extensions to check if any of these is causing Hola VPN blocked problem
  • Uninstall Hola from the browser then go to hola.org and click Start
  • Disable other Virtual Private Server, proxy software, or other software that might conflict with Hola. These can include IE tab, Avast WebRep, Flash Blocker, and NoScript.
  • Test your Hola VPN via IP location site. This site shows the country you’re browsing from. Click Hola extension icon>Select Country and the IP location site will refresh and show the country you’re browsing from or any other country you choose.
  • Ensure that you have the latest version of your browser.
  • Disable your antivirus or firewall (at your risk) to see if they are causing the problem. Third-party app settings like your security software settings which sometimes block the PPTP and L2TP protocols, especially when your set higher than the normal level. Try connecting again, then, allow PPTP, L2TP and IPSec through your antivirus and firewall and re-enable the security software.
  • Check if your VPN account may have expired as this can cause connection or blockage issues.
  • Check your router settings if you’re connected to a WiFi router. Check for pass-through options for PPTP, L2TP, and IPSec, under Router Firewall/Security tab and enable them. If these options don’t exist, disable the router firewall and try again then reenable the firewall.
  • Download the latest version of your VPN.
  • Disable and enable the Hola extension

Hola browser not working

Hola VPN extension not working Chrome

  1. Close Chrome and open it again
  2. Move your mouse to the address bar (next to bookmarks) and drag the address bar to the left
  3. Click >> (more) icon at the top right side of the address bar
  4. Check if Hola icon is on the list
  5. Open Chrome extension settings – ensure Hola extension isn’t installed or download it from the Hola website
  6. Disable Hola and re-enable it again

Hola VPN not working Firefox

  1. Close Firefox and open it again
  2. Open Firefox Add-on settings. Ensure Hola extension is installed, or download from Hola website
  3. Move your mouse to Firefox settings button, then right-click and select Customize.
  4. Drag the Hola icon back to the address bar

2. Change your VPN to a more secure one

pia login

When Hola VPN doesn’t work, or you’re having trouble accessing certain websites, your best course of action is to start using a much more secure VPN that is not a disguised botnet.

You can change your VPN provider to Private Internet Access, which has thousands of servers all over the world. When connecting to a server, you will be assigned an IP address, which can be easily changed in case the IP is blocked.

This is where having multiple servers in a specific area can be of use, as this will give you the possibility to immediately reconnect and have a fresh IP address. Additionally, you are at risk of your IP being shared with anyone else.

Private Internet Access is constantly being updated and new servers are being added constantly. With a reach of over 45 countries, you can bypass geo-restrictions and protect your data at the same time.

Many users have reported that Hola VPN is not working on Chrome. This is due to more and more services blocking Hola users from their platforms.

Here are some of the features you can look forward to when you sign up to Private Internet Access:

  • Over 3300 servers in more than 45 countries
  • Easily mask your IP for private browsing
  • Block ads, trackers, and malware
  • Military-grade data encryption
  • Multiple VPN Gateways
  • Unlimited bandwidth
  • Strict no-log policy

Private Internet Access

This high-speed VPN can mask your IP and allow you to access blocked content easily.
Check price Visit website

3. Flush the DNS

This allows your computer to access your VPN’s DNS automatically, for the proper/correct entries. To do this:

  1. Click Start
  2. Click All Apps
    hola vpn blocked
  3. Select Accessories
  4. Type CMD in the search box, and right-click Command Prompt then select Run as administrator
    hola vpn blocked
  5. Type ipconfig /flushdns and press Enter. You’ll get a confirmation that says: Windows IP Configuration Successfully flushed the DNS Resolver Cache will be displayed

Has any of these solutions helped? Let us know in the comments section below.

Nintendo eShop Not Available in Region: 4 Ways to Access it

Is Nintendo eShop not available in your region? This is a common error that many have experienced, and if you encounter it, you won’t be able to download any content. Luckily, there are ways to fix this issue.

Why can’t I access the Nintendo eShop?

Nintendo eShop isn’t available worldwide yet, so you can access it in certain regions.

What to do if the Nintendo eShop is not available in my country?

1. Update account region

  1. In a web browser, visit accounts.nintendo.com.
  2. Enter your credentials.nintendo account login
  3. Click the User Information tab and then click the Edit button next to Profile.nintendo account edit user information
  4. Under Country /region of residence, select a country where the Nintendo eShop is available, such as the United States.nintendo account change country/region of residence
  5. Save changes.
  6. Go back on your Nintendo Switch and try to open the eShop. You may have to clear the app’s cache or log back into your account for the changes to apply.

2. Change your device country in Nintendo Switch

  1. Using your Nintendo Switch, go to the Settings area.
  2. Select System > Select Region.
  3. Set your region to an eShop support area such as The Americas.
    change Nintendo Switch region settings
  4. Open Nintendo eShop.
  5. When asked to enter a region, set the United States.
  6. Go to Location Settings and click Change.
  7. Set a ZIP code from the US (e.g. 10026). You can find valid US ZIP codes here.
  8. Save changes and see if you can access the Nintendo eShop now.

3. Switch your location with a VPN

  1. Sign up for a VPN with servers in eShop-supported countries. ExpressVPN is a reliable and easy-to-use choice.
  2. Download and install the VPN on your device.installing expressvpn
  3. Launch the VPN and connect to a server in the United States or another compatible country.expressvpn connect to us server
  4. Share your VPN connection.
  5. Connect your Nintendo to the Hotspot you created.
  6. Try to access Nintendo eShop now.

A VPN can hide your current location by giving you an IP address from another country.

If you connect your VPN to a location where the eShop is available, the app should work and become available to use on your Nintendo Switch.

ExpressVPN

ExpressVPN

Access the Nintendo eShop in just a few steps! Bypass region locks with ExpressVPN!
Check price Visit website

4. Create a new Nintendo account

  1. If none of the above options help you fix the region issue, go to the Nintendo website to sign up for a new account in a supported country.nintendo website login signup button
  2. Click the Sign up button to continue.signup button on nintendo website
  3. Enter your details and pick a supported location as your region of residence, such as the United States.nintendo account country united states
  4. Verify your email address to complete the signup.nintendo verify email
  5. On your console, login using this new account and check if you can now access the Nintendo eShop.

Which region is Nintendo eShop available in?

Currently, Nintendo eShop is available in Argentina, Brazil, Canada, Chile, Colombia, Mexico, Peru, and the United States, and most European countries.

While Nintendo eShop not available in region message appears for users in Indonesia, the Philippines, and Malaysia, it can also appear in any other country that isn’t on the list of supported regions.

If you haven’t managed to fix this issue, your only option would be to play Switch games offline.

There are many other issues you can experience on this console, and we wrote about Nintendo Switch error code 2122-2503 in our previous guides.

Valorant Packet Loss: 5 Ways to Get Rid of it For Good

Because Valorant can be played exclusively online, in some cases, there might be some issues when connecting to the game servers, such as packet loss.

If that’s happening to you, we’ll show you a few ways to fix it. You can also learn how to check packet loss in Valorant. Let’s get started.

How to fix packet loss in Valorant?

First, try restarting your router and check if there’s anything physically wrong with your setup (rundown cables, etc). Also, test your connection speed. Anything below 20 Mbps can result in lag & packet loss.

1. Restart the game client

Although it might disrupt your current game and affect your teammates, the benefits of fixing the packet loss might outweigh the temporary inconvenience.

Give it a try to see if it improves your connection and overall gameplay. Just press Alt+F4 and launch it again.

2. Use a trustworthy VPN service

  1. Get an ExpressVPN subscription plan.
  2. Install ExpressVPN on your computer and launch it.
  3. Log into your ExpressVPN account.expressvpn login
  4. Choose a server that’s closer to your physical location (closer = faster).expressvpn us servers windows
  5. Launch Valorant once more. Check if you still experience packet loss.

You can safely use ExpressVPN to reduce packet loss in Valorant, but this VPN has even more perks under the hood. Keep in mind that some servers can cause high ping, so always test Valorant ping if using a VPN.

For instance, it can help you improve in-game ping, circumvent geo-blocking, and stop ISP throttling in a jiffy.

ExpressVPN

ExpressVPN

If your ping is higher most of the time and you suffer packet loss give it a try with a reliable VPN service.
Check price Visit website

However, keep in mind that this packet loss VPN fix will only work if your ISP causes it by limiting your connection. A good VPN such as ExpressVPN can circumvent bandwidth throttling and improper traffic routing.

3. Update network drivers to their latest version

Tip icon Tip
For a quick and safe way to update your drivers, try using a tool like Fortect Driver Updater. It can scan for outdated or missing drivers that might affect your Valorant gameplay. With just a few clicks, you can update your network driver or all drivers at once.
  1. In the Start Menu type Device Manager.
  2. Identify Network Adapters and click it to expand.
  3. Right-click on the Network adapter and choose Update Driver.
  4. Select the Search automatically for drivers option.
  5. Wait for the process to find the best available drivers.
  6. Restart your PC after the process is complete.

4. Flush your DNS

  1. Type Command Prompt with Run as Administrator option.
    run as administrator option for command prompt
  2. In the Command main window, type in the following command and press Enter.

    ipconfig/flushdns
    ipconfig/registerdns
    ipconfig/release
    ipconfig/renew
    netsh winsock reset

5. Close any bandwidth-heavy apps

  1. Press Ctrl+ Alt+ Delete keystrokes on your keyboard.
  2. Choose Task Manager.
  3. Filter the results in the list by clicking the arrow on Network.
  4. Right-click on the draining apps and select End Task.

How to test packet loss in Valorant?

1. Use the game’s built-in option

  1. Launch the Valorant client.
  2. Log into your Riot account.
    Riot Client
  3. Update the game to its latest version.
  4. Click the gear-shaped button.
  5. Access the Video section of the configuration screen.
  6. Go to the Stats category.
  7. For the Packet Loss option choose between text, graph, or both.Enable packet loss stats in Valorant

That’s it, your packet loss will be displayed for you while you’re in the game. It’s not too complicated and displays only the packet loss percentage between you and the Valorant server.

2. Use Windows’ pathping tool

  1. Launch Valorant.
    valorant how to play valorant on windows 11
  2. Connect to a server in your region.
  3. Use third-party apps like Wireshark to trace the IP of the server.
  4. Launch an instance of CMD prompt.
  5. Type pathping x.x.x.x (replace x.x.x.x with server IP).CMD pathping
  6. Wait for the pathping test to finish.
  7. Check the hops for any traces of packet loss.

The second way of detecting packet loss in Valorant may take a while, so we don’t recommend it, especially considering that you’ll likely ruin other players’ experience.

More so, Riot Games servers might be difficult or downright impossible to trace. Using tracers yielded a request timeout in our case, which made us believe they’re not exactly out there for you to see.

What causes packet loss in Valorant?

Packet loss can stem from various causes, including WiFi use, poor Ethernet cables, and network congestion. Network congestion occurs when a network can’t manage the load effectively, leading to uneven resource distribution and packet loss.

One of the most common fixes we’ve discovered is simply restarting the game.

You can also start using a VPN, but this fix only works with network congestion or if your ISP throttles your bandwidth. Thus, you must ensure you get the cause right before purchasing a subscription.

Let us know which option helped you fix this issue.

How To Play Naruto Online On Your Browser

The Naruto series has gained massive popularity, so it’s no wonder to see various Naruto games on the market. However, did you know that you can also play some of these games in your web browser?

That’s right, many games can run in your browser, and today we’ll show you how to play them.

We know you are curious about how to play naruto online on your Chromebook or even how to play Naruto online on your Mac device, so you’re about to see just that.

Can you still play Naruto Online?

Yes, you still can, and we are about to show you precisely what you need to do on your end to make this happen right now.

All you need to do is carefully follow this guide, and you’ll be fighting your enemies in no time.

What browser can play Naruto Online?

For Naruto Online, you need to use the latest versions of the browsers like Firefox, Chrome, or Edge, as recommended by its official website.

Many people have been wondering how to play naruto online without flash, so pay close attention to what you are about to see next.

Quick tip:

For the best experience, you must have a good web browser optimized for gaming, such as Opera GX. It lets you limit the number of resources used, thus ensuring your PC runs smoothly even during intense gaming sessions.

The browser has a built-in Twitch integration, and thanks to the video pop-out feature, you can enjoy your favorite streams while multitasking.

Opera GX

Help Naruto become the best Hokage ever by playing via the world’s best web browser for gamers!

How can I play Naruto Online on Windows?

1. Naruto Online

  1. Go to Naruto Online website.
  2. Click the Play Game button.
    play game naruto browser game
  3. Choose a login method or create a new user account.
    user login naruto browser game
  4. After you log in, pick the server, and you’re ready.

2. Play on online game websites

  1. Visit your favorite online game website.
  2. Enter Naruto in the search bar.
  3. Now select one of many available games.
    naruto games naruto browser game
  4. Click on the Play button to start the game.

Can I play Naruto Online on mobile?

On mobile devices running on Android or IOS, you can play the games using the Puffin browser since it allows you to view the websites in desktop mode.

Playing Naruto games online is simple; in most cases, you won’t even have to sign up for a game to play it.

That is all you need to know on how to play Naruto online on your browser. You don’t have to be a science whizz to make it happen.

What is your favorite Naruto browser game? Let us know in the comments below.

The File Couldn’t Open in Protected View [Excel, Word]

Some MS Office users have said on Microsoft’s support forum that they can’t open Excel and Word files in Protected View.

For them, this feature has stopped working or The file couldn’t open in Protected View error messages might pop up.

Here is what one user had to say about this specific issue on the Microsoft Answers forums:

Recently it seems I can not open any Excel or Word files in Protected View. This was not a problem previously, but seems all of a sudden all files get hung up trying to open in Protected View; and I have to force quit the program.

This error usually arises for Excel and Word files that were attached to Outlook emails. For more information, you can read our guide on how to disable Word Protected View.

The issue can be due to antiquated DisplayLink adapter drivers. If you need to fix that issue, check out these potential resolutions for it.

Why am I stuck in Protected View?

microsoft 365 protected view

Protected view is a security measure in Word and Excel that prevents files from the Internet from being open in Edit mode. By doing so, the files won’t be able to compromise your PC.

You can disable this feature, but if the file is malicious it can compromise your PC, so only disable this feature if you really must and only with the files that come from 100% secure source.

How can I fix the Word and Excel Protected View error?

If you notice The file couldn’t open in protected view Microsoft Office 365, here are a couple of methods you can use to fix it.

1. Use the Stellar Repair software to fix the Protected View error

1. 1. Word File Repair Tool

The Word File Repair Tool from Stellar is the best software to use when you need to repair Word files that have been corrupted, without losing any of the data stored in them.

This amazing software can repair files in batches, which enables you to quickly go through a list of corrupted Word files without the need to waste any time.

When using this tool to repair your files, you should never worry about specific elements of your Word document, as this app repairs text, font, hyperlinks, headers, footers, bookmarks, etc.

Hence, in case you need to repair your corrupted MS Word files rapidly and without modifications in documents, you can go with Word File Repair Tool.

Word File Repair Tool

Keep your Word files organized and clean corrupted documents.

1. 2. Repair Excel Tool

This powerful software is extremely useful for repairing Excel Attachments from Outlook, and also any corrupted Excel files on your PC.

As in the case of its Word counterpart, this software produced by Stellar also offers you batch processing of files, while also recovering any tables, charts, chart sheets, cell comments, images, formulas, sorts, and filters.

This software also offers full compatibility with all MS Excel versions. If you’re getting The file couldn’t open in Protected View error in Excel 2016, 2019, or any other version, this tool should help.

You can take advantage of this service to repair broken Excel files and recover all datasets you need, all using Excel Repair Tool.

Repair Excel Tool

This Excel file repair program converts a corrupt Excel file into a fresh blank Excel file.

2. Update the DisplayLink driver to fix the Protected View error

  1. Visit the Synaptics driver section.
  2. Locate the latest driver and click on Download.
    displaylink driver
  3. Once the driver is downloaded, run the setup file to install it.

You can easily update the DisplayLink driver by using powerful and easy-to-use software that will correctly update drivers without other issues.

It’s much more practical to approach specialized methods when you have to update the display or any other driver on your PC to protect it from critical mistakes that can lead to system issues.

So if you need to efficiently update the latest version of the DisplayLink driver and resolve this unfortunate error, it’s a good idea to use the best driver update software on the market.

    3. Disable Protected View to fix the File couldn’t open in Protected View error

    If you are getting this error, you can disable Protected View altogether from the app’s settings.

    After you disable Protected View in Excel or Word, the issue won’t appear anymore, but keep in mind that disabling this feature comes with security risks.

  1. 1. Open your MS Word or Excel application.

  2. 2. Next, select the File tab.

  3. 3. Click Options to open a Settings window.

    ms word settings
  4. 4. Select Trust on the left side of the window.

  5. 5. Click the Trust Center Settings button.

  6. 6. Select Protected View on the left of the Trust Center window.

    protected view options word
  7. 7. Then deselect all the selected Enable Protected View checkboxes.

  8. 8. Press the OK button to leave the window.

4. Disable hardware graphics acceleration

  1. To disable hardware graphics acceleration, open Excel or Word.
  2. Click the File tab.
  3. Then click Options on the File tab to open that window.
  4. Select the Advanced tab on the Options window.
    Disable hardware graphics acceleration option the file couldn't open in Protected View
  5. Select the checkbox for the Disable hardware graphics acceleration option.
  6. Press the OK button to exit the window.

If you’re getting The file couldn’t open in Protected View error with Outlook attachments, then this solution might be helpful.

5. Unblock the Excel or Word document

  1. Click the File Explorer button on Windows 10’s taskbar.
  2. Open the folder that includes MS Word or Excel files with the file couldn’t open in Protected View error.
  3. Then right-click a World or Excel document and select Properties to open the window shown directly below.
    properties settings
  4. Select the Unblock option.
    Unblock option the file couldn't open in Protected View
  5. Press the Apply button.
  6. Click OK to exit.

Those are some of the resolutions users have fixed Excel and Word Protected View errors with.

Disabling Protected View will probably resolve the issue for most users, but you can try the other fixes if you need to keep Protected View enabled.

This isn’t the only issue that users reported, and many users reported that they are unable to create new documents in Office 365.

Don’t hesitate to let us know if you found a different way to fix this problem on your PC.

Hamachi Server Not Working with Minecraft: 6 Ways To Fix It in 2026

Some players have said they can’t connect to the Minecraft servers while utilizing Hamachi.

This can be caused by a weak Internet connection, Minecraft not being updated to the latest version or because Windows Firewall gets in the way.

How can I fix Hamachi not working with Minecraft?

1. Update Minecraft to the latest version

  1. Open your Minecraft Launcher.
  2. Click Options in the Minecraft Launcher window.
  3. Press the Force update button shown directly below.
  4. Then select the Done option.

Note: If you’re playing with multiple users, they must utilize the same Minecraft and Hamachi versions. So, you might also need to ask the other players to update the required software.

2. Check your Windows firewall settings for jawaw.exe

  1. Click the Cortana search box.
  2. Enter firewall in the search box.
  3. Choose Windows Defender Firewall.
    The Windows Defender Firewall applet hamachi not working minecraft
  4. Click Allow an app or feature through Windows Defender Firewall to open the options shown directly below.
    The allow app settings hamachi not working minecraft
  5. Press the Change settings button.
  6. Select the Private and Public checkboxes for jawaw.exe.
  7. Click the OK button.

3. Add LogMeIn Hamachi to your firewall’s exceptions

  1. Open the WDF Control Panel applet as outlined for the resolution directly above.
  2. Click Allow an app or feature through Windows Defender Firewall.
  3. Click the Change setting option.
  4. Press the Allow another app button.
    Add an app window hamachi not working minecraft
  5. Click the Browse button.
  6. Select the LogMeIn Hamachi.exe in the Browse window.
  7. Select LogMeIn Hamachi on the Add an app window.
  8. Click the Add button.
  9. Then click OK to exit.

4. Turn off the Windows firewall

  1. Open the WDF Control Panel applet.
  2. Click Turn Windows Defender Firewall on or off to open the settings shown directly below.
    Turn off Windows Defender Firewall options hamachi not working minecraft
  3. Select the Turn off Windows Defender Firewall radio buttons before playing Minecraft.
  4. Click OK to close the window.

If you’re utilizing third-party antivirus software, right-click the system tray icon for your antivirus utility.

Then look for and select a disable or turn off the utility’s context menu option.

Your antivirus software might also include options to select a specific period to disable its shield.

Avast Antivirus context menu hamachi not working minecraft

Note: Turn Windows Defender Firewall or your antivirus utility back on after playing Minecraft.

5. Adjust Hamachi’s IPV4 Interface metric value setting

  1. Press the Windows + S keyboard shortcut.
  2. Type network in the search box.
  3. Click View network connections to open the applet in the shot directly below.
    Network Connections applet hamachi not working minecraft
  4. Right-click the Hamachi network and select Properties.
    Properties window hamachi not working minecraft
  5. Select Internet Protocol Version 4 on the Networking tab, and click the Properties button.
  6. Click Advanced on the General tab to open the window in the shot directly below.
    Interface metric box hamachi not working minecraft
  7. Deselect the Automatic metric checkbox if required.
  8. Enter one as the new value in the Interface metric checkbox.
  9. Click the OK buttons to close the windows.

Note: All the other players joining your Hamachi server will need to change the metric value to one.

6. Enter your IPV4 address in the server.properties file

  1. Press the Windows key + R keyboard shortcut.
  2. Type cmd and press the Enter key.
  3. Input ipconfig in the Command Prompt, and press the Return key.
    The ipconfig command hamachi not working minecraft
  4. Note down the IPV4 Address listed under Wi-Fi.
  5. Open your Minecraft game folder in File Explorer.
  6. Open the server.properties file within the Minecraft installation folder.
  7. Enter your IPV4 address just after the = sign for server-ip=.
  8. Then save the file as serverproperties (without the dot in the file title).

Players have confirmed the solutions above can fix Hamachi not working with Minecraft. In addition, playing Minecraft without any mods might also help resolve the issue.

Let us know if you found this guide helpful in the comment section below.

FIX: Course Cannot be Played Because Flash is Unavailable

Sometimes you might encounter the following message on certain websites:

This course cannot be played because Flash is unavailable in your browser

The message usually appears if Flash isn’t installed or enabled on your web browser. In today’s article, we’ll show you how to fix that.

Which browsers still support Flash?

With the exception of Opera One, no major web browsers currently offer support for the well-known Adobe Flash Player.

Of course, this includes Chrome, Firefox, and Edge. However, there are a few lesser-known browsers that still offer support for Flash, among which are Puffin, FlashFox, Dolphin, and Kiwi.

Opera One

Access web content of any kind that requires Flash Player with this highly flexible browser.

How do I fix the Flash is unavailable in your browser error?

1. Use a browser that still runs Flash content

  1. Click the Opera One icon in the top left and choose Settings.opera settings
  2. Go to Site Settings.opera site settings
  3. Select Flash.
  4. Now enable Allow sites to run Flash option.flash opera

2. Enable Flash in your browser

2.1. Edge

  1. Open Edge.
  2. Go to Settings and more, then Settings.edge settings
  3. In the left navigation, select Cookies and Site permissions.site permisions
  4. In Site permissions, select Adobe Flash.
  5. Set the toggle on for the Ask before running the Flash option.

2.2 Chrome

  1. Open Chrome
  2. Click on the three dots in the top right corner and then Settings.chrome settings
  3. Go to Advanced, then Content Settings.chrome Content settings.
  4. Select Flash.flash player chrome browser
  5. Toggle on the button next to Ask first (recommended).

2.3. Safari

  1. Open Safari.
  2. Choose the website you want to enable Flash on.
  3. Click on Safari and then Preferences.safari preferences
  4. In the Websites tab, go to Plug-ins, and select the box next to Adobe Flash Player.flash player safari

2.4. Firefox

  1. Open Firefox.
  2. In the browser’s address bar, type: about:addonsfirefox about config
  3. Then, select the Extensions tab and activate Flash Player.firefox flash

2.5. Internet Explorer

  1. Open Internet Explorer.
  2. Click on the Options button in the top right corner, and then Manage Addons.internet explorer flash
  3. Select Toolbars & Extensions, click on Shockwave Flash Object, and press the Enable button.enable flas internet explorer

Remember that you’ll need to manually activate Flash on each website, similar to the previous section.

Opera One is grand for all multimedia content due to its low hardware requirements, and with the built-in ad blocker, Opera One will render your pages faster than ever.

As for multimedia, it’s worth mentioning that the browser has a pop-out video player that can come in handy for multitasking.

The browser allows you to customize your home page with RSS feeds, allowing you to keep track of the latest news.

Free VPN is also available, and it comes with unlimited bandwidth. In addition, the browser uses the Chromium engine and even works with Chrome extensions.

Opera One

Run Flash content from any website without any issues with the help of this fast and ultra-modern web browser.

In case you didn’t know, Adobe ceased support for Adobe Flash content on January 12, 2021, which is the main reason you may be getting this error.

The entire Internet content has migrated to HTML5, and no more Flash content is available online.

Seeing a message such as Flash is unavailable in your browser means you will need to install it yourself, as the browser no longer has it by default, like in the old days.

Flash player not working in Chrome is another prevalent issue, but after reading our guide, you will better understand the situation.

However, there is a workaround if you still have courses saved in flash format (.SWF), which would be to use Opera One as a web browser to play locally-stored flash content.

How To Install Ultimate Crosshair OPK In Overwolf

Crosshair use in online games is a debatable topic that may go on for long. However, publishing platforms like Overwolf may not support third-party overlays, citing security reasons.

Now, if you want to know how to install Ultimate Crosshair in Overwolf, this article you need.

Several users have reported that they cannot install Ultimate Crosshair in Overwolf in the Reddit community.

any Crosshair Overlay in Overwolf works?
Ultimate Crosshair is dead? What now?

Since Overwolf has banned the use of Ultimate Crosshair, you cannot directly install it from the Overwolf App Store. In this article, we have listed two methods to install Ultimate-Crosshair in Overwolf manually.

Does Overwolf have a crosshair overlay?

Anything that creates an overlay on top of your game could be bannable if the company in question does not explicitly permit it.

So we’re going to go with no, it doesn’t have one anymore, but it can if you know exactly what tweaks you need to make.

Is crosshair overlay cheating?

Yes, it is mainly considered cheating in most gaming communities, so think about that and the work you’ve put into your account before getting banned.

How do I install Ultimate Crosshair OPK in Overwolf?

1. Manual installation in Overwolf

  1. First, download and install Overwolf.
  2. Download the latest release of Ultimate Crosshair as OPK (Origin Pack File) from Github.
  3. Launch Overwolf and sign in to your account.login overwolf
  4. Click on Settings (the gear/wrench icon on the dock).
  5. Open the Support tab and then Development Options.overwolf
  6. Now click on Install extension.
  7. Please navigate to the location where the OPK file is stored and select it.
  8. Click on Open and proceed with the installation.

2. Install Ultimate Crosshair as developer

If the manual installation did not work, try to install Ultimate Crosshair as a developer in Overwolf.
Make sure you have the latest version of Overwolf installed.

  1. Download the Ultimate Crosshair repo from Github to your computer.
  2. Extract the archive to get a folder.
  3. Launch Overwolf and log in.log in overwolf
  4. Go to Settings.
  5. Select the Support tab and then click on Development Options.support tab overwolf
  6. Click on unpacked Load extension.overwolf unpack
  7. Navigate to the location where the downloaded Github repo is stored. Select the repo.
  8. Make sure you select the folder and not the files inside.

That’s it. Following this article’s steps, you can install Ultimate Crosshair in Overwolf. Next, make sure you can use Crosshair while playing a game.

Anti-cheat systems incorporated by many game developers may flag it as a cheating tool, thus suspending your account. So, think twice before using any Overwolf custom crosshair.

Yes, an Overwolf crosshair overlay could be helpful, but it could also get you into a heap of trouble.

Do let us know your favorite Overwolf crosshair overlay for online games in the comments.

How To Unsync OneDrive from PC [4 Easy Ways]

OneDrive is one of the big three cloud storage services along with Google Drive and Dropbox.

Windows 10 includes a built-in OneDrive app that syncs your OD folders and files so you can open them from File Explorer.

However, there are a few ways to unsync OneDrive if you don’t need to keep the cloud storage harmonized with Windows 10 at all times.

How to unsync OneDrive in Windows 10?

1. Uninstall the OneDrive App from Control Panel

  1. Press the Win key + R keyboard shortcut to open Run.
  2. Enter appwiz.cpl in Run’s Open text box and click OK to open a Control Panel window.
  3. Now scroll down to the Microsoft OneDrive app. Alternatively, enter OneDrive in the search box as shown directly below.
  4. Select the OneDrive app, and click its Uninstall button.uninstall onedrive control panel
  5. Press the Yes button to provide further confirmation.

If you really don’t need the OneDrive app syncing at all, and prefer to open documents via browser, you can uninstall the app in some Windows 10 versions.

Since the Windows 10 Creators Update rolled out, you can uninstall the OneDrive app via the Programs and Features tab on the updated platform. You can now uninstall the OD app as shown above.

2. Uninstall OneDrive with the CMD

  1. Press the Cortana button, and enter cmd search box.
  2. Then right-click Command Prompt and select Run as administrator.run cmd as admin
  3. Enter taskkill /f /im OneDrive.exe in the Prompt and press Return to close the OneDrive app.
  4. To uninstall OneDrive on a 64-bit Windows platform, enter the command shown in the snapshot directly below and press Return.uninstall onedrive with cmd
  5. To remove OneDrive from a 32-bit system, input the command shown below and press Enter.
uninstall onedrive with cmd

You can’t uninstall OneDrive as outlined above in earlier Windows 10 builds. Nevertheless, you can still uninstall the OneDrive app in Windows 10 versions that predate the Creators update.

Instead, you can uninstall the cloud storage app with the Command Prompt.

    3. How to unsync OneDrive with GPE

    There are a few ways that you can unsync OneDrive without uninstalling the app. Windows 10 Pro and Enterprise include the Local Group Policy Editor with which you can disable OD syncing instead.

  1. 1. Enter gpedit.msc in the Windows search box, and select the first result to open the document.

    open gpeditmsc
  2. 2. Select Computer Configuration and Administrative Templates from the left pane.

  3. 3. Press twice on the Windows Components and OneDrive folders.

  4. 4. Then double-click on the Prevent the usage of OneDrive for file storage setting on the right of the Group Policy Editor window.

    unsync onedrive windows 10 gpedit
  5. 5. Select the Enabled radio button.

  6. 6. Then press the OK button.

  7. 7. To switch the cloud storage app back on when required, select the Not Configured radio button for the Prevent the usage of OneDrive for file storage setting.

4. How to unsync OneDrive using the Unlink account option

  1. Right-click the OneDrive notification area icon and select Settings.
  2. Then select the Account tab shown in the snapshot directly below.onedrive account settings
  3. Click Unlink this PC to open the dialog box window directly below.
  4. Press the Unlink account button to unsync your OD files.unlink account on this PC onedrive
  5. You can also uncheck the Start OneDrive automatically when I log in to Windows check box on the Settings tab.
  6. Press the OK button on the Microsoft OneDrive window.

If you don’t have the Group Policy Editor on Windows, you can still unsync the OD app by selecting its Unlink account option as shown above.

Bonus: How to unsync OneDrive only for specific folders

You can also choose to unsync specific files and folders, which is much more flexible than unsyncing all your OneDrive storage in Windows.

Then you can free up some hard drive space by unsyncing selected files and folders, but keep some of OneDrive synced with Windows 10.

This is how you can selectively unsync OD files and folders.

  1. Right-click the OneDrive system tray icon and select Settings.
  2. Select the Choose folders tab, which includes a Choose folders button.Folders you choose will be available on this PC onedrive
  3. Press the Choose folders button to open a list of your OneDrive folders and files.
  4. Uncheck the Sync all files and folders in my OneDrive option
  5. Then you can uncheck the check boxes beside the folders and files you don’t need to sync.
  6. Press the OK buttons to close the OneDrive windows when you’ve deselected the file and folder check boxes. Your OneDrive File Explorer folder will no longer include the unsynced folders and files.

So, you can unsync OneDrive by uninstalling the app, selecting the Unlink account option, or pressing the Choose folders button.

Unsyncing OneDrive files and folders will free up hard drive space for new software. Thus, it’s worth unsyncing documents and images that you seldom open.

5 Best Browsers That Support Kerberos Authentication

There are several browsers in the market that users download and install on their devices. However, the difference between browsers is the features they have to offer their users. Some browsers target specific users like developers, which means they contain tools that are useful for developers.

Also, there are browsers for regular users for normal daily activities. Hence, software like Kerberos authentication requires some browser features before assigning them the Kerberos browser support.

The Kerberos authentication service is a protocol that authenticates requests between a trusted host and an untrusted network. It securely validates the transmissions between a client that is the host across a server that is not reliable, e.g., the internet.

However, Kerberos is software that protects your requests across untrusted networks from threats and hijacking. Hence, authentication services like Kerberos will secure your requests across networks, giving you safe access.

Nevertheless, browsers can use Kerberos authentication to secure your browsing activities. However, not all browsers are reliable for their services.

How does Kerberos authentication work in the browser?

Kerberos Authentication is an inbuilt security protocol for Microsoft Windows. However, it can also use in browsers. Hence, you need to configure your browser to use it. It means you’ll give your browser an active directory integration.

Kerberos configuration differs in different browsers like Chrome, Firefox, and Microsoft Edge. It authenticates service requests between the hosts and clients through an untrusted network.

Do all browsers support Kerberos authentication?

However, what determines whether the service supports your browser or not is how many features your browser can offer. Features like security and privacy are part of the requirements that make a browser good for Kerberos.

Nonetheless, Kerberos supports almost every browser. However, not all browsers can function properly with it. As we go further into this article, we’ll go through our list of the best browsers that support Kerberos authentication.

What are the best browsers that support Kerberos?

Opera – Trusted for security

Opera is one of the best and oldest browsers in the market. It has been through many improvements over the years. However, Opera comes with an inbuilt integrated messenger that allows users to use their social media platforms to reach out to their friends.

Also, it has the best internet security system that protects users browsing information from malware, hijackers, and viruses.

However, Opera is a browser that Kerberos supports because of its strict security. More so, note that Kerberos only supports the latest version of the Opera browser. Hence, using an outdated browser can cause difficulties with Kerberos.

Opera

Encrypt your browsing data with increased security of Kerberos and an effective VPN.

Google Chrome – Best for browsing speed

One of the best browsers that support Kerberos is Google Chrome. It runs on the Chromium code, and it comes with many features. However, Chrome uses advanced technology to secure browser information sent from different servers, which is a good feature for Kerberos.

Furthermore, Google Chrome has an inbuilt Ad Blocker that prevents ads from popping up in the middle of your browsing experience. It allows you to focus on what you are doing at the moment. Also, it loads websites with a fast speed and smoothly.

Another feature of the Chrome browser is a high-security system that protects user browsing information from external threats and intruders. Also, it offers a good tab manager that allows you to arrange and organize your tabs. Moreover, Chrome has a repository where users can get extensions to improve their browsing activities.

⇒ Get Google Chrome

Safari – Ideal for Mac users

Safari is a fast browser that helps you browse the internet swiftly and smoothly without interruptions. It is the default browser for Apple devices. Safari has a high-standard browsing system that allows its users to enjoy the latest features for browsers. It uses an advanced security system, one of the browsers’ requirements that support Kerberos.

Moreover, the Safari browser has a good speed that helps you to load websites quickly and smoothly. Unlike other browsers, Safari has the best syncing system that helps you safely access your browsing data across several devices.

Furthermore, users can download and install Safari across different operating systems e.g, macOS, Linux, and Windows.

⇒ Get Safari

Microsoft Edge – Great for Windows users

Edge is a browser by Microsoft. It is one of the best browsers to use with Kerberos. However, Microsoft Edge has many features that make it a perfect browser that supports Kerberos.

Some notable features of Microsoft Edge are easy navigation and a customizable user interface that helps you enjoy your browsing sessions.

Also, it has an inbuilt Ad Blocker that prevents ad pop-ups and an inbuilt VPN service that helps you surf the internet without geolocation difficulties.

⇒ Get Microsoft Edge

Firefox – Packed with great features

Firefox is a fast and reliable browser that houses several features. It has a lot of extensions that users can install on their browsers for a better internet experience. Hence, it is one of the browsers that support Kerberos.

Furthermore, it has a customizable feature that allows users to configure their display. It runs on the Chromium code, which helps it to perform faster.

However, Kerberos supports the IE mode of Firefox and the latest versions.

⇒ Get Firefox

How do I enable Kerberos in my browser?

  1. Press the Windows key, search for the Control panel, and launch it.
  2. Select Internet Options, and click on Advanced under the Security tab.
  3. Select the Enable Integrated Windows Authentication option.
  4. Click on Local Intranet, then select Custom level.
  5. Select Automatic logon only in Intranet zone under the User Authentication/Logon tab, then click OK.
  6. Click on Sites, then tick all the boxes.
  7. Click Advanced, add the BMC Helix SSO service website to the local zone, then click Add.

In conclusion, users can read through the five best browsers that support XML [view and edit XML online]. However, users should update their browsers to the latest version to prevent the browser not sending Kerberos token errors.

Also, users can read through our articles about the 20 best browse with the highest support for HTML.

Leave your suggestions and questions in the comments section below. We’d like to hear from you.

7 Ways to Fix There Was a Problem Playing This Video Error

One of the most appreciated things in Google Drive is its video-playing feature. Firstly, it supports numerous video file types: MPEG4, 3GPP, MOV files,  AVI, WMV, and more.

Secondly, it’s so easy to use: you upload your videos and then double-click to play. There are other advantages, like allowing you to upload videos of any resolution.

However, various issues crop up sometimes when attempting to watch uploaded videos. It’s particularly annoying to receive the message Oops there was a problem playing this video when attempting to access a video you just uploaded.

Well, what is most interesting is that it’s an error caused by sometimes minor problems like a user signing into Google from a different user account.

In such cases, the error is quite simple to troubleshoot. But before going deeper into how to solve this error, let’s look at what triggers this message.

Why does it say this video Cannot be played?

We already mentioned this fault because you could have signed in to Google Drive using multiple Google accounts.

Here are more of its other possible causes:

  • Overloaded Cache/cookies – Caused by a high amount of content in your browser’s cache.
  • Browser Extensions – Caused by problematic add-ons installed in your browser.
  • Malware: Caused by infection with a virus, worm, or even a Trojan horse.
  • Damaged Browser – Caused by corrupted software installation files.
  • Presence of Unwanted Third Party Programs – Caused by Potentially Unwanted Programs (PUP) installed apps that compromise your security/privacy.
  • Incompatible Video – Caused by Google Drive video format incompatibilities.

This being said, let’s see how you can fix the Couldn’t preview file there was a problem playing this video error in Windows 10, and start using Google Drive flawlessly right away!

Quick Tip:

If you need to have improved video results and uninterrupted game time, then the best solution is to use a dedicated game browser.

Opera GX has been built with a variety of excellent features in order to create a better user experience. You can choose from the browser a range of topics, wallpapers, and colors.

Opera GX

Resolve web video playing issues using this optimized browser for streaming and flawless navigation.

How do you fix there was a problem playing this video?

Before we head to the slightly complex solutions, here are a few quick ones you can try:

  • Make sure your connection is working fine, and the Internet speed is high.
  • Open the video in a new tab or window.
  • Restart the computer and the modem/router. Also, unplug the power cable for the modem/router, and turn it back on after 1-2 minutes.
  • Switch to Incognito or Private browsing mode. For Chrome, Edge, and Opera, press Ctrl + Shift + N, while for Firefox, the keyboard shortcut is Ctrl + Shift + P.

If none work, move to the fixes provided next.

1. Scan your PC for malware

Don’t also forget to scan your PC for viruses and malware. Use an updated and powerful antimalware that runs deep scans and doesn’t miss a corrupted video file.

A video file might get infected with viruses or spyware, so the Google Drive video player is unable to play it. We advise you to use 
antimalware software entirely compatible with your PC.

Antimalware software is highly rated in the cyber-security industry and provides your PC full protection. Regarding security, these solutions are defined by their high levels of malware detection, greater speed, and increased performance.

A professional malware remover searches your PC for viruses, worms, trojans, rootkits, and other malicious software and removes them from your device completely.

As a suggestion, you should consider ESET HOME Security Essential as a lightweight antivirus that detects any malware or ransomware attacks and prevents phishing threats from stealing your private data.

2. Check the video format

Not every video format load on all devices. You should thus verify that your video isn’t in one of the unsupported formats.

The supported types include .WEBM, .MPEG4, .MOV, .AVI, .3GPP, .MPEG, .MPEGPS, .FLV, .WMV, and .OGG.

You may have to convert your incompatible video file to one of the types accepted by Google Drive.

Additionally, Google Drive allows a maximum playback resolution of 1920 x 1080, so any video exceeding this won’t play.

If the video you’re trying to play isn’t the one listed above, you can use an awesome tool called WinX HD Video Converter Deluxe to convert your video to any of these formats.

It has a modern UI, it’s easy to use, and the results will be professional after utilizing it.

WinX HD Video Converter Deluxe can help you download videos, reduce their size, cut, and merge clips, and even easily convert 4K UHD videos.

WinX HD Video Converter Deluxe

Use the best converter tool to transform any video into an accessible format with just a few clicks!
Free trial Visit website

3. Check your Google Accounts settings

  1. Visit Google.com and click on your profile pic.google-profile there was a problem playing this video
  2. Click each unwanted account under your current one, then choose Remove.

An alternative solution to multiple accounts

  1. Right-click on the video, then select the Get shareable link option.get-shareable there was a problem playing this video
  2. Now Open a new browser tab.
  3. Paste the link then press Enter.

4. Clear browser cache and cookies

Google Chrome

  1. Open Chrome then use the following keyboard shortcut to access the Clear browsing data menu: Shift + Ctrl + Delete and select All time as the time range.all-time-chrome images not loading in chrome
  2. Checkmark the Cookies other site data and Cached images and files options.cookies-and-cache-chrome images not loading in chrome
  3. Click Clear Data. The There was a problem playing this video issue will be resolved.clear-data images not loading in chrome

Edge

  1. Open Edge then click the three dots menu to access Settings.settings-edge-option there was a problem playing this video
  2. Next, go to Cookies and other site permissions followed by Manage and delete cookies and site data.cookies-manage-edge there was a problem playing this video
  3. Select See all cookies and site data.
  4. Click Remove all and select Clear.remove-clear there was a problem playing this video

Mozilla Firefox

  1. Start Firefox then tap the hamburger menu icon from the top right corner and navigate to History.firefox-history twitch error 4000
  2. Click Clear Recent History.clear-recent-firefox twitch error 4000
  3. Click the Time range dropdown menu and select Everything.everything-firefox twitch error 4000
  4. Select anything you want to clear from the History and Data sections. It is recomended to check all the boxes except Active logins.delete-data twitch error 4000

5. Reset the Google Chrome settings

  1. Resetting Google Chrome will turn off all its extensions. Users can reset the browser by clicking on the three-dot menu followed by Settings.chrome-settings windows 10 blocking chrome install
  2. From the left menu select Reset and clean up then click the Restore settings to their original defaults option.restore-settings windows 10 blocking chrome install
  3. Click Reset settings. That’s it! reset-settings-yes windows 10 blocking chrome install

6. Check your browser extensions

Chrome

  1. Open Chrome and click the three-dot menu then go to More tools followed by Extensions.chrome-extensions=button salesforce not loading in chrome
  2. Here, turn off your extensions one by one by clicking the toggle button next to them, then check Salesforce to see which one is buggy.turn-off-ext salesforce not loading in chrome

Microsoft Edge

  1. Open Microsoft Edge and select Extensions under the three-dot menu.edge-ext there was a problem playing this video
  2. Next, select Manage extensions.manage-ext-edge there was a problem playing this video
  3. Here, toggle off your extensions one by one and check whether There was a problem playing this video issue is gone.

Mozilla Firefox

  1. Open Firefox and click the hamburger menu followed by Add-ons and themes.add-ons-firefox confirm form resubmission err_cache_miss
  2. Click the toggle button next to one of your extensions in order to turn it off then check whether the There was a problem playing this video issue is gone.toggle-off-ext-firefox confirm form resubmission err_cache_miss

7. Uninstall and reinstall your browser

  1. Open the Start menu by pressing Windows, then search for the browser you need to remove.
  2. Right-click the result then choose Uninstall. uninstall-chrome-w10 there was a problem playing this video
  3. Head to the browser’s website and download it again.

How do I recover a video that failed to load?

When you try to upload your videos or any other type of data to a program, you should always have a backup of your videos and data.

You also have the option of making use of one of the top five file recovery programs available for PC.

Alternatively, you can look at the best deleted file recovery software [Windows 10/11 & Mac] to recover your videos successfully.

Before you go, you should know that error code 232001 is rather common when streaming videos, but we have a guide that tackles this issue. We also have a guide on No valid sources are available for this video error, so feel free to visit it.

Following these steps, you should be able to fix the error stopping your video from playing. Let us know which solution worked for you by leaving us a message in the comments section below.

Twitch Not Connecting To Youtube/Blizzard/Steam [2026 Guide]

Users worldwide claimed that Twitch is not connecting to YouTube/Blizzard/Steam and if it’s happening to be in the same boat, you should read this guide completely.

Twitch is one of the most popular streaming platforms for gamers. It is a reliable and easy-to-use tool even for not very experienced users.

A connectivity problem in this app might have various causes, and today we will show you what to do if you encounter this issue.

Before anything else, let’s take a look at some of the most common reasons why this error can occur, then jump into the list of solutions for Twitch connections not working.

Why is Twitch not connecting to YouTube/Blizzard/Steam?

  • Antivirus are blocking the connection – This one seems to be one of the most serious problems. Fortunately, we have the best solution to perform an antivirus scan. To discover it, make sure you keep on reading.
  • Temporary bugs – In this case, we recommend logging out and logging back in the apps that you’re using. In addition, you can also restart the webpage.
  • Cache, cookies and browser history are blocking the connection – This one can be solve in a couple of minutes by clearing all of them. You’re going to find how you can do it later in this guide.

What can I do if Twitch is not connecting to Blizzard?

1. Log out and log back in

1.1 Twitch

  1. Open the Twitch browser version click on your profile image, from the upper right corner of the window.
  2. Now, click on Log out.
  3. After you logged out, enter your Twitch credentials and click on the Log in button.

1.2 YouTube

  1. Open YouTube click on your profile image, from the top-right corner of the page.
  2. Select Sign out.
  3. Now, click on the SIGN IN blue button.
  4. Choose you Google account and log back in. This way, the Twitch failed to connect to Youtube issue will be resolved.

1.3 Blizzard

  1. If you can’t connect Blizzard to Twitch, open Blizzard click on your Blizzard nickname from the top-right corner of the page.
  2. Now, click on Log out.
  3. In the upper right corner, click on My Account.
  4. Now, click on the Log in button.
  5. Enter your Blizzard credentials, then click on Log in.

1.4 Steam

  1. If you can’t connect Steam to Twitch, open Steam click on your Steam username.
  2. Choose to Logout.
  3. Now, click on login.
  4. Enter you Steam credentials, then click on Sign in. This way, the Failed to connect. please try again. Twitch Steam error will be fixed.

2. Restart the webpage

  1. Close your browser by clicking on the X button from the upper right corner of the page.
  2. Now, use the following keyboard shortcut to open Task Manager: Ctrl + Shift + Esc.
  3. Look for your recently closed browser, and if you find any related processes, click on them, then on the End task button.google-end twitch not connecting youtube blizzard steam
  4. Open again your browser and the apps that you want to use.

Sometimes, a simple restart of your webpage can solve this issue. If not, try the solution below.

3. Clear browser cache, cookies, and history

1.1 Google Chrome

  1. Hit the Windows key, type Chrome, then open the first result.
  2. Use the following keyboard shortcut to open the Clear browsing data menu: Ctrl + Shift + Delete.
  3. Select All time as the time range.
  4.  Now, checkmark all the boxes.
  5. Click on the Clear Data button.

1.2 Mozilla Firefox

  1. Press on the Windows key, type Firefox, then click on the first result.
  2. Click on the 3 horizontal lines button from the top right corner.
  3. Navigate to History.
  4. Click on Clear Recent History.
  5. Select the Time range dropdown menu and select Everything.
  6. Checkmark all the boxes from the History and Data sections, then hit the OK button.
  7. Now, go again to the Firefox general menu.
  8. Navigate to Settings.
  9. From the left window pane, choose Privacy & Security.
  10. Scroll down to Cookies and site data, then click on the Clear Data… button.

1.3 Opera

  1. Hit the Windows key, type Opera, then open it.
  2. Use the following keyboard shortcut to open Opera Settings: Alt + P.
  3. Click on Clear browsing data.
  4. Checkmark all the boxes.
  5. Click on Clear Data.

4. Perform an antivirus scan

If you encounter a Twitch connectivity error on YouTube, your computer might be infected with malware.

You can perform an antivirus scan. It is recommended that you use the best antivirus for Windows 10. As it happens, we have the best options. Be sure you choose the antivirus tool that suits your PC better.

Additionally, you can opt-in for advanced antivirus software that can protect you from all kinds of digital threats.

For instance, TotalAV will highly secure your PC from malware, phishing attacks, or ransomware threats that may compromise your system.

The solution also includes a Network Inspector and firewall tools capable to scan your computer and erase risky malware.

⇒ Get TotalAV

What other Twitch connection problems should I be aware of?

Our presented issue is just one of the Twitch connection troubles you can face. Because it is important to be aware of the most common ones, we suggest taking a look at the list below:

  • Twitch chat not connecting / loading – This seems to be one extremely popular among users worldwide. If it’s happening to face it, make sure you check our dedicated guide.
  • The app can not connect at all – Some users reported that sometimes Twitch won’t let them sign up. This is one of the most annoying issues, so if you ever face it, do not hesitate to check some easy solutions to fix it.

How do I find out what my Twitch account is linked to?

  1. Open Twitch, then click your profile icon and choose Settings.sett-twitch twitch not connecting youtube blizzard steam
  2. Here, navigate to the Connections tab where you will find all the apps your account is linked to.connections twitch not connecting youtube blizzard steam

As you can see, you can solve connectivity issues in no time with the easiest solutions. Twitch is still not connecting to YouTube/Blizzard/Steam, you’ll need a more technical solution.

Also, don’t forget to try the best browsers to stream Twitch effortlessly. Our recommendation goes to Opera which brings fast browsing experience and a stable streaming experience.

If you face any additional questions, feel free to leave a comment in the section below.

How To Make A Minecraft Server In 2026 [Java, Bedrock]

We can all agree that Minecraft is an amazing game. It has come a long way since its initial release, and updates don’t cease spawning. So what’s the thing that makes Minecraft so great, even after so many years?

It might be that after a while, you get accustomed to thinking in squares. But no. Perhaps the fact that a rather simplistic survival game has evolved to the point where you can build fully-functional computers in it? Maybe.

Can you create a free server on Minecraft?

If you wonder how to make a Minecraft server for free, there are a number of websites that provide free hosting for Minecraft; however, these services often come with restrictions, such as a lack of support and the availability of paid add-ons.

Free Minecraft server hosting is an excellent choice if you are new to Minecraft servers or only want to play with a few friends online because most free server hosting has a maximum player restriction.

Before you join up for any free Minecraft server hosting, you should do some research to find out what type of customer care and extras, such DDoS protection and server backups, come with the hosting package.

Minecraft’s servers are all community-based

But the real reason why Minecraft thrived and still keeps at it is the community. As you probably know, Minecraft never had any official servers, everything was run by its community.

So there was no place where everything was readily available to you. You had to soldier on through tears and frustration to build the perfect world for you and your friends.

However, all of this couldn’t be possible without servers, the backbone of every single Minecraft world ever built. With that in mind, let’s see how you can build your own Minecraft server that your friends can join.

Since most of the servers are community-made, it would be a wise idea to protect your online privacy using a VPN. You can find a list of our best 5 VPNs for Minecraft on Windows and Mac.

Before we continue, here are similar questions asked by our users that will be answered in the solution list below:

  • How to make a Minecraft server for friends
  • How to make a Minecraft server with mods
  • How to make a Minecraft Java server
  • How to make a Minecraft Bedrock server

How do I make my own server on Minecraft?

1. Create a Minecraft Server using a dedicated server hosting

apex-hosting-minecraft-server

Creating a Minecraft Server is never been easier with Apex Hosting. You can make your own Minecraft server or create one for your friends by simply choosing a provider, determining the size that you need, and selecting which version to start with.

Most packages are instantly deployed and ready to run within a few minutes. You just have to share the IP address with everyone you wish to play with.

Apex Minecraft Hosting uses the latest and most powerful hardware to ensure that your Minecraft server runs without lags or downtime.

You can easily control your server hosting account with full access to the edit configurations and console. You can change versions anytime with a simple change in the control panel or you can contact the support team to do this for you in seconds.

You can enjoy all the following features:

  • Free Server Transfers
  • DDoS Protection
  • 24/7 Servers & Support
  • Java & Bedrock Edition Servers
  • Instant Setup
  • One-Click Modpacks
  • Automated Backups

Apex Hosting server is extremely secure to use and one of the best server hosters with video tutorials if you are unsure of how to use any of its components.

Apex Minecraft Hosting

An endless number of options for creating the Minecraft server of your dreams!
Check price Visit website

2. Check that the latest version of Java is installed

  1. First of all, you have to download and install Java. If you already did, you need to make sure that the latest version is installed on the PC you’ll use to host the server. Here’s what you can do to perform a Java version check:
  2. In your Control Panel, click Java (32 or 64-bit), go to the Update tab , and click Update Now.update-java how to make a minecraft server
  3. Visit the Java Version checker tool and let it check the version for you. Note that this doesn’t work on Chrome and Firefox.Check Java version online
  4. Launch the Command Prompt, type java -version, and hit Enter on your keyboard. Compare the version to the official website.

3. Download the Minecraft server files

You can find the Minecraft server files on the official website’s Download section. It’s possible to retrieve older versions, as well, but not from the official website. If you want the latest developments, we recommend you always use the latest version from the official site.

Note that the server is a JAR file that won’t work unless you have Java on your system.

It’s worth mentioning that the JAR file will create various configuration files in the location you launch it. So, before you launch the server, make sure it’s in an appropriate location on your PC.

The best practice would be creating a dedicated folder wherever you feel like, moving the JAR file there, and launching it.

4. Launch the server

After you set everything up, just launch the server by double-clicking the JAR file. This should start a process that writes some configuration files and quits almost immediately.

Minecraft game view

First, and foremost, we have to agree to the EULA. Therefore, locate the eula.txt file in the server‘s folder and open it in a text editor. Edit the eula=false part inside the document to eula=true, save it and close it. Note that doing so means you accept the EULA.

Note: in order to avoid any complications, make sure you always launch the Minecraft server as an Administrator.

If you want to keep your privacy safe while playing Minecraft, this easy fix will show you how to connect to Minecraft with a VPN.

⇒ Get Private Internet Access

Can you make a Minecraft server without Realms?

It is possible to run a server without making use of Realms; however, doing so typically necessitates paying for the services of a third party.

This being said, you might as well use a dedicated server hosting solution such as Apex Minecraft Hosting, and start playing right away!

How to make a Minecraft: Bedrock server on Windows 10

As you probably know, Minecraft has a Windows 10 version, which isn’t compatible with Java version servers and the other way around. So you can only connect to servers that are designed for your current edition.

Launch Minecraft Bedrock server

Creating a Minecraft: Bedrock server is easier than making its Java counterpart since there’s no Java dependency. All you have to do is download the server files from the official website, unpack the archive and run the executable.

However, note that the same thing will happen as with the Java server. A lot of configuration files will be created in the location of the executable, so make sure it’s someplace you’re comfortable with.

You can configure the server before you launch it by editing the server.properties file. However, if you want to learn more about it, there’s an extremely helpful How-To HTML guide in the archive.

Thus, you might want to check it out if you want to operate and customize the server effortlessly.

Can’t make a Minecraft public server?

There are some cases where making a Minecraft public server is simply not doable. The reasons may vary from having a restrictive ISP to double NAT configurations that make port forwarding difficult, if not downright impossible.

In those cases, you can either play with your friends by connecting to an existing public server or creating a LAN one. You can use Radmin VPN with Minecraft so that the game will detect you and your friends as part of the same physical network.

Once the VPN connection is established, you can host/join LAN Minecraft servers without any issues.

We hope our article proved helpful to you. As always, don’t hesitate to leave a comment in the section below and share your thoughts with us. Thanks for reading!

5 Best Browsers That Support RGBA and Multiple CSS Values

An RGB color value denotes Red, Green, and Blue light sources. In CSS, you can define a specific color using RGB value.

Each parameter of the RGB defines the intensity of the color, and they usually range from 0 to 255. For instance, in order to display black, color parameters should be 0, and defined like rgb (0, 0, 0).

RGBA color values are an extended version of the RGB color values with an additional alpha channel, which is denoted by the A attached to RGB.

However, there is one caveat related to RGBA. That is not all browsers support RGBA color values, and if you are using an old browser, chances are it does not support RGBA.

Now, which are the browsers that support RGBA values? This is exactly what we are going to discuss in this guide. Because here, we will give you a list of the 5 best browser that support RGBA.

Without any further ado, let us jump right into it.

What is RGBA in CSS?

RGBA is a new color format that comes with an additional value A, that lets you define the opacity of the color.

RGBA in CSS lets you add transparency to color with the first three numbers defining the colors and the value A defining the amount of transparency value.

You can define RGBA values in rgba(red, green, blue, alpha) format in CSS. The value of A should be defined by values 0 or 1, with 0 being fully transparent, and 1 being fully opaque.

There was opacity property already available for quite a long time but the downside of using opacity forces all the dependent values to become transparent.

The availability of RGBA lets you make a box transparent or opaque and leave all of the dependent colors alone. This gives more room for the web designers to play with the CSS to add opacity or transparency in the background.

How do you write RGBA in CSS?

RGB Color Scheme is a three-channel format containing data or values for red, green, and blue colors. In CSS, you can easily define RGB color format using: rgb(red, green, blue)

Whereas, you can define RGBA in CSS as: rgba(red, green, blue, alpha)

The alpha value or A value is defined with values 0 and 1 allowing to select the background to be transparent or opaque.

What are the best browsers that support RGBA?

Opera One – Supports HSL

With tons of features such as the built-in VPN, built-in ad blocker, and a sidebar that gives you access to Facebook, Twitter, Instagram, WhatsApp and even it’s own AI, the Opera One browser is one of the best browsers that you can use in 2023.

Opera One browser is based on Chromium and also supports RGBA. This means web designers can define specific colors along with transparency values in CSS using the Opera One browser.

It also supports HSL (Hue, Saturation, Lightness) and RGBA allowing developers to tap into these color models to apply more intelligent color schemes.

Opera One

It supports HSL (Hue, Saturation, Lightness) and RGBA.
Free Download Visit website

Google Chrome – Popular choice

Google Chrome does support RGBA values. Meaning web designers can use the alpha (transparency) value along with the other hex values.

Chrome is the father of Chromium browsers. Notably, other popular browsers such as Opera, Brave, Vivaldi, etc. are based on Chromium.

Although, Chrome does not come with multiple features such as built-in adblockers, tracking protection, etc. the Chrome Store is full of extensions that can get you the desired functions quickly and easily.

⇒ Get Google Chrome

Mozilla Firefox – Enhances your productivity

Mozilla Firefox, which has created its name as one of the choices for power users, does come with RGBA support in CSS.

With multiple add-ons available from the Firefox store, you can easily enhance your productivity within the browser.

Mozilla Firefox isn’t based on the Quantum browser engine which is specifically designed for the browser to keep the user data private and secure.

⇒ Get Mozilla Firefox

Microsoft Edge – Default web browser in Windows 11

The browser that comes built-in with Windows, i.e. Microsoft Edge is also one of the browsers that support RGBA.

Not all browsers support RGBA in CSS. Microsoft Edge not only supports RGBA but it is the default web browser in Windows 11. So, you need to tweak some Settings in Windows 11 in order to make a different browser on your PC.

There are multiple new additions that have been added with the Windows 11 overhaul. You can learn more about the new additions by visiting our helpful article about Microsoft Edge’s upcoming overhaul.

⇒ Get Microsoft Edge

Safari – Fast and easy to use

The most used web browser on Apple devices, Safari is also among the browsers that support RGBA. Unfortunately, you cannot use the Safari browser on your Windows 10 or Windows 11 PCs.

However, we at WindowsReport have a solution that will allow you to run the Safari browser on your Windows 10 or 11 PCs.

In order to install the Safari browser on Windows 10, you can check out our dedicated guide here. Else, Windows 11 users can check out our guide to installing Safari on a Windows 11 PC.

⇒ Get Safari

How do you convert RGB to RGBA?

RGB can be represented in RBGA. It is just the same RGB values with A (transparency value)=max or 1. So, for example, in CSS colors, rgb(255,102,71) = rgba(255,102,71,1) since the maximum alpha is 1. You can test it here.

However, do note that you cannot directly convert RGBA back to RGB (except when everything is with A=max). The actual color displayed also depends on what is the background that you have chosen.

Some differences between RGB and RGBA color formats:

RGB Color FormatRGBA Color Format
RGB is a three-channel color format.RGBA is a four-channel color format.
The CSS function rgb() has wide browser support.The CSS function rgba() may have limited browser support.
The opacity of the color cannot be specified using RGB.The opacity of the color can easily be defined by specifying the value for a, by setting the value between 0 and 1.

There you have it from us in this guide. Let us know in the comments below if you liked this guide and learned something from it.

3 Ways to Fix Your Backspace if it’s Not Working in Chrome

If Google Chrome is your primary browser, you probably use some of its default keyboard shortcuts. But, several users reported that backspace isn’t working on Chrome anymore.

Backspace was one of the most popular shortcuts in Google Chrome and was used to return to the page previously opened in a tab.

And with backspace and, sometimes, the delete key not working in Chrome, users are left in a lurch. But, it’s not that you can’t head to the previous page using a keyboard shortcut anymore. There’s another shortcut for that. Read the following sections to find out.

Quick Tip:

As an alternative, you can try the Opera One browser as it comes with built-in ad and tracker blocking, useful sidebar extensions, and even a unit converter for time zones.

And if security is essential for you, keep in mind that it includes a built-in VPN that works quickly. After all, that’s a browser that uses the Chromium page-rendering engine.

Opera One

With a built-in ad blocker to block crypto-mining scripts and a free VPN, Opera One is a worthy alternative to Chrome.

Why is my backspace not working in Chrome?

Chrome has disabled the backspace shortcut to revert to the previous webpage. Unfortunately, this was done in Chrome Version 52. So if you have that or a later version of the browser installed, the backspace key wouldn’t work.

The change was introduced because several users reported accidentally hitting backspace and losing their data or progress.

While Chrome disabled the shortcut and provided no built-in option to re-enable it, it now offers users another shortcut and an extension in case the backspace key is not working in Chrome.

How do I get my backspace to work again on Chrome?

1. Use the new keyboard shortcut

From now on, you can navigate through Google Chrome pages by pressing Alt + Left Arrow to go back and Alt + Right Arrow to go forward.

This is a significant improvement because navigating pages is now simpler than ever. In addition, you don’t have to worry about losing the work if you accidentally hit backspace. So, if backspace was not working in Chrome to go back, you now know which shortcut to go for.

2. Install the Go Back with Backspace extension

  1. Open the Go Back with Backspace extension in the Chrome web store and click on Add to Chrome.add extension to fix backspace not working in chrome
  2. Click Add extension in the confirmation prompt.add extension
  3. Once the extension is installed, you can use the Backspace key to navigate the previous page.
  4. To disable the Backspace key on a particular webpage, click on the extension in the Toolbar and select Disable on this page.disable on this page

If you are unwilling to adopt the new keyboard shortcut and want the backspace key to keeping working in Chrome, the Go Back with Backspace extension by Google would do the job.

How do I change backspace settings?

Using a third-party extension, you can change the backspace settings or even the other keyboard shortcuts in Chrome.

Shortkeys is a great extension to modify or reconfigure the keyboard shortcuts, and you might just as well give it a try. It offers a simple interface, and the changes made to the shortcuts reflect as soon as the webpage is refreshed.

How to disable backspace as a back button in Chrome?

While earlier you could disable backspace as the back button in Chrome, there’s no need for that anymore since the browser itself has disabled the keyboard shortcut.

As stated earlier, the back button functionality has now been replaced with the Alt + Left Arrow keyboard shortcut.

Google Chrome is currently the most used web browser worldwide and is constantly trying to improve. As a result, regular updates and patches for previously known bugs are introduced.

If the backspace is not working in Chrome to delete text, it could be a problem with the keyboard. So make sure to look for that.

What do you think about this way of navigating through pages in Google Chrome? Is it more practical and safer now? Tell us in the comments.

5 Best Browsers That Support KeePass [Ranked by Security]

The KeePass password safe is primarily designed for the Windows operating system. However, it can also be a cross-platform software that works on other operating systems like macOS and Linux.

Likewise, it works for mobile devices, making it more accessible to users. An advantage of the KeePass Password Safe is that it helps you store & manage your passwords in one database.

Furthermore, it gives you easy access to your password. Nevertheless, there are some limitations that you can encounter with KeePass, and one of them is the KeePass browser support.

Moreover, the KeePass browser support deals with browsers authorized to use the password manager’s services. Users download and use many browsers in the market, but only a few are reliable.

Hence, not all browsers are supported by KeePass to run it. Some of the main features that KeePass requires are browser speed, security, and privacy. Also, it allows you to use KeePass on your work and home devices.

However, we’ll discuss some of the best browsers you can use on your devices that support KeePass.

Does KeePass have a browser extension?

KeePass password safe works for browsers, but it doesn’t have a browser extension that users can download for features like security prompts and pop-ups.

However, to use KeePass on your browsers, you need to integrate KeePass into your browsers by using third-party browser extensions. Furthermore, it allows users to download third-party apps and plugins from its extensions and repository.

What browsers does KeePass support?

Opera One – Best for data protection

Opera One is a widely used browser with lots of advanced features. It has undergone many improvements, making it one of the best in the market. However, it is a browser that KeePass supports.

Other Opera One browser features are built-in VPN and AI, and a modular AI-ready design to help you integrate other AI technologies, current or future.

Also, it comes with an inbuilt ad blocker that prevents ads from interrupting your browsing sessions. Likewise, It is highly customizable.

The browser has many built-in features that make it one of the recommendations.

Opera One

Go for highly flexible navigation and support for password managers such as KeePass.
Free Download Visit website

Google Chrome – Best for customization

Google Chrome is a Chromium-based browser. It is one of the most reliable browsers in the market. A commendable feature of the Chrome browser is security and privacy.

It uses an advanced security system to protect users’ browser information, securing it from intruders and hijackers. Hence, it is our best pick for browsers that support KeePass.

Furthermore, Google Chrome has a vast repository of extensions where users can download browser tools that can help them make them work better. Likewise, it is a highly customizable browser that allows users to download themes and wallpapers to customize their user interfaces.

However, KeePass Password Safe supports the latest version of the Chrome browser for Windows, macOS, and Mono.

⇒ Get Google Chrome

Mozilla Firefox – Good for data syncing

Mozilla Firefox has been around for a long time, and it is known as one of the best browsers in the world. However, it is one of the best browsers for KeePass because of its features. Also, Firefox is a browser that supports KeePass.

Some features of Mozilla Firefox are a reliable and fast internet connection and user protection from external threats like malware and viruses.

Also, Firefox offers a good browser syncing service that helps users link and access their browser data across different devices. Firefox is a good browser for developers because it comes with developer tools that are good for HTML and others.

Nevertheless, Firefox can download and install extensions from the Chrome browser because they are both Chromium-based.

Likewise, Firefox has an extension repository where users can download tools for their browsers. Another notable thing about the browser is its customizable features and inbuilt tools like Adblocker.

⇒ Get Mozilla Firefox

Microsoft Edge – Ideal for Windows users

Edge is a browser by Microsoft. It is a fast and easy browser to use for different users. However, it is one of the best browsers that support KeePass. It is a cross-platform browser available across other operating systems like Windows, Linux, and macOS. Moreover, Edge is the default browser for Windows devices.

Furthermore, Microsoft Edge has advanced browser features like a high-security system that helps protect user data from internet threats.

Also, it is easy to navigate and has a customizable interface. Microsoft Edge supports the latest browser-features, allowing users the best browsing experience.

A significant feature that determines KeePass browser support is security. However, Edge is reliable and has a strict security and privacy policy.

⇒ Get Microsoft Edge

Safari – Ideal for Mac users

Safari is the default browser for Apple devices. However, it is accessible across different operating systems. Safari uses a high-standard browser system that can’t compare to other browsers. One of its features is security which is the main requirement for KeePass browser support.

Moreover, the Safari browser is fast, allowing you to load websites quickly and smoothly. Unlike other browsers, Safari has the best syncing system that helps you safely access your browsing data across several devices.

Furthermore, users should note that KeePass supports and works well with Safari 12 and later versions.

⇒ Get Safari

Is LastPass better than KeePass?

Generally, LastPass is the best option for most users because of its outstanding features. However, KeePass is also reliable and has a strong password generator, but it lacks some features that LastPass possesses. A significant part is the password pop-up option which is not available in KeePass.

↪️ You didn’t make up your mind yet? Luckily, AVG Secure Browser is the ideal choice as it can organize all your passwords and accounts in seconds and complete web credentials safely with 1 click.

However, users can read our article about the safest password managers with multifactor authentication. It will help you learn about other password managers and their services.

Conclusively, we recommend you check the latest versions of the above-listed browsers as KeePass works better with them.

Kindly leave your questions and suggestions below in the comments section below. We’d like to hear from you.

Wondershare PDFelement 9: Simple and Affordable PDF Editor

Editing PDF documents is necessary, and to do that effectively, you need proper software. Many tools can perform this task, but today we want to focus on Wondershare PDFelement 9.

The latest version was released recently, and it brings a wide array of new features that will help users improve their workflow and productivity.

This is so much more than a simple read-only PDF converter, it’s full editing software that you can use to edit your documents.

In today’s guide, we’re going to take a closer look at the latest version of Wondershare PDFelment 9 and examine all the new features that it offers.

Wondershare PDFelement 9: A fast and easy tool to edit PDF documents

What is Wondershare PDFelement?

Wondershare PDFelement is an incredibly powerful and versatile PDF editor that allows you to easily edit, convert and sign PDF documents.

A professional PDF editor usually comes with an expensive license fee, but that’s not the case with Wondershare PDFelement, and the software is more affordable than most other similar applications.

Despite its affordability, the application offers simplicity of use, so it’s perfect for home users and professionals alike.

The software is available on desktop and mobile, so you can edit your documents while on the go. You can even edit your files on the Web, so you don’t have to rely on desktop software if you don’t want to.

Features overview

Editing and annotation

Just like with most PDF editors, with Wondershare PDFelement you can easily edit text, images, backgrounds, and other elements of your documents.

Creating PDFs is also simple, and you can add pdf, html, rtf, txt, jpeg, jpg, png, and gif files to your documents.

Regarding editing, you can manage pages, reorganize them, insert new ones, or even delete them as you please. You can even merge different PDFs into a new one if you want.

You can change the font settings, and add backgrounds and watermarks. Annotation is also supported, allowing you to add notes and text comments.

You can highlight any text you want or you can draw on the document with one of many available tools.

Form filling, OCR, and file conversion

Form filling is also supported, and you can create fillable PDF forms with ease. If you need a quick solution, there are many prebuilt PDF forms that you can use. Of course, there’s support for adding a digital signature to your forms.

Optical Character Recognition is available, and it allows you to edit scanned PDF documents or pictures. Regarding language support, this feature currently works with 29 major languages.

File conversion is available, and you can easily convert multiple formats to PDF. Wondershare PDFelement supports PDF to Word, Word to PDF, JPG to PDF, and PDF to JPG conversion.

All your elements will remain after the conversion, so you’ll retain the original format. Batch processing is also available, allowing you to convert multiple documents.

It’s worth mentioning that you can convert your documents to docx, xlsx, pptx, jpg, png, gif, epub, html, text, and rtf format.

Different reading modes, batch processing, security

The application comes with several viewing modes, and you can view the document on a single page or in the two-page mode. Of course, there are also scrolling modes available for both layouts.

For full immersion, there’s a Read Mode that will open your document in a full-screen mode, and you can even change the background, and find the most suitable one for your eyes.

The application also allows you to compare documents for differences, which can come in handy when creating multiple versions of a document.

Batch editing is also supported, and you can create, convert, compress or print PDF files in batches. It’s also possible to crop pages in batches, which can be quite useful.

To help you speed up the editing process, you can add backgrounds, watermarks, footers, headers, and numbering in batches.

Security is a big component of Wodershare PDFelement and it allows you to protect your files with passwords. You can also set permissions and block users from accessing certain features, such as copying, editing, etc.

To protect sensitive information including both text and images, there’s redact option available as well.

The software offers great features that you would expect from any serious PDF editor, so it’s suitable for all types of users. The user interface is simple and sleek, so even first-time users won’t have issues using this software.

Wondershare PDFelement 9 improvements

Cloud management

With the new version, you can access your documents on any platform, be it desktop, mobile, or web.

The documents are stored in the cloud, so they can be easily accessed from any platform or location for editing.

Improved performance

Among other improvements, this version PDFelement offers faster document rendering thanks to the new PDF technology.

The software is 30% faster than its predecessor, so it will start and load your documents faster than ever before.

Redesigned user interface

The new interface is minimalistic, and all features are easily accessible. All functionality is located in a tabbed menu, and you can access it with a single click.

Thanks to the tabbed interface, you can open multiple documents and switch between them easily, which is perfect for multitasking.

New features

There are many new features added in this version and they include the following:

  • Form table recognition extraction
  • Document translation
  • Focus Mode
  • Batch Print and Compress
  • Image signatures
  • Ability to merge multiple images into a single PDF

Is PDFelement better than Adobe Acrobat?

In our opinion, PDFelement is just as good as Adobe Acrobat, if not better. The interface is simple and it offers a wide array of features that both professional and home users will use.

It’s worth mentioning that PDFelement is more affordable than Adobe Acrobat, and as such, it’s a better choice for most users.

Wondershare PDFelement is available for Mac, Windows, iOS, Android, and online, so you can use it on any platform without issues.

Is Wondershare PDFelement safe?

Yes, Wondershare PDFelement is completely safe to use. We didn’t experience any security issues while testing the software.

The software doesn’t come with any unwanted applications or hidden malware, so it’s 100% safe to use.

Closing thoughts

In the digital age editing PDF documents is a must, even if you’re a business or a home user, so why not use a proper tool for it?

Wondershare PDFelement 9 has once again proven to be a professional tool with features that all types of users will find useful. With the sleek and easy-to-use interface, this software is a perfect choice for first-time users as well.

Lastly, we have to mention that this tool is more affordable compared to many other PDF editors, plus it offers a couple of unique ones, so there’s no reason not to try it.

Ramnit Malware: What It Is, How It Works & How to Remove It

Antivirus and anti-malware programs are becoming increasingly powerful and cybercriminals seem to have found a new way to counter this.

Ramnit is one such worm that was recycled from BullGuard. Recycling a computer worm is nothing but repackaging it in such a way that it avoids detection, and still does its job.

Our intention is to explain what Ramnit is, how it can affect your PC, and how to safely remove it. If you’re concerned about its negative effects, look below for a detailed explanation.

What is Ramnit?

Ramnit is infecting Windows executables, Microsoft Office, and HTML files. It is known to steal usernames, passwords, and browser cookies. Furthermore, it allows hackers to take control of the infected PC.

Ramnit keeps on replicating itself without the need to be attached to an existing program. In a nutshell, the Ramnit is known to spread across the Internet rapidly.

How does Ramnit work?

Ramnit is commonly spread via flash drives and it all starts after the Worm (Win32/Ramnit) is copied with a random file name. The infection is at large at sites that promise to offer keygen and cracks.

The Ramnit works by infecting .exe, HTML/HTM files before opening a back door that compromises your computer.

This backdoor can be used by a remote attacker to download and execute more malicious files.

If not dealt with in a timely manner the Ramnit infects more files and the entire system might eventually become unusable.

How can I remove Ramnit from an infected PC?

1. Perform a deep antivirus scan to remove Ramnit

First, you have to run an antivirus scan. Ramnit might have corrupted the .exe, and HTML/HTM files and that compromises your PC.

Modern users are taking advantage of the facilities used by the Internet to work, perform online shopping, and do online banking. However, this raises different problems regarding their privacy.

This performant software will ensure the users’ privacy and protect their devices regardless if they are running the Android, Windows, Mac, or Linux operating systems.

You will no longer have to worry about the safety of your personal information, passwords, online payments, and your smart home devices.

Use a single license to secure all your devices, and do not worry about the safety of your private data when you make an online payment or use an electronic wallet.

TotalAV

This powerful tool protects your online identity and keeps your PC safe from malware.
Check Price Visit Website

2. Use a third-party tool from Symantec to remove Ramnit

The Ramnit removal tool by Symantec is specifically designed to detect Ramnit on computers. In order to use this tool, one needs to be logged in as an admin and only then download the executable file.

Please note that the Risk Detected message will appear on the main page when you are trying to scan the virus with Symantec.

The tool will automatically repair all the infected files and also resets the registry values that have been tampered with. Moreover, the tool will also terminate all the processes associated with Ramnit.

3. Use Bitdefender’s remover tool

The Bitdefender Rootkit Remover is designed to tackle known rootkits efficiently. You can download the tool from the official website.

This great tool is capable of removing the following worms: Ramnit, Mayachok, Mybios, Plite, XPaj, Whistler, Alipop, Cpd, Fengd, Fips, Guntior, MBR Locker, Mebratix, Niwa, Ponreb.

The Bitdefender developers have added the definitions for the newer rootkits as well.

    4. Remove Ramnit by formatting and reinstalling Windows

    Some security analysts claim that the Rammnit is not disinfectable and it’s always advisable to format your PC and reinstall Windows.

    This solution may seem extreme, but the erasing and reinstalling method remains the best, especially when you are dealing with rootkits. Before using this solution, don’t forget to back up all your files.

  1. 1. Hold the Windows Key + S to open the search box.

  2. 2. Type Settings in the search box, and then click on the result.

    Go to Settings to Fix Needs Your Attention in Windows 11
  3. 3. Select Update and Security, then click on Recovery.

  4. 4. Navigate to Reset this PC.

  5. 5. Click Get Started to initiate the reset/refresh. You can choose to remove everything or keep personal files.

    reset this pc control panel

Once a system has been affected by a backdoor Trojan, it is very difficult to sweep the remnants and in some cases, the files become corrupted making the entire system unstable.

That being said it’s also wise to employ some precautionary measures, for instance always make it a point to scan the email attachments.

To scan your emails, we recommend you to use any of these great email-scanning software to remove malware.

Ensure that your antivirus suite is updated to the latest version and the same goes for the Windows 10 build.

We hope at least one of these solutions was helpful. In case you have any subject-related questions or suggestions, just reach for the comments section below.