Windows 11 File History: How to Enable, Disable or Set up

File History is a powerful backup feature in Windows 11. To be more precise, it is an automatic backup feature that will back up your user folder libraries to a selected external USB storage device. It also keeps a history of file versions for users.

With File History enabled, you’ll have alternative backup versions of your files available. Then, you can select to restore previous versions of files preserved by the File History feature.

Although you’ll probably rarely need to restore backup versions of files, it’s a good idea to keep backup copies for them with File History, just in case.

You can enable and disable File History with the methods outlined below.

Is File History a new Windows 11 feature, and where can I find it?

File History isn’t something new in Windows 11. Microsoft originally introduced File History in Windows 8 as an alternative to Backup and Restore. It’s a better utility for backing up user folders than Backup and Restore.

However, some users have been confused by the absence of File History options in Windows 11’s redesigned Settings app. Windows 10 includes options for enabling and configuring File History via Settings, which isn’t available in 11.

The only backup options you can configure in Windows 11’s Settings app are for OneDrive. You can set up the OneDrive folder syncing via Accounts, then Windows backup in Settings. That cloud sync feature backs up folders and files to OneDrive.

Don’t worry, File History still exists in Windows 11! However, you’ll need to activate that legacy feature via the Control Panel now. Alternatively, you can enable and disable it with the two other methods below.

How can I turn on Network Discovery for File History?

Keep in mind that you’ll need to have Network Discovery enabled to utilize File History in Windows 11.

If it’s not enabled, File History’s Turn on button will be grayed out in the Control Panel. This is how you can turn on Network Discovery in Windows 11:

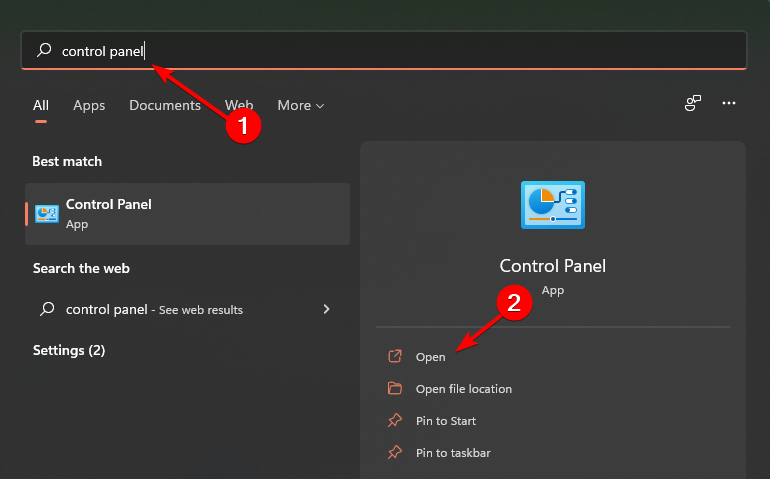
  1. To open the search tool, click the magnifying glass taskbar button.
    The search tool's button windows 11 file history
  2. Type the keyword Control Panel within the search box.
  3. Select Control Panel to open it.
  4. Click the Network and Internet category.
    Network and Internet category windows 11 file history
  5. Next, select Network and Sharing Center in that category.
  6. Click Change advanced sharing settings on the left of the Control Panel.
    Change advanced sharing settings option windows 11 file history
  7. Select the Turn on network discovery radio button.
    The Turn on network discovery option windows 11 file history
  8. Then click the Turn on file and printing sharing option.
  9. Press the Save changes button to apply the new settings. With Network Sharing enabled, you can then proceed with turning File History on.

How can I turn on and off File History in Windows 11?

1. Use the Control Panel

  1. 1. Open Windows 11’s search box by pressing the magnifying glass taskbar button on your desktop. Alternatively, you can press the Windows key on your keyboard.

  2. 2. Type the word File History within the search box.

    file history search windows
  3. 3. Select File History from the results to open the Control Panel applet.

  4. 4. Next, click the Turn on button shown directly below.

    how to enable file history windows 11 button
  5. 5. You can later disable File History by clicking the Turn off button there.

  6. 6. To select an external drive to back up files on, insert a USB storage device in your PC.

  7. 7. Click Select drive to bring up the options and choose a storage drive listed there.

    how to turn on file history windows 11 select drive
  8. 8. Press the OK button to confirm your chosen storage device.

  9. File History can be very easily managed via the built-in Control Panel. From there, you can toggle File History on and off in a simple click.

2. Use the Group Policy Editor

  1. First, press the Windows + R keys simultaneously, which will open the Run accessory.
  2. To open Group Policy Editor, type this text in the Open box and click OK: gpedit.msc
  3. Next, open this policy location within Group Policy Editor: Computer Configuration\ Administrative Templates\ Windows Components\File History
  4. Select File History on the left of the window.
  5. Double-click the Turn off File History policy.
    Turn off File History policy windows 11 file history
  6. Select the Enabled or Disabled option on the Turn off File History window depending on preference.
    The Enabled and Disabled options windows 11 file history
  7. Press the Apply button to save the new policy setting.
  8. Click OK to exit the Turn off File History window.
Note icon NOTE
Group Policy Editor is not available in Windows 11 Home edition. You can utilize Group Policy Editor within the Pro and Enterprise editions of the platform.

3. Edit the registry

  1. Open Run as outlined in the first step of the second resolution.
  2. Type this command in the text box and click OK: regedit
  3. Input this registry key location within the Registry Editor’s path bar and press Enter: HKEY_LOCAL_MACHINE\Software\Policies\Microsoft\Windows\
  4. Now right-click the Windows key on the left the the Registry Editor and select New, then Key.
    The Key option windows 11 file history
  5. Input File History for the keyword’s title.
  6. Right-click in the right pane of the registry to select New, then DWORD (32-bit) Value.
    The DWORD Value option windows 11 file history
  7. Enter Disabled for the DWORD’s title.
  8. Double-click the new Disabled DWORD to open the window in the screenshot below.
    The Edit DWORD Value window windows 11 file history
  9. You can enter 1 in the Value data box there to deactivate File History. The 0 value in that Value data box enables the backup feature.
  10. Press the OK button to save your value setting for that DWORD.

What can I do if File History doesn’t work?

If File History still doesn’t work with Network Discovery enabled, make sure that Network Discovery stays on as it should.

Even more, the service for that feature might be disabled. Thus, the solution might be to enable the File History Service. You can check that service as follows:

  1. Press the Windows key + S shortcut for the search box.
  2. Type services in the search tool’s text box.
  3. Then click Services in your search results to open that window.
    Services window windows 11 file history
  4. Double-click the File History Service to bring up the properties window for it.
  5. Click the Startup type drop-down menu and select Automatic.
    File History Service Properties window windows 11 file history
  6. Press the Start button if the service is stopped.
  7. Click the Apply and OK buttons.
  8. Repeat steps five to seven for the Windows Search service.

How can I restore my files with File History?

When File History has preserved some backup copies, you can restore previous file versions any time you fancy. To do so, open the File History Control Panel applet as outlined within the first three steps of the first resolution for activating the backup feature.

  1. Open the Control Panel‘s File History applet as covered within method one. 
  2. Click Restore personal files on the left side of the File History applet.
    Restore personal files option windows 11 file history
  3. Click the Previous Version and Next Version buttons to browse through your files’ backup versions.
  4. Next, choose a file or folder that you want to restore.
  5. Press the Restore to original location button.
    The Restore to original location button windows 11 file history
  6. To further configure the backup feature, click Advanced settings on the File History Control Panel applet.
    Advanced settings option windows 11 file history
  7. Then you can select alternative options on the Save copies of files and Keep saved versions drop-down menus.
    Advanced settings windows 11 file history
  8. Press the Saved changes button to confirm.

Although there are plenty of third-party backup utilities for Windows, File History is sufficient for preserving user file copies. It’s a convenient feature that automatically backs up user folders at specified intervals.

Don’t think you won’t ever need backup file copies. There are many ways user files can become corrupted or accidentally deleted. So, it might be better to be safe than sorry by enabling and utilizing File History in Windows 11.

And if you can’t decide on which backup solution to go for, we have a comprehensive File History vs Windows Backup article to help you make a choice.

You can also take advantage of the Backup and Restore utility to create a system image copy. Our guide on how to create a system image provides details on how you can enjoy that utility in Windows 11.

Follow the steps above and let us know which method worked for you in the comments below.

How to Recover Deleted Files on Windows 11 [7 Ways]

There are several methods for deleting files. Consequently, it is extremely common for users to require the recovery of files that have been accidentally erased.

The Recycle Bin is a Windows feature that allows you to recover files after they have been deleted. Unless otherwise specified, it saves data that users choose to discard.

As a result, removed user files are frequently recoverable from the bin feature.

All references to a file are deleted when it is totally destroyed, and the hard drive space that it previously occupied is freed up as a result.

Fortunately, files that have been permanently erased can still be recovered. There is, however, one limitation to meeting this requirement.

Continue reading to learn about a variety of methods for recovering both accidentally and permanently erased files.

Where do deleted files go?

When a computer deletes a file or empties the Recycle Bin, it removes its reference from the hard drive. As a result, the computer can no longer see the file if its header or reference is erased.

recycle bin recover deleted files windows 11The space that the file occupied is no longer designated for it, and any new file can be stored there.

Because the file is theoretically present, it may be possible to recover it by utilizing data recovery software to recreate the file header, allowing the computer to see it once more. Note that this software only works if the deleted file was not overwritten by another file or data.

Computers are more efficient at removing a file’s reference than they are at commanding the hard drive to replace the file with new data.

Only by performing a low-level format or using another software that overwrites all deleted files with noughts or other nonsense can you be certain that the data will not be retrieved in the future.

How can I recover deleted files in Windows 11?

1. Retrieve files from the Recycle Bin

  1. Double-click the Recycle Bin icon on your Desktop.
    click recycle bin recover deleted files windows 11
  2. Select the files you want to recover by left-clicking on them.
  3. Right-click any of the selected files and choose the Restore option. Alternatively, drag and drop the selected files to a location of your choice.
    restore-deleted-files recover deleted files windows 11

Just keep in mind that the Recycle Bin may only be utilized to restore files that have been accidentally deleted into it.

2. Use Undo Delete

  1. Access the folder where your photos were located, then press Ctrl + Z, or alternatively right-click anywhere in the folder and choose the Undo Delete option.
    undo-new recover deleted files windows 11

The major drawback of the undo tool is that when you restart your computer, all of your previous activities are erased. Furthermore, because you can only undo one operation at a time, it’s difficult to undelete Windows 11 files that were deleted a long time ago.

3. Use the File History feature

  1. Press the Windows key + S to open the search bar and type in Control panel. Next, click on the most relevant result.
    control-panel-search recover deleted files windows 11
  2. Navigate to System and Security.
    system-security recover deleted files windows 11
  3. Click on File History, then choose Restore personal files from the left sidebar.
    file-history recover deleted files windows 11

Go back in time until you find a backup copy that contains the files you want to recover, then select them, and click on the green recover button from the middle-bottom side.

4. Use data recovery software

Automated data recovery software such as Stellar Data Recovery can identify and retrieve lost data with high accuracy.

  1. Install and launch the application on your Windows 11 PC.
  2. From the main window, select the type of file you want to recover and click Next.recover deleted files in Windows 11
  3. Select the location where your deleted files were and then clik Scan.recover deleted files in Windows 11
  4. After the scan is complete, you will get a list of all files found. Select what you want to recover and click Recover.
  5. Select the location where you want to save your retrieved files and wait for the process to complete.

As you can see, you have the option to browse around and preview your files before you recover. This option can come in handy when the scanner finds old files that you may not remember or recognize.

The tool can save you a lot of time and hassle and strives to offer you a recovery file with the same quality as the original one.

Stellar Data Recovery

A trustworthy data recovery program that helps you retrieve any critical documents and deleted files.
Free Download Visit Website

5. Access This PC’s properties

  1. Launch File Explorer and select This PC from the list of locations in the left sidebar.
    this pc recover deleted files windows 11
  2. Right-click the storage device you want to repair and choose Properties.
    properties recovery recover deleted files windows 11
  3. Navigate to the Tools tab, then click on the Check button.
    change tool  recover deleted files windows 11

6. Run the CHKDSK scan

  1. Press the Windows + S key to open the search bar then enter cmd. Right-click on the most relevant result and choose Run as administrator.
    cmd  recover deleted files windows 11
  2. Type or paste in the following command, and remove the volume part with the letter assigned to your storage device, then press Enter to repair the corrupted files:
    chkdsk volume: /r
    chkdsk  recover deleted files windows 11

Additionally, Windows 11 includes a utility known as ATTRIB, which works in conjunction with CHKDSK. This utility allows you to modify the properties or qualities of a computer file or directory in a variety of ways.

7. Use Microsoft’s Windows File Recovery app

  1. 1. Press the Windows + S key to open the search bar.

  2. 2. Enter Microsoft Store in the search bar and click the most relevant result.

    microsoft store recover deleted files windows 11
  3. 3. Once you are inside the app, search for the Windows File Recovery tool and download it.

    windows file recovery recover deleted files windows 11
  4. 4. After the installation process is completed, press the Windows key + X and choose Windows Terminal from the opened menu.

    windows terminal recover deleted files windows 11
  5. 5. Type or paste in the following command to recover the documents folder on drive C to drive E: winfr C: E: /regular /n \Users\<username>\Documents\

    It goes without saying that you may substitute whatever path you like for the Documents folder, and you can choose a different source and destination drive as well.

    winfr command recover deleted files windows 11
  6. 6. Press Enter to run the command.

  7. You can use the Windows File Recovery app to retrieve your deleted files. It is a dedicated tool from Microsoft that helps users recover deleted files from hard disks, USB drives or memory sticks.

Can I recover permanently deleted files?

Fortunately, files that have been permanently erased can still be recovered. There is, however, one stipulation! If you wish to recover permanently erased files in Windows 10, turn off the device right away.
permanently deleted files recover deleted files windows 11

Otherwise, data would be overwritten, and you will never be able to retrieve your files. You can recover irreversibly erased files if this does not happen.

They aren’t actually deleted from your computer, instead, they are stored in the depths of your hard drive. The system has tagged these files as inaccessible data and is waiting for new data to be overwritten on the disk.

In this instance, there are various viable options for recovering permanently deleted files in Windows 10, as detailed below.

To begin, locate and open the folder containing the deleted files. Then right-click on History and select Previous. Choose the file you want then left-click the Restore button. By now, the files must have been recovered. But if this does not happen, there are other methods.

Alternatively, you can find and select the folder where the deleted files were stored and right-click on it. Click Properties, then choose Restore previous version. Windows will write down the previous versions of permanently deleted files.

Not having a backup for these files is the ultimate apocalypse. As a last solution, you should try using third-party data recovery software. To undo the damage, take a look at five of the best file recovery software programs available.

If you’ve ever wondered whether upgrading to a new operating system version deletes your data, check out our article on whether the Windows 11 installation will delete your files or not.

However, if you already found the answer on your own skin, and it was a rather negative one, check out what to do if an update deleted all your files. The solutions detailed for Windows 10 may be applied by Windows 11 users as well.

Please let us know in the comments section below whether you were successful in recovering your files. We are hopeful that the answer will be affirmative.

3 Ways to fix Facebook if it Keeps Asking to Switch Accounts

Due to how bothersome Facebook Messenger adds account problem pop-up is, you may decide to look for an alternative.

The disruption caused by this pop-up may compel you to switch between accounts or even cause the app to freeze.

Most users recommend limiting the app to no more than two accounts, as the software will prompt you to switch accounts if it detects more than two connected accounts.

However, it would help if you tried several fixes to resolve the Messenger switch account problem forever.

Why is Messenger asking me to switch accounts?

The switch account issue in Facebook Messenger is most likely a bug reported everywhere, including in the Facebook official forum.

However, the leading cause is that your Messenger app has several accounts. Another common reason is that you are not using the same account on Facebook and Messenger. 

How do I fix the switch account problem on Facebook Messenger?

1. Disable chat heads

  1. Disable the Chat Heads by opening the Messenger app and tapping your profile symbol in the top left corner.
  2. Scroll down and turn off the toggle next to Chat Heads. This will usually resolve the switch account issue on Facebook Messenger.chat heads slider

Most users solved the switch account issues by removing the Chat Heads in their Android Messenger app.

2. Reinstall the app

  1. Touch and hold the Messenger application icon, then press Uninstall or Remove.remove app option in iPhone
  2. Visit the app store on your phone (Google play for Android and App Store for iPhone.)
  3. Search for Messenger in the search bar and install the latest version of the app.

This procedure allows for the installation of new data on your device and guarantees that you have the app’s most recent version.

To fix the Facebook Messenger add account problem, this will hard reset your app and update it to the most recent version.

3. Update the app

  1. Go to the App Store/Google Play Store.
  2. Search for Messenger.Updating Messanger App
  3. Tap on Update.

You must update the app if you’re having trouble with “Select an account.” Wait for a new update if you already have the most recent version of Messenger.

There are issues in specific releases that need to be fixed in subsequent updates. If the most recent update contains a flaw, you must wait to correct it until Facebook releases the next update.

Can you have 2 Messenger accounts?

Like most other messengers, you can have several active accounts with Facebook Messenger. In addition, you can move between multiple Messenger accounts. There is a five-account limit, though.

Here is how to add an account in Messenger without Facebook:

First, tap your profile image in the Messenger app, then go to Switch Account, select Add Account, and now type in your information to add a Messenger account.

Messenger’s problems are well-known to worsen with each new version, and many have long since given up on the app.

However, users have discovered numerous workarounds or fixes for these issues. The official Facebook Forum is full of such holes that users have submitted over a long period.

The fixes above are meant to assist you in getting rid of the messenger select. An account keeps popping up the issue, so you may use the app uninterrupted. Elsewhere, if the switch account button is missing on Facebook, head on over to our article and see what to do.

If Messenger continues giving you problems and you no longer want to deal with account issues, check out our complete guide on how to delete your Facebook account.

In the comment section below, let us know how you fixed this problem.

How to Change Your IP Address Without Restarting the Router

Connecting to a router means your computer will use the router’s global IP address. However, changing your IP address can be challenging if you don’t know how to navigate it.

Changing your IP addresses can require you to restart the router. Hence, users inquire about not knowing how to change IP addresses without restarting the router.

Furthermore, changing the IP address of a router can vary. It depends on how the manufacturer has configured it to work.

Likewise, the firmware can make some distinctions on how you can switch your router’s IP address.

Nonetheless, there are some steps you can follow to conveniently change the IP address without restarting the router. Hence, this article will discuss these steps.

Can you change your IP by turning off your router?

Turning off your router is one of the easiest ways to change your IP address. It allows your router to disconnect from your device. However, unplugging your router from its power source for about five minutes and plugging it back in can help reset the router IP.

Furthermore, some users complain about this not working as expected on their computers. The response can vary depending on the router and your device.

Likewise, routers are built to remember the device and assign the same IP address to it. So, it can be challenging to change IP by turning off your router.

Nonetheless, you can change your IP by turning off your router. Also, we recommend you forget to repeat the process a couple of times if turning your router off doesn’t change your IP.

What happens if I change the IP address of my router?

Changing your router’s IP (Internet Protocol) address disrupts every internet connection it has made with the services and programs running on your device. It means the connection previously made with the changed address no longer counts.

However, changing your router’s IP address doesn’t adversely affect your network connection. It can improve the privacy and security of your connection to the internet.

Nonetheless, you may find it beneficial to know how to set up and change your static IP address on a Windows 10/11 PC.

How do I force my router to change my IP?

1. Manually change adapter settings

  1. Click the Start button, input the Control Panel, and launch it.
  2. Select Network and Internet and click on Network and Sharing Center.
  3. Click on Change adapter settings from the pane of the screen.
  4. Go to the connection you want to change the IP address and double-click on it.
  5. Click on Properties and select Internet Protocol Version 4 (TCP/IPv4).
  6. Input an IP address or select the Obtain an IP address automatically option to have the router control the IP address. (If you have an IP address to use, you can manually input it.)
  7. Click on OK and close the program to save the changes.

2. Use Commands

  1. Press the Windows + R keys to launch the Run dialogue box.
  2. Input CMD and press Enter to launch it.
  3. Type the following and hit Enter: ipconfig /release
  4. Then input this also after the first process stops and press Enter: ipconfig /renew
  5. Close the Command Prompt and check your IP address.

Using the command prompt will force reset the router IP. Hence, this should help change the IP without restarting the router.

3. Use a VPN

Many VPNs can help change your IP address without restarting the router. Select any of the best VPNs available right now and choose a new location.

By doing this, the new server will change your IP address to a discreet location within the area. Hence, it is a faster alternative to consider when trying to change your IP address.

A great option is Private Internet Access (PIA) because it has a fast and easy setup process. It also has a strict no-logs policy feature that doesn’t record traffic or store any browsing data from its users at all.

Private Internet Access (PIA)

VPN with an unbreakable security that has a strict no-logs policy to protect your data.
Check price Visit website

Will my IP address change if I get a new router?

Getting a new router will change your IP address. The new router will assign a new IP address to your device. So, your IP address will change if you get a new router.

However, if you have set your computer’s Internet Protocol to Obtain an IP address automatically, your IP can change if you get a new router. Unfortunately, if your computer’s Internet Protocol settings are on Manual input, the IP address will be static and may not be changed by switching to a new router.

Conclusively, updating your router’s firmware will help it perform smoothly. Hence, you can check our guide for steps to update your router’s firmware. Also, knowing how to fix the router that won’t connect to the internet issue can be beneficial.

If this guide has been helpful, kindly leave feedback or suggestions in the comments below. We’d like to hear from you.

5 Best VPNs for 7 Days to Die To Fix Lag & Reduce High Ping

7 Days to Die is a survival horror game with solo and multiplayer content set in an open world. You can play it on Windows, Mac, Linux, PlayStation 4, Xbox One, and Steam.

In the game, you must do everything you can to survive a zombie invasion, which includes seeking shelter, food, and water. Although you can play it alone, 7 Days to Die is much better with friends in co-op mode.

Regrettably, many users face 7 Days to Die lag, high ping, delays, stuttering, and other slow connection issues. Since every frame counts in an action-packed game where you must run away from zombies, you can use a VPN to improve your ping and gameplay.

Fortunately, you can eliminate lag spikes, laggy servers, and high ping issues by downloading and installing a VPN for 7 Days to Die. It’s also the ideal solution for fixing packet loss.

How do I lower my high ping in 7 Days to Die?

Many users are stating that 7 days to die ping is too high and is messing up their games and eventually end up uninstalling and reinstalling the game. But is that the best approach to fix lag and reduce high ping in 7 days to die? We believe it’s not the greatest method to use.

That high ping generally indicates that you haven’t excluded the game from your antivirus/antimalware software, and it’s stalling the scanning procedures.

It’s also possible that you’re distant from Texas where most servers are located, which might explain your poor gaming experience.

One secured and valid solution to avoid high ping and decrease latency is to utilize a VPN service that connects you to the most appropriate server location immediately. If you wish to set up a private connection and a spoofed location, you may use ExpresVPN to create your own gaming server.

What you’re looking for is a virtual private network solution with high-speed servers, a global network, and security features tailor-made to enhance your gaming experience.

What are the best VPNs to fix 7 Days to Die lag?

ExpressVPN – Excellent throttling bypass

ExpressVPN is a VPN service provided by Express Technologies Ltd, a company registered in the British Virgin Islands.

ExpressVPN is one of our top choices when choosing a GPN over a VPN service. There are several reasons for this, including the option to rapidly change your IP address to one of 160 locations in 94 countries.

A drawback of this VPN service could be the price which is a little bit high for an independent newbie gamer.

ExpressVPN is for gamers who want to maximize their connections while avoiding high latency and pings after a Windows 10 upgrade and stopping ATT throttling. Its speeds are excellent, its stability is unparalleled, and once turned on, you’ll forget it’s even there.

What else you should know:

  • Has split tunneling
  • Offers unlimited server switches
  • 99.99% uptime connections
  • Provides Kill Switch
  • Best-in-class encryption
  • Employs Zero-knowledge DNS
  • OpenVPN, L2TP-IPsec, SSTP, PPTP

It is compatible with any device, with specific programs for PC gamers, and ExpressVPN can be used on your PlayStation 4, Xbox, bypass Nintendo eShop when not available in your country, or other consoles when manually configured.

You are allowed to install the app on as many devices as you like. You can connect to up to three devices simultaneously.

ExpressVPN

Works with a full range of devices, including modern gaming consoles at blazing speed.
Check price Visit website

NordVPN – Reliable game servers

NordVPN is yet another splendid choice for fixing 7 Days to Die laggy server issues. You can use it to redirect all network traffic through VPN using more than 5,400 servers from 59 countries.

Created by Tefincom & Co., NordVPN is one of the best VPNs for hosting game servers. Moreover, it’s one of the few VPNs that comes with obfuscated servers, which you can use to hide the fact that you’re using VPN and get around VPN blocks. It’s also ideal for fixing Xbox packet loss.

NordVPN uses the OpenVPN protocol to encrypt your data traffic, optimize it for gaming, and reduce 7 Days to Die ping when it’s too high. It comes with private DNS servers, an integrated ad and malware blocker, and a kill switch to turn off your VPN in case of an emergency.

What else you should know:

  • One of the most popular VPNs for gaming
  • Set it up on Windows, Mac, Linux, PlayStation 4, Xbox One
  • Zero data collection
  • Allows 6 simultaneous connections
  • Provides a fast and easy 7 Days to Die high ping fix
  • 30-day money-back guarantee (no free trial)

NordVPN

Reduce 7 Days to Die lag and high ping by turning to this trustworthy VPN service.
Check price Visit website

Private Internet Access – Best for fixing packet loss

The surest way to get rid of 7 Days to Die lag spikes is by using Private Internet Access (PIA). Made by Kape Technologies, this virtual private network service is great for fixing Wi-Fi packet loss and for speeding up your Internet connection for gameplay.

PIA has more than 3,300 VPN servers available in 47 different countries. It supports OpenVPN, WireGuard, private DNS, port forwarding, and split tunneling, together with an ad and malware blocker.

With the help of PIA, you can quickly fix network congestion and 7 Days to Die laggy issues so that you can go back to enjoying the game with your friends. It’s one of the few VPN services that offer 24/7 live chat support.

What else you should know:

  • Optimized for gaming, streaming, torrenting, secure browsing
  • Works with Windows, Mac, Linux, PlayStation 4, Xbox One
  • Strict no-logging policy
  • 10 connections at the same time
  • Offers a quick and easy 7 Days to Die lag fix
  • 30-day money-back guarantee (no free trial)

Private Internet Access

Whenever you have a 7 Days to Die ping problem, turn to this fast and secure VPN for assistance.
Check price Visit website

Surfshark VPN – Budget-friendly

Because of its effective servers and inexpensive pricing, Surfshark VPN is the preferred VPN service for games like 7 Days to Die. It helps to

Nord Security and Surfshark announced their merger in early February 2022, making Nord Security the sole owner of both companies. According to SurfShark’s merger blog article, the companies will continue to operate independently, with different VPN infrastructures.

Surfshark provides fast servers to provide a lag-free gaming experience. But, perhaps as importantly, they are the least expensive VPN for gaming choice on this list. What stands out for Surfshark is the blazing speed connections and gaming-optimized servers.

With over 1040 servers spread around the globe, the network should be adequate to support your games.

What else you should know:

  • Safeguards you against DDoS cyberattacks
  • Static IP Servers
  • Gives access to geo-restricted game servers
  • Split tunneling
  • Smart DNS
  • Unlimited simultaneous connections

Surfshark is available for all major platforms and may be installed on your router as well.

Surfshark VPN

Optimized servers for gaming and VPN chaining technology for 7 Days to Die no lags gameplay.
Check price Visit website

CyberGhost VPN – Known for minimizing jitter

An alternative solution to fix 7 Days to Die lag multiplayer problems is by using CyberGhost VPN. Also, a product of Kape Technologies, this virtual private network service provides you with over 6,400 servers from 89 parts of the world.

CyberGhost VPN has a split-tunneling mode so that you can set up whitelists or blacklists to manage your bandwidth resources more intelligently. Furthermore, the tool supports exclusive DNS servers, together with DNS leak protection.

You don’t need to worry about hacker attacks while playing 7 Days to Die since the VPN offers anti-DDoS protection. It can eliminate 7 Days to Die lag issues on PS4 and Mac, optimize your network traffic for gameplay, and minimize jitter.

What else you should know:

  • Secures your router against hacker attacks
  • Compatible with Windows, Mac, Linux, PlayStation 4, Xbox One
  • Zero-logs privacy policy
  • Connect up to 7 devices at once
  • Ideal when 7 Days to Die is lagging out
  • 45-day money-back guarantee (1-day free trial)

CyberGhost VPN

When you get 7 Days to Die high ping time, turn to this reliable VPN to swiftly resolve the matter.
Check price Visit website

Why is 7 days to die so laggy?

The issue with 7 days to die multiplayer lag is not uncommon for most users that have a security solution that doesn’t meet the needs of your gaming routine and expectations. For the best overall 7 days to die multiplayer lag fix we recommend using antivirus for gaming PCs to decrease ping and reduce lag.

Ping can be affected by a variety of factors, including network protocol engineering, Internet connection speed, the quality of a user’s Internet service provider, and firewall settings.

Geographic location also has an impact on ping. For example, if someone is in India and playing on a server in the United States, the distance between the two is larger than it would be for players in the United States, therefore data transmission takes longer.

Thus you will get the 7 days to die multiplayer lag whenever you join a different server location from other players of the game.

Join our 7 Days to Die section to stay in touch with news and how-to guides about this game!
If you frequently have high ping or packet loss issues in other games, visit our Gaming VPN Hub.

To conclude, if you’re experiencing high ping and lag issues during gameplay, you need a powerful 7 Days to Die VPN to solve this situation hassle-free. Besides, you can also use a VPN to fix packet loss.

It can be difficult to choose the right VPN to get rid of the 7 Days to Die lag. If you can’t decide between the five options we presented above, we suggest picking ExpressVPN since it can not only improve your gameplay but also evade geoblocks.

How to Play Android Games on Windows 11

Windows 11 has the unique ability to run Android apps on a computer alongside other Windows apps. The new feature was shown off when the operating system was first announced, and the ability to run mobile apps excited many people, especially gamers.

This feature has been in the works for a long time, and we probably won’t see an official release until 2022. Fortunately, eager people can now try out a beta version of the Android feature.

What is the Android feature?

This beta version is known as Windows Subsystem for Android with Amazon Appstore, and as the name suggests, it allows you to install apps from the Amazon Appstore only.

Only 50 Android apps are available, from teaching apps to games like Lords Mobile and Color by Numbers.

If you want to try out the Android app feature, you must become a member of Windows Insider and install the latest version of the Windows 11 beta.

You must also live within the United States because this beta is locked to the US. If you’re outside, unfortunately, you are out of luck and will have to wait until Microsoft officially releases this feature.

You will need an American Amazon account to gain access to the Amazon App Store and make sure your computer meets specific requirements.

On top of being able to run Windows 11, your computer needs:

  • 8GB of RAM
  • Version 22110.1402.6.0 or higher of the Microsoft Store app
  • Build 22000.xxx or higher of Windows 11
  • Have a solid-state drive (SSD) storage

Without these requirements, the beta will not work.

That said, this guide will show you step-by-step instructions on how to check if your computer meets the requirements, how to become a member of the Windows Insider Program, and how to install some games.

How can I install Android games and apps on a Windows 11 PC?

1. Check System Requirements

  1. Click on the magnifying glass icon on the bottom bar.
  2. Select the Settings app icon or type it in the top search bar.
  3. Click on System, the first entry in the Settings menu.
  4. Scroll all the way down until you see the About tab on the right side, which gives detailed information on the computer’s specifications.
  5. Click About.
  6. Click Device Specifications on the right side of the window.
  7. Confirm the required RAM in the drop-down menu.
  8. Afterward, open the Windows Specifications drop-down menu and locate the OS build.
  9. Confirm your computer has Windows 11 build 22000.282. This means it can run the Android feature.
  10. Once you’ve confirmed the correct Build, click on System again and scroll down until you see the Storage tab on the right side.
  11. Locate the Storage management section and select Advanced storage settings.
  12. Scroll down and click on the Disks and volumes tab.
  13. Confirm the media type is indeed SSD.

2. Join the Windows Insider Program

  1. Open the Settings app again.
  2. Click on the Windows Update tab located at the bottom of the menu.
  3. Click the Windows Insider Program tab located on the right side of the window.
  4. Click the Get Started Button.
  5. Tap the Link an account button in the small windows that appears.
  6. Confirm your Microsoft account then click Continue.
  7. Select Beta Channel (Recommended).
  8. Review the device agreements and then hit Continue.
  9. Select the Restart now button to enroll into the beta channel.

3. Download the latest version of the Microsoft Store

  1. Click on Microsoft Store icon on the bottom bar to open the app.
  2. Click on the Library tab in the bottom left corner.
  3. Click on the Get updates button found near the top of the window.
  4. After updating, click on the Profile menu at the top of the window and select App settings.
  5. Locate About this app in the bottom left corner and confirm the version is either equal or higher than 22110.1402.6.0.

4. Install Windows Subsystem for Android

  1. In the Microsoft Store, type in Amazon Appstore in the bottom search bar and open the first app you see.
  2. Click the Install button.
  3. Click Set up when the small window appears.
  4. Click the Download button on the next window.
  5. Click the Next button once it finishes.
  6. Click the Restart button to complete the setup.

After this, you are finally ready to install Android games on your Windows 11 computer.

5. Install Android Games on Windows 11

    Windows 11 supports Android games for users who join the Windows Insider Program and install the Amazon Appstore. If you have already done these two things, all that is left to do is open the app to start downloading and installing your desired games.

  1. 1. Click the magnifying glass icon on the bottom to open the Start menu.

  2. 2. In the top search bar, search for the Amazon Appstore. The full name is Windows Subsystem for Android with Amazon Appstore.

    how to install android games on windows 11 appstore
  3. 3. On the next window, click the Sign in button. 

    how to play android games on windows 11 amazon appstore login
  4. 4. Sign in with your United States-based Amazon account.

    android games on windows 11 login appstore amazon
  5. 5. Select the game and Click the Get button. In this example, we’re downloading Color by Numbers.

    how to play android games on pc windows 11 amazon install game
  6. 6. Click the Download button to start downloading the selected game.

    amazon appstore download game
  7. 7. After the game finishes downloading, the blue bar underneath it changes to Open. Click Open to bring up the game.

    how to play android games on pc windows 11 open game
  8. 8. A small window of the game will appear which can be resized. You can also use the mouth and keyboard to play the game.

    start game how to play android games on windows 11

Once you’ve completed the steps, you can open the app from the Amazon Appstore or find it on the Start menu.

6. Buy an Android Game

  1. To purchase a game, click the price tag to bring up the purchase menu.
  2. You can either purchase with 1-click settings or Amazon Coins. 1-click takes the money directly from the Amazon account’s wallet, while Amazon Coins are a virtual currency.
  3. After purchasing, it will take some time to download.
  4. Once it finishes downloading, you can open the game and play.

What can I do if I don’t have the system requirements?

If your computer doesn’t meet the system requirements, you can upgrade your hardware by installing an SSD or updating your RAM. But there are so many kinds of SSDs that it can be overwhelming, so it’s essential to research and find out which SSDs are the best.

Suppose you do manage to download the Windows Subsystem for Android beta; note that the selection is pretty slim. Only a handful of games are available, and there is no news if more are coming. But the selection of Android apps is pretty decent as it has other games like Minecraft and some non-game apps.

If you still want to try out Android apps on your computer, there are other options. There are Android emulators that allow people to use apps on a Windows 10 and 11 computer, and the best part is that the best ones are free.

The only downside is that you may experience frequent errors like Eversoul 4010 compared to running them on an Android device.

Installing Android games on Windows 11 can help, especially when you cannot play Soul Knight Prequel due to error code 6.

Feel free to comment below if you have questions about the Android feature methods or issues. Suggest guides you’d like to see or information on other Windows 11 features.

Windows 11 Tablet Mode: How to Switch to It

Windows 11 Tablet Mode works differently than in the previous version. It’s more intuitive to use, but it does have a few drawbacks.

In today’s guide, we’re going to take a closer look at it and see what it can do.

Is there a Tablet Mode in Windows 11?

Yes, this feature is still available, but only on compatible devices. This means that you won’t be able to enable it manually anymore on your desktop or any other incompatible device.

How to turn on or off the Tablet Mode in Windows 11?

    How do I switch my Windows tablet to Tablet Mode?

  1. 1. Turn on your device that you want to use in Tablet mode.

  2. 2. For 2-in-1 laptops, while the touch-screen feature works just fine under normal use, rotating the screen all the way back enables the Tablet mode.

    Tablet mode in Windows 11 laptop
  3. 3. For tablets with attached keyboards, the mode will kick in as soon the keyboard is detached.

    Tablet running Windows 11
  4. 4. To check whether tablet mode is enabled, you need to look at the Taskbar icons. As soon as they space out a little, you will know that Windows has switched modes.

In case you are stuck on tablet mode and can’t disable it, an error reported by several users, here’s our dedicated guide that will list the methods to resolve the stuck on Tablet mode issue.

How do I change my tablet to Desktop Mode in Windows 11?

For 2-in-1 laptops, just rotate the screen back to its original or optimal position, and the Tablet Mode will be disabled.

If you have an external keyboard, reattach it and you’ll switch to the desktop mode again.

What is the difference between Windows 10 and Windows 11 Tablet Mode?

Windows 10 Tablet Mode drastically changes your user interface which makes it cumbersome to use. In Windows 11, the interface becomes more touch-friendly and behaves almost the same as in desktop mode.

It’s worth mentioning that you can manually access Tablet Mode on Windows 10, on any device while that’s not the case with Windows 11.

In recent days, we have seen users complain that the touch screen is not working in tablet mode. This isn’t the only issue, a few users complained that certain websites are stuck in Tablet Mode, but that’s most likely a browser or website issue.

Tell us your experience with this feature and your thoughts on whether it’s better than the previous iteration of the OS in the comments section below.

Folder Access Denied on Windows 11: How to Fix it

Xbox Game Bar allows gamers to capture a video of the game screen, take screenshots, and communicate with friends via Xbox Social.

Game DVR is a feature of the app that is responsible for continuously recording your screen so you can capture a clip of the game whenever you want.

In order to prevent Xbox from constantly collecting video from your screen and consuming your resources, you may turn off the auto-capture option.

The Record what happened feature can be disabled by navigating to Settings, followed by Gaming then Captures, and unchecking the box.

It is not yet possible to completely eliminate the Xbox Game Bar in Windows 11. In contrast to Windows 10, the toggle button to turn off the Xbox Game Bar is no longer available in the Settings menu.

If the feature is causing you problems, you can remove it instead of disabling it.

However, if you find that you can’t uninstall it or that the uninstall option is greyed out, we will present you a list of alternative methods to follow, right after we get a better grasp of the Xbox Game Bar.

What does the Xbox Game Bar do?

The answer to the question of what the Xbox Game Bar accomplishes is deceivingly straightforward. It is a gaming overlay that is included in Windows 11. It was created by Microsoft to allow us to use a variety of widgets while playing games on our PCs.xbox-game-bar-search uninstall xbox game bar windows 11

When you use a simple keyboard shortcut, you can gain access to widgets in the Xbox Game Bar, which allow you to capture game clips while still in the game, take screenshots, find friends, monitor and manage performance, and so on, all without having to exit the game you’re currently playing.

Xbox Game Bar allows you to effortlessly record gameplay and take screenshots of your game while you are still in the middle of it. All you have to do is open the Xbox Game Bar and select the Capture widget from the list of options.

In this manner, you can preserve all of your gaming for eternity, from beginning to end, or merely save highlights, such as your most recent boss battles or Pentakills, for later reference.

When you first activate it, the overlay app immediately displays all of the audio channels that are currently active on your Windows device. Each of them has its own volume control slider, which you can use to adjust the volume of each audio channel separately.

Because of the Xbox Game Bar, you no longer have to go back to the desktop in order to modify the volume of other apps or media players. Instead, you can complete the task directly from your game.

What can I do if I can’t uninstall Xbox Game Bar in Windows 11?

1. Use Windows Terminal

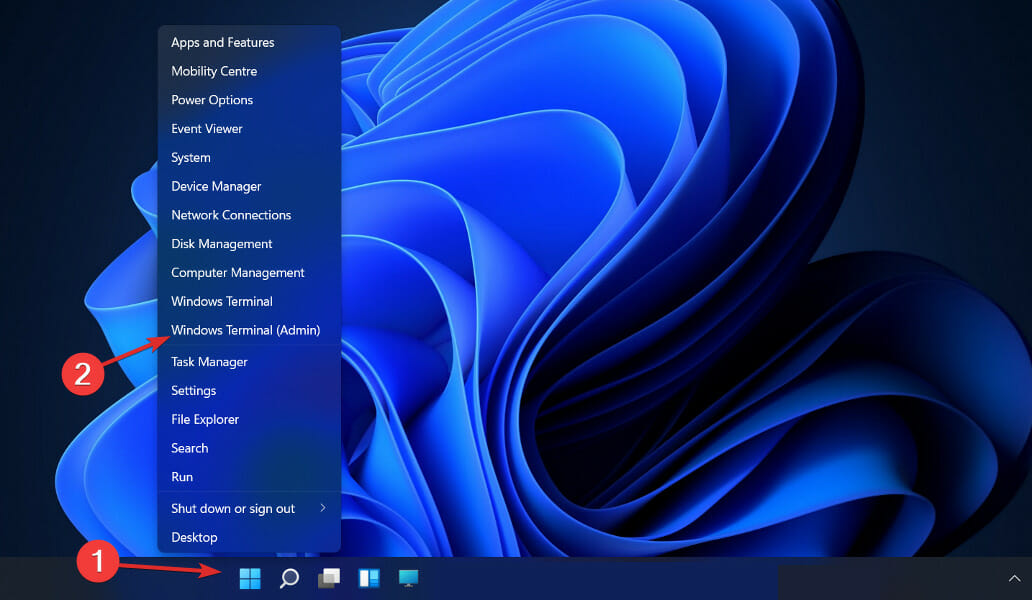
  1. 1. Right-click on the Start icon and select Windows Terminal (Admin). If you do not see it, select Command Prompt or Powershell.

    windows-terminal uninstall xbox game bar windows 11
  2. 2. Select Powershell or Command Prompt from the tool’s menu. If you are already using one of these, skip to step 3.

    Command Prompt
  3. 3. In the command line tool’s window, type or paste in the following command: Get-AppxPackage Microsoft.XboxGamingOverlay | Remove-AppxPackage

    remove-gamebar-command uninstall xbox game bar windows 11
  4. 4. Press Enter to run the command.

  5. 5. The tool will now show the progress of the removal. Do not close the window at this stage as the removal is still in progress.

  6. 6. Once done, try to press Windows + G. The Xbox Game Bar overlay shouldn’t show up as it is already removed from your Windows 11.

  7. If you cannot remove the Xbox Game Bar using traditional methods, you can force uninstall it using the built-in Windows Terminal. All you need to do is open this tool and input a command, then it will delete the Xbox Game Bar for you.

To reinstall the app again, simply go to Microsoft Store, search for Xbox Game Bar, and install it from there.

2. Disable the launch shortcut

  1. Press the Windows key + I to open the Settings app, then go to Gaming followed by Xbox Game Bar.gaming-xboxgamebar  uninstall xbox game bar windows 11
  2. Turn off the toggle next to the Open Xbox Game Bar using this button on a controller option. This will only disable the launch shortcut.turn-off-gamebar-shortcut  uninstall xbox game bar windows 11
  3. To make sure the app doesn’t run in the background, go back to Settings, then Apps and lastly Apps & features.apps-apps-and-feature uninstall xbox game bar windows 11
  4. Search for the Xbox Game Bar app, click on the three-dot menu, and choose Advanced Options.xboxgamebar-advanced-options  uninstall xbox game bar windows 11
  5. Scroll down until you meet the Background apps permissions section and choose the Never option from the drop-down menu.never-bg-process uninstall xbox game bar windows 11
  6. Then scroll down further down the page and click the Terminate button to immediately stop the app and its related processes.terminate-xbox-gamebar  uninstall xbox game bar windows 11

Do I need Xbox Game Bar and is it safe?

Gamebar.exe is completely safe. It is a genuine program designed and distributed by Microsoft that manages the background operations that are required in order for the Xbox Game Bar to function properly.

xbox-game-bar-widgets uninstall xbox game bar windows 11

In fact, it comes preinstalled on all Windows 11 computers as the default program. There are, however, some hazards that could arise.

A small number of customers have experienced instances where malware is attempting to pass itself off as the Xbox Game Bar. If you are concerned about the chance of this happening, you should pick an antivirus and malware detection tool that you can rely on, our recommendation is to give it a try to TotalAV.

As a general rule, gamebar.exe will consume very little processing power. It is possible that this figure will climb somewhat if you are recording gameplay footage, but during normal day-to-day, you should see it utilize no more than 1 to 2 percent of your system’s resources in Task Manager.

If you’re a frequent gamer on either Xbox or PC, the Xbox Game Bar can be a useful tool that allows you to stay in touch with friends, capture incredible gameplay moments, or simply listen to music while gaming.

But, if you solely use your Windows computer for business or online browsing, you don’t need the feature. While there is no danger in leaving it enabled, you can quickly disable the gamebar.exe by following the steps outlined above and never have to worry about it again.

For more information and potential solutions that may be applicable to Windows 11 as well, check out our article on how to remove Xbox Game Bar in Windows 10.

Alternatively, we have already prepared a guide on how to fix the game bar if you encounter errors and it stops working in Windows 11.

Additionally, users have benefitted from reading our post on how to fix a buggy Xbox Game Bar that can’t be disabled in Windows 11. Make sure to take a look at it!

Let us know in the comments below which solution worked best for you as well as how often you use the Xbox Game Bar. Thanks for reading!

How to Register the Firestick for Your Amazon Account

The Amazon Fire Stick is an amazing device when you come to realize what it can do.

Down to its very essence, it is a stick you plug into your TV, and it will turn it from a traditional TV into a Smart TV.

This means that you can now access various streaming services, such as Netflix, Hulu, or HBO GO. More so, you can also install apps on your TV now.

However, it does have slightly less power than the TV Box, probably because of the reduced size. Of course, all of these facilities can only be achieved if you have an Amazon account.

If you’ve accessed this guide, then you are probably wondering how to set up an Amazon Fire Stick from scratch.

As such, this step-by-step guide will show you how to completely install your Amazon Fire Stick from A to Z.

What are the requirements to set up the Amazon Firestick?

Before registering per se, you need to set up the device. As such, you must check that you have all the necessary tools:

  • A compatible TV that has HD or UHD plus an HDMI port
    • Fortunately, most TV screens today will have this
  • A wireless internet connection
  • An Amazon account.
    • You don’t have to be an Amazon Prime customer to use the Amazon Fire TV Stick
    • However, you do have to have a regular Amazon account
    • If you don’t have one, you can simply create one in later steps, when setting up the devices
  • 2 AAA batteries for your TV Stick remote
amazon fire tv stick how to register smart TV

If you have everything needed, you can proceed to set up and register your Amazon Fire Stick.

How can I set up my Amazon Firestick?

1. Connect the Amazon Fire Stick to a power source.

2. Plug the Fire TV Stick directly into the HDMI port on the back of your TV.

3. Turn on the TV and select the channel corresponding to the port you inserted the Fire Stick in.

4. Put the batteries in your remote.

5. Hold the HOME button pressed for 10 seconds for it to pair with the Fire Stick.

6. Follow the on-screen instructions to connect your Fire Stick to your Wi-Fi network.

Register the Amazon Firestick

    After you ensure that you have all the necessary tools to register your Firestick, you can proceed with the process.

    The registration can be done directly from your Amazon account as soon as you connect the Firestick to the Wi-Fi network.

  1. 1. Open the TV that is connected to the Firestick.

  2. 2. Go to Settings.

  3. 3. Navigate to My Account.

  4. 4. Select Register.

  5. 5. Enter your Amazon account information when prompted. If you ordered the Fire Stick straight from Amazon, it will come pre-registered, and the associated name appears on this screen.

Now that you’ve registered your Fire Stick, you are all set to enjoy a whole new dimension of multimedia streaming.

Once your Fire Stick is up and running, you can enhance your streaming experience by learning how to activate the History Channel on your Fire TV Stick. This simple step lets you unlock exclusive documentaries and shows right from your device.

You can also find out how to install Sony apps on your smart TV from our website.

Got any questions regarding the Amazon Fire Stick? Let us know in the comments section below.

How to Automate Tasks in Windows 11 Using Macros

Some office applications, such as MS Office, include macro-recording tools. With those, users can record macros to automate repetitive tasks. Then, they can play macros to carry out their recorded tasks within their applications.

What is Power Automate?

Now, you can automate repetitive tasks within Windows 11 much the same with its Power Automate Desktop app. Note that it comes pre-installed and enables users to record task sequences with flows, which are much the same as macros.

For example, a lot of users often manually empty their Recycle Bins in Windows to free up disk space. With Power Automate, you could record a flow that empties the Recycle Bin.

When played, that flow will carry out all the recorded mouse clicks for emptying the bin.

So, Power Automate can be a very useful app for any user who needs to carry out repetitive tasks in Windows 11 with regularity. You can record both desktop and browser task flows with that software as outlined below.

Is Power Automate only for Windows 11?

Power Automate is also available for Windows 10. However, it doesn’t come preinstalled with that platform. You must install the Windows 10 app by clicking the Get button on its Microsoft Store page.

This app is also available for mobile platforms. You can add Power Automate to Android mobiles from its Google Play page. The iOS version has a download page on the Apple Apple Store.

Is there any prerequisite software or account needed for Power Automate?

NET Framework 4.7.2 or higher must be installed on your PC to run Power Automate. Download the latest version from the .NET Framework 4.8 page if that software is seemingly missing on your computer.

Then install .NET Framework 4.8 with the downloaded installer for it. You’ll also need a Microsoft account to utilize Power Automate.

If you don’t have one already, open the Microsoft account page to set one up. Then, follow the steps below to sign in and record some flows with Power Automate.

How can I record flows with Power Automate in Windows 11?

1. Open and sign in to Power Automate

  1. Click the magnifying glass taskbar icon.
    The magnifying glass button automate tasks windows 11
  2. Enter the keyword Power Automate within the search utility’s text box.
  3. Select Power Automate in the search tool’s results to open a Power Automate Desktop window.
  4. Click the Sign in button on that window.
    Sign in button automate tasks windows 11
  5. Enter the email address for your Microsoft account within the email address box, and press the Sign in button.
  6. Type in your MS account password, and click Sign in again.

2. Record a desktop flow task

  1. 1. First, click the + New Flow button.

    windows 11 macro desktop power automate
  2. 2. Type a name for the flow in the text box, and then press the Create button.

    windows 11 macro create button
  3. 3. Click the Desktop recorder button.

    create flow windows 11 desktop recorder
  4. 4. Press the Record button.

    power automate record option
  5. 5. Minimize the Desktop recorder window after starting the recording.

  6. 6. Carry out the task you need to record.

  7. 7. Click the Finish button on the Desktop recorder window when you’re done.

  8. 8. Thereafter, click the Run button on the editing window for your recorded flow to play it. Alternatively, you can select to play the recording from your My flows list.

    play button power automate
  9. 9. Click File and Save on the menu.

    save macro windows 11
  10. 10. Press the OK button to confirm.

  11. With Power Automate, you can create a macro that records your desktop. You can configure all the settings in the tool, and it will do the task for you.

3. Record a browser task

  1. First, click the + New flow button on the Power Automate Desktop window.
  2. Enter a title for your new flow, and click the Create button.
  3. Click the Web recorder option.
    Web recorder option automate tasks windows 11
  4. Select a browser to record the flow for.
    The Specify web browser window automate tasks windows 11
  5. When the Web Recorder window opens, it will say that you need to install the Power Automate extension for a selected browser if it’s not installed. Click Get Extension on the dialog box.
  6. Then click the install button for the extension on its web page to add it. Make sure the extension is also enabled in your browser after installing it.
  7. Thereafter, you’ll need to repeat steps three and four to bring up the Web Recorder window.
  8. Click the Record button on that window.
  9. Then carry out the task to record in your browser.
  10. Press the Finish button on the Web Recorder window.
  11. Click the Save (disk icon) within Power Automate’s editor window.
    The save button automate tasks windows 11
  12. Press the OK button to confirm.

For a boost of productivity in your daily workflow, check out how the Scribe Chrome extension may be a better fit or this guide on how to automate browser actions on Windows 10. The same tips may be applied in Windows 11 as well.

What are the best alternative apps to Power Automate?

There are various third-party automation software solutions available for Windows 10 at least. Macro Express, Robo Task, and JitBit Macro Recorder are three notable applications that incorporate macro recorders. Our list including the best programs to automate PC tasks provides further details.

Keep in mind that Windows 11 is a very new platform at the moment. Double-check that those applications are compatible with the latest OS.

Try out their trial packages to check if you can install and run them on your Windows 11 PC.

Even more, feel free to record browser macros with the iMacros extension. That’s an extension you can record tasks in Chrome, Firefox, and Internet Explorer. Since it’s a Chrome extension, you should also be able to install it on other Chromium browsers.

As it comes with Windows 11, and even with occasional network errors, Power Automate is well worth a look before considering other alternatives. It’s a relatively straightforward app with which you can record automated repetitive and monotonous tasks that can be useful for business and home users.

Although more limited than Power Automate, Task Scheduler is ideal for automating tasks. With that utility, you can schedule all kinds of software and files to open at specified times. Task Scheduler is certainly worth noting if you want programs to start automatically.

So, you don’t need to be a programmer to automate tasks in Windows 11. With Power Automate and Task Scheduler, you can automate almost anything in Windows 11 without needing to manually code any complex scripts.

Can I automate tasks with Task Scheduler?

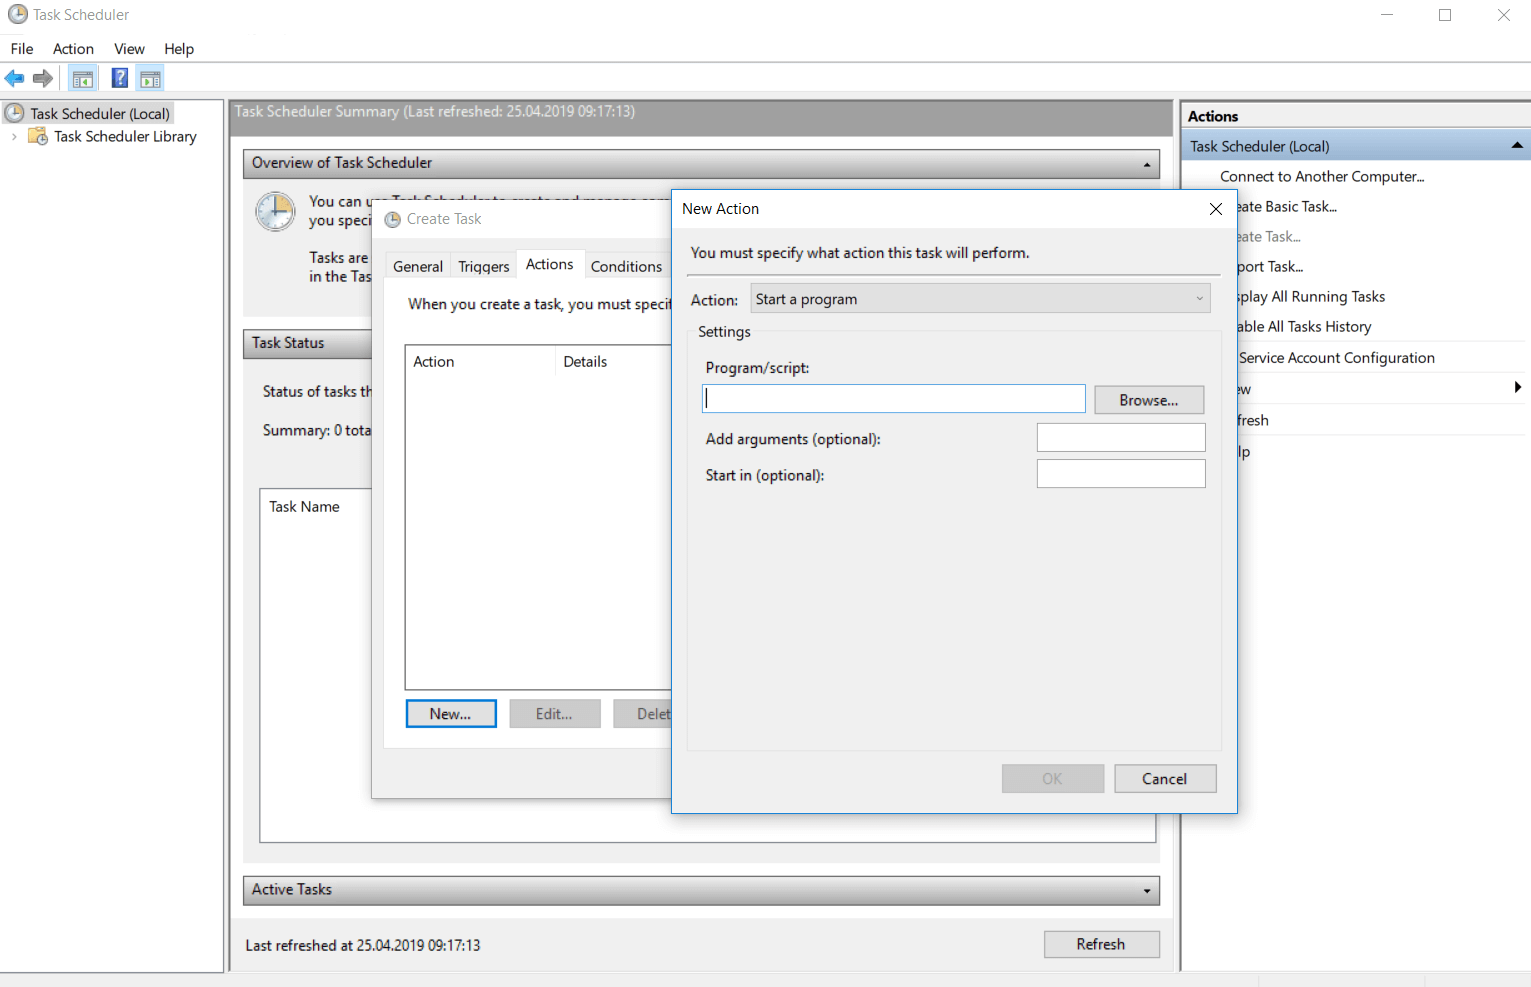
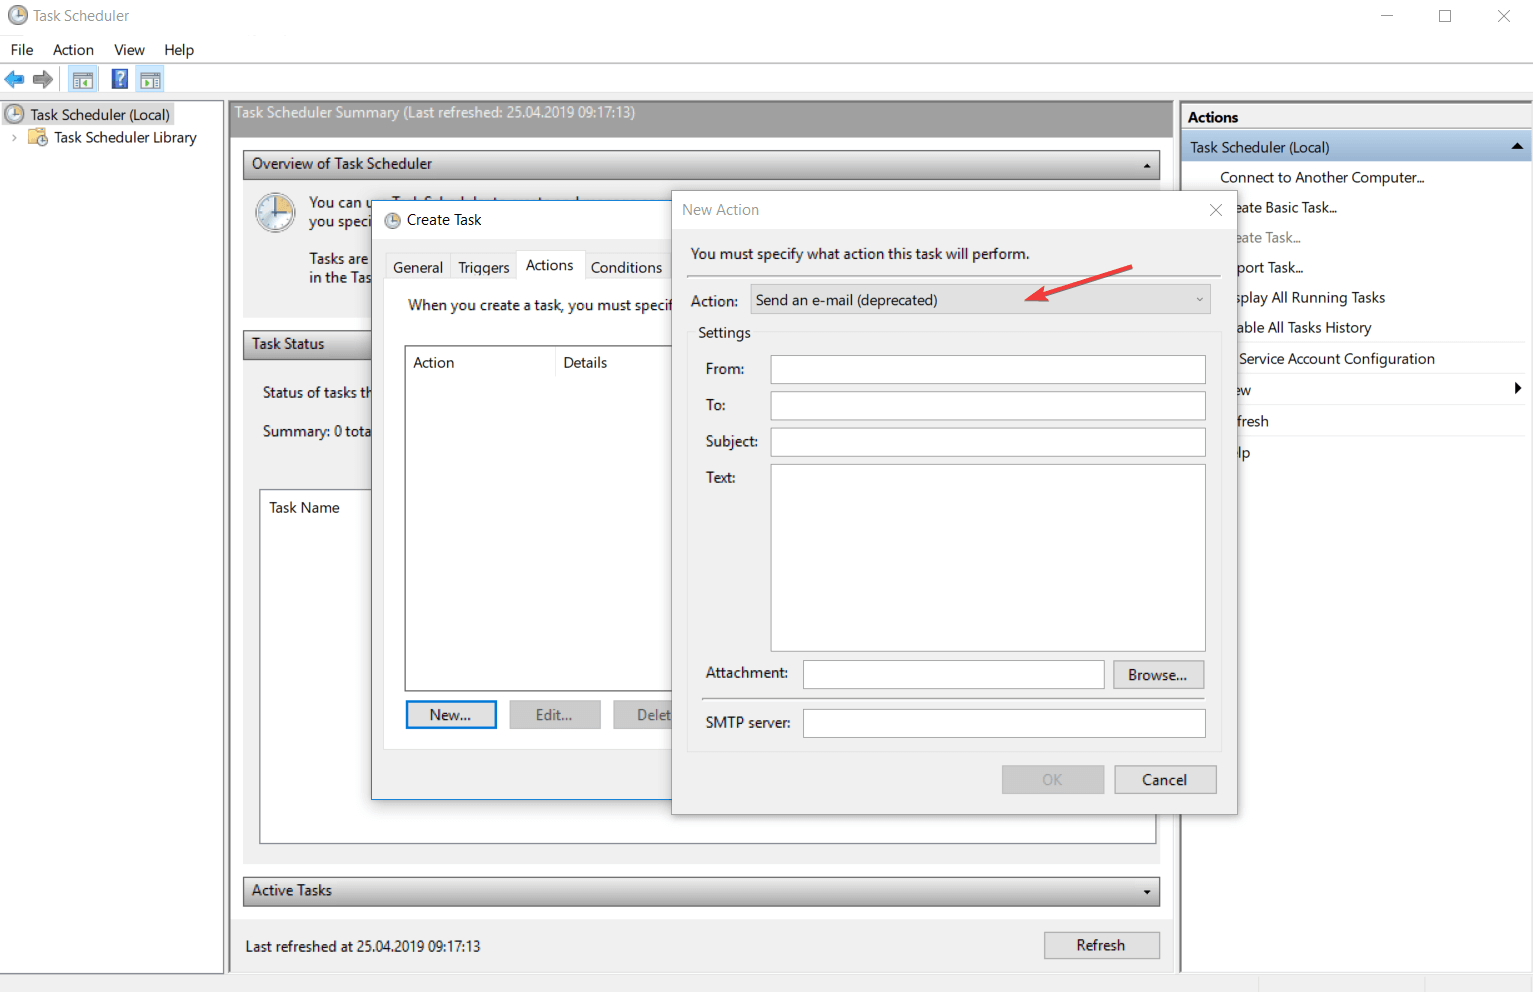
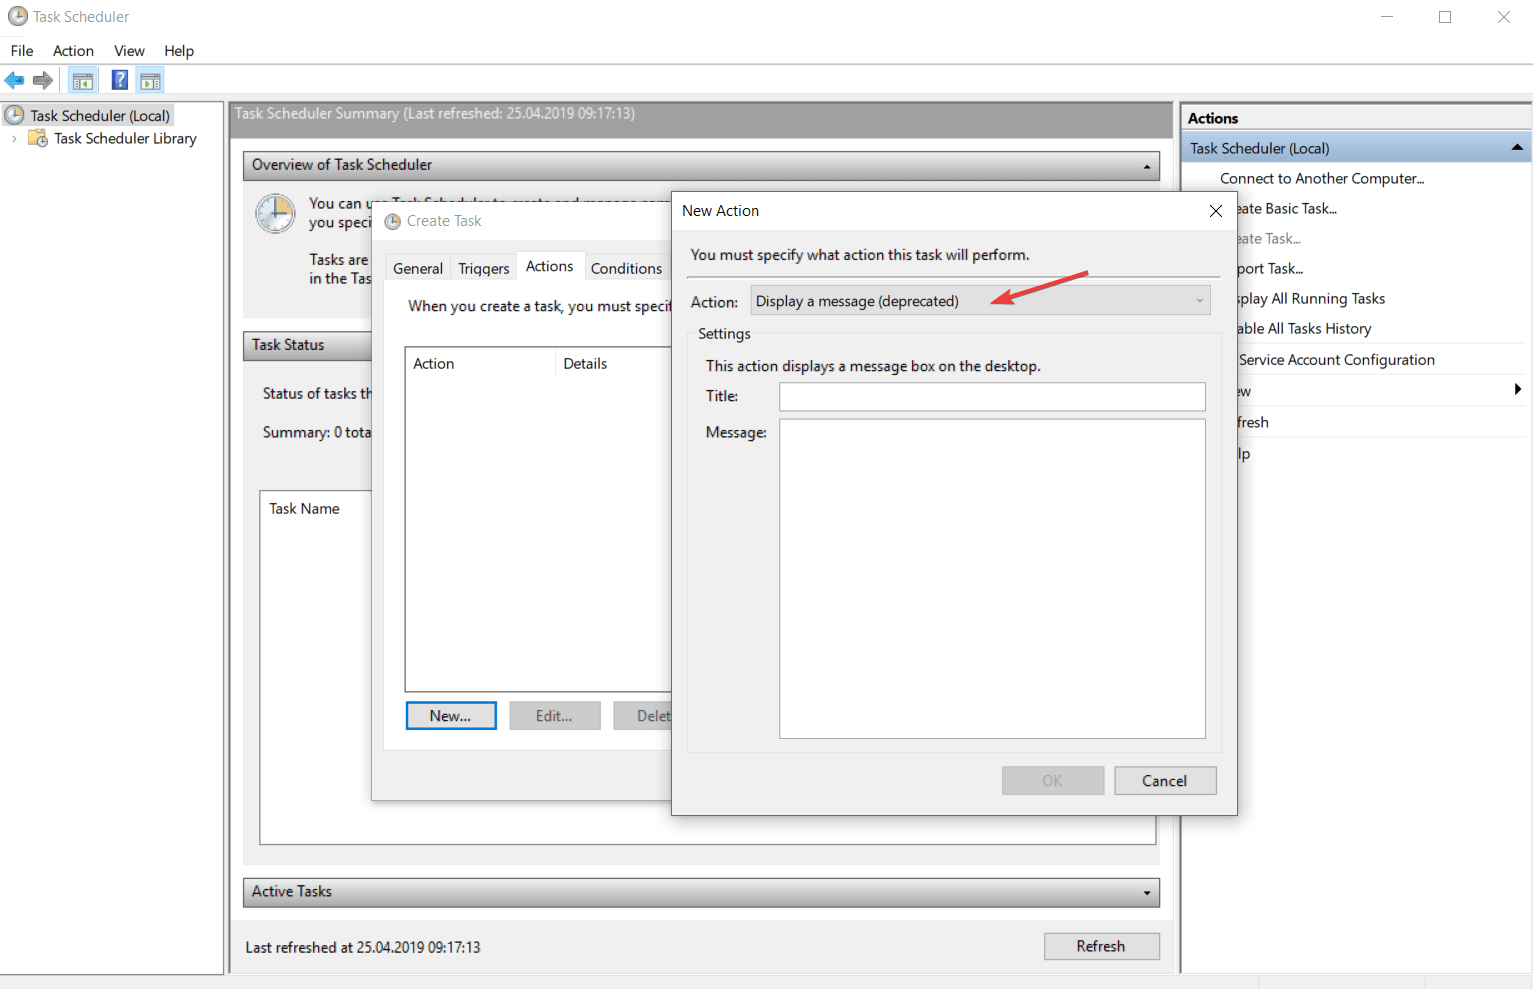
Task Scheduler remains in Windows 11, but it hasn’t changed much. You can still utilize that tool to set up scheduled tasks for opening programs, sending emails, and displaying messages at specific times.

However, you can’t record macros with Task Scheduler. Nevertheless, Task Scheduler is a viable alternative to Power Automate for automating startups for software.

You can also use it to automatically execute Command Prompt commands by adding in arguments. That’s how you can set up tasks for opening programs with this utility:

  1. First, click the search tool’s magnifying glass button on the taskbar.
  2. Next, type the keyword Task Scheduler in the window.
  3. Then select Task Scheduler in the search results to open that tool.
  4. Click Create Basic Task on the right side of the Task Scheduler window.
    Create a Basic Task option automate tasks windows 11
  5. Enter a title and description for the scheduled task, and press the Next button.
  6. Select a trigger option, and click Next to continue.
    Trigger options automate tasks windows 11
  7. Then select more specific time settings, and select the Next option.
  8. Choose the Start a program option.
    Start a program option automate tasks windows 11
  9. Click Next to proceed.
  10. Then click Browse on the Create Basic Task Wizard.
    The Browse button automate tasks windows 11
  11. Select a program for the task to start, and click the Open button. Alternatively, you could select a file to open with its default software.
  12. Press the Next button again.
  13. Finally, select the Finish option.

After that, the program you selected will automatically start at the time you configured it. You can edit the task anytime by right-clicking it in Task Scheduler and selecting Properties. Then click the Edit buttons for actions and triggers on its properties windows.

To set up a task that executes a command, you must select it to open PowerShell or Command Prompt. Then, enter the command to start within the Add arguments box. For example, you could set up a task to run a system scan by entering this command: sfc /scannow

For more information about using the Task Scheduler in Windows 11, check out our dedicated article.

Just as you can see in this guide on how to schedule tasks in Windows 10, as a Windows 11 user, you may also enable various scripts and schedules to run at a specific time or event, depending on your needs.

Even more, take advantage of the best Windows task scheduler software if you want to rapidly automate repetitive tasks.

For any questions and more suggestions, don’t hesitate to access the comments section below.

How to Convert Apple Pages to Word Documents Quickly

While macOS users can also use Microsoft Office programs, many are still partial to their own dedicated software. So, at some point, it’s important to be able to convert Apple Pages to Word documents.

In this step-by-step guide, we will show you how you can convert an Apple Pages document into a Microsoft Word document.

Can Microsoft Word open Apple Pages?

Although you can open a Word document in Apple Pages, Microsoft doesn’t recognize the Apple document format.

That’s precisely the point why if you’re a macOS user, you would want to convert the Pages document to Word. Don’t worry because the conversion is simple.

How can I convert Apple Pages to Word Documents?

    Apple Pages files can be easily converted into DOC or DOCX format through the Pages app’s built-in settings. All you need to do is open the file in Pages and export it as a Word document.

  1. 1. Open a .pages file in Apple Pages.

  2. 2. Go to File.

  3. 3. Select Export. You will see multiple available options.

    convert apple pages to word export
  4. 4. Choose Word.

  5. 5. Click Next.

  6. 6. Select the export location for the new Word document.

  7. 7. Click Export to start the conversion.

Other settings you can choose when exporting

Normally, the Word tab is automatically selected in the Export Your Document dialog box. This is mainly because there are several other formats you can export your document to as well.

If you are looking to save the document in a specific Word version, you can select the Advanced options.

This will allow you to specify whether to export the document as:

  1. A .docx file
    • Word 2007 and over
  2. A .doc file
    • Word 2003 and earlier
doc docx file

More so, those of you that want to password-protect the resulting file can check the Require password to open check box.

By following these steps, you should be able to transform a .pages file into a .doc or.docx file easily.

However, keep in mind that given the different formats, there may be inconsistencies in terms of the fonts and special symbols used.

That is when you will be prompted to replace the missing fonts with ones that you already own. Other than this minor inconvenience, the conversion process should run smoothly.

Do you prefer to use pages or Microsoft Word as your text editor? Let us know which you prefer and why in the comment section below.

How to Change Time and Date on Windows 10?

Time and date are very important settings on Windows 10 because every app on the system, backups, etc. rely on that information.

Moreover, if you want to restore your system to a previous iteration, having the wrong time and date can lead to errors. In this article we will show you how to change date and time on Windows 10 to avoid any type of those issues.

How to change the time and date on Windows 10?

  1. 1. The first thing you need to do is right-click the clock on the taskbar and select Adjust date/time.

    change date and time windows 10 taskbar
  2. 2. You’ll be directed to Time & Language tab in the Settings app.

  3. 3. The safest way is to make sure that the Set time automatically switch is ON. That will synchronize the time on your PC with the one on the Microsoft Time server.

    how to change time on windows 10 automatically
  4. 4. Next, you will see the Related settings section.

  5. 5. Click on the link Date, time & regional formatting to modify the format according to your needs (you can set the first day of the week, short date, long date, short time and long time and so on).

    how to change time on windows 10 related settings
  6. 6. The date and time you chose are now set up on your PC.

  7. Adjusting time and date can be easily done through the system’s built-in settings. You can choose to set the date automatically or manually.

    As you can see, setting the right time and date on Windows 10 is extremely easy and you can do it with just a few clicks.

    Of course, you can also turn OFF the Set time automatically switch and hit the Change button below to set it manually but we wouldn’t recommend relying on other conventional methods.

Why are the correct time and date so important on Windows?

The time and date on a PC are not just simple reminders for you to check from time to time instead of looking at your smartphone.

Setting the incorrect information can have implications even on Internet access so here are a few of the most important reasons to set the right time and date:

➡ Connection errors

Typically, the time and date don’t affect the Internet connectivity but if they are way off when the browser looks for PKI certificates, they may look as expired or not valid and you will get some warnings.

Also if need to authenticate on a network for access and the time is off, your computer may not trust the certificate belonging to the authentication server and refuse to connect.

➡ Computer synchronization

If your PC is part of a network, it will need to synchronize with the other ones in order to communicate and exchange data.

Being part of that network works on timestamps that are required for identification within the group. For us, users, time is relative but for machines, time and date are crucial.

➡ Programming software

Software development systems depend on timestamps to know what needs to be recompiled.

Thus, using a remote file system mounted on a PC at the wrong time even by more than a few seconds can lead to serious consequences.

That’s because filesystems store metadata including the timestamps for file creation, modification, and access.

If you want to learn more about how to set the time automatically on Windows 10, be sure to check out this guide on Set Time Automatically on Windows 11.

So, this is how you set the time and date easily on Windows 10. Additionally, you can read our guide on what to do if the Windows Server is not getting the correct time.

If this post was useful or if you have any other questions, feel free to use the comments section below.

5 Best Wi-Fi File Transfer Software To Use On Your PC

Transferring files through Wi-Fi is one of the best and fastest ways of sharing files from your laptop to other devices like phones. We will take you through our best five picks of Wi-Fi file transfer software to use on your PC. Likewise, we’ll discuss how to transfer files through Wi-Fi from your laptop.

What is the best software for Wi-Fi file transfer?

Ease US Todo PCTrans – Best PC-to-PC transfer

This is a reliable tool for transferring files via Wi-Fi from one PC to another. It supports all versions of Windows and can transfer multiple files at once. Ease US can also be used to back up and recover files on the PC.

Further, you can use this software to transfer via the internet or offline. Also, it supports cloud storage transfers and a host of other features. This is one of the best laptop Wi-Fi file transfer software.

You may link two computers to the same LAN and transfer files from one to the other across the network.

Transfer through Image Files allows you to generate images of your files, applications, and accounts and then export them from a source PC to a target PC. It allows you to copy via a wireless connection as well as by sharing an ISO file containing an image of the disk to be copied.

Ease US Todo PCTrans

It allows you to move data from one PC to another in a quick method through Wi-Fi and LAN.
Free trial Visit Website

SHAREit – Best for Wi-Fi transfer

SHAREit is a cross-platform software for sharing files and data from mobile devices to PC. The app is available on Windows, macOS, iOS, and Android. It uses a Wi-Fi connection to link the computer and the mobile phone.

To transfer data between devices, ShareIt uses the WiFi direct idea or a WiFi hotspot. It essentially establishes a file server (your device) and a network (WiFi hotspot or direct). And, because no data connection is necessary, it utilizes the full speed of your WiFi.

The Share It app optimizes chunk size as well as reading and writing files on the sender and recipient sides.

However, the software is one of the best and easiest to use as it doesn’t require lots of experience before use. We recommend it as the best laptop for mobile file transfer software.

⇒ Get SHAREit

Xender – Best for PC-to-phone

Xender is a simple-to-use file-sharing software. It doesn’t require any app download before connecting to your laptop. Users only need to install the app on their mobile devices and connect to the computer through Wi-Fi.

There are over 700 million active users worldwide, speaking over 30 different languages. The program is really basic and straightforward to use and everyone can understand it quickly.

Xender, with its creative technology and high-performance worldwide server network, offers numerous great capabilities for connecting a phone to a PC or smart TV.

However, it allows you to transfer media files like videos, images, and others. It is available across operating systems like Android and iOS. Likewise, it is available on app stores like Google Play Store and Apple App Store.

⇒ Get Xender

Droid Transfer – Best for mirror transfer

Droid Transfer allows you to access almost all of the stuff on your Android phone and do anything you want with it. It provides a free edition for new users as well as a one-time payment option for those who wish to achieve further tasks.

When you use your mobile devices on a regular basis, you will ultimately run out of storage space. You must either remove certain files or copy some of them to your PC.

You can enable bulk USB storage for this, but it’s not very user-friendly. This is where Droid Transfer comes in, by giving you a more structured and methodical means of accessing everything.

This software comes with more than just Wi-Fi file-sharing features. It allows you to mirror your phone on your computer. It is one of our best recommendations because it is easy to use.

Also, it allows you to copy files directly from the phone mirror display on your computer.

⇒ Get Droid Transfer

Get Wi-Fi Transfer – Packed with great features

Get Wi-Fi Transfer is a Windows application that allows you to transfer files between your mobile device and your PC. It can be set up with a password to secure the files transferred over to the other device.

Only Google Chrome allows you to upload or download multiple files at once, as well as upload entire folder structures. Get Wi-Fi Transfer program also allows you to delete, rename, copy, compress, or unzip files and view images straight in the browser.

Furthermore, it allows access to external SD cards and USB storage devices while the device is in hotspot mode. You can set it to automatically connect to your home network, although this is optional and customizable.

However, you need to connect the two devices to the same network to initiate the connection. The app works for Windows 10 upward.

⇒ Get Wi-Fi Transfer

How can I transfer files from my laptop through Wi-Fi?

Use the Nearby sharing feature on Windows

  1. Click on Start and select Settings from the drop-down.
  2. In Settings, go to System.
  3. Scroll down and select Shared Experience.
  4. Toggle On the Nearby Sharing option from the right-side tab.
  5. Press the drop button beside I can share or receive content from and select Everyone nearby.
  6. Select a location for saving received files.
  7. Open File Explorer on your laptop and navigate to the file you want to share.
  8. Right-click on it and select Share from the options.
  9. Click on the PC name icon of the recipient to transfer the file through Wi-Fi.

Steps 1-7 configure your laptop to be able to use the Nearby Sharing feature. Note that the same steps apply to the receiving laptop.

Users can find it beneficial to read our article about Windows 10 Nearby Share supports iOS and Android for easy file transfer.

How can I increase my Wi-Fi transfer speed?

Update your Network Adapter

  1. Click on Start, type Device Manager in the search box, and then Enter.
  2. Select Device Manager and click on Network Adapters.
  3. Right-click on your adapter and click on Update Driver.
  4. Then select Search automatically for updates.

Windows will install updates if there are any available. Restart your computer.

However, file transfer on Windows may encounter a lot of difficulties. Users complain about slow file transfer, which can result from various issues. Hence, we recommend that users read through our article about how to fix slow file transfer on Windows 10.

Alternatively, Windows Share to Gmail is a more direct way that is built-in Windows and lot faster.

If this guide is helpful, kindly leave suggestions or feedback in the comments section. We’d like to hear from you.

Turn Off And Permanently Disable Sticky Keys in Windows 11

It can be quite irritating when you’re working on something, and suddenly, Sticky Keys turn on. This is why many want to know how to turn off Sticky Keys on their Windows 11 PC.

While this feature is excellent for users with disabilities, it can sometimes interfere with your daily activities, so today, we’ll show you how to deactivate it.

Why did Sticky Keys turn on?

This feature turns on whenever you press the Shift key five times quickly. This can happen while working on a document or while playing games.

How do I turn off Sticky Keys on my keyboard?

1. Close the dialog box

  1. Stop what you’re doing and look for the dialog box.
  2. Click on No.
  3. Now, resume your previous activities.

Keep in mind that this is just a temporary solution, and this dialog box can appear again.

2. Use the Settings app

  1. Press the Windows + I keys simultaneously to open Settings.
  2. Select Accessibility on the left pane then click on Keyboard on the right pane.
  3. Toggle the Sticky keys button off.

To explore more accessibility options and keyboard tools, read our complete guide on Accessibility settings in Windows 11.

To learn more about accessibility, visit our Ease of Access Keyboard Settings guide.

3. Use Control Panel

  1. 1. Press the Windows + I keys simultaneously to open Settings.

    turn off sticky keys settings
  2. 2. Type Control Panel in the search bar and click Open.

    launch control panel
  3. 3. Select Ease of Access Center and click on Make keyboard easier to use.

  4. 4. Uncheck the Turn on Sticky Keys box.

    turn off sticky keys control panel settings
  5. 5. Click Apply to save the changes and turn off sticky keys.

  6. A great method to turn off Sticky Keys is to use the built-in Control Panel. The Ease of Access Center from Control Panel allows you to turn on/off Sticky Keys with a simple click.

Should I enable Sticky Keys?

In most cases, no. However, if you have mobility issues or trouble performing certain keyboard shortcuts, feel free to use this feature.

What can I do if I can’t turn off Sticky Keys in Windows 11?

  1. Press the Windows + R, type regedit, and press Enter.
  2. Navigate to the following location and click on Flags: Computer\HKEY_CURRENT_USER\Control Panel\Accessibility\StickyKeys
  3. Under Value data, type in 58, then press OK.

If the Sticky Keys become a nuisance, we hope you can use one of our recommended solutions to turn the feature off. Other features like the Filter Keys can also be switched off if they’re a problem.

There is also an article on our site on how to turn off sticky keys on Windows 10 that you can check out.

Should you encounter any other related problems, such as Sticky Keys not working, feel free to refer to our expert guide and try out our solutions.

Some keyboard keys may also not be working, but worry not, as we have a dedicated guide to address the issue, too.

Let us know of any additional thoughts you may have about Sticky Keys in our comment section below.

How to Enable Dark Mode in Windows 10

If the ordinary look of Windows 10’s user interface already has you bored, you can change the theme and refresh it.

Since the release of the Anniversary Update, Microsoft made the option to switch to the Dark mode available to all users.

The Dark theme will apply to all elements of Windows 10 but based on our experience, you’ll mostly see it in the Settings app.

What is Dark mode and should you be using it?

Whether it’s called Dark mode, Dark theme, Night mode, or Black mode, it is a display setting that comes in the majority of apps, systems, and devices including smartphones, tablets, desktops, and laptops.

The whole idea behind this concept is to reduce the light emitted by the screens of these devices thus protecting your eyes.

However, the subject is still up for discussion because although some experts believe it’s healthier to read text against a dark background other studies have shown the contrary.

Returning to the Dark mode in Windows 10, you should know that switching to this color scheme is only going to affect the system and the native apps, not all the third-party ones.

How can I Enable Dark Mode in Windows 10?

Changing the mode is extremely easy, requiring just a few mouse clicks. Don’t worry, you’ll be able to activate the Light mode at any time in case you don’t like the new look.

  1. 1. Click the Start button and choose Settings.

    windows 10 settings window
  2. 2. Open Personalization from the list of available options.

    personalization windows 10 settings
  3. 3. Now go to Colors on the left pane, then click the Choose your color drop down menu and select Dark.

    enable dark theme windows 10 settings
  4. 4. It will take a few seconds but the system will change all the windows to Dark mode.

  5. 5. You can also choose the Custom color theme, to be able to switch to Dark mode only for the Windows system or the apps.

    windows 10 custom theme
  6. 6. If you are not satisfied with the result, come back to this menu and select the Light or Custom color to start over.

    windows 10 enable dark mode personalization
  7. If you are looking to find a way to easily enable Dark Mode on Windows 10, you can do it through the Personalization tab in Settings. The OS’s built-in settings can help you tweak your screen color to your liking in just a few steps.

The ability to choose between Dark and Light modes has been present on Windows 10 Mobile (and even Windows Phone 8.1) long before it was applied to Windows 10.

When it comes to PCs, Microsoft Edge already had this option way before it was added to the system overall, but something prevented Microsoft from delivering the Dark mode to the rest of the system until now.

Use Dark mode in any app of your choice

As we have mentioned above, most of the third-party apps have a Dark mode setting on their own so if turning it on on Windows 10 didn’t change their appearance, here’s what to do:

  1. Open the app you want to switch to Dark mode and click on its Settings menu. We’re showing an example for Chrome where you can find it by clicking on its three points icon from the top right of the window.
  2. Now click on the Theme link.
  3. You will be redirected to the Chrome web store and if you scroll down a bit, you will see a whole category of free dark and black themes. Just browse them and select the one you like best.

As you have noticed, Chrome doesn’t have a default setting for Dark theme or mode so you need to select a different theme from the store.

However, in most apps, you will find the dark color scheme in their Colors, Display, or Appearance section from their Settings menu.

If you’ve switched to the new OS, we also have a complete guide on how to activate Dark Mode on your Windows 11 PC.

If you’re a Chrome user, you might be interested in our guide on how to disable dark mode in Chrome, so don’t miss it.

Do you like using Dark Mode on your Windows 10 PC? Let’s discuss that in the comments section below!

3 Easy Ways to Turn On the Microphone in Windows 10

After installing Windows 10, the microphone can be disabled. If this happens, there are a few things you can troubleshoot before going out and buying an external or internal sound card.

The free upgrade for Windows 10 was available to everyone at one point. This gift did not come with no strings attached. The upgrade disabled microphone in PCs across the world.

If your computer is running Windows 10, the microphone should function regardless of whether you are using an HP, Dell, Lenovo, or any other laptop or desktop.

If the microphone driver is correctly identified and activated in Windows, it should function with the majority of microphones, whether they are in a headset, headphone, or standalone device.

There are a couple of settings in the Settings app of Windows 10 that will turn off your microphone across all programs. Even desktop programs cannot get microphone input if your webcam is off in settings. Regardless of the situation, we have the solutions here.

Quick Tip:

Before digging into the troubleshooting process we recommend you download and install the latest microphone drivers. A missing or damaged driver won’t allow the microphone to be set up properly.

Using a dedicated tool like Outbyte Driver Updater is a tested method we applied for this issue. Due to its large library, you can rest assured that you will get the latest version of the drivers.

Outbyte Driver Updater

A lightweight utility that can automatically scan and fix damaged or outdated drivers.
Free trial Download here

How can I enable the microphone on Windows 10?

Some users will get frustrated easily and go out to buy an external sound card but for those users who would like to troubleshoot the issue, take a look at the following solutions.

1. Via Device Manager

  1. 1. Access the Winx Menu by simultaneously pressing the Windows + X keys.

  2. 2. Select Device Manager from the list.

    device manager
  3. 3. Click on Sound, Video and Game Controllers.

    device manager sound controllers
  4. 4. Right click on the sound card that is currently installed on the PC.

  5. 5. Choose Enable device.

  6. 6. Restart the computer to finish the process.

  7. If your microphone is not enabled, you can manually turn it on using Device Manager. This built-in tool allows you to easily enable or disable your sound devices, as well as update their drivers.

Note: If there is a yellow warning icon beside the name of the sound controller, the drivers for that controller are either damaged or uninstalled.

2. Using Sound Settings

  1. At the bottom right corner of the windows menu Right Click on the Sound Settings Icon.
  2. Scroll up and select Recording Devices.
  3. Click on Recording.
  4. If there are devices listed Right Click on the desired device.
  5. Choose enable.hyperx problems with sound
  6. Right Click anywhere in the screen and select Show Disabled Devices
  7. Select the microphone from the generated list.
  8. Click on Properties.
  9. Under Device Usage select Use this Device (Enable).
  10. Click on Apply and OK.

3. Via Windows Settings

  1. Access Windows Settings by simultaneously pressing the Windows Key and I.gaming settings on windows 10
  2. Click on Privacy.
  3. On the left menu choose Microphone.Fix sound recording problems in Windows 10
  4. Under Let apps use my microphone, ensure that the indicator is set to On.

If these solutions do not work to resolve the issues with the microphone there may be damage to the computer’s hardware.

Hardware issues can be resolved by buying external components or having new internal components installed.

Buying external components to resolve this issue may be an inexpensive way to fix the issue. Resolving sound issues can take a few restarts and re-installations.

Be sure to exhaust all options before buying new hardware.

If you have any other suggestions or questions, don’t hesitate to leave them in the comments section below and we’ll be sure to check them out.

3 Ways to Fix Login Error Game Code Failure on Fallout 76

Recently, there have been multiple user reports regarding the Fallout 76 login error game code failure preventing users from login into the game.

While this is not something new and Fallout 76 is known to throw up errors now and then, software’s nature.

However, what makes it worse is that you will several Fallout 76 players experiencing this issue, making it a sort of looked into the topic.

Thankfully, for those looking for permanent solutions to fix the Fallout 76 login error game code failure problem, this guide is here to help you out.

Because, in this guide, we will list down 3 of the most effective and practical solutions that will help you resolve the Fallout 76 login error game code failure. With that being said, Let us jump right into it.

Why does Fallout 76 say login failed?

Well, a software-related error could be triggered because of multiple reasons. Looking at the user reports it seems like the Fallout 76 login error game code failure has been troubling users for different reasons.

After some research, we were able to deduce a list of reasons that are probably behind triggering the Fallout 76 login error game code failure:

  • The game server is facing an outage
  • Your internet connection might be jumpy
  • The game cache is corrupt
  • Your VPN is interrupting the game’s communication to its server
  • Some important game files failed to load

Now that you have an idea of what could be the possible reasons for this error, let us take a look at the solutions that would help you resolve it.

How do I fix the login error game code failure on Fallout 76?

1. Check the Fallout server status

Often the cause of multiple game errors is not from the user’s end but the game’s end. Notably, one of the reasons you would come across Fallout login error game code failure is the server facing an outage.

In such a case, we would advise you to head over to the official Bestheda.net website and check the current server status. You can also keep up with the official Twitter handle of Fallout76 and Bethesda to know about any such downtime or maintenance announcements.

Another way to avoid login errors is to connect to another server. While Fallout 76 doesn’t provide this, you can trick it to automatically connect you to a new server, by using a VPN that changes your IP location.

PIA is one of the most trusted VPN providers in the world. It has a no-logs policy, it’s 100% open-source and you can easily configure the IP location changes. If you really want to play a game, there will always be a solution for you.

⇒ Get Private Internet Access

2. Verify the integrity of the game

  1. Open the Steam launcher.
  2. Switch to the Library tab.
  3. Locate the game you wish to check and right-click on it.
  4. From the drop-down menu select Properties.
  5. From the left side, select LOCAL FILES.
  6. On the right, select Verify integrity of game files.
  7. Steam will start verifying the game files and resolve the problems if it finds any.

If you are coming across an issue while verifying the integrity of game files on Steam, then you can check out our guide which lists some effective solutions that will help you resolve the error.

3. Disable VPN

A VPN lets you access restricted content in your region. You can access restricted websites, restricted streaming platforms, or any restricted content.

However, often the usage of a VPN could trigger multiple issues with the internet and overall with the programs dependent on the internet.

So, we would advise you to disable any VPN that you are using and try logging in to Fallout 76 and check if this fixes the issue or not.

A VPN is a nice way to hide your internet presence and you should be using one when web browsing. So, we have a list of the best VPNs that you can opt for on your PC.

Is the Bethesda launcher down?

Bethesda launcher officially ended support on May 11. This means that you no longer can use the Bethesda launcher to launch games.

You were asked to move all of your in-game data, and everything to the Steam launcher.

So, you will have to do all of your stuff right from the Steam launcher since the Bethesda launcher now no longer works.

Bethesda launcher is no longer available to download. If you still have games on the Bethesda launcher, then you can check out the complete official guide on how you can transfer all of your data from Bethesda to Steam.

While some games would transfer the game data automatically over to Steam, for others, you need to manually do that. For games that are exclusive to Bethesda, you may want to hang on to the login information.

So that is it from us in this guide. Do note that you can also try restarting your PC or the console that you are trying to play Fallout 76 to fix the problem.

Many people underestimate the power of a simple reboot, but it could do wonders in solving many peculiar problems.

Let us know in the comments below which one of the solutions helped you resolve the error with Fallout 76.

5 Ways to Fix PR_CONNECT_RESET_ERROR on Firefox & Chrome

Mozilla Firefox and Google Chrome are some of the best and most widely used web browsers on the market.

While there are other feature-rich browsers, users still prefer either Google Chrome or Mozilla Firefox for their robust performance and simple-to-use features.

One of the common things between most web browsers is the errors that you would come across.

Notably, several Mozilla Firefox and Google Chrome users have reported coming across PR_CONNECT_RESET_ERROR.

This could be annoying since it comes out of nowhere and people have no idea what triggers the PR_CONNECT_RESET_ERROR on Google Chrome or Firefox.

If you are also one of such users and are looking for solutions to fix the error, then you have landed in the right place.

Because in this guide, we will give you 5 of the best solutions that have helped users tackle the PR_CONNECT_RESET_ERROR on both browsers and get back to web browsing. Let us check it out.

What does PR_CONNECT_RESET_ERROR mean?

When a browser fails to connect to a server, then you would come across multiple errors one of which is the PR_CONNECT_RESET_ERROR.

While it may seem like it is your regular connection error such as error 400 or 500, the error is mainly shown in Mozilla Firefox.

In other browsers, such as Google Chrome, or other browser based on Chromium, such as Microsoft Edge, Opera, and Brave, you will see the same error as ERR_CONNECTION_RESET.

Both errors are the same and Chrome and Firefox users have reportedly complained about coming across this problem.

After some research, we have found a list of probable reasons that would trigger the PR_CONNECT_RESET_ERROR on Chrome or Firefox:

  • There must be some firewall or other security issue
  • You might be trying to access content that is restricted in your geography
  • There might be some extensions that could be conflicting with the browser
  • There could be an error with the VPN that you are using
  • TCP Protocol filtering can also trigger this problem
  • A corrupt browser cache is also the root cause of many problems

Now that you know about the possible reasons for this PR_CONNECT_RESET_ERROR, let us check out the solutions to fix it.

Quick tip:

Switching to Opera One Browser can be a safer choice in this situation. This browser has a built-in ad blocker feature that helps you save data and load websites faster. In private browsing mode, once you close out the window, your history, cookies and form data are automatically deleted.

Connecting to webpages through Opera’s VPN means that the shared data is encrypted and routed through a remote server. The encryption helps secure your data while the remote server diguises your IP address and location for more privacy.

Opera One

You can easily access your ad blocker and tracker blocker with more advanced options for a better browsing experience.

How do I fix PR_CONNECT_RESET_ERROR?

1. Clear browser cache

Firefox

  1. Click on the 3-line icon.
  2. Select Settings.
  3. From the left, select the Privacy & Security tab.
  4. Locate Cookies and Site data section.
  5. Hit the Clear data button.
  6. Check both Cookies and Site Data and Cached Web Content boxes that appear in the next window.
  7. Hit the Clear button.

Chrome

  1. Click on the 3-dot menu icon.
  2. Select Settings.
  3. Select Privacy and Security from the left side.
  4. Click on Clear browsing data.
  5. Select the appropriate boxes but make sure to check the Cached images and file and Cookies and other site data boxes.
  6. Hit the Clear data button.

2. Uninstall any firewall or antivirus

  1. Open the Start menu.
  2. Search for Windows Defender Firewall and open it.
  3. From the left side, select the option Turn Windows Defender Firewall on or off.
  4. For both Public and Private network setting select the Turn off Windows Defender Firewall option.
  5. Click on OK.

We have explained the steps for Windows Defender Firewall. But if you have installed a third-party antivirus software then you can open it and disable the program and check if this fixes the PR_CONNECT_RESET_ERROR or not.

Also, if you are confused about which antivirus software to go for, you can refer to our guide which lists some of the best antivirus software that you can select for your Windows PC.

3. Disable VPN

If you are using a VPN of any sort then you should try disabling them and check if this PR_CONNECT_RESET_ERROR or not.

Notably, we use a VPN in order to hide our IP address and online whereabouts as well as access the restricted content that is not available in your region.

However, often VPN apps can conflict with the web browser server route and cause multiple issues, one of which is the problem at hand. Disable the VPN and check if this fixes the issue or not.

4. Disable extensions

If you are using extensions on your Firefox or Chrome browser, which you might be to enhance the features, then you might want to check in on them and try disabling them to see if this fixes the issue or not.

Firefox

  1. Open the Mozilla Firefox browser.
  2. Click on the Menu.
  3. Select Add-ons.
  4. Select the unwanted extension and click Remove.

Chrome

  1. Launch Chrome.
  2. Click on the Menu icon.
  3. Navigate to More tools > Extensions.
  4. Simply toggle off the extensions.

Can the firewall block my browser?

A firewall literally acts as a wall between your browser and the malicious content that is trying to enter your PC via your browser.

It protects you from everything malicious that would hamper your overall user experience. A firewall blocks everything suspicious, so there is a high chance that your firewall is blocking your browser.

That is it from us in this guide. Let us know in the comments below which one of the above solutions fixed the PR_CONNECT_RESET_ERROR or not.

Exception on Invalid Stack: How to Fix This BSoD Error

Users have been excited to take advantage of Microsoft’s Windows 11 operating system, but due to its complex system, issues can occur at any second. The Exception on Invalid Stack error is a great example.

Some Windows 11 clients reported that unexpectedly, their PC crashed and failed to boot up, after displaying the error Exception on Invalid File.

In today’s guide, we will show you three different methods to fix the error, as well as how to avoid it in the future.

What causes the Exception on Invalid File error?

corrupted files windows error


➡ Corrupted system files are by far the most common reason why you get an invalid file type of error, yet there are still other possible reasons why you could be experiencing the current issue.

A corrupted file is one that is damaged and does not perform as it should. This can apply to any type of document, from program files to system documents. You will most definitely encounter issues as such at some point or another in time.

Before we jump into the solution list, we must understand why the error appeared in the first place. Amongst the many causes that can lead to the Exception on Invalid File error, here are the three most common reasons you might encounter:


➡ Corrupted boot-related data is another possible reason for your problem. In this case, you will have to perform a System File Checker scan from the Advanced Options Menu or write a few lines in the Command Prompt to fix the corrupted configuration data.


➡  Bad drive sector is the next possible reason why you get the error above. What this means is one of your drives is starting to fail. But don’t panic! If the damage is minimal, you can get away without changing the drive. Running the CHKDSK utility will replace all the sectors that went bad with unused sound equivalents.

We prepared for you a list of recommended solutions that you must try out before you decide to reinstall Windows 11 altogether.

How do I fix the Exception on Invalid Stack error in Windows 11?

1. Run a quick SFC Scan

  1. 1. Insert a compatible Windows 11 installation media, then press any key to boot from it.

    press any key to boot
  2. 2. After your PC boots from the installation media, click on Repair your computer in the bottom left corner.

    repair your computer exception on invalif file error windows 11
  3. 3. When the Advanced Startup menu pops up, click on Troubleshoot.

    troubleshoot exception on invalid file windows 11
  4. 4. Next, select Advanced Options.

    advanced options exception on invalid file
  5. 5. Open the Command Prompt window.

    cmd option exception on invalid file windows 11
  6. 6. Type or paste the following command and press Enter to run it: sfc /scannow

    sfc scannow cmd
  7. 7. Wait until the operation is complete, then close the cmd prompt.

  8. 8. Allow your PC to boot normally.

  9. 9. Check if the Exception on Invalid File error is gone.

  10. Given the fact that corrupted system files are the most likely cause for the exception on invalid stack BSOD error, scanning for them is the first thing you should do. You can perform a safe SFC scan via Command Prompt with a bootable Windows 11 installation media.

Note icon NOTE
If you don’t have a compatible Windows 11 installation media, you can create one by following this guide on how to make a bootable USB drive in no time.

In case you prefer an automated method to run thorough scans for your PC, we kindly suggest you use specialized software and fix Windows issues fast, without other technical knowledge.

2. Run a CHKDSK scan

  1. Restart your computer while holding the Shift button.
    keyboard shift exception on invalid file error windows 11
  2. After the Advanced Startup menu will open, click on Troubleshoot.
    troubleshoot exception on invalid file windows 11
  3. Click on Advanced Options.
    advanced options exception on invalid file
  4. Once you’re inside the Advanced options menu, tap on Command Prompt.
    cmd option exception on invalid file windows 11
  5. Type or paste the following command then press Enter: chkdsk c: /f /r /x
    chkdsk command exception on invalid file windows 11

After you enter the command above, close the Command Prompt and return to the first screen in order to continue with the normal booting process. Then, check if the Exception on Invalid File in Windows 11 error has been solved.

  1. Insert a compatible Windows 11 installation media and press any key to boot from it.
    press any key exception on invalid file windows 11
  2. Click on Repair your computer in the bottom left corner.
    repair your computer exception on invalif file error windows 11
  3. After the Advanced Startup menu pops up, click on Troubleshoot.
    troubleshoot exception on invalid file windows 11
  4. Click on Advanced Options.
    advanced options exception on invalid file
  5. Once you are inside the Advanced Options menu, click on Command Prompt.
  6. Type or paste the following commands one by one and press Enter:
    bootrec.exe /fixmbr
    bootrec.exe /fixmbr
    bootrec.exe /fixboot
    bootrec.exe /scanos
    bootrec.exe /rebuildbcd

    bootrec command exception on invalid file windows 11

Once all the commands above have been processed successfully, close the prompt and allow your computer to boot up normally. The error should now be resolved.

What to do if the exception on invalid file error persists?

If your PC still fails to boot, it is pretty clear that you need to replace all the Windows files with new ones that aren’t corrupted.

To achieve this, you have to perform a clean install, which will definitely fix any underlying corruption issues that you have, but it will delete all of your personal documents as well. Unless you had backed up your data in advance, prepare to lose everything.

An alternative to losing your data is to perform a repair install which allows you to keep your personal documents on the same partition as your Windows installation.

How do I fix an Invalid File Name error?

Every file on your computer has a particular structure and content that it needs to comply with. When the information is in the right place and properly arranged, it will work normally.

But, if the wrong information is introduced voluntarily or involuntarily into a document, it will affect the way the data is used.
invalid file name exception on invalid file windows 11

One aspect that you need to pay attention to is how you name your documents. When you try to save, create or rename documents, keep in mind a few rules in order to avoid errors such as an invalid file. Document names act as their ID and you can’t have two people with the same ID.

Another aspect to remember is the characters that you use. Control characters or forward slashes aren’t accepted in the name field of a document. The Windows operating system has additional rules that the filename needs to comply to:

  • The filename can’t begin or end with a space or a period sign
  • There are certain names reserved by Windows that can’t be used
  • Any of the following characters must be avoided: double quote (“”), asterisk (*), less than (<), greater than (>), question mark (?), backslash (\), pipe (|), forward slash (/), colon (:)

To fix an Invalid File Name error, you simply have to rename it keeping in mind the rules above, especially the colliding aspect of names.

Booting errors can be cumbersome sometimes. If the above solutions don’t meet your requirements or if you consider the idea of reinstalling Windows 11, check out our thorough guide on how to perform a Windows 11 installation in the simplest manner.

Alternatively, rolling back to Windows 10 might be a solution for you. If you feel uneasy about which OS to choose, check out our article on the main differences between Windows 10 and Windows 11.

We also have guides on Invalid Cancel Of File Open error, and Unwind_on_Invalid_Stack, so don’t miss them to learn more.

The driver overran stack buffer error often stems from faulty drivers, bad memory, or corrupted system files. While most troubleshooting applies to all Windows versions, you can find more tailored steps for older systems in the driver overran stack buffer Windows 10 guide.


Feel free to use the comments section below in case you have any further questions, and let us know which solution worked best for you as well as what triggered the error in the first place.

Best Browser for Downloading Large Files [7 Fastest Ranked]

In the past, downloading large files often took hours, which is usually not cost-effective. With the recent improvements in the digital area, where most of the formats are HD/UHD, this has become more challenging.

Worse still, most traditional browsers lack the graphical support or the engine to download such files.

Today, however, there are standard browsers with an optimized engine and the graphical interface needed to support and download huge HD video files and games.

How can I download a large file with high speed?

Apart from getting a browser that can handle big file downloads, we also recommend using a download manager.

These are dedicated tools that improve the download speed and will help you download large files without any issues.

Moreover, many of them are designed to work with all the major browsers like the ones we highlighted below:

  • Opera One – Browser with fastest download speed
  • UR Browser – Great for privacy protection
  • UC Browser – Fast download speed
  • Microsoft Edge – Best integrated browser
  • Brave Browser – Light and privacy-oriented
  • Mozilla Firefox – Great lightweight engine
  • Google Chrome – Steady download

So if you’re looking for the best browser to download large files, this article is for you. We’ve listed the best options you have right now to get the job done in an efficient manner.

Which browser is best for downloading large files?

Opera One – The fastest download speed

Opera One lets you download files faster compared to other browsers on the market thanks to the Turbo Download Manager extension.

Opera’s native download manager is excellent for downloading video, audio, and image files. The tool comes in handy, especially for users who have limited or low-quality Internet connections.

The secret behind Turbo Download Manager is its multi-threading download technology that splits files into smaller chunks to speed up the downloading process.

Downloads can be paused and resumed, and the browser also detects media files automatically.

In this manner, Opera One can decide what’s the best downloading approach for the files you want to get online.

Opera One

Use Opera’s own download manager to get all the large online files you need in no time.

UR Browser – Great for privacy protection

UR Browser is a modern web browser, renowned for its flexibility, ease of use, privacy protection, and more significantly, its fast download speed.

The browser is mostly deployed on desktops/laptops, but it is also supported on mobile platforms. It’s designed to block cookies and ads by default while loading web pages.

Usually, with standard Internet connectivity, you can download huge Ultra-High-Definition video files within minutes. While using this browser you can experience up to 400% faster download speed.

UR Browser’s set of advanced features also includes privacy protection, an inbuilt malware scanner, ad-blocker, auto HTTPS redirect, and one-click download, among others.

UR Browser

Enjoy the best file loading and downloading speeds with this lightweight, fully secure browser.

UC Browser – Fast download speed

UC Browser is arguably one of the best browsers to download large files. It is renowned for its ease of navigation and more significantly, its unrivaled download speed on both PCs and smartphones.

The browser, though best deployed on Android, is supported on Windows and other desktop operating systems.

Apart from its fast load/download speed, UC offers a wide range of advanced features, including low-data consumption, ad-free surfing, cloud sync, auto-close, Video-Bar, malware blocking, and more.

However, this is a Chinese software that was banned from several countries so you should proceed with caution.

⇒ Get UC Browser

Microsoft Edge – Best integrated browser

Edge is Microsoft’s official browser. Originally designed for Windows 10, it is now supported on mobile platforms as well.

The browser serves as an improved version of Internet Explorer, and it’s optimized for better performance and faster loading/download speed.

With direct support from Microsoft, Edge is no doubt one of the most suitable browsers for downloading huge files on Windows PCs.

Other features of Edge include voice control, tab review, organized printing, built-in grammar tools, VR support, and 4K UHD support. In fact, it is currently the only browser that supports Xbox One.

Furthermore, the browser offers double the download speed of IE. And this, coupled with its advanced graphical interface, makes it highly suitable for downloading and streaming HD videos over the Internet.

⇒ Get Microsoft Edge

Brave Browser – Light and privacy-oriented

Brave is a privacy-oriented browser based on the Chromium engine so don’t be surprised if you find the interface familiar.

It comes with its own Crypto Wallet so if you’re into trading cryptocurrency, this browser might be a great choice.

Its distinct feature is however Private browsing with Tor. This is a kind of VPN but instead of designated servers, it uses a network of volunteers to conceal your identity.

However, apart from privacy, this feature also allows fast and steady downloads of large files. It’s not as fast as other browsers but it gets the job done.

Brave Browser is available on most platforms, including Windows, macOS, Linux, iOS, and Android.

⇒ Get Brave

Mozilla Firefox – Great lightweight engine

Firefox is another standard browser for downloading huge files. The browser offers twice the loading and downloading speed of traditional browsers. It is supported on Windows, Linux, Mac, and mobile operating platforms.

Firefox, from Mozilla, is widely seen as the perfect alternative or rather, a close competitor, to Google Chrome. It hosts a powerful engine, which is equipped to download files faster than Chrome’s engine.

With this, it is especially suitable for downloading top-quality video files and games on both smartphones and computer systems.

Other notable features of Firefox include tracking protection, private surfing, a lightweight engine (compared to Chrome), multilingual support, a customizable interface, and many more.

Firefox is an open-source web browser; hence, it is available to all supported OS for free.

⇒ Get Mozilla Firefox

Google Chrome – Steady download

Chrome is widely seen as the best browser today concerning its loading/download speed, interface quality, and, more importantly, its relative ease of use.

It is the official browser from Google, which offers unmatched flexibility to support all major desktop and mobile operating systems, notably Windows, macOS, and Linux, as well as Android and iOS.

Though more suitable for Android smartphones, Google Chrome is also vastly efficient on Windows, Linux, Mac, and other desktop operating systems.

It is suitable for downloading large files, even without a stable Internet connection.

Even more, it hosts other features like advanced privacy/security features, Google Smarts, cross compatibility, auto-updates, and more.

⇒ Get Google Chrome

What browser downloads files the fastest? (steps included)

The browser with the fastest download speed is the one that features the best download manager and, as you’ve seen above, we’re talking about Opera One.

Here’s how Opera One performs on downloading a large file:

  1. For our test, we went to the Microsoft dedicated page and started downloading the Windows 11 ISO, which is 5.2 GB.
  2. The browser took less than 3 minutes to get the large file. To access it, click on the Downloads icon from the top-right of the window and click on the file.

These are the top picks for browsers to download large files. In addition, we recommend checking our list, including the best browser download managers, to increase your download speed further.

We’ve got some tips you may apply when facing a slow browser download speed too: you may disable your antivirus, check download speed on other devices, and not only.

Have you tried any of the browsers from our list? Share your experience in the comments section below.

How to Blur Images in Paint 3D: Step by Step Guide

Paint 3D doesn’t have a lot of basic features, including the blur tool. However, if you want to blur images in Paint 3D we have some workarounds to do that. Here’s how to pixelate an image in Paint 3D, as well as in Paint.

Keep in mind that if you pixelated the images in Paint, you have to import those blurred or pixelated images back into Paint 3D.

How can I pixelate images in Paint 3D?

1. Blur images directly in Paint 3D

    If you want to blur an image, you can manually do this in Paint 3D. By using the Select Tool, you can pixelate any area of the image you want.

  1. 1. Launch the Paint 3D app on your computer.

    paint 3d app - Paint 3D how to rotate view
  2. 2. Open the image you want to pixelate.

  3. 3. Navigate to the Select tool in the menu.

    paint 3d select tool menu
  4. 4. Select the area that you want to blur.

    paint 3d blur selection
  5. 5. Hover your cursor over the bottom right corner of the image and drag it inwards until it reaches a very small size.

    blur in paint 3d drag corners
  6. 6. Click anywhere on the image.

  7. 7. Now go back to the image that you resized and click on it.

  8. 8. Put your mouse cursor on the image’s bottom right corner and drag it outward until it covers the entire white space.

    finish pixelating an image
  9. 9. Your image is now pixelated.

2. Pixelate images in Paint

The process for blurring an image in the classic Paint app is almost identical to the one for Paint 3D.

To blur an image using the Paint tool, you need just to make it bigger to appear pixelated.

Of course, pixellating and blurring an image is not the same thing, but if you want to hide a specific region from an image, such as an email address, this method might help.

  1. Open the Paint app.
  2. Select File and open the image you want to pixelate. Here we have an image with some alcohol bottles in the background. Let’s pixelate them!paint image
  3. Click on Select from the toolbar, and then click on Rectangular selection.paint select
  4. Make a rectangle on the picture.rectangle paint
  5. Click on a corner and make the rectangle small.small rectangle paint
  6. Make the rectangle really large.large rectangle paint
  7. If you’re not satisfied with the result, repeat the process a few times. It should look like in the image below.pixelated image paint
  8. Now, simply copy the pixelated rectangle and paste it into the image in Paint 3D.

3. Use third-party software to blur images

There are a lot of great image editing tools, but for this particular operation, we recommend one simple software. You don’t need Photoshop just to blur images, but you can try this one as well.

ShareX is one of the most popular tools when it comes to screenshots. As we all know, you often need to hide some information, such as names, email addresses, or certain documents.

Therefore, the blur function is very easy to find.

blur sharex

Click on it and select the region you want to blur. Let’s blur the bottles from the upper-left side of the picture!

sharex blurred image

This is a more direct and simple method to blur images than the first one that uses Paint.

Now, you can save and import the picture in Paint 3D if you want to continue your work there.

If not, you can install one of these best photo-editing software to enhance your pictures!

Did you find these alternatives helpful? Do let us know in the comments section below!

Signature Apps for PC: 9 Best to Use in 2026

The need for convenient and efficient ways to handle document signing has become paramount in today’s digital era.

Traditional pen-and-paper signatures are replaced by electronic signatures, offering a faster and more secure alternative. If you’re searching for signature software on your PC in 2023, this guide can help!

We have curated a list of the best signature apps for PC designed to streamline your document signing process and enhance productivity.

What are the benefits of using signature software for PC?

The signature apps for computer offers numerous benefits that enhance efficiency, security, and convenience in document signing processes. Here are some key advantages:

  • Enhanced security – Signature software employs advanced encryption and authentication measures, ensuring the integrity and security of your digital signatures.
  • Time-saving -Signature software eliminates the need for printing, physically signing, and scanning documents. With just a few clicks, you can sign documents digitally on your PC, saving valuable time.
  • Collaboration and workflow optimization – It enables seamless collaboration by allowing multiple parties to sign and exchange documents electronically.
  • Legal validity – Adheres to industry regulations and legal requirements, ensuring that your digitally signed documents hold the same legal weight as traditional signatures.
  • Document tracking and audit trail – Provides features like document tracking and an audit trail, which records and tracks all activities related to the signing process.

What are the best electronic signature software for PC?

Soda PDF – All-in-one solution

Soda PDF - signature software for PC

This reliable and modern software lets you add e-signatures to your documents directly from your web browser. Moreover, using its batch tool, you can work with multiple files in bulk and save time.

Soda PDF is an excellent choice for both personal and business use as it is easy to use but provides plenty of professional-level features.

With the Secure Module, you can protect your documents against unauthorized access by adding 256-bit passwords and setting permission levels. In this way, only the users you want can view and/or edit the files.

Soda PDF lets you add and request electronic signatures in real time. It helps you track your signatures and is notified as soon as your documents are completed.

Along with that, this signature app for PC supports over 300 file types and lets you easily convert them into PDF documents. You can do that with individual files or even convert them in bulk.

Soda PDF can be used both online and offline, and it offers cloud-based integration so you can easily access your files regardless of your location/device.

Soda PDF is a subscription-based software with three plans available. You can get your best deal for the Standard plan, but the other two include additional features.

Some of its key features include:

  • Create, edit, merge, split, and e-sign multiple PDFs in bulk
  • Embedded audit trail
  • Cloud integration
  • Strong file encryption
  • Unique 3D View mode
  • Online/offline availability
  • Customizable and robust interface

Soda PDF

Empower Your Document Management with Digital Efficiency with SodaPDF!
Check price Visit Website

Adobe eSign Services – Best for professionals

Adobe eSign Services

This is a great enterprise solution that accelerates the signing and managing of documents. It also integrates with the most popular business systems.

You can easily sign, send, track, and manage documents using your website browser and business apps.

Adobe eSign services can help you collect both handwritten and digital signatures. It lets you create your own legally recognized signature with the help of an easy toolset.

Each step of the process is guided with helpful prompts so you can create and use your signature in just a few minutes.

Adobe eSign lets users sign documents in bulk, so you can save a lot of time and hassle when dealing with repetitive work.

It also lets you track your signed documents and get notifications about their status. Along with signing, it also lets you easily annotate and fill in documents.

Adobe eSign is a paid service with a monthly subscription. You can try it out for free for 7 days.

The following are features of Adobe eSign Services:

  • Secure document archive
  • Collect signatures on your website
  • Customize configuration and workflows
  • Customize documents with your brand
  • Sign documents anywhere
  • Fax back globally
  • Reuse documents and templates

Adobe eSign Services

Manage your digital and electronic signatures easily with the best tool, Adobe eSign Services.
Free trial Visit Website

signNow – Best integration and compliances

Sign Now - signature software for PC

If you’re looking for a solution that offers a valid and legally binding signature application, look no further than signNow.

This electronic signature software has an easy-to-use, intuitive interface that allows anyone to upload, eSign, and send their first document for signing in minutes without training.

Moreover, you don’t need to download anything on your device because it’s a cloud-based solution, available from anywhere with an Internet connection.

signNow comes with support for no less than 15 document formats, and if you install the Android or iOS app, you can even create a mobile signature on the go.

But the best part is that the signatures are legally binding because the tool offers all the compliances it needs.

If you’re running a legal business or any other business, you can create your own templates and reuse them for any type of document.

Another smart feature is that you can send invite links for multiple parties to sign at the same time so you don’t need to wait for each one.

The signNow digital sign solution has flexible plans for all types and sizes of businesses, but it’s also available as a free trial.

Here are signNow’s best features:

  • Legally binding and valid eSignature
  • Customizable and reusable document templates
  • Document editing with support for 15 popular document formats
  • Mobile signature available on iOS and Android devices
  • Multi-party signing, role-based signature invites
  • Real-time notifications and reminders
  • Court-admissible Audit Trails Security and two-factor authentication
  • Industry-leading compliance (HIPAA, PCI DSS, 21 CFR Part 11, GDPR, FERPA, and SOC 2 Type II)
  • 270+ integrations with popular business applications & API
  • Available in 22 languages

signNow

Sign all your documents with a smart tool that offers all the compliances and over 270 integrations!
Free trial Visit Website

Fill – Best for real-time auditing

Fill

If you want to get to annotate and sign your documents right away, this cloud-based app can be of great help.

Fill is a secure online signing and annotating tool that supports all types of documents and also enables you to upload scans/pictures of physical documents.

You can also download it as a desktop app for your PC, and it is also compatible with macOS computers. It also supports on-the-go endeavors with Android and iOS apps.

The app lets you upload and create easily shareable documents. You can easily send them to whoever needs to fill them in, and you will get notified as soon as they are completed.

It also offers an easy-to-understand toolset that lets you create and fill in your own digital signature.

Due to the fact that users may upload sensitive documents, it is also important to note that Fill is very secure.

All documents and user information are completely private and encrypted with military-grade 256-bit encryption.

Fill has a free version that lets you make eSignature requests and document filling requests and offers real-time audit trails and logs.

There are also premium plans that include more features and integrations. Each plan has a free trial period.

Other key features include:

  • Real-time analytics about your documents
  • Support for email and text message requests
  • Lets you create reusable templates

Fill

Create and share easily signable documents, manage your digital signatures, and receive nifty analytics with this secure and compliant tool.
Free trial Visit Website

DottedSign – Best web & mobile app

DottedSign  - signature software for PC

DottedSign is a comprehensive and easy-to-use e-signature solution for small to medium-sized businesses.

With document delivery automation, high levels of security, and signature progress tracking, you stay in complete control of all the signing tasks.

You can request signatures and fill-ins in bulk, but you can also create your own custom messages to your signers directly from the application.

This signature software for PC helps you manage and track your signatures in real-time. You will always know when somebody signed your documents, and you can also see reports on progress.

DottedSign lets you create your own signatures and stamps that you can then easily access and apply to your documents in a matter of seconds.

Dottedsign has a free limited version as well as three different subscription plans. You can try it out for yourself and see which one works best for you.

Some of DottedSign’s key features include:

  • Digital audit trail
  • Advanced security features
  • Manage and track signatures
  • Auto-reminders, expiry dates
  • Mobile and desktop versions are available
  • Easily import documents from phone or cloud

⇒ Get DottedSign

DocuSign – Great mobile optimization

DocuSign

This is a digital signing platform that can be used by small businesses and individuals. It has a great capacity to accelerate ROI; it has strong mobile optimization. DocuSign is ideal for business setup.

This tool has document collaboration features so that multiple users can connect and work simultaneously.

DocuSign is available as a web app which makes it highly portable. You can sign documents on the go as long as you have an internet connection.

It complies with sign regulations and generates audit trails for each agreement. The tool uses text messages and email notifications to send signature requests.

It is very secure, with powerful encryption. It also supports ID verification so you can check your signer’s passport, driver’s license, or similar documents.

DocuSign integrates multiple productivity tools such as Salesforce, Workday, and even Adobe eSign.

DocuSign is subscription-based, with three different plans available.

Features of DocuSign include:

  • Fully customizable branding
  • Mobile signature capture
  • Autocorrect function
  • Biometric phone authentication
  • Dynamic forms

⇒ Get DocuSign

OneSpan Sign eSignature – Good for signer workflow

OneSpan Sign eSignature  - Best signature software for PC

This electronic signature software is easy to use, even for a novice computer user. However, if you want a reliable digital signature, consider using eSignLive.

OneSpan Signs comes with a set of features that support signer workflow, including pre-made templates and layouts, text tags, conditional fields, and more.

It is easy to use, and you get notified when your signers fill in your documents. Plus, you can also set up reminders to let them know when a deadline approaches.

OneSpan is very secure and uses multiple methods to make sure of users’ and signers’ identities. You get to log in/secure your credential via email, SMS, government ID verification, biometric comparison, and more.

When it comes to the signing experience, OneSpan Sign is very flexible. You can sign documents anywhere, even on mobile.

Not only is it available as a web and mobile app, but the documents you create with the help of this app can also be signed offline and automatically updated the documents once you get a connection.

Some of its main features include:

  • Scripted signature
  • Advanced workflows
  • Basic and advanced authentication
  • Easy integration
  • Open API
  • Third-party verification services
  • Fully customizable branding
  • Mobile signature capture
  • Multiple document format support

⇒ Get OneSpan Sign eSignature

RightSignature – Good for handwriting signatures

Best signature software for PC Right signature

This signature software for PC is widely known for its sleeky GUI, which enables typed and handwritten signatures. You can easily customize the collection fields.

In addition, there are several options available for individuals and businesses.

Right signature supports all major document file formats, including PDF, DOC, and DOCX. You can also upload and convert image files.

Not only does it offer support for creating signatures and filling in documents, but it also offers support for creating easy-to-fill-in forms.

The tool is compatible with all major device platforms, including PC, Mac, iPhone, iPad, and Android. It lets you create a one-time authentic handwritten signature with the help of the touchscreen feature of mobile devices.

RightSignature lets you send one or multiple documents at the same time. You can also send the same document to multiple recipients.

It is a paid service, but you can try it out and see how you like it because it offers a 30-day free trial.

RightSignature’s features include the following:

  • Application add-ons
  • Custom branded signing webpage
  • Detailed audit logs
  • Advanced guidance tools
  • Signing and viewing notifications
  • Performance statistics
  • Powerful API

⇒ Get RightSignature

Sertifi – Advanced security measures

Sertifi -  Best signature software for PC

This is a very powerful electronic signature software for PC that speeds up business workflow signing by approximately 100%. However, it is not difficult to use and has a robust feature set.

Sertifi is a business-oriented tool that lets you integrate forms into your documents and offer quick and easy support for signing.

The tool also offers payment support. Users can have secure and compliant transactions. 

The tool can also automate tasks and autofill certain repetitive fields. This can save a lot of time in the long run and allow you to take care of more urgent stuff.

All of the main features of Sertifi can be used on the go on any device. You can sign, request signing, pay and get payments regardless of location.

Sertifi offers various subscription plans, depending on what exactly you want to integrate and use.

Sertifi’s features include:

  • Secure document archive
  • Collect handwritten signatures
  • Collect signatures on your website
  • Digital signatures
  • Detailed audit logs
  • Advanced guidance tools
  • Signing and viewing notifications
  • Collaboration/Markup
  • Integrate with other applications

⇒ Get Sertifi

Other online electronic signature software includes:

So, these are the best signature software for PC, which offer convenience, security, and efficiency, eliminating the need for physical paperwork.

These apps automate the workflow by providing a set of pre-made templates you can distribute rather than drafting special ones for every occasion.

Check any of the electronic signature software we mentioned, and feel free to share your experience in the comments section below.

How to Use a Task Killer in Windows 10

As every Windows 10 user out there already knows, once you’ve pressed the Windows key on your keyboard, your device will go to the Start Screen.

However, the apps will remain open on your device, and if you take a look at the right-side menu you will see all of them.

But how exactly do you close running apps on your Windows 10 device? On other mobile devices, like Android, when you have too many running apps, you can use a task killer that will close all of them and free up some memory.

However, when it comes to Windows 10 what do you do? Where do you get a Windows 10 task killer?


How can I find a Windows 10 task killer?

how to close apps windows 10 app killer

Truth be told, when you exit an app on Windows 10, it doesn’t just stand there and hog resources, the OS automatically puts the app in a standby state, similar to what iOS users experience.

And while these apps don’t eat up too much memory whilst in this state, when you have many opened, you will see a drop in performance.

If you were thinking of getting a Windows 10 app killer, then think again, as no such apps are available on the Microsoft Store at this moment.

But even so, Microsoft was kind enough to implement a way in which users can stop running apps and free up some memory.


What task killer options do I have for my device?

1. Kill tasks using Task Manager

  1. 1. Press down the Ctrl + Shift + Esc or Ctrl + Alt + Del keys at the same time. Alternatively, you can right click on the taskbar and select Task Manager from the list.

  2. 2. The Task Manager window should now open.

  3. 3. Navigate to the Processes tab from the top-menu. Here you will see all the running apps on your device.

    processes task manager
  4. 4. Locate the task that you want to kill in the list and right-click on it.

    task killer windows 10 right click on process
  5. 5. A menu with options will appear. Select End Task.

    task killer windows 10 end process
  6. 6. The task is no longer running. You can close the Task Manager’s window.

  7. By now, you have seen the new Task Manager in Windows 10, and if you are new to Windows 10 and didn’t get a chance to get familiar with it, know that you will be able to use it to close running apps.

    Task Manager is a good background app killer for Windows 10. You will find the background running apps right below the running ones and you will also be able to end them in one click.

2. Use third-party alternatives

Another way to go around the problem is to use a Task Manager Alternative, which are other desktop programs that allow you to close lagging or not responding processes.

However, these third-party apps have more advanced functions, and if you only need to close a few apps, there would be no point in installing and fiddling with them.

But for those who want to have complete control over what apps are running on their computers, we have a great list of Task Manager alternatives.

It would be nice if Microsoft would add a quick and fast option to close all the running apps, instead of having to go to Task Manager or close them manually one by one. We hope that future updates of Windows will bring such features.


3. Use the hidden Terminate option under Apps & Features

Speaking of closing active apps and programs, Windows 10 does offer a series of settings that allow you to better control what apps can run on your machine at any given moment.

If you go to Apps & Features, you’ll see a list of all the apps installed on your computer and you can quickly uninstall those that you haven’t used for a while.

uninstall apps from settings

From there, select the application you want to kill. Click on the Advanced options or Advanced app info button. Click the Terminate button to immediately kill the app.

You can also limit the number of running apps by performing a clean boot. In this manner, your Windows 10 computer will boot up using only a limited number of drivers.

We hope that our guide on task killers for Windows 10 helped you. Let us know in the comments section below if you have any questions.


How to Change Your IP Address Frequently [1/5/10/30 Seconds]

There are queries available on different platforms regarding changing IP addresses frequently, automatically at regular intervals.

This guide shows you the different ways via which you can change IP every 10 seconds, 15 seconds, basically every X interval of time.

There are several hiccups that you will come across while changing your IP address every 10 seconds or after X intervals such as your media streaming might suffer, and your overall internet might disrupt for a few seconds.

How often should IP address change?

IP addresses are dynamic in nature. But that does not mean your Internet Service Provider (ISP) issues you a new IP address every time you go online.

However, after our research, we found out that the IP address retention rate around the major countries in the world is 9.3. Moreover, there is a handshake between the SIP and the modem that takes place every 14 days when the DHCP lease renewal takes place.

But for different households, this number may vary. As many studies have found that several households have had the same IP address for 9 months.

Does VPN change the IP address every time?

The main work of a VPN is to mask your public IP address and your location, but in doing so your ISP will not change the IP address assigned to you.

The VPN that you are using connects you to the IP address that it is providing instead of your actual address. So, the VPN masks your real address and shows a different one.

There are several VPNs, such as GOOSE VPN, that say that each server on the VPN has its IP address. We have a complete guide on how to hide your IP address when browsing the internet.

How do I change my IP address frequently?

1. Use NordVPN

  1. Download NordVPN from the official website.
  2. Install the program on your PC and launch it.
  3. Click the Start button, type cmd, and select Run as administrator to start Command Prompt with full privileges.
  4. Execute the following command considering that you have installed NordVPN in the default C drive. If not, enter the correct path on your drive: cd "C:\Program Files\NordVPN\"
  5. Open Notepad and paste the commands listed at the bottom of this solution to create a batch file.
  6. Click on the File menu option, select Save as, and save the file with extension .bat. So, the file name should look like NordVPN.bat.
  7. Open the bat file you just created. It will take some time to connect to the first server that you have assigned.
  8. After the assigned time, NordVPN will switch the server to the next assigned country.
@echo off
C:
cd "C:\Program Files\NordVPN\"
:x

nordvpn -c -g "United States"
timeout 10
nordvpn -d
timeout 2

nordvpn -c -g "Canada"
timeout 10
nordvpn -d
timeout 2

goto x

The bat file says to run a command that connects you to the United States server for 10 seconds, then disconnects you for 2 seconds, then again connects you to Canada server for 10 seconds and disconnects you for 2 seconds.

NordVPN is one of the most popular VPNs out there. While this method is for NordVPN, if your main aim isn’t to change the IP address frequently, then you can check out our guide that lists some of the best VPNs, that you can download on your Windows PC.

⇒ Get NordVPN

2. Use Elite Proxy Switcher

  1. Download Elite Proxy Switcher.
  2. Install the program on your PC and launch EPS.
  3. If you are using the free version, then you need to get your proxies from the proxy list sites such as IPRoyal, My-Proxy, KProxy, etc.
  4. Once you have the IP, open the EPS Settings.
  5. Click on the Switch tab on the top menu bar and select the Proxy Switch Settings in the drop-down menu that appears.
  6. Under the Auto Switch option, set the switching interval, in our case, let us say 10 seconds.
  7. Press OK.

After you complete the steps, you will see your IP address getting changed every 10 seconds or whatever interval you have put in the Automatic switching option.

The best part about using the Elite Proxy Switcher is that you can load free proxies and also change the IP address every second as well.

However, some major downsides of using free proxies are that they have a very short life span, and most of them are unreliable. So, take note of that.

3. Use HMA VPN

  1. Go to the HideMyAss (HMA) VPN official website.
  2. Buy a subscription, install the software, and open it.
  3. Click on the Settings symbol and select the Privacy tab from the left side panel.
  4. Turn on IP Shuffle and define the time interval within which you wish to change your IP address.
  5. You can set the program to change your IP address to predefined values of 5, 10, 20 minutes or assign a custom time interval.
  6. Return to the home screen and turn ON the VPN.
  7. Your IP address will now change based on the time interval that you have inputted.

You’re probably asking: Should I change my IP address regularly? While there is no such need to have a rotating IP address feature on your PC, you can change your IP address regularly as it provides some security to your network.

Notably, it will become harder for someone to hack into a network that has an IP address that is inconsistent. Moreover, each time your IP address changes, it goes into the pool, where it will be reallocated to someone else.

So, if you are in a field where chances of getting hacked or traced are quite common, you can use the above methods to change your IP address automatically and add a bit of a security layer.

That is it from us in this guide. We hope that you were able to accomplish the task of changing your IP address every 10 seconds or a set custom time interval using the above guide.

You might also get some extra information from our guide on how to hide your IP address when you’re abroad.

Do you have other suggestions or questions? Let us know your thoughts in the comments section below.

Set Up Automatic Reply in Outlook [Step-by-step Guide]

Did you know that you can set up an automatic reply in Outlook?

This feature can be incredibly useful, and in today’s article, we’ll show you how to set it up on your PC.

How to set up an auto-reply message in Outlook?

1. Enable Automatic Replies in Outlook

If you’re using an IMAP or POP email account, you need to enable automatic replies on your own by following these steps:

  1. Go to File > Manage Rules & Alerts.
    rules and alerts automatic reply in Outlook
  2. Choose Email Rules and check the checkbox next to the auto-responder rule.
  3. Click OK to save changes.

2. Create an email template in Outlook

  1. Select New Email from the toolbar.
    new email how to set up automatic reply Outlook
  2. Create a template message. Once you’re done, click on File > Save as.
  3. Set Save as type to Outlook Template and enter the desired name. Click the Save button.

To learn more about building reusable messages, check out this detailed guide on how to create an email template in the new Outlook.

You can learn more about creating reusable messages by checking this guide on email message templates in Outlook which explains how to build, save, and manage templates.

3. Create Automatic Reply Rule in Outlook

    Another method to set up automatic reply in Outlook is to set up an automatic reply rule on the app. This will ensure that Outlook will reply in your stead to messages you receive, using a template designed by you.

  1. 1. Open the Outlook app.

  2. 2. Go to File > Info > Manage Rules & Alerts.

  3. 3. Navigate to the Email Rules tab.

  4. 4. Select your email account in the Apply changes to this folder field.

  5. 5. Click on New Rule.

    automatic reply outlook new rule
  6. 6. Select Apply rule on messages I receive in the Start from a blank rule field.

  7. 7. Check the Where my name is in the To box option and click Next.

  8. 8. Select Reply using a specific template.

  9. 9. In Step 2: Edit the rule description field, click on the specific template link.

  10. 10. Set Look In to User Templates in File System.

  11. 11. Select the template you created in the previous section and click Next.

  12. 12. In Select exceptions list, check the except if it is an automatic reply check box.

  13. 13. Enter the desired name for this rule and select Turn on this rule check box.

  14. 14. Click Finish and OK and the automatic reply should be enabled.

4. Enable Automatic Replies for Exchange Accounts

  1. Go to File > Info and select Automatic Replies.
    automatic replies set up automatic reply in Outlook
  2. Select Send automatic replies.
  3. Enter the desired message in the text box.
  4. Optional: You can check Only send during this time range option if you want to send automated replies in a specific time frame.
  5. You can also configure different messages for contacts inside your organization or outside of your organization by selecting the appropriate tab.
  6. Once you’re done, click OK.

Having trouble locating the Automatic Replies option or missing panels? Use our reset Outlook view guide to restore the default layout and make the menus visible again.

There you go, a quick and easy guide on how to set up an automatic reply in Outlook. Should you find automatic replies too heavy as a message, find out how you can add a reaction to your Outlook emails.

If you found this helpful guide, feel free to let us know in the comments section below.

How to disable LinkedIn integration on Teams and Microsoft 365

This Teams guide will show you how to enable and disable LinkedIn integration in Teams and Microsoft 365. This feature quietly rolled out in March 2022. When the feature is rolled out to your organization, it is enabled by default.

If enabled, LinkedIn integration allows users to connect their Microsoft account to their LinkedIn account so they can connect with LinkedIn profile connections in Teams and other Microsoft apps like Outlook.

Unfortunately, the LinkedIn tabs in Outlook and Teams cannot be disabled. However, one enterprising redditor found a way for administrators to disable it.

Microsoft Azure AD (Active Directory) administrators can disable the ability for users to be able to connect their Microsoft and LinkedIn profiles.

Disable LinkedIn integration

Please note: If you don’t have administrator privileges, you will not be able to disable LinkedIn integration on Teams and Microsoft 365! If you need extra help, there is a YouTube video explaining what to do.

If you are an administrator, here’s what you need to do to disable LinkedIn integration from Teams and Microsoft Office 365.

1. Log into the Azure AD admin center with an account that’s a global administrator for your organization.
2. Select Users.
3. On the Users page, select User settings.
4. Under LinkedIn account connections, allow users to connect their accounts to access their LinkedIn connections within some Microsoft apps.

4a. Choose Yes to enable the LinkedIn integration service for all users in your organization.

4b. Choose Selected group to enable the service for only a group of selected users in your organization.

linkedin integration

4c. Choose No to withdraw consent from all users in your organization.

5. Click Save to save your settings when finished.

You can see what data is collected between Microsoft and LinkedIn accounts and profiles when the feature is enabled.

To learn more about LinkedIn, you can check out this dedicated guide to LinkedIn Games and stay informed.

Do you like the LinkedIn integration on Teams and other Microsoft apps? Let us know in the comments!

How to Turn Off Focused Inbox in Outlook

Outlook‘s Focused Inbox helps you focus on the emails that matter most to you. This feature divides your inbox into two tabs – Focused and Other. Your most important emails are on the Focused tab.

These are selected based on the content of the email and the frequency you interact with the sender.

However, some users don’t like this inbox hierarchy and want to turn off Outlook Focused.

All of a sudden I have Focused and Other Inbox. I don’t want it. I want my regular Inbox with just one-mail instead of two. How can I get rid of it?

In this article, we’re going to show you how to disable Outlook‘s Focused Inbox feature.

How can I remove Focused Inbox?

1. From the PC app

  1. 1. Launch Microsoft Outlook on your PC.

  2. 2. Navigate to the View tab from the top-menu.

  3. 3. Click on Show Focused Inbox to toggle the feature off.

    disable focused inbox outlook feature
  4. 4. The Focused and Other tabs will no longer be visible at the top of your mailbox.

  5. 5. After, collapse the tab on the left.

  6. 6. Go to Settings > Display settings > Focused Inbox.

  7. 7. Navigate to the When email is received section.

  8. 8. Select Don’t sort messages.

  9. 9. Click OK to apply and save the changes.

  10. The Focused Inbox can be easily turned off via the app’s built-in settings. All you need to do is toggle the feature off with a simple click. Moreover, you can also configure Outlook to stop sorting your messages.


2. On Outlook.com/Hotmail.com

  1. Select the Settings icon > go to Display settings > Focused Inbox.
  2. Under When email is received, simply select Don’t sort messages > click OK.

3. On Outlook for Mac

Go to the Organize tab > select Focused inbox. This simple action disables the feature.


4. On Mail for Windows 10

  1. Go to Settings > select Reading.
  2. Use the Focused Inbox slider to disable the feature.

5. On Outlook Mobile

  1. Click the Settings button in Outlook Mobile.
  2. Use the Focused Inbox slider to turn Focused Inbox off.

The Focused Inbox feature is a very useful mail functionality. It can help you to keep your inbox organized and make sure that you don’t miss any important new emails.

For more information about Focused Inbox and how you can get the most out of it, you can check out Microsoft’s support page.

What do you think about Outlook‘s Focused Inbox feature? It is helpful for you?

3 Quick Ways to Fix Error Saving Photo on Facebook [PC, Mobile]

Facebook is one of the biggest social networks in the world with millions of active users. But there are some users who face issues while uploading or saving photos from their desktop or mobile devices. 

This is a common error that happens on Facebook. The error usually occurs when you are trying to save a photo but are unsuccessful.

If you don’t have enough room for the photo to save, it will fail. You can fix this by deleting photos or videos that are no longer needed. Sometimes, it could be the browser you are using so you can switch to a Facebook-approved browser for a better response.

Why can’t Facebook save my photo on Windows 10/11? 

Some of the reasons why you can’t save Facebook photos on your PC include:

  • Unstable internet connection – Your internet connection may be down or unstable. If your internet connection is very slow then it will take more time to upload a single photo on Facebook.
  • Unsupported file format – While Windows 10/11 does support a wide range of file formats, not all of them are compatible with Facebook. 
  • Insufficient storage – You may not have enough disk space available on your computer which leads to storage errors while saving any content on it.
  • Copyright issues – Some files cannot be saved on Facebook due to its policy on copyright issues. So if you try to save any image with copyrights issues, it will not be able to do so. 

Other possible reasons include an outdated browser or virus-infected OS so be sure to update both for best results.

Quick tip:

Opera One Browser is a great choice for social media platforms because it has a built-in support for them, including Facebook. After you choose your social media platform, it always remains at hand directly in the sidebar.

This feature is called Integrated Messengers where you can chat and browse at the same time with your favorite messengers built into Opera One. Also, this browser features it’s own built-in AI.

Opera One

Chat and browse at the same time with the Integrated Messengers smart feature built into Opera One Browser.
Free Download Visit website

How do I fix error saving photo on Facebook?

1. Check your internet connection

If you’re getting an error saving a photo on Facebook, it could be because of your internet connection. Try turning off your computer, router, and modem, and then turn them back on.

Should the issue persist, run a speed test using an internet speed tester to determine whether you have sufficient bandwidth.

2. Clear storage space

Make sure you don’t have too much storage space taken up by other apps or unnecessary files. If there isn’t enough room for the file, it won’t be able to save.

Try deleting or disabling some apps on your phone or PC. This will free up hard disk space so that the Facebook app can save photos without any issues.

3. Clear browser cache and cookies

A cached copy of a website is saved on your computer so that it can load more quickly when you visit that site again. If there are any issues with the cached version of a website (like broken links), these errors will interfere with some functions.

clearing cookies and cached files chrome

Clearing your browser cache and cookies will remove any temporary files that might be causing problems when you try to save images.

How do I save pictures on Facebook to my phone? 

Saving Facebook photos on your phone can be done whether you are using the app or browser. 

  1. Open the Facebook app on your phone or PC and navigate to the photo you want to save.
  2. Tap on the three dots at the top right-corner and select Save to phone.
  3. You can locate the picture in your Downloads folder.

If you are using your browser, tap the photo to view it full screen then hold and click on Save as.

Hopefully, you have been able to resolve the issue and can now save Facebook photos without a hassle. If you have tried all methods above and still can’t save photos, your system may be infected by a virus.

Sometimes viruses and malware are hidden and undetectable but still have the potential to cause damage. You can install a reliable antivirus to help you weed out any viruses that could expose your device to risks.

Let us know of any other solutions you may have tried that worked out for you in the comment section below.

Fix: This File Does Not Have a Program Associated With It

Windows 10 might be a great operating system, but it also has some of the same problems that its predecessors had.

Users reported This file does not have a program associated with it for performing this action error message on Windows 10 while trying to run certain applications, so let’s see how to fix this problem.

What are the variations of this error message?

This file does not have a program associated with it is a common error message that can appear, and speaking of this error, here are some similar issues that users reported:

  • This file does not have a program associated with it for performing this action USB drive – This problem can occur due to your AutoPlay settings. However, you can fix the problem simply by disabling the AutoPlay feature.
  • This file does not have a program associated with it Excel, Explorer.exe – This problem can affect various system applications, and if that happens, be sure to perform SFC and DISM scans.
  • This file does not have a program associated with it for performing this action OneDrive – If you encounter this problem with OneDrive or other system features, simply reset the file associations to the default and check if that solves the problem.
  • This file does not have a program associated with it Windows 10, 8.1, 7 – This error can appear on almost any version of Windows, and even if you don’t use Windows 10, you should be able to apply most of our solutions to your PC.

How to fix the this file does not have an app associated with it error?

1. Create a new Windows user account

According to users, one of the simplest ways to fix this problem is to create a new Windows user account. To do that follow these steps:

  1. Open the Settings app and go to the Accounts section.
    This file does not have a program associated with it Windows 7
  2. Go to the Family & other users tab and click Add someone else to this PC.
    This file does not have a program associated with it for performing this action USB drive
  3. Click I don’t have this person’s sign-in information.
    This file does not have a program associated with it Excel
  4. Select Add a user without a Microsoft account.
    This file does not have a program associated with it for performing this action OneDrive
  5. Enter the user name and password for the new account and click Next.
    This file does not have a program associated with it Windows 10

2. Add your user account to the Administrators group

    Another solution to this problem is to add your user account to the Administrators group. Users reported that after adding their user account to the Administrators the issue was resolved. This is because you might not be able to open certain files due to lacking admin rights.

  1. 1. Press Windows Key + R to open the Run dialog.

  2. 2. Enter lusrmgr.msc in it and then press Enter or click OK.

    this file does not have an app associated with it run dialog
  3. 3. Navigate to the Groups folder in the left pane .

    program asscociated performing action run as admin
  4. 4. Double-click the Administrators group in the right pane.

  5. 5. When the Properties window opens, click the Add button.

    this file does not have an app associated with it add administrator account
  6. 6. In the Enter the object names to select field, enter your user name and click Check Names. 

  7. 7. If everything is in order click OK. Alternatively, you can click the Advanced button and Find Now button to manually search for your user name.

    this file does not have an app associated add admin
  8. 8. After doing that your user account should be added to Administrators group.

  9. 9. Click Apply and OK to save the changes.

  10. 10. Some users also advised to log out and log back in to Windows 10 in order for changes to take effect.

3. Change your registry

Changing your registry can lead to system instability, therefore before doing any changes to registry, we advise you to create a backup of your registry in case anything goes wrong. To edit the registry do the following:

  1. Press Windows Key + R and enter regedit. Click OK or press Enter.
    This file does not have a program associated with it for performing this action USB drive
  2. In the left pane navigate to HKEY_CLASSES_ROOTlnkfile key.
  3. Check if the IsShortcut value is available. If this value is missing right click the empty space in the right pane and choose New > String Value. Be sure to enter IsShortcut as the name of the new String Value.
    This file does not have a program associated with it Excel
  4. After you’re done, close Registry Editor.

Sometimes this String Value can be deleted from your registry, and if it’s missing be sure to recreate it by following the aforementioned steps.

Several users are suggesting to perform the following steps as well:

  1. Go to the HKEY_CLASSES_ROOTCLSID{20D04FE0-3AEA-1069-A2D8-08002B30309D}shellManagecommand key in the left pane. Double-click (Default) in the right pane.
    This file does not have a program associated with it Explorer.exe
  2. Set the Value data to %SystemRoot%system32CompMgmtLauncher.exe and click OK to save changes.
    This file does not have a program associated with it for performing this action OneDrive

4. Delete certain keys from the Registry

This solution only applies if you can’t open any folder on your PC. If you can open folders on your PC there’s no need to perform this solution. To delete registry entries do the following:

  1. Open Registry Editor.
  2. In the left pane navigate to HKEY_CLASSES_ROOTDirectoryshell.
  3. Expand the shell key and delete both find and cmd keys.
    This file does not have a program associated with it for performing this action OneDrive
  4. After you’re done, close Registry Editor.

5. Run DISM and SFC scans

Sometimes you might get This file does not have a program associated with it message because your system files are corrupted.

This can occur for various reasons, and in order to fix this problem, it’s advised to perform both SFC and DISM scans. To do that, just follow these simple steps:

  1. Press Windows Key + X to open Win + X menu and choose Command Prompt (Admin) or PowerShell (Admin).
    This file does not have a program associated with it for performing this action OneDrive
  2. When Command Prompt opens, enter sfc /scannow and press Enter.
    This file does not have a program associated with it Excel
  3. The SFC scan will now start. The scanning process can take about 15 minutes, so don’t interrupt it.

After the SFC scan is completed, check if the problem is still there. If this issue is still present, you need to run DISM scan. You can do that by following these steps:

  1. Start Command Prompt as administrator.
  2. Run DISM /Online /Cleanup-Image /RestoreHealth command.
    This file does not have a program associated with it Windows 10
  3. DISM scan will now start. The scanning can take about 20 minutes, so don’t interrupt it.

Once the DISM scan is finished, check if the problem is still there. If you were unable to run the SFC scan before, try running it now and check if that solves the issue.

If the SFC scan stops or you’re getting the DISM error 2 on your Windows 10 device, check out our dedicated articles.

Moreover, if your WinX menu is not working, we have yet another article you can read.

6. Disable Autoplay for all devices

  1. Open the Settings app and go to Devices section.
    This file does not have a program associated with it for performing this action USB drive
  2. Select AutoPlay from the menu on the left. In the right pane disable Use AutoPlay for all media devices. Set Removable drive and Memory card to Take no action.
    This file does not have a program associated with it Explorer.exe

If you’re getting This file does not have a program associated with it message, the issue might be because of AutoPlay feature. However, you can fix the problem simply by disabling Autoplay completely.

After doing that, AutoPlay should be completely disabled and the issue will be resolved.

7. Reset file association

  1. Open the Settings app and go to the Apps section.
    This file does not have a program associated with it for performing this action OneDrive
  2. From the menu on the left select Default apps. Scroll down and in the Reset to the Microsoft recommended defaults section click the Reset button.
  3. This file does not have a program associated with it Windows 7

By default, Windows 10 is configured to open files with its default applications, but most users usually change these settings. Sometimes there might be an issue with your configuration and that can lead to This file does not have a program associated with it message to appear.

To fix the problem, you just need to reset file associations to default. This is quite simple as described in the steps above.

After doing that, the problem with file associations should be completely resolved.

8. Run Powershell

According to users, sometimes you might be able to fix This file does not have a program associated with it error by reinstalling all Universal apps. This is quite simple to do, and you can do it by following these steps:

  1. Press Windows Key + S and enter powershell. Right-click Windows PowerShell from the list of results and choose Run as administrator.
    This file does not have a program associated with it Windows 8.1
  2. Now run the following command: Get-AppXPackage -AllUsers |Where-Object {$_.InstallLocation -like “*SystemApps*”} | Foreach {Add-AppxPackage -DisableDevelopmentMode -Register “$($_.InstallLocation)AppXManifest.xml”}.
    This file does not have a program associated with it for performing this action USB drive

After the command is executed, the issue should be resolved completely.

If Powershell stops working, we have an article on how to fix it.

9. Perform a System Restore

According to users, sometimes the best way to fix This file does not have a program associated with it error is to perform a System Restore. To perform a System Restore, just do the following:

  1. Press Windows Key + S and enter system restore. Choose Create a restore point from the list of results.
    This file does not have a program associated with it Explorer.exe
  2. When System Properties window opens, click the System Restore button.
    This file does not have a program associated with it for performing this action OneDrive
  3. System Restore window will now appear. Click Next to proceed.
    This file does not have a program associated with it Windows 8.1
  4. If available, check Show more restore points option. Choose the restore point you want to go back to and click Next.
    This file does not have a program associated with it for performing this action USB drive
  5. Follow the instructions on the screen to complete the restoration process.

Once your system is restored, check if the problem is still there.

This file does not have a program associated with it for performing this action can be a problematic error, but we hope that you managed to fix it after using one of our solutions.

Chrome is Slow on Windows 11: How to Get Rid of the Lag

Google Chrome is the leading Internet browser, and six out of ten users use it to browse the Internet. One of the overwhelming reasons for this high adoption level is its speed, reliability, and performance.

However, many of our readers reported that Chrome is slow in Windows 11, and their browsing experience is altered.

There are a variety of different reasons that can impact its speed and performance. Some possible reasons include high disk usage, too many open tabs, some extensions, a high volume of caches, and more. 

Before fixing it, let’s take a more in-depth look at the possible causes of why Chrome is slow in Windows 11.

Why is Chrome suddenly so slow?

Chrome can slow down for many reasons, ranging from intense memory usage to an outdated version.

➡ Cache

Chrome can slow down when you have too many tabs open as it holds the cache or temp files in its memory for a long time.

While this can speed up your browsing experience, storing too much browsing history can also slow it down.

➡ Outdated browser

An outdated browser can slow your browsing experience as it may not have the latest patches/fixes.

The updates often happen automatically, but for some reason, if it doesn’t happen in your system due to the existing settings, you may have to do it manually.

➡ Resource Usage

Another probable reason is excess resource usage. Chrome uses multiple threads to improve your browsing and user experience, which can sometimes take up many resources.

While it is hard to pinpoint the exact reason, some of the other possible causes may be:

  • Extensive use of Chrome add-ons and extensions
  • Opening too many tabs
  • Large browser history
  • Poor Internet connection

Fortunately, there are many simple ways to fix this Chrome slow Windows 11 issue, and you will have to follow our guide below.

Quick Tip:

While Chrome can become slow and laggy due to cache or history data, you can try a faster and more reliable browser like Opera One.

Using this browser instead will give you enhanced security online with its free VPN or integrated ad-blocker. Hence, you’ll get improved speed to navigate freely on your PC.

Opera One

Benefit from faster navigation with this browser and light resource usage on your Windows 11 PC.

How do I make Chrome run faster on Windows 11?

1. Restart your browser

  1. Click on the X button from the top right corner to close the browser and try restarting it again. If it doesn’t work, try the next step to close the browser completely.
  2. Right-click the Start button and select Task Manager from the list.
  3. Click on Google Chrome from the list of processes and hit the End task option from the bottom right corner.
  4. Now try to start Chrome again and see if you have the same problem.

The simplest solution is often the most effective, at least in the world of computers! That is to close Chrome and start it again. Once done, the Google Chrome lagging issue in Windows is fixed.

2. Clear the browsing data

  1. At the top right-hand corner, look for three vertically-lined dots and click them.
  2. Navigate to More Tools, then click on Clear Browsing History.
  3. Click on Privacy and security from the left pane, then select the Clear browsing data option.
  4. Click on the Time range tab and select All time from the list of options.
  5. Now, decide what data you want to remove (preferably all of them) and then choose Clear data.
  6. Restart Chrome and see if it now works faster than before. 

Another possible reason for a slow Chrome in Windows 11 is excess stored data. Chrome stores all your data, including the sites you visit, websites’ cookies, cached images, files, etc.

These data levels can quickly add up, depending on how much time you spend browsing the Internet. 

Since Chrome has to load all the data at startup, it can be slow. So, consider deleting unwanted data and browsing history so your Chrome loads faster. 

3. Use Chrome’s Task Manager

  1. Click on the three vertical dots button from the top right corner to access Chrome’s menu.
  2. Select More tools and choose Task manager from the list. You can also open Chrome’s Task manager using the Shift + Esc key combination.
  3. Look for unuseful processes that consume more CPU resources, click on them, then hit the End Process button from the bottom right corner. Chrome can’t work with some methods; if you end them, Chrome will restart them immediately.

Chrome runs multiple processes in the background, which can take up many of your CPU resources, leading to a slow Windows 11.

An excellent way to fix this is to open Chrome’s Task Manager to look through the processes and end the unwanted ones.

4. Disable the preload option

  1. Click on the three vertically-aligned dots from the top right corner and select Settings from the list.
  2. Navigate to the Privacy and Security option on the left-hand pane, then select Cookies and other site data.
  3. Look for an option called Preload pages for faster browsing and searching, and disable it.
  4. Restart Chrome and see if it is faster now.

Chrome uses your browsing history to predict what pages you will likely open and preloads them for you.

While this can be convenient, it is often a waste of your resources and can cause Chrome to slow down in Windows 11.

To avoid this bottleneck, disable the preload option using the steps above. This option will significantly increase your Chrome speed and performance and is a proper fix for Chrome working slowly in Windows 11.

5. Remove Chrome extensions

  1. Click on the three vertically-aligned dots on the right-hand top corner.
  2. Navigate to More tools and click on Extensions. 
  3. Go through this list and remove the ones you don’t need by clicking the Remove button in each extension. You can also deactivate them by toggling off the switch to their lower right corner, so they don’t load.

Using many extensions can cause Chrome to be slow in Windows 11. First, check the installed browser extensions and remove the ones you don’t need. Finally, restart Chrome and check if it is faster.

6. Update Chrome

  1. Click the three vertically-lined dots on the top right-hand corner and select Settings.
  2. On the Settings page, select About Chrome on the left-hand pane.
  3. If your browser is up-to-date, you can see it; otherwise, Google will auto-update when you open this page. 

Google releases regular updates in the form of Chromium builds that address its existing issues and vulnerabilities.

It’s a good idea to install these updates monthly to ensure that your browser is up-to-date with the latest version. 

You should reset the browser if Chrome is still slow after a Windows 11 update.

7. Reset Google Chrome

  1. Click the three vertical dots on the top right corner and select Settings.
  2. Select the Advanced option from the left, and after it expands, click on Reset and clean up.
  3. Choose Restore settings to their original defaults.
  4. Now you only have to click on Reset settings.

Thus, these are some ways to address the slow Chrome issues in Windows 11. So, it would help if you tried all these options to see which works for you.

Does clearing history make Chrome faster?

To make your browser faster, you need to rid it of as much data as possible.

Your browser history is some data even though, in some cases, it may be so small and insignificant. However, clearing it will reduce the amount of data the browser holds and may make the browser generally faster.

However, in reality, the difference may be minute and negligible.

To conclude, Chrome being slow to open in Windows 11 can be due to many reasons, and we strongly suggest you run through each of the above options, as one of them is sure to fix your problem, depending on the underlying cause.

Note that if all browsers are slow in Windows 11, you may consider a malware scan of the entire system. Also, some Windows 11 Chrome users have said disabling hardware acceleration has also helped.

However, if you can’t make Chrome work as it should, we have a list of the best browsers for Windows 11, and you may choose a better one.

Contact us through the comments section if you have questions regarding a slow Chrome in Windows 11.

You can also read about fixing high CPU usage in Windows 11, which can make Chrome and other apps run faster on Windows 11. 

How to Schedule Tasks in Windows 10 via Task Scheduler

Task Scheduler is one of the most practical preset Windows applications because it can streamline your work.

The main idea of this application is to trigger the running of different scripts and programs at a specific time or a certain event.

It has a library where all the tasks loaded are indexed, and it organizes them according to the time that must be done and their importance.

Let’s discover together in the lines below what Task Scheduler contains and how we can use this useful application.

How do I schedule tasks in Windows 10 using Task Scheduler?

  1. Types of triggers
  2. Types of actions
  3. Types of Task Conditions
  4. Task settings
  5. Task security context
  6. How to use the Task Scheduler

1. Types of triggers

The first step of creating a task is to determine what will cause it to run, so the trigger is a set of conditions that when fulfilled, starts the task.

The triggers can be found in the Trigger tab from the Task Properties and the Create Task menu. From the Create Task menu, you can create new triggers for your needs.
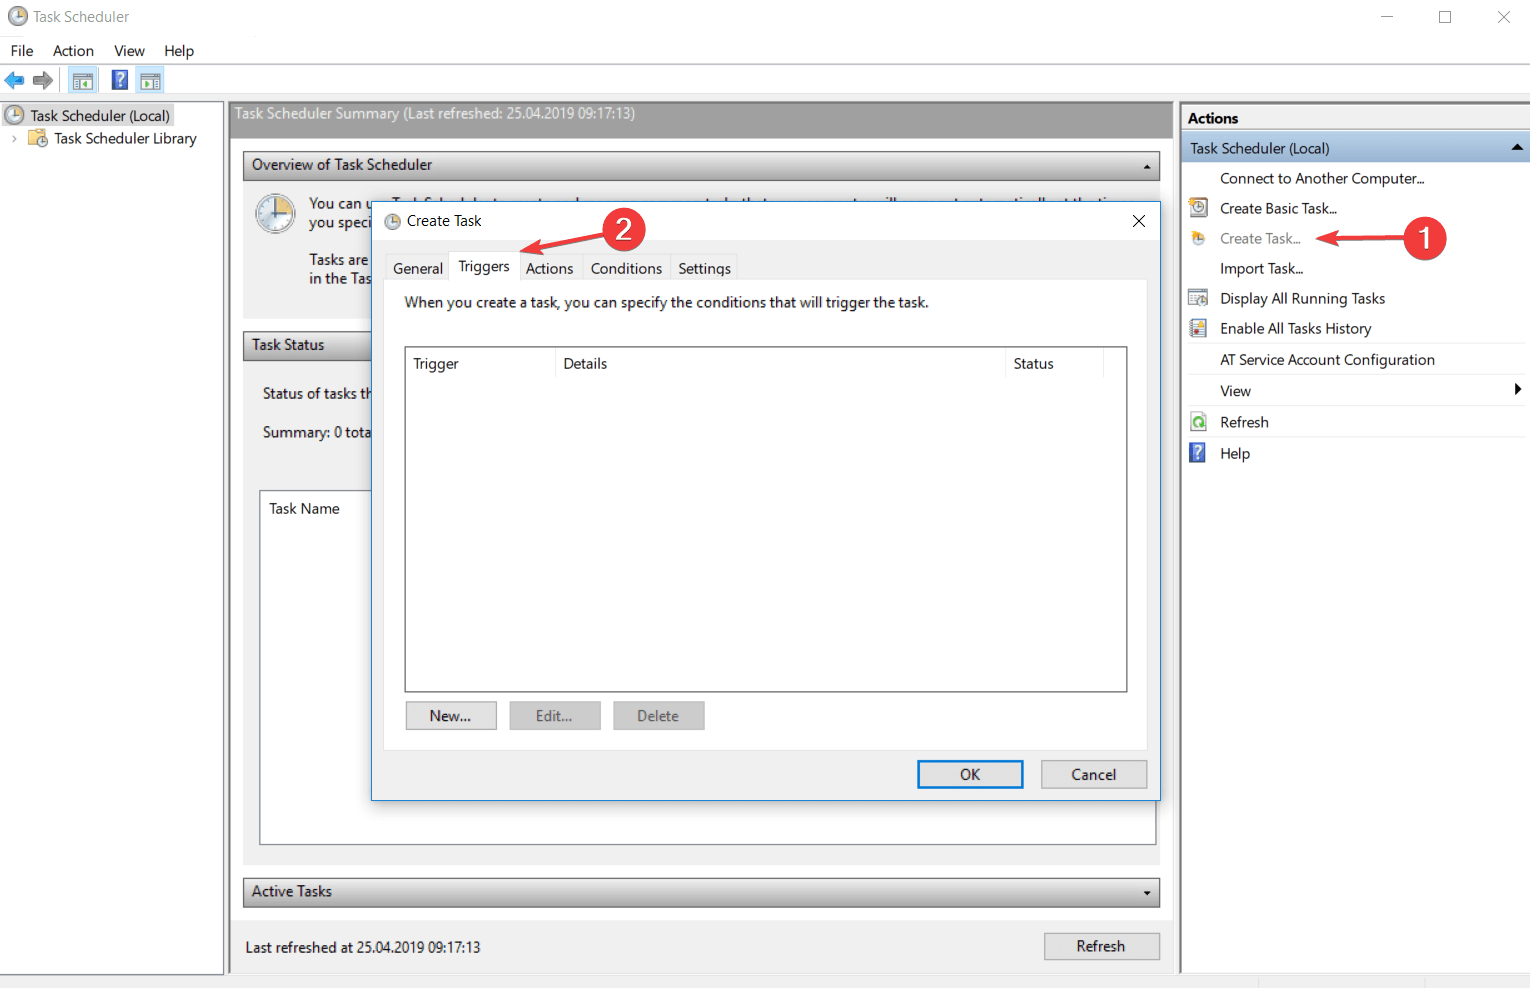
There are two types of triggers: the time-based trigger and the event-based trigger.

  • The time-based trigger is used for tasks that start at a certain time or tasks that starts periodically, depending on your schedule.
  • The event-based trigger is used for actions that start at a specific system event.

For example, let’s suppose that on this day you want to recover a few hours of work, and you want to have the same productivity, even though you know you will work more than usual.

You can set a task to be triggered every time your computer is entering an idle state.

Note icon NOTE

1.1. Triggers for a schedule

This kind of trigger causes the task to run after a well-determined schedule configured by you. From the trigger settings, you can choose if the task will be repeated once, daily, weekly, or monthly.

new trigger windows 10

This time interval is guided by the computer’s date and time. You can check the Universal box for making the time interval relative and synchronize it with UTC (Coordinated Universal Time).

This feature allows you to coordinate multiple tasks to run independently in different time zones.

  • The One time trigger is the easiest to set up. All you have to do is enter the day and time you want the action to take place.
  • The Daily trigger is based on a recurrent system and the date and time you want to start using this kind of trigger.

The interval of 1 is producing a daily schedule, the interval of 2 is producing an every other day schedule, and so on.

  • If you opt for a Weekly trigger you must enter the date and time you want to start this schedule, the days when you want to take place and how often to repeat. Recursion of this trigger is similar to the daily one.

For the interval of 1, the task will be repeated weekly, for the interval of 2, the task will be repeated every two weeks, and so on.

  • The Monthly trigger does not have many differences from the others, you only need to select the week and the day that you want to activate your task.

The recursion system is the same, the only difference being that the minimum interval of repetition is one month.

1.2. Triggers for logging on

trigger log on windows 10

This type of trigger runs an action when a user logs onto the computer. It has a customization feature that allows you to set the action to occur for all users or only for certain users.

1.3. Triggers for idle state

trigger on idle windows 10

This trigger determines the action to run after entering the computer in the idle state. The trigger conditions can be configured from the Conditions tab of the Create Task menu or from the Task Properties window.

conditions task schedule windows 10

1.4. Triggers for an event

The event-based trigger determines the action to run after an event occurs. You can choose from a predefined list of events but you can also set a specific event.

trigger on an event windows 10

If you are choosing the Basic trigger settings, only one event from the specific event log will run the task.

If you choose the Custom trigger settings you can enter the XML event query or a custom filter for the events that can run the task.

1.5. Triggers on workstation lock

trigger on workstation lock windows 10

This type of trigger runs the task when the computer is locked. You can configure from the settings if this action will be available for any user or for a specific user. You can do the same thing for the unlocking station process.

1.6. Advanced settings of triggers

trigger advanced settings windows 10
  • Delay task for up to (random delay)

This feature allows you to insert a delay between the moment when the task was triggered and the moment when the task will take place.

For example, if you have a time based trigger, the task is scheduled to be triggered at 3:00 PM and you set the Delay task for up to (random delay) to 30 minutes, your task will be triggered in between 3:00 PM and 3:30 PM.

  • Repeat task every:

Here you can set a repeating time for your task. So, after the task will be triggered, it will wait the amount of time specified and after that, it will be triggered again. This entire process will continue until the period allocated is done.

2. Types of actions

The action is the process or a part of the process that is performed when the task is running. A task can have up to 32 actions. Every action has some settings that determine how the task is performed.

task scheduler actions windows 10

You can find and edit the task‘s actions from the Actions tab of the Task Properties menu or from Create Task window.

When the list contains more than one action, they will be executed consecutively starting with the action from the top of the Actions tab and ending with the action from the bottom of the list.

If you want to change the actions order all you have to do is to click on the action that you want to move and then use the arrow keys to move it above or below.

2.1. Action that activates a program

This kind of action is used for starting a program or a script.

action task scheduler windows 10

In the Settings menu of the Actions tab, you enter the name of the script or the program you want to start.

If one of those sequences takes command line arguments you can add, delete and edit them in the Add arguments (optional) text box.

The Start In (optional) is the place where you can specify the directory for the command line that will execute your script or your program.

This should be either the path to the program or the script file that leads to the files that are used by the executable file.

2.2. Action that sends an e-mail

This action is particularly useful for people who communicate a lot via email.

action send email task scheduler

In the settings of this action, you have to enter your e-mail address, the e-mail address of the person who will receive the mail, the title of the e-mail, the message you want to be sent, and you have also an optional feature to attach different files to the mail.

You must also specify the SMTP server of your e-mail.

2.3. Action that displays a message

action display a message windows 10

This action is used more like a reminder because it displays on your screen a text with a title. Select the Display a message category from the Actions menu and type the title and the message of the reminder.

If you are facing Task Scheduler failed to launch an action issue, we recommend you check out this detailed guide for solutions.

3. Types of Task Conditions

Task conditions decide if a task can run after it was triggered. Conditions are optional and their main role is to help you accomplish a more accurate task reported to the operating situation.

task scheduler conditions windows 10

You can find them in the Conditions tab of the Task Properties or Create Task menu. Conditions are divided into 3 categories: idle conditions, network conditions, and network conditions.

3.1. Idle conditions

With this condition, you can tell the task to run only if your computer is an idle for a certain amount of time. Every 15 minutes, Task Scheduler is checking your activity to find out if your PC has entered into an idle state.

It is considered that your computer is in an idle state if the screensaver is on or if the percentage of CPU and memory operation is 0%.

As soon as the Task Scheduler has detected that your computer is in an idle state, it will begin the countdown of the length of time that has been set.

If you come back at this time and continue your work, the application will reset the task.

You can also set the time condition to 0 and in this case, the task will run when the application will detect that your computer has entered the idle state.

If the Stop if the computer ceases to be the idle condition is on, the task will stop running after the computer gets out from the idle state. Normally, this task will run just one time.

To run every time the computer remains inactive you have to check the Restart if the idle state resumes.

3.2. Power conditions

This condition is dedicated to laptop users because it follows the power method of the device.

While a computer receives a current flow of energy from a source, the laptop can run on a battery when you do not have a stable source of power.

With this condition, you can set a task to run when the computer is connected to a stable and continuous source of energy after the trigger was activated. You can also set a condition.

You can also configure the condition so as not to allow the task to run if the device goes on the battery power.

From these conditions, you can also create a task that will tell the computer to start from sleep mode and run the actions after it was triggered. Consider that this can happen during hours of rest and may create trouble.

To avoid this, make sure the device is at a distance where it cannot bother you or turn it off when you rest.

Note icon NOTE

3.3. Network conditions

With this condition, you can configure a task to run if a specific named network is available or if any connection is available when the task is triggered.

If you consider that your task will need network conditions to run, you can also set this in the conditions.

4. Task settings

Task settings are indicating how a task run, is deleted, or is stopped. You can find the panel with all the available settings in the Settings tab from the Task Properties or from the Create Task menu.

task scheduler settings windows 10

The following list contains a description of all the available settings.

4.1. Allow tasks to run on demand

Here you can specify if the task can be run manually before or after it is scheduled by allowing it to run on demand. You can set a task to run at any time on demand.

You find more information about the demand configuration in the How to run a task on demand topic of this article.

4.2. Run a task as soon as possible after a scheduled start is missed

This setting will assure you that a task will start running even if it could not run when it was scheduled from different reasons (the device was turned off, Task Scheduler was busy).

In the default settings, the Task Scheduler will not start the task immediately when the service is available. It will wait 10 minutes and then immediately start the process.

4.3. If the task fails, restart every time period

This setting will force the Task Scheduler to restart the task if the previous attempt was thwarted by an error.

You have to add the time interval between the running attempts and the number of attempts to achieve.

4.4. Stop a task if it runs longer than the time period

With this setting you can establish a time limit in which the task can run.

This setting is used for limiting the number of tasks that need a long period of time to execute and in this way you can save resources for your computer.

4.5. If the task is not scheduled to run again, delete if after a time period

This feature replaces an action that you should do it manually.

If you schedule a task to run only once means that you will not need it in the future and not unnecessarily load the list of tasks you should delete after you have used it.

This setting will delete automatically the task after a period of time set by the user after it was activated.

Remember, your task must include at least one trigger with an expiration date in order to select this setting.

4.6. If a task is already running you must know a few things

You must configure the Task Scheduler to know how to run the task in case another instance of the current task is already running.

  • Do not try to start a new instance because the application will not run the new instance and either stop the current instance from running.
  • You can run a new instance in parallel. Task Scheduler is able to run different instances in parallel, so if you want to run a new instance, it will run it at the same time as the instance that is already running.
  • You can queue a new instance. You can set an instance to start as soon as the current task ends the activity. The Task Scheduler will add your add the new instance in a queue and the service will not stop the current task from running.
  • Stop the current instance. After you stop the current instance, the service will try to run on the next one.
  • You can run a new instance in parallel. Task Scheduler is able to run different instances in parallel, so if you want to run a new instance, it will run at the same time as the instance that is already running.
run a new instance task scheduler
  • You can queue a new instance. You can set an instance to start as soon as the current task ends the activity. The Task Scheduler will add your add the new instance in a queue and the service will not stop the current task from running.
  • Stop the current instance. After you stop the current instance, the service will try to run on the next one.
  • You can run a new instance in parallel. Task Scheduler is able to run different instances in parallel, so if you want to run a new instance, it will run it at the same time as the instance that is already running.
  • You can queue a new instance. You can set an instance to start as soon as the current task ends the activity. The Task Scheduler will add your add the new instance in a queue and the service will not stop the current task from running.
  • Stop the current instance. After you stop the current instance, the service will try to run on the next one.

If you are looking for ways to enable Task Scheduler History, check out this guide.

5. Task security context

By default, the Task Scheduler runs the tasks in order with the security context of every user logged on when the task is triggered.

You can modify these settings from the Security options sections of the General tab after you have selected the task that you want to modify.

task scheduler general windows 10

For a better organization of your tasks, you can group them on users or on groups of users by clicking on the Change User or Group category.

If your user does not have administrator rights the button will be called Change User and your account will not be able to enter the Administrators group.

task scheduler change user windows 10

The Run whether the user is logged on or not feature allows you to run tasks even if the specific user is not logged on.

The feature is used for tasks that need to be run on any user of the system. If this setting is checked, the tasks will not run interactively.

To make a task run only when a user is logged on, select the Run only when the user is logged on radio button.

If the Run whether the user is logged on or not feature is used, you should supply the credentials of the account no matter if you check the Do not store password or not.

task scheduler do not store password windows 10

In the account is not logged on, the Task Scheduler will use the saved credentials in order to run the task.

When you select the Do not store password, the application will not save the credentials when you are creating a task but will discard them after the user properly authenticates.

When the service requires running a task, it will use the Service-for-user (S4U) extensions to the logging protocol to retrieve the user’s token.

In other words, the main purpose of the Service-for-user is to secure the context of the account.

6. How to use the Task Scheduler

6.1. Start Task Scheduler

  • Using Windows interface
  1. Type Control Panel in the search bar from the bottom left corner of your screen.
  2. Click on the System and Security, and select Administrative Tools.
  3. This will open you a list with different applications and in that list, you will find Task Scheduler.
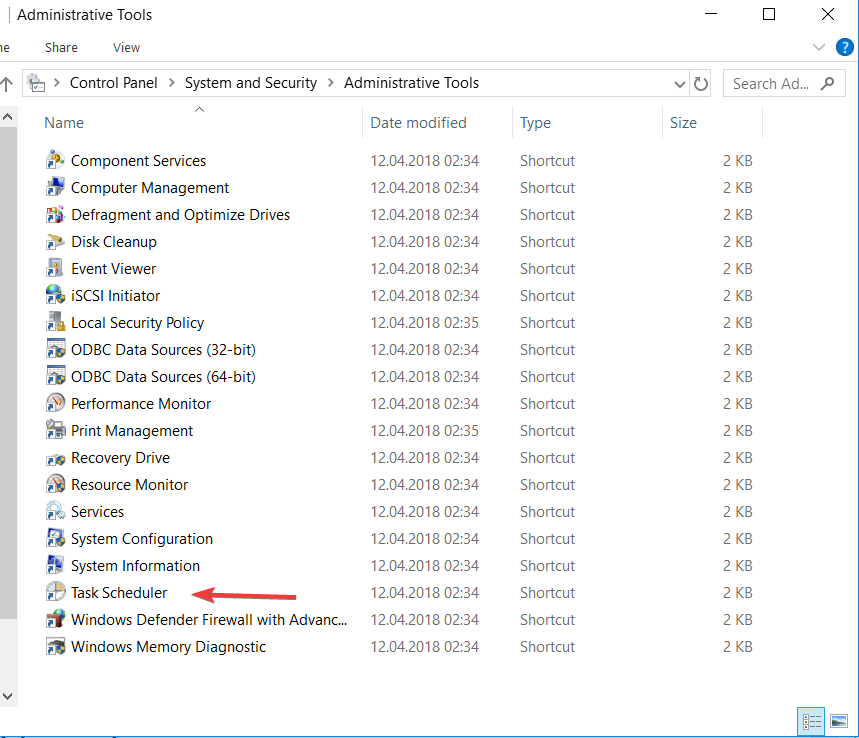
  4. Double-click on it and the application will open.
  • Using Command Prompt
  1. Type cmd in the search bar from the bottom left corner of your screen, and select Command Prompt.
  2. Type msd command in the console, and you will open the application.

There are several ways you can get to access this application. You find above two of them that will work on any version of Windows that you have.

6.2. Create a task

  1. 1. Press the Start button on your taskbar.

  2. 2. Type task scheduler in the search box that opens and click on the first result.

  3. 3. When the Task Scheduler app opens, navigate to the Library section from the left pane.

  4. 4. Select the folder where you want to create a task. If you have not already a created folder, from the Actions tab, click on the New folder… button and name your new folder.

    task scheduler new folder windows 10
  5. 5. Click on the Create Task button from the Actions section.

  6. 6. You must enter a name for your task in the General tab of the Create Task dialog box.

  7. 7. Select what type of trigger you want to be attached to this action. To do this, open the Triggers tab, and click on the … button.

  8. 8. Choose the action or the set of actions which will be found in the task. Enter the Actions menu of the Create Task, and click on the .. button and configure your action settings.

  9. 9. Take a look at the Conditions and Settings tab to better customize the task for your needs.

  10. 10. Click on the OK button from the Create Task dialog box to finish the task creation process.

  11. The process of creating an automated task via Task Scheduler in Windows 10 is simple and fast. The app allows you to configure every setting, such as the task’s name, its triggers and conditions.

6.3. How to change an already created task

  1. Open Task Scheduler, and select the task that you want to change.
  2. Click on the Properties tab from the Action menu to open the Task Properties dialog box.
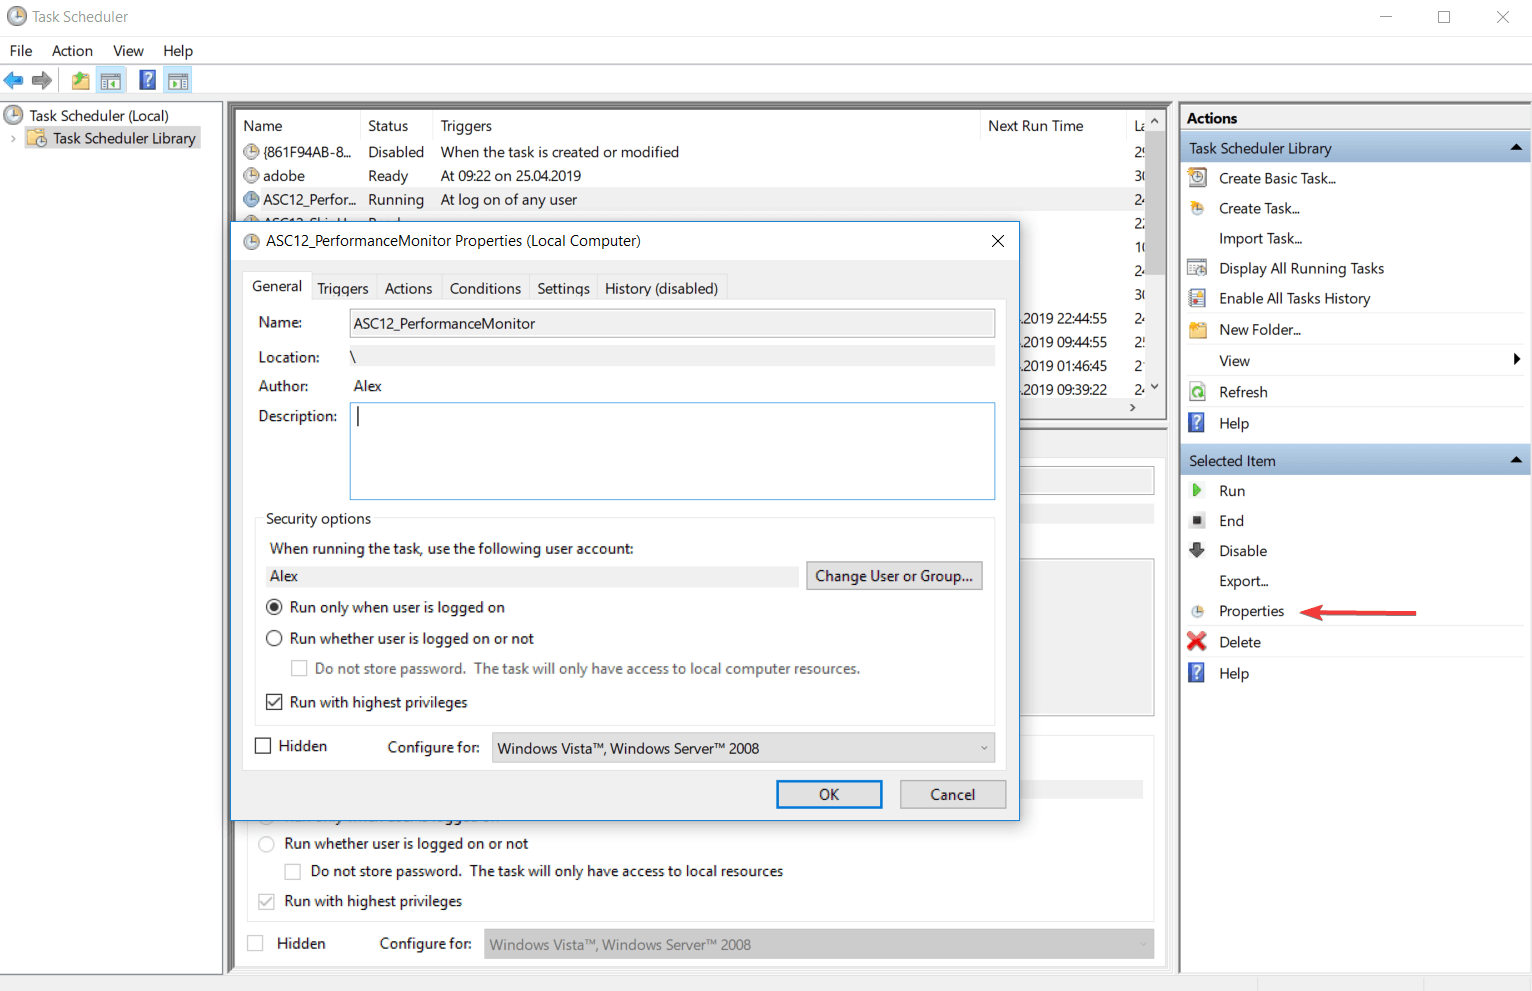
  3. Click on the General tab to view the task‘s general settings that you can modify.
  4. To finish the process click on the OK button of the Task Properties dialog box, and the new task will be registered.
  5. If you have already created a task that activates when you register another task, it will enable it.

6.4. How to delete a task

  • Using Windows interface
  1. Open Task Scheduler, and click on the Task Scheduler Library folder.
  2. Right-click on the task that you want to remove and select Delete Folder.
task scheduler delete folder windows 10
  • Using Command Prompt
  1. Type Command Prompt in the search bar, and open it.
  2. Paste the following command: schtasks /Delete [/S <system> [/U <username> [/P [<password>]]]] /TN <taskname> [/F]
  3. To find more information about the command from above, type: schtasks /Delete /?

6.5. How to create a Task Folder

  1. Open Task Scheduler, and select the task folder under which you want to create a new task folder.
  2. Press on the New Folder button from the Actions, and enter the name of the new folder.
  3. Click on the OK button to finish the process.

To organize better the scheduled tasks we recommend you to share them in different folders depending on their role.

Note icon NOTE

6.6. How to delete a Task Folder

  1. Start Task Scheduler, and select the task folder from the left table of the application interface.
  2. You will notice that in the Action panel you have the Delete folder.
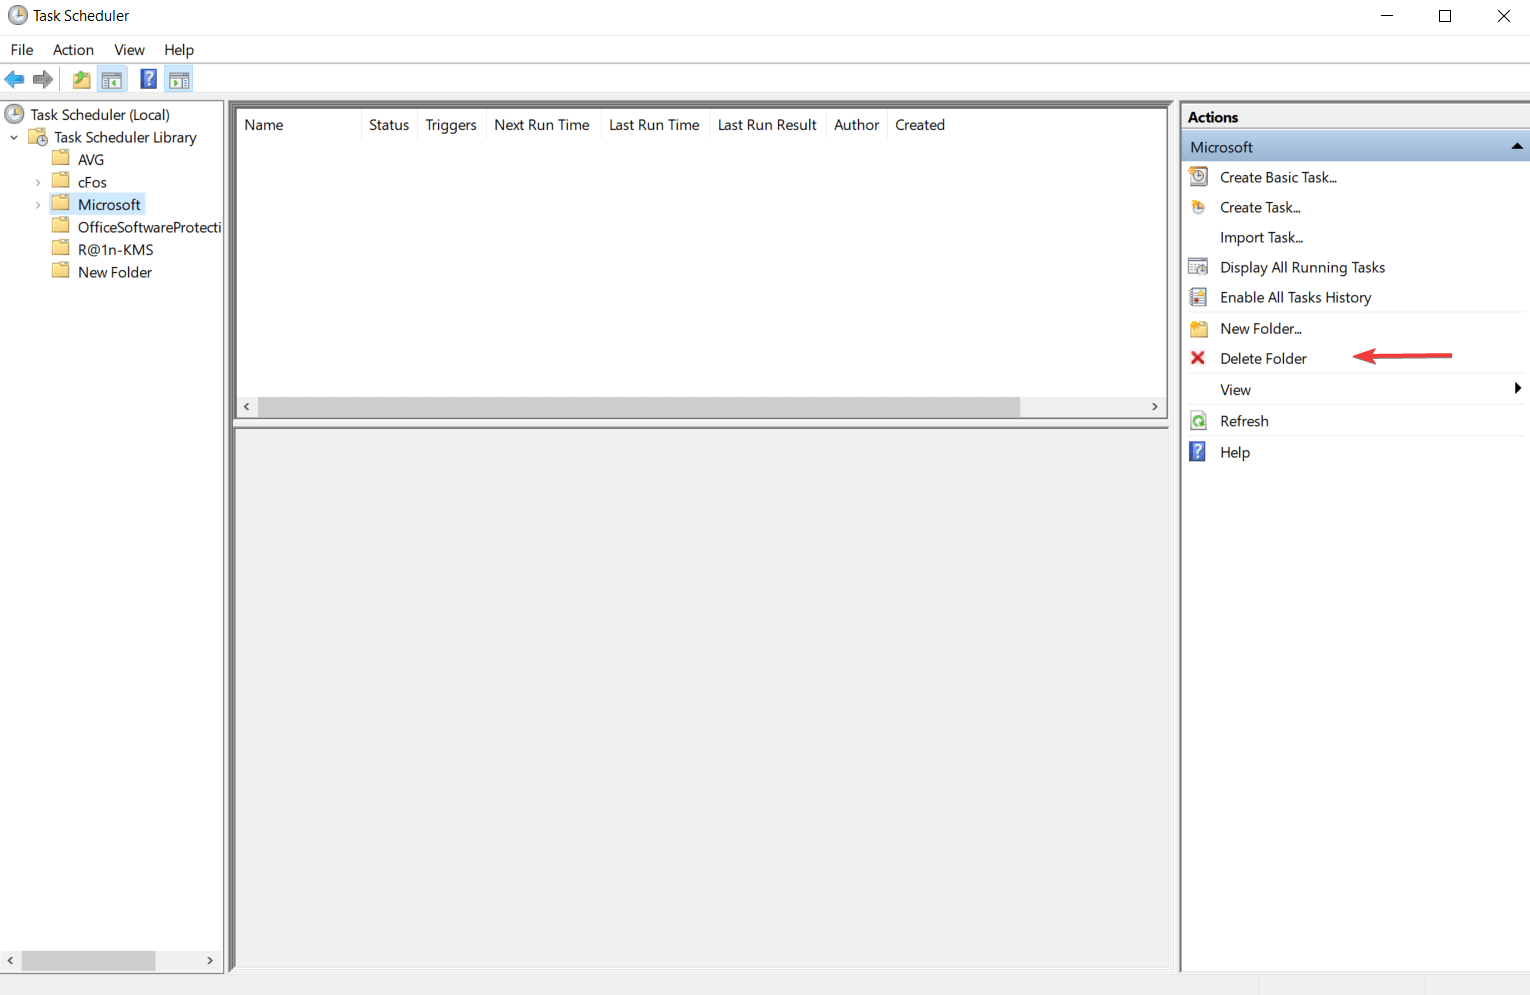
  3. Click on that option and choose the Yes option to complete the process.

If you want to delete a folder to better organize your tasks, you must ensure that it is empty, so be sure to delete all the tasks and the subfolder tasks before you delete the task folder.

Note icon NOTE

6.7. How to import a task

  • Using Windows interface
  1. Open Task Scheduler, and select the folder where you want to import the new task.
  2. Click on the Import Task button from the Action, and select the path to the XML file of the task.
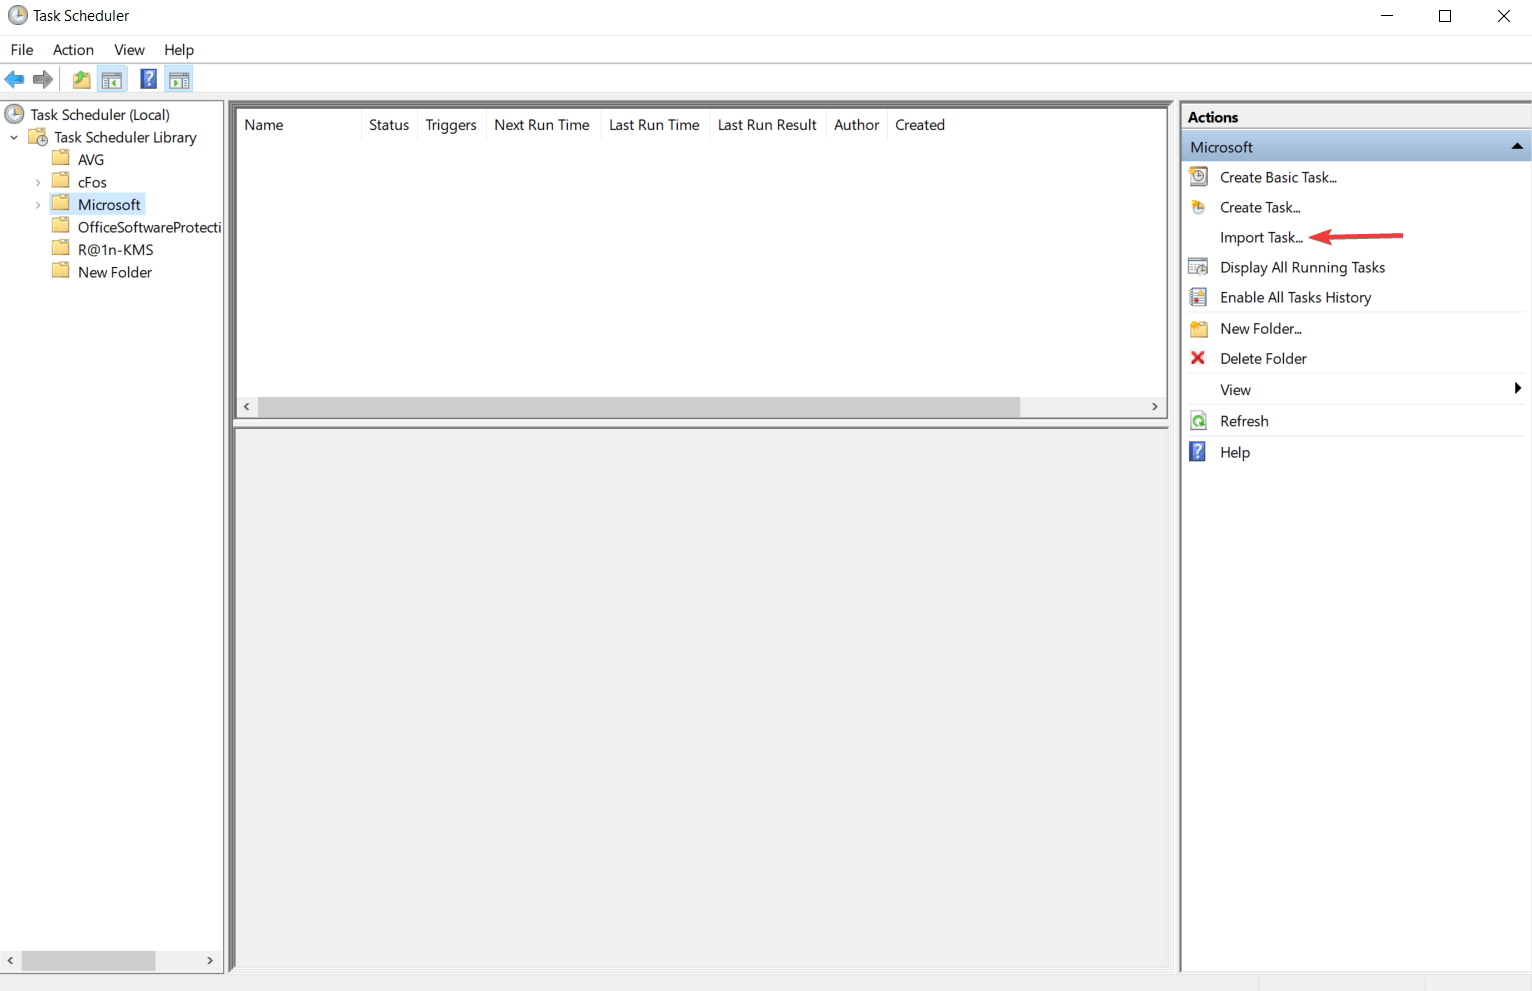
  3. After you entered the path to the task, the app will open the Create Task dialog box where you can find all the information about the imported task.
  4. Click on the OK button to finish the importing process.
  • Using Command Prompt
  1. Open Command Prompt. To do that, type cmd in the Windows search bar.
  2. Edit and paste the following command: schtasks /Create [/S <system> [/U <username> [/P [<password>]]]] /XML <xmlfile> /TN <taskname>
  3. For more information about the command from above, type the following command: schtasks /Create /?

Task Scheduler has a feature that allows you to import tasks, which will be added to a folder chosen by you. All the task characteristics can be found in an XML file.

6.8. How to export a task

  • Export a task using Windows interface
  1. Open Task Scheduler, and select the task folder which contains the task that you want to export.
  2. Right-click on the task that you want to export and select the Export option.
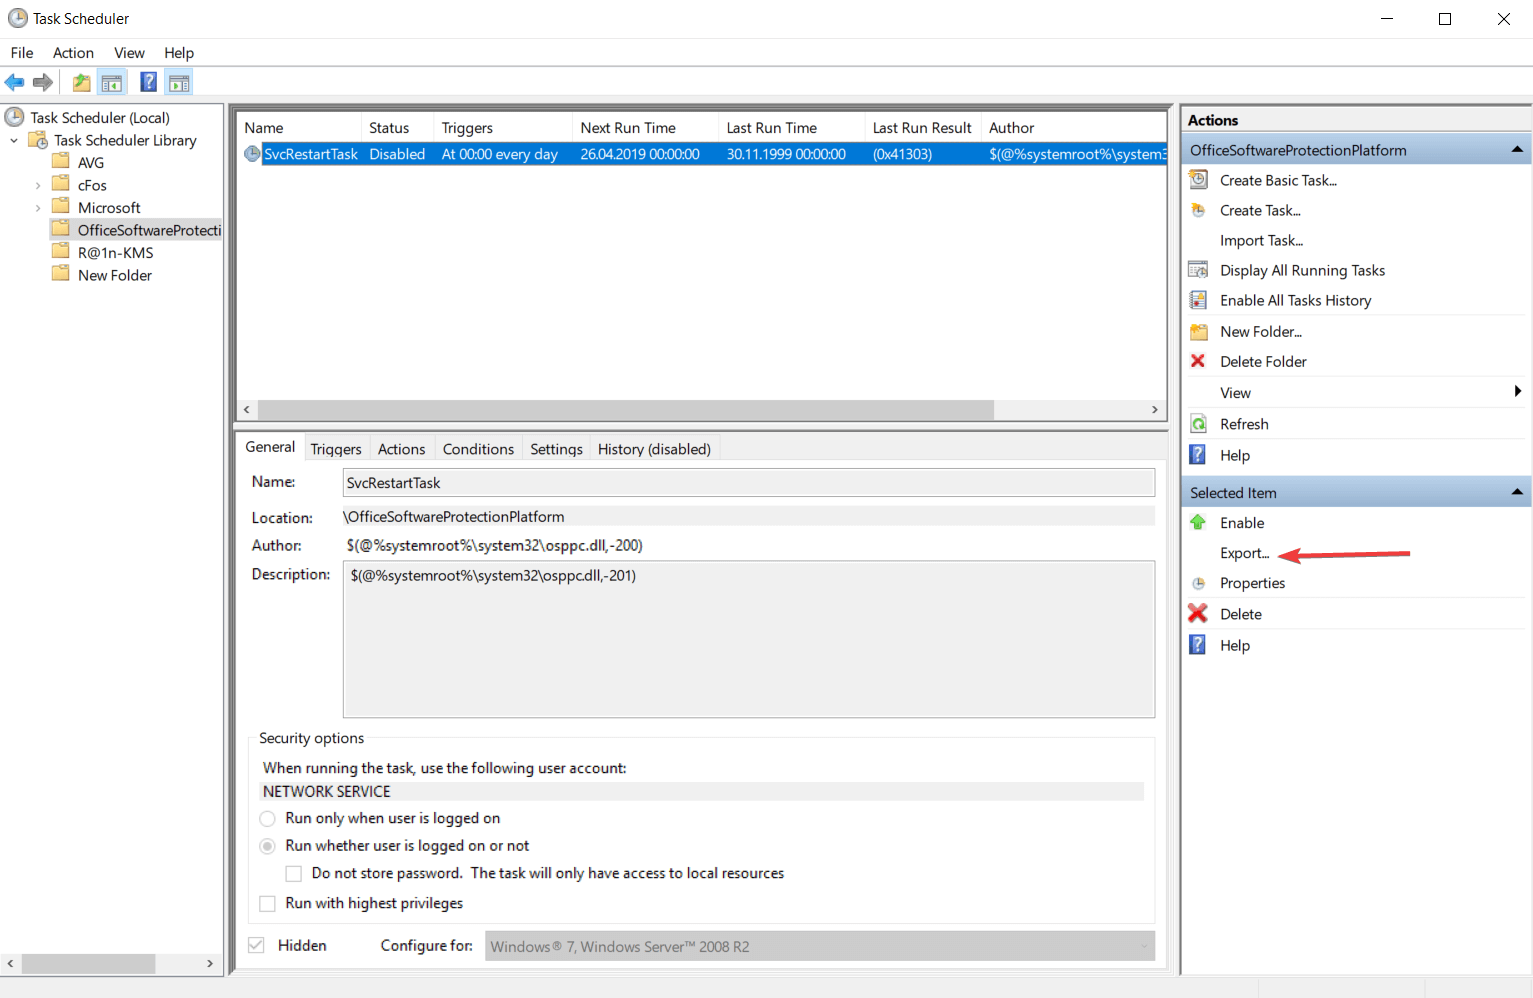
  3. If you select the task, you can find this option in the Action panel.
  4. This action will open a dialog box where you must browse the location where you want to save the task.
  • Using Command Prompt
  1. Open Command Prompt by typing cmd in the Windows search bar.
  2. Edit and paste the following command: schtasks /Query [/S <system> [/P <password>]]]] /XML /TN <taskname>
  3. To find more information about the command tag, type the following command: schtasks /Query /?
  4. Your XML file is shown in the console. Copy the task XML and paste it into a blank XML file.
  5. After the XML file is saved, it will contain all the characteristics of your task.

Task Scheduler has also an integrated feature that allows you to export your task to different users. The task will be saved in an XML format that can be shared like a usual file.

6.9. How to run a task on demand

  • Using Windows interface
  1. Open the Task Scheduler, and select the folder that contains the task you want to run.
  2. Right-click on your task and select Run.
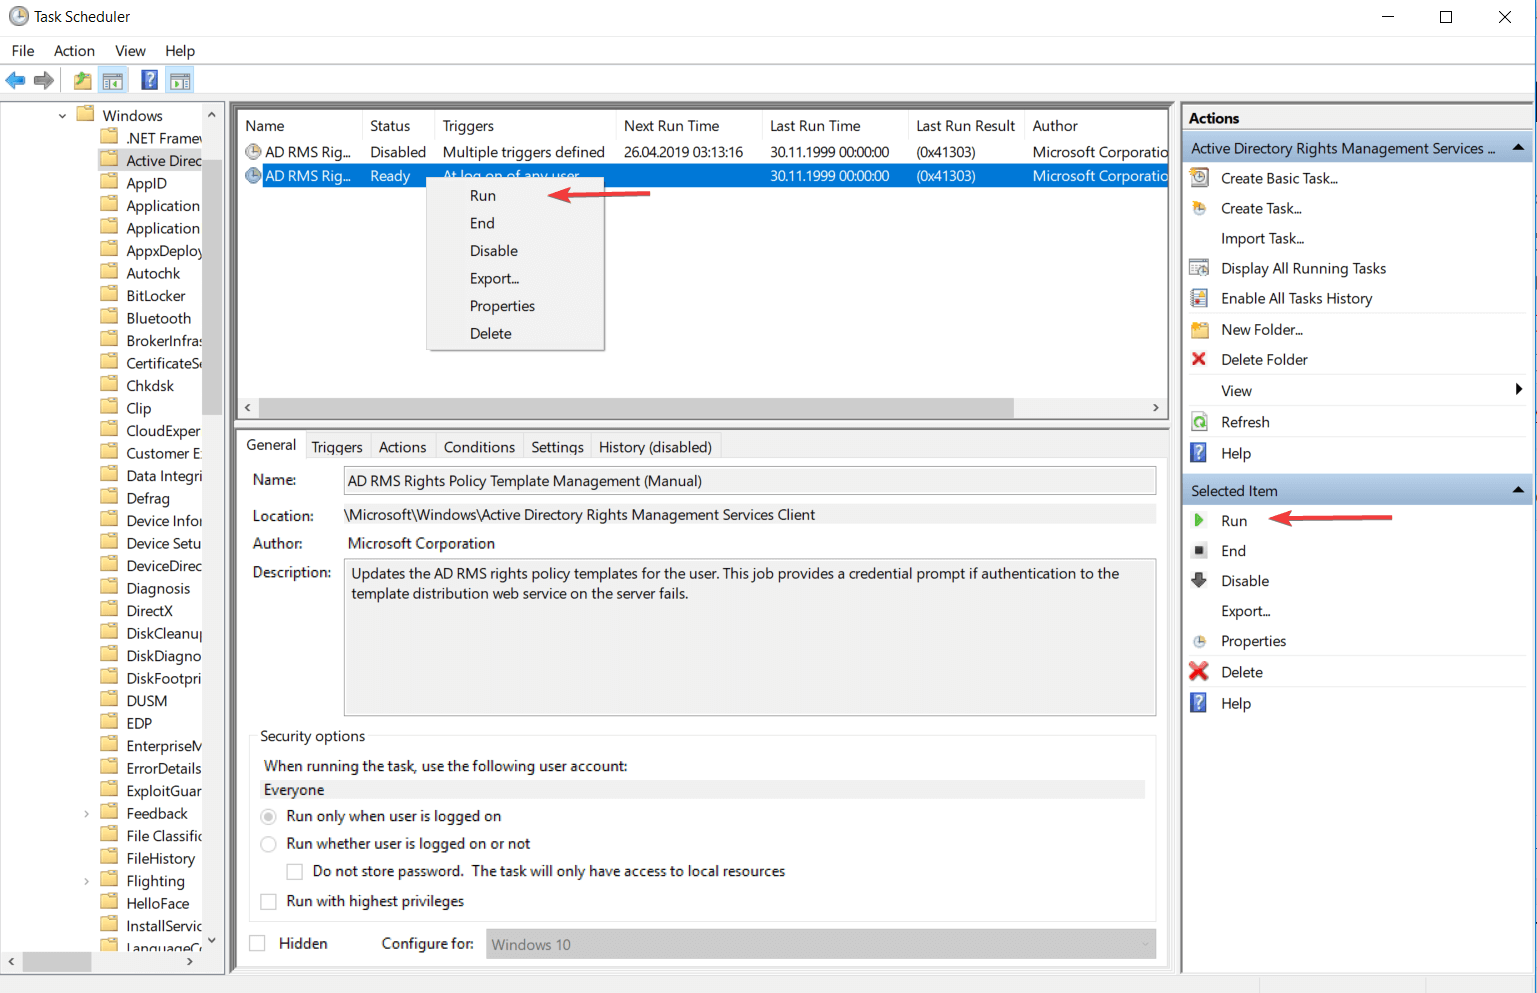
  3. If you select the task you can find this option in the Action panel.
  • Using Command Prompt
  1. Right-click on the Windows icon from the bottom left corner of your screen, and select the Command Prompt (Admin) section.
  2. Edit and type this command: schtasks /Run [/S <system> [/U <username> [/P [<password>]]]] /TN <taskname>
  3. For more information about the command lines from above, type in the console schtasks /Run /?

This feature helps you to run a task after or before it was scheduled to run. This is possible only if the task is not disabled and the Allow task to be run on demand setting is selected for your task.

6.10. How to stop a running task

  • Using Windows interface
  1. Open Task Scheduler, and select the folder which contains the task that you want to close.
  2. Right-click on your task, and select the End If you select the task.
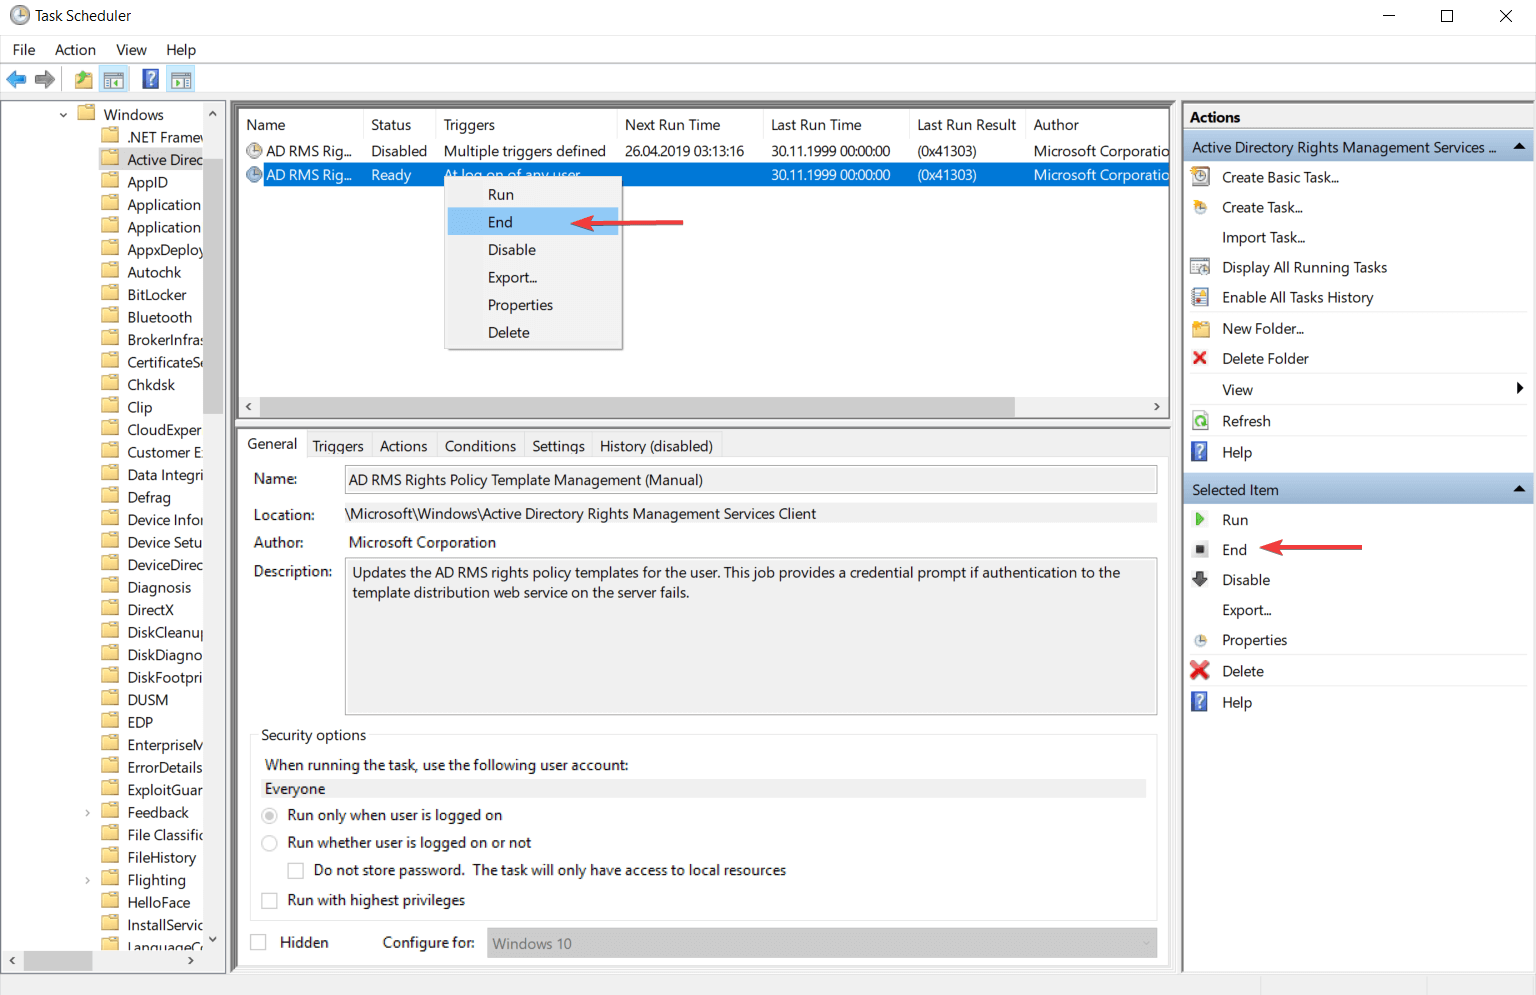
  3. It will be displayed a dialog box where you will be asked if you want to end all instances of this task. Click on the Yes button to end stop the task.
  • Using Command Prompt
  1. Use the Windows Key + R combination to open the Command Prompt.
  2. Edit and type this command to end the activity of your task: schtasks /End [/S <system> [/U <username> [/P [<password>]]]] /TN taskname
  3. To see the role of each sequence you can enter the following command in the console to get all the information you need: schtasks /End /?

Task Scheduler is offering a feature that allows you to end the activity of a task even if it is already running.

To do that, the running task must have the If the running task does not stop when requested, force it to stop setting activated.

This feature is commonly used when a task does not finish its activity when you finish the ending process.

6.11. How to enable a task to run

  • Using Windows interface
  1. Open Task Scheduler, and select the task folder which contains the task you want to enable.
  2. Right-click on your task, and select the Enable option.
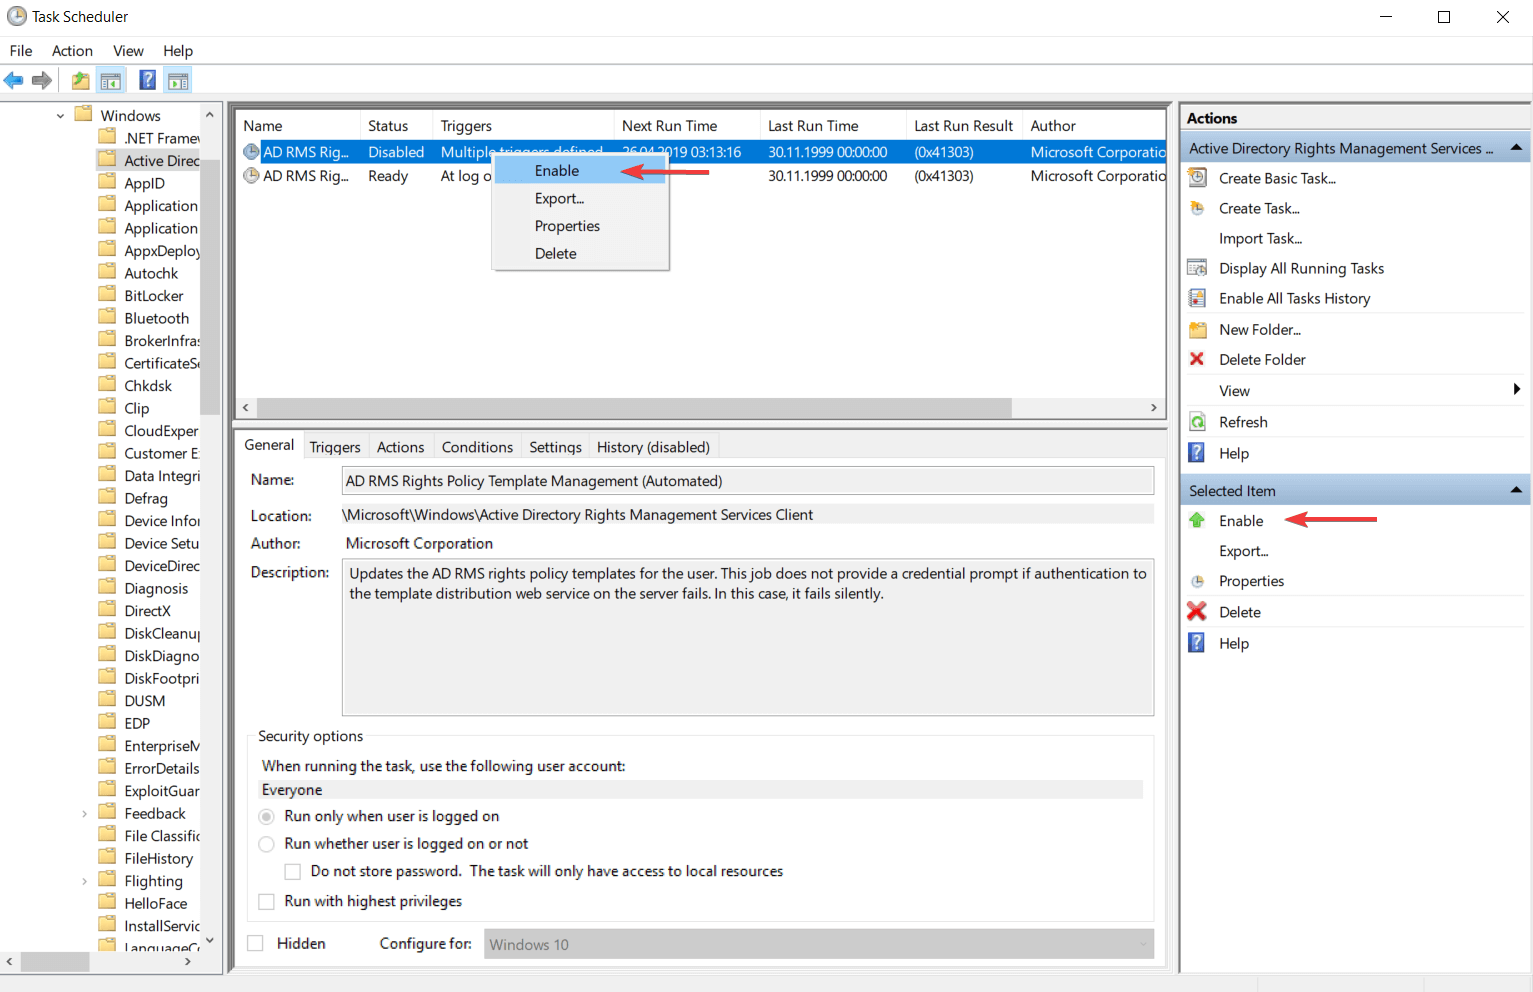
  3. You can also select your task and run it from the Actions panel.
  • Using Command Prompt
  1. Use the Windows Key + R key combination to open Command Prompt.
  2. Edit the following command and paste it in the console dialog box: schtasks /Change [/S <system> [/U <username> [/P [<password>]]]] /TN <taskname> [/ENABLE]
  3. Enter this command to obtain more information about the command from above: schtasks /Change /?

When a task is disabled it can execute the actions. You can create a task and leave it off until the moment you want to use it. Here are two ways to activate a task that any kind of user can implement.

6.12. How to disable a task for running

  • Using Windows interface
  1. Open the Task Scheduler, and select the folder where you have the task.
  2. This action will display in the console panel all tasks from that folder.
  3. Search the task that you want to disable and then right-click on it.
  4. It will display a list with some actions, but in this case, we are only interested in one. Click on the Disable option to stop your task activity.
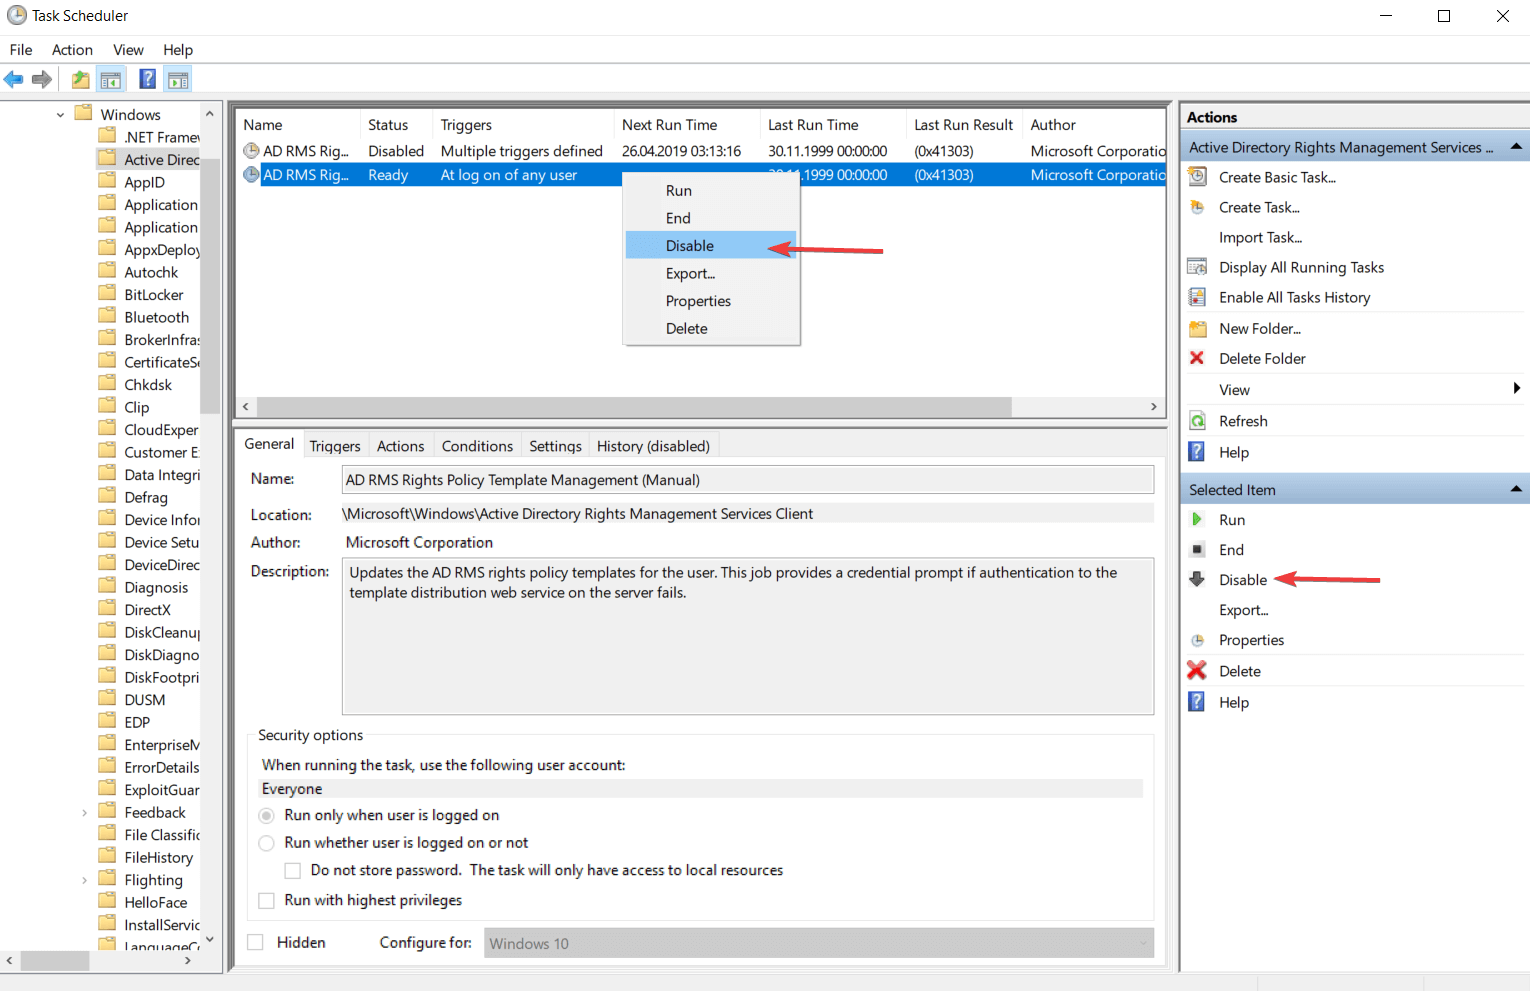
  • Using Command Prompt
  1. To open Command Prompt, right-click on the Windows icon from the bottom left corner of your screen.
  2. Click on the Command Prompt (Admin) to open the console as an administrator.
  3. Edit with your information the following command and paste it in the Command Prompt dialog box: schtasks /Change [/S <system> [/U <username> [/P [<password>]]]] /TN <taskname> /DISABLE
  4. You can find more information about this command line by pasting the following command in the console: schtasks /Change /?

Task Scheduler has a feature that allows you to disable the activity of a task for a certain period of time. You can enable the task again at any time when you will need it.

6.13. How to view task properties and history

  • Using Windows interface
  1. Open Task Scheduler, and select the folder that contains the task you want to view.
  2. Right-click your task and select Properties.
  3. In the Task Properties dialog box, you will find the General, Triggers, Actions, Conditions, and Settings.
  4. Click on any of these tabs to see the properties.
  5. Click on the History tab to view the task‘s history.

The task history option can be enabled and also disabled from the Action panel. There you will find the Disable All Task History / Enable All Task History buttons, and depending on your wish, you can configure the task’s history.

Also, you can view the description of an event from the events list by clicking on the History tab.

  • Using Command Prompt
  1. Right-click on the Windows icon next to the Windows search bar, and select Command prompt (Admin).
  2. Paste the following command: Schtasks /Query /FO LIST /V
  3. For more information about the command line from above, type: schtasks /Query /?

The task properties contain everything we must know about every task (name, description, actions, triggers, security options, conditions, and settings).

The task history is a list with all the tasks created until that moment and can be viewed along with the properties. This list is based on the events tracked by Microsoft Windows Task Scheduler event log.

Every action related to a task is considered an event, so every time when a task runs is building a line in the event log.

We hope that our detailed guide to Tasks Scheduler has given you a broad overview of this application and that you will be able to successfully schedule your tasks in Windows going forward.

Also, if you own a business and want to make sure you have everything under control, then check out our list of the best scheduling software for employees.

For any questions and more suggestions, please access the comments section below.

Ventoy for Windows 10: How to Download & Install [64 Bit]

If you want to create multiple bootable USB drives, Ventoy is the tool that can help you. Bootable USB drives are an easy way to carry around an operating system on a thumb drive. 

They’re also great for troubleshooting computers, as they can allow you to boot up a machine and access the files on your hard drive without affecting the existing OS. 

The main reason for creating multiple bootable USB drives is to have a backup that you can use in case your primary computer breaks down. 

Another option is to have a bootable USB drive for each OS that you use and switch between them, or even just keep one of them as a backup in case something goes wrong with one of your computers. 

Does Ventoy support Windows 10 & 11? 

Yes, Ventoy is compatible with Windows 10 & 11. For Windows 10, since there is no Ventoy directory, you will have to create one. Windows 11 is a bit tricky with the system requirements but you can still bypass them during installation.

It supports both 32-bit and 64-bit processors so when downloading be sure to select an option that is compatible with your device.

Is Ventoy software safe?

The Ventoy software is free and open source. It doesn’t require any special permission or administrator rights to install and run on your computer, which means it won’t affect your system’s performance at all. 

Also, it doesn’t require you to make any changes or tweaks in the settings of your computer or operating system.

Some programs that you install on your computer may contain malware or viruses that could harm your device if they are not updated regularly.

This is why you should always install an antivirus program and keep it up to date to remove any suspicious applications from your system as soon as possible after discovering them. 

How do I download and install Ventoy? 

  1. Head over to GitHub and download Ventoy for your OS.
  2. Unzip the file, locate Ventoy2Disk and Run it.
  3. Now select the USB drive you wish it to be installed.
  4. Click the Install button.
  5. You are now ready to copy any ISO image files you may have to the USB drive.

Remember to back up all your files before installation as all data will be lost.

Which is better Ventoy or Rufus?

The answer is: It depends. For most people, Rufus will be the better choice. Rufus is a free utility that can create bootable Windows USB drives and other USBs from an ISO file. 

It’s faster than the Microsoft tool, works on more systems, and supports UEFI booting too. Rufus does not need any installation process or additional DLLs. In addition, its portable version can be run directly from a USB flash drive without leaving a trace on the host computer.

For Ventoy, users can copy and paste files directly on the USB drive without extraction. It allows you to create multiple bootable OS images from a single ISO file on your PC. 

The main advantage of using Ventoy is that it can save your time as well as money because you don’t have to spend money on buying another USB stick every time when you want to create multiple bootable drives from a single ISO file.

While you are still here, you can also explore other tools to create multiboot USB drives. Also, having an antivirus program for your USB will help keep your system safe from external storage sources.

Have you installed Ventoy? We’d love to hear your experience so far in the comment section below.

KB5016688 for Windows 10 addresses 0x1E kernel BSOD issue

We know that Windows 10 users were expecting another cumulative update from Microsoft, so we’re going to take a closer look at the latest one.

Know that this recent Microsoft update release addresses some pretty nasty issues that Windows 10 users were struggling with recently.

Since we’re talking about this operating system, don’t forget to also check out KB5016690, and information on how to fix Windows 10 broken audio after installing KB5015878.

Circling back to today’s rollout, let’s focus on KB5016688 and discover exactly what the tech giant managed to deal with.

KB5016688 comes with important fixes

Indeed, the Redmond-based tech giant released KB5016688 recently, an update that addresses several major issues in the operating system.

Keep in mind that this preview update is an optional one, but administrators on affected devices may want to install it to resolve these issues before the official rollout on the September 2022 Patch Tuesday if experienced issues are major.

This update actually fixes several annoying bugs which include issues related to game installations due to a licensing bug, a 0x1E kernel error during shut down or restarts, an issue related to the IE mode in Microsoft Edge, and more.

To get a better idea of what exactly we are dealing with, this is the information that Microsoft shared:

  • IT admins have the ability to remotely add languages and language-related features. Additionally, they can now manage language scenarios across several endpoint managers.
  • Enhances Microsoft Defender for Endpoint’s ability to identify and intercept ransomware and advanced attacks.
  • Addresses an issue that causes ServerAssignedConfigurations to be null in a few full configuration scenarios.
  • Addresses a known issue that causes Microsoft Edge to stop responding when you use IE mode. This issue also prevents you from interacting with a dialog.
  • Addresses an issue that affects transparency in layered windows when you are in High Definition remote applications integrated locally (RAIL) mode.
  • Addresses an issue that might generate error 0x1E when you shut down or restart a device.
  • Addresses an issue that causes a subscription activation to fail under certain conditions.
  • Addresses an issue that might cause some game installations to fail because of a licensing issue.
  • Addresses an issue that prevents virtualized App-V Microsoft Office applications from opening or causes them to stop working.
  • Addresses an issue that might cause the deployment of the Windows Hello for Business certificate to fail in certain circumstances after you reset a device.
  • Addresses an issue that degrades BitLocker performance.
  • Addresses an issue that causes the Resultant Set of Policy tool (Rsop.msc) to stop working when it processes 1,000 or more “File System” security settings.
  • Addresses an issue that continues to trust a revoked Attestation Identity Key (AIK) certificate and fails to generate a new certificate.
  • Addresses an issue that causes the Take a Test app to remove all policies related to lockdown enforcement when you close the app.
  • Addresses an issue that affects the jump list icon colors in the Search app.
  • Addresses an issue that affects Focus Assist functionality for applications that run in full screen.
  • Addresses an issue that prevents devices from receiving an offer from Windows Update for the same extension driver when that extension driver is already installed without the base driver.
  • Addresses a race condition that causes the Local Security Authority Subsystem Service (LSASS) to stop working on Active Directory domain controllers. This issue occurs when LSASS processes simultaneous Lightweight Directory Access Protocol (LDAP) over Transport Layer Security (TLS) requests that fail to decrypt. The exception code is 0xc0000409 (STATUS_STACK_BUFFER_OVERRUN).
  • Addresses an issue that affects a lookup for a nonexistent security ID (SID) from the local domain using read-only domain controller (RODC). The lookup unexpectedly returns the STATUS_TRUSTED_DOMAIN_FAILURE error instead of STATUS_NONE_MAPPED or STATUS_SOME_MAPPED.
  • Addresses an issue that might cause cldflt.sys to reference invalid memory in race conditions.
  • Addresses an issue that affects input and output in the Storport driver and might cause your system to stop responding.

Known issues

  • Devices with Windows installations created from custom offline media or custom ISO image might have Microsoft Edge Legacy removed by this update, but not automatically replaced by the new Microsoft Edge. This issue is only encountered when custom offline media or ISO images are created by slipstreaming this update into the image without having first installed the standalone servicing stack update (SSU) released March 29, 2021 or later.
  • After installing this update, XPS Viewer might be unable to open XML Paper Specification (XPS) documents in some non-English languages, including some Japanese and Chinese character encodings. This issue affects both XML Paper Specification (XPS) and Open XML Paper Specification (OXPS) files. When encountering this issue, you may receive an error, “This page cannot be displayed” within XPS Viewer or it might stop responding and have high CPU usage with continually increasing memory usage. When the error is encountered, if XPS Viewer is not closed it might reach up to 2.5GB of memory usage before closing unexpectedly.
  • After installing this update, some Windows devices might have issues with audio not working. Some affected Windows devices might have no audio, but other affected Windows devices might only have issues on certain ports, certain audio devices or only within certain applications. Most affected audio devices drivers have the “audio enhancements” setting disabled before installing this update or the sound device driver has issues with the “audio enhancements” feature.
Release ChannelAvailableNext Step
Windows Update or Microsoft UpdateYesGo to Settings > Update & Security > Windows Update. In the Optional updates available area, you’ll find the link to download and install the update.
Windows Update for BusinessNoNone. These changes will be included in the next security update to this channel.
Microsoft Update CatalogYesTo get the standalone package for this update, go to the Microsoft Update Catalog website.
Windows Server Update Services (WSUS)NoYou can import this update into WSUS manually. See the Microsoft Update Catalog for instructions.

Don’t forget that you can also download the update manually from the Microsoft Update Catalog, just in case it doesn’t pop up for you in the Windows Update interface.

Also, keep in mind that this update is only available for:

  • Windows 10 Enterprise Multi-Session, version 20H2
  • Windows 10 Enterprise and Education, version 20H2
  • Windows 10 IoT Enterprise, version 20H2
  • Windows 10 on Surface Hub Windows 10, version 21H1, all editions
  • Windows 10, version 21H2, all editions

Have you experienced other issues after installing KB5016688 on your device? Share your experience with us in the comments section below.

How to Schedule a Batch File in Windows using Task Scheduler

Batch files usually contain several Command Prompt commands, and they are extremely useful for advanced users. Speaking of batch files, today we’re going to show you how to schedule batch file in Windows.

Scheduling batch files is as simple as creating one, and to do it, we’re going to use a built-in Task Scheduler application.

Even if you’re unfamiliar with Windows 11’s Task Scheduler, the instructions are simple and straightforward, so you can’t do anything wrong. So, without further ado, let’s get started.

How can I schedule a .bat file to run daily?

  1. 1. Press the Windows key on your keyboard to open the Windows Search box.

  2. 2. Type task scheduler in the Windows Search box and click on the search result in order to open the Task Scheduler app.

    task scheduler windows search
  3. 3. Navigate to Task Scheduler Library in the left pane.

    task scheduler create basic task
  4. 4. Select Create Basic Task in the right pane.

  5. 5. In the Create Basic Task Wizard windows that has opened, enter a name for the task and a description (optional), then click Next.

    enter task name task scheduler
  6. 6. Select Daily in the Trigger section, then click Next.

    schedule .bat file to run daily setting
  7. 7. Choose a date and time you’d like the task to trigger: set to Recur every 1 day > click Next.

    schedule .bat file to run daily reoccur time
  8. 8. In the Action section, choose the Start a program option > click Next.

  9. 9. Browse the .bat type file of the program you want to run daily > click Next.

  10. 10. Finally, click Finish.

  11. Scheduling tasks via Task Scheduler is very simple and can be done by anyone, without needing to be tech-savy. All you need to do is open the app and start setting up the batch file to run at the specific time and days you want.

There you go, now you know how to schedule batch file in Windows systems. As you can see, the process is pretty simple, and it will take you five minutes tops to schedule a batch file.

Scheduling a site to open automatically takes a little less time, so you may also want to check our article on the same.

If you found this helpful guide, leave us a comment in the comment section below.

How to Open Multiple Folders at Once in Windows 10

File Explorer doesn’t include an option that groups multiple folders into a single shortcut. That would then enable you to open multiple folders simultaneously by clicking a File Explorer or desktop shortcut.

However, you can still set up batch files that open multiple folders in Windows 10. So this is how you can add handy folder batch files to the desktop.

We also have a guide on how to batch rename files on your Windows 10 device that you can check out.

How can I open multiple folders in Windows 10 at the same time?

1. Create a batch file to open multiple folders in Notepad

  1. 1. First, open Notepad on your device.

  2. 2. Then enter @echo off into the top line of the app.

  3. 3. Type start, followed by the path of a folder to open as in the snapshot directly below.

    multiple folders file explorer
  4. 4. You can enter as many alternative folder paths as needed into the batch file much the same. Enter each folder path directly below the others without any spacing as shown below.

    notepad multiple folders file explorer
  5. 5. Click File > Save As, to open the Save As window.

  6. 6. Select All Files from the Save as type drop-down menu.

  7. 7. Enter a suitable title for the file followed by .bat. For example, you could enter folder.bat into the text box.

    how to save multiple files at once windows 10 bat file
  8. 8. Choose a folder to save the batch in and press the Save button.

  9. 9. Next, open the folder that you saved the batch file to.

  10. 10. Double-click the batch file to try it out. It will open all the folders you included in it.

  11. 11. To add more folders to the batch, you can right-click it and select Edit.

  12. 12. If you want to add the batch file to desktop, you should right-click it and select Send to and Desktop.

  13. Although there isn’t a dedicated built-in feature that allows you to open multiple files at once in Windows 10, there is a workaround. You can use Notepad as a file manager and configure it to open all the folders you assign to it in a simple click.

2. Add Hotkeys to the batch file

Now you can quickly open multiple folders at once by clicking batch file shortcuts on the desktop. However, wouldn’t it be great if you could open a group of folders by pressing a hotkey instead?

You can do exactly that by configuring the batch file shortcuts as follows.

  1. First, right-click the batch file on the desktop and select Properties to open the window in the snapshot directly below.folder shortcut
  2. Click inside the Shortcut key text box and press a key. The hotkey will then be Ctrl + Alt + the key you pressed. For example, if you entered 9, there the keyboard shortcut would be Ctrl + Alt + 9.
  3. Press Apply and OK to close the window.
  4. Now press the new hotkey to open the folders entered into the batch file.

The desktop will get cluttered if you add many batch files to it. So we suggest you move the batch files into one desktop folder.

You can do that by right-clicking the desktop and selecting New and Folder.

Then drag and drop the batch files into the folder.

3. Open Multiple Folders at Windows Startup

You could also configure multiple folders to open when Windows starts.

This can be done by adding folder shortcuts to the Startup folder. Alternatively, you could add your folder batch files to the startup so they automatically open a group of folders.

  1. Press the Win key + R to open Run.
  2. Enter shell:startup into the Run text box and click OK to open the Startup folder below.new shortcut folder
  3. Next, you should right-click an empty space on the right of the File Explorer window and select New> Shortcut from the context menu.create shortcut multiple folders
  4. Click the Browse button to select a folder or batch file to add to the startup.
  5. Press Next and Finish to close the Create Shortcut window and add the folder or batch file to the Windows startup.
  6. Now all the folders you add to the Windows startup will automatically open when you boot up.

If you don’t know where the Windows 10 startup folder is, read our dedicated article to find out about it.

So that’s how you can simultaneously open multiple folders in Windows 10. With the batch files and their hotkeys, you can now open multiple folders more quickly.

Note that the batch shortcuts will also work on most Windows platforms.

Let us know in the comments section below whether you succeeded in opening multiple folders at once on your Windows 10 device.

How to backup emails on Outlook

So you want to back up all your emails Outlook emails? We’d understand. In the age of rising security threats and accidental data losses, taking precautions beforehand can never harm anyone.

In fact, as per the research by Verizon in 2020, 17% of all data breaches and losses were caused by human errors. It, therefore, makes perfect sense to keep all your files backed up regularly.

How to backup all your emails on Outlook

By backing up your data, you protect it against accidental data loss, corruption, random deletion, and all other forms of loss. You can do something similar for Outlook emails by performing regular backups.

Let’s learn how:

  1. Launch the Outlook app and select File > Open & Export > Import/Export.
  2. Click on Export to a file and select Next.
  3. Then select Outlook Data File (.pst) and click on Next.
  4. Pick a folder in which you’d like to keep your backup and select Next.
  5. Select the location of your file or folder and click on Finish.

A new backup of all your Outlook emails will be created in a few seconds. After the backup is complete, you can also set up a password for the .pst email files; this will protect your data against unauthorized access.

Back up your emails on Outlook Web

The method above is only one of the many ways to back up your files on Outlook; it only backs up Outlook desktop emails. To back up your emails on Outlook Web, however, you’ll have to rely on an email client.

There are a host of email clients available online. For this example, we’ll use Thunderbird—the open-source, cross-platform email client available for free.

Download and launch the Thunderbird email client, and log in with your Outlook account. Enter the email address and password; select the IMAP configuration, and click Done. Thunderbird will then verify your login information and set up your configuration—ideally, this shouldn’t take more than a few seconds. Finally, click on Finish.

thunderbird setup

Your Outlook account will be successfully mapped on the Thunderbird app as soon as you do this. You can then download all the emails from here on. If you want to save all emails in your inbox, head to the Inbox tab.

Then select all the emails by clicking on Ctrl + A, and click on Save As…

Now choose the location you’d like to save your emails at, and click on Select Folder. All the emails from your inbox will then get saved in EML format in the selected location.

saving email back ups

Backing up your emails on Outlook

As our lives and work become more and more entwined with tech, it’s an undisputed fact that users will have to keep up with different privacy and troubleshooting practices; regularly backing up your data—be it from the hard drive, cloud, or your emails—is one such healthy practice.

In the case of Outlook, creating an email backup doesn’t have to be a headache. And we hope this was exactly your experience when you saved your emails from the methods laid out above.