Microsoft open sources one of Bing’s most advanced AI tools

Once again Microsoft has sought the counsel of the open source community and laid one of its most power AI technologies at its feet.

As of May 15, 2019, the open source community congregating at GitHub repositories will now have access to Microsoft’s Space Partition Tree and Graph (SPTAG) algorithm that “allows users to take advantage of the intelligence from learning models to search through billions of pieces of information, called vectors, in milliseconds.”

As a bit of a refresher, Vector searching stems from the evolution of keyword search but conduct searches based on broader conceptual understanding more than specific keyword queries. As voice search lurches towards prominence, Vector searches that involve more conceptual questions such as “How tall is the tower in Paris?”, will spur answers that involve Paris’ most well-known landmark, the Effiel Tower, without the user ever having to explicitly involve the Effeil keyword.

Microsoft AI blog author Charlie Walburger walks through the more nuanced description of Vector searching as such:

Essentially a numerical representation of a word, image pixel or other data point, a vector helps capture what a piece of data actually means. Thanks to advances in a branch of AI called deep learning, Microsoft said it can begin to understand and represent search intent using these vectors.

Once the numerical point has been assigned to a piece of data, vectors can be arranged, or mapped, with close numbers placed in proximity to one another to represent similarity. These proximal results get displayed to users, improving search outcomes.

The combination of Microsoft’s SPATAG algorithm used in Bing, and the evolution of voice and audio search is on display in this new 2:37 min long company produced video below.

Microsoft’s Bing search engine has been implementing Vector searches for its own efforts to varying degrees of success and now developers with considerably fewer resources than the software giant, will reap the benefits of its cloud development A/R.

Once deprecated MS Paint to receive new accessibility features in Windows 10 May 2019 Update

If Microsoft at one time had been encouraging Windows 10 users to leave legacy apps for new UWP experiences such as OneNote for Windows 10 and Paint 3D, now there are more indications the company isn’t ready yet to leave classic Windows apps behind. Following years of neglect, the Notepad app recently received several new features such as additional keyboard shortcuts and improved UTF-8 encoding, and now we’ve just learned that the classic Paint app is also getting some love in the Windows 10 May 2019 Update.

Yesterday, a new blog post on the Windows Insider blog highlighted new Accessibility features coming to Paint in the May 2019 Update. To our knowledge, this isn’t something that Microsoft previously discussed during the 19H1 testing period, but it was hard to imagine Microsoft ever updating its Paint after announcing its deprecation in favor of the new Paint 3D.

“We know that Microsoft Paint (MSPaint) is well-loved by customers and we’re pleased to announce new accessibility features coming to Microsoft Paint with the release of the Windows 10 May 2019 Update,” wrote Brandon LeBlanc from the Windows Insider team yesterday. The main change is that the app is getting full keyboard input support: Microsoft added lots of new keyboard shortcuts making it possible to use the app and create drawings without using a mouse or touch input.

If creating images using only keyboard input is great, Microsoft has also changed how Paint interacts with Narrator and other Screen Readers. The company will be listening to feedback and may continue to improve Paint with new features going forward. That’s quite a big turnaround for an app that Microsoft wanted to make an optional Microsoft Store download at some point.

Thanks for the tip, Leo!

Windows 10 Game Bar gets a name change to Xbox Game Bar with latest Insider update

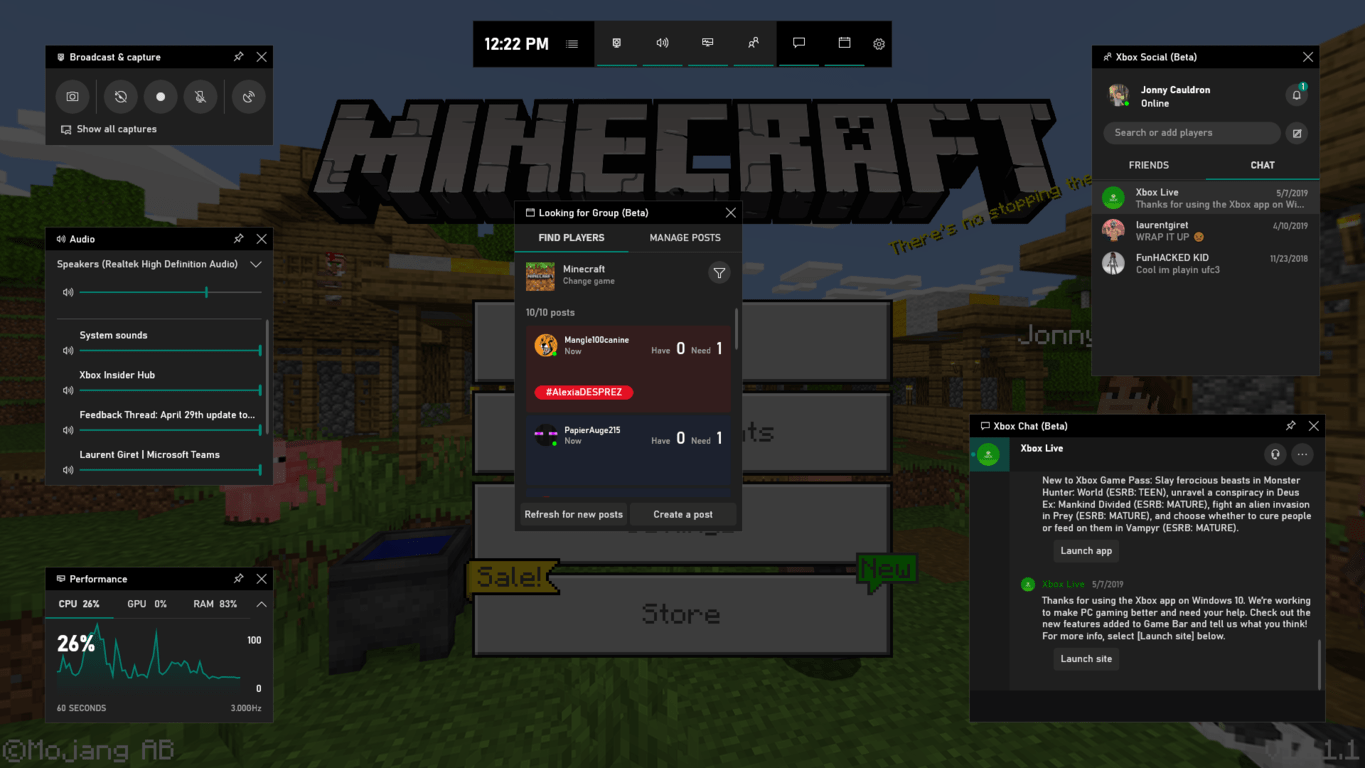
Microsoft is renaming the Windows 10 Game Bar to Xbox Game Bar, as can be seen in the latest update of the beta app available for early adopters. A rename of the app actually makes a lot of sense, especially given how tightly integrated it is to Xbox Live. In addition to the name change, the update also features the new Welcome pop-up window, which gives helpful suggestions as to what you can do with the app if you’re not already familiar with it (via MSPU).

The update comes not too long after the recently introduced Looking for Groups widget was added to the beta, allowing users to find other players with similar missions and objectives. Additionally, the Chat widget also recently allowed users to quickly paste images, such as screenshots, that were captured in the clipboard.

Microsoft has been working on the new Game Bar for some time now, which splits the single bar that most Windows 10 users are likely familiar with into multiple “widgets.” These include chat, friends, broadcasting, CPU performance and even music controls for Spotify.

If you’re eager to try the new features out, you’ll need to be running the Windows 10 October 2018 update or later, but you don’t have to worry about becoming a Windows or Xbox Insider. You can sign up to try the beta by downloading the Xbox Insider Hub app on the Microsoft Store. From there, just open the app and join the Windows Gaming list to make the update available to download from the Store

Microsoft announces first early release of Web Template Studio, a VS Code extension for making cloud based web apps

Microsoft continues to build on the success of Visual Studio Code, a free, cross platform code editor that’s rapidly becoming one of the most popular IDEs (integrated developer environment), and today has announced an early look at the Microsoft Web Template Studio. This cross-platform extension for VS Code, open sourced on GitHub and created by Microsoft Garage interns, starts out using a single full stack app path using React and Node.js, but the community driven extension is seeking input on what else developers are looking for. The installation page for the dev-nightly builds of Web Template Studio describes the new extension:

Web Template Studio (WebTS) is a Visual Studio Code Extension that accelerates the creation of new web applications using a wizard-based experience. WebTS enables developers to generate boilerplate code for a web app by choosing between different front-end frameworks, back-end frameworks, pages and cloud services. The resulting web application is well-formed, readable code that incorporates cloud services on Azure while implementing proven patterns and best practices. Sprinkled throughout the generated code we have links to Docs to provide useful insights.

If this sounds familiar, Microsoft already has a Windows Template Studio for building native UWP apps, but now developers can build web applications using the same familiar tools and workflow. You can learn more about Microsoft Web Template Studio from the blog post or try it out with Visual Studio Code.

UNESCO project is helping students rebuild historical structures damaged in conflict using Minecraft

In the same vein as Ubisoft offering up Assassin’s Creed Unity to help rebuild the Notre Dame Cathedral, Minecraft is being used in a special project by UNESCO. The United Nations Educational, Scientific, and Cultural Organization (UNESCO) created a project for students and teachers around the world to recreate historical sites located throughout Syria and Iraq using Minecraft. Here’s a video look at what UNESCO hopes to achieve with History Blocks.

As noted on its website, History Blocks hopes to allow teachers and students to learn and work together to recreate historical sites destroyed by war.

“The History Blocks project is an answer to the hundreds of historical monuments destroyed in war zones. With it, teachers can work together with their students to rebuild, restore and preserve the World Heritage sites that have been brought down by the conflicts.”

Minecraft Education tweeted about the UNESCO project and how it helps students in the Middle East learn about their cultural heritage through these sacred structures that were destroyed in war.

At the moment, History Blocks is being used in lesson plans in classrooms in more than 30 countries. For teachers interested in using these lessons in their classrooms, UNESCO has the History Blocks lesson plan available for download via Dropbox.

High Performance Mode Missing on Windows 10 [Fix]

Using a proper power plan is important, but many users reported that high performance mode is missing on Windows 10.

In case you’re not familiar with it, we have a great guide on high performance vs balanced power plan that you should check it.

This can be a problem, but in today’s guide, we will show you how to fix this issue.

Where is my high performance power plan in Windows 10?

This power plan is located in Power Options in Control Panel. You can access it by doing the following:

  1. Press Windows key + S and type power plan. Select Choose a power plan.
  2. From there, you should see all available power plans.
  3. Select High performance plan.

How do I enable missing high performance mode in Windows 10?

1. Add a new High-Performance battery mode

  1. Press the Windows key + Q hotkey.
  2. Enter power plan in Cortana’s search box as shown directly below.choose power plan
  3. Then click Choose a power plan to open the Control Panel as shown below.choose power plan
  4. Click Create a power plan to open the options shown directly below.create a power plan
  5. Select the High performance option there.
  6. Enter a title for the plan in the text box, and click the Next button.
  7. Then users can adjust the settings for the plan by selecting alternative options on the drop-down menu.custom power plan personalize
  8. Click the Create button to add the new plan.
  9. After that, select the new custom plan within the Power Options Control Panel applet.

This is a bit complex solution, but it can help you if high performance mode is missing on Windows 10.

2. Adjust Power Settings With the Power Mode Slider

  1. However, users can also select a high-performance mode with the Power mode slider bar. To adjust power settings with that bar,  enter power plan in Cortana’s search box.
  2. Select Choose a power plan to open the Power Options Control Panel applet.
  3. Users can’t adjust the Power mode slider bar without the Balanced option selected. So, select the Balanced radio button if it’s not already selected.
  4. Then close the Control Panel.
  5. Double-click the battery icon on the Windows 10 system tray to open the Power mode bar shown directly below.
    power options notification area
  6. Now users can drag that bar to the far right to select a high performance mode.

As you can see, missing high performance mode on Windows 10 isn’t a major issue, and it can be fixed with these simple solutions.

If you need even more power, you might be interested in the ultimate performance power plan. We have a great guide on it, so be sure to visit it.

Did you use a different solution? If so, let us know in the comments below.

Fix CPU fan speed error detected on Windows 10/11 like a PRO

Sometimes while booting your PC, the BIOS may display CPU fan speed error detected message on the screen. This error appears on custom built PCs and most of the time can be fixed with a few tweaks.

Are you bothered by the CPU Fan Speed error detected while booting Windows? Try configuring (ignoring) Fan Speed Low Limit in BIOS settings. That should stop the error message from reappearing. If it doesn’t, make sure to check your Pump connection. Finally, update your BIOS if updates are available.

Read about each step below.

How do I stop CPU fan speed error detected while booting Windows

  1. Ignore CPU Fan Speed Low Limit
  2. Check your Pump Connection
  3. Check for BIOS Update

1. Ignore CPU Fan Speed Low Limit

A quick fix for this issue appears to be setting the CPU Fan Speed Low Limit option in the BIOS to ignore. Users have reported that ignoring the fan speed limit has fixed the issue for them. Here is how to do it.

Enter the BIOS

First, you need to enter the BIOS / UEFI. You can enter BIOS through different ways but the easiest one is to enter the specified key on your keyboard when the PC starts to boot.

Below instructions are for Windows 10 devices.  In case it doesn’t work you can easily find the right key for your desktop with a bit of search.

  1. Click on Start and Settings.
  2. Click on Update and Security.
  3. Click on Recovery.
    recovery advanced startup
  4. Under “Advanced Startup” click on the “Restart now” button.
  5. You should see an Options menu. Click on Troubleshoot.
    troubleshoot advanced recovery menu
  6. Under Troubleshoot options, click on Advanced Options.
  7. Click on “UEFI Firmware Settings”.uefi firmware settings
  8. Click on Restart.
  9. You should see the BIOS screen after a brief shutdown.

Ignore CPU FAN Speed

  1. Assuming that you are in the BIOS screen, go to the Advanced Mode and then click on the Fan Control section / Monitoring tab.
  2. The CPU Fan headers should show “CPU Q-FAN Control – Enabled or Disabled”.
  3. Enable the Settings.
  4. Now, set “CPU Fan Speed Low Limit” to Ignore.

Save the changes and exit the BIOS screen. Restart the PC to see if the CPU fan speed error detected error is resolved.

2. Check your Pump Connection

If you are new to the custom PC build world, you may end up making some obvious mistakes. One of which is connecting the pump connector to CPU fan header. This may result in CPU fan speed error.

The right way to do is to connect the Pump to a Molex connector through an adapter. You may need to purchase the adapter separately.

Open your build and make sure the 2 fans on radiator are connected to Y fan cable adapter and CPU fan header. In case you don’t have Y fan cable adapter, you can connect one fan to the CPU header and other to the CPU optional (opt) header.

3. Check for BIOS Update

If your CPU fans are connected right and you have ignored the warning and the message still appears, check for any pending BIOS updates. BIOS updates usually come with Windows updates, you can check for the latest version on the motherboard manufacturer’s website.

Download the Windows 10 May Patch Tuesday updates now

UPDATE: The May 2019 Patch Tuesday updates are here. If you want to install the latest Windows updates on your PC, follow the download links listed below:

You can read the original report below.


Microsoft is all set for another round of Patch Tuesday updates today.  The company will roll out a series of new updates today to fix the vulnerabilities that exist in different products.

Therefore, we can expect the update to come with a bunch of security enhancements.

Just like all the previous releases, the May Patch Tuesday Updates should also bring some fixes for the Japanese era bugs.

Furthermore, we have seen that Microsoft is determined to improve the performance of Windows 10 systems. So, Patch Tuesday will also come with some non-security improvements and fixes.


How often are Windows 10 updates released? Find out from our detailed article about Patch Tuesday!


Back up your system ASAP

Windows 10 cumulative updates often turn out to be a disaster for users, and specifically IT Administrators.

Windows 10 users often experience a various update issues including installation failure, download stalls and BSoD errors.

Therefore, it is better that you delay or defer the installation of all of these updates until a stable build is available.

Alternatively, it is highly recommended that you should perform a complete backup of your systems before installing these updates.

This system backup option will help you to get rid of any potential issues.

If we’re lucky, we may even get the Windows 10 May 2019 Update today

The Windows 10 May 2019 Update has some exciting new features on the list. It is coming with File Explorer improvements, improved Action Center experience, and High DPI improvements.

But what if Microsoft is planning to surprise its users and roll out the May 2019 Update today? After all, the update was supposed to roll out in April but was postponed due to some major OS bugs.

We will keep an eye on the upcoming Patch Tuesday release. Keep visiting WindowsReport for the latest information regarding the latest features and bugs included in the Windows 10 May 2019 Patch Tuesday updates. 

RELATED ARTICLES YOU NEED TO CHECK OUT:

How to fix common FIFA 17 issues on Windows PCs

FIFA 17 is an impressive game that will definitely have you hooked you for hours in front of your computer screen. But as impressive as it is, playing FIFA 17 has been a bumpy ride for many Windows PC owners due to various issues.

The bad news is that for some issues, there are no workarounds available yet. The good news is that the majority of bugs can be fixed. We’ll list the solutions in this article.

Fix common FIFA 17 issues

 1. VC++ runtime error

Many gamers reported that the following error message appears during the installation process: “VC++ runtime redistributable package was not installed successfully. Setup cannot continue.”

  1. Go to C:Program Files (x86)Origin GamesFifa 17_Installervc
  2. Run the vcredist_x64.exe file
  3.  Immediately go back to your Origin Library and install the game.

2. Issues with saving the resolution option when starting the game

  1. Go to: C: > Documents > FIFA 17, open the fifasetup.ini file
  2. Add your customized resolution at the RESOLUTIONHEIGHT and RESOLUTIONWIDTH options
  3. Save the file and go back to the game.

3. The game crashes when launched

  1. Go to the Origin game library.
  2. Right-click on the game and select Repair.

If you’re experiencing the issue on Windows 10, follow these steps:

  1. Go to the FIFA 17.exe file > right-click on it > select Properties.
  2. Select the Compatibility tab > check the option “Compatibility Mode” > select Windows 7.

If your computer has two graphics cards, use this workaround:

  1. Go to Control Panel and run your graphics card.
  2. Go to Add > make profiles for fifaconfig.exe and fifa15.exe
  3. Launch regedit > change the value of the following two keys from 1 to 0

HKEY_LOCAL_MACHINESOFTWAREMicrosoft
WindowsNTCurrentVersionWindowsRequireSignedAppInit

HKEY_LOCAL_MACHINESOFTWAREWow6432Node
MicrosoftWindowsNTCurrentVersion
WindowsRequireSignedAppInit


4. E0001 error

This error is caused by graphics card incompatibility issues. The only solution to get rid of this error is to run the game on low settings.


5. FIFA 2017 doesn’t start; the game never worked

  1. Start Origin as the game administrator
  2. Use CCleaner to clean your registry.
  3. Delete the Origin cache files.
  4. Check your hardware, by running the chkdsk command in Command Prompt to eliminate potential issues.
  5. Make sure your antivirus software/firewall are not the culprits. Adding the game to the exceptions’ list doesn’t always solve the problem. Nevertheless, add the following programs to your exception list: authorizationUI, TS4.exe, Origin.exe.
    1. Comodo Firewall is notorious for blocking FIFA 17.
  6. Start the game in windowed mode. If the game runs, lower the settings and then put it back to full-screen.
  7. Reinstall Origin and the game and make sure they are on the same drive.
  8. Repair the game through Origin
    1. Go to the Origin game library.
    2. Right-click on the game and select Repair.
  9. Clean boot your PC
  10. Make sure that you don’t have programs with known conflicts with Origin.
  11. Update your graphics drivers.
  12. VPNs can lead to potential conflicts with the game. Turn off your VPN and check if this solves your problem.
  13. Update your Windows version.
  14. Update FIFA 17: right-click on the game in Origin and select Search for Updates.
  15. Flush the DNS Cache.

6. Fix graphics issues

  1. Update your graphics drivers.
  2. Turn down shadows and adjust graphics settings.
  3. Disable third-party background apps and then set FIFA 17 in High Priority in Task Manager.
  4. If your computer is equipped with an Nvidia GPU, go to Settings and set Power Management Mode to Maximum Performance.

7. The people in The Journey don’t have faces

  1. Go to NVIDIA Control Panel > Manage 3D settings > Program Settings.
  2. Select FIFA 17.
  3. Choose the desired graphics processor: High-performance NVIDIA processor.
  4. Check the box next to Application-Controlled.

8. Cannot join an online session

If you want to play online in multiplayer mode, you need to fully install the game. If you can’t accept invites, it may be because the game needs to be completely installed.


Game Fire is a game booster that will get rid of freezes, lags, low FPS and other annoying issues while playing. Try it for free for a better gaming experience.


Many gamers are also reporting the game randomly freezes and this appears to be the most severe issue so far.

Despite the various workarounds gamers have tried so far, there seems to be no permanent solution for these annoying freezes.

DirectX crashes represent another common bug that has been ruining the gaming experience for thousands of FIFA 17 gamers.

direct x crash FIFA 17

Players developed various workarounds to fix this problem but again, none of them are permanent solutions. It appears that at this stage, the only solution for the DirectX crashes and the random freezes in FIFA 17 is a hotfix.

Game freezes also plagued FIFA 16 and EA released a fix on October 6, 2015. Let’s hope EA reacts as promptly as it did last year and releases a fix for FIFA 17 as soon as possible.

We also have a dedicated guide what to do if FIFA 17 is not launching, so don’t miss it for more solutions.

How has your FIFA 17 experience been so far? Is the game running smoothly for you or you have encountered Fifa 17 issues? In case you’ve encountered other workarounds for the issues mentioned above, you can list the troubleshooting steps in the comment section below.

An error occurred while generating the report WSUS [Full Fix]

Windows Server Update Services or WSUS is in charge of your updates, but sometimes you might encounter An error occurred while generating the report error. This can be caused by simply an unstable network connection.

But most of the time, it’s related to recent software changes that have left your machine in a restart pending state. And restarting doesn’t seem to quite do the trick. However, we have a few solutions that can help you out, so let’s begin.

How can I fix An error occurred while generating the report WSUS error? The first thing that you should do is to reset Winsock and restart the WSUS server using Command Prompt. If that doesn’t work, make sure that Windows Firewall isn’t interfering with WSUS in any way.

What to do if WSUS reports aren’t working?

  1. Reset Winsock
  2. Restart WSUS server
  3. Check your Firewall
  4. Registry editing
  5. Remote desktop solution
  6. Update or reinstall your network drivers

1. Reset Winsock

In order to fix An error occurred while generating the report error, you need to reset Winsock by doing the following:

  1. Start Command Prompt as administrator.
  2. Enter netsh winsock reset catalog in Command Prompt and press and press Enter.
  3. Type netsh int ip reset reset.log, and press Enter.
    netsh int ip reset reset.log An error occurred while generating the report
  4. Restart your PC and try running the update services again.

2. Restart WSUS server

In order to do this, follow these steps:

  1. From your Start Menu, open Command Prompt with Administrator rights.
  2. Now type the following command:
    C:Program FilesUpdate ServicesToolscommand prompt An error occurred while generating the report 
  3. And now type in:
    WsusUtil.exe postinstall /servicing
  4. Now restart your WSUS Server.

3. Check your Firewall

You can disable your Windows Firewall, and check if that solves the An error occurred while generating the report error.

  1. Open the Control Panel.
  2. Then click on Windows Firewall.
    windows defender firewall
  3. Now, click on Allow an app or feature through Windows Firewall.
  4. Now, the Allowed App window will open.
  5. Click on the Change Settings button.
    allow apps through firewall An error occurred while generating the report
  6. Check the boxes next to the apps or programs you want to allow through the Windows Firewall.
  7. Click OK to save your new settings.

4. Registry editing

The following fix involves you editing some registry sections. To do this, follow these steps:

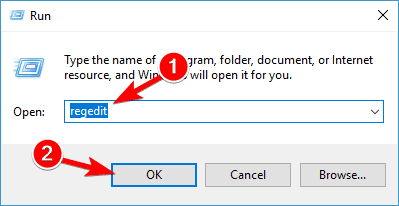
  1. Firstly, click Start and click Run, type regedit, and then click OK.
    regedit
  2. Locate and then click to select the following registry subkey:
    ComputerHKEY_LOCAL_MACHINESYSTEM
    CurrentControlSetControlSession Manager
    .
  3. After you select the subkey right-click on PendingFileRenameOperations, and then click Delete.
  4. Locate the following registry subkey and click on it:
    ComputerHKEY_LOCAL_MACHINESOFTWARE
    MicrosoftWindowsCurrentVersion
    WindowsUpdateAuto Update
    .
  5. After you select this key, right-click RebootRequired, and then click Delete.
  6. In the File menu section, click on Exit to exit the Registry Editor.
  7. Restart your machine.

5. Remote desktop solution

This fix works in the event that you’re using a remote desktop server, and you’re facing connectivity issues. To do this, follow these steps:

  1. Click Start, then go to Administrative Tools and Open Computer Management.
    administrative tools An error occurred while generating the report
  2. In the console section, click the Local Users and Groups tab.
  3. In the details tab, open the Groups.
  4. Click on Remote Desktop Users, and then click Add.
  5. In the Select Users dialog box, click Locations to specify the search location.
  6. Click on Object Types to specify the types of objects you want to search for.
  7. Type the name you want to add in the Enter the object names to select box.
  8. Click on Check Names.
  9. When you locate the name, click OK.

6. Update or reinstall your network drivers

If all else failed, you might fix An error occurred while generating the report error by updating or reinstalling your network drivers.

Firstly, in order to update them, follow these steps:

  1. In the search box on the taskbar, select Device Manager.
  2. Select a category to see names of devices, then right-click on the one you’d like to update.
  3. Select Update Driver.
    update driver
  4. Now click on Search automatically for updated driver software.
    search for drivers automatically An error occurred WSUS
  5. Once it’s done updating you’re all set.

If this method doesn’t work, you can use third-party applications, such as Fortect Driver Updater. By using this tool, you’ll automatically update all your drivers with just a couple of clicks.

To reinstall your network drivers, follow these steps:

  1. Repeat the first step from the previous workaround.
  2. Right-click on the name of the device, and select Uninstall.
  3. Now restart your machine.
  4. Windows will attempt to reinstall the driver at start-up.

There you go, these are 6 solutions that might help you fix An error occurred while generating the report error. If our solutions helped you feel free to let us know in the comments section below.

Got an old USB flash drive? 20 great ideas on how to use it

USB flash drives are the most convenient way to transfer files from one computer to another, but if you have an old USB flash drive that you don’t use for file transfer anymore, you can use it for several other things.

What to do with an old USB flash drive?

  1. Run an antivirus software from USB flash drive
  2. Unlock your computer using a USB flash drive
  3. Run Linux from a USB flash drive
  4. Run Portable apps from USB flash drive
  5. Encrypt it and use it to store sensitive data
  6. Create a password reset USB
  7. Use it as a portable server
  8. Sync your files automatically
  9. Use it as an external storage for your smartphone or tablet
  10. Create an App install drive
  11. Create repair disk
  12. Use it with your password manager
  13. Create a Windows 10 installation media
  14. Create a digital time capsule
  15. Use it to play retro games
  16. Create a digital library
  17. Use it to listen your favorite music in your car
  18. Use it for Virtual Network Computing
  19. Use it as a network drive
  20. Give your USB flash drive to charity

1. Run an antivirus software from USB flash drive

If you have an infected PC that you cannot access, sometimes you can remove the problem by running the antivirus scan from your USB flash drive.

Many antivirus solutions offer USB or CD recovery tools, so find the antivirus you wish to use, download USB or CD recovery image. Use it to create a bootable USB flash drive that you can use to remove viruses and other malware from your computer.

2. Unlock your computer using a USB flash drive

If you want to protect your computer from unauthorized access, you can use tools such as Predator. After downloading and installing this tool, you’ll be asked to connect your USB drive in order to create a specific key that will be used to unlock your computer.

Bear in mind that all your files and folders on this USB flash drive will remain intact, and you can still use this drive to transfer files.

In addition to creating a key on your USB flash drive, this tool will also require you to create a password so you can access your computer in case you lose your USB flash drive or if it stops working for some reason.

After you’ve done that, Predator will scan your computer every 30 seconds, and if your USB flash drive isn’t connected, your computer will automatically lock itself thus preventing unauthorized access.

This is a small and free tool, and it’s perfect if you want to protect your computer from unauthorized access.

3. Run Linux from a USB flash drive

If you are a member of Insider Program, you can run Linux GUI apps through Bash for Windows 10, but if you never used Linux before, you can use your USB flash drive to run Live USB version of Linux on your PC.

This can be great if you want to familiarize yourself with Linux, but at the same time, you can use Linux to remove problematic files such as viruses or to back up important files if you can’t boot to Windows 10.

To create Live Linux USB, you’ll need to download Universal USB Installer, and use this tool to create a bootable Linux USB drive.

This tool allows you to download Linux .iso files automatically, so you won’t have to download them on your own.

4. Run Portable apps from USB flash drive

If you need to run a specific application on a computer without installing it, you can always create a portable version of that application on your USB flash drive.

This can be rather useful if you want to run a specific application on your work computer or in internet cafe, or if you are simply trying to fix another computer.

To install portable apps on your USB flash drive, you’ll need to download PortableApps Platform. After you download and install the application, you need to connect your USB flash drive and select which portable apps you wish to install.

Once the apps are installed, you can simply plug in the USB flash drive to any other computer and run any of these apps directly from it without installation.

5. Encrypt it and use it to store sensitive data

If you have an old USB flash drive, you can always encrypt it and use it to store sensitive data. In order to encrypt a USB flash drive you’ll need a tool such as TrueCrypt or any other similar tool. You can find the right tool from these carefully selected 12 software solutions to encrypt a USB flash drive.

Just download the tool and follow the instructions carefully, and make sure not to forget your password because it’s the only thing that can unlock your USB flash drive. Also, check out this special guide on How You Can Encrypt your USB Flash Drive.

6. Create a password reset USB

If you use local account to access Windows 10, sometimes you might forget your Windows 10 password. We already wrote about what to do if you lose your Windows 10 password, but if you want to avoid all of that, it’s always good to have a password reset USB.

To create a password reset USB on Windows 10, do the following:

  1. Press Windows Key + S and enter User Accounts. Select User Accounts from the list of results.
    user-accounts
  2. Select Create a password reset disk from the menu on the left.
    password-reset-disk
  3. Follow the instructions from Password Reset Disk wizard to create a password reset disk.

Bear in mind that you’ll have to repeat this process if you change your account password. In order to create password reset USB, you’ll need to enter the latest Windows 10 password and this is why you’ll have to repeat all the steps.

In case you forget your Windows 10 password, you just have to insert your USB flash drive and click Reset password option from the log in screen.

Bear in mind that anybody can use this USB flash drive to change your computer password, so make sure to keep it somewhere safe.

7. Use it as a portable server

If you are a web developer, you are probably running a local server on your computer in order to test web applications.

Creating a portable web server on your USB flash drive can be useful if your hard drive gets corrupt and you have to finish your project, or if you simply want to test your application on a different computer.

There are several tools that can turn your USB flash drive into portable server and Server2Go is probably the best known for this purpose, but there are many alternative solutions available if this tool doesn’t work for you.

8. Sync your files automatically

If you have any important files on your computer, you can use tools such as SugarSync or SyncBackSE to automatically synchronize your files and copy them to USB.

Syncing your files is rather useful since it allows you to automatically create backup for your work or school project every time you connect your USB flash drive.

9. Use it as an external storage for your smartphone or tablet

If you have an old USB that you don’t use, you can always use it as an external memory for your Android device. In order to do that, you’ll need a device that supports USB OTG and USB OTG cable.

Bear in mind that some devices don’t have USB OTG drivers and required apps, so you might have to root your device and install an app that lets you mount external drives.

Bear in mind that rooting your smartphone or tablet will break your warranty, and if you’re not careful you can even cause permanent damage to your device, so keep that in mind.

10. Create an App install drive

If you install certain applications rather often on different computers, you probably might find a tool such as Ninite rather useful.

This tool allows you to create a single setup file for some of the most common applications, so you can easily install all of them.

Just select the applications you want, move Ninite to a USB flash drive, and run it on any computer to quickly install some of the most commonly used applications.

If you are a computer administrator, this tool is definitely one that you need to use.

11. Create repair disk

If you have an old USB drive that you don’t use anymore, you can use it to create a recovery drive with some of the most useful tools that will allow you to test your memory, partition hard drives and much more.

To do that, simply download Hiren’s Boot CD and use tool such as Rufus to create a bootable USB flash drive with that .iso file.

After creating a bootable flash drive, boot your computer from it and select one of the tools you want to use.

12. Use it with your password manager

Certain password managers, such as LastPass, allow you to download the portable version of their application along with a portable web browser and and use them from a USB flash drive.

This can be extremely useful if you are accessing your Facebook account or an email account from an unsafe computer.

By using portable password manager, your passwords will remain safe even if you use them on a public computer.

If you want to read more about useful manager tools, you should check out Top 10 tools to organize browser bookmarks on Windows PCs.

13. Create a Windows 10 installation media

Sometimes you might experience serious problems on Windows 10, and the only solution might be to reset or completely reinstall your operating system.

In case you need to do that, it’s always good to have a Windows 10 installation media in case you need to perform a reinstall.

14. Create a digital time capsule

If you have an old USB flash drive, you can use it to create a digital time capsule. In order to do that, you just need to collect as much information about the world as you can and store it on the USB.

Remember to keep that USB flash drive safe, so the future generations can see how world looked like.

15. Use it to play retro games

If you are a fan of retro games, you can always use the old USB flash drive to store them.

There is wide range of emulators available online, and since games for the most popular consoles don’t take too much space, you can easily put them on your USB flash drive and play them directly from it.

16. Create a digital library

If you enjoy reading, you can always store free ebooks on your old USB flash drive.

Ebooks don’t take too much space, and you can store hundreds of ebooks on a regular USB flash drive thus turning it into your own portable digital library.

17. Use it to listen your favorite music in your car

If you don’t own an expensive car radio that can read USB flash drives, you’ll be pleased to know that you can still use it to play your favorite music from the USB flash drive.

All that you need is a Thumbdrive Transmitter device that you connect to your car’s cigarette lighter socket. After you connect Thumbdrive Transmitter, connect your USB flash drive to it, turn on your radio and set it to the Transmitter’s frequency.

Bear in mind that sound quality might vary, and the Thumbdrive Transmitter might not be the most elegant solution, but it’s still better than buying a new car radio.

18. Use it for Virtual Network Computing

Virtual Network Computing, or VNC for short, allows you to access your computer remotely and use it without any restrictions. VNC tools come with graphical user interface, and you can even see your computer desktop and open applications in real time.

By using a VNC client from your USB flash drive, you can easily access your computer wherever you are, as long as you have Internet connection and USB port available.

19. Use it as a network drive

Many routers come with a USB port, and you can use that USB port to attach your USB flash drive and use it as a network drive.

The device will be available to all computers on your network and you can use it to back up files, or to stream music or videos.

20. Give your USB flash drive to charity

Many charity organizations are accepting USB donations and are using donated USB flash drives to help students in developing countries.

If you have an old USB flash drive that you don’t use anymore, and you can’t find a new purpose for it, we strongly suggest that you consider giving it to charity.

We hope that our list was helpful to you, and that you managed to find a new purpose for your old USB flash drive.

PC Gaming show at E3, led by Epic Games, plans lots of news and announcements

This year, PC Gamer will hold its fifth PC Gaming Show at E3 on June 10, just a day after Microsoft’s E3 press briefing. The event will be broadcasted live from The Mayan Theater in Los Angeles, and this year’s lineup will be led by Epic Games, which according to the press release will “reveal brand new material for several games, including some exclusives, coming to the Epic Games store.”

Epic Games made headlines this year following the launch of its new Epic Games Store in December. If Valve’s Steam remains the leading digital video games storefront thanks to its massive collection of Windows, Mac and Linux games, Epic Games is willing to attract game developers by offering them a 12% revenue split, which is much more favorable than Steam’s standard 30%.

In recent months, Epic Games also managed to conclude some valuable timed-exclusivity deals for high-profile games such as Metro: Exodus or the upcoming Borderlands 3, with the latter expected to be one of the biggest games to launch this year. Earlier this month, the company behind the massively popular Fortnight game also announced the acquisition of Psyonix, the developer of the vehicular soccer video game Rocket League. The game is expected to launch on the Epic Games Store before the end of the year, but Psyonix said that the Steam version will continue to be supported.

It’s unclear what are the new game announcements Epic Games plans to reveal at the PC Game show, but the event will feature many other game studios including Chucklefish (Wargroove), Funcom (Conan Exiles), Paradox Interactive (Cities: Skyline), and more. “This year’s livestream will present more announcements and new trailers than any previous PC Gaming Show,” says PC Gamer Global Editor-in-Chief Evan Lahti. “From brilliant indies to studios that have shaped PC gaming for decades, we’re excited to showcase what’s next for the world’s most vibrant gaming platform.”

The PC Gaming Show will be broadcoasted live on June 10 at 10 AM PT, and you’ll be able to watch it on Twitch, Mixer or YouTube. PC gaming has become more interesting than ever thanks to the competition between digital storefronts, as well as the rise of subscription services such as Origin Access Premier, Discord Nitro, and Microsoft’s own Xbox Game Pass and Project xCloud offerings. E3 2019 is now less than a month away, and the event should be pretty special this year with Microsoft promising to “go big” and Sony skipping the annual trade show entirely.

How to enable Microsoft Translate in the Edge Dev browser

The current public version of Microsoft Edge, using the EdgeHTML rendering engine and UWP platform, supports Microsoft’s Translator extension to automatically translate foreign webpages. The company’s upcoming rebuild of Edge using Chromium will add native support for translation though, cutting out the need for an extension. In this guide, we’ll show you how to enable and use it today.

This functionality isn’t yet enabled by default in the Chromium Edge Dev or Canary builds. As such, it should be considered experimental until Microsoft officially announces it. We’ll be enabling it manually using a feature flag – see our guide to Edge Dev flags to understand how they work and where to find them.

Enabling Microsoft Translate in Edge Dev

Begin by launching your Edge beta installation, whether Dev or Canary. Navigate to the “about:flags” URL. In the search box at the top of the page, search for “translate.” You should see a single flag appear, labelled “Microsoft Edge Translate.”

Change the value of the flag’s dropdown menu to “Enabled.” You’ll be prompted to restart Edge. Click the button in the banner at the bottom of the display to relaunch immediately.

Microsoft Translate in Edge Dev

Translation support will now be enabled inside Edge Dev, using Microsoft’s translation service. To see it in action, head to a foreign-language webpage. After a few seconds, you should see the Microsoft Translate popup appear in the address bar.

Edge will confirm whether it should automatically translate the webpage, saving you the effort of pasting it into a translation service yourself. You can choose the language to translate the page into, if you want to read it in a different language to your system one. The prompt also lets you tell Edge to automatically translate all future pages written in the source language, so you won’t have to continually acknowledge the popup.

Official Windows 10 Twitter app gains new quote tweet media feature and more this month

The official Twitter app for Windows 10 devices has received several updates over the past month or so and they’ve now finally been detailed in a new set of release notes.

Despite these notes being dated as May 5th, some of changes have only rolled out this week such as the new ability to include gifs and other media in a quote tweet (see above image). The inclusion of this particular feature is rather notable as it was only added to the iOS and Android Twitter apps last week, making it one of the few times Windows users have gotten a Twitter feature relatively soon after the smartphone users.

Some other notable changes made over the past month include the new ability to edit your birthday on your profile and the ability to delete Twitter Moments. The app is now also noticeably more stable and faster to load menu and timeline elements.

Here’s the full release notes:

New

  • Design: Many users are seeing the new site and designs for the first time. Welcome! We hope you enjoy the faster experience. There’s lots of improvements coming every day!
  • Accessibility: Added a reduced-motion setting under Settings -> Accessibility. This will also respect reduced motion settings from your OS if set and supported.
  • Tweets: Quote Tweets can now be sent and consumed with additional media in them.
  • Profile: You can now set or update your birthday.

Updated

  • Display: The Font Size and Night Mode controls are now found under Settings -> Display
  • Errors: Improved the messaging and display around several errors
  • Errors: Improved the messaging and display when certain pages have no Tweets to show
  • Moments: Allow deletion of moments
  • Accessibility: The input fields for adding alt text to images now grows a bit more

Fixed

  • Safari: Safari 10 should no longer be unusably laggy and slow. This is caused by a layout issue in Safari 10 though, and cannot be totally fixed. We recommend users update to a newer iOS or MacOS for even better performance.
  • Scrolling: Fixed going back to a page sometimes returning users to the wrong spot. The intent is that you should return to the Tweet you left the timeline from.
  • Emoji: The guitar emoji now has the proper number of strings and heads.
  • Windows: Emoji should now have more personal space when they are next to other emoji.
  • Windows: Fixed clicks frequently not registering and instead causing text selection.
  • Tweets: Consistently show more items in the Tweet activity pages (i.e. Likes + Retweets)
  • DMs: Media will now stop uploading when you cancel sending a DM.
  • DMs: Fixed issues where DMs would occasionally fail to send immediately after attaching media.
  • Profiles: Fixed a halo that would sometimes appear around avatar images
  • RTL: Icons should now come before the text in a few more places throughout the app

No actual app update is need to receive all of these changes as each change is automatically activated as soon as they’re made live due to the Progressive Web App (PWA) format.

Do you use the official Twitter app or do you prefer to use an alternative? Let us know in the comments below and then follow us on Twitter for more Windows news.

The app was not found in the store. ?

Here’s how to get your free Godzilla Xbox Avatar costume on Xbox One and Windows 10

In an apparent marketing move to help promote the upcoming Godzilla movie, Godzilla: King of the Monsters, a new digital Godzilla outfit has been added to the Microsoft Store for gamers to throw onto their Xbox Avatars on Xbox One consoles and Windows 10 devices.

Officially referred to as the Godzilla Suit, this bit of digital content is completely free to claim and enable and can be grabbed on this page here in your web browser after logging into your Microsoft account.

After claiming it, gamers simply need to enable the Godzilla Suit as they would any other Xbox Avatar item in the Avatar editing app their Xbox One console. Once saved, the change will sync across all devices using the same Microsoft account.

Looking for some more cool free Xbox Avatar items? There are also official items based on Game of Thrones and Shazam.

Do you like to dress up your Xbox Avatar? Let us know why or why not in the comments below and then follow us on Pinterest for more Xbox gaming content.

Internet Connection Required in QuickBooks Tool Hub [Fix]

Quickbooks users have reported an Internet connection required in QuickBooks Tool Hub.

An error message will prevent users from downloading the latest updates on their PC. Unfortunately, using a browser might not work since QuickBooks isn’t working in Chrome for some users.

In the guide below, we’ll list a series of fixes that should allow QuickBooks to access the Internet and install the latest update.

Why does QuickBooks say No internet connection?

  • Problems with the network connection.
  • An expired subscription can cause this problem.
  • Antivirus and firewalls can interfere with QuickBooks.
  • Corrupted Quickbooks installation will cause network problems.
  • Expired desktop certificates are a common cause of this issue.

Does QuickBooks require an Internet connection?

No, you can use QuickBooks with a desktop app without an Internet connection. Keep in mind that this comes with several caveats:

  • The desktop version isn’t regularly updated.
  • No online security for your data.

What is a QuickBooks Tool Hub?

QuickBooks Tool Hub is a collection of tools that can help you fix various QuickBooks issues. It comes with the following features:

  • Quick Fix My File
  • File Doctor
  • Quick Fix my program
  • Password reset Utility
  • Install Diagnostic Tool

How can I fix QuickBooks Tool Hub Internet connection required?

1. Check the internet connection in QuickBooks

  1. Open QuickBooks and select Help in the menu bar. Next, click Internet Connection Setup.
  2. Check to have Use my computer’s Internet connection settings to establish a connection when this application accesses the Internet selected.
  3. Click Next and Done.
  4. Try to update and see if it works.

Our guide on how to fix the QuickBooks payroll service connection error will provide more information and solutions.

2. Check if your subscription is active

  1. Open QuickBooks.
  2. Select Employees and click My Payroll Service.
  3. Click Account/Billing Information and make sure to have the payroll subscription set to Active.check quickbooks status active
  4. Close the window and see if QuickBook connects to the server.

Expired subscription is a common cause for QuickBooks Tool Hub Internet connection required error.

3. Allow QuickBooks connection through Windows Firewall

  1. Open Control Panel.
  2. Click System and Security and select Windows Firewall.windows firewall
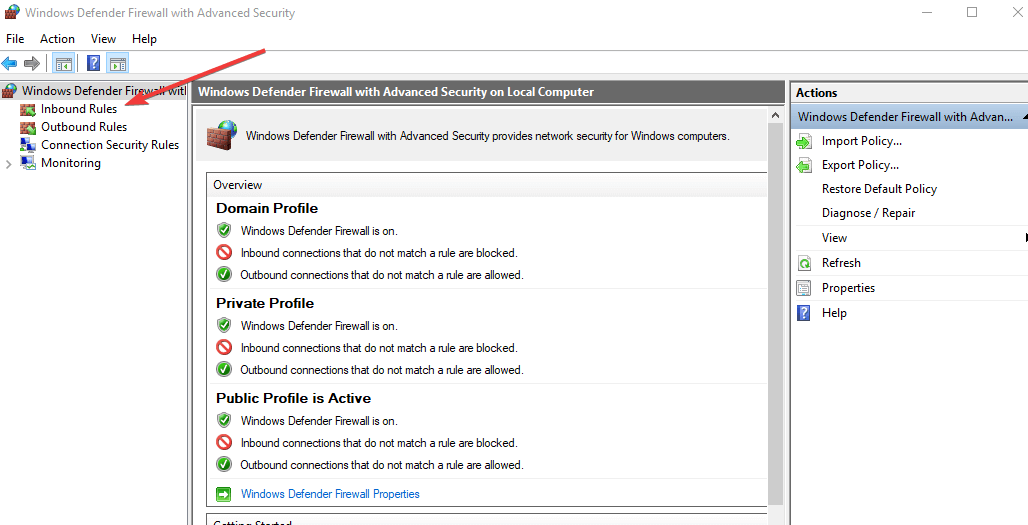
  3. Under the Advanced settings, right click Inbound Rules and select New Rule.
  4. Under Programs click Next and choose This Program Path.
  5. Open QuickBooks file location and click Next.
  6. Select Allow the Connection and click Next.
  7. Make sure all the boxes are checked and then click Next.
  8. Input a name for the new rule. Lastly, click Finish.
  9. Follow the same steps for the Outbound Rules.

After doing that, check if the Internet connection required is gone in QuickBooks Tool Hub.

4. Give Intuit’s URL the Trusted Website privilege

  1. Open Internet Explorer and select Tools. Click on Internet Options.
  2. Open the Security tab and click the Trusted Websites icon.trusted websites google chrome
  3. Select the Sites button.
  4. Type in the Add this website to the zone box the next URL: *.intuit.com.
  5. Make sure to have the Require server verification (https:) for all sites in this zone box unchecked
  6. Press Close and OK.

5. Do a clean install of QuickBooks in Selective Startup mode

  1. Press R + Windows buttons on your keyboard to open the Run box > type msconfig and hit Enter.
  2. In the general tab, choose Selective startup and Load system services.
  3. Open the Services and select Hide all Microsoft Services. Then, select Disable all.hide all microsoft services
  4. Uncheck the Hide all Microsoft Services box.
  5. Make sure that the Windows Installer box is checked and click OK.
  6. After your Windows starts up, reinstall the QuickBooks app. Then bring your computer to its normal configuration by following these steps:
  7. Press R + Windows buttons on your keyboard to open the Run box, type msconfig and hit Enter
  8. Select Normal Startup and click OK.
  9. In the System Configuration window, choose Restart.

6. Try to install or update QuickBooks Desktop Security Certificate

  1. Right click QuickBooks Desktop icon and select Proprieties.
  2. Select the Shortcut tab and choose Open File Location. Lastly, click OK.
  3. Go to QuickBooks app .exe file, right click on it and select Proprieties.
  4. Select the Digital Signatures tab and choose QuickBooks. Click on Install Certificate.
  5. In the Certificate Import Wizard, check to have Current User set as the Store Location and click Next.
  6. Select Next and then Finish.

We hope you successfully implemented our proposed solutions and fixed the QuickBooks Tool Hub Internet connection required error.

If you’re still having issues, our QuickBooks keeps crashing guide might be able to help you out.

Let us know if you found a different solution in the comment section below.

Cortana’s new conversational AI technology sounds almost human

Microsoft is all set to enhance the intelligence of its Cortana Digital Assistant. Microsoft announced that Cortana will get conversational artificial intelligence technology very soon.

In simple words, Microsoft says that Cortana will now hold more natural and realistic conversations with its users. The Redmond giant acquired a natural language startup Semantic Machines last year and now it wants to get the most out of its technology.

Furthermore, the tech giant used a video to demonstrate its plans in front of the global community. The video showed that Cortana helping an executive to schedule and reschedule meetings with her colleagues.

The whole process was done in a more natural and realistic manner than ever before. 

As a matter of fact, the conversation was smooth and realistic to the extent that Cortana even used human-like phrases such as “umm”.

The CEO of Microsoft, Satya Nadella ensures users that the company wants to eliminate command based interactions to allow smart conversations. 

Microsoft believes there is a room for improvement

Microsoft highlights the weaknesses of existing digital assistants in the following manner:

They can check the weather, traffic and sports scores. They can play music, translate words and send text messages. They can even do math, tell jokes and read stories. But, when it comes to conversations that lead somewhere grander, the wheels fall off.

The tech giant thinks that there is still a large room for improvement in this spectrum. Microsoft is undoubtedly aiming high for its digital assistant and it can turn out to be a revolutionary change for the company.

Microsoft wants Cortana to be your digital partner who seamlessly manages everything in your life from official meetings to ordering a gift for your friend.

This announcement clearly shows Microsoft’s vision for the future of its digital assistant. It remains to be seen if Microsoft manages to replicate in real live what it demonstrated in the video.

RELATED ARTICLES YOU NEED TO CHECK OUT:

Download and install WSL Arch Linux from Microsoft Store

After years of criticising open source projects and specifically Linux, it seems that Microsoft started to embrace the open source concept.

Previously, Fedora, Ubuntu and SUSE Linux made their way to Microsoft Store and now the recent candidate to join the team is Arch Linux.

Windows users can not only enjoy Arch Linux Terminal but they can also run utilities such as Pacman, bash, git, ssh and others. However, Microsoft says that Arch Linux Terminal is not available for Windows 10 S users.

Apparently, Windows 10 users are impressed by the documentation available for Arch users. One Reddit user wrote:

The best thing about Arch is their documentation, particularly their wiki. I’m looking stuff up there all the time and I don’t even run Arch, it’s just the best collection of Linux systems documentation there is.

Download and install Arch Linux Terminal

download Arch-Linux

You first need to enable Windows Subsystem for Linux (WSL) on your Windows 10 system, before installing Arch Linux.

You need to visit the Control Panel and navigate to Programs and Features >> Turn Windows features on or off and click Windows Subsystem for Linux. Finally, click OK and restart your system. windows subsystem for linux

Alternatively, you can open the Administrator PowerShell prompt and run the command mentioned below to enable WSL:

Enable-WindowsOptionalFeature -Online -FeatureName Microsoft-Windows-Subsystem-Linux

Now your system is ready to run Arch Linux and you can now visit Microsoft Store to download the software. 

WSL 2 and Linux coming soon

Microsoft announced the release of Windows Subsystem for Linux (WSL2) at Build 2019. The company says that WSL 2 will leverage an in-house Linux kernel to offer new features including the support for Docker container. 

It seems like Microsoft is putting some extra efforts to bring some more features to the Windows 10 platform.

The company recently grabbed the attention of command-line users by announcing Windows Terminal. Microsoft plans to launch the terminal next month. It will allow users to access environments such as CMD, WSL and PowerShell from a single app. 

RELATED ARTICLES YOU NEED TO CHECK OUT:

Users are loving the new Microsoft Office file icons

Microsoft recently released a series of brand-new filetype icons for the Office Suite applications including PowerPoint, Word, and Excel. Furthermore, this time, Microsoft also revamped the current icon design released back in 2013. 

Erin Woo, who is currently working as Microsoft’s Product Designer announced the brand new icons on her Twitter account.

She unveiled some of those icons by sharing a brief video of them. The video shows that the tech giant also released new icons for video, audio, and image file types. T

he tweet says that these icons are gradually rolling out to mobile users of OneDrive and Outlook. However, it remains to be seen if the same icons will be available to Windows 10 users as well.

Microsoft has always been experimenting with the design of its Office Suite varying from a small icon redesign to a complete visual overhaul.

However, the new change appears to be powerful, smart and appealing for users. You will now find a more simple background with a Fluent Design touch.

New Microsoft Office icons coming soon

The Redmond giant has not released new icons for Publisher and Access. According to Microsoft, the company aims to achieve harmony and simplicity with its light, bold and appealing colors.

Microsoft is reportedly currently working to release a new Fluent Design UI revamp for its entire range of products.

It seems like Microsoft is making significant efforts to revamp most of its applications including Office Suite.

Microsoft Office is very popular among both MacOS and Windows users.

Although there are many other third-party office management software, users still prefer to use Microsoft Office.

Most users loved these icons but some of them pointed out some visible inconsistencies.

Why would the music, video, and photo icon not match the document icon? Why would they choose just a rectangle for those three? That doesn’t make any sense to me.

Do you want Microsoft to add some other changes in Microsoft Office? Let us know in the comments section below.

RELATED ARTICLES YOU NEED TO CHECK OUT:

Windows 10 integrates OneDrive files in File Explorer search results

Microsoft recently rolled out a new Windows 10 20H1 build. This build brings some general updates and fixes along with some very interesting File Explorer features.

The new File Explorer features are currently available only to a subset of Insiders who are currently enrolled in the Fast Ring.

Microsoft is trying to offer a unified search experience across all its platforms including Microsoft Office, Windows, and Bing. The company wants the search box to be available everywhere. In this manner, users will be able to easily find related content.

You can now use File Explorer to search for OneDrive files

Microsoft plans to integrate the content of your OneDrive with regular File Explorer results.

So, when you type something in the search box of File Explorer, you will now see a list of suggested OneDrive files. You can either open the location of the file with a right-click or click on the file‘s name from the dropdown menu.

You can further explore your non-indexed locations by pressing the enter key. Furthermore, you can view the dropdown list that contains your search history by pressing CTRL+E keys. 

Improved accessibility options

Microsoft also improved three different accessibility options in this release. The can now efficiently read tables, or provide a summary of your desired web page. When users navigate within the same column or row, they can no longer see repeated header information. 

Although the search box is wide enough to properly show suggestions and search results, you still have the option to resize it with the help of your mouse.  

As a quick reminder, Windows 10 has received six major feature updates so far. Microsoft is all set to release the Windows 10 May 2019 Update later this month.

RELATED ARTICLES YOU NEED TO CHECK OUT:

How to emulate and run Lineage 2 Revolution on your PC

There are many great PC games out there but sometimes you simply want to play a title that is available only on Android.

While this may seem like a daunting task at first, you can quickly and easily run Android games on PC with the help of an Android emulator.

So, if you want to play Lineage 2 Revolution on your Windows 10 PC, you’ve come to the right place.

Follow the instructions listed below and you’ll be able to run Lineage 2 Revolution on your computer in no time.

Unfortunately, there is no Lineage 2 Revolution PC version available yet, so that’s the only way that you can play it on your computer.

But don’t worry, after the install is complete, you will be able to play it with no PC lag at all! Also, once installed, you will be given specific Lineage 2 Revolution PC controls to enjoy the game.

Here’s how to play Lineage 2 Revolution on PC

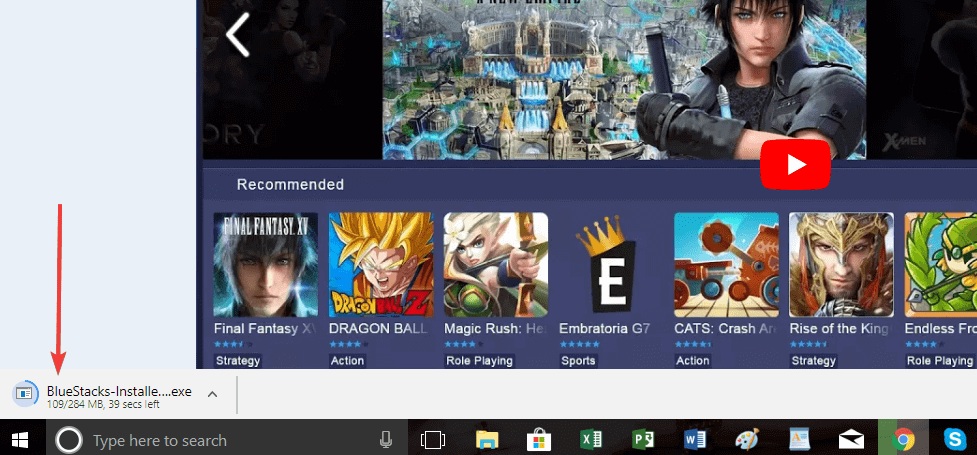
  1. Go ahead and download BlueStacks through that free game. Click on Download BlueStacks on PC
  2. On the next page, you will have to click on download again, to start downloading BlueStacks emulator for your Windows PC.download bluestacks pc
  3. Next, you will see the .exe file for BlueStacks-Installer being downloaded. Once it’s finished, click on it and run it.bluestacks install
  4. If you get the ‘Do you want to run this file?’ pop-up, just ignore it. BlueStacks is completely safe and will not harm your PC. Go ahead and click Run. run bluestacks
  5. Do the same for the next step, if you get the “do you want to allow this app to run on your device?” Click Yes.
  6. Now, you’re almost there. Go ahead and click Install to start installing BlueStacks on your PC.
  7. Wait until the installation process is finished. As suggested by BlueStacks, you might want to disable your antivirus temporarily. Don’t worry, it won’t let any viruses in. Once it’s finished, click on Complete.extract bluestacks pc
  8. Now, you need to wait a couple of minutes in the “Starting the Engine” step of the process. This is needed for the Android Emulator to assess your PC performance and work accordingly.start bluestacks windows 10 pc
  9. Next, you will need to login with your Google account. This might seem annoying, but it is actually a sign that BlueStacks has a professional relationship with Google, thus being able to download any Android game or app on your PC. If you are already logged in with a Google account, make sure to use that one.BlueStacks login google account
  10. Now, the final step is to make sure everything is running smoothly on your PC. Go ahead and install Lineage 2 Revolution. The game will appear in a similar window like the one below:


As you can see, the game comes from the Google Play Store itself, and is also free. Install it, see if it runs on Bluestacks. After that, you can go ahead and download any Android game that you wish.

We’ve tested the game ourself, and we can confirm that the Lineage 2 Revolution PC gameplay is indeed impressive, with nice, smooth PC graphics.

Bonus – by installing the first game that you see, you will also get some special points. You will then be able to redeem them for gaming mice, premium subscriptions and so on.

bluestacks bonus

There you go, you should now be able to run Lineage 2 Revolution PC version on your Windows PC without any problems. In our opinion, BlueStacks is the best PC simulator for Lineage 2 Revolution, so use it without hesitation.

UPDATE: as of 2019, BlueStacks 4 is available.

The PC requirements for the emulator are pretty basic –  3GB of RAM, 5GB of disk space, Windows 7 / Windows 8 / Windows 10 and DirectX 9.0c or higher  installed. Also,  you need a Dual-Core Intel or AMD processor, and for graphic: OpenGL 2.0 support.


RELATED STORIES TO CHECK OUT:

Unable to Join Fortnite Login Queue: How to Get Through

Taking the market by storm, Fortnite quickly became one of the most popular games ever created, but many players reported Unable to join login queue error message in Fortnite.

This is a network issue, and it’s somewhat similar to the previously covered Unable to join a friend’s party in Fortnite problem.

However, there’s a way to fix this error, and in today’s guide, we will show you how to fix it.

Why can’t I queue in Fortnite?

  • Issues with matchmaking servers can cause this error.
  • Not starting the game with necessary privileges.

What to do if I’m unable to join the Fortnite login queue?

1. Check the server status

  1. Visit Epic Games Public Status page.
  2. Check if there are any issues with the servers.
  3. If there are, wait until the developers sort it out.

Start Fortnite as an administrator

  1. Navigate to your Fortnite installation directory: C:\Program Files\Epic Games\Fortnite\FortniteGame\Binaries\Win64
  2. Run the FortniteClient-Win64-Shipping.exe file with administrator privileges.
  3. This might cause some issues with the Fortnite process or the Epic Game Launcher. If this happens, open Task Manager and close these processes a few times while repeating the first and second steps.
    task manager Unable to join login queue fortnite
  4. Users have reported that after closing the unresponsive tasks from Task Manager a few times, they eventually could log into Fortnite and play normally.

In this article, we talked about the recent error found in Fortnite that didn’t allow users to start playing matches.

Some users have reported that they couldn’t see any games, or that the loading process never ended while waiting to log into a game.

Fortunately for PC users, you can try the fix presented in this article to bypass Unable to join login queue error.

It is worth mentioning that this method doesn’t affect your data or game in any way. Speaking of errors, you might want to check our guide on The client is not compatible in Fortnite guide for more in-depth solutions.

Speaking of Fortnite errors, recently we covered Matchmaking error #3 in Fortnite, so don’t miss it for more solutions.

Please let us know how this fix worked by using the comments section below.

Microsoft’s next Xbox exclusive Gears 5 may launch on September 10 according to new leak

Gears 5, the next first-party game from Xbox Game Studios may already have a release date if we believe a new leak from Taiwan. According to a report from Generación Xbox (via Reddit), the Taiwan age rating agency revealed the game’s cover and September 10 launch date, though the latter has since been removed from the web page.

Microsoft took the wraps off Gears 5 at E3 2018 last year, revealing that the third-person shooter would be released sometime in 2019. Gears of War 4, the previous episode was released on October 11, 2016 on Xbox One and Windows 10. Gears 5 is expected to support Xbox Play Anywhere, and it should also be be available on Xbox Game Pass on launch day, just like all of Microsoft’s first-party games since last year.

Gears 5 will likely be a big part of Microsoft’s E3 press conference, as Gears of War remains one of Microsoft’s most important video games franchises along with Halo and Forza. Rod Fergusson, studio head at The Coalition also announced during last month’s Inside Xbox episode that we’ll see the worldwide debut of Gears 5 Versus multiplayer at the ELEAGUE Gears Summer Series live tournament on July 13-14.

Following the disappointing Crackdown 3, we hope that Gears 5 will be a solid new entry in the decade-old Gears of War series. In addition to Gears 5, there are two other Gears games currently in development, a mobile game called Gears Pop! that is now available in closed beta on iOS, as well as a turn-based strategy game for Windows 10 PCs called Gears Tactics.

Install Privacy Possum browser extension to block online tracking

Internet tracking got out of hand these days due to developing technologies that companies use to track users. The tracking process happens in the background, and you may have noticed it by now.

A company may have monitored you if various sites begin displaying all kinds of product ads after you have been checking out the product on a single location. Fortunately, there’s a solution for preventing tracking, and it’s called Privacy Possum.

Privacy Possum open source browser extension for Google Chrome and Mozilla Firefox aims to block data used by companies to track you online.

Privacy Possum’s best features

privacy possum

Here are the main features boasted by the current version of this extension:

  • It blocks referrer headers that may reveal the browsing location.
  • It blocks etag headers to prevent browser catching tracking – the extension strips and stores etag header data and compares it to third-party requests to the URL to determine whether the header is following you or not.
  • It blocks cookies that track users via third-parties.
  • It also blocks browser features that may be used to fingerprint users.
  • Privacy Possum will run automatically, blocking elements without you needing to do anything more.
  • The extension supports whitelist functionality.
  • Privacy Possum lists blocked elements that are loaded in the interface.

In case you want to be secure while surfing the internet, you will need to get a full-dedicated tool to secure your network.  Install now Cyberghost VPN and secure yourself. It protects your PC from attacks while browsing, masks your IP address and blocks all unwanted access.


Increase your online privacy with Privacy Possum

The interface of the extension comes with an on/off switch that you can use to deactivate the extension. The tool also shows blocking activity by displaying a number to the icon.

If you click on the number, you’ll see just how many tracking related elements it managed to block and what’s the exact type of the blocked items. You can disable a blocked site by simply checking on the checkbox that’s placed in front of that particular blocked element.

Privacy Possum will successfully enhance privacy online, so make sure to download it and give it a go.

Get the extension for Mozilla as well.

UR Browser doesn’t need extensions to keep your private data untouched

Although the new kid in town, UR Browser,  fully supports Chrome’s extensions, those are not required when it comes to privacy and safety. UR Browser comes with a built-in VPN, ad-blocker, and antivirus.

Not to mention that it blocks trackers and 3rd-party cookies with a rather ease.

ur browser

You can choose one of the 3 Privacy modes at your disposal, based on the level of privacy you want to achieve.

Check it out today and see for yourself how private browsing can go hand in hand with a great interface and a plethora of customization features.

Editor's recommendation
ur browser
  • Fast page loading
  • VPN-level privacy
  • Enhanced security
  • Built-in virus scanner

RELATED STORIES TO CHECK OUT:

Failed to Request Product Key From Steam: How to Fix

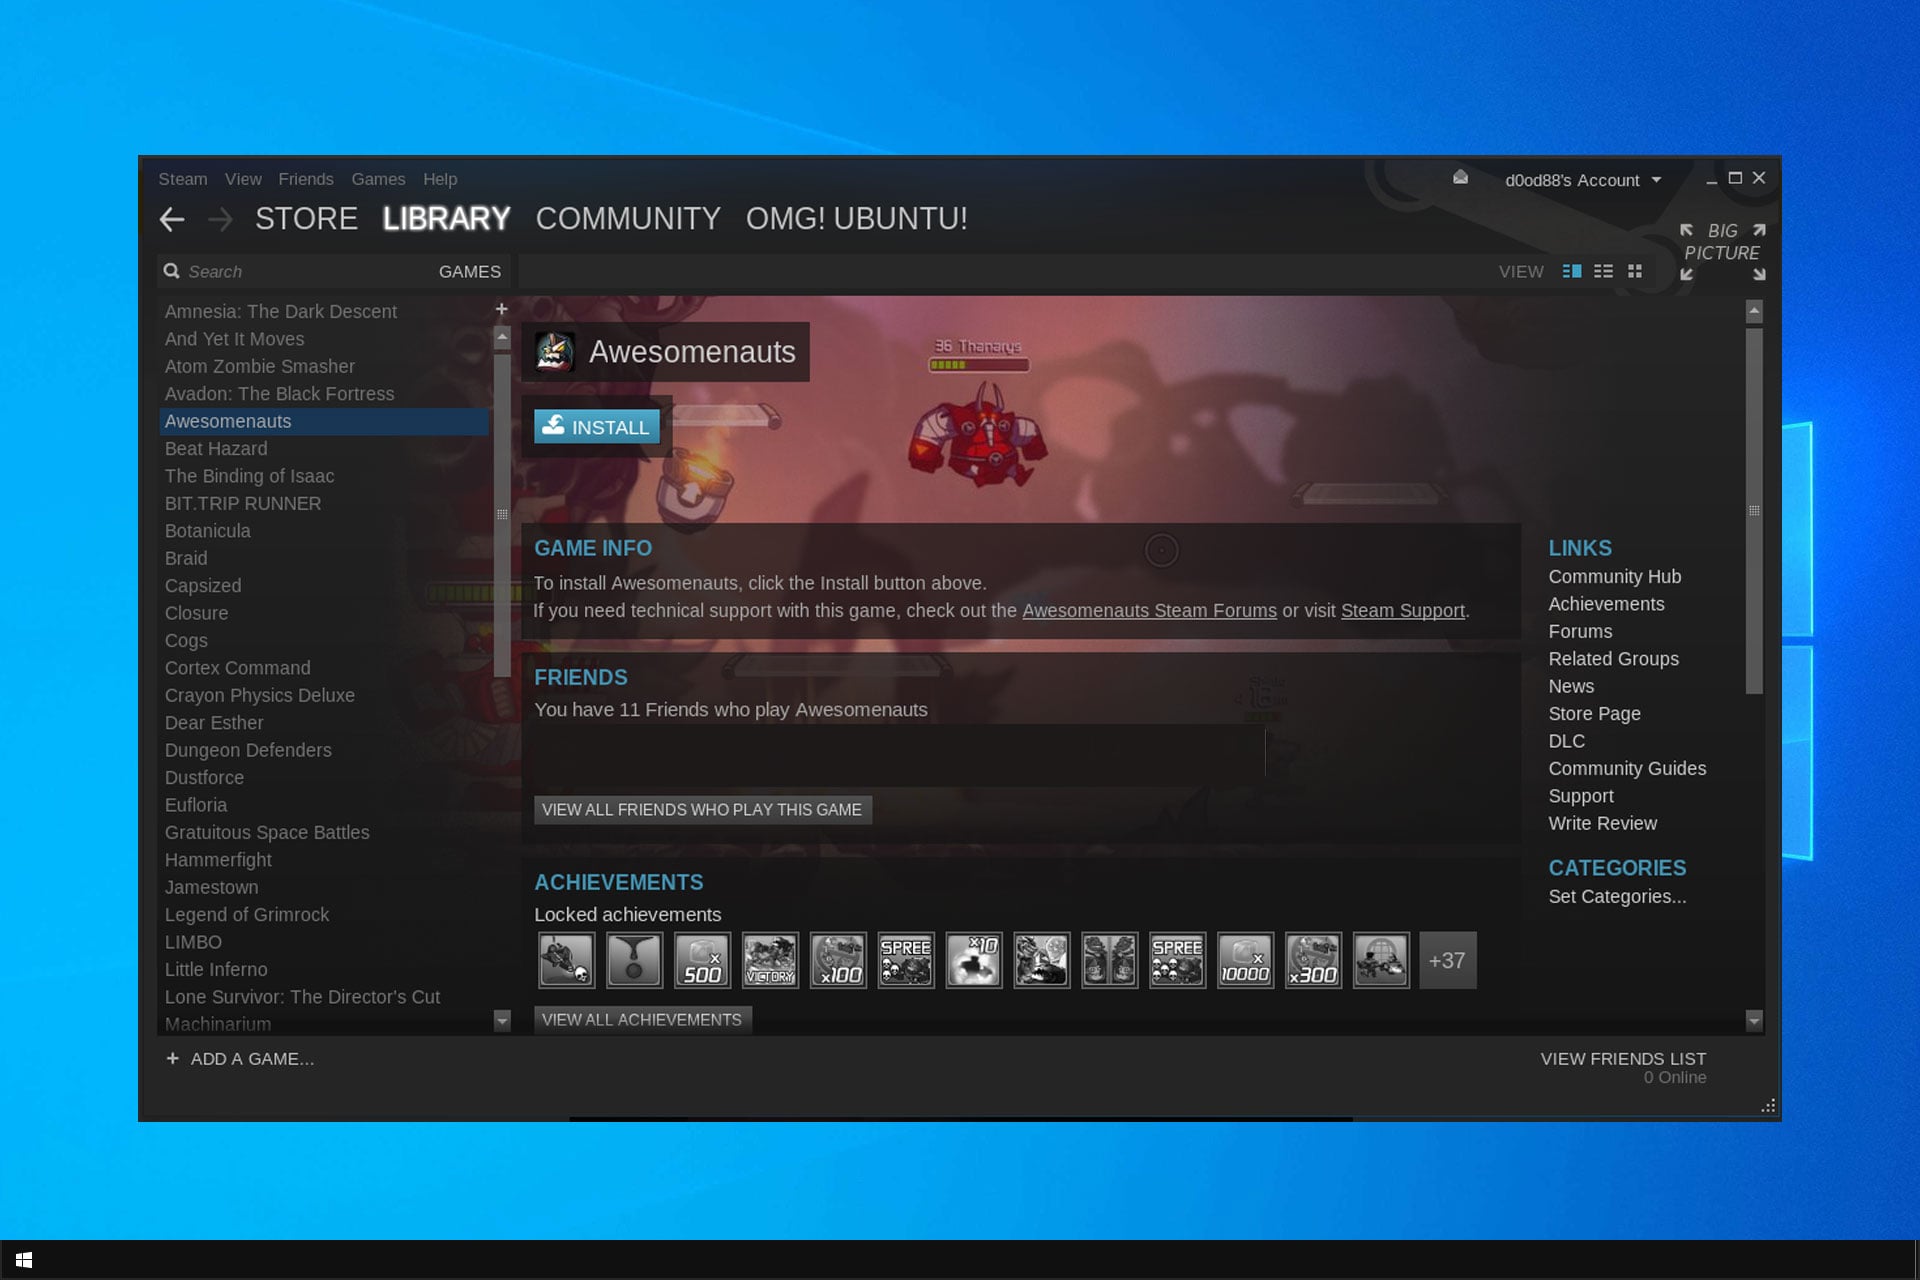
Steam is the best platform for gamers, but many users reported Failed to request product key from Steam. This error can be problematic and prevent you from playing your favorite games, but there’s a way to fix it.

This is just one of many Steam errors that you can encounter, but rest assured that this issue can be easily fixed.

In today’s guide, we’re going to show you the best methods you can use to fix this error on your PC.

Why won’t my Steam key work?

There are several reasons for this issue:

  • Corrupted game files or download cache.
  • Internet settings aren’t properly configured.
  • Issues with ClientRegistry file.
  • The firewall is blocking Steam.

How can I fix Steam product key request failed error?

1. Verify your game files

  1. Open up the Steam window.
  2. Click the Library to open the game collection.
  3. Then right-click on your game and select Properties.
    Properties Key request failed steam
  4. Press the Verify integrity of game files button.Key request failed Steam verify integrity

2. Clear your download cache

  1. Open your Steam client and navigate to Settings.
  2. Select Downloads in the Settings panel.
  3. Click on Clear Download Cache, next click OK to confirm your choice, Steam will ask for your login details afterward.clear download cache Key request failed steam
  4. After logging in again, Steam will start as expected.

3. Change your Internet settings

  1. Open the Internet Settings window.
  2. Select the Advanced tab and scroll down the Security listings.
  3. Uncheck Enable Enhanced Protected Mode.
    enable enhanced protected mode Key request failed steam
  4. Restart your machine and launch Steam.

4. Modify your shortcut

  1. Locate your Steam client.
  2. Create a shortcut of Steam in the same directory.
  3. Click Properties and head over to the General tab.
    properties Key request failed
  4. In the Target dialogue box, add -tcp in the end and click Apply.
  5. Use this shortcut as long as Steam launches.

After doing that, check if Failed to request product key from Steam message is gone.

5. Rename the client registry file

  1. Browse your Steam directory.
  2. Locate ClientRegistry.blob file.
  3. Rename the file to ClientRegistryOld.blob.
  4. Restart Steam and allow the file to be recreated.

6. Open your game through browse local files

  1. Open your Steam client, and next head over to your Library.
  2. Select the game in question, right-click on it, and select Properties.
  3. Now select Browse Local Files, open the game’s executable file and run it from there.

7. Add an exception to your Firewall

  1. From the Start Menu open Control Panel.
  2. In the Manage security settings area, select Windows Firewall.
  3. Click on Allow an app or feature through Windows Defender Firewall.
  4. Click Change settings. Locate Steam on the list and check both Private and Public. If Steam isn’t available, click on Add another app to add it.
    allow app through windows defender firewall steam error key request failed
  5. Click OK, and you’re good to go.

8. Reinstall  Steam

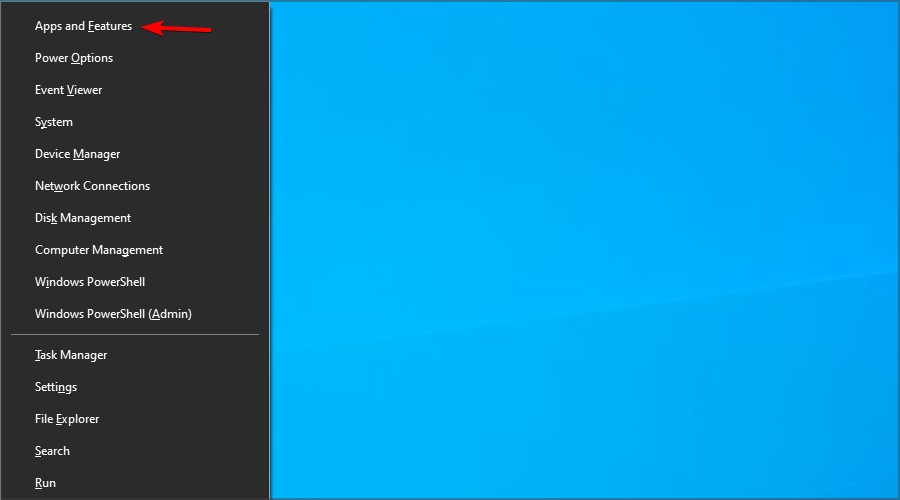
  1. Press Windows key + X and choose Apps and Features.
  2. Locate Steam and click on Uninstall.
  3. Once you remove it, download and install it again.

We hope that these fixes were of help to you and that you managed to fix Key request failed Steam error.

For more information about similar issues, visit our There was a problem adding this product to Steam guide.

If these solutions worked for you, feel free to let us know in the comments below.

Reminder: Edgium or Chredge? Soon it won’t matter

Microsoft’s recent move to switch out browser engines from their own EdgeHTML to the open source Chromium, while a bold move, has if nothing else made life a bit more difficult for tech pundits. Now, there’s Edge, the currently shipping proprietary browser, and Edge, the new open source browser of the future, but they both exist and journalists need a way to talk about them both. Here at OnMSFT.com, we’re using “Edge Insider,” but others have suggested “Edgium” or “Chredge” or even (shudder) “Chredgium“.

Apart from being a bit of a first world problem, this “Edge vs Edge” dilemma should be short lived, however. After a session at Build last week, a few attendees gathered around CVP for Edge Chuck Friedman, who explained that the problem will soon just go away.

Friedman explained that once Edge Insider ships, it will replace current Edge on all versions of Windows 10 (once users actually update their machines, something they’ve been historically slow to do), including replacing the current various versions of the Web View control built in to Windows with a new single and updateable (via the new Edge app) one, so that (in theory) all versions of Windows 10 will be running the same browser and Web View controls at the same time.

And while the new Edge will indeed be an “app,” updateable via the web apart from Windows Update, it will most definitely not be removable, if only for the nightmare scenario that if you uninstall Edge you wouldn’t be able to access the internet, even to download and install Chrome, for example.

So when will this new Edge be ready? “When it’s great,” Friedman told us. Microsoft isn’t announcing a timeline for the new Edge, and don’t seem to be in any rush to make the change. But once Edge Insider ships, it will become once again just Edge. You’ll no longer be able to run Edge/Chromium and Edge/EdgeHTML side by side, as old Edge will be replaced by new Edge (that is, unless you opt out of updating, furthering the problem that this move is supposed to help fix.)

Xbox One 1905 update reaches Preview Omega ring, with public release coming soon

Xbox Insiders on the Preview Omega ring can now download the next system update for the Xbox One. For those unfamiliar, the Preview Omega ring is the equivalent of the Release Preview ring for Windows 10 updates, so the Xbox One 1905 update hitting the Omega ring yesterday means that the public release is likely imminent.

The next Xbox One system update is a pretty minor one, and we counted five new features overall:

  • With Message Requests, Xbox Live messages sent by your friends will now be separated from other messages sent by strangers.
  • Your Friend List will now display different icons to show when your Xbox Live friends are playing on console, PC or mobile.
  • In recent preview builds, Microsoft also added Voice channels in Xbox Live Messaging.
  • Microsoft has improved sorting options in the My Games & Apps section. Articles such as “a,” “an” and “the” are no longer being used to sort titles when using the “Sort A-Z” and “Group by letter” views, and the Xbox team also added more options to sort games and apps by date.
  • For Xbox Game Pass members, a new a “Play Later” feature will make it easy to add any games in the catalog to a special list that will also be available from the Xbox Game Pass mobile app

It’s not clear yet if we’ll get another minor system update in June, but has already working on the next major Xbox One update to be released in October. For now, Xbox One 1810 builds are only available for Preview Alpha Skip Ahead Insiders, and there are no significant new features so far.

We’re having trouble reaching the server SharePoint error [FULL FIX]

SharePoint is a web-based document management and storage system that integrates with Microsoft Office. However, some users have reported a server related error while using the service. The reported error Sorry we’re having trouble reaching the server occurs when the user tries to use people picker control, enter the username or adding new users.

Are you stuck with an error preventing you to reach the server on SharePoint? Fix it by performing the IIS Reset. By resetting the Internet services, you should be able to restore the connection to Windows servers and resolve the error. In case you’re still unable to do so, install and activate HTTP Activation.

Check the detailed step-by-step explanations below.

How do I fix Sorry we’re having trouble reaching the server on SharePoint

  1. Perform IIS Reset
  2. Install and activate HTTP Activation

1. Perform IIS Reset

IIS (Internet Information Service) for Windows server is a flexible, secure and manageable web server for hosting your contents on the web. Sometimes, the web server may malfunction resulting in Sorry we’re having trouble reaching the server error.

Resetting the IIS service can help you to resolve this error with your Windows servers. Here is how to do it.

  1. Press the Windows Key and type cmd.
  2. Right-click on”Command Prompt” and select “Run as administrator”.
  3. In the command prompt type the following command and press enter:
    iisreset
    Reset IIS Service Windows server
  4. You should see “Internet services successfully restarted” message displayed on the screen.

Now try to use the Windows server and check if the error is resolved after resetting the ISS service.


2. Install and activate HTTP Activation

Now, this may come as a surprise for many, but it is possible that you don’t have HTTP Activation installed for your Windows server. It is an essential component of the .NET framework and if not installed will result in Windows server error.

First, check if you have activated HTTP activation for both .NET 3.5 and .NET 4.5. Here is how to do it.

  1. Launch Windows Server Manager.
  2. From the Dashboard clock on Manage and select “Add or Remove Users“.
  3. In the Add Roles and Features Wizard, click on Next.
  4. Click Next and go to the Server Roles tab.
  5. In the Server Roles tab, make sure “HTTP Activation (installed)” option is checked under “Windows Process Activation Service Support“.Windows server manager HTTP Activation Server role
  6. Click Next to go to the Features tab.
  7. In the Feature tab, under  .NET Framework 3.5 Features (installed), make sure “HTTP Activation” box is checked.
    Windows server manager HTTP Activation
  8. Then under, “WCF Services” make sure “HTTP Activation (installed) “ box is checked.
  9. Click Next and close the wizard.

Before trying to add a user or using people picker, perform an IIS service reset once again. The instructions to perform IIS reset is given in the first solutions.

If you don’t find the HTTP Activation (installed), proceed with installing HTTP Activation on your server and repeat the steps.

RELATED STORIES YOU MAY LIKE:

BEX Error in Steam: 3 Ways to Fix it on Your PC

Steam is without a doubt the best platform for gamers, but many gamers reported Steam Bex error on their PC.

If Steam client is blocked from accessing memory on your system, you might encounter this error, but there’s a way to fix it.

Before we start, you might want to take a look at our Steam not responding guide for more fixes and solutions.

What is Bex in PC?

BEX is short for Buffer Overflow Exception. These types of errors are caused by the following:

  • Compatibility issues
  • Problems with Data Execution Prevention
  • Corrupt software installation

How can I fix Steam BEX error?

Before we start, you might want to try this workaround:

  • Disable peripheral devices, especially if using Synapse technology.

1. Run Steam in Compatibility Mode

  1. Locate your Steam installation directory.
  2. Now, right click on Steam.exe, and choose Properties.
    properties steam error bex
  3. Next, click on the Compatibility tab. Check Run this program in compatibility mode for and select the desired version of Windows.
    compatibility mode steam error bex
  4. Click Apply and OK to save changes.
  5. Double click on Steam.exe to launch Steam.

If this method doesn’t help, try using different settings for Compatibility mode to fix eventtype bex error.

2. Disable Data Execution Prevention

  1. In the Start Menu open Control Panel.
  2. Open System and Security, and select System.
  3. Now select Advanced System Settings.
    advanced system settings steam error bex
  4. Click Settings in the Performance section.
    advanced settings
  5. Go to the Data Execution Prevention tab.
  6. Disable the service, and click OK to exit.

In Command Prompt:

  1. Start Command Prompt with administrator rights.
  2. Now run the following bcdedit.exe /set {current} nx AlwaysOff
  3. Optional: To enable DEP again, run this command: bcdedit.exe /set {current} nx AlwaysOn
  4. Wait till you receive the operation was successful message and close the window.

After doing that, check if the error is gone.

3. Verify game installation

  1. Start Steam and go to the Library.
  2. Right-click the affected game and choose Properties.
     
  3. Now click Local Files and then on Verify integrity of game files.
  4. Wait for it to finish.

We hope that these solutions were able to help you fix Steam Bex error on your PC.

In case you’re having further problems, we have a great guide on how to fix Steam errors on your PC, so be sure to check it out.

In the meantime, let us know in the comment section any potential solutions you found on your own.

Your operating system is not supported by CCleaner error [FIX THIS]

CCleaner is a highly rated system optimization utility that’s compatible with 64 and 32-bit Windows platforms from XP to 10. However, some users have stated on forums that a CCleaner doesn’t work on this version of Windows notification appears when they try to run the software. Consequently, users can’t run CCleaner in Windows 10. How can CCleaner not support Windows 10?

Are you unable to run CCleaner on Windows 10 as the system is seemingly not supported? Firstly, update CCleaner by reinstalling it. Some older versions might give you problems, but the latest one certainly supports Windows 10. Alternatively, you can switch to the portable version and run it from a USB stick when needed.

The step-by-step explanations are below.

The CCleaner Doesn’t Work on This Version of Windows Error

  1. Update CCleaner by Reinstalling the Software
  2. Add the Portable CCleaner to a USB Stick

1. Update CCleaner by Reinstalling the Software

To fix the “CCleaner doesn’t work on this version of Windows” error, users need to reinstall CCleaner. Then users can add the latest CCleaner to Windows 10 to ensure compatibility. This is how users can reinstall CCleaner in Windows 10.

  1. Right-click Windows 10’s Start button and select Run.
  2. Next, enter ‘appwiz.cpl’ in the Open text box and click OK to open the Windows uninstaller.control panel add remove programs
  3. Select the CCleaner software listed on the Programs and Features Control Panel applet.
  4. Click the Uninstall/Change button.
  5. Then select Yes to uninstall CCleaner.
  6. Restart Windows 10 before reinstalling CCleaner.
  7. Next, click the green Download button on CCleaner’s website to save the installer for the latest freeware version.
    ccleaner download
  8. Those users who need to reinstall the Pro version will need to download the installer for CCleaner Pro from the software’s website. Users might also need to find their product license key, which they can lookup with the product key tool on CCleaner‘s website.
  9. Thereafter, open the setup wizard for CCleaner to reinstall the software.

2. Add the Portable CCleaner to a USB Stick

  1. Alternatively, users can run the portable CCleaner version from a USB drive. To add CCleaner to a USB drive, click the green Download button for CCleaner – Portable on the software’s website.
  2. Next, insert a USB stick in a USB slot.
  3. Open the folder that includes the CCleaner ZIP.
  4. Double-click the CCleaner (ccsetup556) ZIP.
  5. Press the Extract all button to open the window shown below.extract compressed folders
  6. Press the Browse button, and select to extract the ZIP to a USB drive folder path.
  7. Click the Extract button.

So, those are two resolutions for the “CCleaner doesn’t work on this version of Windows” error. Users can either reinstall the latest CCleaner desktop version or try out the portable alternative.

RELATED ARTICLES TO CHECK OUT: 

We Couldn’t Find Your Folder in OneDrive: How to Fix it

If you use OneDrive to sync your document to the Microsoft account, you may encounter errors like We couldn’t find your OneDrive folder on Windows 10. It’s seemingly one of the many bugs users reported.

Many reported that the error keeps coming back every few days, and a Windows update is the only thing that provides a temporary reprieve. If you, too, are facing the same problem, here are a few quick solutions that helped others fix things.

How do I fix the We couldn’t find your OneDrive folder error?

1. Reset OneDrive Client

  1. Press Windows + R to open Run, paste the following command, and hit Enter:%localappdata%MicrosoftOneDriveonedrive.exe /reset
    Run - Reset - OneDrive App
  2. A command prompt window may appear briefly to complete the reset process.

Your OneDrive desktop clients come with a built-in option to reset the app. Resetting the app will set all the settings to factory default and remove any broken or corrupted configuration. And once done, the We couldn’t find your folder OneDrive error should disappear.

2. Login with an administrative account

  1. Click on Start and select Settings.
  2. Go to Accounts, and select Your Info.
  3. Check if the profile says Administrator.
    WIndows 10 - User Account - Infop
  4. If not, you may have to log out and log in with an administrator account.
  5. Then, launch the OneDrive client and check for any improvements.

If you are using a local user account without administrative privilege, OneDrive may have problems locating the folders and permission issues. So, switch to an administrator account in Windows.

3. Relink your account

  1. Launch the OneDrive client on your system.
  2. Click the Menu button and select Account Settings.
  3. Locate your account, click on Sign out, and then exit OneDrive.
  4. Relaunch OneDrive and sign in again.
  5. The account is now linked to the OneDrive client.

A possible solution when you see the We couldn’t find your OneDrive folder error is to unlink your Microsoft account from OneDrive and then re-link it. Doing so will flush any broken configuration.

4. Change the OneDrive folder location

  1. Open OneDrive, click on Menu, and choose Account settings.OneDrive - Account Settings - Signout
  2. Select your OneDrive account and click on Sign out.
  3. Windows will sign out of your account and ask you to sign in again. Leave the OneDrive account as it is, and don’t sign in yet.
  4. Press Windows + E to open File Explorer, and go to the location where the OneDrive folder is stored.
  5. By default, it is located in the following location, where Username is the active profile name:C:\Users\Username
  6. Select the OneDrive folder, and then from the Home tab, click on the Move to option, and select Choose location at the bottom.
    OneDrive- Folder- Move to - Choose a Location
  7. Finally, select your D: or E: drive, and click Move. If you have a secondary hard disk, that is also a good option.
    OneDrive- Folder Move - Location E
  8. The moving process may take some time, depending on the size of the folder.
  9. When it has finished moving, sign in to your OneDrive account.

If you get the We couldn’t find your folder in OneDrive error due to a permission issue or a corrupt hard disk, try to move the OneDrive folder to a different partition or secondary hard drive on your computer.

Before you leave, find out how to speed up OneDrive uploads.

For any queries or to share what worked for you, drop a comment below.

Google Chrome gets new cookie control options

Google recently announced that it is about to tweak the way its web browser handles cookies. The upcoming version of Google Chrome will come with improved cookie protection and control.

The importance of cookies on the web cannot be denied these days. Cookies are used to save your preferences, sign in details and more.

Google explains that some cookies are used to target users for personalised advertisement campaigns, while others are used to maintain user login sessions.

You can choose not to delete login cookies

As a matter of fact, the browser treats all cookies in the same manner. In case a user accidentally deletes his cookies, he will automatically lose all his login details.

This is a pretty much frustrating experience for the Google Chrome users. The company announced in a blog post that the company would make some significant improvements to the way Google Chrome tackles cookies.

Users will no longer lose their login details because they will have the option to clear specific type of cookies. Furthermore, Google says that developers should eventually adapt to this new technique.

Moreover, the company further explains there are many security benefits attached to this change:

This change also has a significant security benefit for users, protecting cookies from cross-site injection and data disclosure attacks like Spectre and CSRF by default. We also announced our plan to eventually limit cross-site cookies to HTTPS connections, providing additional important privacy protections for our users.

Google restricts fingerprinting practice

Apart from cookies, Google says that the company is restricting fingerprinting for its users. This technique uses the hardware details, user agent, and browser plugins for unique identification of devices and browsers.

Google is currently testing some changes and plans to officially release them later this year. However, there is no confirm from Google in this regard.

What do you think about this recent move by Google? Is it enough to ensure your privacy?

RELATED ARTICLES YOU NEED TO CHECK OUT:

Canon Printer Error 5011: 3 Ways to Clear it

If you’re getting a  Canon printer error 5011, it is mostly because the cartridge of the printer is stuck. This can be a problem and it can lead to issues such as ink cartridge full but printer not printing.

Today we’re going to show you how to fix this printer error, so let’s get started.

What is error message 5011?

  • It’s a hardware issue on your printer.
  • A jammed paper or any other object inside of your printer can cause it.

How can I fix Canon printer error 5011?

1. Perform a power cycle

  1. Unplug your Printers power cord as well as the USB cable that is connected to your PC.
  2. Keep the printer powered off for at least 3 minutes.
  3. After three minutes, plug the power cord and USB cable back and turn it on.

Check for any improvements after the printer restarts. If not, continue the troubleshooting steps.

  1. Power off the printer again.
  2. Open the printer’s lid for the scanner. Turn on the printer again keeping the lid open.
  3. Close the lid after the printer restarts.

Check if Canon printer error 5011 is gone.

2. Check the cartridge

  1. Turn off your printer.
  2. Check if a piece of paper or something else is stuck in the printer jamming the cartridge.
  3. Even a small object can cause this error. So, analyze the printer thoroughly.

After doing that, the error should be gone.

3. Remove and reinsert the cartridge

  1. Turn off your printer and open it.
    canon catrige
  2. If you haven’t tried this already, try to remove and carefully reinsert the cartridge.
  3. You can also try to clean up all the encoder strips found behind the printer.
  4. Reinsert the Cartridge after cleaning the encoder and checking for any objects stuck inside the printer.

Turn the printer on and see if the error is resolved. If the issue persists, you may need to take the printer to an authorized service center to get it fixed.

There are many printer issues that you can encounter, and in the past, we wrote about printer not printing full page, so you might want to check that one.

What methods did you use to fix this issue? Share them with us in the comments section below!

Fix Youtube.com/activate Enter Code problems on Xbox One [Easy Steps]

YouTube is a great service available on many platforms, but many users reported problems with youtube.com/activate enter code screen on Xbox One. This screen is used for authentication, and if you fail to authenticate, you might not be able to watch YouTube on Xbox One. However, there’s a way to fix this issue.

How can I fix Youtube.com/activate Enter Code problems on Xbox One? The first thing that you can do is to re-log into your account and try to authenticate the YouTube app again. If this method fails, try restarting both your Xbox One and network connection to fix the problem.

How to fix problems with youtube.com/activate enter code screen on Xbox One

  1. Re-log into your account
  2. Check your Internet connection
  3. Restart your Xbox

1. Re-log into your account

Sometimes re-logging to your account can help with youtube.com/activate enter code problems. In order to log into your account, simply follow these steps:

  1. Open your Youtube app.
  2. Head over to Sign in & settings.
  3. Now select Sign in and press X.
  4. The app will present to you a code.
  5. Write down the code and don’t close the window.
  6. Go to youtube.com/activate from your PC or phone.
  7. Now enter your Google account information and sign in.
  8. Enter the code that the YouTube app gave you and continue.
  9. Now select Allow access.

2. Check your Internet connection

restart network connection youtube.com/activate enter code xbox one

Sometimes your Internet connection can cause problems with youtube.com/activate enter code screen on Xbox One. As a simple suggestion, you can try restarting your modem/router. But to troubleshoot your network problems, simply follow these steps:

  1. Press the Xbox button to open up the Guide.
  2. Now select Settings, and next select All Settings.
  3. Select Network.
  4. Select Network settings. All connections should show up now.
  5. On the right side of the Network settings screen, select Test network connection.
  6. If there are any issues detected, the Network Connection Troubleshooter will attempt to fix them.
  7. Wait till the troubleshooter is done fixing the issue.

3. Restart your Xbox

restart xbox one youtube.com/activate enter code xbox one

Sometimes the simplest solution can bring give you the best results, and several users claim that they fixed the problem with youtube.com/activate enter code screen by restarting their console. To do that, follow these steps:

  1. Press the Xbox button and open the Guide.
  2. Select Settings.
  3. Select Restart console.
  4. Choose Yes to confirm.

We hope that these fixes were of help to you. In the meantime, let us know in the comment section down below on what other issues have you stumbled upon while using apps on your Xbox One.

RELATED STORIES TO CHECK OUT:

Microsoft’s Purple Cape Crusader steps down from OneNote, Sticky Notes and To Do duties

Just as the future of Microsoft’s note-taking platform comes into view, one of its champion executives and high-profiled Technical Fellow is stepping aside and handing the project over to a new crop of stewards.

Vice president and Microsoft Technical Fellow Laura Butler announced via her Twitter account that she would no longer be shepherding what appears to be the unification of the company’s previously disparate note-taking experiences.

Arguably the face of the modern development of OneNote and her lean-in on using the color of OneNote as identifier online, Butler became associated with the purple color scheme as much as her tendency to tease the internet with her baked goods.

The distinguished engineer has not mentioned what lies beyond her transition away from OneNote, Sticky Notes, and Microsoft To Do daily activities. Many of her fans and Windows developers have voiced their support of her staying within the company, over the past 24 hours.

Butler has since responded to her initial post with “I’ll tweet whatever happens,” and while that doesn’t necessarily mean she’ll be part of Microsoft in the future, it doesn’t hamper her chances of being “president of Mars in 50 years,” either.

From OnMSFT to Laura Butler, thank you, for all your hard work.

Fix BattlEye service startup failed error with these solutions

The BattlEye service startup failed error is an error that comes up when you are using games with the BattlEye anti-cheat setup. This error can create various problems, but today we’ll show you how to fix it.

How to fix BattlEye service startup failed error? This error occurs if the BattlEye files are corrupted, so you need to remove those files manually and then verify the game cache to reinstall BattlEye. In case that doesn’t work, be sure to update your graphics card driver to the latest version and try to run BattlEye again.

How can I fix failed to start BattlEye service error?

  1. Delete the BattlEye file
  2. Make sure all your graphics drivers are up to date

1. Delete the BattlEye file

If you’re getting BattlEye service startup failed error, you can fix it by deleting the BattlEye file. To do that, follow these steps:

  1. If you bought the game on Steam, open your Steam client.
  2. As soon as it opens, open the Library and search for the game that uses BattlEye.
  3. Right-click the game and choose Properties from the menu.
    Battleye service startup failed error properties
  4. Locate the game’s installation directory and go to it.
  5. Search for BattlEye folder, right-click and select the Delete option.

After this, you need to delete the game’s cache.

  1. Press Windows Key + R and enter %appdata%. Press Enter or click OK.
    Battappdata lEye service startup failed error
  2. Now locate the game’s directory and remove all files from it. Be sure to back up your saved games beforehand.

Now, you have to re-download the files you deleted. To do this, carry out the procedure below.

  1. Return to your Steam client.
  2. Open the Library tab and right-click on the affected game and select Properties.
  3. Then, get to the Local Files and click on the Verify integrity of game files.
    verify integrity Battleye service startup failed error

The game files you just deleted will be downloaded and the BattlEye will be installed.

2. Make sure all your graphics drivers are up to date

When the graphics drivers on your computer are not the latest, you might encounter various issues, one of them being BattlEye service startup failed error. To fix the problem, do the following:

  1. Open the Device Manager.
  2. Locate your graphics card on the list, right-click it and choose Uninstall device.
    uninstall device Battleye service startup failed error
  3. Wait for the process to finish.
  4. After removing the driver, visit your graphics card manufacturer’s website and download and install the latest drivers for your model.

Alternatively, you can use third-party software to automatically update all outdated drivers with just a couple of clicks.

There you go, these are some solutions that might help you fix BattlEye service startup failed error on your PC. Be sure to let us know in the comments section if any of these solutions worked for you.

READ ALSO: