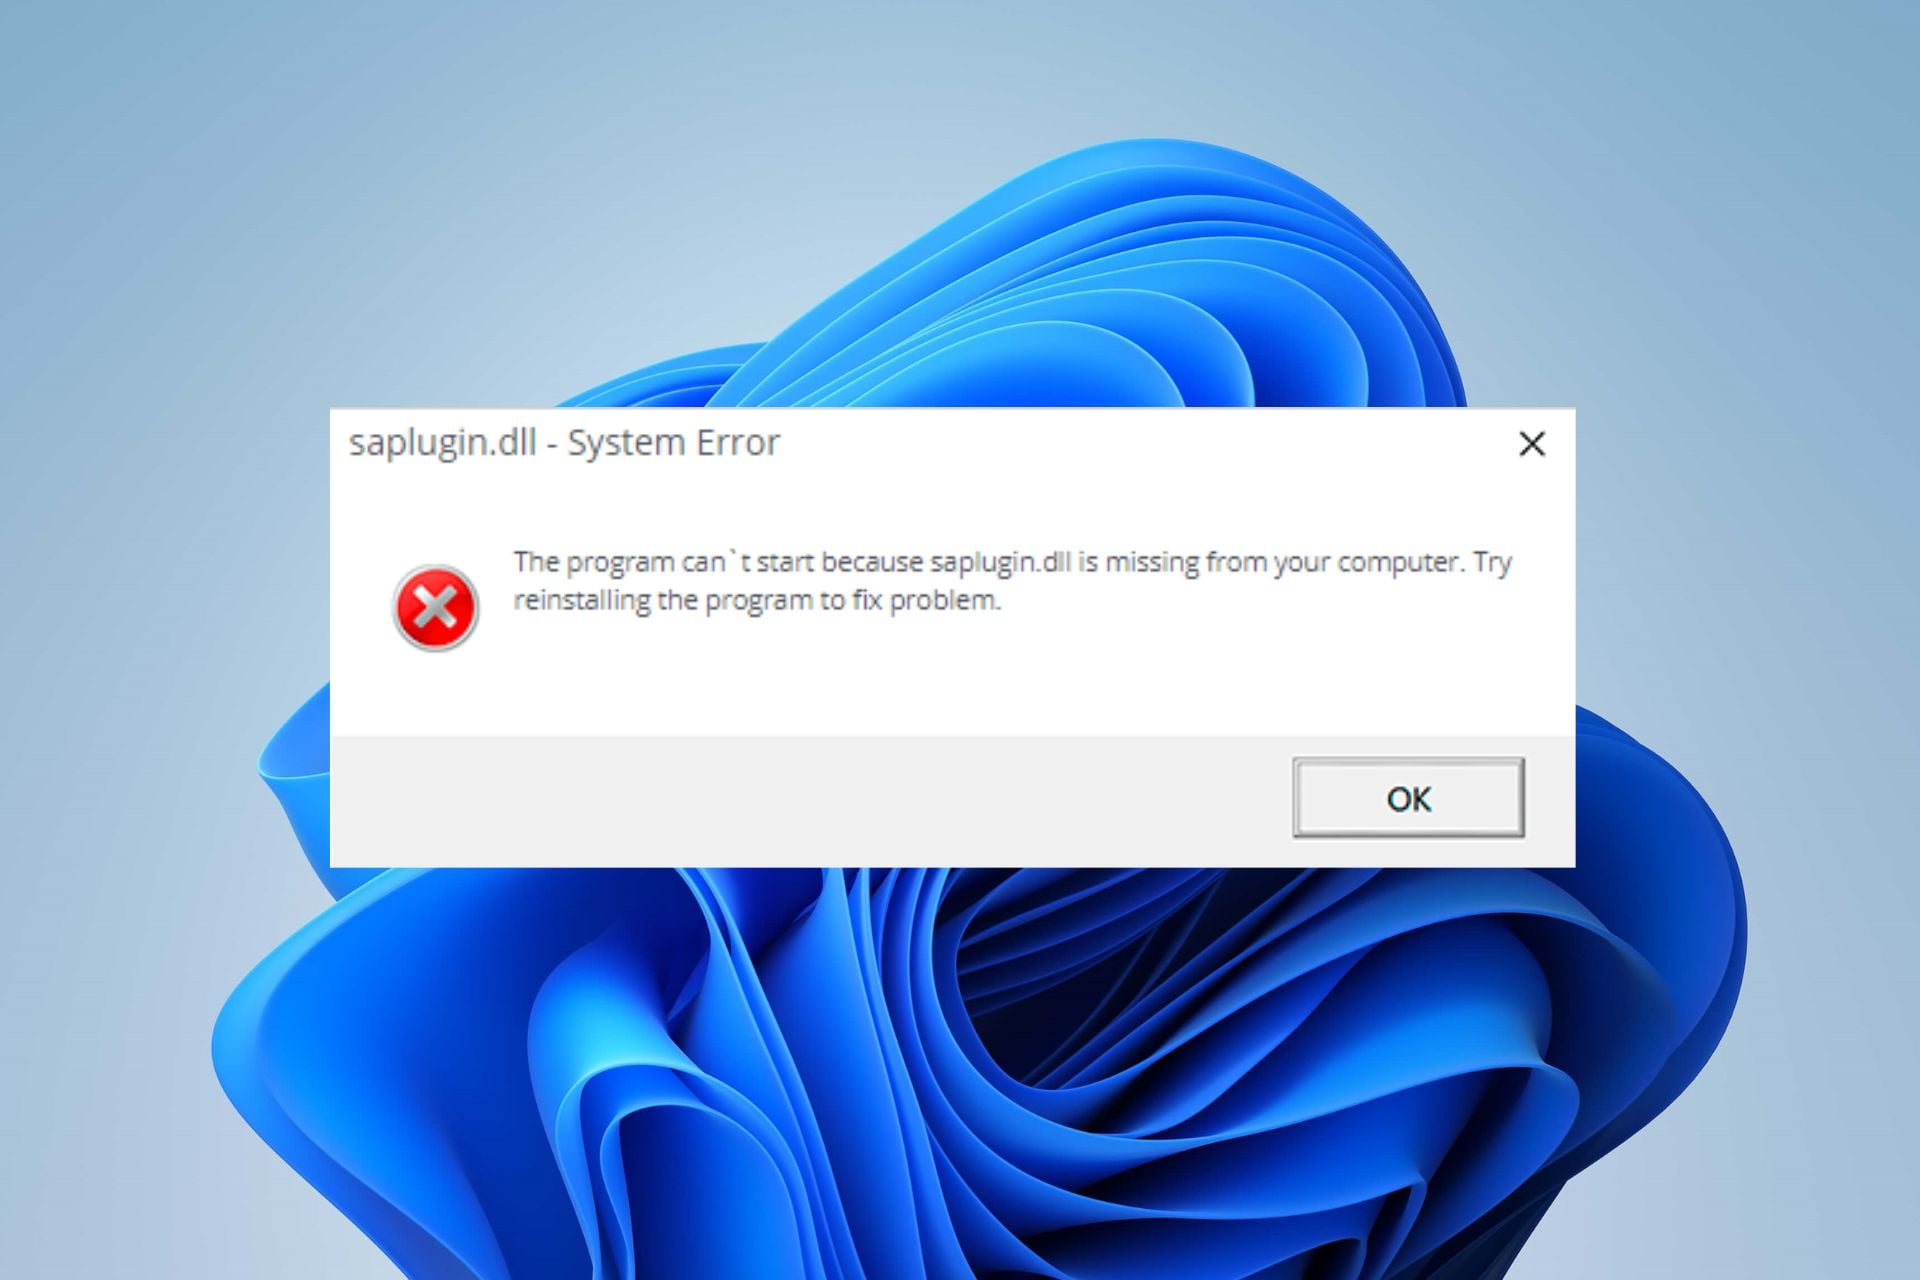
.DLL is Not A Valid Win32 Application: 5 Ways to Fix it

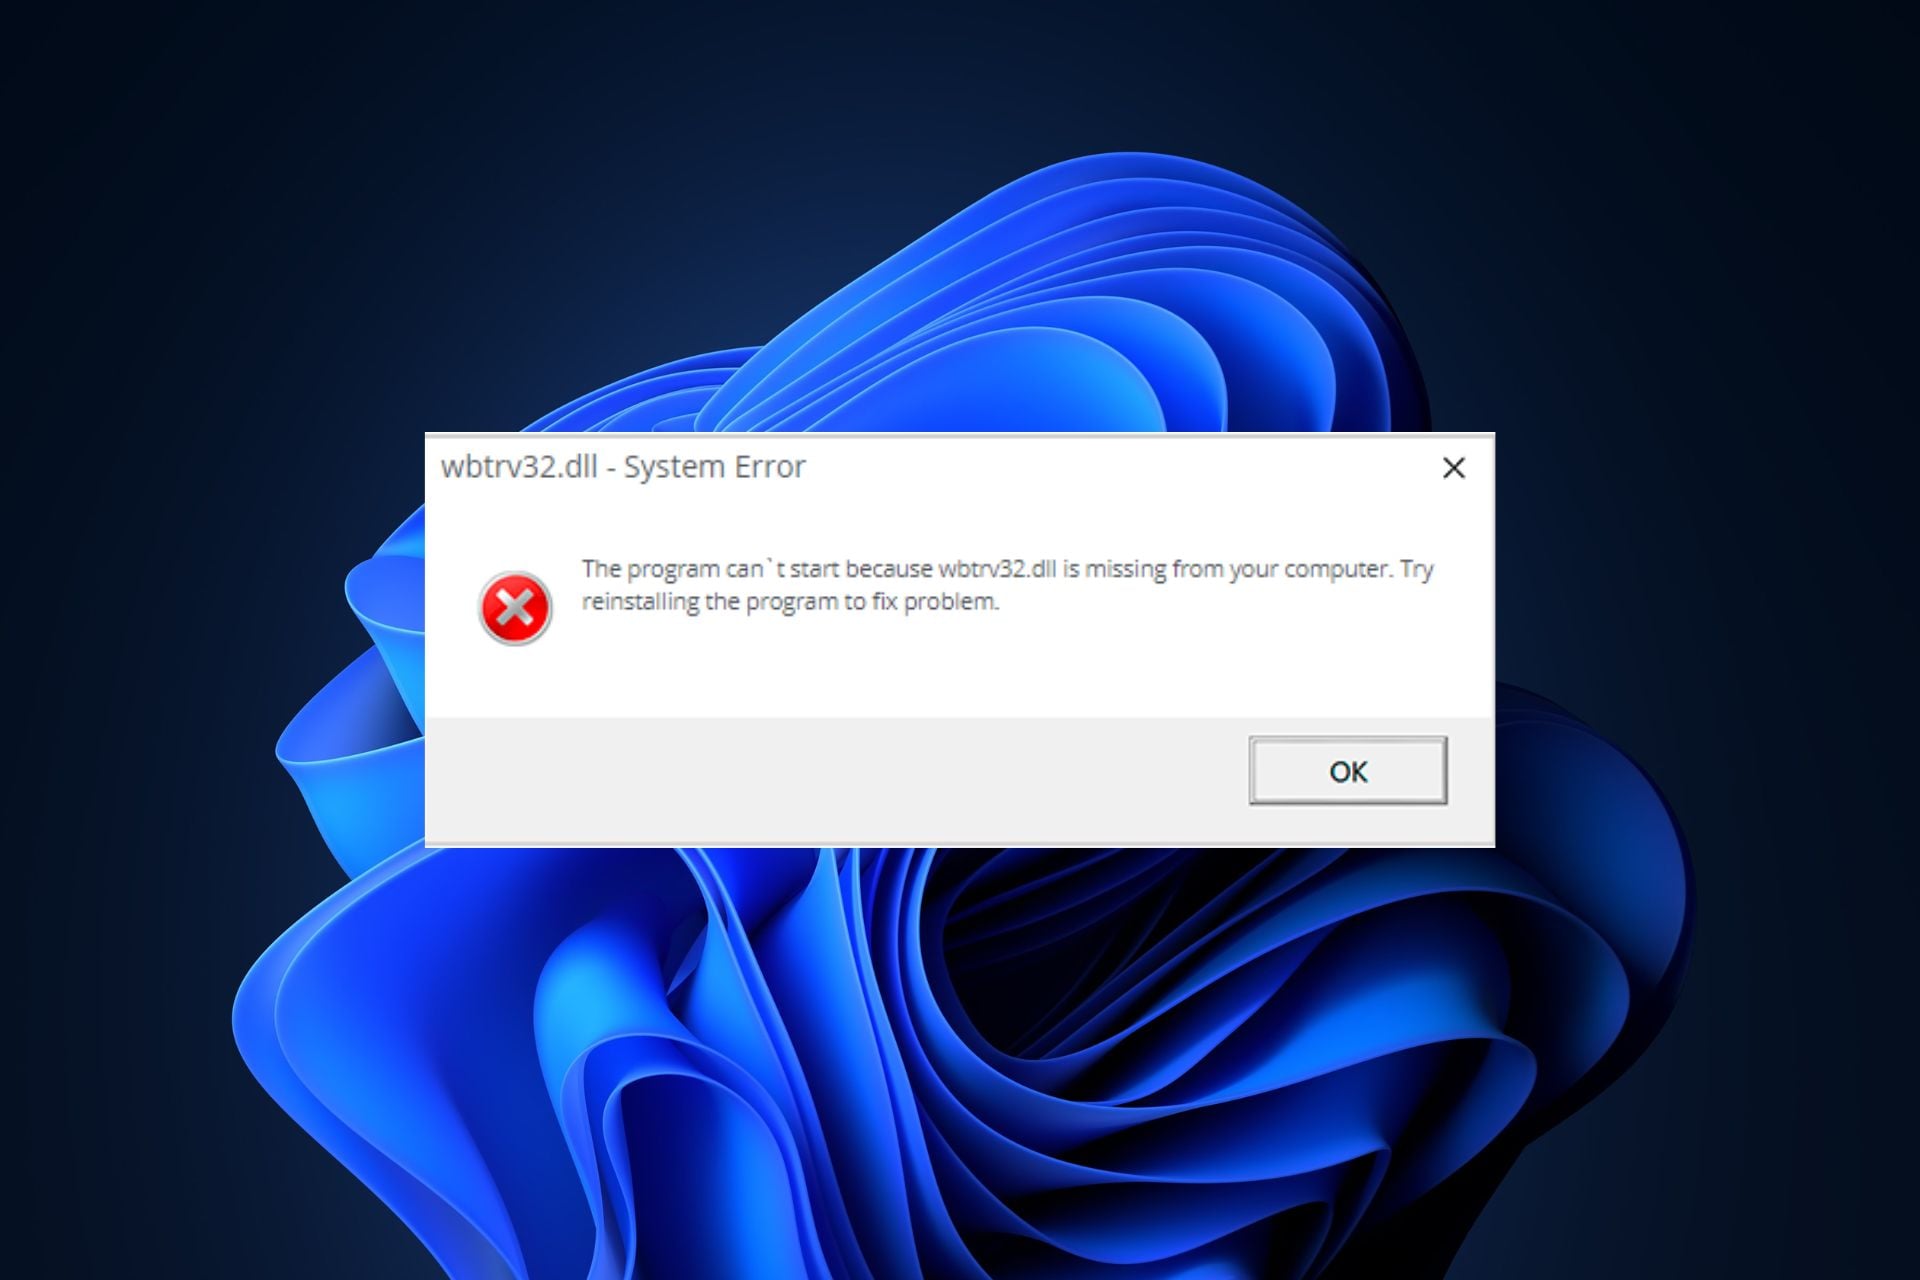
Many of our readers have run into an error .DLL is not a valid Win32 application when trying to launch a program or install an application.

This indicates that the DLL file is not supported, and as a result, Windows is unable to interpret its contents. Corrupt or missing DLL errors are frustrating but can be easily fixed using a few workarounds.

Why do I get the .DLL is Not A Valid Win32 Application error?

The error in question might arise because of one of the following reasons:

  • Virus and malware – If an antivirus is not installed, viruses and malware can modify, delete and even overwrite the DLL causing all sorts of issues. Scan your PC with a reliable antivirus.
  • Unsupported DLL version – The DLL version might not be supported with the system architecture of your Windows PC.
  • Incomplete installation – The error can occur if the application has not been installed correctly. Uninstall the affected program and re-install it.
  • Outdated application – If the concerned app hasn’t been updated for a long time, there can be incompatibilities with the system hence the error.

Now that we know the probable causes for this error, follow the solutions below to fix it.

How do I fix .DLL is not a valid Win32 application error?

1. Use a DLL fixer

The most prominent reason behind the .DLL is not a valid Win32 application error is the incompatibility issues between Windows and the program the DLL is a part of.

Trying to resolve such problems single-handedly is a Gordian knot, especially if you have little understanding of system-related errors.

Hence, it is recommended to use a reliable DLL fixer that is capable of resolving all sorts of DLL-related errors.

2. Run SFC and DISM scans

  1. Press the Windows key, type cmd in the search bar, and select the Run as administrator option from the result section.
  2. Type or copy-paste the following command and press the Enter key to initiate the SFC scan. sfc /scannow.DLL is Not A Valid Win32 Application
  3. After the verification is complete, type or paste the following command and press the Enter key to run the DISM scan. DISM /Online /Cleanup-Image /Restorehealth.DLL is Not A Valid Win32 Application

When the scanning process is complete, reboot your PC and check if the .DLL is not a valid Win32 application error persists.

3. Re-register Shell32.dll

  1. Press the Windows key to launch the Start menu, type cmd in the search bar and choose Run as administrator from the right result section..DLL is Not A Valid Win32 Application
  2. Type the following command and press the Enter key to execute it. regsvr32 /i shell32.dll.DLL is Not A Valid Win32 Application
  3. Press the OK button on the register server prompt that states that the action is completed.

Shell32.dll is a crucial system file of the Windows operating system which is executed every time an executable file runs on your computer.

If this .DLL becomes gets unregistered, you are likely to run into the .DLL is not a valid Win32 application error every time you attempt to run an application.

4. Run the program in compatibility mode

  1. Launch the File Explorer using the Windows + E shortcut and navigate to the file location.
  2. Right-click the executable file and choose Properties from the context menu..DLL is Not A Valid Win32 Application
  3. Switch to the Compatibility tab, enable the option saying Run this program in compatibility mode, and then in the drop-down, select the OS version in which you want to run the file..DLL is Not A Valid Win32 Application
  4. Finally, press the OK button to save the changes.

5. Manually install the compatible DLL

We always discourage our readers from downloading app installers and DLLs from unreliable internet sources, as doing so means exposing yourself to various online threats.

However, you can manually download the DLL file from trusted websites such as DLL Files, having a library of legitimate DLL files.

Hence, you should make sure that you download the correct version of the DLL compatible with your computer. After the download is completed, unzip its contents, paste the DLL into the program installation folder, and try installing the program once again.

These are all the methods that will prove effective in resolving the .DLL is not a valid Win32 application error that appears when you launch a program on your PC.

If you didn’t upgrade to the latest OS, here’s our guide on how to fix missing DLL errors on Windows 10. And rest assured that troubleshooting Cannot Load Library DevIl.dll error is simple as well when having the right guidance.

Also, if you have any queries or suggestions for us, do let us know in the comments section below.

Srv2.sys BSOD error: Causes & How to Fix It

Srv2.sys is a Server Message Block Version 2.0 server driver which may sometime cause a random blue screen issue or unexpected reboot on your computer. This may result in causes data loss and it restricts the inability to perform any task on your computer.

Why do I encounter the srv2.sys BSoD error?

There are several possible reasons why the srv2.sys BSOD error decided to show up on your PC. Some of the common ones are:

  • Corrupt kernel mode drivers – srv2.sys BSOD error primarily occurs due to corrupt kernel-mode drivers of your computer.
  • Malware infection – A system infected with viruses and malware is vulnerable to BSoD errors like the one you are currently facing.
  • Corrupt system files – Missing or damaged system files on your computer cause your system to malfunction and crash with a BSoD error.
  • Problematic Windows updates – Some Windows updates if buggy can cause multiple issues within the system instead of improving the user experience.
  • Conflicting apps – Some of our readers have experienced the srv2.sys crash right after installing some third-party apps.

Now that we know the potential causes, let’s fix the problem quickly with the solutions below.

How do I fix the srv2.sys BSoD error?

Before jumping on the advanced solutions listed below, perform the following workarounds on your computer:

If these methods did not do the trick, employ the following fixes one by one.

1. Restart your PC in Safe Mode

  1. Power on your PC and quickly turn it off as soon as the Windows logo flashes on the screen. Repeat this process until you reach the Automatic Repair screen.
  2. Now press the Advanced options button to go further with the automatic repair process. srv2.sys
  3. Next, choose Troubleshoot option. srv2.sys
  4. Choose Advanced options from the next screen. srv2.sys
  5. Now select Startup Settings from the Advanced options window. srv2.sys
  6. A list of options on the screen. Hit the F5 key to enable Safe Mode with Networking. srv2.sys

Your PC will be operating with the minimum number of apps and system drivers. You can now apply the methods listed below to troubleshoot the successfully troubleshoot srv2.sys BSOD issue.

2. Run SFC and DISM scans

  1. Press the Windows key to launch the Start menu, type cmd in the Search bar and choose Run as administrator from the right section of the search results. srv2.sys
  2. Click the Yes button on the User Account Control prompt to launch the command prompt with administrative privileges.
  3. Type or paste the following command and press the Enter key to scan your system files using System File Checker. sfc/scannow  srv2.sys
  4. After the verification is 100% complete message appears, type or copy-paste these commands one at a time and press Enter key after each one. DISM /Online /Cleanup-image /Scanhealth DISM /Online /Cleanup-image /Restorehealth DISM /online /cleanup-image /startcomponentcleanup srv2.sys

The SFC scan analyzes your system for damaged files, and the DISM tool scans and repairs the faulty Windows system images which might trigger the srv2.sys blue screen error.

Instead of using Command Prompt processes, you’re able to diagnose your OS issues with dedicated repairing tools.

3. Run the CHKDSK command

  1. Click the Windows icon on the taskbar, type cmd in the search bar on top, and choose the Run as administrator option from the search result section. srv2.sys
  2. Press Yes on the User Action Control popup to launch Command Prompt with elevated permissions.
  3. Now type the following command and press the Enter key to initiate the check disk utility. You can replace the letter C with the hard drive letter on which the operating system is installed. chkdsk c: /f /r srv2.sys

The CHKDSK command will scan your hard disk space to identify the bad sectors, automatically repair them and generate the status report. After the process is completed, restart your PC; hopefully, the srv2.sys BSOD error will no longer bother you.

4. Update the drivers

  1. Right-click the Windows icon and choose Device Manager from the Quick Links menu. srv2.sys
  2. Double-click the Display adapters category to view the list of devices.
  3. Right-click the graphics card and select Update driver from the context menu. srv2.sys
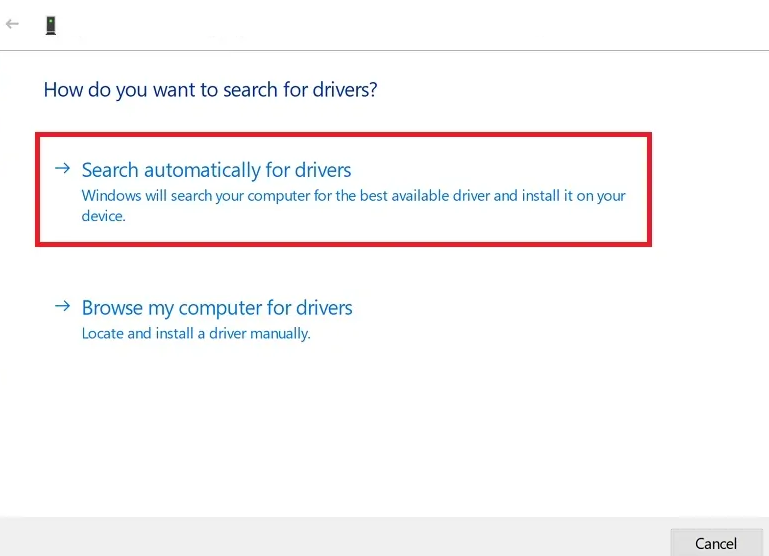
  4. Choose the Search automatically for drivers option.
  5. This will prompt your computer to find the best available driver for the graphics card on the system and will automatically download and install them.

However, if you see a message saying the best drivers are already installed, close the Update Drivers window and implement the other methods for updating the graphics drivers on Windows PC.
Follow the same process to update the outdated drivers one by one under each category.

5. Perform System Restore

  1. Click the Windows icon to bring up the Start menu, type create a restore point in the search bar, and choose the first search result to access the System Properties window. srv2.sys
  2. Press the System Restore button present in the System Protection tab. srv2.sys
  3. Choose the restore point from the list where your PC was working normally, and hit the Next button on the bottom right. srv2.sys
  4. Press the Finish button on the Confirm your restore point window to initiate the system restore process.

Keep in mind that you restoring your PC to a previous state is only possible if you have created a restore point on your system before this BSOD error showed up.

Hopefully, the methods listed above successfully resolved the srv2.sys BSOD error such that the normal state of your computer is restored.

Refer to this guide wherever you encounter the BSOD with the 0xc0000001 error code on your PC.
If you need further help in this context, do not hesitate to drop us a comment below.

How to join the Microsoft 365 Insider program

Are you a Microsoft 365 user looking to stay ahead of the curve and get early access to new features and updates? If so, you’re in luck. The Microsoft 365 Insider program allows users to do just that, by providing early access to new features and updates before they’re released to the general public. In this comprehensive guide, we’ll walk you through the steps to join the Microsoft 365 Office Insider program and start exploring all that Microsoft 365 has to offer. If you’re interested in installing Microsoft 365 Insider builds on your device, follow the steps below to check if you’re eligible and pick the Insider level that best suits your needs.

Step 1: Check your eligibility for the Microsoft 365 Insider program on Windows

Microsoft 365 insider program

To check if you’re eligible to install Microsoft 365 Insider builds, open a desktop application like Word or Excel and click on Account. Look for your license under Product Information and compare it to the license types listed below.

  • If you have a Microsoft 365 Family or Personal subscription, you can install Insider builds by following the instructions provided on the page. Look for “Microsoft 365” under Subscription Product, and you should also see a “Microsoft 365 Insider” button.
  • If you have a Business/Education subscription, your Microsoft 365 administrator manages your subscription, and you won’t be able to install or manage Insider builds unless they enable it.
  • If you have a perpetual license, such as a year like 2019 or “LTSC” in your license name, you have a non-subscription version of Office and won’t be able to join the Microsoft 365 Insider program.

Step 2: Choose an Insider level

Microsoft 365 insider program

Microsoft 365 Insider for Windows offers two levels for those with a Microsoft 365 subscription: Beta Channel and Current Channel (Preview). The Beta Channel is best for those who want to use the latest builds to identify issues and provide feedback about new features still in development. The Current Channel (Preview) is best for early adopters who want early access to new features but also want to receive less frequent, more stable updates.

Step 3: Install Microsoft 365 Insider builds

To install Insider builds, open any Microsoft 365 app on Windows and click on File > Account > Microsoft 365 Insider > Join Microsoft 365 Insider.

Microsoft 365 insider program

In the Join Microsoft 365 Insider dialog box, check the box next to “Sign me up for early access to new releases of Microsoft 365 apps” and choose the Insider channel you want. Click the box to “Check for and apply updates” and “I agree to the terms and conditions…” and then click OK.

Microsoft 365 insider program

Depending on your notification settings, you may need to confirm that you want to allow the app to make changes to your device. After which you should get a confirmation message that you have successfully joined the program, be sure to click OK again.
Microsoft 365 insider program

Once you have successfully completed the process of joining the Microsoft 365 Insider program and have chosen the Insider level that best suits your needs, clicking OK will allow you to download and install new Insider builds of Microsoft 365 apps on your PC. These new Insider builds will have the latest features and updates not yet released to the general public. Being an Insider member lets you have access to these features early, enabling you to start using them before they become widely available.

However, keep in mind that these Insider builds are still in development, so they may not work seamlessly and can have sudden bugs or glitches that are yet to be ironed out. You can help improve Microsoft 365 Insider builds by giving feedback to Microsoft when a new version causes issues or if you have any suggestions. Overall, clicking OK is an exciting moment and the beginning of your journey to exploring the latest and greatest features of Microsoft 365.

Step 4: Join the Community

Microsoft 365 insider program

If you have any questions or feedback about the Microsoft 365 Insider program or want to access resources to help you get started with the program, the Microsoft 365 Insider Tech Community and the Answers forum are great places to start. These platforms offer a variety of resources, including step-by-step guides and forums where you can connect with other Microsoft 365 Insiders to share feedback and ask questions.

Conclusion

Becoming a Microsoft 365 Insider is an excellent opportunity to get early access to new features and updates before they are released publicly. By following the simple steps outlined in this guide, you can check your eligibility, choose an Insider level, and install Insider builds on your device. Additionally, you can connect with the Microsoft 365 Insider Tech Community and the Answers forum to provide feedback and ask questions. Join the Microsoft 365 Insider program today and experience all that Microsoft 365 has to offer. And if you’re interested in other Microsoft apps and services, be sure to check out our other guides, including Teams, Windows 11, and more.

Fix: Windows Upgrade Failed with 0x4005(16389) Error

The error code 0x4005(16389) is a common Windows system error that can occur when upgrading Windows. It usually indicates that there was an issue during the upgrade process, such as a failure to install or update a specific system component or driver.

In this guide, we will discuss the possible causes of the 0x4005(16389) error and provide step-by-step instructions on how to fix it.

What causes 0x4005(16389) error?

The error code 0x4005(16389) can occur during a Windows upgrade process and is usually associated with the following common causes:

  • Different Windows edition: If the Windows edition you are trying to upgrade to differs from the one currently installed on your computer.
  • Third-party antivirus conflicts: Certain third-party software installed on your computer may conflict with the Windows upgrade process and cause the 0x4005 error.
  • Insufficient storage space: If your computer’s hard drive does not have enough space to install the Windows upgrade files, the process may fail and result in the 0x4005 error.
  • Corrupt system files: If the essential Windows system files are corrupt, it can lead to the 0x4005 error.
  • Local Computer Description: If you set the computer description during the task sequence, the error code may occur if the script or command used to perform this action fails.

How do I fix the 0x4005(16389) error when upgrading Windows?

Before attempting more complex solutions, here are some straightforward steps to try:

  • Restart your device: Restarting your computer can often resolve the issue at hand.
  • Use the same Windows Edition to upgrade: If you attempt to upgrade to a different version of Windows than what’s on your computer, ensure that you upgrade to the same edition.
  • Disable third-party antivirus programs: Antivirus programs can sometimes interfere with the upgrading process and prevent it from completing successfully. To avoid this issue, you should disable your antivirus program temporarily. 

1. Free up disk space

  1. Open the Start menu, type disk cleanup, and select the Disk Cleanup app from the search result.Disk Cleanup
  2. Select the drive system drive (typically labeled C🙂 and click OK.C drive
  3. Next, click the Clean up system files button.Clean system files
  4. Select the system drive again and click OK.Choose drive
  5. Now, select the files you wish to delete, and click OK.Choose files to delete
  6. Click Delete Files to confirm. Delete files

Insufficient disk space is a common issue that arises during Windows updates and upgrades, making it impossible to install them. According to Microsoft, you will need at least 20 GB of free space for upgrading to Windows 10 or 64 GB of free space for Windows 11.

You can also defragment the drive to free up some space and optimize the PC’s performance.

2. Extend the partition to create more space

  1. Press the Windows + R to open the Run command, type diskmgmt.msc, and hit Enter. diskmgmt.msc
  2. If you want to shrink a volume, locate the drive or partition, right-click on it, and select Shrink Volume…Shrink Volume
  3. Enter the amount of space you want to subtract from the drive in MB and click Shrink.Shrink
  4. In case you want to delete a volume, right-click on the unused drive/partition you want to delete and select Delete Volume...Delete volume
  5. Right-click on the drive/partition you want to extend and select Extend Volume…Extend volume
  6. In the Extend Volume Wizard window, click Next.Extend
  7. Click Next to add all the unallocated space to the drive you want to extend or specify the volume size you want to add and then click Next.specify the size.
  8. Click Finish to extend the drive.finish
  9. If you see a warning prompt, click Yes to proceed.finish
Note icon NOTE
To expand the storage capacity of a drive or partition, you must first reduce the size of another drive or remove an unused drive to generate unallocated space. Then, you can use the unallocated space to increase the volume of any drive on your disk.

3. Change the local computer description command

Note icon NOTE
These instructions are intended for IT professionals or system administrators who are using System Center Configuration Manager (SCCM) to deploy Windows operating systems in an enterprise environment.
  1. Confirm if the error is related to a script or command failing during the task sequence, which is responsible for setting the local computer description. 
  1. Open the task sequence in the System Center Configuration Manager (SCCM) console and locate the option for setting the computer description.
  2. Add a Run Command-Line to the task sequence and then run the following command:cmd /c net config Server /SRVCOMMENT:"%OSDComputerDescription%"
  3. Save the changes.
  4. Run the task sequence again, and the error should now be resolved.

If you encounter the 0x4005(16389) error while attempting to set the local computer description using a script or command during the task sequence, you can use this method to resolve the error and successfully complete the task sequence.

4. Clean install Windows

4.1 Create Windows installation media

  1. Insert a blank USB or blank DVD with at least 8 GB of space.
  2. Go to the Windows 11 download page on the official Microsoft website.
  3. Under Create Windows 11 Installation Media section and click Download Now.Download Windows media creation tool
  4. Once downloaded, run the mediacreationtool.exe file.
  5. Click Accept to continue.Accept
  6. To select a different language, untick the checkbox beside Use the recommended options for this PC. Then, click Next.change language
  7. Choose the USB flash drive option and click Next.USB flash drive
  8. Select the USB drive you want to use, and click Next.select USB
  9. Wait for the setup to download all the necessary files to the flash drive.Downloading
  10. When the download is complete, click Finish.Finish

4.2 Install the Windows operating system

  1. Restart your computer and press Esc, F2, F10, or F12 to access the boot menu, and select the USB media to boot from.
  2. Choose the language and input method, and then click Next.Choose lang
  3. Click Install now.Install now
  4. Input your Windows product key and click Next or click I don’t have a product key.active windows
  5. Choose the Windows edition and click Next.Choose edition
  6. Select the Custom: Install Windows only (advanced) option.Custom
  7. Choose the partition where you want to install Windows and click Next. Select partition
  8. After the installation, follow the on-screen instructions to set up your computer.

We hope one of these solutions helps you fix the 0x4005(16389) error. After you’ve upgraded, learn how to the most of Windows 11 features.

Please let us know in the comment section if you have further questions or suggestions.

MSVCP140_1.dll was Not Found: 6 Ways to Fix This Error

The MSVCP140_1.dll file is a Dynamic Link Library file that is part of the Microsoft Visual C++ Redistributable for Visual Studio 2015, 2017, and 2019. It is a necessary component used by many applications to ensure the proper functionality of the application.

An error message indicating that the MSVCP140_1.dll file is missing or not found means that the DLL file is corrupt or missing. Additionally, the application you are trying to run requires this file for proper operation.

What is the MSVCP140_1.dll?

MSVCP140_1.dll, also known as a Microsoft® C Runtime Library _1 file, is an essential component for running software applications created using the Visual C++ programming language.

There are several reasons why this error can occur, some of which are – missing or corrupt DLL, outdated or incompatible software, malware, registry errors, or hardware issues.

If the MSVCP140_1.dll file is missing or broken, it may cause various error messages, including:

  • The program can’t start because MSVCP140_1.dll is missing from your computer.
  • MSVCP140_1.dll missing.
  • MSVCP140_1.dll is missing from your computer. Try reinstalling the program to fix this problem.
  • MSVCP140_1.dll not Found.
  • This application has failed to start because MSVCP140_1.dll was not found. Reinstalling the application may fix this problem.

How can I fix the MSVCP140_1.dll was not found error?

1. Use a dedicated DLL repair tool

MSVCP140_1.dll file is essential for running various programs on a Windows operating system that were developed using Microsoft Visual C++. Hence, if it is missing from your device, it is best to use a professional DLL repair tool instead of downloading the DLL file from shady sites.

DLL fixers are a reliable solution for fixing DLL files as it automatically performs a thorough scan of your device and guarantees a 100% success rate in repairing all damaged or missing DLL files.

2. Reinstall the Microsoft Visual C ++ Redistributable Package

  1. Visit the Visual C++ 2015 Redistributable download page on Microsoft’s official website, select the language, and click Download.Download
  2. Select the vc_redist.X64.exe option and click Next.VC++64
  3. After the file is downloaded, run the EXE file and follow the instructions to install it.
  4. Then, restart your PC.

As you know, the MSVCP140_1.dll is part of the Microsoft Visual C++ Redistributable package. Hence, reinstalling the Microsoft Visual C ++ Redistributable Package will easily fix this issue.

3. Clean install the program

  1. Press the Windows + R key to open the Run dialog box, type appwiz.cpl, and press Enter.appwiz.cpl
  2. Right-click the program that caused the error and choose Uninstall. Click Yes if prompted.Uninstall
  3. After that, restart your computer and reinstall the program.
  4. Launch the app and see if the error appears again.

4. Re-register the DLL file manually

  1. Press Windows + R to open Run, type cmd, and press Ctrl + Shift + Enter to open the Command prompt in elevated mode.cmd
  2. Click on Yes to the UAC prompt.
  3. Type the below command and press Enter:regsvr32 msvcp140_1.dllregv32
  4. Reboot your system to save the changes.

5. Run a full virus scan

  1. Press the Windows key, type in Windows Security in the Search menu, and press Enter.Windows security
  2. Go to the Virus & threat protection tab and click on Scan options on the right pane.
  3. On the Scan options page, select Full scan, and click Scan now.Full scan
  4. After the scan is over, restart your computer.

6. Run the System Checker

  1. Press Windows + R to open the Run command box, type cmd, hold the Ctrl + Shift key, and click OK to run Command Prompt as administrator.
  2. Click Yes on the User Account Control (UAC) prompt window.
  3. Type the following command and press Enter: sfc /scannow
  4. Wait for the SFC tool to complete the scan, then restart your computer.

In conclusion, the MSVCP140_1.dll not found error can be a frustrating issue to deal with, but several effective solutions are available to fix it.

You can try using a dedicated DLL repair tool which will automatically scan and replace any damaged or missing DLL files.

Before you leave, check the best Windows settings for enhanced performance and security.

By following these steps, you can successfully fix the MSVCP140_1.dll not found error and ensure your system runs smoothly without any further errors.

10 Best Skype Alternatives to Use in 2026

Looking for the best Skype alternatives now that Skype is discontinued? With Microsoft dropping support for the platform, many users are searching for Skype alternatives for Windows 11 and 10 that offer reliable messaging and calling features. Whether you’re after free Skype alternatives or dependable replacements for Skype phone call services, there are plenty of options to consider.

What are the best alternatives to Skype?

Discord – Best overall alternative to Skype

What is arguably the best Skype alternative, Discord quickly rose to the top as the premier VoIP app for internet communities. The best thing about Discord is you get so many great features for free.

It offers voice channels for gamers to communicate with each other in real-time without any lag, the ability to share screens, plus a robust set of moderation tools.

With those tools, users can create their servers and manage their communities. You’ll be able to create multiple channels within those servers, then assign roles with specific permissions to people.

Another great aspect of Discord is its intuitive interface which is easy to navigate if you join multiple servers.

There is a premium version called Discord Nitro, allowing users access to use custom emojis on other channels.

⇒  Get Discord

Zoom – Best for remote meetings

Zoom has been around for a little over a decade now, but only really rose to prominence within the last couple of years or so when remote work exploded in popularity.

In that time, the app has become the go-to software for professional video conferences thanks to its ability to handle a large number of participants and maintain a high-quality live stream.

Zoom has a more user-friendly interface with very clear ways of either joining or scheduling meetings. It even offers a simpler way to record meetings than Skype.

Other notable features include the ability to share screens, collaboration tools, as well as virtual backgrounds to add a bit of uniqueness to your meeting.

Zoom has a degree of privacy thanks to its powerful encryption and measures to protect user data.

⇒  Get Zoom

Microsoft Teams – Has tons of collaborative features

Third on our list is Microsoft Teams which has usurped Skype as Microsoft’s main communication app for professionals.

It features a range of collaborative features such as in-app document editing and file sharing. This makes it easy for teams to collaborate without requiring multiple apps.

Additionally, Microsoft Teams is quite flexible thanks to its ability to create custom tabs and integrate with other Microsoft apps like Outlook and SharePoint.

This level of integration is great as it allows businesses to tailor their Teams’ workspace to meet their specific needs. Of course, it would be remiss of us not to mention the app’s level of security.

Thanks to data loss prevention, you don’t have to worry about data leaking. If it detects data being misused or lost, the software enacts protective measures.

⇒  Get Microsoft Teams

Google Meet – Works best with Google apps

The last entry on this list of the best Skype alternatives is Google Meet. Of the two, Google Meet is the superior one with more reliable and higher-quality video conferencing.

The audio is notably crisper, the video feed is sharper, plus there is very little lag involved. It would be remiss of us not to mention the fact that it integrated with other Google tools.

Which ones, you may ask? Well, almost all of them; from Gmail, Google Calendar, and Google Drive. This allows for document sharing among coworkers. It’s quite convenient.

Google Meet also has great features too, like the ability to host meetings with up to 250 participants and then record those meetings for later use.

Other people enjoy the virtual background tool for added privacy, real-time captions, and screen sharing. Security is strong on Google Meet thanks to end-to-end encryption.

⇒  Get Google Meet

Slack – Can integrate with thousands of apps

Similar to Microsoft Teams, Slack is a communication app often used by professionals to talk with others about certain topics or projects, plus group conversations.

What’s unique about Slack is the number of apps that can integrate with the platform. Teams can connect with over 500 apps. Slack, on the other hand, supports over 2000.

And just like Microsoft Teams, having this level of integration is great for when you need to switch tools on the fly. Besides the neat additions, Slack also has a customizable interface.

You can upload custom emojis to fit your workspace, set reminders for yourself, and create notifications. All this ensures Slack meets the specific needs of users.

Security is another important factor for communication apps. Rest assured, your data will be protected since Slack has two-factor authentication and encrypted messages.

⇒  Get Slack

WhatsApp – Used by over two billion people

WhatsApp is an easy-to-use communication app used by people to keep in touch with friends and family easily. It’s a titan in the industry, with over two billion active users worldwide.

A big reason for its popularity is its multiple features, user-friendly interface, and strong security WhatsApp allows users to send voice messages quickly and have access to their chat history.

You can also create giant group chats with up to 256 participants. And if you want to go even further, WhatsApp’s Community tool lets you add 5000 people into one gigantic group.

Regarding security, WhatsApp offers end-to-end encryption to all messages, calls, and video chats to make sure your conversations are totally secure.

Similar to Viber, you can make international calls with WhatsApp, and the best part, it’s free to do so.

⇒  Get WhatsApp

Viber – Supports lots of customization options

Stepping away from work-centric apps for a bit, we have Viber. The software is particularly popular with people making international calls thanks to its Viber Out feature.

Viber Out is similar to Skype’s premium subscription in that it allows people to call non-users. Call rates differ from country to country. Calling someone in India, for example, costs $0.015 per minute.

Beyond making international calls, Viber has several other great features. First, it has a very friendly user interface, most so than Slack or Teams.

It can send short voice messages to others. The service offers group chats with up to 250 participants, plus you can send money through it via Viber Pay.

On top of all this, Viber has a wide variety of stickers, emojis, and GIFs within its database, making conversations a lot more fun and engaging than just static text.

⇒  Get Viber

Line – Has social media features

Continuing down the list of personal communication apps, there is Line which has similar features to the two previous entries like voice and video calls, custom emojis, plus text messaging.

What’s unique about Line is that it has all these services within it that make it a digital one-stop shop. It comes with a timeline where people can share short video clips of their lives.

Line Doctor makes it easy to locate a nearby doctor. Line Pay allows users to send or request money from others. You can even play video games on it, like Dr. Mario World.

The app functions a lot like a social media platform of sorts. Beyond that, Line has several customization options like themes to add personalization and end-to-end encryption.

Like WhatsApp, people can make free international calls while sharing their real-time location on Line.

⇒  Get Line

Jami – Best open-source alternative

If you’re technically minded and know how to code, Jami is the communication app for you. Jami is an open-source platform meaning its code is publically available.

So you can download Jami onto your device and modify it via its built-in plugin platform. This makes the software a community-driven platform with a big focus on security.

Speaking of security, the software is built on peer-to-peer network architecture. So communicating is done directly between users without needing a centralized server to do the work.

This is important as it makes Jami a decentralized platform lacking a single point of failure or vulnerability to hacking by a bad actor.

⇒  Get Jami

Chanty – Very flexible for business platforms

Chanty is pretty unique among the others on this list. The reason is that it’s a combination of personal communication apps like WhatsApp and the business ones like Slack.

It can be integrated with business platforms such as Trello and Google Drive for flexible collaboration between platforms. Plus, end-to-end encryption prevents leaks from occurring.

As a comparison, Skype only offers encryption for a few features making it not very secure overall. Chanty’s premium plan adds screen sharing and 20GB of storage per user.

The free version offers 20GB for everyone. Moving past the business side, Chanty incorporates some social media-style tools like mentions with a unified inbox for messages and notifications.

⇒  Get Chanty

There you have it: the 10 best Skype alternatives on the Internet. You can’t go wrong with any of these, but if we had to choose just one, it would be Discord.

And for those looking for the safest options, check the most secure video conferencing apps for Windows.

If you have any other suggestions or want to recommend an app, leave them in the comments below.

0x89240101 Error on Age of Empires: 5 Ways to Fix It

A lot of our readers playing the Age of Empires games have reported the error code 0x89240101 when trying to launch or download the real-time strategy video game on their computer. The error code follows a message: The Microsoft Game Runtime is not correctly installed. Ensure it’s installed and try again. 

Why do I get the 0x89240101 error on Age of Empires? 

Generally, the error code 0x89240101 occurs if the installation process of the runtime installer gets interrupted. However, some other reasons can be: 

  • Virus and malware – Virus and malware modify or delete the essential game files, which in turn induces this error upon launch. 
  • Corrupt user account – If the user account can gets corrupt because of a sudden power outage, the Age of Empires may fail to download on your PC.
  • Outdated graphics driver – Graphic drivers are an essential requirement for gaming apps, and if they malfunction, this error code is inevitable. 
  • Conflicting apps – If there is a conflict between the system files and third-party utilities, Age of Empires may crash with the 0x89240101 error upon launch. Uninstalling such apps may help.
  • Missing gaming services – Age of Empires may refuse to launch on your PC if the gaming services are not installed. 

If you are also experiencing a crash issue at the time of game launch, the solutions recommended in this guide will prove effective in this situation. 

How do I fix the error code 0x89240101 in Age of Empires? 

Before you try the advanced solutions mentioned in this guide, make sure to perform the following actions: 

If these workarounds could not alleviate the error at hand, move on to the next fixes. 

1. Re-install the Microsoft Runtime installer

  1. Launch the Run dialog box using the Windows + R shortcut key, type the following command, and press Enter. appwiz.cpl 0x89240101
  2. In the Programs and Features window, right-click the Microsoft Visual C++ 2008 Redistributable and Microsoft Visual C++ 2015 Redistributable one at a time and choose Uninstall from the context menu. 0x89240101
  3. Follow the on-screen methods to uninstall these programs and restart your computer.
  4. Upon startup, visit the official Microsoft website and download the Visual C++ Redistributables for Visual Studio 2015.
  5. Then follow the on-screen prompts to install the software on your PC. 

The error code 0x89240101 primarily occurs if the current version of Microsoft Visual C++ Redistributable has become corrupted or was not installed correctly.

2. Disable real-time protection

  1. Launch the Settings app using the Windows + I shortcut.
  2. Select Privacy & security from the left menu and then the Windows Security option from the right section. 0x89240101
  3. Click Virus and threat protection.  0x89240101
  4. Follow the Manage settings link present under the Virus and threat protection settings section.
  5. Toggle Off the switch for the Real-time protection feature.  0x89240101

Age of Empires mail crash upon launch because Windows Defender may flag the game as a potential threat restricting it from running on your computer. You can turn off the real-time protection feature and try again.

If a third-party antivirus is installed on your computer, you can add the executable file to the list of exceptions to get past the 0x89240101 error code. 

3. Run SFC and DISM scans

  1. Press the Start icon on the taskbar, type cmd in the search box on top, and click Run as administrator. 0x89240101
  2. Choose Yes on the User Action Control window to launch Command Prompt with administrative privileges.
  3. Type or paste the following command and press the Enter key to initiate the SFC scan. sfc/scannow 0x89240101
  4. After the SFC scan gets completed, type or paste the following command to run the DISM tool. DISM /Online /Cleanup-Image /Restorehealth 0x89240101

After the SFC and DISM scan finish running on your computer, restart your PC and visit the Microsoft Store to reinstall Age of Empires on your PC.

However, you have another solution if this Windows process seems too technical or doesn’t work for you.

We advise you to better utilize a system repair application that will entirely scan your device and repair damaged files in one click.

4. Run the Windows Store troubleshooter

  1. Use the Windows + I shortcut key to launch the Settings app.
  2. Scroll down the System settings section and choose Troubleshoot option from the right. 0x89240101
  3. Next, click the Other troubleshooters option located in the next window. 0x89240101
  4. Scroll down the list of all in-built troubleshooters available on your computer and press the Run button located next to Windows Store Apps. 0x89240101

5. Install Gaming Services

  1. Press the Windows key to launch the Start menu, type powershell in the search bar on top, and choose Run as administrator from the right section. 0x89240101
  2. Type or paste the following command in the Powershell window and press the Enter key. start ms-windows-store://pdp/?productid=9MWPM2CQNLHN  0x89240101
  3. As soon as you will execute the command, Microsoft Store will launch on your PC with the Gaming Services. Press the Get button to initiate the download.  0x89240101
  4. After installing the Gaming Services, restart your PC and launch the Age of Empires on your system.

That’s pretty much it! Hopefully, you were successful in resolving the error code 0x89240101 using the methods listed here.

If you can’t change the graphics settings in Age of Empires 4, refer to this guide for possible solutions. 

Which of the workarounds listed above did the trick for you? Do let us know in the comments section. 

Fix: 0x80042308 System Restore Error Code

Many of our readers are unable to create a restore point successfully on Windows PC due to the error code 0x80042308 which displays a message – The specified object was not found.

This error code is encountered in two conditions – if the restore point creation could not be started or if it gets interrupted in between. 

Why do I get the error code 0x80042308? 

The possible causes for the System Restore error code 0x80042308 can be as follows: 

  • Antivirus software – Antivirus software may prevent Windows from creating a restore point on Windows. 
  • Third-party antivirus programs – Third-party programs if incompatible with your Windows PC, disrupt the normal working of Windows. 
  • Hard drive issues – Issues with hard drives, such as bad sectors, also trigger the 0x80042308 during system restore point creation. 
  • Corrupt restore points – You will also face issues while creating a new restore point if the previous restore points get corrupted somehow. 
  • Insufficient disk space – If there is insufficient disk space on hard disk, you won’t be able to create a system restore point successfully. 

If you witness the error code 0x80042308 when attempting to create a system restore point on your PC, implement the solutions listed in this guide. 

How do I fix the 0x80042308 system restore error code?

1. Disable real-time protection

  1. Use the Windows + I shortcut to launch the Settings app.
  2. Select Privacy & security from the left menu bar and the Windows Security option from the right section. 0x80042308
  3. Select the Virus and threat protection option. 0x80042308
  4. Click the Manage settings link located in the Virus and threat protection settings section.
  5. Toggle Off the switch located under the Real-time protection section.0x80042308

The system restores may fail because Windows Firewall may block the action for some reason. You can temporarily turn off real-time protection in Microsoft Defender. 

If you use a third-party antivirus to protect yourself against online threats, you can disable it for the time being. 

Thus, you have multiple software antivirus to pick from, yet one stands out from the crowd. TotalAV should be the best solution due to multilayered security against the most complex malware.

⇒ Get TotalAV

2. Delete old restore points 

  1. Launch the Run dialog box using the Windows + R shortcut keys.
  2. Type the following command in the text box and press the Enter key to access the System Properties window. sysdm.cpl 0x80042308
  3. Switch to the System Protection tab, select OS (C:) (System) in the Available Drives section, and press the Configure button.0x80042308
  4. Next, press the Delete button at the bottom right to delete all restore points for this drive.0x80042308
  5. Click Continue on the confirmation popup for deleting all the restore points on the C: drive. 0x80042308 
  6. Click OK to exit the System Protection window after all the previous restore points are deleted. 

Deleting the previous restore points will rule out this cause, and you will be able to create a new restore point successfully.  

3. Clean Boot your PC

  1. Use the Windows + R shortcut using the Run dialog box. Type the following command in the text box and hit the OK button to access the System Configuration window. Msconfig 0x80042308
  2. In the General tab, disable the checkbox for Load startup items and check the box preceding the Load system services option. 0x80042308
  3. Switch to the Services tab, enable the Hide all Microsoft services option located on the bottom left, and press the Disable all button. 0x80042308
  4. Click Apply to save the changes and OK to close the System Configuration window. 
  5. Now, restart your PC as you normally do to enter the clean boot mode.

If you do not encounter the error code 0x80042308, it means that third-party apps are restricting the successful creation of a restore point. You should uninstall these conflicting third-party programs as a measure to resolve this error code.

4. Set Volume Shadow Copy service to Automatic

  1. Use the Windows + R shortcut key to bring up the Run dialog box, type the following command in the text box, and press the Enter key. services.msc 0x80042308
  2. Scroll down the services window, right-click the Volume Shadow Copy service, and choose Properties. 0x80042308
  3. In the General tab of the Properties window, change the Startup type to Automatic. 0x80042308
  4. Press Apply to save the changes and OK to close the window. 
  5. Now, restart your computer and see if the issue is resolved. 

The Volume Shadow Copy service temporarily freezes all the I/O requests when creating the volume partition, using system restore and creating a backup to protect your data against accidental loss.

Configuring its startup type to automatic ensures that it promptly becomes active allowing the successful creation of a restore point. 

5. Increase the disk space usage value 

  1. Press the Windows key to launch the Start menu, type create a restore point, and choose the relevant search result. 0x80042308
  2. Switch to the System Protection tab of the System Properties window. Choose OS (C:) (System) and press the Configure button. 0x80042308
  3. In the new window that appears, drag the slider for Max Usage and set it to 3% of C drive space. 
  4. Click Apply to save the changes and OK to exit the window. 0x80042308

Now restart your PC to let Windows apply the changes made to your system. After your PC reboots, try creating a restore point now. 

That’s all about it! The workarounds discussed in this guide will prove helpful in resolving the system restore error code 0x80042308 so that you can create a restore point before installing a new Windows update. 

In case, the system restore not working in Windows, refer to this guide to find out the solutions that will prove effective in this case. 

If you have any queries or suggestions, feel free to drop them in the comments section below. 

4 Ways to Map a Network Drive in Windows 10

Say you need to gain access to a specific folder on another computer. You can always walk over to that other machine and get the files, but why do that when you can connect the drive to your own computer.

Mapping a network drive may sound complicated, but it isn’t. It’s quite simple, and there are multiple ways to do it.

Why is map network drive not showing up in Windows 10?

  • You have the wrong settings – In the Control Panel, Network Discovery must be turned on otherwise, the drives won’t appear.
  • UAC is blocking the network drive – User Account Control, or UAC, has been known to block what it thinks is malicious, so you may need to disable it.

How can I map my network drive on Windows 10?

Before you go on and map your network drive on Windows 10, there are a couple of things you should do first:

1. Map a network drive via File Explorer

  1. Launch the File Explorer, which you can do by either selecting the taskbar icon or by hitting the Windows and E keys at the same time.
  2. Click This PC on the left-hand side.
  3. Select the Computer tab at the top, and in the drop-down menu that appears, click Map network drive.
  4. In the Drive list, choose a letter for the new drive. Any available letter will work just fine.
  5. In the Folder box, you can either type in the path or click Browse to locate the folder.
  6. Once you’ve added a folder, click Finish.

2. Map a network drive via Command Prompt

  1. Type cmd into the Windows 10 search bar. Click Run as administrator when Command Prompt appears.
  2. To map a drive, you will need to follow a net use DRIVE: PATH command where DRIVE indicates the drive letter and PATH indicates the folder. For example net use Z: \\vmware\Shared
  3. You can add your credentials by adding your drive username and password to the command. For example, you can enter net use Z: \\vmware\Shared /user:Cesar Password1
  4. You should also enter the persistent swtich to make sure the connection is constant such as net use Z: \\vmware\Shared /user:Cesar Password1 /persistent:Yes
  5. To remove a connection, run the following command: net use Z: /delete

3. Map a network drive via PowerShell

  1. Type in powershell into the Windows 10 search bar. Select Run as administrator.
  2. In the command line, enter the following: New-PSDrive -Name "DRIVE-LETTER" -PSProvide "FileSystem" -Root "\\PATH" -Persists
  3. Replace DRIVER-LETTER with the actual letter of your drive and PATH with the drive you want to add. In the image below is an example.

4. Use the Group Policy Editor

  1. Press Windows + R to open the Run console.Gpedit.msc Run command
  2. Type gpedit.msc and click OK to open Group Policy Editor.
  3. Navigate to this path: User Configuration\Preferences\Windows Settings\Drive Maps
  4. Right-click the space in the right pane, choose New, then Mapped Drive.map network drive windows 10
  5. In the New Mapped Drive Properties window, choose the drive letter, network location, and other options accordingly.
  6. Click OK to save the changes.

And that’s pretty much the gist of it. Once you’re done, the newly mapped drive will appear in the File Explorer under the This PC section.

You can remove the mapped drive by right-clicking the drive in File Explorer and then selecting Disconnect. If you have any suggestions or guides you’d like to see, comment below.

The Windows 11 LSA bug was fixed with kernel-mode hardware stack protection

Microsoft is always releasing little updates to deal with certain flaws or problems it previously overlooked, so nothing new there.

By the way, the April Patch Tuesday updates have rolled out, so you might want to check that out as well.

Now, the tech giant may have quietly fixed a widespread issue that was affecting Windows Defender recently.

Here’s how Microsoft tackled this annoying bug

After a surge in user reports and complaints, the company confirmed that a recent Defender update, led to an error that caused the Windows Security app to wrongly display Local Security Authority (or LSA) protection as disabled.

KB5007651 (version 1.0.2302.21002), released via the March Patch Tuesday, left users worried as the message would suggest that their devices could be vulnerable.

As a result, users were failing to toggle LSA protection to on as a device restart, which was prompted by this change.

Know that it would do nothing and revert the change automatically. Basically, LSA protection would remain disabled even after the PC was restarted as instructed by the Defender app.

The Redmond-based tech giant had provided a workaround for the issue, and it basically involved dismissing such warnings.

That being said, the company have since fixed the problem with a more recent Defender update (KB5007651).

With a new update and as noted from Windows release health‘s page, Windows Security Service version 1.0.2303.27001 has supposedly fixed the issue, so you don’t have to worry about it anymore.

Experts suggest the issue was resolved by an update to Kernel-mode Hardware-enforced Stack Protection security feature present under Core Isolation (VBS).

This feature was introduced with Windows 11 22H2. However, KB5007651 was released nearly two weeks ago and Microsoft’s known issues dashboard still lists the bug as open.

Others are also noticing that the setting may be disabled by default, or it could be a bug. In order to use the Kernel-mode Hardware-enforced Stack Protection feature, Intel’s Control-flow Enforcement Technology (CET) or AMD Shadow Stack technology is required.

Supported chips include Intel 11th Gen Tiger Lake or newer parts, or AMD Zen 3 and newer, so please keep that in mind.

We will constantly monitor the situation and report anything new. Share your thoughts and ideas with us in the comments section below.

How to Force Start Windows 10 in Safe Mode

Safe Mode boots Windows in a basic state using a minimal collection of files and drivers. The Safe Mode option exists to help you troubleshoot Windows.

If you do not know how to enter Safe Mode Windows 10, we will take you through some of the different methods on how to start Windows 10 in Safe Mode.

What does it mean to start in Safe Mode?

Starting in Safe Mode simply means booting the operating system (OS) with a limited set of drivers, services, and applications. When Windows starts normally, it loads all the drivers and services required to run the operating system and all the software installed on it.

However, some of these drivers and services may cause problems and prevent Windows from starting properly. So, Safe Mode allows you to troubleshoot these issues by starting Windows with only the minimum required drivers and services.

Since Windows runs a basic set of drivers and services with minimal functionality, that means some features and programs may not work. So, the Safe Mode in Windows 10 PC is a stripped-down version of your computer.

How do I boot in Safe Mode Windows 10?

1. Use the Settings app

  1. Press the Windows + I keys to open the Settings app.
  2. Click on Update & Security on the right pane.
  3. Next, select Recovery on the left pane. Under Advanced Startup, click Restart Now.
  4. Once the computer restarts, on the Choose an Option screen, select Troubleshoot
  5. Then click on Advanced Options. Choose Startup Settings.
  6. Select F4 to start the computer in Safe Mode and click on Restart.

By using the Windows Settings app, you can enter the start Windows 10 in safe mode while booting.

2. Enable the F8 Key to enter Safe Mode

  1. Left-click the Start button and type cmd in the Search box.
  2. Right-click on Command Prompt from the search results and select Run as administrator on the right pane.
  3. Next, paste the following command in the Command Prompt Window and press Enter: bcdedit /set {default} bootmenupolicy legacy 
  4. Now, turn off your computer and on it again.
  5. Before anything appears on the screen, press F8 repeatedly till the Boot options appear on your screen.
  6. Select Safe Mode from the menu.

If the Boot options don’t display, and your Windows launches normally, you probably didn’t press the F8 key early.

3. Turn off your computer 3 times to enter Safe Mode

  1. Shut down your computer. Press the Power button to turn it back on.
  2. Once the computer is loading, press and hold the Power button for 4-5 seconds until your PC shuts down.
  3. Repeat the same process 3 times.
  4. Now, start your computer again and let it run. It should now go into Automatic Repair mode. Wait for Windows to diagnose your PC and choose Advanced Options.
  5. Next, click on Troubleshoot.
  6. Then, click on Advanced options and click on Startup settings.
  7. Press 4 to Enable Safe mode or press 5 for Safe mode with Networking.

By turning off your computer 3 times, your computer is made to believe there is an error that needs to be fixed.

4. Use the System Configuration tool 

  1. Left-click the Start button and type msconfig in the Search box and select System Configuration utility.
  2. Navigate to the Boot tab, then check the box with Safe boot and click OK.
  3. Once prompted, click on the Restart button to enter Safe mode.

To disable this feature, you can follow the same steps and uncheck the Safe boot box and proceed to restart your PC.

5. Enter Safe Mode from the Login Screen

  1. Once in the Login screen, hold down your Shift key and click the Power button at the bottom-right side of the screen. Then, select Restart.
  2. The Windows Recovery (WinRE) screen will now display. Click on Troubleshoot.
  3. Click on Advanced option and click on Startup settings.
  4. Now, click on the Restart button.
  5. Press 4 to Enable Safe mode or press 5 for Safe mode with Networking.

If you’re able to boot your PC to the login screen, follow the steps above to enter safe mode Windows 10.

And that’s it on how to start Windows 10 in Safe Mode. Hopefully, you should be able to boot your PC to Safe Mode using any of the methods provided.

Alternatively, you can explore our detailed guide to know how to add safe mode to the boot menu on Windows 10.

If you have any questions or suggestions, do not hesitate to use the comments section below.

0x80073d23 Microsoft Store error: How to Fix it

Several users have reported error code 0x80073d23 that prevents you from downloading, installing, uninstalling, and updating apps from the Microsoft Store. The error code is accompanied by a message- The operation did not complete successfully. Try again in a bit.

Why do I encounter the 0x80073d23 Microsoft Store error?

Speaking of the reasons for encountering the Microsoft Store 0x80073d23 code, the most common ones are as follows:

  • Invalid network configuration – Misconfigured network settings often trigger a variety of Microsoft Store codes, such as 0x80073d23.
  • Corrupt Microsoft Store cache – If the Microsoft Store cache gets corrupted, you will not be able to update or install apps.
  • Faulty user account – If the current user profile gets corrupt, you will be prevented from downloading apps from the Store hence the error code.
  • Incorrect Date and Time settings – If your computer is unable to synchronize time with the server, you won’t be able to use apps that rely on Internet-based authorization schemes.
  • Server outage – You may also encounter the error code 0x80073d23 if the Microsoft Store server is down for some reason.

If you are also facing a similar issue, this guide presents you with all possible methods to fix this error code.

How do I fix the Microsoft Store error code 0x80073d23?

1. Reset the network settings

  1. Use the Windows + I keyboard shortcut to launch the Settings window.
  2. Choose Network & internet from the left sidebar, followed by Advanced network settings from the right section. 0x80073d23
  3. Click the Network reset option present under the More settings section. 0x80073d23
  4. Click the Reset now button to reset the network settings. 0x80073d23
  5. Choose Yes on the confirmation pop-up window and then restart your Windows PC.

2. Reset the Microsoft Store cache

  1. Use the Windows + R shortcut key to bring up the Run dialog box.
  2. Type the following command in the text box and hit the Enter key. wsreset.exe 0x80073d23

The command prompt window will blink on the screen as soon as you will execute the command, and the Microsoft Store cache reset process will get started. Wait for the Microsoft Store to automatically launch on your computer as an indication of the cache reset completion.

3. Run Windows Store Apps troubleshooter

  1. Use the Windows + I shortcut key to launch the Settings app.
  2. Scroll down the System settings section and choose Troubleshoot option from the right. 0x80073d23
  3. Next, click the Other troubleshooters option located in the next window.0x80073d23
  4. Scroll down the list of all in-built troubleshooters available on your computer and press the Run button located next to Windows Store Apps.0x80073d23

After the Microsoft Store Apps troubleshooter completes its operation, you can visit Microsoft Store to install new apps or update the existing ones.

4. Re-register the app packages

  1. Press the Windows icon on the taskbar to launch the Start menu. Type powershell in the search bar on top and select the Run as administrator option, located on the right. 0x80073d23
  2. Click Yes on the User Action Control window to launch the PowerShell window with administrative privileges.
  3. Type or paste the below command in the Powershell window and press the Enter key to execute it. Get-AppXPackage -AllUsers | Foreach {Add-AppxPackage -DisableDevelopmentMode -Register "$($_.InstallLocation)\AppXManifest.xml"} 0x80073d23

Once the deployment operation gets completed close the PowerShell window and restart your PC.

5. Restart the Xbox related-services

  1. Use the Windows + R shortcut key to launch the Run dialog box, type the following command and click OK. services.msc 0x80073d23
  2. Scroll down the Services window, right-click the Xbox Accessory Management Service, and choose Properties.
  3. If the Service status is Stopped, press the Start button and OK to save the changes.
  4. Now repeat the same process for Xbox Live Auth Manager, Xbox Live Game Save, and Xbox Live Networking Service as well.

Now exit the services window and try to install the game from Microsoft Store once again.

If you encounter the 0x80073d23 error code in Microsoft Store while downloading a new game using an Xbox game pass, restarting the Xbox-related services will help resolve the issue.

So these are workarounds that you can employ to get rid of the 0x80073d23 error code that prevents you from downloading anything from the Microsoft Store.

Also, if you frequently encounter the Server Stumbled error when using Microsoft Store, this guide will provide the possible fixes to resolve the issue.

If you have any other queries or suggestions for us, do let us know in the comments section below.

You Do Not Have The Permission to Complete The Task [Fix]

The Hyper-V Manager is an excellent Windows feature that allows users to set up multiple virtual machines using the Hyper-V Virtual Machine Connection. However, while trying to launch the feature, you can trigger the error you don’t have the required permission to complete the task.

If you’re experiencing the error you do not have required permission to complete the task, this article will briefly discuss some common causes of the error and provide steps to help fix it.

Why do I get you do not have required permission to complete the task?

The error you don’t have the required permission to complete the task can be triggered by so many factors, the following are some of the most common causes of the Hyper V Manager error:

  • User is in Multiple Local Groups – One of the most common reasons triggering this Hyper-V error is that the user is a member of other local groups. Specifically, if they’re members of the General Administrators group, you’ll experience the Hyper-V error.
  • Firewall Restrictions – In some cases, Windows Firewall prevents specific features from operating in Windows. This is mostly done with security in mind, but it hinders certain applications from functioning properly. If you’re experiencing the Hyper-V error, it’s likely a result of a firewall block.

What can I do to fix this Hyper-V Manager error?

1. Disable Firewall

  1. Press the Windows key, type Control Panel in the search bar, and hit Enter.
  2. Select Windows Defender Firewall from the list of options.
  3. Click Windows Defender Firewall on or off.
  4. Under the Private Network and Public Network Settings, click the Turn off Windows Defender Firewall (not recommended), button to turn off the Firewall.
  5. Close the Control Panel window, and check if the error persists.

The firewall can indirectly block essential Windows features from operating if it suspects the feature to be unauthorized.

2. Enable PS Remoting

  1. Press the Windows key, type PowerShell, click on Run as Administrator.
  2. Click Yes in the User Account Control (UAC) window.
  3. In the PowerShell window, type in the following and hit Enter: Enable-PSRemoting
  4. Alternatively, some users stated that the command that helped resolve the error was: Enable-PSRemoting -SkipNetworkProfileCheck -Force
  5. Wait for PowerShell to enable the service, close the window, and check to see if the error persists.

PS Remoting comes enabled by default in most Windows machines but is not enabled all the time. On Windows Server, PS Remoting comes enabled, but not at all times, depending on the network profile Windows is running. 

3. Add user to HyperV Administrators Group

  1. Press the Windows key + R, type control panel in the dialog box, and hit Enter.
  2. Click System & Security, and select Administrative Tools.
  3. In the next window, double-click on Computer Management to open it. Expand the Local Users and Groups section, and click on Groups.
  4. Double-click on the Hyper-V Administrators Group to open the dialog box.
  5. Then, click Add in the dialog box, enter your name in the box, and click OK.
  6. Click OK again, and close the Computer Management window.
  7. Some users often have to log out of Windows and sign in again for the changes to work. 

Even as a local administrator, you can experience the error you don’t have the required permission to complete the task. This is because there is a Hyper-V Administrators group that is empty by default. 

To fix the error, you’ll have to manually add yourself to this group. After completing the above steps, you should be able to use the Hyper-V connection tool to connect your PC’s local virtual machine without any problems.

The Hyper-V error you don’t have the required permission to complete the task isn’t a common error among Windows users because a large portion of users doesn’t make use of virtual machines. 

However, if you triggered the error while trying to access the Virtual Machine feature, we hope the steps outlined in this article will help you fix the Hyper-V error.

If you’ve experienced this error in the past and successfully fixed it using alternative methods, you can let us know in the comments below.

Steamclient64.dll Not Found: How to Fix or Download It Again

The Steam Client is one of the most popular digital game stores where users can purchase computer games. While running the app, users have reported that they experienced the steamclient64.dll not found error. 

This error prevents users from accessing Steam’s functionality. In this article, we’ll briefly discuss what the steamclient64.dll file is and also provide you with a couple of steps to help you fix the steamclient64.dll not found error. 

What is steamclient64.dll?

The steamclient64.dll is a third-party DLL file developed and released by Valve. The file is pretty standard among Steam users and is triggered when the file is missing, corrupt, or an incorrect installation of the Steam client.

The steamclient64.dll is not a Windows DLL file but originates once the Steam client is installed on your PC. The file is commonly associated with Steam but is also utilized by other third-party applications. 

How can I fix the steamclient64.dll not found error?

1. Apply a DLL fixer

Traditionally, resolving missing DLL errors usually involves a lot of troubleshooting. This method is relatively efficient but isn’t always successful. Alternatively, you can fix the error by employing the help of a DLL repair tool.

DLL fixers scan your entire PC for anomalies with system files, DLLs, executables, and more. However, because the steamclient64.dll is a non-system DLL file, a DLL file doesn’t guarantee a 100% success rate when fixing missing DLL errors.

A DLL file can also be triggered due to incompatibility between the third-party app and the Windows OS. In this case, employing the tools and functionality offered by a DLL repair tool can help resolve the error. 

2. Update Windows

  1. Press the Windows key + I to open the Settings app.
  2. In the Settings app, click Windows Update and select Check for Updates, and wait for Windows to scan for available updates.
  3. Once the update is complete, restart your PC to check if the steamclient64.dll not found error is fixed. 

If the steamclient64.dll error is triggered due to outdated software, updating your Windows OS can help resolve the error. 

3. Update the Graphics driver

  1. Press the Windows key, type in Device Manager, and hit Enter.
  2. In the Device Manager window, scroll through the list of Drivers, and check to see if there is a yellow alert symbol next to the option. Right-click on the Driver, and select Update Driver.
  3. In the next window, click Search automatically for updated driver software, and follow the prompts to complete the update.
  4. Once you’ve updated all the Drivers, restart your PC and check if the error is resolved.

Drivers are utilized by most graphics-intensive applications and games. If the drivers are outdated, it can lead to a series of errors like the steamclient64.dll not found.

4. Run a virus scan

  1. Press the Windows key, type in Windows Security, and hit Enter.
  2. In the next window, click on Virus & Threat Protection, and click Scan Options under the Current Threats option.
  3. Select Full Scan from the Scan Options menu and click the Scan Now button to initiate the virus scan.
  4. Wait for the scan to complete, restart your PC and check if the error is fixed.

Windows Defender is a pretty efficient security tool for Windows but doesn’t offer the level of features and functionality provided by third-party antivirus software.

If you’d like to check out some of this software, here is a guide showing you the best antivirus tools for Windows in 2023.

5. Run an SFC scan

  1. Press the Windows key, type in CMD, and select Run as Administrator.
  2. Click Yes to grant the app administrative access in the User Account Control window.
  3. Once the command prompt opens, type the following and hit Enter: sfc /scannow
  4. Wait till the scan is complete, and restart your PC to check if the error persists.

Missing DLL errors are usually triggered by corrupt system files. An SFC scan can help resolve errors triggered due to corrupt system files. 

6. Reinstall Steam Client

  1. Press the Windows key + I to open the Settings app.
  2. Click on Apps, and select Installed apps.
  3. Locate the Steam Client, click on the options icon, and select Uninstall. 
  4. Then, click on Uninstall again to complete the removal of the Steam Client. 
  5. After uninstalling the app, you must visit the Steam website and download the app again. Then follow the installation prompts to reinstall.

Reinstalling the steam client is one of the last steps to apply when fixing the steamclient64.dll not found error. However, you should only uninstall the app if you’ve attempted all troubleshooting steps and the error remains. 

Resolving the steamclient64.dll error is a straightforward process that can be achieved by following our guide.  We also have a guide on what to do if awesomium.dll is missing, so go ahead and check it out.

If you’ve been searching for a way to resolve the error, we hope this article has provided the necessary steps to help fix the missing DLL error.

DLL Hijacking: What is It & How to Safely Stop It?

DLLs are a critical component of the Windows OS. However, this component also poses a security risk to your PC as it is prone to hacking and exploitation by cybercriminals.

In this article, we’ll extensively discuss the term DLL hijacking, and provide you with numerous steps you can apply to help you prevent the exploit.

What is DLL hijacking?

DLL hijacking simply refers to a cyberattack that allows hackers to insert and execute malicious code using the Dynamic Library File (DLL). The error is very common and is pretty difficult to detect, at least not until you begin to see the results of the attack.

With DLL hijacking, hackers replace legitimate DLL files on your PC with malicious ones. This makes it harder for antivirus software to detect the malicious file because it camouflages as a DLL file.

Hence, loading a malicious DLL on your PC can lead to massive data breach and affect services utilizing the DLLs.

DLL hijacking may occur through social engineering or phishing attacks that trick the user into downloading malicious code disguised as a DLL file.

How can I stop DLL Hijacking?

1. Avoid downloading/installing files from unknown sources

While attempting to troubleshoot errors like missing DLL files on Windows, users will have to download specific files to fix them. However, files critical to the PC’s functionality shouldn’t be downloaded from just any website.

For example, if you want to fix the msvcp120.dll error, avoid downloading the missing DLL file from third-party websites. This is because hackers can easily camouflage malicious code as a DLL file and make the file available for download. 

Hence, you can use a DLL repair tool like the following one. These tools scan your PC and take care of any anomalies they detect; if there are malicious DLL files on your PC, a DLL repair tool can identify such files.

2. Use a Powerful Antivirus Software

Windows Defender is Microsoft’s primary security software but doesn’t provide as many features and functionality needed to tackle emerging threats and vulnerabilities. 

There are countless free and paid antivirus software available for Windows, but you shouldn’t just install any antivirus, as this software will be responsible for managing your entire PC security. Therefore, it’s important to employ the help of software like ESET.

ESET HOME Security Essential is an award-winning cyber security software that provides protection for Windows, macOS, and Android devices. The software is very easy to use and supports over 700 languages, allowing you to utilize the software in your preferred language.

Plus, this antivirus solution guarantees speedy and comprehensive protection from viruses and threats.

3. Keep your PC updated

As simple as it sounds, updating your PC regularly can protect you from viruses and malware.  This is because most Windows updates usually contain fixes for critical bugs on your Windows OS.

Further, bugs lead to vulnerabilities in software which hackers can further exploit. If hackers exploit a bug, users who haven’t updated their OS would likely fall victim to the attack.

4. Avoid clicking on suspicious links in Emails

Phishing is one of the most effective techniques used by hackers to gain access to a system.  It refers to the process where a user is tricked into performing a specific action, e.g. downloading a file, with the sole aim of compromising the unsuspecting victim.

If you receive an email that looks a little suspicious, it’s most likely a hacker attempting to gain access to your PC. Avoid clicking on such links to protect your PC from malware.

5. Apply fully qualified paths

One of the major factors that facilitates a DLL hijack is that a malicious DLL file is placed in a location that is searched by Windows before the legitimate file. A fully qualified path defines an exact path from a particular drive to a target file or directory.

Employing fully qualified paths while loading DLL files ensures that Windows only loads the DLL file from a specific location. Hence, preventing the malicious file’s accessibility from an alternative location.

DLL hijacking is a very dangerous cyberattack that can severely affect the functionality of your PC. Preventing the attack isn’t a straightforward process but you can take certain precautions to improve the security of your PC.

We hope this article has enlightened you about DLL hijacking, and provided you with the steps needed to protect yourself from the attack.

Codex64.dll Was Not Found: 4 Ways to Fix It

Windows users are gradually becoming accustomed to missing DLL errors. This is especially common among gamers because such errors are triggered while attempting to launch a game or graphic-intensive application.

In this article, we’ll briefly discuss the codex64.dll file,  highlight the reasons triggering the codex64.dll not found, and provide steps to help you fix the error.

What is codex64.dll?

codex64.dll is a non-system DLL file developed by ACME corporation. The file contains instructions, procedures, and driver functions utilized by the Windows OS to run specific games and applications.

The file is mainly used by Windows-based games and graphics-intensive applications. 

Why is codex64.dll not found?

Here are some of the reasons triggering the codex64.dll not found error:

  • Damaged Windows Registry – The Windows registry is a critical component of your PC that controls most of your PC’s functionality. If the registry is damaged or corrupt, it can trigger system errors like codex64.dll not found.
  • Virus and Malware – PCs infected with viruses often act differently depending on the nature of the virus. If the virus is a type that removes Windows files, it could have deleted the codex64.dll file resulting in the missing DLL error. It can also be triggered if you’re not using a compatible antivirus software.
  • Faulty Software Installations – DLL missing errors are usually triggered while attempting to launch an application. This is because the application might have been incorrectly installed, which can trigger errors like the codex64.dll error.
  • Incorrect DLL Installation – Some users, while experiencing DLL errors in the past, might opt to install the files manually without having the technical know-how. This can lead to an incorrect DLL installation, leading to a series of missing DLL errors. 

What can I do if codex64.dll is not found?

If you’re experiencing the codex64.dll, the following are a couple of ways you can fix the error:

1. Apply a DLL Fixer

Troubleshooting is an effective way to resolve missing DLL files in Windows, but it takes a lot of time, and you can end up repeating the same steps without resolving the error. However, with the development of technology, one of the best ways to fix DLL errors is to use a DLL fixer.

Considering that the codex64.dll is a non-system DLL file, employing the help of a third-party DLL fixer doesn’t guarantee a 100% fix but can still resolve the error.

This is because most DLL Fixers, have a vast database containing every system DLL file available for Windows but have a limited supply of third-party DLL files.

2. Scan for Viruses and Malware

  1. Press the Windows key, type in Windows Security, and hit Enter.
  2. In the next window, click on Virus & Threat Protection, and click Scan Options under the Current Threats option.
  3. Select Full Scan from the Scan Options menu and click the Scan Now button to initiate the virus scan.
  4. Wait for the scan to complete, restart your PC and check if the error is fixed.

You can protect your PC from viruses using the Windows Security app or third-party antivirus software.

3. Run an SFC Scan

  1. Press the Windows key, type in CMD, and select Run as Administrator.
  2. Click Yes to grant the app administrative access in the User Account Control window.
  3. Once the command prompt opens, type the following and hit Enter: sfc /scannow
  4. Wait till the scan is complete, and restart your PC to check if the error persists.

If you experience the Windows Resource Protection error while attempting to run the System file checker, read our guide on how to fix the error.

4. Perform a System Restore

  1. Left-click the Start menu, type restore and click Create a restore point.
  2. Select System Properties and choose System Restore button.
  3. In the Restore Files and Settings box, click Next.
  4. In the next window, select the Restore Point that you wish to restore your PC to, and click Next.
  5. Then, click Finish to complete the system restore.

If you noticed the codex64.dll not found error after making significant changes on your OS, you could resolve it by performing a system restore. Here is a detailed guide showing you how to create a system restore point in Windows.

Missing DLL errors are common to Windows users and can be resolved by following a well-laid guide. By following our guide, you should be able to fix the codex64.dll error.

If you’ve experienced the codex64.dll not found an error in the past and successfully fixed it using alternative methods, you can let us know in the comments below.

Want to use Spot Fix on Photos on Windows 11? Here’s how

A lot of new things are coming to the Photos app: new original music, the comeback of the timeline scrollbar, improvements of the drag-and-drop feature while importing photos from external devices and multi-select photos features, and more. But, if you’re using the Spot Fix feature in Photos, you’re in for a treat.

We previously reported last year that the feature has gone missing, alongside the Red Eye function. It caused quite a stir on Windows forums and among users, but according to May 2023 update, the Spot Fix tool is back.

As noted from Microsoft’s official release note, the Spot Fix feature allows you to remove blemishes or unwanted areas in your photo. It is indeed one of the most important retouching tools on the app that lets you remove unwanted elements from your photos. 

It works by analyzing the surrounding pixels and blending them together to create a seamless result. This tool can be used to remove blemishes, scratches, or other minor imperfections from your photos.

So, now we know why all the fusses were all about when Microsoft removed them with no warning back then.

Now that it’s back for Windows insiders in the Canary and Dev Channels before being rolled out again for general users, make sure to join those channels and update the operating system so you can try it.

How to use the Spot Fix feature on Windows 11

1. Open the Photos app and select the photo you want to edit.

2. Click on the Edit image button at the top of the screen.

3. Click on Retouch ➜ Spot Fix.

4. Use the brush tool to select the area you want to fix. Adjust the intensity of the Spot Fix tool using the slider if necessary.

5. Click “Save a copy” or “Save” to save your edited photo.

If you don’t rely on Spot Fix a lot, you can still enjoy the features that the Photos app in Windows 11 has to offer.

Do you find these tips helpful? Let us know in the comments!

Fsulgk.sys BSoD: 5 Ways to Fix It on Windows 10 & 11

If you have encountered the fsulgk.sys BSoD error on your Windows computer, then this guide can help! Fsulgk.sys is a driver and an important part of F-Secure software. We will discuss some of the expert-recommended methods to get rid of this Blue Screen of Death error.

What causes the fsulgk.sys BSoD error on Windows 10 & 11?

There are several reasons for which this blue screen error appears; some of the common ones are listed here:

  • Obsolete driver – If the driver itself is old or outdated, it could cause this BSoD error. You need to update the driver to fix the problem.
  • Corrupted system files – If the system files on your computer are corrupted or missing, it could cause this BSoD error. Run a system repair scan and fix this issue.
  • Outdated software – When you are running the older version of F-Secure software, you might see this blue screen error. Try reinstalling the app to get rid of this error.
  • Pending Windows updates – It is important to keep your Windows updated, as the pending updates could cause this issue. Check for Windows updates and install them if available.
  • Malware infection – If your computer is infected with viruses, it can damage your system files on your computer. Run a malware scan to remove the corrupted files.

Now you know the causes of the blue screen error; let’s check out the solutions to resolve the problem.

How can I fix the fsulgk.sys BSoD error on Windows 10 & 11?

Before engaging in advanced troubleshooting steps, you should consider performing the following checks:

If these things didn’t fix the issue for you, move to the detailed steps mentioned below.

1. Reinstall F-Secure software

  1. Press the Windows key, type control panel, and click Open.Control Panel start menu  fsulgk.sys
  2. Select Category as View by and click Uninstall a program.Uninstall a program fsulgk.sys
  3. From the list of installed software, locate & select the F-Secure program and click Uninstall.Uninstall software fsulgk.sys
  4. Follow the on-screen instructions to complete the uninstallation.
  5. Now, go to the F-Secure website and select the tool and click Download.Download fsulgk.sys
  6. Double-click the Setup file and follow the on-screen instructions to complete the installation.

2. Run SFC & DISM scans

  1. Press the Windows key, type cmd, and click Run as administrator.CMD elevated fsulgk.sys
  2. Type the following command to repair system files and press Enter: sfc/scannowSFCSCANNOW CMD fsulgk.sys
  3. Wait for the scan to complete, copy & paste the following command to repair the Windows OS image, and hit Enter: DISM /Online /Cleanup-Image /CheckHealth DISM /Online /Cleanup-Image /ScanHealth DISM /Online /Cleanup-Image /RestoreHealth
  4. Restart your computer to let the changes take effect.

If this process seems too detailed or it simply didn’t help you, we advise you to go for a specialized repair tool to fix your Windows PC.

3. Update the graphics driver

  1. Press Windows + R to open the Run dialog box.Device Manager Run command fsulgk.sys
  2. Type devmgmt.msc and click OK to open Device Manager.
  3. Double-click Display adapters to expand it.
  4. Right-click the graphics driver and click Update driver.Graphics Driver update fsulgk.sys
  5. Select Search automatically for drivers.Update driver 2 fsulgk.sys
  6. Follow the on-screen instructions to complete the process.

Alongside the manual method, you could try dedicated support for any outdated drivers on your device.

This ideal solution can automatically find problematic drivers and update them from its vast database with official manufacturer drivers.

⇒ Get Outbyte Driver Updater

4. Perform a System Restore

  1. Press the Windows key, type Control panel, and click Open.Control Panel start menu fsulgk.sys
  2. Select View by as Large icons and click Recovery.Recovery Control Panel fsulgk.sys
  3. Click Open System Restore.Open system restore
  4. On the System Restore window, select Choose a different restore point and click Next.Next Choose a different restore point fsulgk.sys
  5. Select the restore point and click Next.Choose a point fsulgk.sys
  6. Click Finish to initiate the process.Finish

Windows will restart and restore the previous version. If the System Restore is not working for you, we suggest you check out this informative guide.

5. Reset Windows

5.1 Windows 11

  1. Press Windows + I to open Settings.
  2. Go to System, then click Recovery.System - Recovery Windows 11 fsulgk.sys
  3. Under Recovery options, locate Reset this PC, and click the Reset PC button.Reset now
  4. For Choose an option window, click Keep my files.Keep my files fsulgk.sys
  5. On How would you like to reinstall Windows page, click Cloud download.Cloud download
  6. Now on Additional Settings, click Next.additonal settings fsulgk.sys
  7. On Reset this PC window, click Reset.Reset fsulgk.sys

5.2 Windows 10

  1. Press Windows + I to open the Settings app.
  2. Click Update & Security.Windows 10 Update & Security fsulgk.sys
  3. Now from the left pane, select Recovery, then locate Reset this PC, then click Get started.Reset this PC Windows 10 fsulgk.sys
  4. Select the Keep my files option from the next page.keep my files fsulgk.sys
  5. Now choose Cloud download to reinstall Windows from the cloud.Cloud download fsulgk.sys
  6. On the Additional settings window, make the changes you want and click Next.
  7. Click Reset to initiate the process.Reset fsulgk.sys

This will change the settings of your PC to default and download & reinstall Windows.

So, these are methods to follow to fix the fsulgk.sys BSoD error on your Windows 10/11 computer. If you have any questions or suggestions, feel free to mention them in the comments section below.

0x89245102 Minecraft Error: Best Way to Fix It

Are you one of the many Minecraft players having trouble due to the error code 0x89245102 in Minecraft? Fret not, for we have got you covered!

This error is similar to the error code 0x80070057 in Minecraft, and some of its solutions can also help you with this error.

In this article, we will share four highly effective troubleshooting methods to help resolve this issue.

What is it 0x89245102 Minecraft error?

There are many causes for this error, but the most common causes are the following:

  • Not updating Minecraft – If your Minecraft is not up to date, you might encounter this issue whenever you want to launch the game.
  • Minecraft launcher problems – Whenever you encounter any issues with the Minecraft launcher on your computer. It can impede the game’s components and hinder its functionality from running properly.
  • Minecraft service issues – If you do not enable the authentication services, it might induce an error while launching the game.

How can I fix the 0x89245102 Minecraft error?

Here are a few potential solutions that can address the issue before we make any necessary adjustments:

  • Update the game – Updating the game can fix various issues, including this one.
  • Use an older launcher – Few users reported that using the older launcher fixed the problem for them.

Enable authentication services

  1. Type Services in the search bar. Select Services from the search results.
  2. Scroll down to Xbox Live Auth Manager and right-click it. Choose Properties from the menu. 
  3. Turn the startup types for Manual, select Apply and choose OK.
  4. Close all and restart Windows.

We trust that this guide has assisted you in resolving the error. As you can see, the problem can be easily fixed by enabling the necessary services.

If you encounter any further complications, we recommend referring to our comprehensive Minecraft errors guide for additional solutions.

We would greatly appreciate it if you could share which solution worked best for your situation in the comments section below.

Spot Fix makes sensational return on Windows 11 Photos app

First, the good news: yes, Photos has a richer set of editing tools now. The new app’s interface is more in line with the Photos app on iPhone, which isn’t necessarily better but does at least allow you to work quickly and intuitively. 

While it doesn’t yet have all of the features of its desktop counterpart (there are no tilt-shift or panorama tools, for example), it’s not far off either — especially if you don’t mind working in the much-maligned Photos for iOS.

A little over a year ago, however, several users have raised their complaints that the Spot Fix feature, a tool where you can easily fix spots and remove them.

But, as noted from May 2023 update, the tech giant has just rolled out dozens of new improvements here and there on the Photos app.

In short, there are 25 original music soundtracks, complete with transitions and animations to choose from while making a slideshow on the Photos app. Redmond officials also re-introduced the timeline scrollbar to group photos by year and month.

And, you name it, the Spot Fix feature is back!

What does Spot Fix do?

One of the most useful features of Photos is its ability to correct the exposure and color of an image. However, in Windows 11, it appears that Microsoft has removed this feature from Photos.

When you’re taking photos, it’s easy to end up with some unwanted elements that you wish were different. Maybe you’ve got some red-eye in a photo of your pet, or a distracting person walking through the shot.

Perhaps there’s a light leak causing a big white spot on an otherwise great photo. The quickest fix for many of these issues is the new Spot fix tool and the Red Eye feature.

If you are in the market for another photo editing tool or software, we have a comprehensive guide on some of the best photo editing software.

If you don’t rely on Spot Fix a lot, you can still enjoy the features that the Photos app in Windows 11 has to offer.

What do you think of Microsoft’s move to bring back the Spot Fix function? Let us know in the comments section below.

What is Wbload.dll & How to Fix It When It’s Missing?

DLL files contain specific codes and instructions that enable Windows computers to function properly; wbload.dll is one such file. If such a file is missing, your PC is bound to experience a series of errors. 

If the wbload.dll file is missing on your PC, this article will provide you with a brief description of the DLL file and steps to fix it when it’s missing.

What is wbload.dll?

wbload.dll is a system DLL file developed by Stardock Corporation. The file isn’t as common as DLLs like the msvcr100.dll or msvcp120.dll, but it’s one of the many hidden system files of a Windows computer. 

The wbload.dll is not a Windows essential file, but if it’s missing, it can still trigger a couple of errors while attempting to launch specific applications. The file is located in the C:\Windows\System32 folder.

How can I fix a missing wbload.dll error?

The following are some of the ways you can fix a missing wbload.dll error in Windows:

1. Apply a DLL Fixer

The best DLL fixers scan your PC for broken system files, DLLs, viruses, and malware. Due to the fact that the wbload.dll file is a system DLL, you’re guaranteed a 100% success rate if you attempt to fix the wbload.dll missing error using a third-party fixer. 

This is because DLL fixers utilize a database that stores every Windows DLL released by Microsoft. All the software has to do is scan and identify the missing DLL in your PC, download it from its database, and install it on your PC. 

2. Update Drivers

  1. Press the Windows key, type in Device Manager, and hit Enter.
  2. In the Device Manager window, scroll through the list of Drivers, and check to see if there is a yellow alert symbol next to the option. Right-click on the Driver, and select Update Driver.
  3. In the next window, click Search automatically for updated driver software, and follow the prompts to complete the update.
  4. Once you’ve updated all the Drivers, restart your PC and check if the error is resolved.

3. Scan for Malware

  1. Press the Windows key, type in Windows Security, and hit Enter.
  2. In the next window, click on Virus & Threat Protection, and click Scan Options under the Current Threats option.
  3. Select Full Scan from the Scan Options menu and click the Scan Now button to initiate the virus scan.
  4. Wait for the scan to complete, restart your PC and check if the error is fixed.

4. Run the System File Checker Utility/ DISM scans

  1. Press the Windows key, type in CMD, and select Run as Administrator.
  2. Click Yes to grant the app administrative access in the User Account Control window.
  3. Once the command prompt opens, type the following and hit Enter: sfc /scannow
  4. Then, Enter the last command: DISM /Online /Cleanup-Image /RestoreHealth
  5. Wait till the scan is complete, and restart your PC to check if the error persists.

The presence of corrupt DLL files often triggers missing DLL errors. Running a DISM scan will help repair corrupted Windows update files and resolve errors caused by missing DLL files. 

5. Perform a System Restore

  1. Left-click the Start menu, type restore and click Create a restore point.
  2. Select System Properties and choose System Restore button.
  3. In the Restore Files and Settings box, click Next.
  4. In the next window, select the Restore Point that you wish to restore your PC to, and click Next.
  5. Then, click Finish to complete the system restore.

A system restore is one of the most efficient ways to resolve a Windows error. This is because after creating a restore point, you can later restore your OS to that exact state when you created the restore point. 

If the error was triggered after a recent change in settings or configuration, you could perform a system restore to fix the wbload.dll not found error. 

6. Reinstall the Program

  1. Press the Windows key + I to open the Settings app.
  2. In the Settings app, select Apps, and click on Installed Apps.
  3. Click on the options button beside the Program or App triggering the wbload.dll error. Then, click the Uninstall button.
  4. After uninstalling the app, you’ll need to install the program or game cleanly.

If you’ve attempted all troubleshooting techniques and the error remains unfixed, the last thing you can try to help fix the error is to uninstall the program or application.

A clean installation of the program currently triggering the missing wbload.dll error would delete all the corrupt or missing game/app files and install them with default settings and configurations. 

Resolving missing DLL errors in Windows is a pretty straightforward task that is only made easier by employing the help of a DLL repair tool. If you’ve been searching for a way to resolve the wbload.dll missing error, we hope this article has provided you with the necessary steps to help you fix the error.

0x80090030 Error Code: How to Fix This Windows Hello Bug

Some of our readers have recently reported that they encounter the error code 0x80090030 whenever they try to enter their PIN, remove the PIN, or try to create another one. This is mostly caused by system corruption.

In case you are also experiencing problems with your Windows Hello wherein you’re unable to log in using biometrics or PIN, we have gathered some potential fixes to troubleshoot the issue in this article.

What causes the 0x80090030 error code?

The 0x80090030 error is a common Windows error that can occur for a variety of reasons. Below are some of the possible reasons for the error:

  • Corrupted NGC folder – If the data content of your NGC folder is corrupted, it can result in the 0x80090030 error. You can delete the folder to fix the issue.
  • Faulty hardware – Faulty hardware such as a failing hard drive or memory module can also cause the error. Run hardware diagnostics to identify and replace any faulty components.
  • Faulty Windows update – If there are changes or updates to the device’s hardware or software, such as a Windows update, it may also trigger this error.
  • System crash – The 0x80090030 error can also manifest due to a system crash or a sudden shutdown of the system.

The above are some of the potential causes for the 0x80090030 Windows Hello error. Let’s proceed to how you can fix the issue in the next section.

How can I fix this windows hello error code 0x80090030?

Before trying any of the advanced solutions provided in this article, you should consider performing the following preliminary checks as they may help fix the issue:

  • Restart your computer and check again.
  • Update or reinstall drivers related to biometric devices.

If after attempting the above checks you still require further assistance, you can explore the solutions provided below.

1. Run the SFC and DISM Scanner

  1. Press the Windows, type cmd in the text field and select Run as administrator.
  2. In the CMD window, type the following command in the text field and press Enter: sfc/scannow
  3. The scanning process may take some time, so wait till the verification reaches 100%.
  4. Type the following command in the dialog box and press Enter: Dism.exe /Online /Cleanup-Image /Restorehealth
  5. Wait till the process is complete and restart your PC.

After running the System File Checker tool to scan and repair corrupted system files, if the problem persists, you can proceed to run the DISM scan.

Besides this method, you also have the alternative to solve Windows bugs with a standalone system repair tool.

Now, check if you can enter your PIN or sign in to Windows Hello without any errors. If the error persists, try the next solution.

2. Delete the NGC folder

  1. Press the Windows + E keys to open File Explorer and navigate to the path below: C:\Windows\ServiceProfiles\LocalService\AppData\Local\Microsoft
  2. Now, right-click on the NGC folder and choose Properties.
  3. Navigate to the Security tab and click on Advanced.
  4. Next, go to Owner on the Advanced Security Settings page and click on Change.
  5. Under Enter the object name to select, type Administrator, click on Check Names, and press OK.
  6. Back on the Advanced Security Settings page, select Replace owner on sub containers and objects. Press Apply and OK.
  7. Double-click on the NGC folder for it to open.
  8. Press Ctrl + A to select all files and folders inside the NGC folder and press Delete.
  9. Restart your PC.

The NGC folder is where all your PIN information is stored on Windows. Once the files and folders are deleted from the NGC folder, go back to step 1 to add a new PIN and check if the error is fixed.

3. Install Windows Updates

  1. Press the Windows + I keys to open the Settings app.
  2. Go to Windows Update. Click Check for Updates and download necessary files.
  3. Restart your computer.

If there is a new version of Windows, make sure you download it to see if that fixes the 0x80090030 issue.

And that’s it on how to fix the 0x80090030 Windows hello error. Additionally, users can also check our expert guide on most common Windows hello errors & how to fix them for further assistance.

And if you have forgotten your pin & password for Windows 11, this guide will show you how to bypass it.

If you have any questions or suggestions, do not hesitate to use the comments section below.

Where can I watch the Xbox Game Showcase 2023?

It’s that time of the year again. Microsoft finally announced the event date of its Xbox Game Showcase event, coming to you on Sunday, June 11, 2023.

Game Showcase event is an annual celebration of upcoming titles coming to the console in 12 months cycle. This year, the tech giant has promised to bring more news on Bethesda’s hotly-anticipated utopian RPG Starfield.

Starfield is the first new universe in 25 years from Bethesda Game Studios, the award-winning creators of The Elder Scrolls V: Skyrim and Fallout 4. In this next generation role-playing game set amongst the stars, create any character you want and explore with unparalleled freedom as you embark on an epic journey to answer humanity’s greatest mystery.

Starfield is coming to Windows PCs and Xbox Series X/S on September 6, 2023. A broadcasting event, dubbed Starfield Direct, is taking place after the Game Showcase and will reveal more about all the tidbits of the game: mechanism, storyline, combat system, etc.

Where can I watch the Xbox Game Showcase 2023?

As Microsoft and Xbox pulled out from the physical event of E3 this year, Redmond’s focus is mostly on the Showcase event. 

Like last year’s edition, Game Showcase 2023 will likely be livestreamed through Xbox’s various streaming channels on YouTube, Twitch, etc. 

If you want to watch the Xbox Game Showcase 2023, you can tune into Xbox’s official accounts on YouTube, Twitch (or XboxASL’s Twitch), and Facebook — now available in over 30 languages. Depending on your time zone, it will start airing on 10 AM (PT), 1 PM (ET) 6 PM (BST), 7 PM (CET), or on June 12 at 4 AM for JST and 3 AM for AEST time zones. 

High expectations on Starfield

The game has been facing quite a lot of delays. A short teaser was released back in 2018 two years before Microsoft acquired Bethesda. Then, further, during the E3 2021, the devs promised a release window of November 2022. It was pushed to the first half of 2023 before settling for the current release date.

With this release, Starfield is officially Bethesda’s first IP (intellectual property) in over 25 years, so it only makes sense if they want to get everything right although some fans just couldn’t be patient to get their hands on the game.

Moreover, we can also expect more to come from Forza Motorsport, Hellblade 2, and Avowed during this event.

On the other hand, Xbox’s competitor, Sony and its PlayStation console, is apparently upset with Starfield’s exclusivity. In a statement to UK’s CMA authorities, the rival said that Microsoft’s history with its exclusive titles should be the reason why its long-lasting acquisition saga of Activision Blizzard be prohibited or subject to remedy, at least.

Bit weird coming from Sony, given it has a lot of exclusive titles to its name, like The Last of Us, Days Gone, and more.

Are you excited about this announcement? Let us know in the comments!

Epson Printer Drivers for Windows 11 [Download & Install]

You can find below 3 different ways to download and install the Epson Printer drivers on your PC. Work your way through them and pick the one that suits you best.

How can I download and install Epson Printer drivers for Windows 11?

1. Download from official site

  1. Visit the Epson official Support website on your web browser.
  2. In the Search text field, type your printer model number and press Enter or click the Search button.
  3. Then, select your printer model name from the list of printers provided.
  4. Now, click on the Drivers and Downloads option and select your operating system as Windows 10.
  5. Click on the Download button for the driver file to be downloaded to your computer.
  6. Double-click on the driver file once it has been downloaded, and double-click on it to start the installation process.
  7. Now, follow the on-screen instructions to complete the installation.
  8. Once installed, restart your computer.

If you own the Epson i5290 model, you can skip manual searching and head straight to this Epson i5290 driver download guide for the correct package and installation steps.

Alternatively, you can use a specialized driver updater software to make this whole process faster and safer.

2. Via the Device Manager

  1. Open the Start Menu and type Device Manager in the search box and launch it.
  2. Now, expand the Print queues section and right-click on your Epson printer, and select Update driver.
  3. Now, click on Search automatically for updated driver software.
  4. Finish the update process.

This method automatically updates your installed Epson printer drivers to the latest version.

3. Install drivers from Windows Update

  1. Connect your Epson printer to your Windows 11 computer using a USB cable.
  2. Press the Windows + I keys to open the Settings app.
  3. Then, click on Windows Update and select Advanced options.
  4. Then, check Optional updates for available updates.
  5. Now, select Driver updates and click on Download & Install.
  6. Restart your computer.

Wrapping up

And that’s how to download and install the Epson printer drivers for Windows 11.

Alternatively, users can also check our detailed guide on the Epson software updater for further assistance.

If you have any questions or suggestions, please use the comments section below.

Gds32.dll Failed to Load or Missing: 3 Ways to Fix It

Some of our Windows users complain about the Gds32.dll failed to load or missing errors appearing on their PCs.

It can occur when opening or installing InterBase-related programs. However, you can fix the error by following the solutions discussed in this article.

Also, we have a detailed guide about missing .dll files on Windows 11 and ways to fix it, so don’t hesitate to check it out.

What is Gds32.dll?

Gds32.dll is associated with InterBase Client, and Firebird Project created it. It isn’t a Windows system file but can cause app problems. So, it is essential to find ways to repair the file.

Further, Gds32.dll file is a critical component for the software to work properly without any problems. You may receive an error message I variance like the ones listed below:

  • This application failed to start because gds32.dll was not found.
  • The file gds32.dll is missing or corrupted.
  • A required component is missing: gds32.dll. Please install the application again.
  • Error loading gds32.dll. The specified module could not be found.
  • The program can’t start because gds32.dll is missing from your computer.

What can I do if Gds32.dll fails to load?

1. Use a dedicated DLL fixer

Repairing the files can be difficult if you’re not tech-savvy. Fortunately, you can use dedicated DLL fixing tools to repair and restore it to your PC. They will fix incompatibility issues due to third-party DLLs and the operating system.

2. Reinstall InterBase and copy the Gds32.dll to the correct directory

  1. Download InterBase to your local computer from the web and extract the .zip file to a new directory.
  2. Run the install launcher install_windows.exe.
  3. Select the InterBase Client Only install option on the Select Components window.
  4. After the installation, copy Gds32.dll from the folder where InterBase is installed.
  5. Paste it to the System32 folder inside of the Windows directory, then to the directory of the application that needs it.
  6. Restart your PC and check if the error appears.

Downloading the file makes it available for apps needing it. Also, you can download Firebird 3.0 to unify server architecture if the steps above fail.

3. Reinstall Microsoft Visual C++

  1. Click the Start button, type control, then press Enter to open the Control Panel.
  2. Click on Programs and find Microsoft Visual C++ Redistributable, then click Uninstall.
  3. Install Visual C++ redistributable 2015 from the official Microsoft website.
  4. Open the downloaded file and follow the installation wizard prompts.
  5. After the installation, reboot your PC.

Alternatively, you can read the review of the best corrupt file repair software for Windows PC to learn more about DLL errors and how to fix them.

If you have further questions or suggestions on the solutions that have worked for you apart from the above-listed, kindly drop them in the comments section.

Epson Printer Drivers for Windows 10 [Download & Install]

Some of our readers have recently requested to know how to download and install the Epson printer drivers for Windows 10.

In case you have also been wondering about how to download and install the Epson printer drivers for Windows 10, do not worry as we have compiled some simplified methods to use in this article.

What is Epson Printer Drivers?

Epson printer drivers are software programs that enable a computer to communicate with an Epson printer. These drivers enable the computer to send print jobs to the printer and also receive status updates and error messages from the printer.

Epson printer drivers are available for different operating systems, including Windows, Mac, and Linux. They can be downloaded from the Epson website or through the operating system’s built-in driver update utility.

Epson releases updated drivers on their website as and when they become available. It is important to ensure that the correct driver is installed for the specific printer model and operating system to avoid compatibility issues and errors.

Now that you know what Epson printer drivers are, let’s proceed to how to download and install the Epson printer drivers for Windows 10 on your PC.

How can I download and install Epson Printer drivers for Windows 10?

1. Download and install drivers from Epson Official Website

  1. Visit the Epson official Support website on your web browser.
  2. In the Search text field, type your printer model number and press Enter or click the Search button.
  3. Select your printer model name from the list of printers provided.
  4. Now, click on the Drivers and Downloads option and select your operating system as Windows 10.
  5. Click on the Download button for the driver file to be downloaded to your computer.
  6. Double-click on the driver file once it has been downloaded, and double-click on it to start the installation process.
  7. Follow the on-screen instructions to complete the installation.
  8. Once installed, restart your computer.

The best place to download your Epson Printer Drivers is the manufacturer’s website, which is the Epson official website. The drivers in there are always up to date and perfectly safe to use on your Windows 10 PC.

2. Use a third-party installer software

In case you want to rely on an automated method, you can make use of highly-recommended software specially created to execute an error-free process.

For instance, Outbyte Driver Updater is one of the most reliable options because it is a one-stop solution for all your driver-related needs.

It will run a thorough scanning procedure to detect all outdated or malfunctioning drivers and find the latest updates within a few seconds.

It has a substantial database of driver versions to ensure that your computer has the smoothest performance afterward.

Outbyte Driver Updater

Worry less about your device’s outdated drivers and let Outbyte Driver Updater update them with the best versions.
Free Trial Download now

3. Install Drivers from Windows Update

  1. Connect your Epson printer to your Windows 10 computer using a USB cable.
  2. Press the Windows + I keys to open the Settings app. Click on Update & Security.
  3. Then click on Windows Update from the left pane and click on Check for updates on the right pane.
  4. Next, if there are any available updates for your printer, they will be listed under view Optional updates.
  5. Now, select the Epson printer driver update and click on Install.
  6. Once installed, restart your computer.

Checking for drivers in Windows Update is another viable procedure to get the latest drivers but if you have an older printer, you probably won’t find it there.

4. Use Device Manager

  1. Press the Start button and type Device Manager and launch it.
  2. Expand the Printers section, right-click on your Epson printer and select Update driver.
  3. Now, click on Search automatically for updated driver software.
  4. Windows will now search for and install the latest driver for your printer.

If this doesn’t work, repeat steps 1-3 and select Uninstall device. When you restart your PC, the system will automatically detect the printer and install a driver for it.

And that’s it on how to download and install the Epson printer drivers for Windows 10.

In case you are unable to install your printer driver on Windows 10, you can explore our expert guide to know how to fix the issue.

If you have any questions or suggestions, do not hesitate to use the comments section below.

New Windows 11 Insider builds drop for Dev, Canary, and Beta Channels, all three get new Facebook widget

Microsoft released new Windows 11 Insider builds today for the Dev Channel with build 23451, the Beta Channel with 22621.1690 and 22624.1690, and the Canary Channel with 25357. All three channels are getting a new version of the Facebook widget:

Facebook is rolling out a preview version of their widget. To give it a try, download the Facebook app from the Microsoft Store or update to the latest version of the app. Then open the widgets board and navigate to the widgets picker by clicking the “+” button at the top-right of the board to pin your widget.

The Facebook widget.

The Canary Channel also includes the new volume mixer experience in Quick Settings now being available for all Canary Channel users.

For the Beta Channel, both versions are trying out the addition of an alert to add a recovery email address or phone number. Also in testing is a change from “Recommended” to “For You” in the Start Menu. Build 22624.1690 includes fiexes to a crash when entering your PIN with the touch keyboard on the login screen, additional fixes to 2FA code patterns not being recognized, and more. You can check out the Windows Insider blog post for all the details.

The Dev Channel includes some new features, including a Modernized Details Pane in File Explorer, some testing with Windows Spotlight treatments, and enhanced Narrator interactions with Excel. Again, be sure to check out the Dev Channel Windows Insider blog post for all the details.

Winscard.dll: How to Replace if Missing

The Winscard.dll missing or not found error is a common error that appears when you attempt to run the software. Winscard.dll file, also known as Microsoft Smart Card API, is an essential Windows component.

Hence, this guide will discuss how to replace the file if it’s missing. Alternatively, you can go through our guide about installing and fixing missing DLL files on Windows 11.

Why is Winscard.dll missing?

Some probable causes for the Winscard.dll missing or not found error are:

  • Driver issues – If the drivers are corrupted or have issues, this may trigger this DLL error to show up.
  • Recently installed or uninstalled app – When you uninstall apps from your system, it can delete essential DLL files shared with other apps. Also, installing the new apps may override some DLL files, removing them from the PC.

These causes can vary for different users. Nevertheless, we will take you through fixes to resolve the Winscard.dll missing error and replace it on your system.

How can I replace Winscard.dll if it’s missing?

Go through these preliminary checks:

  • Run virus and malware scans on your PC to clean it up.
  • Reinstall the program prompting the Winscard.dll not found error.

If you can’t resolve the error, go ahead with the solutions below:

1. Repair the DLL file with a dedicated tool

Winscard.dll, also known as Microsoft Smart Card API is a part of the Microsoft Windows Operating System program developed by Microsoft Corporation. Since it’s an essential system file, it is crucial to repair it quickly to prevent crashes or other issues. Sadly, it may be hard to repair if you’re not tech-savvy.

However, there are dedicated DLL file error repair tools that don’t require user tech prowess. We recommend using the DLL fixer software to resolve 100% of DLL issues.

2. Update the system drivers

  1. Press Windows + I to open Settings.
  2. Then, click on the Windows Update tab and select Advanced options.
  3. Select Optional Updates under Additional options.
  4. Expand Driver updates, select the drivers available, and click on Download & Install.

Updating the drivers will resolve corrupt drivers, and bugs, and install the missing DLL files alongside the updates.

However, you have other options to manage your PC drivers and update them accordingly with efficient driver update software.

This solution starts with a 5-minute scan and detects any outdated drivers, thus you can update them automatically with their manufacturer version.

3. Run a System File Checker (SFC) scan

  1. Left-click the Start button, type the command prompt, and select Run as administrator.
  2. Click Yes on the User Account Control prompt.
  3. Type the following and press Enter: sfc /scannow
  4. Reboot your computer and check if the Winscard.dll missing error persists.

Running a System File Checker scan will repair corrupt system files and registry files affecting the DLL file functionality. Check our article about what to do if run as administrator is not working on Windows 11.

4. Run a System Restore

  1. Press the Windows key, type restore and click Create a System Restore.
  2. Then, select System Protection and select System Restore.
  3. Click Next in the Restore system files and Settings page.
  4. Then, choose the restore point you want to restore from and select Next.
  5. Click Finish after the process is completed to reboot.

Running a System Restore will backdate the system and remove recent changes or configurations causing the .dll missing error. Read our guide on how to fix Restore Point if it’s not working on your PC.

Further, should you be interested in the best corrupt file repair software for Windows PCs, check our recommendations.

Also, we have a detailed guide about missing .dll files after Windows 10/11 Update and ways to fix it.

If you have further questions or suggestions, kindly drop them in the comments section.

0x800F024B Windows Update Error: How to Fix It

If you have encountered Windows Update error 0x800f024b when installing a driver for your peripherals like a keyboard or printer on a Windows computer, this guide can help!

We will cover all the available solutions to resolve this problem right after discussing the causes.

What causes the Windows Update error 0x800f024b?

There could be various reasons for this error; some of the common ones are listed here:

  • Corrupted system files – If the system files required for Windows update are missing or corrupted, the Windows Update may fail. Try to repair the files using the SFC scan.
  • Damaged Windows Update components – If the Windows Update components, like BITS and Windows Update service, are not functioning properly, you may see this error.
  • Third-party software interference – Third-party antivirus tools may interfere with the Windows Update service, leading to this update error. Disable the antivirus and try to run the update.
  • Incompatible or outdated drivers – The Update may fail if your computer has obsolete or incompatible device drivers. Try updating the device drivers and try again.

So, these are the causes of this Windows Update error; let’s talk about the solutions.

What can I do to fix the Windows Update error 0x800f024b?

Before engaging in advanced troubleshooting steps, you should consider performing the following checks:

If these minor tweaks didn’t work for you, consider exploring more detailed methods to fix the issue.

1. Run the Windows Update troubleshooter

  1. Press Windows + I to open Settings.
  2. Go to System, then click Troubleshoot.troubleshoot 0x800f024b
  3. Click Other troubleshooters.Other Troubleshooters
  4. Go to Windows Update and click Run.

Instead of running this task, you can use a workaround that will certainly help you fix Windows update errors on your PC.

Namely, system repair software can diagnose your overall system and find damaged system files, thus repairing them automatically.

2. Install the driver using the Software Distribution folder

  1. Press Windows + R to open the Run dialog box.Device Manager Run command 0x800f024b
  2. Type devmgmt.msc and click OK to open the Device Manager.
  3. Locate the affected driver and right-click it. Here, we are taking graphics driver as an example.
  4. From the context menu, select Update driver.Graphics Driver update 0x800f024b
  5. Select Browse my computer for drivers.Browse 0x800f024b
  6. Click Browse and navigate to this path: C:\Windows\SoftwareDistribution\Download
  7. Select the Download folder and click OK.FOlder
  8. Click Next, choose the driver in question, and follow the onscreen instructions to complete the process.Next 0x800f024b
  9. Restart your computer to save the changes.

3. Hide the update

  1. Download the Show or Hide Updates troubleshooter from the Microsoft website.
  2. Double-click the installer file to initiate the installation.
  3. Click Advanced.Advanced 0x800f024b
  4. Select Apply updates automatically and click Next.Apply repairs automatically 0x800f024b
  5. Select Hide updates.Hide updates
  6. Choose the update you want to hide, and click Next.Choose the update, and click NExt  0x800f024b
  7. Now apply the changes and click Close.

4. Pause the update

  1. Press Windows + I to open the Settings app.
  2. Go to Windows Update; under Pause updates, select Pause for 1 week.Pause the update 0x800f024b
  3. Click Resume updates.Resume updates 0x800f024b

5. Reset the Windows Update components

  1. Press the Windows key, type cmd, and click Run as administrator.CMD elevated 0x800f024b
  2. Copy and paste the following commands to stop Windows Update, BITS & cryptographic services, and press Enter after every command: net stop bits net stop wuauserv net stop appidsvc net stop cryptsvcStop the services
  3. To delete the qmgr*.dat files, type the following command and hit Enter: Del "%ALLUSERSPROFILE%\Application Data\Microsoft\Network\Downloader\qmgr*.dat"
  4. To clear the Windows Update cache to allow Windows 10 to re-download the updates, copy & paste the following commands one by one and press Enter after every command: rmdir %systemroot%\SoftwareDistribution /S /Q rmdir %systemroot%\system32\catroot2 /S /Q
  5. Type the following commands to reset the BITS and Windows Update service to the default security descriptor and hit Enter: sc.exe sdset bits D:(A;;CCLCSWRPWPDTLOCRRC;;;SY)(A;;CCDCLCSWRPWPDTLOCRSDRCWDWO;;;BA)(A;;CCLCSWLOCRRC;;;AU)(A;;CCLCSWRPWPDTLOCRRC;;;PU) sc.exe sdset wuauserv D:(A;;CCLCSWRPWPDTLOCRRC;;;SY)(A;;CCDCLCSWRPWPDTLOCRSDRCWDWO;;;BA)(A;;CCLCSWLOCRRC;;;AU)(A;;CCLCSWRPWPDTLOCRRC;;;PU)
  6. Copy & paste the following command and press Enter: cd /d %windir%\system32
  7. To re-register the BITS files & the Windows Update-related dll files, type the following commands one after the other and hit Enter after every command: regsvr32.exe /s atl.dll regsvr32.exe /s urlmon.dll regsvr32.exe /s mshtml.dll regsvr32.exe /s shdocvw.dll regsvr32.exe /s browseui.dll regsvr32.exe /s jscript.dll regsvr32.exe /s vbscript.dll regsvr32.exe /s scrrun.dll regsvr32.exe /s msxml.dll regsvr32.exe /s msxml3.dll regsvr32.exe /s msxml6.dll regsvr32.exe /s actxprxy.dll regsvr32.exe /s softpub.dll regsvr32.exe /s wintrust.dll regsvr32.exe /s dssenh.dll regsvr32.exe /s rsaenh.dll regsvr32.exe /s gpkcsp.dll regsvr32.exe /s sccbase.dll regsvr32.exe /s slbcsp.dll regsvr32.exe /s cryptdlg.dll regsvr32.exe /s oleaut32.dll regsvr32.exe /s ole32.dll regsvr32.exe /s shell32.dll regsvr32.exe /s initpki.dll regsvr32.exe /s wuapi.dll regsvr32.exe /s wuaueng.dll regsvr32.exe /s wuaueng1.dll regsvr32.exe /s wucltui.dll regsvr32.exe /s wups.dll regsvr32.exe /s wups2.dll regsvr32.exe /s wuweb.dll regsvr32.exe /s qmgr.dll regsvr32.exe /s qmgrprxy.dll regsvr32.exe /s wucltux.dll regsvr32.exe /s muweb.dll regsvr32.exe /s wuwebv.dll
  8. Copy and paste the following command to reset Winsock and press Enter: netsh winsock reset netsh winsock reset proxy
  9. Type the following commands to start Windows Update, BITS & cryptographic services, and press Enter after every command: net start bits net start wuauserv net start appidsvc net start cryptsvcStart the services 0x800f024b
  10. Reboot your PC to confirm the changes.

So, these are the methods that you can follow to fix the Windows Update error 0x800f024b.

We also recommend reading our guide on how to fix Windows Update if it is not working.

If you have any questions or suggestions, feel free to mention them in the comments section below.

Try these 4 game with Xbox Free Play Days May 4-7

Four more games are available with this week’s Xbox Free Play Days event. These games will be available starting Thursday, May 4 through Sunday, May 7. Note that to take advantage of Xbox Free Play Days you need a subscription to Xbox Live Gold or Xbox Game Pass Ultimate. With that out of the way, let’s check out his week’s Xbox Free Play Days lineup.

Golf With Your Friends

Why have friends if not to play Golf… With Your Friends! Nothing is out of bounds as you take on courses filled with fast paced, exciting, simultaneous mini golf for up to 12 players!

Turbo Golf Racing (Game Preview)

Welcome to the future of motorsports. Feel the excitement of fast-paced arcade-style racing as you tee off with your friends in a new exhilarating way. Jump, flip, glide boost and dash with supercharged cars and be the first to get your ball in the hole.

NARUTO TO BORUTO: SHINOBI STRIKER

The Naruto franchise is back with a brand new experience in NARUTO TO BORUTO: SHINOBI STRIKER! This new game lets gamers battle as a team of 4 to compete against other teams online! Graphically, SHINOBI STRIKER is also built from the ground up in a completely new graphic style. Lead your team and fight online to see who the best ninjas are!

For The King

For The King is a strategic RPG that blends tabletop and roguelike elements in a challenging adventure that spans the realms. Set off on a single player experience or play cooperatively both online and locally. None before you have returned from their journey. Will you put an end to the Chaos?

For The King is a challenging blend of strategy, turn-based combat, and roguelike elements. Each playthrough is unique with procedural maps, quests, and events. Explore Fahrul in either single player, local, or online co-op.

Just remember adventurer, you do this not for riches or fame but for your village, for your realm, For The King!

What will you be playing this weekend?

It’s another solid lineup this week for Xbox Free Play Days. Granted, one of these games (Turbo Golf Racing) is already available with Game Pass. But nevertheless the four games on offer present a nice variety.

Will you be trying out any of these games this weekend? Let us know in the comments.

Zlib.dll Not Found? 3 Ways to Fix It

The Zlib.dll not found error is usually triggered when zlib.dll is attempted to be loaded by an application on the system.

This error can occur for many reasons and may appear in different variations. However, this guide is dedicated to helping you fix the error.

Also, you may be interested in our guide about installing and fixing missing DLL files on Windows 11. 

Why is the Zlib.dll not found?

Some culprits for the Zlib.dll not found or missing error are:

  • Uninstallation or Installation of programs – You can run into the error if the Zlib.dll is uninstalled as a shared file of another program or deleted by a recently installed app that has overridden it.
  • Outdated drivers for hardware – If hardware drivers related to zlib.dll or an app using it are outdated, their bugs can impede the file’s ability to run.

As we go further into this article, we’ll discuss how to fix the issue and make the DLL file available for apps that need it.

What can I do if Zlib.dll is not found?

Before trying any advanced troubleshooting steps, go through the following:

  • Update the drivers for hardware devices.
  • Run the System File Checker command.
  • Troubleshoot for a hardware problem.

Proceed with the fixes below if you can’t resolve the error:

1. Use a dedicated DLL repair tool

Zlib.dll is a third-party file for the DWG TrueView software by Autodesk. It is an essential system file, which ensures that Windows programs function properly. However, repairing the file can be tasking if you don’t have a vast understanding of it.

Fortunately, there are dedicated DLL repair tools that you can use to save you stress and time.

An advantage that comes with using these tools is that it requires no prior professional experience in tech-related tasks. Hence, you are only expected to initiate the scan, and they will find and repair the missing file.

2. Uninstall and reinstall DWG TrueView software

  1. Click the Start button, type control, then press Enter to open the Control Panel.
  2. Click on Programs and Features. 
  3. Then, select DWG TrueView software or any other app prompting the error, then click Uninstall.
  4. Restart your PC.
  5. Now, download DWG TrueView from its official site. Double-click the downloaded file and follow the installer prompts to complete the installation.

Reinstalling the DWG TrueView software will install all files it needs to run, including Zlib.dll.

3. Run a System Restore

  1. Press the Windows key, type restore and click Create a System Restore.
  2. Then, select System Protection and select System Restore.
  3. Click Next in the Restore system files and Settings page.
  4. Then, choose the restore point you want to restore from and select Next.
  5. Click Finish after the process is completed to reboot.

A System Restore will roll back recent system changes and configurations that can cause the Zlib.dll file to be missing. Read our guide on how to fix Restore Point if it’s not working on your PC.

In addition, you may be interested in our comprehensive review of the best corrupt file repair software for Windows PC.

Also, we have a detailed guide about missing .dll files after Windows 10/11 Update and ways to fix it.

If you have further questions or suggestions, kindly drop them in the comments section.

Saplugin.dll Missing: How to Fix or Download It Again

Saplugin.dll missing is a recent error Windows users complain about when they attempt to launch an app. It indicates the app can’t access the needed file for its process, resulting in errors, crashes, or freezing. Hence, we’ll take you through the basic steps to fix the issue.

Alternatively, our readers may be interested in our article about how to install and fix missing DLL files on Windows 11. 

What is Saplugin.dll?

The Saplugin.dll file originates from software you installed on your system or alongside system updates. The McAfee SiteAdvisor plugin uses it.

However, it isn’t an essential Windows file and doesn’t affect the system functionality but relatively causes issues with apps using it if not intact. Also, it is commonly found at C:\Program files (x86)\McAfee\SiteAdvisor\saplugin.dll.

Why is Saplugin.dll missing on my PC?

You can encounter the Saplugin.dll missing or other variations due to many factors. Some are:

  • Corrupt DLL registration –  You can also run into the DLL file missing error when there is a registration issue in the DLL path.
  • Issues with McAfee WebAdvisor: Since the DLL file is essential for the proper functioning of the McAfee WebAdvisor, issues with the app may cause issues with the DLL files.

Nonetheless, our technical team has put together some steps to help resolve the error on your computer.

How can I fix Saplugin.dll if it’s missing?

Before trying any advanced troubleshooting steps, go through the following:

  • Perform a clean boot.
  • Perform a System Restore.

If you can’t get around the error, proceed with the steps below:

1. Use a dedicated DLL repair tool

DLL errors can be frustrating and prevent you from accessing some apps using the DLL files. So, repairing the file is important to make apps run properly. Sadly, it is not easy to repair these files if you’re not tech-savvy.

Fortunately, you can use dedicated DLL fixing tools to repair the file. They resolve incompatibility issues due to third-party DLLs and the operating system.

2. Reinstall the app that requires Saplugin.dll

  1. Click the Start button, type the control panel, and then press Enter.
  2. Click on Programs and go to the Programs and Features tab.
  3. Select the McAfee WebAdvisor, click Uninstall at the top of the tab, and then OK.
  4. Download the McAfee WebAdvisor and follow the installation wizard’s prompts.
  5. Then, restart your PC

Reinstalling the app will download the needed files for running it, including Saplugin.dll.

Further, you may be interested in our guide on the best corrupt file repair software for Windows. Also, do not hesitate to read about the causes of missing DLL files on Windows PC and check how to fix them.

For further questions or suggestions, kindly drop them in the comments section.

FIFINE AmpliGame A8Plus review: A colorful alternative

Starting at $46.99

For anyone not privileged enough to make a living podcasting, streaming or making ASMR content, there can be gulf between the quality of recording equipment and an upfront investment necessary to get a career off the ground. Fortunately since the pandemic the emerging “affordable” market for microphones continues to produce viable alternatives such as the FIFINE AmpliGame A8Plus.

Odd naming convention aside, the A8Plus is a fun alternative to the likes of Blue Yeti, Audio-Technica and even some Sennheiser options as it offers focused cardioid, omni, and bi-directional recordings, a no-fuss setup, and an RGB lit ambience for under $50.

Type Condenser
Polar Pattern Cardioid
Output Connection USB Type-C (mic end) to type-A 2.0 (computer end)
Power Consumption USB 5V power
Frequency Response 50Hz-20kHz
Sensitivity -40±3dB
Shipping Weight 1.0 kg

Look and Feel

The A8Plus looks sleek in its matte black appearance but can feel a bit chintzy next to metallic tanks such as a Blue Yeti, Shure, or Rode microphones. Fortunately, the plasticy feel works in the A8Plus’ favor for users who tend to be a bit more mobile with their recording set ups. The weight of the A8Plus is rather light and the overall surface area it takes up is relatively small as well, so users can toss it into a backpack and barely notice it is there, or plop it on desk, coffee table, kitchen counter top, set of books or dinner tray and not have to worry about their recording area feeling cramped.

Furthermore, when the A8Plus is mounted and in view of any camera its slimmer profile of the mic makes way for a fuller view of the content creator for greater interaction with viewers.

FIFINE also do a great job of packaging all the amenities necessary to get great out-of-the-box recording, such as the Suspension Shock Mount and Detachable Pop Filter being included with the purchase. Both attachments to the A8Plus come in the same matte black as the microphone and are preassembled for easy-to-use first experience for customers.

Perhaps the biggest physical selling point of the A8Plus is the RGB lighting feature which allows users to either choose or cycle through 7 color profiles. While most mics may offer a few accented lighting features around the power button, microphone status indicator or connecting port areas, the body of the A8Plus lights up entirely in vivid soft neon lighting.

Another bit of consideration FIFINE took in assembling the A8Plus is giving the microphone capacitive directional and mute buttons to help deafen any additional pops or sounds that might get picked during a recording when interacting with the device. The directional capacitive button does feel like it takes second to react to touch, so be patient or you might find yourself in an annoying selection loop for minutes when trying to change where your mic is picking up sound, the same goes for the button.

Performance

Looks aside, the sound of the A8Plus is great. It does not pack as much bass in its unfiltered recordings as I prefer but out of the box it does a good job of deadening frequencies below 200Hz to prevent the pickup of excess movements around the microphone, as well as softening the sibilance in speech. The harsh “S” test proved a piece of cake for the A8Plus, saving me from any post-production editing necessary to flatten out the peaks when s-sounding words were picked up.

The A8Plus also did well with “plosen” test where “P” pronunciations, when not properly flattened, can blow out the sound for audiences listening with headphones. Typically, I run to my hard-limiter and Equalization settings in Adobe Audition once I’m done recording a session with a standard Blue Yeti microphone and I found myself not having to bother with those settings with the A8Plus.

For gamers, the A8Plus does pick up keyboard clicks, but tends to do a good job of muting controller-based noise. While keyboard clicks are picked up from the back of the microphone when its place around 5 to 6 inches away from the desk, voices are pronounced and clearer than the background noise.

When testing the off-axis mic pick up, the left and right side of the microphone do an excellent job of noise rejection when voices are picked up dead on, but when attempting to record from the top of the microphone can sound muddled, be aware of mic placement before recording.

Summary

With a few pre-recording tweaks in any recording software the A8Plus can pass for a $300 plus microphone as far as audio output. Out of the box it’s great for conferencing meetings and podcasting. For streaming games and more audience interactions, noise rejection, directional audio pickup and pop filter often exceed the performance of similarly priced microphones.

The only shortcomings of the A8Plus that I can nitpick about are the length of the USB-C cord, the sensitivity of the capacity buttons, where the color change button is too sensitive while the directional control almost feels timed, and lastly that FIFINE should include more mounting accessory options. While the A8Plus does offer a passable desktop stand, FIFINE might do better with providing several mounting elbows instead. However, I get that straight out of the box, customers can plug-and-play right away.

For less than $50, most recording enthusiasts would be hard pressed to find a better deal to start their next hobby or career.

Microsoft adds a new slideshow experience and a timeline scrollbar to its Photos app on Windows 11

Microsoft has announced major changes coming to its Photos app for Windows 11. The changes are currently rolling out to Windows Insiders that are part of the Canary and Dev Channels.

The company has been pushing significant updates to the platform, including iCloud integration which shipped for Windows 11 users late last year. This integration allows users to link their iCloud Photos to the Microsoft Photos App.

And now, Microsoft has released yet another major update which ships with new features as well as the usual bug fixes and improvements. Here’s everything you need to know about this update:

First up, it ships with a new slideshow experience which happens to be one of the top requested features by users. The experience will allow users to recap some of their favorite memories and times in a slideshow format. The experience features transitions, animations, and 25 original music soundtracks to choose from.

Create photo slideshows with music and animations.

Next up, the timeline scrollbar which is also a top requested feature by users is also making its way back to the All Photos, OneDrive, and iCloud Photos gallery views. The feature essentially categorizes your photos by year and month. This way it is easier for you to find a specific photo in your gallery.

Scroll through the timeline to find the photos you need.

And finally, the update also adds a spots fix feature that’s designed to help users get rid of blemishes from their photos. It can also be used to get rid of unwanted areas from your photos.

Aside from these new features, the update also ships with several enhancements as well as fixes, we invite you to check out the full changelog over at Microsoft’s blog post. Windows Insiders part of the Canary and Dev Channels should be able to access these new changes immediately by downloading the latest Photos app (2023.11050.2013.0 or higher) from the Microsoft Store.

Microsoft Photos
Microsoft Photos
Price:
Free

Microsoft Edge’s market share growth falls behind Safari

Edge is Microsoft’s favorite browser, but it’s not that popular among Apple users. Redmond giant has been trying to convince users to switch to Edge since Windows 10 was launched years ago, but according according to GS StatCounter’s recent statistics, Edge’s market share fell short to 10.95% in April 2023 compared to Apple Safari’s 11.89%.

As a quick reminder, in the previous month (March 2023), Microsoft Edge had a total market share of 11.13%, right above Safari’s 10.92%. In February, it gained more users but the trend seemed to show that Safari was slowly catching up with Microsoft’s browser.

Indeed, Edge is slowly gaining more users, but this is not nearly enough to become a real threat for Google’s browser. Chrome remains the most popular browser among Windows users, with an impressive 66.22% market share in April 2023, up from 65.77% in March.

Edge, however, has always been the the second most popular browser in the market for months, but it seems like the trend is slowly shifting despite Microsoft’s numerous attempts in revitalizing the browser.

How come Microsoft Edge’s market share growth is falling?

microsoft edge market share growth

The Redmond giant recently rolled out the biggest build update in recent months, revealing many juicy features that will definitely make it more appealing to users.

Earlier this year, Redmond officials rolled out ChatGPT-powered Bing chat mode, allowing you to search the web even deeper with help of the hotly-anticipated AI product. And, with the release of its latest version GPT-4, it seems like the mode will be more powerful than ever.

And, as we’ve previously reported, Microsoft just rolled out Designer, an AI-powered tool where you can create social media posts through prompt texts. While you can still access it on any browser, it’s built-in natively on Edge Canary before eventually rolling out for general users.

Do you use Microsoft Edge or plan to switch to the default browser of Windows 11? Let us know in the comments!

API-ms-win-core-timezone-11-1-0.dll Missing: How to Fix

Our readers recently reported an error message saying that a program won’t open because the API-ms-win-core-timezone-l1-1-0.dll is missing.

The error can occur when launching a program or game on your PC or during a system startup. Hence, we’ll discuss the causes of this error and provide ways to fix it.

Also, you can read our guide about missing .dll files on Windows 11 and ways to fix it.

Why is API-ms-win-core-timezone-11-1-0.dll missing?

The API-ms-win-core-timezone-l1-1-0.dll is usually installed automatically by the program or game that may need it. Some files that can cause it to be missing are:

  • The DLL file is deleted or misplaced – The error can also appear on your computer if the API-ms-win-core-timezone-l1-1-0.dll has been deleted from its folder either mistakenly or knowingly. Also, moving the file to another directory can cause issues with its visibility.
  • Incompatible Visual C++: If the app or program is created without the complete infusion of all the Visual C++, it may encounter difficulties installing or working on other PCs without the runtime files (Dynamic Linked Libraries).

These factors can vary on different computers depending on the circumstance. Nevertheless, we’ll take you through some basic steps to fix the issue.

What can I do if API-ms-win-core-timezone-11-1-O.dll is missing?

Proceed with the following preliminary checks:

  • Temporarily disable antivirus software.
  • Reinstall the application requesting the DLL file.
  • Check for pending Windows Updates.

If you can’t resolve the error, go ahead with the solutions below:

1. Repair the DLL file with a dedicated tool

The API-ms-win-core-timezone-l1-1-0.dll  with the description ApiSet Stub DLL is a Microsoft Windows Operating System program by Microsoft Corporation. It is crucial to repair it quickly to prevent issues with the system. Sadly, you may not understand how to repair it if you’re not tech-savvy.

Fortunately, users can employ dedicated tools for fixing DLL file errors that don’t require tech-related skills. A DLL fixer is the best tool for resolving DLL issues like API-ms-win-core-timezone-l1-1-0.dll missing

However, it’s easy to use and quick to work around. All you need to do is to initiate the scanner, and automatically find and repair the missing file. Plus, you can learn about the best DLL repair tools for your Windows PC.

2. Reinstall Microsoft Visual C++

  1. Click the Start button, type control panel, then press Enter.
  2. Click on Programs and Features.
  3. Then, find Microsoft Visual C++ Redistributable, then click Uninstall.
  4. Install Visual C++ Redistributable 2015 from the official Microsoft website. (you may need to install more Visual C++ Redistributables)
  5. Open the downloaded file and follow the installation wizard prompts.
  6. After the installation, reboot your PC.

Reinstalling Microsoft Visual C++ Redistributable will install run-time components required to run C++ applications.

In addition, our readers may be interested in our review of the best corrupt file repair software for Windows PC. Also, check our article about DLL not found in Visual Studio and some fixes.

If you have further questions or suggestions, kindly drop them in the comments section.